Mastering GCP Virtual Machines – Part 4 (Disk Encryption and Export)
In Part 3 we saw how to create a new Windows virtual machine instance (Windows Server 2025) and how to connect to by using RDP and SSH. Further we saw how to connect to the serial console.
Now in this part we will see how GCP will encrypt the virtual disks of virtual machine instances.
By default, Compute Engine encrypts customer content at rest. Compute Engine automatically uses Google-owned and Google-managed encryption keys to encrypt your data.
Further we will see how to export a disk from Google Cloud Platform (GCP) which lets us move VM data into on-premises environments like VMware vSphere.
Introduction
By default, Compute Engine encrypts customer content at rest. Compute Engine automatically uses Google-owned and Google-managed encryption keys to encrypt your data.
However, you can customize the encryption Compute Engine uses for your resources by providing key encryption keys (KEKs).
Key encryption keys don’t directly encrypt your data, but encrypt the Google-owned and managed keys that Compute Engine uses to encrypt your data out of the box.
You have two options to provide key encryption keys:
- Recommended. Use customer-managed encryption keys (CMEKs) in Cloud KMS with Compute Engine. Using Cloud KMS keys gives you control over their protection level, location, rotation schedule, usage and access permissions, and cryptographic boundaries. Using Cloud KMS also lets you track key usage, view audit logs, and control key life cycles. Instead of Google owning and managing the symmetric key encryption keys (KEKs) that protect your data, you control and manage these keys in Cloud KMS. You can create CMEKs manually, or you can use Cloud KMS Autokey to have them created automatically on your behalf. In most cases, after you create a CMEK-encrypted disk, you don’t need to specify the key when working with the disk.
- You can manage your own key encryption keys outside of Compute Engine, and provide the key whenever you create or manage a disk. This option is known as customer-supplied encryption keys (CSEKs). When you manage CSEK-encrypted resources, you must always specify the key you used when encrypting the resource.
For more information about each encryption type, see Customer-managed encryption keys and Customer-supplied encryption keys.
Source: https://cloud.google.com/compute/docs/disks/disk-encryption
VM Instance Disk Encryption
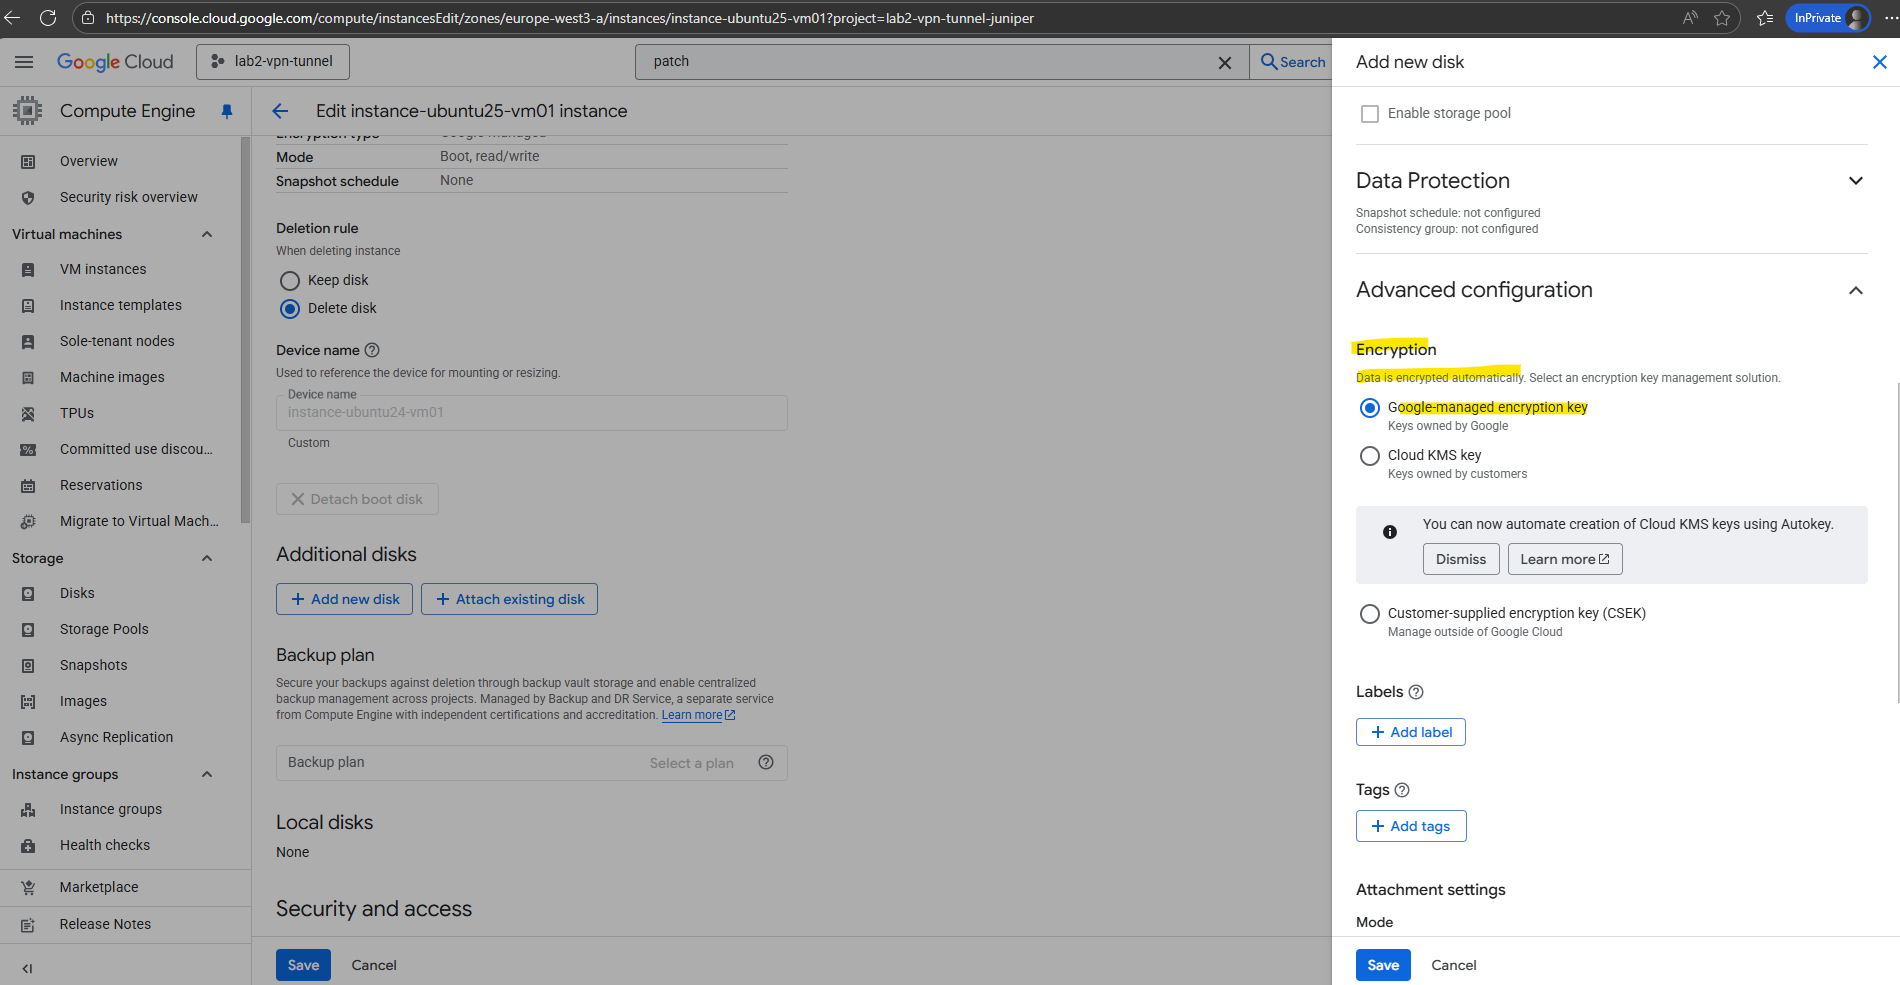
When creating a new virtual machine we can customize the encryption Compute Engine uses under OS and Storage -> Show advanced configuration -> Encryption as shown below.
Below we can choose between Google-managed encryption key (default), Cloud KMS key and Customer-supplied encryption key (CSEK).
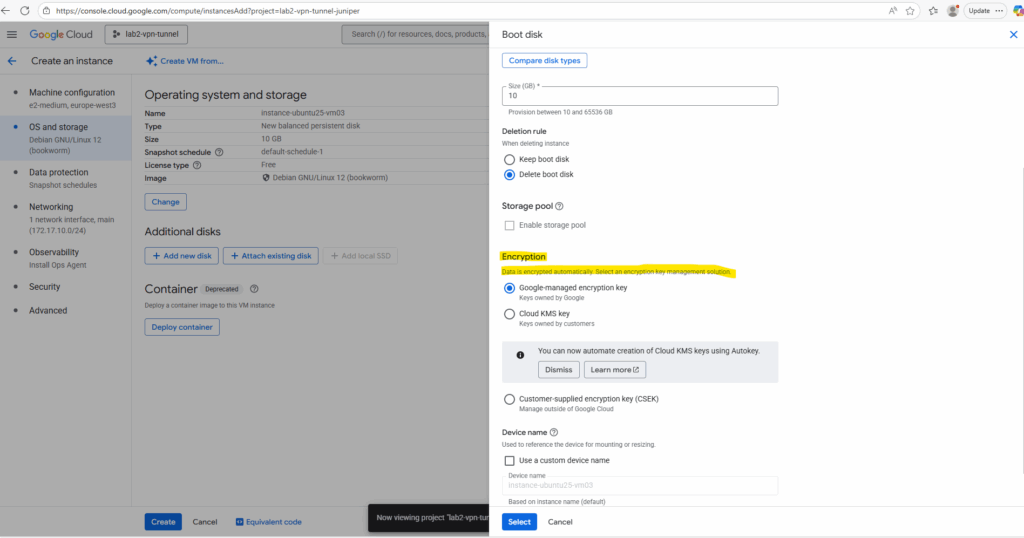
By default Google-managed encryption key is selected for virtual disks, here encryption keys are created, managed, and stored entirely by Google within its infrastructure.
Google has full control over key management operations, including creation, rotation, access, and deletion.
No setup or configuration is required by the users and they cannot directly view or manage these keys.
Using a Customer-supplied encryption key (CSEK)
To meet organizational security and compliance commitments, we can use Customer-supplied encryption key (CSEK) here.
Google can’t recover your data if you lose keys you manage outside of Google Cloud Platform, store them somewhere secure.
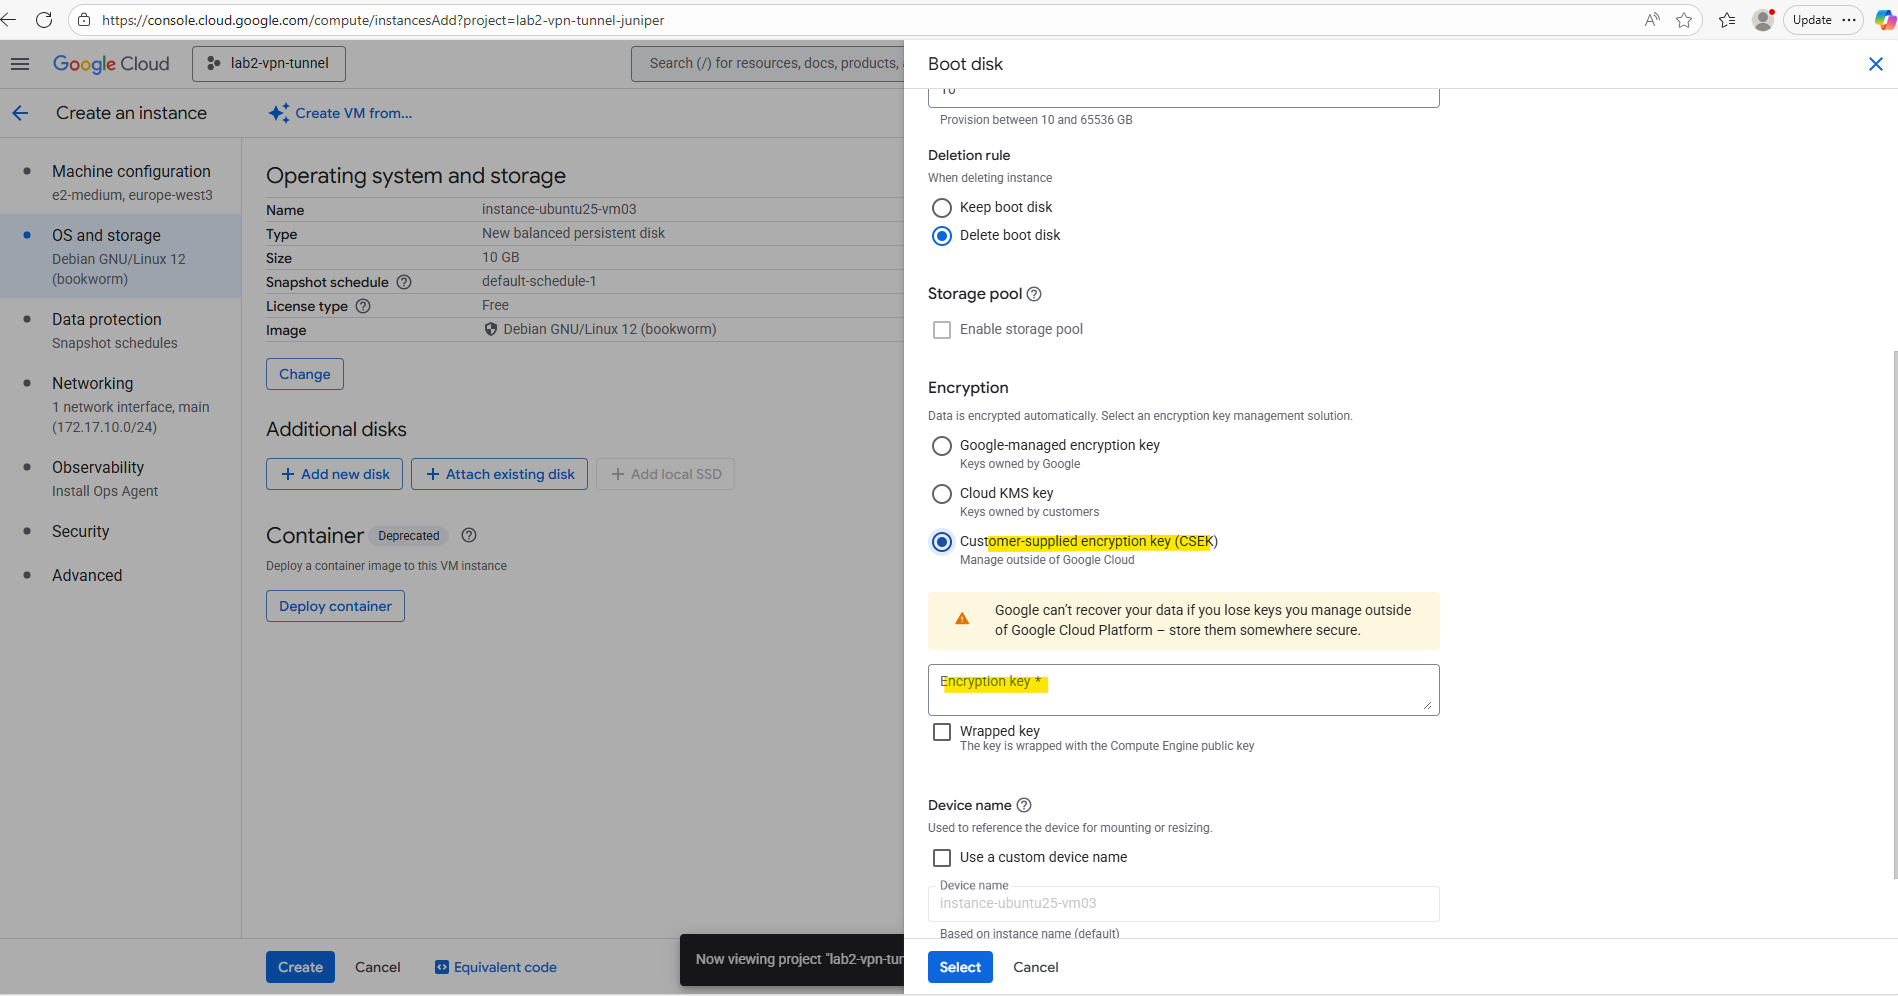
Customer-supplied encryption keys (CSEK) are a feature in Cloud Storage and Compute Engine. If you supply your own encryption keys, Google uses your key to protect the Google generated keys that encrypt and decrypt your data.
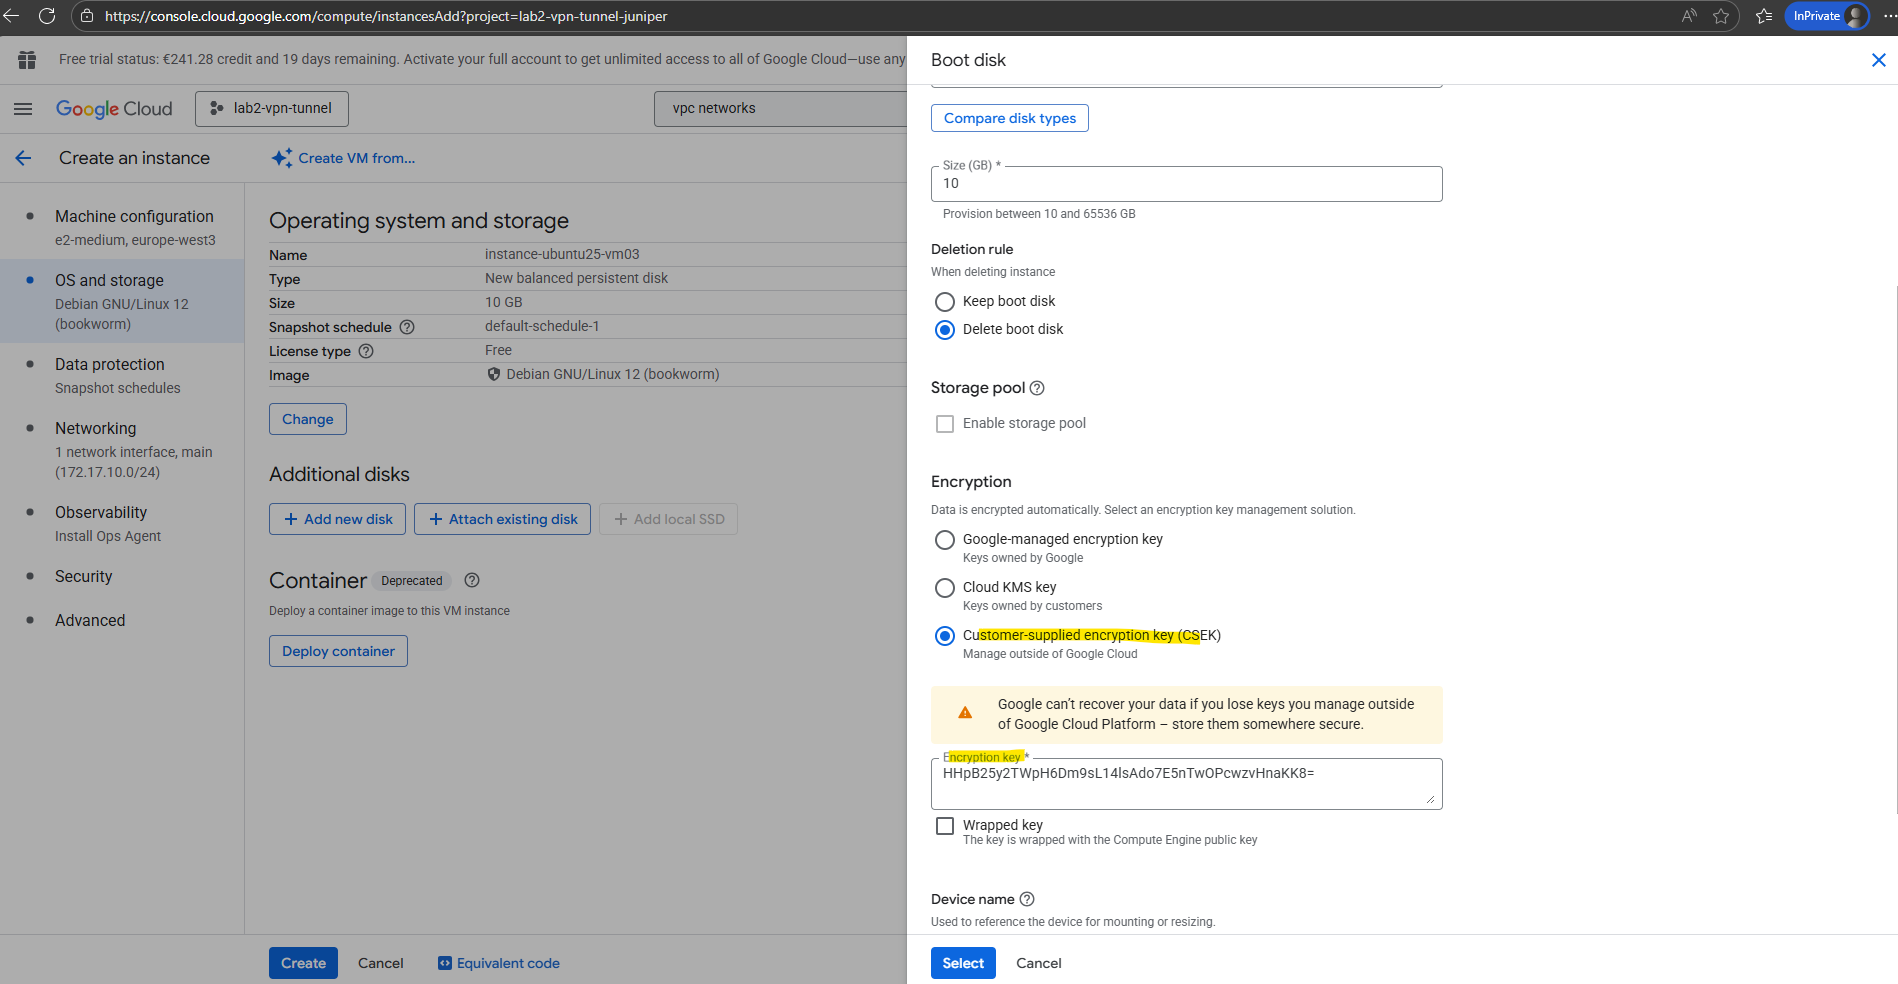
For the CSEK key we finally use and generate a 256-bit AES key provided in base64 encoding when attaching/creating the disk.
As mentioned, GCP does not store or manage this key for us, we are responsible for lifecycle and protection which on the other hand gives us the option to meed with custom organizational security and compliance commitments.
To generate the a CSEK key on Windows, we can use the following command.
PS> openssl rand -base64 32

output raw key:
HHpB25y2TWpH6Dm9sL14lsAdo7E5nTwOPcwzvHnaKK8=

Once we’ve generated the key, wrap it in a file called csek.json.
When working in the GCP Console, you enter the Base64-encoded raw key (or wrapped key if enabled) directly into the encryption field, no JSON needed.
In contrast, when using the gcloud CLI or API, we provide the key inside a JSON file (csek.json) that defines whether it’s a rawKey or a wrappedKey.
Save the key somewhere secure (not just in plaintext on disk).
If the key is lost, the disk is unrecoverable.
{
  "kind": "compute#customerSuppliedEncryptionKey",
  "rawKey": "paste-your-Base64-key-here"
}
So below I will first use a raw key (not wrapped).
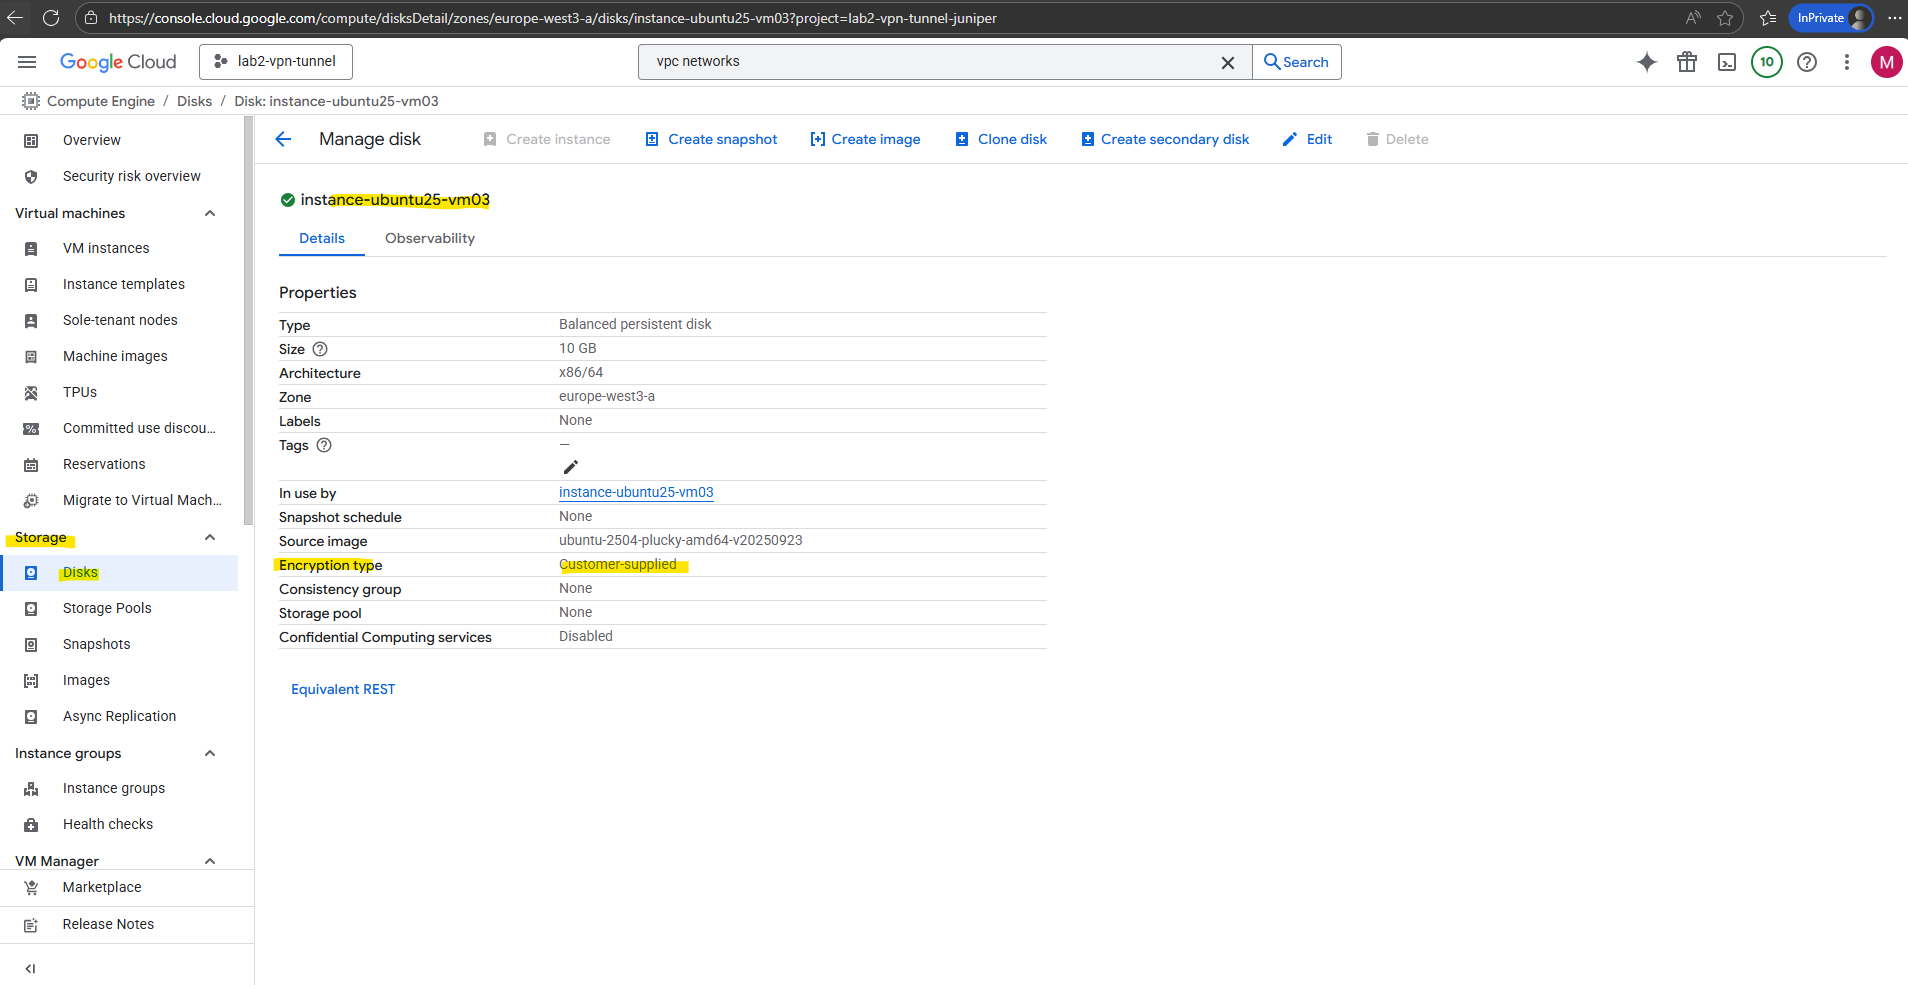
The encryption type of existing disks we will see directly under Compute Engine -> Storage -> Disks, select the desired disk and check the encryption type row.
How CSEKs are protected
How CSEKs are protected on disk, as they move around the Google Cloud infrastructure, and in memory.
Raw CSEKs, CSEK-derived keys, and raw disk keys are never stored on disk unencrypted.
Raw disk keys are stored wrapped with CSEK-derived keys and with Google keys when automatic restart is used. Google doesn’t permanently store your keys on its servers.
Key material lives in various systems’ memory, including cluster manager memory and VMM memory.
Access to these systems’ memory is by exception (for example, as part of an incident) and managed by access control lists. These systems have memory dumps disabled or automatically scan for key material in memory dumps. For information about protections to these jobs, see How Google protects its production services.
Source: https://cloud.google.com/docs/security/encryption/customer-supplied-encryption-keys
When starting a VM instance with CSEK keys, we first need to provide the keys before we can start it.
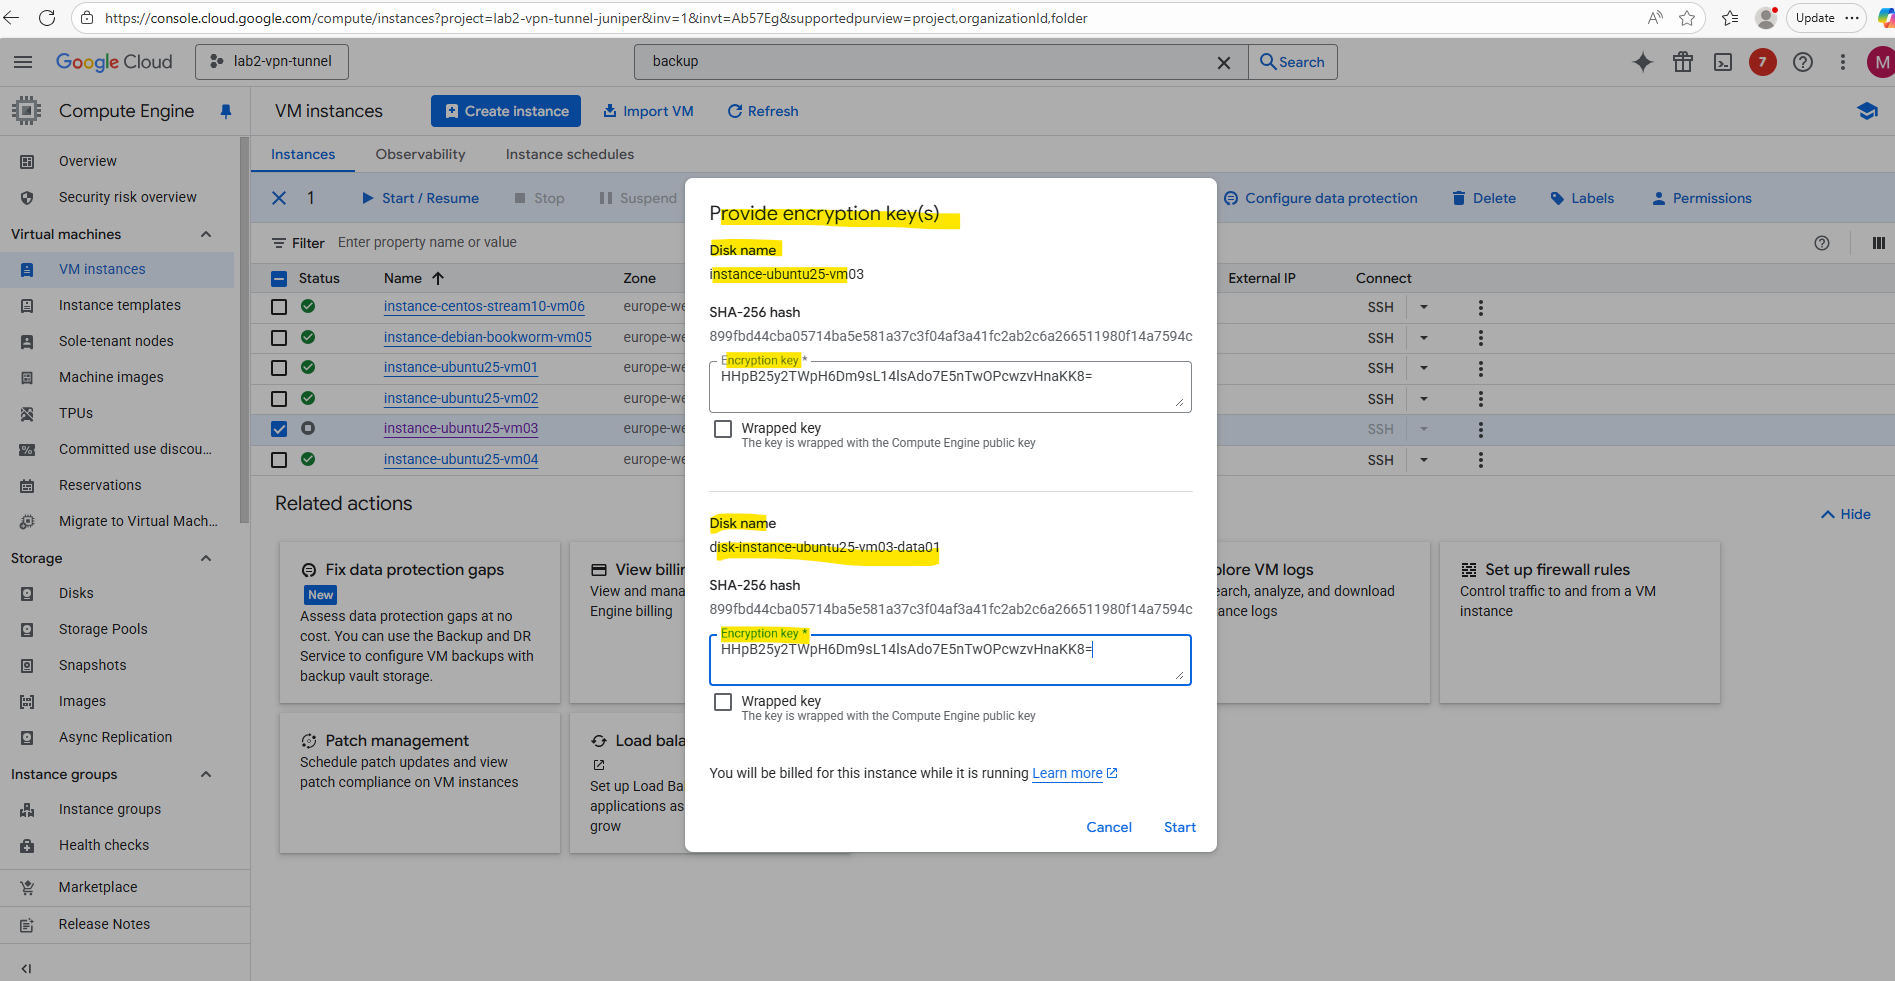
To avoid the need to provide these keys manually we can use Cloud KMS shown below.
Using Cloud KMS
Instead of managing raw encryption keys yourself with Customer-supplied encryption key (CSEK), Google Cloud offers Cloud Key Management Service (Cloud KMS).
With Customer-managed encryption keys (CMEK) stored in KMS, you gain centralized control, auditing, rotation, and IAM-based access policies, without exposing raw key material to Google.
This approach strikes a balance between security and convenience, letting you keep ownership of keys while allowing GCP services to request encryption operations securely.
Google Cloud retrieves the key from KMS automatically when needed → we don’t supply it manually.
This is the recommended approach for production, since it removes the manual step but keeps customer control (we own/rotate the key in KMS).
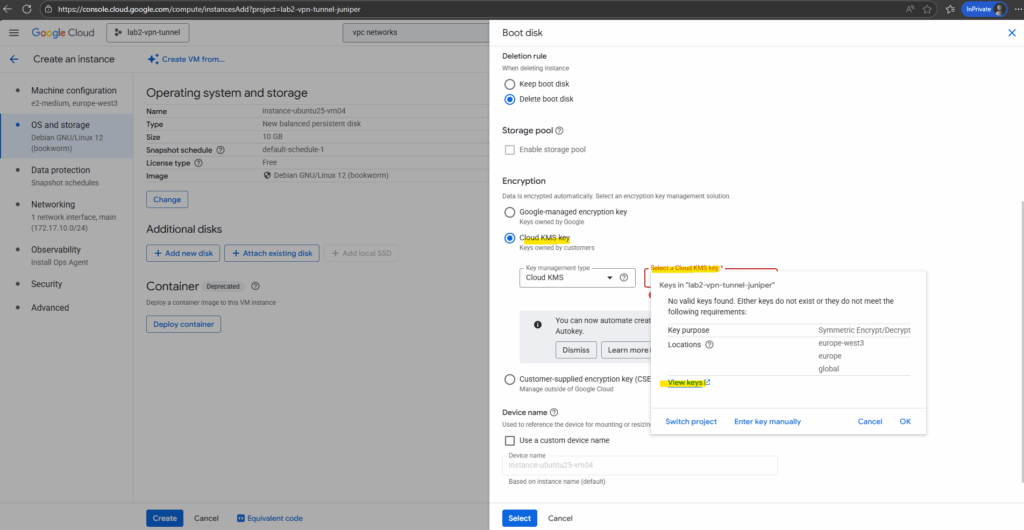
When creating a new virtual machine and disk, this time I will select for the encryption Cloud KMS key as shown below.
So far no valid keys are found, so I will first click on View keys below.
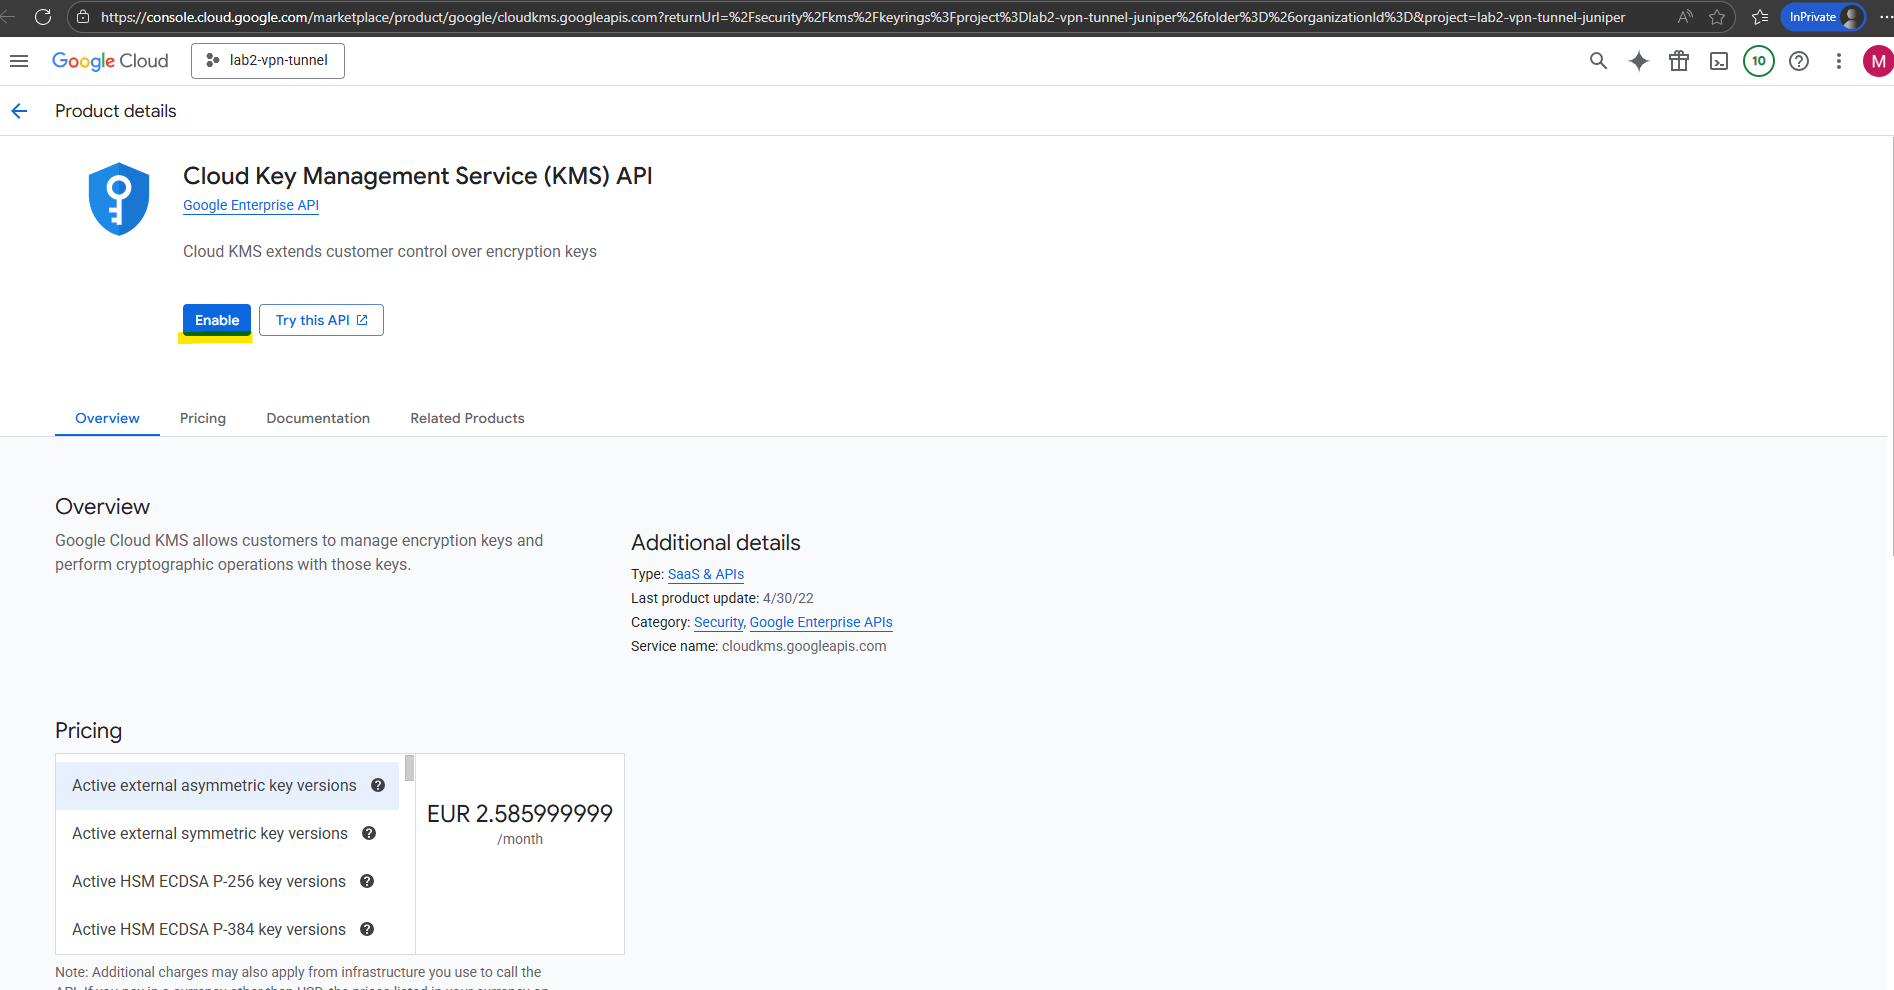
We first need to enable the Cloud Key Management Service (KMS) API for our project to use this service.
After enabling the API we can navigate to Security -> Key management -> Key ring to manage our own keys.
So below I will first create a new key ring by clicking on the button Create key ring.
In Google Cloud KMS, a key ring is a logical container for one or more cryptographic keys. Think of it as a folder, you create a key ring first, then place your keys inside it.
Keys in a key ring share the same location/region (important for compliance and latency).
A key ring can hold multiple keys, and each key can have multiple versions (for rotation).

Enter a key ring name and the location.

Next we can create our first key.
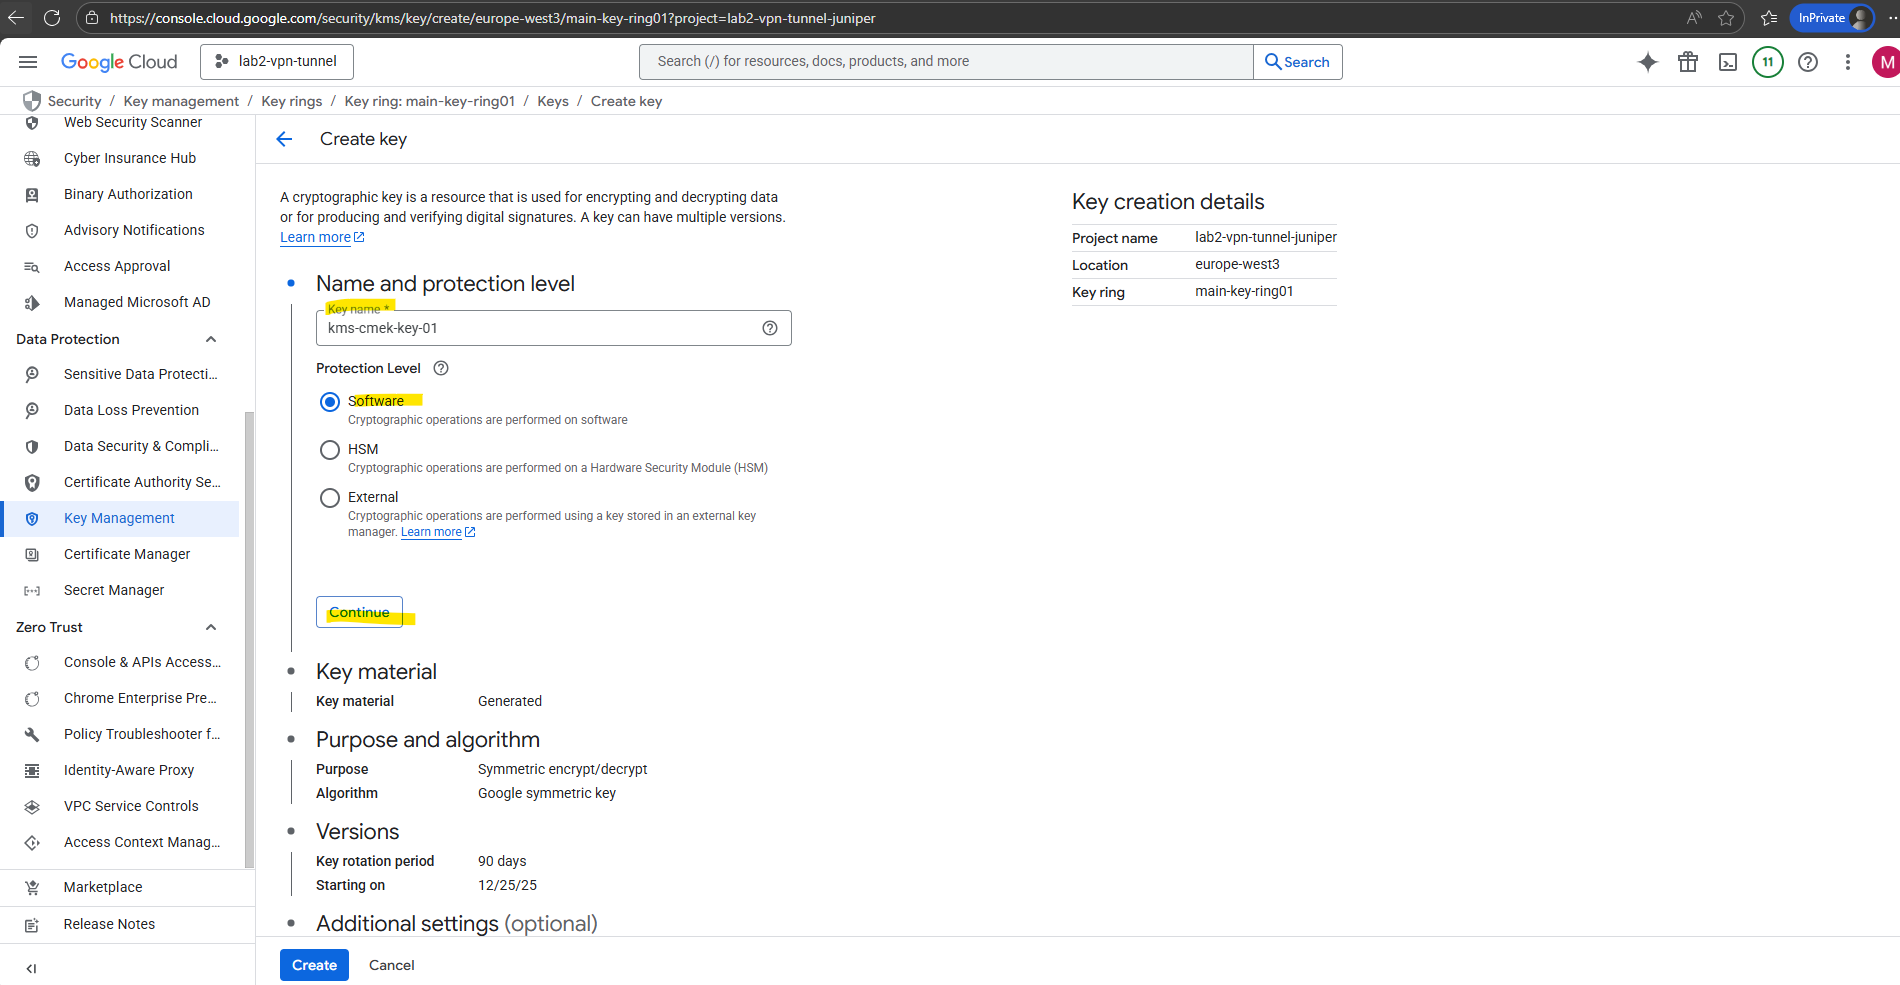
Enter a key name, select the protection level and click on Continue.
More about the protection level you will find here https://cloud.google.com/kms/docs/algorithms#protection_levels.
Next we can either generate a new key or import an existing key. I will let generate a new key below. Click on Continue.
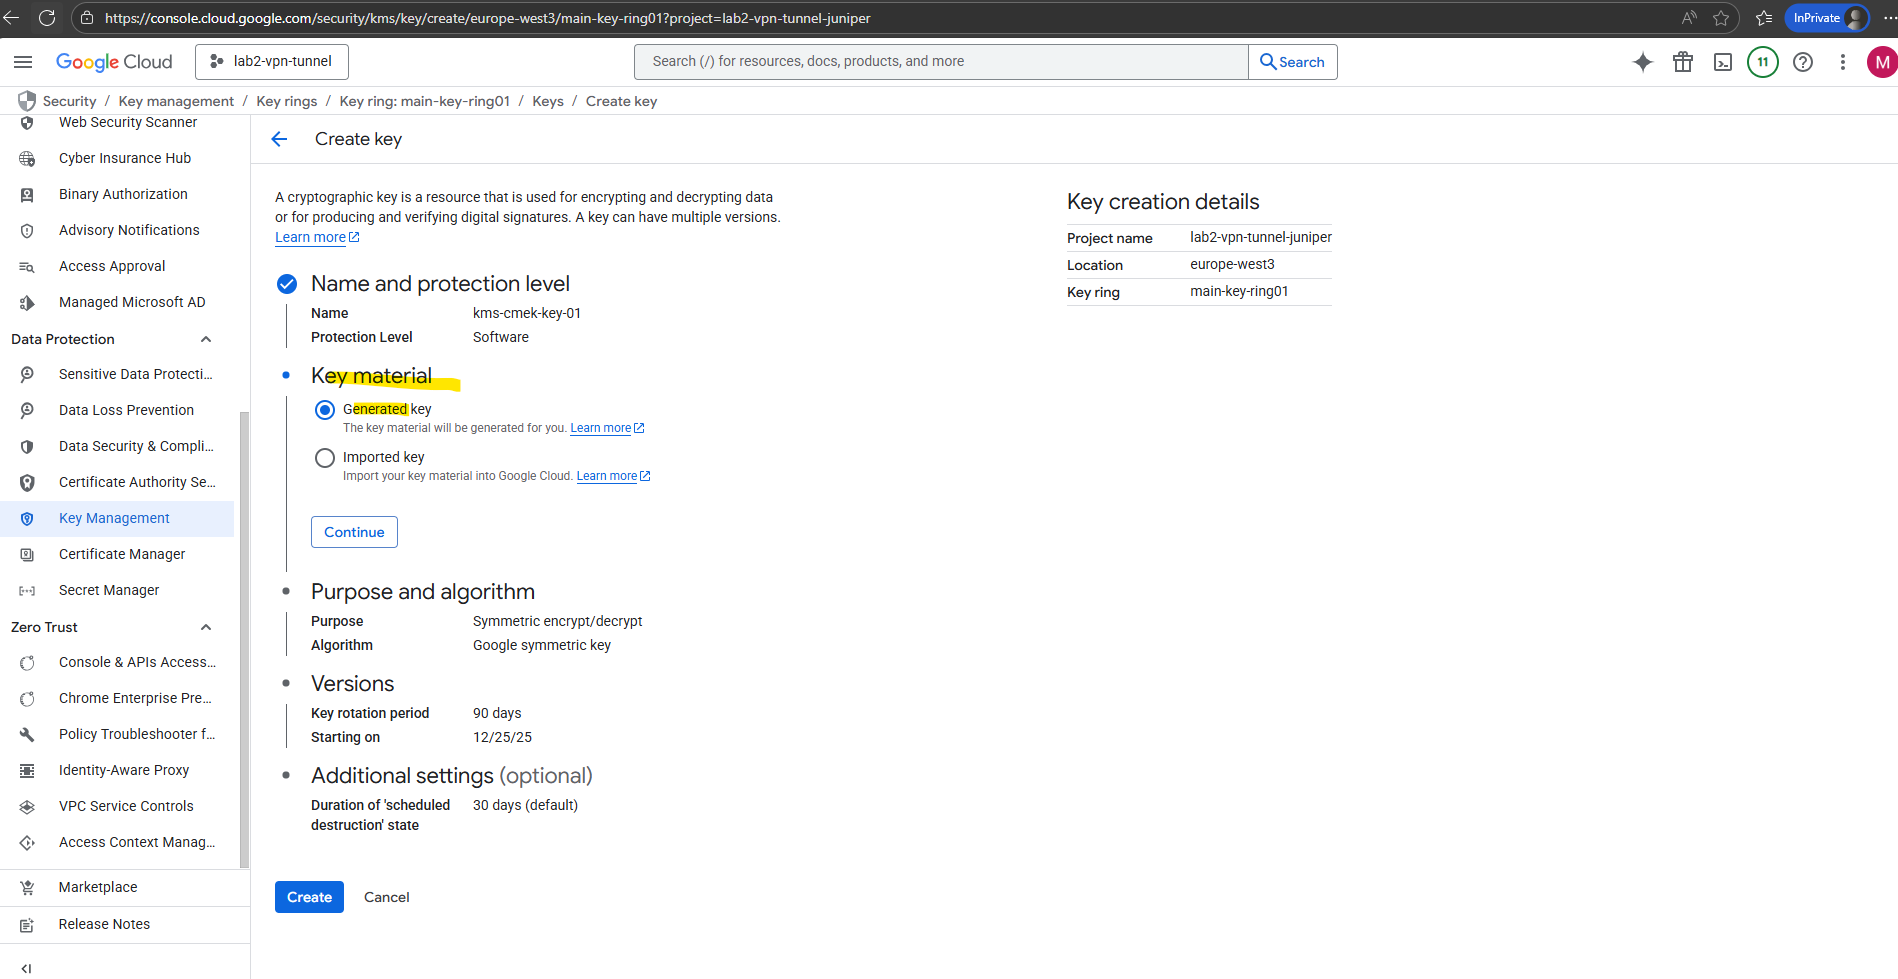
Select the purpose and algorithm for the new key we will generate.
When using the key for VM disks (CMEK), we must choose Symmetric encryption/decryption below.
Compute Engine (and other GCP storage services like Cloud Storage, Filestore, etc.) require a symmetric AES-256 key to wrap the actual disk encryption keys.
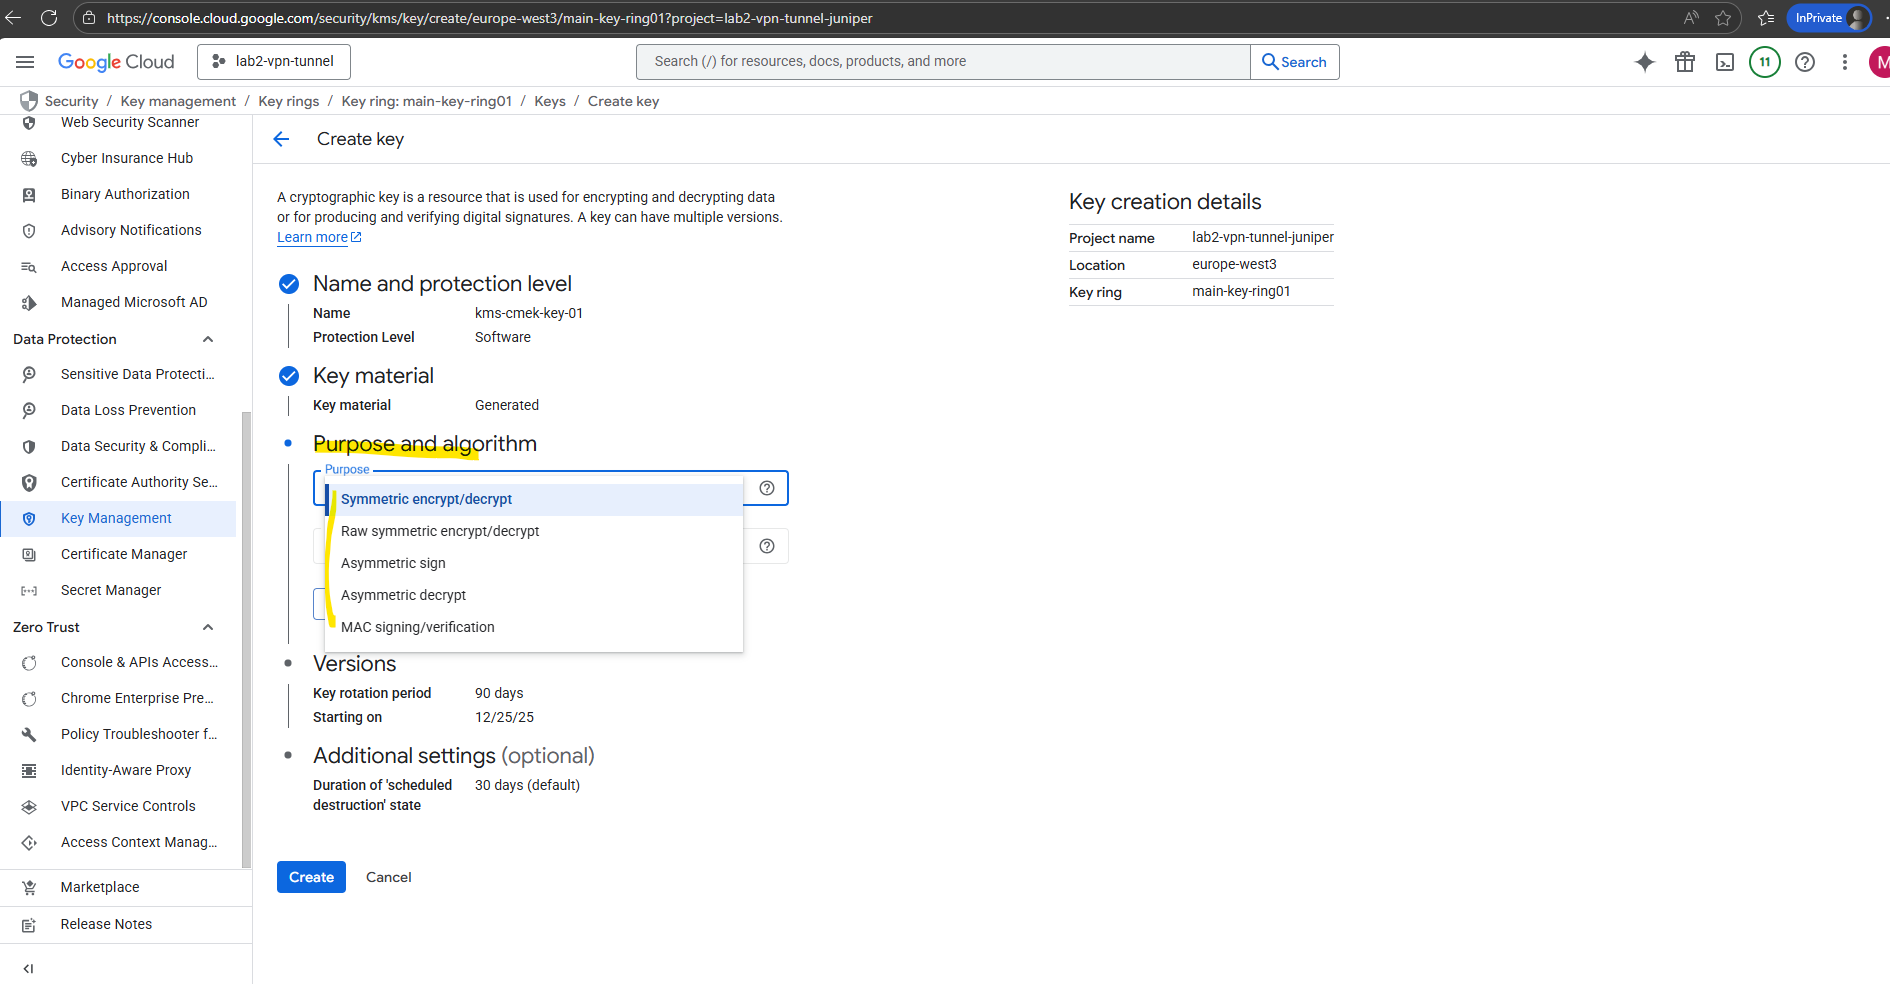
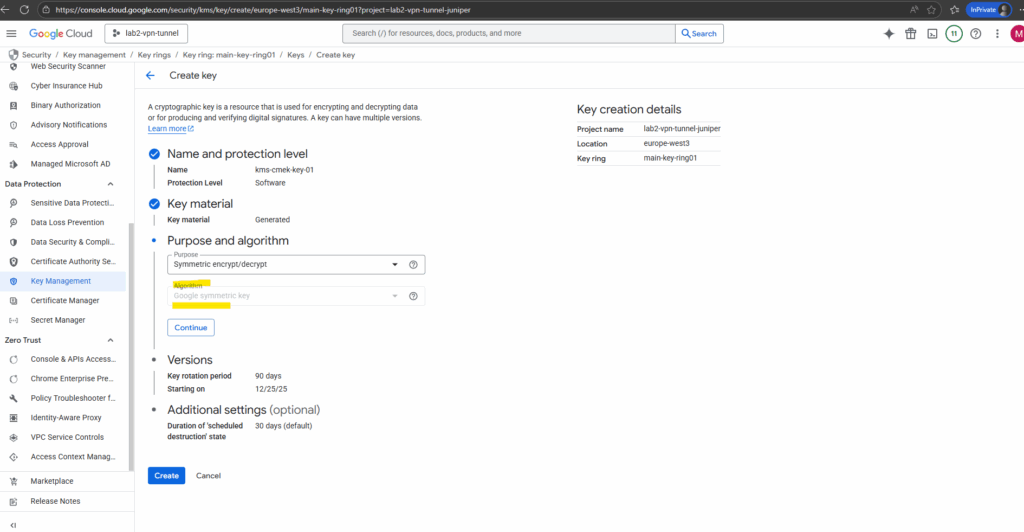
Once you’ve picked Symmetric, there’s only one supported option for CMEK. Click on Continue.
Select the desired key rotation period.
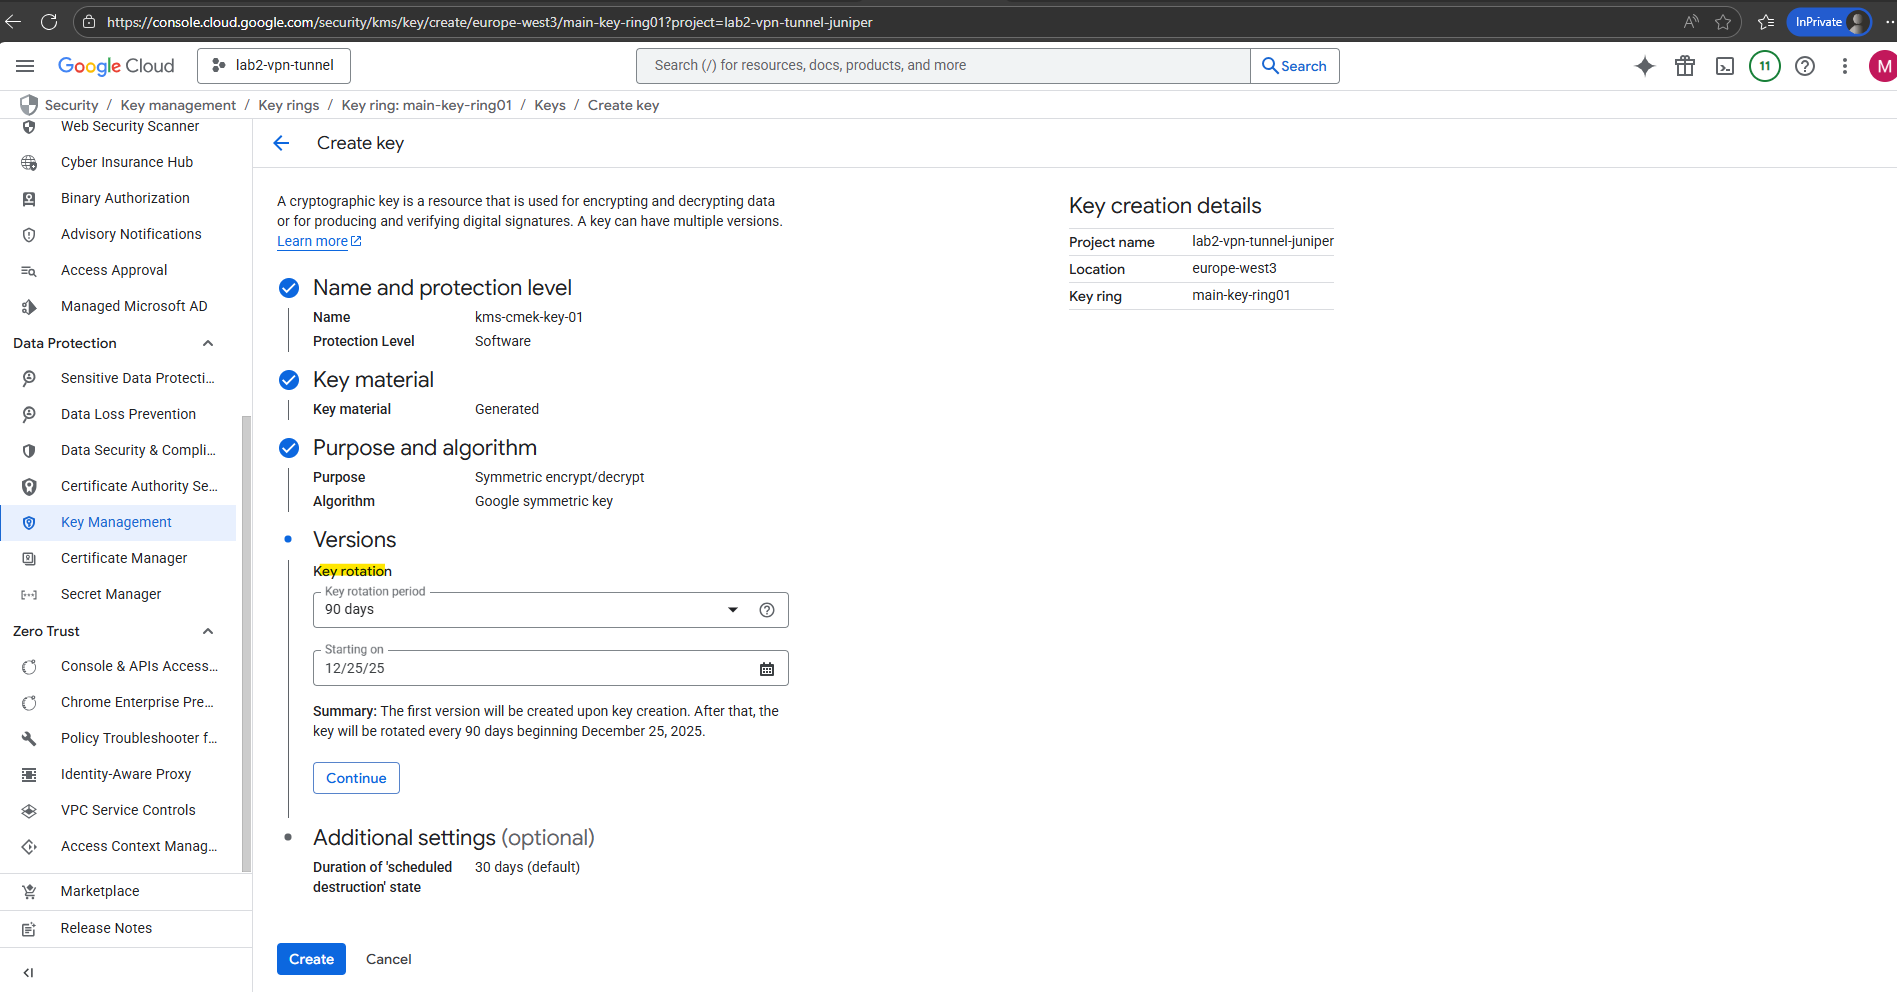
Finally we can click on Create.

Our first CMEK key is created.
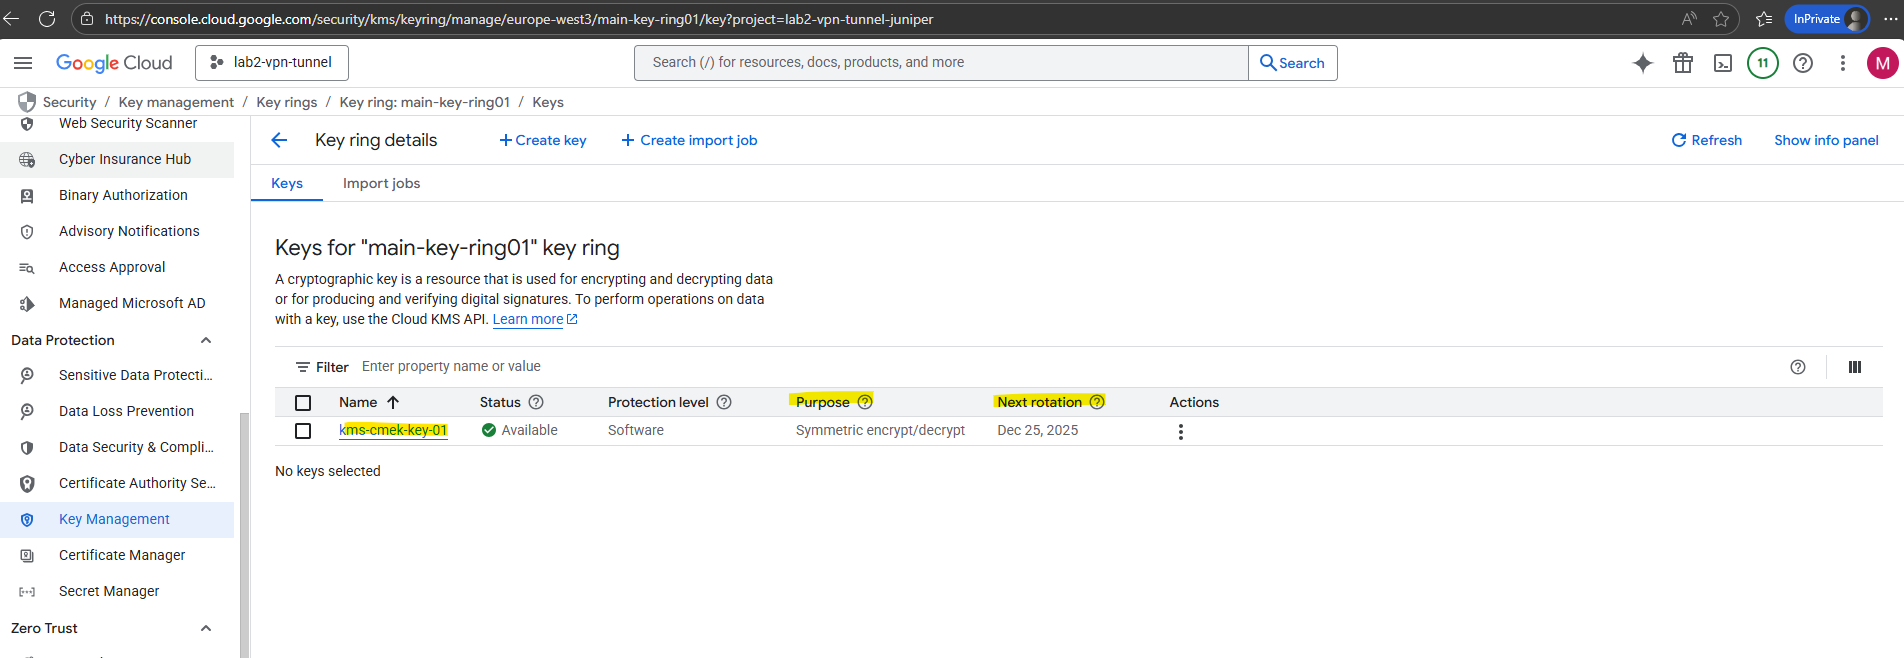
So from now on we can select this new key to decrypt disks.

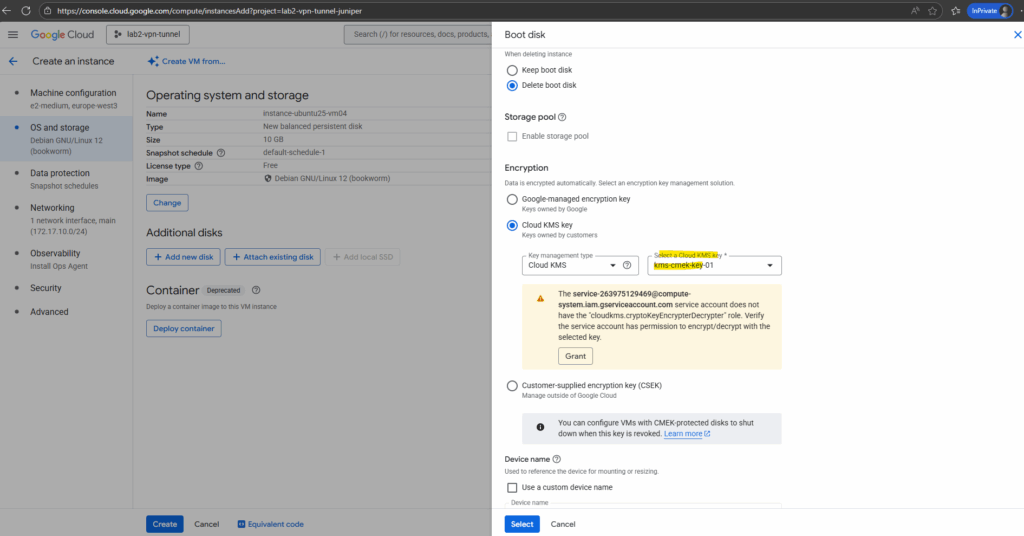
The warning below is expected the first time we try to use a new CMEK key for Compute Engine.
When we enable CMEK for a VM disk, Compute Engine itself needs permission to use your Cloud KMS key.
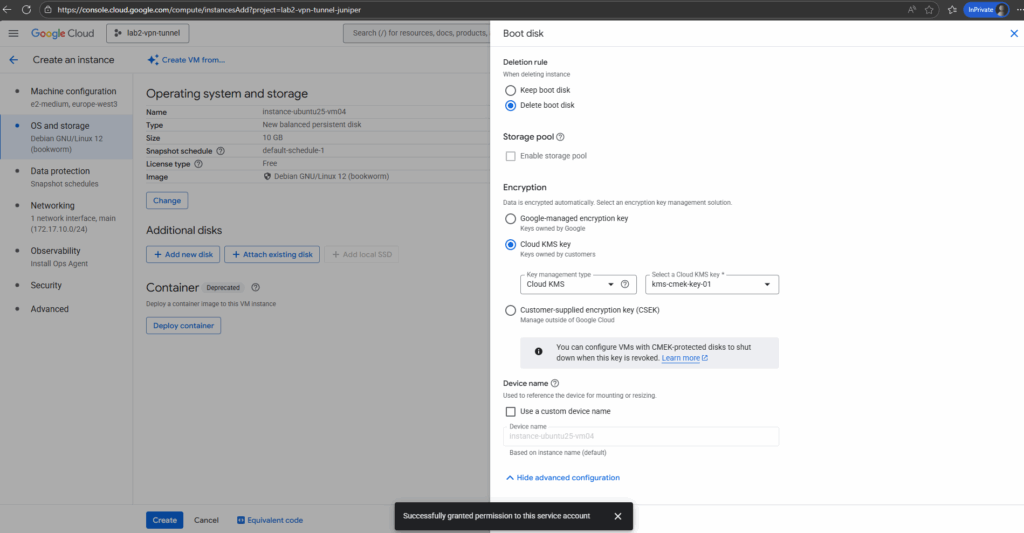
So click on Grant below.
Finally click on Select on the Boot disk blade to move on with the other VM instance settings.
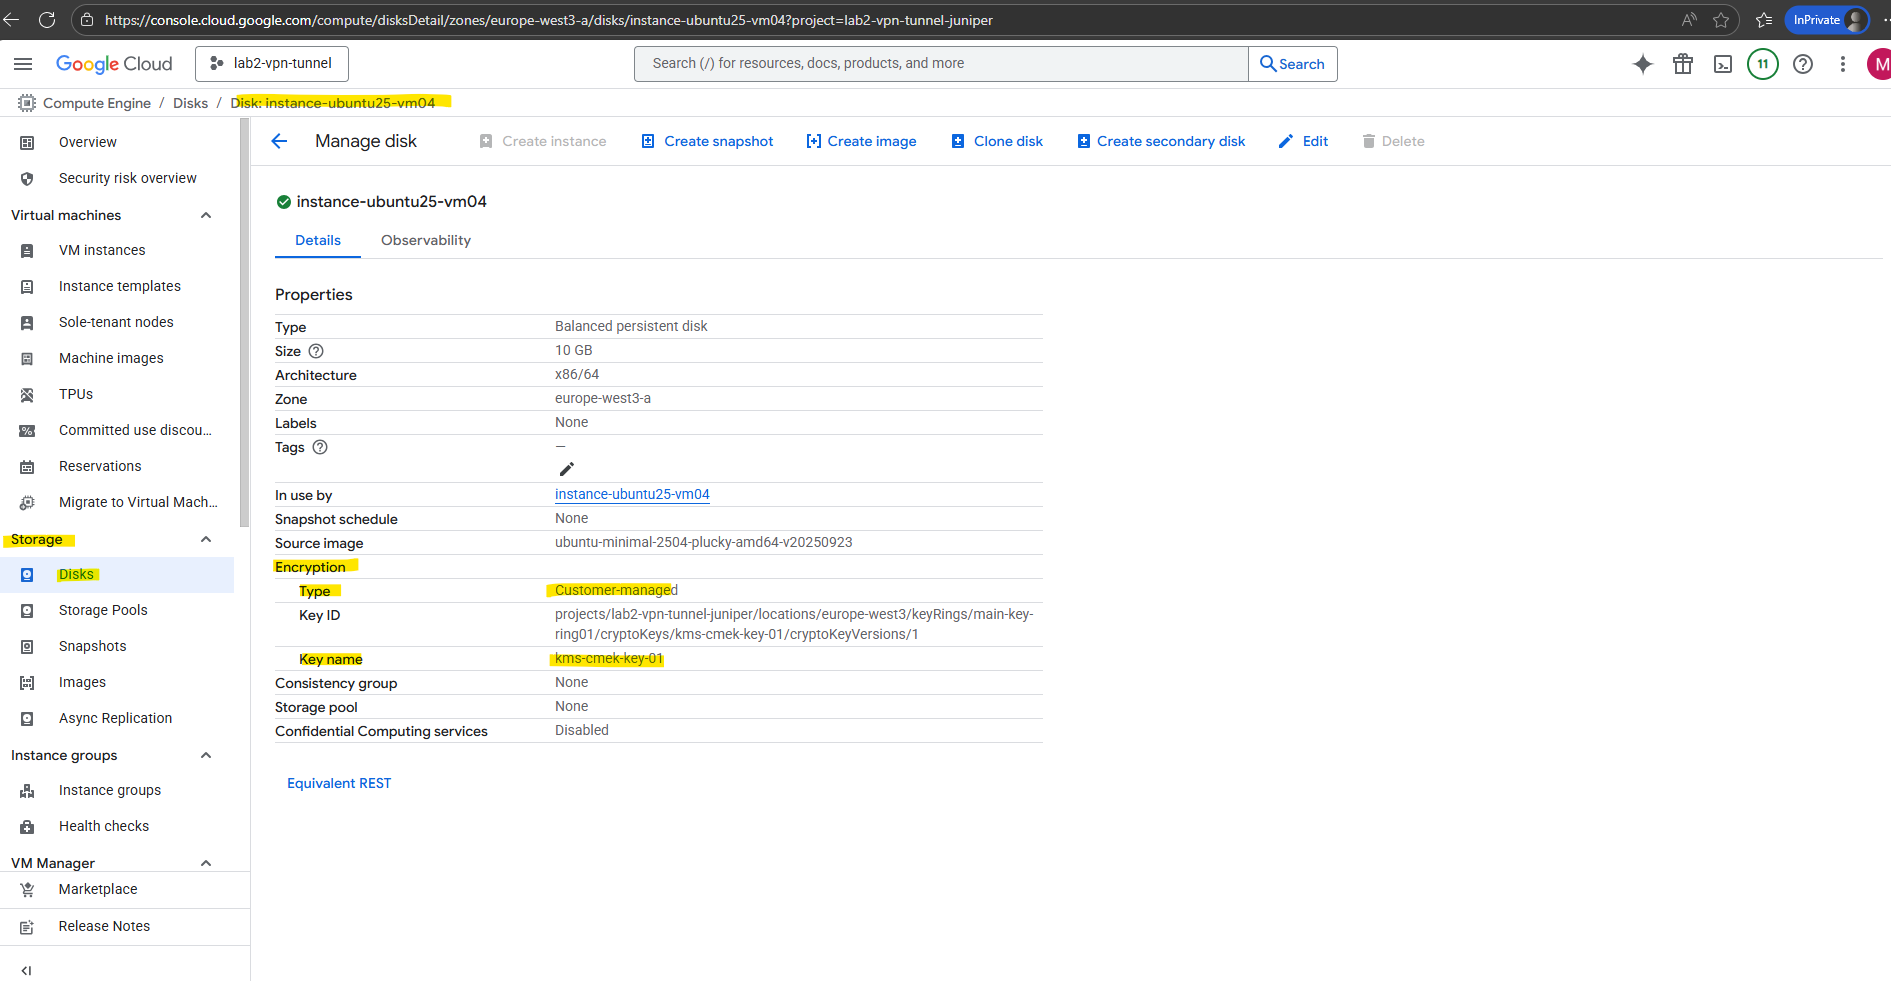
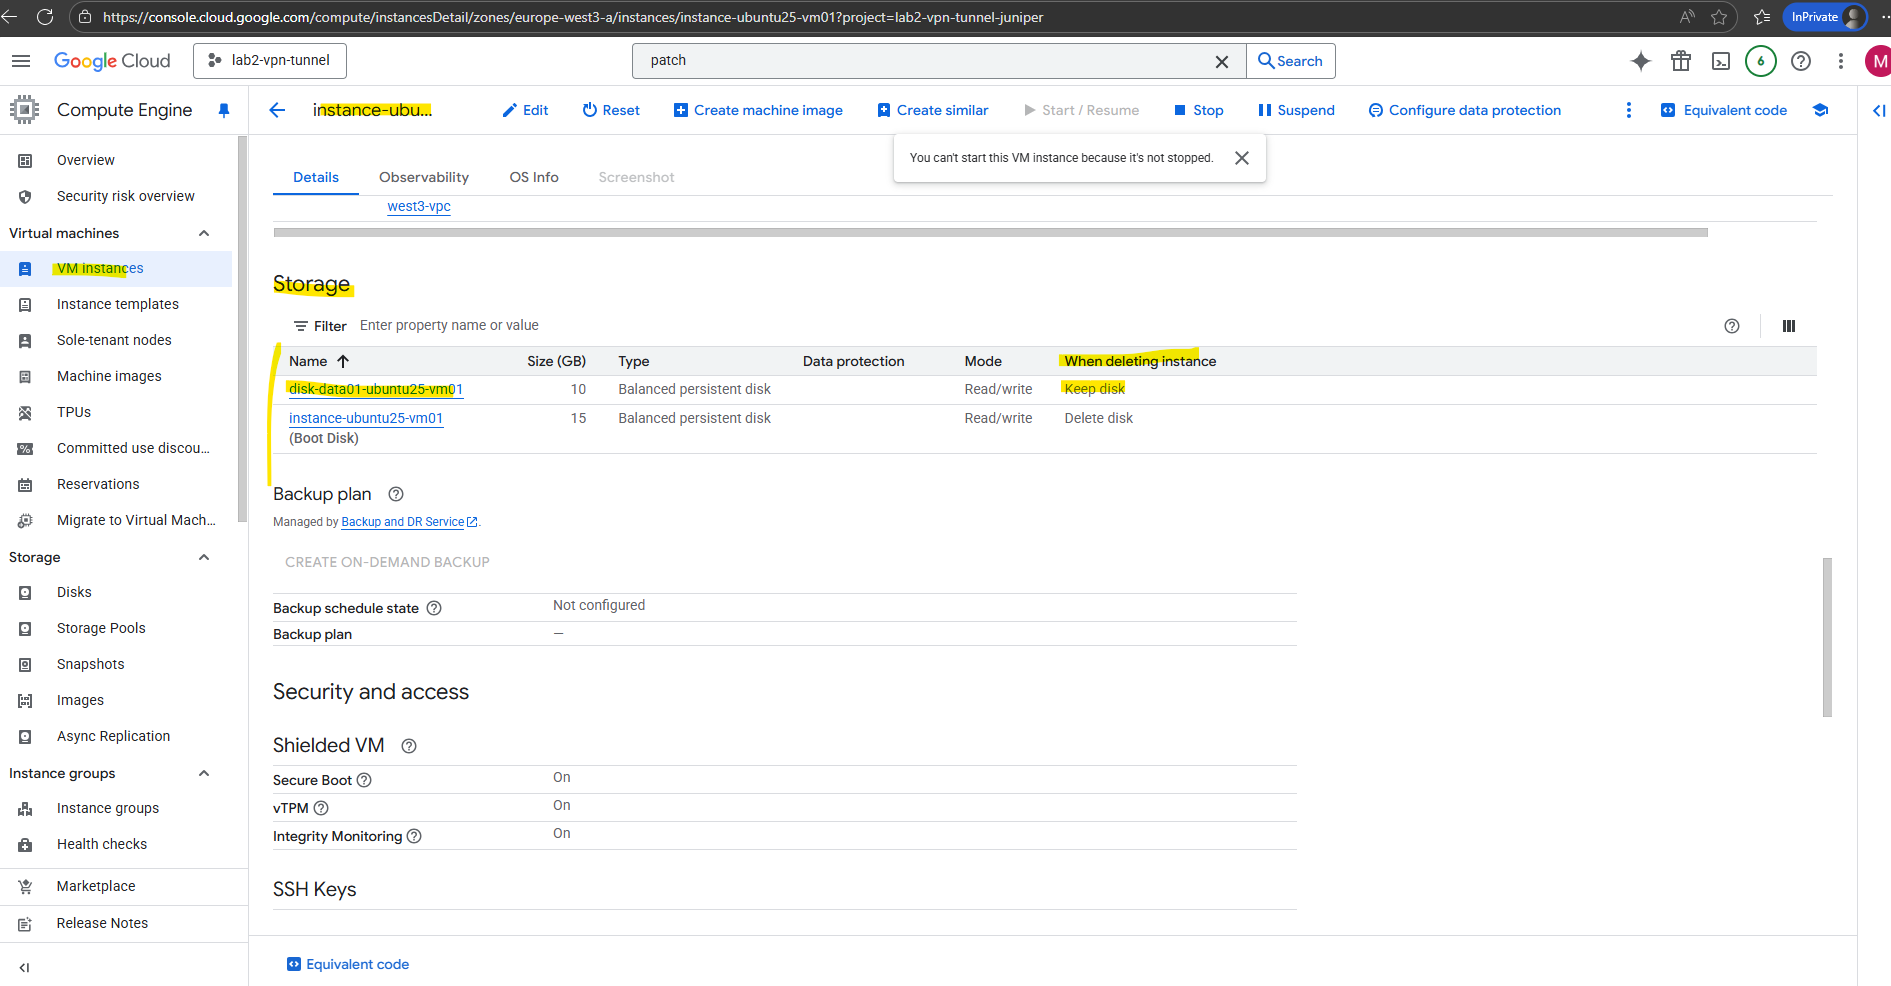
After the new VM instance is created successful, we can check the encryption type as usual under Compute Engine -> Storage -> Disks.
Cloud KMS with Autokey
Above we already used Cloud KMS, to simplify this process, we can also use Cloud KMS Autokey.
Cloud KMS Autokey simplifies creating and using customer-managed encryption keys (CMEKs) by automating provisioning and assignment.
With Autokey, key rings and keys are generated on-demand. Service accounts that use the keys to encrypt and decrypt resources are created and granted Identity and Access Management (IAM) roles when needed.
Cloud KMS administrators retain full control and visibility to keys created by Autokey, without needing to pre-plan and create each resource.
Source: https://cloud.google.com/kms/docs/kms-autokey
Export / Download GCP Data Disks
To download a GCP data disk using the console, first go to Compute Engine → Disks and create an image from the disk.
Then open Compute Engine → Images, select the image, and use the Export option to send it to a Cloud Storage bucket in the desired format (VMDK, VHD, or RAW).
Finally, go to Cloud Storage → Buckets and download the exported file to your local system.
Creating a new data disk
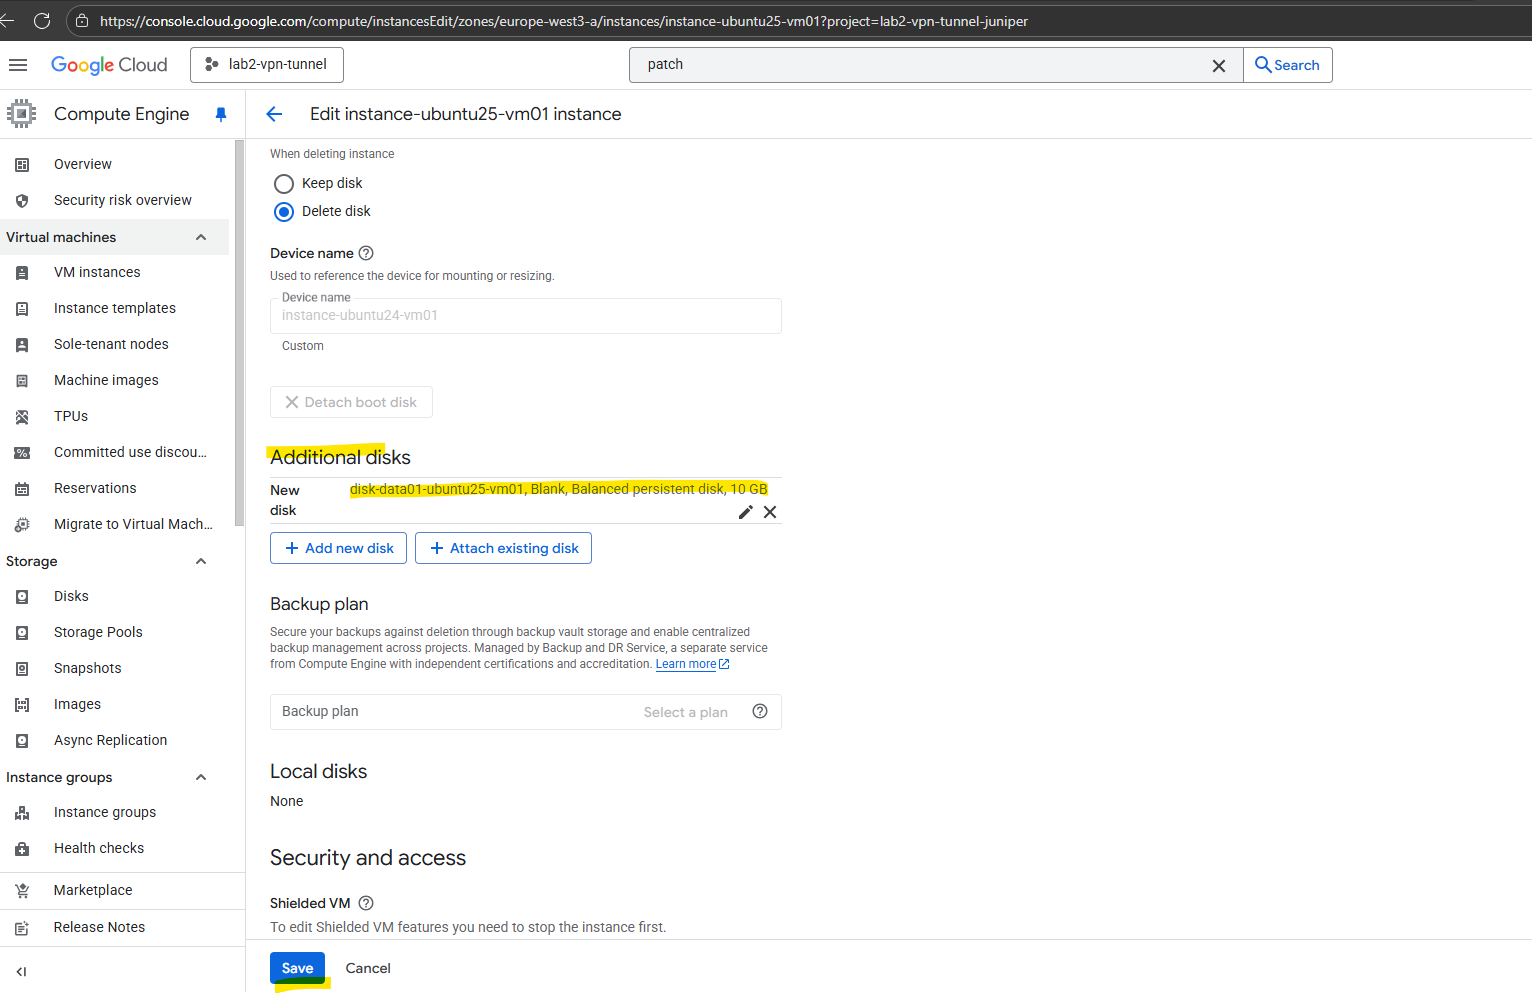
I will first add a new data disk to my VM instance below.
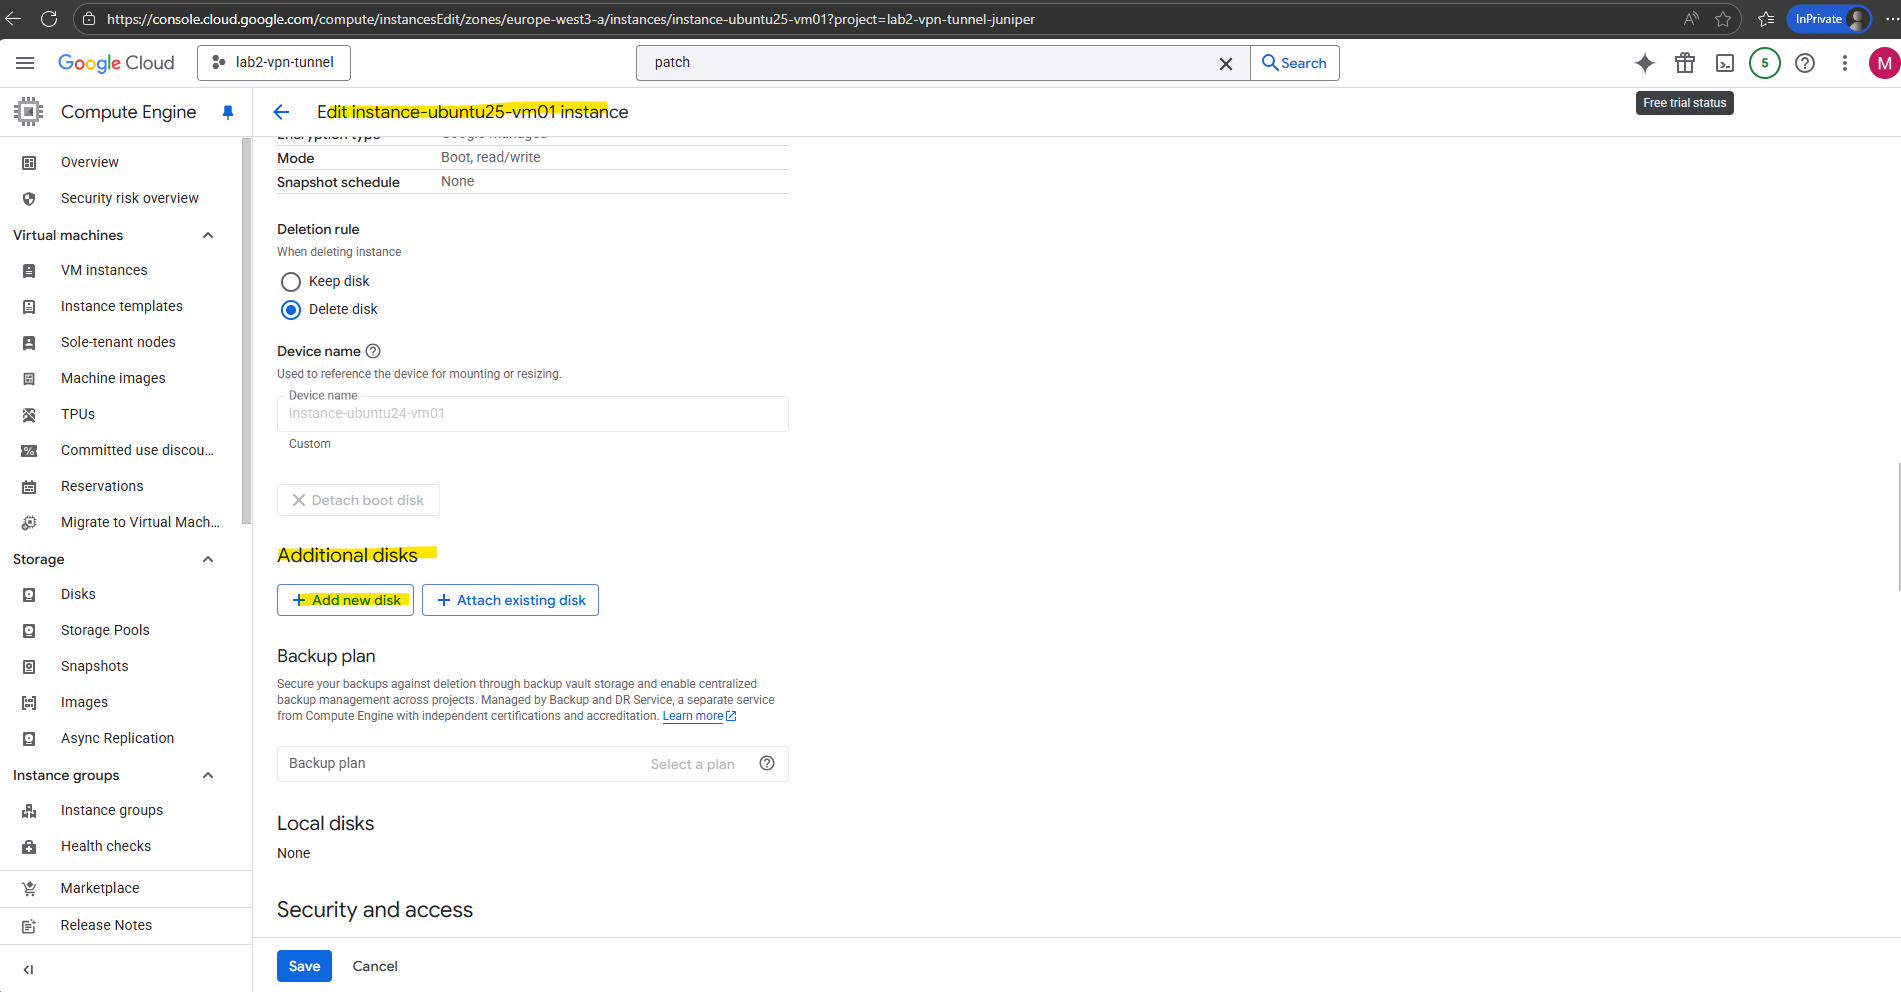
You can use block storage for boot and data volumes for all compute instances, including virtual machines (VMs).
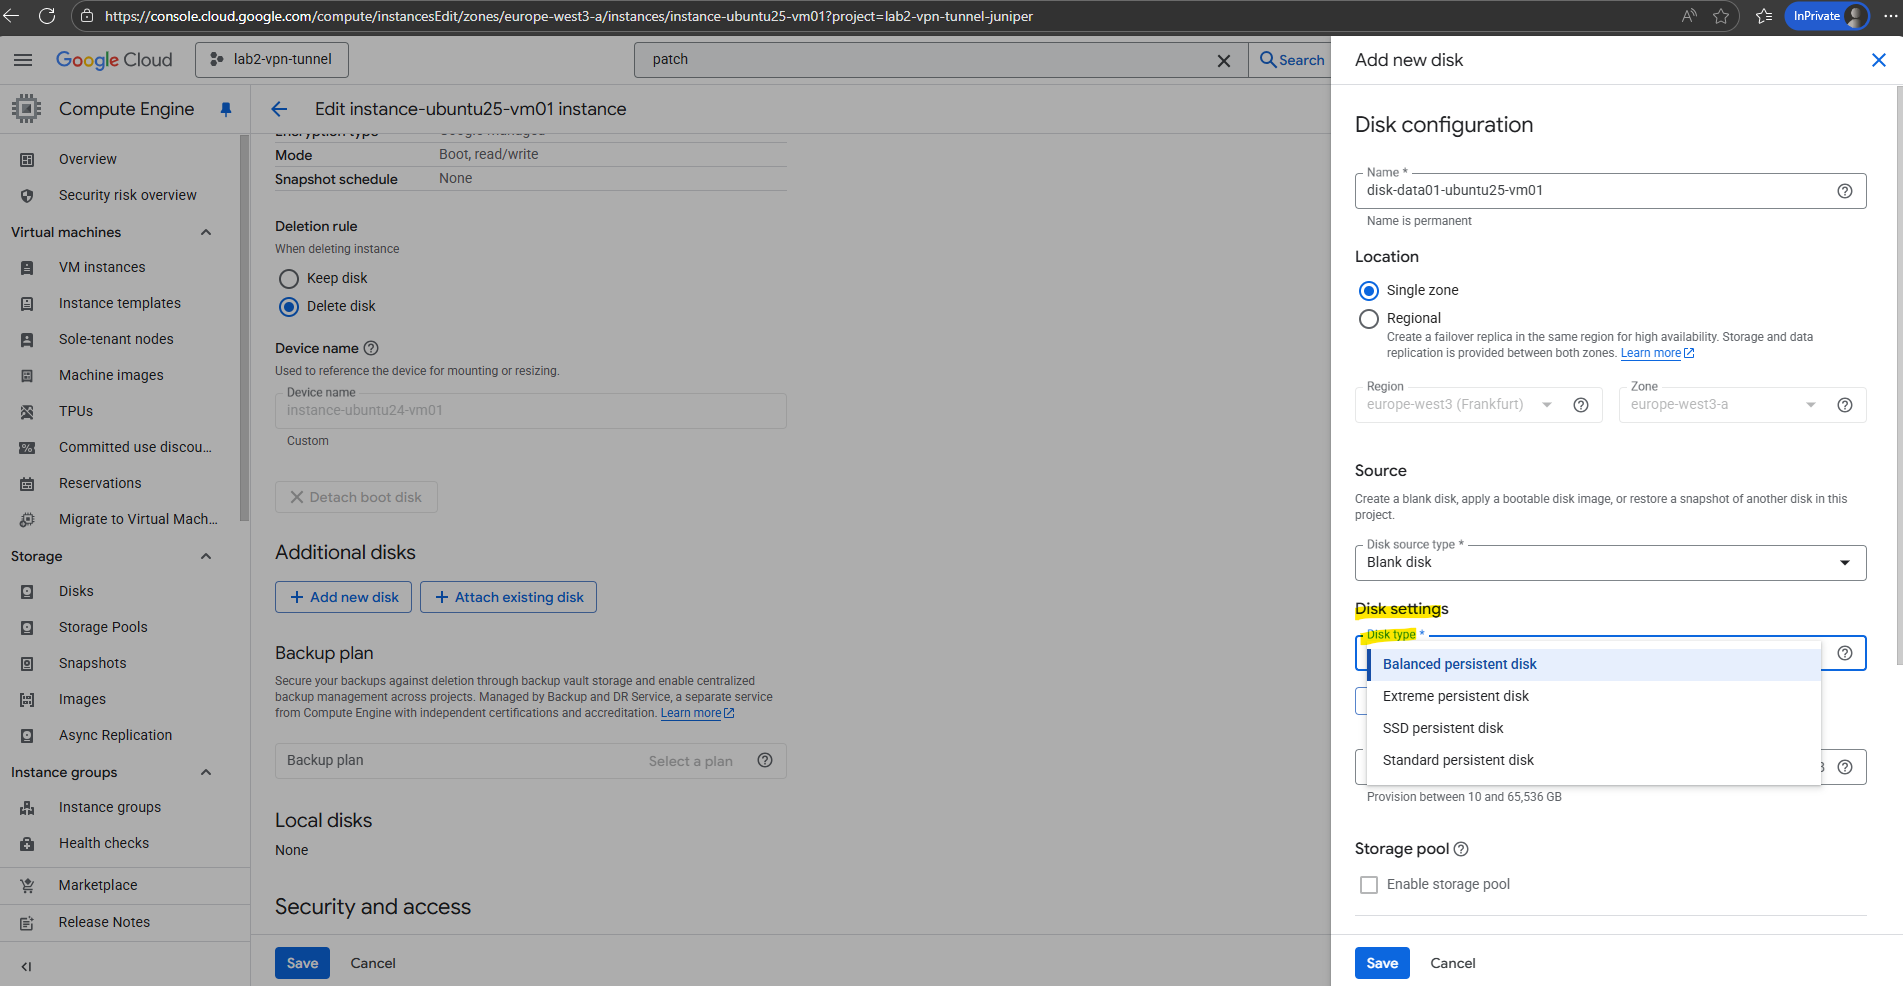
Google Cloud offers two types of disks, or block storage, temporary and durable block storage. You can combine these block storage types in a single compute instance.
Temporary, or ephemeral, block storage offers the fastest performance among all block storage types, with the tradeoff that the stored data is lost if the VM stops for any reason. Data is lost if you stop, suspend, or restart the VM, or if the VM crashes or fails.
Because of its ephemeral nature, use temporary block storage for only scratch data, caches such as tempdb for Microsoft SQL Server, or storage for flash-optimized databases. You can’t use temporary block storage as a boot volume.
For the encryption I will use by default Google-managed encryption key.
For the attachment settings I will leave the default settings with keep disk when the VM instance is deleted.
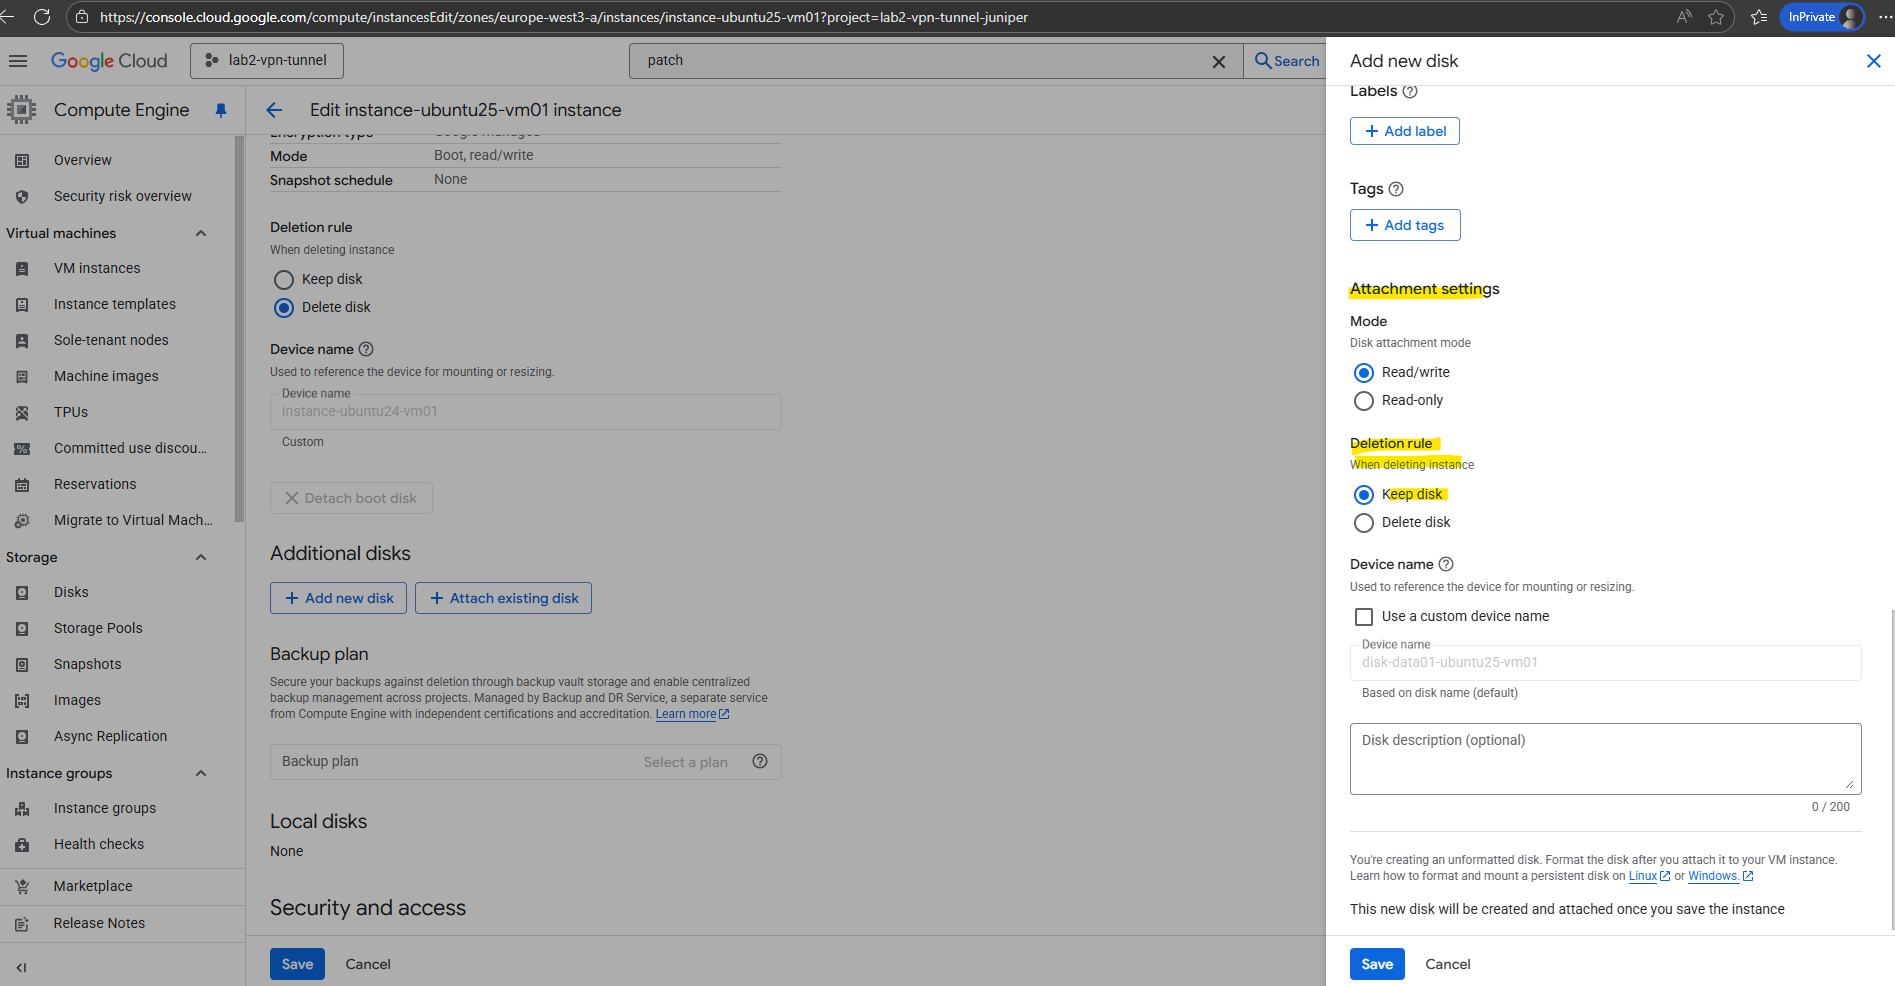
You can use this name to reference the device for mounting, resizing, and so on, from within the instance. By default, the device name is autogenerated based on the disk name. You can also choose to enter a custom name.
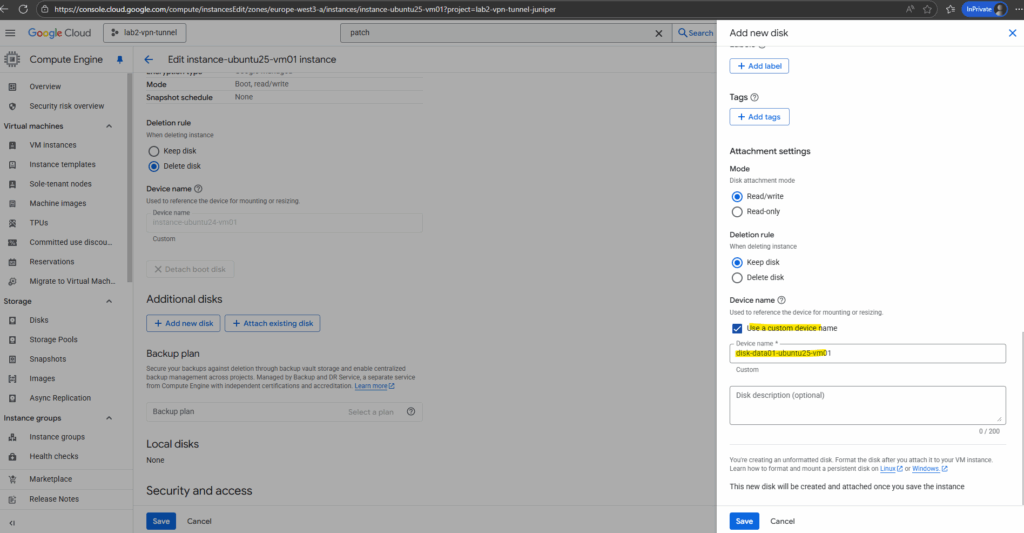
Click on Save.
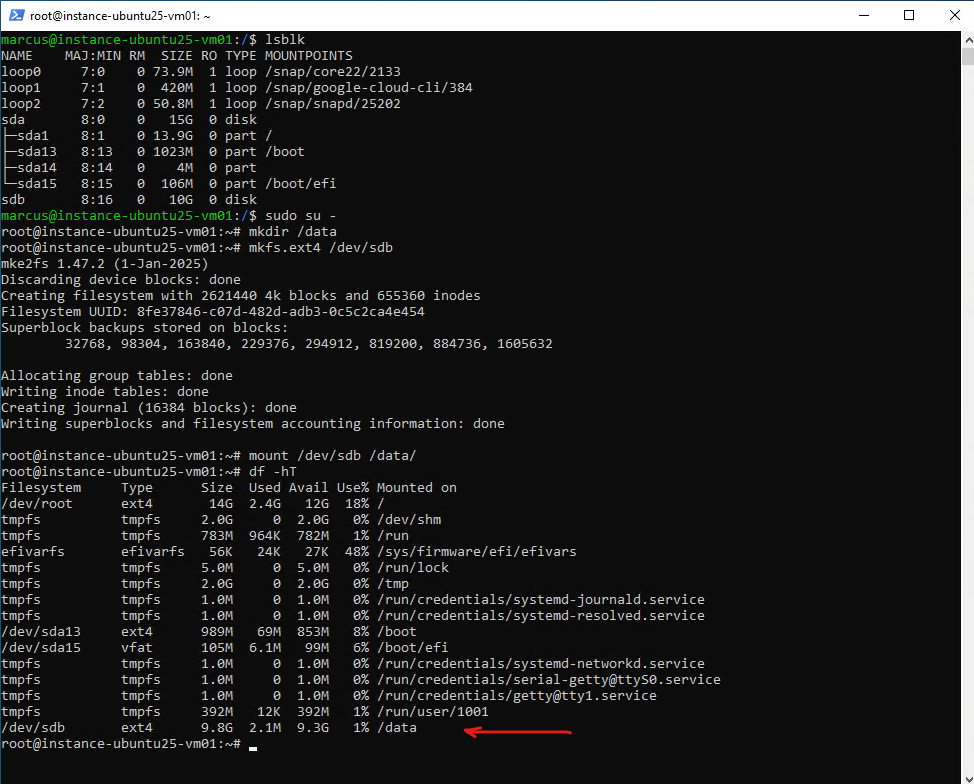
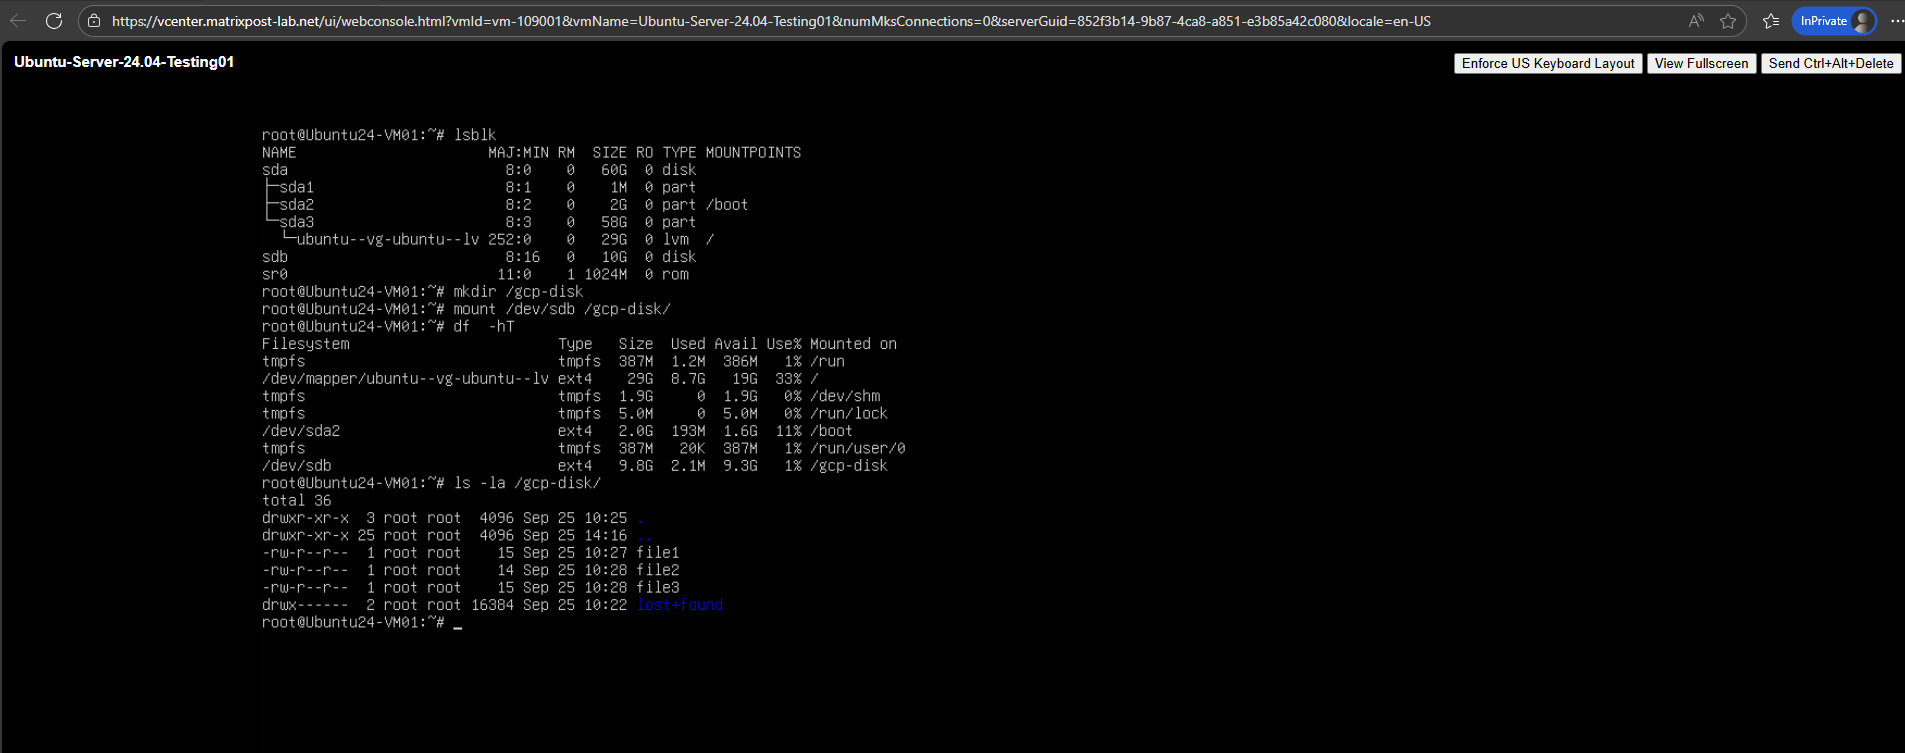
The OS already determined the new disk.
$ lsblk
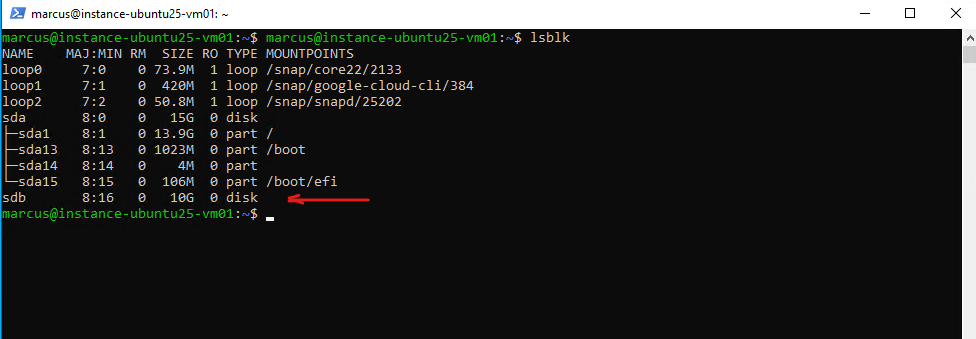
Because we will later test if we can access data stored on this disk, I will below first create a file system on our new disk /dev/sdb, mount it and finally writing some data on.
# mkfs.ext4 /dev/sdb
# mount /dev/sdb /data/
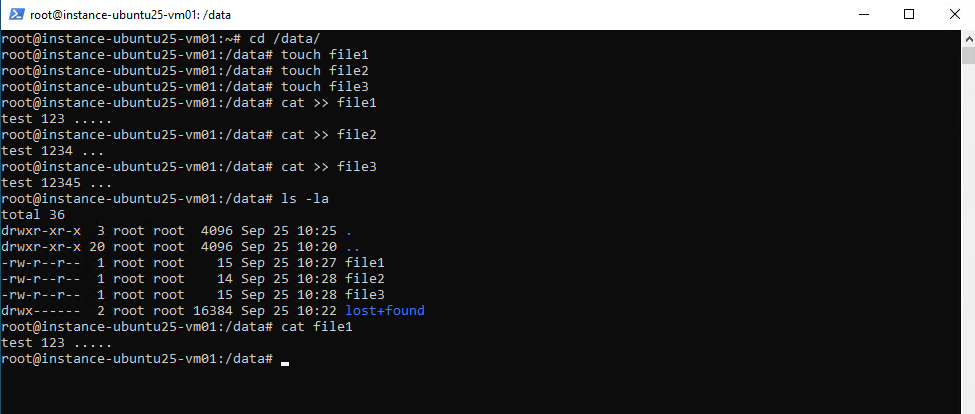
# cat >> file1
test 123 ...
<CTRL+D> to end input
To finally export this disk, we first need to create an image from this new disk as shown next.
Create an Image from the Disk
An image is a bootable or non-bootable disk snapshot that contains an operating system and/or data.
In Azure a managed disk can be exported as a VHD to a storage account using disk export. From there you can download the blob to your local system. You don’t need to create an image first.
In GCP a persistent disk must first be wrapped into an image before you can export it. That image is then exported to Cloud Storage in formats like VMDK, VHD, RAW, which you can download. Snapshots alone can’t be exported directly.
In the Google Cloud Console, navigate to: Navigation menu → Compute Engine → Disks
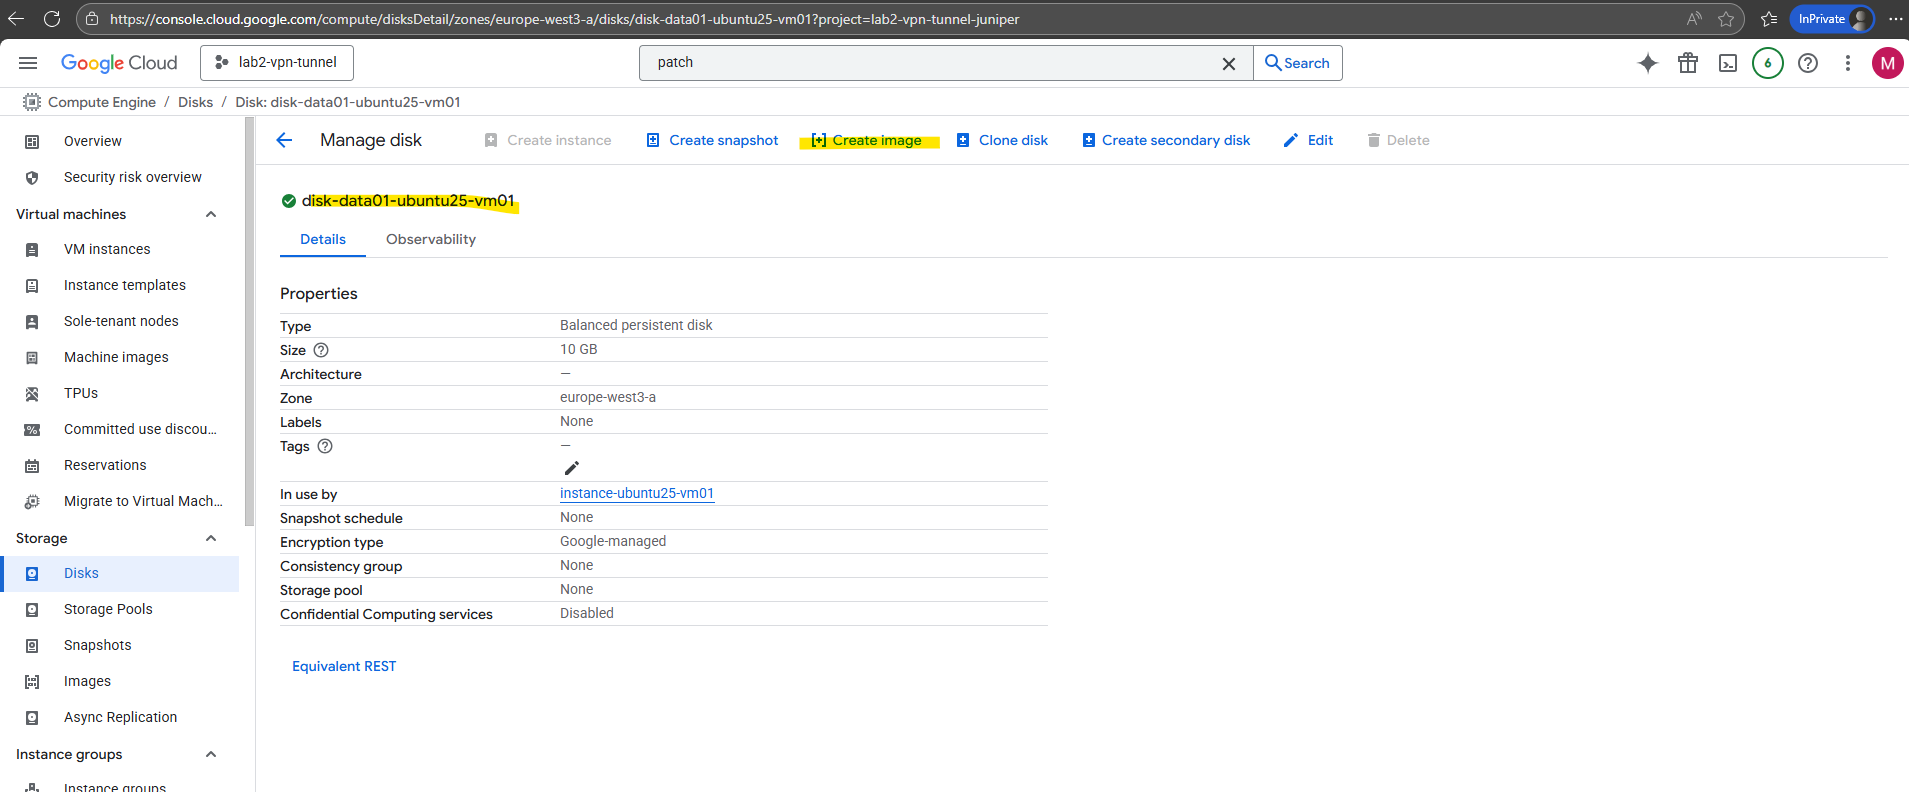
Click on your disk.
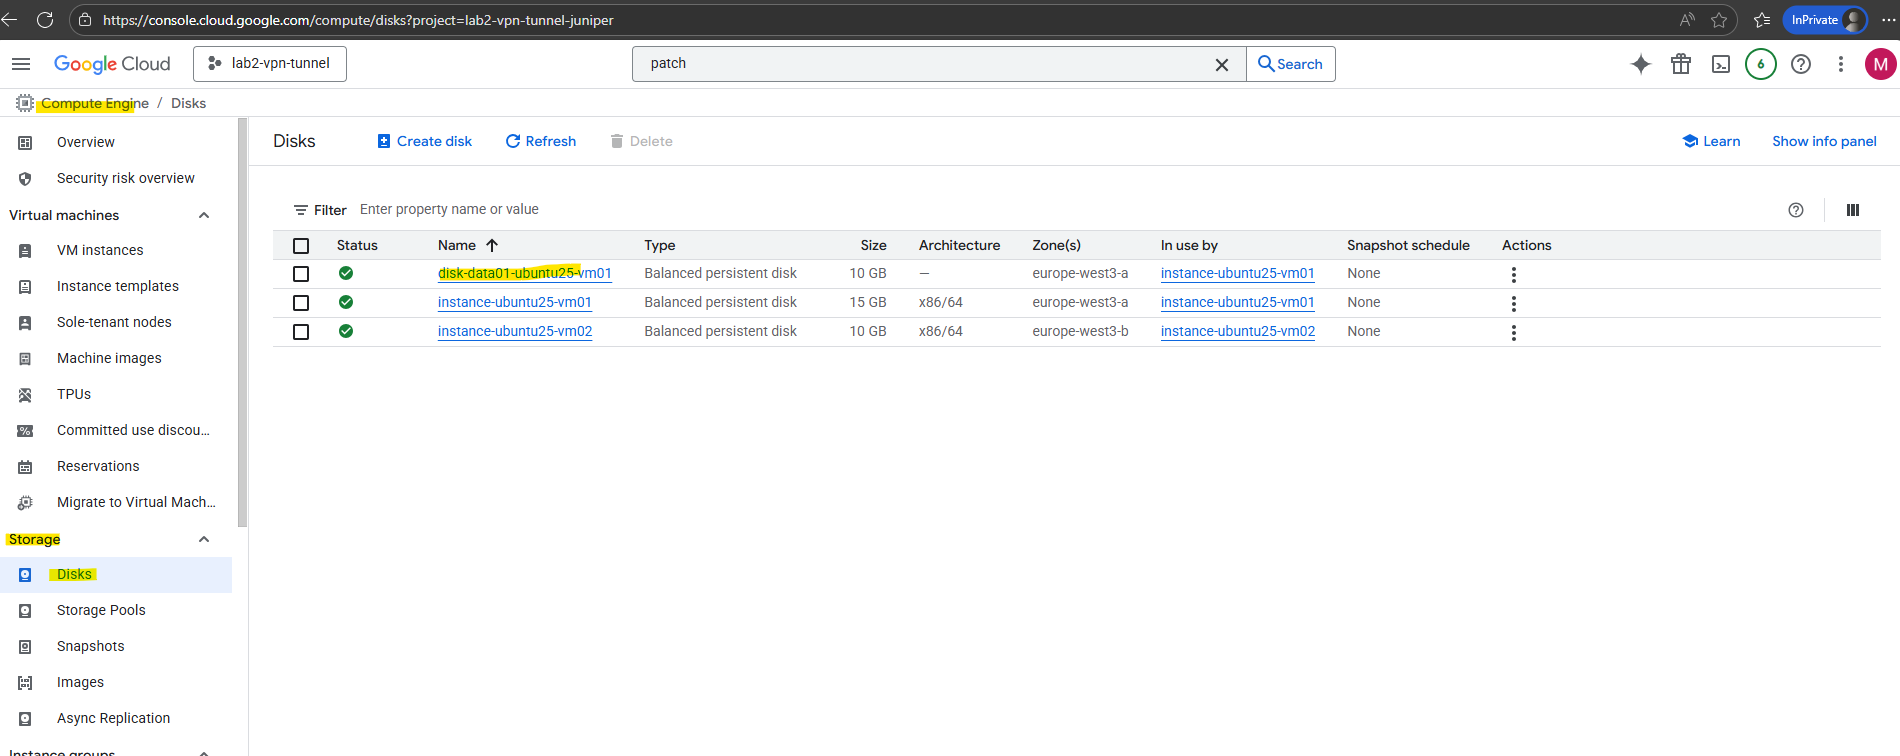
At the top, click Create image.
If the disk is attached to a running virtual machine, first stop the VM.
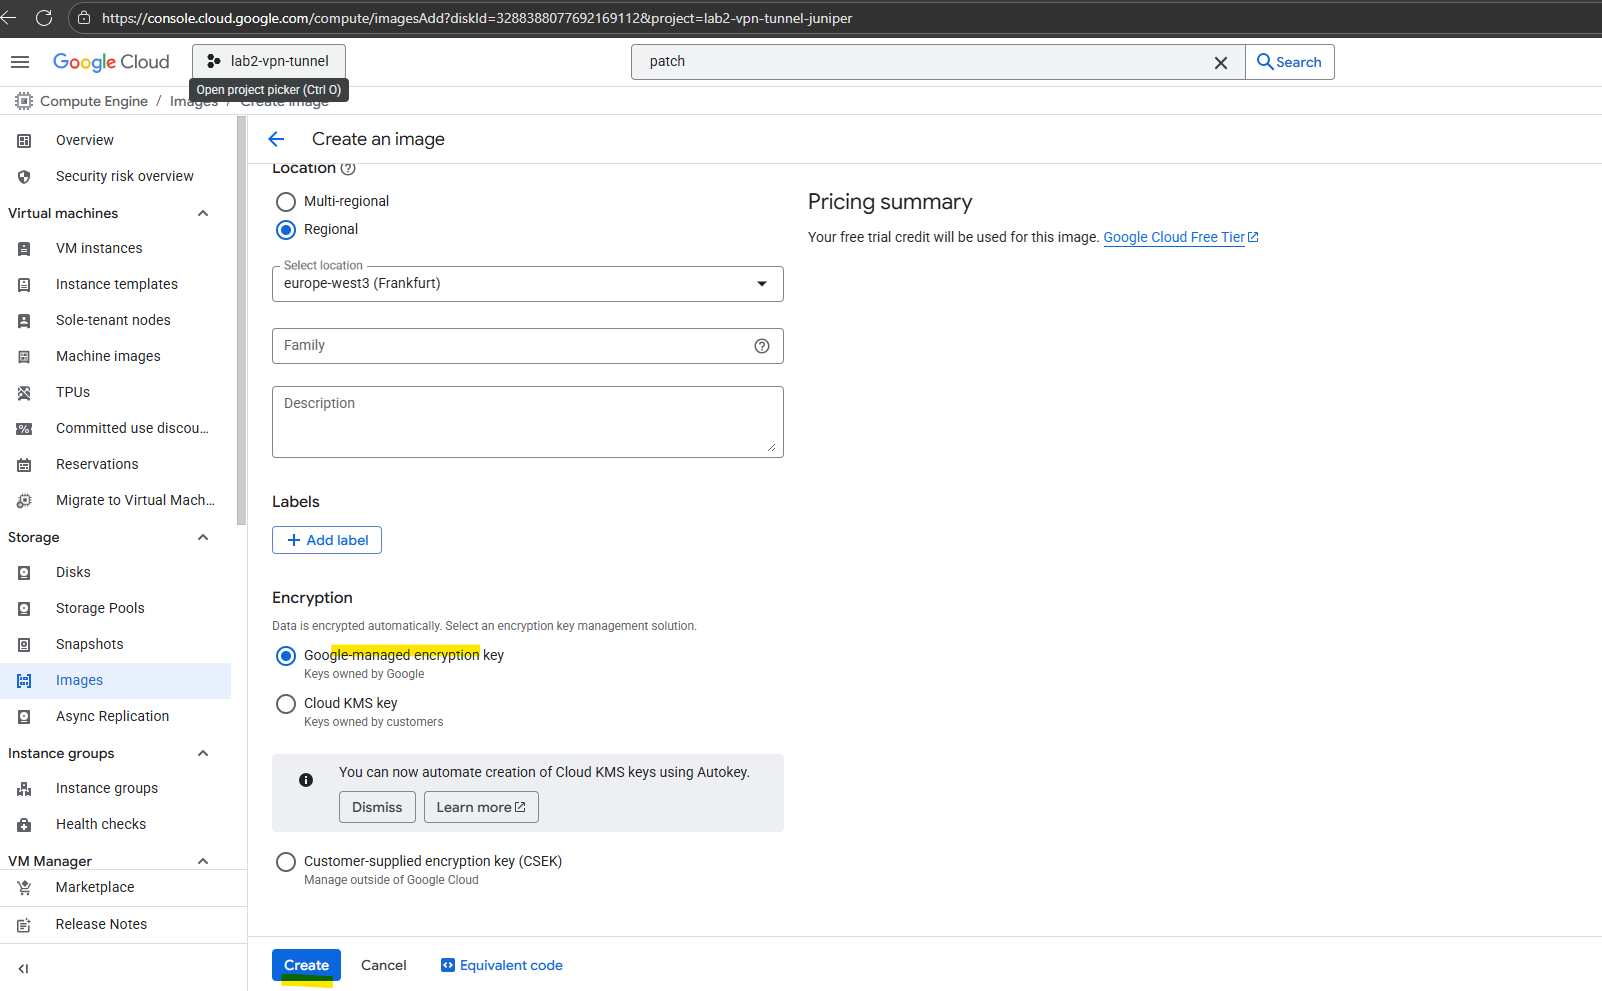
Enter a name and the location.

Click on Create.
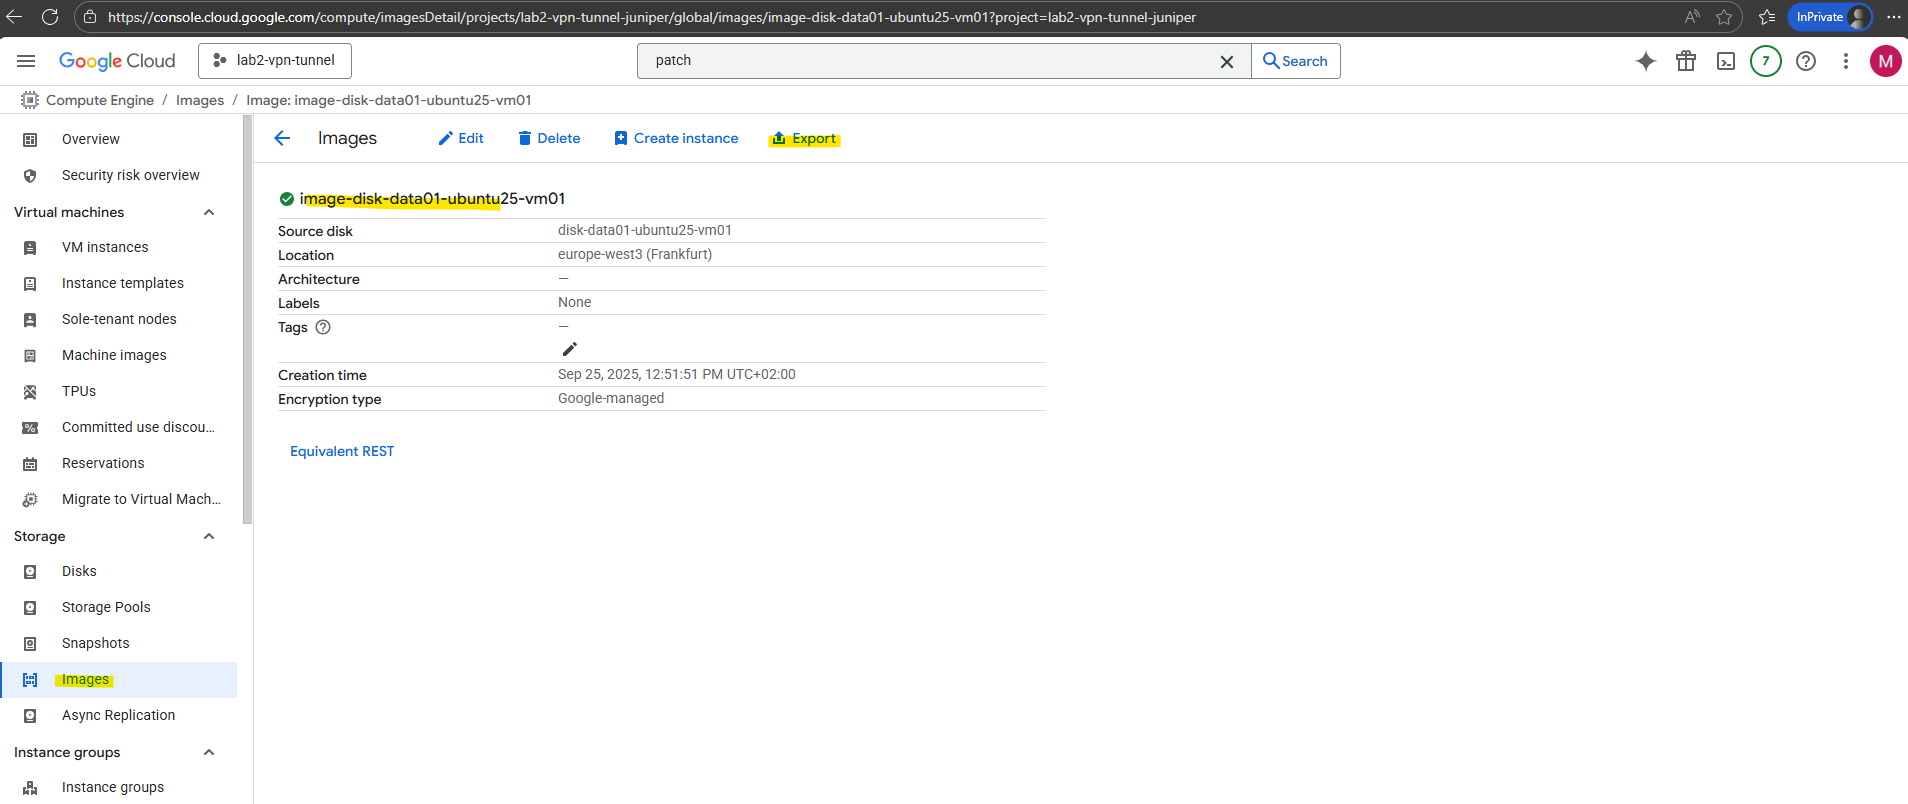
Click on the new created image.
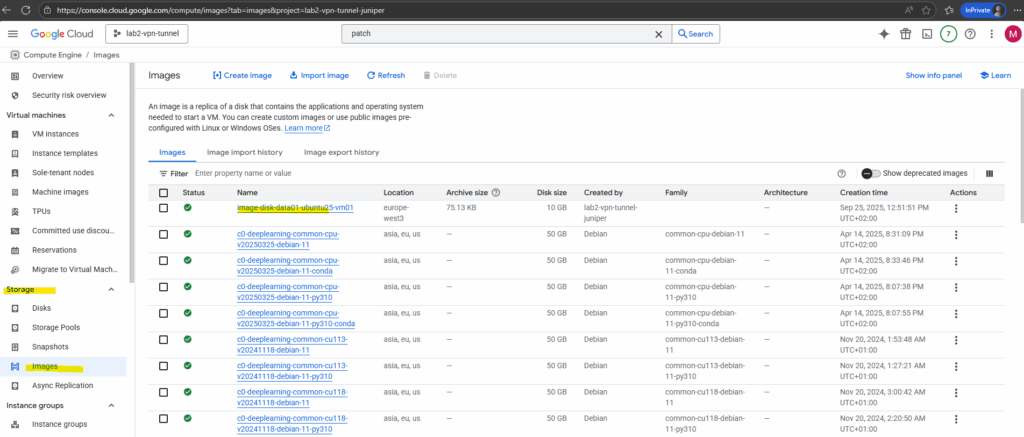
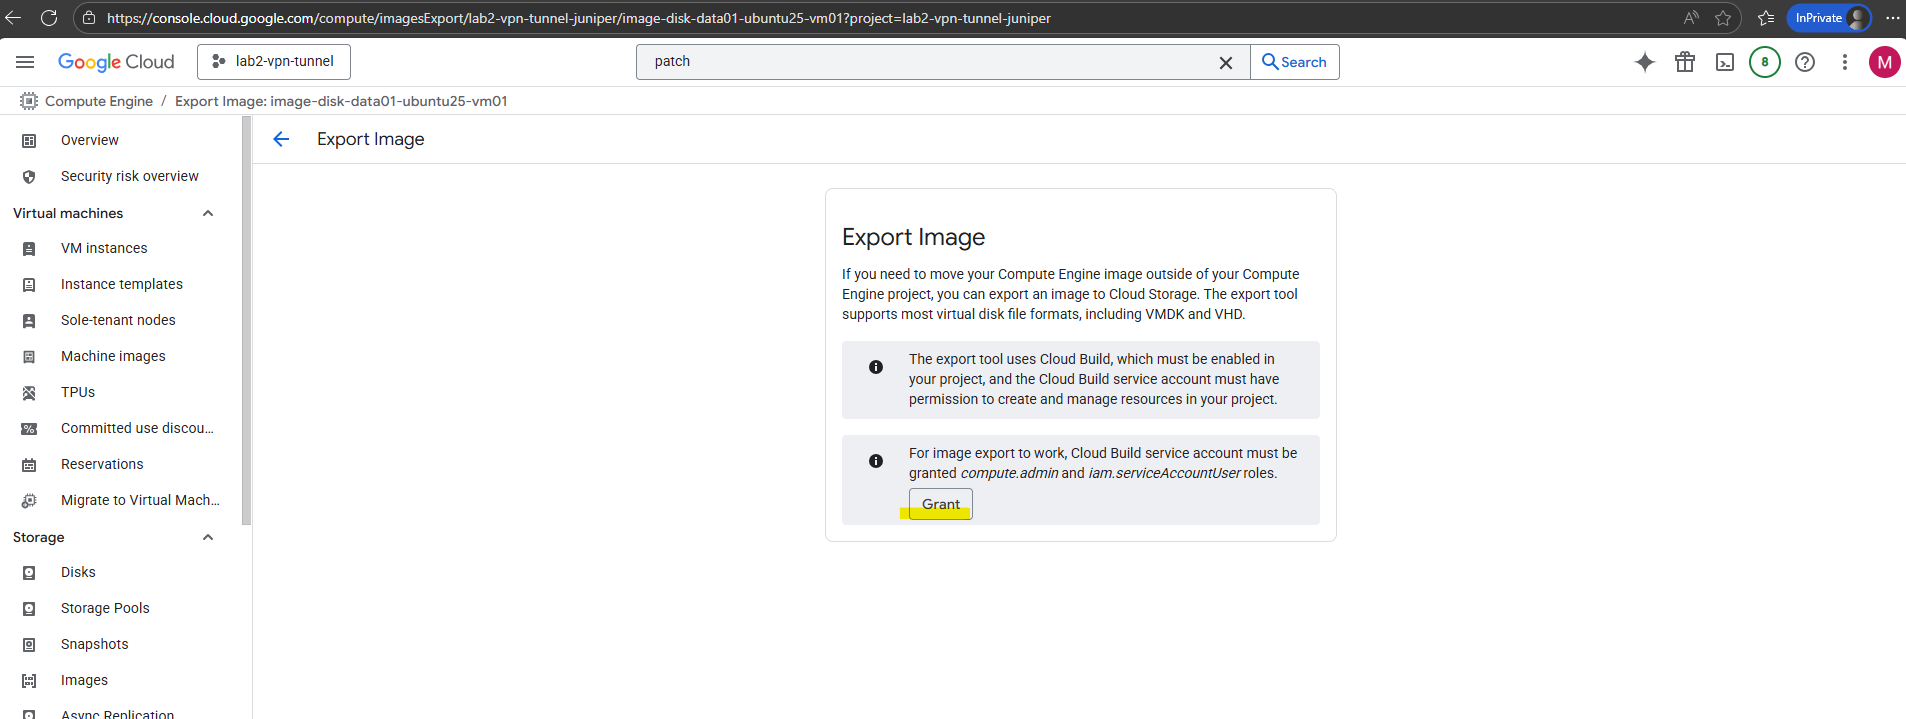
Export the image by clicking on the Export link below.
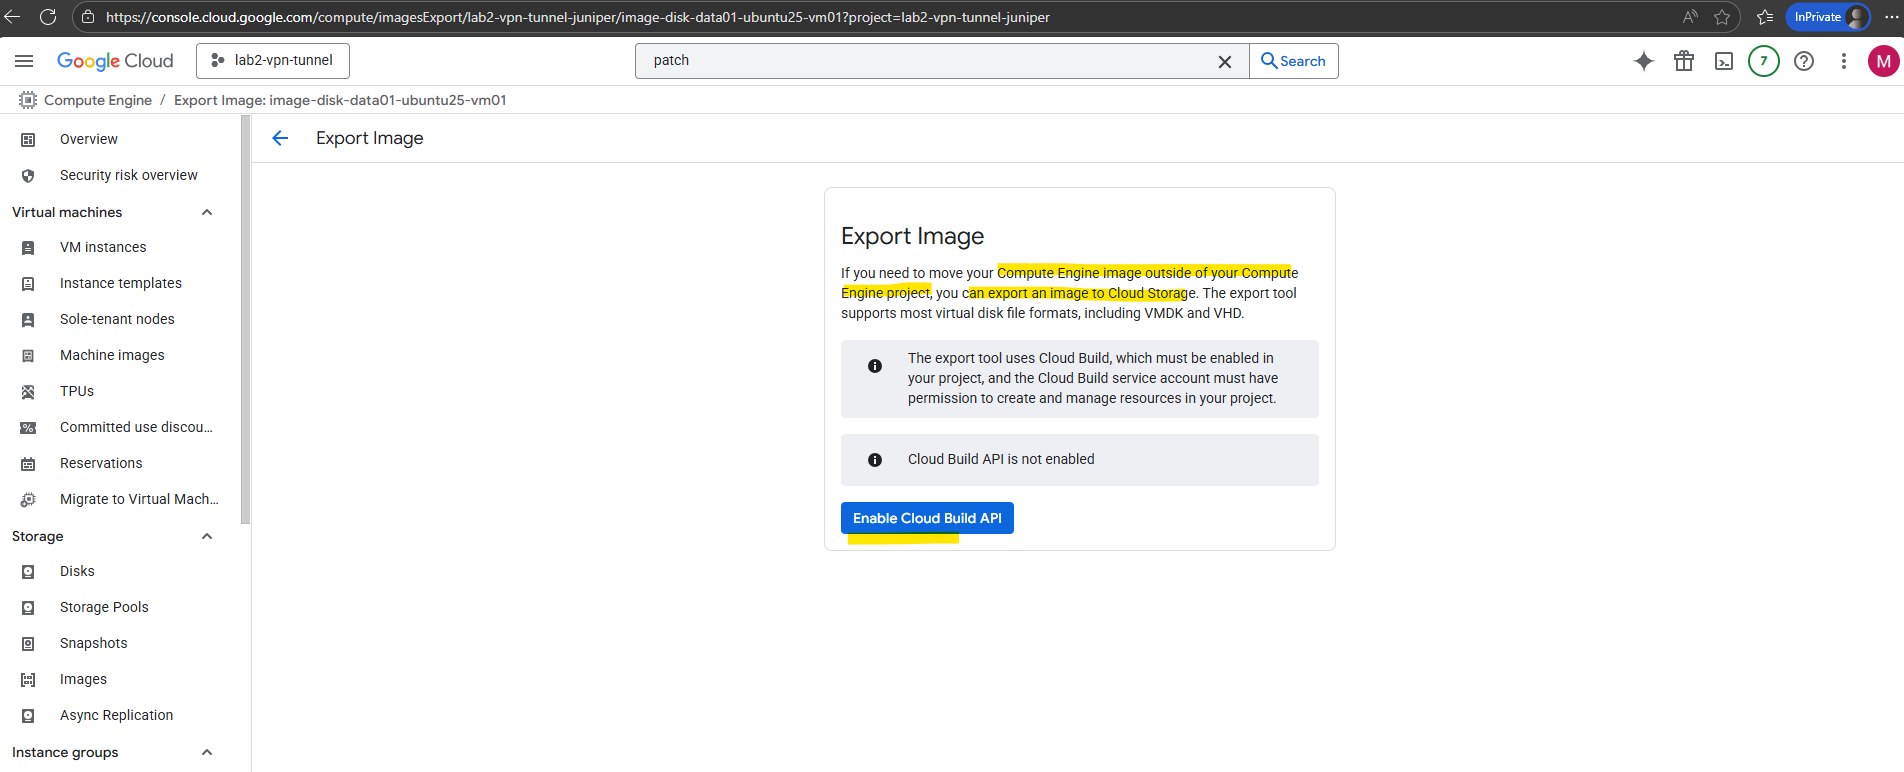
If you need to move your Compute Engine image outside of your Compute Engine project, you can export an image to Cloud Storage. The export tool supports most virtual disk file formats, including VMDK and VHD.
The export tool uses Cloud Build, which must be enabled in your project, and the Cloud Build service account must have permission to create and manage resources in your project.
The Cloud Build API is normally used for CI/CD pipelines, but GCP also leverages it behind the scenes when you export disks or images. It runs the temporary build job that mounts the disk, converts it into the requested format (VHD, VMDK, RAW), and streams it into Cloud Storage. That’s why you must enable the Cloud Build API before using the disk export feature.
Click on Grant.
For image export to work, Cloud Build service account must be granted compute.admin and iam.serviceAccountUser roles.
Here we can see the supported export formats.
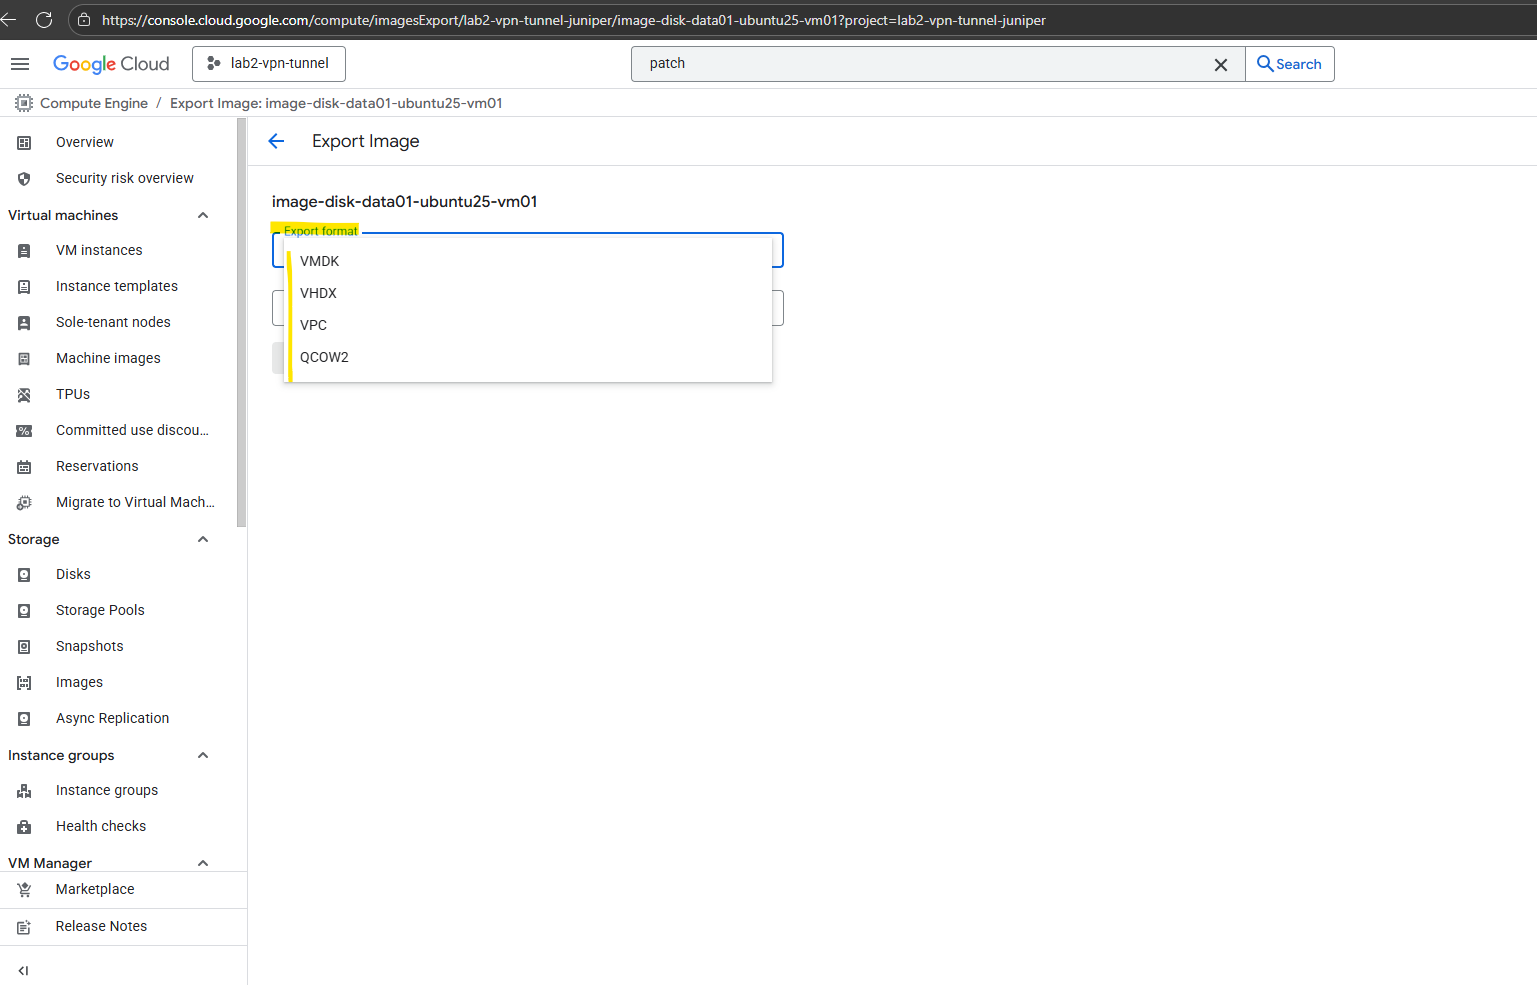
For the format I will use VMDK to attach this disk later to one of my on-prem vSphere virtual machines.
VMDK stands for Virtual Machine Disk and it was originally created by VMware. It’s the native format for VMware products (vSphere, ESXi, Workstation, Fusion).
Other hypervisors can also read or import VMDK, often after conversion. VirtualBox can use VMDK directly. QEMU / KVM can convert VMDK to QCOW2 or RAW.
Hyper-V requires conversion to VHD/VHDX.
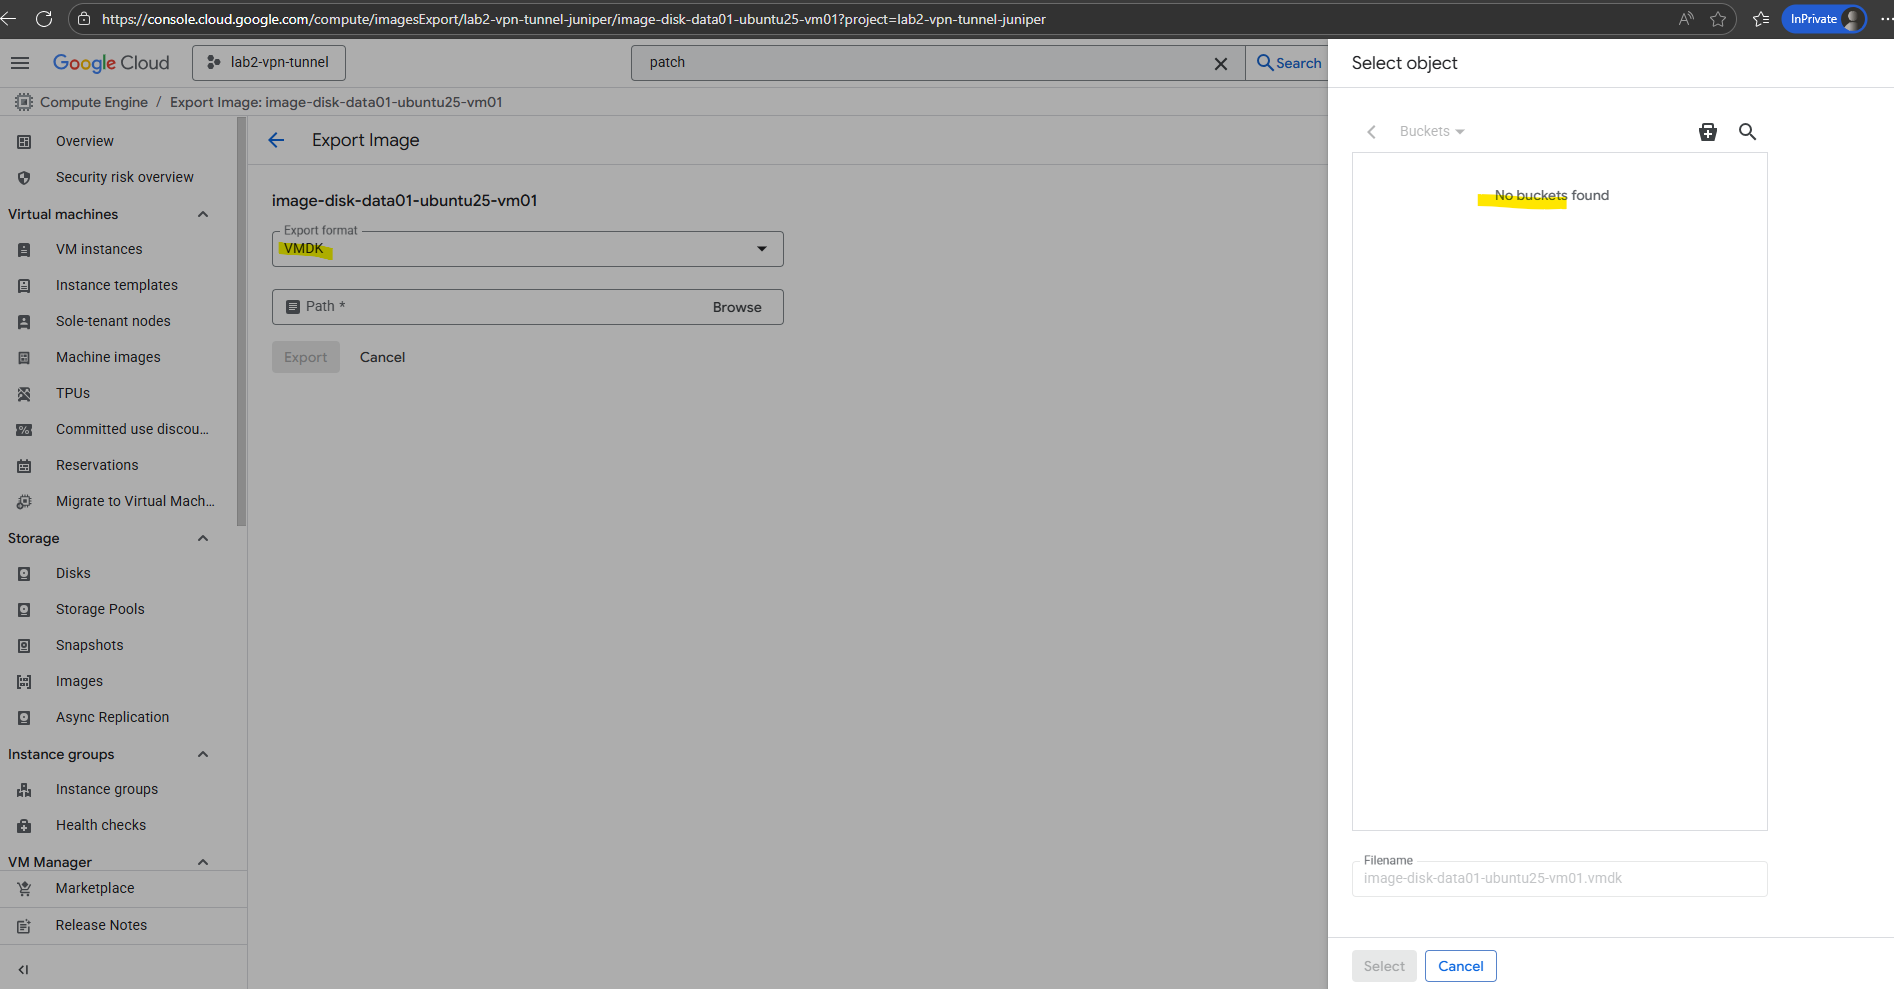
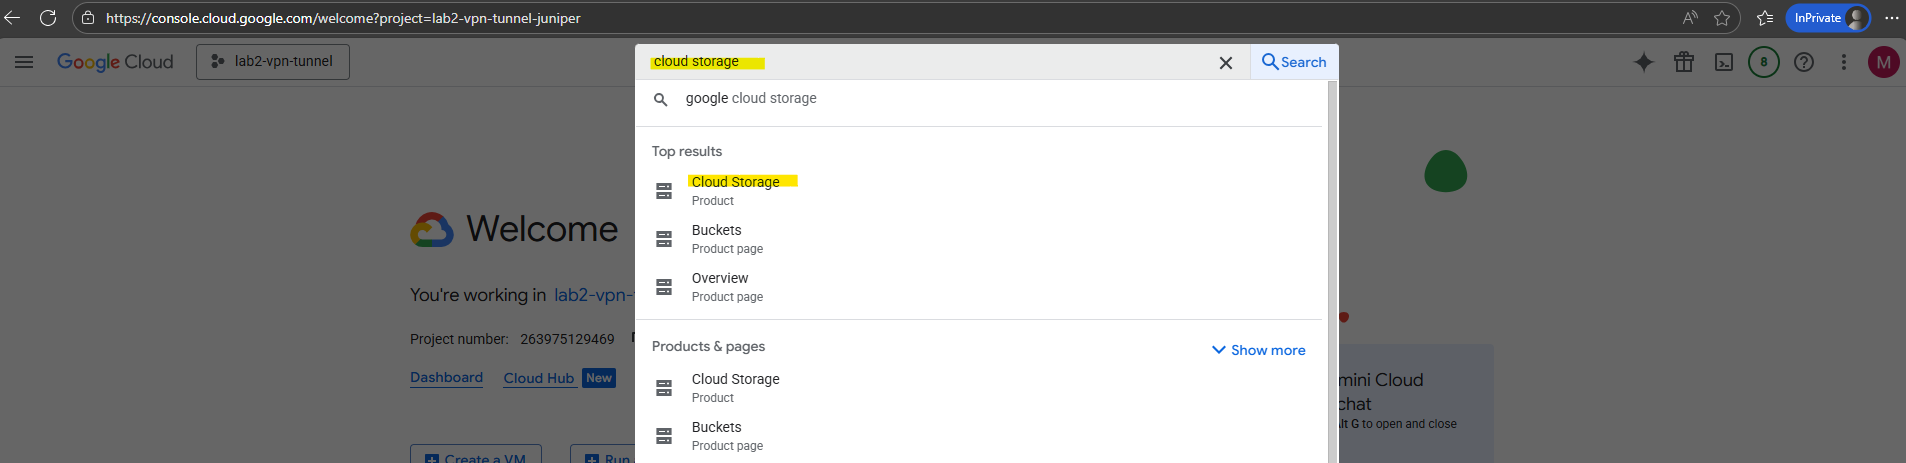
As mentioned I will also first have to create a new Cloud Storage bucket to store the image there. From this Cloud Storage bucket we can then finally download the image to our on-prem network.
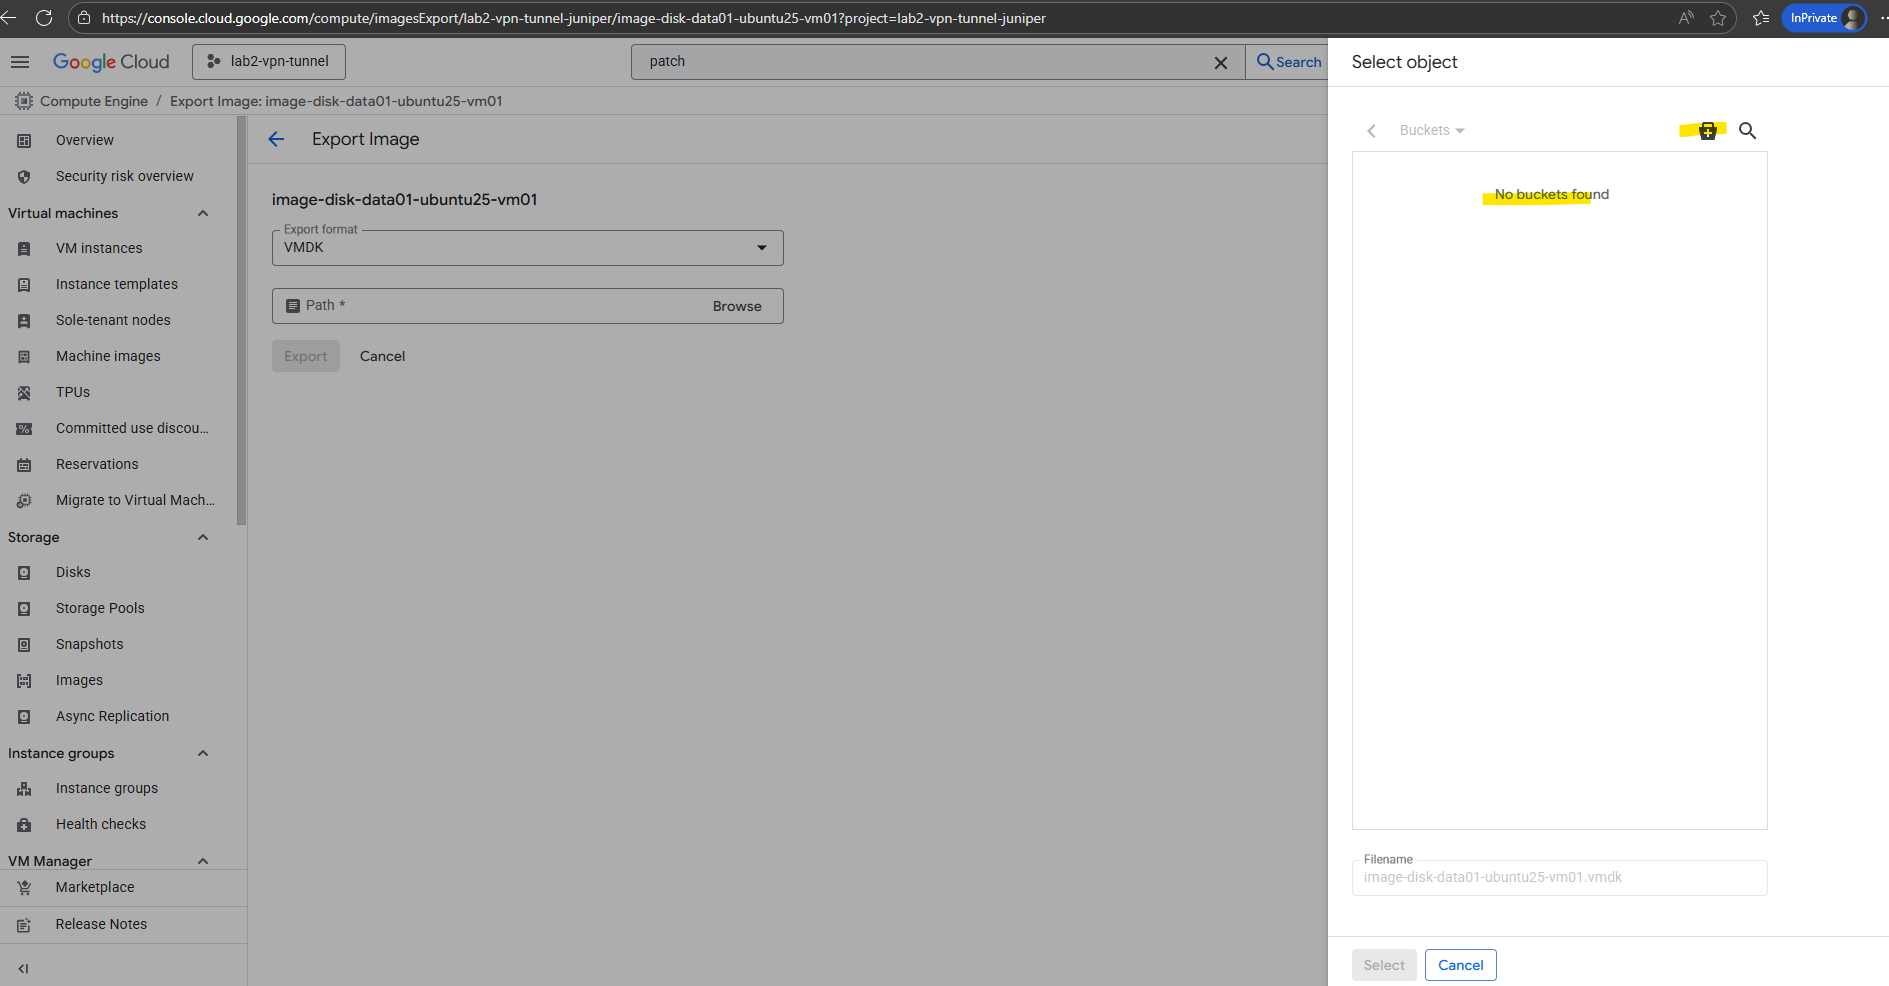
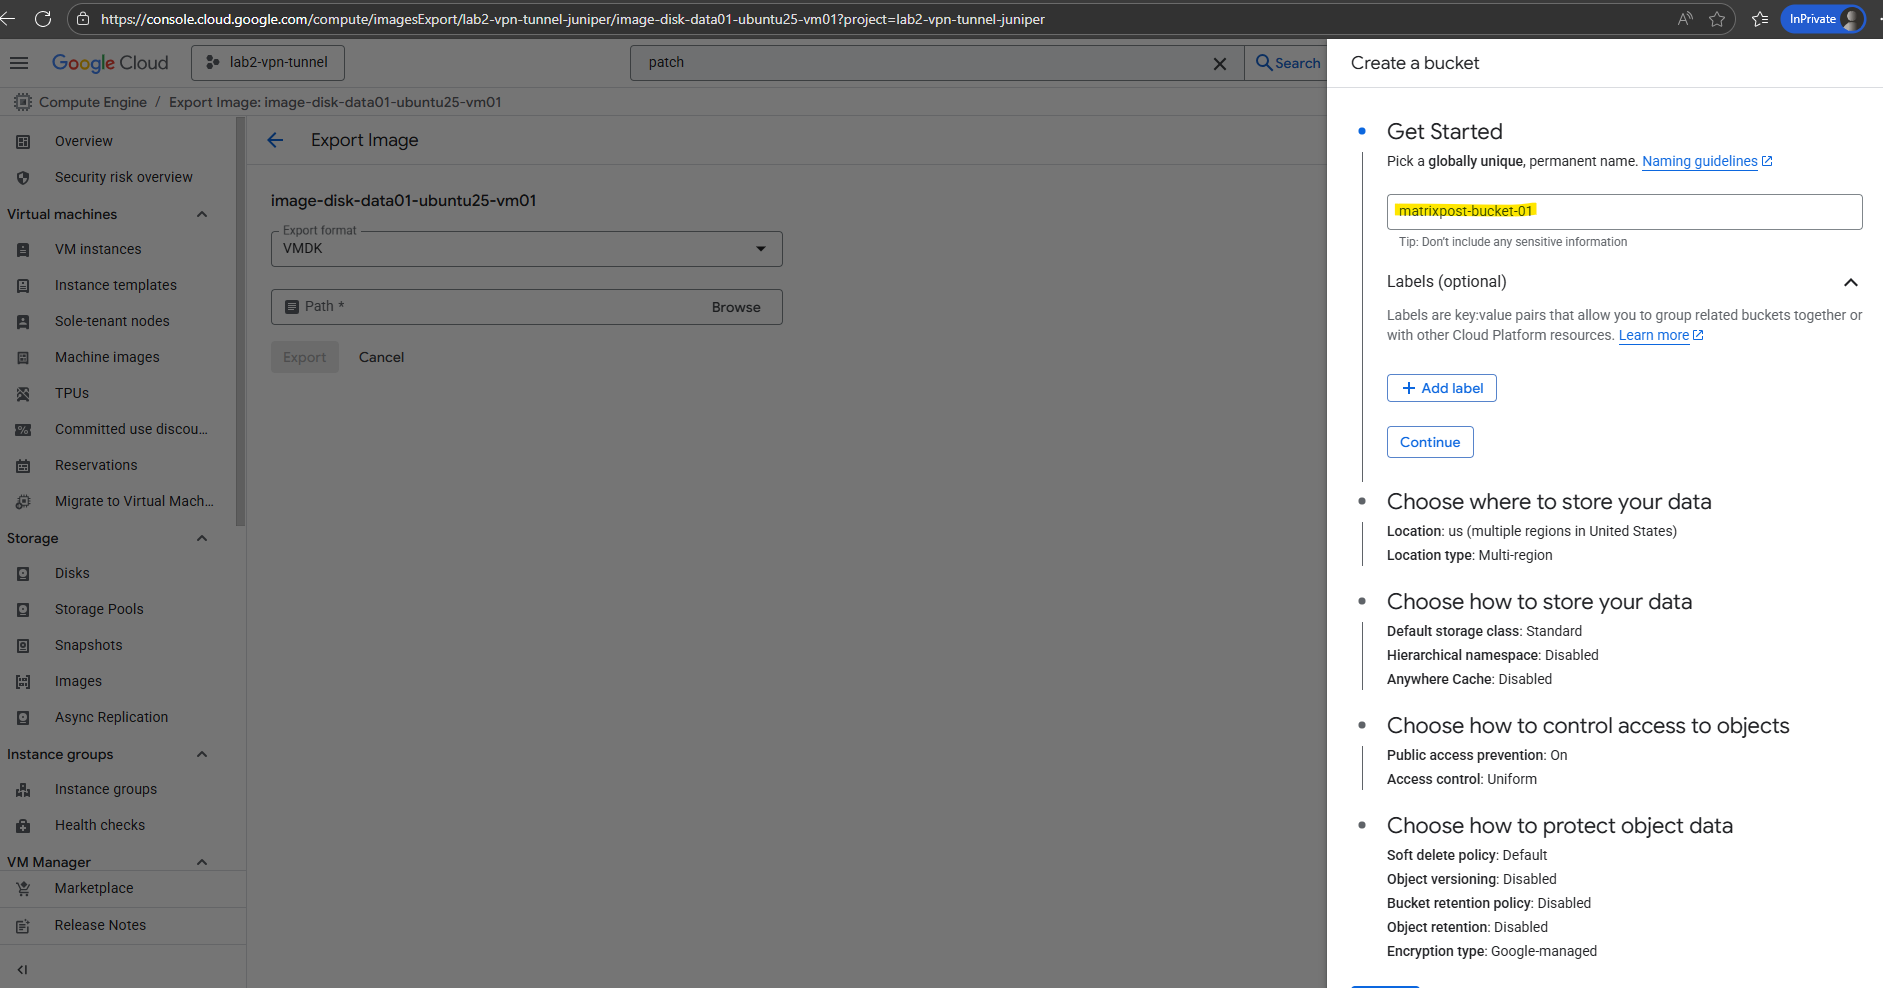
So below I will click on the bucket icon to create a new Cloud Storage bucket.
An Azure storage account is a top-level container that can hold multiple storage services (blobs, files, queues, tables).
A GCP Cloud Storage bucket is a top-level container just for objects, more like an Azure blob container but with account-level properties (region, class, access) built in.
Enter a name and click on Continue.
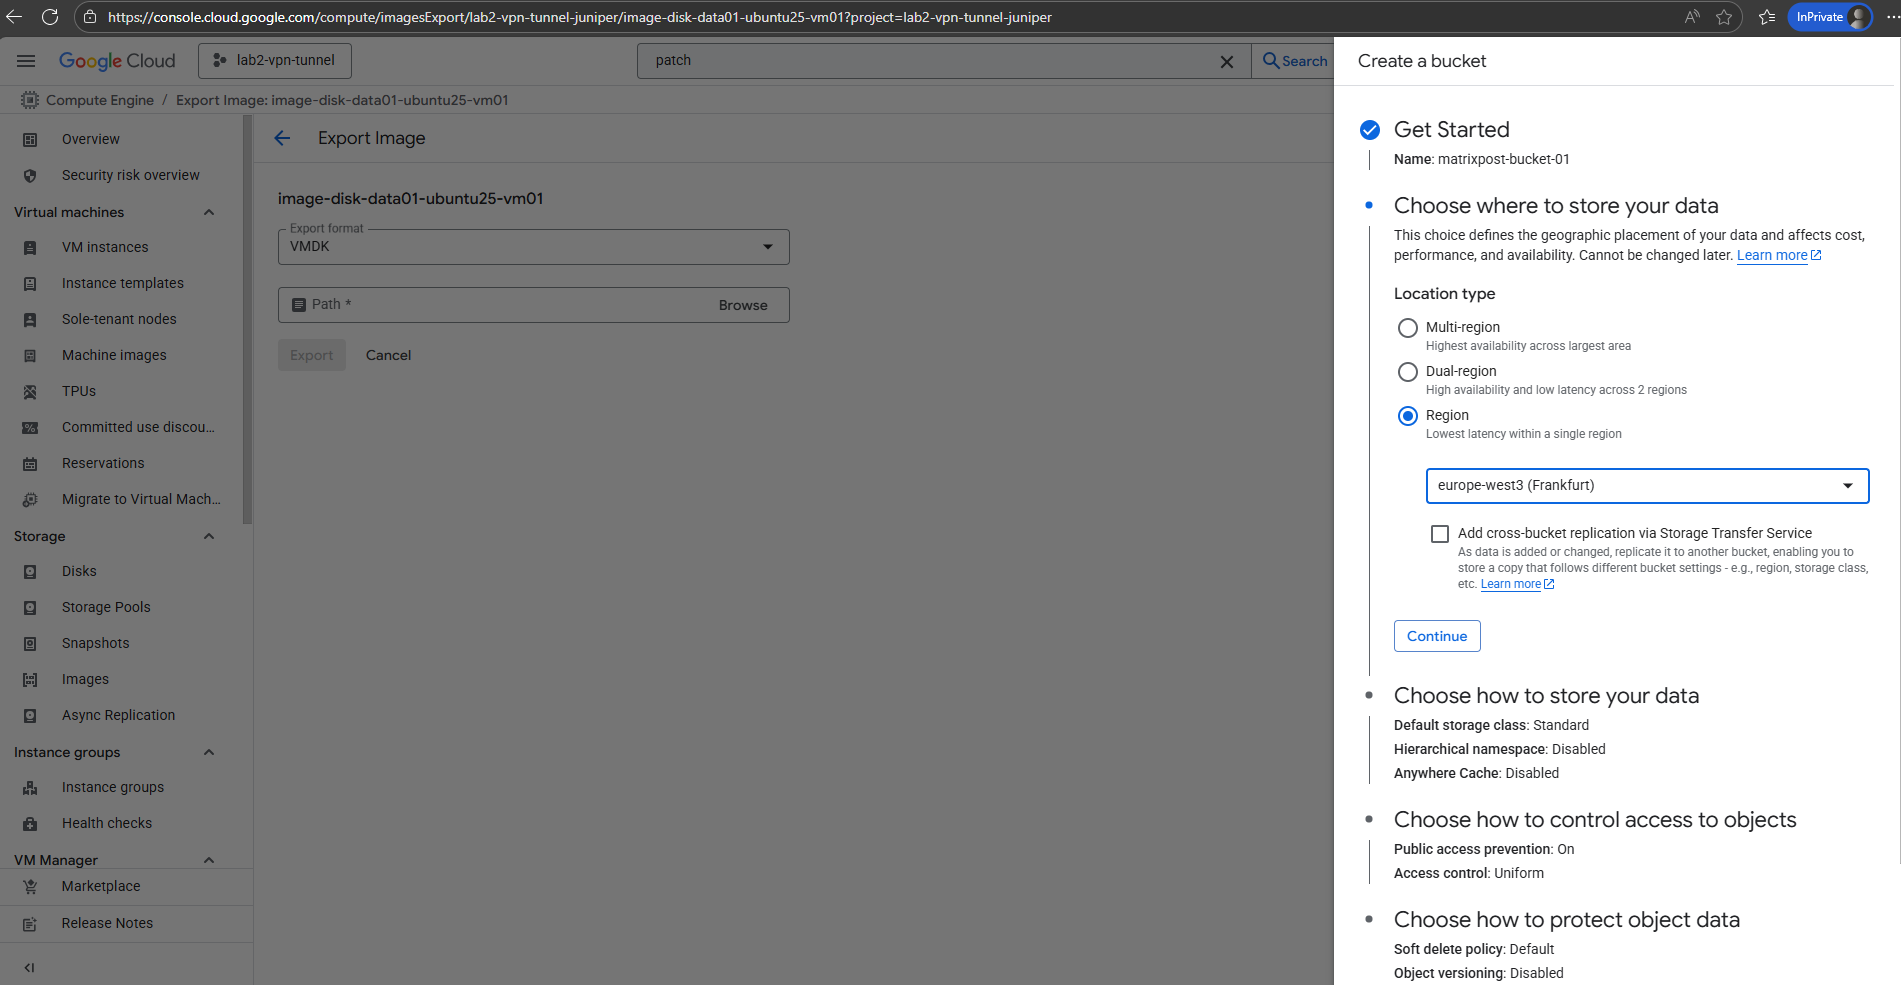
Select the region and click on Continue.
Select a default class and click on Continue.

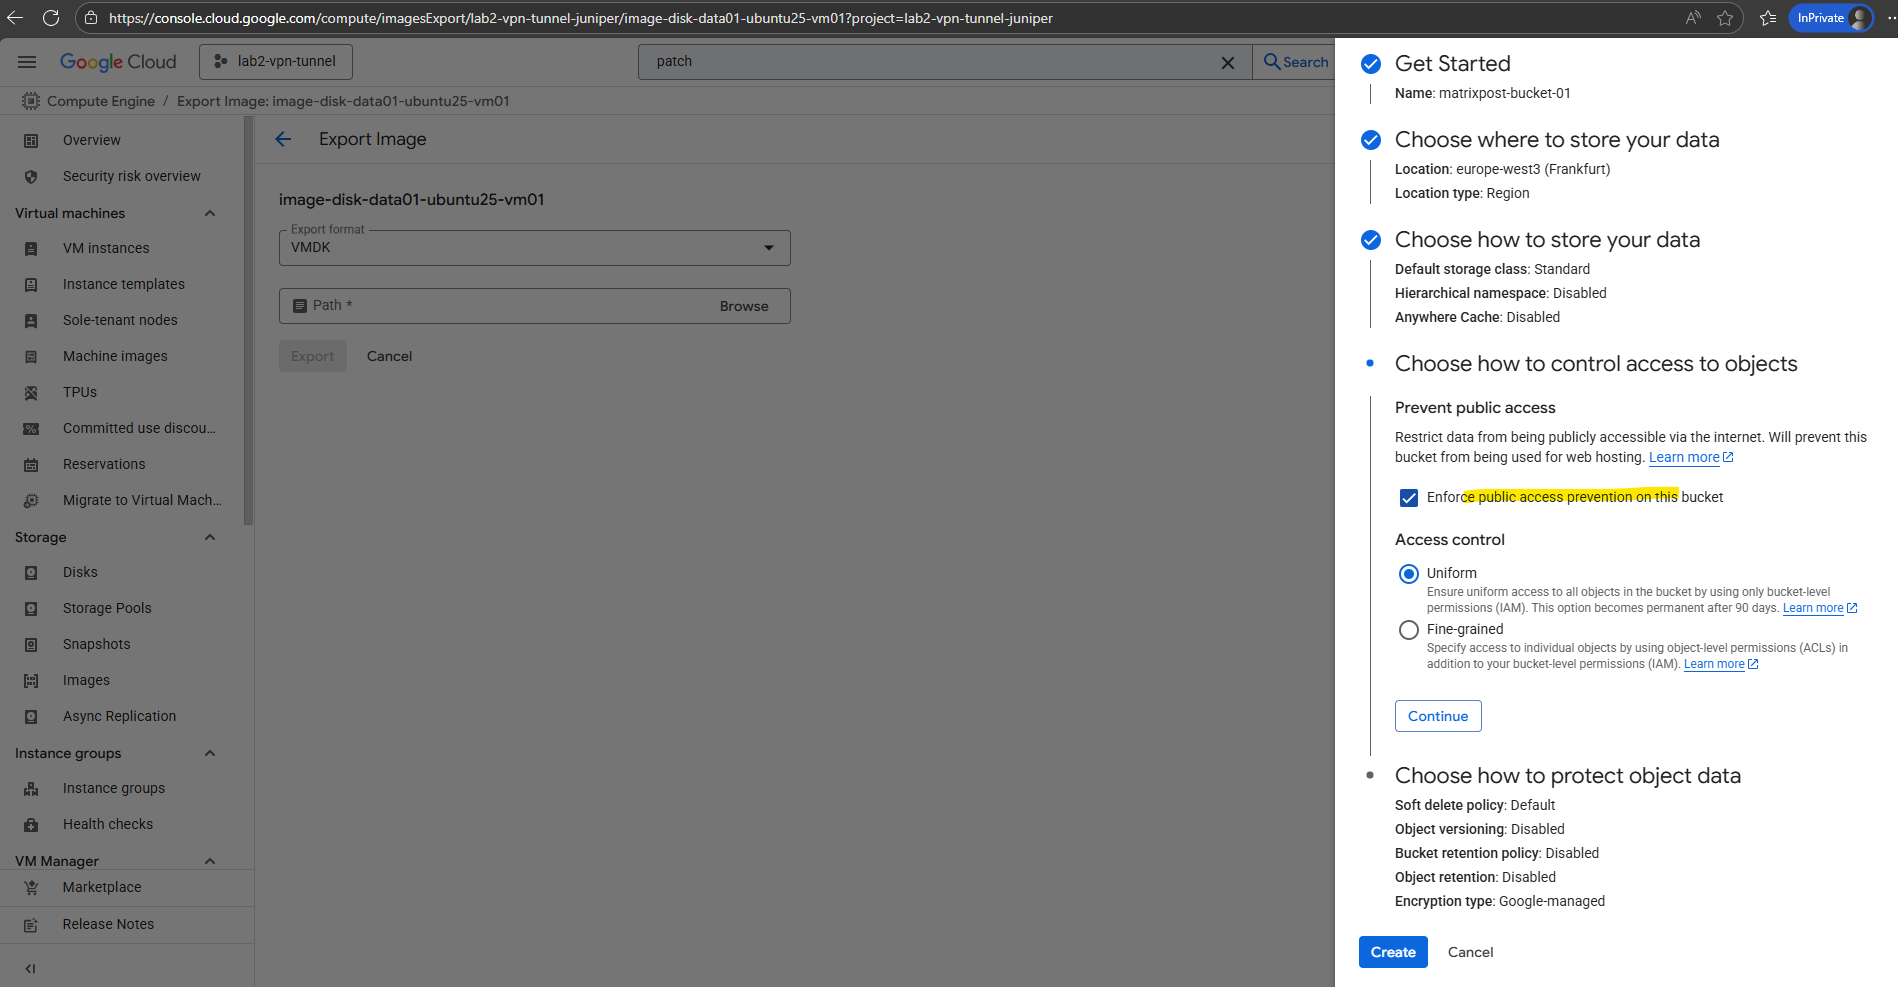
For the access control I will leave Enforce public access prevention for this bucket checked. Authenticated users are still able to download object through the internet.
Public access in GCP Cloud Storage means anyone on the internet can fetch the object without authentication (no gcloud login, no service account, no signed URL).
The checkbox “Enforce public access prevention” makes sure a Cloud Storage bucket (and all its objects) can never be shared publicly. It blocks all public IAM grants or ACLs, providing a strong safeguard against accidental data exposure.
Finally click on Create.
We can now select our new Cloud Storage bucket to export the image to.
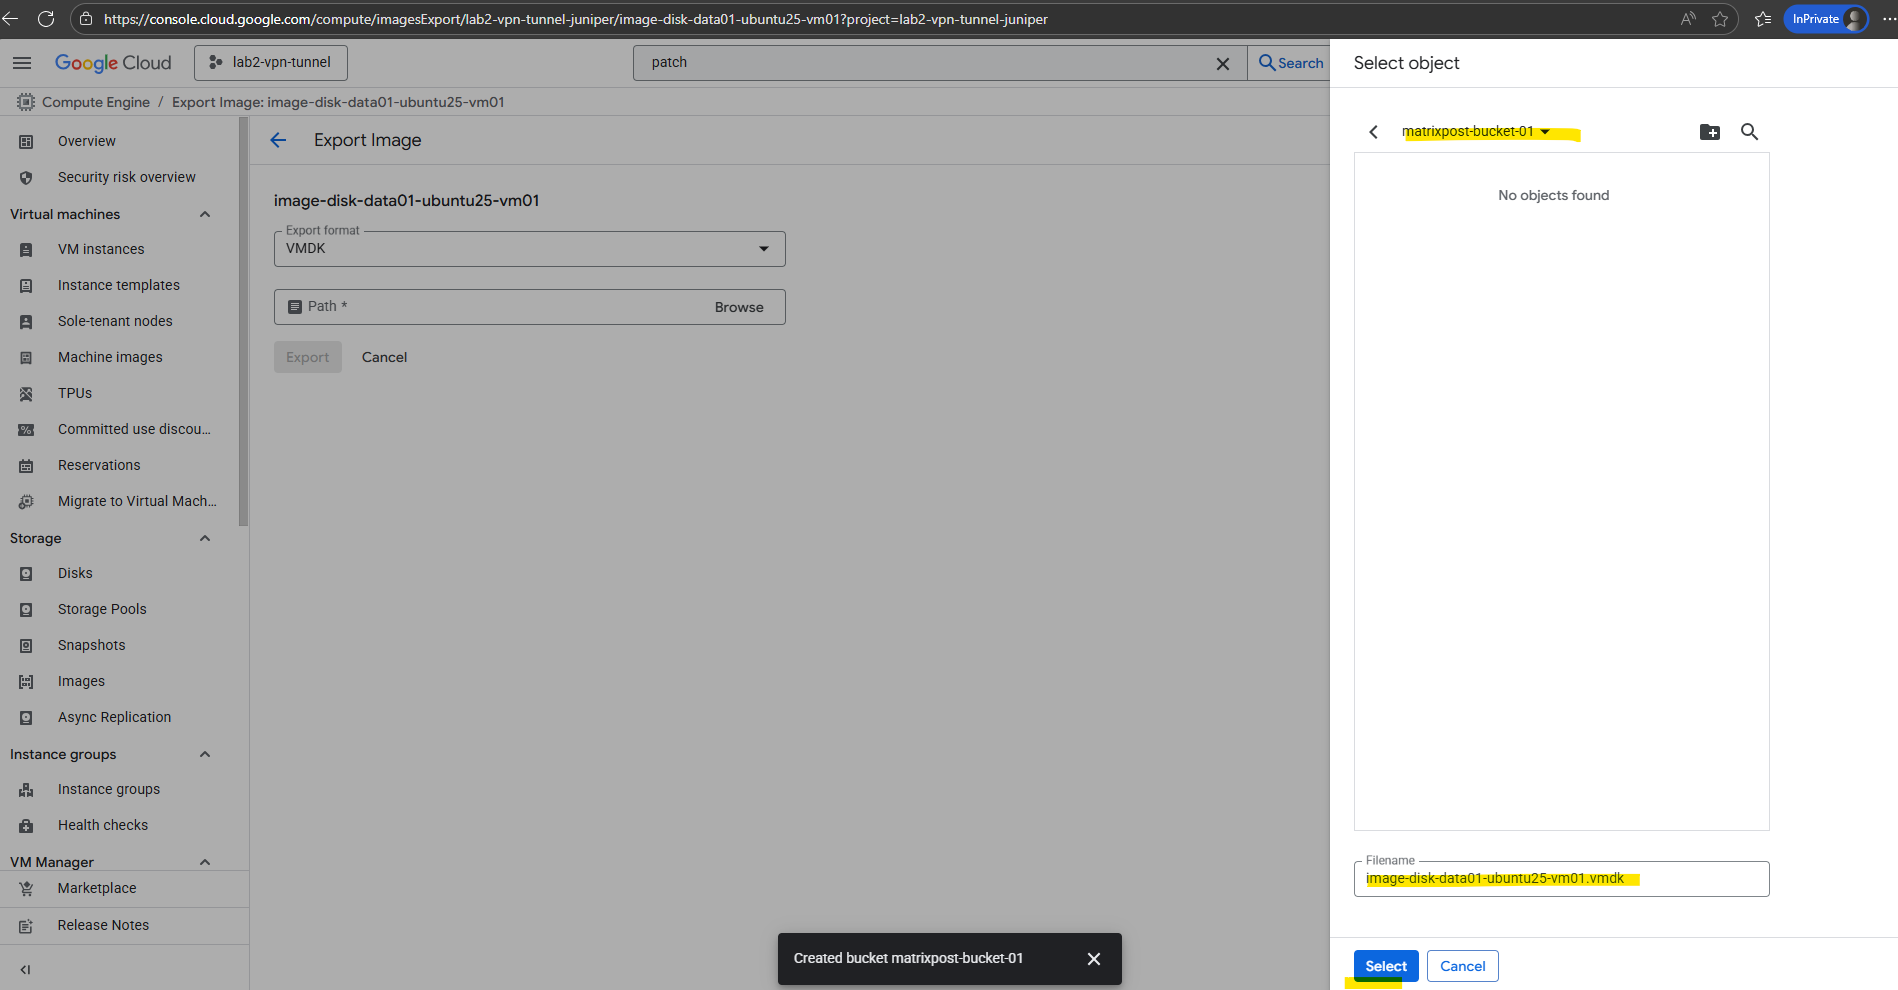
Click on Export.

The export in my case will run into an error. By clicking on them we will see the details of this error.

The export failed because the workflow expected the default network, but it was deleted in my project.
The image export workflow spins up a temporary VM in your project to mount and convert the disk. By default, it tries to use the default VPC network (default).
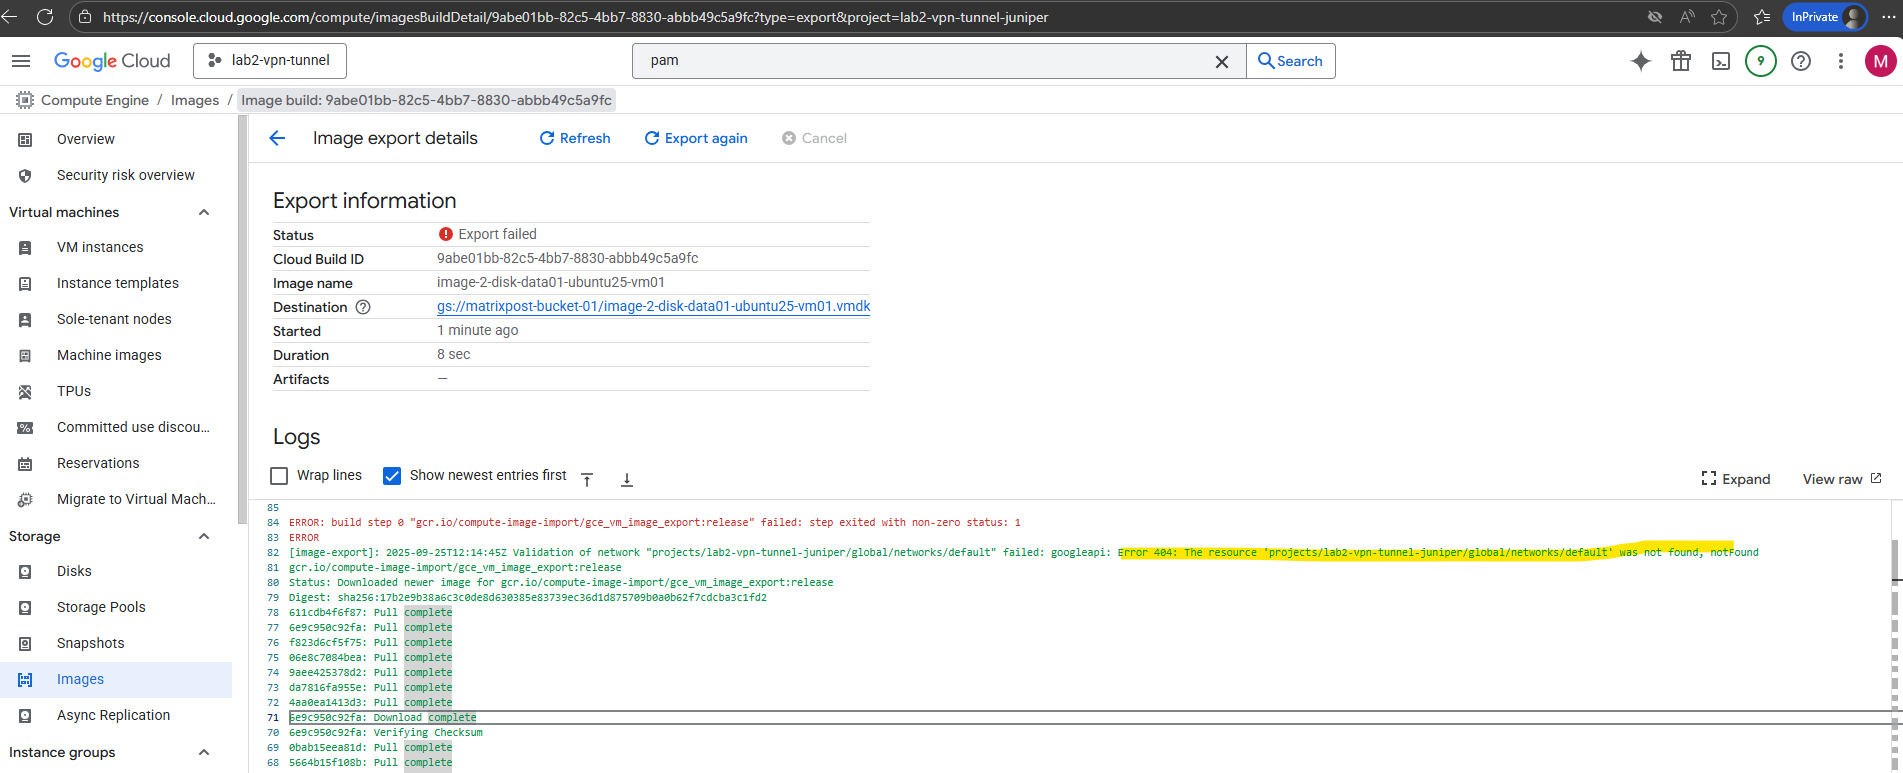
So far the only workaround is to use the gcloud CLI where we can tell the export tool which VPC network/subnet should be used instead the default.
By default, gcloud compute images export gives you a RAW disk image. If you want another format (like VMDK or VHD), you must pass the
--export-formatflag.GCP exports it in streamOptimized VMDK format (the one used in OVF/OVA appliance packages). This format is space-efficient and good for transport. But it’s not directly attachable to a VM in vSphere, hence the “Unsupported disk type 2” error will appear when trying to attach it without converting before like shown below.
Supported formats: RAW (default), VMDK (VMware / Virtual Box), VHD (Microsoft Hyper-V / Azure)
gs:// = Google Storage URI. It’s used by tools like gsutil and the GCP SDK to reference bucket paths.
# export as raw by default
$ gcloud compute images export --image image-disk-data01-ubuntu25-vm01 --destination-uri gs://matrixpost-bucket-01/image-disk-data01-ubuntu25-vm01.vmdk --network lab-europe-west3-vpc --subnet main

# export as VMDK disk
$ gcloud compute images export --image image-disk-data01-ubuntu25-vm01 --destination-uri gs://matrixpost-bucket-01/image-disk-data01-ubuntu25-vm01.vmdk --network lab-europe-west3-vpc --subnet main  --export-format VMDK

The export completed successfully.
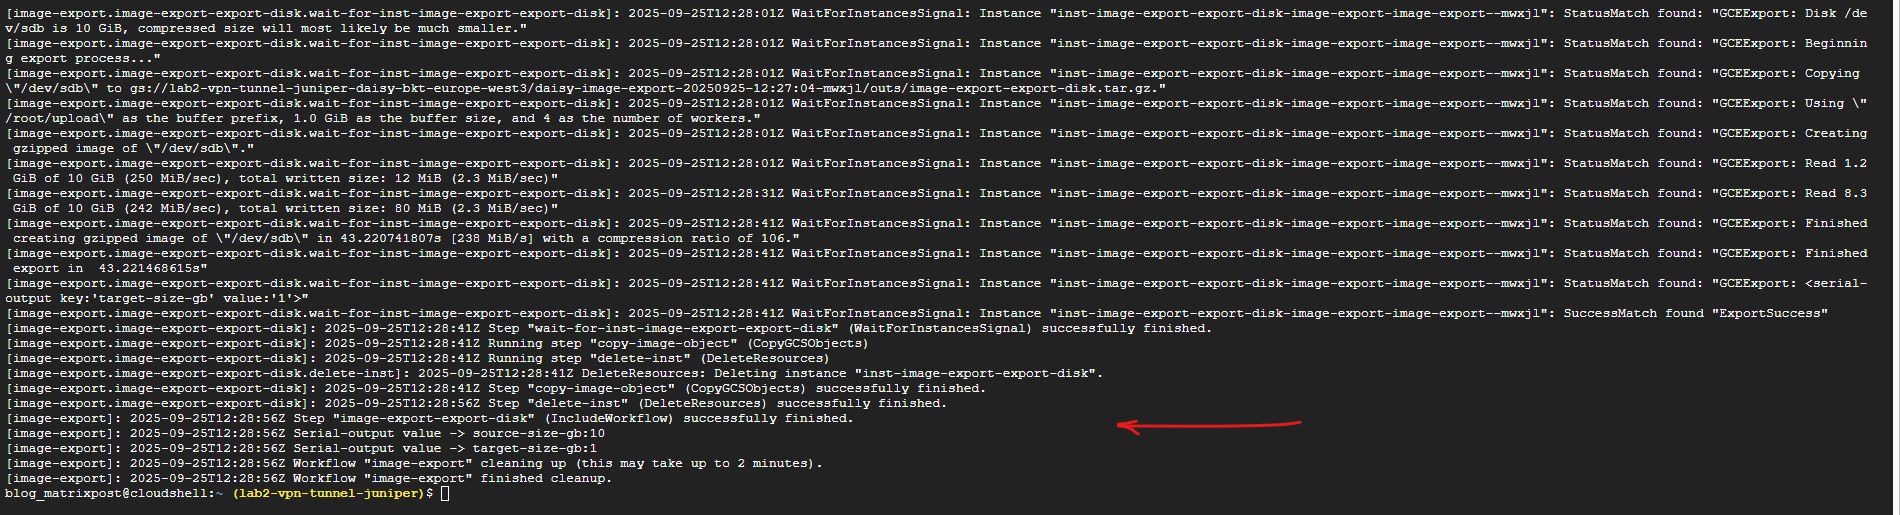
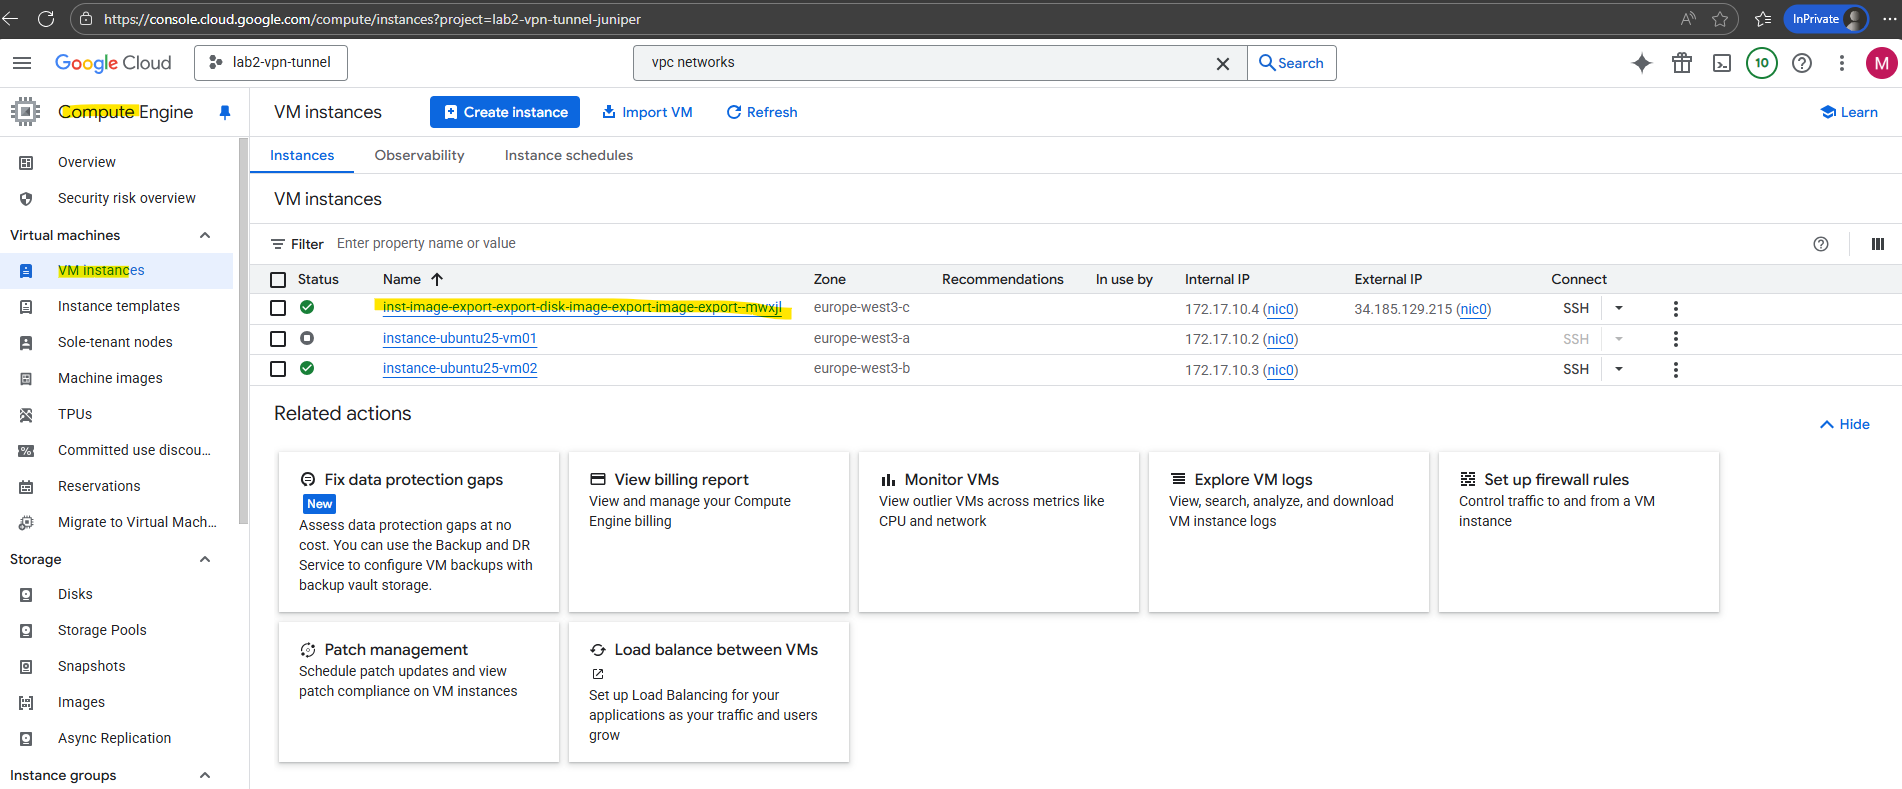
As mentioned the image export workflow spins up a temporary VM in your project to mount and convert the disk.
It attaches the source image/disk. It runs the conversion tool (to RAW, VHD, or VMDK). It streams the result into your Cloud Storage bucket.
Once the export completes (successfully or with error), the workflow detaches the disk, deletes the temporary VM automatically and deletes any temporary resources (like scratch disks).
Scratch disks btw. are a Google Cloud / AWS concept, and they don’t really exist in Azure the same way.
A scratch disk in GCP is a temporary, fast local disk used by background jobs (like disk/image export) for intermediate data. It’s deleted right after use. The closest Azure equivalent is the VM’s temporary OS/resource disk, but Azure doesn’t expose “scratch disks” as a separate concept.
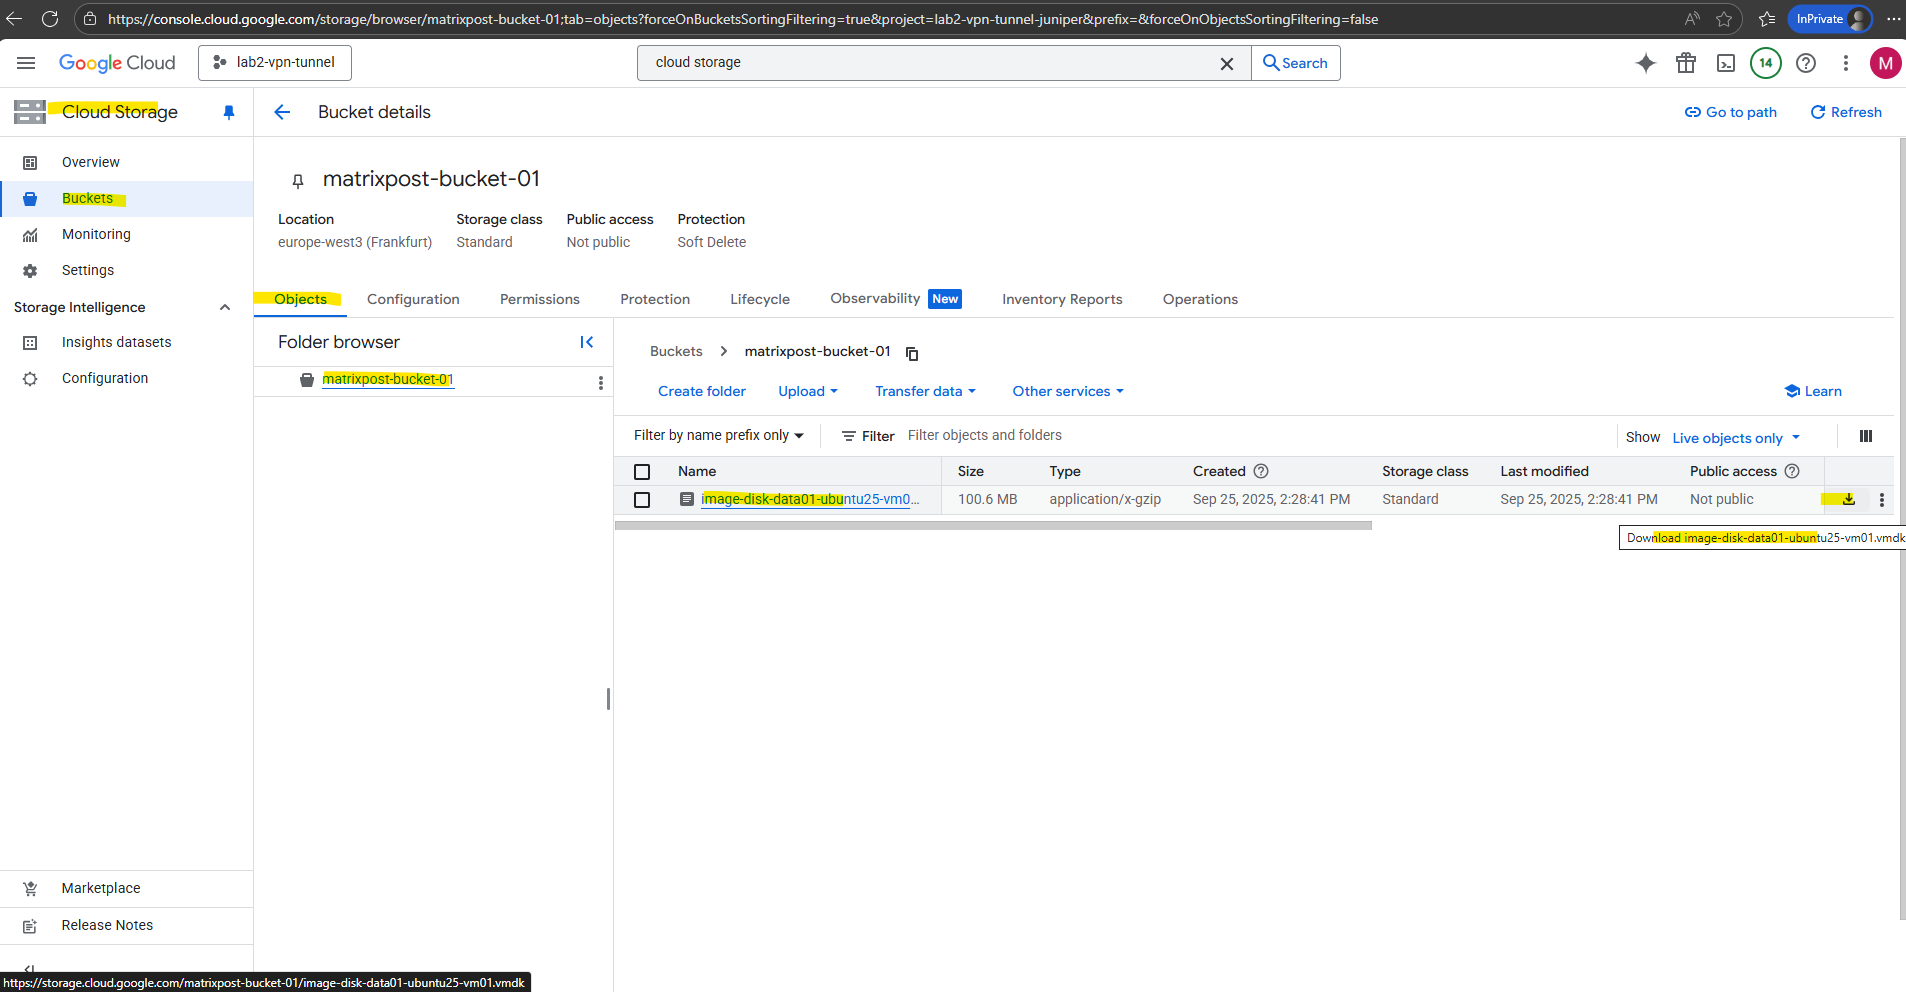
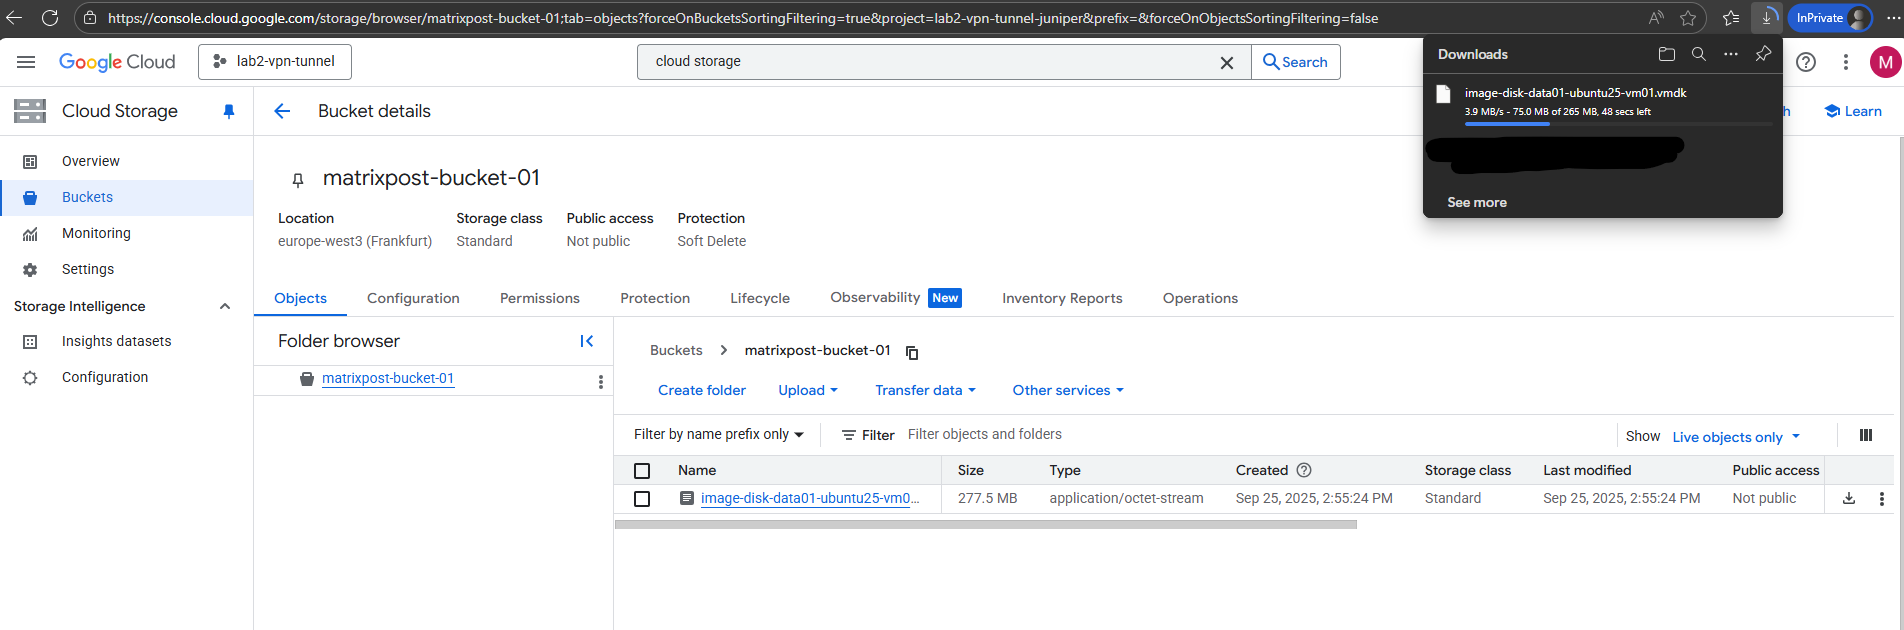
After the successful export of the disk (image) to the Cloud Storage bucket, we can finally download the disk.
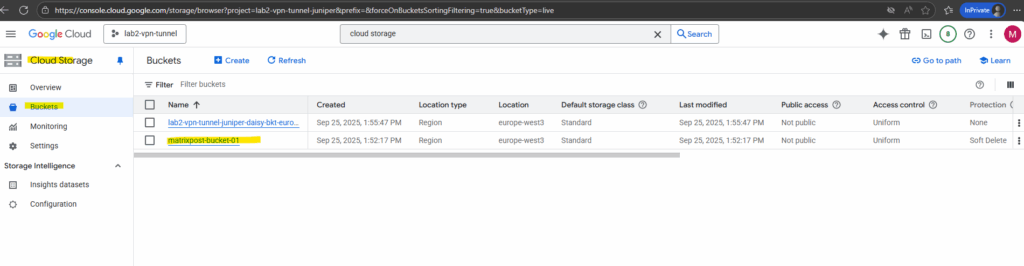
To download the disk browse to the corresponding Cloud Storage bucket.
Select the bucket we exported our image to.
In both Azure and GCP, customer-managed encryption keys (CMEK) or Google-managed keys are only applied while the disk is at rest inside the platform.
When you export to Cloud Storage, GCP transparently decrypts the disk. The object in Cloud Storage is just a plain disk image (unless you additionally enable Cloud Storage Object Encryption, e.g. CMEK or CSEK).
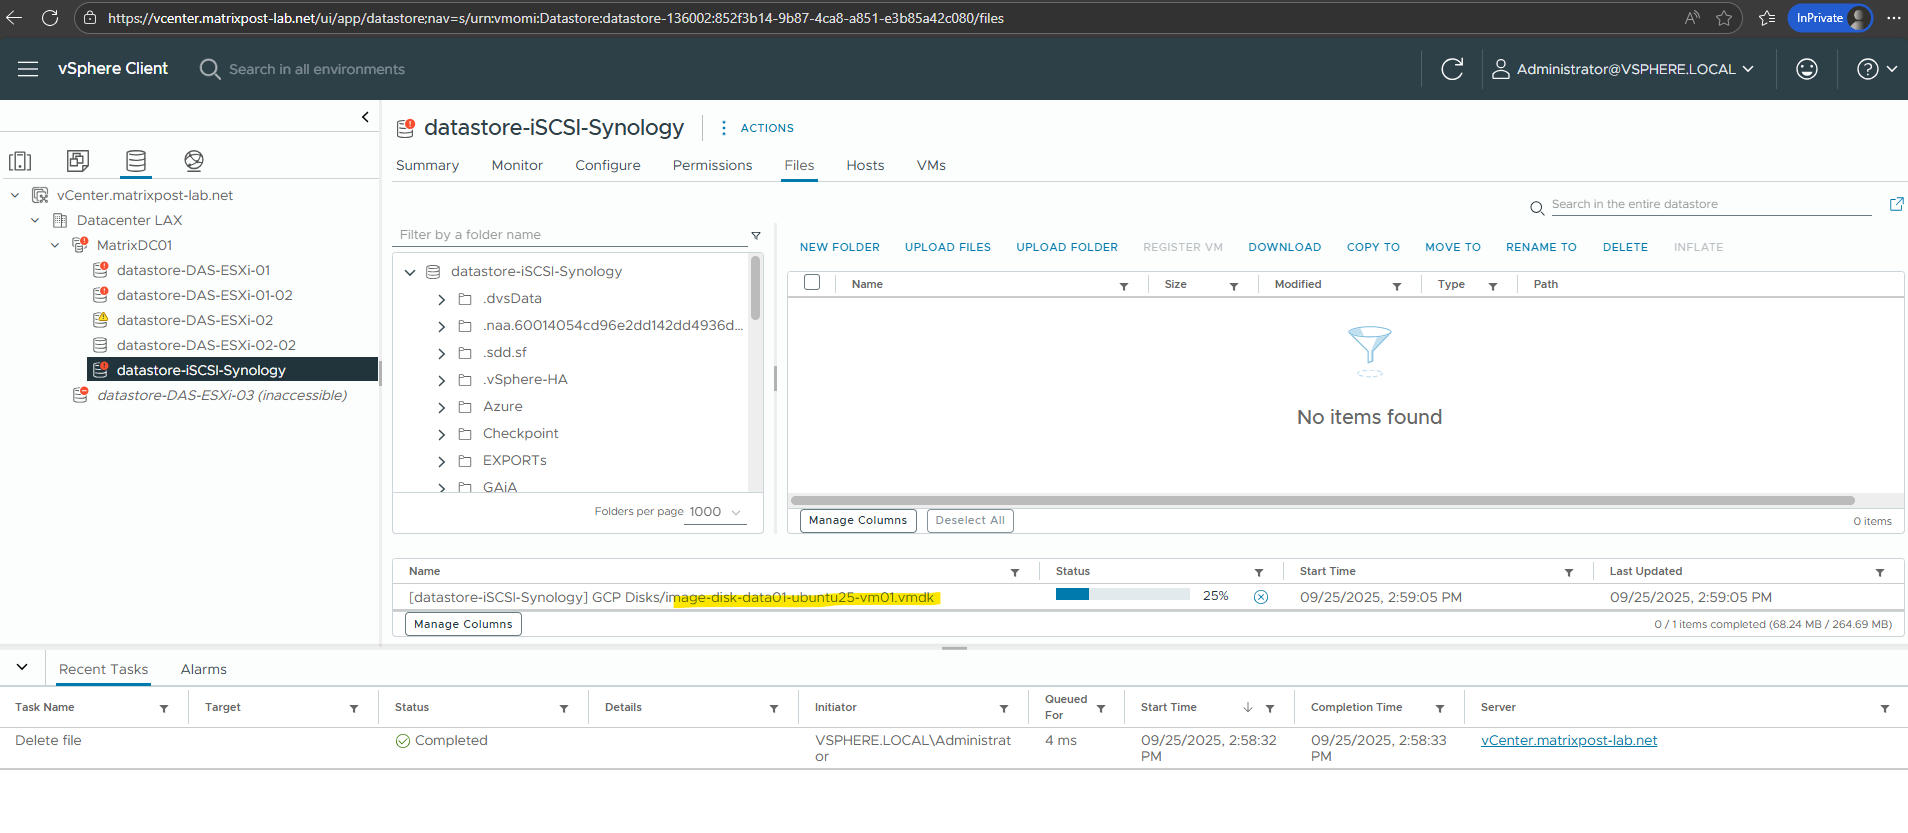
I will now upload the disk to a datastore in my vSphere lab environment.
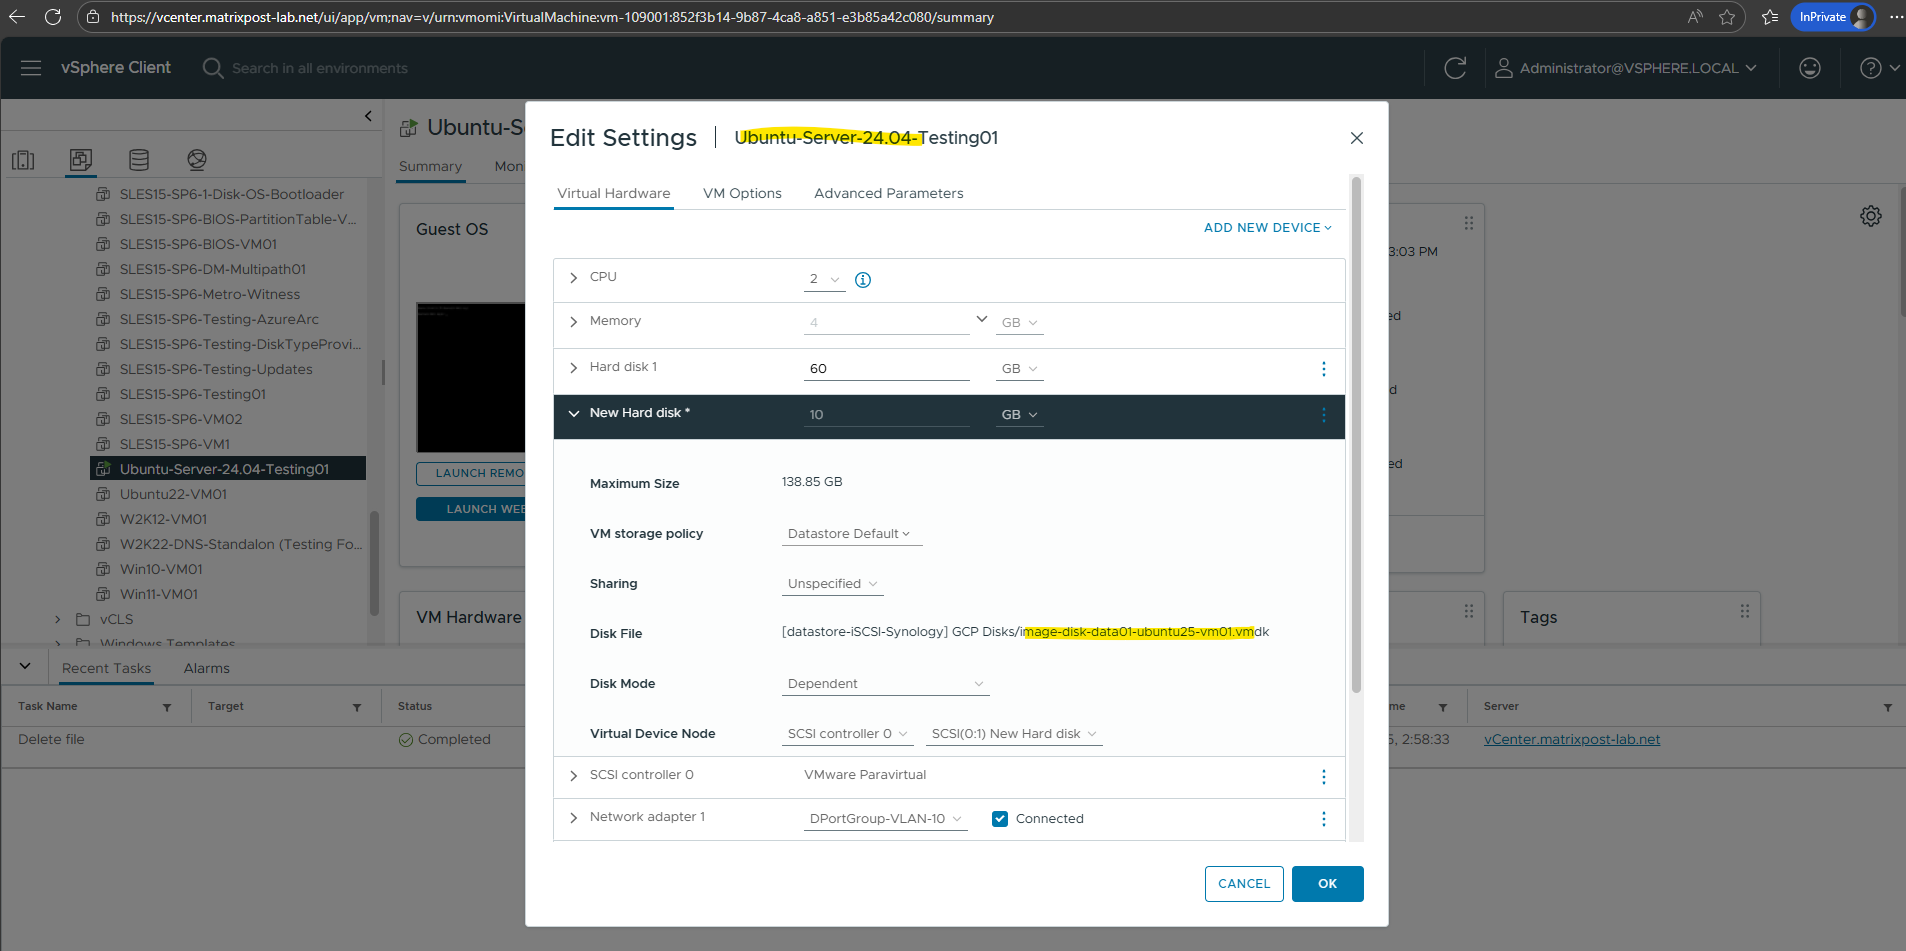
The GCP disk I will now attach to one of my Linux virtual machines running in vSphere.
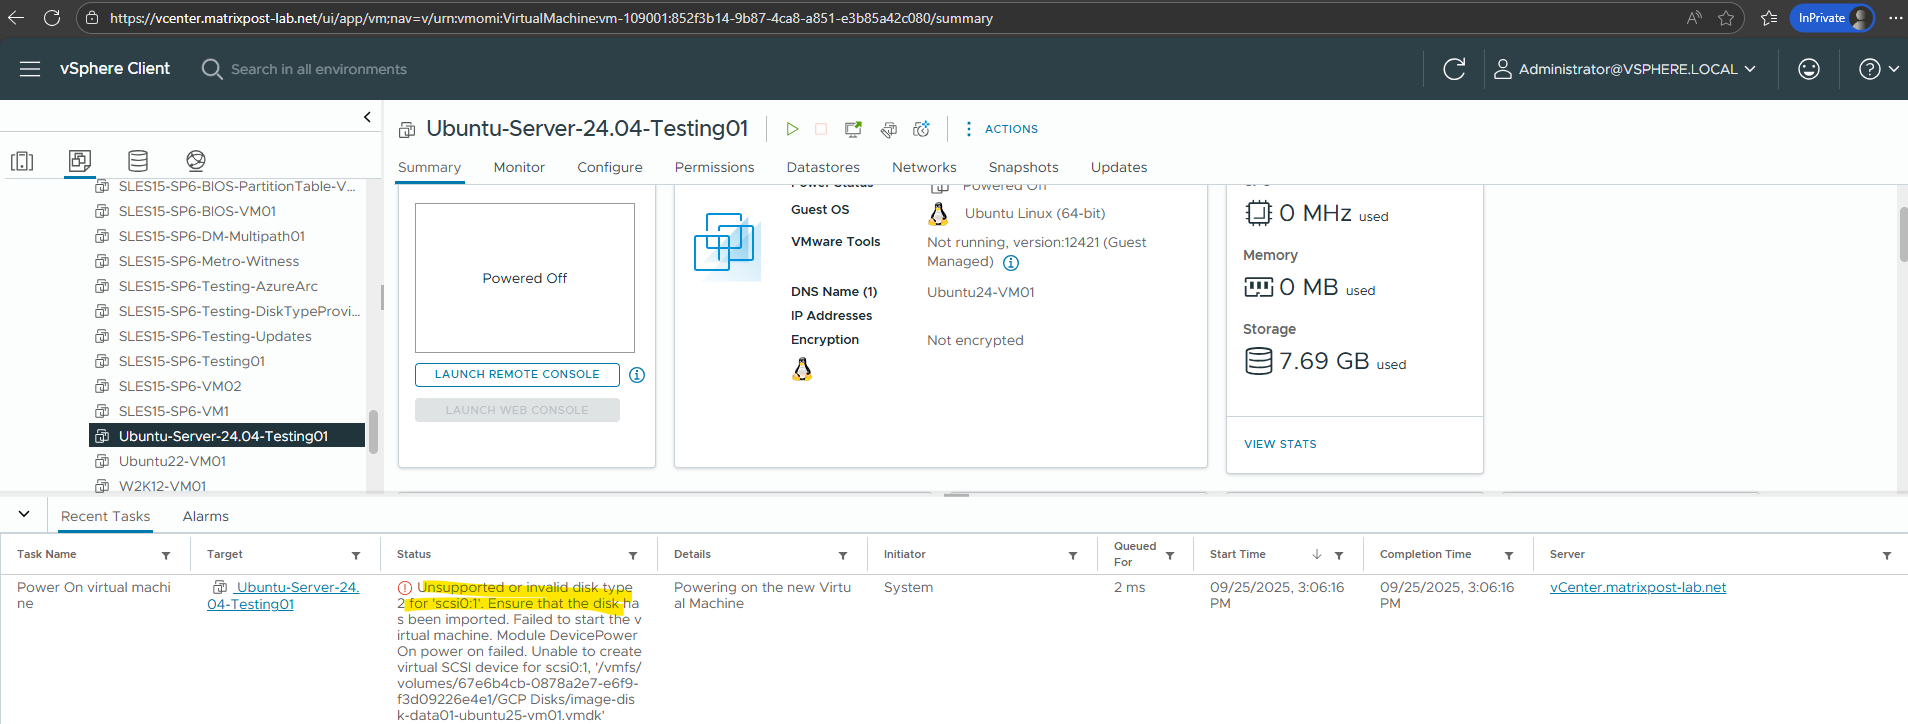
When trying to power on the virtual machine with the attached GCP disk, I will run into the following error.
Unsupported or invalid disk type 2 for ‘scsi0:1’
This is the classic VMware error when the VMDK you’re trying to attach is in a format vSphere doesn’t understand.
GCP exports VMDKs in a streamOptimized (type 2) format. vSphere expects a monolithicFlat, thin, or thick-provisioned format
So even we exported the disk (image) as VMDK, to directly attach it to a virtual machine, we first need to convert it to a monolithicFlat style VMDK, with the data pre-allocated on the datastore. Equivalent to VMware’s thick provisioned disk.
It produces two files, a small descriptor .vmdk (text file) and a large -flat.vmdk` file with the actual data. This is exactly the format vSphere/ESXi expects when you add a disk to a VM.
To convert the disk we can use several tools like the StarWind V2V Converter or the QEMU disk image utility for Windows.
A newer version and maintained build for the QEMU utility we can download from the Stefan Weil QEMU for Windows project.
QEMU Binaries for Windows (64 bit)
https://qemu.weilnetz.de/w64/
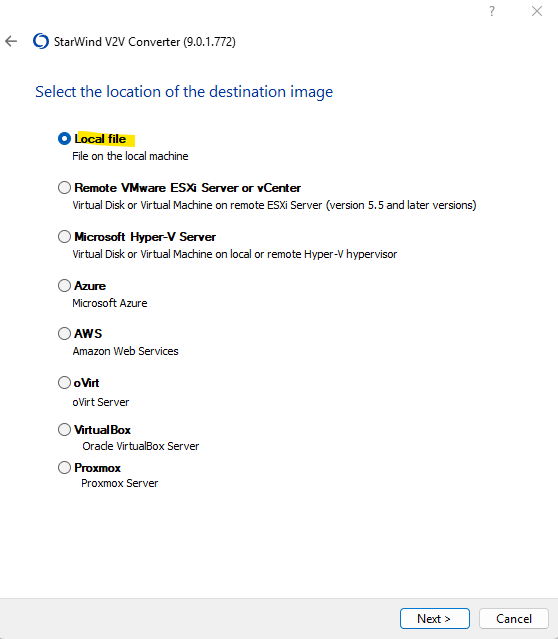
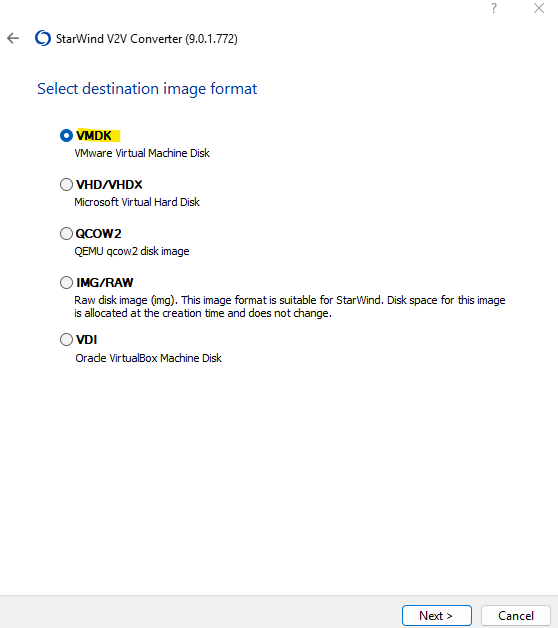
Below I will first use the StarWind V2V Converter here.
Select the previously downloaded GCP disk *.vmdk file as source image.

For the destination image we also select local file.
The converter is also able to upload and already attach the converted disk to an existing virtual machine running in VMware.
Select VMDK for the destination image format.
For the VMDK image format we need to select ESXi pre-allocated image.
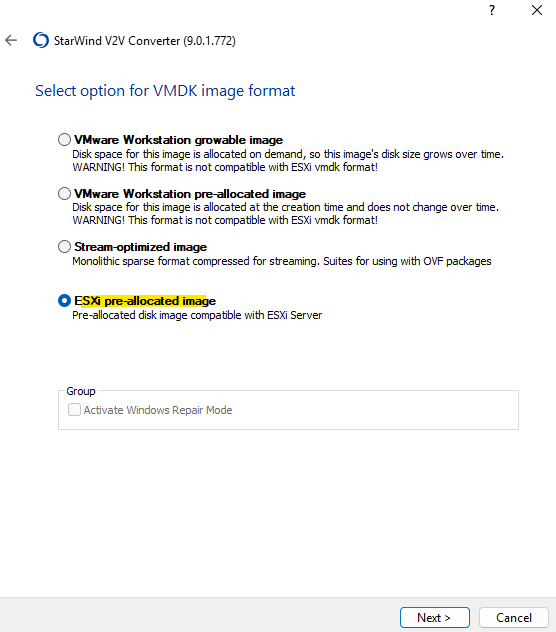
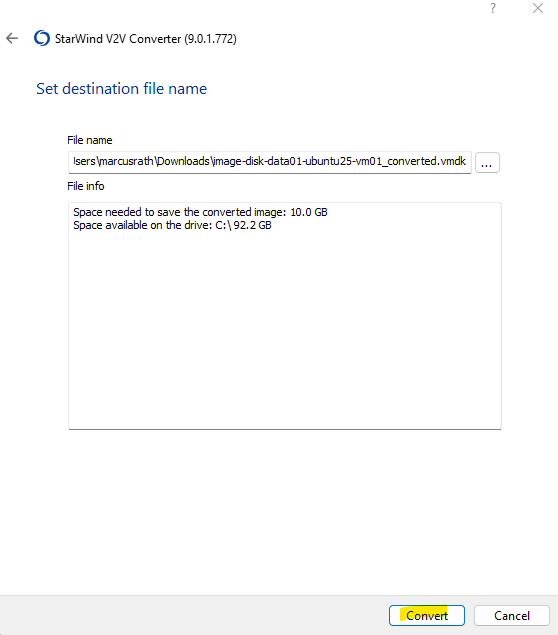
Finally click on Convert.
Click on Finish.
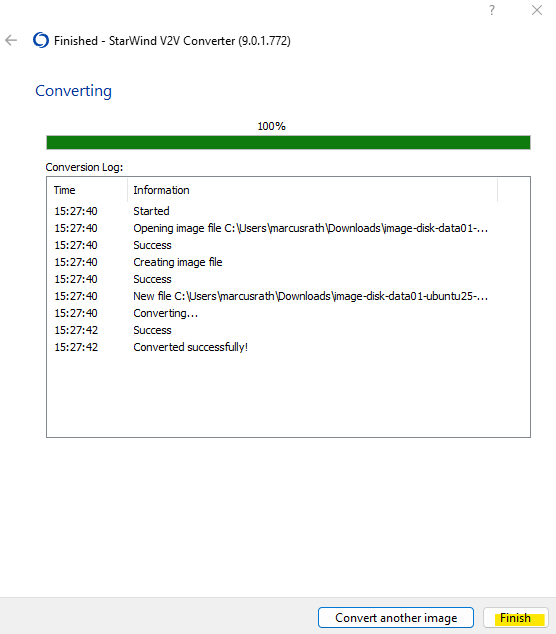
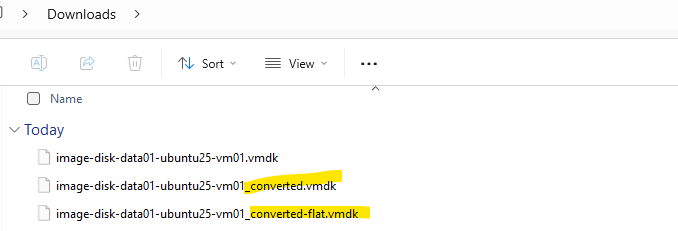
The StarWind V2V Converter will finally produce two new files for us, the flat file and the descriptor file (1 KB size below).
In VMware, the flat file is the binary file which contains every sector of the virtual disk, the actual data.
The descriptor file is a small text file with metadata → tells VMware how to interpret the disk. Contains metadata: adapter type, disk size, and a pointer to the flat file. This is the file we finally attach to the VM in vSphere when adding an already existing disk.
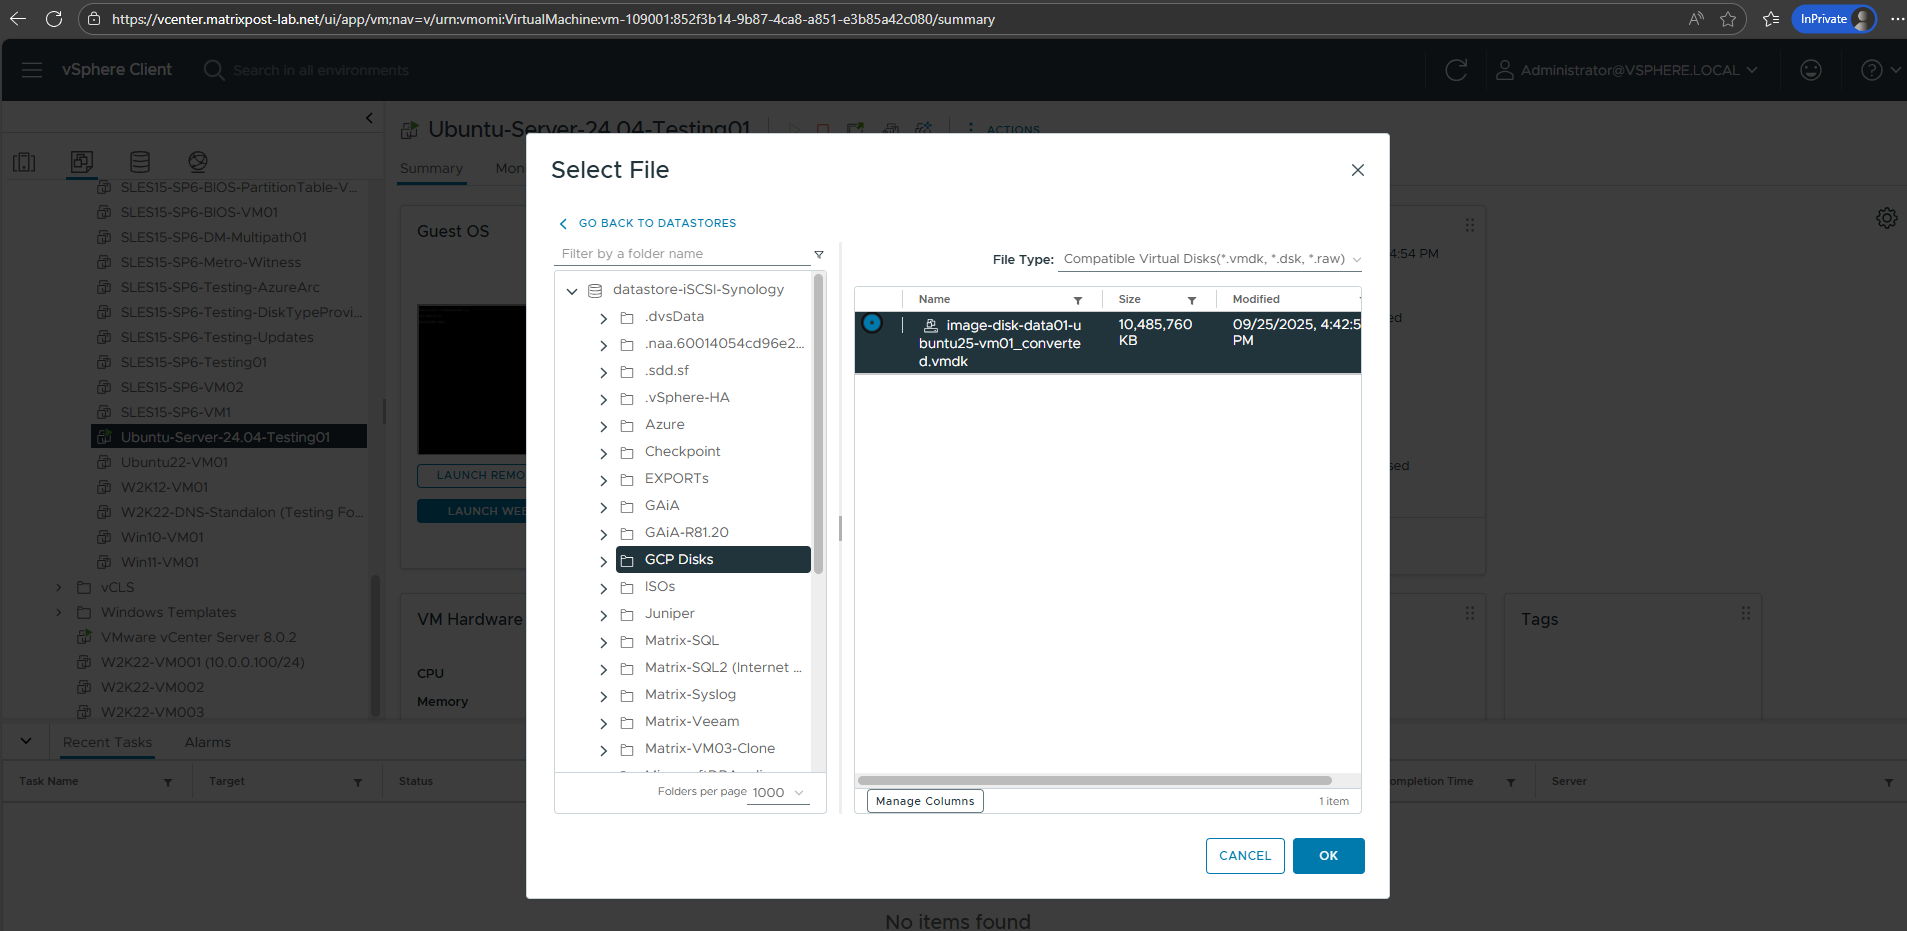
Always add the .vmdk descriptor in vSphere → the flat file just needs to sit in the same directory on the datastore.
The descriptor file finally will contain the following data.
# Disk DescriptorFile
version=1
encoding="windows-1252"
CID=0f94c82e
parentCID=ffffffff
isNativeSnapshot="no"
createType="vmfs"

# Extent description
RW 20971520 VMFS "image-disk-data01-ubuntu25-vm01(1)-flat.vmdk" 0

# The Disk Data Base
#DDB

ddb.adapterType = "ide"
ddb.geometry.cylinders = "16383"
ddb.geometry.heads = "16"
ddb.geometry.sectors = "63"
ddb.longContentID = "362b61a6cd7cfe5de7648d080f94c82e"
ddb.thinProvisioned = "1"
ddb.uuid = "60 00 C2 96 1c 51 94 be-7f 5c 61 20 41 6b ea ac"
ddb.virtualHWVersion = "4"
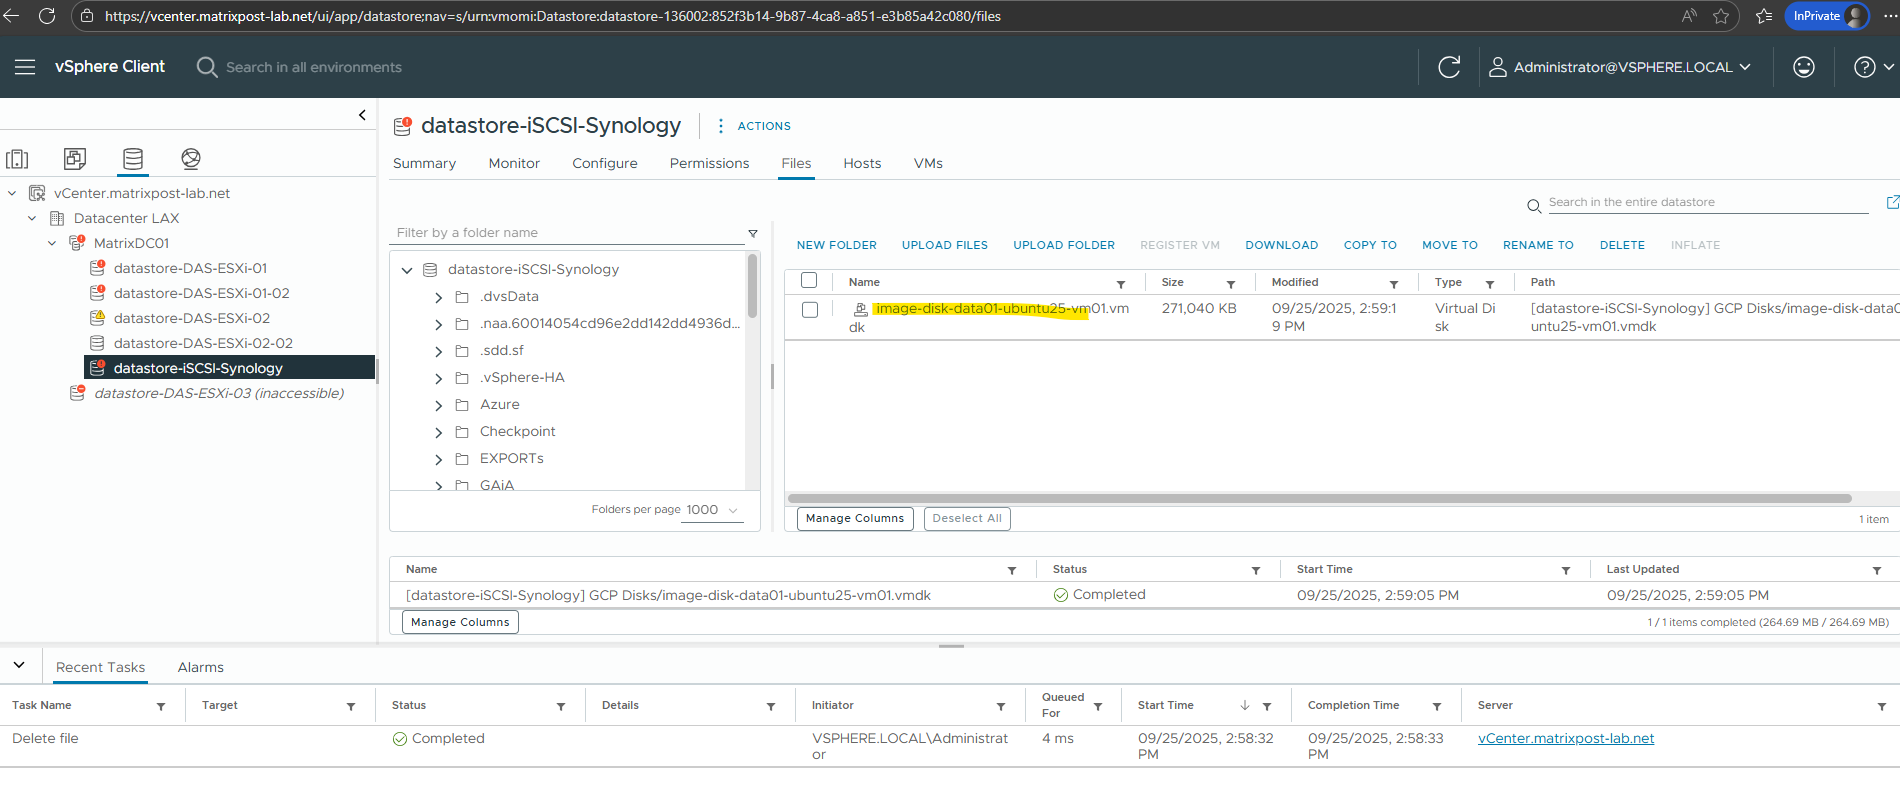
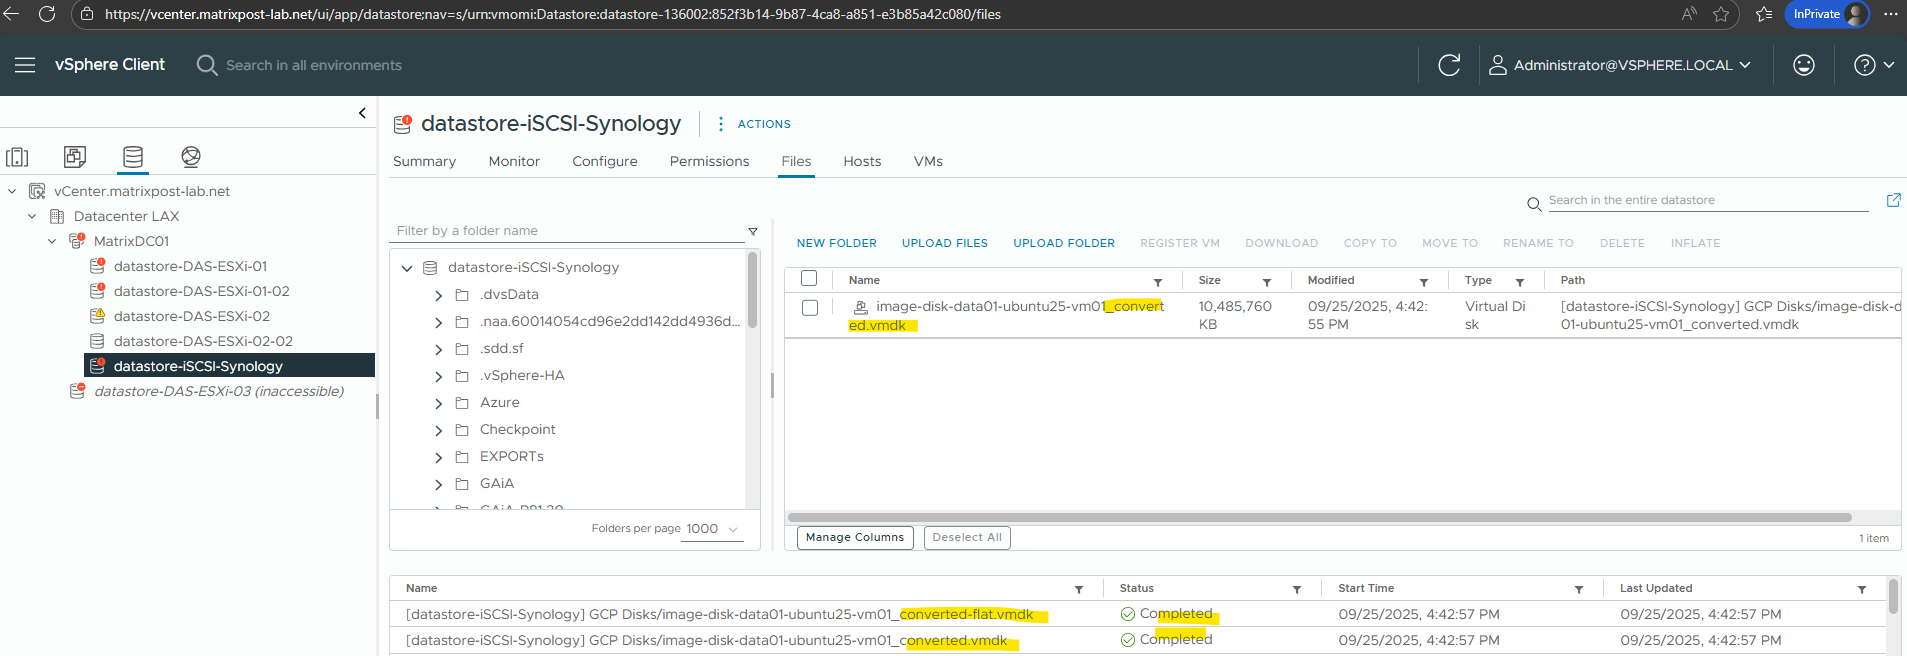
I will now upload this data disk (flat file + descriptor file) to my on-prem vSphere lab environment.
After uploading both files it seems that one of them, the -flat file is missing.
That’s finally normal behavior in vSphere/ESXi. In the vSphere Client / Datastore Browser, the ESXi hides the -flat.vmdk file by default. It’s still physically there on the datastore.
Attaching the disk to my virtual machine running in vSphere.
Looks good and the previously created test files on the GCP disk will be shown.
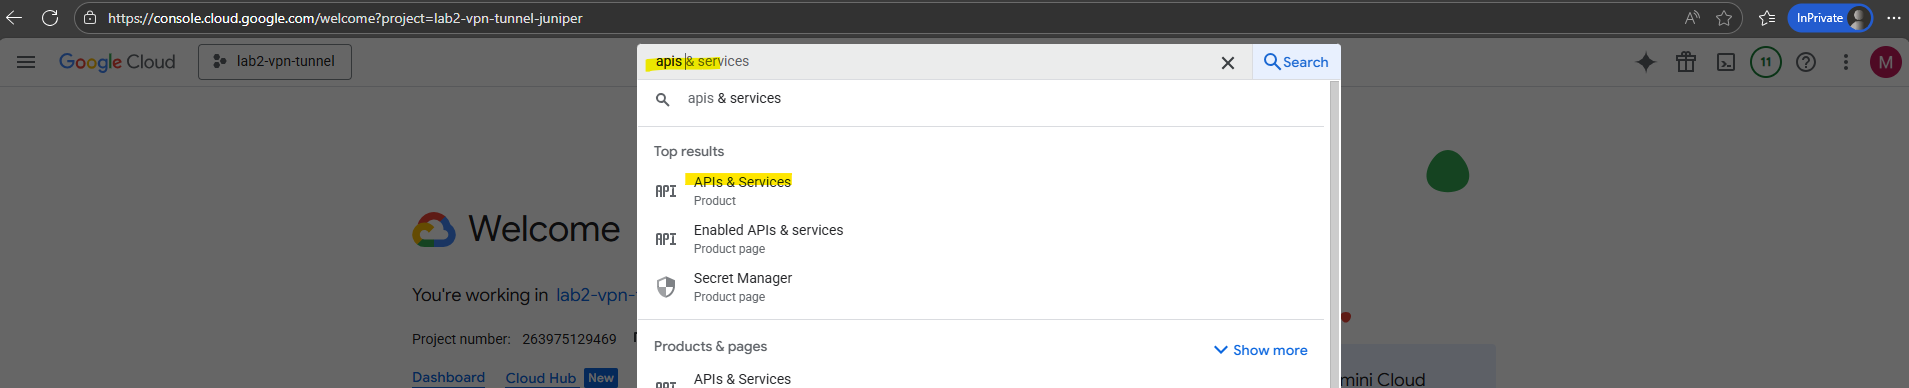
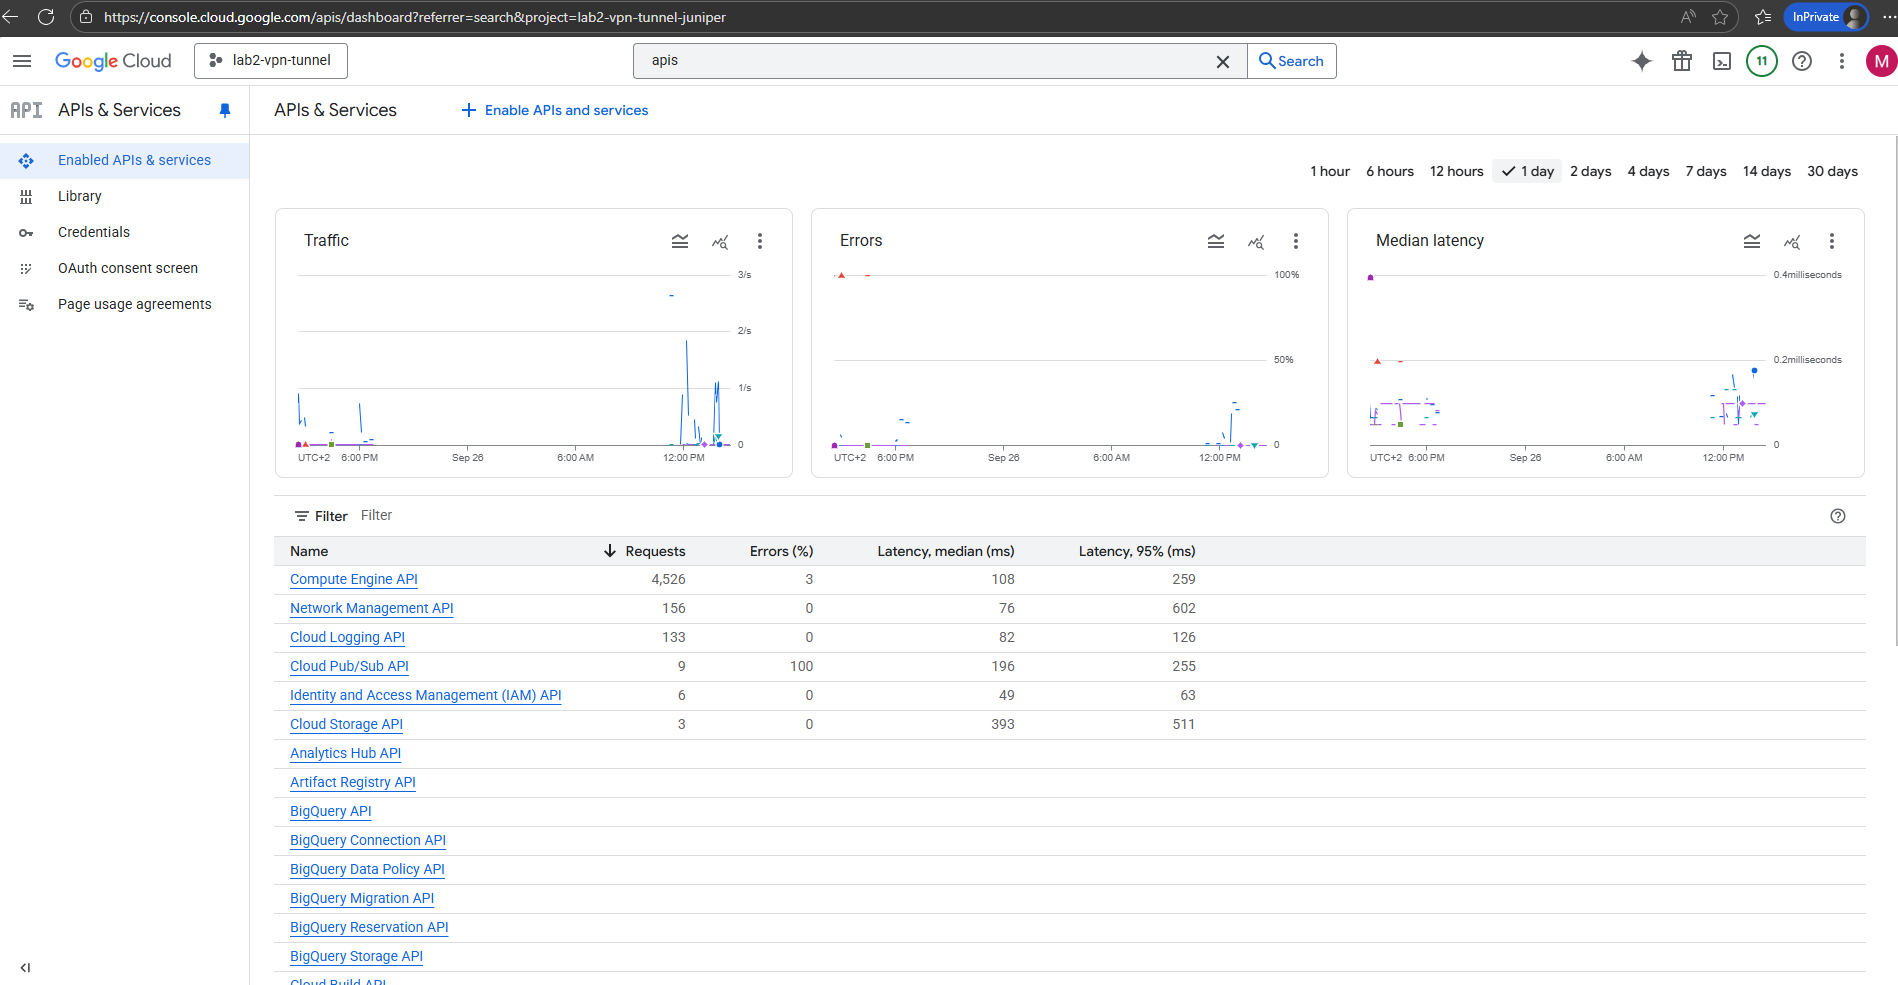
Determine enabled APIs for a Project
Navigate to APIs & Services.
In Part 5 we will take a look at some key networking tools that help you secure and troubleshoot our environment.
Links
About disk encryption
https://cloud.google.com/compute/docs/disks/disk-encryptionCloud Key Management Service documentation
https://cloud.google.com/kms/docsChoose a disk type
https://cloud.google.com/compute/docs/disksCloud Storage buckets – Public access prevention
https://cloud.google.com/storage/docs/public-access-preventionCloud KMS with Autokey
https://cloud.google.com/kms/docs/kms-autokeyCustomer-supplied encryption keys
https://cloud.google.com/docs/security/encryption/customer-supplied-encryption-keysCloud Key Management Service overview
https://cloud.google.com/kms/docs/key-management-service