Mastering GCP Virtual Machines – Part 7 (Backup and DR)
In Part 6 we saw how to use the VM Manager in Google Cloud to orchestrate patching for our VM instances. Finally this is Google’s counterpart to Microsoft’s Azure Update Manager.
Now in this part we will see how to protect and backup VM instances by using the Google Cloud Backup and DR service and Management Console (appliance).
Google Cloud offers two ways to protect your workloads with Backup and DR. The built-in Backup and DR Service provides simple, snapshot-based VM protection directly in the Google Cloud Console.
We need to use and activate the Management Console when our backup strategy involves self-managed storage (like our own Cloud Storage buckets) or when protecting certain workloads like VMware VMs and specific self-managed databases (Oracle/SQL Server) that require this specialized orchestration and management interface.
For the simplest, Google-managed backups to a Backup Vault, the standard Google Cloud console is sufficient.
Google Cloud Backup and DR Service
Google Cloud Backup and DR Service (GCBDR) was previously Actifio GO. In December 2020, Google acquired Actifio to provide a solution to protect GCP workloads.
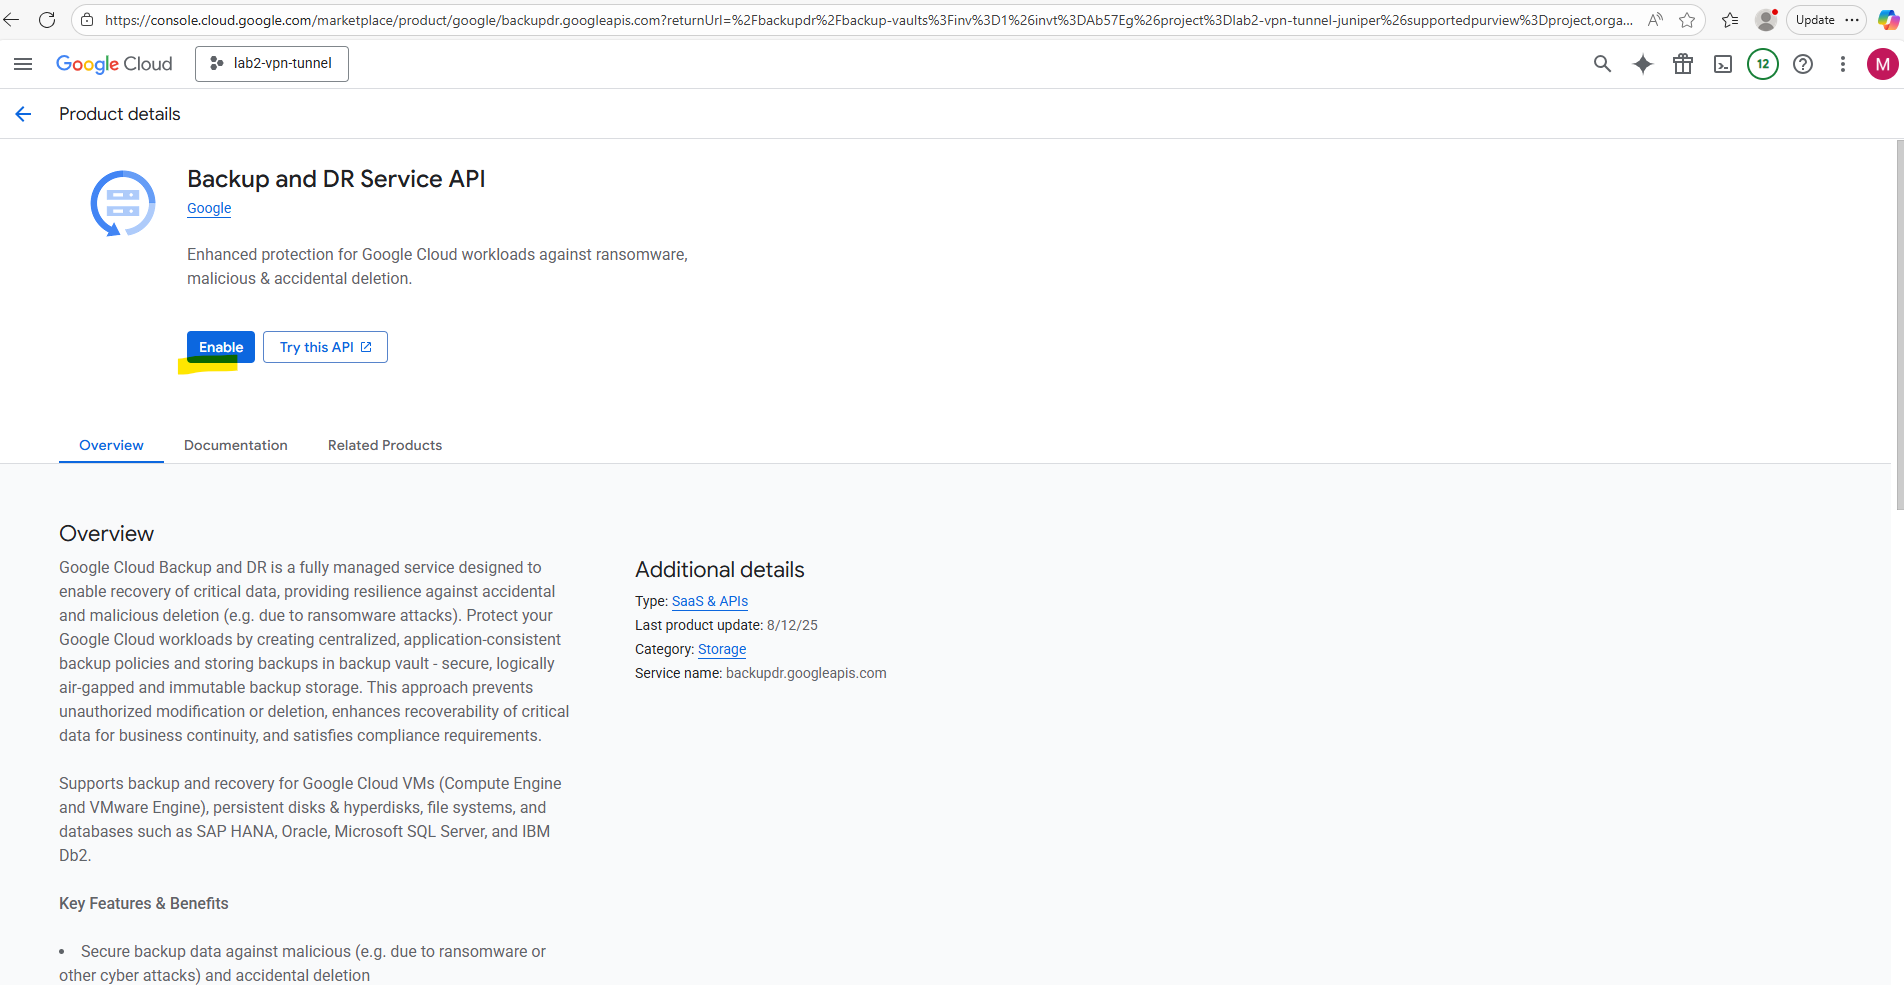
Google Cloud Backup and DR is a fully managed service designed to enable recovery of critical data, providing resilience against accidental and malicious deletion (e.g. due to ransomware attacks).
Protect your Google Cloud workloads by creating centralized, application-consistent backup policies and storing backups in backup vault – secure, logically air-gapped and immutable backup storage.
This approach prevents unauthorized modification or deletion, enhances recoverability of critical data for business continuity, and satisfies compliance requirements.
Supports backup and recovery for Google Cloud VMs (Compute Engine and VMware Engine), persistent disks & hyperdisks, file systems, and databases such as SAP HANA, Oracle, Microsoft SQL Server, and IBM Db2.
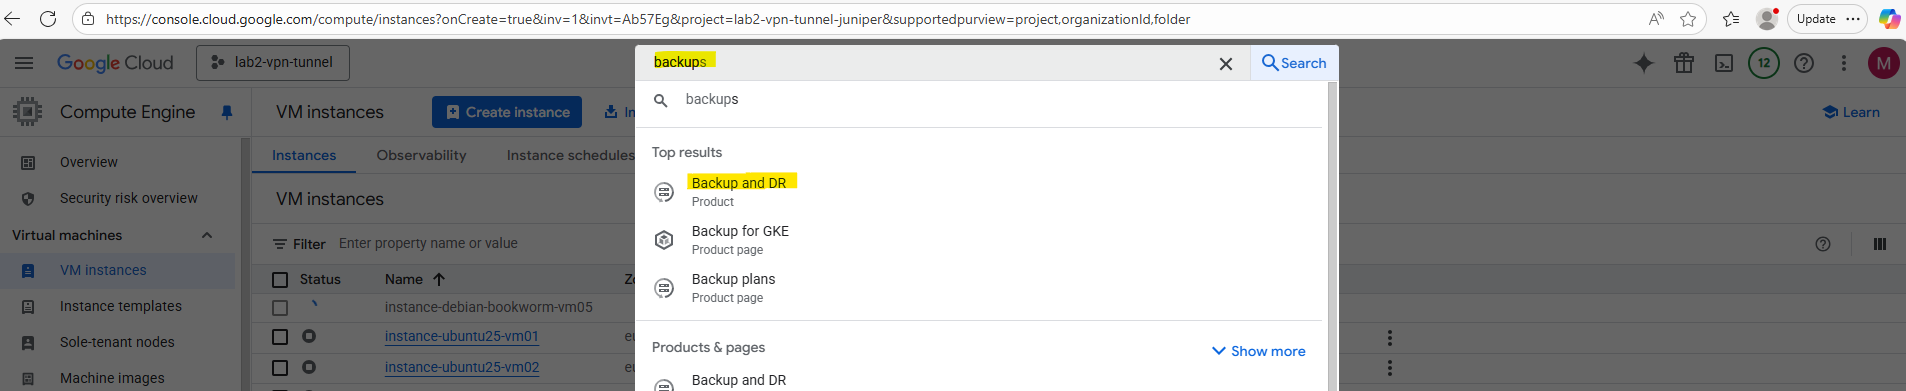
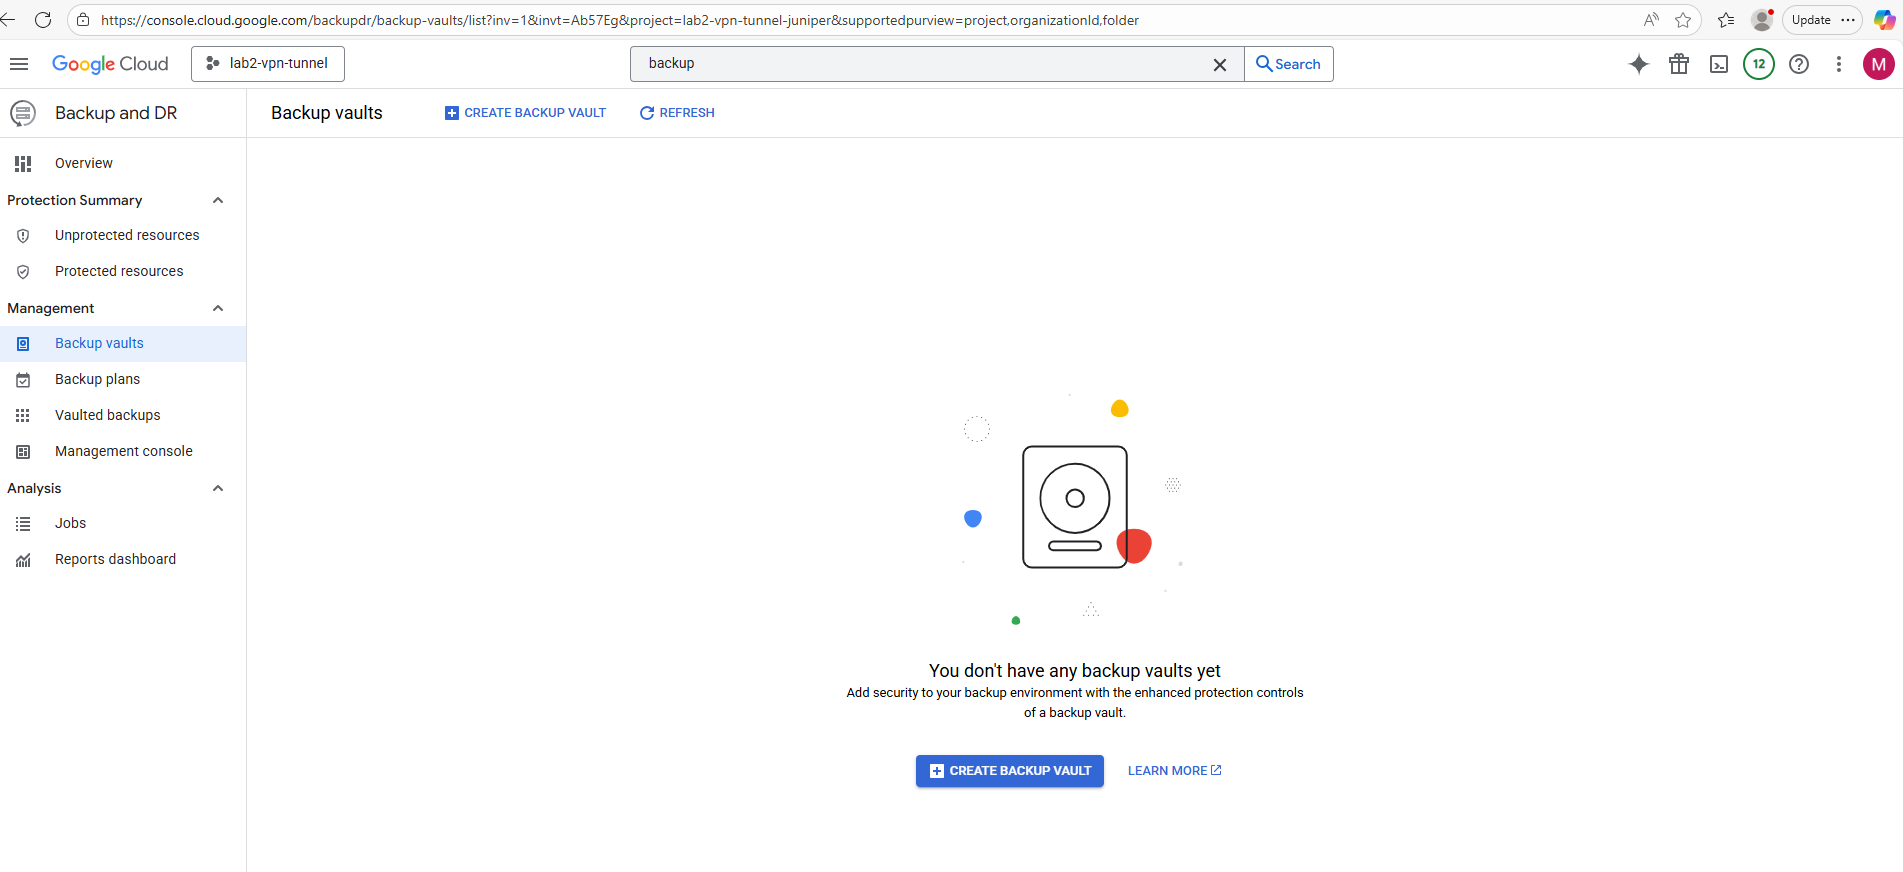
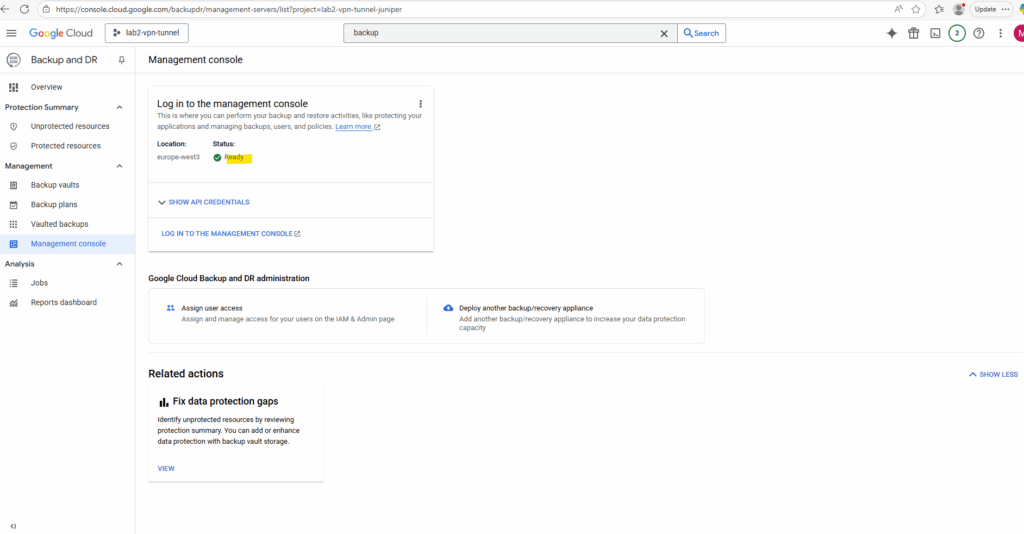
To navigate to Google Cloud Backup and DR for your project, search for backup like shown below.
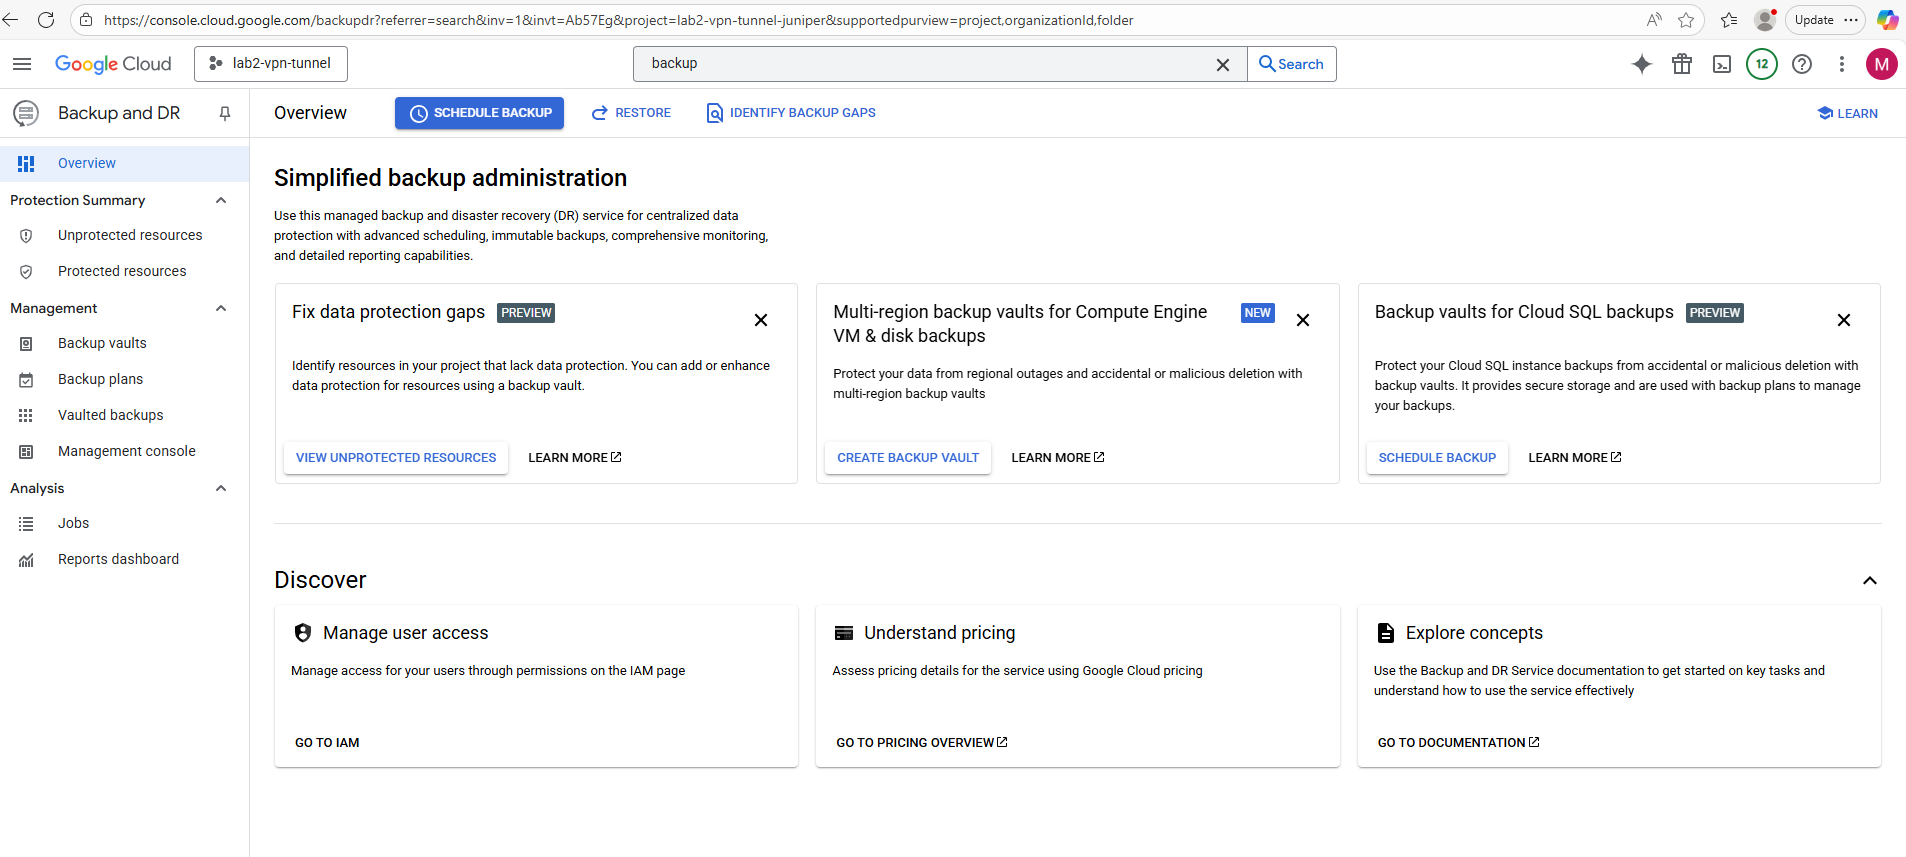
The Backup and DR Service so far wasn’t activated in my project.
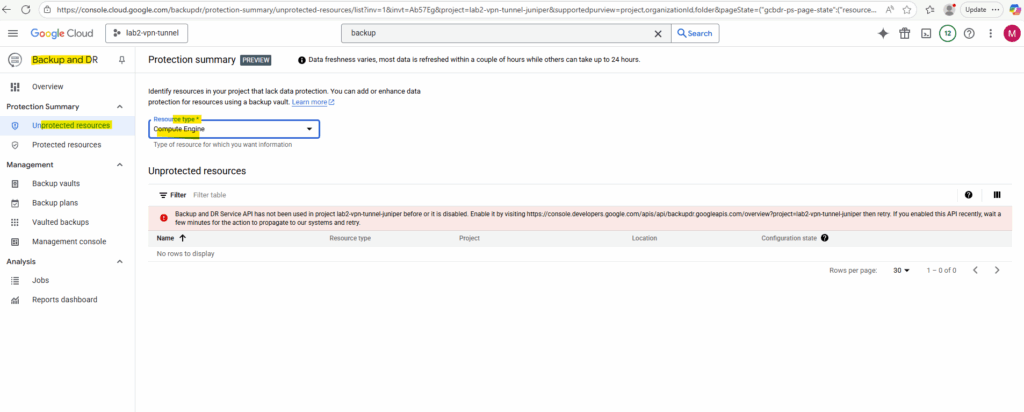
To first activate the Backup and DR Service, we can either browse to the provided link below or we can just browse to Backup vaults or Management console like shown below.
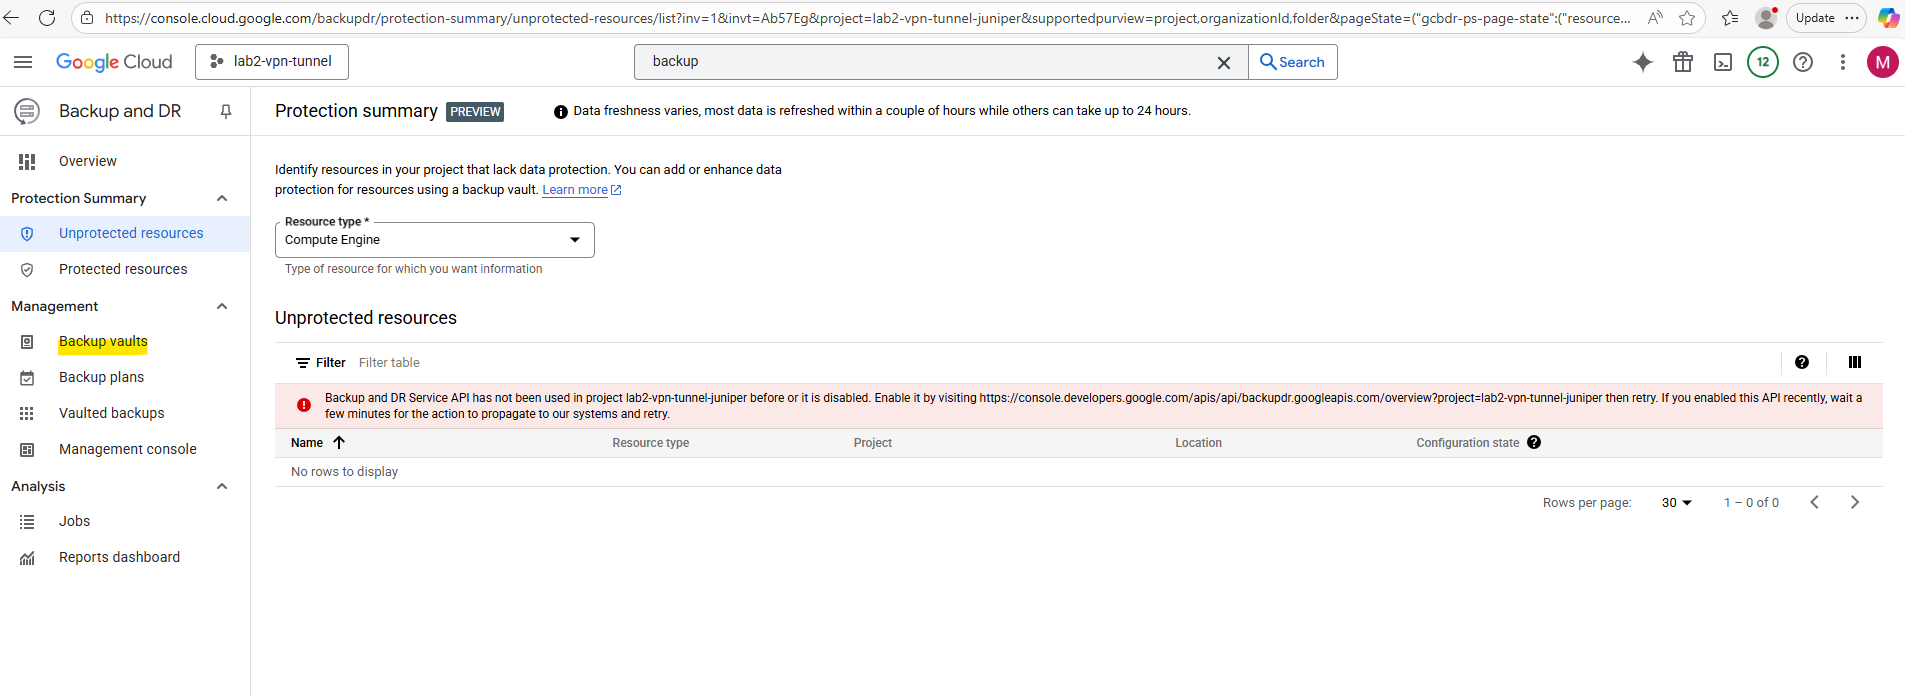
When browsing to the Backup vaults or Management console menu, the following page to enable the Backup and DR Service will appear. Click on Enable.
We can now create a new backup vault. Without first creating a backup vault, we can’t create any backup by using the Backup and DR console.
When using just the Backup and DR console to create VM instance backups, the snapshots will and can only be stored in a Backup Vault.
The Backup and DR Management Console appliance is the separate, specialized interface we can use for advanced protection, such as self-managed storage as mentioned.
Under the following link we will also find some How-to videos about the Backup and DR Service https://cloud.google.com/backup-disaster-recovery/docs/how-to-videos.
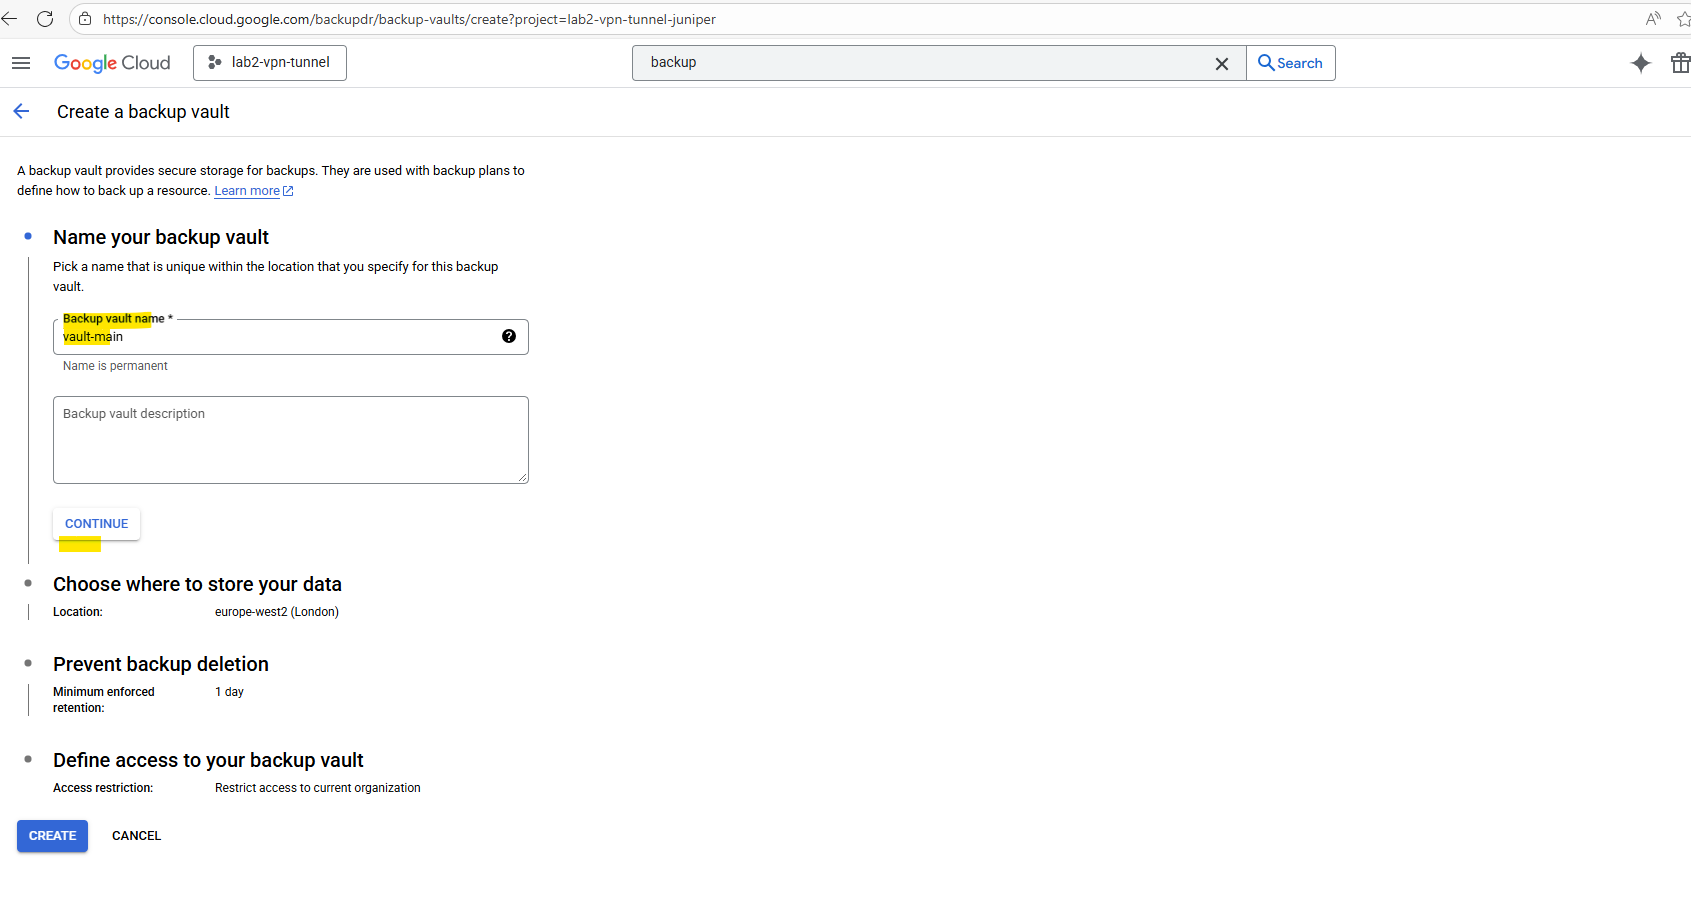
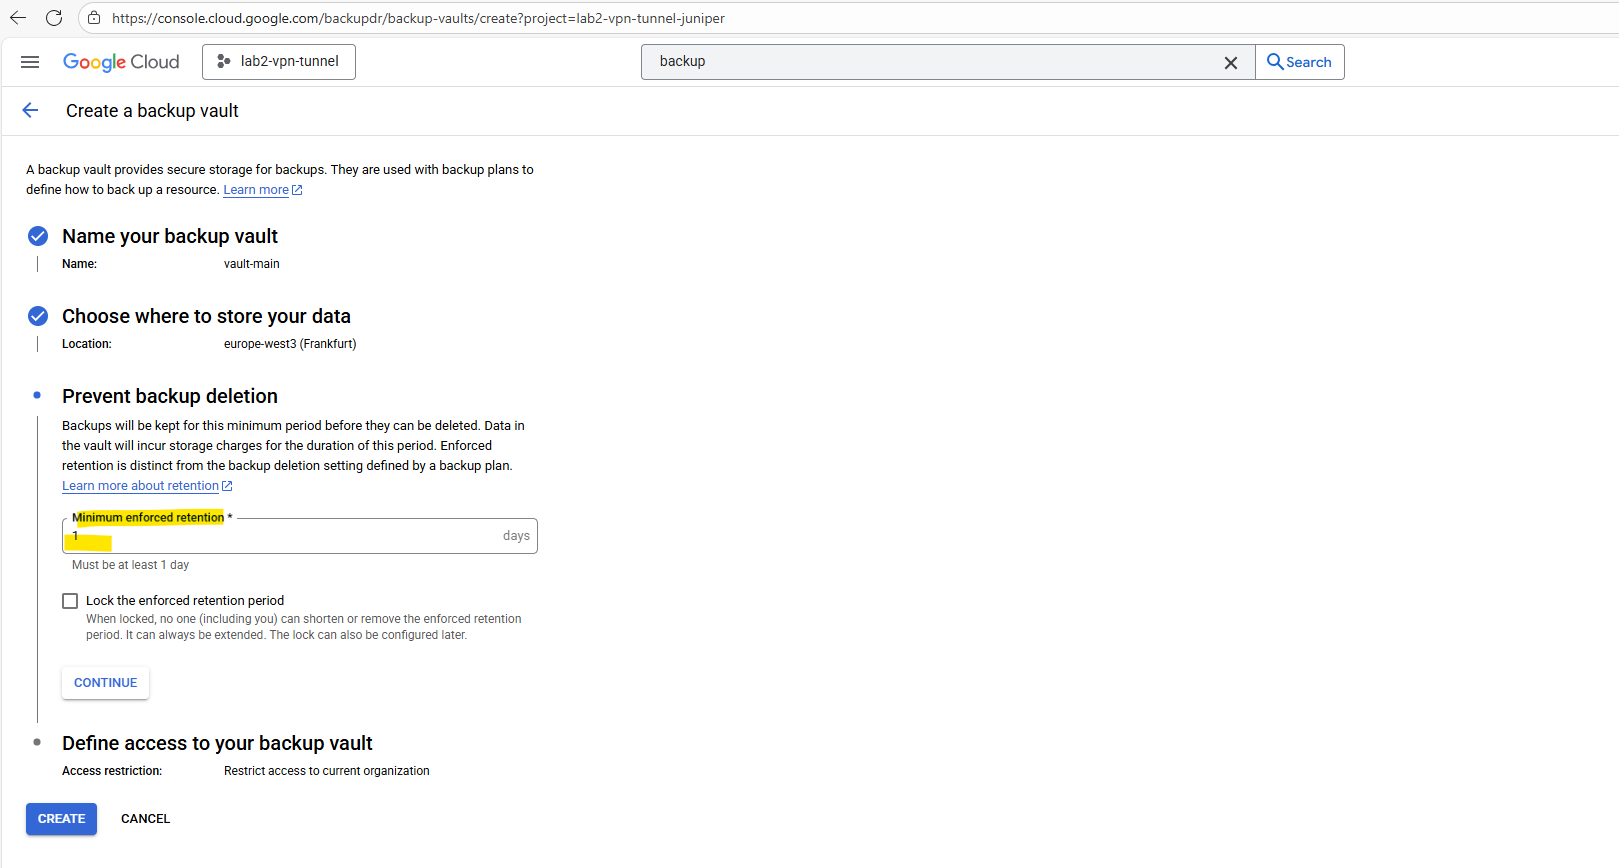
Enter a name for and click on Continue.
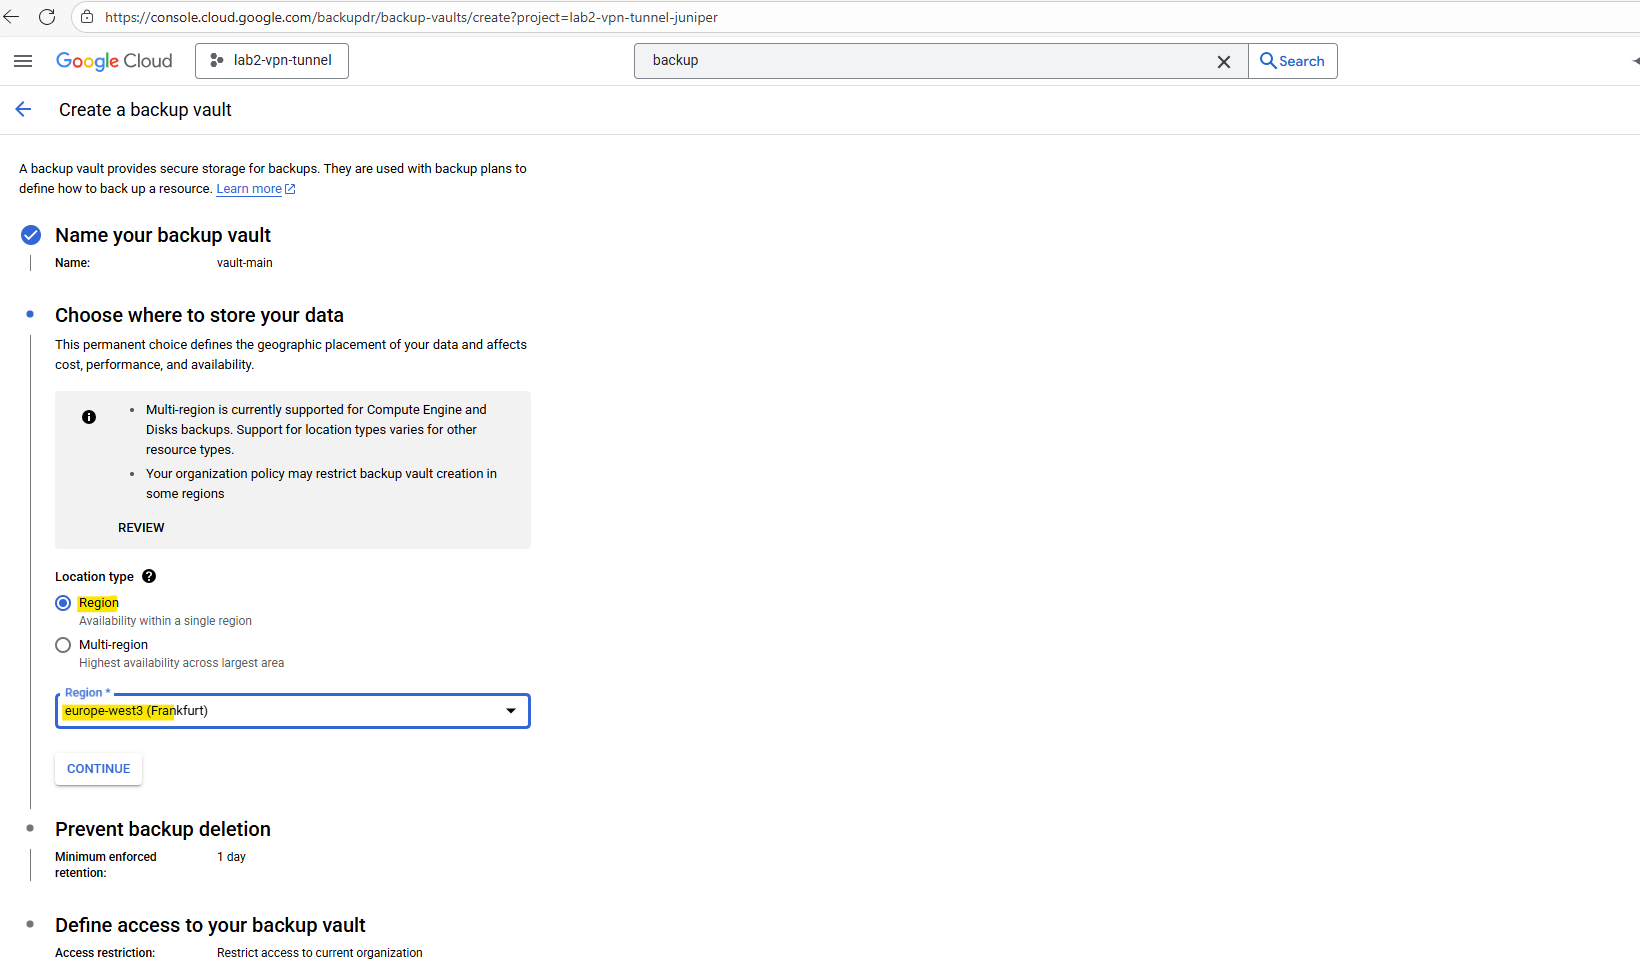
Select the region for.
Select the retention for the vault.
Backup vaults allow you to specify a minimum enforced retention period, which mandates that a backup cannot expire until the specified timeframe has elapsed and helps protect against accidental or malicious deletion.
Backups will be kept for this minimum period before they can be deleted.
More about here https://cloud.google.com/backup-disaster-recovery/docs/concepts/backup-vault.
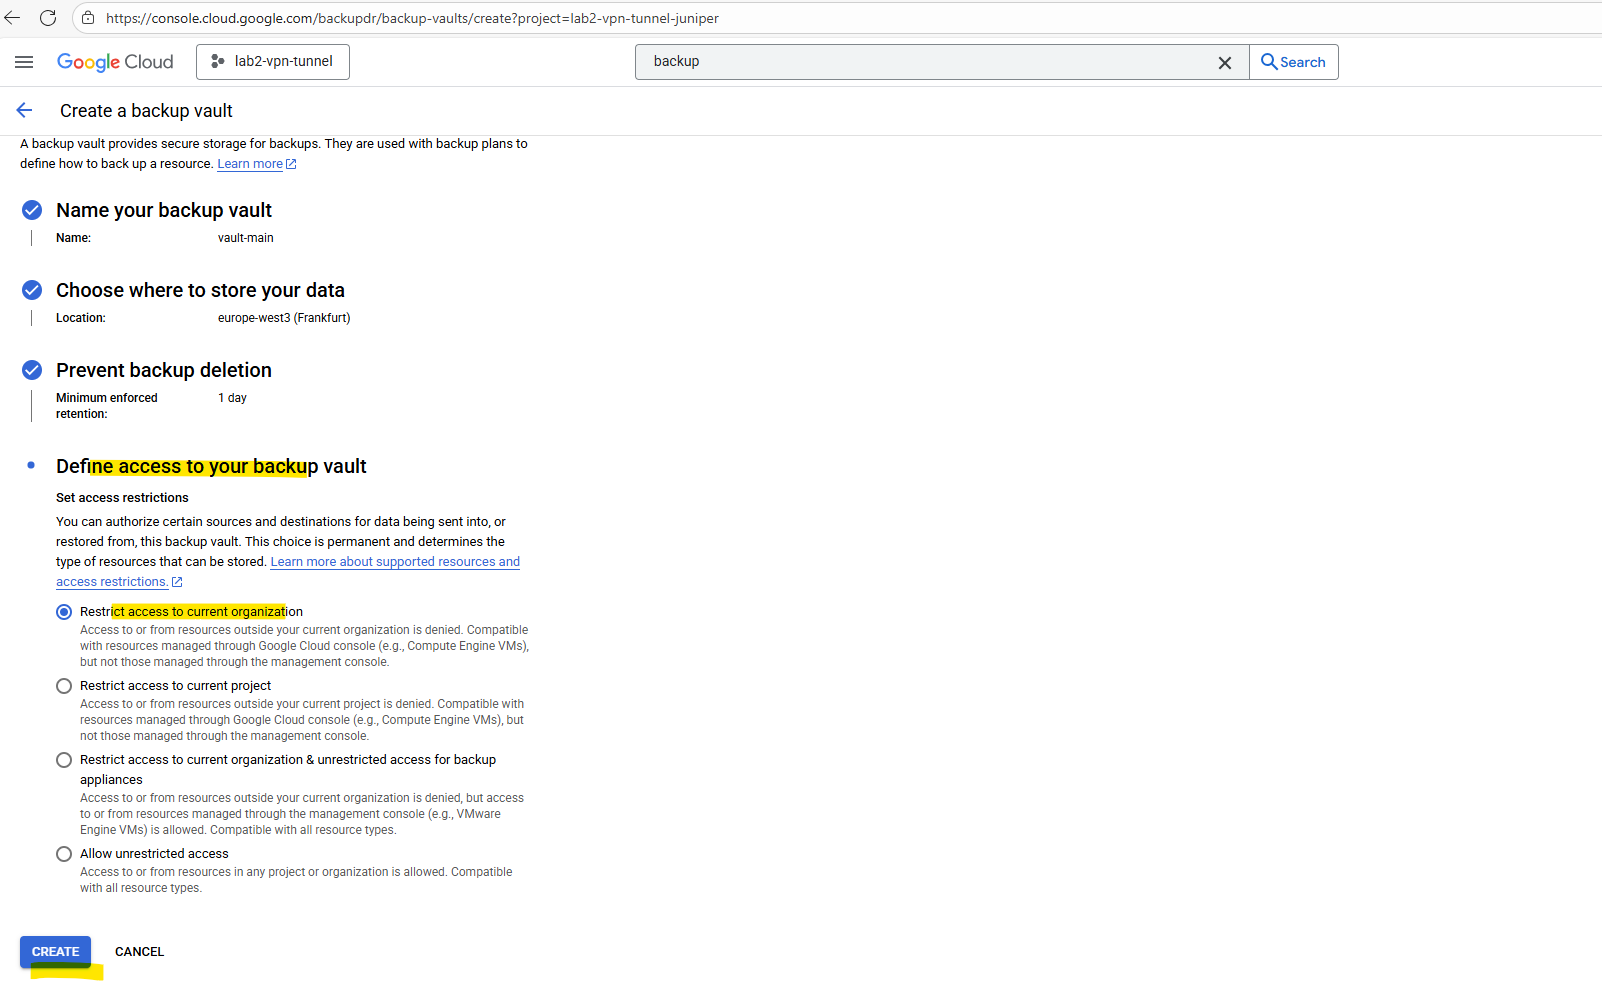
Finally define the access to our new backup vault and click on Create.
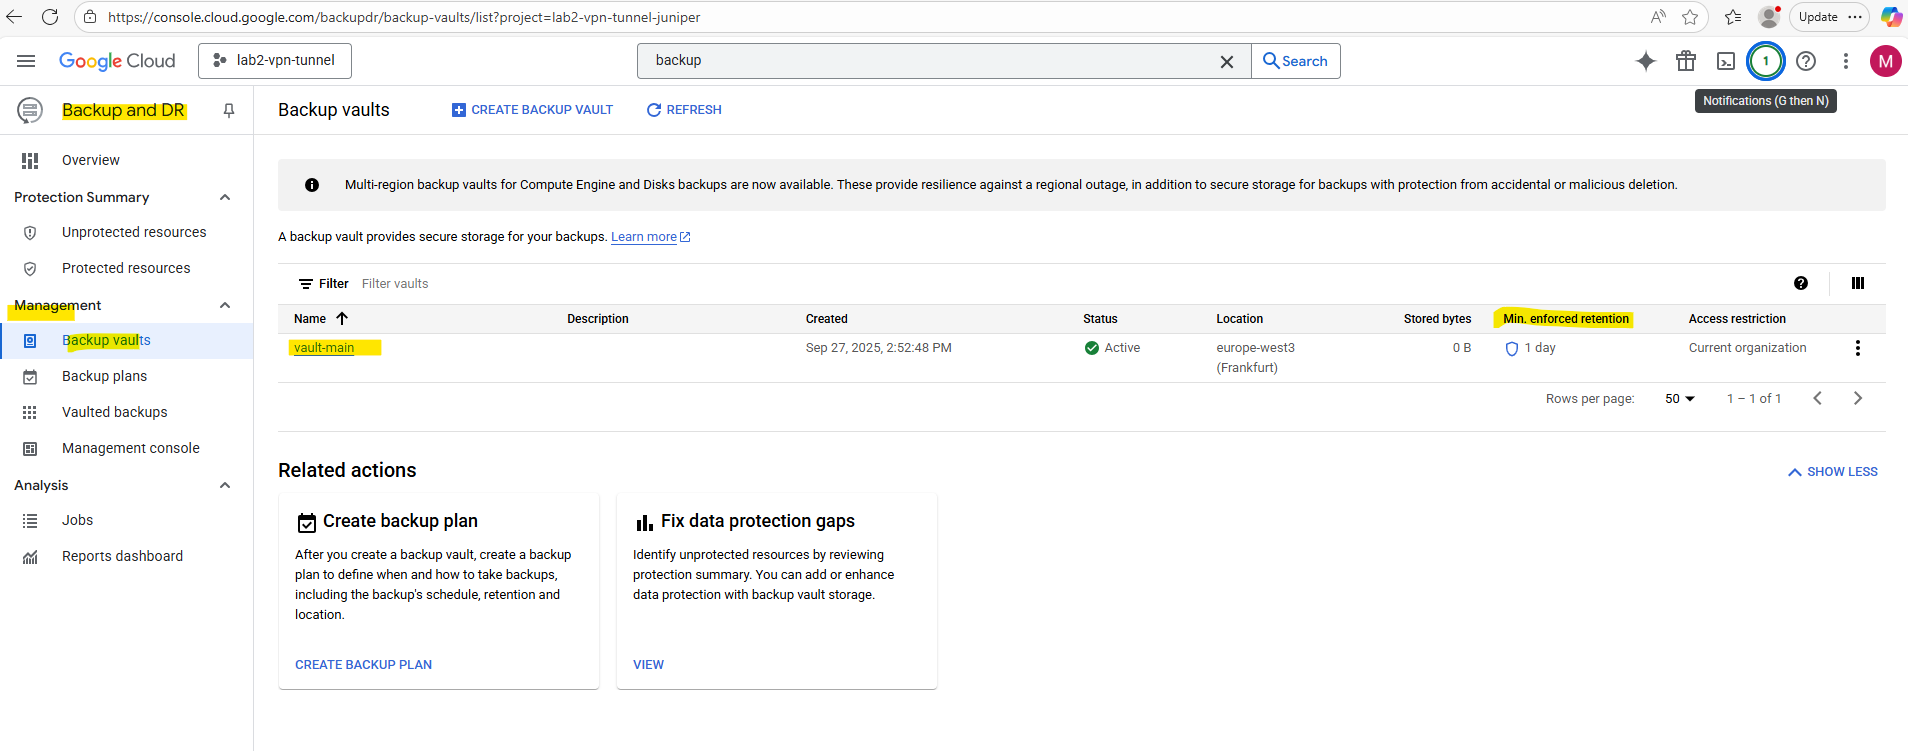
Our new vault is created successful.

Next we will see how to create a backup plan to protect our VM instances. When creating a new backup plan, we also need to select a corresponding backup vault to.
Backup Plans
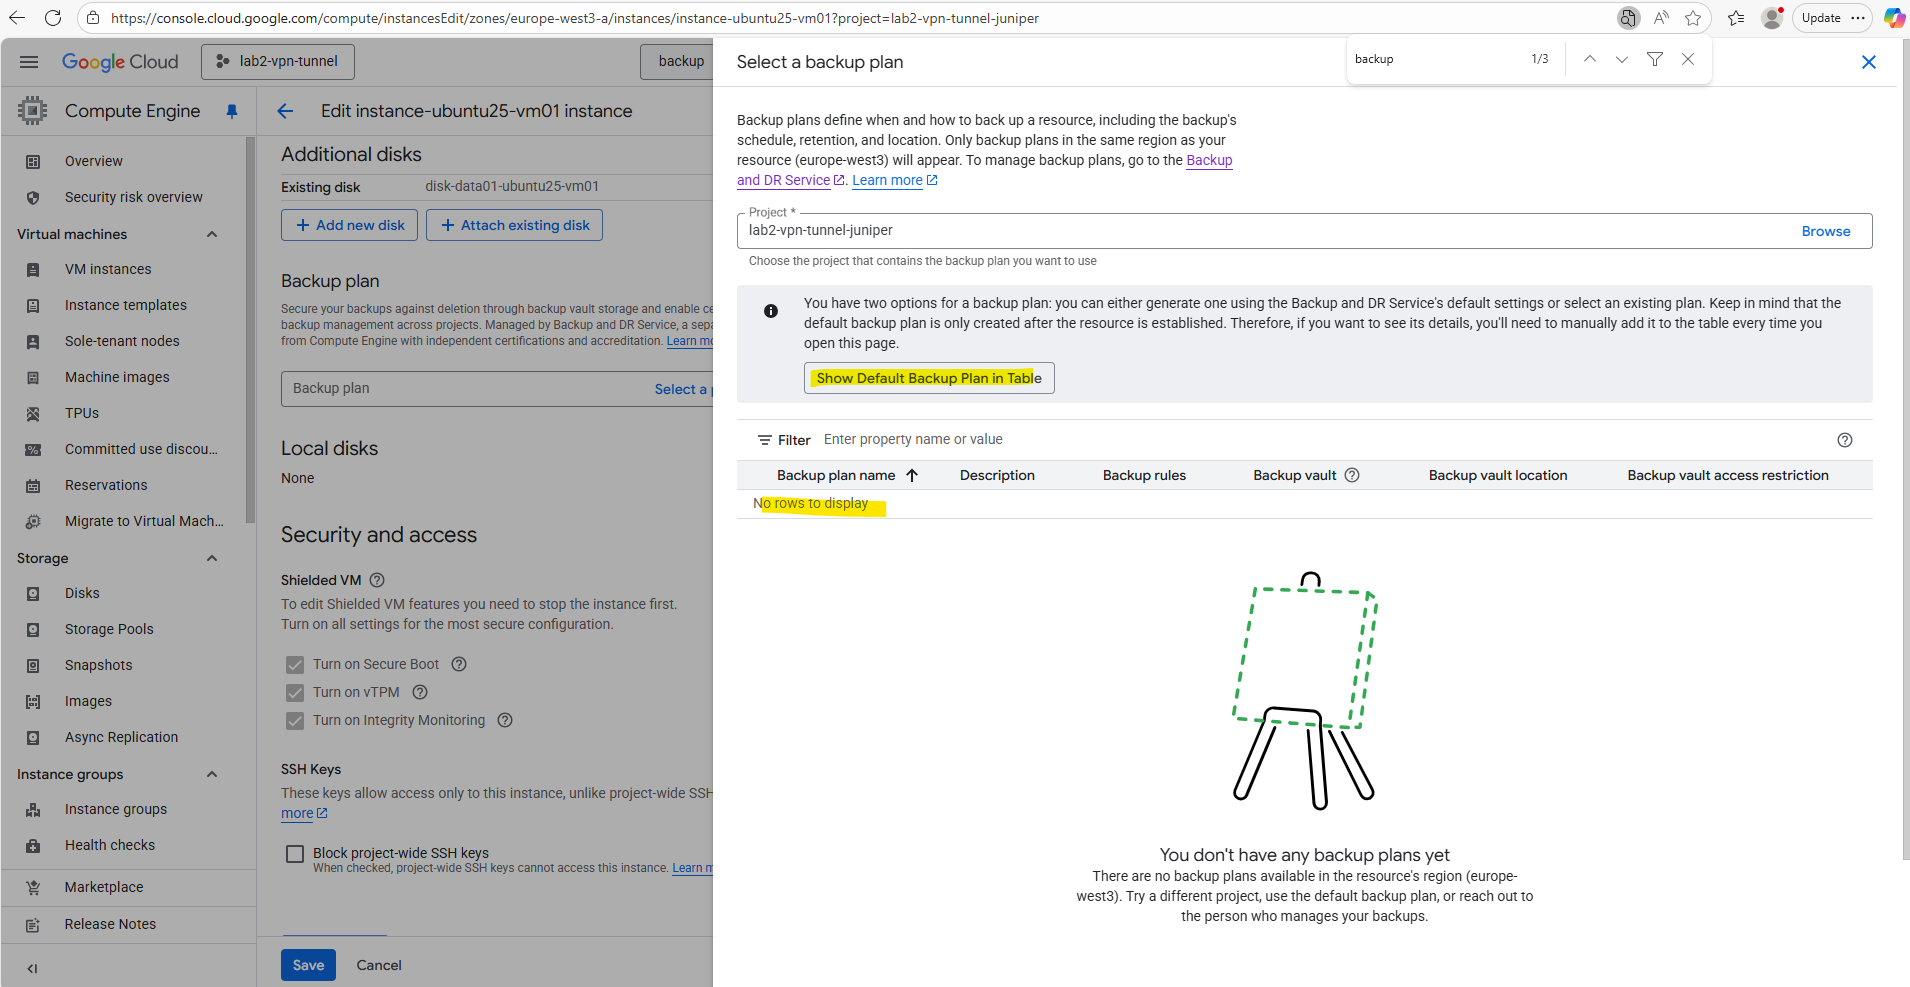
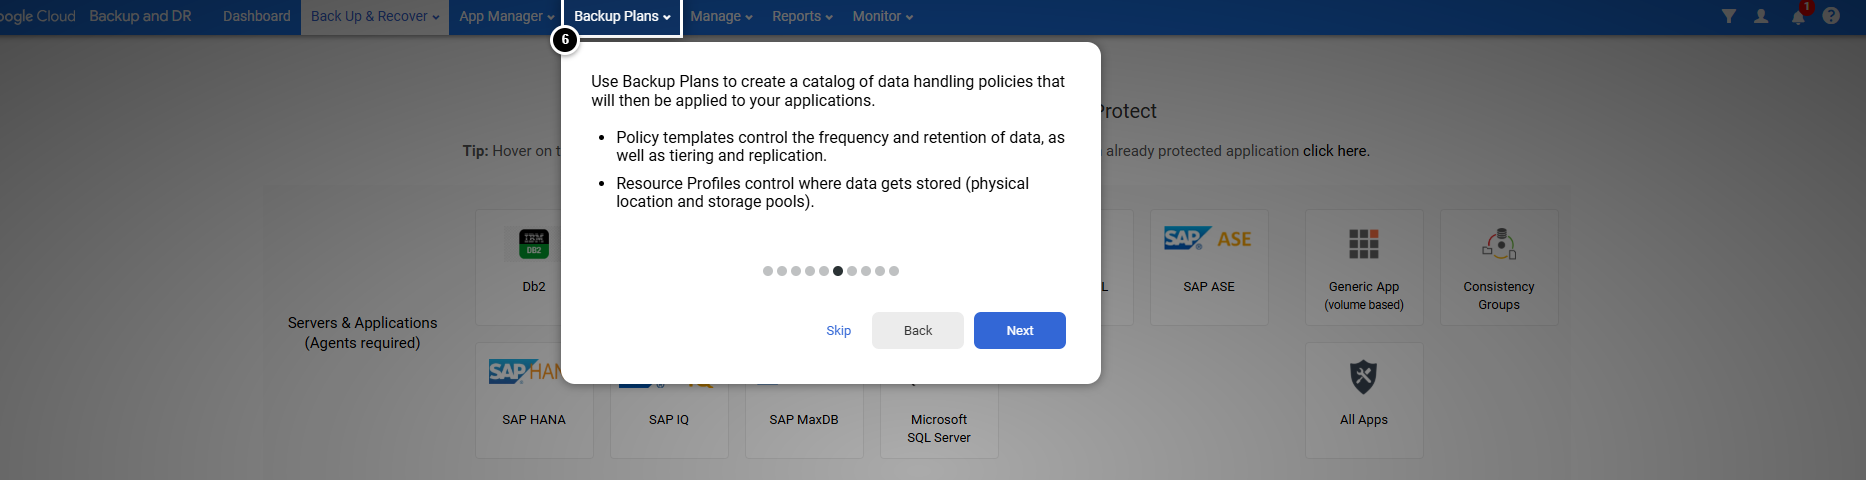
Backup plans define when and how to back up a resource, including the backup’s schedule, retention, and location.
Only backup plans in the same region as your resource (in my case below europe-west3) will appear.
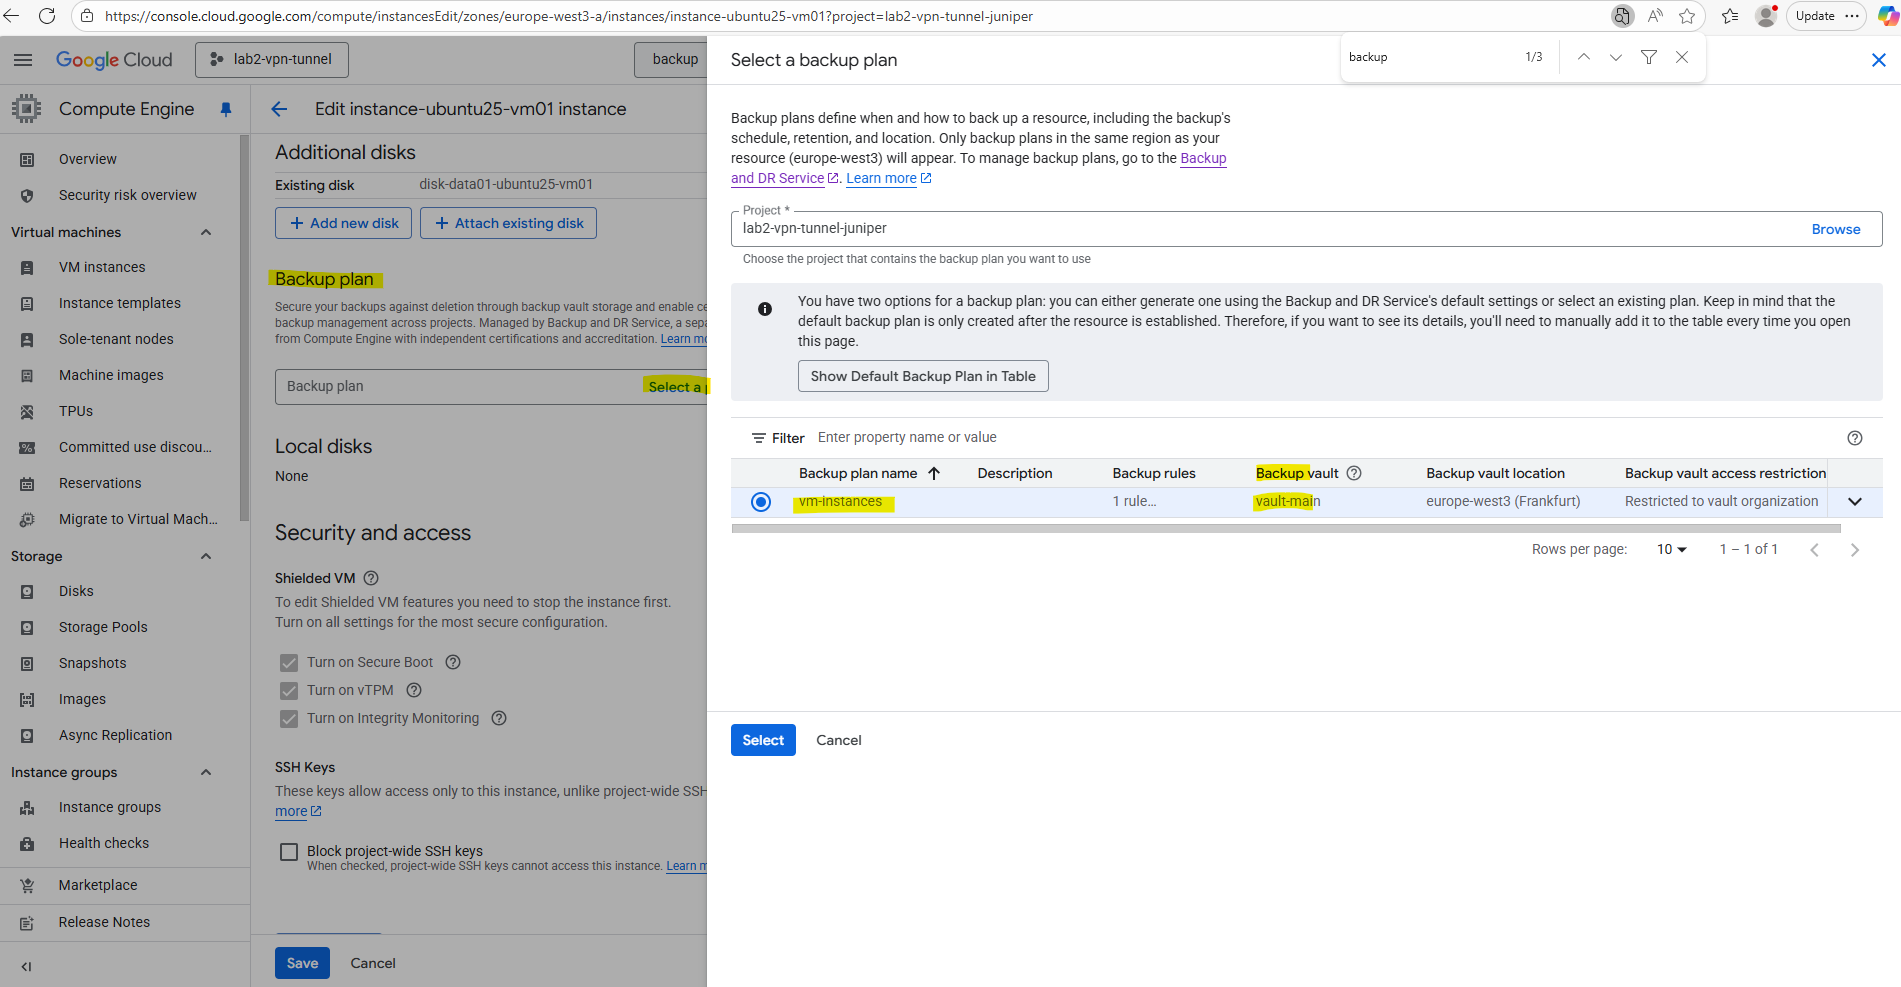
When enabling backups for a VM instance we need to select an existing backup plan as shown below when editing the VM instance settings.
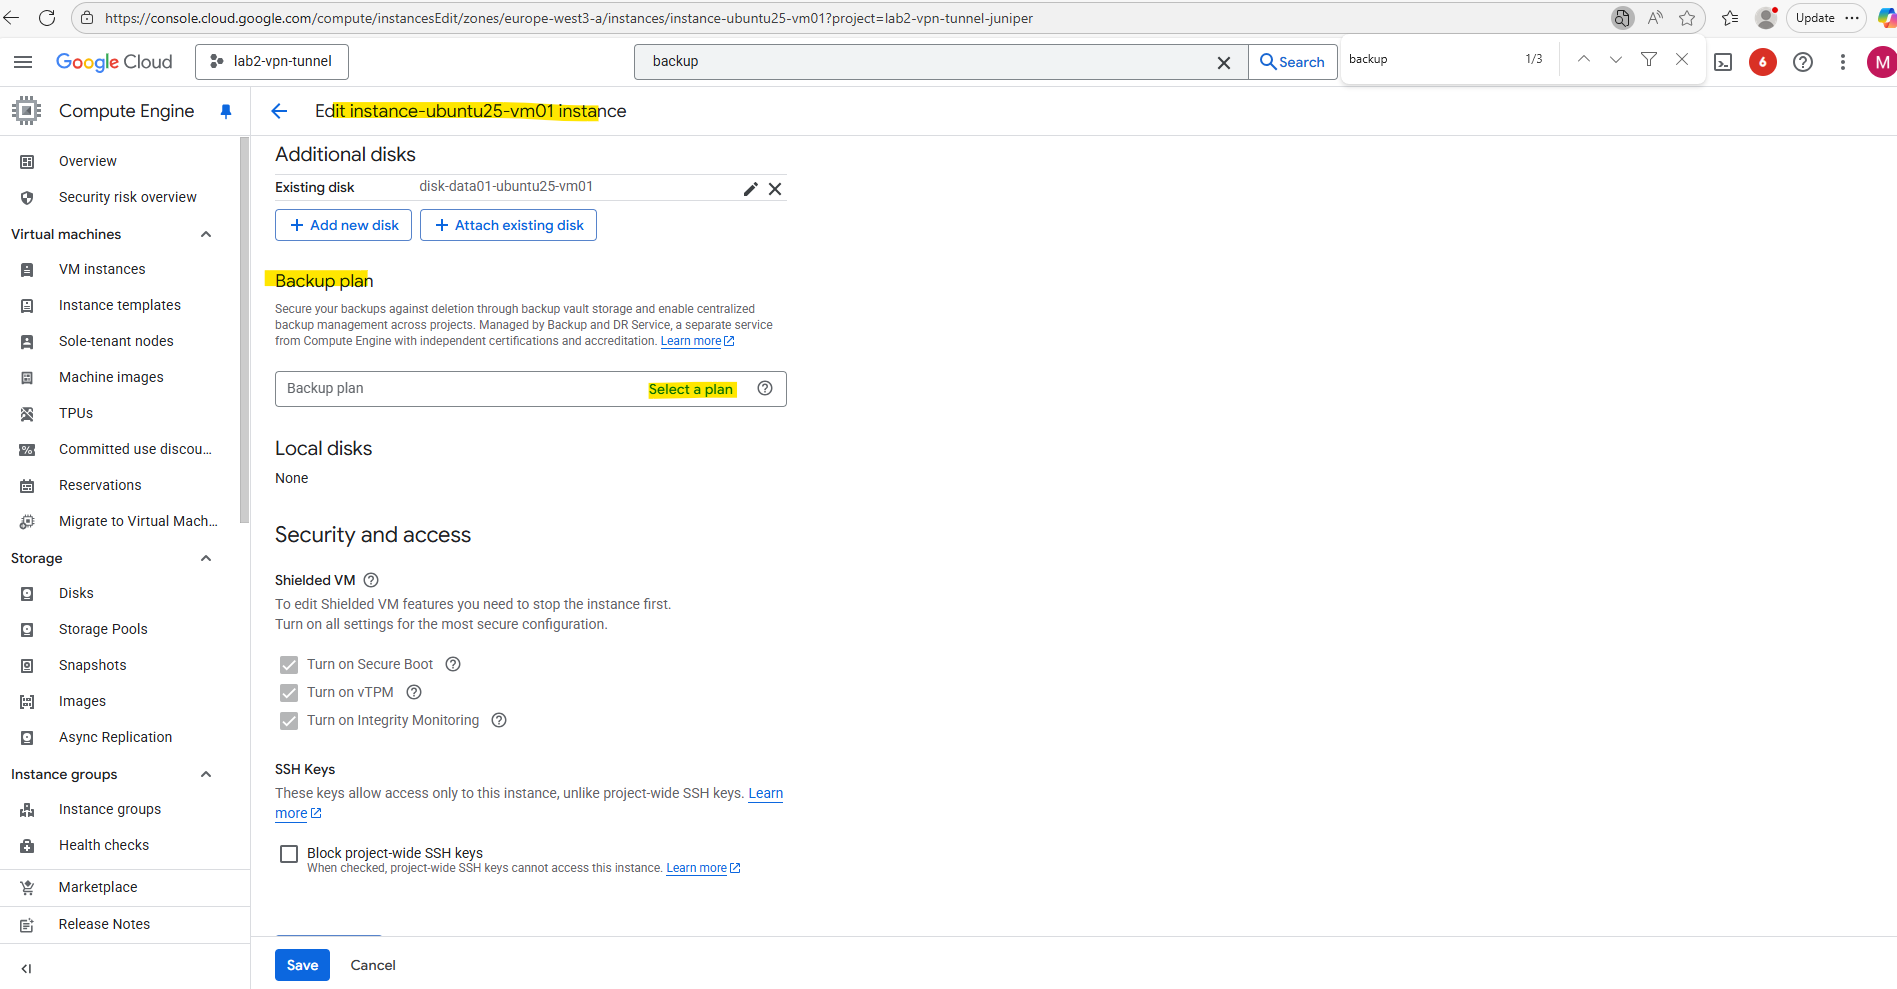
So far I have no existing backup plans in my project. We can now either create a new under Backup and DR Service as shown below or we use the default backup plan by clicking on the Show Default Backup Plan in the Table below.
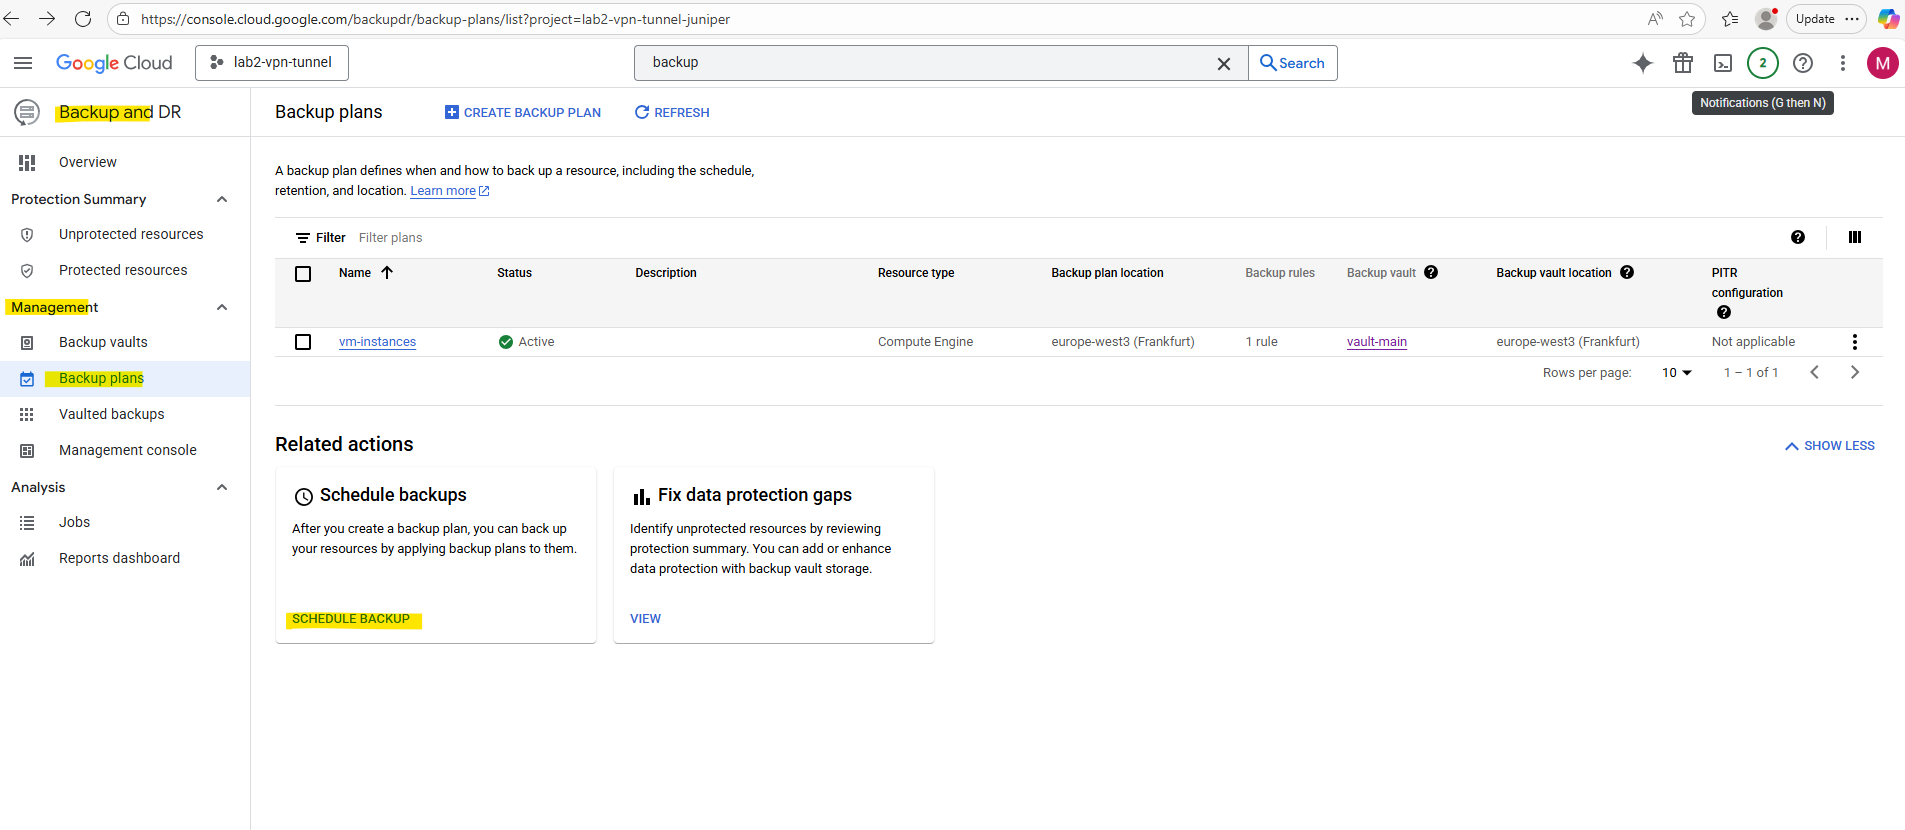
Under Backup and DR -> Management -> Backup plans I will create a new backup plane.
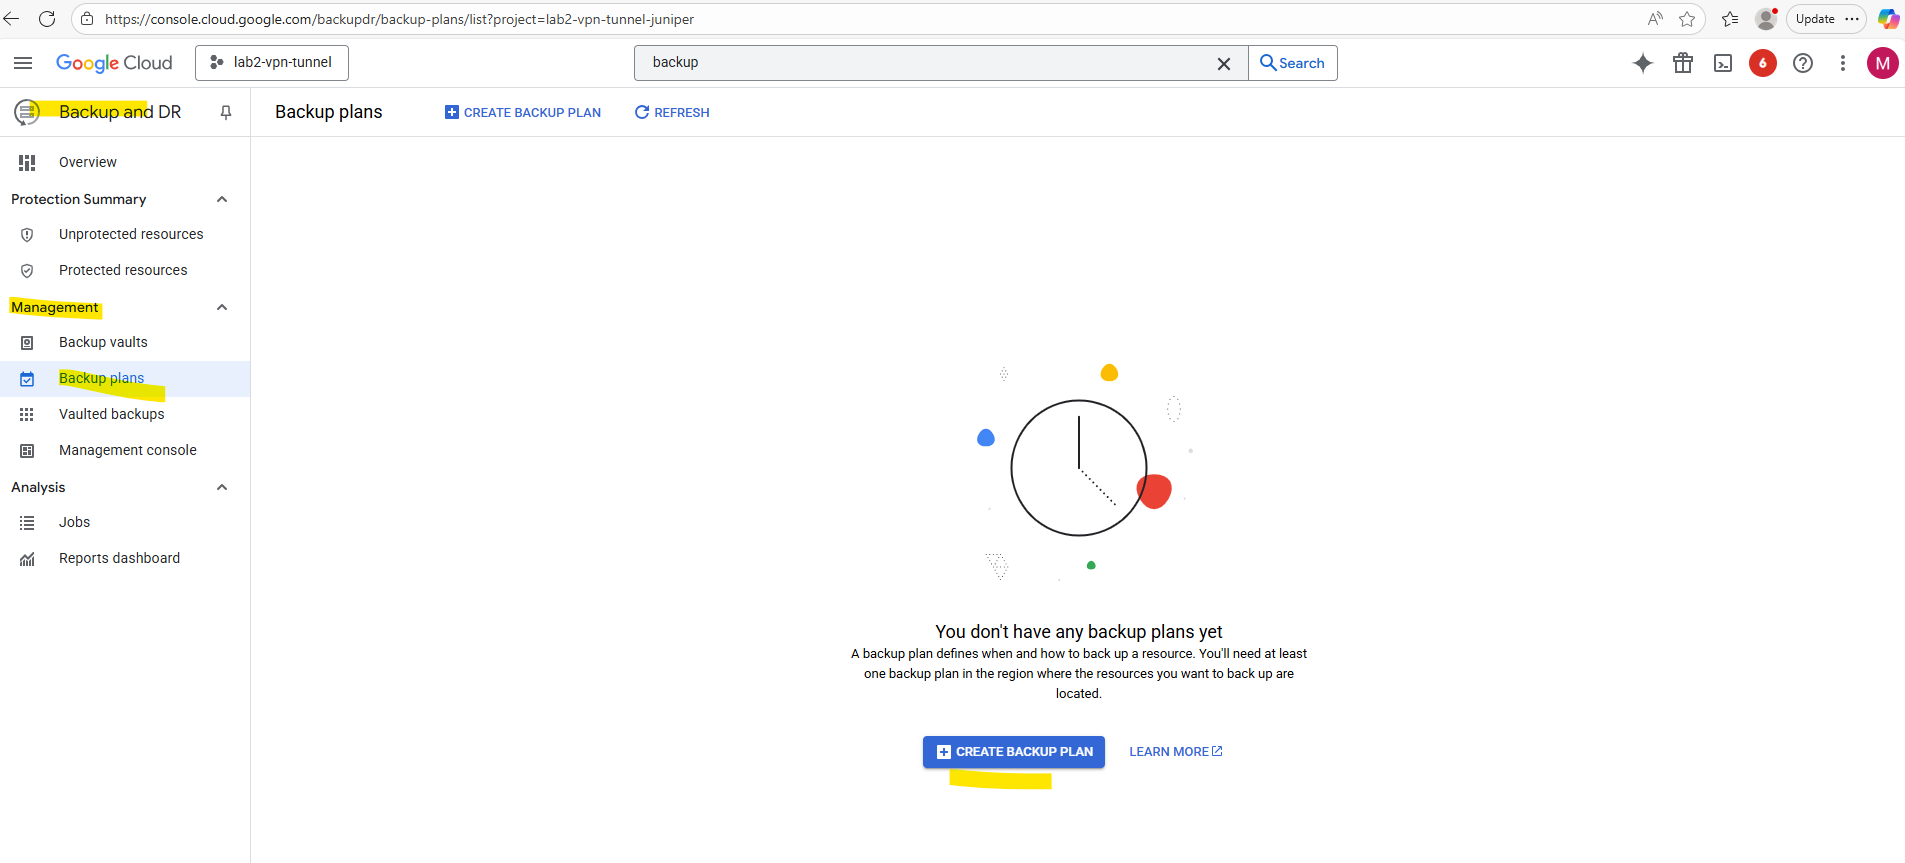
For the resource type I will choose Compute Engine.
Disks → protects standalone persistent disks without necessarily including the VM (good if the disk is used by multiple VMs or for data-only workloads).
Cloud SQL → protects managed Cloud SQL databases (PostgreSQL, MySQL, SQL Server) using native Cloud SQL backup APIs.
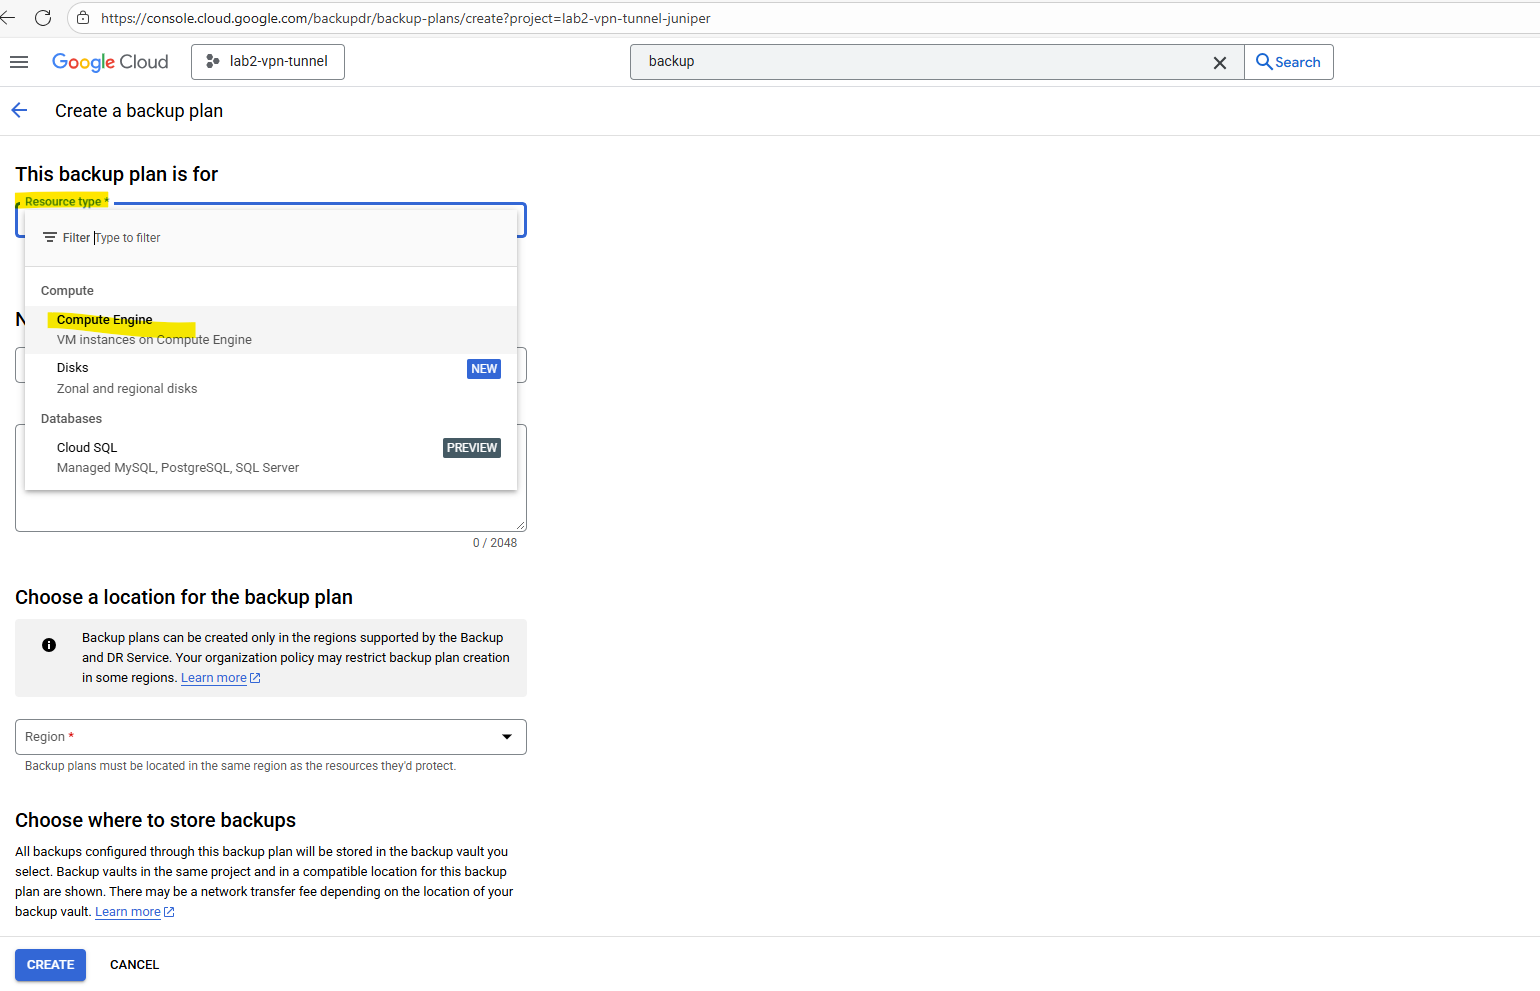
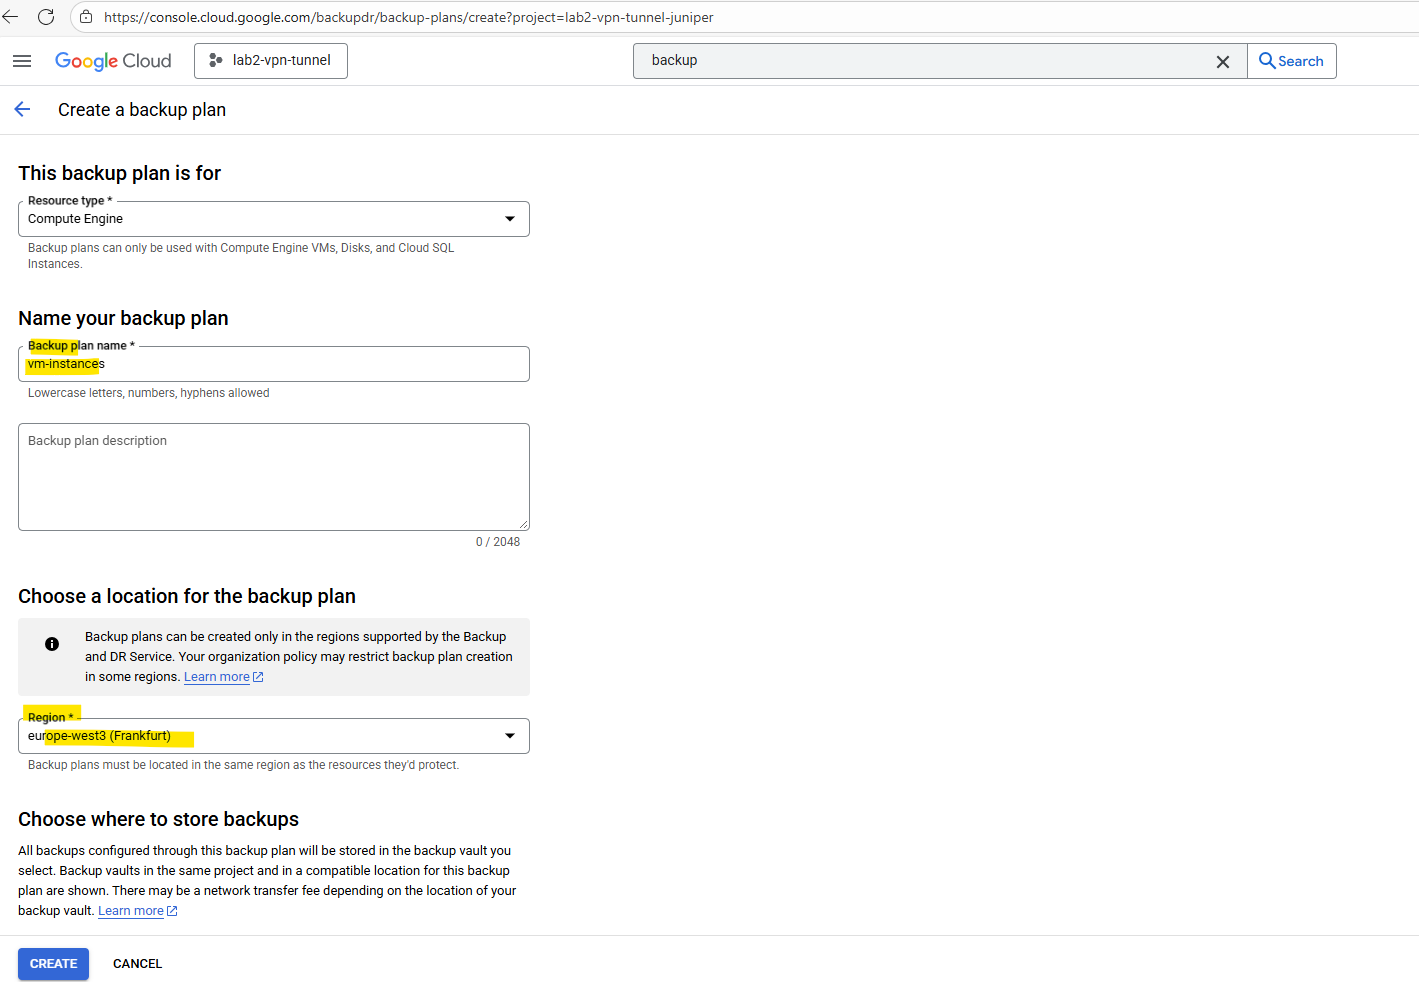
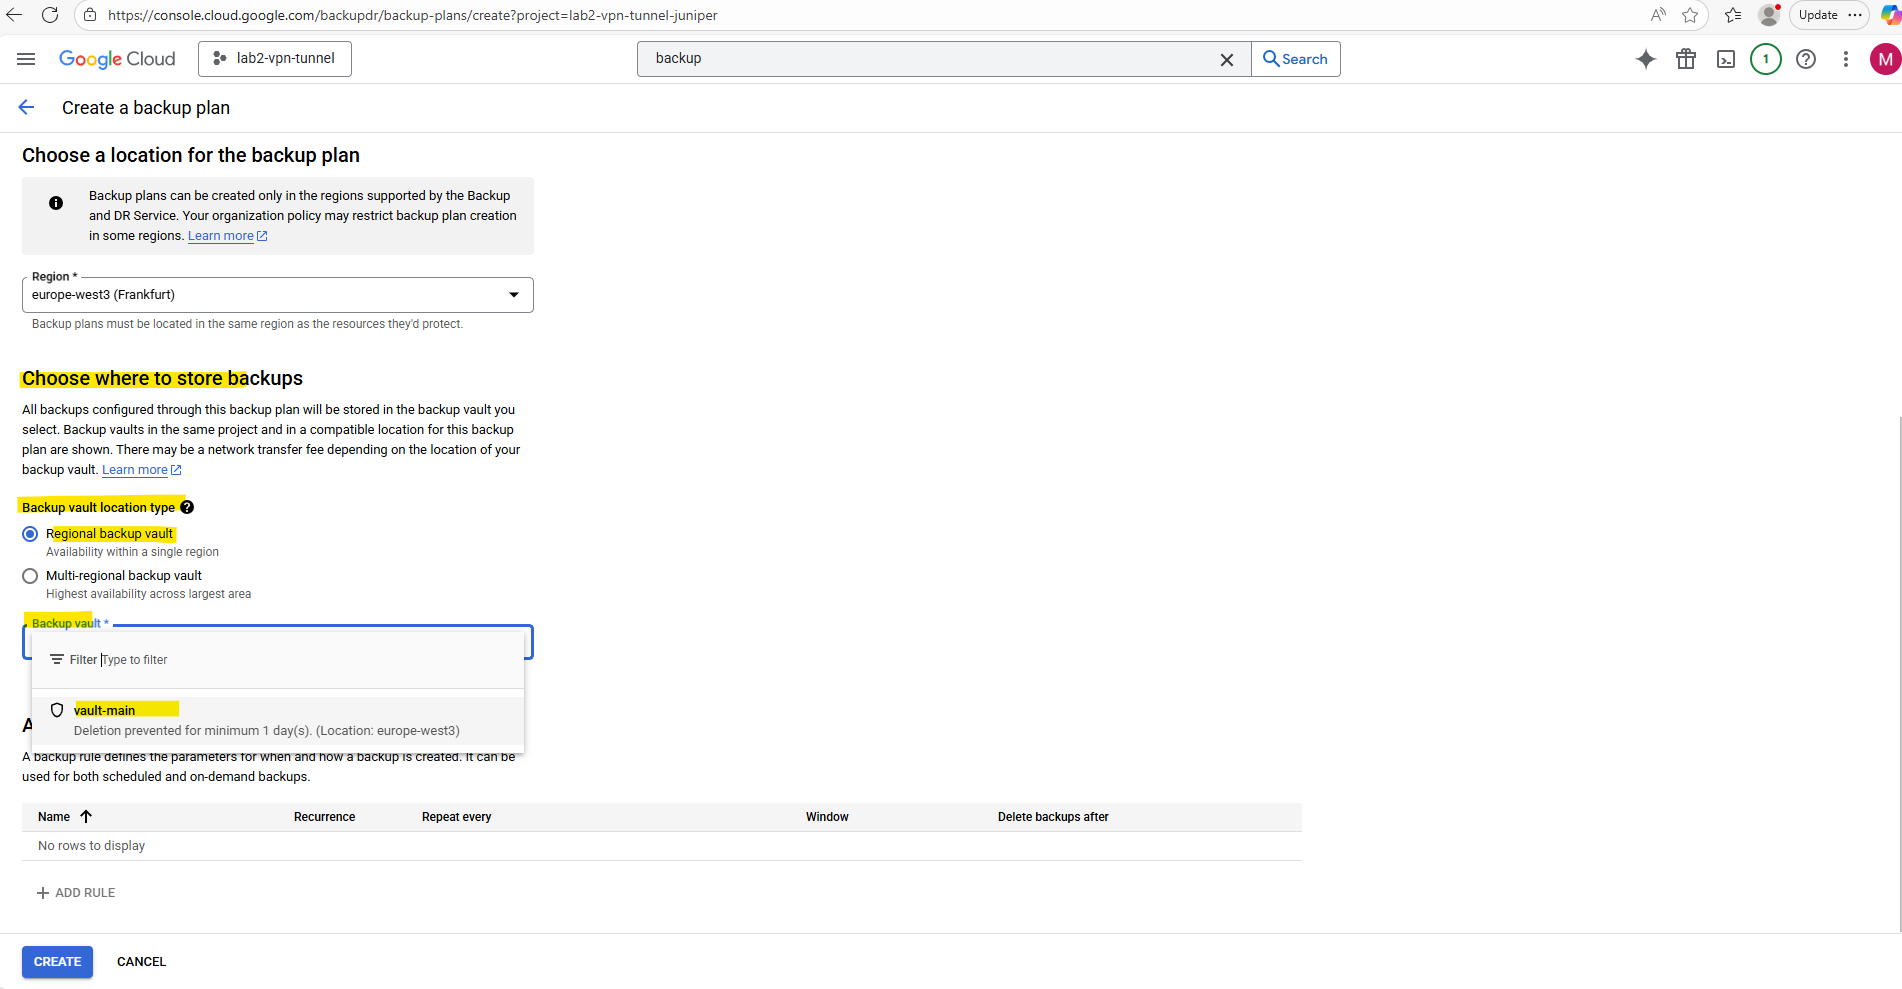
Enter a name and region for.
Backup plans can be created only in regions where the Backup and DR Service is available and where the resources to be backed up are located.
More about here https://cloud.google.com/backup-disaster-recovery/docs/cloud-console/backup-plan.
Choose a backup vault to store the backups of our VM instances. I will select our previously created new backup vault.
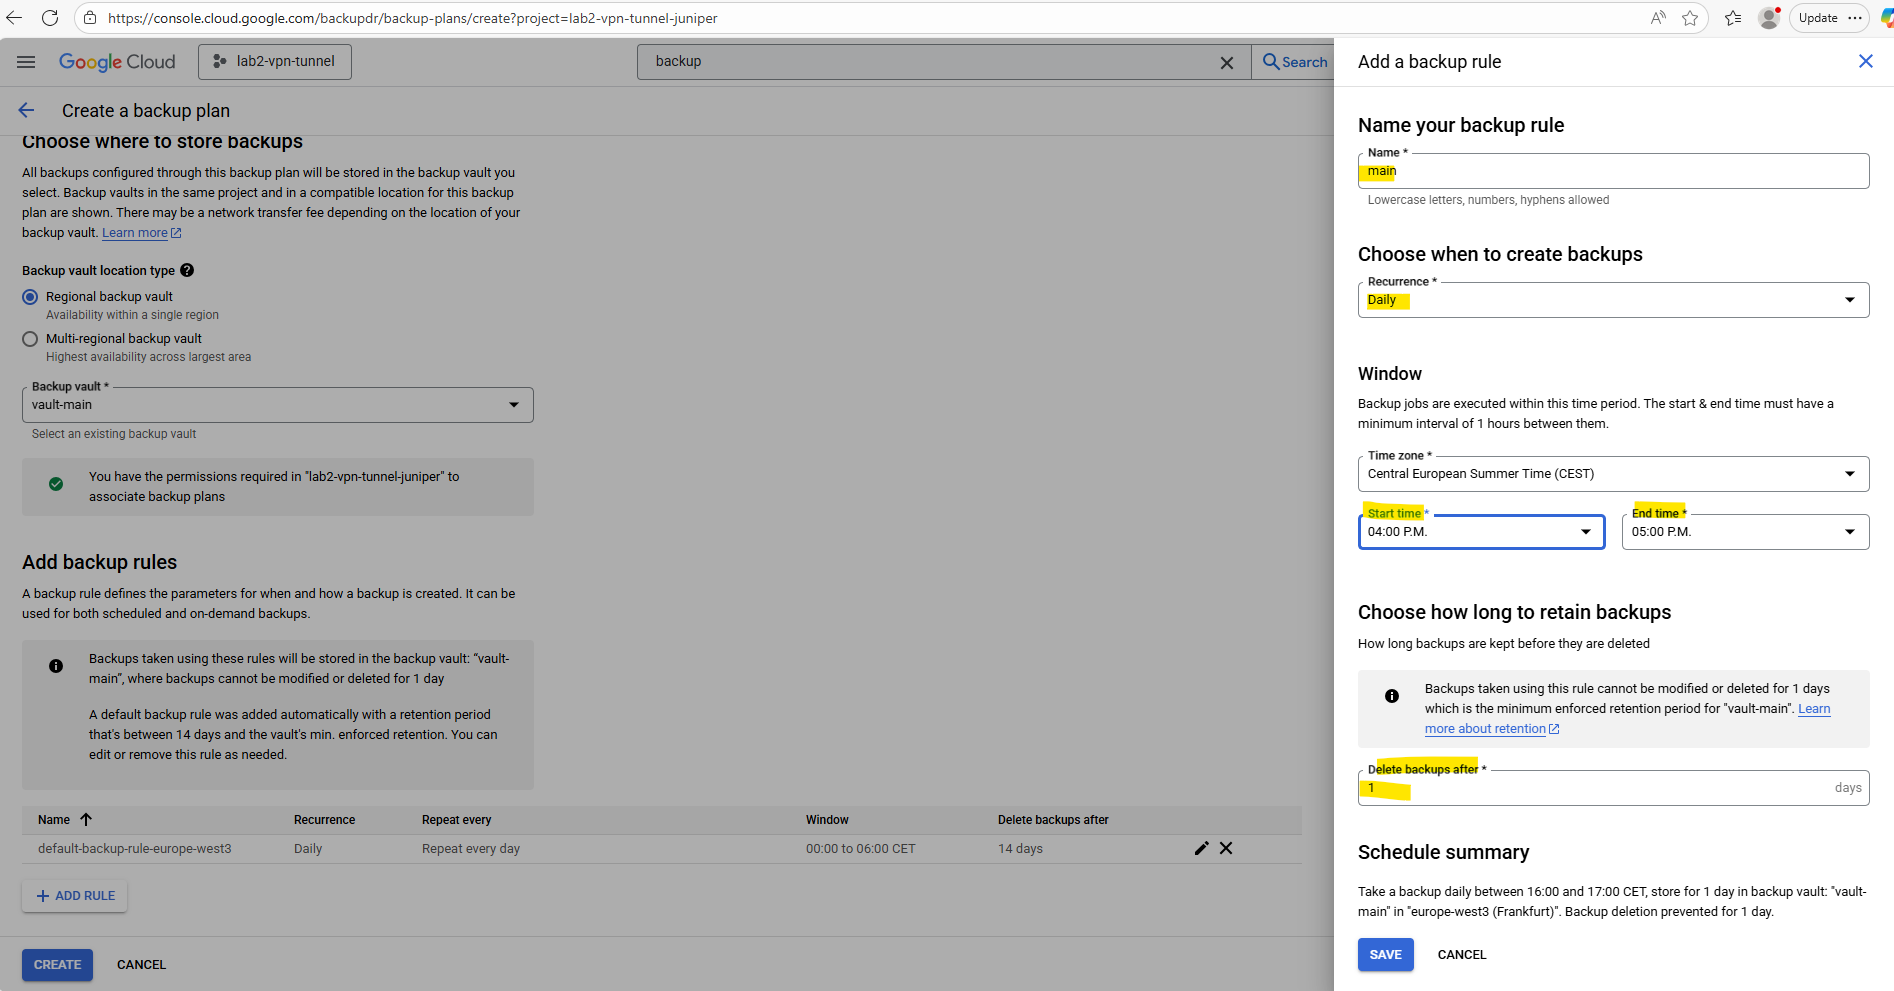
Finally we can add a new backup rule which defines when and how our backup is created. So far we just have a default backup rule added automatically.
Click on + Add Rule.

Adjust the backup plan rule settings to your needs.
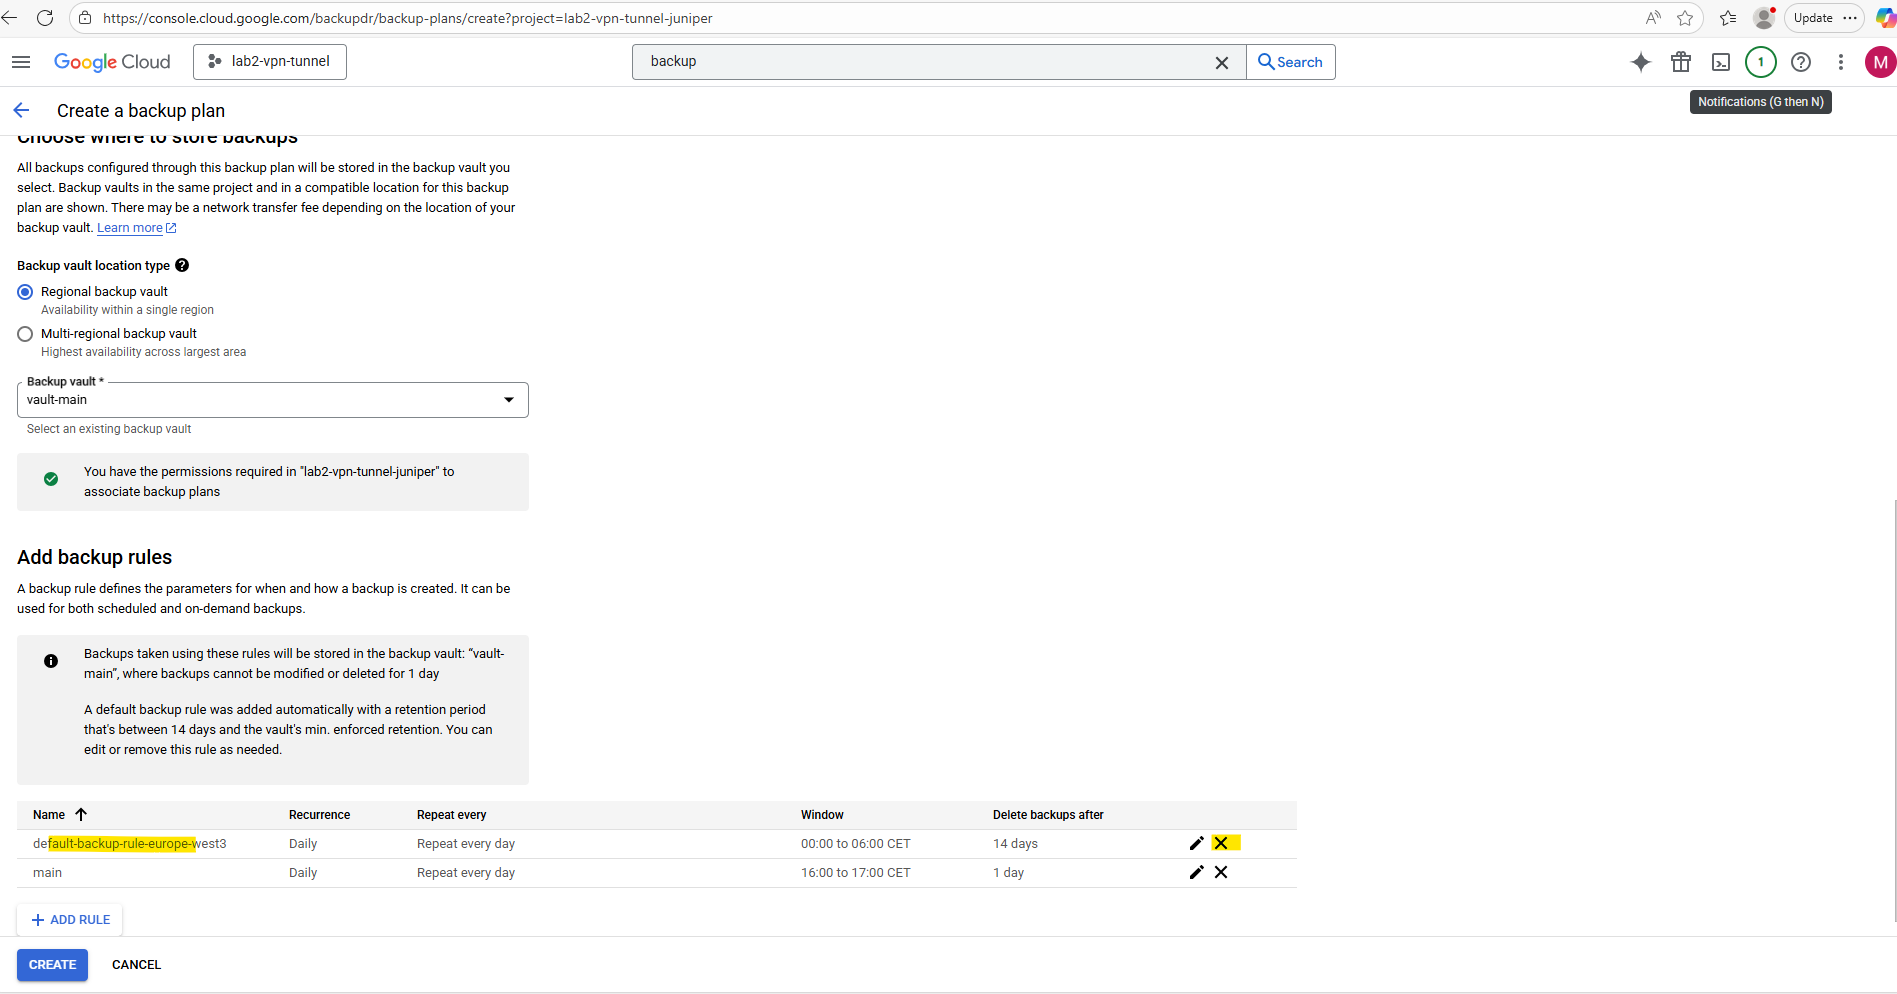
I will also remove the default rule.
Finally click on Create.
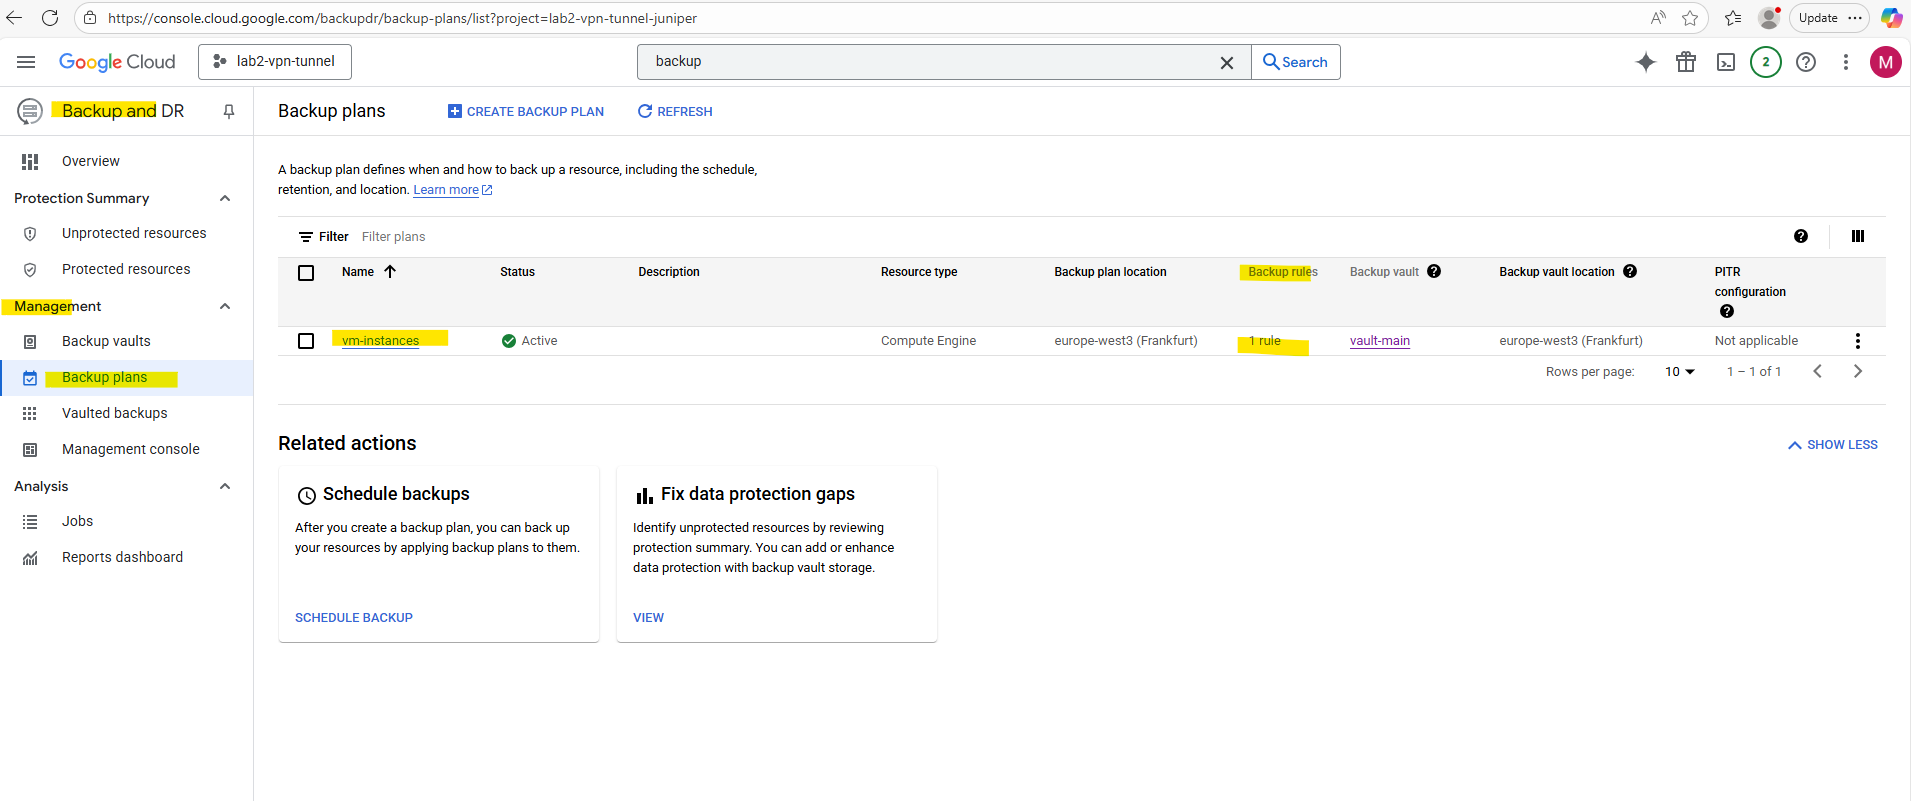
The new backup plan was created successful.
We can now either schedule a backup directly on the VM instance settings as shown below by selecting a backup plan below.
Or we can schedule backups directly on the backup plans blade by clicking below on Schedule Backup.
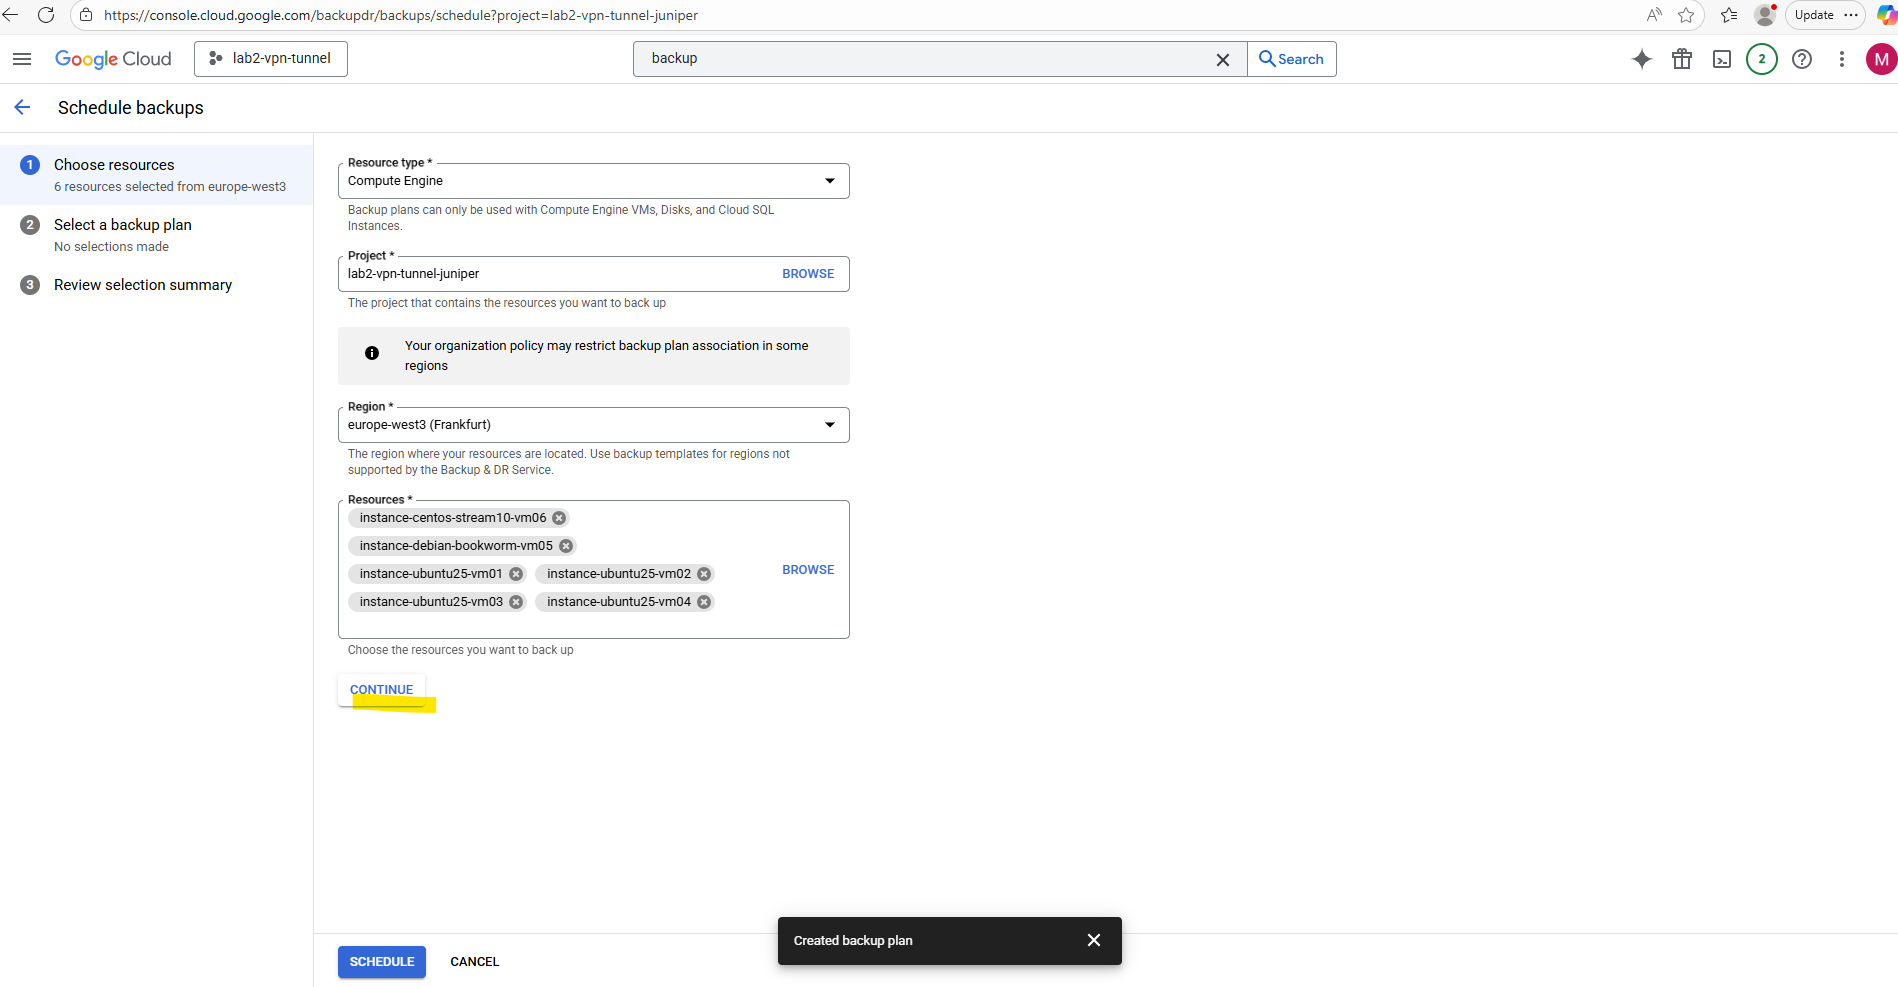
Here we can also select multiple VM instances to be protected by our backup plan.
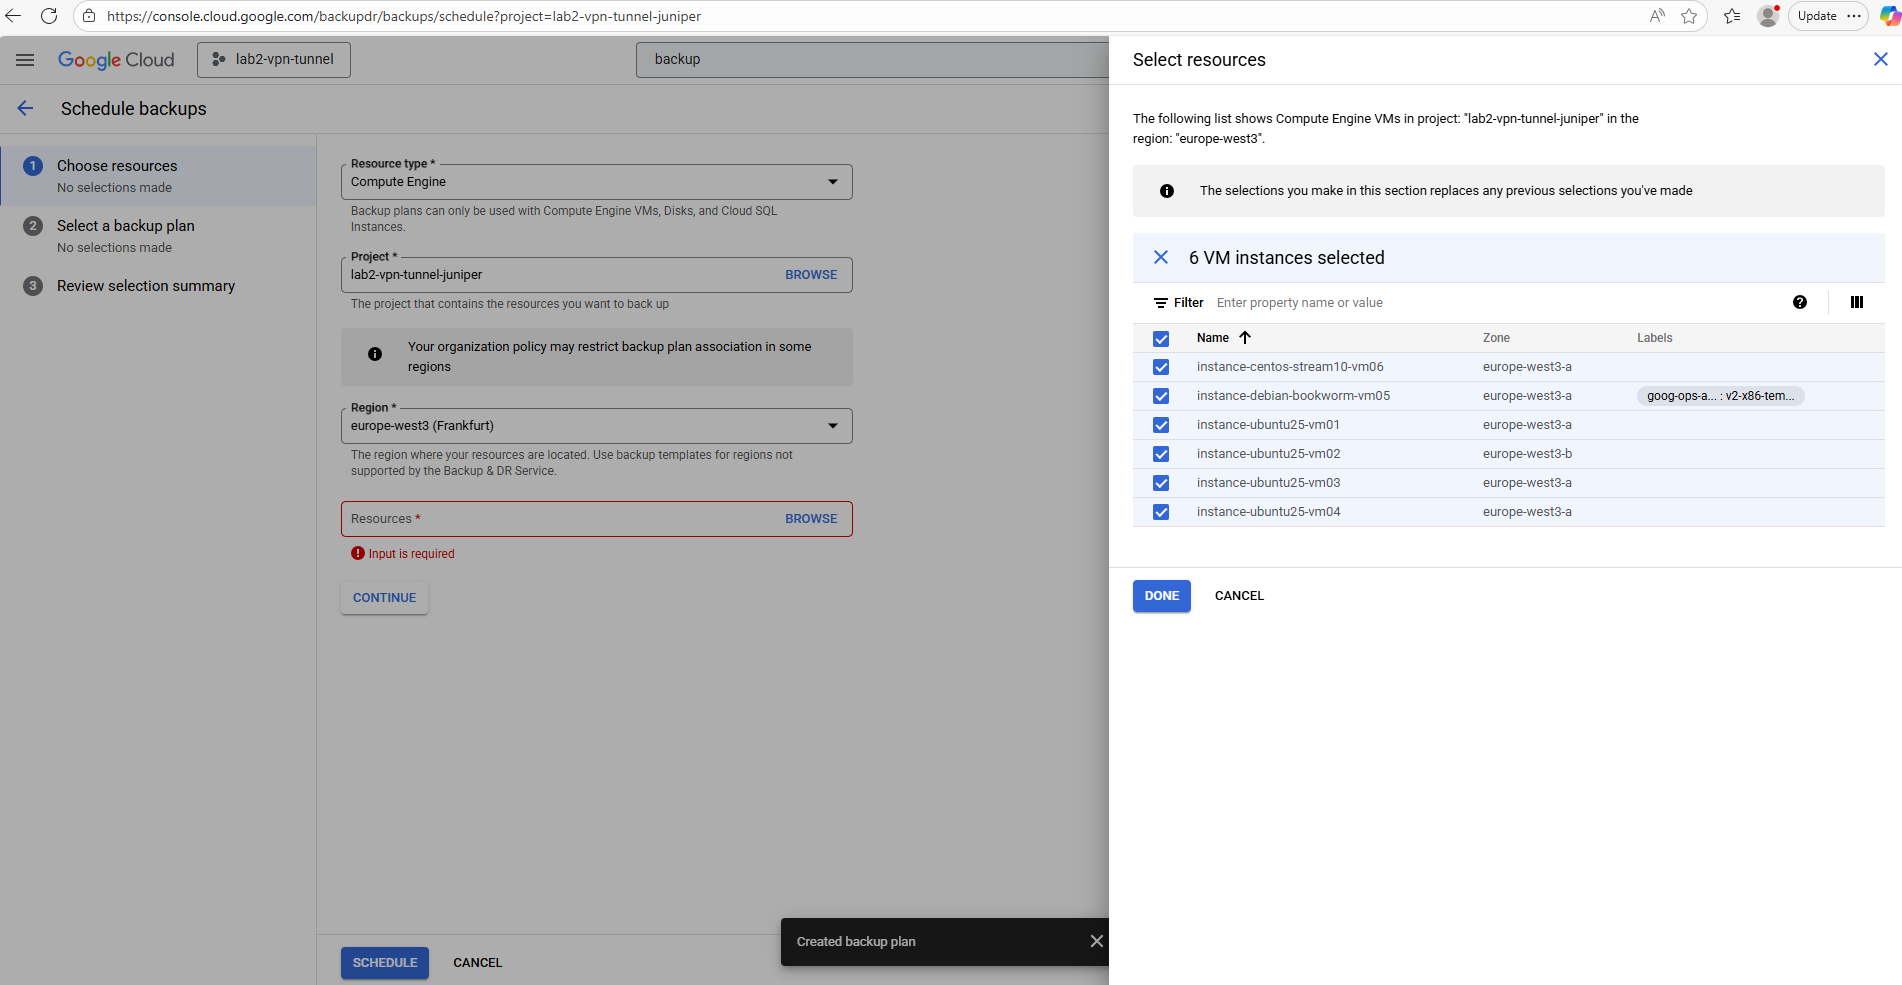
Click on Continue.
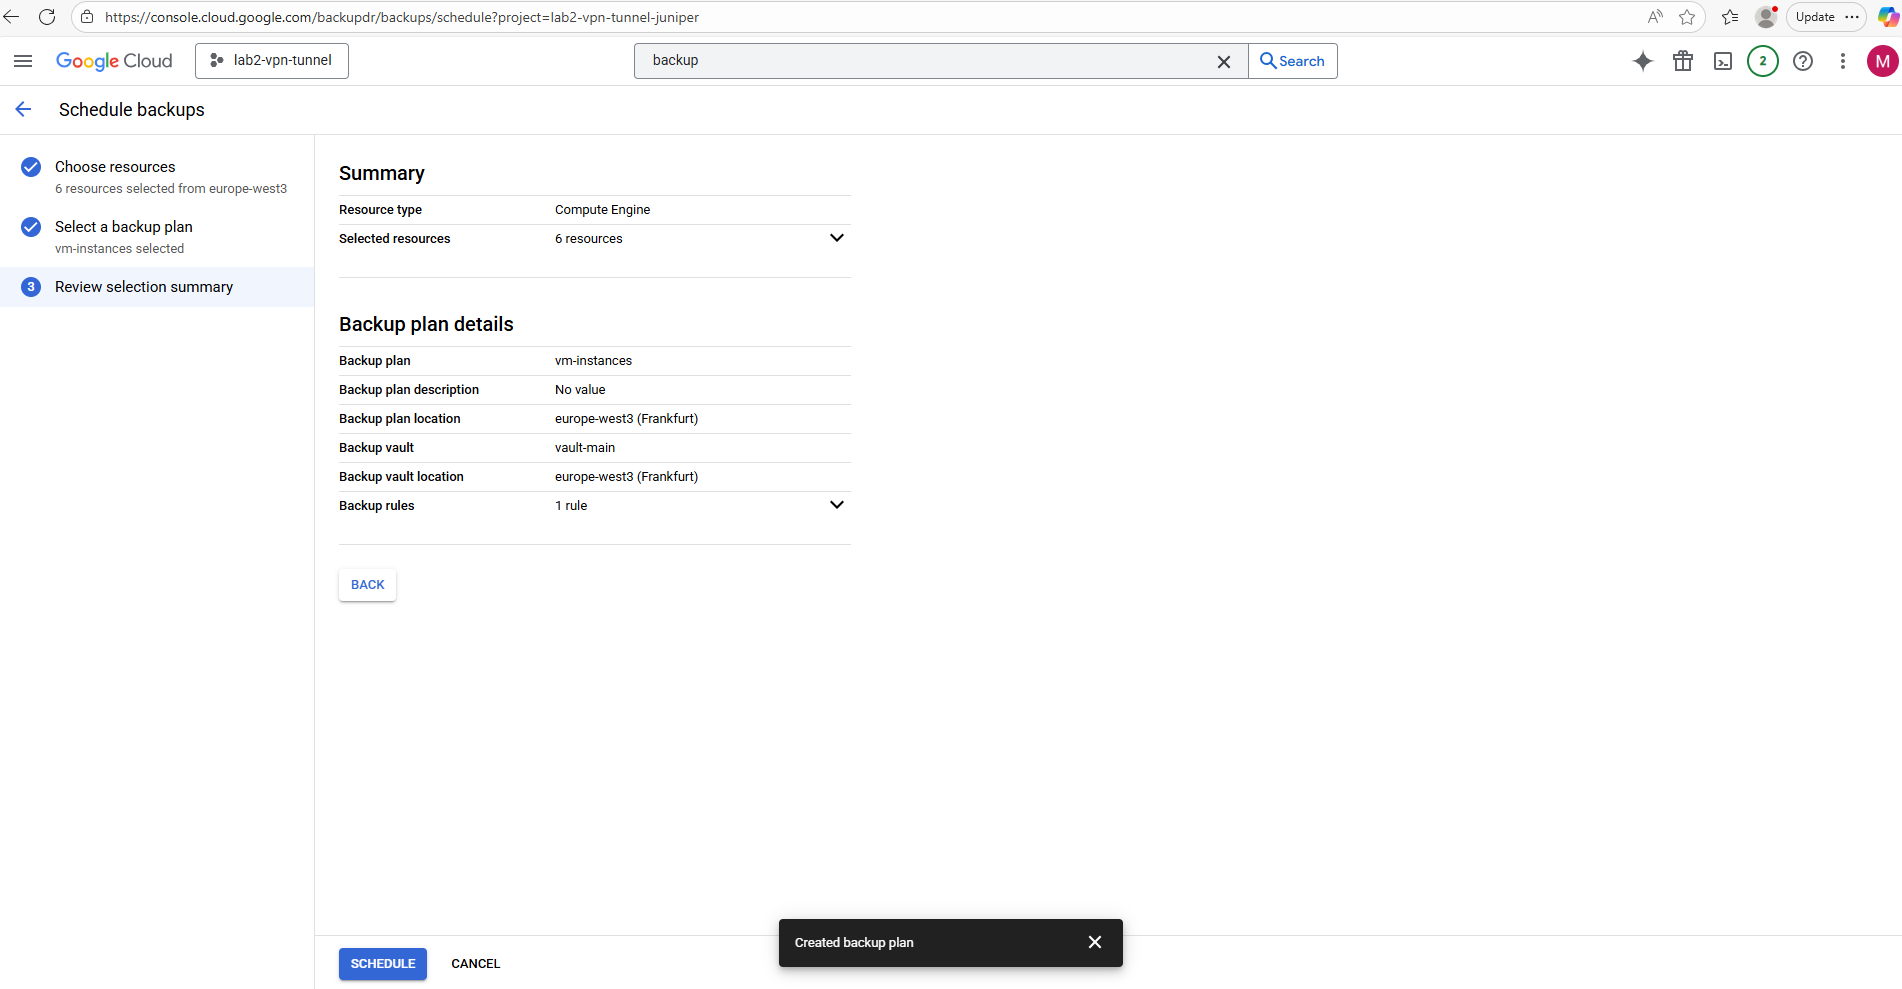
Select the desired backup plan and click on Continue.
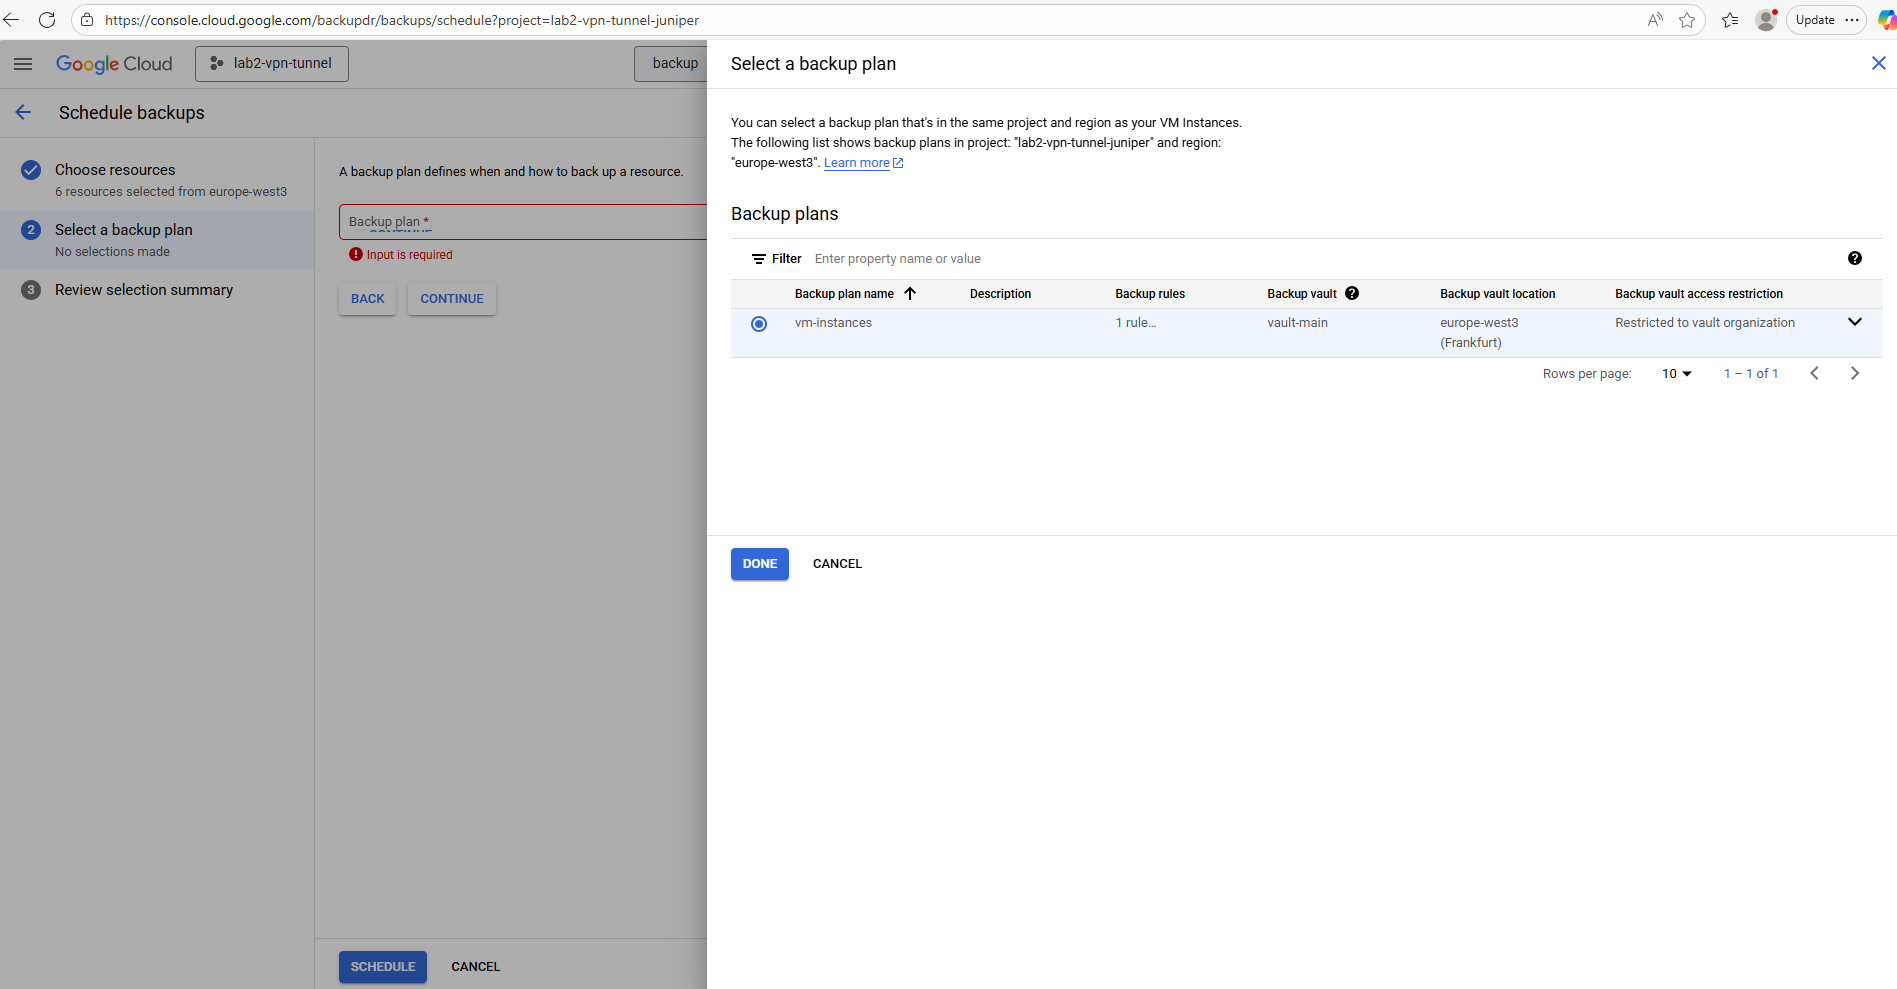
Finally click on Schedule.
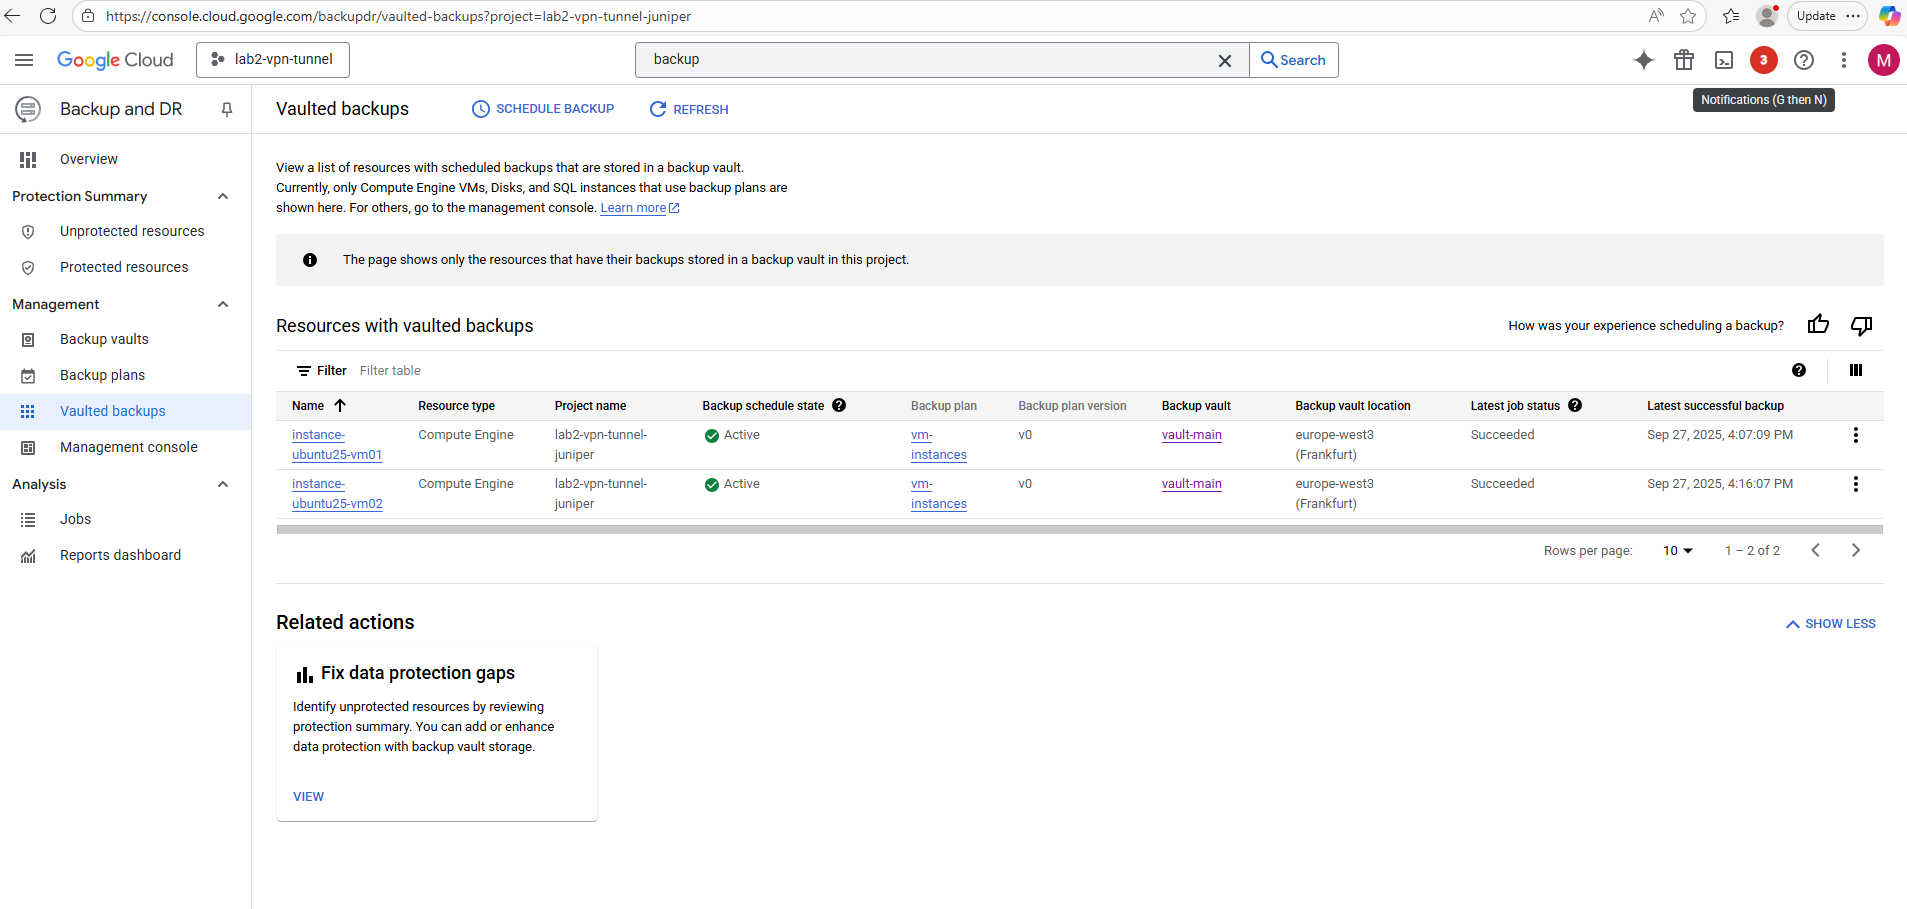
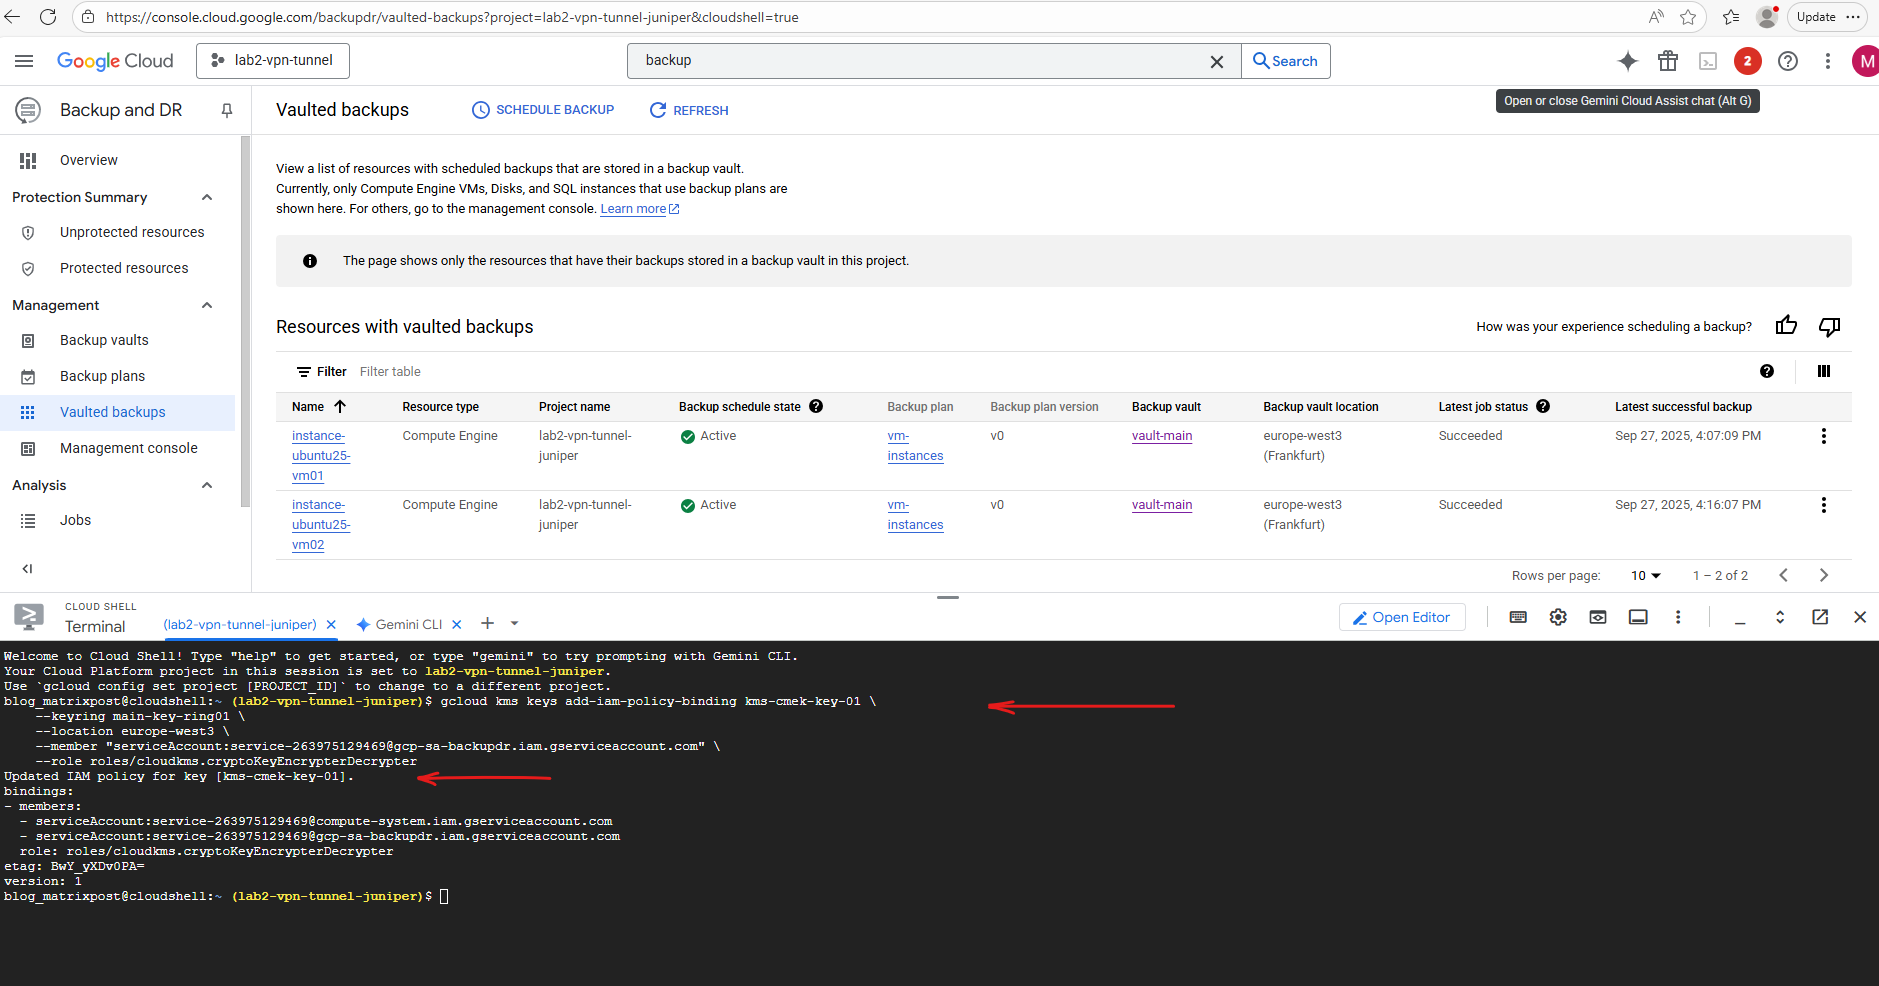
In my case just for two of the selected virtual machines the scheduled backup job was created successfully. More about the failed also below in the troubleshooting section.
Both VM instances which were backed up successfully are using the default Google-managed encryption key to decrypt its disks.
All other which failed using either a Customer-supplied encryption key (CSEK) or a Customer-managed encryption keys (CMEK) aka Cloud KMS.
Backup and DR Service doesn’t support backing up disks to a backup vault for disks with customer-managed encryption keys (CMEK) or customer-supplied encryption keys (CSEK).
Source: https://cloud.google.com/backup-disaster-recovery/docs/cloud-console/compute/disk-backup
The Backup Vault uses Google’s default encryption and does not support Customer-Managed Encryption Keys (CMEK) for the backup data itself.
More about disk encryption you will find in Part 4.
Creating a Backup Plan using Self-Managed Storage
Self-managed storage includes Persistent Disk snapshots and backups in Cloud Storage buckets that are created to store backup data in your Google Cloud projects.
The Backup and DR management console is an interface for managing backup to self-managed storage.
Troubleshooting
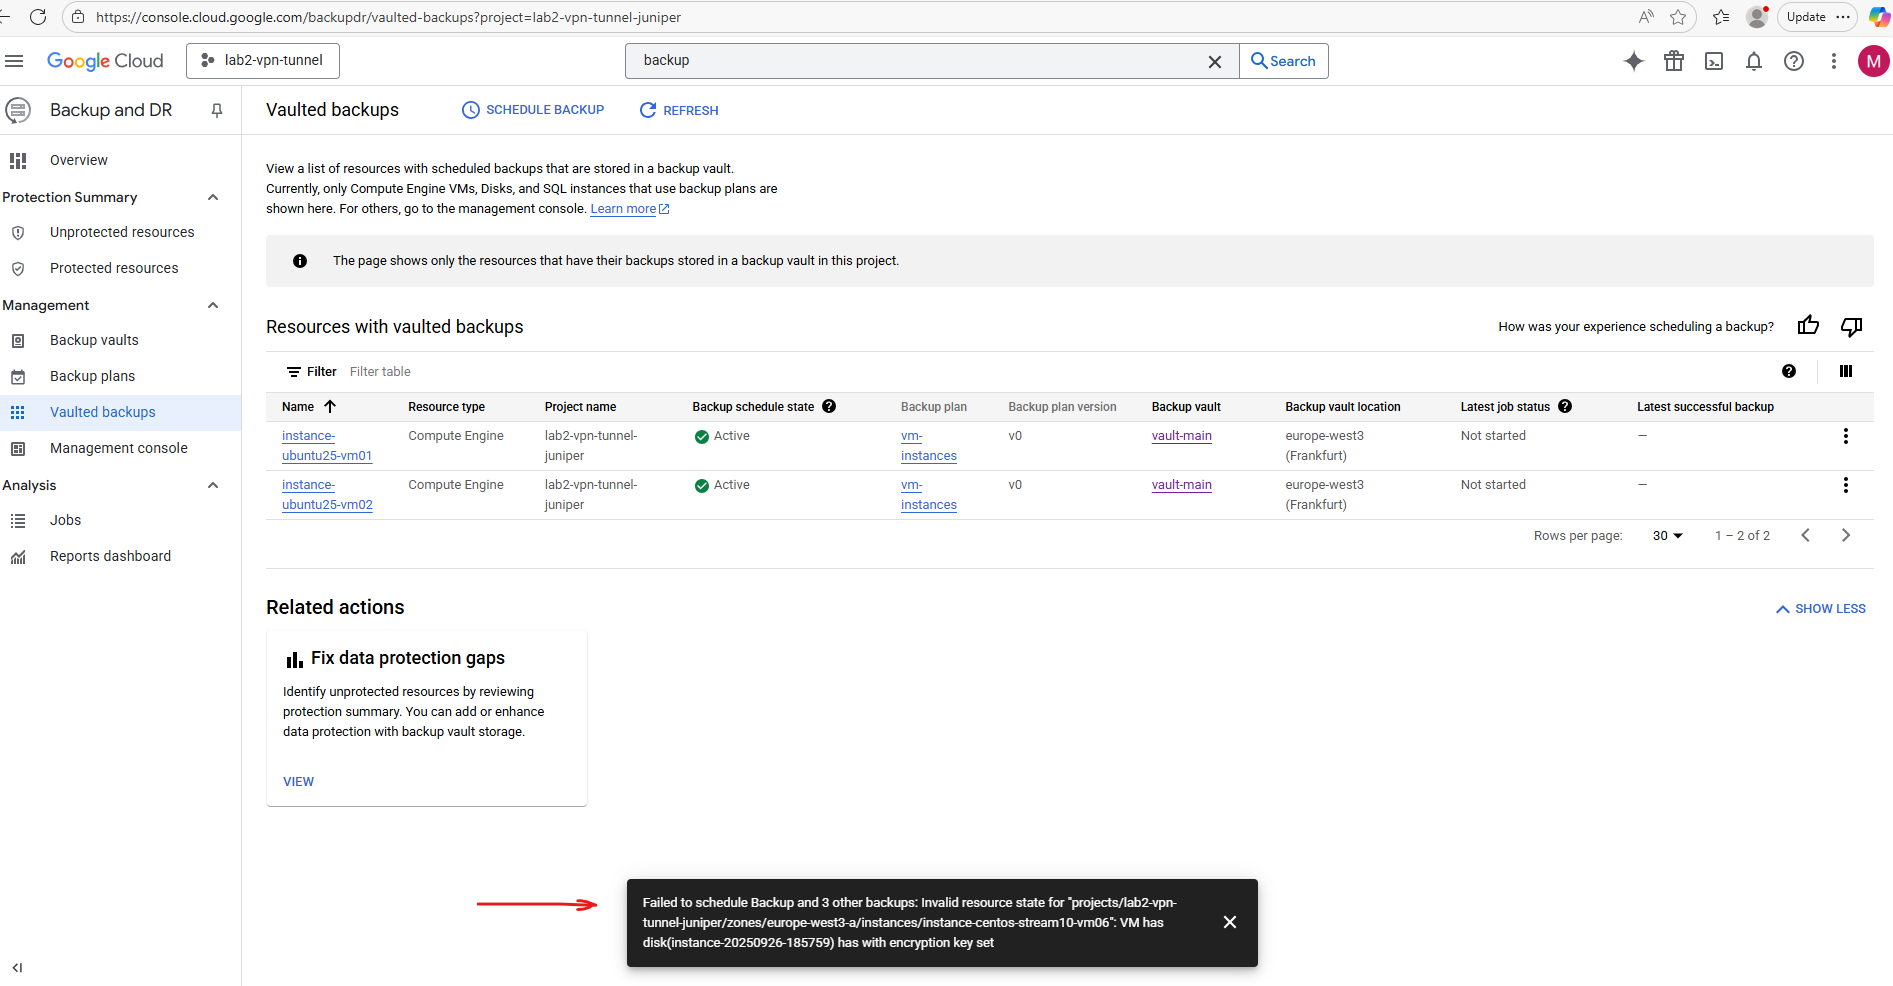
Below I was running into an error trying to create a backup schedule for VM instances they will use CSEK or CMEK (Cloud KMS) for disk encryption.
As already mentioned above, the reason is simply and its just because Backup and DR Service doesn’t support backing up disks to a backup vault for disks with CMEK or CSEK.
Backup and DR Service doesn’t support backing up disks to a backup vault for disks with customer-managed encryption keys (CMEK) or customer-supplied encryption keys (CSEK).
Source: https://cloud.google.com/backup-disaster-recovery/docs/cloud-console/compute/disk-backup
I was first checking if this is just a permission issue before I find the article about that this is in general not supported. So below I will leave this troubleshooting section about how to check if permissions are set correctly just for the showing how to check this.
Failed to schedule backup: Invalid resource state. VM has disk with encryption key set.
Backup and DR in GCP does not support disks encrypted with CSEK or CMEK as shown in Part 4. Use Google-managed encryption keys or a backup plan using self-managed storage if you want them protected by backup plans.
Self-managed storage includes Persistent Disk snapshots and backups in Cloud Storage buckets that are created to store backup data in your Google Cloud projects.
Source: https://cloud.google.com/backup-disaster-recovery/docs/concepts/backup-dr
Permissions were already set to encrypt and decrypt CMEK keys, below just for the sake of completeness how we can check and assign permissions for the corresponding service account.
Locate the tenant project’s Compute Engine service agent by using the TENANT_PROJECT_NUMBER value that’s in the status reason message of your failed backup operation. For example:
service-TENANT_PROJECT_NUMBER@compute-system.iam.gserviceaccount.com.
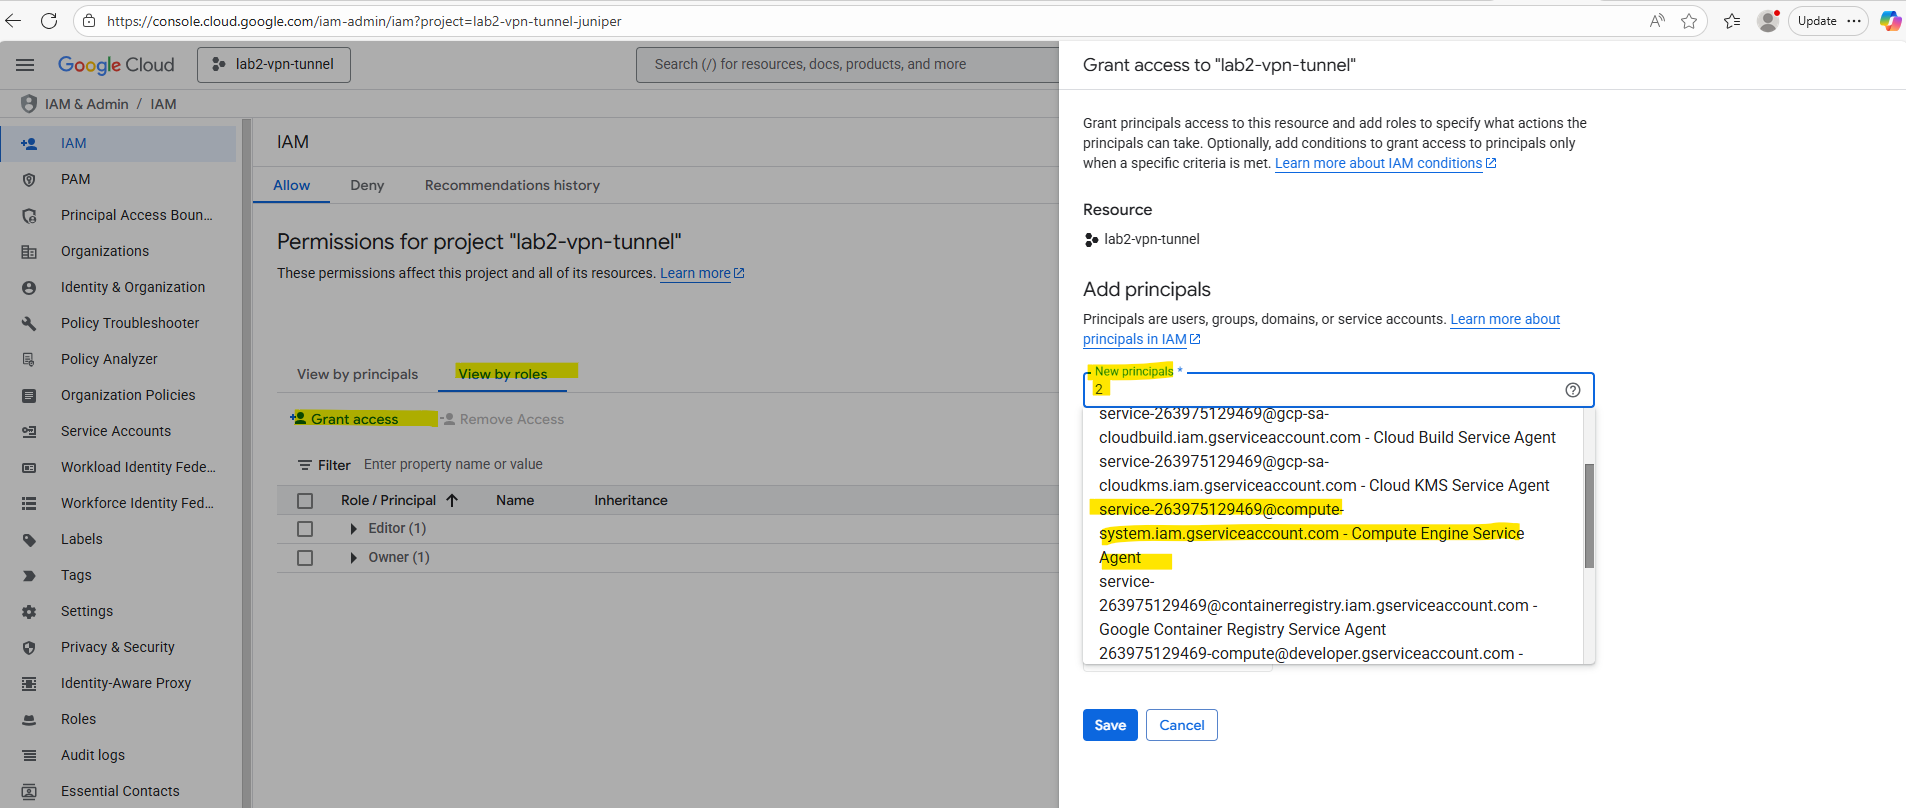
To determine the Compute Engine service agent we can also search for the project number under IAM & Admin -> IAM -> view by roles like shown below.
So in my case this is service-263975129469@compute-system.iam.gserviceaccount.com.
Locate the following CMEK information used for your encrypted Persistent Disk:
- Key name: the name of your encryption key.
- Key ring: the name of the key ring where your key resides.
- Location: the Google Cloud location where your key is located. For example, global or us-central1.
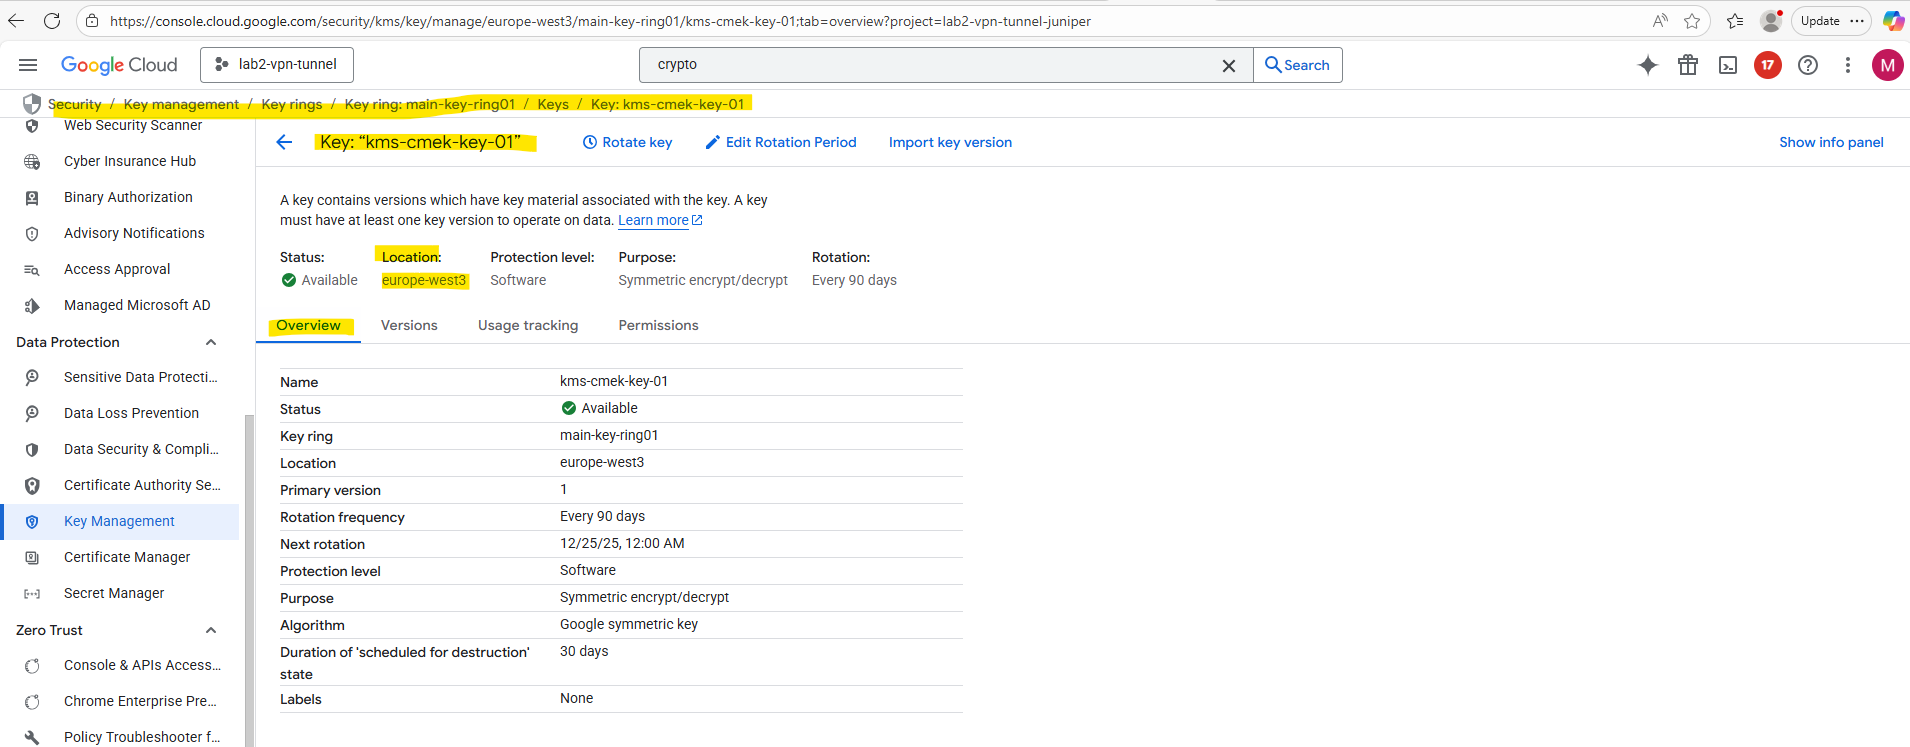
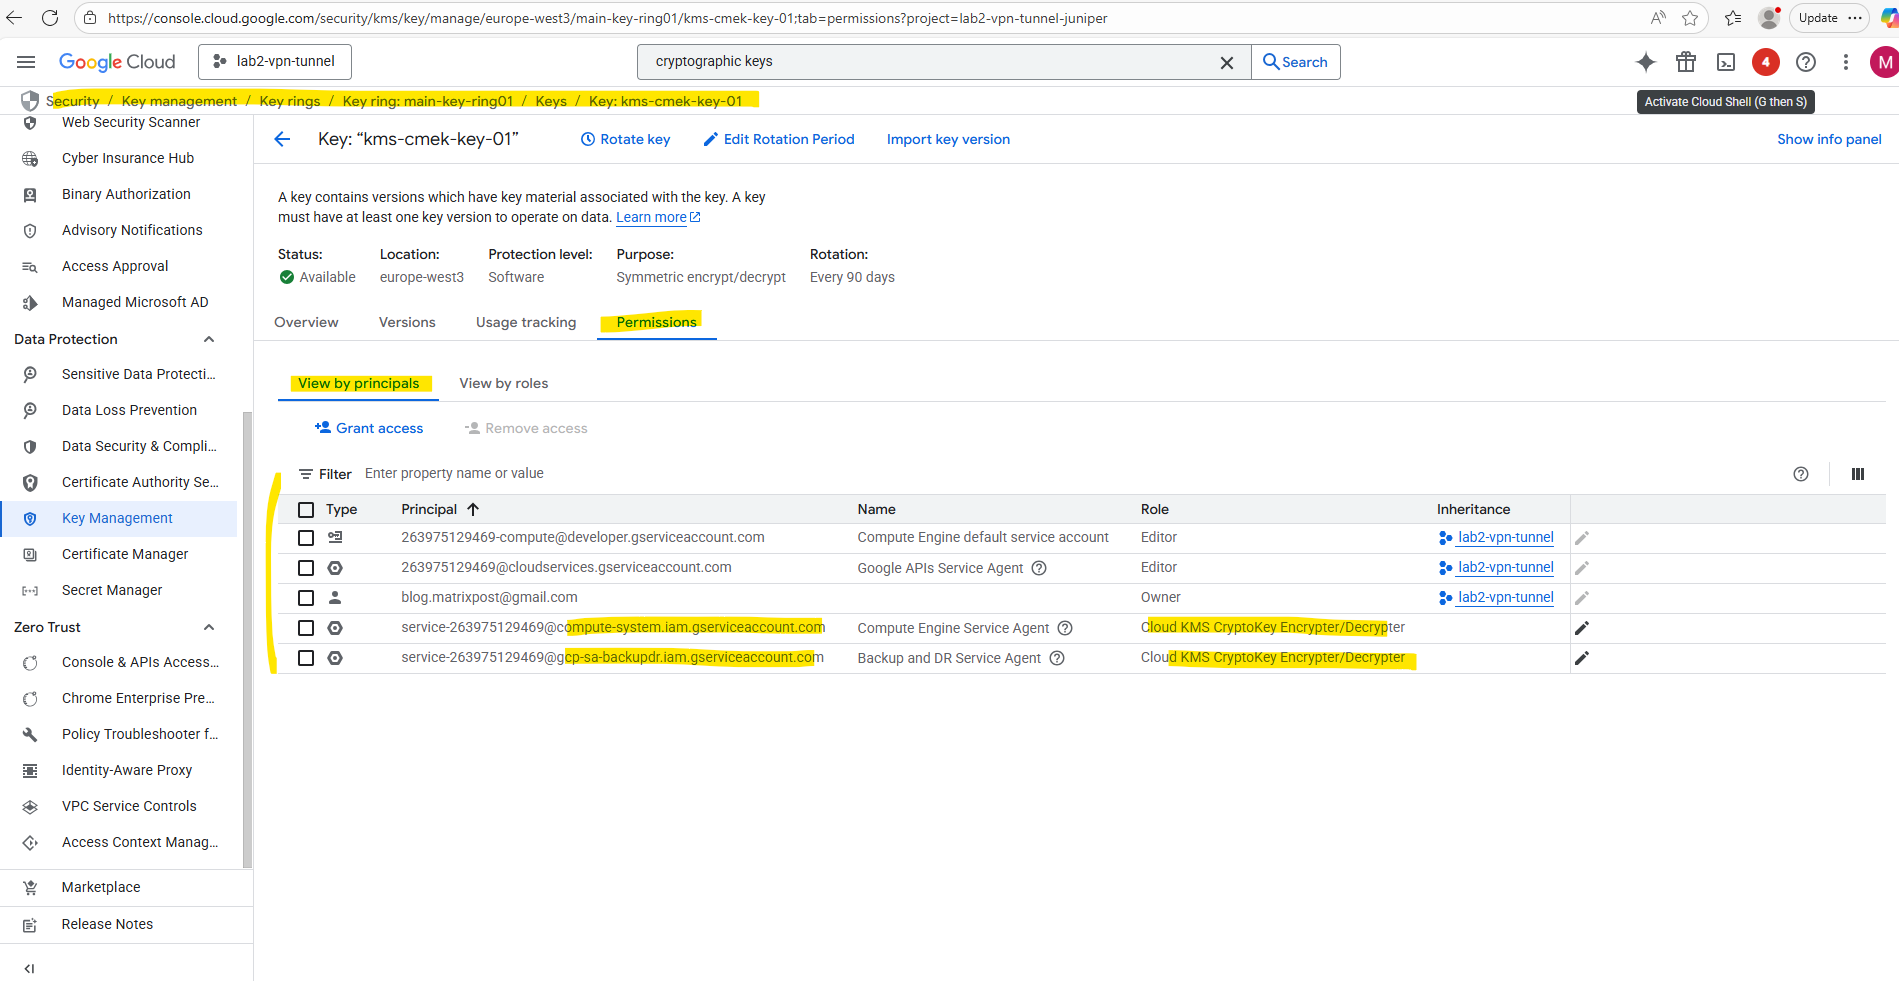
In my case the key name is kms-cmek-key-01 and the key ring name is main-key-ring01.
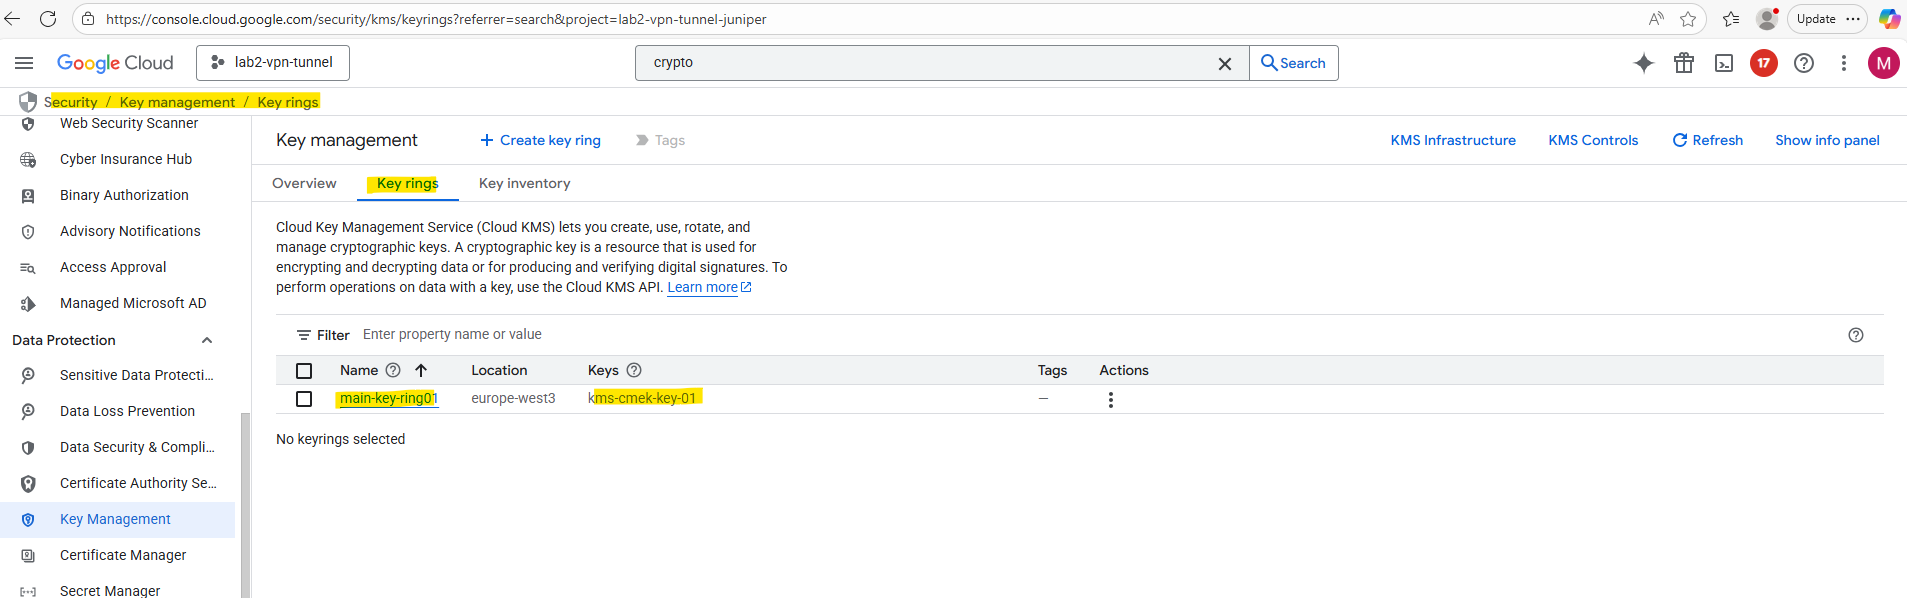
The location of the key is europe-west3.
To grant the tenant project’s Compute Engine service agent the roles/cloudkms.cryptoKeyEncrypterDecrypter role on your CMEK, run the gcloud kms keys add-iam-policy-binding command using Google Cloud CLI:
gcloud kms keys add-iam-policy-binding KEY_NAME \
    --keyring KEY_RING \
    --location LOCATION \
    --member "serviceAccount:service-TENANT_PROJECT_NUMBER@compute-system.iam.gserviceaccount.com" \
    --role roles/cloudkms.cryptoKeyEncrypterDecrypter

gcloud kms keys add-iam-policy-binding kms-cmek-key-01 \
    --keyring main-key-ring01 \
    --location europe-west3 \
    --member "serviceAccount:service-263975129469@compute-system.iam.gserviceaccount.com" \
    --role roles/cloudkms.cryptoKeyEncrypterDecrypter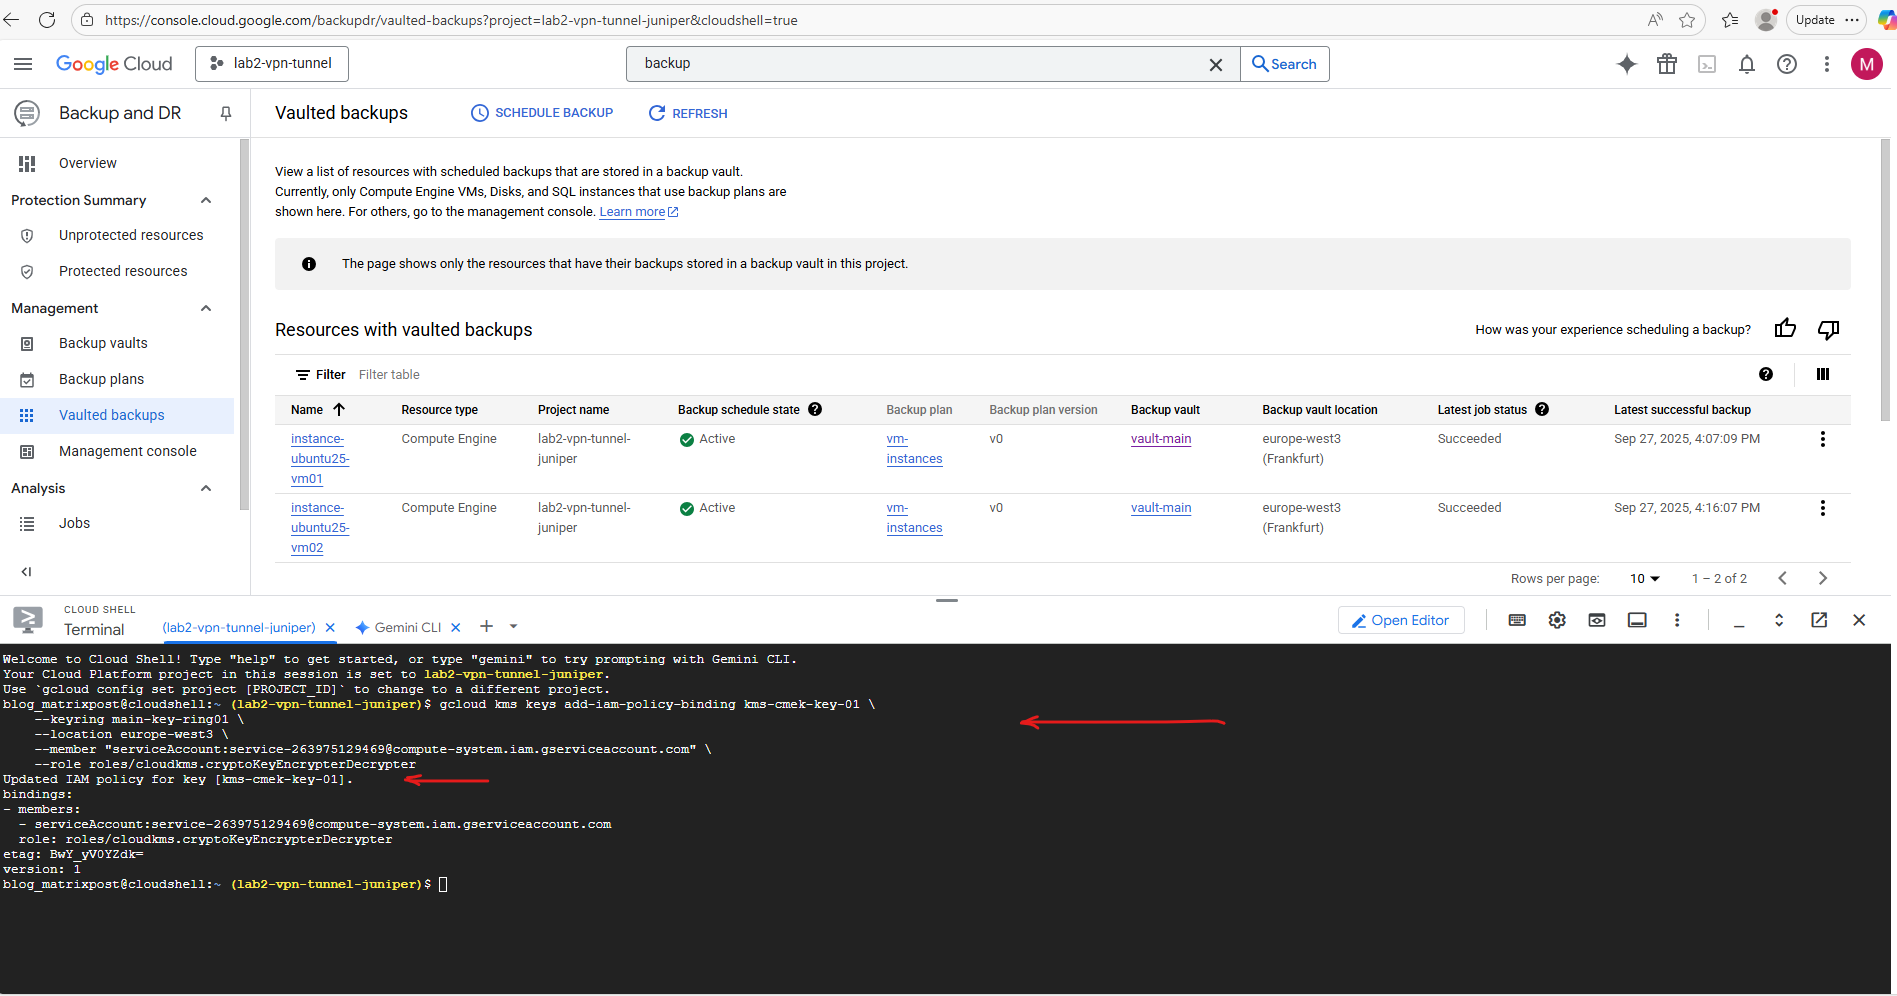
The same for the Backup and Disaster Recovery account.
serviceAccount:service-263975129469@gcp-sa-backupdr.iam.gserviceaccount.com
We can see/assign assigned permissions also directly on the key in the permissions tab as shown below.
Still failed to schedule the backup.

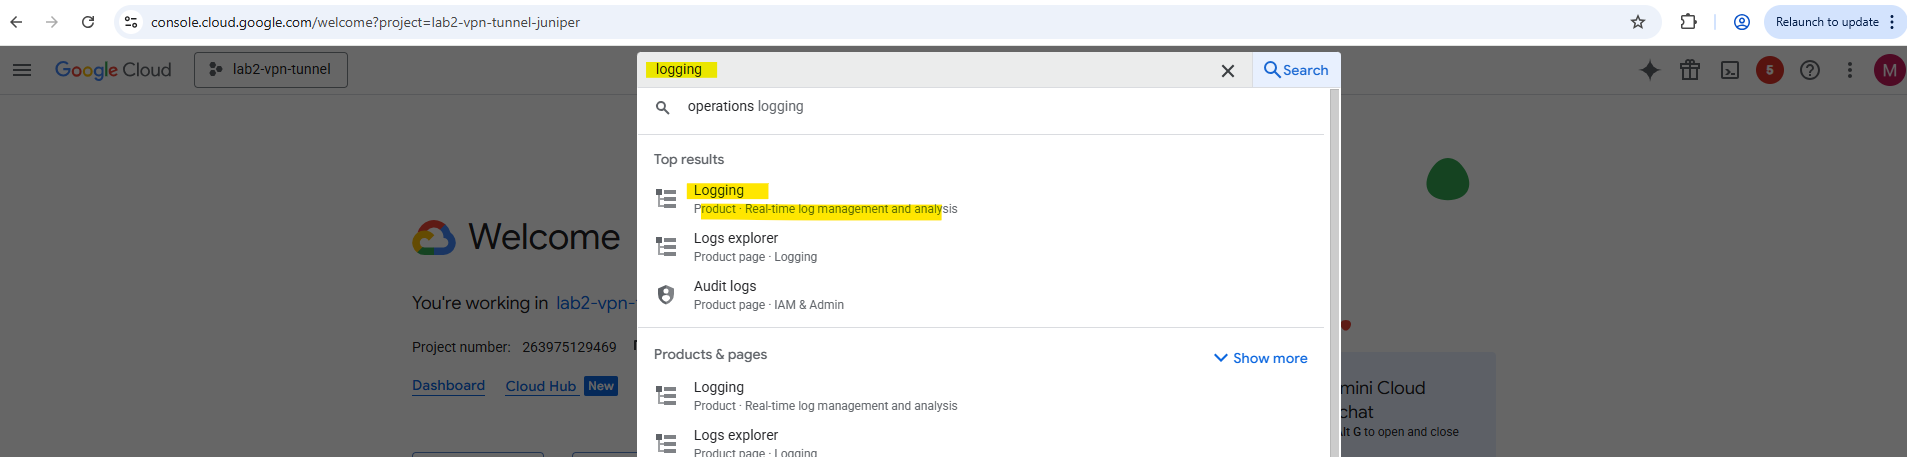
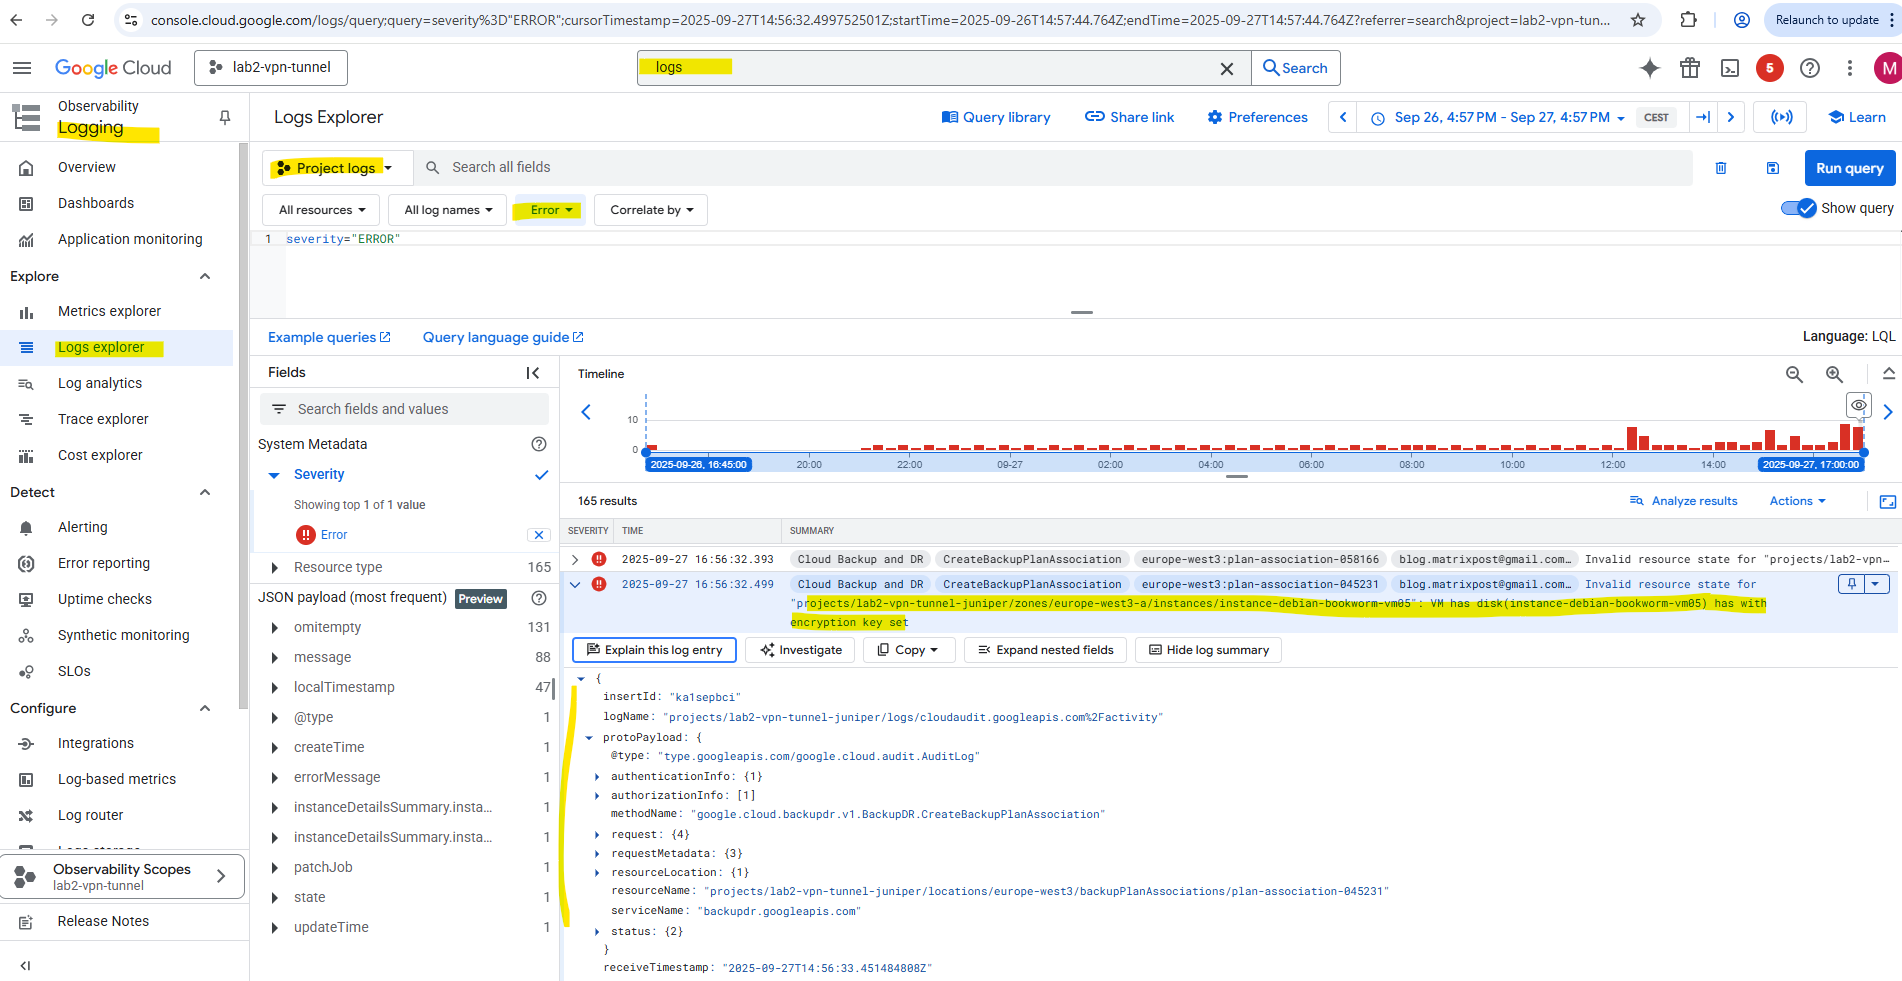
To get more details about this issue we can use the logs explorer, search for logging.
Filter to just show errors.
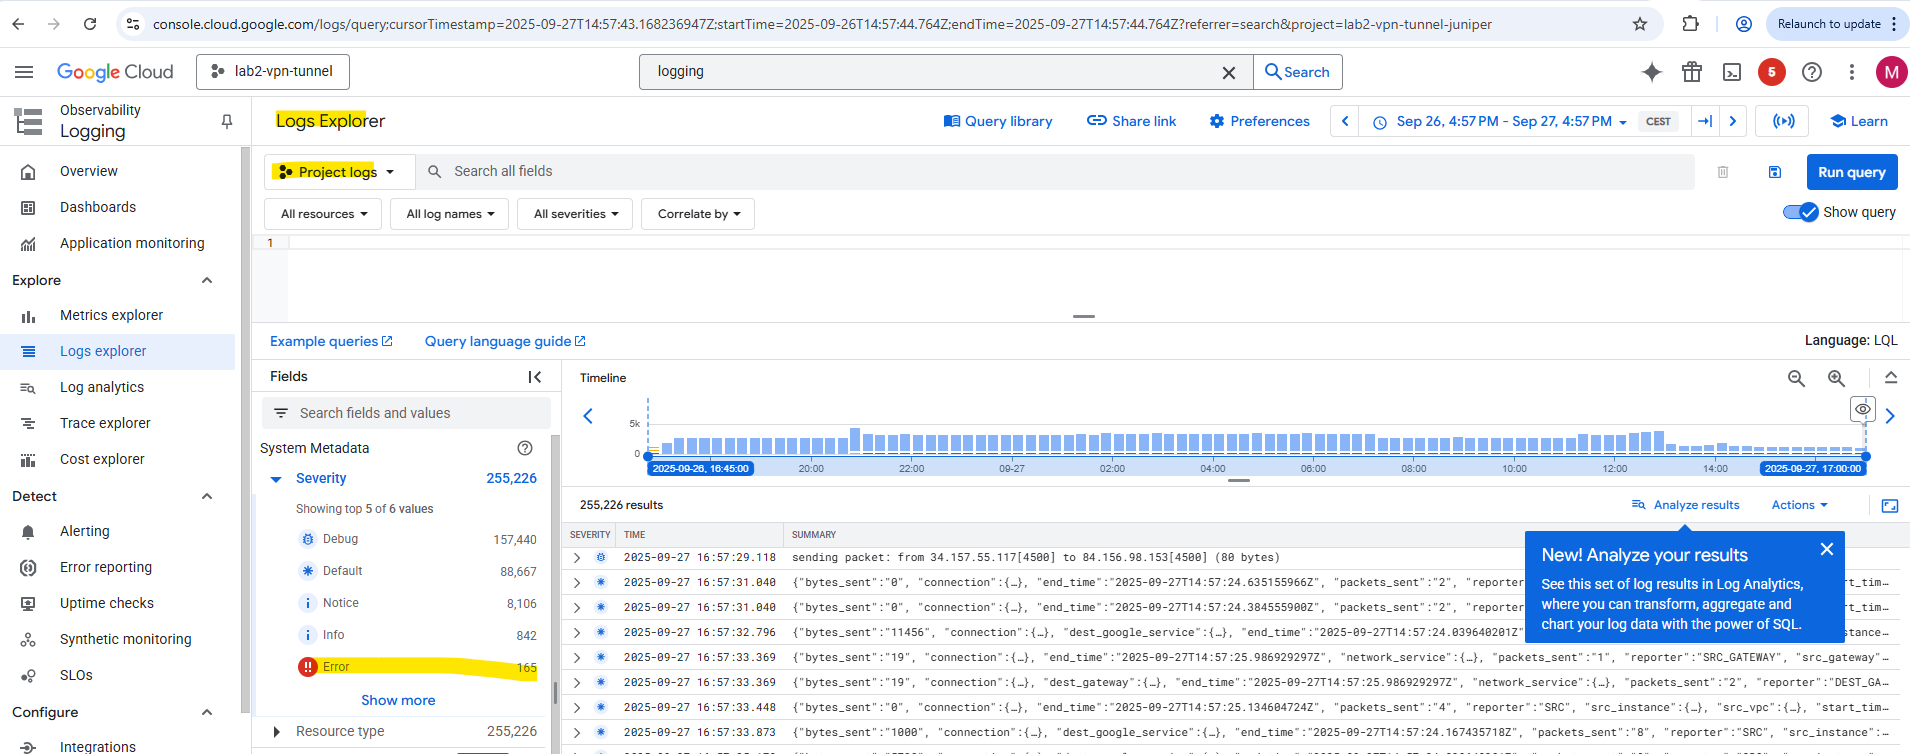
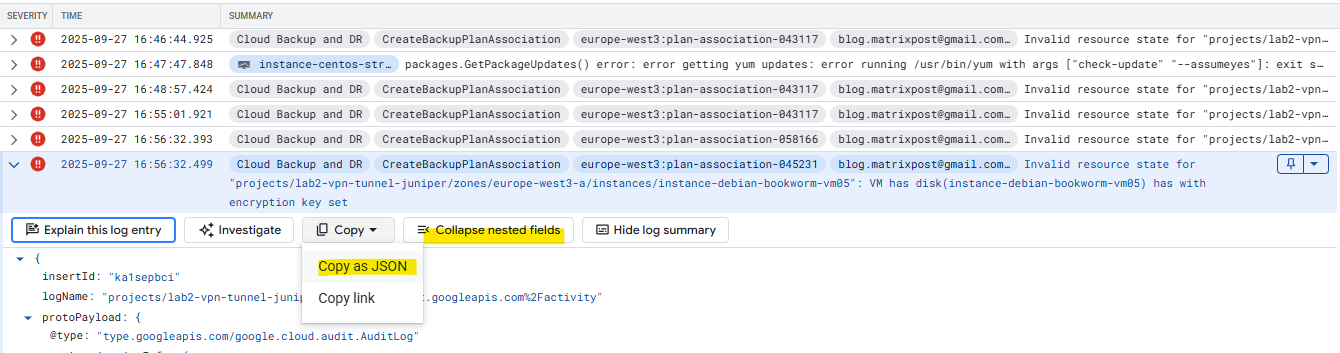
Click on Expand nested fields to get the full output and click on Copy as JSON for further analysis..
{
  "protoPayload": {
    "@type": "type.googleapis.com/google.cloud.audit.AuditLog",
    "status": {
      "code": 9,
      "message": "Invalid resource state for \"projects/lab2-vpn-tunnel-juniper/zones/europe-west3-a/instances/instance-debian-bookworm-vm05\": VM has disk(instance-debian-bookworm-vm05) has with encryption key set"
    },
    "authenticationInfo": {
      "principalEmail": "blog.matrixpost@gmail.com"
    },
    "requestMetadata": {
      "callerIp": "private",
      "requestAttributes": {
        "time": "2025-09-27T14:56:32.499326039Z",
        "reason": "8uSywAYQGg5Db2xpc2V1bSBGbG93cw",
        "auth": {}
      },
      "destinationAttributes": {}
    },
    "serviceName": "backupdr.googleapis.com",
    "methodName": "google.cloud.backupdr.v1.BackupDR.CreateBackupPlanAssociation",
    "authorizationInfo": [
      {
        "permission": "backupdr.backupPlanAssociations.createForComputeInstance",
        "granted": true,
        "resourceAttributes": {
          "service": "backupdr.googleapis.com",
          "name": "projects/lab2-vpn-tunnel-juniper/locations/europe-west3/backupPlanAssociations/plan-association-045231",
          "type": "backupdr.googleapis.com/BackupPlanAssociation"
        },
        "permissionType": "ADMIN_WRITE"
      }
    ],
    "resourceName": "projects/lab2-vpn-tunnel-juniper/locations/europe-west3/backupPlanAssociations/plan-association-045231",
    "request": {
      "@type": "type.googleapis.com/google.cloud.backupdr.v1.CreateBackupPlanAssociationRequest",
      "parent": "projects/lab2-vpn-tunnel-juniper/locations/europe-west3",
      "backupPlanAssociationId": "plan-association-045231",
      "backupPlanAssociation": {
        "backupPlan": "projects/lab2-vpn-tunnel-juniper/locations/europe-west3/backupPlans/vm-instances",
        "resourceType": "compute.googleapis.com/Instance",
        "resource": "projects/lab2-vpn-tunnel-juniper/zones/europe-west3-a/instances/instance-debian-bookworm-vm05"
      }
    },
    "resourceLocation": {
      "currentLocations": [
        "europe-west3"
      ]
    }
  },
  "insertId": "ka1sepbci",
  "resource": {
    "type": "audited_resource",
    "labels": {
      "project_id": "lab2-vpn-tunnel-juniper",
      "method": "google.cloud.backupdr.v1.BackupDR.CreateBackupPlanAssociation",
      "service": "backupdr.googleapis.com"
    }
  },
  "timestamp": "2025-09-27T14:56:32.499752501Z",
  "severity": "ERROR",
  "logName": "projects/lab2-vpn-tunnel-juniper/logs/cloudaudit.googleapis.com%2Factivity",
  "receiveTimestamp": "2025-09-27T14:56:33.451484808Z"
}
This is not a permission error (since granted: true is shown for our backupdr permission). It’s the API refusing the request because the VM has CMEK on its disk.
Backup vault storage does not support protection of CMEK-encrypted workloads, so if you need those features, set up a backup plan using self-managed storage.
Source: https://cloud.google.com/backup-disaster-recovery/docs/concepts/backup-dr

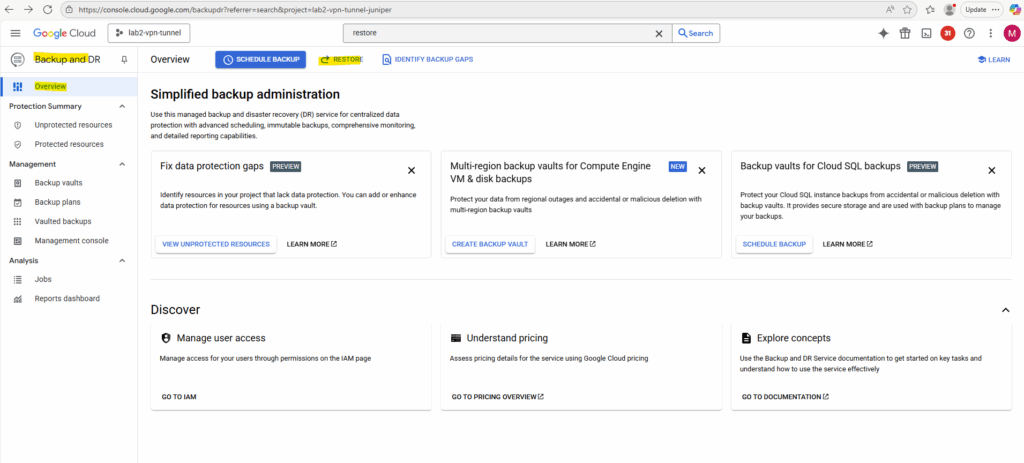
Restore VM instance
We can also use the Google Cloud Backup and DR blade to restore our VM instances we scheduled backups for.
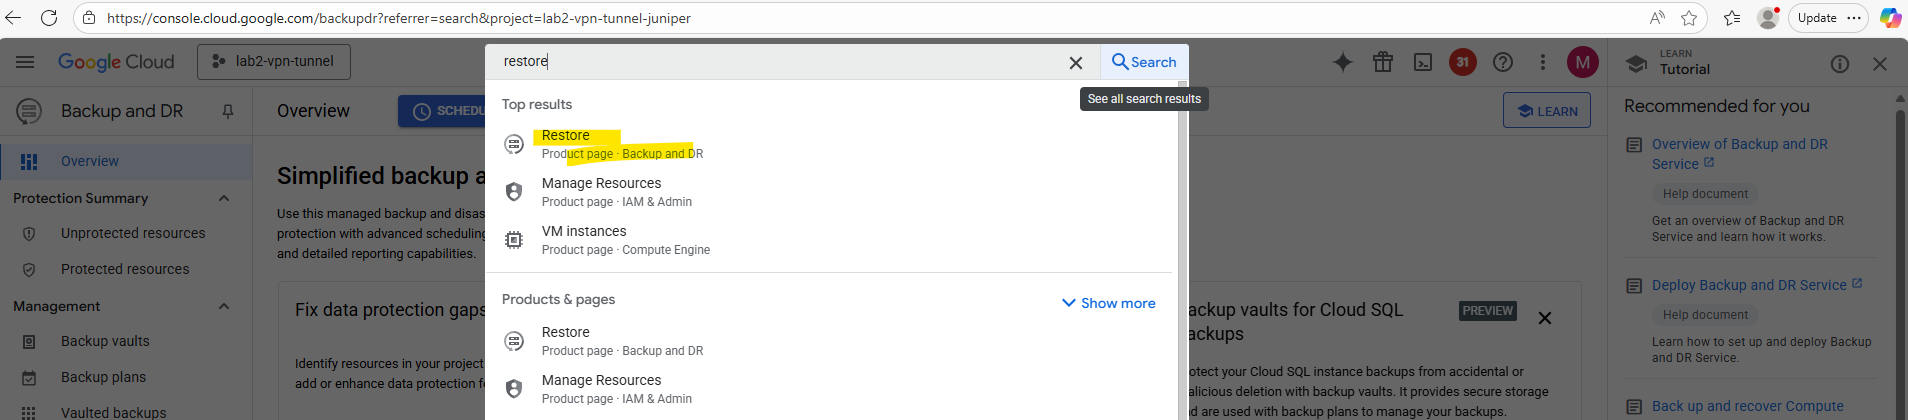
Click on Restore on the Overview page on the Google Cloud Backup and DR blade.
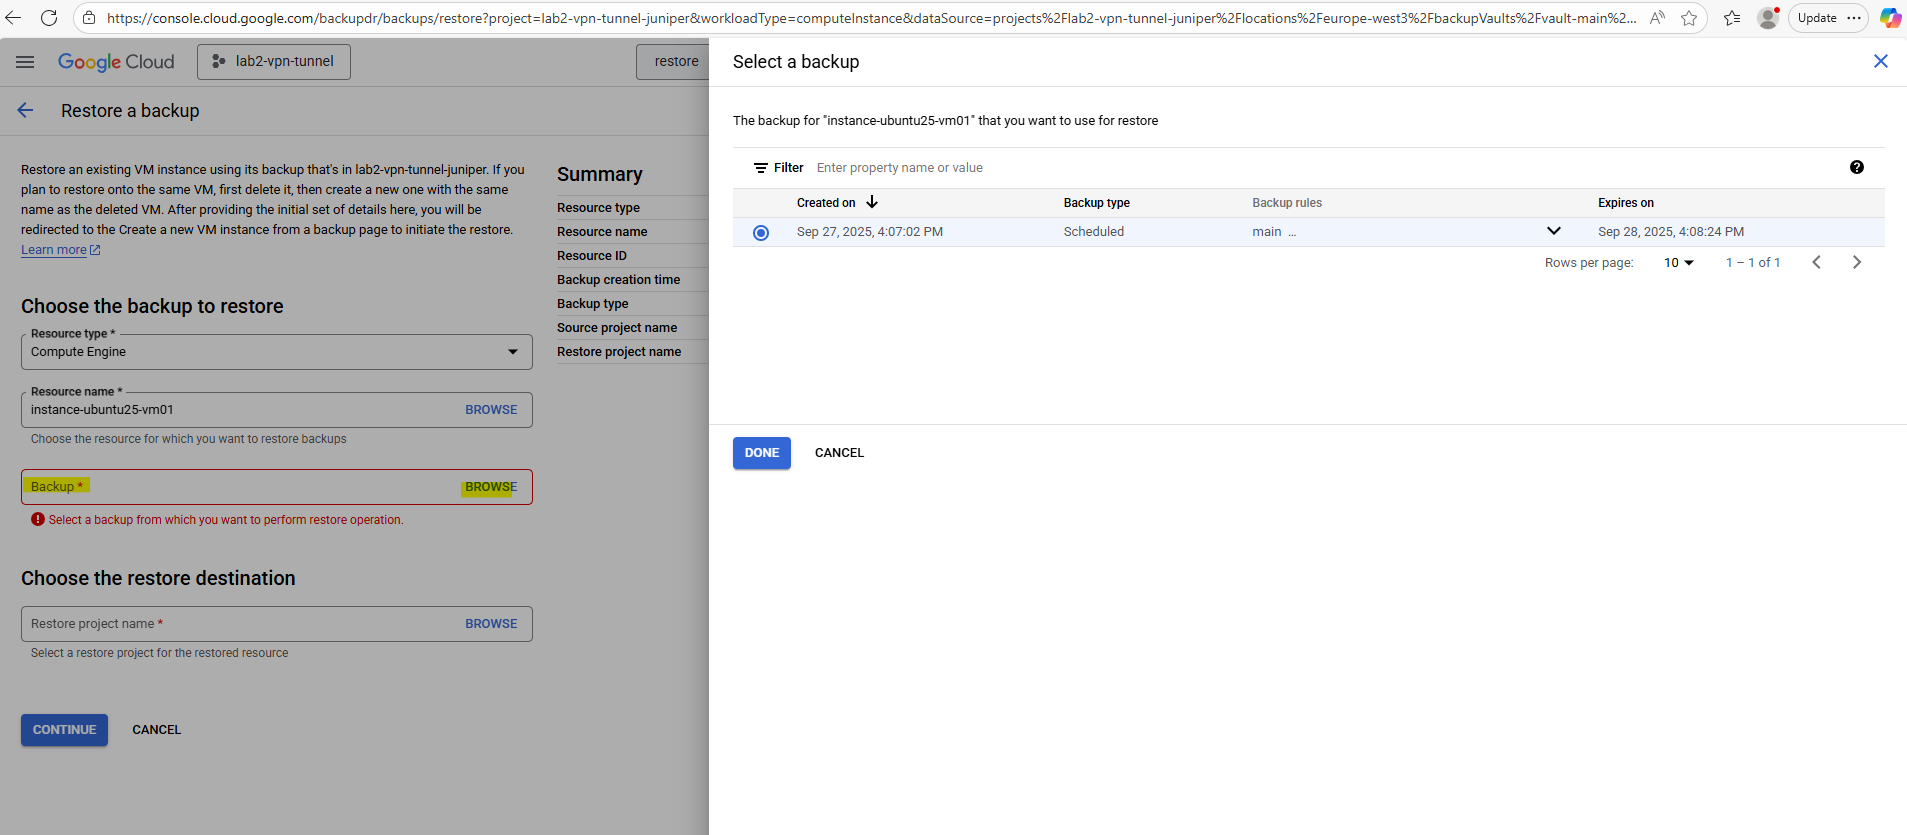
Select the resource type Compute Engine to restore a VM instance.

Select the desired backup you want to use to restore the VM instance.
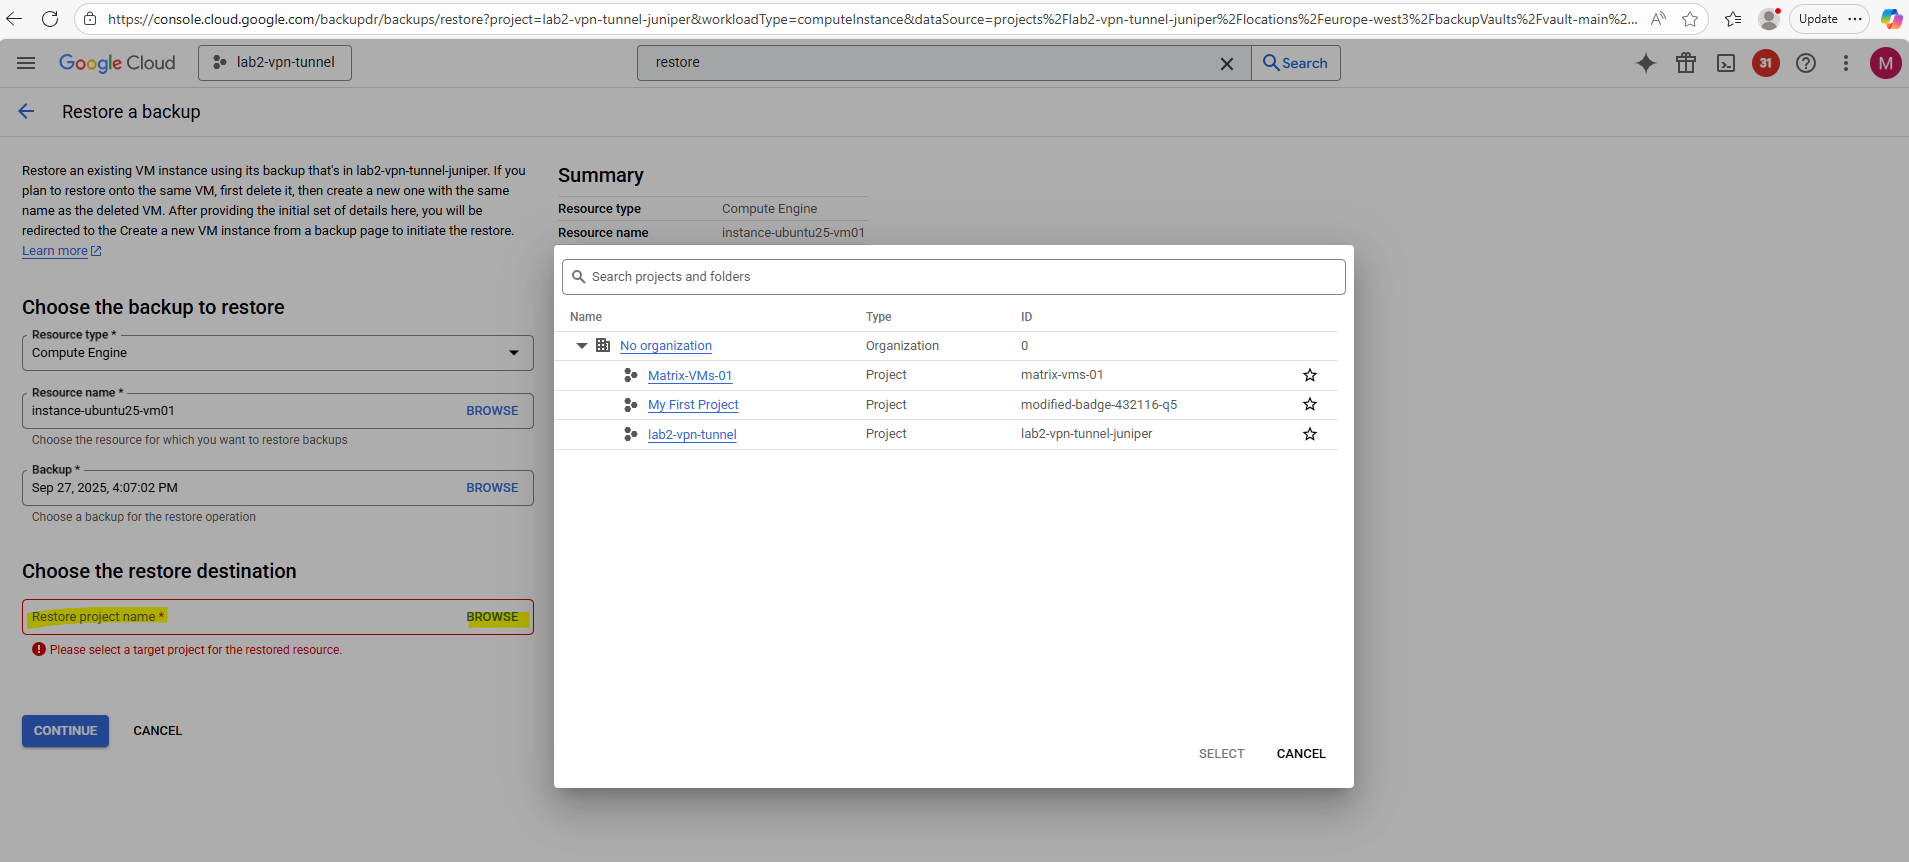
Select the restore destination (project).
We can also restore the VM instance to a different project. Finally always a new VM instance will be created from the backup.
The backup vault service agent must be granted the required roles in the restore project to create instance using the backup.
So in case we haven’t already granted these roles, click on Grant to IAM & Admin.
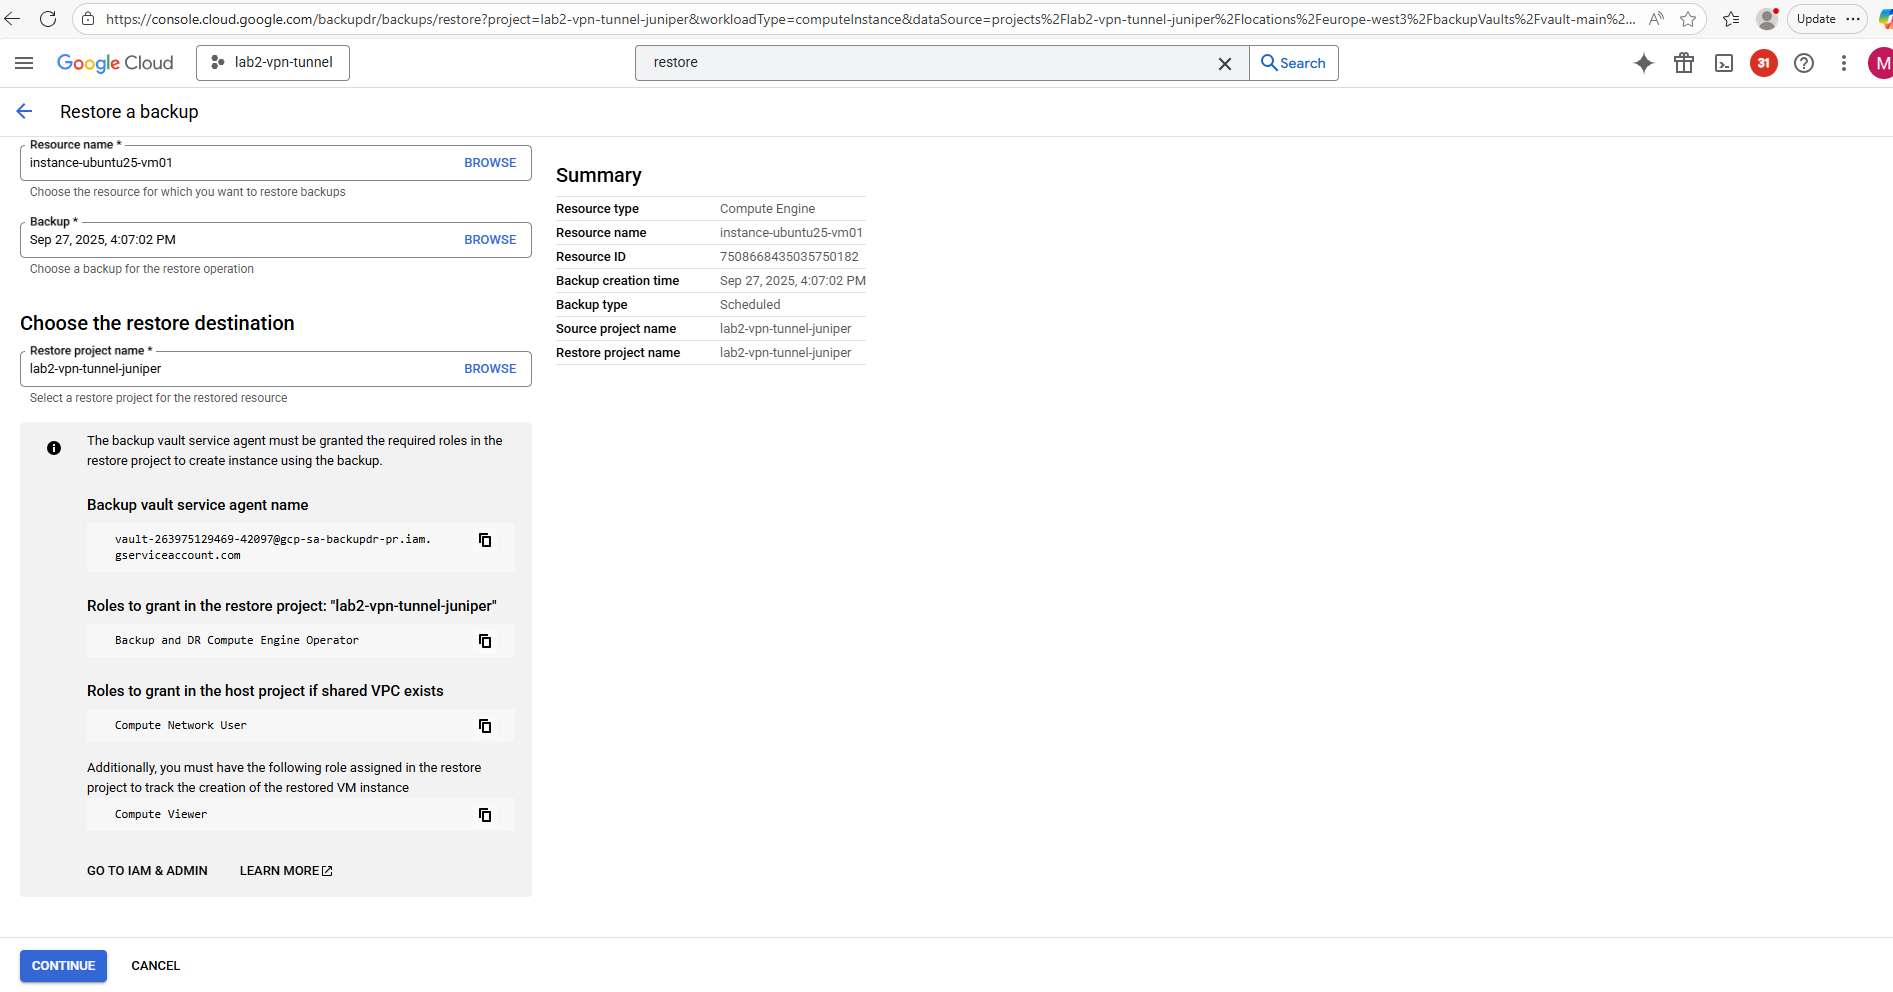
Grant the roles and click on Save.
The policy to update may take a few minutes for these changes to become active.

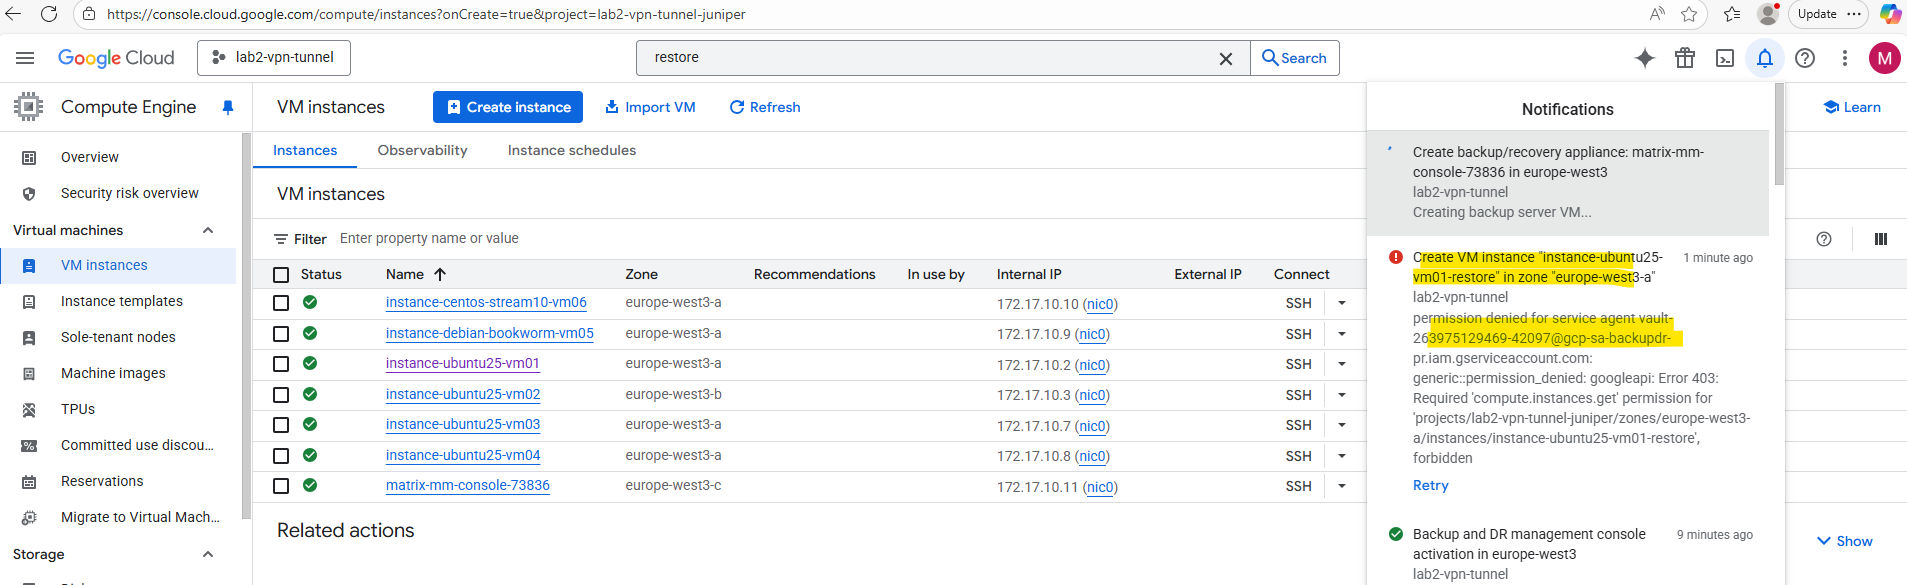
If we doesn’t grant these required roles to the backup vault service agent, we will run into the following error.
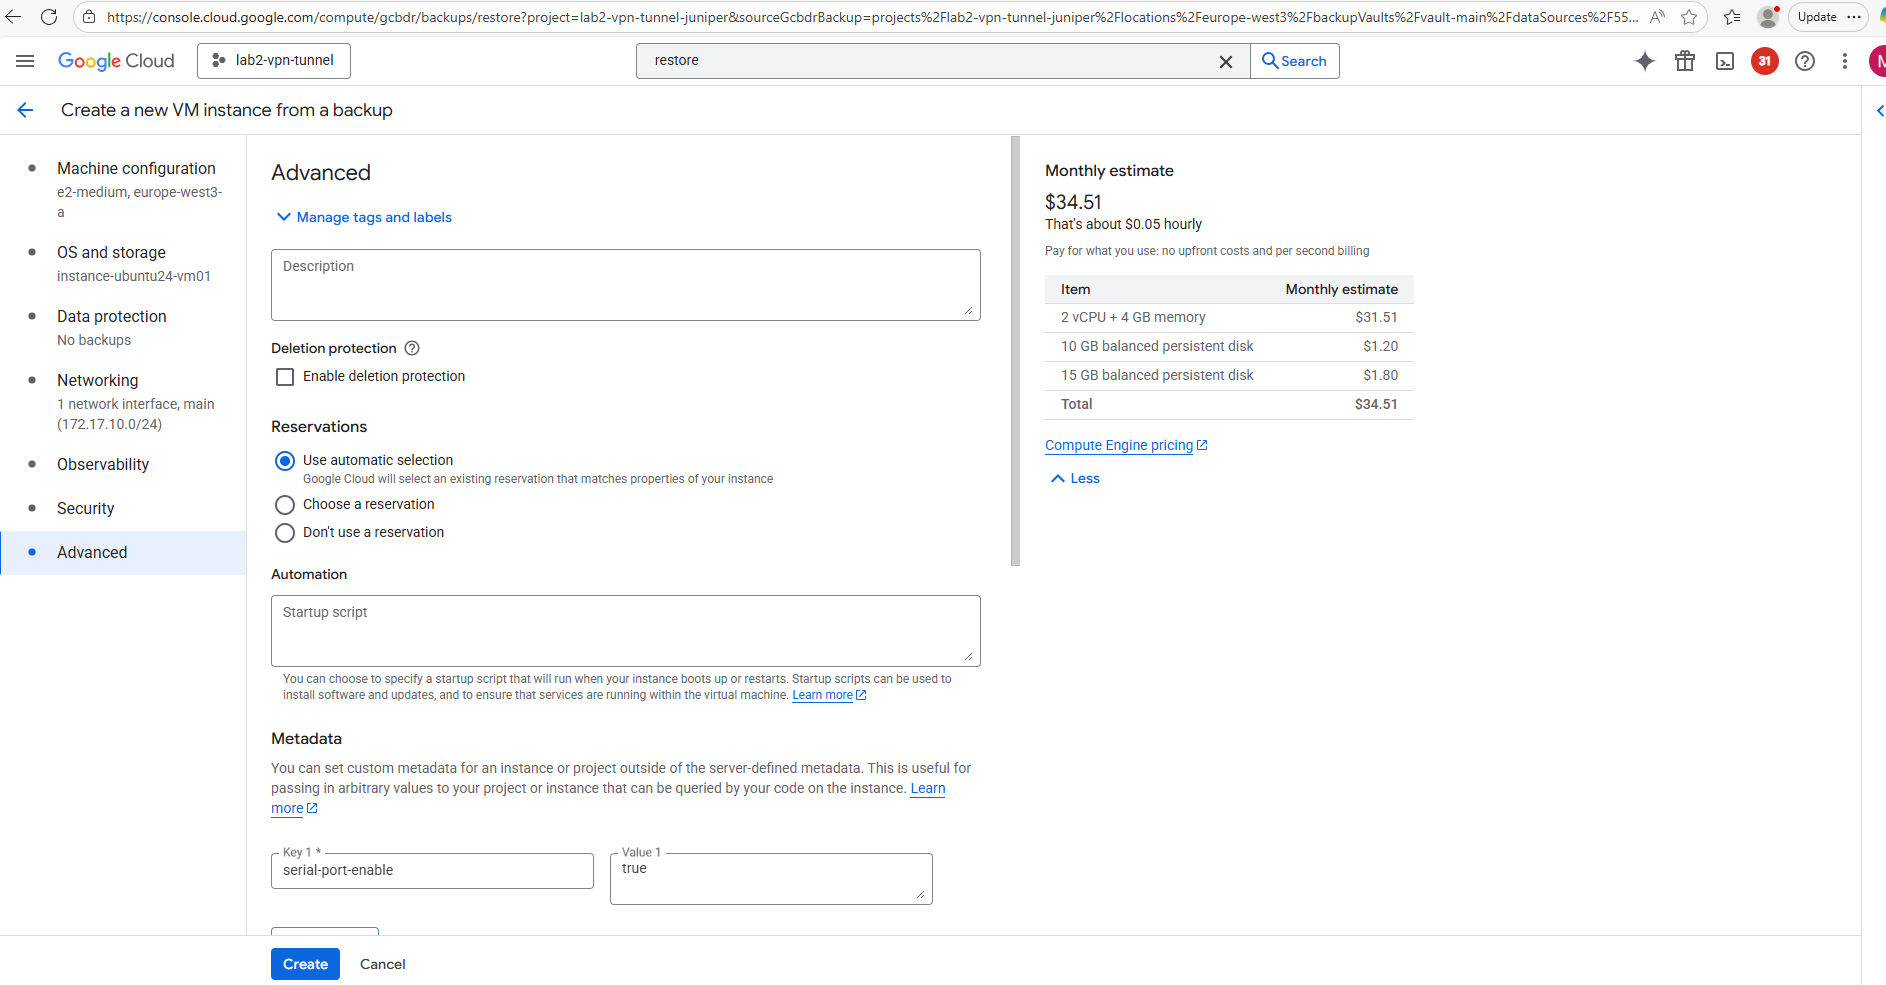
The restore will finally create a new VM instance from the backup. So adjust the settings as needed.
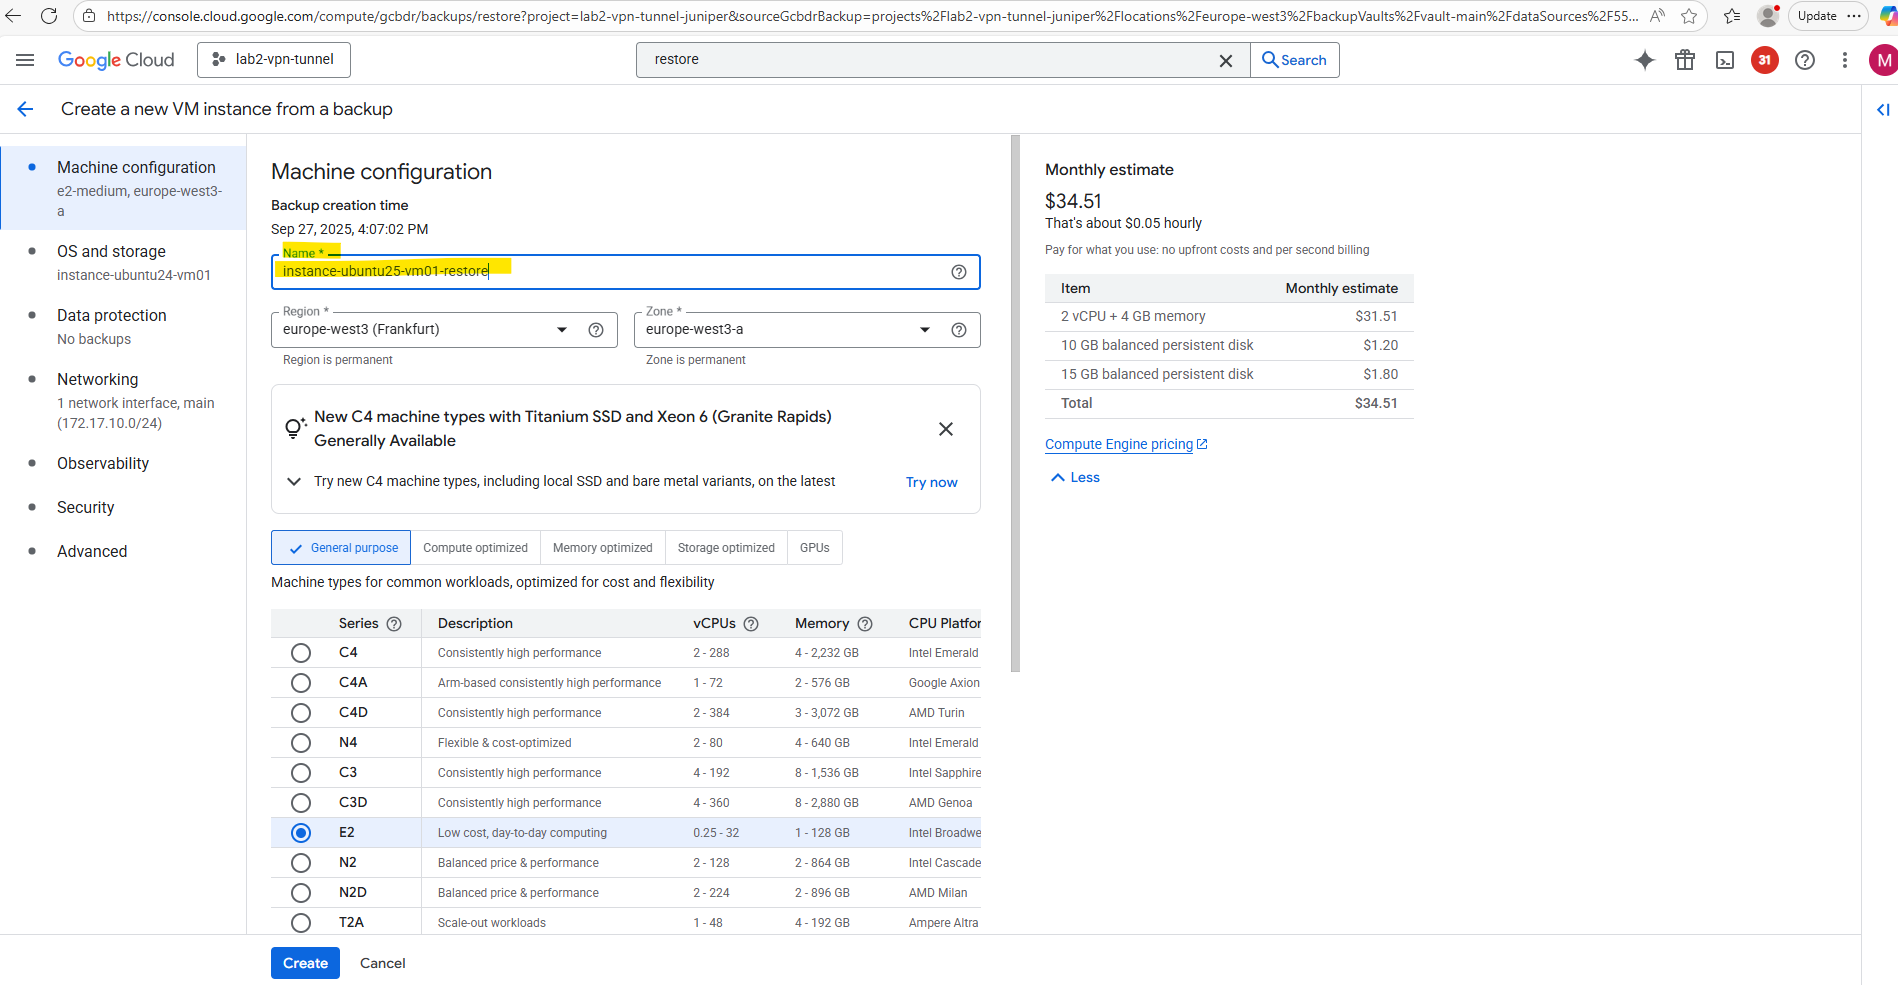
For the disk source our Backup & DR service is set.
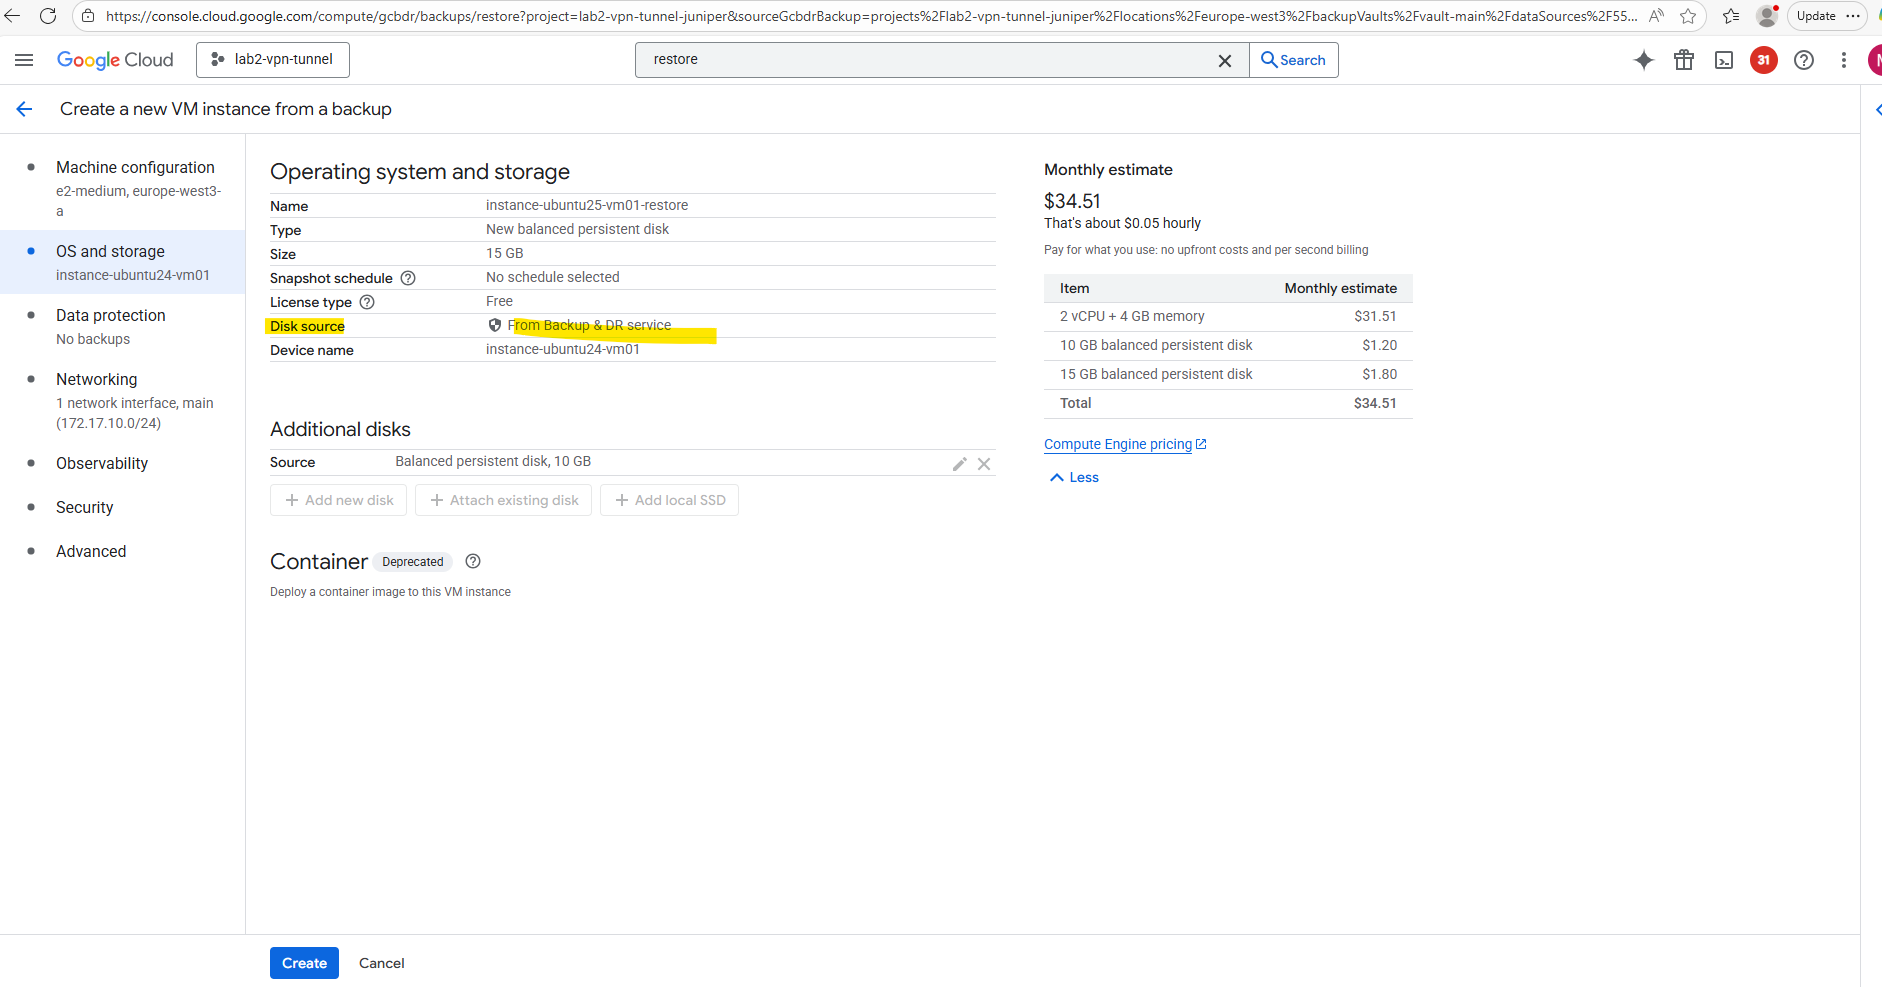
Finally click on Create.
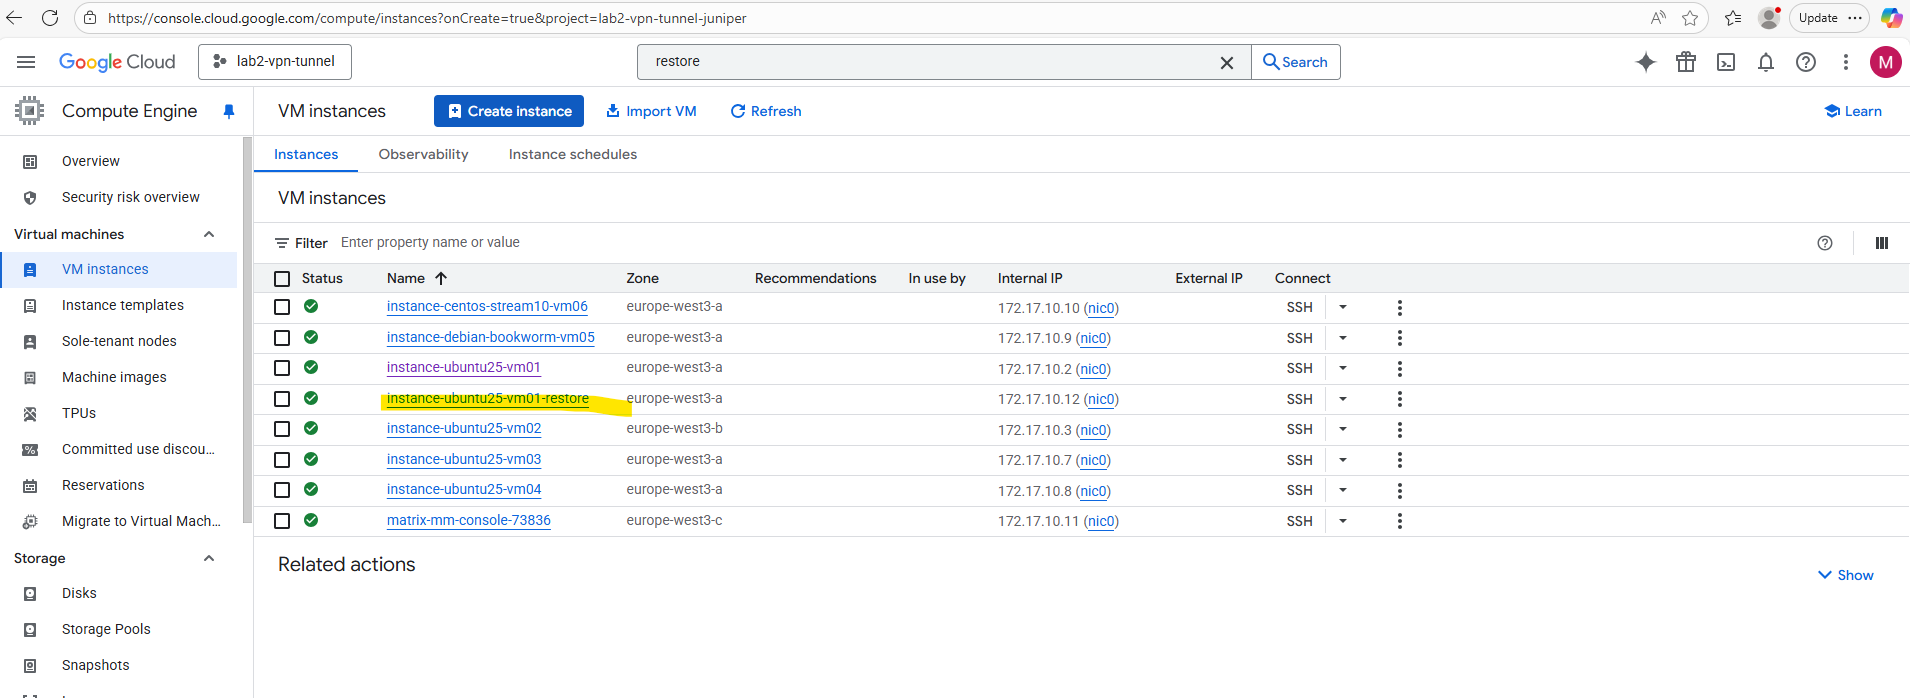
The VM instance was restored successfully.
Backup and DR management console
In case we only need snapshot-based protection for Compute Engine VMs, Persistent Disks, and regional disks, we don’t need to activate and use the management console, we can configure backup plans and policies directly in the GCP console under Backup and DR → Backup plans.
This works fine for most workloads, as long as you don’t use customer-supplied encryption keys (CSEK) or customer-managed encryption keys (CMEKs) and are okay with snapshot-based recovery.
We restore an entire disk/VM from a snapshot. No app awareness, no file-level restore, no cross-platform orchestration.
When we need advanced enterprise-grade features such as:
- Application-consistent backups (for databases, SAP, Oracle, etc.).
- Granular recovery (files, database objects, app-aware restores).
- Cross-region DR orchestration.
- Managing CMEK/CSEK encrypted VMs (since snapshot-only backups don’t support all encryption options natively).
In these cases, we must deploy the management console appliance in our project. This console acts as a control plane for orchestrating backups, not just simple disk snapshots.
All Google Cloud VM backups are snapshot-based at their core. The difference is that native backups are just automated disk snapshots, while the Backup and DR management console (appliance) builds advanced features (app consistency, granular restore, DR orchestration, CMEK support) on top of those snapshots.
The management console serves as the management plane for your backup/recovery appliances.
Each Backup and DR deployment includes a single management console managing any number of backup/recovery appliances.
The management console is deployed in the backup administration project and is highly available within the deployed region, providing resilience against zonal outages.
The backup/recovery appliance is the data mover that efficiently captures, moves, and manages the lifecycle of backup data within your enterprise. The backup/recovery appliances are deployed in the Workload entity for cloud workloads.
Source: https://cloud.google.com/backup-disaster-recovery/docs/deployment/deployment-plan
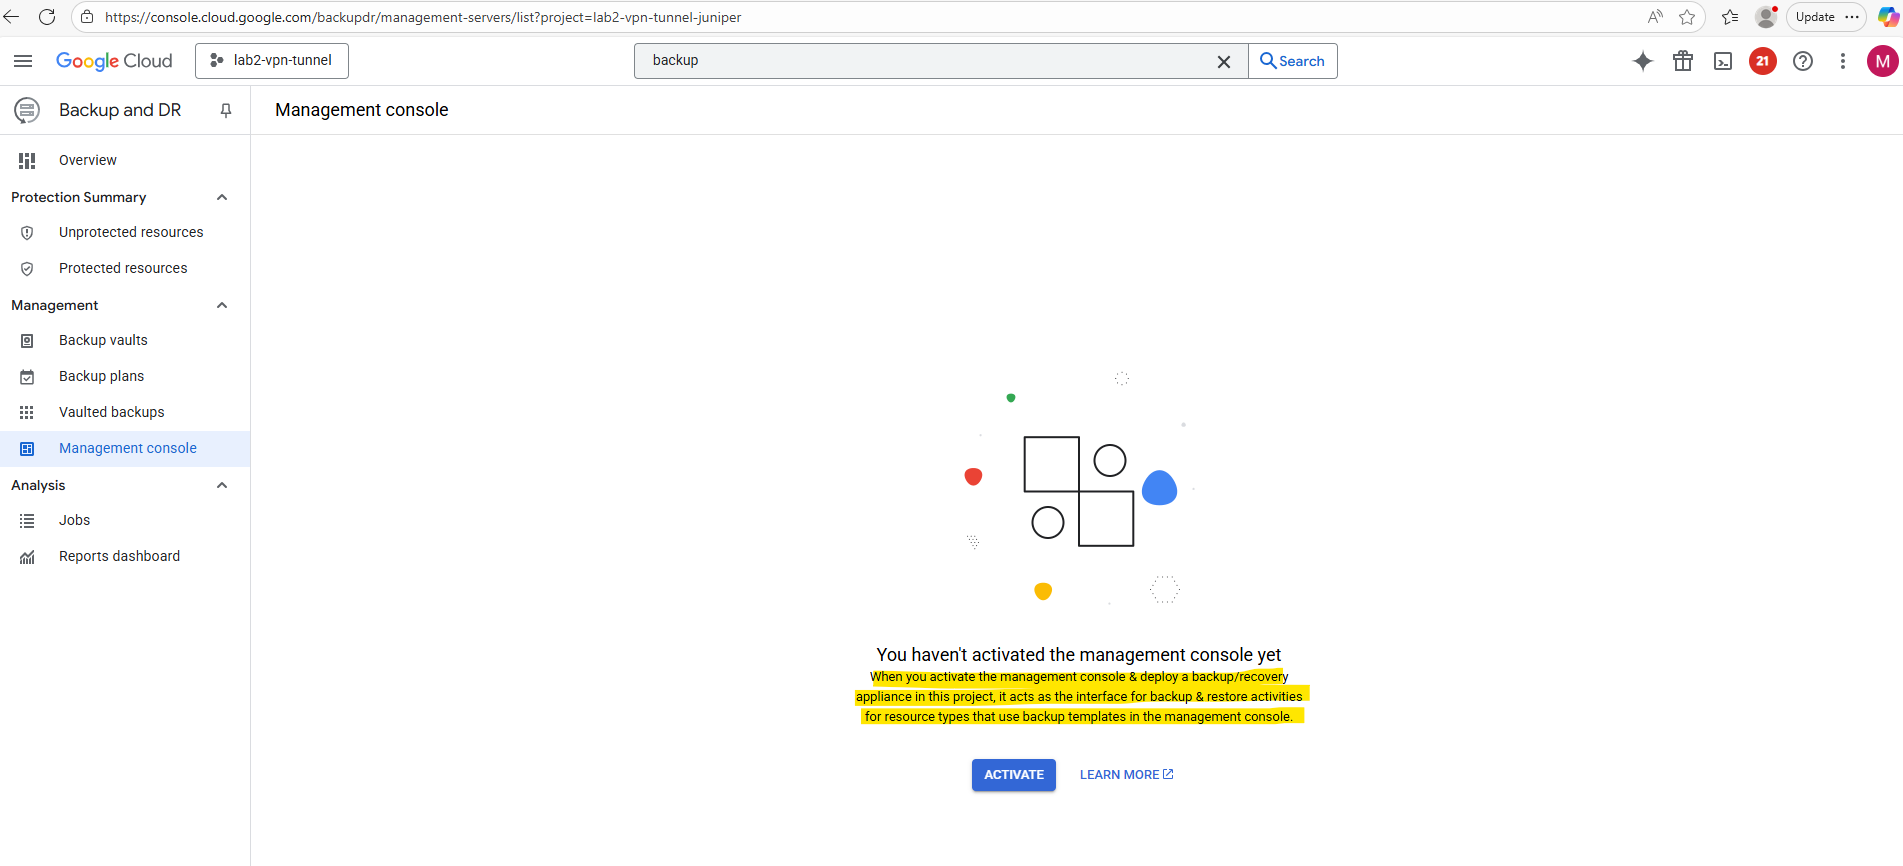
Activate the Backup and DR management console
We first need to activate the management console in our project.
When you activate the management console & deploy a backup/recovery appliance in this project, it acts as the interface for backup & restore activities for resource types that use backup templates in the management console.
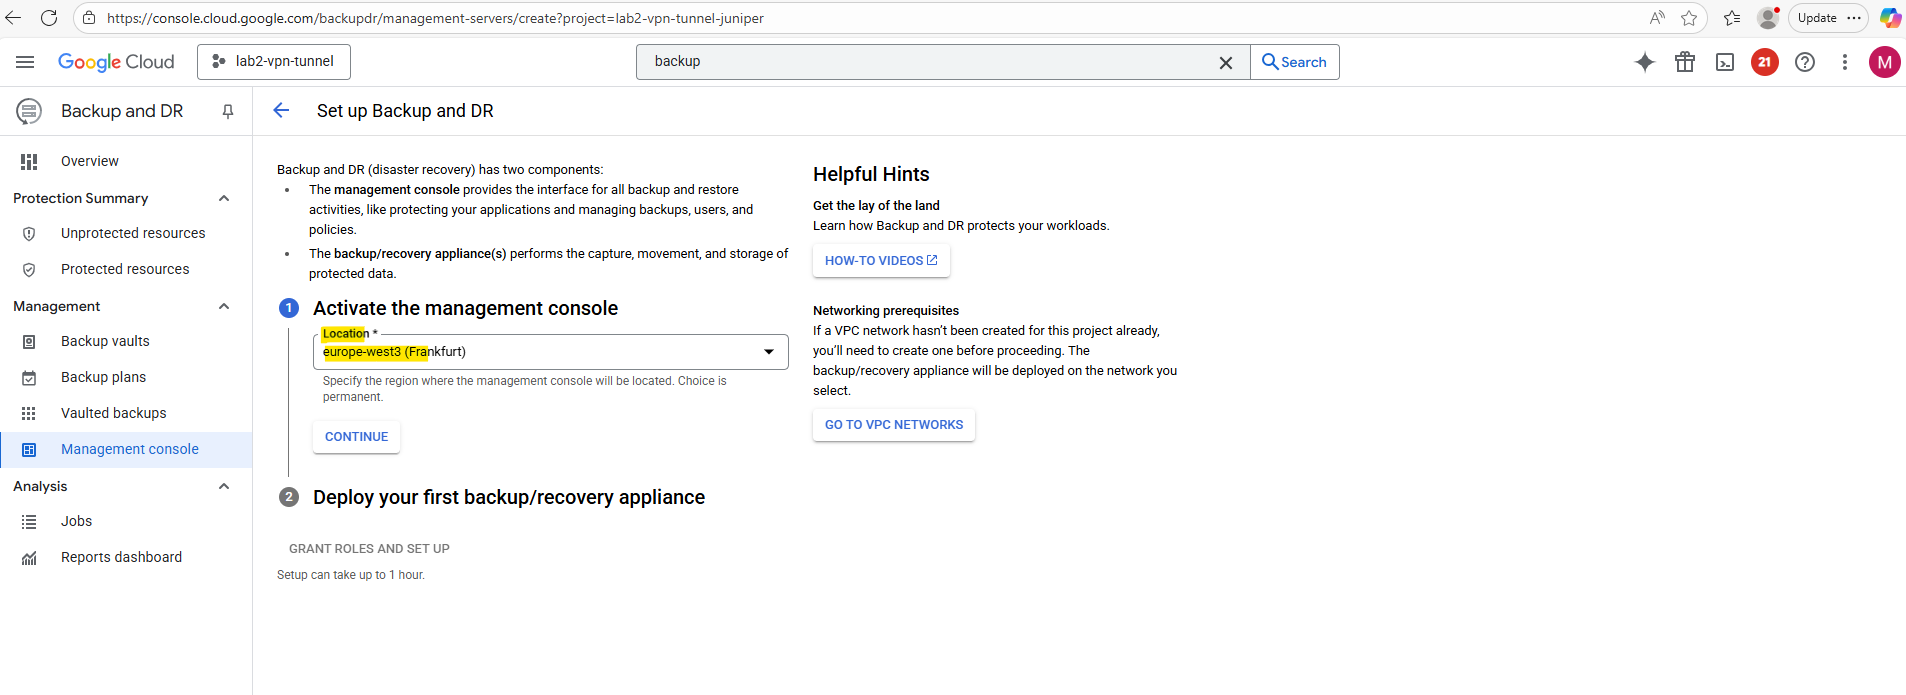
Select the location and click on Continue.
For fastest performance and lower cost, deploy the management console in one of the regions where your workloads are running.
Source: https://cloud.google.com/backup-disaster-recovery/docs/deployment/deployment-plan
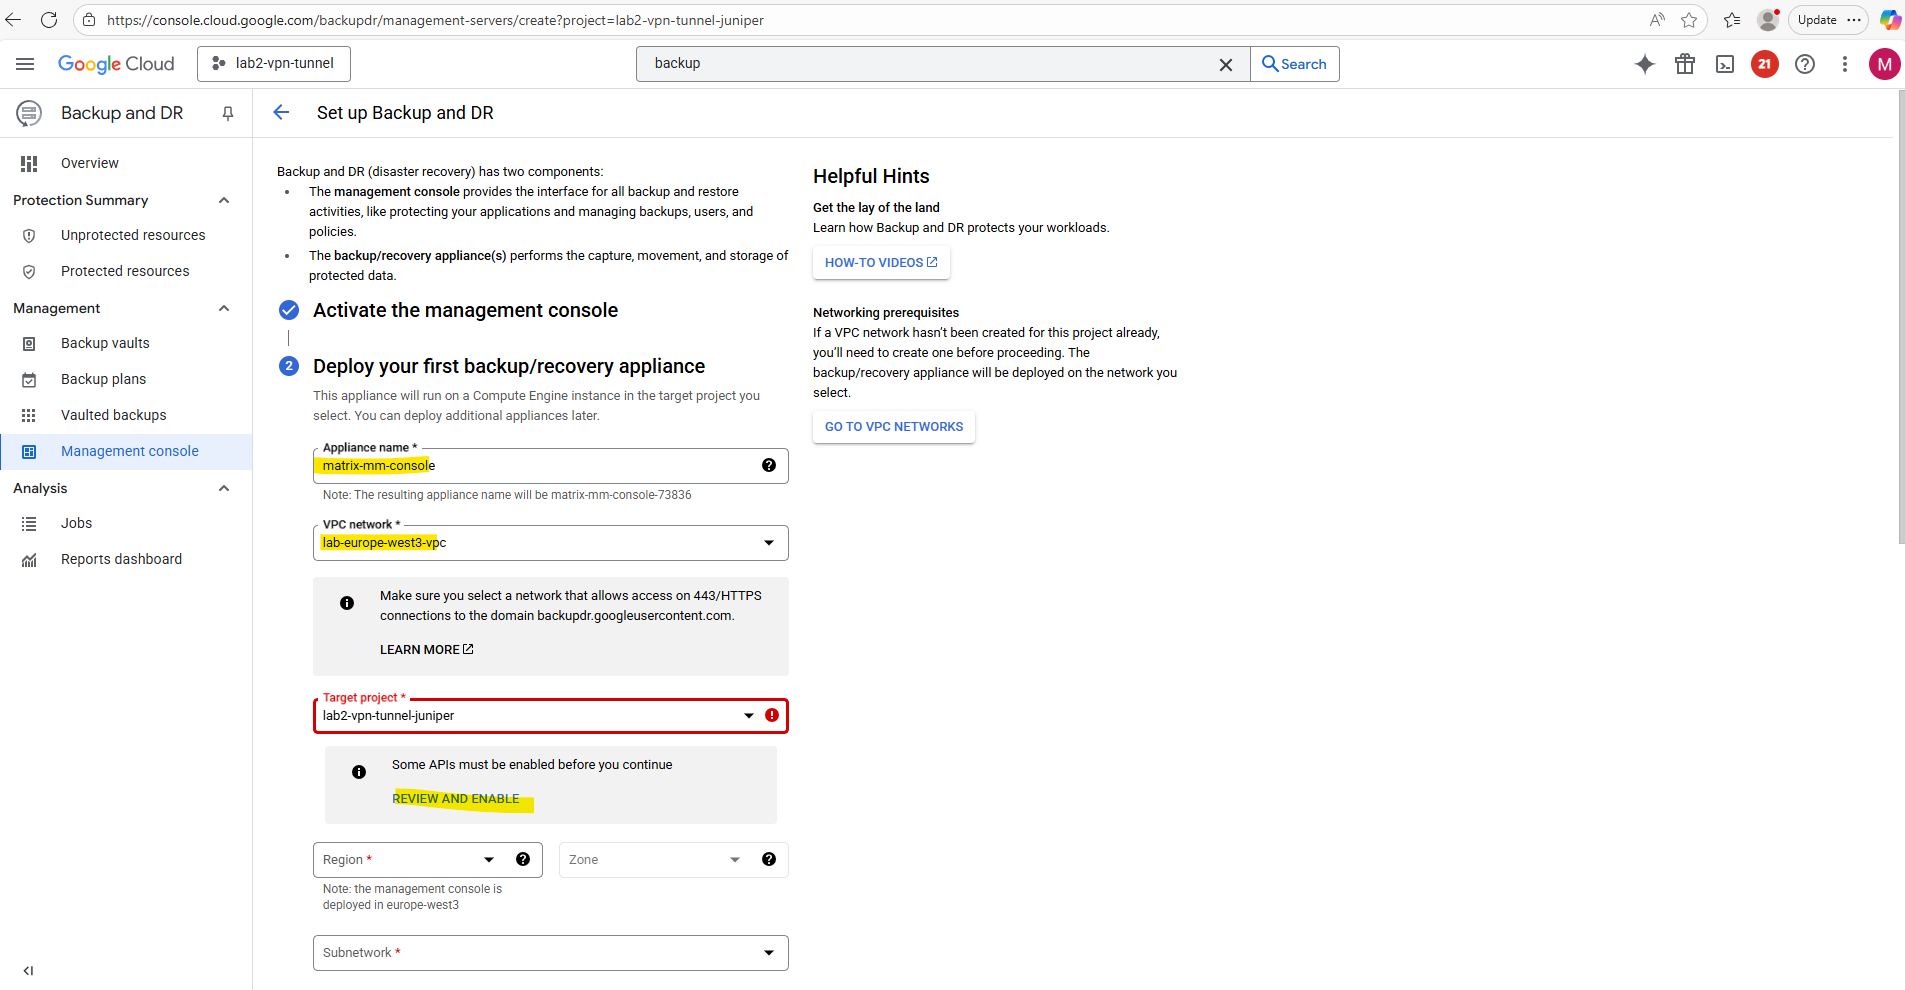
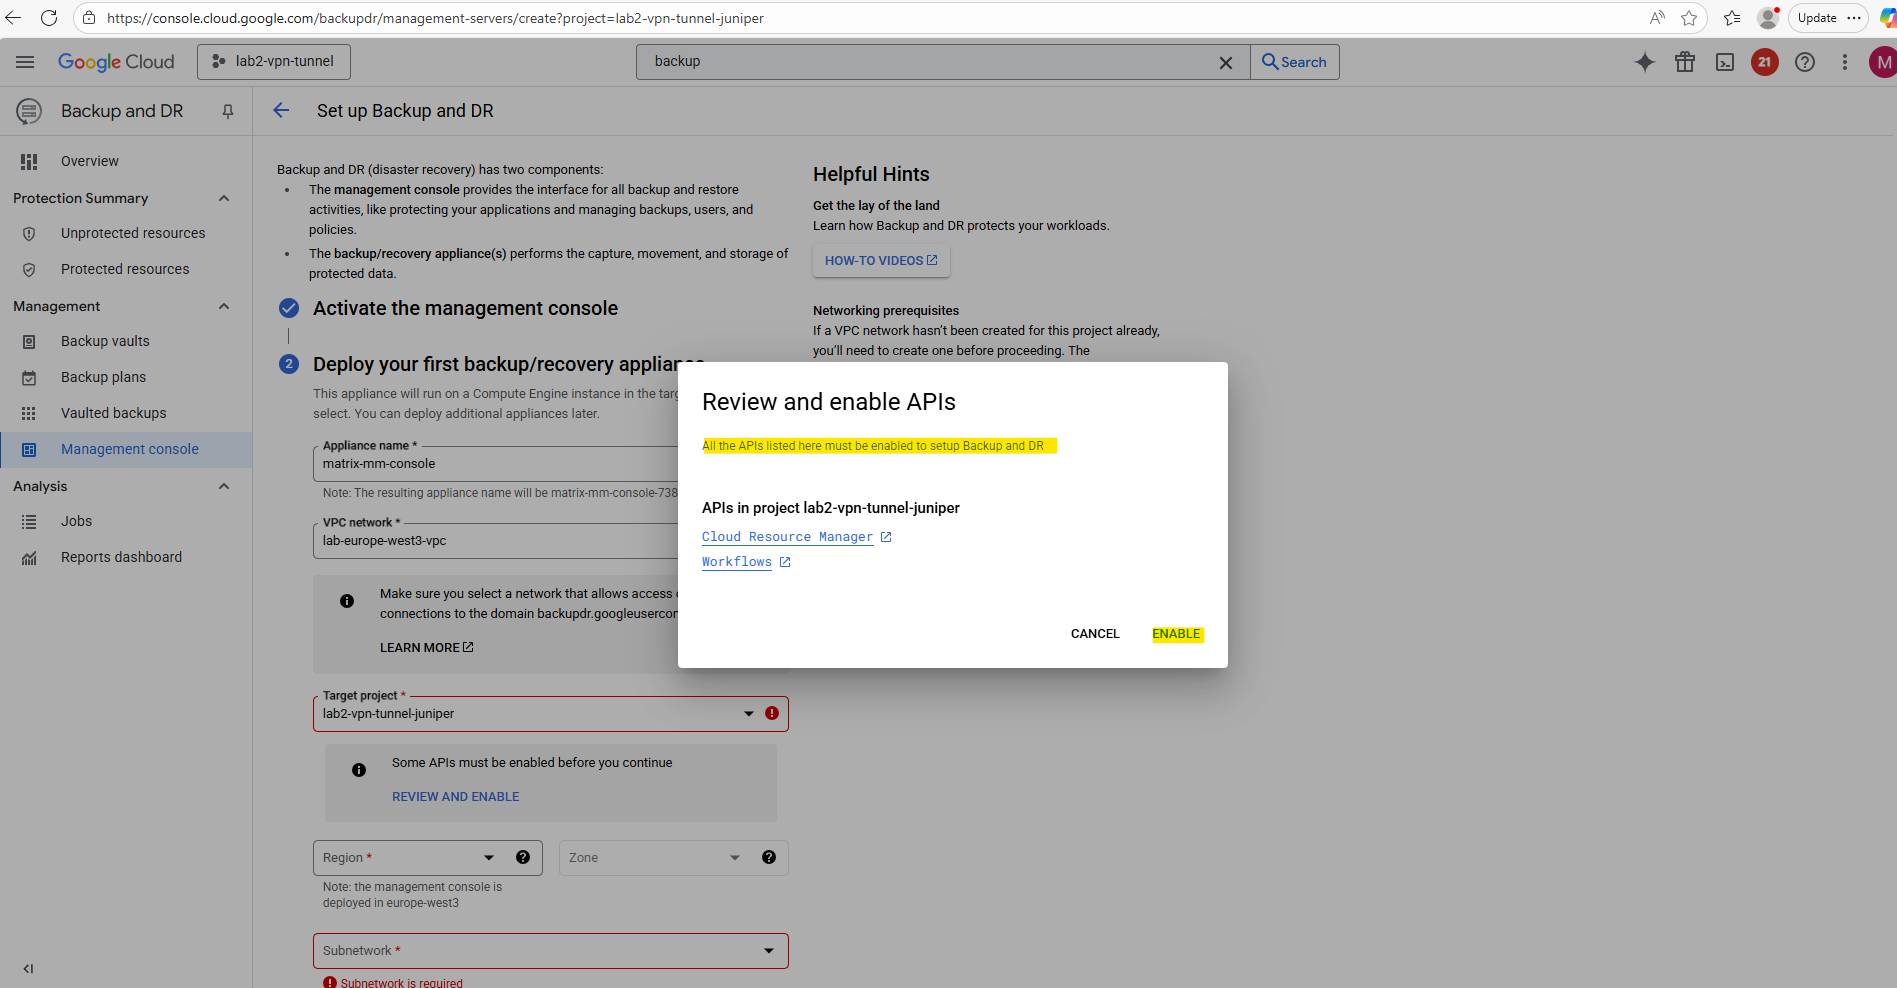
Enter a name for the appliance, the VPC network and target project.
For this project we first need to enable the Cloud Resource Manager and Workflows API.
Click on Review and Enable.
Deploy one or more backup/recovery appliances in each region where the workloads are running. Store your backups in the same region as your workloads.
Source: https://cloud.google.com/backup-disaster-recovery/docs/deployment/deployment-plan
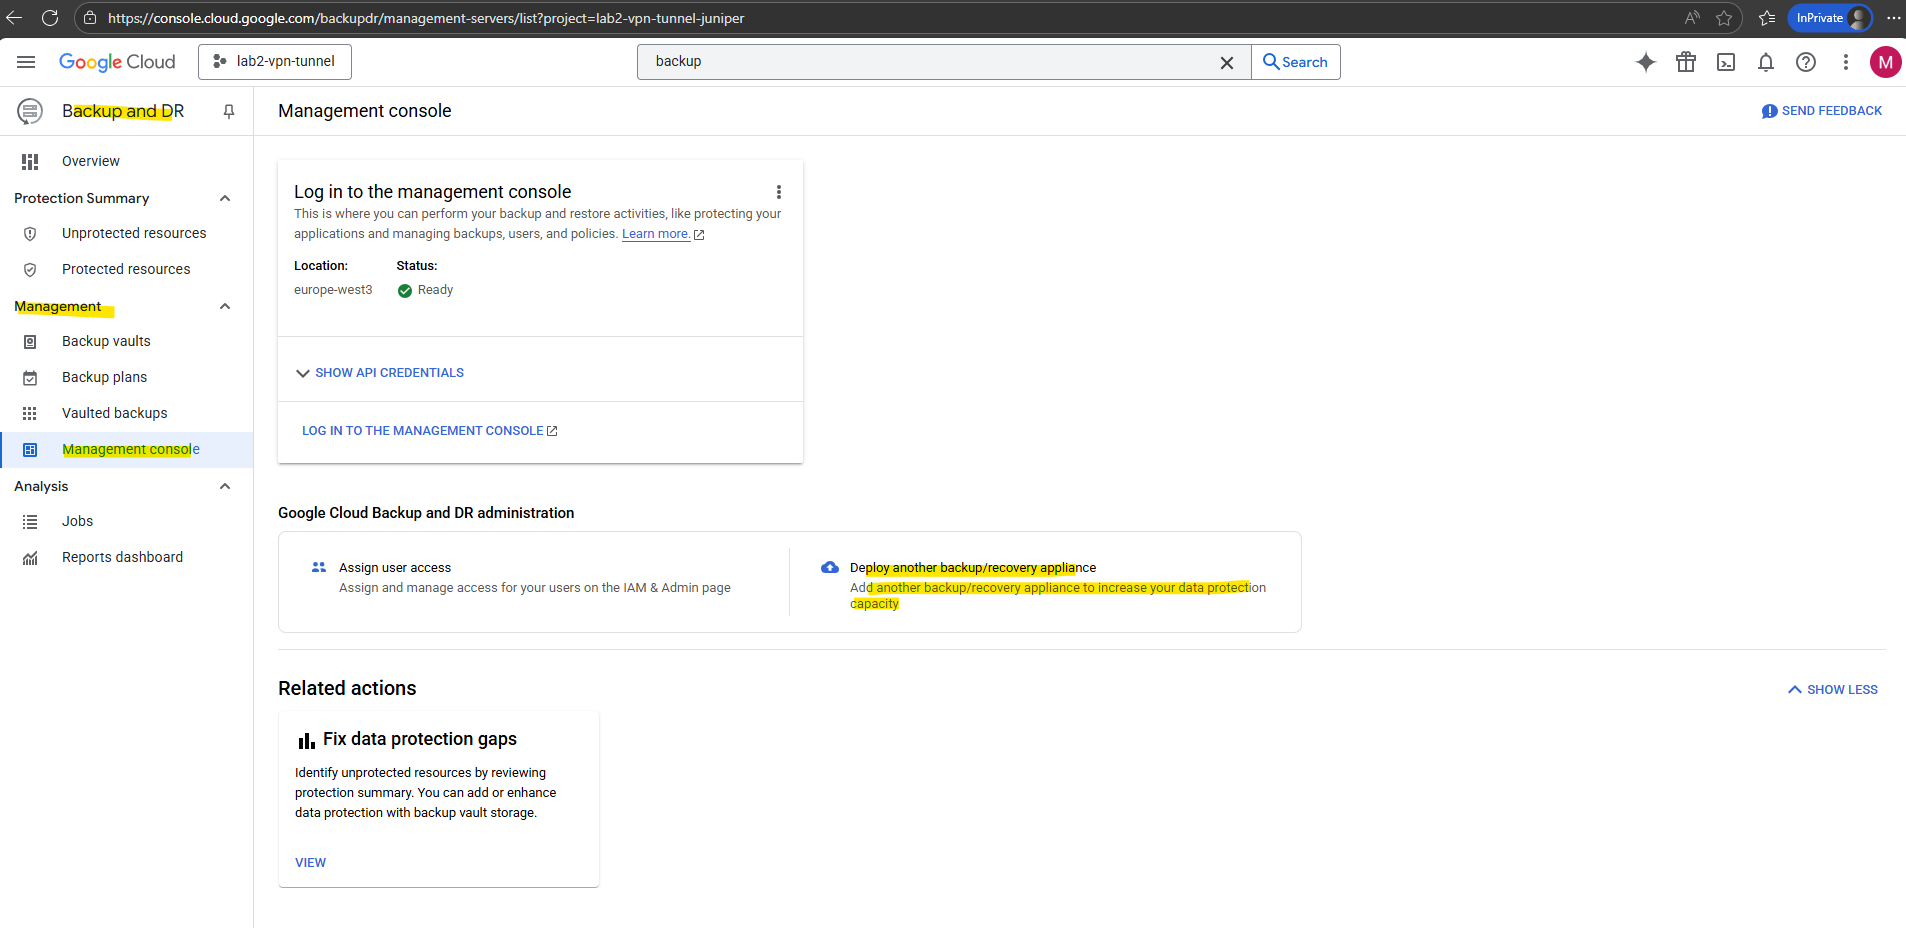
We can deploy more backup/recovery appliances directly in the Backup and DR console under Management -> Management console as shown below.
For example we can also deploy a backup/recovery appliances to backup our on-prem VMware VMs.
Click on Enable.
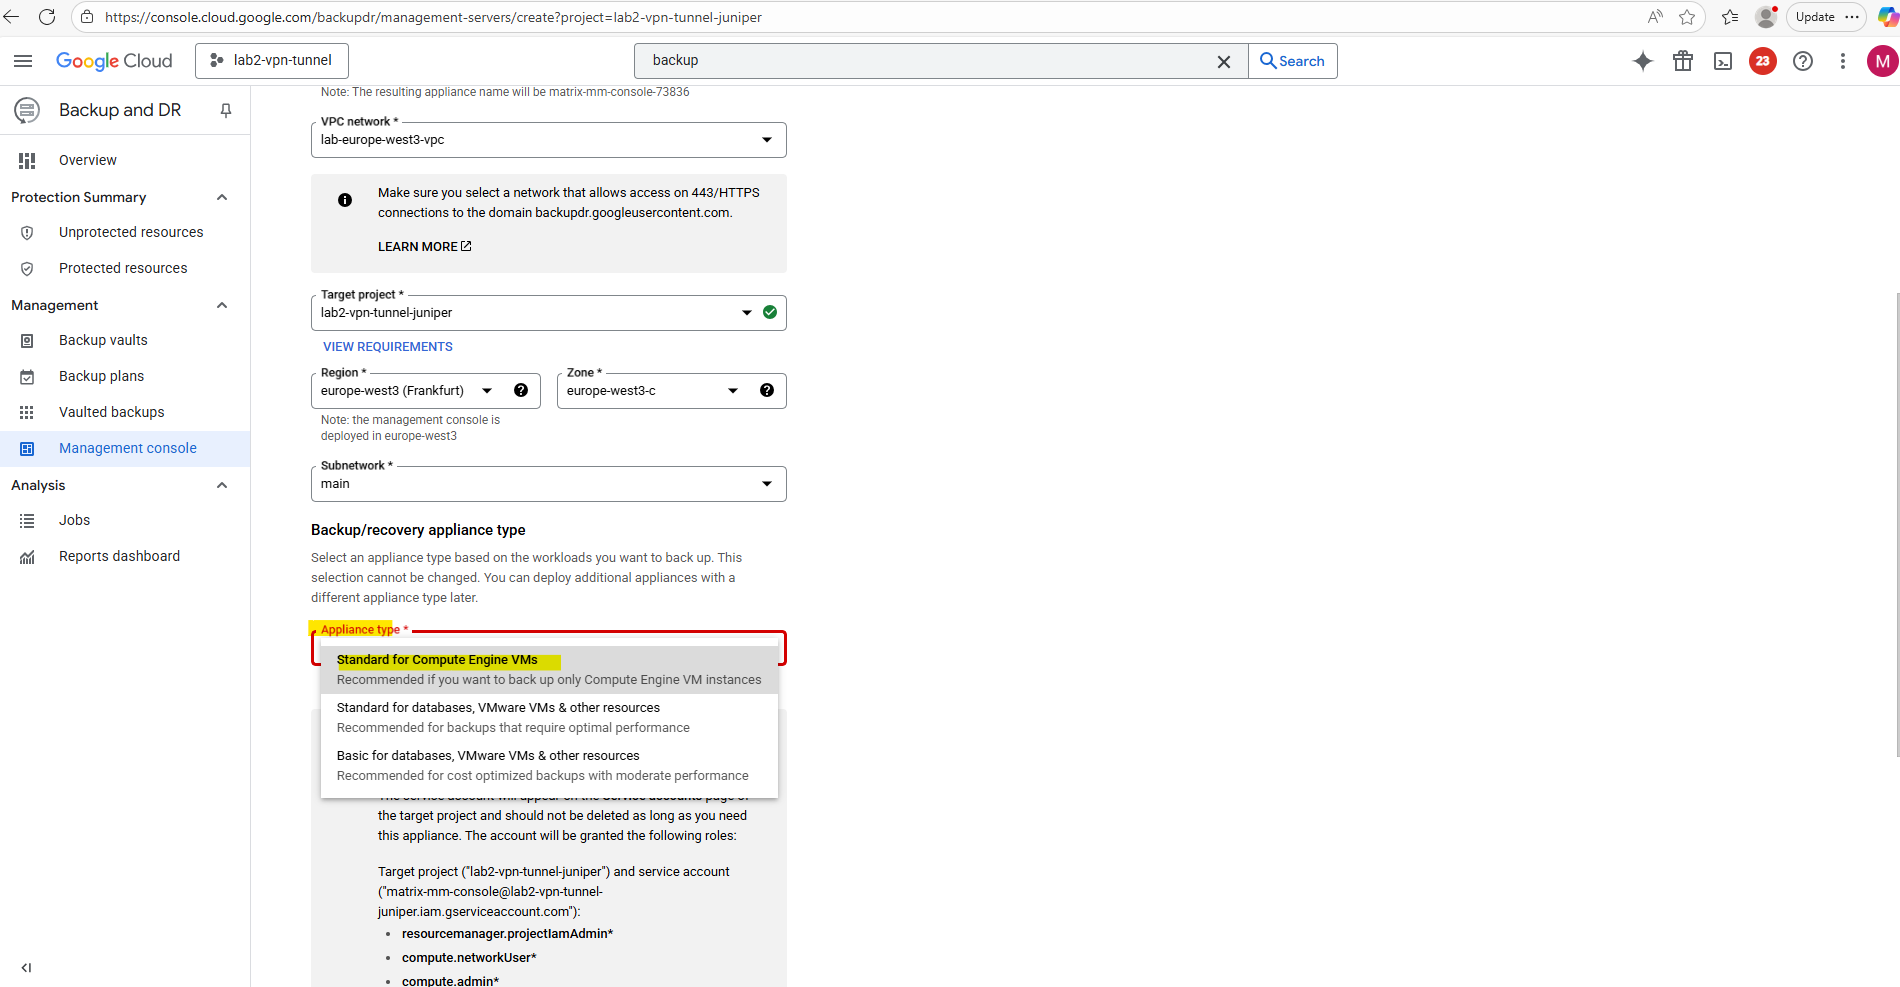
Select the region, subnetwork and appliance type.
Backup and DR Service provides appliance types that are optimized for different workloads, Compute Engine VMs, VMware VMs, databases, and file systems.
You can choose the appliance type that best meets your needs. It’s important to select the best appliance type for your workloads. Once the backup/recovery appliance is in service, it runs continuously forever, always ready to run and re-run backup, restore, and other jobs at all times.
When you deploy an appliance, a service account is created automatically regardless of the appliance type. You can view the service account from the Service Account page.
The service account’s name appears in the email address format my-service-account@my-project.iam.gserviceaccount.com, where appliance-name is the name of an appliance and projectid is the ID of your Google Cloud project.
Source: https://cloud.google.com/backup-disaster-recovery/docs/deployment/deployment-plan#appliance
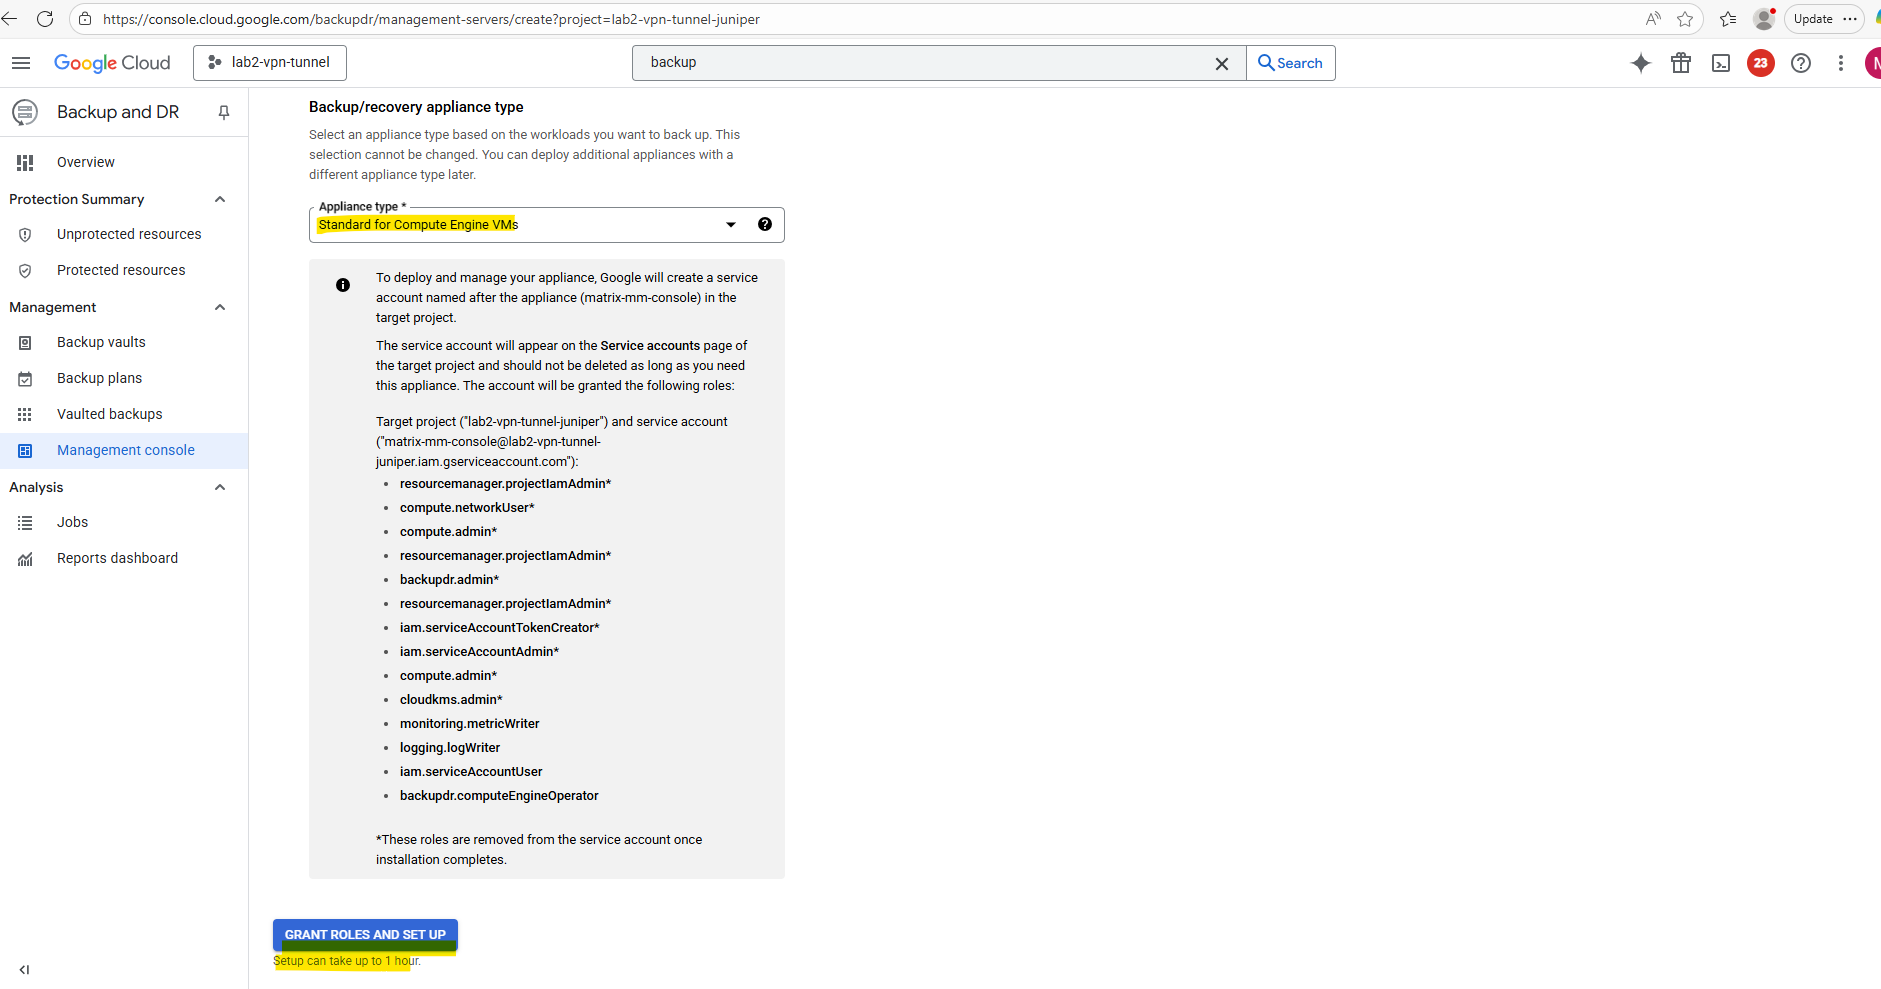
Click on Grant Roles and Set Up (Setup can take up to 1 hour.)
To deploy and manage your appliance, Google will create a service account named after the appliance (matrix-mm-console) in the target project.
The service account will appear on the Service accounts page of the target project and should not be deleted as long as you need this appliance.
The appliance will be created.
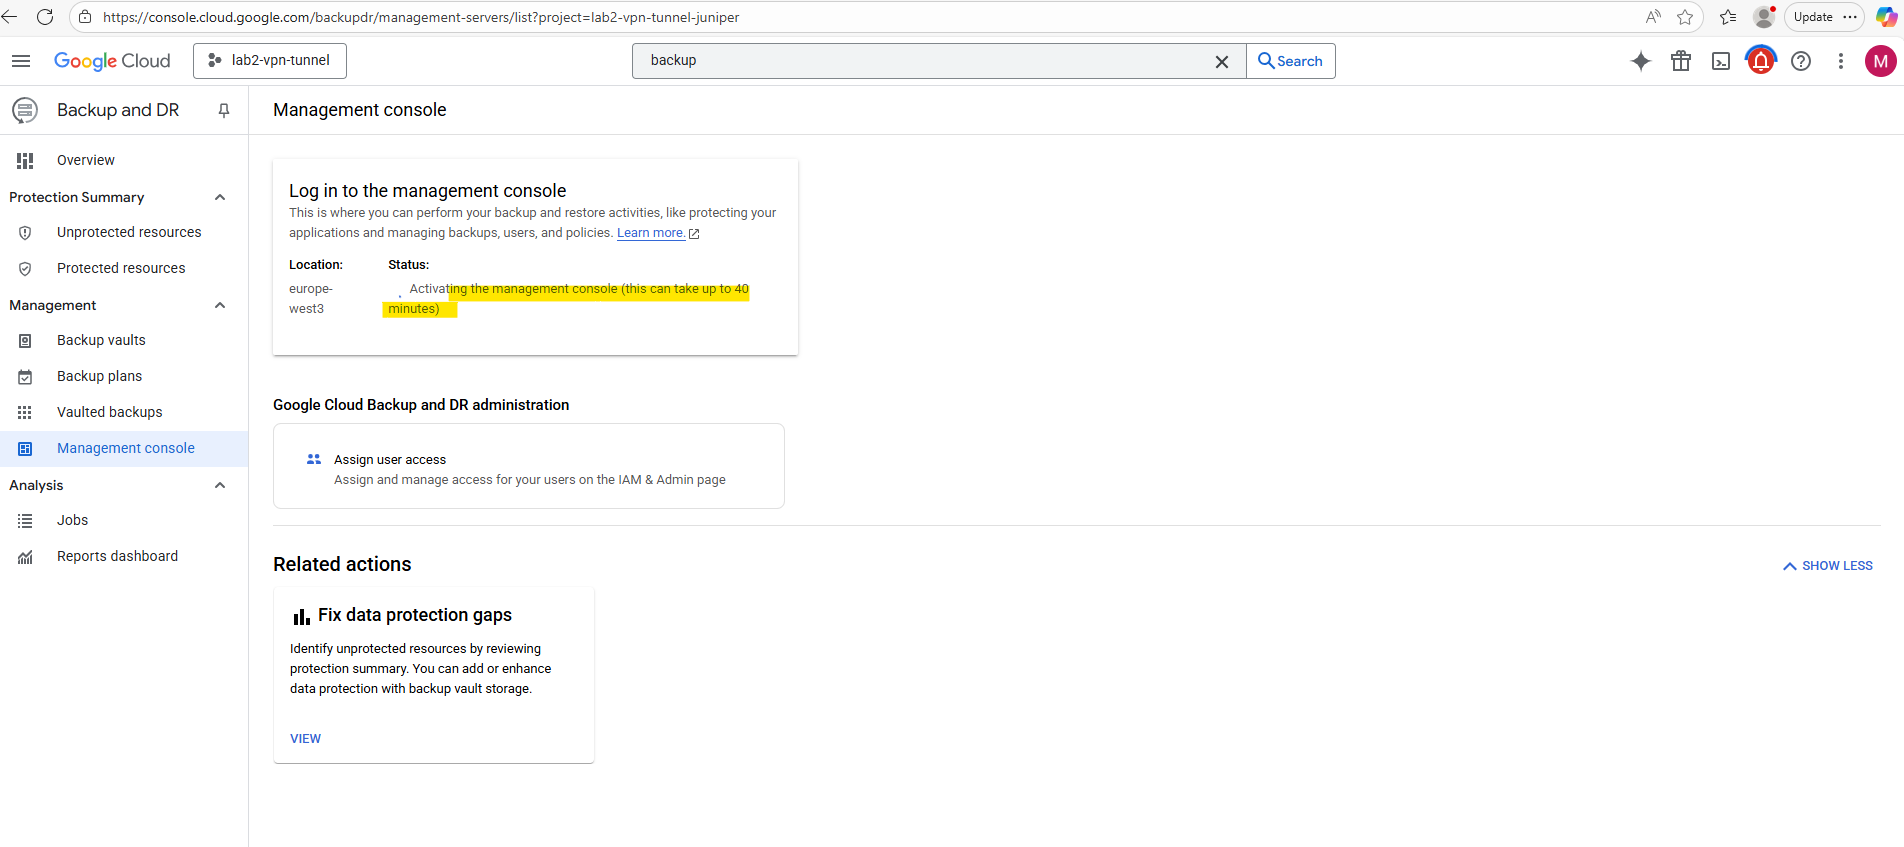
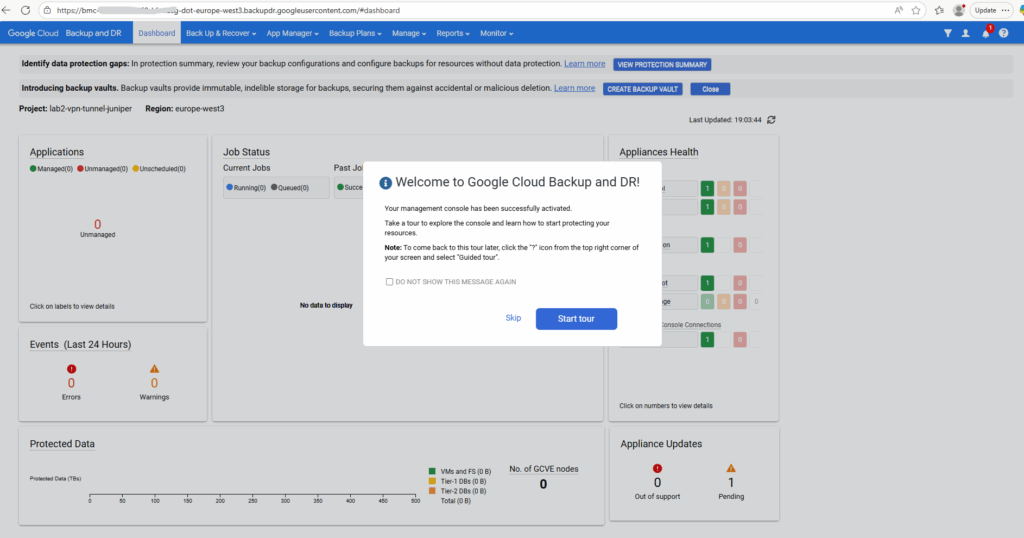
The appliance was created successfully.
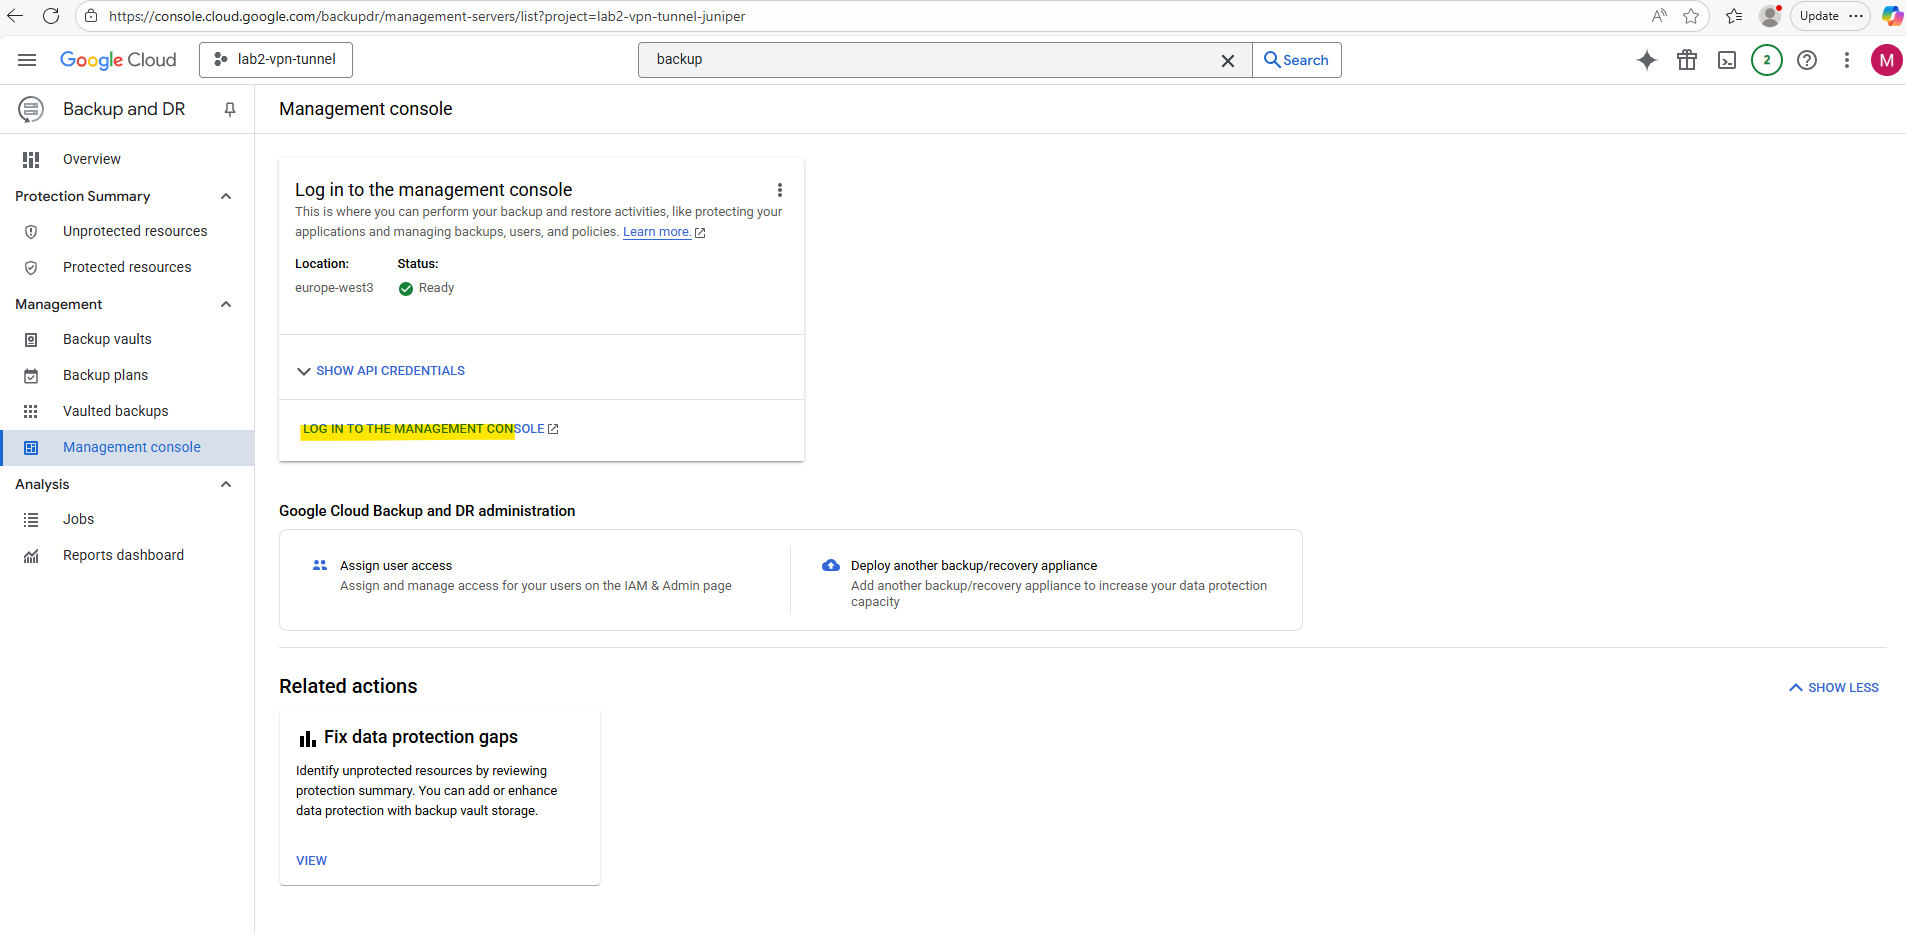
We can now log in to the management console by clicking on the link below.


Backup a VM instance
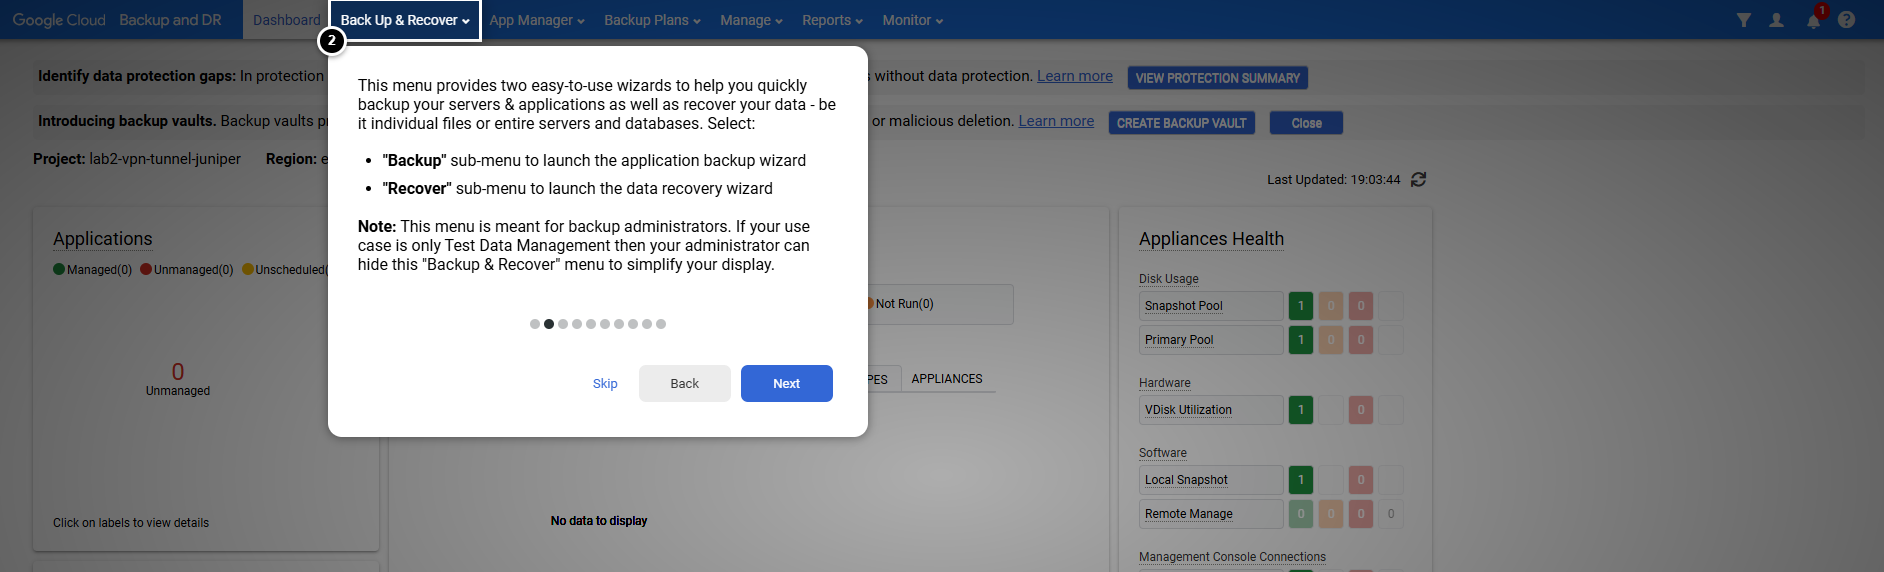
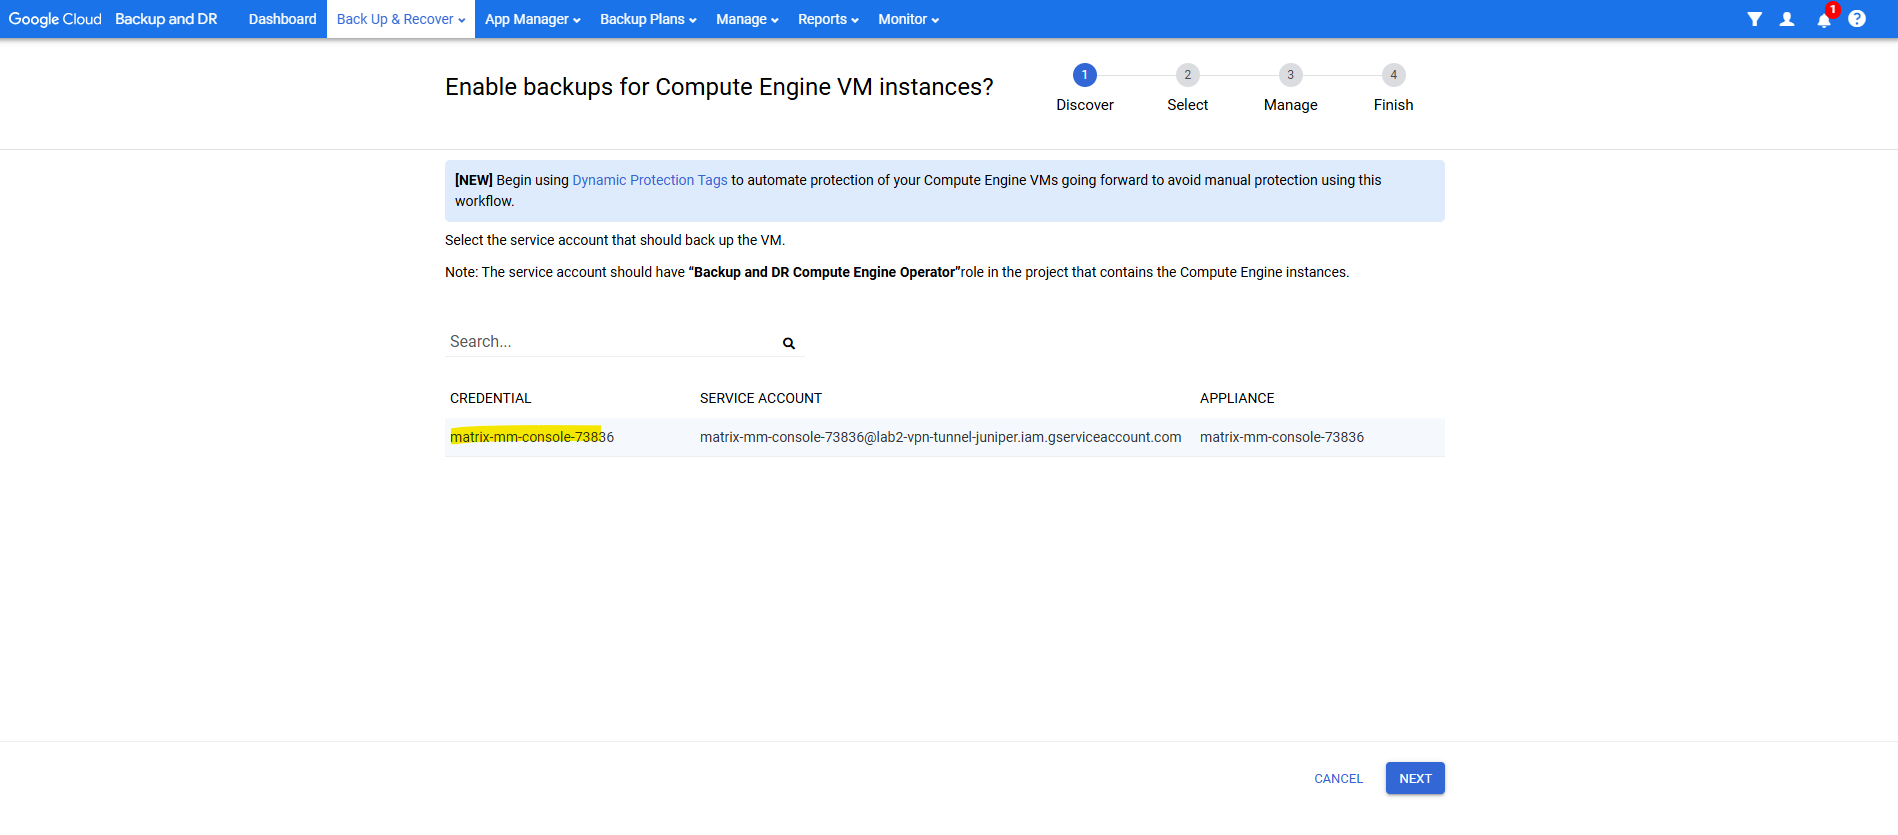
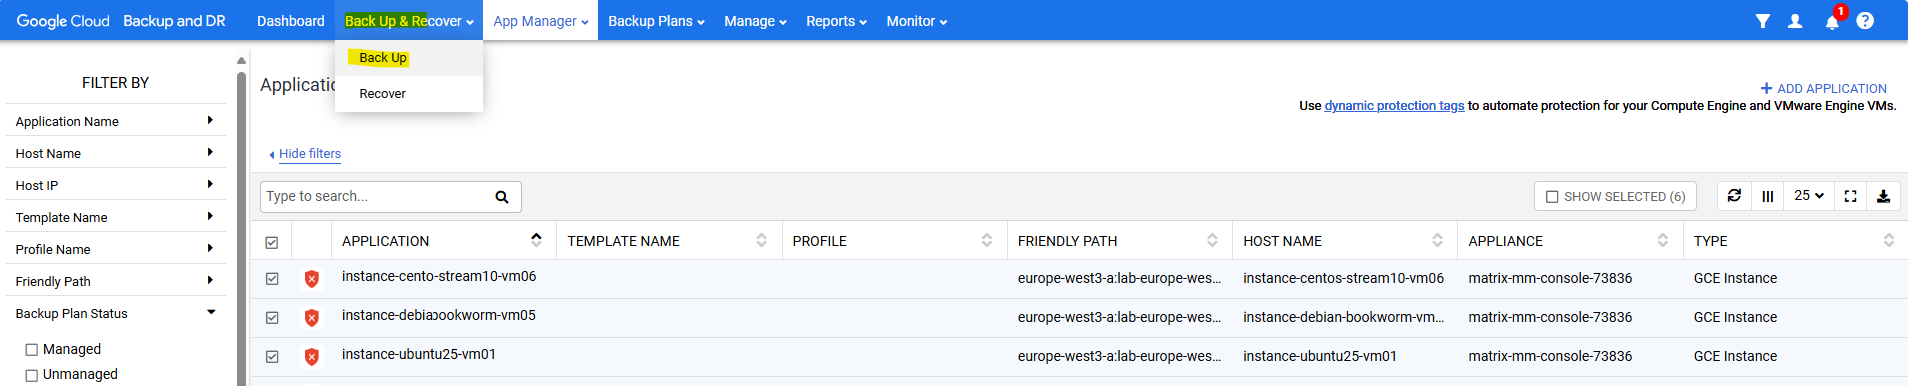
Select Back Up & Recover -> Back up.

Select Compute Engine.

Select the service account from our new appliance we also granted the required roles previously and click on Next.
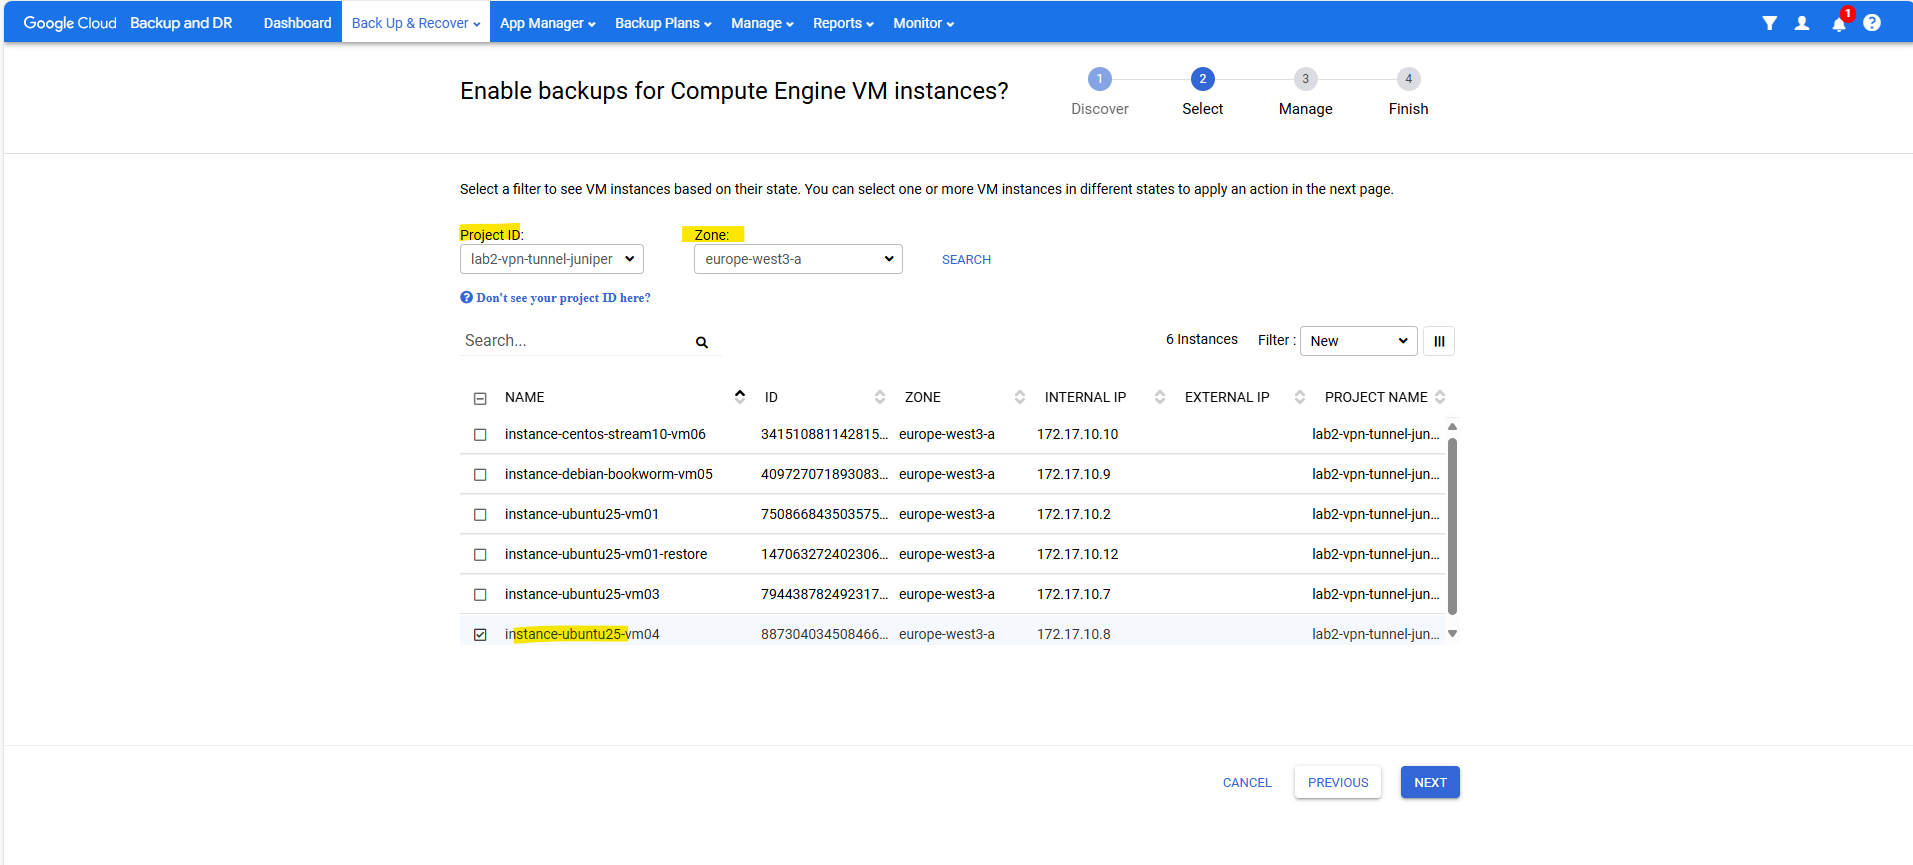
Select the VM instances you want to backup.
Select an action, we want to use the backup template.
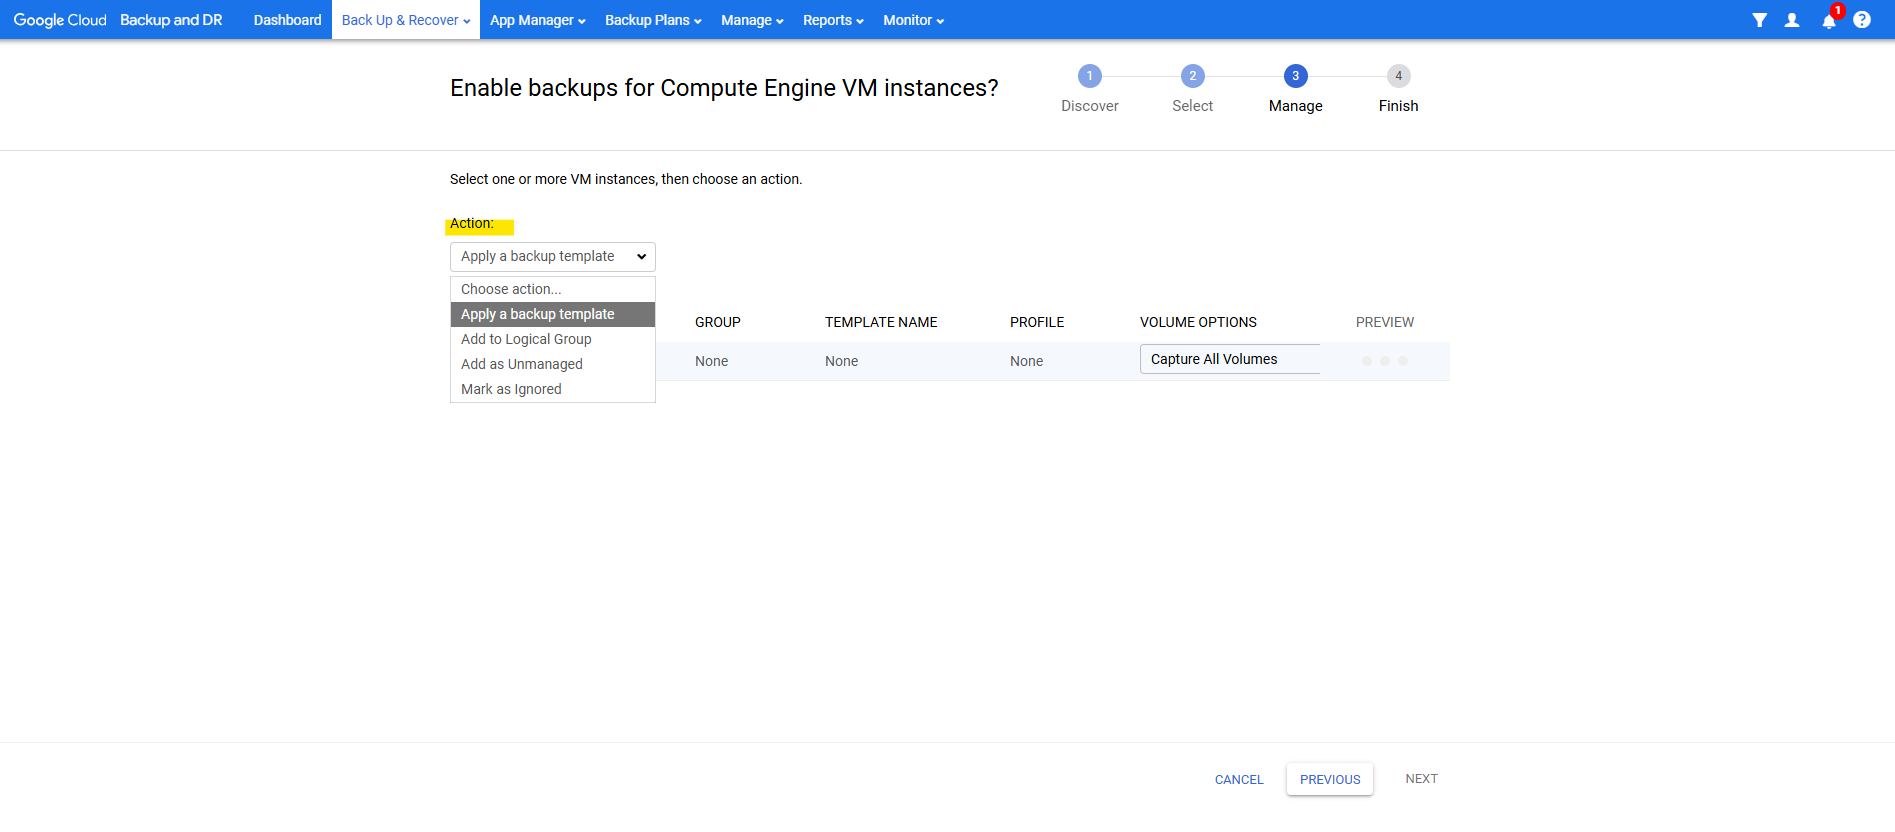
We first need to create a new backup plan. In the next section here we will see how to create first a backup plan.
To protect GCE VMs, you need a backup plan that uses snapshot policies.

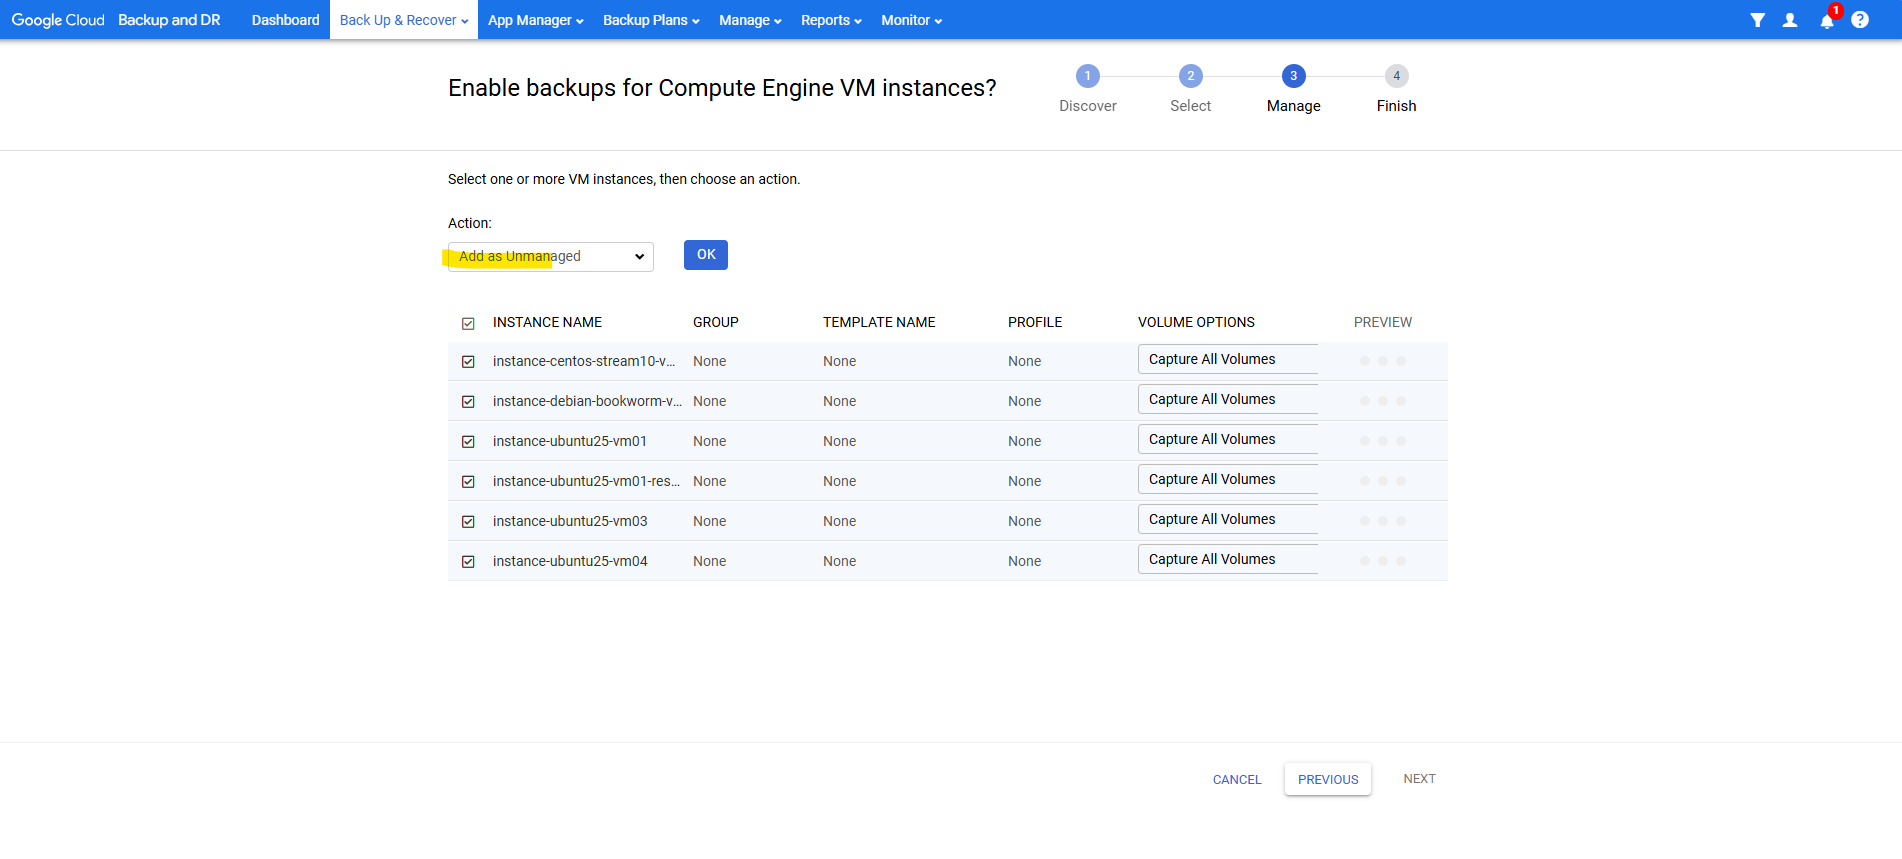
We can also first mark them as unmanaged and applying later a backup plan to. Click on OK and Next.
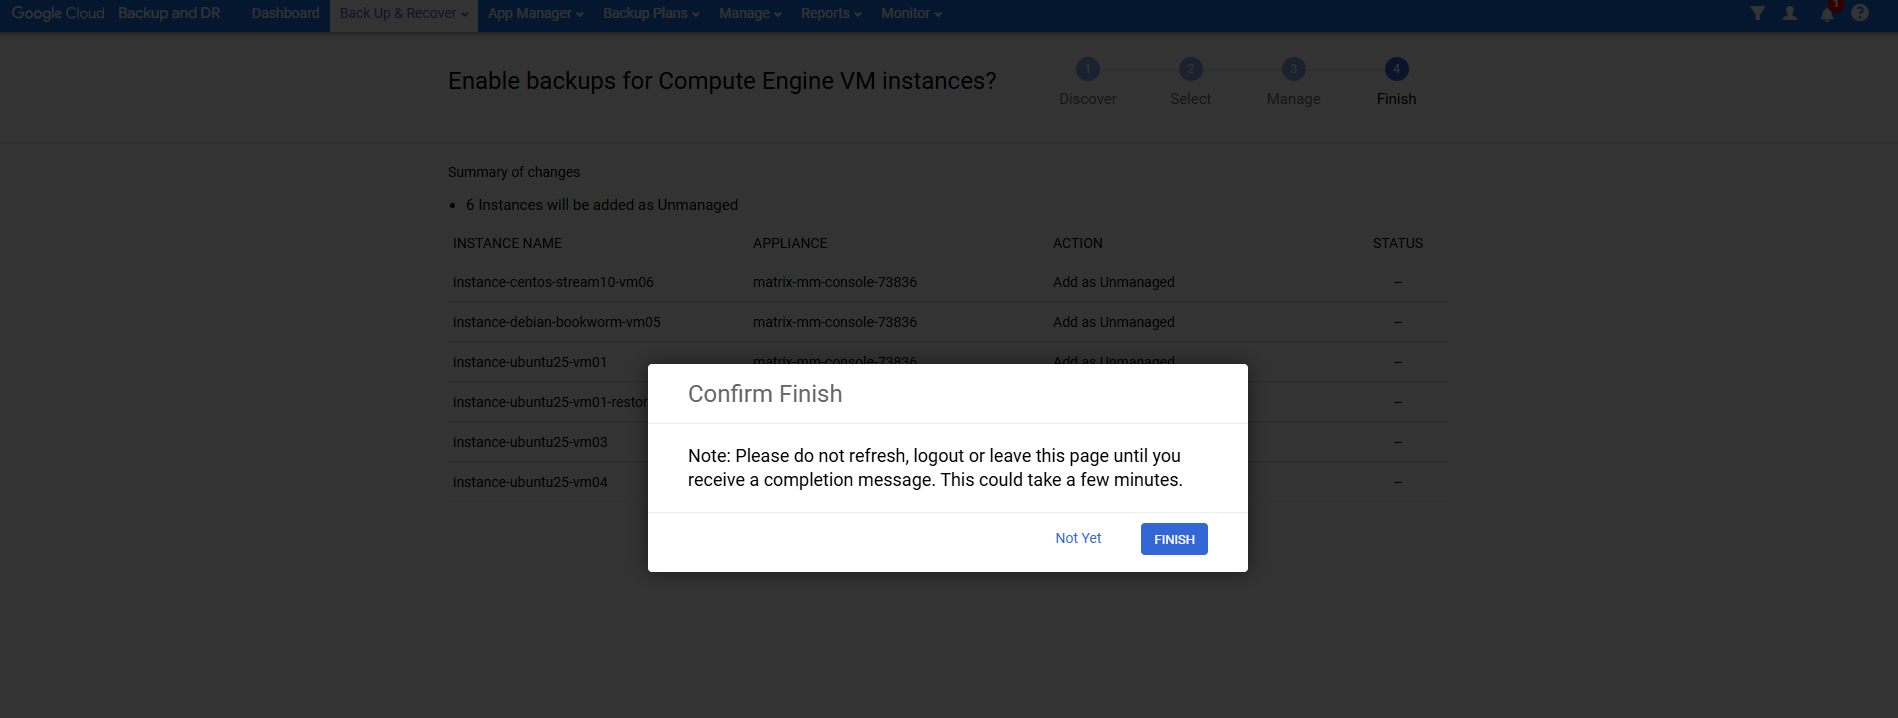
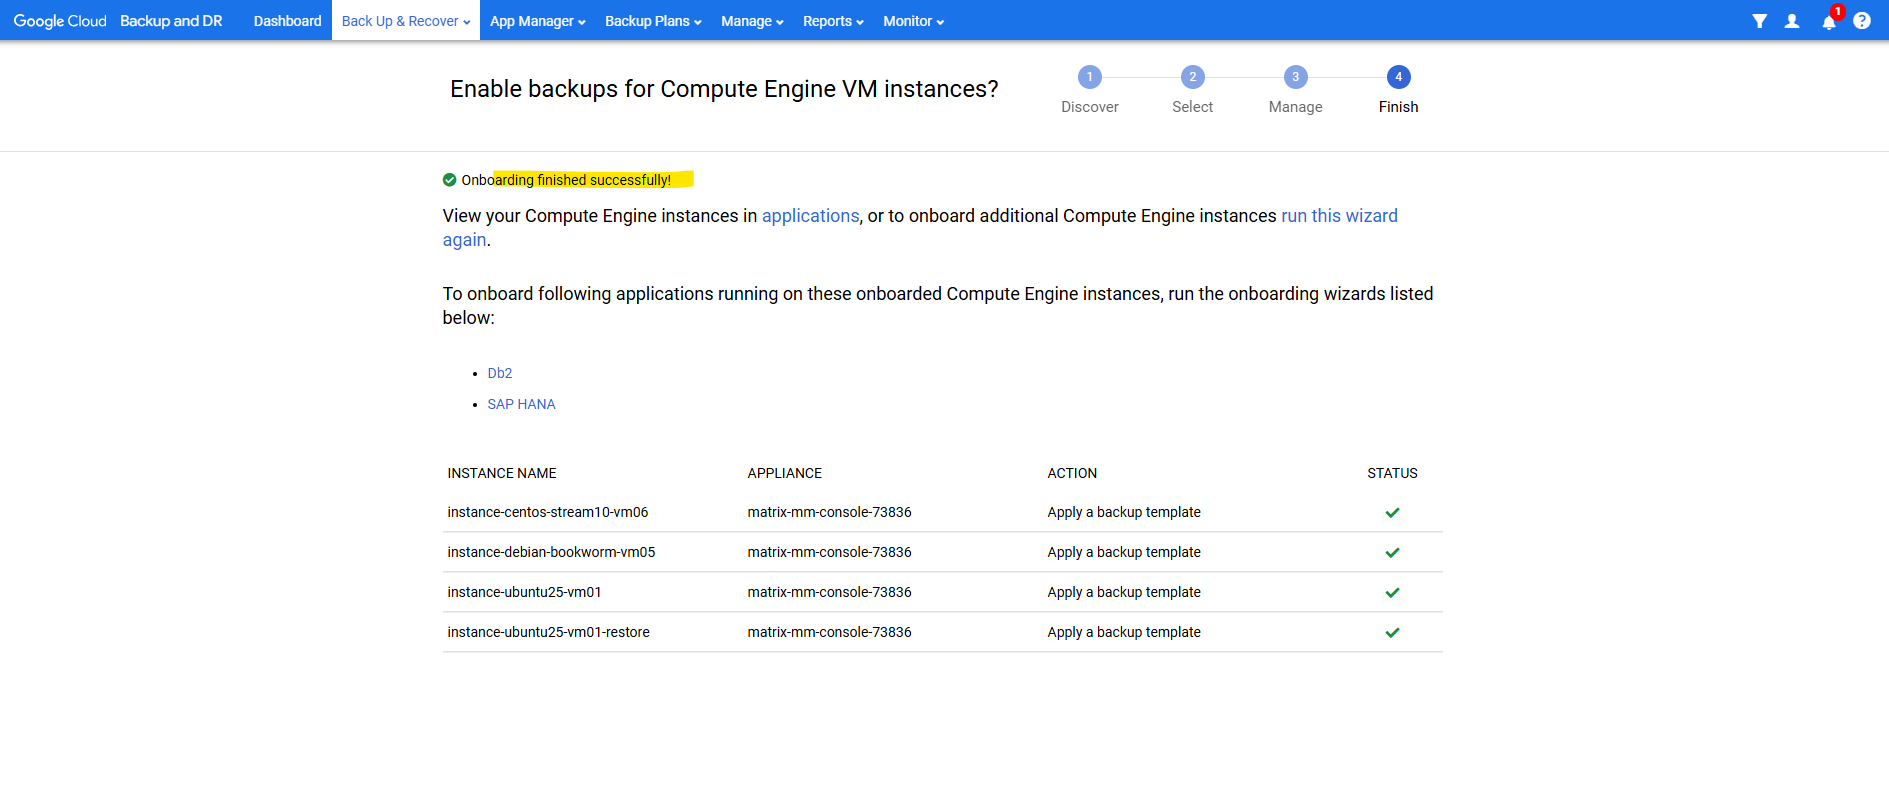
Click on Finish.
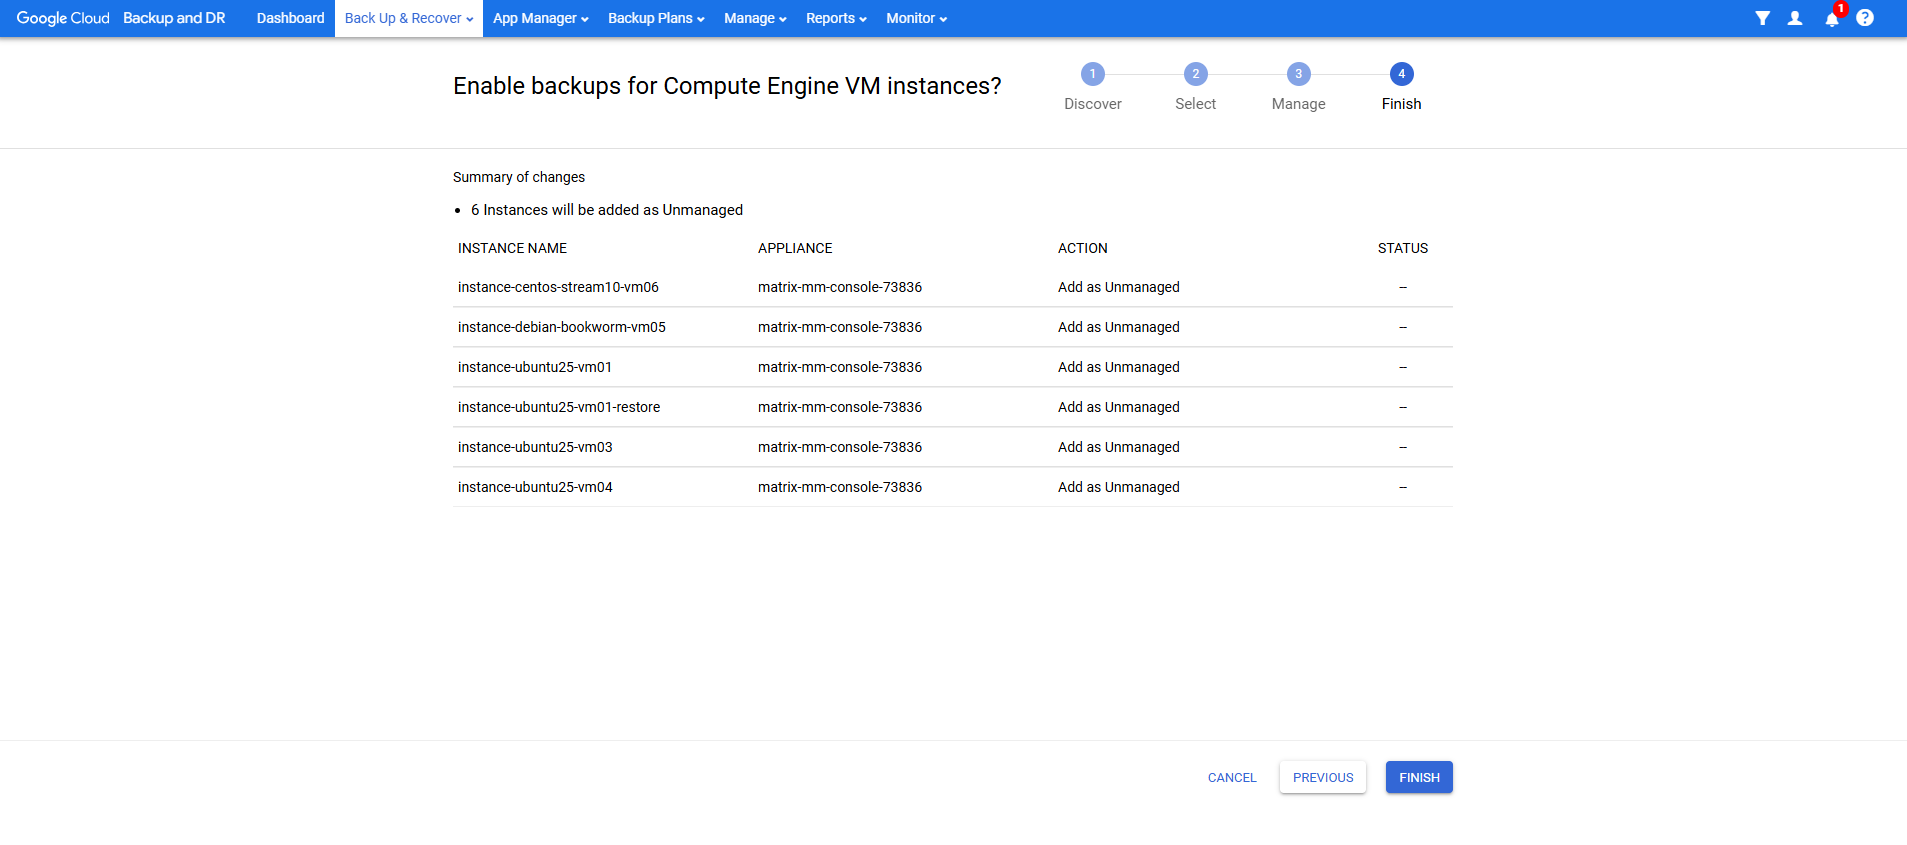
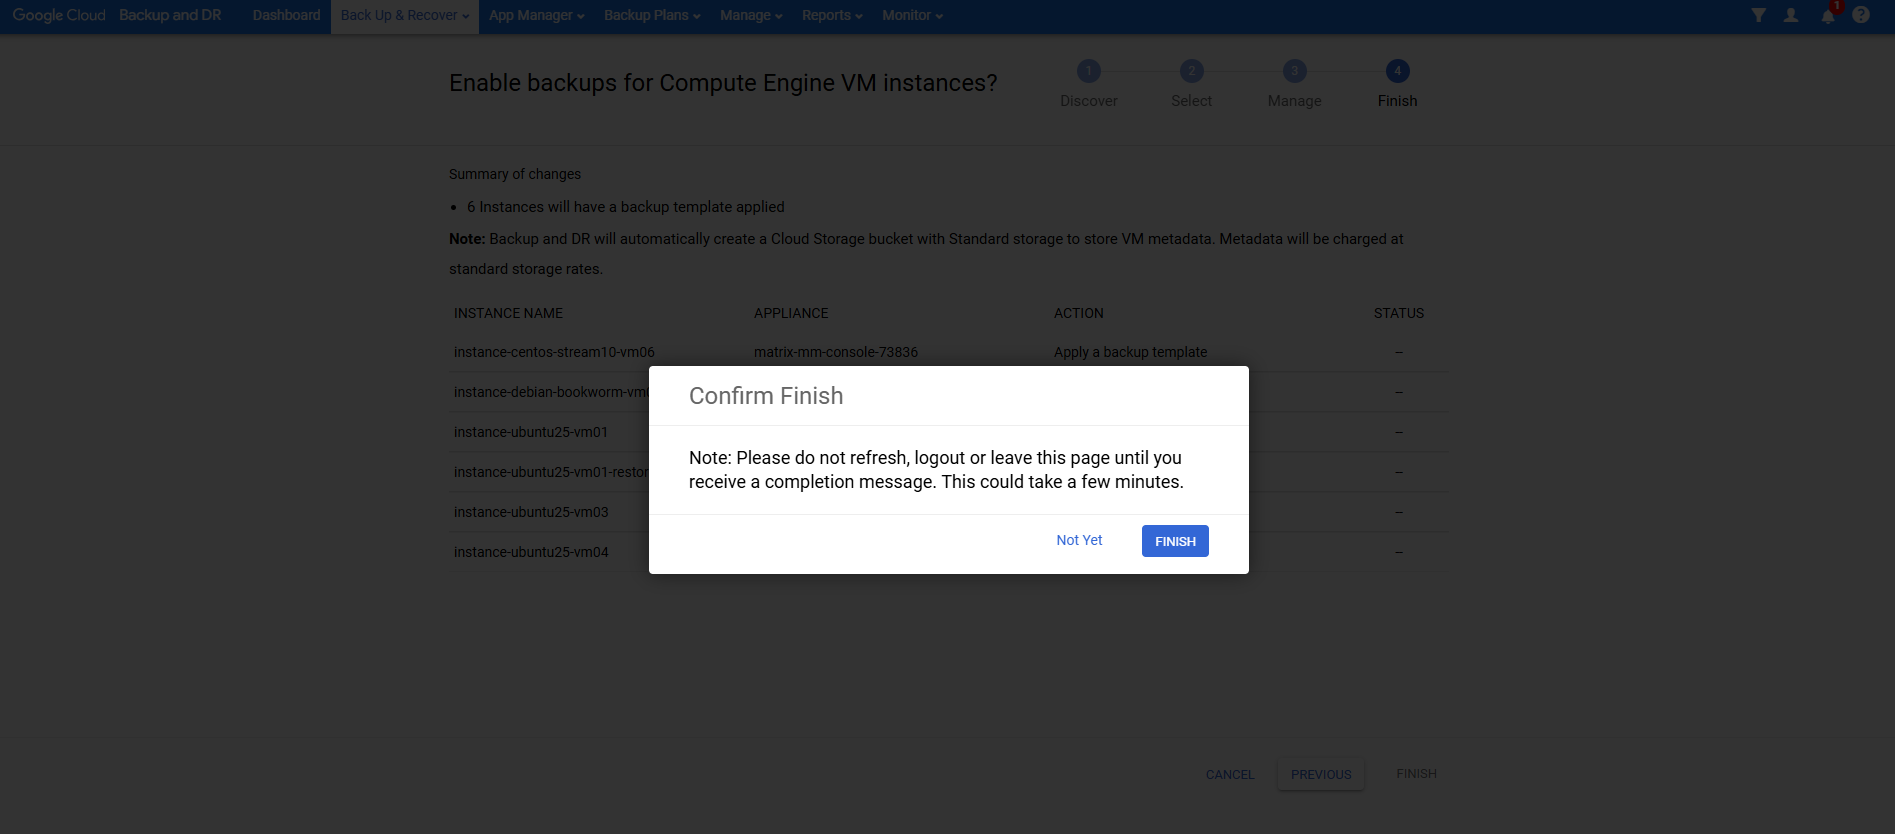
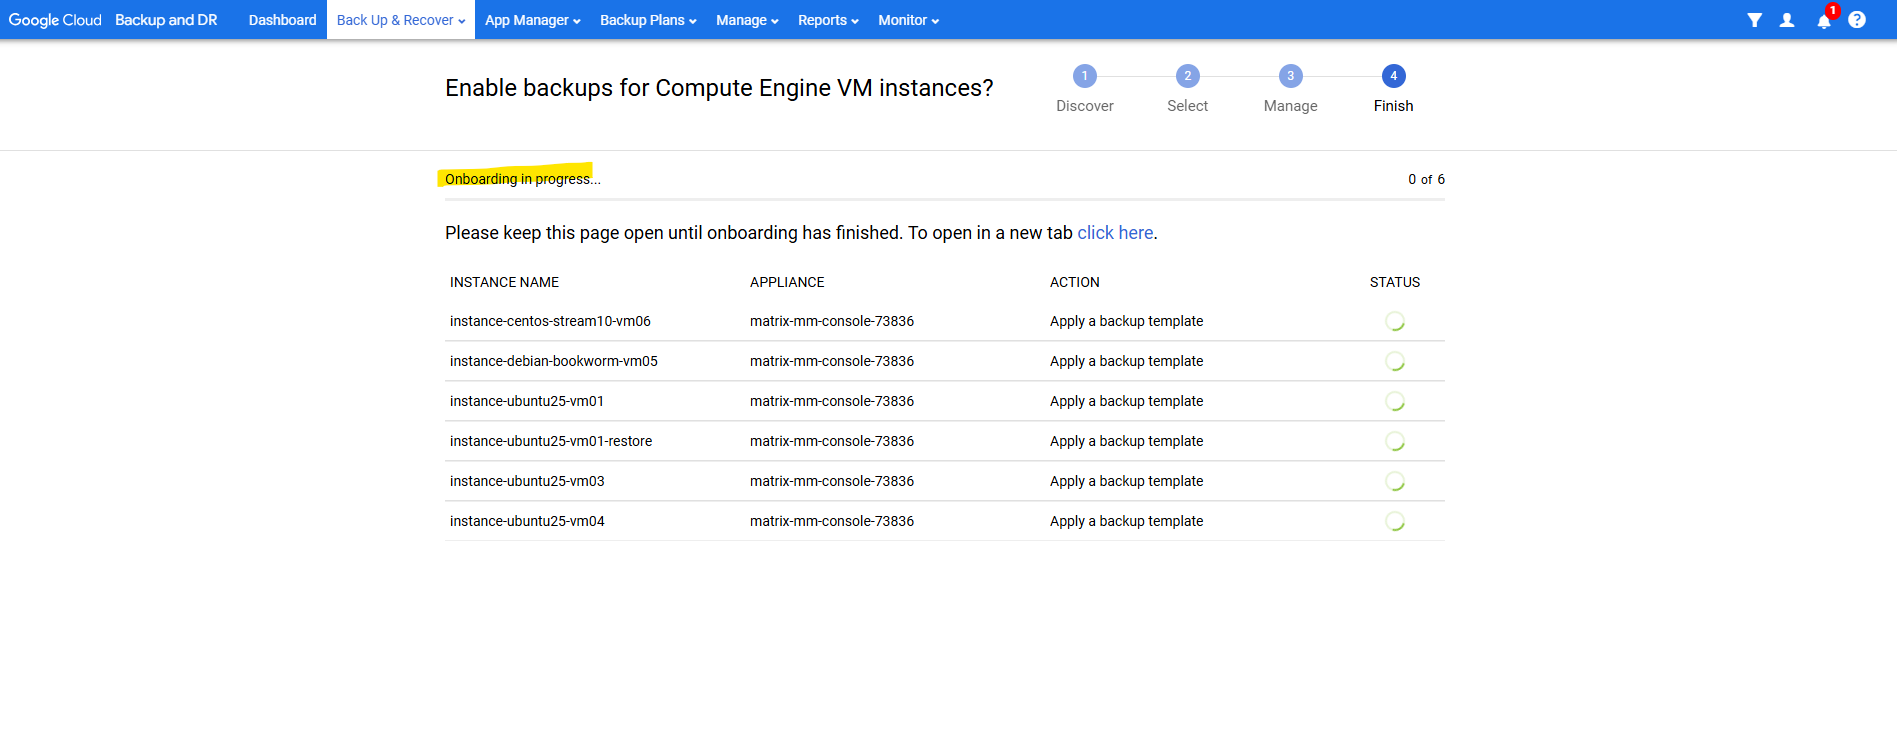
As requested don’t refresh, logout or leave this page until we receive an completion message.

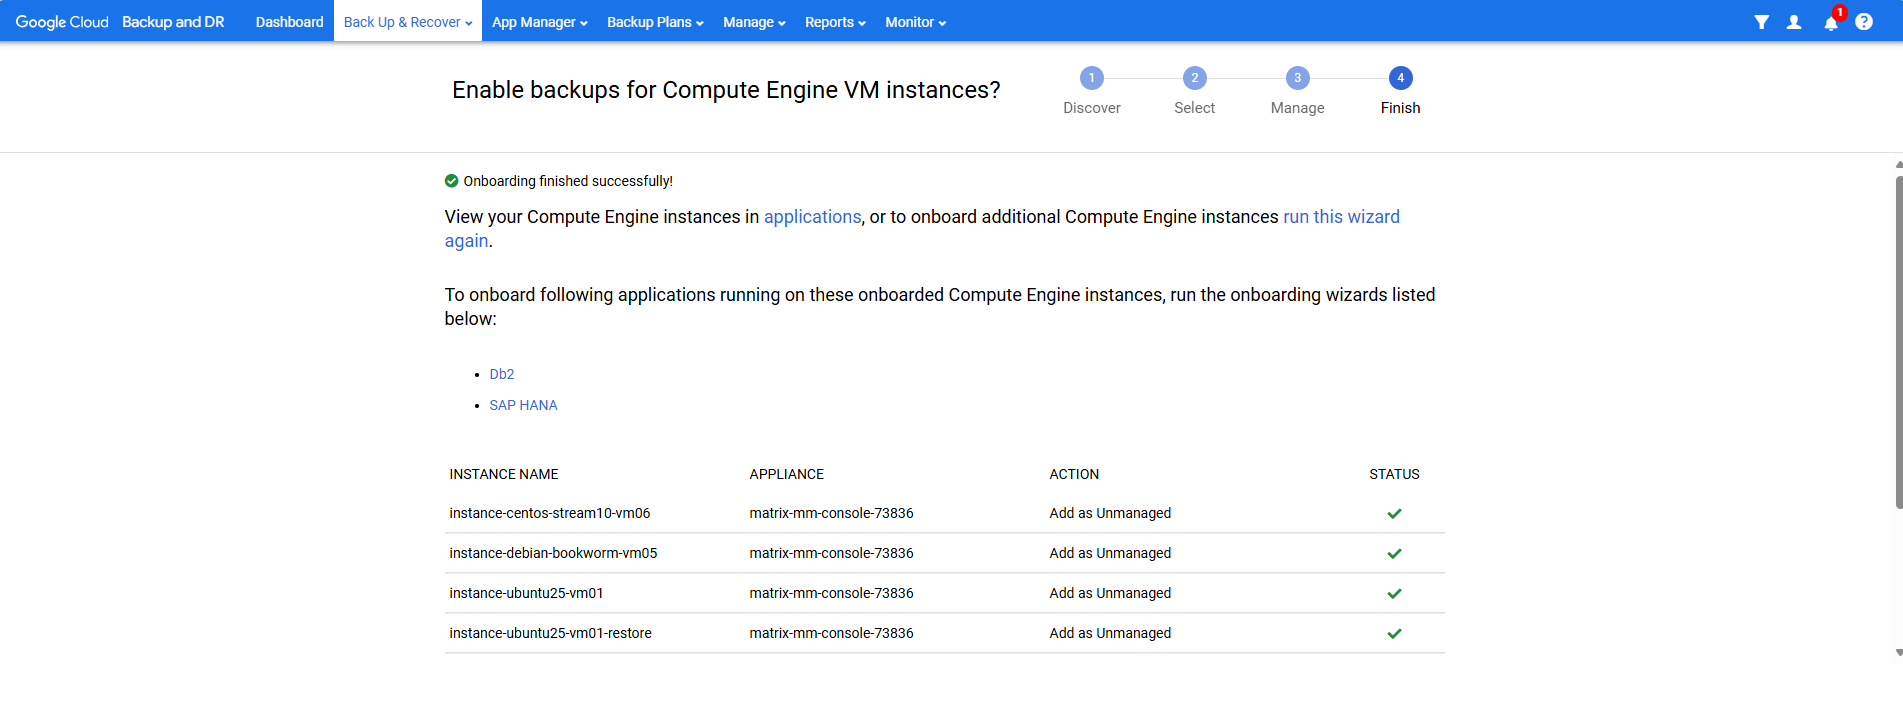
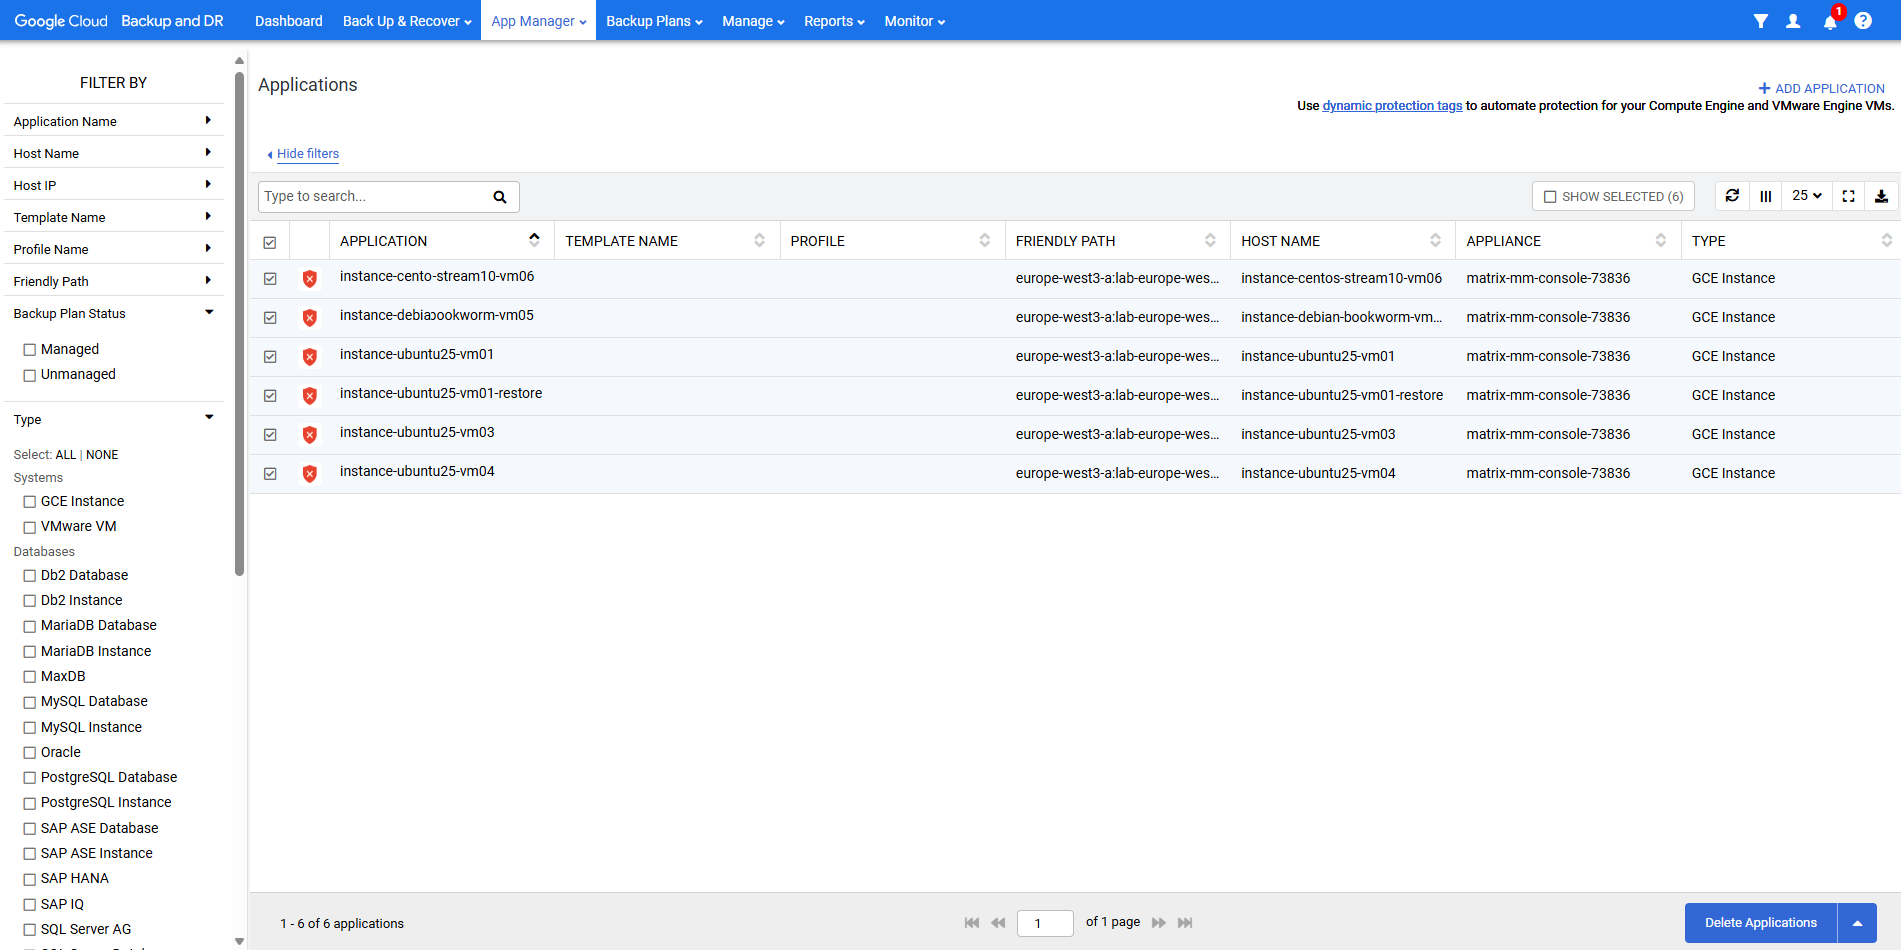
I will click on applications below to view my compute engine instances in App Manager -> Applications.
So after we have created a backup plan template which is compatible with protecting Google Compute Engine VMs, we can move on to backup them.
Click on Back Up & Recover -> Back Up to browse as previously to the page to enable backups for our VM instances.
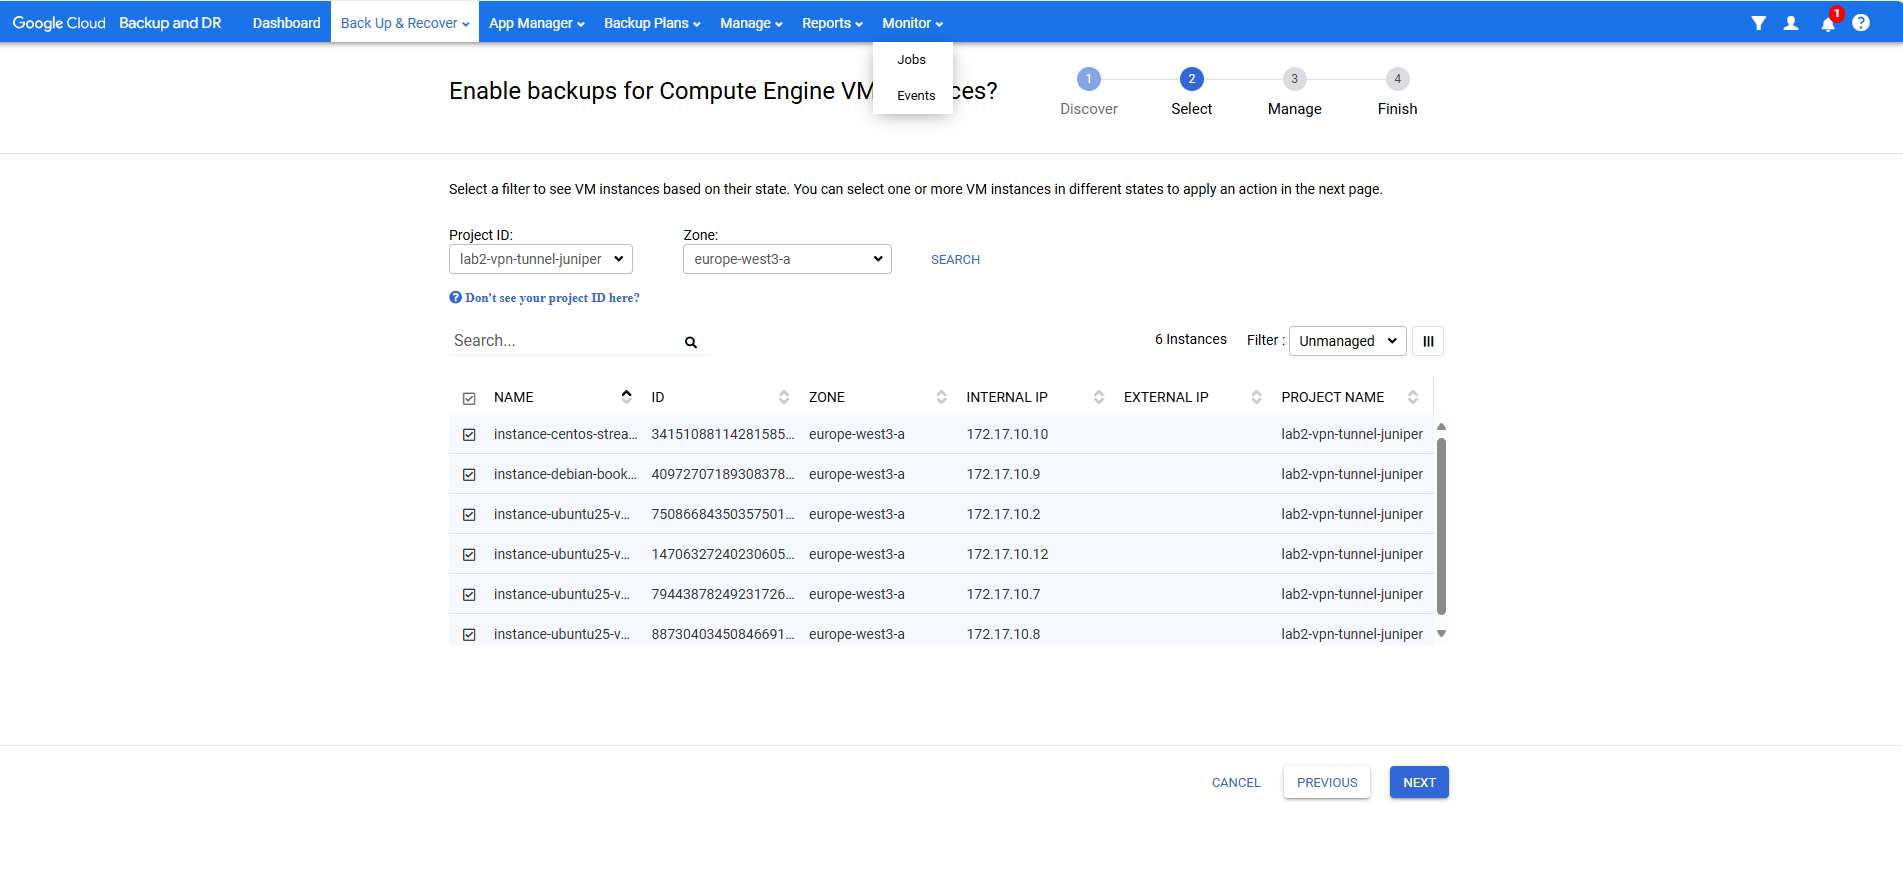
This time we need to filter for unmanaged VM instances to show as we already onboarded them to unmanaged VM instances .
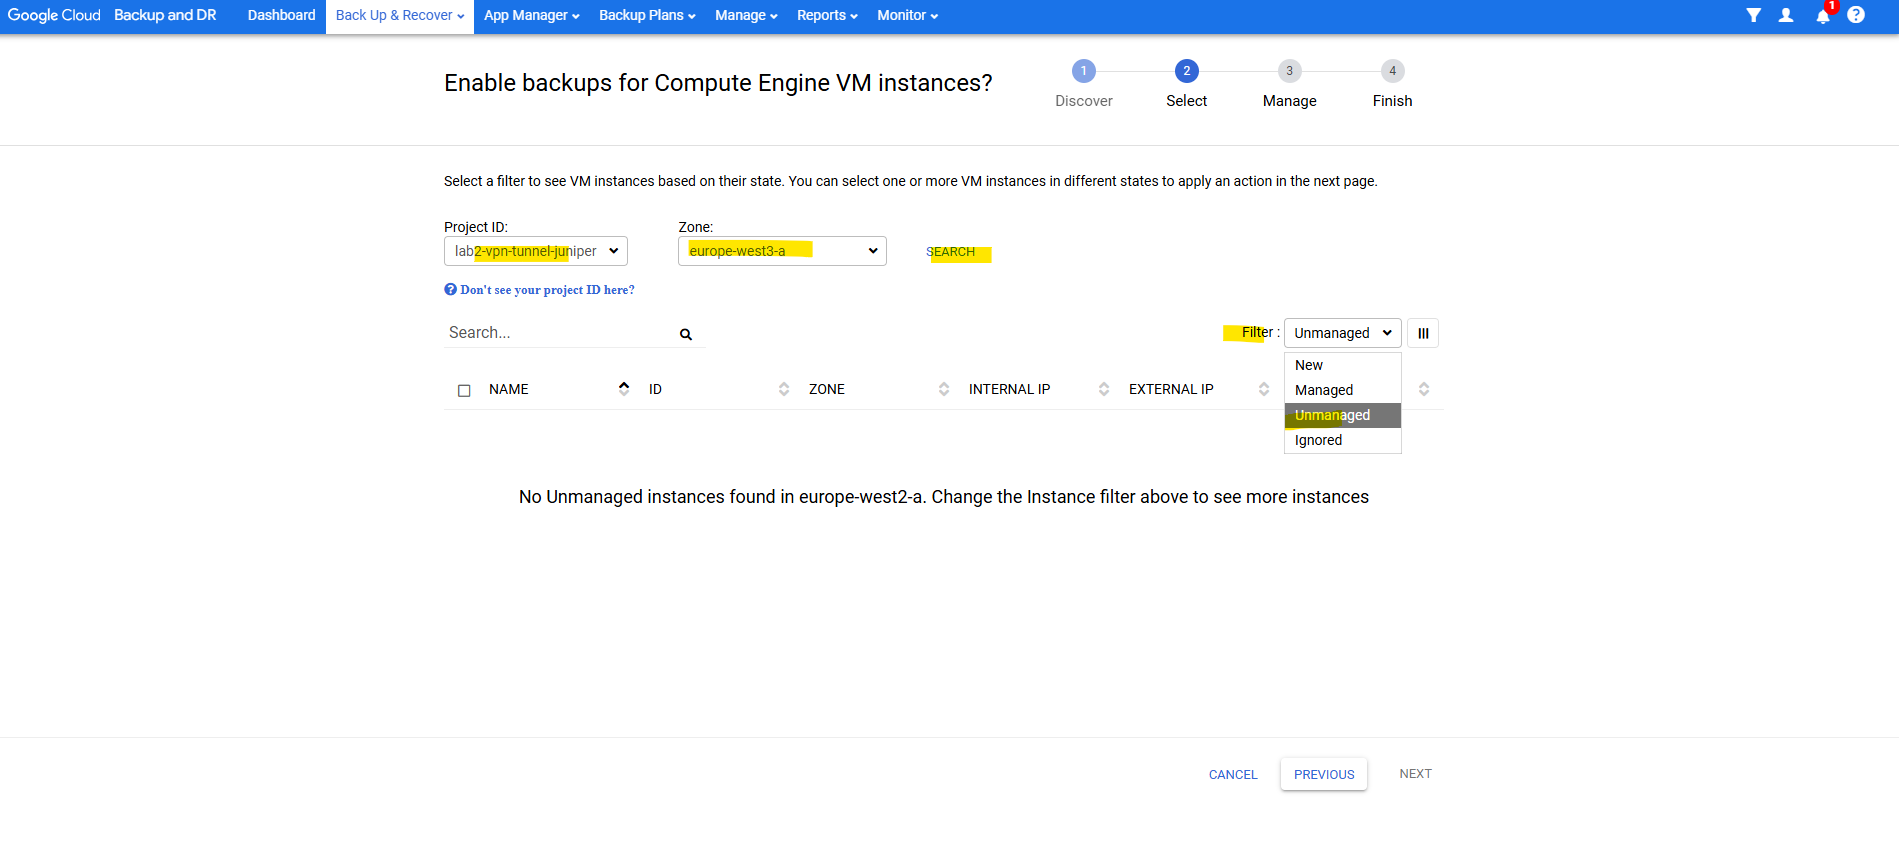
Select them and click on Next.
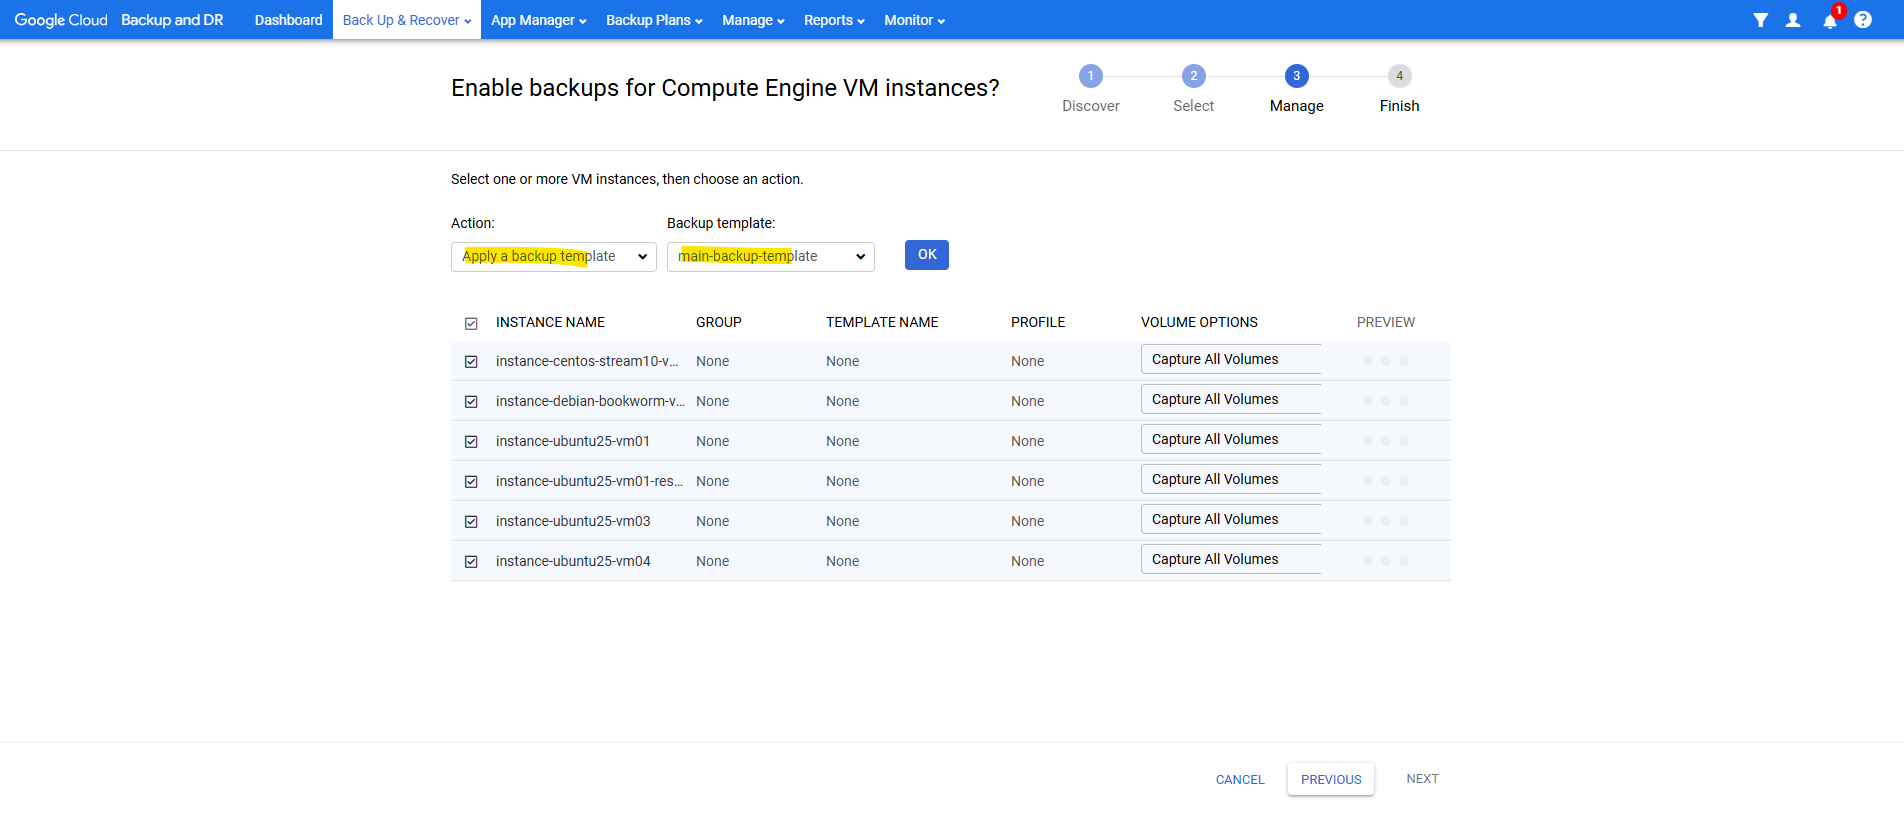
Select the VM instances and select for the Action here Apply a backup template.
Then select the desired backup template, here as mentioned just backup templates with policy type of Snapshot will be shown up and available/compatible for Google Compute Engine VMs.
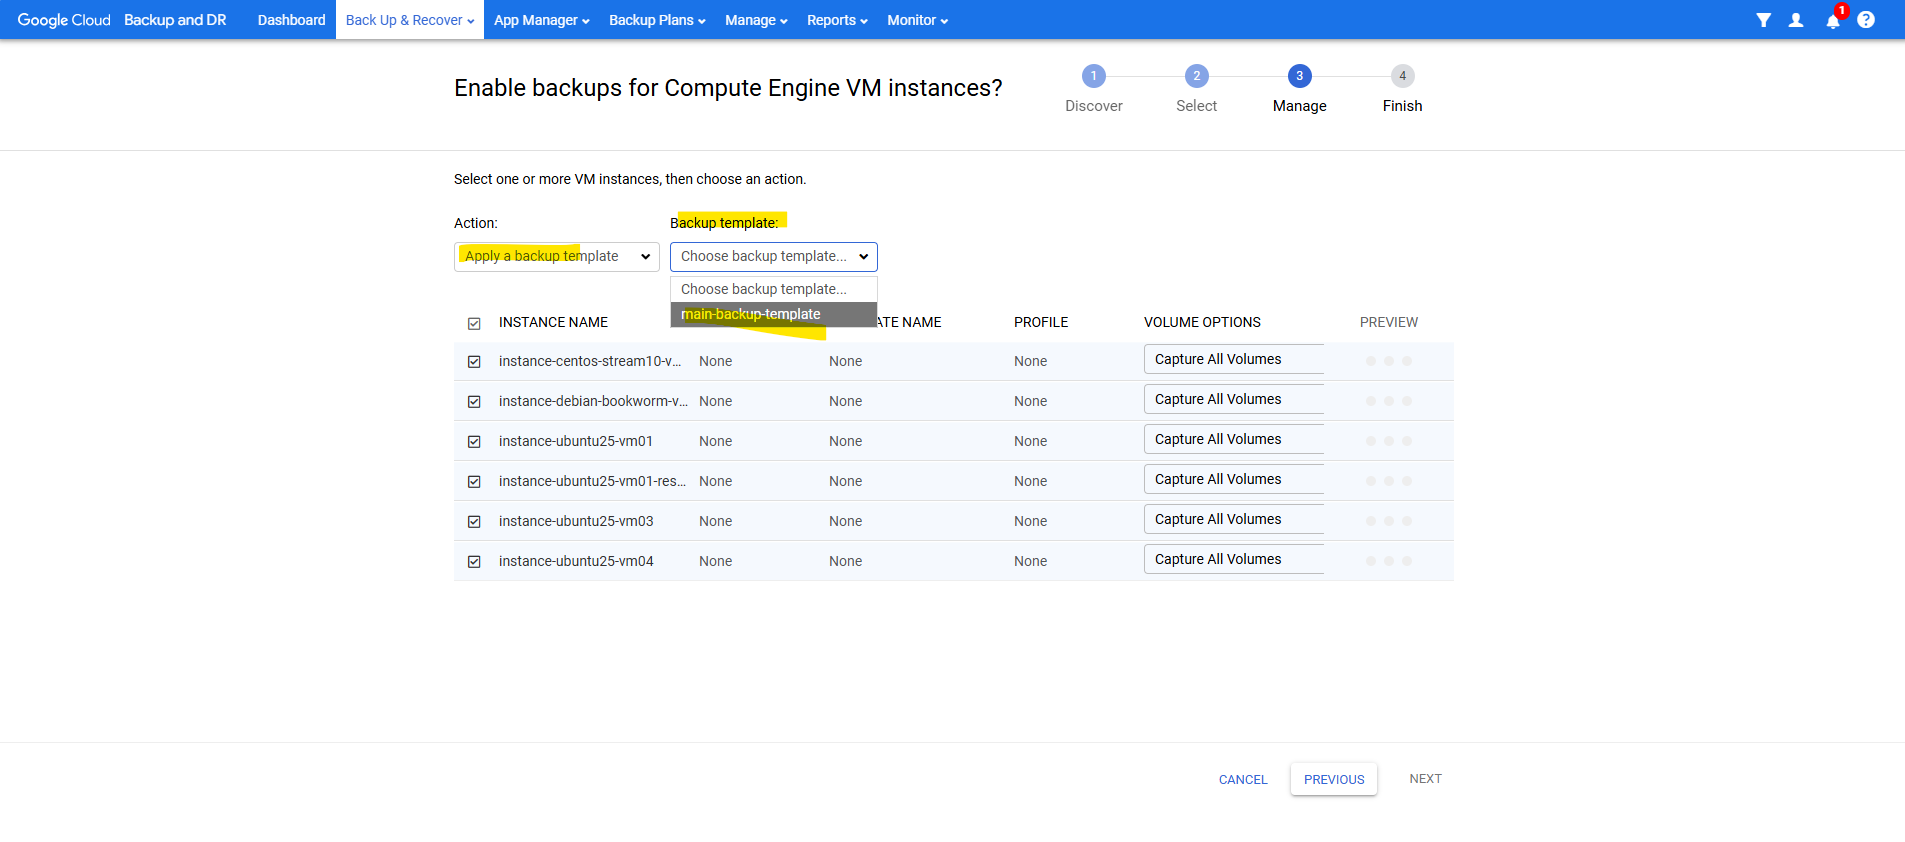
Click on OK and Next.
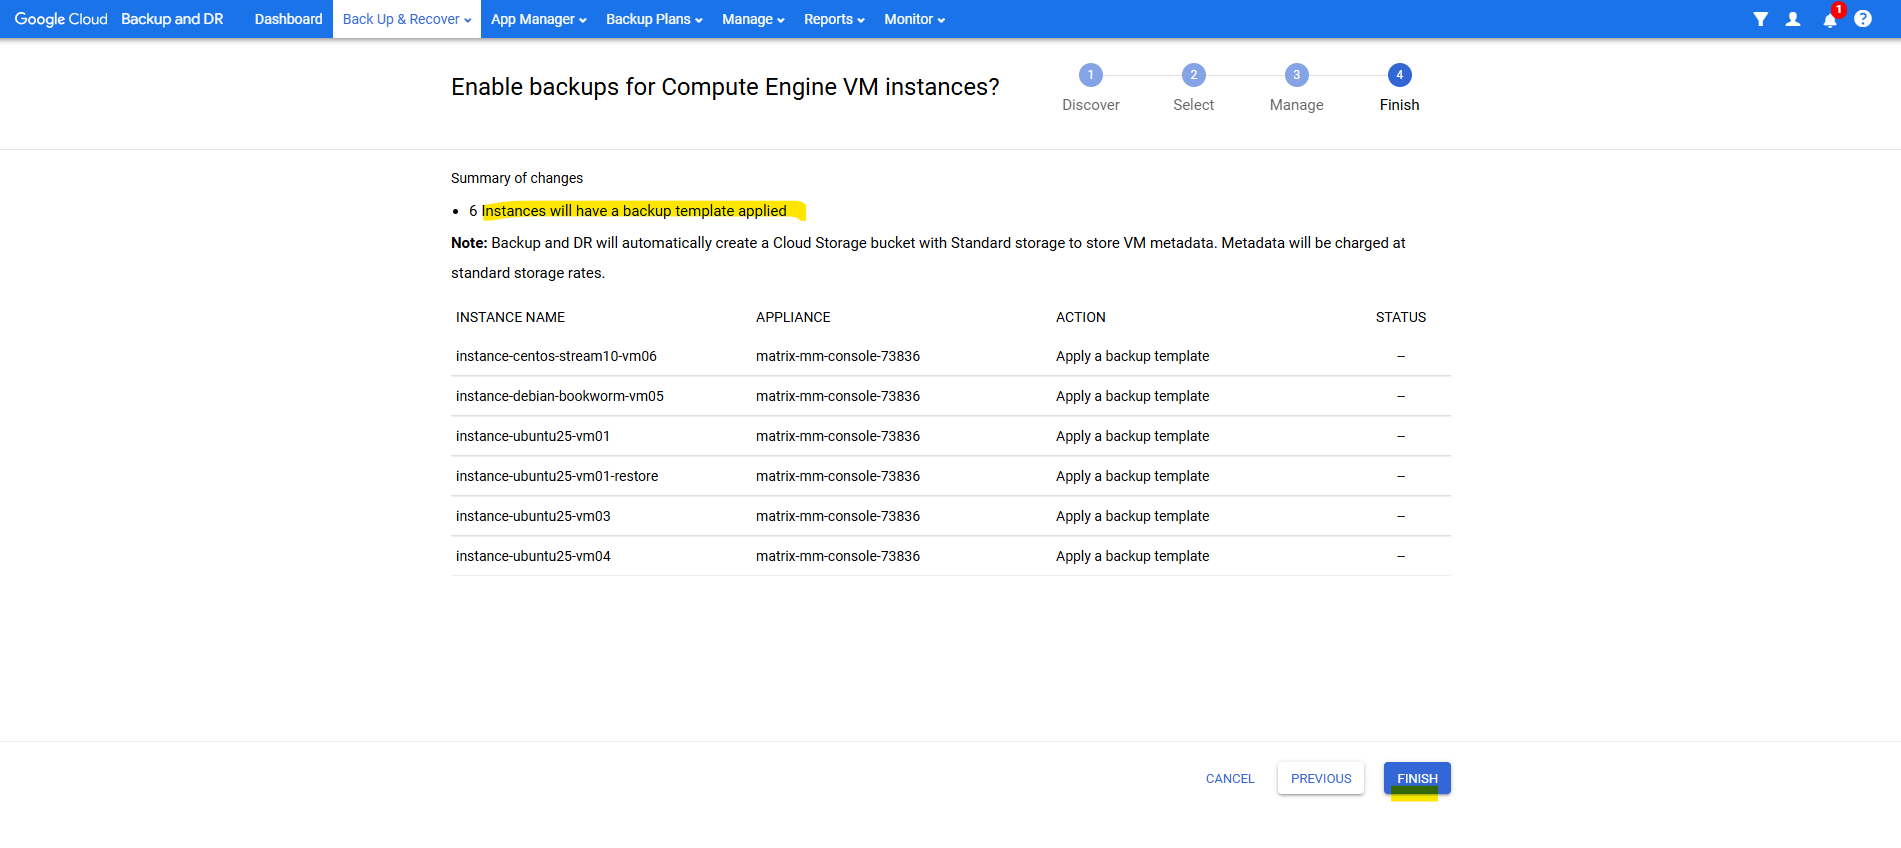
Finally click on Finish.
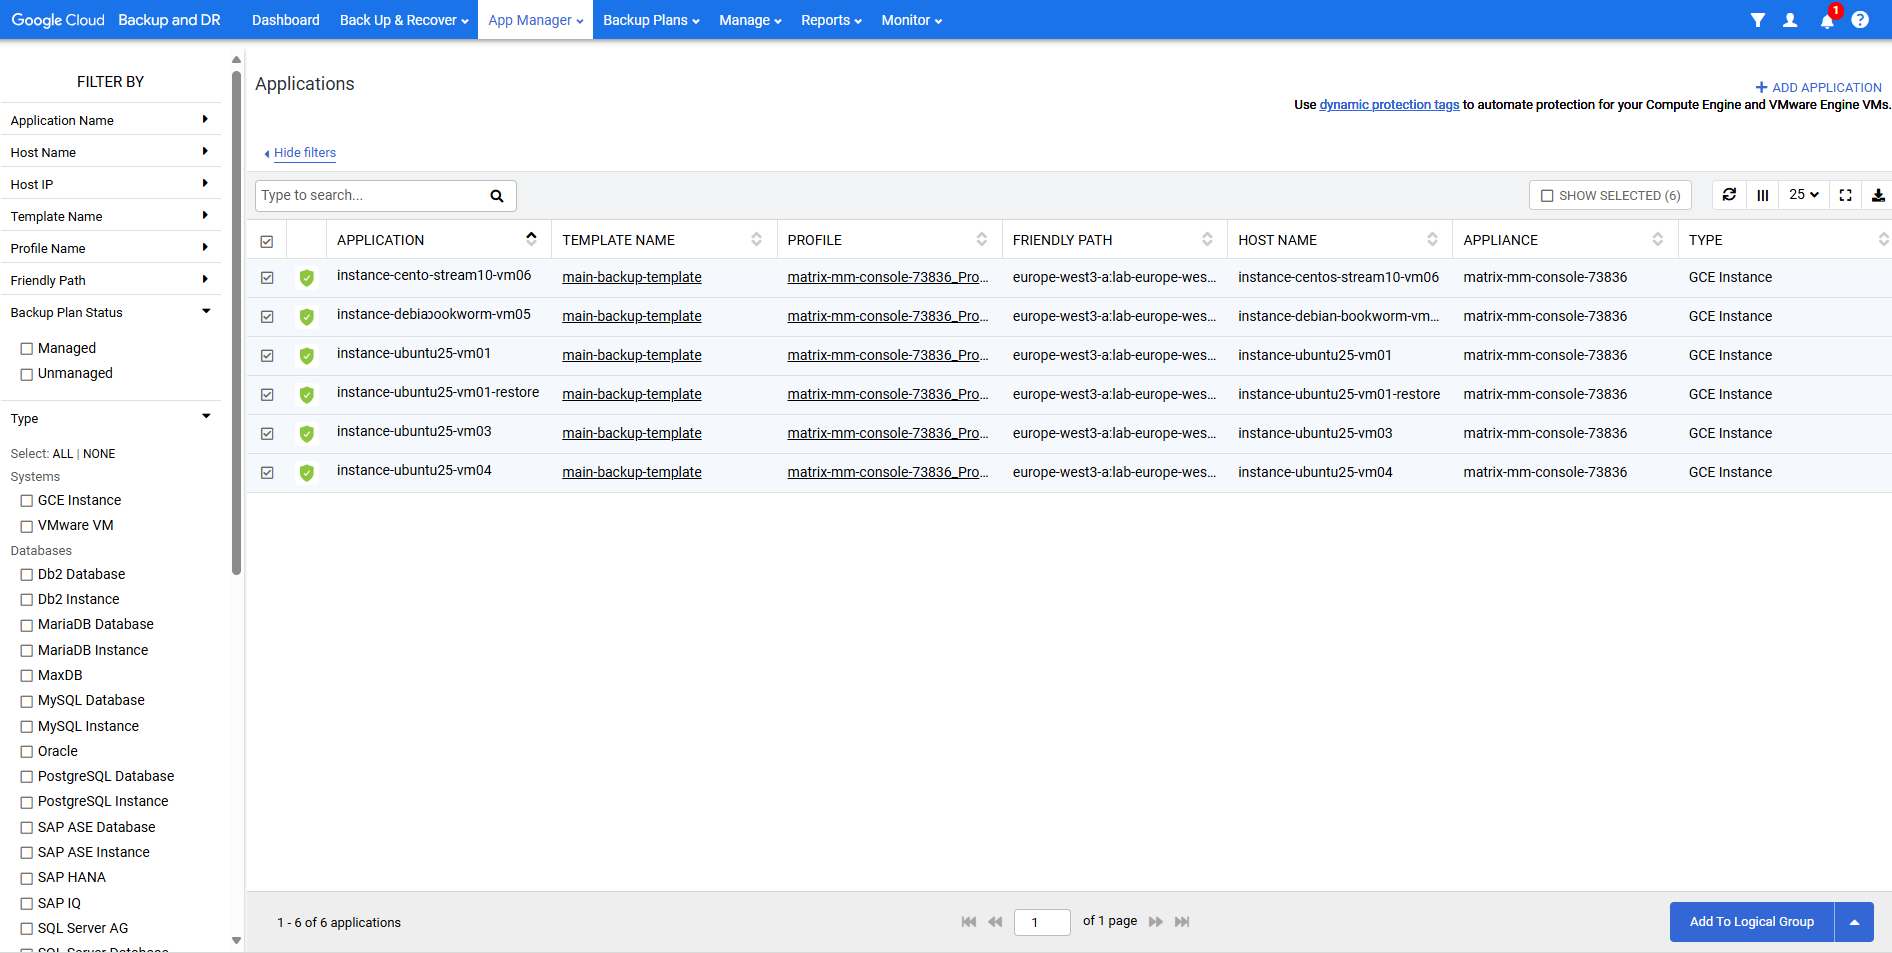
Under App Manager ->Applications they are now marked as protected and we can see the applied backup template.
Create a Backup Plan Template
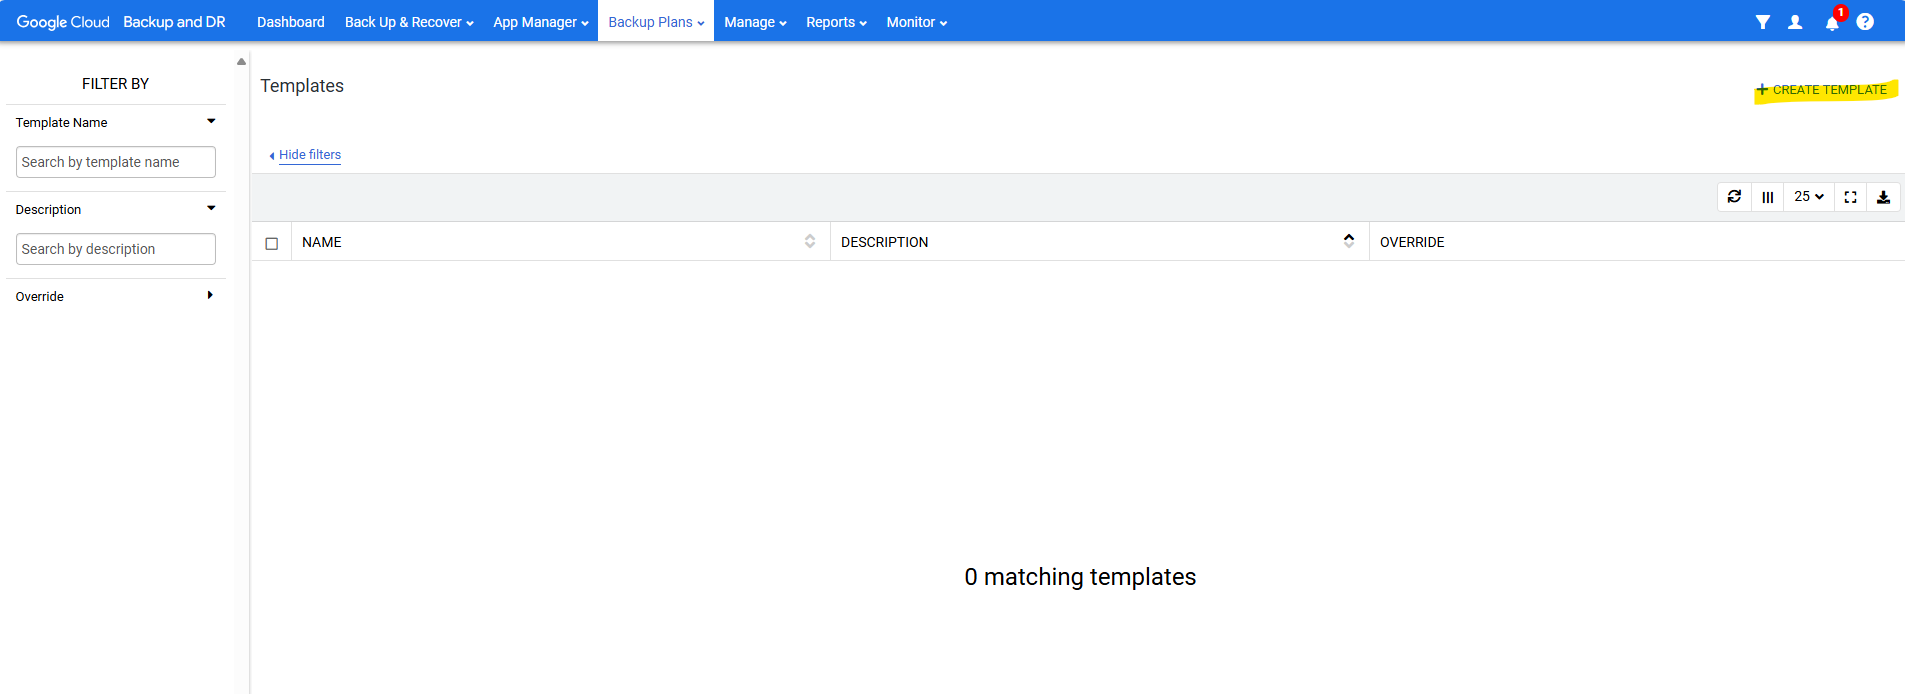
To create a new backup plan template, navigate to Backup Plans -> Templates.
Click on + Create Template.
We can first expand the details section for workload compatibility below to see which type of policy template we can use to protect and backup our Google Compute Engine VMs.
So for our Google Compute Engine VMs just the policy type with Snapshot is compatible and we can use to protect them.
OnVault pool storage is typically used for long-term retention of data.
An OnVault pool is a pointer to a Cloud Storage bucket or a backup vault that is used to store backup data.
Source: https://cloud.google.com/backup-disaster-recovery/docs/backup/create-onvault-pool

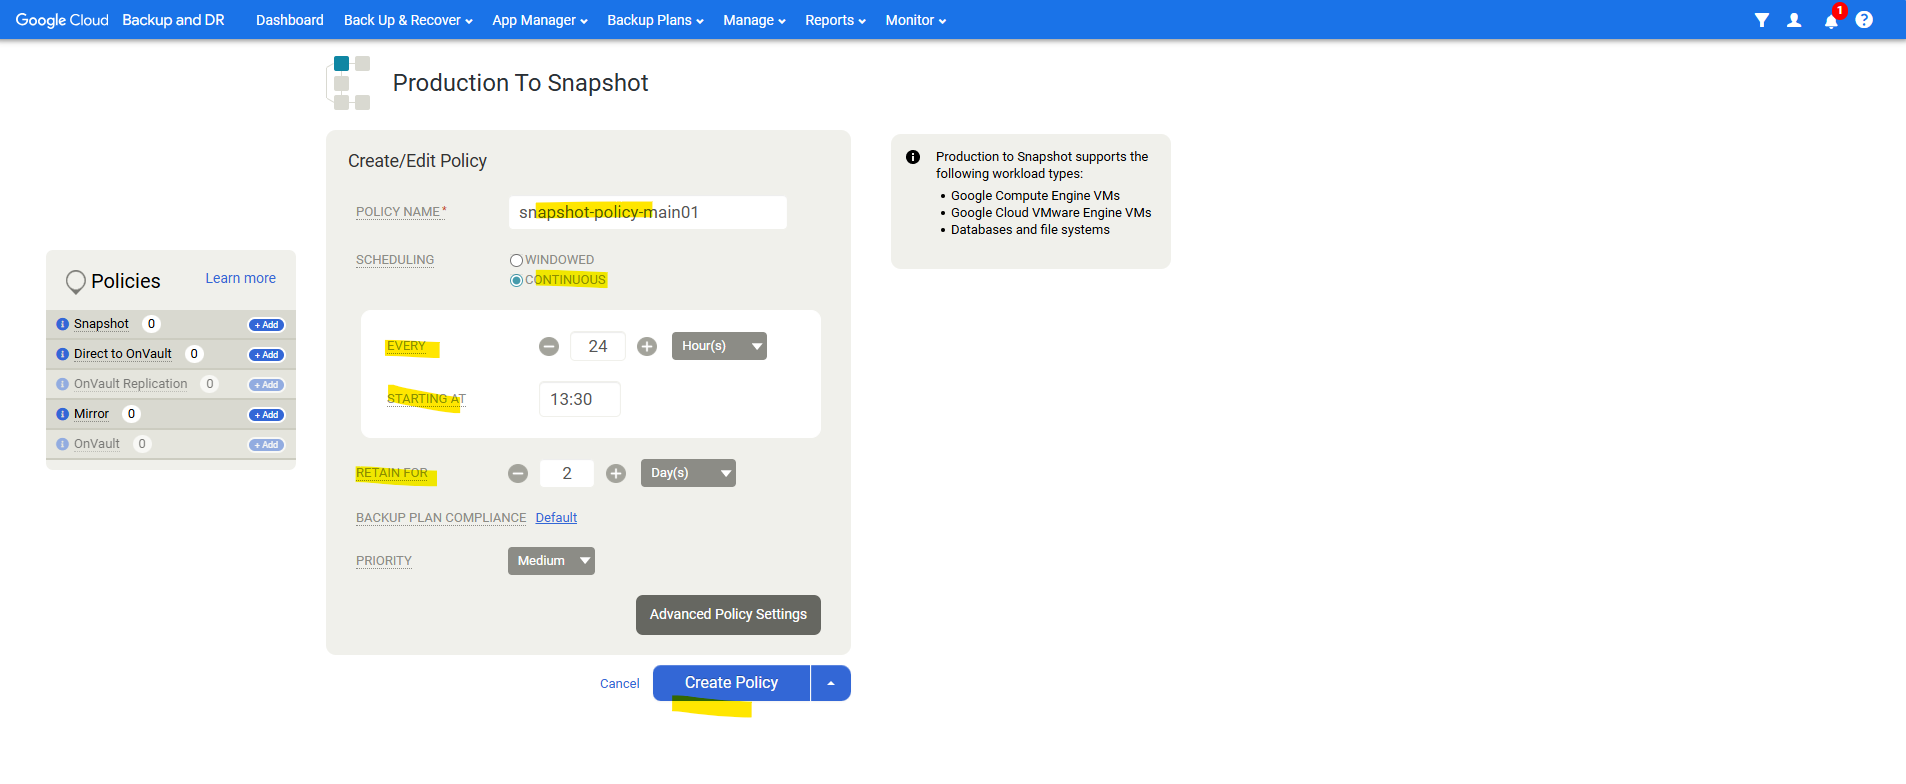
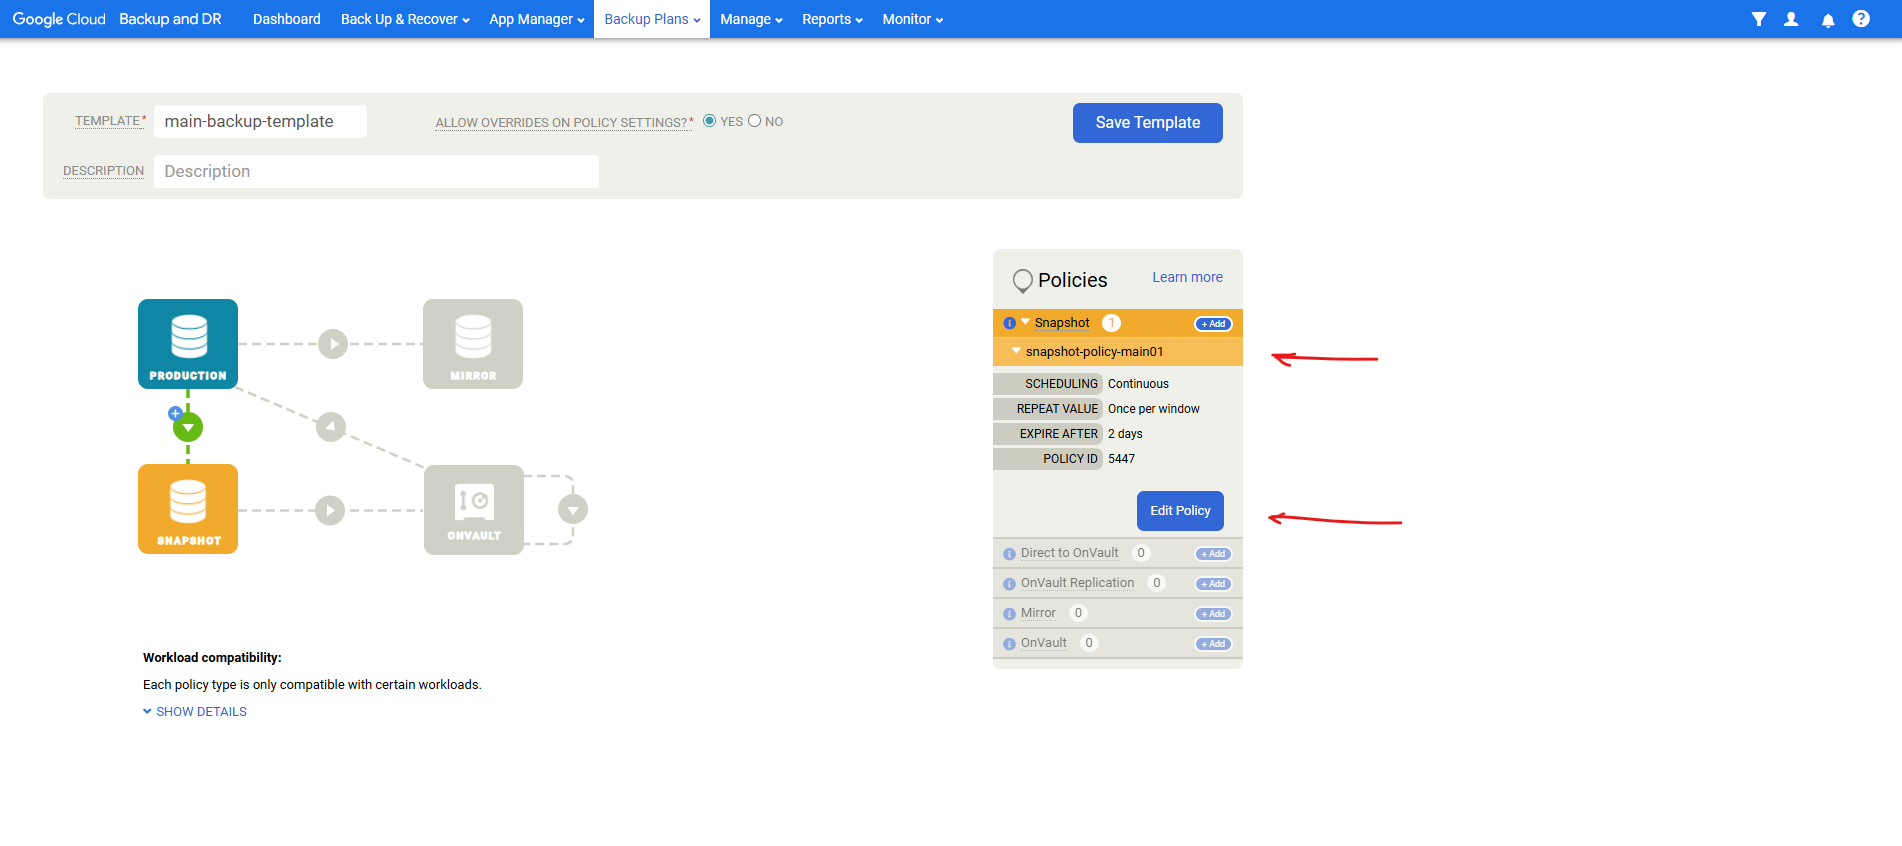
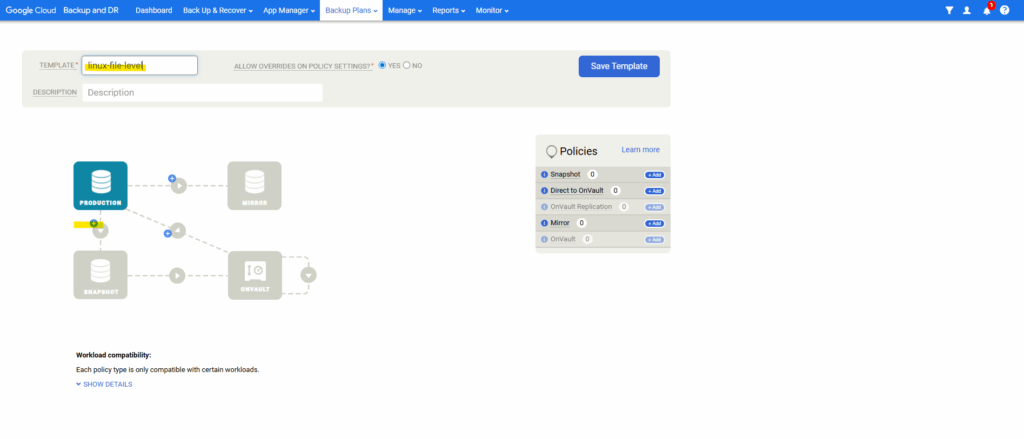
Click on the plus icon below the Production tile to add a snapshot.
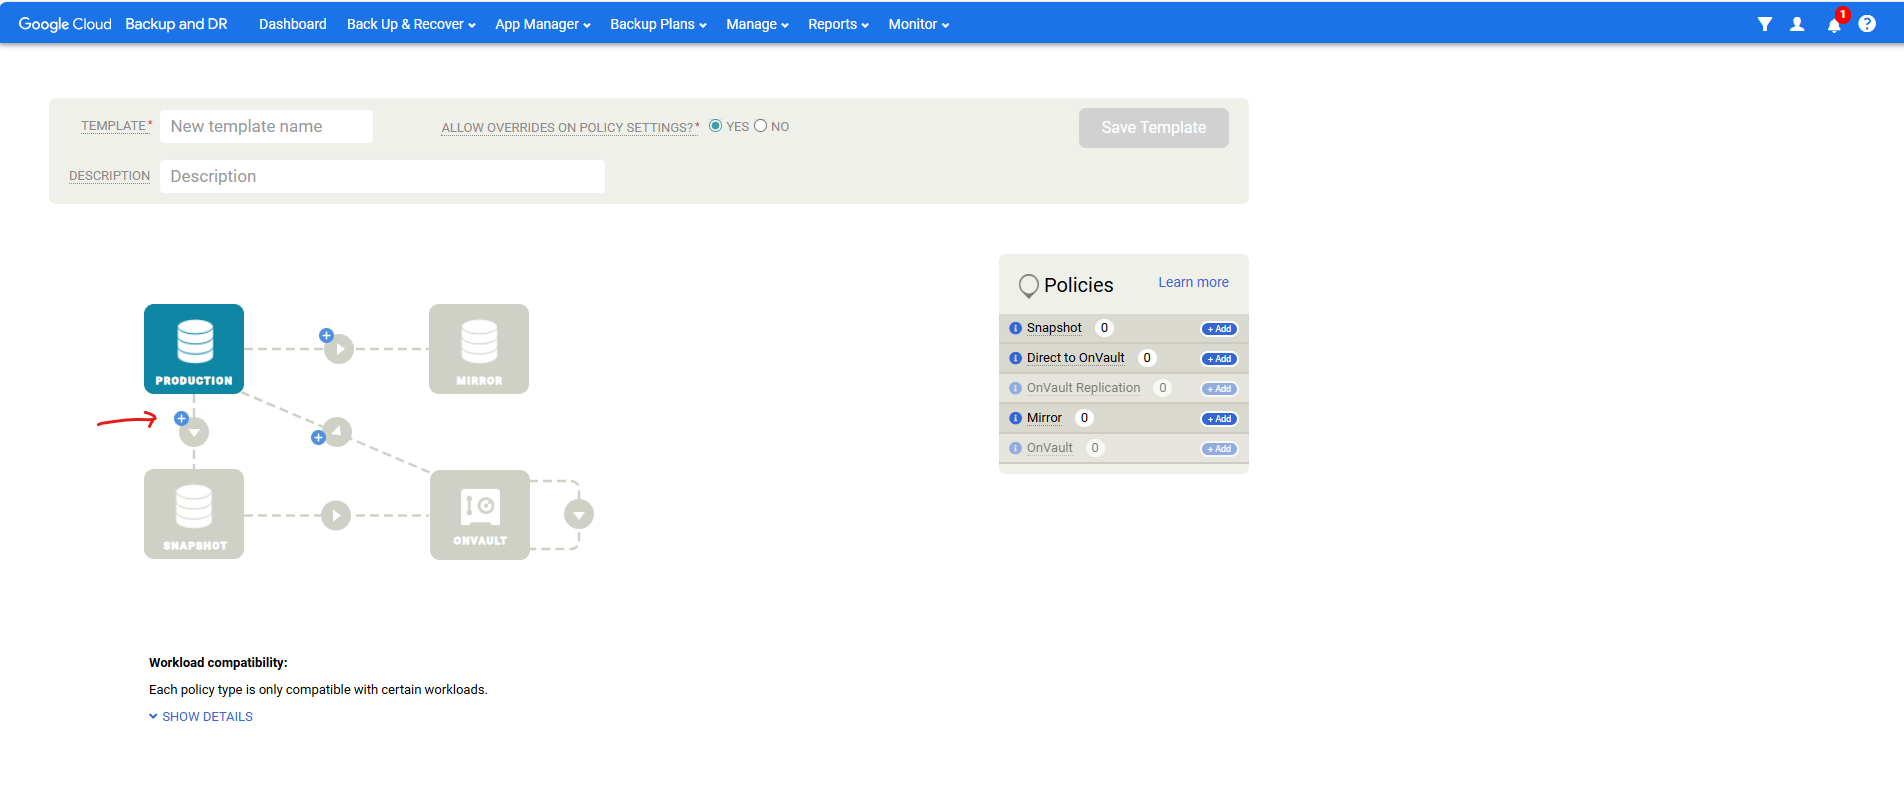
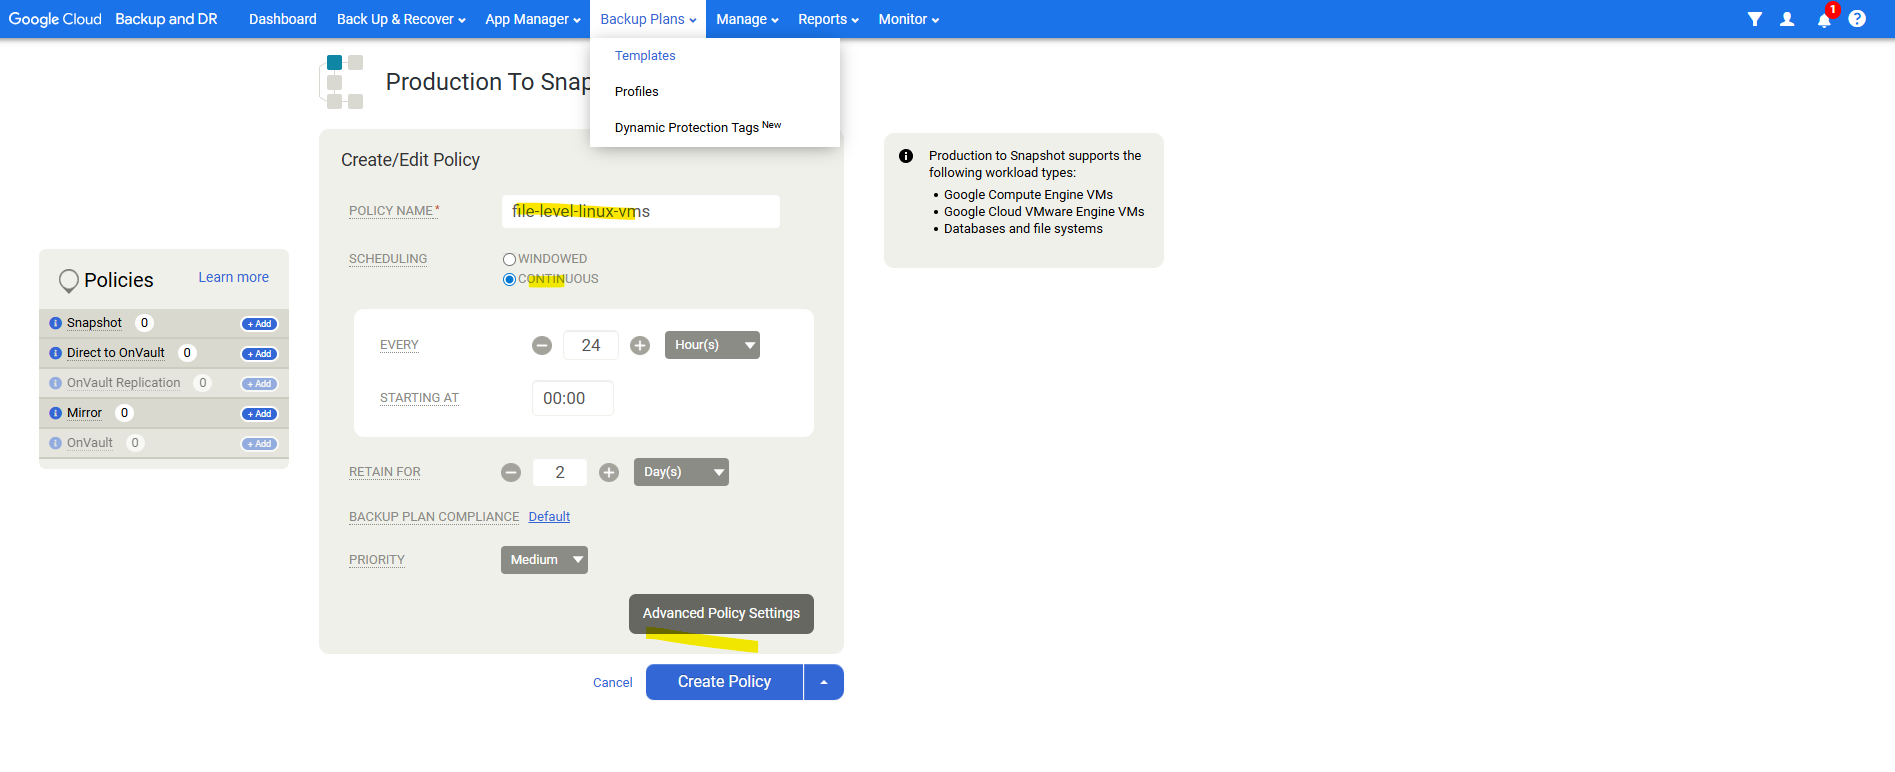
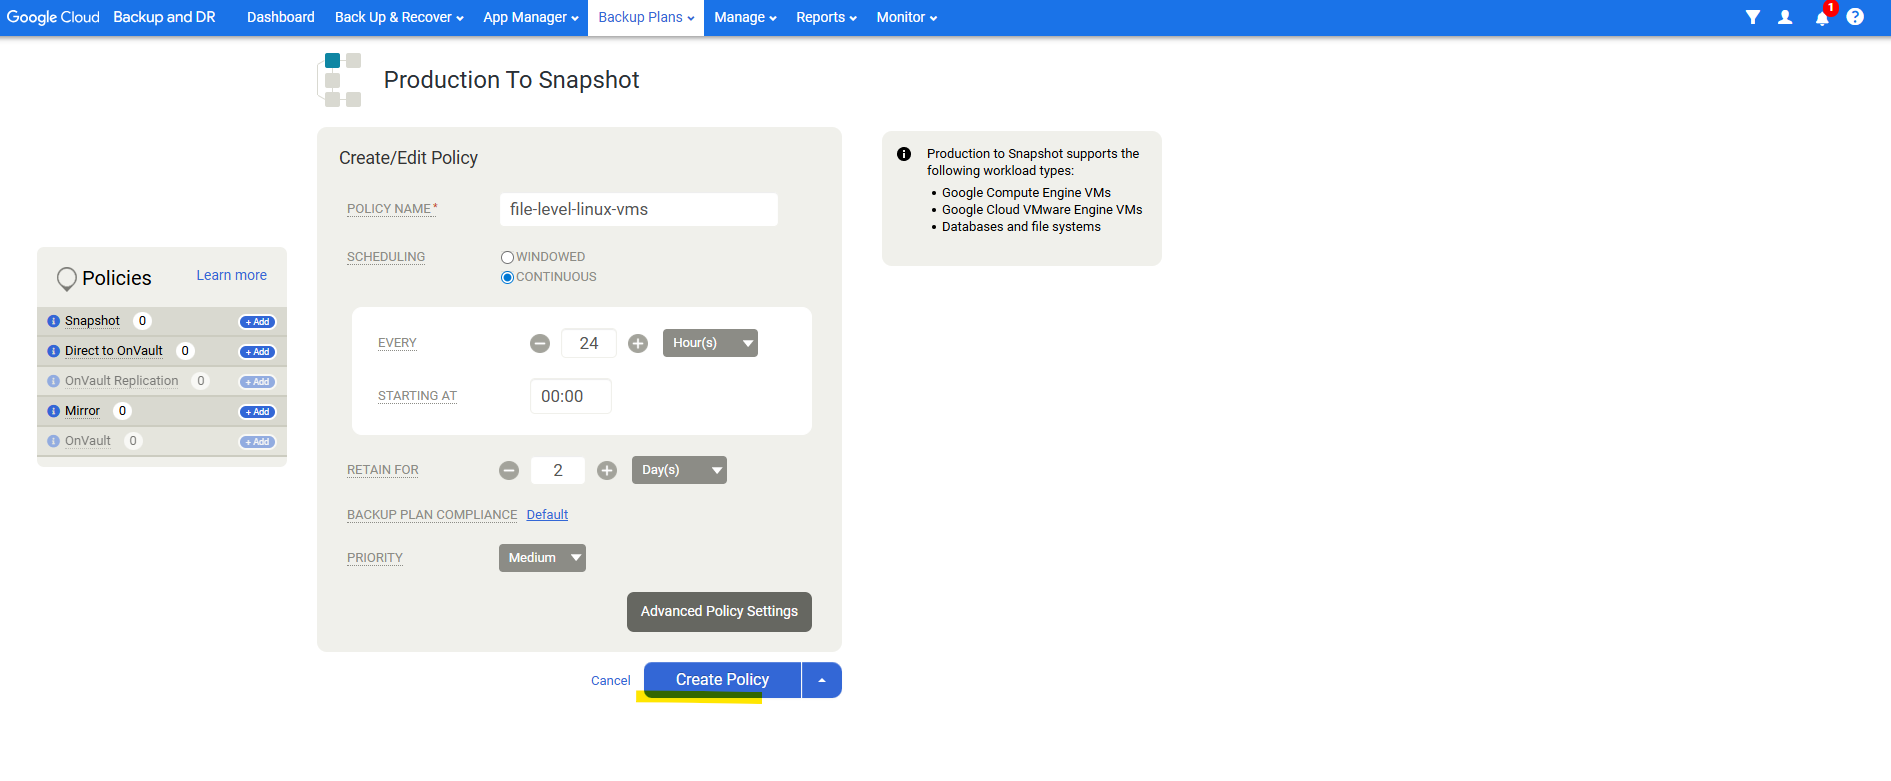
Enter a policy name and select the schedule and retain for the snapshot. Click on Create Policy. Under Advanced Policy Settings we can also adjust a lot of settings for the snapshot.
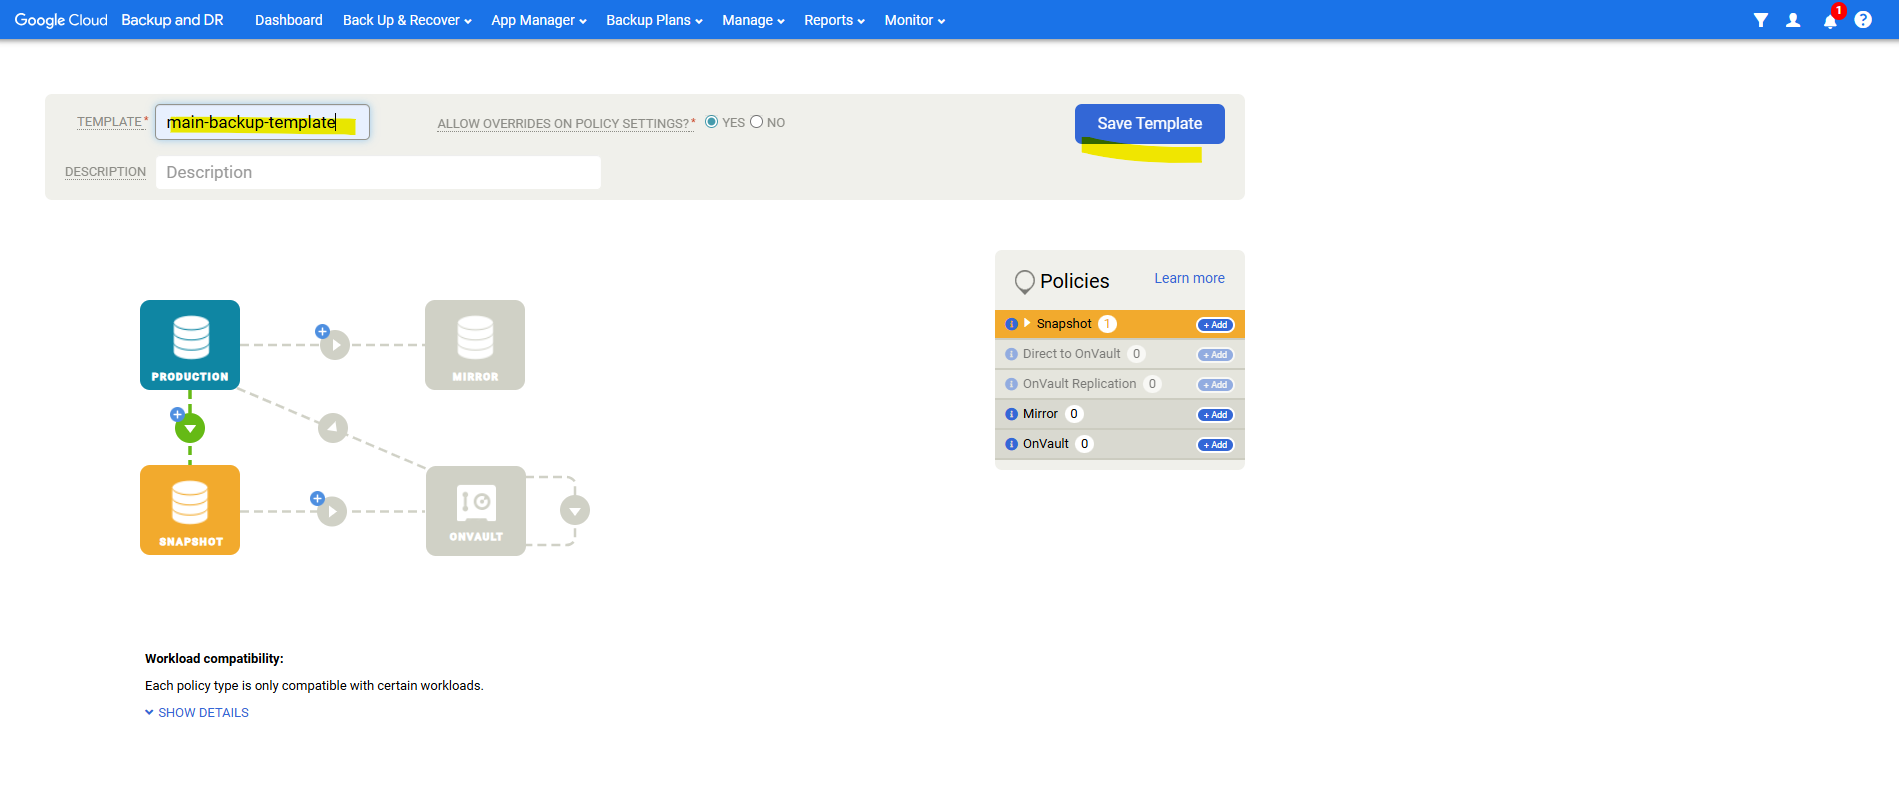
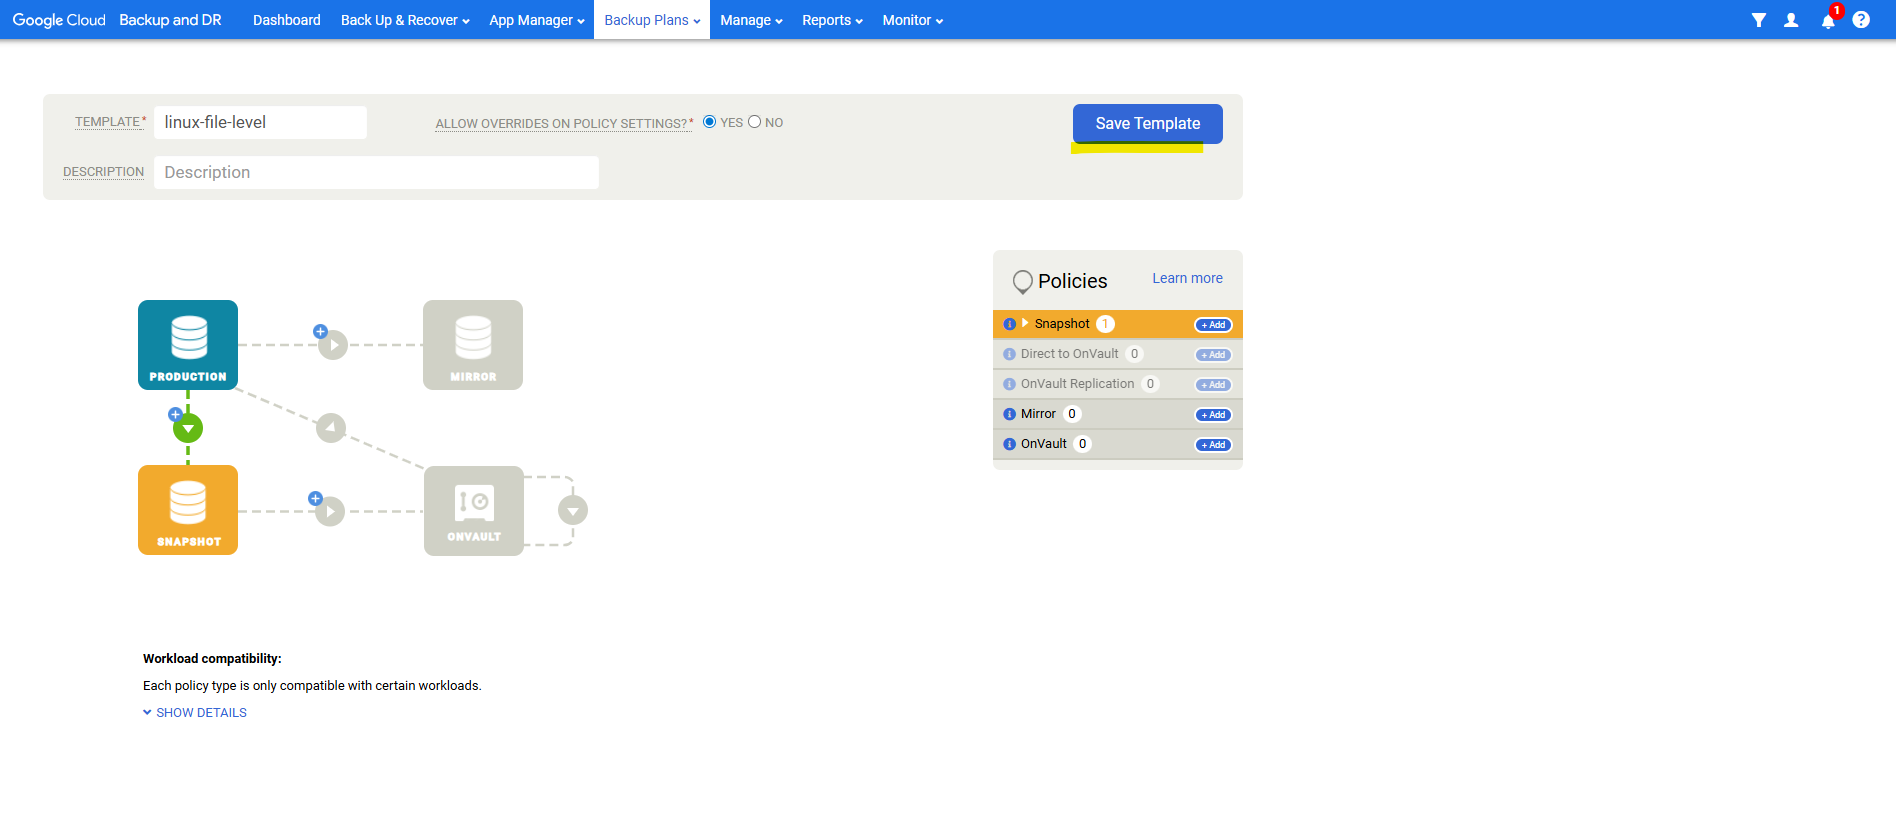
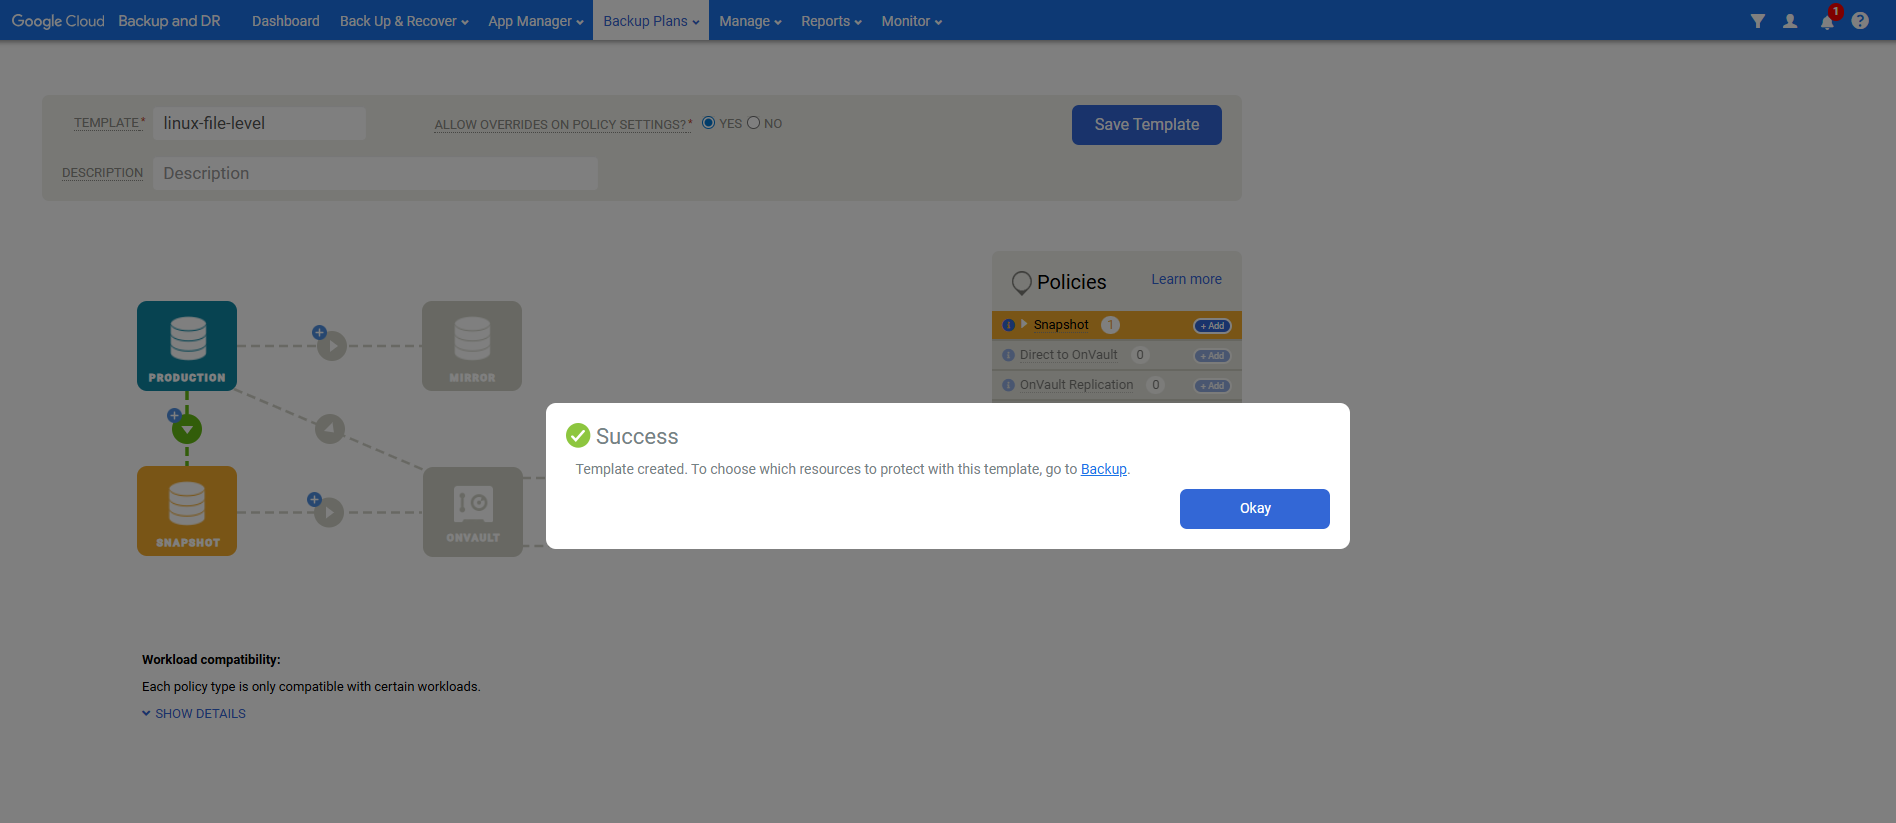
Enter a name for the template and click on Save Template.
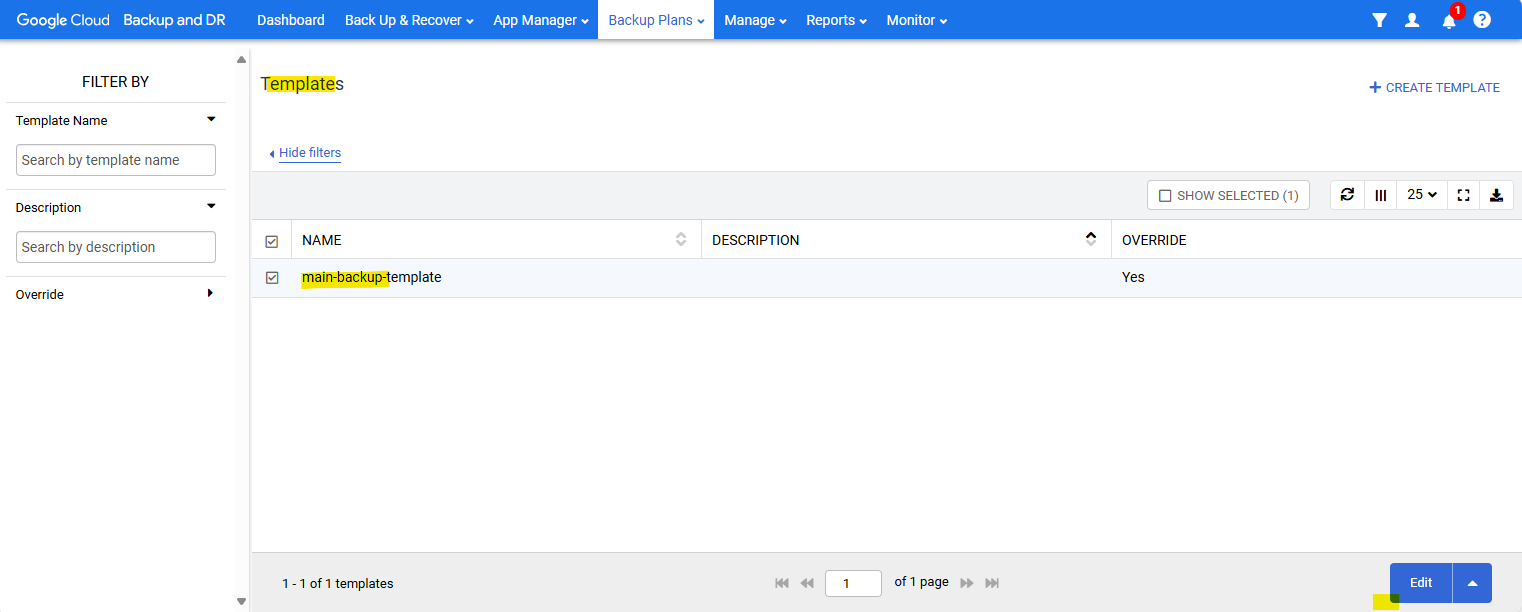
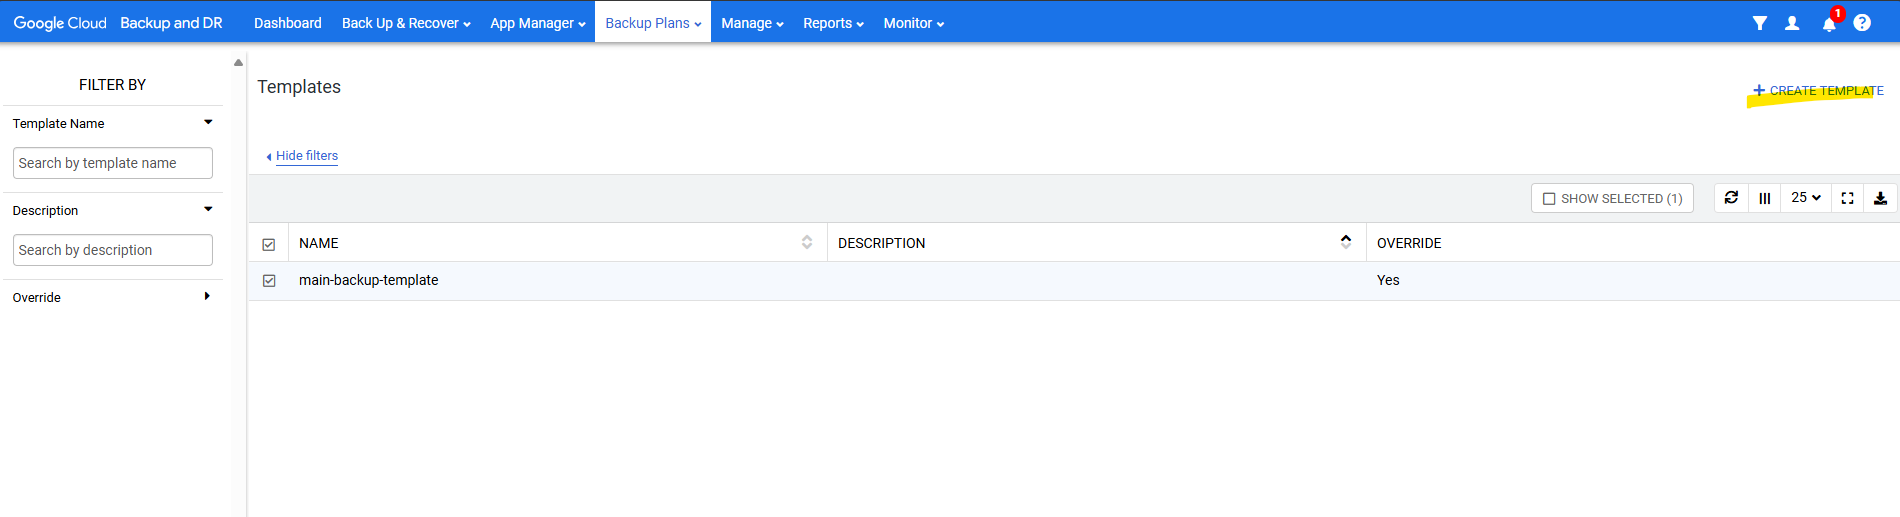
Our template will now shown up under Backup plans -> Templates and can be edited or cloned there anytime.
We can also create further templates here.
From now on this template is compatible with protecting Google Compute Engine VMs and can be used to backup them.
When editing the template we can adjust a bunch of settings like shown below. Expand the Snapshot policy and click on Edit Policy.
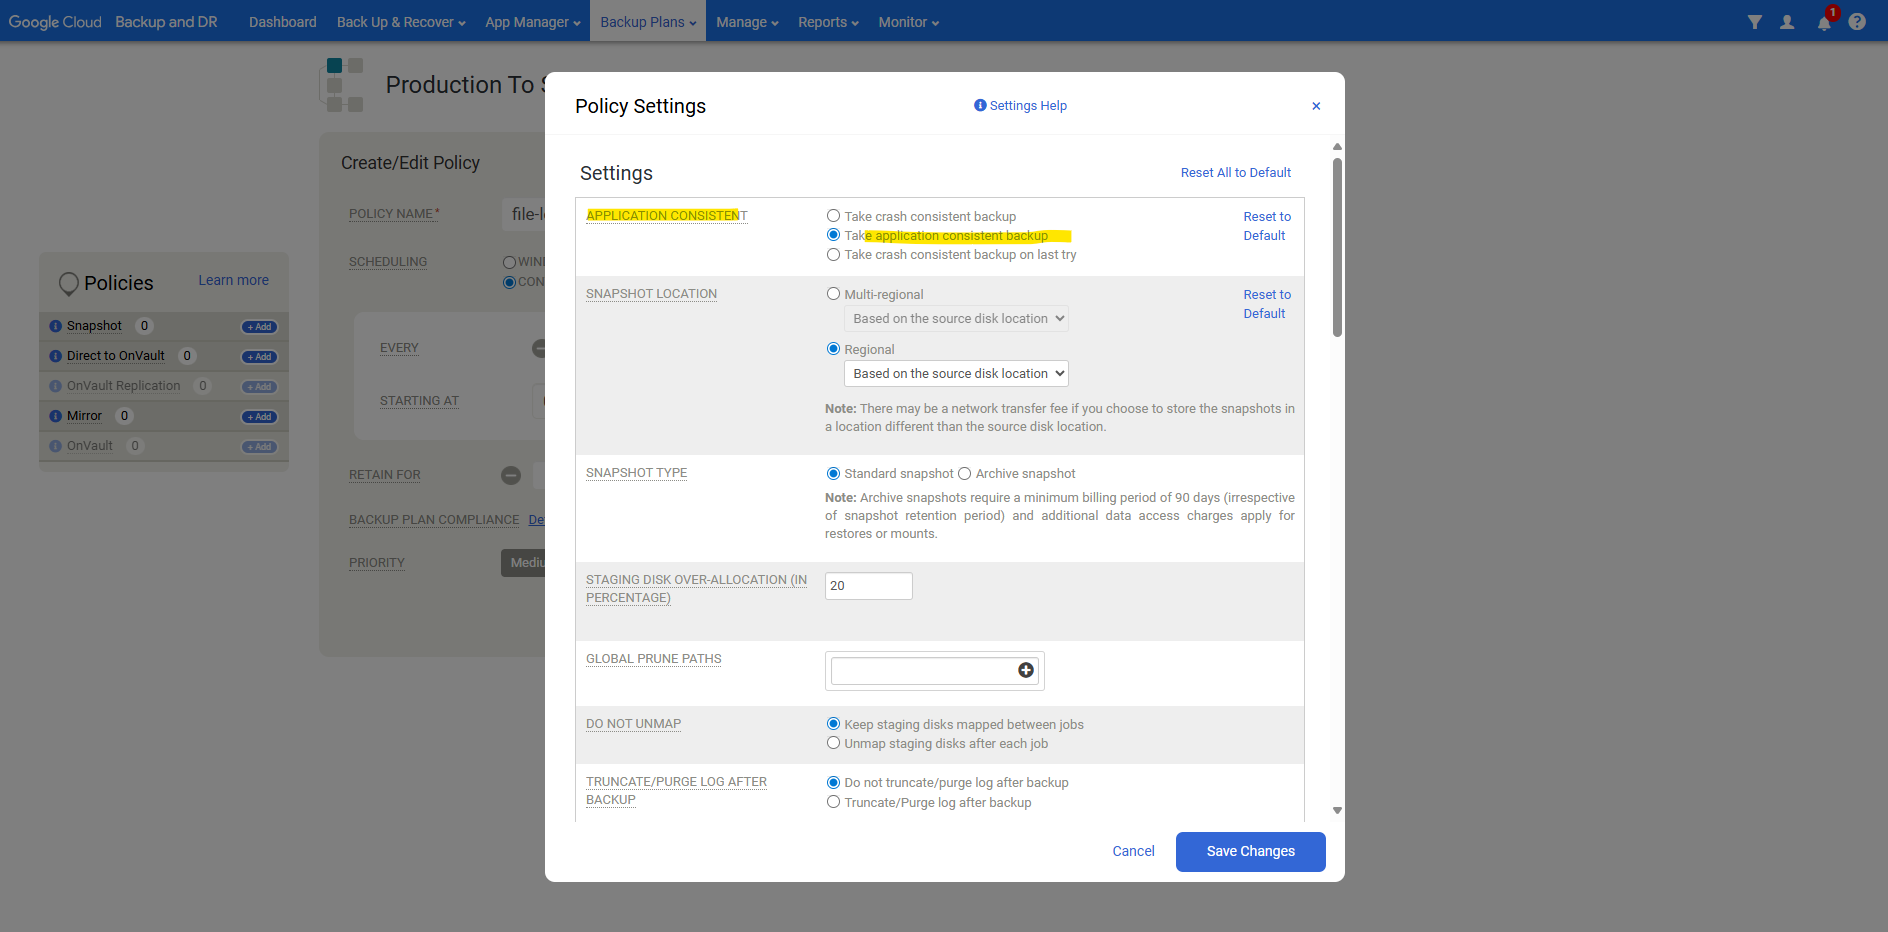
Click on Advanced Policy Settings.
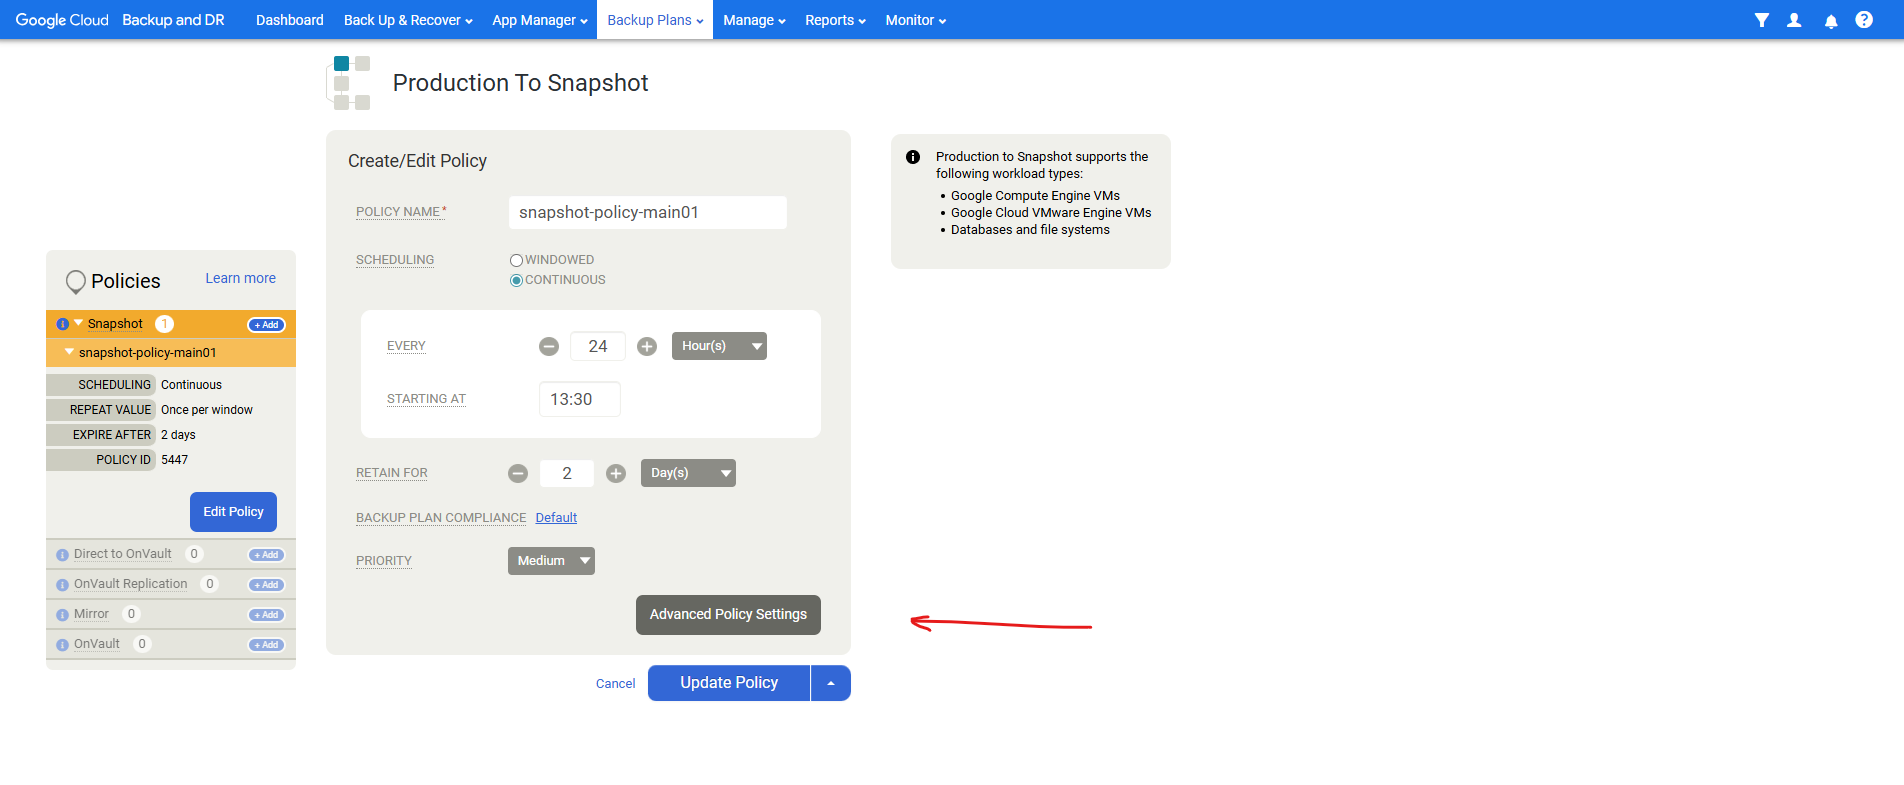
Here we can adjust different advanced settings for the snapshot.
File-Level Restore
File-level restore (FLR) in Google Cloud Backup and DR is enabled by mounting the backup snapshot as a standard read-only disk to an existing VM instance, either the same the backup snapshot was created for or a different.
This process allows you to browse the contents of the disk and copy specific files, without having to restore the entire VM or disk.
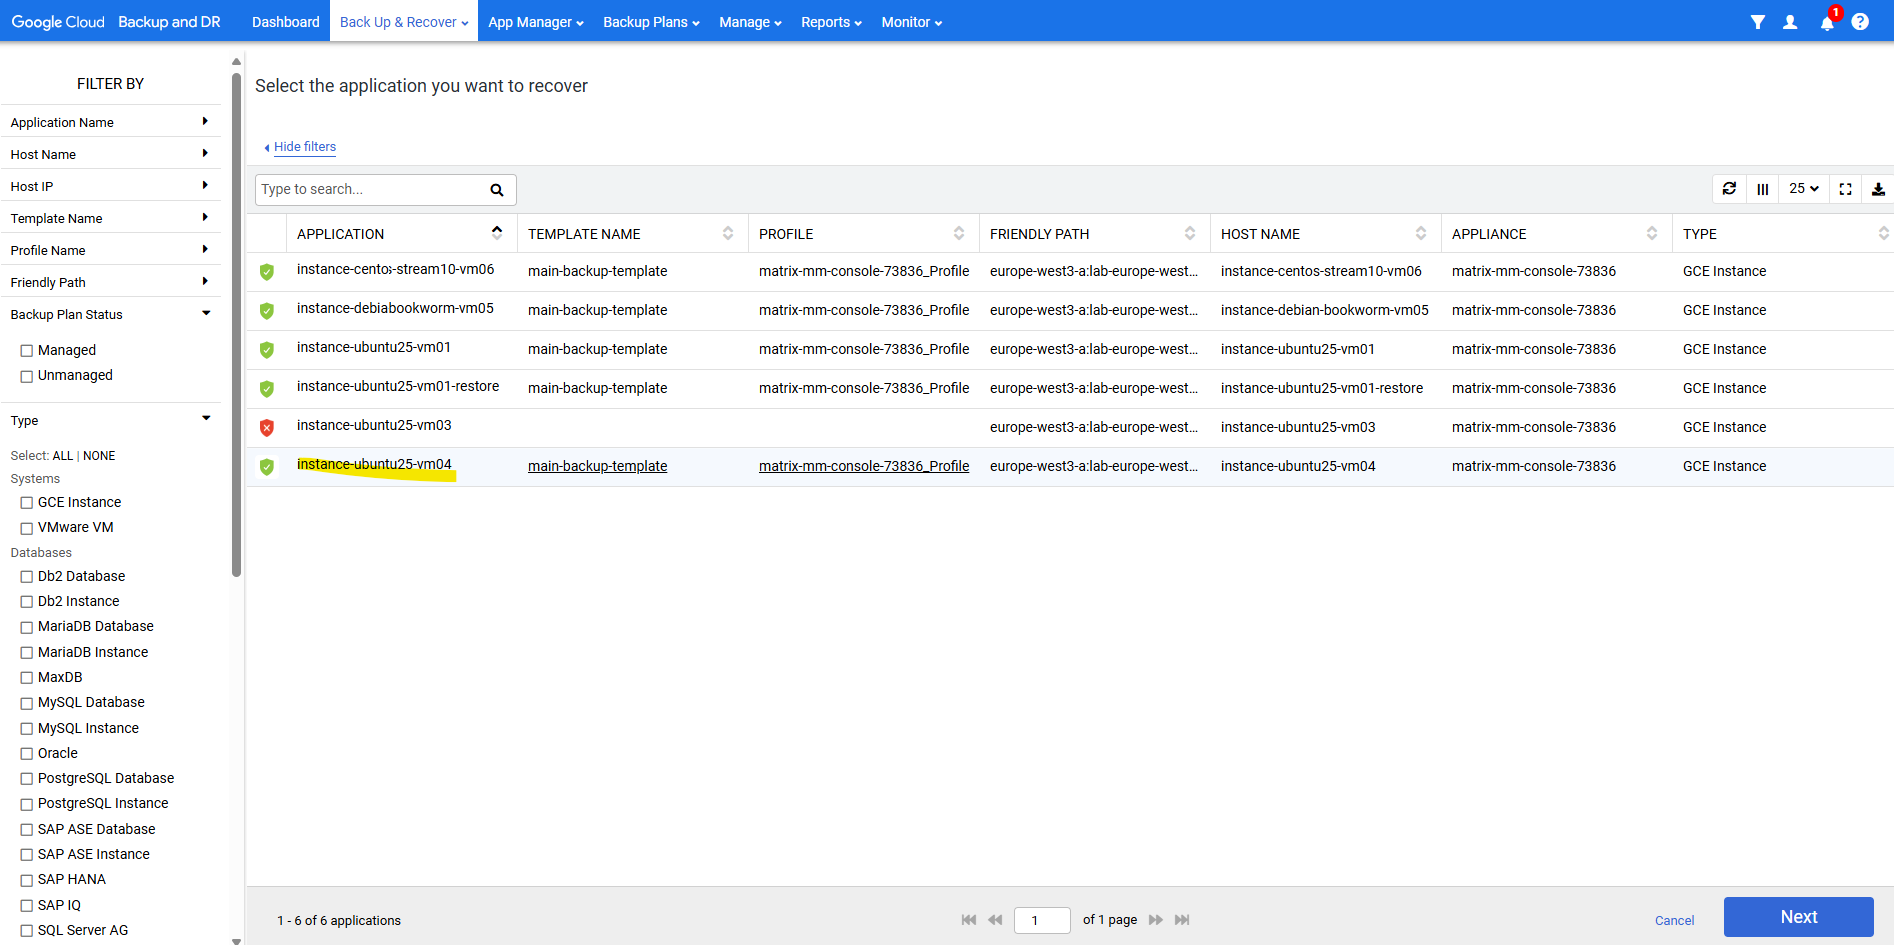
Browse to Back Up & Recover -> Recover.

Select the VM instance you want to restore files from its backup snapshot and click on Next.
Select the recovery points you want to use to restore and click on Mount.
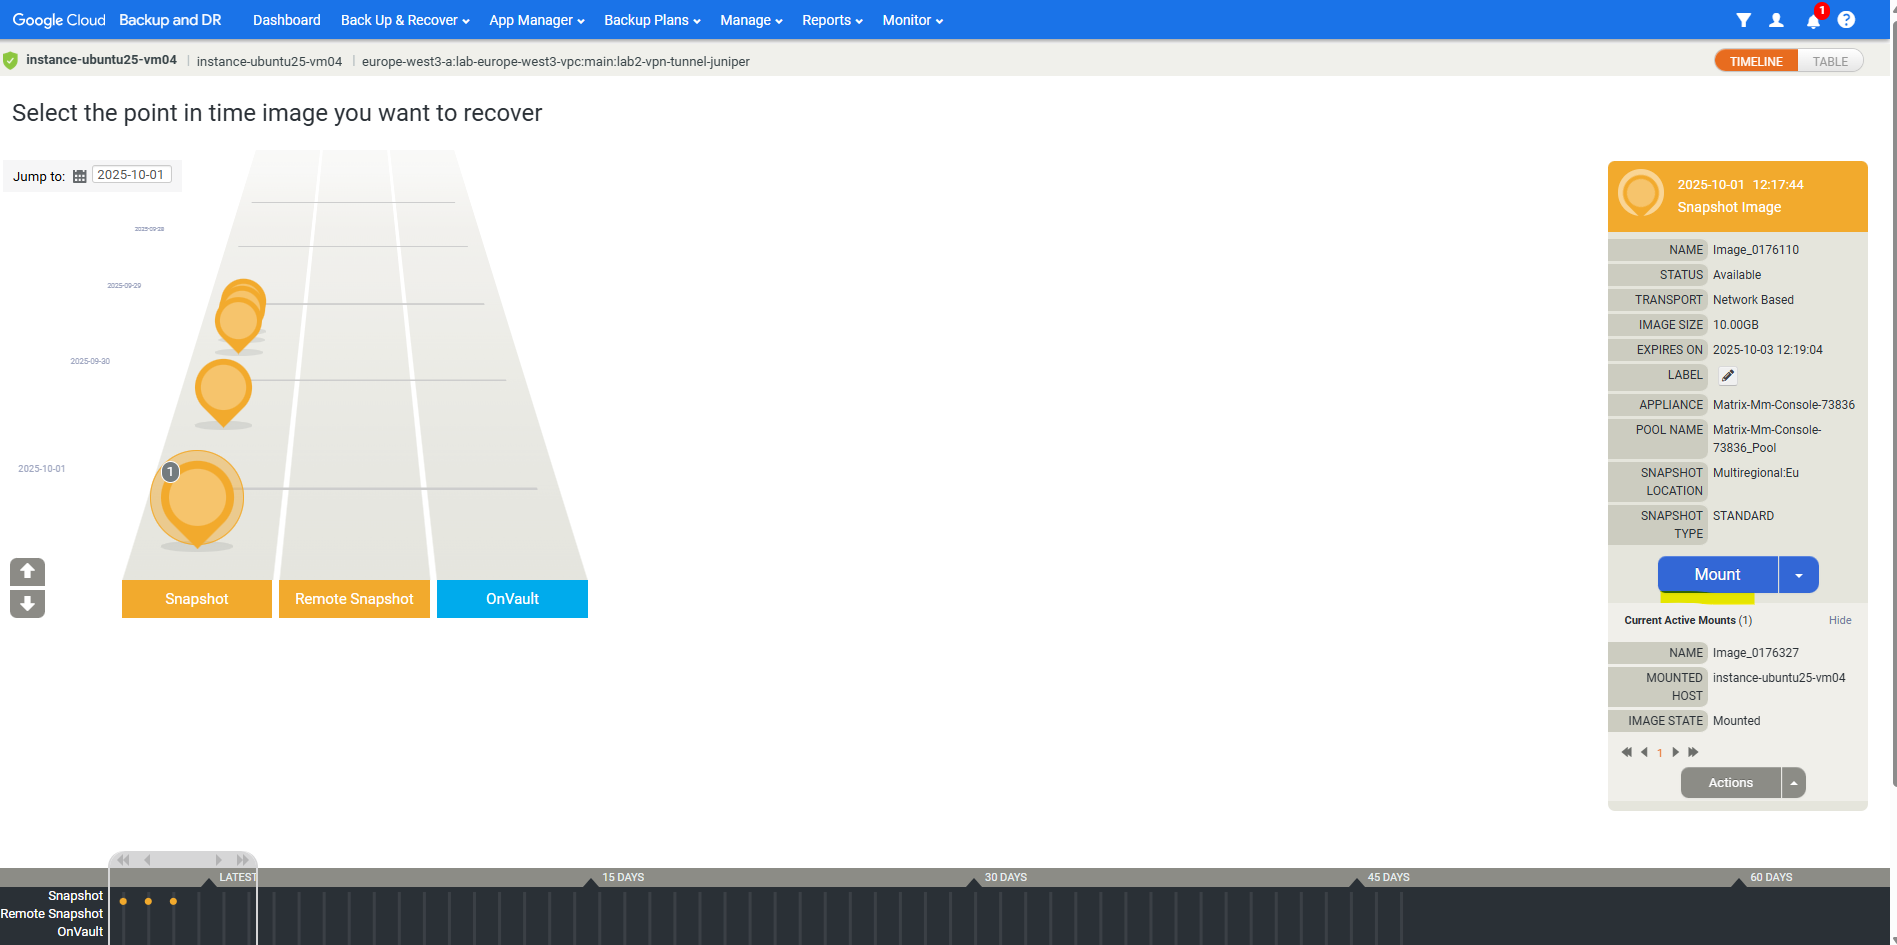
Below I will leave the settings to Mount To Existing GCE Instance and selecting the VM instance to which I want to mount the backup snapshot as a standard read-only disk.

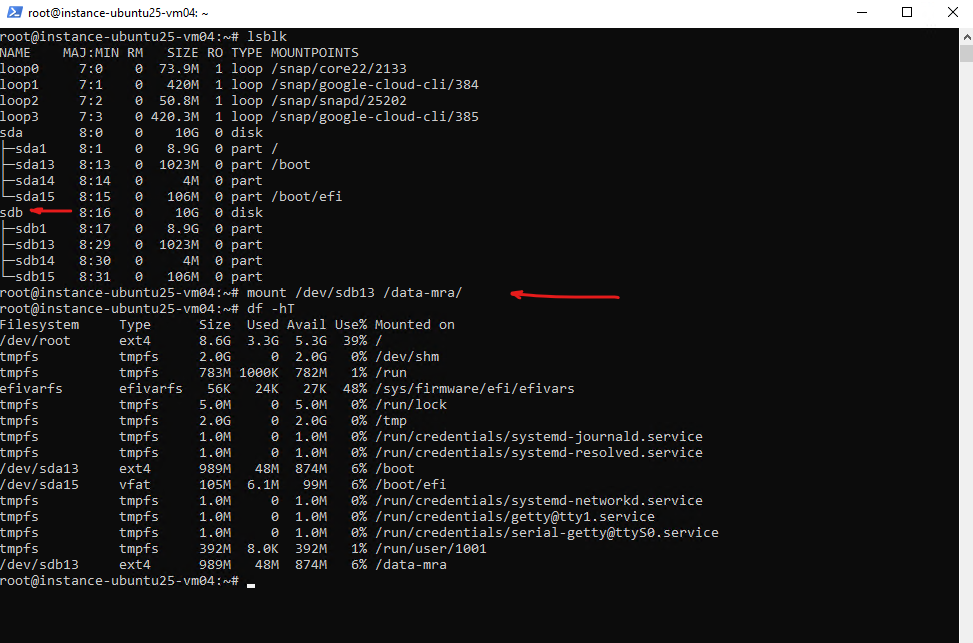
We can now mount the backup snapshot disk (sdb below) to the file system.
To unmount the backup snapshot disk in Google Cloud Backup and DR, you need to go back to the Backup and DR Console and perform an Unmount or Clean up operation on the active LiveMount.
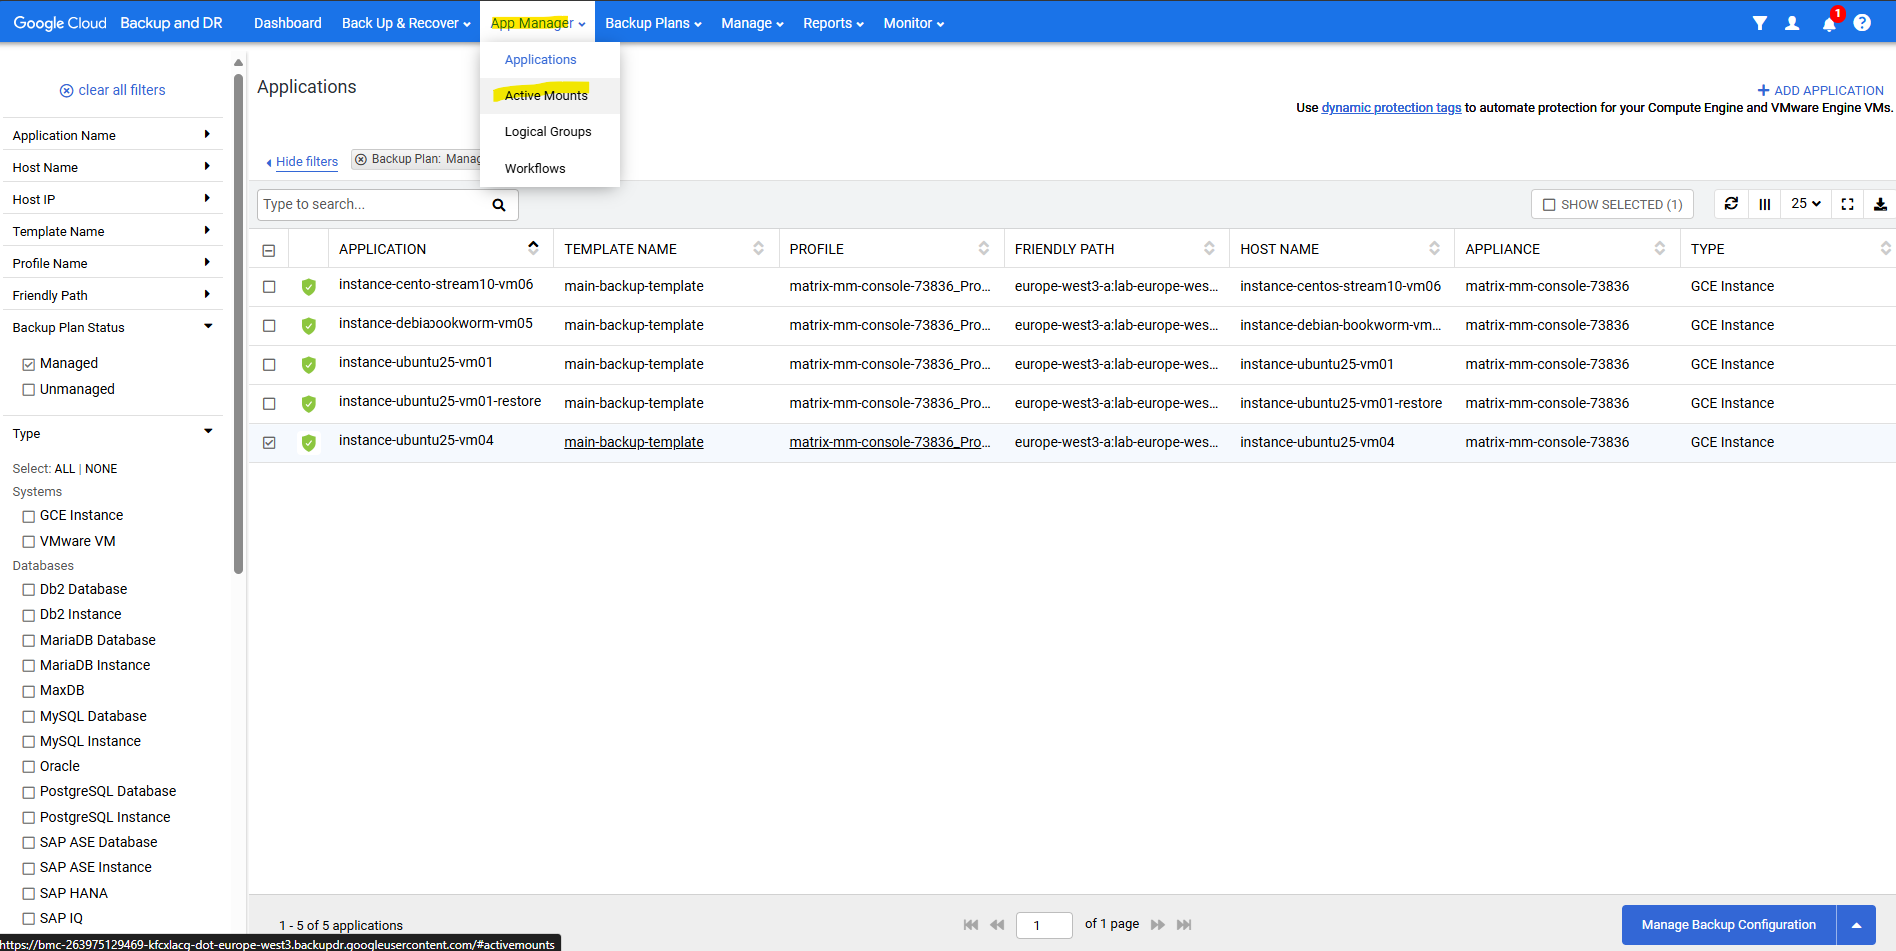
Browse to App Manager -> Active Mounts.
Select the active mount you want to unmount and click on Unmount & Delete.
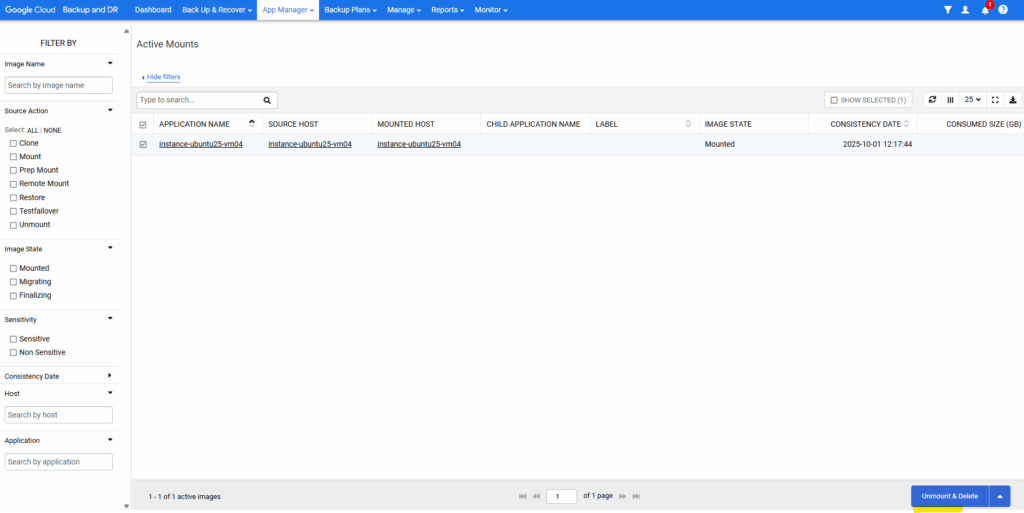
Click on Submit.

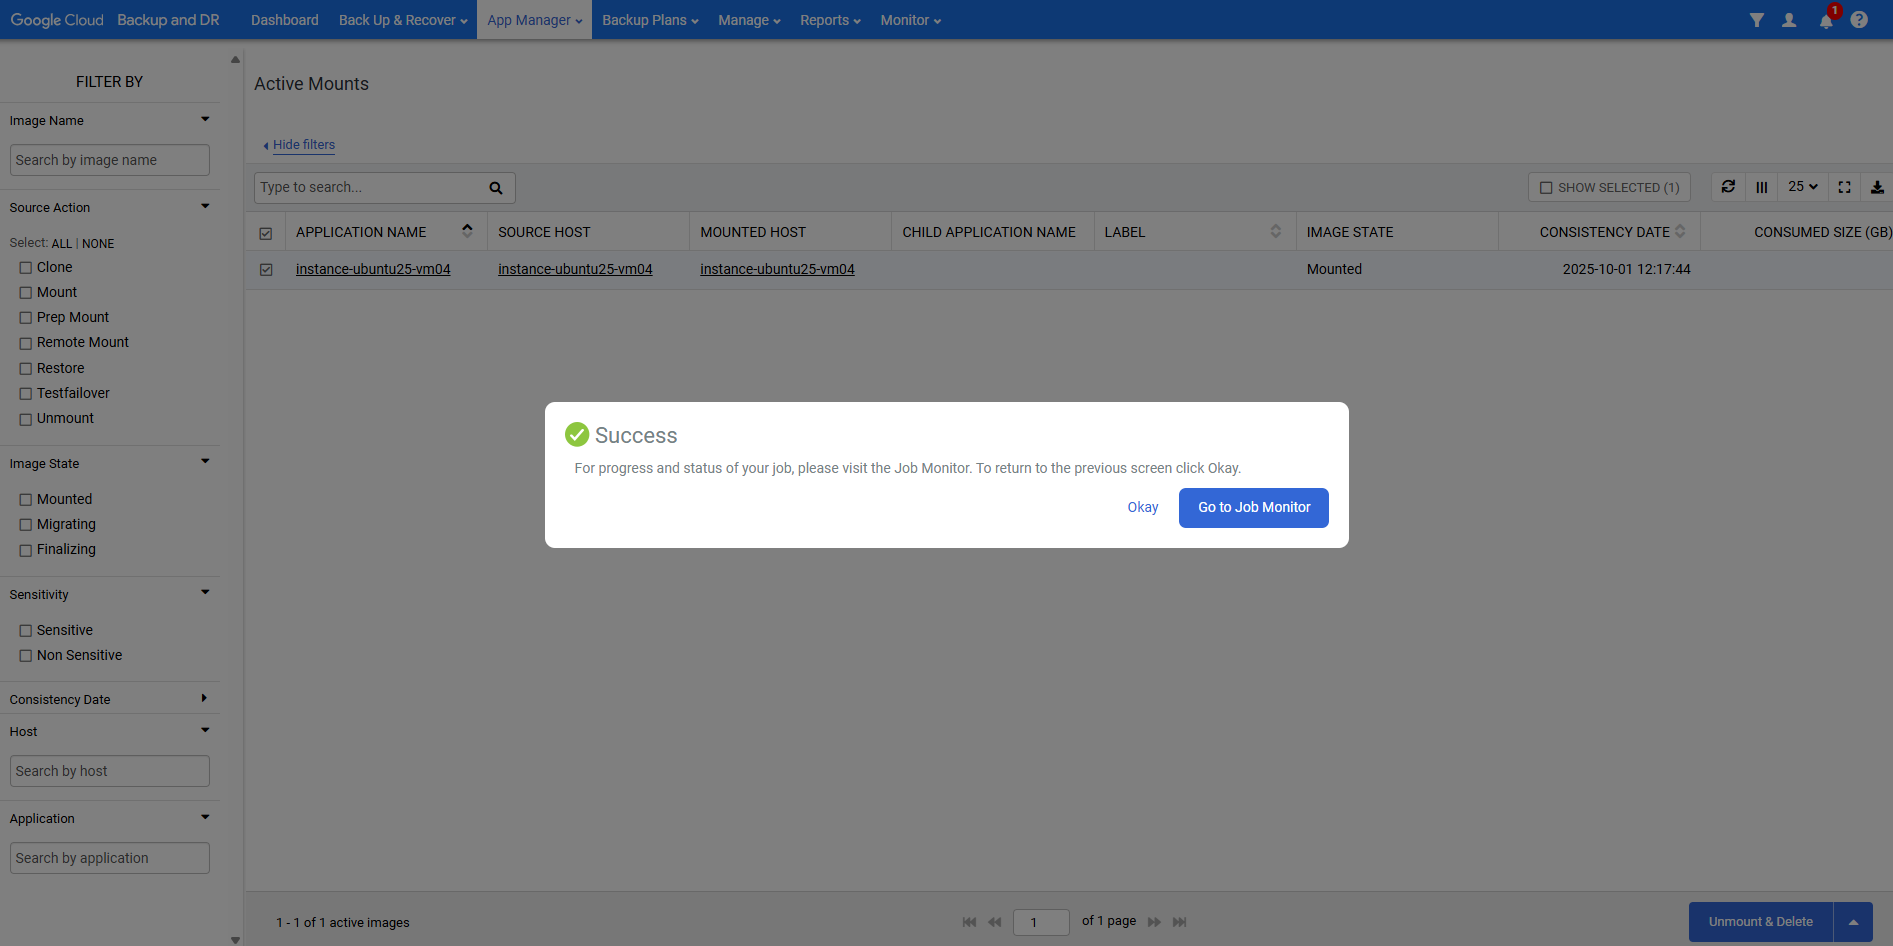
The backup snapshot disk (sdb previously) is not mounted anymore.

Creating Application Consistent Backups
We will first install the Backup and DR agents on our VM instances below to be able to create application consistent backups.
The Backup and DR agents capabilities are:
- Discover and backup individual and groups of applications, including Microsoft SQL Server clusters.
- Quiesce applications for application consistency during backup.
- Enable change block tracking on Windows hosts and low-splash on non-Windows hosts for incremental-forever backup.
- Backup and manage transaction logs, including truncating database transaction logs and rolling database transaction logs forward for point-in-time recovery.
- Rescan storage buses, bring new devices online, assign drive letters, import volume groups, and mount file systems based on the operating system of the application host.
- Prepare application volumes for restore operations.
- Enable agent-based backup images of applications on pRDMs and vRDMs on VMware VMs to avoid potential virtual server stun issues caused by VMware snapshots. Also, Backup and DR agents enable backups of Microsoft SQL Server clusters running on VMware VMs.
- When the Backup and DR agent manages data movement, the backup/recovery appliance presents a staging disk to store a copy of changed application data during each snapshot job.
Source: https://cloud.google.com/backup-disaster-recovery/docs/concepts/about-connector
Create Linux application consistent disk snapshots
https://cloud.google.com/compute/docs/disks/creating-linux-application-consistent-pd-snapshots
Limitations
Creating application consistent snapshots on Linux has the following limitations:
- Application consistency is guaranteed only by the behavior of your custom pre and post snapshot scripts, not by the snapshot operation itself.
- When using the
guest-flushoption in your snapshot creation request, the snapshot isn’t created if the script returns an error or reaches the timeout limit.
Install Agent
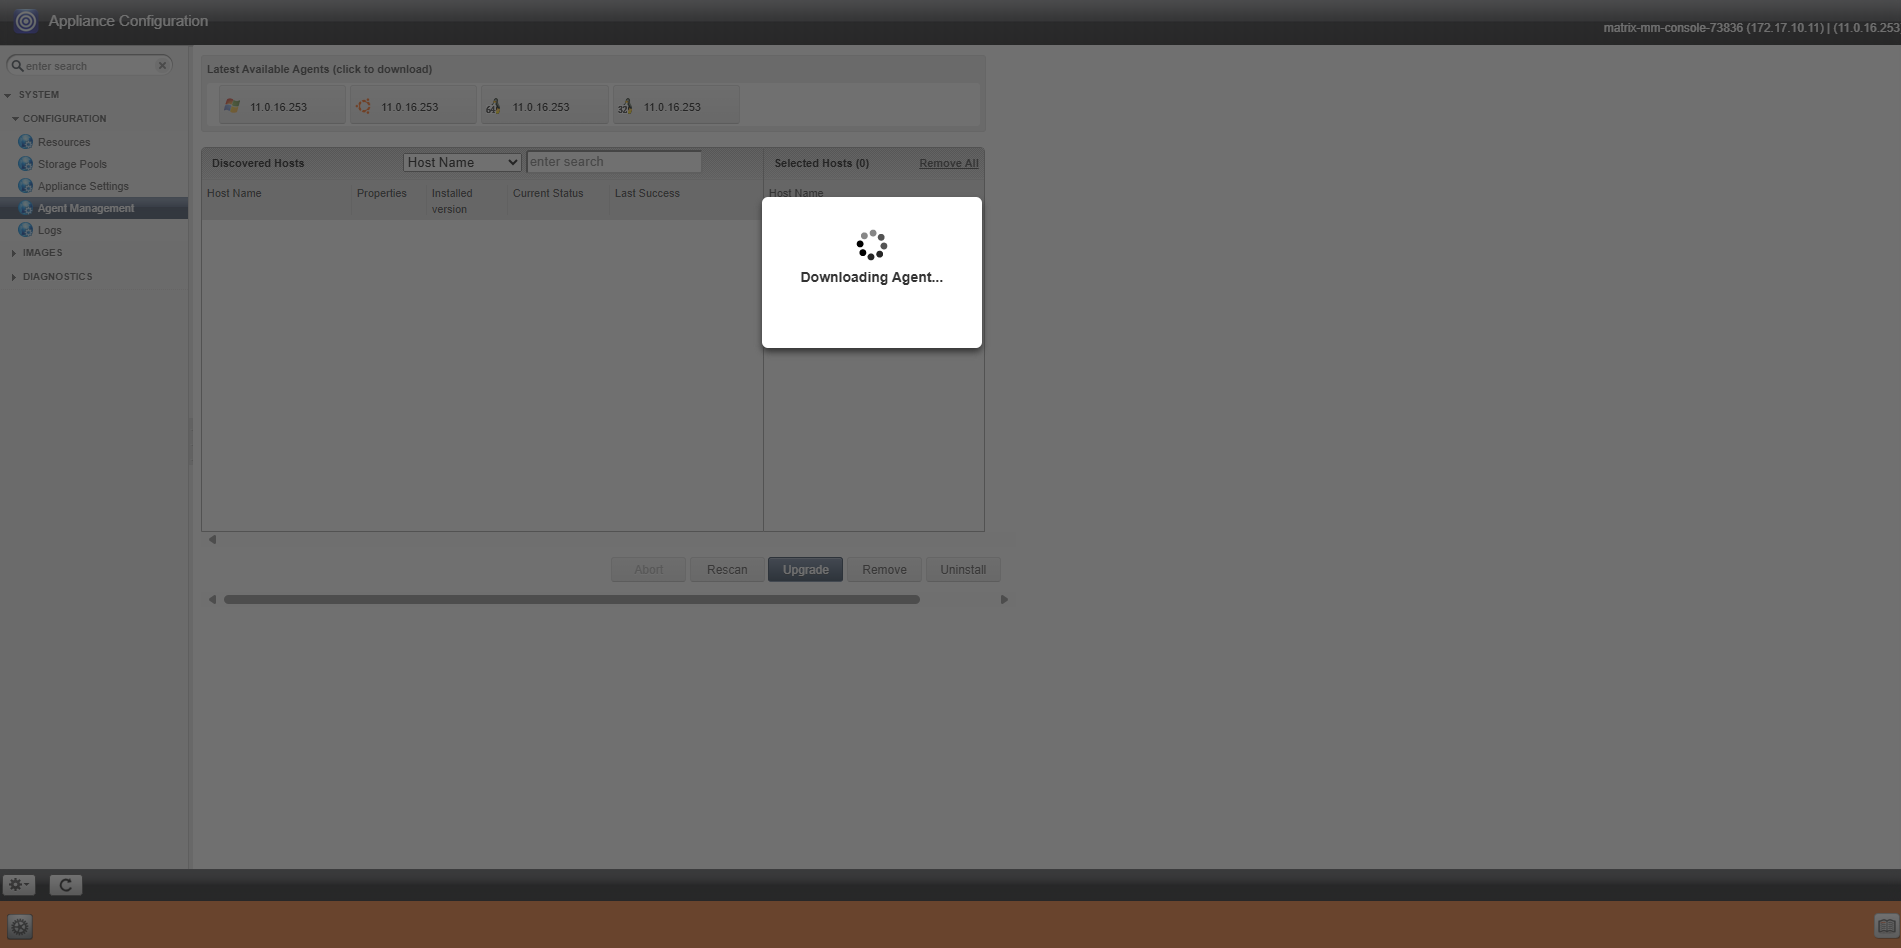
We can download the agent directly from the management console.
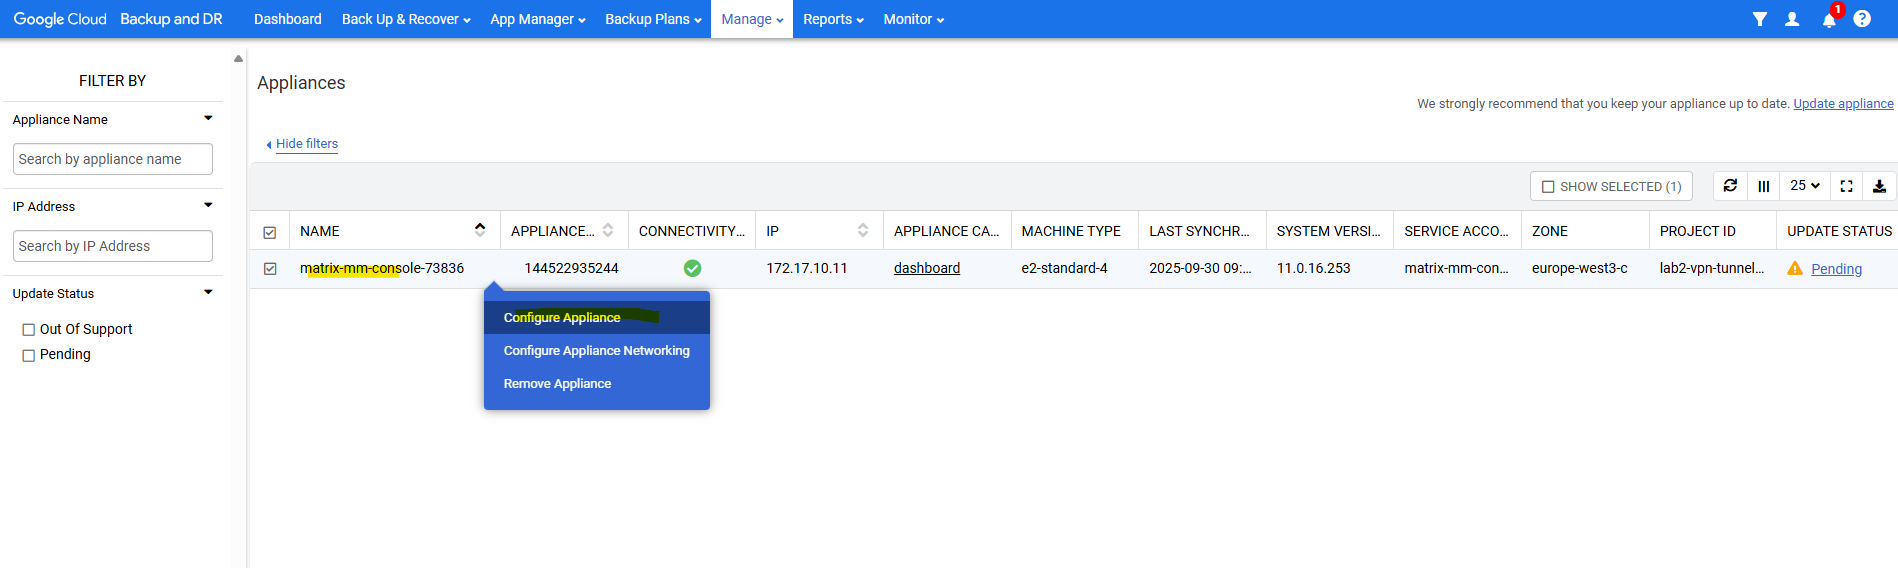
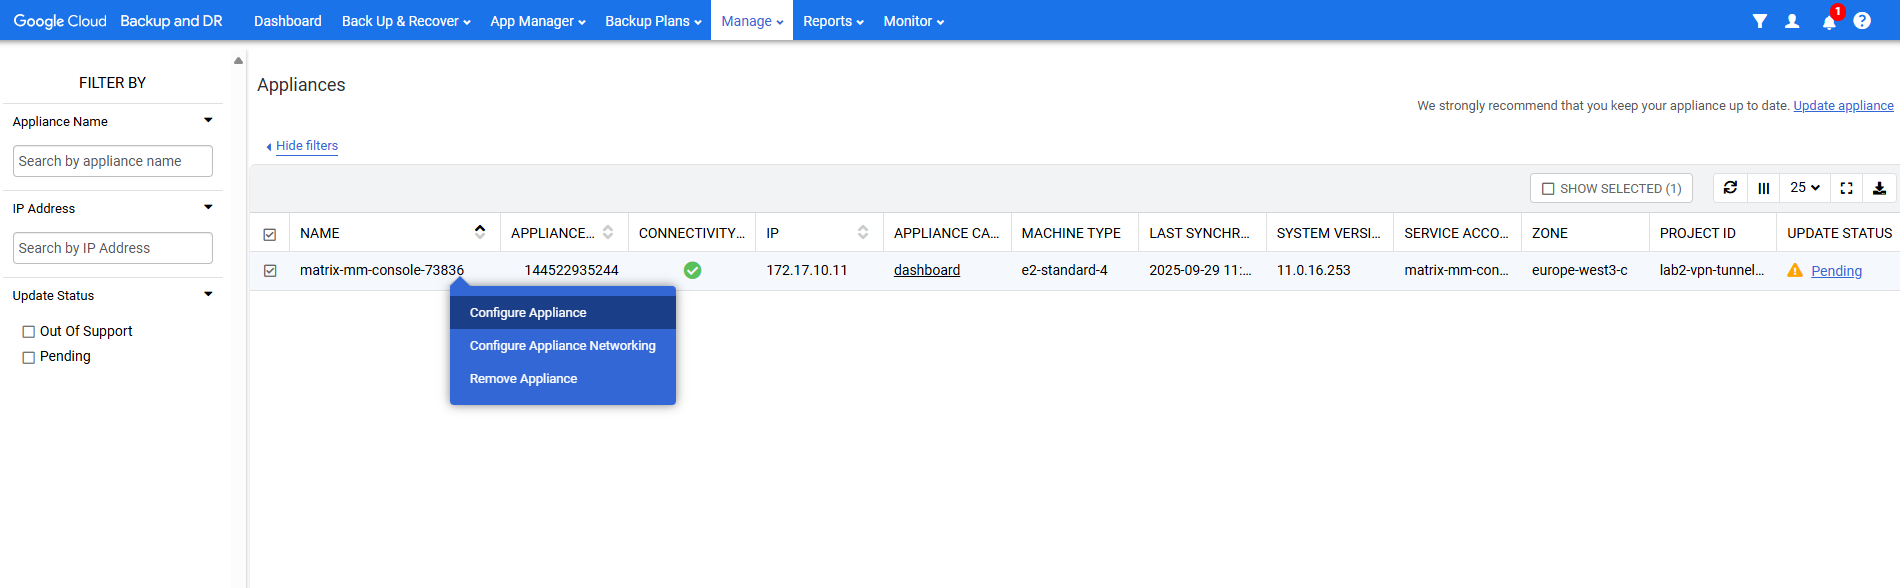
Right-click on the appliance -> Configure Appliance.
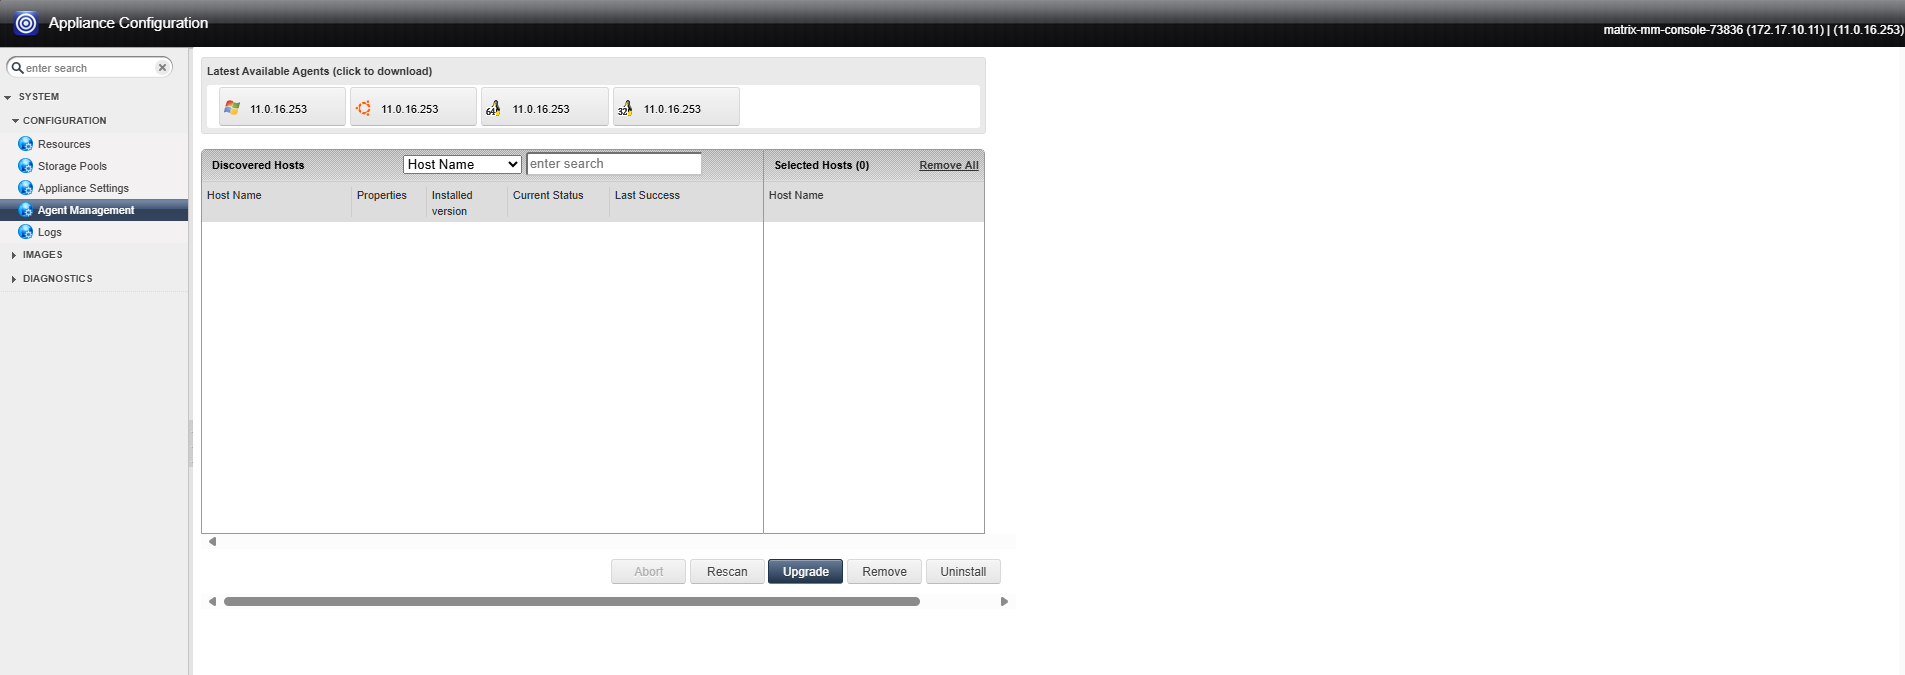
A new browser tab will be opened. In the left menu click on Agent Management and to download either Windows, Ubuntu, general Linux 32bit or 64bit.
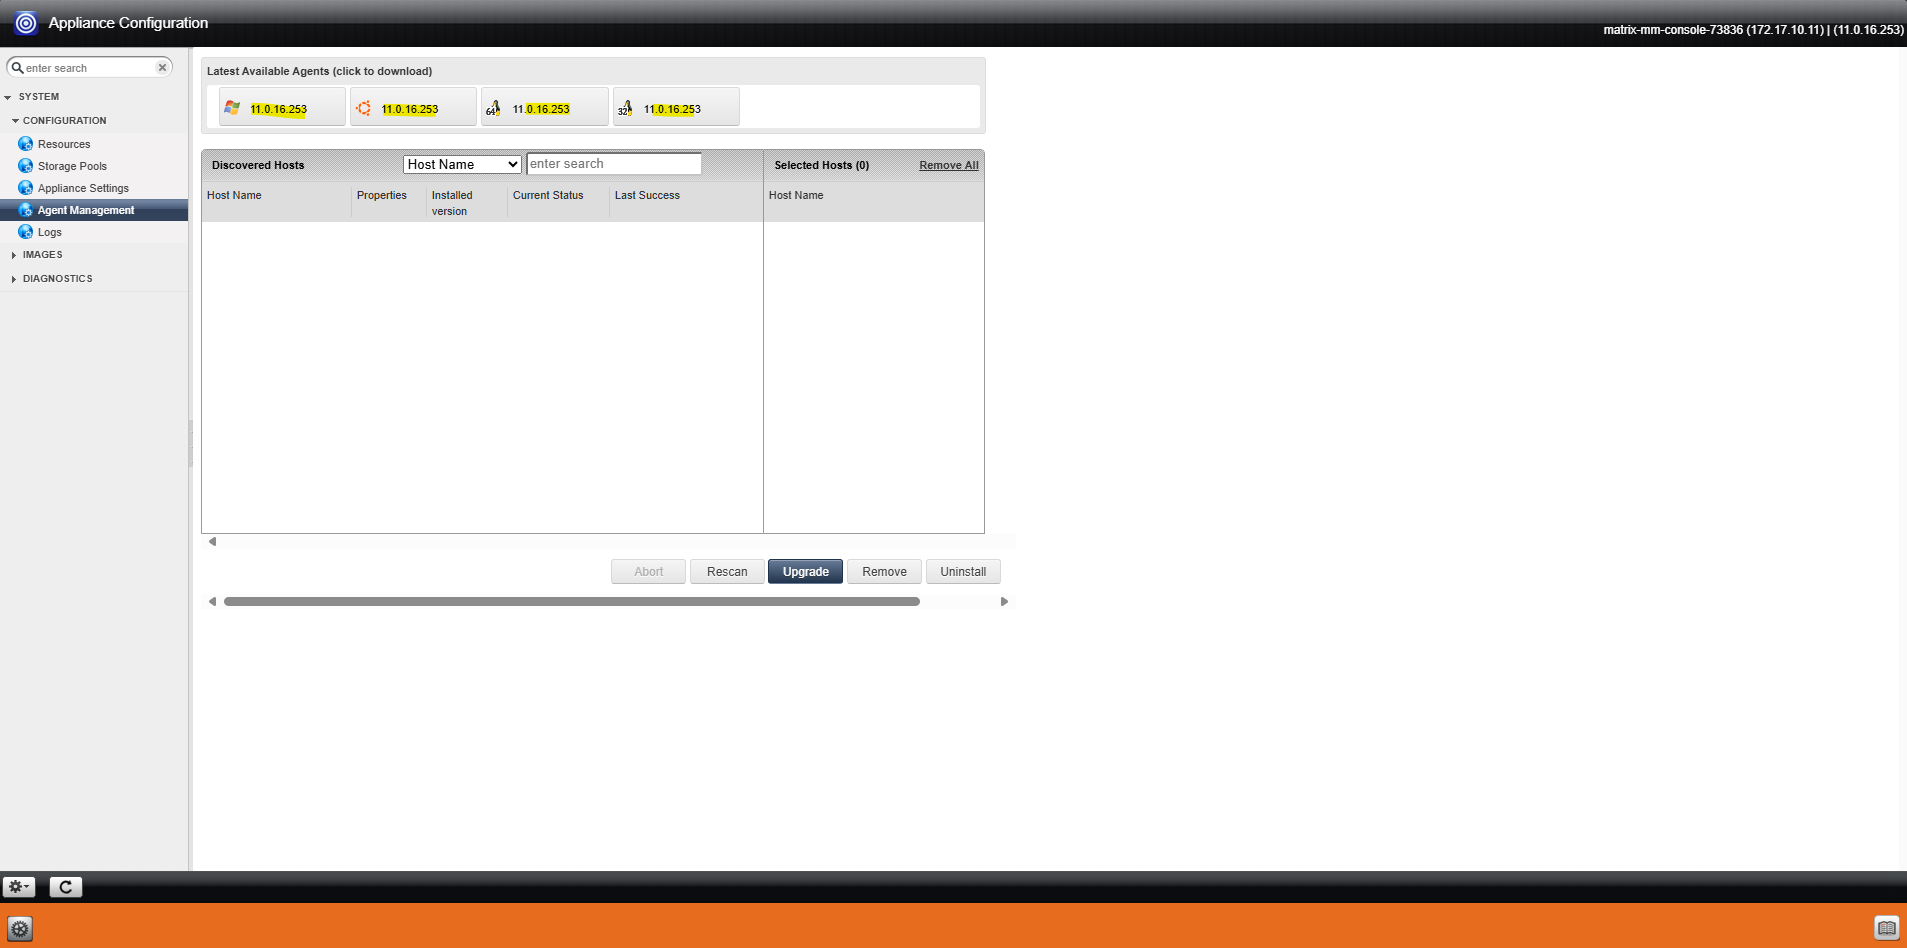
I will click on the Ubuntu icon to download the Agent for my Ubuntu 25.04 VM instance from which I want to restore separate files.
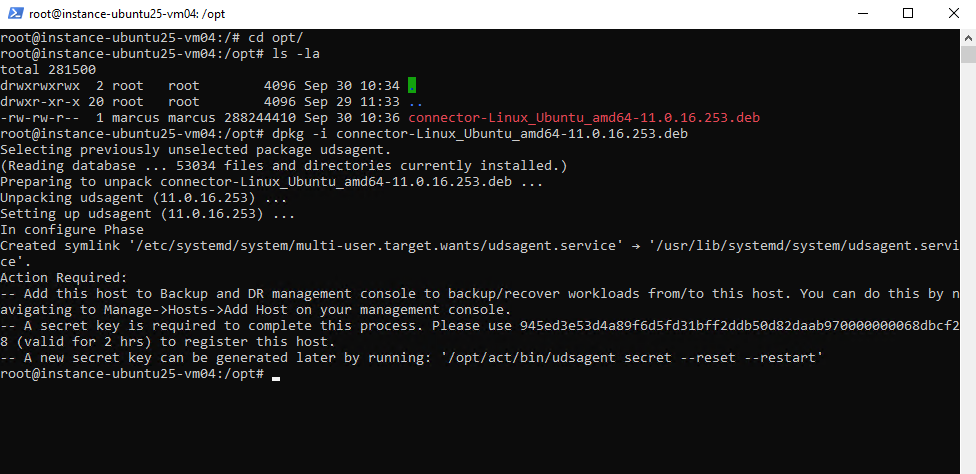
Action Required:
— Add this host to Backup and DR management console to backup/recover workloads from/to this host. You can do this by navigating to Manage->Hosts->Add Host on your management console.
— A secret key is required to complete this process. Please use 945ed3e53d4a89f6d5fd31bff2ddb50d82daab970000000068dbcf28 (valid for 2 hrs) to register this host.
— A new secret key can be generated later by running: ‘/opt/act/bin/udsagent secret –reset –restart’
# dpkg -i connector-Linux_Ubuntu_amd64-11.0.16.253.deb
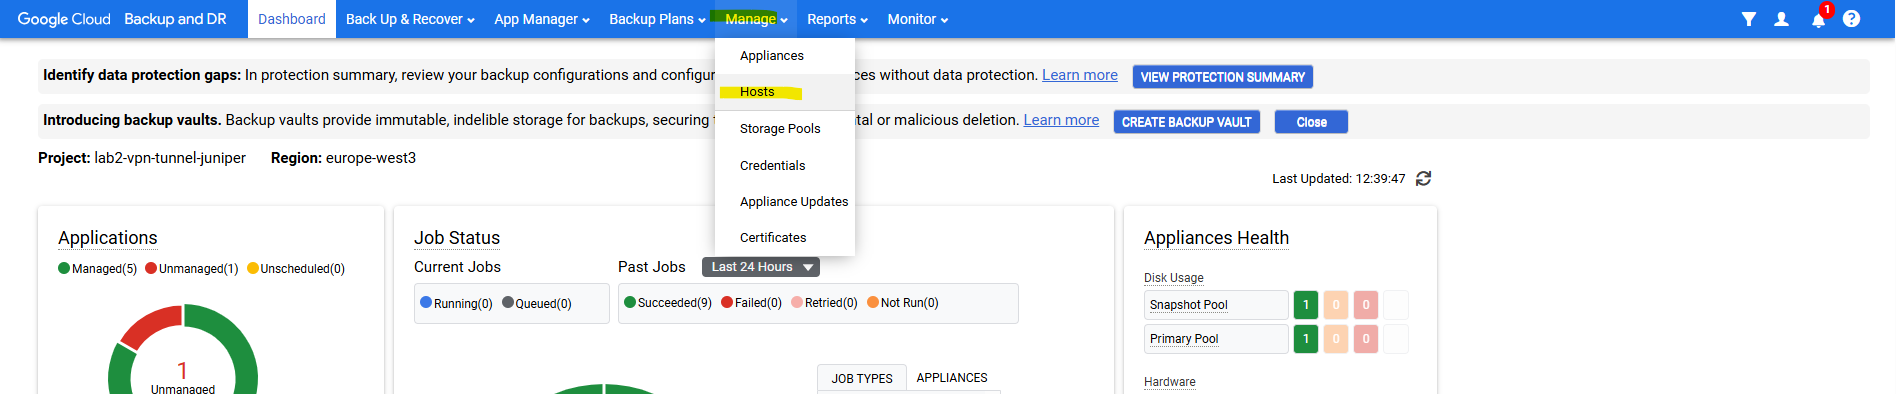
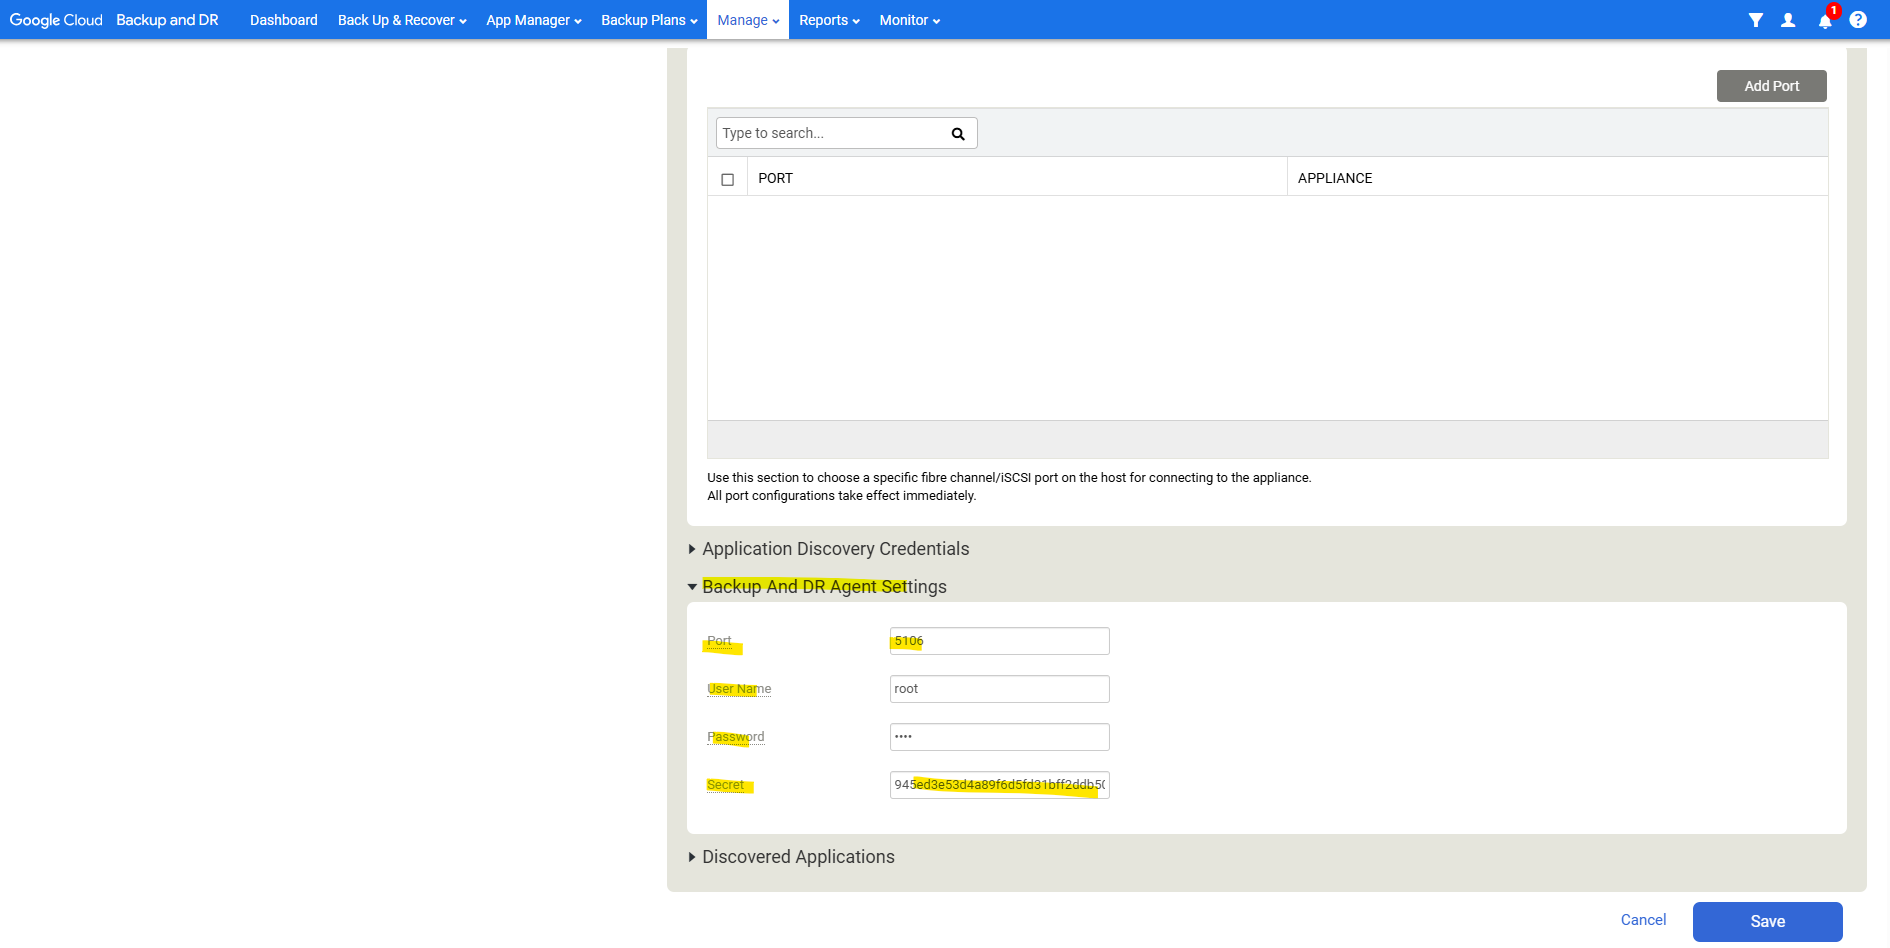
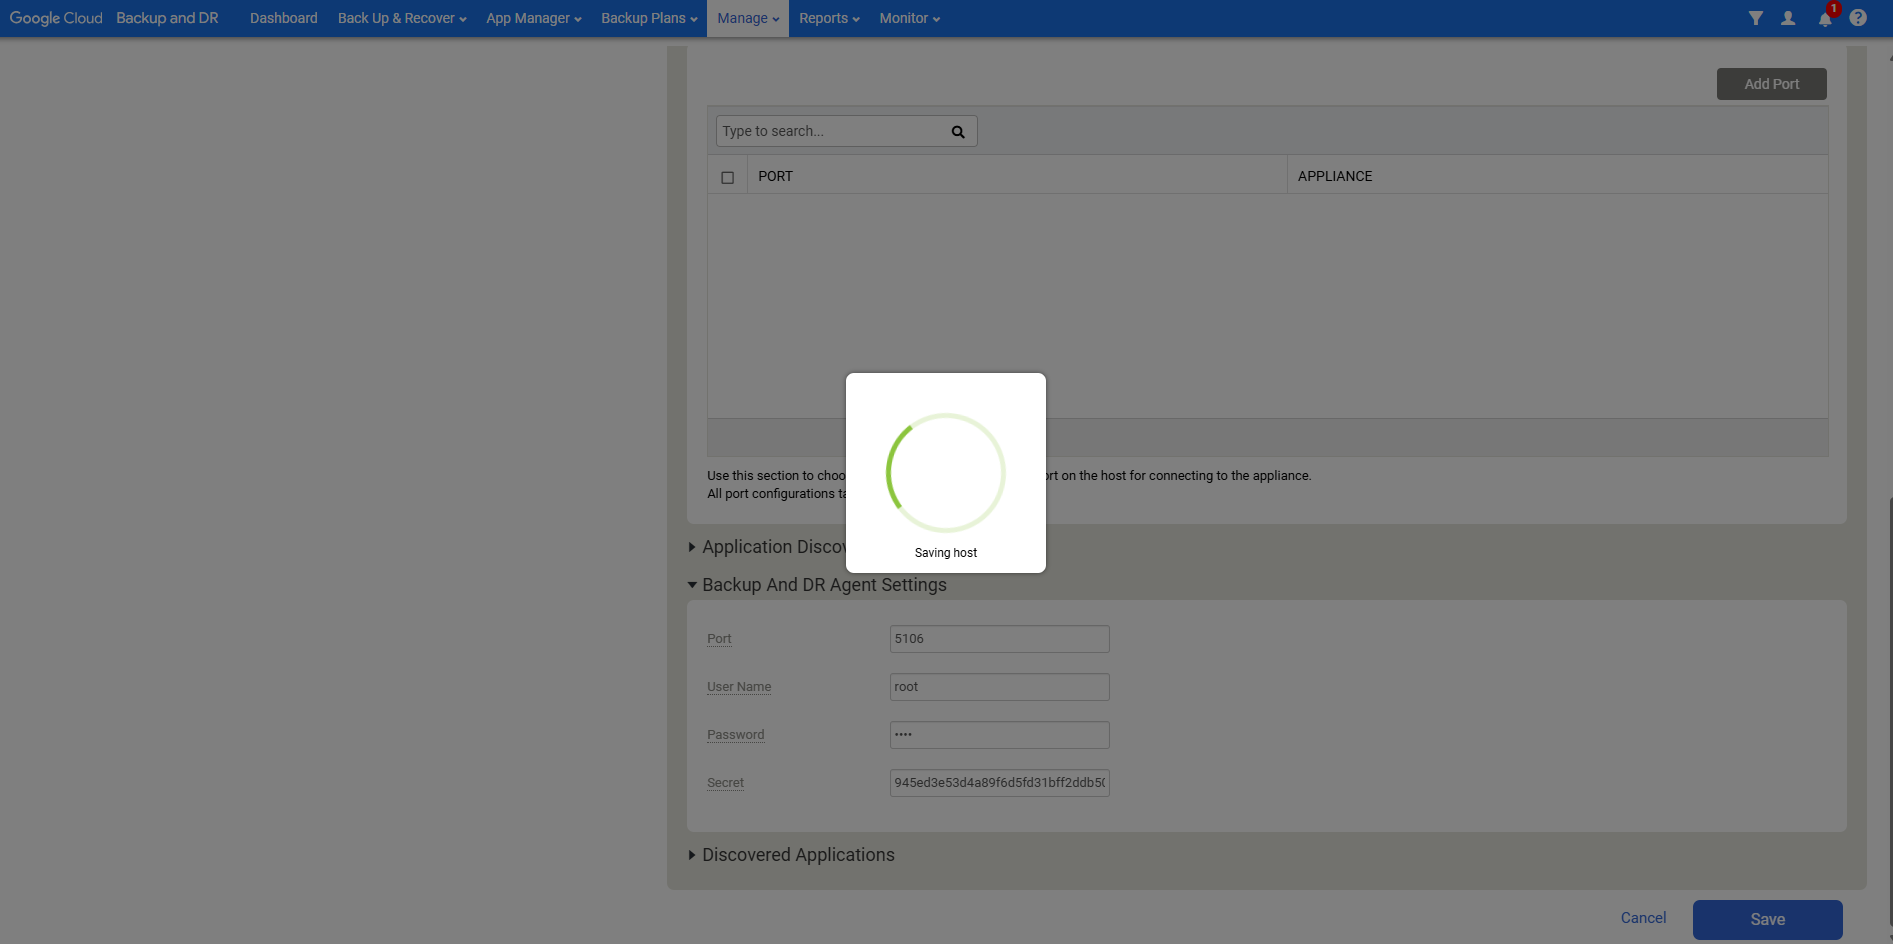
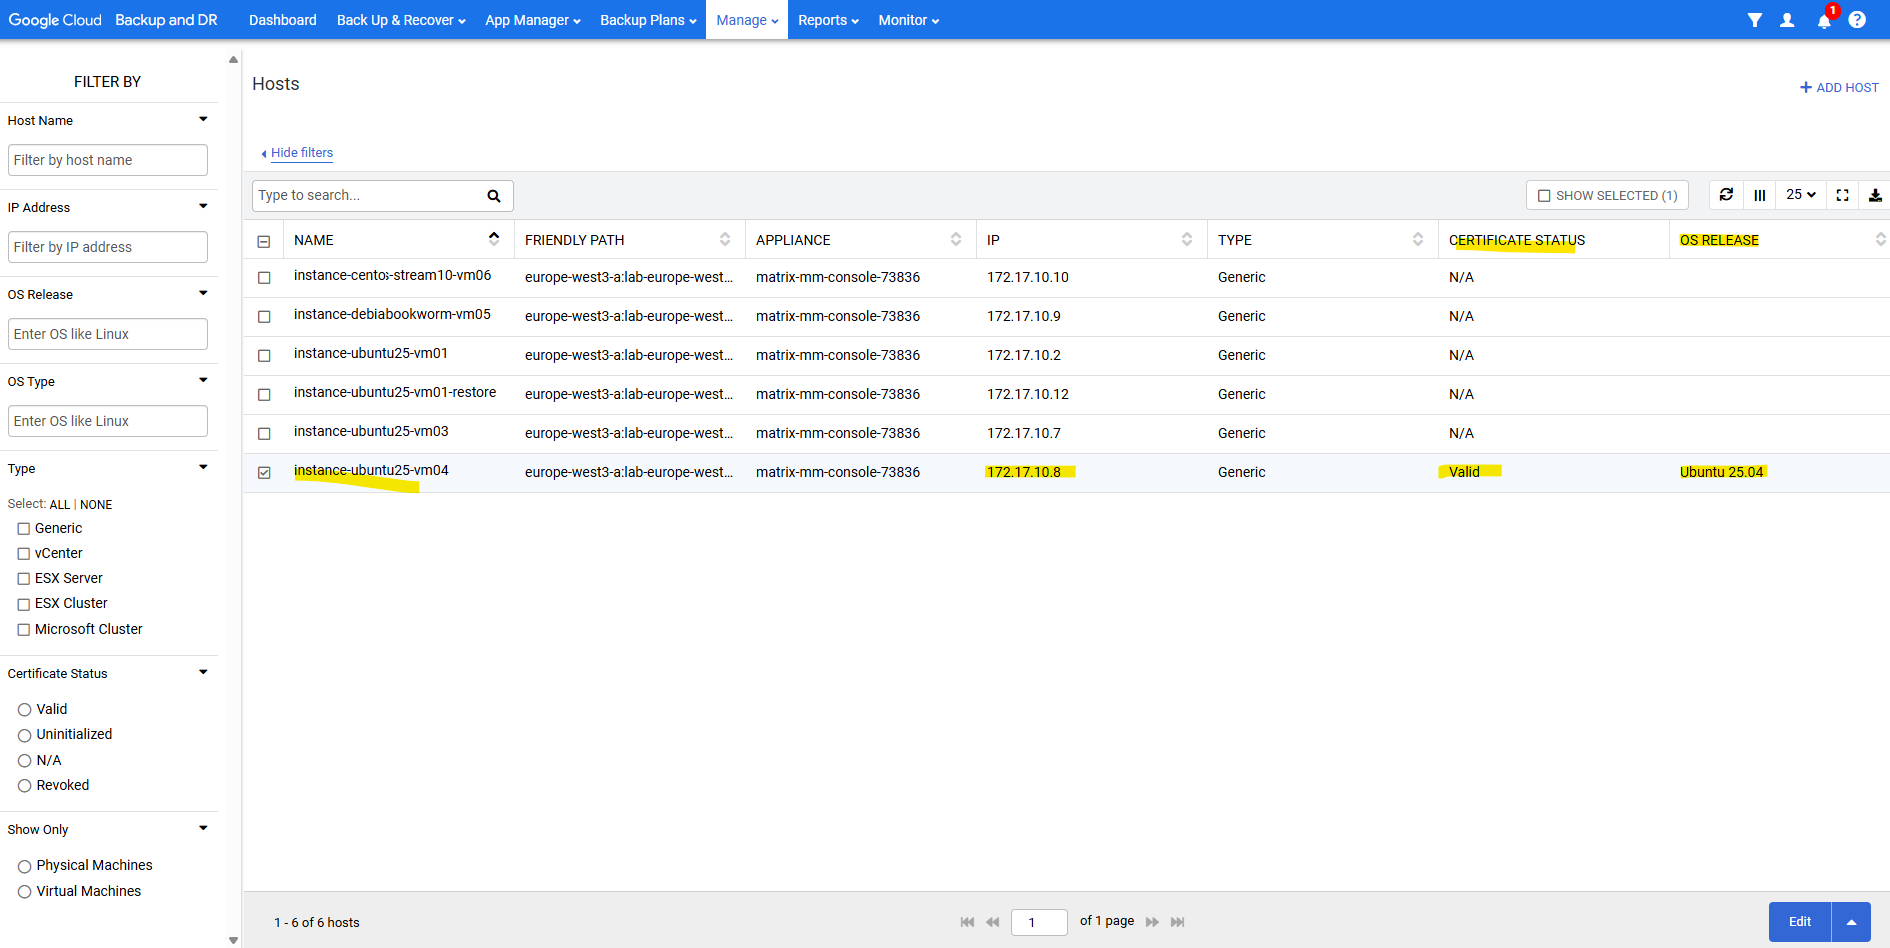
The VM instance is already listed under Manage -> Hosts. Select it and click on Edit.
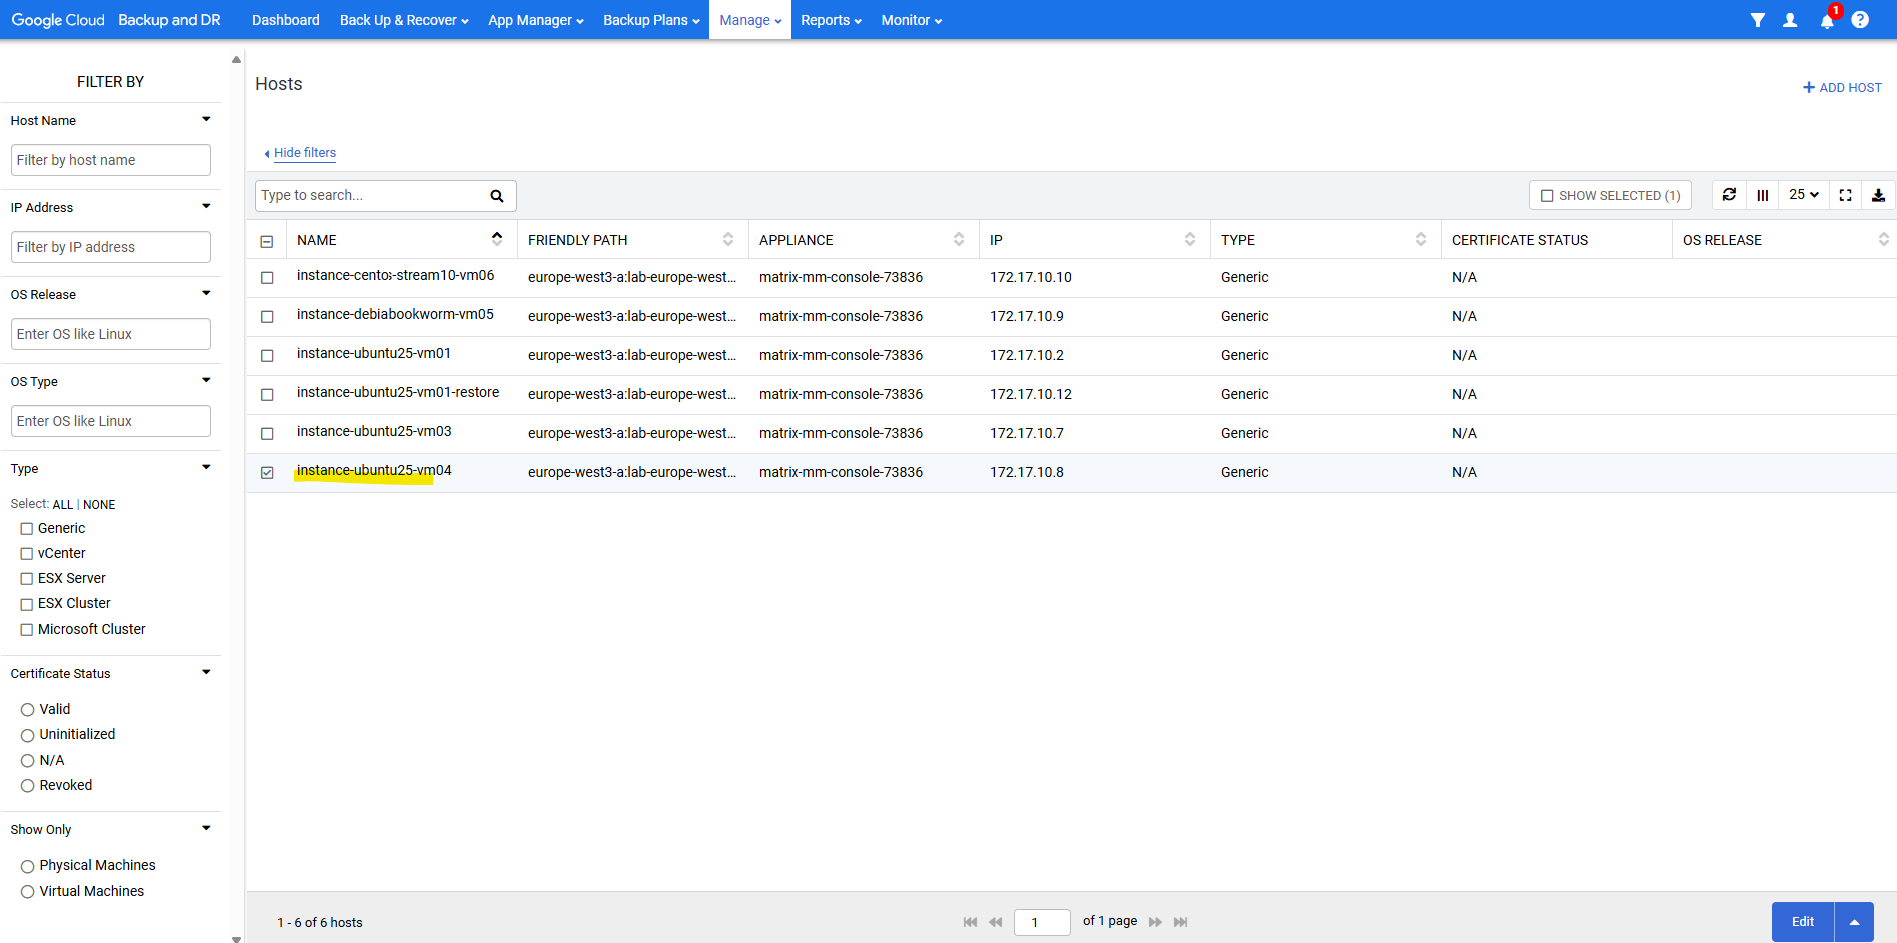
Enter the Backup And DR Agent Settings.
The agent (udsagent) always needs a shared secret to pair with the management console.
If you also get a partial success message like me below, use the instructions to Validate backup/recovery appliance to Backup and DR agent connectivity.
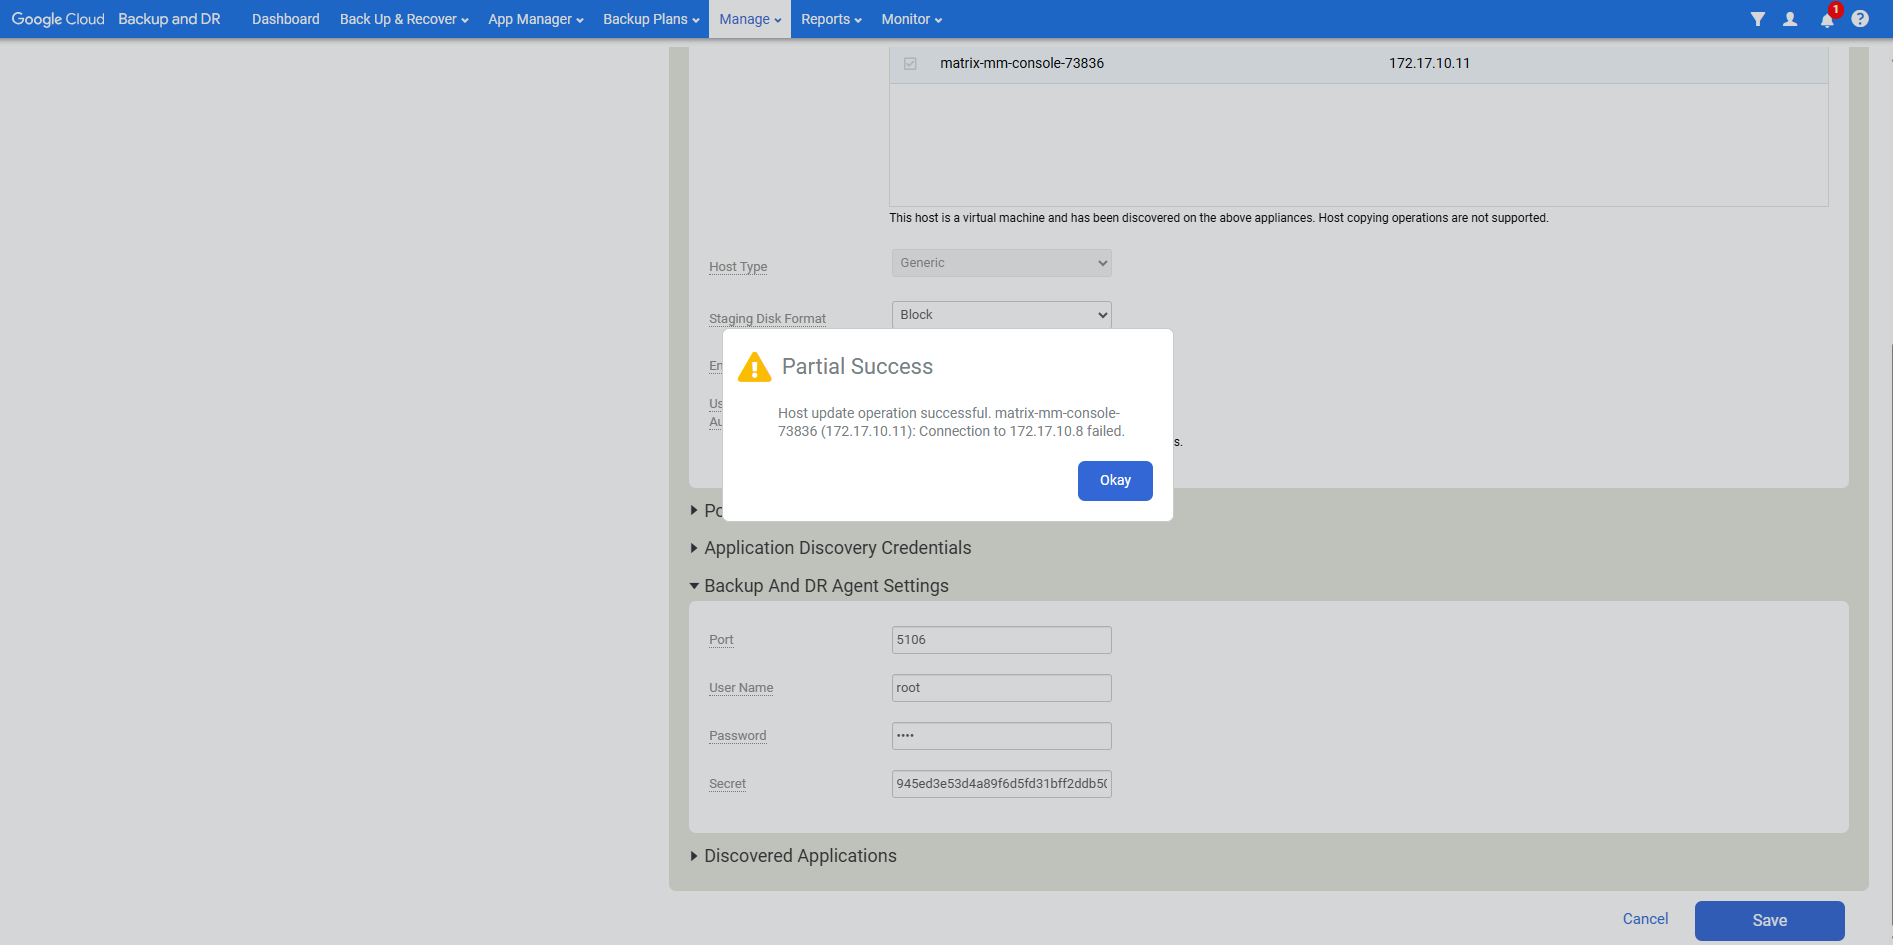
To validate that the backup/recovery appliance is connect to the Backup and DR agent running on a host, we can run the connectivity test. We need the IP address of the target host to perform the connectivity test.
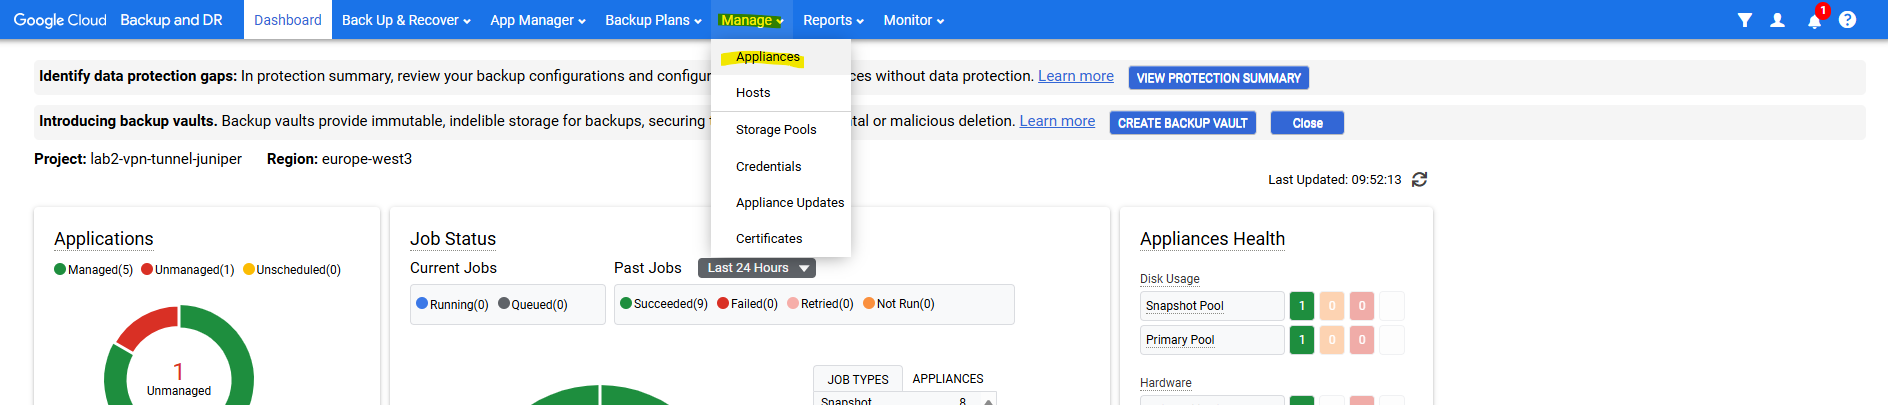
Browse to Manage -> Appliances.

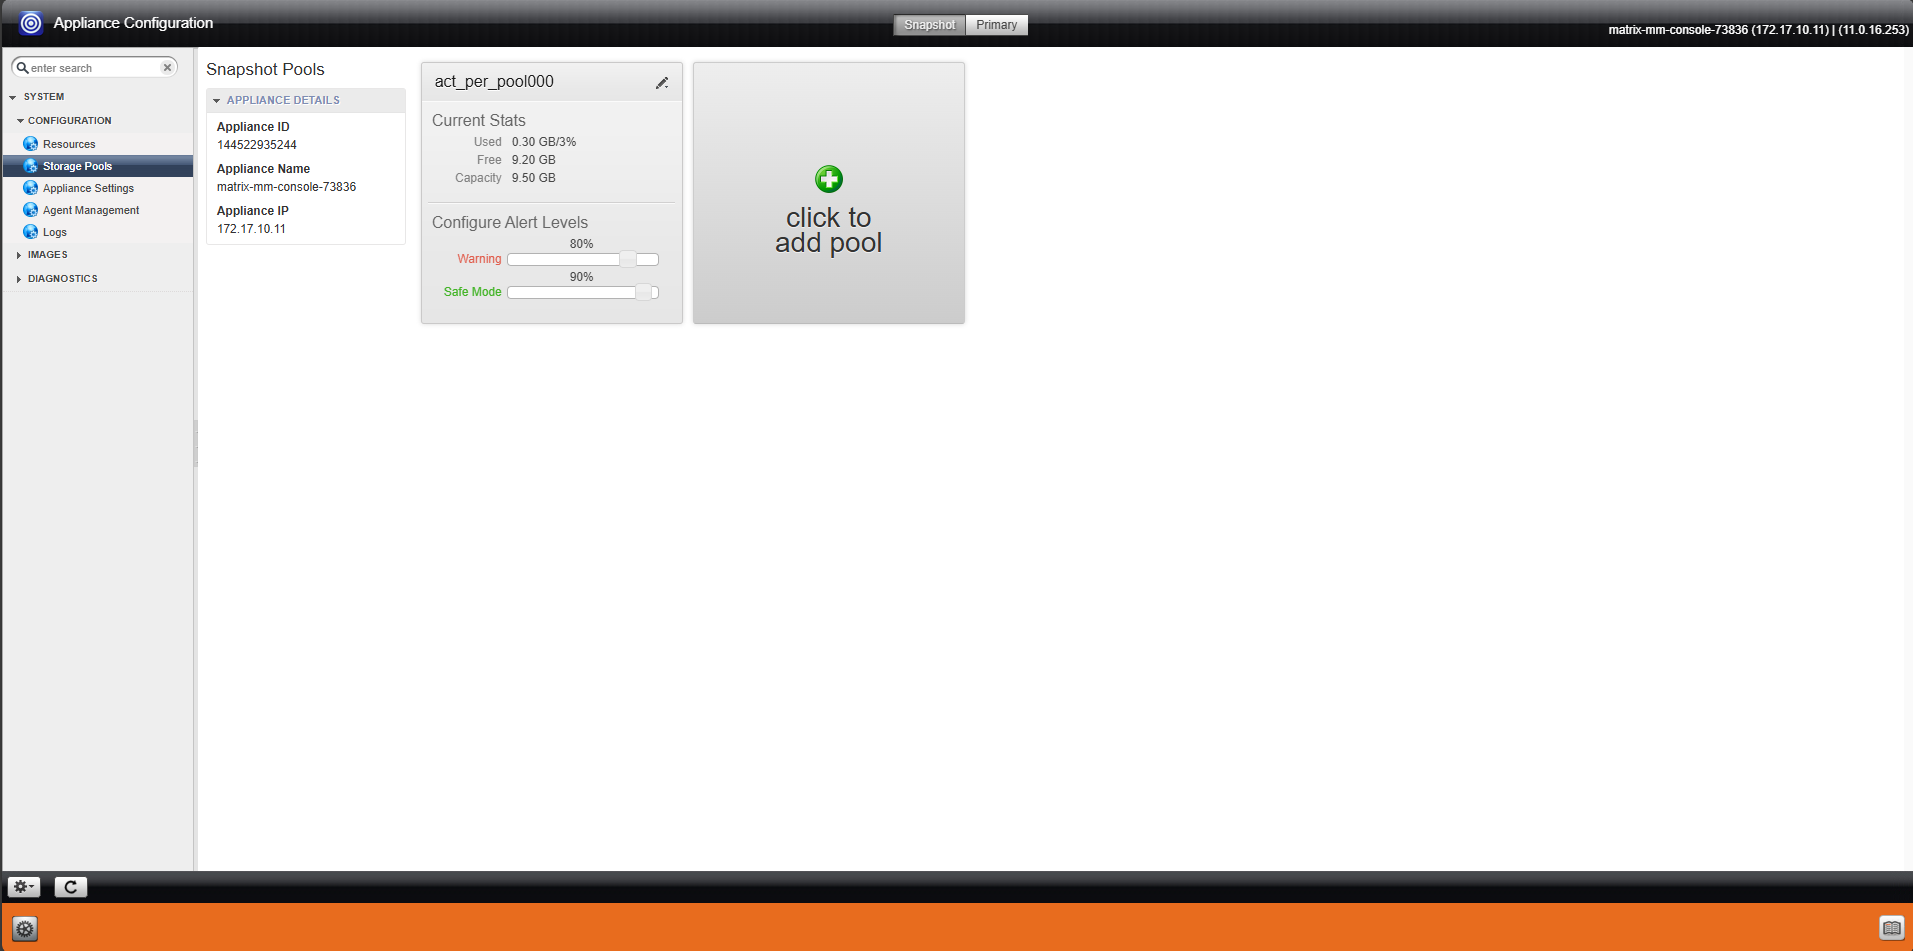
Select the relevant appliance and select Configure Appliance Networking
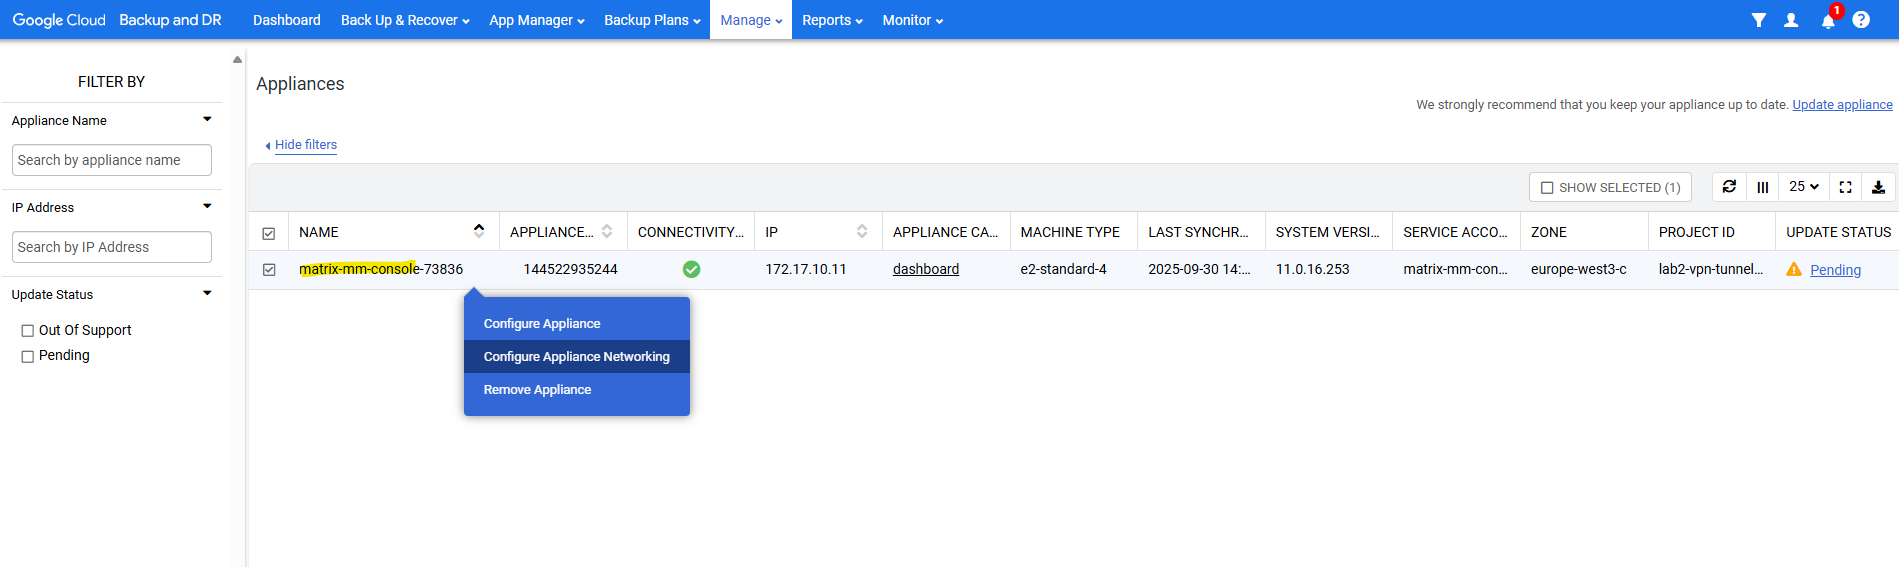
The System Management page opens in a new tab. Go to the Troubleshooting tab.
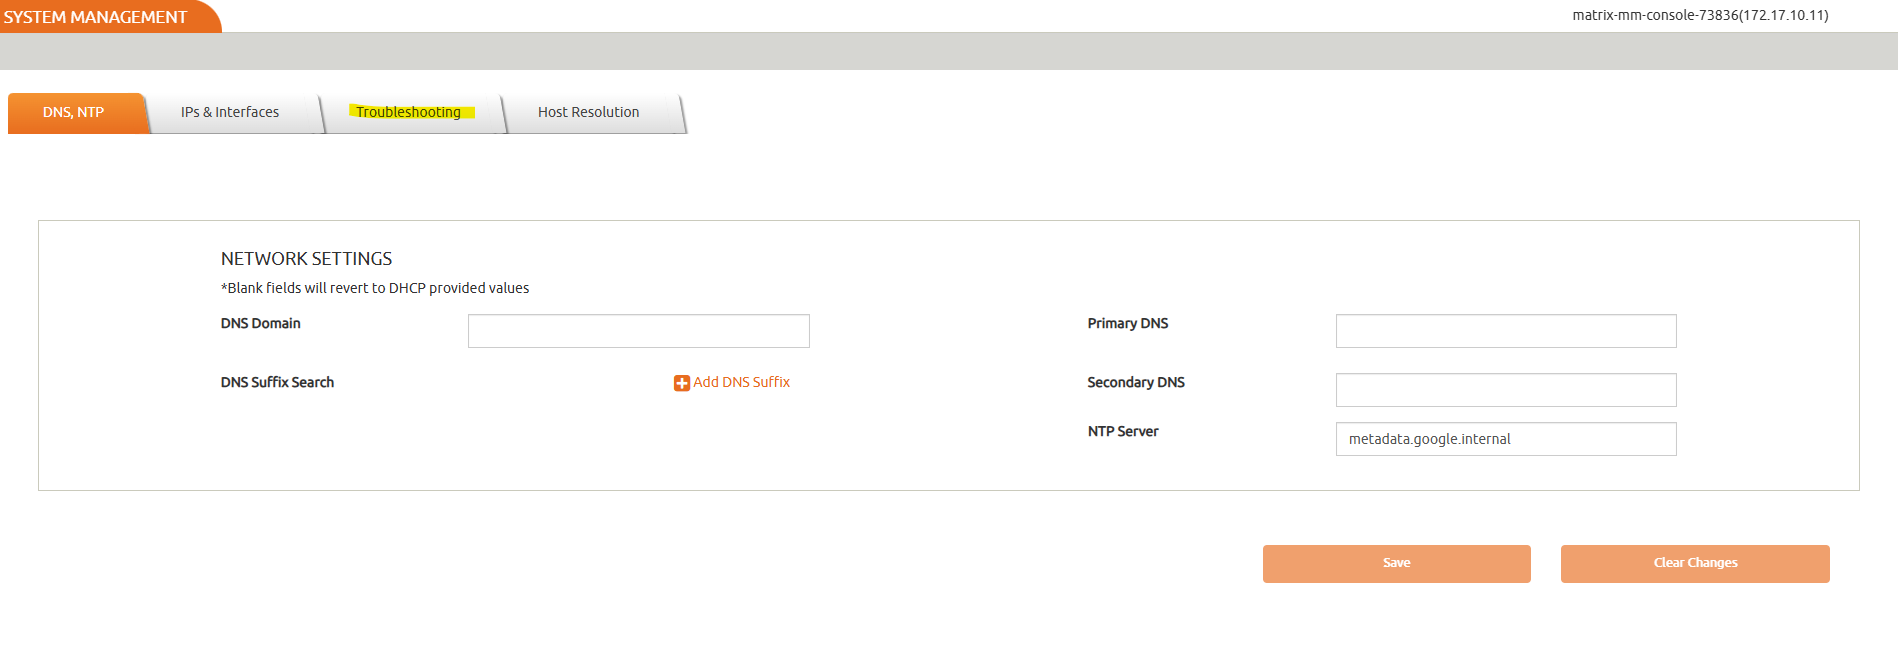
Select TCP Connection Test from the Utility drop-down. Leave the Source IP to Auto Select.
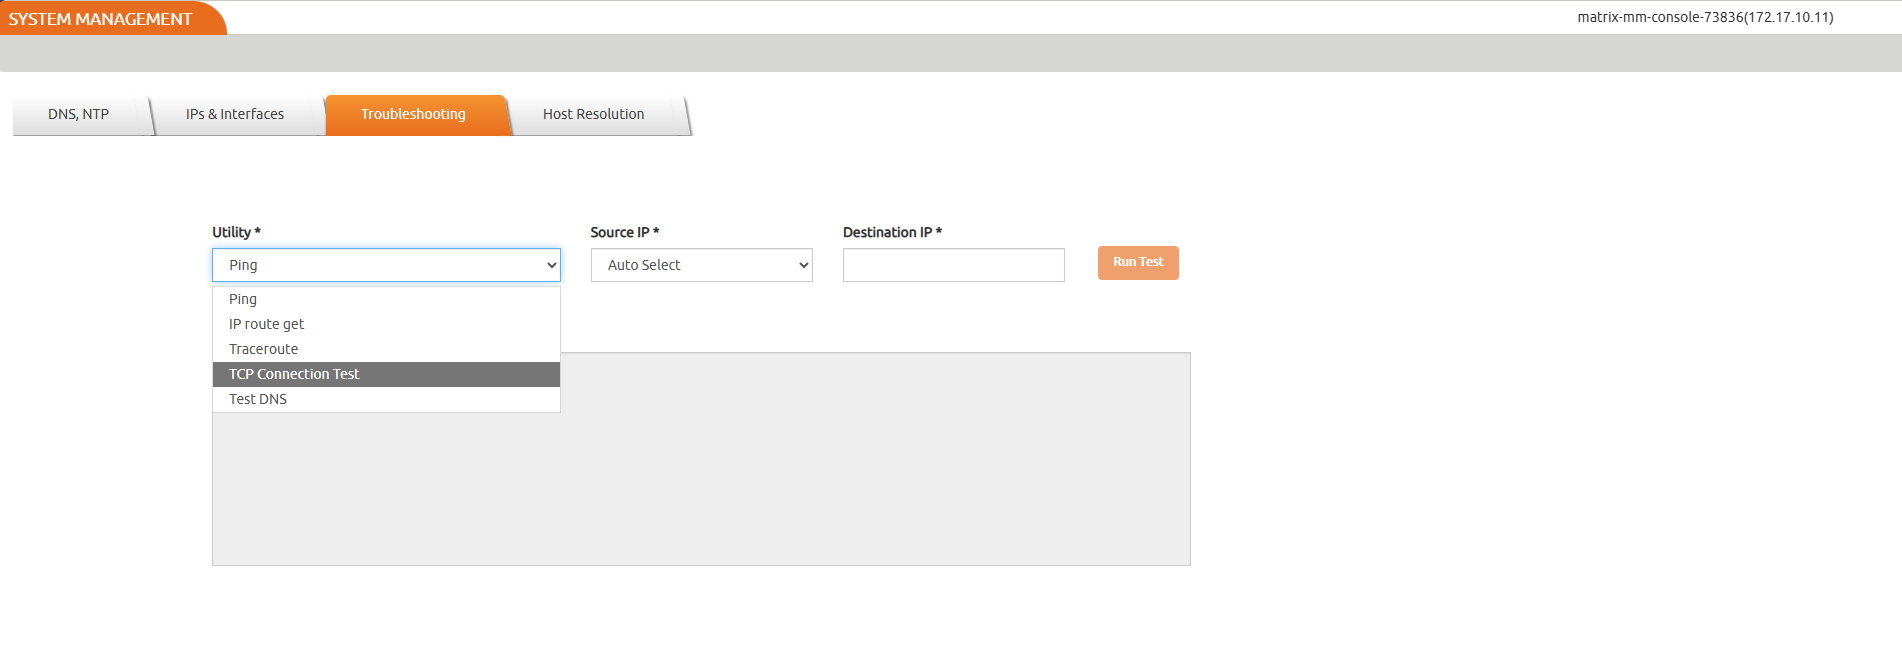
In the Destination IP box, enter the IP address of the target host. In the TCP Port box, enter the value 5106.
Select Run Test.
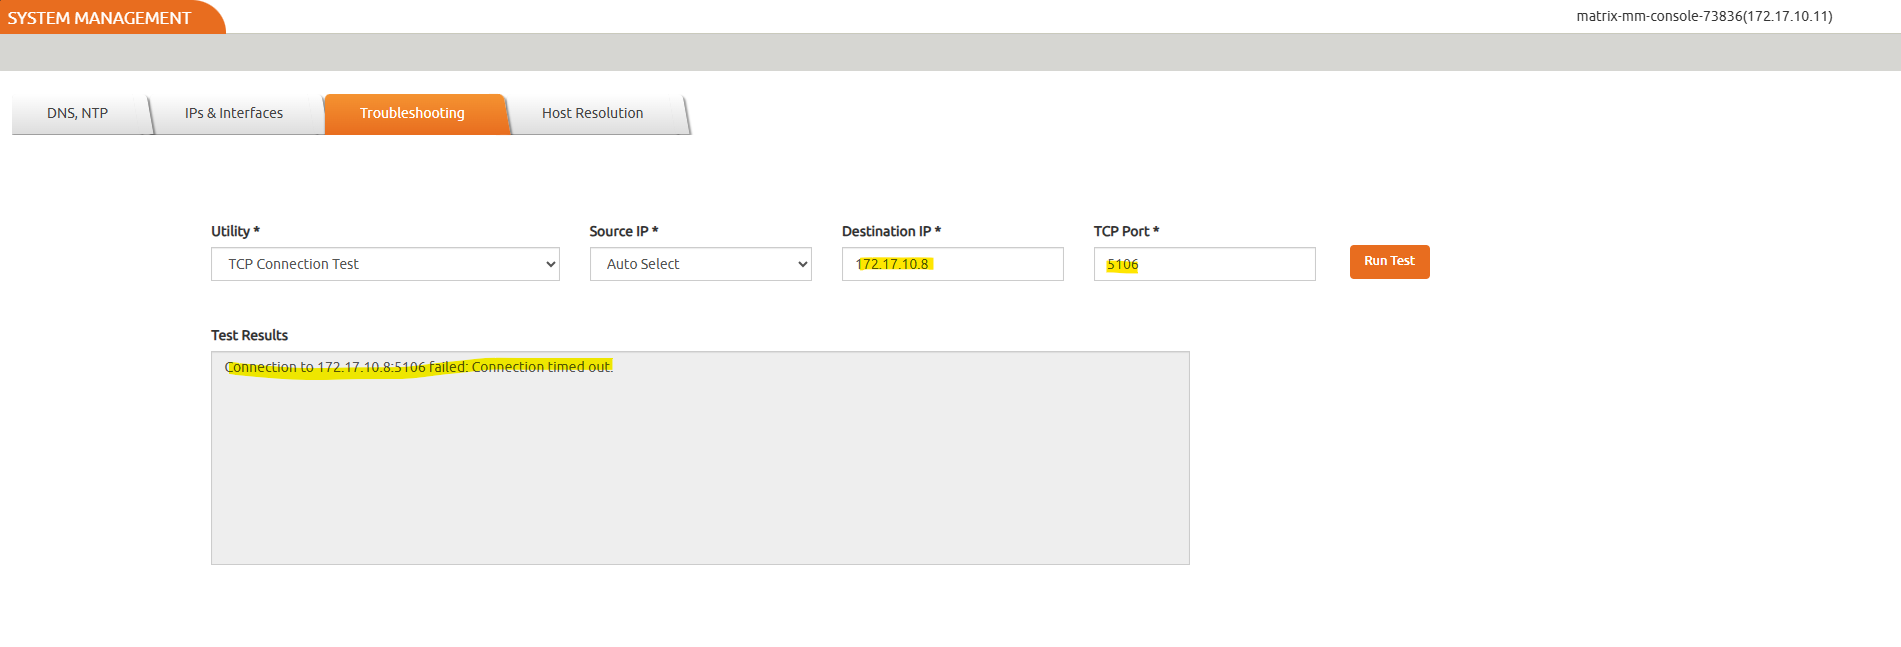
Because in my case the agent is running and already listening on TCP port 5106, I will next check the VPC network firewall settings.
# systemctl status udsagent
# netstat -tulpen | grep udsagent


So far just the inbound (ingress) traffic firewall rule shown below to the management console itself from all sources is allowed (this rule was created automatically).
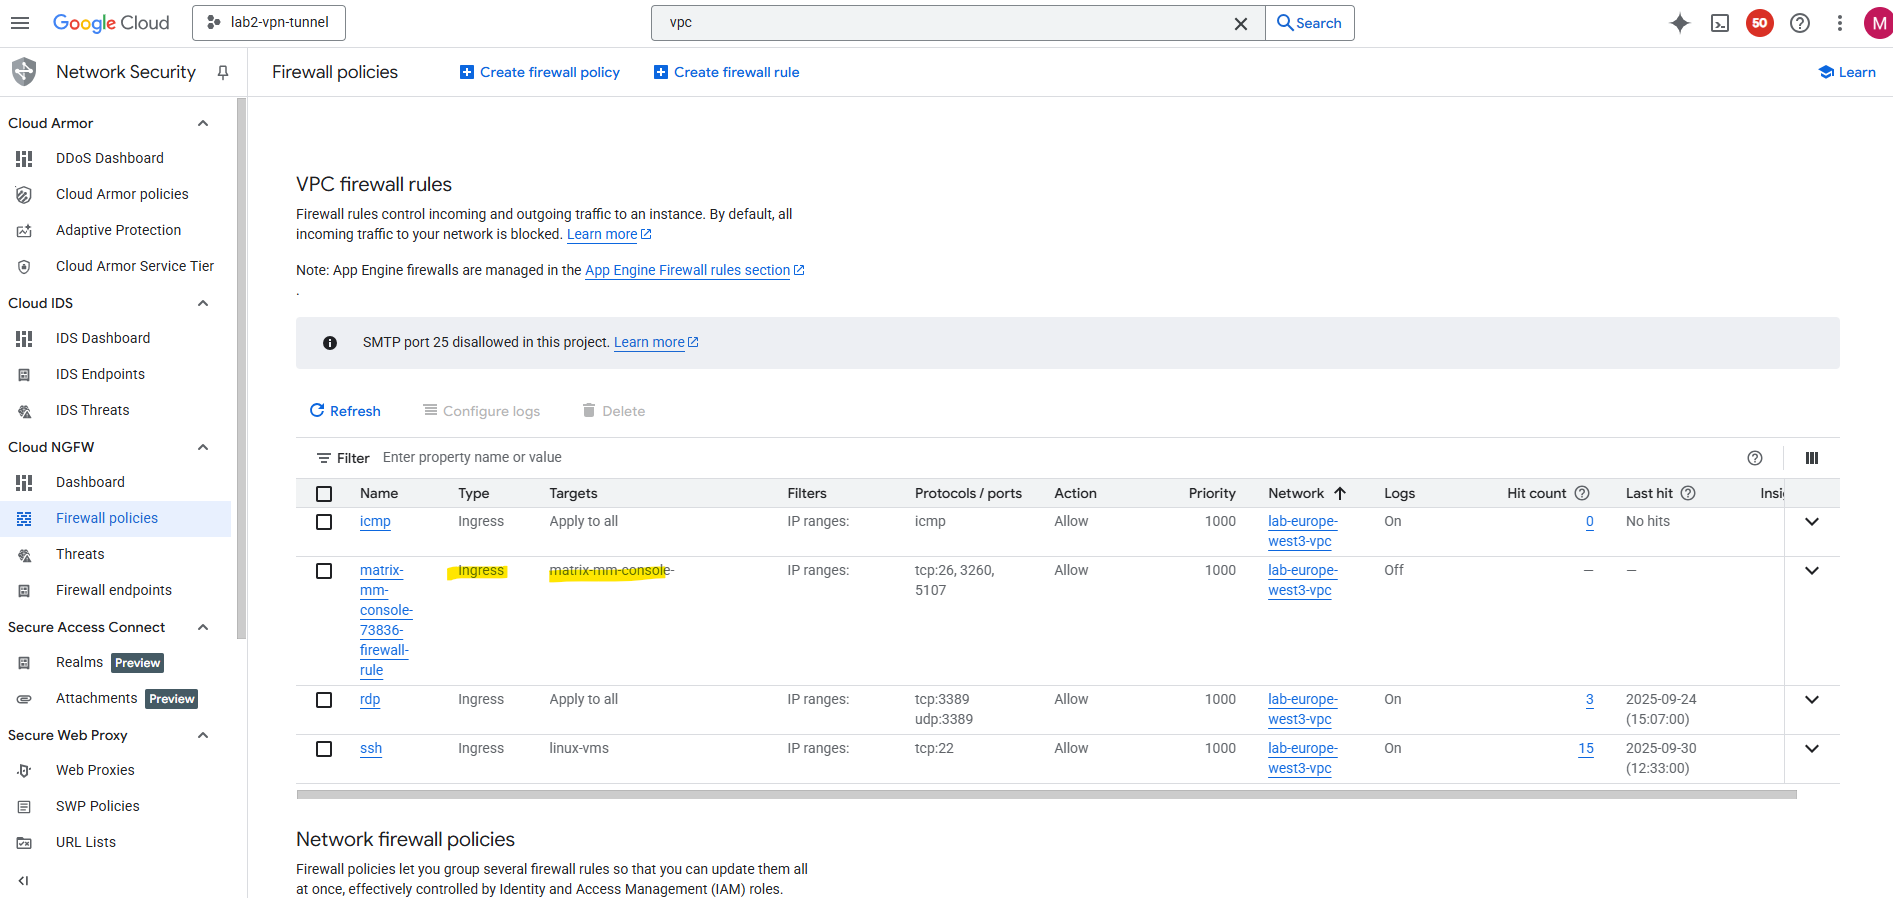
Below I was adding a new firewall rule for which traffic inbound TCP port 5106 is allowed on all destinations in this VPC network and just filters the source to only allow this traffic coming from the management console (backup/recovery appliance).
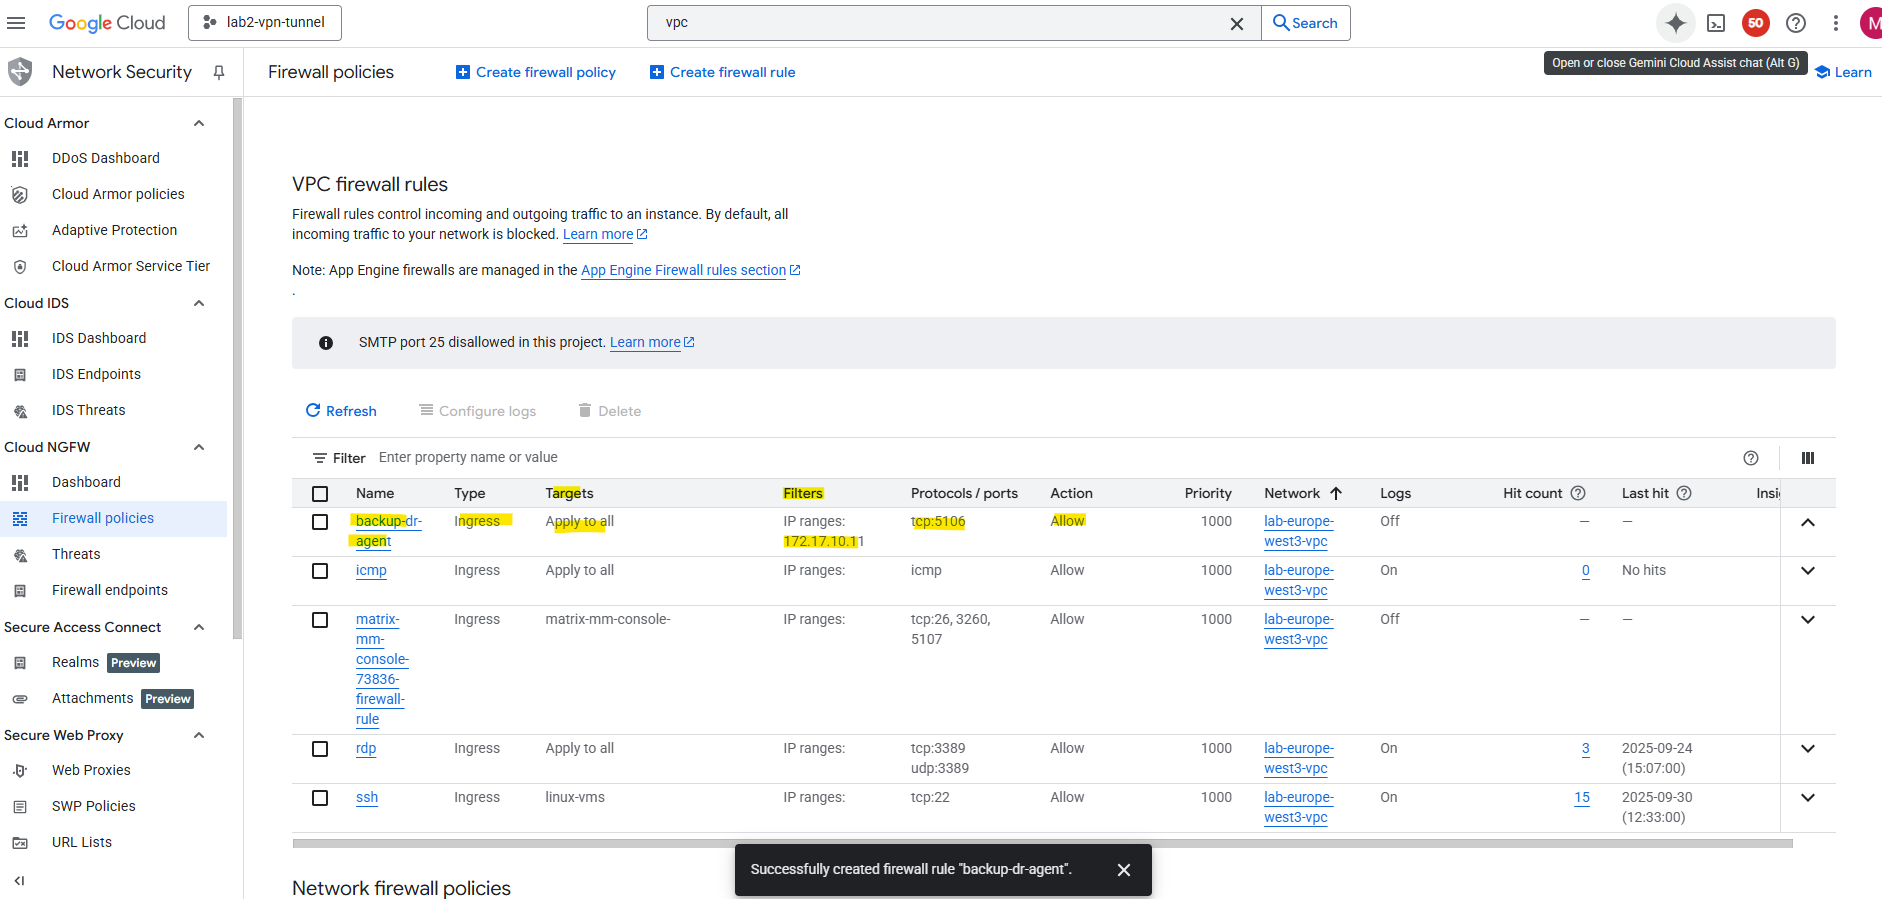
Now the test succeeded.

Also the Host update now succeeds.

Ensure the Certificate status changes to Valid.
Source: https://cloud.google.com/backup-disaster-recovery/docs/configuration/linux-agent
Creating a new Backup Template and Policy for Application Consistent Backup
First we create a new backup template under Backup Plans -> Templates. Click on + Create Template.
Enter a name for and click on the + icon below the Production tile.
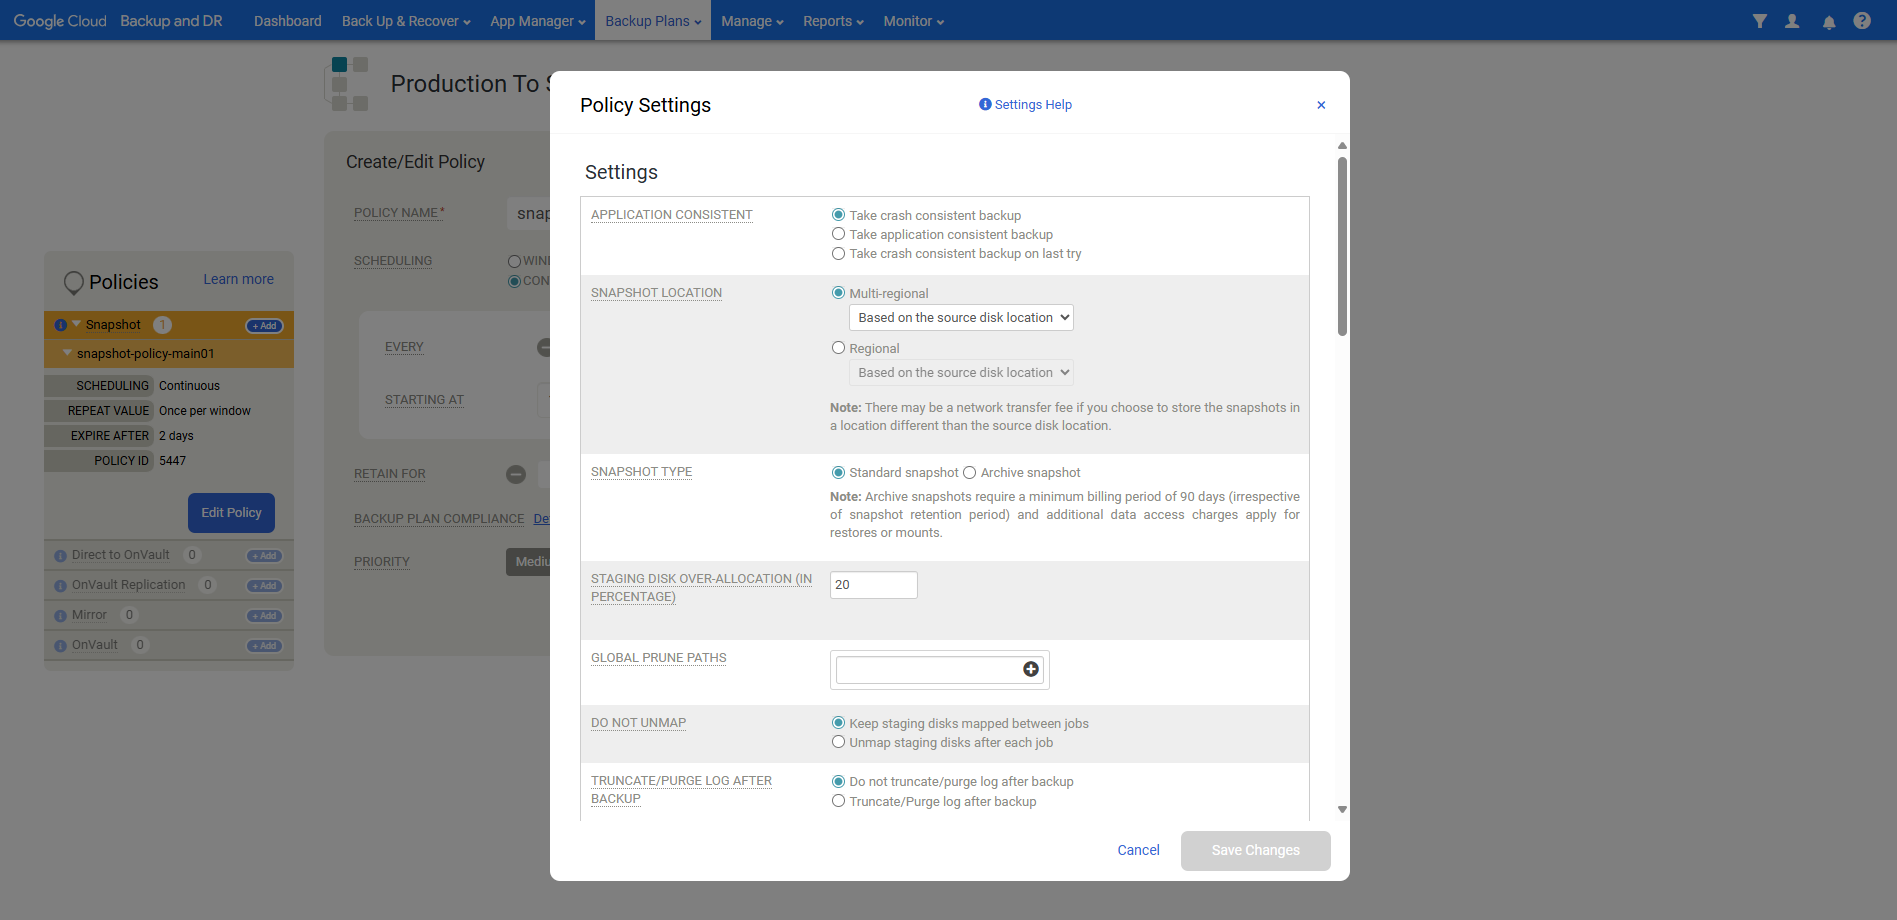
Enter a policy name, select the scheduling and click on Advanced Policy Settings.
Below select Take a application consistent backup. Adjust the other settings as required and click on Save Changes.
Click on Create Policy.
Click on Save Template.
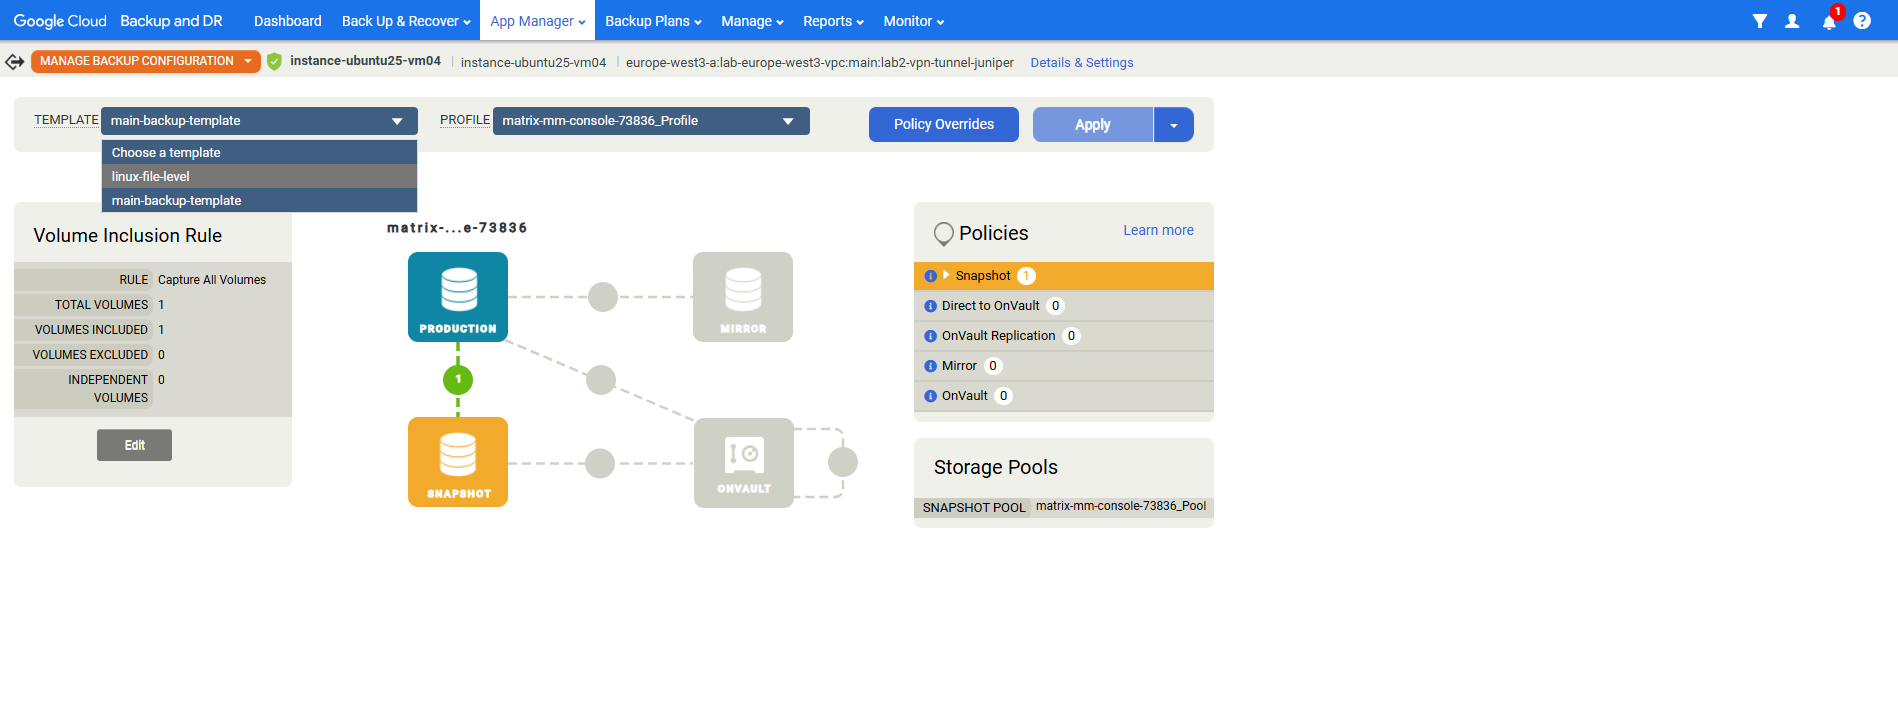
Under App Manager -> Applications we can now assign the new backup template to our VM Instance we want to be able to restore separate files from.
Select the new backup template.
Click on Apply.
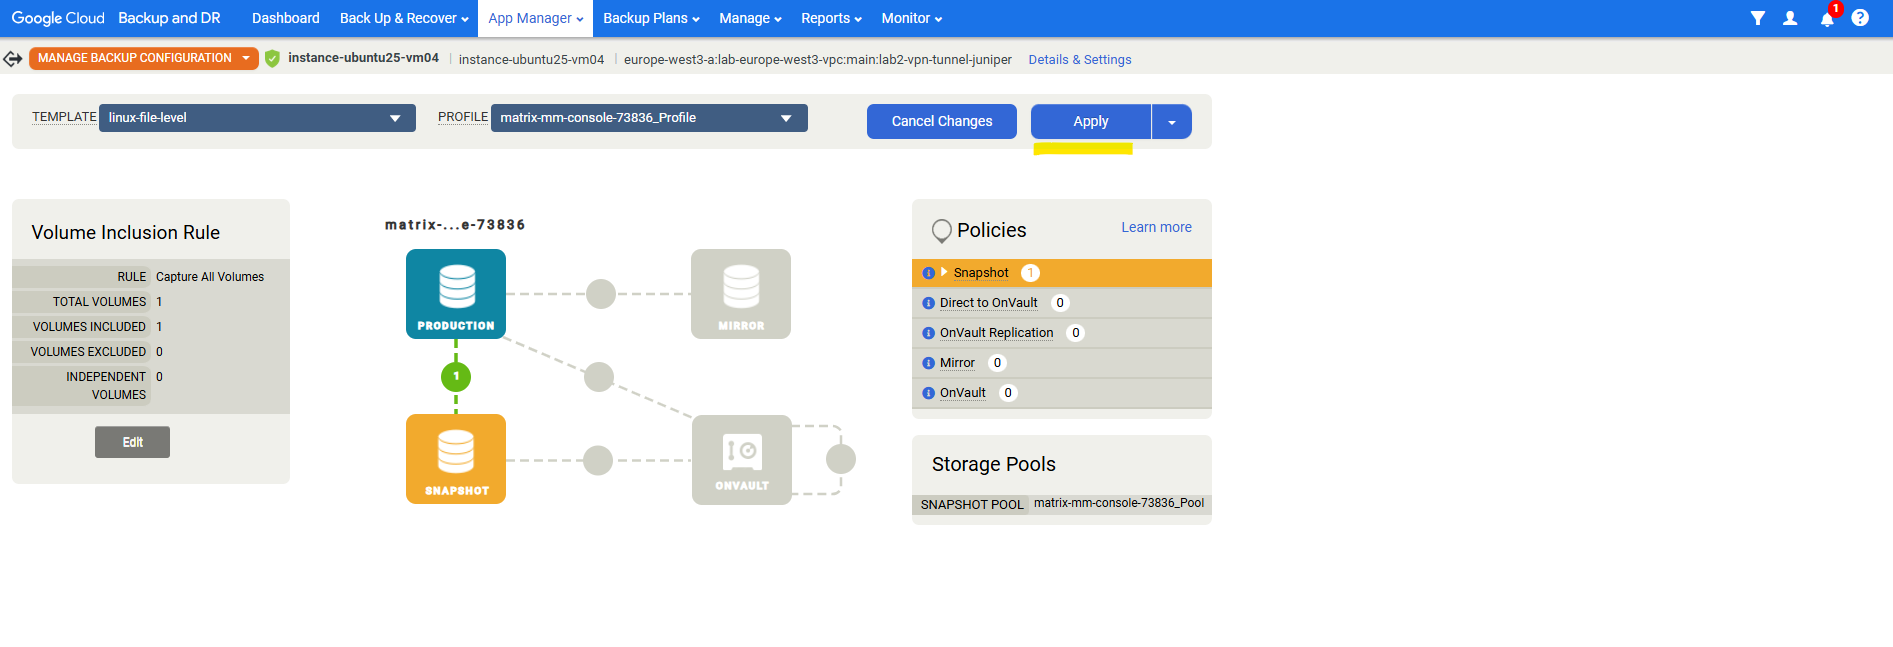
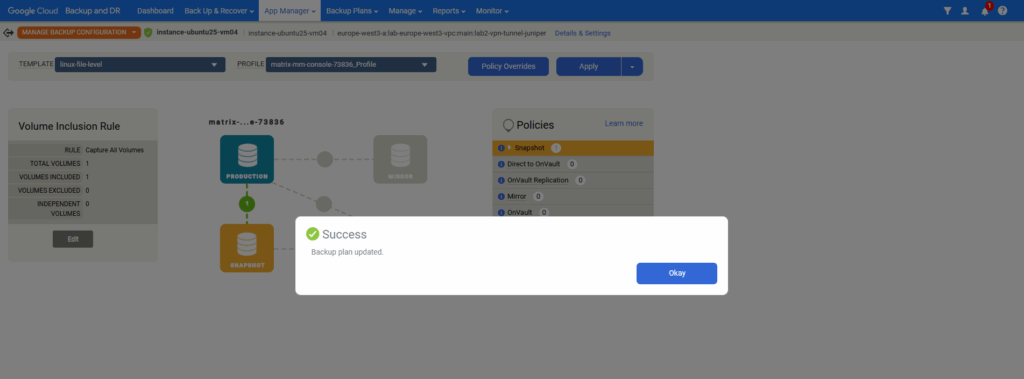
Click on Update.

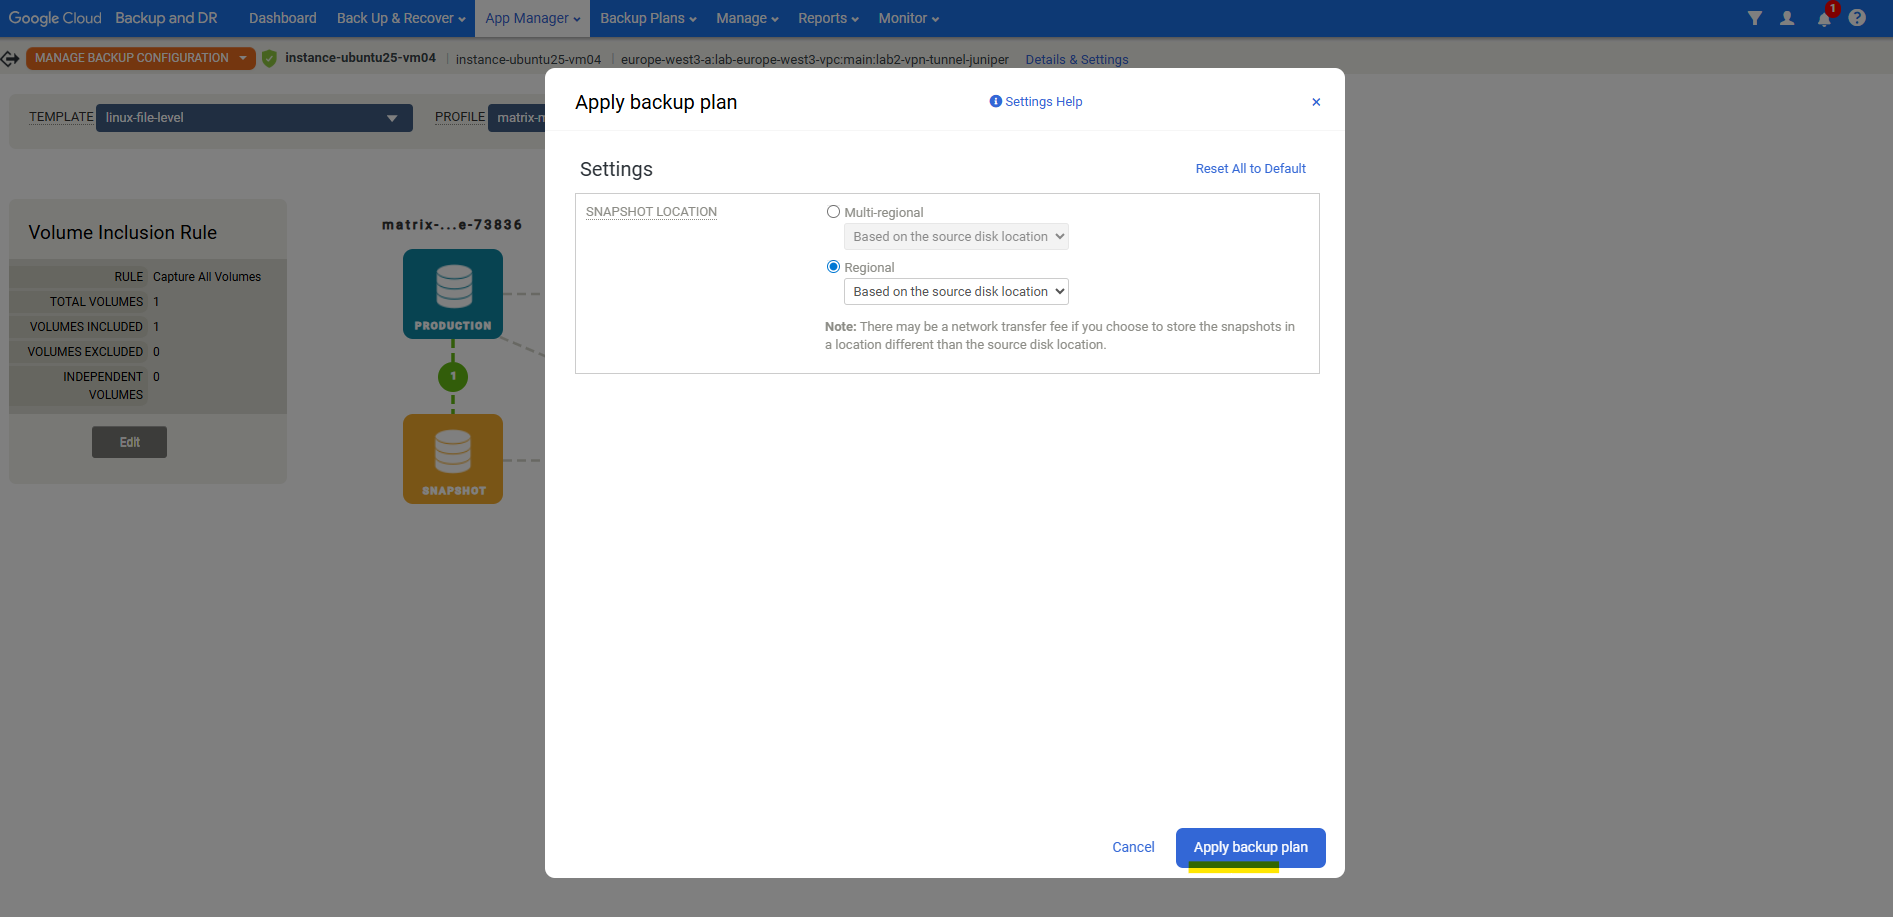
Click on Apply backup plan.

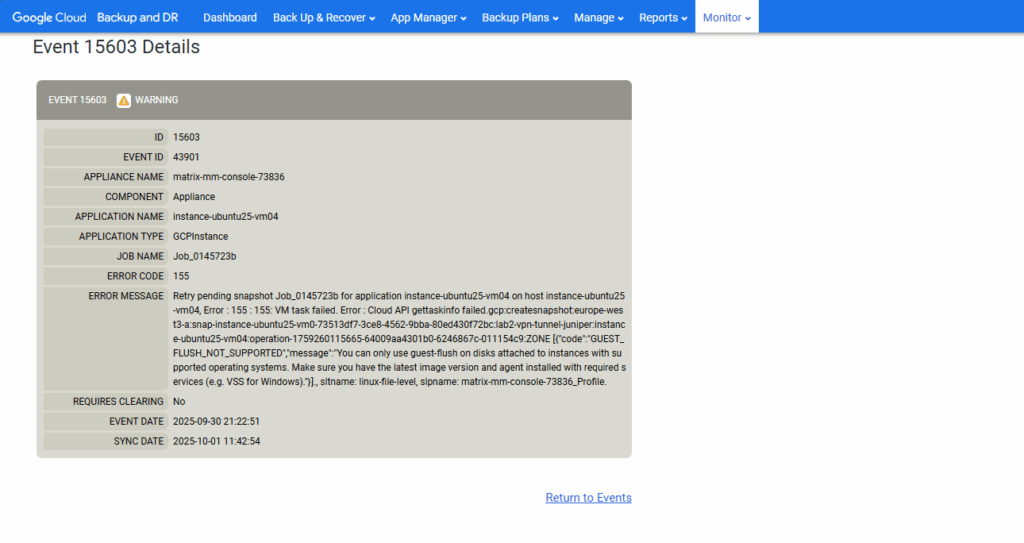
Troubleshooting
You can only use guest-flush on disks attached to instances with supported operating systems. Make sure you have the latest image version and agent installed with required services (e.g. VSS for Windows)
You can only use guest-flush on disks attached to instances with supported operating systems. Make sure you have the latest image version and agent installed with required services (e.g. VSS for Windows)
On-Demand Backup
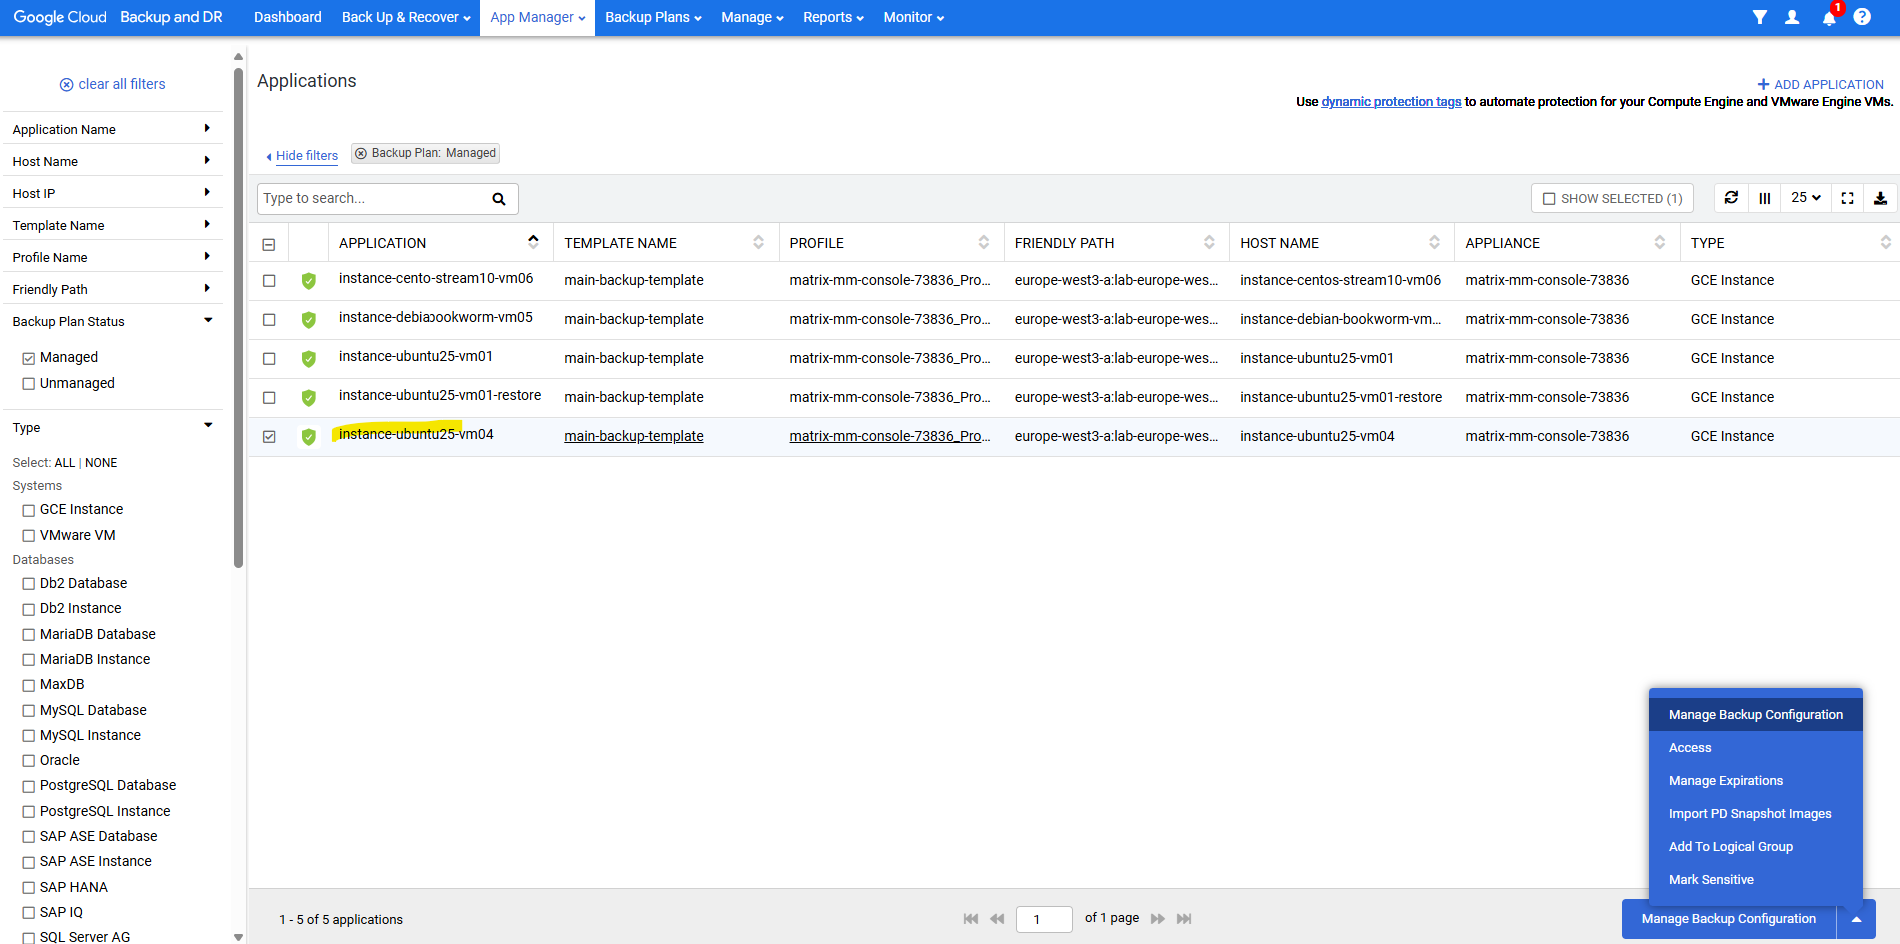
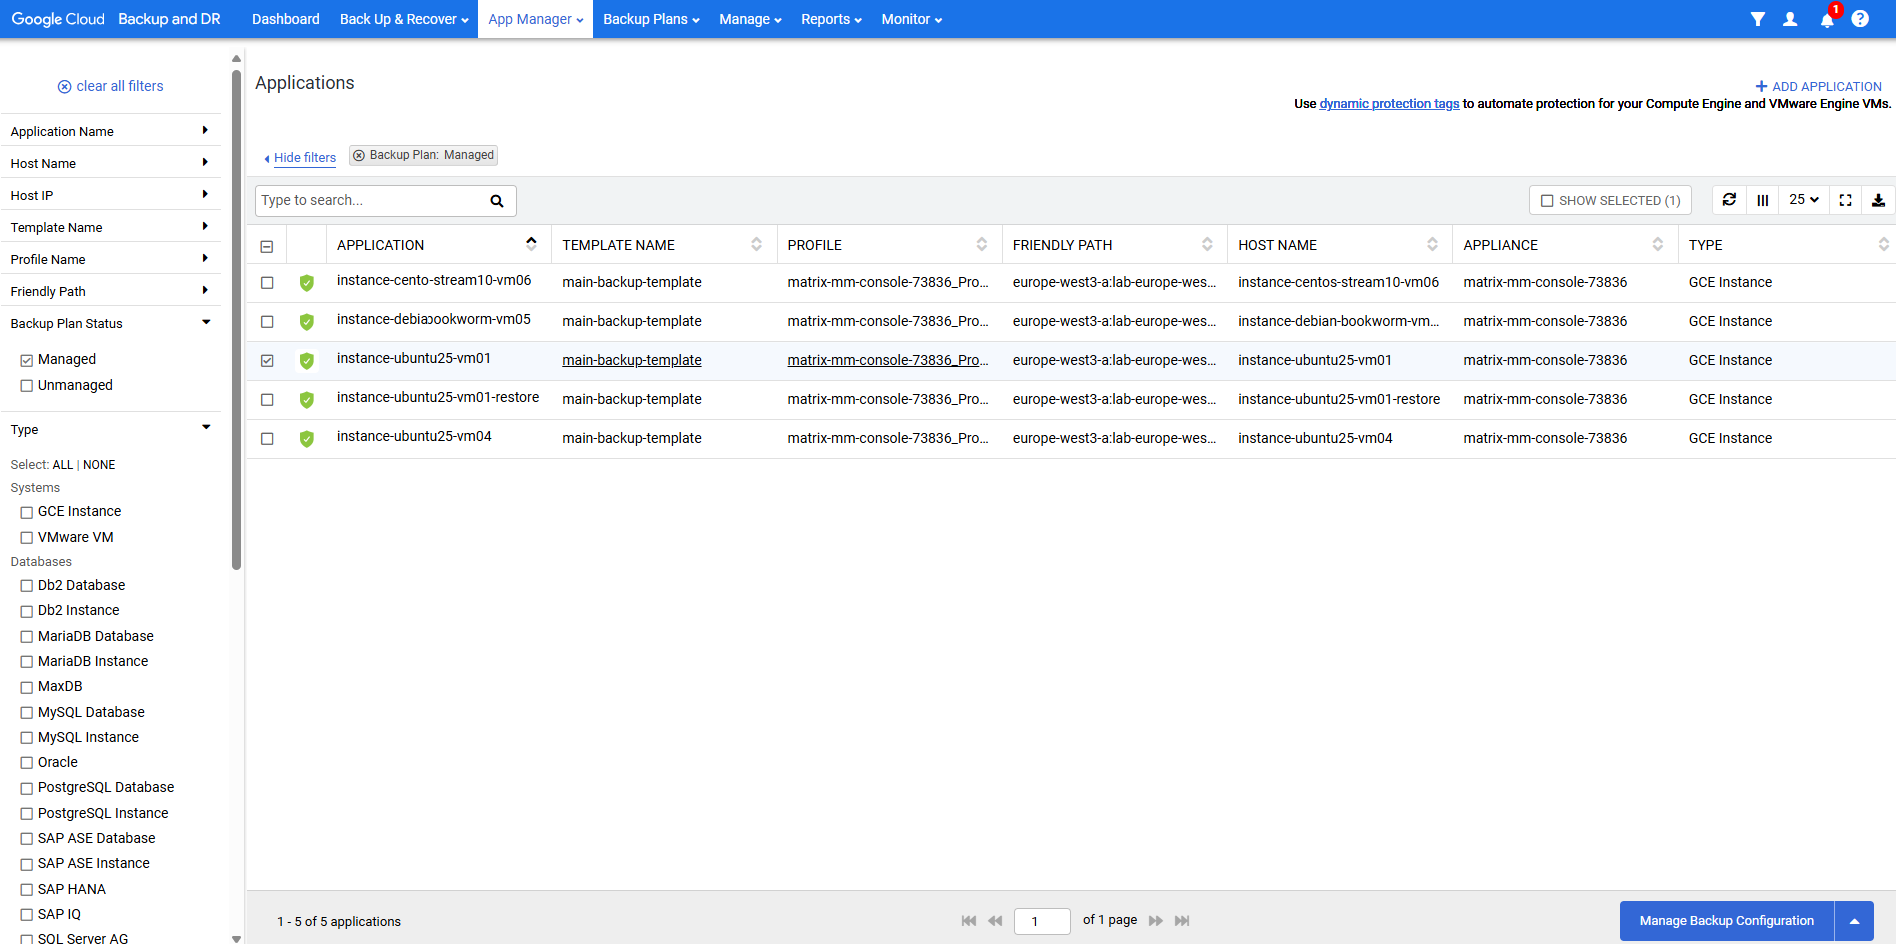
Select the desired VM instance under App Manager ->Applications and click on Manage Backup Configuration.
Select the desired VM instance and click on Manage Backup Configuration.
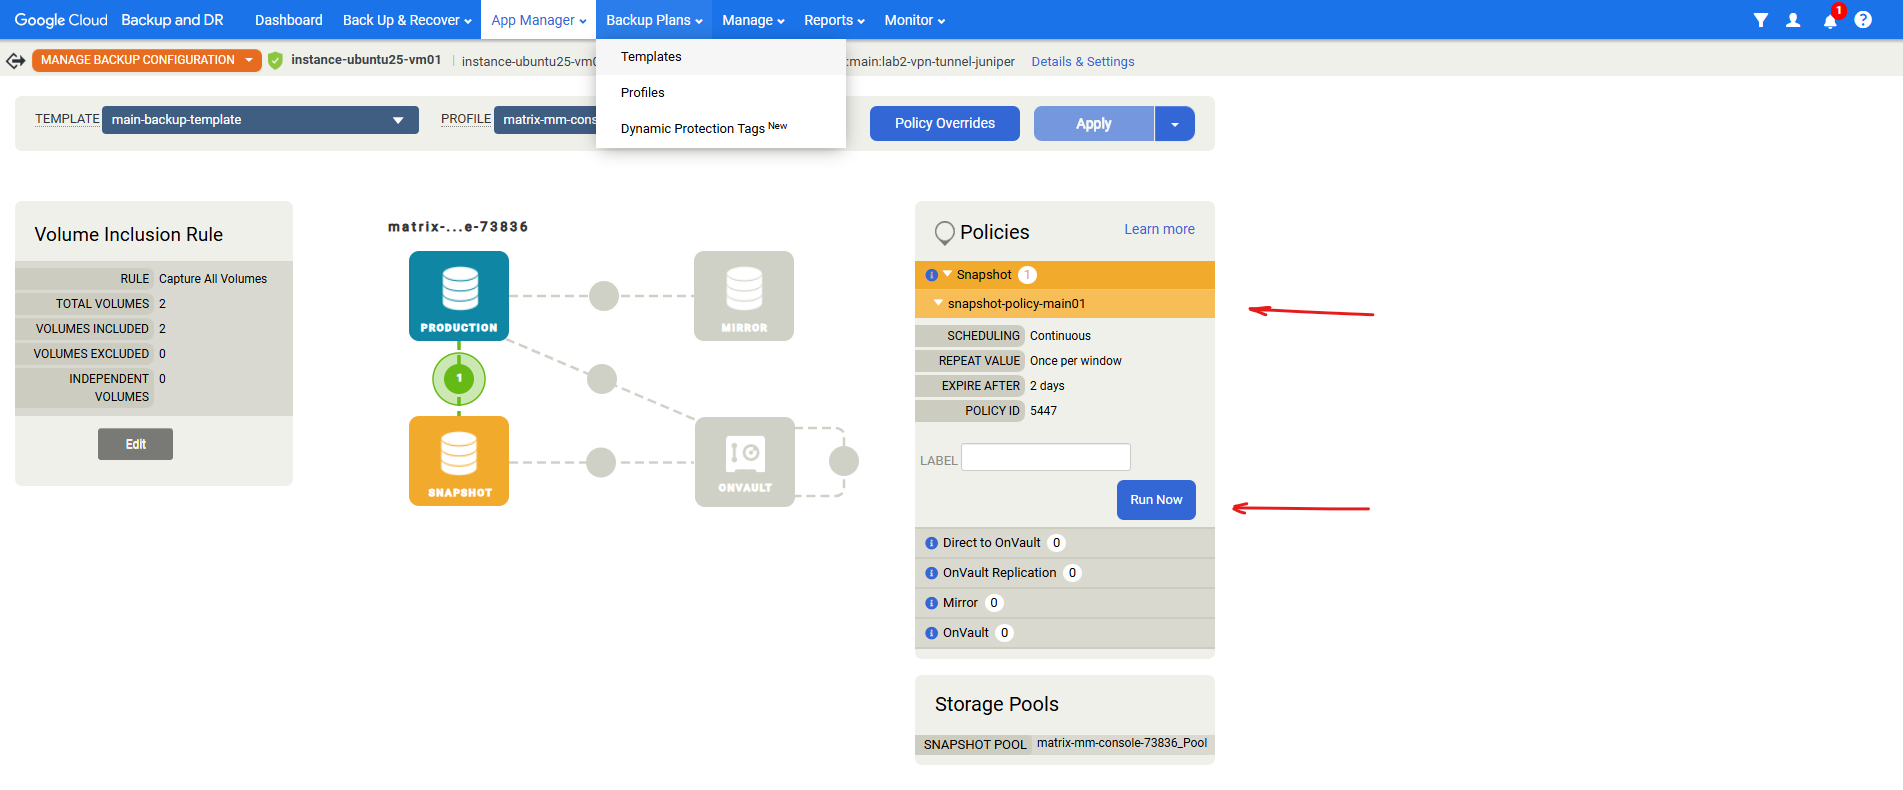
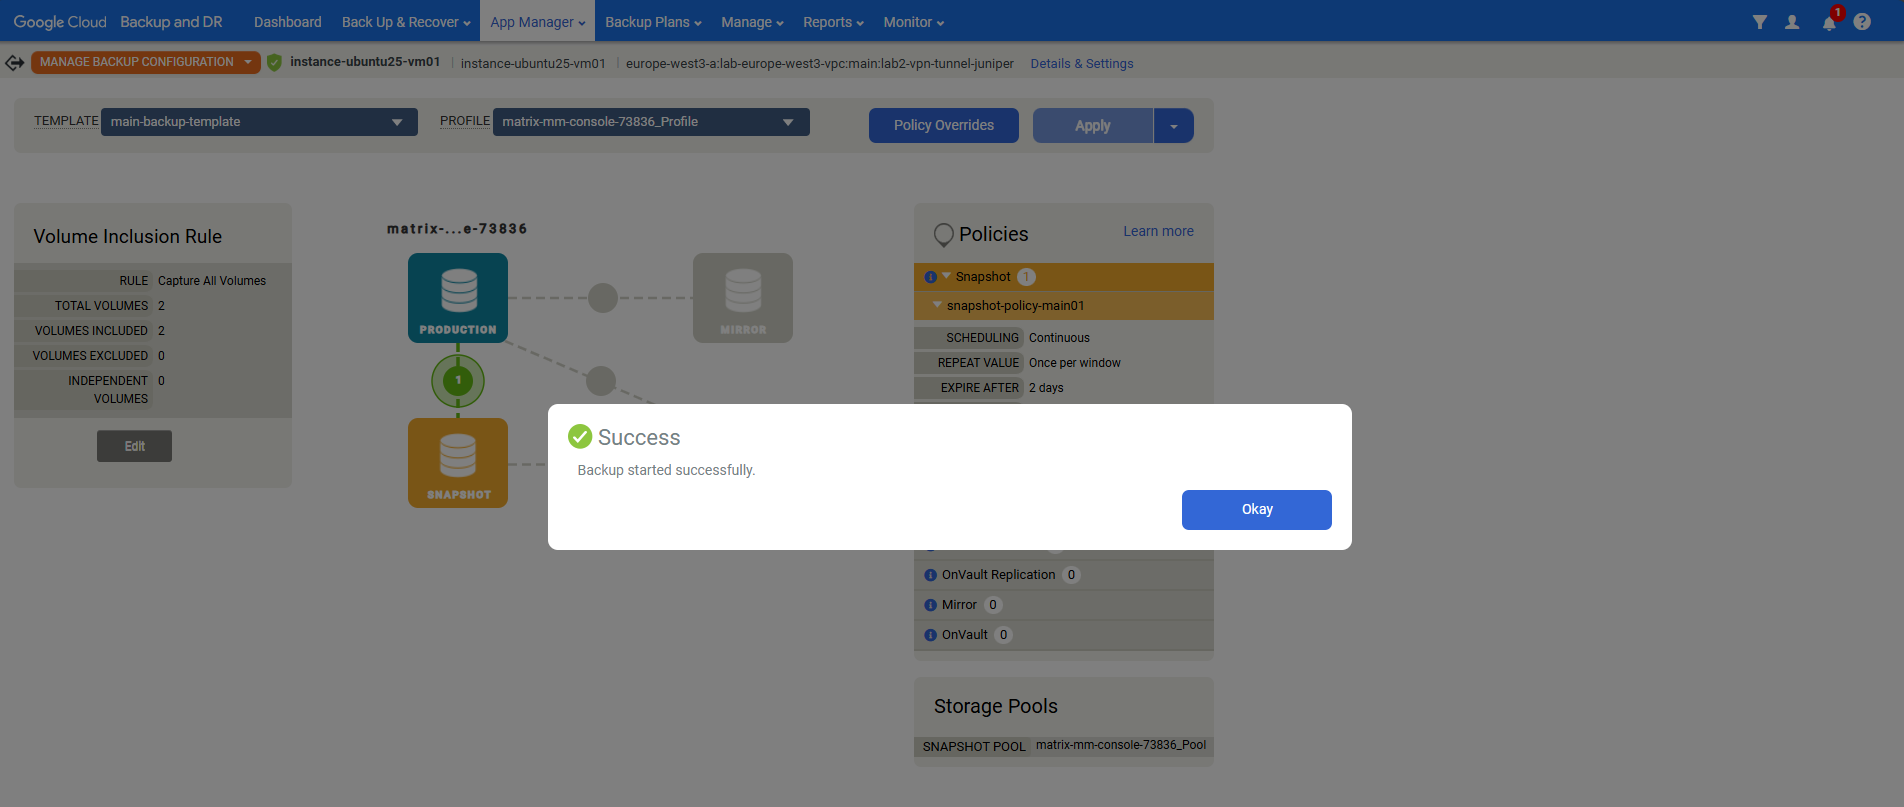
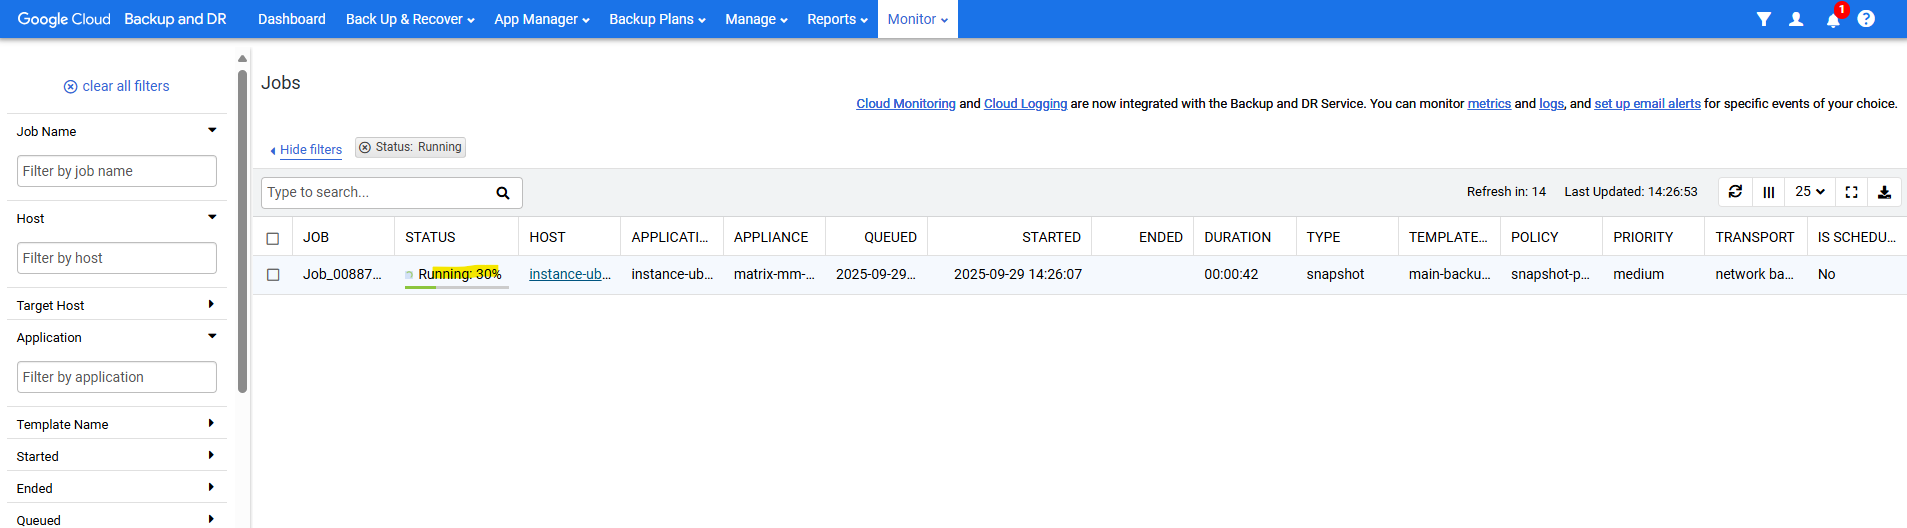
Expand the Snapshot policy and click on Run Now.
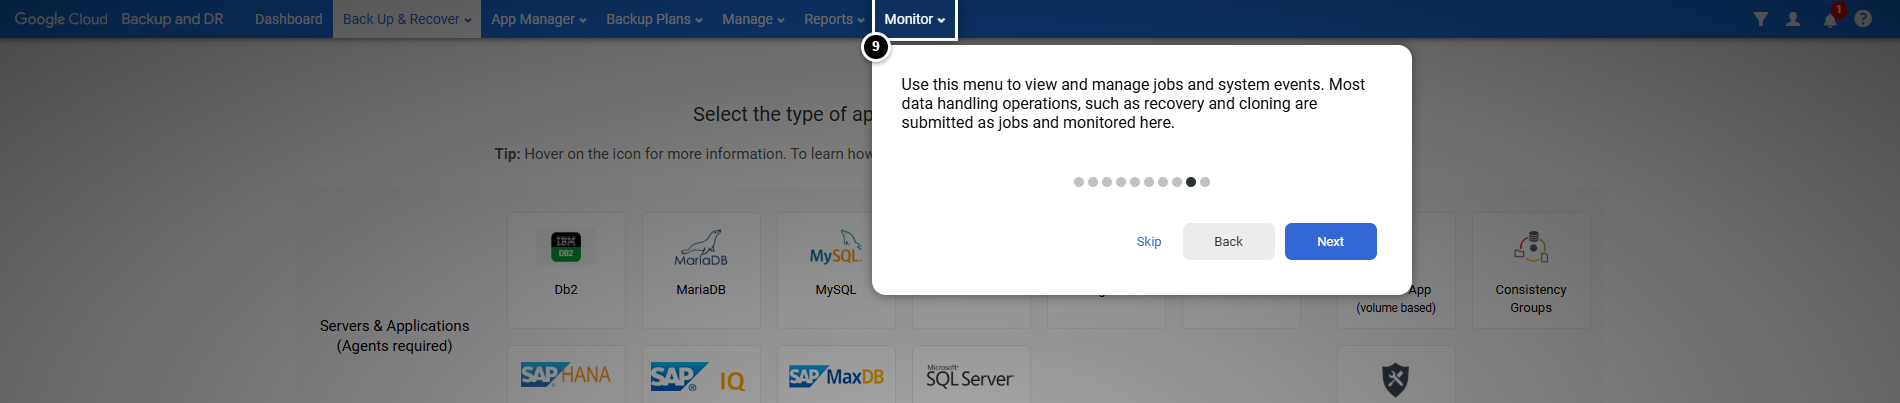
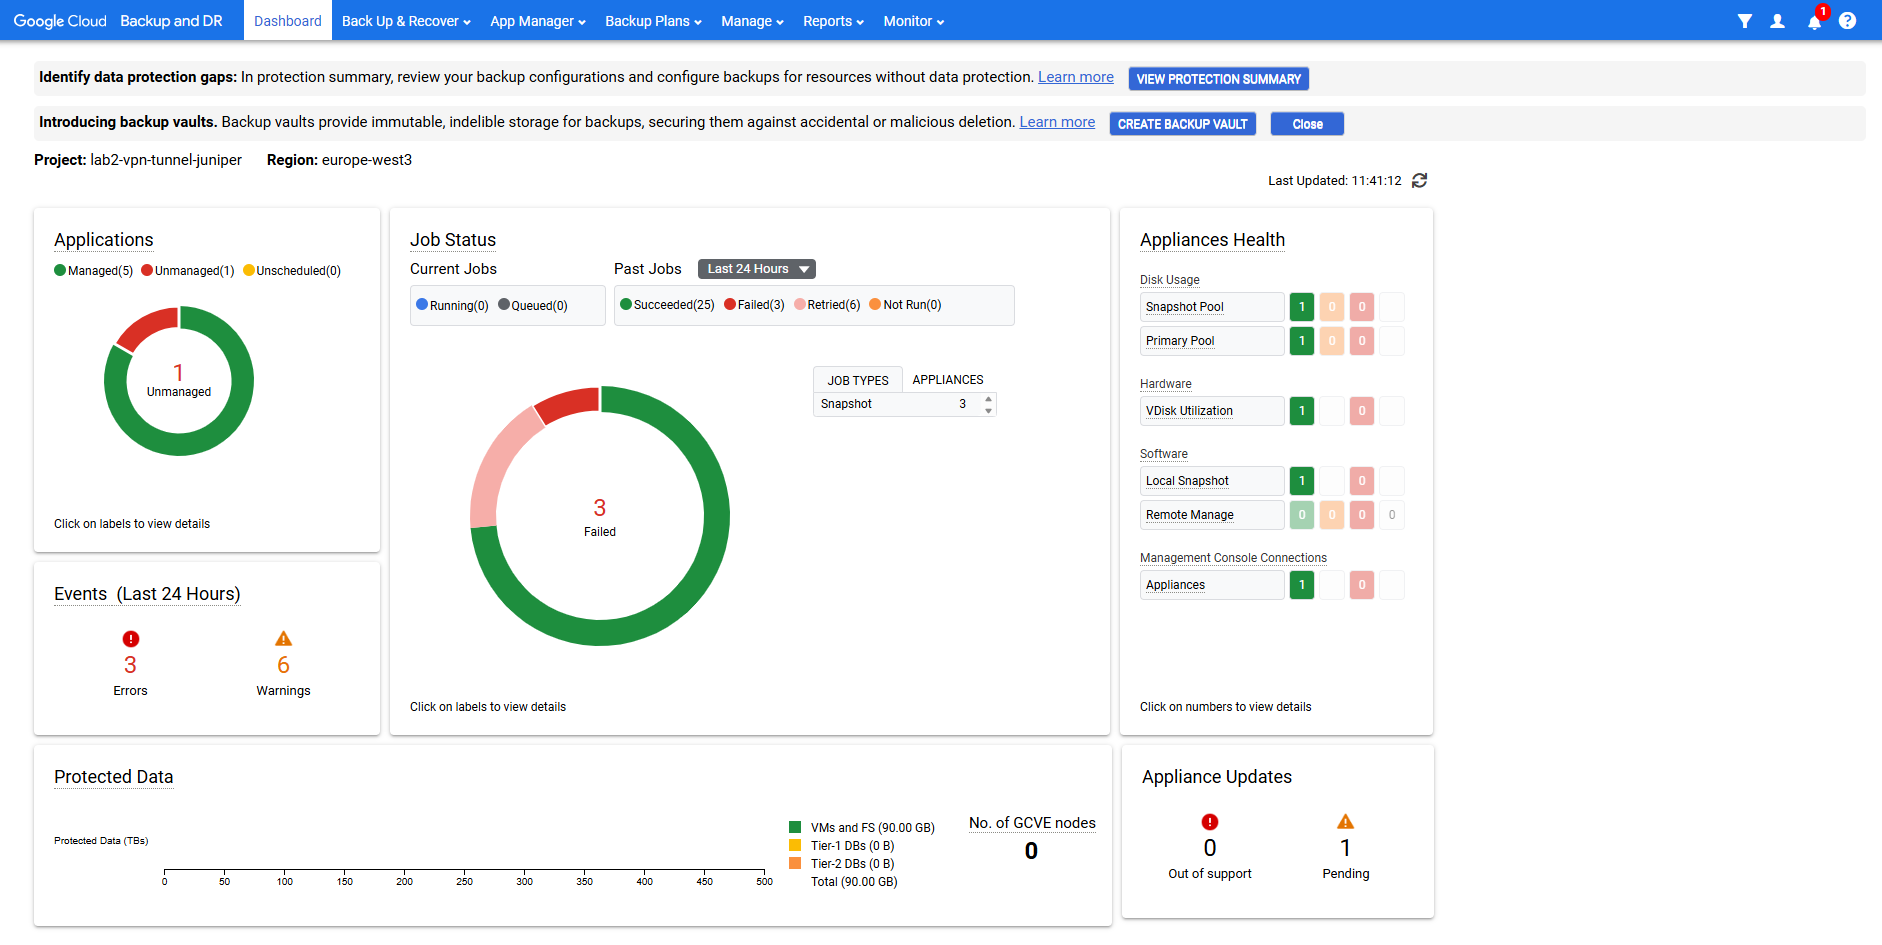
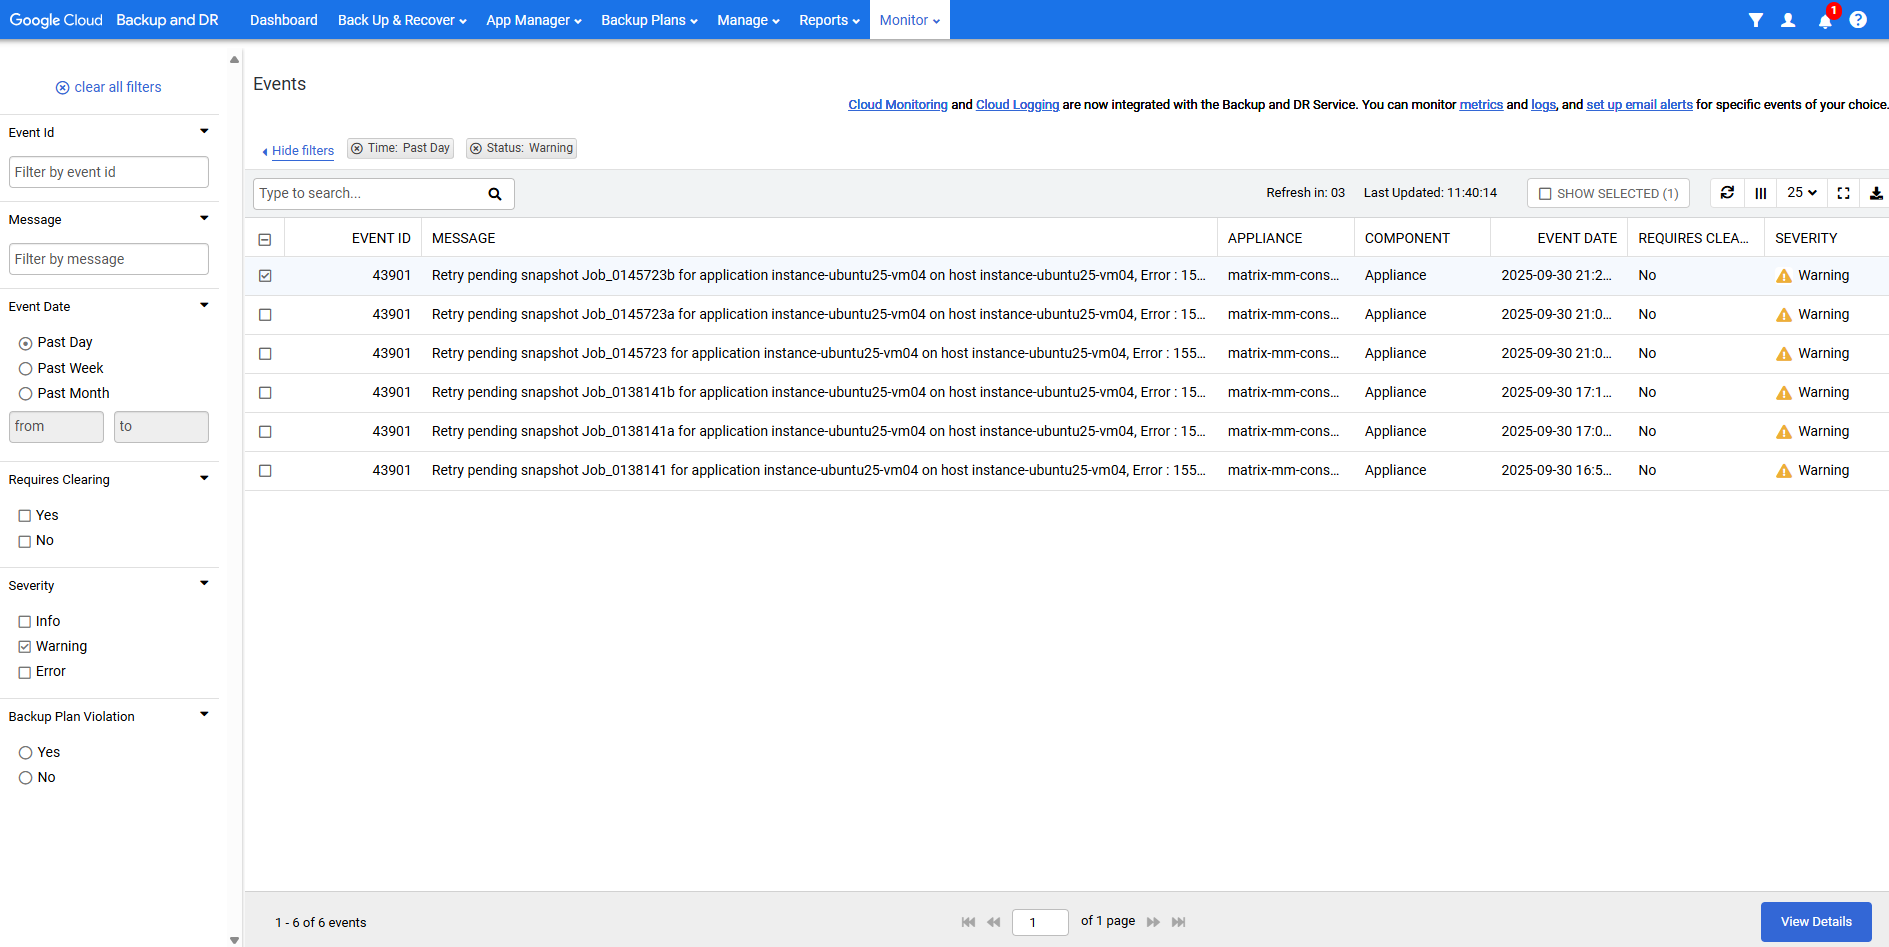
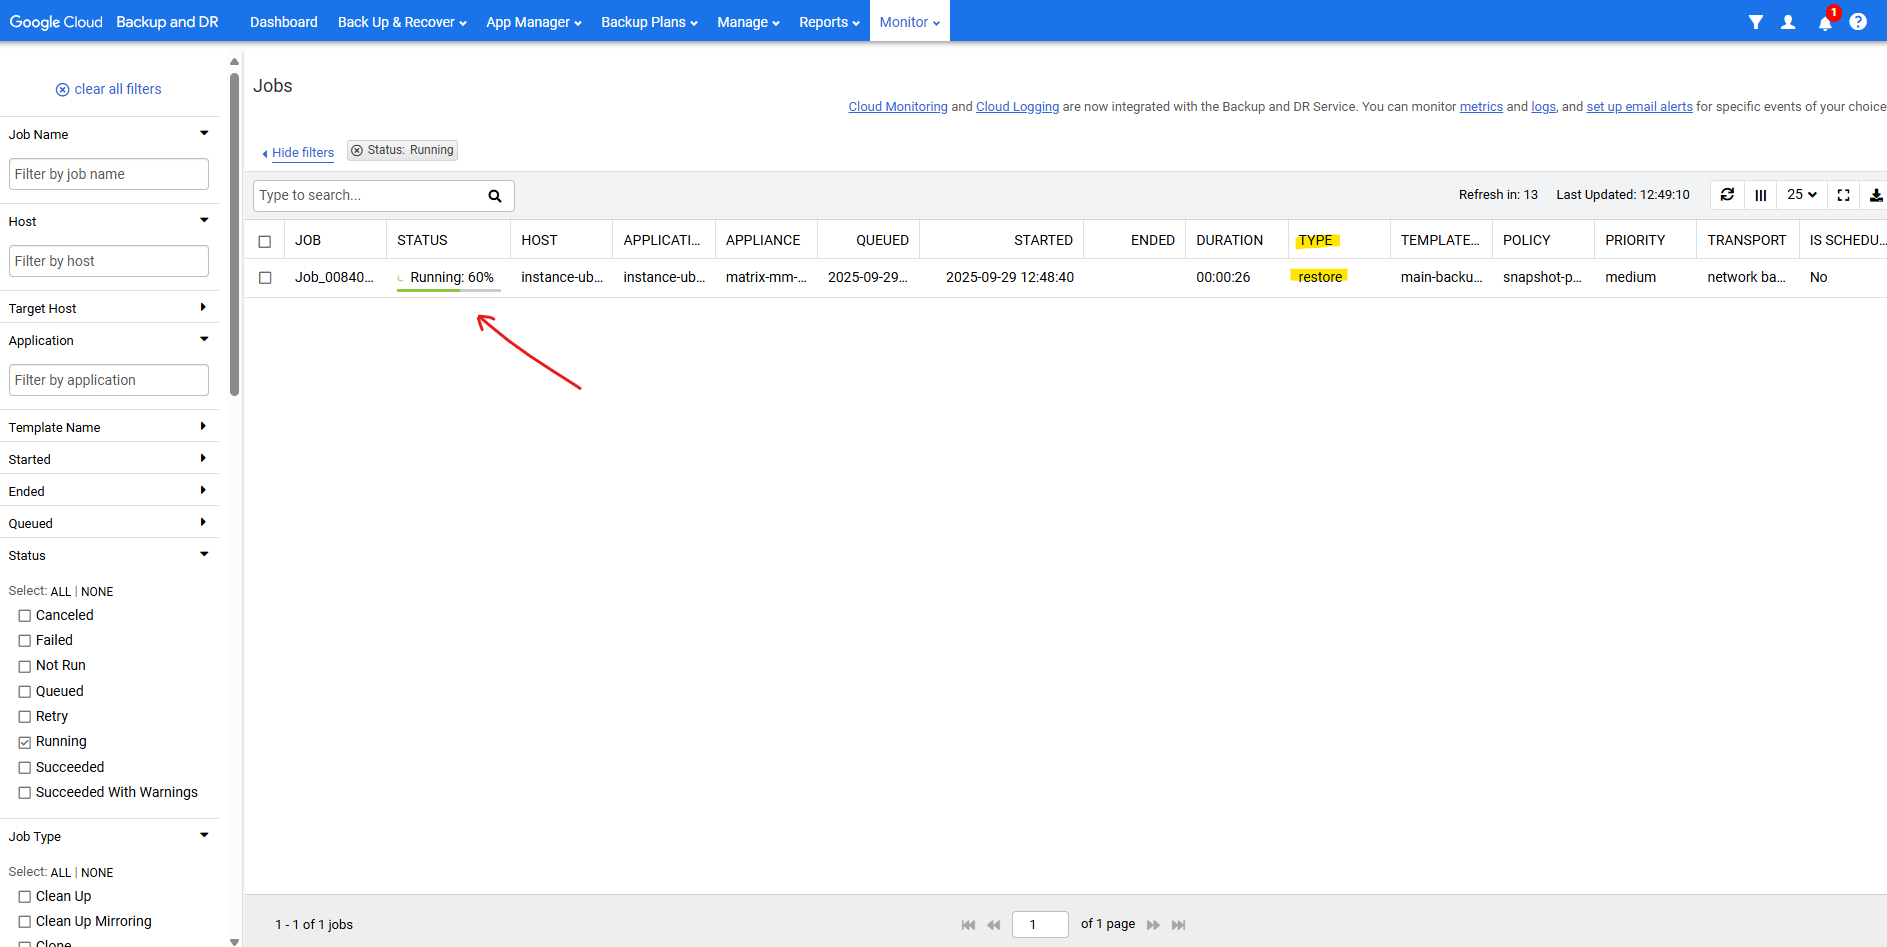
We can check the progress under Monitor -> Jobs.

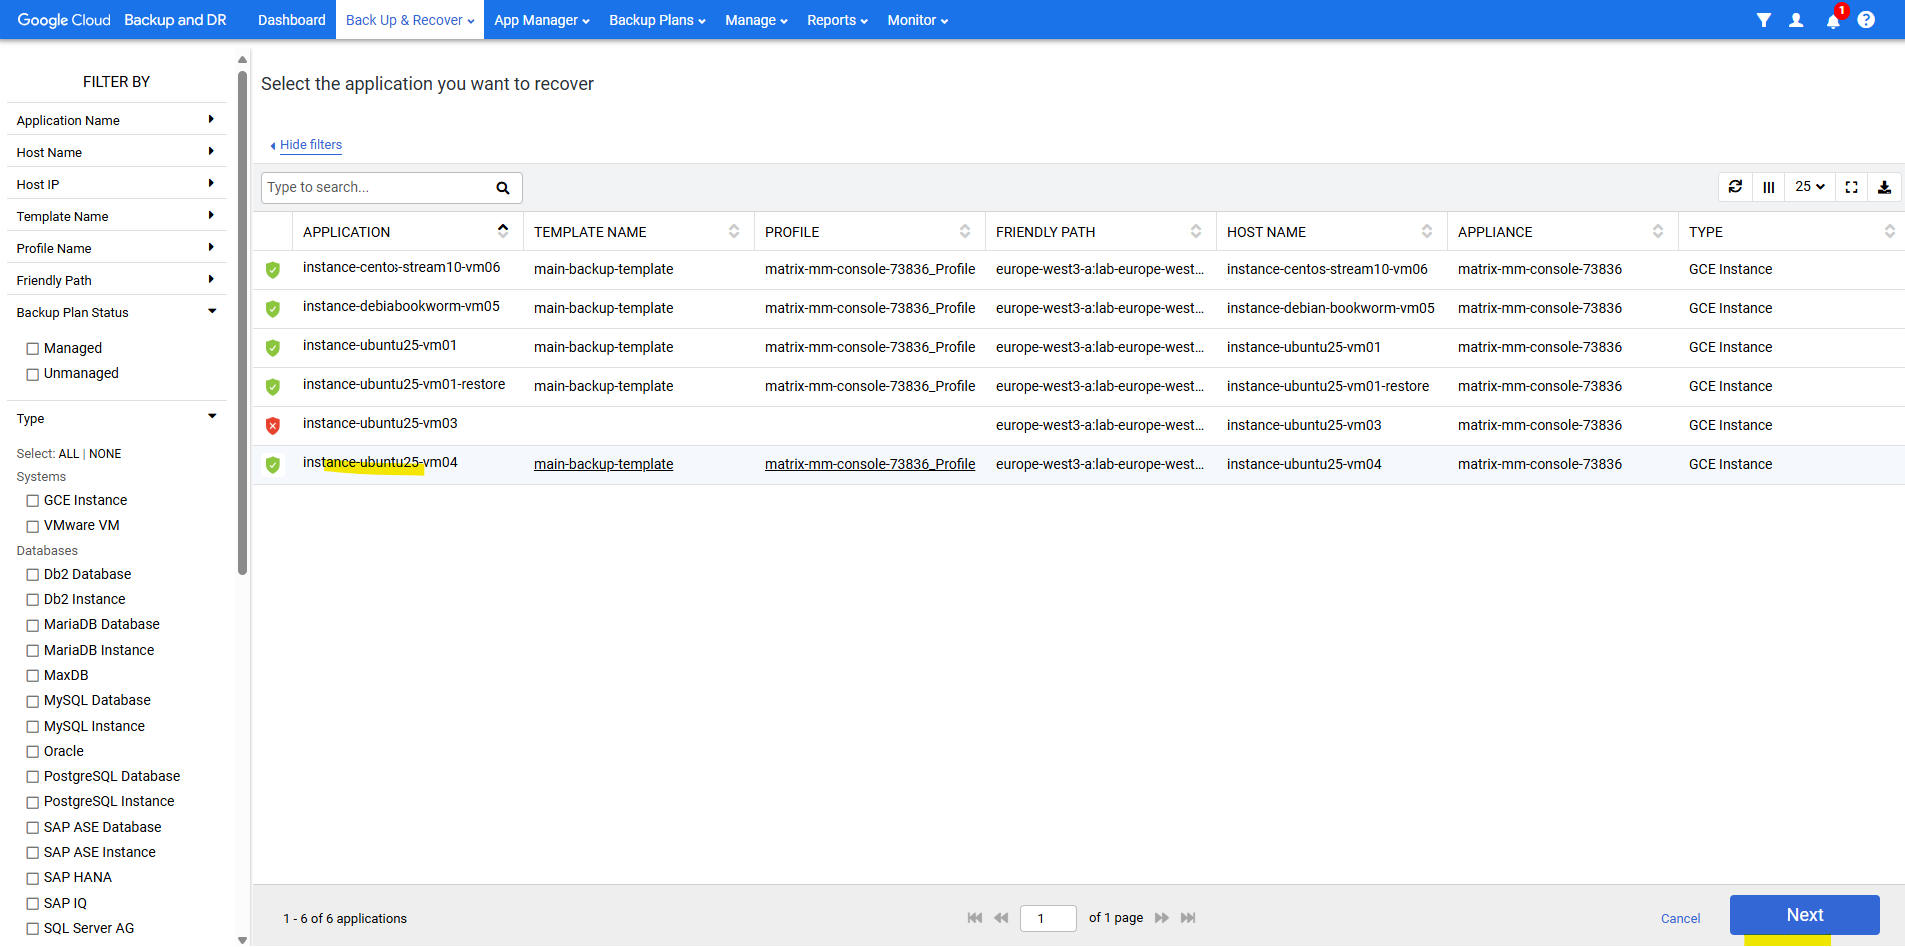
Recover a VM instance

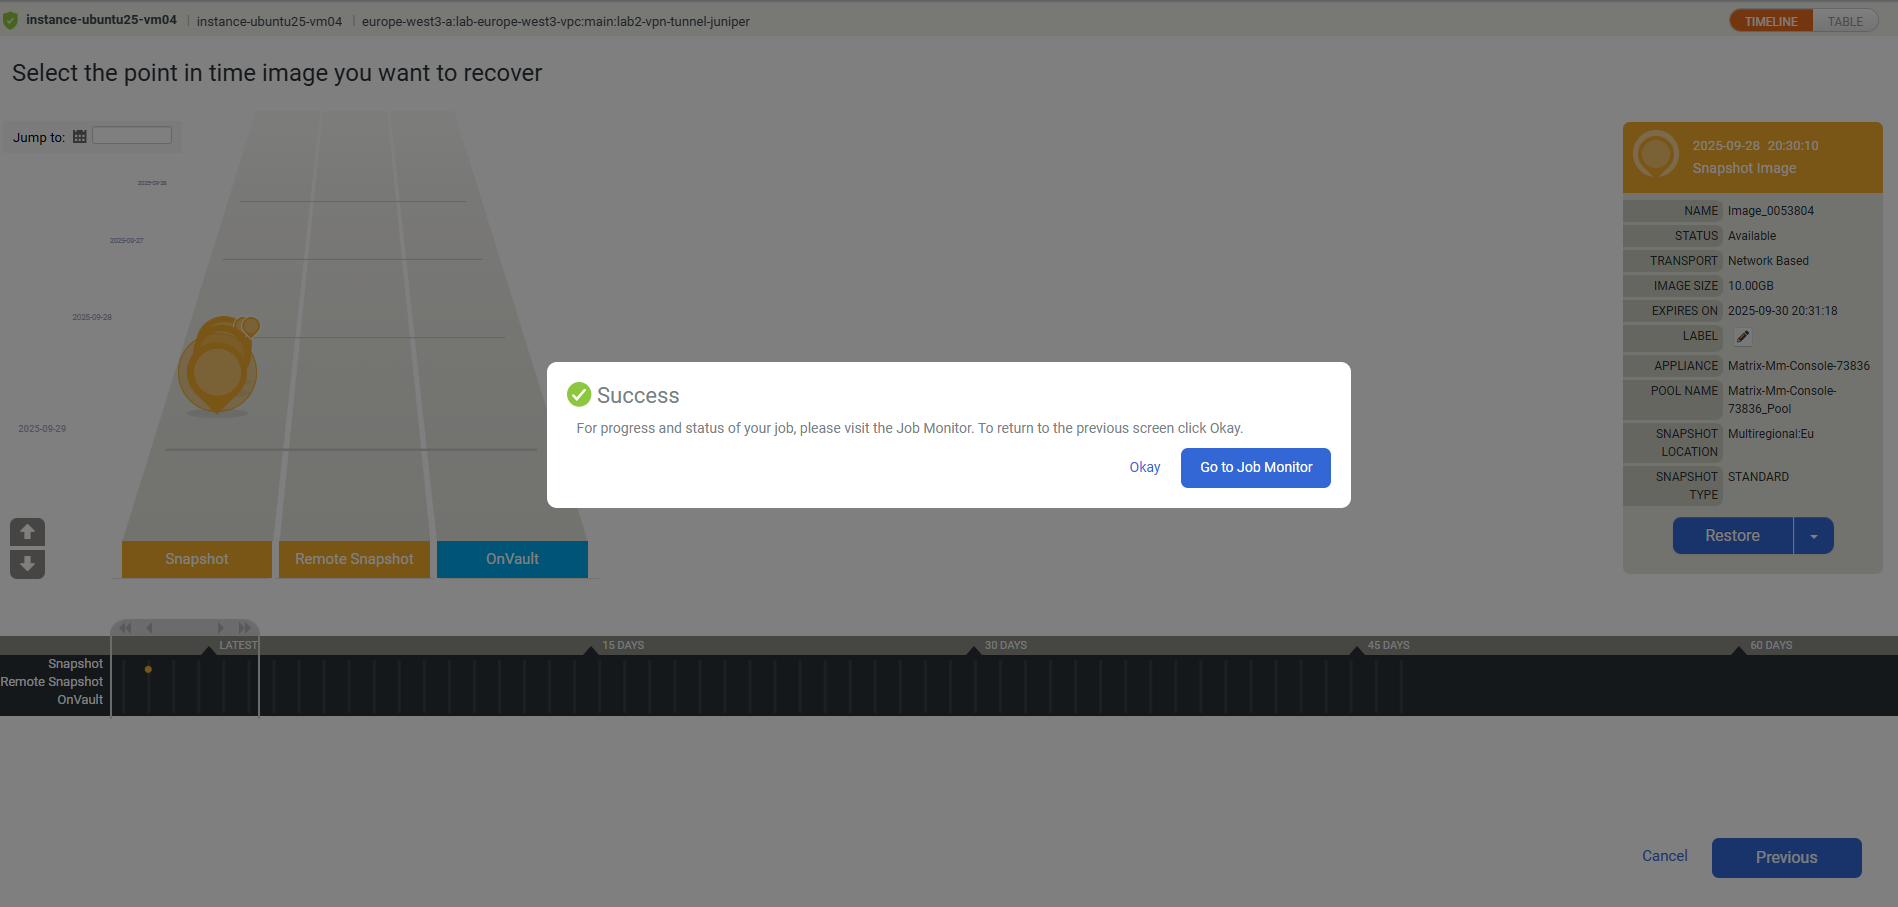
Click on the VM instance you want to recover.
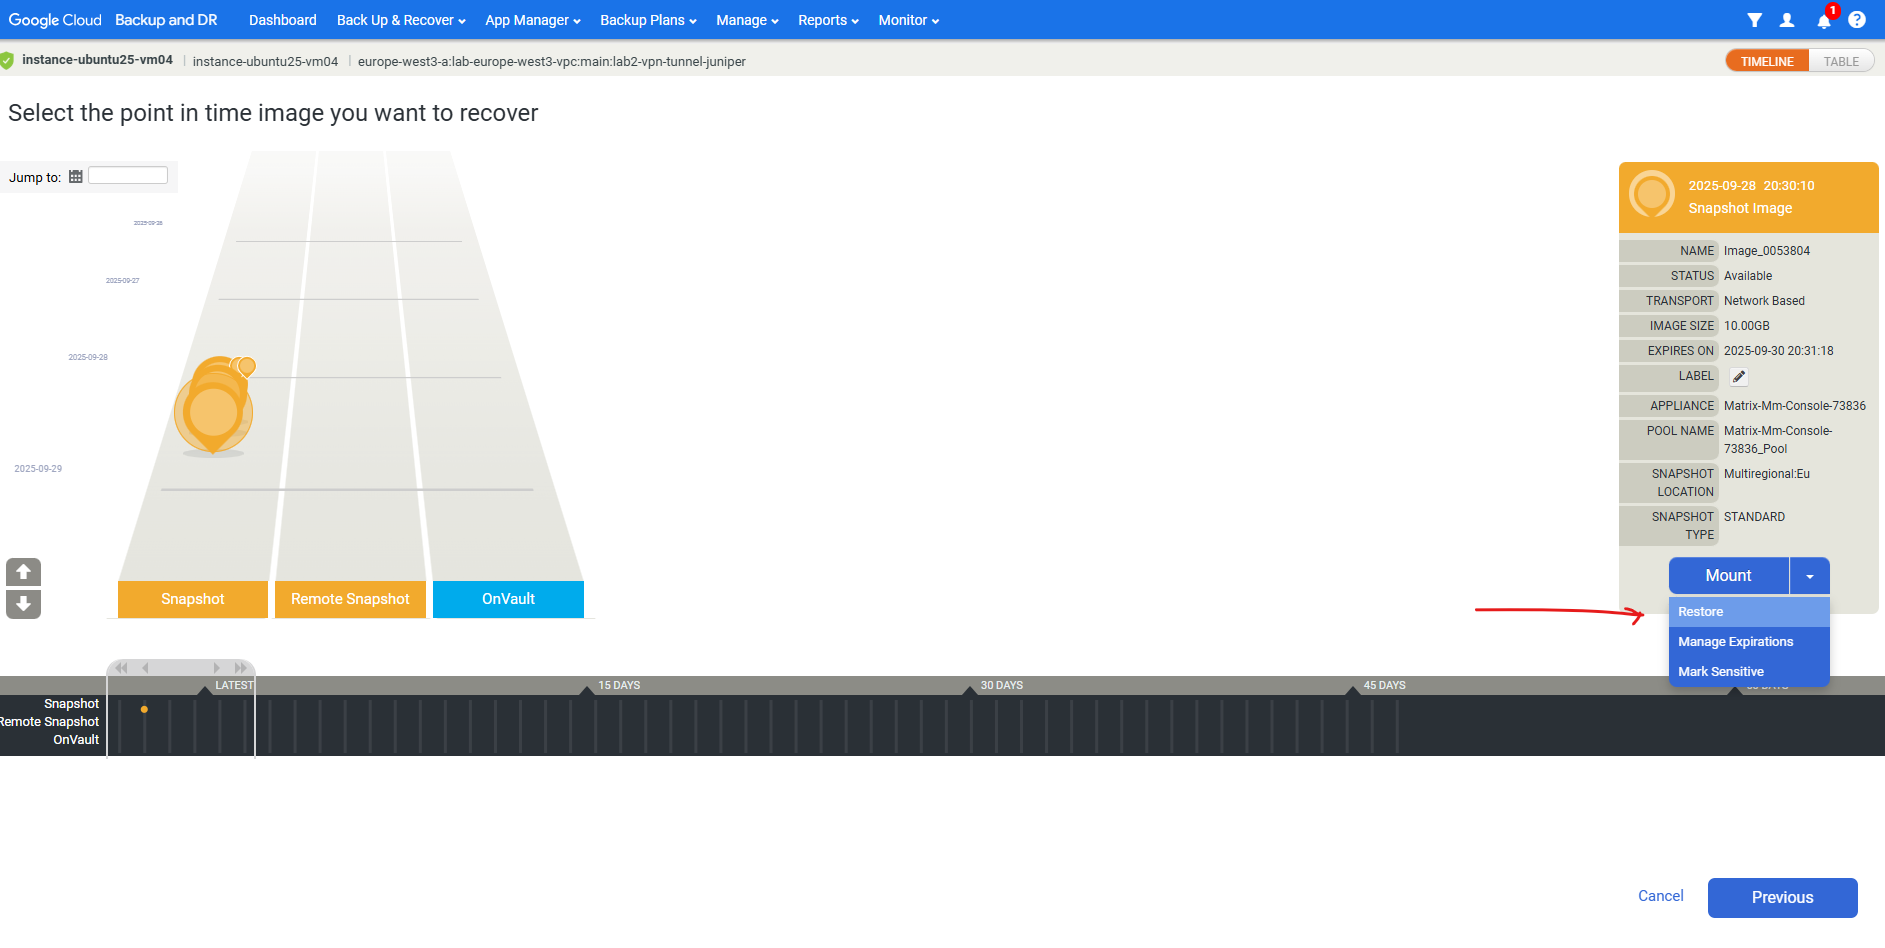
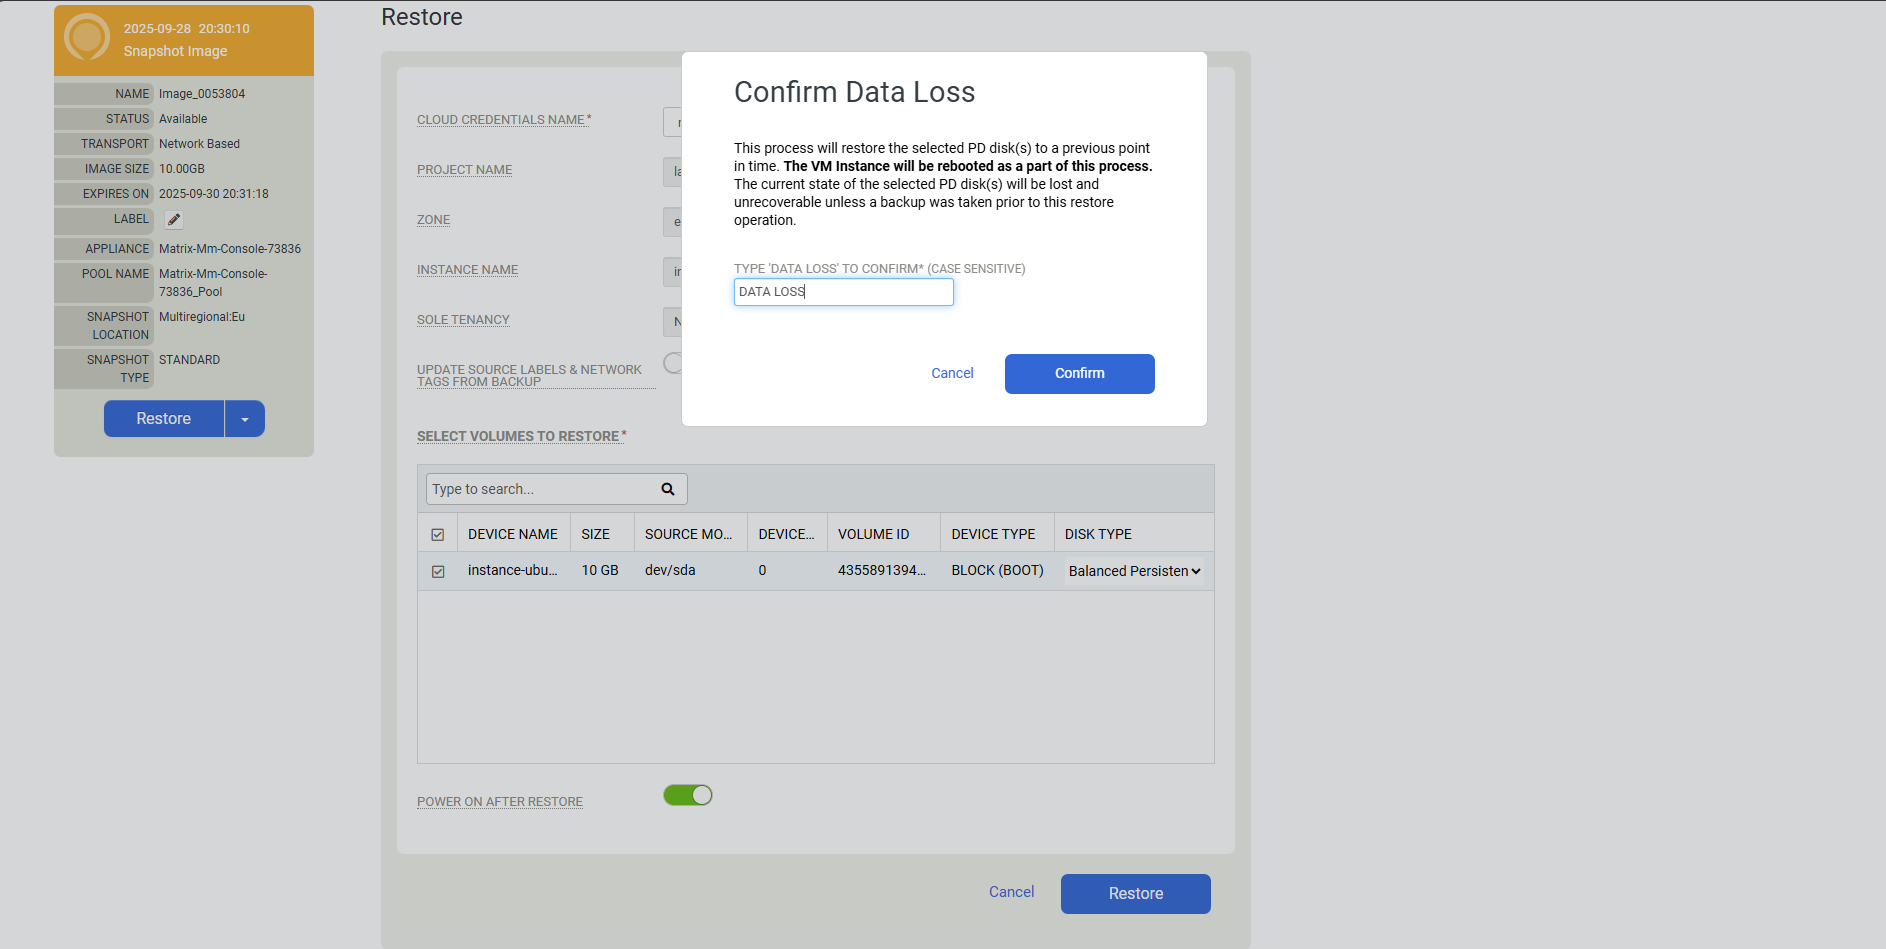
Select the snapshot image you want to use to restore the VM instance from. Click on Mount -> Restore.
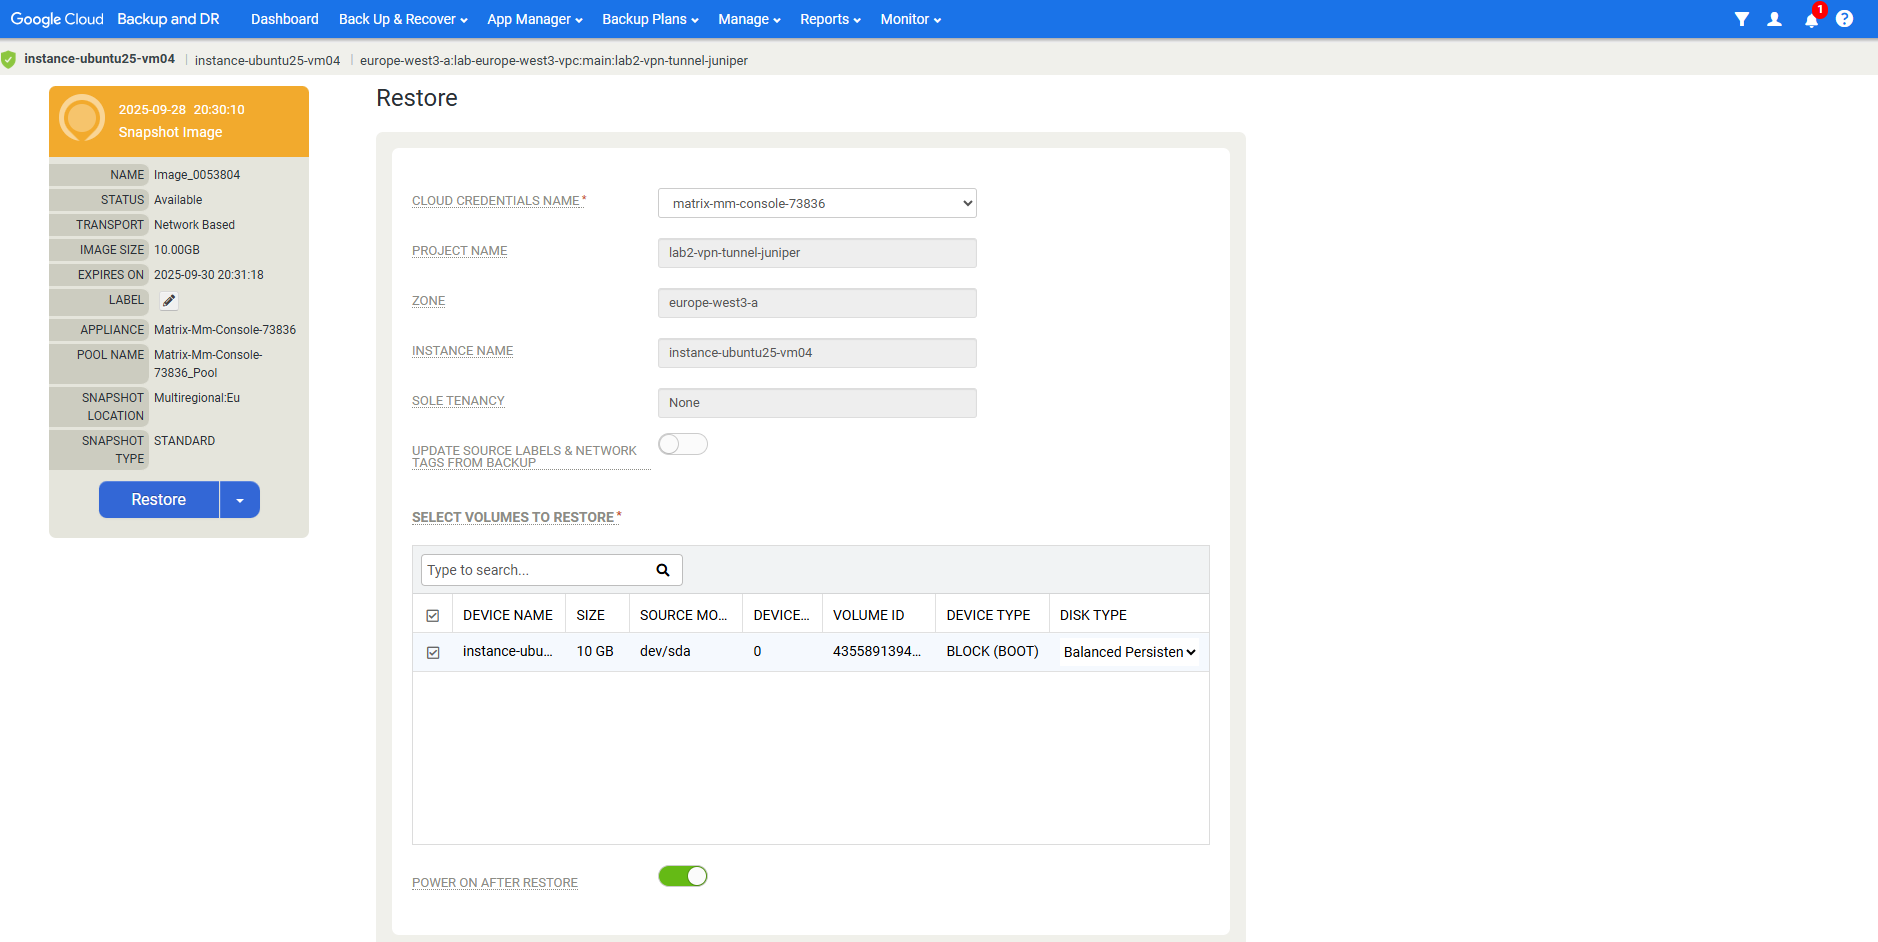
Click on Restore.
Configure the Management Console (Appliance)
Browse to the appliances.
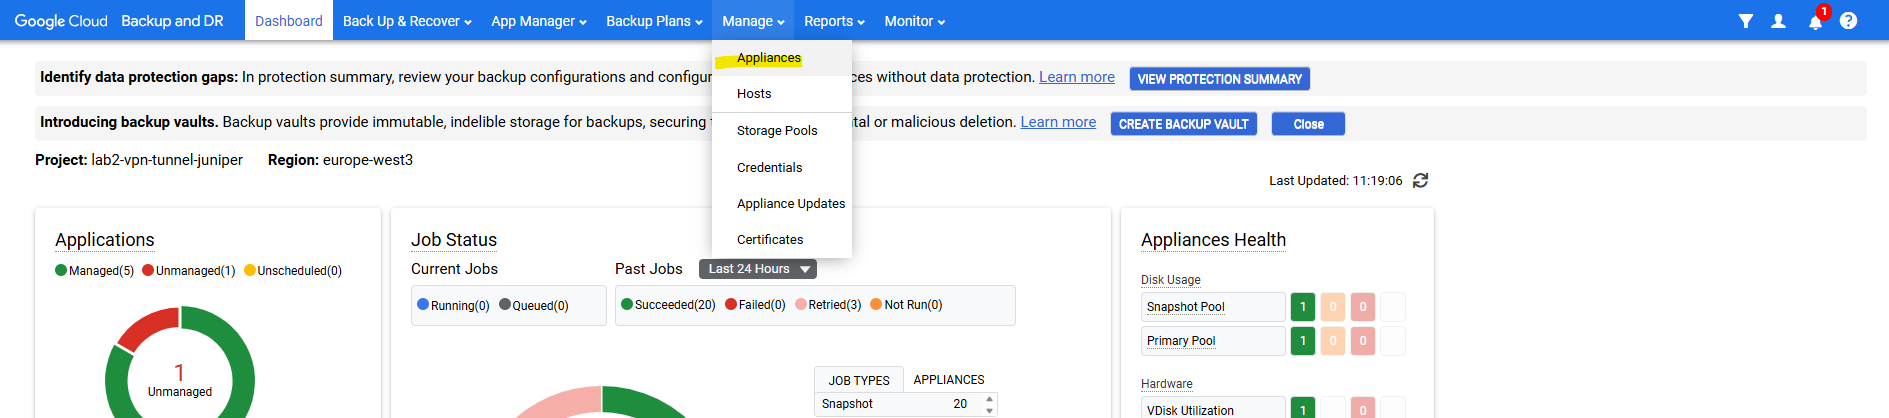
Right-click on the desired appliance and select Configure Appliance.
The Backup and DR agent calls the application-native APIs to efficiently capture data from production applications in an incremental-forever fashion, and provides the application awareness at the time of recovery. The agent is installed on application hosts where applications to be protected reside. If you are only protecting the entire VM or a subset of its disks, then the Backup and DR agent is not required.
Source: https://cloud.google.com/backup-disaster-recovery/docs/deployment/deployment-plan
In Part 8 we will take a look at network best practices in Google Cloud.
Links
Backup vault for immutable and indelible backups
https://cloud.google.com/backup-disaster-recovery/docs/concepts/backup-vaultTroubleshoot permission errors in Backup for GKE
https://cloud.google.com/kubernetes-engine/docs/add-on/backup-for-gke/troubleshoot/permission-errorsBackup and DR Service overview
https://cloud.google.com/backup-disaster-recovery/docs/concepts/backup-drSupport Matrix: Backup and DR Service
https://cloud.google.com/backup-disaster-recovery/docs/supportmatrix-backupdrBackup and DR Service – How-to videos
https://cloud.google.com/backup-disaster-recovery/docs/how-to-videosBackup and DR Service documentation
https://cloud.google.com/backup-disaster-recovery/docsInstall the Backup and DR agent on a Linux host
https://cloud.google.com/backup-disaster-recovery/docs/configuration/linux-agentBackup and DR agent on Windows hosts
https://cloud.google.com/backup-disaster-recovery/docs/configuration/install-agent-windowsConfigure backup/recovery appliance network settings
https://cloud.google.com/backup-disaster-recovery/docs/configuration/br-appliance-network-settingsAbout the Backup and DR agent
https://cloud.google.com/backup-disaster-recovery/docs/concepts/about-connector