Deploying pfSense in Azure – A Step-by-Step Guide to Your Own Cloud Firewall
Spinning up a pfSense firewall in Azure can be done in two ways, out of the box or DIY style.
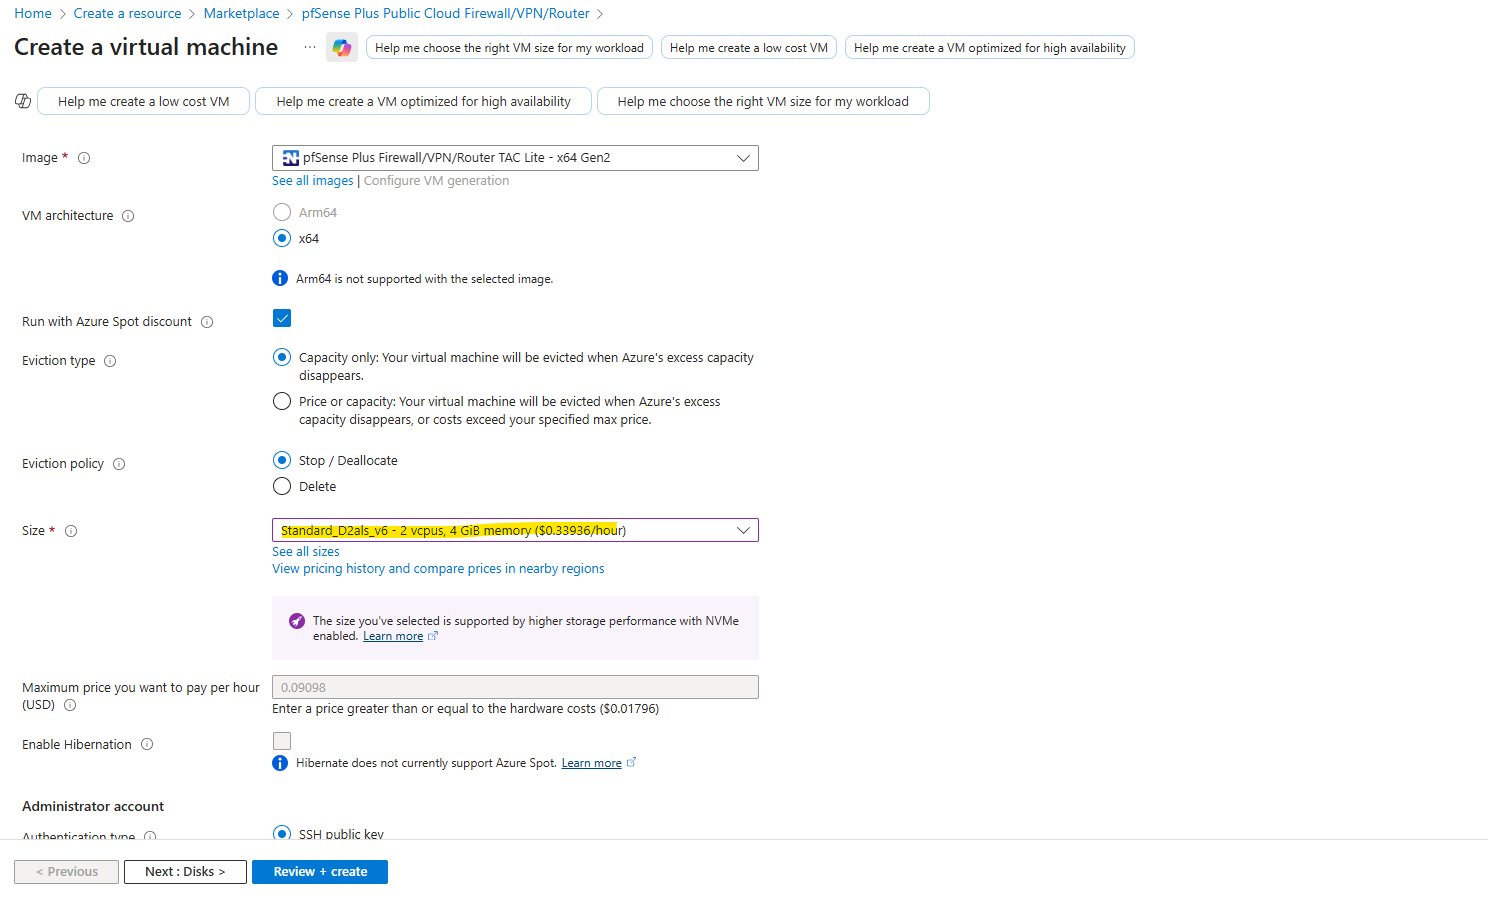
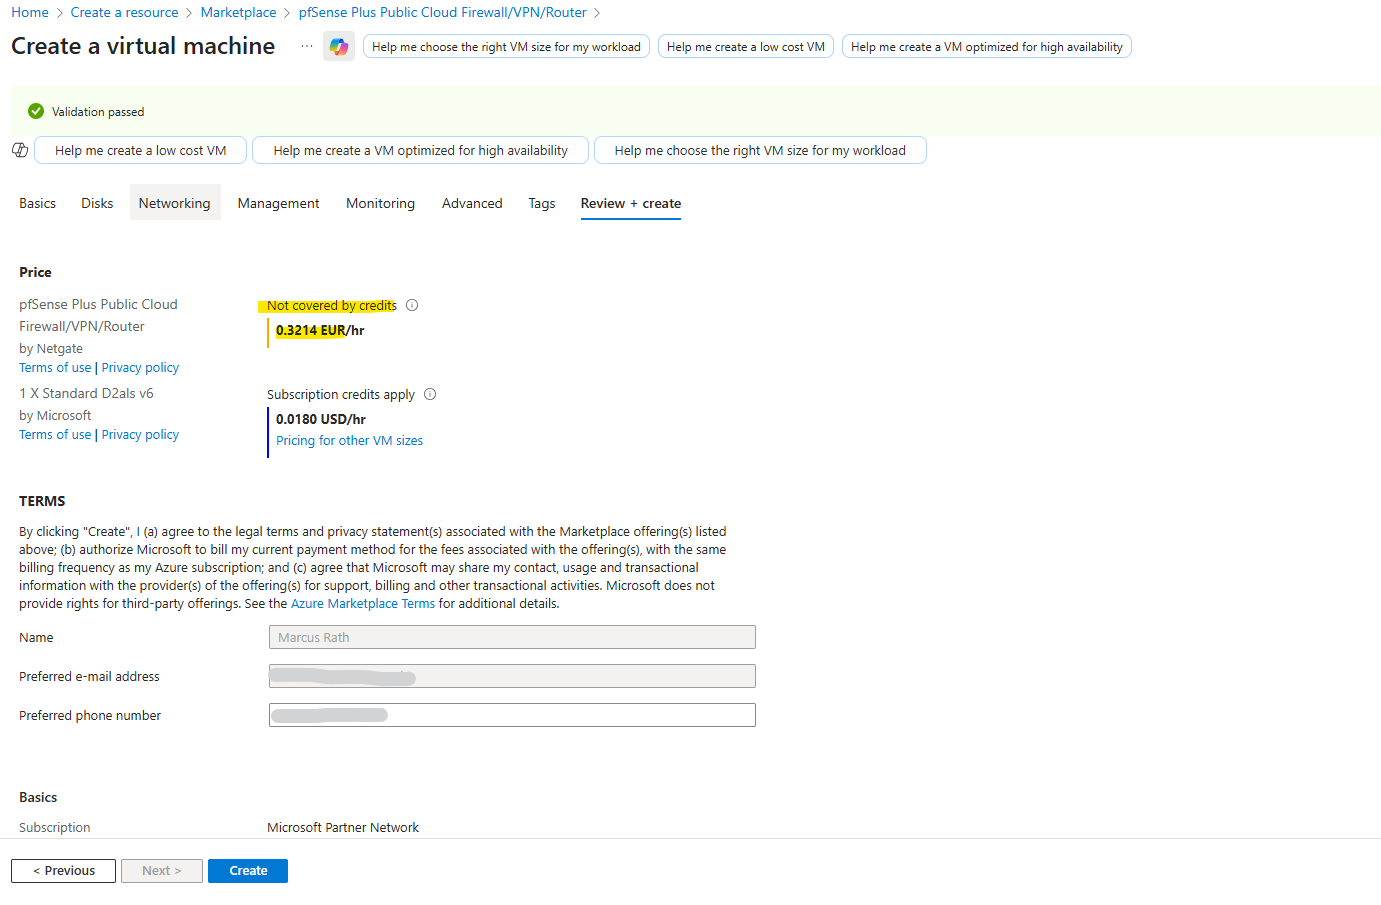
If we just want a ready-to-run appliance, Netgate offers pfSense directly in the Azure Marketplace, complete with support and updates, though it comes at a monthly cost starting around €70 per month.
For lab environments or cost-optimized deployments, however, we can build our own custom pfSense image from scratch and upload it to Azure, giving us full control over the configuration, version, and licensing, with only the usual VM and storage costs to pay.
About deploying pfSense in Google Cloud you can read my following post.
Before you start
Before building your own pfSense image for Azure, make sure you have the following prerequisites ready:
- pfSense ISO installer, you can download the latest Community Edition ISO directly from pfsense.org/download or https://atxfiles.netgate.com/mirror/downloads.
- A local virtualization platform such as VMware, Hyper-V, or VirtualBox to install and prepare pfSense before uploading it.
- Azure Storage Account and a container to upload the exported .vhd file.
- Azure CLI or Azure Cloud Shell to run the image-creation commands.
- Optionally, a resource group and VNet already prepared for deploying the final pfSense VM with separate LAN (or Perimeter) and WAN subnets.
Once you’ve got those ready, you can decide: go with the paid Marketplace pfSense image for simplicity, or roll your own and upload a custom VHD to Azure for full control and zero licensing costs.
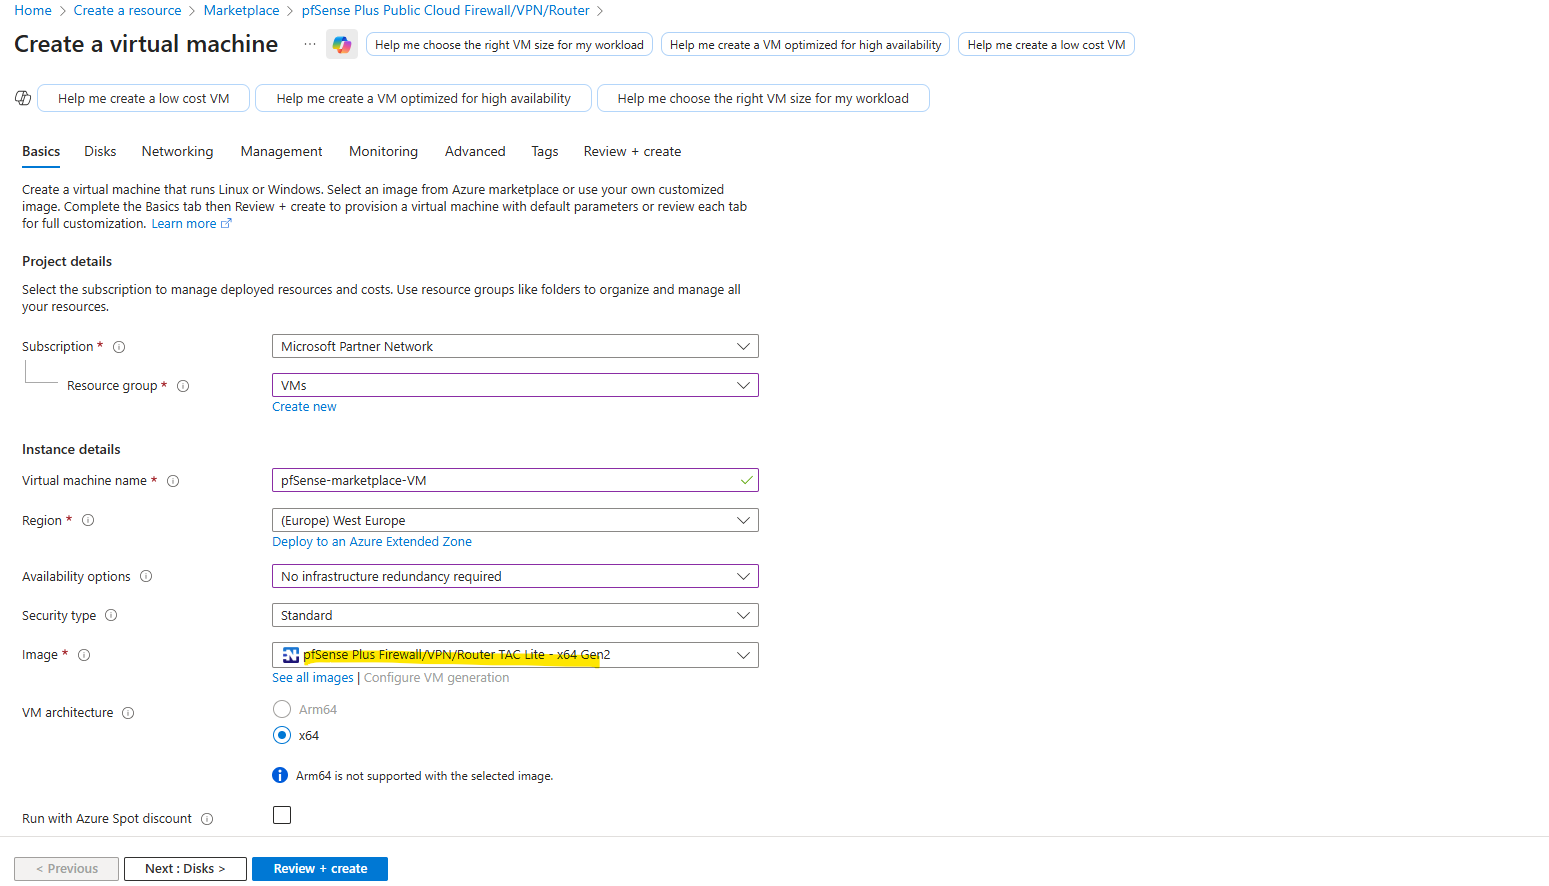
Azure Marketplace pfSense image
Instead of importing your own VHD, you can also deploy pfSense directly from the Azure Marketplace, where Netgate provides a fully supported image that already includes Azure-specific integrations and a working guest agent.
This option eliminates provisioning issues and delivers a smooth, turnkey experience, but it does come at a higher recurring cost compared to running your own custom appliance.
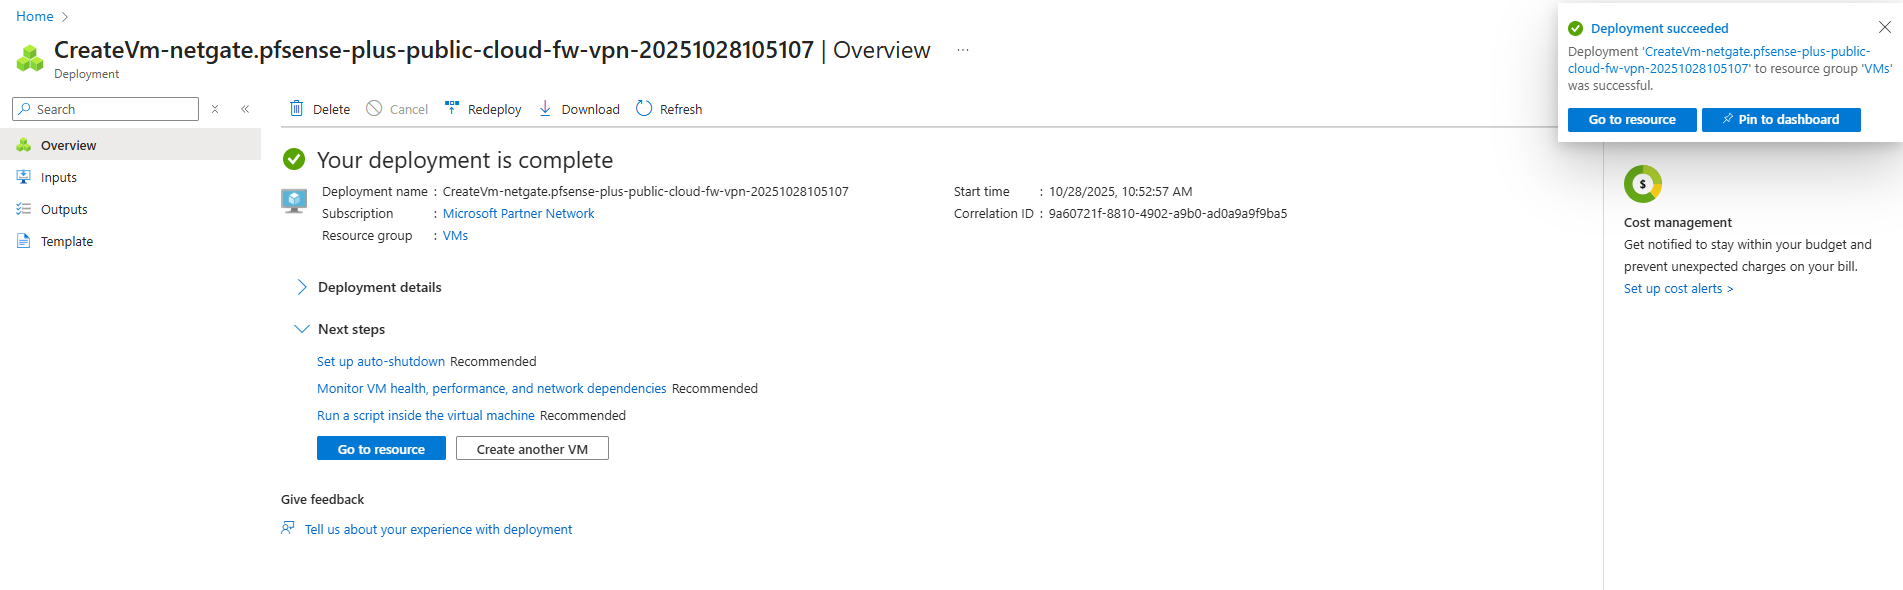
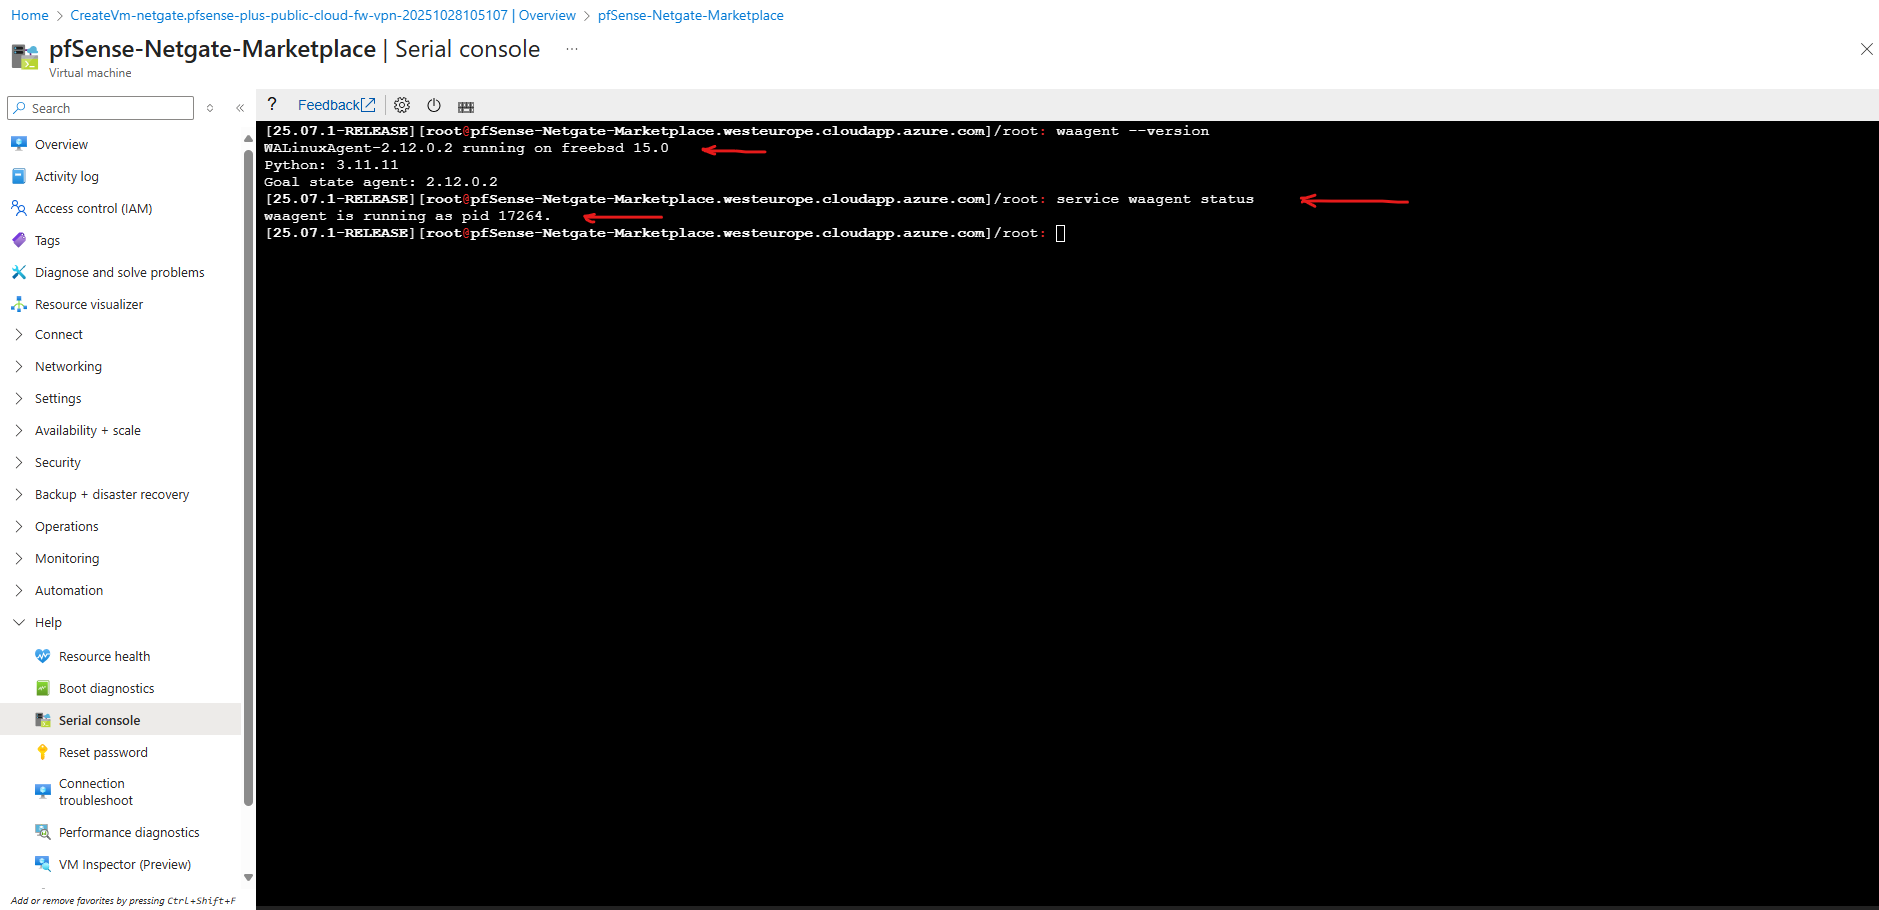
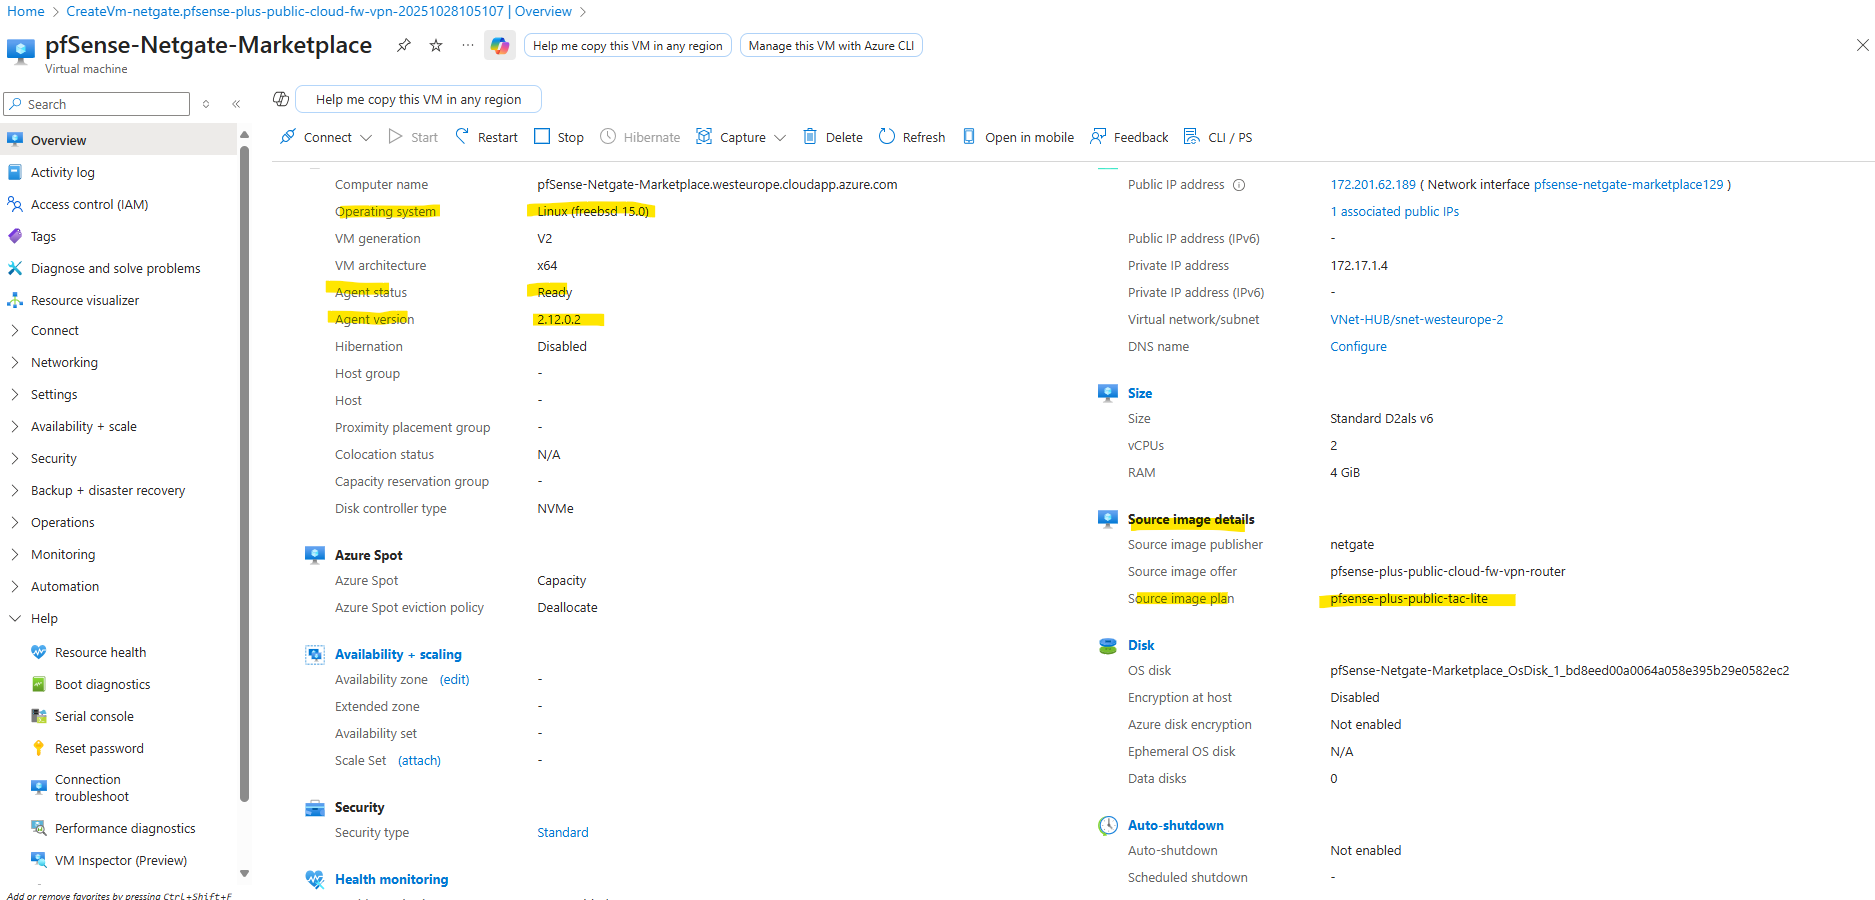
As mentioned already includes Azure-specific integrations and a working guest agent.
waagent --version
service waagent status
NGFW Appliance Term
A Next-Generation Firewall (NGFW) is a modern security appliance that goes beyond traditional port- and protocol-based filtering by providing deep packet inspection, application awareness, and user-level control.
Unlike classic firewalls that only decide based on source, destination, and port, an NGFW can identify and enforce policies on specific applications, users, and content, even when traffic uses common ports or encrypted protocols.
Most NGFWs integrate capabilities such as intrusion prevention (IPS), malware and threat detection, URL or DNS filtering, and advanced logging and analytics.
This makes them suitable not just for perimeter defense but also for segmentation, compliance, and secure hybrid-cloud connectivity in modern network environments.
pfSense and NGFW Capabilities
pfSense can effectively function as a Next-Generation Firewall, especially when extended with its rich ecosystem of security packages.
Out of the box, pfSense provides stateful packet inspection, VPN, routing, and user authentication, and when combined with add-ons such as Snort or Suricata for intrusion prevention and pfBlockerNG for threat intelligence and DNS filtering, it reaches full NGFW capability.
While commercial solutions like Palo Alto or Fortinet integrate these features more tightly, pfSense offers a flexible, modular, and cost-effective alternative for both enterprise labs and production environments.
Download pfSense
We first need to download pfSense from one of the following links.
https://www.pfsense.org/download
https://atxfiles.netgate.com/mirror/downloadsFor older versions of pfSense CE via the official downloads index and mirrors browse to
https://mirror.transip.net/pfsense/downloadsVersions of pfSense software and FreeBSD
https://docs.netgate.com/pfsense/en/latest/releases/versions.html
Downloading the pfSense Installer ISO directly from Netgate
Netgate around 2023-2024 changed how pfSense images are distributed: instead of downloading a plain .iso file, installers now arrive compressed as .iso.gz archives.
Before mounting the installer in vSphere or any hypervisor, we must first decompress the .gz layer to reveal the actual bootable .iso file, without extracting its internal contents.
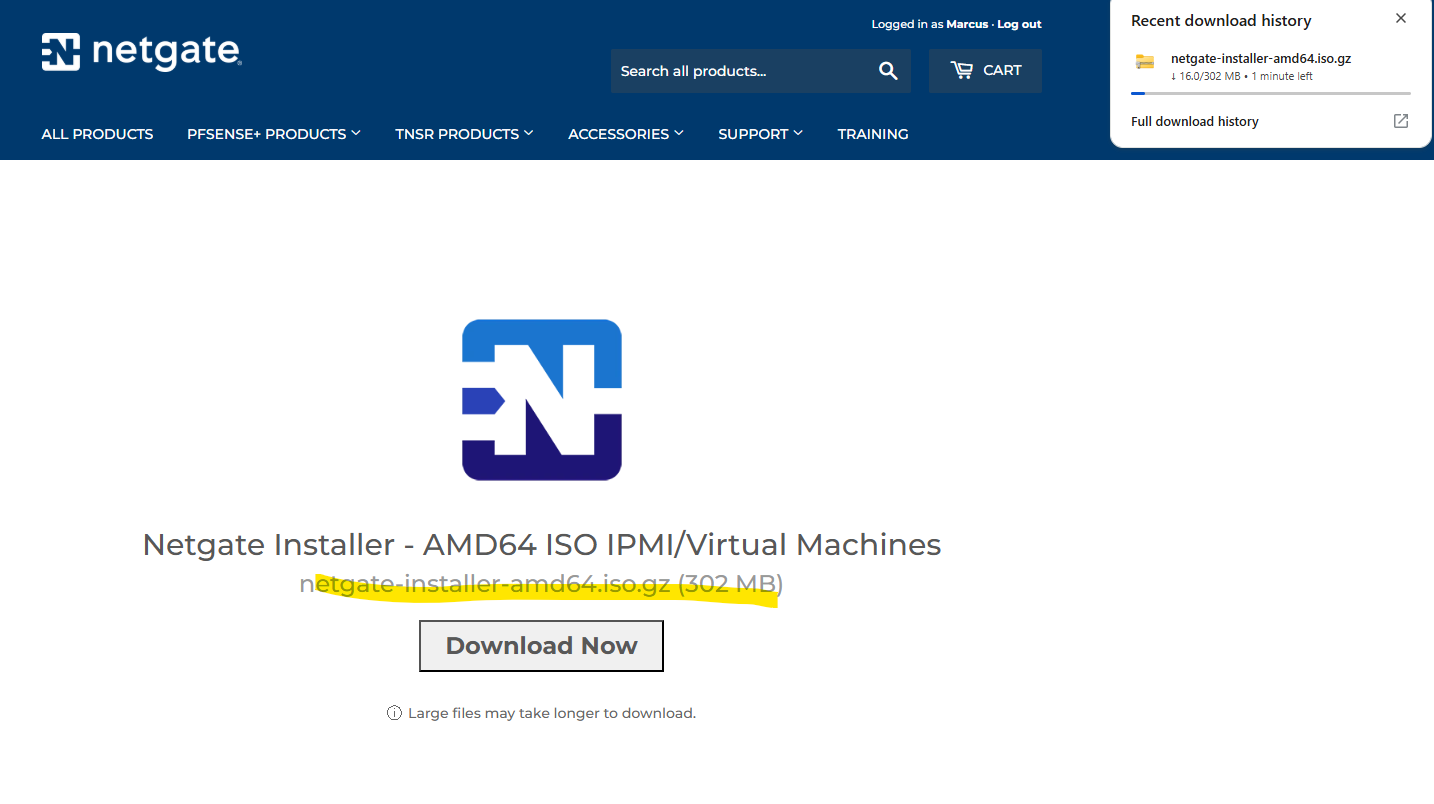
https://www.pfsense.org/download
Below select the AMD64 ISO IPMI/Virtual Machines installation image.
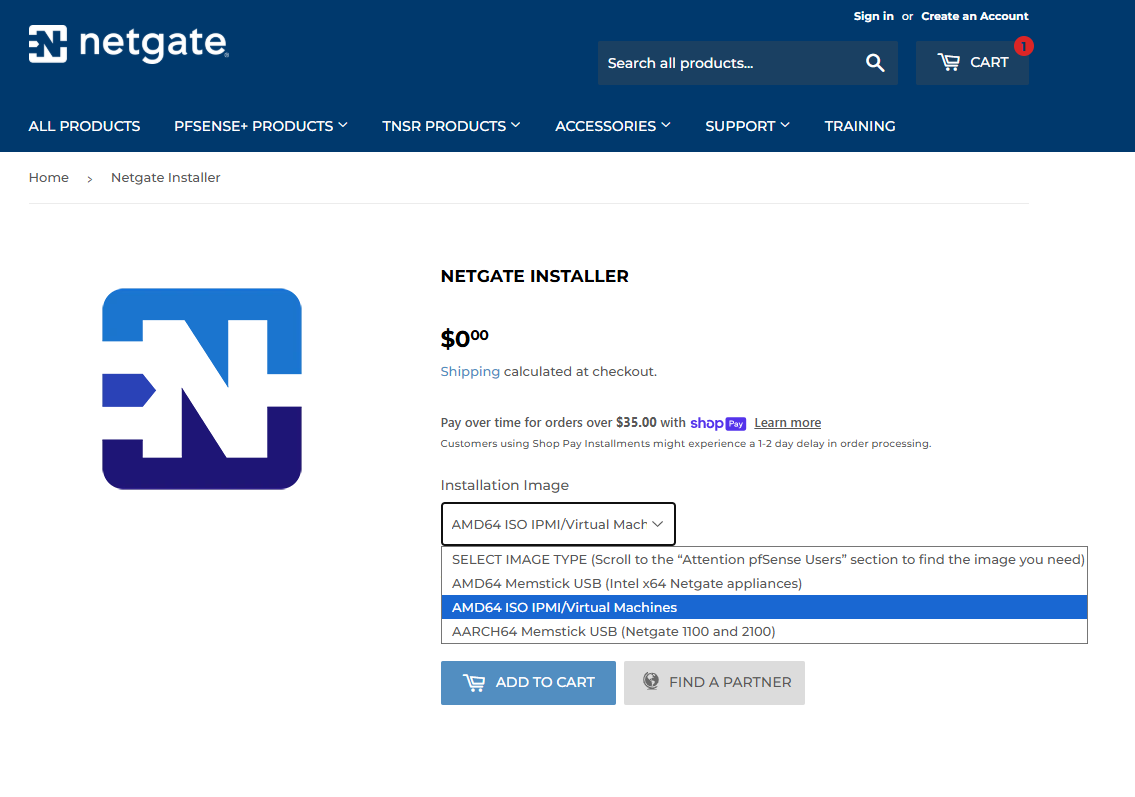
Finally we will download the netgate-installer-amd64.iso.gz file as shown below.
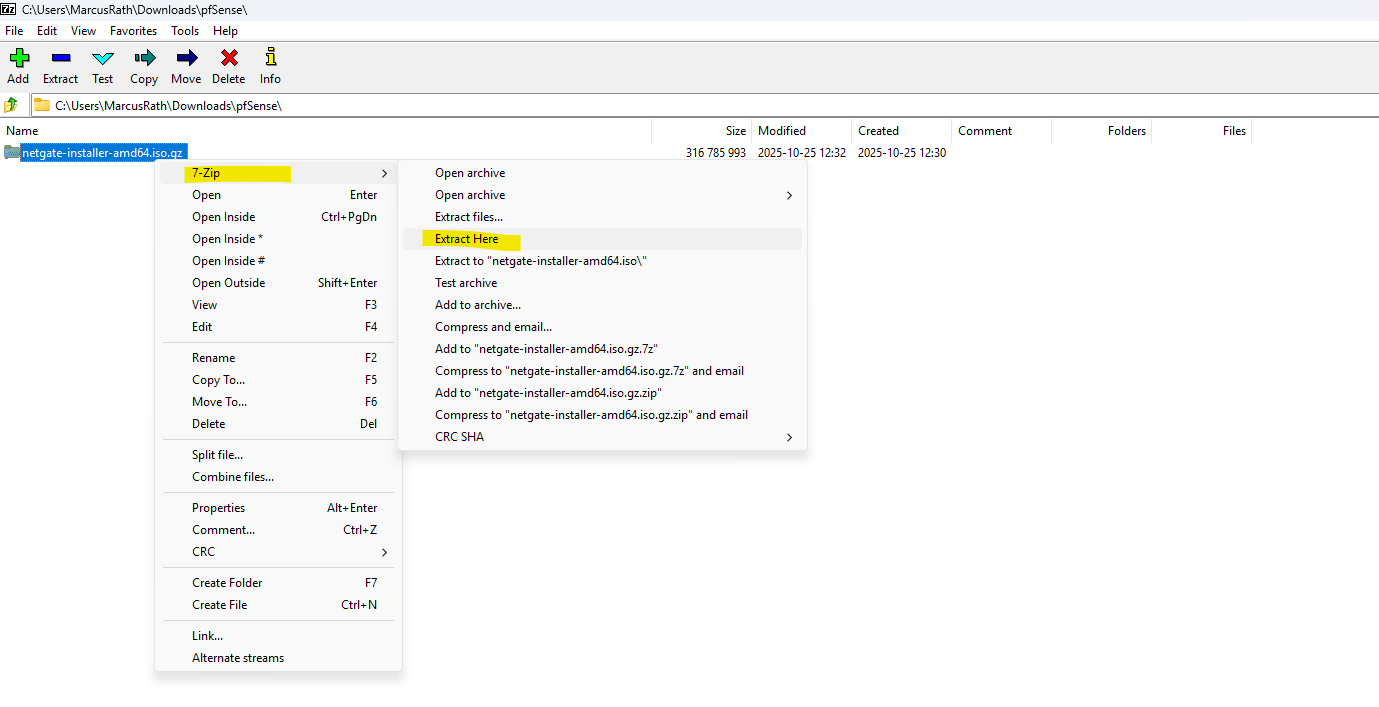
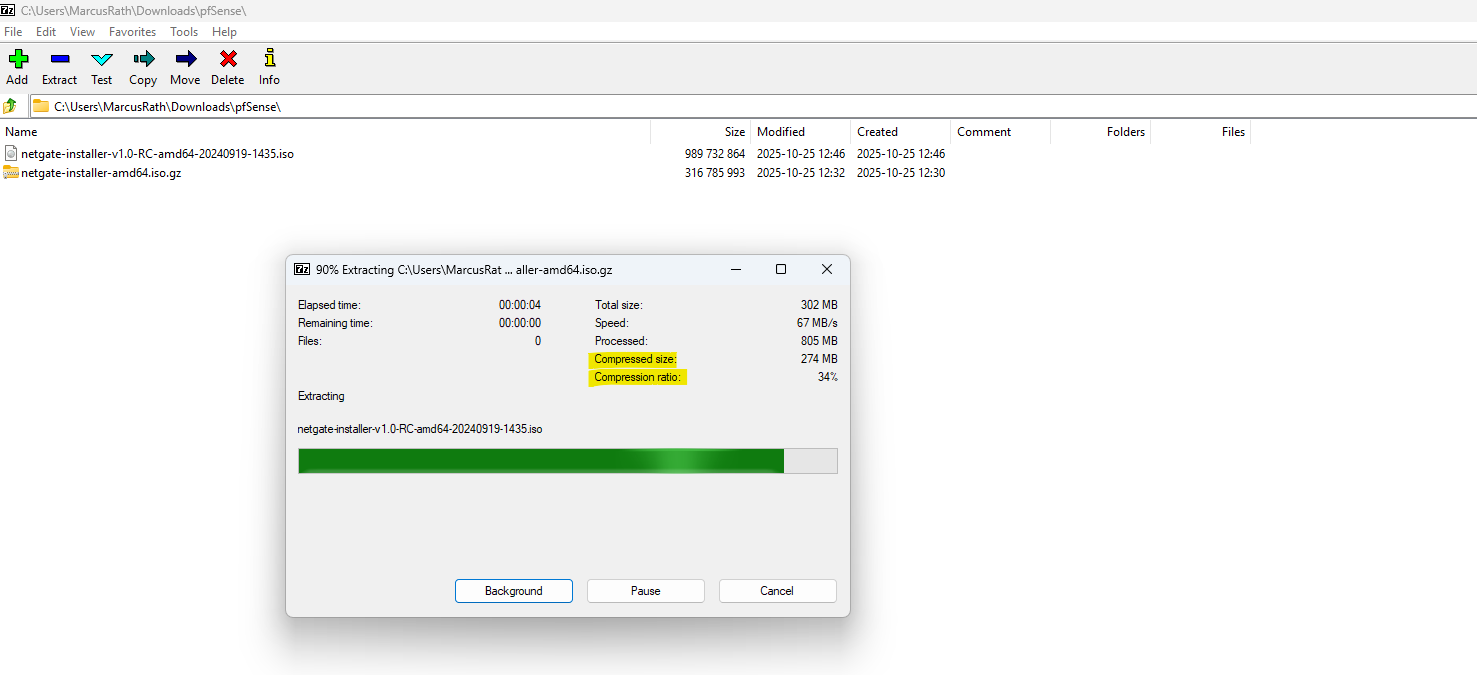
To decompress the .iso.gz file on Windows, we can use 7-Zip and select Extract Here, even though the menu wording may imply a full extraction. In this case, 7-Zip only removes the .gz compression layer and outputs the intact pfSense .iso, ready to mount in your hypervisor.
Windows natively can compress and extract ZIP archives just fine, but .gz is a different compression format that Windows doesn’t support natively, so you must use e.g. 7-Zip to decompress it or a PowerShell command that leverages .NET’s built-in GZipStream to decompress the pfSense .iso.gz downloads into a bootable .iso.
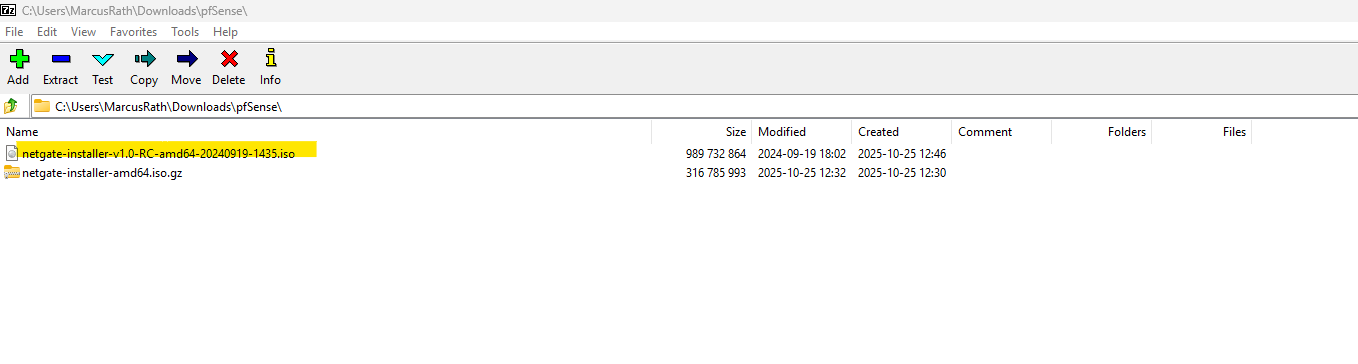
Finally we will get our ISO file we can mount on our hypervisor.
Or as mentioned by using just a PowerShell script using .NET’s built-in GZipStream to decompress the iso.gz file.
Run it from the same folder as your *.iso.gz file is.
$inputFile = "netgate-installer-amd64.iso.gz"
$outputFile = $inputFile -replace '\.gz$', ''

$inStream = [System.IO.File]::OpenRead($inputFile)
$gzStream = New-Object System.IO.Compression.GzipStream($inStream, [IO.Compression.CompressionMode]::Decompress)
$outStream = [System.IO.File]::Create($outputFile)

$gzStream.CopyTo($outStream)

$gzStream.Dispose()
$outStream.Dispose()
$inStream.Dispose()

Write-Host "Done! Created $outputFile"
Set up pfSense VM in vSphere
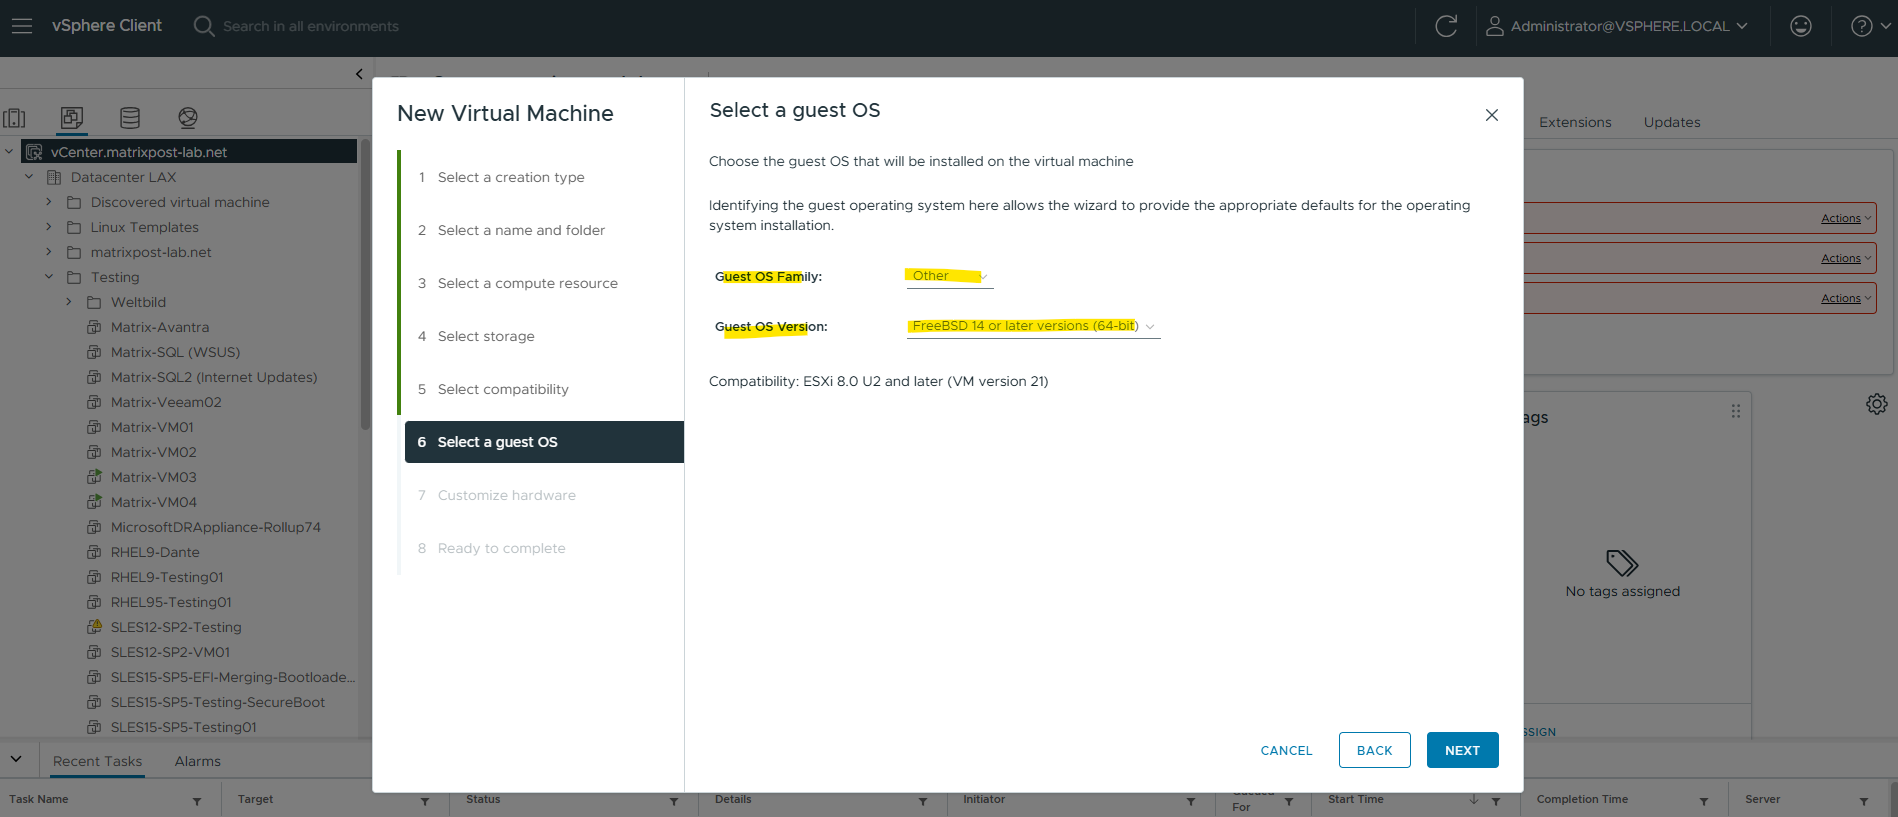
For the guest OS family we need to select Other and for the OS version select FreeBSD 14 or later versions (64-bit).
FreeBSD 14 became the base starting with pfSense CE 2.7.0, released in mid-2023. Before that, pfSense CE 2.6.0 (and Plus 23.01) were still built on FreeBSD 12.3.
Starting with pfSense version 2.8.0 the base operating system has been upgraded to FreeBSD 15-CURRENT.
Source: https://docs.netgate.com/pfsense/en/latest/releases/2-8-0.html
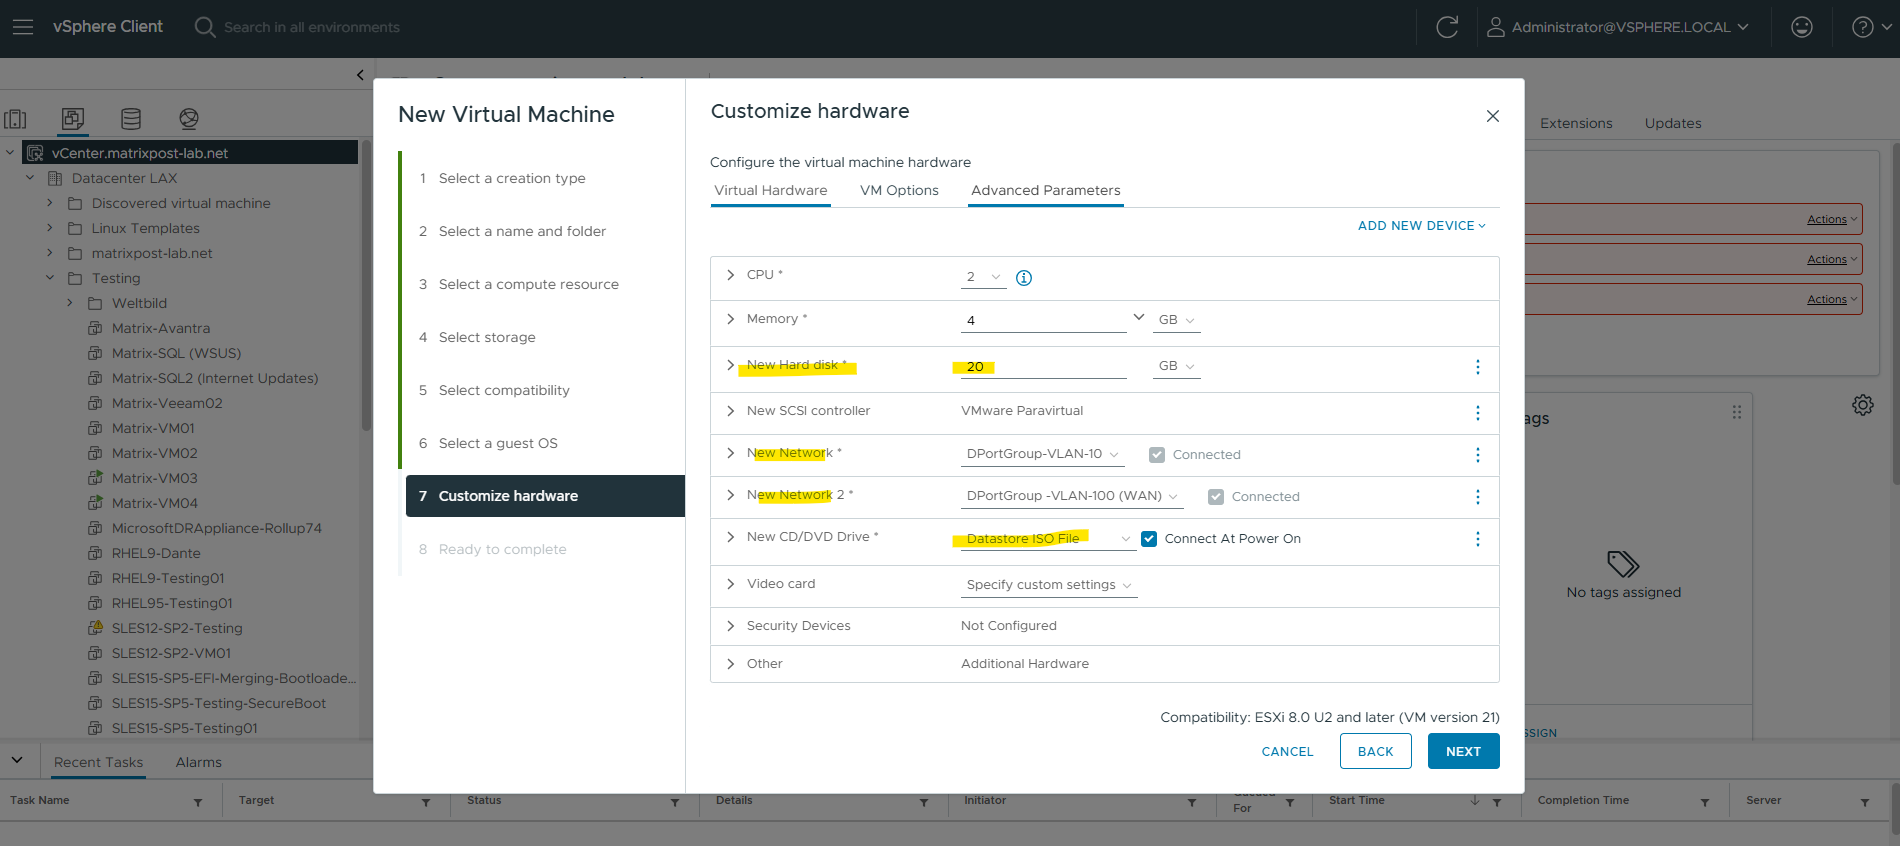
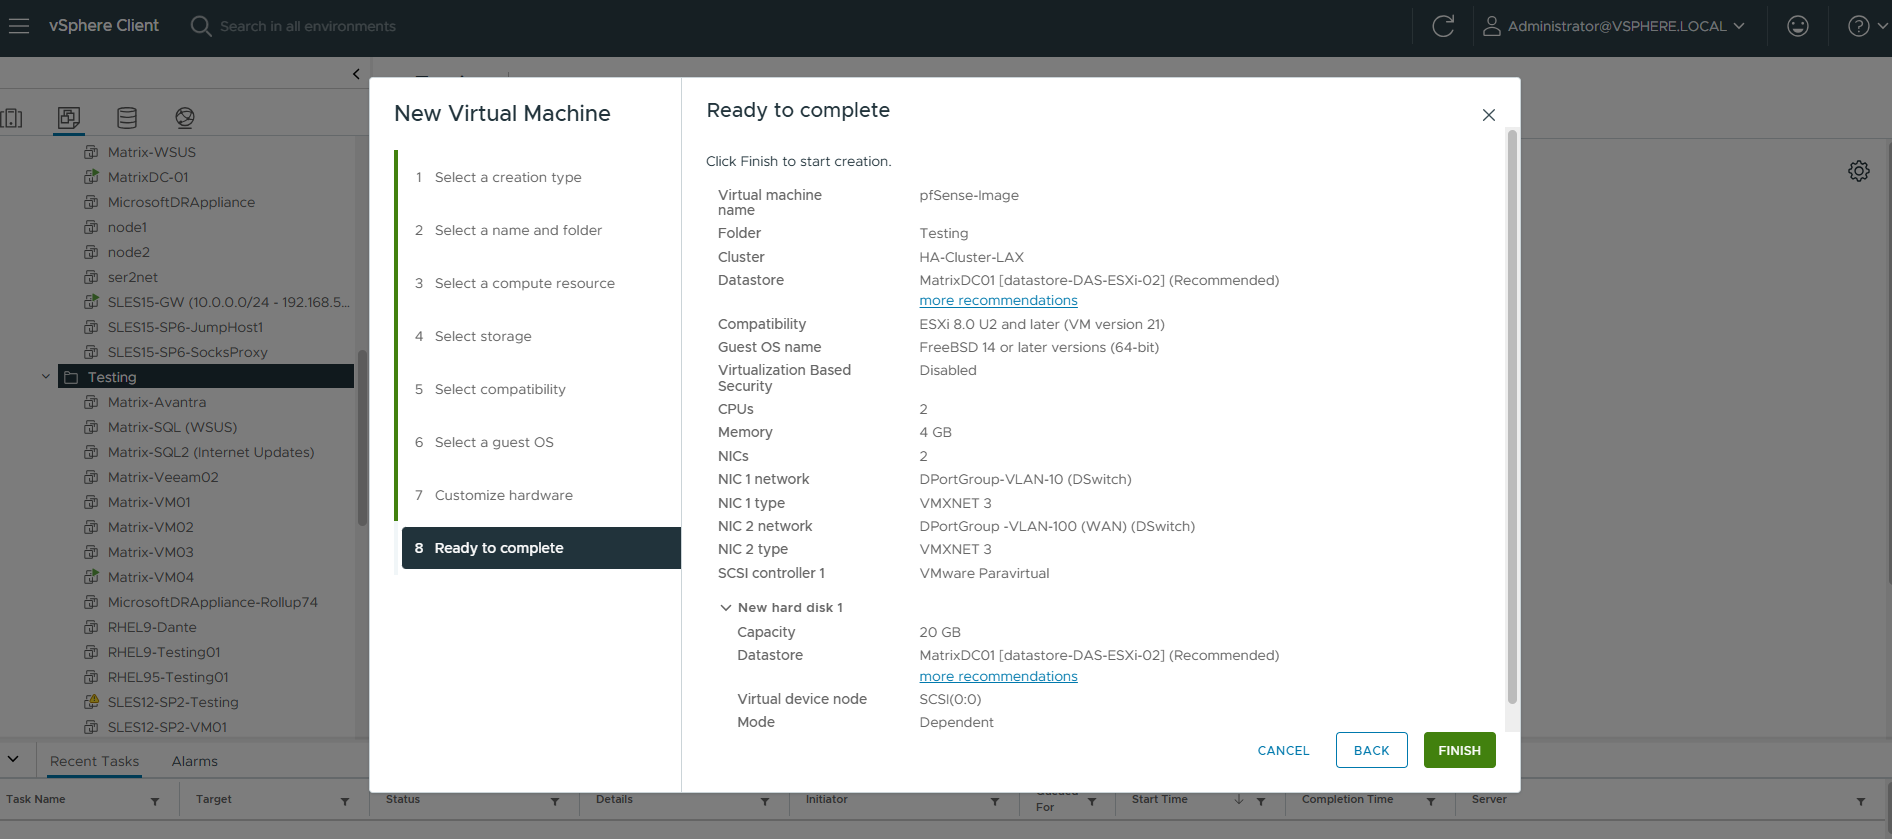
For the disk size I will set 20 GB, further I will select 2 CPUs and 4 GB RAM in my vSphere lab environment. We also need to add at least two network interfaces (LAN or Perimeter + WAN).
On the virtual CD/DVD drive I will mount the pfSense ISO installer (in my case pfSense 2.7.2 community edition).
For the disk size are 16 GB or more recommended (minimum 8 GB, will install, but leaves little room for logs, updates, and packages).
In cloud or lab environments, using 20 GB is a comfortable default.
For CPU its recommended to use 2 vCPUs and for RAM 2 GB.
4 GB or more if you plan to use packages like pfBlockerNG, Snort/Suricata, or Squid, since they can easily consume several hundred MB each.
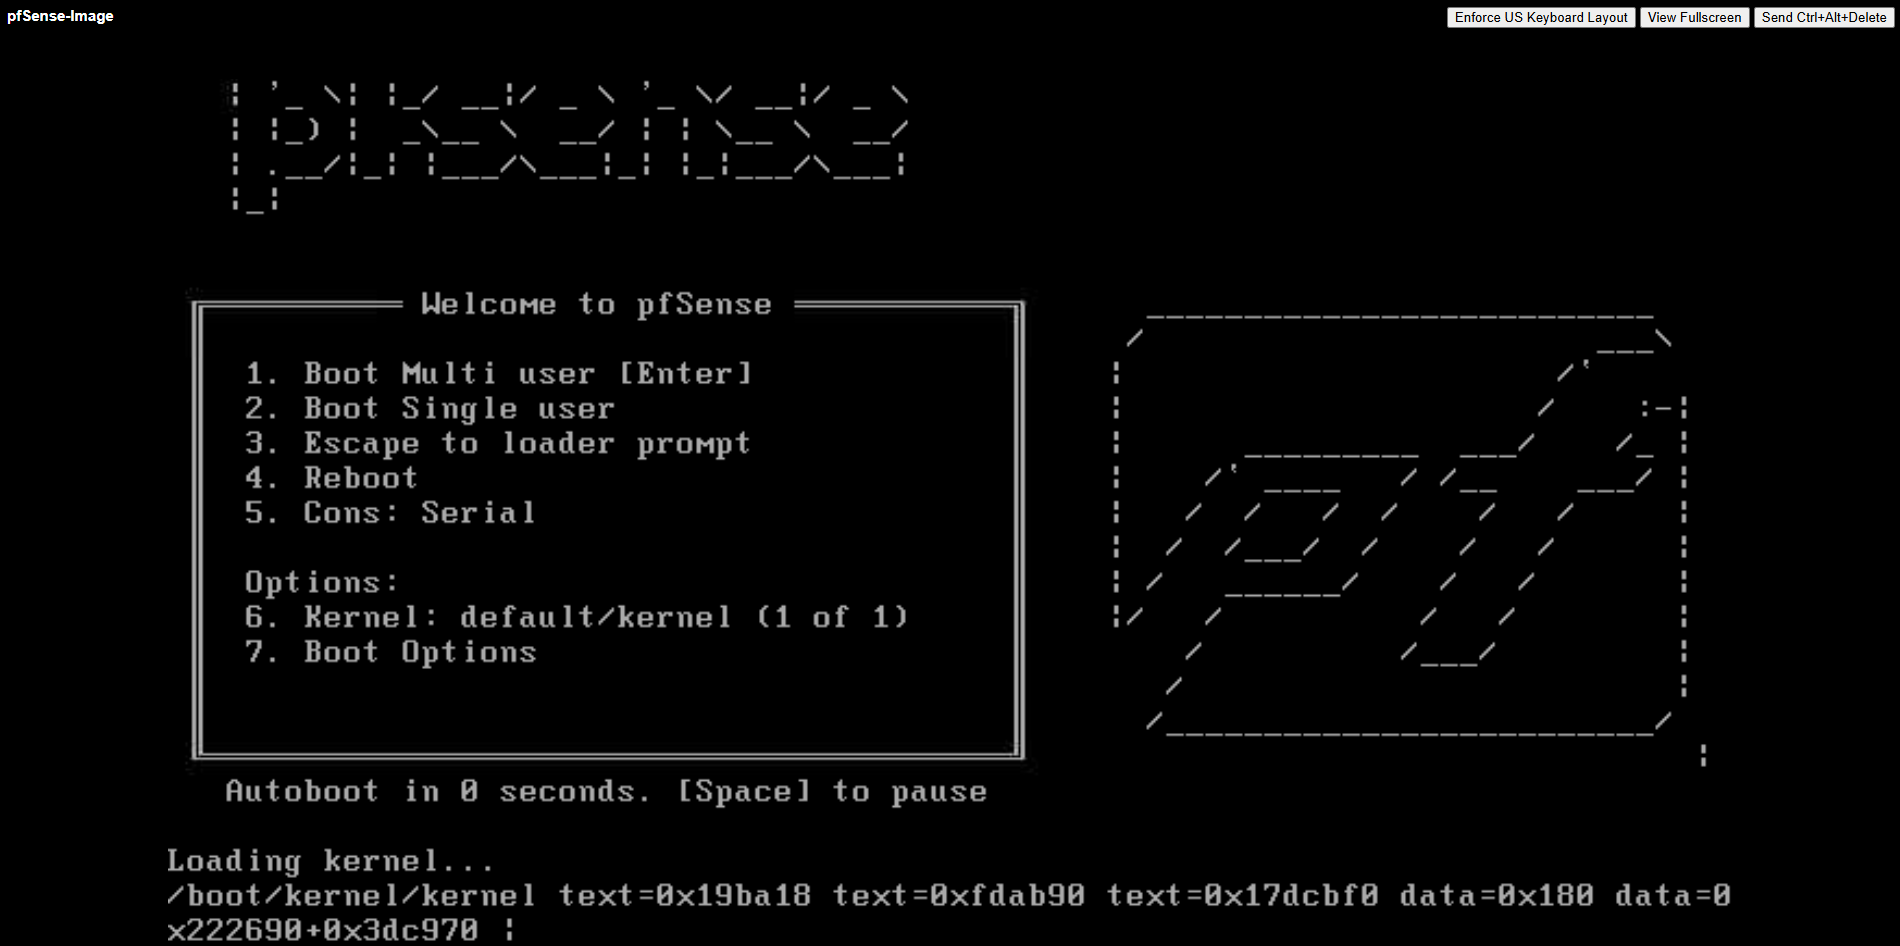
Power on the virtual machine.
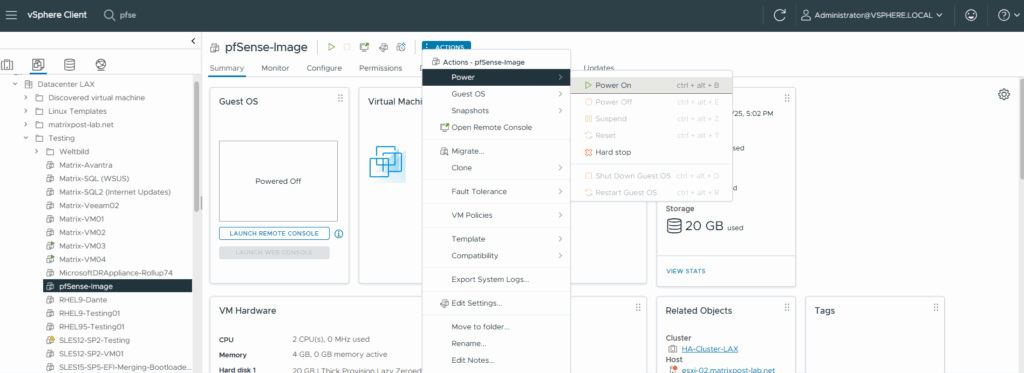
The virtual machine boots from the mounted pfSense installer (ISO).
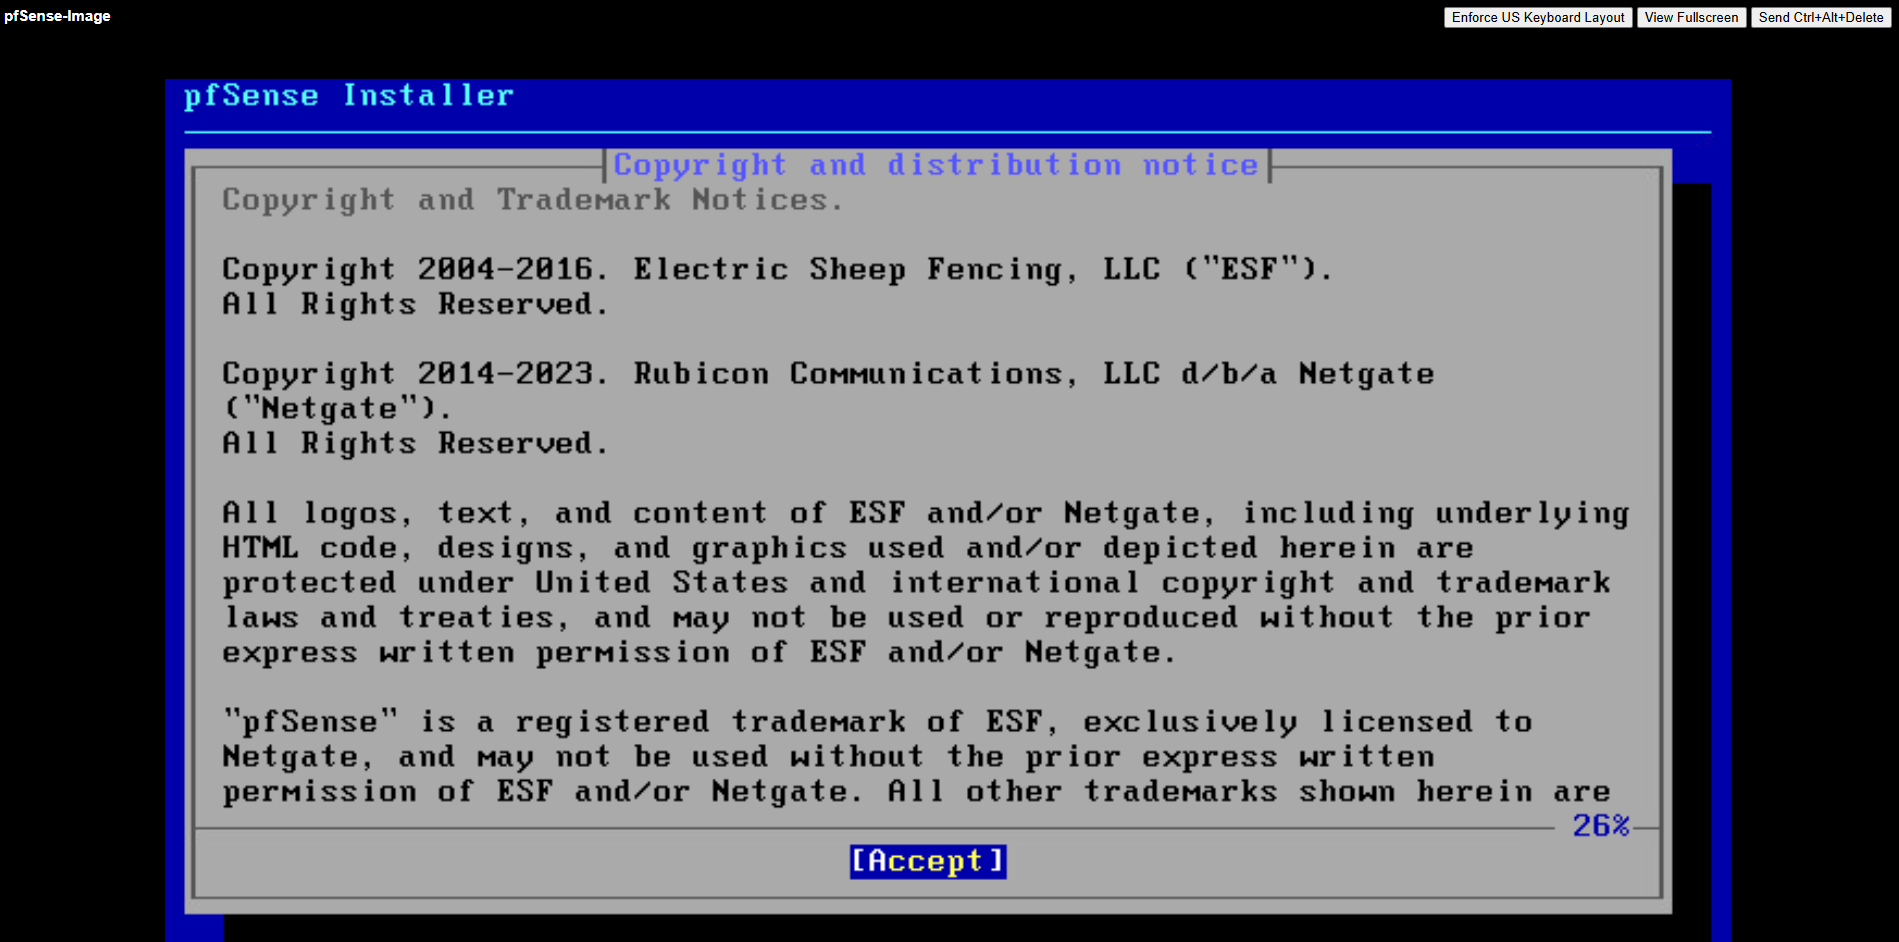
Accept the copyright and distribution notice.
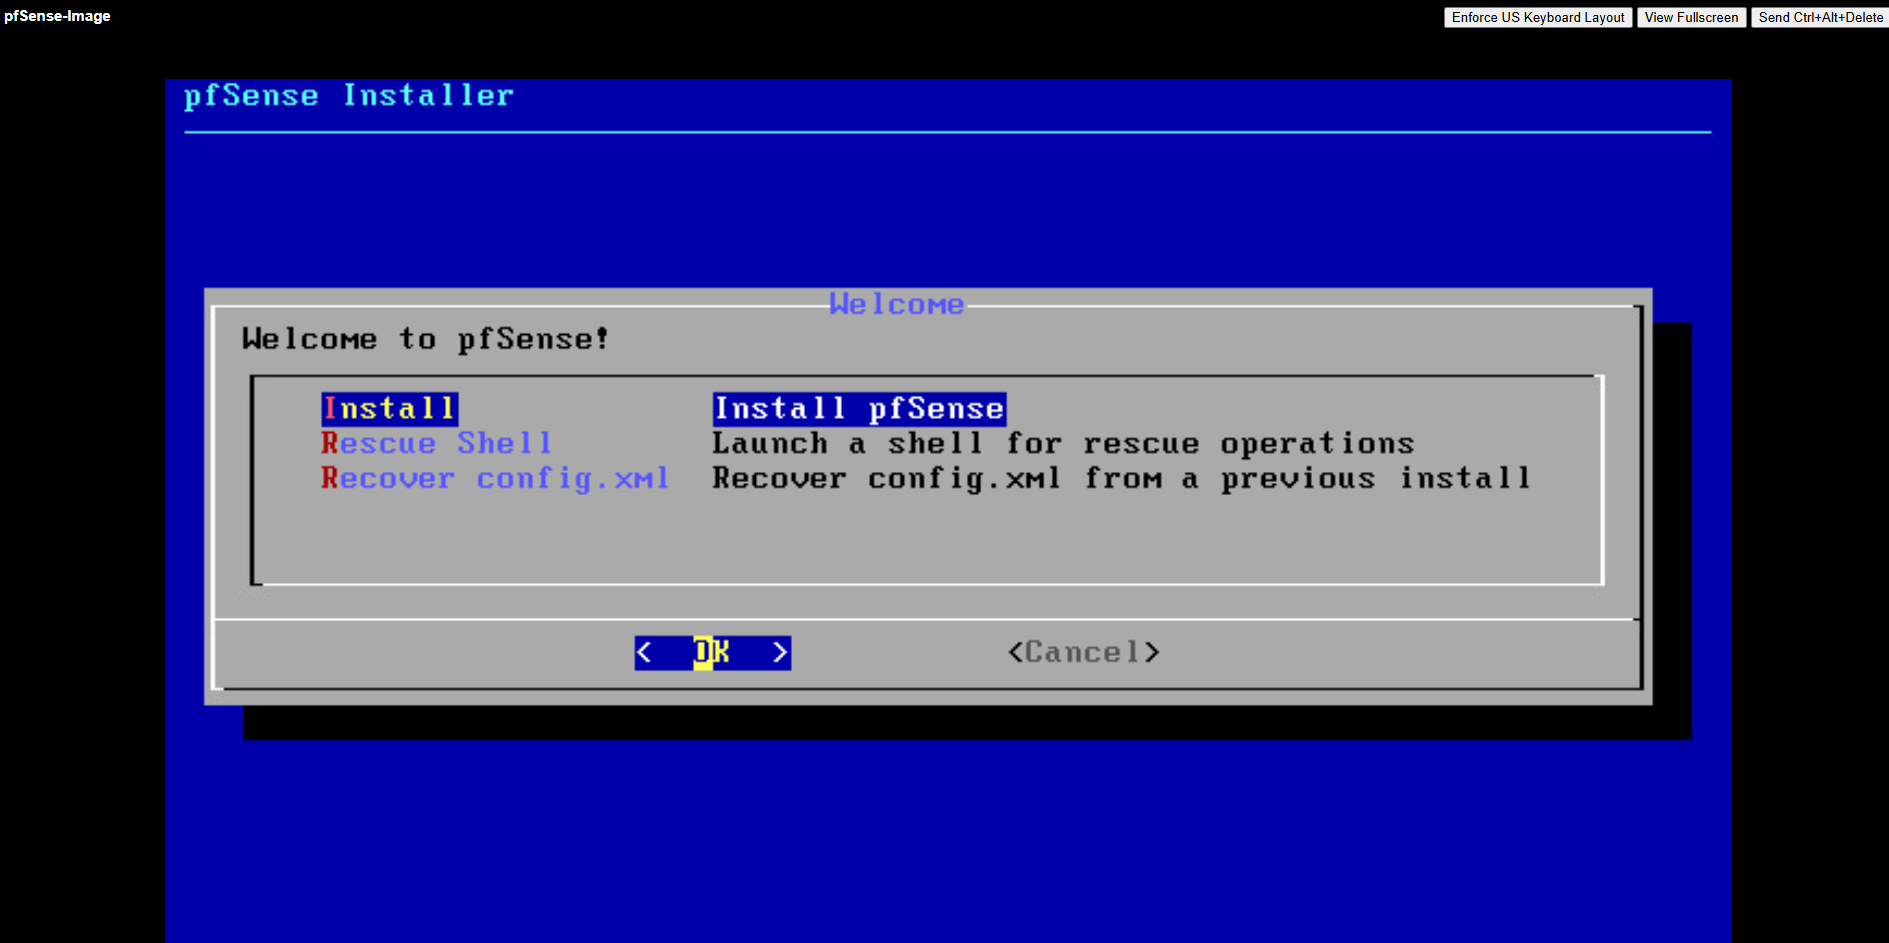
Select Install pfSense.
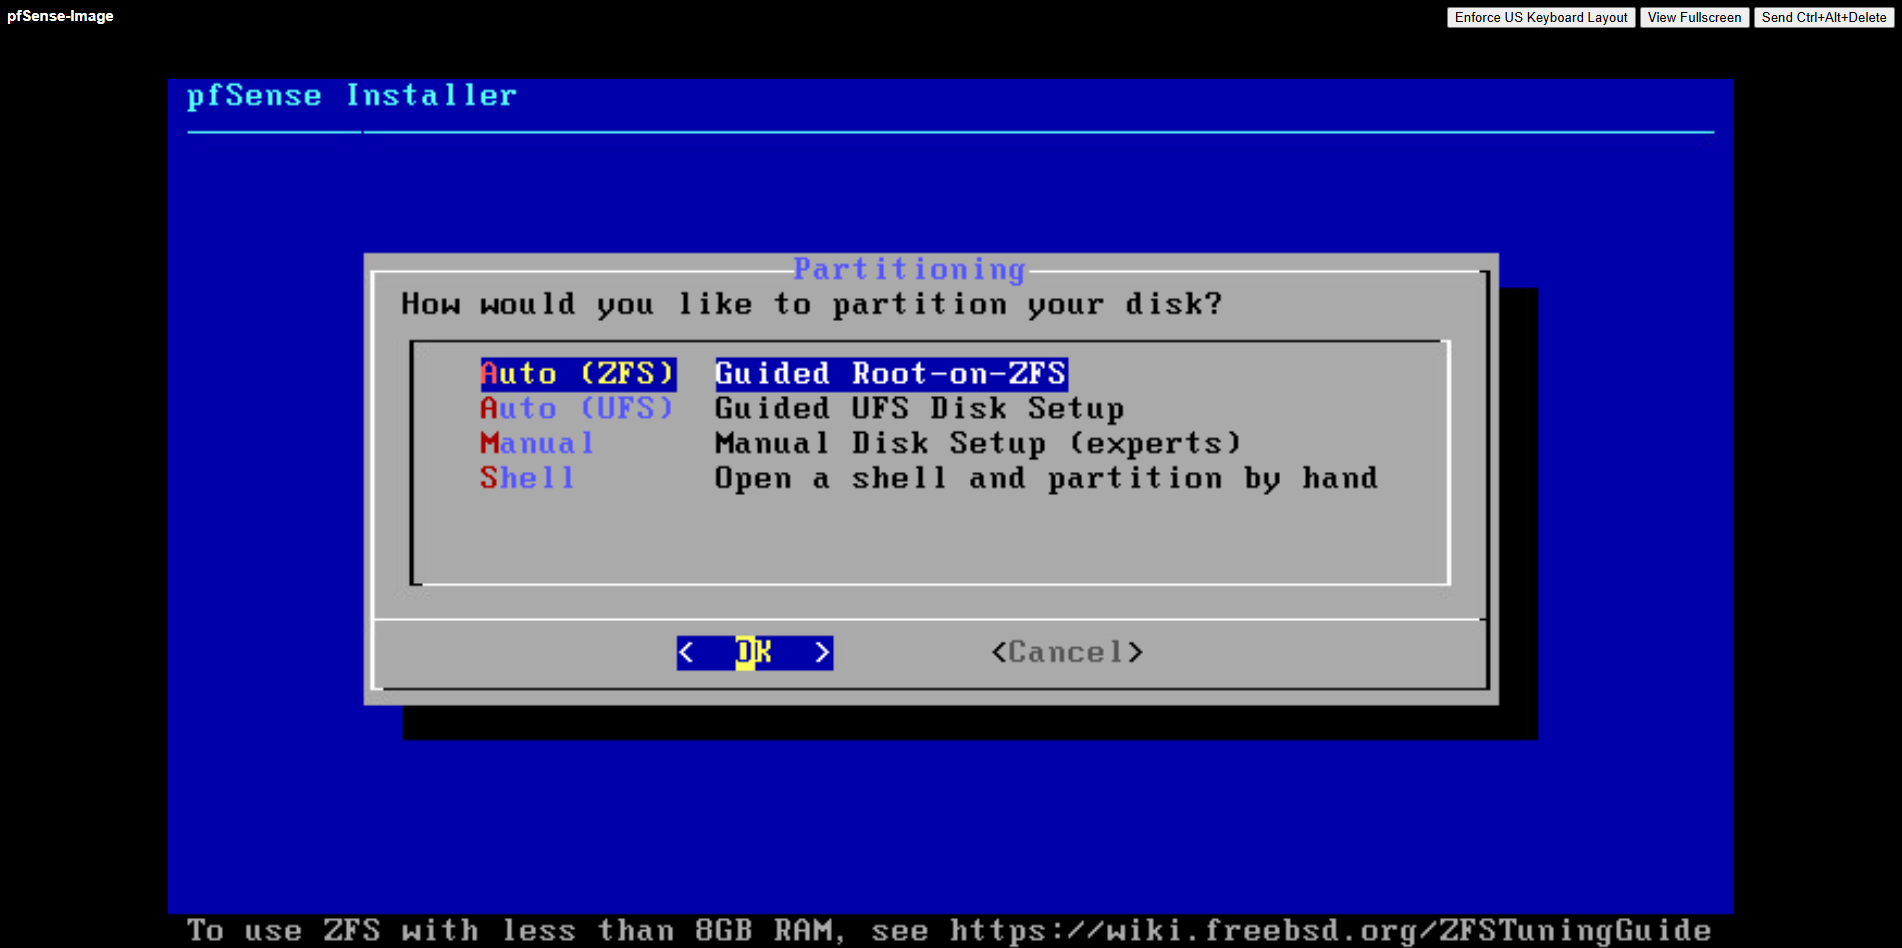
For the partitioning choose between the ZFS and UFS filesystem.
UFS is the traditional, lightweight option that’s simple and fast, ideal for most cloud or virtualized deployments.
ZFS, while more feature-rich with advanced integrity checks and snapshots, adds overhead and is generally only recommended if you need its specific features or plan to run pfSense on larger, persistent storage.
More about both when using pfSense you will also find in my following post https://blog.matrixpost.net/pfsense-boot-loop-after-power-outage/.
Click on Install.
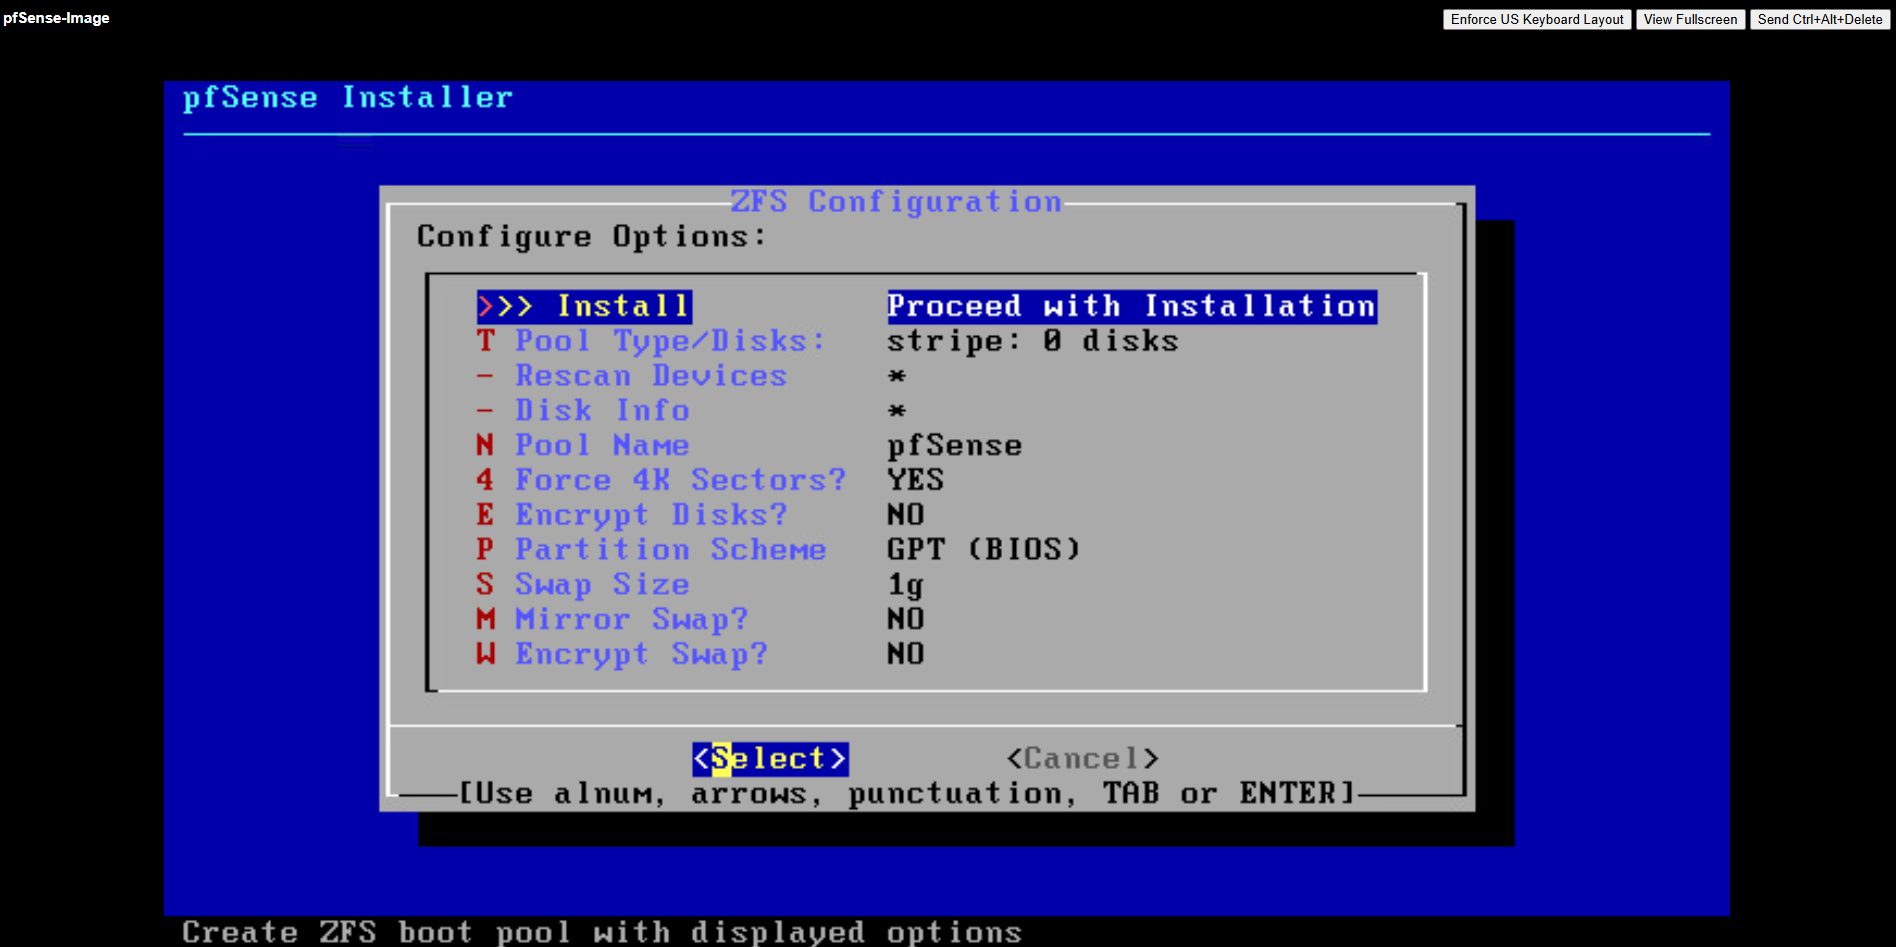
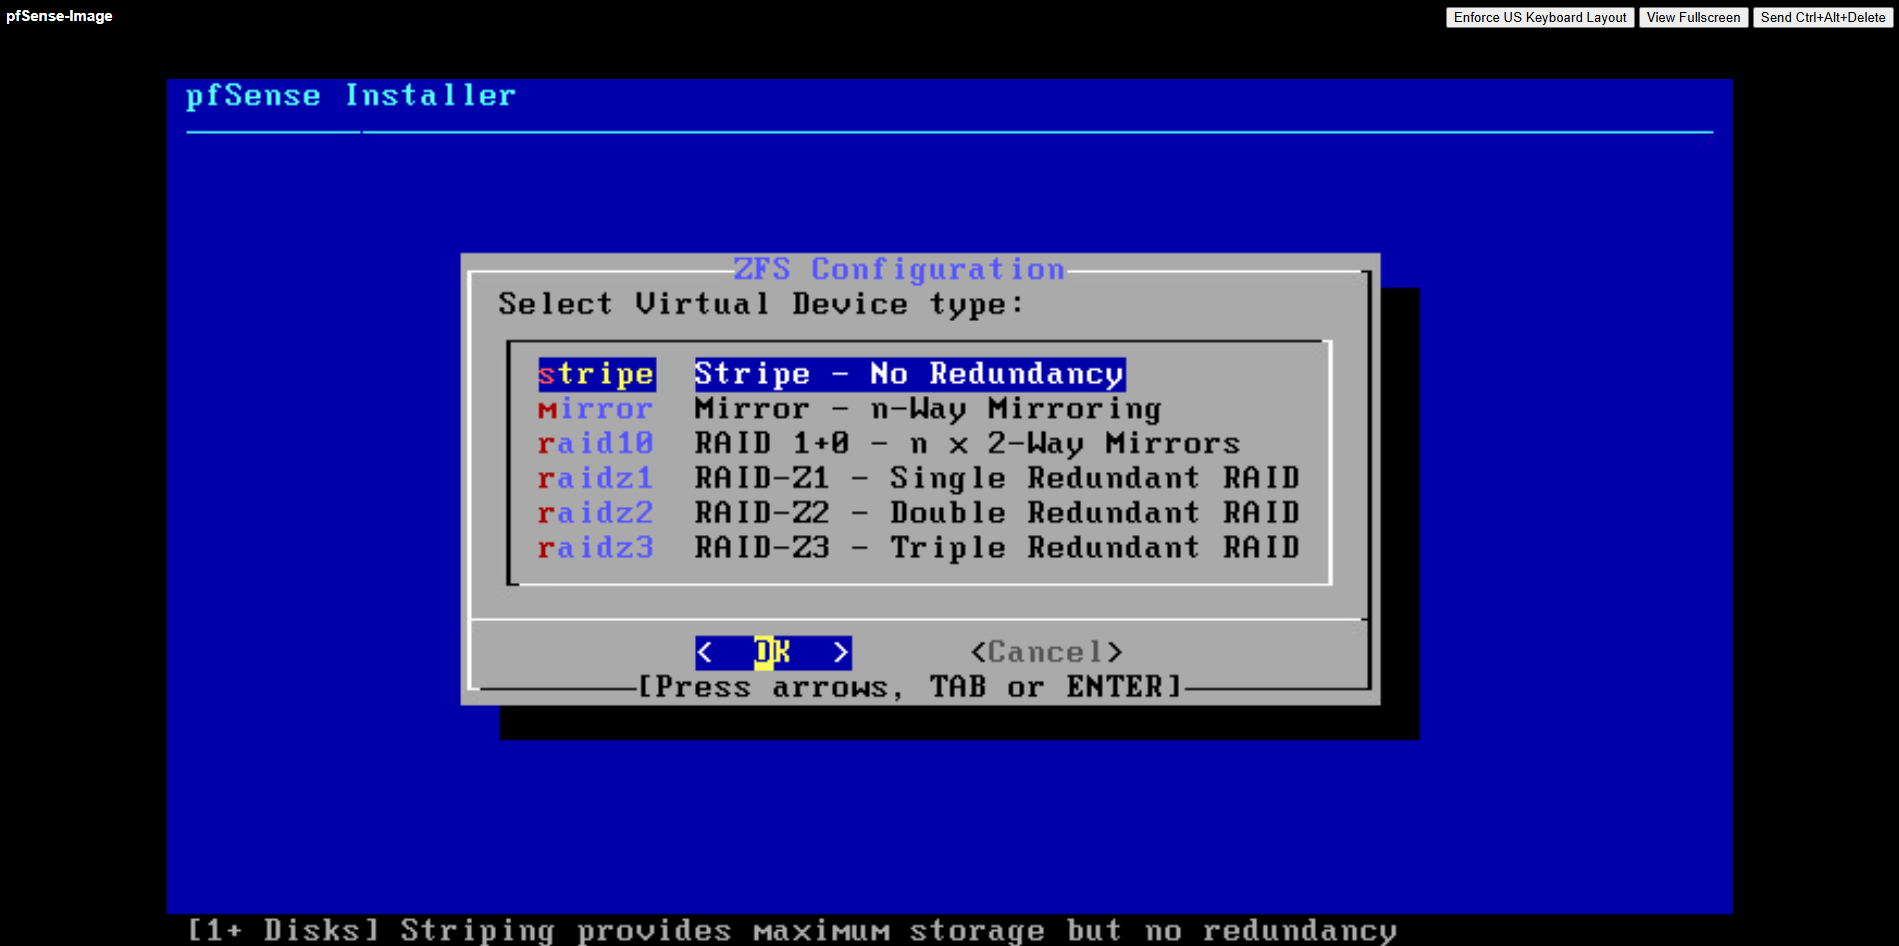
For the virtual device (disk) I will use stripe.
In our GCP setup, using RAID or mirrored ZFS pools inside pfSense makes no real sense and would just add unnecessary overhead.
GCP Persistent Disks (standard or SSD) are already replicated at the storage layer, Google automatically maintains redundancy and durability behind the scenes.
Creating a RAID or mirrored ZFS setup inside the VM would only add CPU and I/O overhead without improving reliability or performance.
Therefore, a simple ZFS stripe (single-disk vdev) or UFS on a single disk is fully sufficient for pfSense in GCP.
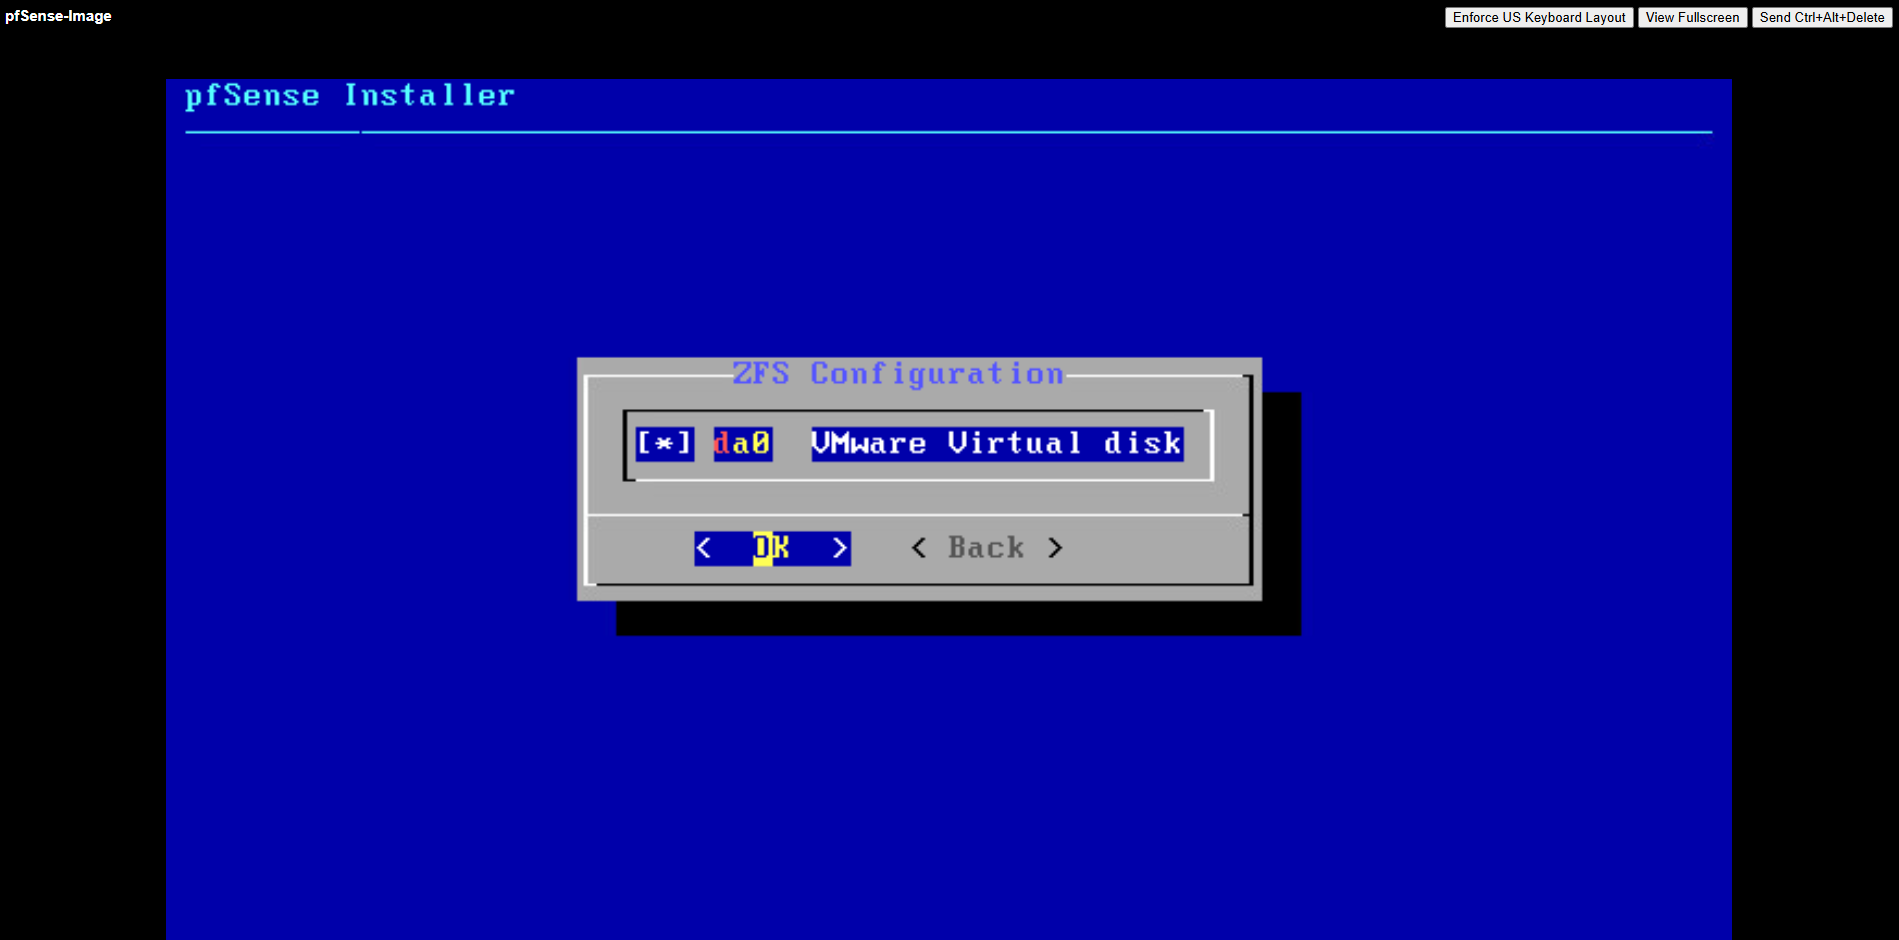
Select the attached disk as the installation target, this is where pfSense will actually be installed.
Press the space key to select our newly attached disk where we want to install pfSense on.
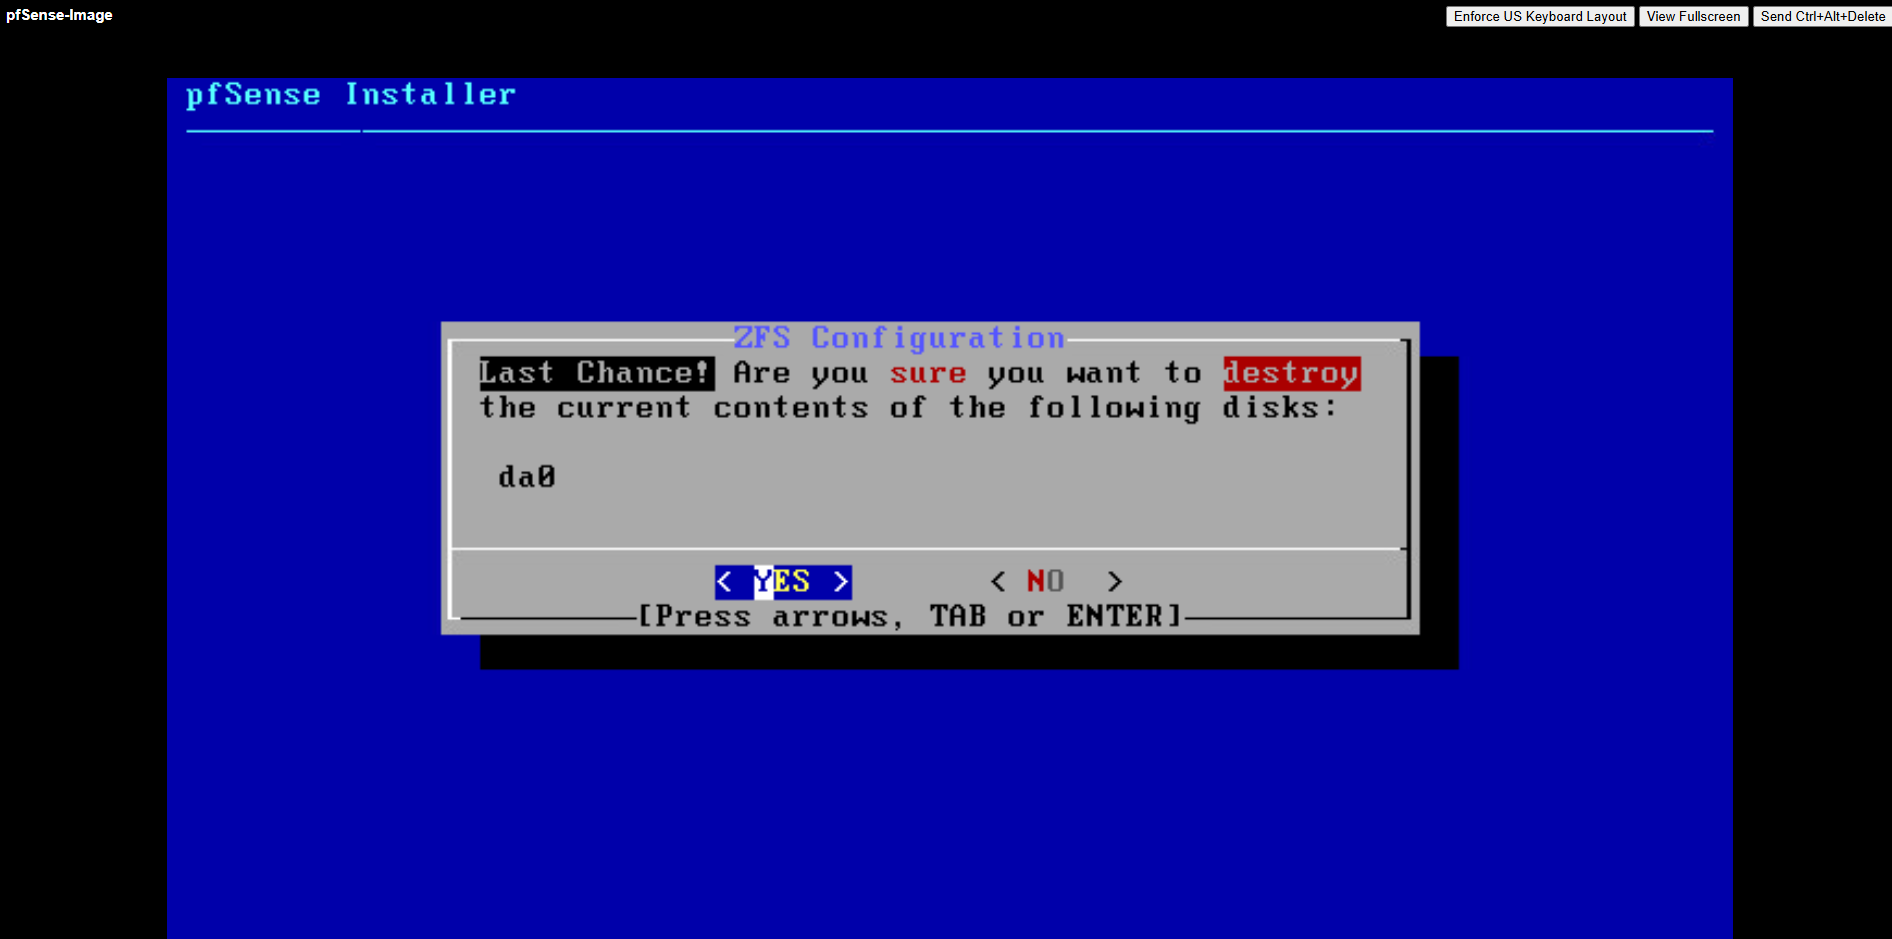
Confirm by pressing yes to finally install pfSense on the selected disk.
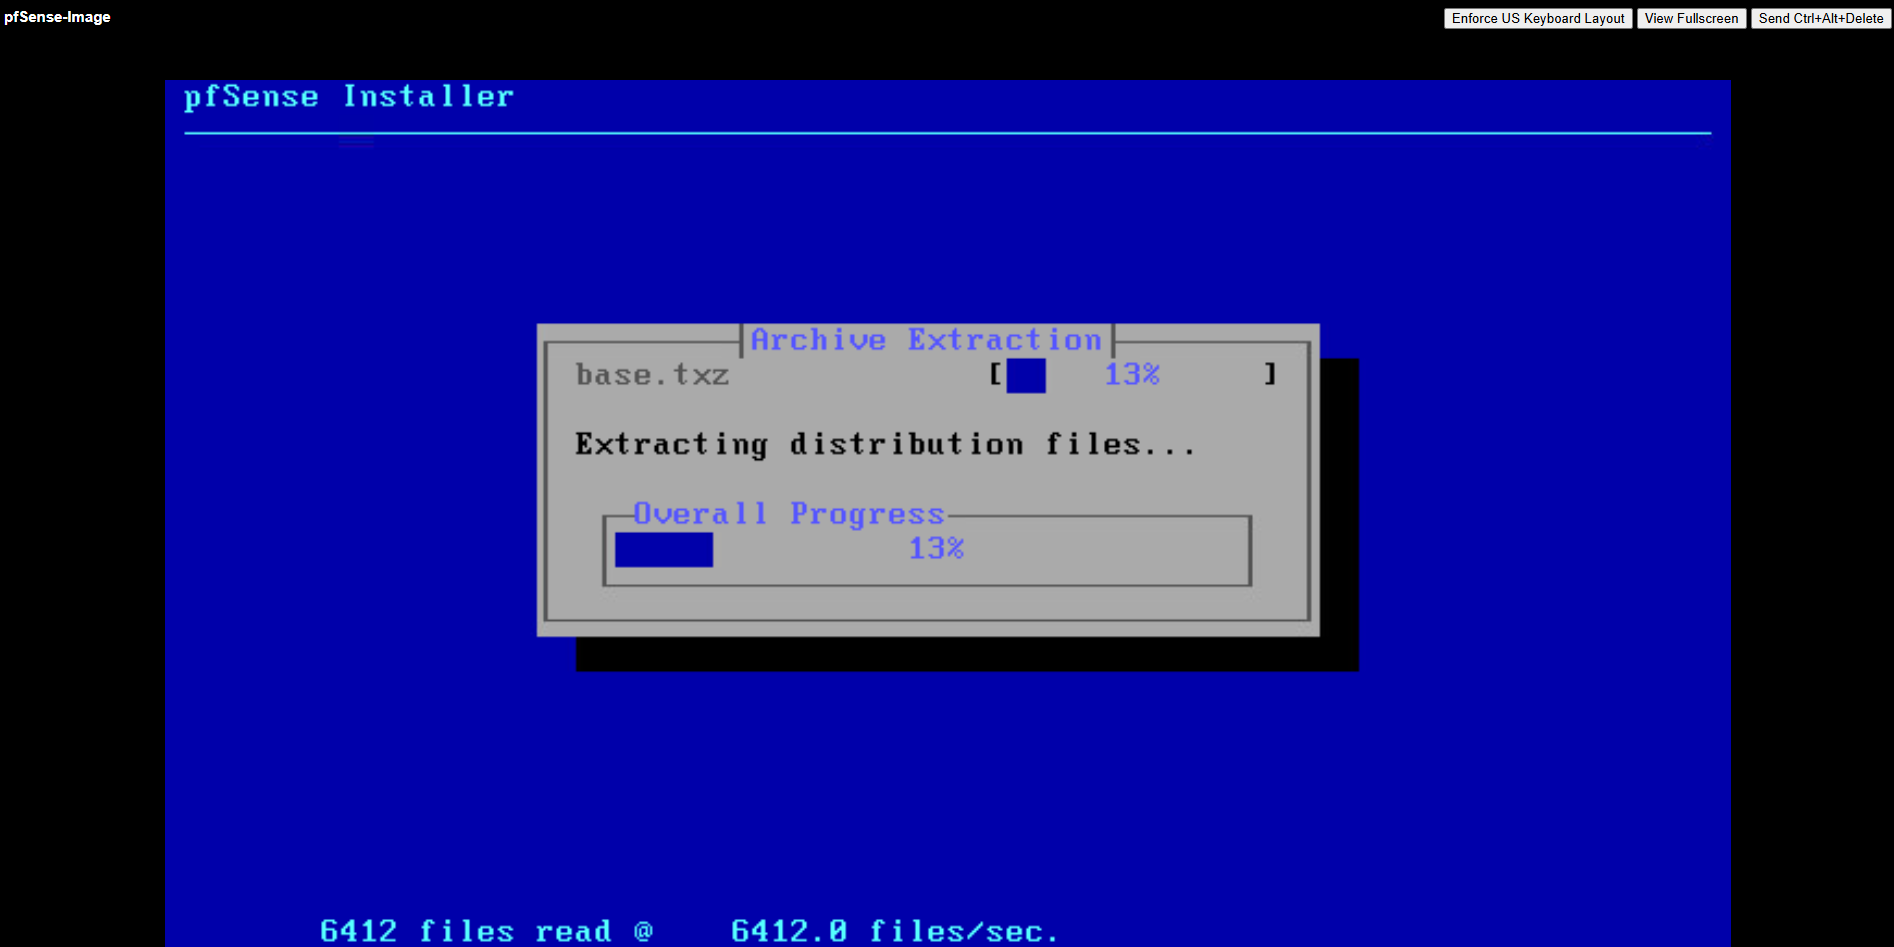
The installation starts.
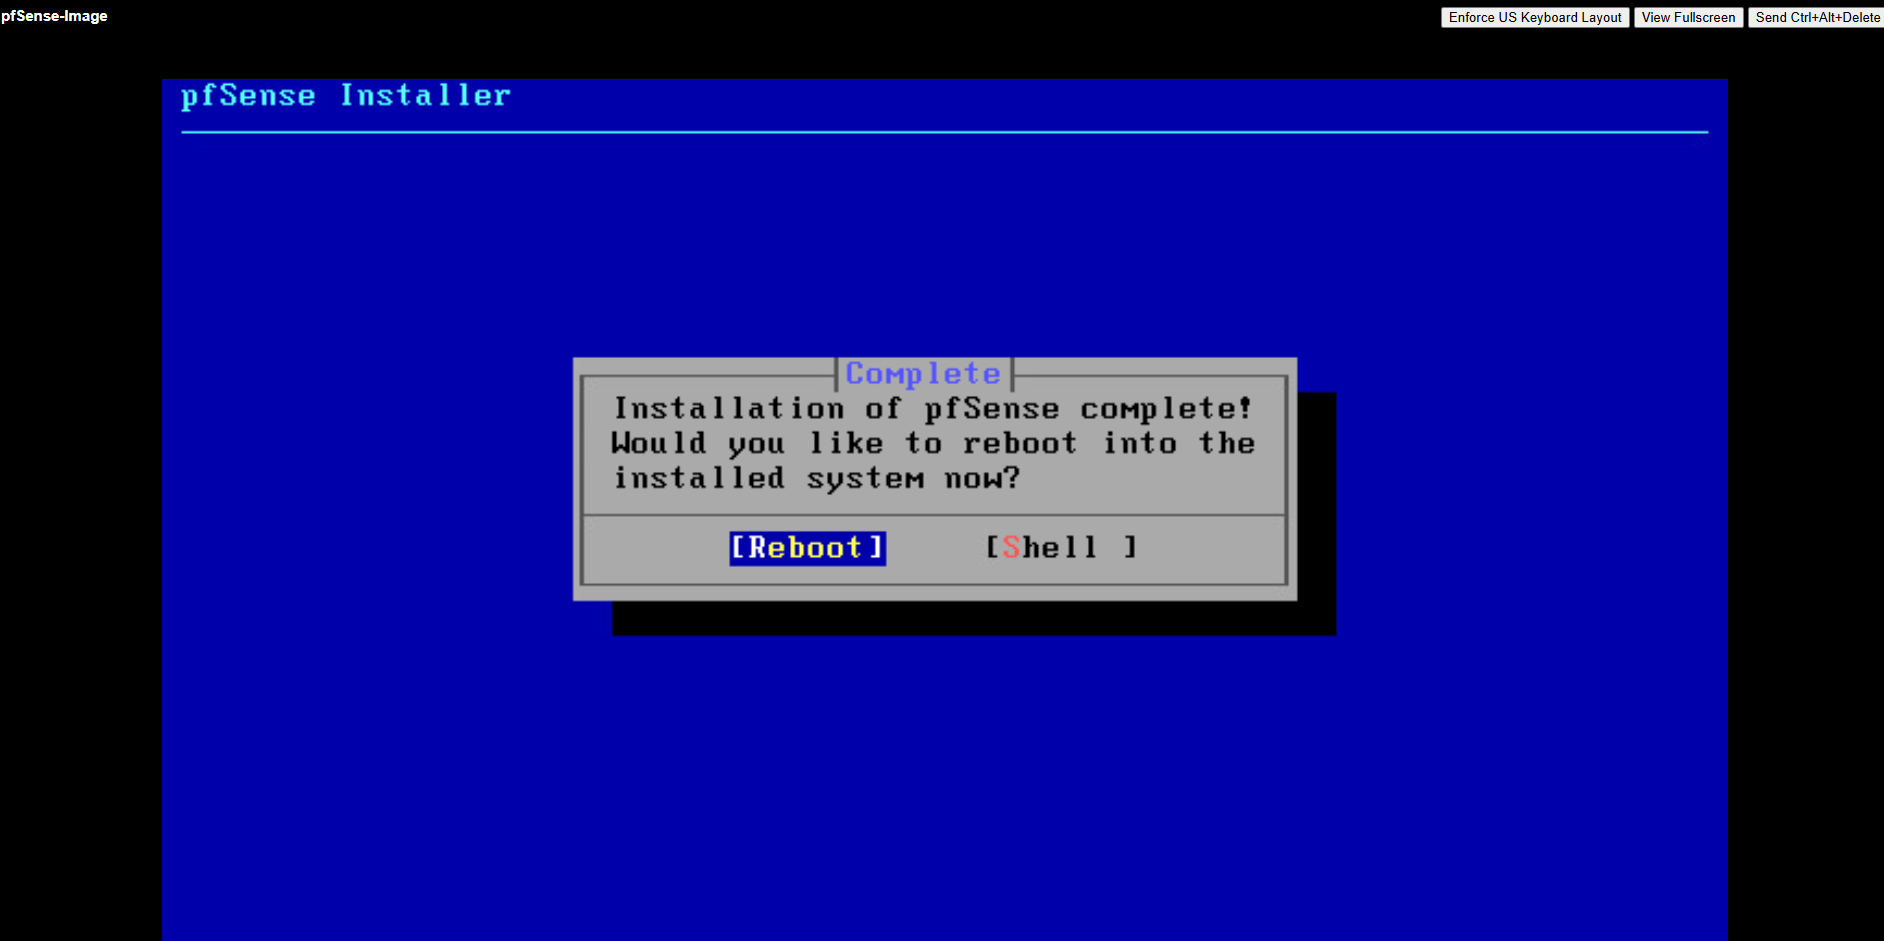
After the installation completes (usually in a few seconds) we need to reboot pfSense.
By the way, when preparing the pfSense image for Google Cloud (GCP), as shown in my post here, we can simply shut it down right from the shell using the poweroff command, and it’s instantly ready for upload.
The initial pfSense setup can be done directly in GCP through the VM’s serial console, making it fast and straightforward.
In Azure, however, we first need to complete the initial configuration and a few extra prep steps before uploading the disk, a process that’s, frankly, a bit of a pain in the ass compared to how smoothly it runs in GCP.
Disable VLANs.
Azure does not expose VLANs to customers, so the VLAN prompt can simply be skipped resp. set to no.

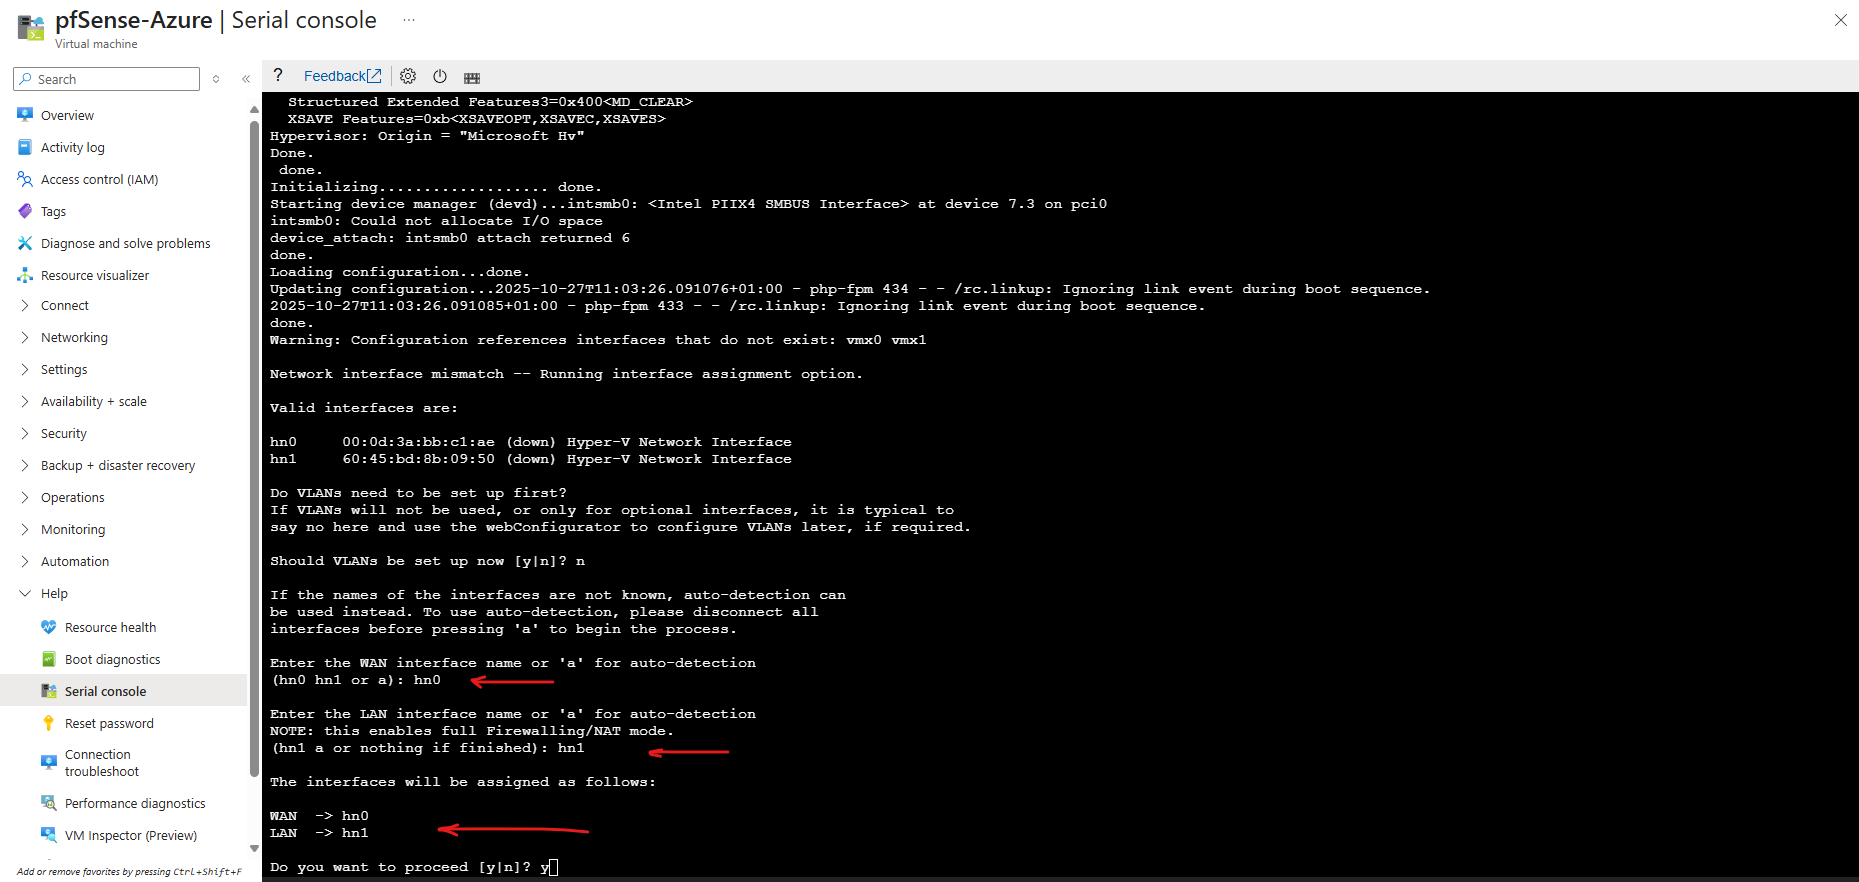
Assign the LAN or Perimeter (in my case vmx0) and WAN (in my case vmx1) interfaces.
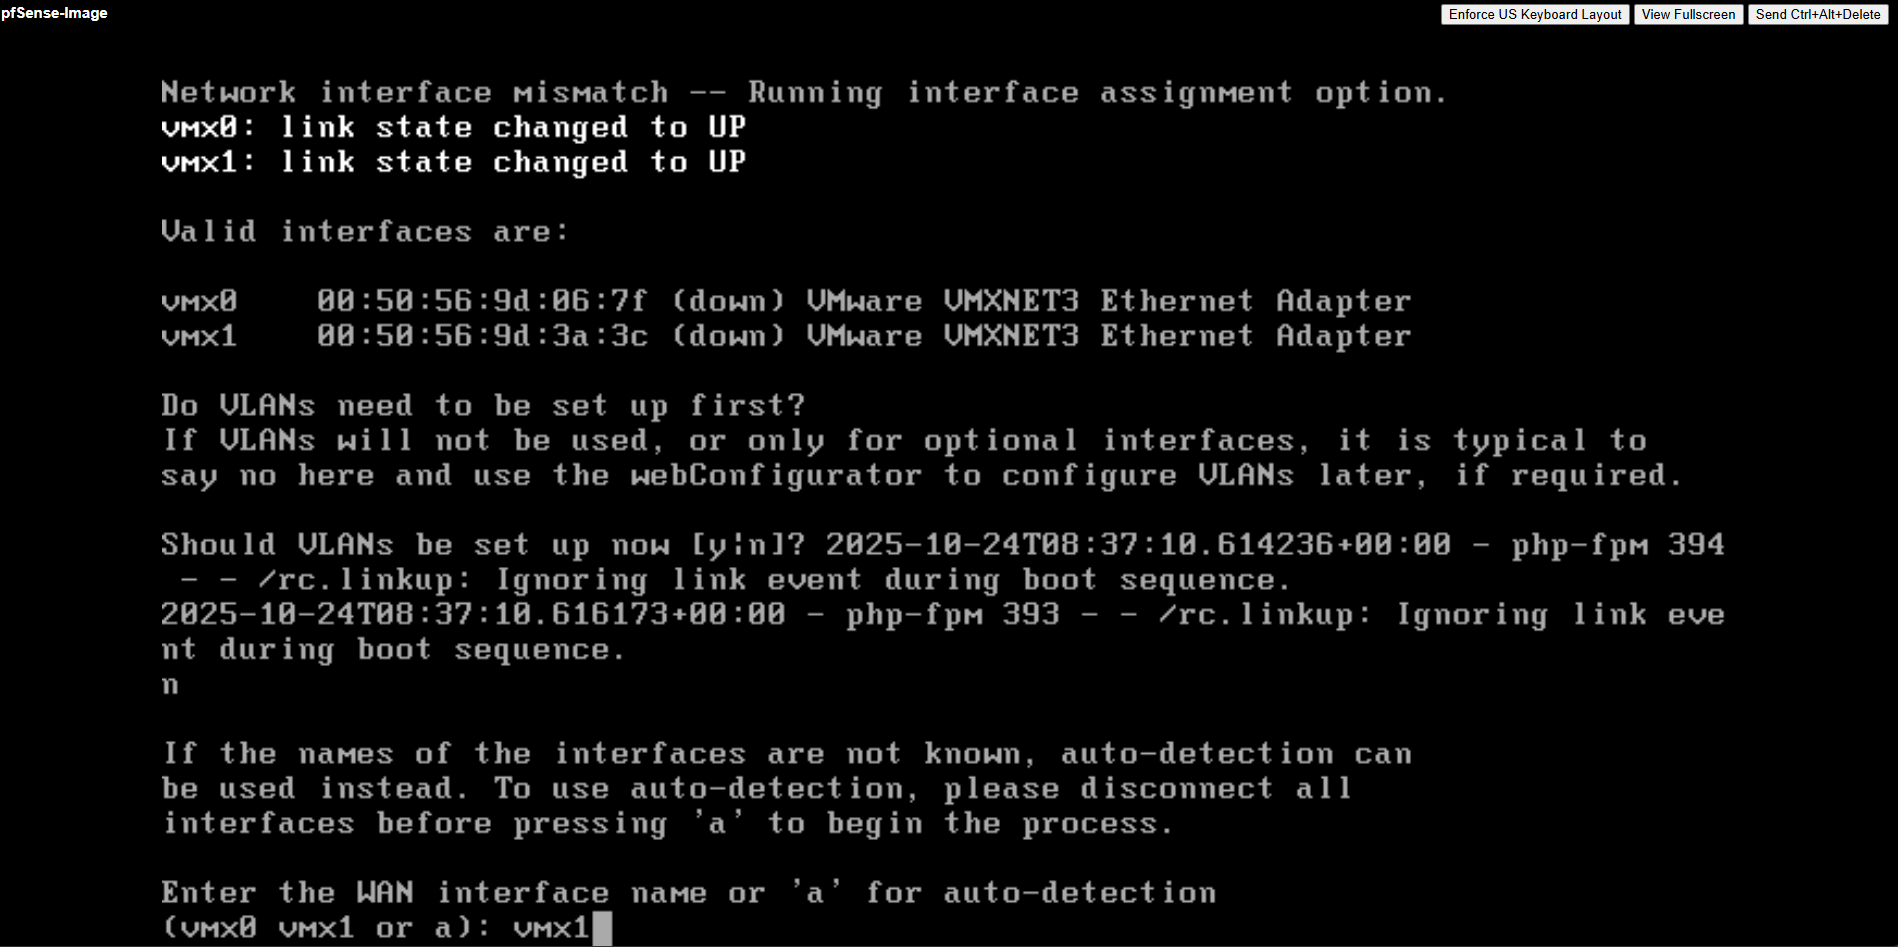
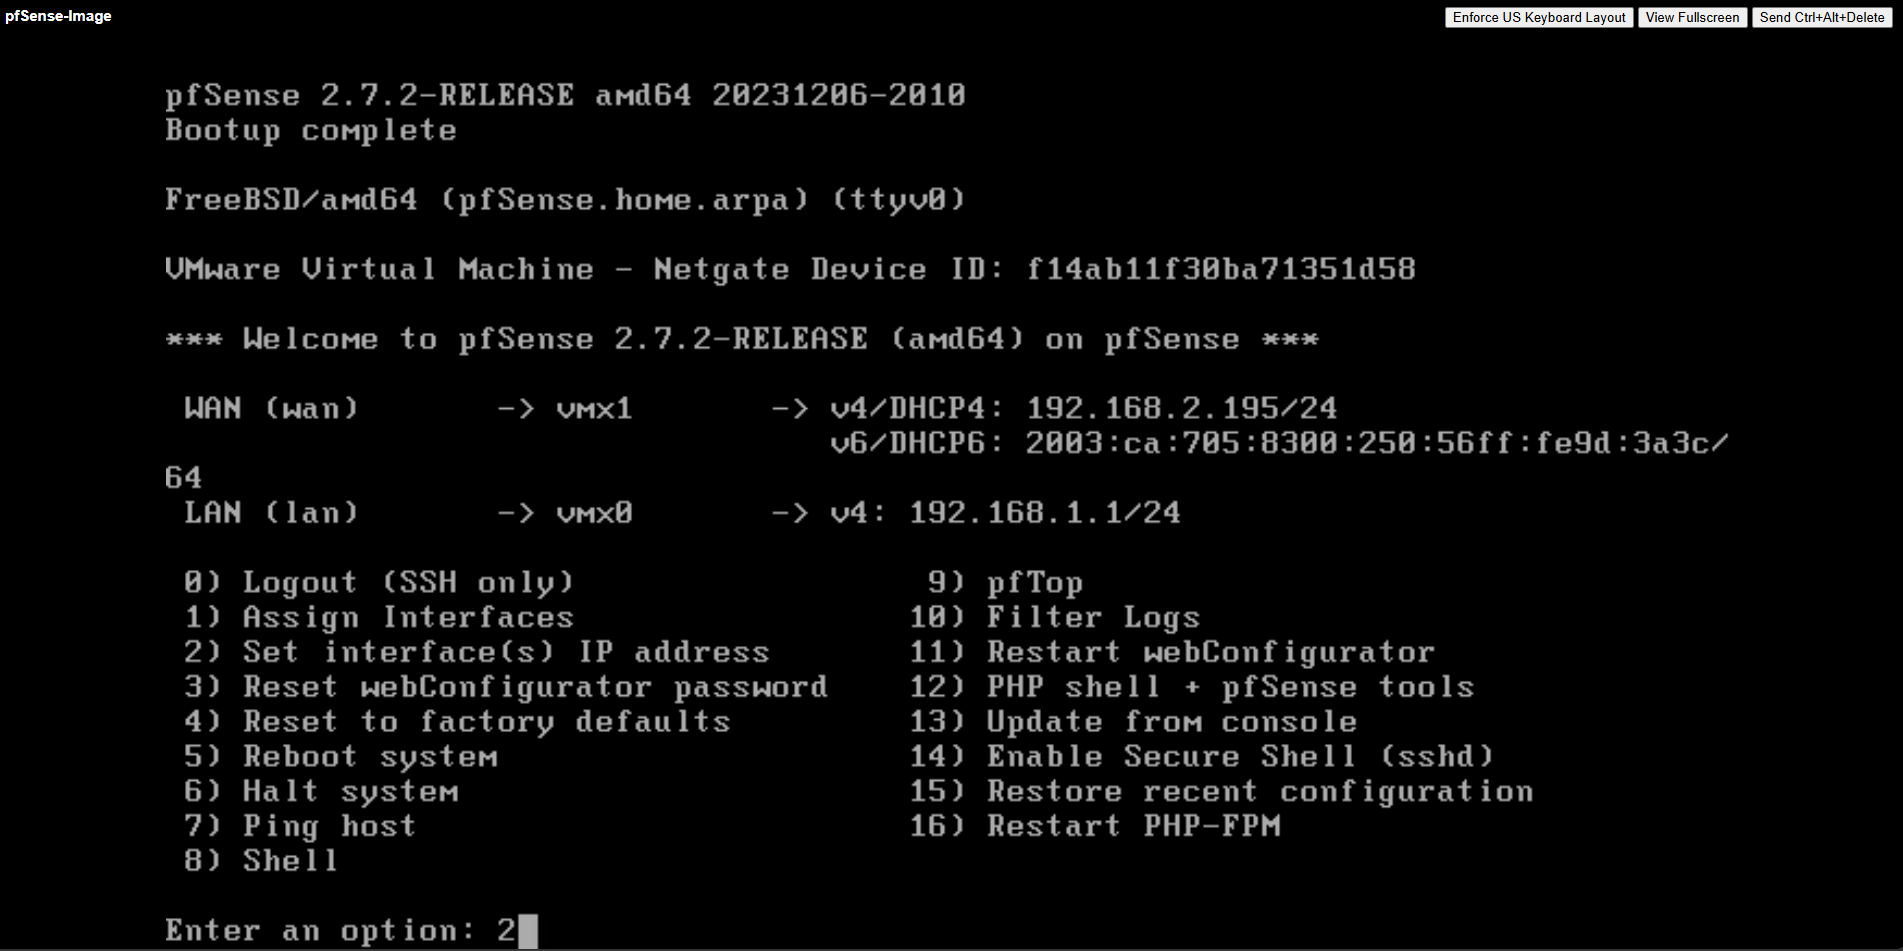
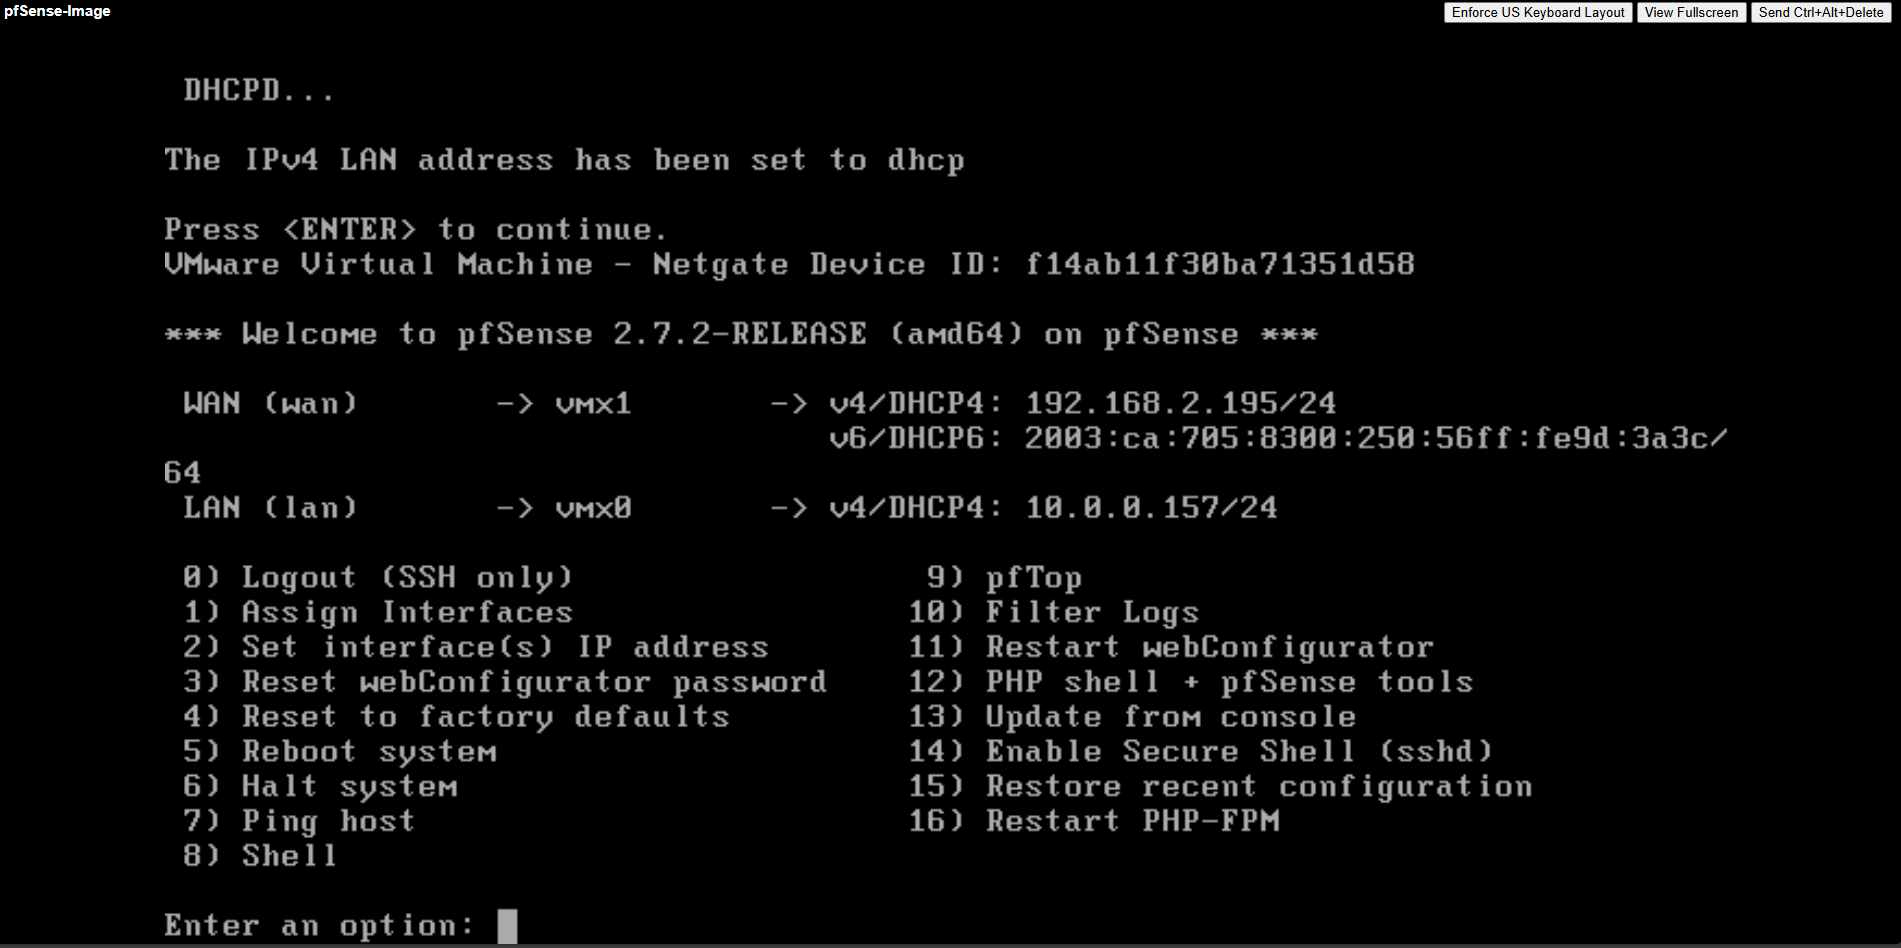
For the LAN (or Perimeter) interface I will enable DHCP to be able to connect to pfSense. Optionally we can of course also use a valid static IP address, finally we need to be able to connect to. The WAN interface I will leave on DHCP.
Select 2) to set DHCP for the LAN (or Perimeter) interface or adjusting the static IP address.
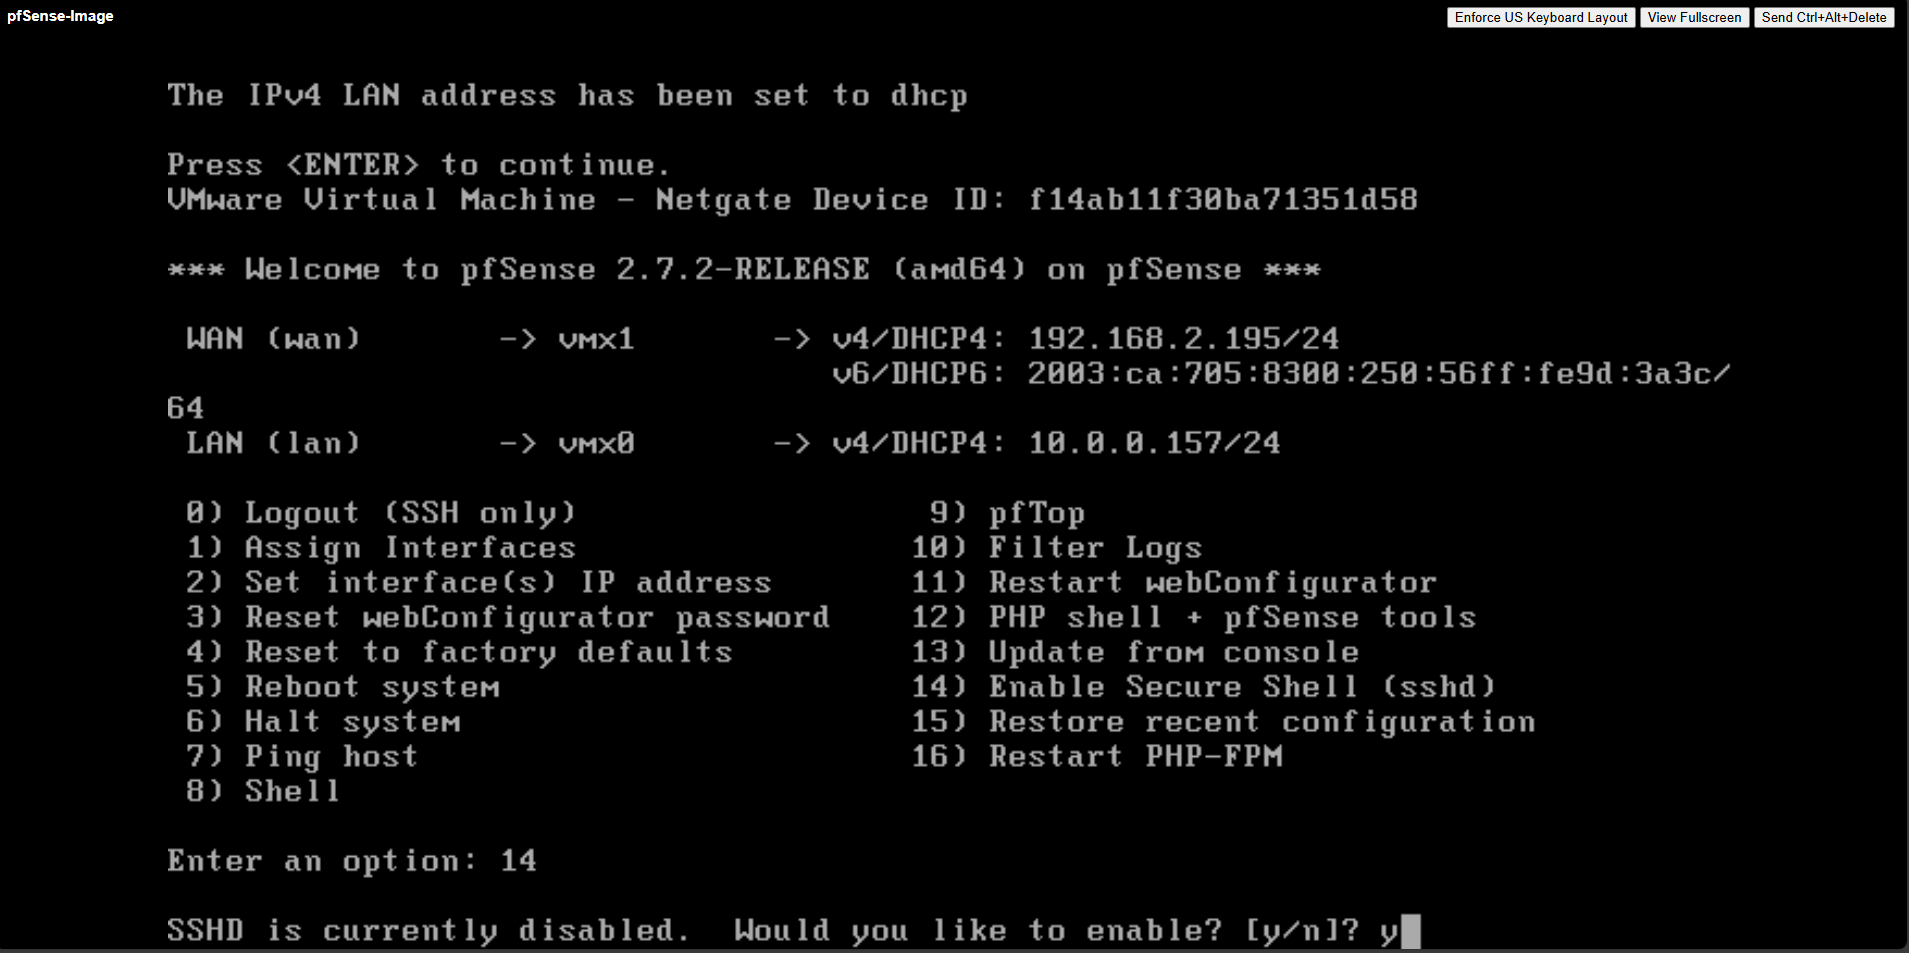
We also need to enable SSH by selecting 14) below.
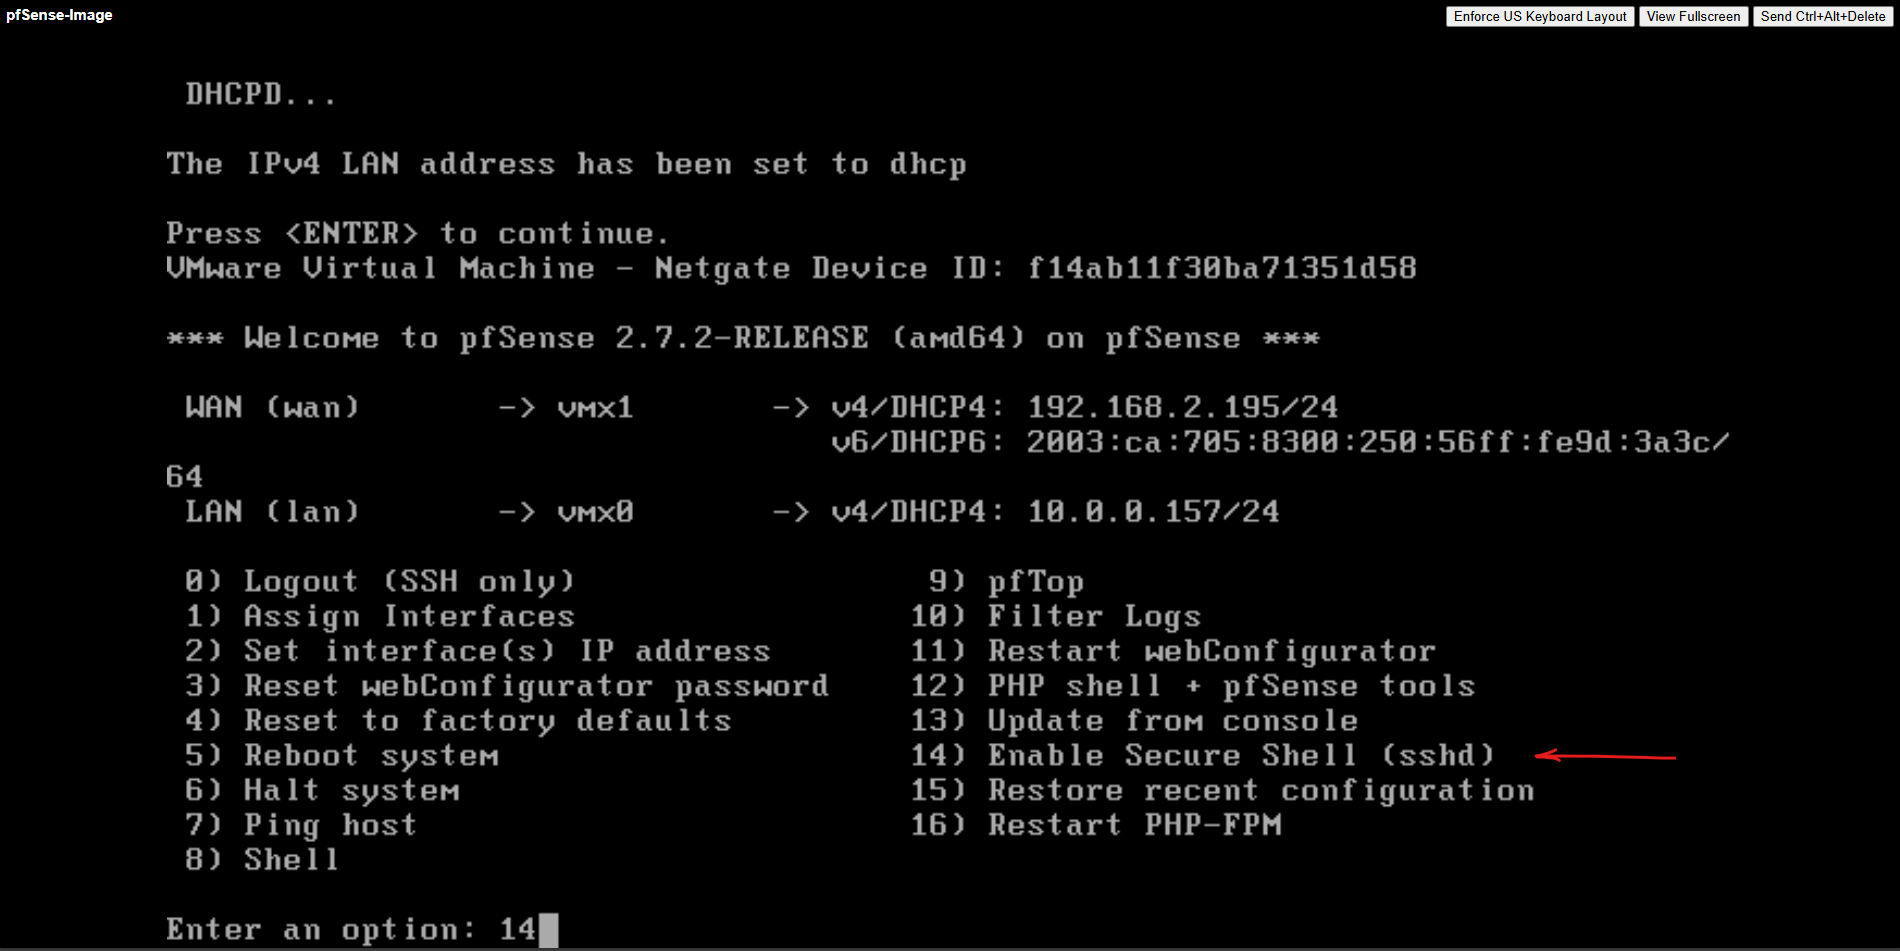
Confirm enabling SSH.
Further to later have access to pfSense’s serial console in Azure, we also need to adjust the /boot/loader.conf file.
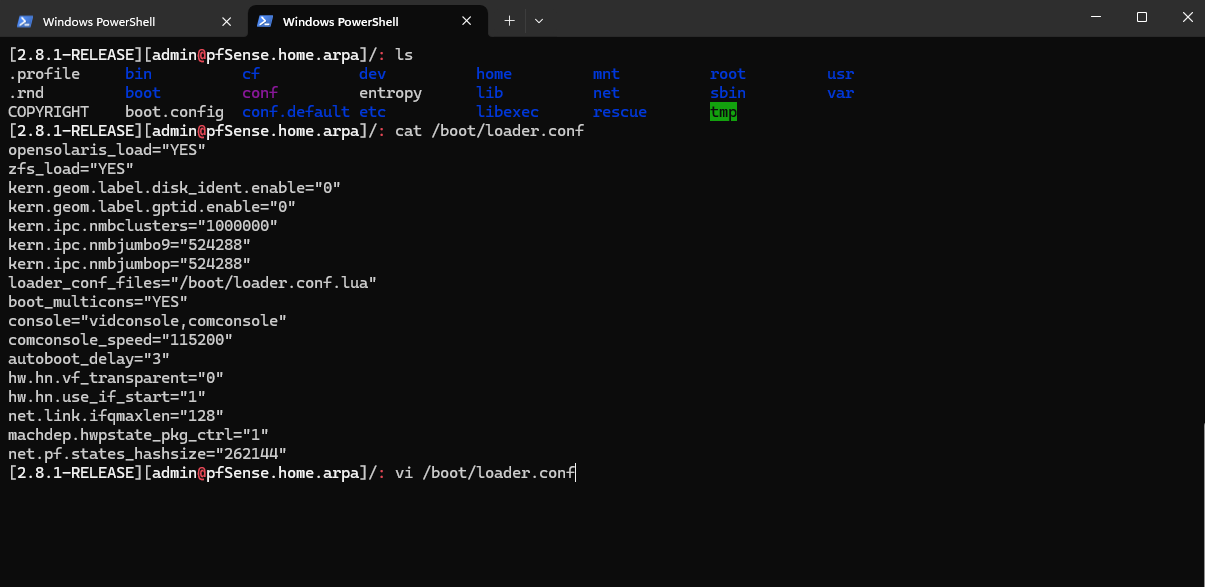
These two lines force Dual Console mode.
- pfSense tries to boot using VGA as primary
➡ Azure only supports serial primary
➡ Boot Diagnostics sees video output (Under Boot diagnostics -> Screenshot you will see pfSense stops at asking if VLANs should be set up)
➡ Serial Console freezes / loops
boot_multicons="YES"
console="vidconsole,comconsole"
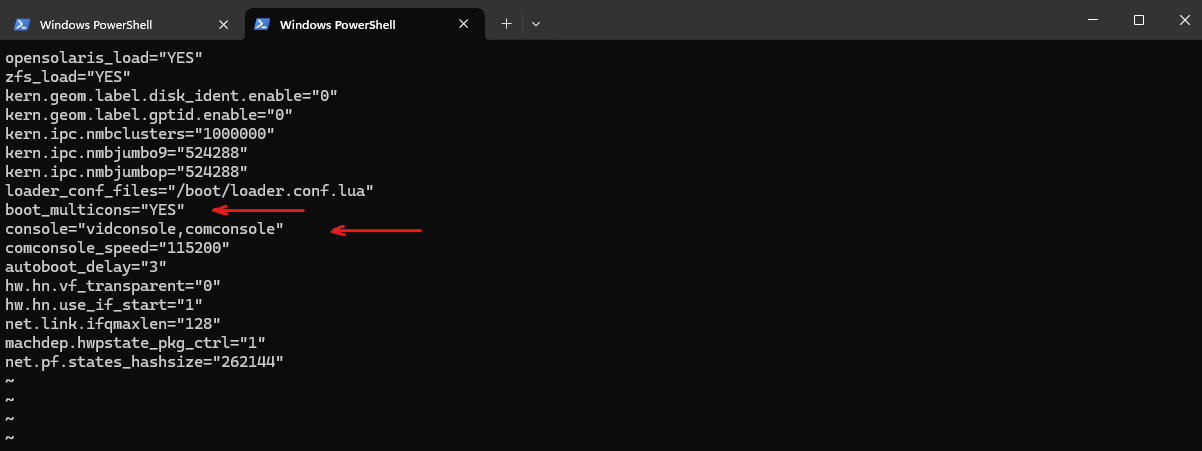
We must flip console priority to serial only.
Further we need to adjust the /boot.config file below.
-S115200 -D ← BAD (Dual console)

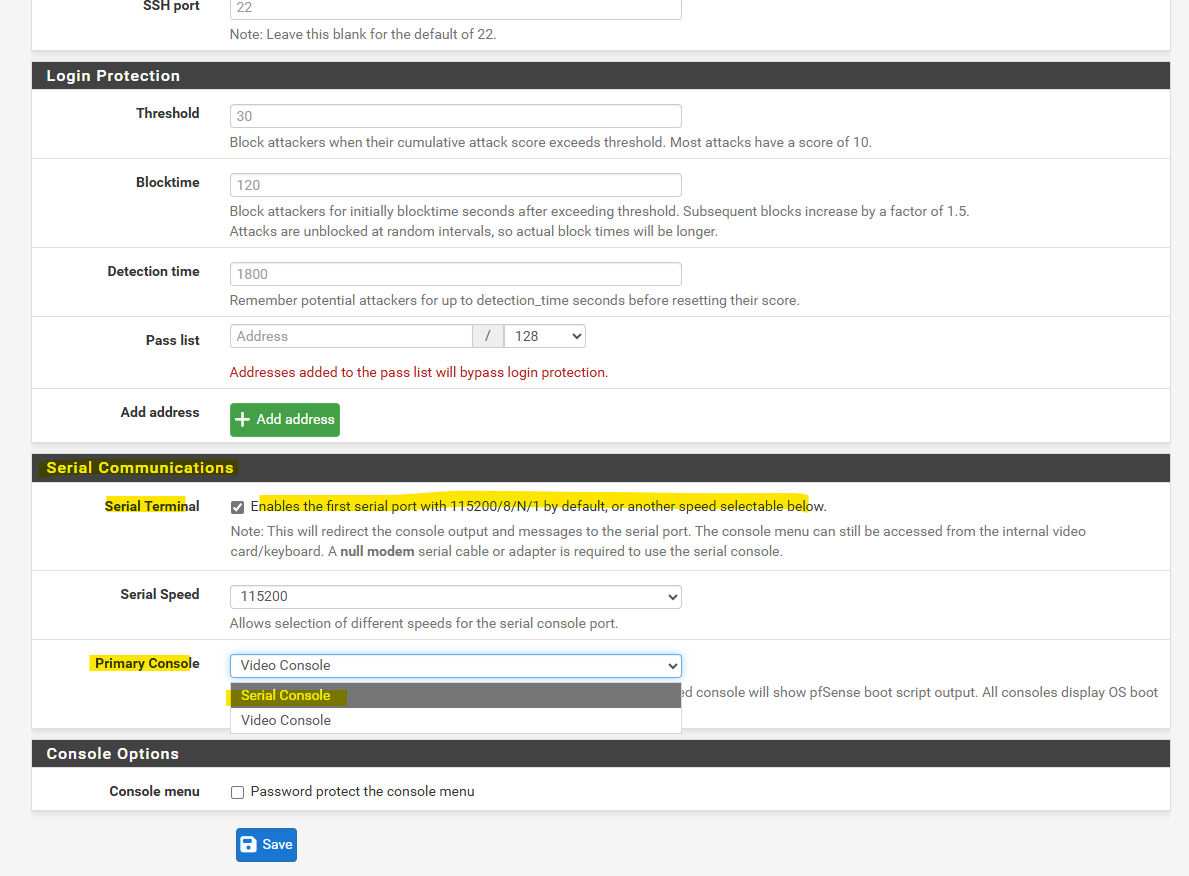
To adjust these we finally need to go to System > Advanced > Admin Access > Serial Communications and set for the primary console here Serial Console as shown on the screenshot below.
While it’s technically possible to modify /boot/loader.conf or /boot.config from the pfSense shell, these changes are not persistent on systems managed by pfSense.
On reboot, pfSense regenerates console configuration files based on settings stored in its main configuration database (
/cf/conf/config.xml) and will overwrite any manual edits.Therefore, the correct and supported way to switch to a serial-only console for Azure deployments is to change the setting in the GUI under System → Advanced → Admin Access → Serial Communications.
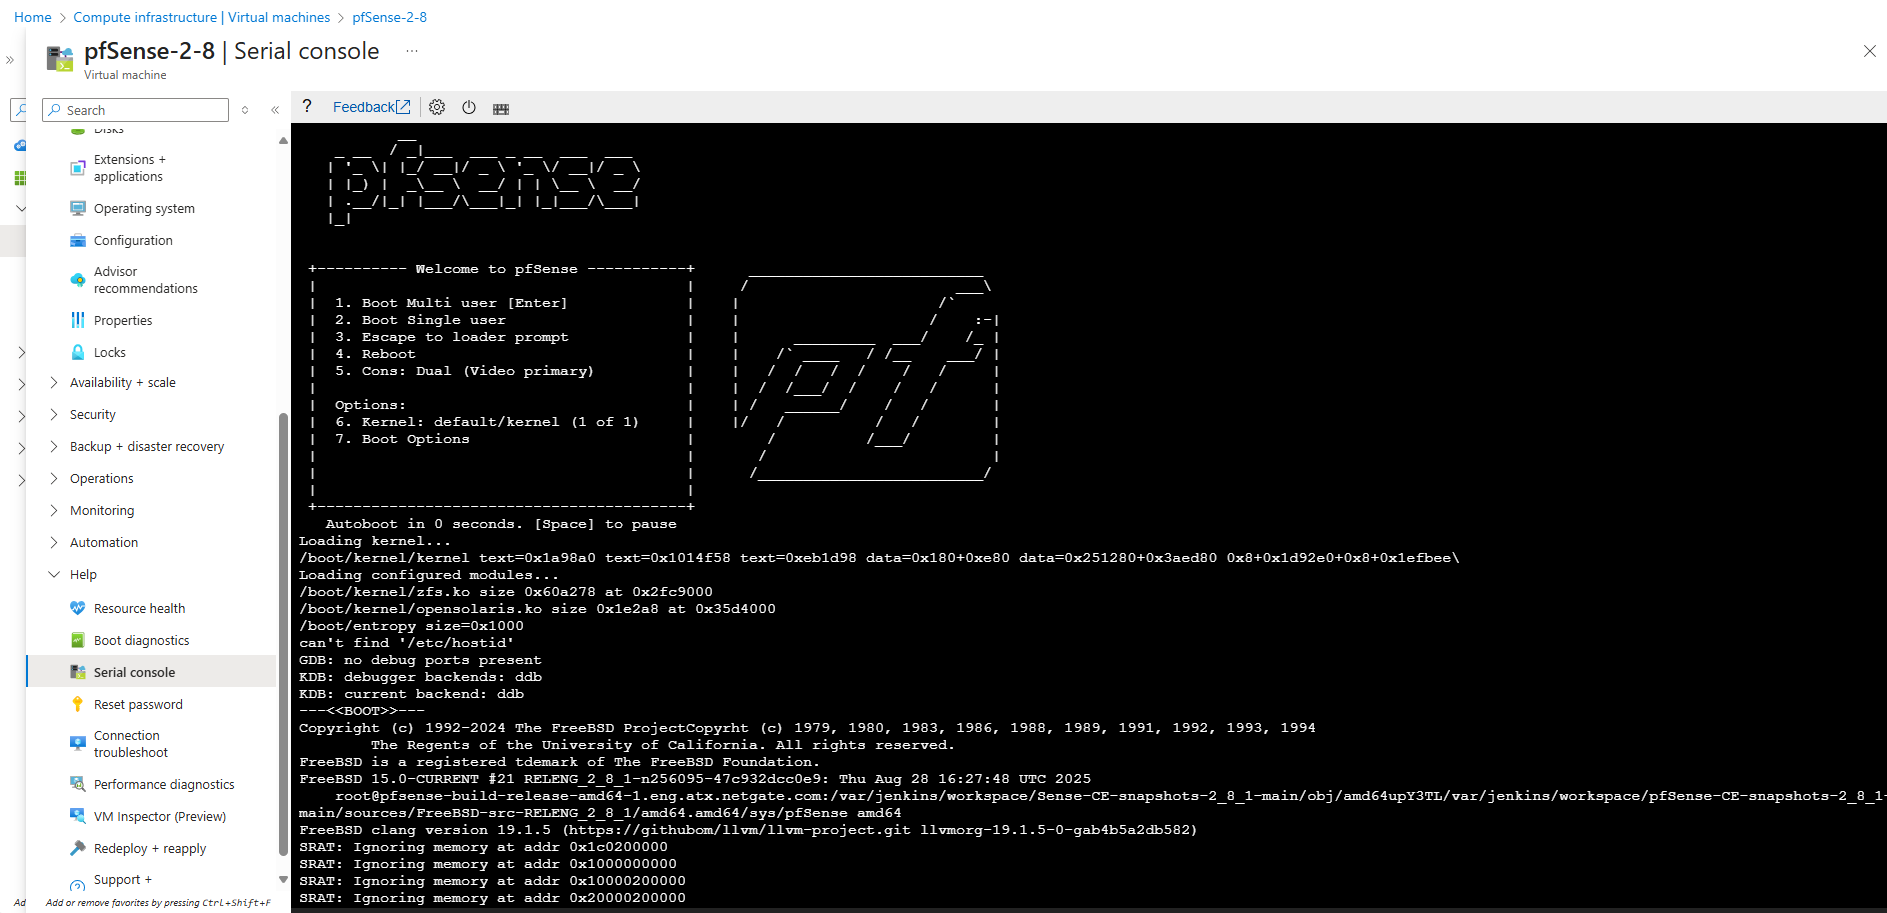
First run the initial wizard.
Also check Serial Terminal below.
When deploying pfSense on Azure, the platform only provides interactive console access through a serial port instead of traditional VGA output.
By enabling the first serial port at 115200 baud and setting the serial console as primary, pfSense sends its boot menu and firewall configuration prompts to Azure’s Serial Console, allowing full control during provisioning.
Without this setting, pfSense may boot with video output only, visible in boot diagnostics but completely unusable for configuration in Azure.
When deploying pfSense in Google Cloud like shown in my post here, we don’t need to configure these both settings to be able to access the VM instances serial console.
GCP exposes only a serial console to the VM, so pfSense automatically uses it as the primary interface. Azure presents a VGA console first, which causes pfSense to send boot output to a display you can’t access, unless you manually switch the primary console to serial as shown.
Next we should update pfSense to the latest stable version before uploading to Azure.
Update pfSense
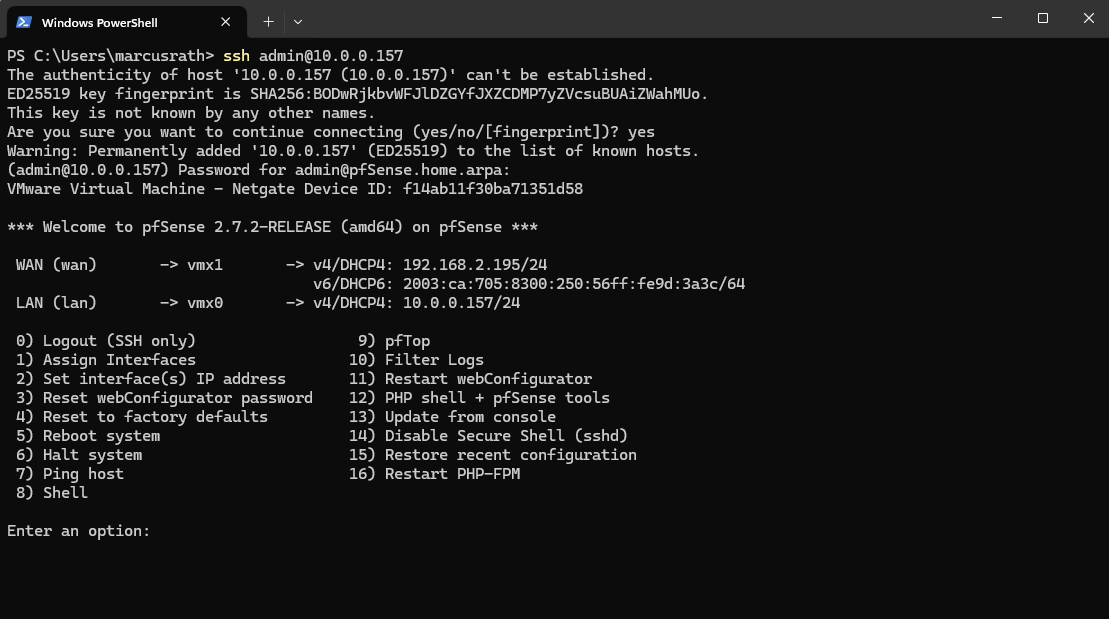
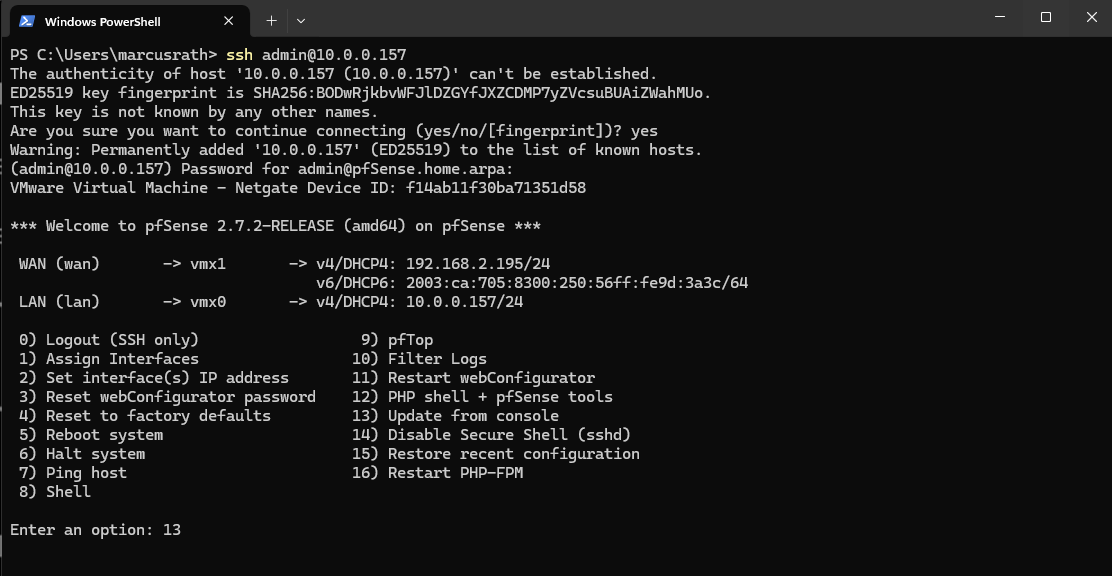
Connect to pfSense by using SSH.
The default admin password is pfsense.
Update pfSense from the console
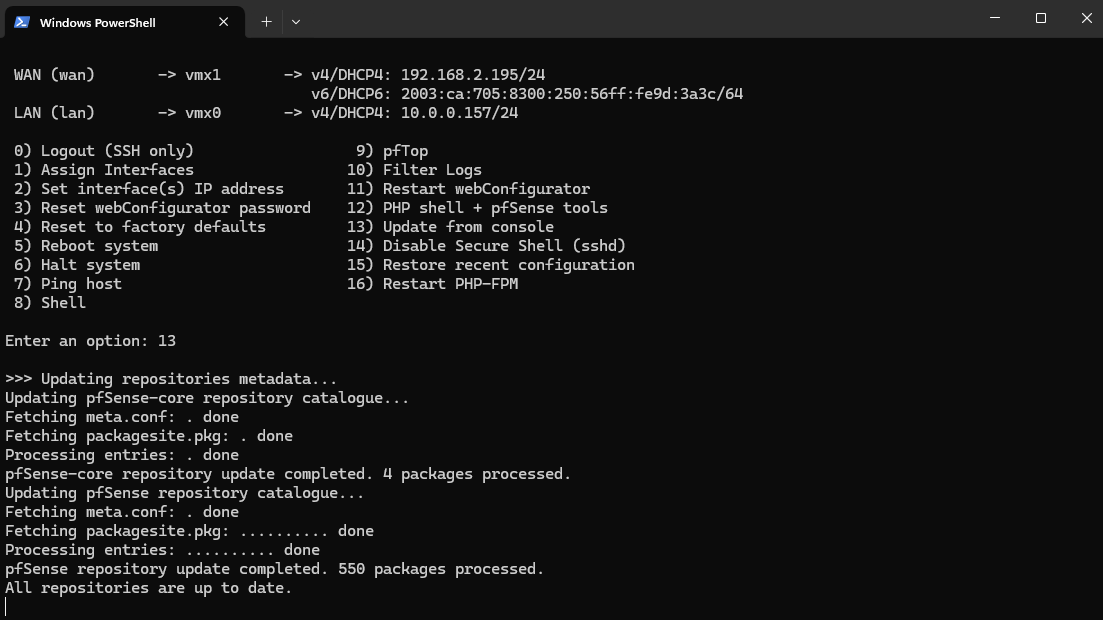
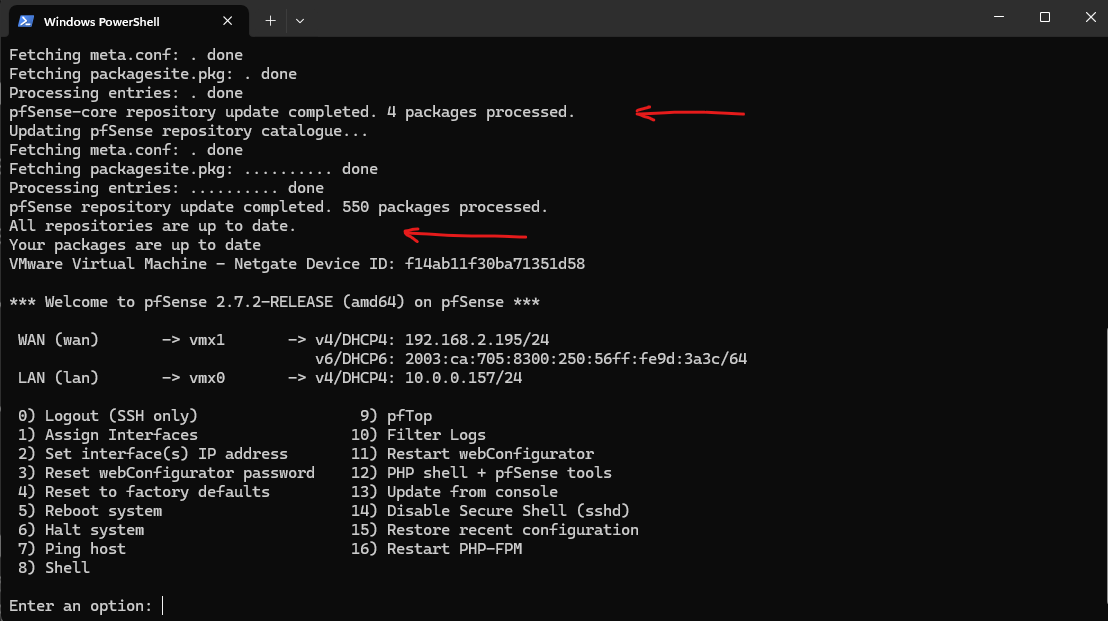
Next we will first update pfSense by selecting 13) Update from console.
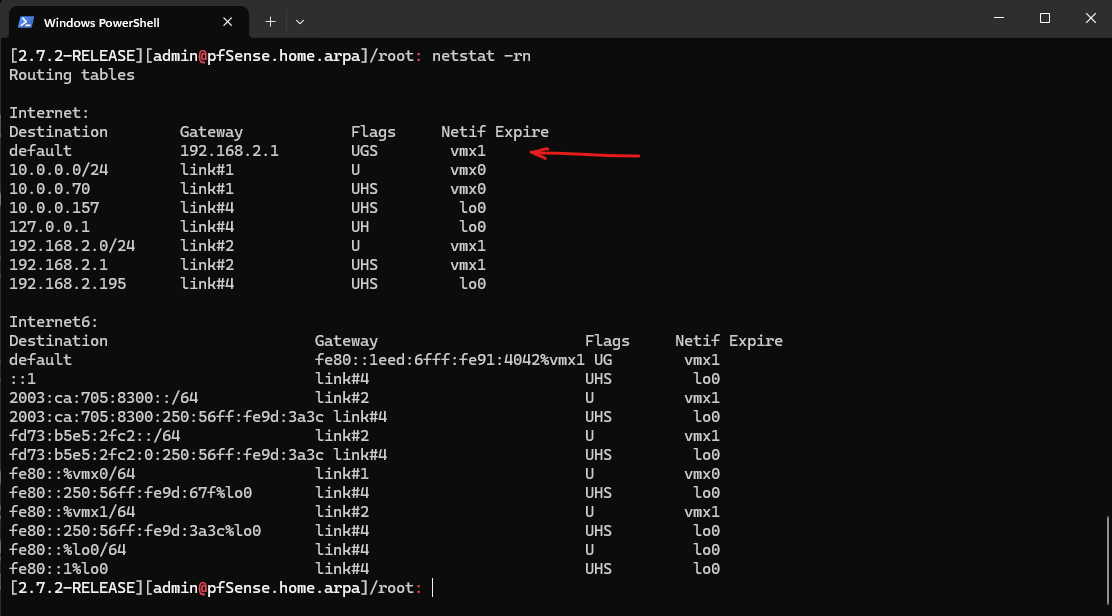
In case outbound internet access is not working, make sure you have a working default gateway, usually on the WAN interface.
netstat -rn
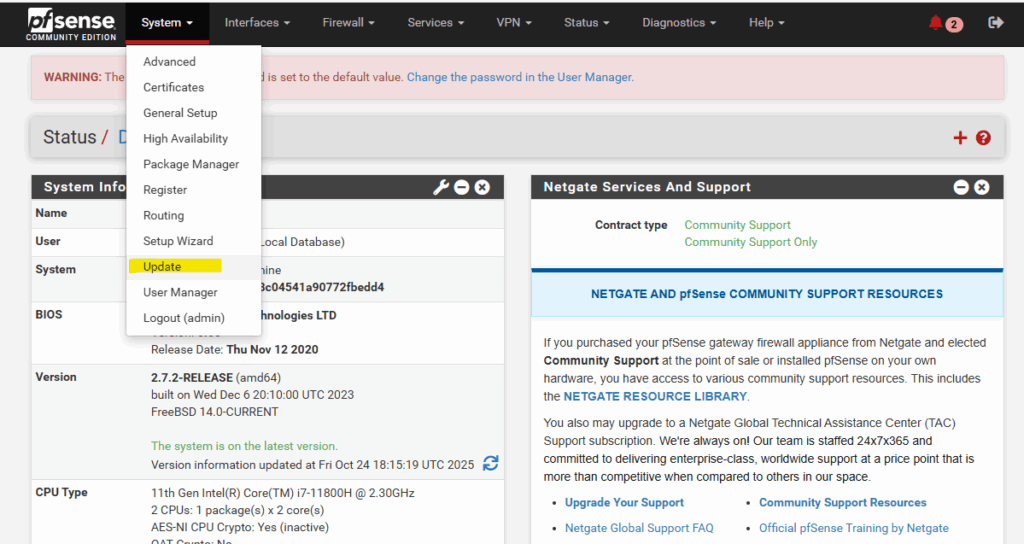
Upgrade pfSense to the latest stable Release by using the GUI
If not using the latest release for pfSense, first update to the latest stable version under System -> Update as usual.
After this we can shutdown pfSense, next we need to download the pfSense VMware disk and converting it to Azure’s VHD version.
Convert Disk to Azure’s VHD Format
We now need to convert the virtual disk we installed pfSense on to VHD format (not VHDX) by using the StarWind V2V Converter, qemu-img or Hyper-V’s converter.
Before you upload a Windows virtual machine (VM) from on-premises to Azure, you must prepare the virtual hard disk (VHD or VHDX). In case of using VMware like in my case the VMDK disk.
Azure supports both generation 1 and generation 2 VMs that are in VHD file format and that have a fixed-size disk. The maximum size allowed for the OS VHD on a generation 1 VM is 2 TB. You can validate your VHD or VHDX file by refering to this documentation.
Source: https://learn.microsoft.com/en-us/azure/virtual-machines/windows/prepare-for-upload-vhd-image
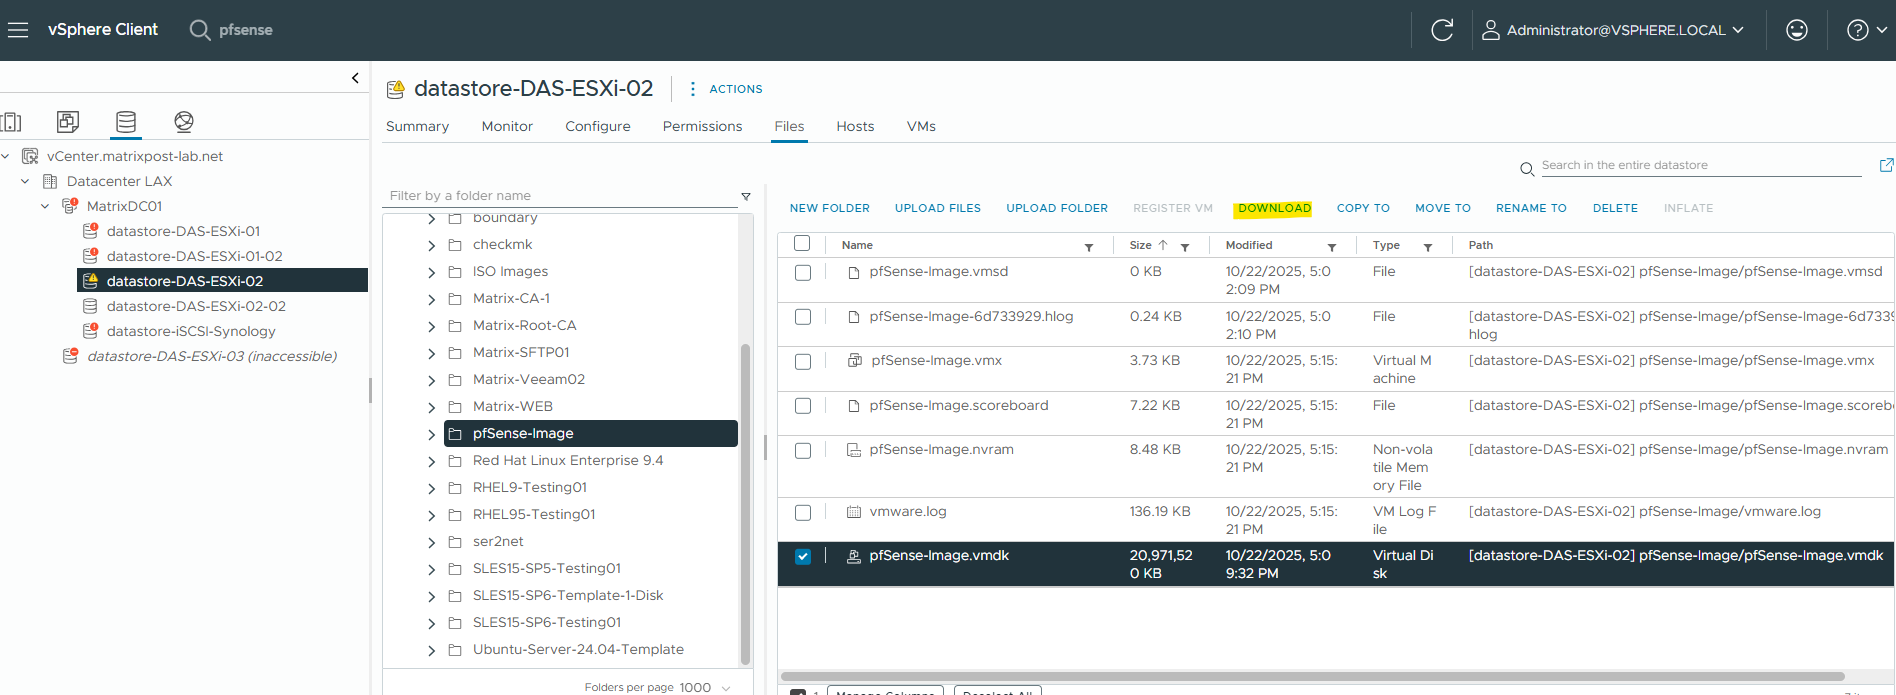
First I will download the virtual disk from vSphere.
The VHD must be fixed-size, not dynamic.
The maximum supported size for Azure upload is 2 TB.For the source we need to set as usual the descriptor file below (pfSense-Image.vmdk).
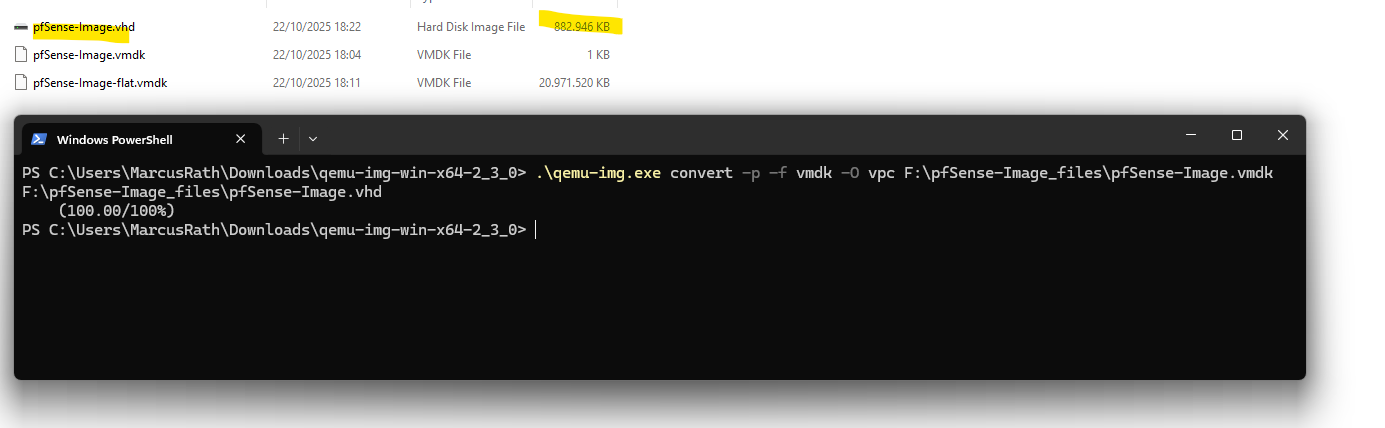
Below I was first using the older Cloudbase qemu-img 2.3.0 utility which doesn’t support fixed-size VHDs. The origin disk size is actually 20 GB but after the conversion its just around 800 MB as we can see below.
!! Note !!
Don’t use the following command and QEMU version 2.3.0, it’s just to demonstrate the issue you will run into when using.
.\qemu-img.exe convert -p -f vmdk -O vpc F:\pfSense-Image_files\pfSense-Image.vmdk F:\pfSense-Image_files\pfSense-Image.vhd
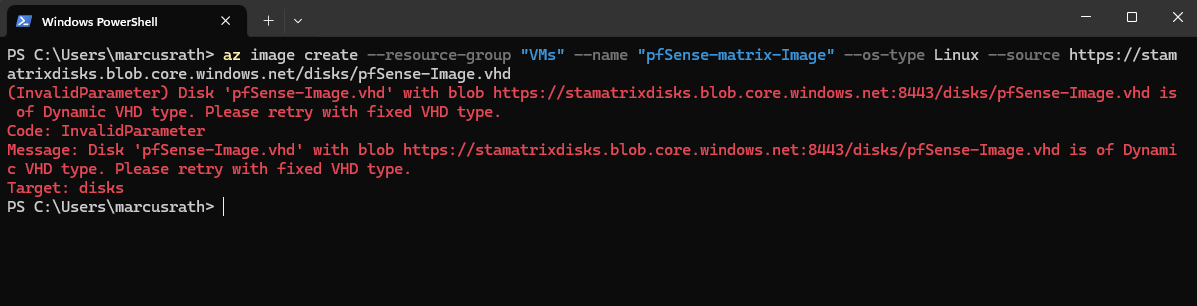
Therefore we will later run into the following error when trying to create an Azure Image by using the uploaded disk.
(InvalidParameter) Disk with blob is of Dynamic VHD type. Please retry with fixed VHD type.
We need to use a maintained build from the Stefan Weil QEMU for Windows project. This one supports modern conversion options.
QEMU Binaries for Windows (64 bit)
https://qemu.weilnetz.de/w64/The older Cloudbase qemu-img 2.3.0 utility was originally built for OpenStack and Hyper-V environments, but it’s outdated and often creates dynamic VHDs that Azure rejects.
For reliable conversions today, use the actively maintained Stefan Weil “QEMU for Windows” builds, which fully support modern disk formats and the -o subformat=fixed option required for Azure-compatible fixed-size VHDs.
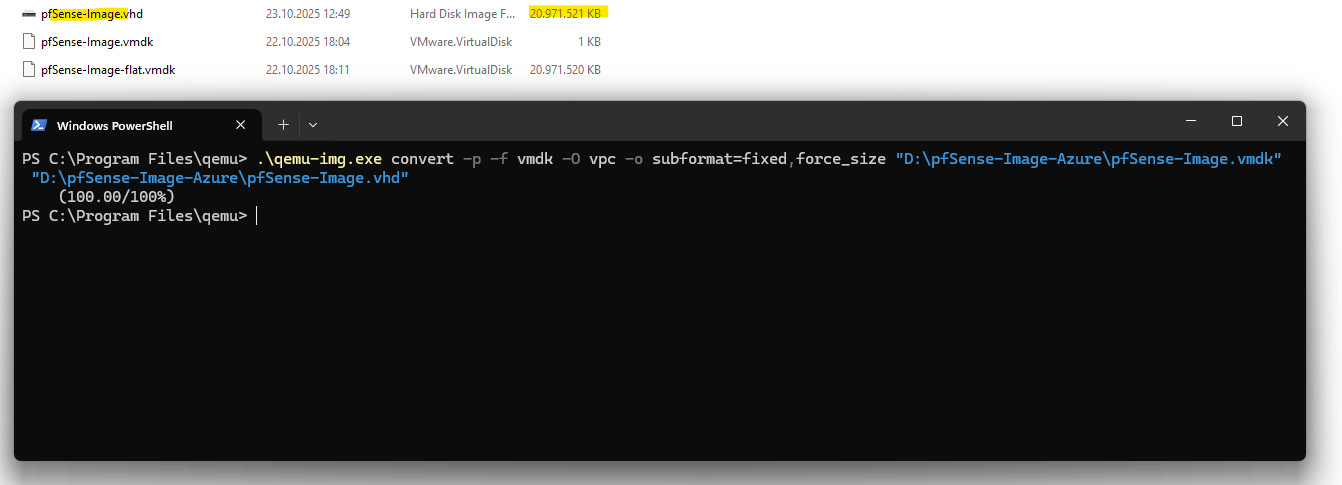
We need to run this command with our new qemu-img to use a fixed size and also to round the size up to the next full MB.
All VHDs on Azure must have a virtual size aligned to 1 MB (1024 x 1024 bytes). When you’re converting from a raw disk to VHD, ensure that the raw disk size is a multiple of 1 MB before conversion
This strict alignment requirement ensures the disk layout matches Azure’s storage block boundaries, preventing corruption or provisioning errors during upload.
Using the latest QEMU version and its force_size flag rounds the virtual disk capacity to a clean MB boundary, eliminating the tiny fractional offsets that often cause Azure’s “unsupported virtual size” errors.
.\qemu-img.exe convert -p -f vmdk -O vpc -o subformat=fixed,force_size "D:\pfSense-Image-Azure\pfSense-Image.vmdk" "D:\pfSense-Image-Azure\pfSense-Image.vhd"
Upload the VHD Disk to Azure (Storage Account)
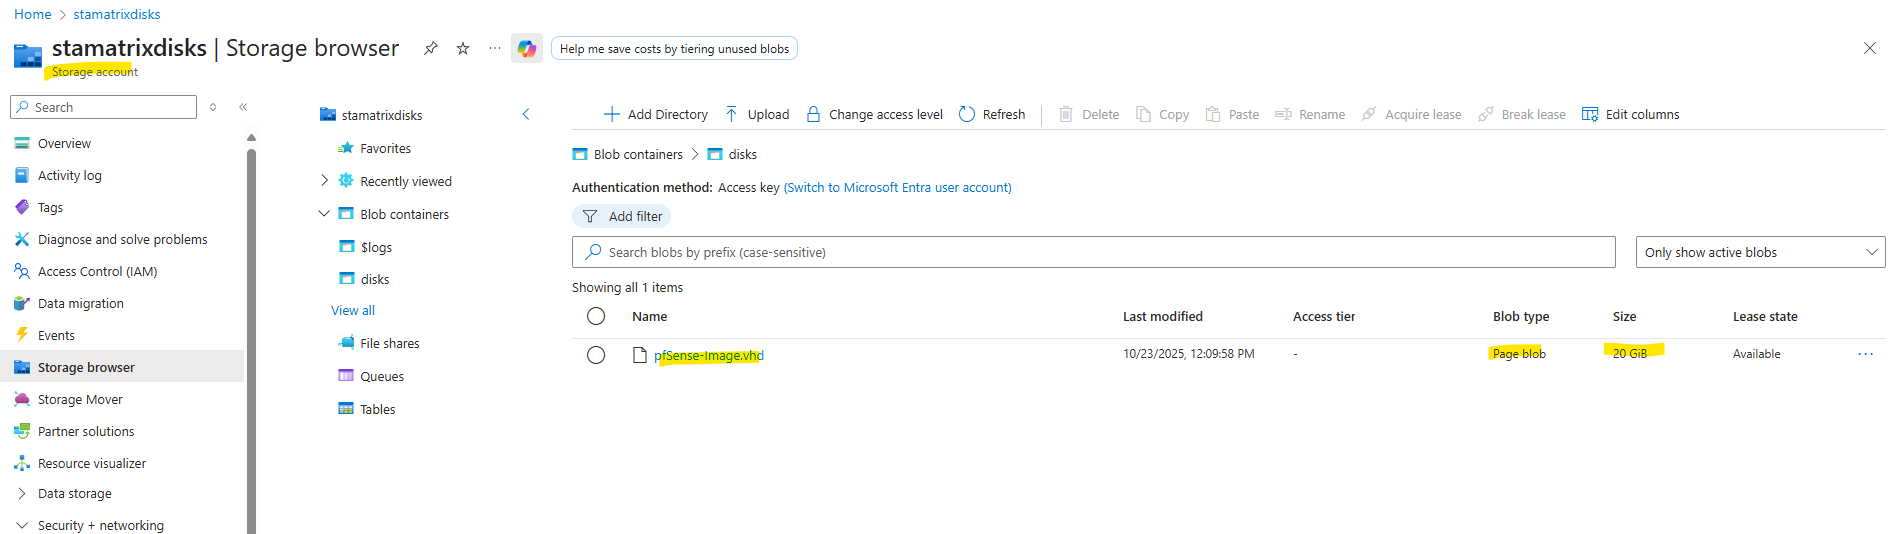
Next we’ll upload the prepared VHD file to an Azure Storage Account container, where it will serve as the source for creating either a managed Linux OS Disk (shown below) or a custom image.
Using AzCopy with a properly scoped SAS token ensures a fast, reliable, and resumable transfer, far more efficient than uploading through the browser.
Generate a SAS Token we use finally use to access the blob storage container within our storage account.
A shared access signature (SAS) is a URI that grants restricted access rights to Azure Storage resources.
You can provide a shared access signature to clients who should not be trusted with your storage account key but whom you wish to delegate access to certain storage account resources. By distributing a shared access signature URI to these clients, you grant them access to a resource for a specified period of time.
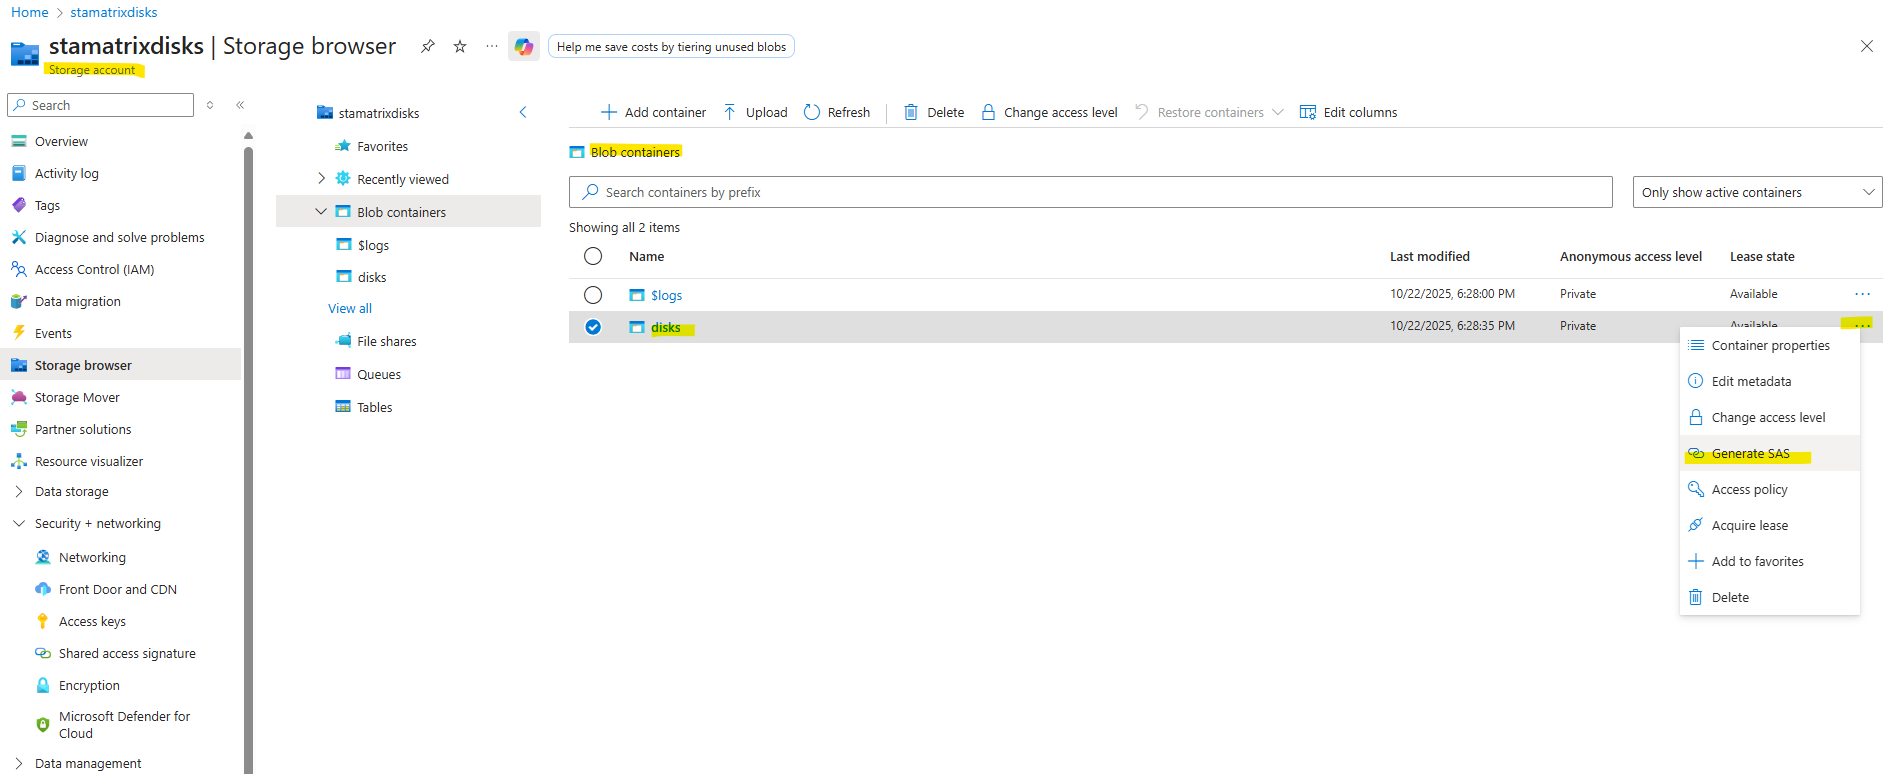
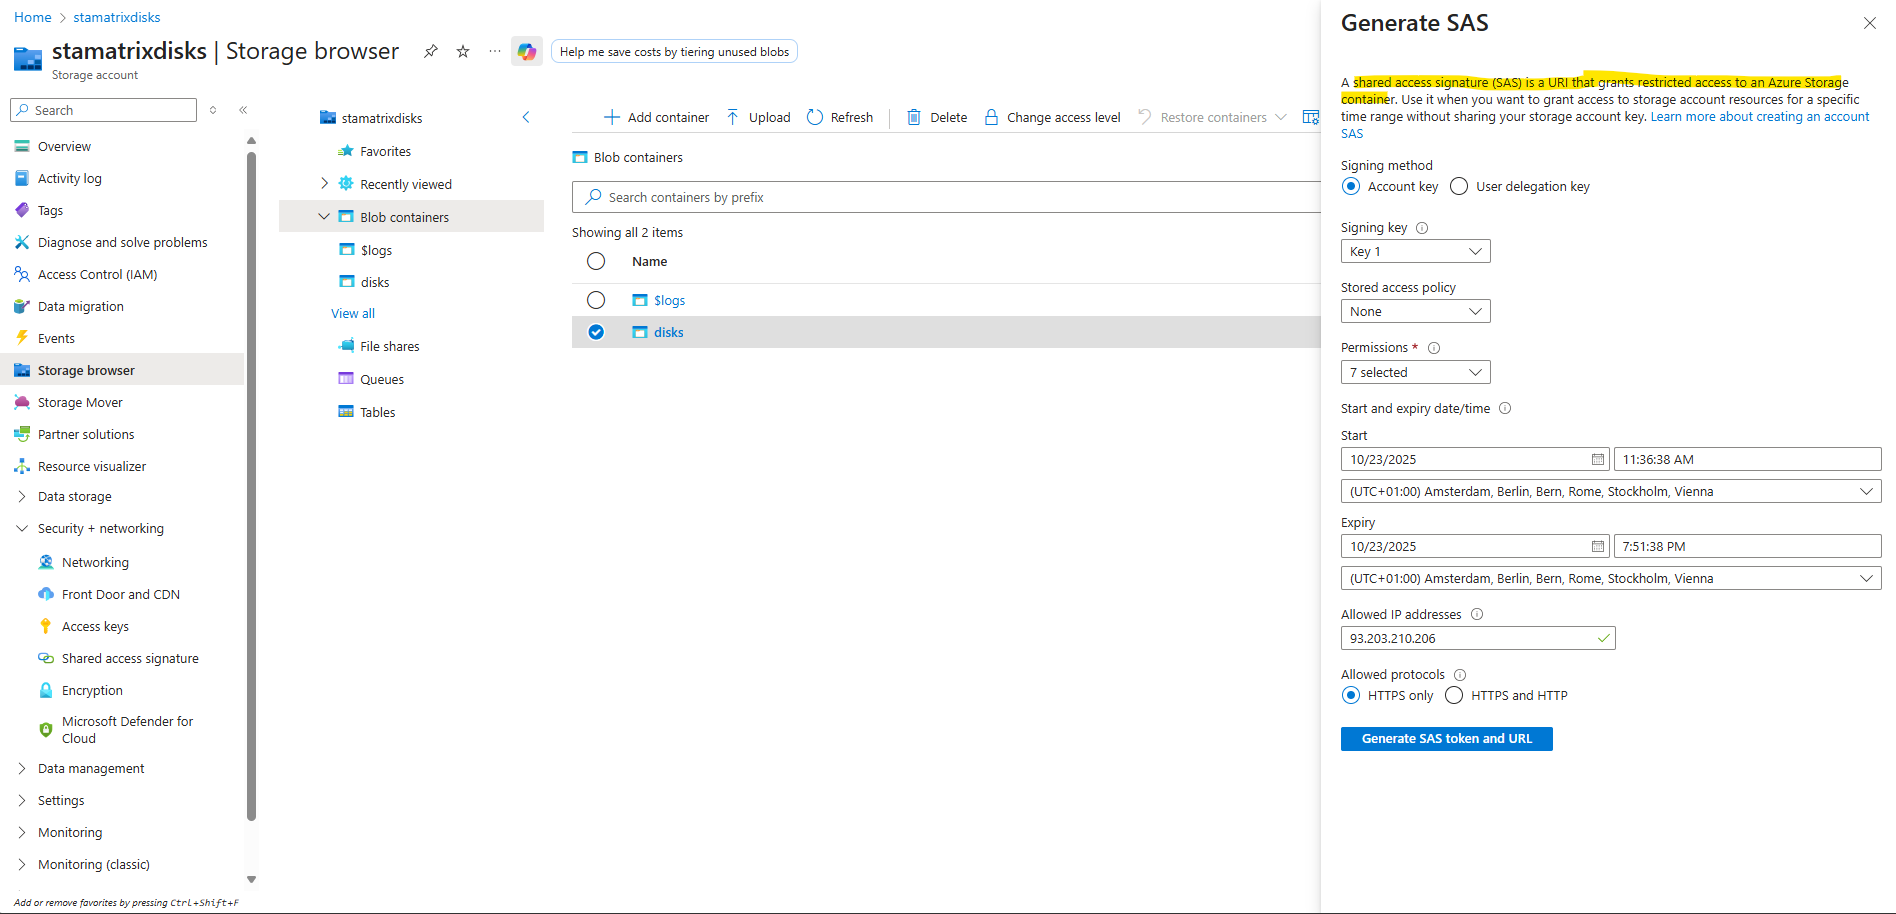
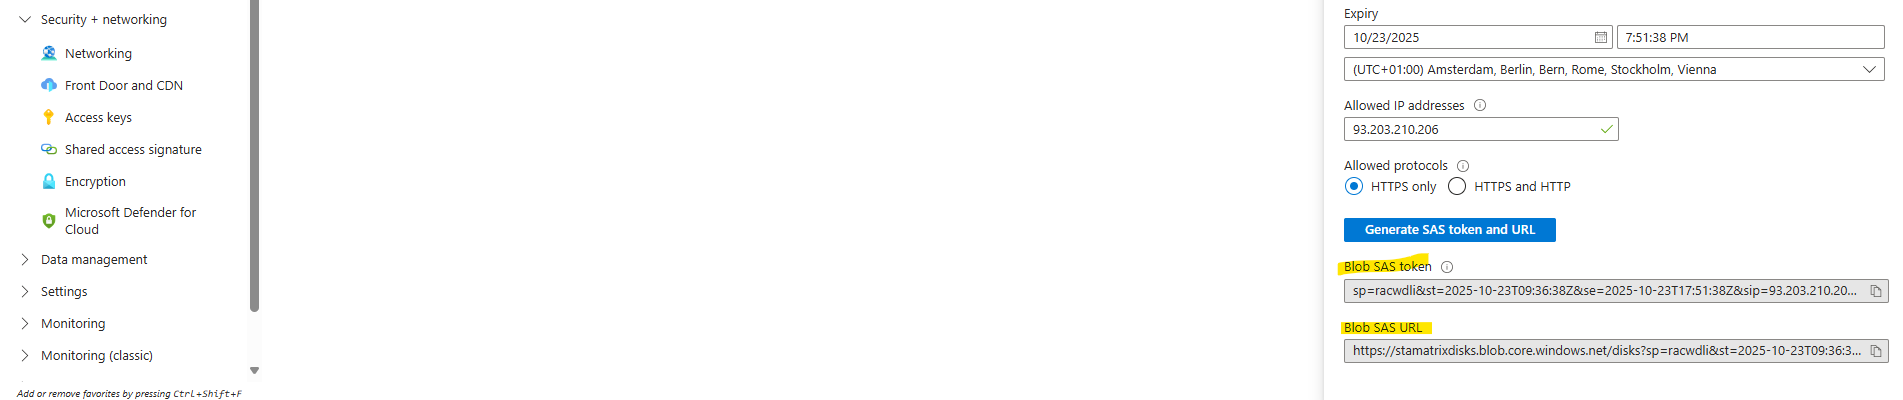
Click on Generate SAS token and URL.
When we upload a VHD to an Azure Blob Storage container using a SAS (Shared Access Signature), we need to grant the SAS at least the following permissions: Read, Add, Create, Write and List.
# Blob SAS token
sp=racwdli&st=2025-10-23T09:36:38Z&se=2025-10-23T17:51:38Z&sip=93.203.210.206&spr=https&sv=2024-11-04&sr=c&sig=pQe66BsUX0M%2F47t7QqyxUn5EL4WkT%2BJX3gZ9EmAn5fQ%3D

# Blob SAS URL
https://stamatrixdisks.blob.core.windows.net/disks?sp=racwdli&st=2025-10-23T09:36:38Z&se=2025-10-23T17:51:38Z&sip=93.203.210.206&spr=https&sv=2024-11-04&sr=c&sig=pQe66BsUX0M%2F47t7QqyxUn5EL4WkT%2BJX3gZ9EmAn5fQ%3D
AzCopy achieves much higher transfer speeds than a browser or PowerShell upload because it splits large files into chunks and uploads them in parallel across multiple TCP connections.
It also uses asynchronous I/O and aggressive buffering, keeping your connection fully saturated instead of waiting between blocks.
The result is that even on modest connections, AzCopy can reach several times your typical single-stream upload rate.
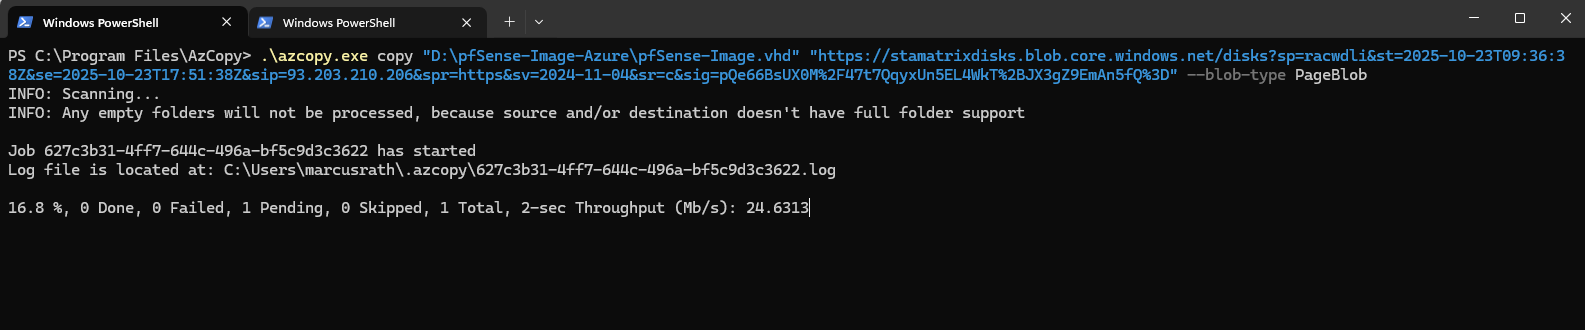
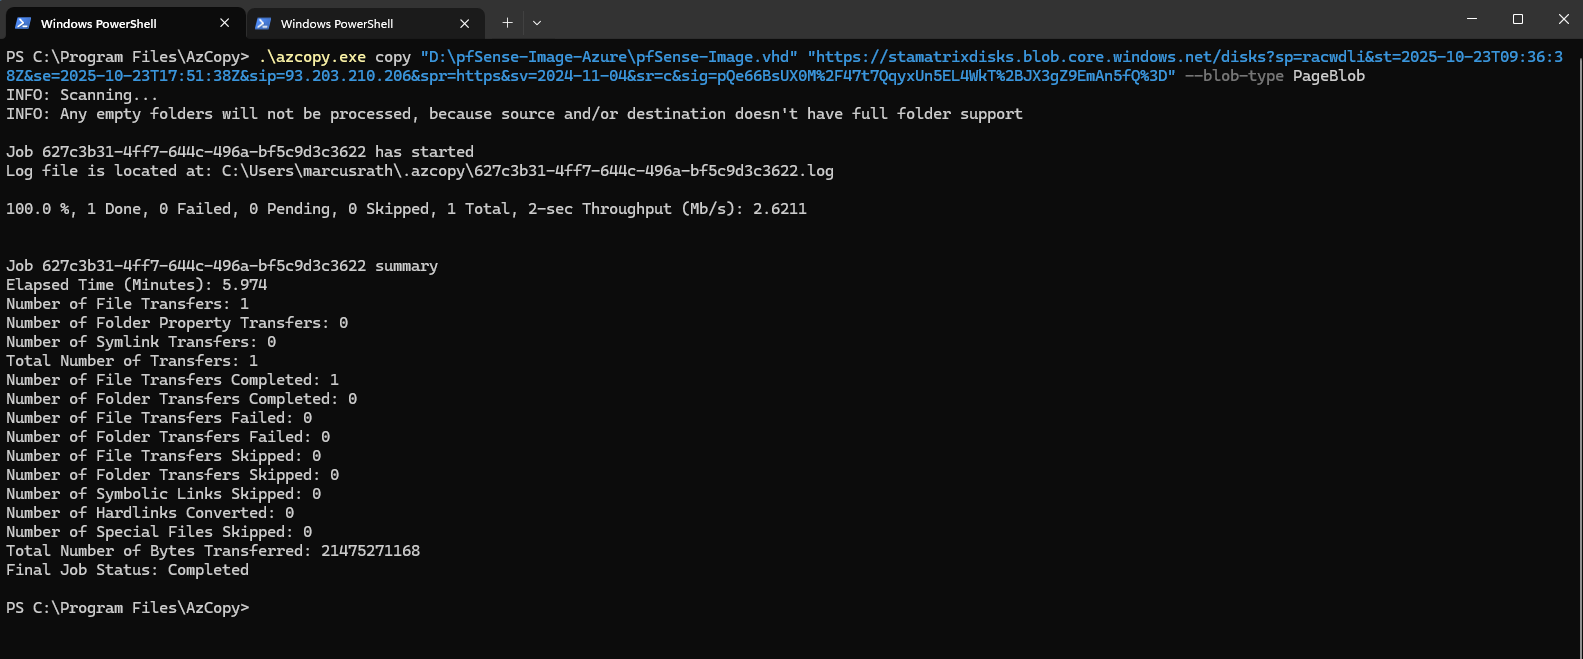
We can download AzCopy from here https://learn.microsoft.com/en-us/azure/storage/common/storage-use-azcopy-v10?tabs=dnf#download-the-azcopy-portable-binary.
 azcopy copy "<source blob>" "https://<storageaccount>.blob.core.windows.net/<directory> <blob><SAS_TOKEN>" --blob-type PageBlob

.\azcopy.exe copy "D:\pfSense-Image-Azure\pfSense-Image.vhd" "https://stamatrixdisks.blob.core.windows.net/disks?sp=racwdli&st=2025-10-23T09:36:38Z&se=2025-10-23T17:51:38Z&sip=93.203.210.206&spr=https&sv=2024-11-04&sr=c&sig=pQe66BsUX0M%2F47t7QqyxUn5EL4WkT%2BJX3gZ9EmAn5fQ%3D" --blob-type PageBlob
Next we will create a managed Linux OS Disk from our uploaded VHD disk which we later attach to a newly created lightweight VM “skeleton”.
Set up pfSense VM in Azure
When deploying a custom pfSense appliance in Azure, the most reliable method is to directly attach the uploaded VHD as a managed OS disk instead of creating a custom image and letting Azure provision the VM.
pfSense isn’t a Linux system and does not support Azure’s full provisioning and guest-agent workflows, which causes deployments from custom images to hang and eventually fail with OSProvisioningTimedOut.
By attaching the disk directly, we bypass Azure’s provisioning expectations entirely, allowing pfSense to boot immediately and operate cleanly without relying on unsupported agent extensions.
Creating a Managed Linux OS Disk from our uploaded VHD Disk
After uploading the pfSense VHD into a Storage Account, the next step is to convert it into a managed Linux OS disk so Azure can use it as a bootable resource.
This step registers the disk with the compute fabric and makes it possible to attach it directly to a new VM without triggering Azure’s standard OS provisioning workflow.
We must first upload the VHD into a container inside a Storage Account. (e.g., /vhds/pfSense.vhd)
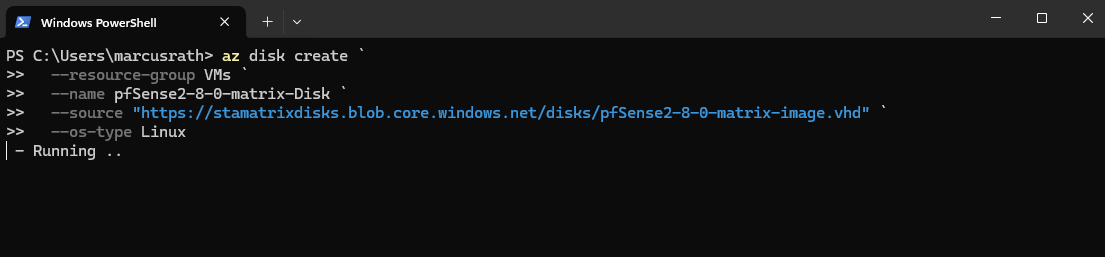
Then convert that blob into a Managed Disk:
az disk create `
  --resource-group VMs `
  --name pfSense2-8-0-matrix-Disk `
  --source "https://stamatrixdisks.blob.core.windows.net/disks/pfSense2-8-0-matrix-image.vhd" `
  --os-type Linux
Next we will create a new lightweight VM “skeleton” and attaching our pfSense disk (managed Linux OS Disk) to.
A skeleton VM in Azure is simply a VM object created with minimal configuration and no pre-installed OS image.
It provides the compute, networking, and hardware profile, and then you attach your own OS disk afterward, making it ideal for custom or imported appliances that can’t go through Azure’s standard provisioning workflow.
Attach it to a VM Skeleton
Once the managed OS disk is created, we deploy a lightweight VM “skeleton” and simply attach the pfSense disk as its boot drive.
This avoids Azure’s provisioning pipeline entirely, ensuring pfSense boots immediately with full network control instead of waiting for unsupported agent extensions to succeed.
Before running the final az vm create command, we must first create both network interfaces, the WAN and LAN (or Perimeter) interfaces, and assign on the WAN NIC a static public IPv4 address.
Azure requires attaching all NICs up-front at VM creation time, so the pfSense appliance comes online with proper routing and reachable management access from the very first boot.
!! Note !!
By enabling--ip-forwarding truebelow, Azure allows pfSense to forward traffic between subnets. Without this flag, Azure enforces standard host behavior, only local traffic works, actual routing is blocked.If we forget to enable
--ip-forwarding true, pfSense will not be allowed to forward any traffic between interfaces, effectively breaking its core function as a firewall and router in Azure.More about IP forwarding here https://learn.microsoft.com/en-us/azure/virtual-network/virtual-network-network-interface?tabs=azure-portal#enable-or-disable-ip-forwarding.
In GCP, we enable IP forwarding at the VM level, not per NIC, we can turn it on in the VM settings as shown in my post about deploying pfSense in Google Cloud here.
# Create Public IP for pfSense WAN
az network public-ip create `
  --resource-group rsg-matrix-weu-hub `
  --name pfSense-WAN-PIP `
  --sku Standard `
  --allocation-method Static `
  --version IPv4

# Create WAN NIC (static private IP + attach Public IP)
az network nic create `
  --resource-group rsg-matrix-weu-hub `
  --name pfSense-WAN-nic `
  --vnet-name VNet-Hub `
  --subnet WAN `
  --private-ip-address 172.17.250.250 `
  --ip-forwarding true `
  --public-ip-address pfSense-WAN-PIP `
  --private-ip-address-version IPv4

# Create LAN/Perimeter NIC (internal only)
az network nic create `
  --resource-group rsg-matrix-weu-hub `
  --name pfSense-LAN-nic `
  --vnet-name VNet-Hub `
  --subnet LAN `
  --private-ip-address 172.17.10.250 `
  --ip-forwarding true `
  --private-ip-address-version IPv4
With both NICs prepared, WAN with its static public IPv4 and LAN (or Perimeter) for internal routing, we now have everything required to spin up the pfSense VM by attaching the managed OS disk.
Azure always designates the first attached network interface as the primary NIC, which is used for platform communication and the public IP.
More about here https://learn.microsoft.com/en-us/azure/virtual-network/virtual-network-network-interface-vm.
For pfSense, this should always be the WAN NIC, so deployment, internet reachability, and management features work properly.
# Create the VM and attach our previously created managed OS disk and NICs
az vm create `
  --resource-group VMs `
  --name pfSense-Azure `
  --location westeurope `
  --attach-os-disk <managed disk name> `
  --os-type Linux `
  --size Standard_B2s `
  --nics <WAN_nic_id> <LAN/Perimeter_nic_id>


# In my case
# Get NIC resource IDs dynamically
$nicWAN = az network nic show `
    --resource-group rsg-matrix-weu-hub `
    --name pfSense-WAN-nic `
    --query id -o tsv

$nicLAN = az network nic show `
    --resource-group rsg-matrix-weu-hub `
    --name pfSense-LAN-nic `
    --query id -o tsv

az vm create `
  --resource-group VMs `
  --name pfSense-Azure `
  --location westeurope `
  --attach-os-disk pfSense2-8-0-matrix-Disk `
  --os-type Linux `
  --size Standard_B2s `
  --nics $nicWAN $nicLAN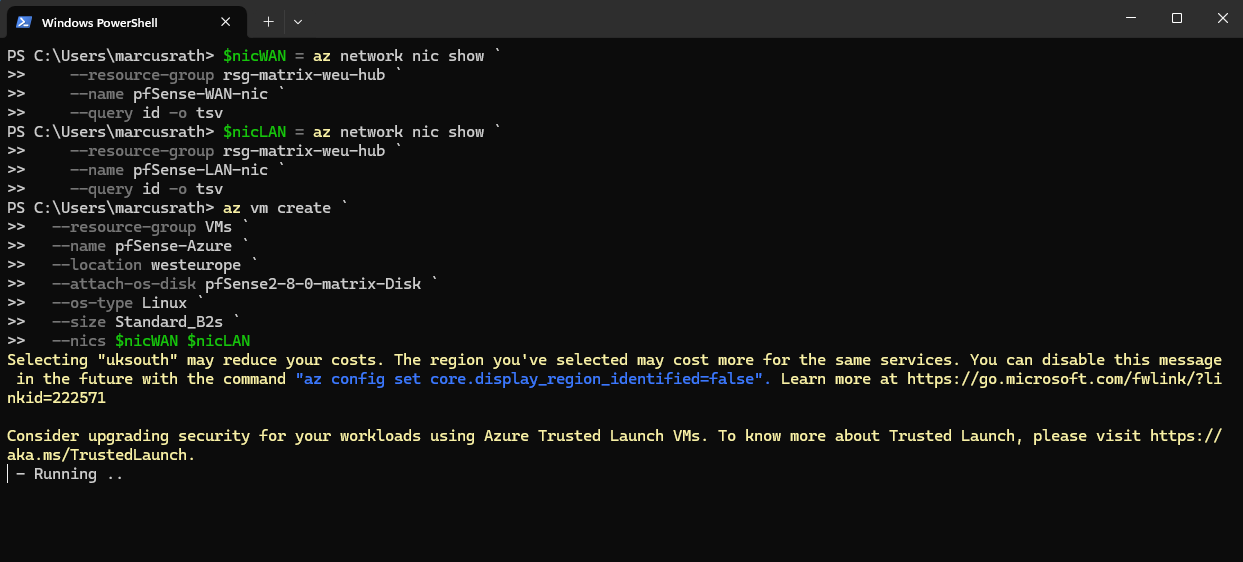
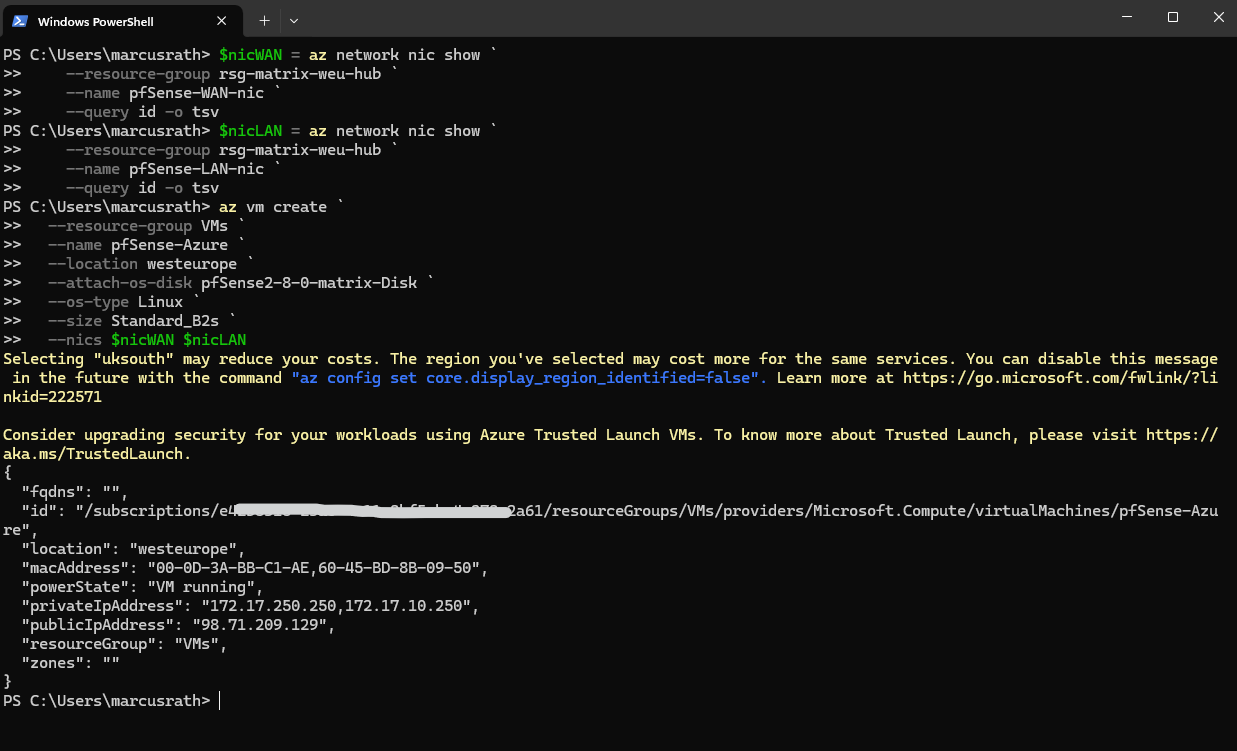
When deploying a VM by attaching an existing OS disk, Azure skips all of the usual image-based deployment and provisioning steps.
The VM simply powers on and boots directly from the disk you provided, in our case, pfSense is up and running within seconds.
This makes the startup process much faster and avoids guest-agent related errors that occur when Azure tries to configure an unsupported OS like our pfSense appliance (FreeBSD 15 since 2.8.x).
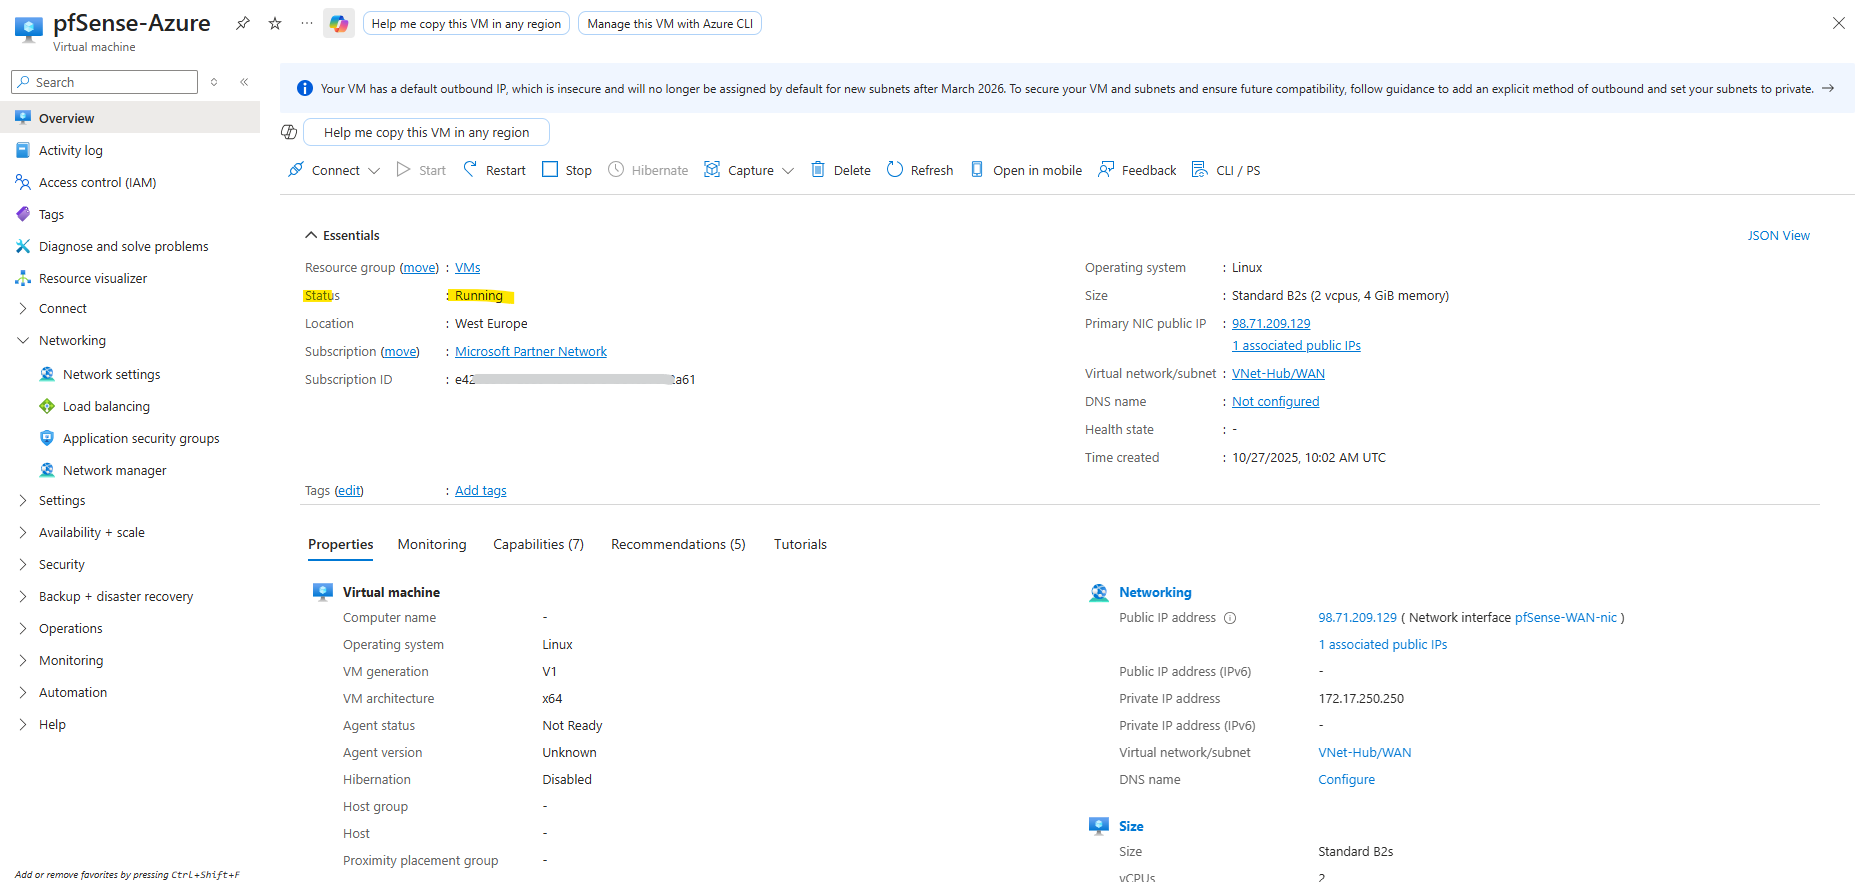
When the pfSense VM is booting, it launches as usual its initial configuration wizard, so next we need to use the serial console to perform the initial configuration where we need to assign the LAN (or Perimeter) + WAN interfaces on pfSense.
Configure pfSense VM in Azure
Because pfSense requires interactive setup on first boot, we must enable Boot Diagnostics to access the Azure Serial Console and complete the VLAN and interface assignment.Set up pfSense VM in vSphere
Azure does not expose VLANs to customers, so the VLAN prompt can simply be skipped resp. set to no.
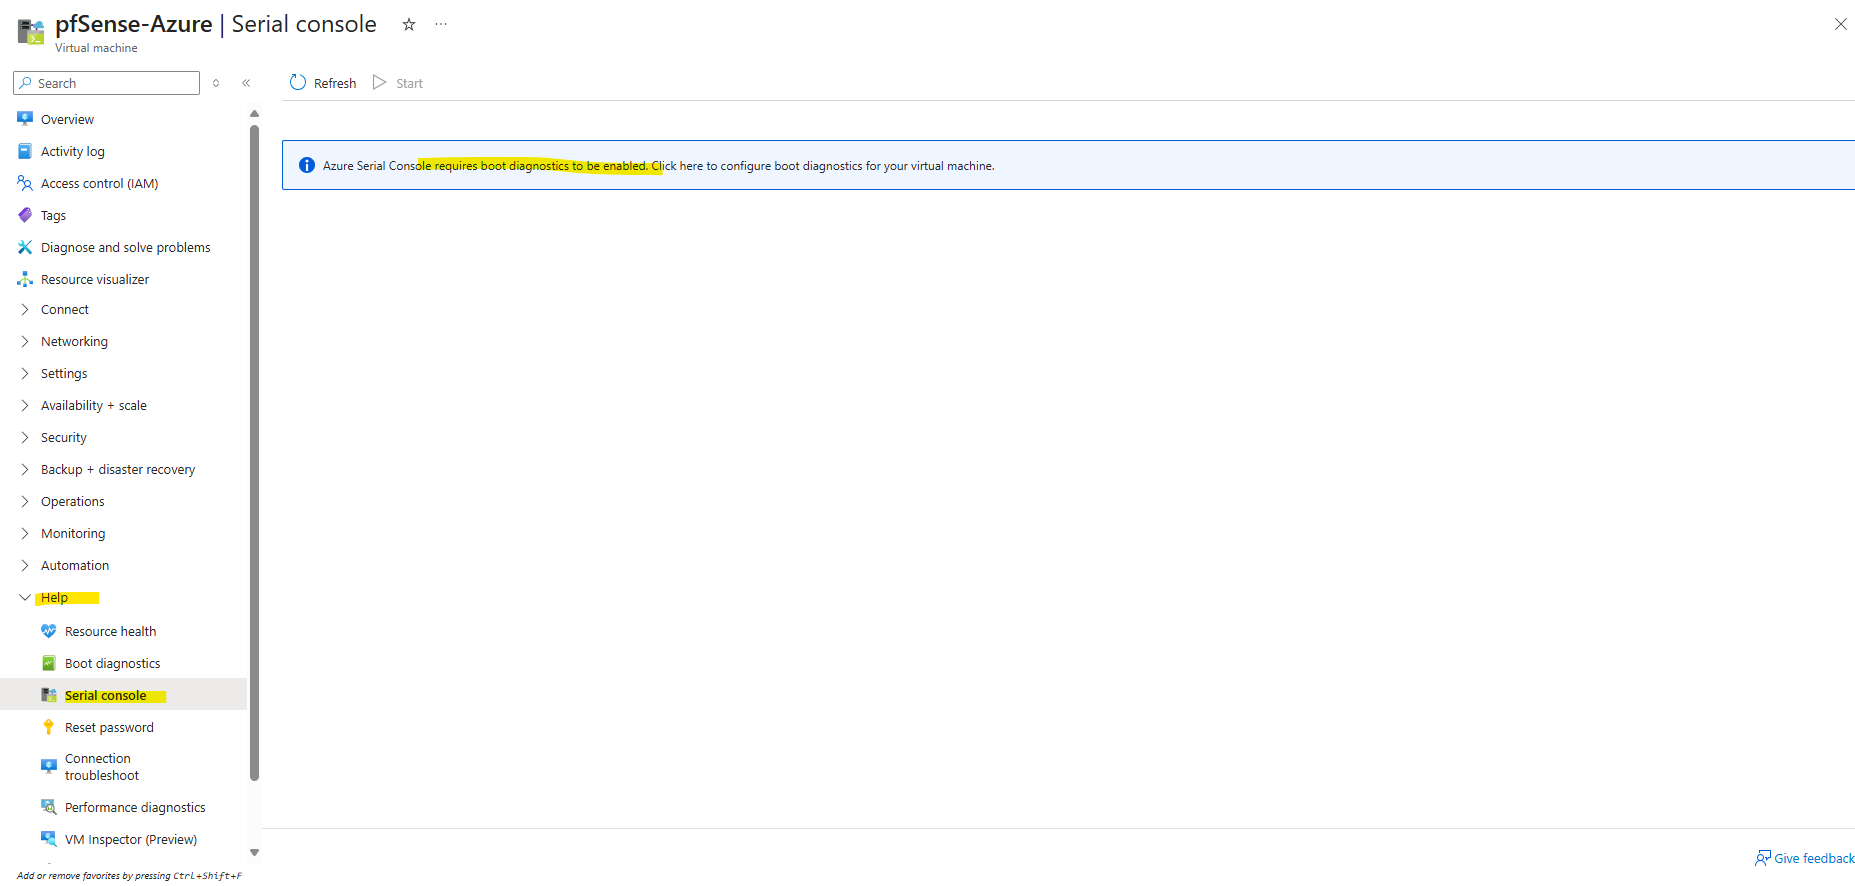
To enable boot diagnostics for our newly created virtual machine, run:
The command below turns on boot diagnostics for the VM using a managed storage account automatically handled by Azure.
az vm boot-diagnostics enable `
  --resource-group VMs `
  --name pfSense-Azure
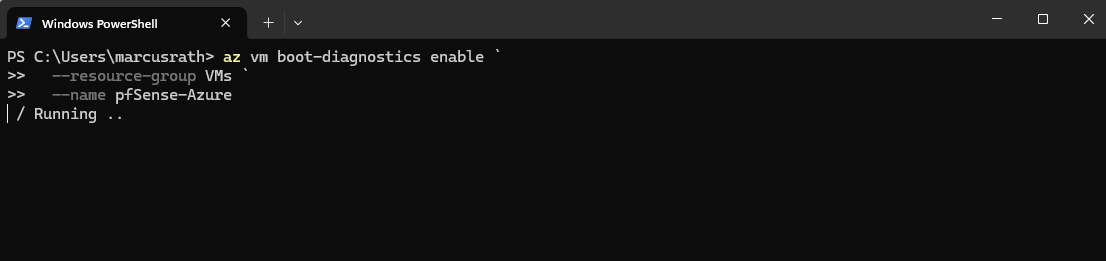
After enabling boot diagnostics, we can immediately access the serial console.
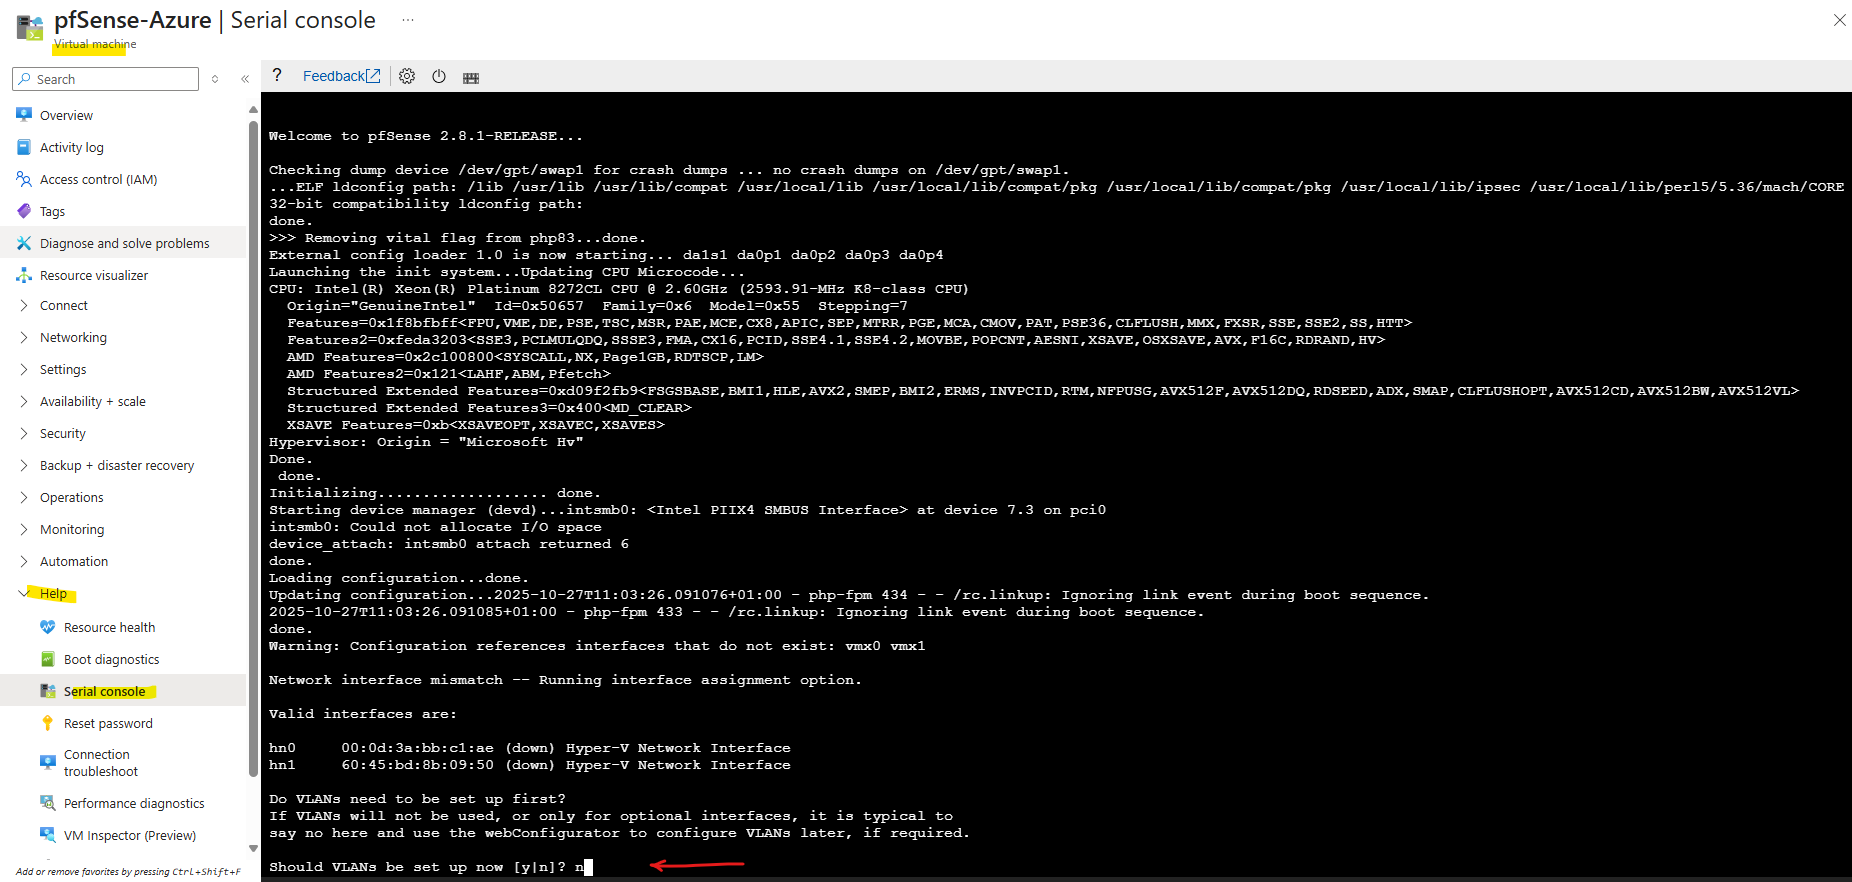
Once the VM boots, pfSense launches its initial configuration wizard where we can assign the LAN (or Perimeter) and WAN interfaces just like on any physical or virtual on-prem deployment.
In Azure, the first attached NIC is always treated as the primary (WAN) interface, so for pfSense we will typically set the WAN on NIC0 and the LAN (or Perimeter) on NIC1 by default.
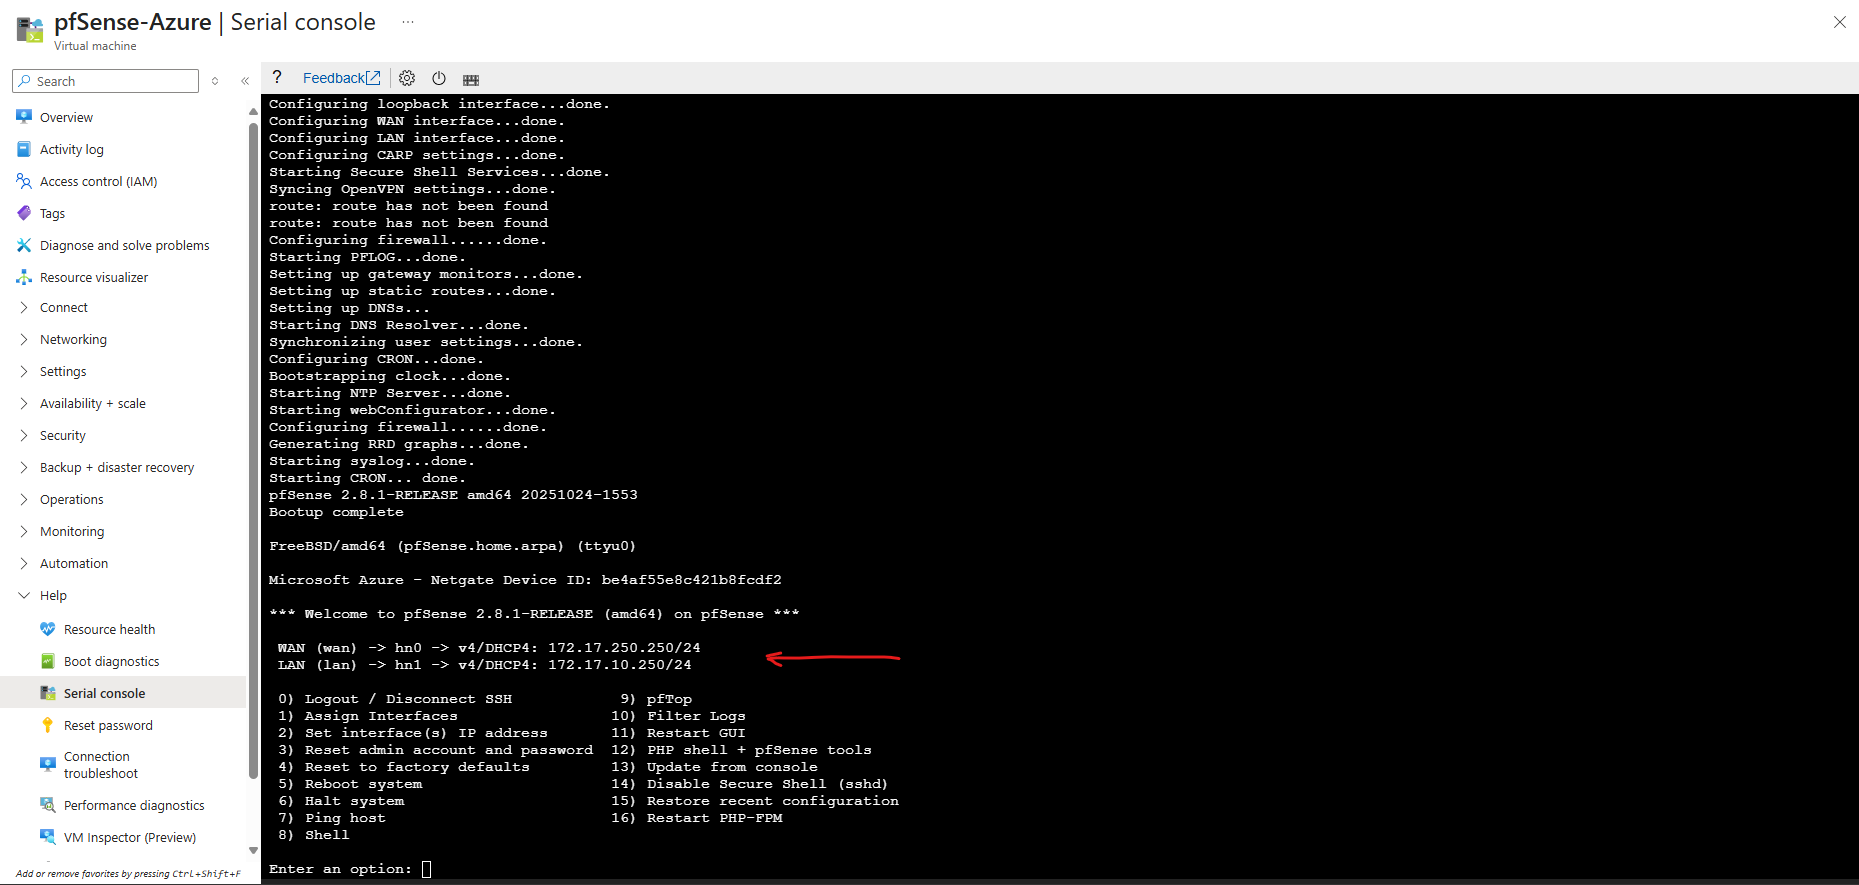
If the pfSense interfaces are configured for DHCP, they will automatically receive the static private IP addresses that we configured on the Azure NICs.
Azure’s SDN fabric hands out these assigned IPs via DHCP, ensuring the pfSense interface settings always match the networking configuration defined in the portal.
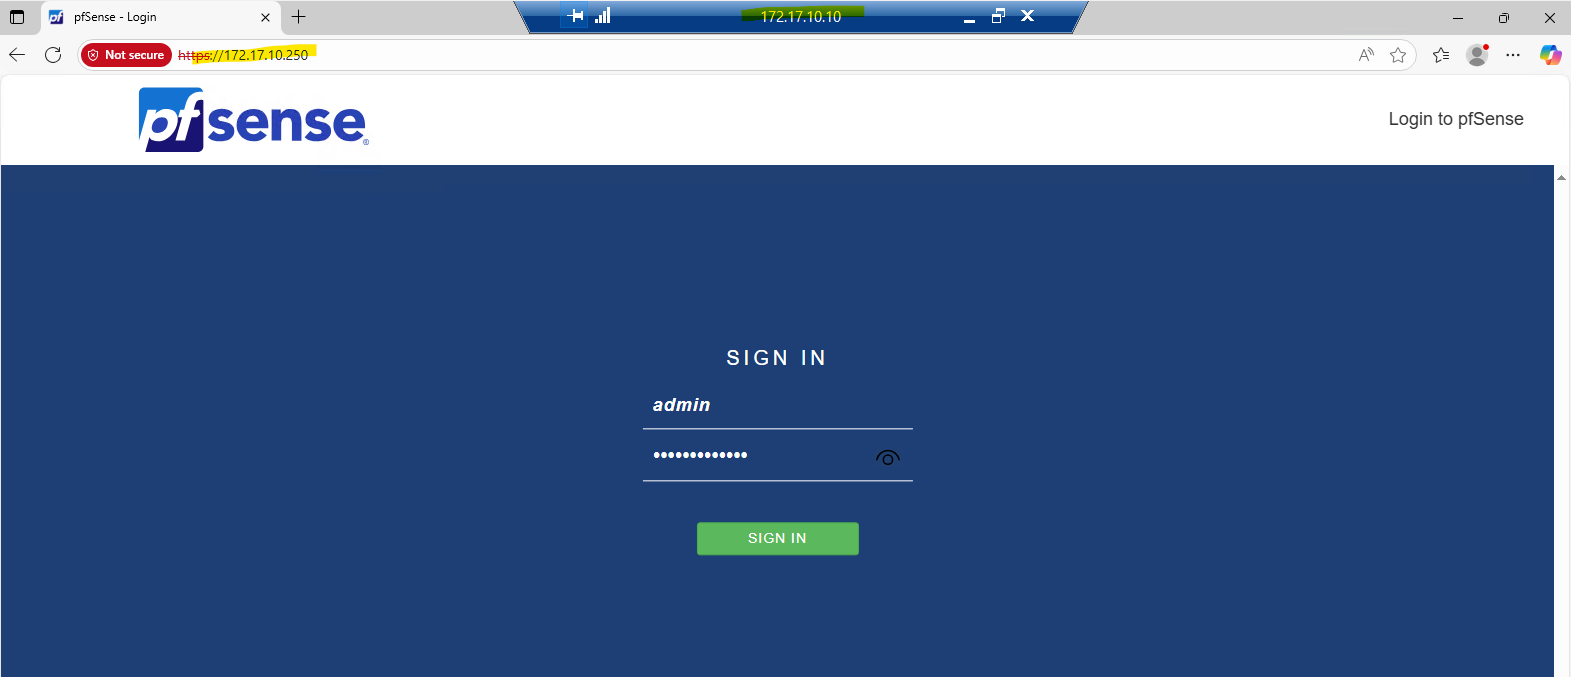
With the network in place, we can now reach the pfSense WebGUI from any machine living on the same internal LAN (or Perimeter) subnet, here pfSense automatically allows management access on its LAN (or Perimeter) interface right out of the box.
We can also temporary disable the firewall by using the pfSense shell within the VMs serial console in case something will block initial access to.
# Checking if the firewall is currently enabled
pfctl -s info | grep Status

# Disable the firewall
pfctl -d

# To re-enable it run
pfctl -e
In my setup, I spun up a Windows Server 2022 jump host inside the 172.17.10.0/24 subnet and connected to it over my site-to-site VPN (shown here) from the on-prem lab.
Alternatively we can set up Azure Bastion as shown in my post here or by spinning up a virtual machine with a public IP address assigned to, this is strongly discouraged for security reasons.
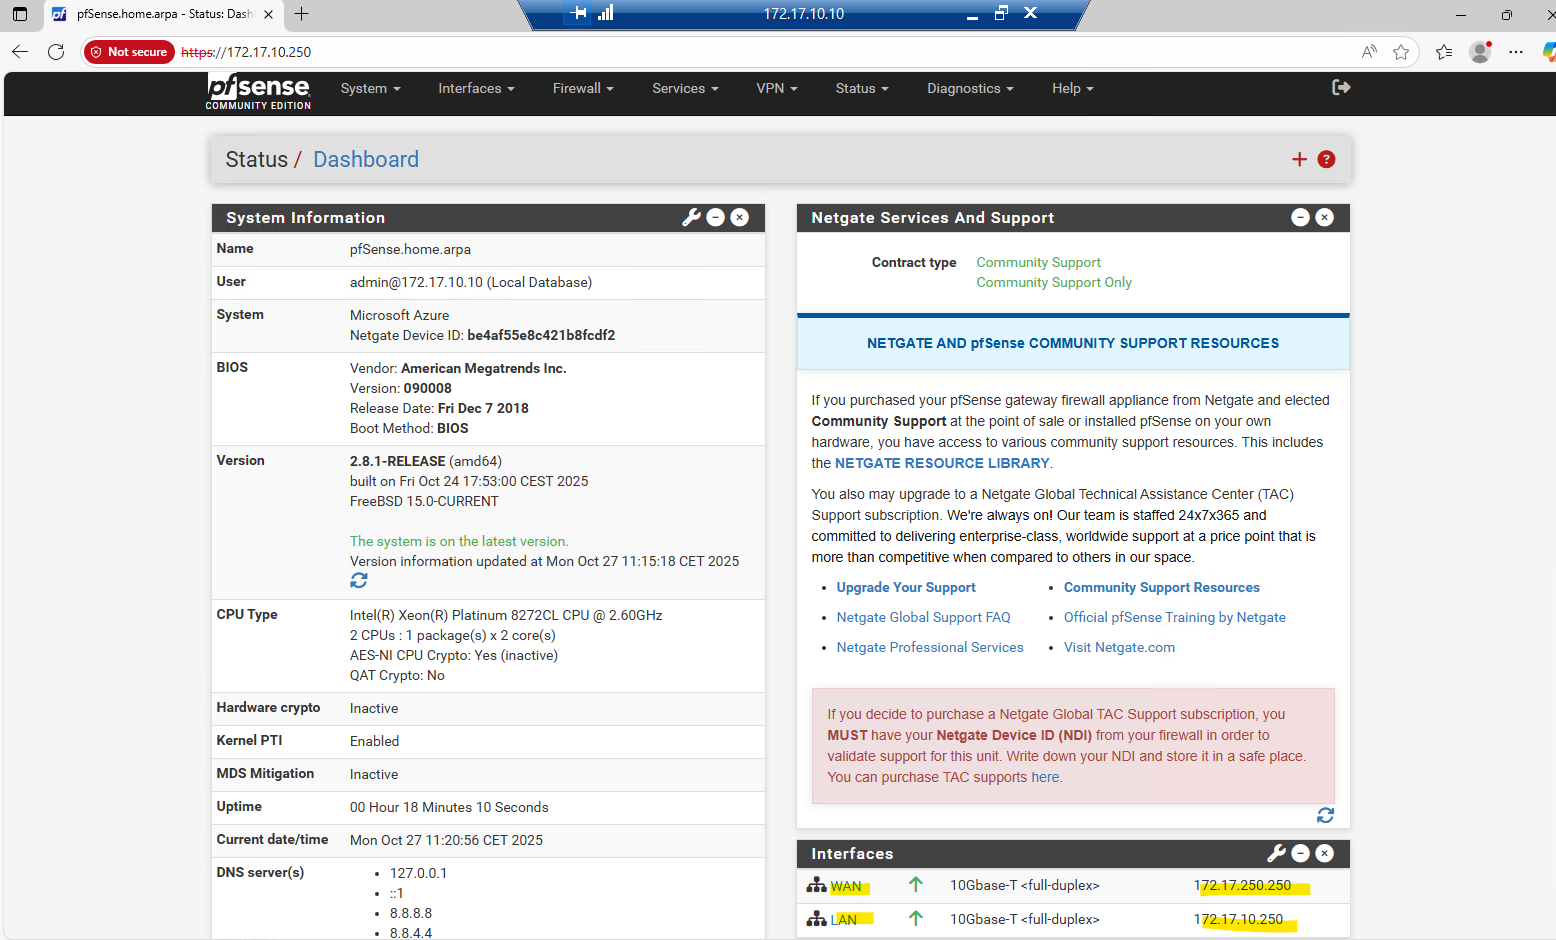
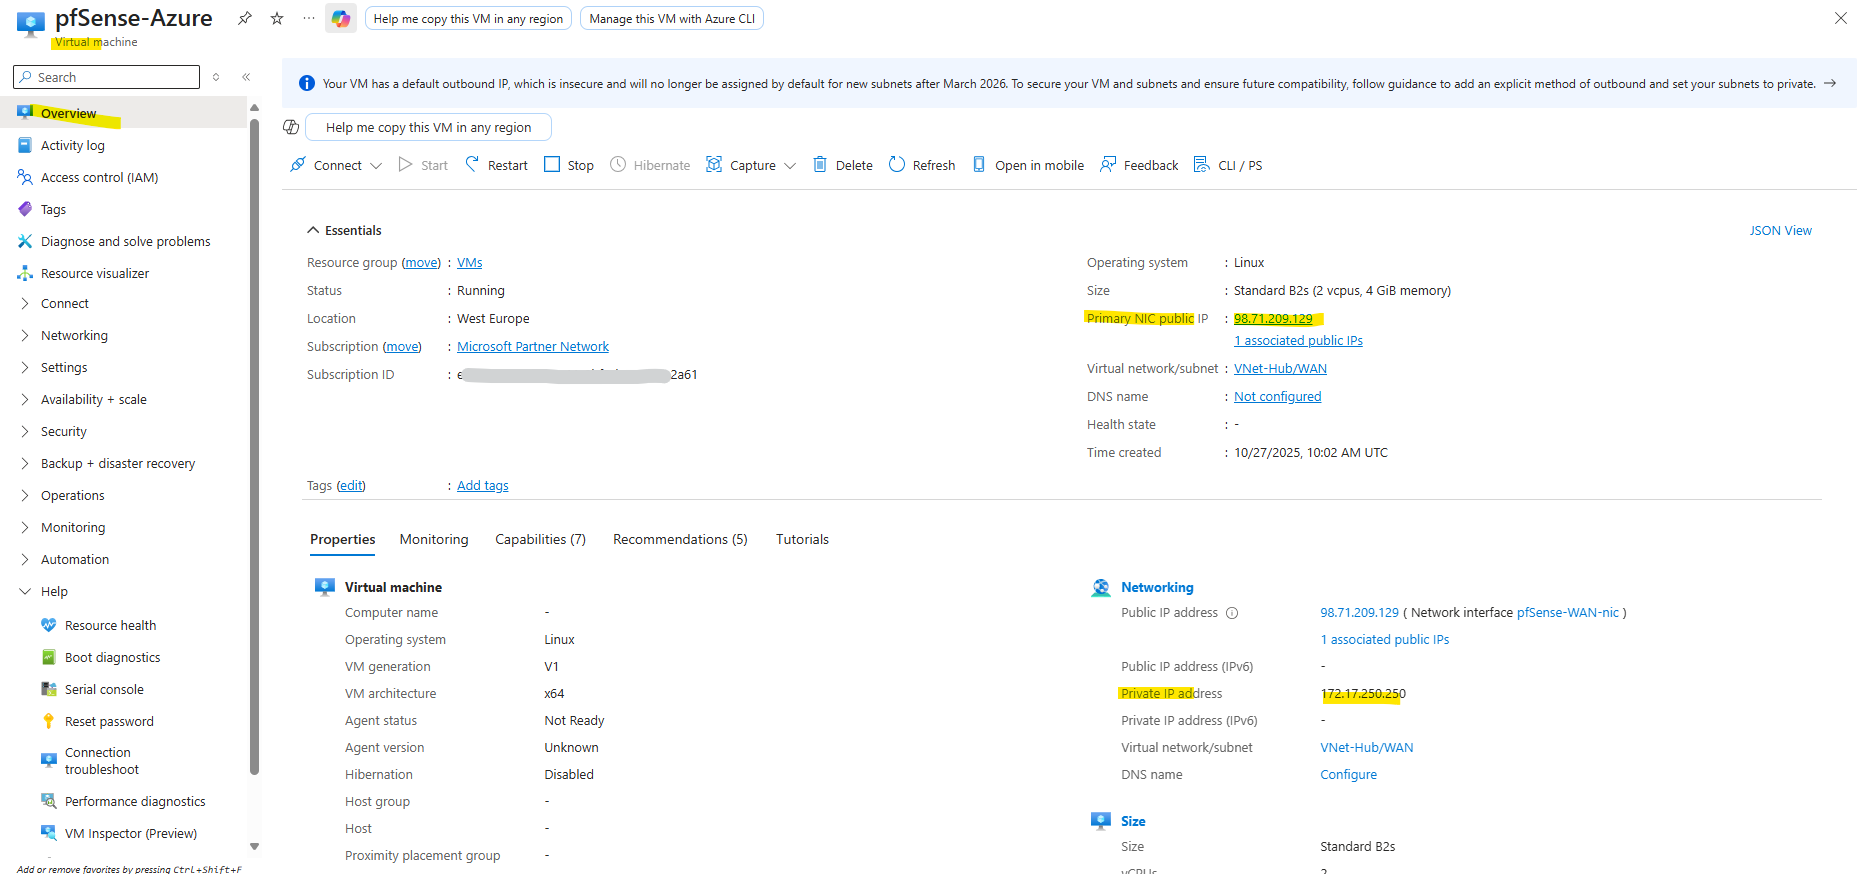
The WAN interface kept its correct default gateway settings from before we moved the disk into Azure, so no extra fixes were needed.
Even though the WAN NIC only holds a private IP, Azure seamlessly routes outbound traffic through the subnet’s virtual router (172.17.250.1), which in turn uses the assigned public IPv4 on that NIC (we previously created in Azure by using the az network nic create cmdlet) for internet access.
Azure handles NAT for us behind the scenes, exactly the same behavior we see in Google Cloud and shown in my post here.

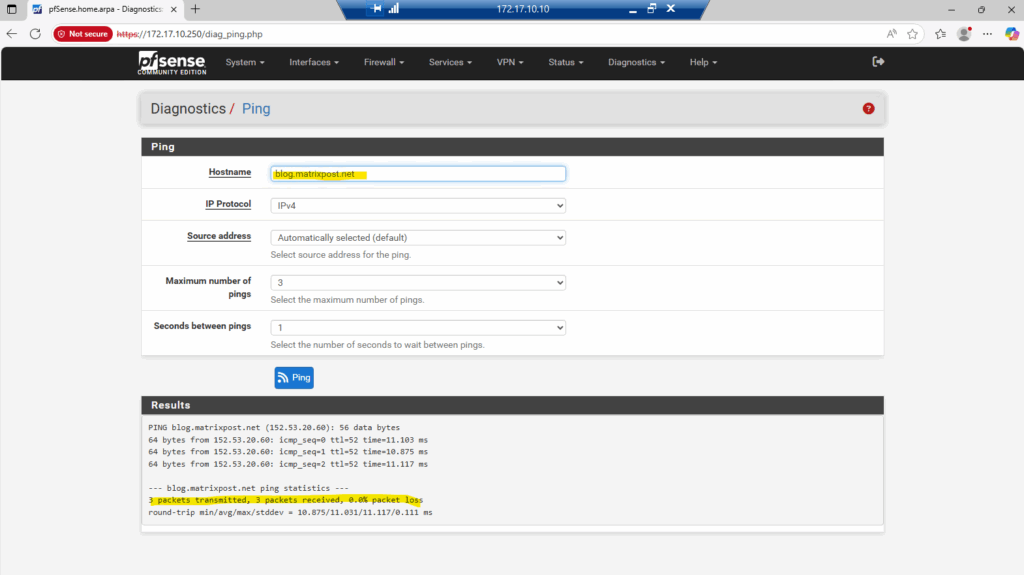
Outbound internet access is working.
About the assigned public IPv4 on pfSense’s WAN NIC we created by using the az network nic create cmdlet previously.
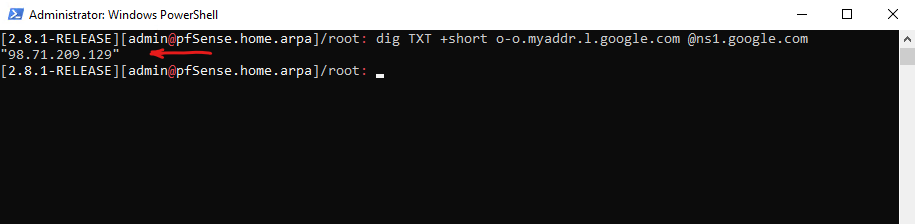
To verify that Azure is truly using the public IPv4 assigned to the WAN NIC, we can run a simple DNS lookup from the pfSense shell.
The following command asks Google’s DNS service to report our external address, and the result should match the Primary public IP shown in the Azure VM overview page shown below.
This sends a DNS query to Google’s name server, which replies with your public IP as seen from the interne, no external tools required.
dig → The DNS lookup utility (stands for Domain Information Groper).
TXT → Specifies the DNS record type to query, in this case, a TXT record (often used for arbitrary human-readable or system info).
+short → Tells dig to return a simplified, short output (just the answer, no headers or additional sections).
o-o.myaddr.l.google.com → The domain you’re querying. Google provides a special hostname here that returns your public IP in a TXT record.
@ns1.google.com → Specifies the DNS server to query directly — here, Google’s authoritative name server (ns1.google.com).
dig TXT +short o-o.myaddr.l.google.com @ns1.google.com
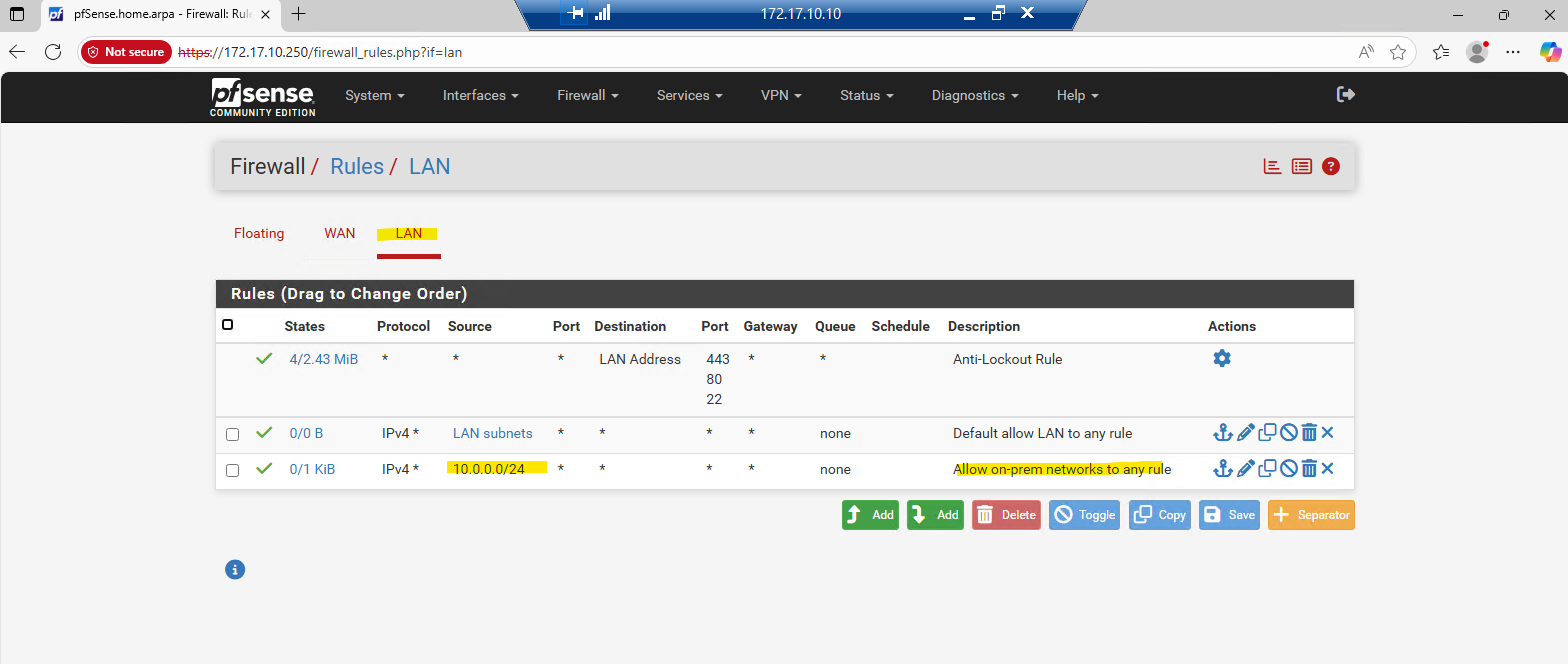
I also want to reach the pfSense GUI directly from my on-prem vSphere lab over the site-to-site VPN, no jump host or extra VM needed (and money saved).
To enable that, I’ll add a firewall rule on the LAN (or Perimeter) interface allowing traffic from my on-prem network (10.0.0.0/24) to pfSense’s LAN (or Perimeter) address.
In production you’d typically allow only the essentials, HTTPS (TCP 443) and maybe SSH (TCP 22), but for testing, allowing all LAN-side traffic is fine.
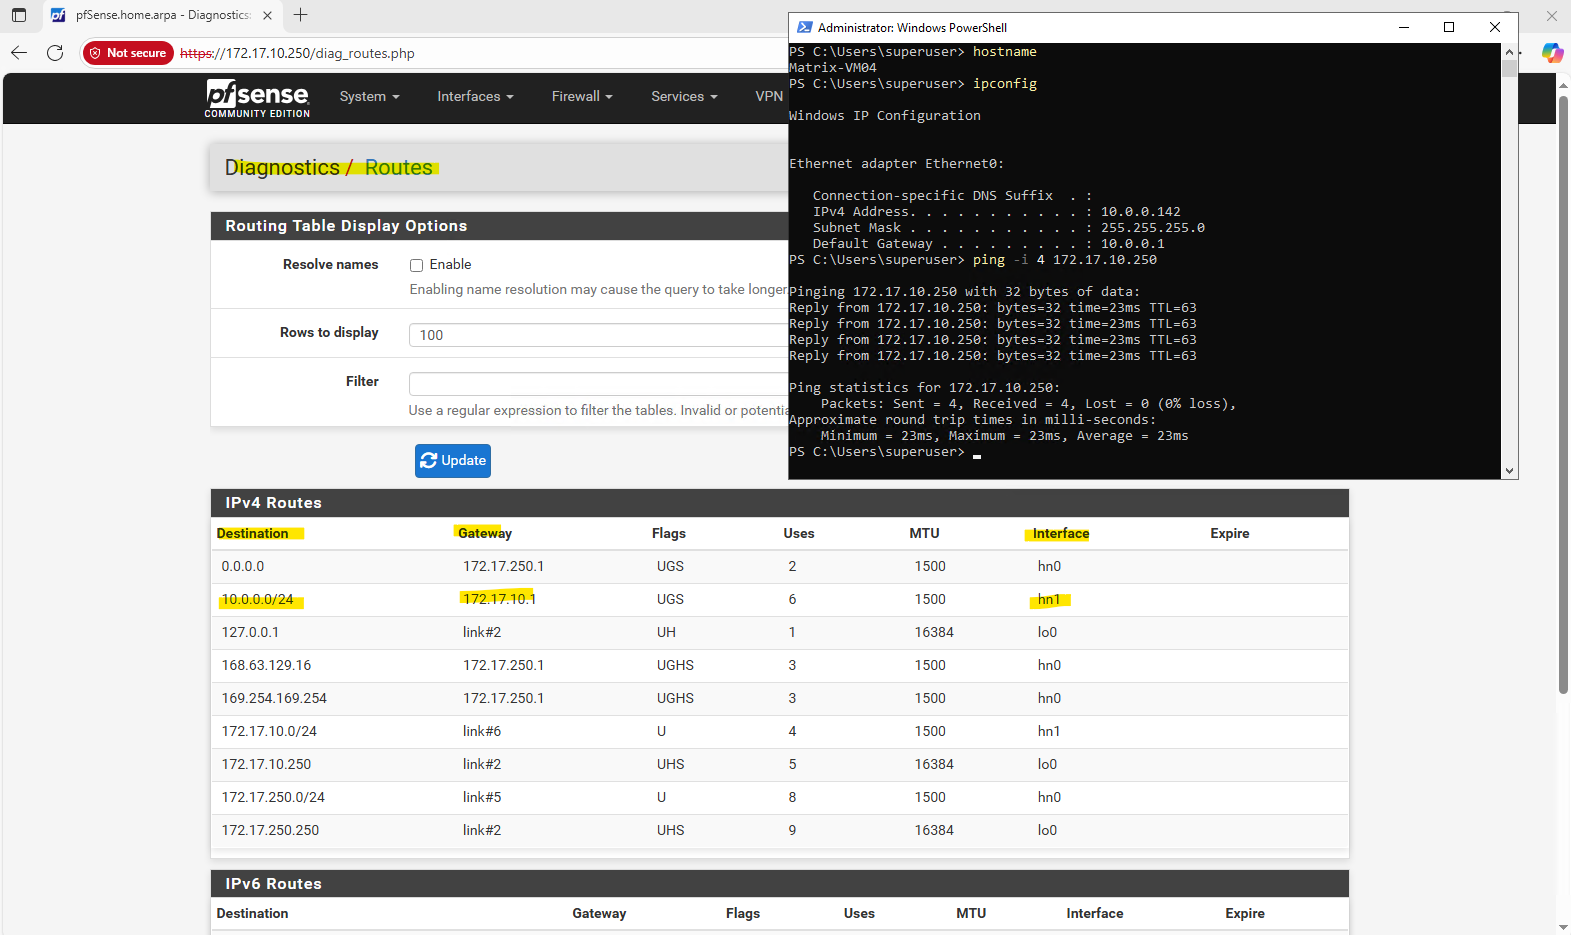
Currently pfSense doesn’t have the route to my on-prem network (10.0.0.0/24), because of this it will route all traffic destined to by using its configured default gatway on the WAN interface (172.17.250.1).
So I will first need to add a new gateway on pfSense with the next hop IP address 172.17.10.1 and by using the internal LAN (or Perimeter) interface for.
In both Azure and GCP, the first usable IP address in every subnet is automatically reserved as the built-in virtual router, handling all routing inside the cloud fabric. You never deploy or manage this gateway yourself, it’s always there, quietly directing traffic behind the scenes.
Azure and GCP expose a real virtual router inside every subnet using the first usable IP, while AWS hides routing logic entirely inside the VPC fabric.

Now I can add a new static route on pfSense for my on-prem subnet where the next hop is the default gateway on the internal LAN (or Perimeter) interface.
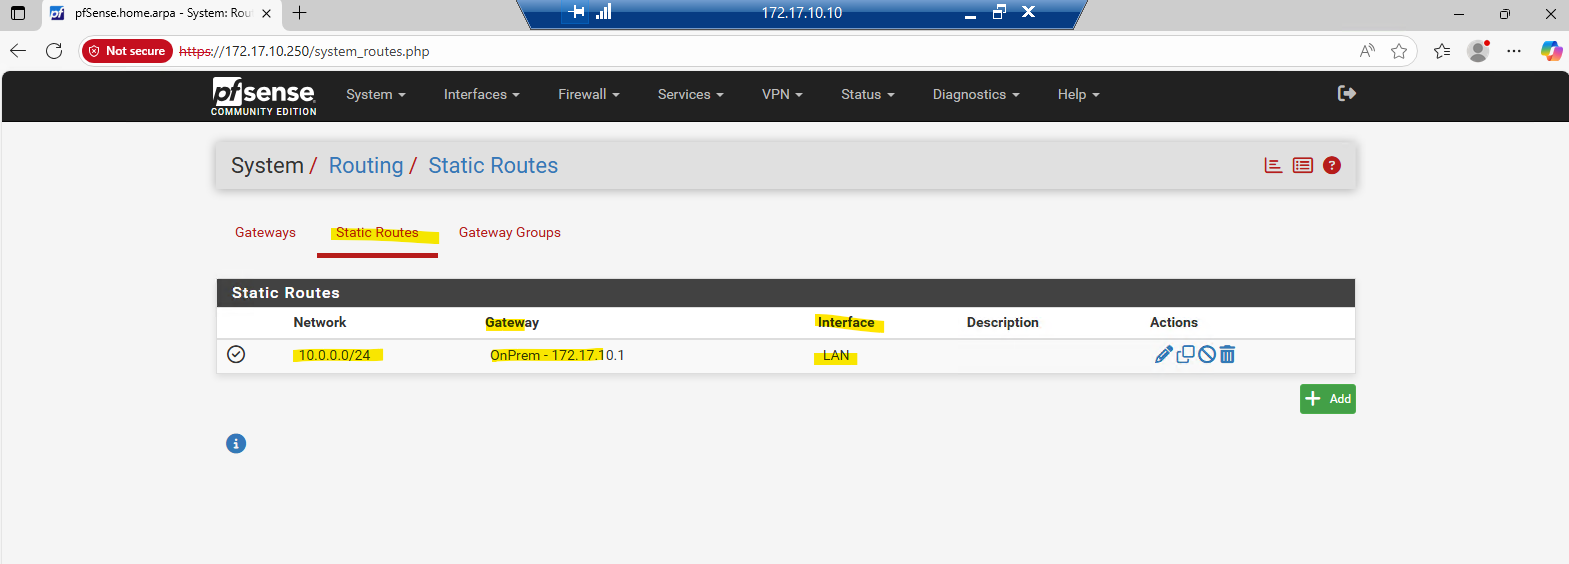
On pfSense under Diagnostics -> Routes we can already see our new static route as shown below. I am already accessing here the pfSense web GUI direclty from a computer running in my on-prem vSphere lab environment.
Troubleshooting
Serial Console Access to pfSense not working
Under Boot diagnostics -> Screenshot all looks fine and pfSense bootet successfully to the wizard setting.
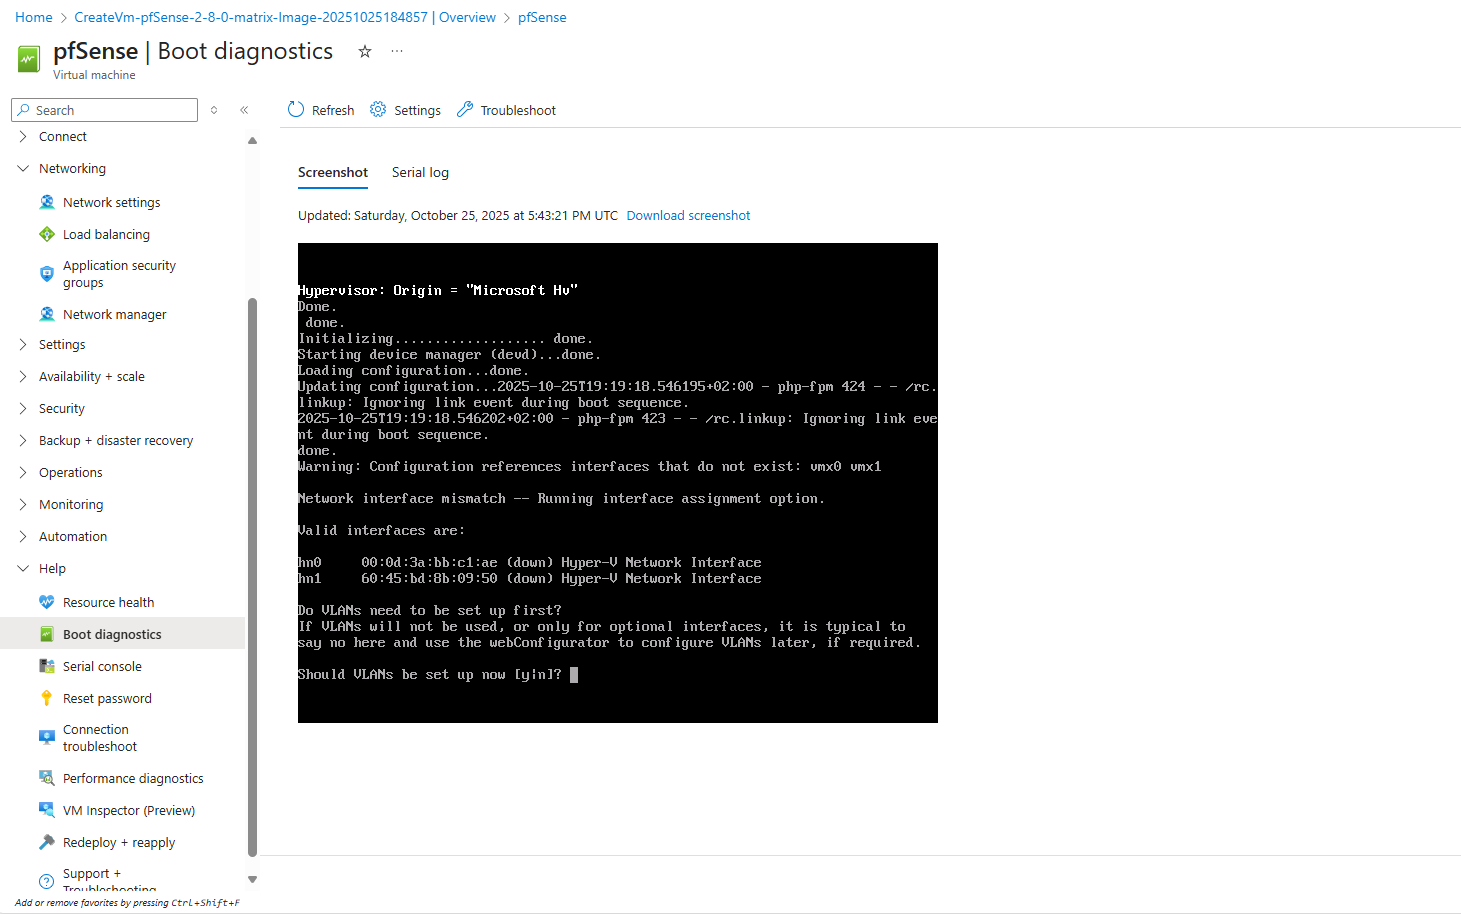
Nevertheless the serial console shows connected to the serial port of the VM but no login prompt resp. the actual console whith the screenshot above shows up. Pressing ENTER also not helps.

Before uploading the pfSense *.VHD disk, we also need to enable the serial terminal and for the primary console we need to select Serial Console in pfSense.
When deploying pfSense on Azure, the platform only provides interactive console access through a serial port instead of traditional VGA output.
By enabling the first serial port at 115200 baud and setting the serial console as primary, pfSense sends its boot menu and firewall configuration prompts to Azure’s Serial Console, allowing full control during provisioning.
Without this setting, pfSense may boot with video output only, visible in boot diagnostics but completely unusable for configuration in Azure.
Serial Console access now should work with these both settings in pfSense configured before uploading the disk to Azure.
AzCopy Copy failed (VHD Upload to Azure)
Sometimes I was running into the following error when uploading the VHD disk to Azure by using the AzCopy utility which can dramatically improve throughput, especially over high-latency VPNs or slow client connections.
The job failed due to network-level errors shown in the log file.
“wsasend: An existing connection was forcibly closed by the remote host”
“wsarecv: A connection attempt failed because the connected party did not properly respond…”
This usually indicates the upload pipeline is too aggressive for the current network conditions.
AzCopy aggressively optimizes bandwidth utilization by transferring multiple chunks of the VHD simultaneously, rather than waiting on a single serial pipeline.
Reducing concurrency with a setting such as $env:AZCOPY_CONCURRENCY_VALUE = “16” (or even lower) can stabilize the transfer by opening fewer simultaneous TCP streams and preventing Azure or intermediate firewalls from terminating connections.
AzCopy automatically sets concurrency based on your system’s CPU count:
Default: Number of logical CPUs × 16
For example, on a system with 8 logical CPUs, AzCopy will use 128 concurrent operations.
$env:AZCOPY_CONCURRENCY_VALUE = "16"

To remove the environment variable later
Remove-Item Env:AZCOPY_CONCURRENCY_VALUE
The AzCopy logfiles will finally shows how many max concurrent network operations were used to upload or download a file. Below in my case number of 16 logical CPUs × 16 = 256.
2025/10/25 14:31:03 AzcopyVersion  10.30.1
2025/10/25 14:31:03 OS-Environment  windows
2025/10/25 14:31:03 OS-Architecture  amd64
2025/10/25 14:31:03 Any empty folders will not be processed, because source and/or destination doesn't have full folder support
2025/10/25 14:31:03 Job-Command copy C:\Users\MarcusRath\Downloads\pfSense\pfSense2-8-0-image.vhd https://stamatrixdisks.blob.core.windows.net/disks?.......--blob-type PageBlob
2025/10/25 14:31:03 Number of CPUs: 16
2025/10/25 14:31:03 Max file buffer RAM 8.000 GB
2025/10/25 14:31:03 Max concurrent network operations: 256 (Based on number of CPUs. Set AZCOPY_CONCURRENCY_VALUE environment variable to override)
2025/10/25 14:31:03 Check CPU usage when dynamically tuning concurrency: true (Based on hard-coded default. Set AZCOPY_TUNE_TO_CPU environment variable to true or false override)
2025/10/25 14:31:03 Max concurrent transfer initiation routines: 64 (Based on hard-coded default. Set AZCOPY_CONCURRENT_FILES environment variable to override)
2025/10/25 14:31:03 Max enumeration routines: 16 (Based on hard-coded default. Set AZCOPY_CONCURRENT_SCAN environment variable to override)
2025/10/25 14:31:03 Parallelize getting file properties (file.Stat): false (Based on AZCOPY_PARALLEL_STAT_FILES environment variable)
2025/10/25 14:31:03 Max open files when downloading: 2147482978 (auto-computed)
2025/10/25 14:31:03 Final job part has been created
2025/10/25 14:31:03 Final job part has been scheduled
In my case by reducing the concurrency to e.g. 16 or 32 was resolving this issue, as mentioned, finally it depends on your internet connection.
$env:AZCOPY_CONCURRENCY_VALUE = "16"
Outbound Internet Traffic from internal Virtual Machines not working
If VMs in your internal subnets like Azure Spoke’s can reach pfSense and routing seems to be correct configured, but nevertheless internet traffic dies silently, one root cause could be that Azure NIC forwarding is not enabled.
Azure network interfaces do not permit Layer-3 forwarding by default, so pfSense can receive packets but cannot forward them between LAN (Perimeter) and WAN networks.
Typical symptom via pfSense Diagnostics → Packet Capture:
- On the LAN (Perimeter) interface: You do see traffic from the Spoke (e.g., 172.16.10.4 → 8.8.8.8 (some public Internet IP address)
- On the WAN interface: Nothing shows up
- Replies arrive back to pfSense but also vanish inside Azure, never reaching the source
Azure is dropping forwarded packets before pfSense is even involved.
To fix this enable NIC-level forwarding when creating the NICs:
--ip-forwarding true
To enable IP forwarding afterwards for a NIC in Azure you can run the following cmdlet.
az network nic update `
  --resource-group rsg-matrix-weu-hub `
  --name pfSense-LAN-nic `
  --ip-forwarding true
Another common culprit is a Network Security Group (NSG) quietly dropping packets before they even reach pfSense.
If your outbound routing looks perfect, default route pointing to pfSense, rules in place, yet no traffic shows up in Diagnostics → Packet Capture, it’s likely the NSG guarding pfSense’s LAN or Perimeter NIC is blocking it at the Azure fabric level.
In other words: the packets never even make it to the firewall.
For setups where pfSense acts as the central firewall, it’s usually best to keep NSGs permissive or even omit them entirely on pfSense’s LAN or Perimeter subnet/NIC, allowing Azure traffic to flow freely into pfSense for inspection and filtering.
However, when pfSense terminates IPSec VPN tunnels, an NSG must still be associated with the WAN subnet/NIC, otherwise, inbound UDP ports (e.g., 500 and 4500) will be blocked by default, preventing tunnel establishment.
Even if no Network Security Group (NSG) is explicitly associated with a subnet or NIC, all inbound traffic to a VM with a public IP is blocked by default, you must attach an NSG and allow the desired ports for connectivity.
For traffic to flow from the internet, a network security group must be associated with the subnet or network interface of the virtual machine.
Links
pfSense – Outbound NAT
https://docs.netgate.com/pfsense/en/latest/nat/outbound.htmlAzure Linux VM Agent overview
https://learn.microsoft.com/en-us/azure/virtual-machines/extensions/agent-linuxVersions of pfSense software and FreeBSD
https://docs.netgate.com/pfsense/en/latest/releases/versions.htmlCreate a VM from a specialized disk using PowerShell
https://learn.microsoft.com/en-us/azure/virtual-machines/attach-os-diskIntroduction to FreeBSD on Azure
https://learn.microsoft.com/en-us/azure/virtual-machines/linux/freebsd-intro-on-azureCreate, change, or delete a network interface
https://learn.microsoft.com/en-us/azure/virtual-network/virtual-network-network-interfaceHow network security groups filter network traffic
https://learn.microsoft.com/en-us/azure/virtual-network/network-security-group-how-it-worksAzure network security groups overview
https://learn.microsoft.com/en-us/azure/virtual-network/network-security-groups-overview