Mastering Azure Load Balancer
The Azure Load Balancer plays a central role in distributing network traffic efficiently and ensuring high availability for applications.
Whether balancing web traffic across IIS servers, directing packets to network appliances, or enabling regional failover, it’s an essential component in many Azure network designs.
In this post, we’ll explore its architecture, tiers, rules, probes, and configuration best practices to help you build reliable and secure load-balancing environments.
Recommended short name patterns for an Azure Load Balancer
If you’re just looking for short, clean naming ideas when creating an Azure Load Balancer for inbound traffic, here are common conventions used in Azure environments:
| Purpose | Abbrev. | Example |
|---|---|---|
| Load Balancer (external/public) | plb | plb-web-prod |
| Load Balancer (internal) | ilb | ilb-app-dev |
| Frontend IP config | fe | plb-fe |
| Backend Pool | be | plb-be |
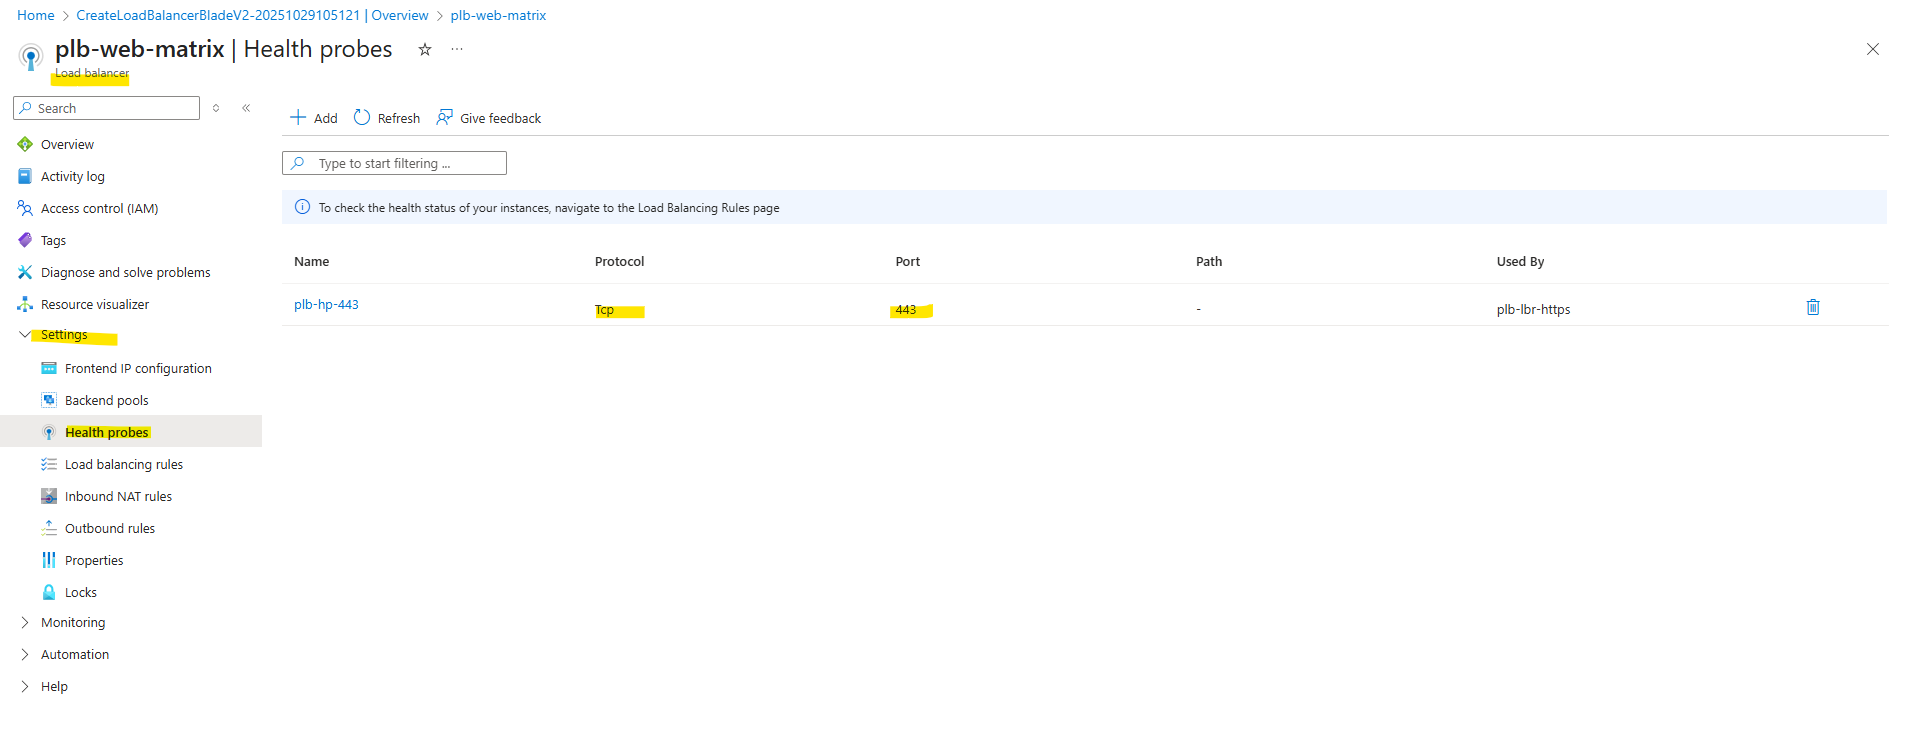
| Health Probe | hp | plb-hp-443 |
| LB Rule | lbr | plb-lbr-https |
| NAT Rule | nat | plb-nat-rdp |
Creating a Network Security Group (NSG) to allow inbound Traffic
Because a Standard Public Load Balancer is locked down by default, backend VMs won’t receive any inbound traffic unless a Network Security Group (NSG) explicitly allows it.
So if no NSG is currently associated with the subnet or the NICs of your backend instances, you first need to create one and add rules permitting the required inbound ports (e.g., HTTPS/443) to ensure the Load Balancer can forward traffic to your servers.
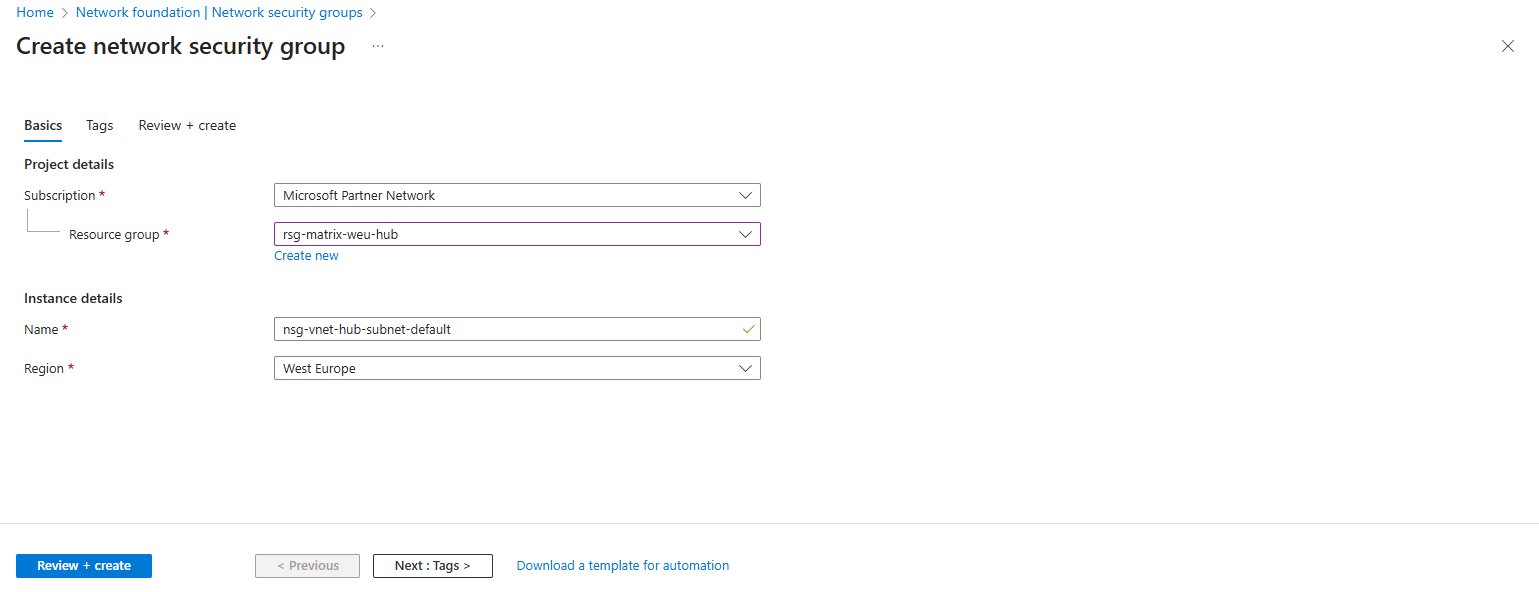
In my case, so far I have neither a NSG assigned to the backend VMs NICs nor to the subnet they are running within.
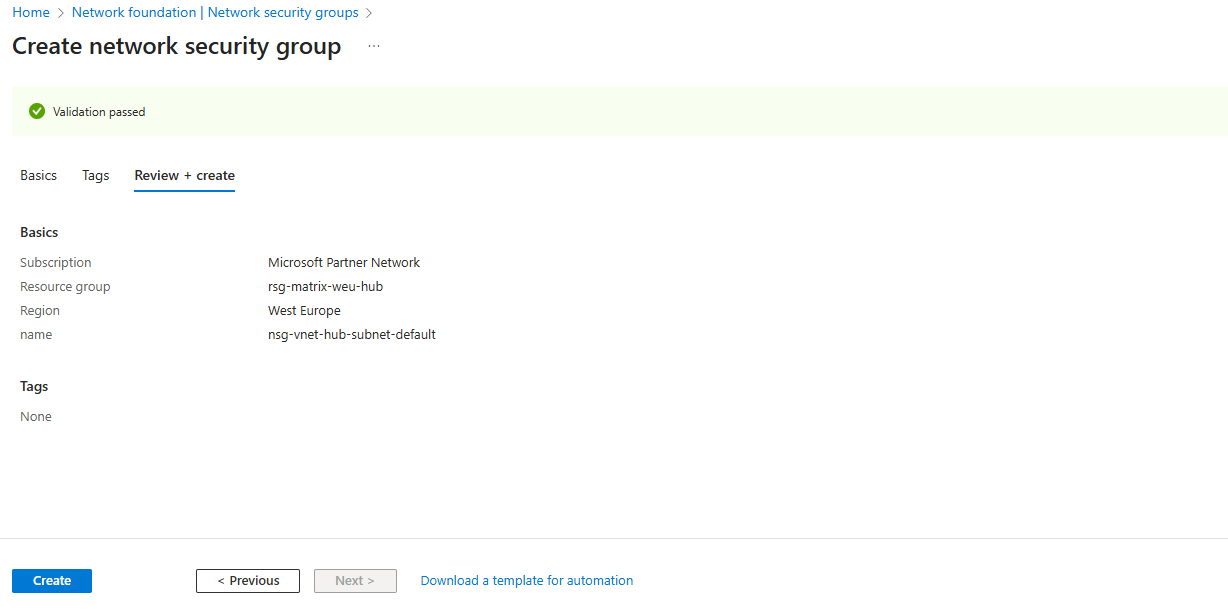
Therefore I will now below first create a new NSG, allowing inbound HTTPS (TCP 443) traffic to both internal private IPs of my backend VMs.
Afterwards I will associate this new NSG to the subnet both backend VMs are running.
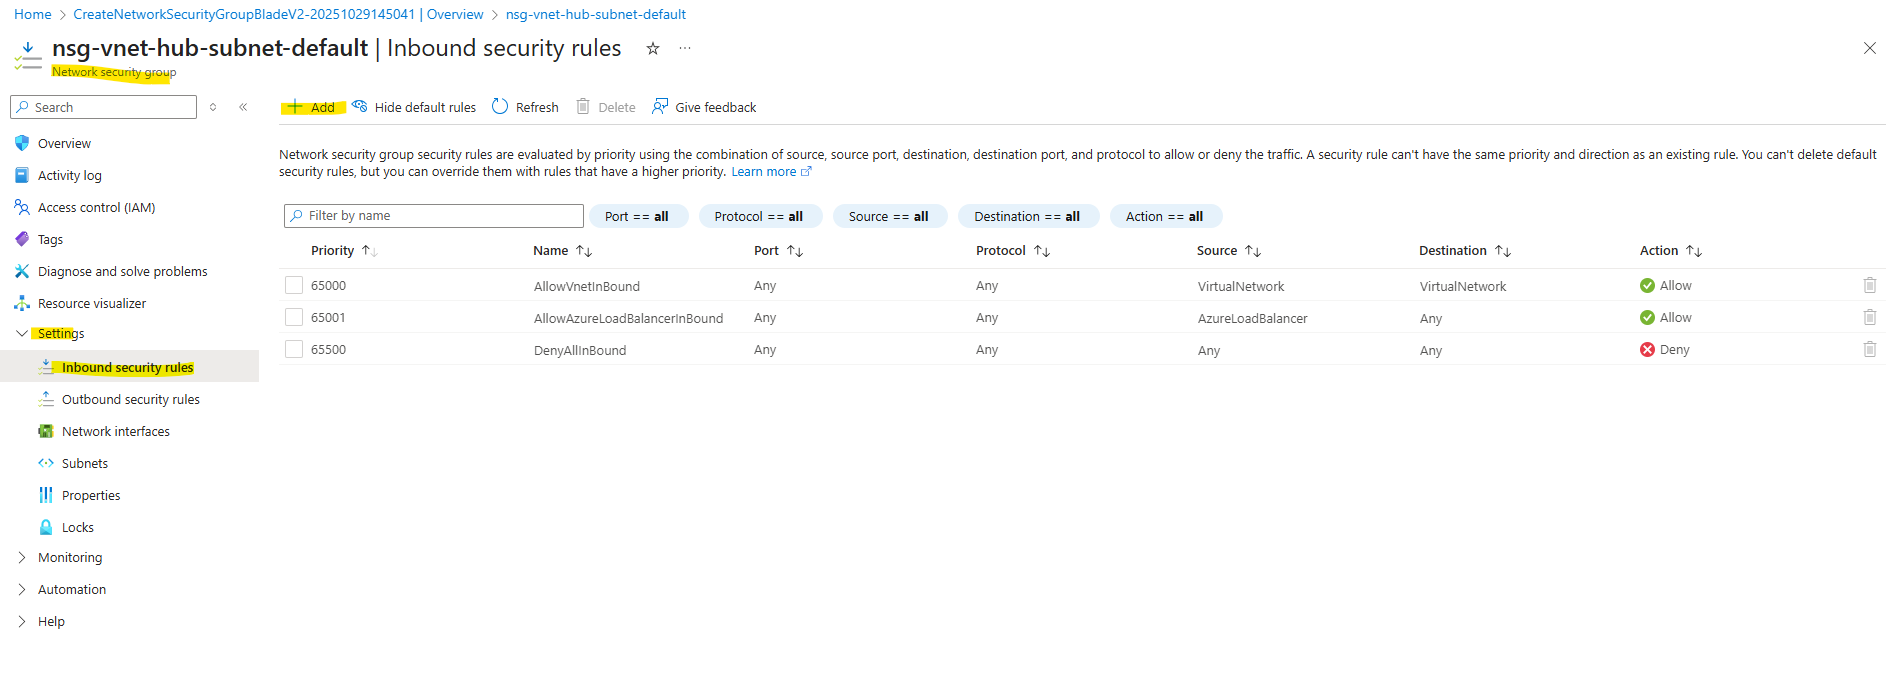
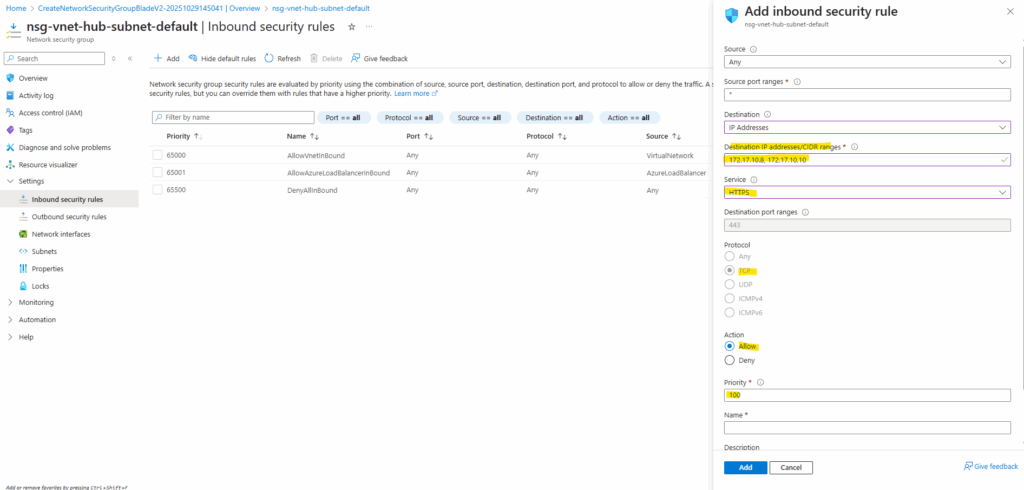
I will add a new inbound security rule to allow HTTPS (TCP 443) traffic inbound to both backend VMs.
For the destination I will enter the IPs of the backend VMs.

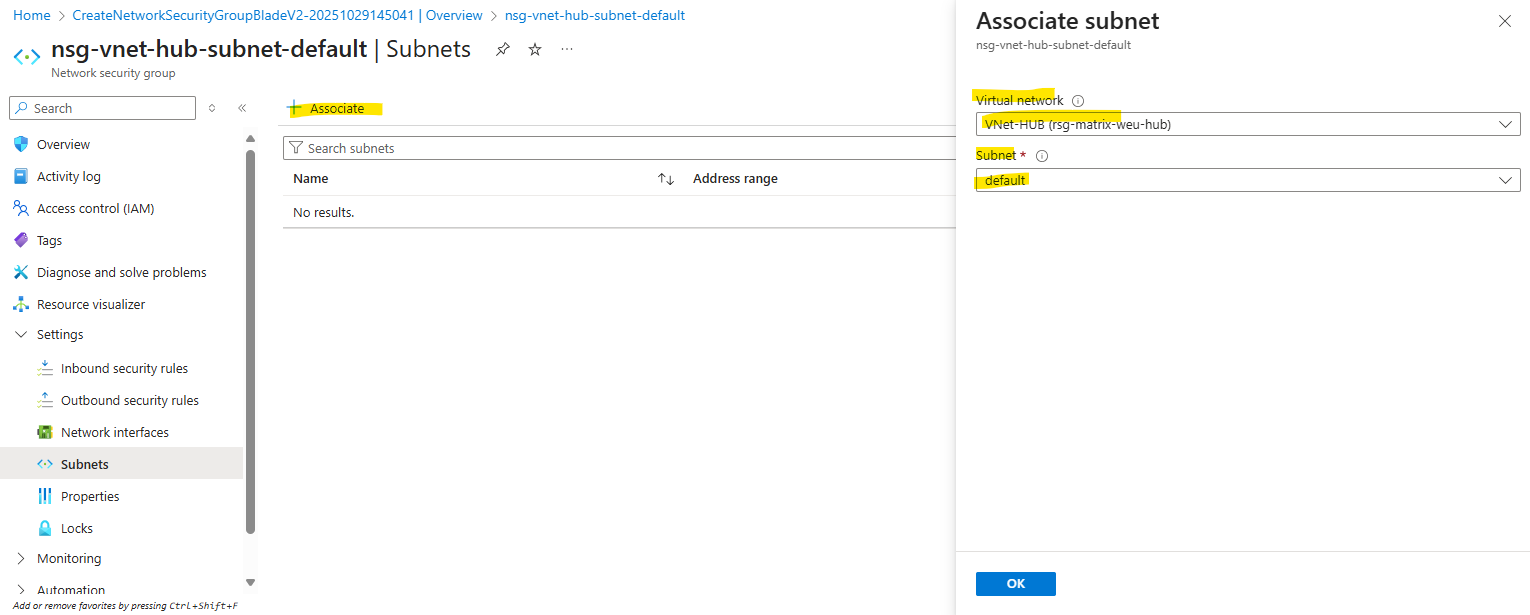
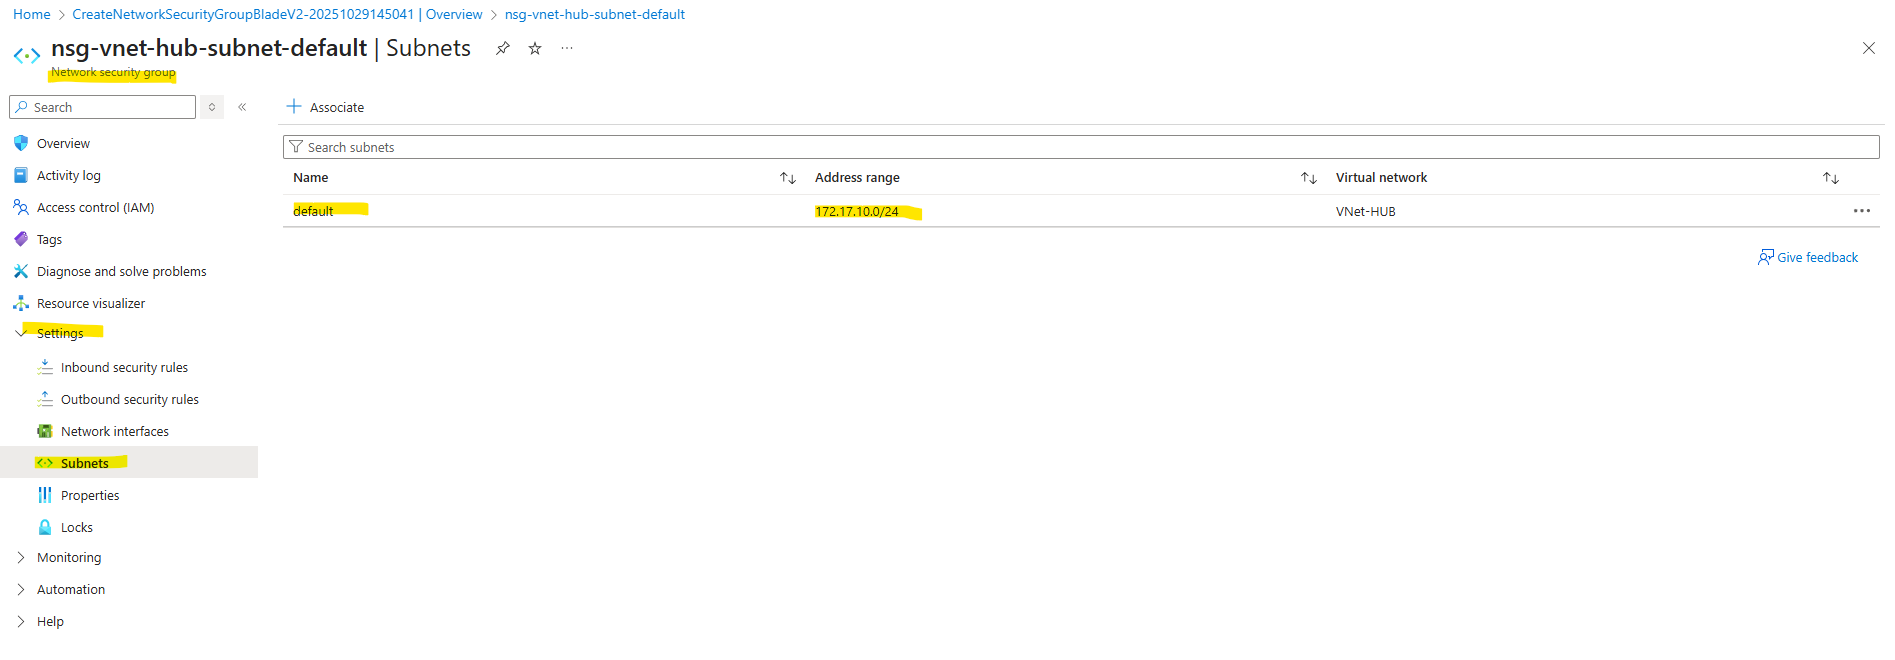
Next I will assign this new NSG with the subnet where the backend VMs are running.

Creating a Public Load Balancer
A Public Load Balancer distributes traffic from the internet to your backend resources using a public IP address, making the service accessible externally.
An Internal Load Balancer, on the other hand, uses a private IP address and operates entirely within a virtual network, balancing traffic between internal resources.
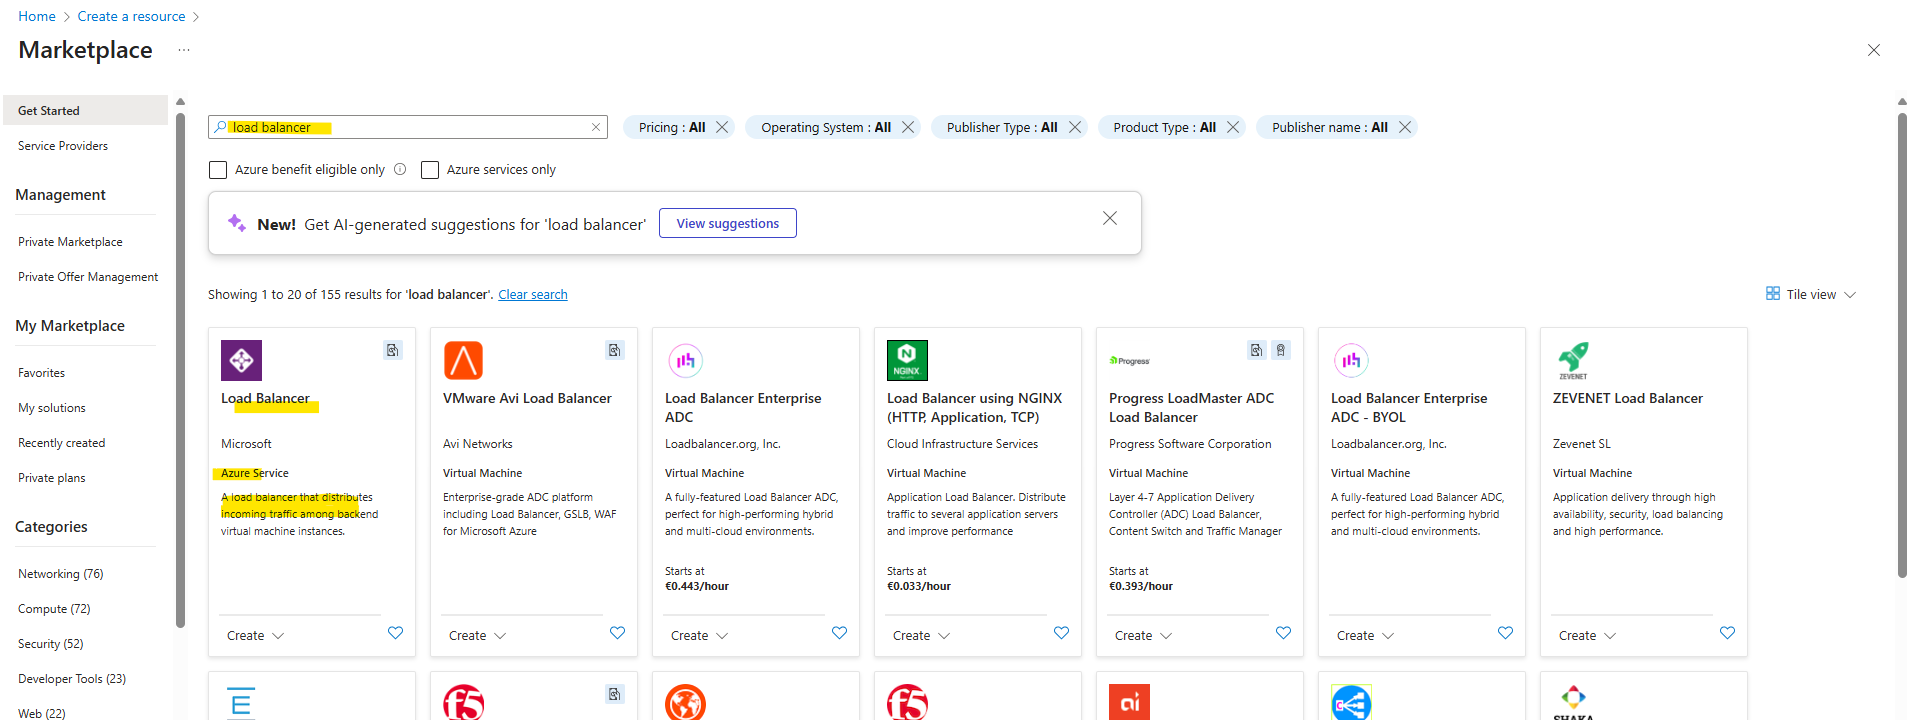
To publish two internal IIS server (websites), we will create below a public load balancer. Search for load balancer in the Azure Marketplace and select the highlighted load balancer shown below.
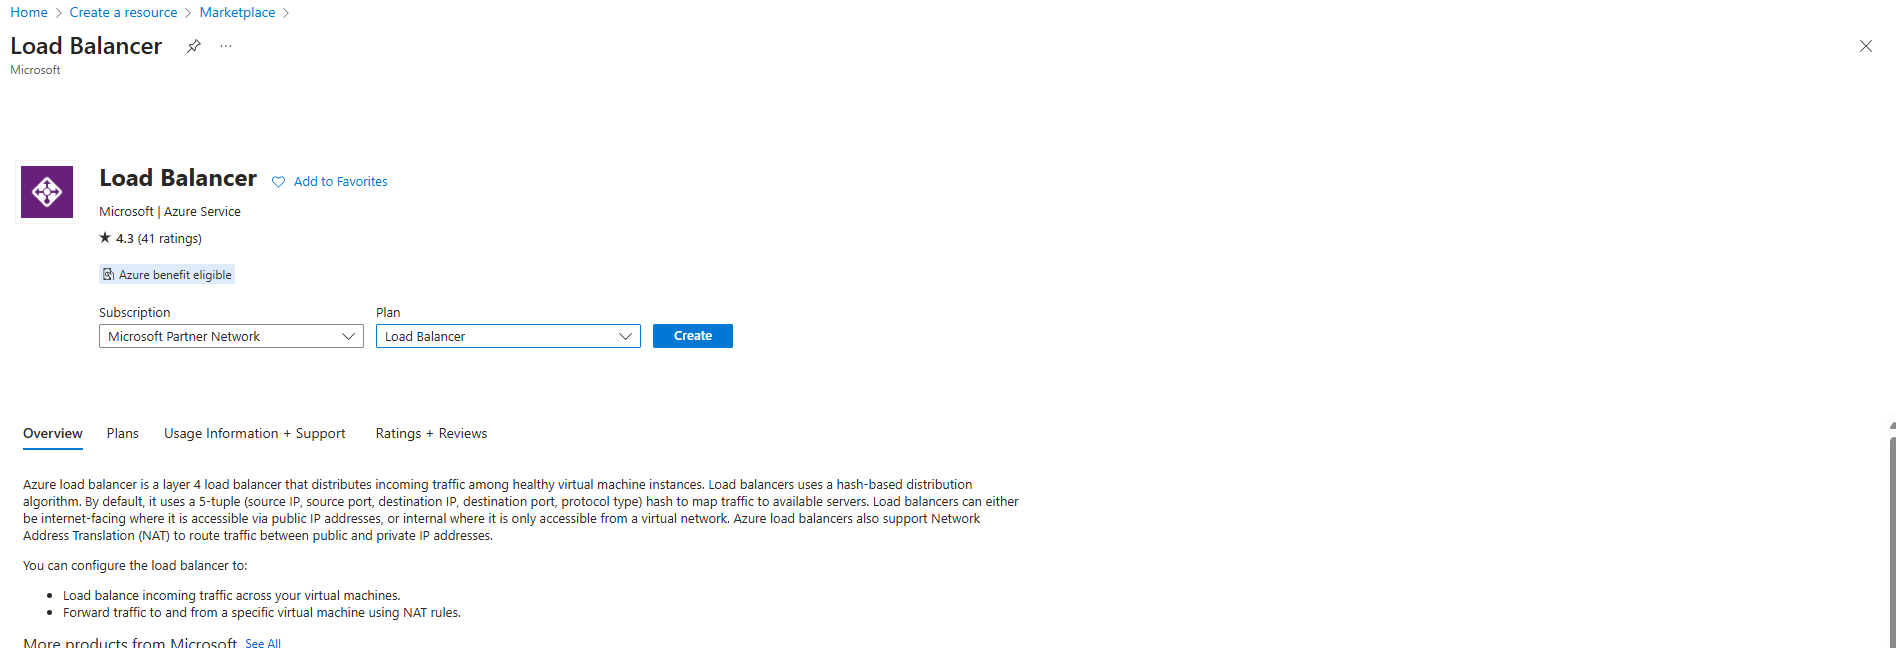
When searching for “Load Balancer” in the Azure Marketplace, you’ll find Microsoft’s native Azure Load Balancer listed first and highlighted below, fully managed, built-in service for Layer 4 traffic distribution. The Marketplace also includes third-party load balancers from vendors like F5, Citrix, and Check Point, which offer additional Layer 7 or advanced traffic-management features.
For the type we will create a public load balancer below. On September 30, 2025, Basic Load Balancer was retired. For more information, see the official announcement
You can use internal load balancers to balance traffic from private IP addresses. Public load balancers can balance traffic originating from public IP addresses.
More about here https://learn.microsoft.com/en-us/azure/load-balancer/load-balancer-overview.
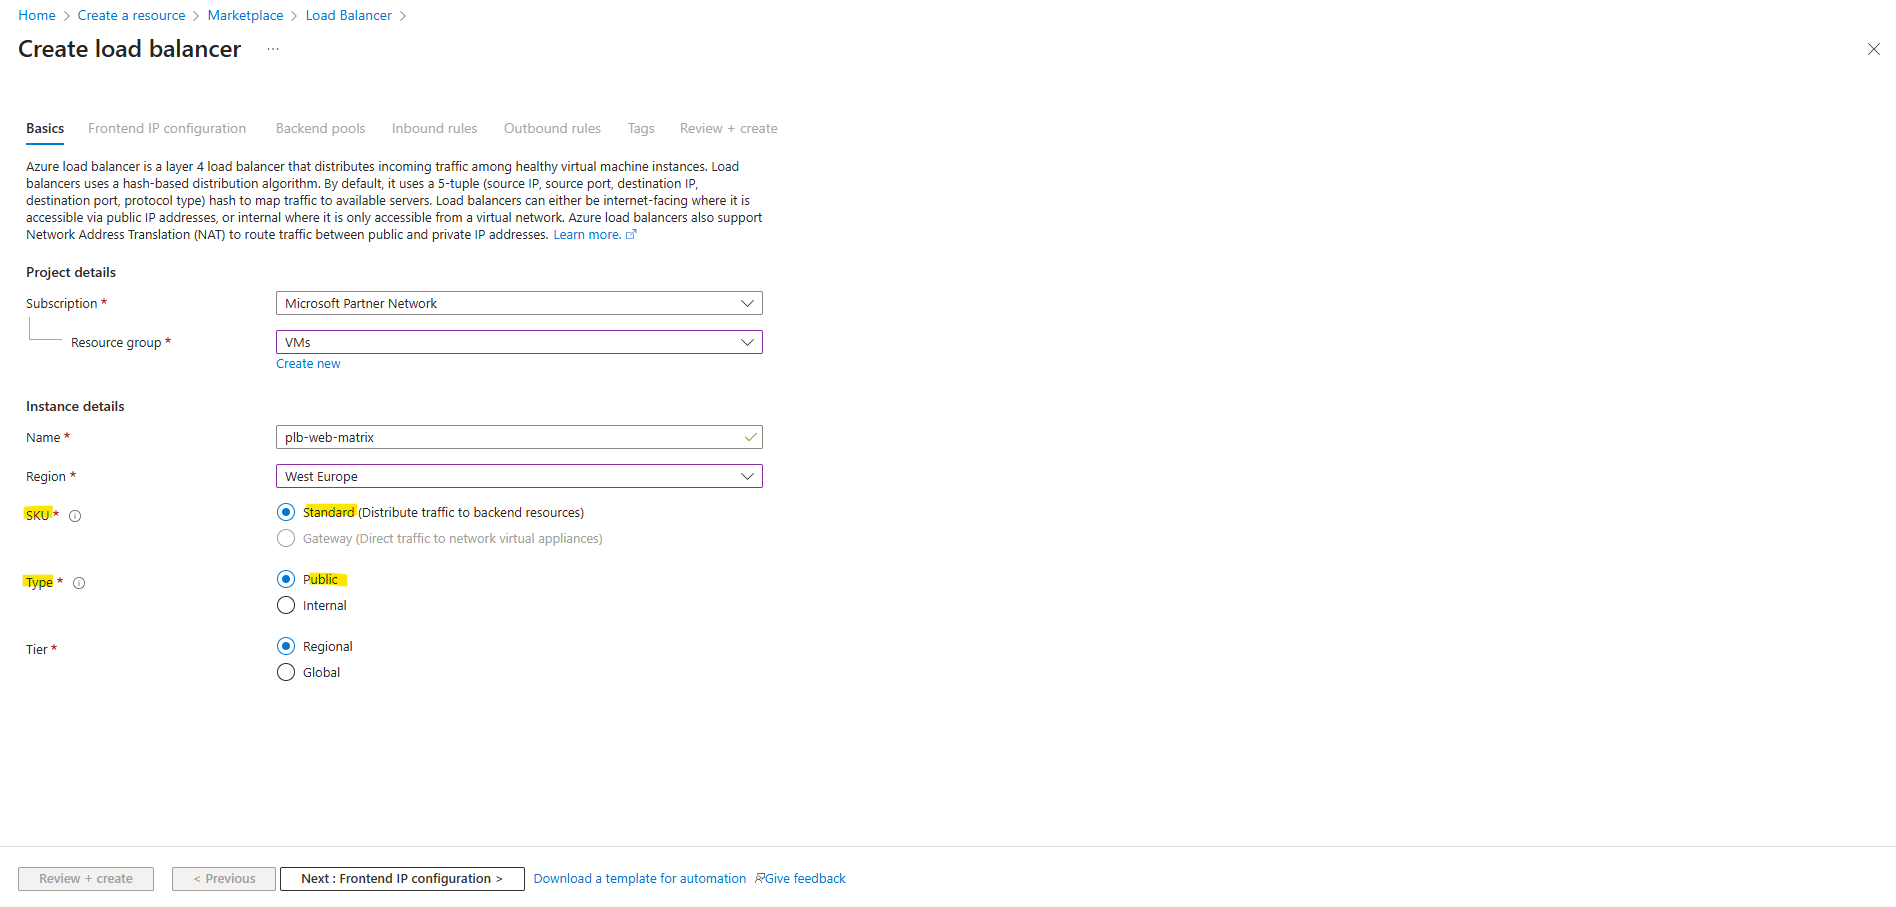
For the Tier I will leave the default setting with Regional.
The Regional Tier means the load-balancer (frontend IP, routing, etc) is scoped to a single Azure region. Traffic comes into that region and is balanced across backend resources in that same region.
The Public IP is in a region; reachable globally but routing goes into that region. When switching to Global, it uses anycast (or Microsoft backbone) so that traffic enters from nearest participating region and is routed via global network.
More about here https://learn.microsoft.com/en-us/azure/load-balancer/cross-region-overview.

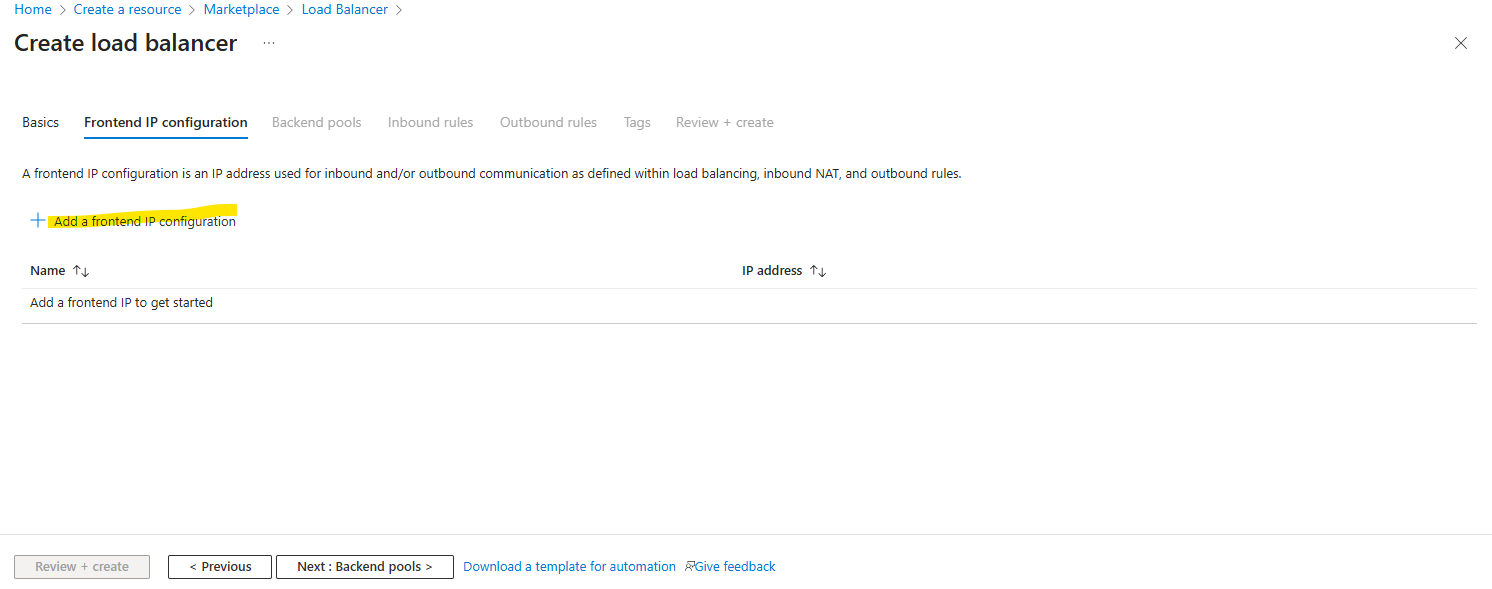
Frontend IP Configuration
Next we need to add a new frontend IP.
A frontend IP configuration defines how external clients reach your Load Balancer by assigning a public or private IP address to its frontend.
You can add multiple frontend configurations when you need additional IPs for different services or inbound NAT rules.
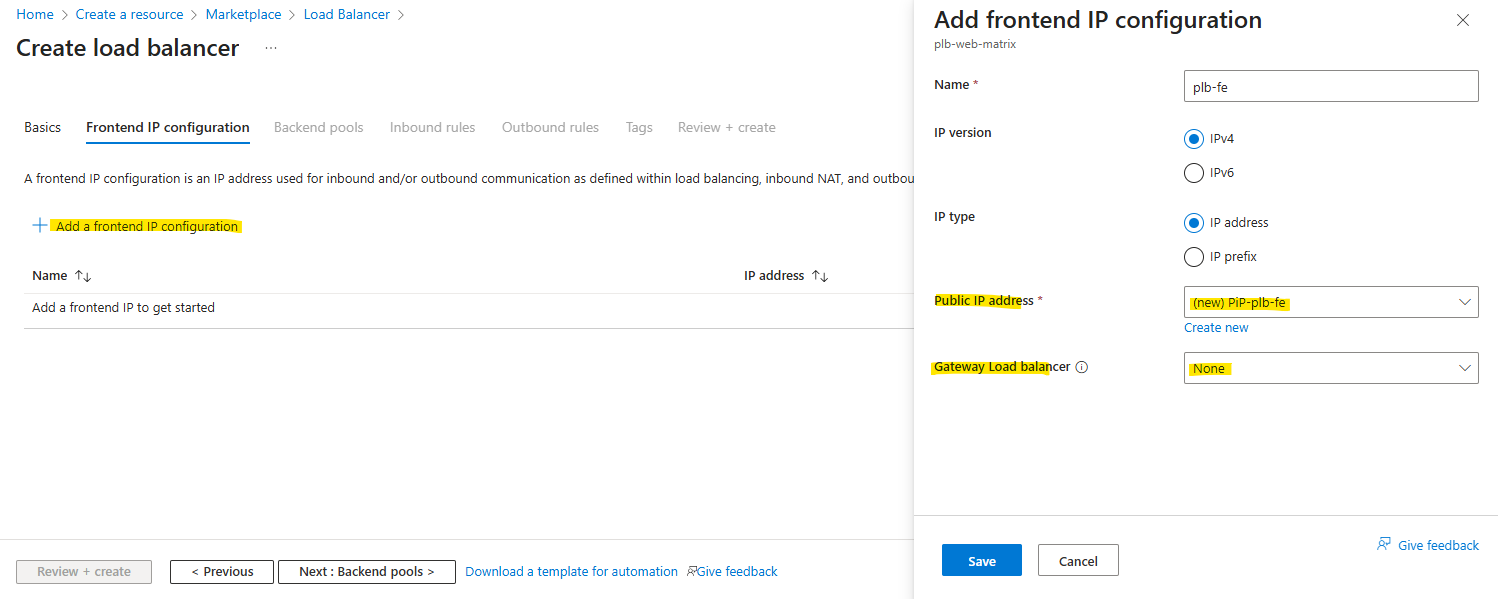
For the frontend IP configuration select the IP version, the IP type (IP address or IP prefix), a public IP address and optional you can select a Gateway Load Balancer. When selecting IP Prefix, we can create a contiguous block/range of public IP addresses (e.g., a /28 = 16 addresses) from which you can use one or more addresses. This is useful for scale, outbound SNAT port capacity, or when you need a range of front-end IPs.
When configuring the frontend IP configuration for a Azure Load Balancer, we can also select a Gateway Load Balancer.
This option is used when you want to chain the frontend IP of the Load Balancer to a Azure Gateway Load Balancer (GWLB) so the traffic is steered through a network virtual appliance before reaching your backend pool.

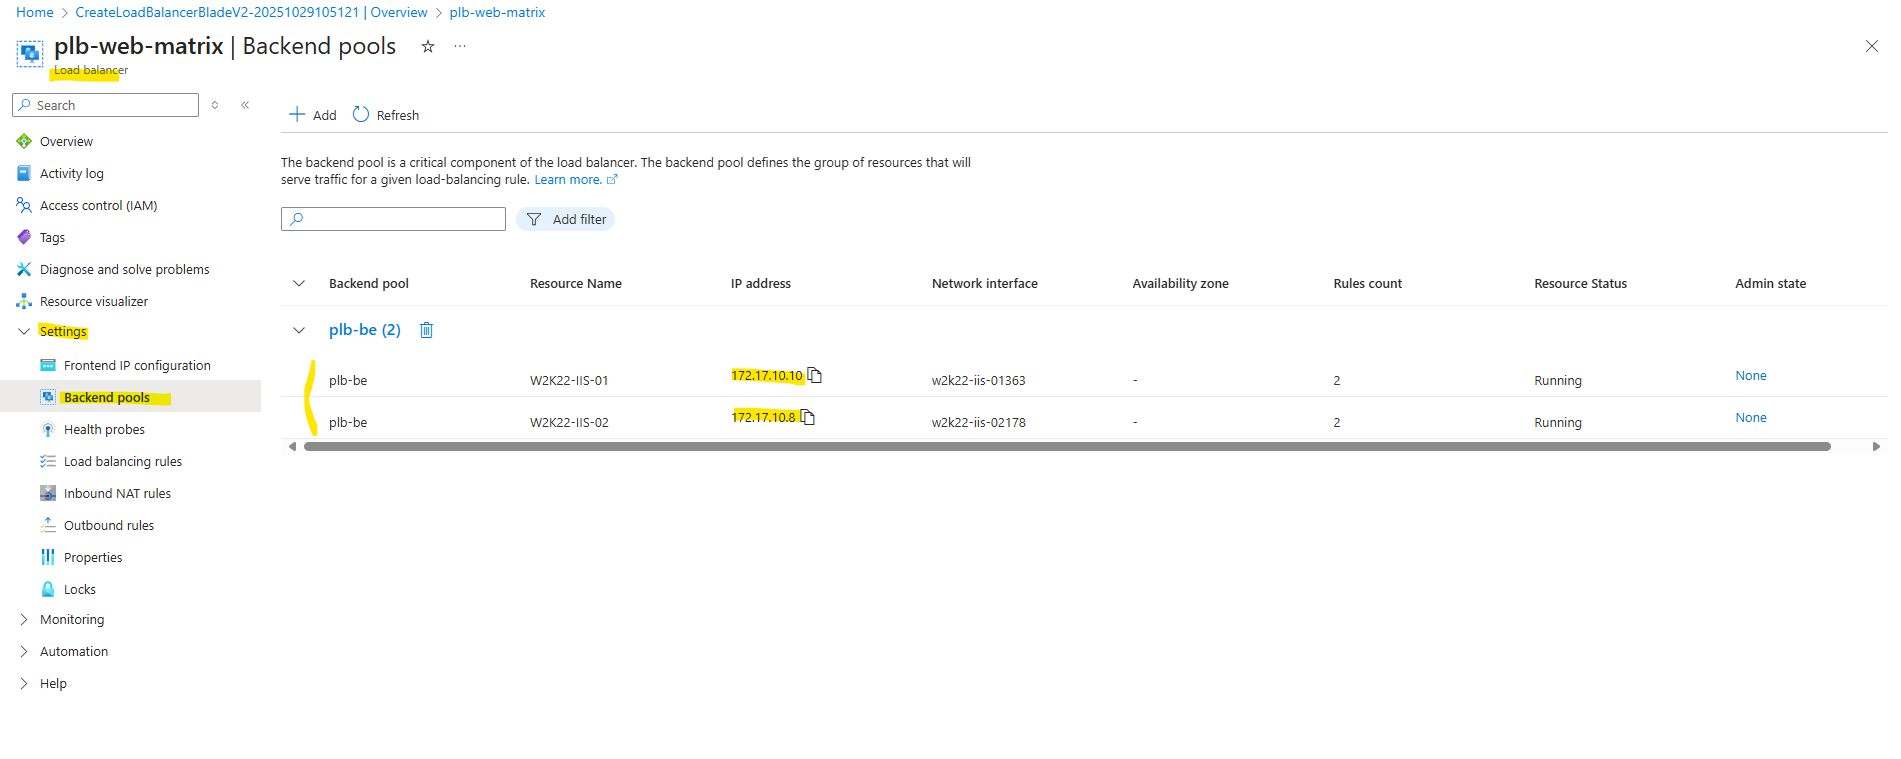
Backend Pools
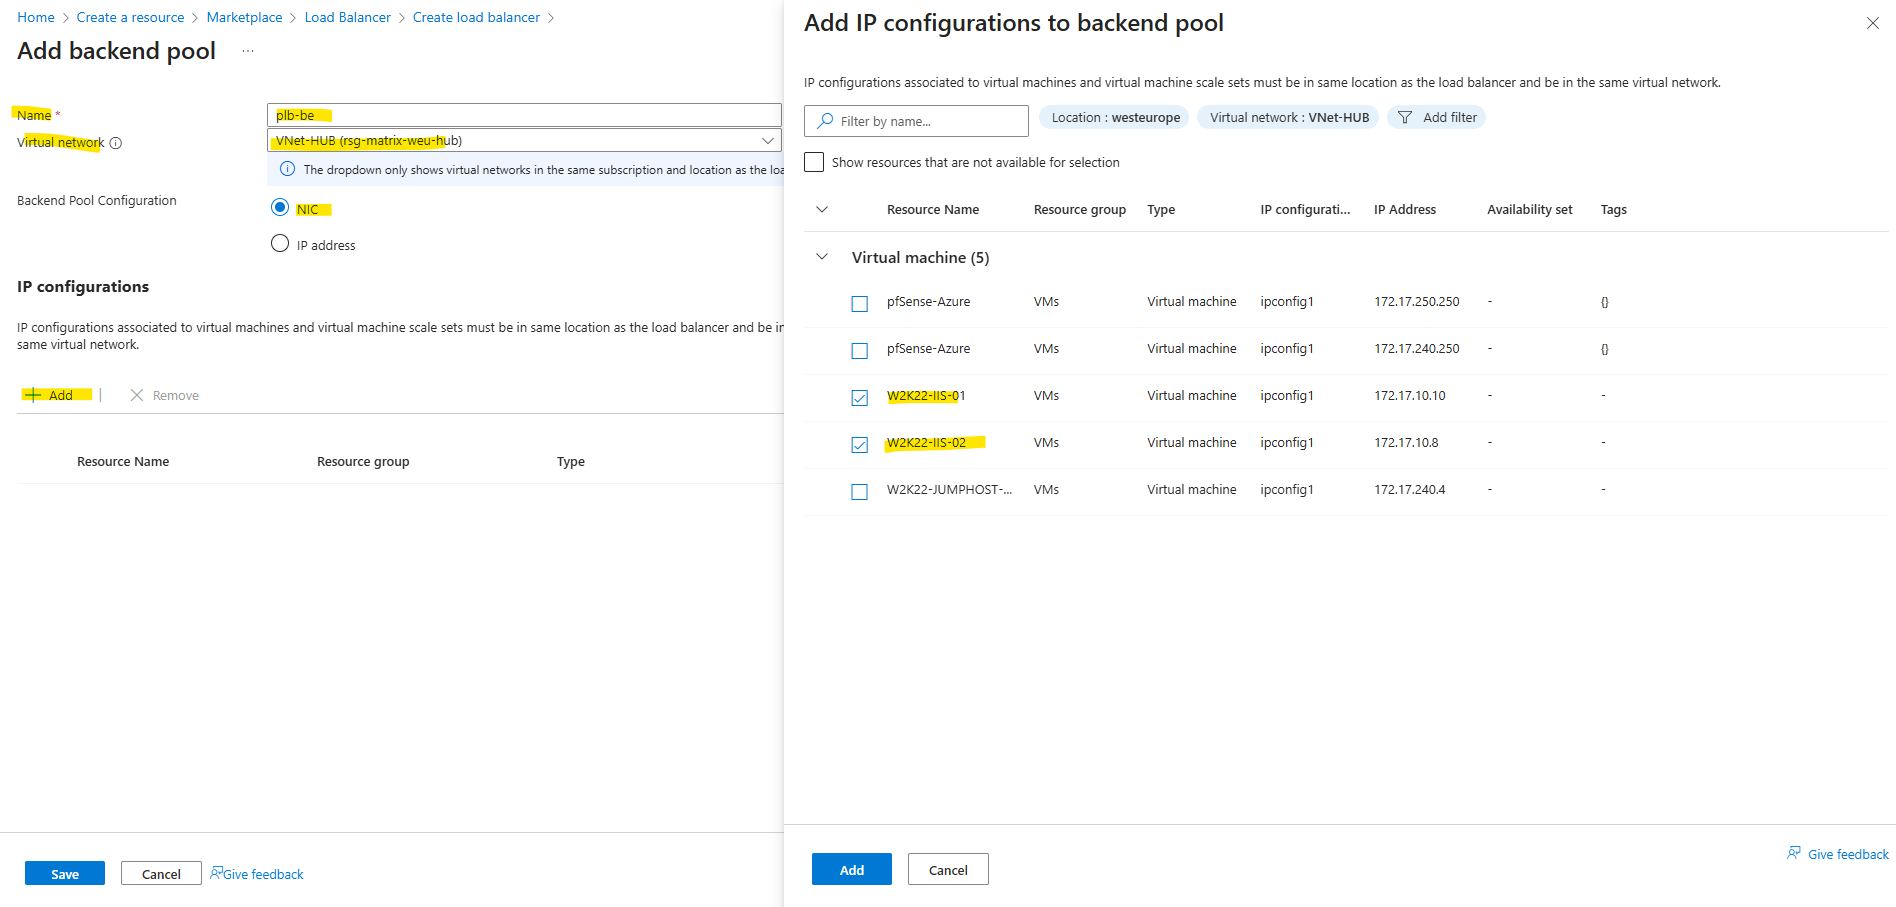
Next add a new backend pool.
A backend pool defines the set of virtual machines or IP addresses that will receive traffic from the load balancer.
When creating it, you associate either the NICs or private IPs of your backend instances so the load balancer knows where to forward incoming requests.
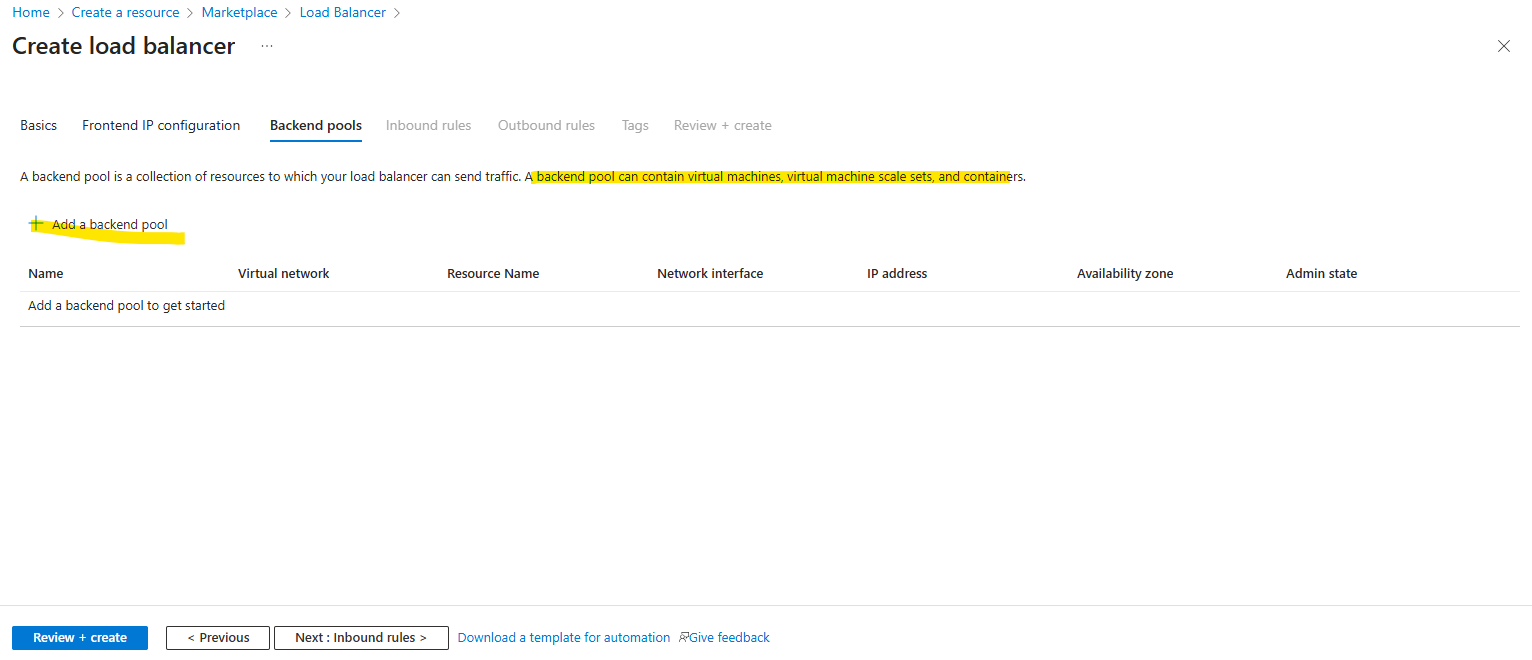
First, pick the virtual network where our backend VMs actually live, that’s where the Load Balancer will hunt for targets.
Then choose whether you want to attach them by NIC or directly by IP address.
IP based backends can only be used for Standard Load Balancers. The backend resources must be in the same virtual network as the load balancer for IP based LBs.
IP-based load balancers backend instances must still be virtual machines or virtual machine scale sets. Attaching other PaaS services to the backend pool of an IP based Load Balancer is not supported.
When a backend pool is configured by IP address, it will behave as a Basic Load Balancer with default outbound enabled. For secure by default configuration and applications with demanding outbound needs, configure the backend pool by NIC.
More about here https://learn.microsoft.com/en-us/azure/load-balancer/backend-pool-management.
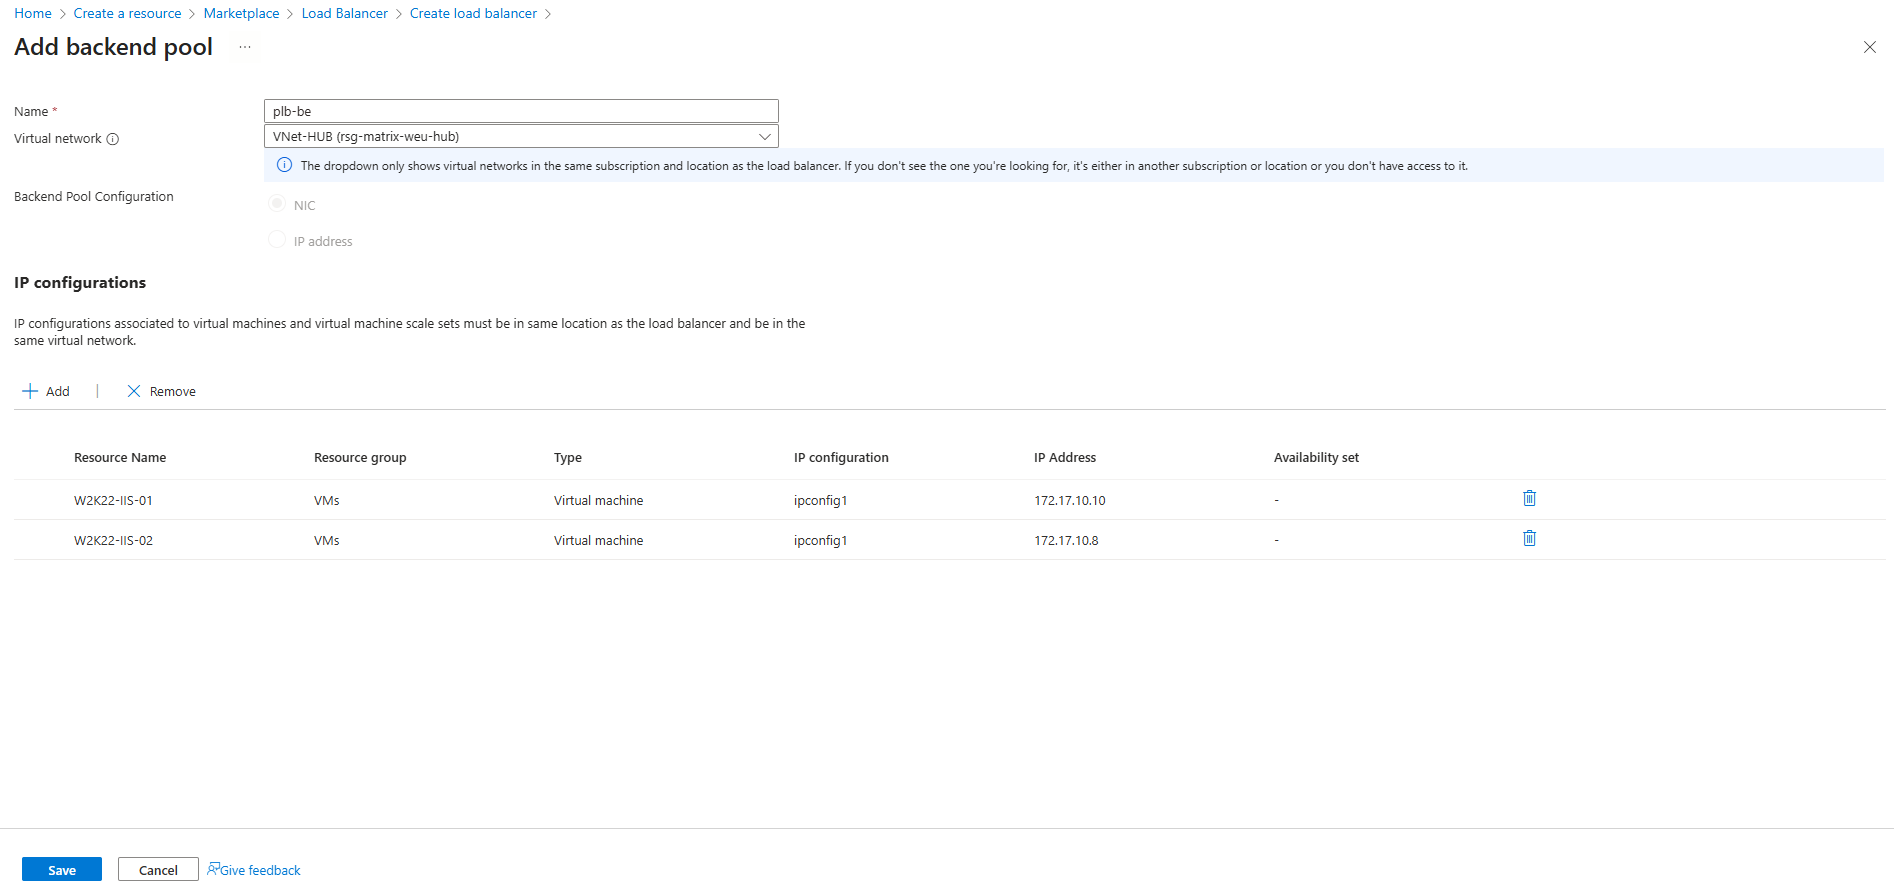
In my case, I’m grabbing the two highlighted NICs (VMs), which be my Windows Server 2022 boxes running IIS and ready to serve traffic.
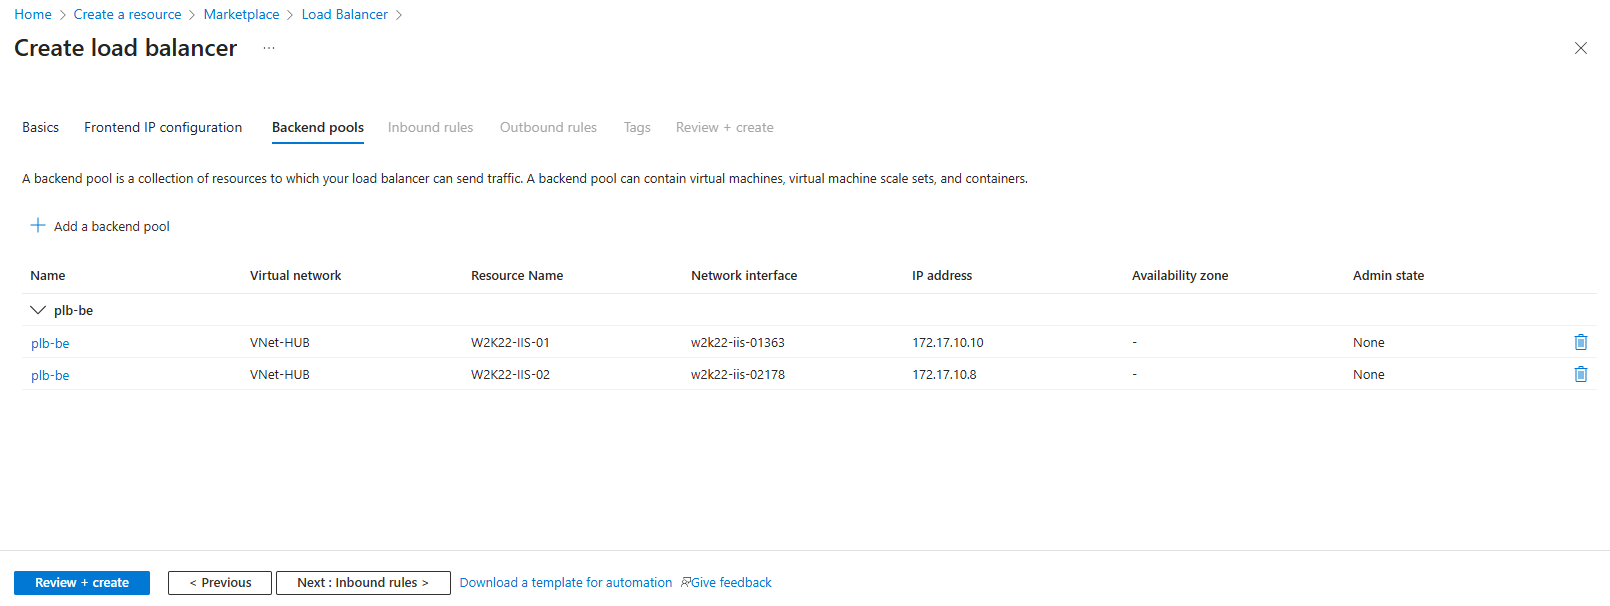
Click on Save.
Click on Next: Inbound rules.
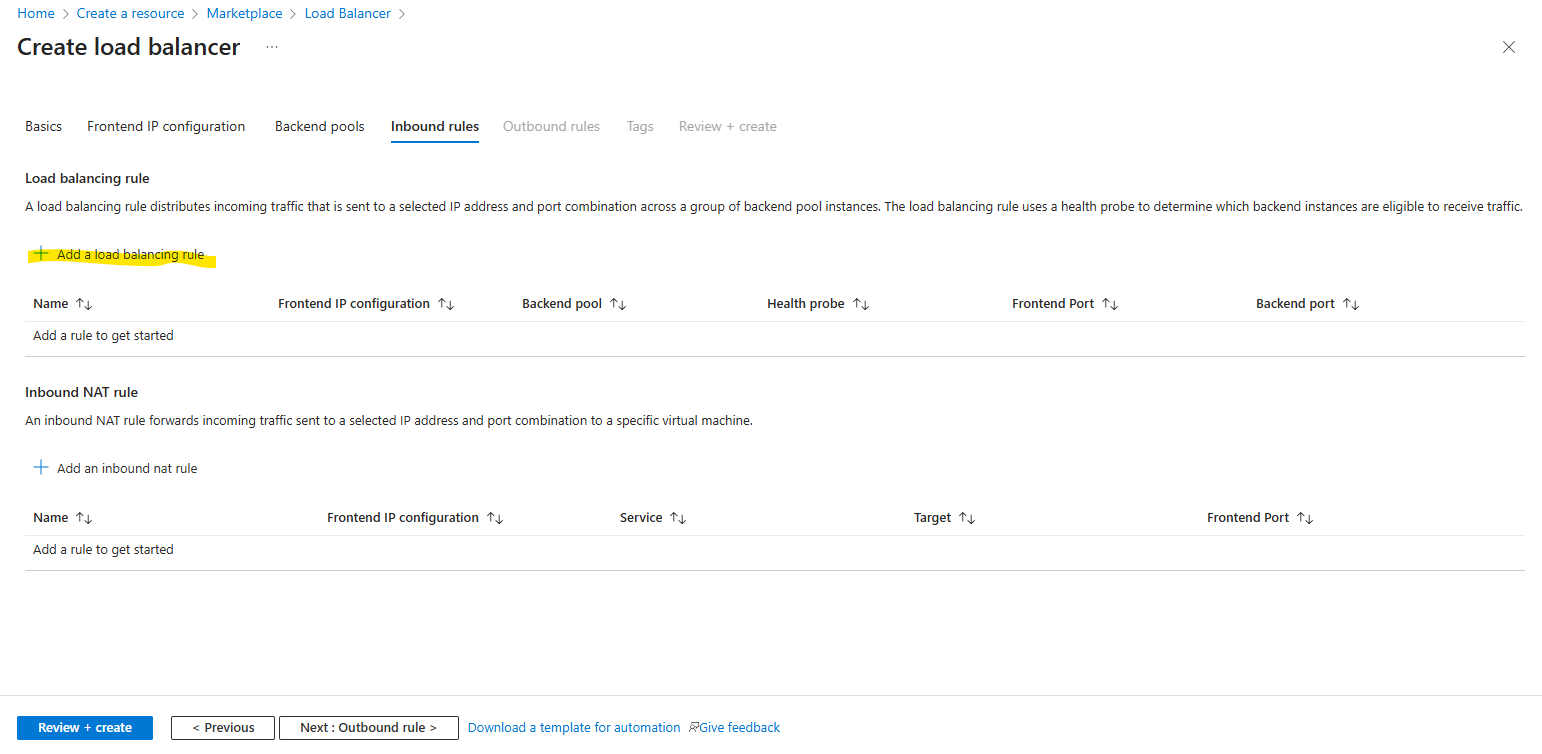
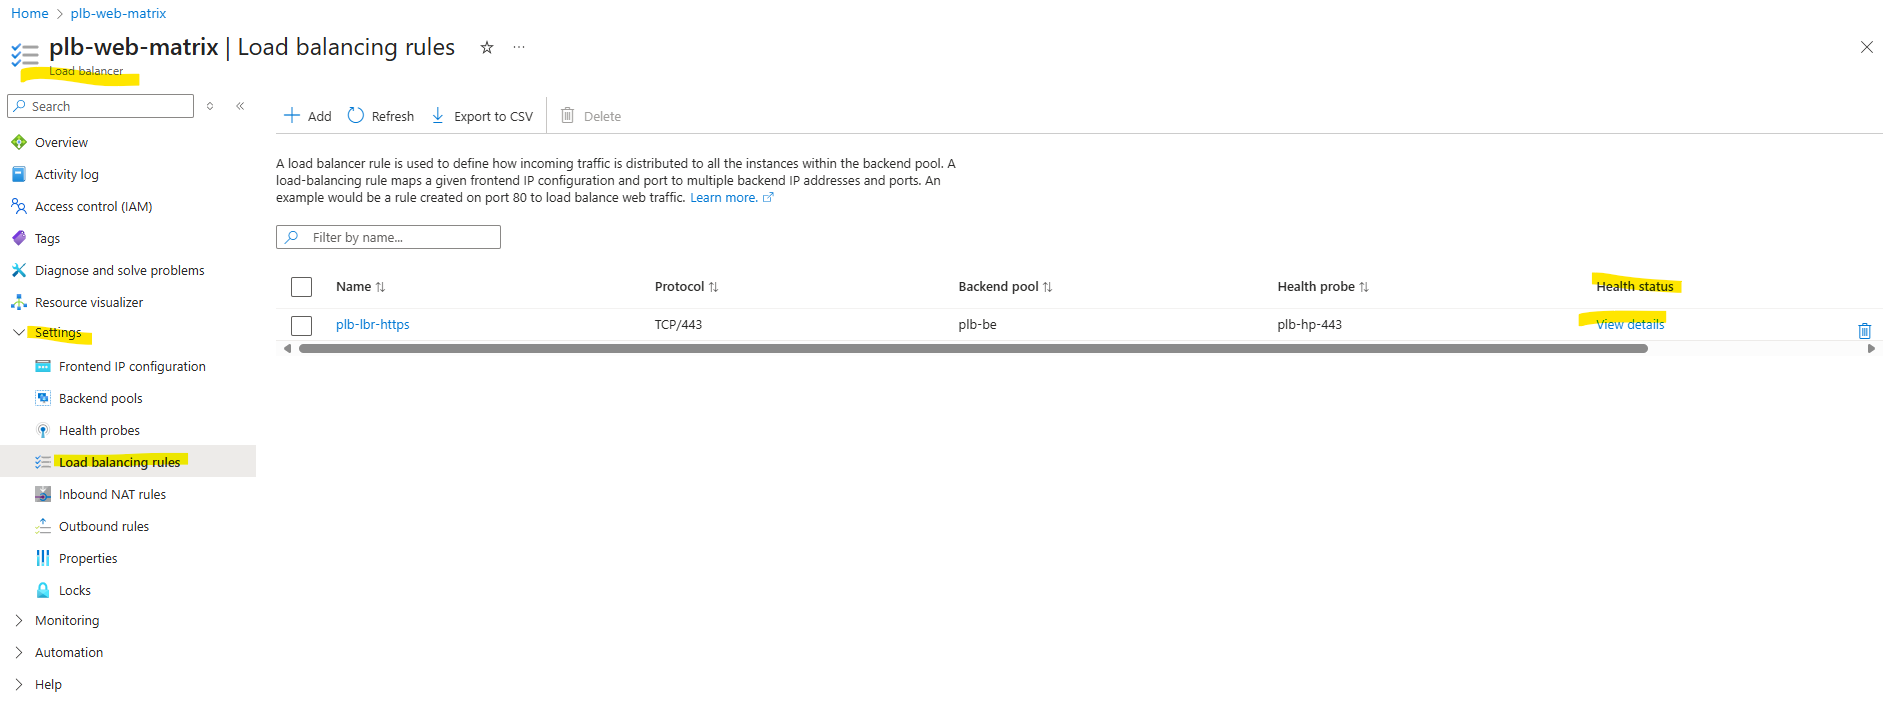
Inbound Rules (Load Balancing Rules and Inbound NAT Rules)
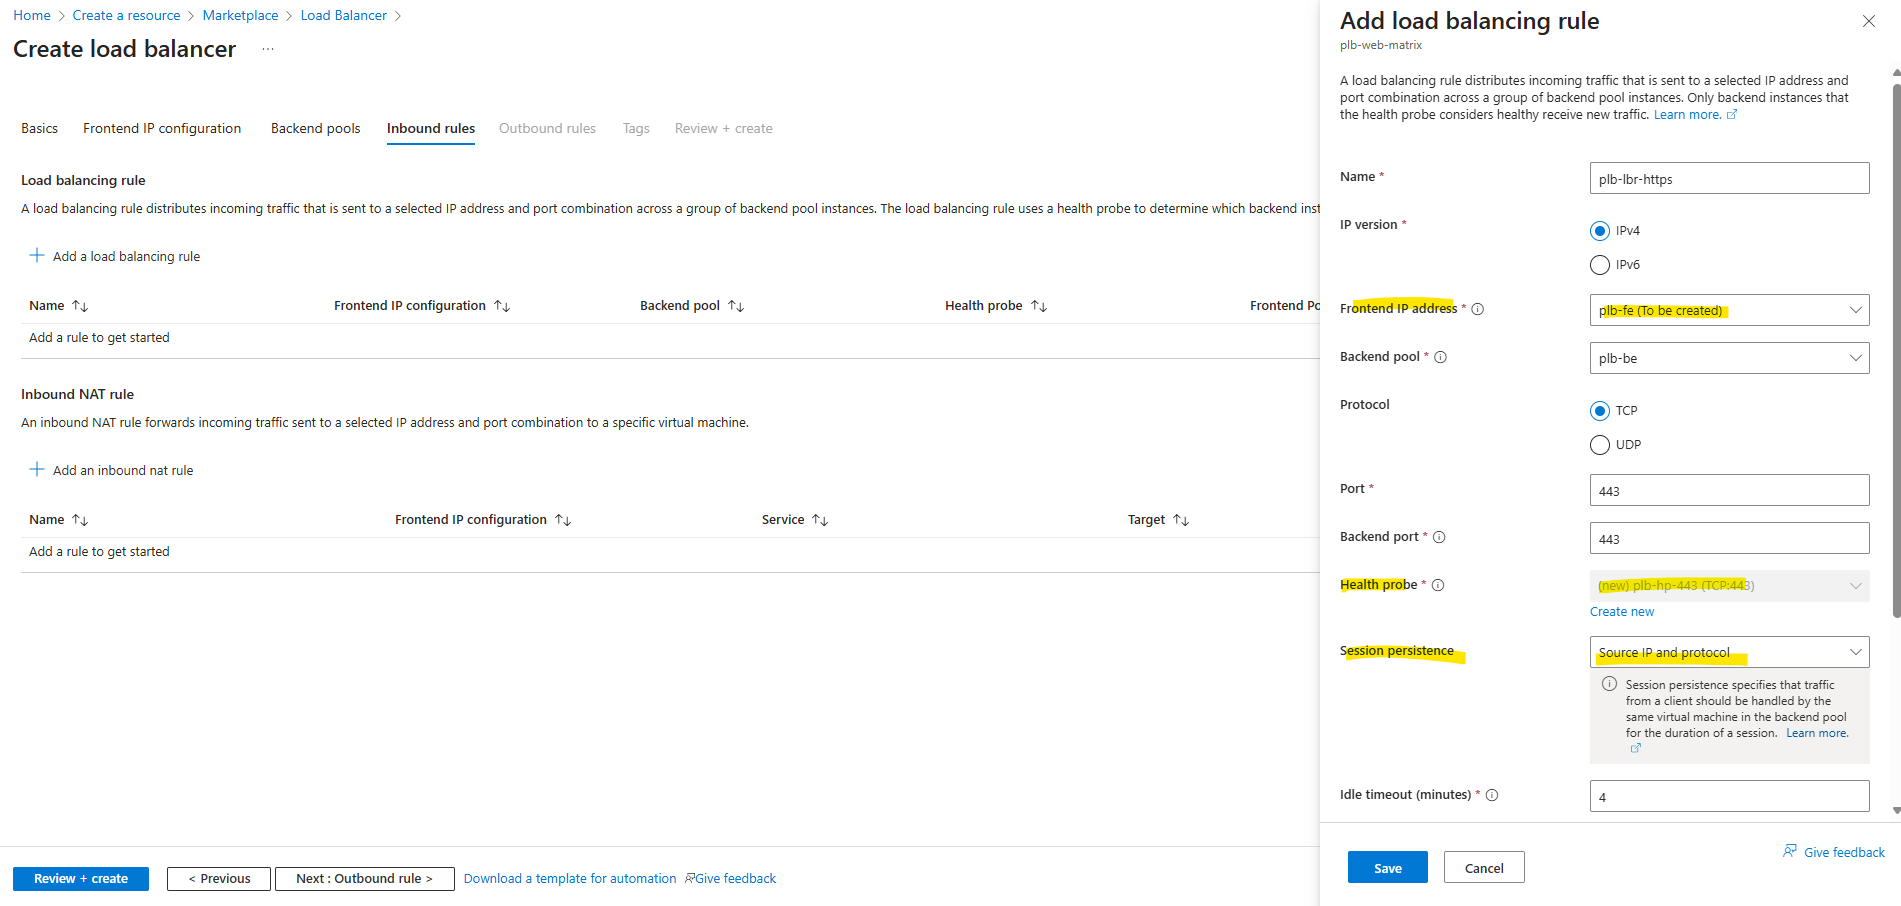
Below we need to add a new Load balancing rule and Inbound NAT rule.
Inbound rules control how traffic enters your Load Balancer and reaches backend systems. Here, you typically start by adding a Load Balancing rule for shared services like HTTP/HTTPS, and if you need direct access to individual VMs, you can then add Inbound NAT rules as well.
Azure Load Balancer doesn’t currently support TLS/SSL termination as it’s a pass through network load balancer.
Source: https://docs.azure.cn/en-us/load-balancer/load-balancer-faqs#does-azure-load-balancer-support-tls-ssl-termination
Below I will set the session persistence to Source IP and protocol.
Session persistence ensures that repeated connections from the same client are consistently directed to the same backend server, which is important for applications that maintain user state.
Azure Load Balancer supports several persistence modes so you can match the behavior to your app’s needs, such as keeping web sessions stable across multiple requests.
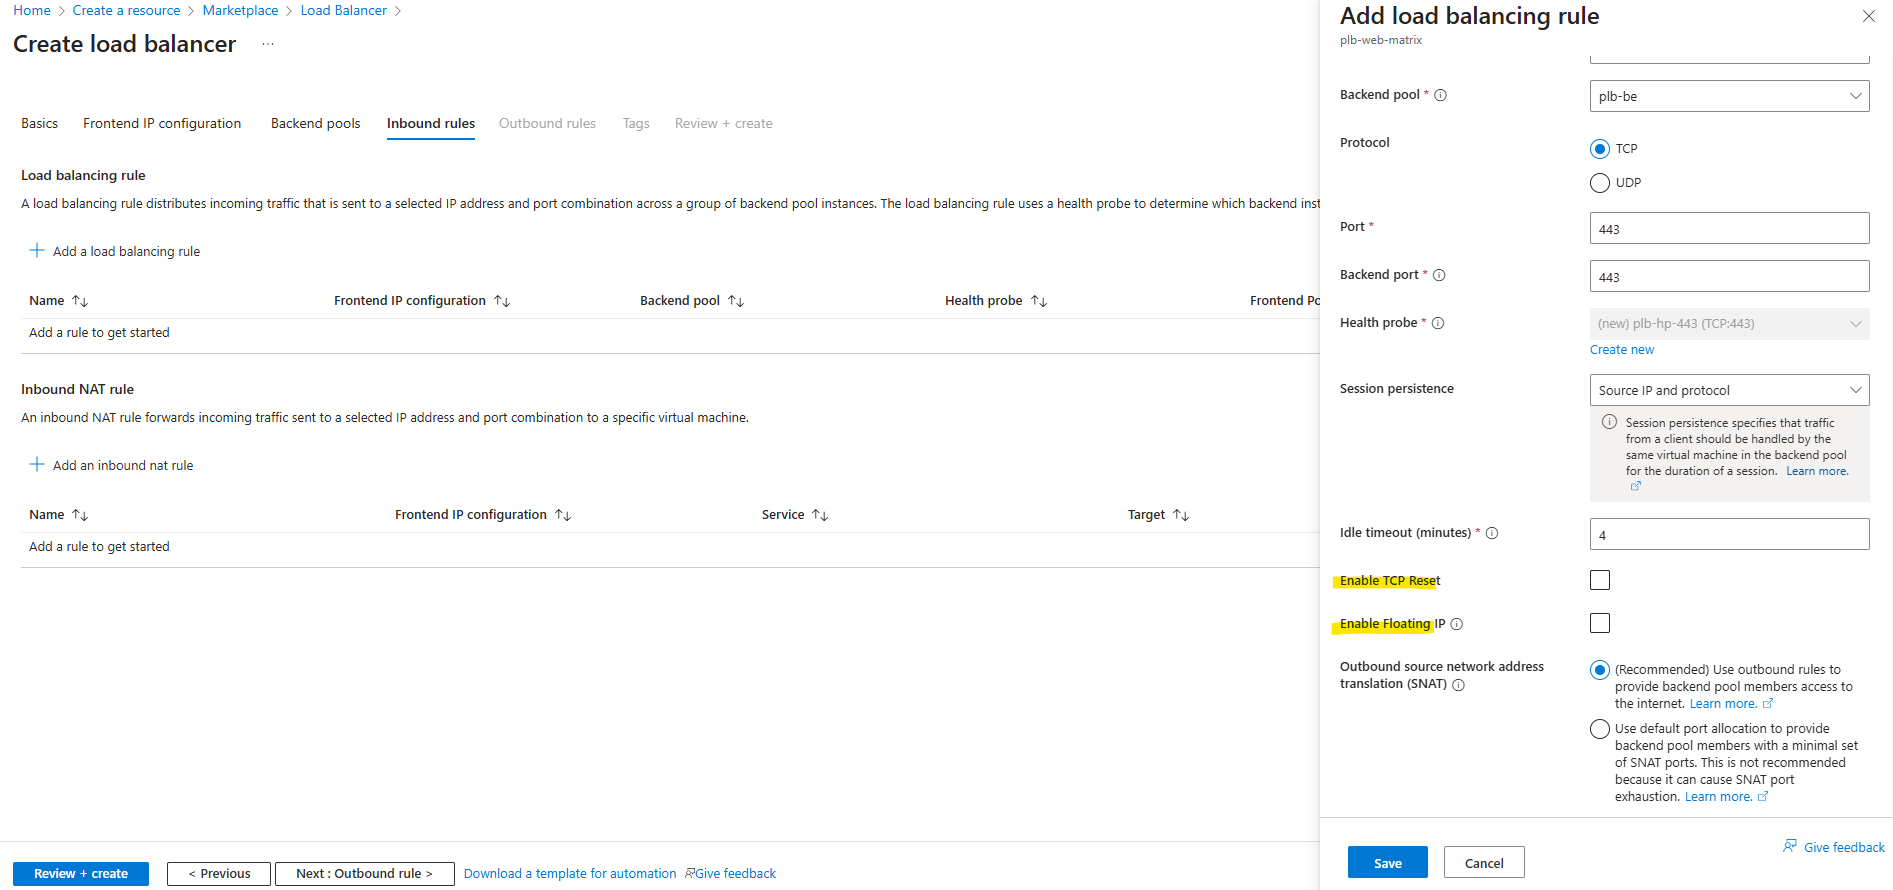
Below we can also enable Floating IP and TCP Reset.
The Floating IP feature in Azure Load Balancer is a configuration setting that enables direct server return (DSR) scenarios. It’s particularly useful for high-performance and low-latency applications, such as SQL Always On availability groups or clustered services that require the same IP address to be used across multiple backend instances.
Floating IP allows multiple backend VMs to respond to traffic on the same IP address. When enabled, the load balancer does not rewrite the destination IP address of incoming packets. This means the packet arrives at the backend VM with the original IP intact.
The backend VM must be configured to listen on the load-balanced IP and respond directly to the client, bypassing the load balancer on the return path.
Direct Server Return (DSR) is a network configuration used in load balancing to forward incoming requests to a backend server, and then send server responses directly back to the client. More about here https://www.haproxy.com/glossary/what-is-direct-server-return-dsr.
When enabled, port forwarding and SNAT (Source Network Address Translation) are not supported. More about here https://learn.microsoft.com/en-us/azure/load-balancer/load-balancer-floating-ip.
For TCP Reset, the Load Balancer’s default behavior is to silently drop flows when the idle timeout of a flow is reached.
Enabling TCP reset causes Load Balancer to send bidirectional TCP Resets (TCP reset packets) on idle timeout to inform your application endpoints that the connection timed out and is no longer usable. Endpoints can immediately establish a new connection if needed. More about here https://learn.microsoft.com/en-us/azure/load-balancer/load-balancer-tcp-reset.
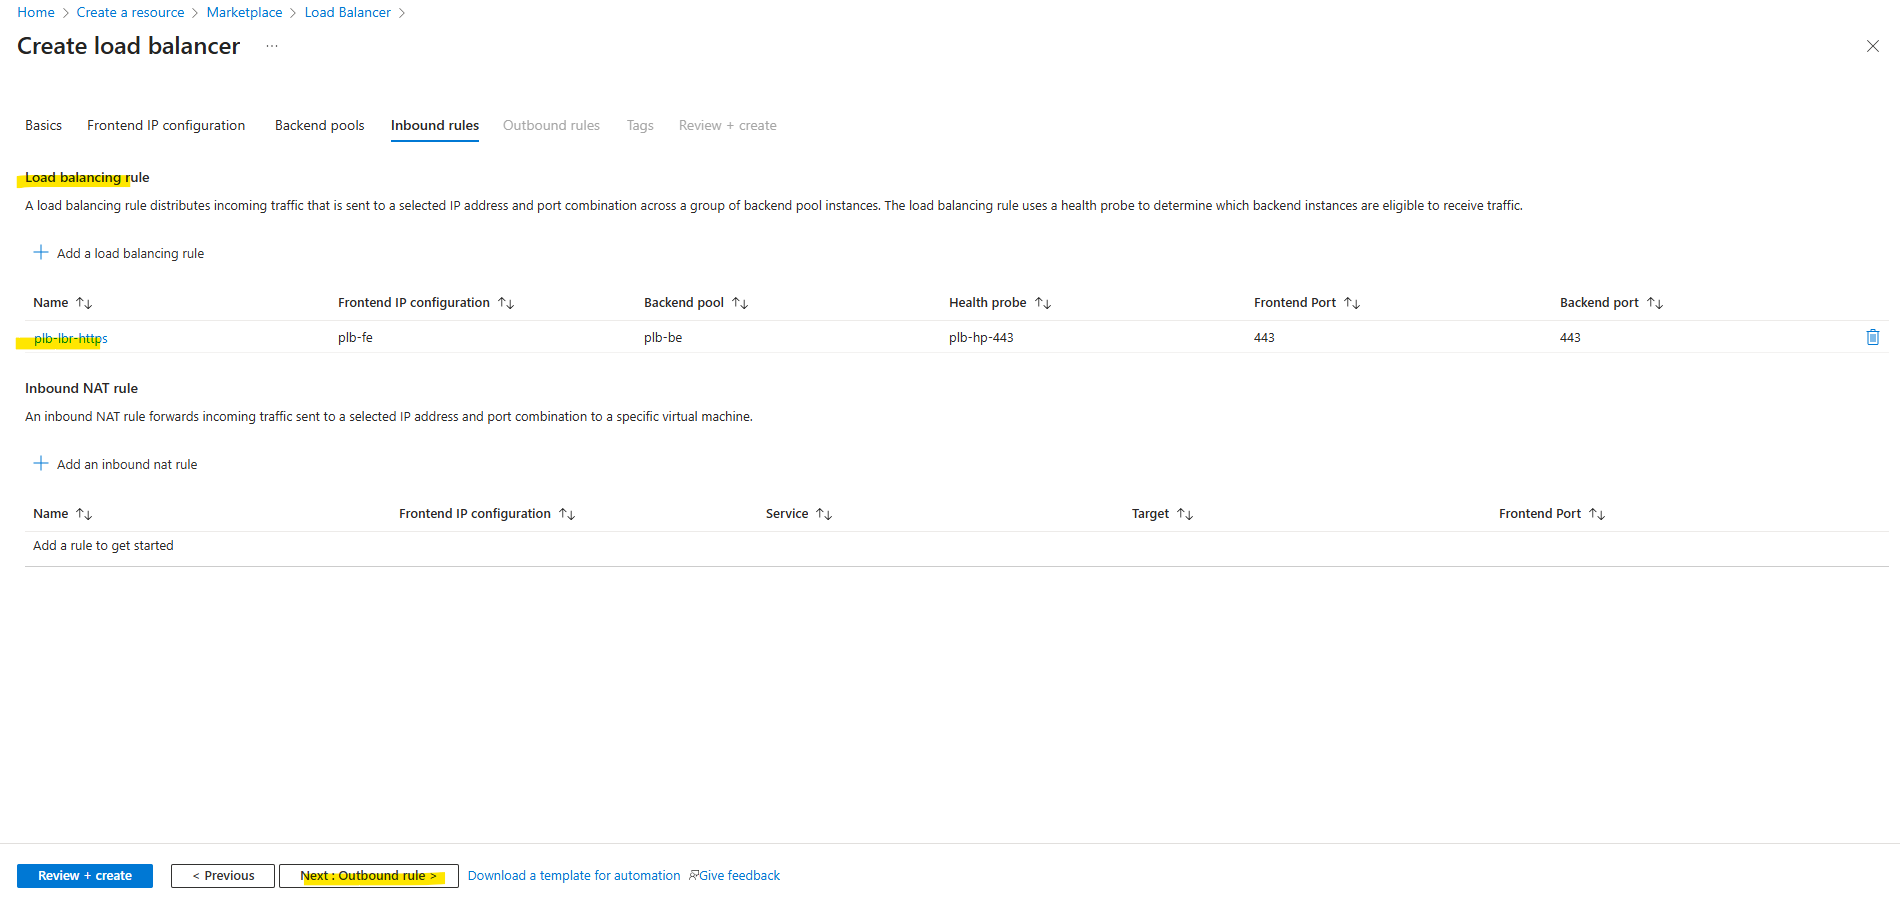
Click on Next: Outbound rule.
An Inbound NAT rule is only needed when you want individual VM access, typically for management or debugging, like RDP/SSH directly to a specific VM through the Load Balancer.
More about here https://learn.microsoft.com/en-us/azure/load-balancer/manage-inbound-nat-rules?tabs=inbound-nat-rule-portal.
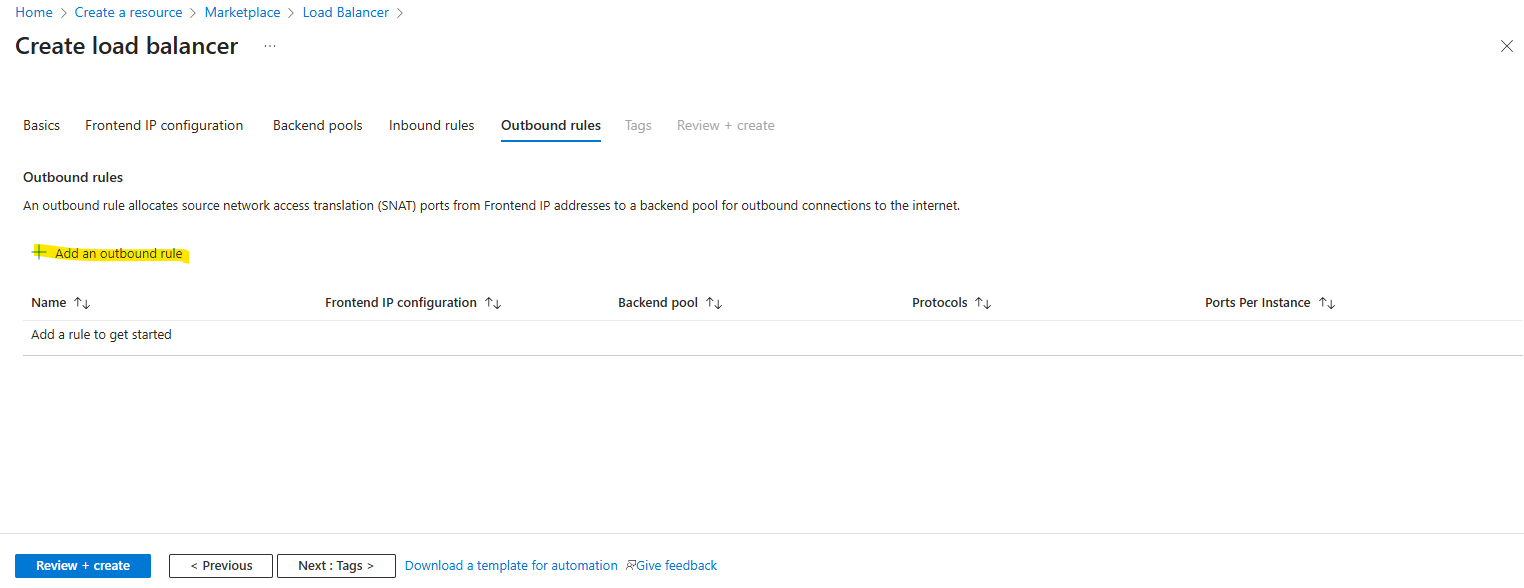
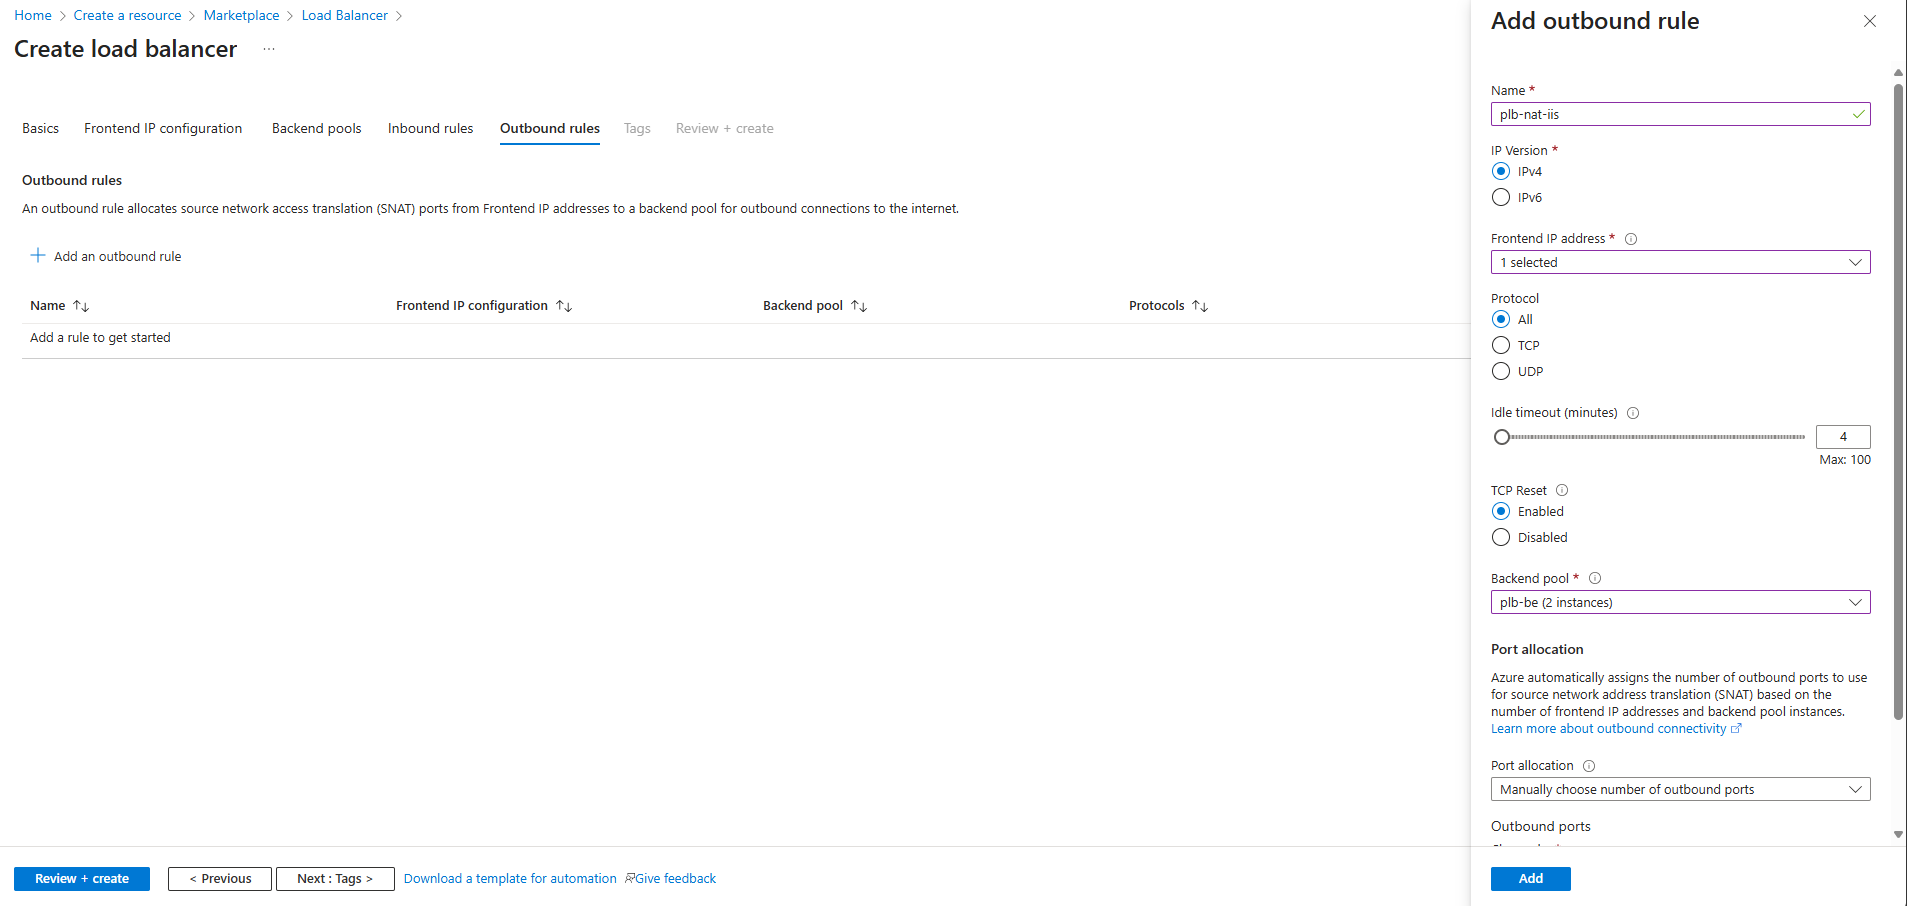
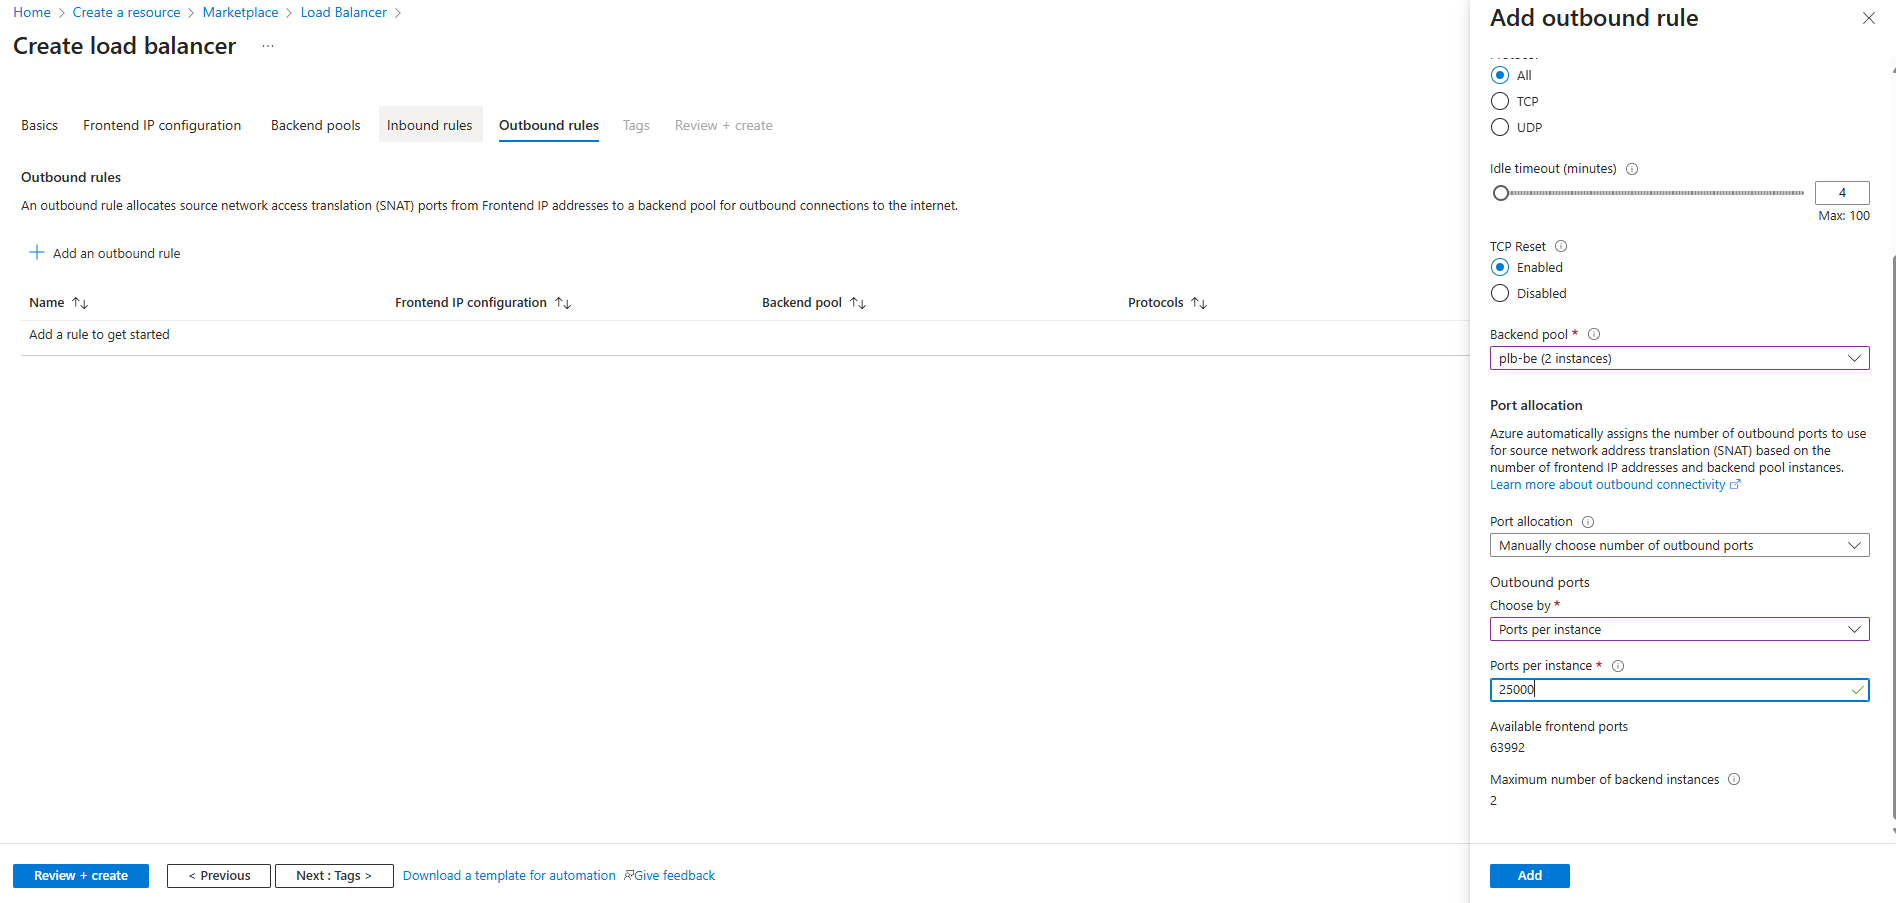
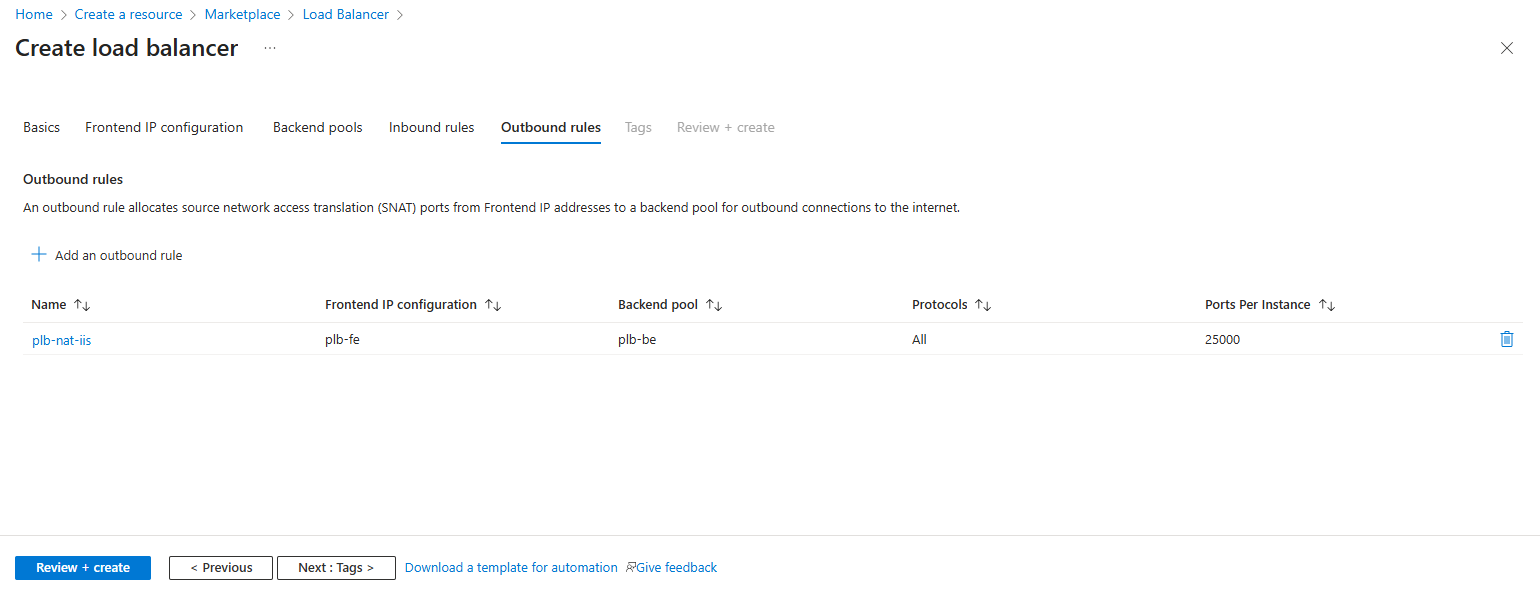
Outbound Rules
Click on Add an outbound rule.
Creating an outbound rule ensures our IIS servers have reliable and controlled internet access through the Load Balancer’s public IP, even after Azure’s default outbound access is retired for new deployments. It also provides predictable outbound IPs and prevents SNAT port exhaustion.
Click on Next: Tags. I will skip them here.
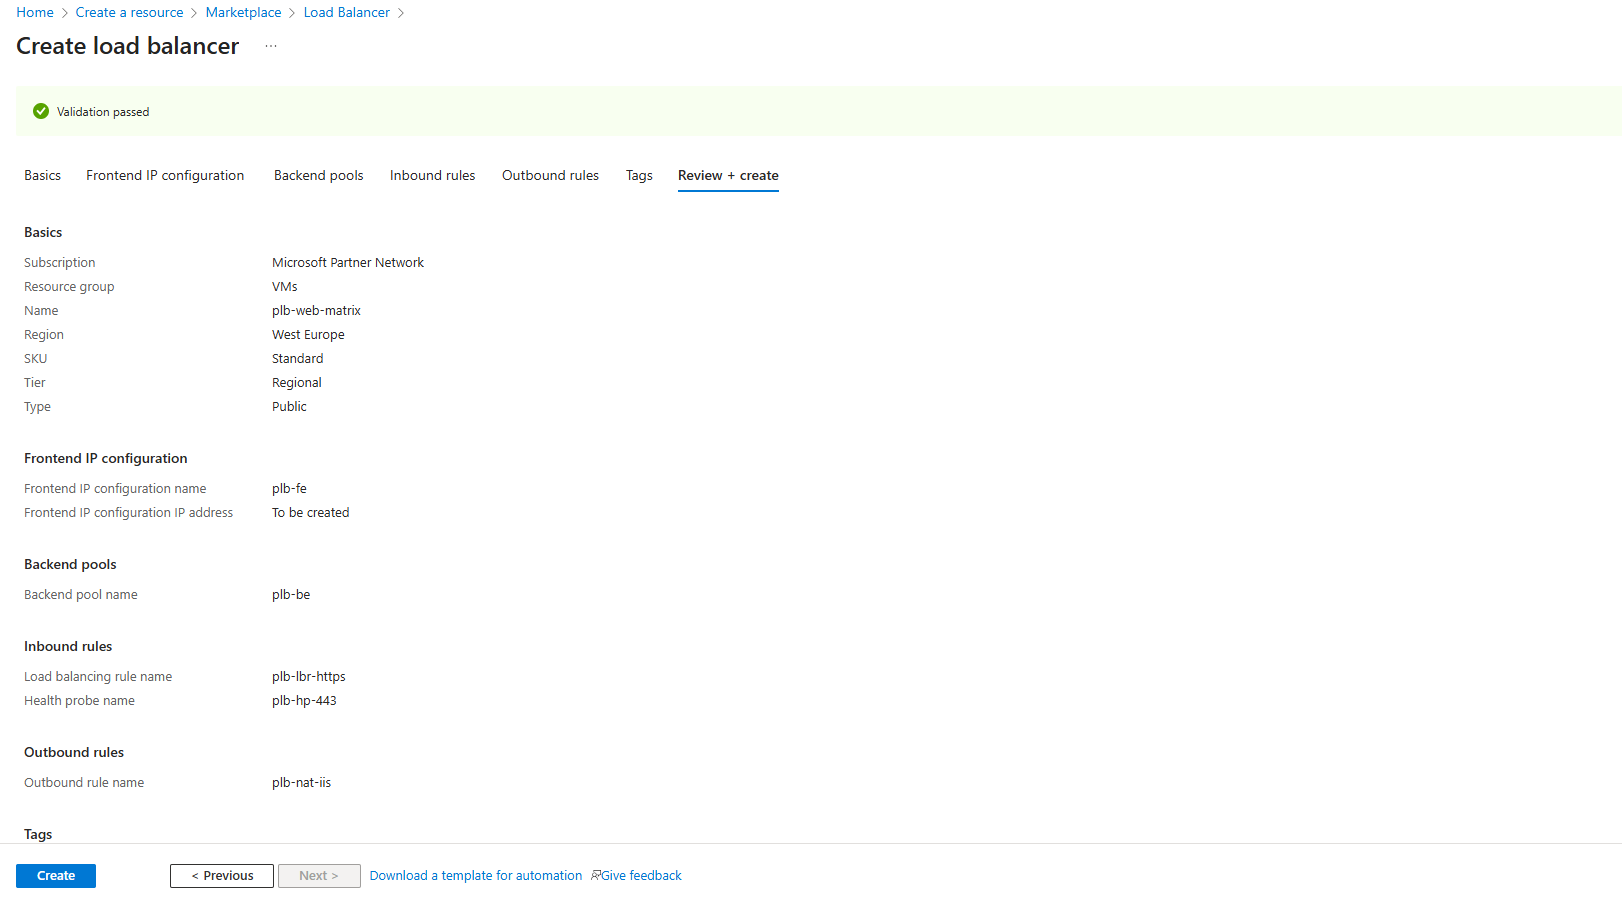
Deployment
Finally click on Create to deploy the public load balancer.
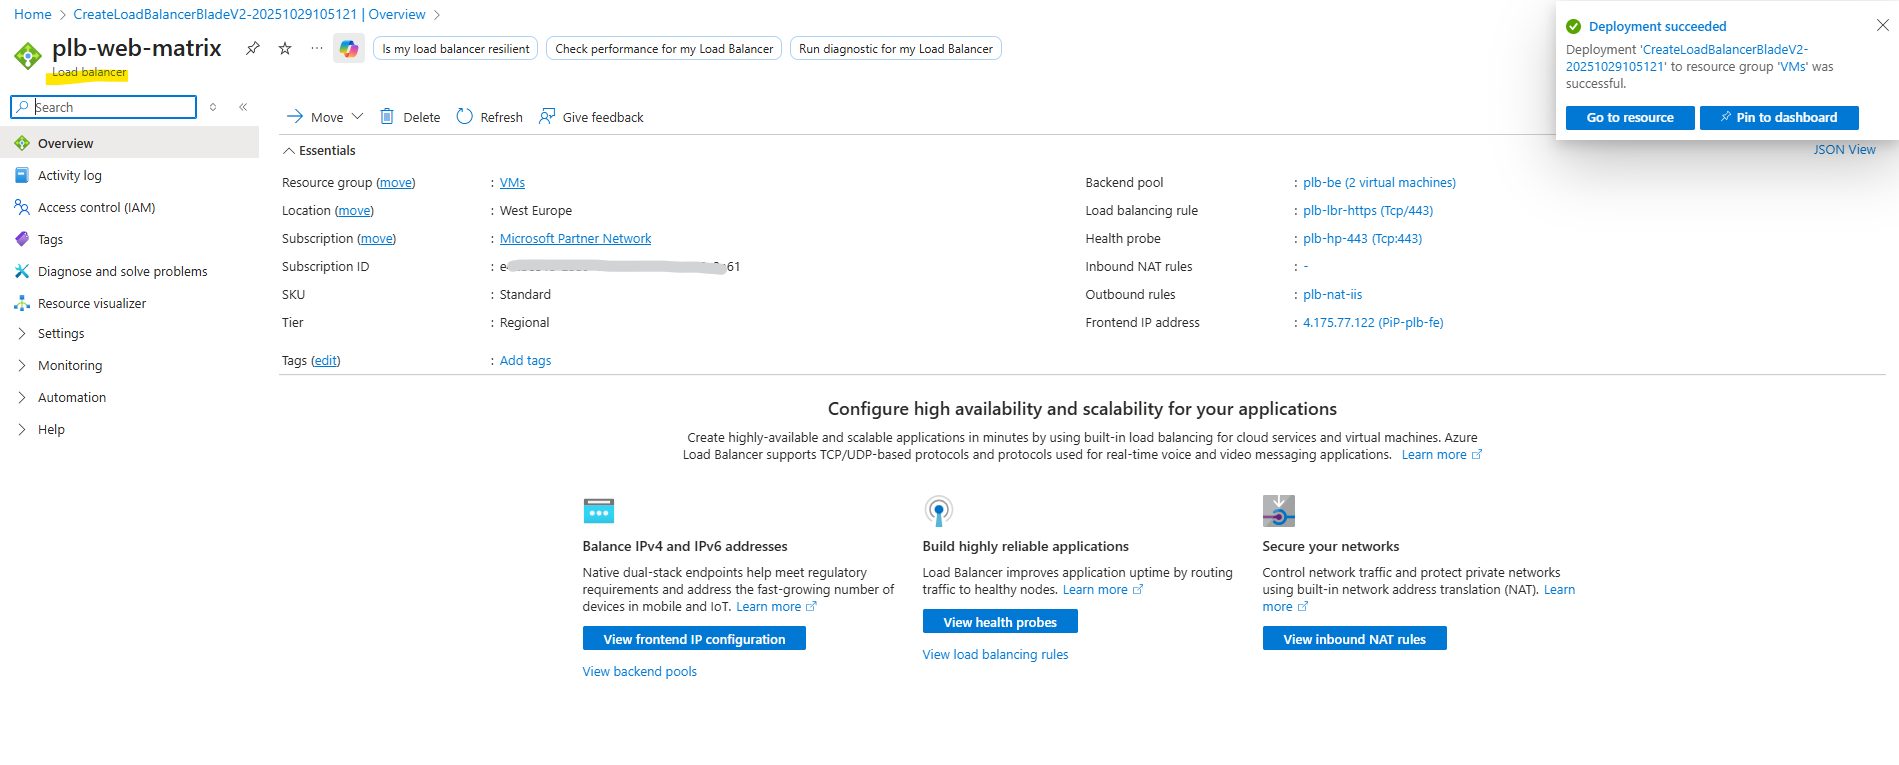

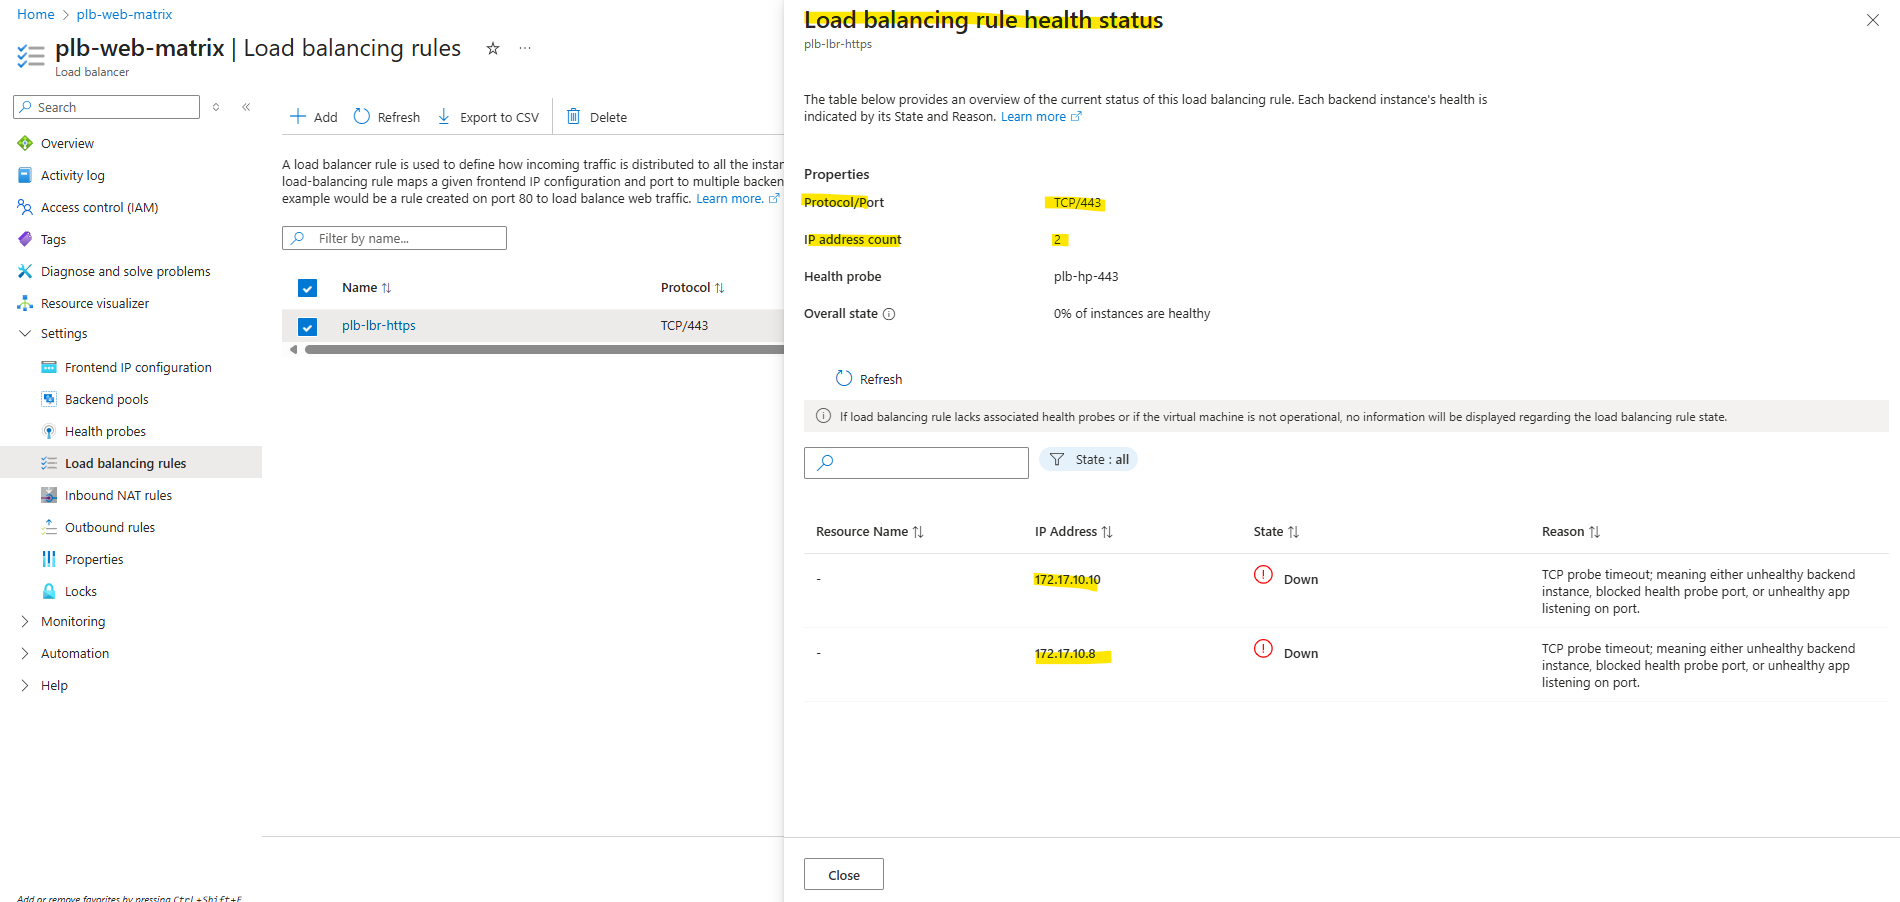
The health status we can check by browsing to our load balancing rules. Select the corresponding rule and click on View details like shown below.
So far the backend instances (VMs) haven’t installed the IIS role and therefore of course no website is configured to listen on TCP port 443.
Set up the Backend IIS Role
For testing purpose I will deploy two Windows Server 2022 virtual machines, each running the IIS role with a simple website.
These backend servers form the foundation of the lab environment and will be used to demonstrate how the Azure Load Balancer distributes traffic and ensures high availability across multiple instances.
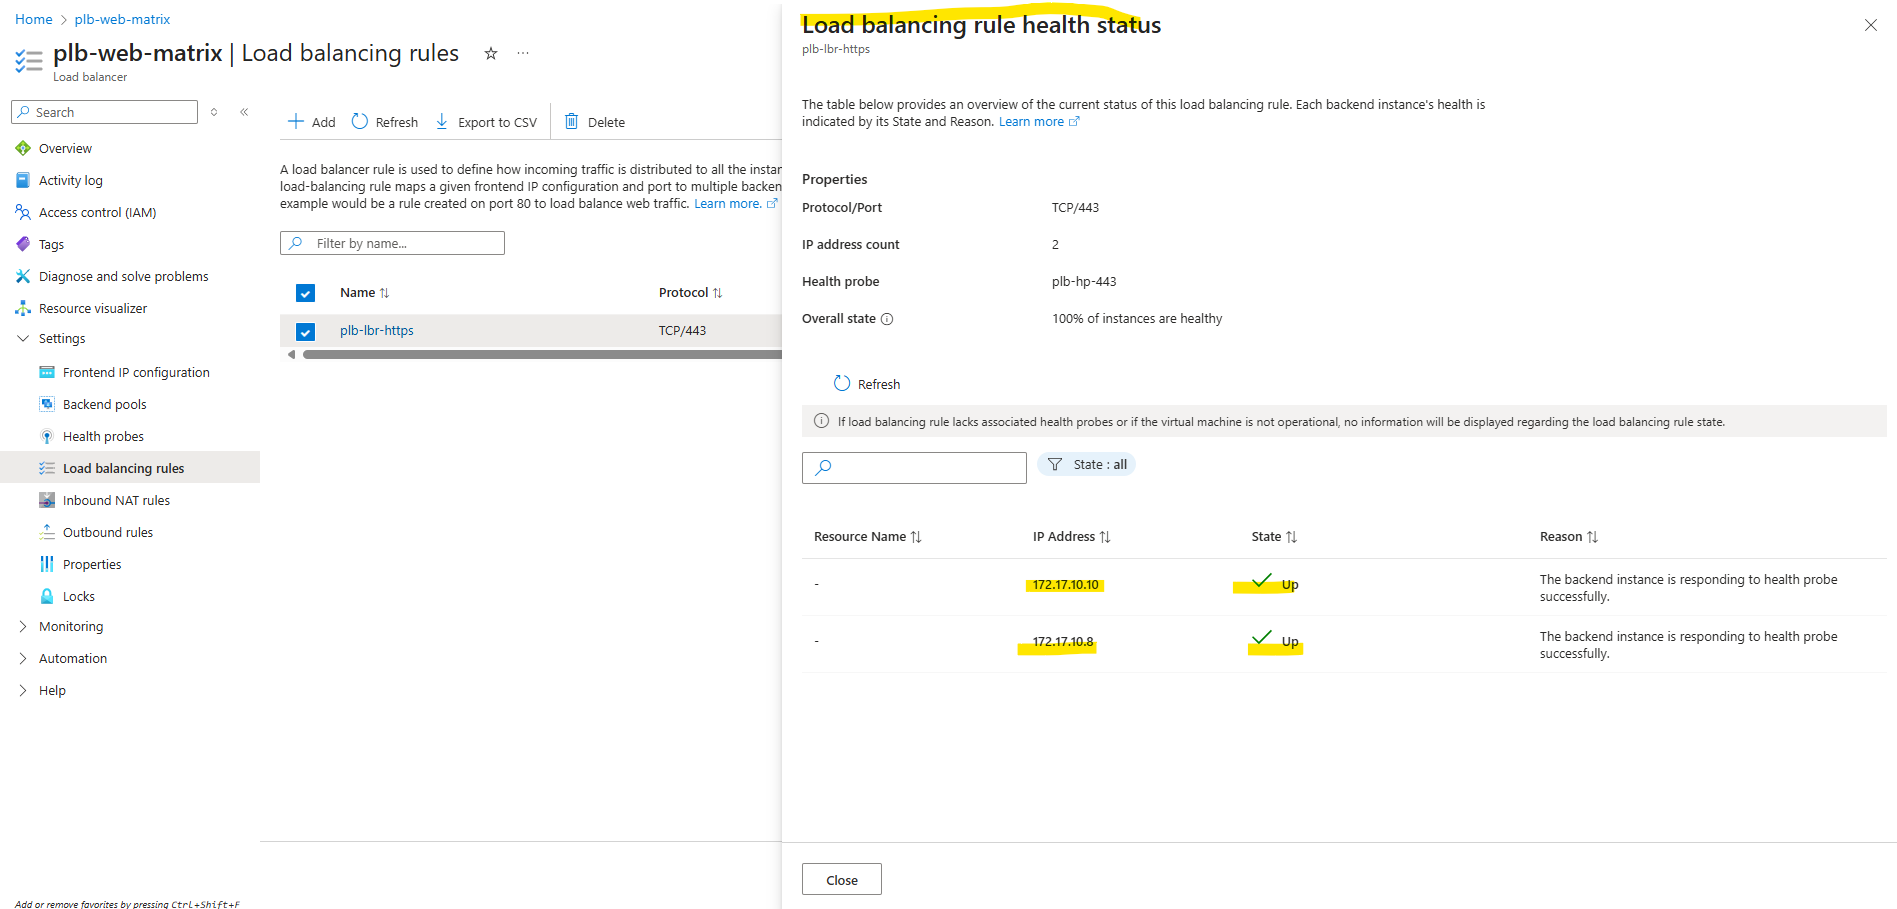
For both I will use just a self signed certificate for testing and both will listening on HTTPS TCP 443.

Afterwards the health status on the load balancer switches immediately to Up and healthy.
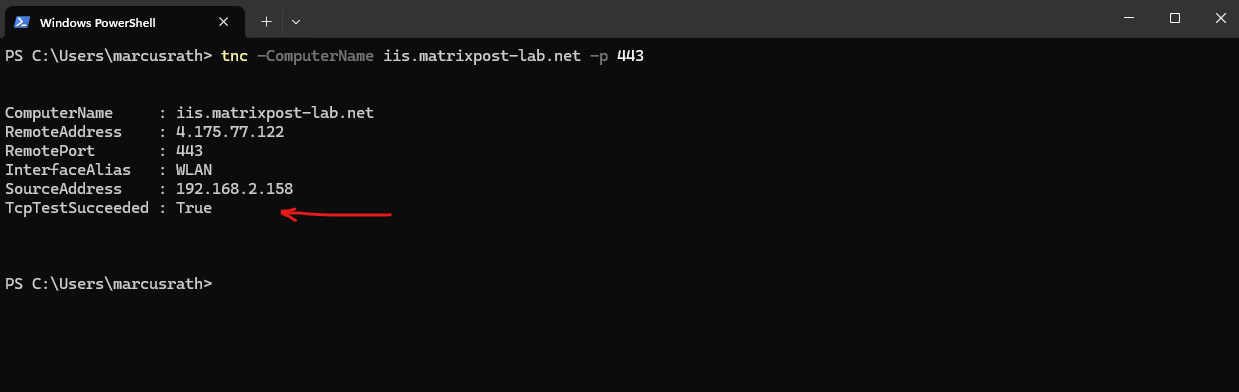
Validating Backend Connectivity
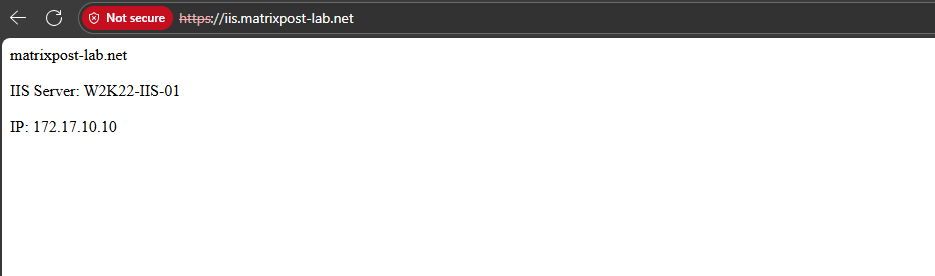
To test the final setup, access the Load Balancer’s public frontend IP address or the associated DNS name from a web browser.
You should see the IIS test page served by one of the backend servers. Refreshing the page multiple times or stopping one IIS instance will demonstrate how the Azure Load Balancer distributes traffic and maintains availability even if a backend node becomes unavailable.
I was creating a new DNS A-record for iis.matrixpost-lab.net at my DNS registrar’s web protal to point to the Load Balancer’s public frontend IP address.
On the minimal test HTML page, I was putting each Windows servers (IIS Role) hostname and private IPv4 address, to see which backend instance finally was serving the page.
Troubleshooting
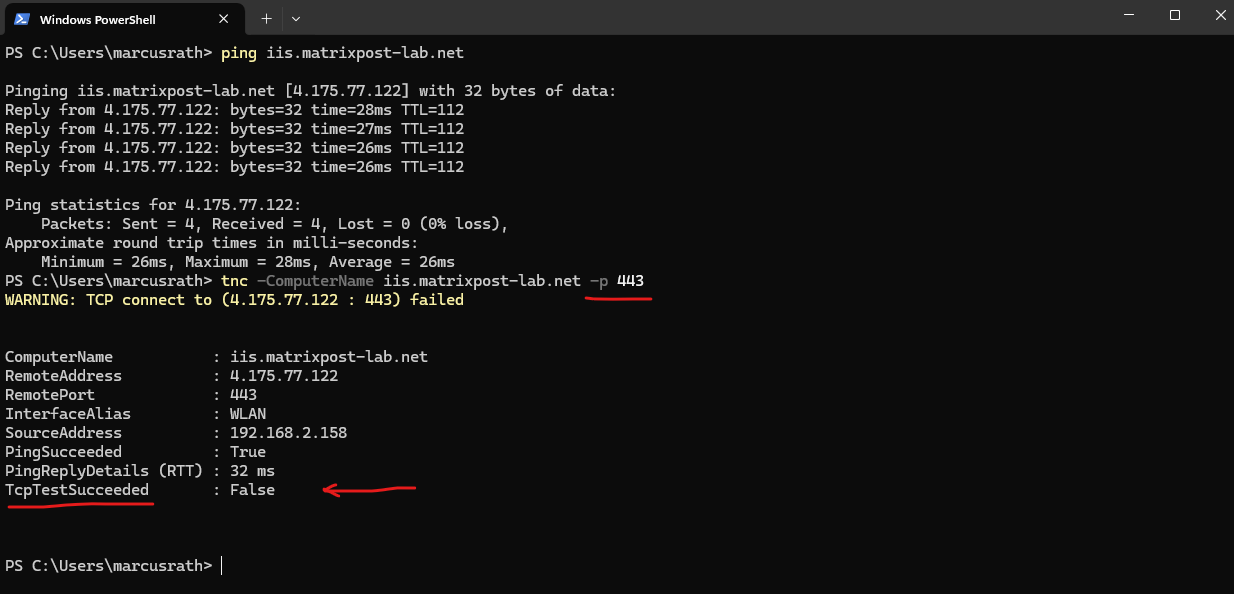
No inbound connectivity to Standard external load balancers
Even if the health probe shows green and the Load Balancer configuration looks perfect, inbound traffic will still fail on a Standard SKU Load Balancer unless an NSG explicitly allows it.
Standard Load Balancers do not automatically open inbound ports for backend VMs like the Basic SKU once did, everything is default-deny for public ingress.
So, to make your application reachable from the internet, ensure that a Network Security Group is associated with the NIC or subnet and includes a rule that allows the required inbound ports (e.g., HTTPS/443) to your backend instances.
So far I have neither a NSG assigned to the backend VMs NICs nor to the subnet they are running within. Therefore I will now create a new NSG, allowing inbound HTTPS (TCP 443) traffic to both internal private IPs of my backend VMs.
Afterwards I will associate this new NSG to the subnet both backend VMs are running.
Now it works.
Links
What is Azure Load Balancer?
https://learn.microsoft.com/en-us/azure/load-balancer/load-balancer-overviewGlobal Load Balancer
https://learn.microsoft.com/en-us/azure/load-balancer/cross-region-overviewAzure Load Balancer Floating IP configuration
https://learn.microsoft.com/en-us/azure/load-balancer/load-balancer-floating-ipTroubleshoot Azure Load Balancer
https://learn.microsoft.com/en-us/azure/load-balancer/load-balancer-troubleshootBackend pool management
https://learn.microsoft.com/en-us/azure/load-balancer/backend-pool-managementLoad Balancer TCP Reset and Idle Timeout
https://learn.microsoft.com/en-us/azure/load-balancer/load-balancer-tcp-resetWhat is Direct Server Return (DSR)?
https://www.haproxy.com/glossary/what-is-direct-server-return-dsr