Deploying and Operating Azure Kubernetes Service (AKS) – A Practical Guide – Part 5 – Ingress & Application Routing (L7)
In Part 4, we exposed our application using Kubernetes Services backed by Azure Load Balancers, providing basic Layer 4 connectivity. In this part, we take the next step and introduce Ingress to enable Layer 7 routing, allowing multiple applications to be exposed through a single entry point using hostnames and URL paths.
By deploying an NGINX Ingress Controller, we will implement a reverse proxy inside the cluster that provides more advanced traffic management capabilities such as HTTP routing and TLS termination.
Introduction
Kubernetes itself does not include a built-in Ingress Controller, it only defines the Ingress resource. Components like the NGINX Ingress Controller implement this functionality and are responsible for actually routing external traffic into the cluster.
An Ingress resource is not a Service, it does not expose Pods directly. Instead, it defines HTTP-based routing rules and forwards traffic to Services, which in turn provide access to the underlying Pods.
While Services of type LoadBalancer expose applications on a per-service basis using dedicated IP addresses, Ingress introduces a more advanced and scalable approach by allowing multiple services to be accessed through a single entry point using hostnames and URL paths.
This makes Ingress a key component for running multiple web applications efficiently in a production-ready Kubernetes environment.
Deploying the NGINX Ingress Controller in AKS
Before we can define and use Ingress resources, we first need to deploy an Ingress Controller that implements the routing logic inside the cluster. In this section, we will install the NGINX Ingress Controller, which will act as a reverse proxy and handle incoming HTTP and HTTPS traffic based on the rules defined in our Ingress resources.
An Ingress resource does not process traffic itself but defines HTTP and HTTPS routing rules for incoming requests. These rules are interpreted by an Ingress Controller, such as NGINX, which acts as a reverse proxy and forwards the traffic to the appropriate Kubernetes Services based on hostnames or URL paths.
To deploy the NGINX Ingress Controller in AKS, we will use Helm, the Kubernetes package manager, which simplifies the installation and management of applications within the cluster.
The Ingress Controller itself is deployed as a set of Pods along with a Kubernetes Service of type
LoadBalancer, providing an external entry point for incoming HTTP and HTTPS traffic.By default, this Service will integrate with the Azure Load Balancer and expose the Ingress Controller through a public IP address. All incoming traffic will then be forwarded to the Ingress Controller, which applies the defined routing rules and directs the requests to the appropriate backend Services.
In the next step, we will install the NGINX Ingress Controller and verify that it is successfully deployed and accessible.
First we need to add the Helm repo by running:
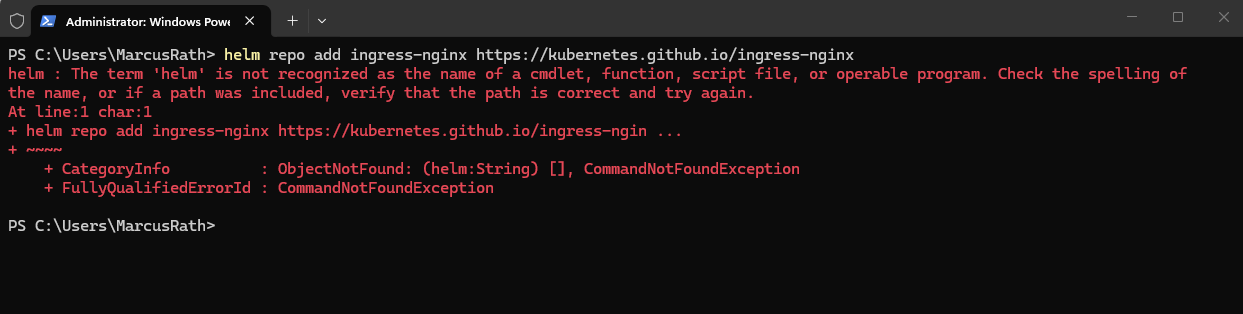
In my case I haven’t Helm installed yet.
PS> helm repo add ingress-nginx https://kubernetes.github.io/ingress-nginx
The easiest way to install Helm is by using the winget command.
PS> winget install Helm.Helm
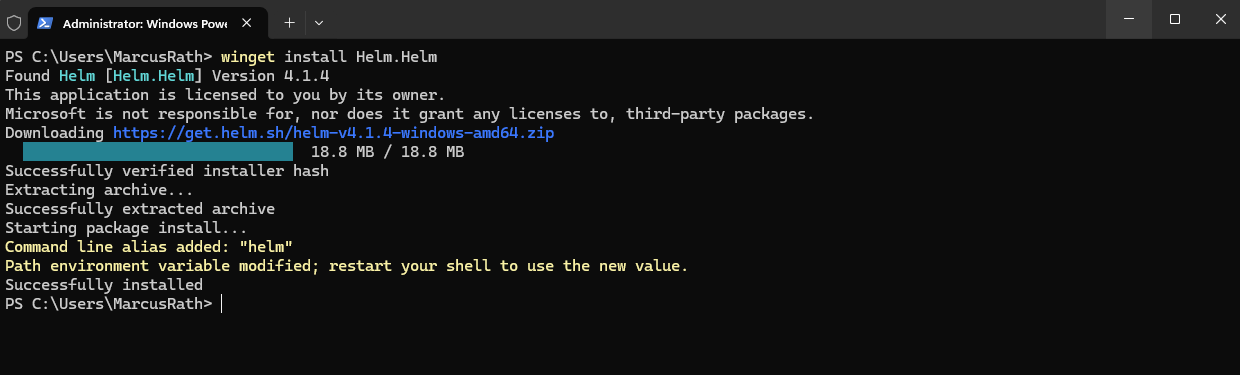
Verify installation by running (Close and reopen PowerShell first):
The command installs Helm using the Windows Package Manager, automatically downloading and configuring it on the system. After installation, Helm can be used directly from the command line to deploy and manage applications in Kubernetes.
PS> helm version

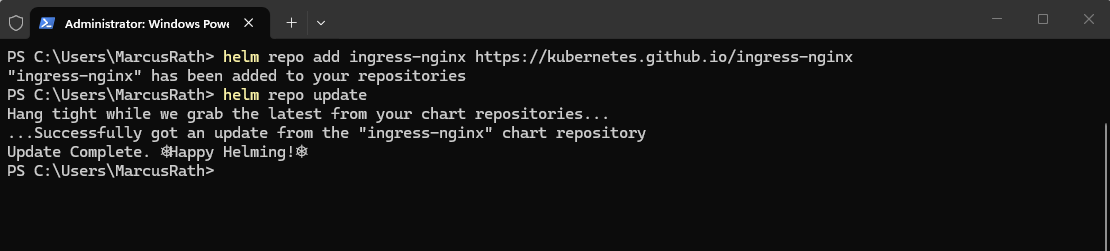
I will now try again to add and update the Helm repo.
PS> helm repo update
PS> helm repo update
Next we can install the controller.
The NGINX Ingress Controller can be installed using Helm, which deploys the controller as a set of Pods along with a Service of type
LoadBalancer. This Service is automatically integrated with the Azure Load Balancer and provides a public IP address that acts as the central entry point for all incoming HTTP and HTTPS traffic.
PS> helm install nginx-ingress ingress-nginx/ingress-nginx --namespace ingress-basic --create-namespace --set controller.service.type=LoadBalancer
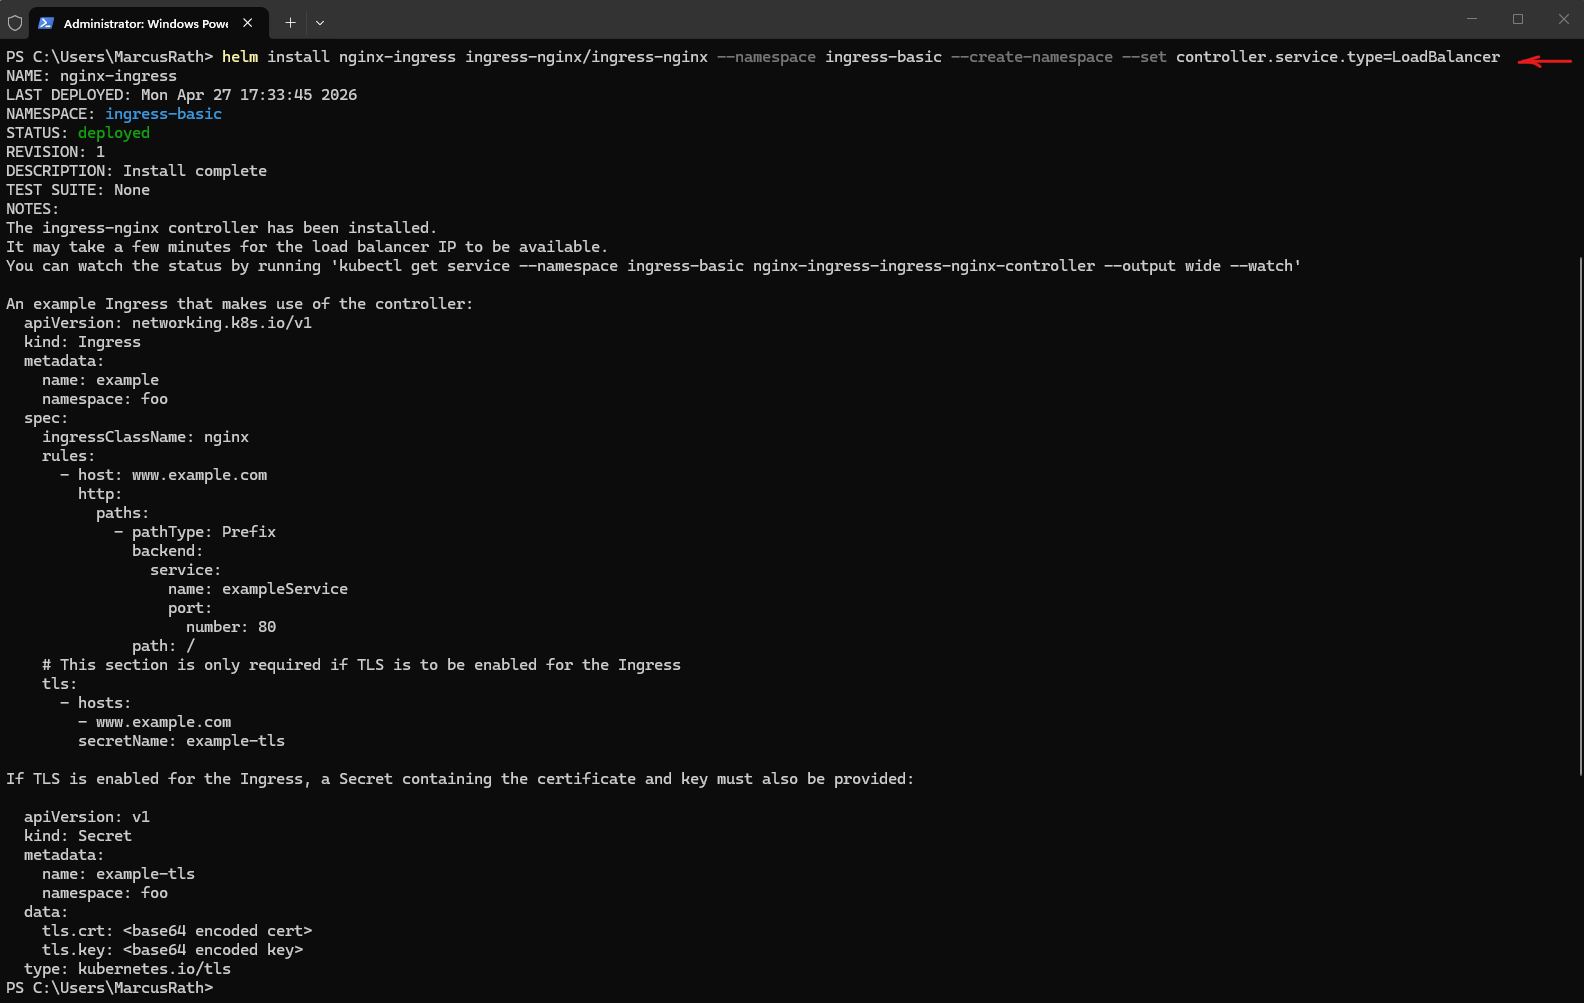
helm==> Starts the Helm package manager for Kubernetes.install==> Instructs Helm to install a new application release into the cluster.nginx-ingress==> The custom name assigned to this Helm release. Helm uses this name to manage and reference the deployment later.ingress-nginx/ingress-nginx==> Specifies the Helm chart to install. The first part (ingress-nginx) is the Helm repository name previously added viahelm repo add, while the second part refers to the chart itself.--namespace ingress-basic==> Deploys all Kubernetes resources into the namespaceingress-basic.--create-namespace==> Automatically creates the namespace if it does not already exist.--set controller.service.type=LoadBalancer==> Overrides the default Helm chart configuration and configures the Ingress Controller Service as typeLoadBalancer. In AKS, this automatically provisions an Azure Load Balancer frontend with a public IP address.
A Helm chart is essentially a packaged collection of Kubernetes YAML manifests and configuration templates used to deploy an application or service into a Kubernetes cluster.
You can think of a Helm chart as: an installation package for Kubernetes applications
To verify the installation we can run.
PS> kubectl get pods -n ingress-basic
PS> kubectl get svc -n ingress-basic

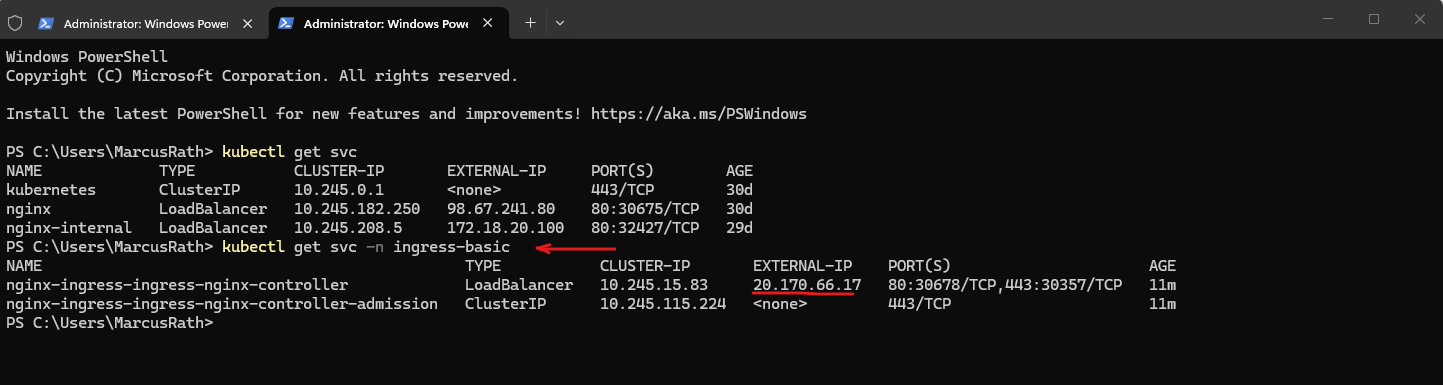
After installing the NGINX Ingress Controller, a new Kubernetes Service of type LoadBalancer is created, which is integrated with the Azure Load Balancer and exposes a public IP address. This IP address represents the central entry point through which all incoming HTTP and HTTPS traffic will be routed to the Ingress Controller.
A new public IP address was added.

The new public IP is not shown in the default namespace because the NGINX Ingress Controller was deployed into the separate
ingress-basicnamespace. To display it, the services must be listed for that namespace using the-n ingress-basicflag.
PS> kubectl get svc -n ingress-basic
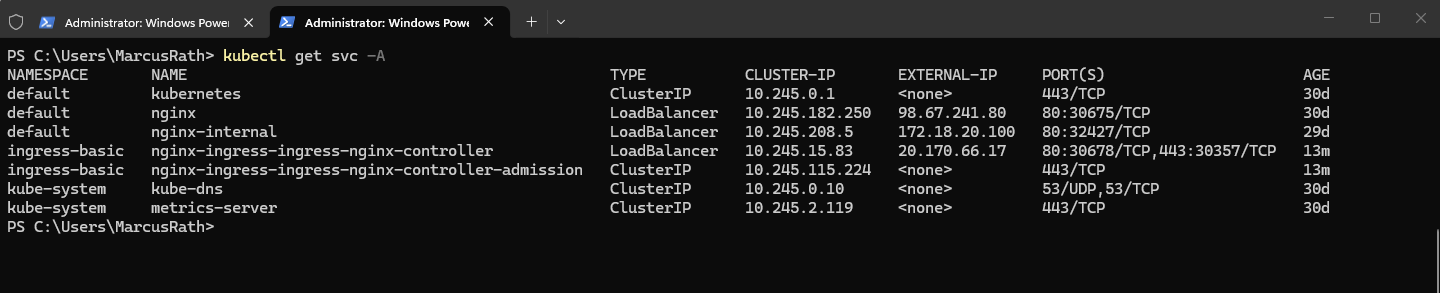
Or show all services across namespaces:
PS> kubectl get svc -A
Creating the First Ingress Resource
With the NGINX Ingress Controller successfully deployed and accessible through a public IP address, we can now define our first Ingress resource. This resource will introduce Layer 7 routing by forwarding HTTP traffic from a single entry point to our existing NGINX Service based on defined rules.
The Ingress resource routes traffic to the existing Kubernetes Service named
nginx(shown in the screenshot we deployed in Part 4), which acts as a stable endpoint for the NGINX Pods (which runs the NGINX web server). The Service abstracts the underlying Pods and ensures that traffic is distributed across all running instances.
PS> kubectl get svc

Step 1 – Create Ingress YAML
In the first step, we define an Ingress resource using a YAML manifest that specifies how incoming HTTP traffic should be routed. This configuration maps requests for a specific hostname to our existing NGINX Service.
Create the following file and save it as e.g. nginx-ingress.yaml.
apiVersion: networking.k8s.io/v1
kind: Ingress
metadata:
  name: nginx-ingress
spec:
  ingressClassName: nginx
  rules:
  - host: nginx.local
    http:
      paths:
      - path: /
        pathType: Prefix
        backend:
          service:
            name: nginx
            port:
              number: 80
As is often the case when working with Kubernetes manifests, the key detail is easy to overlook: the backend.service.name field at the end of the YAML file directly references the existing Service (nginx) and defines the actual routing target for the Ingress.
backend:
          service:
            name: nginx
            port:
              number: 80
Step 2 – Apply the Ingress
Once the Ingress resource is defined, we apply the configuration to the cluster, making the routing rules available to the Ingress Controller. The controller will then automatically update its configuration to handle incoming traffic accordingly.
When creating the YAML file in the previous step, I was saving it to my Downloads folder.
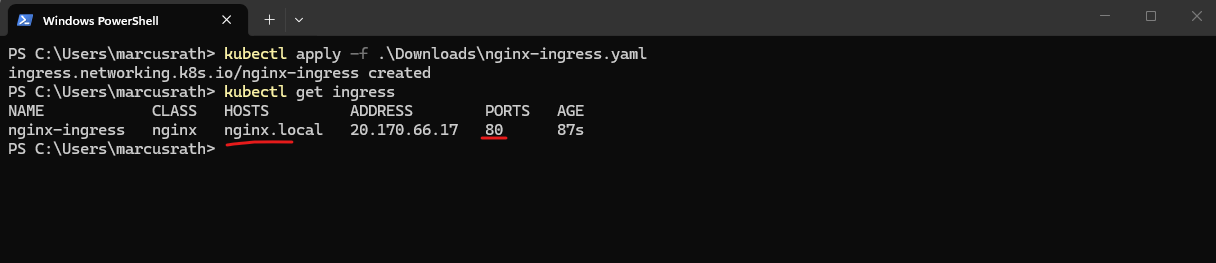
PS> kubectl apply -f nginx-ingress.yaml

Step 3 – Verify
After applying the Ingress resource, we can verify that it has been created successfully and that the assigned address corresponds to the external IP of the Ingress Controller.
PS> kubectl get ingress
Step 4 – Test access
Finally, we test the configuration by sending a request to the Ingress endpoint and validating that the traffic is correctly routed to the NGINX application based on the defined rules.
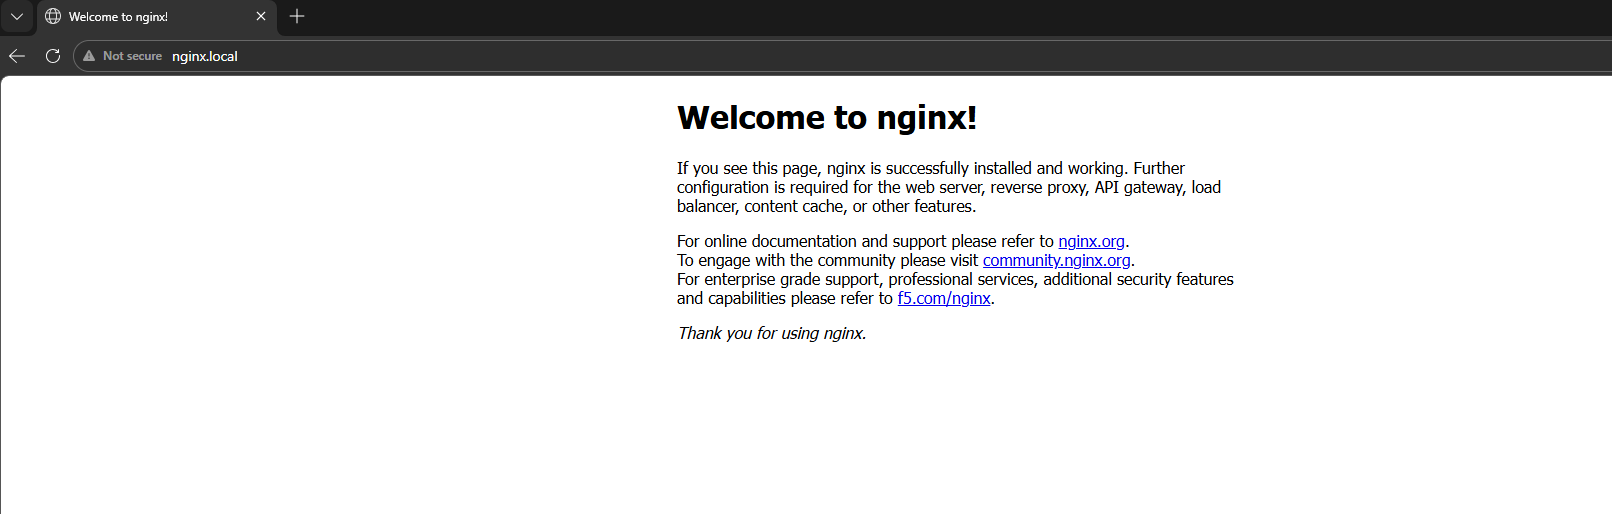
Since nginx.local is not a public DNS name, add an entry to your local hosts file:
20.170.66.17 nginx.local
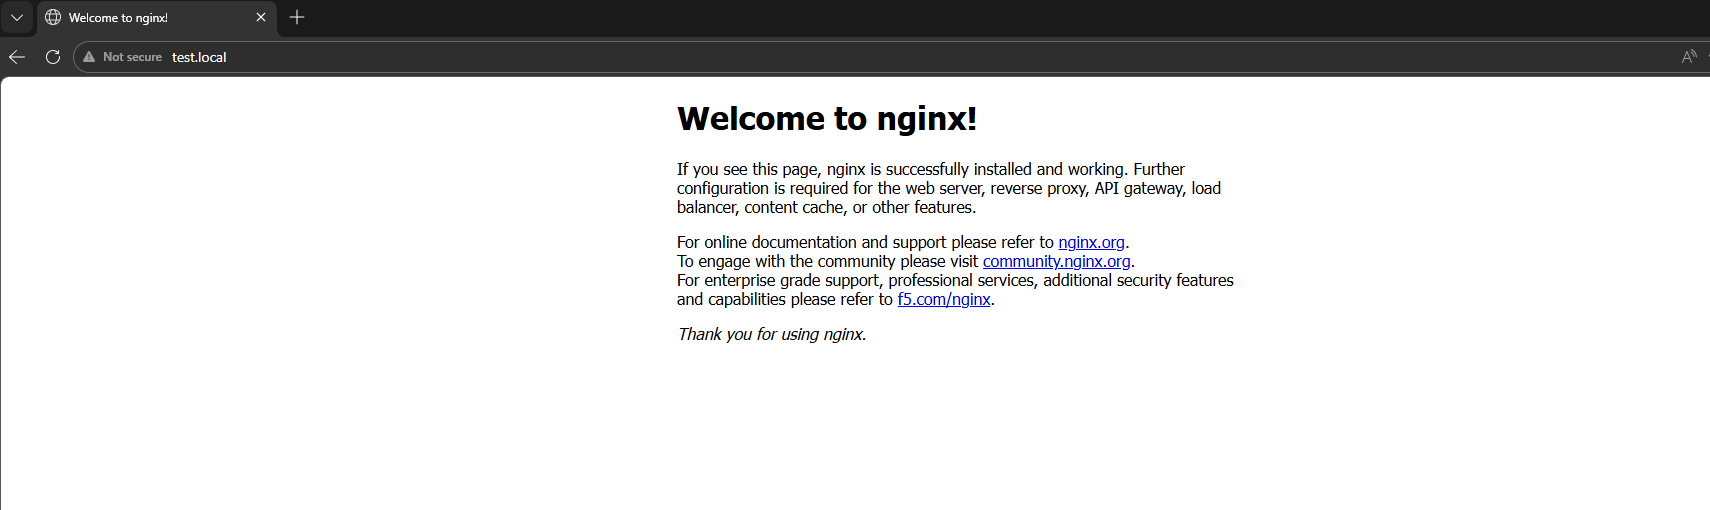
Now we can open a new browser page and browsing to the URL http://nginx.local.
While a Service of type LoadBalancer is sufficient to expose a single application, an Ingress Controller becomes essential in more complex scenarios where multiple services need to be exposed through a single entry point, enabling host-based or path-based routing as well as centralized TLS termination.
By introducing an Ingress resource, the application is no longer exposed directly through a Service, but instead routed through the Ingress Controller, enabling more flexible and scalable HTTP-based access patterns.
Before:
Client → Azure LB → Service → Pod

Now:
Client → Azure LB → NGINX Ingress → Service → Pod
In simple scenarios, requests may still be routed successfully even if the hostname does not exactly match the Ingress rule like shown below when using e.g. http://test.local (also set in the local hosts file to point to the public IP address we used for the service).
This is due to the default catch-all behavior of the Ingress Controller. However, in multi-application environments, explicit host definitions are required to ensure predictable routing.
Routing multiple Applications through a single Ingress Controller
To demonstrate the real value of an Ingress Controller, we will deploy a second application and expose both applications through the same public IP address.
Instead of creating a separate LoadBalancer service for each application, the Ingress Controller will route traffic based on the requested hostname.
In this example, nginx.local will point to the existing NGINX application, while a second hostname will be used for the new application.
nginx.local  → nginx Service
api.local   → second application Service
Step 1 – Deploy a Second Application
We now first deploy a second application alongside the existing NGINX web server. This allows us to route traffic to multiple backend services through a single entry point based on hostname rules.
# in Part 4 we created our first application by running
PS> kubectl create deployment nginx --image=nginx

# now our new application
PS> kubectl create deployment webapp2 --image=httpd

# verify the deployment
PS> kubectl get deployments
PS> kubectl get pods -o wide

The second application is now running in the cluster and will be used in the next step to demonstrate host-based routing using Ingress.
Step 2 – Expose the Second Application Internally with a ClusterIP Service
Before the Ingress Controller can route traffic to the second application, the application must be reachable through a Kubernetes Service.
In the previous section, the existing NGINX application was still exposed using a Service of type LoadBalancer, as it was created earlier for direct external access and not recreated.
The Ingress Controller can still route traffic to this Service, because it only relies on the internal Service endpoint (ClusterIP), but the public LoadBalancer part becomes redundant once Ingress is used.
For new applications, it is therefore recommended to use a Service of type ClusterIP, as external access is handled centrally by the Ingress Controller.
The service we create by running:
PS> kubectl expose deployment webapp2 --port=80 --type=ClusterIP

Verify the newly created service.
A service of type
ClusterIPdoes not receive a public IP address because it is only reachable from inside the Kubernetes cluster.With Ingress, this is exactly the desired behavior: backend applications such as
webapp2remain internal and are accessed through their ClusterIP Services, while external access is provided centrally through the public IP address of the Ingress Controller, which routes incoming traffic to the appropriate Service.
PS> kubectl get svc

Step 3 – Create a Multi-Host Ingress Resource
Now that both backend Services are available, we can create an Ingress resource that routes traffic based on the requested hostname.
In this example, requests for nginx.local will be forwarded to the existing nginx Service, while requests for webapp2.local will be forwarded to the new webapp2 ClusterIP Service.
Create the following file and save it as e.g. multi-app-ingress.yaml.
apiVersion: networking.k8s.io/v1
kind: Ingress
metadata:
  name: multi-app-ingress
spec:
  ingressClassName: nginx
  rules:
  - host: nginx.local
    http:
      paths:
      - path: /
        pathType: Prefix
        backend:
          service:
            name: nginx
            port:
              number: 80
  - host: webapp2.local
    http:
      paths:
      - path: /
        pathType: Prefix
        backend:
          service:
            name: webapp2
            port:
              number: 80
Once the Ingress resource is defined, we apply the configuration to the cluster again, making the routing rules available to the Ingress Controller. The controller will then automatically update its configuration to handle incoming traffic accordingly.
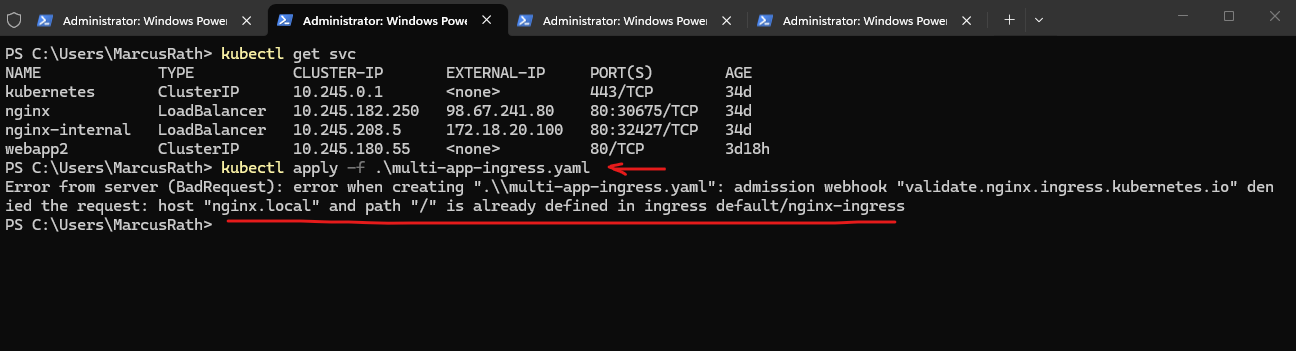
The error occurs because the hostname/path combination
nginx.local /is already defined in an existing Ingress resource, which we previously created for exposing our first application.Each host and path combination must be unique, so the existing Ingress must either be updated to include the new routing rule or removed before applying the new multi-application Ingress configuration.
PS> kubectl apply -f .\multi-app-ingress.yaml
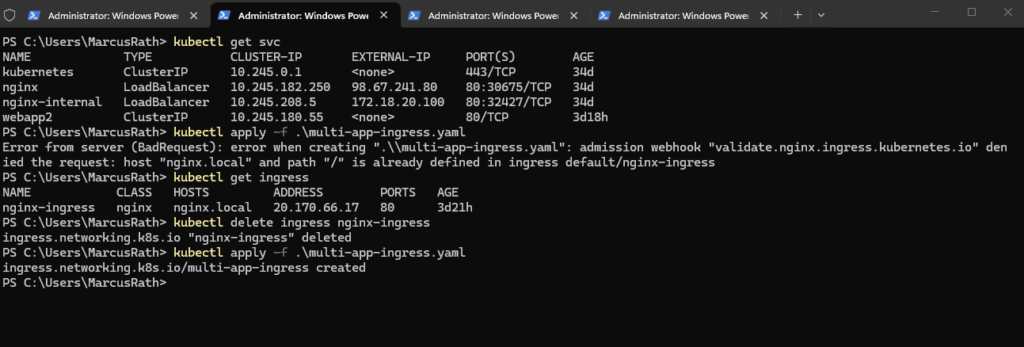
I will remove the existing configuration and then applying the new.
PS> kubectl get ingress
PS> kubectl delete ingress nginx-ingress
PS> kubectl apply -f .\multi-app-ingress.yaml
Then verify:
PS> kubectl get ingress

As previously, since nginx.local and webapp2.local are not a public DNS names, add an entry to your local hosts file:
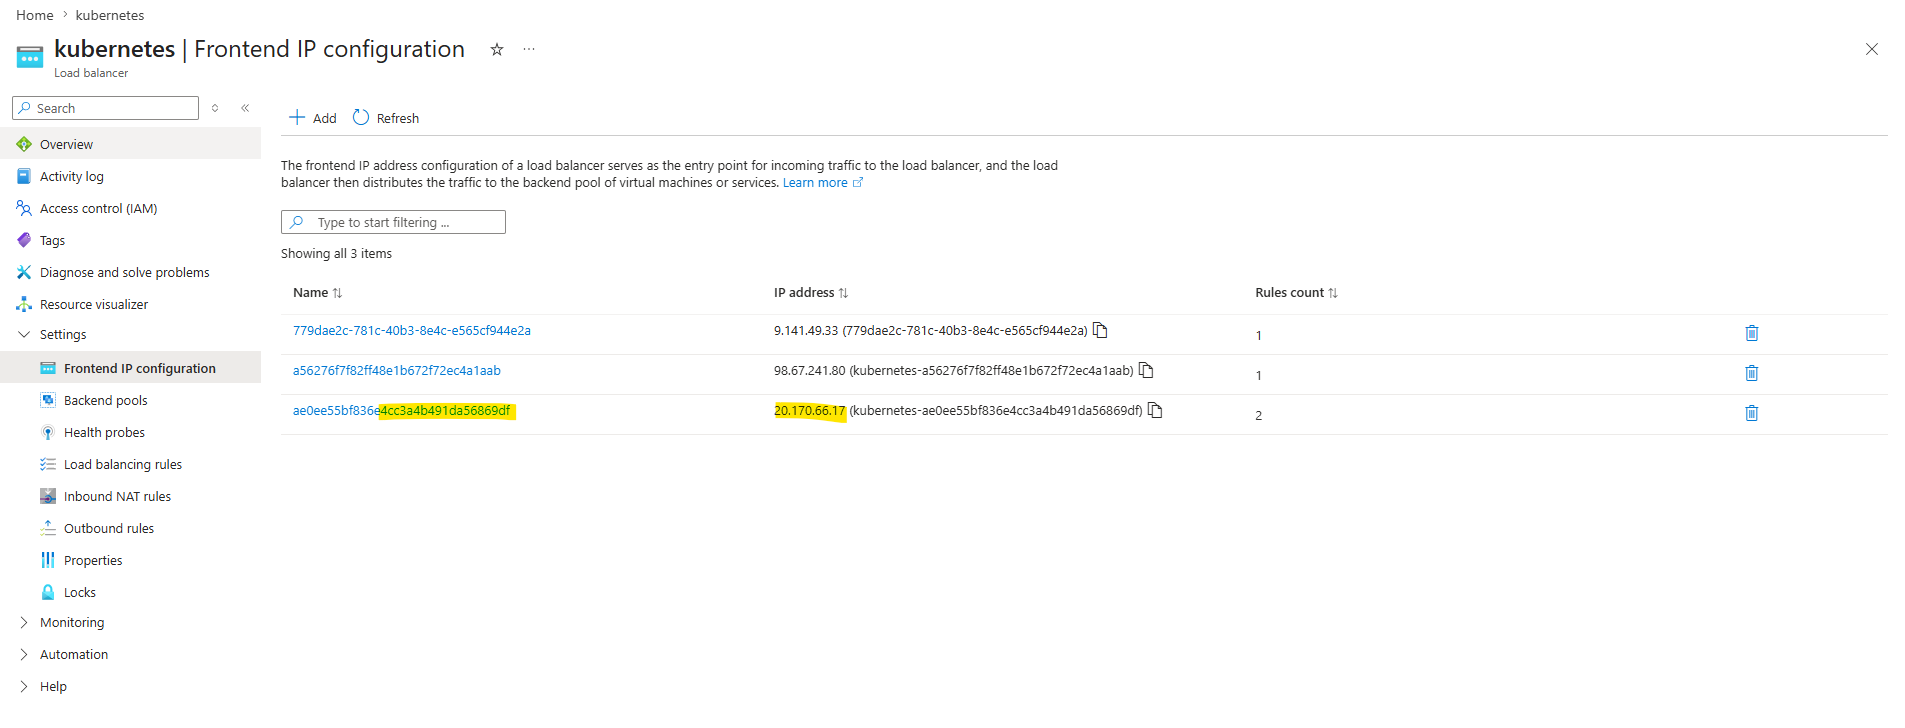
20.170.66.17 nginx.local webapp2.local
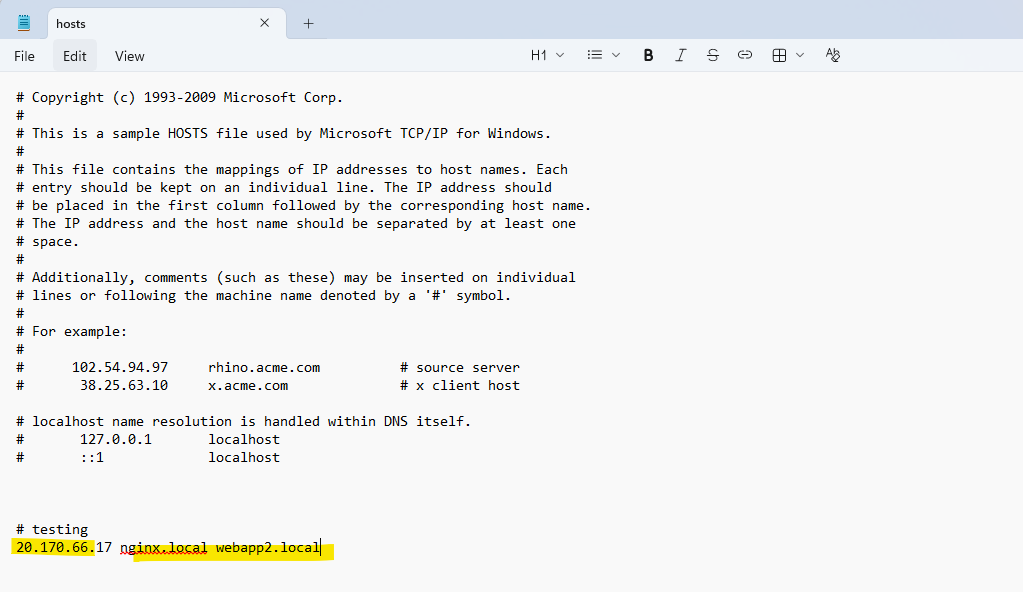
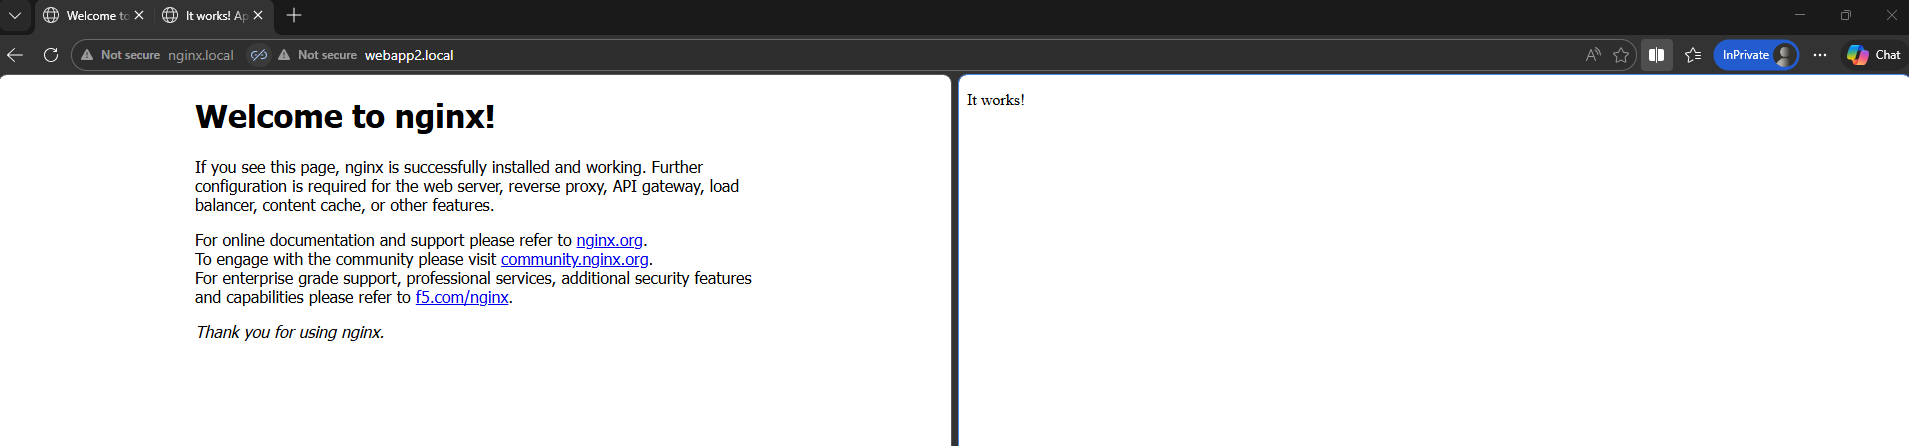
Now we can open a new browser page and browsing to the URL http://nginx.local and http://webapp2.local.
In my case the pages could just be opened from inside the cluster but not from the internet through the public IP address 20.170.66.17 assigned on the Azure load balancer.
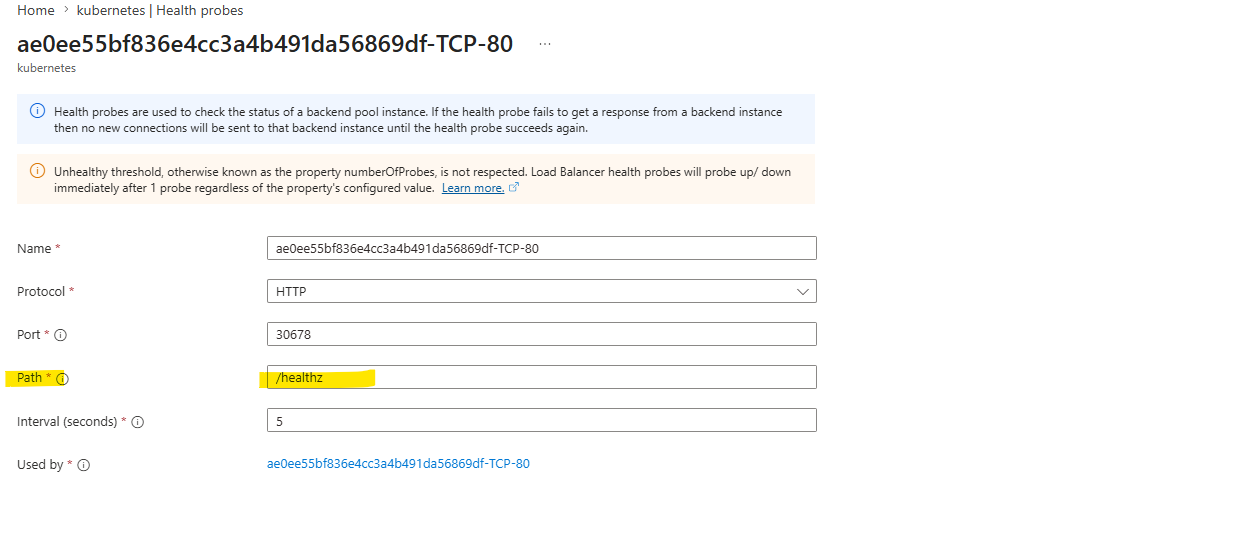
The issue was caused by the Azure Load Balancer and the configured health probe targeting the root path /, which is not suitable for verifying the health of the Ingress Controller.
As a result, all backend nodes were marked as unhealthy and traffic was dropped.
By changing the probe path to /healthz, which is the dedicated health endpoint of the NGINX Ingress Controller, the nodes were correctly marked as healthy and external access started working.
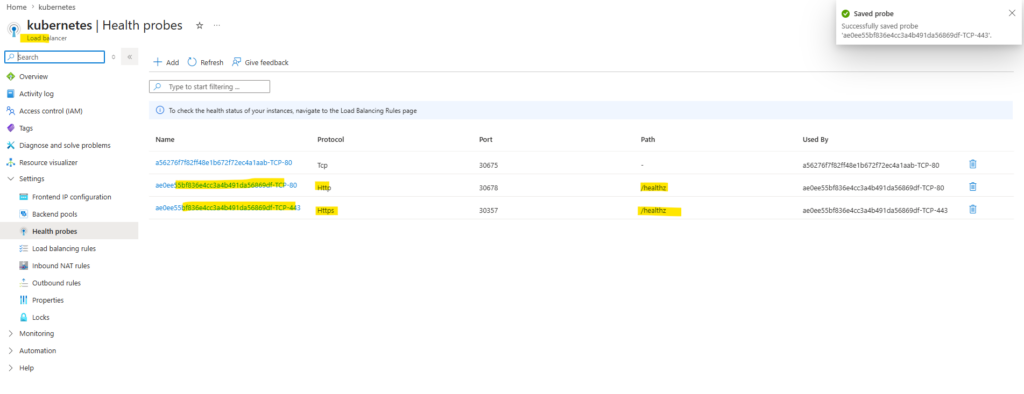
Here we can see that both above health probes (TCP 80, 443) are configured for the public IP address of the NGINX Ingress Controller.
Both pages now could be loaded successfully.
Links
Ingress
https://kubernetes.io/docs/concepts/services-networking/ingress/Ingress Controllers
https://kubernetes.io/docs/concepts/services-networking/ingress-controllers/