Using USB Hard Disk Drives for Datastores in vSphere
Because I am running out of storage in my vSphere lab environment, I wanted to extend the storage quickly and cost effective.
So the most cost effective option here is to just use simple USB hard disk drives and connect them to the ESXi Hosts, in my case for my lab environment, these are just two notebooks which builds a vSphere 2-node cluster.
Stop and disable the USB Arbitrator Service
Before connecting an USB hard disk drive to an ESXi Host, we first we need to stop and disable the USB arbitrator service on the ESXi host by using the commands below.
The service is used to passthrough USB devices from the host to the virtual machines. When this service is not running you can’t passthrough USB devices to the virtual machines.
In our case, we don’t want to passthrough the USB hard disk drive to virtual machines and instead directly to the host, therefore we need to stop and disable the service.
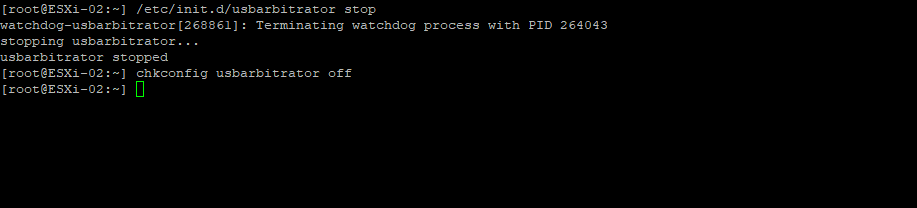
Connect to the host by using SSH, then first stop the service and after that also disable it.
# /etc/init.d/usbarbitrator stop

to permanently disable the service run the following command
# chkconfig usbarbitrator off
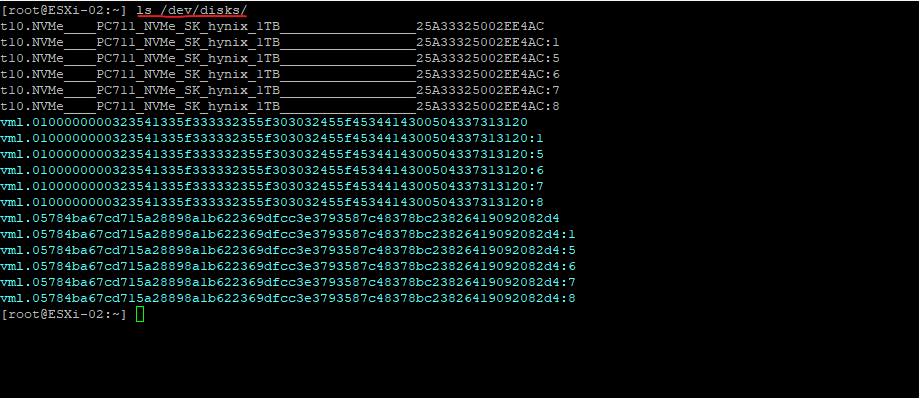
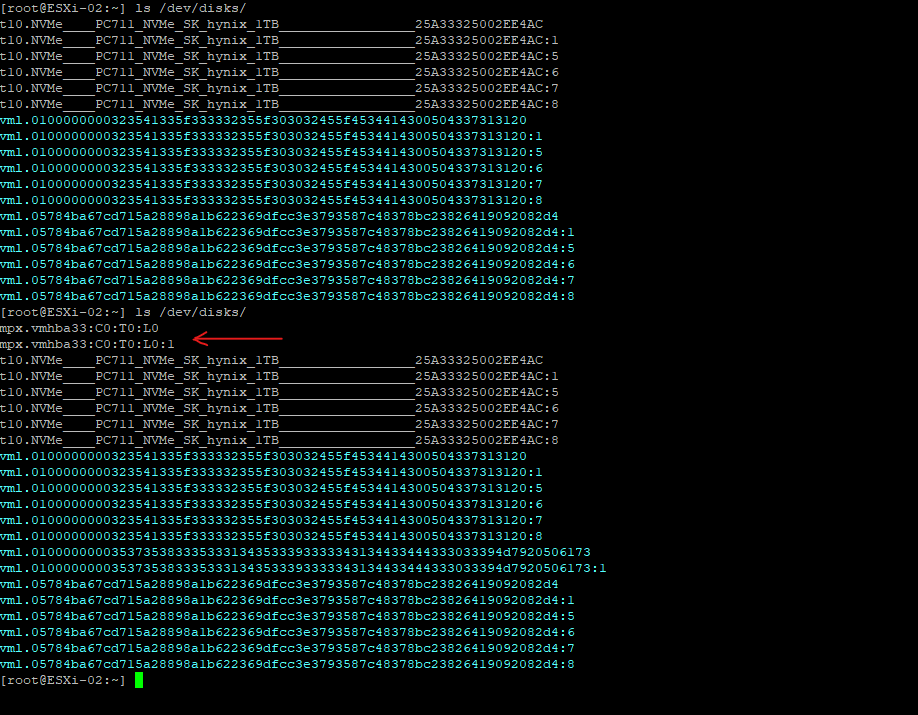
When I am running the ls /dev/disks/ command, it lists and shows already connected hard disk drives on my ESXi host.
As mentioned, I will use notebooks for my ESXi Hosts, the below listed hard disk drive here with the prefix t10.NVMe_, finally is the internal direct attached NVMe PCIe 3.0 x4 drive in the M.2 format.
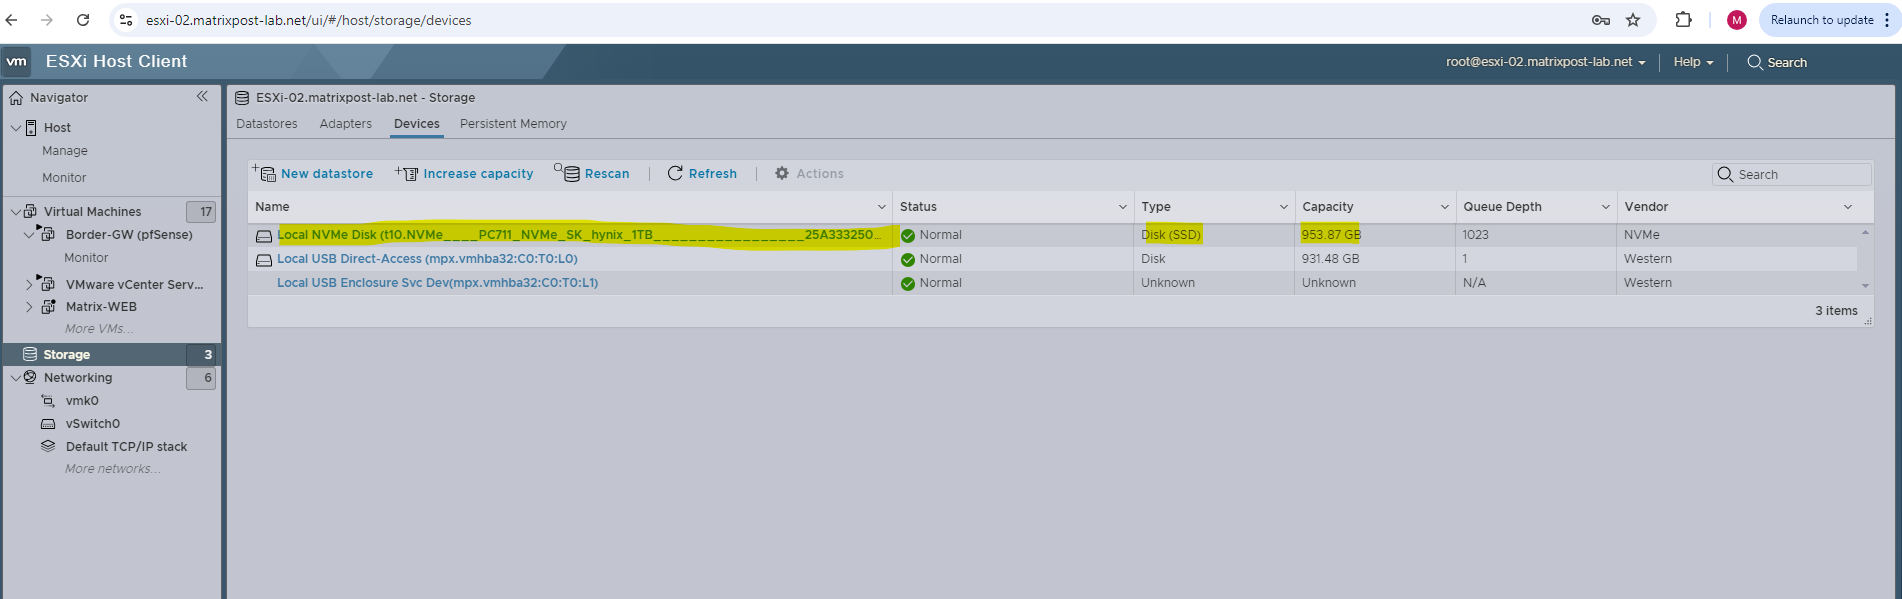
On the ESXi Hosts web gui the disk will shown up like this.
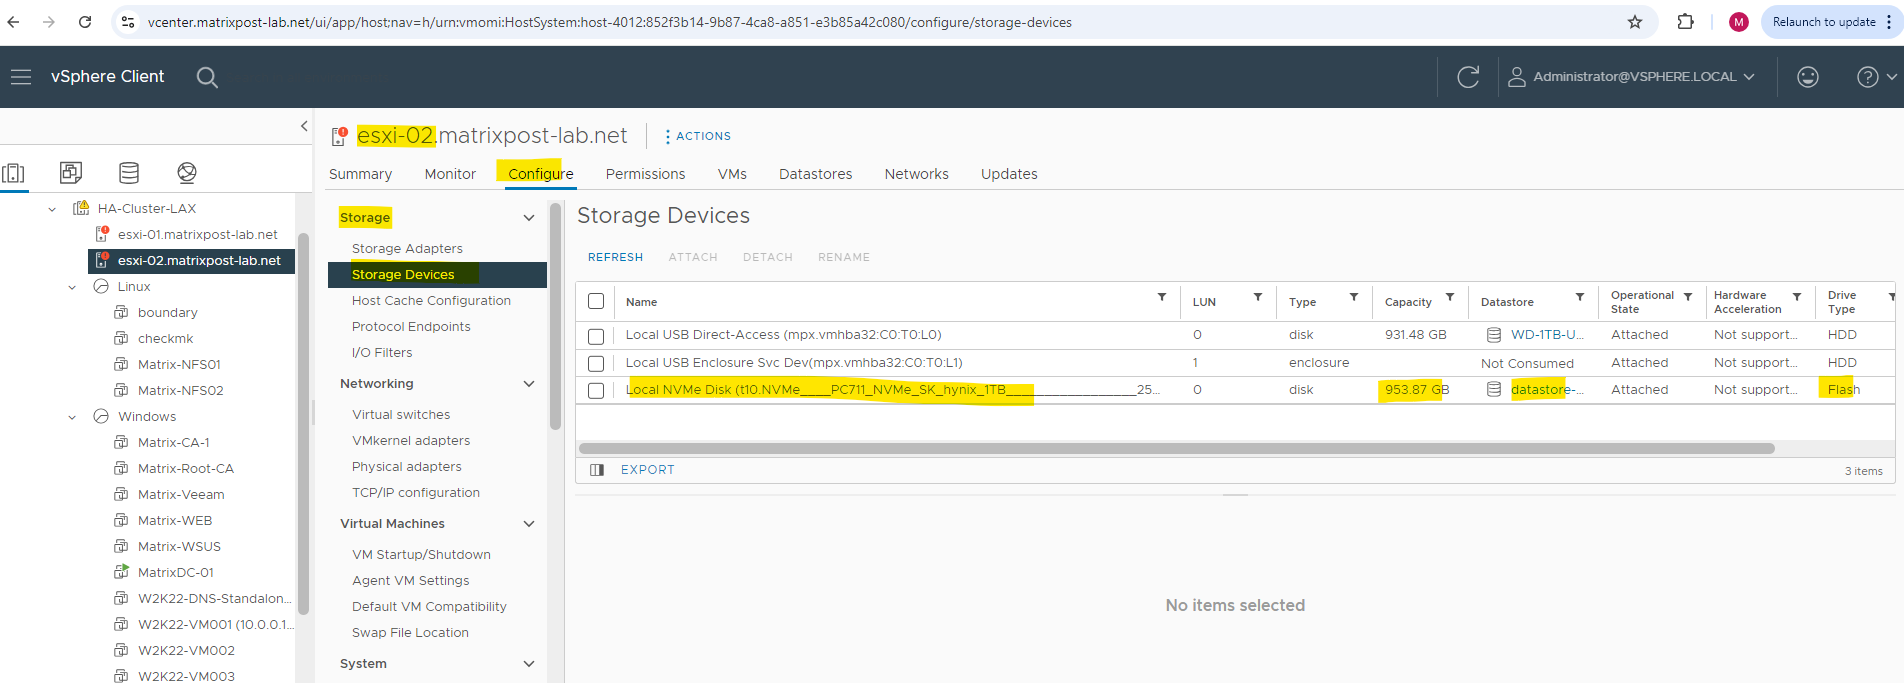
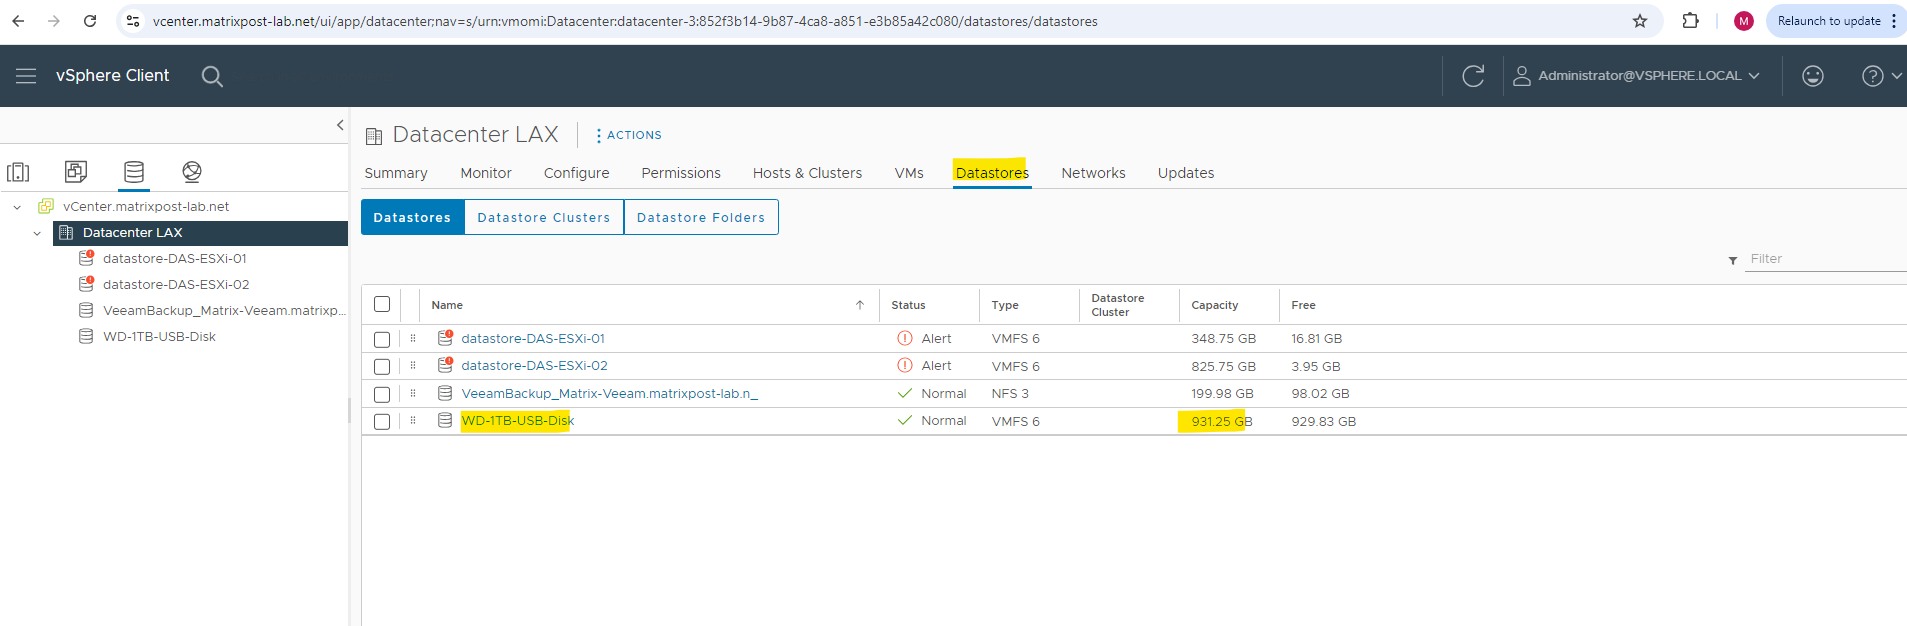
In vSphere the disk will shown up like this.
Now after stopping and disabling the USB arbitrator service on the ESXi Host, we can connect the USB hard disk drive to the ESXi host and run the ls /dev/disks/ command again to see which new hard disk drive(s) appear.
So in my case the first line mpx.vmhba33:C0:T0:L0 which appears after connecting my WD USB hard disk drive with 1 TB will identify my USB hard drive. The second line with mpx.vmhba33:C0:T0:L0:1 is just the USB enclosure of the hard drive itself, we will see this further down in vCenter.
In the ESXi environment, each storage device is identified by several names. Depending on the type of storage, the ESXi host uses different algorithms and conventions to generate an identifier for each storage device.
The ESXi host queries a target storage device for the device name. From the returned metadata, the host extracts or generates a unique identifier for the device. The identifier is based on specific storage standards, is unique and persistent across all hosts, and has one of the following formats:
naa.xx
eui.xxx
t10.xxxWhen the device does not provide an identifier, the host generates an mpx. path name, where path represents the first path to the device, for example, mpx.vmhba1:C0:T1:L3. This identifier can be used in the same way as the storage-provided identifies.
The USB hard disk drive resp. its adapter is also shown up in vCenter under Hosts and Clusters -> ESXi Host -> Configure -> Storage -> Storage Adapters as shown below.

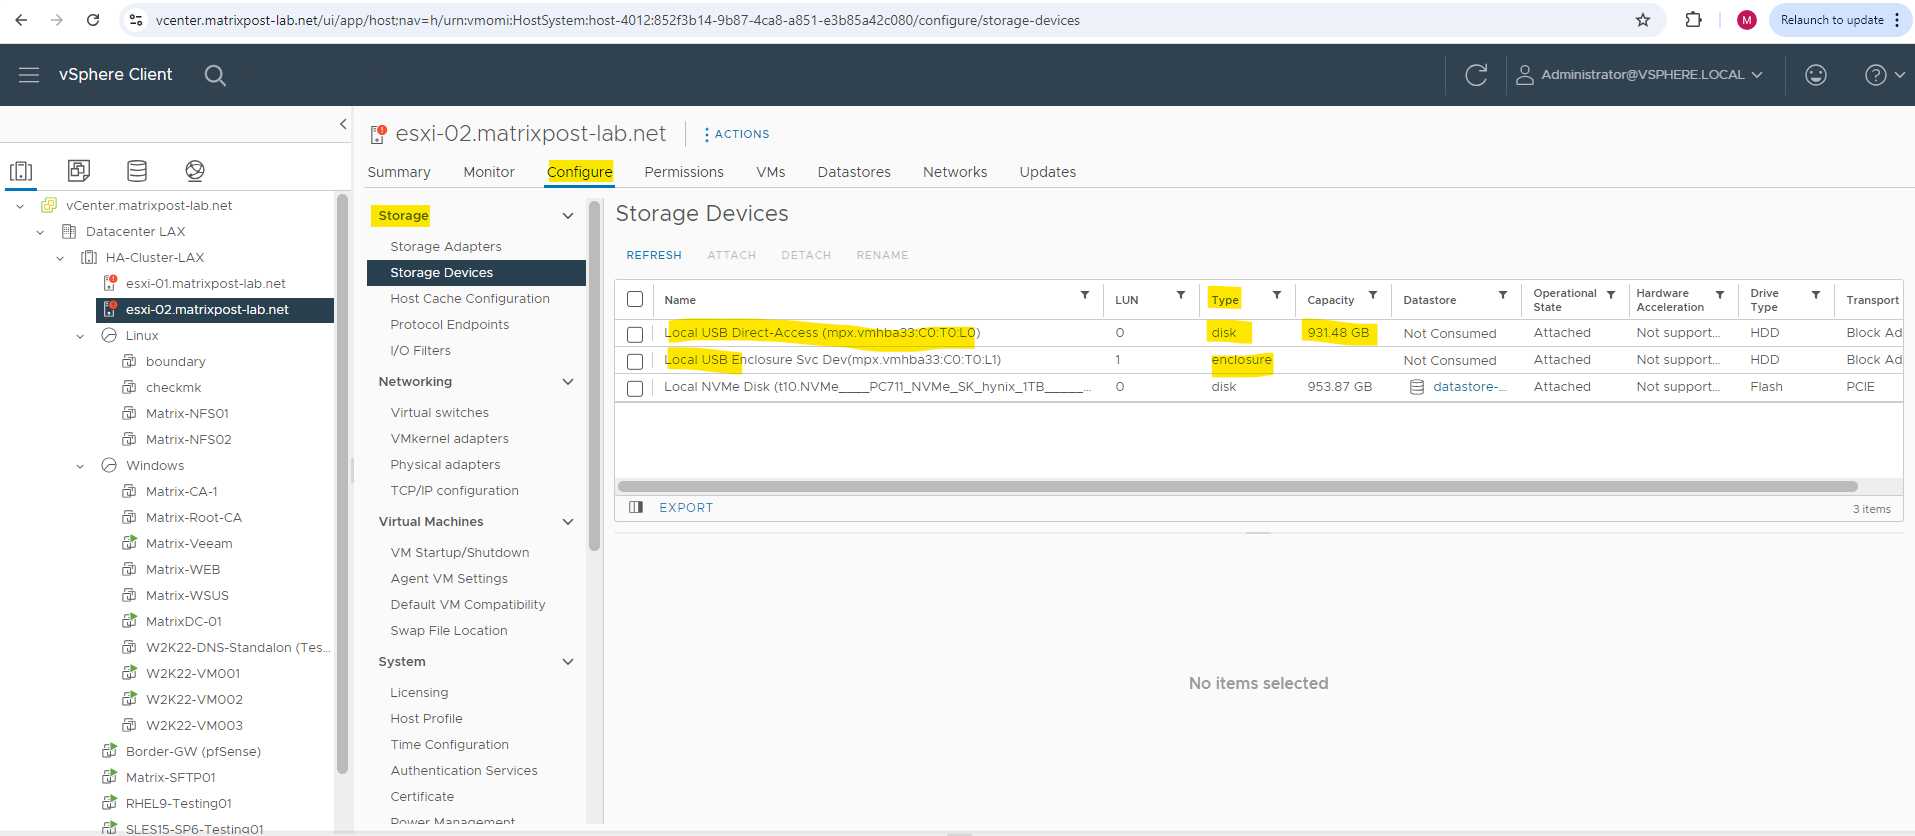
And the disk itself under Storage Devices.
And of course also in the ESXi Hosts web gui.

Further it will also appear under Storage Devices.
You can see here the mentioned USB enclosure of the hard drive also.
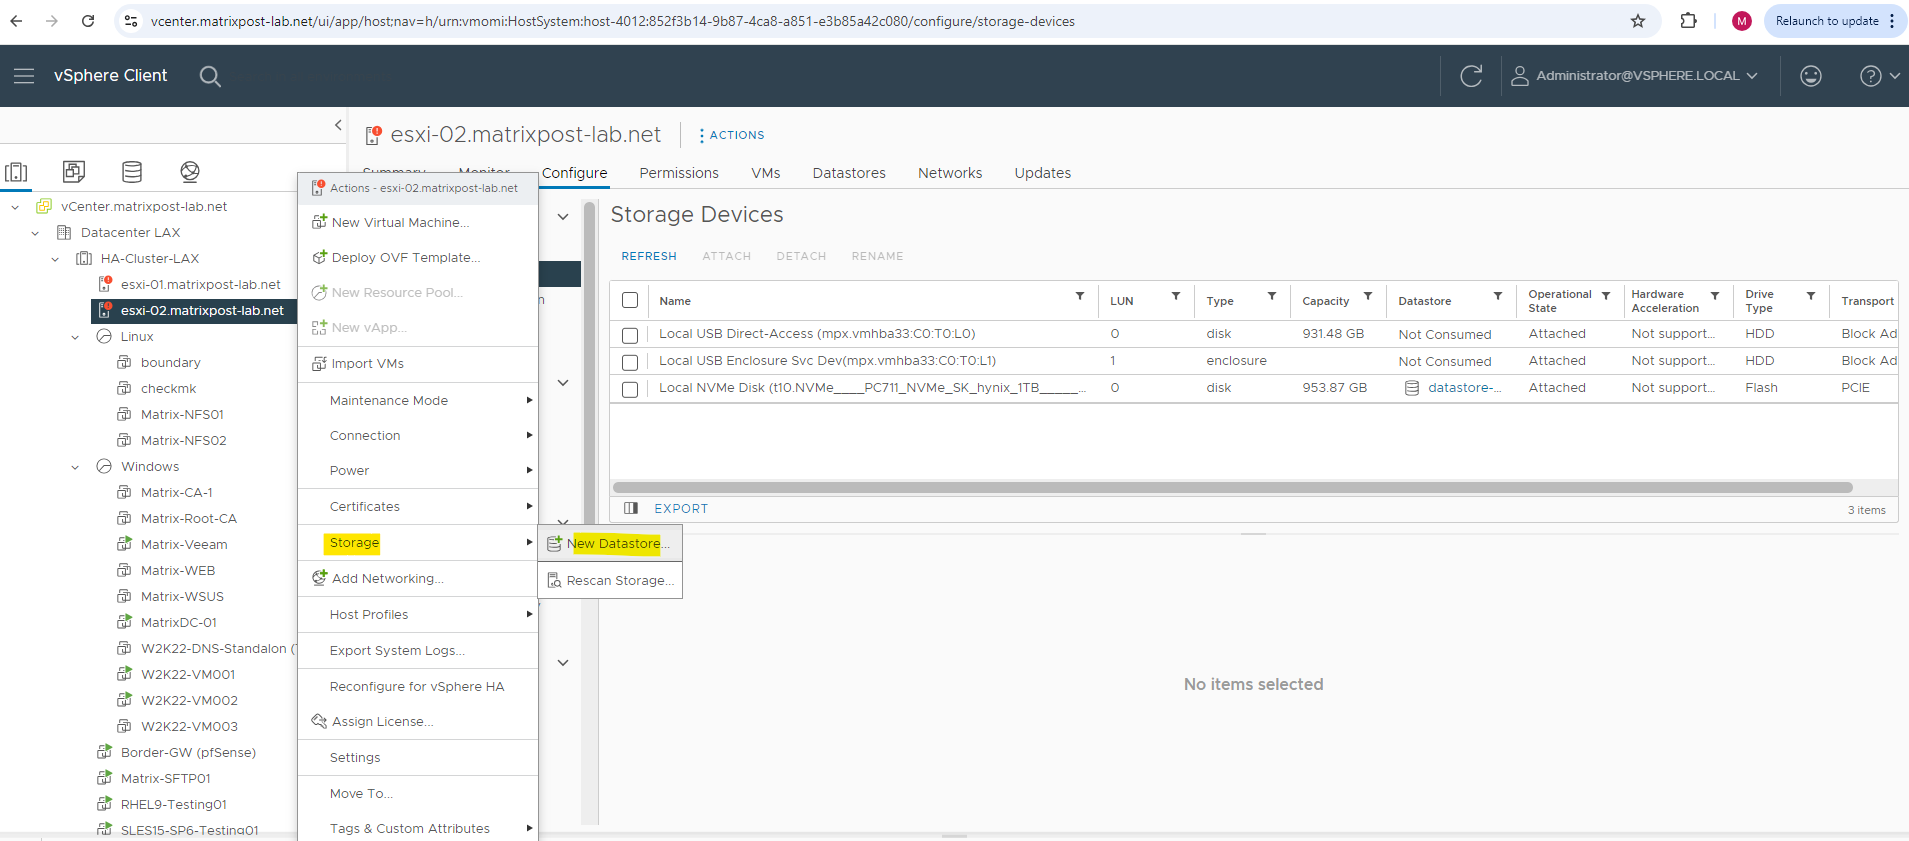
Create a new Datastore by using vSphere
From now on we can create a new datastore in vSphere like usual. Right click on the ESXi Host we connected our USB hard disk drive to and select Storage -> New Datastore …
You can also create a new datastore and partition on the USB hard disk drive by using the command line and shown in the article here:
Using partedUtil command line disk partitioning utility on ESXi
https://knowledge.broadcom.com/external/article/323144/using-partedutil-command-line-disk-parti.html
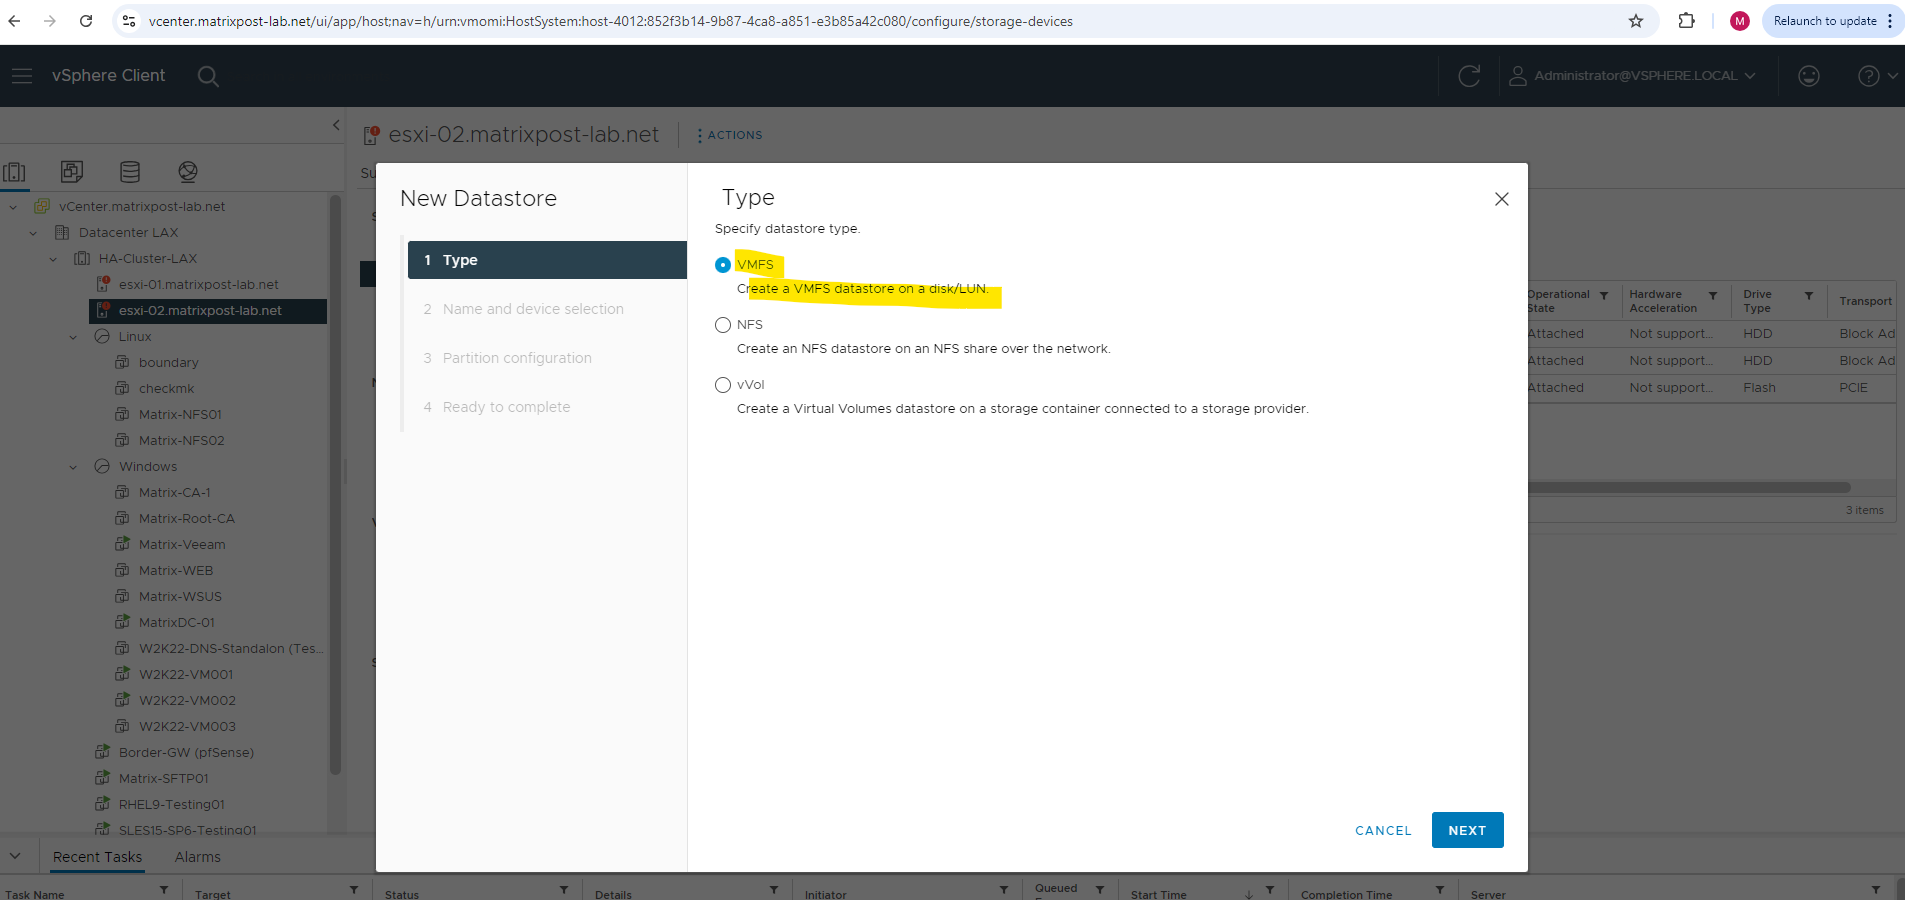
Specify datastore type.
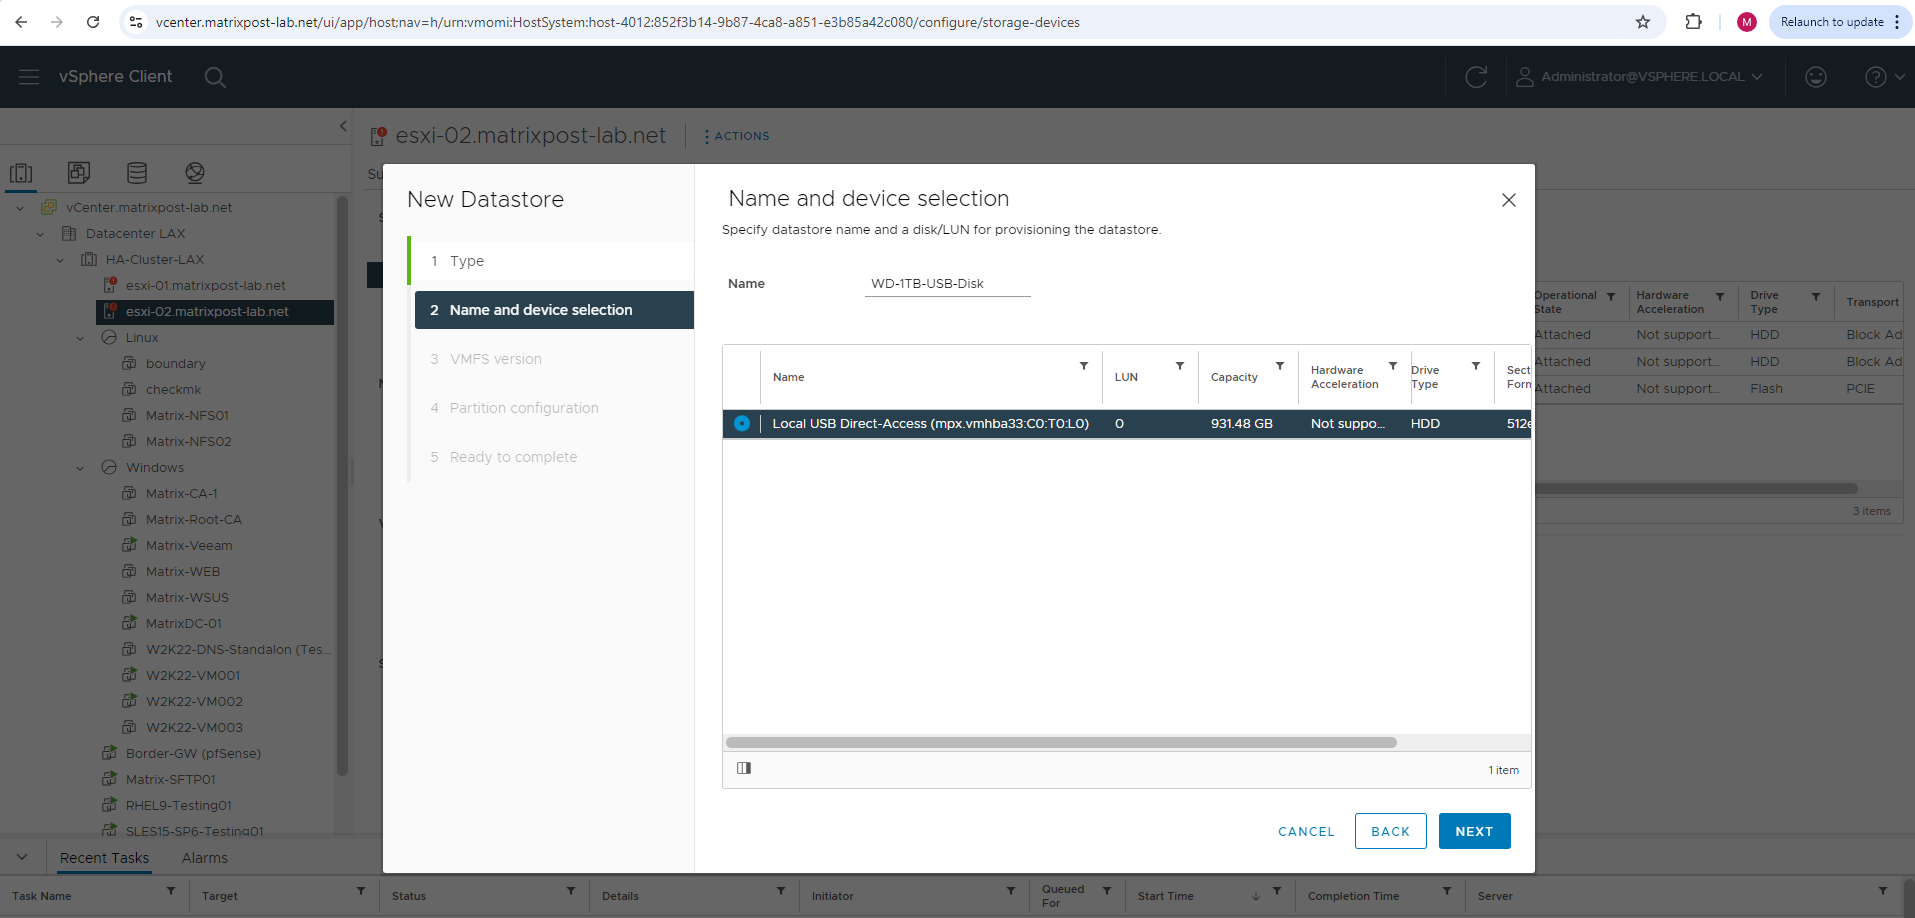
Enter a name for the new datastore and select the device (disk) we want to create this datastore on.
Below my newly connected USB hard disk drive is shown up under devices we can select for.
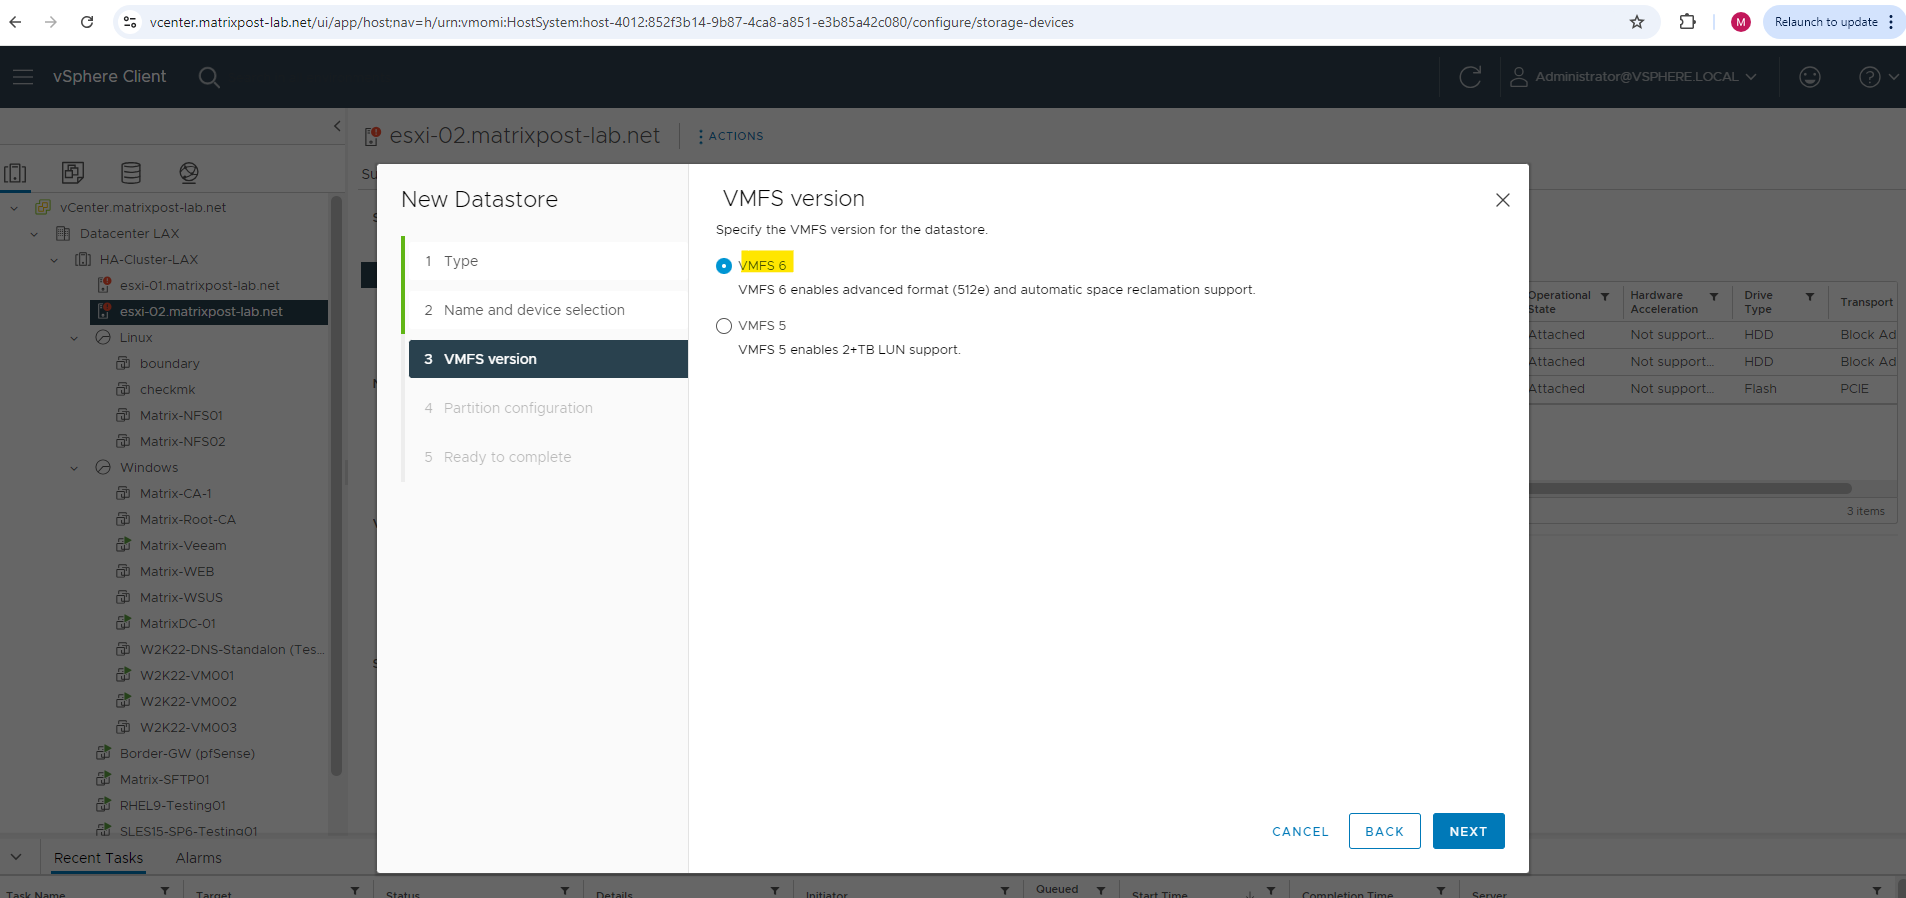
Specify the VMFS version.
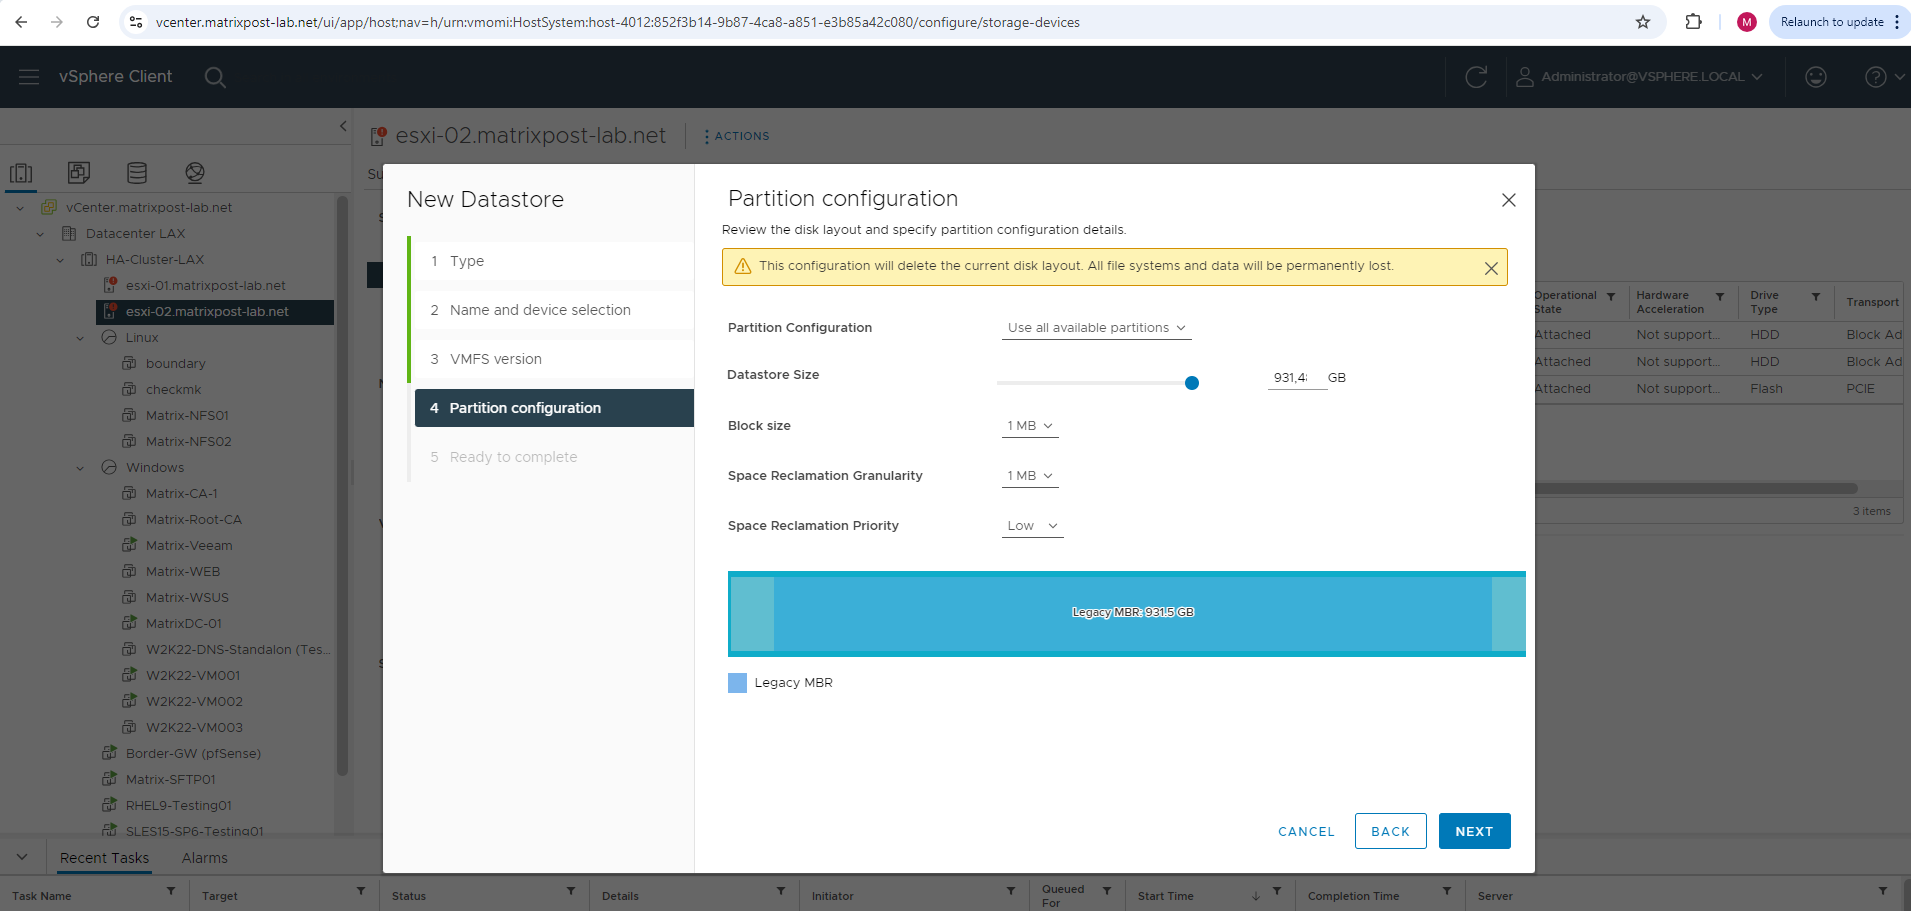
I will create by default a new partition for the whole disk.
Finally click on Finish.
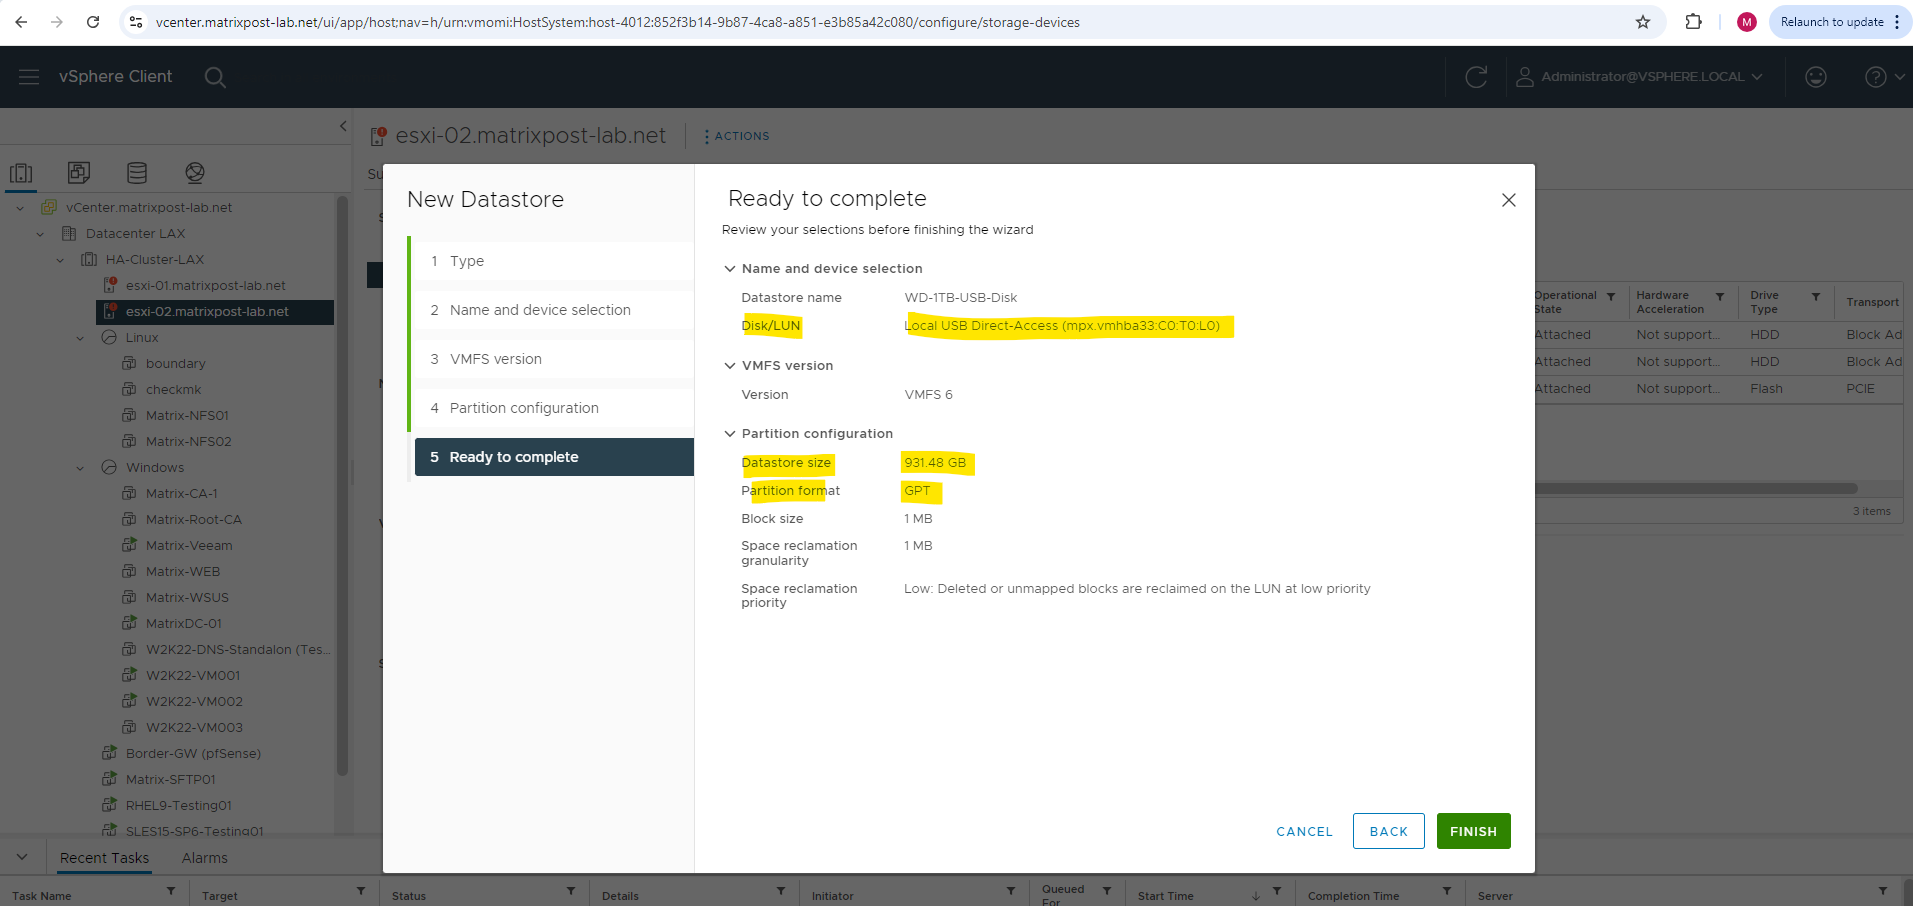
Our new datastore created on our connected USB hard disk drive was finally successful created.
Links
Using partedUtil command line disk partitioning utility on ESXi
https://knowledge.broadcom.com/external/article/323144/using-partedutil-command-line-disk-parti.htmlStorage Device Names and Identifiers
https://docs.vmware.com/en/VMware-vSphere/7.0/com.vmware.vsphere.storage.doc/GUID-A36810F4-00EC-4EA8-A242-2A0DBBF56731.htmlManaging Storage Devices
https://docs.vmware.com/en/VMware-vSphere/7.0/com.vmware.vsphere.storage.doc/GUID-5E1FC535-6DA0-46E0-B88A-73A0F1F8844A.html
Tags In
Related Posts
Follow me on LinkedIn