Set up Azure Site Recovery for On-Premise VMware Virtual Machines (Modernized) – Part 1
This blog post series (in 4 parts) will walk you through each step of setting up Azure Site Recovery (ASR) for VMware.
Azure Site Recovery (ASR) for VMware is a disaster recovery service that enables businesses to protect and replicate their VMware-based virtual machines (VMs) to Microsoft Azure.
ASR ensures business continuity by providing failover and failback capabilities, allowing organizations to recover quickly in the event of outages, natural disasters, or system failures. It works by replicating on-premises VMware VMs to Azure, ensuring that a secondary copy of your critical systems is always available in the cloud.
ASR for VMware is easy to set up, cost-effective, and integrates with existing VMware environments, providing a robust and scalable disaster recovery solution.
In this part we will see the prerequisites we need to set up Azure Site Recovery (ASR) for VMware. This will cover preparing our on-premise vSphere environment and also the virtual machines we want to protect by using ASR.
Further we will create a recovery services vault in Azure which will be used to set up Azure Site Recovery (ASR).
In Part 2 we will prepare the infrastructure in Azure and in on-premises by deploying the ASR appliance in vSphere.
In Part 3 we will enable the replication of virtual machines in on-premise (vSphere) which we want to protect and replicate to Azure. We will also see how to perform a failover from on-premise to Azure and how to re-protect the virtual machine to on-premise back after the failover to Azure.
In Part 4 we will see which traffic between the ASR Appliance and our protected virtual machines will occur and we finally need to allow. Further we will see some troubleshooting in case something doesn’t work as expected.
Prerequisites
The following article summarizes supported components and settings for disaster recovery of VMware VMs and physical servers to Azure using Azure Site Recovery.
Support matrix for disaster recovery of VMware VMs and physical servers to Azure
https://learn.microsoft.com/en-us/azure/site-recovery/vmware-physical-azure-support-matrix
Create an Account in vSphere for automatic discovery Virtual Machines
Site Recovery needs access to VMware servers to:
- Automatically discover VMs. At least a read-only account is required.
- Orchestrate replication, failover, and failback. You need an account that can run operations such as creating and removing disks, and powering on VMs.
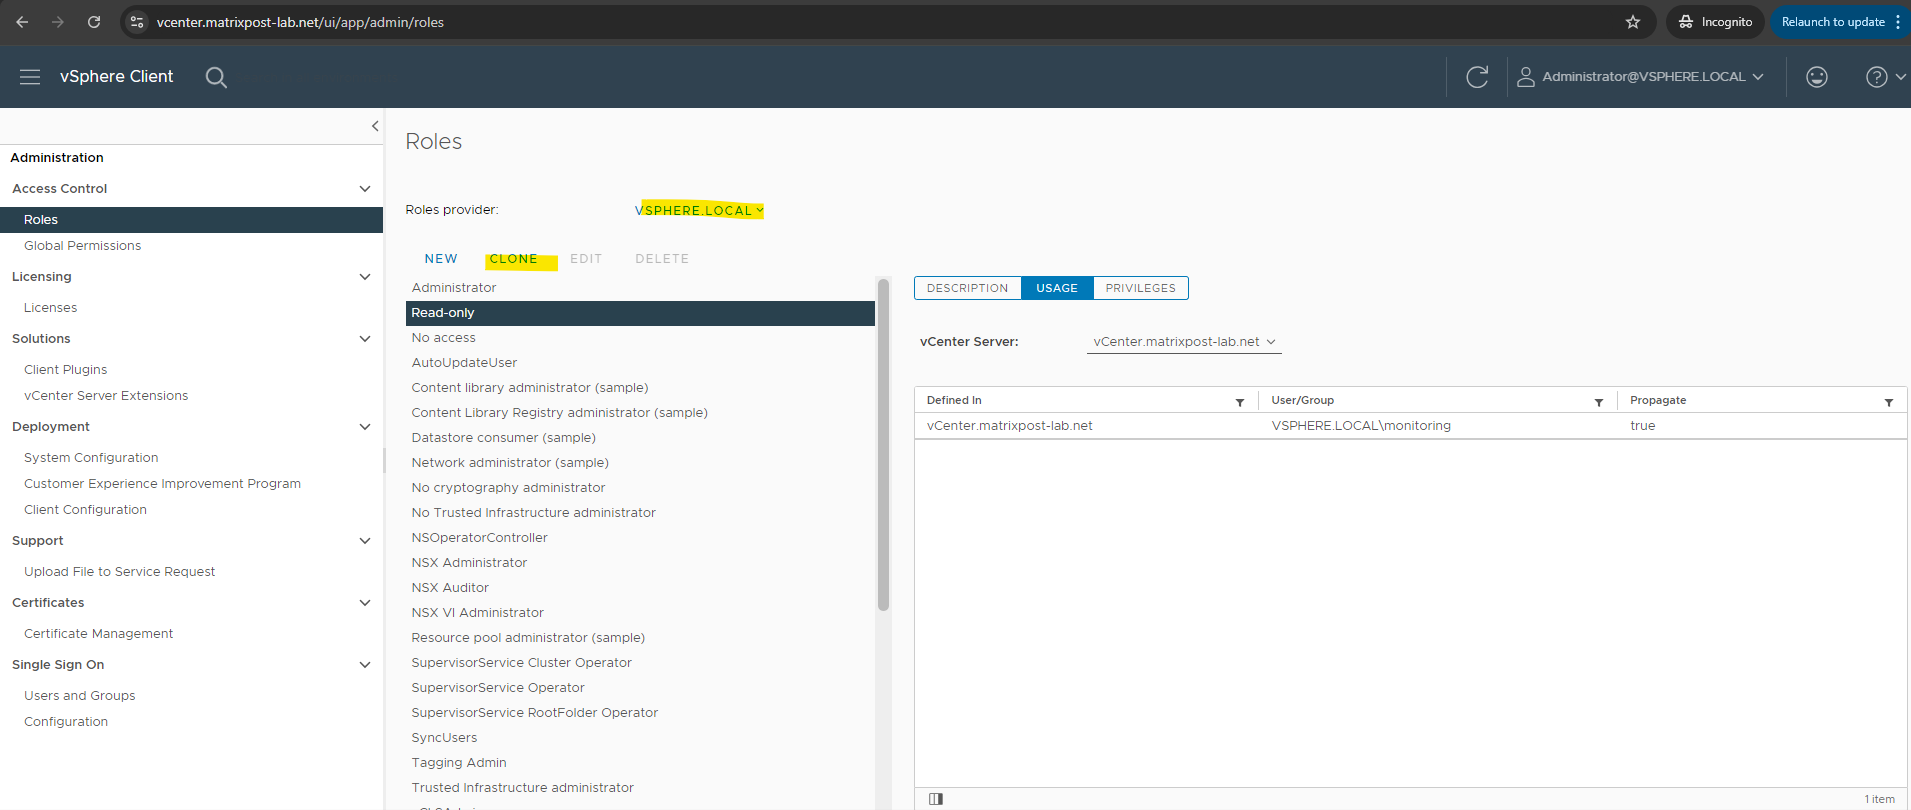
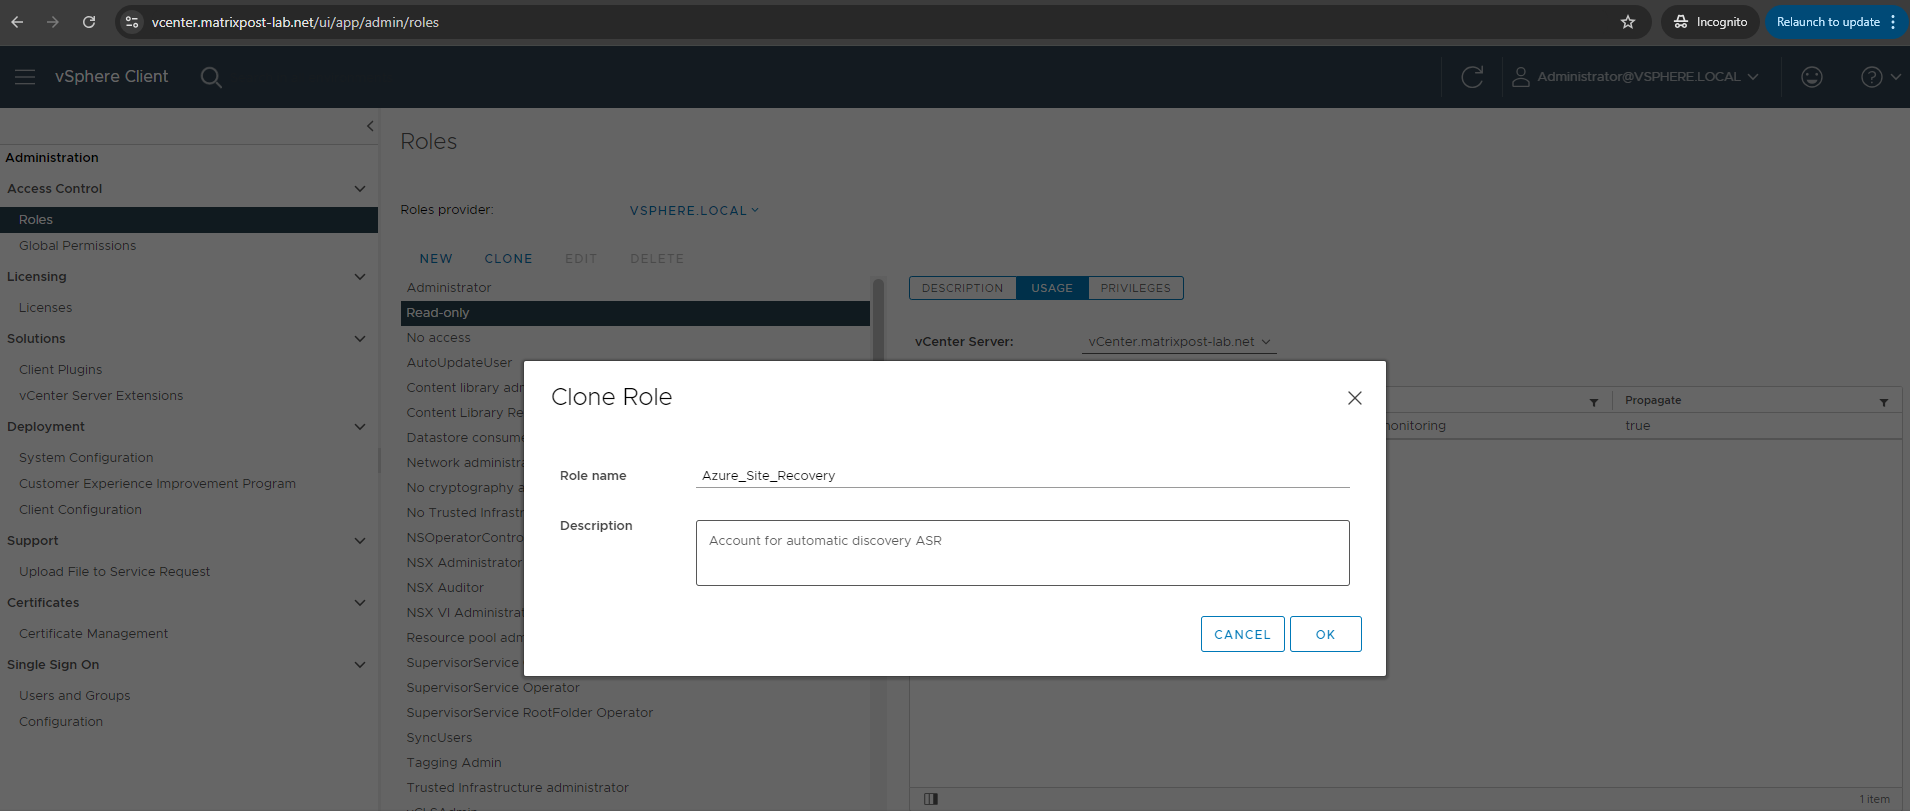
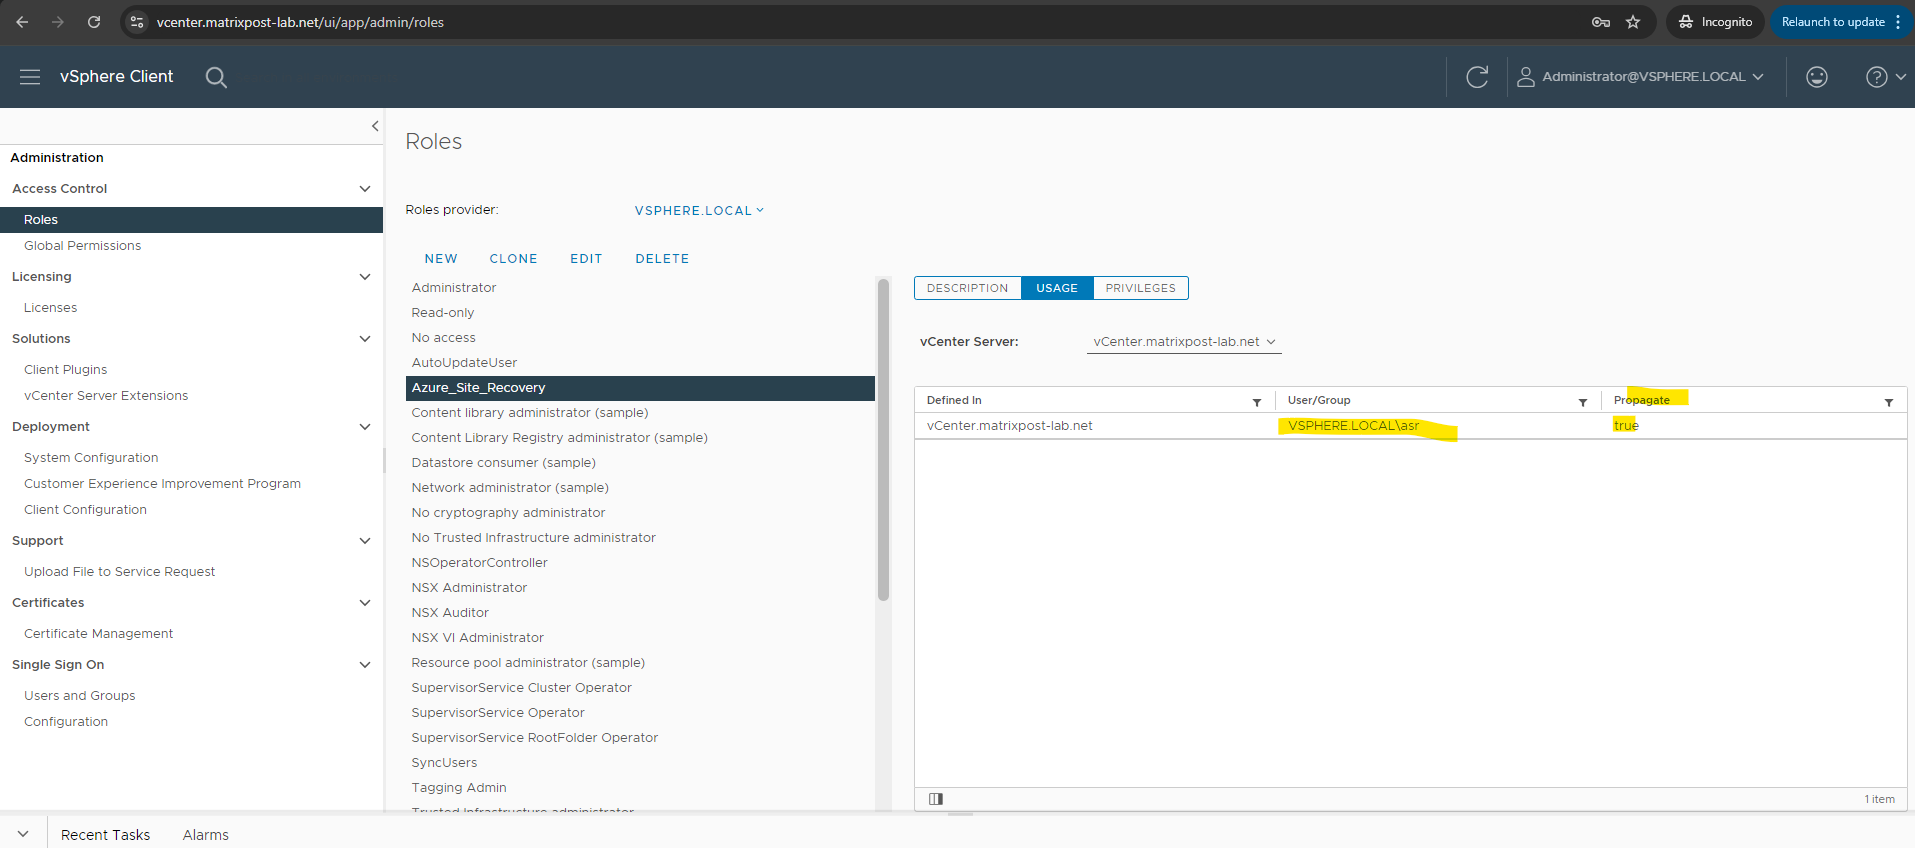
To use a dedicated account, create a role at the vCenter level. Give the role a name such as Azure_Site_Recovery.
In vSphere navigate to Administration -> Access Control -> Roles. Select a roles provider, I will use my vsphere.local domain.
Select the Read-only role and click on CLONE. We then also need to add more privileges as shown below.
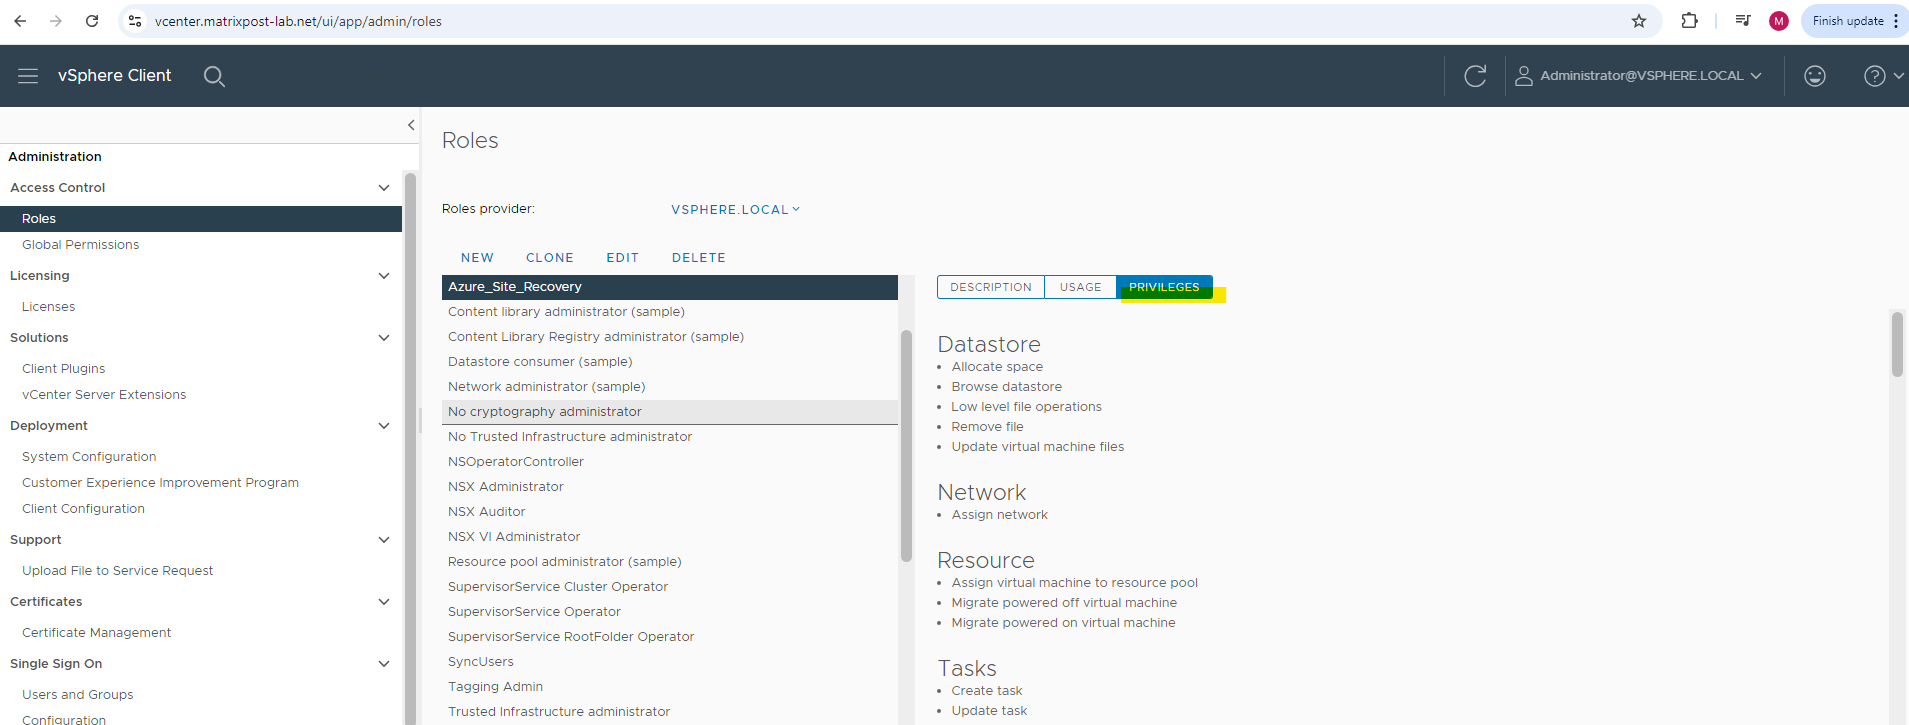
Then we need to add the following privileges: (you will find the detailed needed permissions in the article from Microsoft below).
- VM discovery -> Automatically discover VMs. At least a read-only account is required.
- Full replication, failover, failback -> Orchestrate replication, failover, and failback. You need an account that can run operations such as creating and removing disks, and powering on VMs.
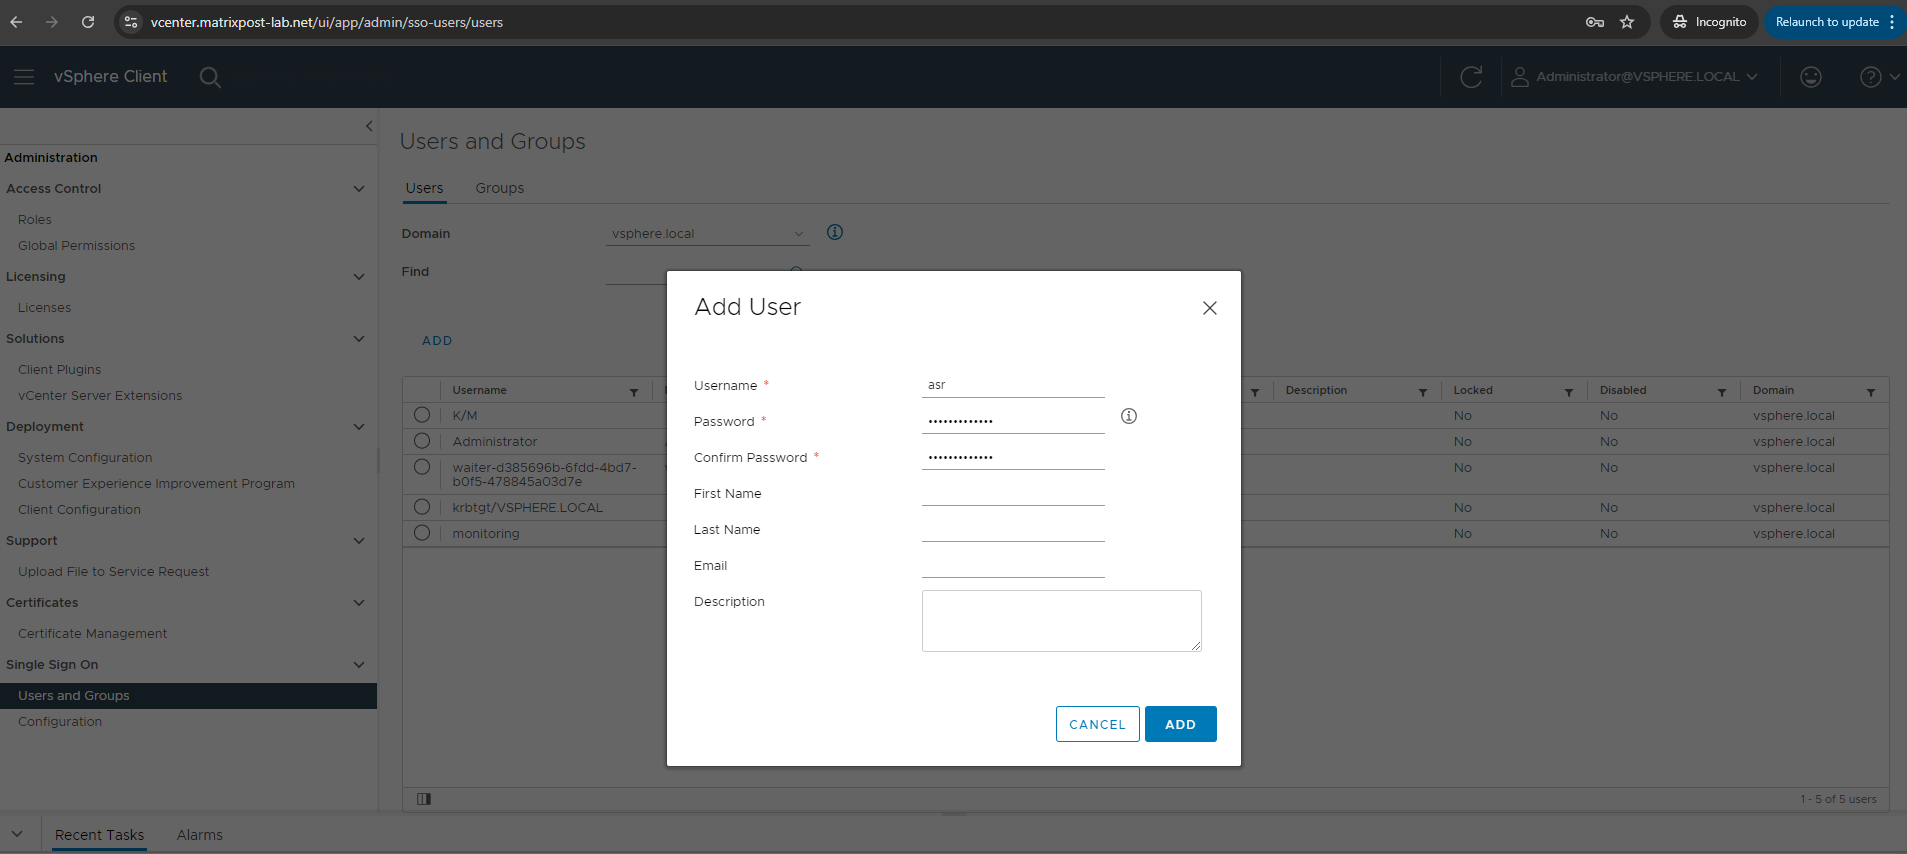
Create a new dedicated user by navigating to Single Sign ON -> Users and Groups, select a domain, in my case I will use my vsphere.local domain and click on ADD.
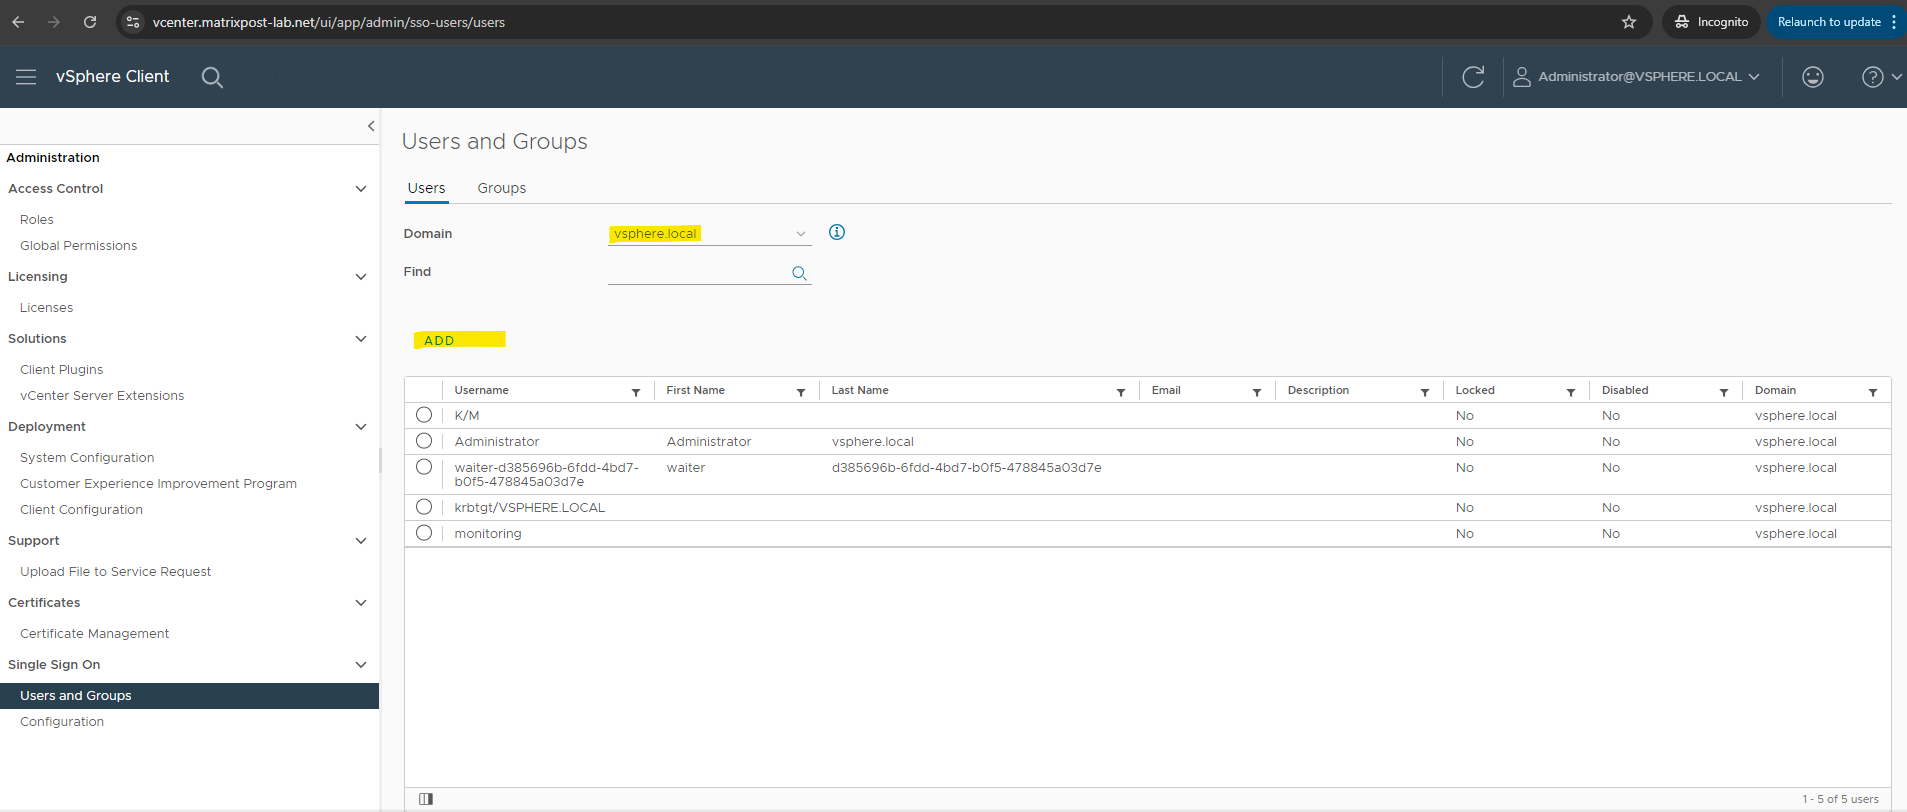
Enter a username and password.
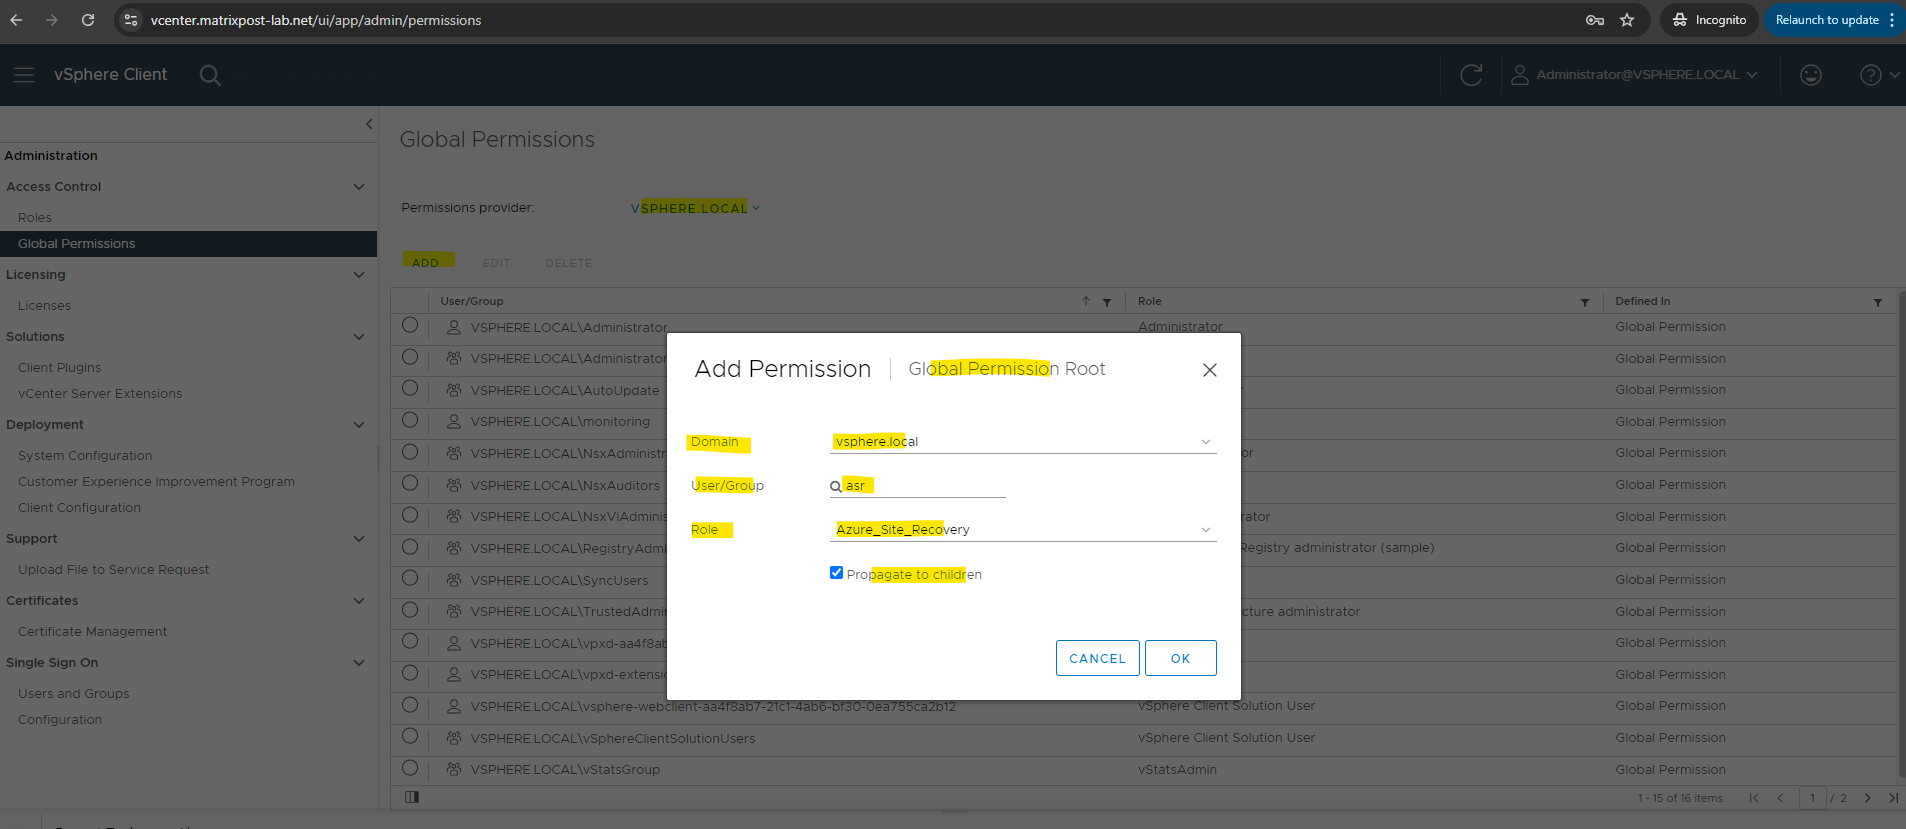
Below add permissions to the user. First select the domain for the user, then search for the previously created user and select our previously cloned role, finally also check Propagate to children.
If you set a permission at a vCenter Server level and propagate it to the children objects, the permission applies to data centers, folders, clusters, hosts, virtual machines, and similar objects in the vCenter Server instance.
Here we can see our newly created global permissions for our user.

Create a VM Customization Specification in vSphere
This step is not mandatory but I will also create a VM Customization Specification just for the ASR appliance.
By doing this, I can conveniently specify and apply a hostname, desired IP address, DNS Server, DNS suffix and Administrator password during the deployment by using the OVA template (downloaded from our Azure tenant and created recovery services vault shown further down). Therefore the appliance is immediately functional after booting the first time and its Microsoft Azure appliance configuration manager which is launched automatically will run successfully from the first start.
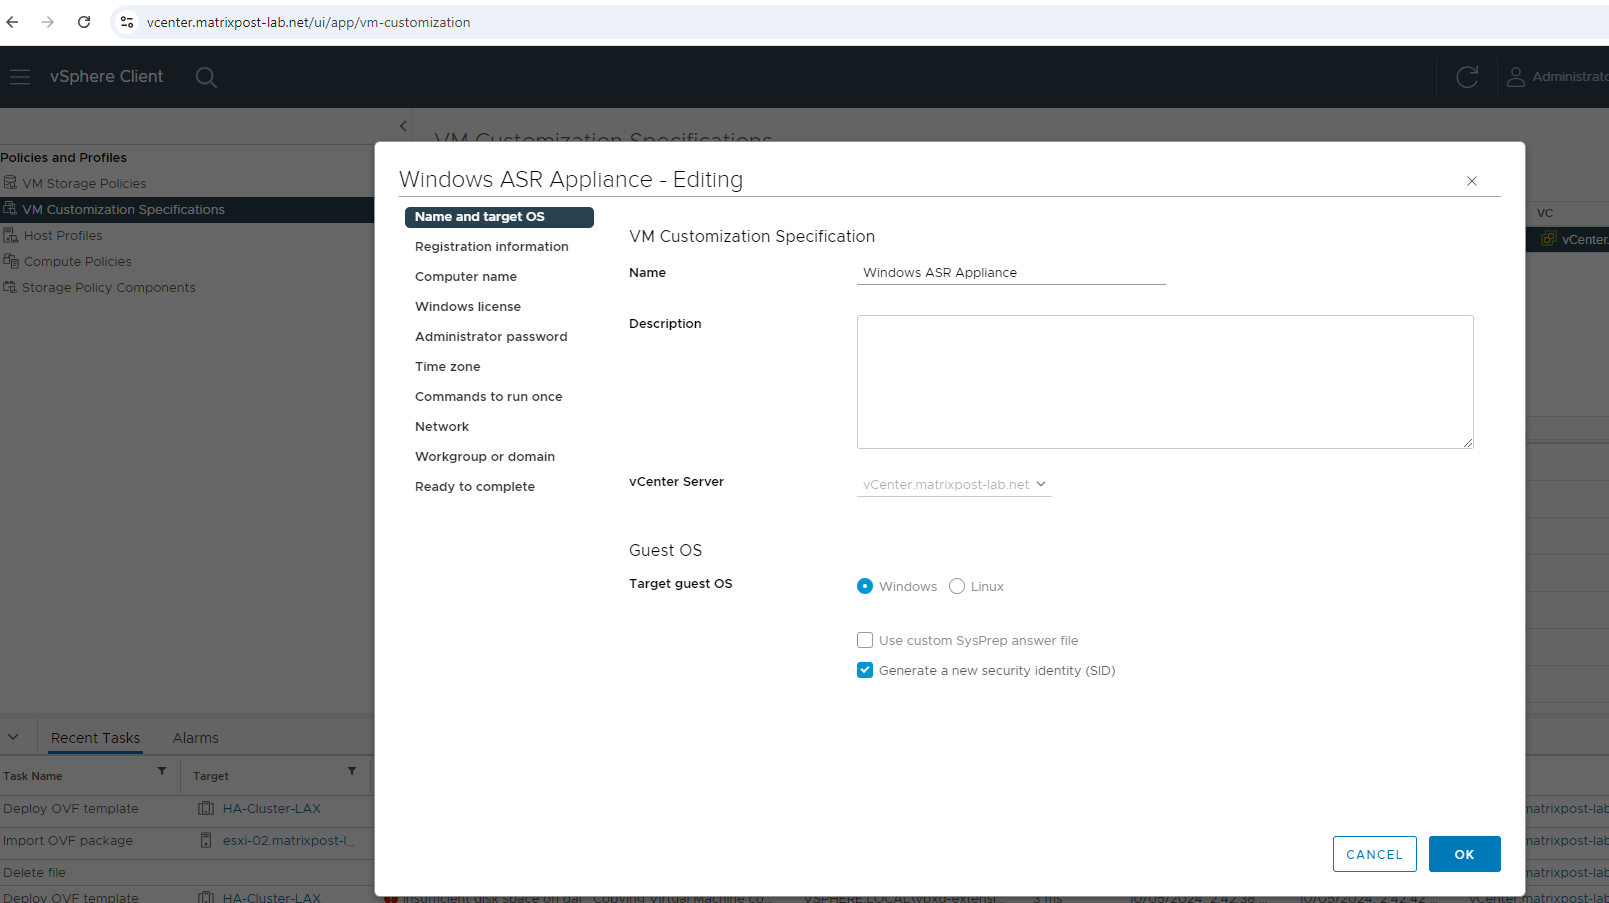
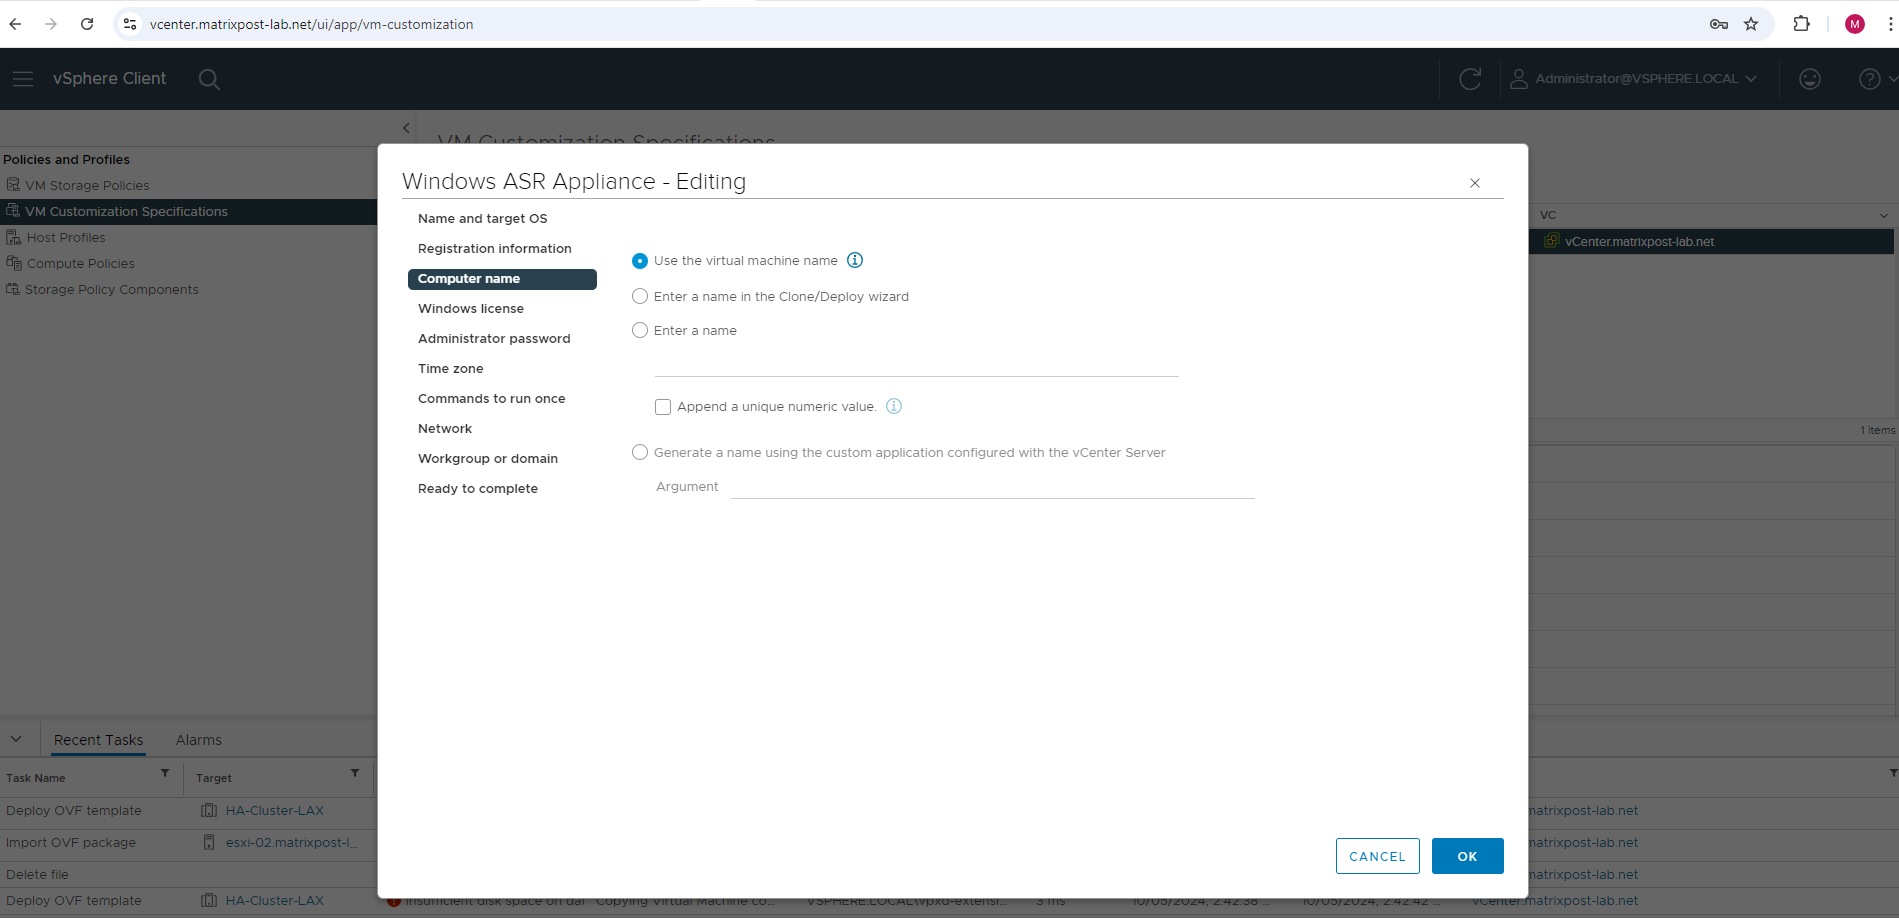
Here I will use the appliances original hostname (MicrosoftDRAppliance) for but we can also enter a different desired name if we want.
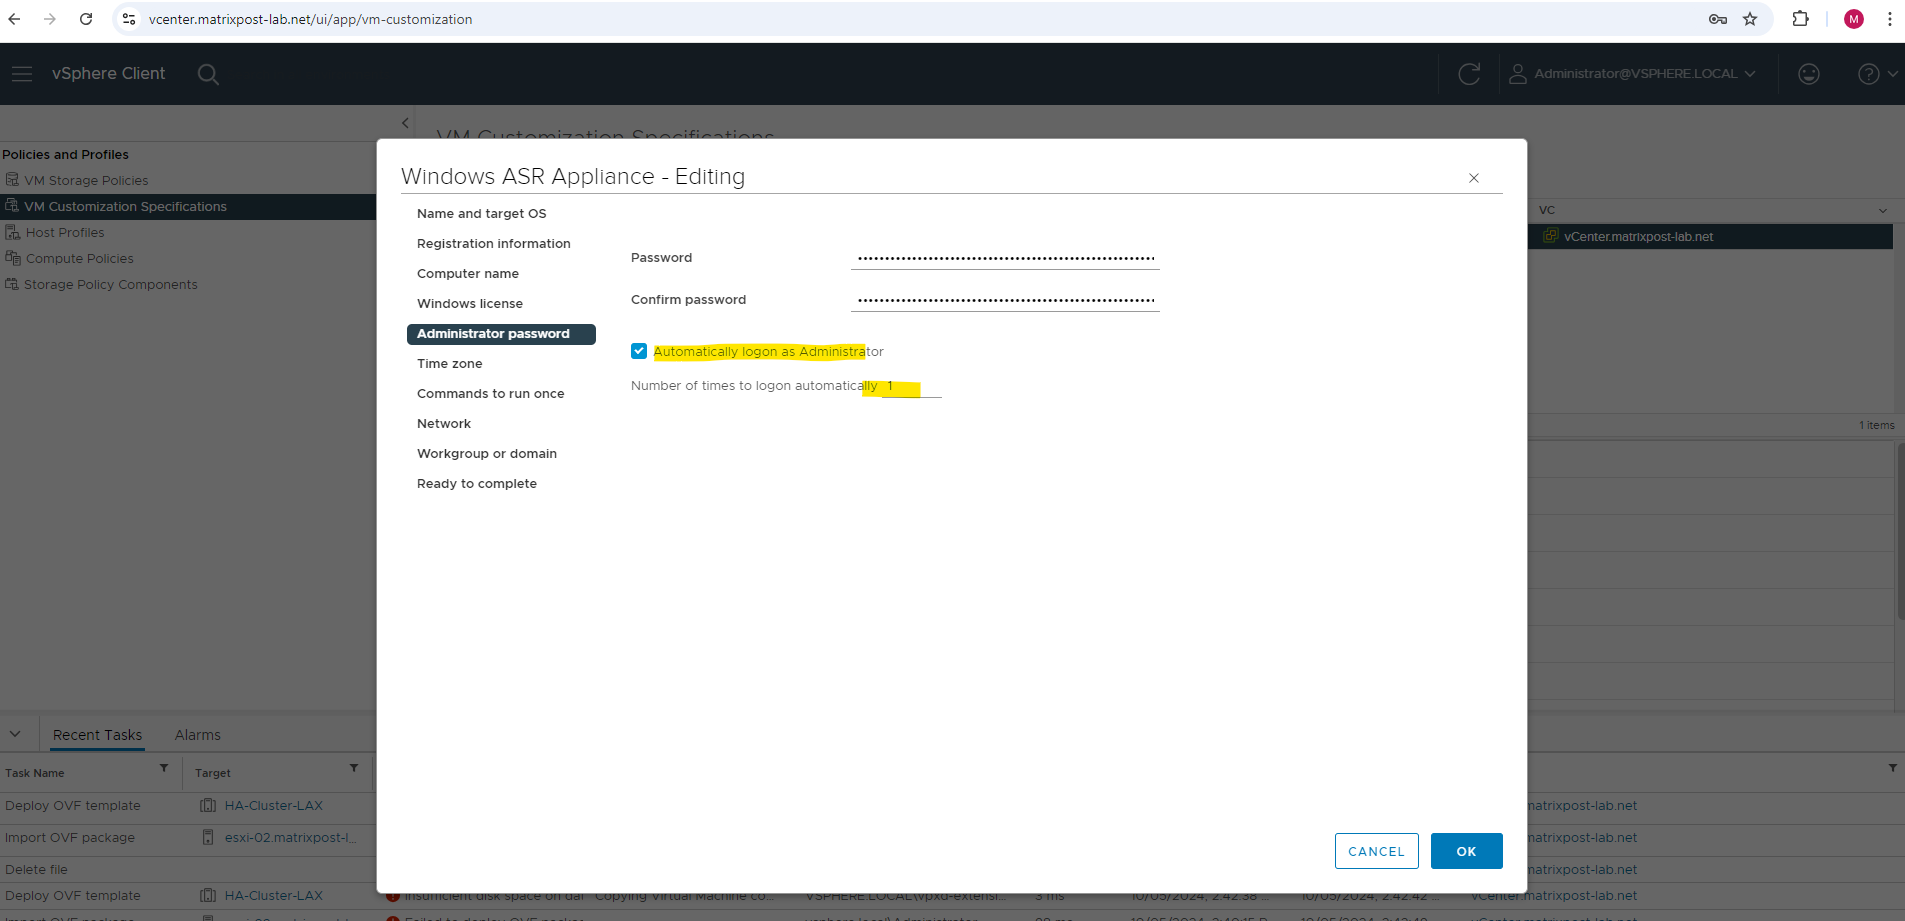
I will also check the Automatically logon as Administrator option of the VM Customization Specification, by enabling this we don’t need to provide our previously specified credentials to logon the first time.
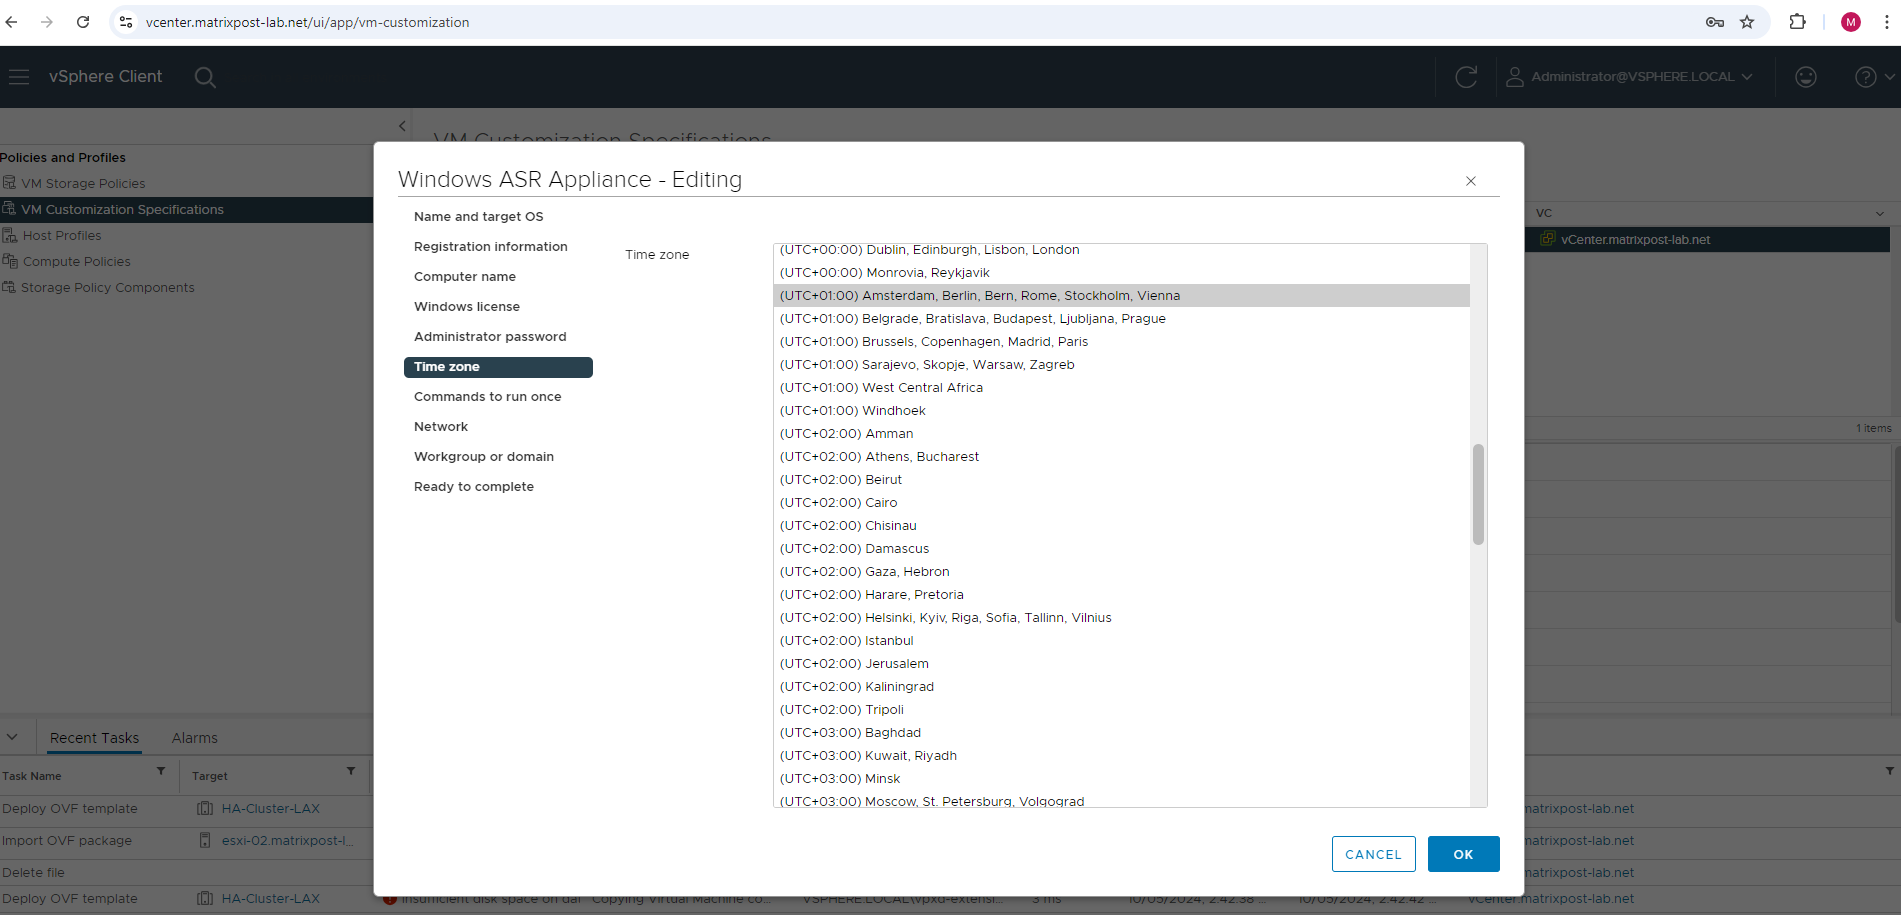
Select the time zone you want to use for.
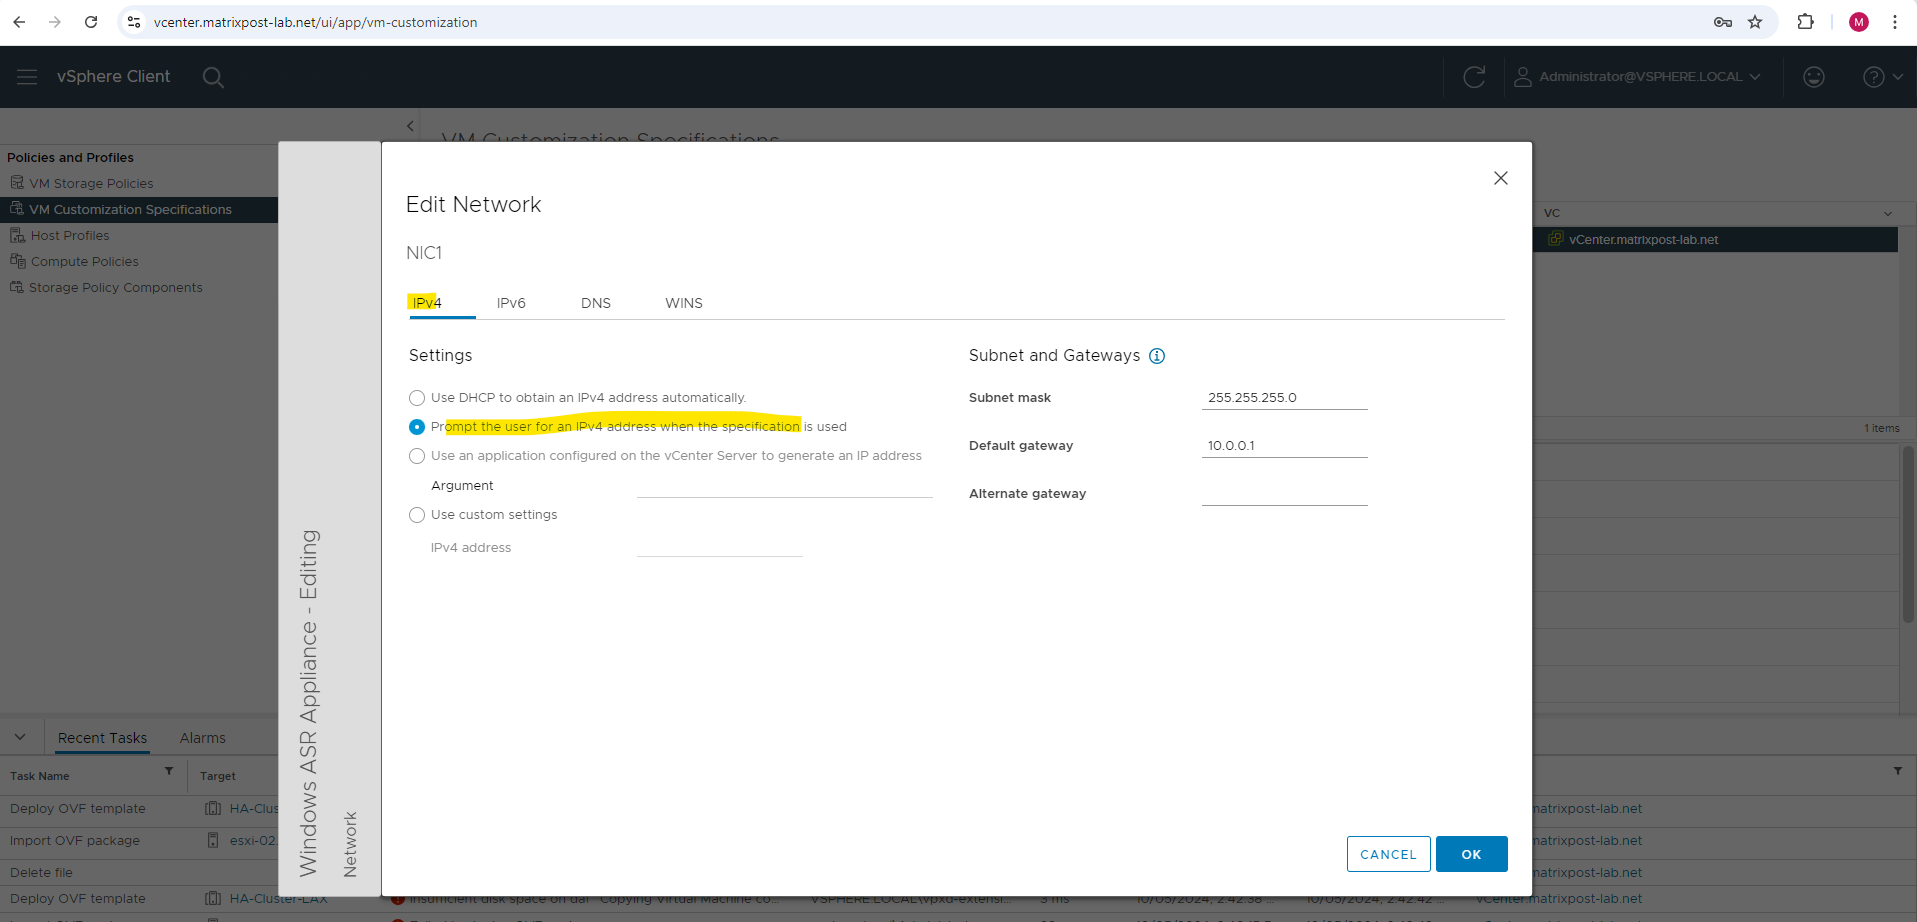
For the network configuration I will use here manual settings in order to specify a static IP address for the ASR appliance during deployment later.
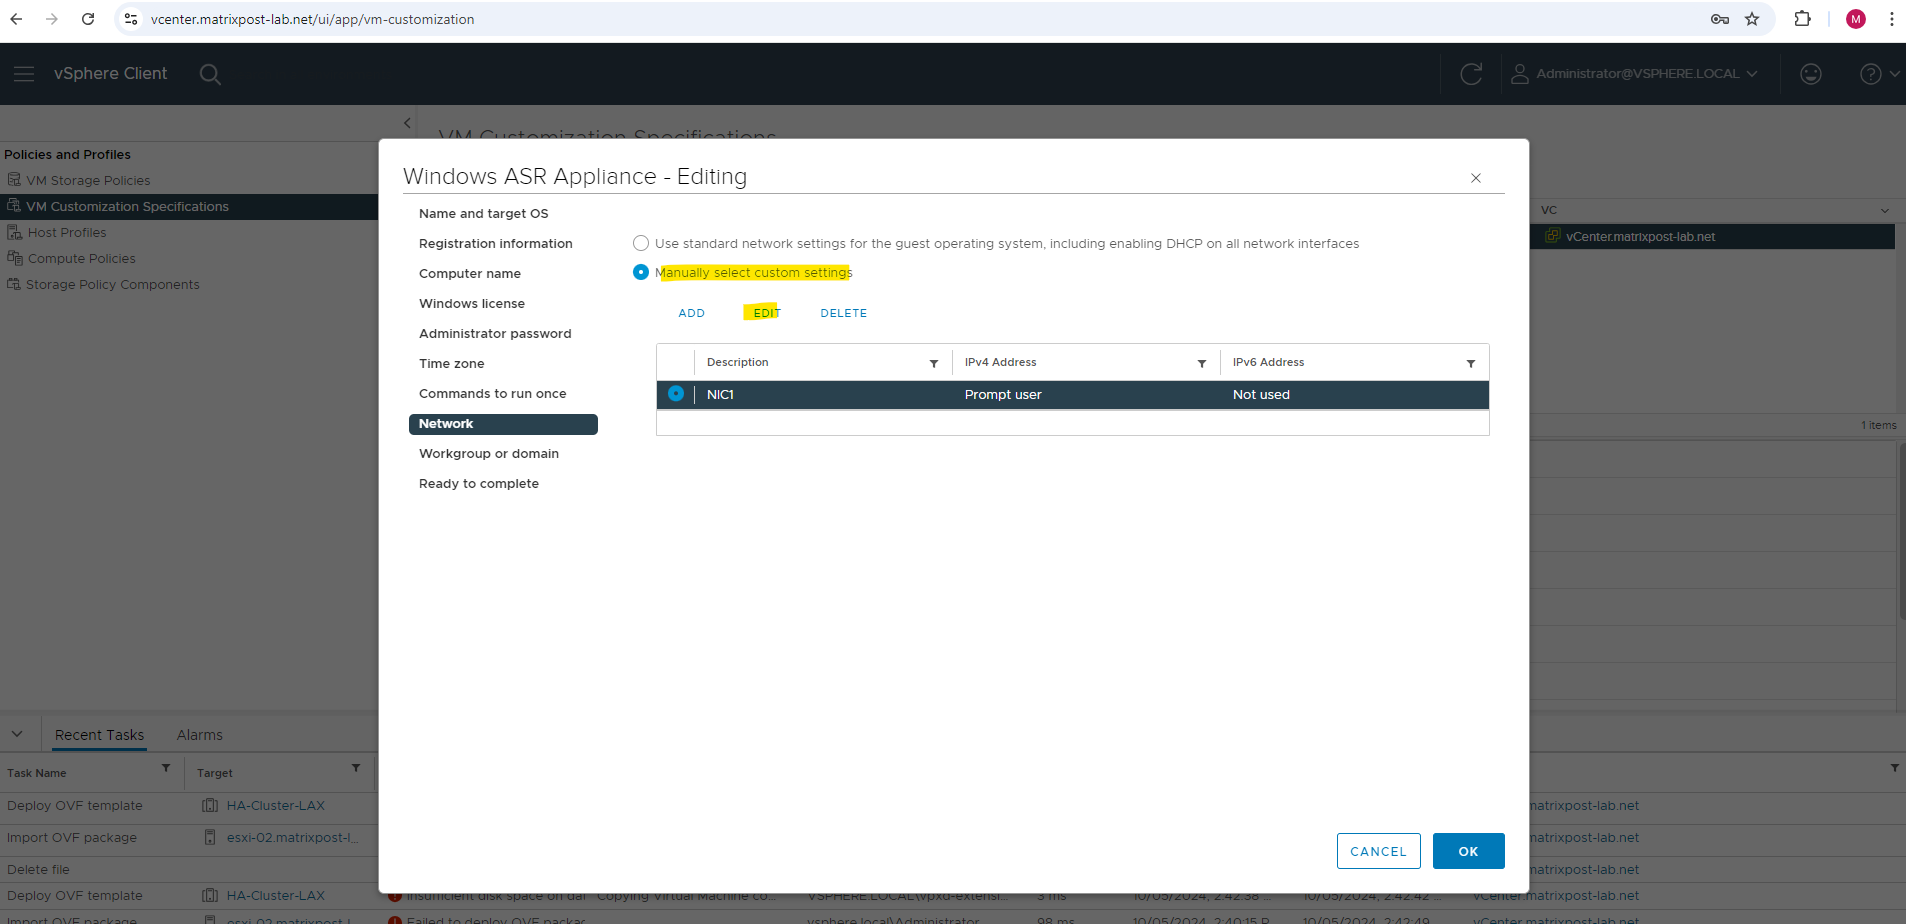
Here we need to enter the subnet mask and default gateway of the desired subnet we want to place our ASR appliance later. In my vSphere lab environment this will be the subnet 10.0.0.0/24 and VLAN ID 10.
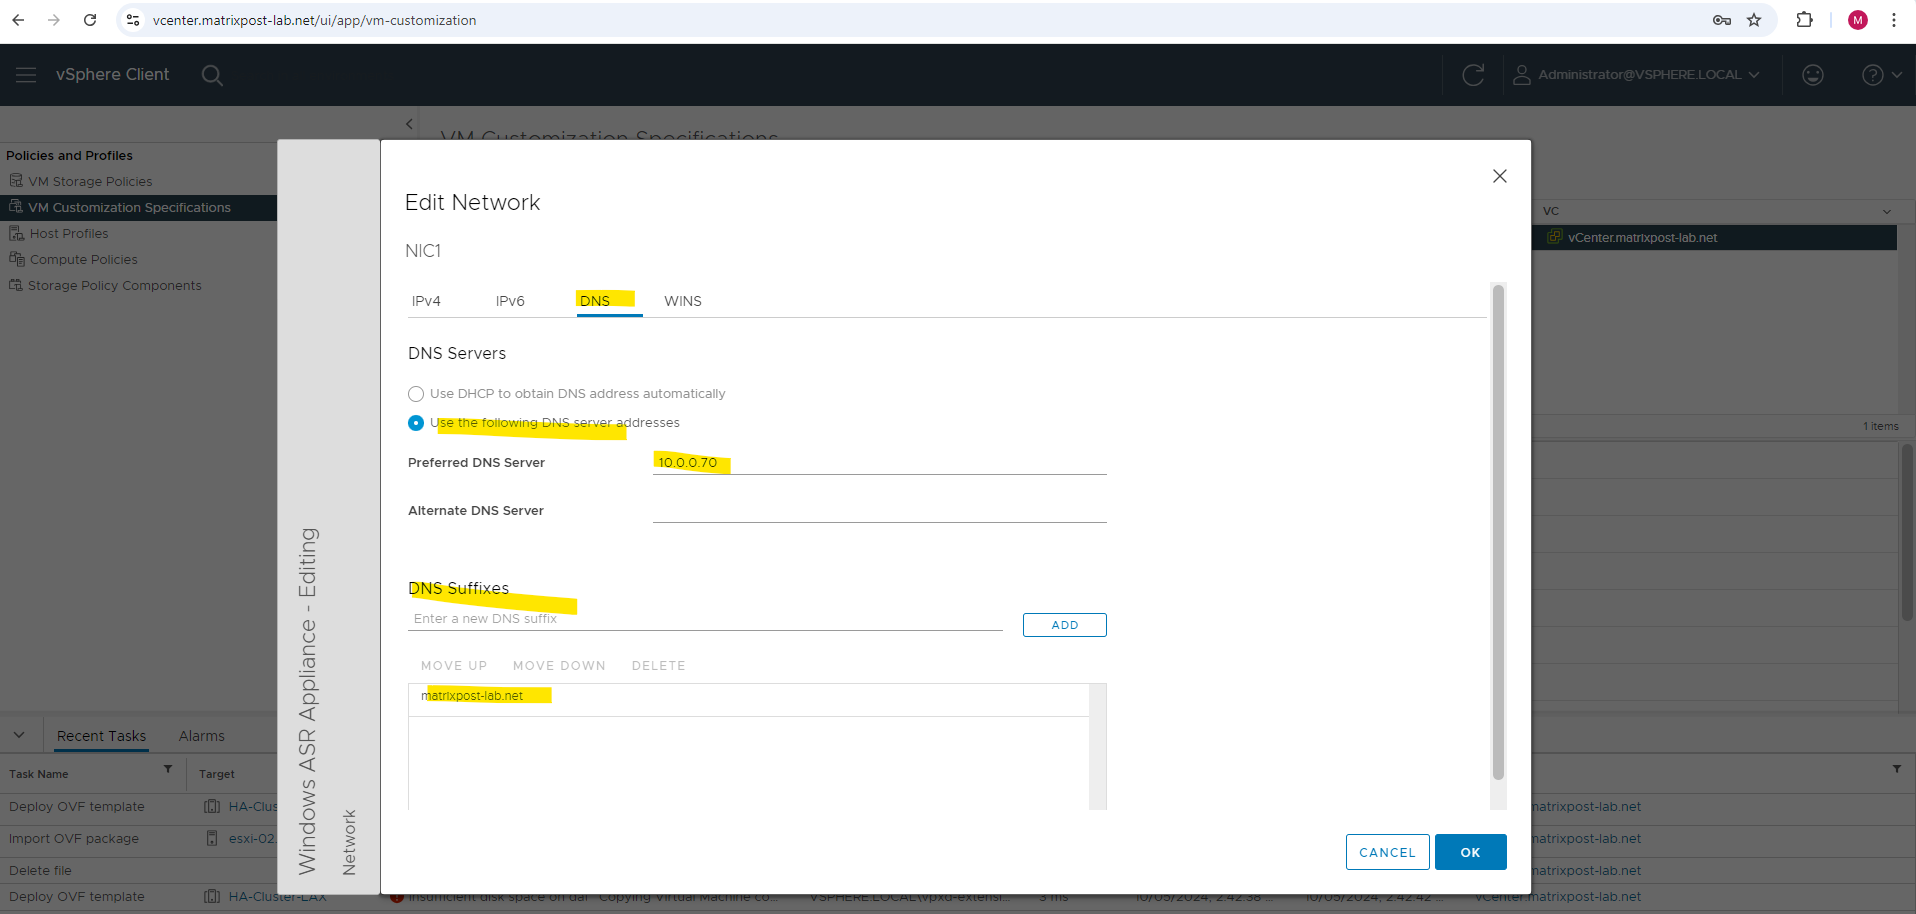
Here I will specify a DNS Server and DNS suffix for the ASR appliance.
During setup of our appliance later and shown further down we can choose a connectivity option with FQDN or NAT IP for the replication appliance.
This will finally define how our deployed (pushed) Mobility Agents on our protected virtual machines will communicate with the replication appliance, either through FQDN or IP address.
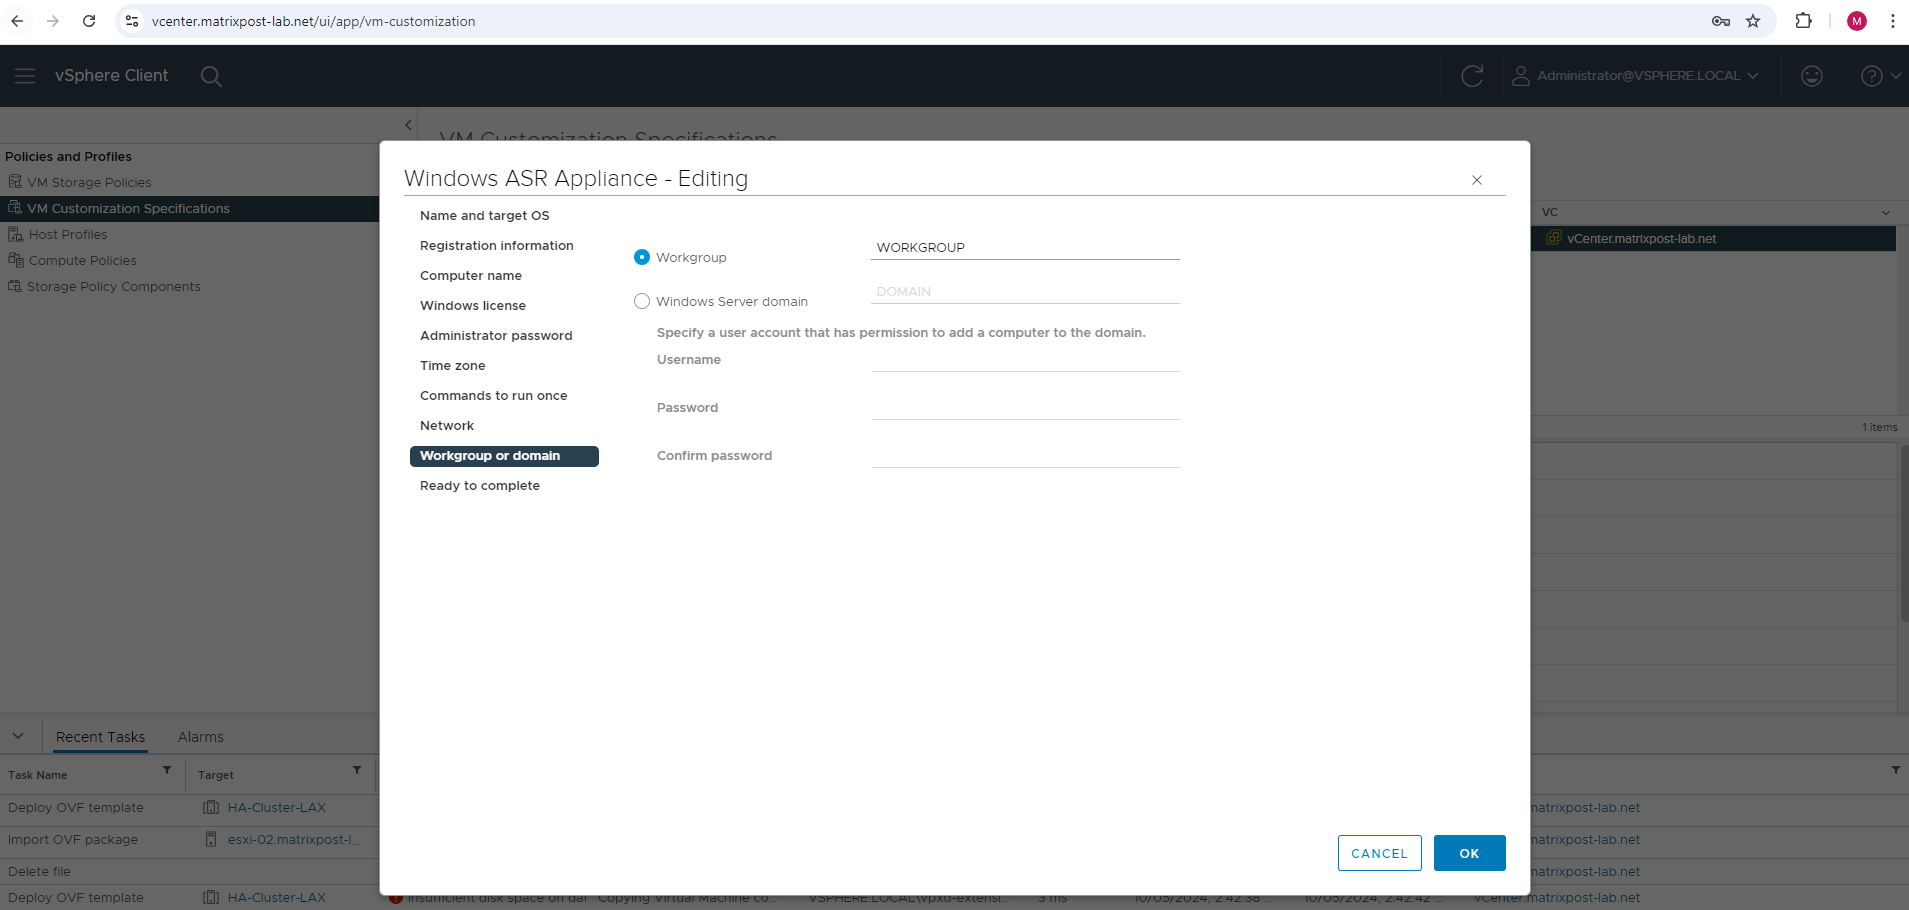
Because I will not join this appliance (virtual machine) to my on-premise AD domain, at least I have to set a domain suffix in order name resolution by using the on-premise AD DNS server will work.
The ASR appliance will be not joined to my internal AD domain as mentioned.
Prepare source machine for push installation of mobility agent
When you set up disaster recovery for VMware VMs and physical servers using Azure Site Recovery, you install the Site Recovery Mobility service on each on-premises VMware VM and physical server. The Mobility service captures data writes on the machine, and forwards them to the Site Recovery process server (our appliance deployed in on-premise vSphere).
Source: https://learn.microsoft.com/en-us/azure/site-recovery/vmware-azure-install-mobility-service
Windows machines
To protect Windows machines we must allow the following traffic. In my case internally I am usually disable the Windows Defender Firewall.
Finally network connectivity between the servers you want to protect and replicate to Azure and the ASR appliance should be work. Therefore at least the following traffic must be allowed for protected Windows machines.
- ASR Appliance –> Protected Server TCP 445
- Protected Server –> ASR Appliance inbound TCP 443, 9443
- ASR Appliance –> Protected Server inbound TCP 135 (RPC Port Mapper), TCP 49152-65535 (dynamic RPC Ports) –> These dynamic ports are required after the initial connection on port 135 to complete the installation process.
Linux machines
To protect Linux machines we must allow the following traffic. Therefore at least the following traffic must be allowed for protected Linux machines.
- ASR Appliance –> Protected Server inbound TCP 22 (SSH/SFTP Access by using root account and password authentication to protected Server)
- Protected Server –> ASR Appliance inbound TCP 443, 9443
Further ensure the SFTP subsystem and password authentication in the sshd_config file is enabled.
In the /etc/ssh/sshd_config file, find the line that begins with PasswordAuthentication. Uncomment the line, and change the value to yes.
Find the line that begins with Subsystem, and uncomment the line.
# override default of no subsystems
Subsystem       sftp     /usr/libexec/openssh/sftp-server
Restart the sshd service.
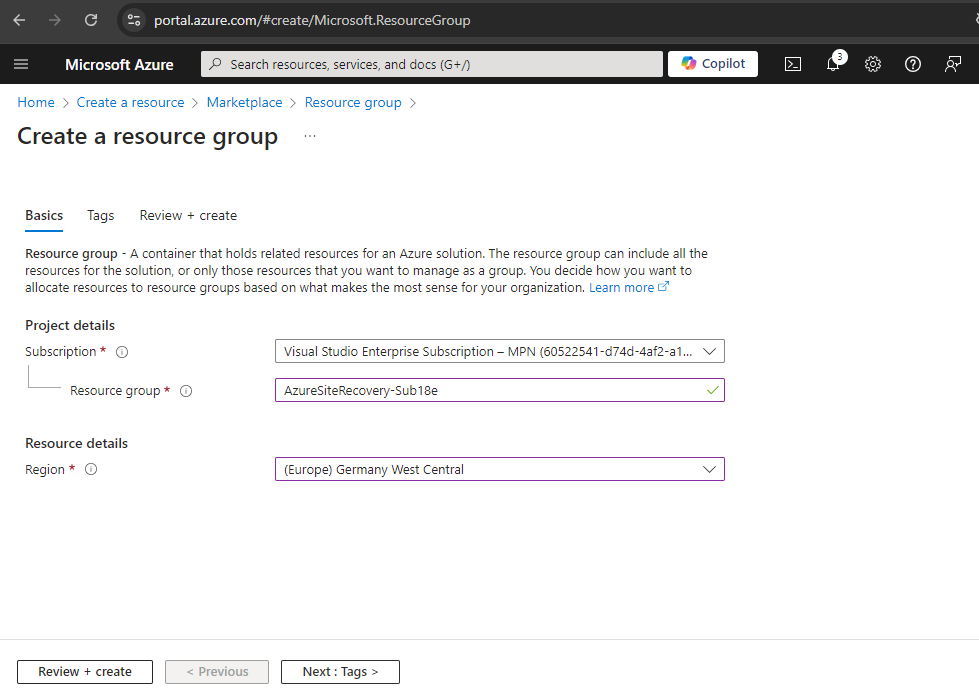
Create a dedicated new Resource Group
In Azure I will first create a new dedicated resource group just for Azure Site Recovery (ASR). This is not mandatory but it will give me a good view about what resources finally will be created for.
Create a Recovery Services Vault
ASR is provided by a recovery services vault in Azure, therefore we first create a new recovery services vault.
Actually we can create a new recovery services vault within the Azure Backup Center or its successor Azure Business Continuity Center (In preview as of today).
Another option is to use an Azure quickstart ARM template as shown here.
Azure Quickstart ARM Templates are pre-built, community-contributed templates that allow users to quickly deploy resources to Azure using Azure Resource Manager (ARM). ARM templates are JSON files that define the infrastructure and configuration for your Azure resources in a declarative manner.
These Quickstart templates are part of a repository on GitHub maintained by both Microsoft and the Azure community, designed to help users quickly set up various Azure environments and services by providing ready-to-use templates for common scenarios.
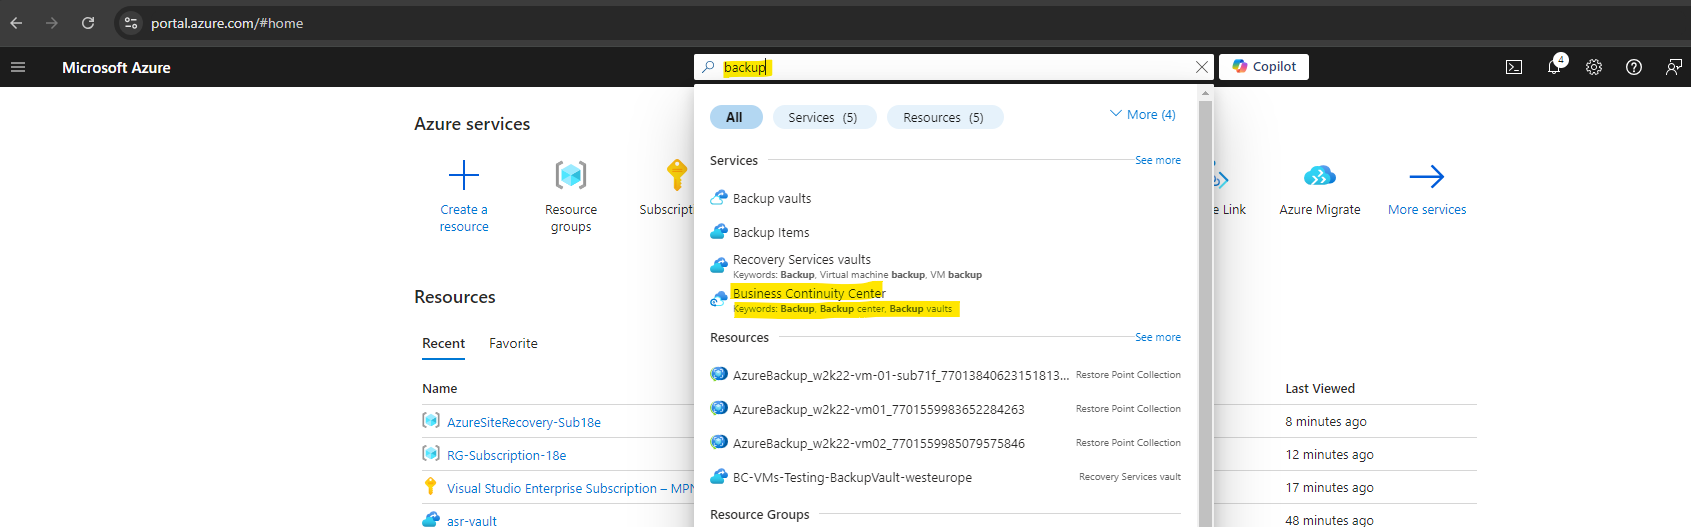
Open the Azure Business Continuity Center (ABCC) by just enter backup for Search resources … as shown below.
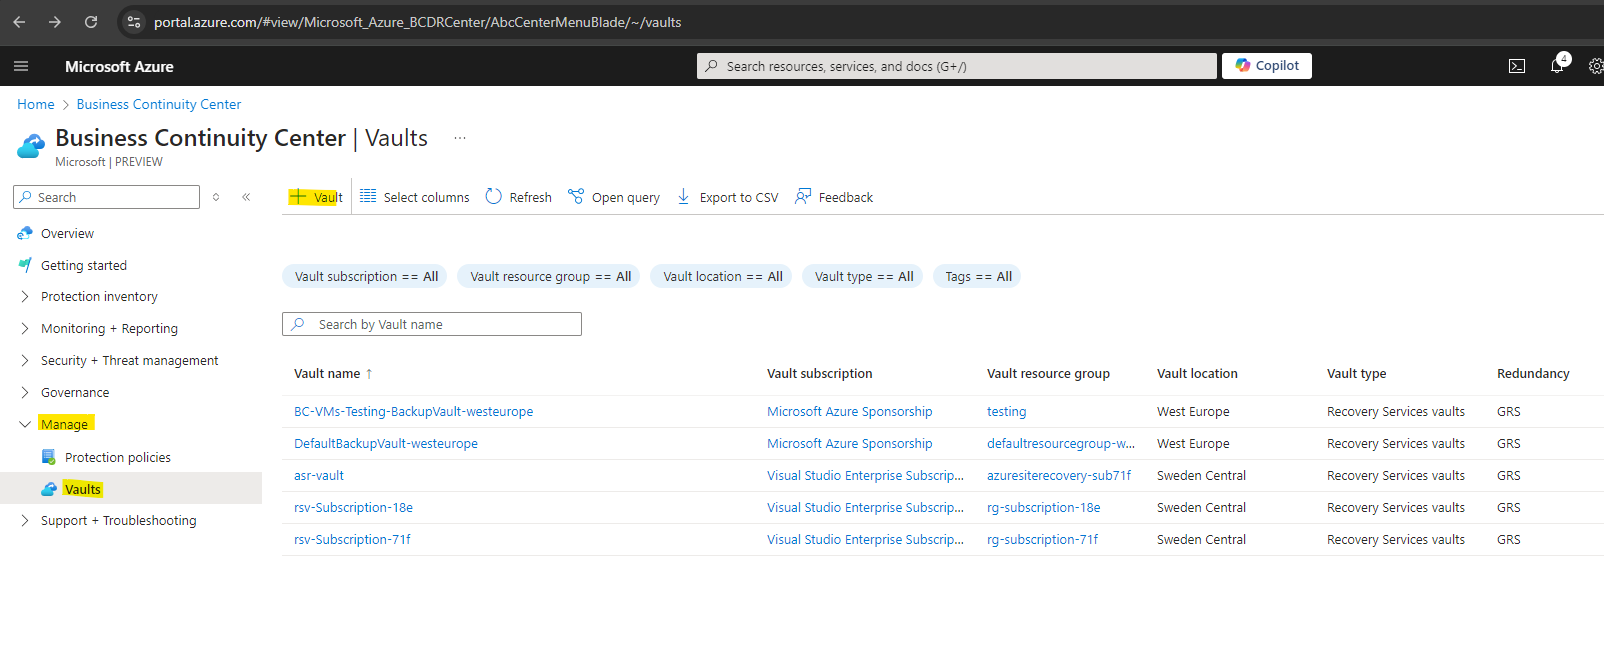
Under Manage click on Vaults and + Vault to create a new recovery services vault.
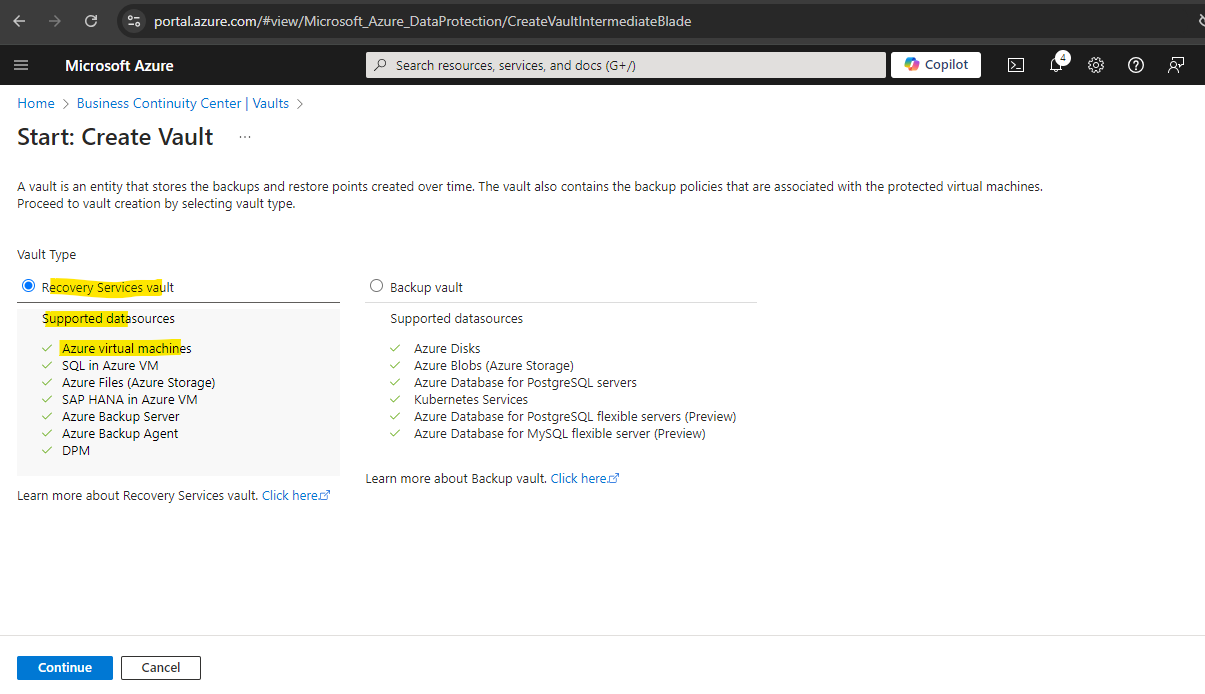
Here is already pre-selected a recovery services vault which we want to create. Click on Continue.
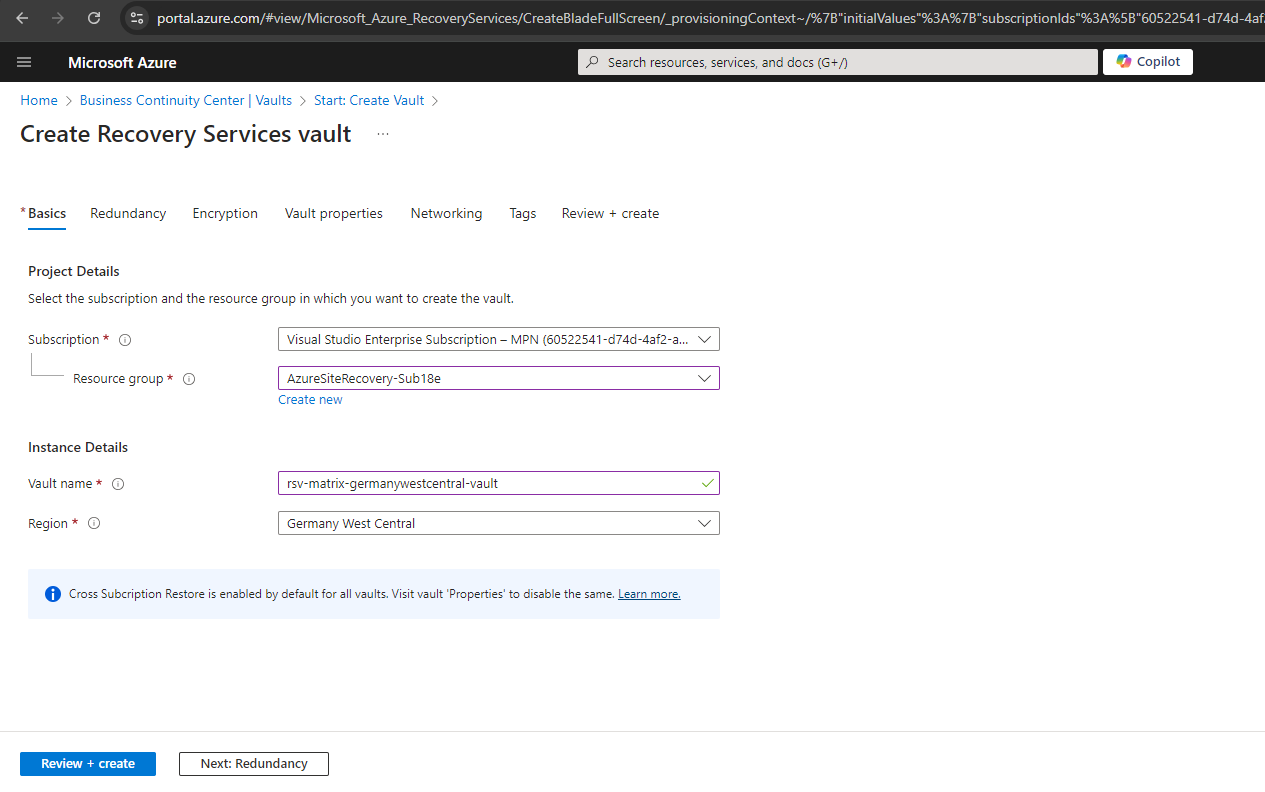
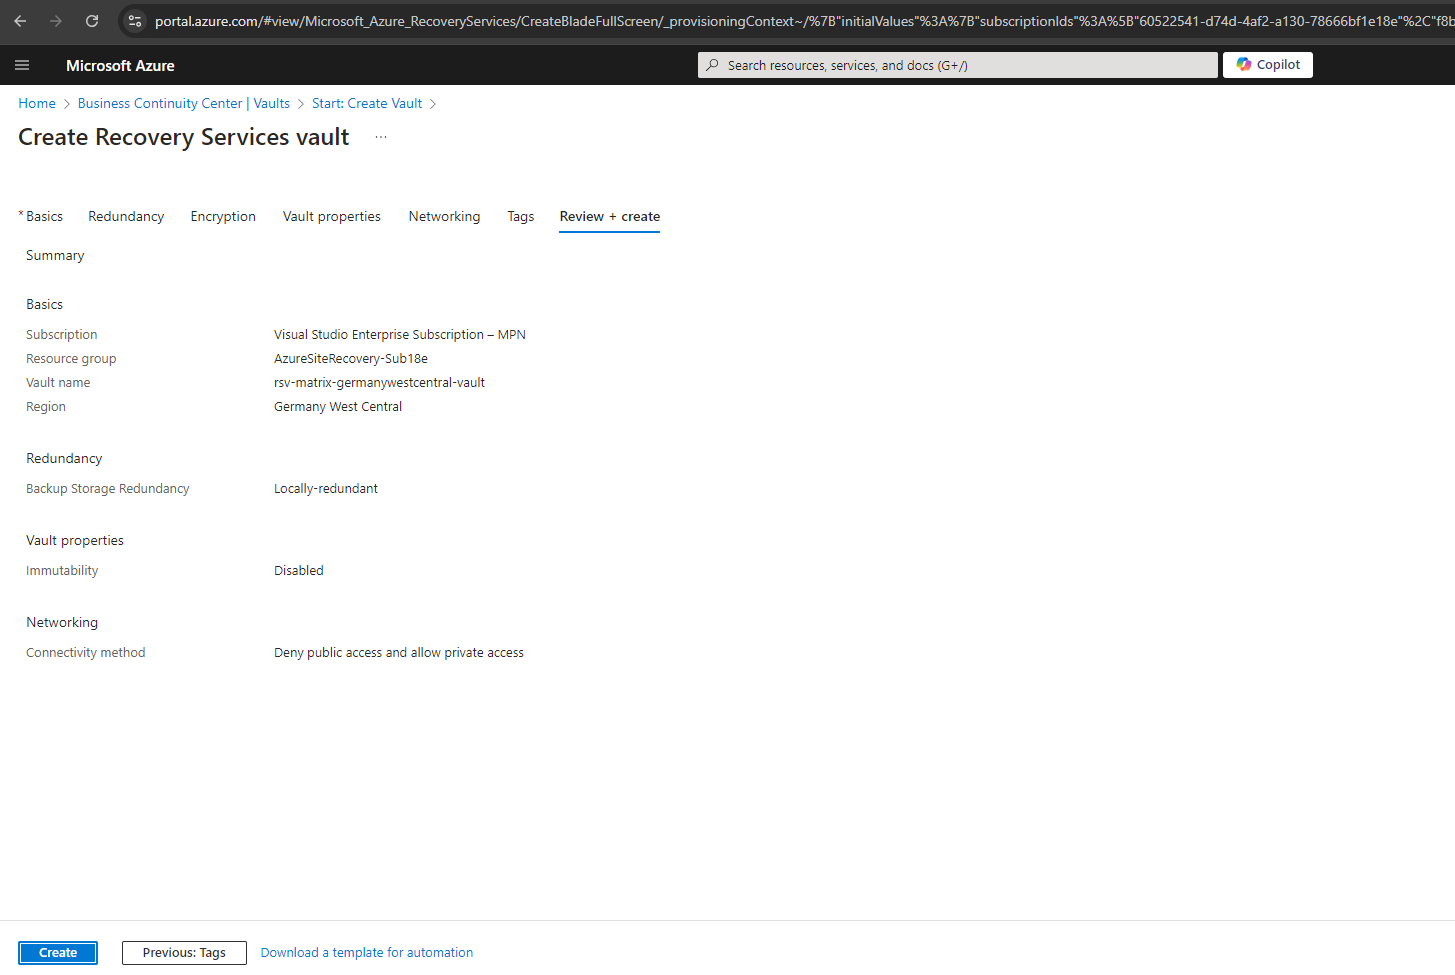
Here I will select my previously created resource group, a name for the vault and the region it will be created.
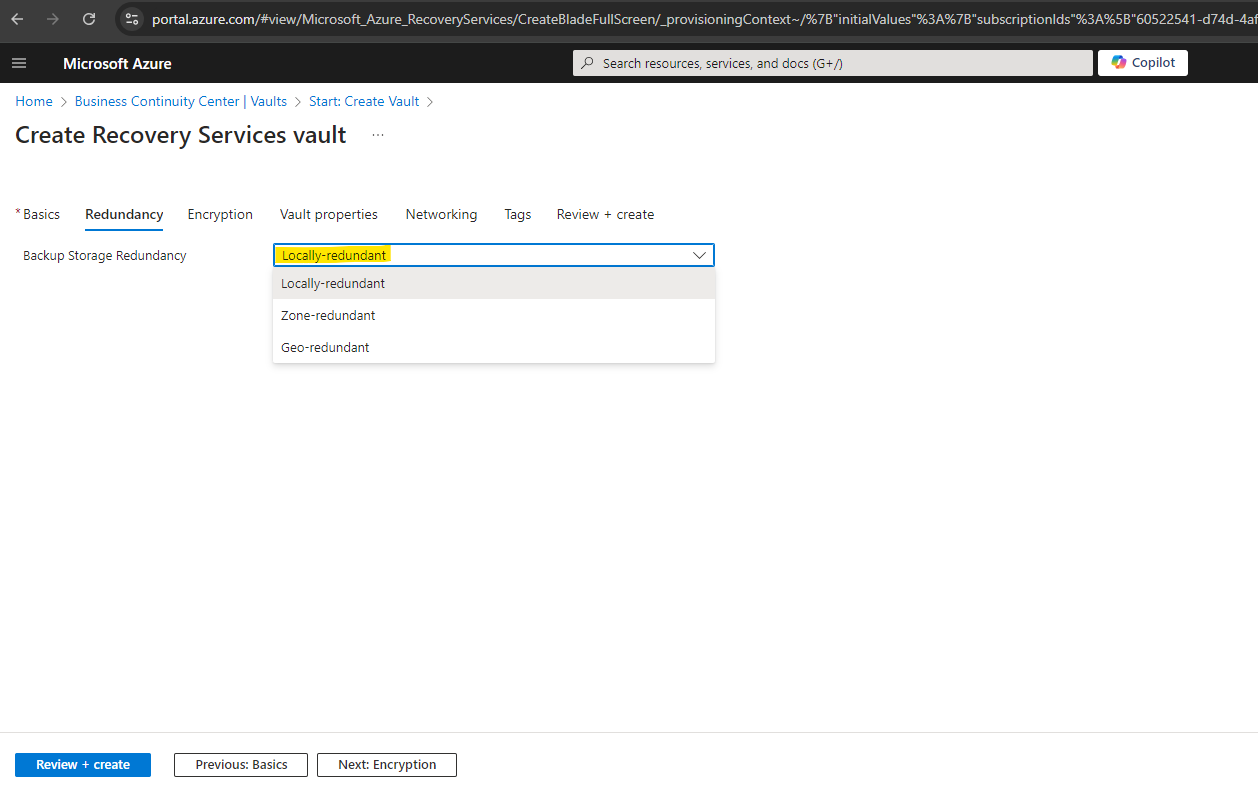
Just for my lab environment and to save costs I will select locally redundant.
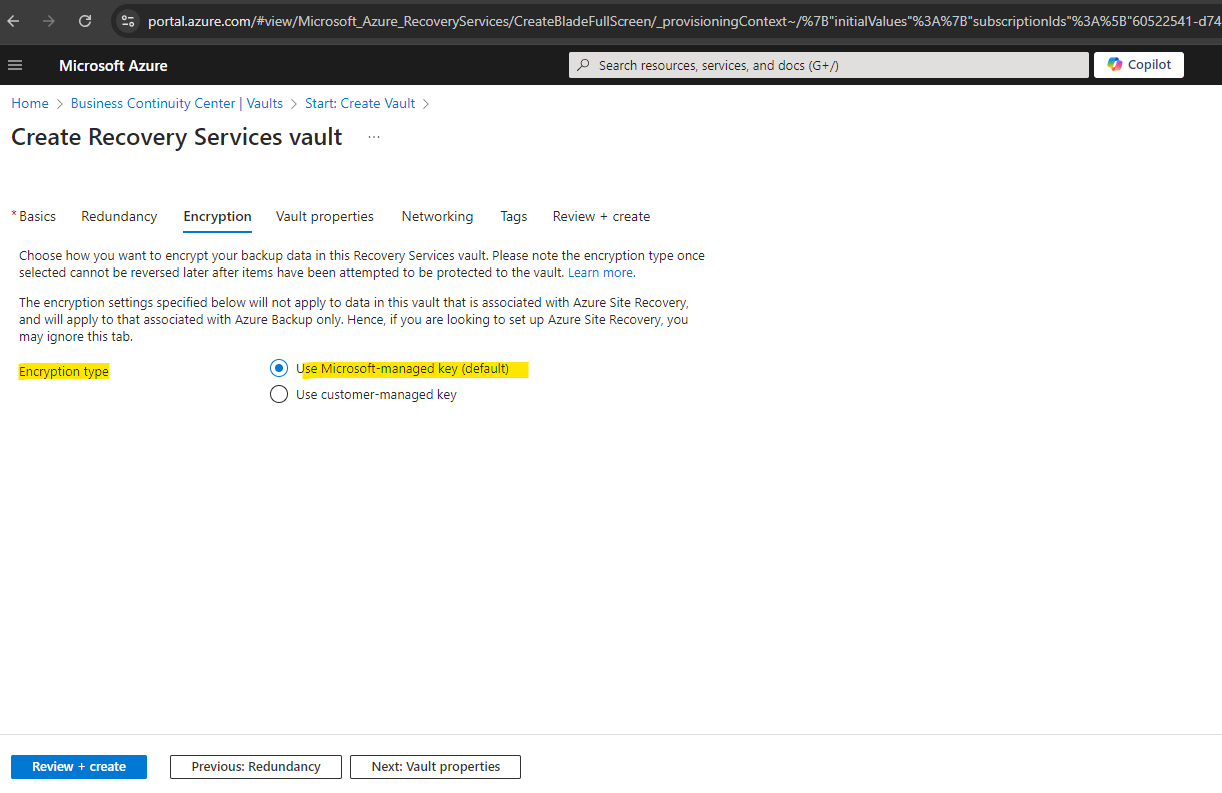
For encryption type of the vault, I will use the default Microsoft-managed key.
More about you will find in the following article.
Encrypt backup data by using customer-managed keys
https://learn.microsoft.com/en-us/azure/backup/encryption-at-rest-with-cmk?tabs=portal
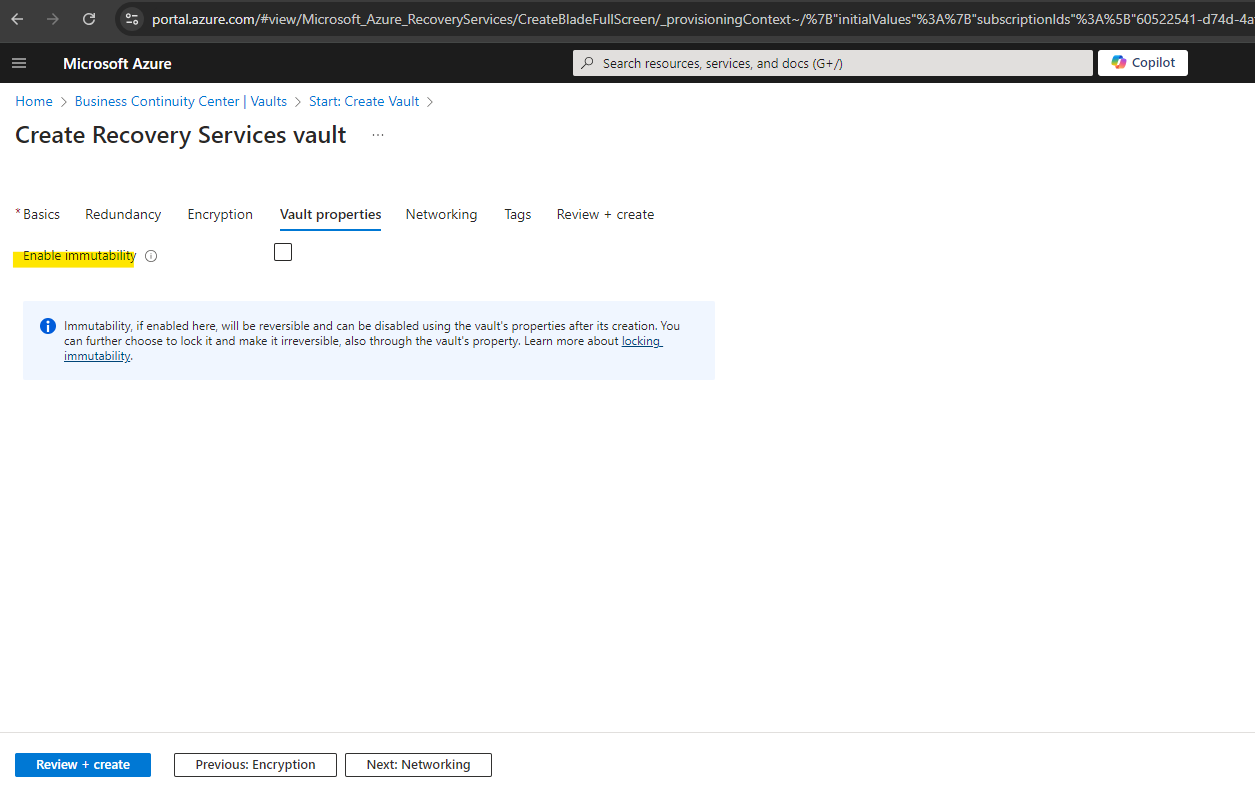
For my lab environment I don’t need to enable immutability for the vault.
Immutable vault prevents you from performing the following operations on the vault that could lead to loss of data:
– Stop protection with delete data
– Modify backup policy to reduce retention
– Change backup policy to reduce retention
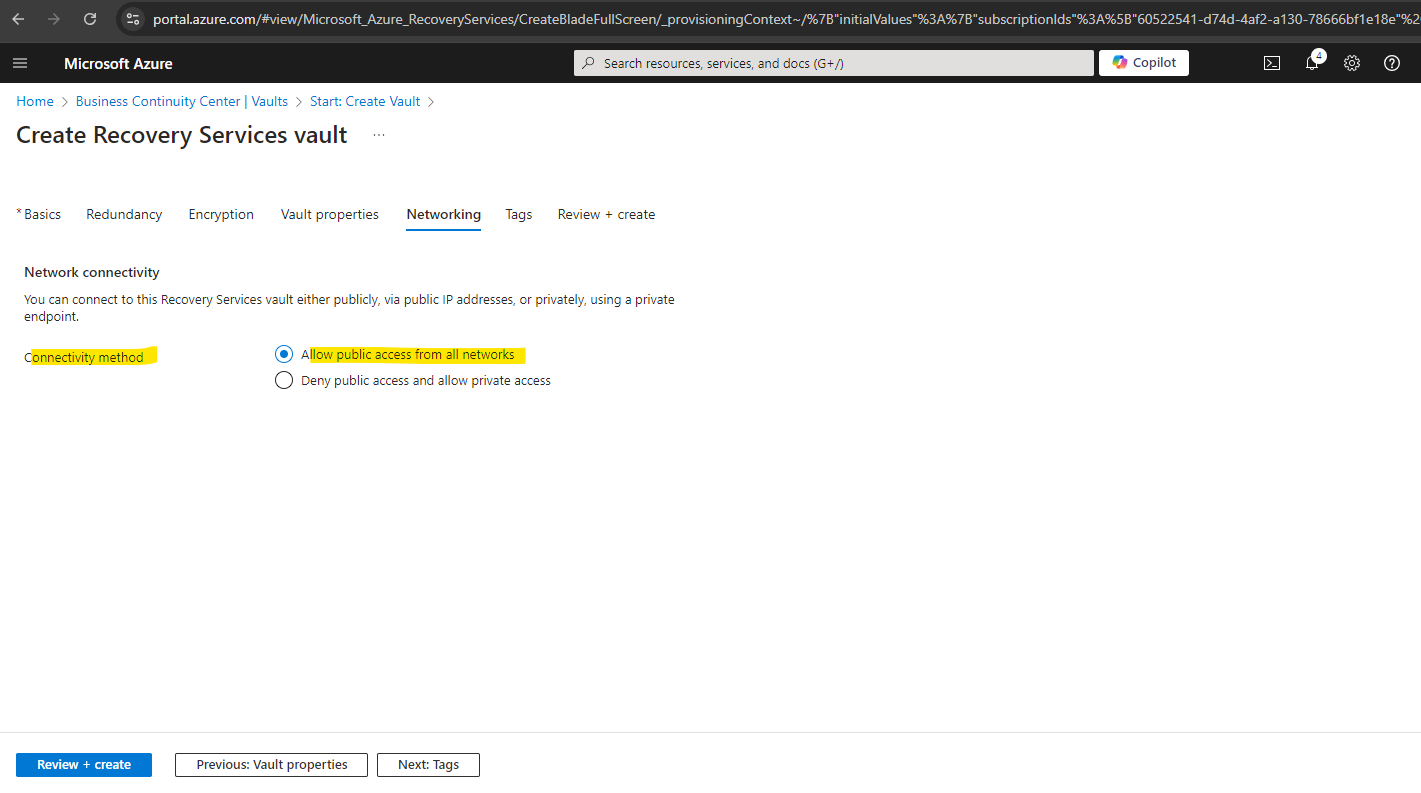
I want to access the recovery services vault publicly.
More about creating and using private endpoints for site recovery you will find in the following article https://learn.microsoft.com/en-us/azure/site-recovery/azure-to-azure-how-to-enable-replication-private-endpoints#creating-and-using-private-endpoints-for-site-recovery.
Finally we can click on Create.
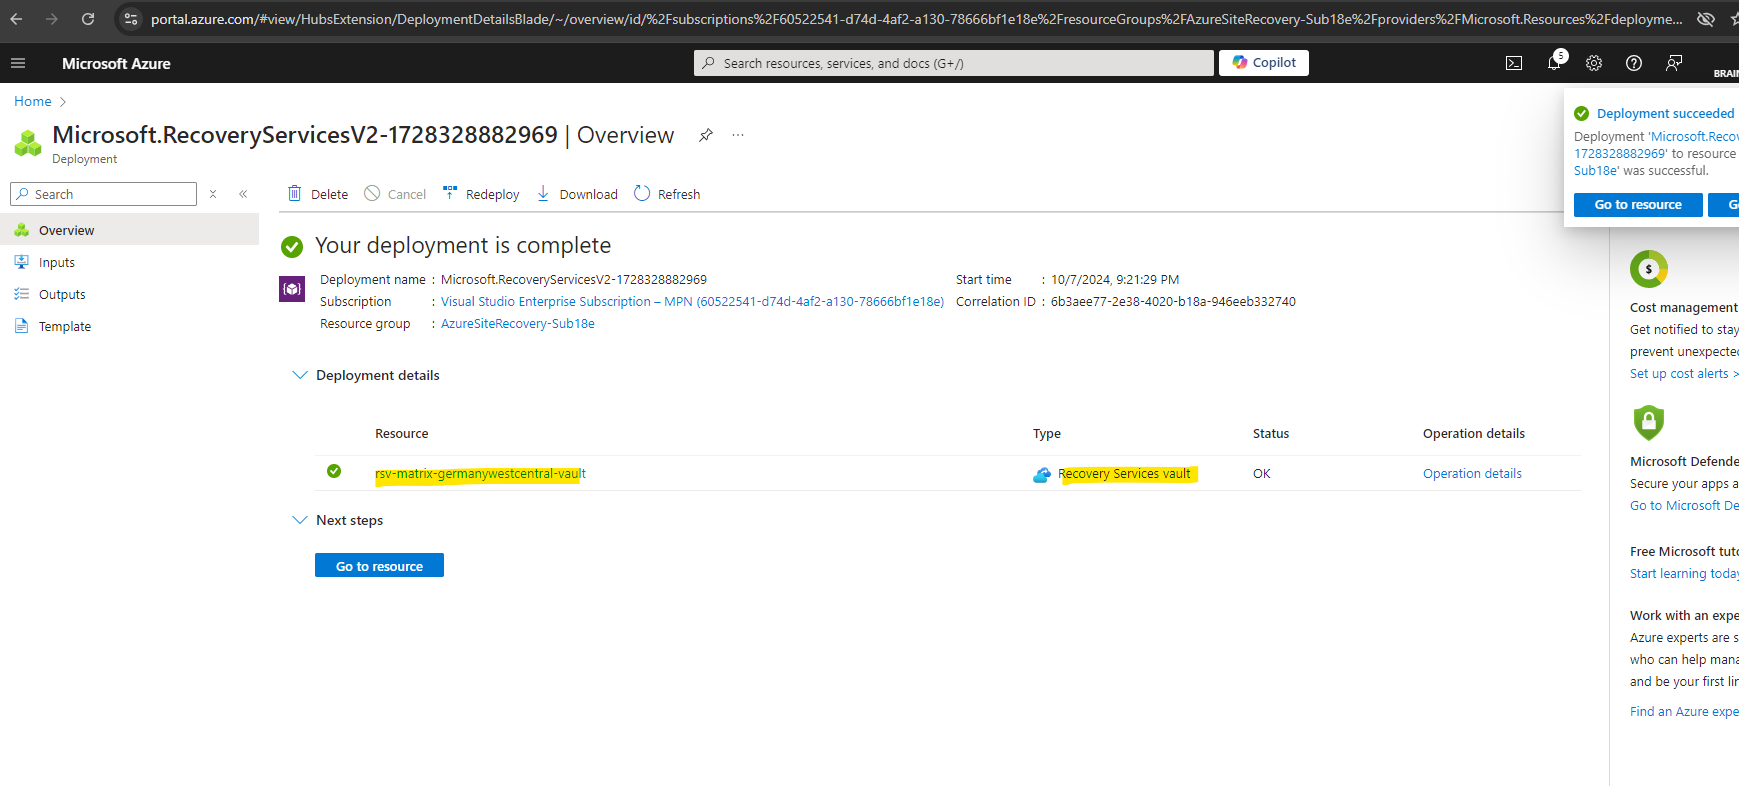
Click on Go to resource to navigate to our newly created recovery services vault.

Within this recovery services vault we will later set up Azure Site Recovery (ACR) and shown in Part 3.
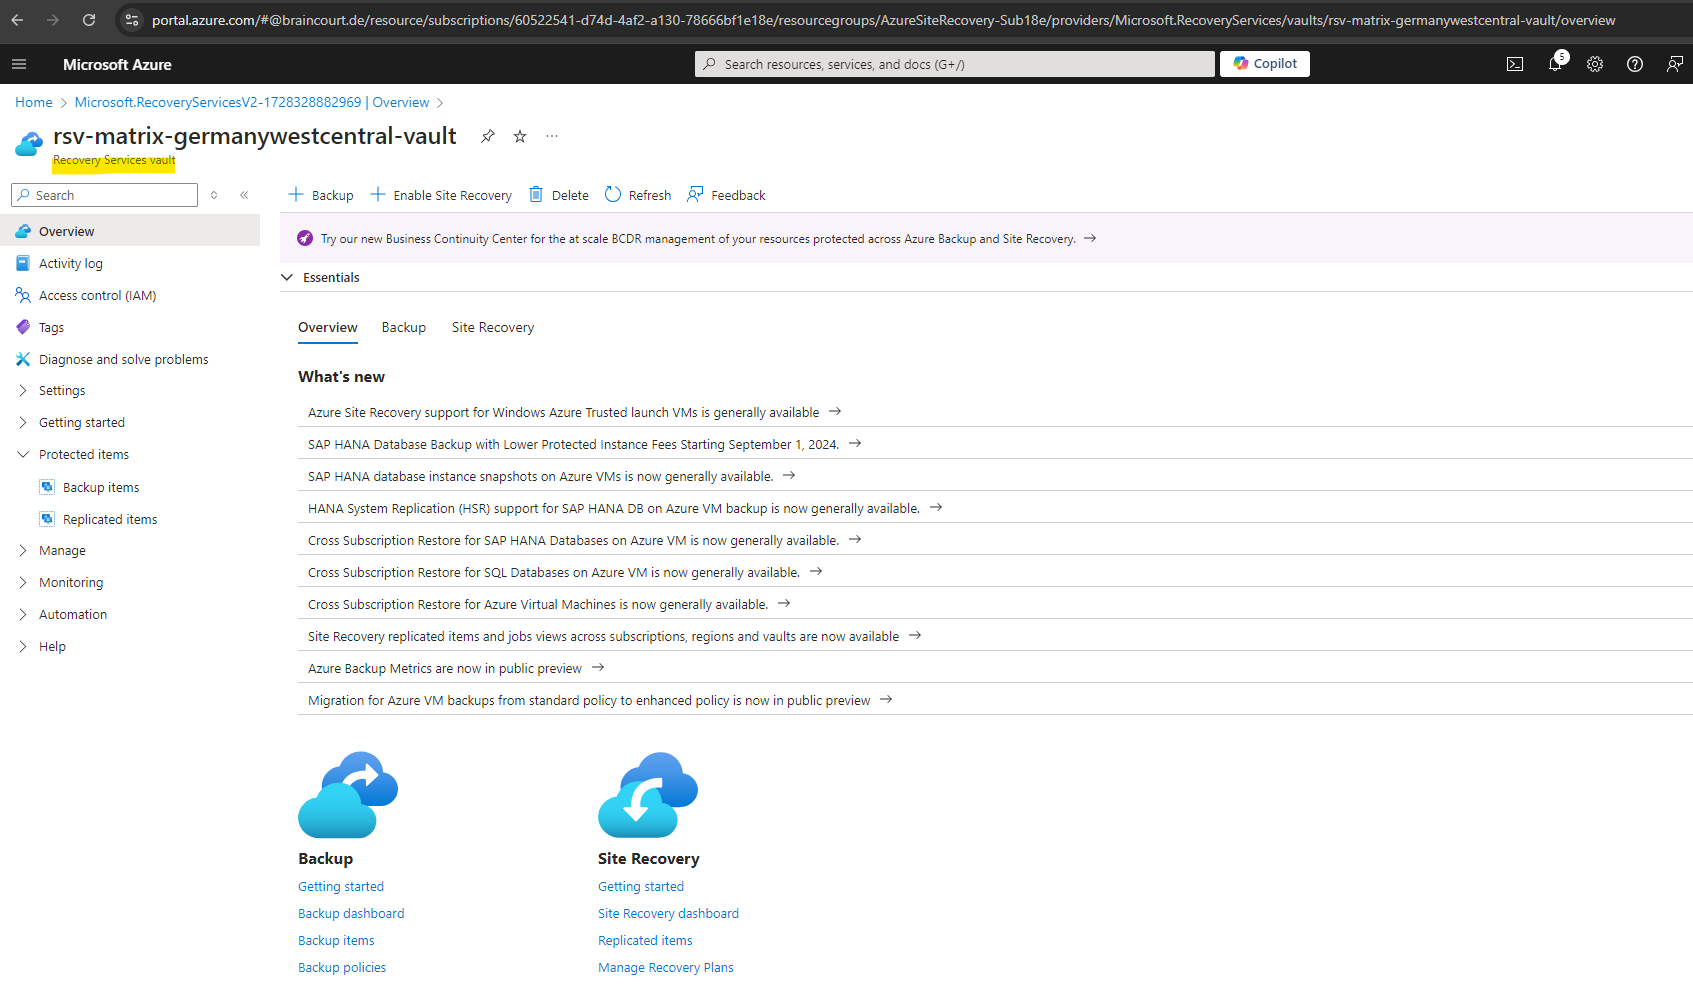
In Part 2 we will first prepare the infrastructure in Azure and in on-premises by deploying the ASR appliance in vSphere.
Links
About Site Recovery
https://learn.microsoft.com/en-us/azure/site-recovery/site-recovery-overviewGeneral availability: Simplified disaster recovery for VMware machines using Azure Site Recovery
https://techcommunity.microsoft.com/t5/azure-compute-blog/general-availability-simplified-disaster-recovery-for-vmware/ba-p/3645694Prepare source machine for push installation of mobility agent
https://learn.microsoft.com/en-us/azure/site-recovery/vmware-azure-install-mobility-serviceWhat is disaster recovery?
https://learn.microsoft.com/en-us/azure/reliability/disaster-recovery-overview
Tags In
Related Posts
Follow me on LinkedIn