Set up the Squid Proxy Server on SUSE Linux Enterprise
Squid is a powerful, open-source caching and forwarding web proxy server that can significantly enhance network performance, improve security, and control internet access within an organization.
Squid supports two subtypes of forward proxies, the explicit (aka non-transparent proxy) and implicit (aka transparent proxy), and two ways of proxy SSL/TLS traffic, intercepting and non-intercepting.
In this post we will see step by step the basics about how to setup Squid on SUSE Linux Enterprise (SLES 15 SP5).
About how to configure Squid as a transparent proxy and intercepting SSL/TLS traffic, we will see in my following post.
Squid Forward Proxy Subtypes supported
As already mentioned, Squid supports two subtypes of forward proxies, the explicit (aka non-transparent proxy) and implicit (aka transparent proxy), and two ways of proxy SSL/TLS traffic, intercepting and non-intercepting.
The explicit proxy needs to be configured on the client with our without authentication and therefore the client is aware of using the proxy. When we configure the proxy on the client, the client is using CONNECT messages to establish a TCP tunnel with the proxy to route HTTP/HTTPS traffic through.
The CONNECT HTTP method requests that a proxy establish a HTTP tunnel to a destination server, and if successful, blindly forward data in both directions until the tunnel is closed.
Source: https://developer.mozilla.org/en-US/docs/Web/HTTP/Reference/Methods/CONNECT
CONNECT www.example.com:443 HTTP/1.1
Host: www.example.com:443
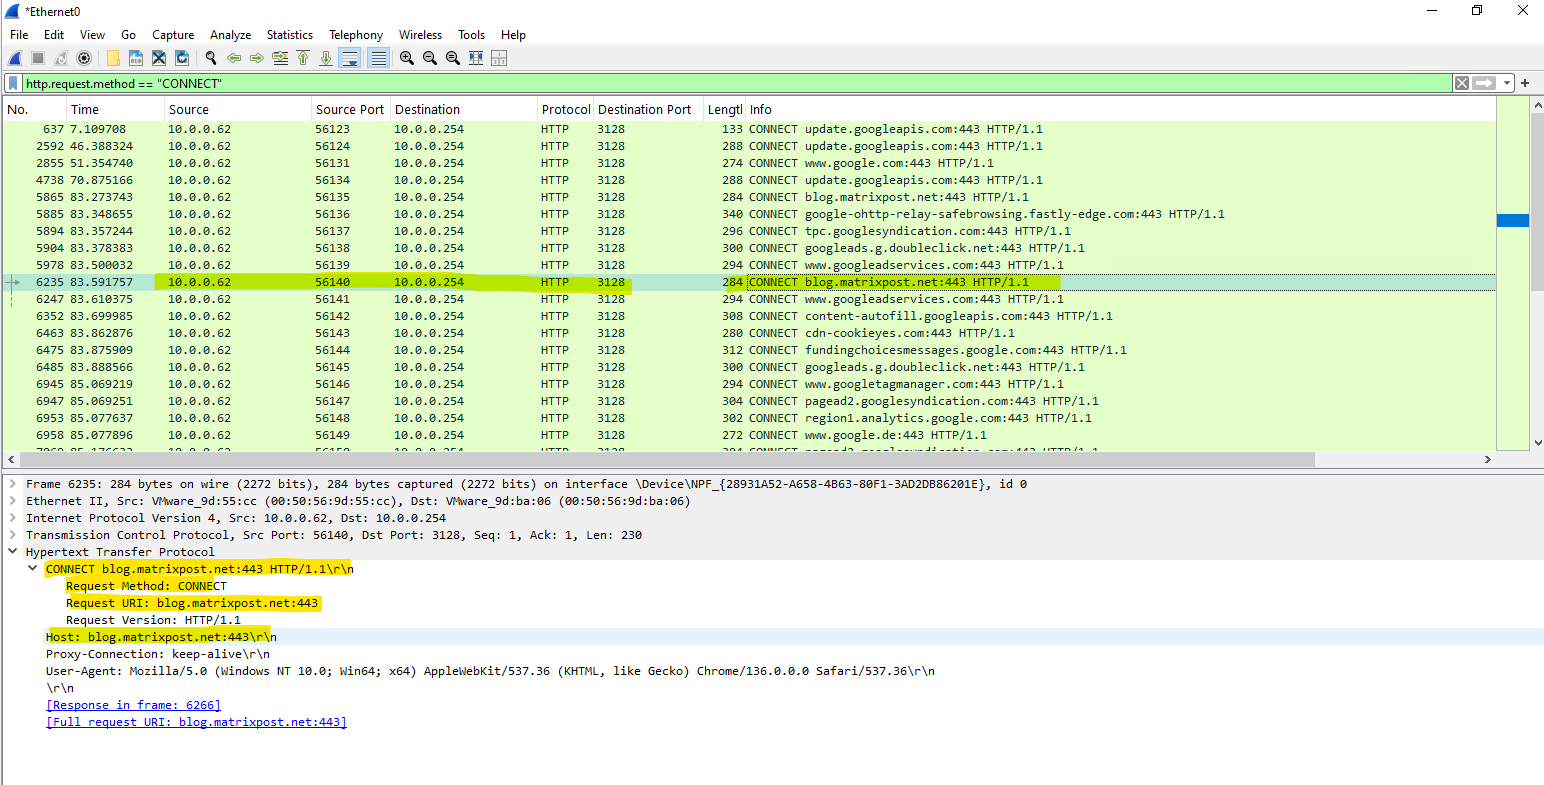
On the client you can also capture the traffic by using WireShark to see these HTTP CONNECT messages.
Display filter
http.request.method == “CONNECT”
When deploying an implicit aka transparent proxy in the network, we doesn’t need to configure this on the clients, therefore the client finally is not aware of using a proxy to connect to remote HTTP/HTTPS sites.
The clients just needs to be configured to route traffic through the proxy.
The proxy here intercepts the HTTP/HTTPS traffic like man-in-the-middle scenarios, it performs decrypting and re-encrypting the traffic between the client and destination.
Introduction
Access Control Scheme
Squid’s access control scheme is relatively comprehensive and difficult for some people to understand. There are two different components: ACL elements, and access lists.
An access list consists of an allow or deny action followed by a number of ACL elements.
Source: https://wiki.squid-cache.org/SquidFaq/SquidAcl
Below for example the second line is the access list which denies the defined ACL elements on the first line, here two destination domains with .facebook.com and .youtube.com were finally the ACL elments.
acl blocked_sites dstdomain .facebook.com .youtube.com
http_access deny blocked_sites
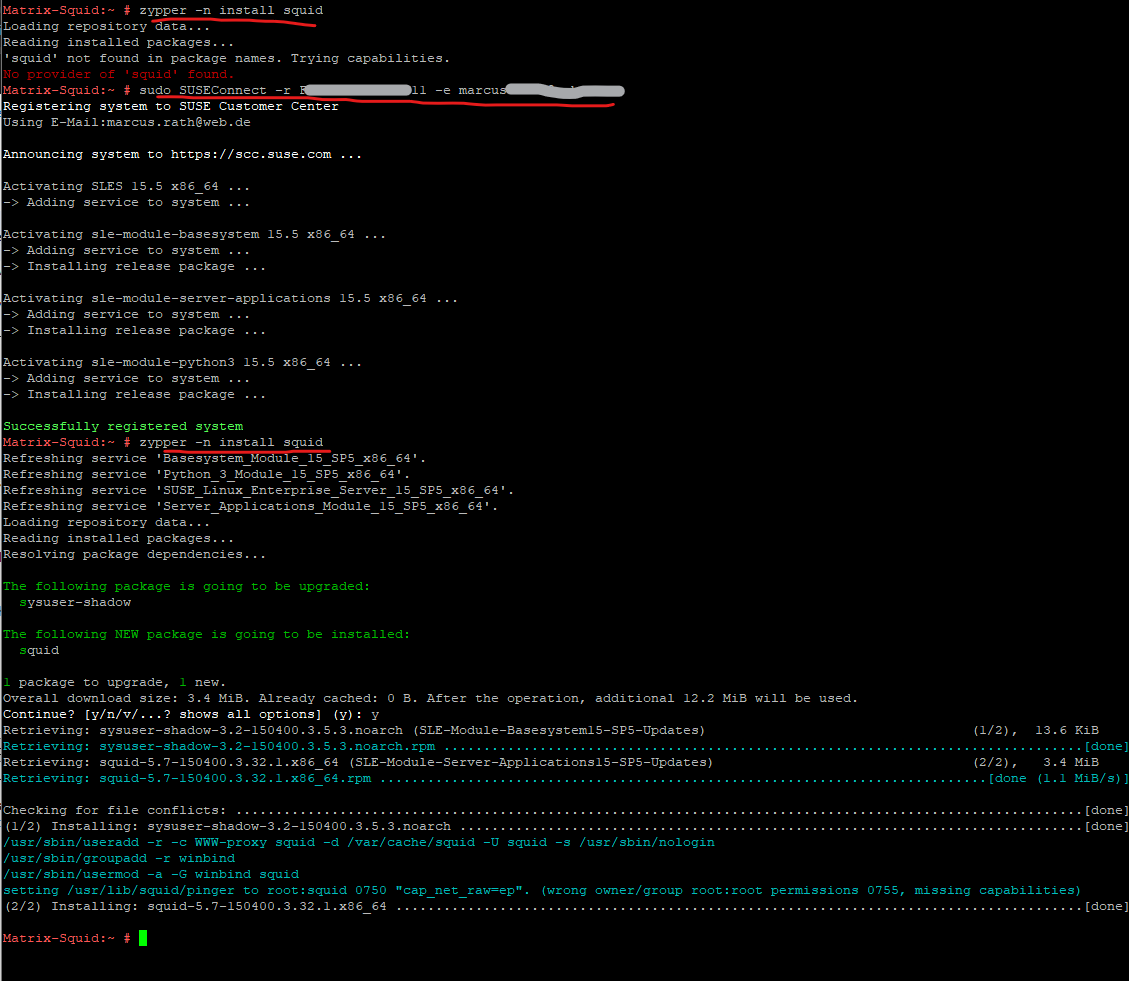
Install Squid Proxy Server
# zypper -n install squid
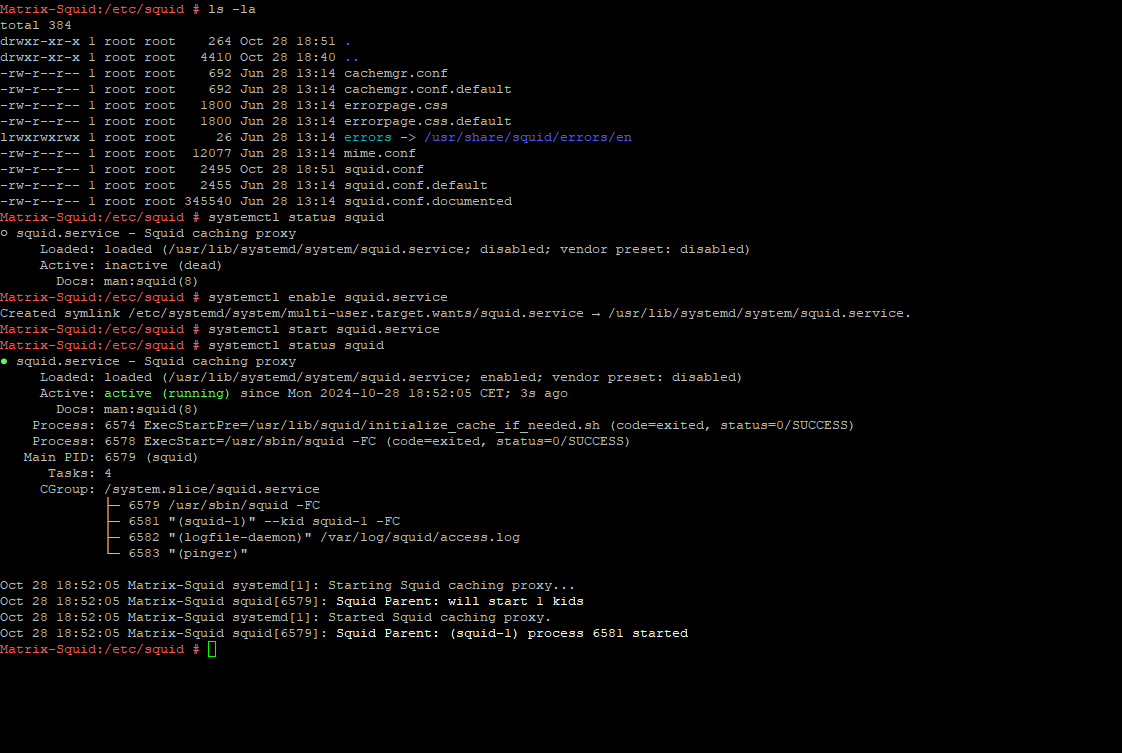
After the installation, we first need to enable Squid.
# systemctl status  squid
# systemctl enable squid
# systemctl start squid
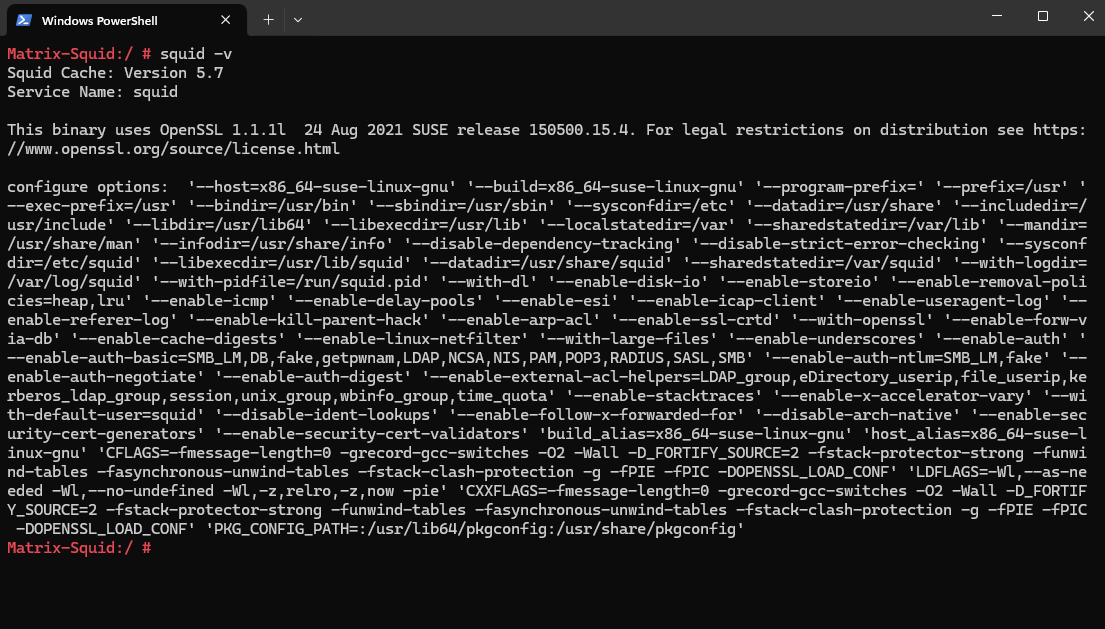
Determine Squid Version and Configure Options
To determine the installed version of Squid, we can run the following command.
# squid -v
This will also print the configure options (flags) as shown below. These flags define Squid’s features and dependencies.
Configure Squid Proxy Server
Allow Traffic for specific Source Networks
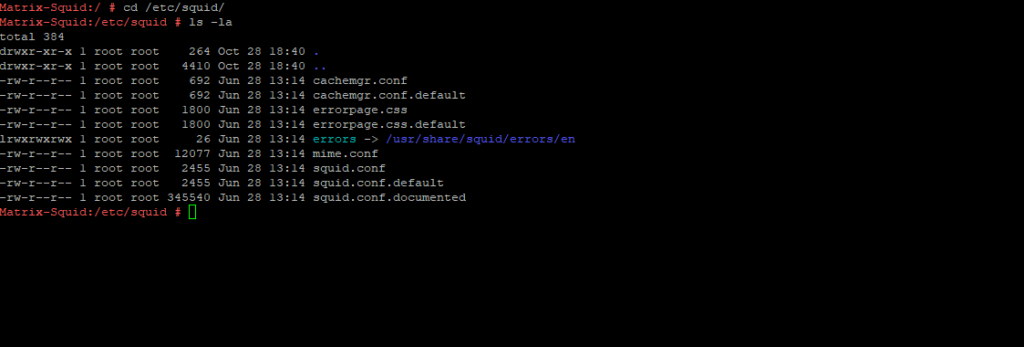
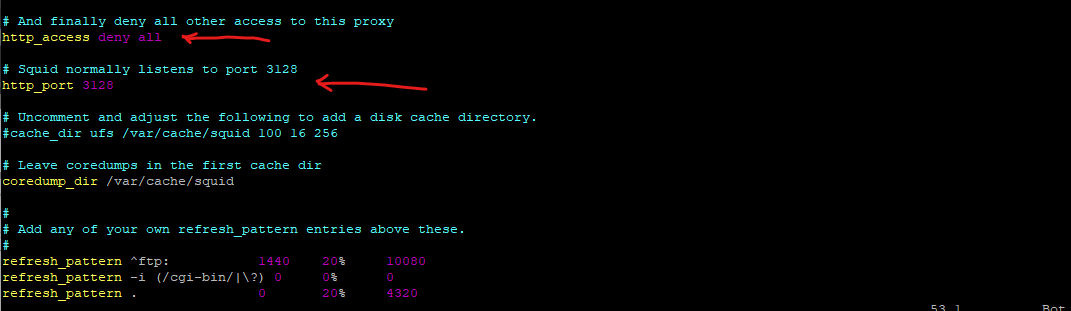
Below you will see a default configuration directly after the installation on SUSE Linux Enterprise 15 SP5.

# systemctl restart squid
or
# systemctl reload squid

Before reloading or restarting the squid service, first check if the configuration is valid by using eihter:
# squid -k parse
or
# squid -k check
In case of configuration failures and Squid refuses to start or proxy rules behave unpredictably, the first step is always to validate the configuration using squid -k parse or squid -k check.
These commands pinpoint exact line-level issues such as invalid domain definitions, or syntax errors that silently break allowlists
squid -k parseperforms a full configuration validation, loading all includes and reporting detailed syntax issues, warnings, and ACL conflicts without affecting the running service.squid -k checkonly does a basic syntax sanity test and reports fatal errors, but skips deeper validation and warnings, which makes its output shorter and less detailed.
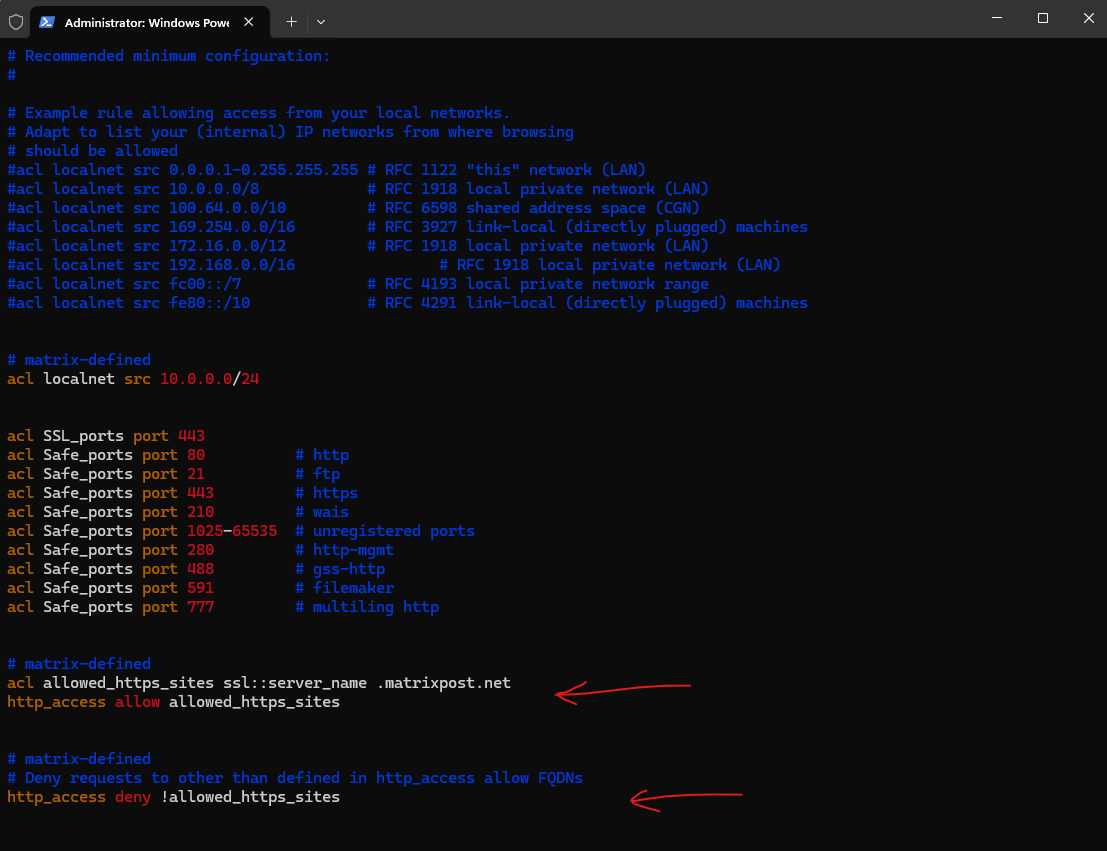
Allow Traffic only for specific Destination FQDNs
We can define acl elements and access lists to allow traffic just to specific destination URLs resp. FQDNs.
An access list consists of an allow or deny action followed by a number of ACL elements.
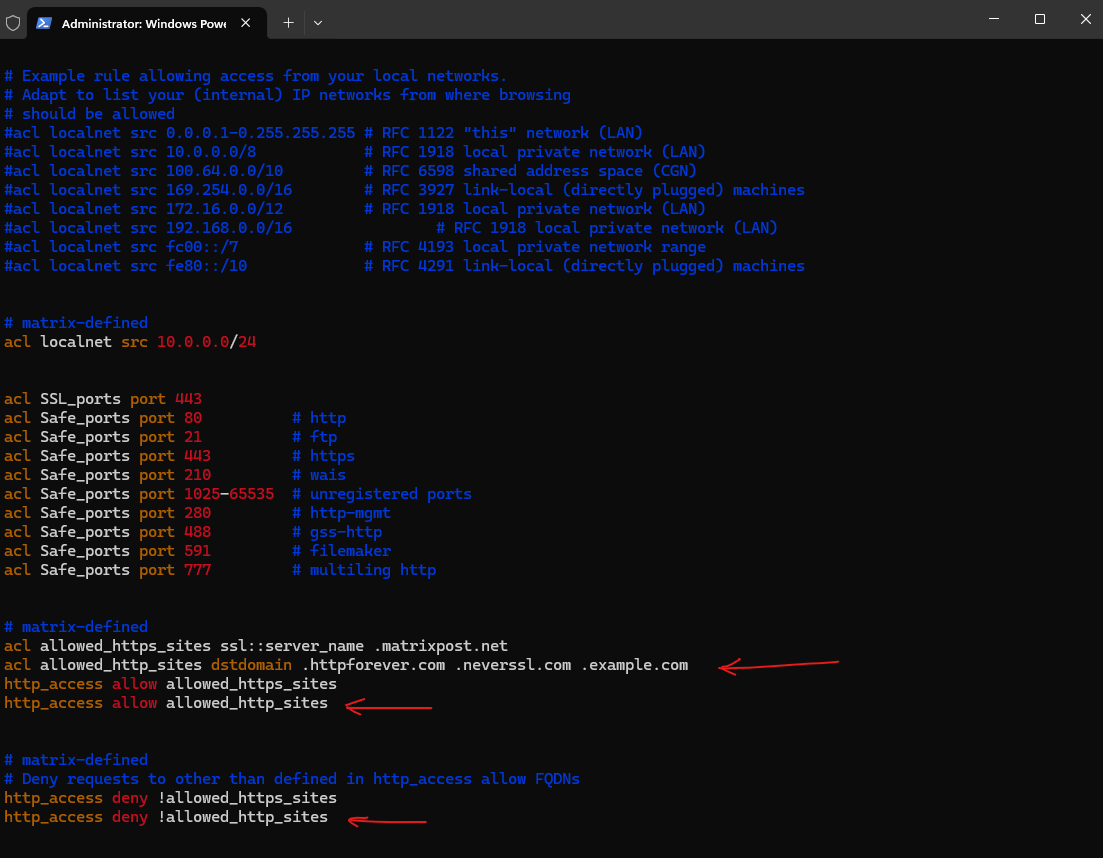
# matrix-defined ACL elements
# The ssl::server_name are SSL-related ACLs to control access based on encrypted traffic (HTTPS/SSL)
acl allowed_https_sites ssl::server_name .matrixpost.net

# multiple FQDNs like this:
acl allowed_https_sites ssl::server_name .matrixpost.net .matrixpost.tech

# access list
http_access allow allowed_https_sites


# matrix-defined
# Deny requests to other than defined in http_access allow FQDNs
http_access deny !allowed_https_sites
The http_access allow localnet at the end of the file we can also comment but finally this access rule will be ignored because of our previously added http_access deny !allowed_https_sites rule which already block all pages besides *.matrixpost.net.
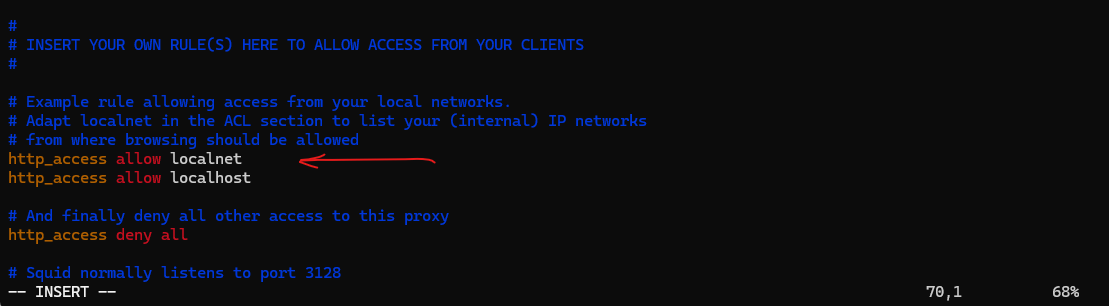
With this configuration, in general just clients from the source network 10.0.0.0/24 will be allowed HTTP access as configured further above.
Because of these two new lines, the clients are now restricted to just browse to *.matrixpost.net URLs instead of all http and https URLs.
The final and main FQDN of my blog is blog.matrixpost.net, because of the defined ACL allowed_https_sites and its wildcard URL *.matrixpost.net, the clients can load this page.
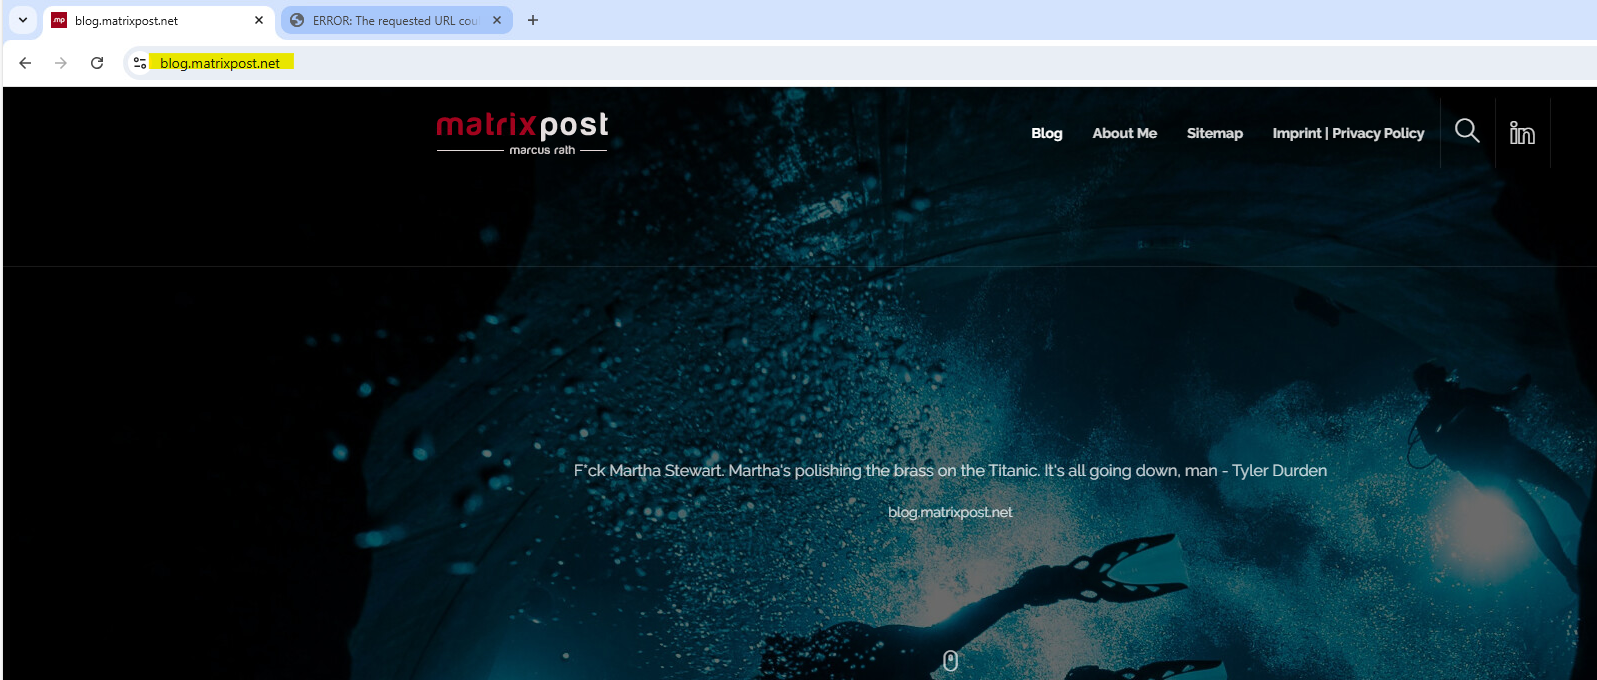
My matrixpost.tech domain will forward to blog.matrixpost.net, client will now see an error page as shown below because now all FQDNs different from the defined ACL allowed_https_sites will be denied from now on.

We can also define acl elements and access lists for pure http traffic as shown below. In Squid Proxy, you can define multiple allowed domains using the acl directive with dstdomain.
Pure HTTP websites: http://example.com/ http://neverssl.com/ http://httpforever.com/
acl allowed_http_sites dstdomain .httpforever.com .neverssl.com .example.com
http_access allow allowed_http_sites

# Deny requests to other than defined in http_access allow FQDNs
http_access deny !allowed_http_sites
Filtering HTTPS Traffic: dstdomain vs. ssl::server_name ACLs in Squid
Using acl … dstdomain for HTTPS works when clients use Squid as an explicit proxy, because Squid can read the domain from the CONNECT request.
However, it becomes unreliable in transparent or mixed environments where Squid only sees the destination IP and no hostname.
Using acl … ssl::server_name matches the real TLS SNI during the handshake and is therefore the more accurate and modern method for HTTPS domain filtering.
For best results, prefer ssl::server_name and use IP-based rules only as a fallback where needed.
acl allowed_https_sites dstdomain .matrixpost.tech blog.matrixpost.net

vs.

acl allowed_https_sites ssl::server_name .matrixpost.tech blog.matrixpost.net

Route Requests directly to the Origin Server
In Squid Proxy, the always_direct directive is used to ensure that a request is always routed directly to the origin server, bypassing any configured parent proxies or cache mechanisms.
This can be useful in specific scenarios where you want to ensure that certain requests are not cached or routed through intermediate proxies, regardless of any other cache settings or hierarchical rules.
acl <acl_name> dstdomain <dst domains>
always_direct allow <acl_name>

Adding Date/Time for Squid Logs
To add the date and time to Squid logs, you need to modify the Squid logging format in the Squid configuration file (/etc/squid/squid.conf). By default, Squid logs include a timestamp, but you can customize the log format to include more detailed date and time information.
logformat timereadable %tl %6tr %>a %Ss/%03<Hs %<st %rm %ru %un %Sh/%<A %mt
access_log daemon:/var/log/squid/access.log timereadable
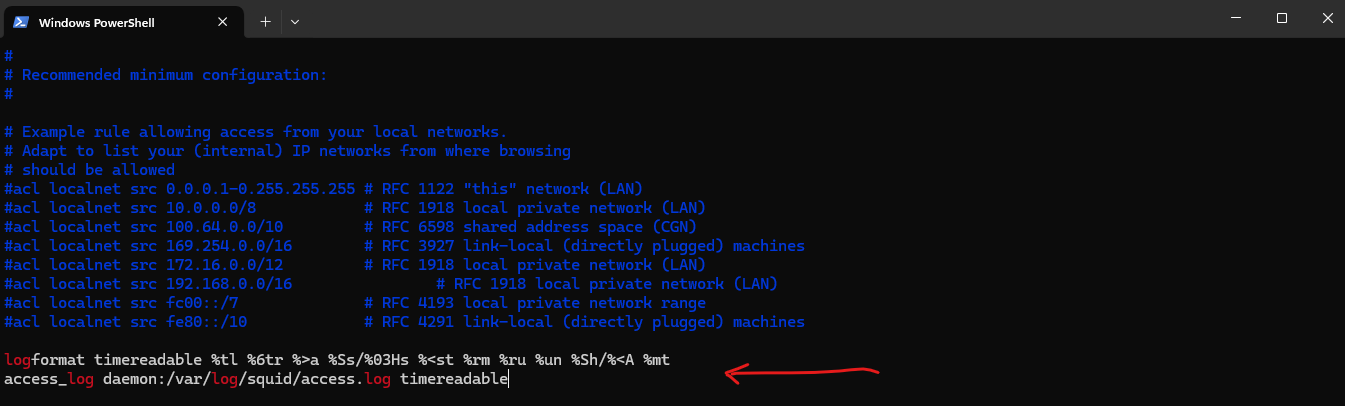
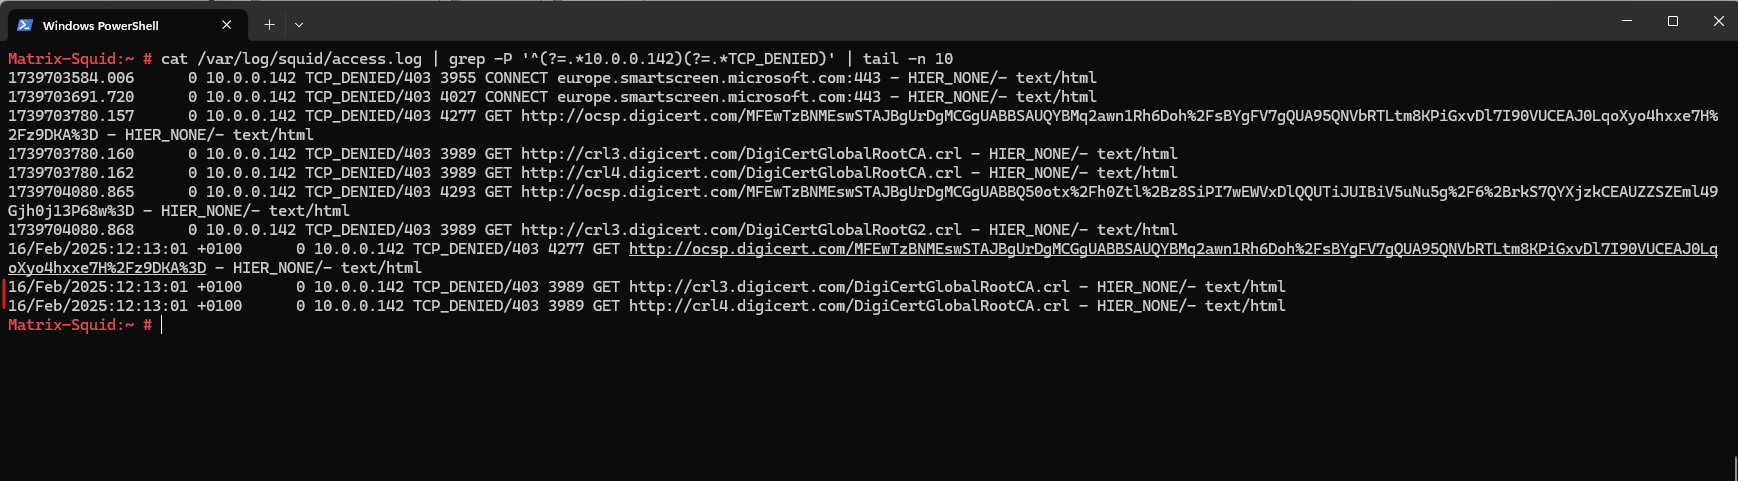
Below you can see the logs before adding the configuration with customizing the log format. The last two lines are the logs after the new configuration showing date and time.
# cat /var/log/squid/access.log
Configure the Proxy on the Clients
Windows
In Windows there are several options to configure a proxy.
- WinINET library
- WinHTTP library
- manual proxy settings in Windows or IE
The Windows Internet (WinINet) application programming interface (API) enables your application to interact with FTP and HTTP protocols to access Internet resources. As standards evolve, these functions handle the changes in underlying protocols, enabling them to maintain consistent behavior.
With a few exceptions, WinINet is a superset of WinHTTP. When selecting between the two, you should use WinINet, unless you plan to run within a service or service-like process that requires impersonation and session isolation.
WinINet vs. WinHTTP
https://docs.microsoft.com/en-us/windows/win32/wininet/wininet-vs-winhttp
Windows HTTP Services
https://docs.microsoft.com/en-us/windows/win32/winhttp/winhttp-start-page
About WinINet
https://docs.microsoft.com/en-us/windows/win32/wininet/about-wininet
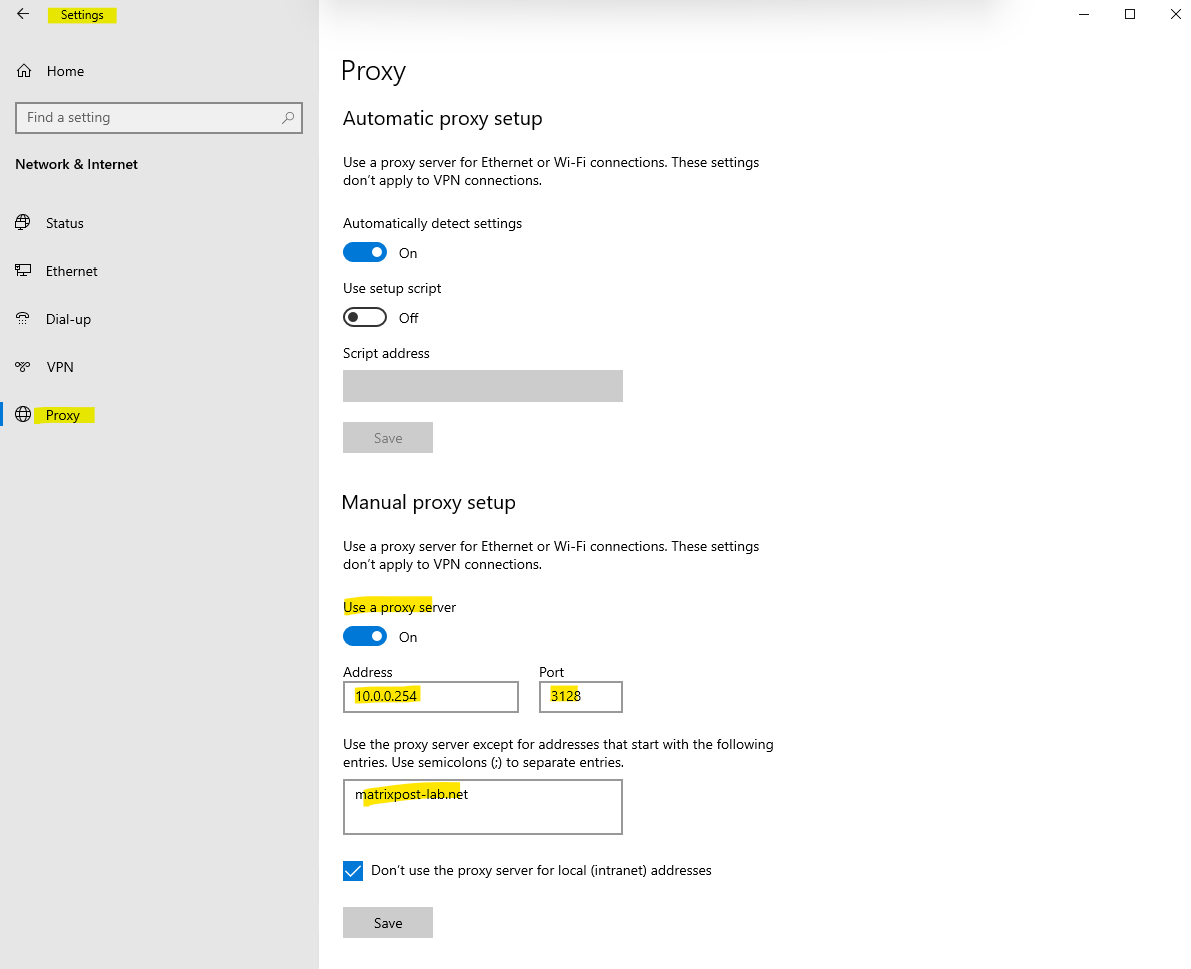
With the GUI – Settings – Network & Internet – Proxy – Manual proxy setup
Set up the proxy here will be leverage the WinINET library which is the core of Internet Explorer. Alternatively you can set it directly in Internet Explorer, both settings will affect the same and can be used by other applications using the WinINET library.
Set up the WinHTTP library can be done with the netsh command.
https://securelink.net/en-be/insights/windows-proxy-settings-explained
WinHTTP is more suited for non-interactive usage, such as windows services or background tasks that need to communicate over HTTP where no user-interaction is required. It is a lot faster than the WinINET library. WinHTTP is also easily accessed from .NET based applications making it a popular library for .NET Applications. WinHTTP by default does not use the proxy settings from WinINET. Typical examples for applications and services using WinHTTP are:
- Adding/Removing features and roles in Windows 8.
- Windows Update
- Certificate validation of code
- Signed binaries / .NET applications that validate the certificate during application launch.
- Exchange Server
For both WinINET and WinHTTP, the proxy can be configured using different mechanisms:
- proxy auto-configuration scripts
- auto-discovery
- manual configuration
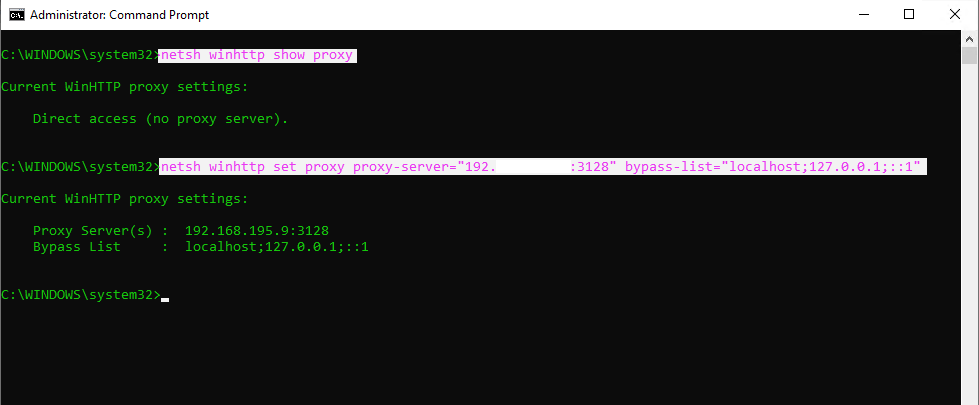
to show WinHTTP proxy settings on the client
netsh winhttp show proxy
to set new WinHTTP proxy settings on the client
netsh winhttp set proxy proxy-server=”proxyserver:port” bypass-list=”localhost; 127.0.0.1; ::1″
to reset WinHTTP proxy settings on the client
netsh winhttp reset proxy
import the IE proxy settings of the current user
netsh winhttp import proxy source=ie
Web Proxy Auto-Discovery Protocol (WPAD) – wpad.dat
The Web Proxy Auto-Discovery (WPAD) Protocol is a method used by clients to locate the URL of a configuration file using DHCP and/or DNS discovery methods. Once detection and download of the configuration file is complete, it can be executed to determine the proxy for a specified URL.
https://en.wikipedia.org/wiki/Web_Proxy_Auto-Discovery_Protocol
Linux
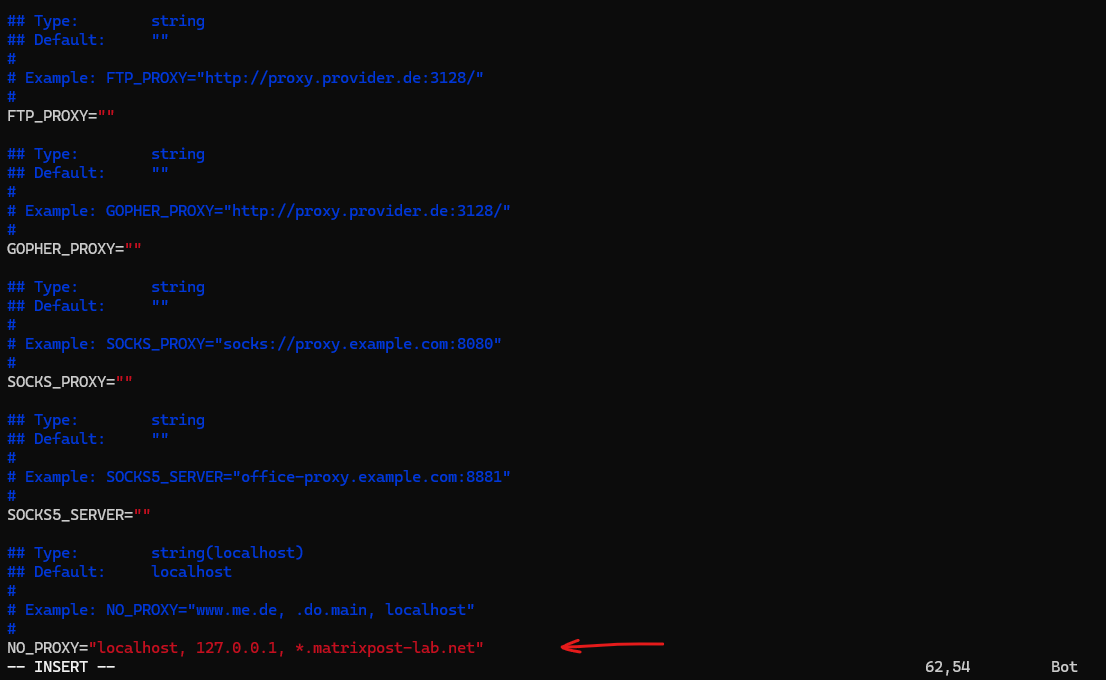
In Linux we configure to use a proxy in the /etc/sysconfig/proxy file as shown below.
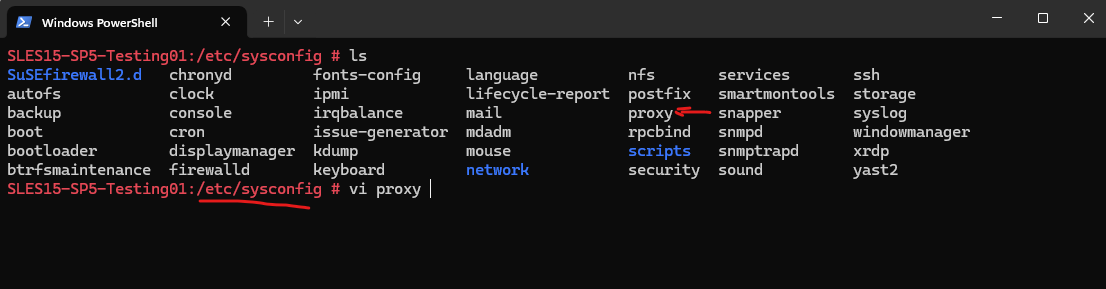
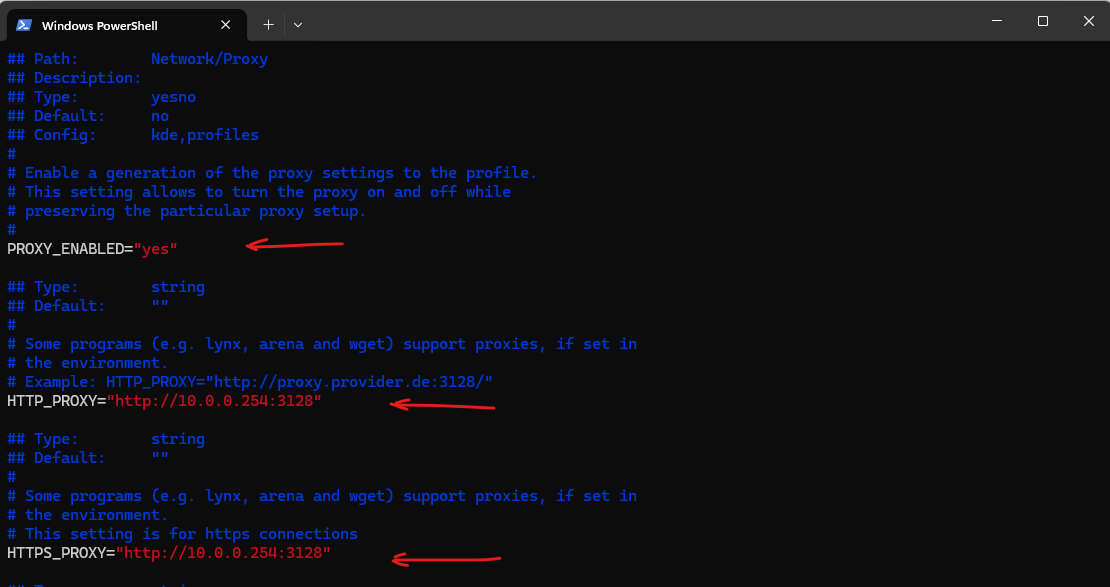
We need to edit the following entries in /etc/sysconfig/proxy.
PROXY_ENABLED="yes"
HTTP_PROXY="http://10.0.0.254:3128"
HTTPS_PROXY="http://10.0.0.254:3128"
NO_PROXY="localhost, 127.0.0.1, *.matrixpost-lab.net"
As you can below, we can also set a SOCKS/SOCKS5 and FTP proxy here.
Note: For the setting to take effect immediately you will need to either log out and back in or export the proxy variables via the terminal session.
Troubleshooting
Analyze Log Files
To see if traffic is allowed or denied, we can check the access.log file of squid.
# cat /var/log/squid/access.log
TCP_DENIED ==> Access was denied by Squid due to your ACL rules.
000 ==> No HTTP status code was returned (blocked before request completed).
0 ==> Zero bytes were transferred (request was dropped immediately).
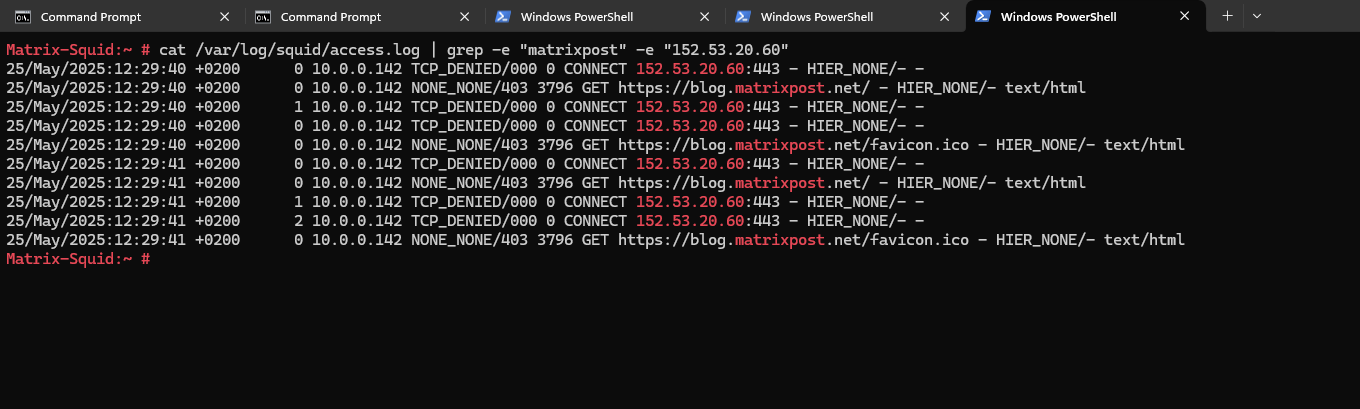
TCP_TUNNEL ==> Squid attempted an HTTPS CONNECT tunnel.
503 Service Unavailable ==> Squid couldn’t reach the destination server. (DNS failer and FQDN couldn’t resolved, Firewall blocking request, upstream proxy not responding, SSL handshake failed, no internet acccess from proxy.)
0 ==> No data transferred — the connection failed at startup.
HIER_NONE/- – ==> No upstream server was contacted. No response received.

Check Configuration for Syntax Errors
We can use squid -k parse command to check our Squid proxy server’s configuration file for syntax errors without actually starting or restarting the service. It’s a valuable troubleshooting tool that helps you validate your configuration before applying changes.
# squid -k parse
More about how to set up a SOCKS5 proxy on SUSE Linux Enterprise Server you will see in my following post.