Azure Migrate – How to migrate on-premises VMware vSphere Virtual Machines to Azure – Part 2
In Part 1 we saw the prerequisites for our on-premise vSphere environment, how to create a new Azure Migrate project and set up the Azure Migrate Appliance in Azure which we now need to deploy in our on-premise vSphere environment.
This part will show how to deploy this Azure Migrate Appliance in our on-premise vSphere environment and how to configure it by using its configuration manager.
Deploy the Azure Migrate Appliance in On-Premises (vSphere)
The Azure Migrate appliance is a lightweight appliance that the Azure Migrate: Discovery and assessment tool uses to discover servers running in vCenter Server and to send server configuration and performance metadata to Azure.
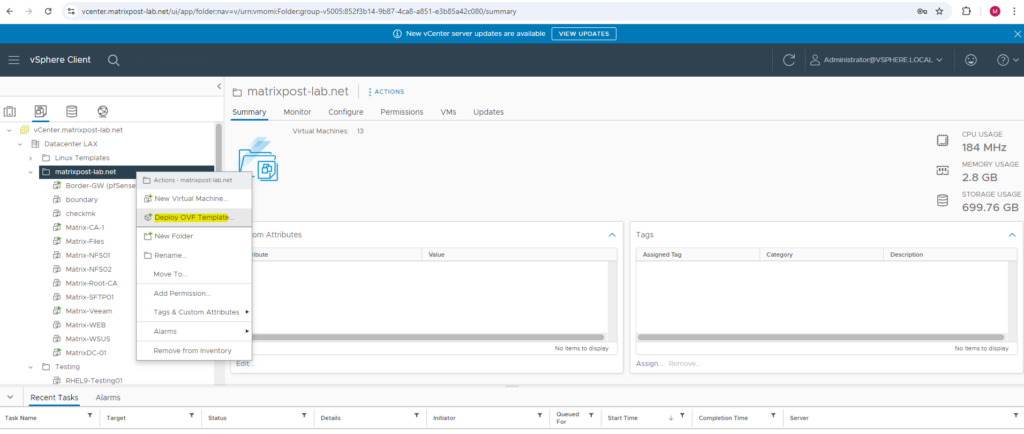
After downloading the .OVA file we can start to deploy our appliance in vCenter. Therefore right click on a folder within VM and Templates or Host and Cluster and then select Deploy OFV Template as shown below.
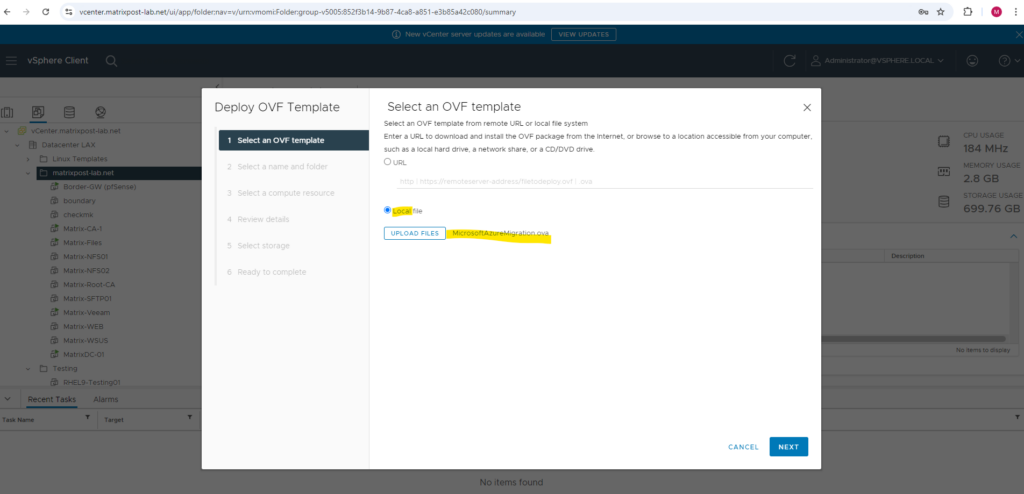
Selecting our previously downloaded .OVA file.
OVF is an open standard which contains multiple files as a package. For example, .ovf, .vmdk, .nvram, and so on. OVF supports exchange of virtual appliances across products and platforms.
OVA is a single file distribution of the OVF file package. When you export a virtual machine as an OVF file, you create a directory that contains an OVF file and the virtual disk files.
OVF and OVA files are compressed, allowing for faster downloads. The vSphere Web Client validates an OVF or OVA file before importing it, and ensures that it is compatible with the intended destination server. If the appliance is incompatible with the selected host, it cannot be imported and an error message appears. OVF and OVA can encapsulate multi-tiered applications and more than one virtual machine.
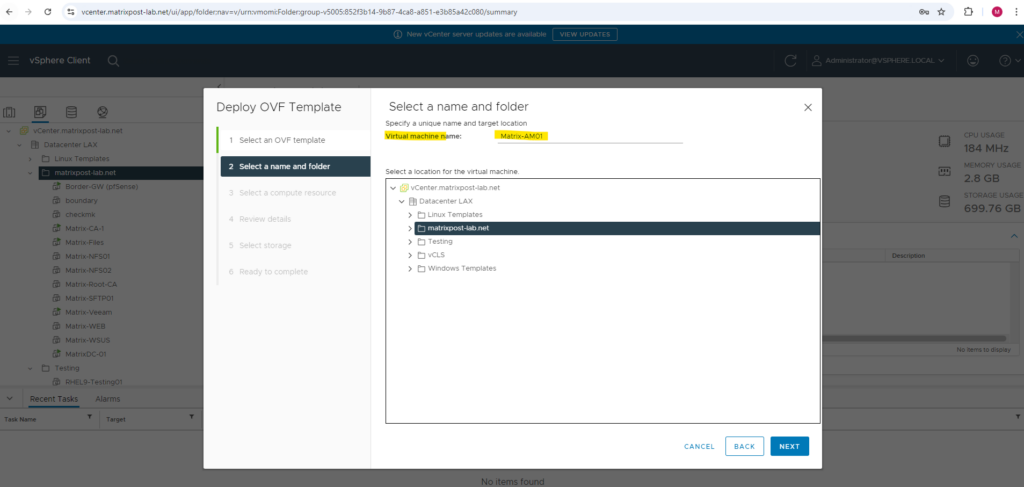
Enter a virtual machine name, in my case this will also later be the hostname of the appliance.
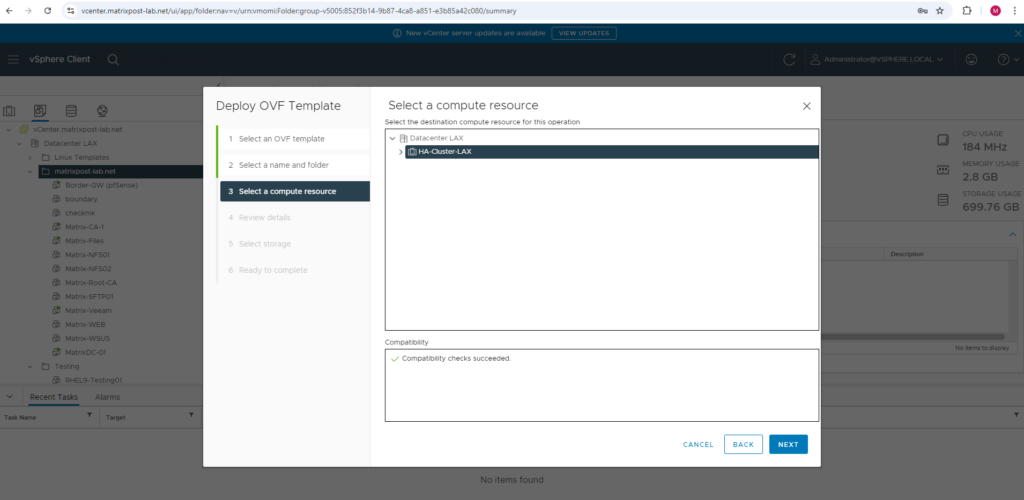
For the compute resource (ESXi Host) on which the appliance later will run, I will select my vSphere cluster.
Review the details and click on Next.
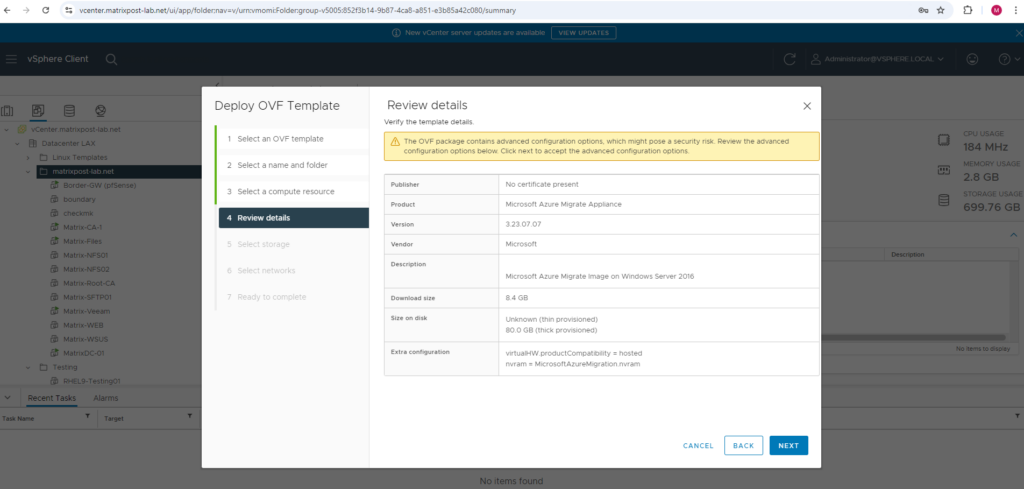
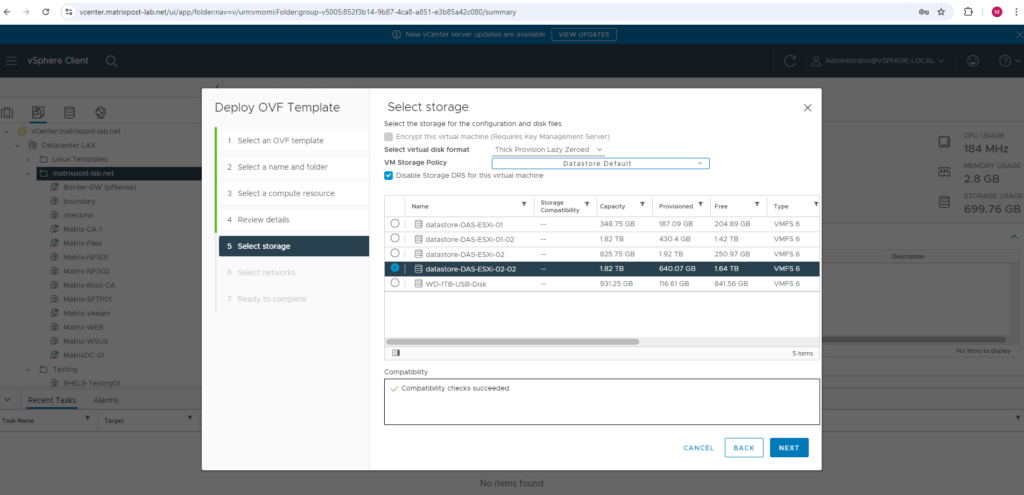
Select the storage on which we place this appliance.
Because the appliance is thick provisioned we should calculate here with 80 GB storage the appliance will claim for as shown in the details above.
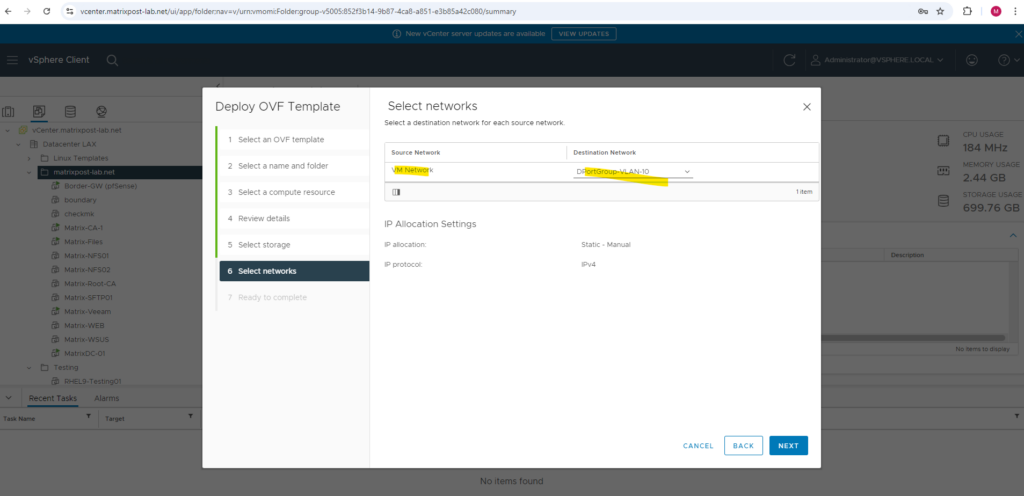
Select the VM Network (Port Group/VLAN) you want to place this appliance in your on-premise network.
Finally click on FINISH to deploy the appliance in vSphere.
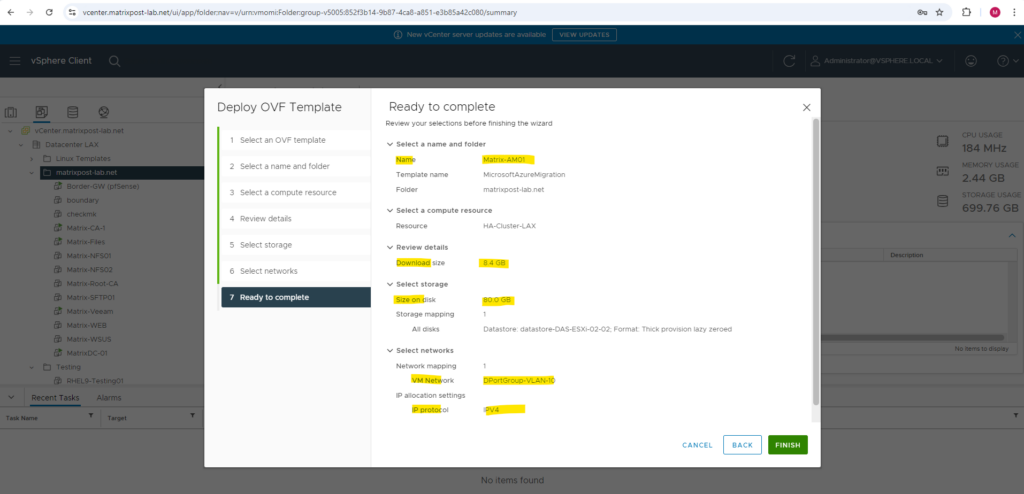
Our Azure Migrate Appliance will be deployed in vSphere.
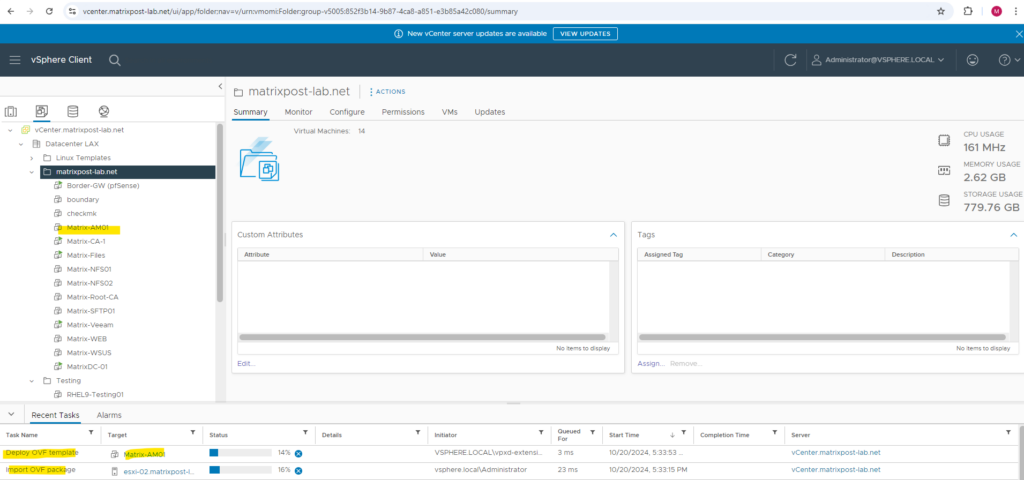
The appliance was deployed successfully.
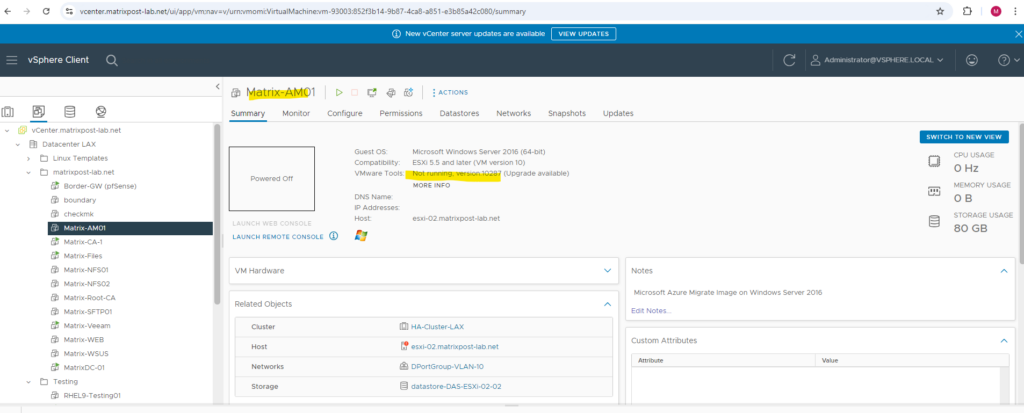
We can now either power on the appliance and configure some settings like hostname, network, dns suffix, … by hand or we can apply in vSphere a so called VM Customization Specification which will do this automatically on the fly.
About how to create such a VM Customization Specification in vSphere you can read here https://blog.matrixpost.net/set-up-azure-site-recovery-for-on-premise-vmware-virtual-machines-modernized-part-1/#vm_customization_specification.
So I will use here my already created VM Customization Specification from the post above about Azure Site Recovery (ASR).
To apply it we can right click on our appliance and selecting Guest OS -> Customize Guest OS …
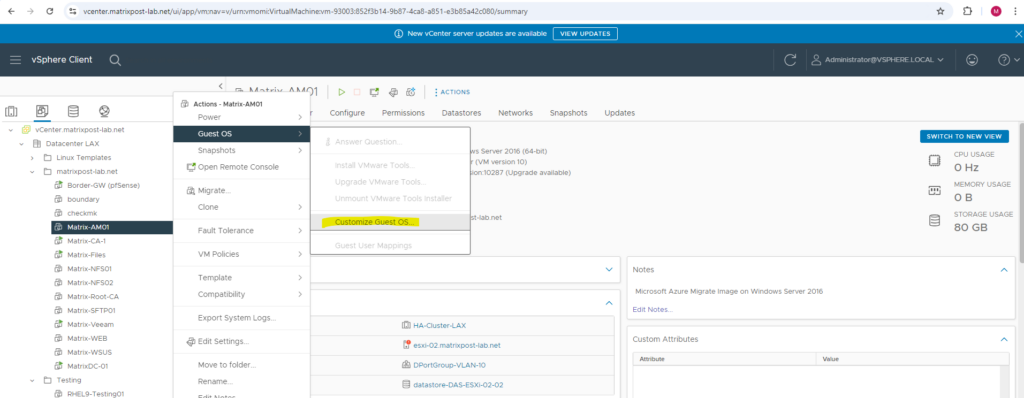
For the Windows operating system so far I have just the following VM Customization Specification created. Click on OK to apply it to our appliance.
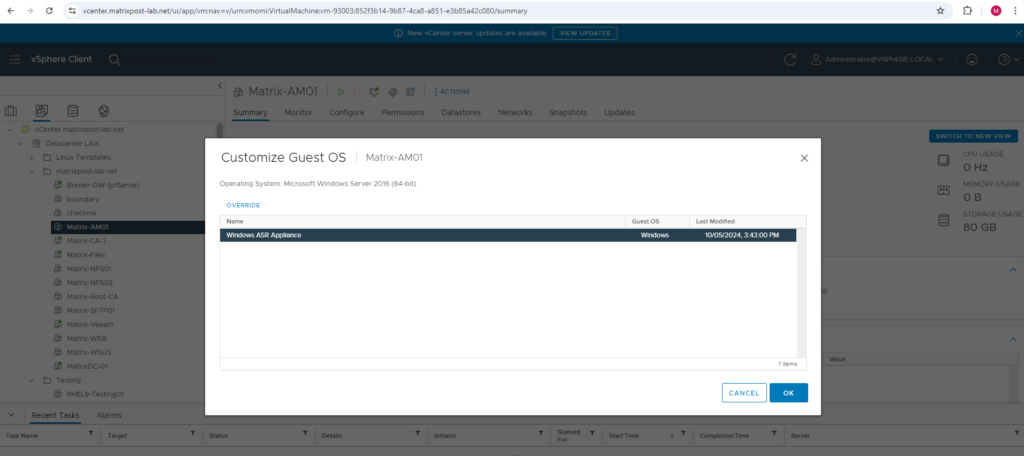
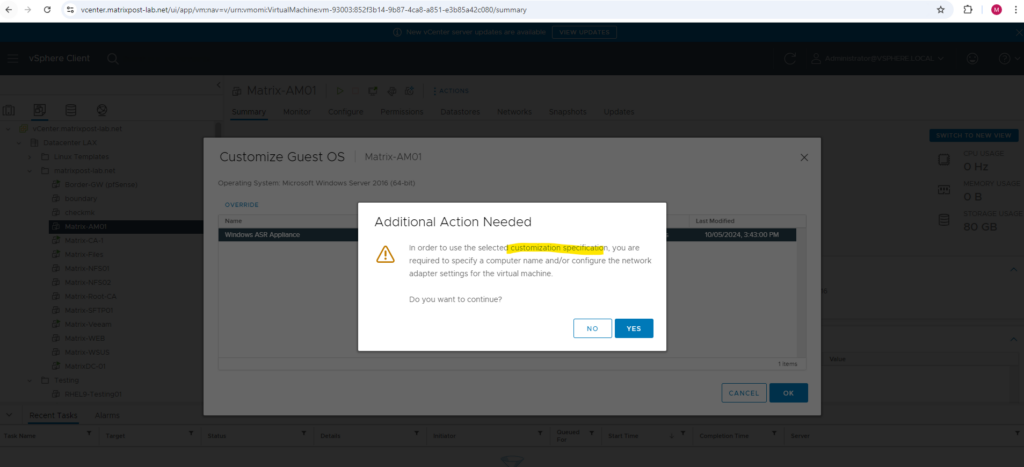
Confirm the dialog.
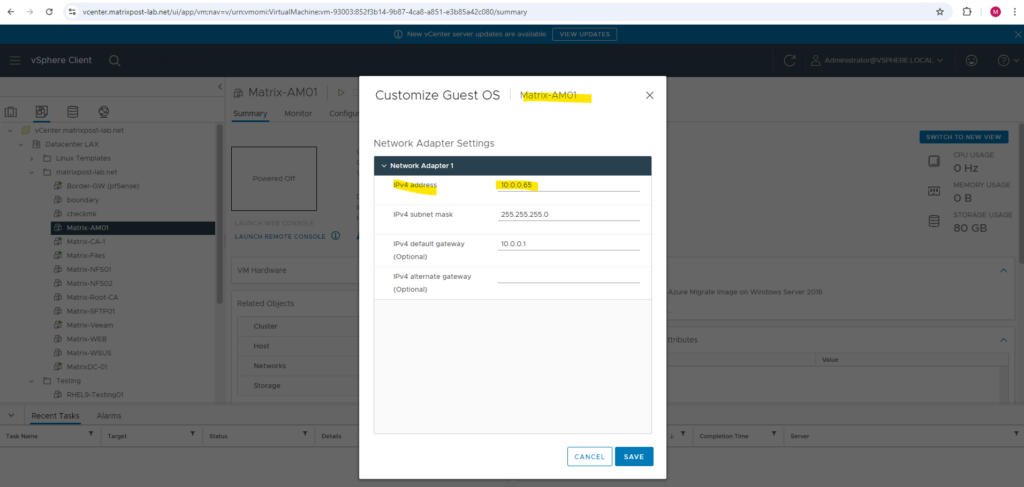
Enter a desired IP address for the appliance in your on-premise network and click on SAVE.
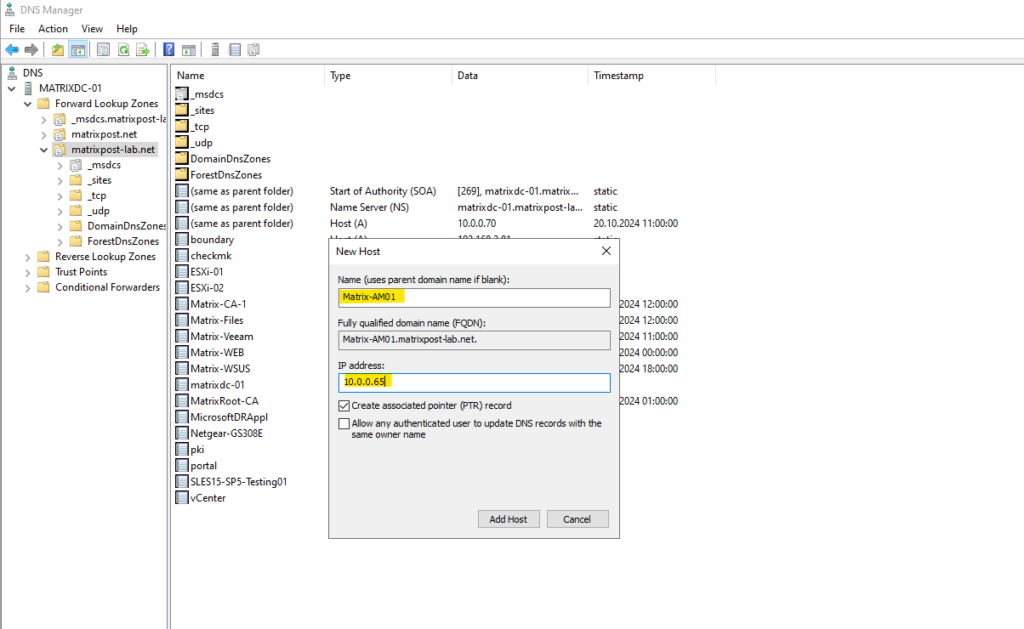
I have already reserved an IP address and FQDN for the appliance in my on-premise network.
The VM Customization Specification was applied successful.
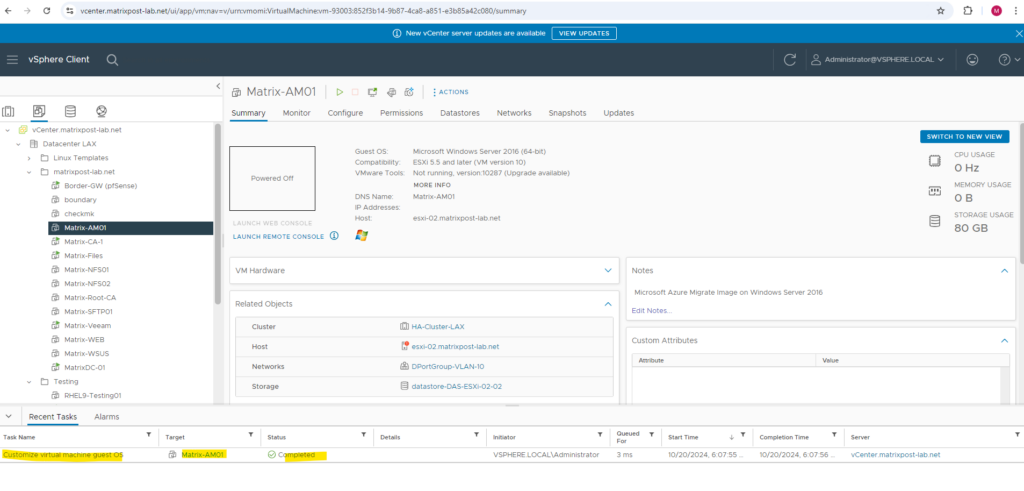
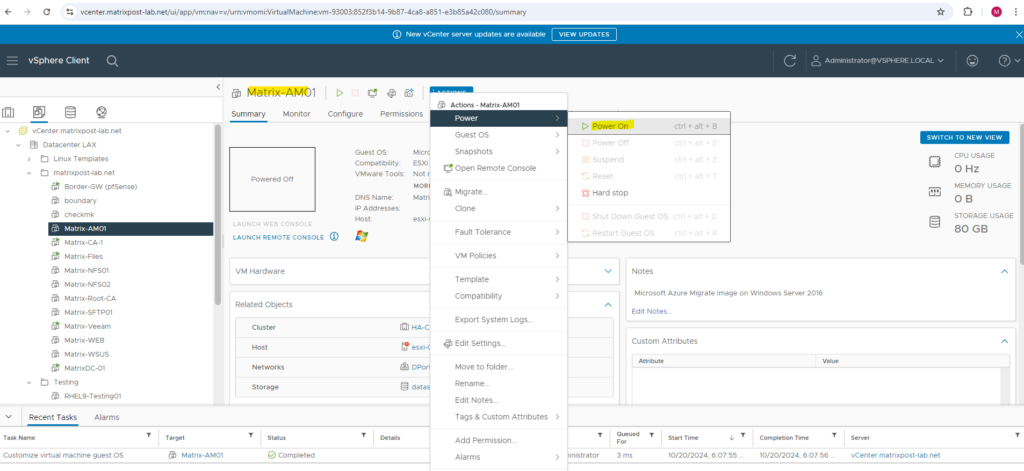
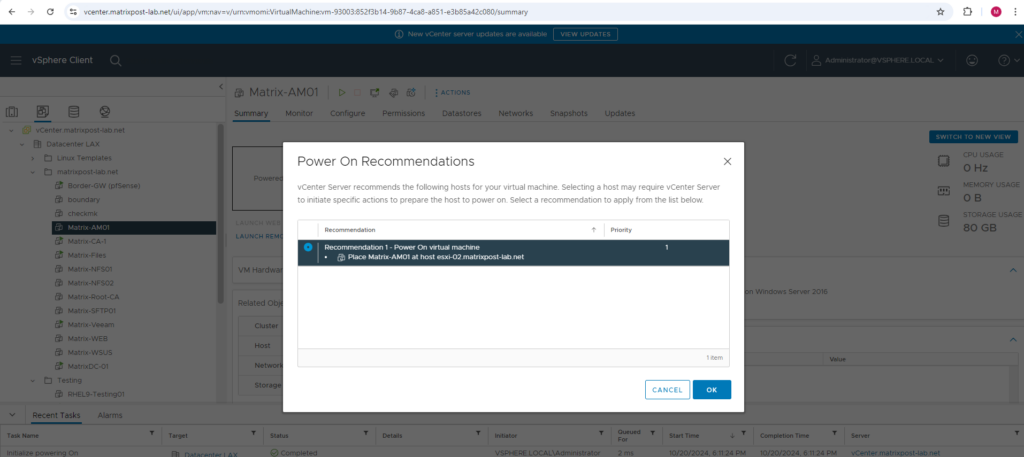
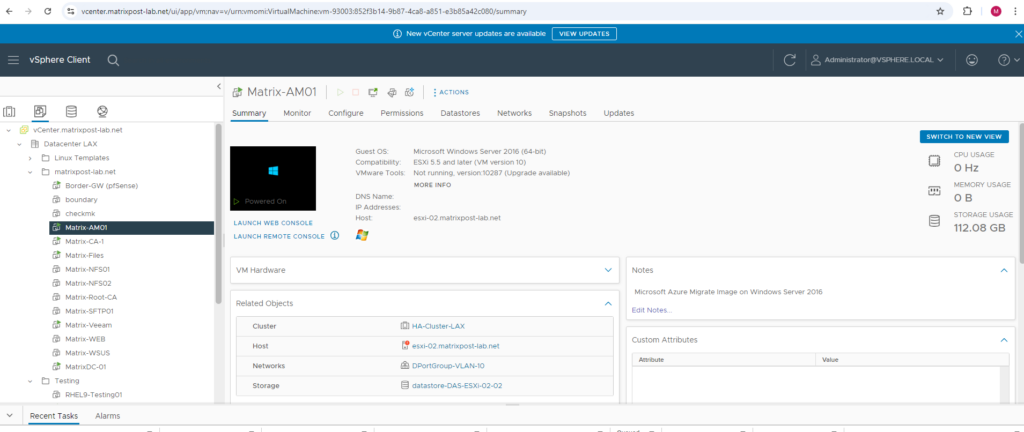
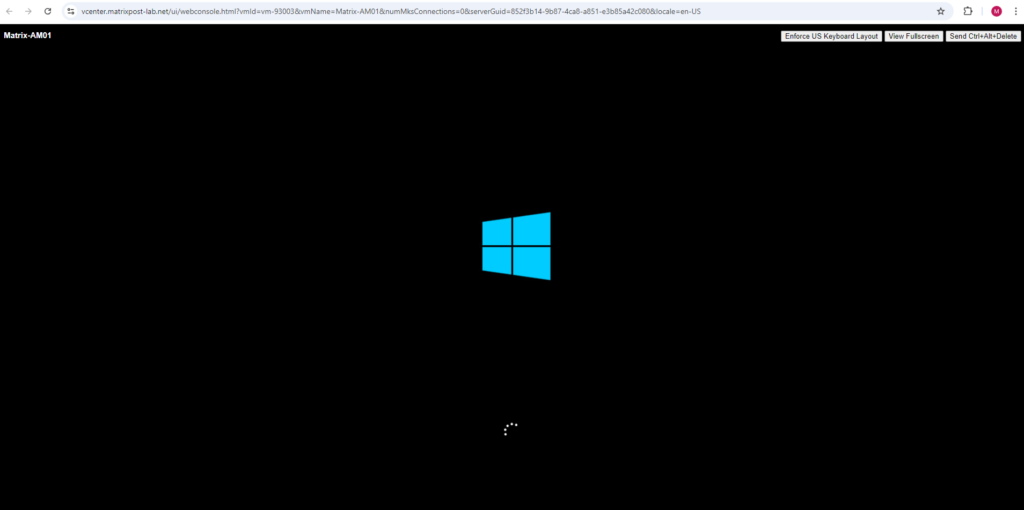
We can now finally power on the appliance (virtual machine).
Configure the Appliance by using its Configuration Manager
Access the appliance configuration manager from your browser and complete the configuration steps to initiate the discovery.
The appliance configuration manager will get started by default when the virtual machine booted successful.
We can also open the URL on any computer that can connect to the appliance by using https://<appliance name or IP address>: 44368.
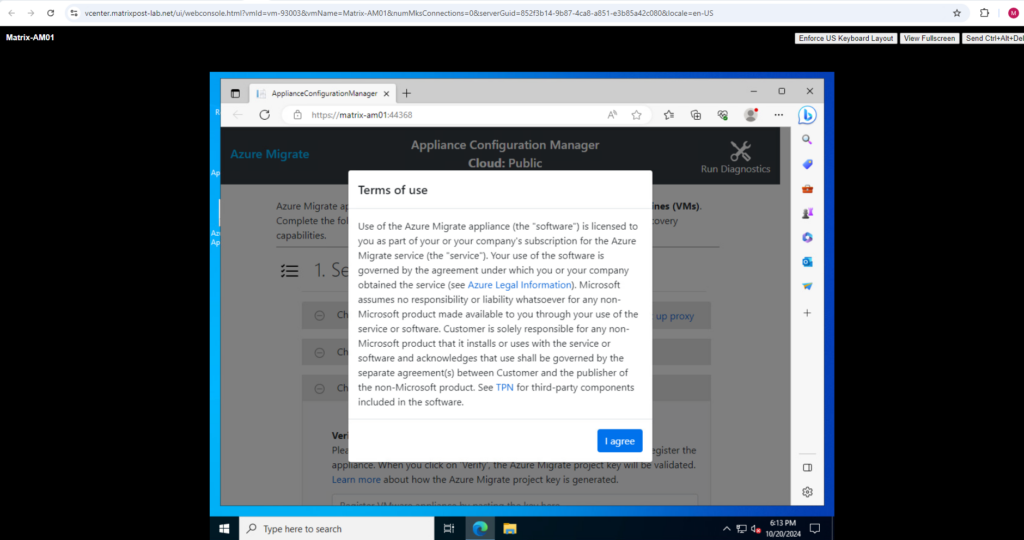
Because the VM Customization Specification was also setting the local Administrator account password, I will now first switch to use a remote desktop connection.
Below we first need to agree the terms of use.
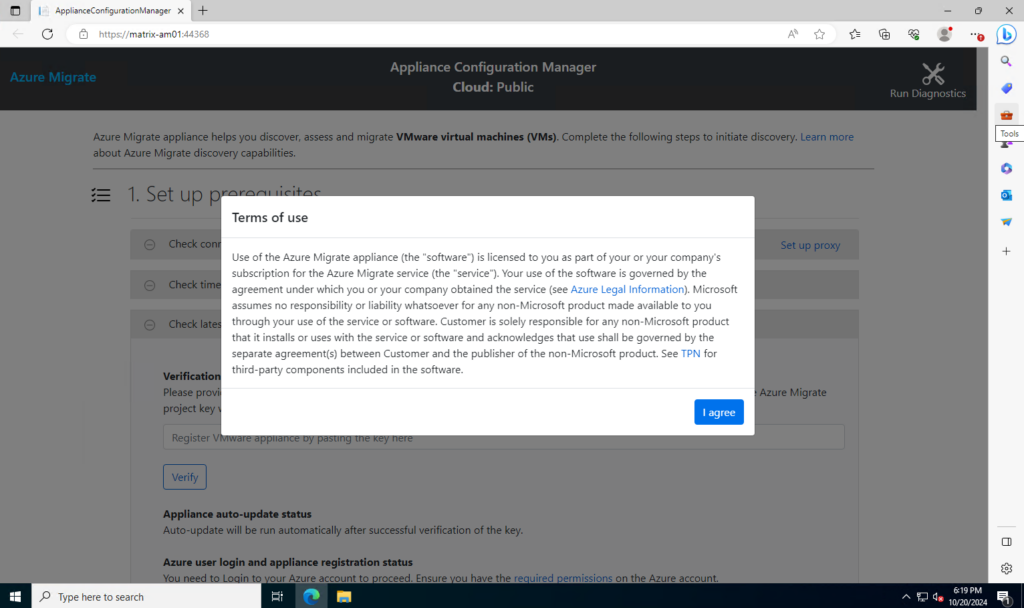
Then the configuration manager first is checking the connectivity to Azure, in my case through the public Internet.
Here the same as for the previously mentioned Azure Site Recovery (ASR) Appliance we can also set up an proxy to connect to Azure.
If you also want to restrict just for specific URLs, please read the following article by Microsoft where all URLs are listed the appliance need to be able to connect to. https://learn.microsoft.com/en-us/azure/migrate/migrate-appliance#url-access.
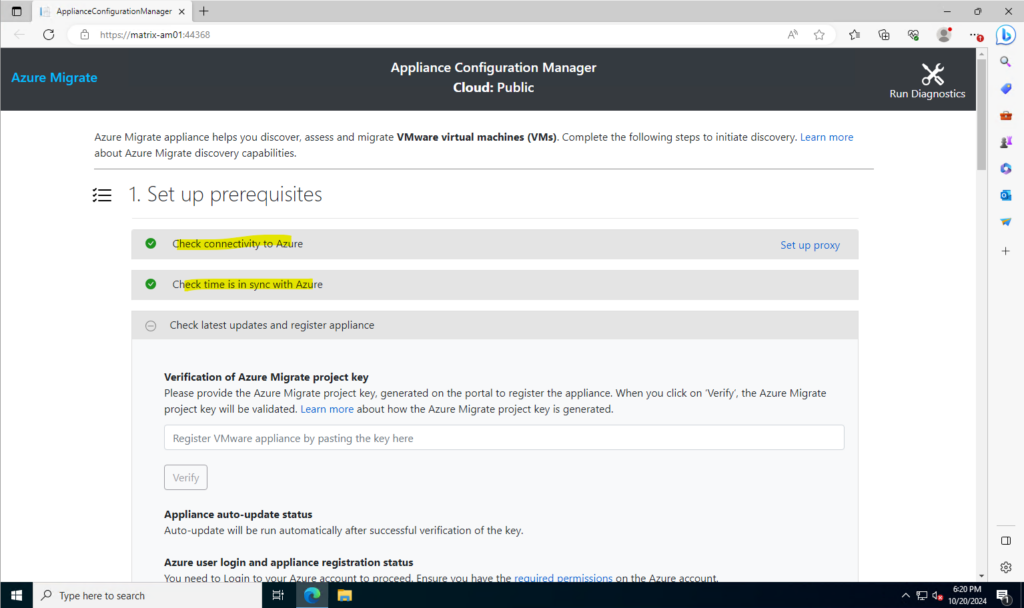
We now need to enter the Azure Migrate project key below. In case we previously not noted this key, we can pick it up again by navigating within our Azure Migrate project to Migration goals -> Servers, databases and web apps and here clicking on Discover.
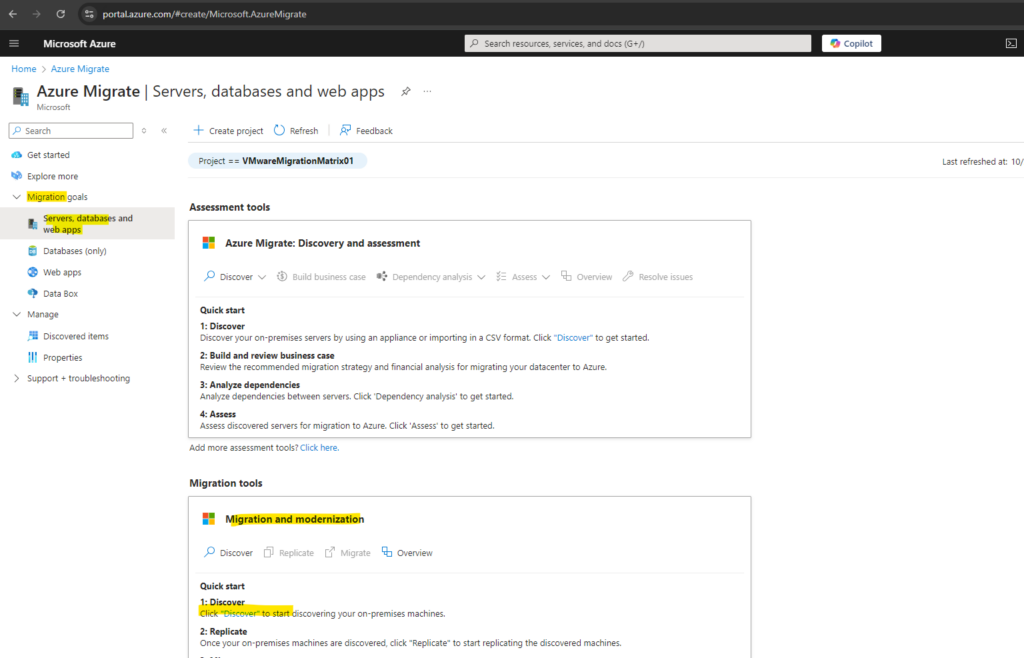
Then we need to select as previously some settings as shown below and finally click on Manage existing appliances.
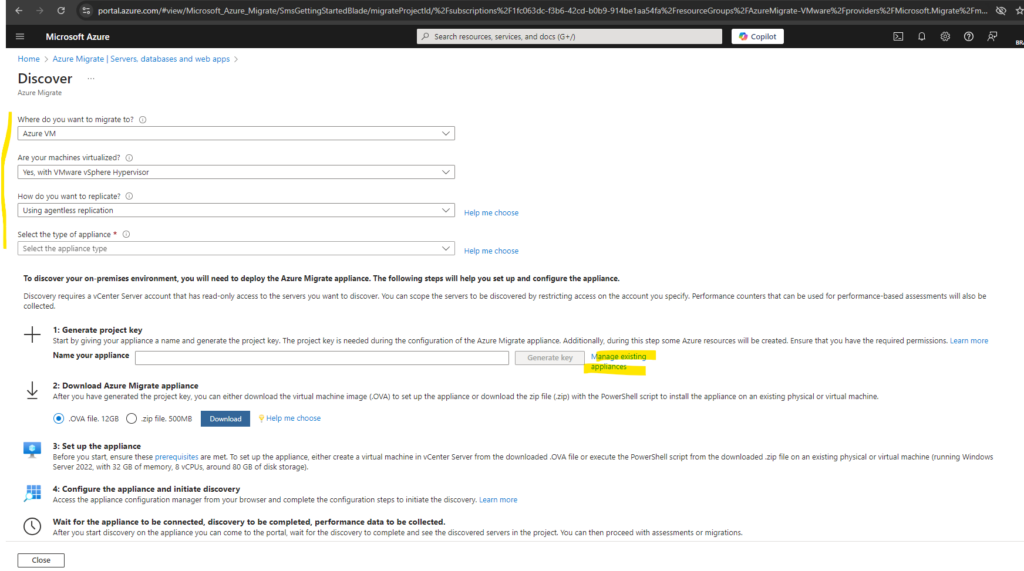
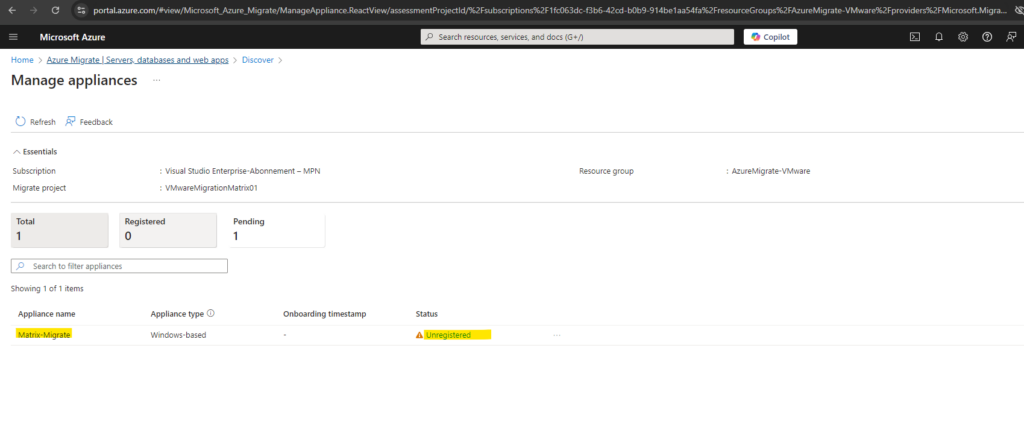
Here we need to click on Unregistered.
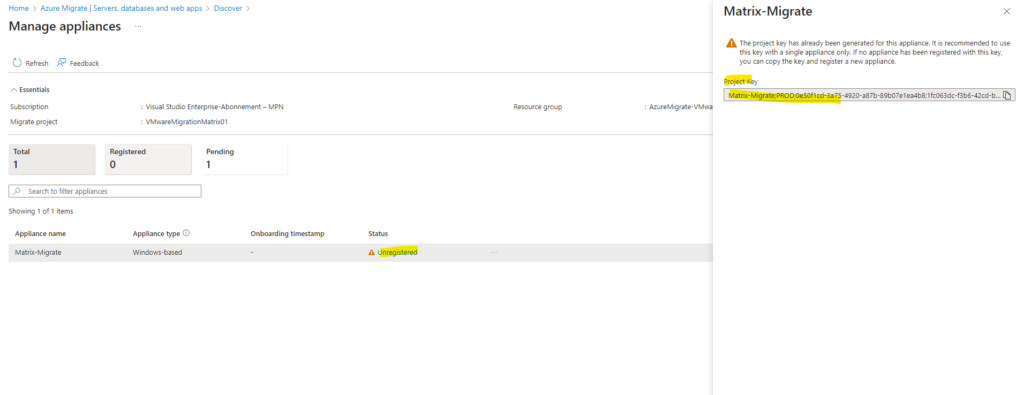
And here we can again copy the project key to enter it in our on-premise vSphere appliance.
Back on the appliance I will enter the project key and click on Verify.
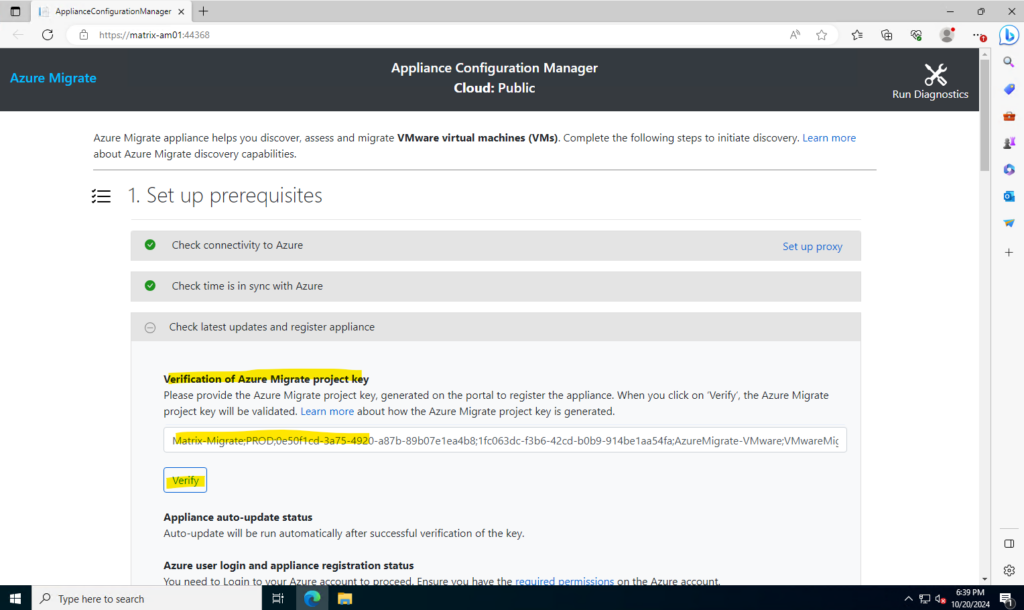
After the Azure Migrate project key was verified successful, the appliance will check for new updates.
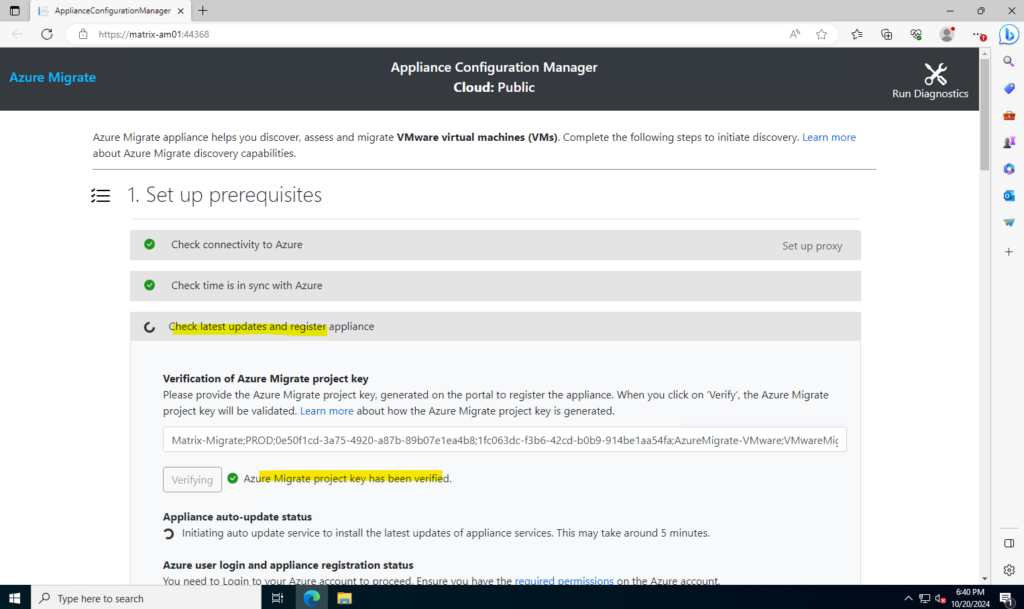
Also some prerequisites will be checked.
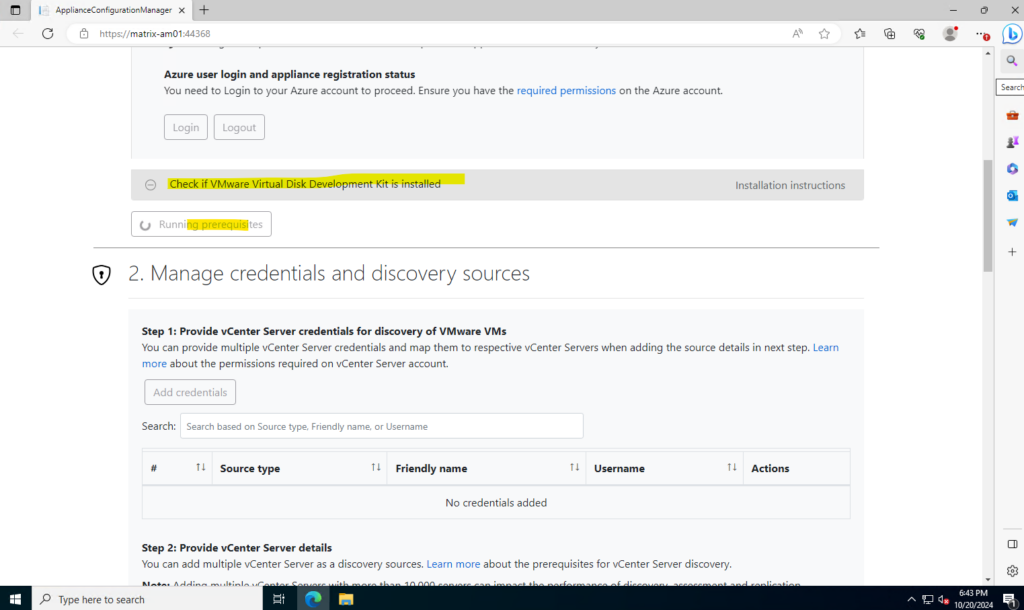
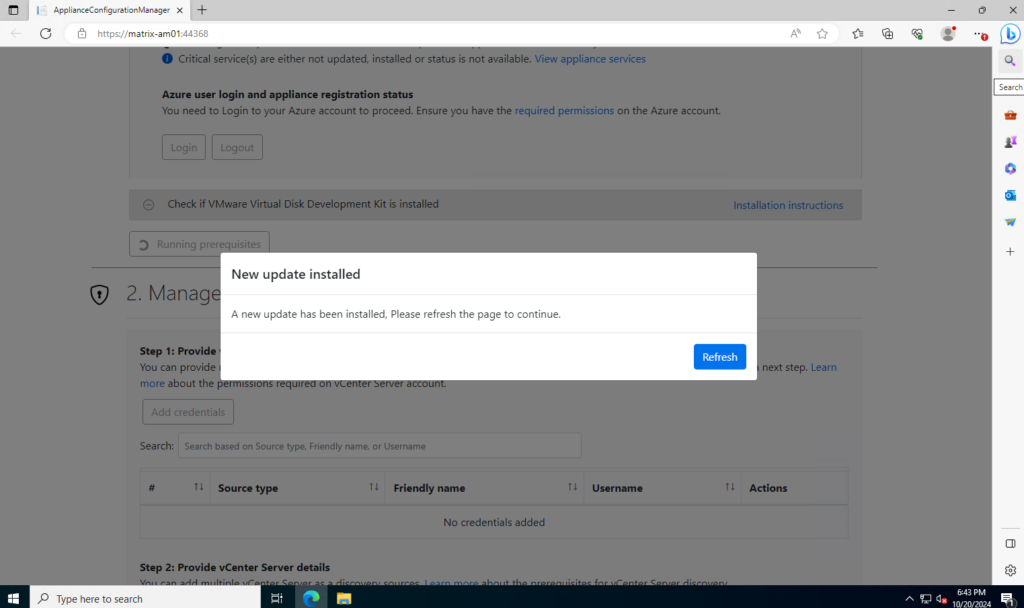
In my case a new update has been installed. To start over we need to click on Refresh.
A few minutes later we can login to Azure.
Ensure you have the required permissions on the Azure account.
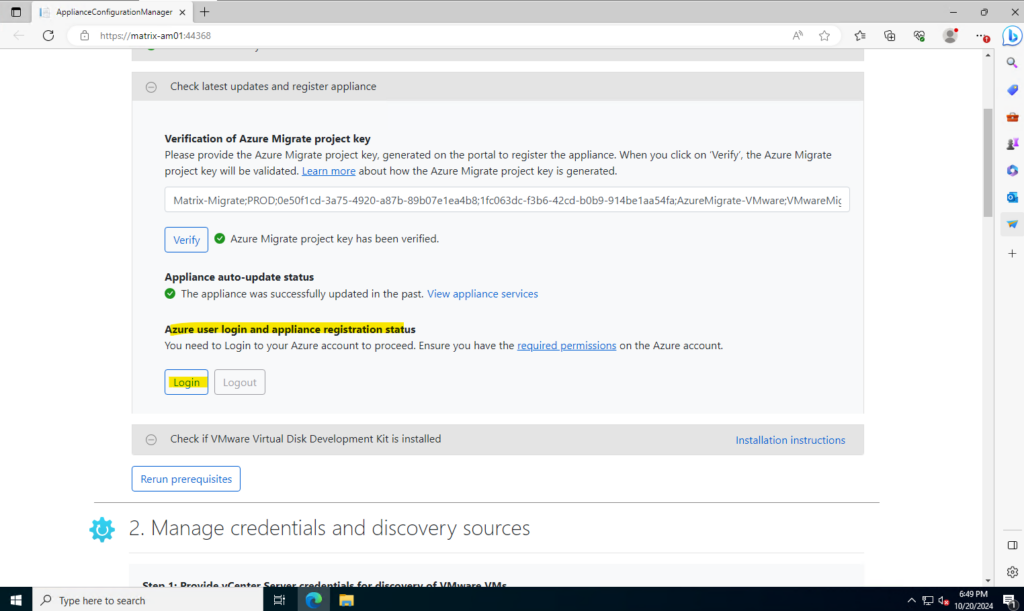
Click on Copy code & Login.
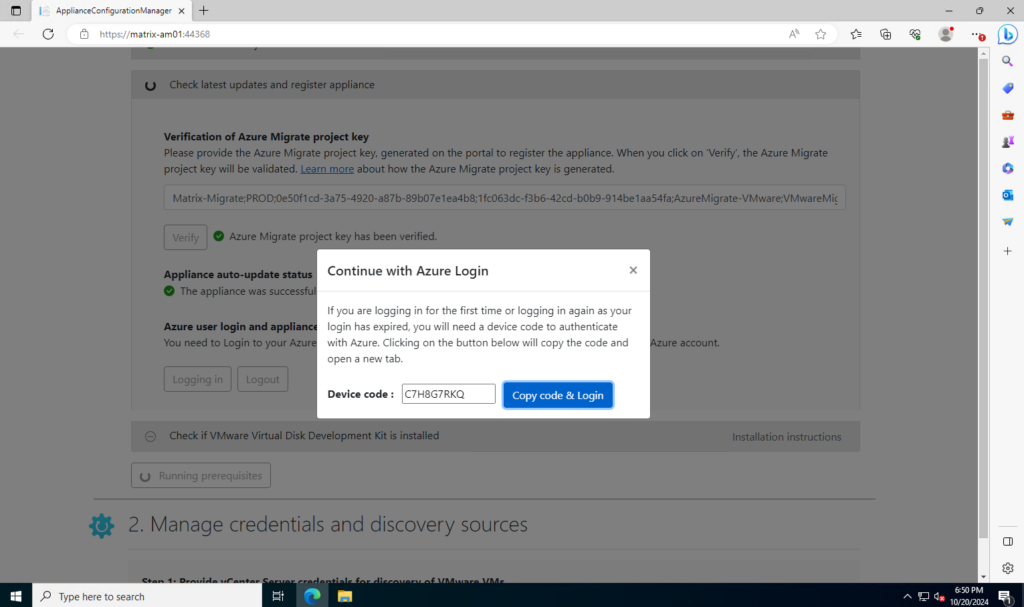
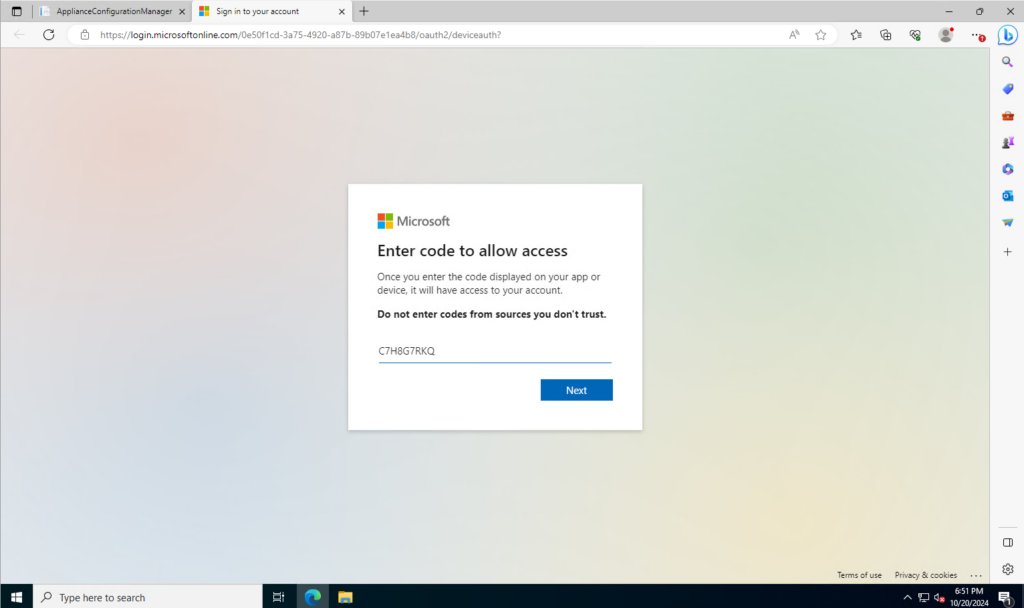
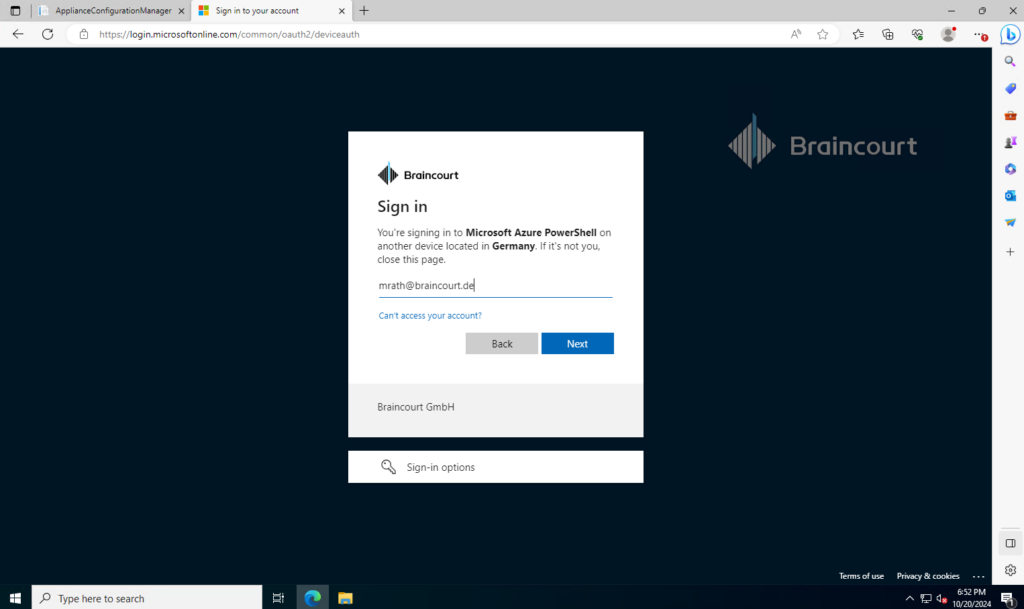
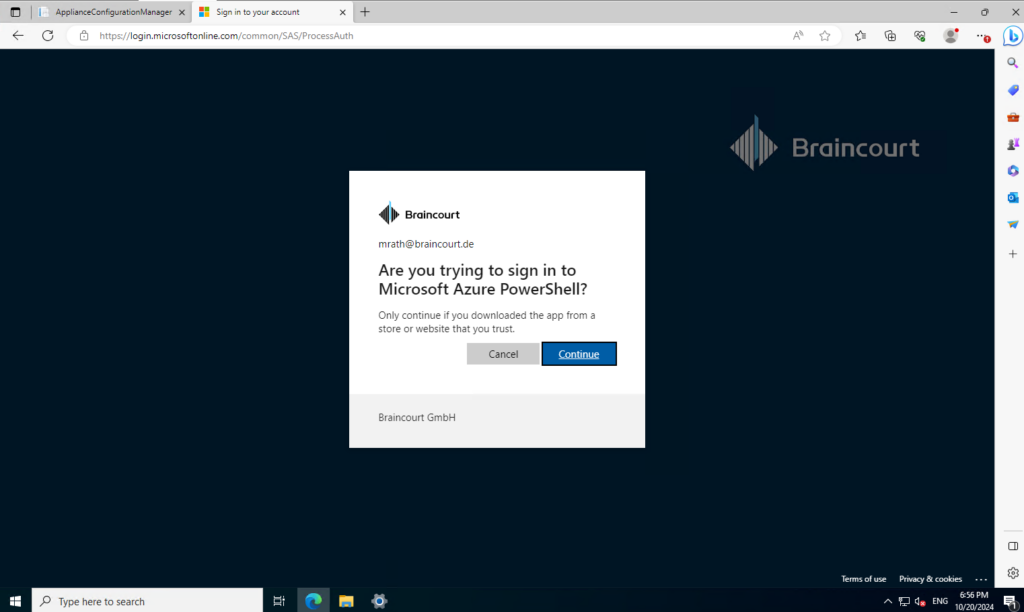
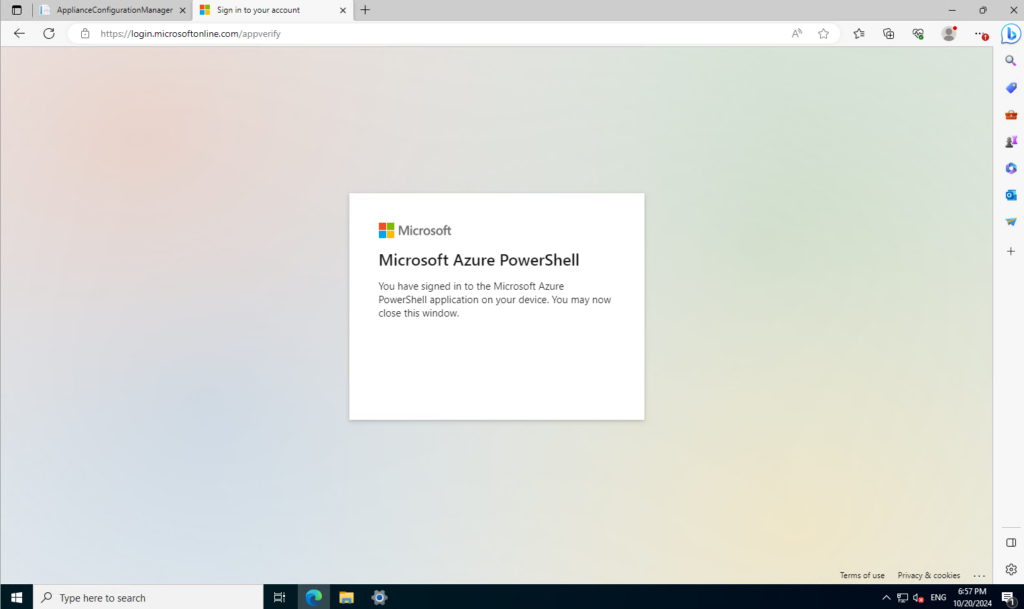
The appliance will now be registered to our Azure Migrate project in Azure.
This can take up to 10 minutes to complete.
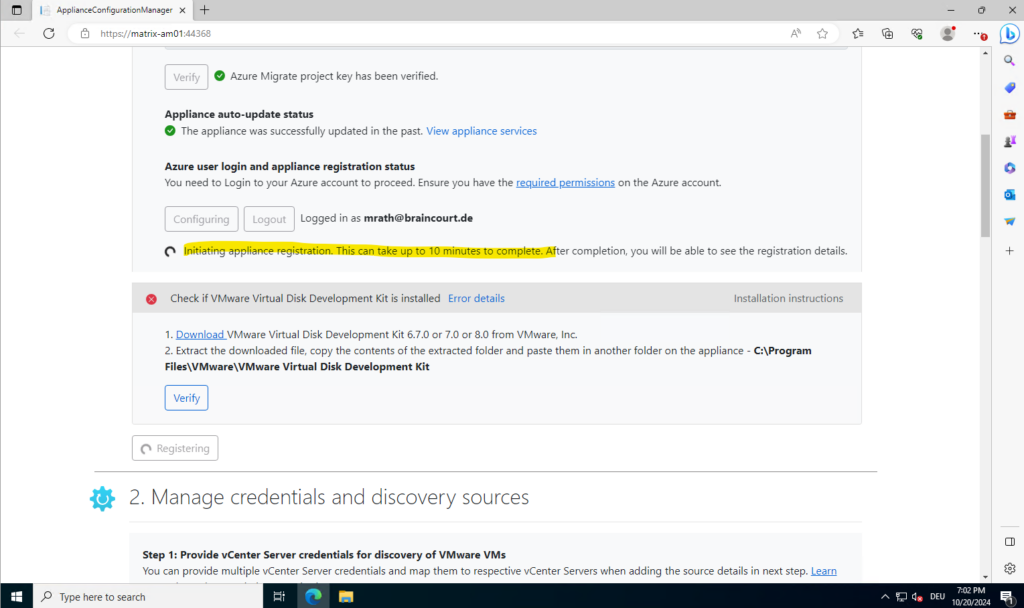
A few minutes later the appliance has been successfully registered.
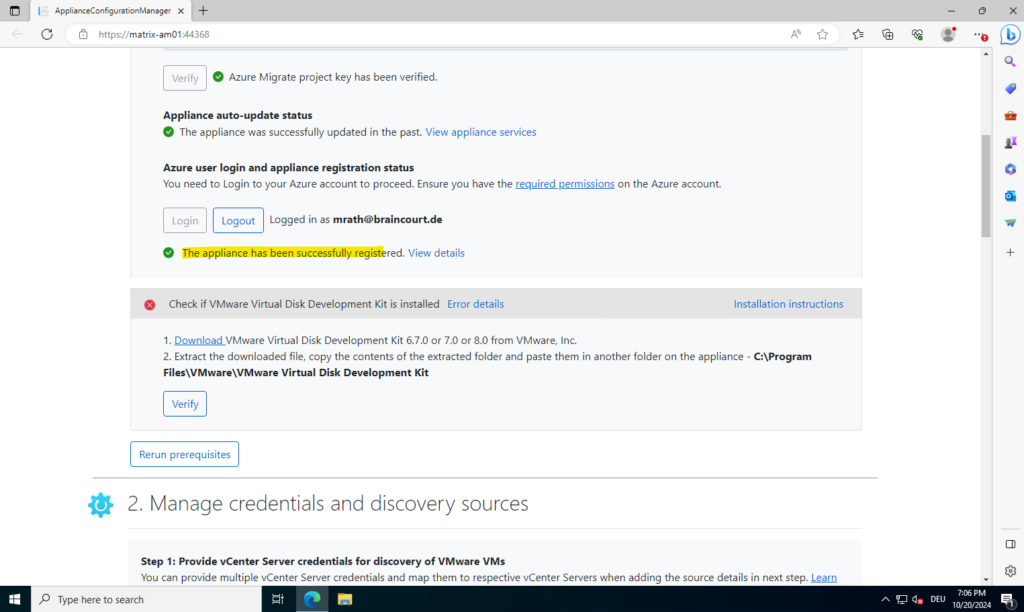
I will now also download and install the VMware Virtual Disk Development Kit.
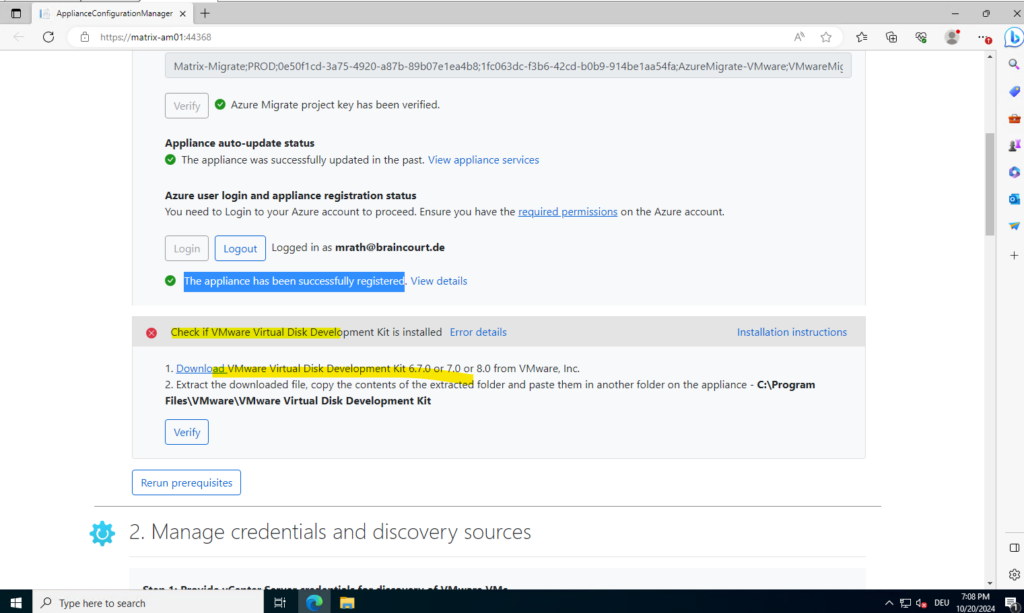
Therefore we first need to login to the Broadcom portal.
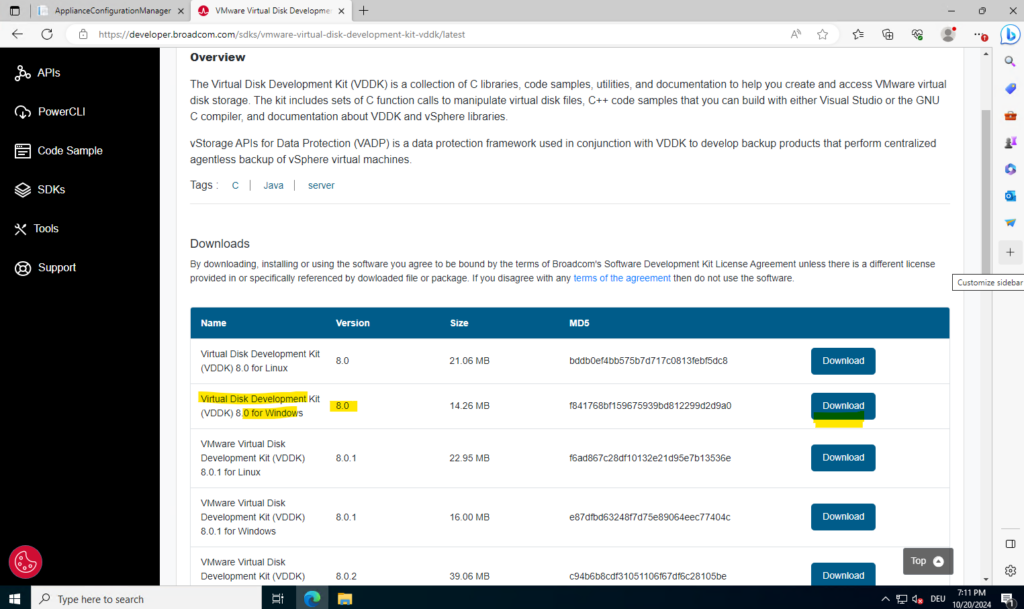
Extract the files and copy it to the following already existing folder.
C:\Program Files\VMware\VMware Virtual Disk Development Kit
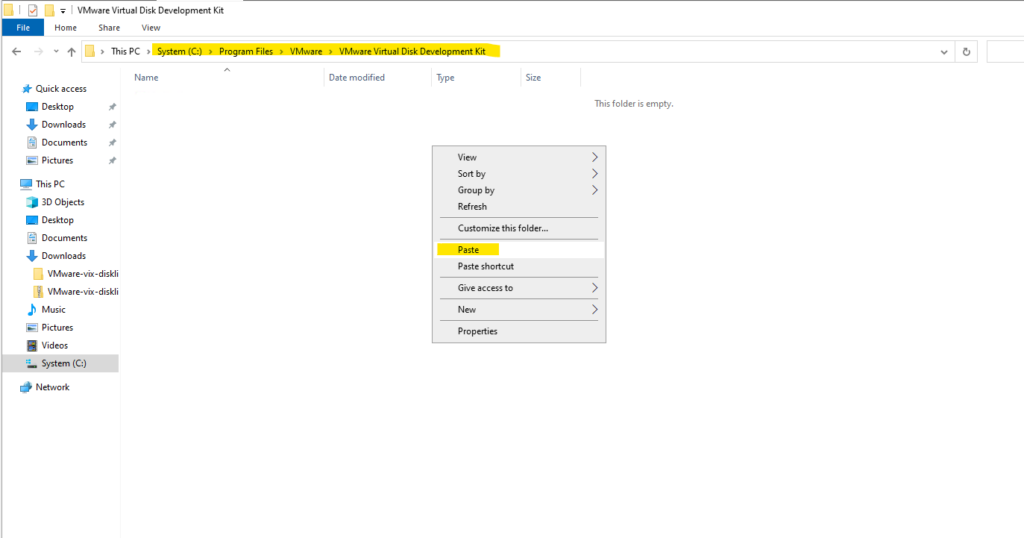
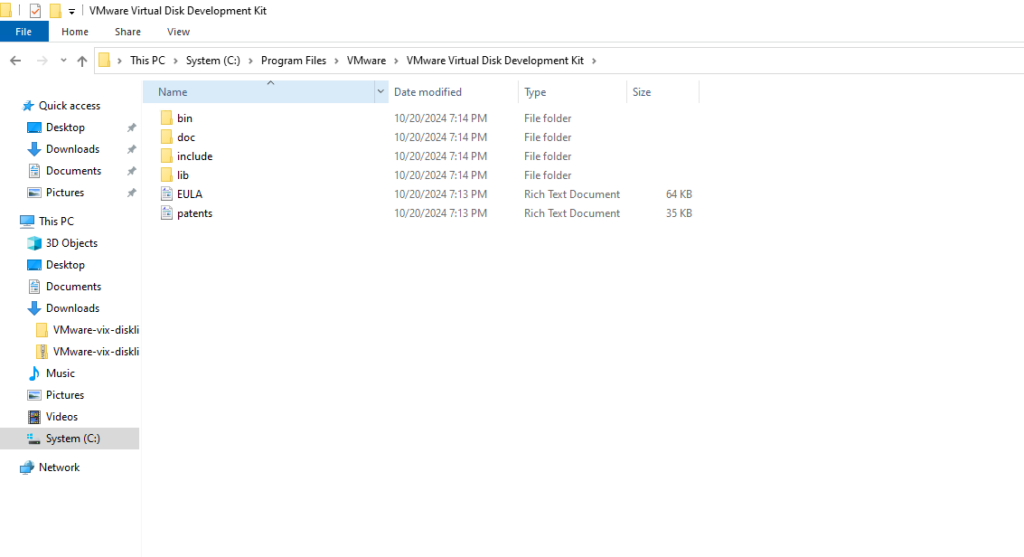
Then verify again, looks good!
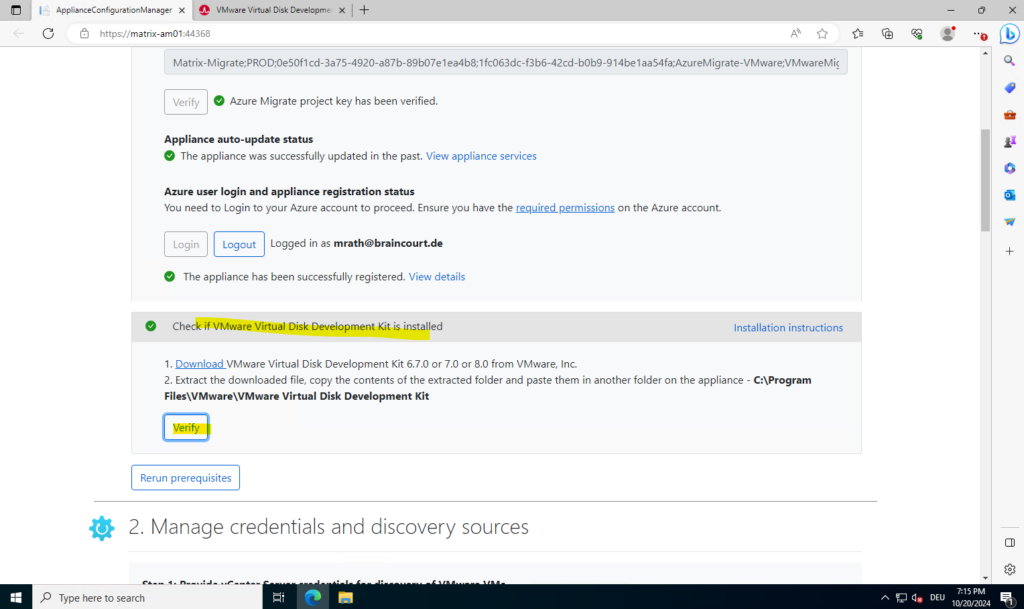
We can now add our previously created vSphere read-only account. We can also add here multiple vCenter Server credentials and map them to respective vCenter Servers when adding the source details.
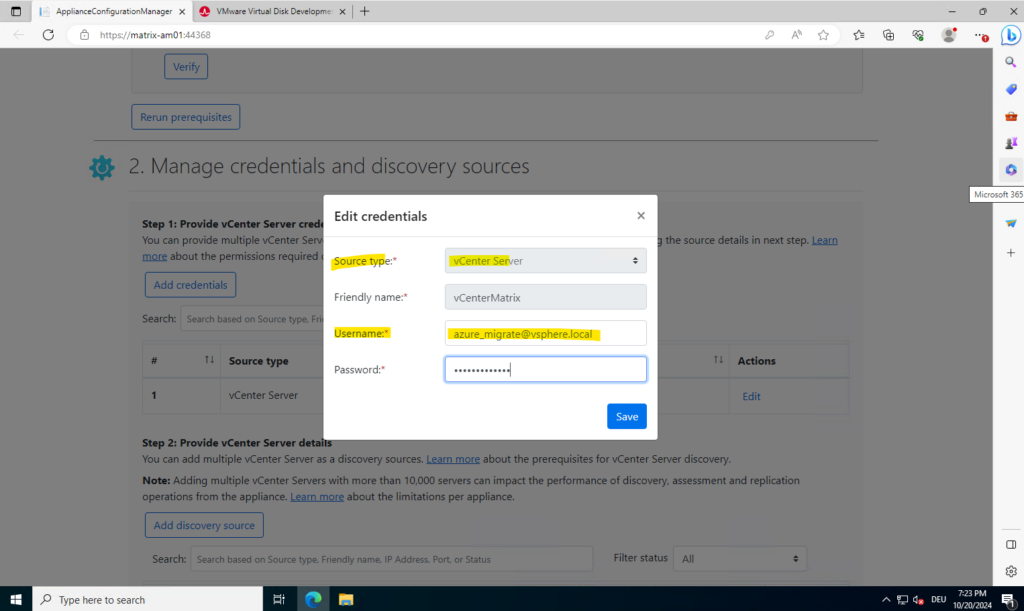
Next we need to map these credentials to our vCenter Server, in my case for my lab environment I will just have one vCenter Server.
So click on Add discovery source and enter your vCenter IP Address/ FQDN and map the credentials.
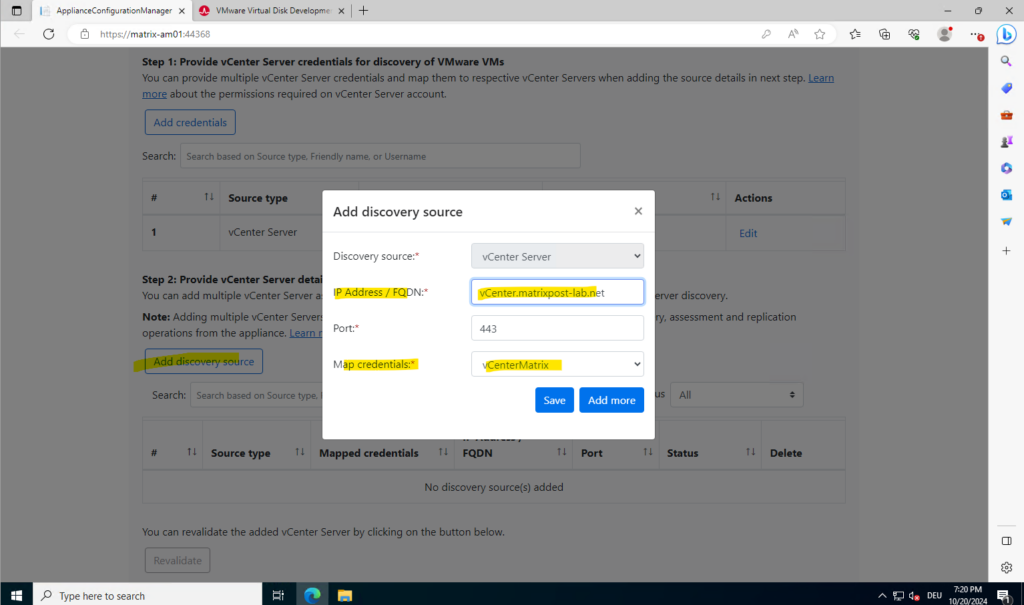
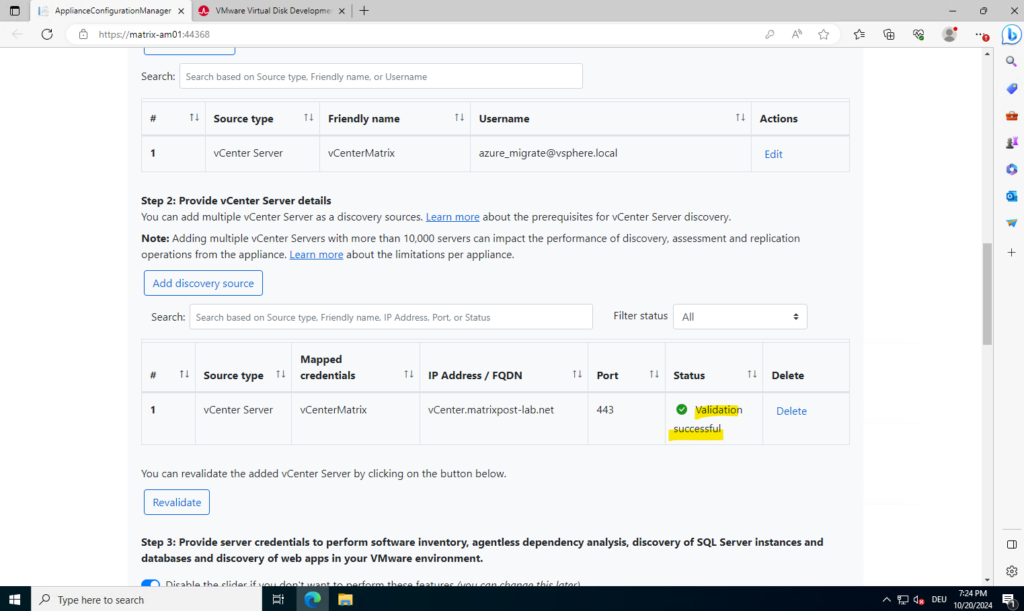
Looks good!
Next we can Provide server credentials to perform software inventory, agentless dependency analysis, discovery of SQL Server instances and databases and discovery of web apps in your VMware environment, you can provide multiple server credentials.
If you don’t want to use any of these appliance features, you can skip this step and proceed with vCenter Server discovery. You can change this option at any time.
If you will provided server credentials here, software inventory (discovery of installed applications) is automatically initiated.
More about here https://learn.microsoft.com/en-us/azure/migrate/vmware/tutorial-discover-vmware#how-discovery-works.
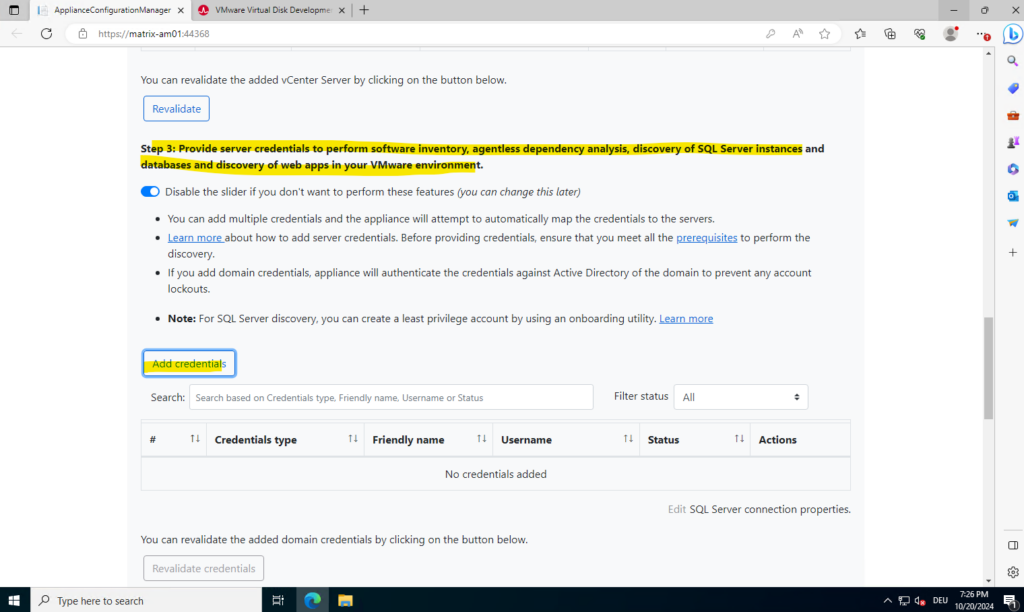
We can choose here between Domain Credentials, Linux (Non-domain), Windows (Non-domain) and SQL Server Authentication.
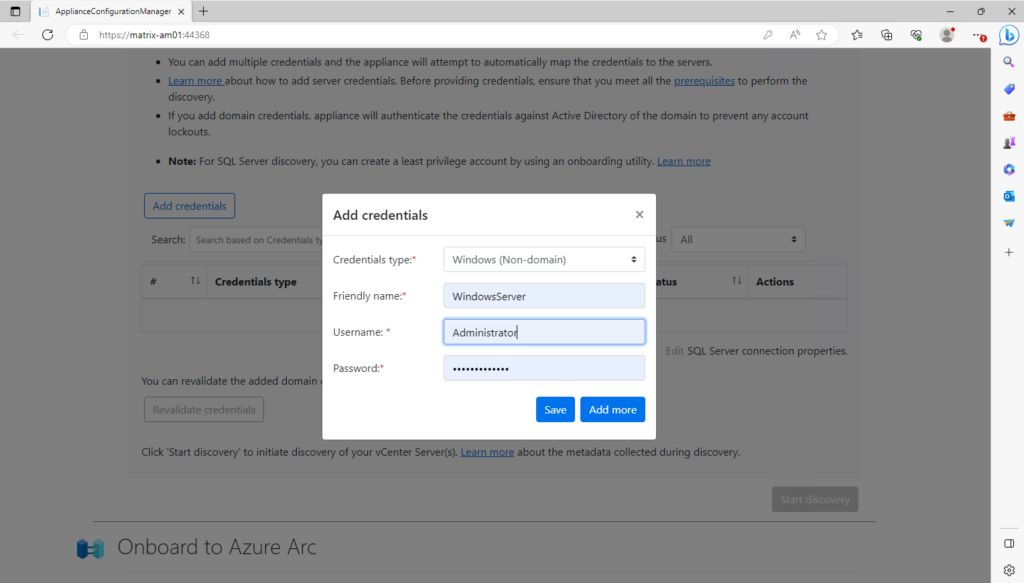
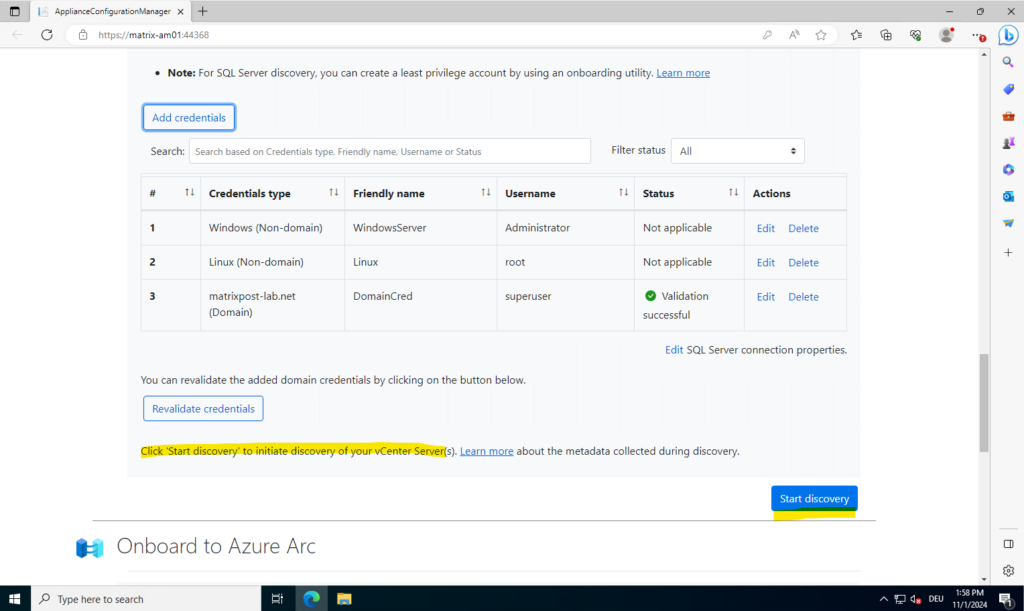
I will also add credentials for my Linux virtual machines and also domain credentials from my on-premise lab domain matrixpost-lab.net, finally we can click on Start discovery.
The appliance must connect to vCenter Server to discover the configuration and performance data of the servers.
If you have provided server credentials, software inventory (discovery of installed applications) is automatically initiated when the discovery of servers running on vCenter Server(s) is finished. Software inventory occurs once every 12 hours.
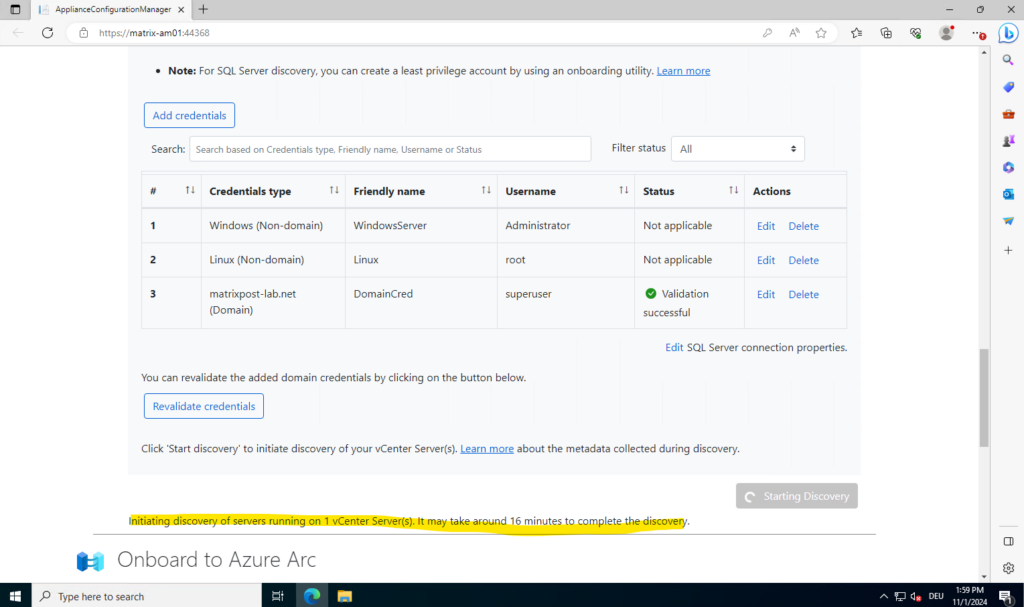
The discovery is running and takes supposedly around 16 minutes to complete.
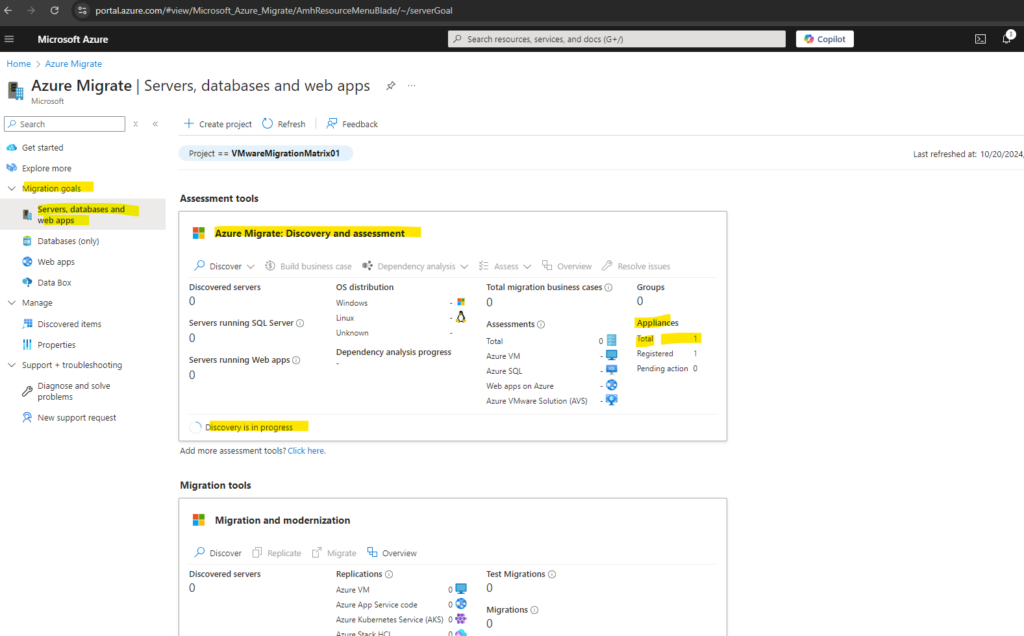
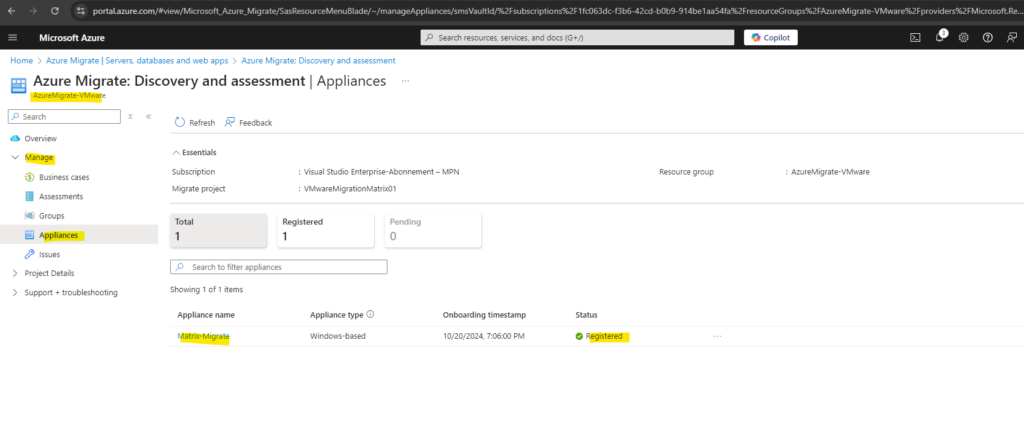
By the way when switching meanwhile back to the Azure portal, we can now see in our Azure Migrate project under Migration goals -> Servers, databases and web apps that in the Azure Migrate: Discovery and assessment tile there is now one registered appliance shown up. Click on it to navigate to.
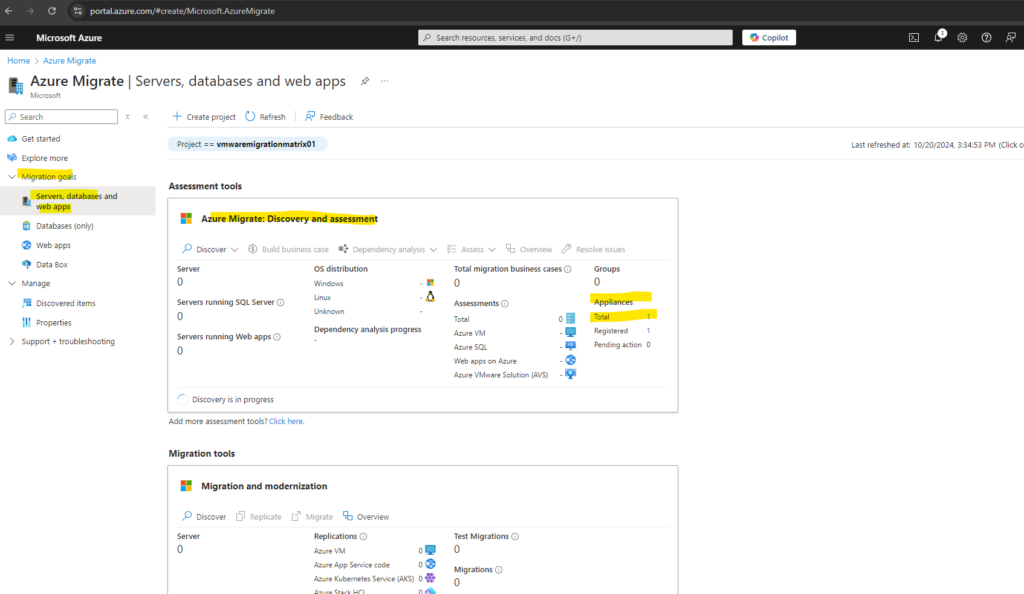
Here we can now see our registered Azure Migrate appliance running in our on-premise vSphere environment.
We also see that there is a discovery in progress at the moment.
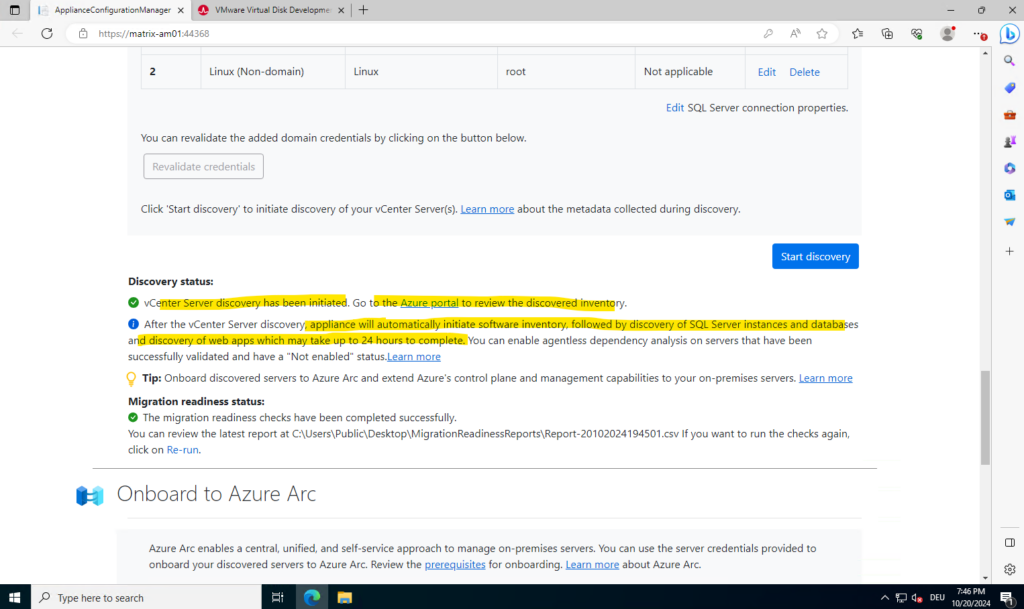
Back on the appliance configuration manager meanwhile also the vCenter Server discovery has been initiated successful.
After the vCenter Server discovery, appliance will automatically initiate software inventory, followed by discovery of SQL Server instances and databases and discovery of web apps which may take up to 24 hours to complete. You can enable agentless dependency analysis on servers that have been successfully validated and have a “Not enabled” status. Learn more
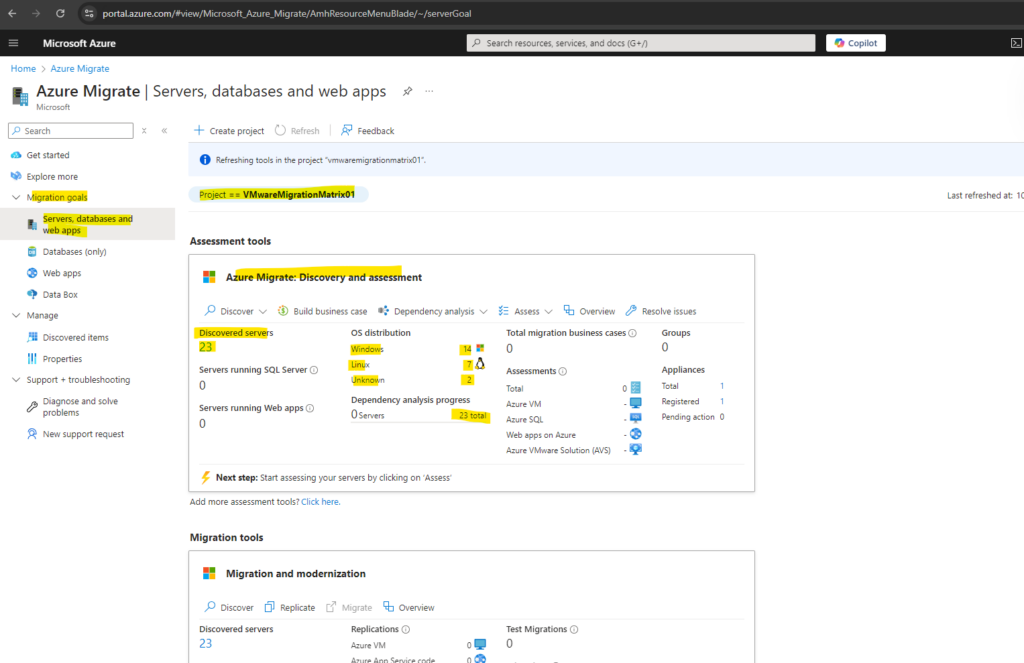
In the Azure portal we can now see that meanwhile 23 servers in total has been discovered, from which 14 servers are Windows, 7 servers are Linux and 2 with unknown operating systems.
By clicking above on the total 23 servers above I will get forwarded to the following discovered servers page.
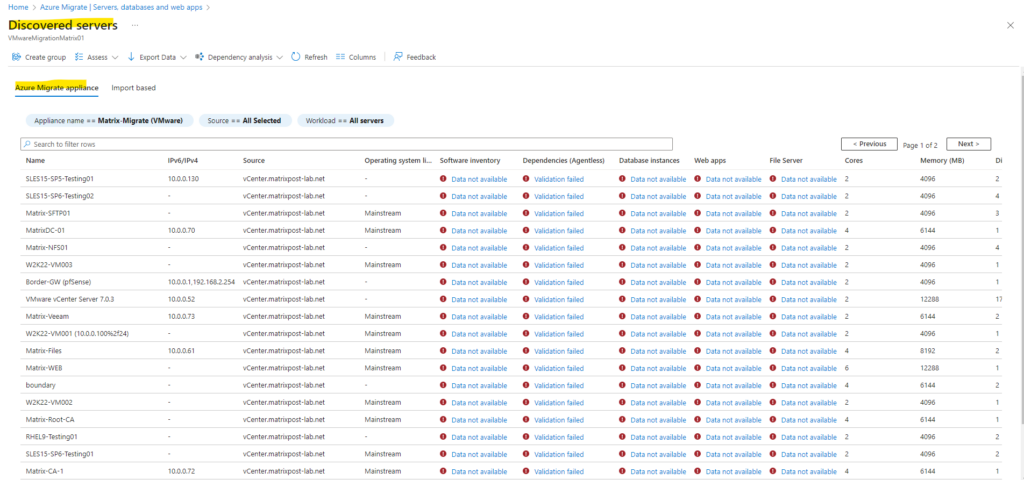
You can gain deeper insights into the support posture of your environment from the Discovered servers and Discovered database instances sections.
The Operating system license support status column displays the support status of the Operating system, whether it is in mainstream support, extended support, or out of support. Selecting the support status opens a pane on the right, which provides clear guidance regarding actionable steps that can be taken to secure servers and databases in extended support or out of support.
Troubleshooting
Failed to update the appliance services
A modification was made recently to the MSI validation process, which could potentially impact the Migrate appliance auto-update process.
The auto-update process might fail with the following error message:
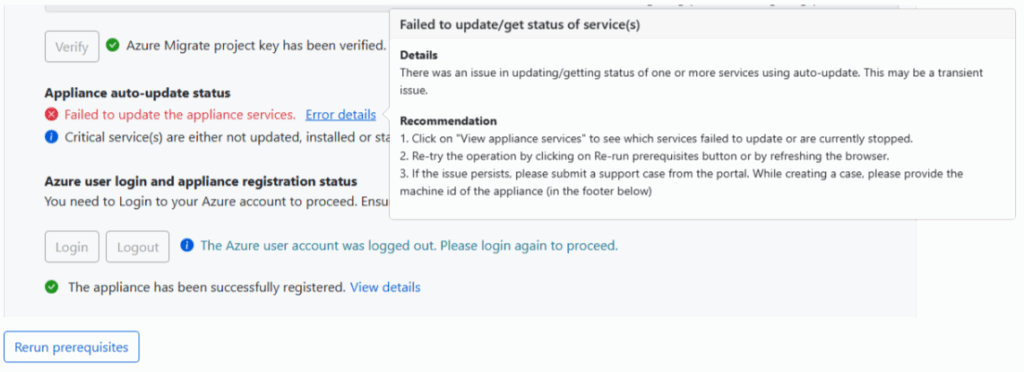
To fix this issue, follow these steps to ensure that your appliance can validate the digital signatures of the MSIs:
Open the certificate manager on the appliance.
In the certificate manager, you must see the entry for Microsoft Root Certificate Authority 2011 and Microsoft Code Signing PCA 2011. Both certificates must be installed in the Trusted Root Certification Authorities and Trusted Publishers store.
- If these two certificates are not present, proceed to download them from the following sources:
In Part 3 we will see how to first assess VMware VMs for migration to Azure VMs and then replicate and migrate them to Azure.
Links
About Azure Migrate
https://learn.microsoft.com/en-us/azure/migrate/migrate-services-overviewMigrate on-premises machines to Azure
https://learn.microsoft.com/en-us/azure/site-recovery/migrate-tutorial-on-premises-azureMigrate VMware VMs to Azure (agentless)
https://learn.microsoft.com/en-us/azure/migrate/vmware/tutorial-migrate-vmwareMigrate VMware vSphere VMs to Azure (agent-based)
https://learn.microsoft.com/en-us/azure/migrate/vmware/tutorial-migrate-vmware-agentTutorial: Discover servers running in a VMware environment with Azure Migrate
https://learn.microsoft.com/en-us/azure/migrate/vmware/tutorial-discover-vmwareGrouping servers
https://learn.microsoft.com/en-us/azure/migrate/how-to-create-a-groupTroubleshooting replication issues in agentless VMware VM migration
https://learn.microsoft.com/en-us/azure/migrate/vmware/troubleshoot-changed-block-tracking-replicationDelete an Azure Migrate project
https://learn.microsoft.com/en-us/azure/migrate/how-to-delete-project
Related Posts
Latest posts
Deploying NetApp Cloud Volumes ONTAP (CVO) in Azure using NetApp Console (formerly BlueXP) – Part 5 – Backup and Recovery
Follow me on LinkedIn


