Azure Automation – Virtual Machine Start/Stop Schedule
Azure has a feature similar to GCP’s Schedule Instance, though it’s implemented a bit differently.
Azure provides “Start/Stop VMs during off-hours” using Azure Automation. This allows you to schedule when VMs should start or stop, which is useful for cost savings.
Azure Automation with Runbooks
You can create a Runbook that starts or stops VMs at specific times. It supports recurring schedules (daily, weekly, monthly) and can target multiple virtual machines.
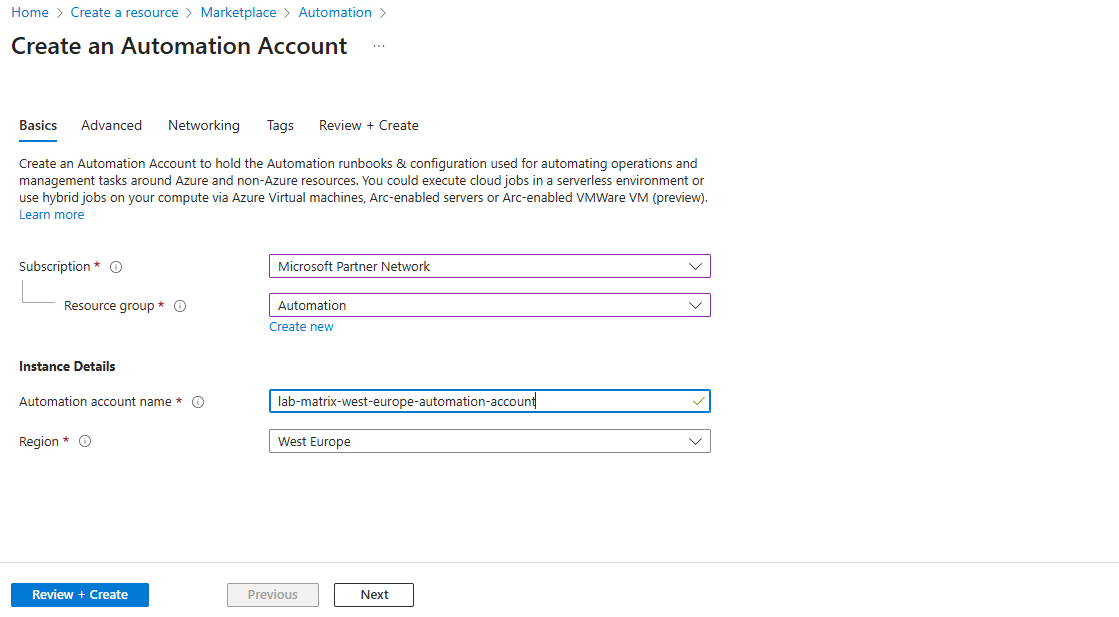
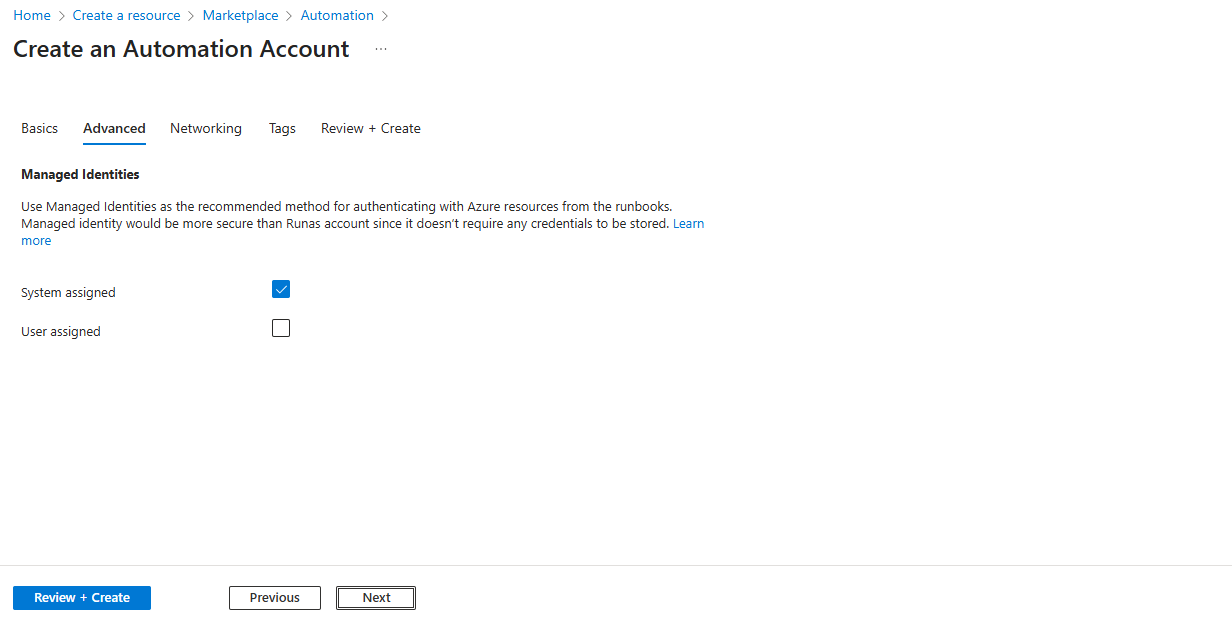
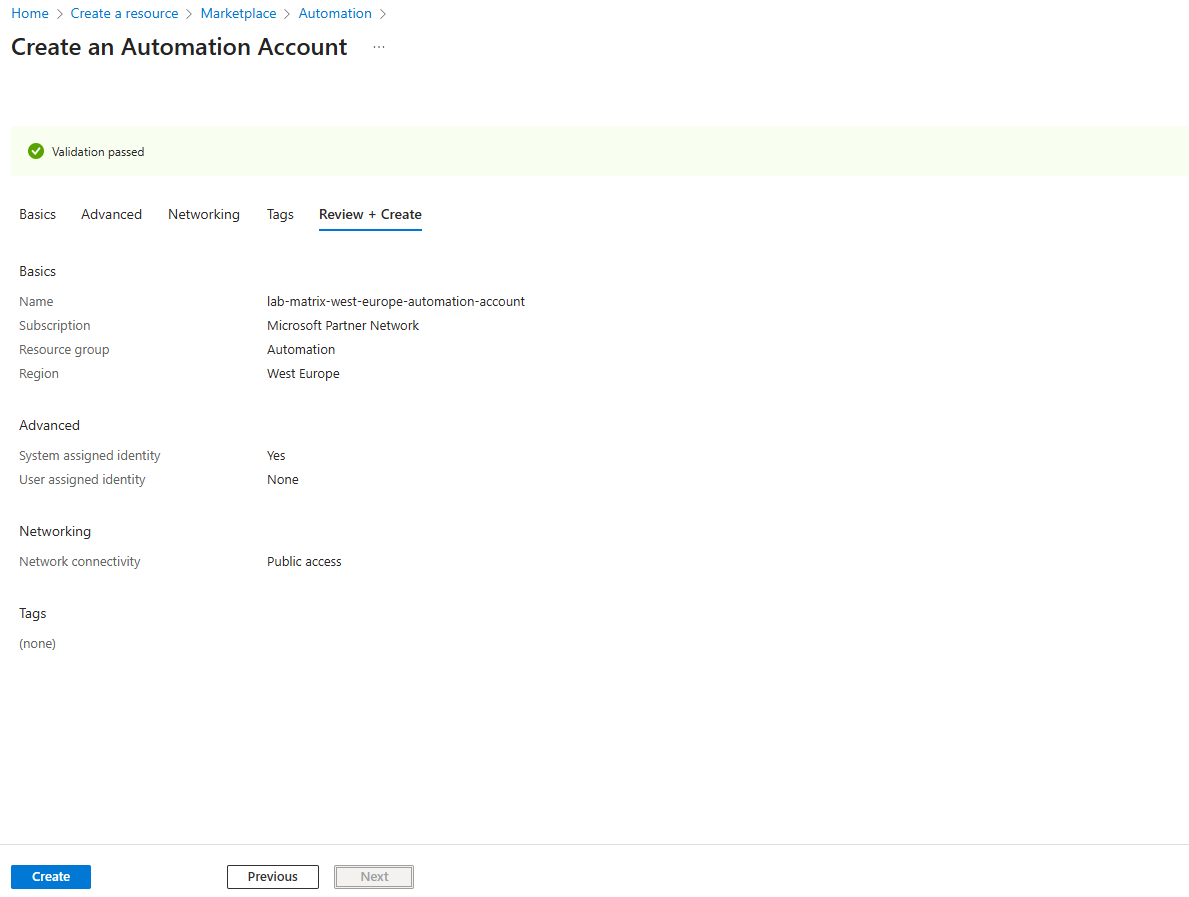
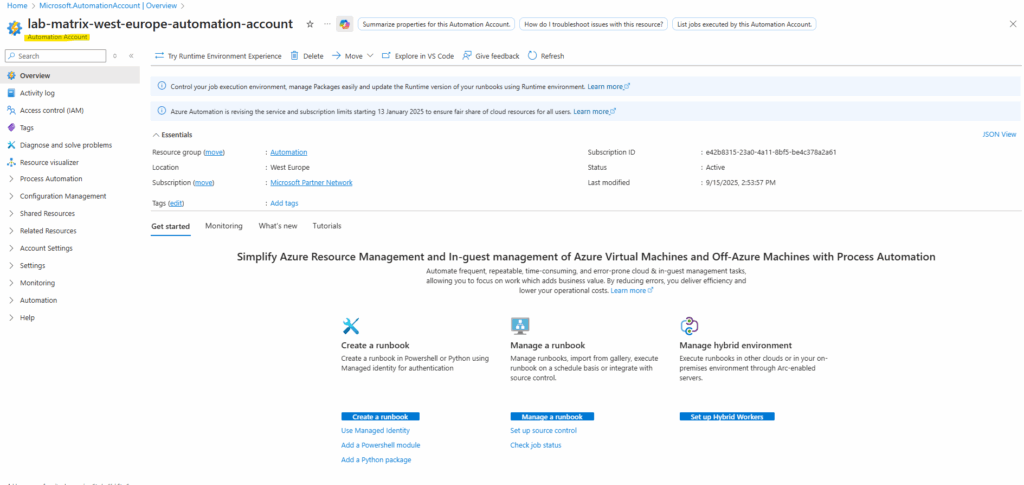
Create an Automation Account
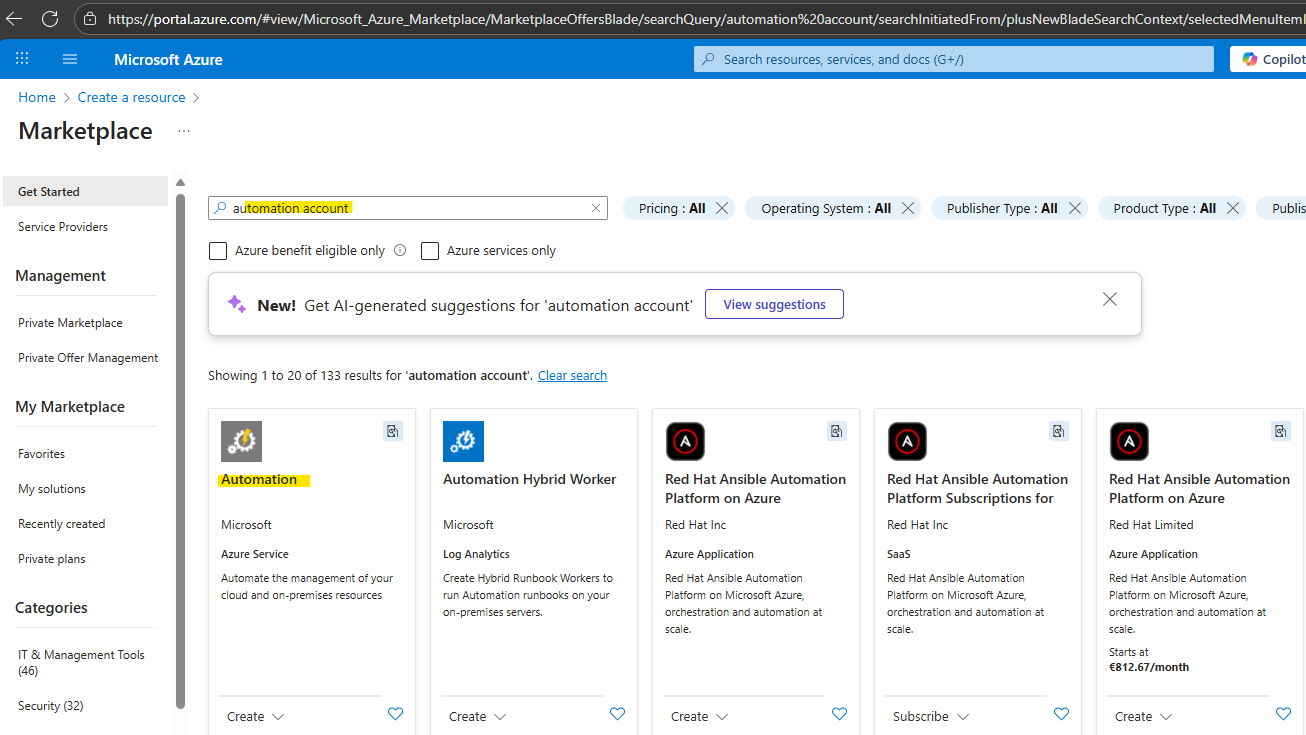
Go to the marketplace and search for automation account, select Automation as shown below.
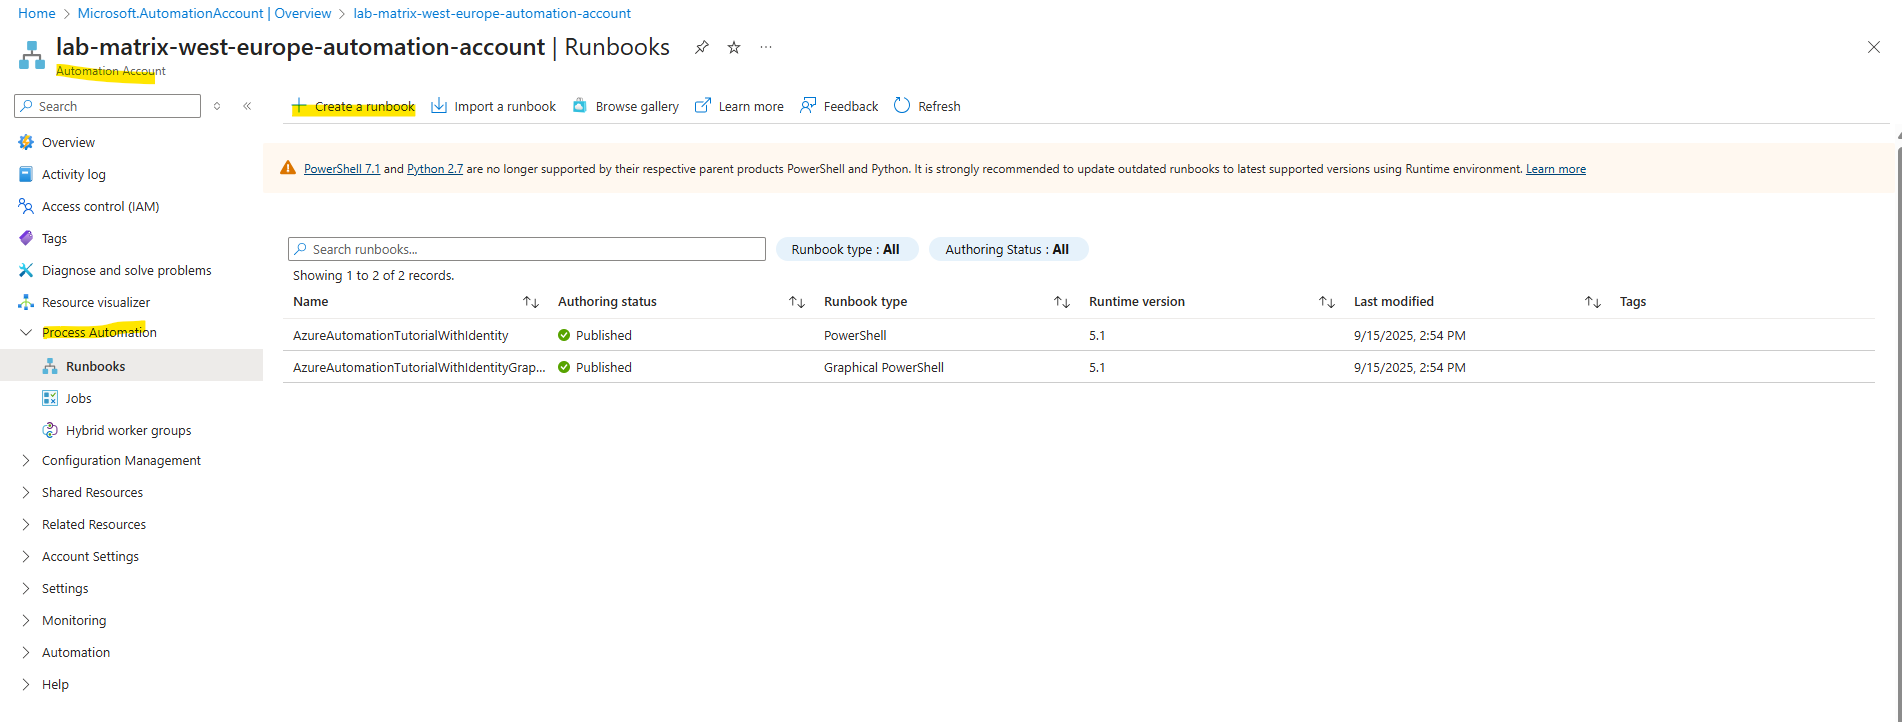
Add a Runbook
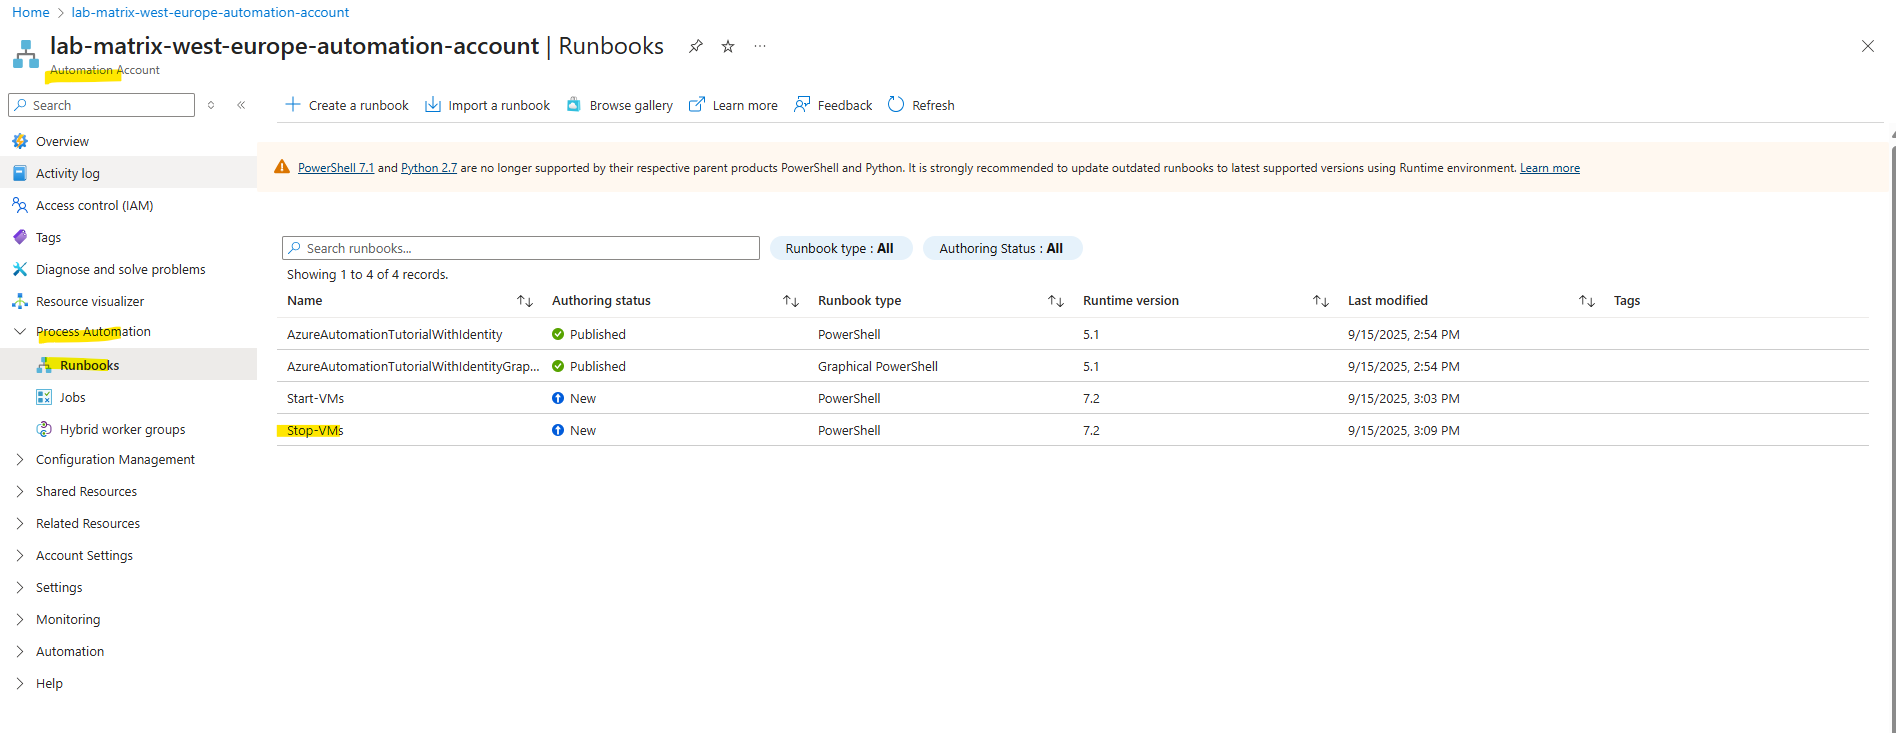
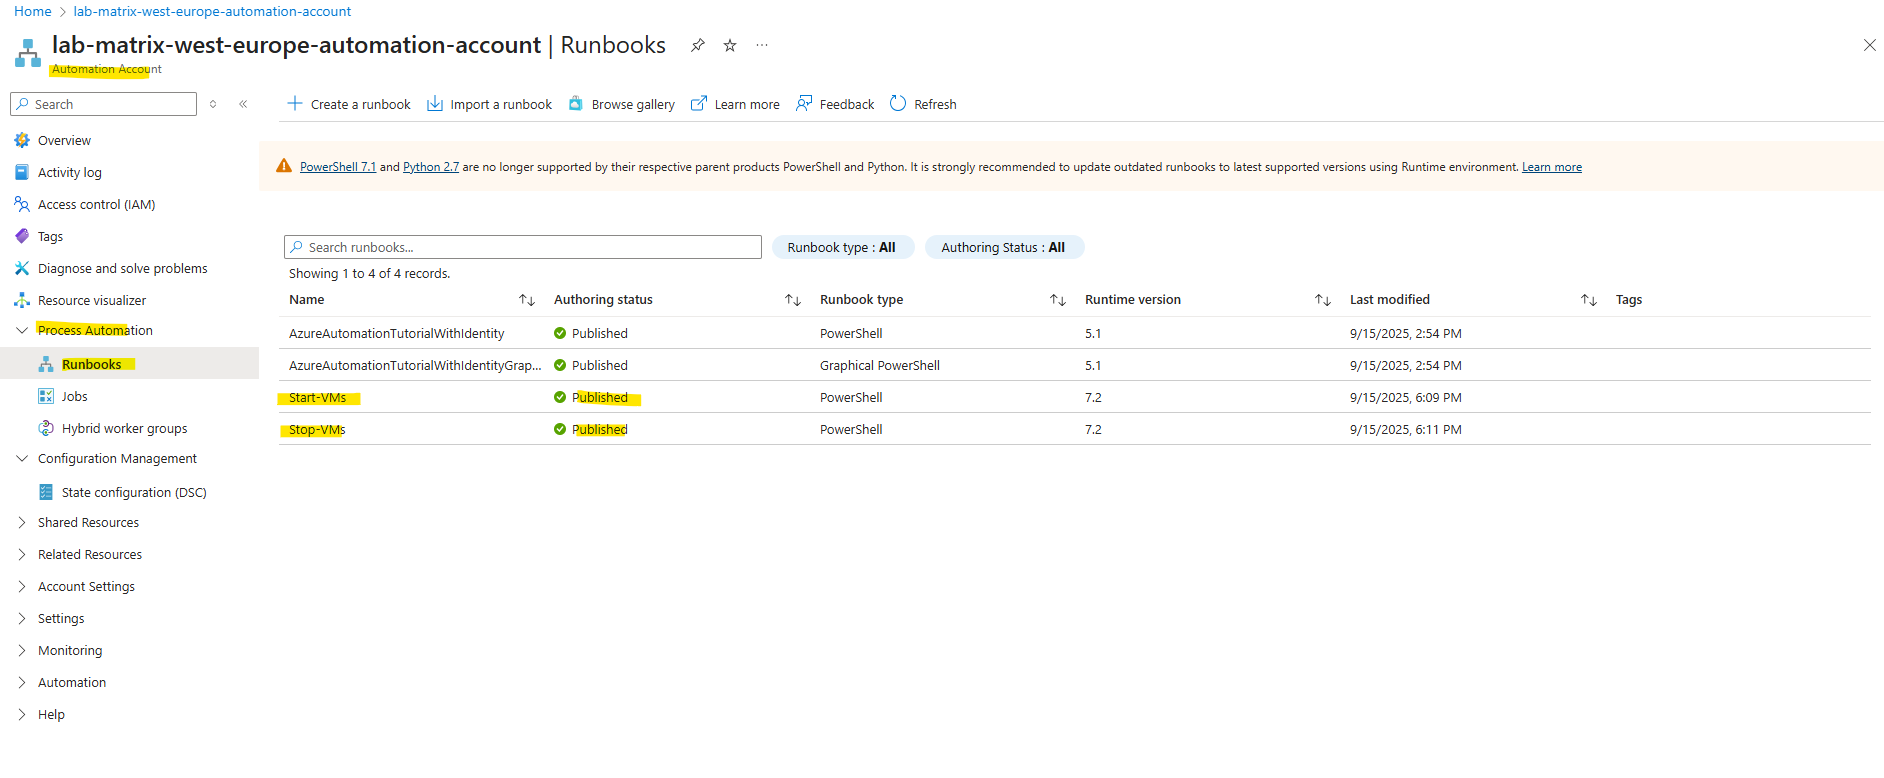
Go to your Automation Account → Process Automation → Runbooks → Create a runbook.
PowerShell 7.1 and Python 2.7 are no longer supported by their respective parent products PowerShell and Python. It is strongly recommended to update outdated runbooks to latest supported versions using Runtime environment. Learn more
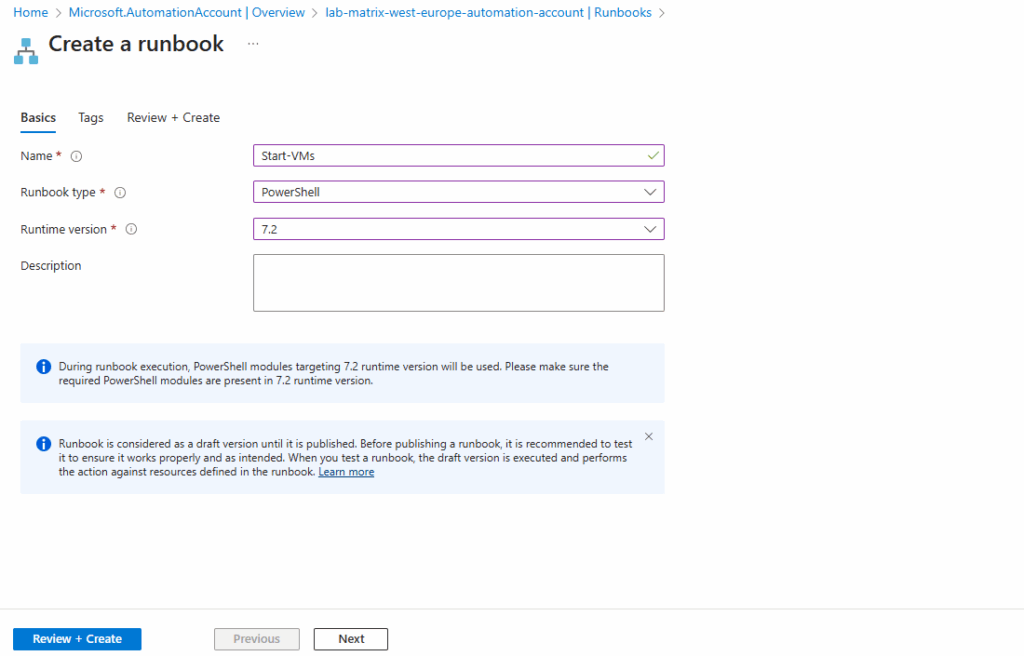
Enter a name for the Runbook, the type, we use PowerShell and the runtime version, as PowerShell 7.1 is no longer supported, I will already select version 7.2. Click on Review + Create.
Our new Runbook is created successfully.
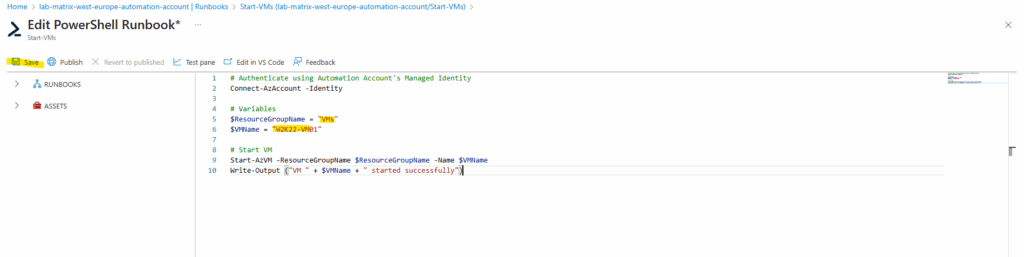
Paste the following example to the Runbook editor and click on Save. This PowerShell code will later start our virtual machine.
# Authenticate using Automation Account's Managed Identity
Connect-AzAccount -Identity

# Variables
$ResourceGroupName = "myResourceGroup"
$VMName = "myVM"

# Start VM
Start-AzVM -ResourceGroupName $ResourceGroupName -Name $VMName
Write-Output ("VM " + $VMName + " started successfully")
I will adjust the resource group name and VM name which whould be affected by this Runbook.
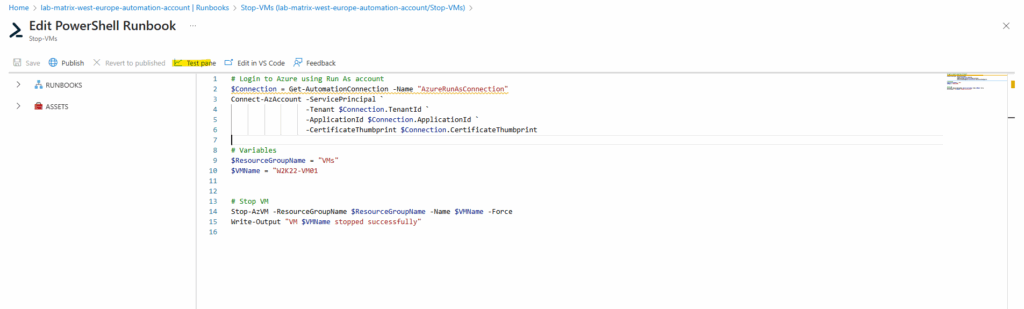
To stop the VM add a further Runbook and use the following PowerShell code.
# Authenticate using Automation Account's Managed Identity
Connect-AzAccount -Identity

# Variables
$ResourceGroupName = "myResourceGroup"
$VMName = "myVM"

# Stop VM
Stop-AzVM -ResourceGroupName $ResourceGroupName -Name $VMName -Force

# Output message
Write-Output ("VM " + $VMName + " stopped successfully")
Finally we have these two new Runbooks.
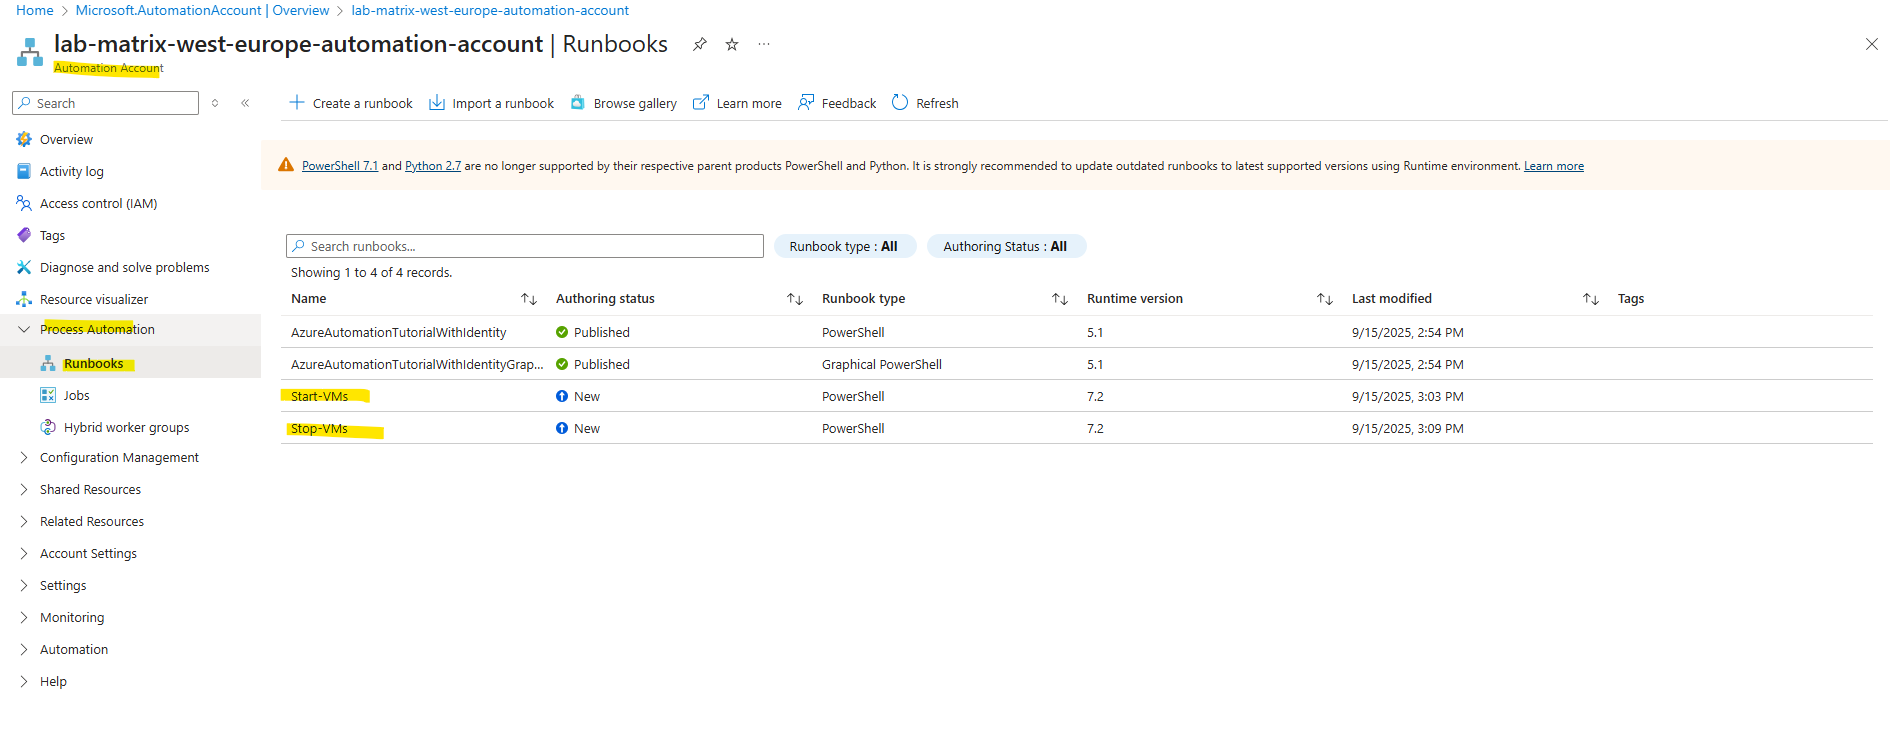
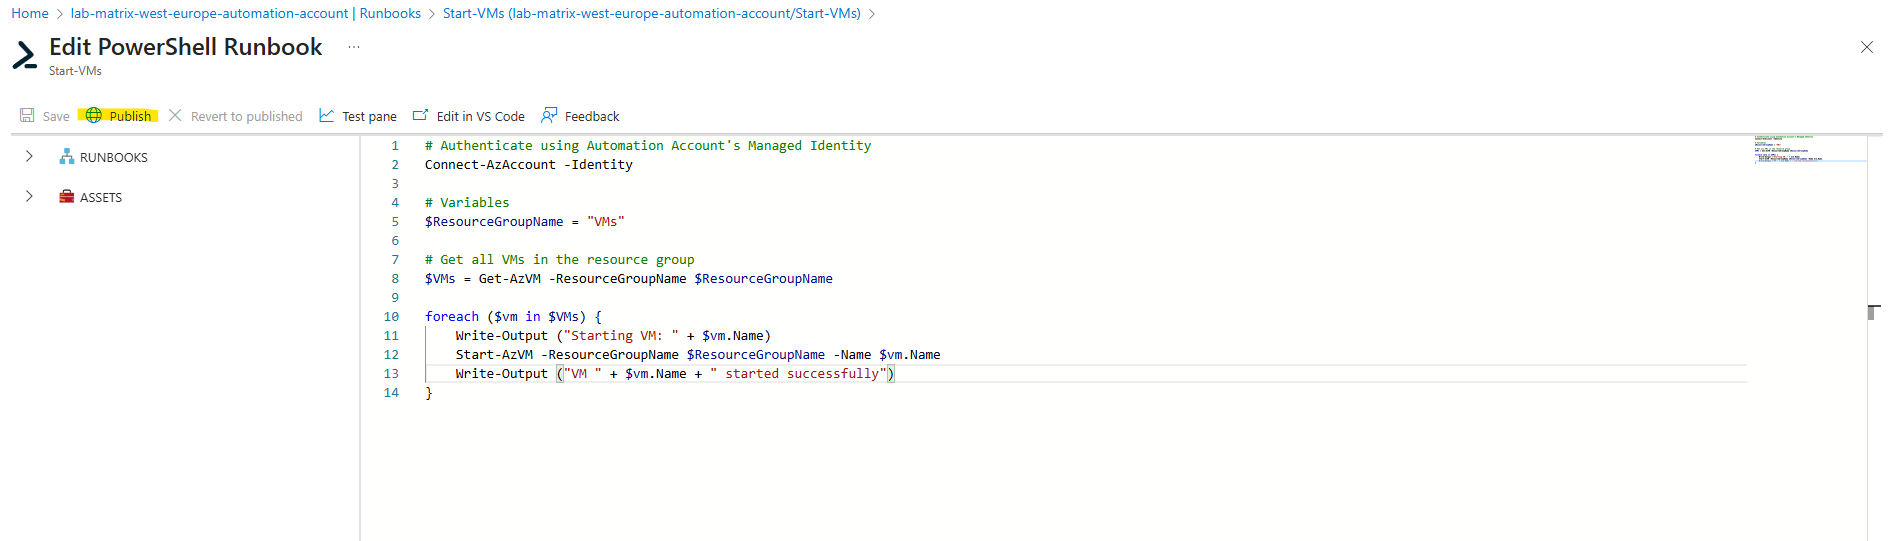
Loop all Virtual Machines in the Resource Group
We can also stop or start multiple virtual machines by looping through the resource group to which our virtual machines are placed to.
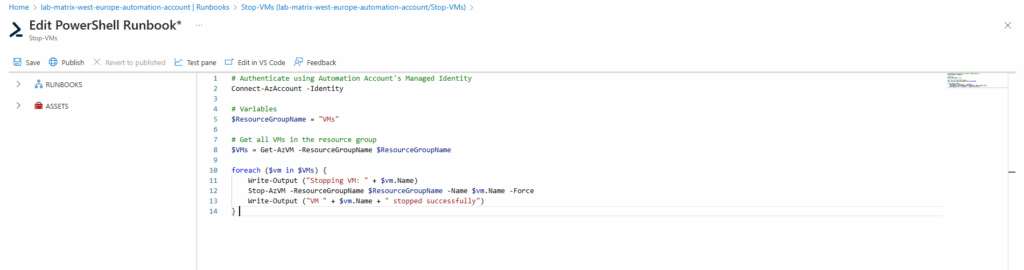
To stop all virtual machines in a specific resource group we can adjust the Stop-VMs script as shown below.
# Authenticate using Automation Account's Managed Identity
Connect-AzAccount -Identity

# Variables
$ResourceGroupName = "VMs"

# Get all VMs in the resource group
$VMs = Get-AzVM -ResourceGroupName $ResourceGroupName

foreach ($vm in $VMs) {
    Write-Output ("Stopping VM: " + $vm.Name)
    Stop-AzVM -ResourceGroupName $ResourceGroupName -Name $vm.Name -Force
    Write-Output ("VM " + $vm.Name + " stopped successfully")
} 

The same for the Start-VMs script.
# Authenticate using Automation Account's Managed Identity
Connect-AzAccount -Identity

# Variables
$ResourceGroupName = "VMs"

# Get all VMs in the resource group
$VMs = Get-AzVM -ResourceGroupName $ResourceGroupName

foreach ($vm in $VMs) {
    Write-Output ("Starting VM: " + $vm.Name)
    Start-AzVM -ResourceGroupName $ResourceGroupName -Name $vm.Name
    Write-Output ("VM " + $vm.Name + " started successfully")
}
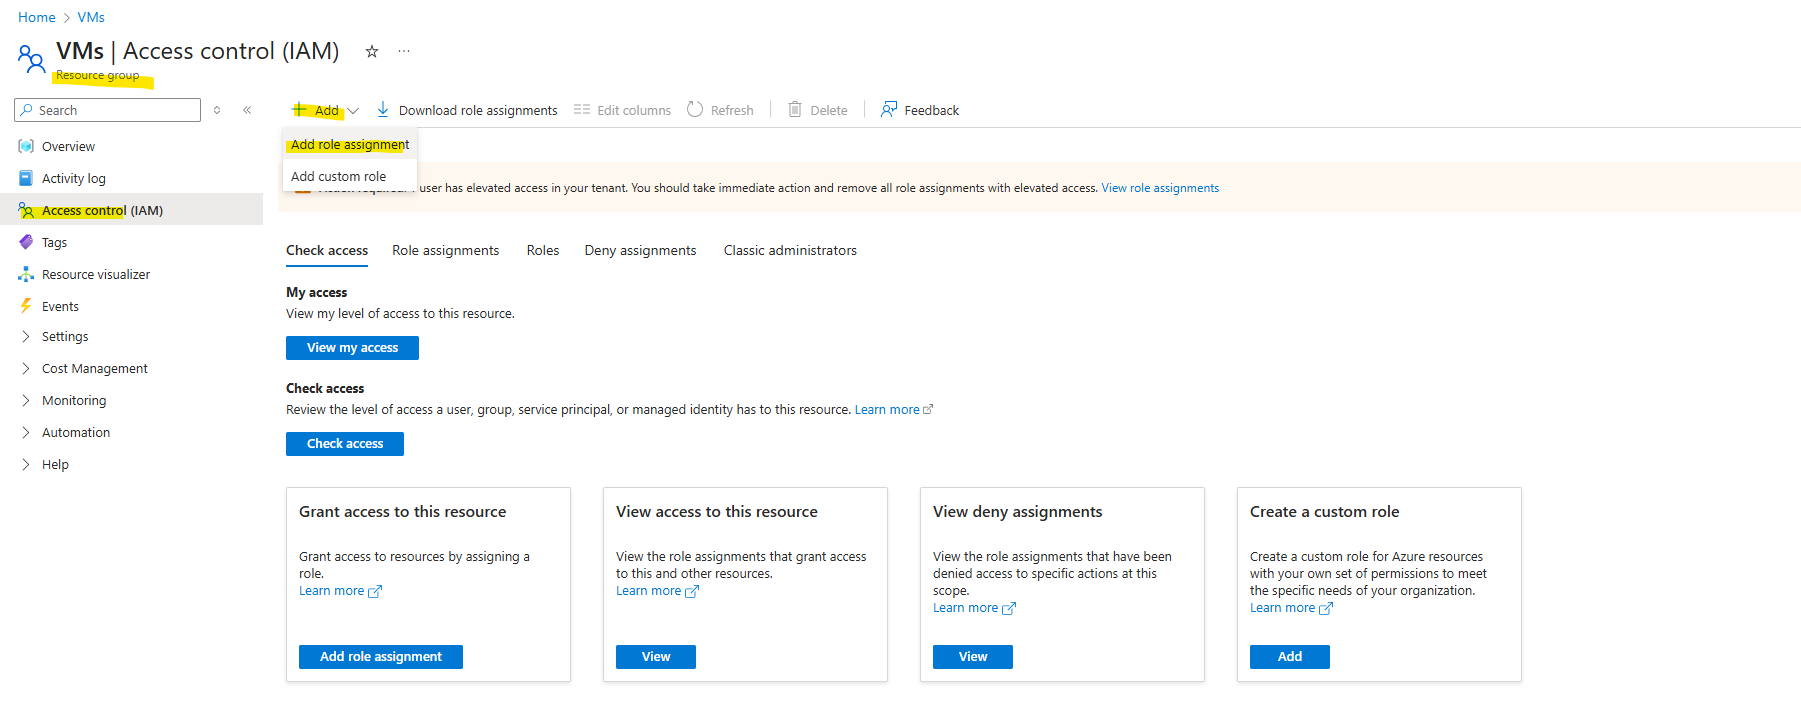
Adding the Contributor Role to the Automation Account’s Managed Identity
Before we can test our new Runbook if it works and will start and stop our virtual machines, we first need to assign the contributor role for our automation account’s managed identity on the resource group where the corresponding virtual machines are placed to.
On the resource group where our virtual machines are running, navigate to Access Control (IAM).
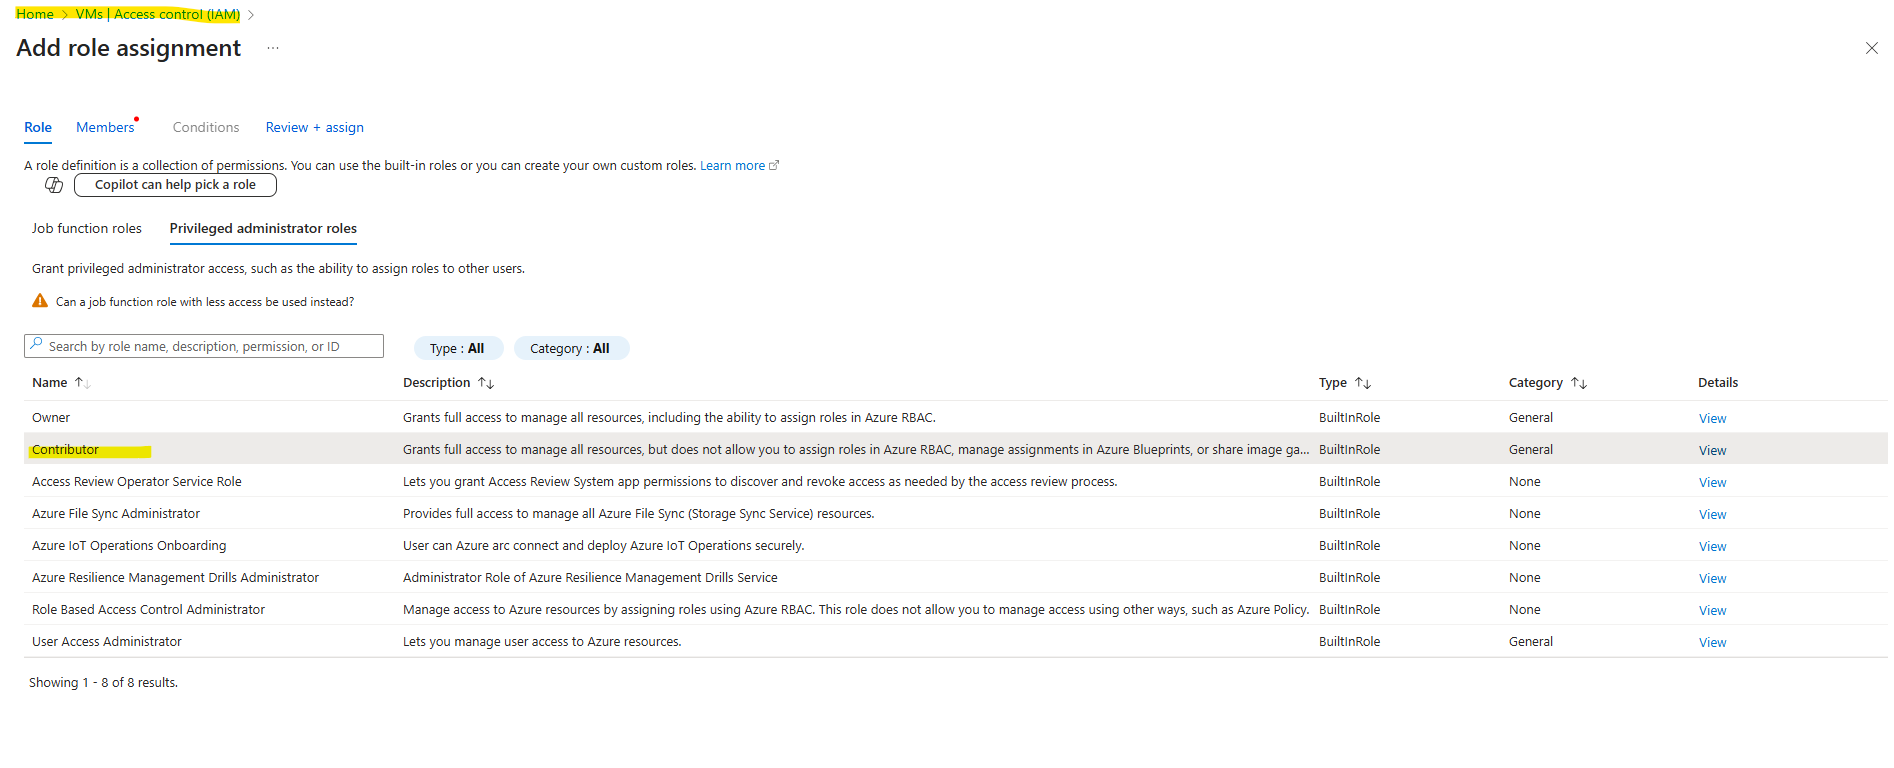
Select the contributor role under privileged administrator roles.
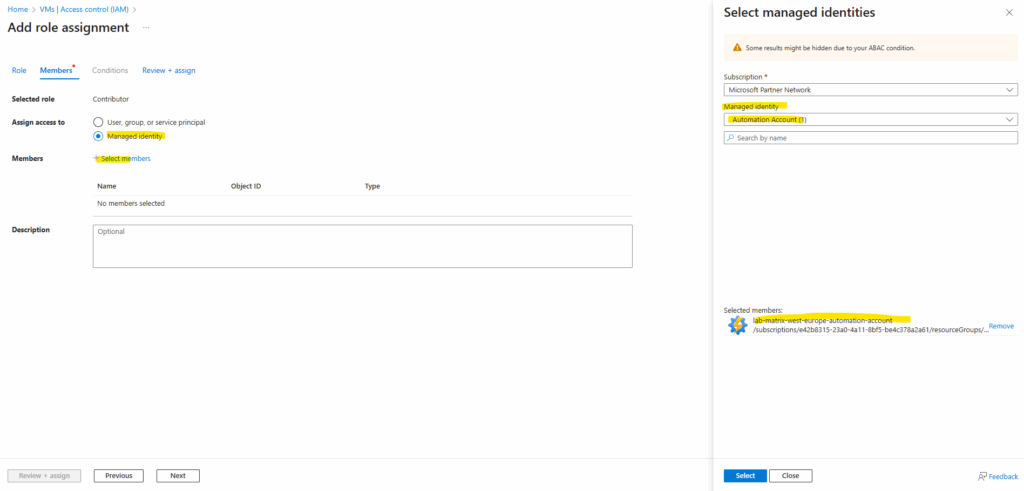
Select the automation account to assign the role to.
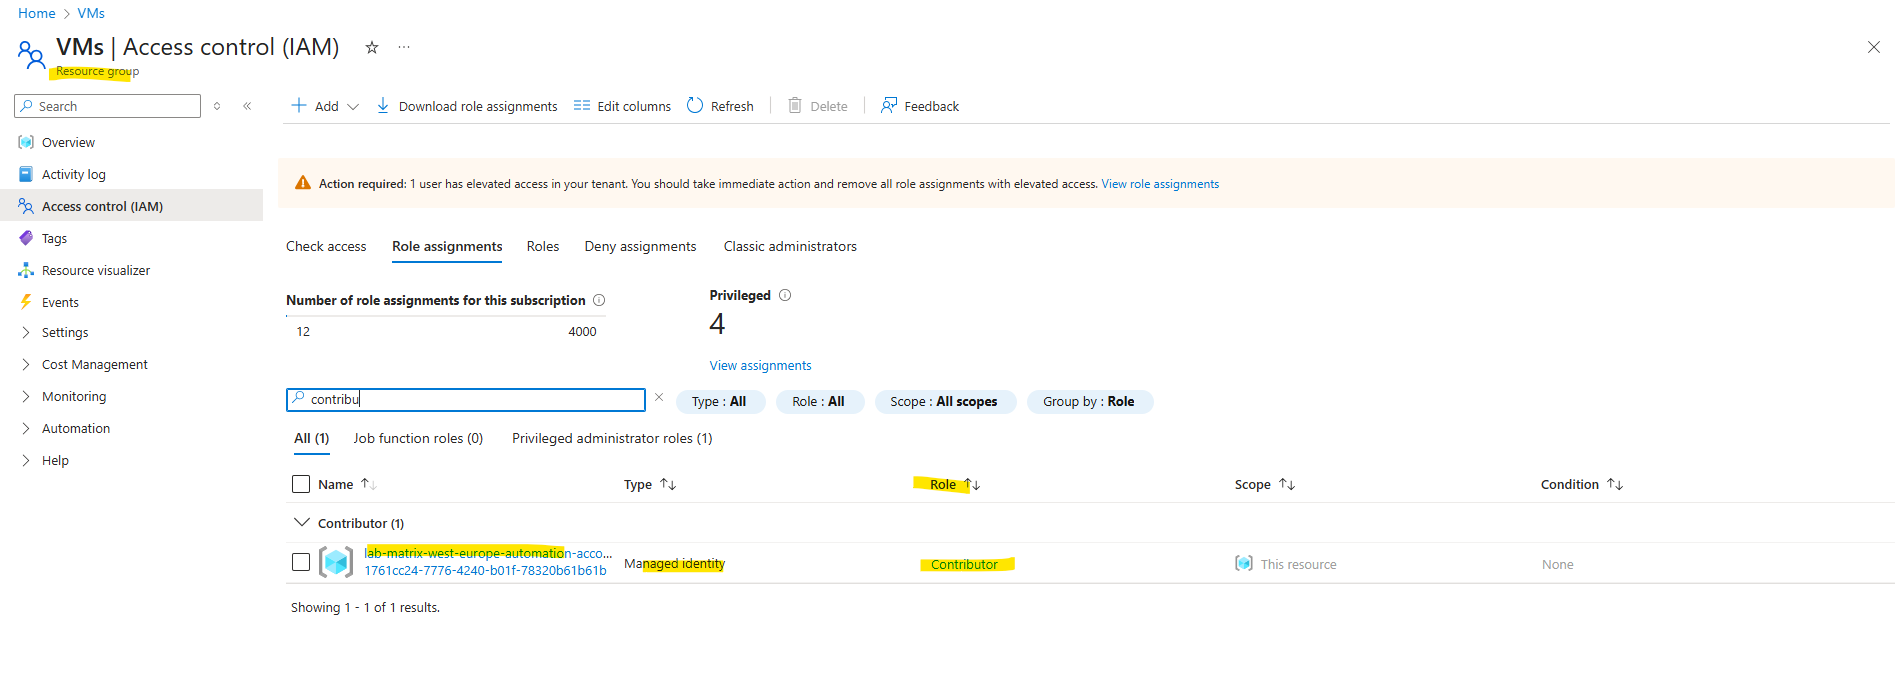
From now on, our automation account has the required permissions to start and stop the virtual machines running in this resource group.
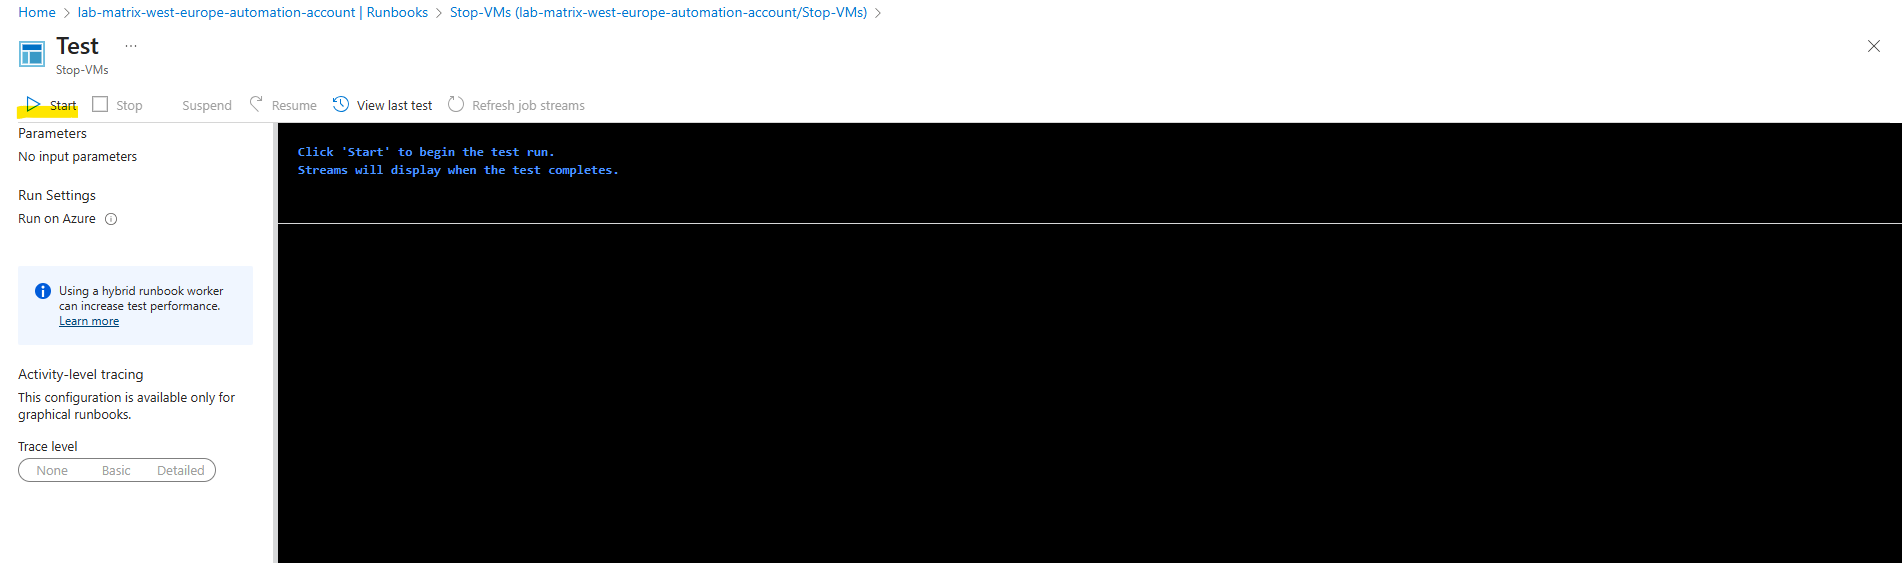
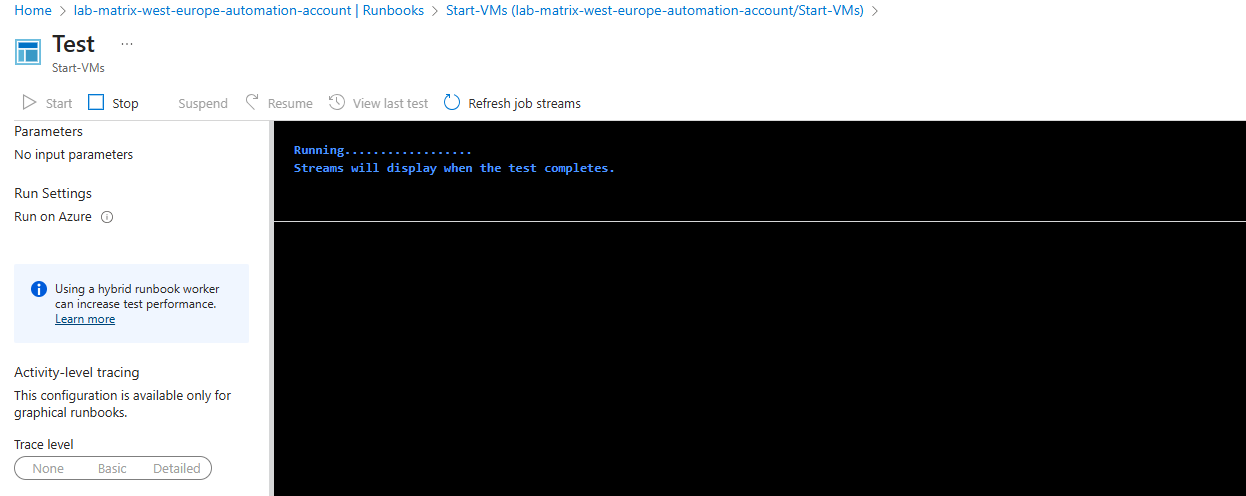
Test the Runbook
We can now test the Runbook if it works as expected.
Therefore click on the Runbook we want to test below.
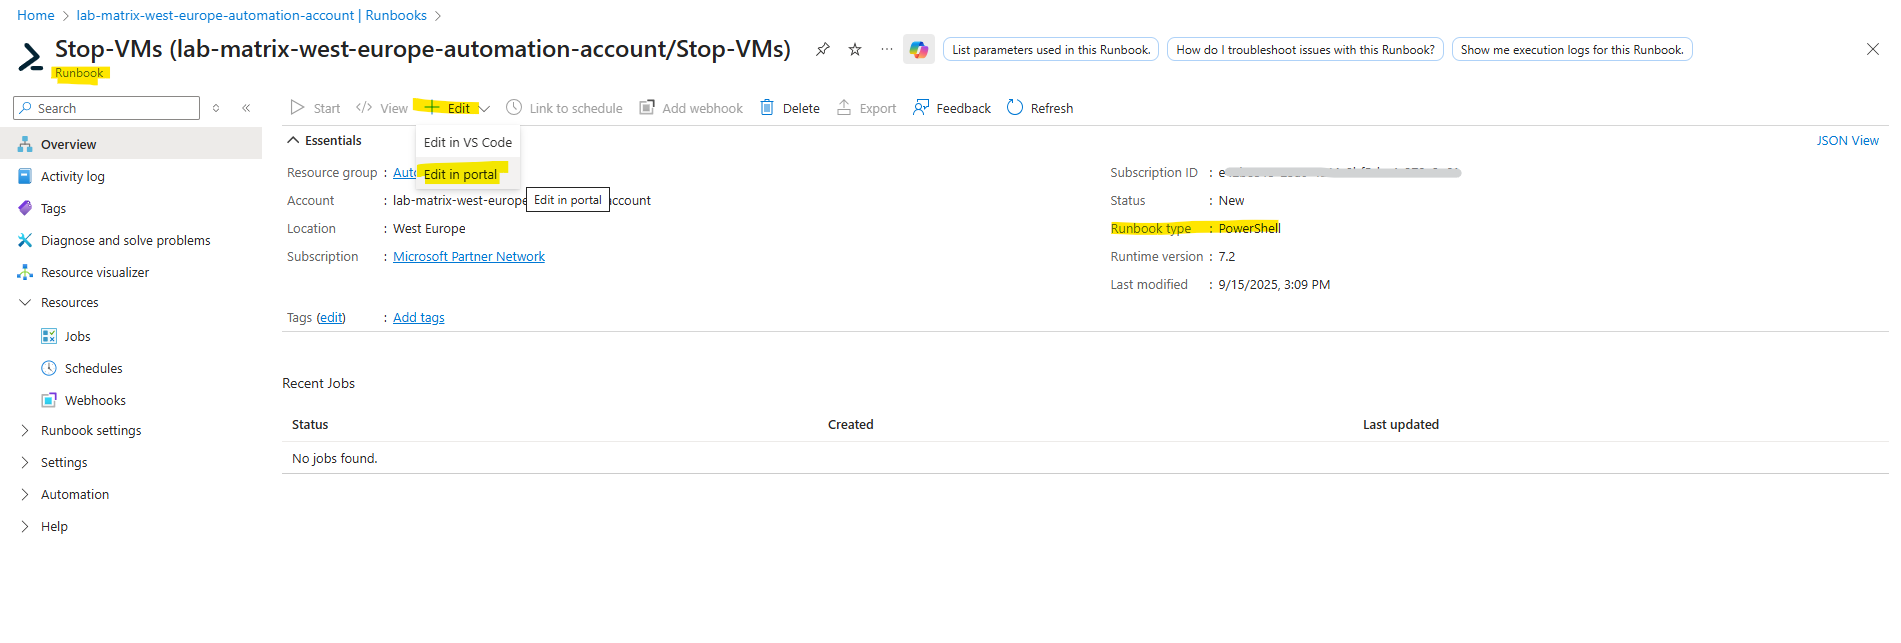
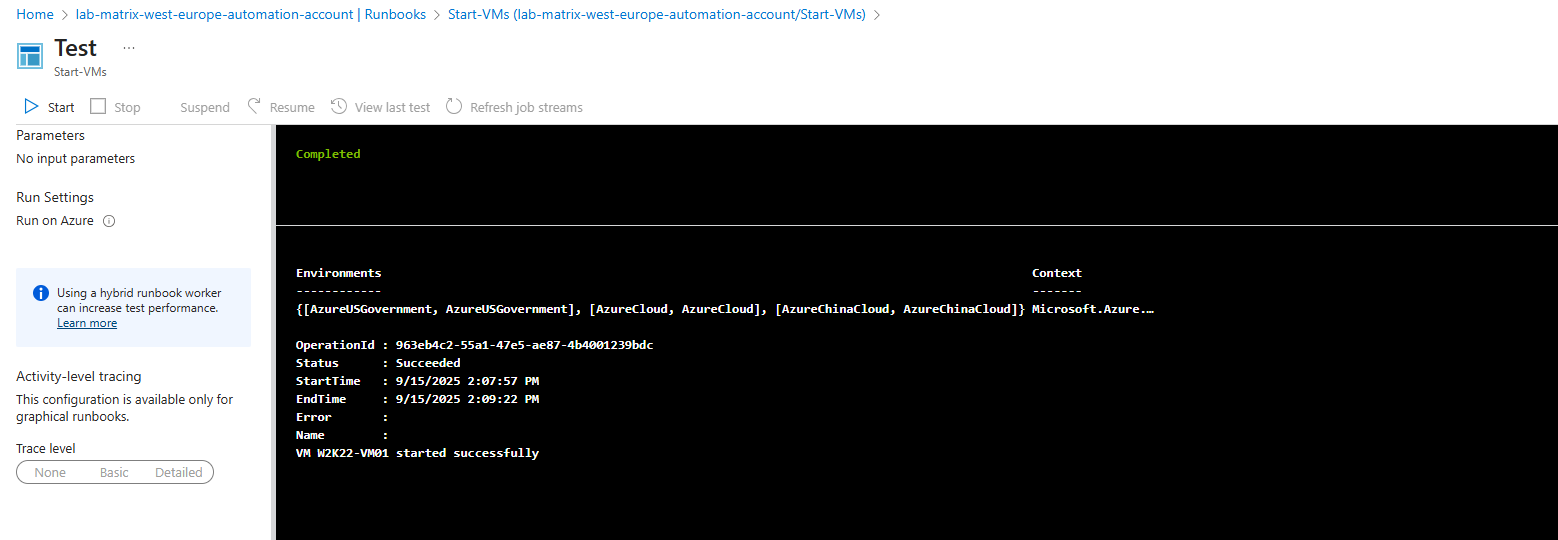
As my virtual machine I will use for is already running, I will first test the Stop-VMs Runbook and click on this Runbook.
Click on + Edit -> Edit in portal.
Click on Test pane in the Runbook editor.
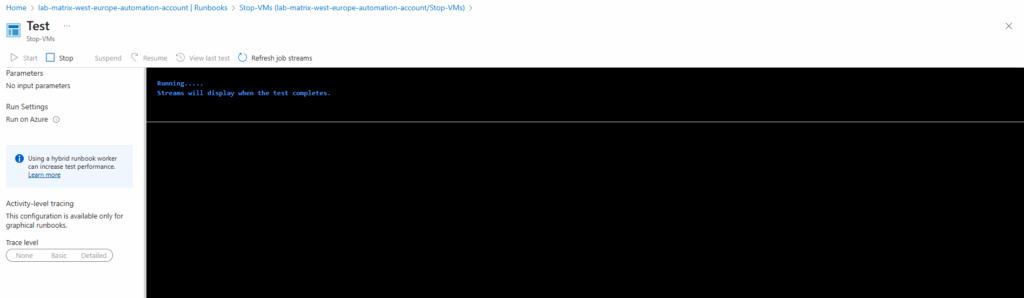
Click on Start.
The PowerShell code of this Runbook will be executed.
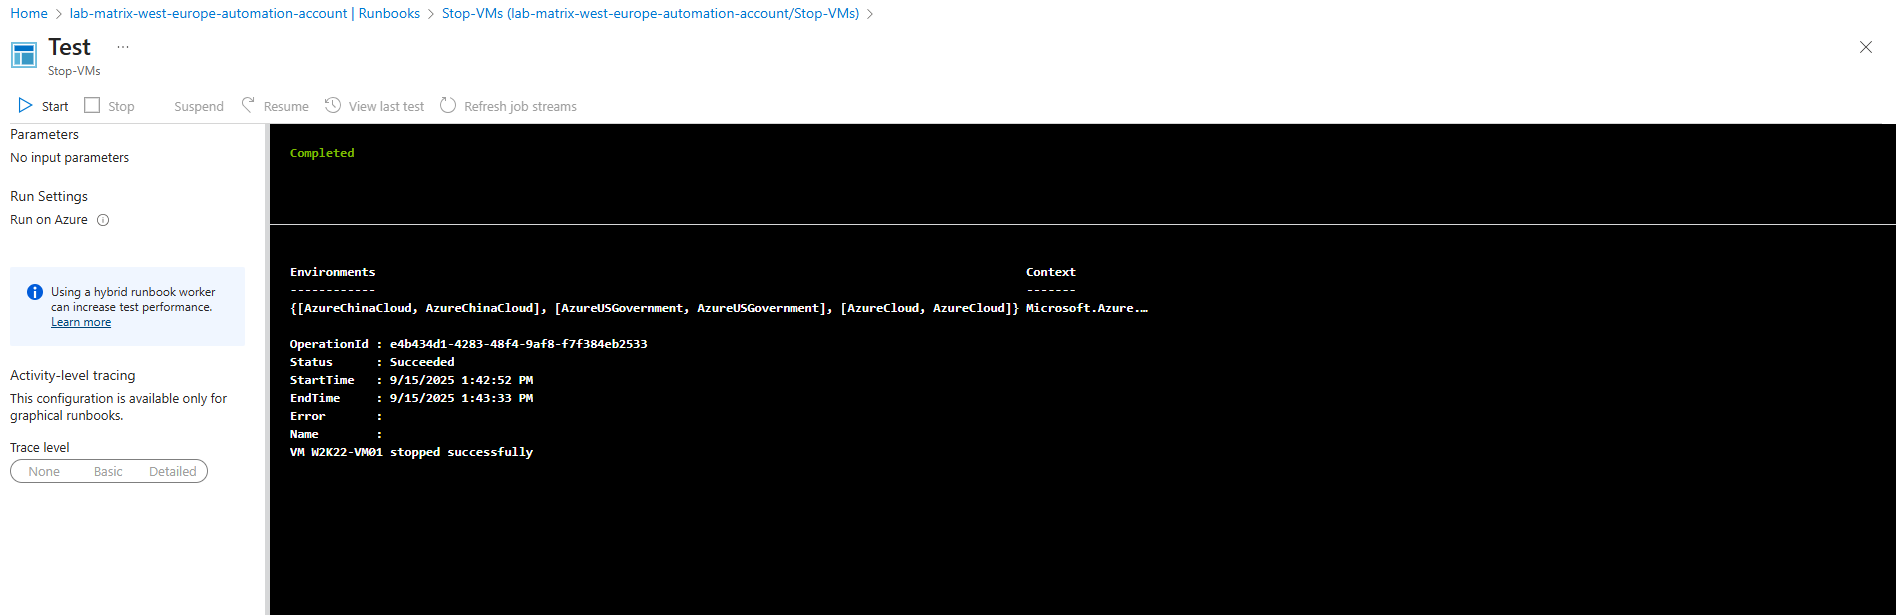
Looks good, the virtual machine was stopped and deallocated successful.
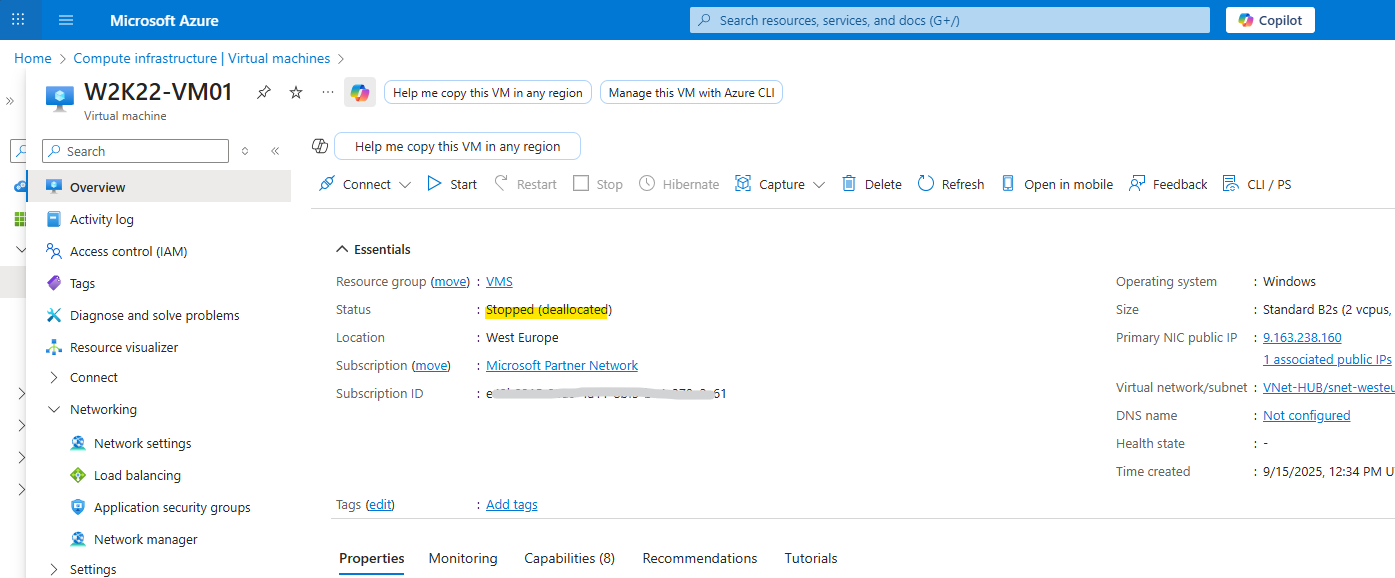
About the differences between just Stopped and Stopped (Deallocated), you can read my following post.
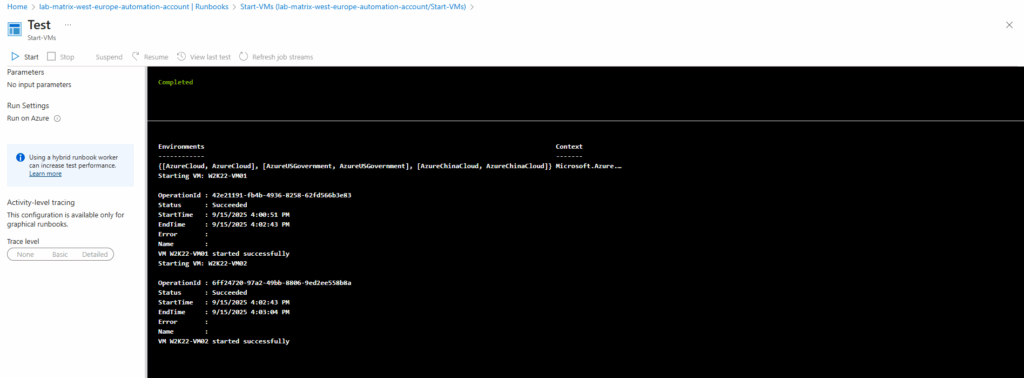
The Start-VMs Runbook was also running successful.
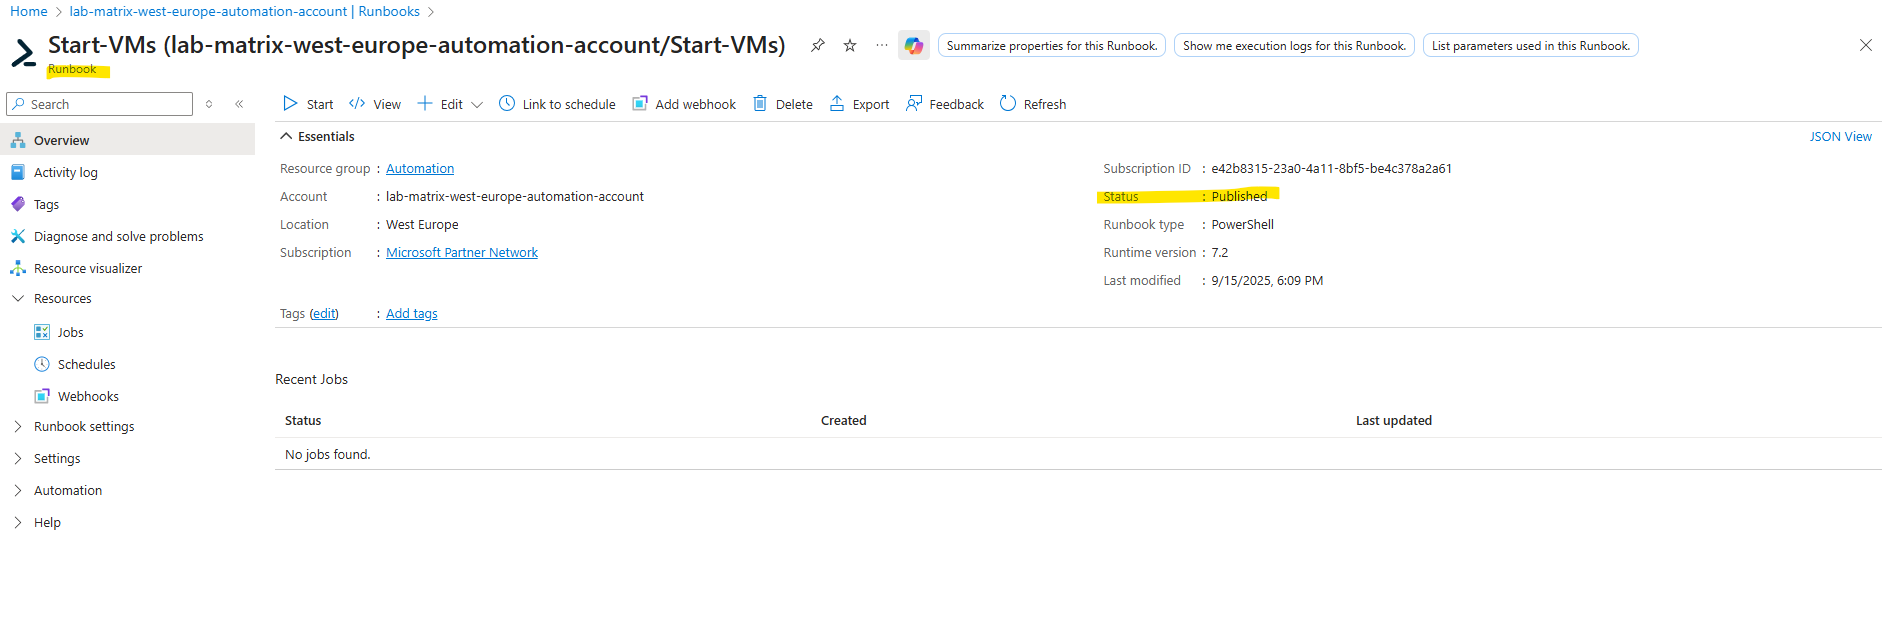
Publish the Runbook
As our test was running successful, we can now publish both Runbooks. Publishing moves the current Draft into the Published version.
Draft Runbooks cannot be linked to a schedule or run on demand.
In the Runbook editor from each Runbook click on Publish.
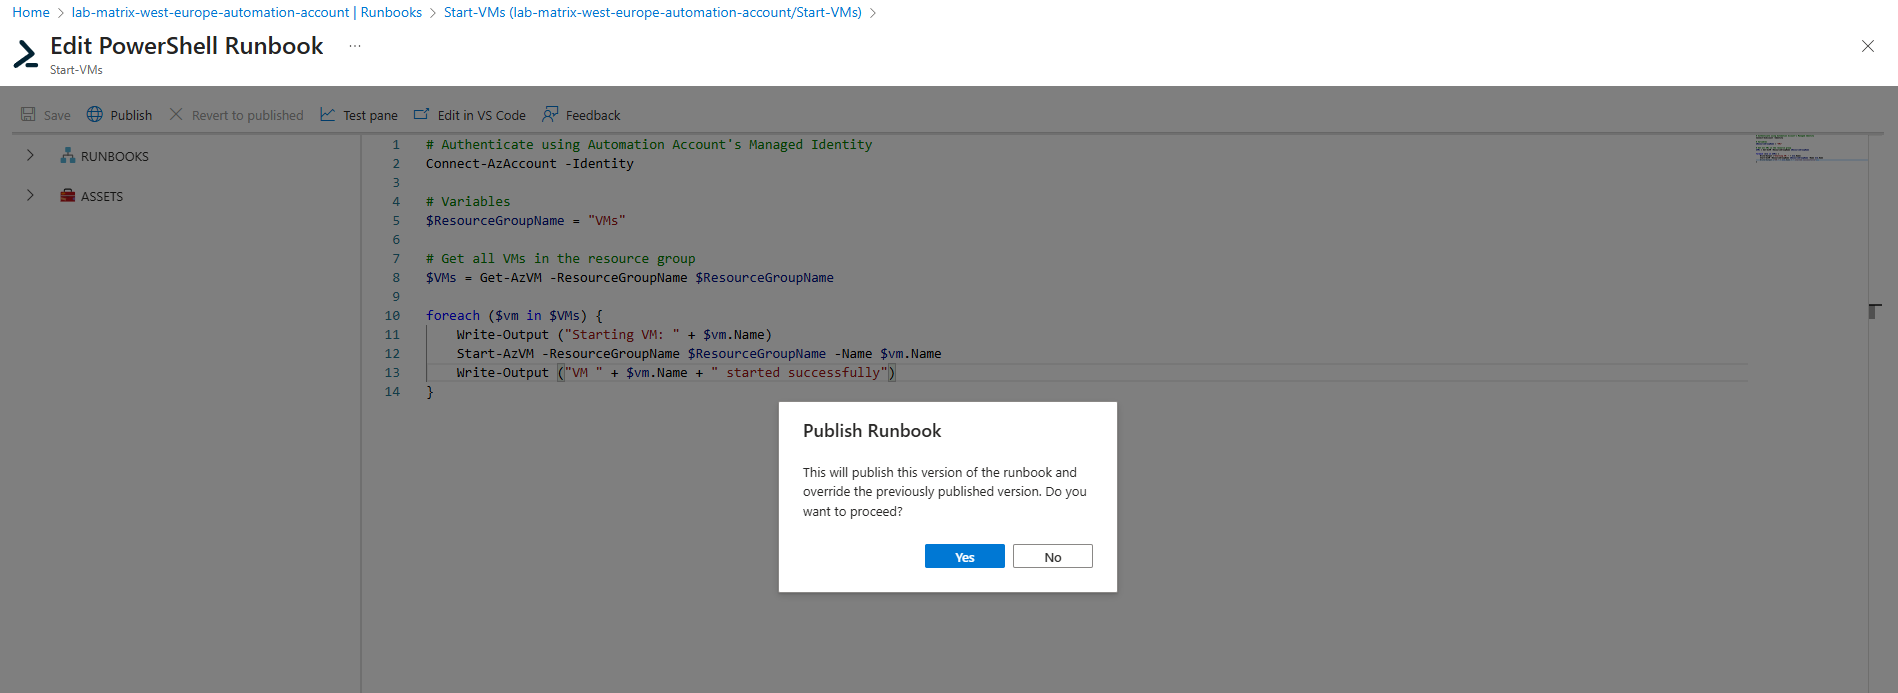
The Status switches from New to Published.
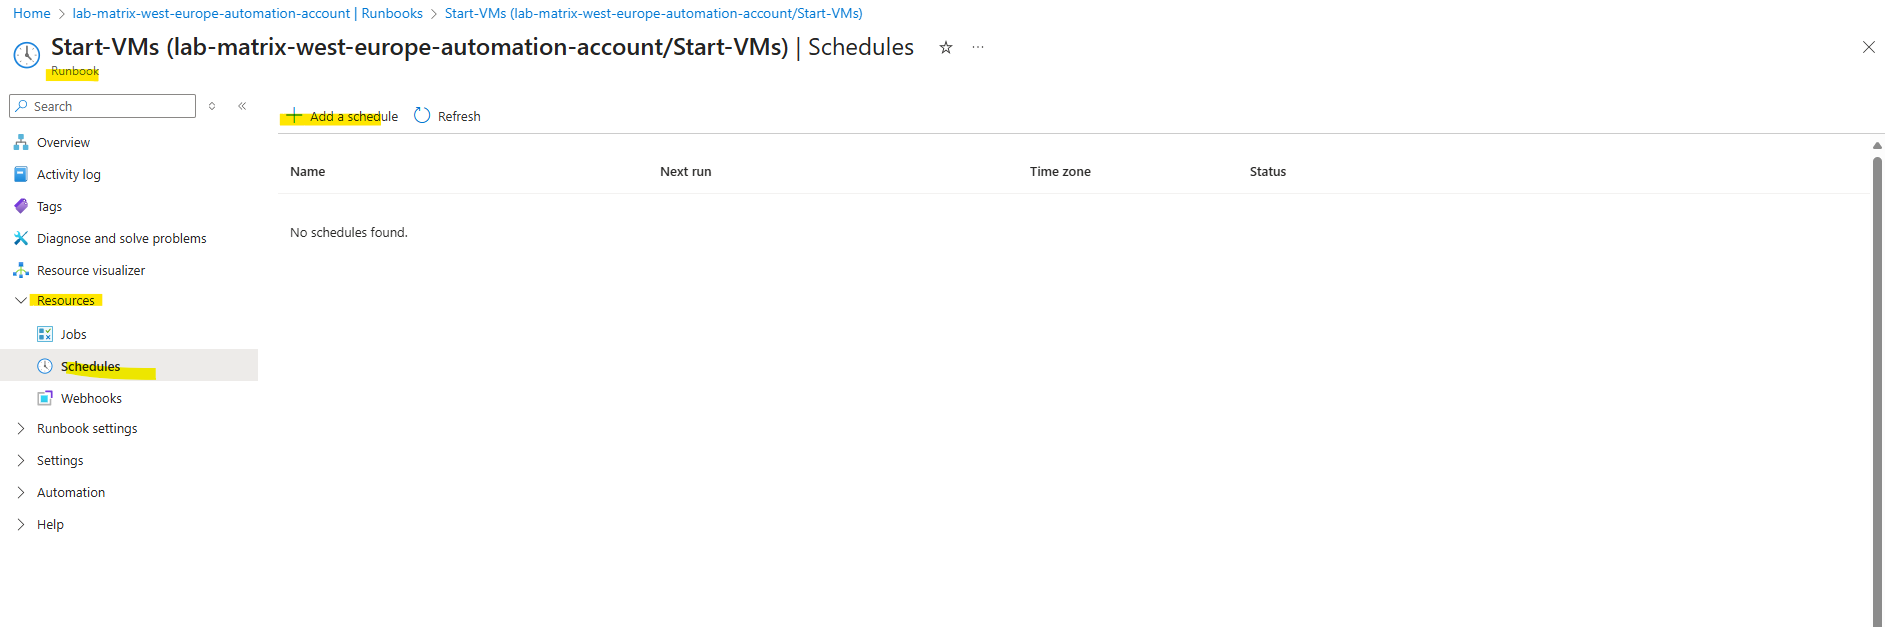
Schedule the Runbook
As both Runbooks are published, we can now create a schedule for both which will finally trigger them for a specific date and time.
Click on the desired Runbook and navigate to Resources -> Schedules.
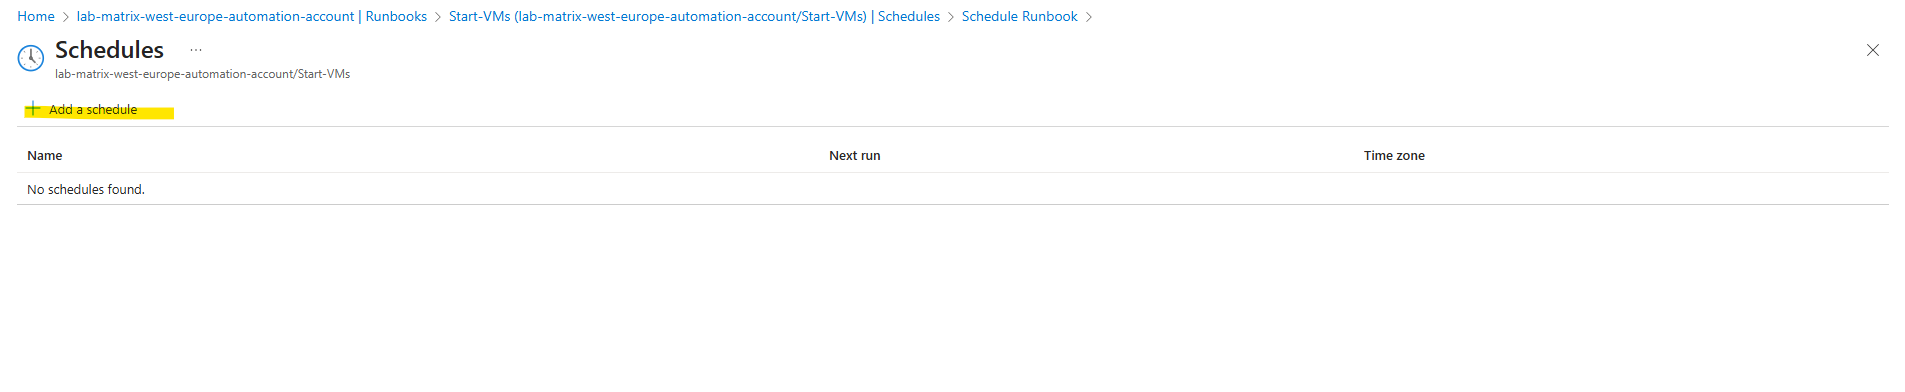
Click on + Add a schedule
Click on link a schedule to your runbook.

Click on + Add a schedule if no suitable is found.
Configure the new schedule as needed.
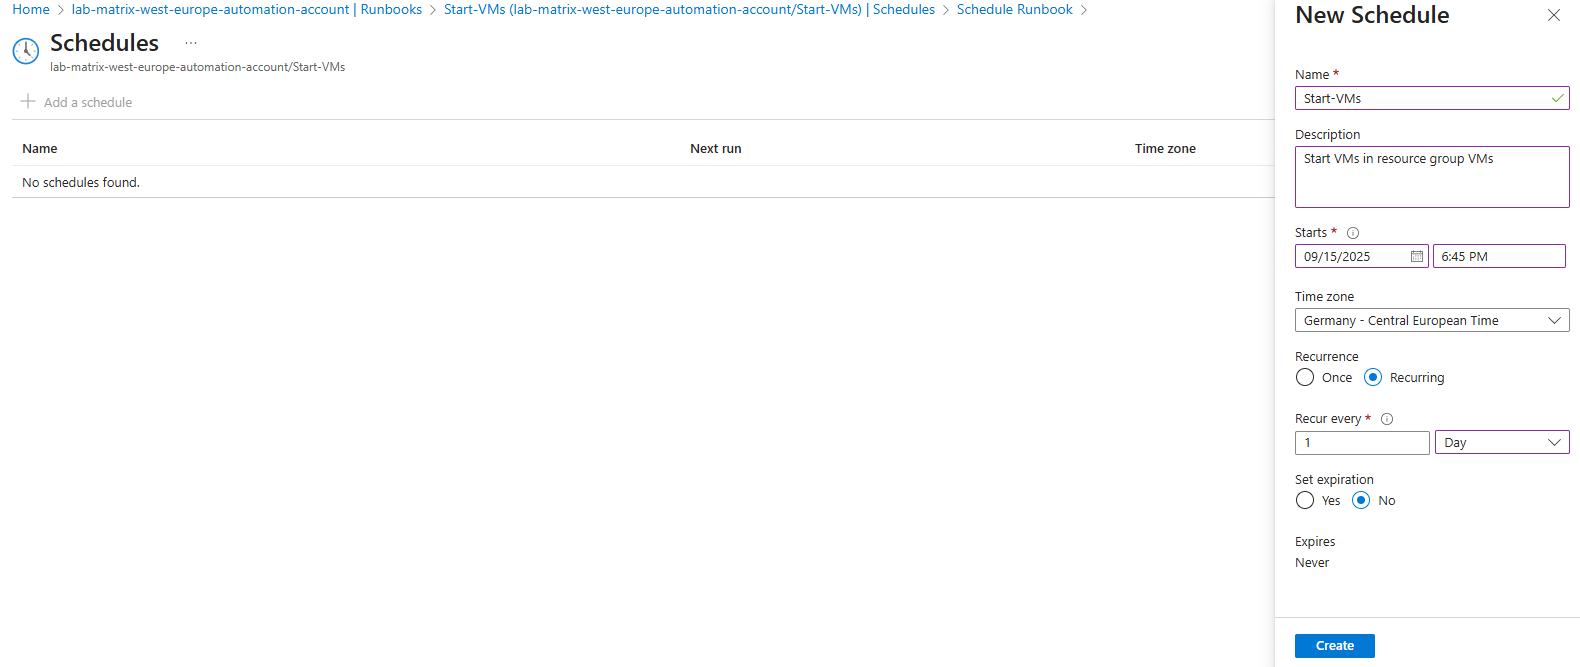
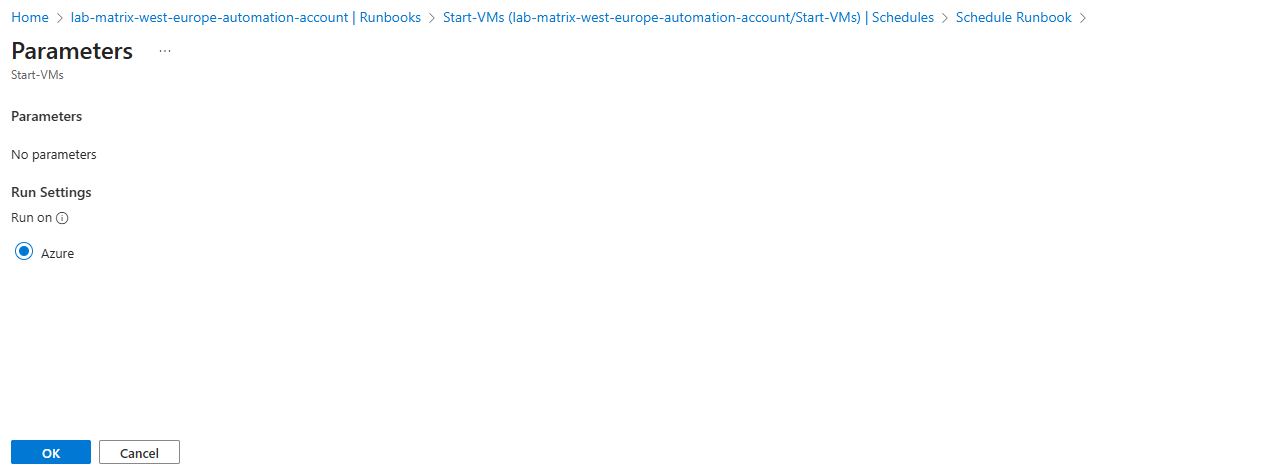
Click on Modify run settings (Default: Azure).

Click on OK.
Click on OK.
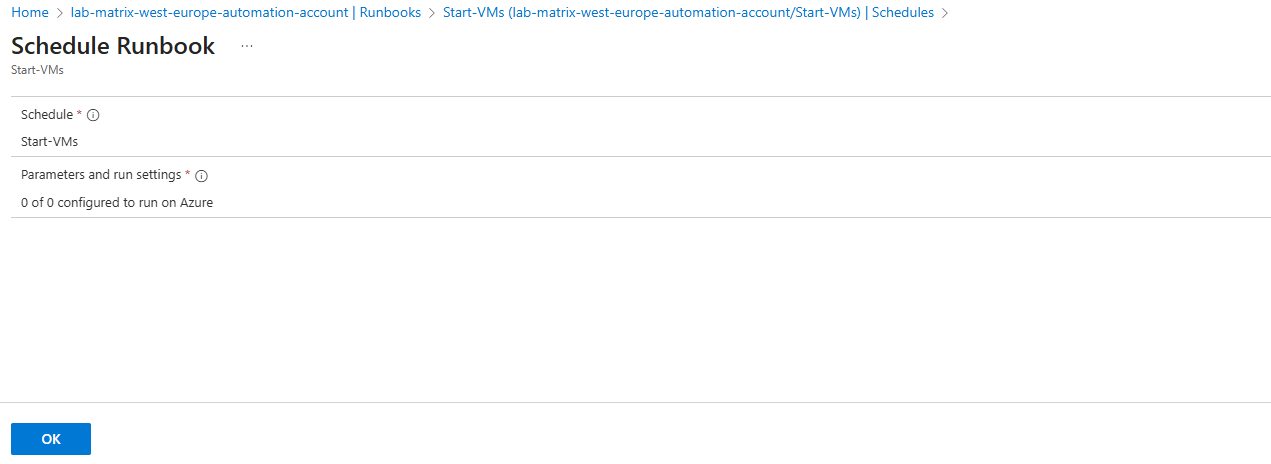
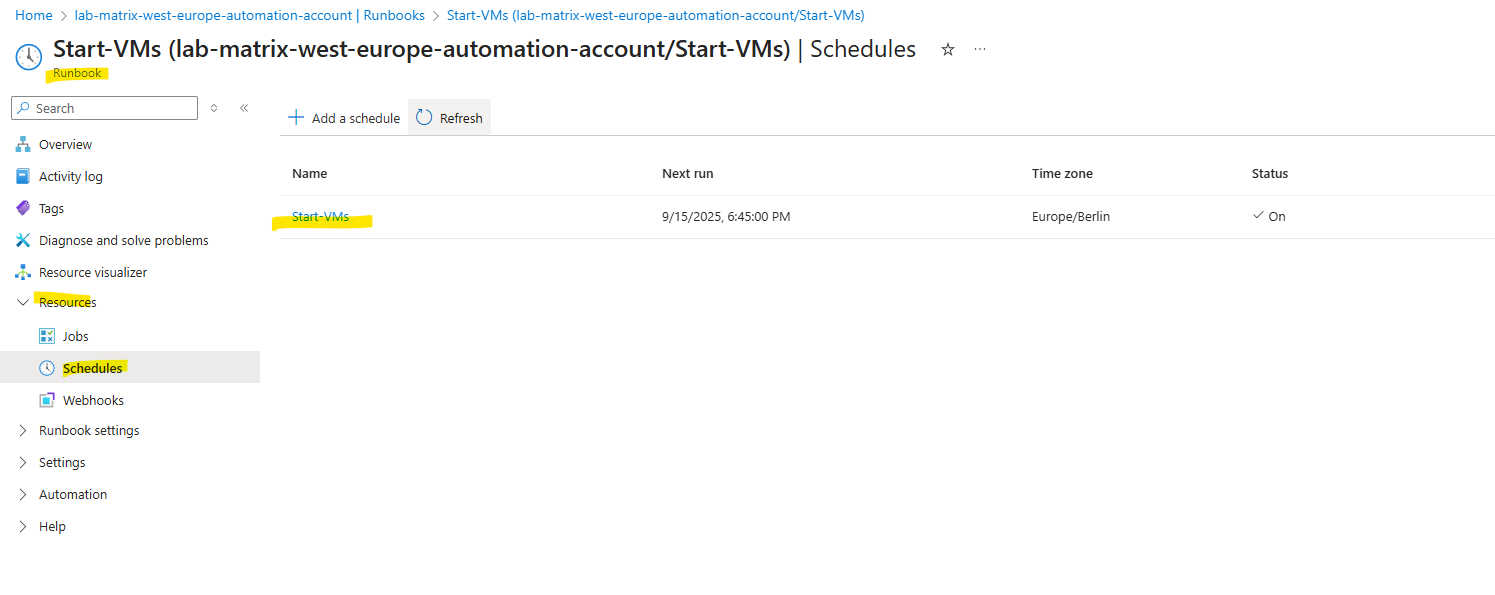
Our new schedule is created successful.
Finally I will also create a new schedule for Stop-VMs Runbook.

From now on the virtual machines will be automatically stopped and started according our associated schedules.
Links
What is Azure Automation?
https://learn.microsoft.com/en-us/azure/automation/overviewCreate a standalone Azure Automation account
https://learn.microsoft.com/en-us/azure/automation/automation-create-standalone-account