How to monitor Windows Clients in Checkmk
In my last post we saw how we can monitor VMware vSphere environments in Checkmk. In this post we will see how we can monitor Windows Clients in Checkmk.
Checkmk can monitor Windows clients effectively. It provides comprehensive monitoring capabilities for Windows servers and workstations, allowing administrators to track system health, performance, and availability in detail.
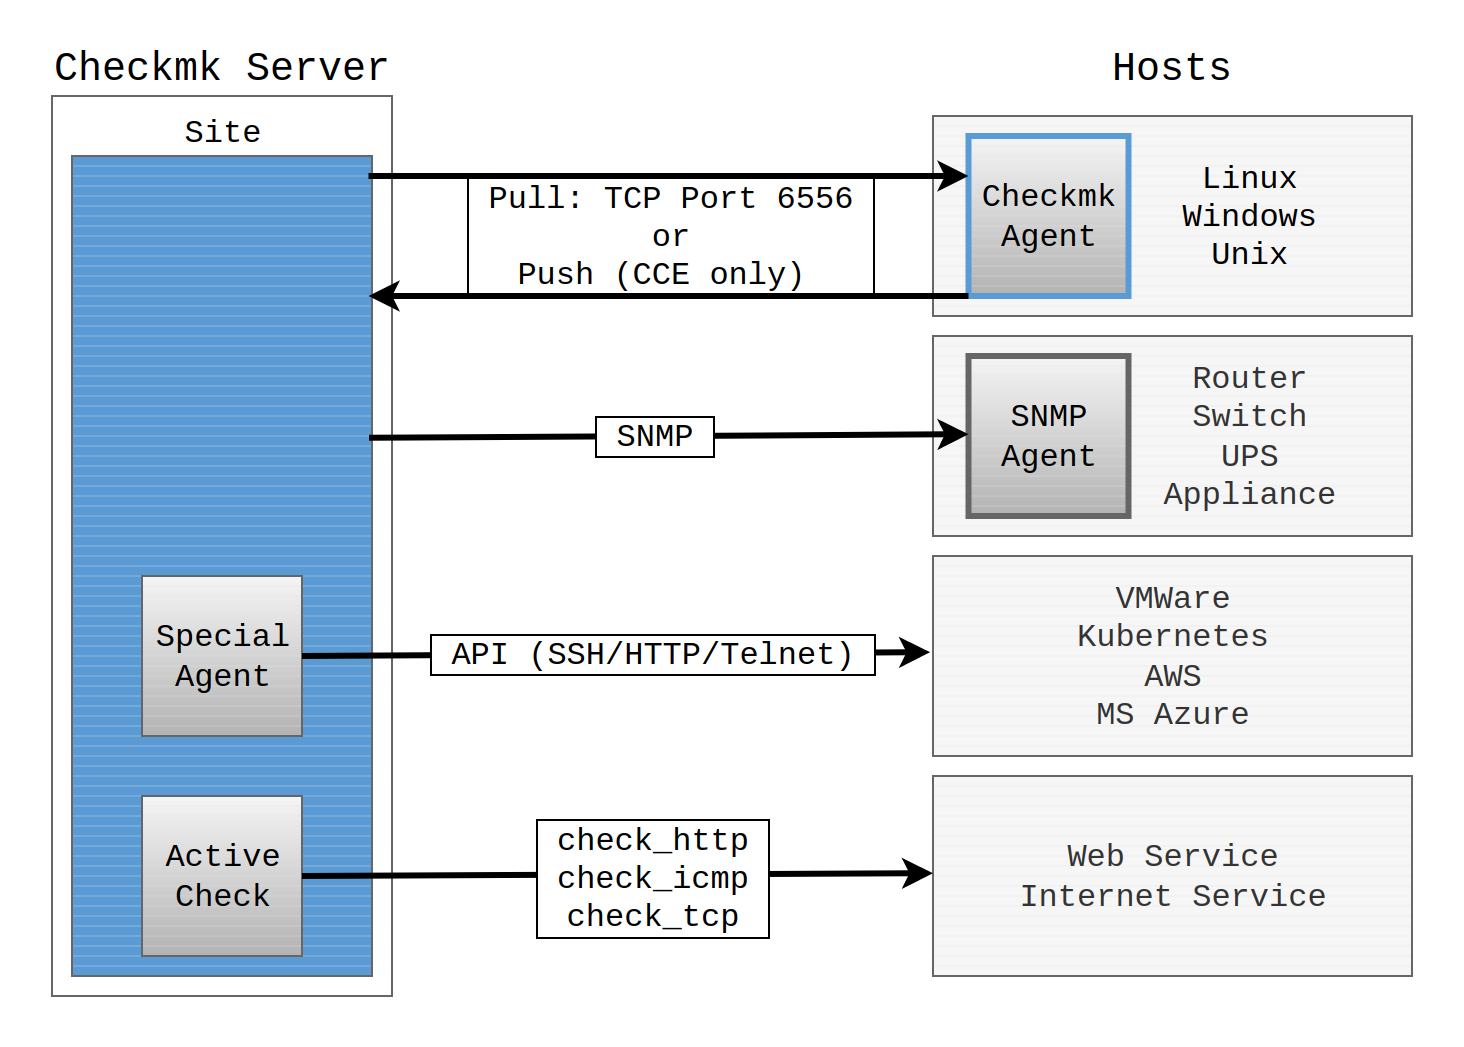
The primary method for monitoring Windows clients is through the Checkmk Agent, a lightweight agent that you install on each Windows machine. The agent collects a wide range of data about the system and sends it back to the Checkmk server for analysis and display.
The agent provides detailed information on CPU usage, memory usage, disk performance, network activity, running processes, event logs, services, and more.
There are also SNMP agents for Windows and Linux, however using these instead of the Checkmk agent is not recommended. SNMP is not very performant, so using this for monitoring generally means that the Checkmk server needs more CPU and memory per host than when working with its own agent. In addition the data provided via SNMP are incomplete. In some cases, however, monitoring via SNMP in addition to the Checkmk agent can be useful.
Install Windows Agents
The Checkmk Agent for Windows can be easily installed via an installer package. Once installed, it runs as a service on the Windows machine, periodically collecting data and responding to requests from the Checkmk server.
The agent can be deployed manually, via scripts, or using automated deployment tools like Group Policy (GPO) or SCCM for large-scale environments.
Below I will install the agent manually by first downloading it from the Checkmk server to my Windows client and then installing it.
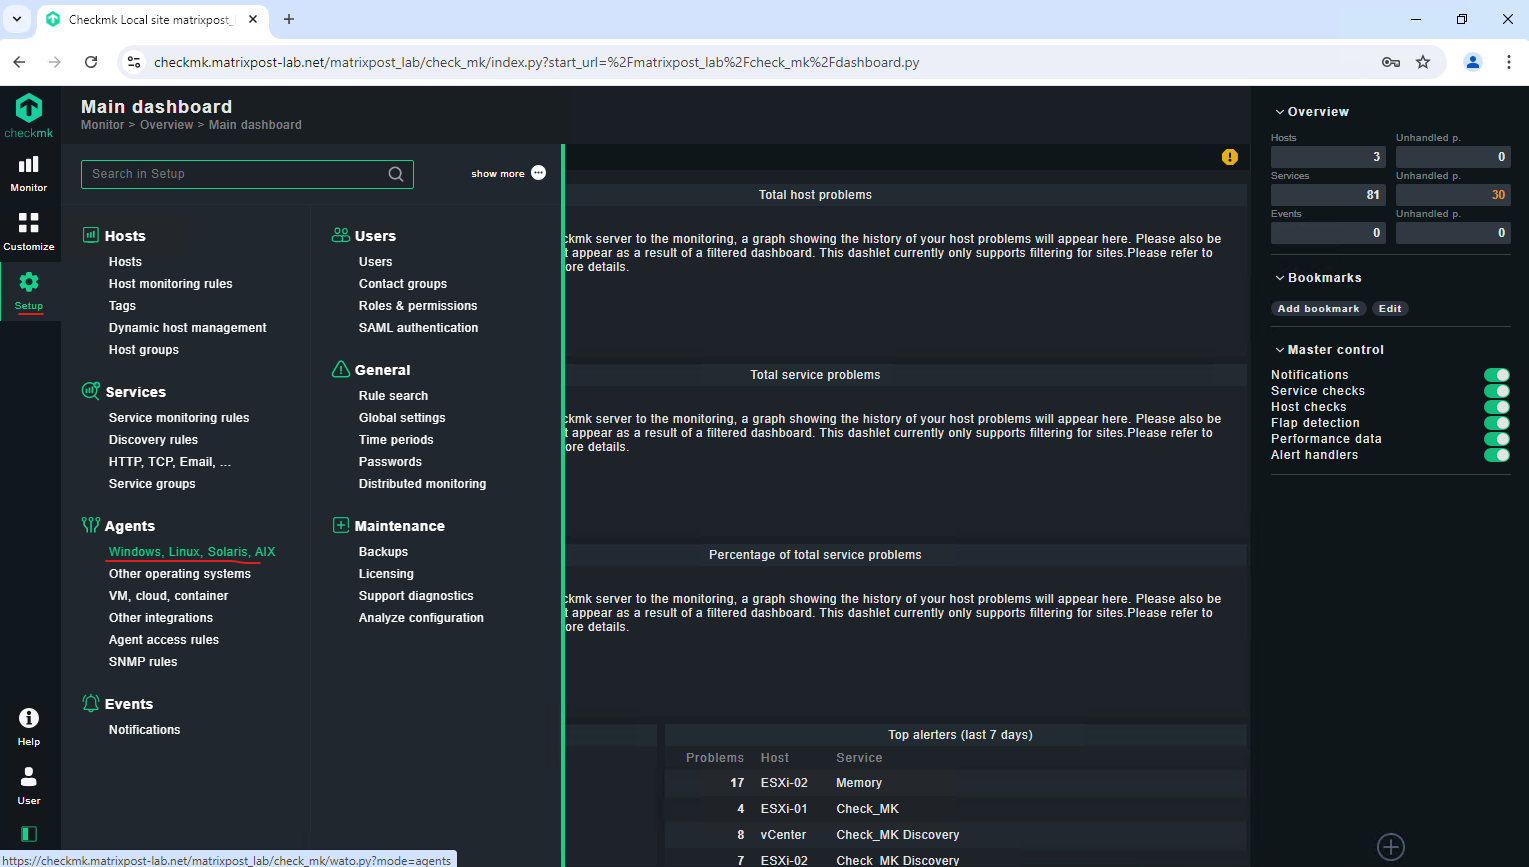
Browse to Setup -> Agents -> Windows, Linux, Solaris, AIX
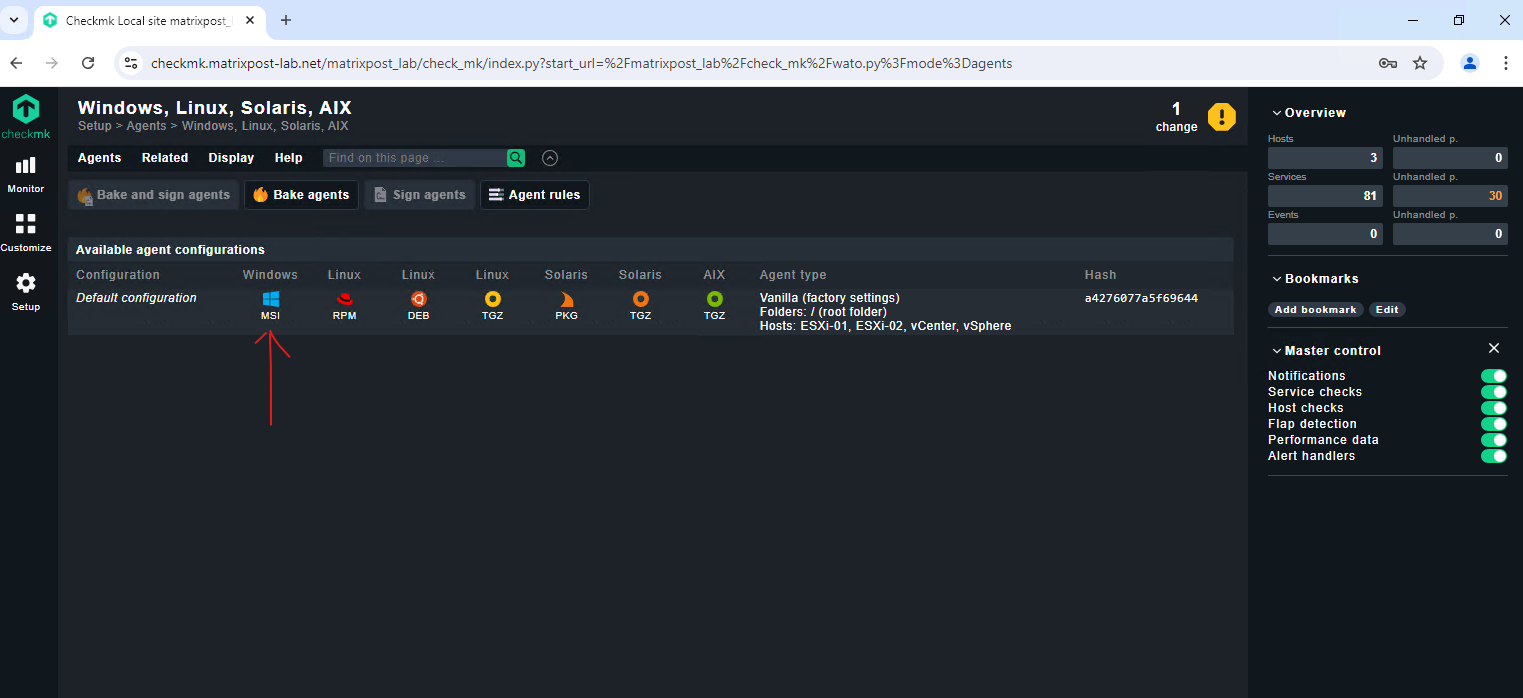
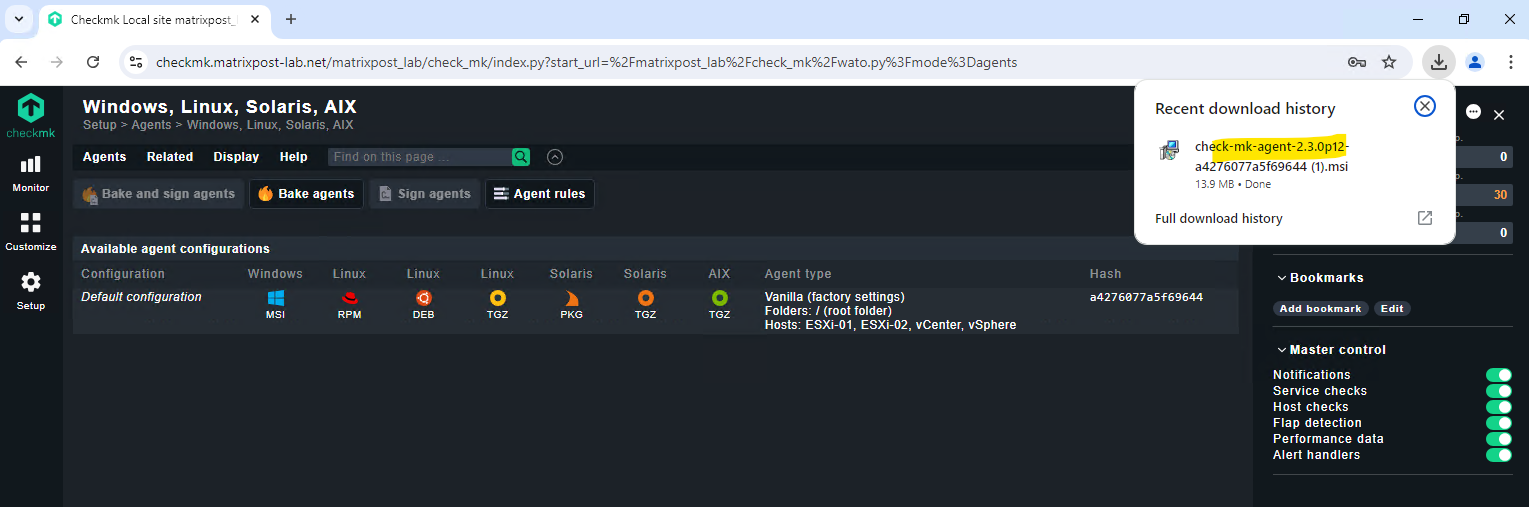
Download the MSI file of the agent.
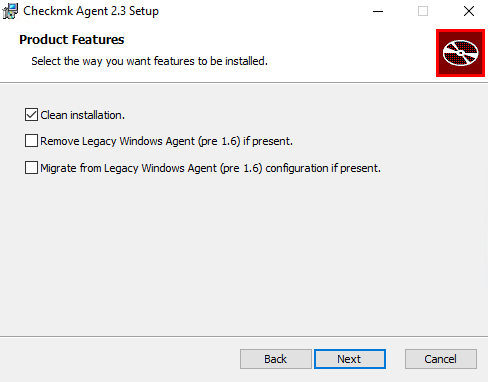
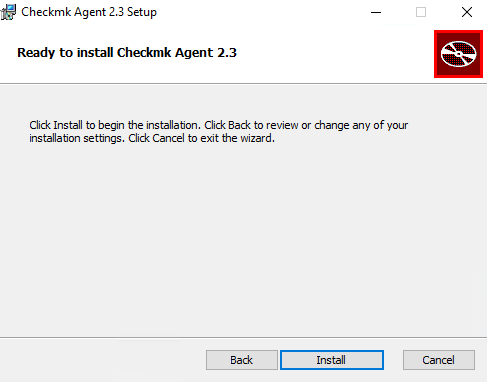
Run the *.msi install file.
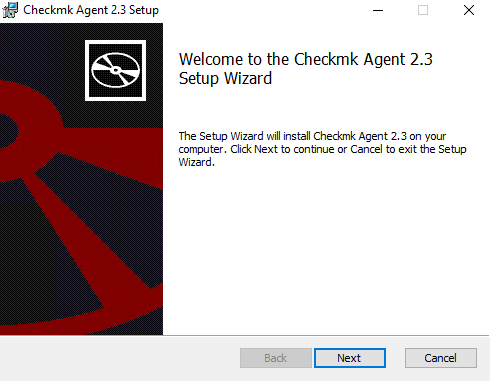
I will select Clean installation because so far no other Checkmk agent was installed on this machine.
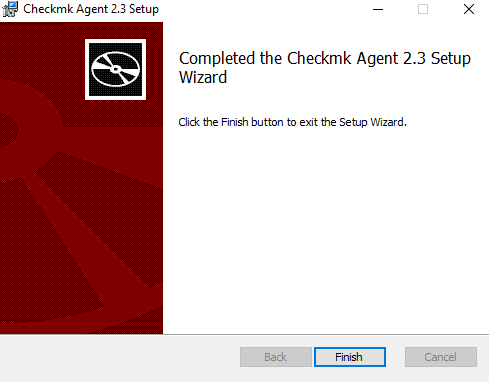
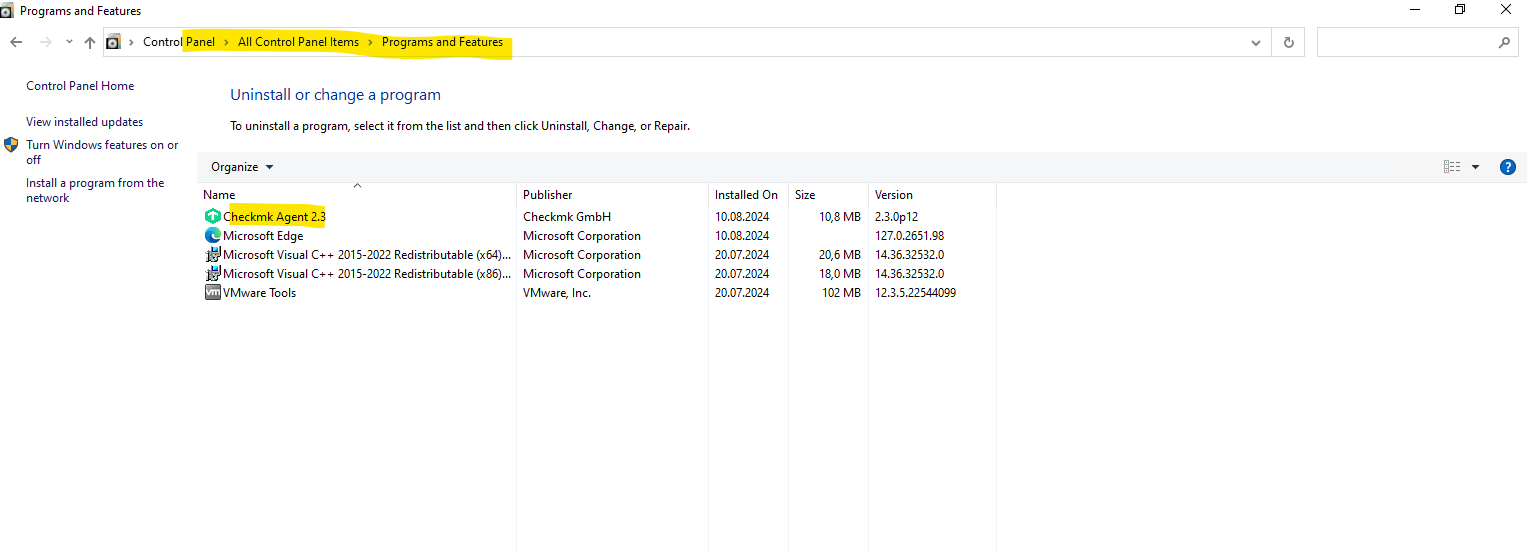
Finally the agent is installed.
After installing the agent including the Agent Controller, the next step is the registration, which sets up TLS encryption so that the encrypted agent output can be decrypted by the Checkmk server and displayed in monitoring.
There is a special feature when the agent was installed with the Agent Controller for the first time. Then the agent switches to the unencrypted legacy pull mode so that the Checkmk server is not cut off from the monitoring data and can continue to display it. This applies to a new installation as well as to an update of an agent of version 2.0.0 and older.
Source: https://docs.checkmk.com/latest/en/agent_windows.html
Before we can register our new Windows Client, we first need to create a new host in Checkmk.
Add the Windows Client as Host in Checkmk
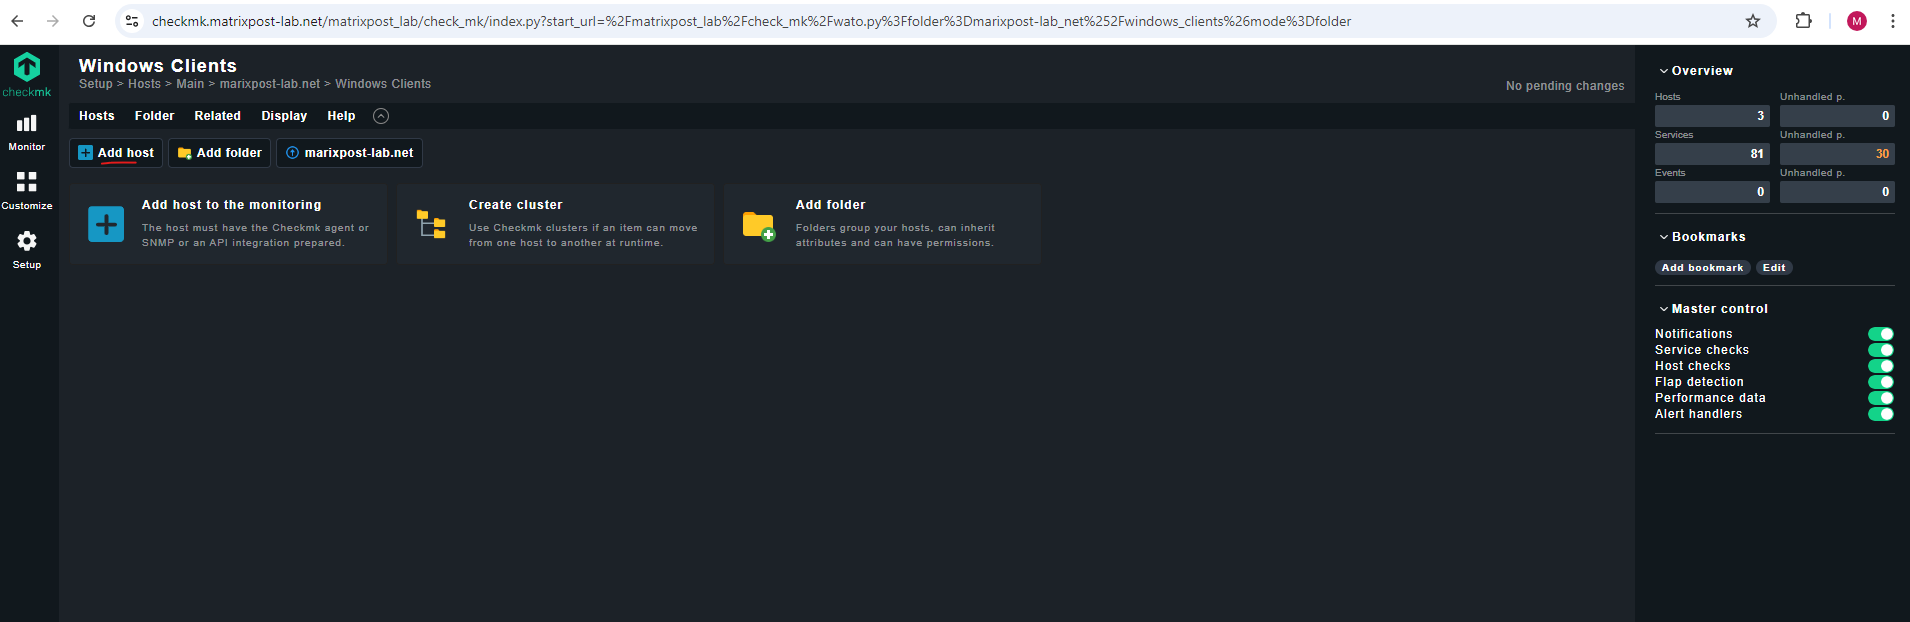
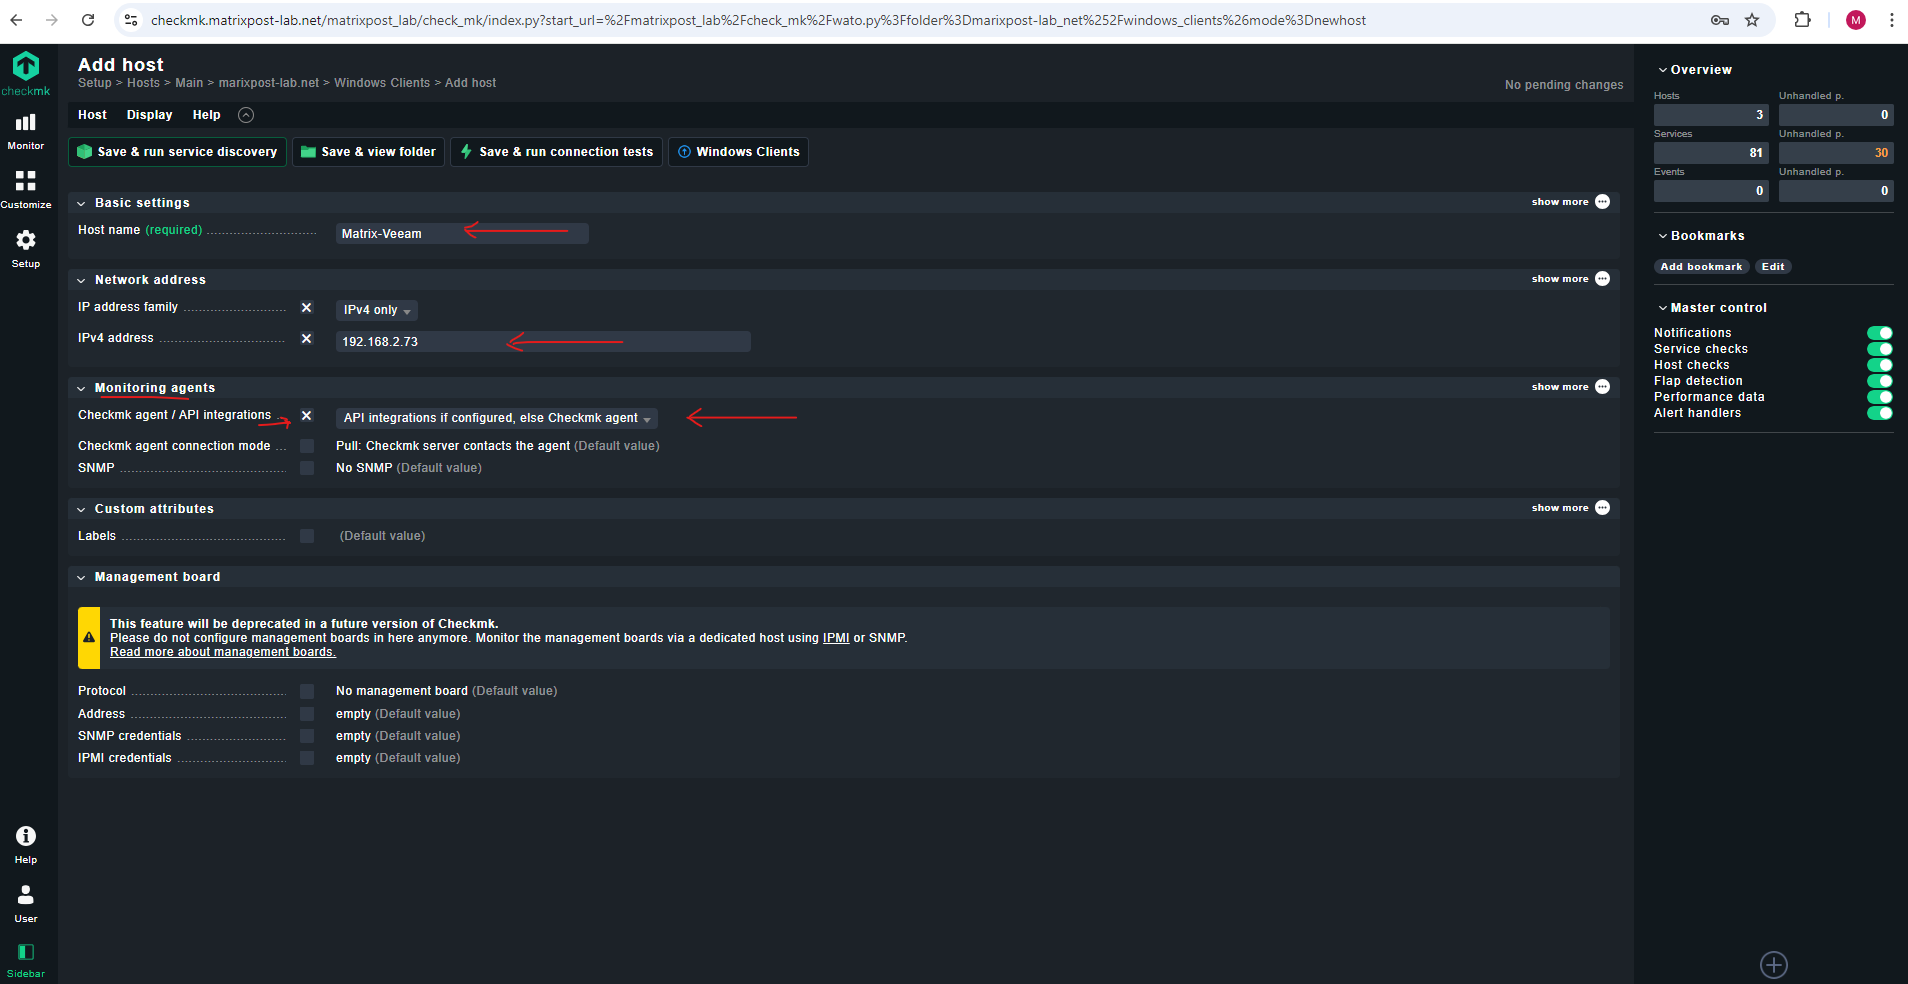
Browse to Setup -> Hosts -> Add host.
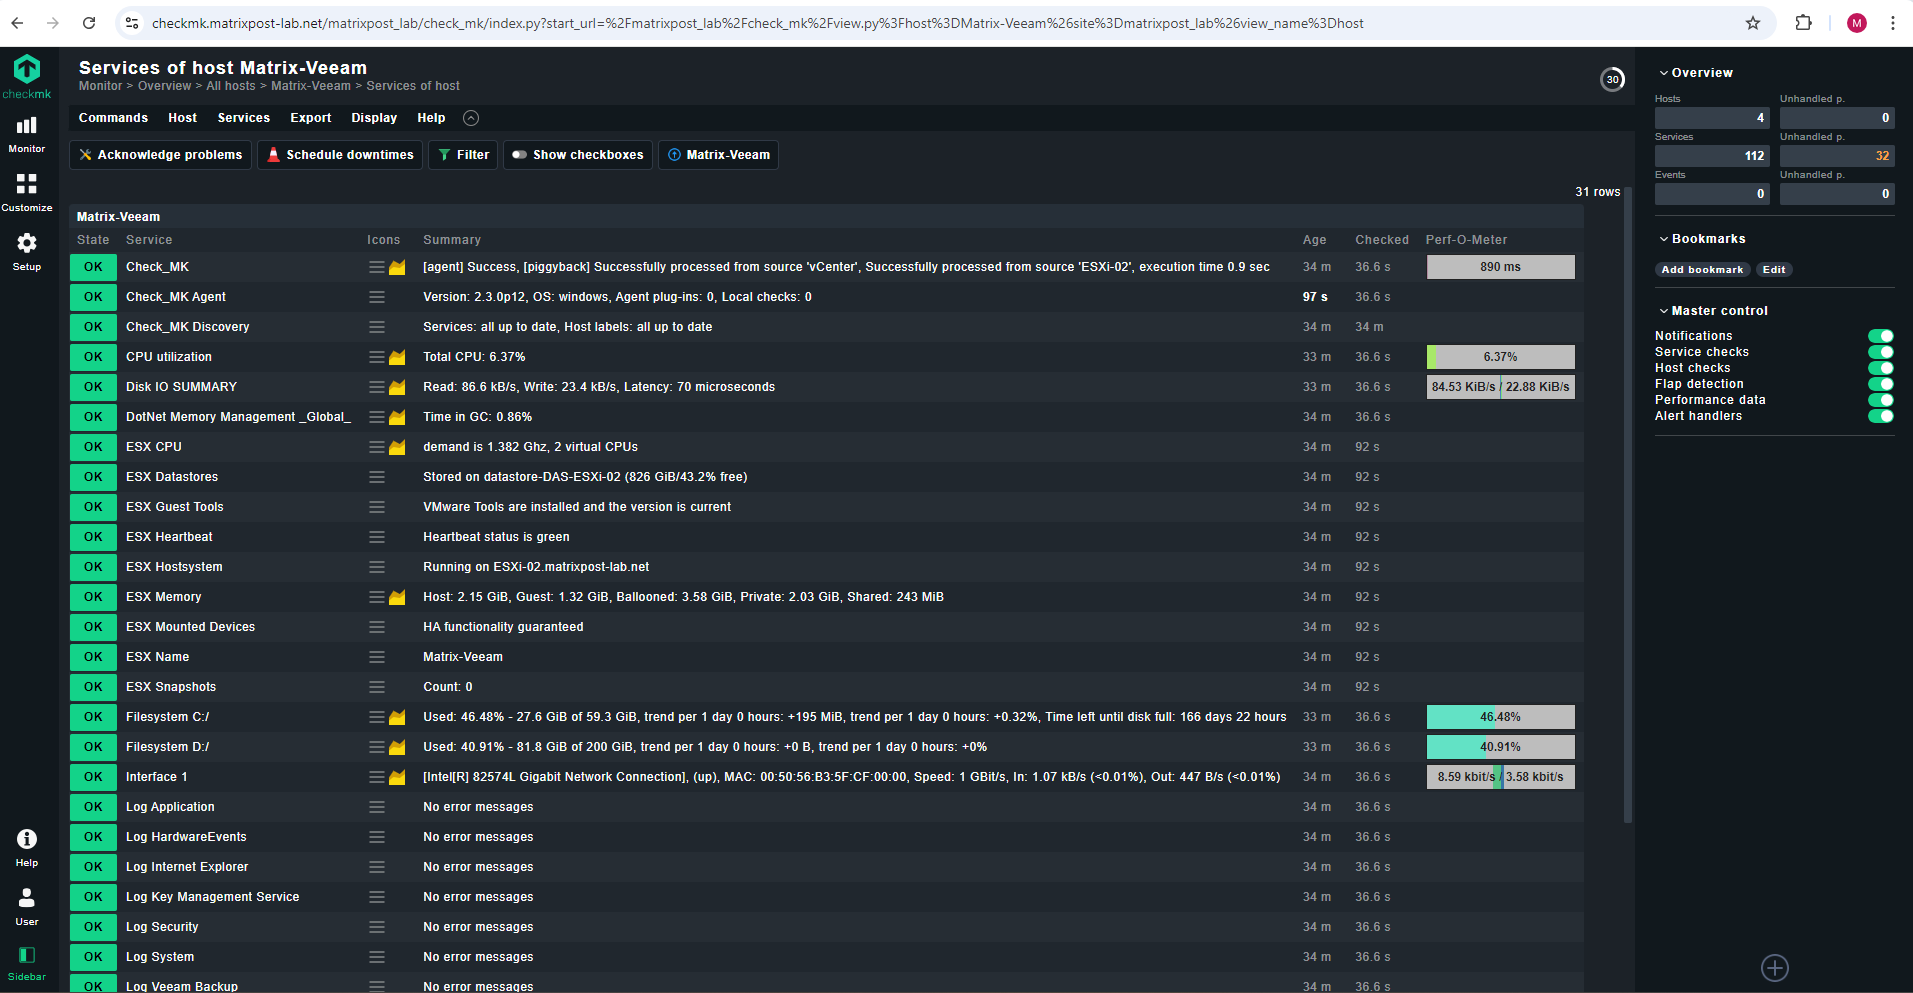
Finally go back to the host configuration and execute a service discovery and take the desired actions in the action bar (red arrow).
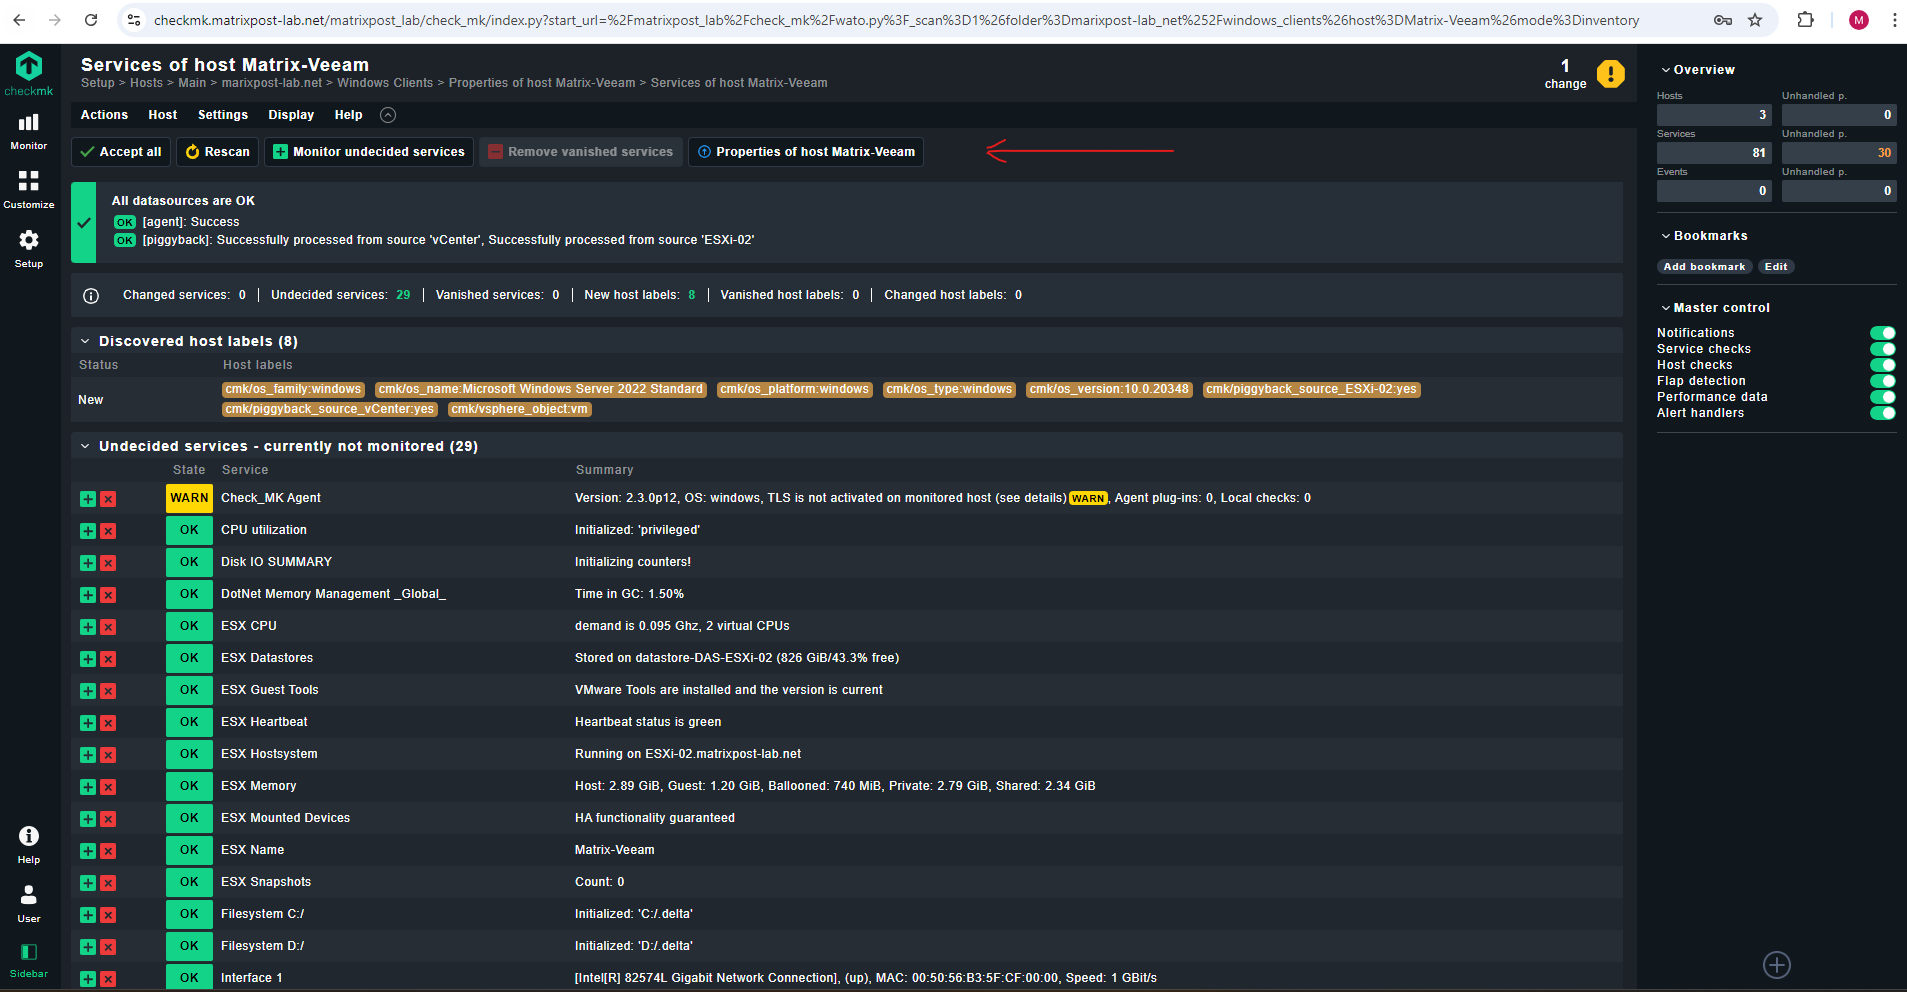
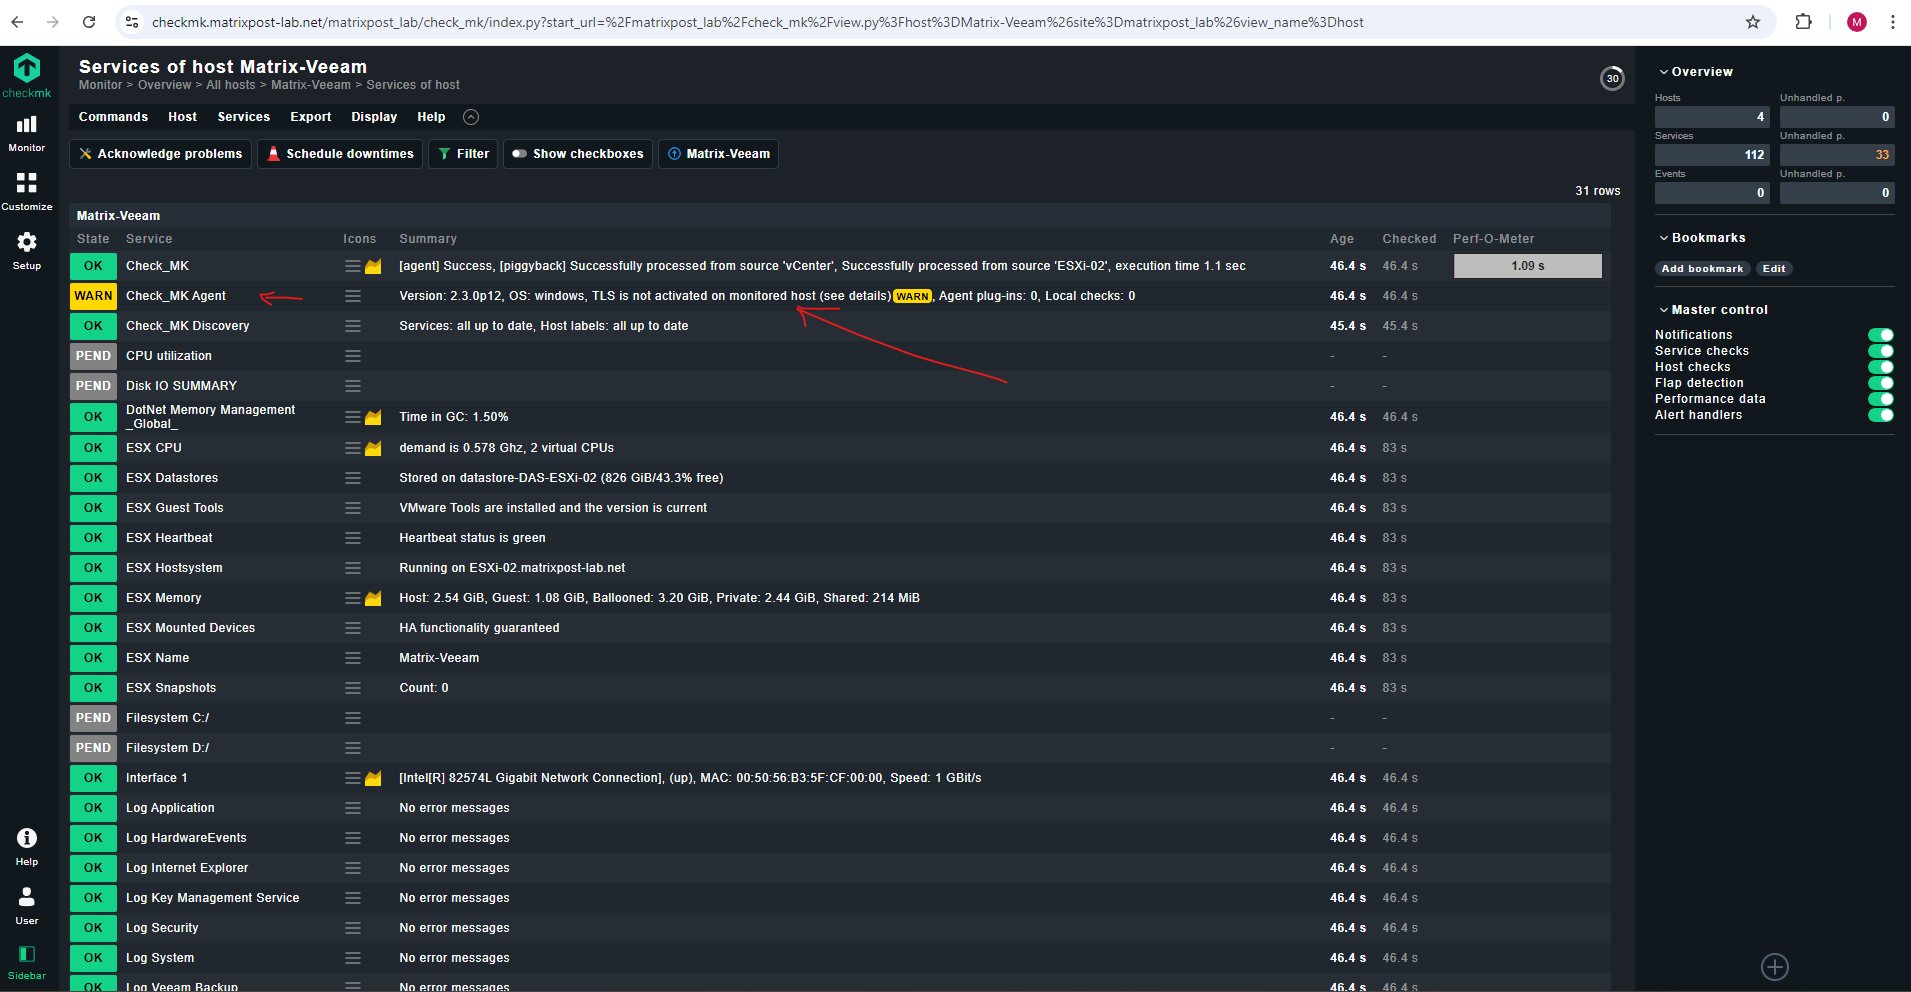
As mentioned previously before registering and when the Windows agent was installed with the agent Controller for the first time, the agent switches to the unencrypted legacy pull mode so that the Checkmk server is not cut off from the monitoring data and can continue to display it.
The Checkmk site recognizes from the agent output that the Agent Controller is present and thus TLS encryption is possible — but not yet enabled. The Check_MK Agent service changes to the WARN state and remains so until you register it. After registration, only encrypted pull mode is used for communication. The legacy pull mode is switched off and will remain so. However, it can be switched on again by command if necessary.
Source: https://docs.checkmk.com/latest/en/agent_windows.html
Registering a host with the server
The registration is done using the Agent Controller cmk-agent-ctl, which provides a command interface for configuring the connections. You can display command help with cmk-agent-ctl help, also for specific available subcommands, with cmk-agent-ctl help register for example.
Whether the host is configured for the pull mode (all editions) or the push mode (only Checkmk Cloud) makes no difference for the command examples. The Agent Receiver tells the Agent Controller in which mode it should operate during registration.
Now go to the host that is to be registered. Here you have to make a request to the Checkmk site with administrator rights:
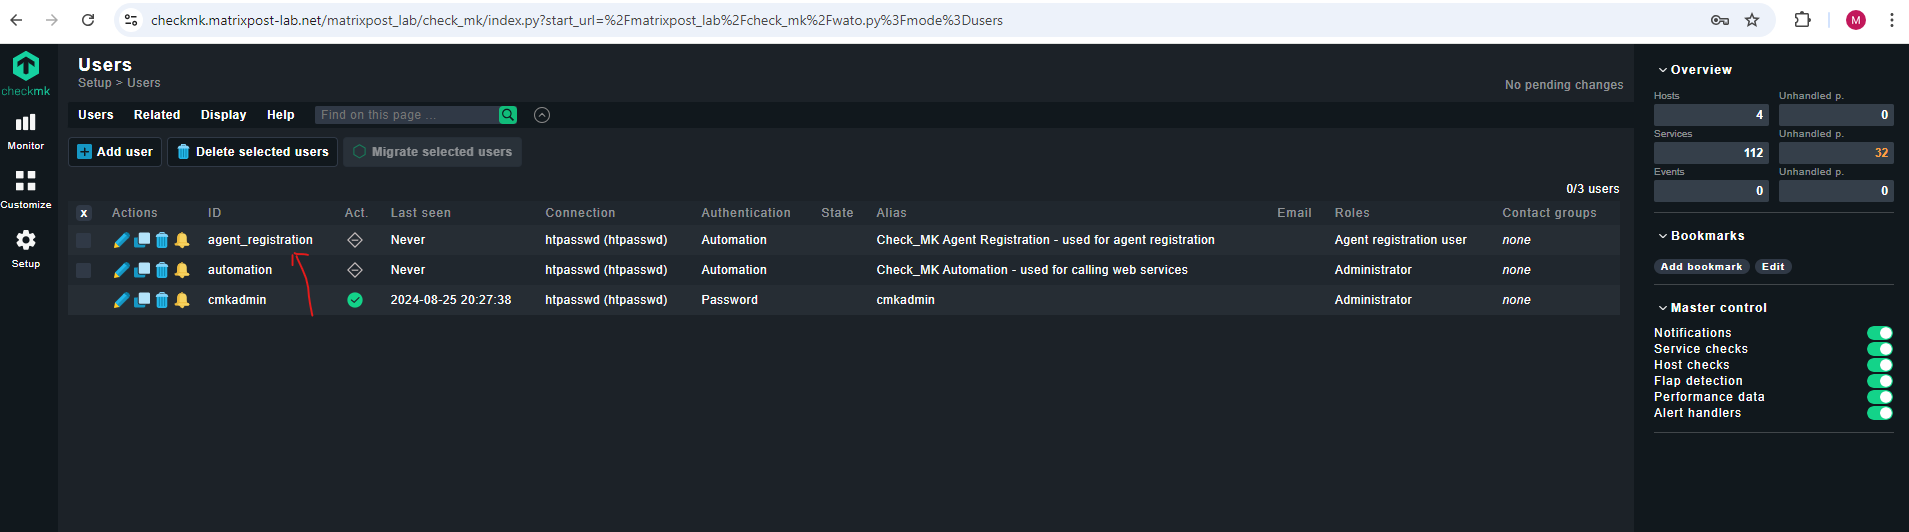
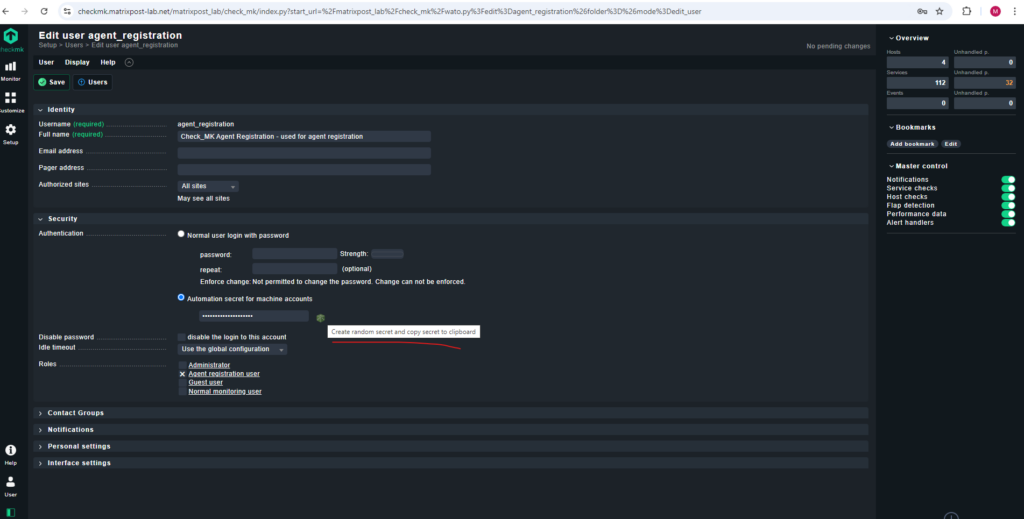
The registration and thus the establishment of the mutual trust relationship is done under a Checkmk user with access to the REST-API. For this, a good choice is the automation user agent_registration which only has the permission to register agents and is automatically created with every Checkmk installation. You can randomize the corresponding automation password (automation secret) with the
icon.
Source: https://docs.checkmk.com/latest/en/agent_windows.html#registration
To determine the password for the agent_registration user navigate to:
Setup -> Users
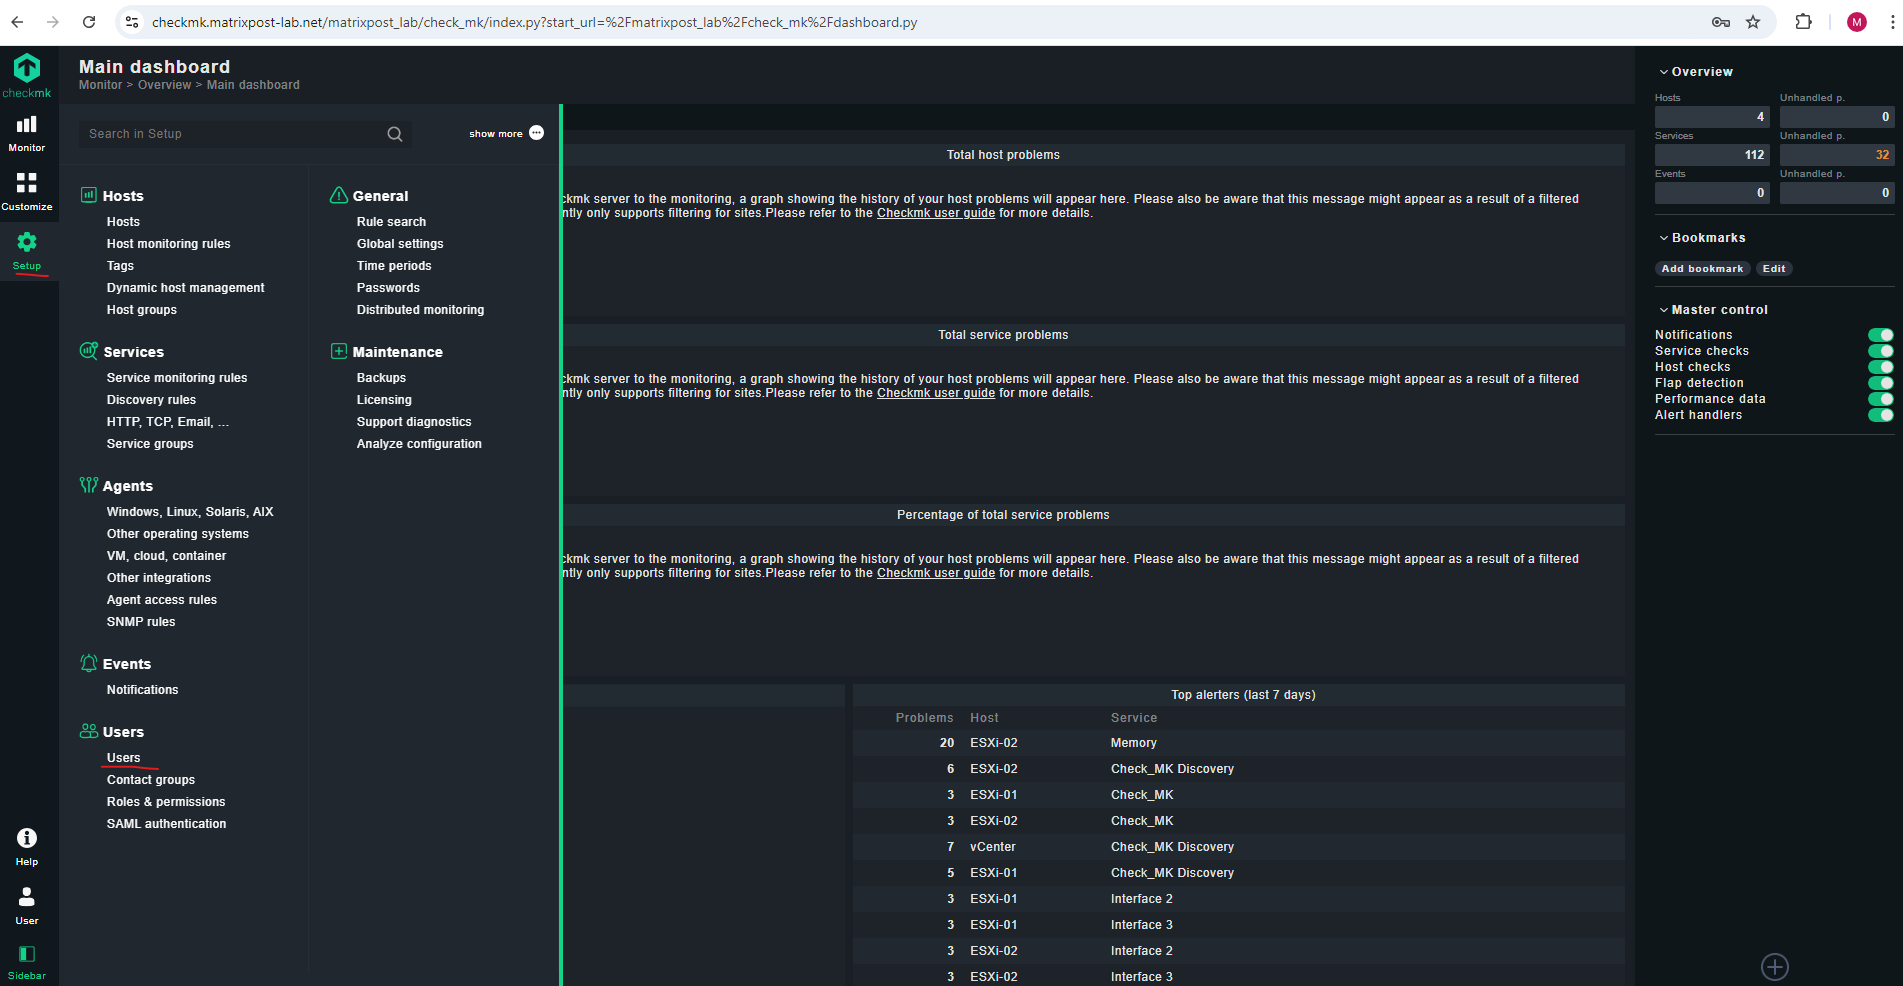
Click on the properties for the agent_registration user.
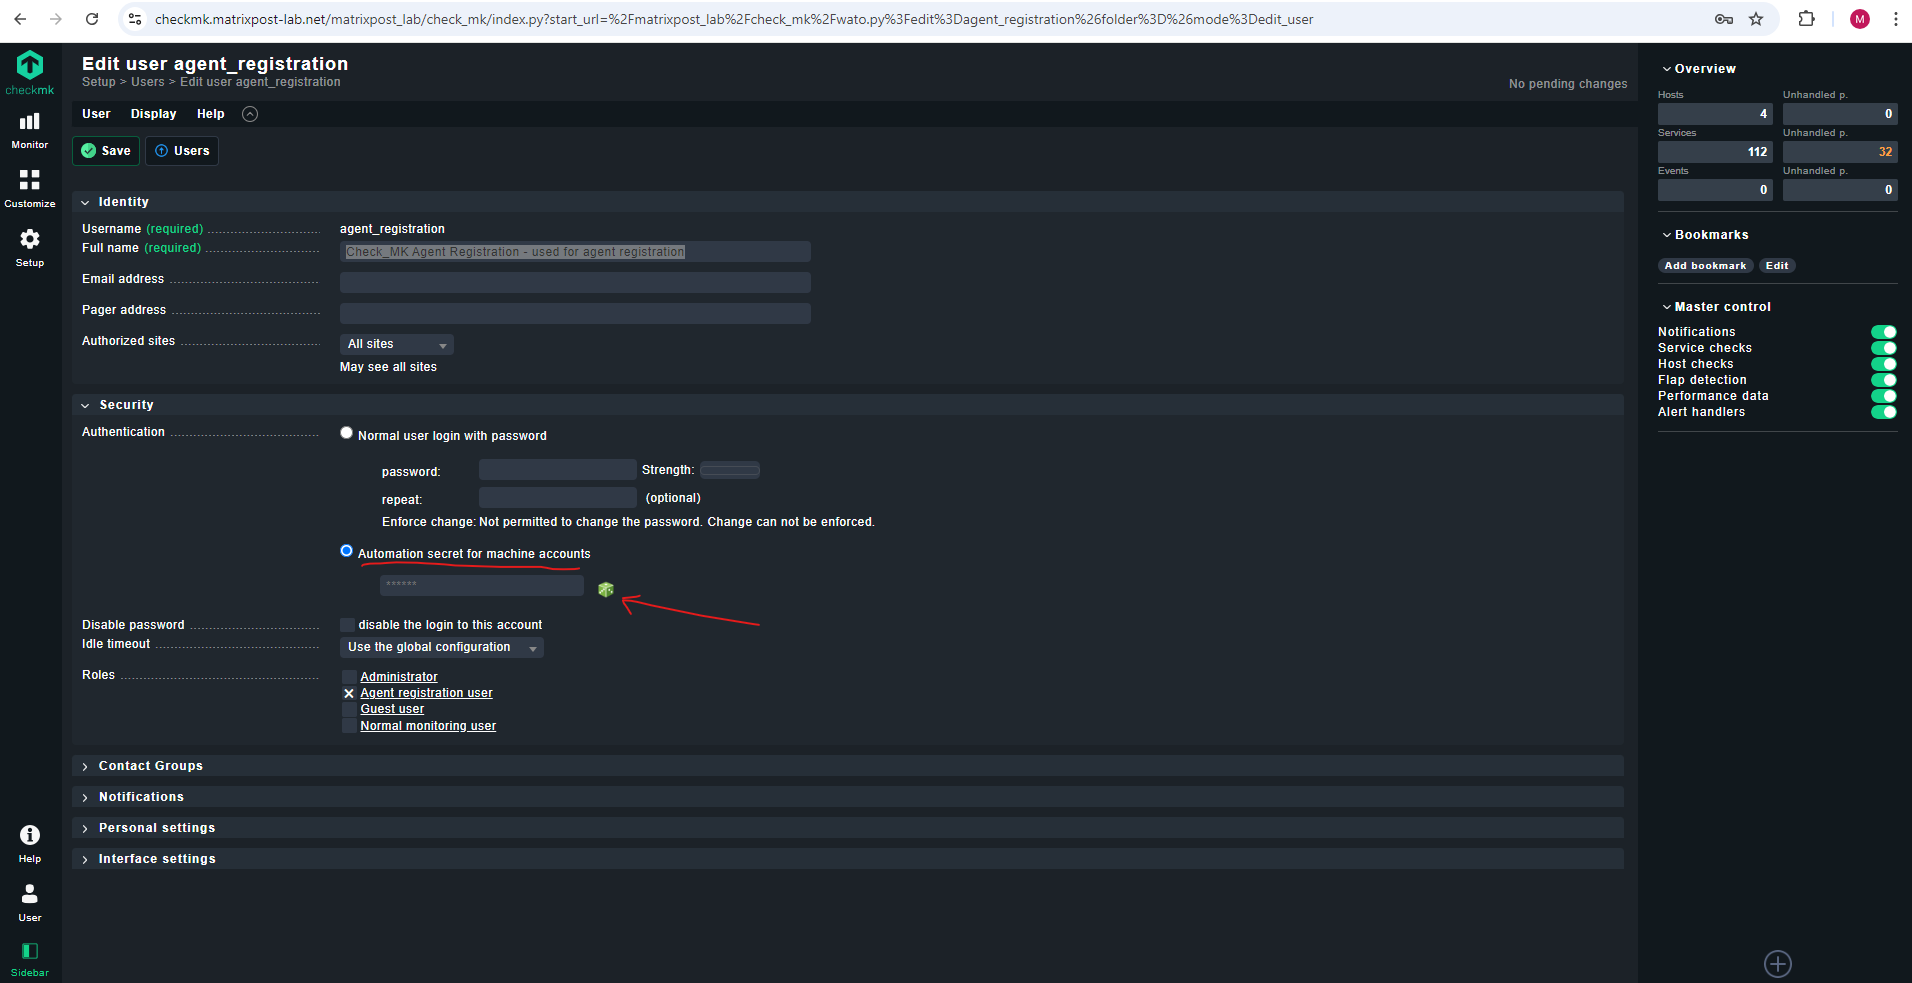
When clicking on the ![]() icon a new password is set and copied to the clipboard.
icon a new password is set and copied to the clipboard.
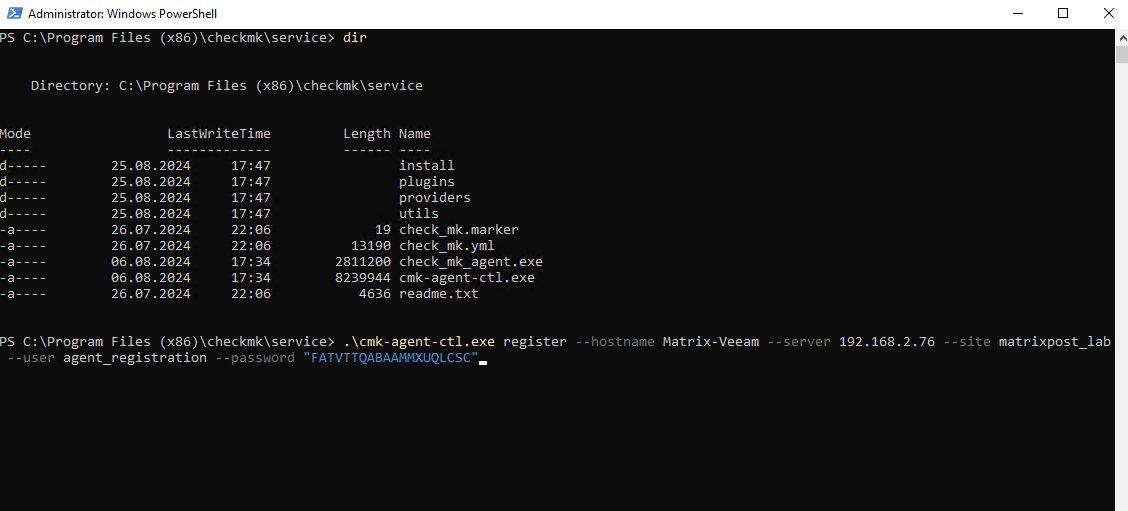
This password we now need to register the Windows client by executing the following command.
PS C:\Program Files (x86)\checkmk\service> cmk-agent-ctl.exe register --hostname Matrix-Veeam --server 192.168.2.76 --site matrixpost_lab --user agent_registration --password "FATVTTQABAAMMXUQLCSC"
Confirm with Y to complete the process.
If no error message is displayed, the encrypted connection will have been established. All data will now be transmitted in compressed form via this connection.
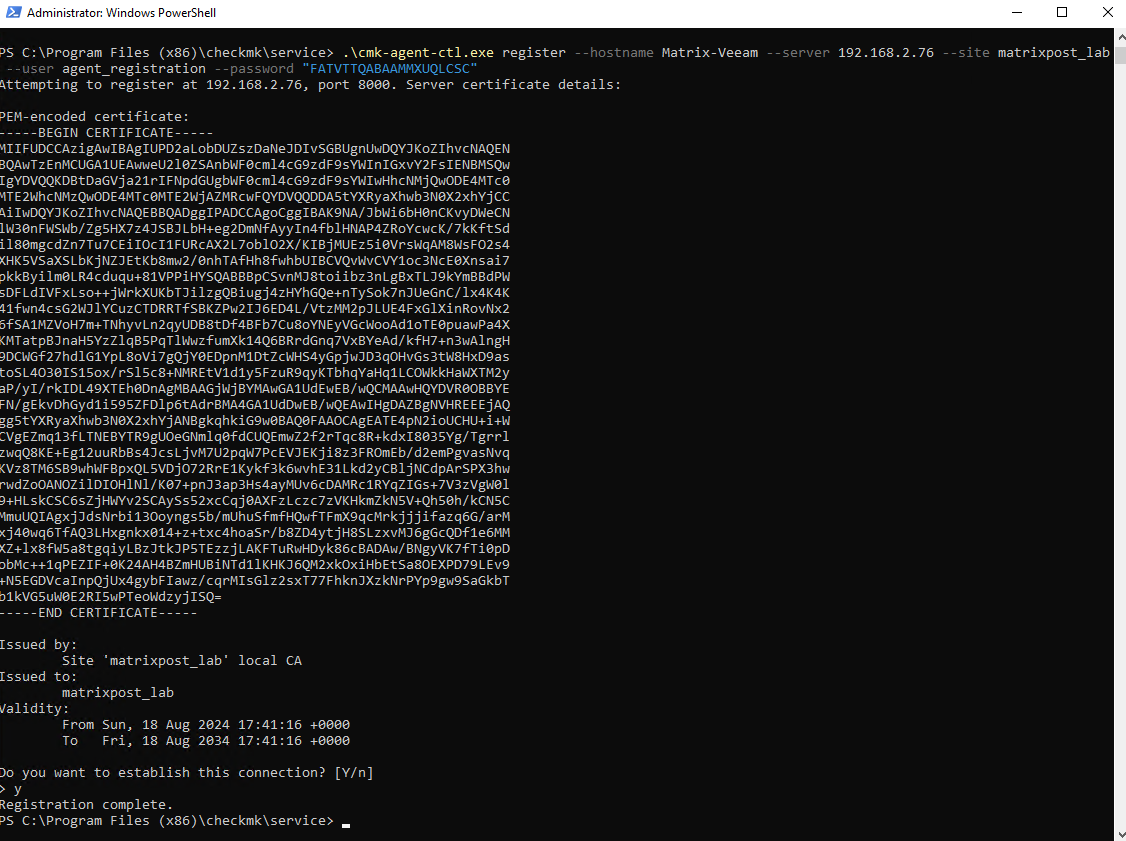
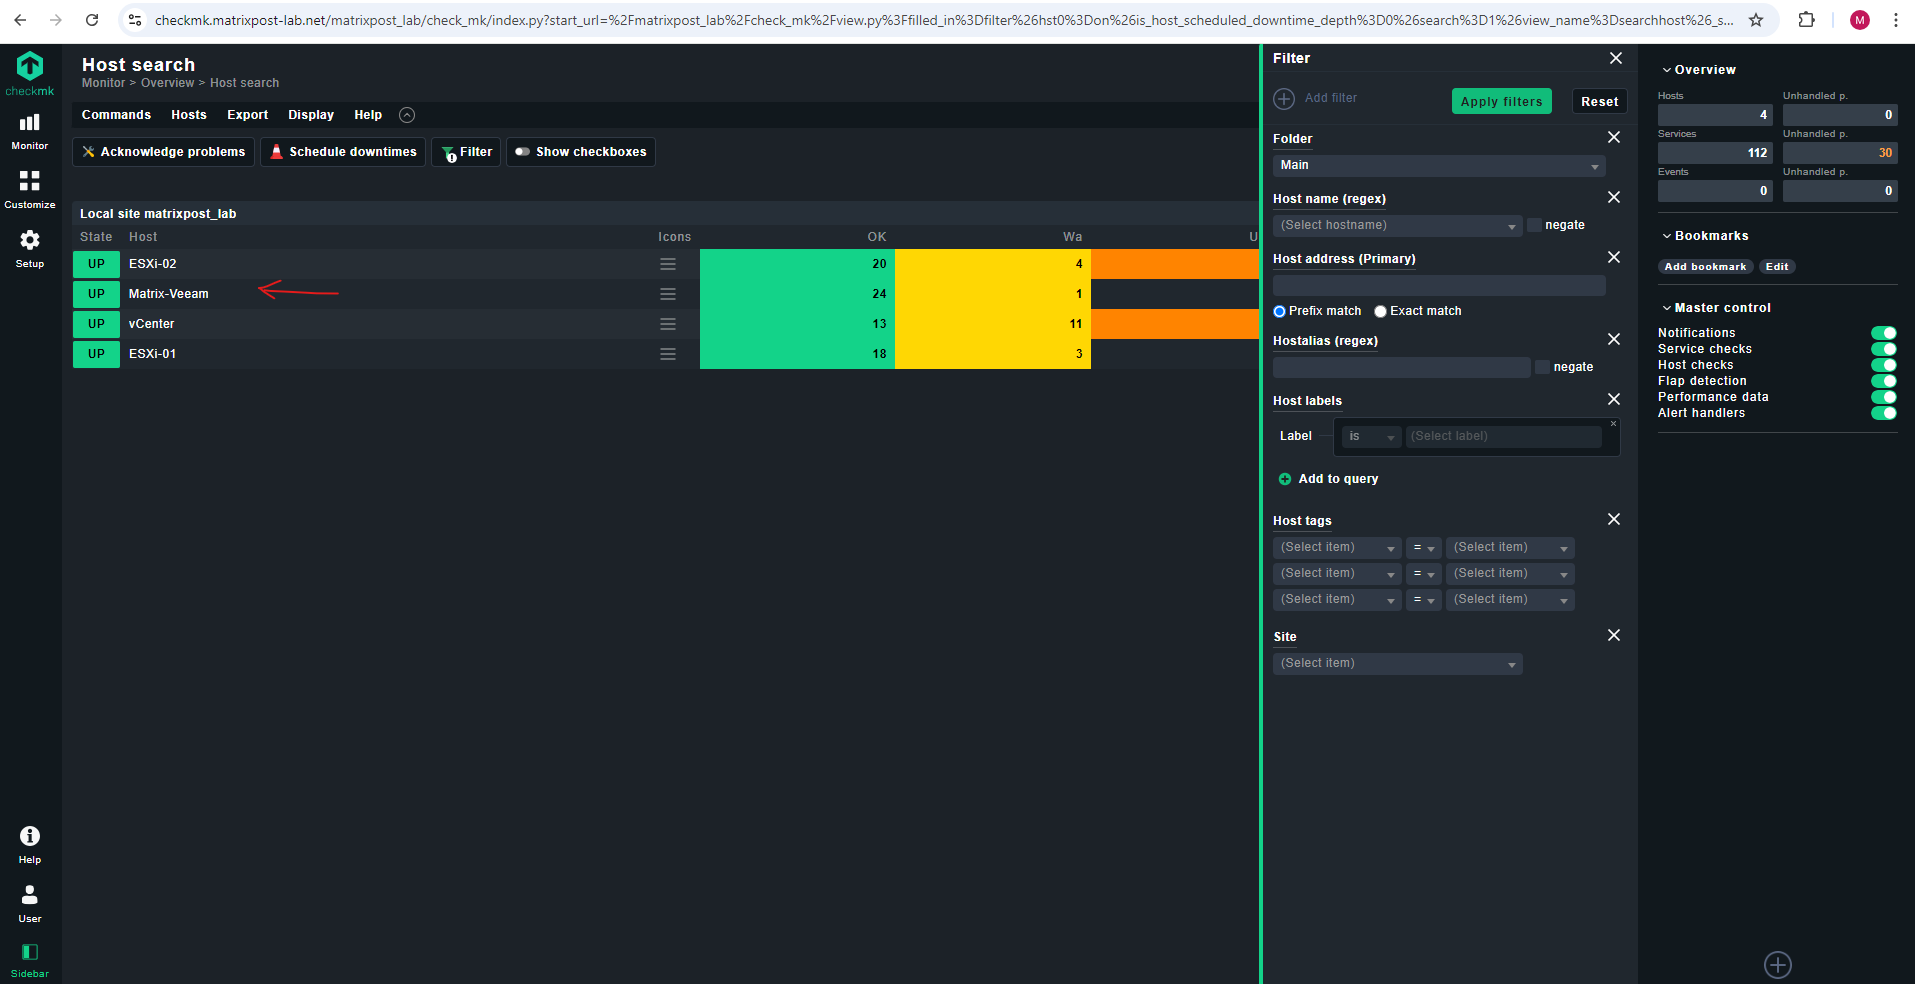
The previous WARN state that TLS is not enabled is now gone.
Ports used by the Windows Agent
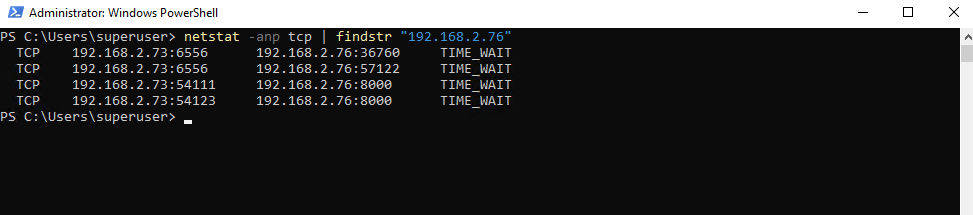
The Checkmk Agent for Windows primarily uses TCP port 6556 for communication. This is the default port used by the Checkmk agent on Windows (and other operating systems) to listen for incoming connections from the Checkmk server.
The agents are passive in pull mode and listen on TCP port 6556.
In the pull mode, the Checkmk agent listens for incoming connections from the Checkmk server on TCP port 6556. As soon as the agent receives a request, it sends the monitoring data to the server. Here, the initiative for data transmission comes from the server, which basically pulls the data from the agent. The pull mode is the default way to transmit data from the Checkmk agent — and works in all Checkmk editions.
Source: https://docs.checkmk.com/latest/en/wato_monitoringagents.html
The figure below is from my Matrix-Veeam Windows Server where we installed the Checkmk client previously. It’s local address on the left is the IP 192.168.2.73 and on the right the foreign address of the Checkmk server with the IP 192.168.2.76.
The listening Port TCP 8000 here on the Checkmk server is its Agent Controller for TLS registration (all editions) and agents in push mode.
To register a host for monitoring, this host must be able to reach the REST API of the Checkmk server (port 443 or 80) and the Agent Receiver (port 8000 for the first site, 8001 for the second…).
In the push mode, the Checkmk agent sends the monitoring data to the Checkmk server once per minute. The agent pushes the data transmission on its own and does not wait for a request from the server. The push mode is always required if the Checkmk server cannot access the network in which the host to be monitored and its agent are located, for example, in a cloud-based configuration. For this reason, the push mode only exists in ![]() Checkmk Cloud.
Checkmk Cloud.
Source: https://docs.checkmk.com/latest/en/wato_monitoringagents.html
Monitor Windows by using SNMP
As already mentioned to the beginning, you can also use SNMP to monitor Windows and Linux instead of using the Checkmk agent, but finally it is not recommended because of bad performance and incomplete data.
More details about monitoring with SNMP you will find here.
Monitoring with SNMP
https://docs.checkmk.com/latest/en/intro_setup_monitor.html#snmp
Install and configure the SNMP Service on Windows
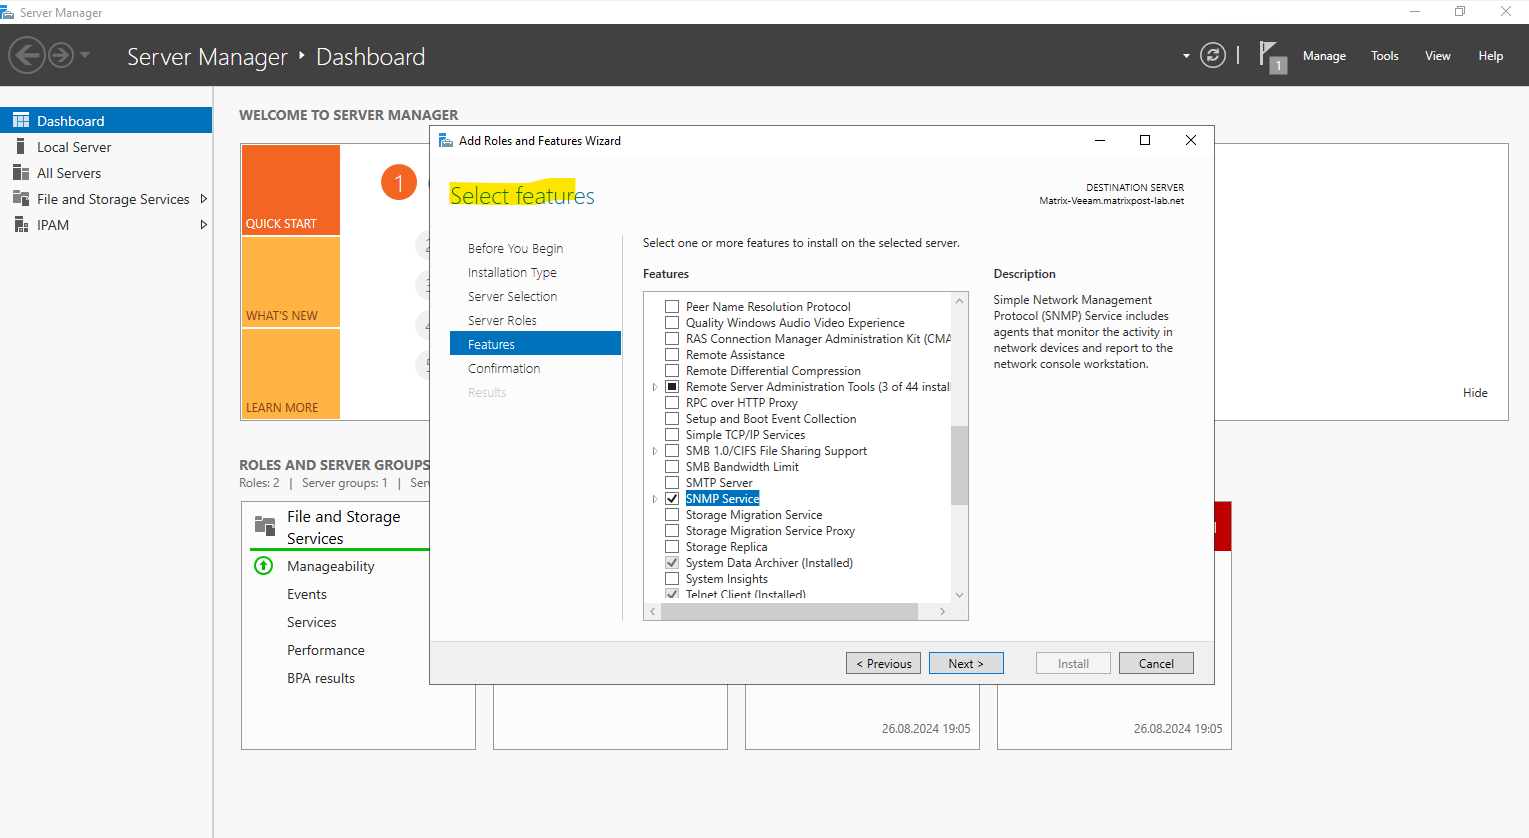
On Windows Server you can install SNMP as a feature by using the Server Manager (see fig. below).
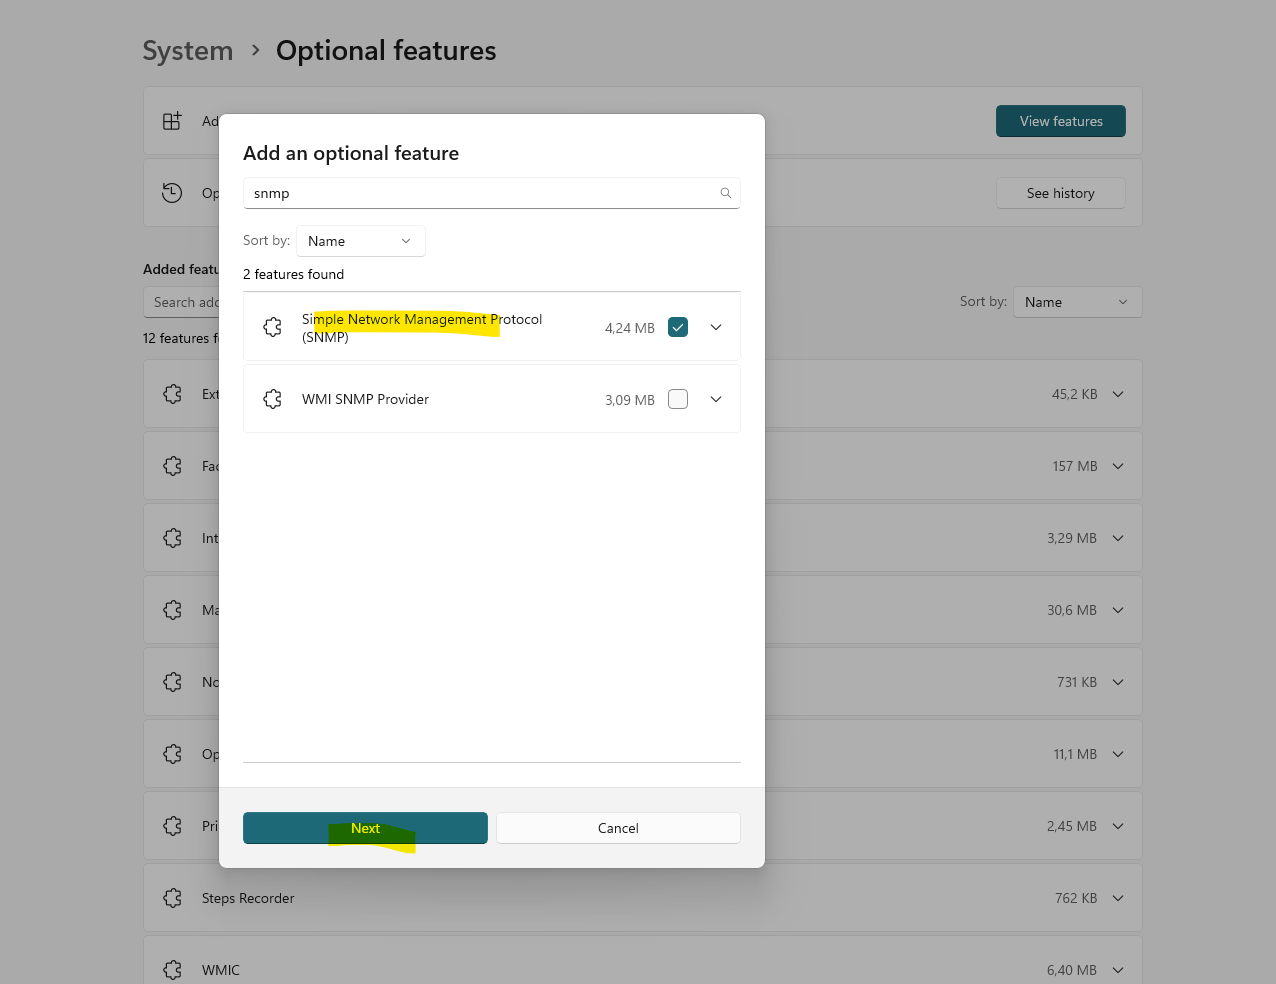
On Windows 10 and Windows 11 you need to browse to Settings -> System -> Optional features -> click on View features (button) and search for SNMP.
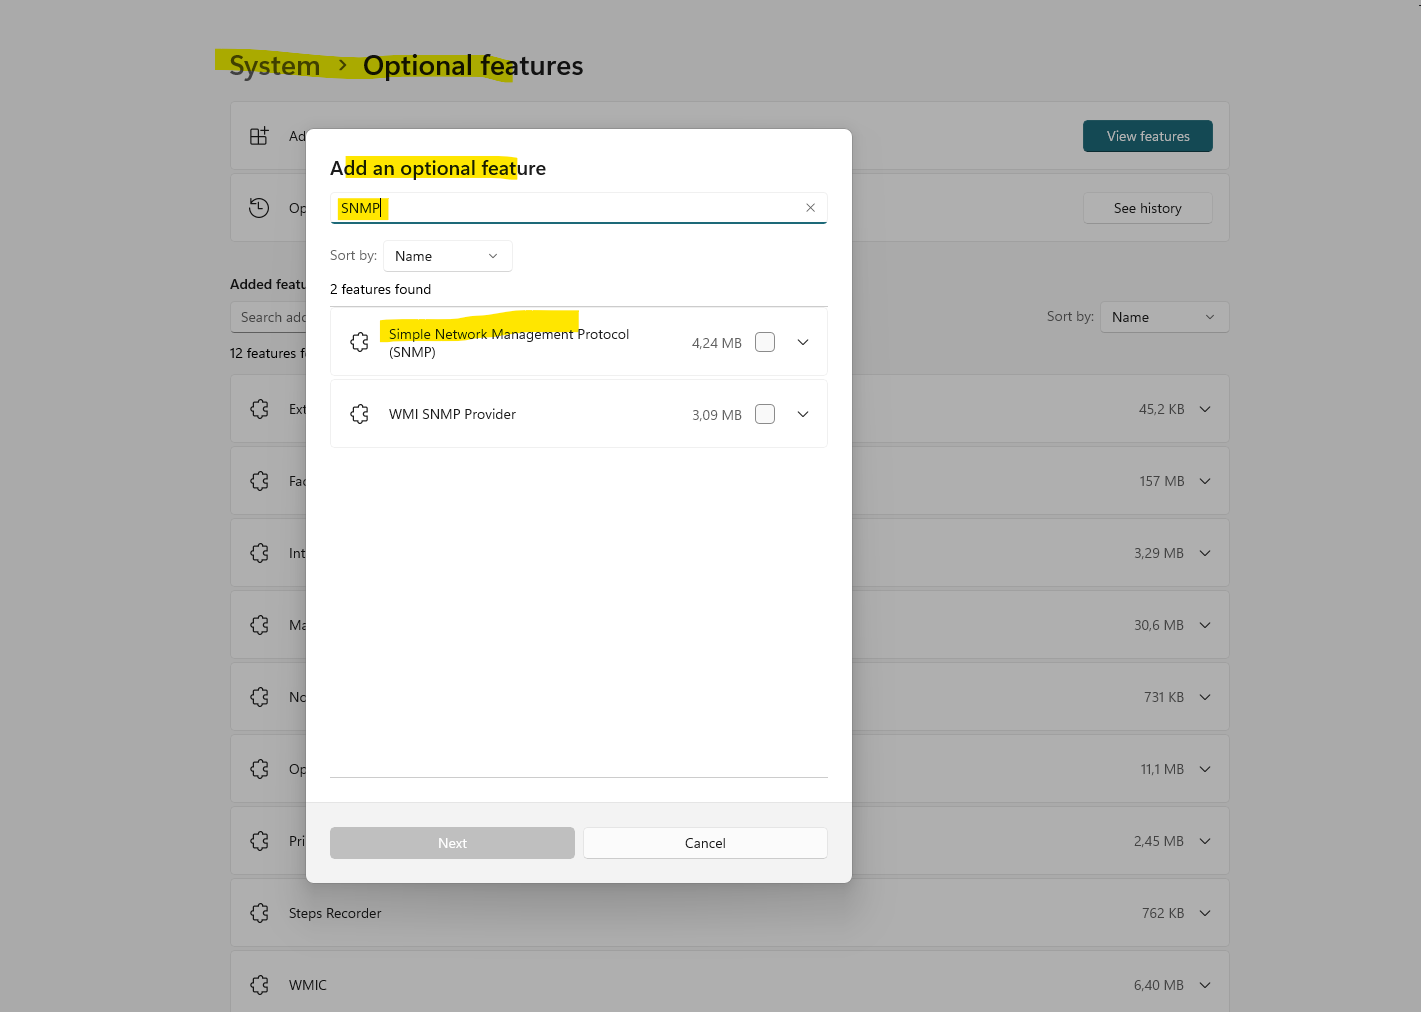
Check Simple Network Management Protocol (SNMP), click on Next and finally on Add to install SNMP.
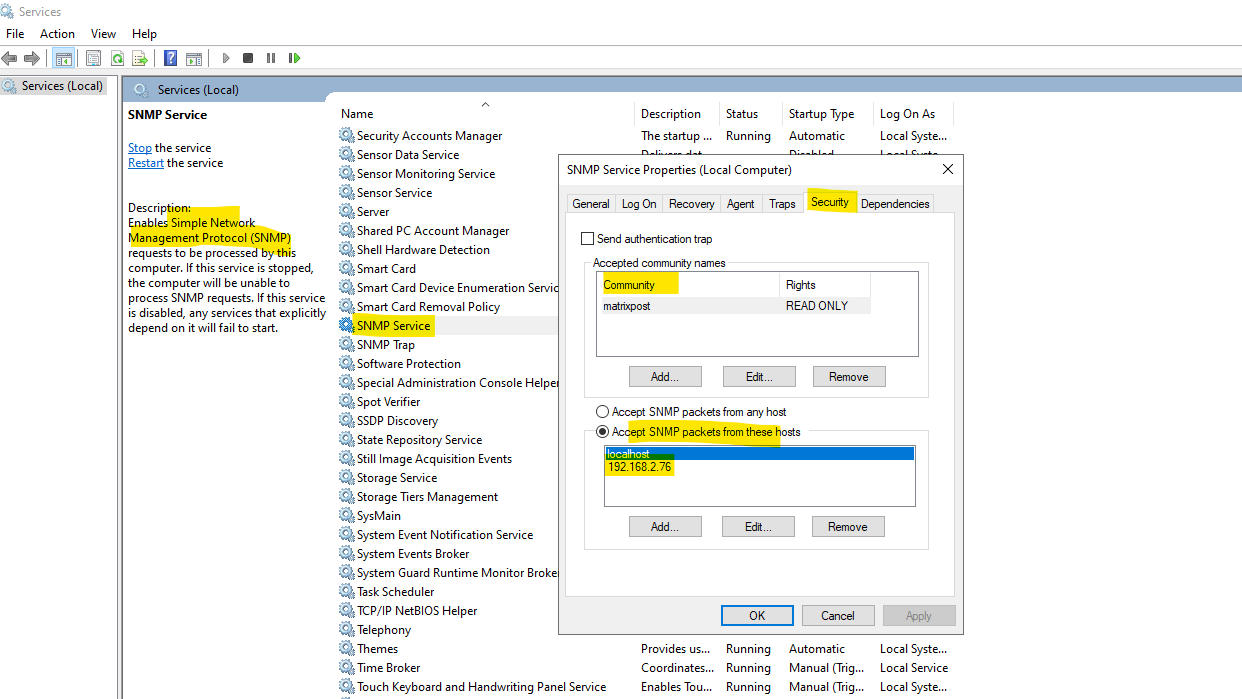
SNMP will be installed as Windows service (see fig. below). Here we just need to open the properties of the service and navigate to the security tab.
Enter a new community string as read-only and add the Host name or IP address of the Checkmk server under Accept SNMP packets from these hosts.
SNMPv1 and SNMPv2c use communities to establish trust between managers and agents. Most agents support three community names, one each for read-only, read-write and trap. These three community strings control different types of activities. The read-only community applies to get requests. The read-write community string applies to set requests. The trap community string applies to receipt of traps. SNMPv3 also uses community strings, but allows for secure authentication and communication between SNMP manager and agent.
Source: https://en.wikipedia.org/wiki/Simple_Network_Management_Protocol
Read-only – The read-only community string enables a device to extract read-only data from another device.
Read-write – The read-write community string is used to extract data and alter device configurations.
SNMP trap – The SNMP trap community string is used when an SNMP trap is sent by a device.
Set up the Host in Checkmk
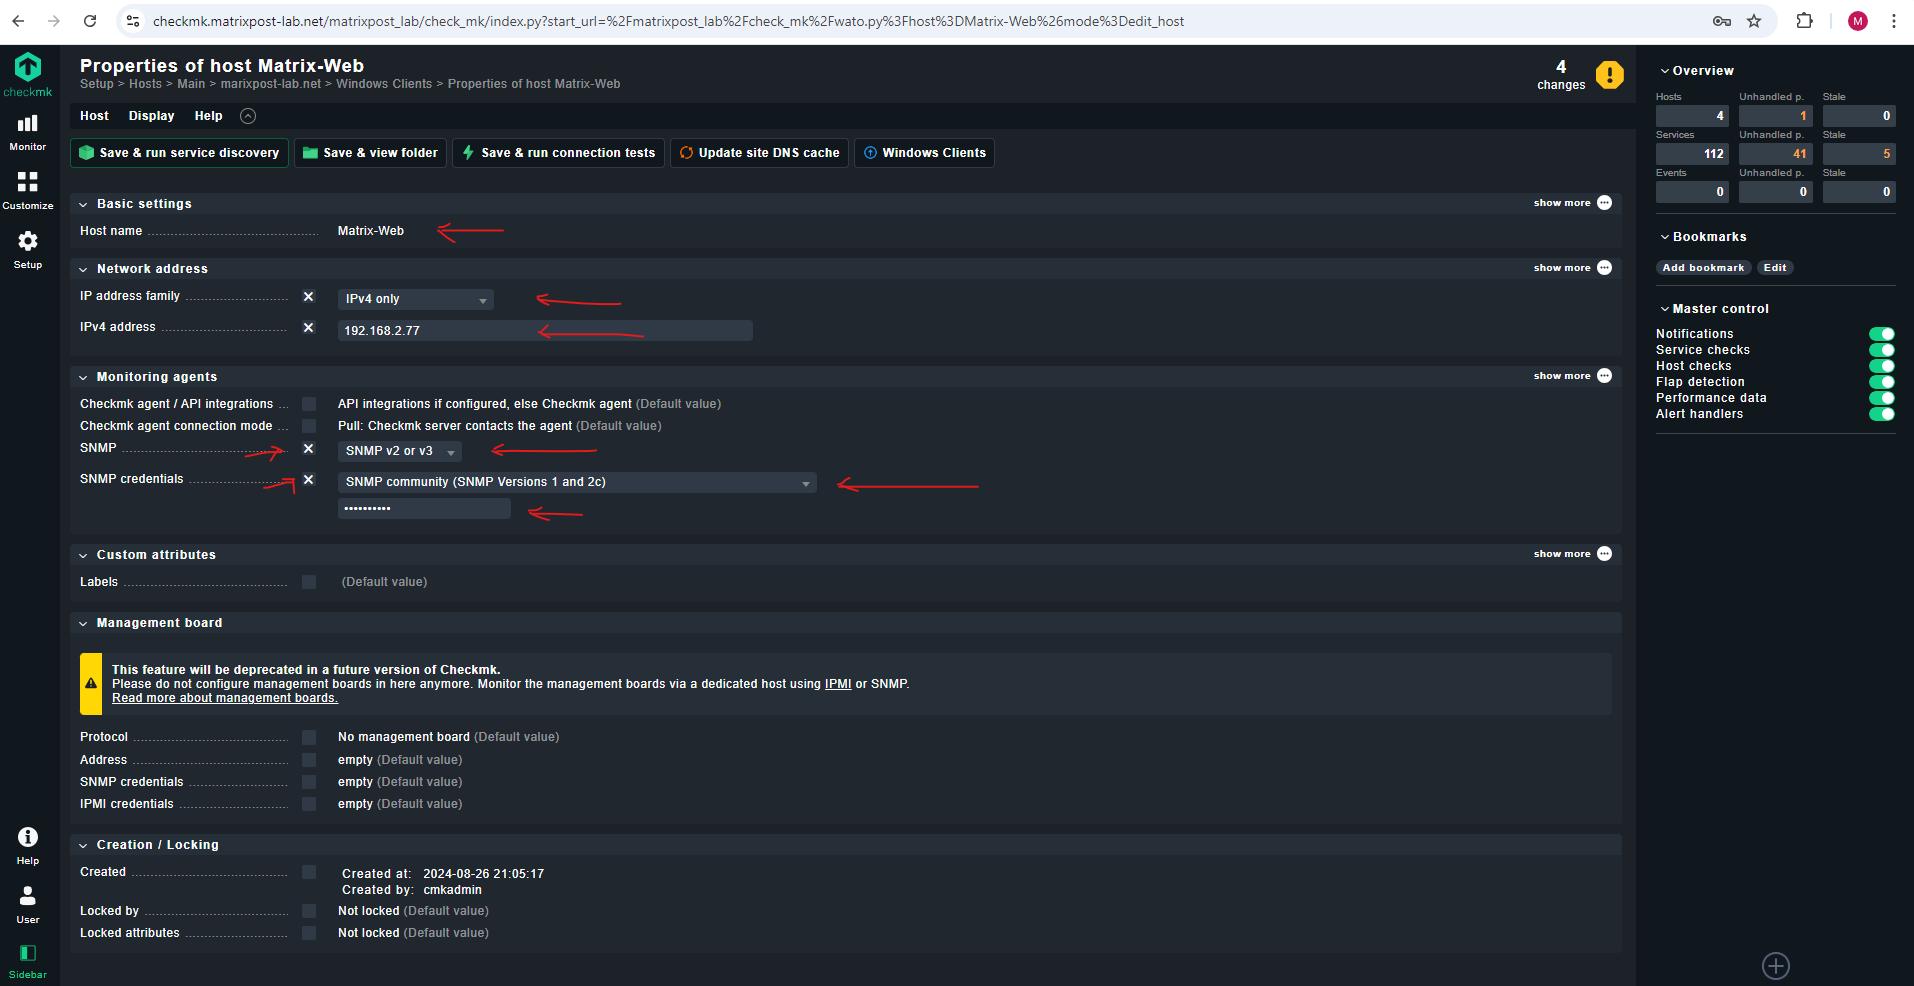
In Checkmk we need to create a new host as usual, under Monitoring agents we check SNMP and select SNMP v2 or v3, for the SNMP credentials, we select SNMP community (SNMP Version 1 and 2c).
When you compare the amount of monitored services by SNMP in contrast to the Checkmk agent, you will see that SNMP monitors much less services.

Links
Monitoring Windows
https://docs.checkmk.com/latest/en/agent_windows.htmlUnderstanding and configuring services
https://docs.checkmk.com/latest/en/wato_services.html
Tags In
Related Posts
Follow me on LinkedIn