How to set up Dante SOCKS5 Proxy on SUSE Linux Enterprise Server
In this post I will show step by step how we can set up the Dante SOCKS5 Proxy on SUSE Linux Enterprise Server and finally check if it works.
Dante is an implementation of the following proxy protocols: SOCKS version 4, SOCKS version 5 (RFC 1928), and msproxy. It is a stable and popular open-source SOCKS proxy.
A SOCKS proxy is a network proxy protocol that routes any type of internet traffic between a client and a server through an intermediary (proxy server).
Unlike HTTP/HTTPS proxies, which are designed specifically for web traffic, SOCKS proxies work at a lower level (Layer 5 – Session Layer of the OSI model) and can handle any type of traffic, including:
- Web browsing (HTTP, HTTPS)
- Email (SMTP, IMAP, POP3)
- SSH (Secure Shell)
- File transfers (FTP, SFTP)
- Peer-to-peer applications (BitTorrent, Tor)
- VoIP and gaming traffic
- SOCKS5 supports both TCP & UDP traffic
Install Dante Server on SLES
To install the Dante SOCKS5 proxy I will first search what packages are available in the SCC repositories by SUSE.
Therefore we can use the zypper search-packages <name> command.
# zypper refresh
# zypper search-packages dante
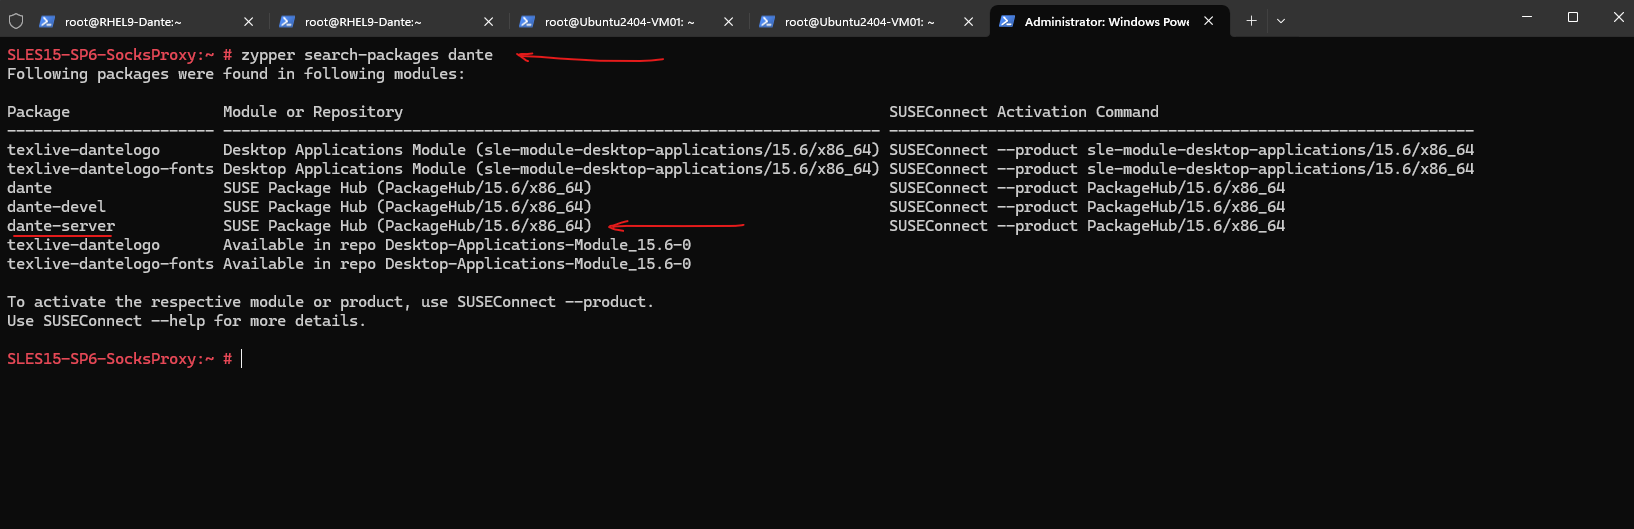
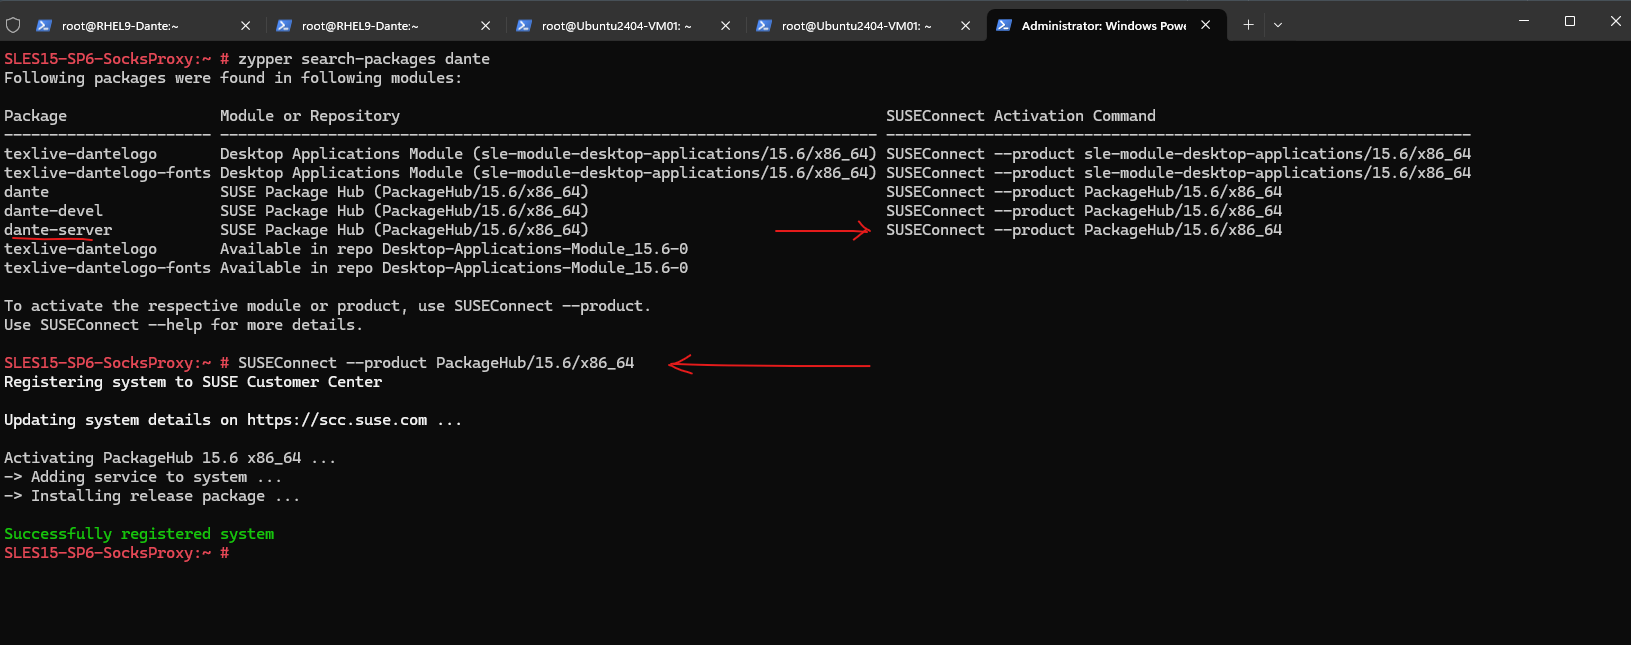
So I will first connect the repository which listed the dante-server package above by executing the following command.
# SUSEConnect --product PackageHub/15.6/x86_64
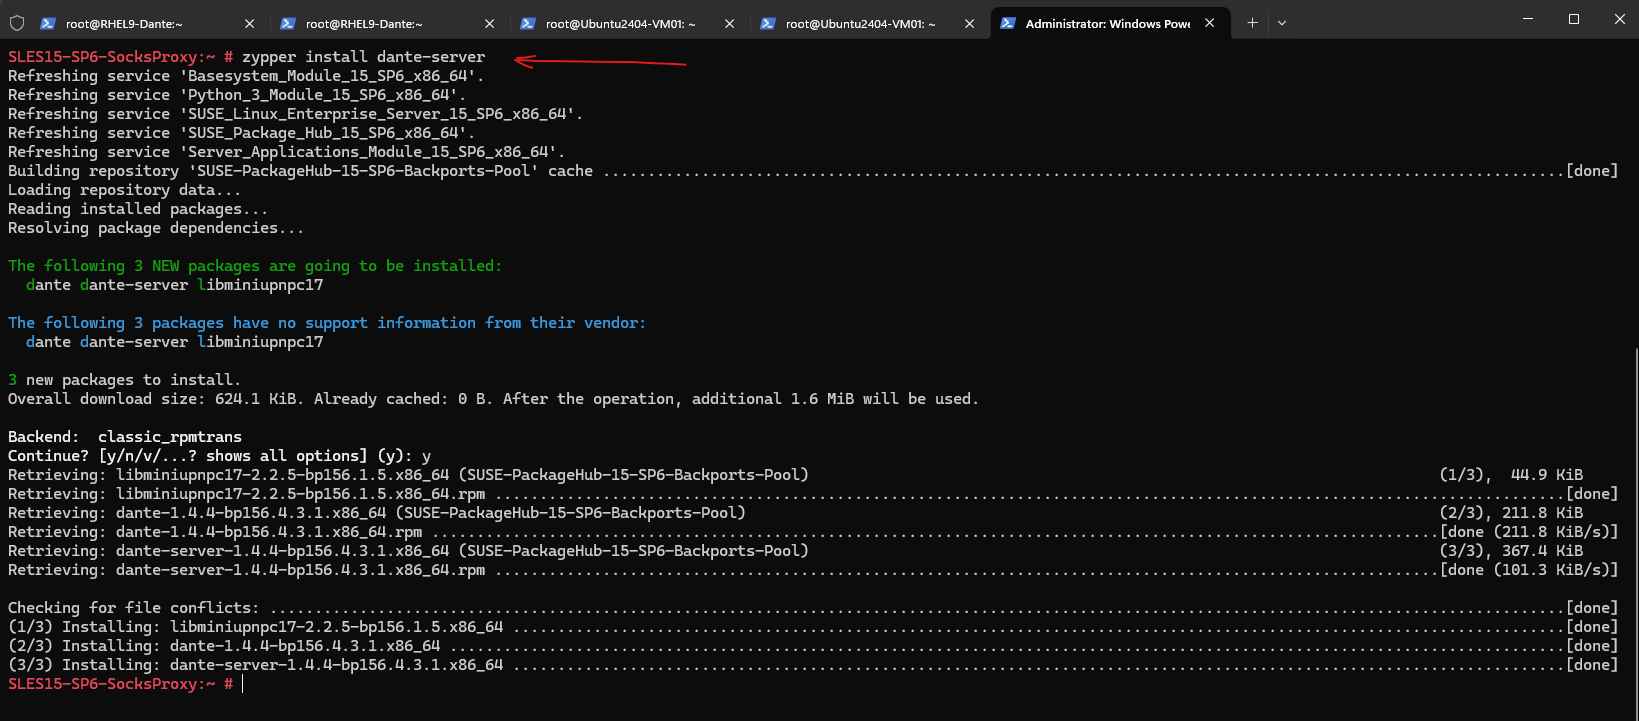
We should now be able to install the Dante SOCKS5 proxy on SLES by using the following command.
# zypper install dante-server
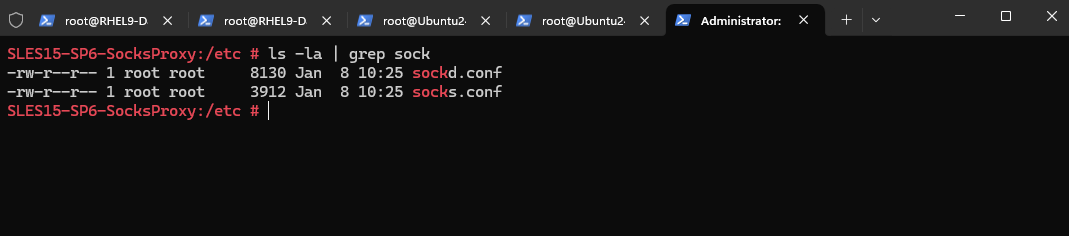
After the installation we now have two new configuration files for the Dante SOCKS5 proxy in the /etc folder.
The sockd.conf file is the Dante server configuration file and socks.conf is the SOCKS client configuration file.
Further we have a new executable binary in the /user/sbin folder. Here we can also see that a new systemd daemon with sockd.service was created we can use to control the Dante SOCKS5 proxy.
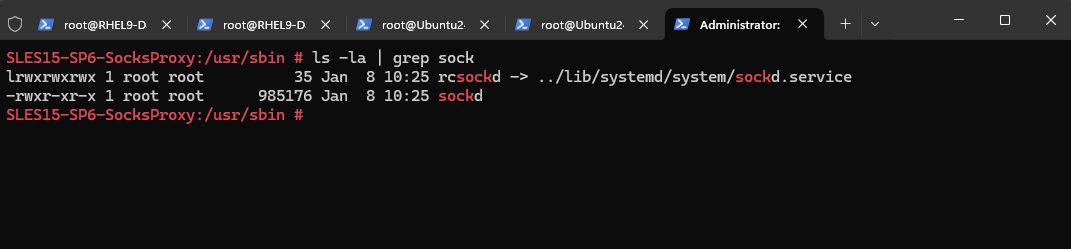
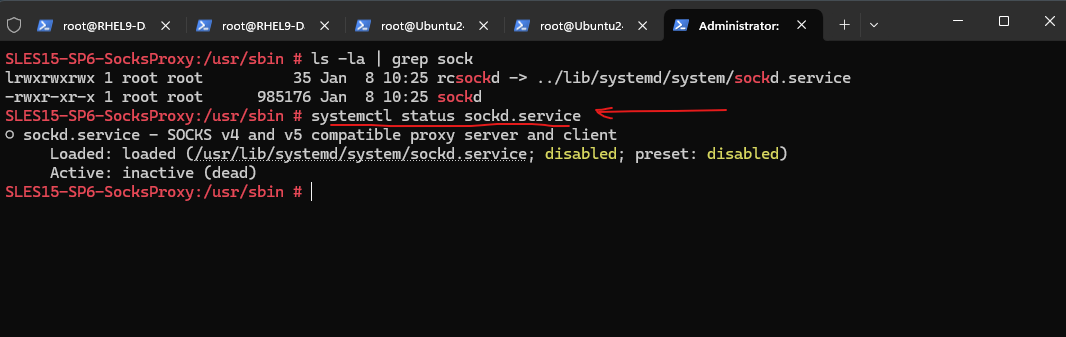
So far our Dante proxy daemon is disabled and not running.
# systemctl status sockd.service
But before we enable and start our Dante proxy daemon, we first need to configure it as shown in the next section.
Configure Dante Server on SLES
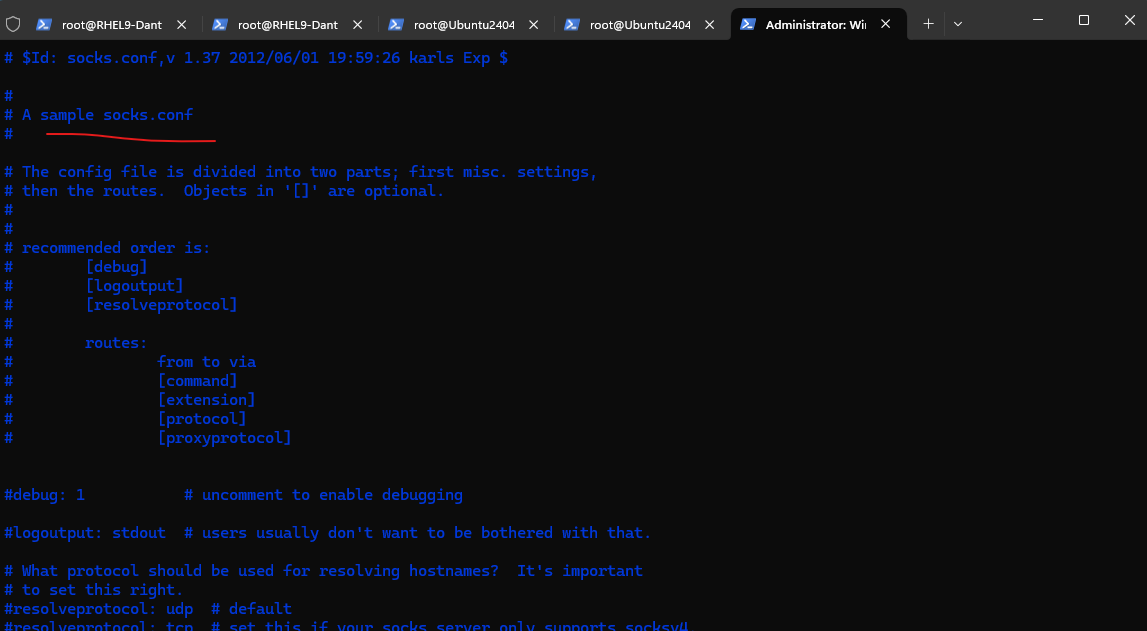
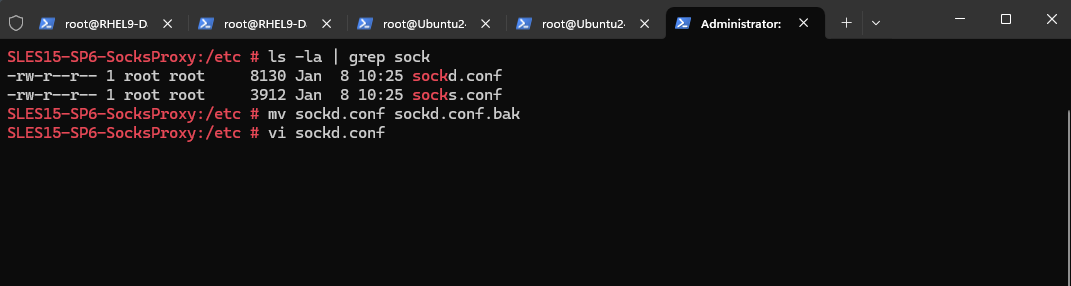
After installing the dante-server package in SLES we have the following new configuration file /etc/sockd.conf to control Dante.
So far all settings are commented and not enabled.
# vi /etc/sockd.conf
I will first rename the existing default configuration and then create a new one.
To configure Dante we can fortunately use the configuration pages of Dante under the following link https://www.inet.no/dante/doc/latest/config/index.html and here the Server configuration https://www.inet.no/dante/doc/latest/config/server.html where we can use and just adjust the Full minimal template.
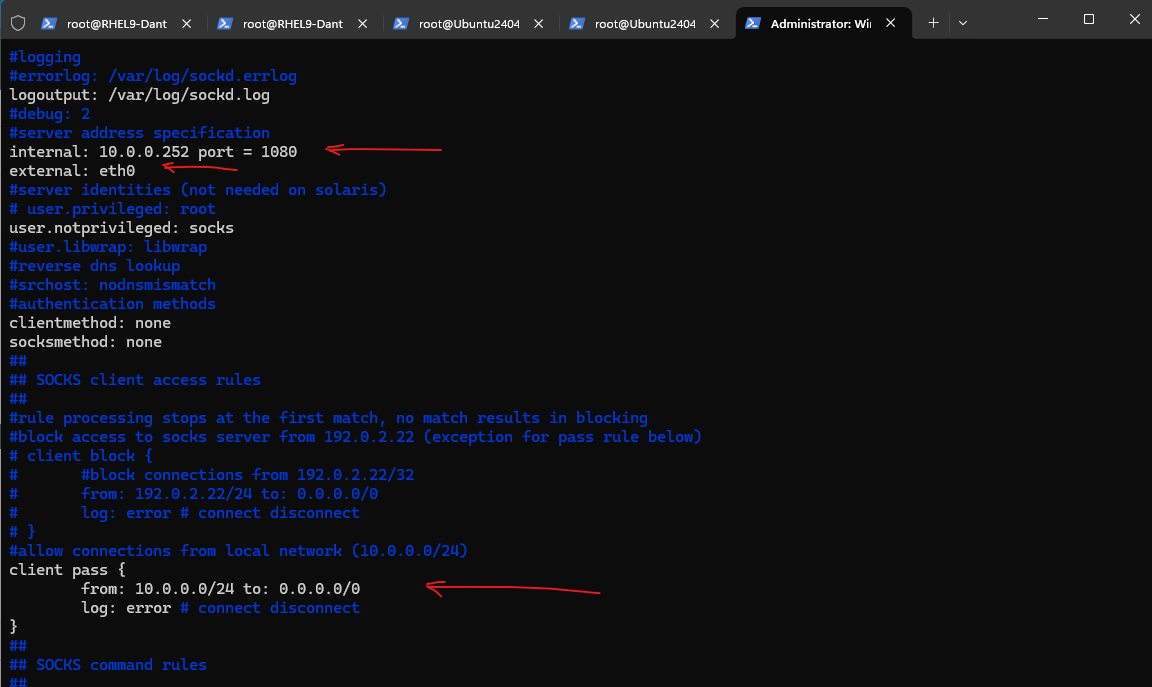
I was here only adjusting the internal IP Address with 10.0.0.252 and port 1080, the external network interface with external = eth0 and finally allow connections from local network section and changed the subnet which is allowed to connect to Dante.
#logging
#errorlog: /var/log/sockd.errlog
logoutput: /var/log/sockd.log
#debug: 2
#server address specification
internal: 10.0.0.252 port = 1080
external: eth0
#server identities (not needed on solaris)
# user.privileged: root
user.notprivileged: socks
#user.libwrap: libwrap
#reverse dns lookup
#srchost: nodnsmismatch
#authentication methods
clientmethod: none
socksmethod: none
##
## SOCKS client access rules
##
#rule processing stops at the first match, no match results in blocking
#block access to socks server from 192.0.2.22 (exception for pass rule below)
# client block {
#       #block connections from 192.0.2.22/32
#       from: 192.0.2.22/24 to: 0.0.0.0/0
#       log: error # connect disconnect
# }
#allow connections from local network (10.0.0.0/24)
client pass {
        from: 10.0.0.0/24 to: 0.0.0.0/0
        log: error # connect disconnect
}
##
## SOCKS command rules
##
#rule processing stops at the first match, no match results in blocking
#block communication with www.example.org
# socks block {
#        from: 0.0.0.0/0 to: www.example.org
#        command: bind connect udpassociate
#        log: error # connect disconnect iooperation
# }
#generic pass statement - bind/outgoing traffic
socks pass {
        from: 0.0.0.0/0 to: 0.0.0.0/0
        command: bind connect udpassociate
        log: error # connect disconnect iooperation
}
#block incoming connections/packets from ftp.example.org
# socks block {
#        from: ftp.example.org to: 0.0.0.0/0
#        command: bindreply udpreply
#        log: error # connect disconnect iooperation
# }
#generic pass statement for incoming connections/packets
socks pass {
        from: 0.0.0.0/0 to: 0.0.0.0/0
        command: bindreply udpreply
        log: error # connect disconnect iooperation
}
For the server identities section below:
These keywords specify the identities that the SOCKS server should use for different types of operations. We recommended that a special user, such as socks is created for the SOCKS server. For this minimal configuration, none of the keywords are required, but specifying the user.notprivileged user ensures that the server will try to avoid running as the root user, even if started by root.
Because of the server identities section above and we will using the non privileged user named socks under user.notprivileged: socks, we also first need to create this user on the system.
# useradd socks

We can now enable and start the sockd.service daemon.
# systemctl enable sockd.service
# systemctl start sockd.service
# systemctl status sockd.service
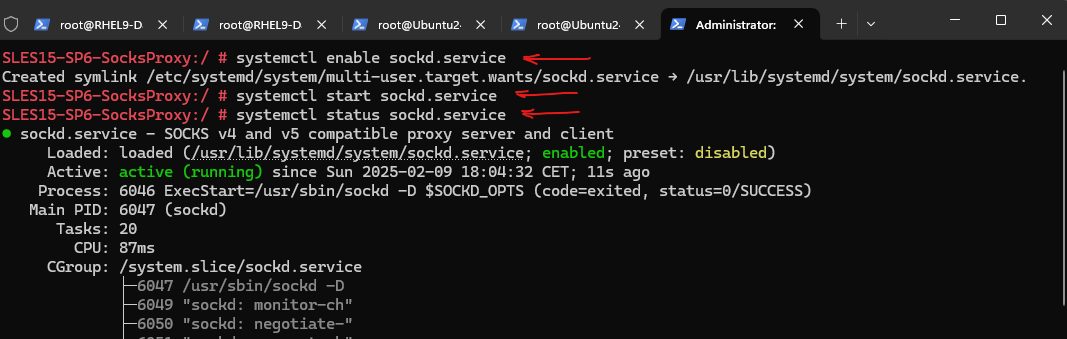
Looks good, our Dante SOCKS5 proxy is listening as configured on IP address 10.0.0.252 and tcp port 1080.
# ss -anp | grep 1080

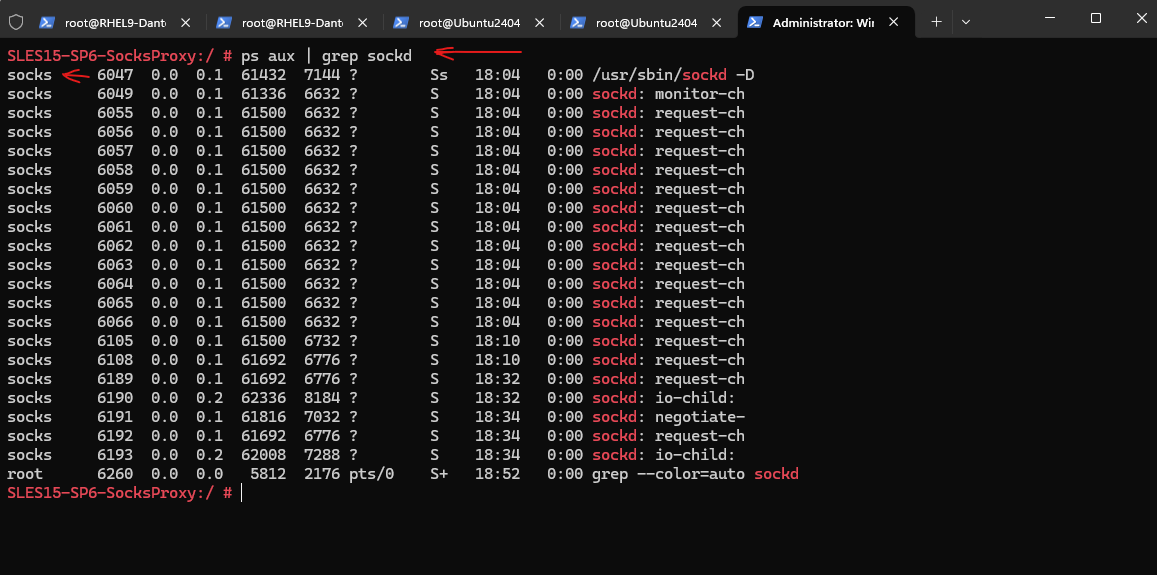
By using the following command, we can also check if our Dante proxy is really running with the non privileged user named socks we created and assigned to.
Looks also good!
# ps aux | grep sockd
Testing the SOCKS5 Proxy by using the SSH and Ncat Utility
In order to test if our new SOCKS5 Proxy is working, we can try to connect to a remote host by using SSH on Windows.
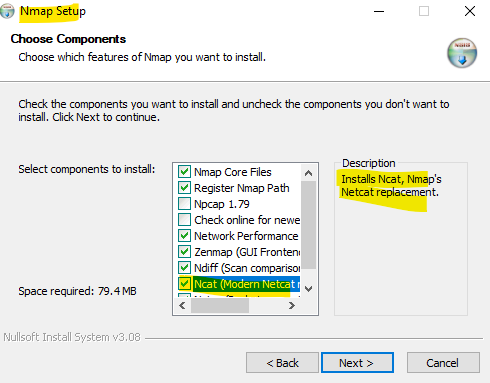
On Windows we can use the ssh command together with the Ncat (successor of Netcat by Nmap) utility. To install the Ncat we need to install Nmap which installs also Ncat by default.
Below an example how we can use Ncat in general to connect to a remote computer by using a proxy, in our case the Dante SOCKS5 proxy.
The remote computer here with the IP address 52.232.113.206 is an Ubuntu Azure virtual machine to which I will connect on TCP Port 22 (SSH daemon).
Ncat Proxying
Source: https://nmap.org/ncat/guide/ncat-proxy.html
ncat --proxy <proxyhost>[:<proxyport>] --proxy-type  { http  |   socks4  |   socks5 } <host> [<port>]

> ncat -v --proxy 10.0.0.252:1080 --proxy-type socks5 52.232.113.206 22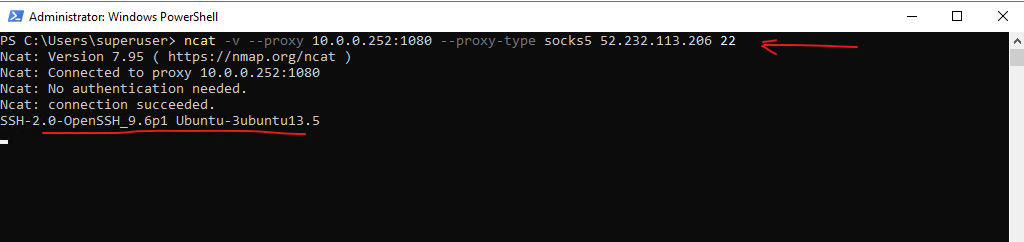
As mentioned we can now also use Ncat to proxy SSH connection for the in Windows built-in SSH client (since latest Windows 10 and Windows Server 2019 builds).
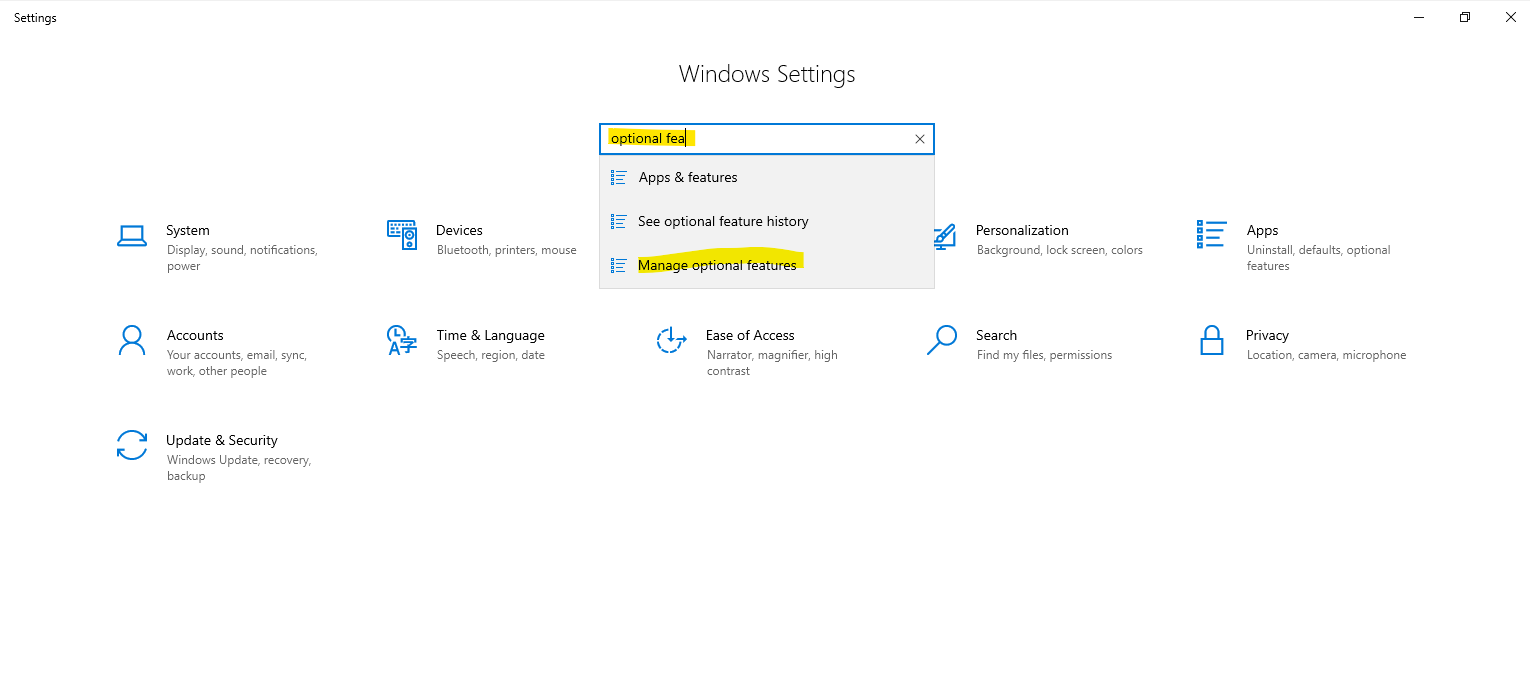
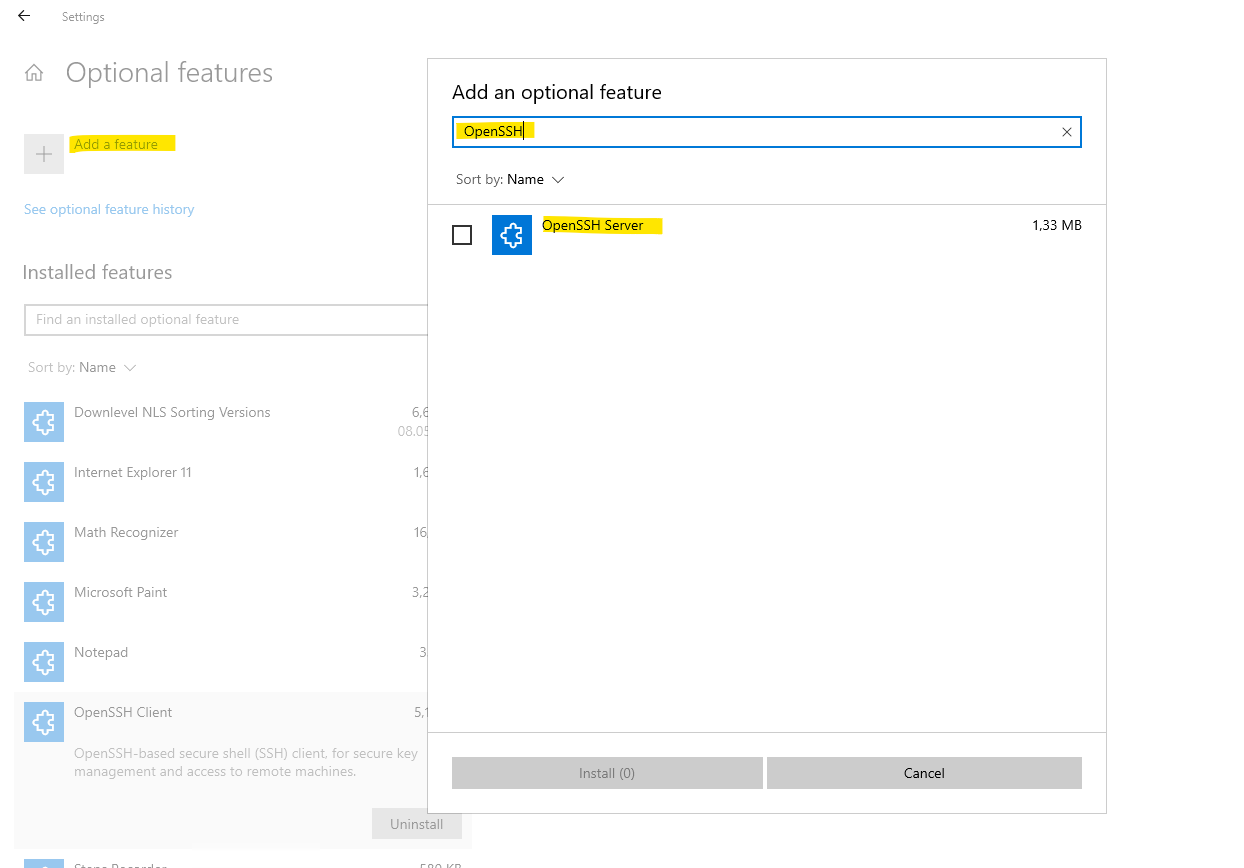
By default, the OpenSSH client and OpenSSH server are located in the directory: C:\Windows\System32\OpenSSH. You can also check that it is present in Windows Settings > System > Optional features in your added features as shown below.
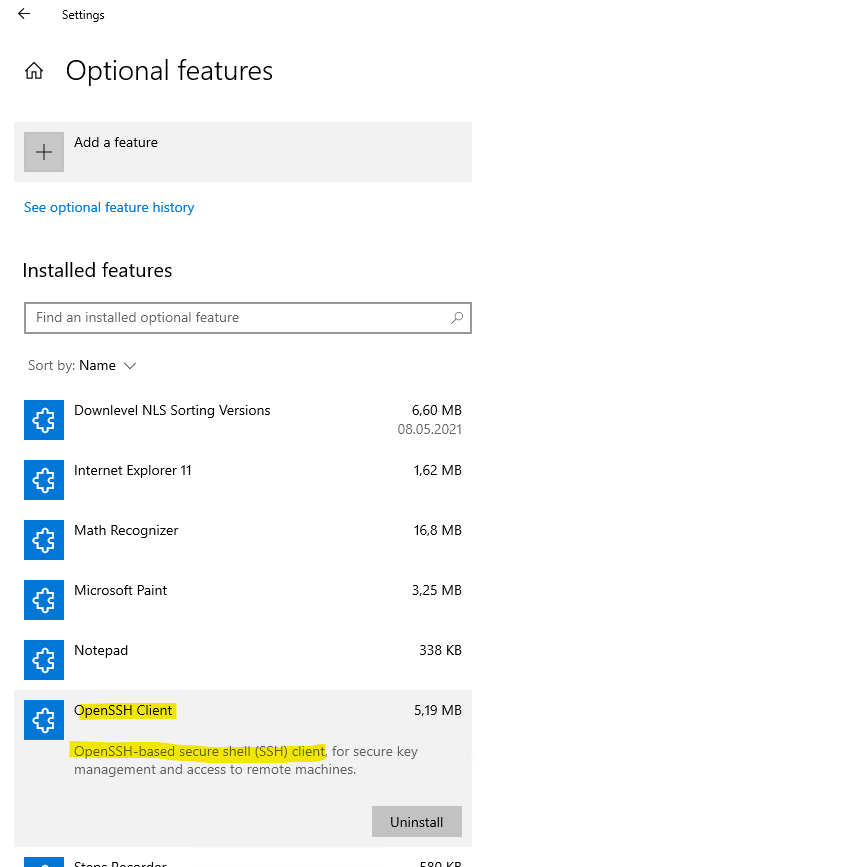
The OpenSSH Server we first need to add and is not added by default.
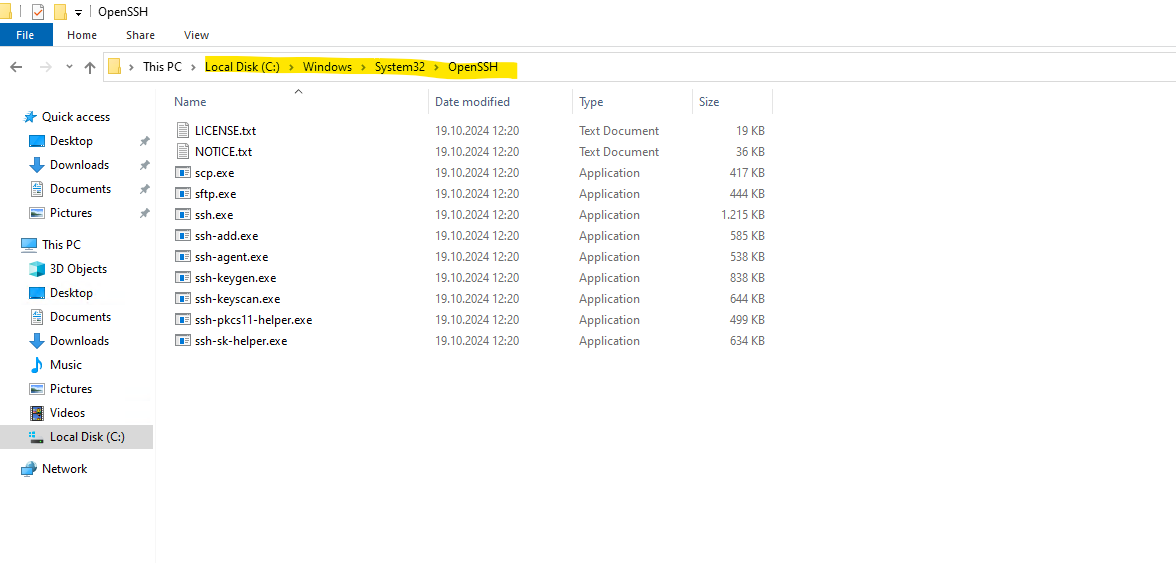
As mentioned the OpenSSH client and server and its tools are located in the directory C:\Windows\System32\OpenSSH.
After we successfully installed Nmap and Ncat on our Windows machine, which doesn’t have any internet access, we can now finally connect to a remote host by using the SSH client together with Ncat to proxy the SSH connection through our SOCKS5 proxy.
> ssh user@<remote host> -o "ProxyCommand ncat --verbose --proxy-type socks5 --proxy <FQDN or IP SOCKS5 proxy>:<port> %h %p"

> ssh root@52.232.113.206 -o "ProxyCommand ncat --verbose --proxy-type socks5 --proxy 10.0.0.252:1080 %h %p"
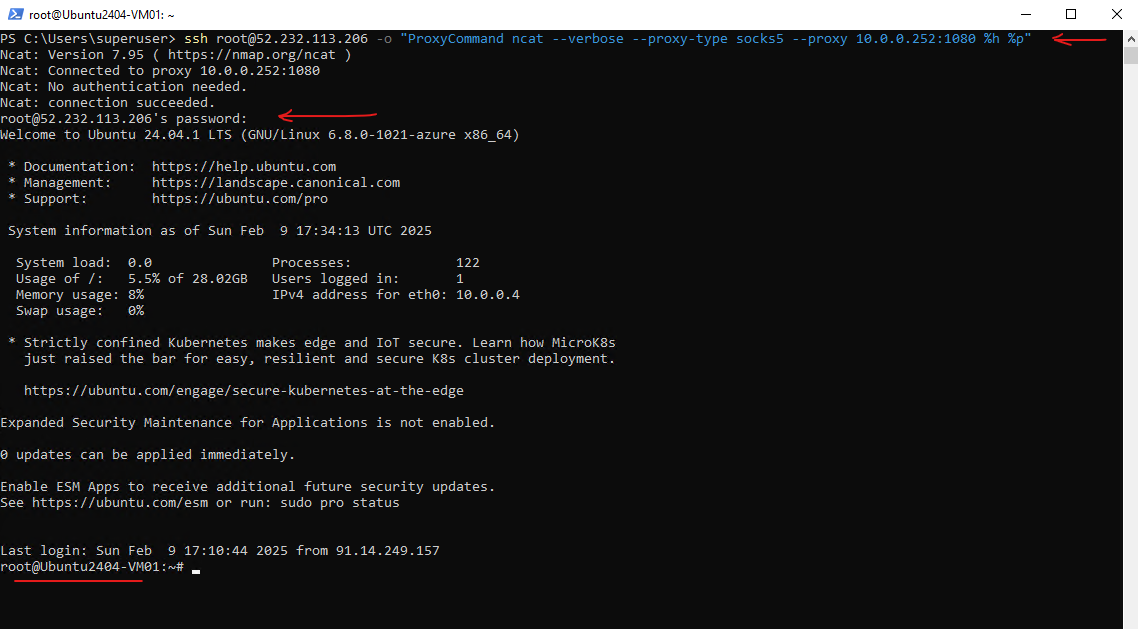
Works like a charme!
Links
dante-server
https://software.opensuse.org/package/dante-server?locale=deDante configuration
https://www.inet.no/dante/doc/latest/config/index.htmlA free SOCKS server
https://snapcraft.io/danteSOCKS4 protocol
https://www.openssh.com/txt/socks4.protocolTutorial: SSH in Windows Terminal
https://learn.microsoft.com/en-us/windows/terminal/tutorials/sshProxyChains ver. 4.3.0 README
https://github.com/haad/proxychains?tab=readme-ov-file