Mastering GCP Virtual Machines – Part 1
Even with all the fancy managed services, plain old virtual machines are still the backbone of a lot of real-world builds.
We will keep it hands-on: choosing machine families and images, regions/zones, disks and snapshots, VPC basics and firewalls, access (SSH/IAP & service accounts), startup scripts/metadata, and a few gotchas around pricing (Spot vs. on-demand) and tagging.
By the end, we will know how to launch, secure, and operate a GCE (Google Compute Engine) VM the right way, without the guesswork.
In this part we will see how to create a new virtual machine instance (Linux Ubuntu), checking if the google guest environment (VM agent) is installed and what instance schedules are and how to configure them.
In Part 2 we will explorer the different access methods we can use to connect to our virtual machine instances.
In Part 3 we will see how to create a new Windows virtual machine instance (Windows Server 2025) and how to connect to by using RDP and SSH. Further we will see how to connect to the serial console.
In Part 4 we will see how GCP will encrypt the virtual disks of virtual machine instances. Further we will see how to export a disk from Google Cloud Platform (GCP) which lets us move VM data into on-premises environments like VMware vSphere.
In Part 5 we will take a look at some key networking tools that help you secure and troubleshoot our environment.
Creating a new Virtual Machine Instance (Linux)
A Compute Engine instance can be either a virtual machine (VM) or bare metal instance that is hosted on Google’s infrastructure.
You can create an instance or create a group of managed instances (MIG) by using the Google Cloud console, the Google Cloud CLI, or the Compute Engine API.
The terms Compute Engine instance, compute instance or instance are synonymous. Based on the machine type that you specify, an instance can be either a bare metal instance or a virtual machine (VM) instance, as follows:
- If the name of its machine type ends in -metal, an instance is a bare metal instance, which does not have a hypervisor installed.
- Otherwise, an instance is a VM instance. The terms virtual machine instance, VM instance, and VM are synonymous.
Compute Engine instances can run the public images for Linux and Windows Server that Google provides as well as private custom images that you can create or import from your existing systems. You can also deploy Docker containers, which are automatically launched on instances running the Container-Optimized OS public image.
Source: https://cloud.google.com/compute/docs/instances
First we will create a new Linux virtual machine below by using the Google Cloud console.
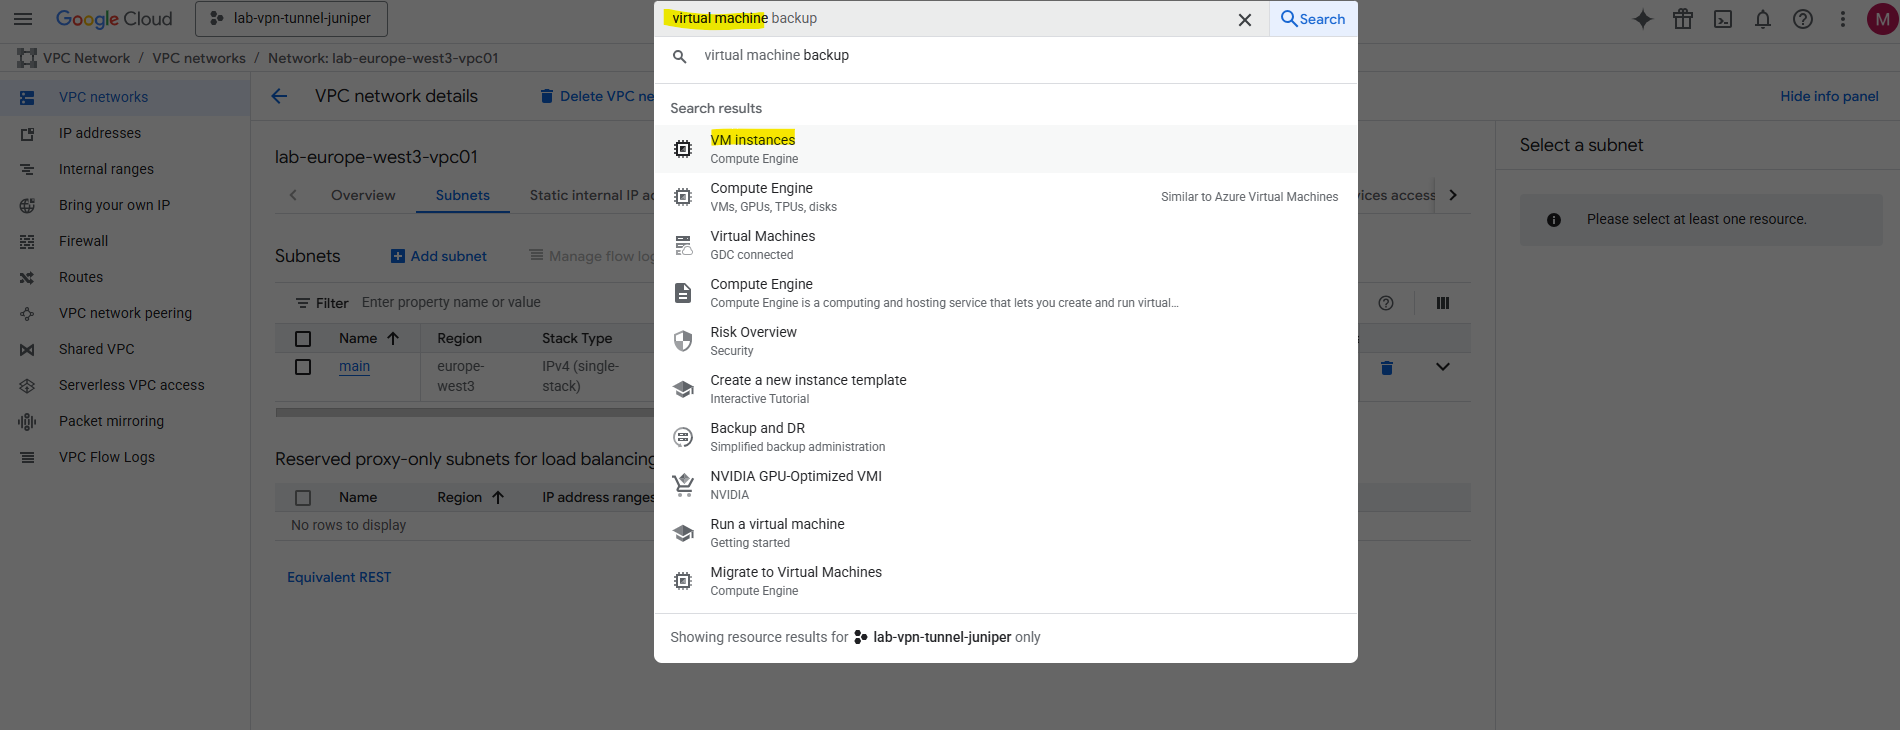
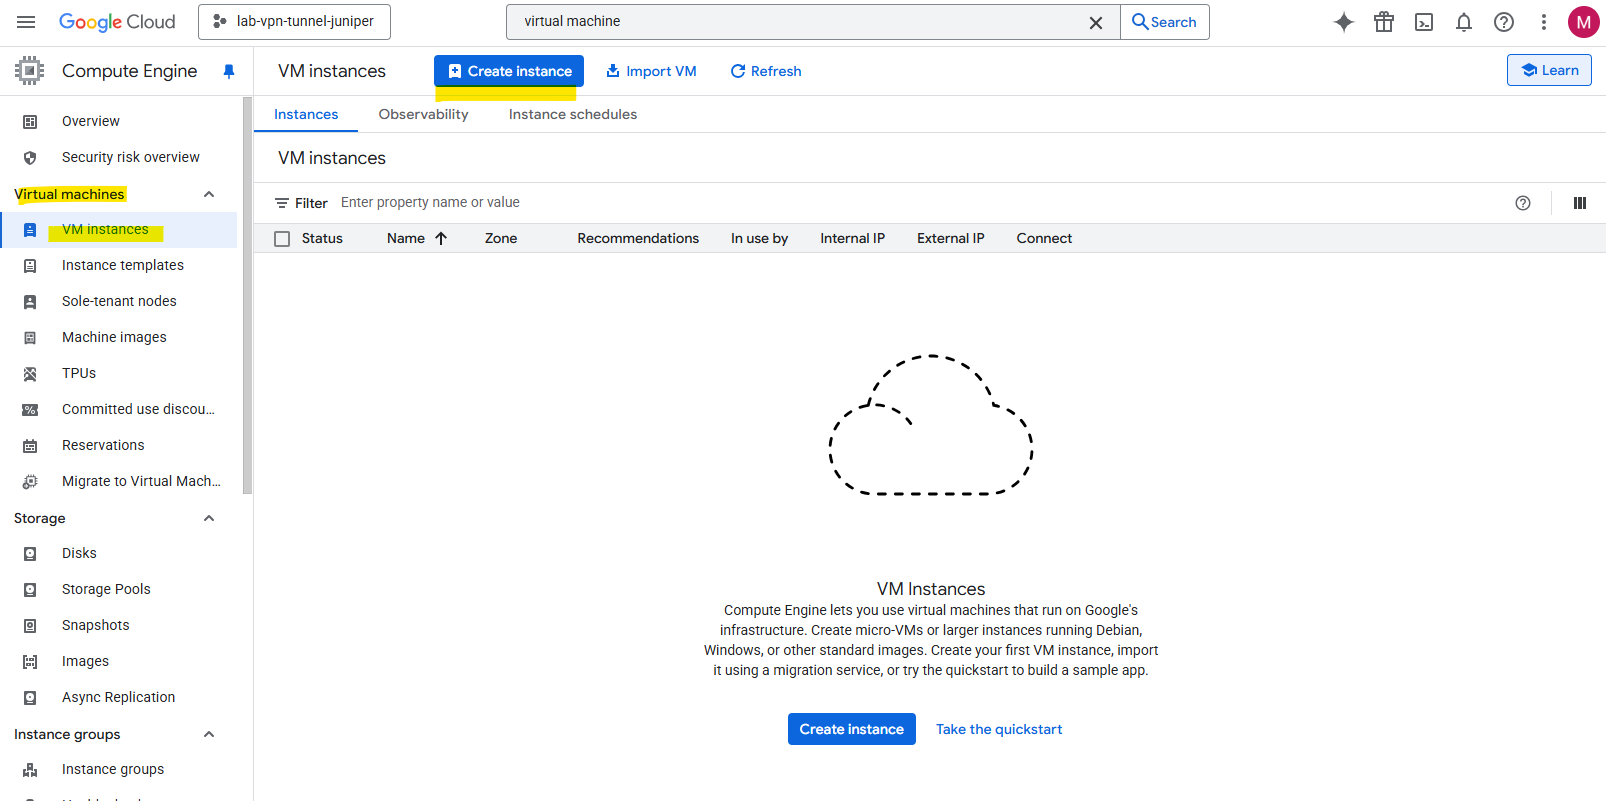
Search for virtual machine and select VM instances.
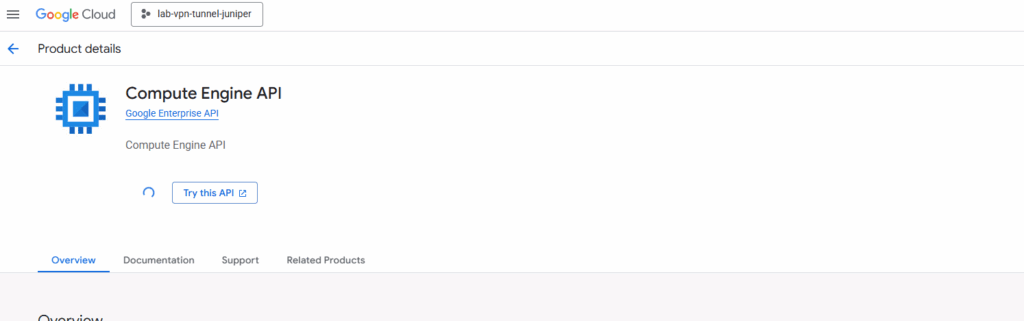
In case the Compute Engine API is not already enabled for our project, we first need to enable this API in order to create virtual machines instances.
In a brand-new project, many services are disabled by default, including the Compute Engine API.
Click on Create instance.
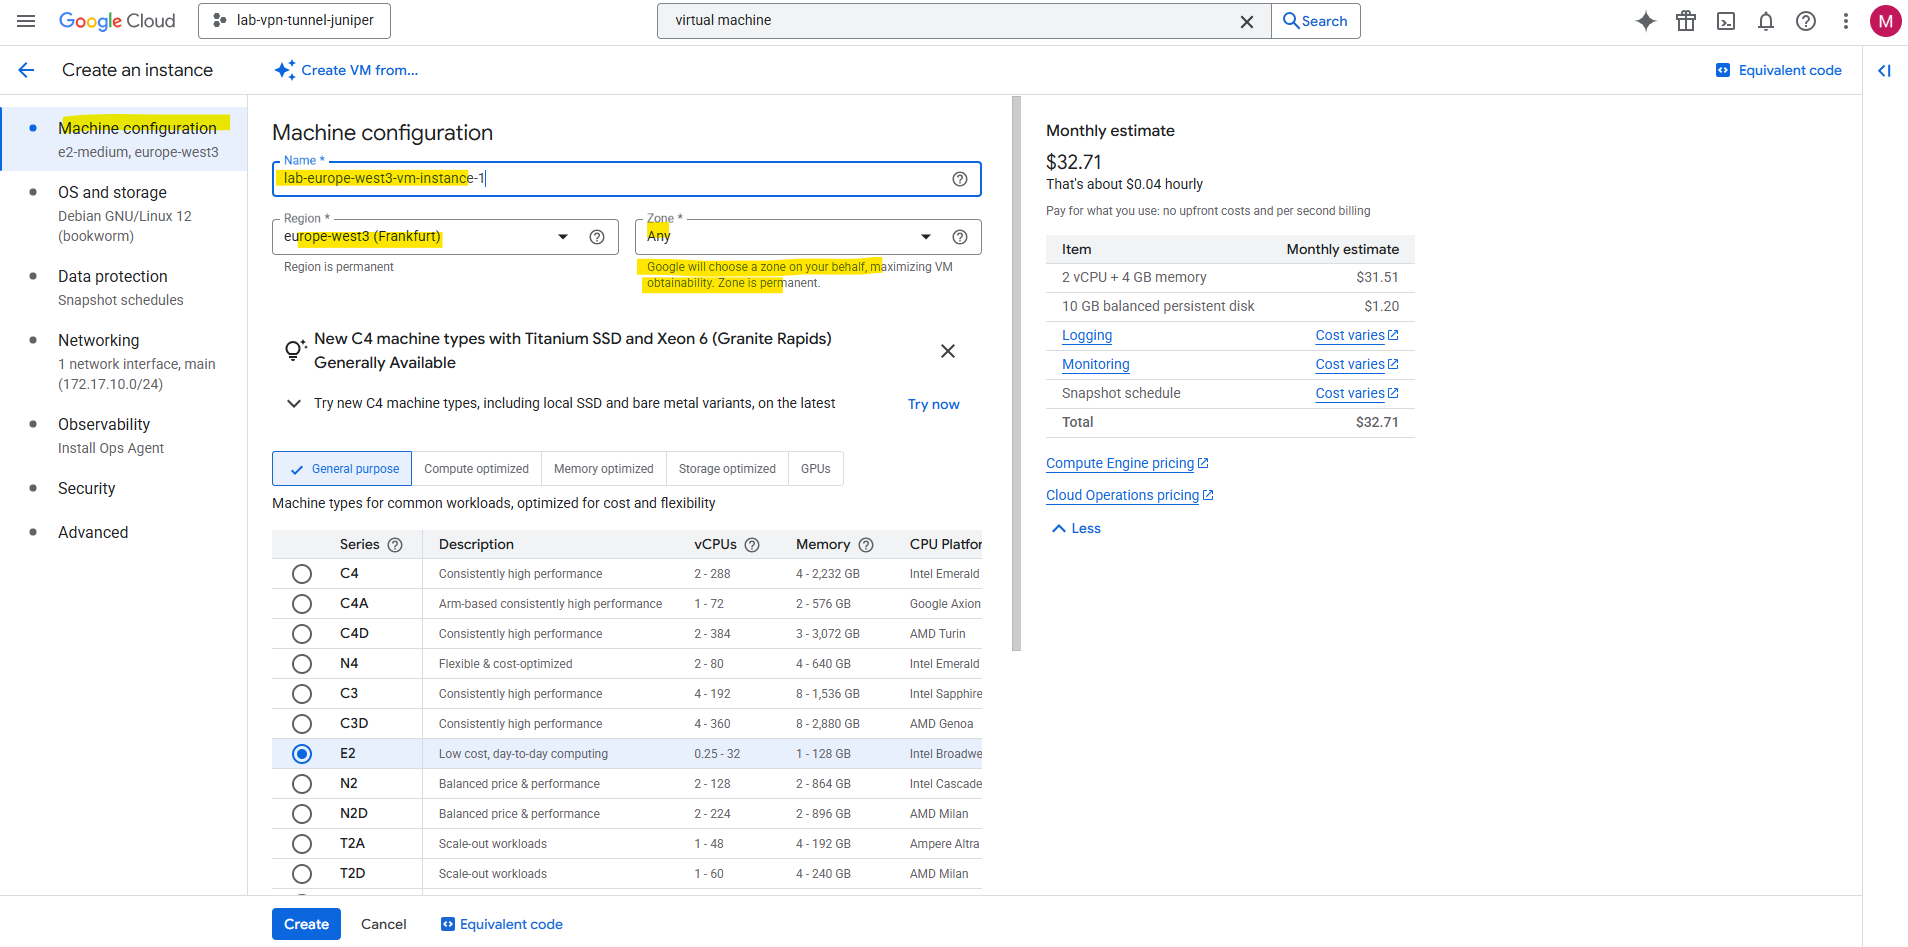
First we need to enter a name for our new virtual machine, selecting the region and zone it will run and choosing a machine type for.
Pick the region closest to your users/data to cut latency and meet compliance, and make sure it offers the services you need at a good price.
Treat a zone as a failure domain (set of resources that can fail together because they share power, network, or control dependencies e.g. rack/cage), use multiple zones in the same region for high availability. Choose the machine type to match workload: general-purpose (E2/N2) for most, compute-optimized (C2/C3) for CPU-heavy, memory-optimized (M2/M3) for RAM-heavy or use a custom/ARM (T2A) if your stack supports it to save cost.
Select the OS type and disk size. I will select here Ubuntu.

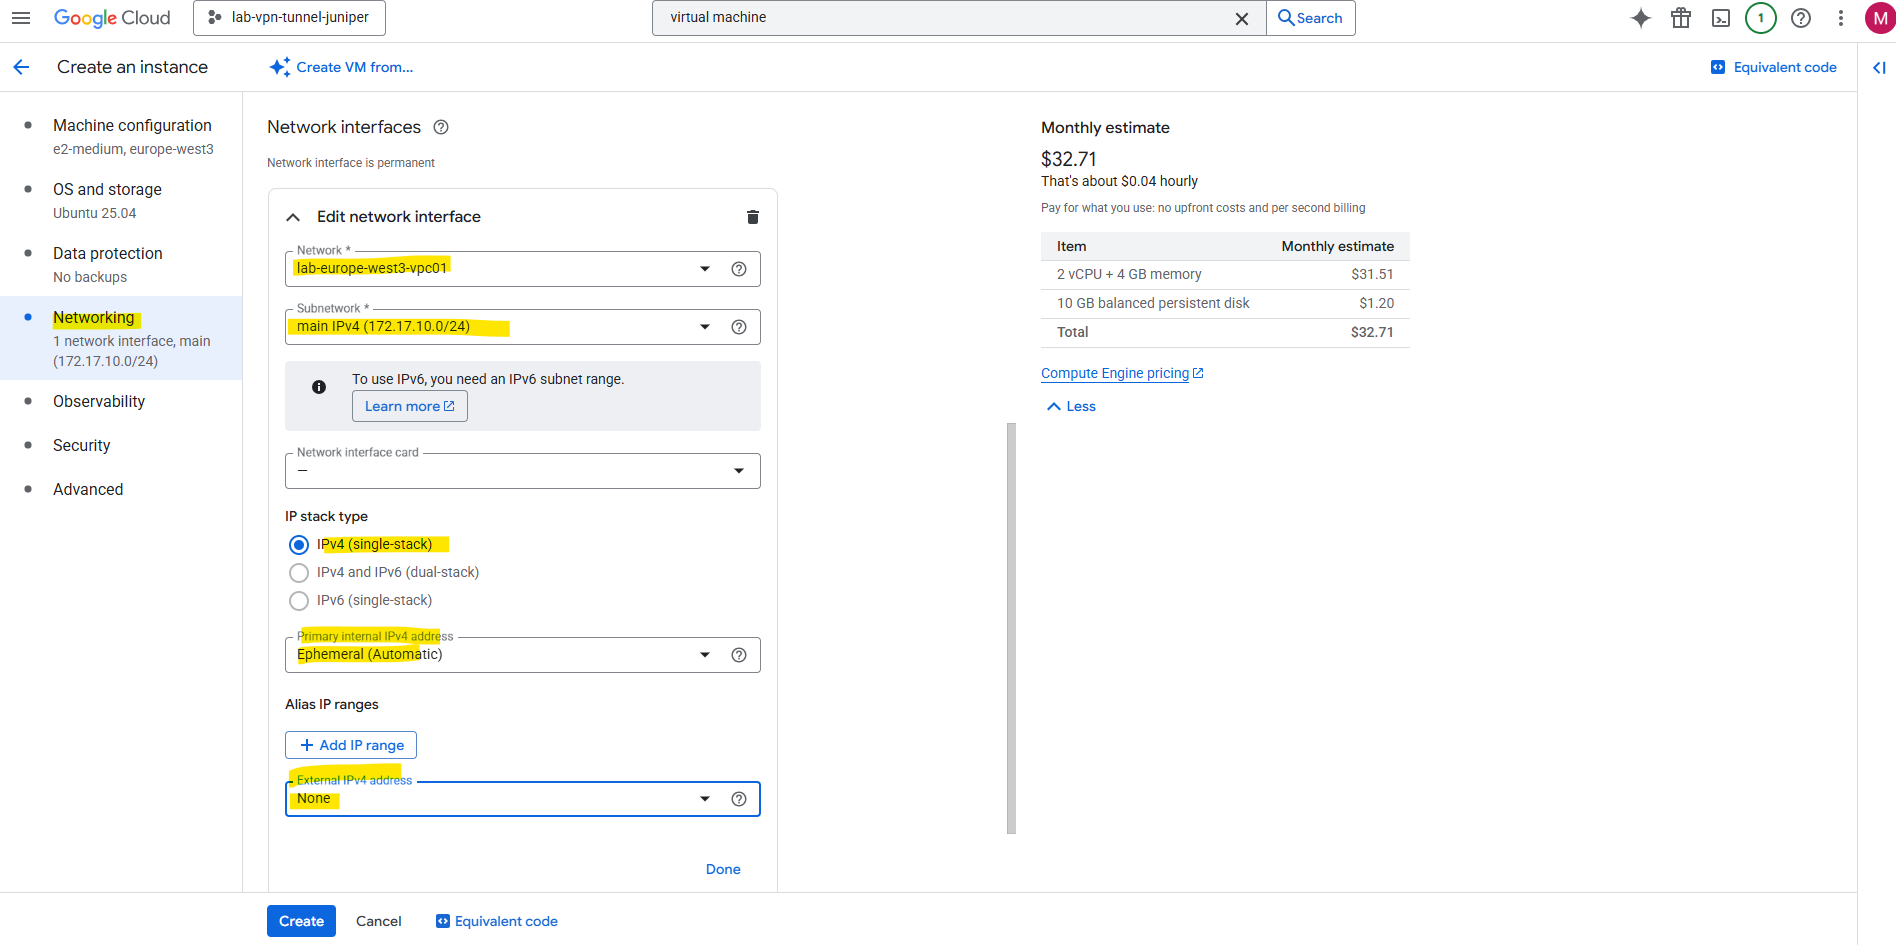
I will not set a public IP address for the virtual machine as I just want to connect to its private IP address by using an IPSec VPN tunnel which connects my on-prem lab environment with GCP as shown here.
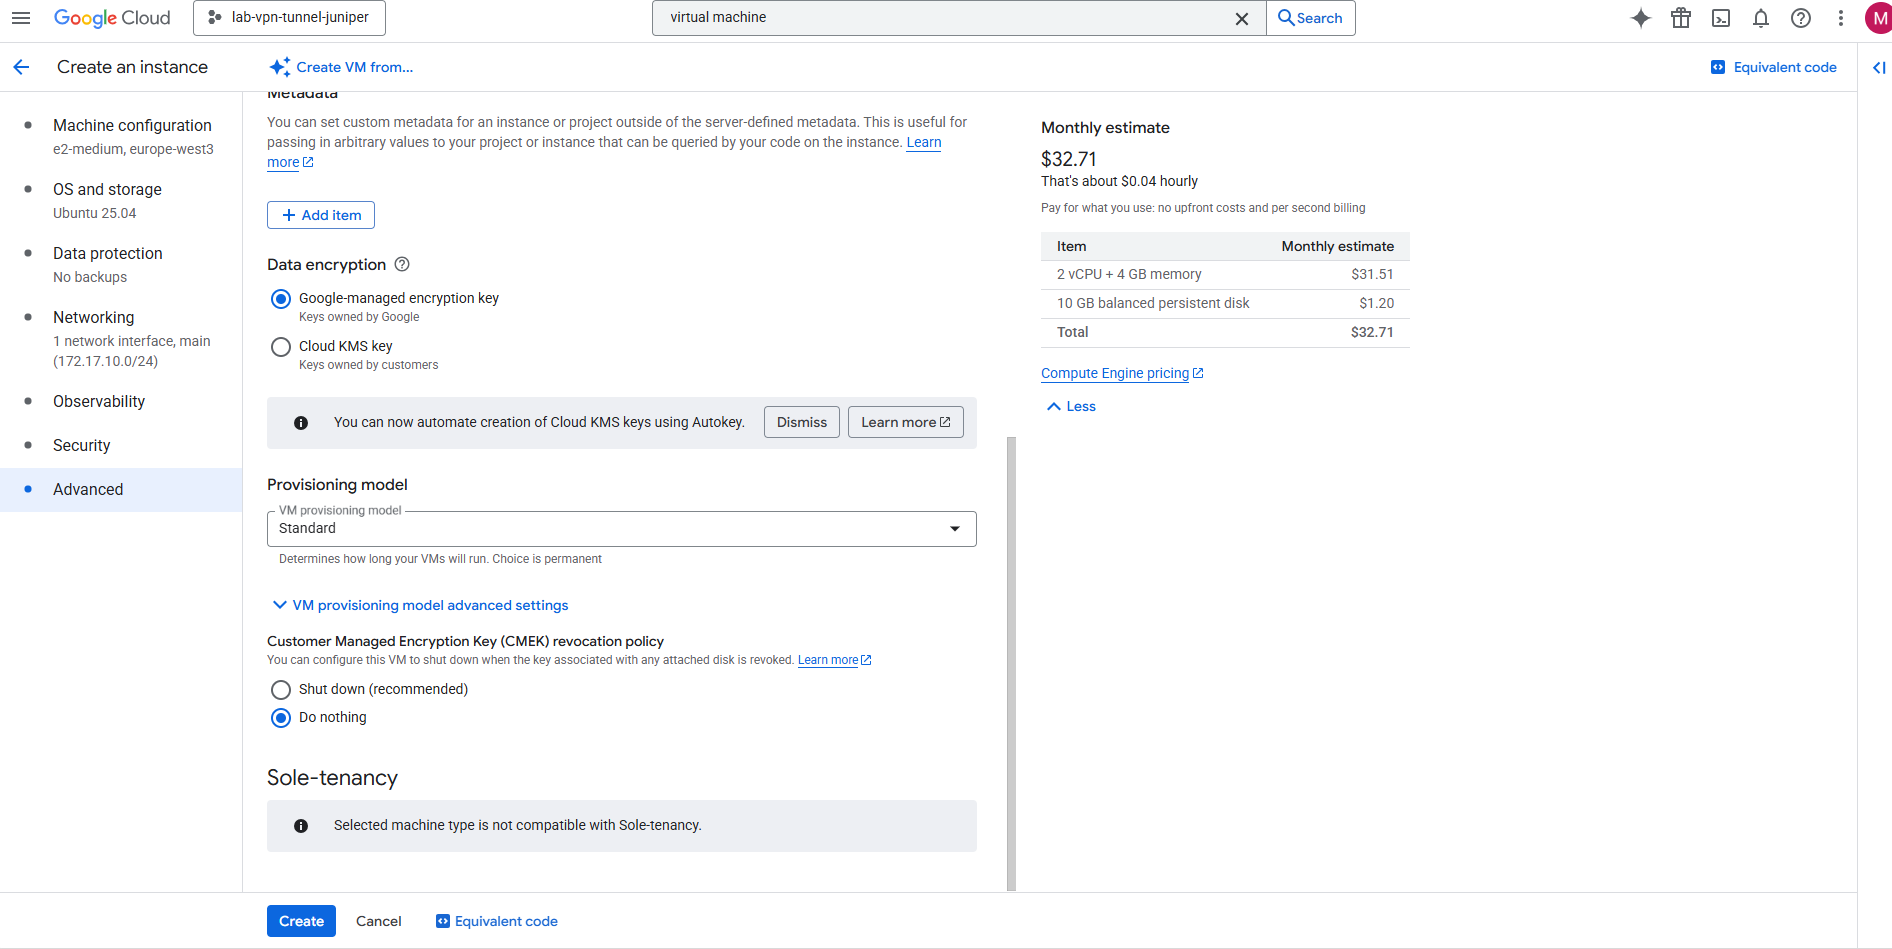
On the security section I will enable all three options with Turn on Secure Boot, Turn on vTPM and Turn on integrity Monitoring.
– Secure boot helps protect your VM instances against boot-level and kernel-level malware and rootkits.
– Virtual Trusted Platform Module (vTPM) validates your guest VM pre-boot and boot integrity, and offers key generation and protection.
– Integrity monitoring lets you monitor and verify the runtime boot integrity of your shielded VM instances using Cloud Monitoring.
Note: requires vTPM to be enabled.
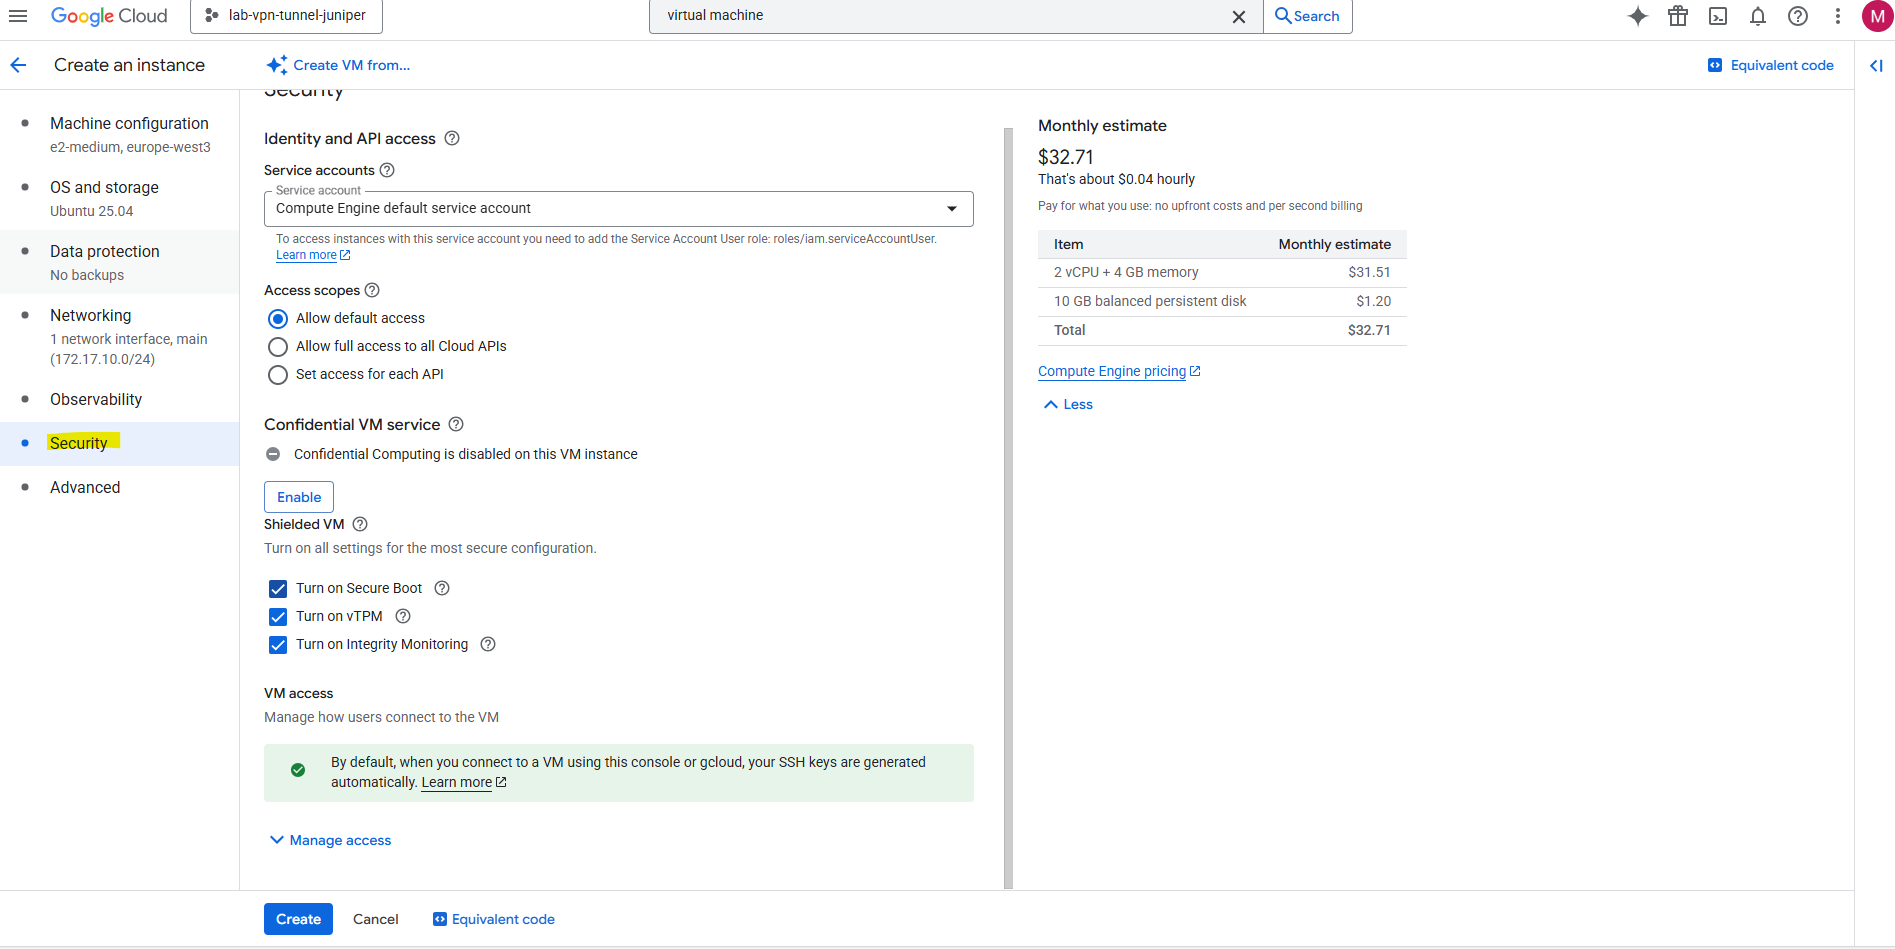
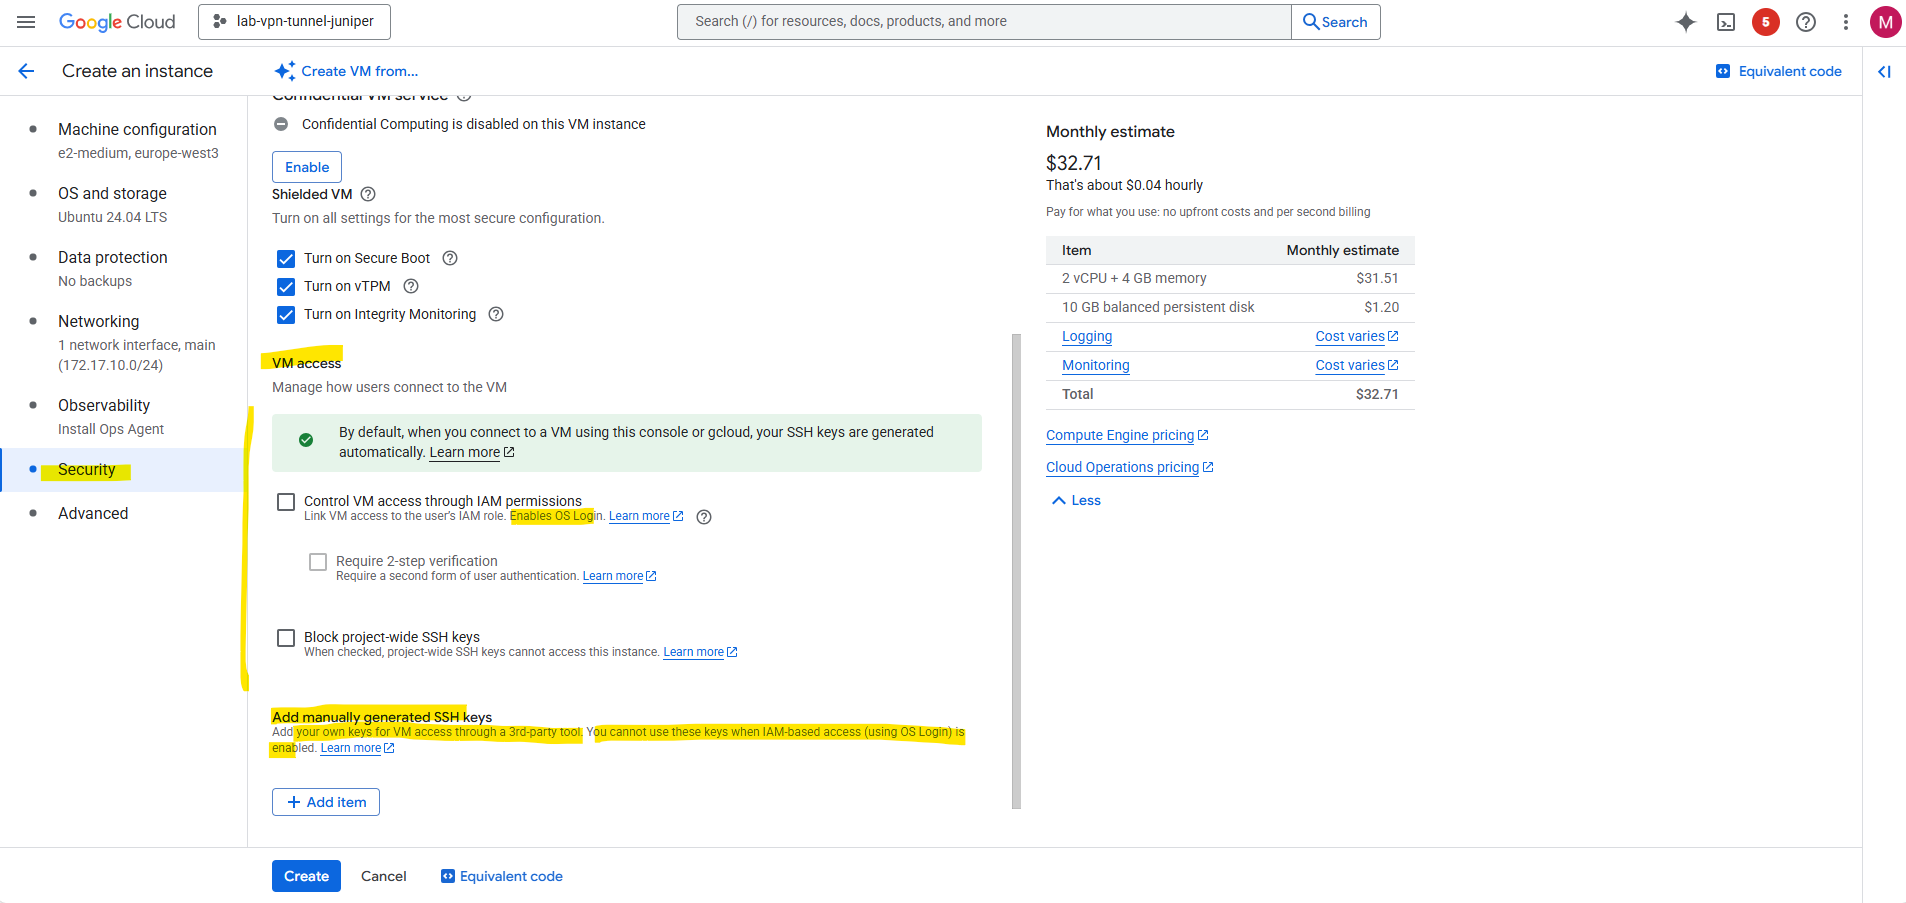
Also crucial here on the Security tab is the VM access section.
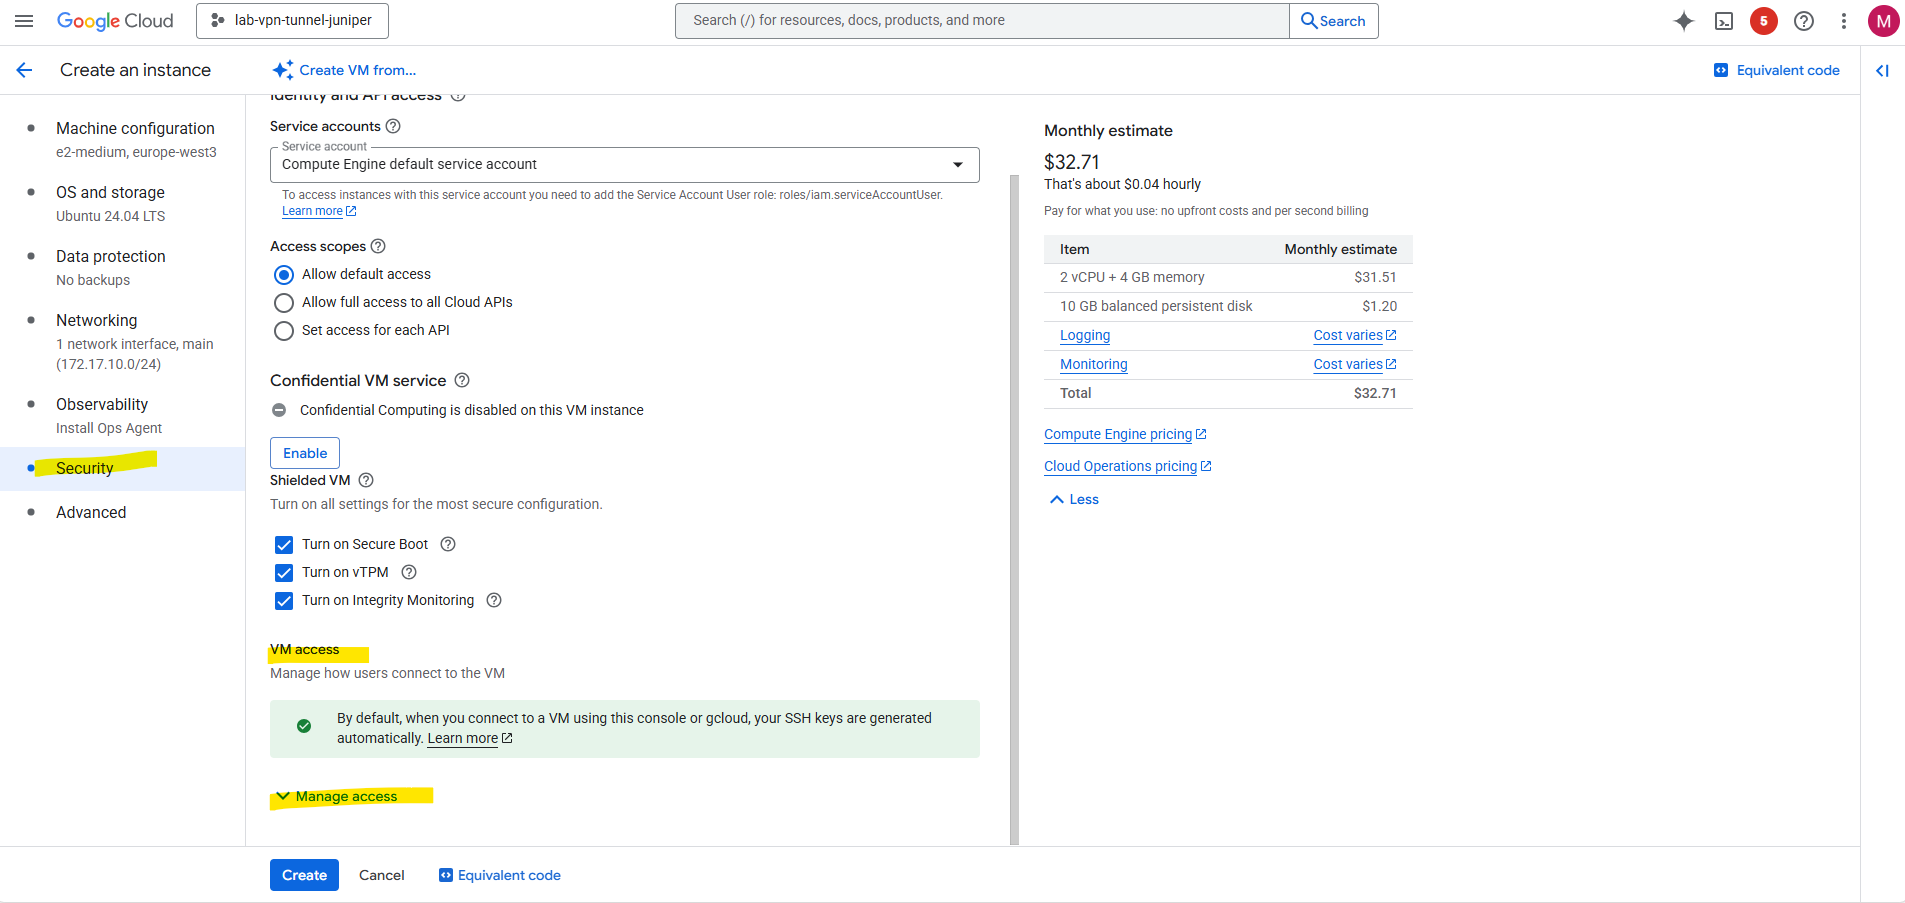
By default neither “Control VM access through IAM permissions (OS Login)” nor “manually generated SSH keys (Metadata-based SSH Keys Login)” are checked and enabled. SSH keys we actually cannot check below but so far we haven’t added any SSH keys.
Nevertheless we are able to connect to the SSH console by default.
When you click the “SSH in browser” button or use the gcloud compute ssh command, Google Cloud automatically generates a temporary SSH key pair (aka ephemeral SSH keypair) for you. It then pushes your public key to the instance’s metadata for a short period of time. This allows the SSH session to be authenticated without you having to manually generate and manage keys or enable the full OS Login system.
Since the browser tool handles this process automatically and temporarily, you won’t see your key listed in the metadata afterward, and you don’t need OS Login to be active. It’s a quick and easy way to get access to your VM for basic tasks.
More about the VM access options here we can use we will see in Part 2.
So far by default we are just able to connect to our VM by using either the Google Cloud console (SSH Browser) or the Google Cloud CLI (gcloud compute ssh command).
Finally click on Create.
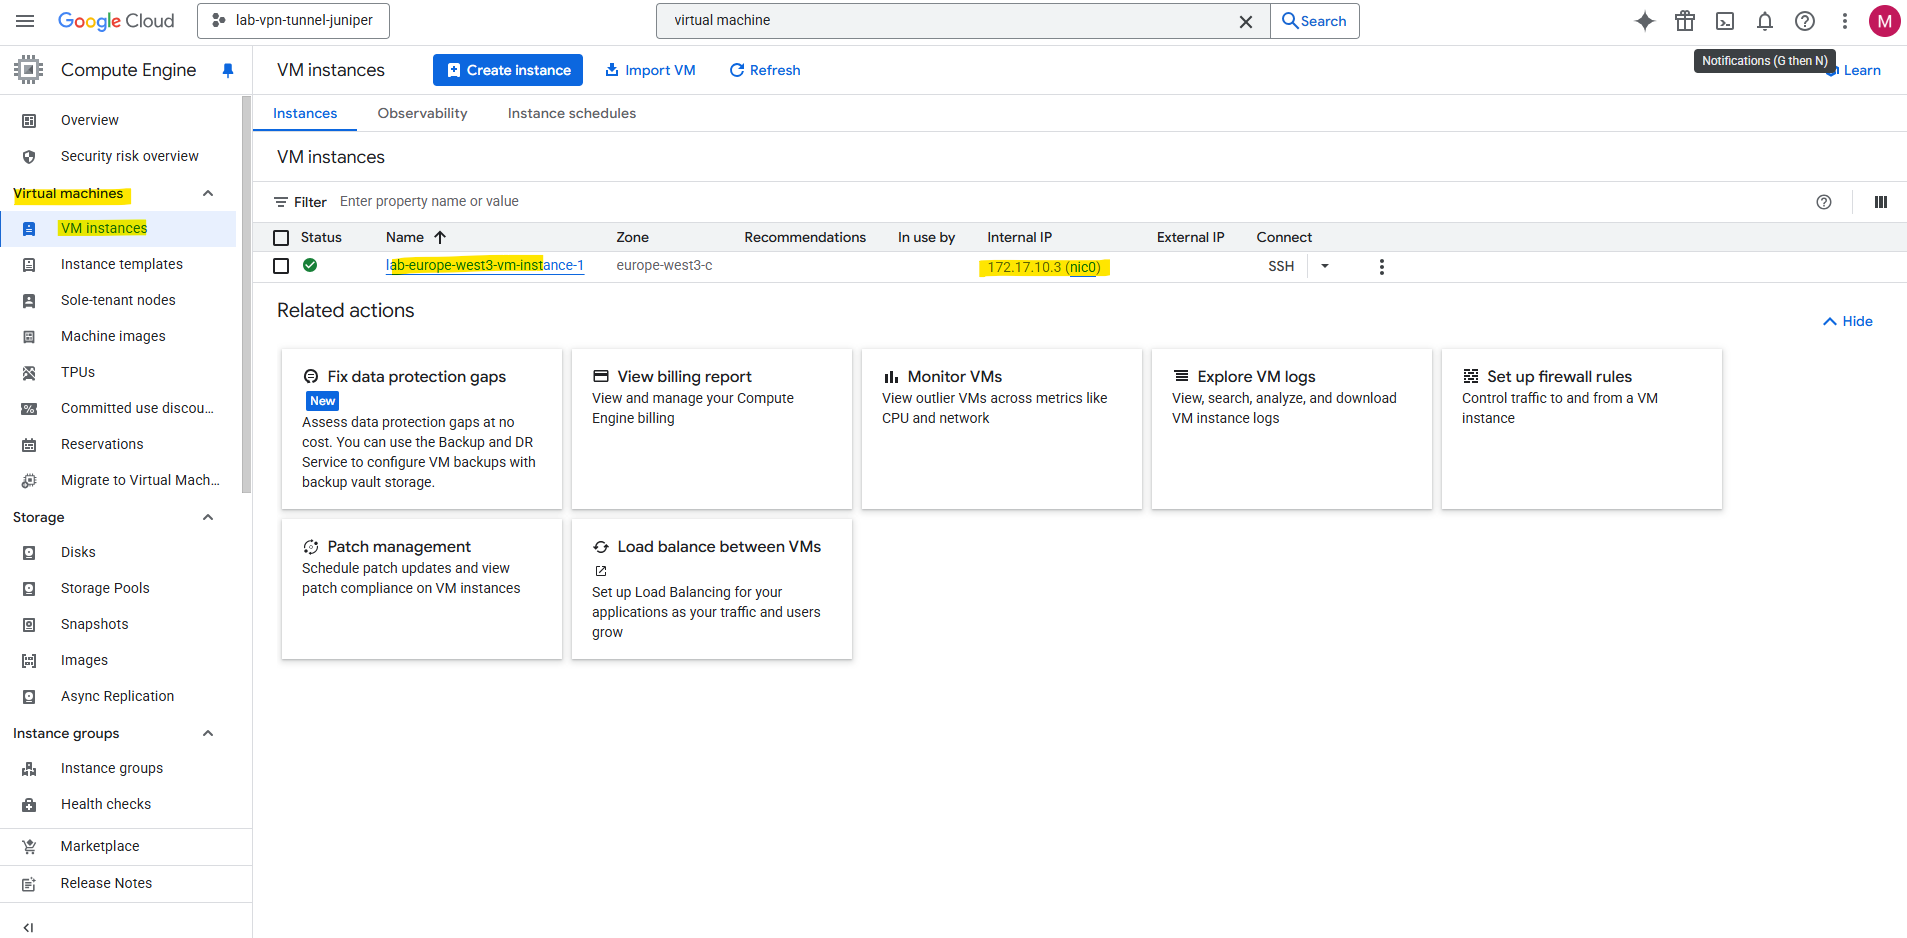
Our new virtual machine is created and running. We can also see its private IP address here which is 172.17.10.3 assigned from the previously created main subnet 172.17.10.0/24.
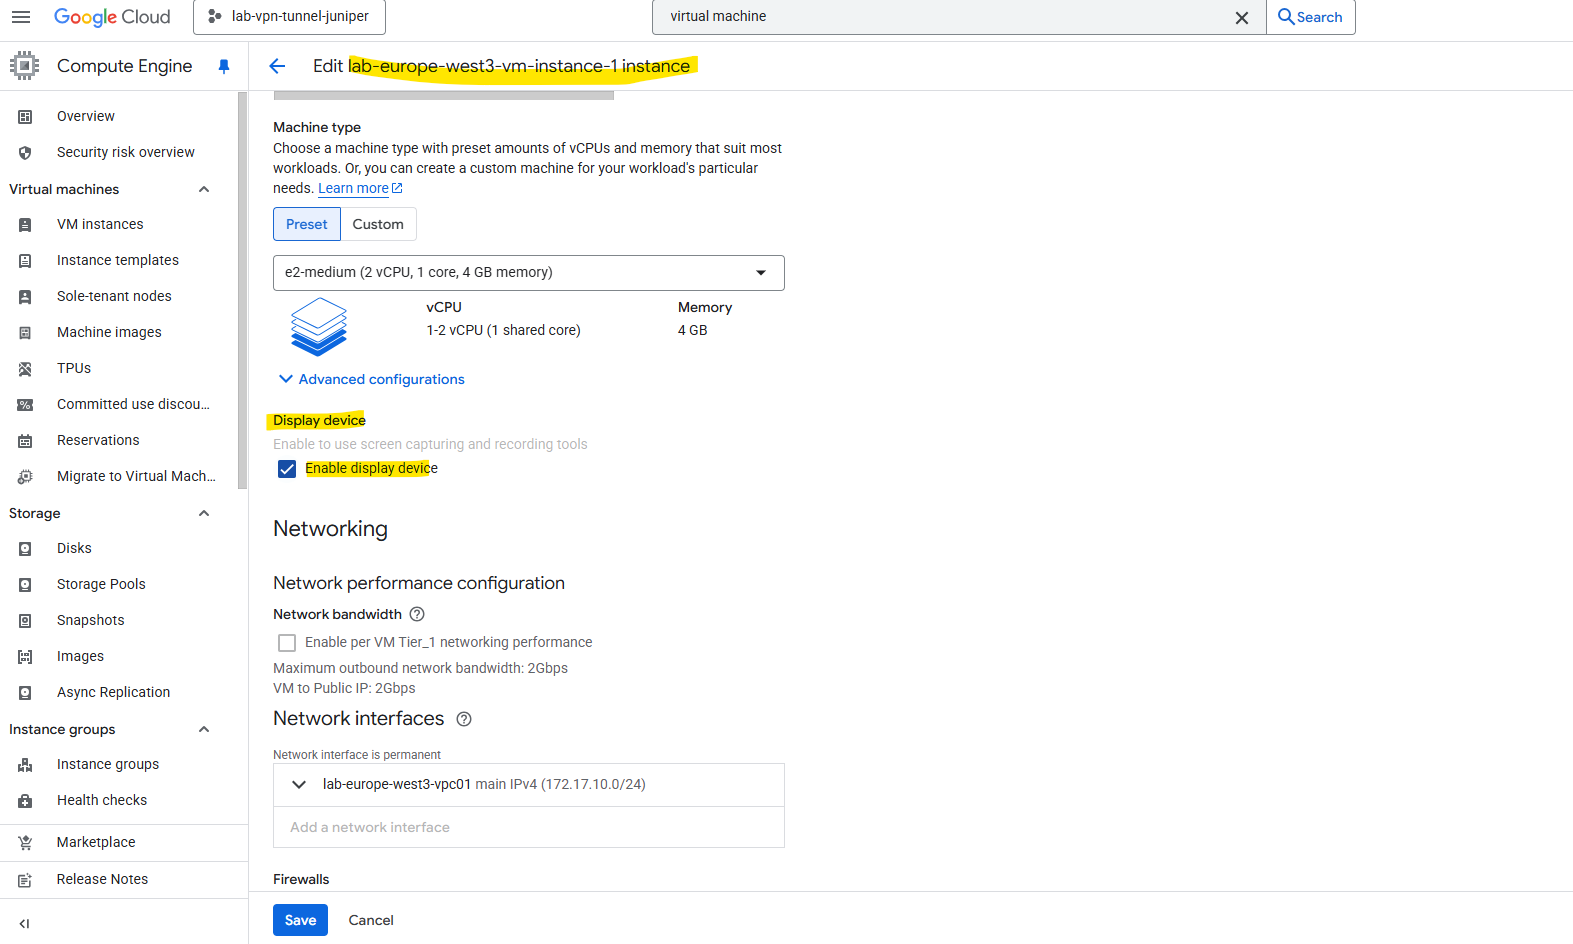
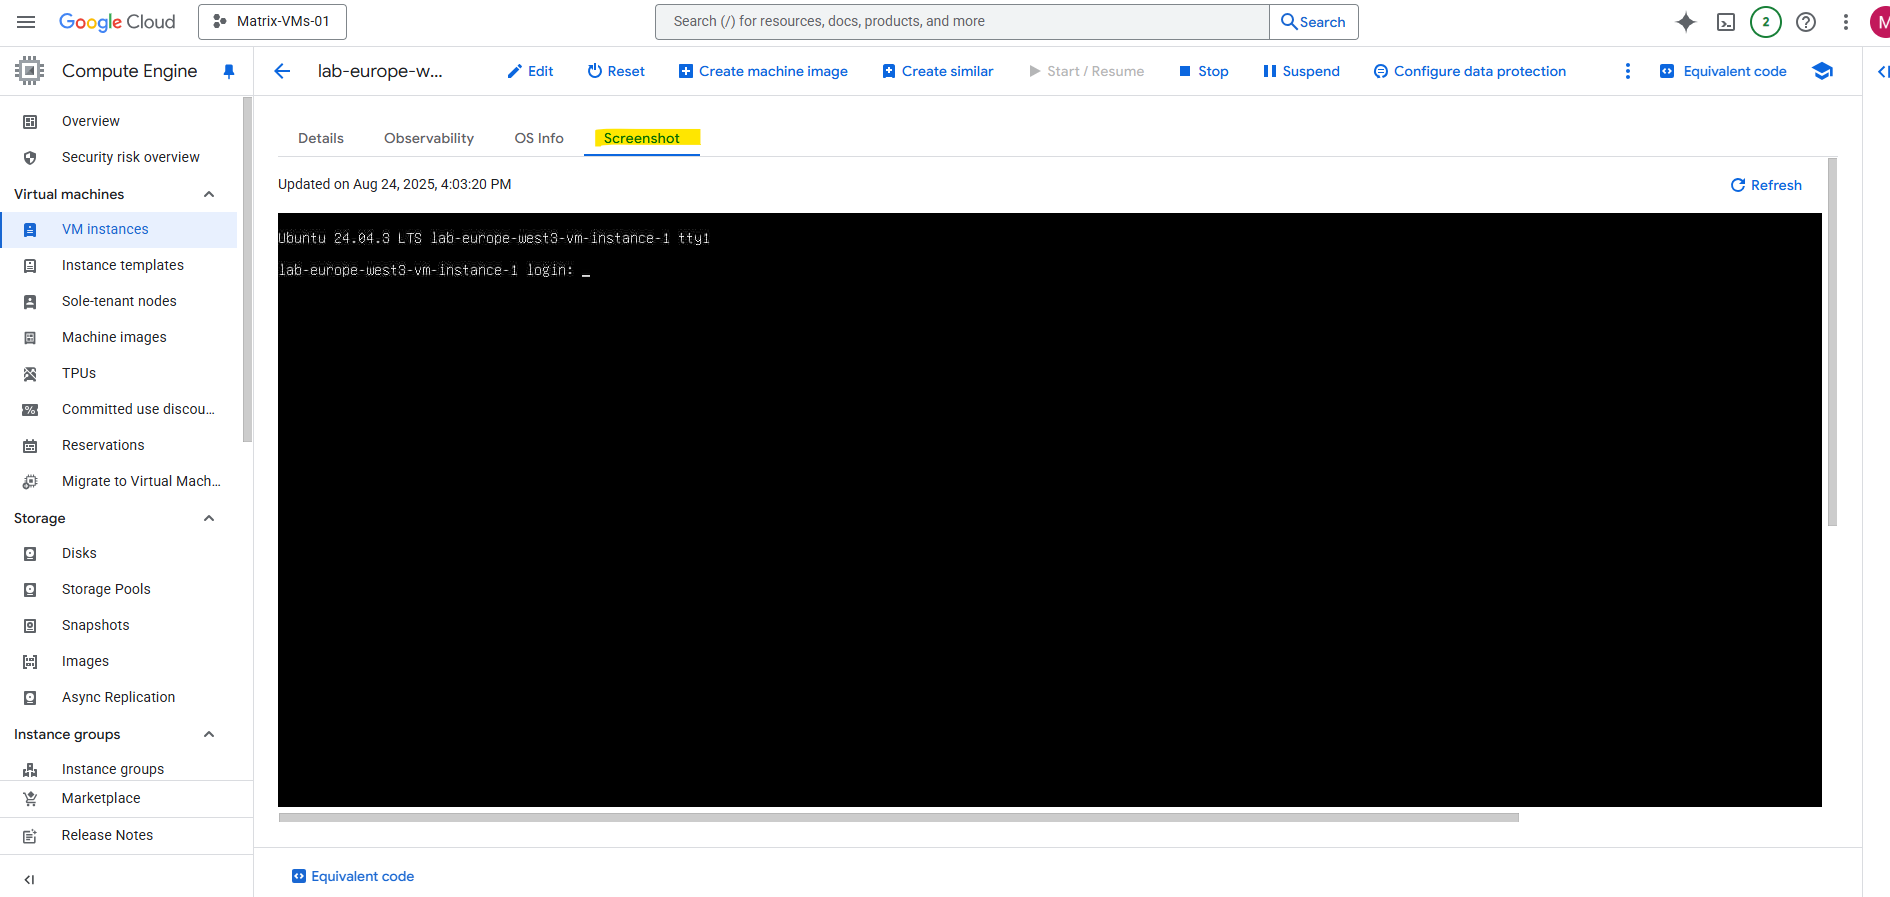
I will also enable the display device to be able to see OS screenshots. For the virtual machine instance click on Edit and scroll down to the Display device settings.
Here check Enable display device.
There are no costs associated with enabling or disabling virtual displays on a VM.
More about you will find here https://cloud.google.com/compute/docs/instances/enable-instance-virtual-display.
Virtual Machine Agent (Google Guest Agent)
When you start a virtual machine (VM) instance using Google-provided public images, a guest environment is automatically installed on the VM instance.
The guest environment is a set of scripts, daemons, and binaries that read the content of the metadata server to make a VM run properly on Compute Engine.
A metadata server is a communication channel for transferring information from a client to the guest operating system.
Every virtual machine (VM) instance stores its metadata on a metadata server. Your VM automatically has access to the metadata server API without any additional authorization. Compute Engine maintains the metadata keys and values for your VMs and projects in directories. Each directory stores metadata entries in the form of key-value pairs. Some directories contain subdirectories.
Source: https://cloud.google.com/compute/docs/metadata/overview
Source: https://cloud.google.com/compute/docs/images/guest-environment
It runs on virtual machine (VM) instances and provides a set of tools that enable and enhance various GCP features. This includes:
- OS Login
- Guest attributes
- Instance metadata handling
- Clock synchronization
- Network configuration
- Diagnostics and logging
Common package names:
Depending on your OS, the guest agent may be installed as:
- google-guest-agent (Linux)
- google-compute-engine-tools or google-guest-agent (Windows)
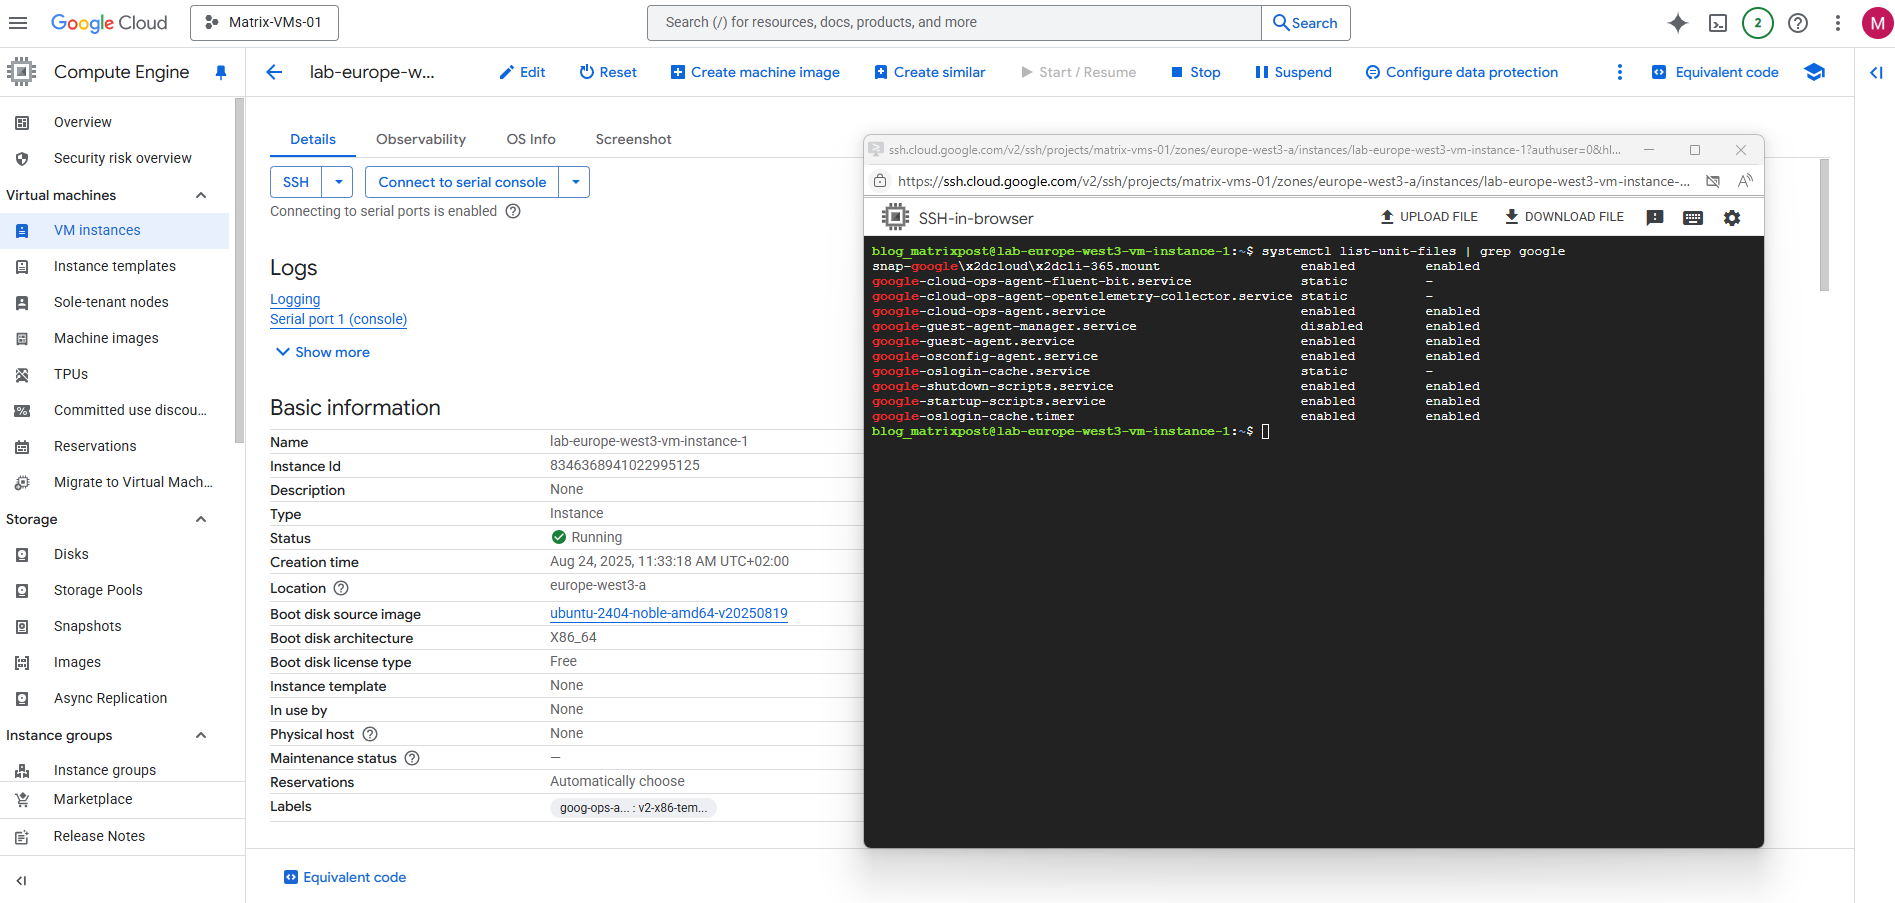
To check if the guest environment is running on your instance, we can run the following command on the virtual machine. More about the guest environment you will find here https://cloud.google.com/compute/docs/images/install-guest-environment#wgei.
For Linux:
$ systemctl list-unit-files | grep google | grep enabled

to see all google unit files
$ systemctl list-unit-files | grep google
The output shows two columns regarding enabled or not, the first shows the current state and the second is the vendor preset.
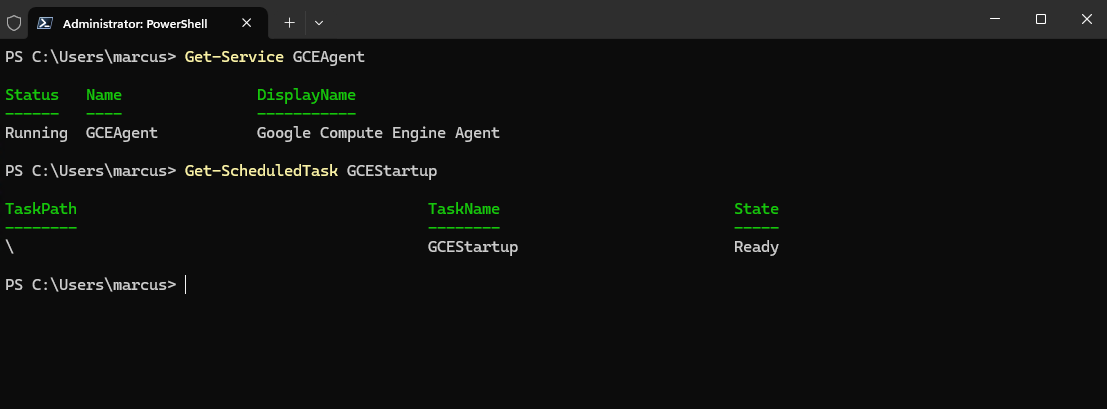
For Windows:
PS> Get-Service GCEAgent
PS> Get-ScheduledTask GCEStartup
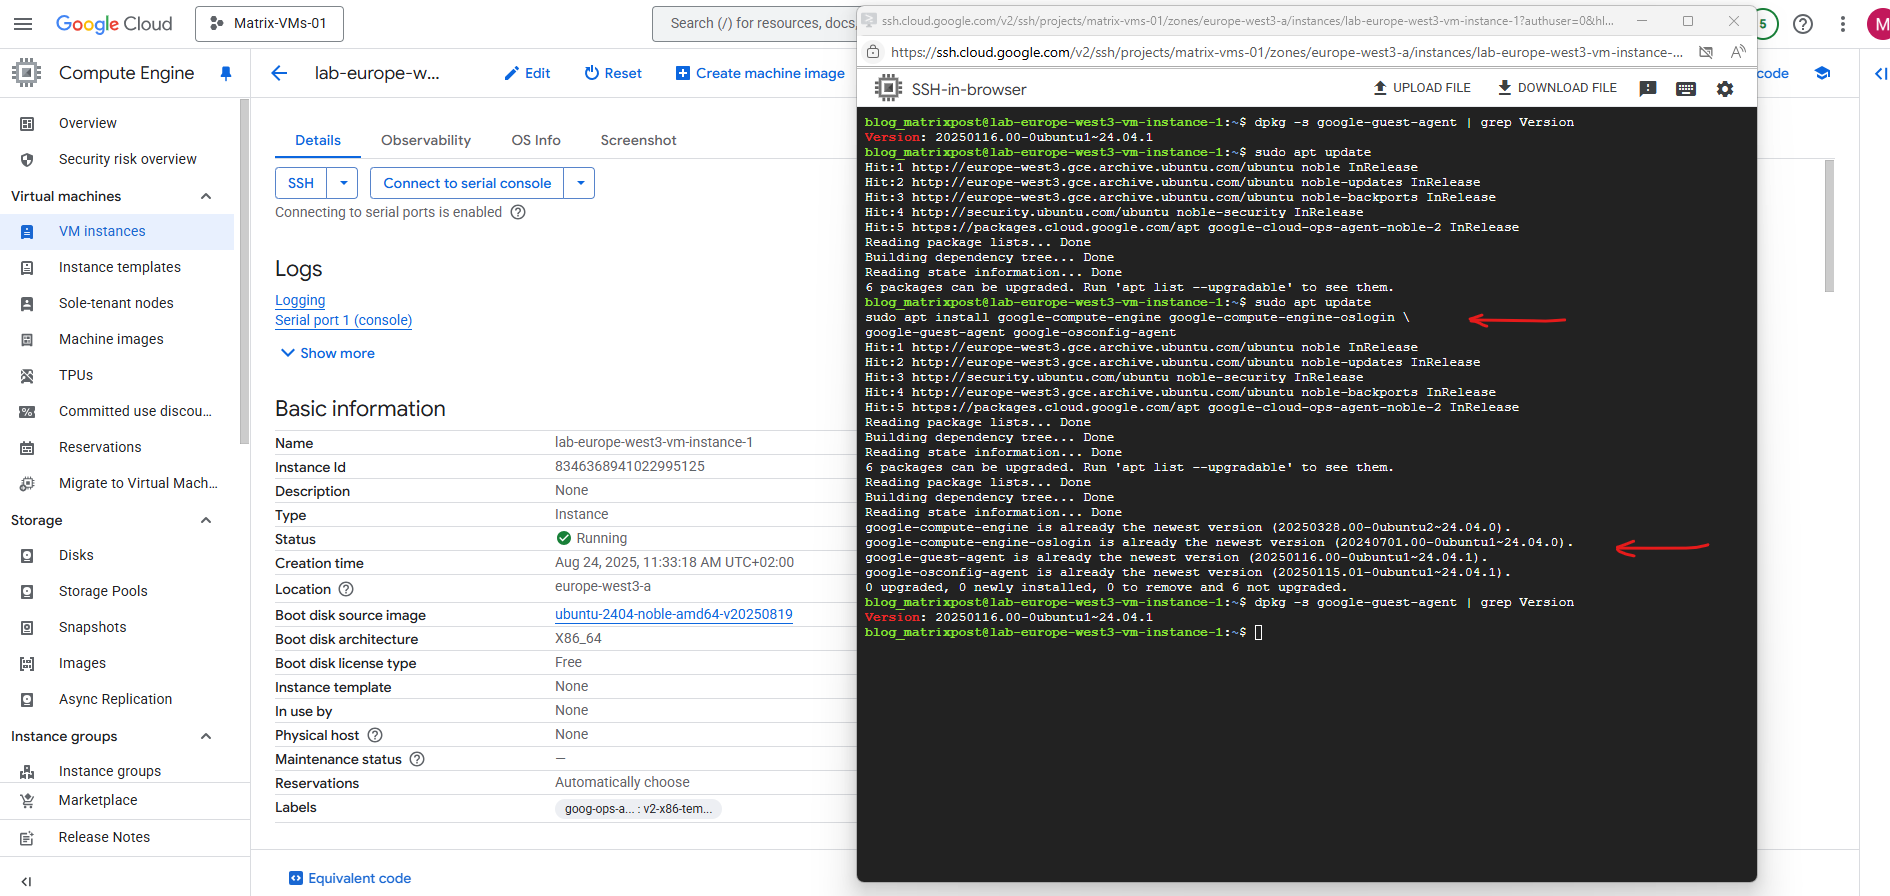
About how to update the guest environment you will find here more https://cloud.google.com/compute/docs/images/install-guest-environment#update-guest.
For Debian/Ubuntu-based images:
$ dpkg -s google-guest-agent | grep Version

For Red Hat/CentOS/SUSE-based images:
$ sudo yum info google-guest-agent
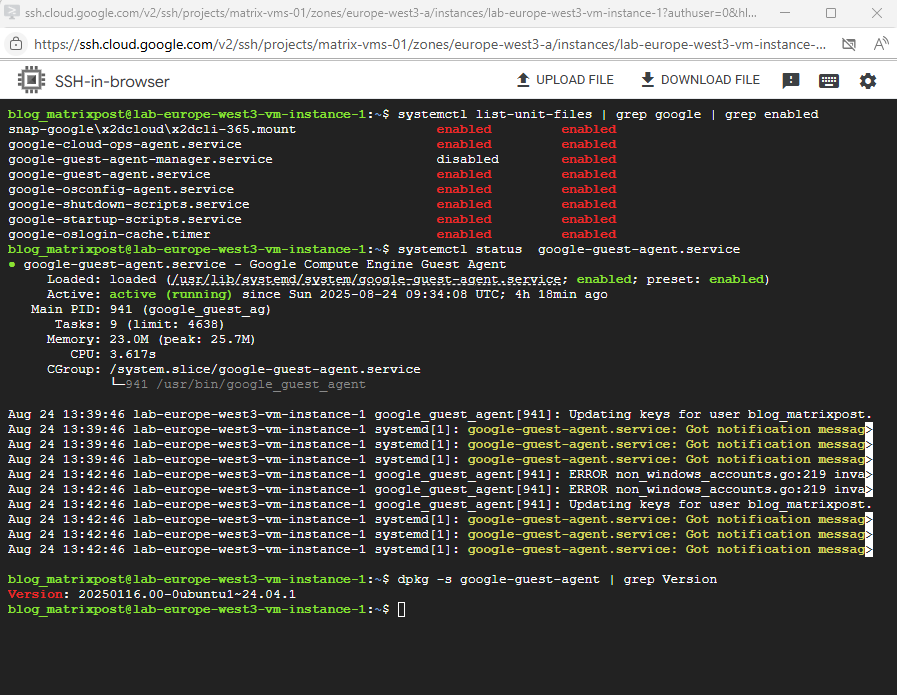
In my case the guest environment is already running with the newest version.
sudo apt update
sudo apt install google-compute-engine google-compute-engine-oslogin \
google-guest-agent google-osconfig-agent
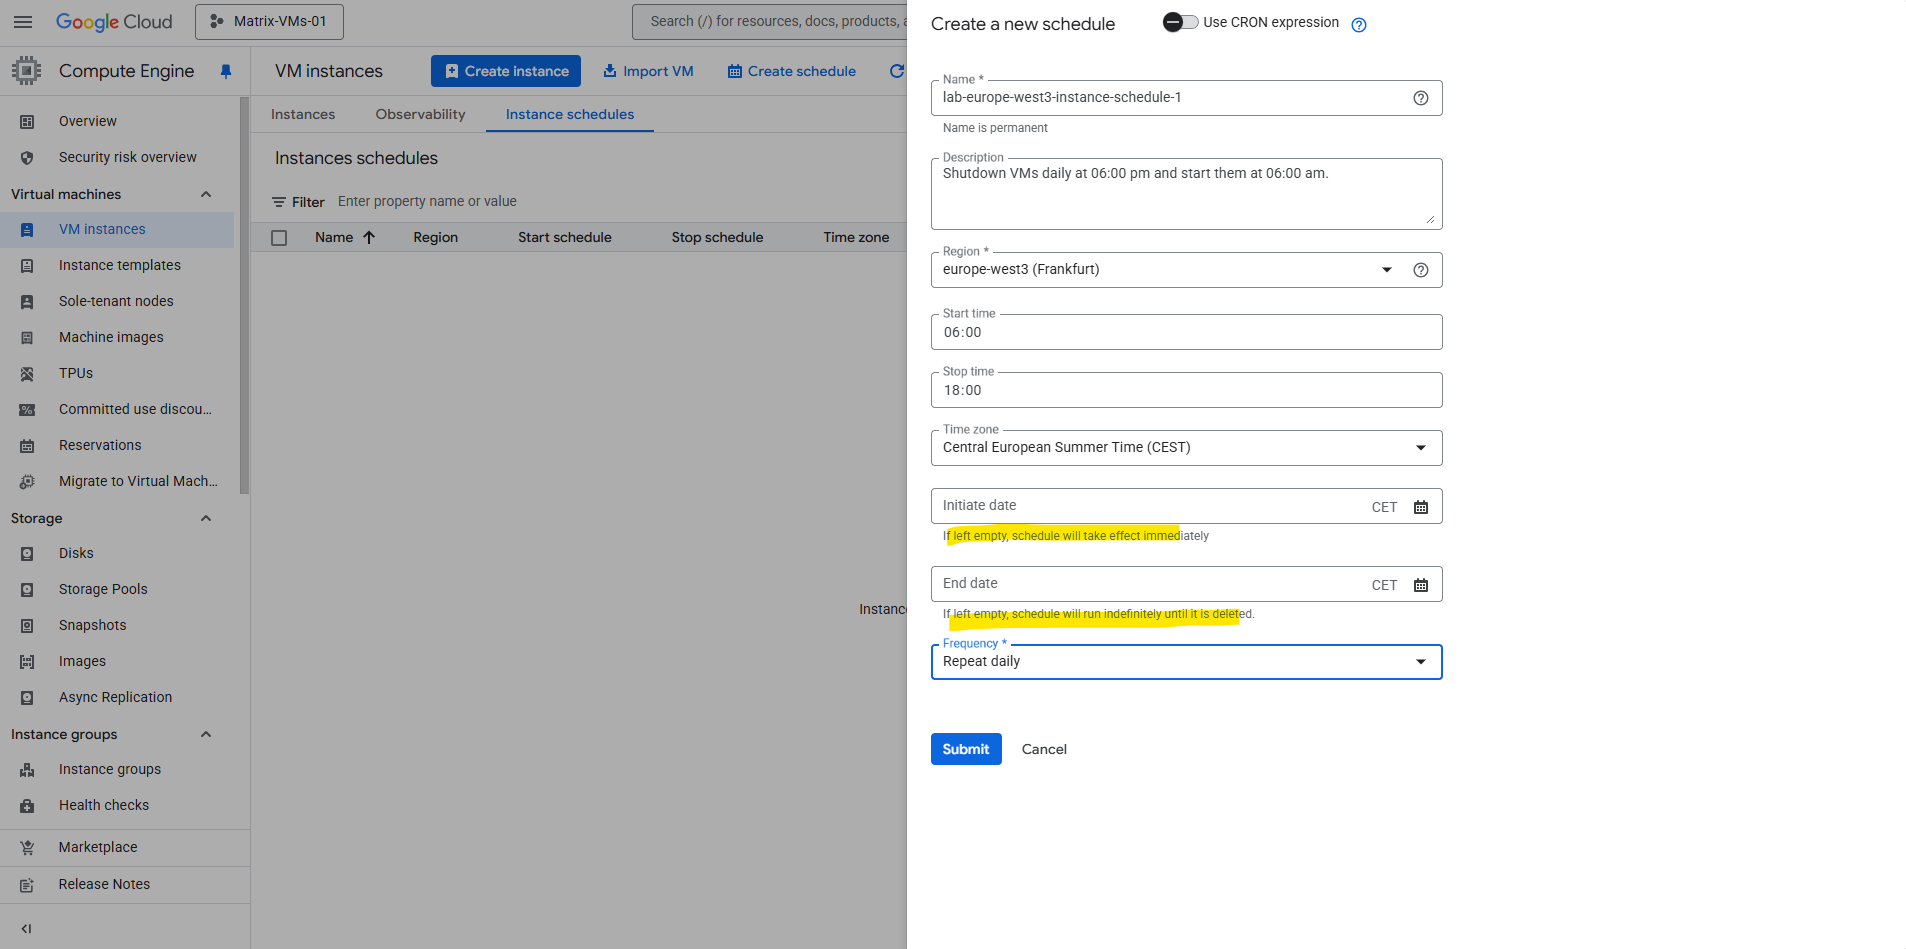
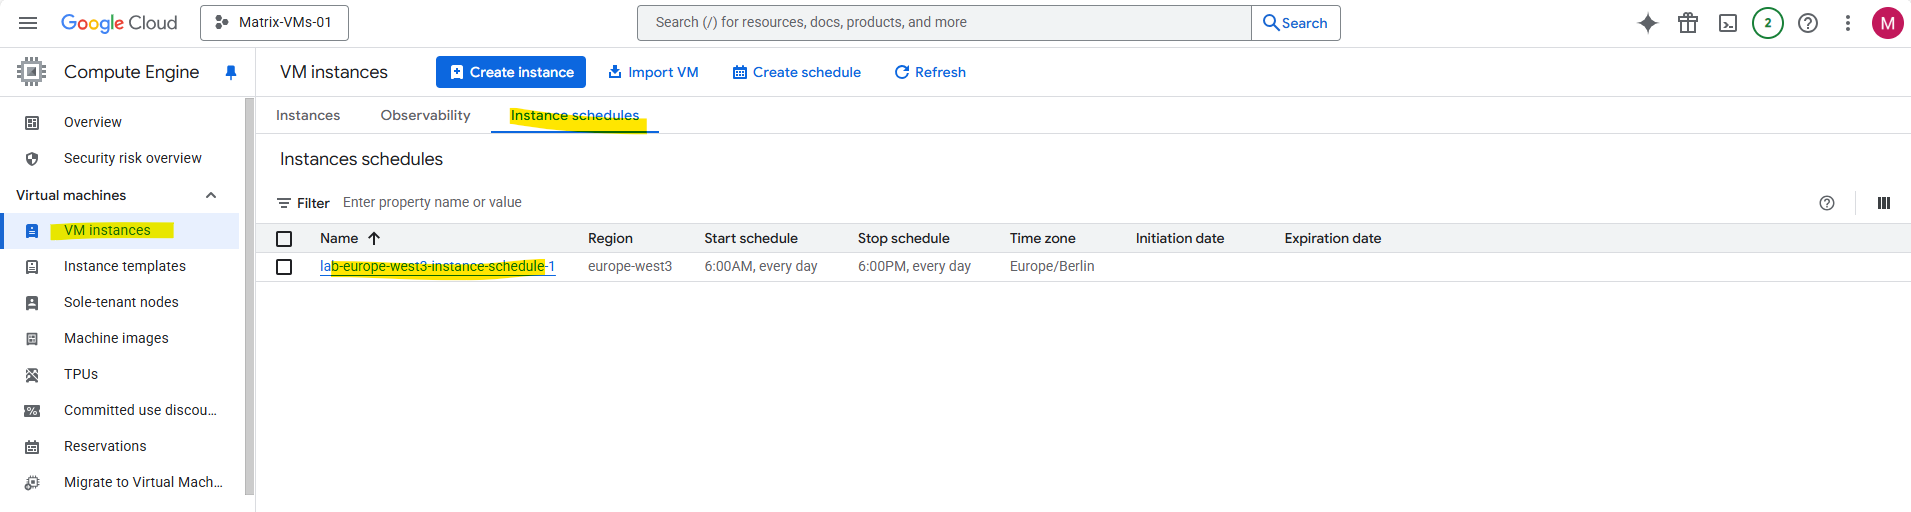
Instance Schedules
Instance schedules let you start and stop virtual machine (VM) instances automatically. To use instance schedules, create a resource policy detailing the start and stop behavior, and then attach the policy to one or more VM instances.
Using instance schedules to automate deployment of your VM instances can help you optimize costs and manage VM instances more efficiently. You can use instance schedules for both recurring and one-off workloads. For example, use instance schedules to only run VM instances during working hours or to provide capacity for a onetime event.
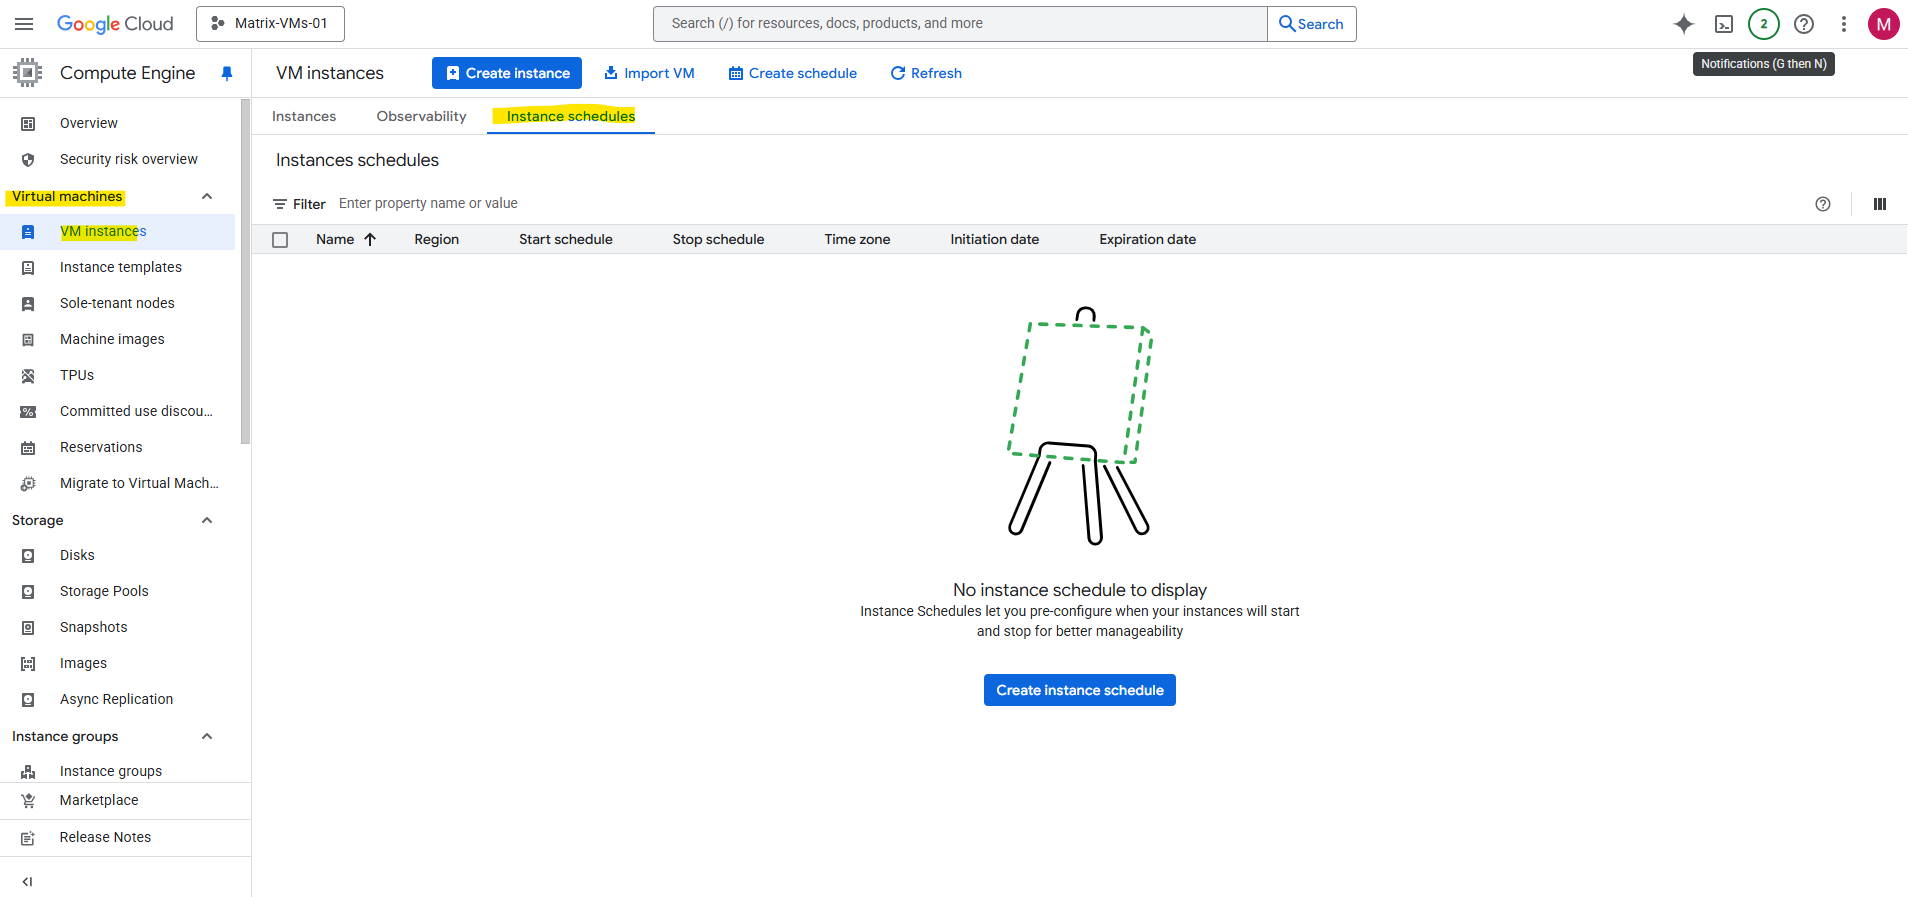
Under VM instances -> Instances schedules tab click on Create instance schedule.
Source: https://cloud.google.com/compute/docs/instances/schedule-instance-start-stop
Links
Compute Engine instances
https://cloud.google.com/compute/docs/instancesGuest environment
https://cloud.google.com/compute/docs/images/guest-environmentInstall the guest environment
https://cloud.google.com/compute/docs/images/install-guest-environmentScheduling a VM instance to start and stop
https://cloud.google.com/compute/docs/instances/schedule-instance-start-stop