Set up Azure Site Recovery for On-Premise VMware Virtual Machines (Modernized) – Part 2
In Part 1 of this blog post series we saw all prerequisites and how to create them to set up Azure Site Recovery for On-Premise VMware Virtual Machines (Modernized).
This part will show how to prepare the infrastructure which is finally setting up the ASR appliance in on-premise (vSphere).
We will see how to deploy the ASR appliance in vSphere and how to configure it in order to later orchestrate the connection and replication between on-premise (vSphere) and Azure.
Prepare Infrastructure and On-Premise ASR Appliance
To later enable replication for a new virtual machine, you must have permission to:
- Write to an Azure managed disk.
- Create a VM in the selected resource group.
- Create a VM in the selected virtual network.
- Write to an Azure storage account.
Your account should be assigned the Virtual Machine Contributor built-in role. In addition, to manage Site Recovery operations in a vault, your account should be assigned the Site Recovery Contributor built-in role.
On-premises machines are replicated to Azure managed disks. When failover occurs, Azure VMs are created from these managed disks, and joined to the Azure network you specify in this procedure.
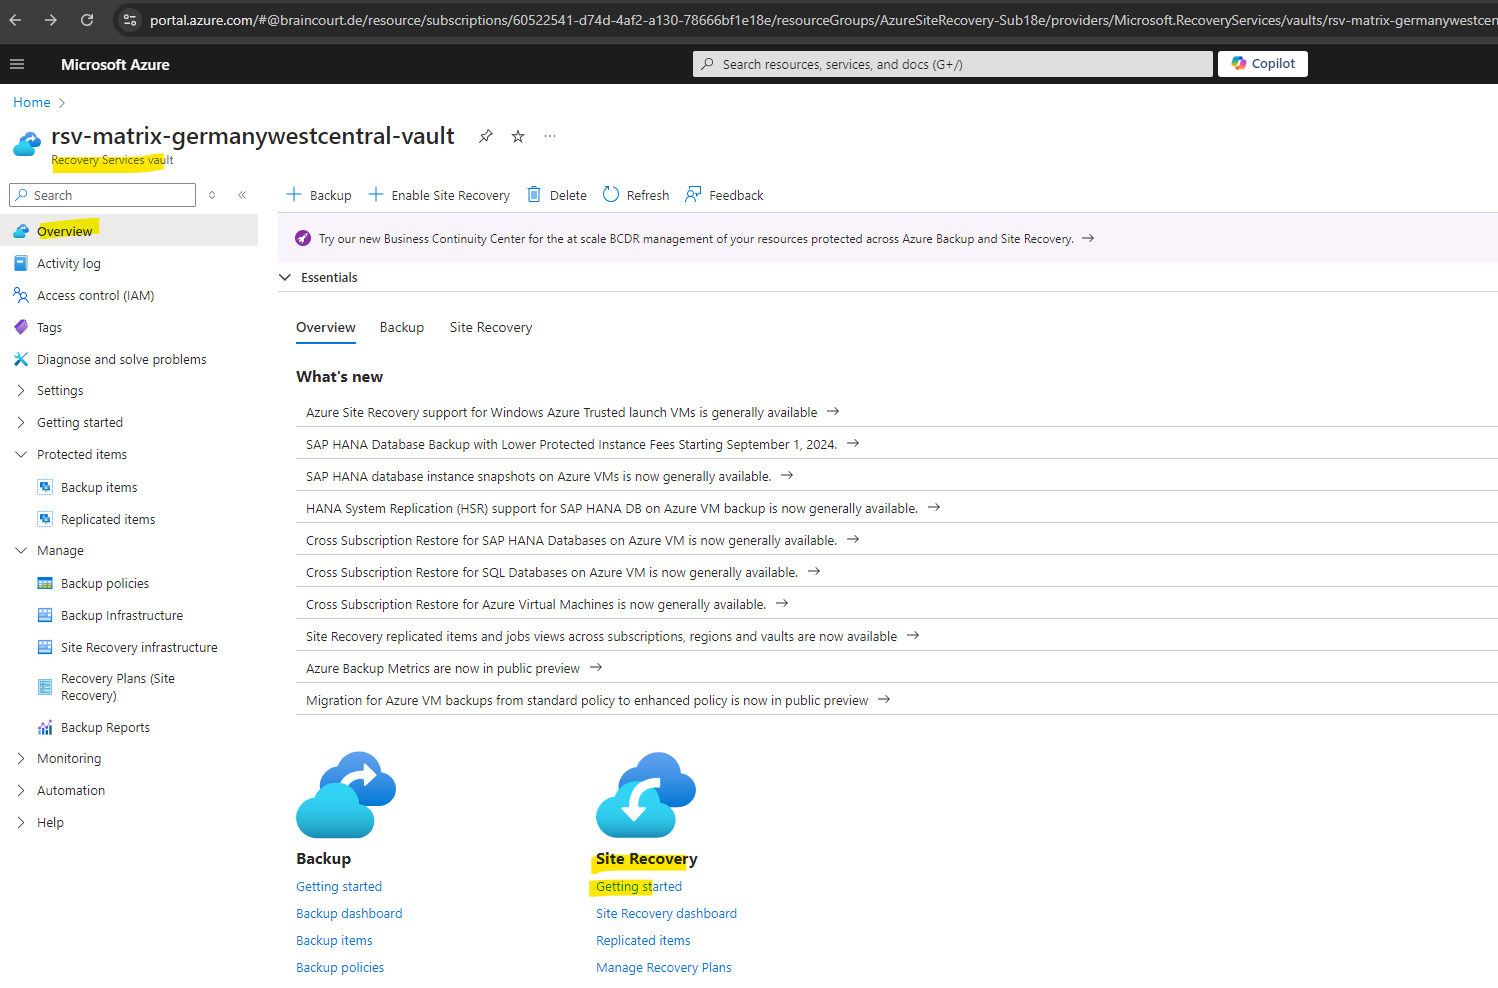
Now we first need to prepare the infrastructure in Azure and our newly created recovery services vault.
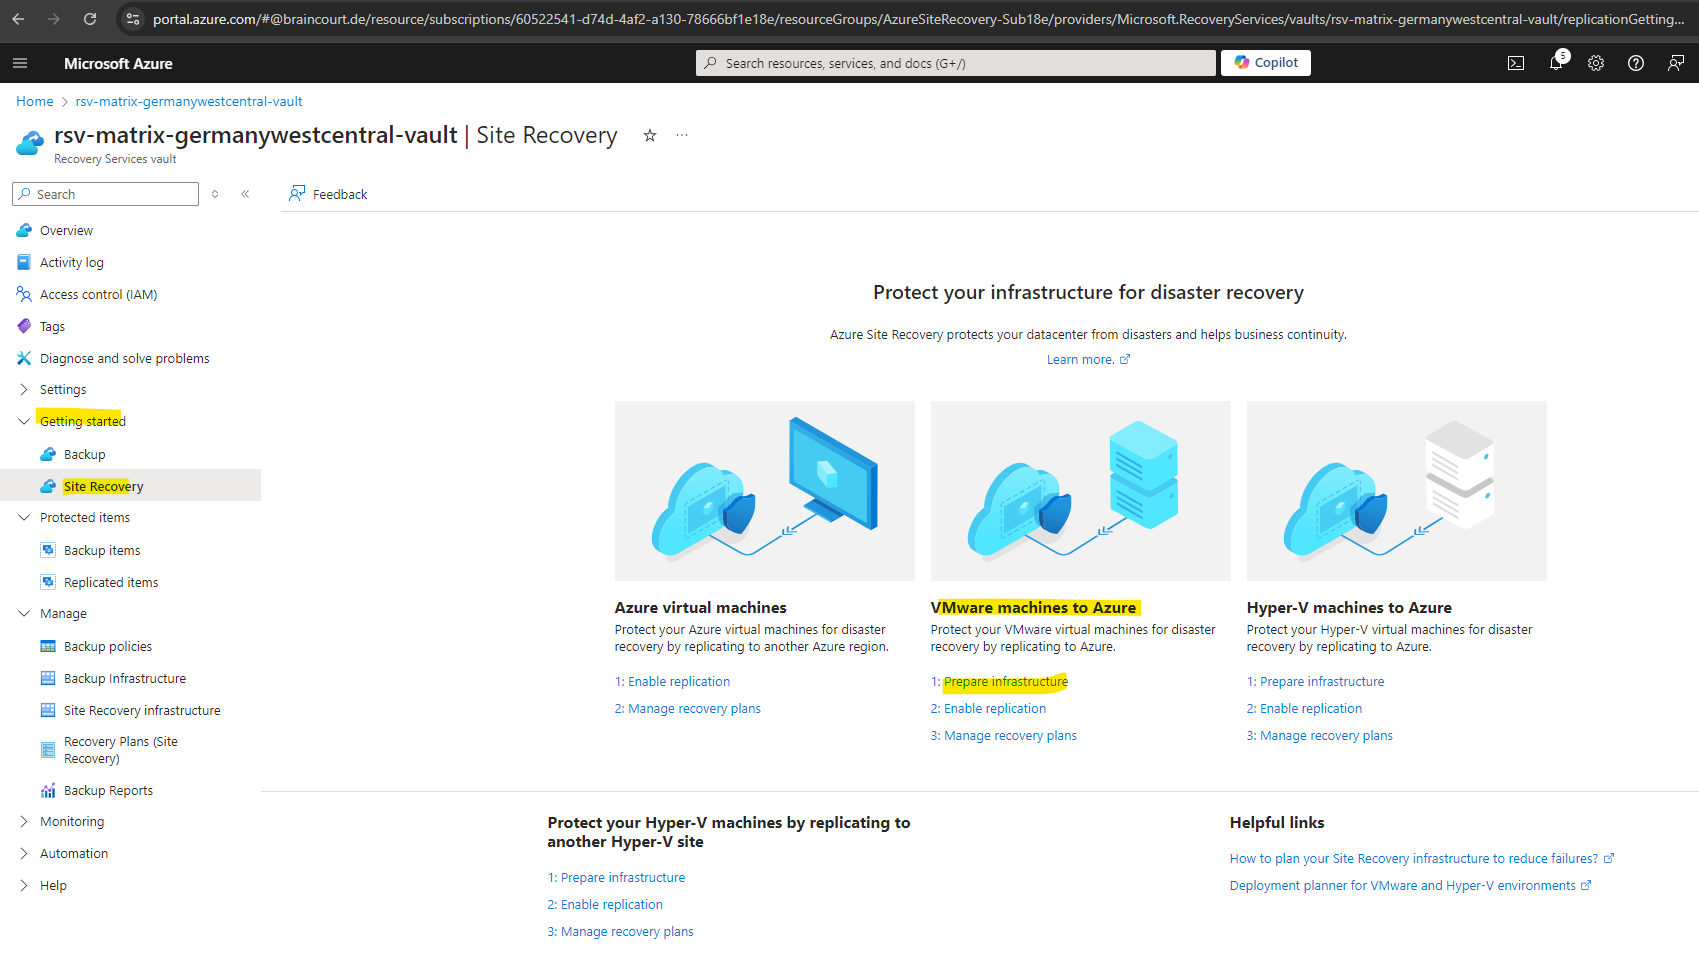
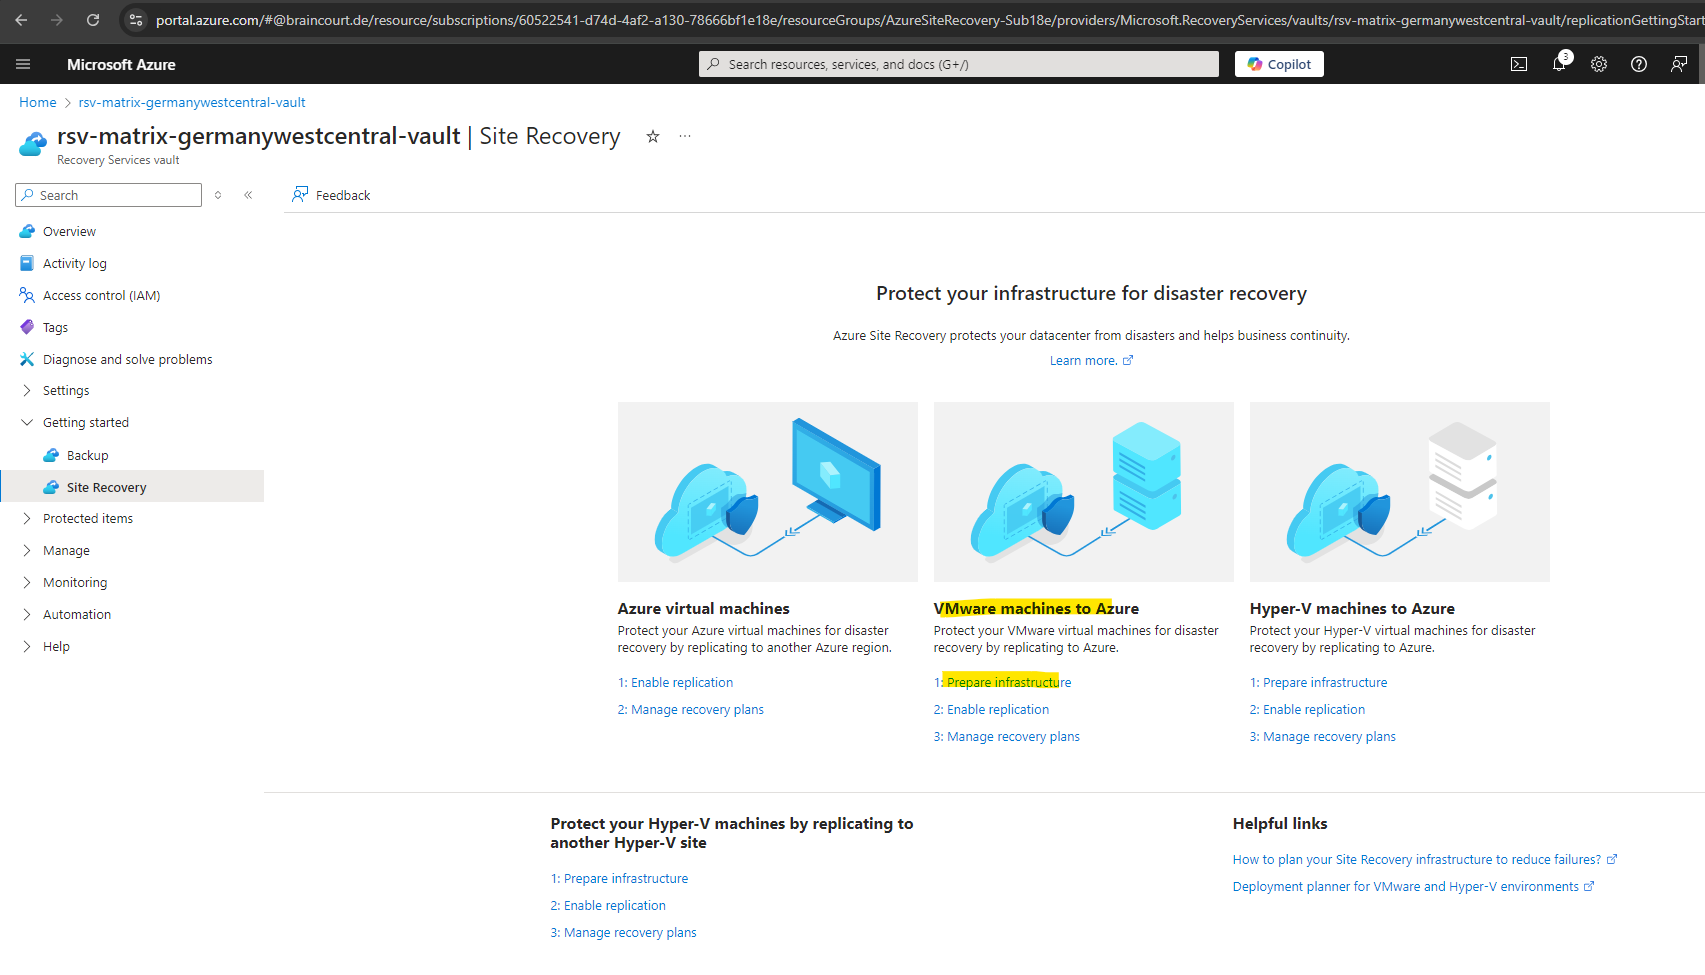
Therefore click on Getting Started under Site Recovery section as shown below.
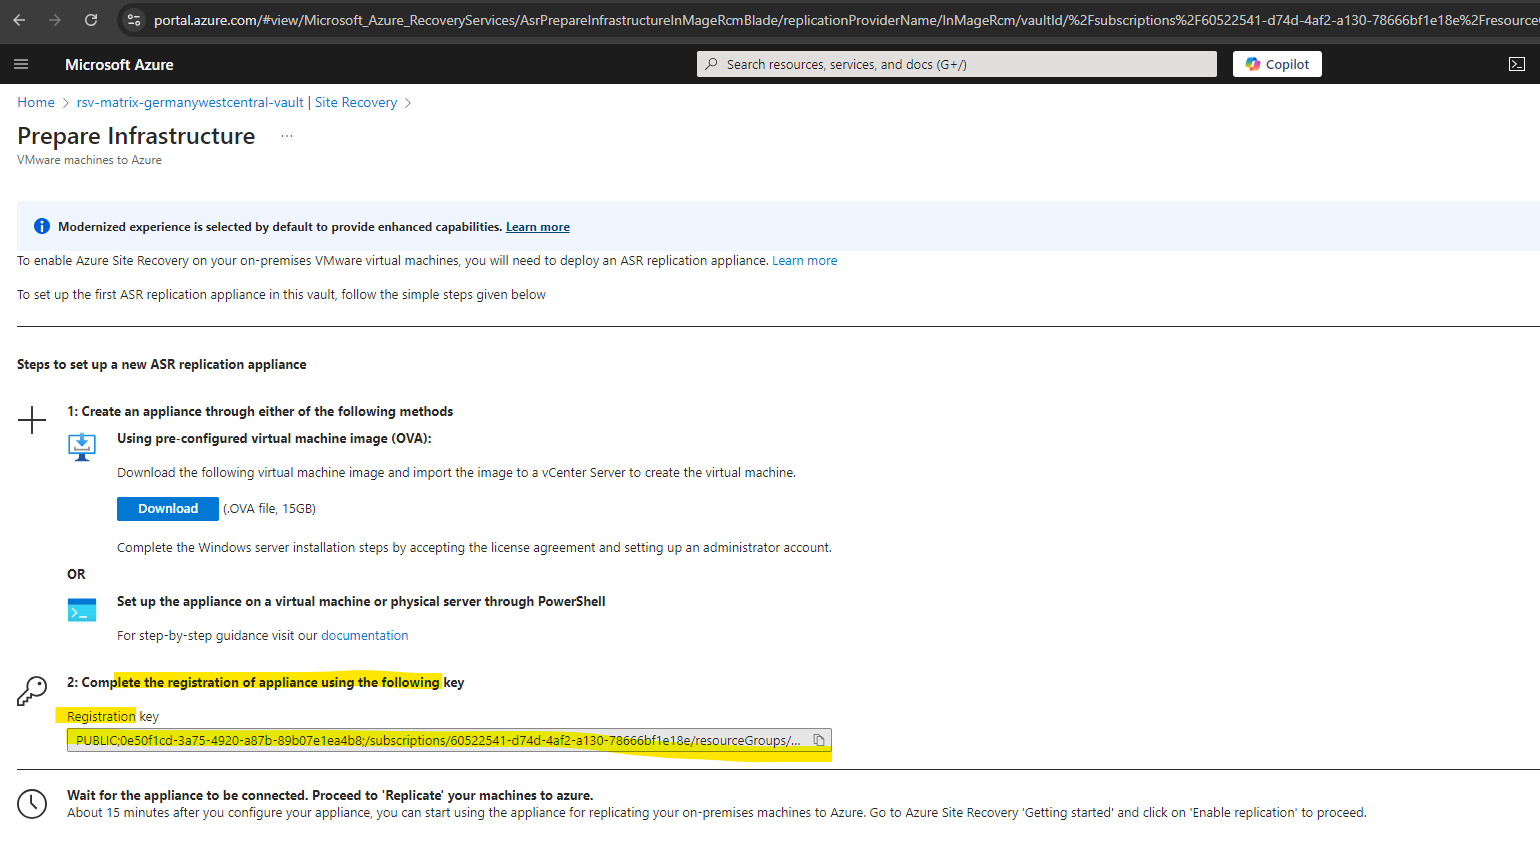
Select Prepare infrastructure under the VMware machines to Azure section.
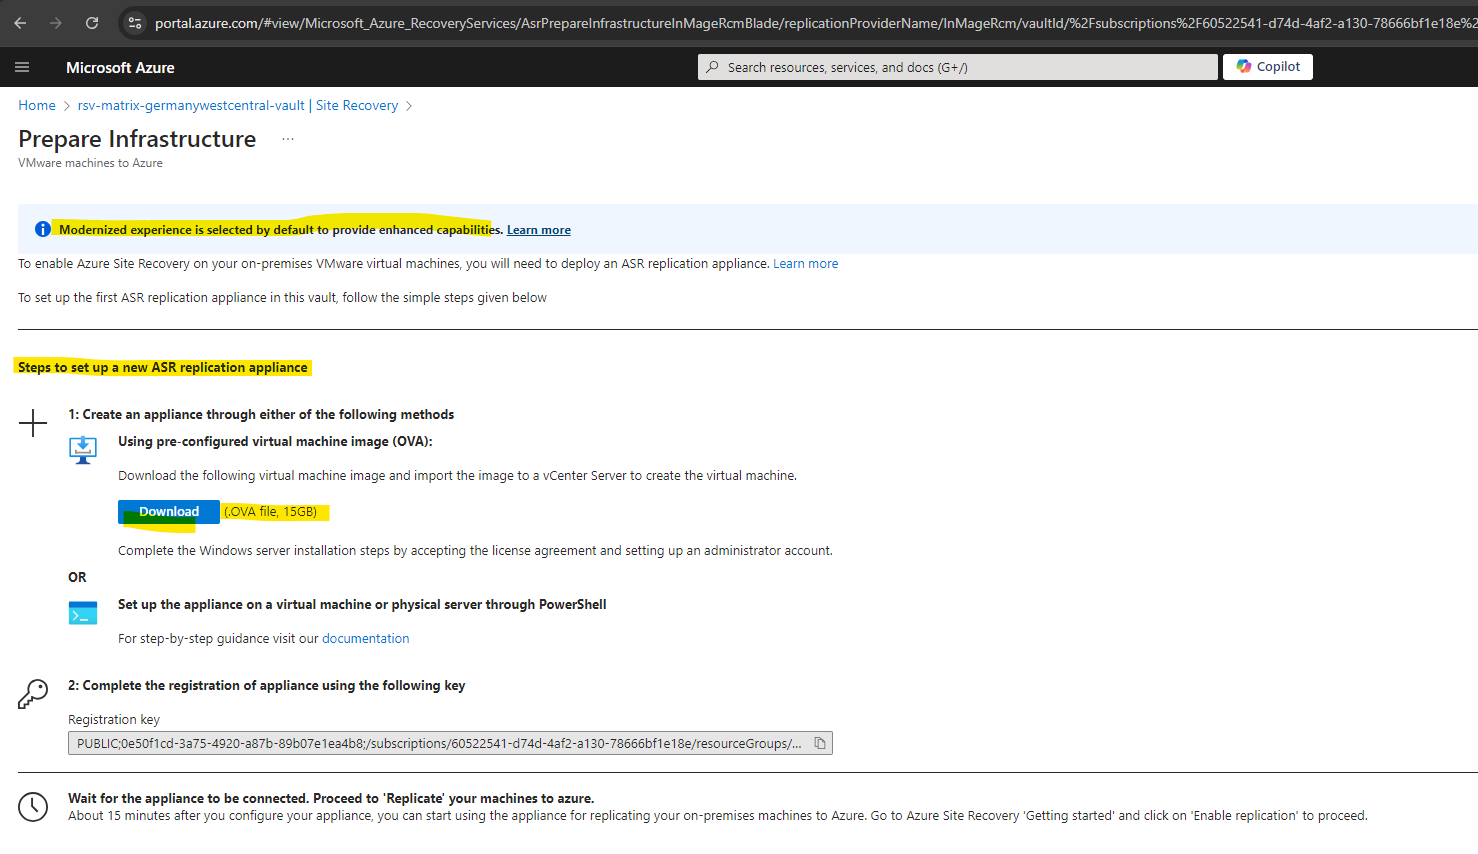
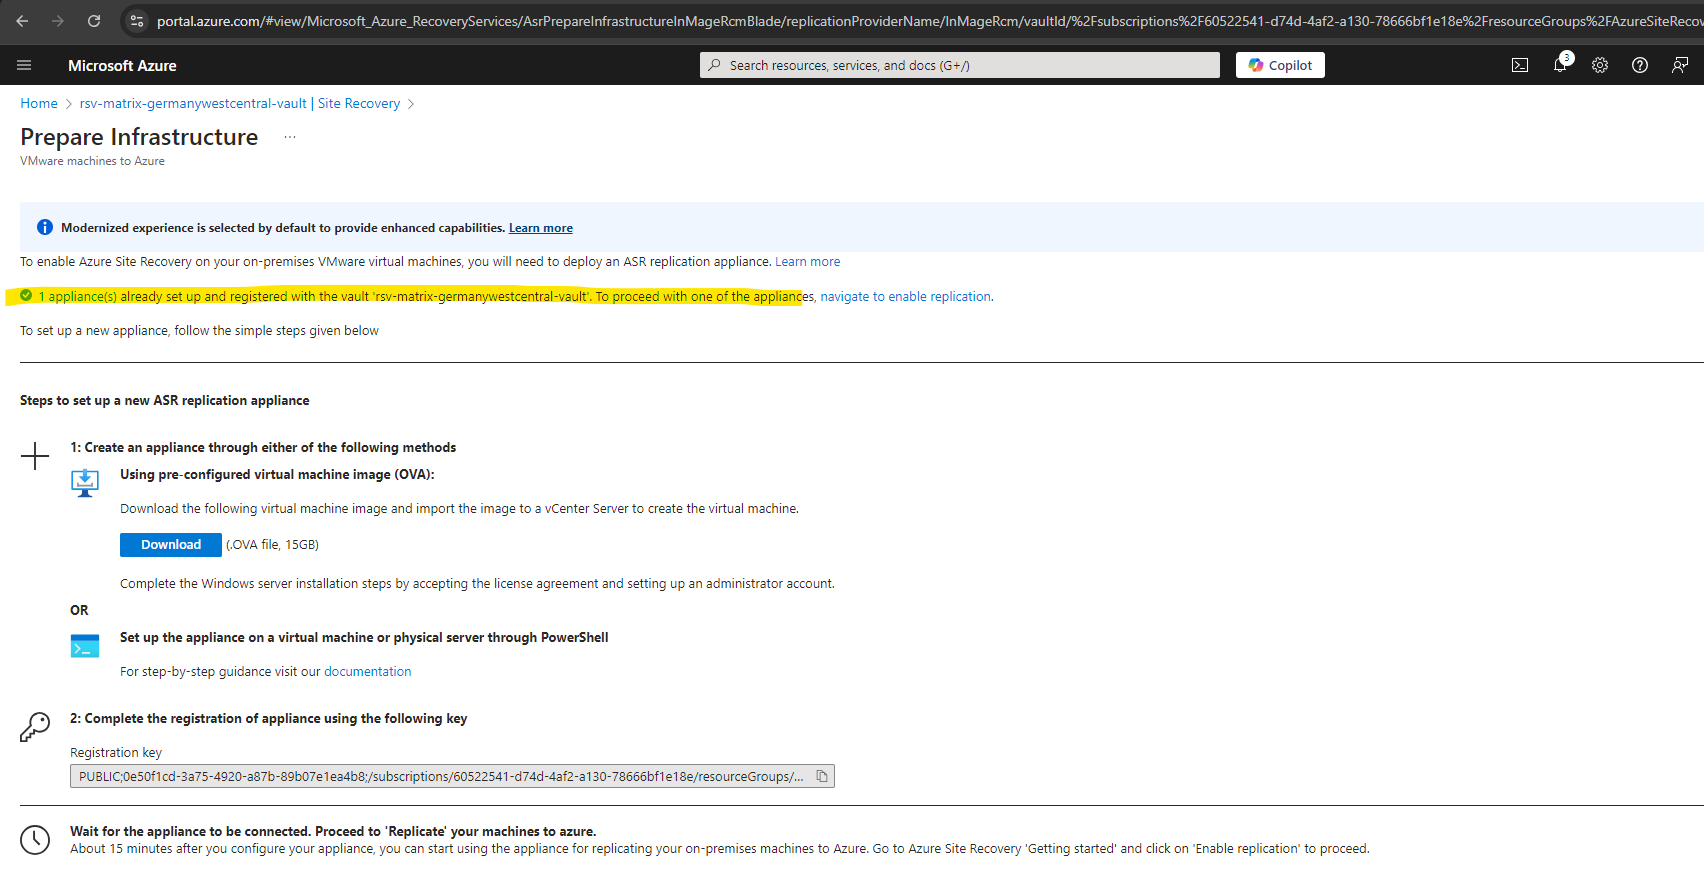
Here we need to click on the Download button to download the ASR replication appliance as .OVA template file to deploy it later in our on-premise vSphere environment.
About the Modernized experience as shown below in the notification banner you can read the following article.
General availability: Simplified disaster recovery for VMware machines using Azure Site Recovery
https://azure.microsoft.com/en-us/updates/vmware-dr-ga-with-asr/
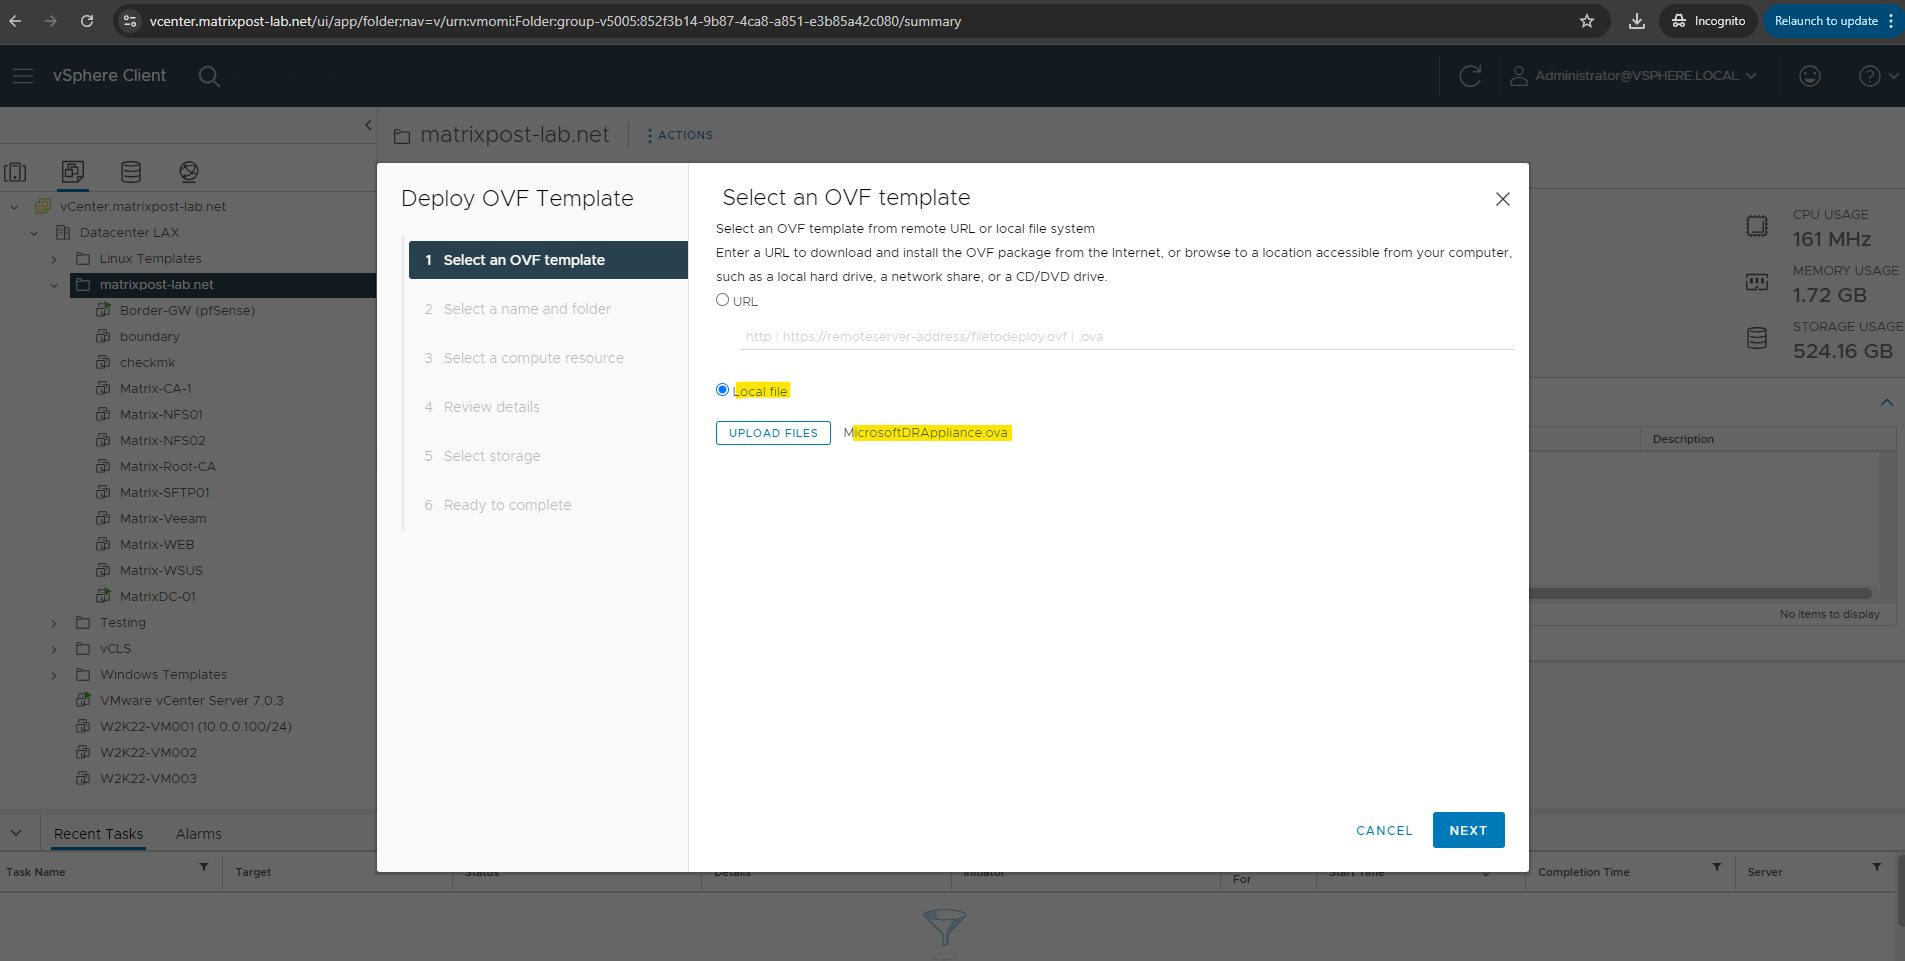
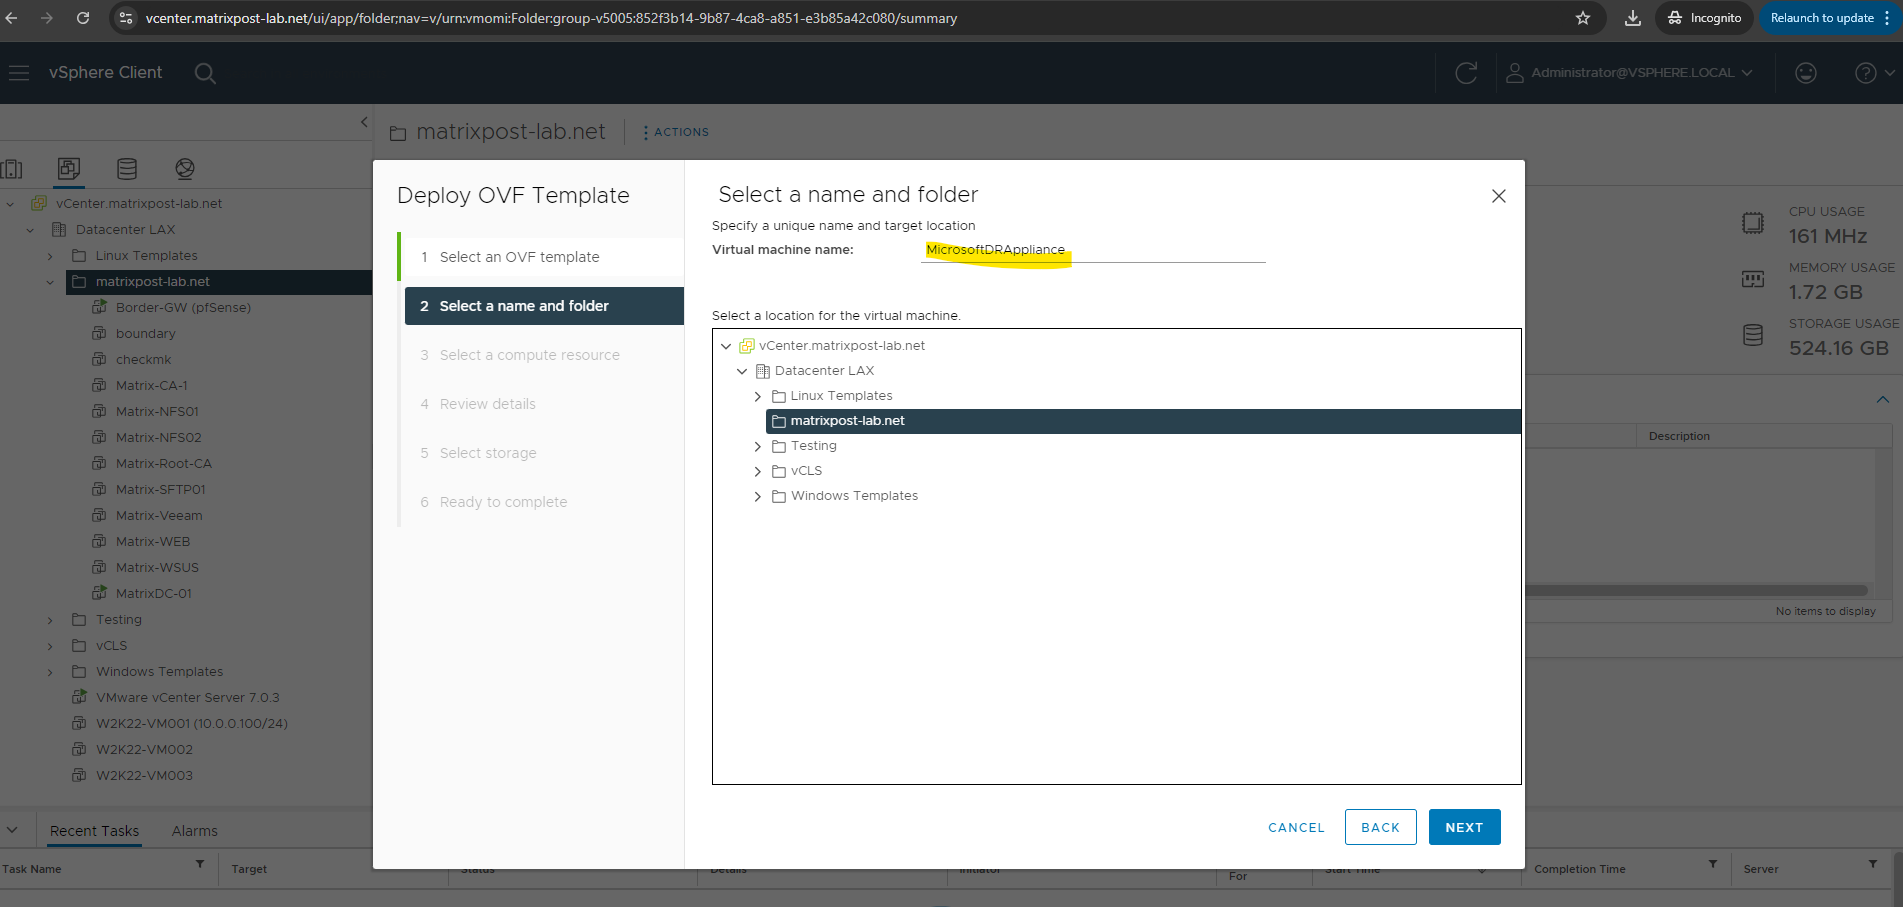
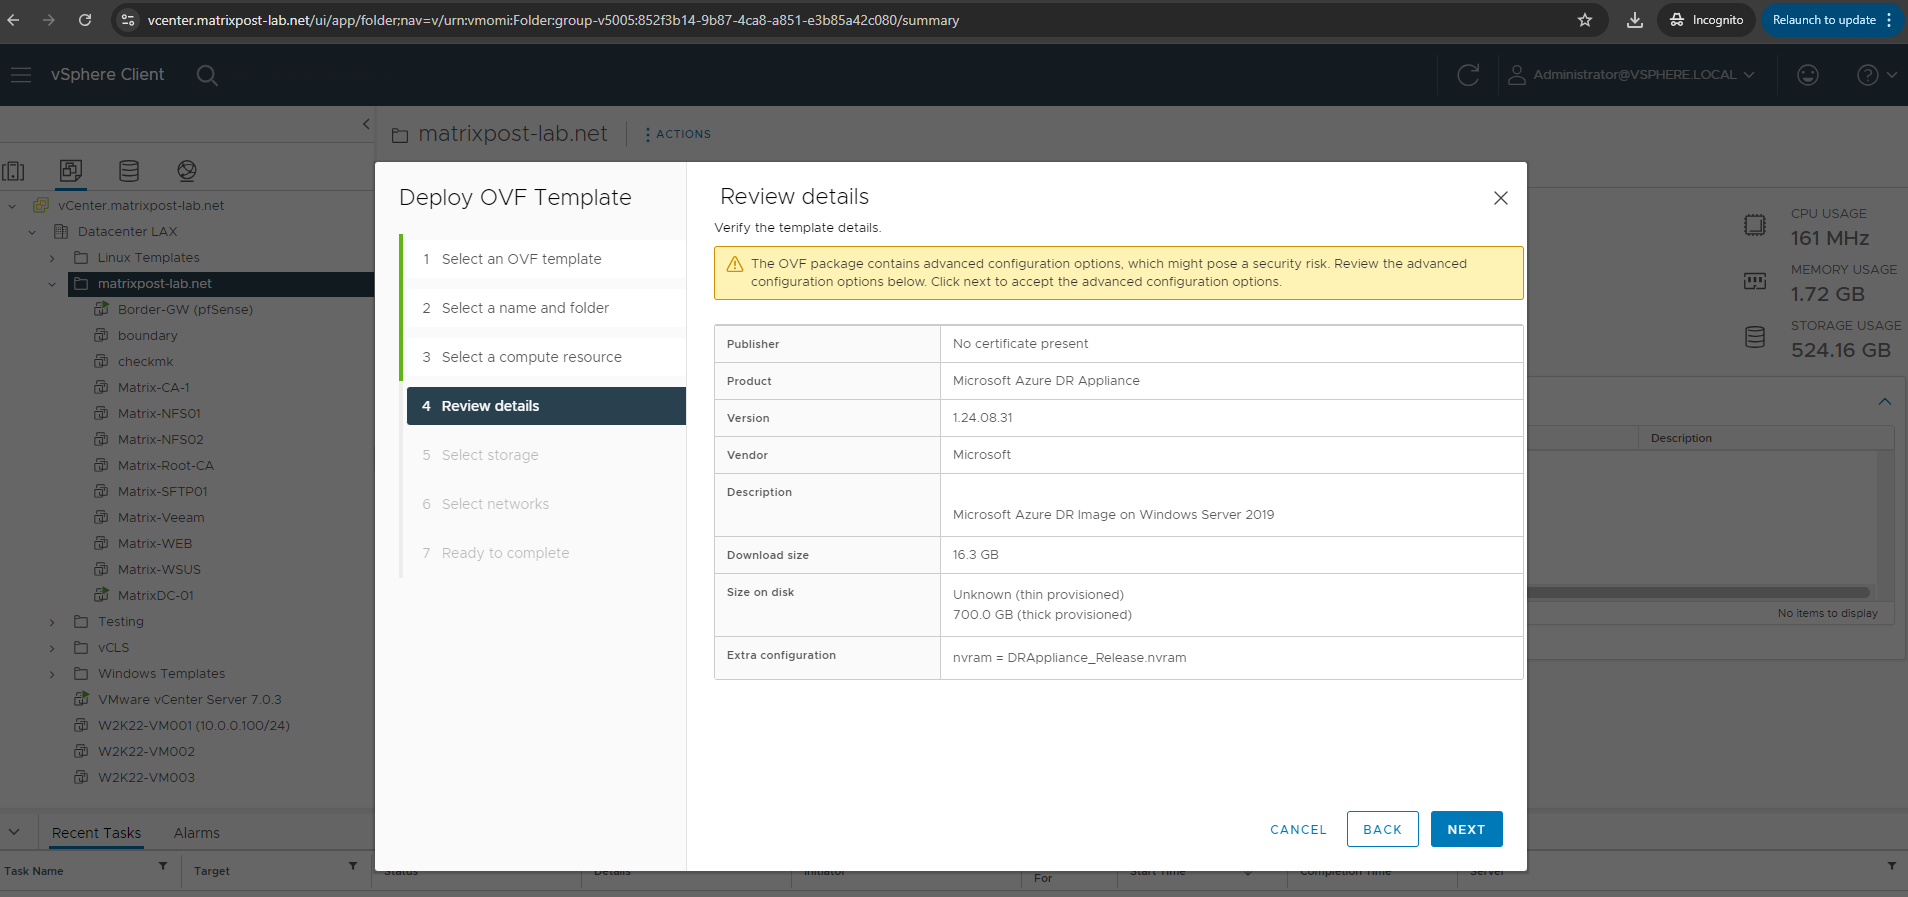
Deploying the ASR Appliance in vSphere
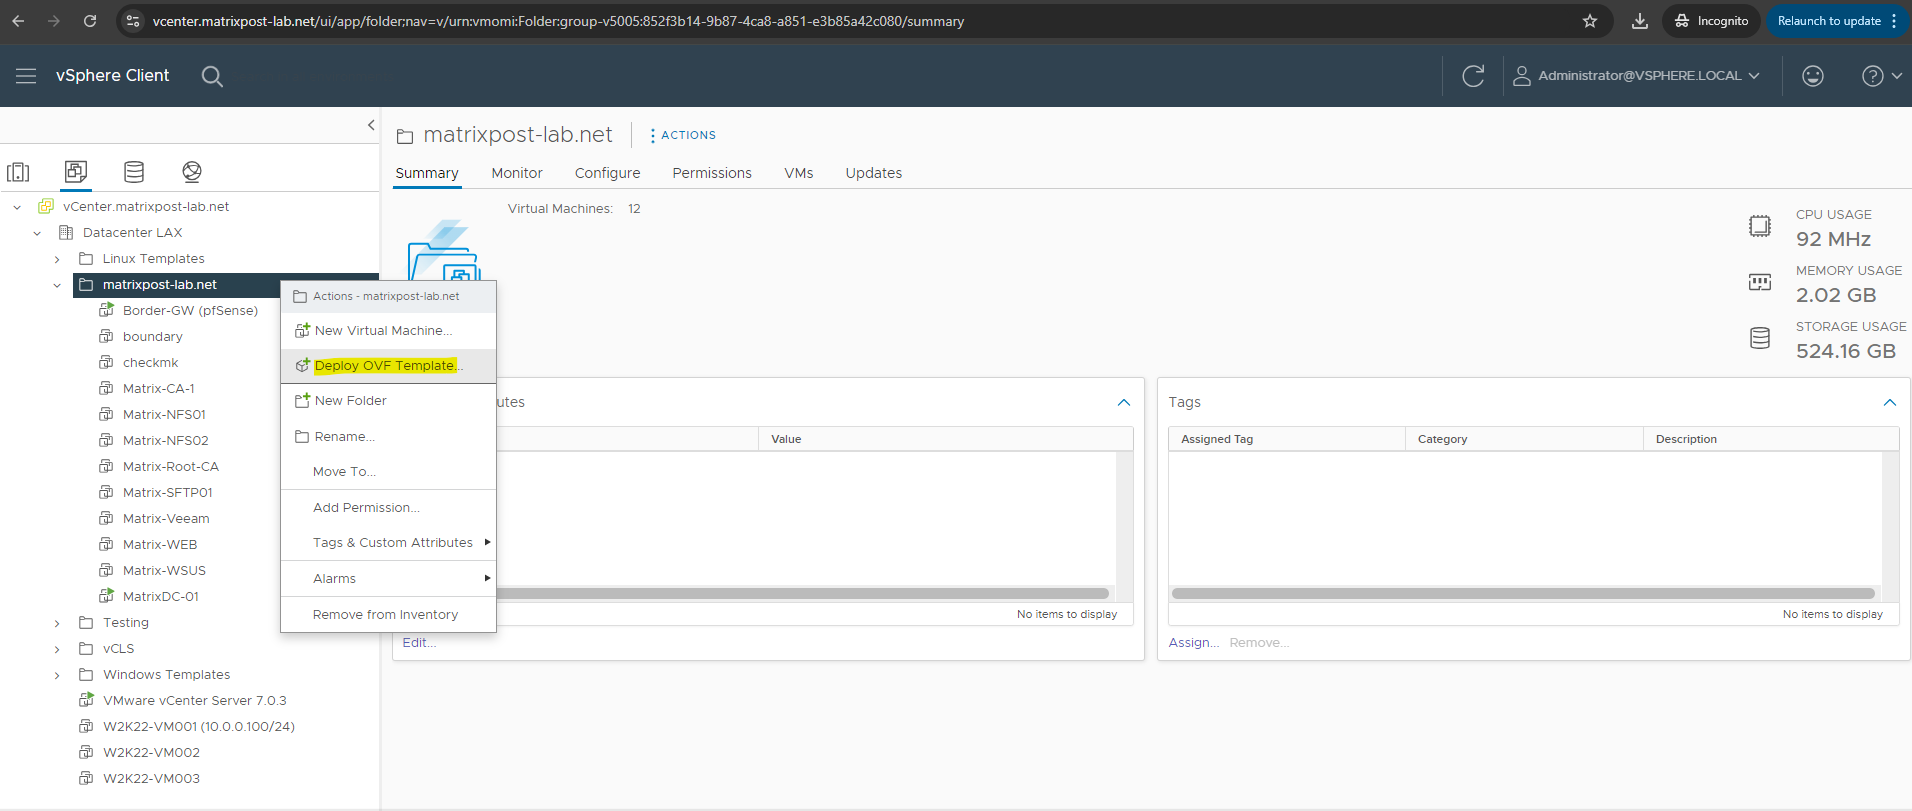
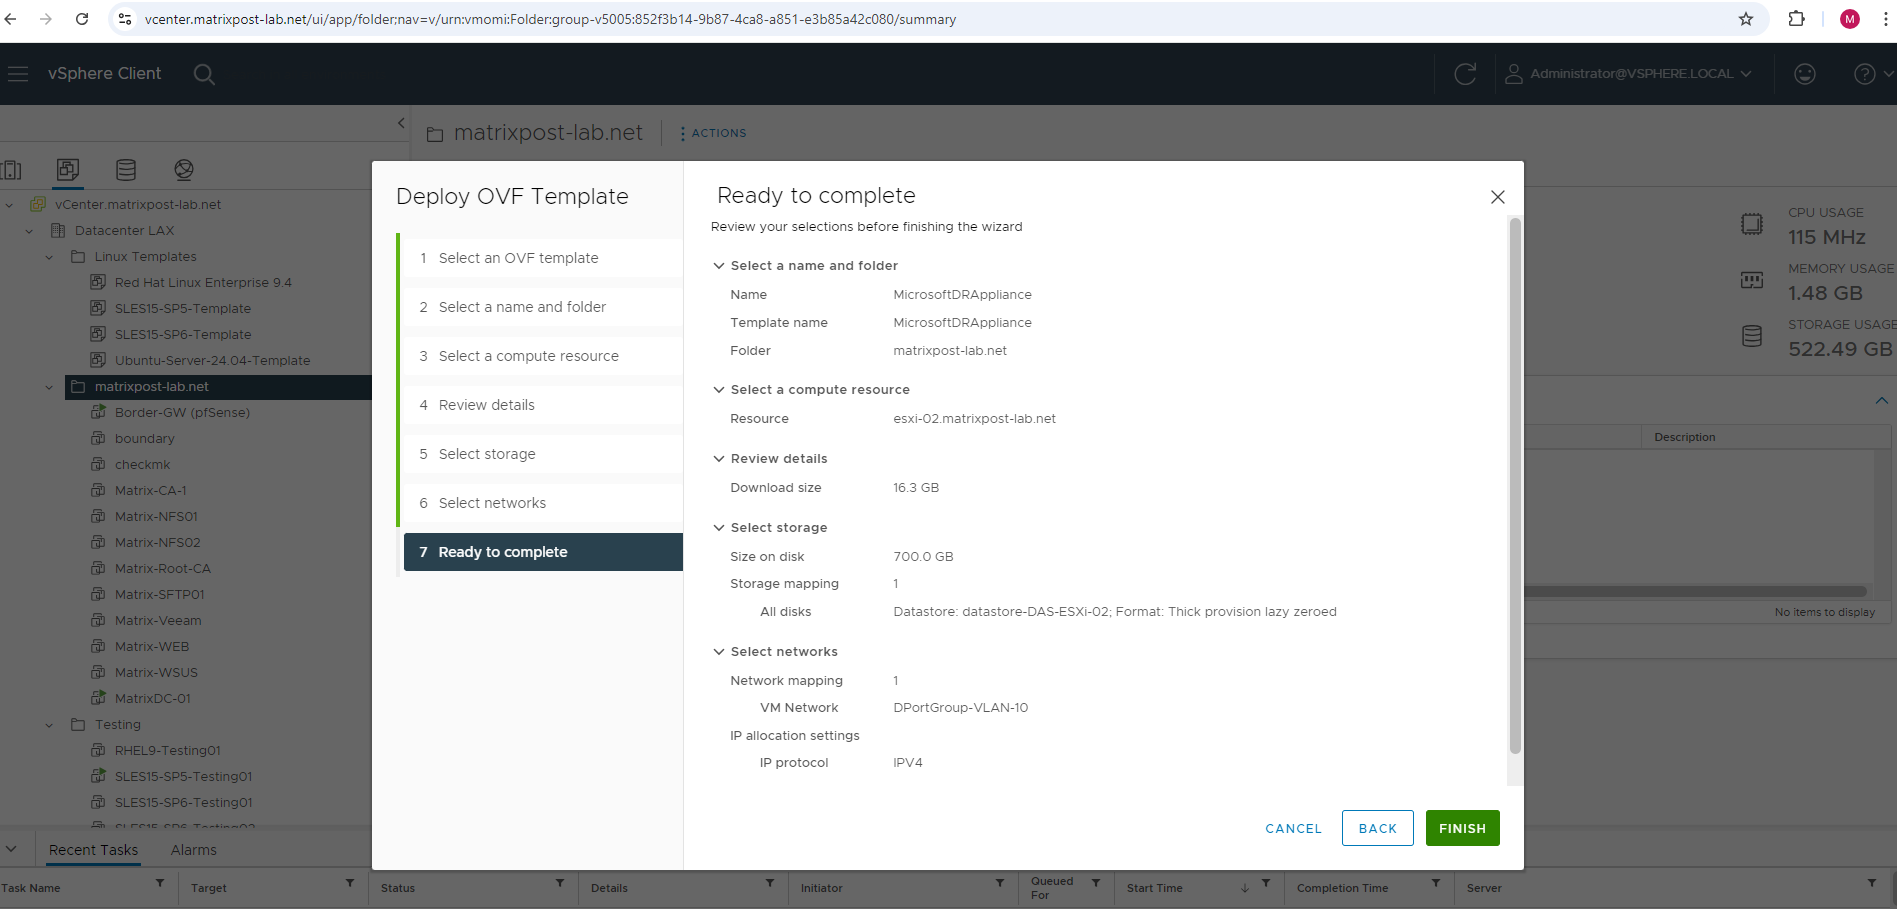
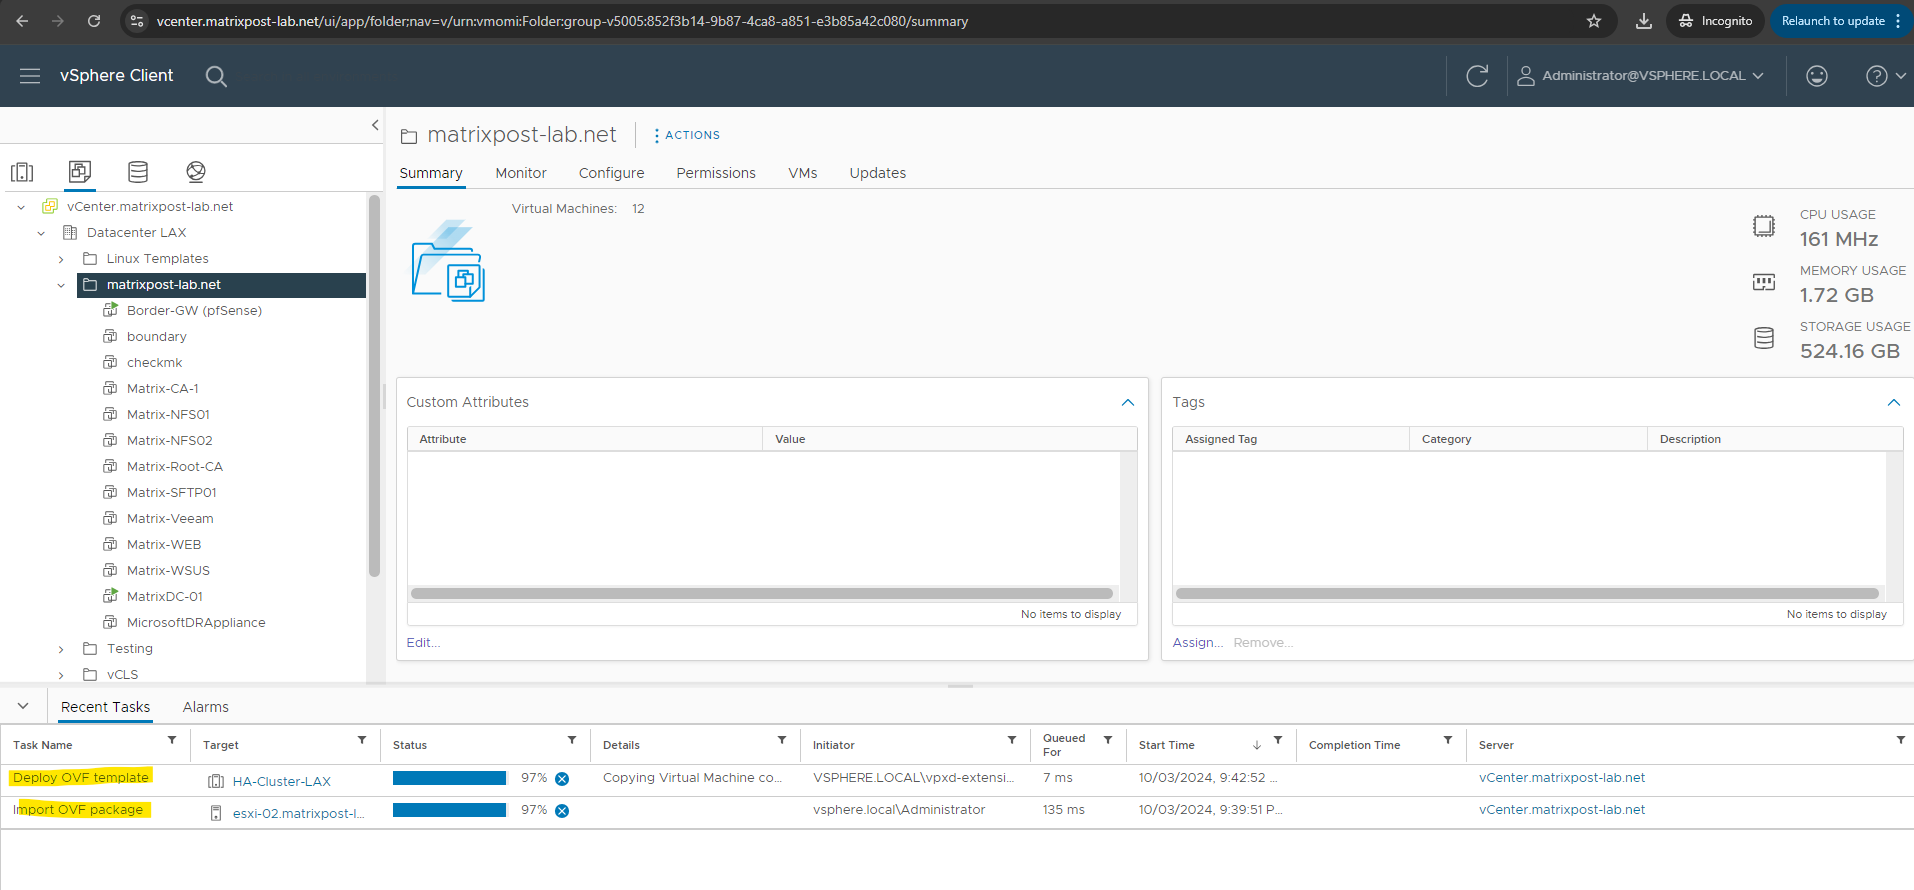
After downloading the .ova template we can deploy it in vSphere.


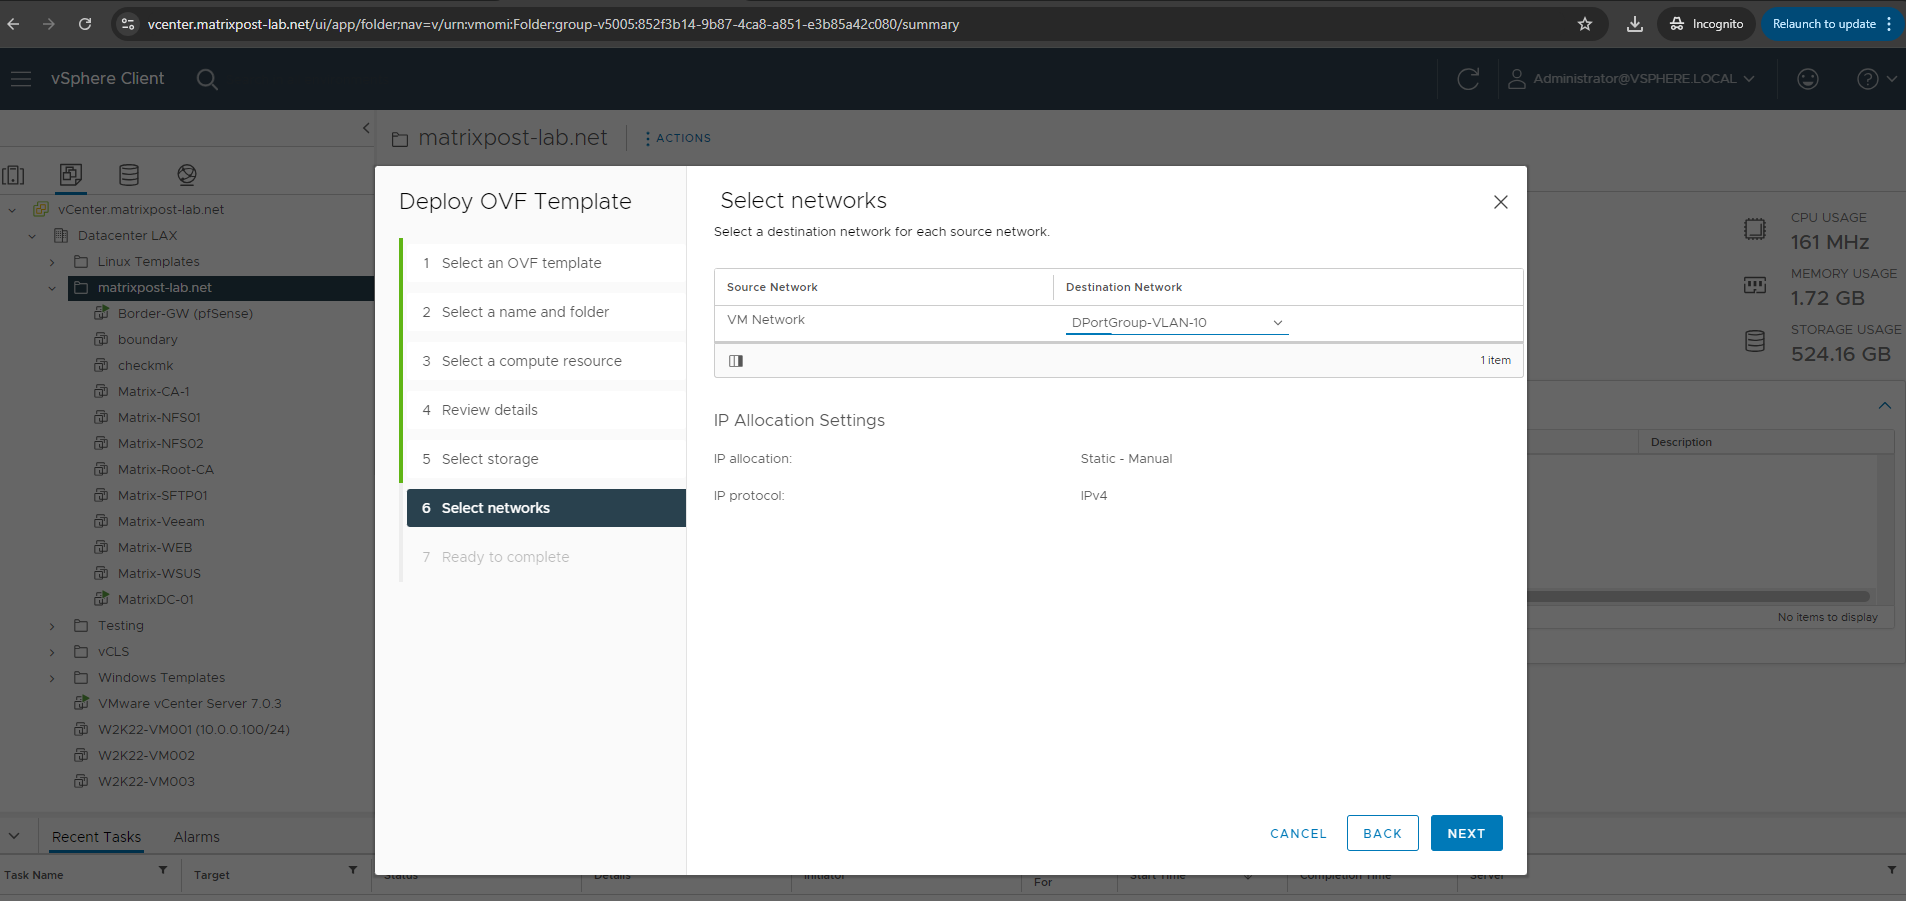
For the VM Network I will use my DPortGroup-VLAN-10 which is a distributed virtual switch within the VLAN ID 10.
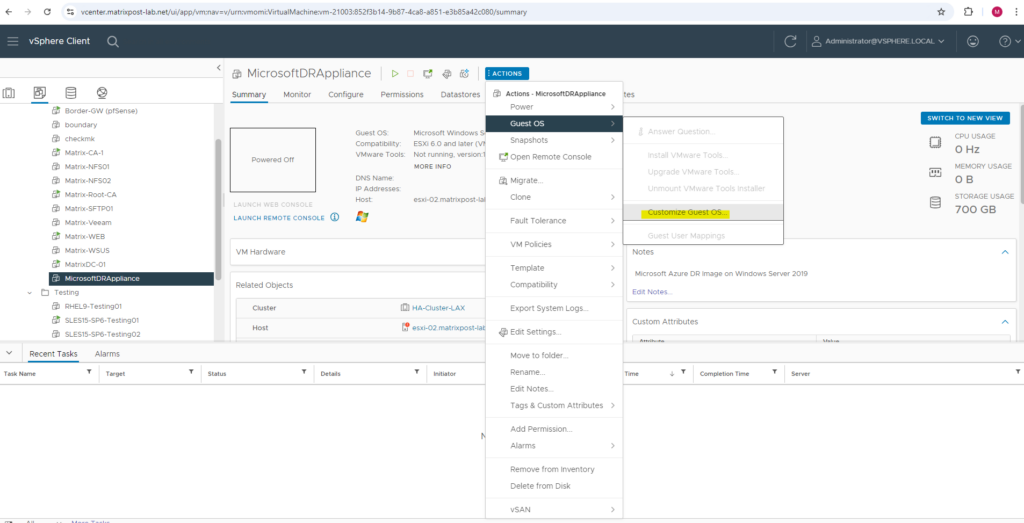
After the deployment is completed we can right click on the virtual machine or using its ACTIONS menu, either way select Guest OS -> Cutomize Guest OS …
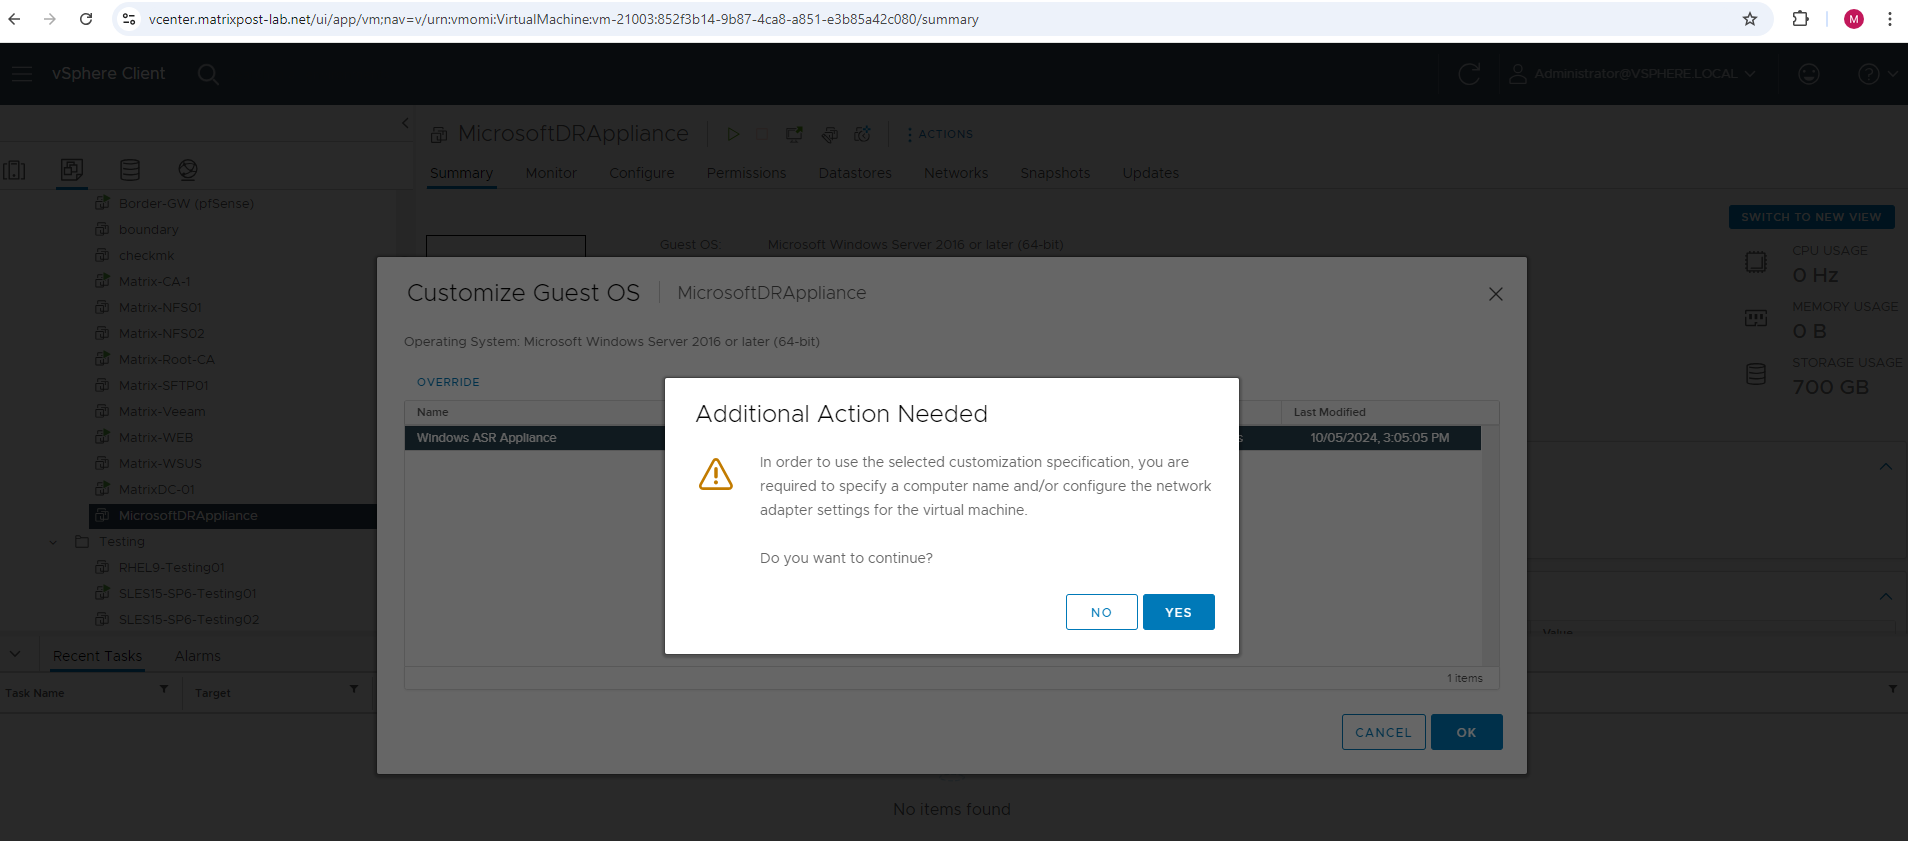
Now we need to select our previously created VM Customization Specification.
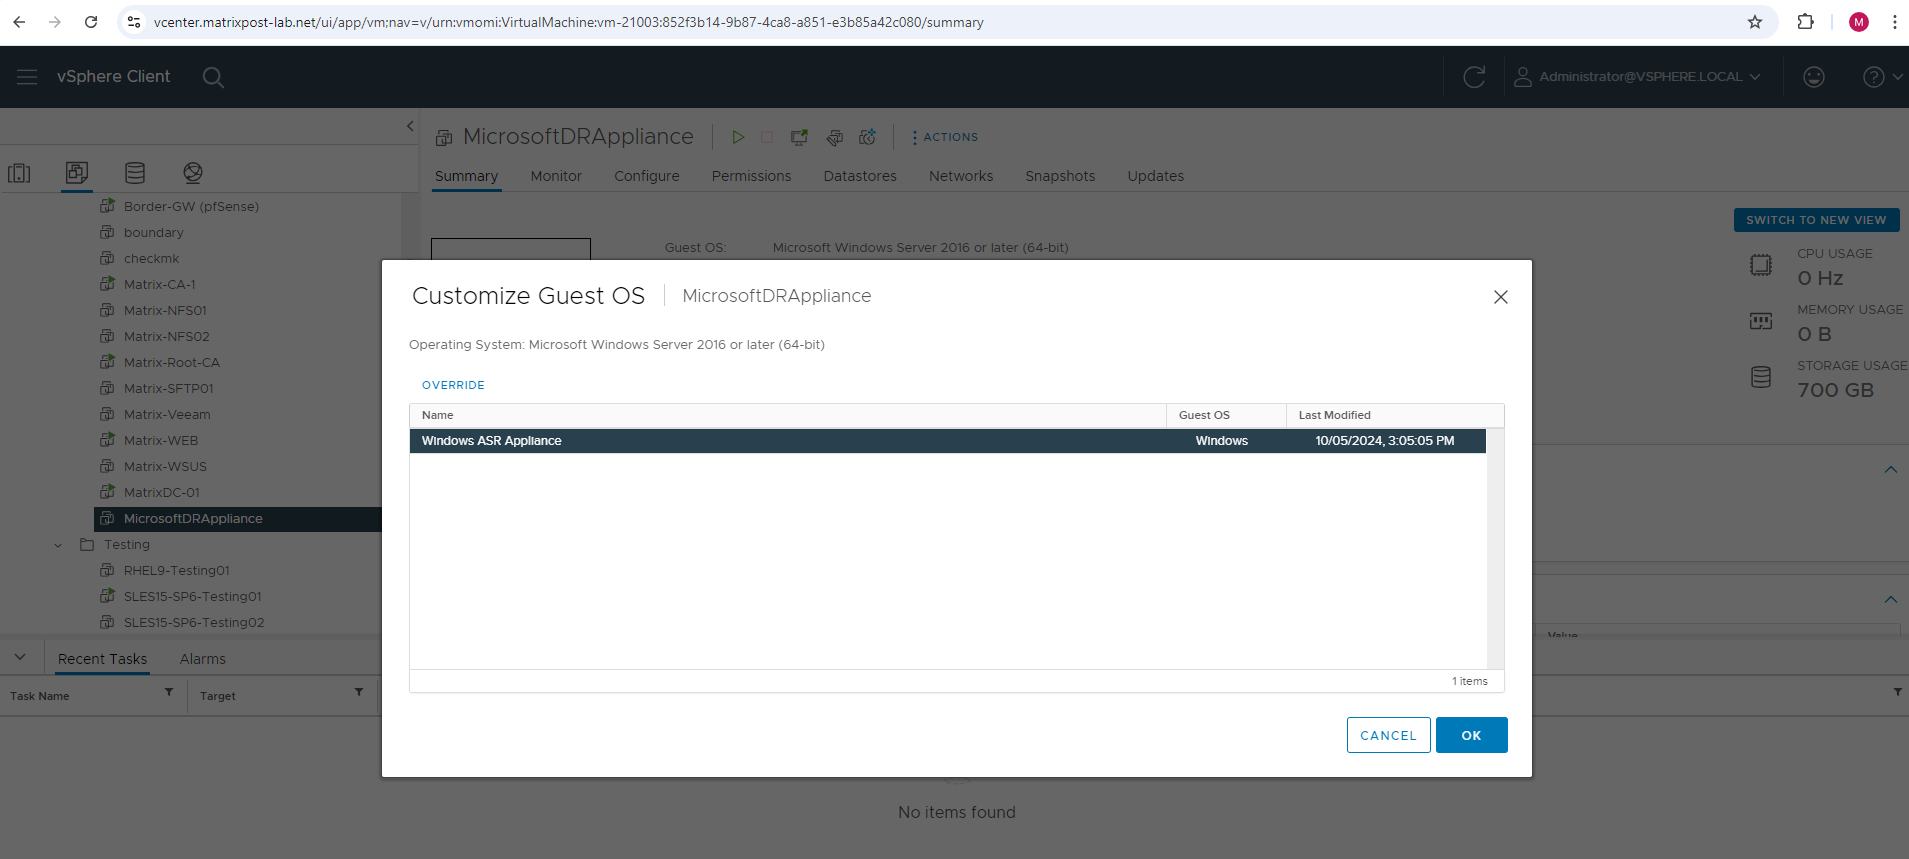
Confirm the dialog.
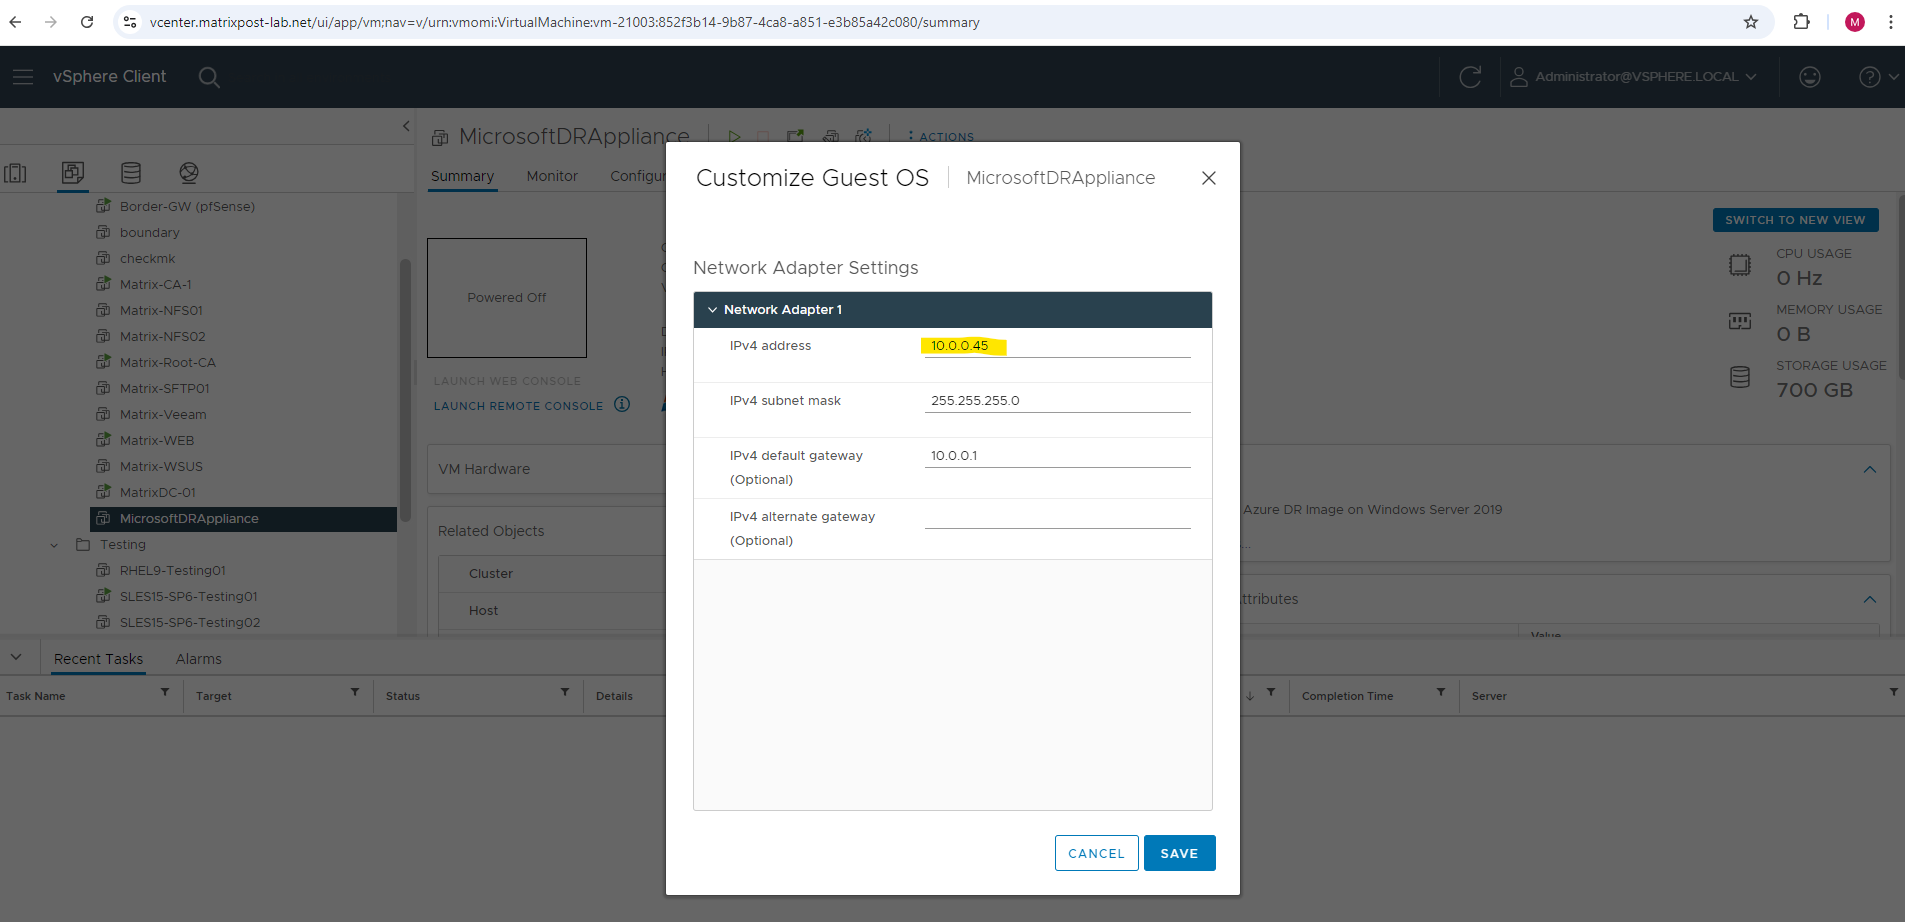
Enter the desired IP address for your ASR appliance.
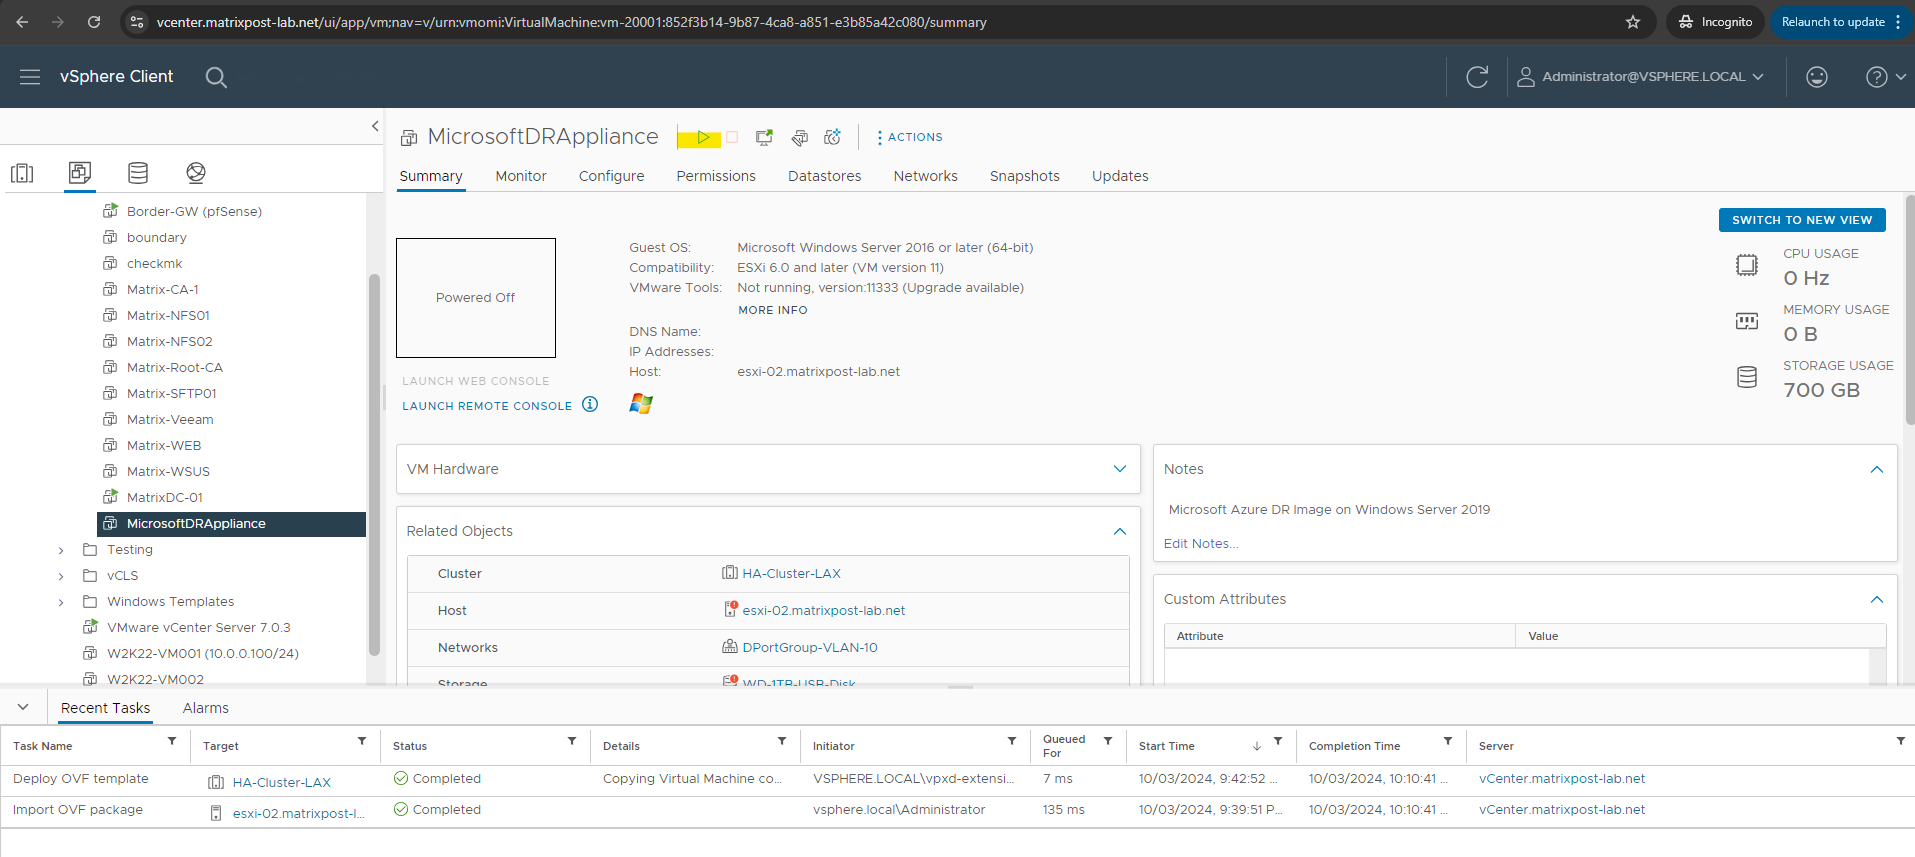
Power on the ASR Appliance in vSphere and enable replication of VMware VMs
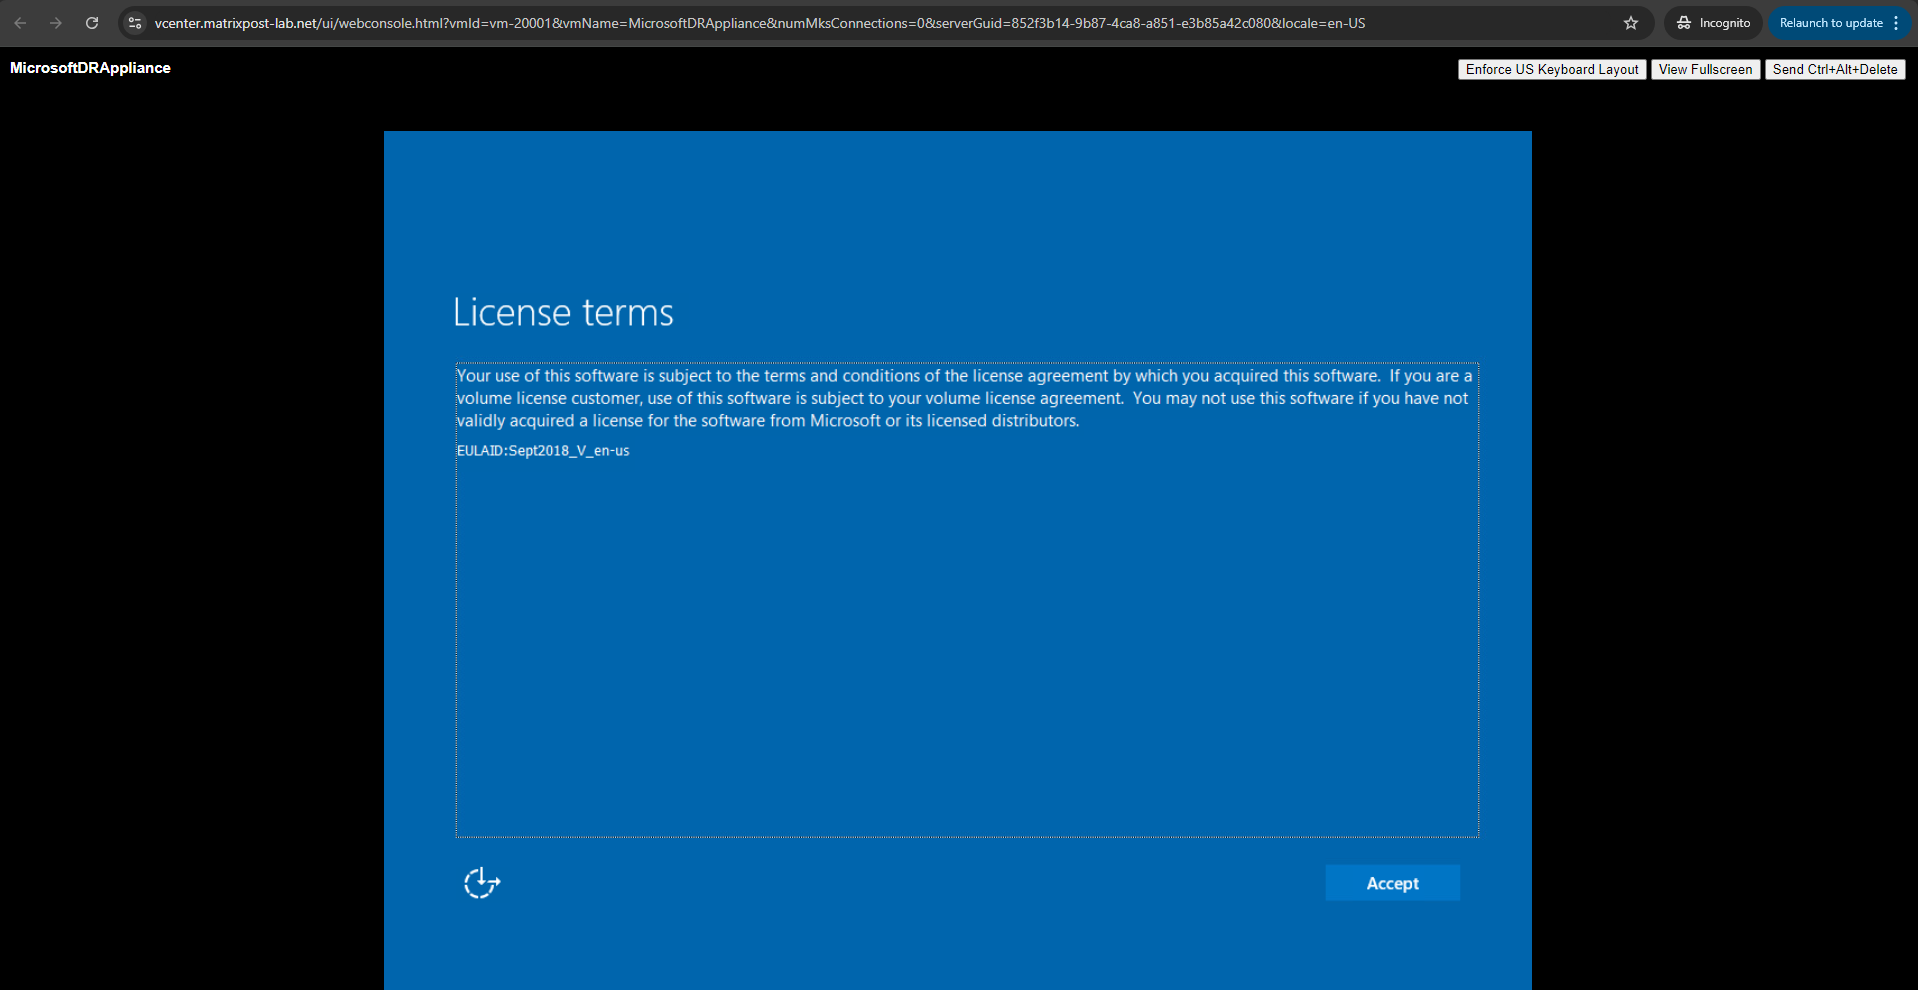
We can now power on the appliance VM to accept Microsoft Evaluation license.
To finally apply the configurations of our VM Customization Specification the virtual machine will reboot one time during the initial boot as usual.
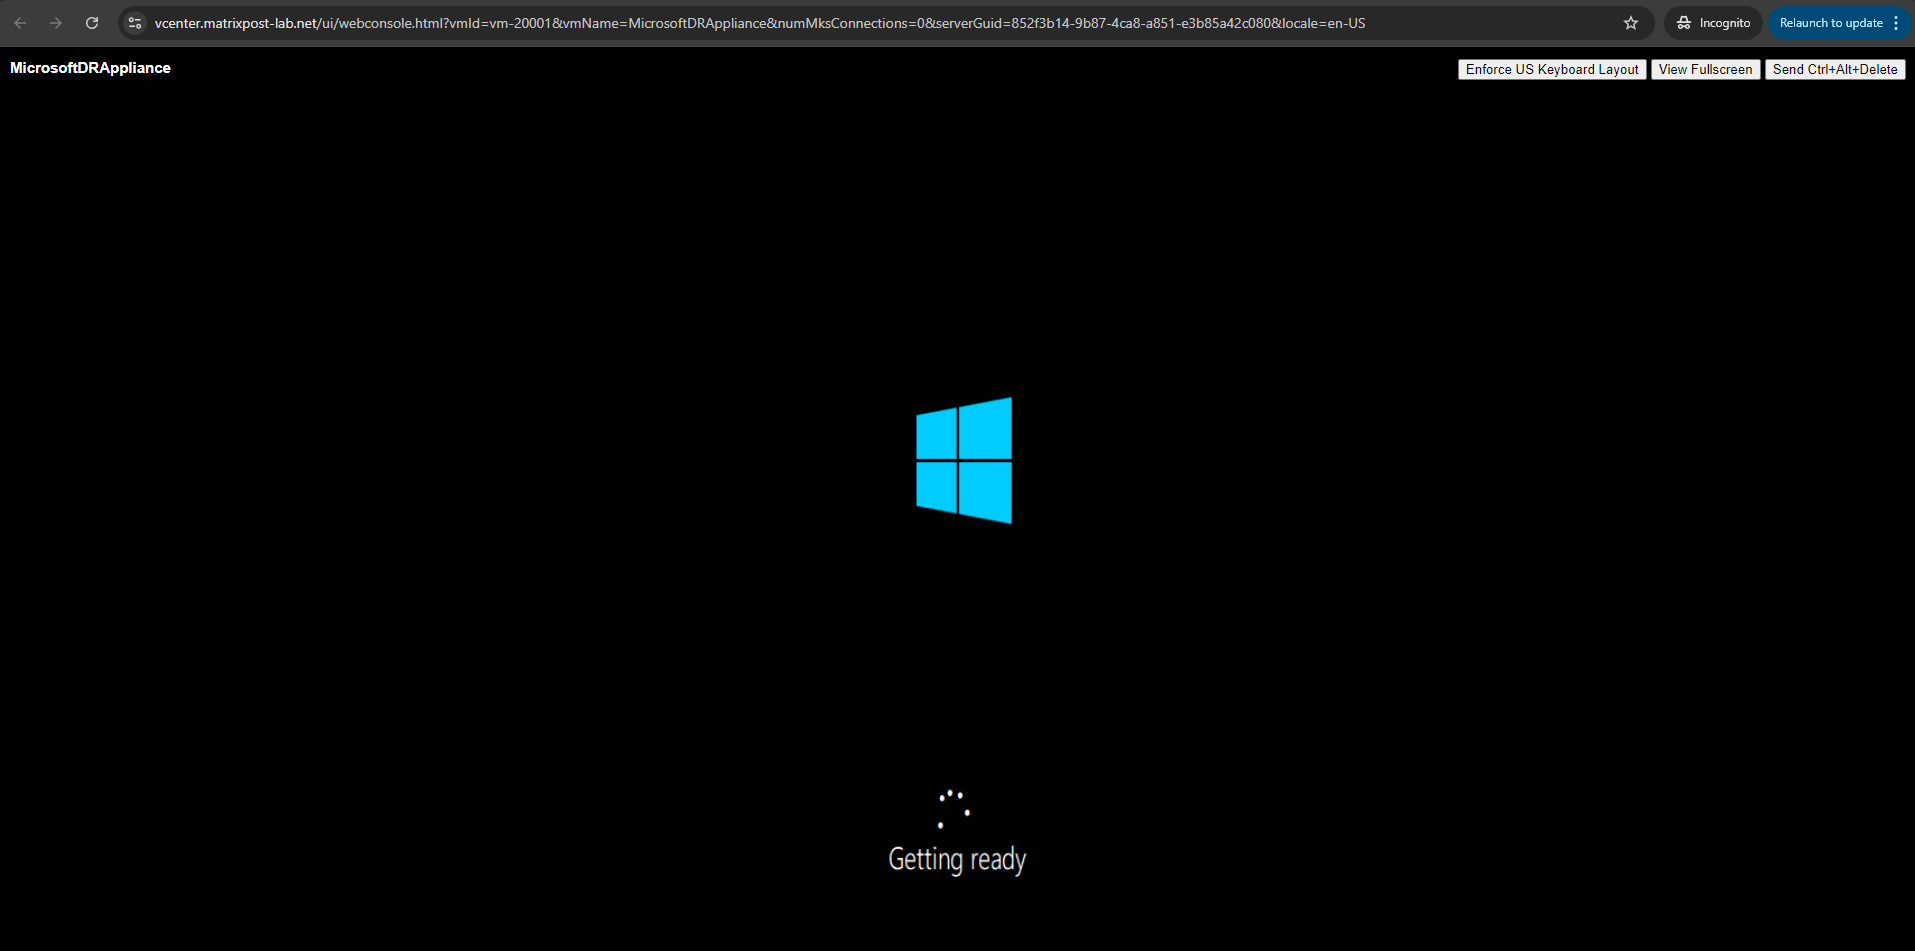
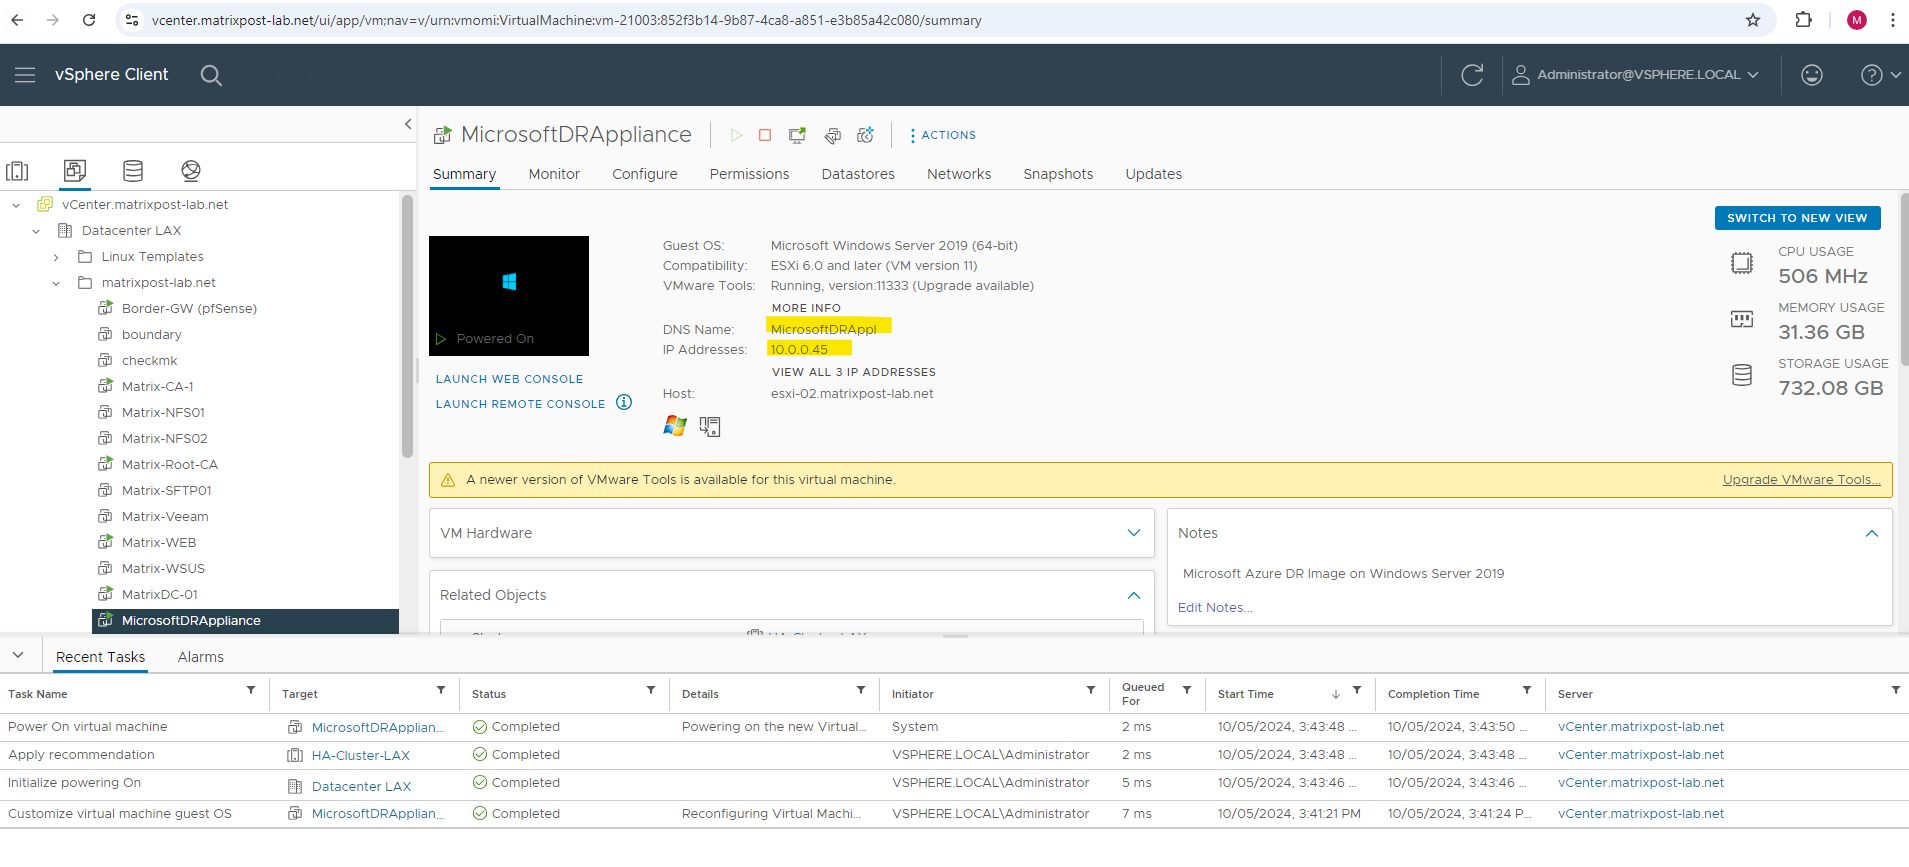
The IP Address and hostname is already applied to our ASR replication appliance as desired.
Without VM Customization Specification you also need to accept the license terms.
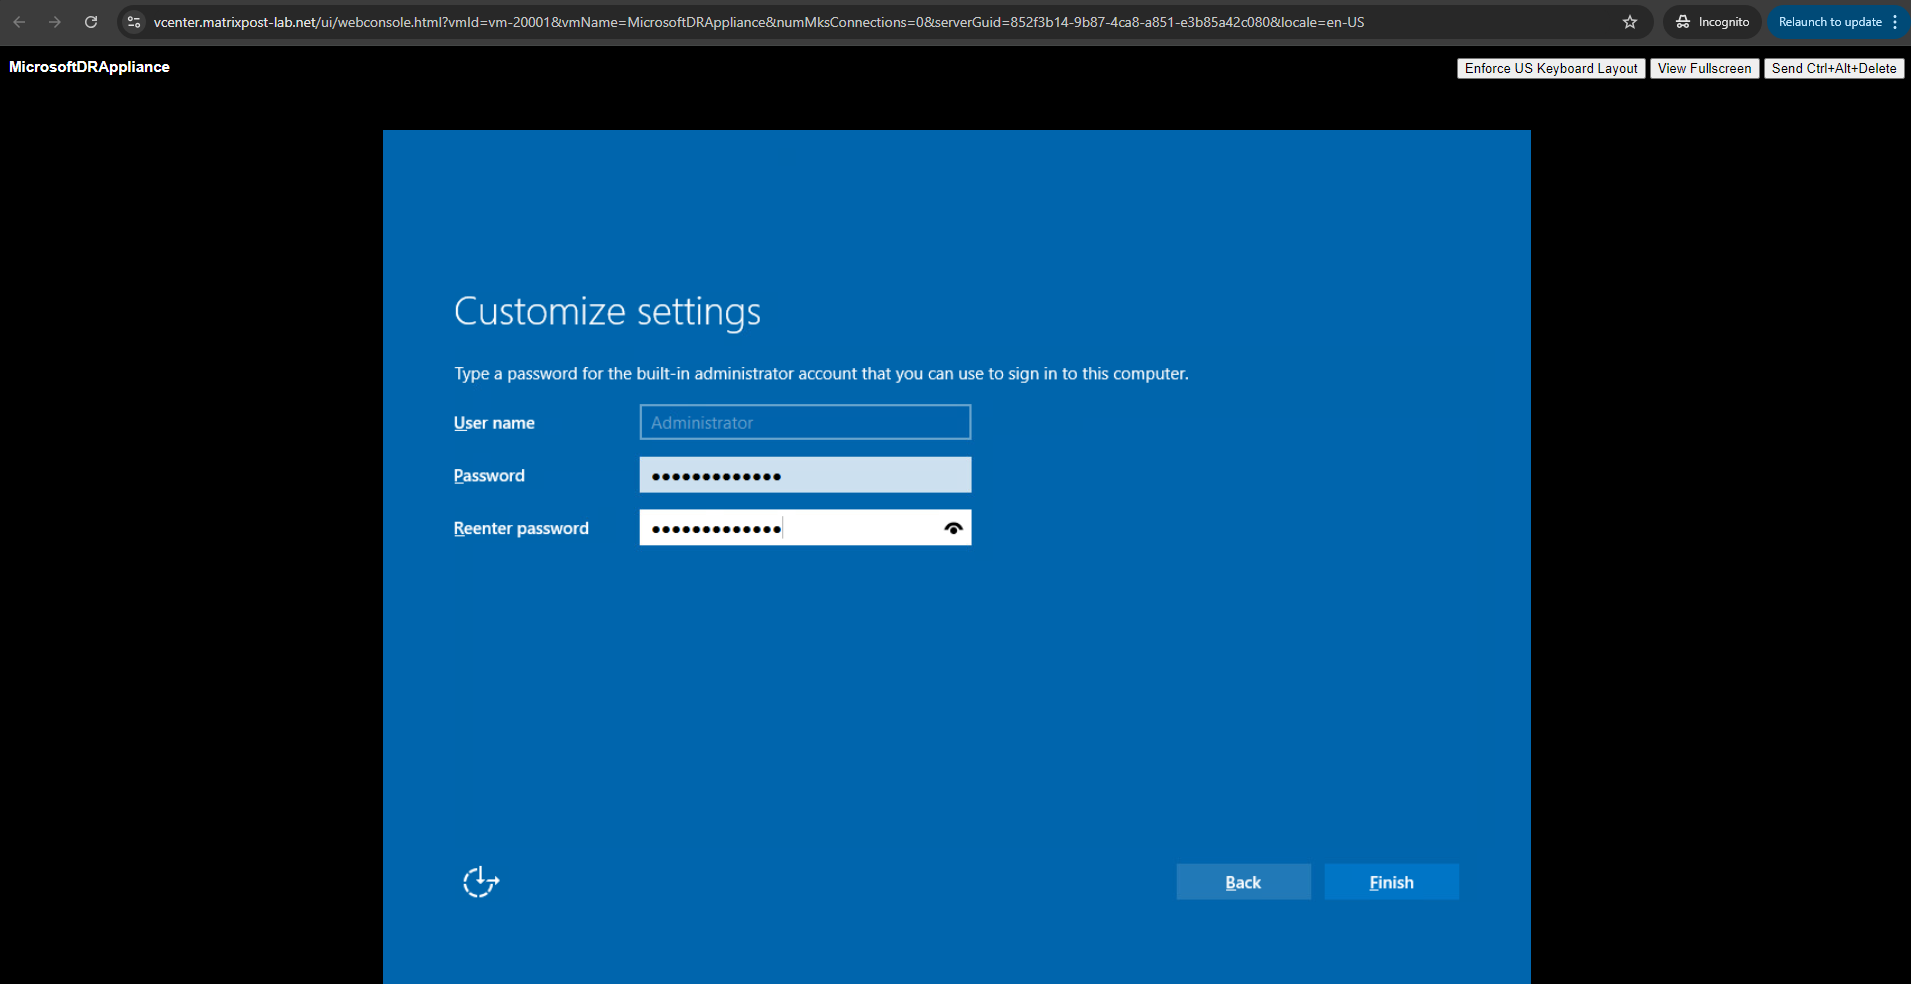
And you need to provide password for the administrator user. In our case this is done automatically by the VM Customization Specification.
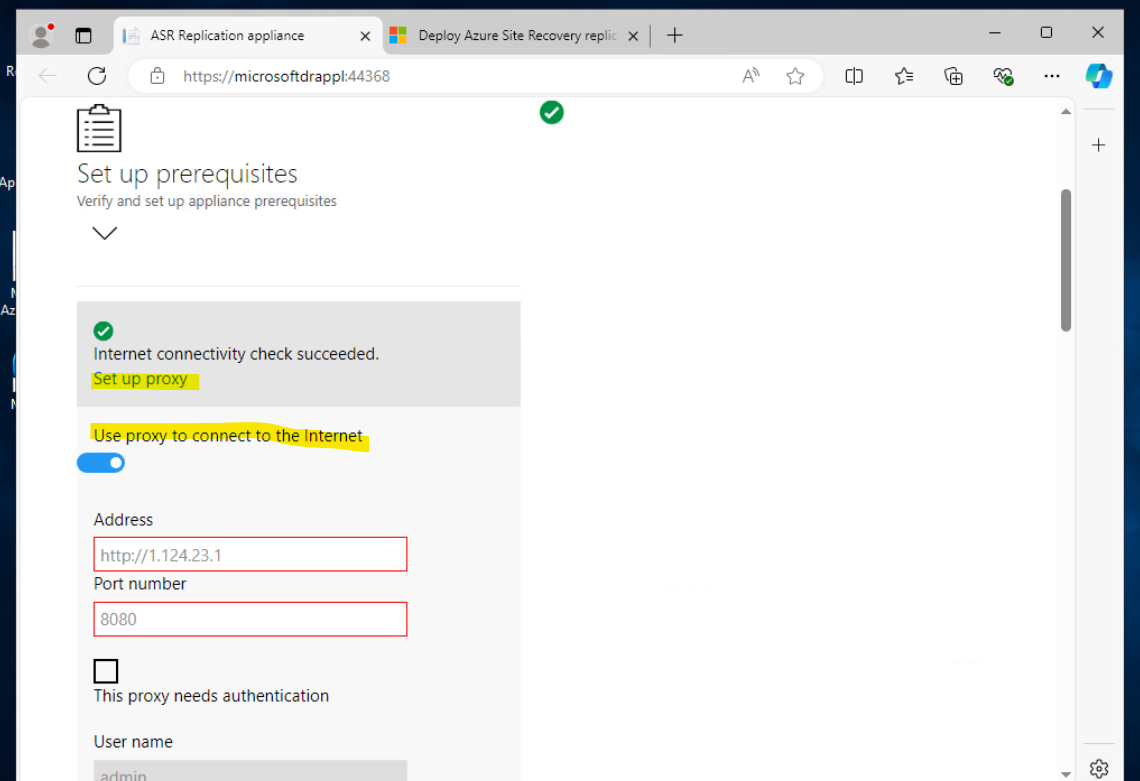
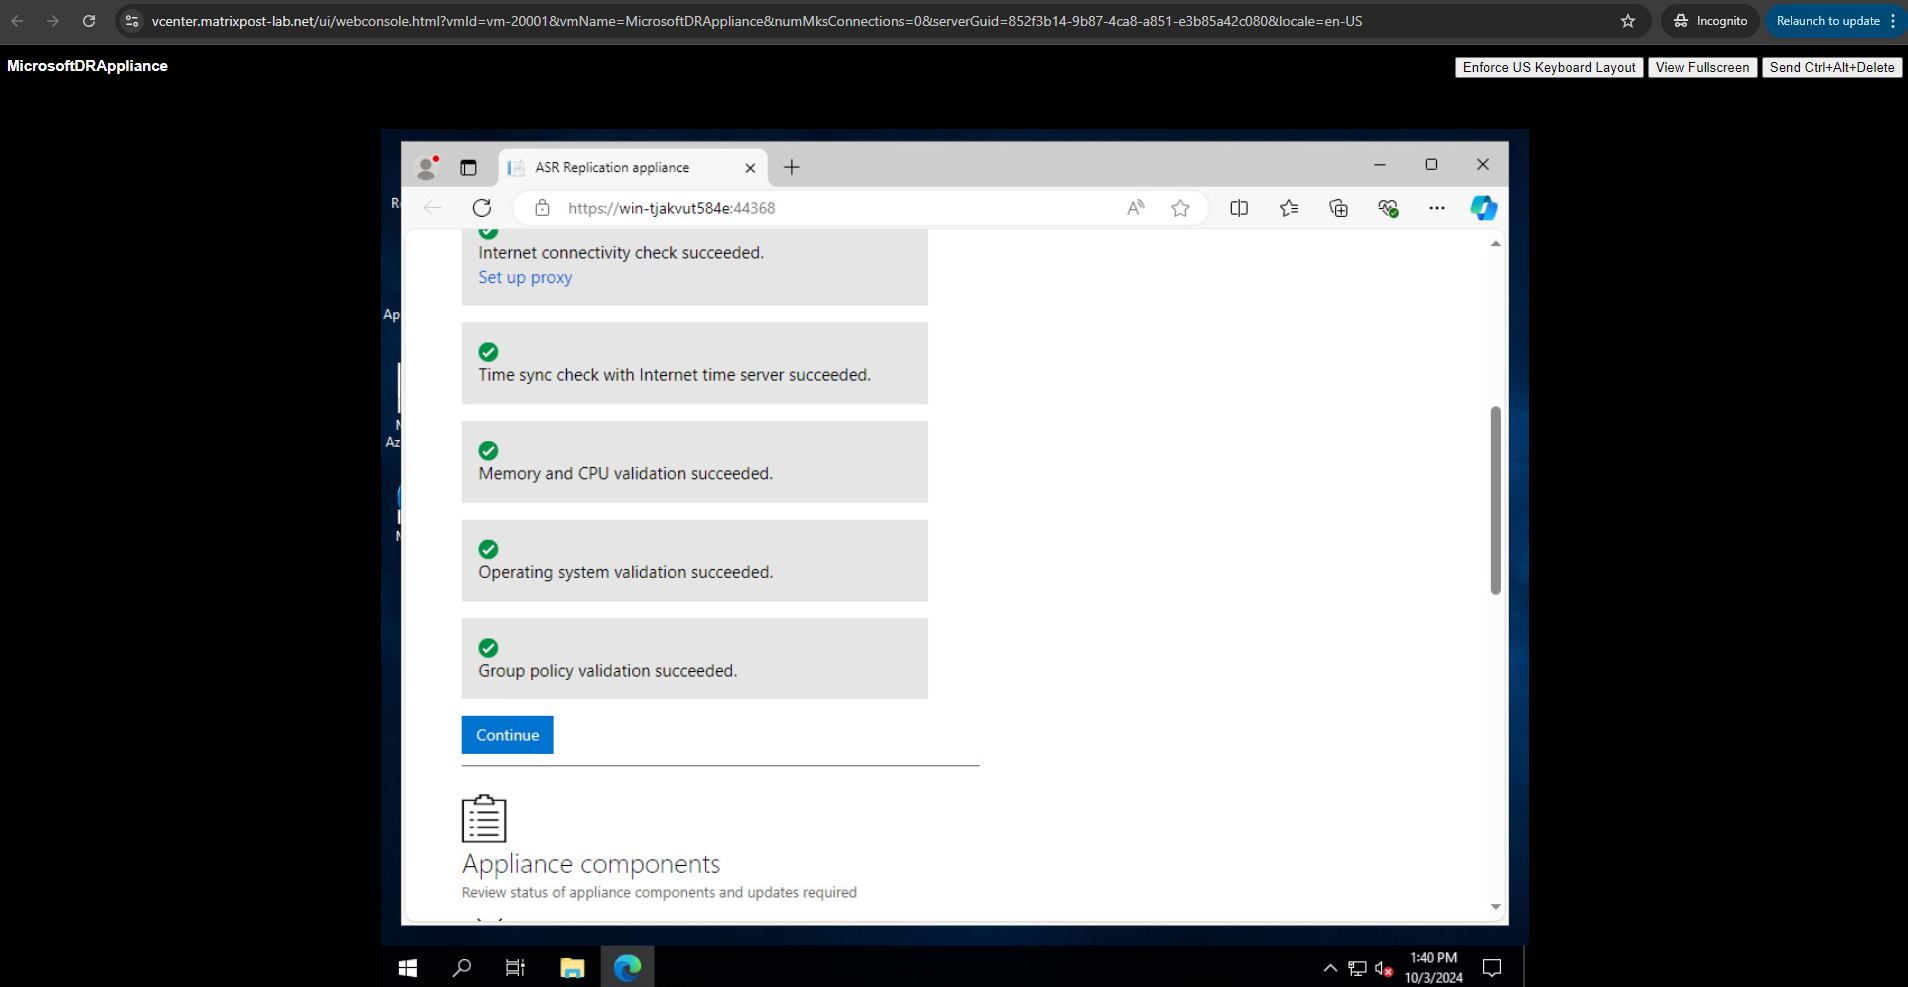
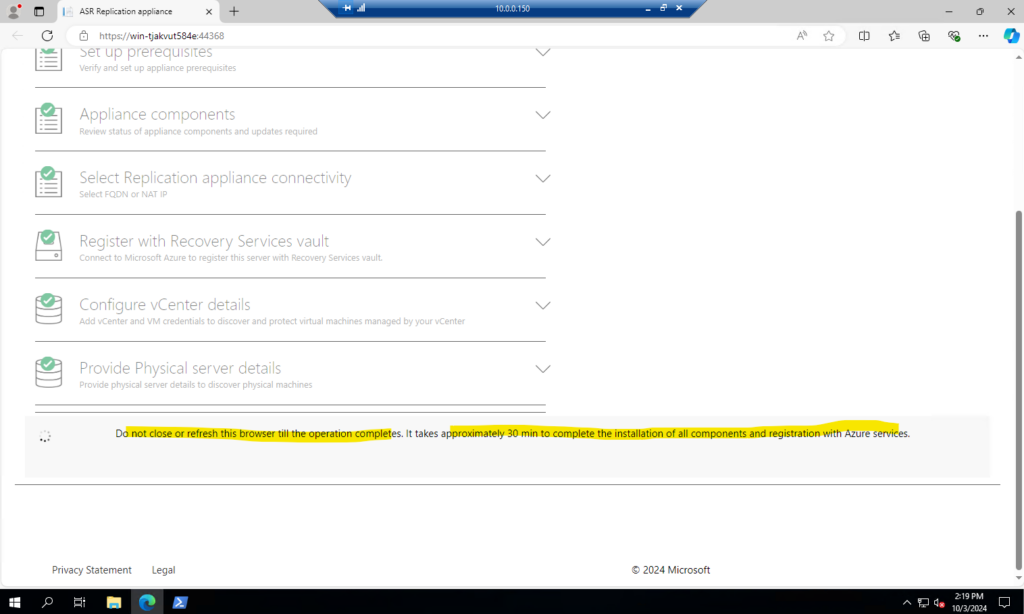
The Microsoft Azure appliance configuration manager is launched automatically when the appliance is finally booted. Prerequisites such as internet connectivity, Time sync, system configurations and group policies (listed below) are validated.
We can also open the URL on any computer that can connect to the appliance by using https://<appliance name or IP address>: 44368.
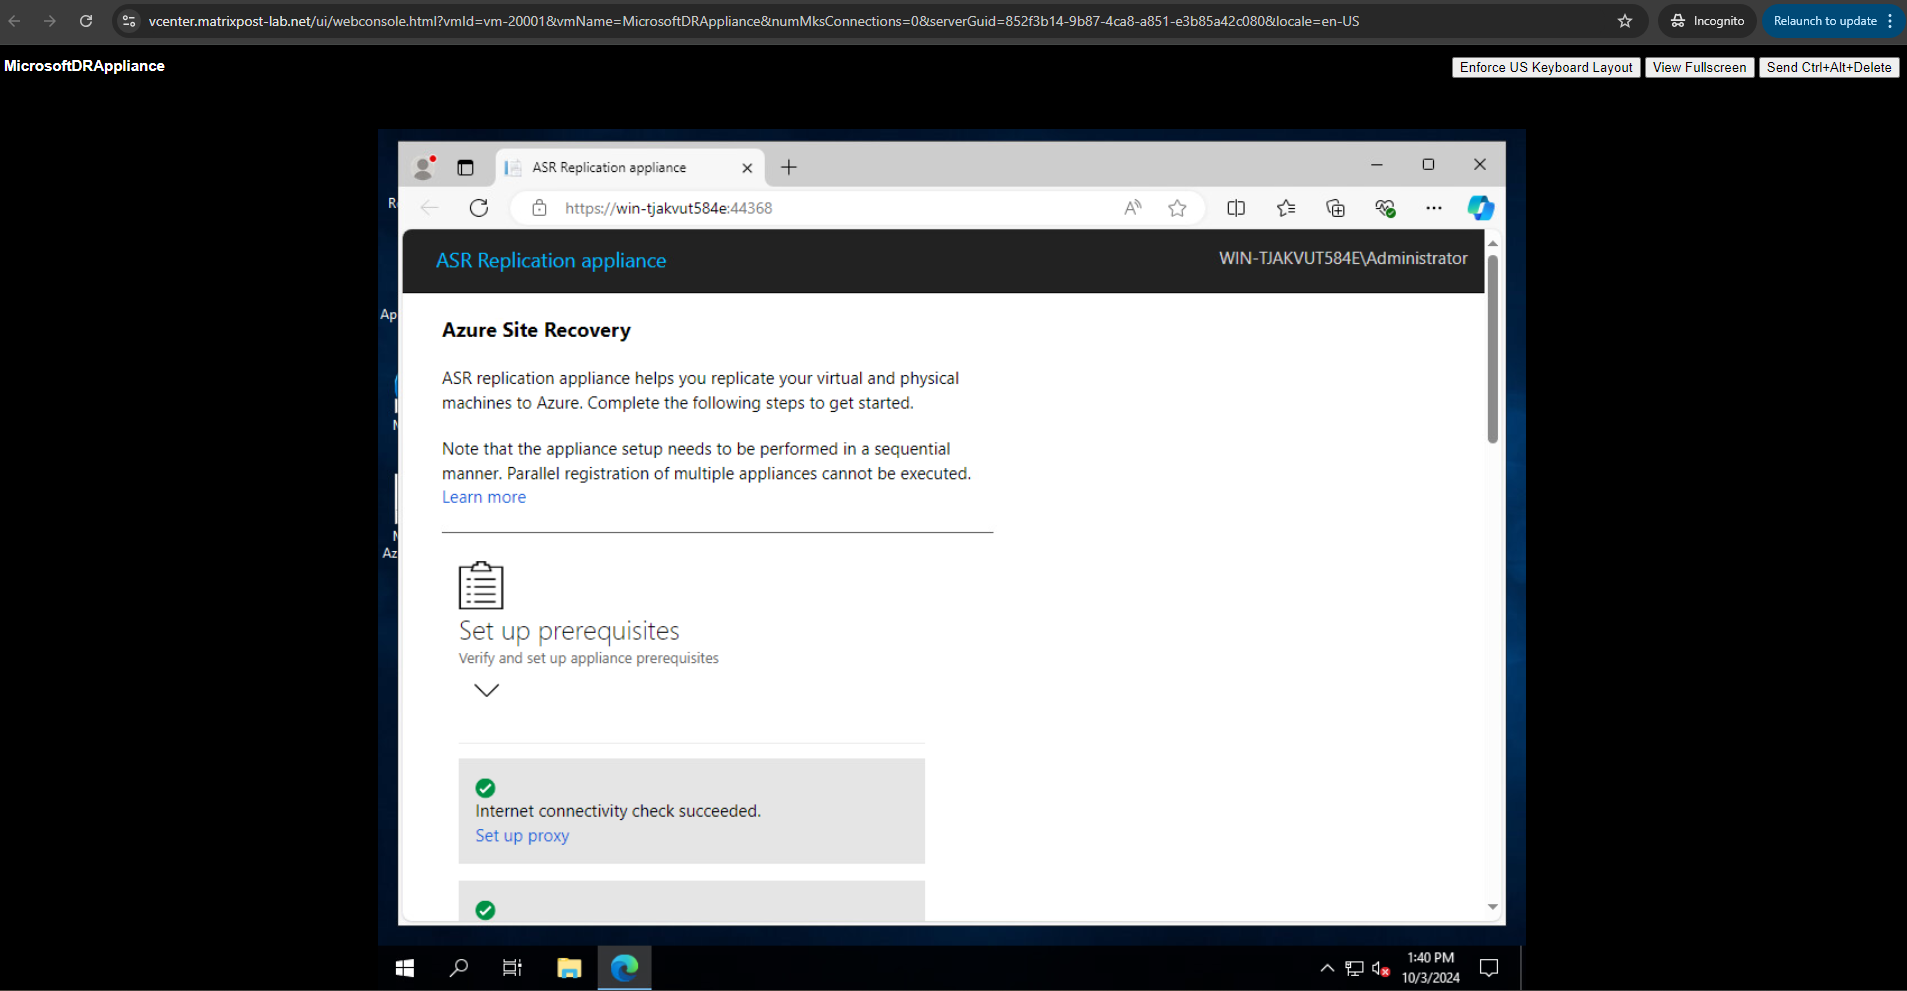
If the appliance uses a proxy for internet access, configure the proxy settings by toggling on the use proxy to connect to internet option as shown below.
Our in vSphere deployed ASR Appliance should be able to connect to the following URLs by uing outbound HTTPS TCP 443 over the Internet. Either you allow outbound all HTTPS TCP 443 traffic or you filter to just allow the listed URLs in the article by Microsoft below.
ASR Appliance –> Internet HTTPS TCP 443 (MS URIs https://learn.microsoft.com/en-us/azure/site-recovery/replication-appliance-support-matrix#allow-urls)
Click on Continue.
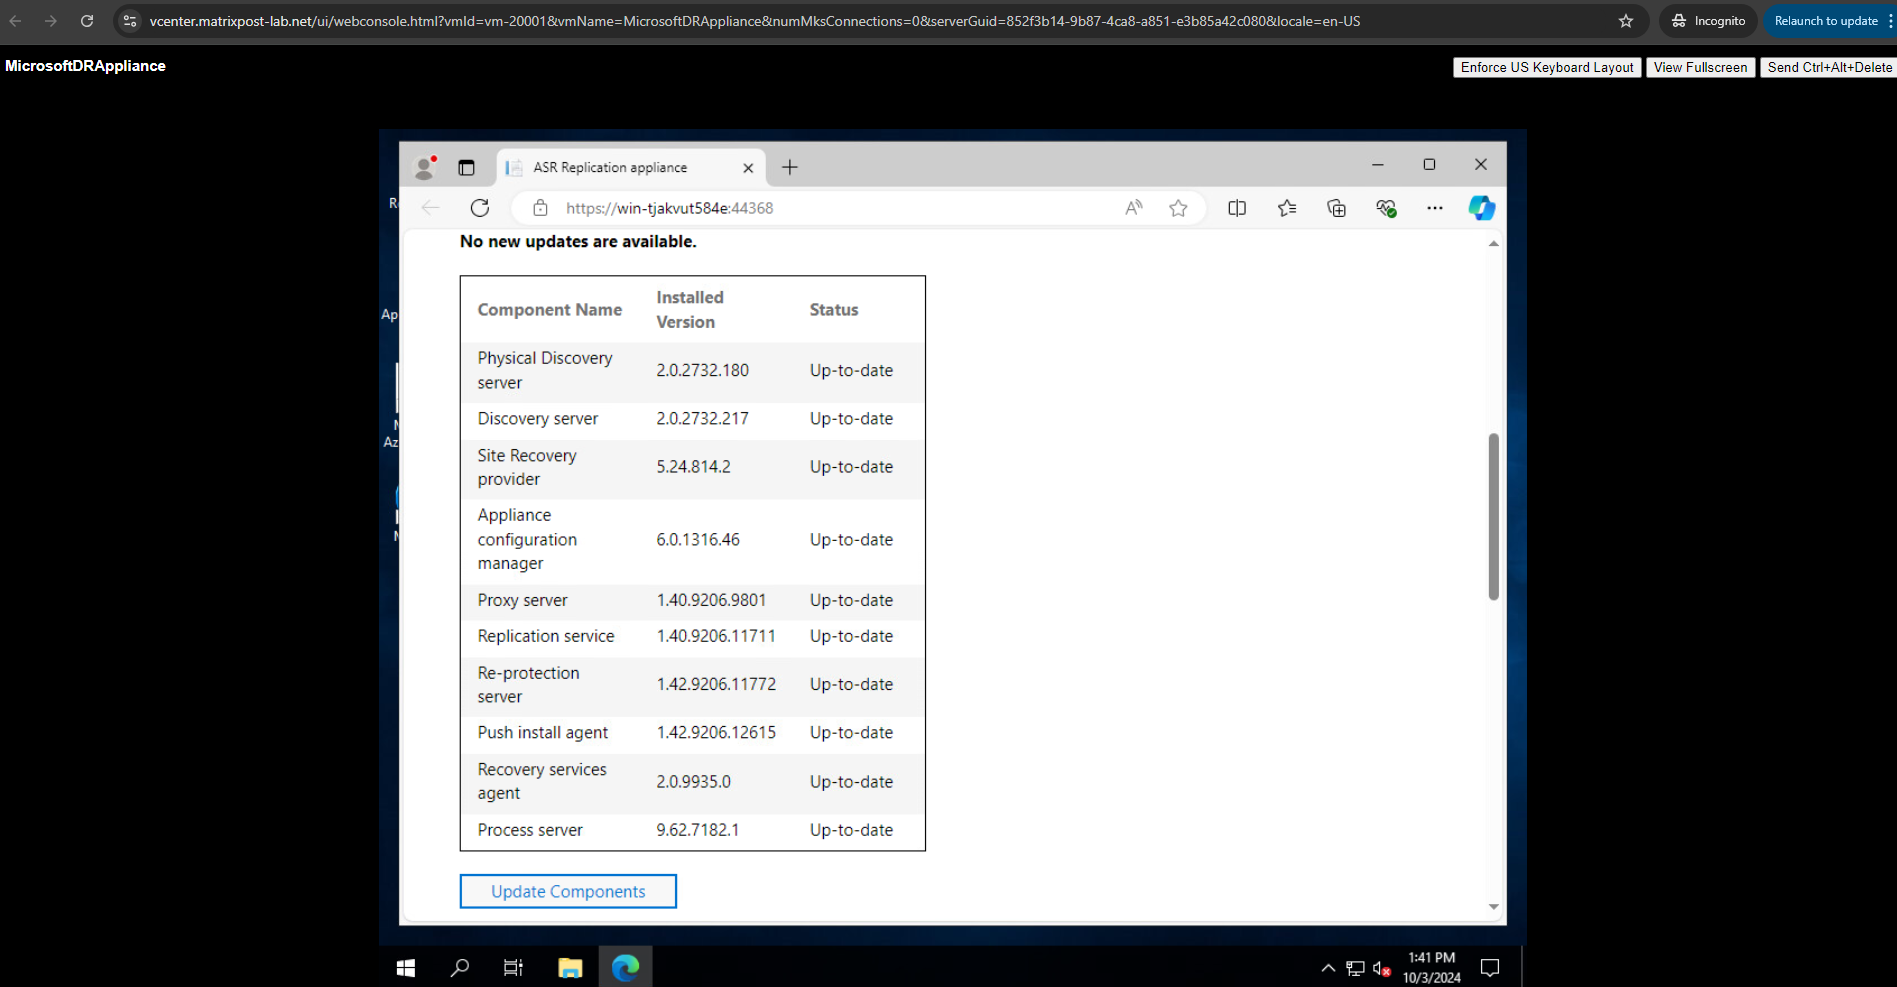
All components are already Up-to-date.
Ensure the following required URLs are allowed and are reachable from the Azure Site Recovery replication appliance for continuous connectivity.
Once the prerequisites have been checked, in the next step information about all the appliance components will be fetched. Review the status of all components and then select Continue.
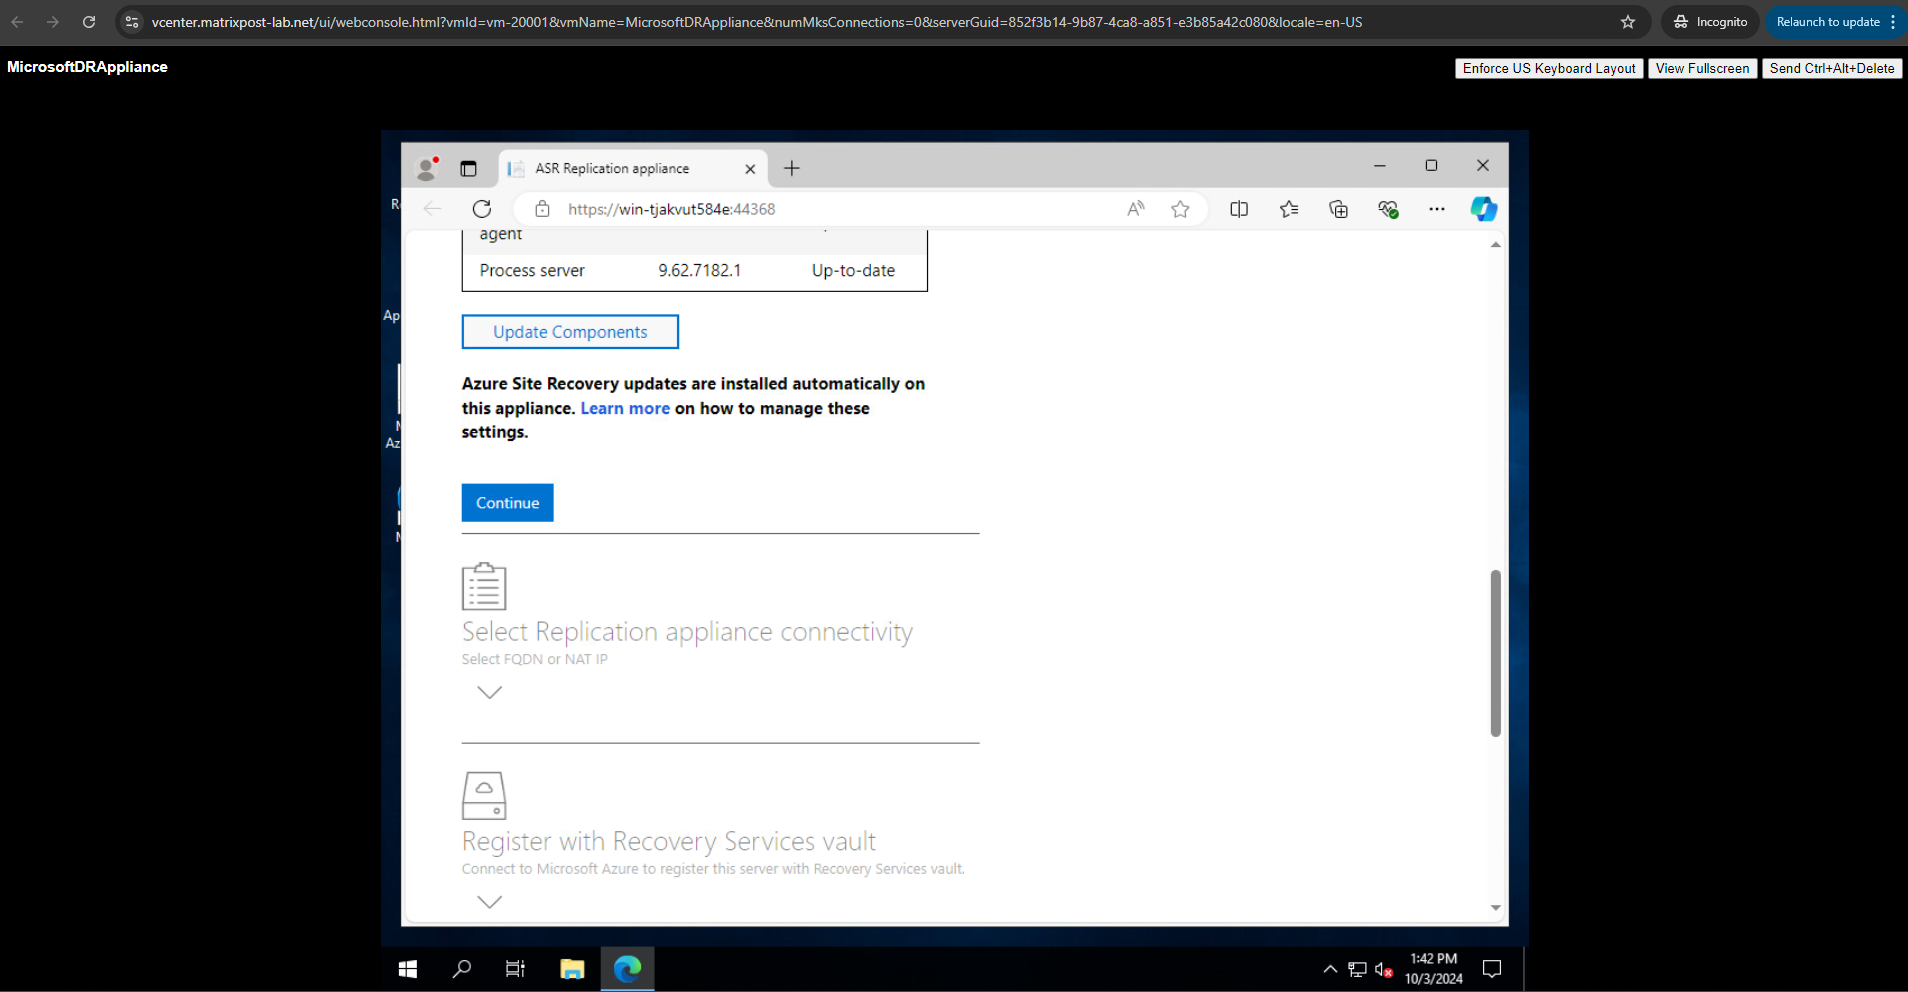
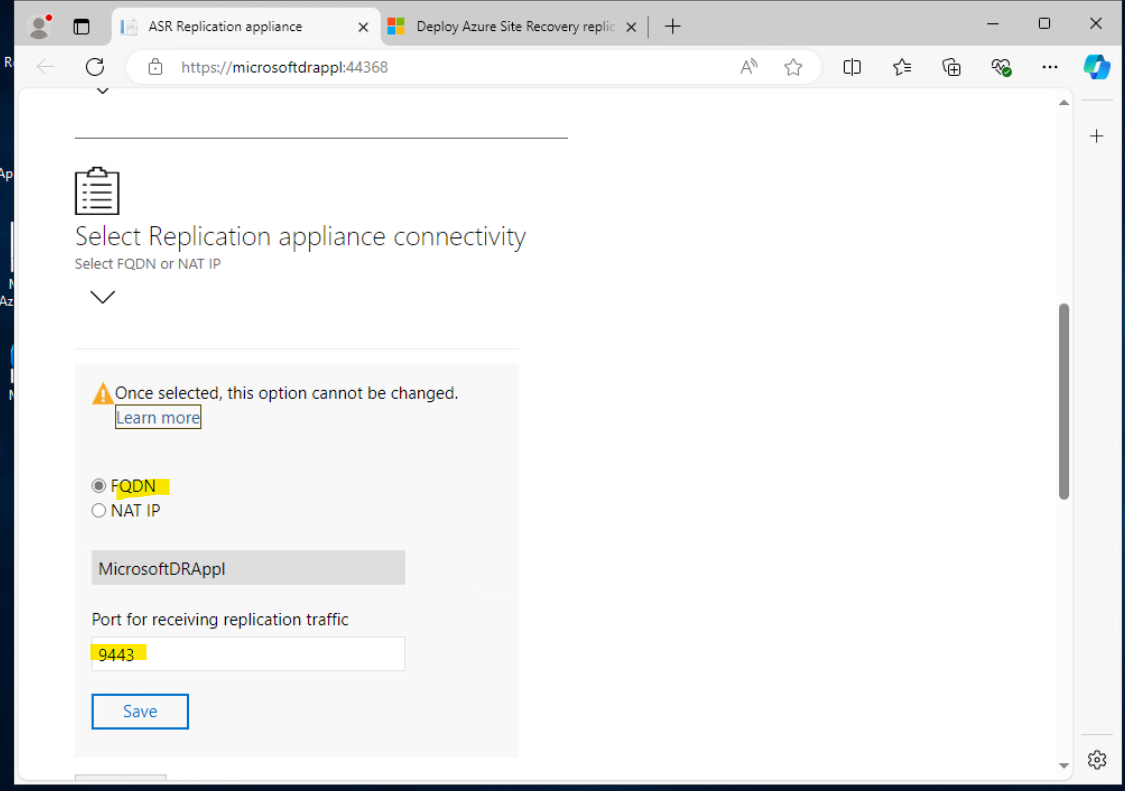
After saving the details, proceed to choose the appliance connectivity. Either FQDN or a NAT IP can be selected to define how the communication with the appliance would happen.
As already mentioned further above this will finally define how our deployed (pushed) Mobility Agents on our protected virtual machines will communicate with this replication appliance, either through FQDN or IP address.
Click on Save and Continue.
Later this will look like below.
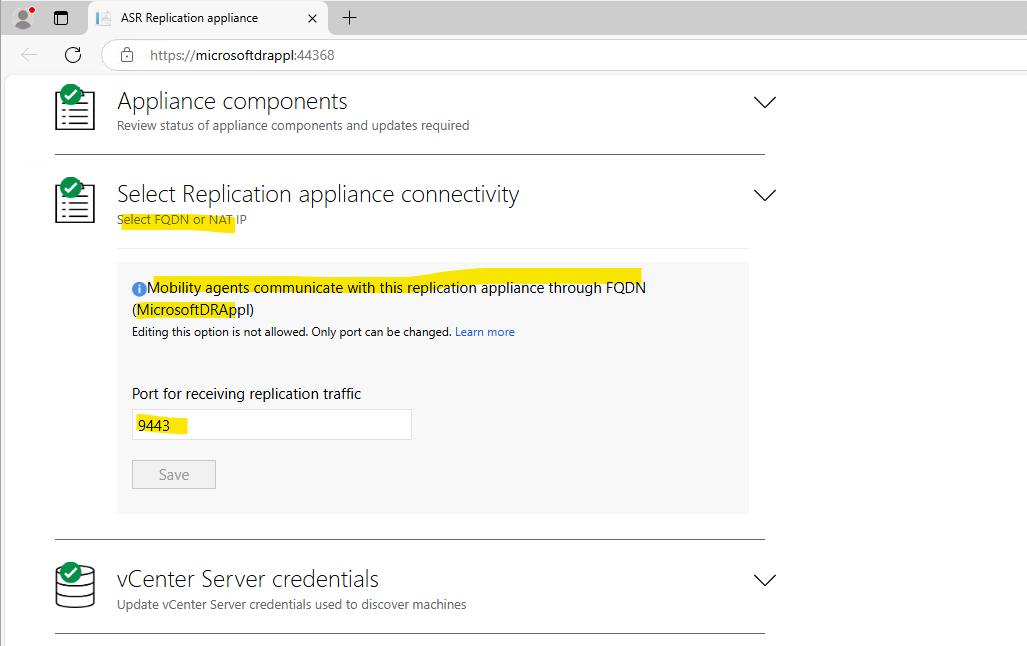
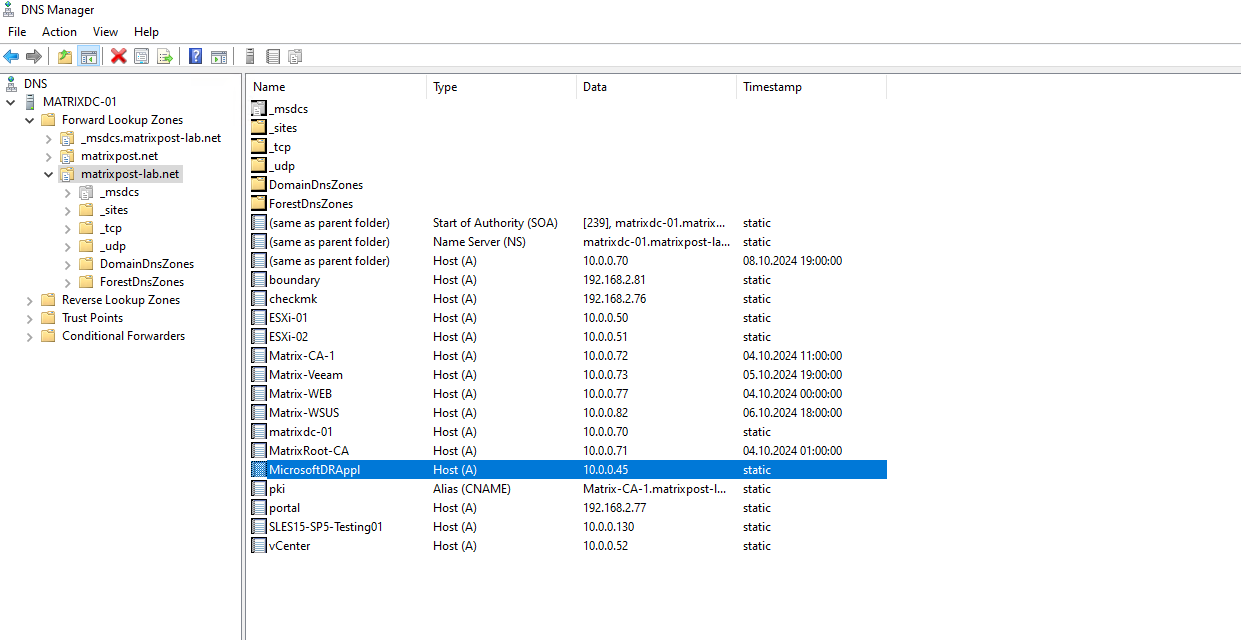
Make sure the servers you want to protect can resolve this FQDN in the network.
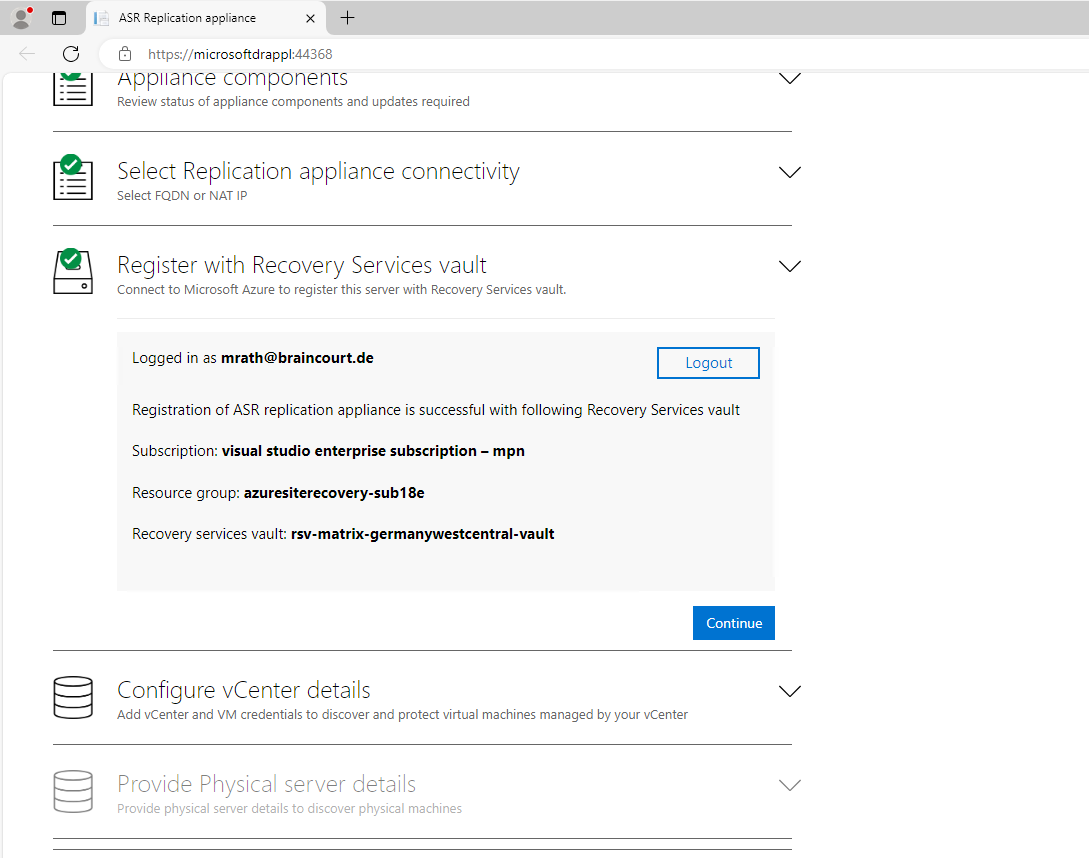
After saving connectivity details, select Continue to proceed to registration with Microsoft Azure.
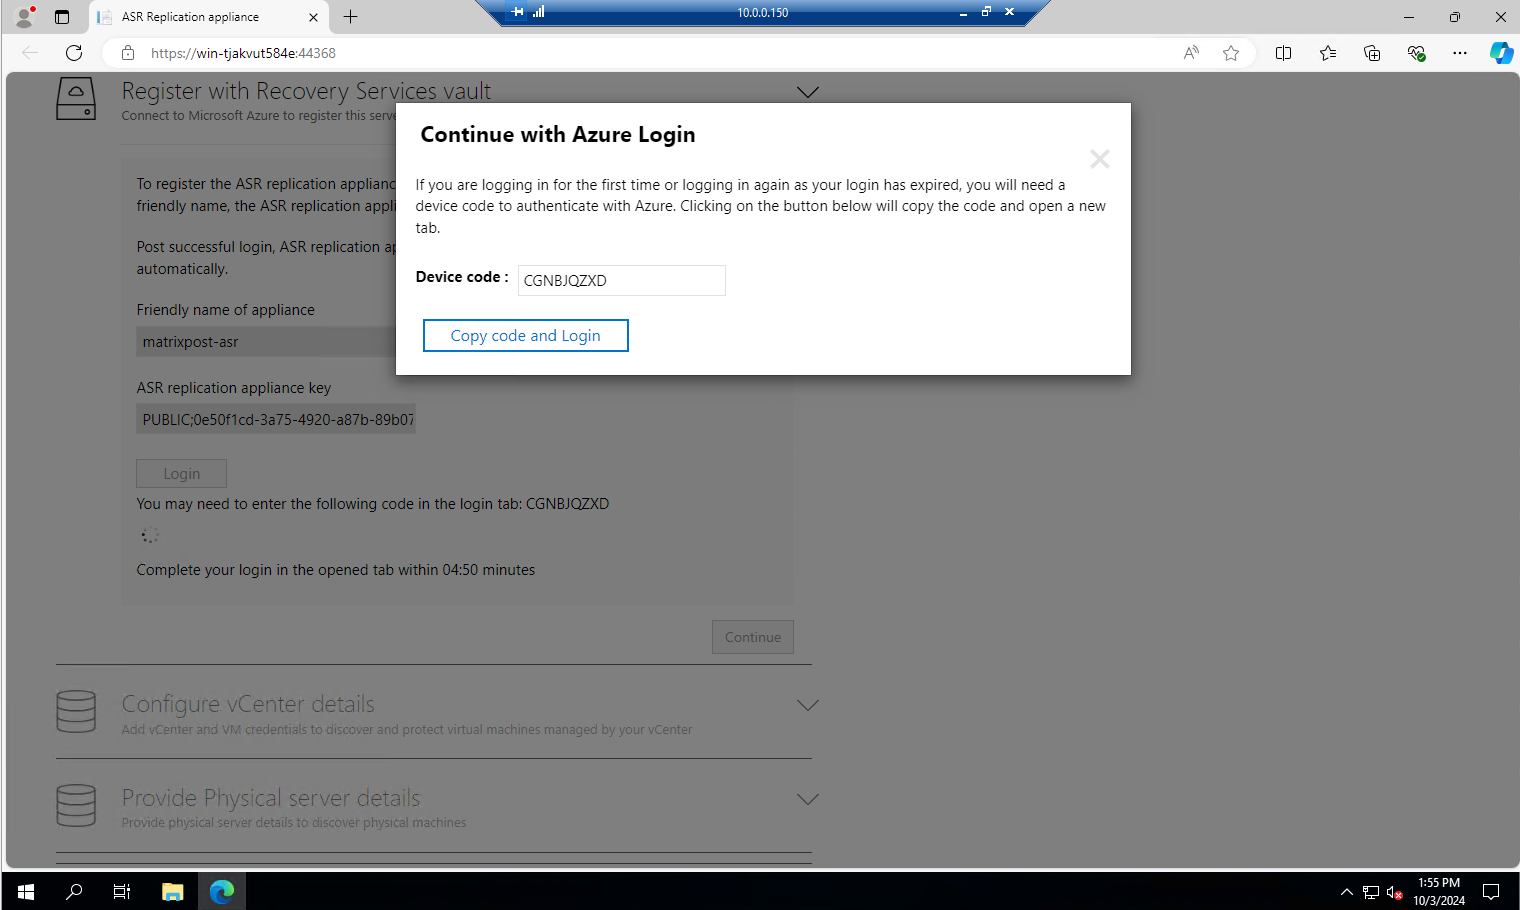
Ensure the prerequisites are met, proceed with registration. Enter here a friendly name for the appliance, this name will later appear in the Azure portal.
To copy paste the ASR replication appliance key here I will switch to a RDP session.
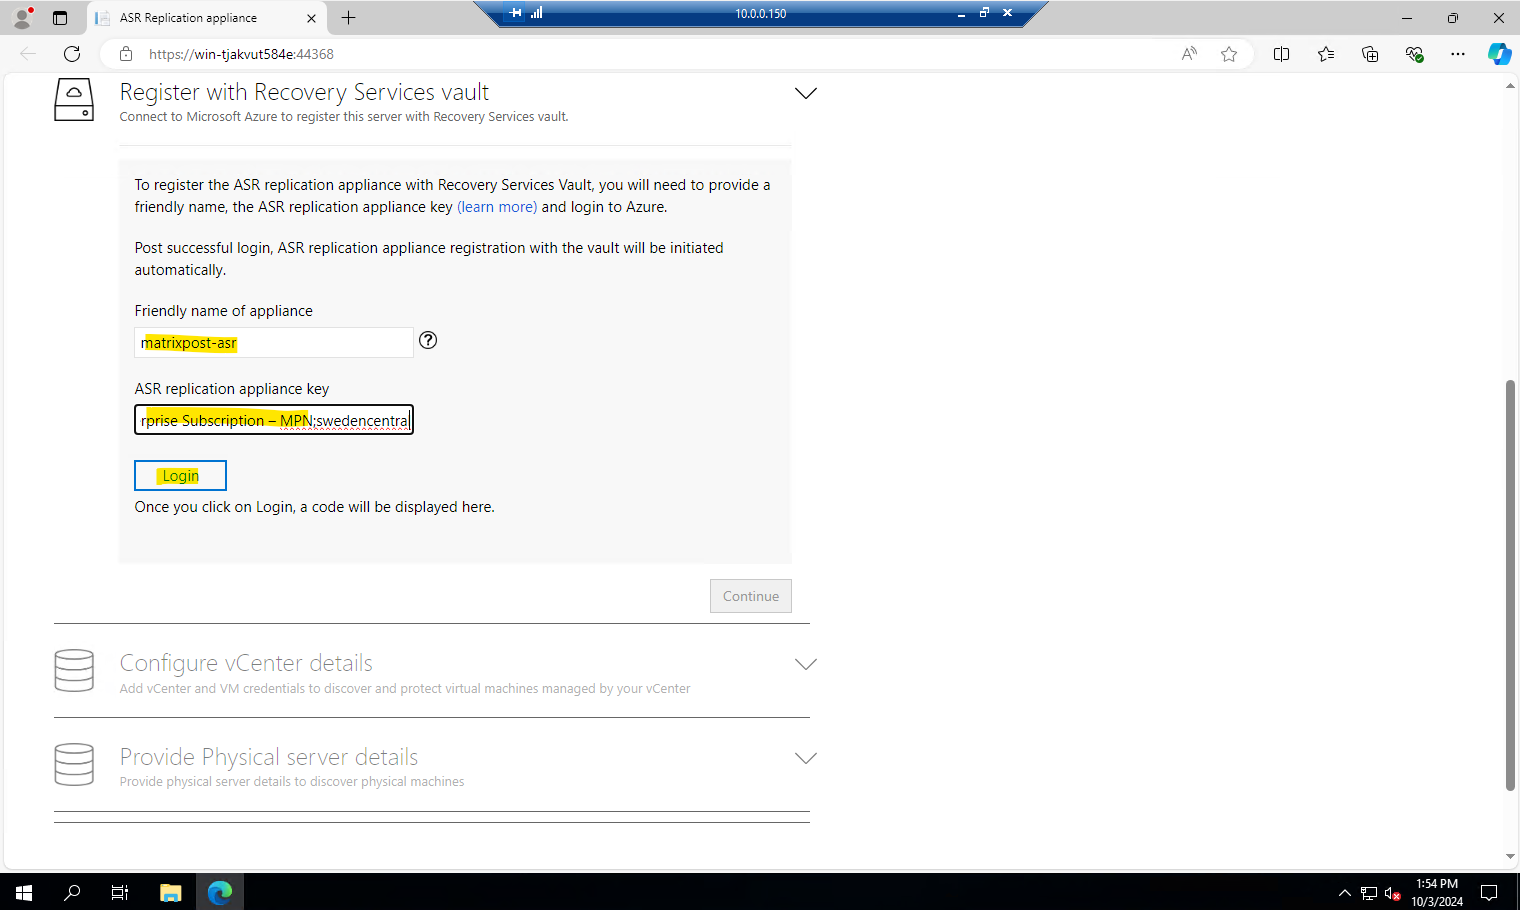
You remember, the registration key you will find any time in the Azure portal and your recovery services vault under Getting started -> Site Recovery -> VMware machines to Azure -> Prepare infrastructure.
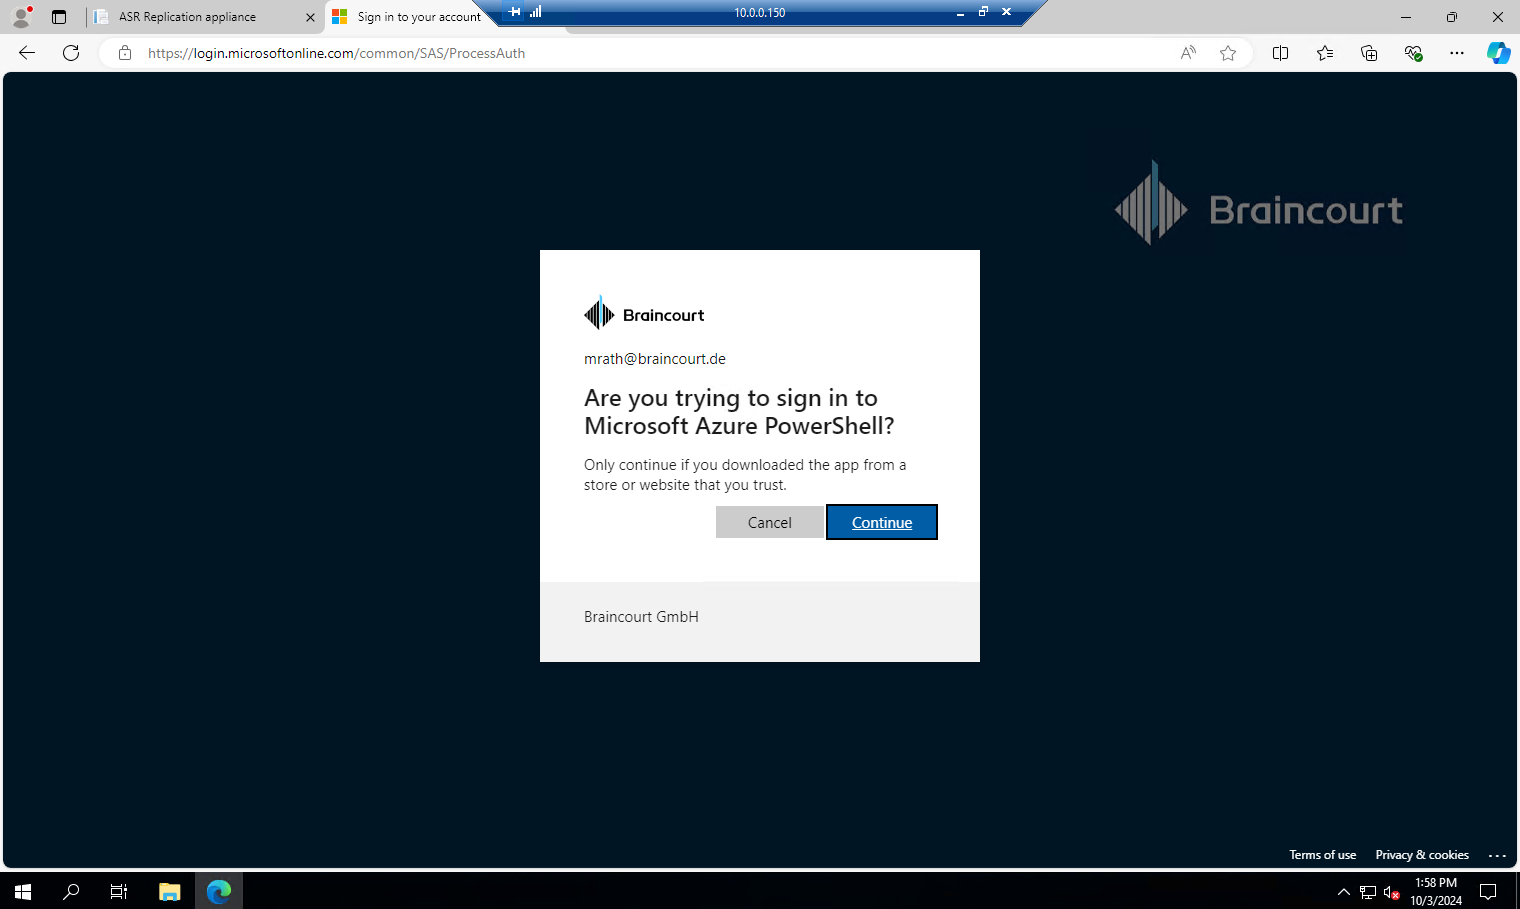
Click on Login above after entering the registration code and below copy the code for the Login.
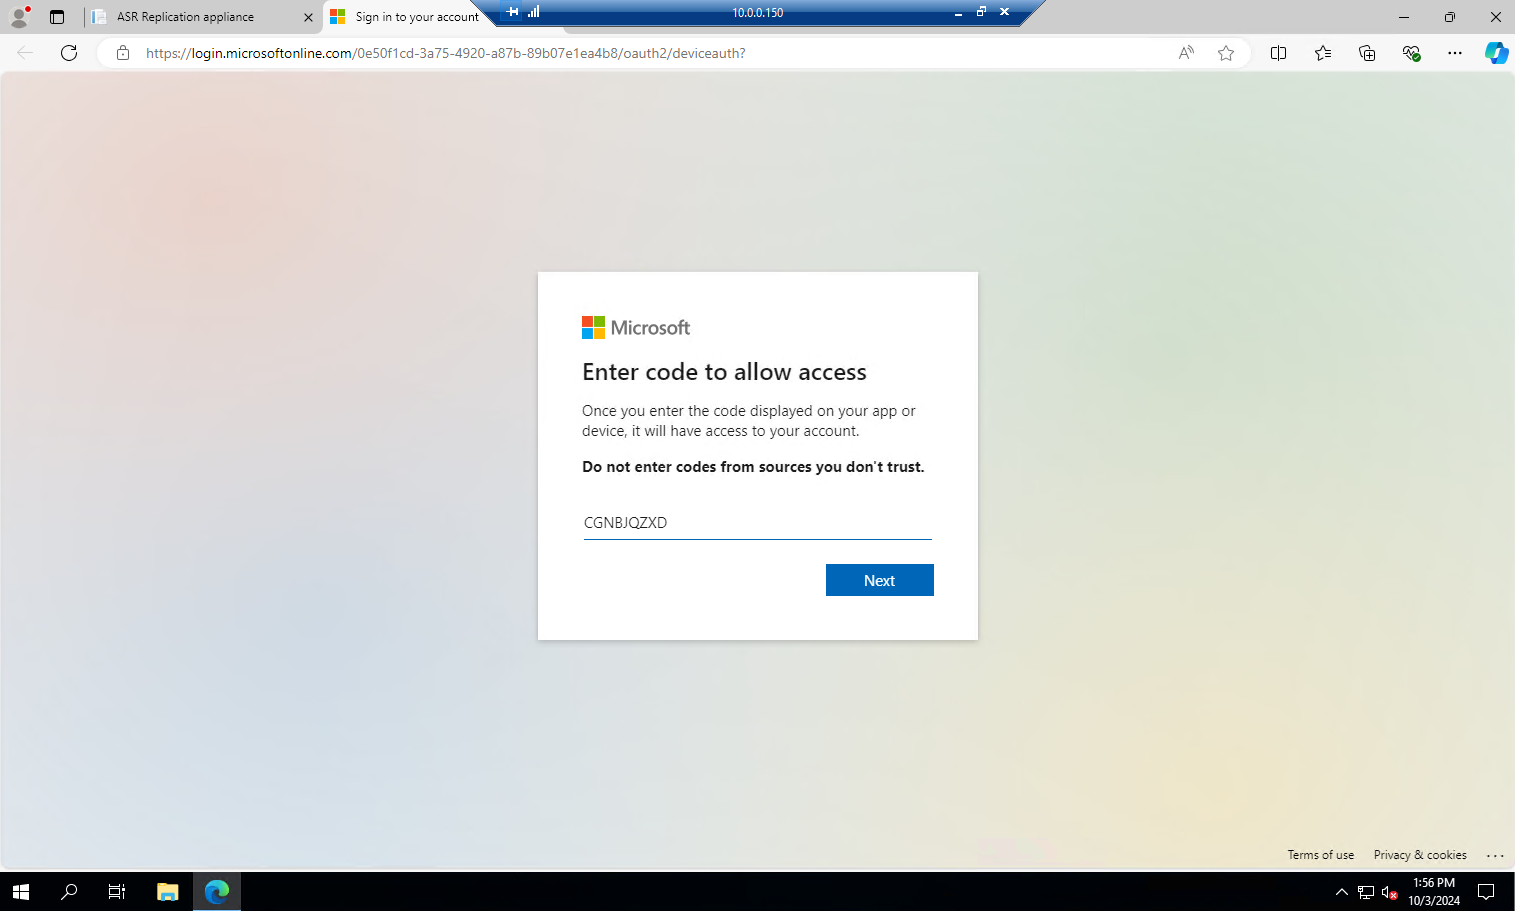
Sign in to Azure.
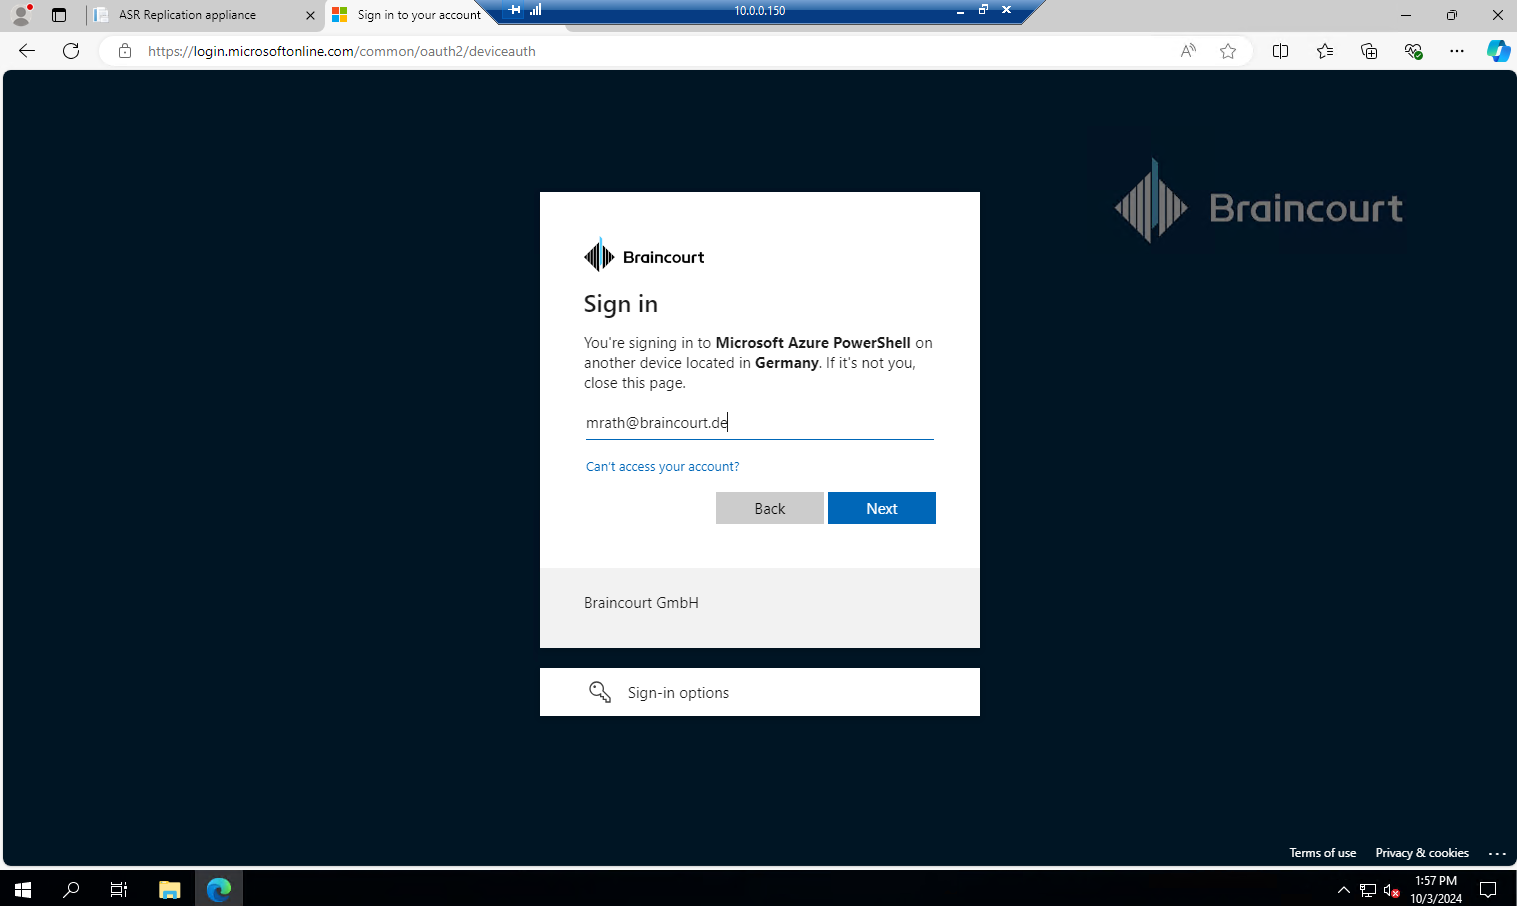
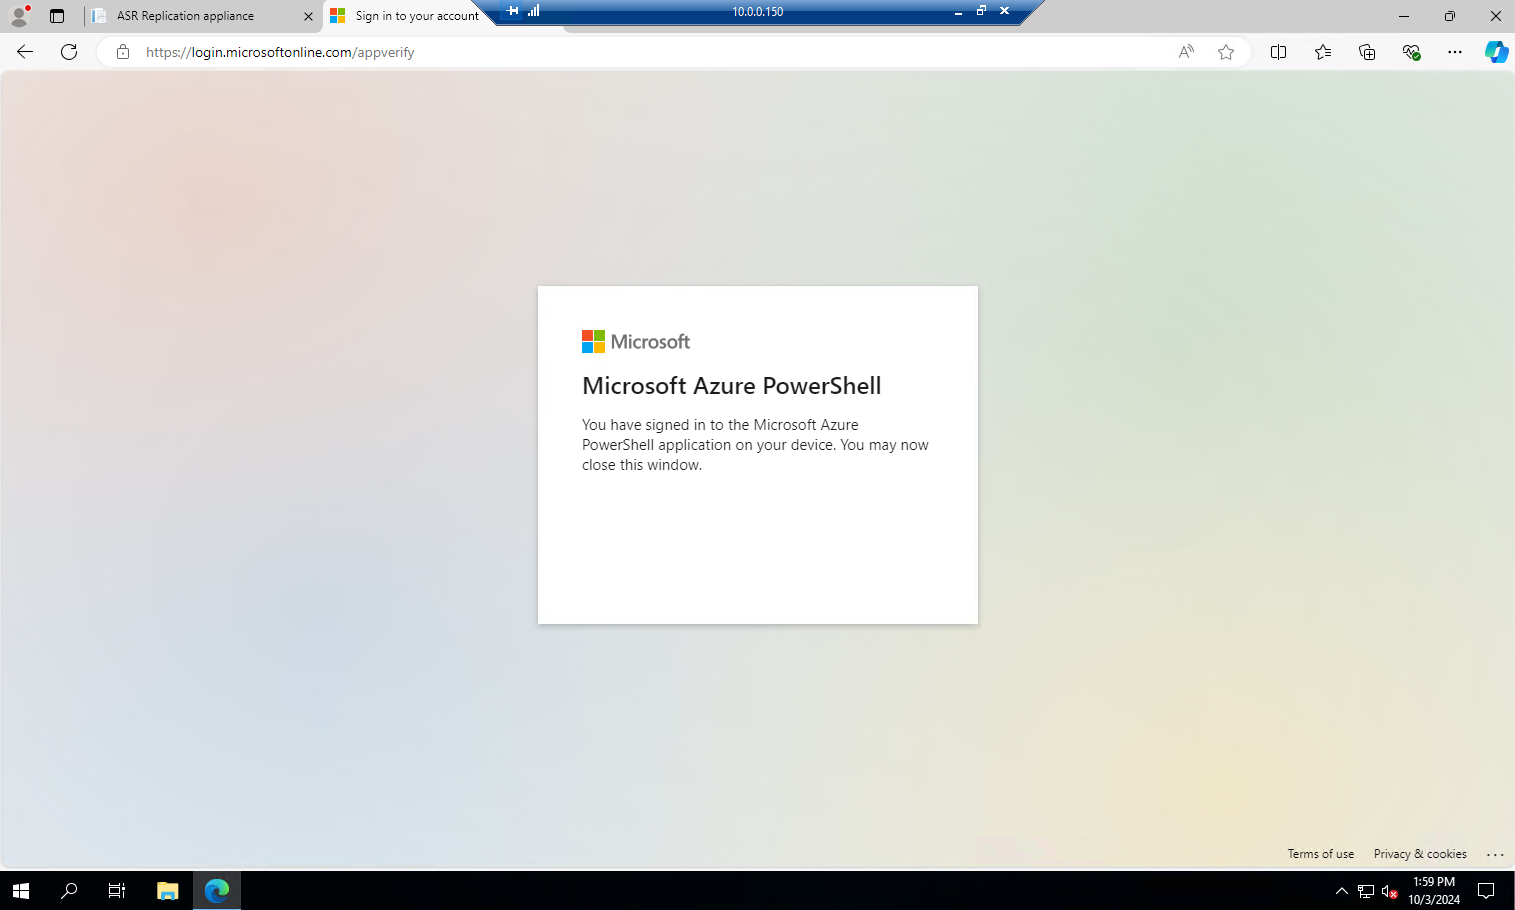
The window we can close here as we are successfully signed in to Azure PowerShell for registering with our recovery services vault now.
Click on Continue.
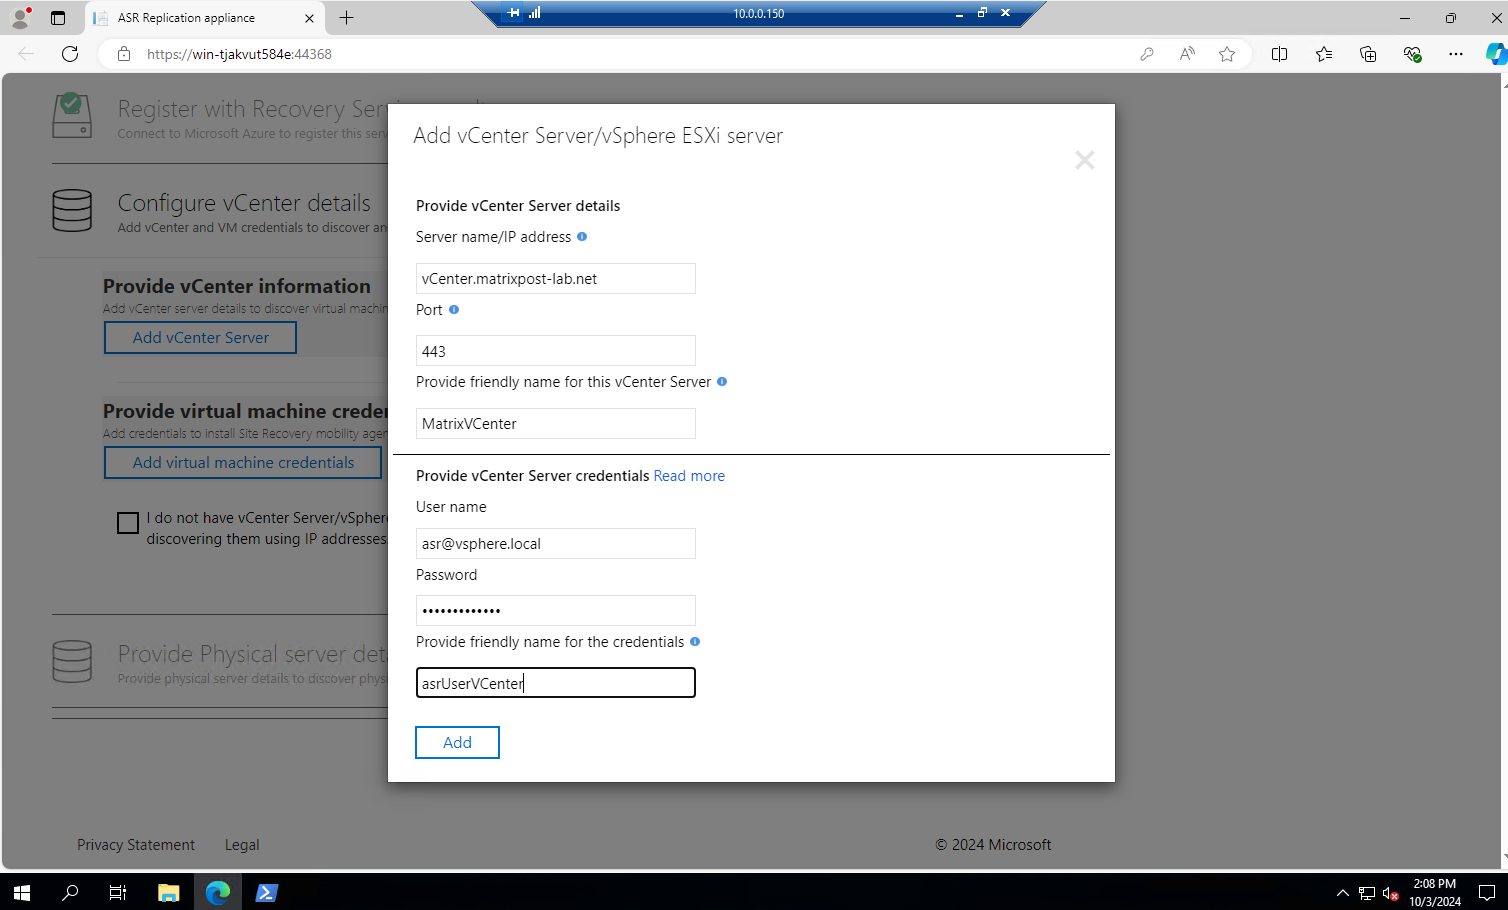
Click on Add vCenter Server.
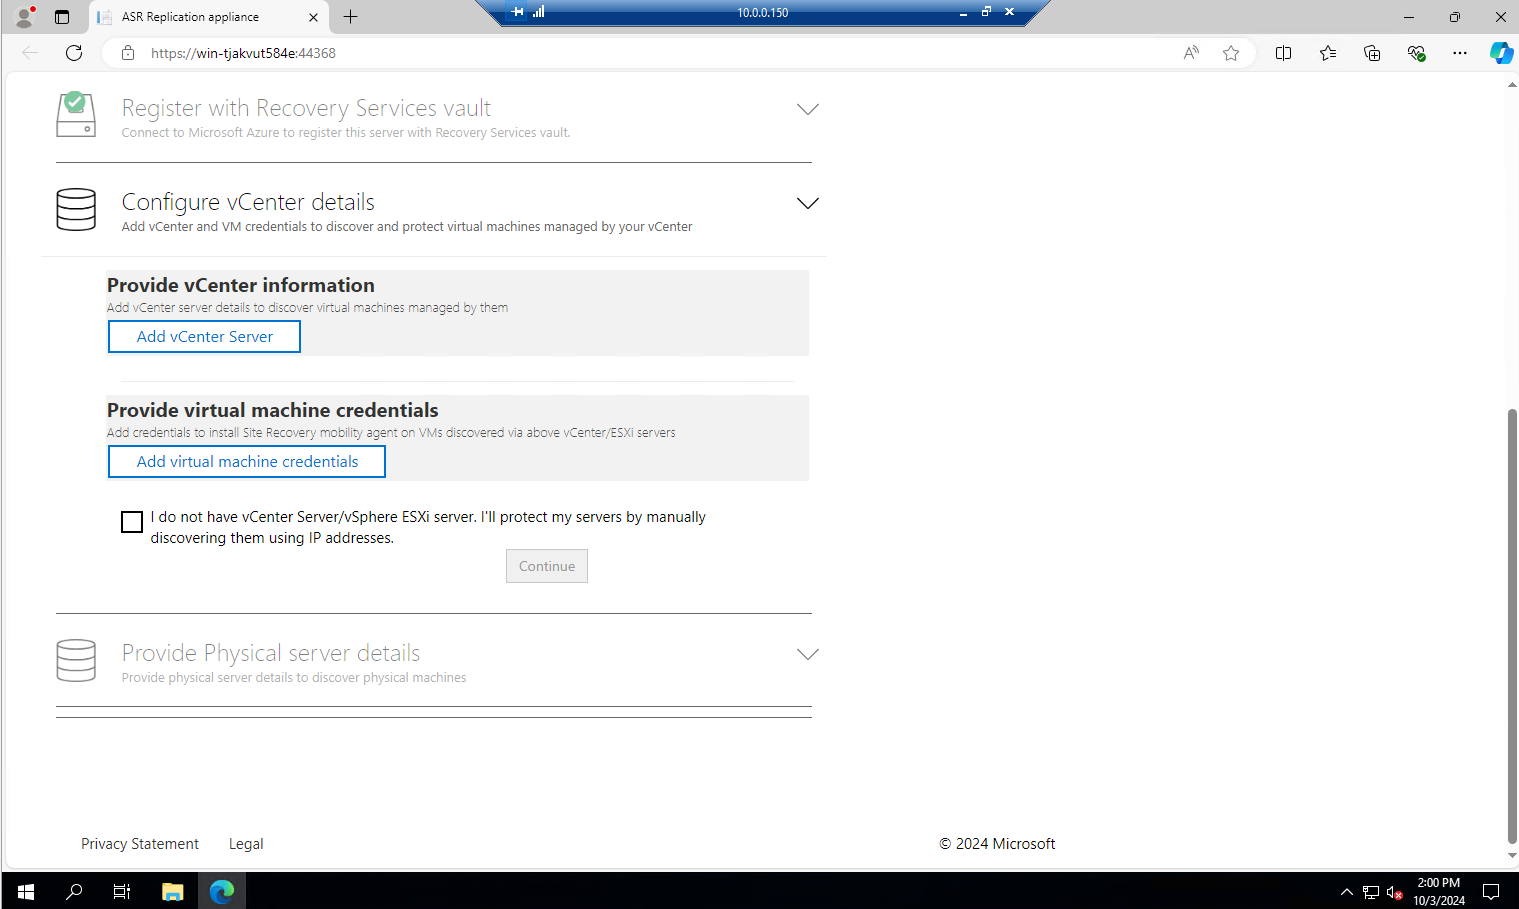
The friendly name is the name which appears in Azure. The user we created previously in vSphere and read-only permissions.
Click on Add.
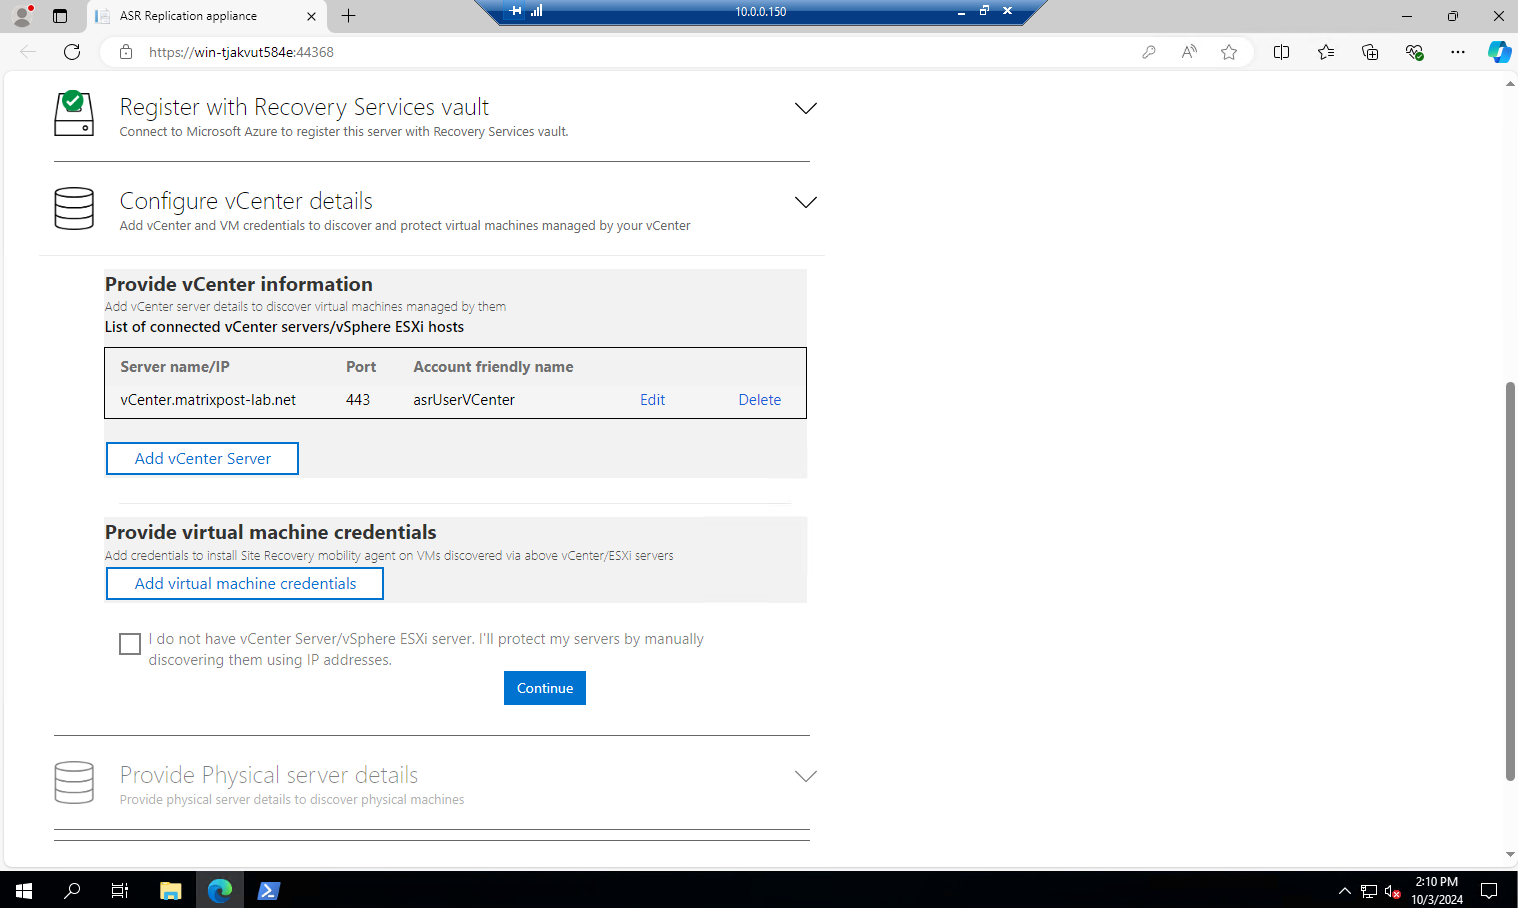
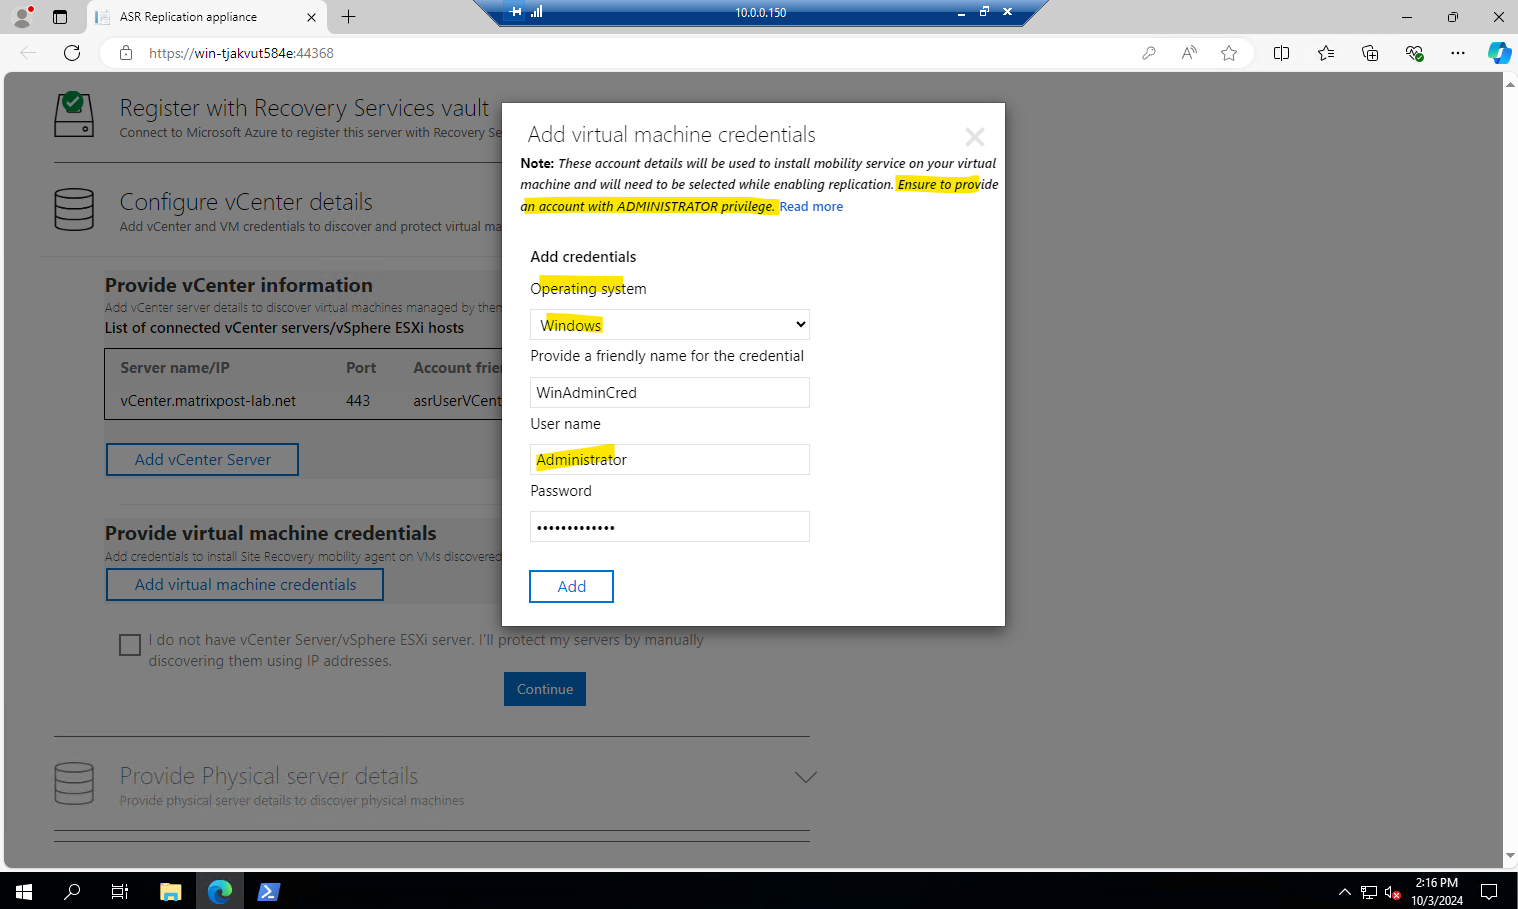
Click on Add virtual machine credentials.
For Linux OS, ensure to provide the root credentials. For Windows OS, a user account with admin privileges should be added. These credentials will be used to push Mobility Service on to the source machine during enable replication operation.
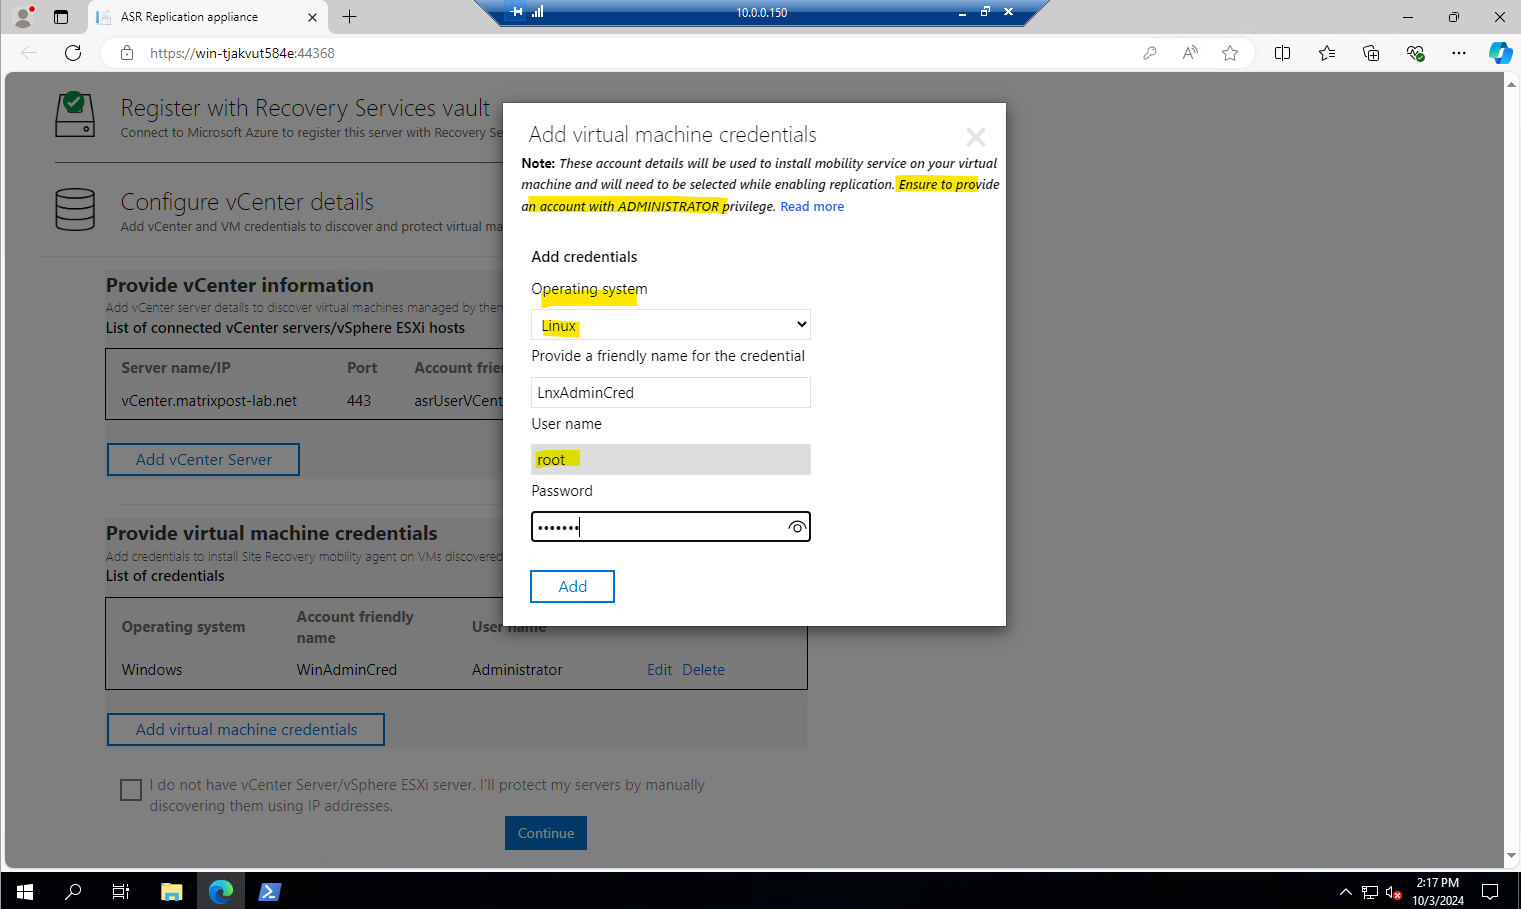
Click on Continue.
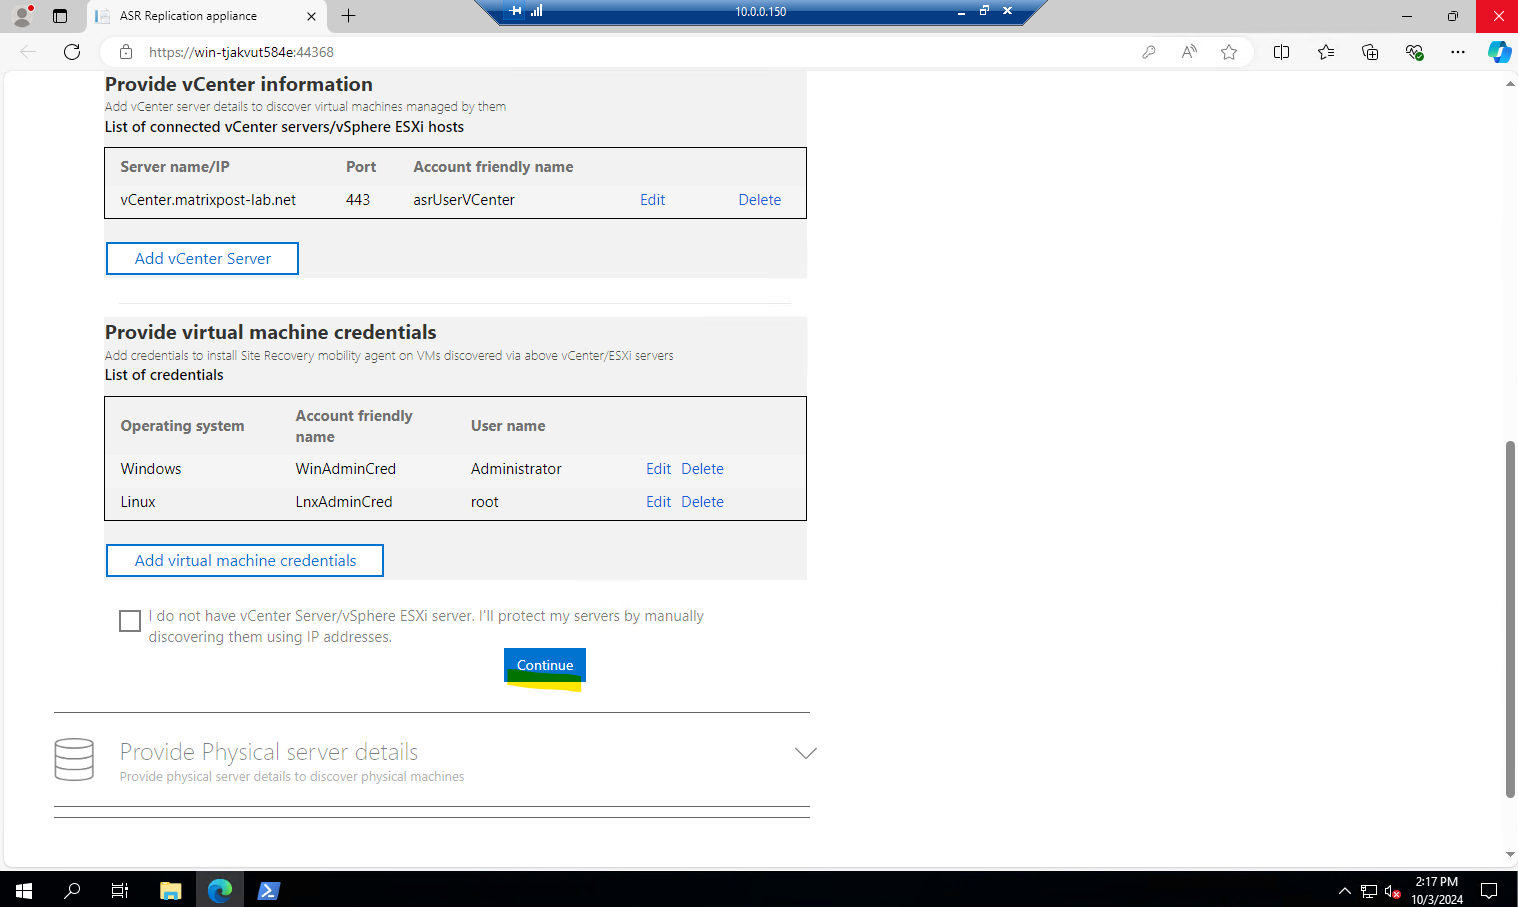
I will not protect physical servers. Click on Continue.
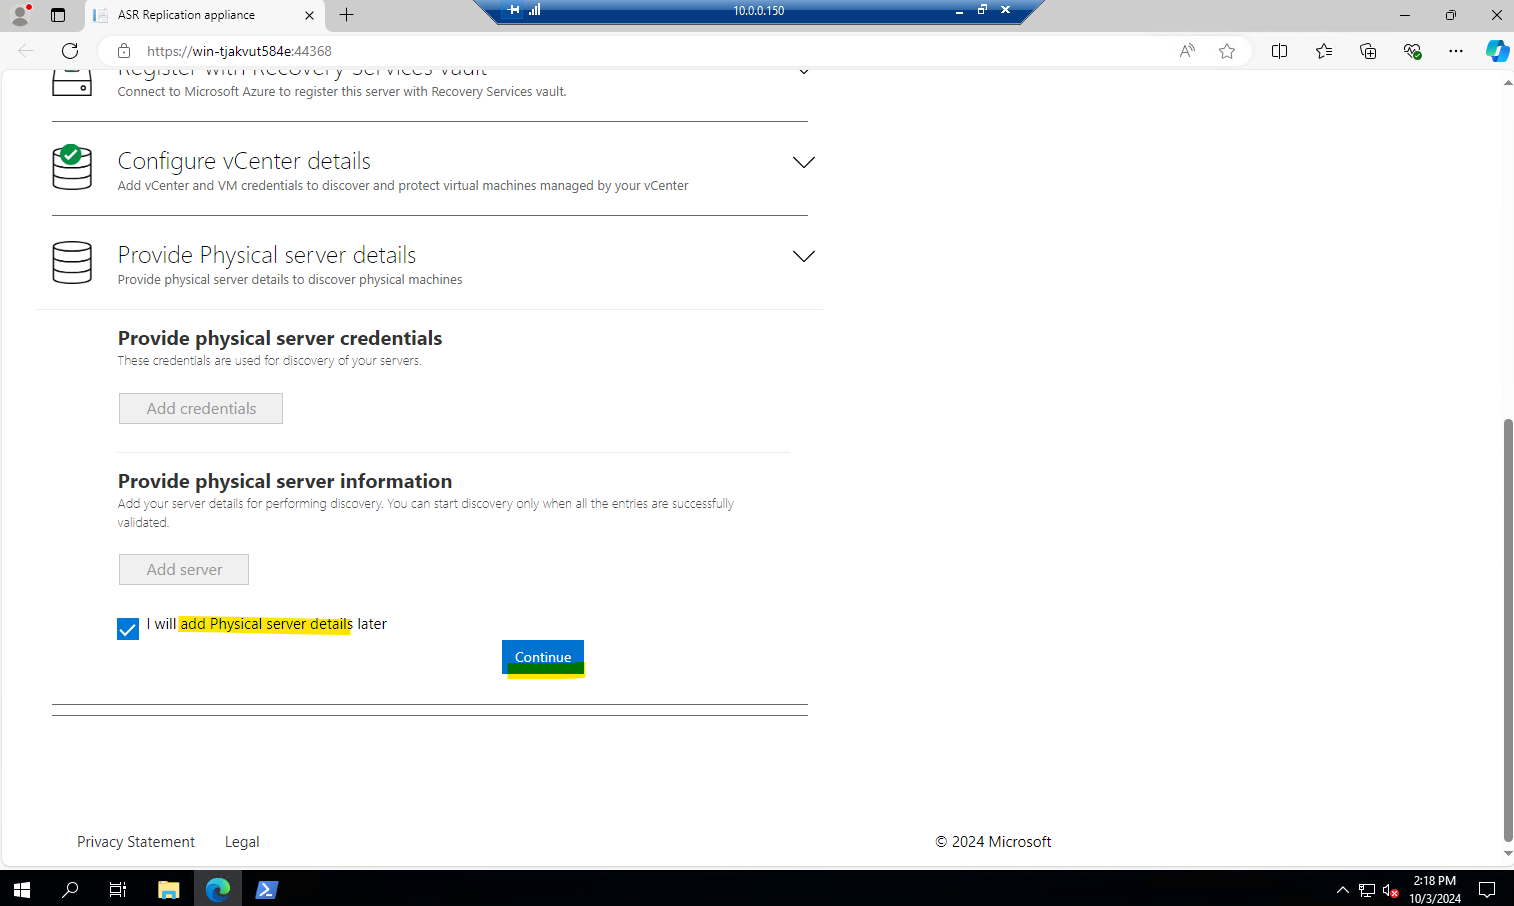
After clicking above on Continue I was running into the following error.
Cache drive E:\ is write protected.
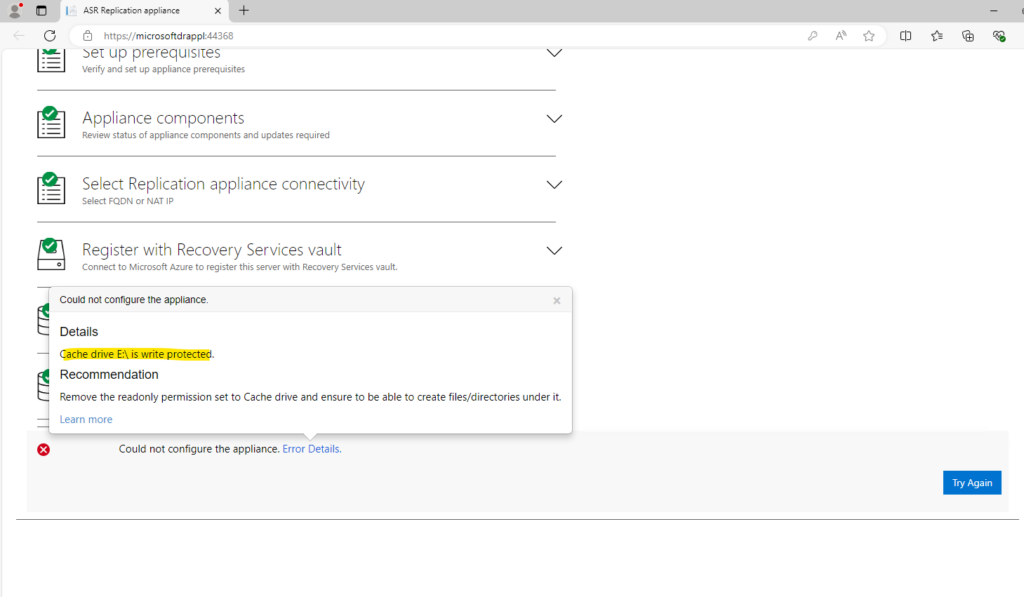
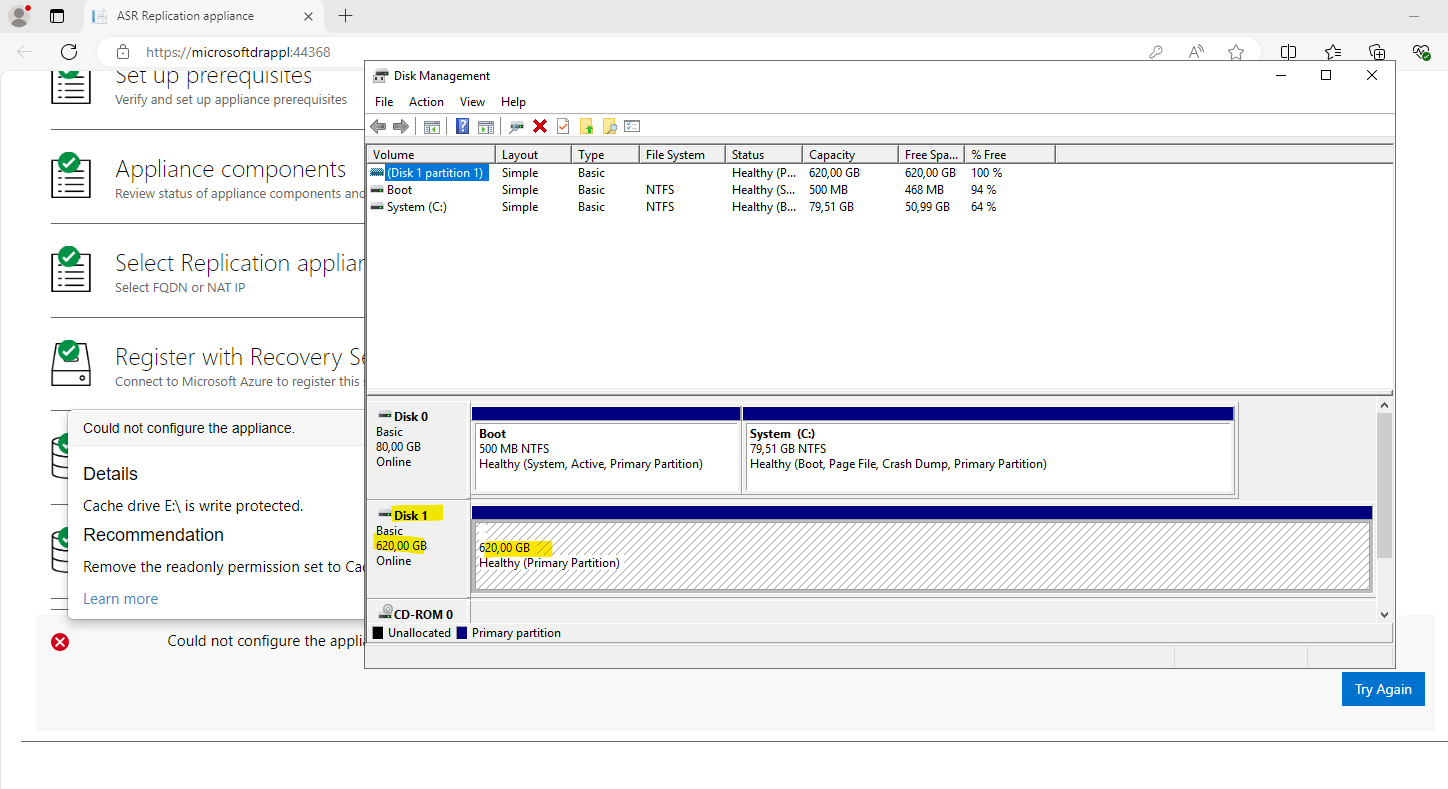
In my case the appliances E:\ drive was not really write protected but instead hadn’t assigned a drive letter. So I just had to assign the E:\ drive letter to this disk and click on Try Again.
This seems to be a general bug since months because I encountered this issue meanwhile for each downloaded ASR appliance.
The E:\ drive on the Azure Site Recovery (ASR) appliance, also known as the Configuration Server or Process Server, serves a crucial role in the replication process. Its primary purpose is to provide temporary caching and staging for replicated data from the on-premises infrastructure before the data is transferred to Azure.
Do not close or refresh this browser till the operation completes. It takes approximately 30 min to complete the installation of all components and registration with Azure services.
The first time I was also running into the following generic failure.
Process server’s registration has failed with the following error: The operation failed due to an internal error.

A second try was successful, so no idea what was the problem in the first place.
Appliance cloning is not supported with the modernized architecture. If you attempt to clone, it might disrupt the recovery flow.

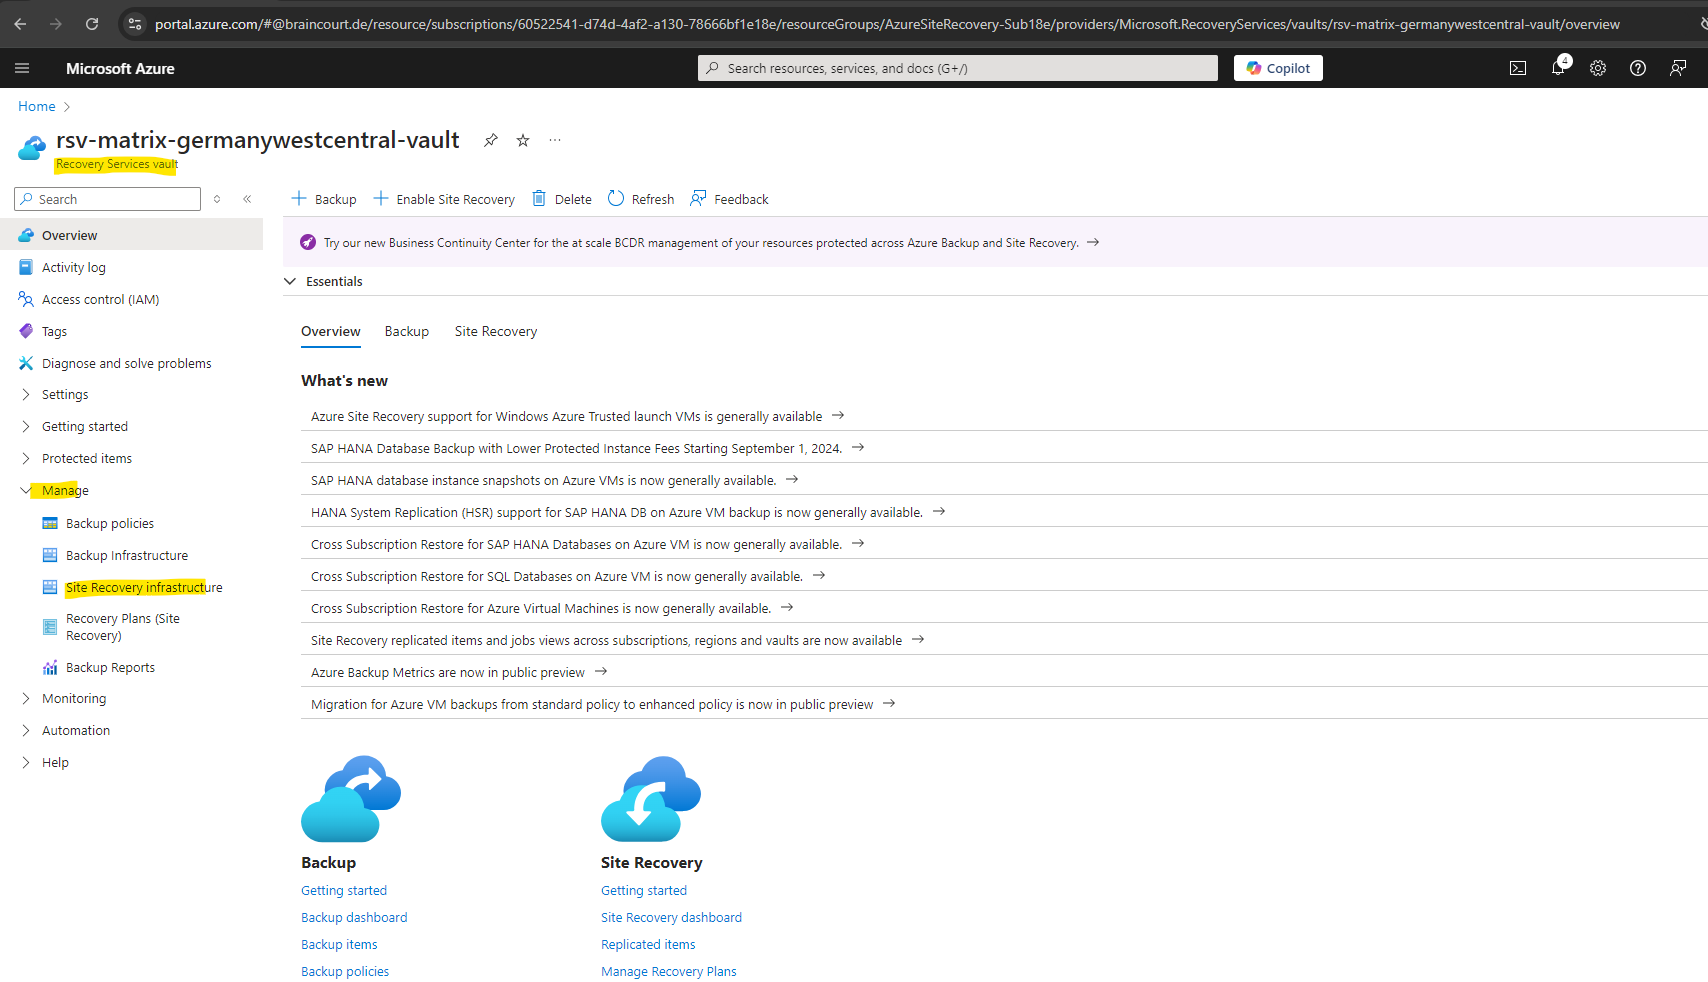
After successful configuration of Azure Site Recovery replication appliance, navigate to Azure portal, Recovery Services Vault.
Select Prepare infrastructure (Modernized) under Getting started, you can see that an Azure Site Recovery replication appliance is already registered with this vault. Now you’re all set! Start protecting your source machines through this replication appliance.
When you select Select 1 appliance(s), you’ll be redirected to Azure Site Recovery replication appliance view, where the list of appliances registered to this vault is displayed.
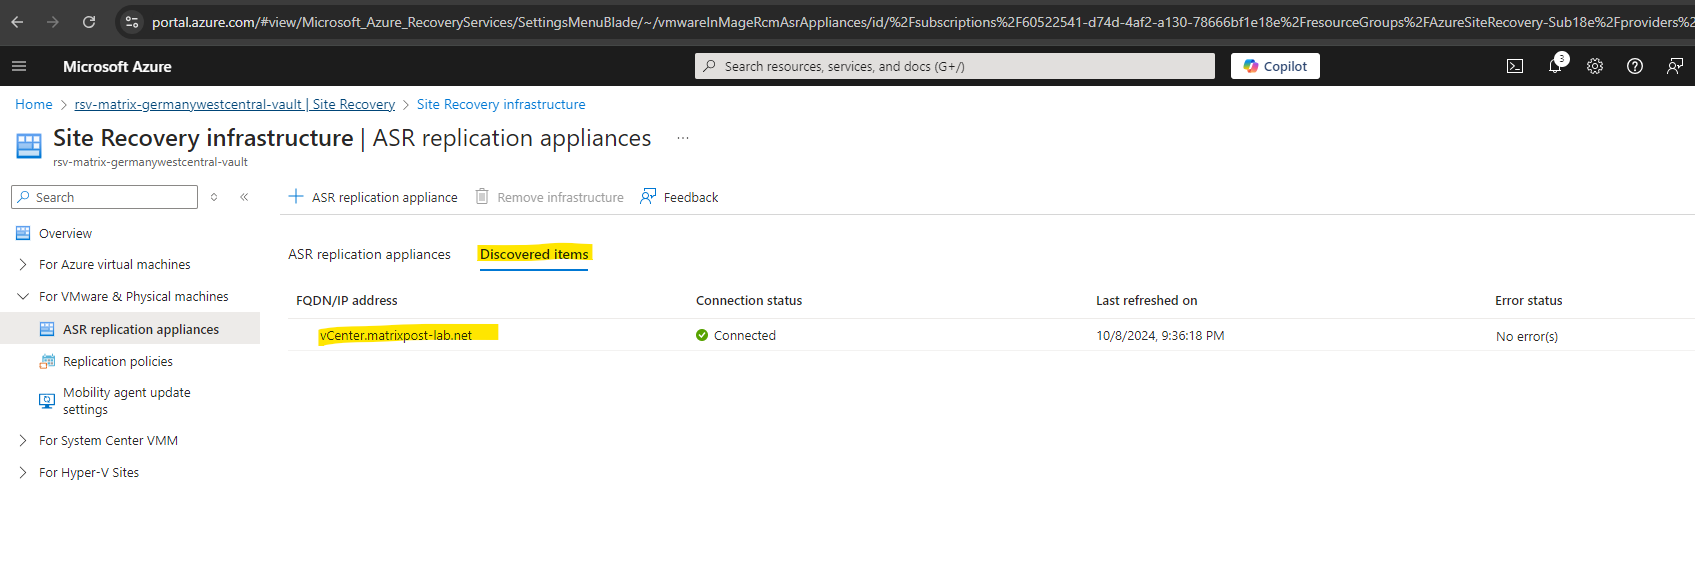
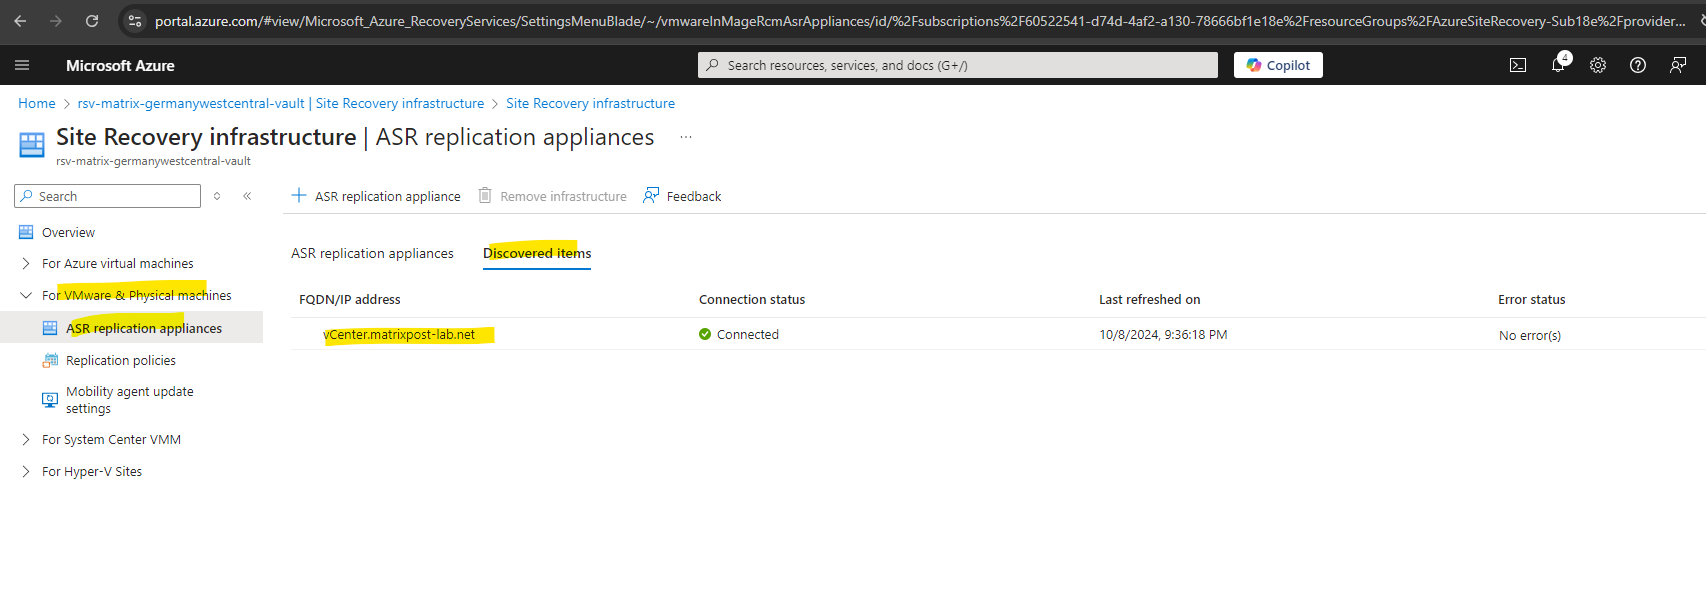
You’ll also be able to see a tab for Discovered items that lists all of the discovered vCenter Servers/vSphere hosts.
To see our connected ASR replication appliances to this recovery services vault, we can also jump directly to.
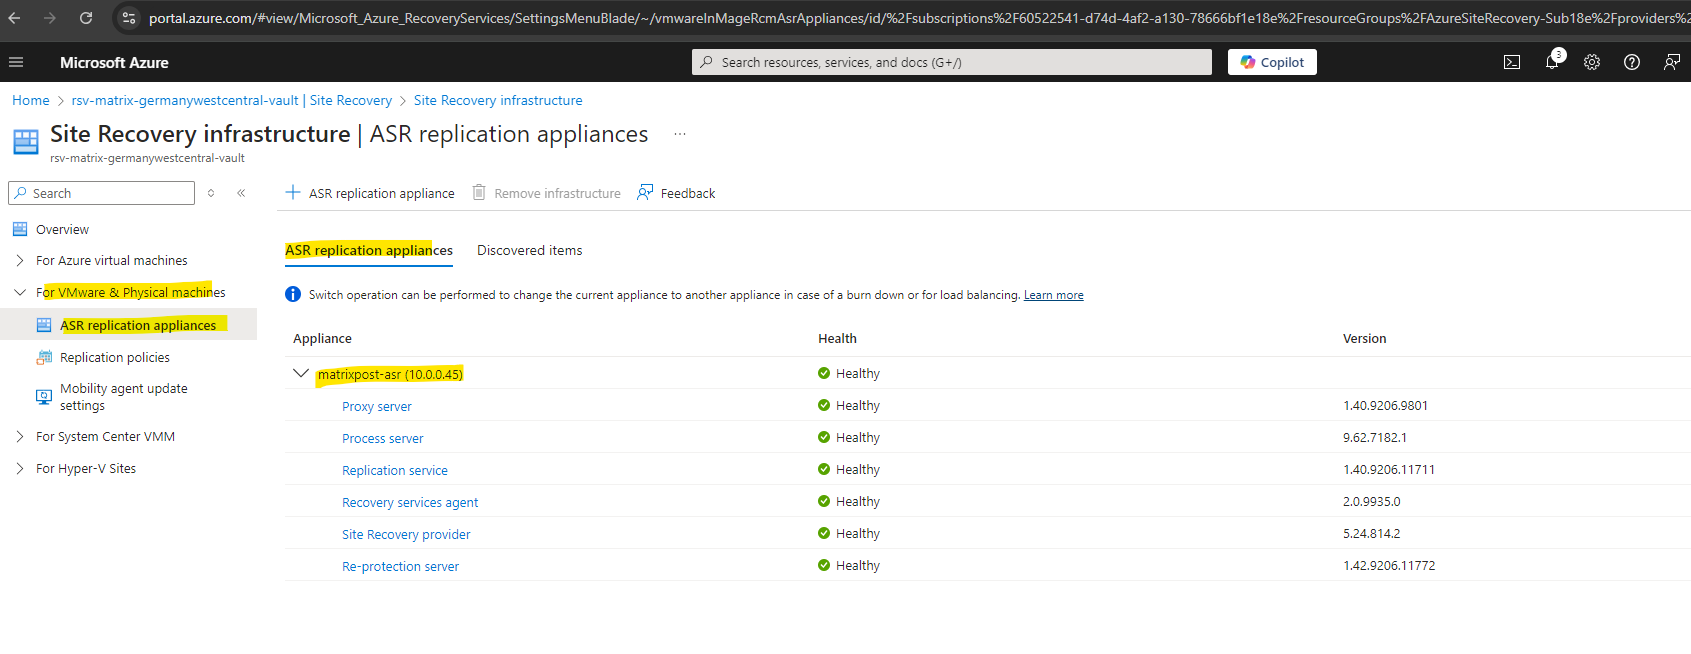
Navigate to Manage -> Site Recovery infrastructure on the recovery services vault.
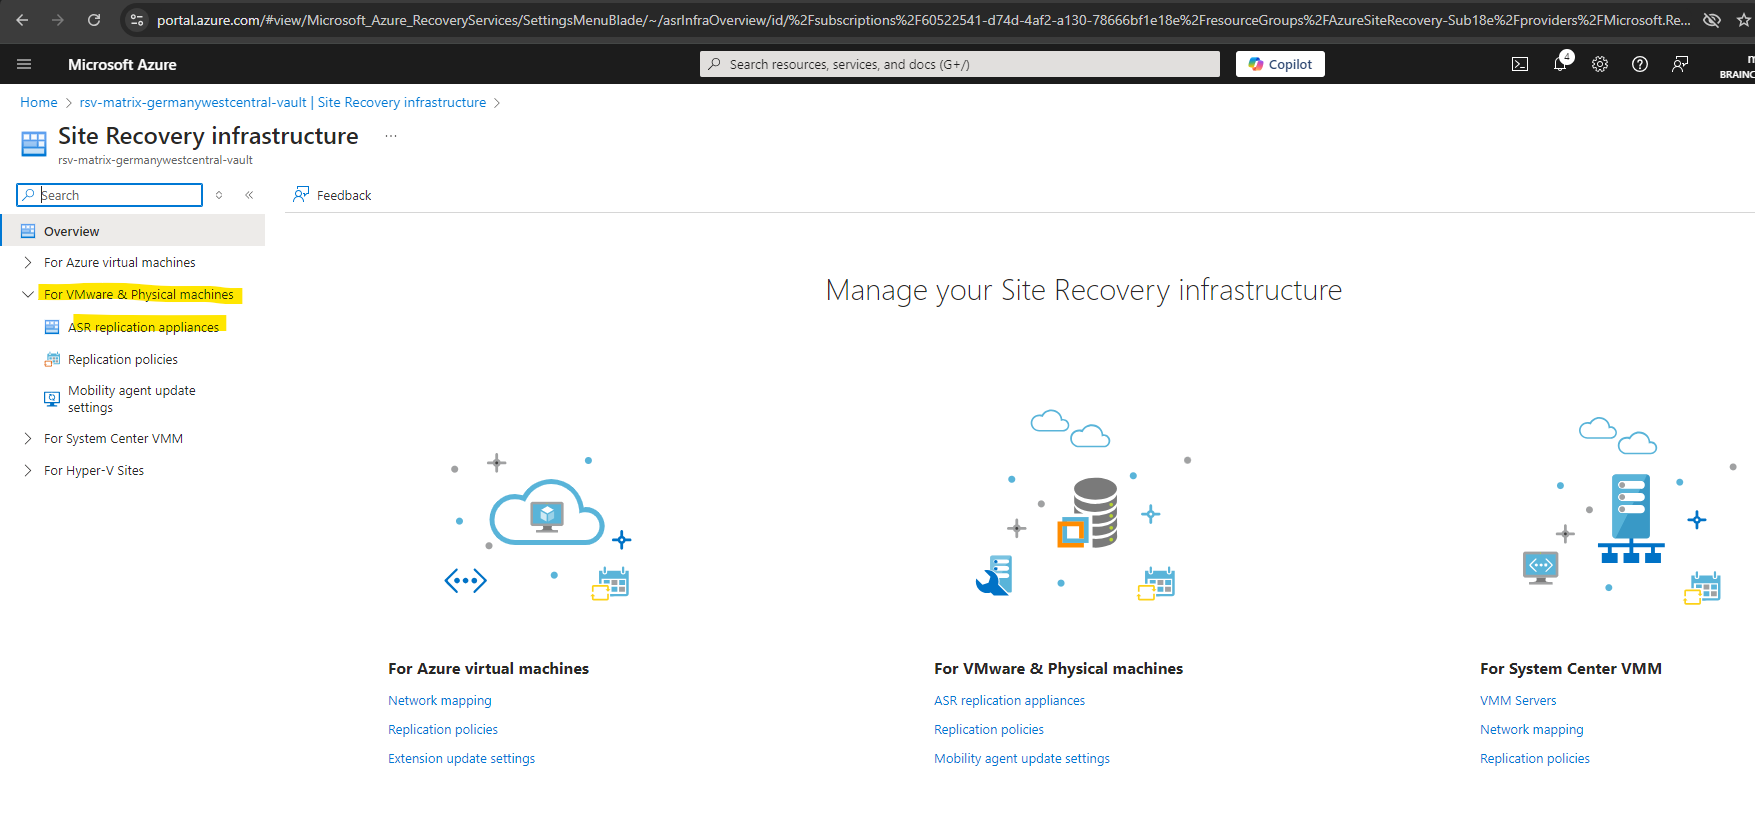
Here we need to go to For VMware & physical machines -> ASR replication appliances.
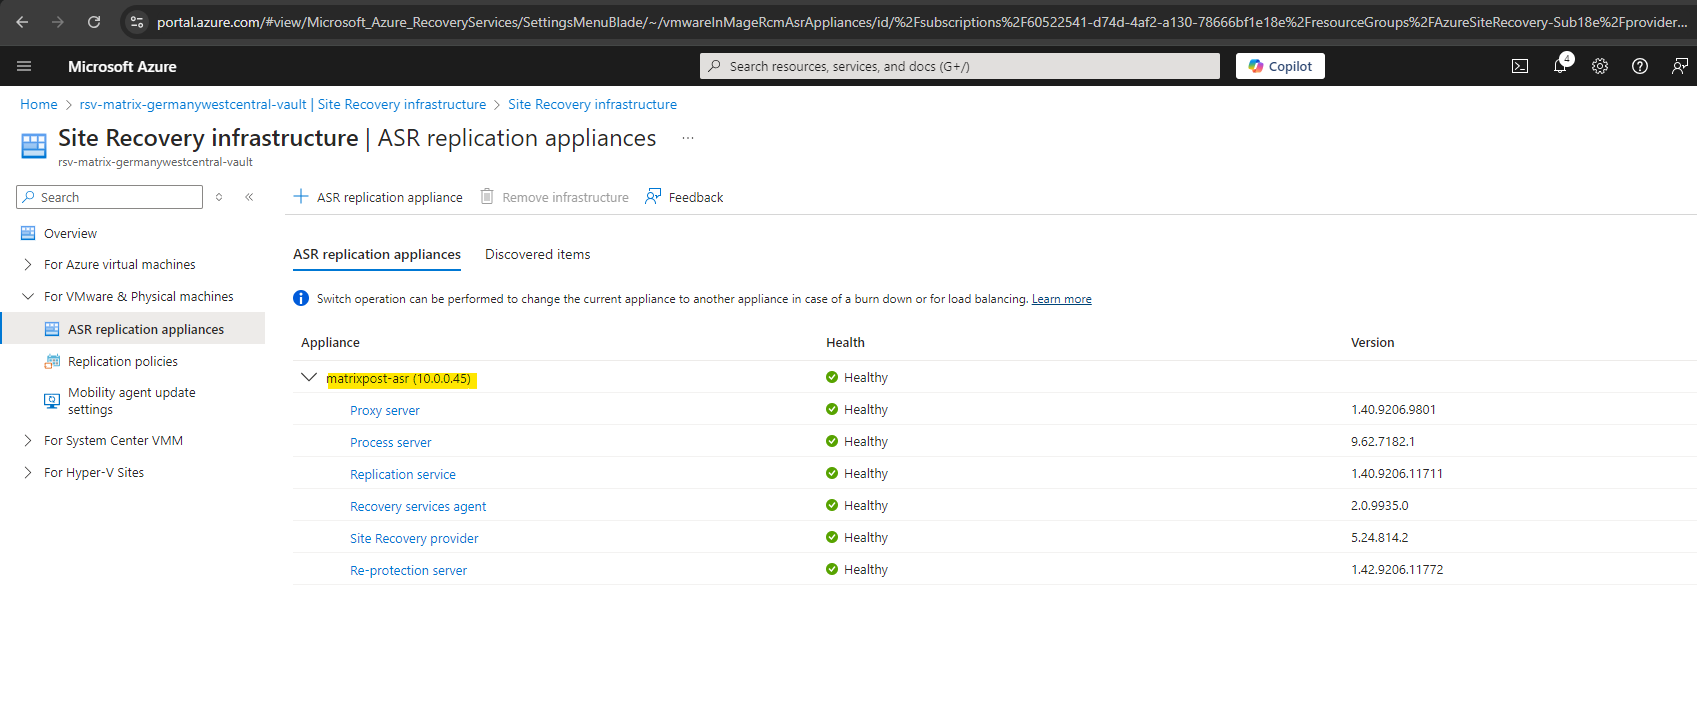
Here we see all of our connected ASR replication appliances and discovered vSphere vCenters to this specific recovery services vault.
In Part 3 we will enable the replication of virtual machines in on-premise (vSphere) which we want to protect and replicate to Azure. We will also see how to perform a failover from on-premise to Azure and how to re-protect the virtual machine to on-premise back after the failover to Azure.
Links
What is disaster recovery?
https://learn.microsoft.com/en-us/azure/reliability/disaster-recovery-overviewAbout Site Recovery
https://learn.microsoft.com/en-us/azure/site-recovery/site-recovery-overviewGeneral availability: Simplified disaster recovery for VMware machines using Azure Site Recovery
https://techcommunity.microsoft.com/t5/azure-compute-blog/general-availability-simplified-disaster-recovery-for-vmware/ba-p/3645694Prepare source machine for push installation of mobility agent
https://learn.microsoft.com/en-us/azure/site-recovery/vmware-azure-install-mobility-service
Tags In
Follow me on LinkedIn