Simple UDP Messaging in PowerShell or Ncat: Build your own Listener and Sender
Ever needed to test simple UDP communication without reaching for Wireshark or Netcat?
In this post we will see how to implement a lightweight UDP listener and sender by using pure PowerShell and .NET libraries, perfect for quick lab setups, testing firewalls, or learning about datagram communication.
The .NET UdpClient class provides simple methods for sending and receiving connectionless UDP datagrams in blocking synchronous mode. Because UDP is a connectionless transport protocol, you do not need to establish a remote host connection prior to sending and receiving data.
Source: https://learn.microsoft.com/en-us/dotnet/api/system.net.sockets.udpclient?view=net-8.0
No external tools required, just a few lines of code!
Further I will also show how we can use the ncat tool to test UDP communication between two hosts.
Unlike TCP, UDP is stateless and connectionless, meaning there’s no TCP 3-Way Handshake or acknowledgment mechanism.
Tools like telnet or PowerShell’s Test-NetConnection (tnc) rely on TCP’s connection model to determine success or failure.
Since UDP doesn’t establish a session, these tools can’t accurately test whether traffic is allowed or received.
To validate UDP connectivity, you need to send actual UDP packets and confirm reception, which is exactly what a simple PowerShell UDP listener and sender or the netcat tool can do and shown in this post.
PowerShell UDP Listener
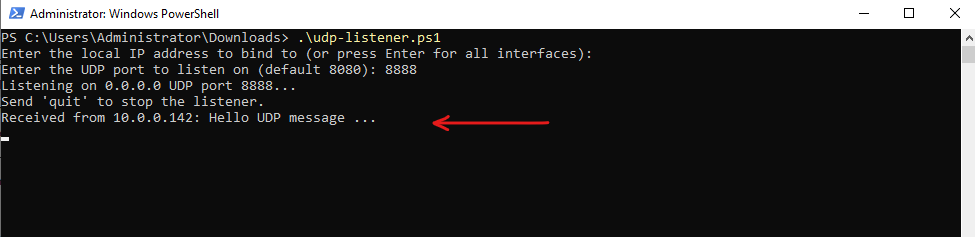
For the UDP listener we can use this lightweight UDP listener executed just in PowerShell. It will prompt for the local IP address to bind to and UDP port to listen on.
# Prompt for IP interactively
$ipInput = Read-Host "Enter the local IP address to bind to (or press Enter for all interfaces)"
if ([string]::IsNullOrWhiteSpace($ipInput)) {
    $localIP = [System.Net.IPAddress]::Any
} else {
    try {
        $localIP = [System.Net.IPAddress]::Parse($ipInput)
    } catch {
        Write-Error "Invalid IP address format."
        exit 1
    }
}

# Prompt for Port interactively
$portInput = Read-Host "Enter the UDP port to listen on (default 8080)"
if ([string]::IsNullOrWhiteSpace($portInput)) {
    $Port = 8080
} elseif ($portInput -as [int]) {
    $Port = [int]$portInput
} else {
    Write-Error "Invalid port number."
    exit 1
}

# Ensure the port is not already bound
try {
    $udp = [System.Net.Sockets.UdpClient]::new([System.Net.IPEndPoint]::new($localIP, $Port))
} catch {
    Write-Error "Port $Port on IP $localIP is already in use. Try a different port or close the other listener."
    exit 1
}

Write-Host "Listening on $localIP UDP port $Port..."
Write-Host "Send 'quit' to stop the listener."

while ($true) {
    $remoteEP = [System.Net.IPEndPoint]::new([System.Net.IPAddress]::Any, 0)
    $data = $udp.Receive([ref]$remoteEP)
    $text = [System.Text.Encoding]::UTF8.GetString($data)
    Write-Host "Received from $($remoteEP.Address): $text"

    if ($text -eq "quit") {
        Write-Host "Exit command received. Closing listener..."
        break
    }
}

$udp.Close()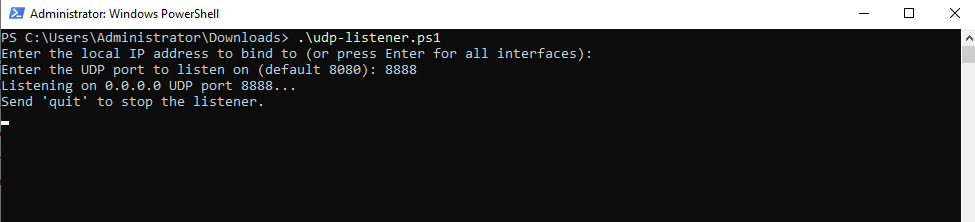
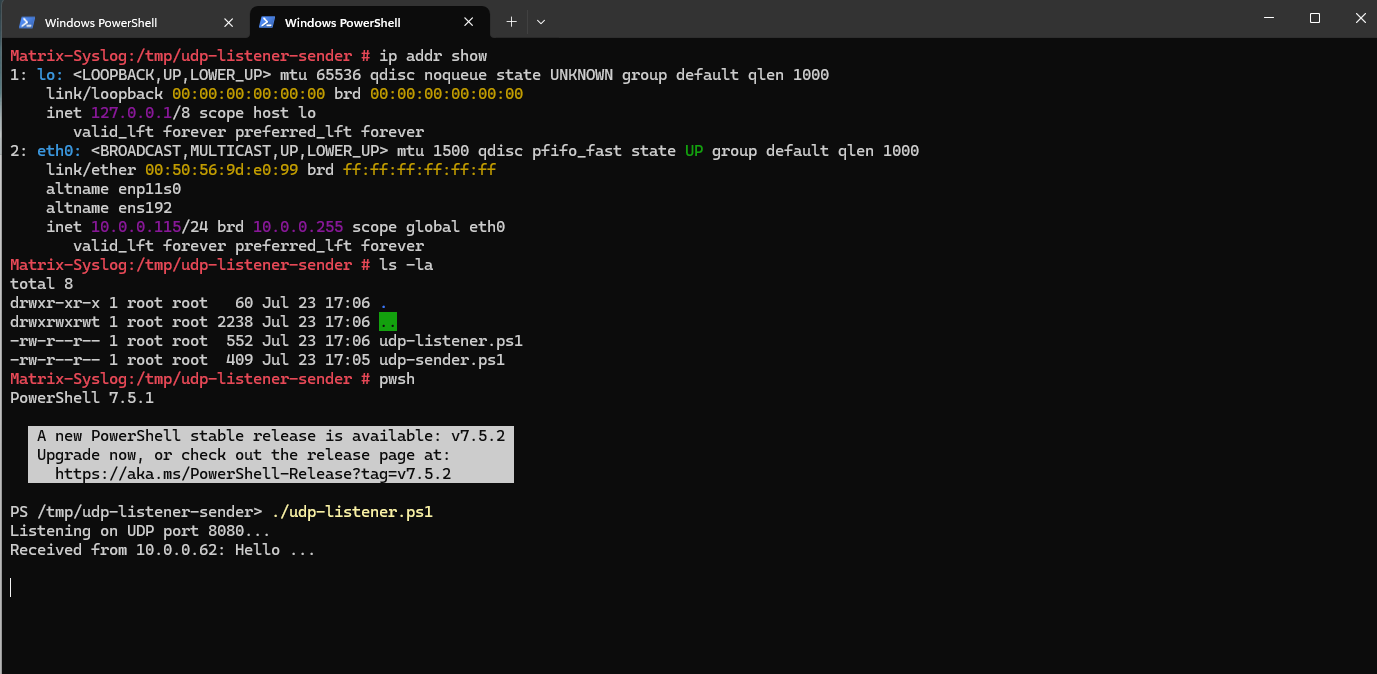
We can use both PowerShell scripts (UDP listener and sender) also on Linux. To install PowerShell Core (PowerShell 7 or later) on Linux, you can read my following post.
Sending UDP message to the Linux host by using ncat or the PowerShell script.
Running the UDP listener on Linux.
PowerShell UDP Sender
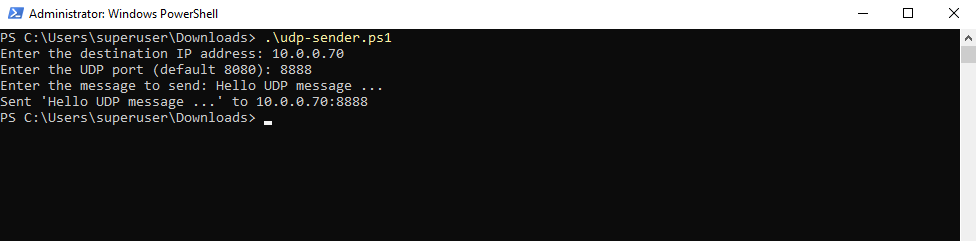
Also for the UDP sender we can use the following PowerShell script as lightweight UDP sender.
It will prompt for the destination IP/FQDN and destination UPD Port to send a message to.
# Prompt for destination IP
$ipInput = Read-Host "Enter the destination IP address"
try {
    $IP = [System.Net.IPAddress]::Parse($ipInput).ToString()
} catch {
    Write-Error "Invalid IP address format."
    exit 1
}

# Prompt for destination port
$portInput = Read-Host "Enter the UDP port (default 8080)"
if ([string]::IsNullOrWhiteSpace($portInput)) {
    $Port = 8080
} elseif ($portInput -as [int]) {
    $Port = [int]$portInput
} else {
    Write-Error "Invalid port number."
    exit 1
}

# Prompt for message
$Message = Read-Host "Enter the message to send"

try {
    $udp = [System.Net.Sockets.UdpClient]::new()
    $bytes = [System.Text.Encoding]::UTF8.GetBytes($Message)
    $udp.Send($bytes, $bytes.Length, $IP, $Port) | Out-Null
    Write-Host "Sent '$Message' to ${IP}:${Port}"
    $udp.Close()
} catch {
    Write-Error "Failed to send UDP message: $_"
}
On the destination server where the usb-listener.ps1 script is running:
Ncat Introduction
Ncat is a feature-packed networking utility which reads and writes data across networks from the command line.
Ncat was written for the Nmap Project as a much-improved reimplementation of the venerable Netcat.
It uses both TCP and UDP for communication and is designed to be a reliable back-end tool to instantly provide network connectivity to other applications and users.
Ncat will not only work with IPv4 and IPv6 but provides the user with a virtually limitless number of potential uses.
Among Ncat’s vast number of features there is the ability to chain Ncats together, redirect both TCP and UDP ports to other sites, SSL support, and proxy connections via SOCKS4 or HTTP (CONNECT method) proxies (with optional proxy authentication as well).
About Testing the SOCKS5 Proxy by using the SSH and Ncat Utility you can read my following post.
https://blog.matrixpost.net/howt-to-set-up-dante-socks5-proxy-on-suse-linux-enterprise-server/#ncat
Some general principles apply to most applications and thus give you the capability of instantly adding networking support to software that would normally never support it.
Ncat is integrated with Nmap and is available in the standard Nmap download packages (including source code and Linux, Windows, and Mac binaries) available from the Nmap download page. You can also find it in our SVN source code repository.
The Ncat Users’ Guide contains full documentation including many tips, tricks, and practical real-life examples! There is also an Ncat man page for a quick usage summary.
Source: https://nmap.org/ncat/
Using Netcat (or Ncat)
We can also use the ncat tool (by Nmap) to connect to our a lightweight UDP listener or itself act as a UDP or TCP listener.
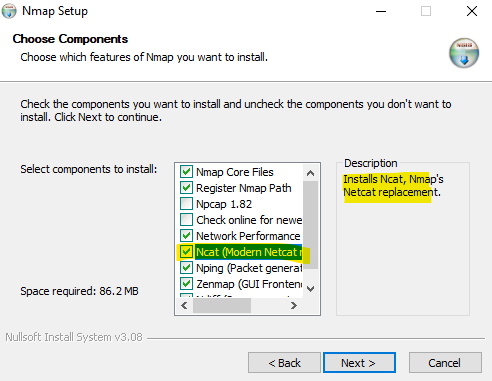
Download the Windows installer from https://nmap.org/download.html, during install, make sure Ncat is selected (it usually is by default).
Act as UDP/TCP Sender
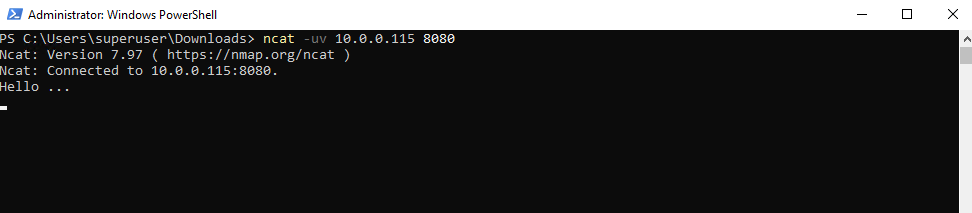
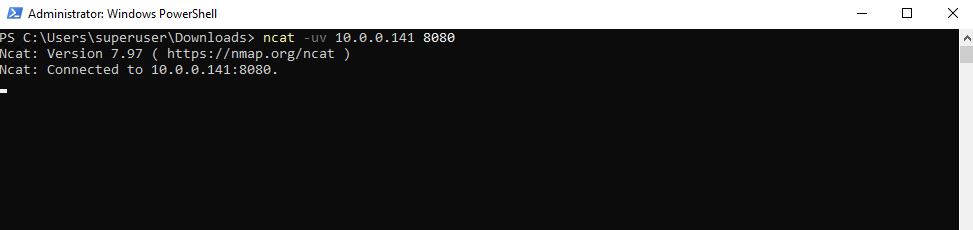
We can use the ncat tool as UDP/TCP listener or UDP/TCP sender, after installation, open PowerShell or CMD and run the following command to let ncat act as UDP sender.
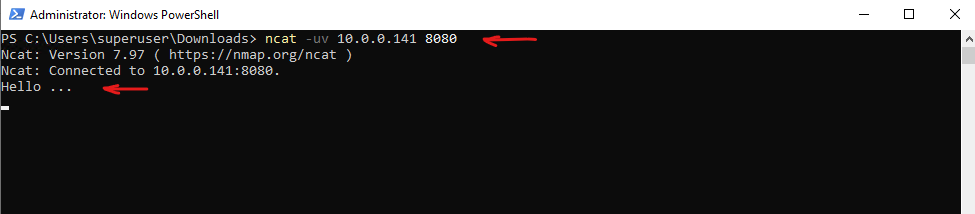
PS> ncat -uv <destination IP or FQDN> <Port>
PS> ncat -uv 10.0.0.141 8080

-h, --help                 Display this help screen
-u, --udp                  Use UDP instead of default TCP
-v, --verbose              Set verbosity level (can be used several times)
-4                         Use IPv4 only
-6                         Use IPv6 only
-l, --listen               Bind and listen for incoming connections
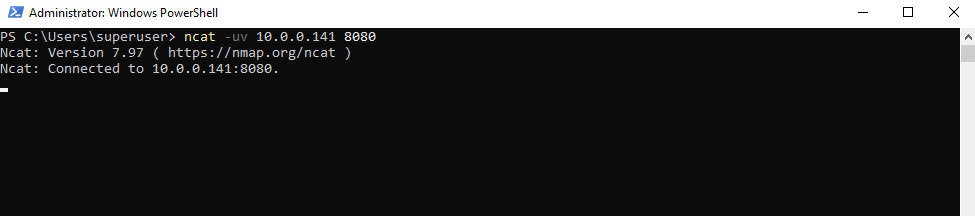
UDP is stateless, and netcat (or ncat) showing connected for a UDP target is misleading, because no actual connection is really established here.
The “Connected to…” message means that ncat is ready to send UDP packets to this destination. It does not send anything by itself until you press a key or send input.
We need to enter some text and afterwards pressing Enter like shown below.
PS> ncat -uv 10.0.0.141 8080
Ncat: Version 7.97 ( https://nmap.org/ncat )
Ncat: Connected to 10.0.0.141:8080.
Hello ... <after Connected to .... we can enter some text to send to the destination on UDP port 8080>
Or by sending some text like this.
PS> echo "hello" | ncat -uv 10.0.0.141 8080
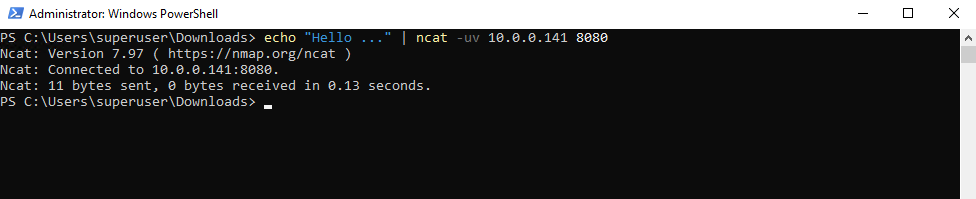
The destination host (10.0.0.141) like shown below in the next section will act as UDP listener (also by using ncat) and displaying the text message send by the UDP sender.
We can also use our PowerShell UDP listener from above in combination with ncat as sender or vice versa.
PS> ncat -uv -l 8080

-h, --help                 Display this help screen
-u, --udp                  Use UDP instead of default TCP
-v, --verbose              Set verbosity level (can be used several times)
-4                         Use IPv4 only
-6                         Use IPv6 only
-l, --listen               Bind and listen for incoming connections
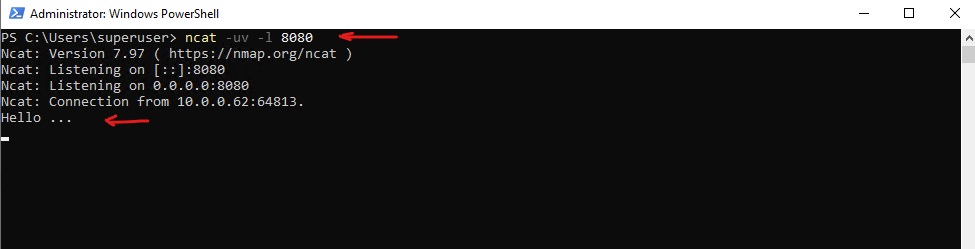
Act as UDP/TCP Listener
Below we will use the ncat tool as UDP listener and already shown above, after installation, open PowerShell or CMD and run the following command.
We can see the “Hello …” message send by the ncat UDP sender above.
PS> ncat -uv -l 8080
Ncat: Version 7.97 ( https://nmap.org/ncat )
Ncat: Listening on [::]:8080
Ncat: Listening on 0.0.0.0:8080

-h, --help                 Display this help screen
-u, --udp                  Use UDP instead of default TCP
-v, --verbose              Set verbosity level (can be used several times)
-4                         Use IPv4 only
-6                         Use IPv6 only
-l, --listen               Bind and listen for incoming connections

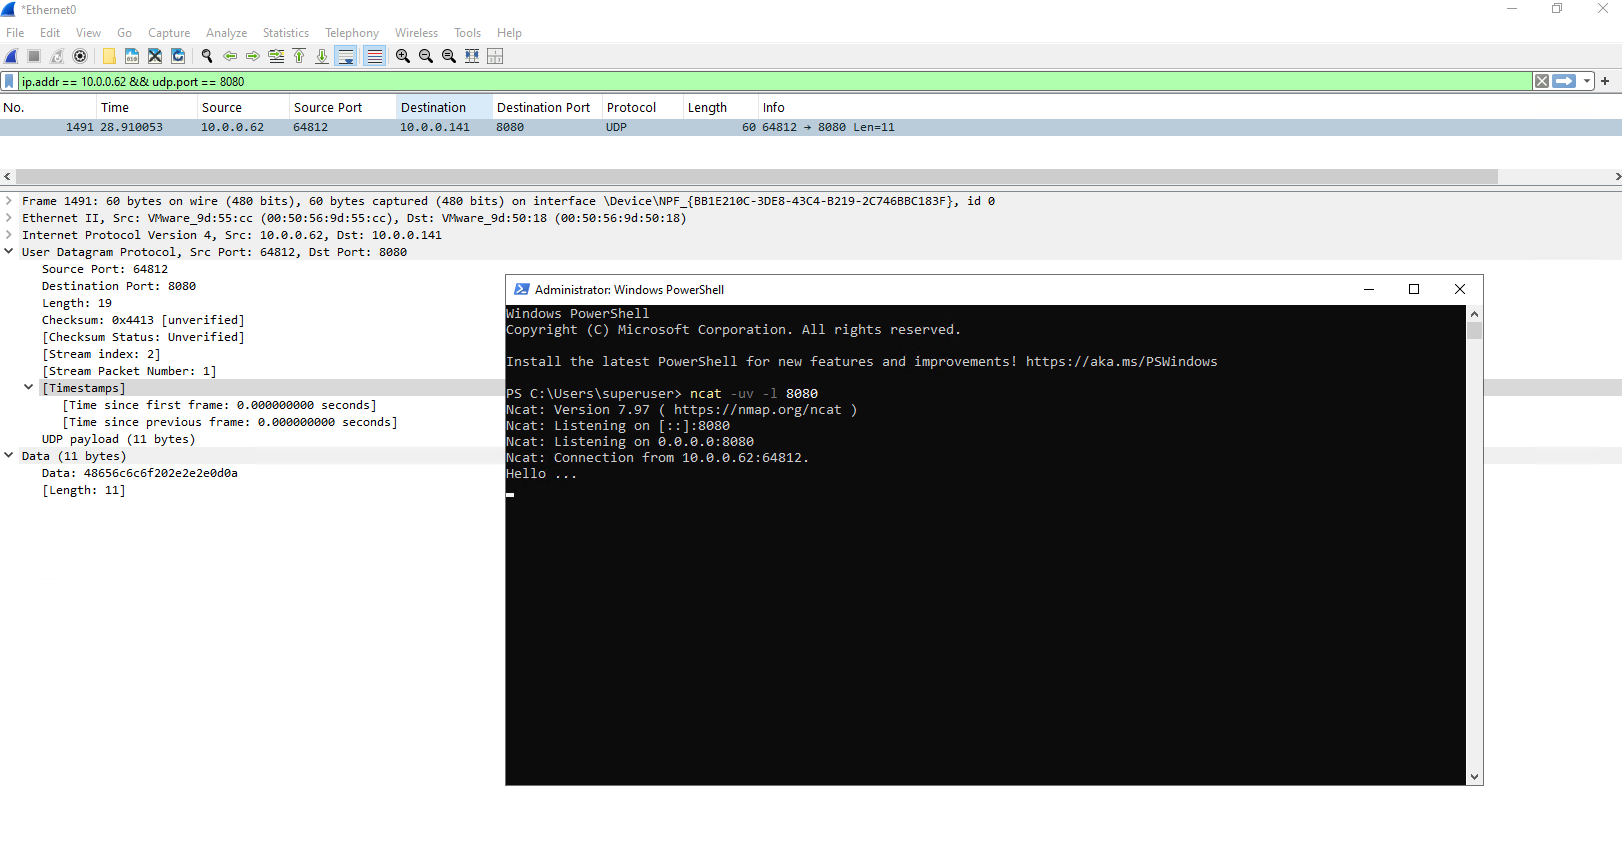
We can also capture the inbound UDP traffic on port 8080 by using WireShark.
Determine local open UDP Ports and Connections
To show all open UDP ports or as specific on a system we can use the Get-NetUDPEndpoint cmdlet.
Get-NetUDPEndpoint | Where-Object { $_.LocalPort -eq 111 }

# or by using the -like flag to use wildcards
Get-NetUDPEndpoint | Where-Object { $_.LocalPort -like "11*" }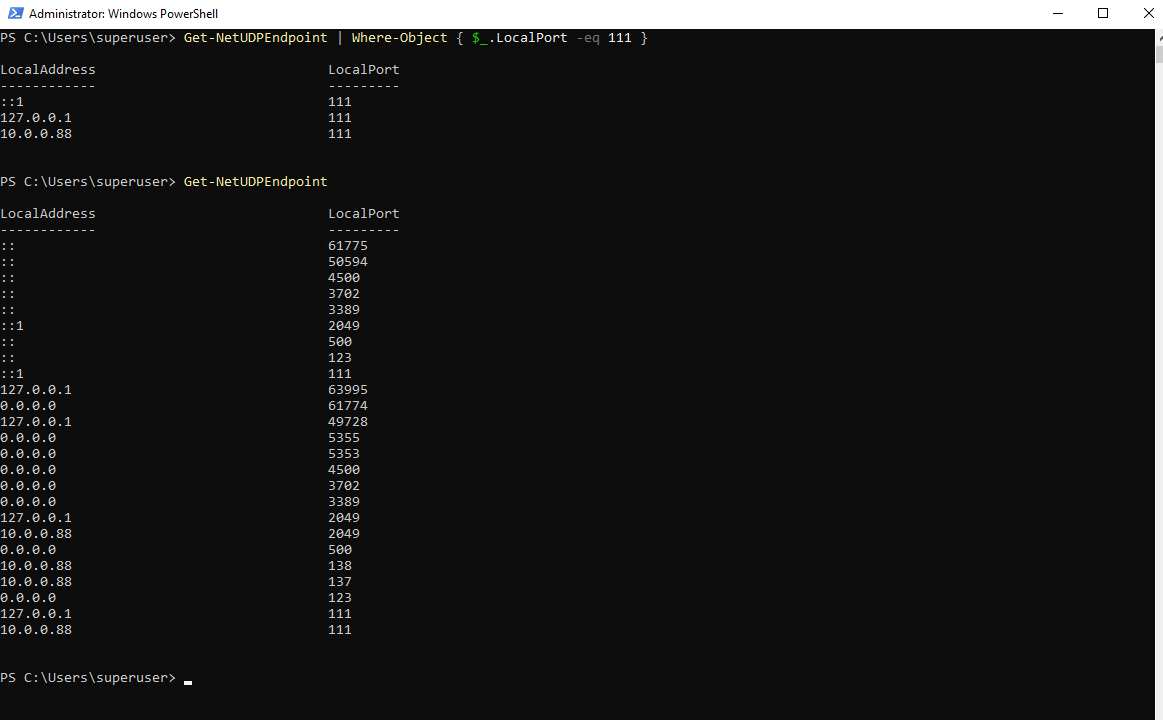
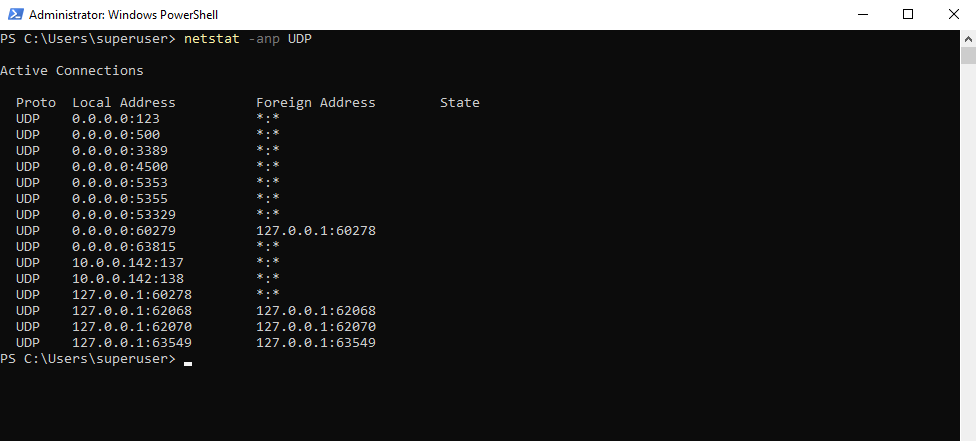
The following command will show all open UPD ports and connections.
PS> netstat -anp UDP
-a – Show all connections and listening ports
-n – Show numerical addresses (no DNS resolution)
-p UDP – Filter for UDP only
Links
UdpClient Class
https://learn.microsoft.com/en-us/dotnet/api/system.net.sockets.udpclient?view=net-8.0