Modern Azure Deployments with Terraform & GitHub – Part 2 – Remote Backends and Multi-Environment Deployments
In Part 1, we deployed our first Azure resources with Terraform and GitHub using a locally stored Terraform state In addition to the dedicated backend configuration files, we file. While this approach works well for labs and small environments, it quickly becomes problematic once multiple engineers, automation pipelines, or production workloads are involved.
In this part, we will move our Terraform state into a centralized Azure Storage Account backend and explore why remote state management is essential for collaboration, consistency, and reliable Infrastructure as Code deployments in real-world environments.
In Part 3, we transform the Terraform project into a fully automated multi-environment CI/CD platform using GitHub Actions and Microsoft Azure. We will implement automated Terraform validation, planning, and deployment workflows, integrate secure Azure authentication through GitHub Secrets, deploy isolated development, testing, and production environments, and finally protect production deployments with approval workflows using GitHub Environments.
- Why Local Terraform State Becomes a Problem
- Understanding Terraform State
- Creating a New Terraform Project for Remote State Management
- Remote Backends in Terraform
- Deploying Resources with the Remote Backend
- Preparing Terraform for Multi-Environment Deployments
- Switching Between Terraform Environments
- Troubleshooting
- Links
Why Local Terraform State Becomes a Problem
In Part 1, Terraform automatically created a local terraform.tfstate file in our working directory. This state file is a critical component of Terraform, as it keeps track of all infrastructure resources managed by our configuration and maps them to the actual resources deployed in Azure.
While storing the state file locally works well for learning, testing, or single-user environments, it quickly becomes problematic in real-world scenarios where multiple engineers, automation pipelines, or different deployment environments are involved.
Typical challenges with local Terraform state include:
- The state file only exists on a single workstation
- Team members cannot safely collaborate on the same infrastructure
- CI/CD pipelines do not have access to the local state
- Multiple users may accidentally overwrite or corrupt the state
- Sensitive information may be stored inside the state file
- There is no built-in locking mechanism to prevent concurrent changes
By default, Terraform creates the following files locally inside the project directory:
terraform.tfstate
terraform.tfstate.backup
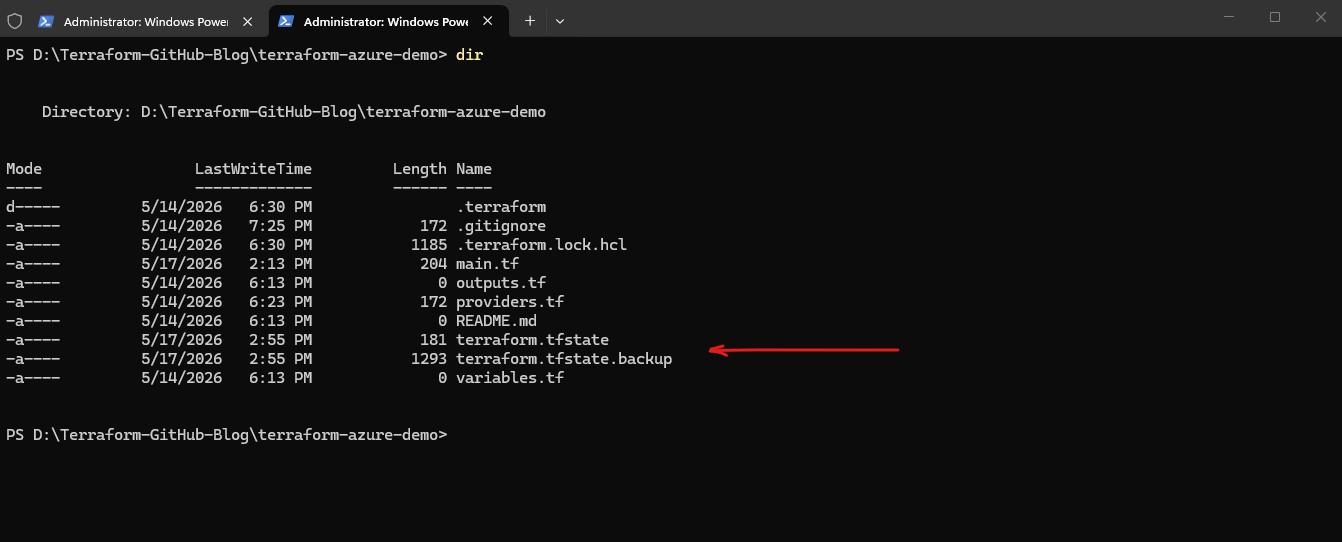
The
terraform.tfstatefile contains the current infrastructure state, while the backup file stores the previous version of the state before changes are applied.
Understanding Terraform State
Terraform state is a locally or remotely stored file that keeps track of all infrastructure resources managed by Terraform. It acts as the source of truth that allows Terraform to understand which resources already exist, how they are configured, and what changes need to be applied during future deployments.
Without the state file, Terraform would not be able to reliably determine whether resources need to be created, modified, or deleted.
The Terraform state contains information such as:
- Resource names and IDs
- Resource properties and configuration values
- Dependencies between resources
- Metadata used by Terraform internally
- The mapping between Terraform configuration and actual Azure resources
After running a deployment, Terraform automatically creates the terraform.tfstate file inside the working directory.
We can inspect the resources currently tracked inside the Terraform state by using the following command:
At the end of Part 1, we cleaned up and removed all previously deployed Azure resources. Since our Terraform configuration is already stored and versioned in GitHub, we can now simply recreate the entire infrastructure again by running Terraform against the existing configuration files.
PS> terraform state list

To demonstrate the Terraform state and the resources currently tracked by Terraform, we will now simply recreate the project again from the previously stored GitHub configuration version named Storage account name change. This allows us to restore the exact infrastructure state that existed at that point in time.
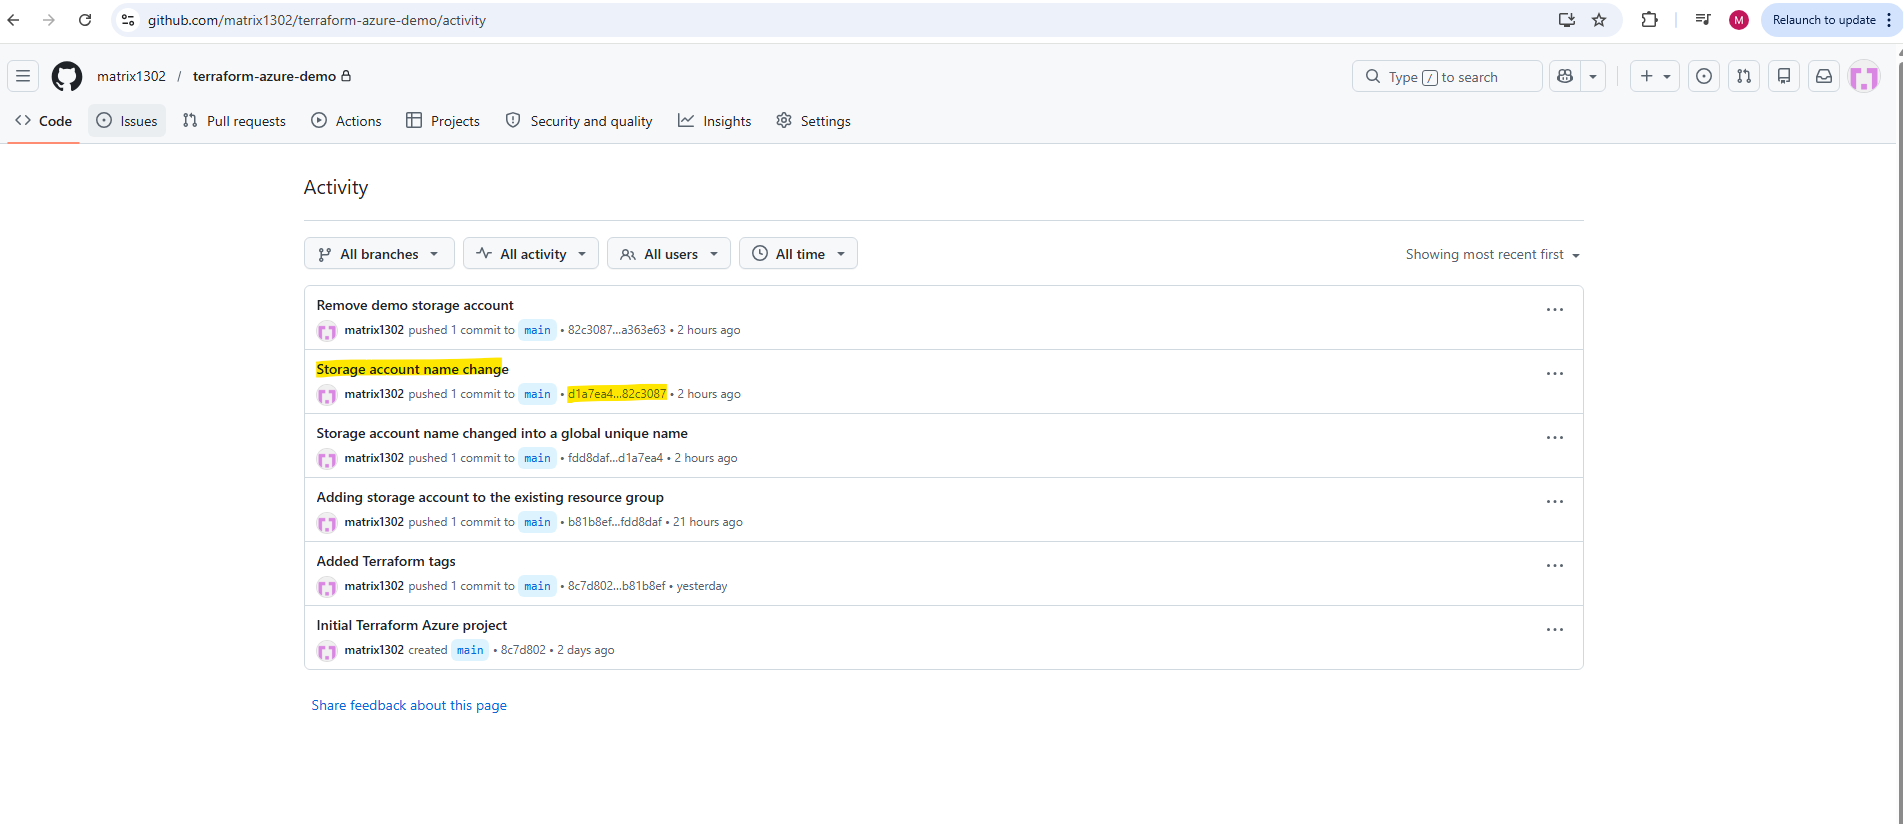
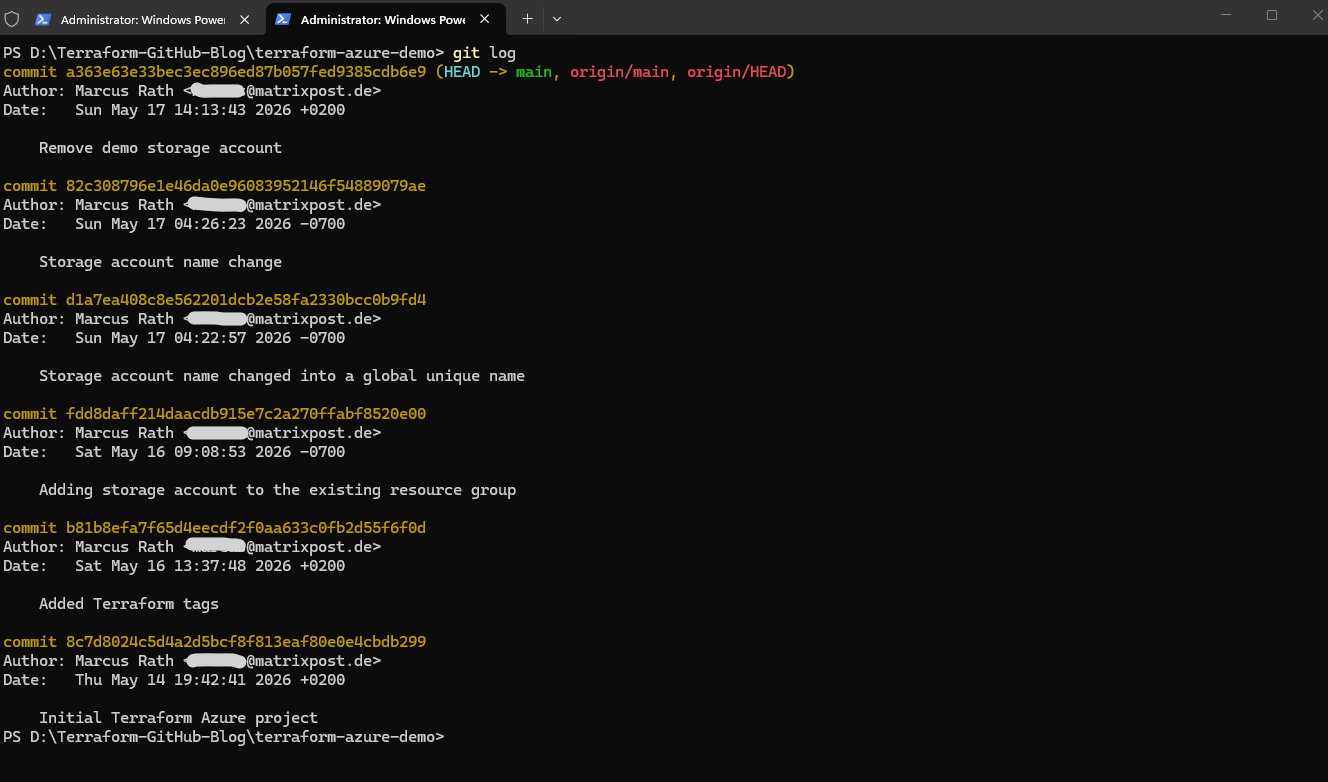
Before restoring the project, we first need to determine the commit ID of the Terraform configuration version we want to deploy. We can display the complete Git commit history of the repository by using the following command:
In our case, we will use the commit
82c308796e1e46da0e96083952146f54889079ae, which contains the configuration version namedStorage account name change.
PS> git log
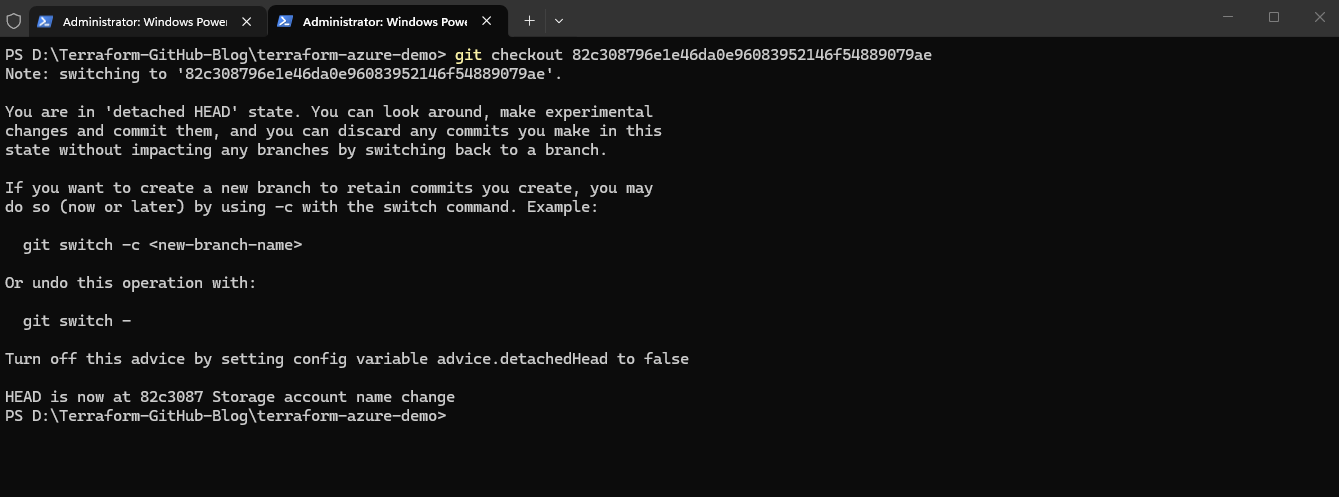
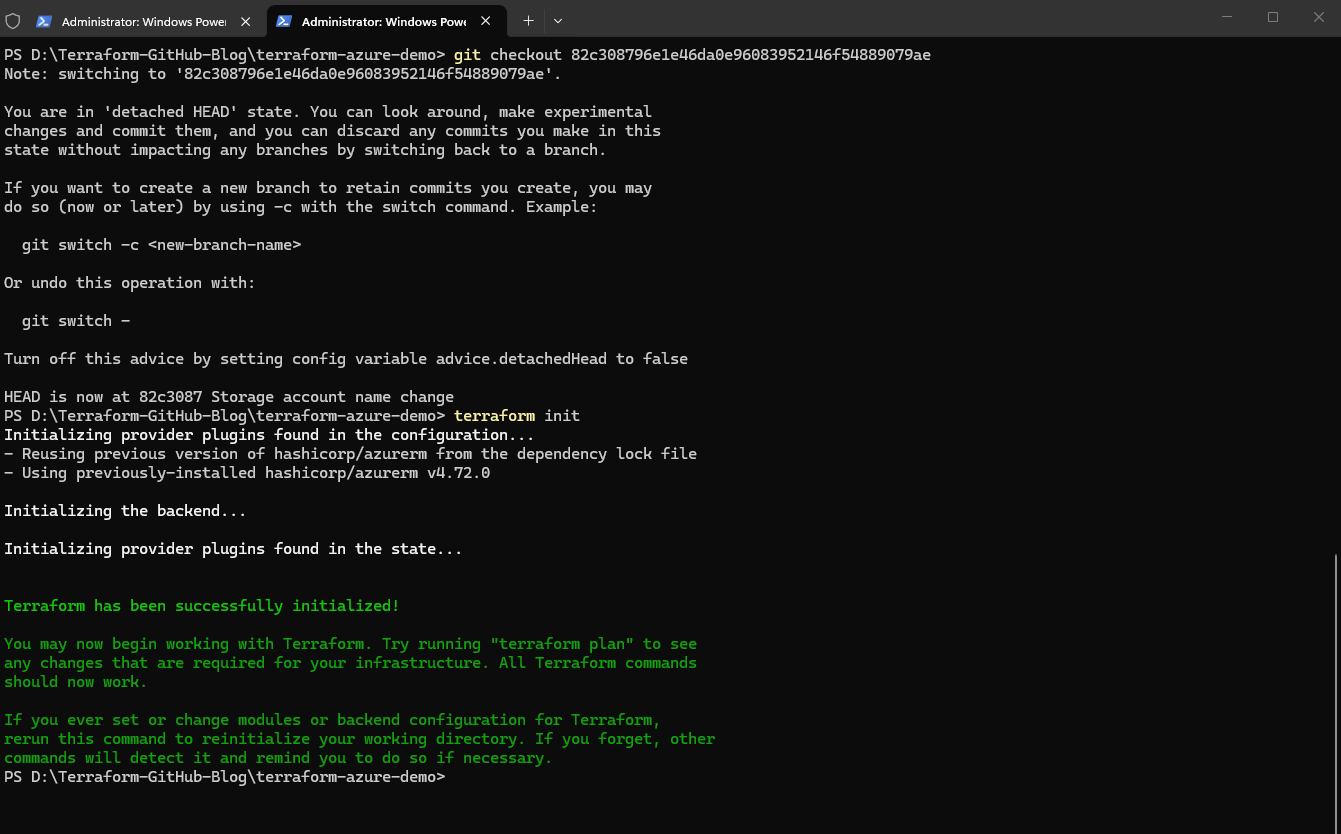
We can now restore the repository to this specific configuration version by checking out the corresponding Git commit. This allows us to recreate the exact Terraform project state that existed at that point in time.
After switching to the selected commit, Git places the repository into a so-called
detached HEADstate. This simply means that we are currently working directly on a specific historical commit instead of the latest state of themainbranch.From here, we can initialize Terraform again and recreate the infrastructure exactly as it existed in this configuration version.
PS> git checkout 82c308796e1e46da0e96083952146f54889079ae
We can now initialize the Terraform working directory again by running:
This command downloads the required Terraform provider plugins and prepares the working directory for the deployment.
PS> terraform init
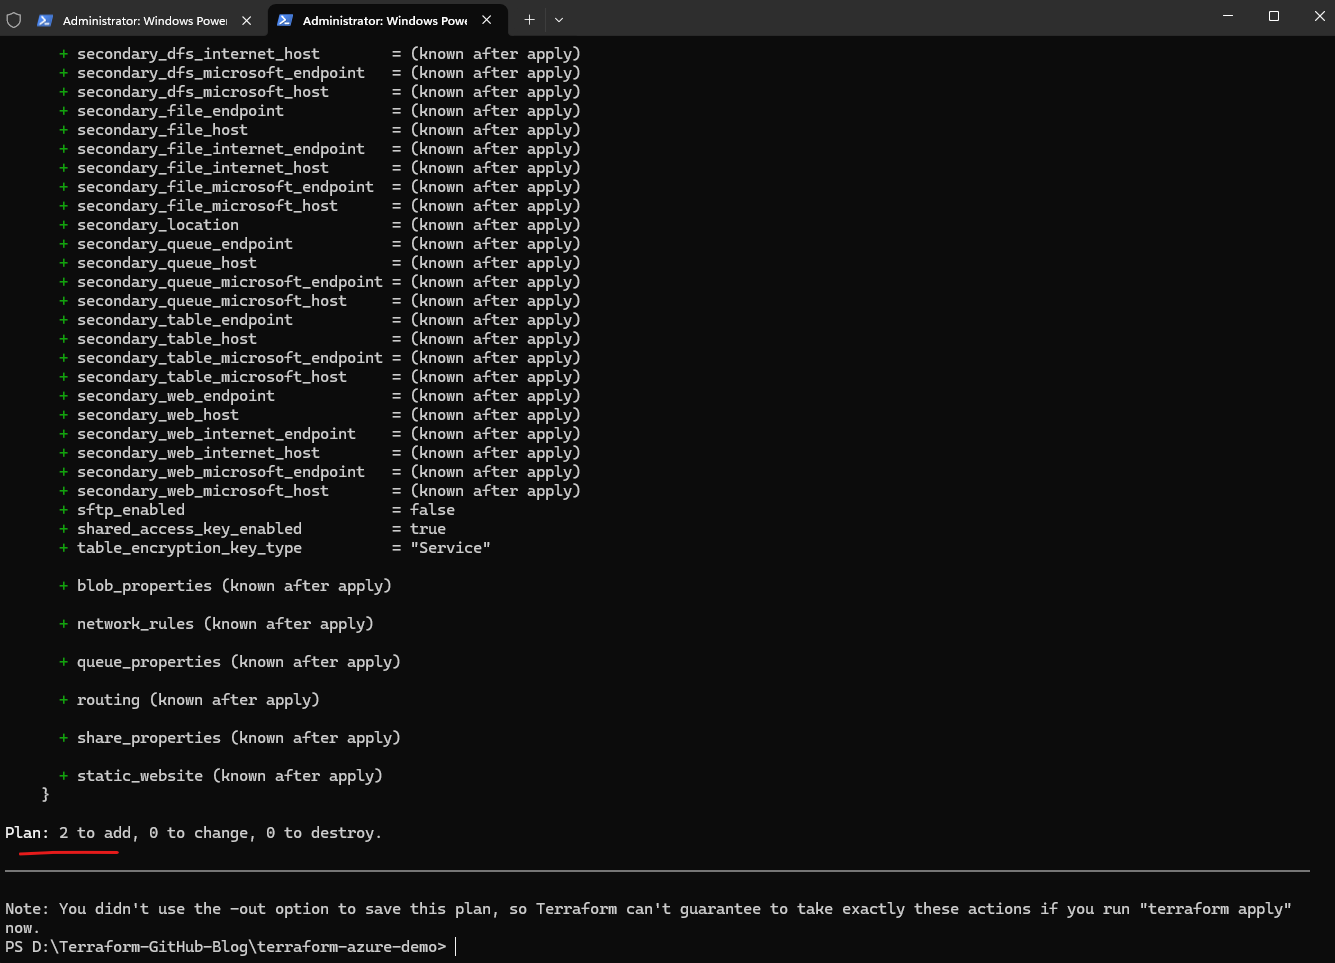
Next, we can verify which resources Terraform is going to create:
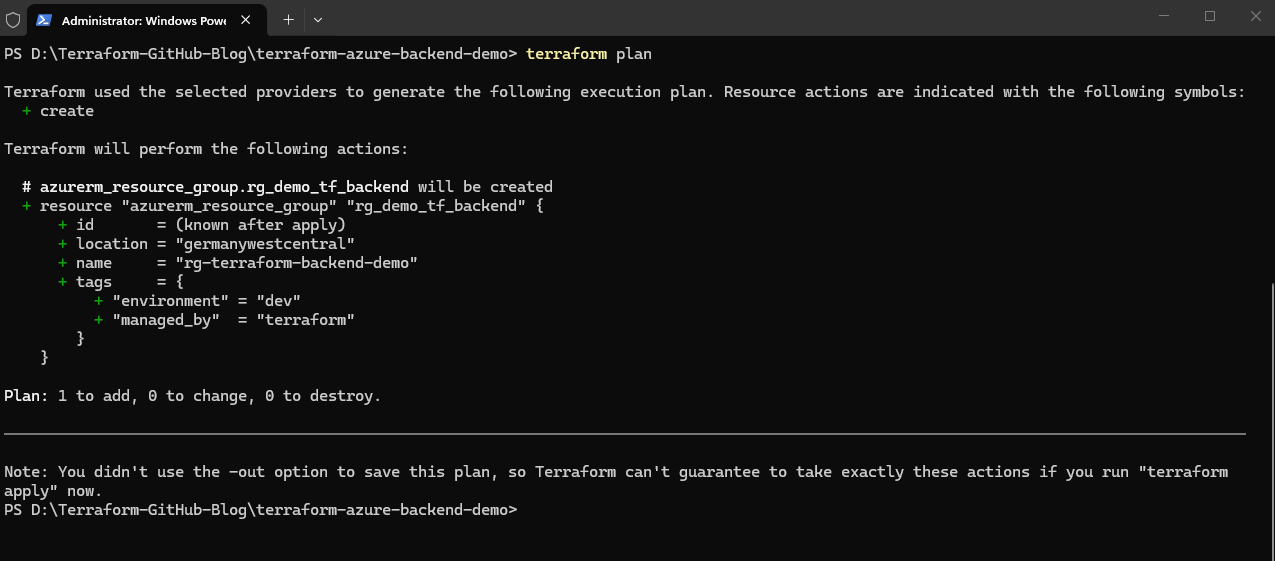
The Terraform plan output shows that two new Azure resources will be created, in our case the Azure resource group and the storage account defined in the Terraform configuration.
PS> terraform plan
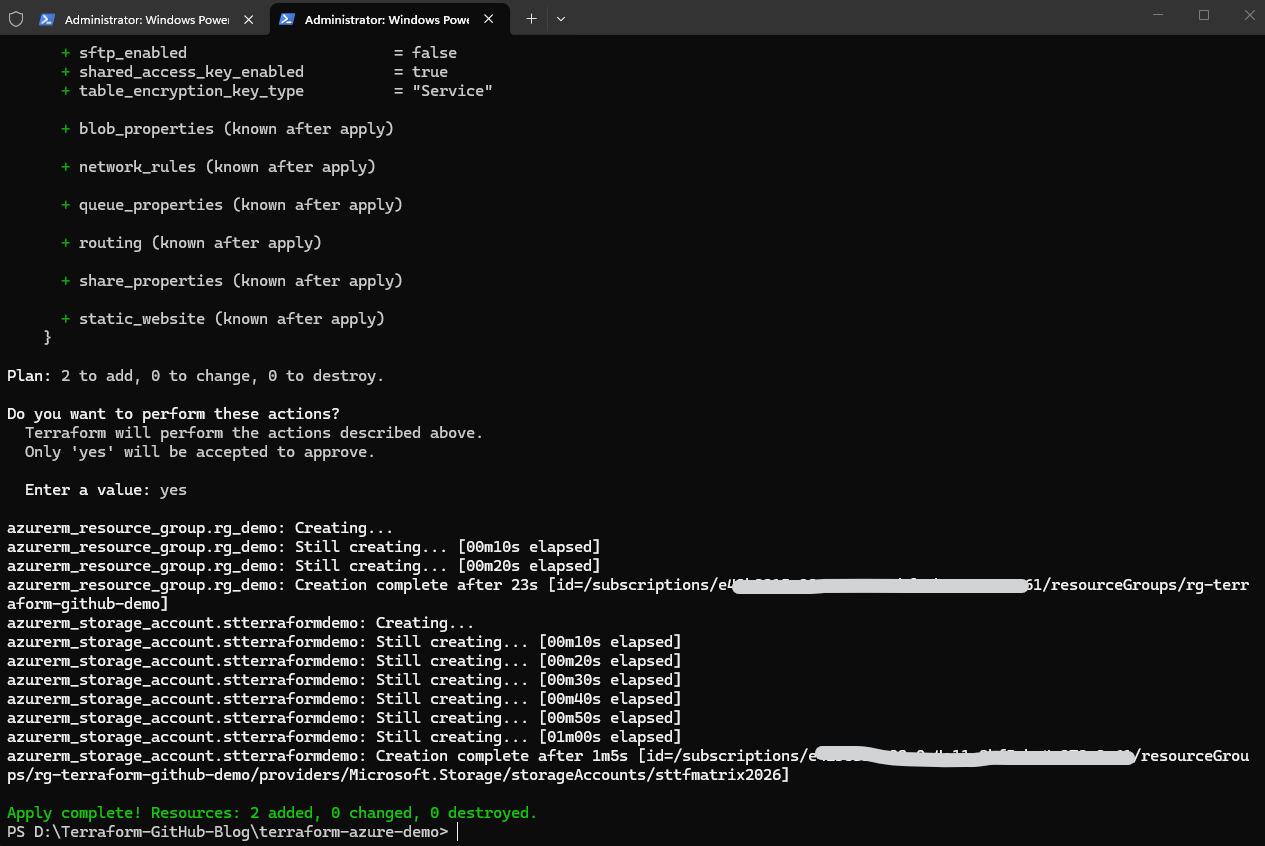
Finally, we can deploy the infrastructure again by running:
Terraform will now recreate the Azure resources defined in this specific GitHub configuration version.
PS> terraform apply
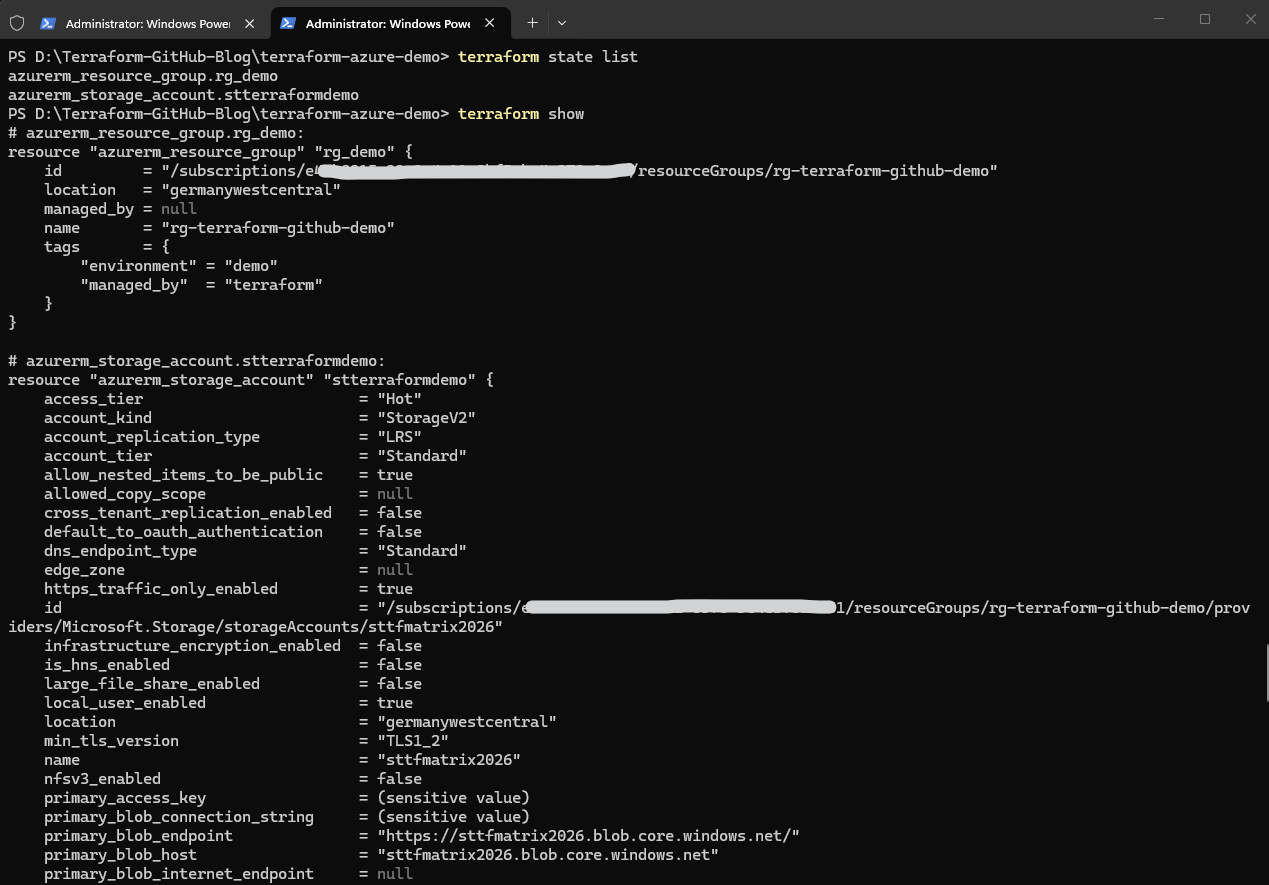
After the deployment has completed successfully, Terraform automatically updates the local state file with the newly created Azure resources. We can now display all resources currently tracked inside the Terraform state by using the following command:
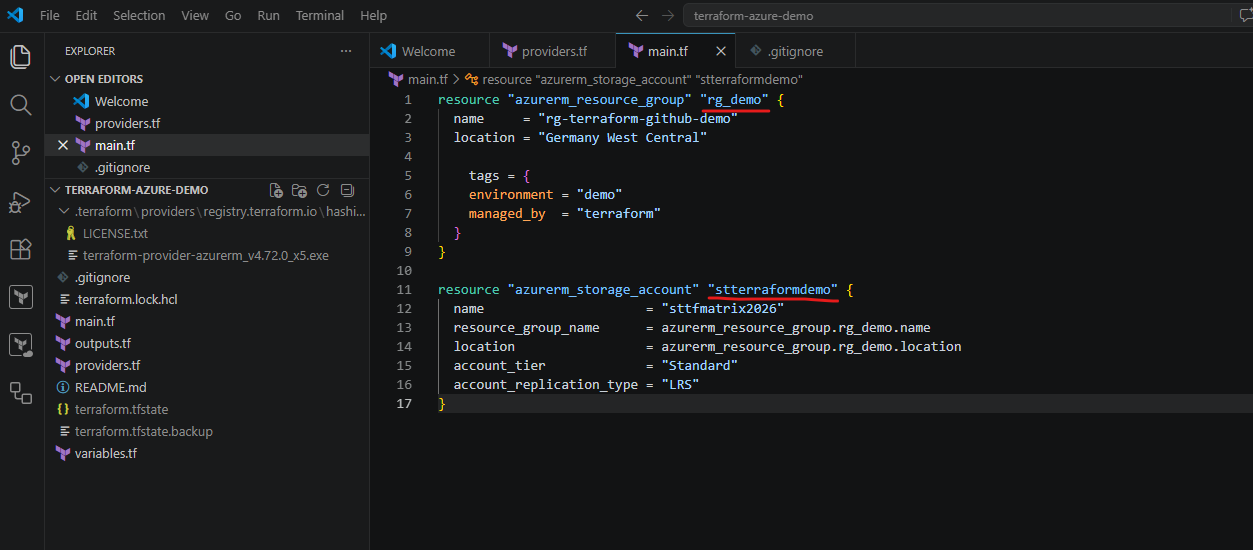
The names
rg_demoandstterraformdemoare the internal Terraform resource names defined inside our Terraform configuration files. These logical names are used by Terraform to reference and manage the corresponding Azure resources within the state file.
PS> terraform state list

We can display the complete Terraform state by using:
In our example, Terraform displays detailed information about both the Azure resource group and the Azure storage account currently managed inside the Terraform state. The output also includes various properties automatically assigned by Azure during the deployment process
PS> terraform show
It is important to understand that the Terraform state does not replace the actual Azure resources. Instead, it stores metadata and references that allow Terraform to compare the desired configuration with the current infrastructure state in Azure.
Because the Terraform state is such a critical component, losing or corrupting the state file can make infrastructure management significantly more difficult. This is one of the main reasons why centralized and protected remote backends are commonly used in professional environments.
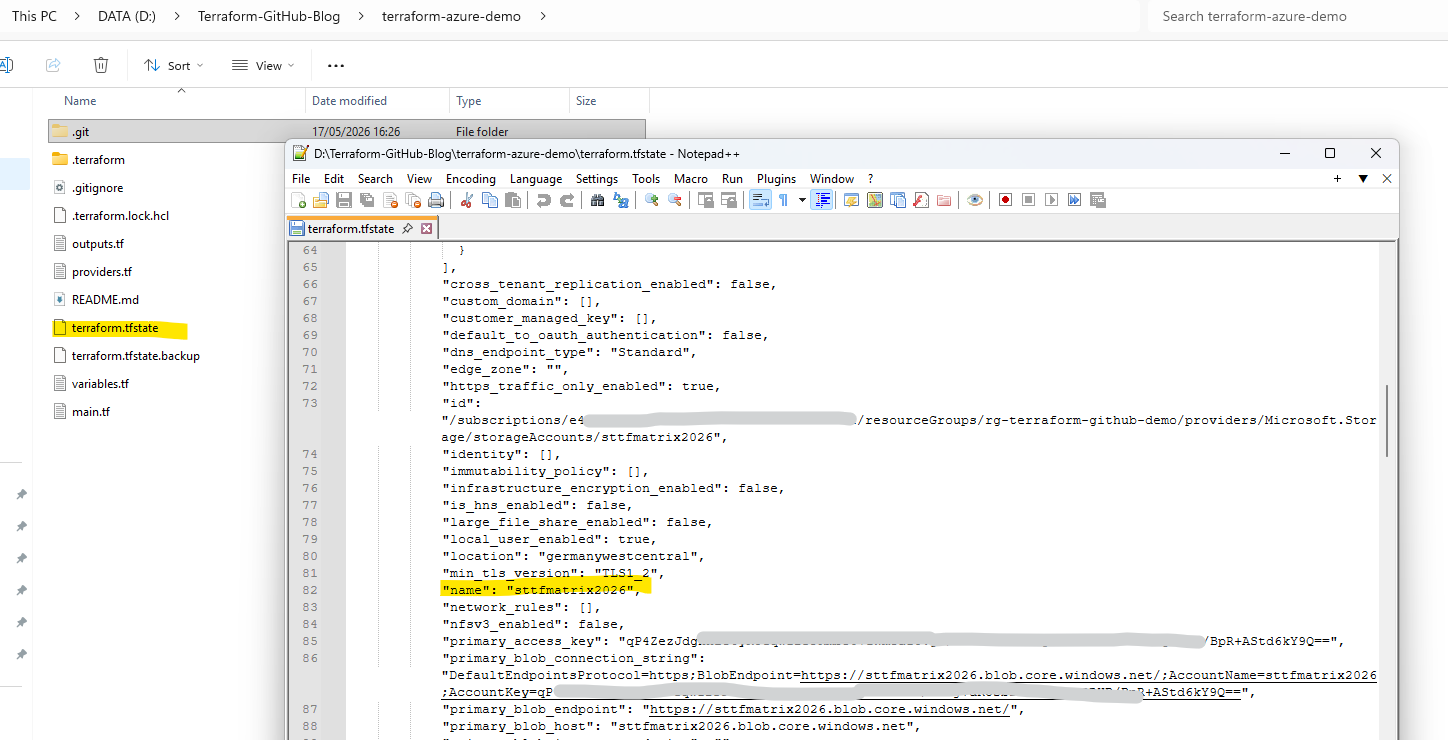
The Terraform state may also contain sensitive information such as access keys, connection strings, passwords, or other infrastructure-related secrets.
Although Terraform masks these values in the console output as
(sensitive value), the actual secrets are still stored in clear text inside the underlyingterraform.tfstatefile itself.
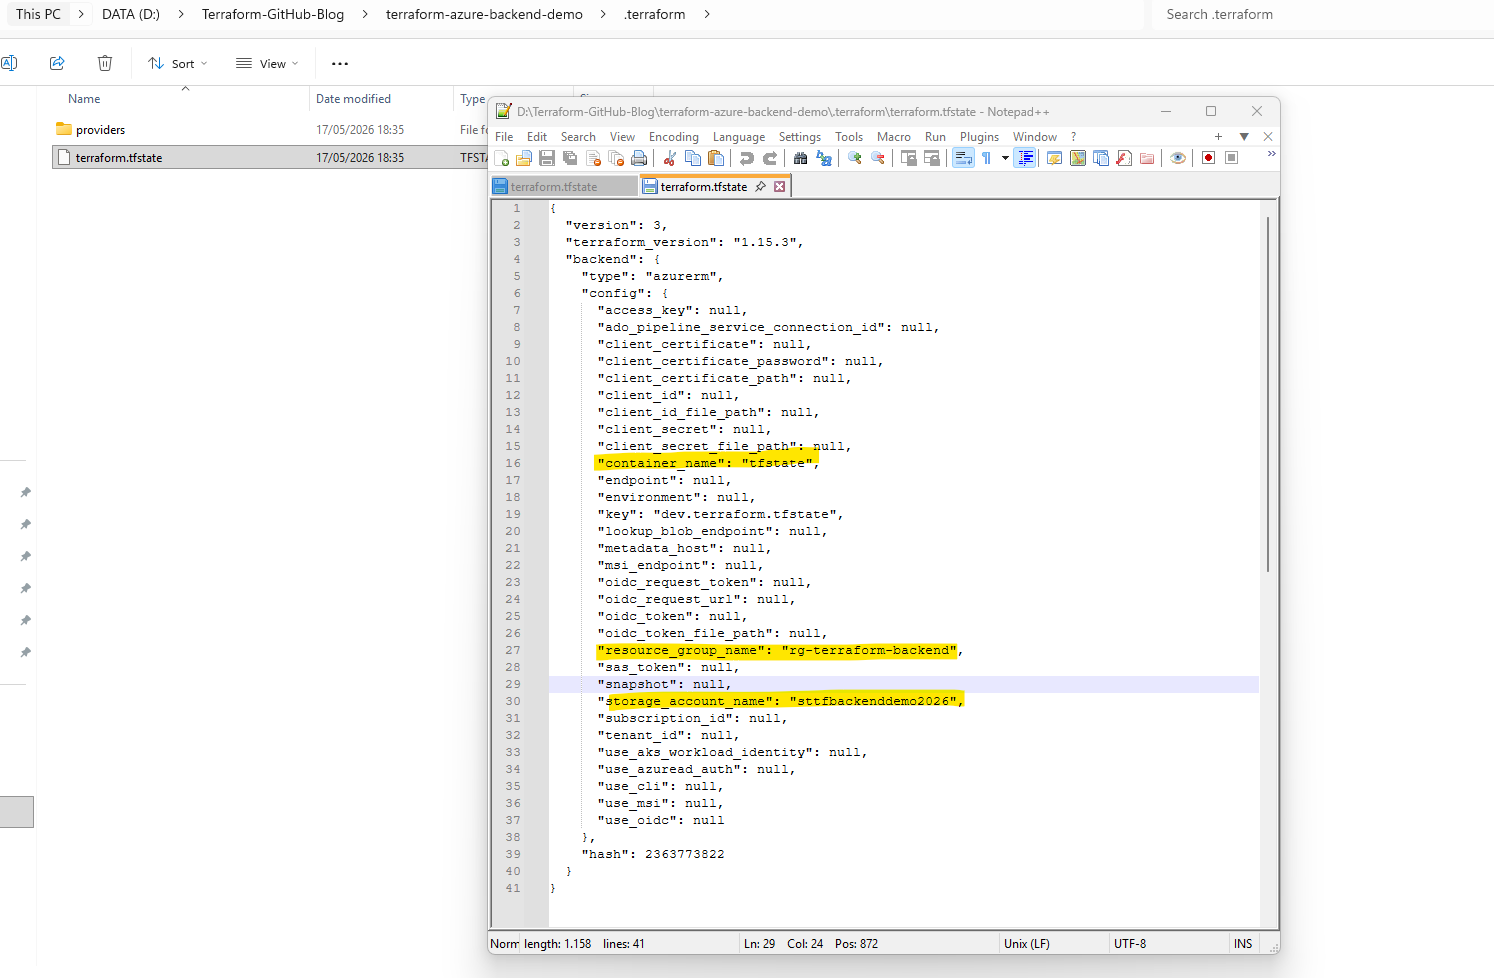
The following screenshot shows a section of the underlying terraform.tfstate file opened with a text editor. As visible, sensitive information such as the Azure Storage Account primary access key is stored directly inside the state file in clear text.
Creating a New Terraform Project for Remote State Management
After cleaning up the initial Terraform deployment from Part 1, we will now create a new Terraform project that will use a centralized remote backend from the beginning.
This allows us to demonstrate a more realistic enterprise-style setup focused on collaboration, shared state management, and multi-environment deployments.
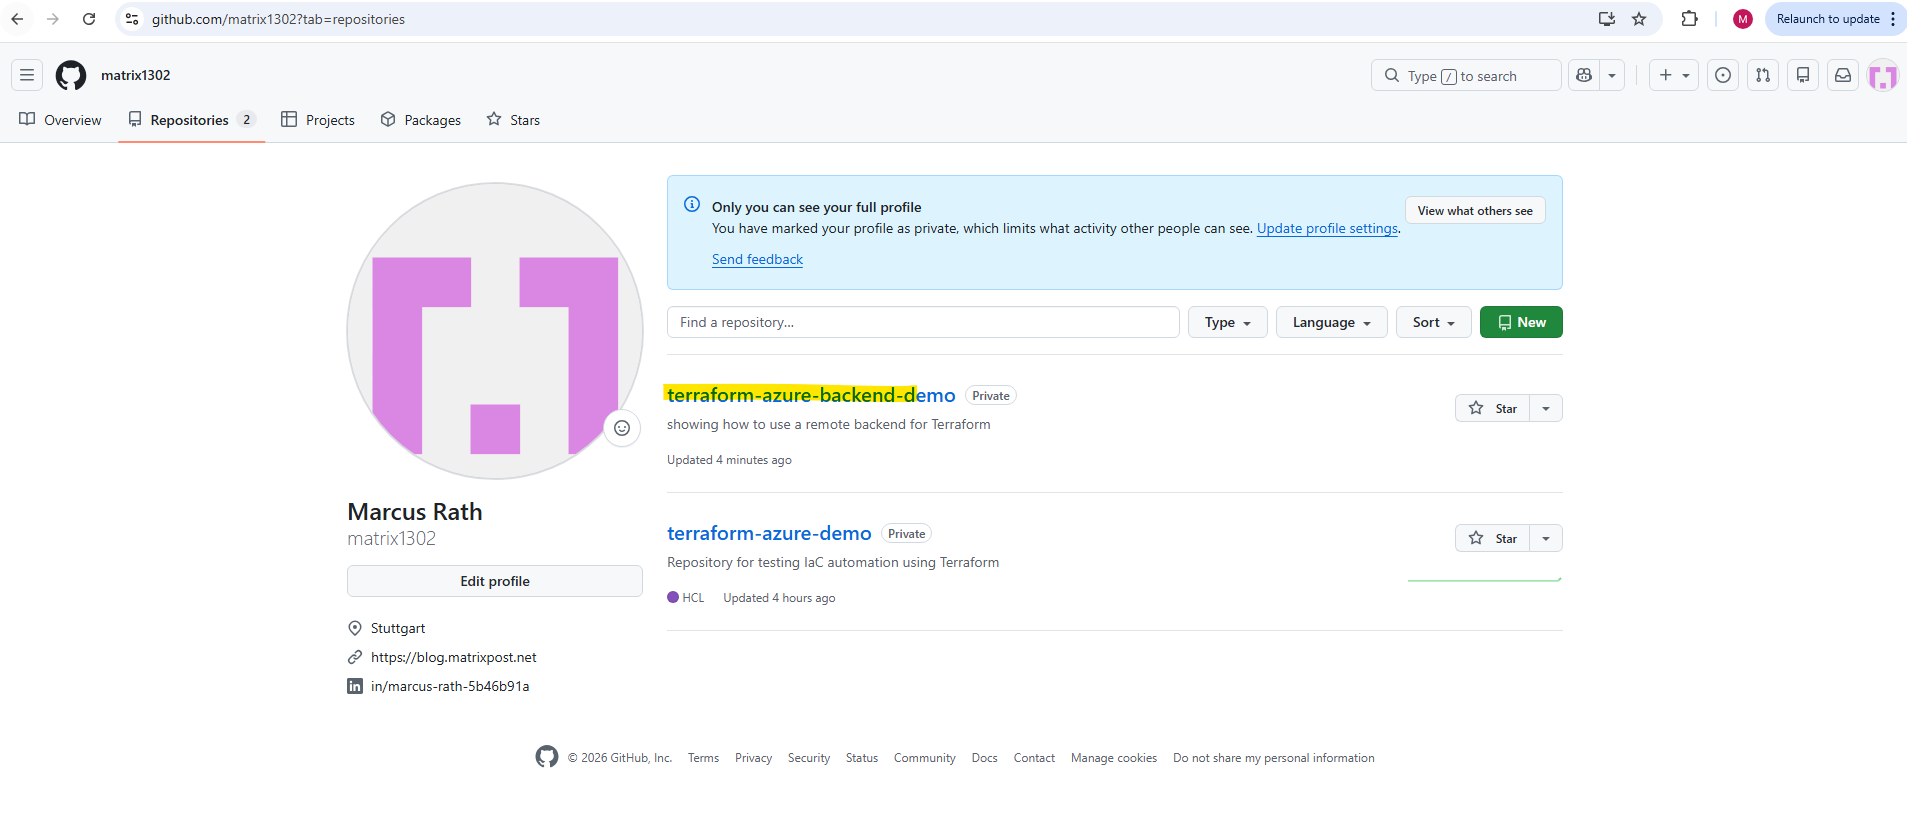
About how to create a new GitHub repository we saw already in Part 1, so I was creating a new repository named terraform-azure-backend-demo.
Further I was cloning the repository locally by running:
By default, the
git clonecommand downloads the repository into the current working directory using the repository name as the local folder name.
PS> git clone https://github.com/matrix1302/terraform-azure-backend-demo
The repository can now be opened directly in Visual Studio Code using:
The
.parameter tells Visual Studio Code to open the current working directory as the active project folder.
PS> code .

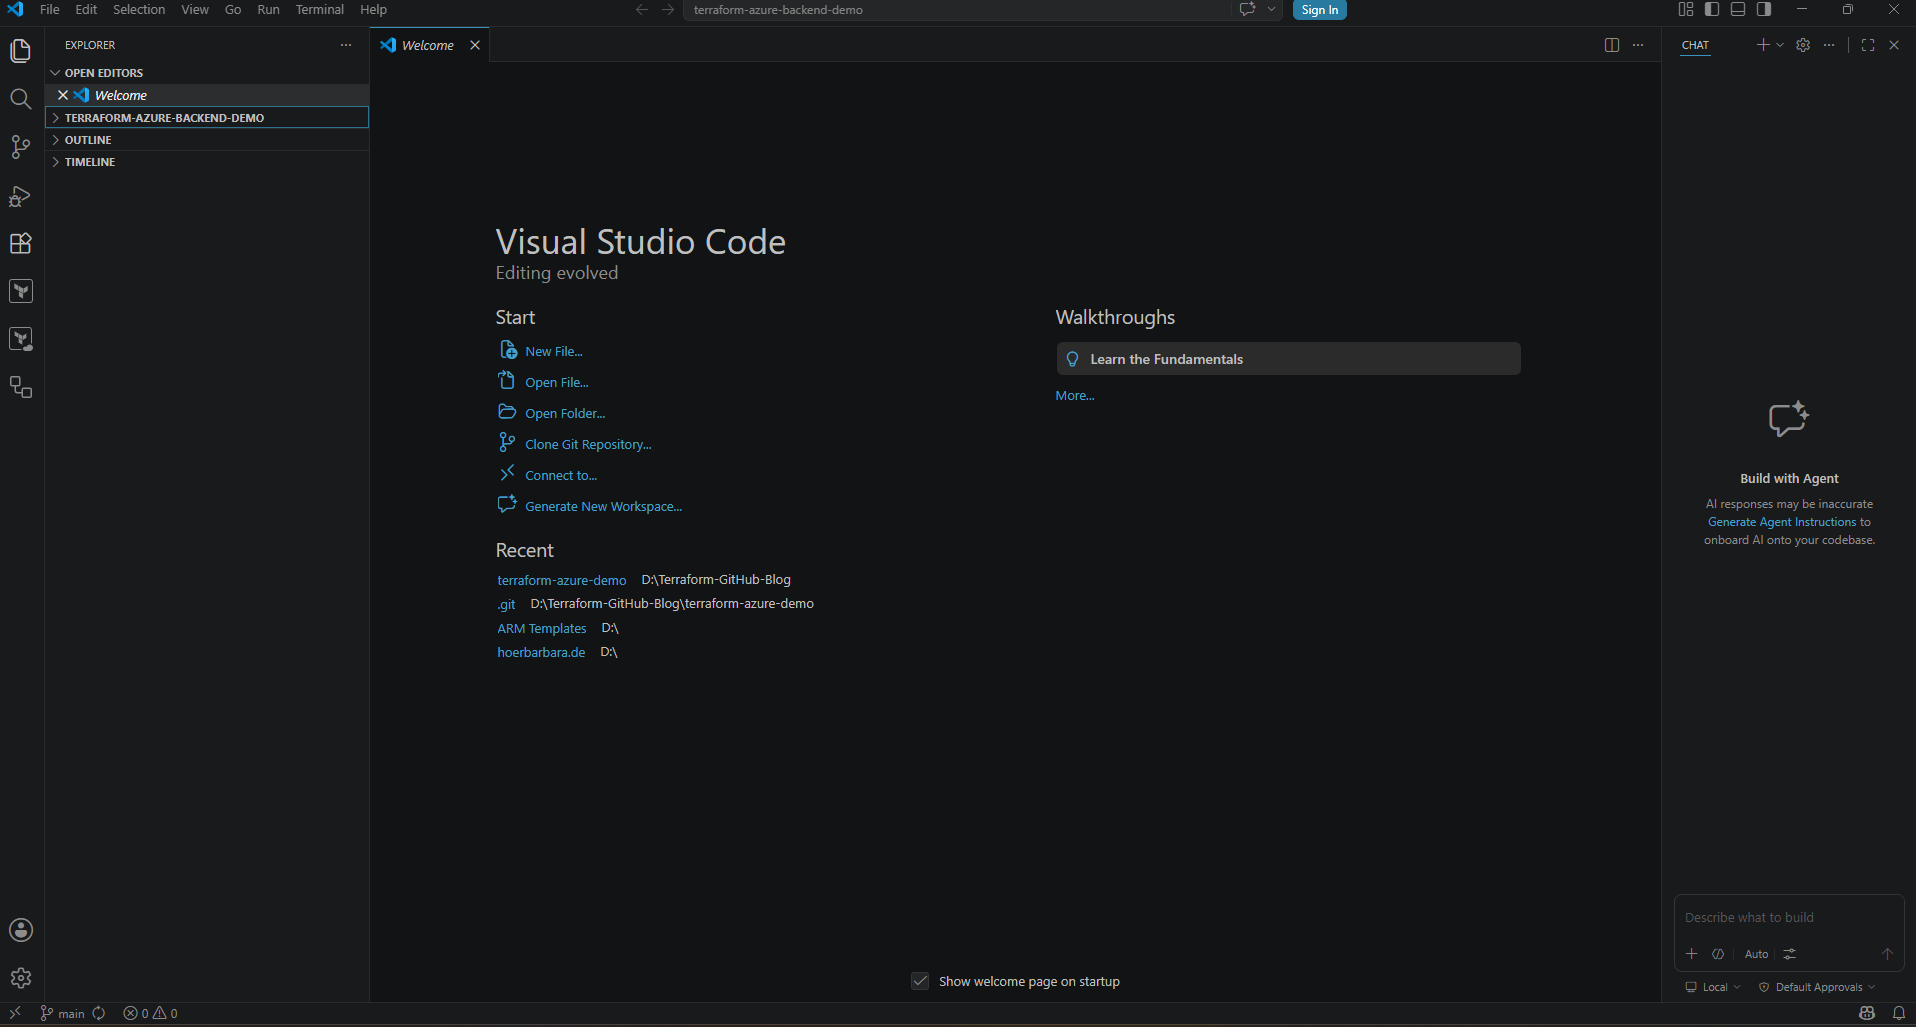
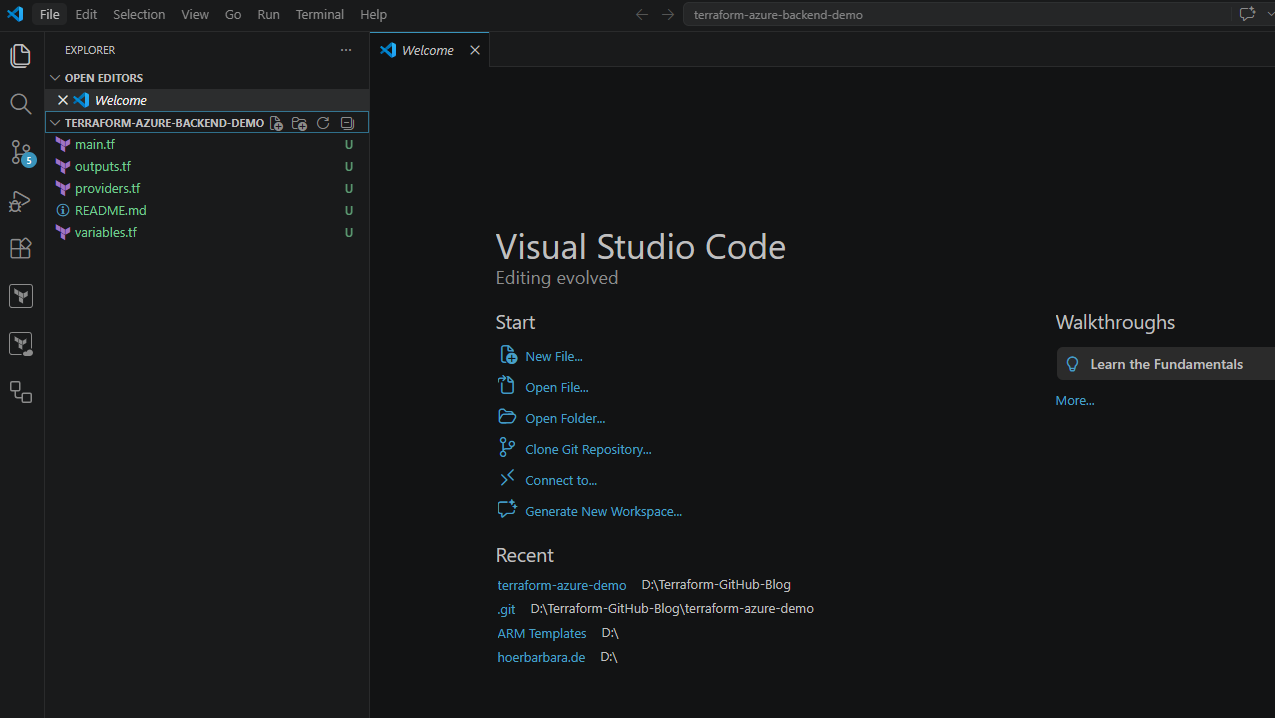
After cloning the empty GitHub repository locally and opening it in Visual Studio Code, we can create the Terraform project files.
terraform-azure-demo/
│
├── providers.tf
├── main.tf
├── variables.tf
├── outputs.tf
└── README.md
Each file has a specific purpose:
providers.tf==> Defines the required Terraform provider, in our case the AzureRM provider for Microsoft Azure.main.tf==> Contains the main Azure resources we want to deploy.variables.tf==> Defines input variables, for example resource names, locations, or environment names.outputs.tf==> Defines values Terraform should print after deployment, for example resource IDs or names.README.md==> Provides basic documentation for the repository.
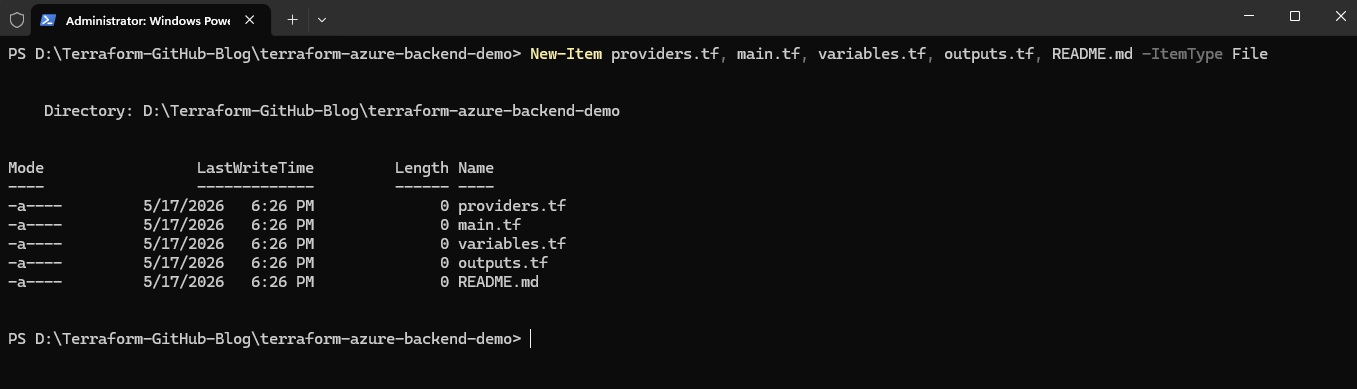
The files can be created directly in Visual Studio Code by right-clicking in the Explorer pane and selecting New File. Alternatively, we can create them from PowerShell inside the repository folder:
PS> New-Item providers.tf, main.tf, variables.tf, outputs.tf, README.md -ItemType File
Terraform uses providers to interact with external platforms and services. Since we want to deploy resources to Microsoft Azure, we need to configure the AzureRM provider.
Open the providers.tf file and add the following configuration:
The
required_providersblock tells Terraform which provider plugins are required for the project and which version should be used. Theprovider "azurerm"block initializes the Azure provider that Terraform will use to communicate with Microsoft Azure.
terraform {
  required_providers {
    azurerm = {
      source  = "hashicorp/azurerm"
      version = "~> 4.0"
    }
  }
}

provider "azurerm" {
  features {}
}
After creating the new GitHub repository, cloning it locally, and preparing the initial Terraform project structure, we now have the foundation for a more enterprise-oriented Terraform setup.
In the next section, we will configure Terraform to use the centralized Azure Storage backend for remote state management and collaboration.
Remote Backends in Terraform
Because the Terraform state is such a critical and sensitive component, storing it only locally on a workstation is usually not sufficient in professional environments. Terraform therefore supports so-called remote backends, which allow the state file to be stored centrally and securely.
A Terraform backend defines where the Terraform state file is stored and how Terraform accesses it during deployments. While Terraform uses a local backend by default, many production environments use remote backends to support collaboration, automation, and secure state management.
Terraform supports multiple backend types including:
- Azure Storage
- AWS S3
- Google Cloud Storage
- Terraform Cloud
- Kubernetes
- Consul
In Microsoft Azure environments, Azure Storage Accounts are commonly used as a remote backend because they provide centralized storage, access control, high availability, and built-in state locking capabilities.
Using a remote backend provides several important advantages:
- Centralized Terraform state management
- Secure collaboration across teams
- Support for CI/CD pipelines
- Protection against local workstation loss
- State locking to prevent concurrent modifications
- Better separation between environments such as development, testing, and production
Instead of storing the terraform.tfstate file locally inside the project directory, the state file will now be stored centrally inside an Azure Storage Account blob container.
Creating the Azure Storage Backend
To store the Terraform state remotely, we first need to create an Azure Storage Account and a blob container that will later hold the Terraform state file.
In our example, we will create:
- A dedicated resource group for the Terraform backend
- An Azure Storage Account
- A blob container named
tfstate
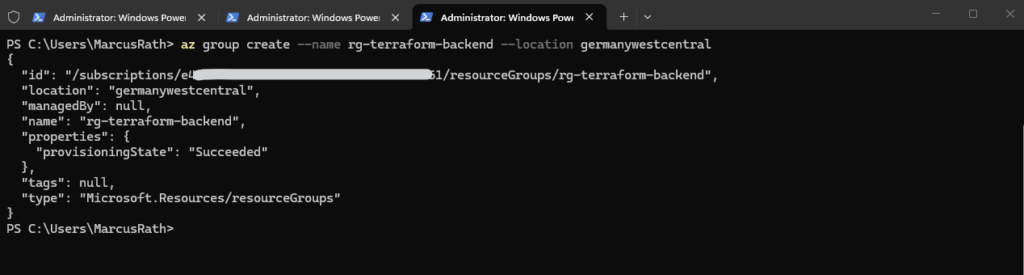
First, we create the resource group:
In most environments, the Terraform backend infrastructure itself is usually created separately and not managed by the same Terraform project using that backend.
This avoids circular dependencies where Terraform would first need the backend state storage before being able to deploy the backend resources themselves.
PS> az group create --name rg-terraform-backend --location germanywestcentral
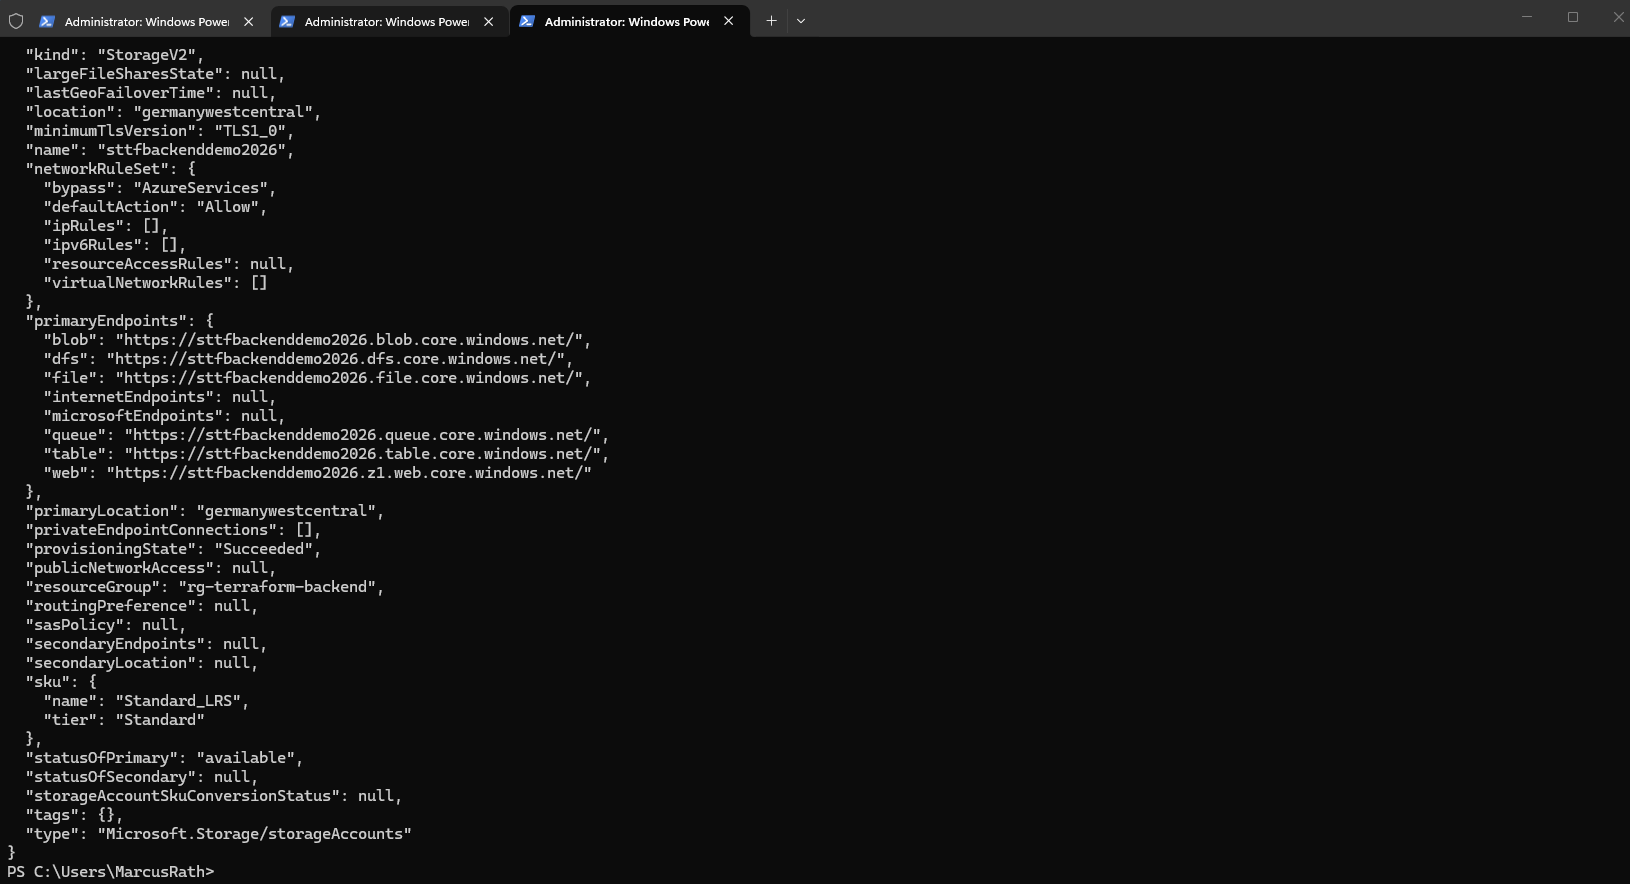
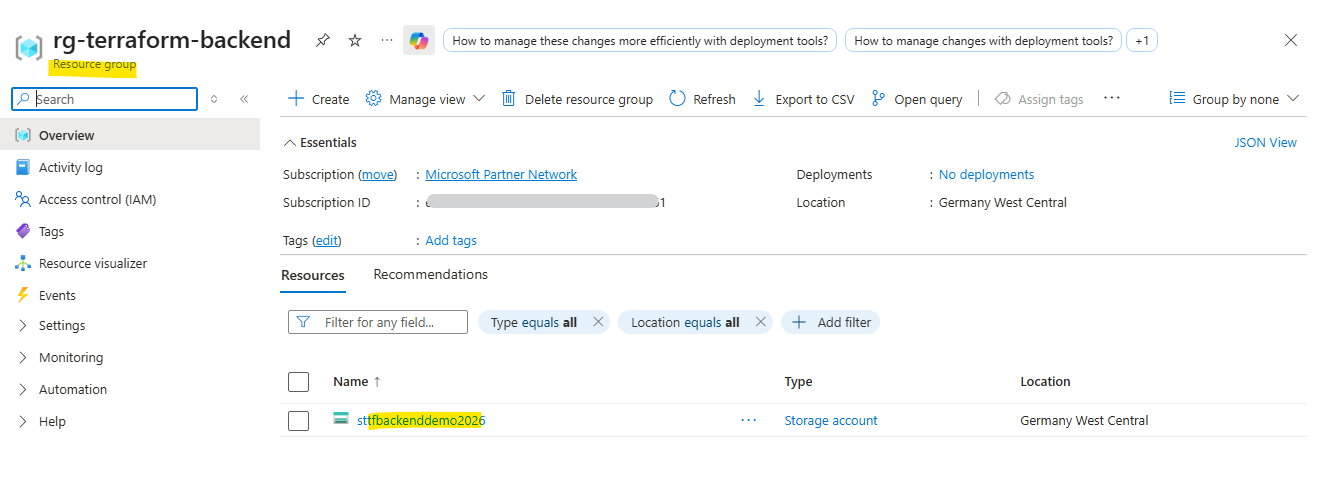
Next, we create the Azure Storage Account that will host the Terraform state file:
The storage account name must be globally unique across Azure and may only contain lowercase letters and numbers.
PS> az storage account create --name sttfbackenddemo2026 --resource-group rg-terraform-backend --location germanywestcentral --sku Standard_LRS
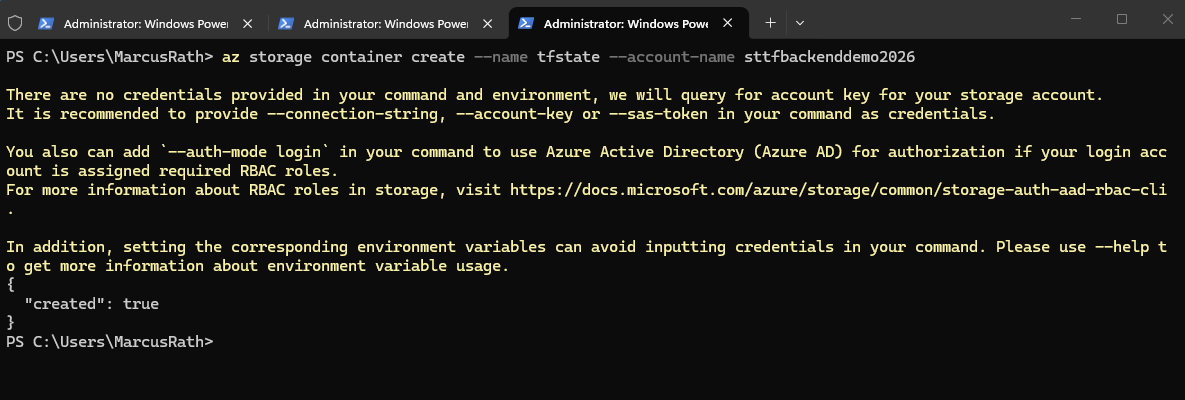
Finally, we create the blob container that will store the Terraform state file:
The blob container acts as the centralized storage location for the Terraform state and will later be accessed automatically by Terraform during deployments.
When creating the blob container, the Azure CLI automatically authenticates against the storage account. If no explicit storage credentials such as an account key, SAS token, or connection string are provided, the Azure CLI attempts to retrieve the required access automatically using the currently authenticated Azure account.
PS> az storage container create --name tfstate --account-name sttfbackenddemo2026
Configuring Terraform to Use the Remote Backend
Now that the Azure Storage Account and blob container are available, we can configure Terraform to store the state file remotely instead of locally inside the project directory.
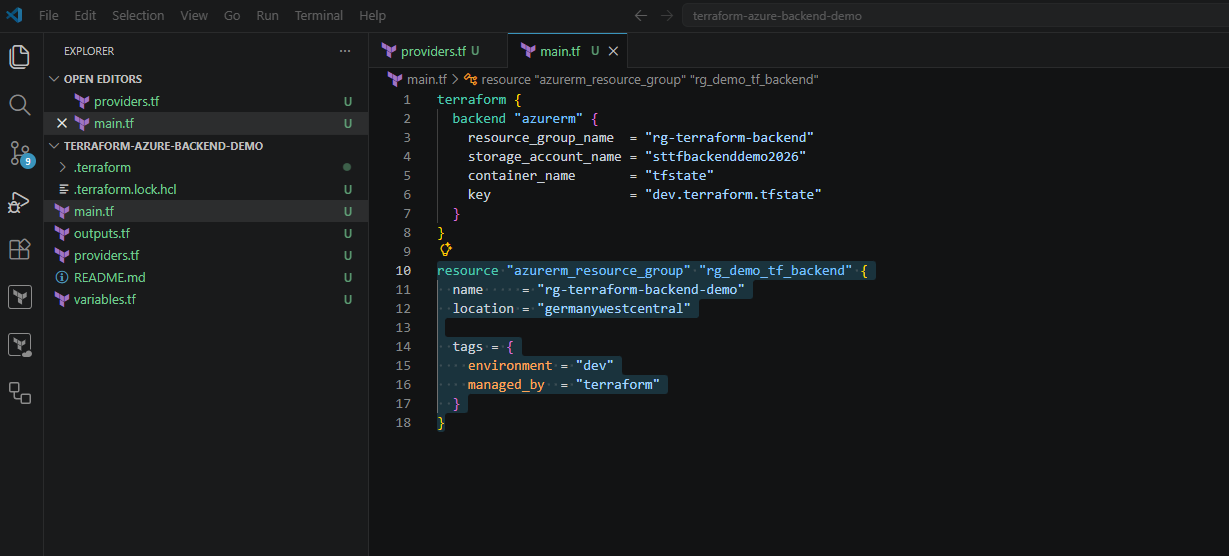
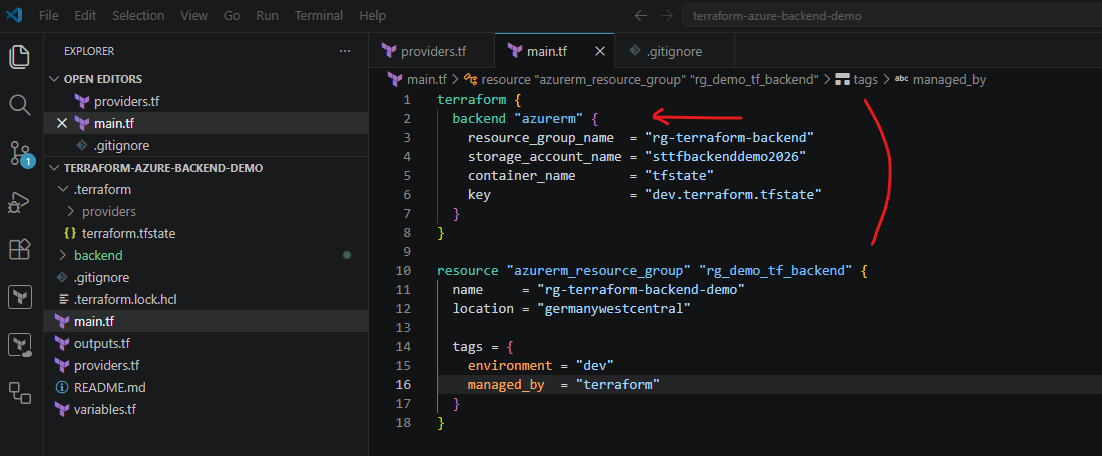
Inside the Terraform configuration, we add the following backend configuration block inside the main.tf file to define the Azure Storage backend used for remote Terraform state management:
terraform {
  backend "azurerm" {
    resource_group_name  = "rg-terraform-backend"
    storage_account_name = "sttfbackenddemo2026"
    container_name       = "tfstate"
    key                  = "dev.terraform.tfstate"
  }
}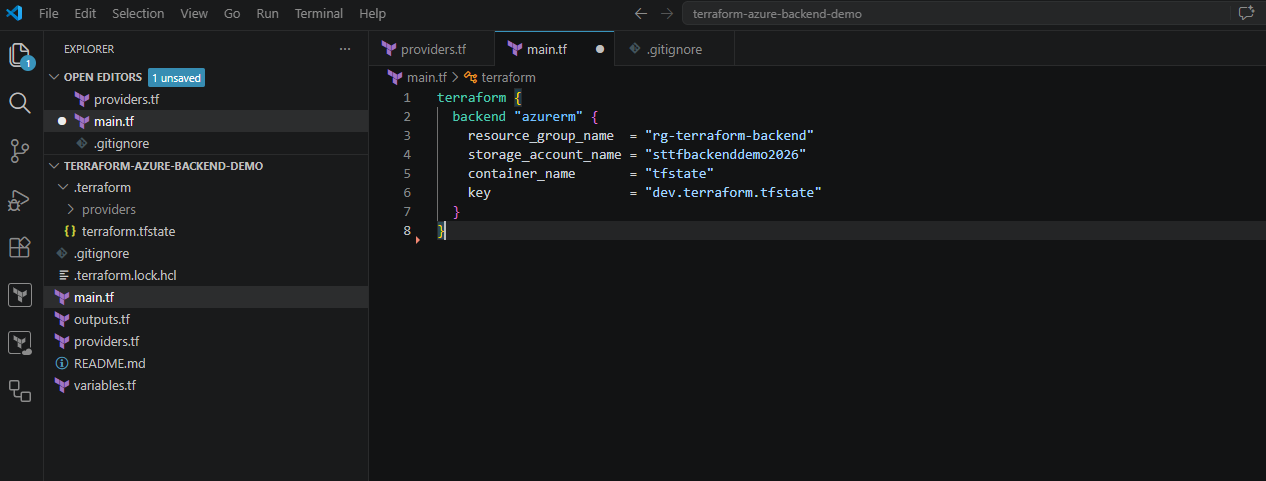
The key parameter defines the name of the Terraform state file stored inside the blob container. This later also allows us to separate multiple environments such as development, testing, or production by using different state file names.
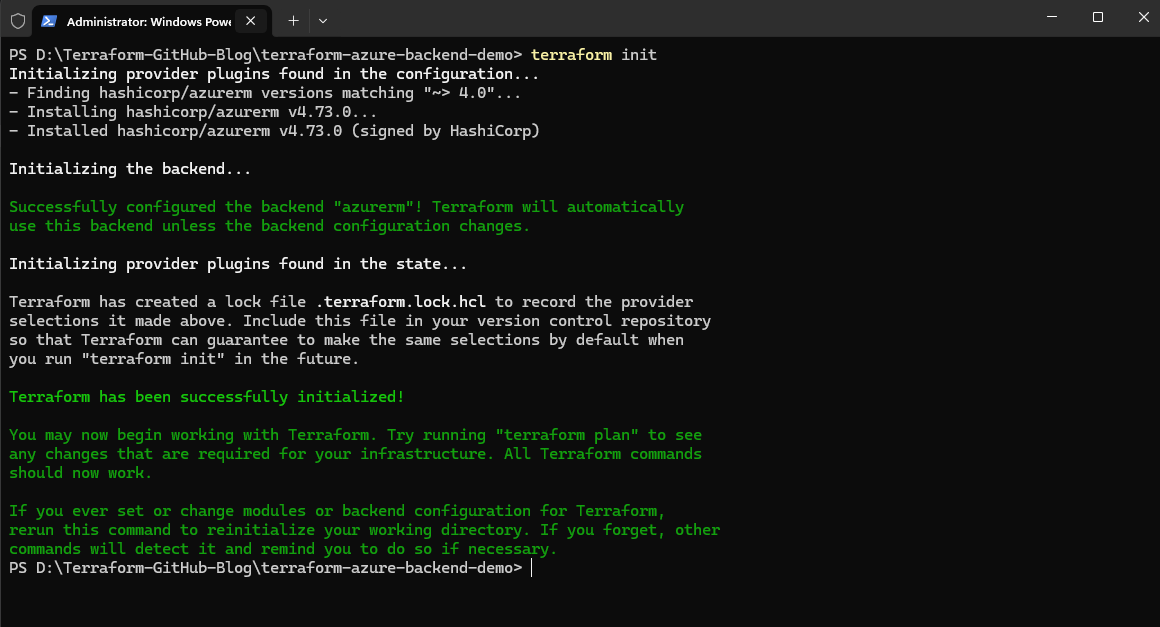
After adding the backend configuration to the main.tf file, Terraform must reinitialize the working directory:
During the initialization process, Terraform detects the configured remote backend and prepares the project to use Azure Storage for state management instead of the default local backend.
Terraform will also automatically create the remote state file inside the configured blob container if it does not already exist.
PS> terraform init
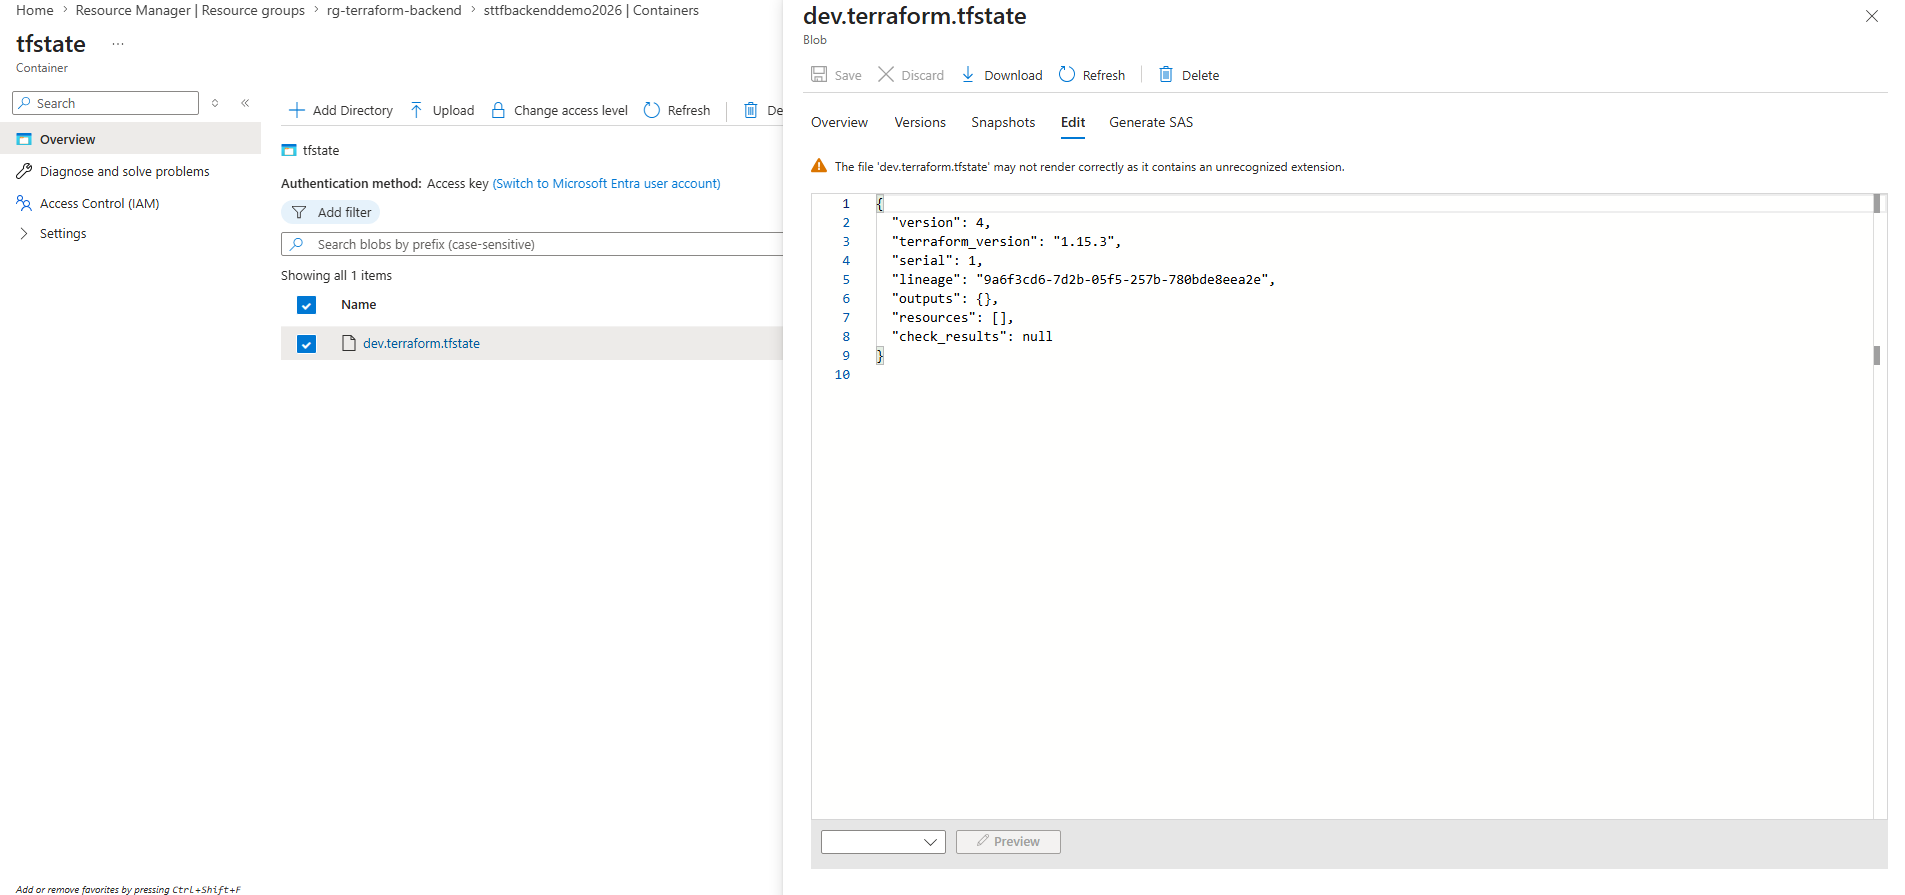
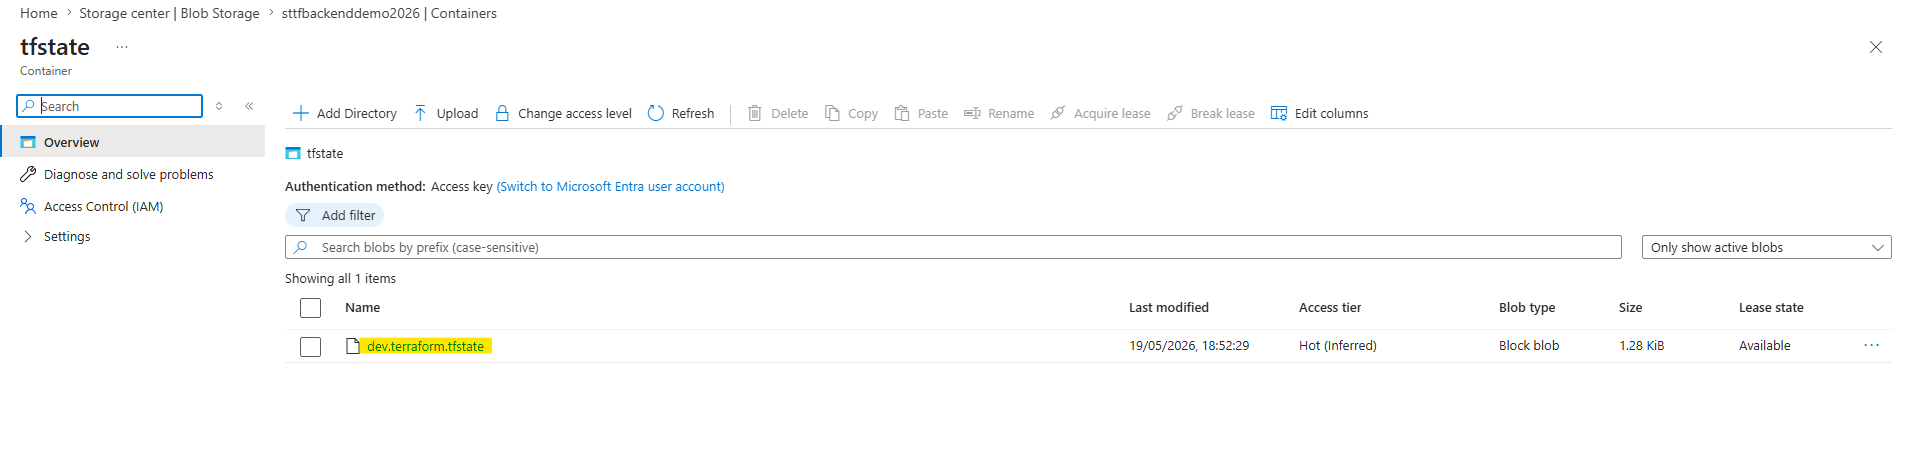
In Azure we can see the file in the Azure Storage container, dev.terraform.tfstate, which is the real remote Terraform state.
At the moment it contains no resources yet because we only initialized the backend, but have not deployed any Azure resources with this new project.

The local file under .terraform\terraform.tfstate is not our infrastructure state. It is Terraform’s local backend metadata file, which stores information about the configured backend, for example the storage account, container name, and state key.
The actual infrastructure state is now stored remotely in the Azure Storage blob container as
dev.terraform.tfstate.Terraform still creates a local metadata file under the hidden
.terraformdirectory, but this file only stores backend configuration details and does not contain the managed Azure resources themselves.
We should also again exclude Terraform working directories and local state files from version control. In particular, the following should normally not be committed:
.terraform/terraform.tfstateterraform.tfstate.backup
The .terraform directory contains downloaded provider plugins and local Terraform working data, while the Terraform state file may contain sensitive infrastructure information.
To exclude these files, create a .gitignore file inside the repository directory by running:
PS> New-Item .gitignore -ItemType File
Then adding the following content:
# Terraform working directory
.terraform/
# Terraform state files
terraform.tfstate
terraform.tfstate.*
# Terraform plan files
*.tfplan
# Crash logs
crash.log
Deploying Resources with the Remote Backend
Now that Terraform is connected to the Azure Storage backend, we can deploy resources as usual. The important difference is that Terraform will no longer store the infrastructure state in a local terraform.tfstate file, but instead update the remote dev.terraform.tfstate file inside the Azure blob container.
We will now first add a resoure group in main.tf:
resource "azurerm_resource_group" "rg_demo_tf_backend" {
  name     = "rg-terraform-backend-demo"
  location = "germanywestcentral"

  tags = {
    environment = "dev"
    managed_by  = "terraform"
  }
}
Before deploying the first resources with the remote backend configuration, we first commit the current Terraform project state to GitHub. This gives us a clean restore point for the initial remote-backend-enabled project configuration.
Since the Git add, commit, and push workflow was already covered in detail in Part 1 of this series, we will skip the individual Git commands here and continue directly with the Terraform deployment process.
Since this is a newly created local repository, Visual Studio Code initially shows the
Publish Branchoption instead ofSync Changes. This publishes the local Git repository to the connected GitHub repository and establishes the remote branch tracking configuration.
PS> git remote add origin https://github.com/<username>/<repository>.git

PS> git remote add origin https://github.com/matrix1302/terraform-azure-backend-demo.git
PS> git add .
PS> git commit -m "Initial Terraform remote backend project"
PS> git push -u origin main
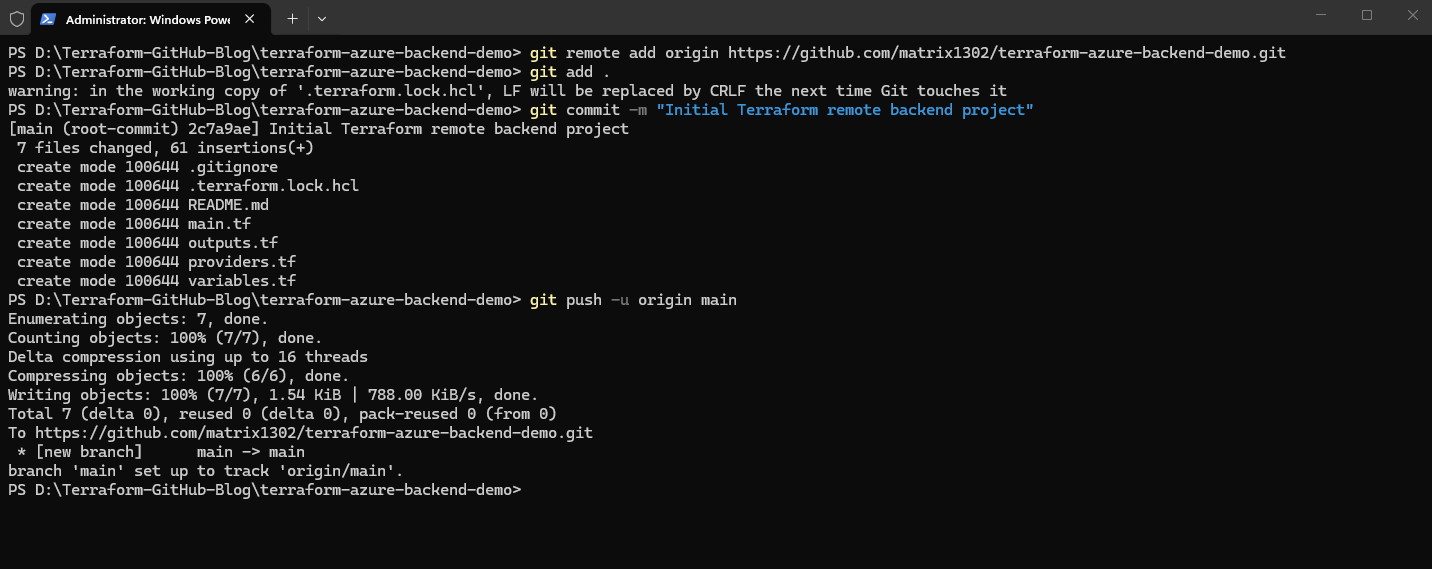
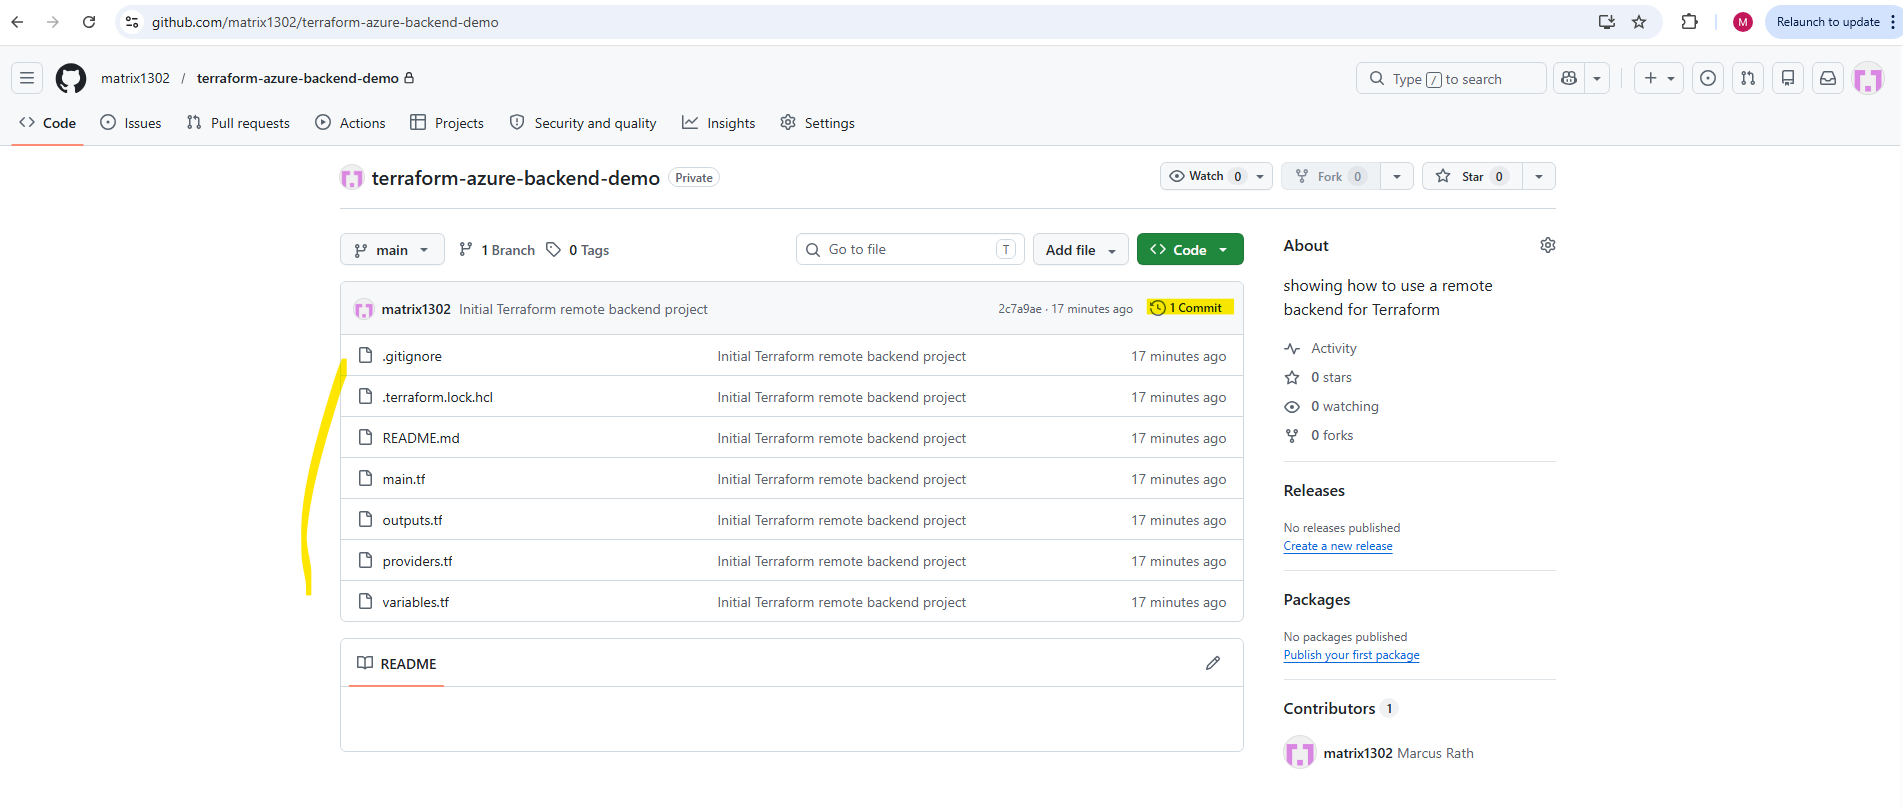
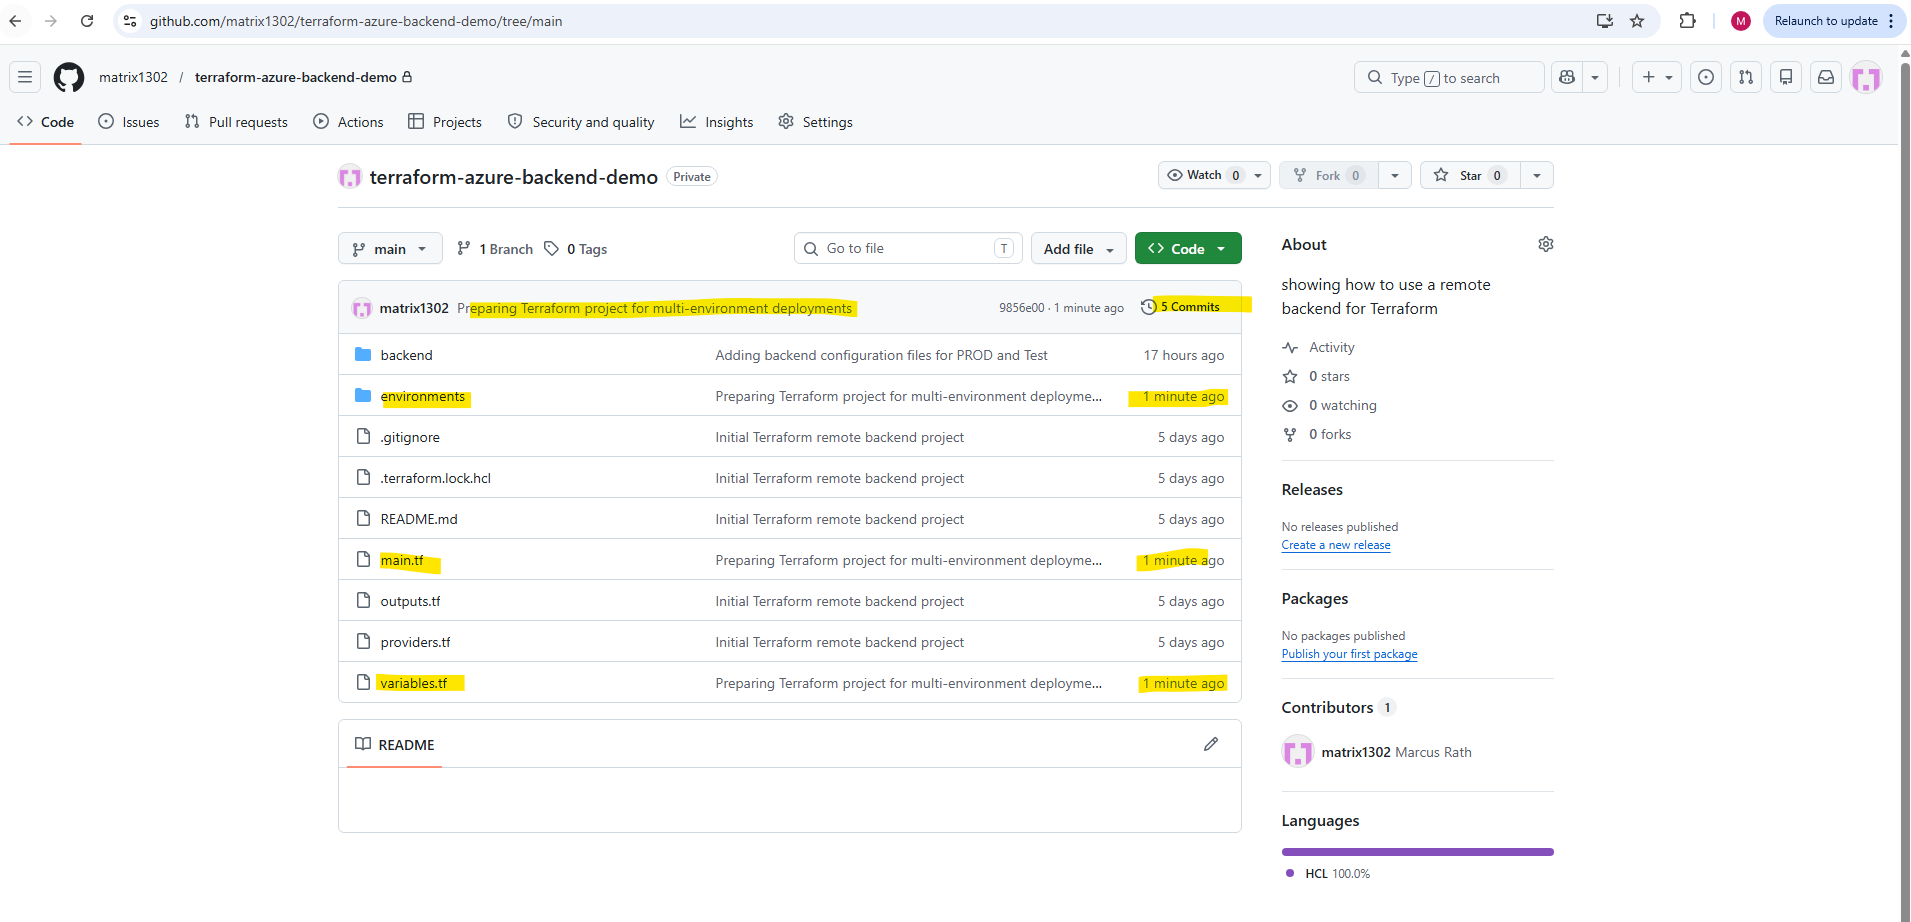
The following screenshot shows the successfully uploaded Terraform project files inside the GitHub repository after the initial push.
Since the .gitignore configuration excluded the Terraform working directory and local state files, only the relevant Terraform configuration files were committed and uploaded to GitHub.
Now that the Terraform project is configured to use the Azure Storage backend and the initial Terraform project files are stored in GitHub, we can deploy resources as usual using Terraform.
The important difference is that the infrastructure state will now automatically be stored and managed centrally inside the remote Azure blob container instead of locally on the workstation.
Initializes the Terraform working directory and downloads the required provider plugins. Terraform also connects to the configured Azure Storage backend and prepares the project for remote state management.
PS> terraform init

Compares the Terraform configuration with the current infrastructure state and displays which resources will be created, modified, or removed before applying any changes.
PS> terraform plan
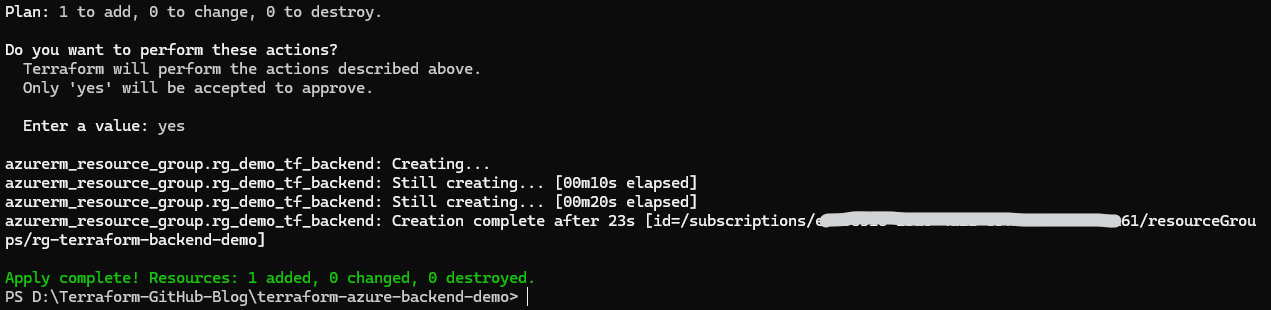
Executes the planned infrastructure deployment and creates or updates the Azure resources defined in the Terraform configuration.
The resulting infrastructure state is then automatically stored inside the remote Azure Storage backend.

The following screenshot shows both Azure resource groups currently used in this setup. While
rg-terraform-backendcontains the centralized Azure Storage backend for the remote Terraform state, the newly deployedrg-terraform-backend-demoresource group is now managed directly by Terraform using the remote backend configuration.

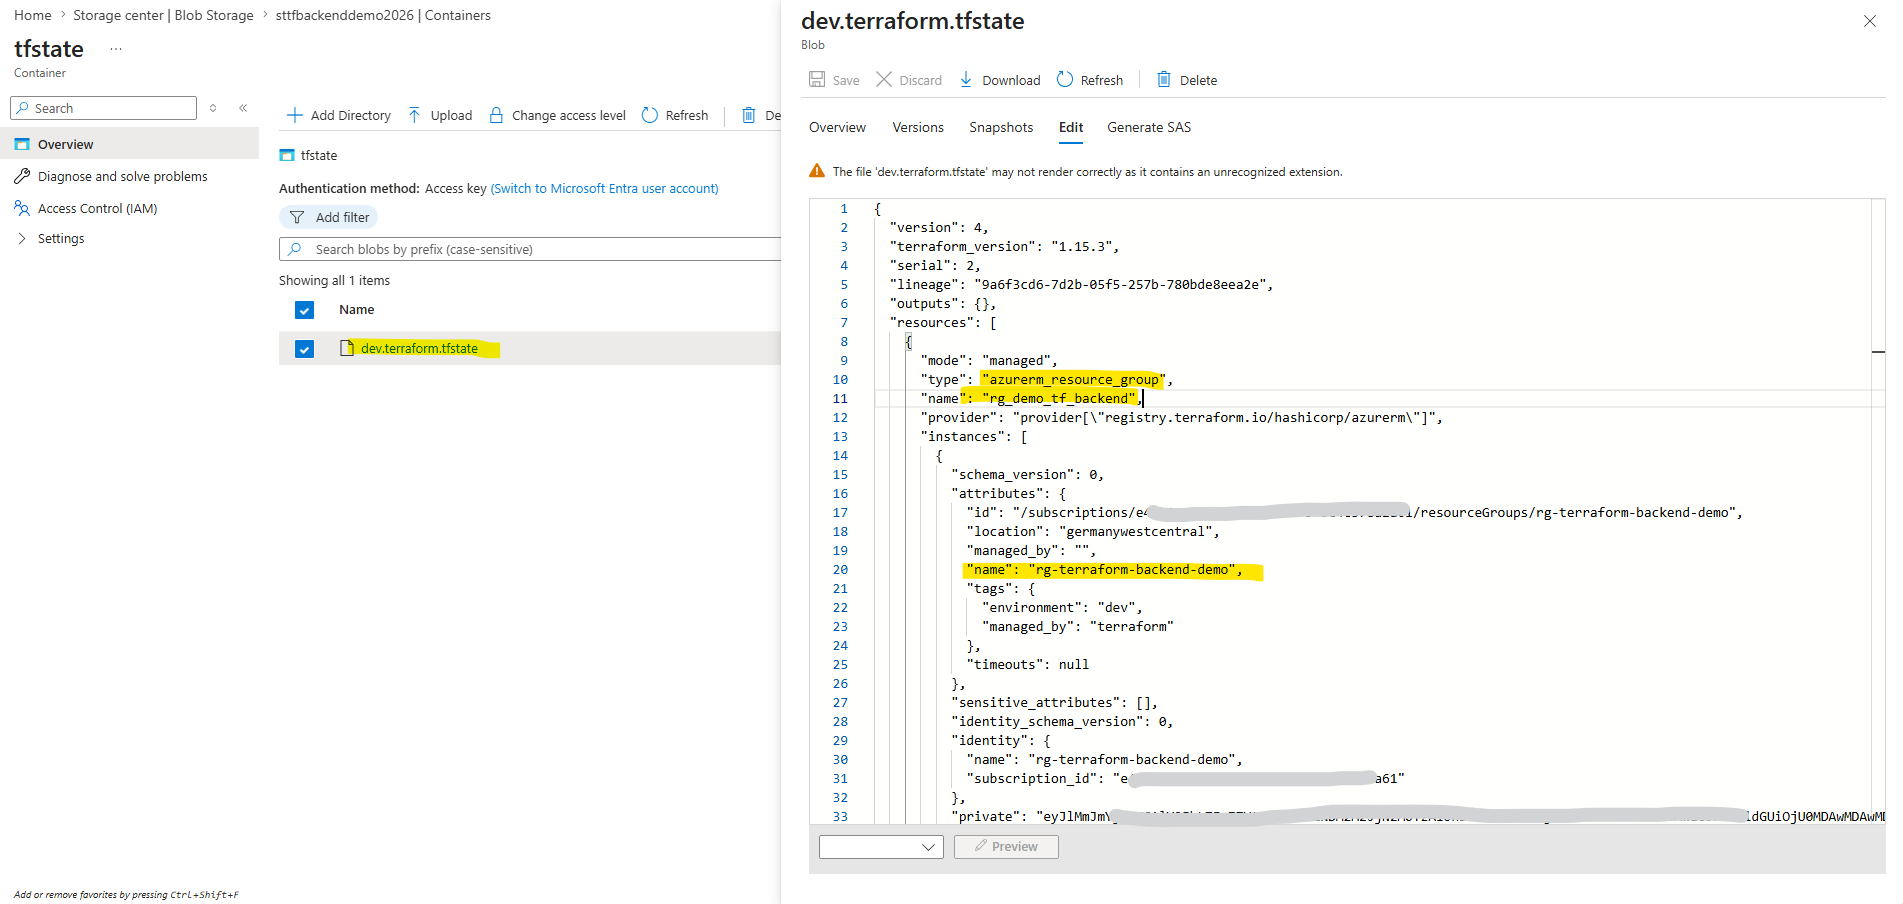
The following screenshot shows the updated remote dev.terraform.tfstate file stored inside the Azure Storage backend after the Terraform deployment completed successfully. Unlike the initially empty state file, the resources section now contains the deployed Azure resource group together with its associated configuration, metadata, and Azure resource identifiers.
Preparing Terraform for Multi-Environment Deployments
Now that the remote backend is working successfully, we can prepare the Terraform project for real multi-environment deployments.
In professional environments, Terraform projects are commonly structured in a way that separates both the remote state files and the environment-specific deployment values for development, testing, and production environments.
Configuring the Remote Backends for Multi-Environment Deployments
In our current backend configuration, we already use a state file named dev.terraform.tfstate.
This means the current deployment stores its state in a dedicated state file for the development environment.
For other environments, we could use separate state files like test.terraform.tfstate or prod.terraform.tfstate.
This separation makes the Terraform setup safer, cleaner, and better prepared for team collaboration and CI/CD pipelines.
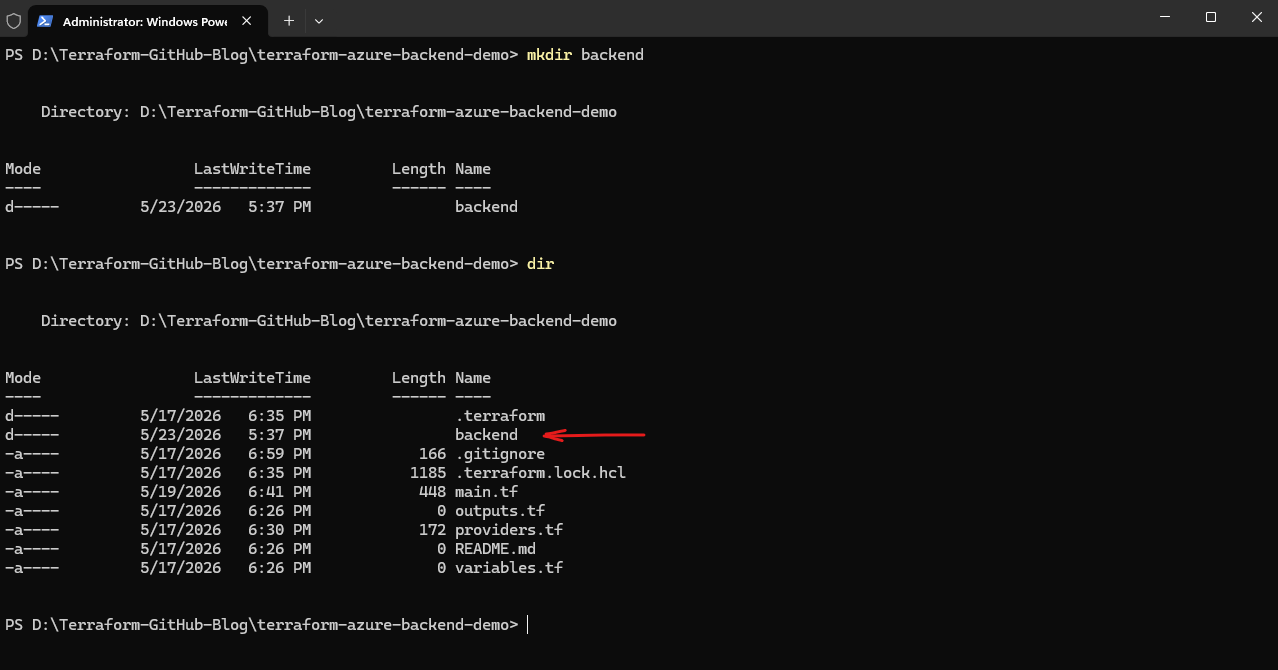
To organize Terraform Environments with Backend Configuration Files we first create a new dedicated backend folder in the root directory of our Terraform project. In this folder we store environment-specific backend configuration files.
This keeps the main Terraform configuration clean and allows us to use different remote state files for different environments.
PS> mkdir backend
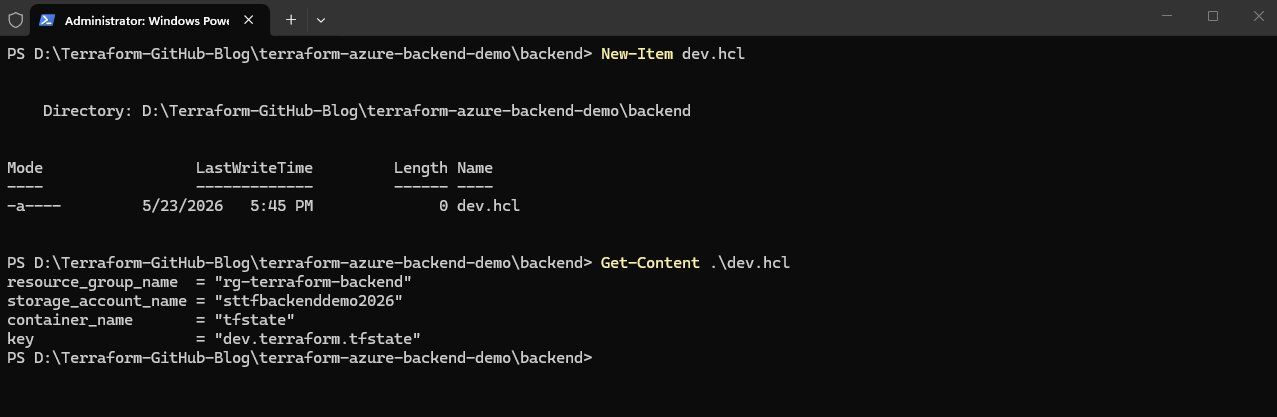
Next we create a backend file for the development environment with the content shown below in this new folder.
This backend configuration points Terraform to the Azure Storage Account and defines the remote state file for the development environment.
The
.hclextension stands for HashiCorp Configuration Language, which is the configuration language used by Terraform. Using separate.hclbackend configuration files is a common Terraform practice because it allows environment-specific backend settings such as different state file names or storage accounts to be managed independently from the main Terraform configuration files.The
.hclextension itself is not technically mandatory. Terraform can also read backend configuration files with other extensions or even without an extension at all.
PS> New-Item dev.hcl
resource_group_name  = "rg-terraform-backend"
storage_account_name = "sttfbackenddemo2026"
container_name       = "tfstate"
key                  = "dev.terraform.tfstate"
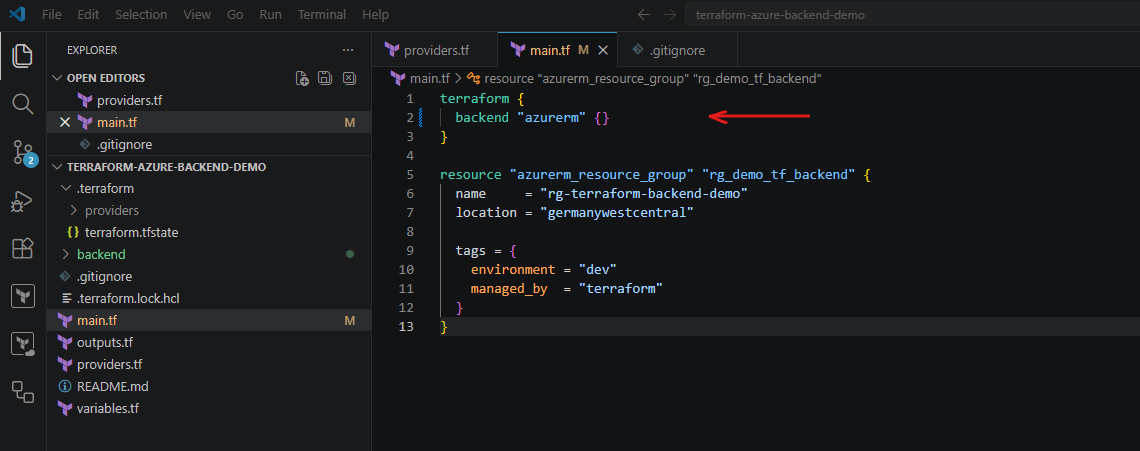
We now need to adjust the main.tf Terraform configuration file (primary configuration file in Terraform).
So far it looks like shown below.
We now only keep the following configuration and removing the other lines.
The backend block now only defines the backend type. The actual backend settings are loaded dynamically from the
backend/dev.hclfile duringterraform init.
terraform {
  backend "azurerm" {}
}
Configuring the Environment-Specific Deployment Variables
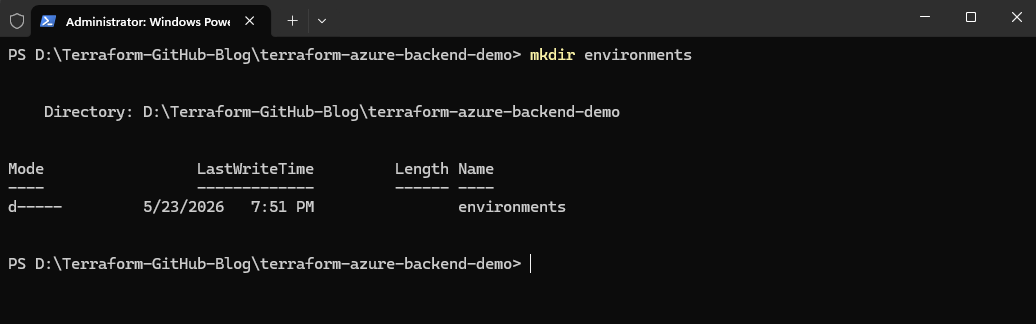
Next, we create a dedicated folder for the environment-specific deployment variables:
This folder stores the Terraform variable files used to define the actual Azure resources and settings for each environment.
PS> mkdir environments
Inside the environments folder, we create the development environment variable file environments\dev.tfvars.
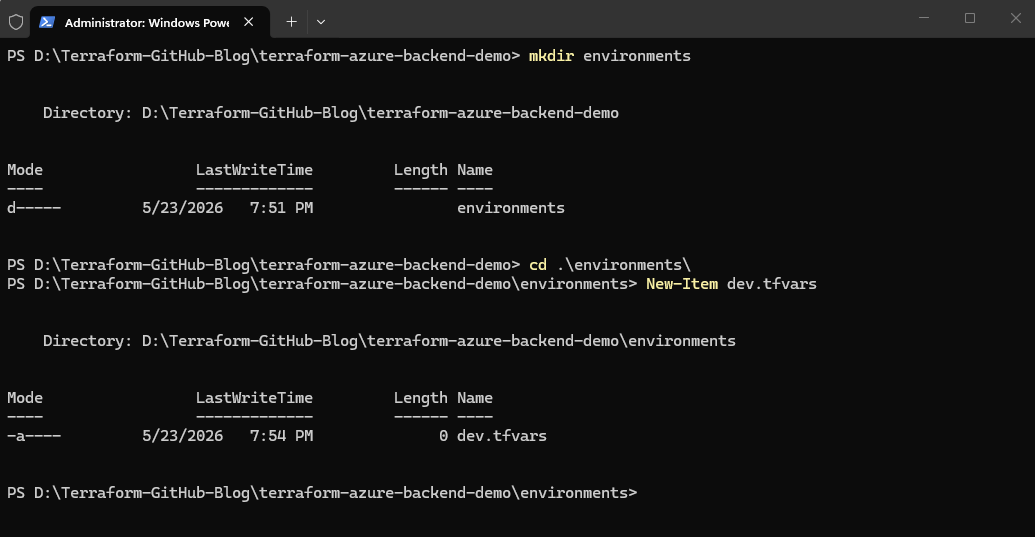
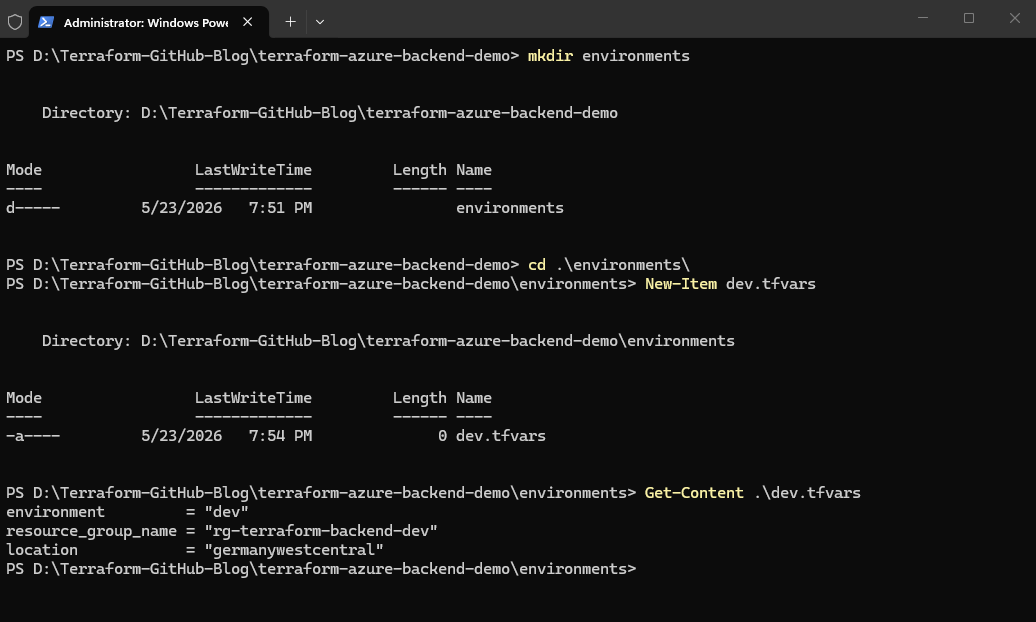
Enter the following content:
The
.tfvarsfile defines the actual deployment values used for the development environment, while the backend configuration file defines where the Terraform state for that environment is stored.
environment         = "dev"
resource_group_name = "rg-terraform-backend-dev"
location            = "germanywestcentral"
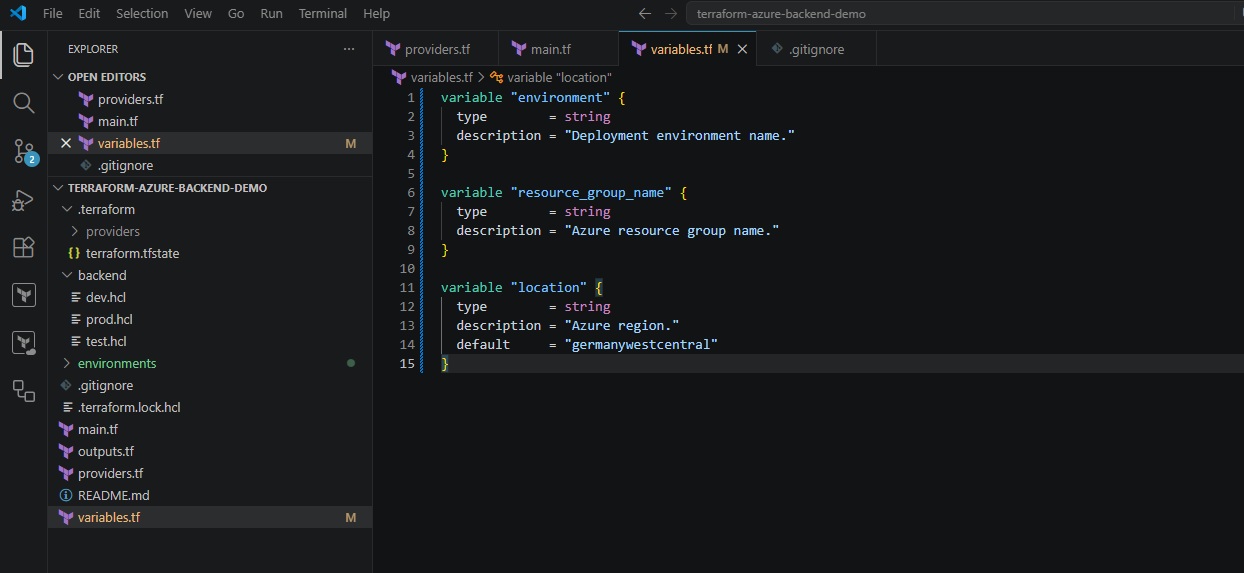
Next we adjust the variables.tf file.
Inside the variables.tf file, we define the variables used by the Terraform project:
The
variables.tffile is commonly used in Terraform projects to define reusable input variables for the infrastructure configuration. Instead of hardcoding values such as resource names, locations, or environment identifiers directly inside the Terraform resources, variables allow the configuration to become more flexible, reusable, and environment-specific.Although the
variables.tffile is not strictly required by Terraform and can technically have any.tffilename, using a dedicatedvariables.tffile is considered a common best practice because it keeps all variable definitions centralized and easier to maintain.In our example, the variables defined inside
variables.tfwill later receive their actual values from the environment-specific.tfvarsfiles such as:environments/dev.tfvars,environments/test.tfvars,environments/prod.tfvars.This allows the same Terraform configuration to deploy different Azure resource names, tags, and settings depending on the selected environment.
variable "environment" {
  type        = string
  description = "Deployment environment name."
}

variable "resource_group_name" {
  type        = string
  description = "Azure resource group name."
}

variable "location" {
  type        = string
  description = "Azure region."
  default     = "germanywestcentral"
}
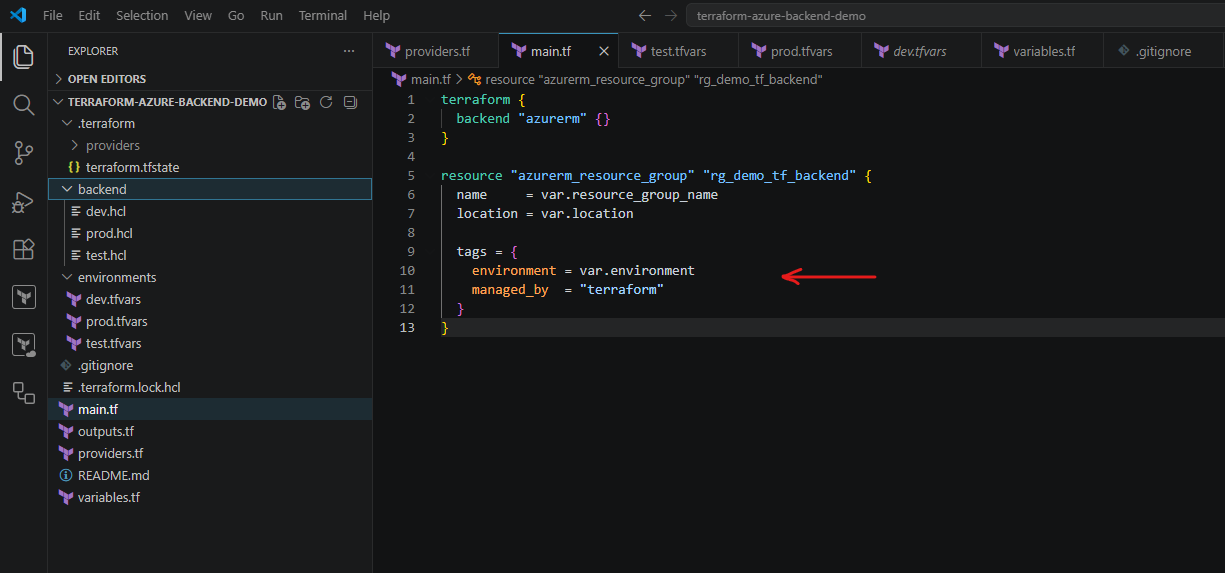
We also need to adjust the main.tf file.
We now modify the Terraform resource configuration to use the variables from the environment variable files:
The Terraform configuration can now dynamically deploy different Azure resource names and settings depending on the selected environment variable file.
terraform {
  backend "azurerm" {}
}

resource "azurerm_resource_group" "rg_demo_tf_backend" {
  name     = var.resource_group_name
  location = var.location

  tags = {
    environment = var.environment
    managed_by  = "terraform"
  }
}
Committing and Uploading the Multi-Environment Configuration Changes
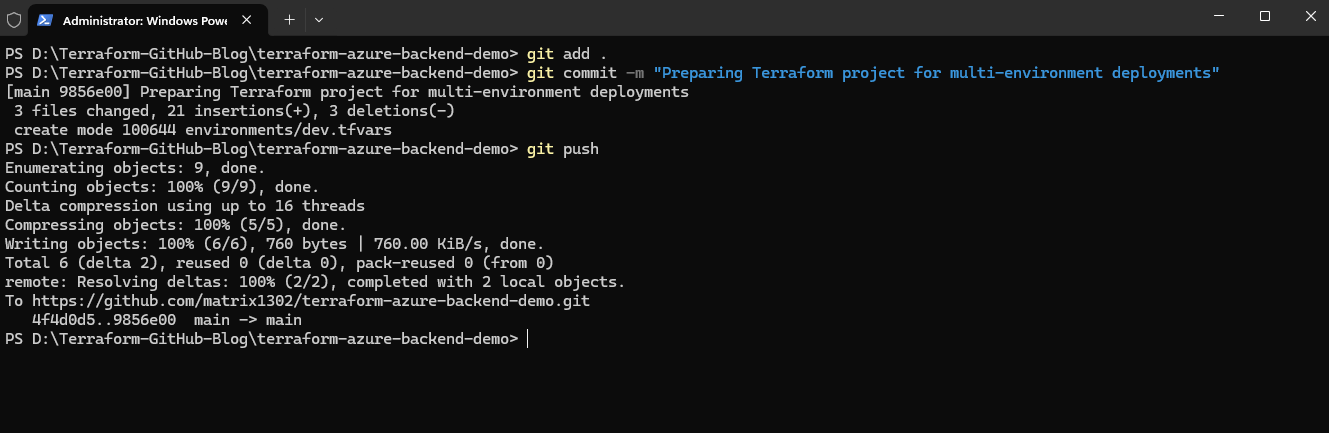
Now that the Terraform project has been prepared for multi-environment deployments, we can commit the updated backend and environment configuration files to the local Git repository and upload them to GitHub.
This ensures that the complete multi-environment Terraform project structure is centrally versioned and available for collaboration, automation, and future CI/CD integrations.
# Adds all modified and newly created project files to the Git staging area for the next commit.
PS> git add .

# Creates a new local Git commit containing all previously staged changes from the Git staging area. The commit acts as a snapshot of the Terraform project at this specific point in time and stores the changes together with the provided commit message inside the local Git repository history.
PS> git commit -m "Preparing Terraform project for multi-environment deployments"

# Uploads the committed Terraform project changes from the local repository to the connected GitHub repository.
PS> git push
Initializing Terraform with the Development Backend
After preparing the generic backend block, the backend/dev.hcl file, and the development variable file, we can initialize Terraform for the development environment. This connects the project to the remote Azure Storage backend and tells Terraform to use dev.terraform.tfstate as the active state file.
The backend block now only defines the backend type. The actual backend settings are loaded dynamically from the backend/dev.hcl file during terraform init.
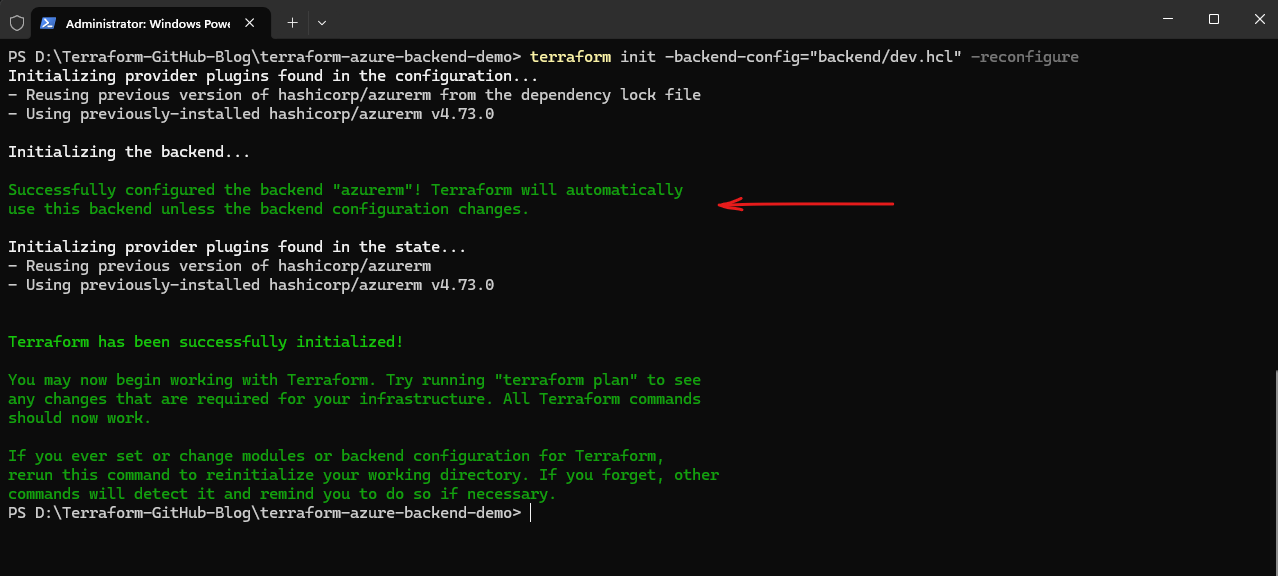
So now we can reinitialize Terrafrom with the new backend config file by running:
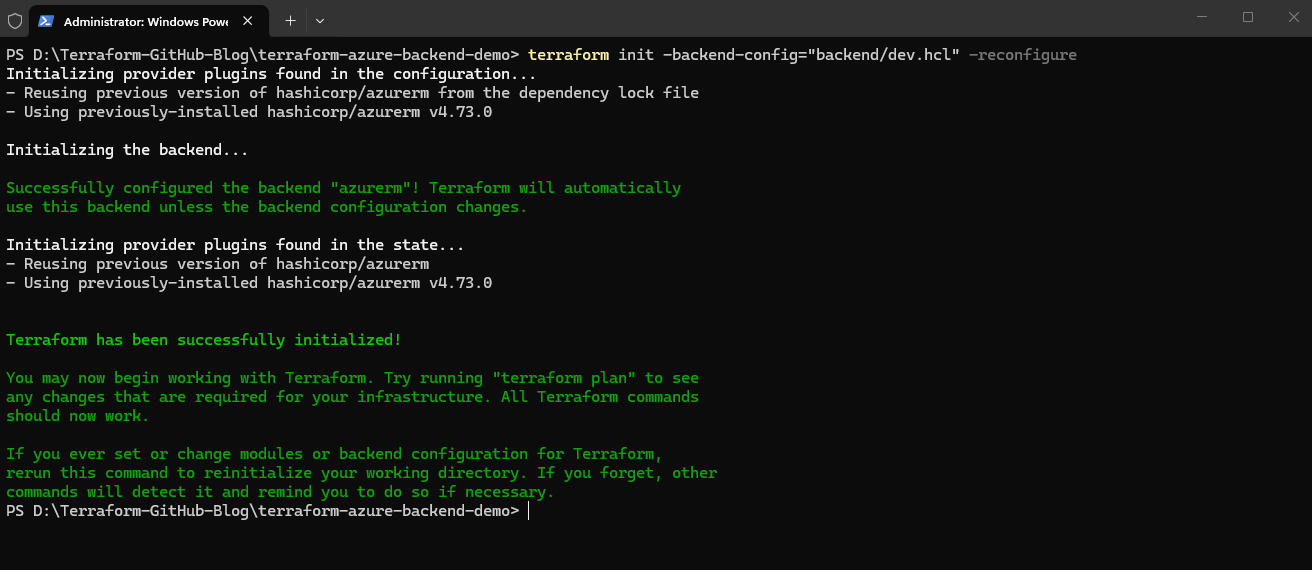
The
-backend-configparameter tells Terraform which backend configuration file to use. The-reconfigureparameter forces Terraform to re-read the backend settings.
PS> terraform init -backend-config="backend/dev.hcl" -reconfigure
We can now verify the state of Terraform by running:
Terraform still sees the existing resource because it is using the same remote state file:
dev.terraform.tfstate.The command displays all infrastructure resources currently tracked inside the Terraform state file. The command reads the current Terraform state, either locally or from the configured remote backend, and lists the Terraform resource identifiers managed by the project.
PS> terraform state list

Now that the general backend configuration structure is prepared and the development backend configuration file has been created, we can extend the setup later with additional environment-specific backend files such as test.hcl and prod.hcl.
This approach allows Terraform to dynamically switch between isolated remote state files while still reusing the same Terraform project configuration.
Switching Between Terraform Environments
Now that the general backend folder structure is in place and the development backend configuration is working, we can extend the same pattern for additional environments.
In the next step, we will add separate backend configuration files for test and production, each pointing to its own isolated Terraform state file.
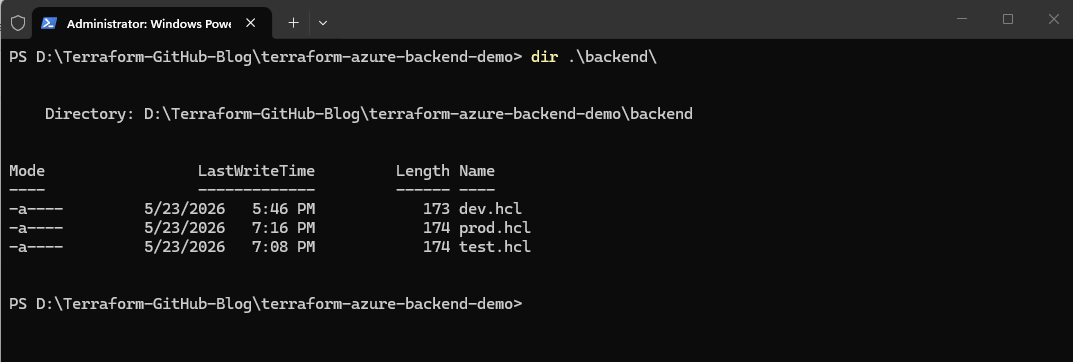
Creating Additional Backend Configuration Files
Inside the backend folder, we now create additional backend configuration files for the testing and production environments:
backend\test.hcl
backend\prod.hcl
The only difference between the files is the Terraform state file name defined by the
keyparameter.
Example backend/test.hcl:
resource_group_name  = "rg-terraform-backend"
storage_account_name = "sttfbackenddemo2026"
container_name       = "tfstate"
key                  = "test.terraform.tfstate"
Example backend/prod.hcl:
resource_group_name  = "rg-terraform-backend"
storage_account_name = "sttfbackenddemo2026"
container_name       = "tfstate"
key                  = "prod.terraform.tfstate"
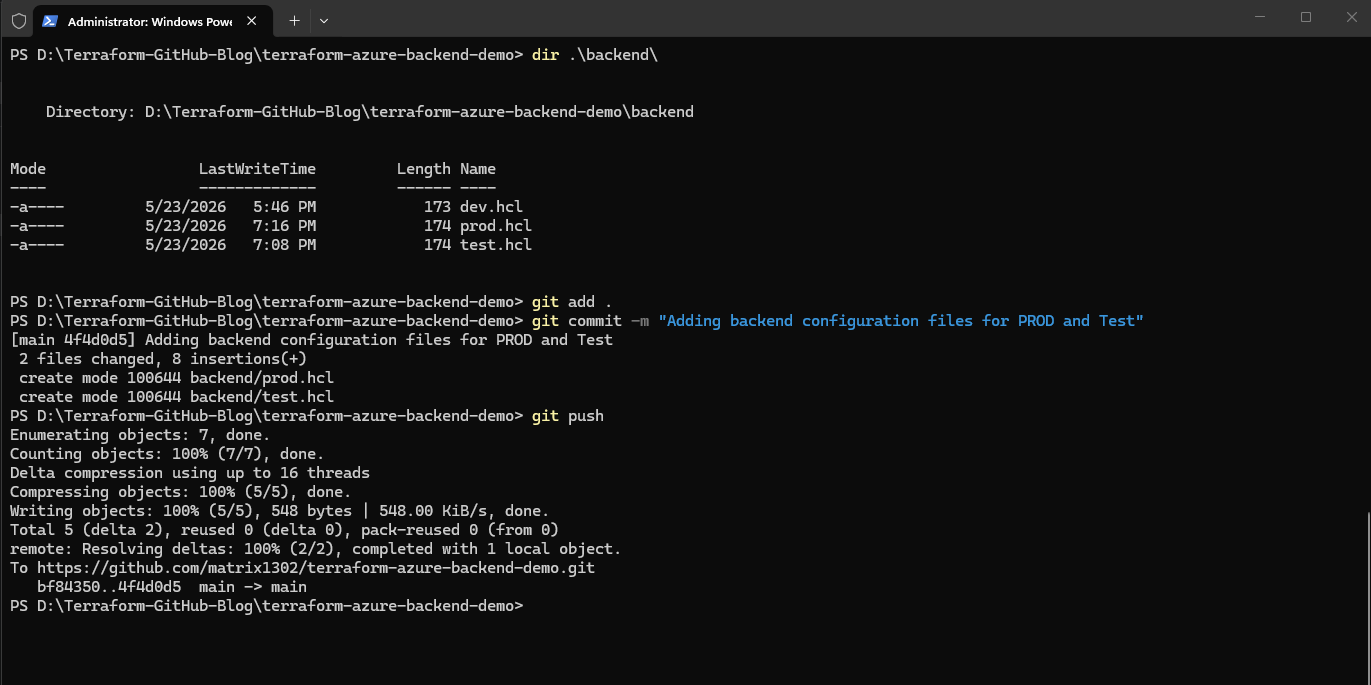
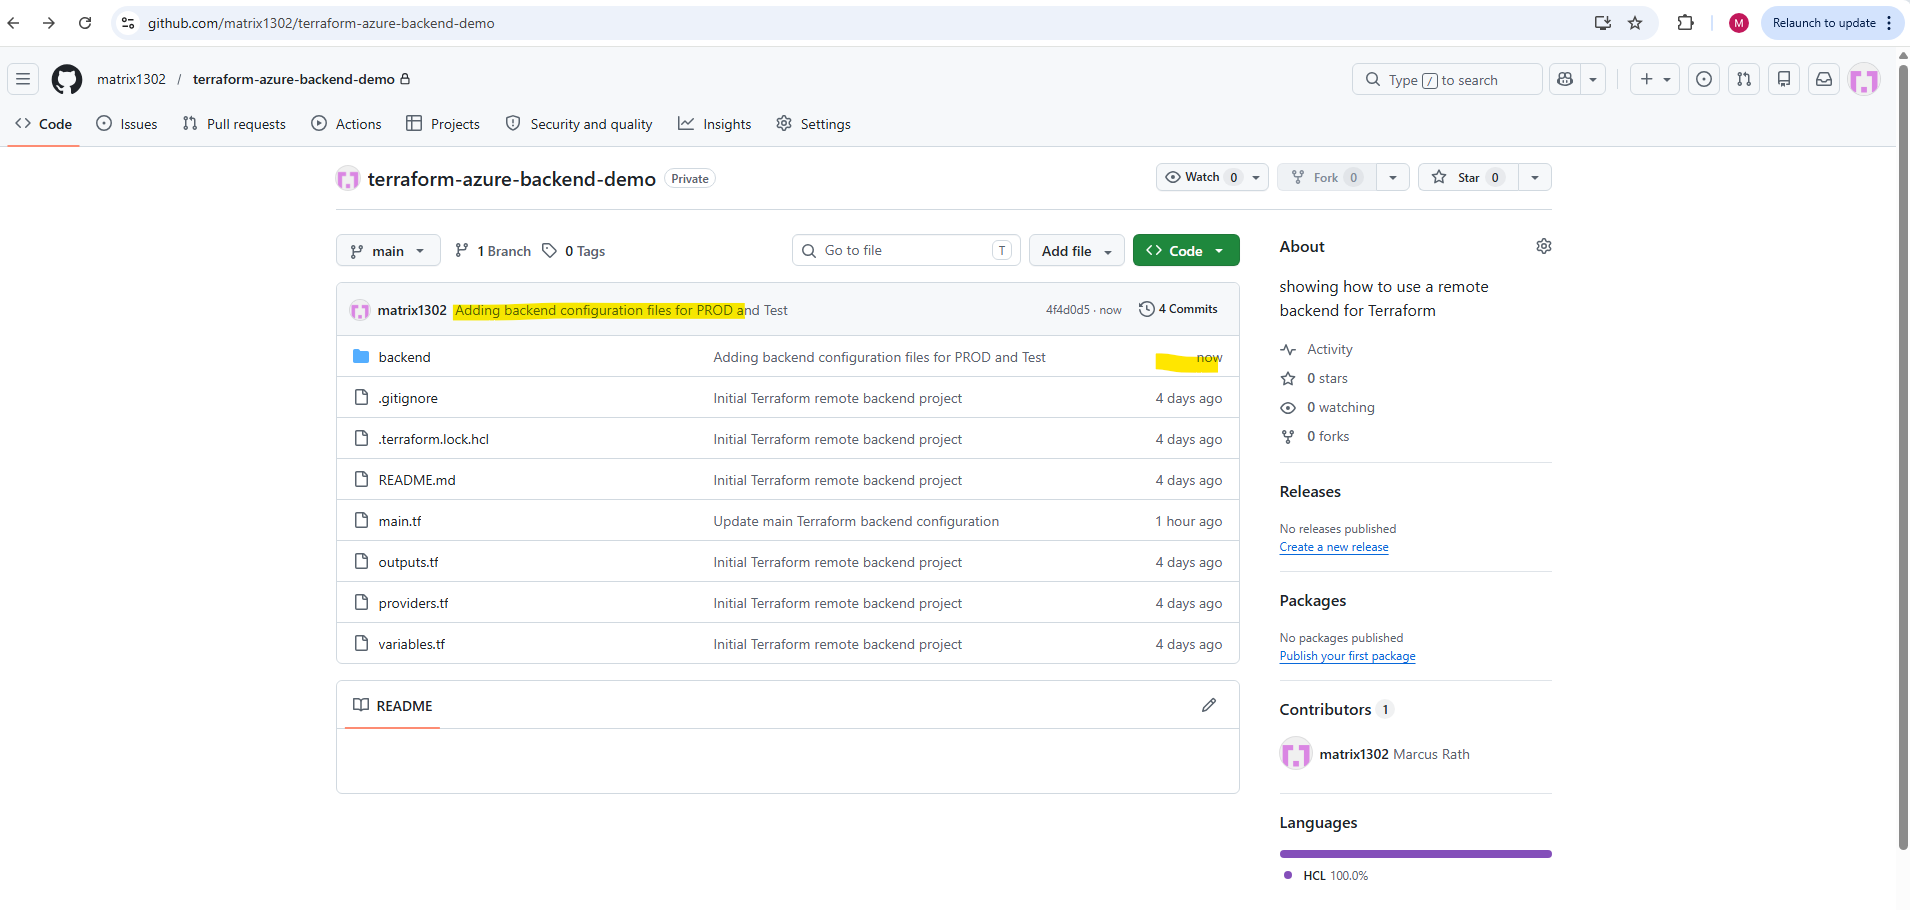
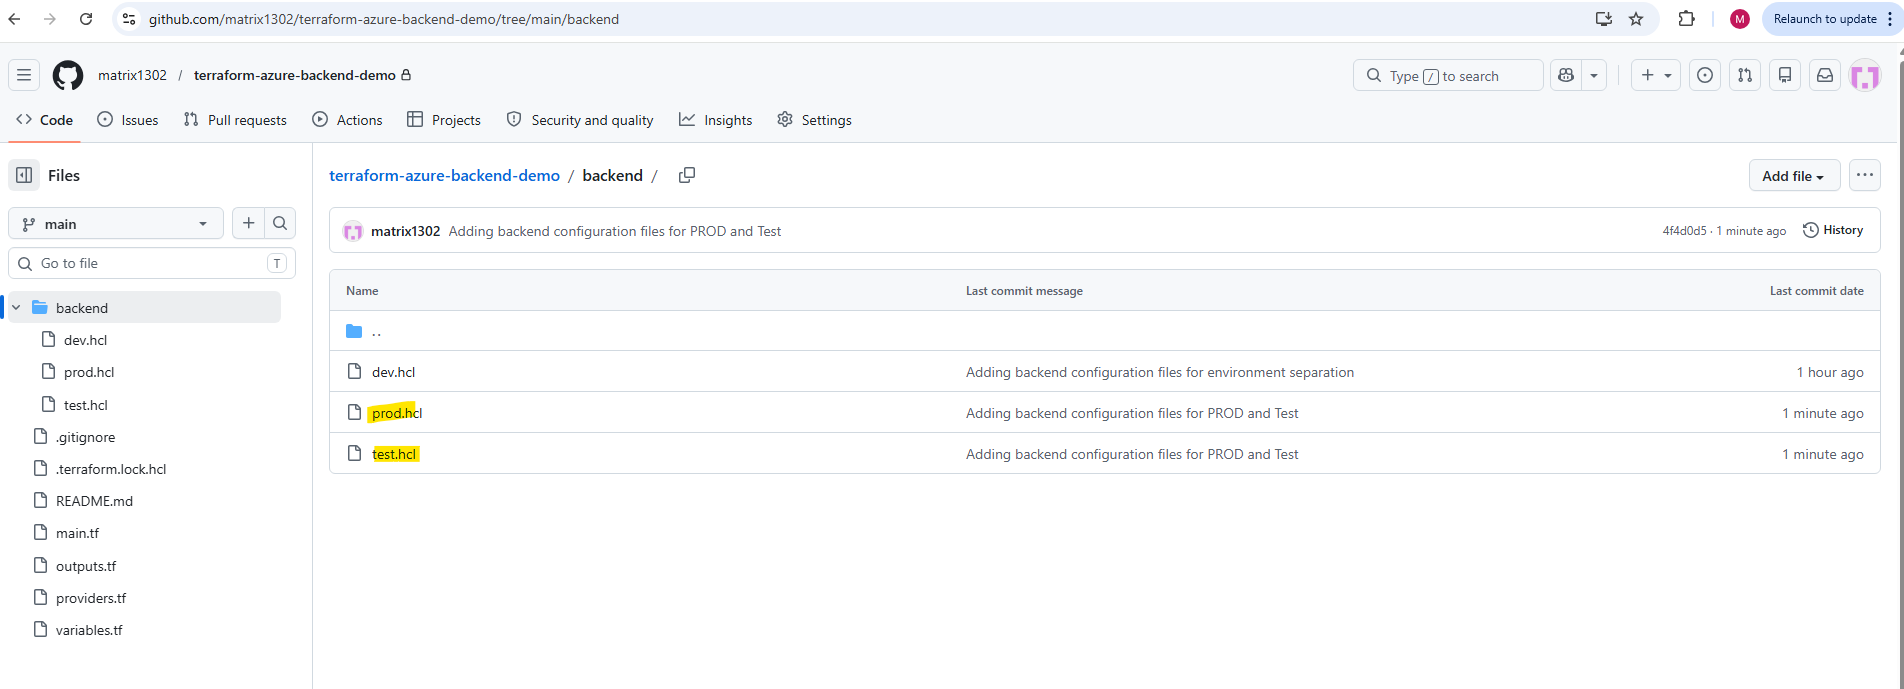
Before switching the Active Terraform Environment we first commit the updated project files to GitHub as usual.
PS> git add .
PS> git commit -m "Adding backend configuration files for PROD and Test"
PS> git push
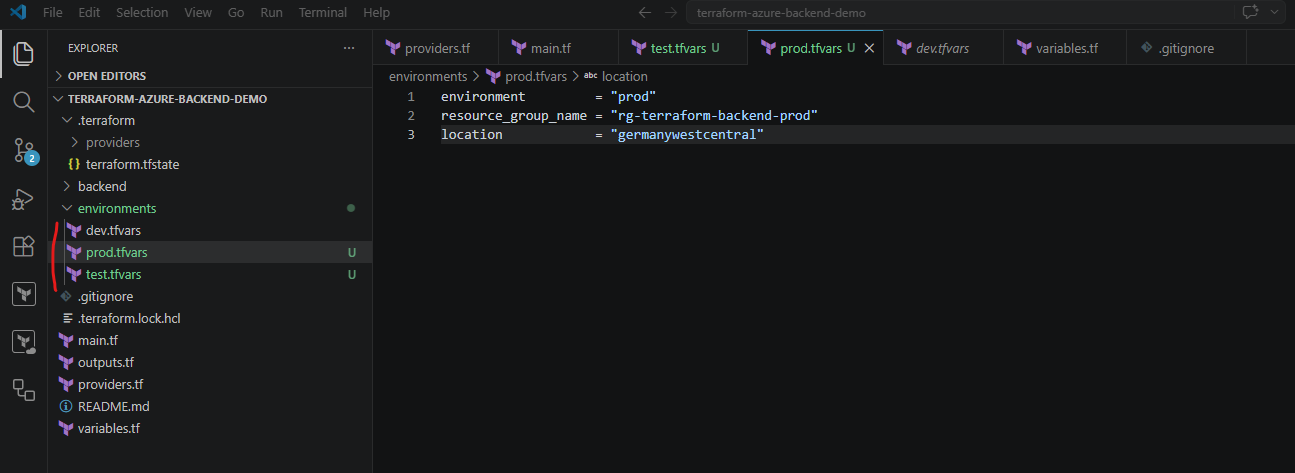
Creating Additional Environment Variable Files
In addition to the dedicated backend configuration files, we also create separate environment variable files for the testing and production environments.
These .tfvars files define the actual deployment-specific values such as resource names, environment identifiers, and Azure regions used by each Terraform environment.
We now create the additional environment variable files inside the environments folder:
PS> New-Item test.tfvars
PS> New-Item prod.tfvars

Example environments/test.tfvars:
environment         = "test"
resource_group_name = "rg-terraform-backend-test"
location            = "germanywestcentral"
Example environments/prod.tfvars:
environment         = "prod"
resource_group_name = "rg-terraform-backend-prod"
location            = "germanywestcentral"
Each environment variable file defines the deployment-specific configuration values for its corresponding Terraform environment.
This allows the same Terraform project to deploy separate Azure resources for development, testing, and production while reusing the same Terraform resource definitions.
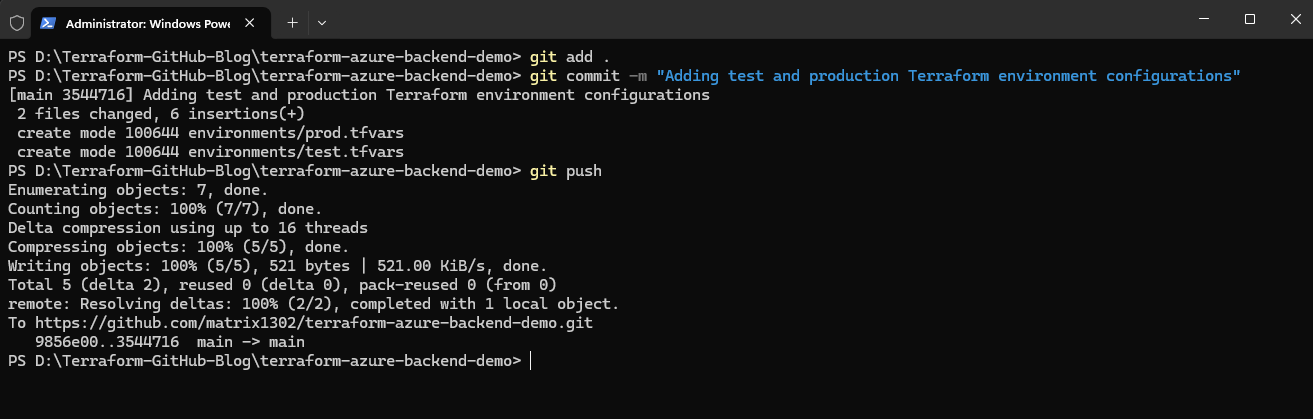
Committing and Uploading the Changes
Before deploying the additional Terraform environments, we first commit the newly created backend and environment variable configuration files and upload them to GitHub.
This ensures that the complete multi-environment Terraform project structure is versioned and centrally available before further deployments are executed.
# Adds all modified and newly created project files to the Git staging area for the next commit.
PS> git add .

# Creates a new local Git commit containing all previously staged changes from the Git staging area. The commit acts as a snapshot of the Terraform project at this specific point in time and stores the changes together with the provided commit message inside the local Git repository history.
PS> git commit -m "Adding test and production Terraform environment configurations"

# Uploads the committed Terraform project changes from the local repository to the connected GitHub repository.
PS> git push
Initializing Terraform with the Updated Multi-Environment Configuration
Now that the backend configuration files and environment variable files for the additional Terraform environments are prepared, we can reinitialize Terraform using the development backend configuration.
This ensures that Terraform loads the updated backend structure and reconnects to the correct remote state file.
The
-backend-configparameter specifies which backend configuration file Terraform should use, while-reconfigureforces Terraform to reload the backend configuration from the updated project structure.
PS> terraform init -backend-config="backend/dev.hcl" -reconfigure

Switching the Active Terraform Environment
Now that the backend configuration files and environment variable files for all environments are prepared, we can dynamically switch Terraform between the different environments.
Terraform will then use the selected remote state file together with the matching environment-specific deployment variables.
Switching to the Testing Environment
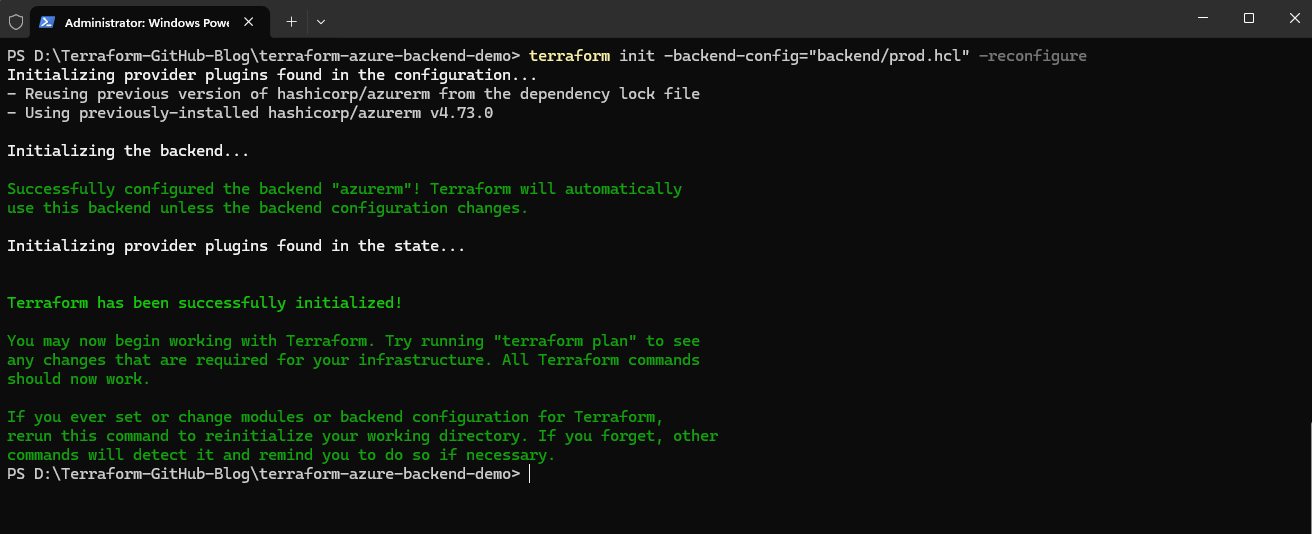
To switch Terraform from the development environment to the testing environment, we reinitialize Terraform using the testing backend configuration file:
PS> terraform init -backend-config="backend/test.hcl" -reconfigure

Terraform now uses the remote state file test.terraform.tfstate instead of dev.terraform.tfstate.
We can now verify the currently active Terraform state by running:
Since the
test.terraform.tfstatefile does not yet contain any deployed resources, the command currently returns no resources.
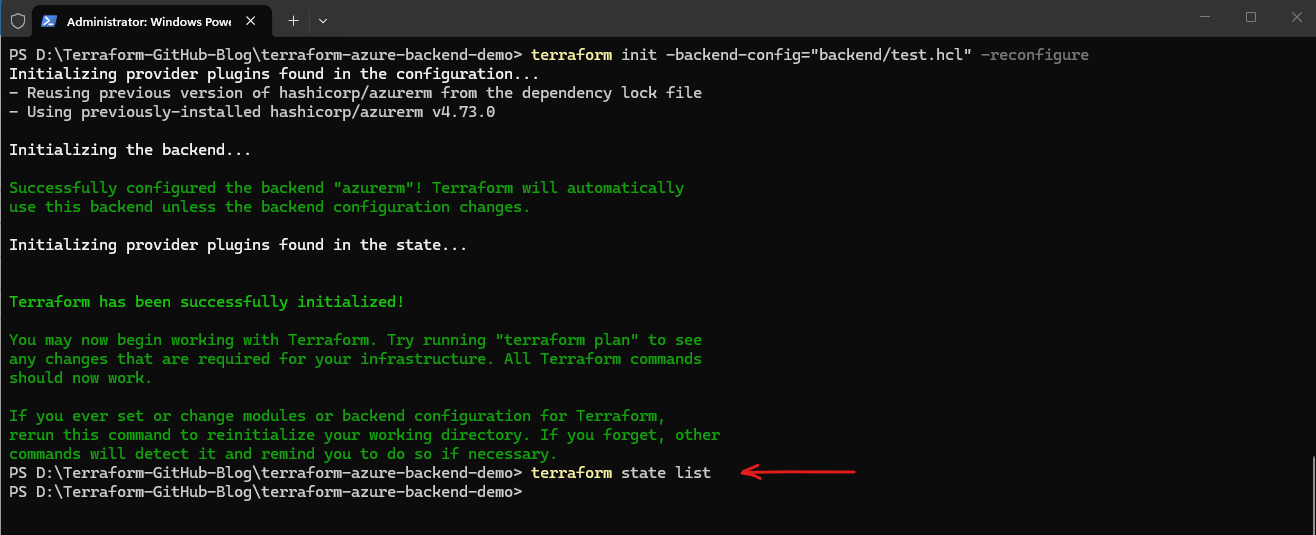
This demonstrates that each Terraform environment uses its own completely isolated remote state file even though the same Terraform project and configuration files are reused.
After switching to the testing backend configuration, Terraform now reads from
test.terraform.tfstateinstead ofdev.terraform.tfstate. Since no resources have been deployed into the test environment yet, the state list is empty, which confirms that the environments are isolated from each other.
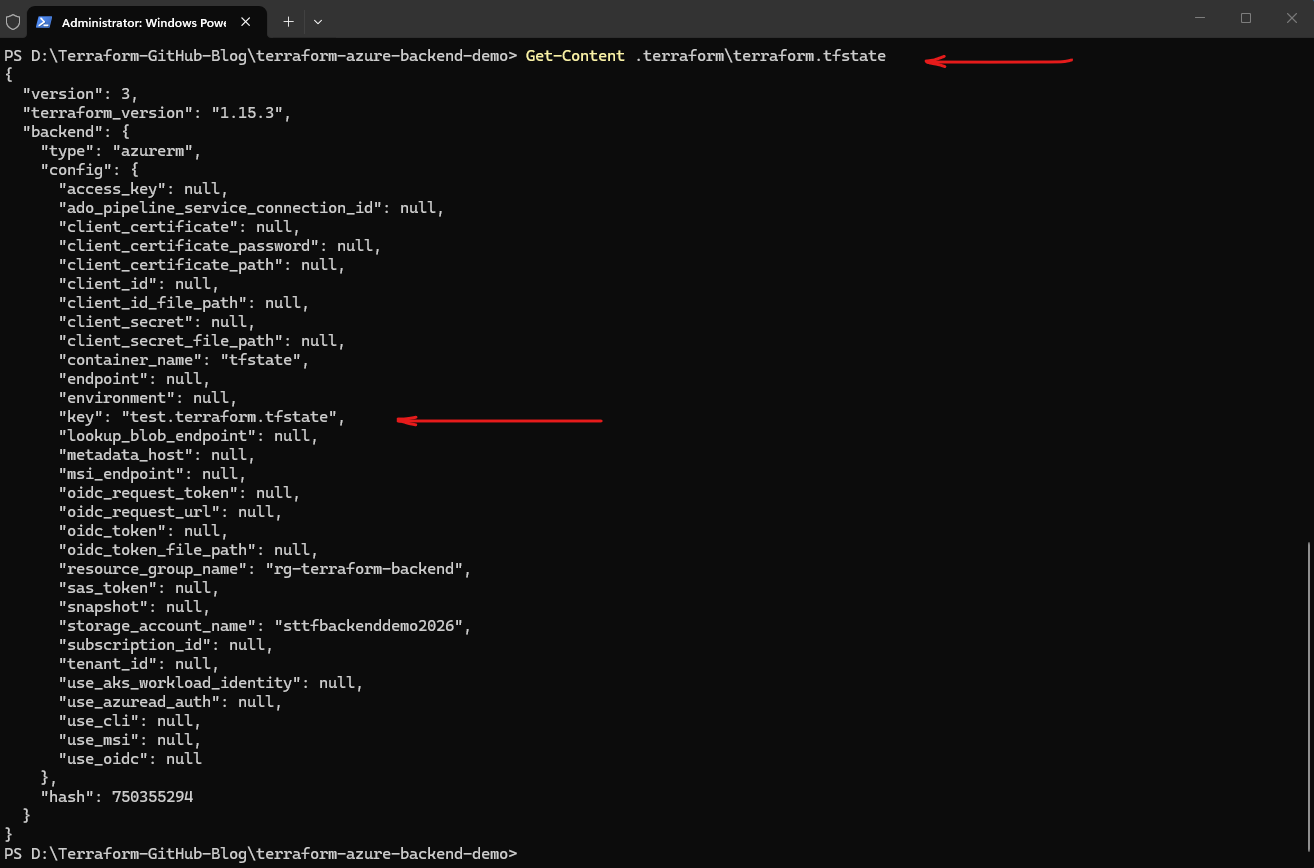
We can first verify which backend/state file Terraform is currently connected to. This helps ensure we are working against the correct environment before planning or applying changes.
We can check the active backend configuration by inspecting the locally initialized backend metadata stored in the .terraform directory:
Look for the backend
keyentry in the output.
PS> Get-Content .terraform\terraform.tfstate
We can now run terraform plan and terraform apply using the selected environment variables file to deploy and manage the infrastructure for the active Terraform environment.
PS> terraform plan -var-file="environments/test.tfvars"
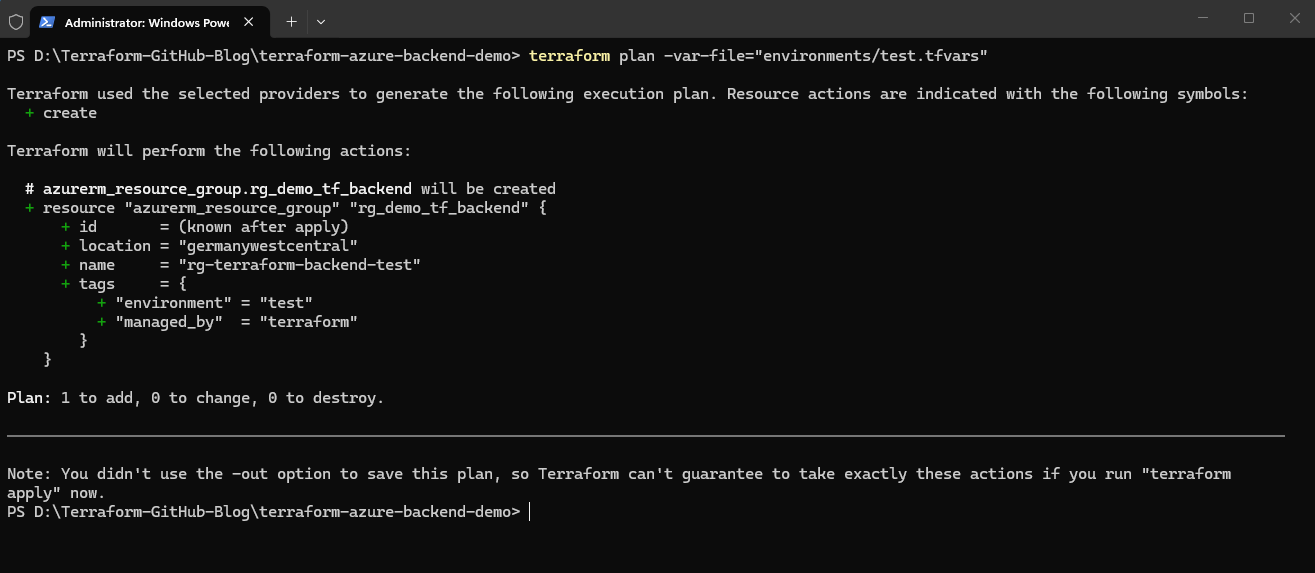
This deploys the testing-specific Azure resources while using the dedicated testing Terraform state file. The Terraform project now deploys the testing resource group.
PS>terraform apply -var-file="environments/test.tfvars"
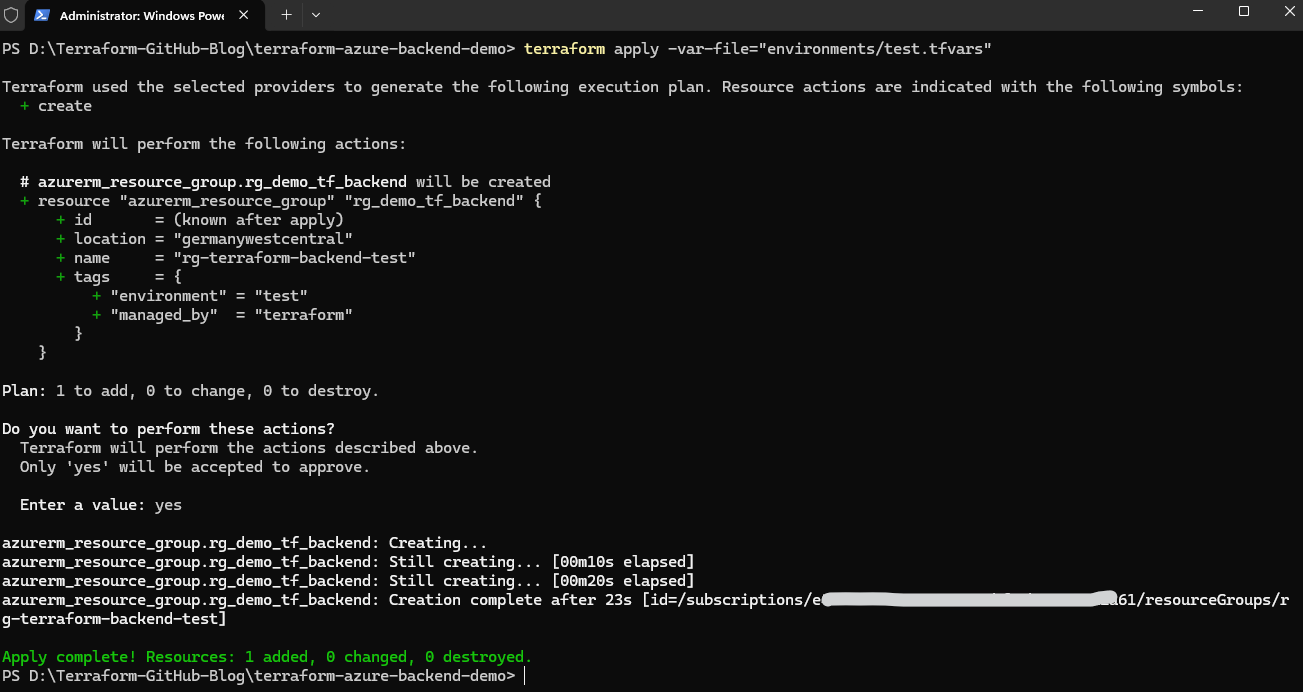
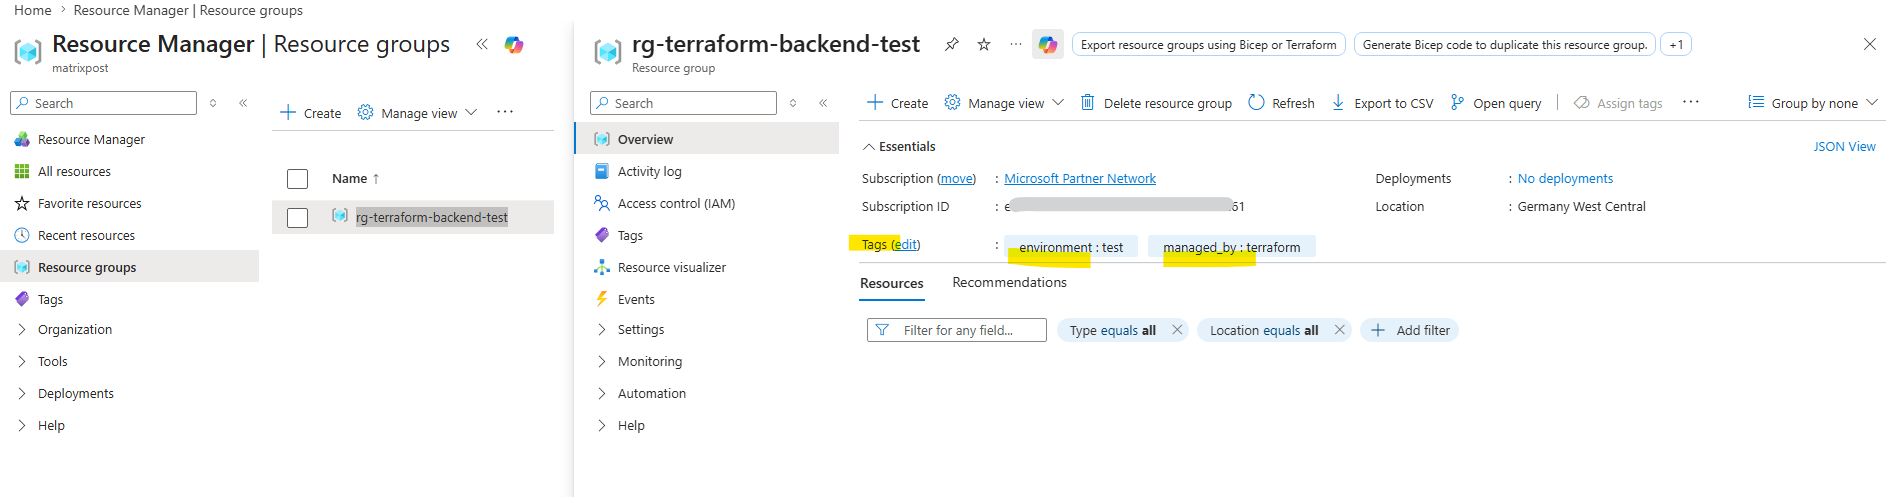
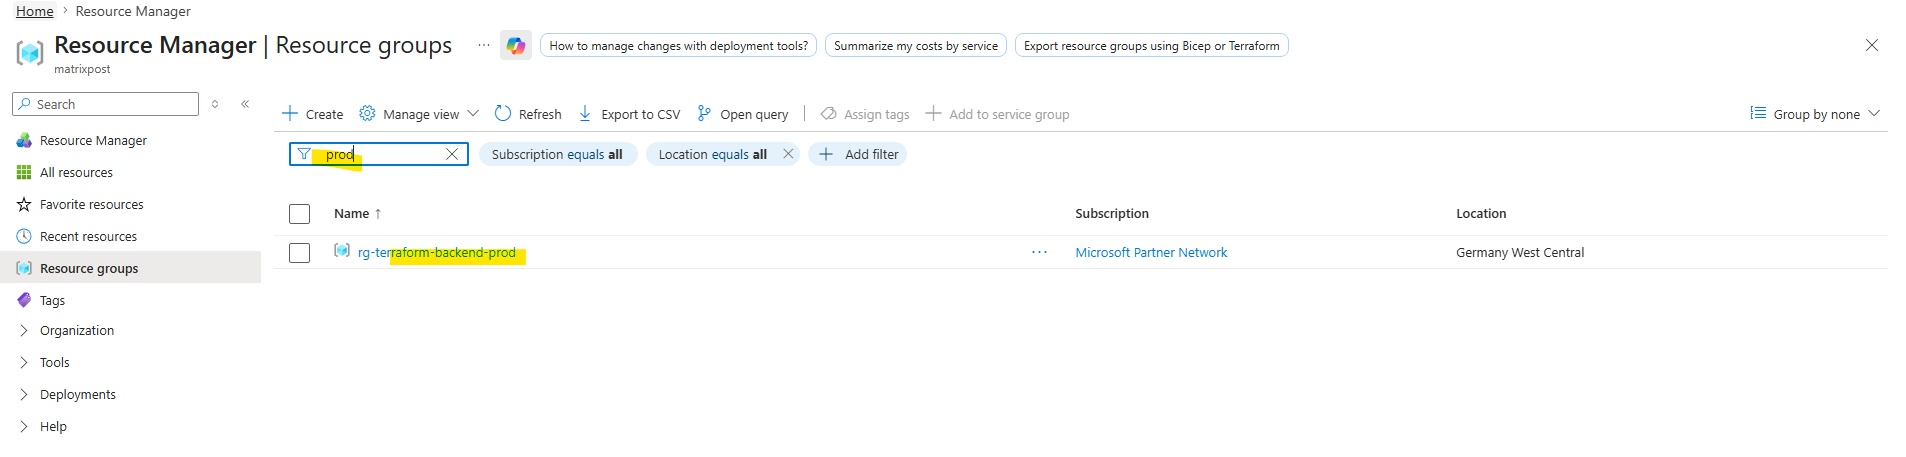
The Azure resource group named rg-terraform-backend-test was created successfully.
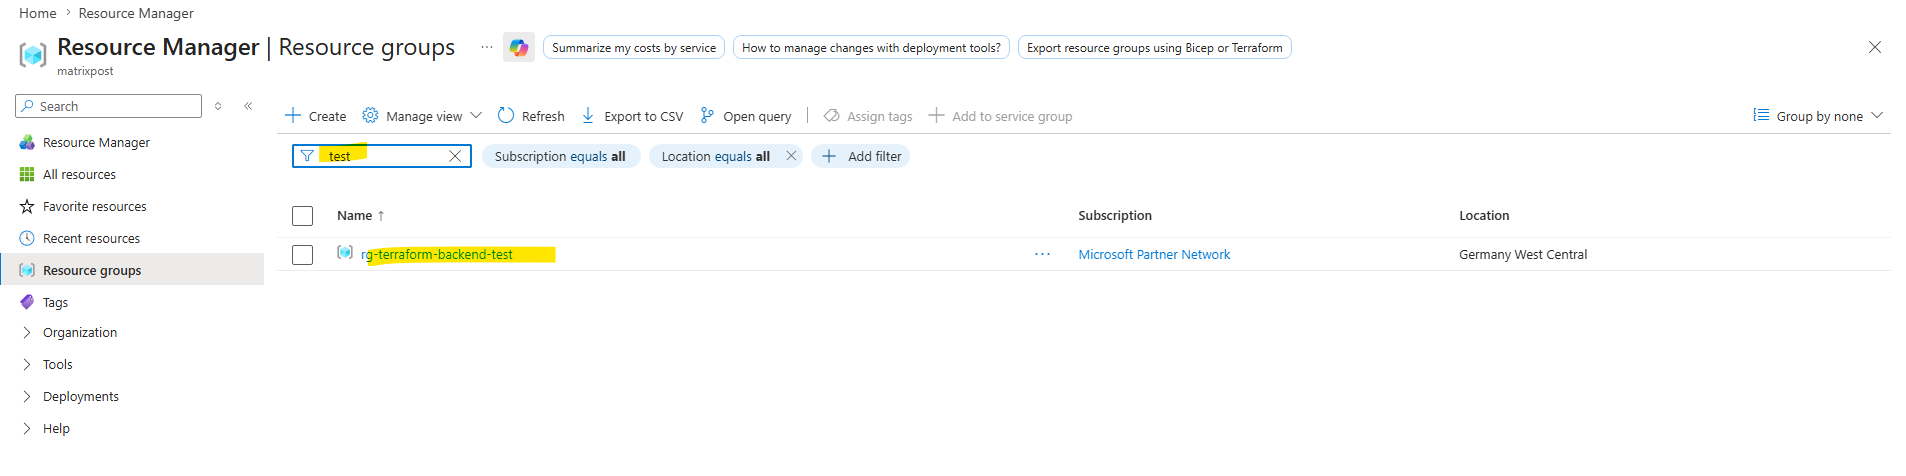
Also the tags for the resource group were applied correct.
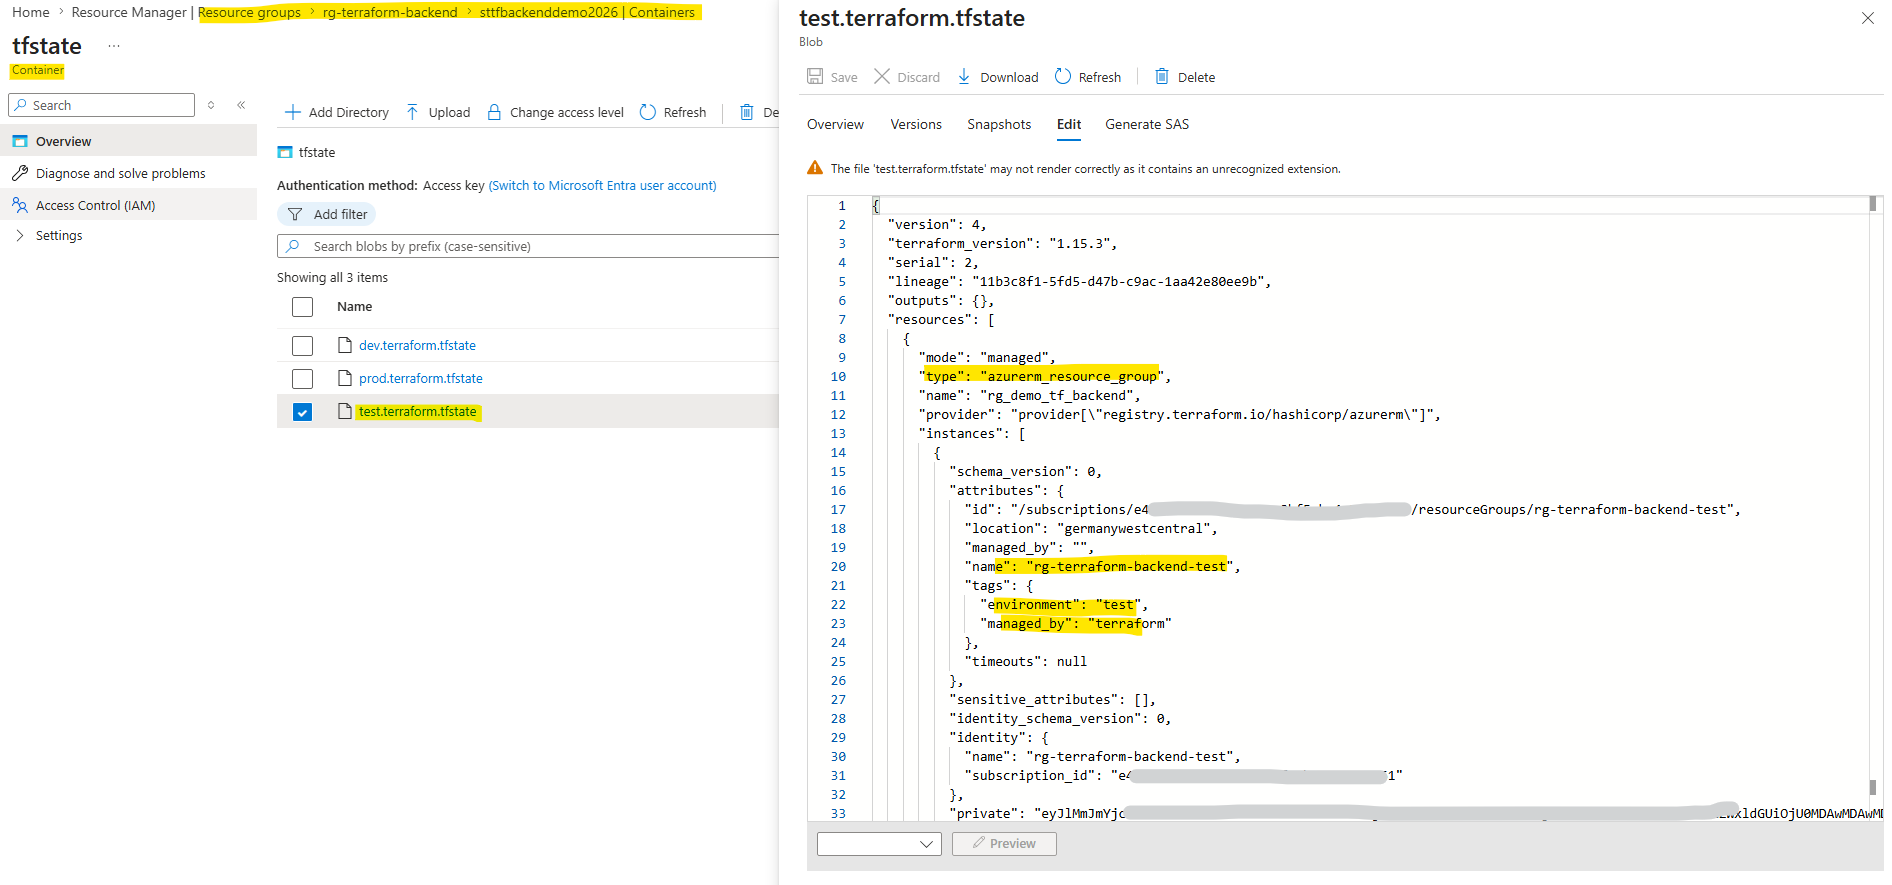
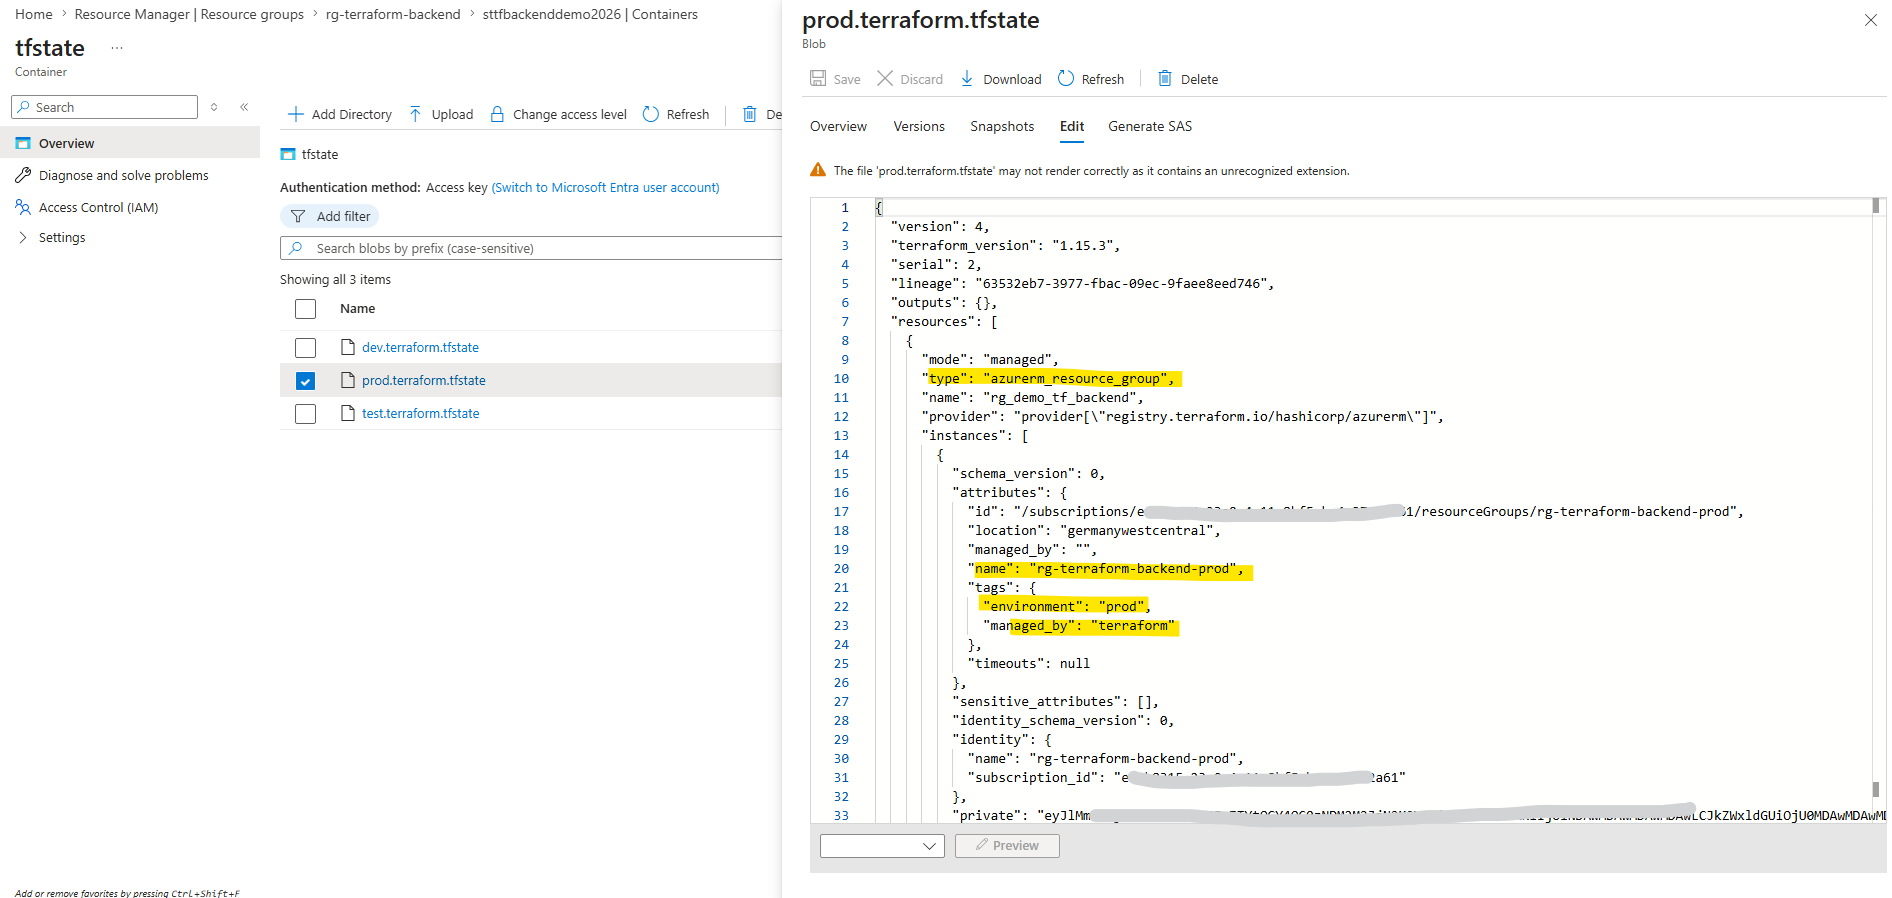
After running
terraform apply, the updated Terraform state is automatically stored in the configured remote backend inside the Azure Storage Account container. Thetest.terraform.tfstatefile now contains the current state information for all resources deployed in the test environment.
We can also display the current Terraform state stored in the active backend by running:
PS> terraform show

Switching to the Production Environment
The same process can later be repeated for the production environment:
PS> terraform init -backend-config="backend/prod.hcl" -reconfigure
We can now run terraform plan and terraform apply using the selected environment variables file to deploy and manage the infrastructure for the active Terraform environment.
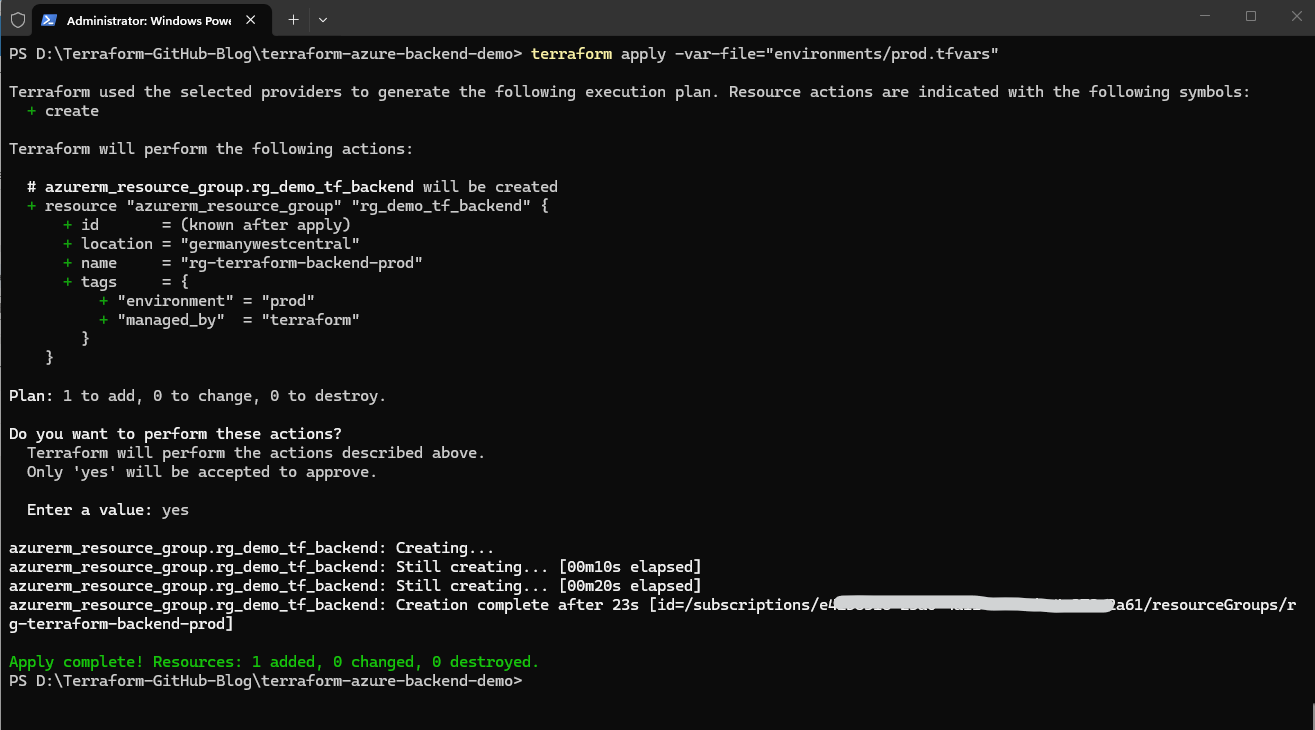
PS> terraform plan -var-file="environments/prod.tfvars"
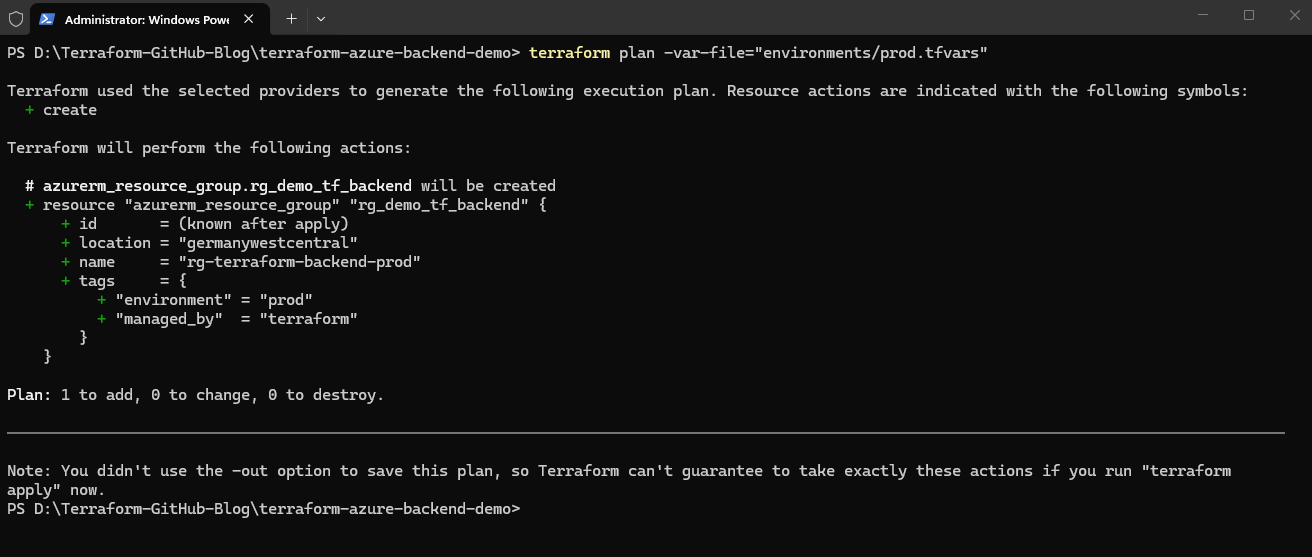
This deploys the testing-specific Azure resources while using the dedicated production Terraform state file. The Terraform project now deploys the production resource group.
PS> terraform apply -var-file="environments/prod.tfvars"
Each Terraform environment is therefore fully isolated regarding: Terraform state, Azure resource names, deployment variables and infrastructure lifecycle management.
Switching to and Redeploying the Development Environment
Previously, in the section Deploying Resources with the Remote Backend, we used the development environment exclusively to demonstrate the initial remote backend deployment process and therefore named the resource group rg-terraform-backend-demo
Now that the Terraform project is being extended for real multi-environment deployments, we introduce environment-specific naming conventions such as rg-terraform-backend-dev, rg-terraform-backend-test, and rg-terraform-backend-prod to clearly separate the Azure resources belonging to each environment.
Because of this naming change, the existing development resource group must now be redeployed using the updated development-specific Terraform configuration.
First, initialize Terraform again using the development backend configuration:
PS> terraform init -backend-config="backend/dev.hcl" -reconfigure
Next, run the Terraform plan using the development environment variable file:
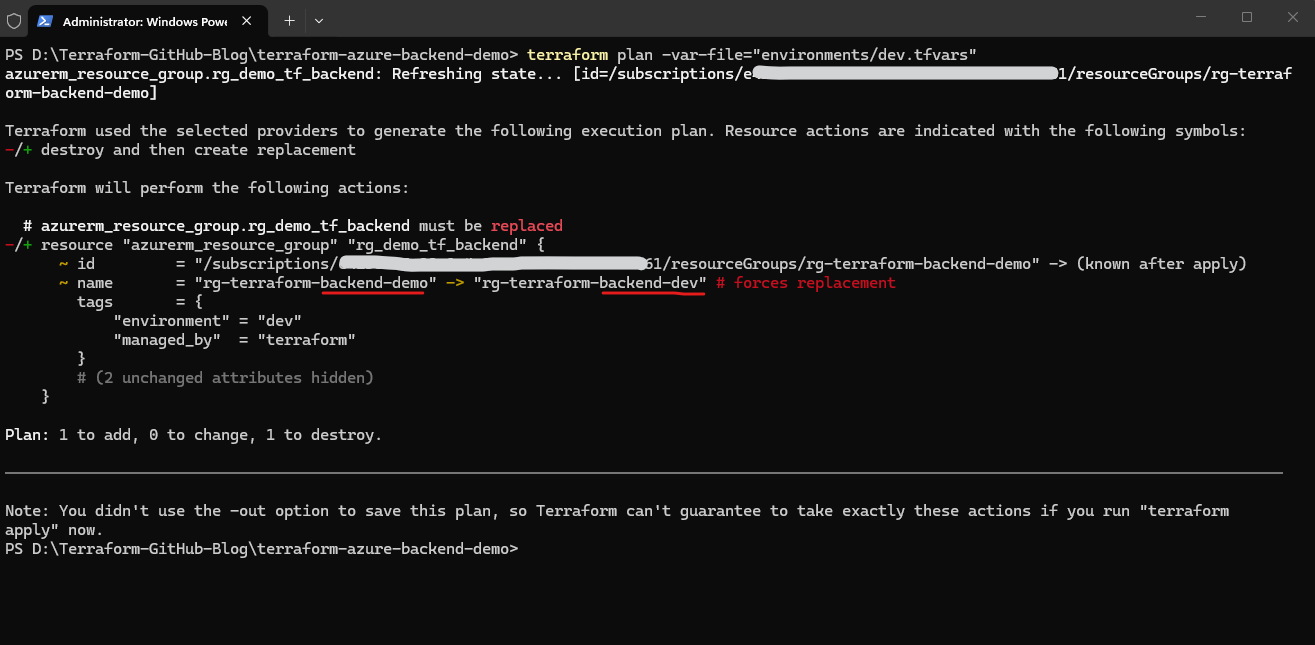
The Terraform plan shows that the existing resource group
rg-terraform-backend-demowill be destroyed and replaced with the new environment-specific resource grouprg-terraform-backend-dev. This happens because the Azure resource group name is part of the resource identity and changing it forces Terraform to recreate the resource.
PS> terraform plan -var-file="environments/dev.tfvars"
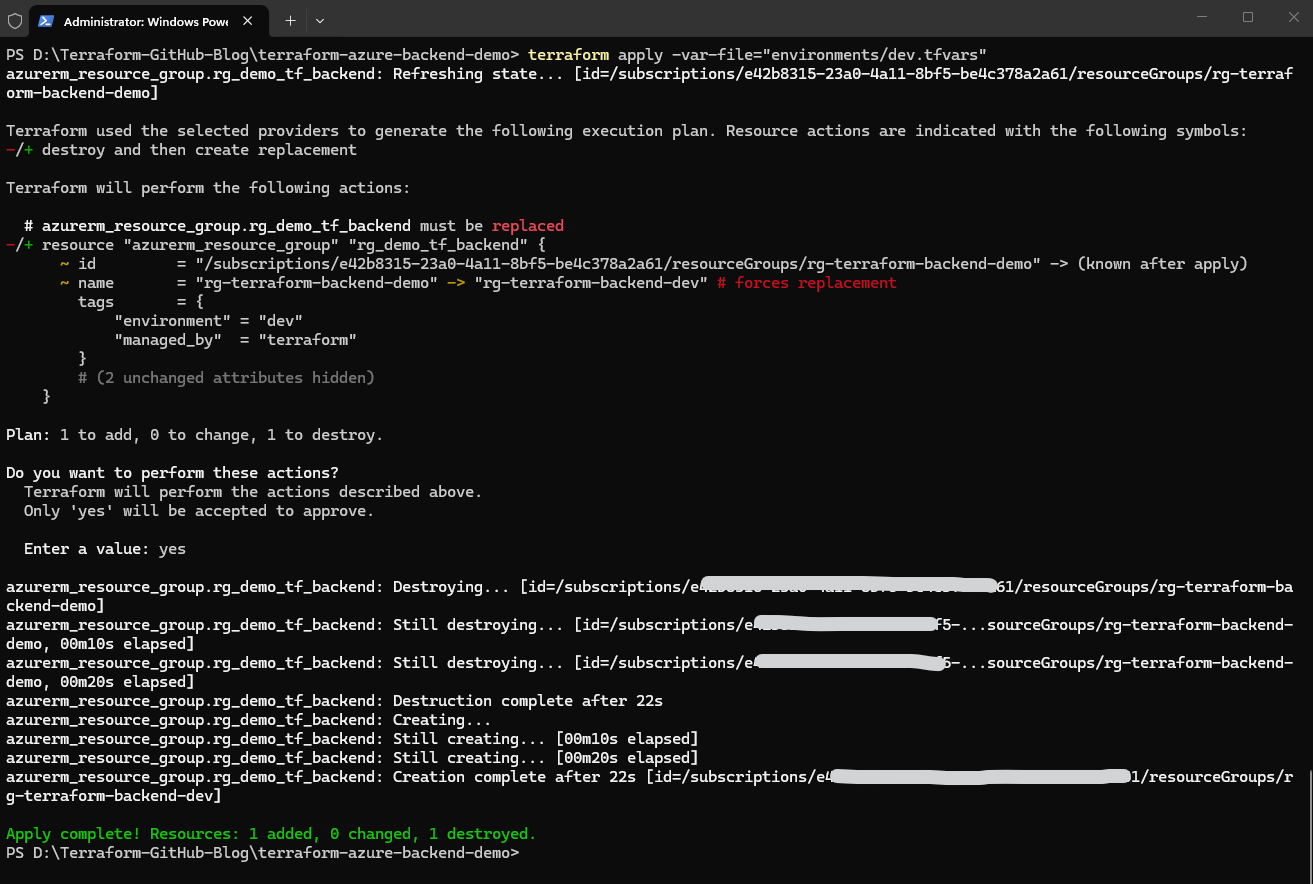
Finally, apply the updated development deployment:
PS> terraform apply -var-file="environments/dev.tfvars"
Troubleshooting
Repository and Push Errors
When working with Terraform, Git, and GitHub repositories, configuration or repository-related issues can occasionally occur, especially during the initial project setup.
To recreate a clean Git repository we can remove the broken local Git history and initialize a completely fresh repository again.
The command below deletes the existing local Git repository metadata and history while keeping the actual project files unchanged.
PS> Remove-Item -Recurse -Force .git
Then we initialize a brand new local Git repository in the current project directory.
PS> git init
Next we renames the current branch to main to match the default GitHub branch naming convention.
PS> git branch -M main
Now we connect the local Git repository with the remote GitHub repository.
PS> git remote add origin https://github.com/<username>/<repository>.git

e.g.
PS> git remote add origin https://github.com/matrix1302/terraform-azure-backend-demo.git
We add all project files to the Git staging area for the next commit.
PS> git add .
Create the initial Git commit for the Terraform project.
PS> git commit -m "Initial Terraform remote backend project"
Finally uploading the local repository to GitHub and configures upstream tracking between the local main branch and the remote origin/main branch
PS> git push -u origin main
In this case, unlike in Part 1, we did not clone the newly created empty GitHub repository locally. Instead, we initialized a completely fresh local Git repository first and then connected it afterwards to the still empty remote GitHub repository.
Visual Studio Code still shows Changes to Commit
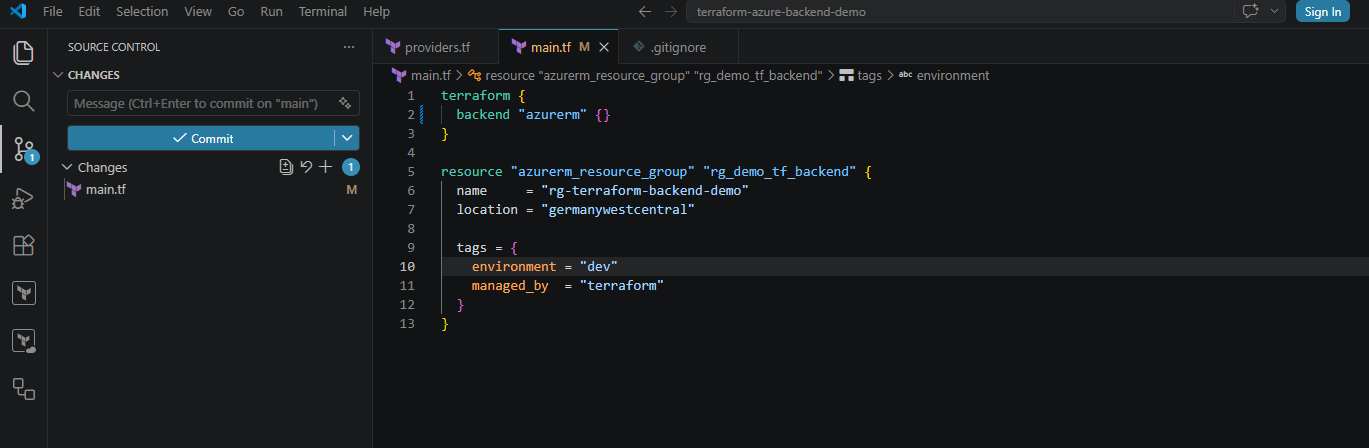
Below Visual Studio Code still shows changes in main.tf to commit.
That usually means
main.tfwas not staged when we committed previously, or it was modified again after the commit.When using
git add ., Git only stages files relative to the current working directory. In my case, I was running the command from inside thebackendsubfolder and therefore only staged the backend configuration files, while changes in the parent project directory such asmain.tfwere not included in the commit.
The exact state we can verify by running:
PS> git status
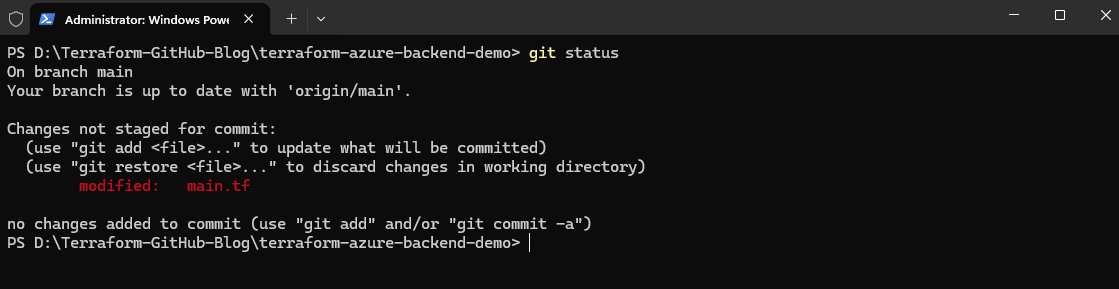
So I will run the following commands again to stage and commit the remaining changes, but this time from inside the root directory of the Terraform project.
PS> git add main.tf
PS> git commit -m "Update main Terraform backend configuration"
PS> git push
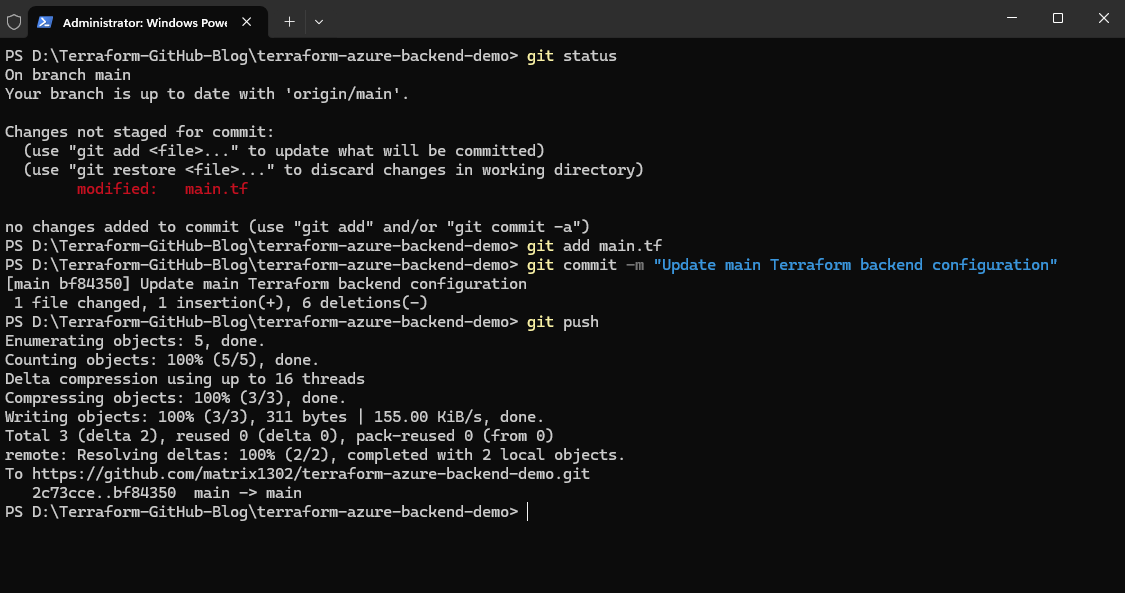
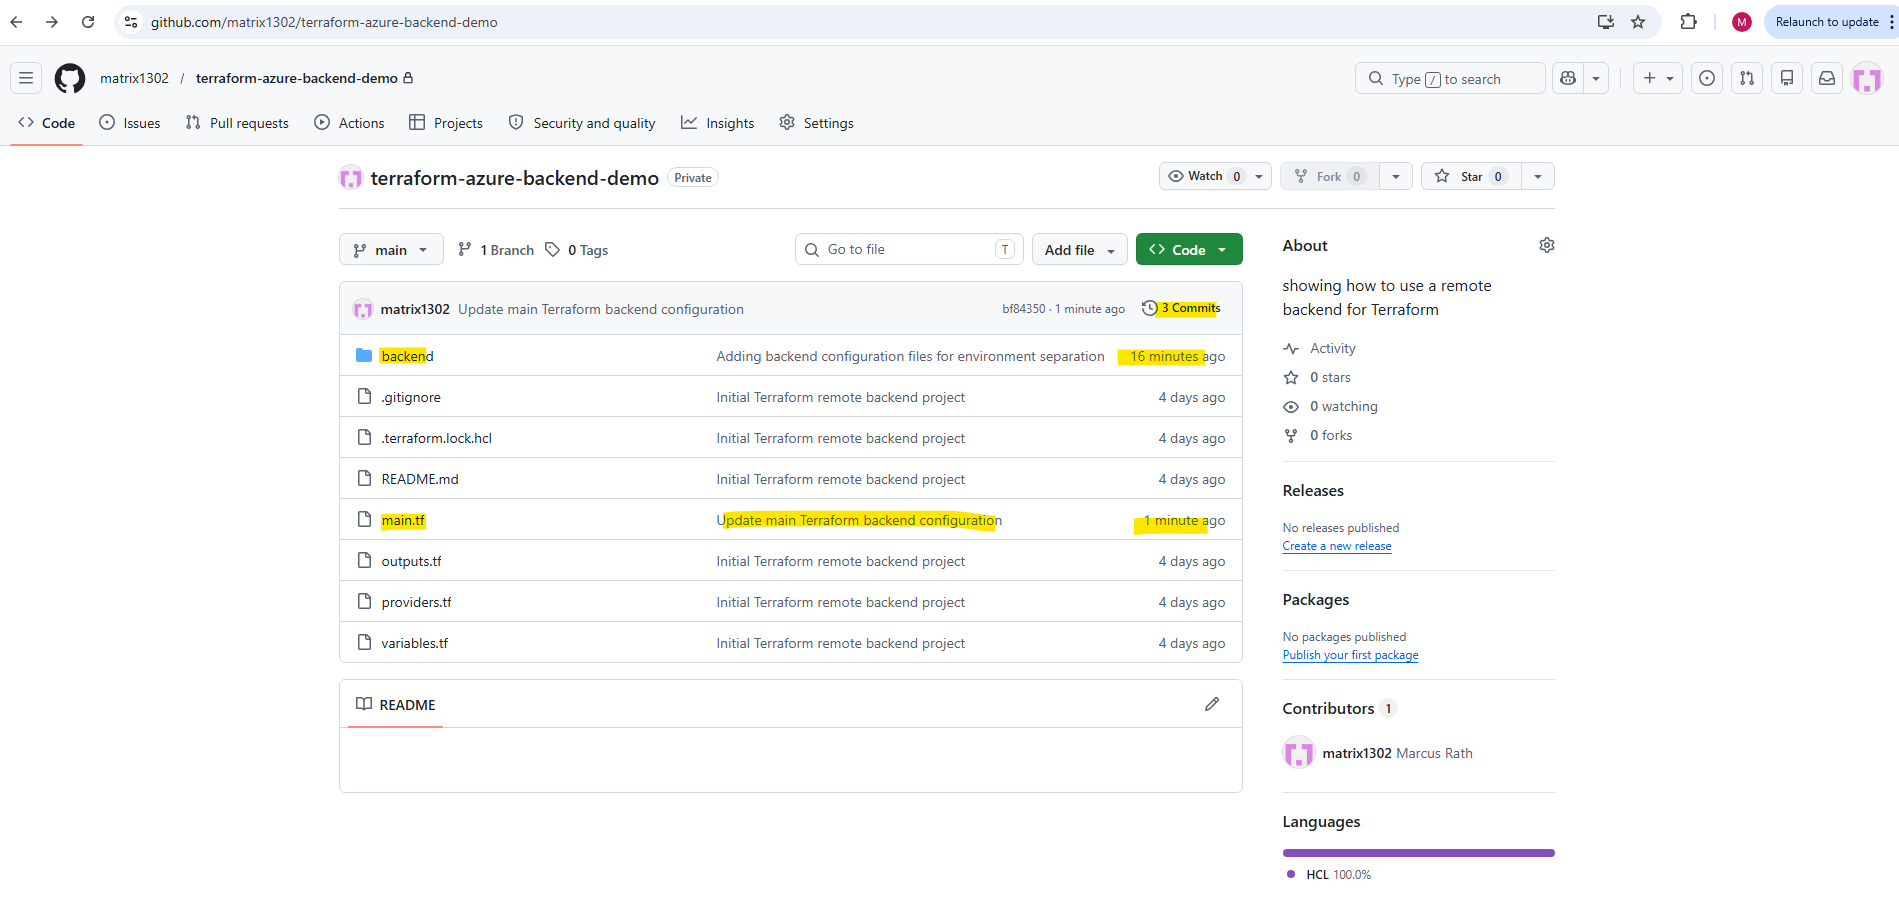
Looks good.
We can also run the following command to determine any differences between our working copy and the last commited version.
PS> git diff main.tf

In this part, we transformed a simple local Terraform deployment into a structured multi-environment Terraform project using Azure remote backends, GitHub version control, isolated state files, and environment-specific deployment configurations.
The resulting project structure now provides the foundation for collaborative infrastructure management and prepares the Terraform project for later CI/CD and automation workflows.
In Part 3 coming soon, we will build on this multi-environment Terraform project and start automating deployments by integrating Terraform with GitHub Actions and CI/CD workflows for Azure infrastructure deployments.
Links
remote backend
https://developer.hashicorp.com/terraform/language/backend/remoteUse input variables to add module arguments
https://developer.hashicorp.com/terraform/language/values/variables