How to elevate a Linux User Account with Sudo Rights
In the world of Linux and Unix-based systems, user roles and permissions are the foundation of security and system integrity.
By default, regular user accounts have limited access to prevent accidental or malicious system wide changes. However, there are times when granting administrative privileges becomes necessary for managing software, configuring system settings, or handling critical tasks.
This is where the power of sudo comes in. The sudo command allows trusted users to execute commands with superuser privileges, enabling them to perform administrative tasks without directly logging in as the root user.
Below, we’ll see how to safely elevating a standard user account to an admin user with sudo rights.
List all local users on a Linux system
To list all local users on a Linux system, you can use several methods. Here are the most common ones:
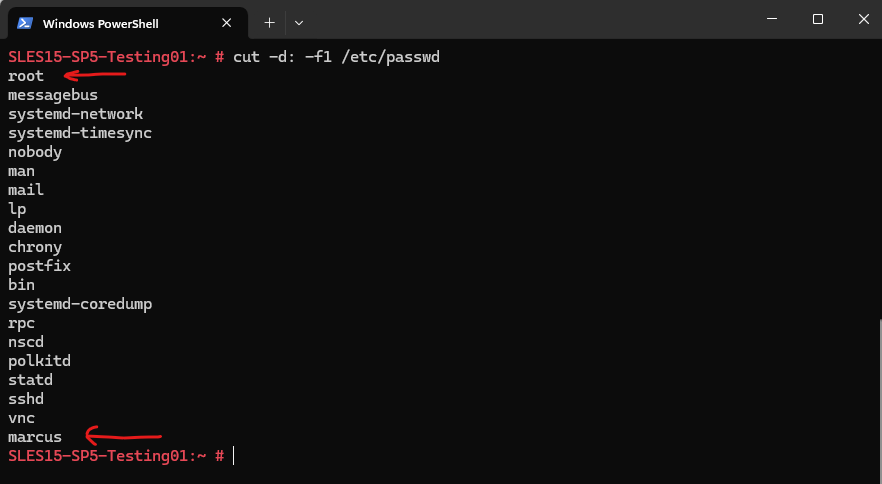
The /etc/passwd file contains user account information. This command displays all usernames. To list all local users:
# cut -d: -f1 /etc/passwd
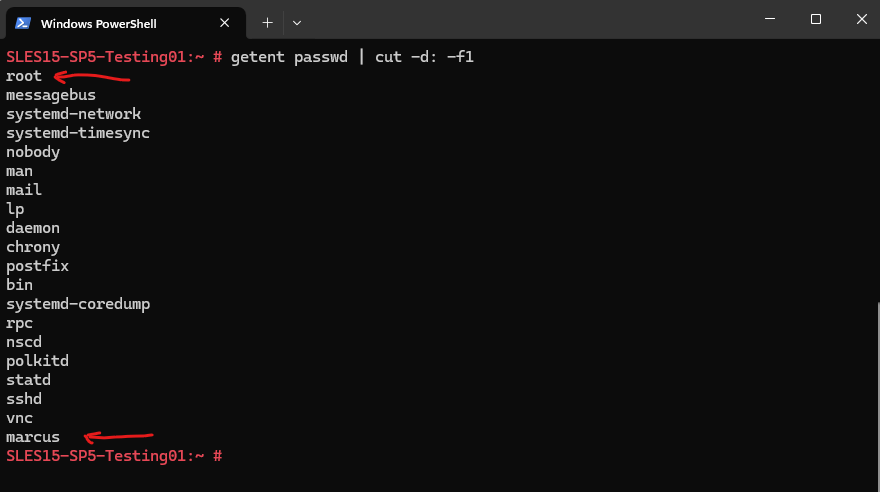
Using the getent command works across different authentication systems:
getent passwd retrieves user information from the system’s user database, including network-based users (LDAP, NIS).
# getent passwd | cut -d: -f1
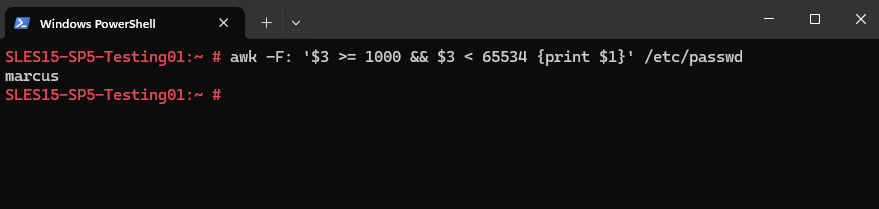
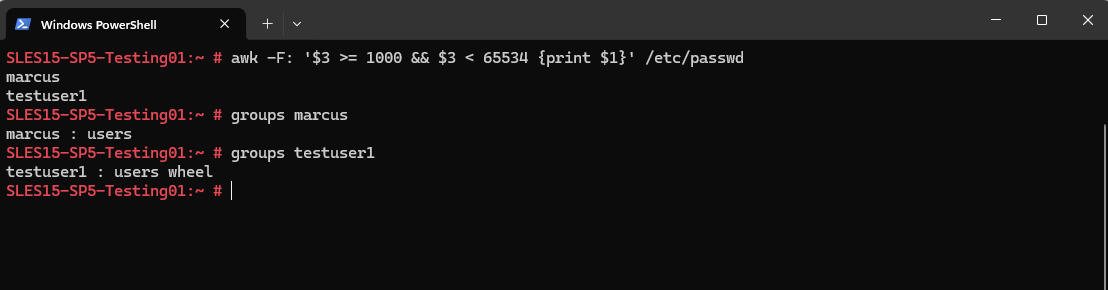
To list only regular (non-system) users with UID ≥ 1000:
# awk -F: '$3 >= 1000 && $3 < 65534 {print $1}' /etc/passwdUIDs ≥ 1000 are for regular users, while lower values are reserved for system users.
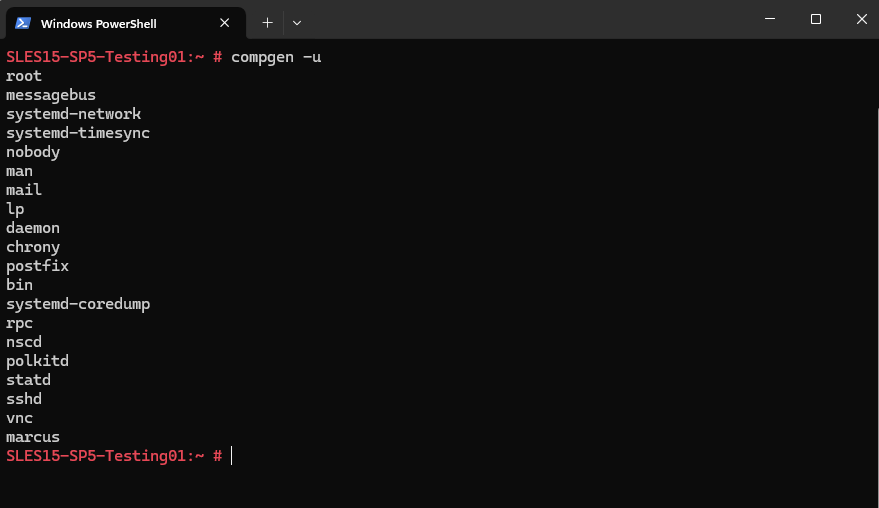
We can also use the compgen command which shows all users known to the system. compgen is a shell builtin that generates a list of usernames. -u lists all users.
# compgen -u
Determine the Groups a user is member of
To determine in which groups a user is we can use the following command.
# groups <username>
In Linux, the users group is a default group designed to include regular (non-administrative) user accounts. It serves as a basic way to organize user permissions and manage access to shared resources.
On some Linux distributions, newly created user accounts are automatically added to the users group.
Members of the users group have standard access, they can read and write files in their own directories but cannot perform administrative tasks.
They lack sudo privileges unless added to groups like sudo or wheel as shown further down.
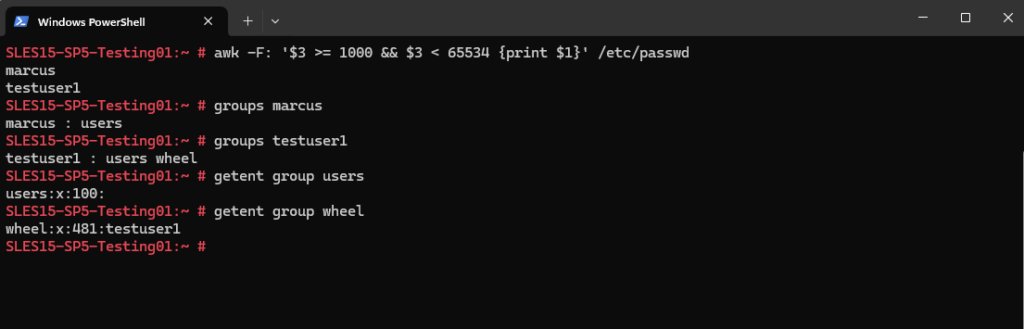
To list all members of a specific group we can use.
# getent group <groupname>

To list all groups in Linux use
# getent group
More about the wheel group further down.
Adding Users to a Group
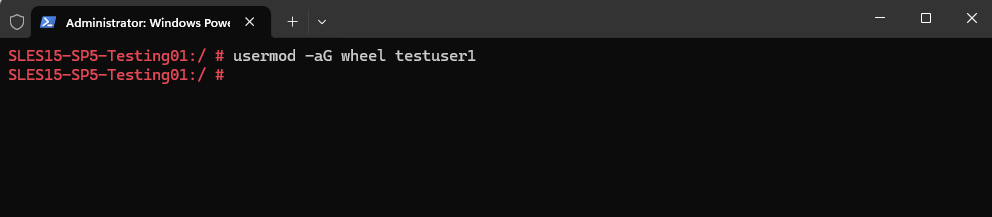
We can use the usermod command to add users to an existing group on Linux. Below for example I will add the user named testuser into the wheel group which exists on SUSE Linux Enterprise and can be used to grant the members elevated privileges to execute administrative commands via sudo.
# usermod -aG wheel testuser

-a, --append ==> append the user to the supplemental GROUPS mentioned by the -G option without removing the user from other groups

 -G, --groups GROUPS ==> new list of supplementary GROUPS
Removing Users from a Group
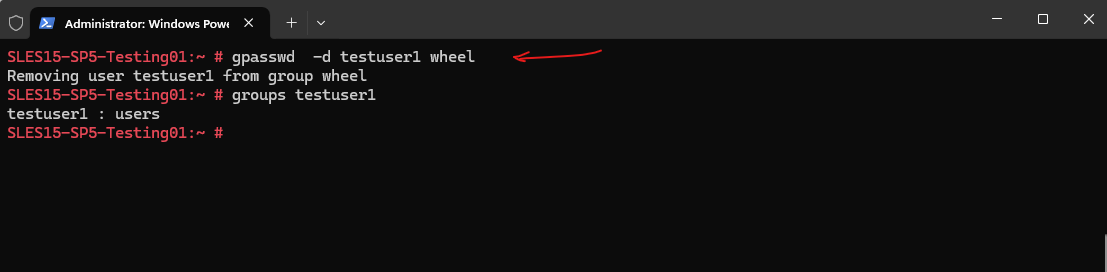
To remove a user from a specific group we can use the gpasswd command. For example to remove the testuser1 from the wheel group we added him above, we can use the following command to remove it from the wheel group.
# gpasswd -d testuser1 wheel
Adding a new User and elevate it as Admin (sudo Group) under SUSE Linux Enterprise
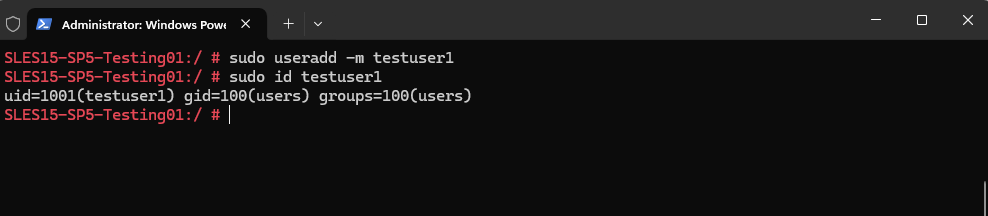
First I will create a new user below.
The -m (–create-home) flag will create the user home directory in /home/<username>.
# sudo useradd -m <username>
# sudo useradd -m testuser1
By executing the following command, we can verify that the new user was really created.
# sudo id <username>
# sudo id testuser1
Set a password for our new user.
# sudo passwd testuser1
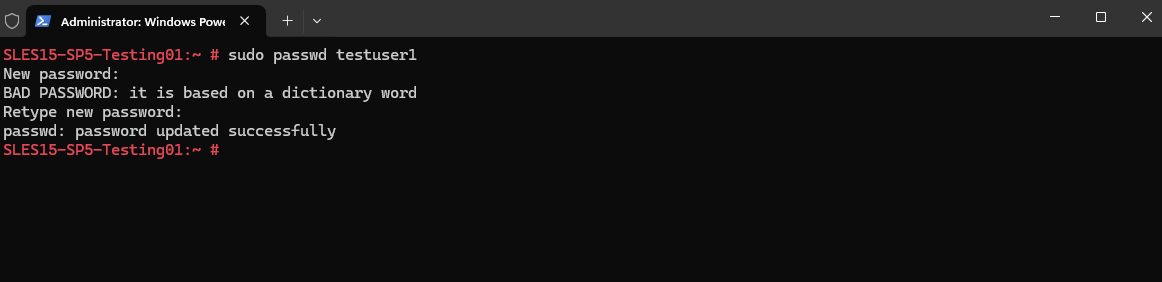
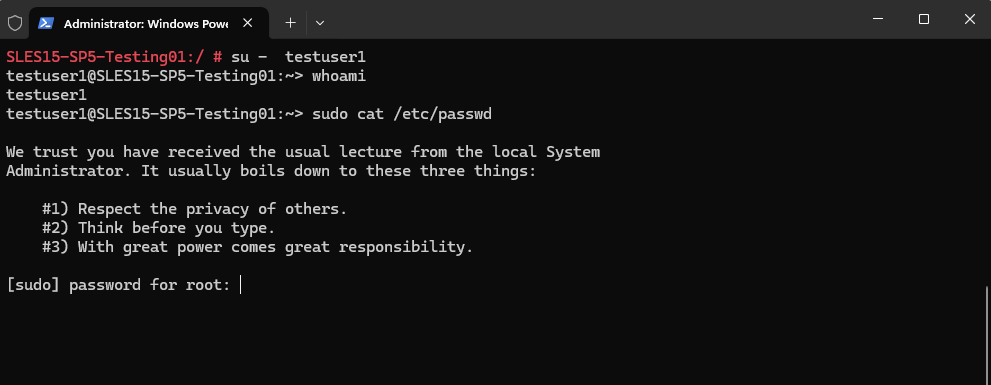
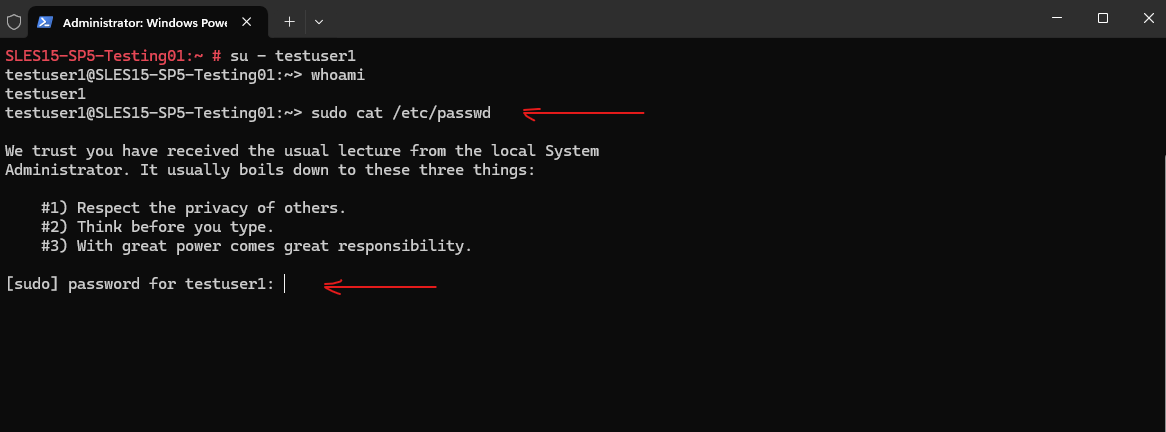
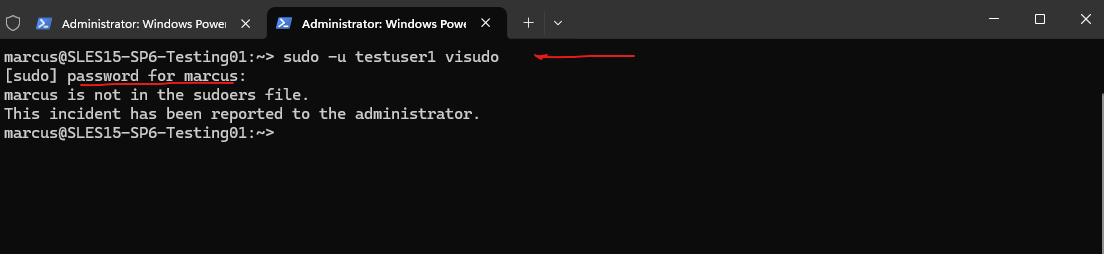
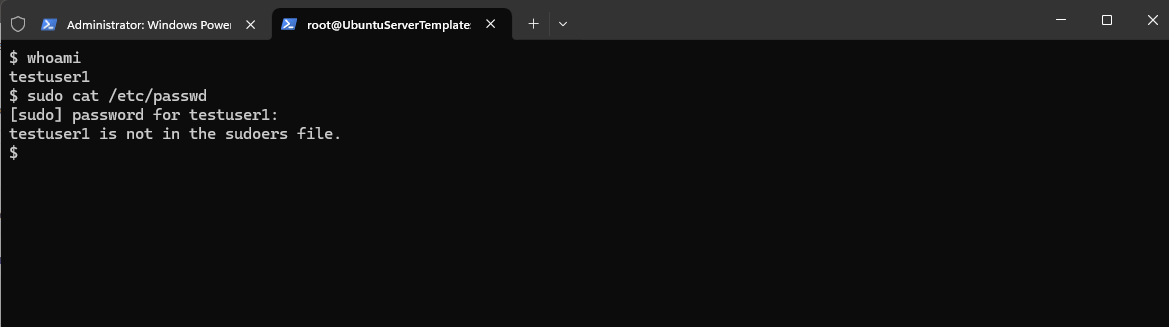
So far our user can’t execute the sudo command without providing the root account password.
By using the wheel Group
For SUSE Linux Enterprise we can to add the user to the wheel group to be able to run sudo commands as shown below.
# usermod -aG wheel testuser

-a, --append ==> append the user to the supplemental GROUPS mentioned by the -G option without removing the user from other groups

 -G, --groups GROUPS ==> new list of supplementary GROUPS
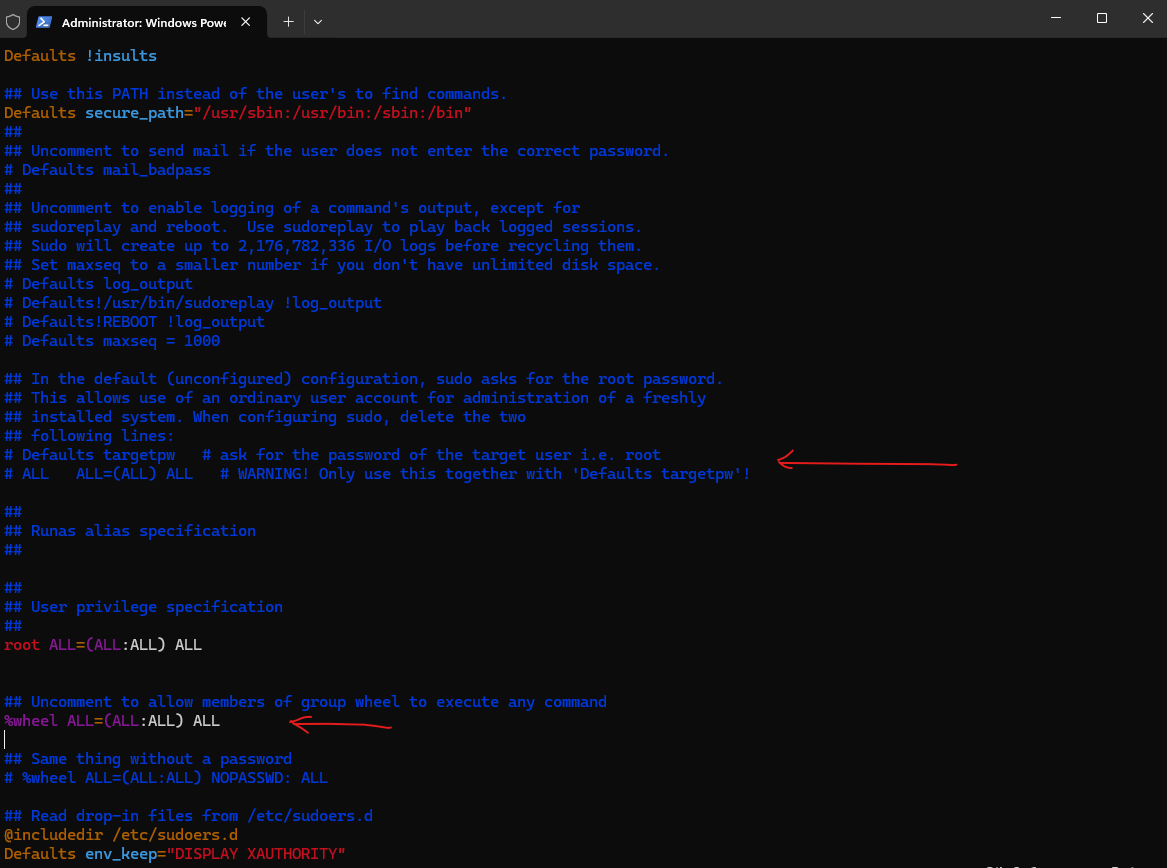
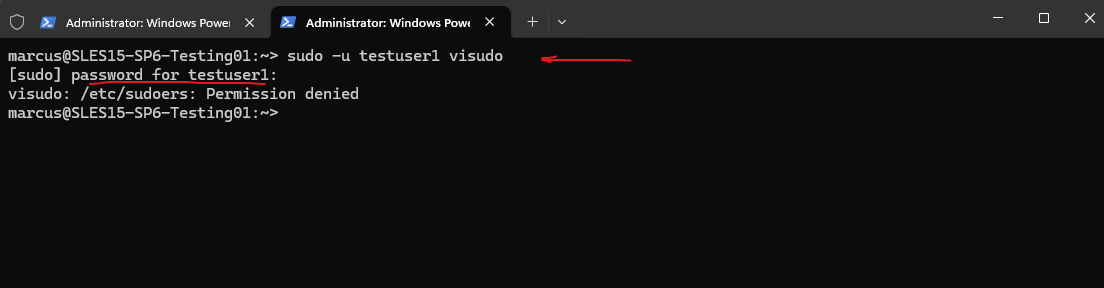
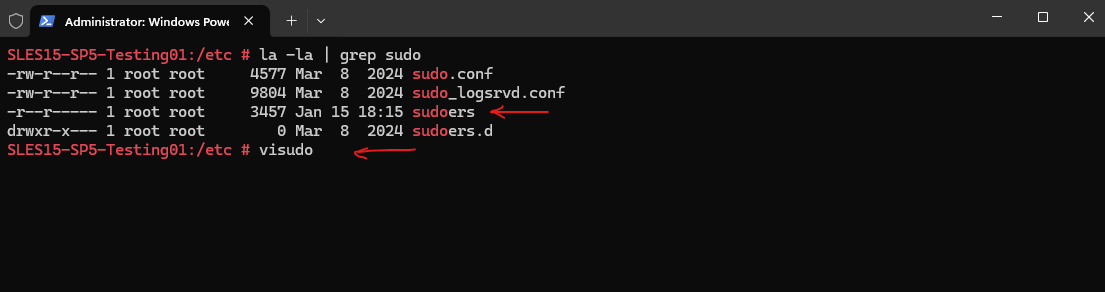
But first we need enable the wheel group in the /etc/sudoers file. To open the file just enter the visudo command.

Please note: making changes directly to the /etc/sudoers file is discouraged, and the visudo utility should be used instead. Also see Additional Information below regarding /etc/sudoers.d.
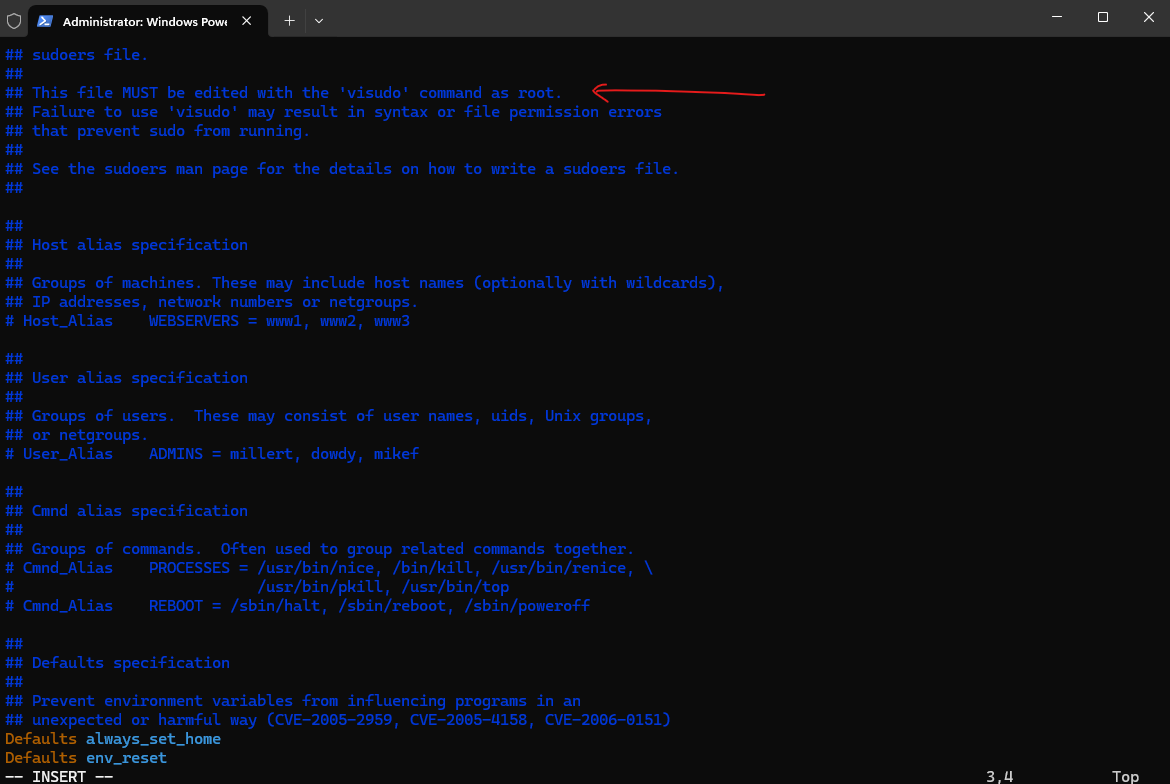
Comment the following two lines if not already commented (default):
# Defaults targetpw   # ask for the password of the target user i.e. root
# ALL   ALL=(ALL) ALL   # WARNING! Only use this together with 'Defaults targetpw'!
And uncomment the following line:
%wheel ALL=(ALL:ALL) ALL
From now on the new user can execute sudo commands by providing its own password.
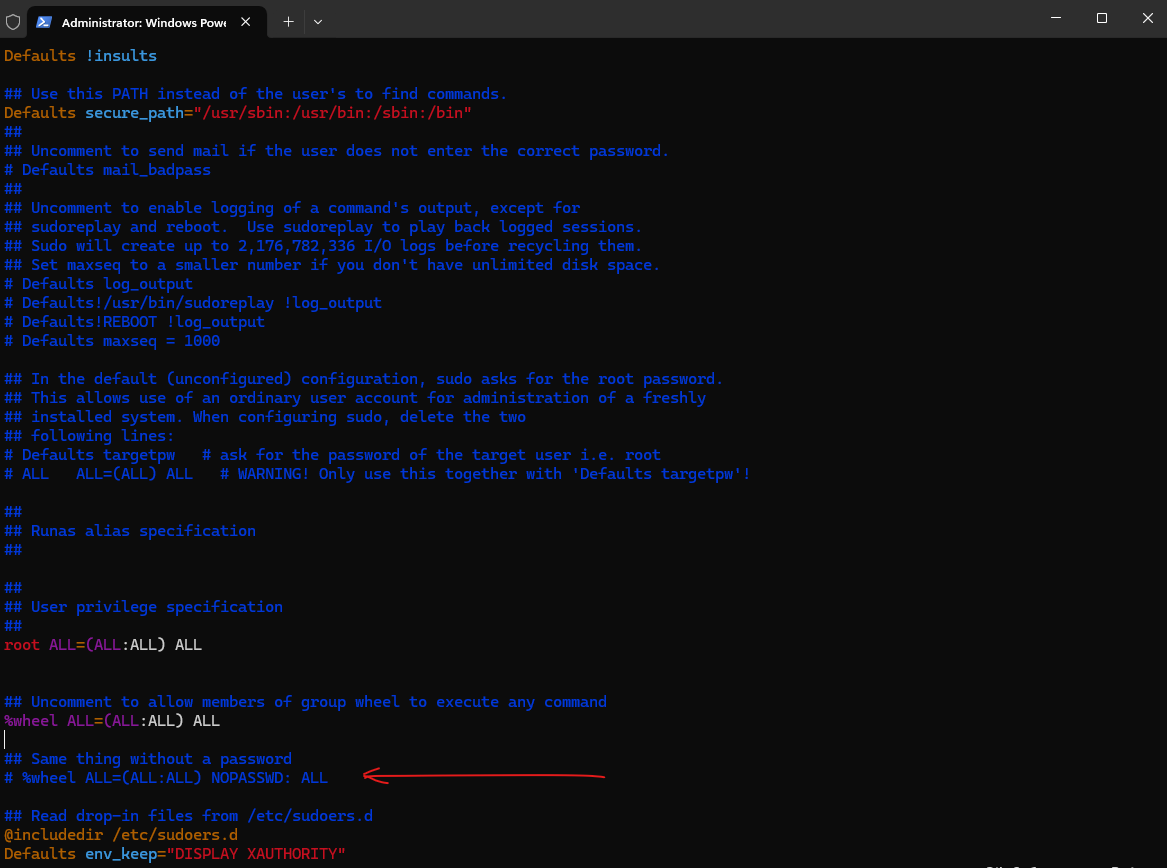
Or the following line so that users in the wheel group didn’t even need to provide its own password.
# %wheel ALL=(ALL:ALL) NOPASSWD: ALL
What exactly means this line.
%wheel ALL=(ALL:ALL) ALL
wheel: Refers to the wheel group. Members of this group will be affected by this rule.
ALL: The first ALL means this rule applies to all hosts (useful in networked environments).
(ALL:ALL):
The first ALL allows members of the wheel group to run commands as any user.
The second ALL allows members of the wheel group to run commands as any group.
ALL: The last ALL allows members of the wheel group to run any command with sudo.
And the following similar line (default).
%wheel ALL=(ALL:ALL) NOPASSWD: ALL
wheel: Refers to the wheel group. Members of this group will be affected by this rule.
ALL: The first ALL means this rule applies to all hosts (useful in networked environments).
(ALL:ALL):
The first ALL allows members of the wheel group to run commands as any user.
The second ALL allows members of the wheel group to run commands as any group.
NOPASSWD: This means that members of the wheel group can use sudo without being prompted for a password.
ALL: The last ALL allows members of the wheel group to run any command with sudo.
And finally the following two lines?
# Defaults targetpw   # ask for the password of the target user i.e. root
# ALL   ALL=(ALL) ALL   # WARNING! Only use this together with 'Defaults targetpw'!
Uncommented enabled the first line → This setting requires users to enter the target user’s password instead of their own when using sudo.
By default, sudo asks for the calling user’s password, but with targetpw, it instead asks for the password of the user being switched to (typically root).

Commented disabled → being prompted for the own password and not for the target users password.

And the second line here with ALL ALL=(ALL) ALL?
# Defaults targetpw   # ask for the password of the target user i.e. root
# ALL   ALL=(ALL) ALL   # WARNING! Only use this together with 'Defaults targetpw'!
When Defaults targetpw combined with ALL ALL=(ALL) ALL, this means:
- Any user can run any command as any other user.
- However, they must know the password of the target user (e.g., root) to do so.
This combination adds a layer of security by ensuring that only users who know the target user’s password can escalate privileges.
By adding the User directly into the sudoers File
We can either adding the user directly in the /etc/sudoers file or by creating a custom file in the /etc/sudoers.d/ folder which will be included by default in /etc/sudoers.
Adding the user directly in the /etc/sudoers file.
Here testuser1 is able to run sudo commands without entering first its own password.
testuser1 ALL=(ALL) NOPASSWD:ALL

To force the user to provide its own password for the sudo command, we can use.
testuser1 ALL=(ALL) ALL
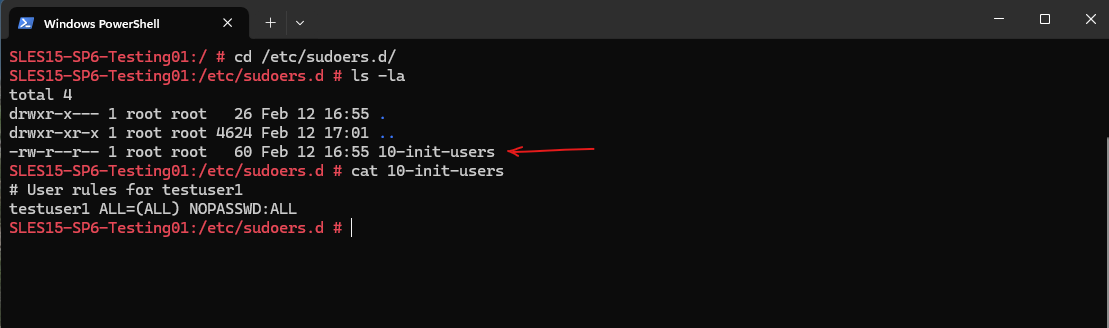
Or as mentioned by using a custom file in /etc/sudoers.d/. All files in this directory will be included by default in /etc/sudoers.
## Read drop-in files from /etc/sudoers.d
@includedir /etc/sudoers.d

# User rules for testuser1
testuser1 ALL=(ALL) NOPASSWD:ALL
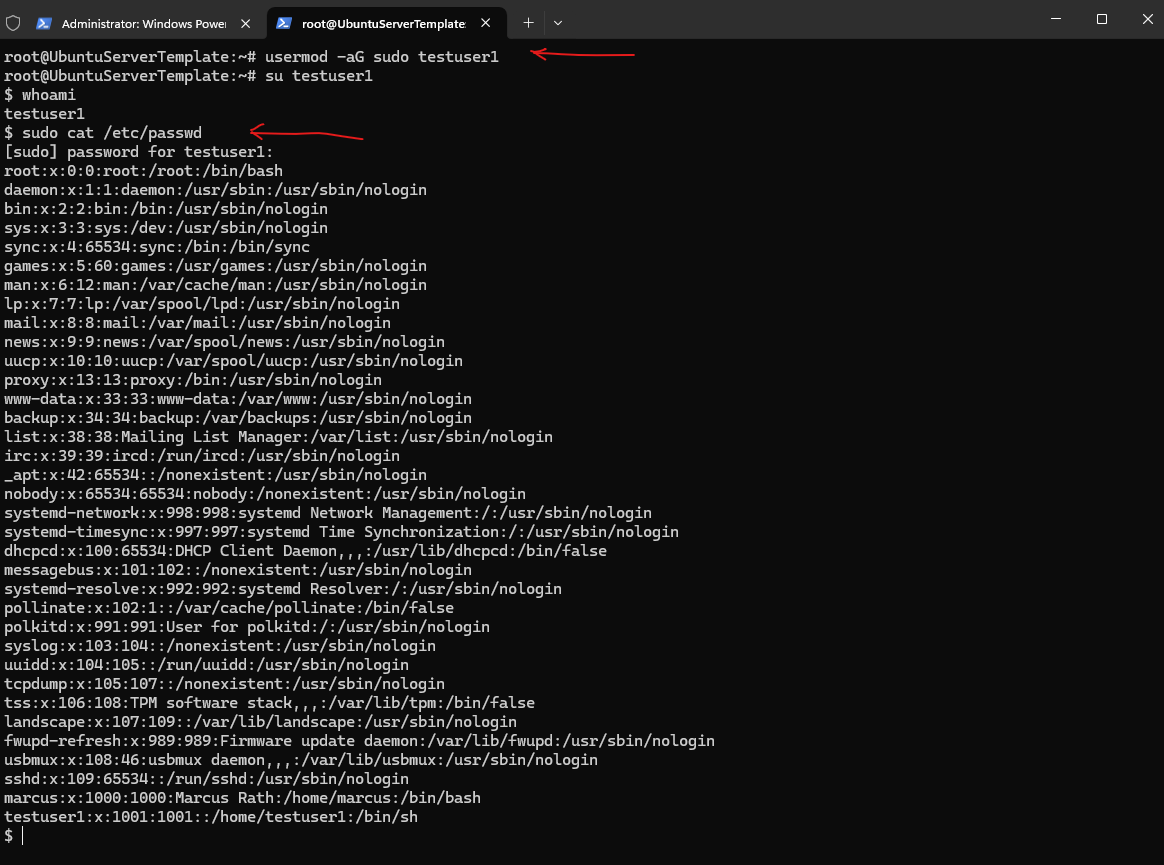
Adding a new User and elevate it as Admin (sudo Group) under Debian/Ubuntu
Under Debian/Ubuntu adding the user is the same as previously for SUSE Linux Enterprise, so I will skip this step here.
So far I just created the new user named testuser1 but didn’t added the user to any group or edited the /etc/sudoers file.
Under Debian/Ubuntu we just need to add the user to the sudo group as shown below.
# usermod -aG sudo testuser1

-a, --append ==> append the user to the supplemental GROUPS mentioned by the -G option without removing the user from other groups

 -G, --groups GROUPS ==> new list of supplementary GROUPS
To check the /etc/sudoers file on Debian/Ubuntu we should also use the visudo command.
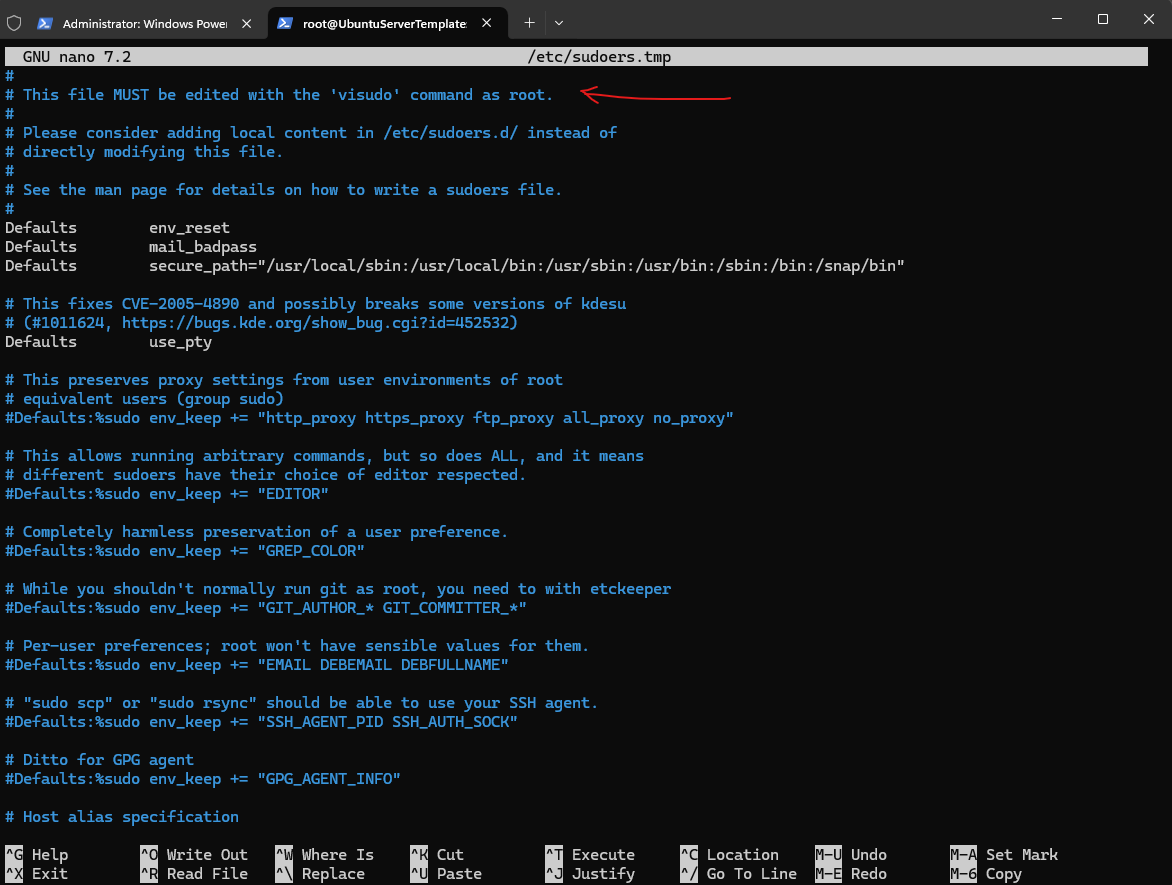
The sudo group in /etc/sudoers is enabled and commented out by default in contrast to SUSE Linux Enterprise and its counterpart with the wheel group.
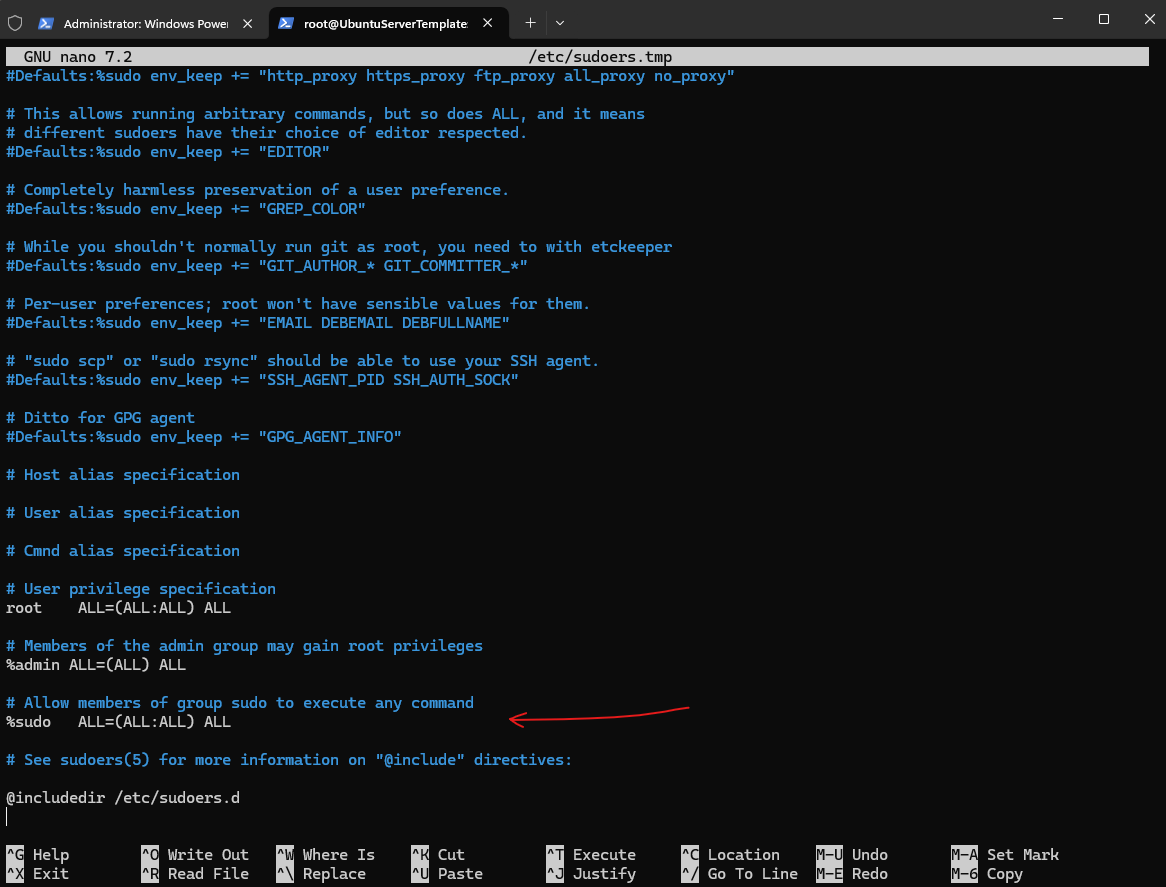
Instead adding the user to the sudo group, we can of course also add the users directly into the /etc/sudoers file or a custom file in the /etc/sudoers.d/ folder as previously for SUSE Linux Enterprise Server.
Links
Using sudo to allow non-root users to perform root level functions
https://www.suse.com/support/kb/doc/?id=000016906