Google Cloud – Create a new Linux VM Instance and Connect to using SSH Metadata
In my last post I was showing how to create and connect to a new Windows VM instance in Google Cloud. In this post we will see how to create a new Linux VM instance and later how to connect to using SSH Metadata.
For Linux and SSH you will have different methods and clients you can use to connect to. Google will recommend in most scenarios using the OS Login.
To connect to your Linux VM instances, you can use one of the following methods:
If you need to manage application access to your VM instances, see Use SSH with service accounts.
Below in this post we will see how to connect to our Linux VM instance using SSH Metadata.
About how to connect to using OS Login, you will see in my next post below.
Create a new Linux VM Instance
The steps to create a new Linux VM instance didn’t differ much from creating a Windows instance besides generating access credentials.
For Windows instances you will use normally a local windows user and a password to connect to by using the Remote Desktop Connection App. Therefore we first have to generate these credentials for Windows VMs as shown my following post.
Now for Linux VMs by default passwords aren’t configured for local users on Google Cloud and we need to use a SSH key pair to connect to.
Besides further down I will nevertheless show how you can enable password authentication for Linux VMs.

As I also want to test routing within a Shared VPN network, this time for the Linux VM I will assign the region europe-west2 (London) in order to assign an interface and IP address from a different subnet than previously for the Windows VM in my last post.
For the Window VM hosted in the region europe-west3 (Frankfurt) was assigned an IP address from the subnet 172.24.0.0/16 and now for the Linux VM in europe-west2 (London) I will assign an IP address form the subnet 172.25.0.0/16.

For the Linux OS I will choose Ubuntu 22.04 LTS.

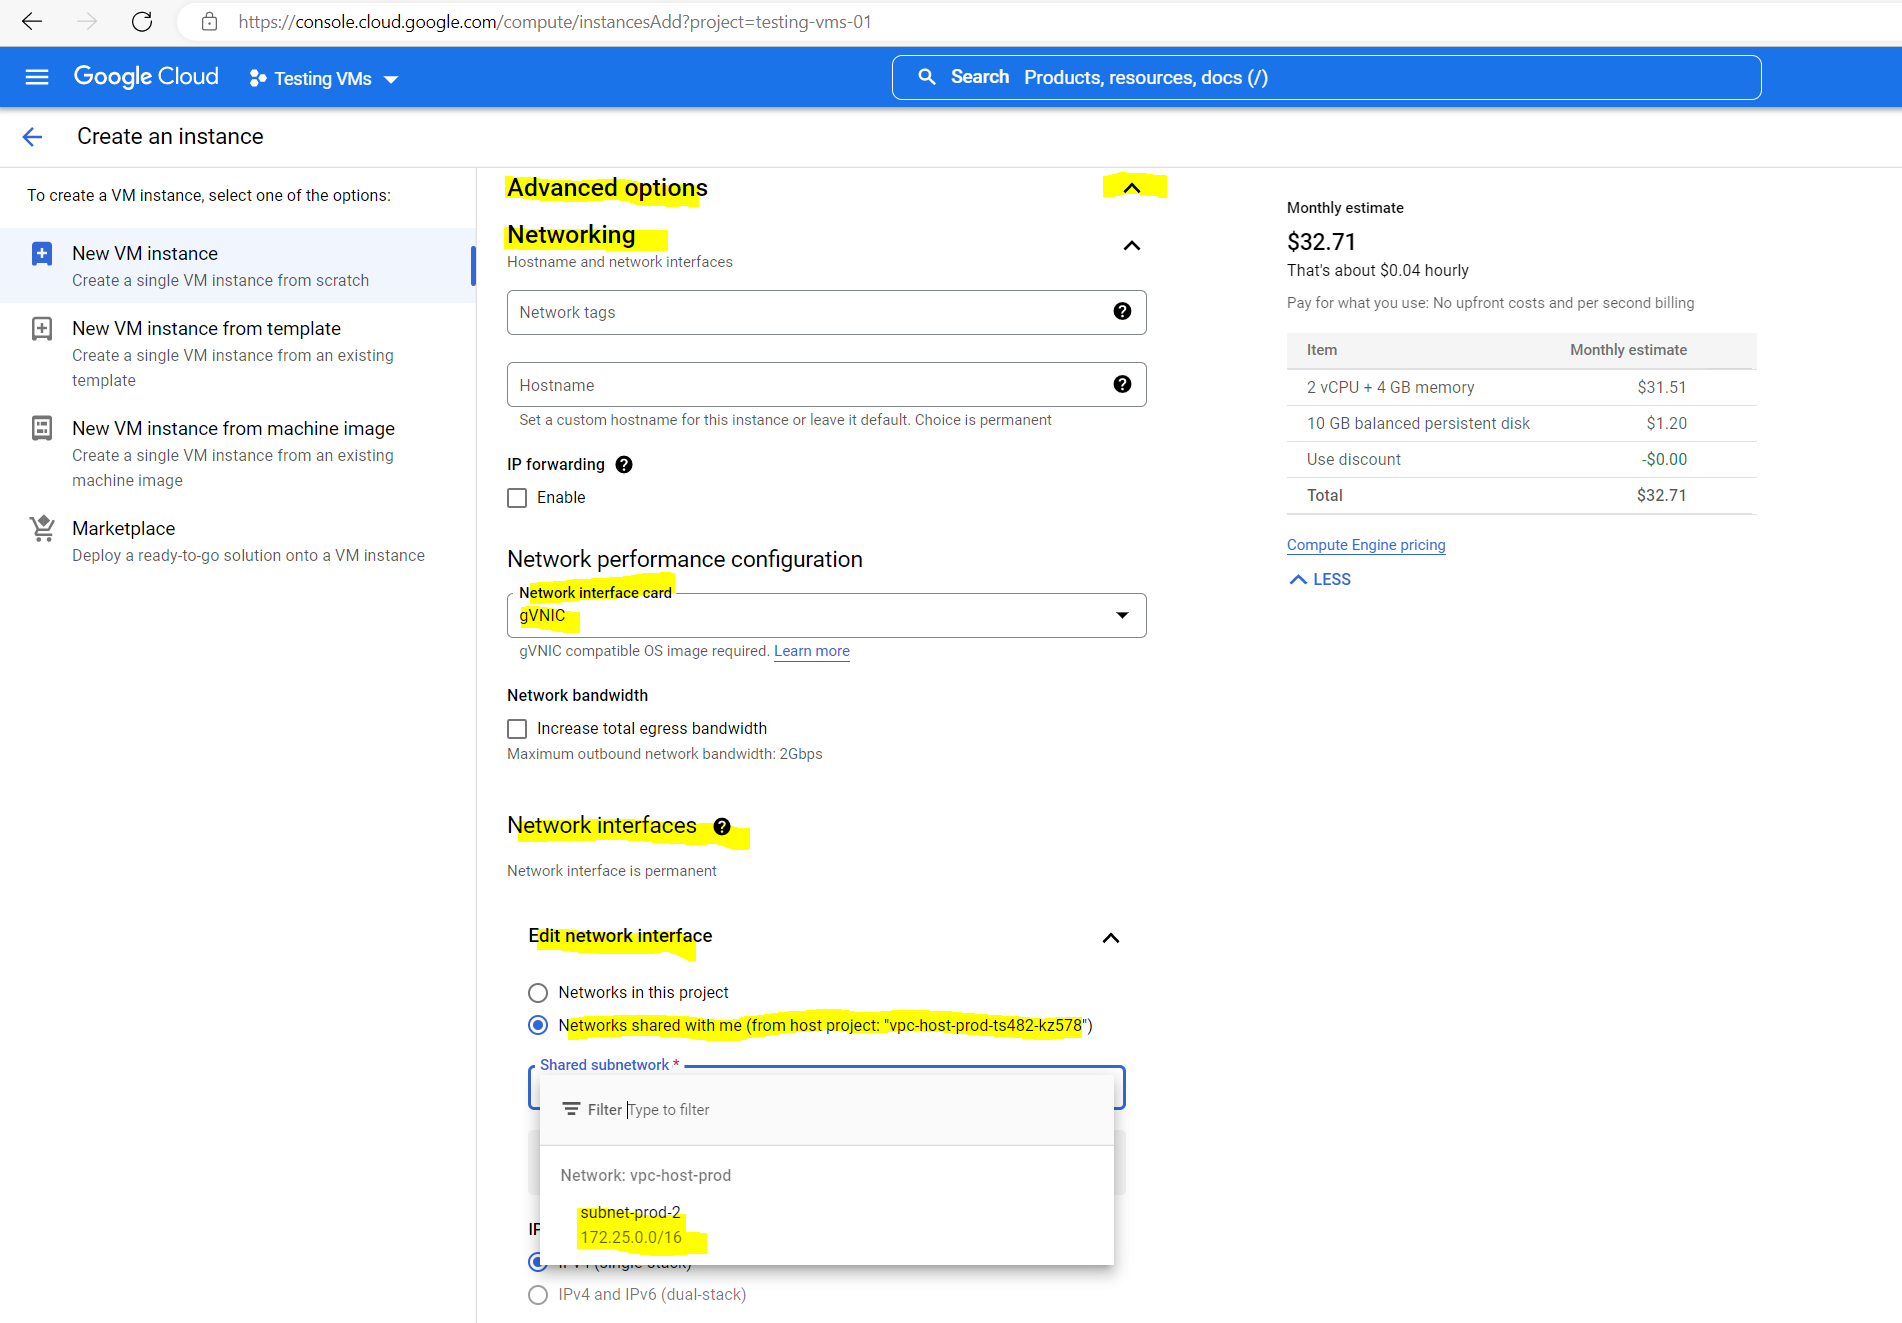
For the network settings the same as previously for the Windows VM but this time because of the different region I can use the subnet 172.25.0.0/16 to assign an interface and IP address for.
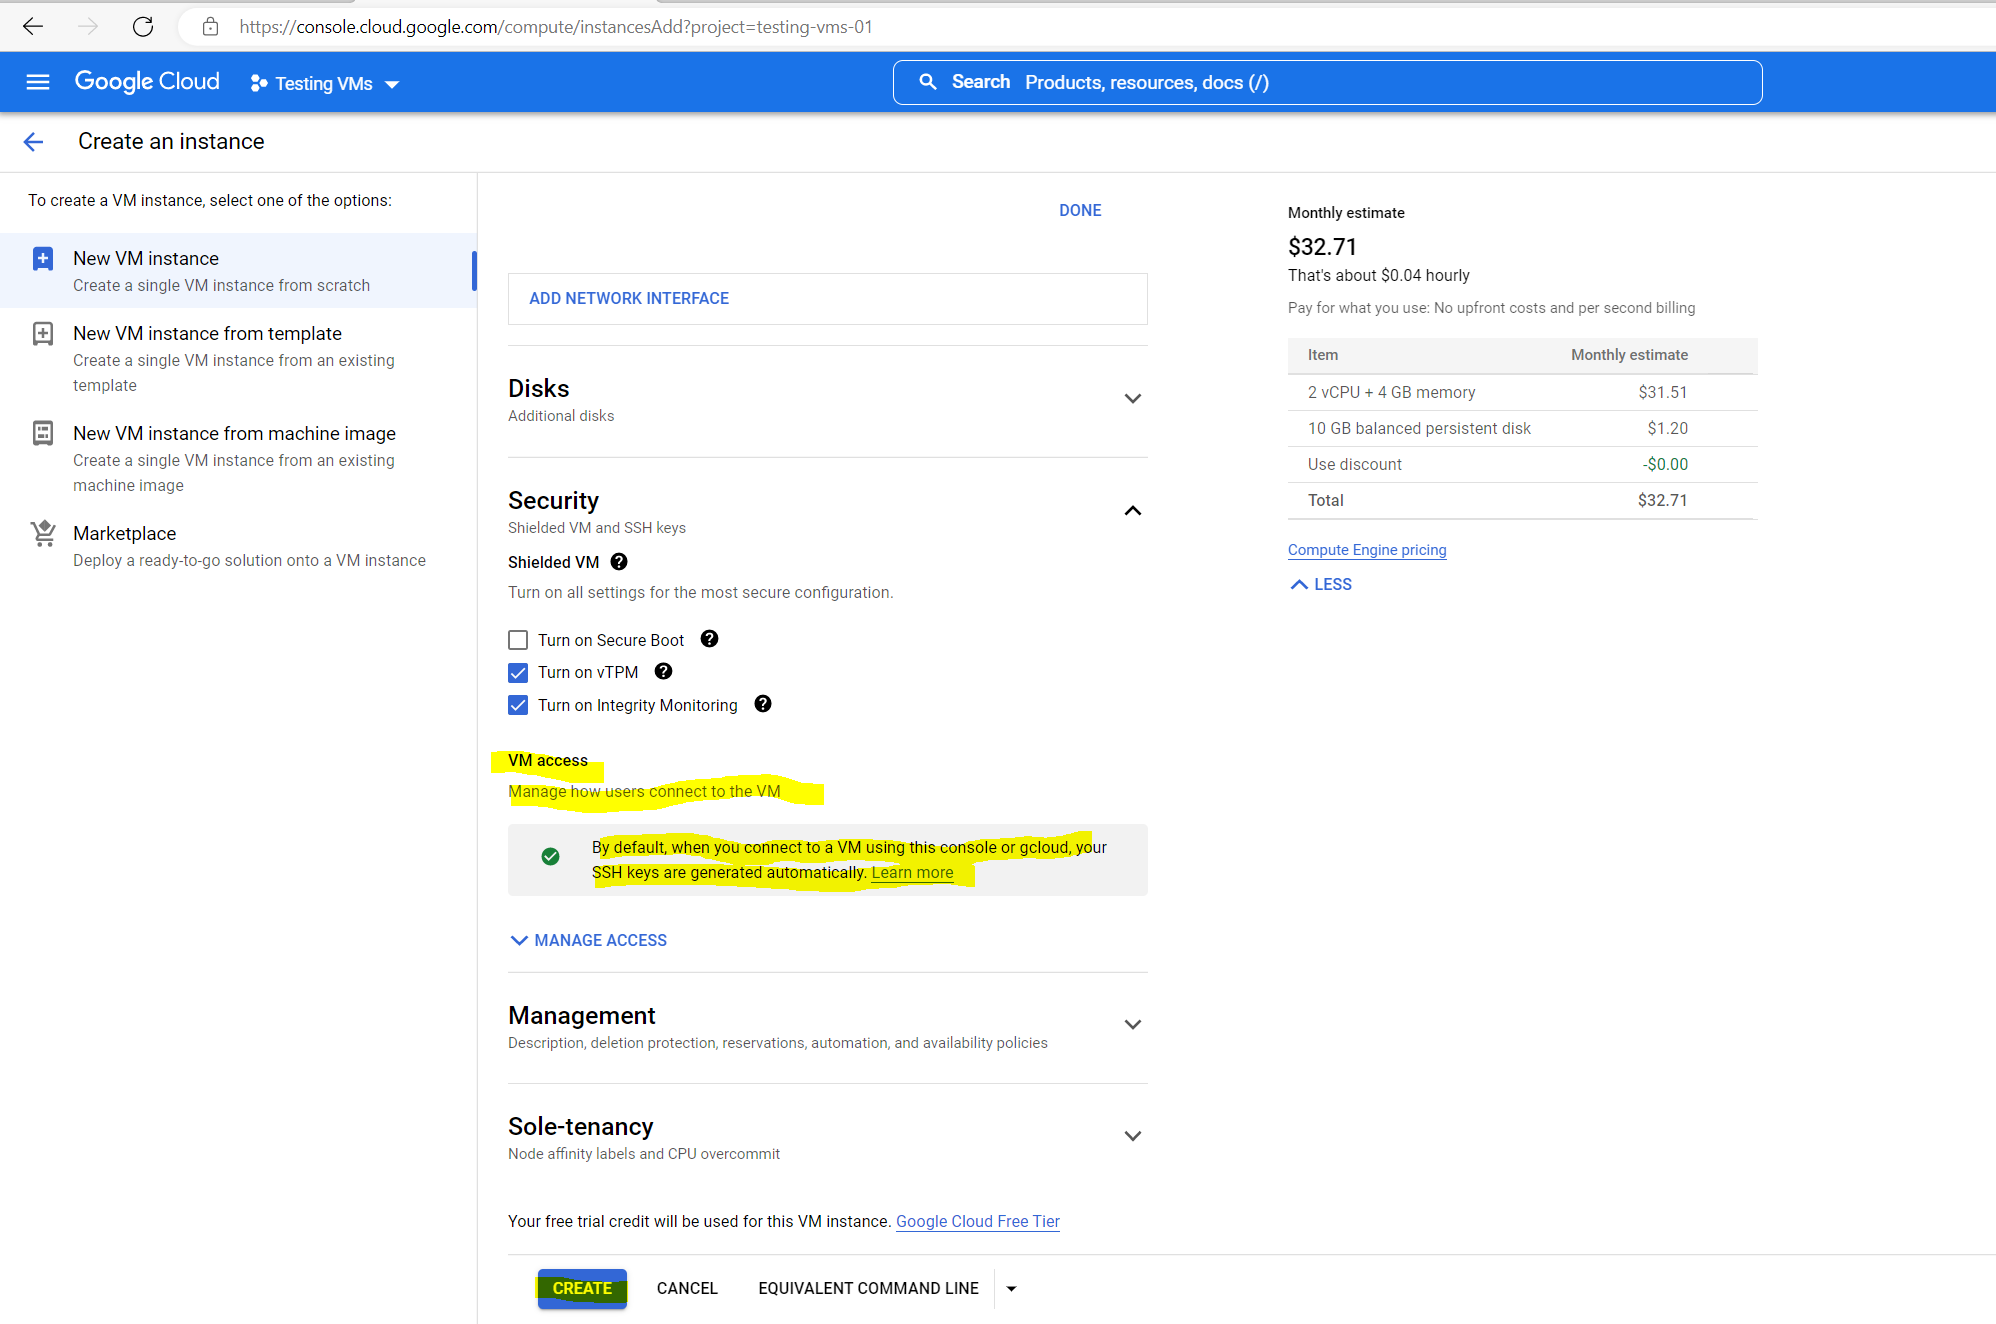
VM access section
About SSH connection
https://cloud.google.com/compute/docs/instances/sshBy default, passwords aren’t configured for local users on Linux VMs.
Before you can connect to a VM, several configurations must be performed. If you use the Google Cloud console or the Google Cloud CLI to connect to your VMs, Compute Engine performs these configurations on your behalf.
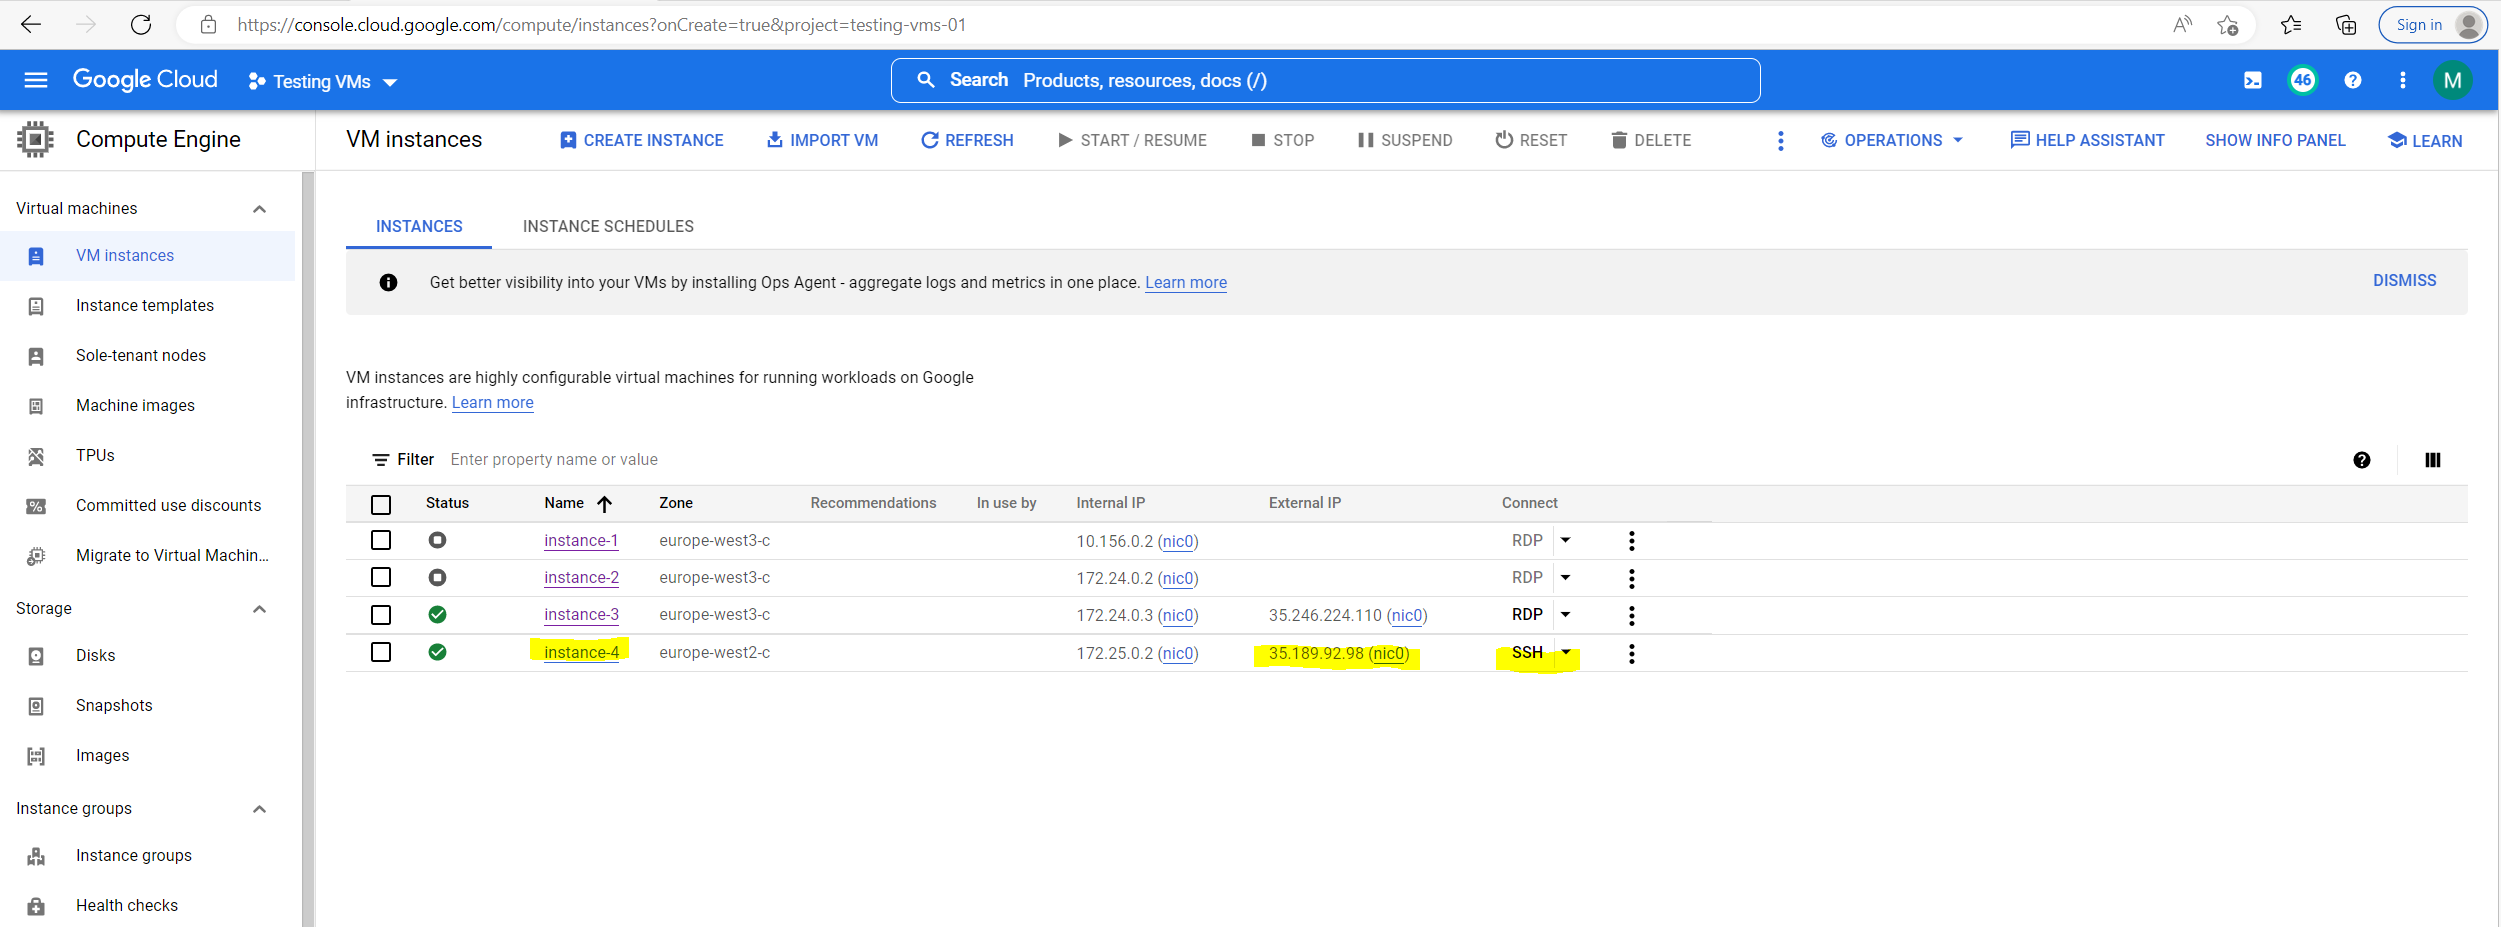
The new Ubuntu VM instance will be deployed.

Connecting by using SSH to the Linux VM (Ubuntu)
In general, the best SSH connection methods are described in the Connecting to instances document.
Compute Engine uses key-based SSH authentication to establish connections to all Linux virtual machine (VM) instances. You can optionally enable SSH for Windows VMs. By default, passwords aren’t configured for local users on Linux VMs.
Before you can connect to a VM, several configurations must be performed.
If you use the Google Cloud console or the Google Cloud CLI to connect to your VMs, Compute Engine performs these configurations on your behalf.
Compute Engine performs different configurations depending on which tool you use to connect and whether you manage access to VMs through metadata or OS Login. OS Login is available only for Linux VMs.
By default, Compute Engine uses custom project and/or instance metadata to configure SSH keys and to manage SSH access. All Windows VMs use metadata to manage SSH keys, while Linux VMs can use metadata keys or OS Login.
If you use OS Login, metadata SSH keys are disabled.
VMs that don’t use OS Login store SSH keys in Compute Engine project and instance metadata.
If you connect to VMs without using the Google Cloud console or the gcloud CLI, you must perform some configurations yourself.
Source: https://cloud.google.com/compute/docs/instances/ssh
Access to VMs through Metadata
Connecting by using the Google Cloud Console (by default Metadata-managed SSH connections)
The easiest and fastest way after deploying an new Linux instance is to use the Google Cloud Console.
Note: When you connect to VMs using the Google Cloud console, Compute Engine automatically creates an ephemeral SSH key for you.
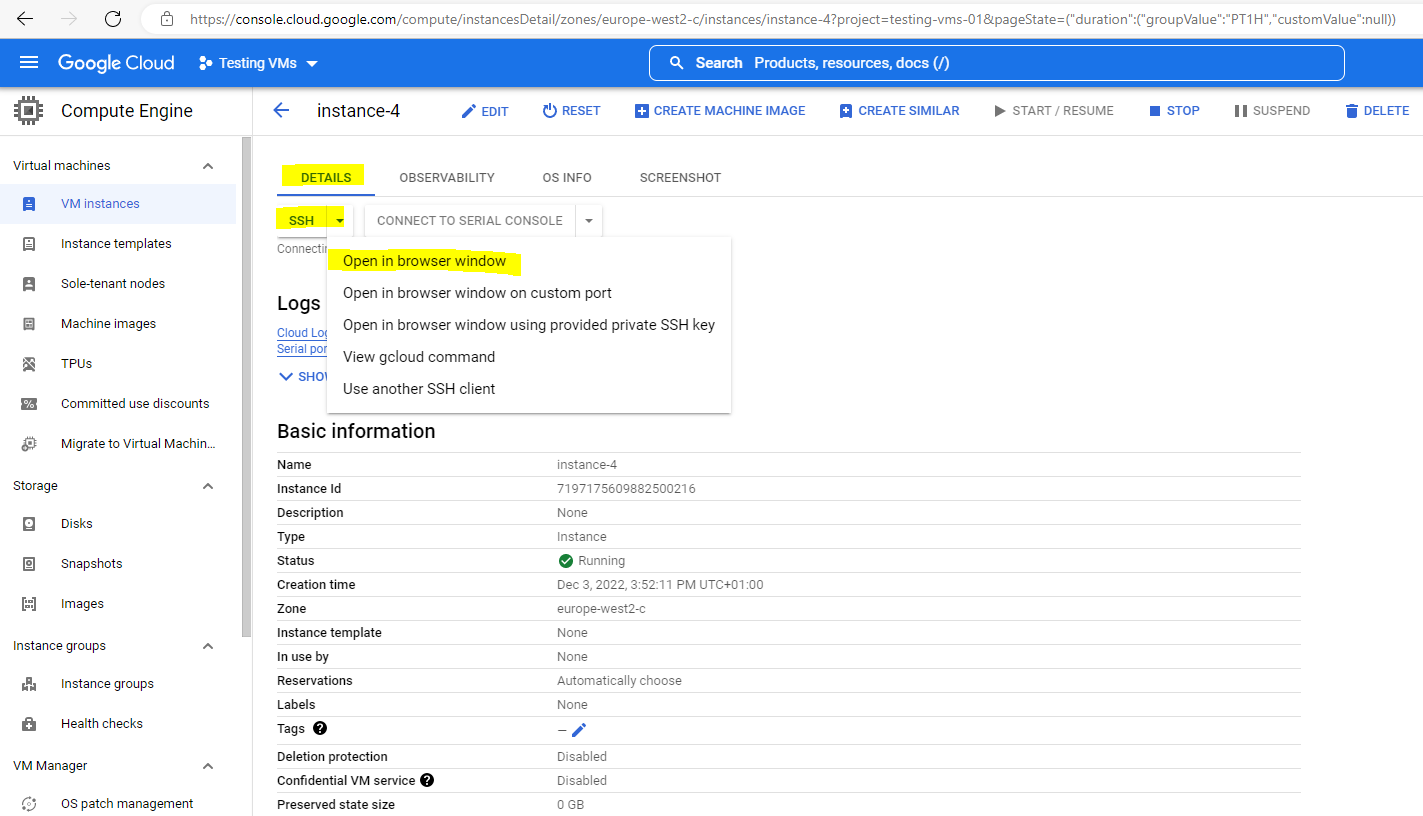
When you click on the button Open in browser window as shown above, the following steps will executed.
Compute Engine sets a username and creates an ephemeral SSH key pair with the following configuration:
- Your username is set as the username in your Google Account. For example, if the email address associated with your Google Account is cloudysanfrancisco@gmail.com, then your username is cloudysanfrancisco.
- Your public and private SSH keys are stored in your browser session.
- Your SSH key has an expiry of five minutes. Five minutes after Compute Engine creates the key, you can’t use the SSH key to connect to the VM anymore.
Compute Engine uploads the public SSH key and username to metadata.
About VM metadata
https://cloud.google.com/compute/docs/metadata/overview
Compute Engine retrieves the SSH key and username from metadata, creates a user account with the username, and on Linux VMs, stores the public key in your user’s ~/.ssh/authorized_keys file on the VM. On Windows VMs, Compute Engine doesn’t store the public key on the VM.
Compute Engine grants your connection.
Source: https://cloud.google.com/compute/docs/instances/ssh
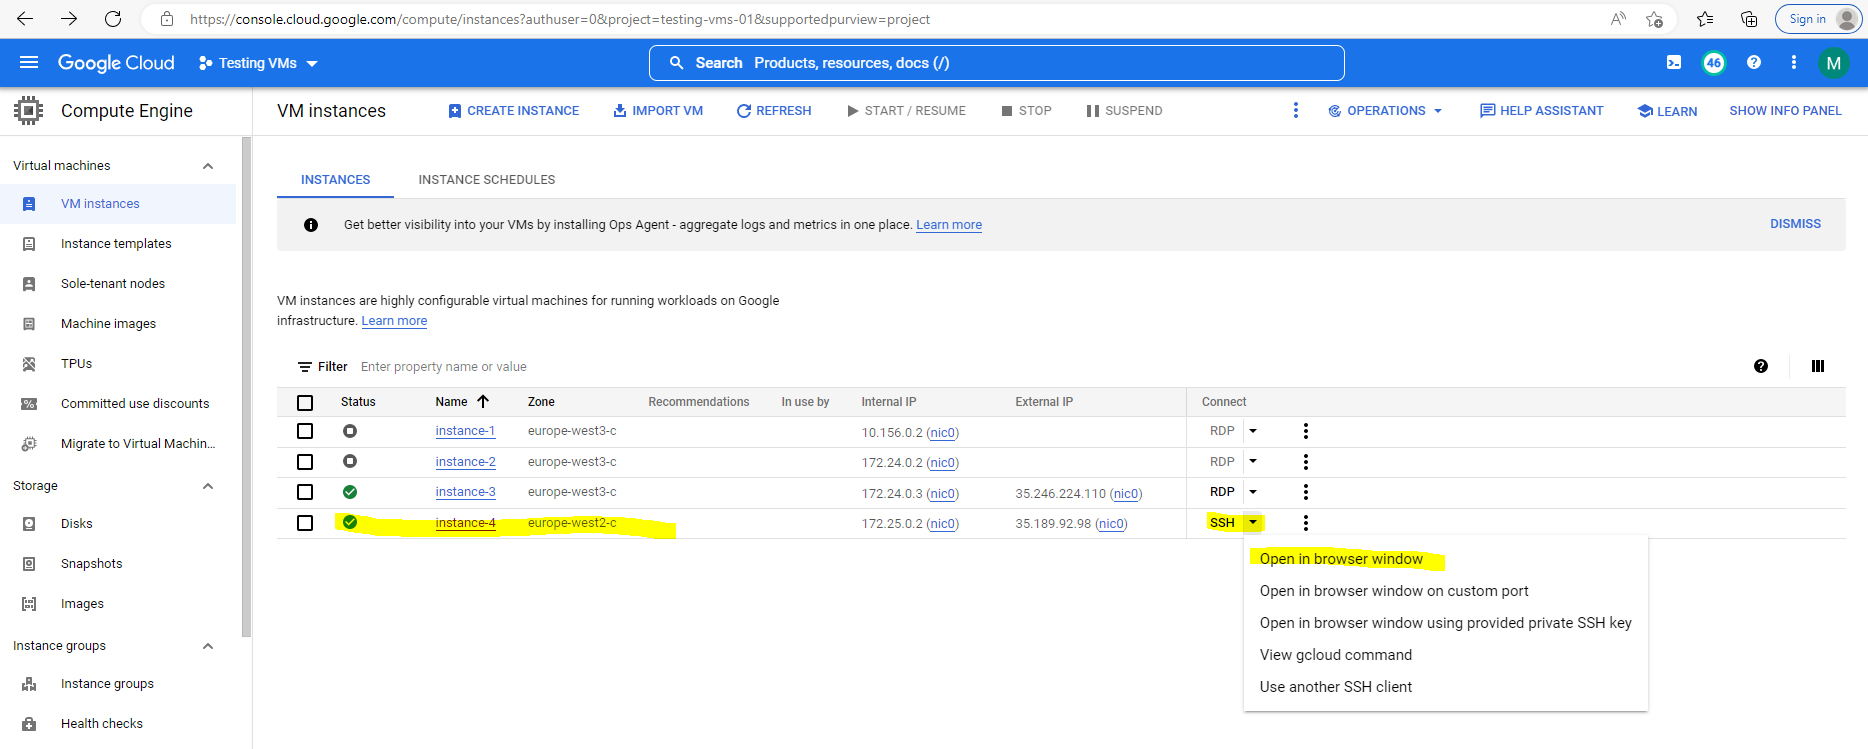
So to connect to the VM click in the GCP console and the VM instance overview or details page on SSH –> Open in browser window.
SSH-in-browser
You can connect to Compute Engine virtual machine (VM) instances from within the Google Cloud console by using the SSH-in-browser tool. SSH-in-browser doesn’t require any additional extensions or software. SSH-in-browser supports connections from VMs that store SSH keys in metadata, VMs that use OS Login, and VMs that use IAP for TCP forwarding.
Each time you connect to a VM by using SSH-in-browser, Compute Engine creates an ephemeral key pair and sets a username for your connection. Your username and the location where Compute Engine stores your SSH keys depend on whether you use SSH keys stored in metadata, or OS Login. For more information see About SSH connections.
Source: https://cloud.google.com/compute/docs/ssh-in-browser
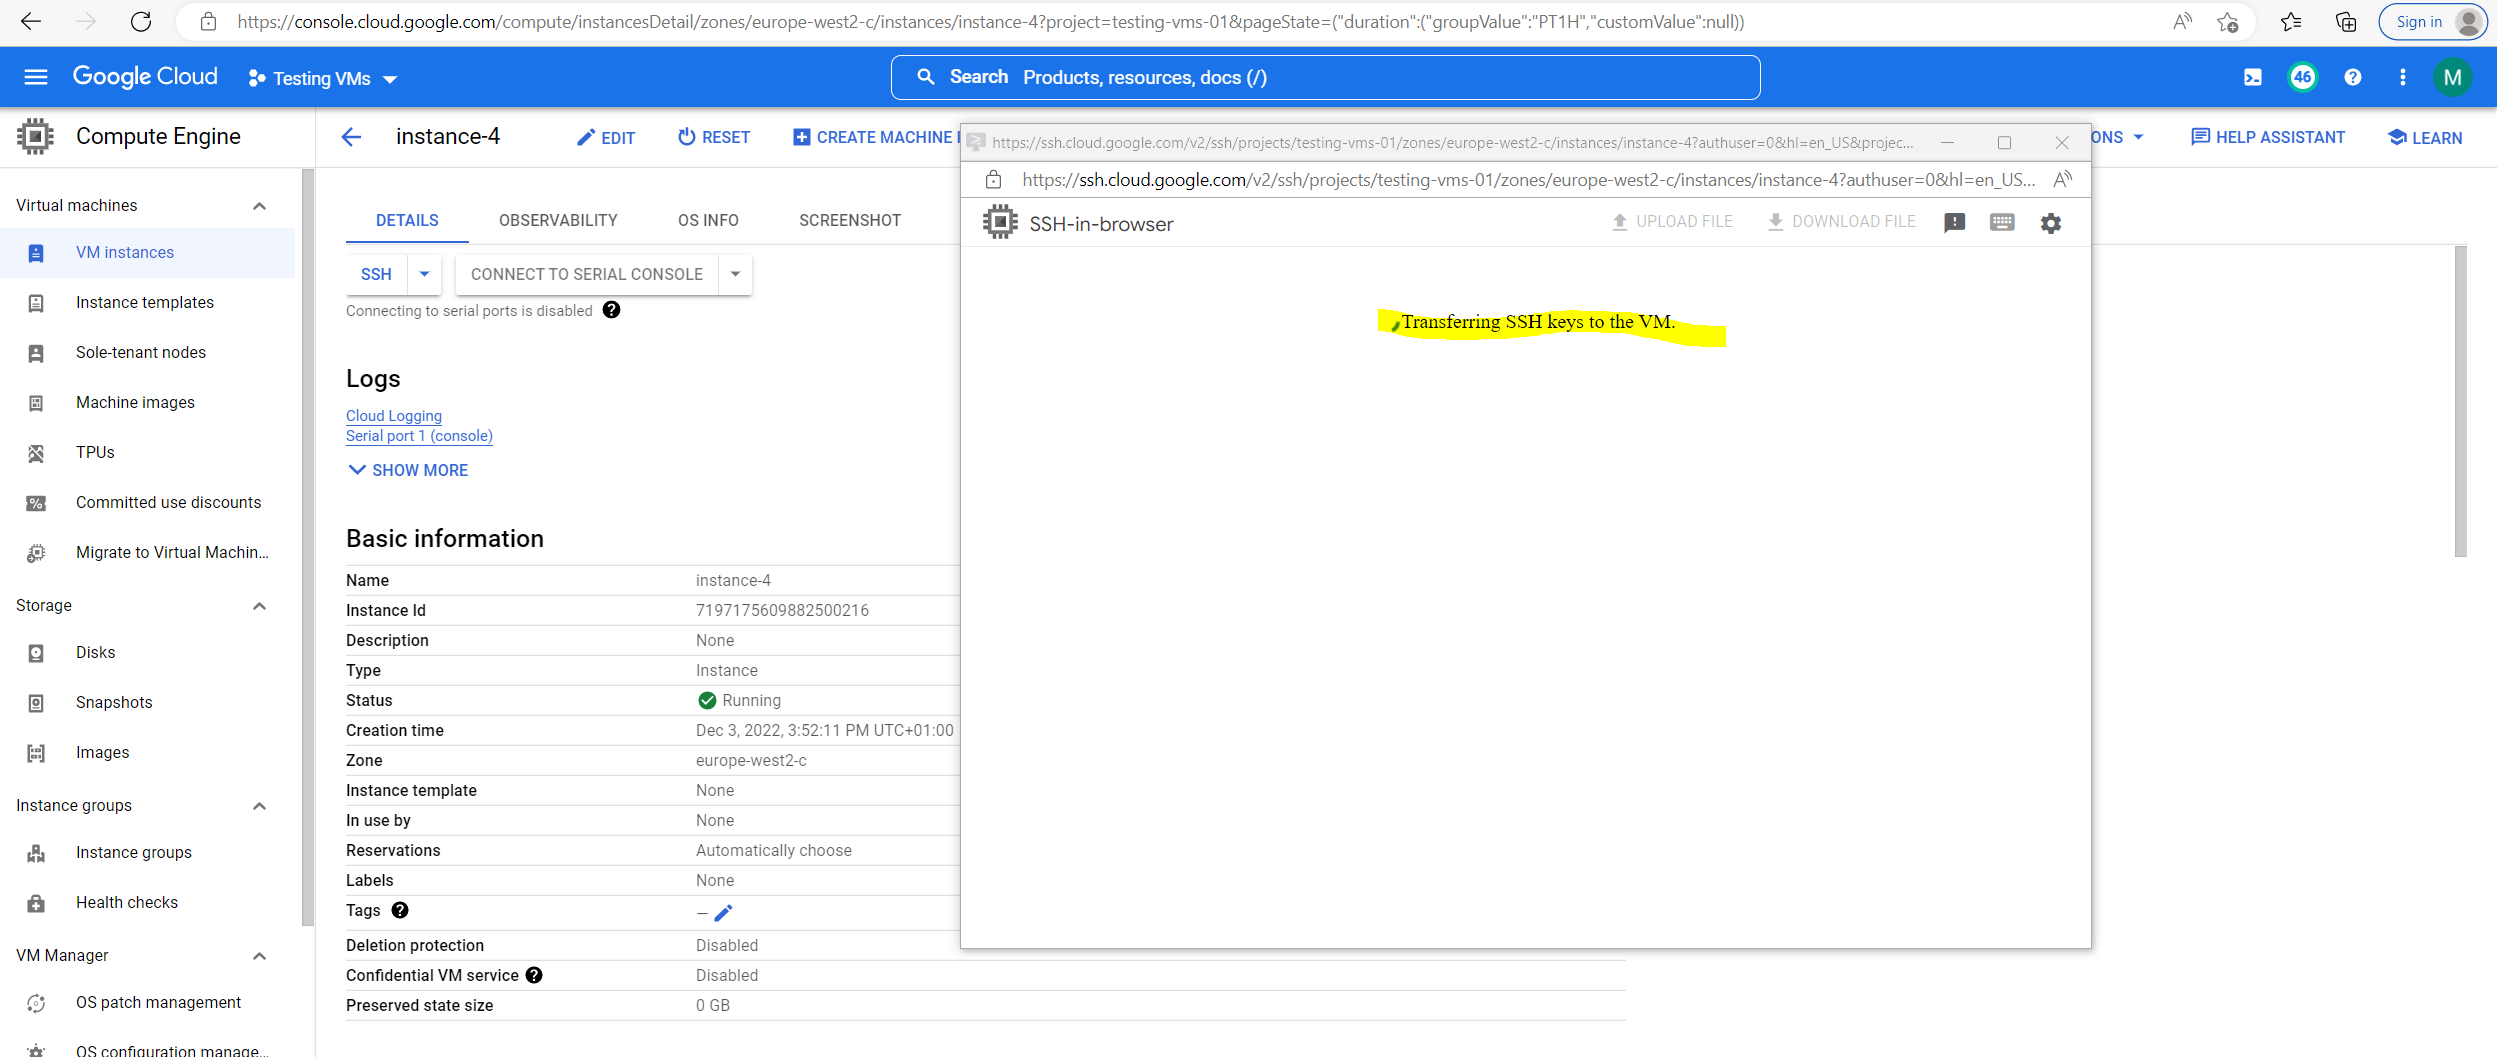
The ephemeral public key will be transferred from metadata to the VM instance.
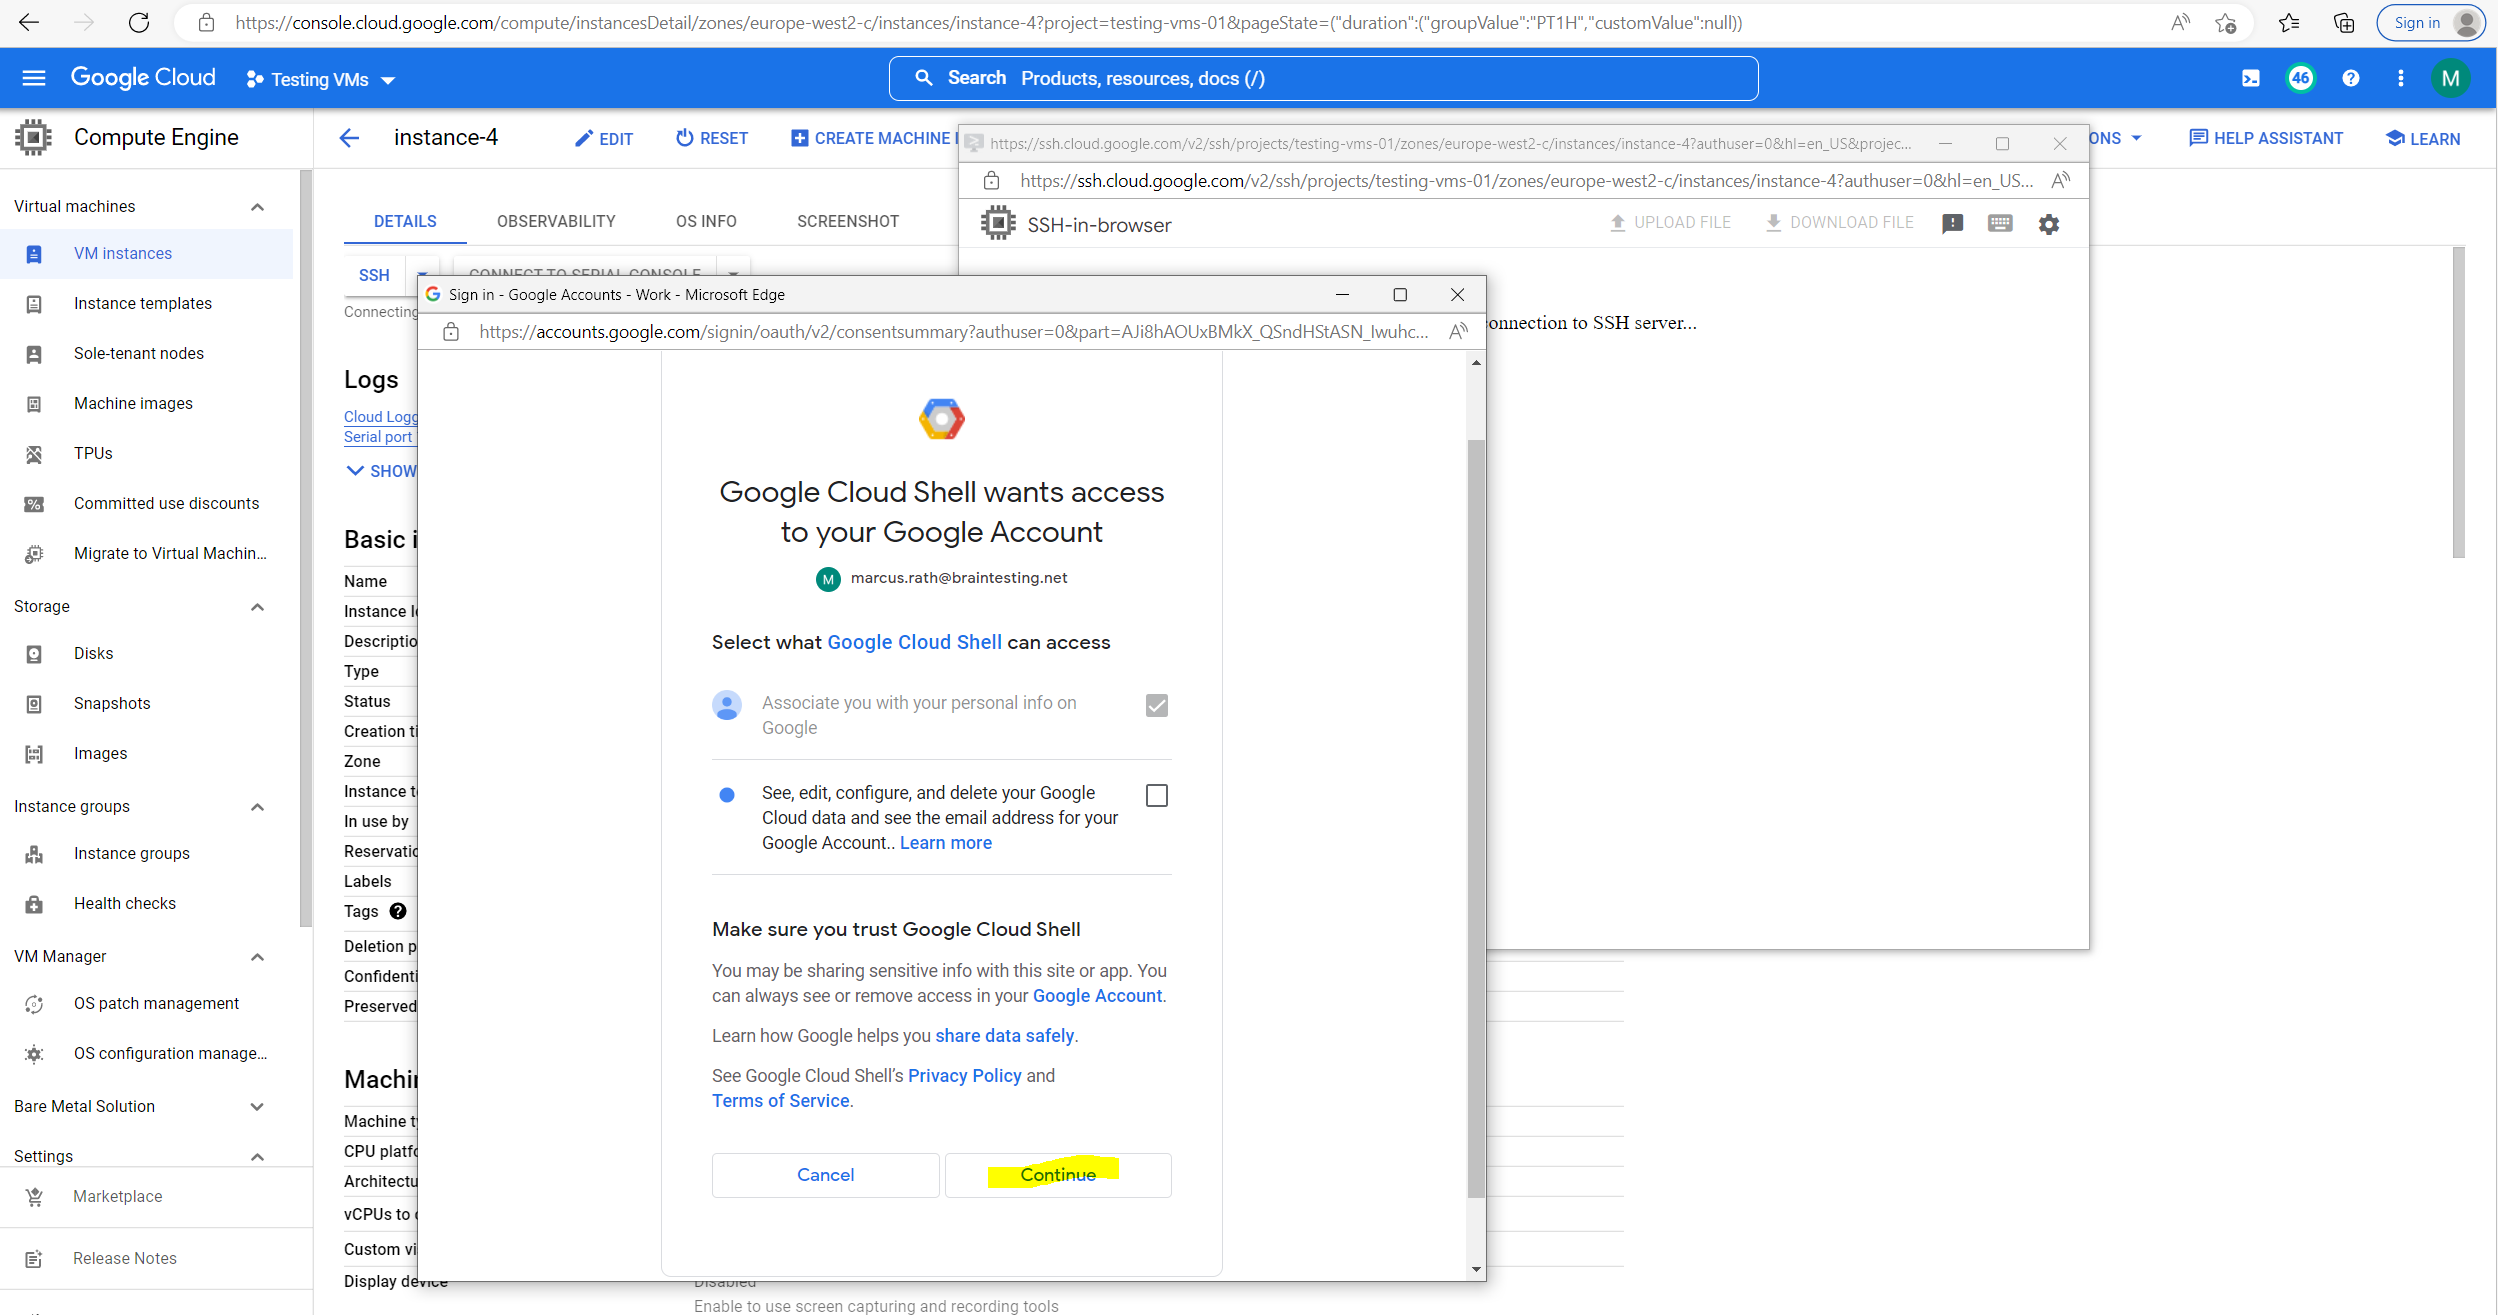
About how the OAuth 2.0 Authorization flow exactly will work, you will find at the following link several posts about in my blog.

Sign in with your Google Account.

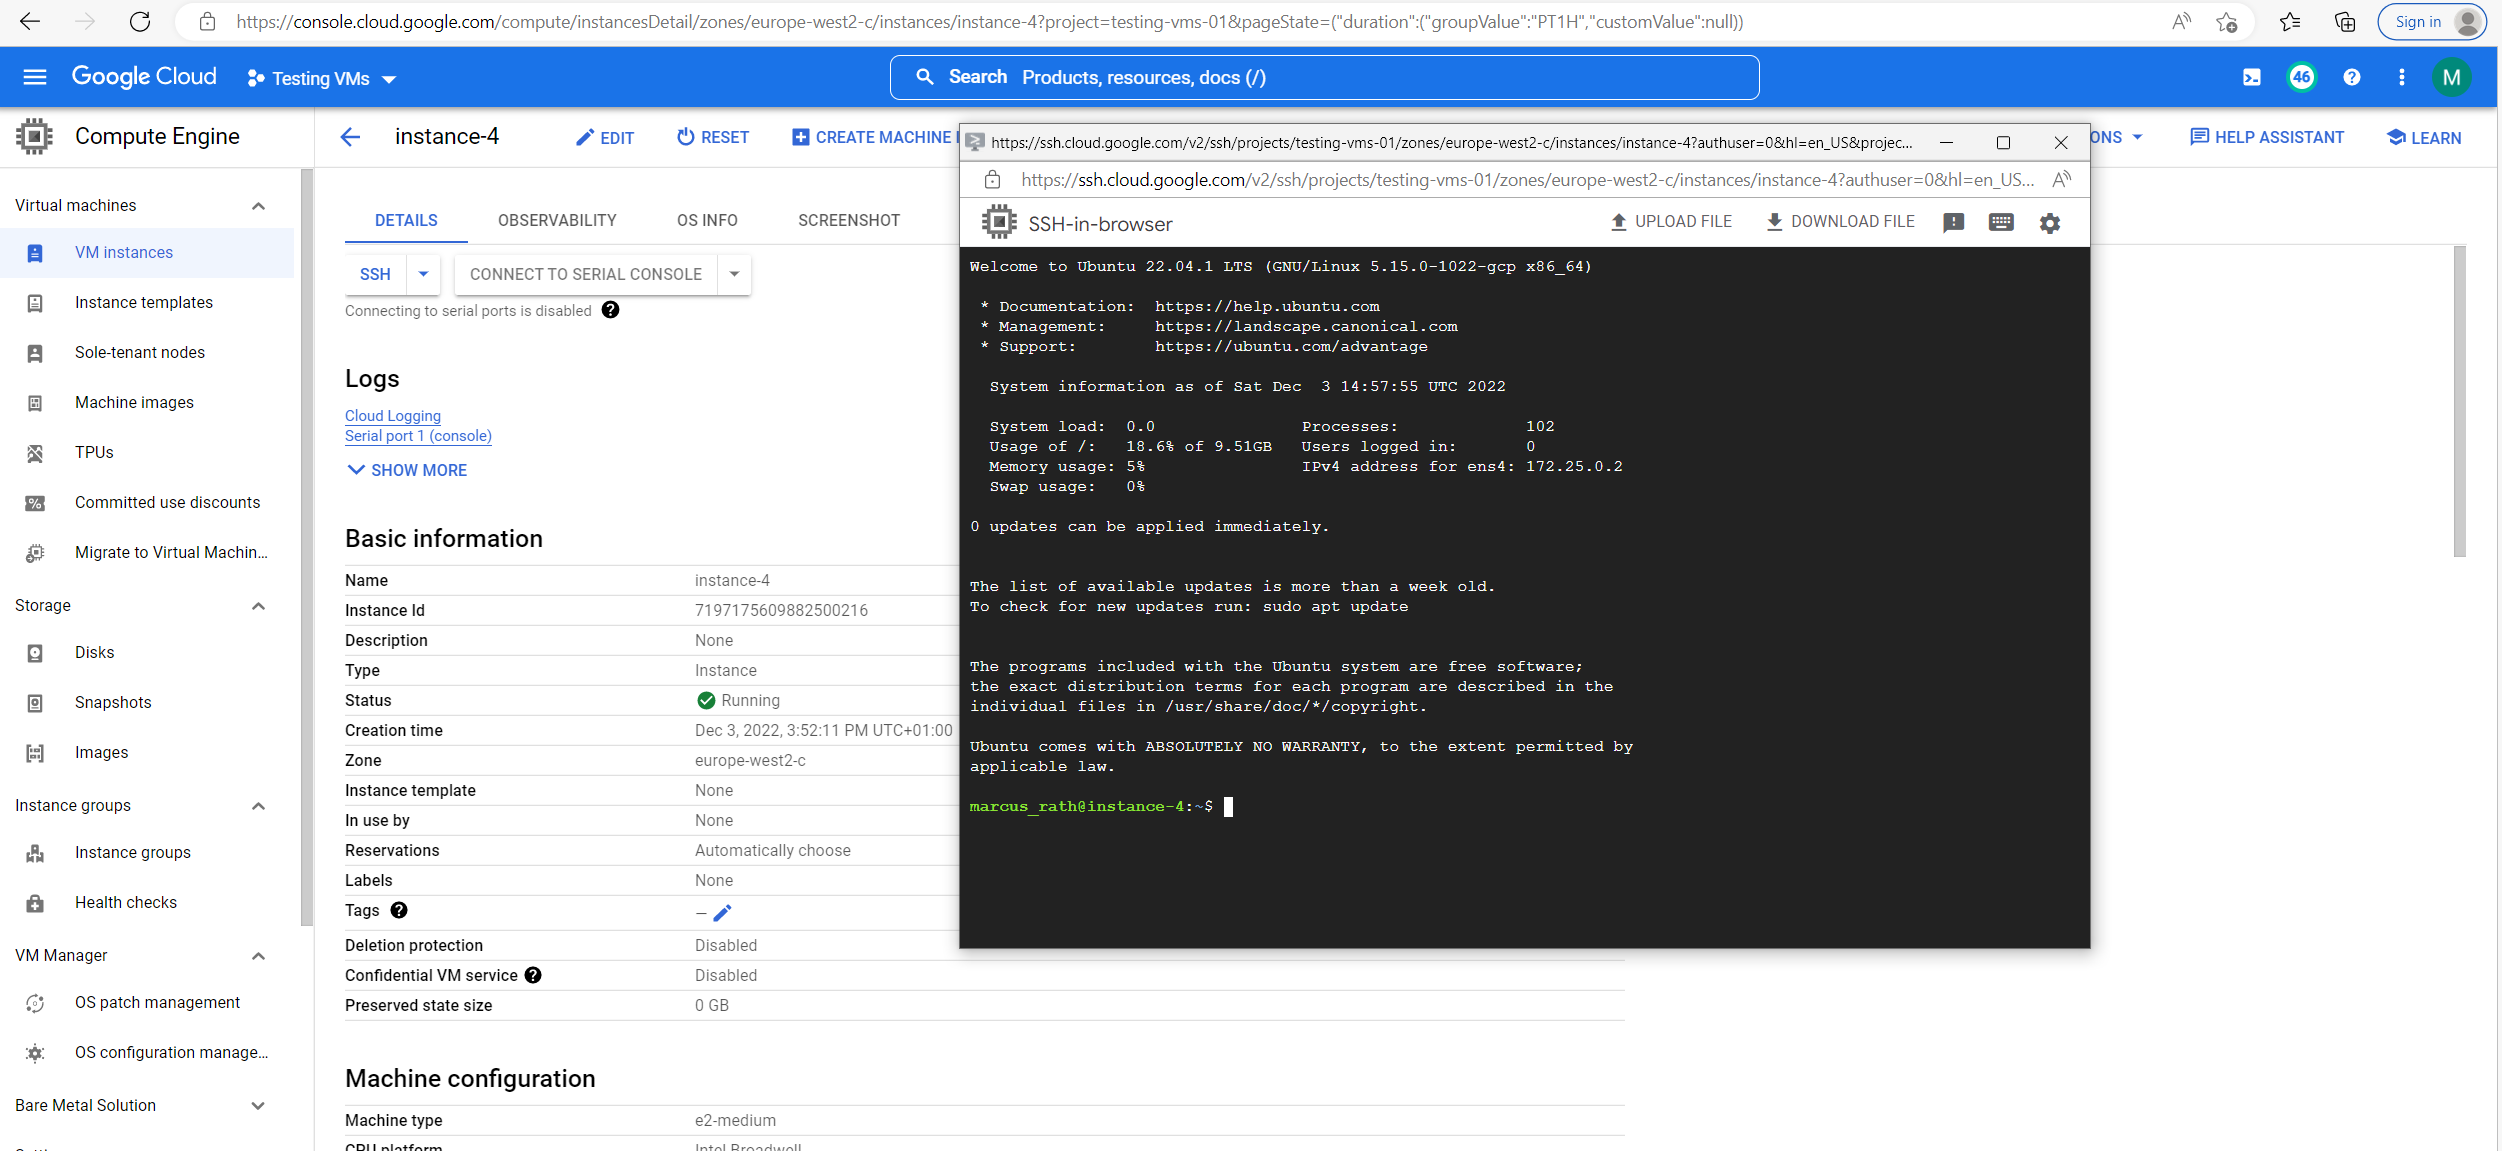
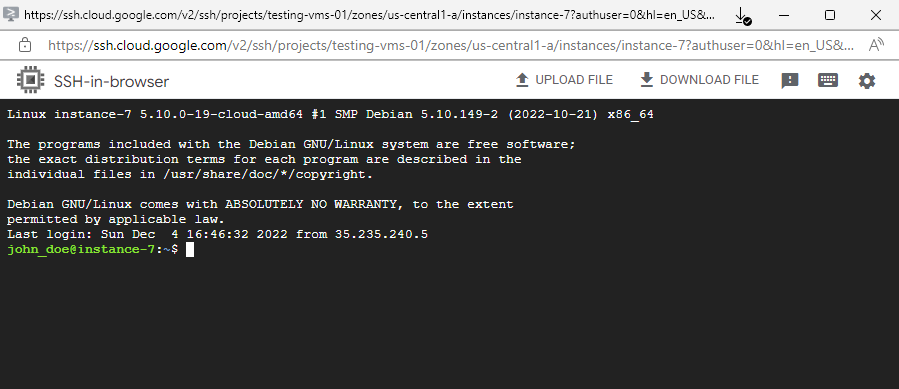
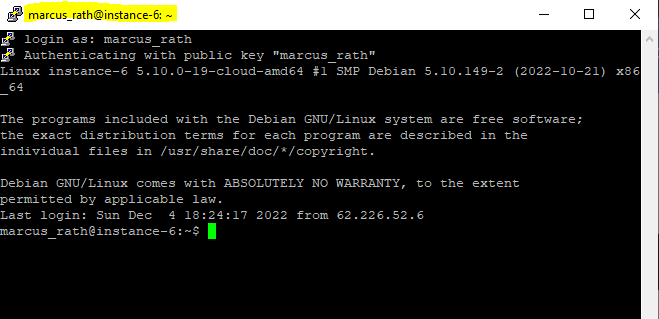
Finally I will have a browser based SSH console and already logged in.
And as also mentioned my username created and derived from my Google’s account email address with one exception. Google apparently changes the period into an underline.
From marcus.rath@braintesting.net the username marcus_rath was created.
Regarding the POSIX standards also periods allowed to be included in the username. Nevertheless several distributions will handle this different. In Ubuntu by default periods are not allowed to be included in the username but you can force Ubuntu to allow and create them by using for the adduser command the –force-badname flag.
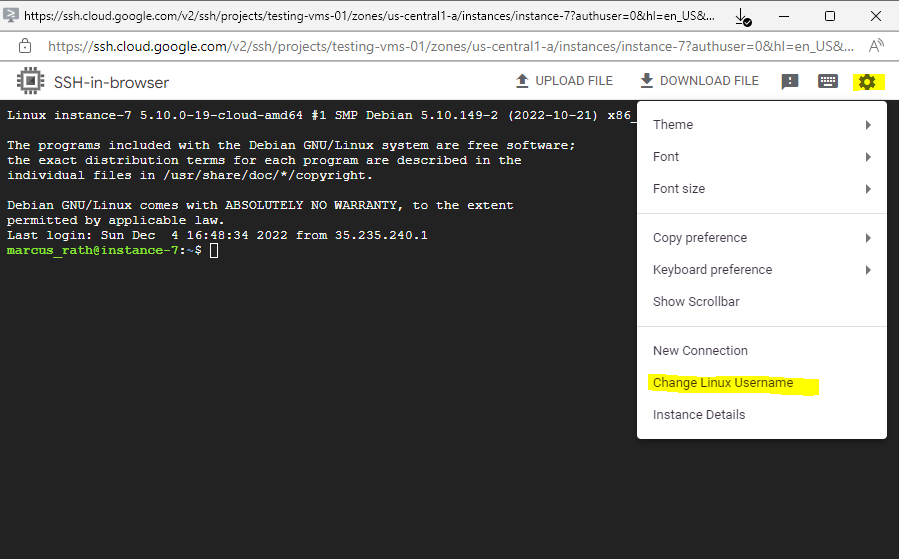
You can override the default username by clicking the settings gear icon and selecting Change Linux Username when you connect to the VM.

Connecting by using the Google Cloud CLI (by default Metadata-managed SSH connections)
You can either use cloud shell within the Google Cloud console or you can use the local shell installed on your computer.
About how to install and configure the local shell you can read my following post.
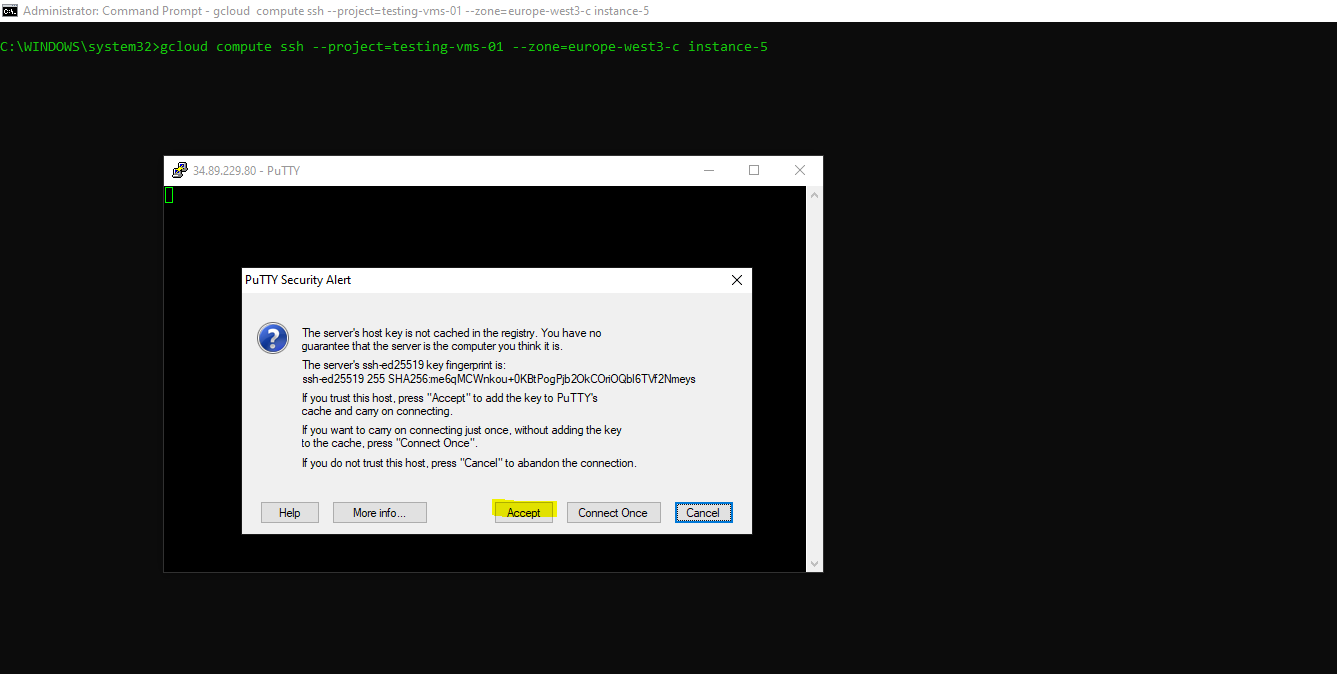
Run the following command to connect to your Linux instance you have IAM access to.
gcloud compute ssh --project=<project id> --zone=europe-west3-c <vm-name>
In case you will using a Windows Computer, whether putty is installed or not, the Google Cloud CLI will launch putty when executing the gcloud compute ssh command as shown below.
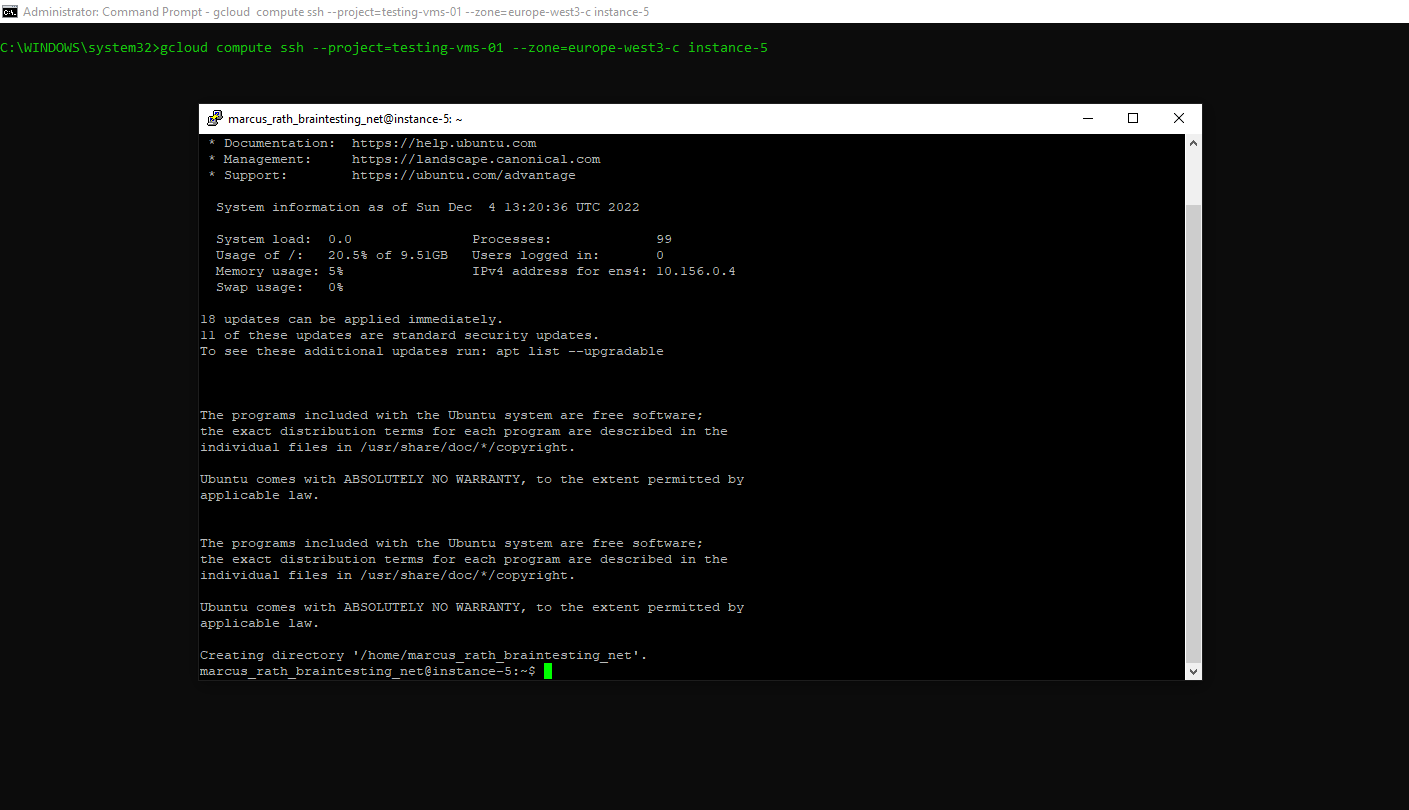
The reason for is that recent releases of Cloud SDK for Windows come with prepackaged putty executables as shown below.
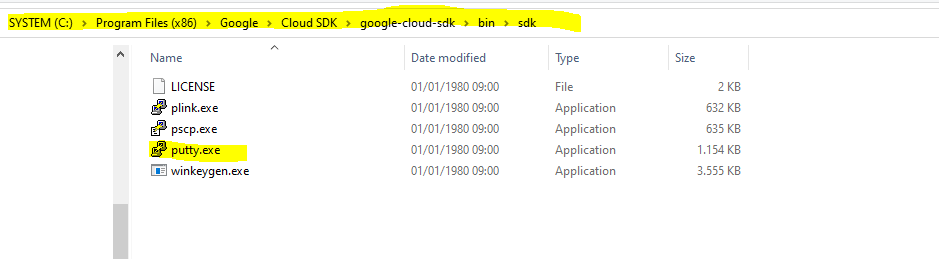
By looking at the source code of gcloud it seems that the use of PuTTY is hardcoded and it’s currently not possible to choose another SSH client.
Source: https://superuser.com/questions/1281977/prevent-gcloud-from-using-putty-google-cloud-sdk-on-windows
Connecting by using third-party tools like Putty (metadata-based SSH keys)
When you connect to VMs using third-party tools like Putty, you must create and upload your own SSH keys to the Compute Engine project or instance metadata.
Risks of manual key management
All users who connect to VMs using SSH keys stored in metadata have sudo access to VMs.
You must keep track of expired keys and delete keys for users who shouldn’t have access to your VMs. For example, if a team member leaves your project, you must manually remove their keys from metadata, so they can’t continue to access your VMs.
Specifying your gcloud CLI or API calls incorrectly can potentially wipe out all of the public SSH keys in your project or on your VMs, which disrupts connections for your project members.
Source: https://cloud.google.com/compute/docs/instances/access-overview#risks
Below I will go through the separate steps to connect to my Linux VM by using PuTTY.
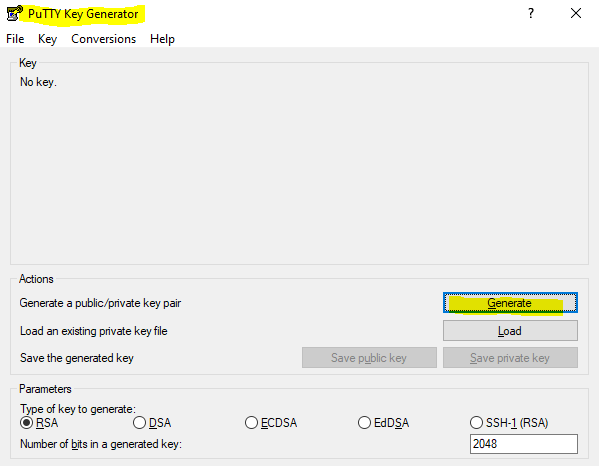
First we need to create a new SSH private/public key pair by using PuTTYgen. So open PuTTYgen if already installed on your computer or first download it under the following link.
Click on Generate and move your mouse to generate a random key.
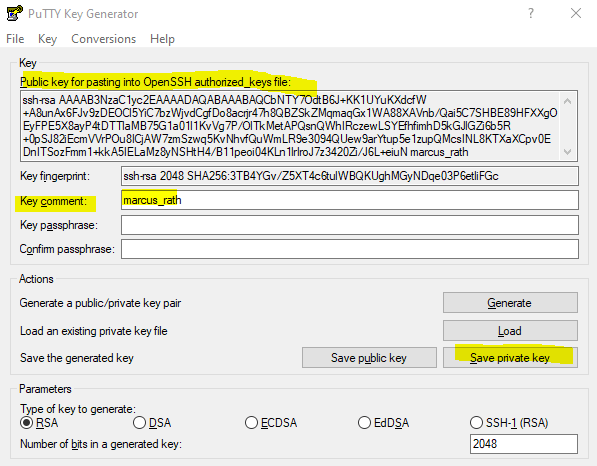
Under Key comment enter a username you want to use and click on Save private key to save it on your local computer you want to connect later to your Linux VM.
You can use each username you want and only need to be aware of the POSIX standards and distribution specific differences regarding valid characters the usename can contain.
Select the public key marked below and copy it.
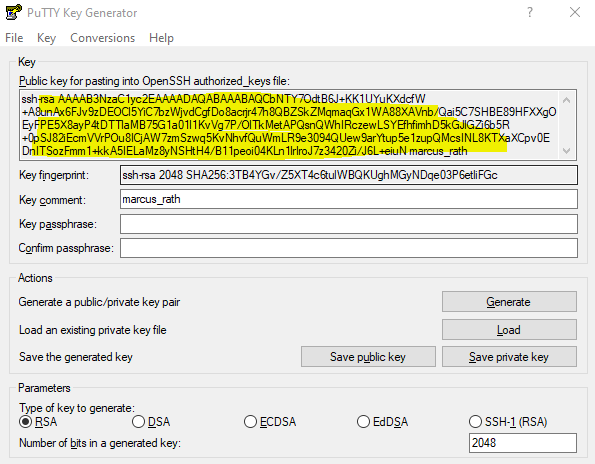
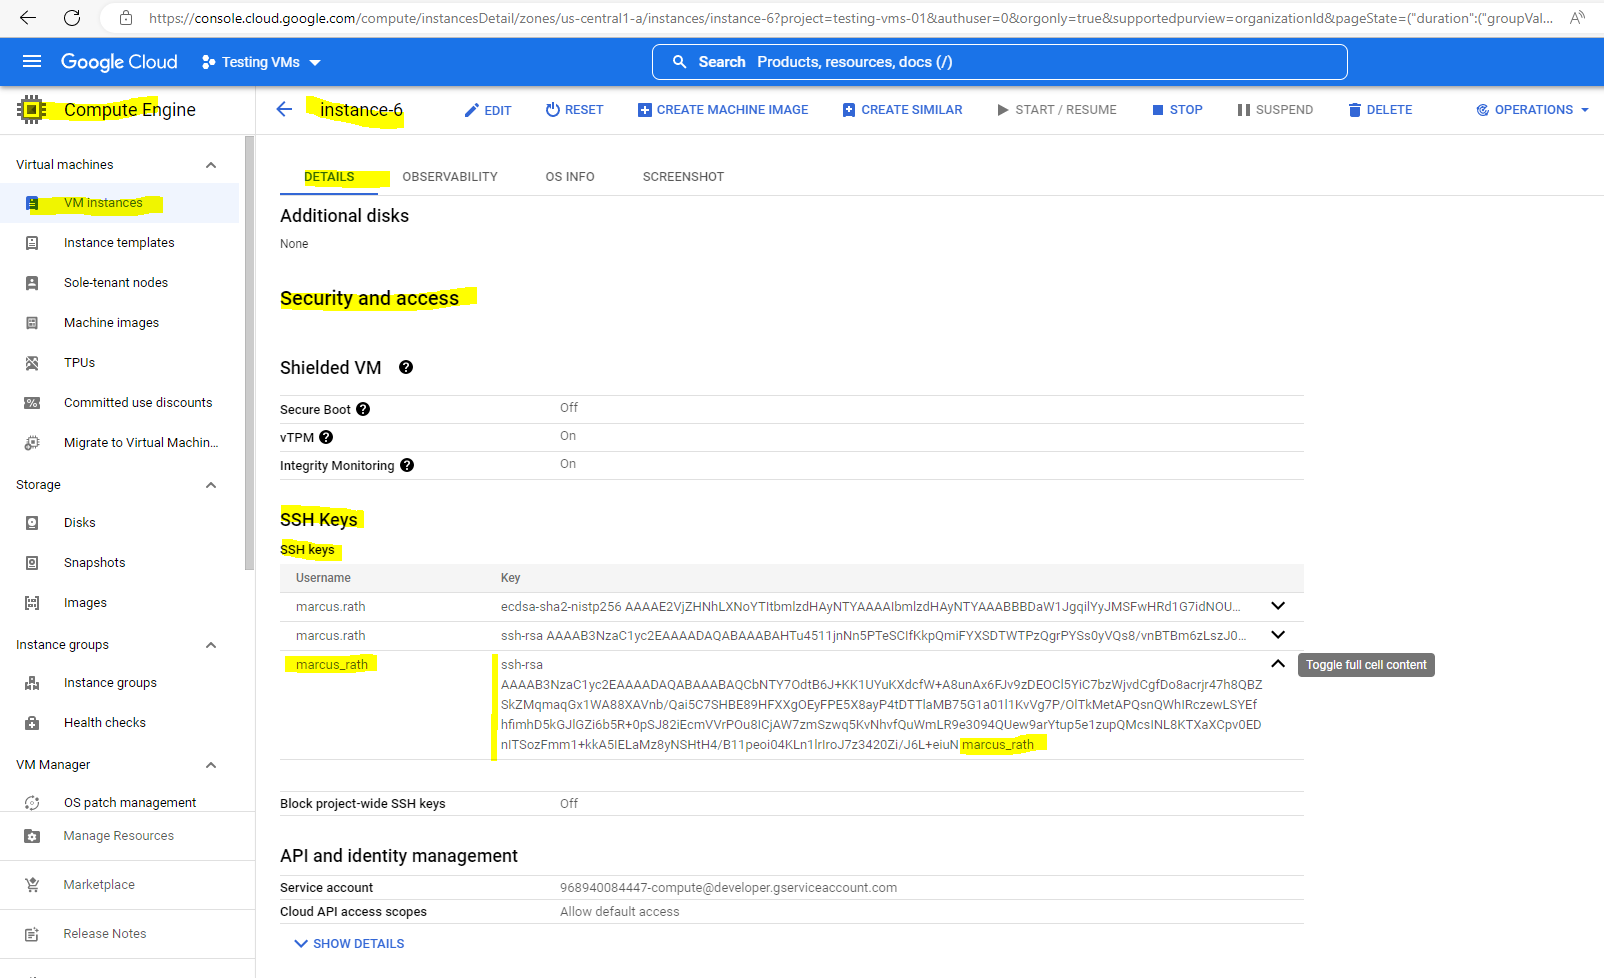
To upload the public key to the instance metadata open the details page in the GCP console from your VM instance and click on EDIT to add the previously copied public SSH key.
In the Security and access section under SSH Keys click on the ADD ITEM button to add your public key.

Finally click on SAVE.

Compute Engine will now create the user account and home directory including the .ssh directory on your Linux VM instance. Further the uploaded public key to metadata will be added to the authorized_keys file.
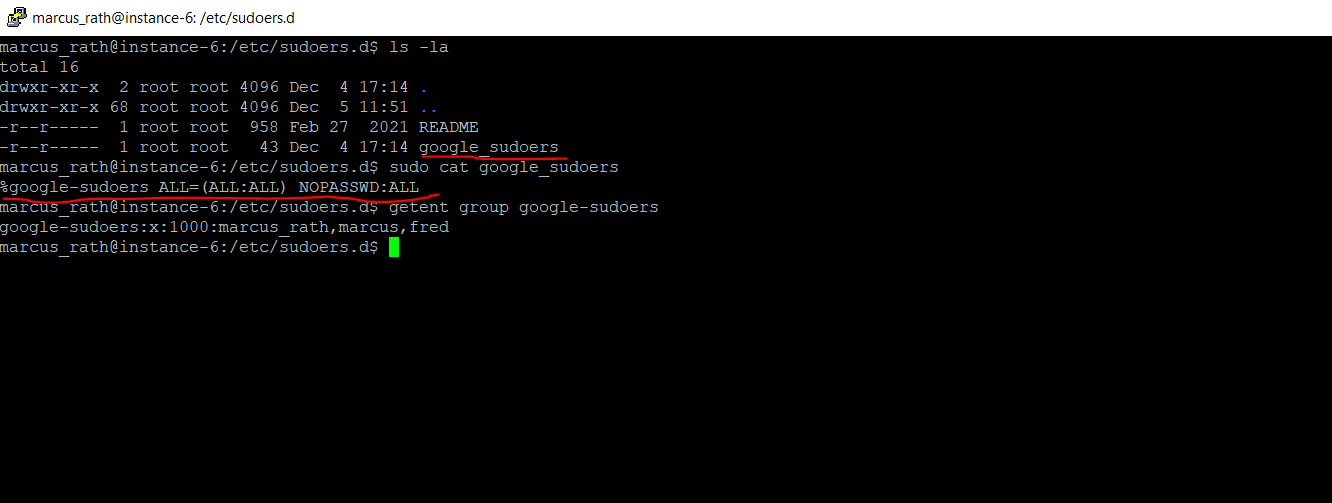
Further Compute Engine will add the user to the google_sudoers group which itself is granted root permissions in the /etc/sudoers.d/google_sudoers file.
NOPASSWD:ALL means that members can execute commands without prompted for password.
More about the sudo command and sudoers file you will find in my following post.
https://blog.matrixpost.net/linux-sudoers-sudo-command-files/More and in general about private/public key authentication you will find in my following post.
https://blog.matrixpost.net/set-up-ssh-private-public-key-without-using-password-authentication-on-linux/
As mentioned you can also store SSH keys that can be used to connect to the VM instances of a project to the project metadata. Project-level keys are propagated to all VM instances that DO not have their own SSH keys.
There’s one exception, if OS Login is enabled for the VM, metadata SSH keys are disabled and therefore of course also project-level keys won’t be propagated to theses VMs.
Therefore click on Metadata in Compute Engine for your selected project, select the SSH Keys tab and click on ADD SSH KEY.


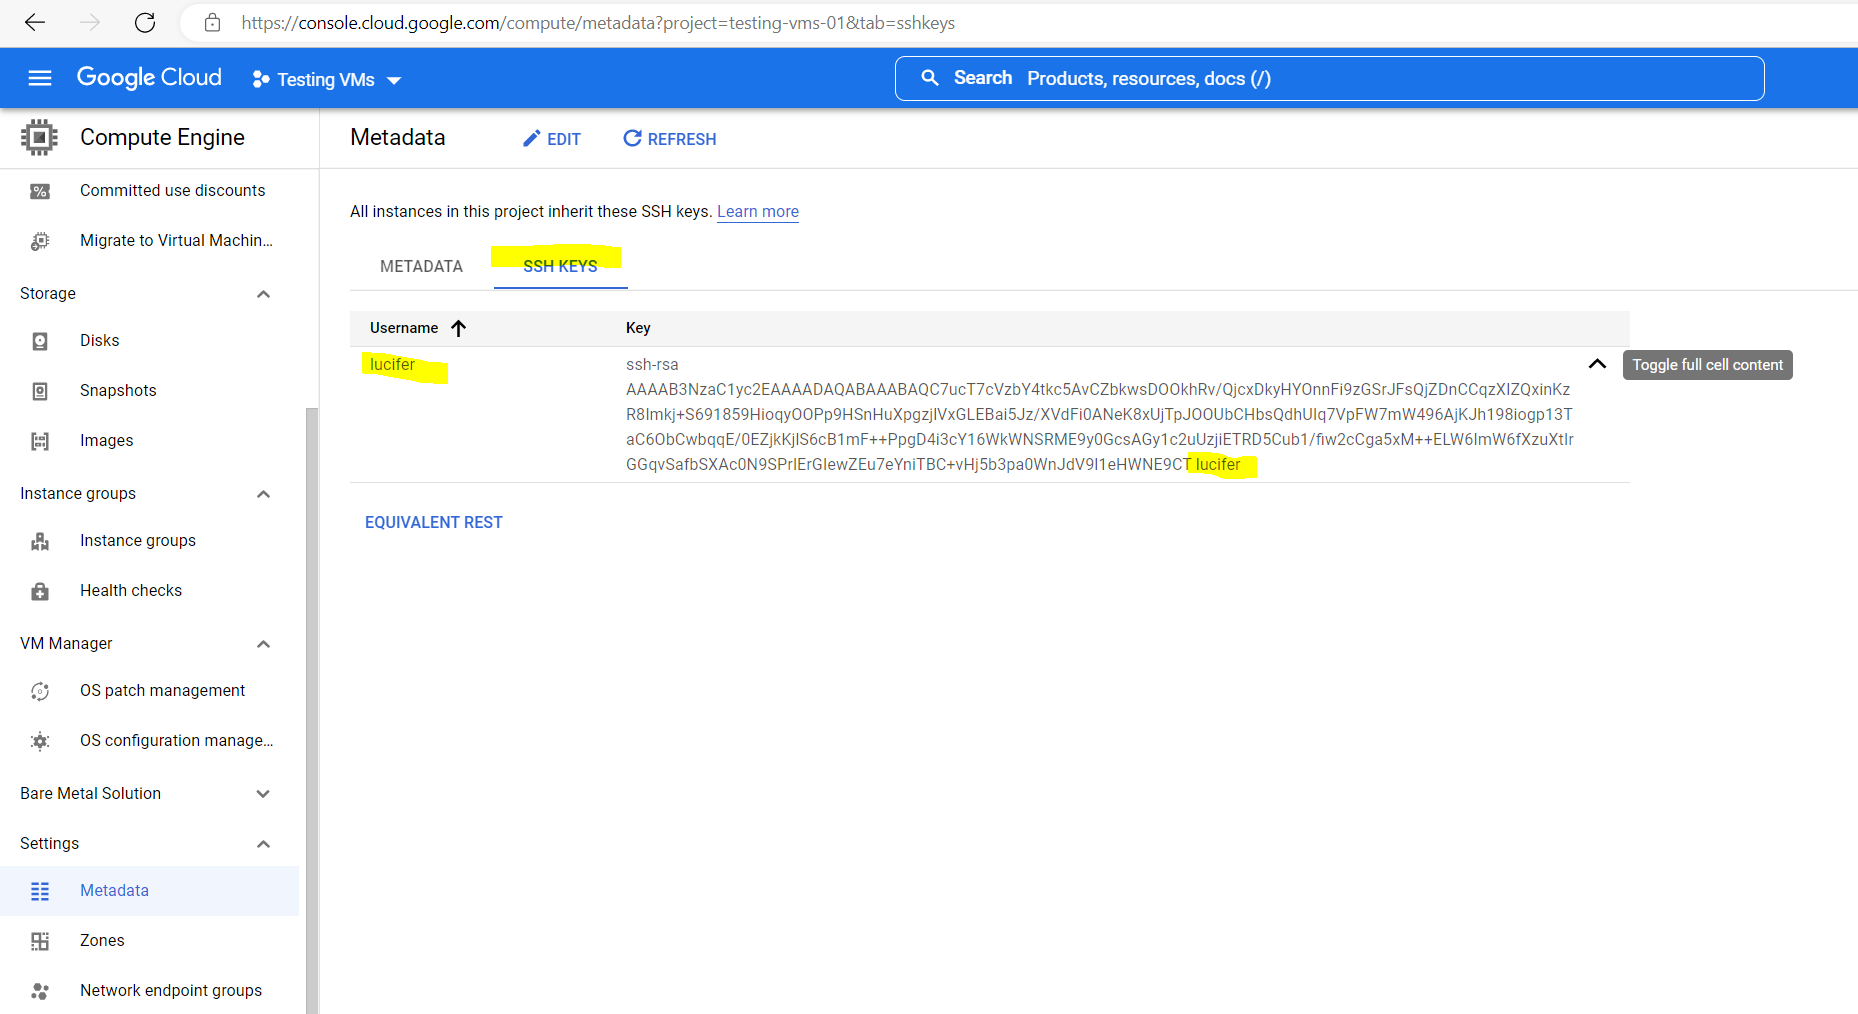
To check if the public key will be really deployed to all VM instances where OS Login is not enabled in my project, I will connect to my instance-4 where so far the user lucifer and its public key wasn’t provisioned through the instance metadata.
As you can see the user is created and also the public key is appended to the authorized_keys file.

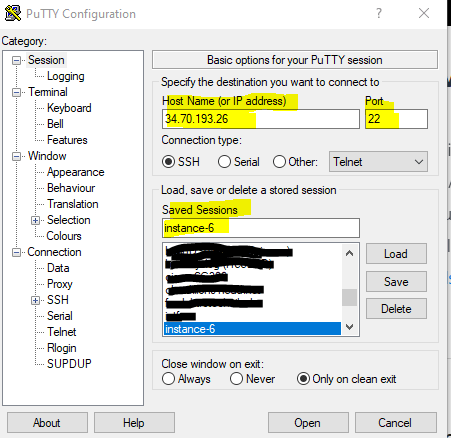
Now we can open PuTTY if installed on the computer or first download it.
In PuTTy create a new session by entering the external IP address of the Linux VM instance, or internal in case you can access the VM through an IPSec S2S VPN tunnel, the default Port 22 and a name for the session, then save it.
You also need to append the previoulsy saved private key to the session under Connection –> SSH –> Auth –> Authentication parameters
Don’t forget to save the settings in PuTTY after selecting the private key.
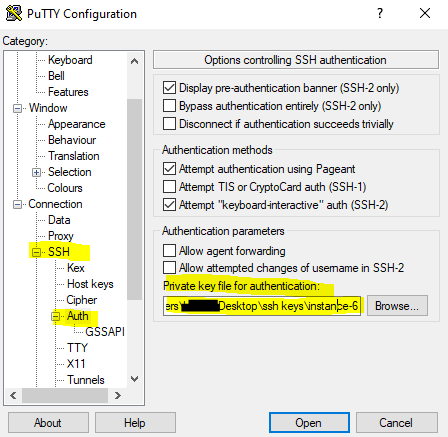
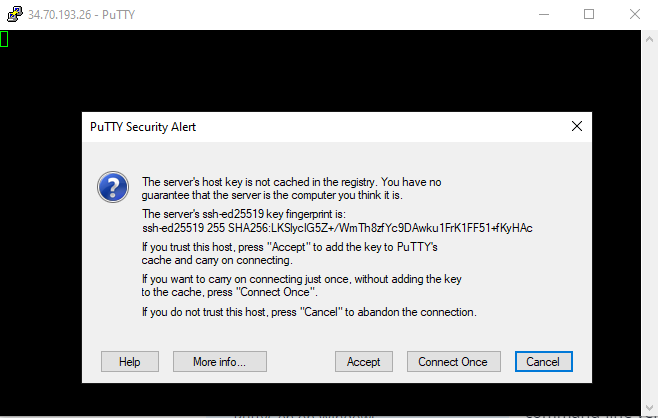
Finally you can connect to the VM by clickin on the Open button.
Click on Accept to trust the new host.
If you are interested in how the same works in Microsoft Azure and AWS, you can read my following posts.
Links
About SSH connection
https://cloud.google.com/compute/docs/instances/sshConnect to Linux VMs using Google tools
https://cloud.google.com/compute/docs/instances/connecting-to-instanceAbout VM metadata
https://cloud.google.com/compute/docs/metadata/overviewOpenSSH for Windows overview
https://learn.microsoft.com/en-us/windows-server/administration/openssh/openssh_overviewCreate SSH keys
https://cloud.google.com/compute/docs/connect/create-ssh-keysSSH-in-browser
https://cloud.google.com/compute/docs/ssh-in-browser