Google Cloud – Create and Connect to a new Windows VM Instance
Below we will see how to create in Google Cloud a new Windows VM instance and connect to it by using RDP.
Create a new Windows VM Instance
To create a new Windows VM instance I will first have to select a project where I want to deploy it to.
So below I will create an new instance in my project Testing Vms.
GCP console –> Compute Engine –> VM instances
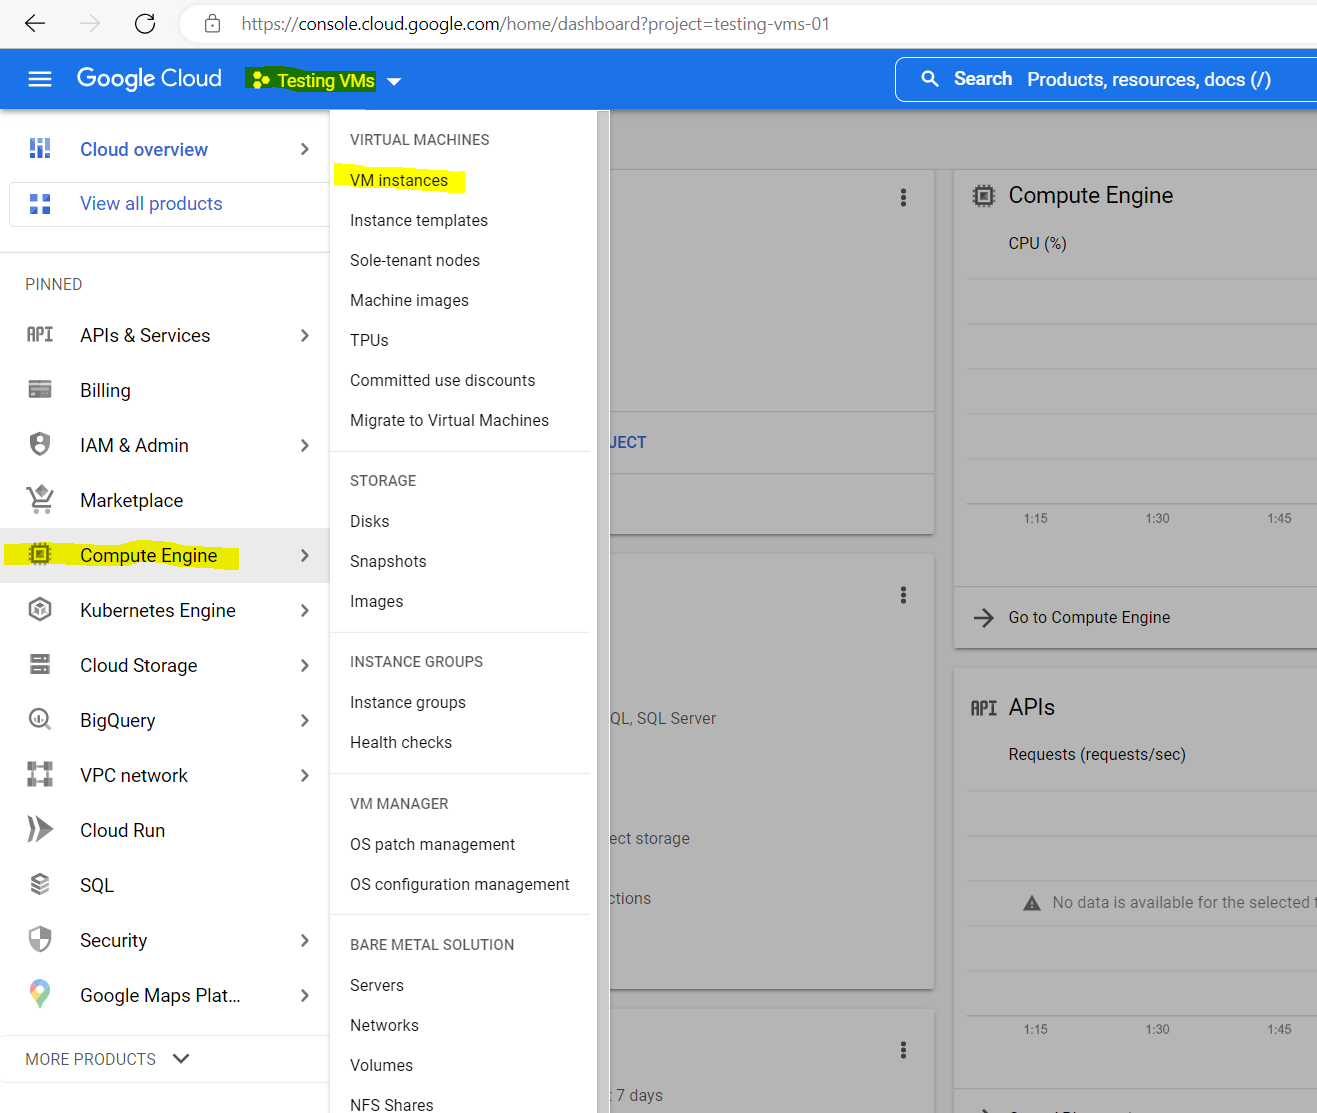
Click on Create Instance
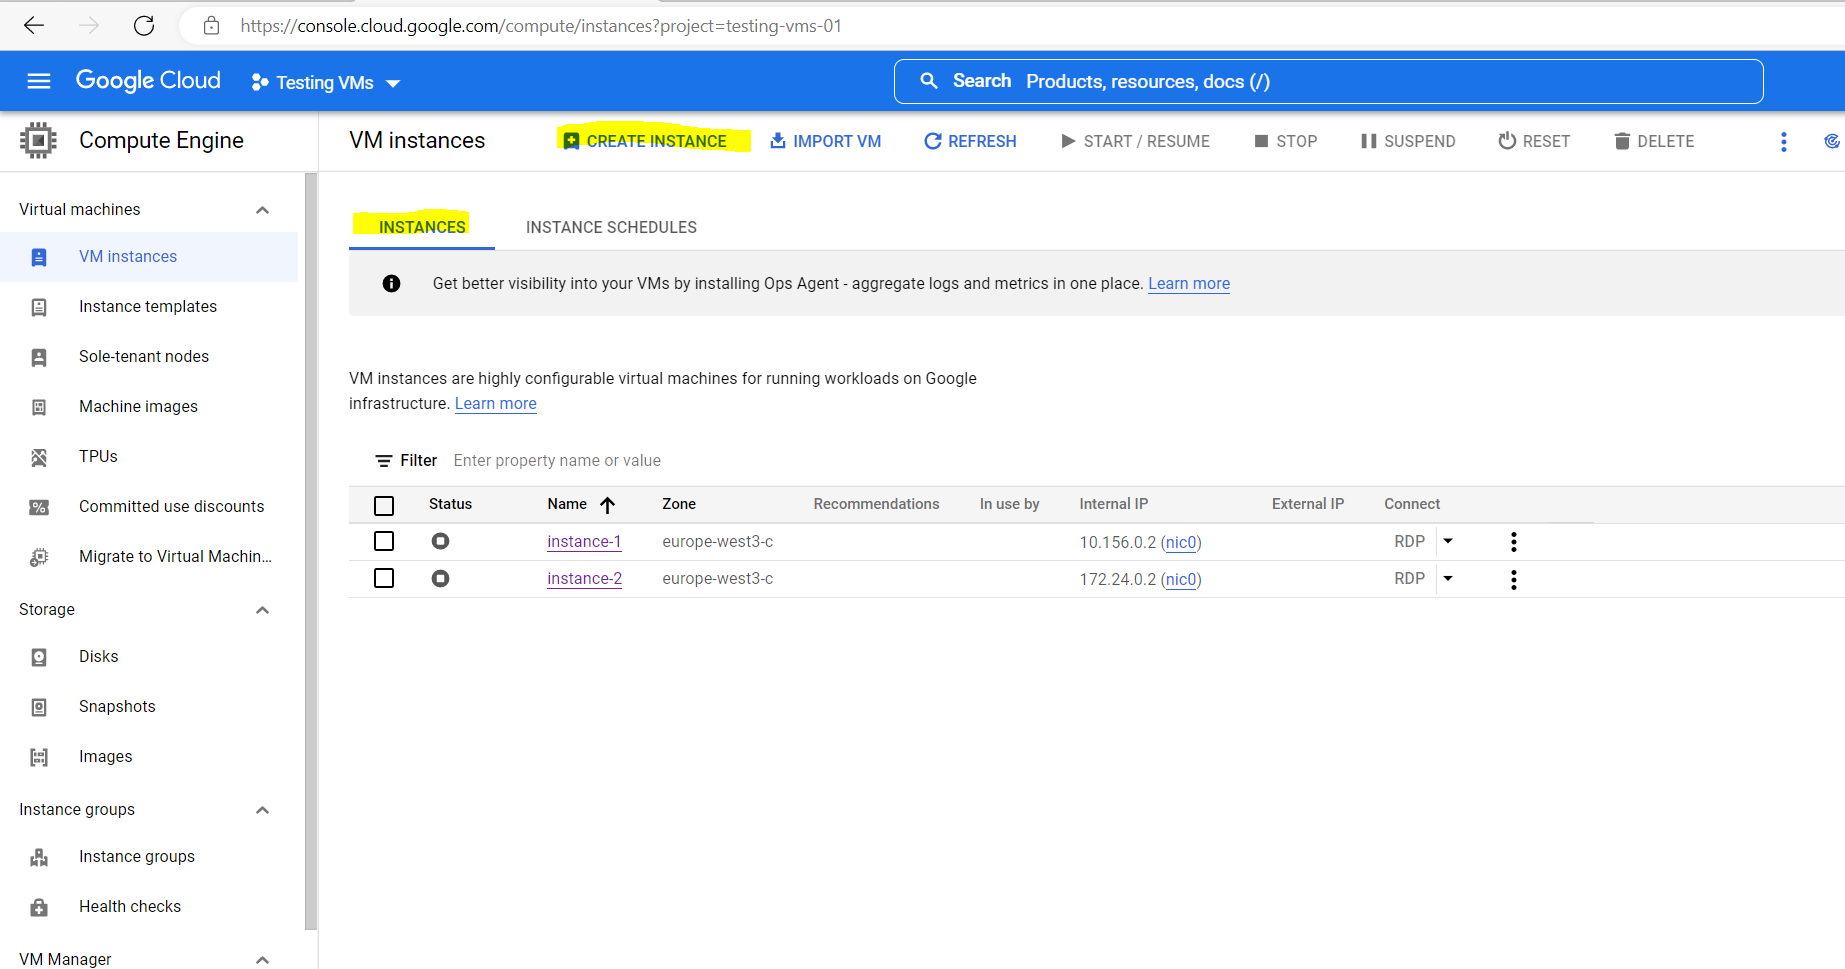
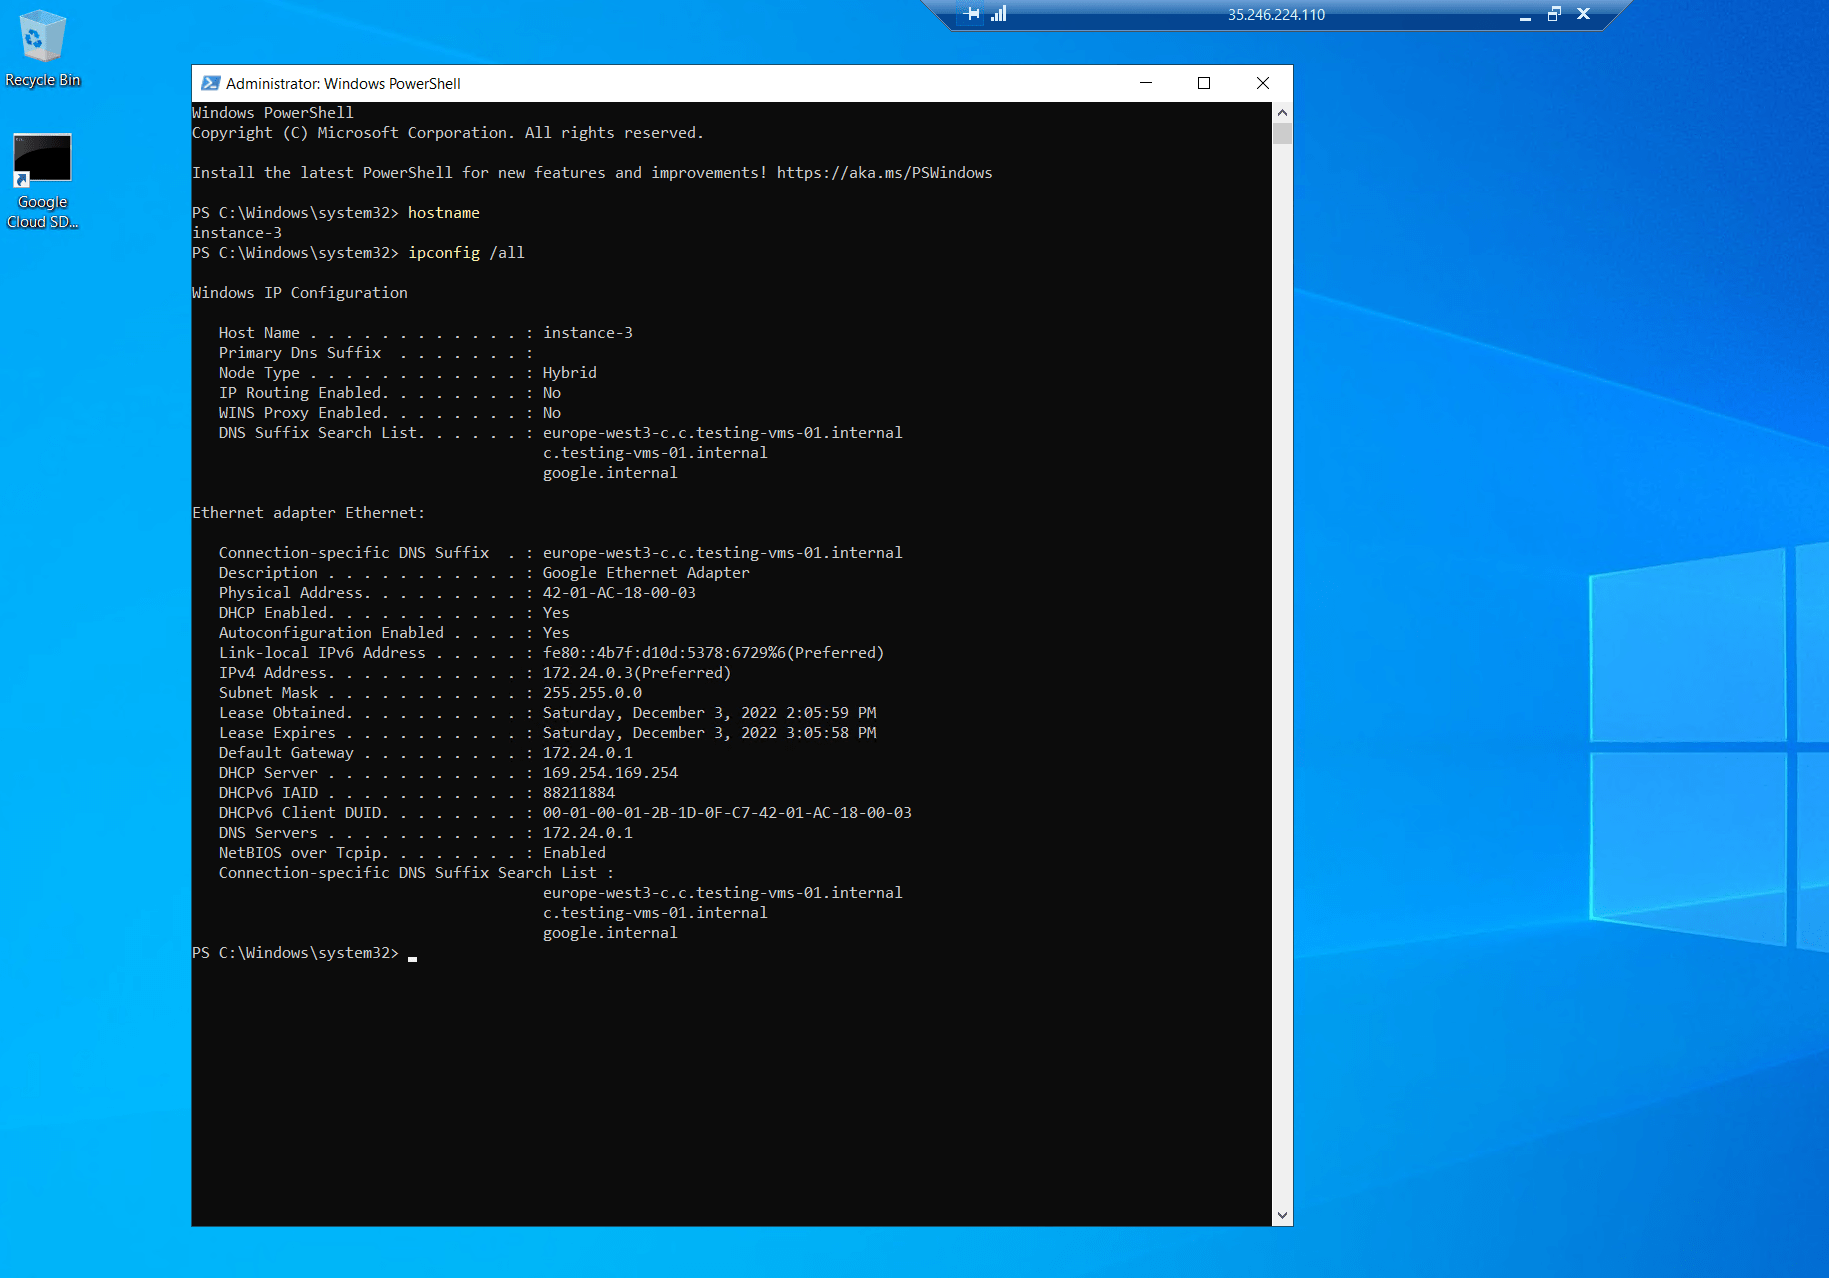
Below you can see that I already created two instances, the first VM had assigned a network interface and IP address from the project’s default VPC network and the IP address 10.156.0.2.
New projects start with a default network (an auto mode VPC network) that has one subnetwork (subnet) in each region. So no matter in which region you deploy your instance, a corresponding subnet will be available for.
The second VM had an network interface and IP address assigned from my organizations Shared VPC network.
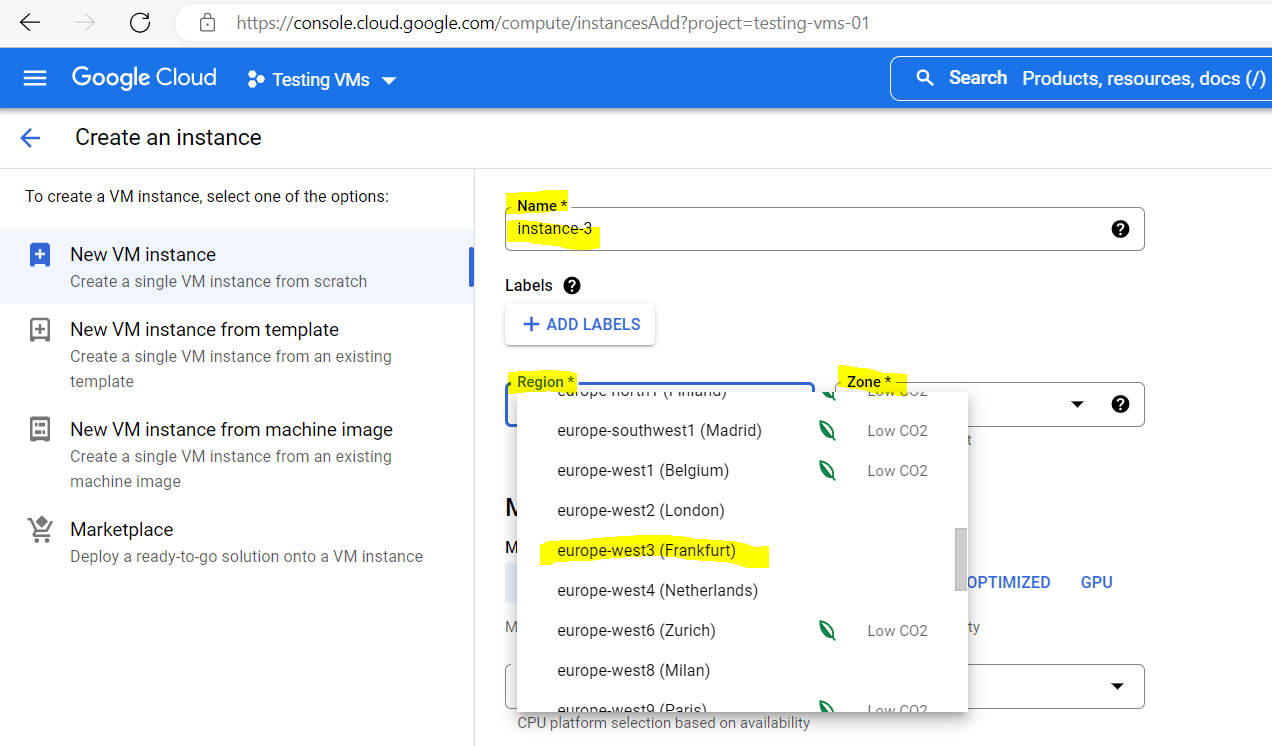
For the new instance we first need to provide a name and the region and zone we want to deploy it to.
For the region you choose please be aware of the following fact:
Because subnets are regional objects, the region that you select for a resource determines the subnets that it can use.
In a nutshell –> When you want to use instead of the project’s default network a different for example your shared VPC network, you need to choose the region the VPC network (and its subnet) you want to use is hosted in order to be available to choose.
For Shared VPC networks you further need to attach the project you created the VM instance within to the Shared VPC network.
Regions and zones
A region is a specific geographical location where you can host your resources. Regions have three or more zones. For example, the us-west1 region denotes a region on the west coast of the United States that has three zones: us-west1-a, us-west1-b, and us-west1-c.
Putting resources in different zones in a region reduces the risk of an infrastructure outage affecting all resources simultaneously. Putting resources in different regions provides an even higher degree of failure independence. This lets you design robust systems with resources spread across different failure domains.
Regions are collections of zones and a zone is a deployment area within a region.
The following settings I will leave on default and is fine for and this test VM instance.
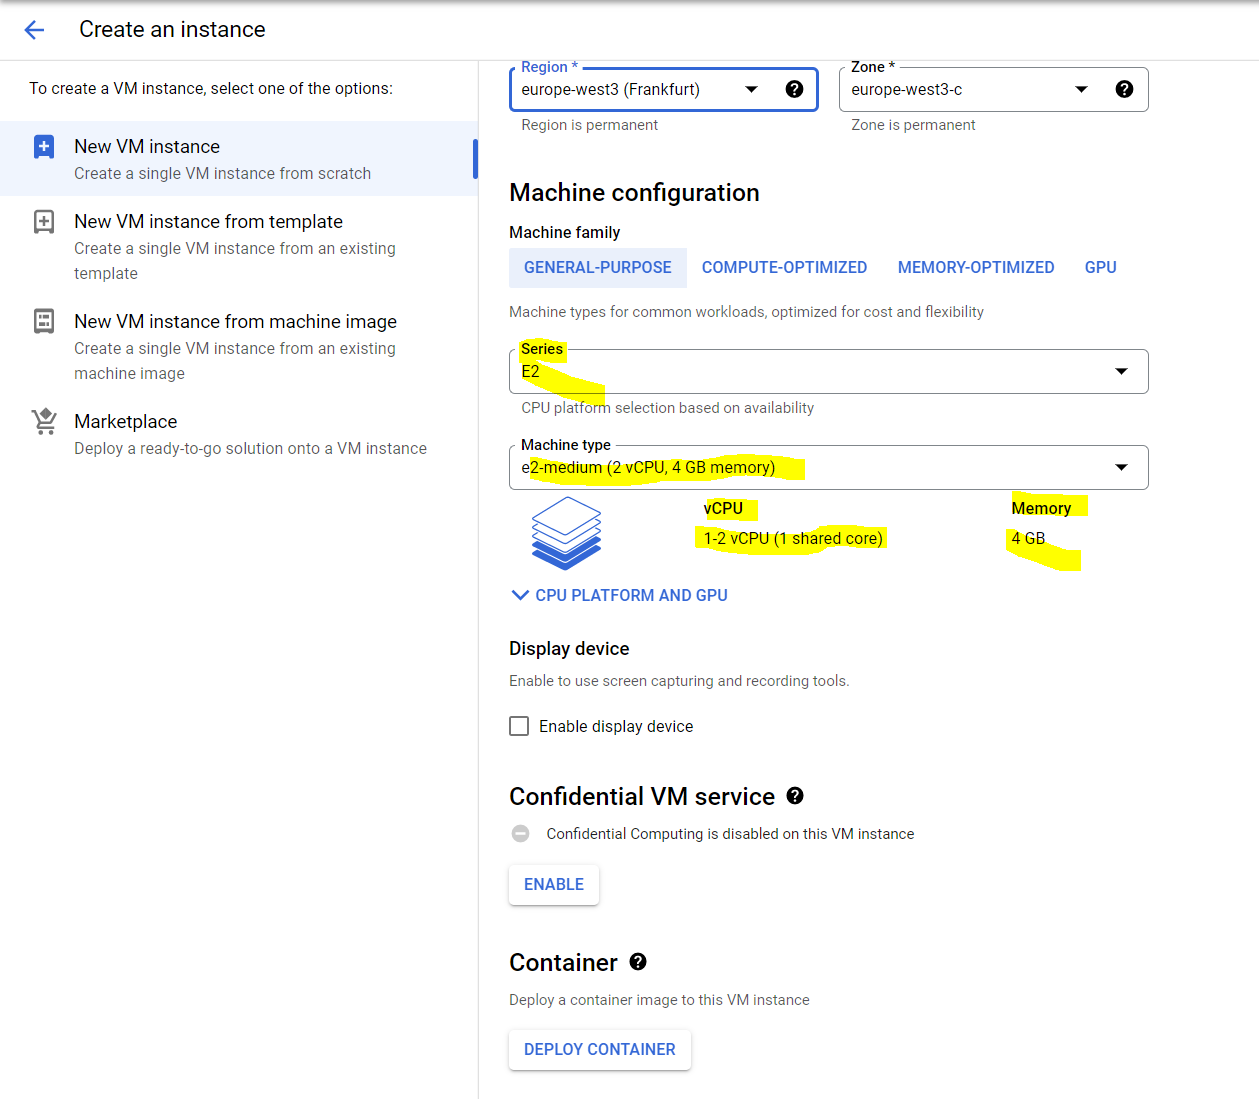
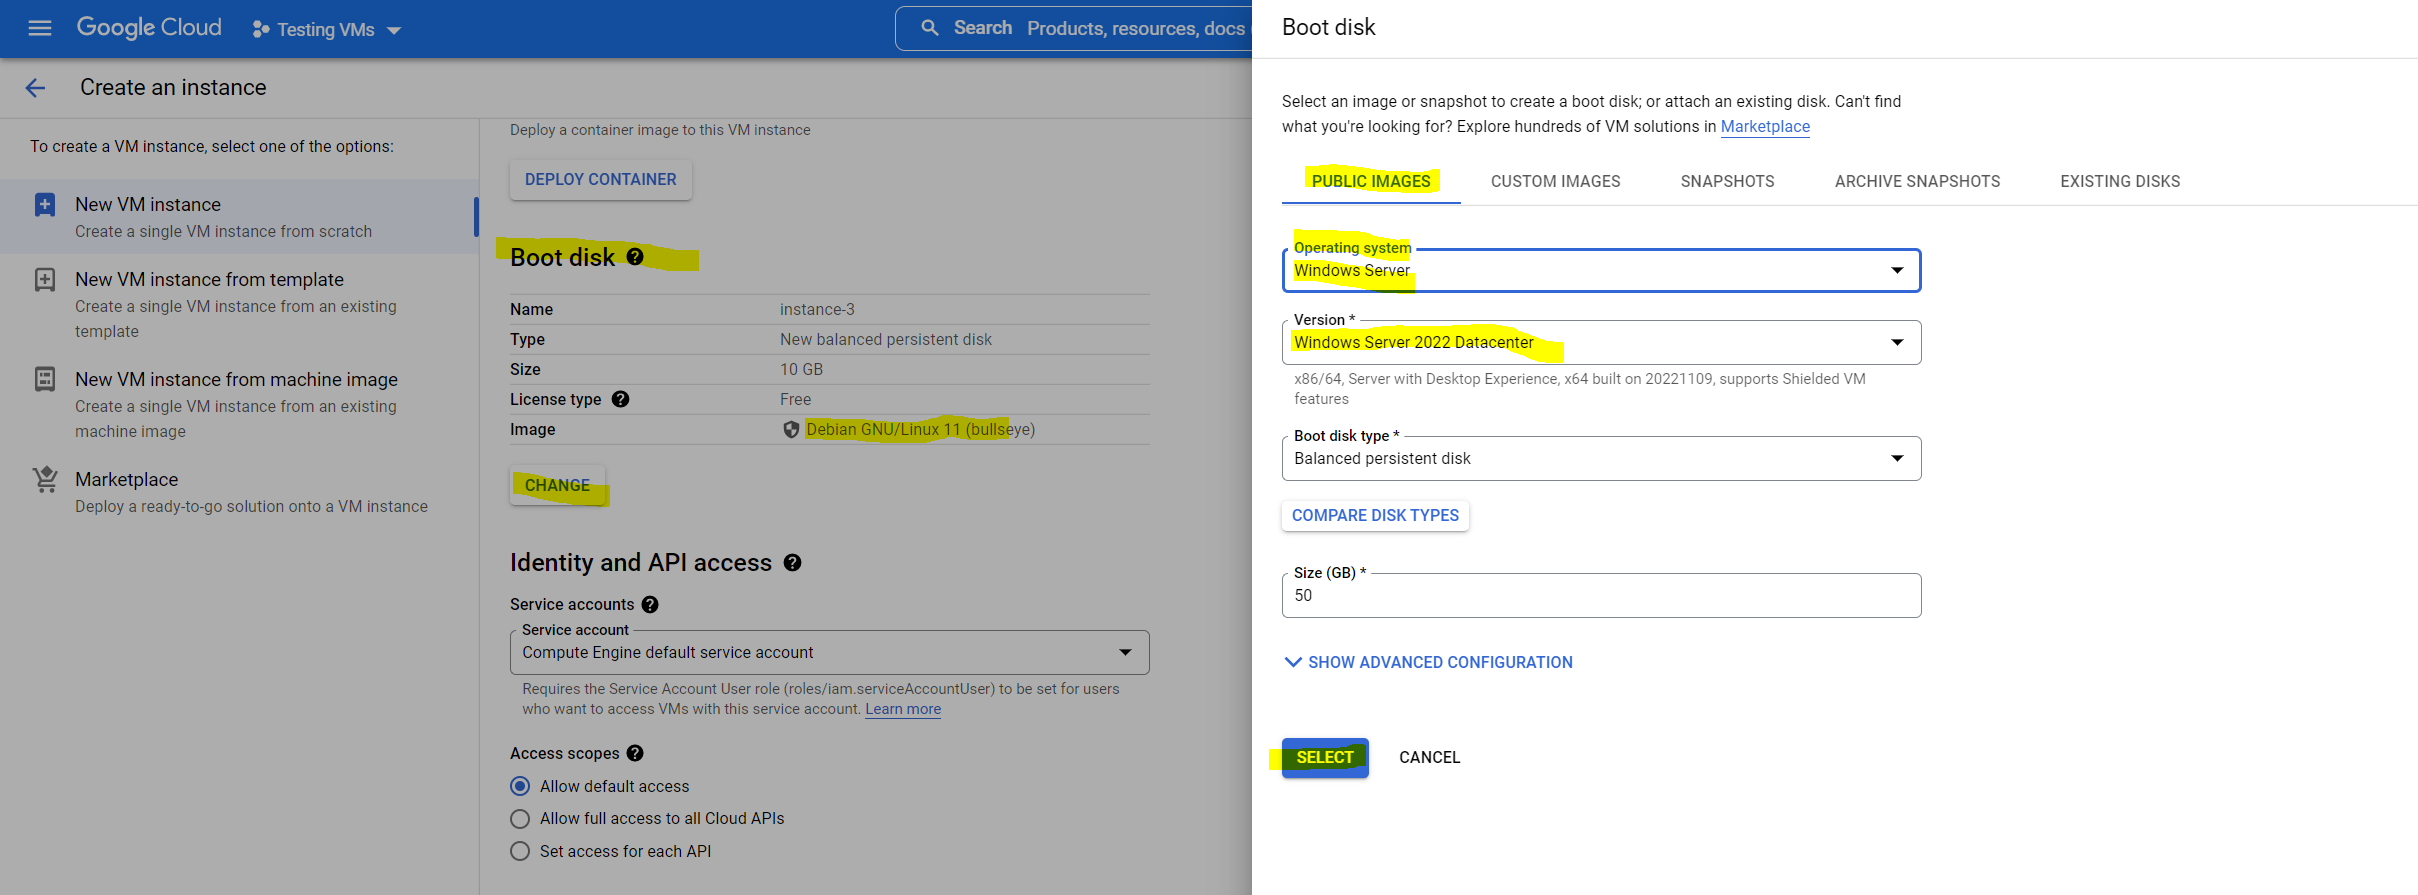
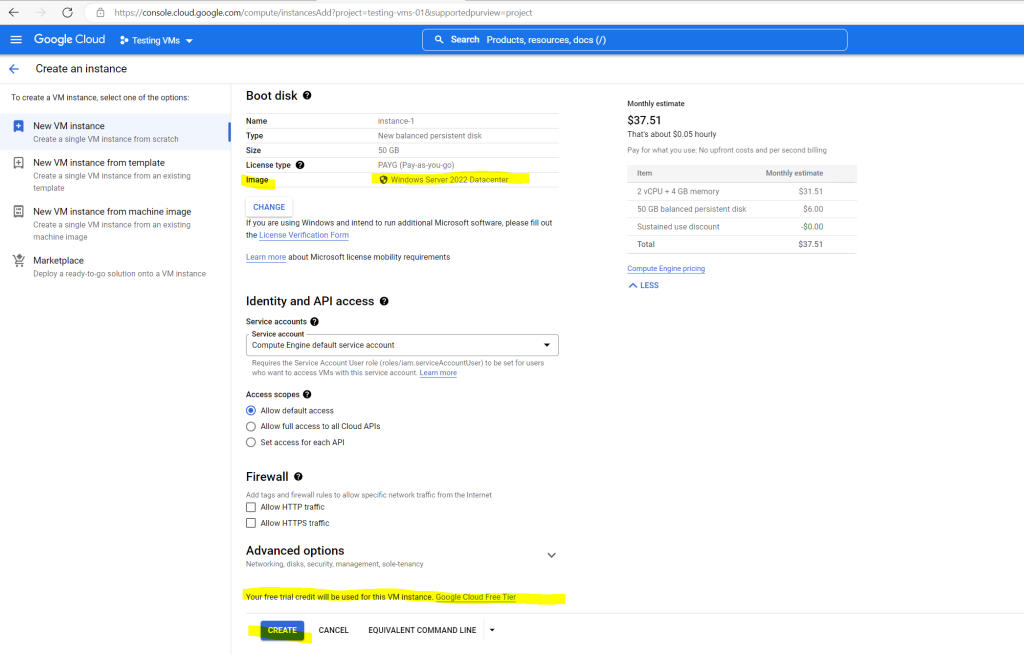
Under the Boot disk section I need to change the image from Debian to Windows Server 2022.
The rest of the settings besides Networking I will leave on default and is fine for me.
When leaving the Network settings on default, an interface and IP address from the project’s default VPC network and subnet, hosted in the region the VM will be deployed, is assigned.
I want to use a network interface and IP address from my organizations Shared VPC network and one of its subnets 172.24.0.0./16 homed in the region europe-west3 (Frankfurt).
So I need to expand the Advanced options settings below, select a network interface card (type) and also need to expand the Edit network interface menu in order to select my Shared VPC network.
As already mentioned, you first need to attach the project you created the VM instance within to your Shared VPC network in order to be able to use it here.
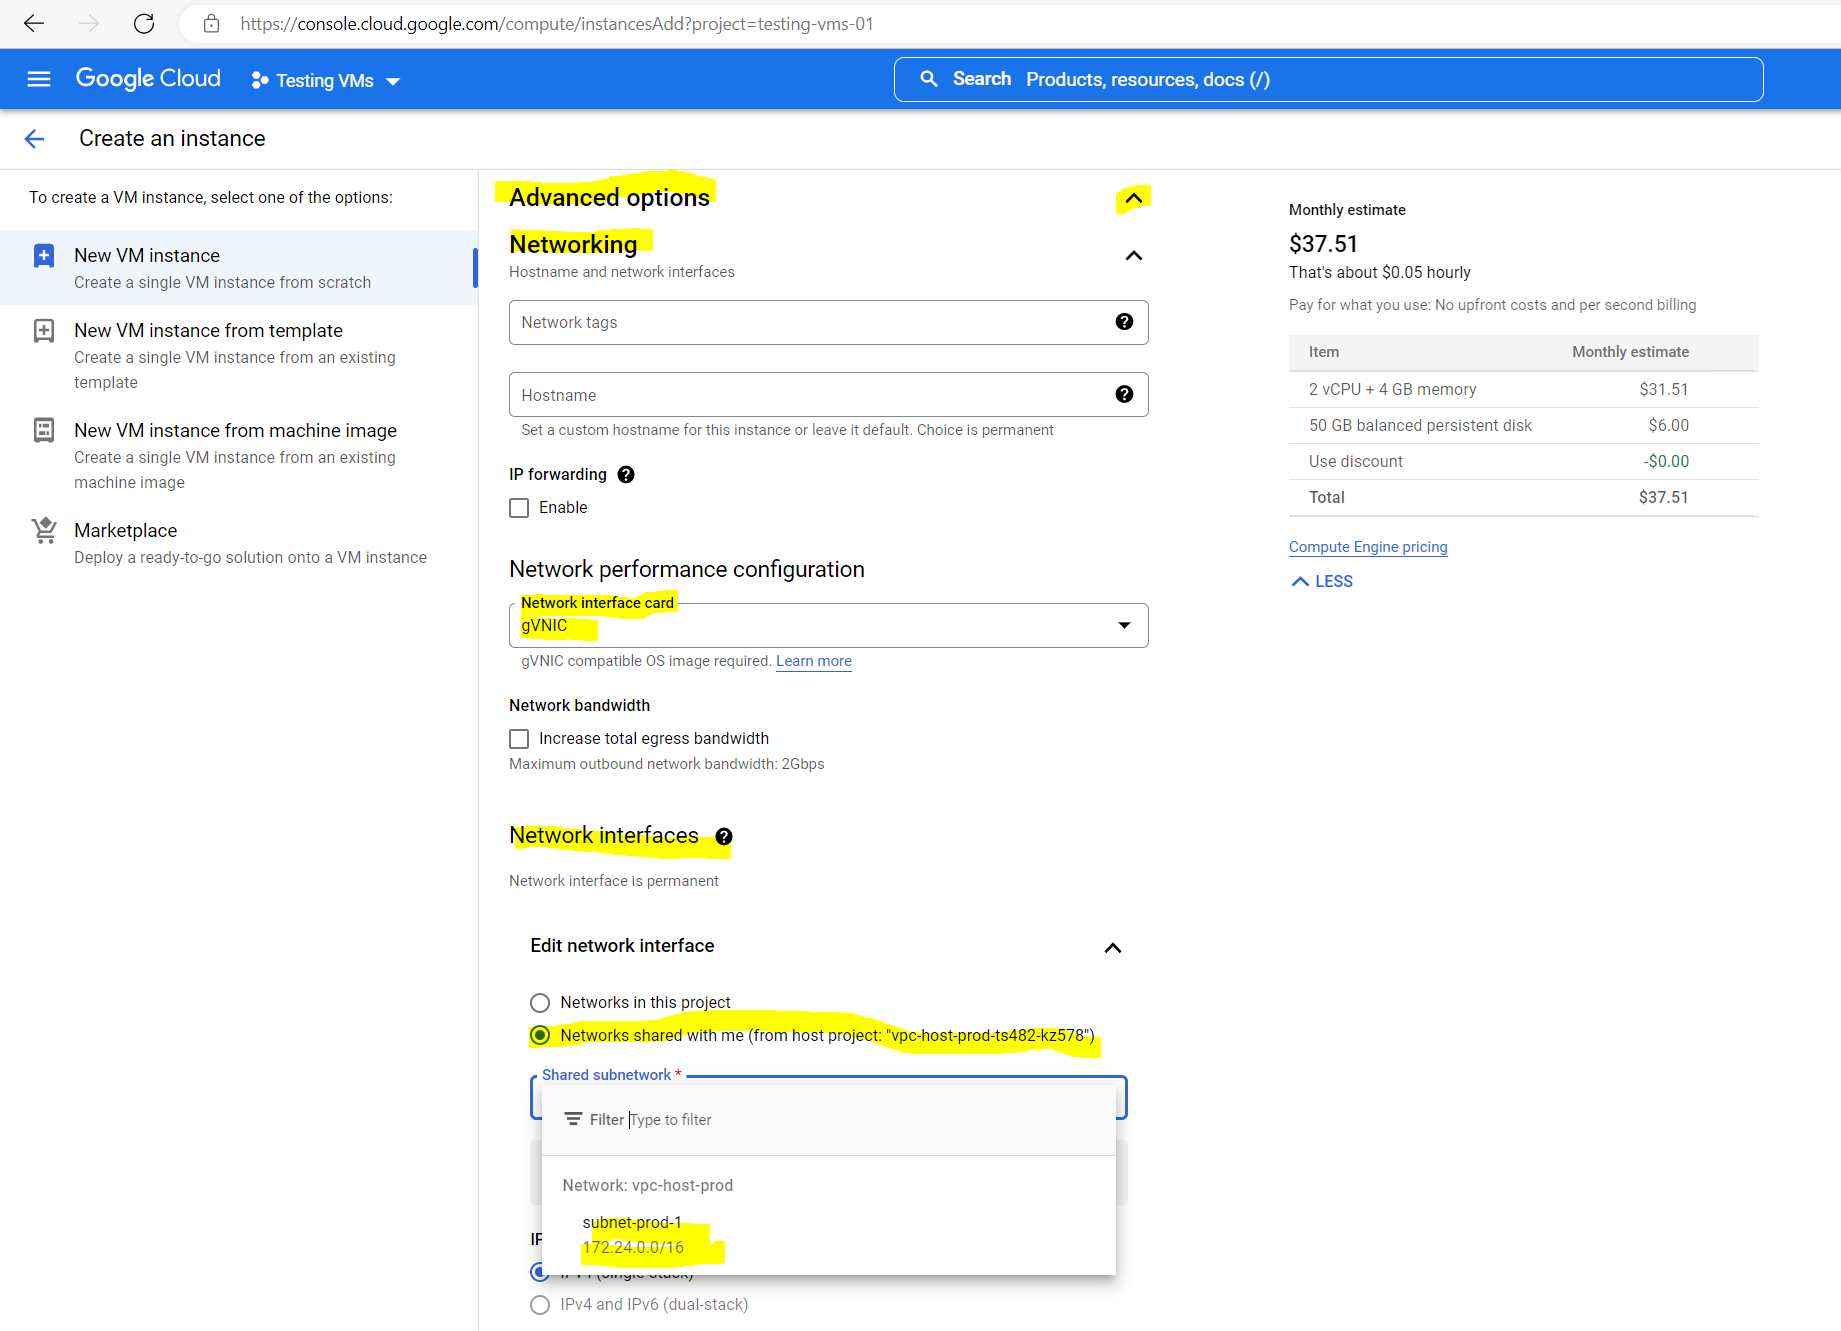
Regarding the above network interface card type (gVNIC or VirtIO) and Shared VPC network you can read more about in my following post.
The rest of the settings as mentioned I will leave on default and finally I can click on Create.
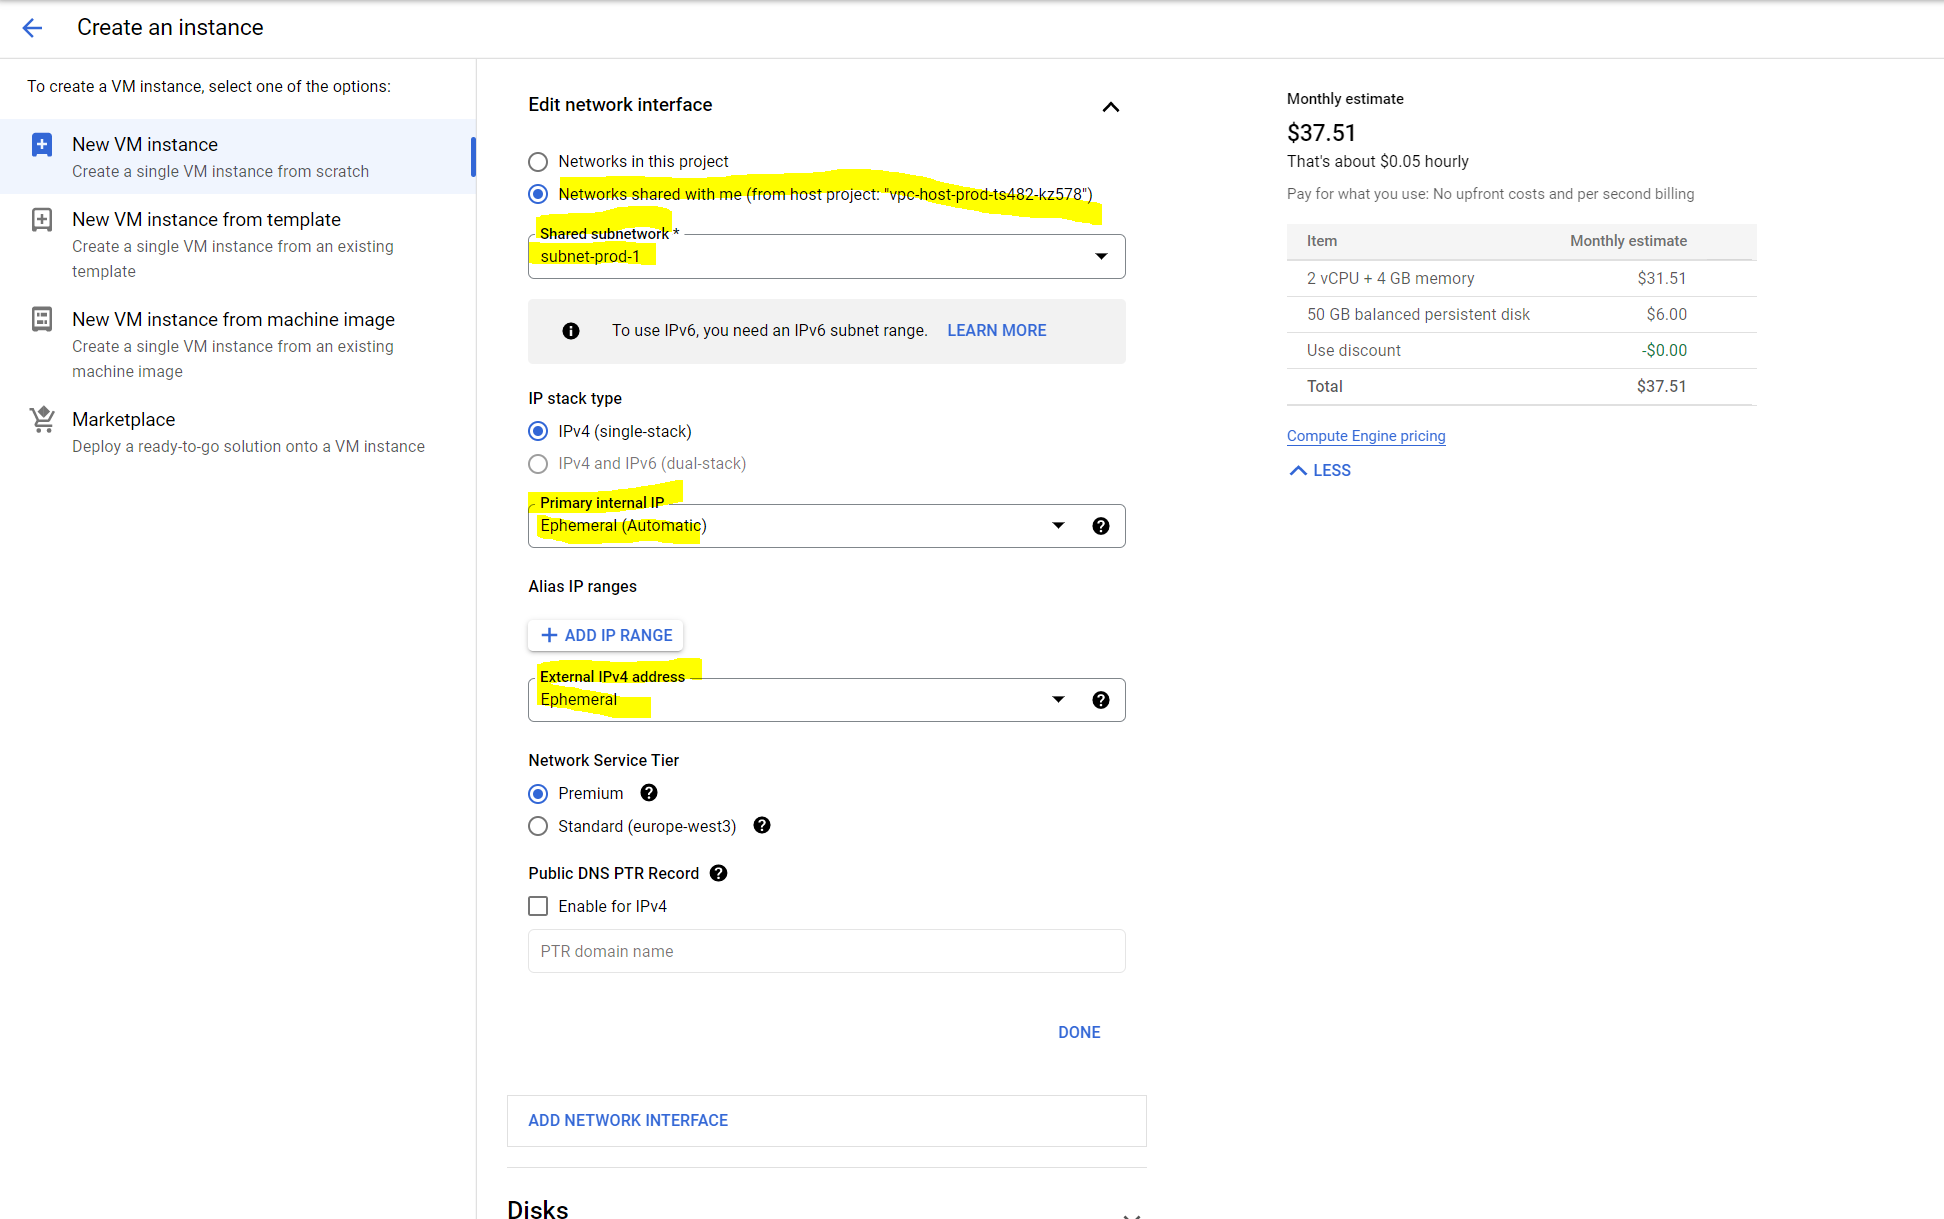
Below you can see by default will be assigned an ephemeral internal and external IPv4 address.
Restarting the VM won’t change ephemeral IP addresses, just deleting, stopping and recreating the VM. When using for internal (automatic), a random IP address from the subnet range will be assinged and with (custom) you can manually assign one from the subnet.In general, the ephemeral IP address is released if you stop or delete the resource.
By default an internal IPv4 and external IPv4 address will be assigned. In case you have set up an IPSec S2S VPN tunnel between your on-premise network and the Google Cloud VPC network, the VM will be deployed, you can also change the external IPv4 address to None and just use the internal to connect to.
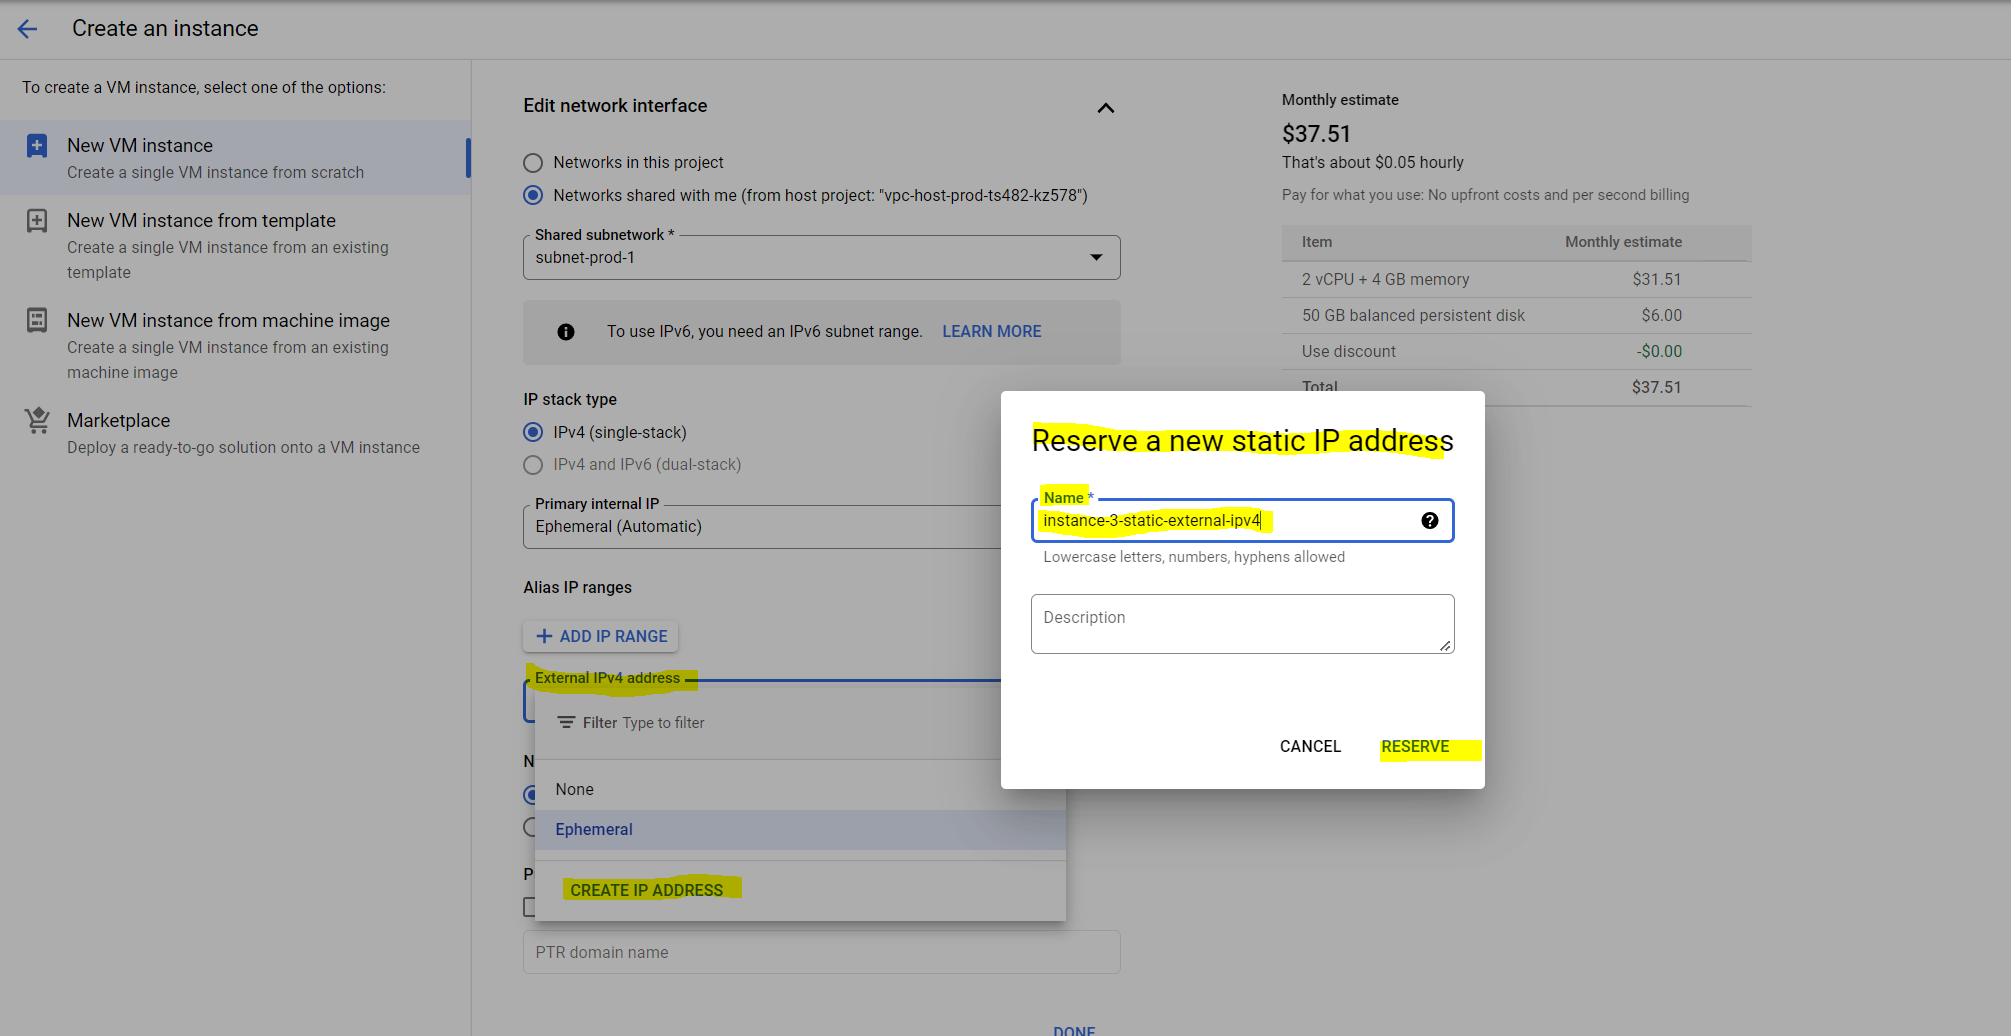
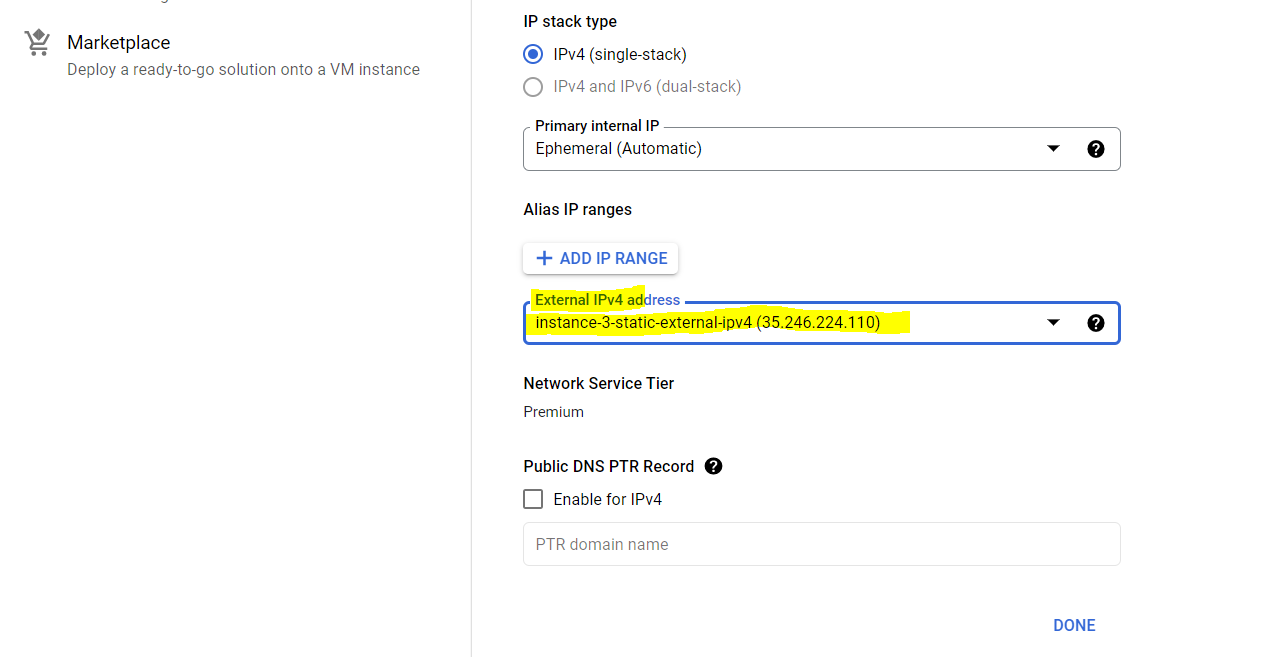
If you want to use a new static IP address for the external IPv4 address, you can click on Create IP Address as shown below.
The new Windows Server 2022 VM instance will be deployed to my Testing VMs project.
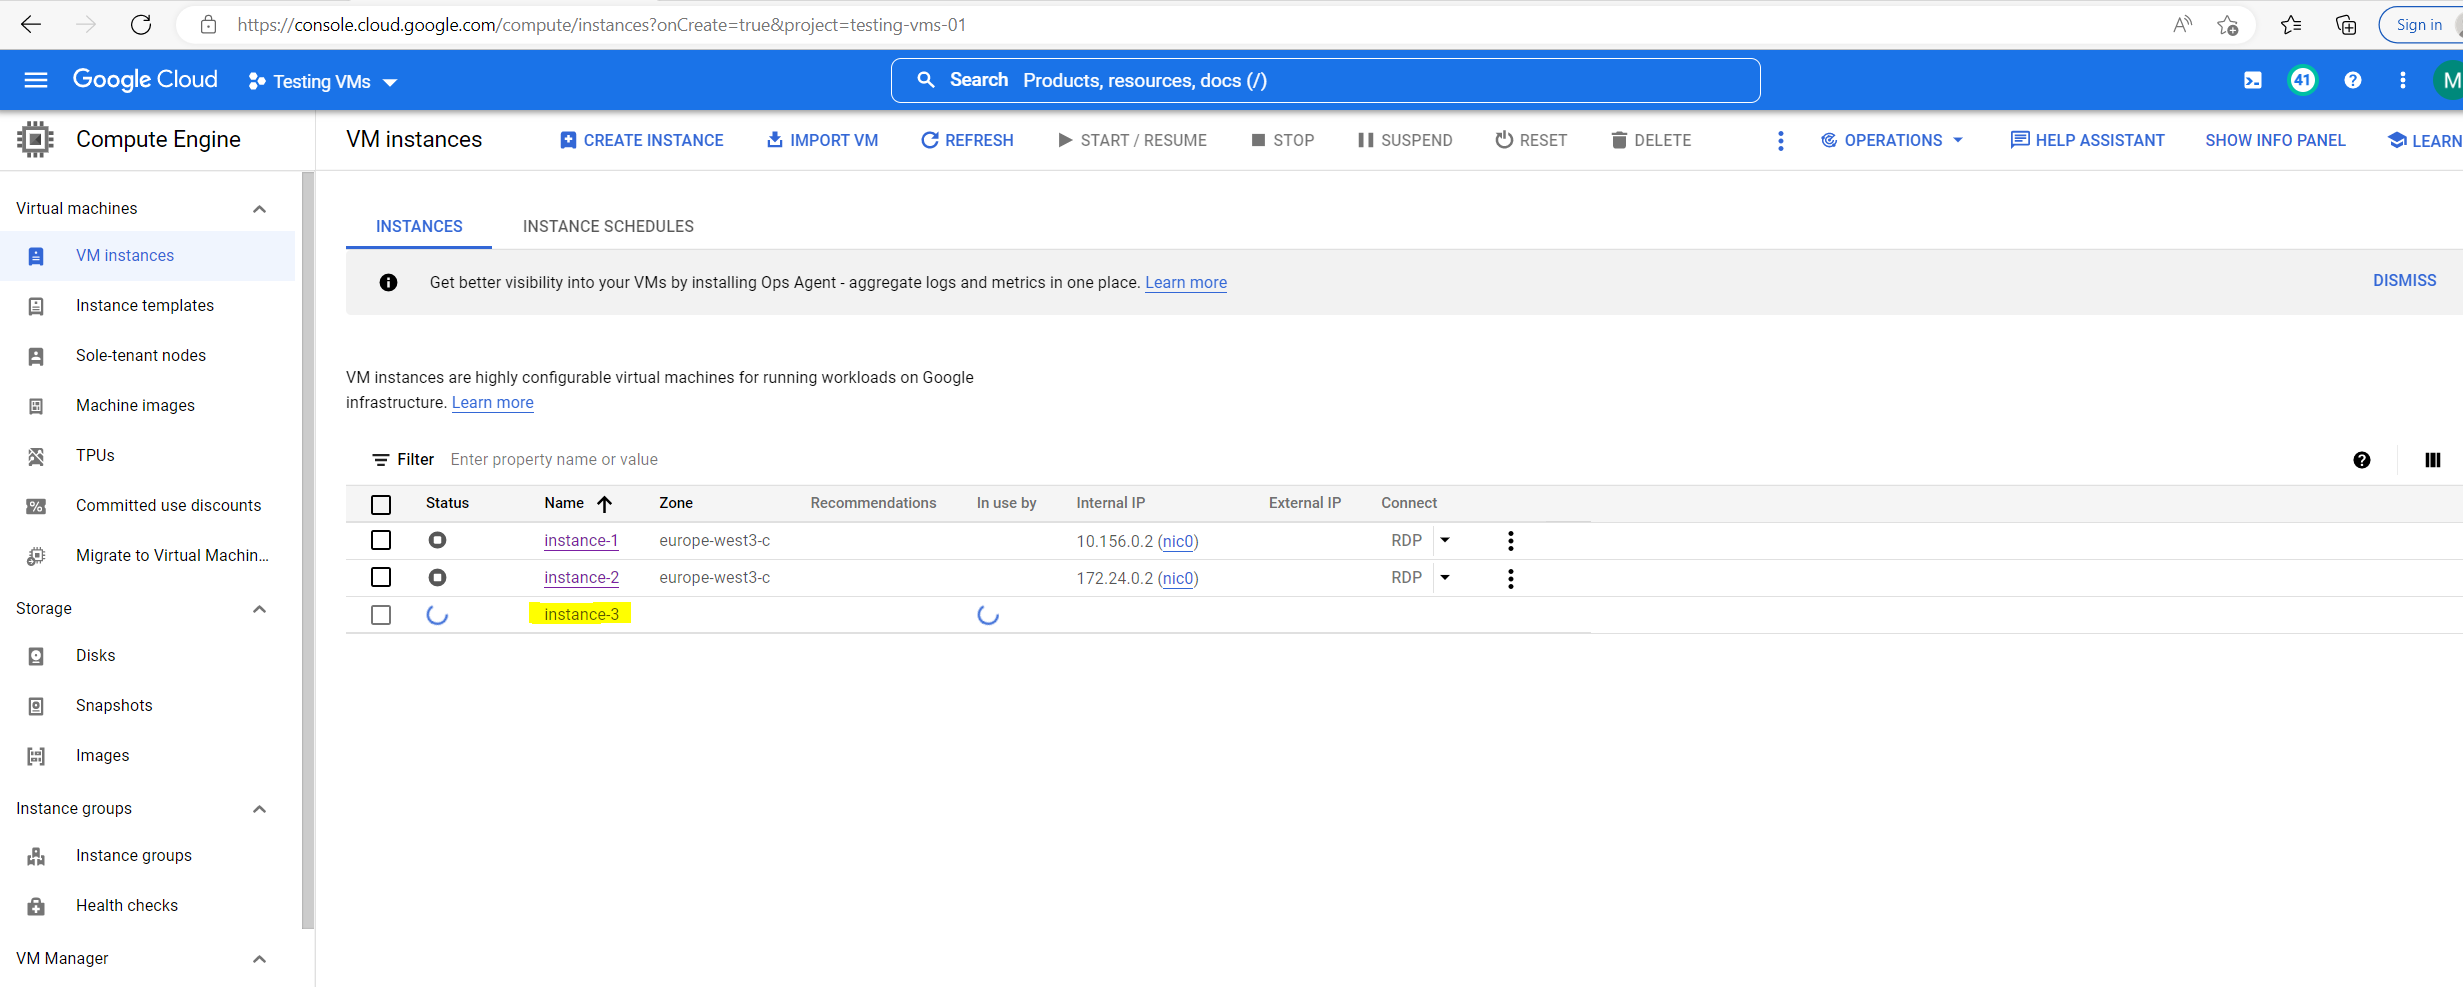
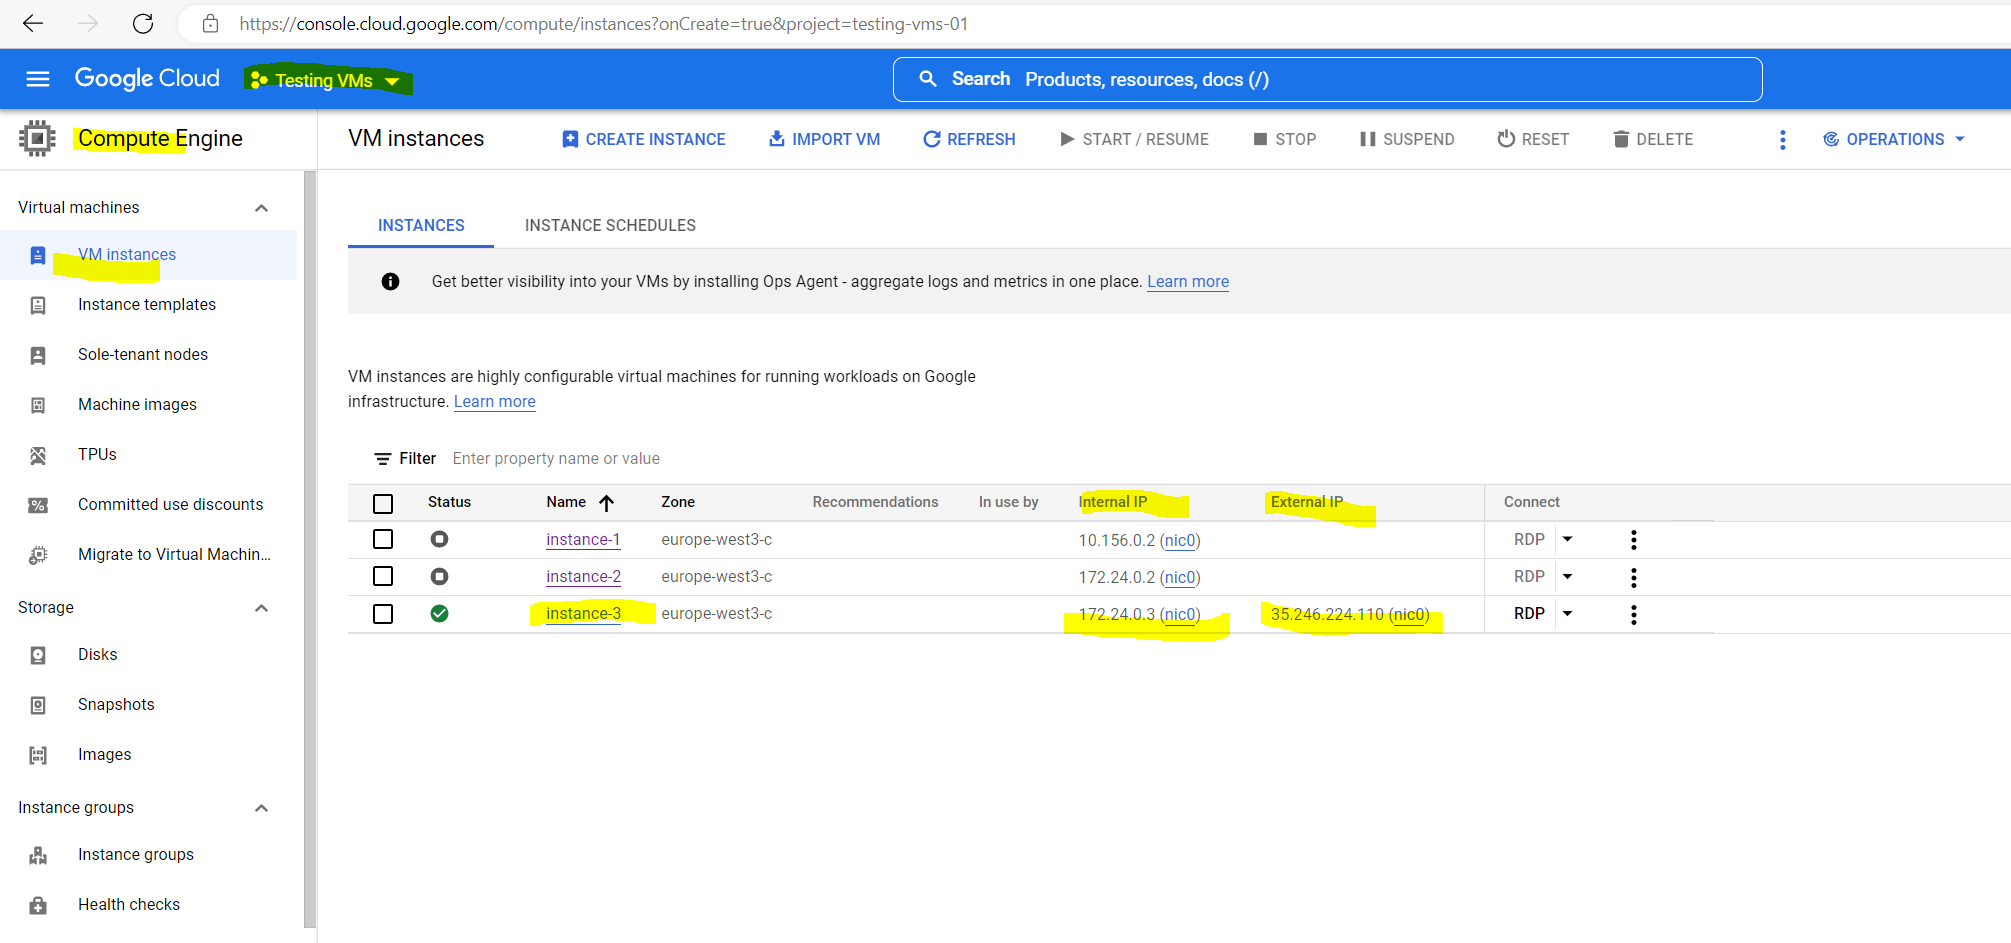
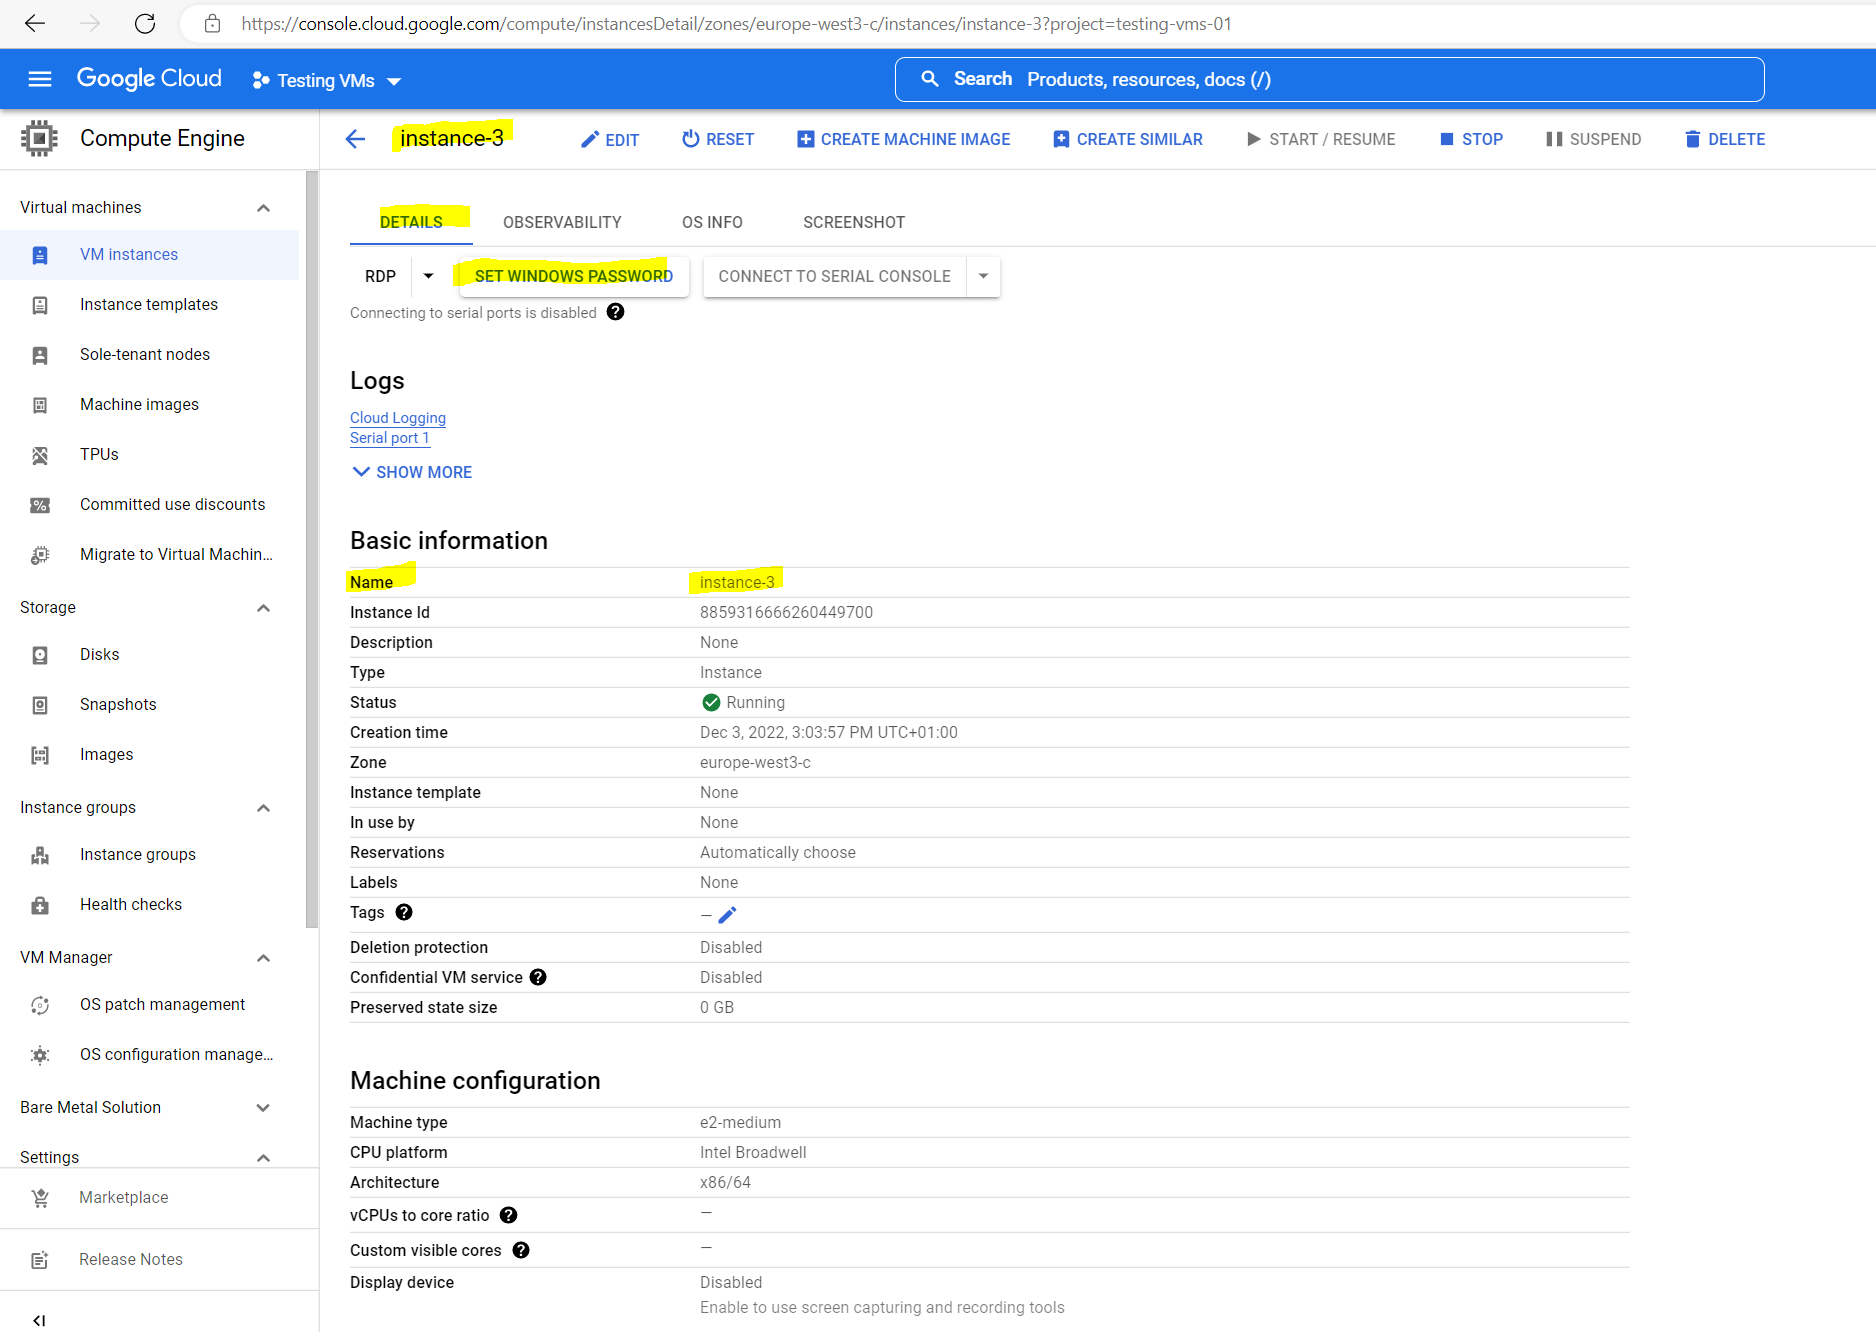
Finally my new instance is deployed and I can access it by using RDP.
As you can see the both other VM instances only had assigned an internal IPv4 address, the reason for is that I had set up an IPSec S2S VPN tunnel between my on-premise network and my organization Shared VPC network in Google Cloud.
About how to set up IPSec S2S VPN between your on-premise network and Google Cloud VPC, you can read my following post.
About how to set up an organization and Shared VPC network in Google Cloud, you can read my follwing post.
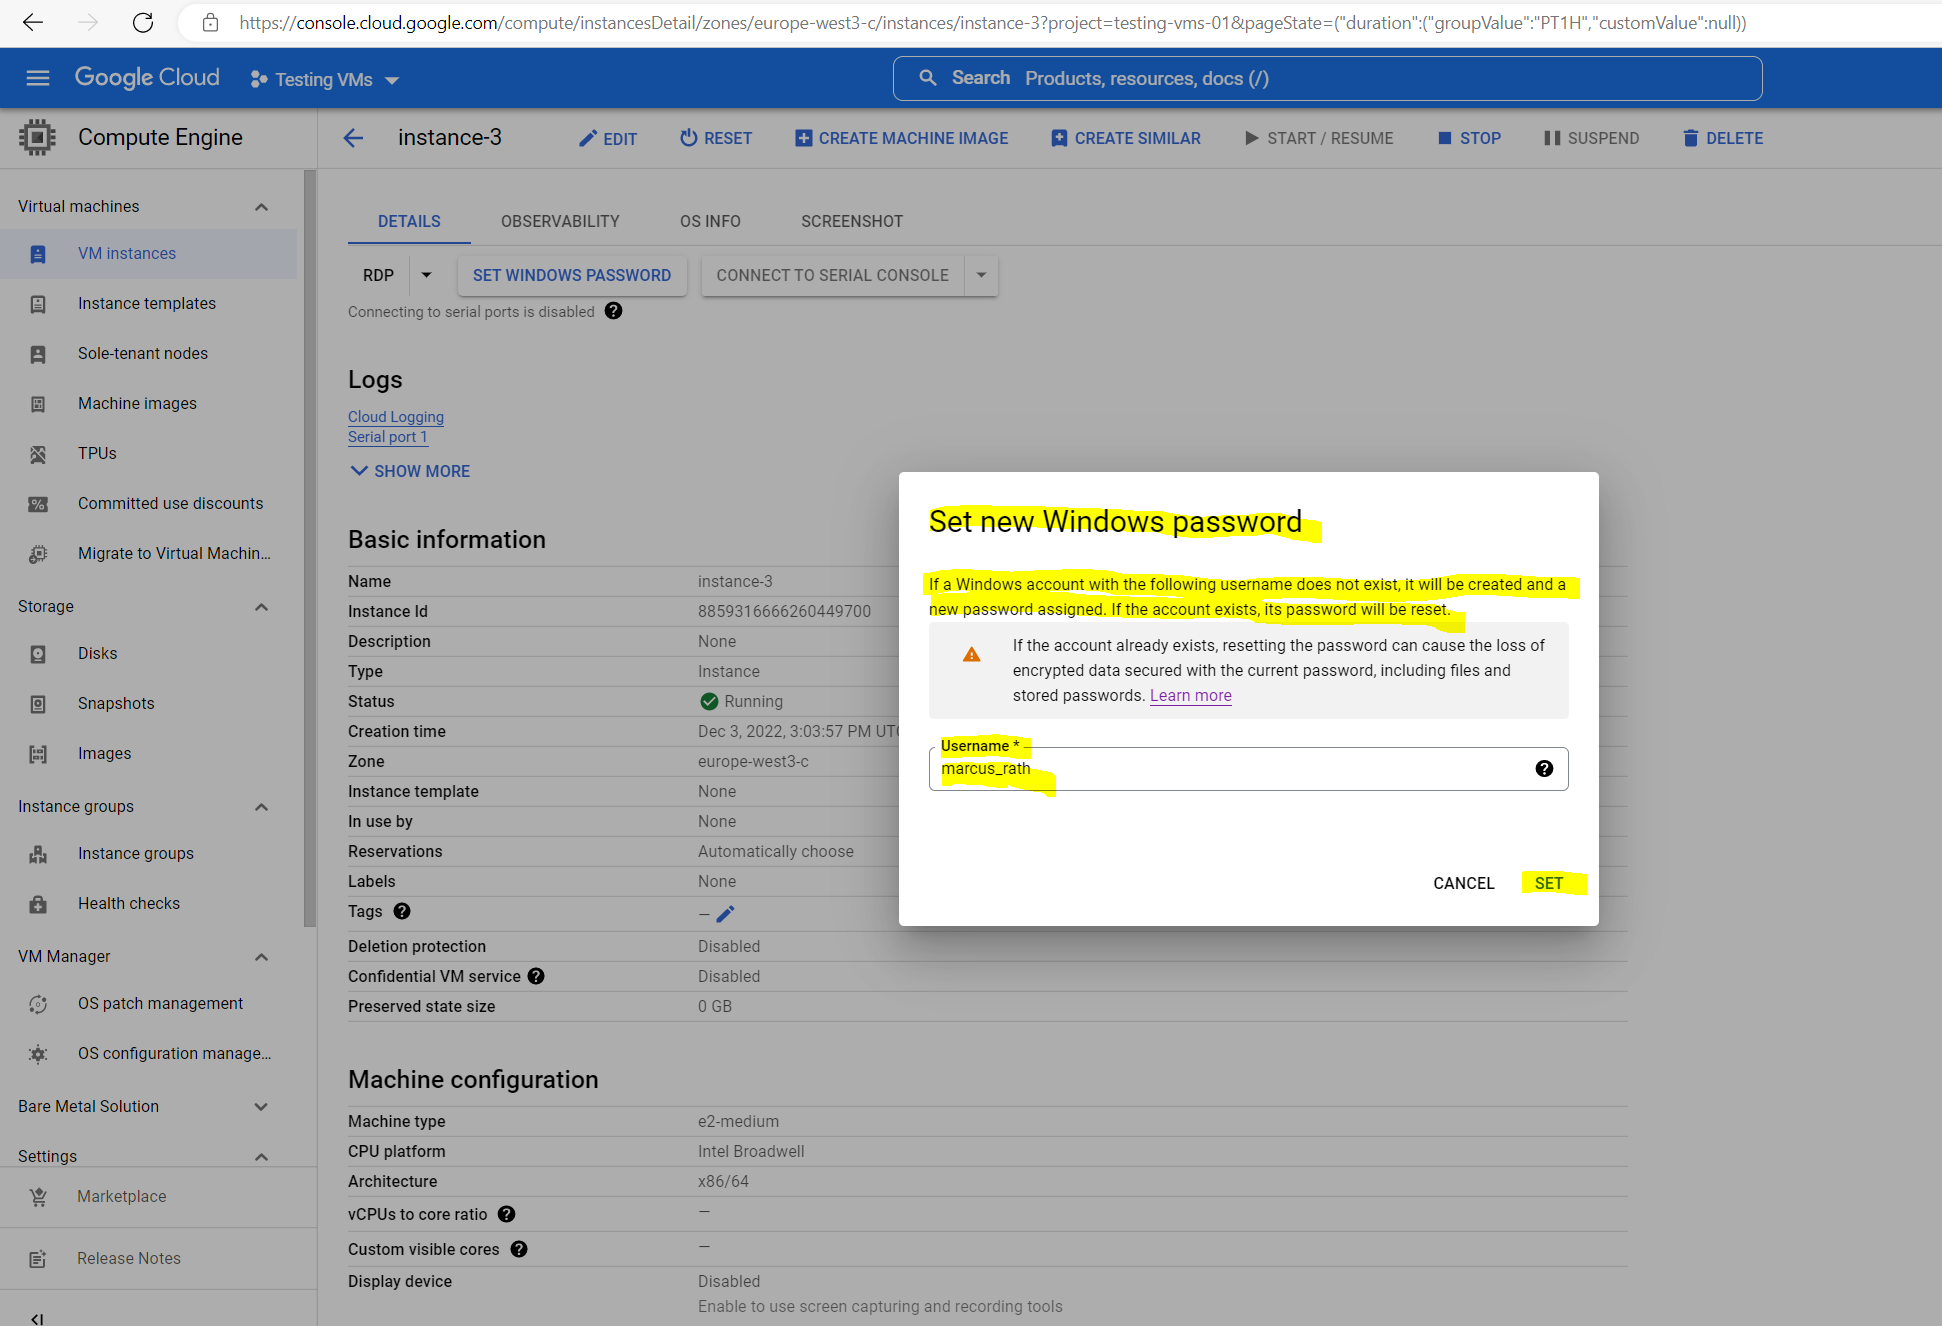
Now in order to be able to connect to our new Windows VM instance, we first need to generate credentials for as shown below.
Generate credentials for Windows VMs
By default, Windows virtual machine (VM) instances authenticate by using a username and a password instead of by using SSH. If you don’t enable SSH for Windows, you must generate new credentials before connecting to the VM. This document describes how to generate credentials for Windows VMs.
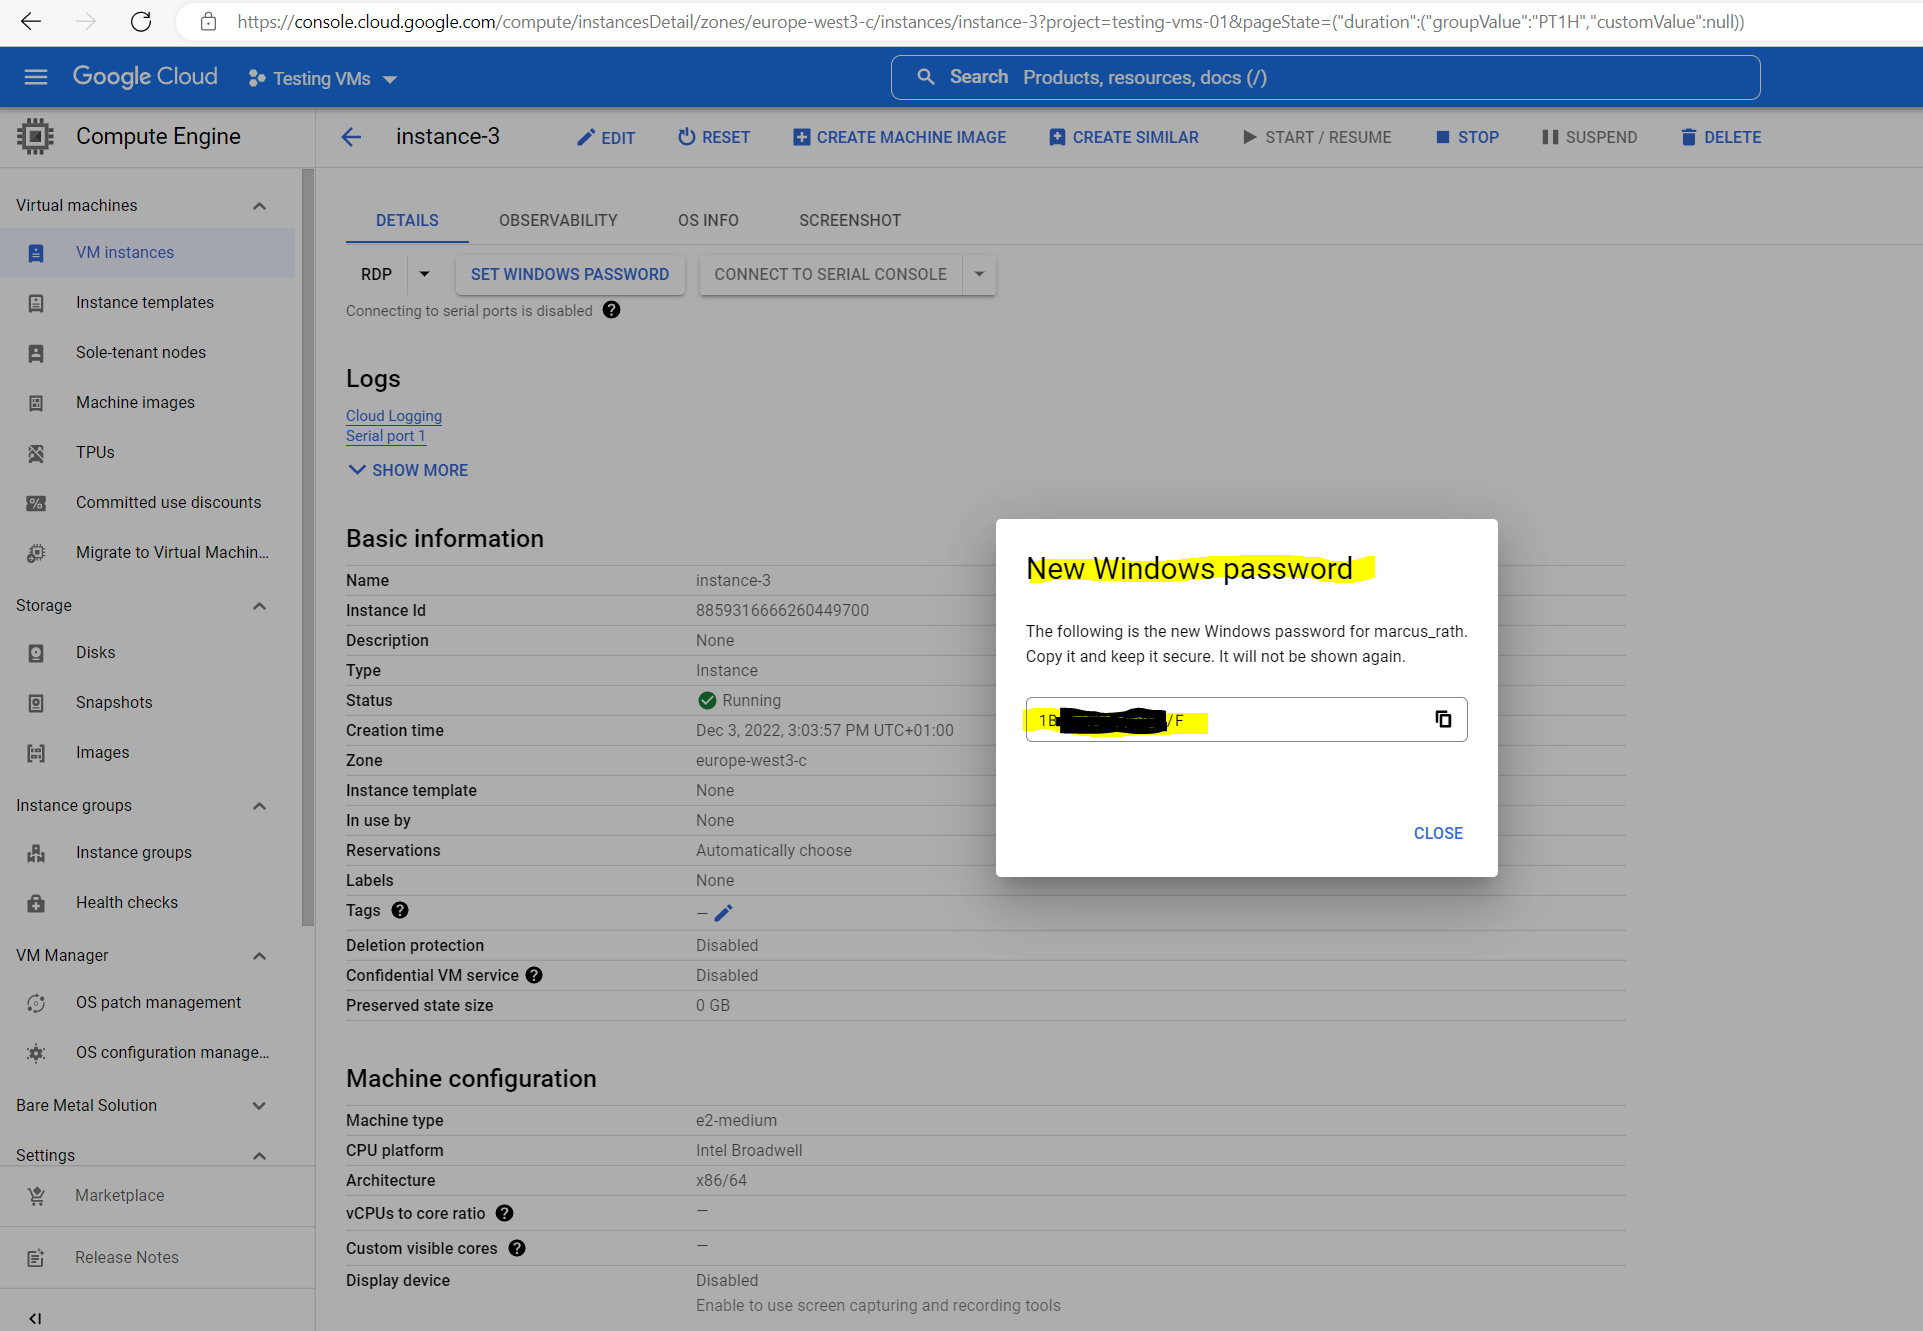
You can also use this process to generate new credentials if you no longer have the original credentials. If you use this process to generate new credentials for existing users, any data that is encrypted with the current credentials, such as encrypted files or stored passwords, might not be retained.
If a Windows account with the following username does not exist, it will be created and a new password assigned. If the account exists, its password will be reset.
The username will be automatically created by the Compute Engine API and is derived from my Google’s account email address with one exception. Google apparently changes the period into an underline.
From marcus.rath@braintesting.net the username marcus_rath was created.
The following is the new Windows password for marcus_rath.
Copy it and keep it secure. It will not be shown again.
Source: https://cloud.google.com/compute/docs/instances/windows/generating-credentials
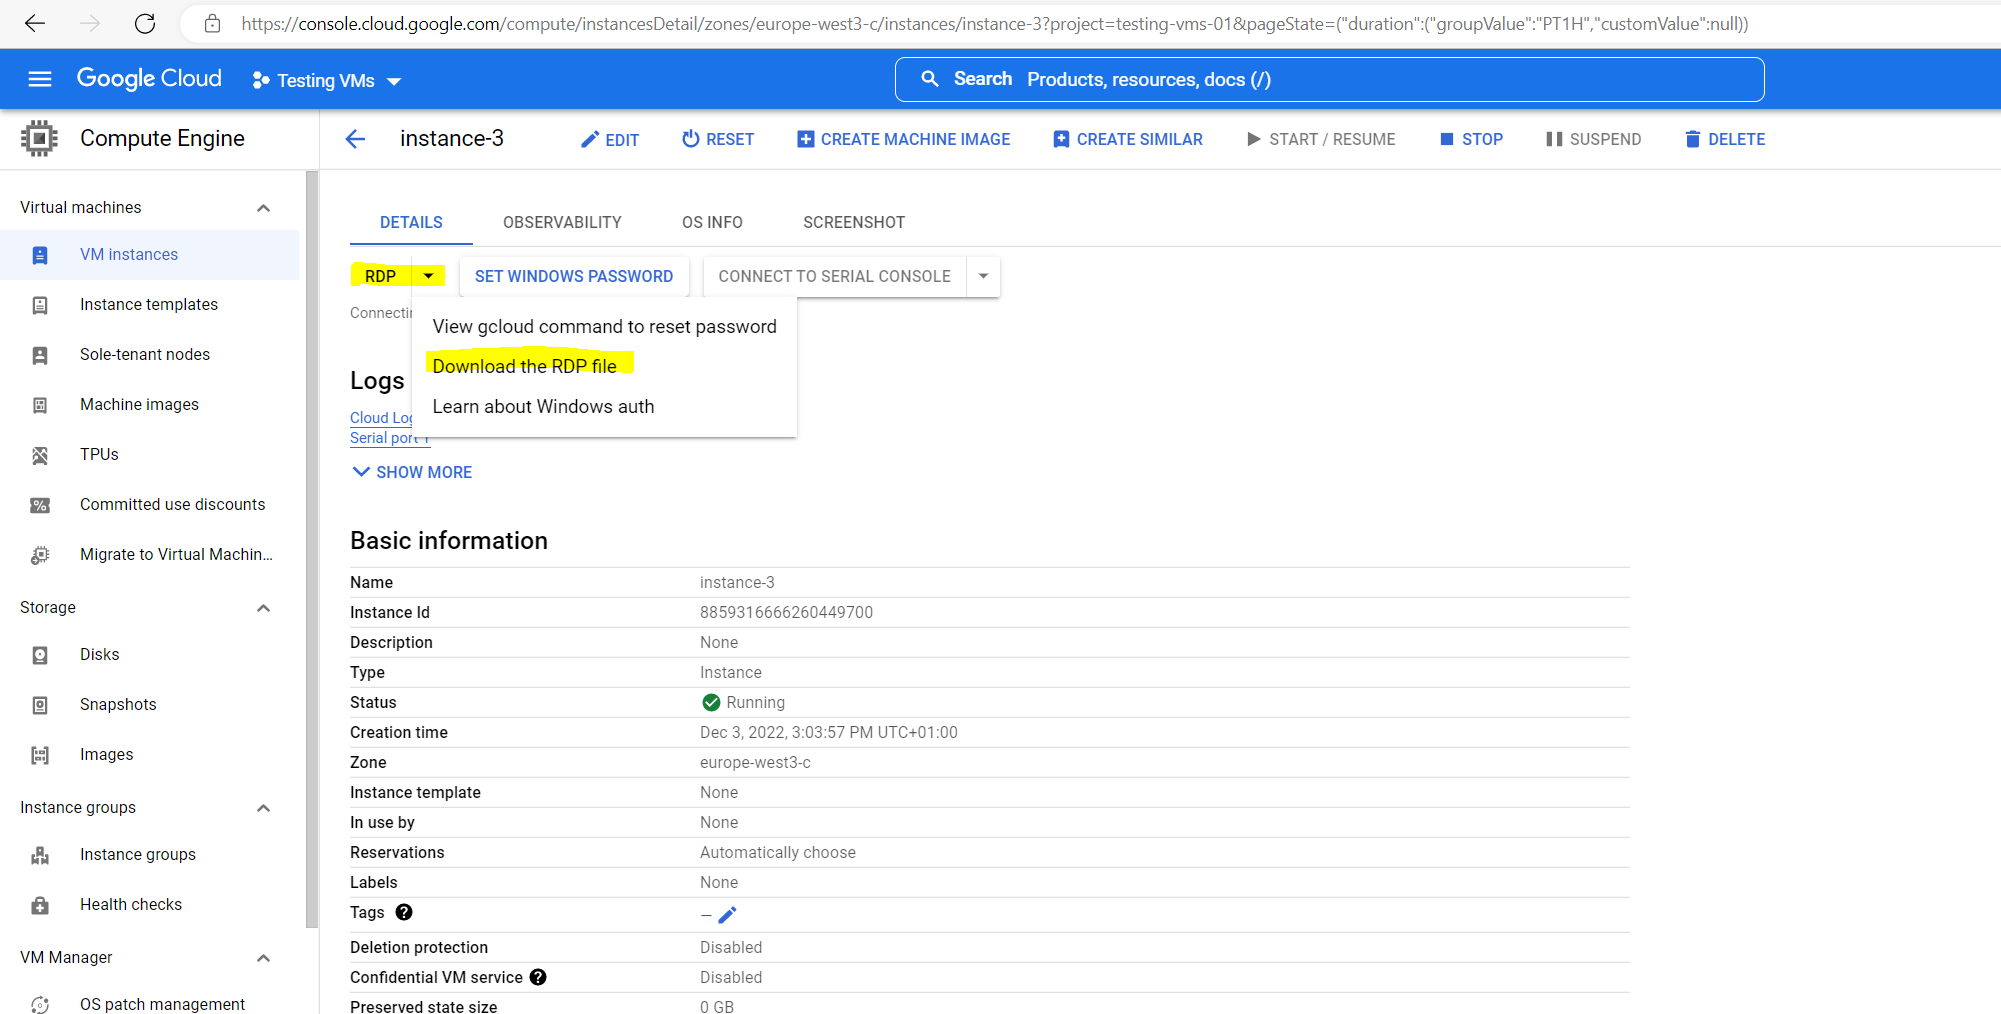
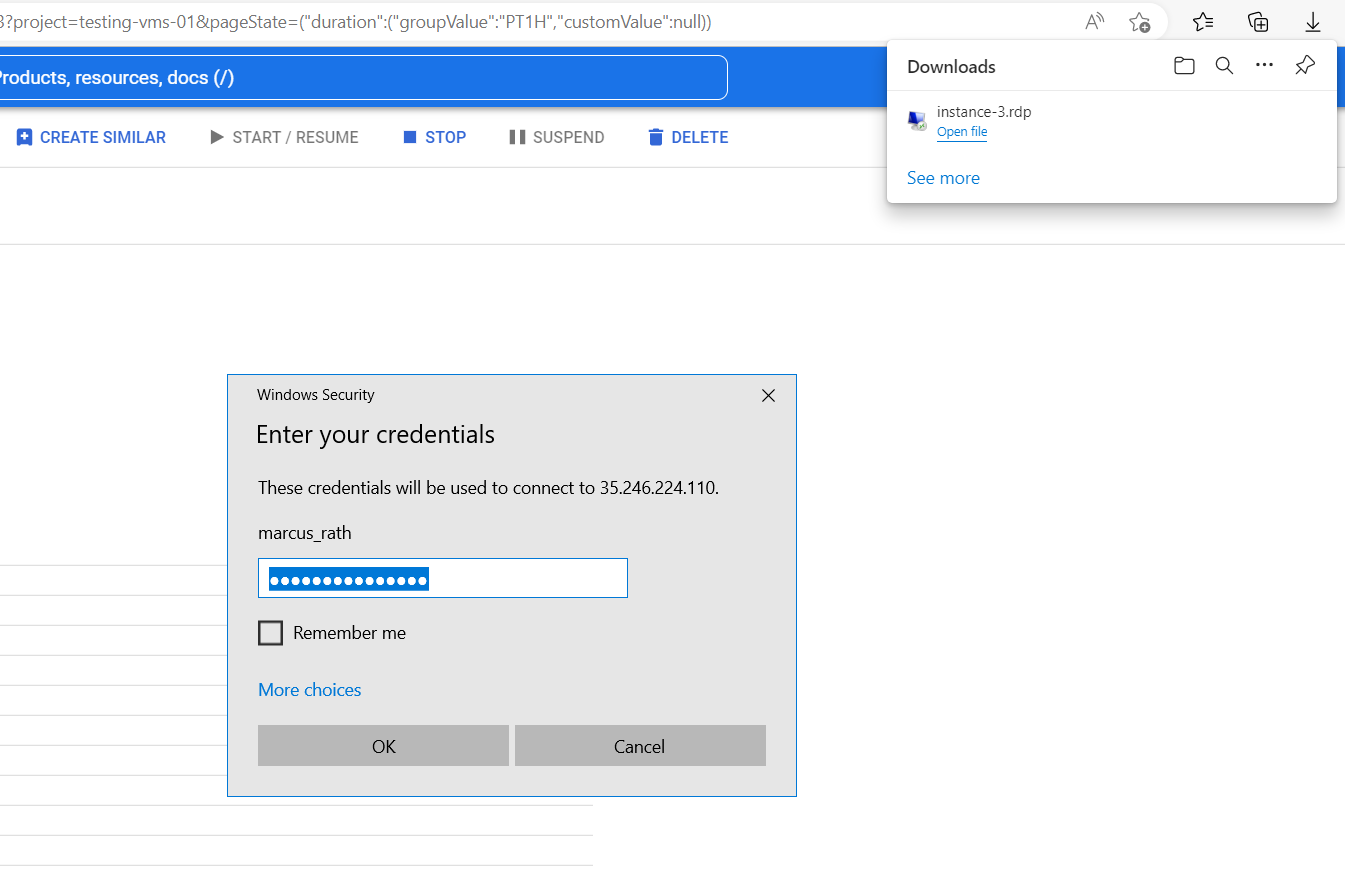
Connecting by using RDP to the Windows VM
Now we can connect to the VM by downloading the RDP file as shown below or of course you can also open directly the Remote Desktop Connection App and enter the external IP address, username and your generated password.

Troubleshooting
In case your billing acount is still on Free Trial status, you couldn’t create VM instances using Windows OS.

You first need to upgrade your billing account to a paid Cloud Billing account as described in the link below.
Upgrading to a paid Cloud Billing account
You can upgrade your Cloud Billing account at any time after starting the Free Trial, to ensure that your resources keep running uninterrupted after the trial ends. You might also want to upgrade your account if you want to use features that are not included in the Free Trial, such as GPUs and Windows servers.
Source: https://cloud.google.com/free/docs/free-cloud-features?_ga=2.247017600.-527018892.1669043303
Links
Generate credentials for Windows VMs
https://cloud.google.com/compute/docs/instances/windows/generating-credentials