Set up SSH private/public Key Pair without using Password Authentication on Linux
SSH keys are not only more convenient but also improve the security in contrast to the password authentication, provided the private key is managed, stored and secured properly.
As I set up a new virtual Ubuntu machine for my lab environment, the first thing I will always do is to set up SSH for private/public key authentication and disabling the password authentication.
Below I will show how to set up private/public key authentication and disabling the password authentication. These are just a few steps.
Alter the default SSH Port
Before I will also change the default SSH port from 22 to another one beyond the well-known ports range, which is from 0 through 1023. By doing this you will get rid of most annoying automatic brute-force attacks, they just trying the default SSH port 22. So if port 22 is closed, you get rid of all these automatic connection attempts.
Well-known ports
https://en.wikipedia.org/wiki/List_of_TCP_and_UDP_port_numbers#Well-known_ports
Therefore we need to open the /etc/ssh/sshd_config file.
$ sudo nano /etc/ssh/sshd_config
Change the port into a number as mentioned beyond the well-known port range and isn’t still in use and listening from another daemon (service) on your system.
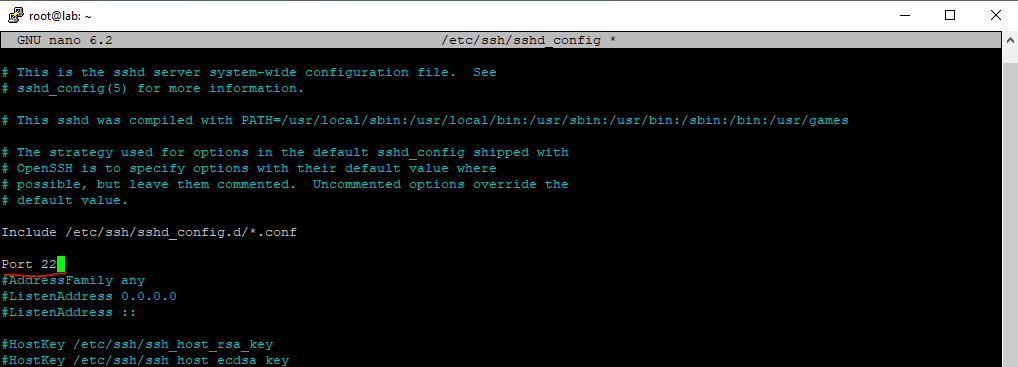
Now restart SSH that the daemon listens on the new port.
$ sudo systemctl restart SSH
!!! Note
I would recommend to not close the active SSH Console like putty, before you opened a new session and using the new port. If it works, you can exit the old session, if not you still have remote access and can change the configuration.
Generating the SSH Key Pair (private & public key)
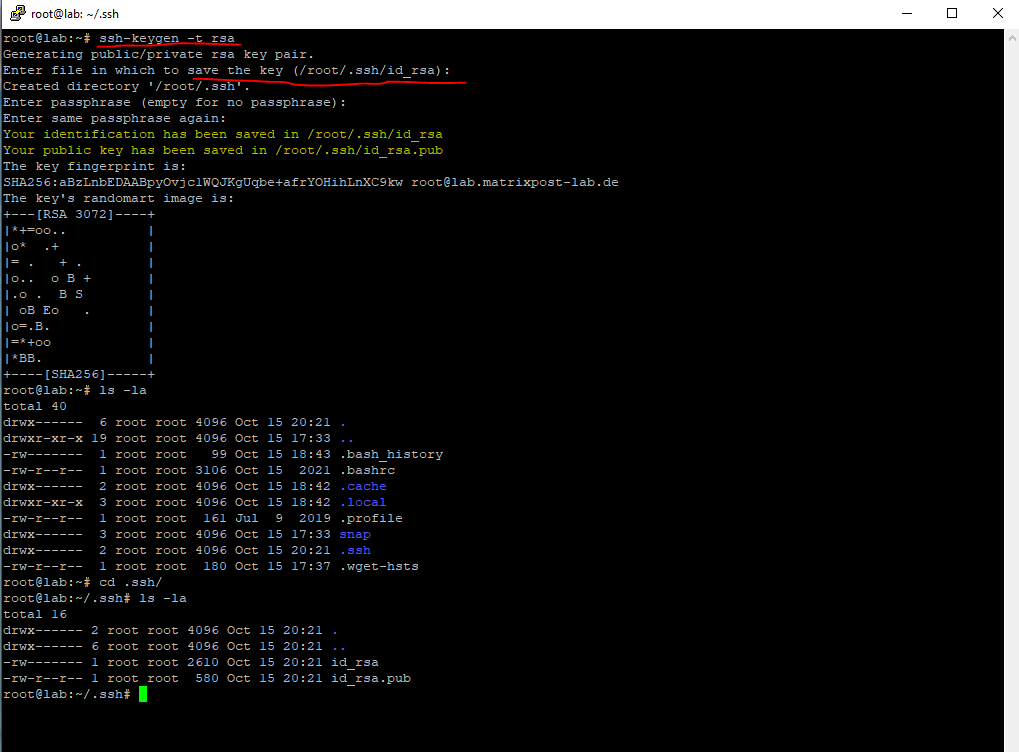
So now I will generate the new key pair to use for SSH private/public key authentication.
$ ssh-keygen -t rsa
This will generate the private key (here id_rsa) and the public key (here id_rsa.pub) in the hidden ssh folder from the user’s home directory. You can also enter a passphrase which will encrypt the private key to protect it from attacker. I will also remove the private key from the server as I will just use it from a client to connect from remote to the server.
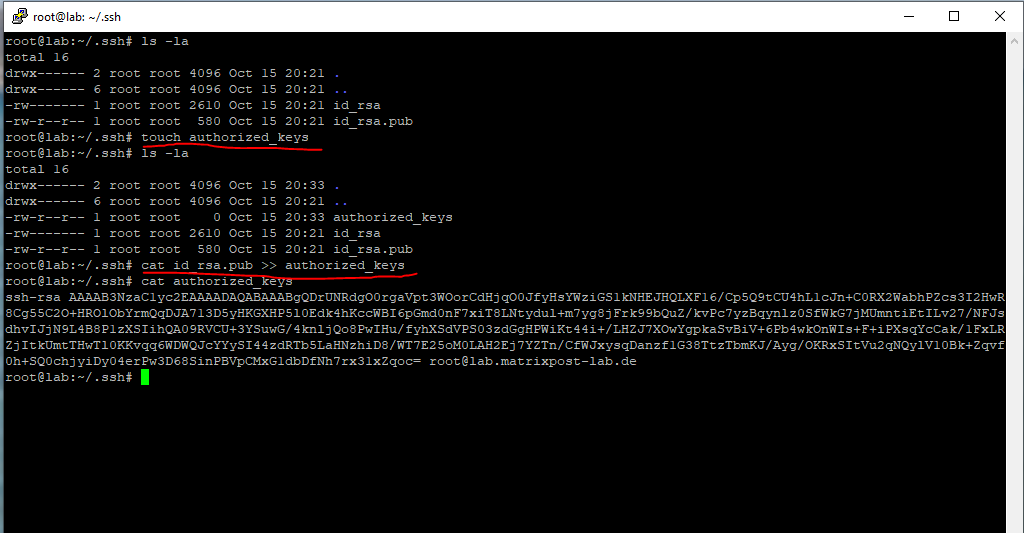
We then need to append the public key to the ~/.ssh/authorized_keys file (user’s home directory) in order to be able to connect by using the private key to the server.
$ sudo touch authorized_keys
$ sudo cat id_rsa.pub >> authorized_keys
By using the touch command, the file will get created if not already existing. Normally the tool is used to update access and/or modification date of a file or directory.
Convert the private key for using in Putty
Now I need to copy the private key to my remote client computer. In case your client is a windows computer and you want to use Putty to connect to your linux server, you first need to convert the native Linux private key in Pem format to Ppk format for Putty by using PuTTYgen.
Convert Pem to Ppk File Using PuTTYgen
https://www.puttygen.com/convert-pem-to-ppk
Enable private/public key authentication
To enable private/public key authentication for the root user, we need to open the /etc/ssh/sshd_config file again.
$ sudo nano /etc/ssh/sshd_config
!!! Before changing this be sure you have first copied the private key to your computer from where you will connect to the Linux server by using private/public key authentication, otherwise you will lockout yourself !!!
Find the line
PermitRootLogin yes
and change it to
PermitRootLogin without-password
Restart the SSH daemon
$ sudo systemctl restart ssh
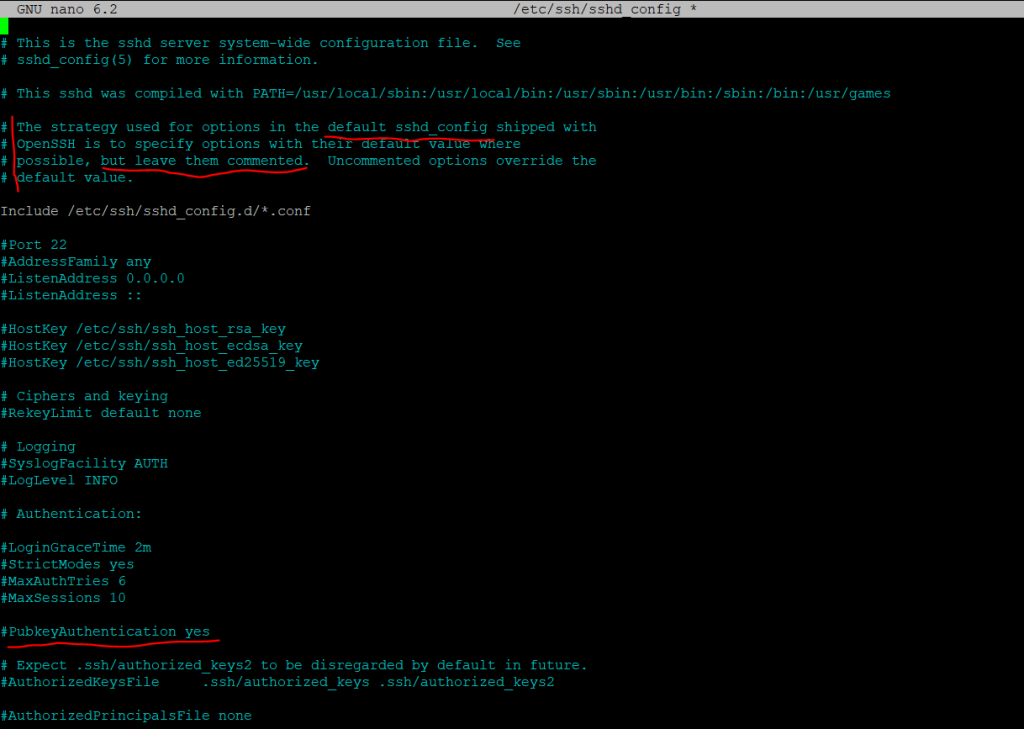
By the way private/public key authentication for all other users are enabled by default and the PubkeyAuthentication yes option as shown below in the /etc/ssh/sshd_config file.
Disable password authentication
Finally if private/public key authentication works, I will disable password authentication for SSH. Therefore we need to open the /etc/ssh/sshd_config file another time.
$ sudo /etc/ssh/sshd_config
Find the line
PasswordAuthentication yes
and change it to
PasswordAuthentication no
Restart the SSH daemon
$ sudo systemctl restart ssh
From now on, if a user wants to authenticate by password, the server will refuse!
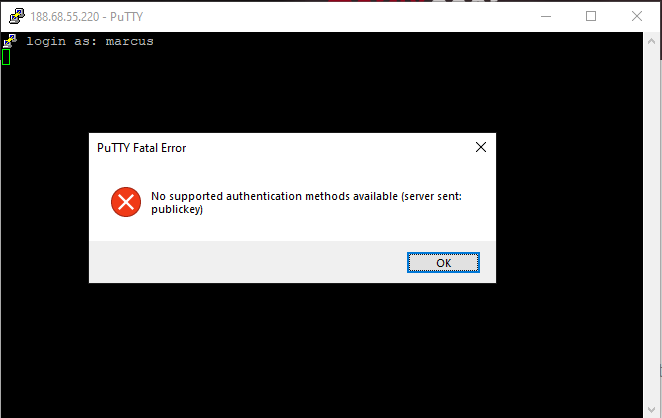
Troubleshooting
If you get any error messages and couldn’t connect to your server using SSH, check the authentication log for more information.
/etc/var/log/auth.log
Also check if the main config file /etc/ssh/sshd_config may have referenced another config file like below in the /etc/ssh/sshd_config.d/ folder all *.conf files. This is usually the case for cloud instances.
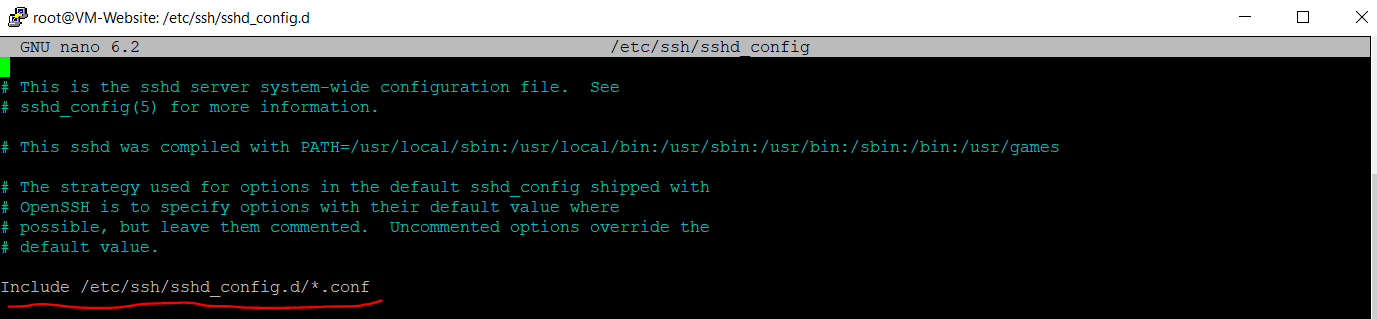
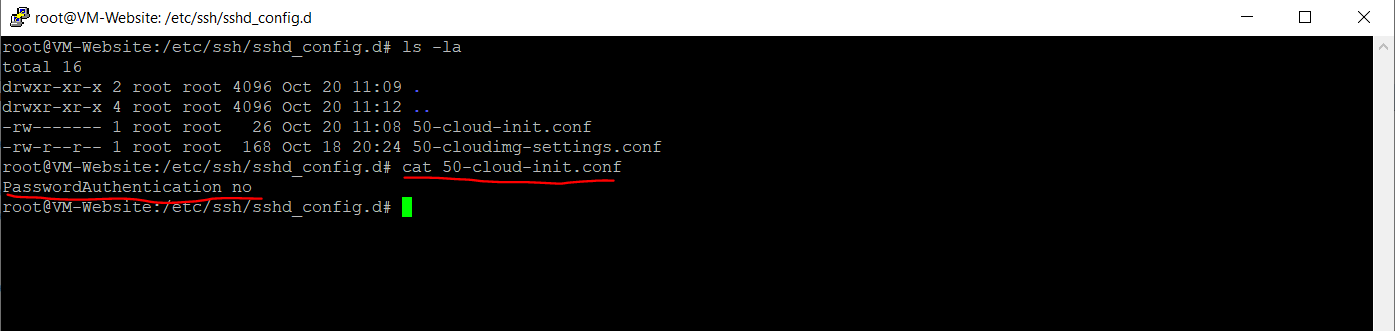
For example in the main /etc/ssh/sshd_config was configured the parameter PasswordAuthentication no and in the referenced /etc/ssh/sshd_config.d/50-cloud-init.conf it was set to yes.
So as I wanted to disable password authentication, I had to set it in the /etc/ssh/sshd_config.d/50-cloud-init.conf file.
Here I still changed it to no.
Links
Convert Pem to Ppk File Using PuTTYgen
https://www.puttygen.com/convert-pem-to-ppkWell-known ports
https://en.wikipedia.org/wiki/List_of_TCP_and_UDP_port_numbers#Well-known_ports
Tags In
Related Posts
Latest posts
Protecting NetApp ONTAP Workloads with Autonomous Ransomware Protection (ARP) – Part 4 – Detecting and Recovering SMB Workloads from Ransomware
Follow me on LinkedIn