Set up ownCloud on Ubuntu
Today I wanna show how to set up ownCloud (release 10.11) on Ubuntu 22.04.1 LTS.
ownCloud is an open-source file sync, share and content collaboration software that lets teams work on data easily from anywhere, on any device.
https://owncloud.com/product/
I will use for this post a new minimal Ubuntu 22.04.1 LTS installation, so I have to install and set up all the components like apache webserver, MySQL and PHP on a virtual machine from scratch.
Minimal Ubuntu
https://wiki.ubuntu.com/Minimal
Install PHP
Actually I wanted to install the latest stable version from PHP which is at the moment 8.1. Unfortunately this is not supported from the latest ownCloud release 10.11 and I was getting the following message instead the setup page. So reading prerequisites makes sense.
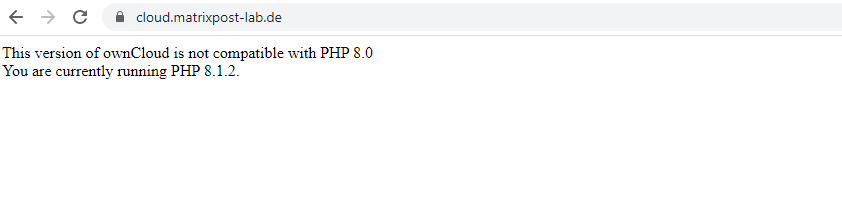
ownCloud can run with following PHP versions: 7.3 and 7.4
ownCloud recommends PHP 7.4 for new installations. Sites using a version earlier than PHP 7.3 are strongly encouraged to migrate at least to PHP 7.3.
Note that PHP 8.x is currently not supported.
Source: https://doc.owncloud.com/server/next/admin_manual/installation/manual_installation/manual_installation_prerequisites.html#php-version
So I need to install PHP 7.4
Old Stable PHP 7.4
https://www.php.net/downloads
I will also check, if PHP is really not already pre-installed on the minimal Ubuntu image.
$ sudo php -v
Now I will install PHP 7.4 itself and a few further php modules needed by MySQL, Apache and ownCloud.
If you try on Ubuntu 22.04.1 LTS to install PHP 7.4 you will get the following error message.
Package ….. is not available, but is referred to by another package.
This may mean that the package is missing, has been obsoleted, or
is only available from another source
On Ubuntu 22.04.1 LTS with the default repositories you just could install new versions of PHP. To get an older version we need to add the PPA Ondrej repository.
https://launchpad.net/~ondrej
https://launchpad.net/~ondrej/+archive/ubuntu/php
$ sudo apt install software-properties-common
$ sudo add-apt-repository ppa:ondrej/php -y
$ sudo apt update
Now I can install PHP 7.4 and a few modules.
$ sudo apt-get install php7.4 php7.4-cli php7.4-common libapache2-mod-php7.4 php7.4-mysql php7.4-fpm php7.4-curl php7.4-gd php7.4-mbstring php7.4-xml php7.4-intl php7.4-zip
- php7.4-cli – command interpreter, useful for testing PHP scripts from a shell or performing general shell scripting tasks
- php7.4-common – documentation, examples, and common modules for PHP
- php7.4-mysql – for working with MySQL databases
- php7.4-zip – for working with compressed files
- php7.4-gd – for working with images
- php7.4-mbstring – used to manage non-ASCII strings
- php7.4-curl – lets you make HTTP requests in PHP
- php7.4-xml – for working with XML data
- libapache2-mod-php7.4 – PHP module for the Apache 2 webserver
- php7.4-fpm – (an acronym of FastCGI Process Manager) is a hugely-popular alternative PHP (Hypertext Processor) FastCGI implementation.
- php7.4-intl – Internationalization extension (further is referred as Intl) is a wrapper for ICU library, enabling PHP programmers to perform various locale-aware operations
As I first installed PHP 8.1, the default version is still 8.1.

It is possible to install different php versions on a single system at the same time. By using the command update-alternatives you can switch between them and set a default version.
update-alternatives will create here a symbolic link which points to the version you set as default. The command is from Debian origin but also adopted in other distributions like Fedora.
https://manpages.ubuntu.com/manpages/trusty/man8/update-alternatives.8.html
If you had installed multiple php versions you can show and select them by executing the following command.
$ sudo update-alternatives --config php
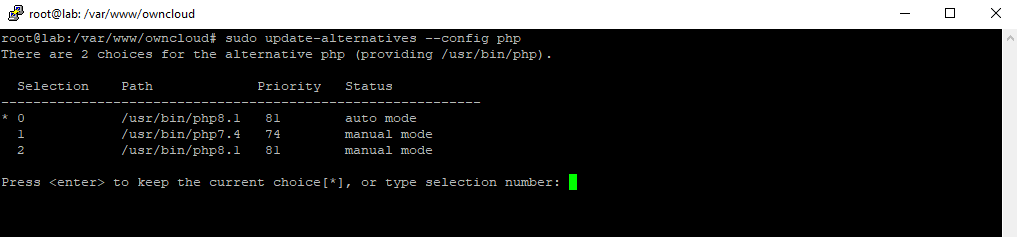
So here I will enter 1 to change to PHP7.4 as default PHP version on the system.
So by checking another time the version it is switched to 7.4.32.
$ php -v

For Apache I need also execute the following commands to change the PHP version from 8.1 to 7.4.
First I need to disable php8.1
$ sudo a2dismod php8.1
then I need to enable version 7.4
$ sudo a2enmod php7.4
also I need to restart apache
$ sudo systemctl restart apache2
Install and Configure the Apache HTTP Server
The Apache web server was installed along with the libapache2-mod-php8.1 and php8.1 package we installed previously, they both depends on the httpd packages. If not you can install Apache with the following command.
$ sudo apt install apache2
Checking the version with the command
$ apache2 -v
I will also configure an Apache Virtual Host for ownCloud which Document Root points to my ownCloud directory we set up later.
Apache Virtual Host documentation
https://httpd.apache.org/docs/2.4/vhosts/index.html
VirtualHost Examples
https://httpd.apache.org/docs/2.4/vhosts/examples.html
The term Virtual Host refers to the practice of running more than one web site (such as company1.example.com and company2.example.com) on a single machine.
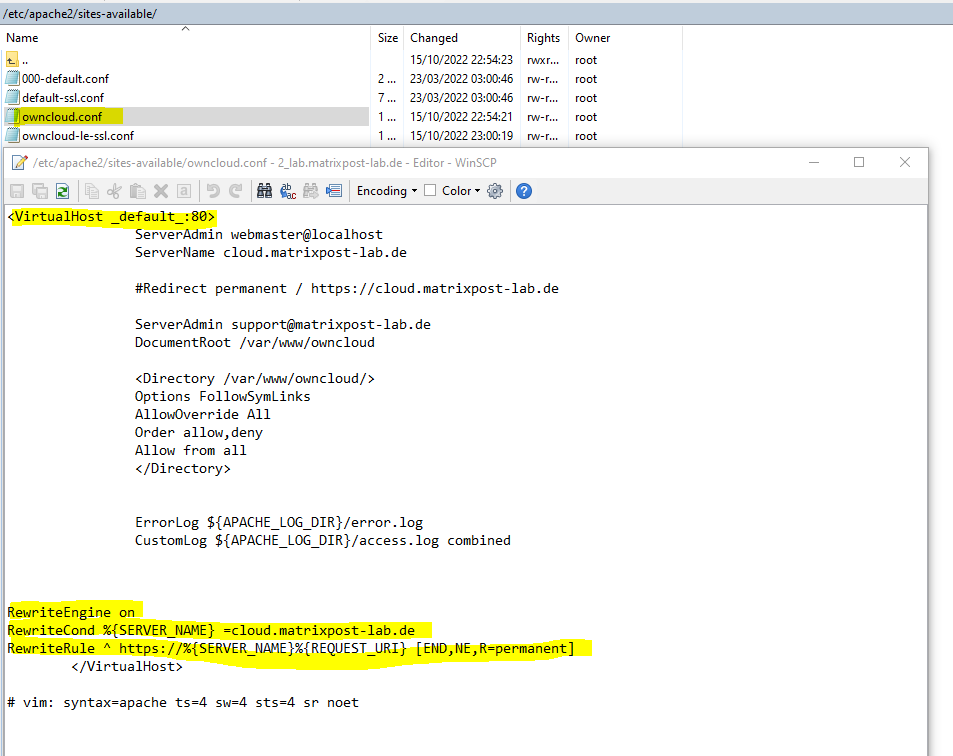
Therefore I will duplicate the default HTTP Port 80 Virtual Host /etc/sites-available/default 000-default-conf as shown below by using WinSCP.
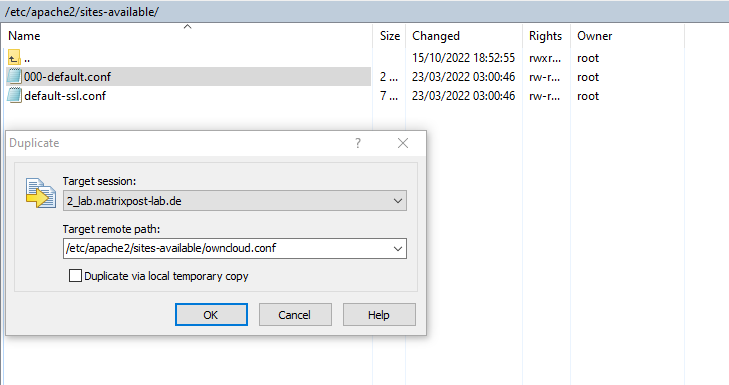
The Virtual Host owncloud.conf which will listen under HTTP Port 80 will look like this.
The redirect from HTTP to HTTPS I will first comment out to set up a Let’s Encrypt Certificate which will also create a virtual SSL host and configure the redirect to the encrypted virtual HTTPS host automatically.
Let’s encrypt will create a rewrite rule to redirect all requests from HTTP to HTTPS instead using the Redirect directive, it’s up to you which method you use, the Redirect directive or a Rewrite rule, both will work.
Apache anyway recommends to prefer for http requests redirected to https the Redirect directive.
When not to use mod_rewrite
https://httpd.apache.org/docs/2.4/rewrite/avoid.html
A common use for RewriteRule is to redirect an entire class of URLs. For example, all URLs in the /one directory must be redirected to http://one.example.com/, or perhaps all http requests must be redirected to https. These situations are better handled by the Redirect directive.
<VirtualHost _default_:80>
		ServerAdmin webmaster@localhost
		ServerName cloud.matrixpost-lab.de

		#Redirect permanent / https://cloud.matrixpost-lab.de

		ServerAdmin support@matrixpost-lab.de
		DocumentRoot /var/www/owncloud

        	<Directory /var/www/owncloud/>
   		Options FollowSymLinks
   		AllowOverride All
   		Order allow,deny
   		Allow from all
 		</Directory>


		ErrorLog ${APACHE_LOG_DIR}/error.log
		CustomLog ${APACHE_LOG_DIR}/access.log combined


	</VirtualHost>

# vim: syntax=apache ts=4 sw=4 sts=4 sr noet
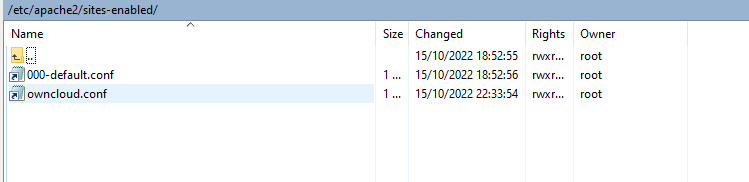
We also need to enable the Virtual Host by executing the following command.
$ sudo a2ensite owncloud.conf
$ sudo systemctl reload apache2
From now on the Virtual Host is also listed in /etc/sites-enabled/
For a new Let’s Encrypt certificate I also need to create a new DNS A Record which points to the new lab server where ownCloud is running.

How to get a Let’s Encrypt certificate by using the Certbot utility you will find in my following post.
Now I can request a new certificate by using
$ sudo certbot --apache
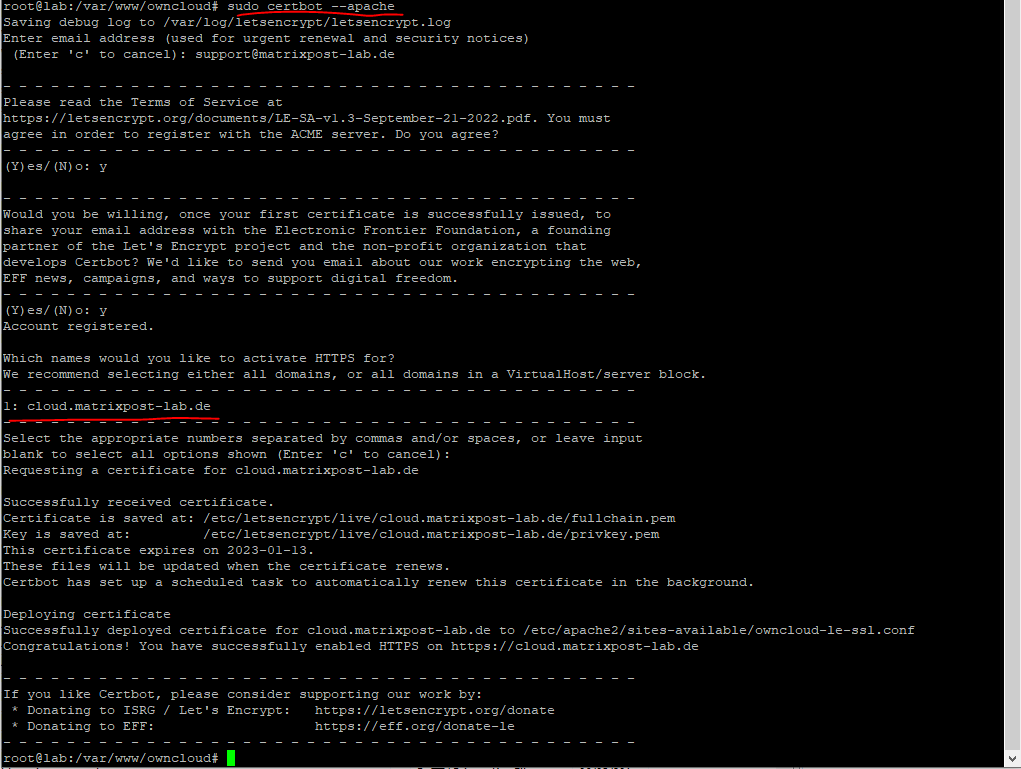
The Certbot tool will also configure and enable a further Virtual Host which is listen under Port 443 HTTPS and configured with the new Let’s Encrypt certificate.

Further the Certbot tool will automatically configure a redirect by using a Rewrite Rule as mentioned perviously from HTTP to HTTPS at the HTTP Virtual Host.
Install MySQL
ownCloud requires a database in which administrative data is stored. The following databases are currently supported:
Database Configuration on Linux
https://doc.owncloud.com/server/next/admin_manual/configuration/database/linux_database_configuration.html
I will use a MySQL database, therefore to install execute the following command.
$ sudo apt install mysql-server
You can check the version with
$ mysql -V
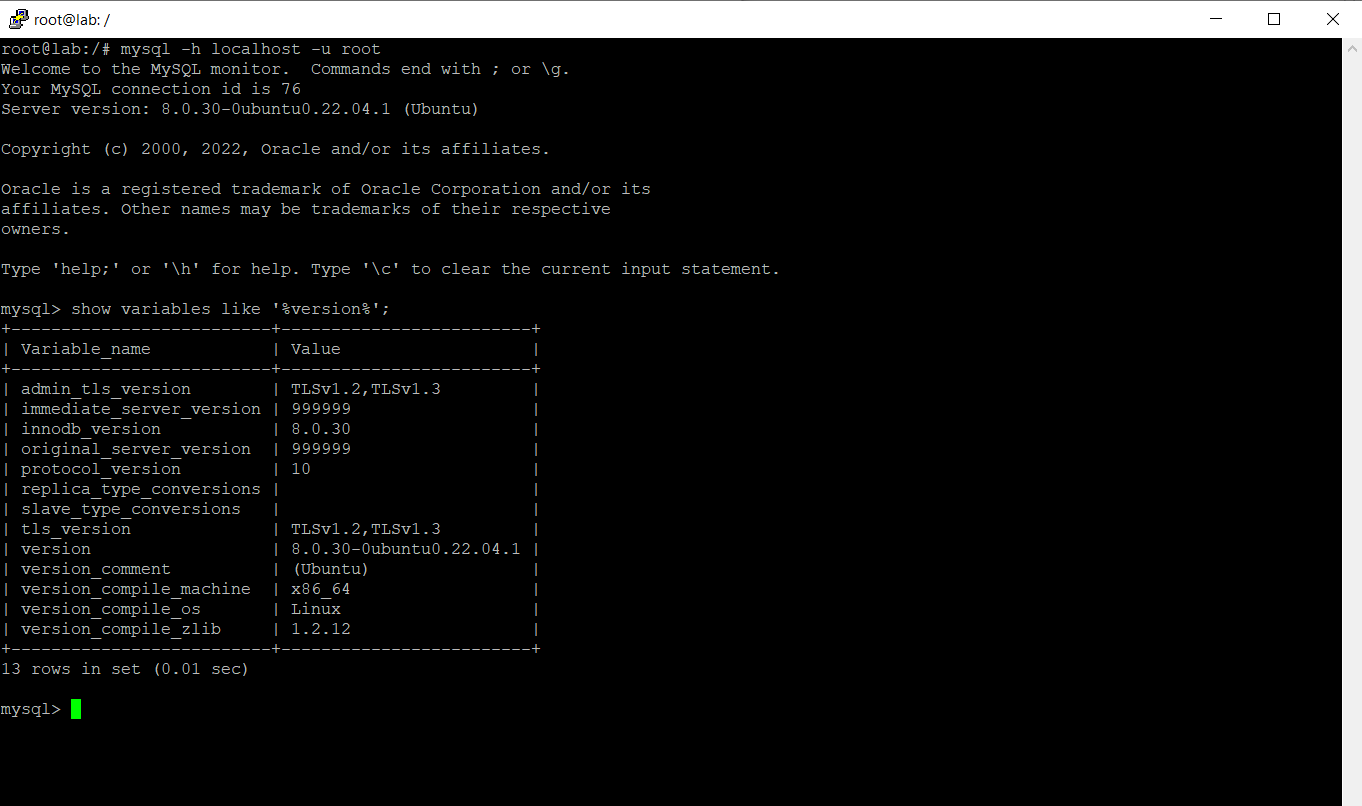
Another way to check the version and getting more details is to login in to and execute the following T-SQL command.
$ mysql -h localhost -u root
show variables like ‘%version%’;
I will first create a dedicated MySQL user and database which ownCloud can use to set up. We need them later for the setup page from ownCloud.
Therefore I will first connect to my local MySQL database and enter the following T-SQL commands.
$ mysql -h localhost -u root -p
CREATE DATABASE dbOwnCloud CHARACTER SET utf8 COLLATE utf8_general_ci;
CREATE USER ‘owncloud’@’localhost’ IDENTIFIED BY ‘<your password>’;
GRANT ALL PRIVILEGES ON dbOwnCloud.* TO ‘owncloud’@’localhost’;
Install ownCloud
To install ownCloud we first download the latest source package
Download Server Packages
https://owncloud.com/download-server/
Below I will download the latest source package, unzip it and copy it to a directory in the document root from the Apache Virtual Host we created previously. I will also make the user and group which is running Apache as owner and set access permissions on the directory and files.
$ cd /opt
$ sudo wget https://download.owncloud.com/server/stable/owncloud-complete-latest.zip
$ sudo apt install unzip
$ sudo unzip owncloud-complete-latest.zip
$ cp -R ownlcloud /var/www/
$ chown -R www-data:www-data owncloud
$ chmod -R 755 owncloud
Now I can open openCloud in the browser and because its a new installation I will see the setup page.
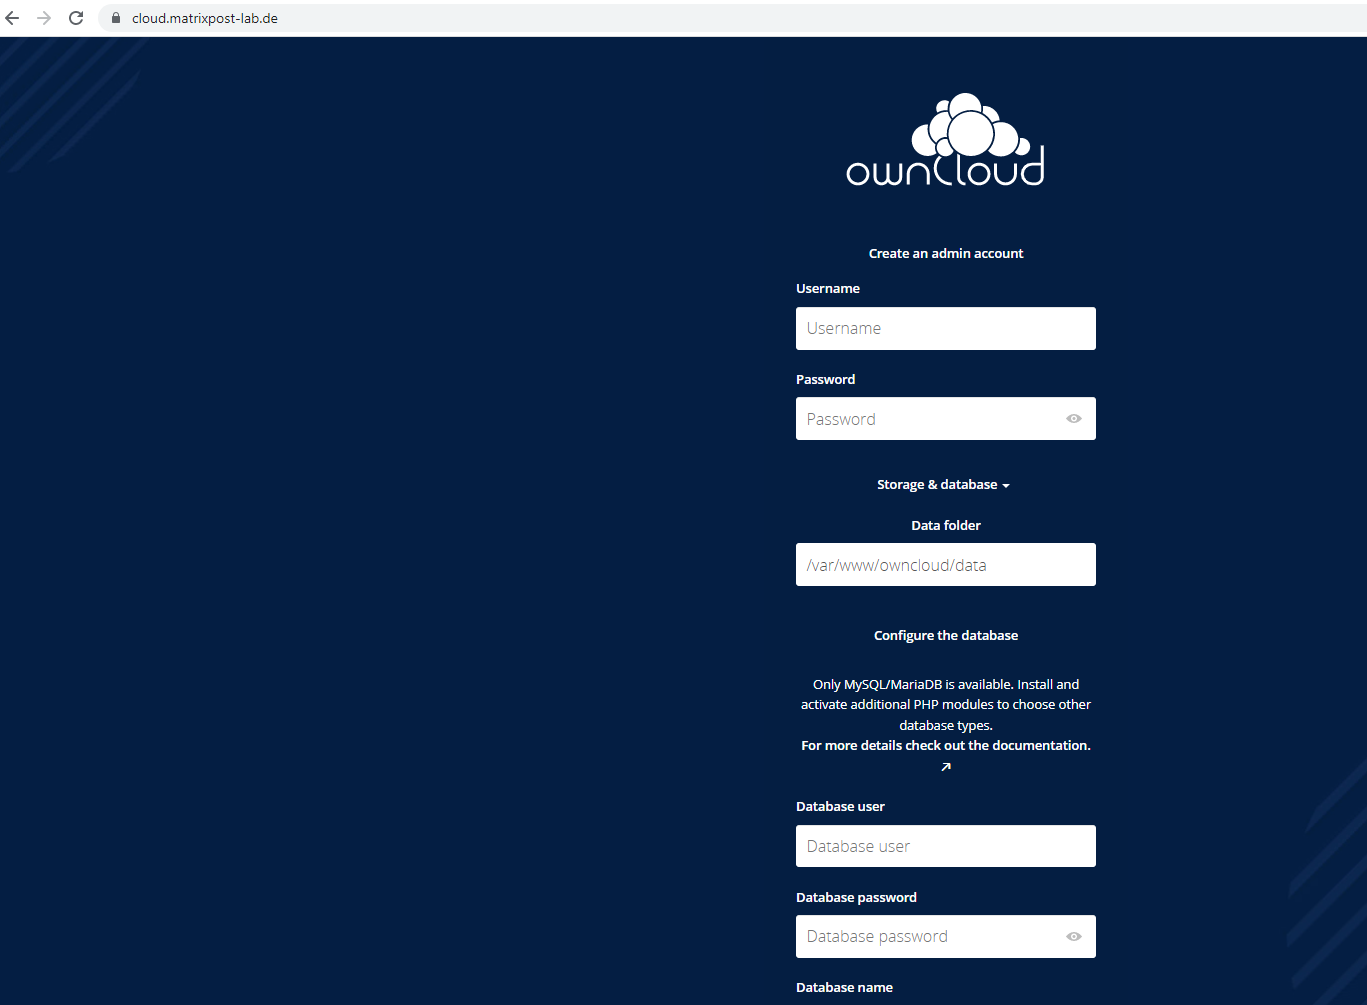
Now I can enter the information the ownCloud setup page is needed. The MySQL database and user we created previously.
We also need to enter a username and password for the admin account to log on to ownCloud after the setup.
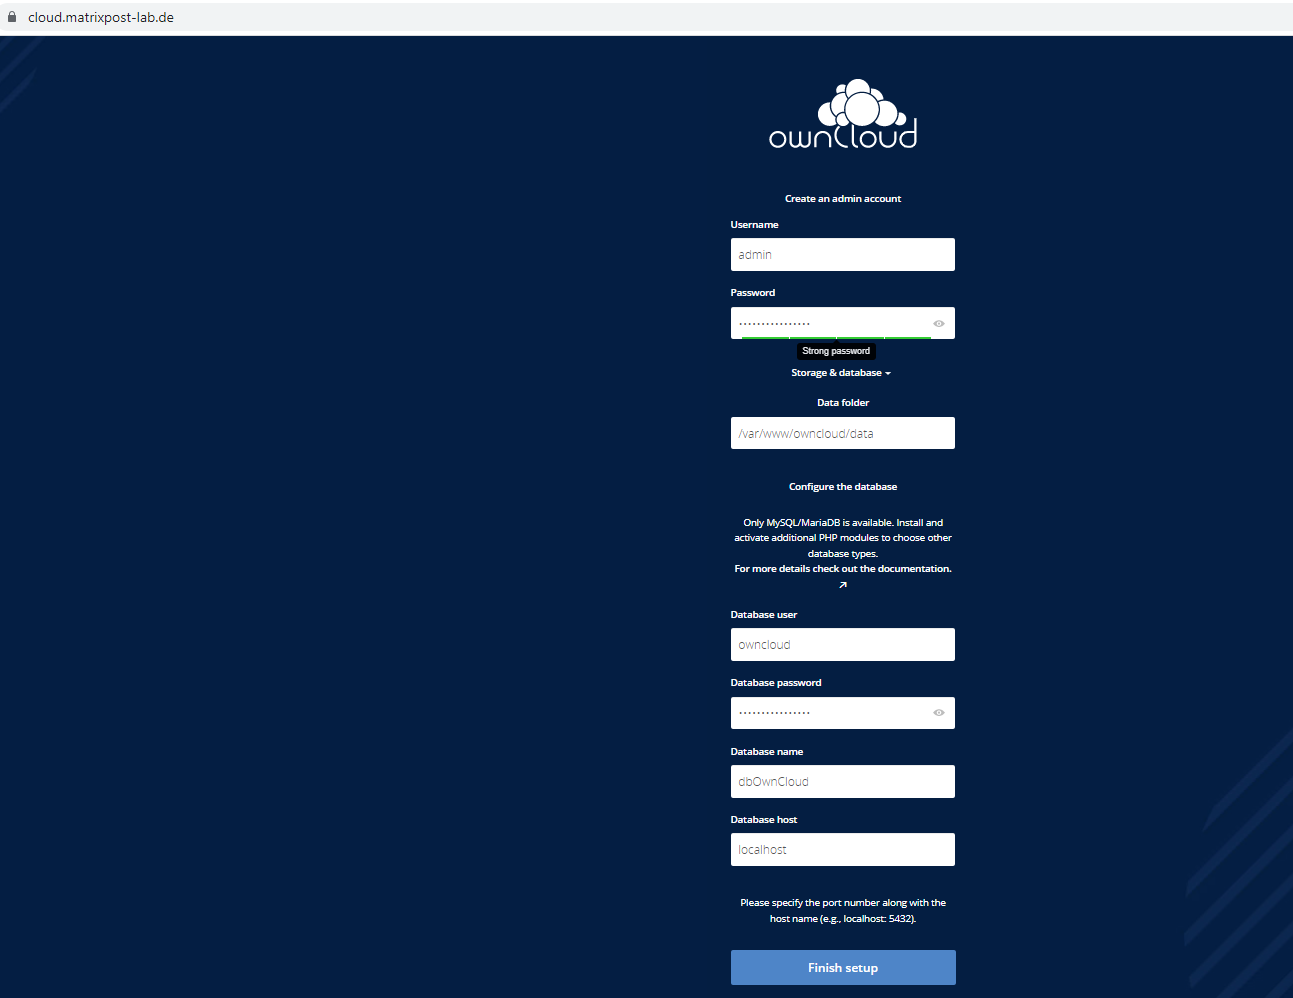
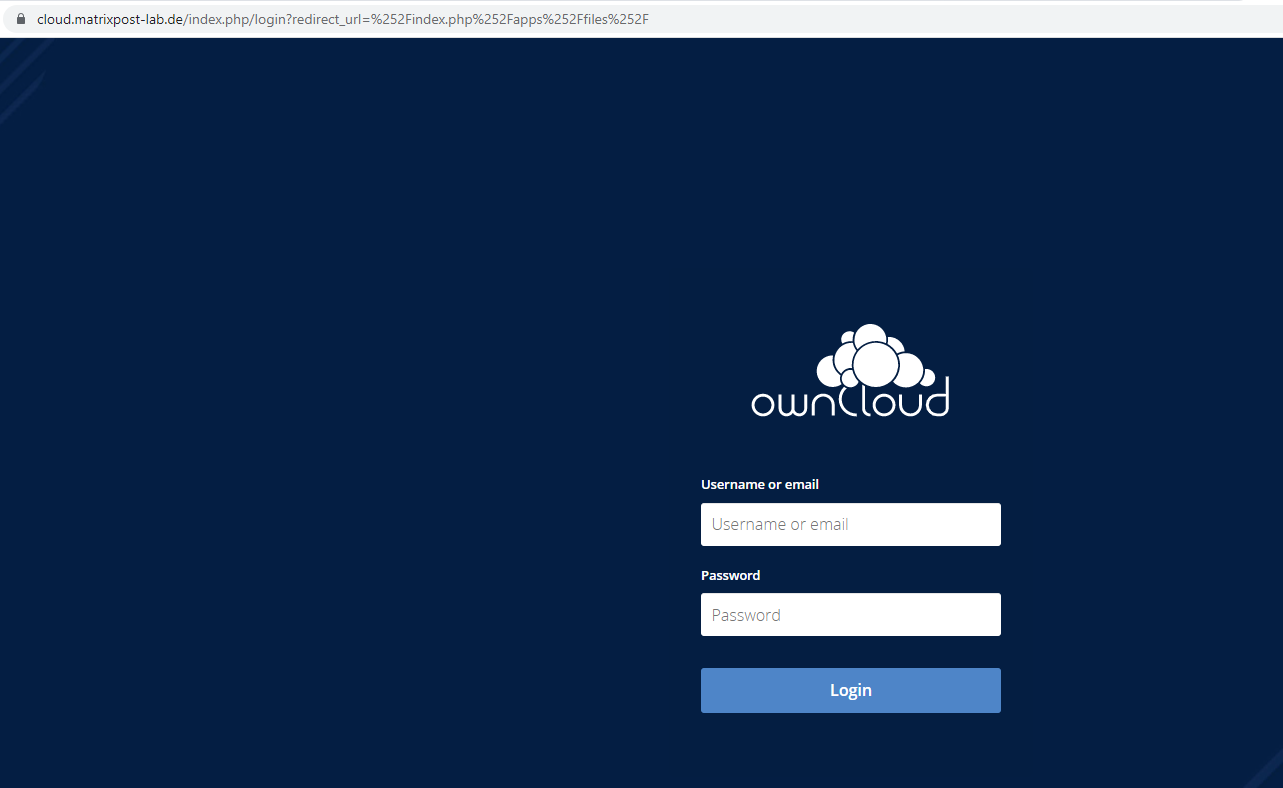
After clicking on Finish setup it takes a minute to set up ownCloud and finally you get routed to the login page.
I can login with the admin account I entered at the setup page.
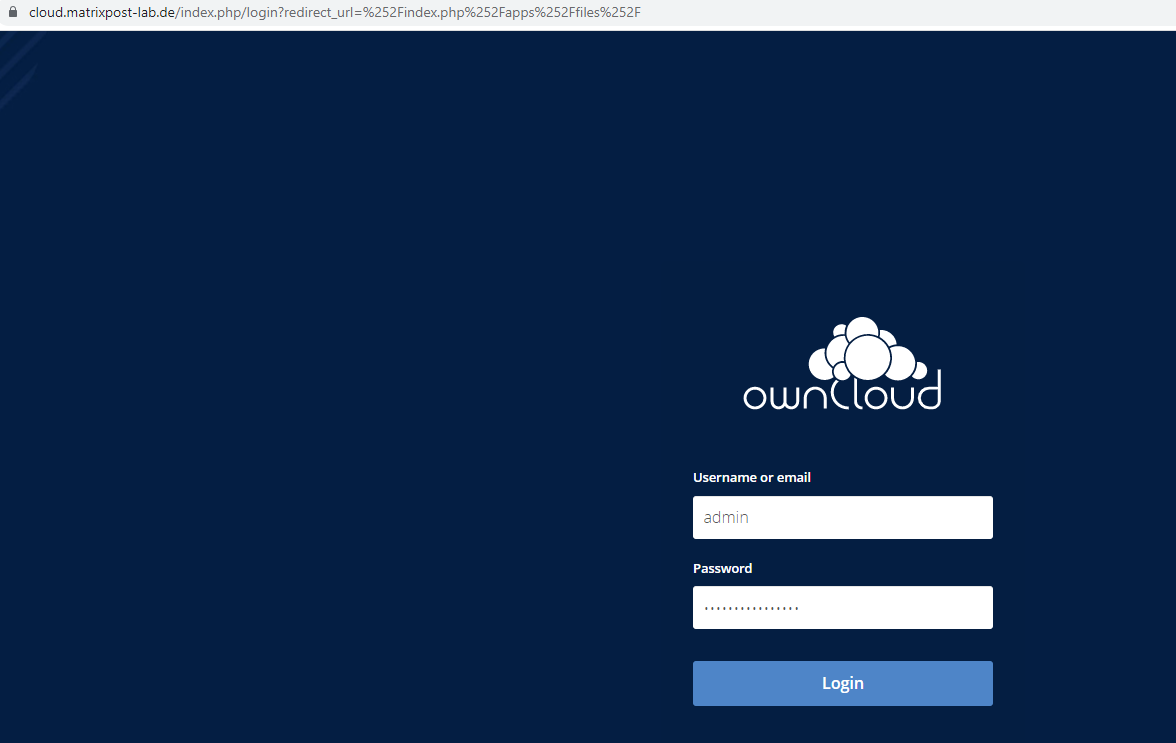
Finish!
Further users I can create in the settings from the admin account here.

Links
ownCloud is an open-source file sync, share and content collaboration software
https://owncloud.com/product/
Download Server Packages
https://owncloud.com/download-server/
Minimal Ubuntu
https://wiki.ubuntu.com/Minimal
HTTP Server Project
https://httpd.apache.org/