Set up AD Connector in AWS
In this post I want to show how to set up the AD Connector in AWS.
AD Connector is a directory gateway with which you can redirect directory requests to your on-premises Microsoft Active Directory without caching any information in the cloud. AD Connector comes in two sizes, small and large. You can spread application loads across multiple AD Connectors to scale to your performance needs. There are no enforced user or connection limits.
AD Connector does not support AD transitive trusts. AD Connectors and your on-premises AD domains have a 1-to-1 relationship. That is, for each on-premises domain, including child domains in an AD forest that you want to authenticate against, you must create a unique AD Connector.
Once set up, AD Connector offers the following benefits:
- Your end users and IT administrators can use their existing corporate credentials to log on to AWS applications such as WorkSpaces, Amazon WorkDocs, or Amazon WorkMail.
- You can manage AWS resources like Amazon EC2 instances or Amazon S3 buckets through IAM role-based access to the AWS Management Console.
- You can consistently enforce existing security policies (such as password expiration, password history, and account lockouts) whether users or IT administrators are accessing resources in your on-premises infrastructure or in the AWS Cloud.
- You can use AD Connector to enable multi-factor authentication by integrating with your existing RADIUS-based MFA infrastructure to provide an additional layer of security when users access AWS applications.
Source: https://docs.aws.amazon.com/directoryservice/latest/admin-guide/directory_ad_connector.html
AD Connector prerequisites
To connect to your existing on-premise directory with AD Connector, you need the following prerequisites:
Set up a VPC and two Subnets
At least two subnets. Each of the subnets must be in a different Availability Zone.
The VPC must be connected to your existing on-premise network through a virtual private network (VPN) connection or AWS Direct Connect.
The VPC must have default hardware tenancy.
For how to set up an IPSec route-based Site-to-Site VPN tunnel between your on-premise network and your AWS VPC you can read my following post.
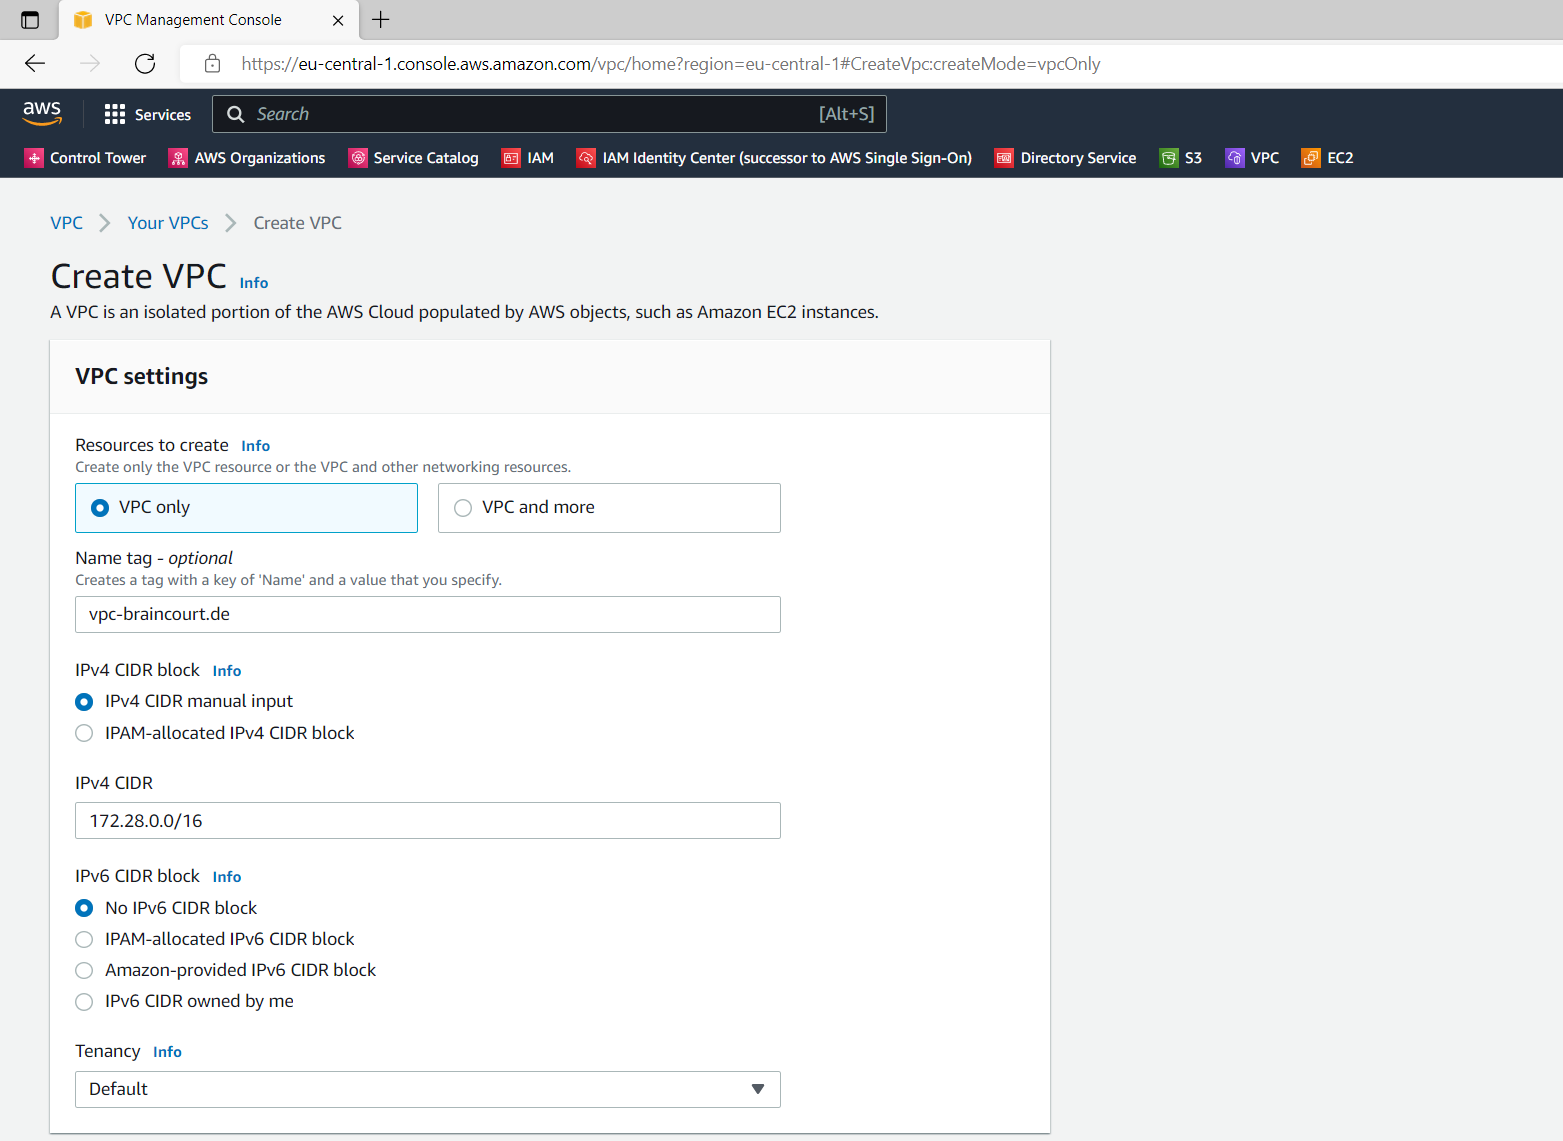
So first I will create a VPC and defining a new network CIDR block which doesn’t conflicts with my existing on-premise or any existing connected remote networks like my Azure VNet.
In case you can’t avoid having the same CIDR block in your on-premise network and one of your remote networks, you have to use NAT/BINAT translation for your IPSec Site-to-Site VPN as shown in my following post.
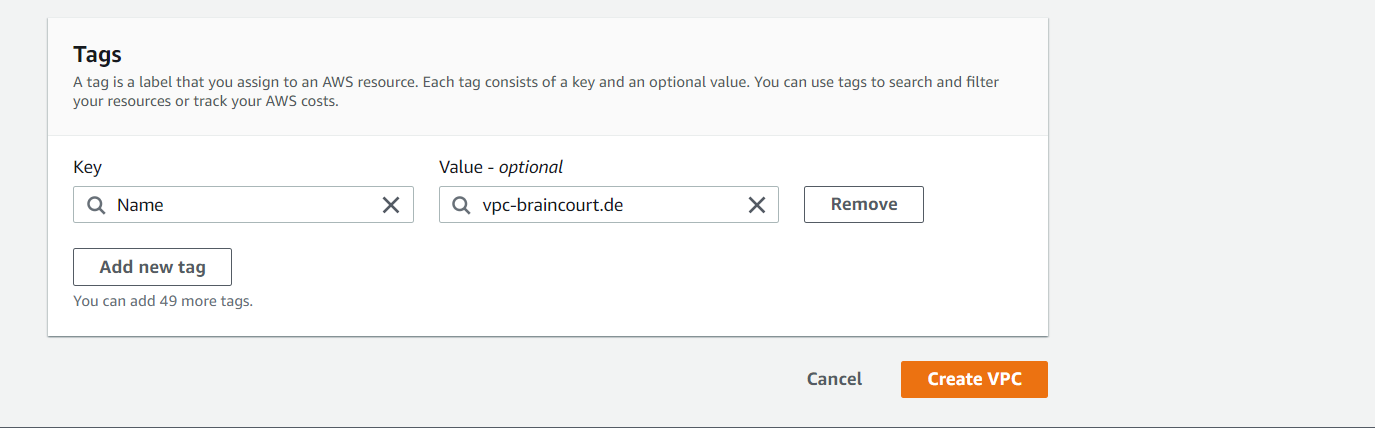
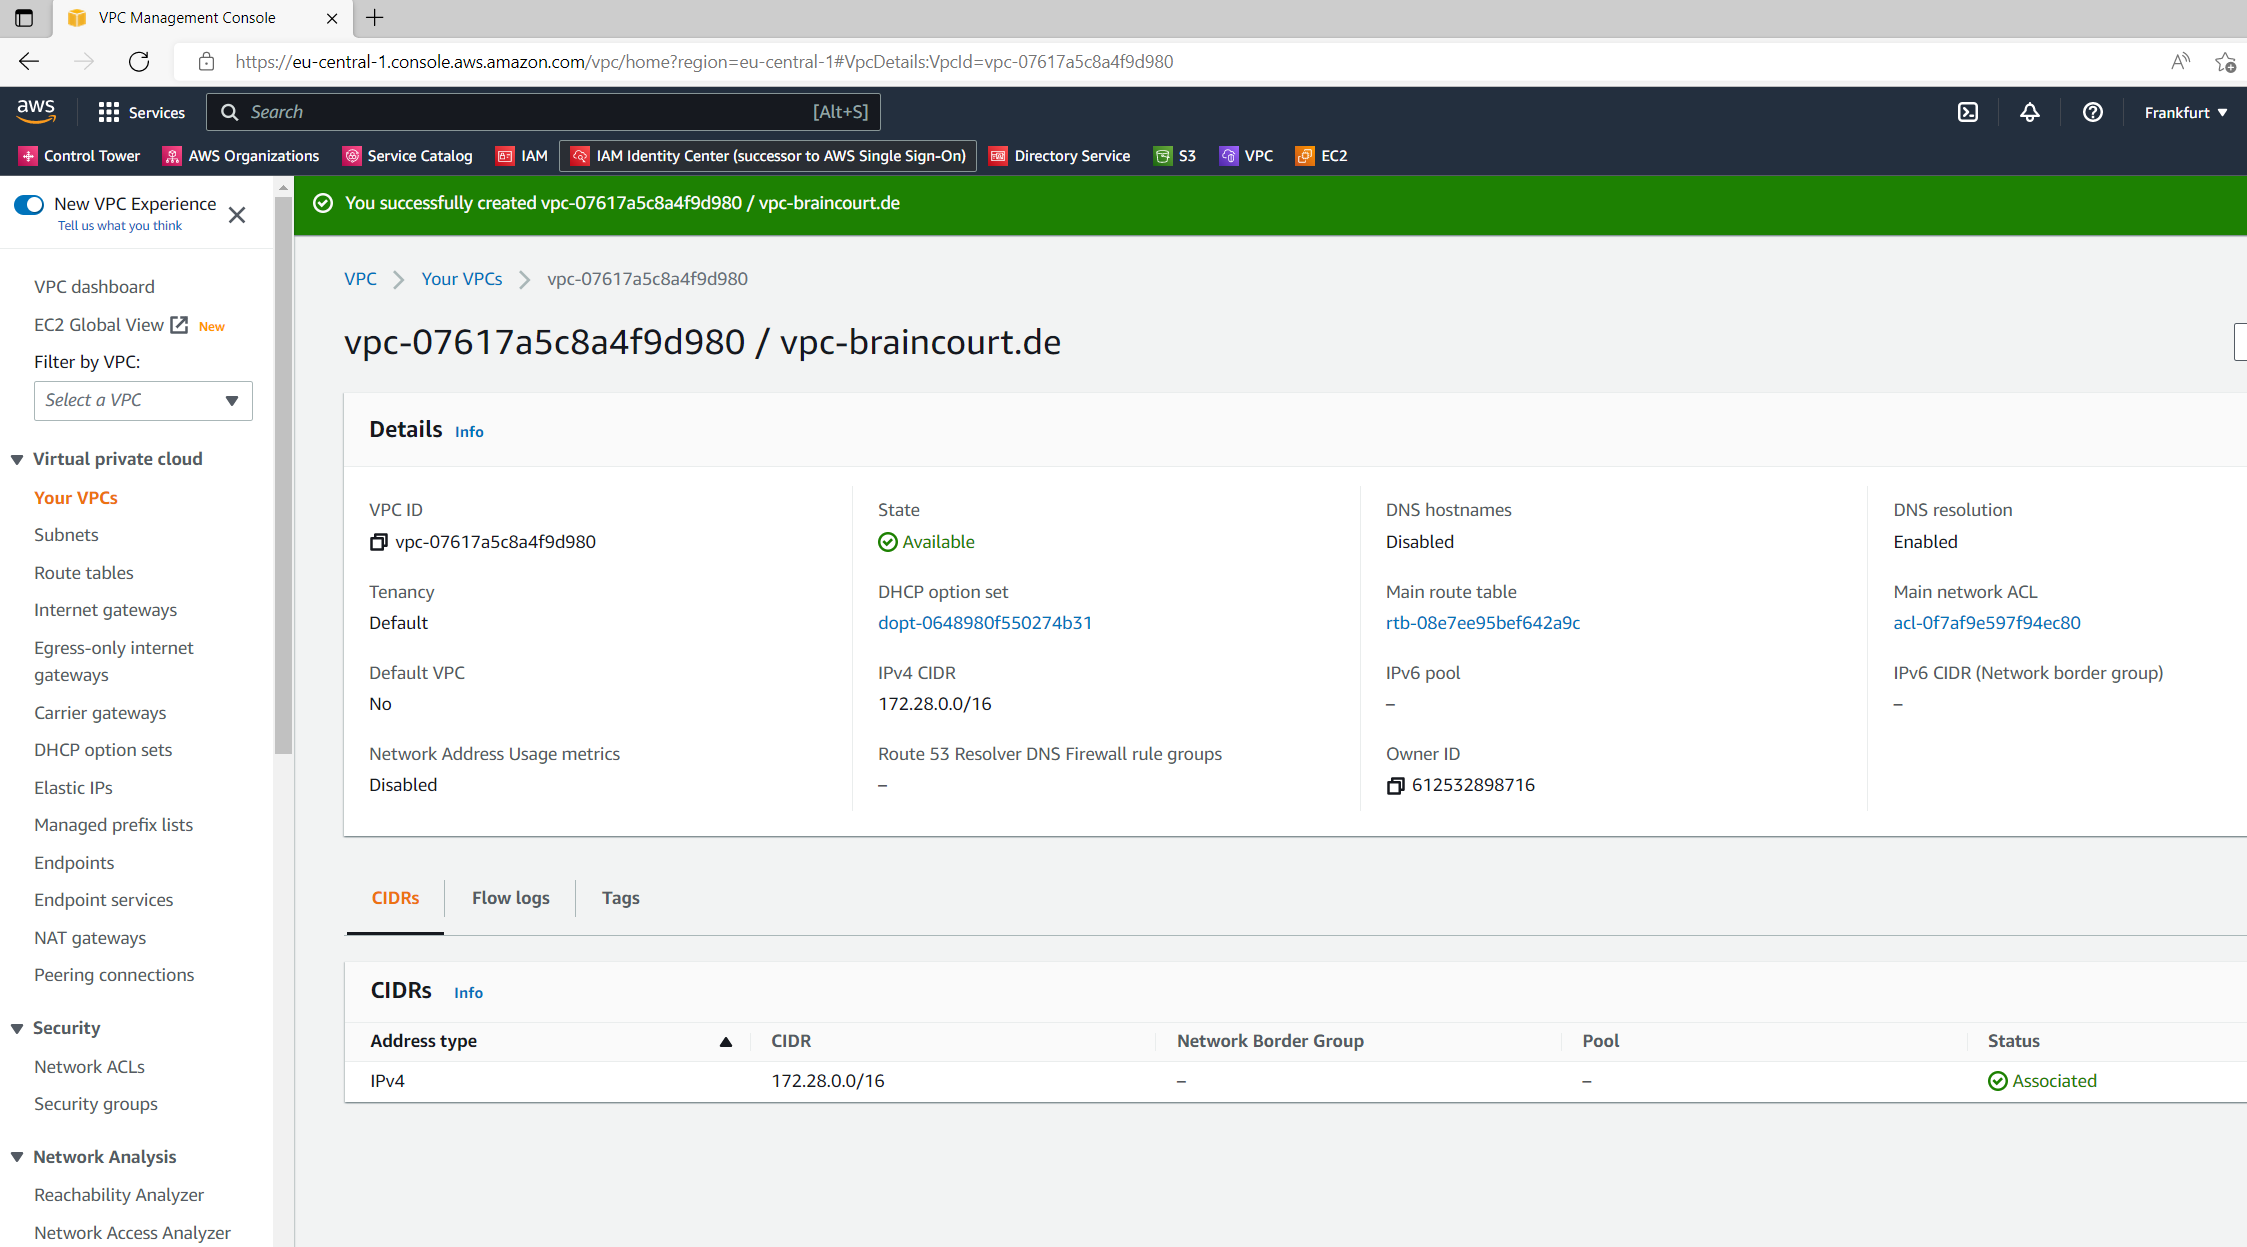
VPC –> Your VPCs –> Create VPC
I will create a new IPv4 network CIDR block with 172.28.0.0/16
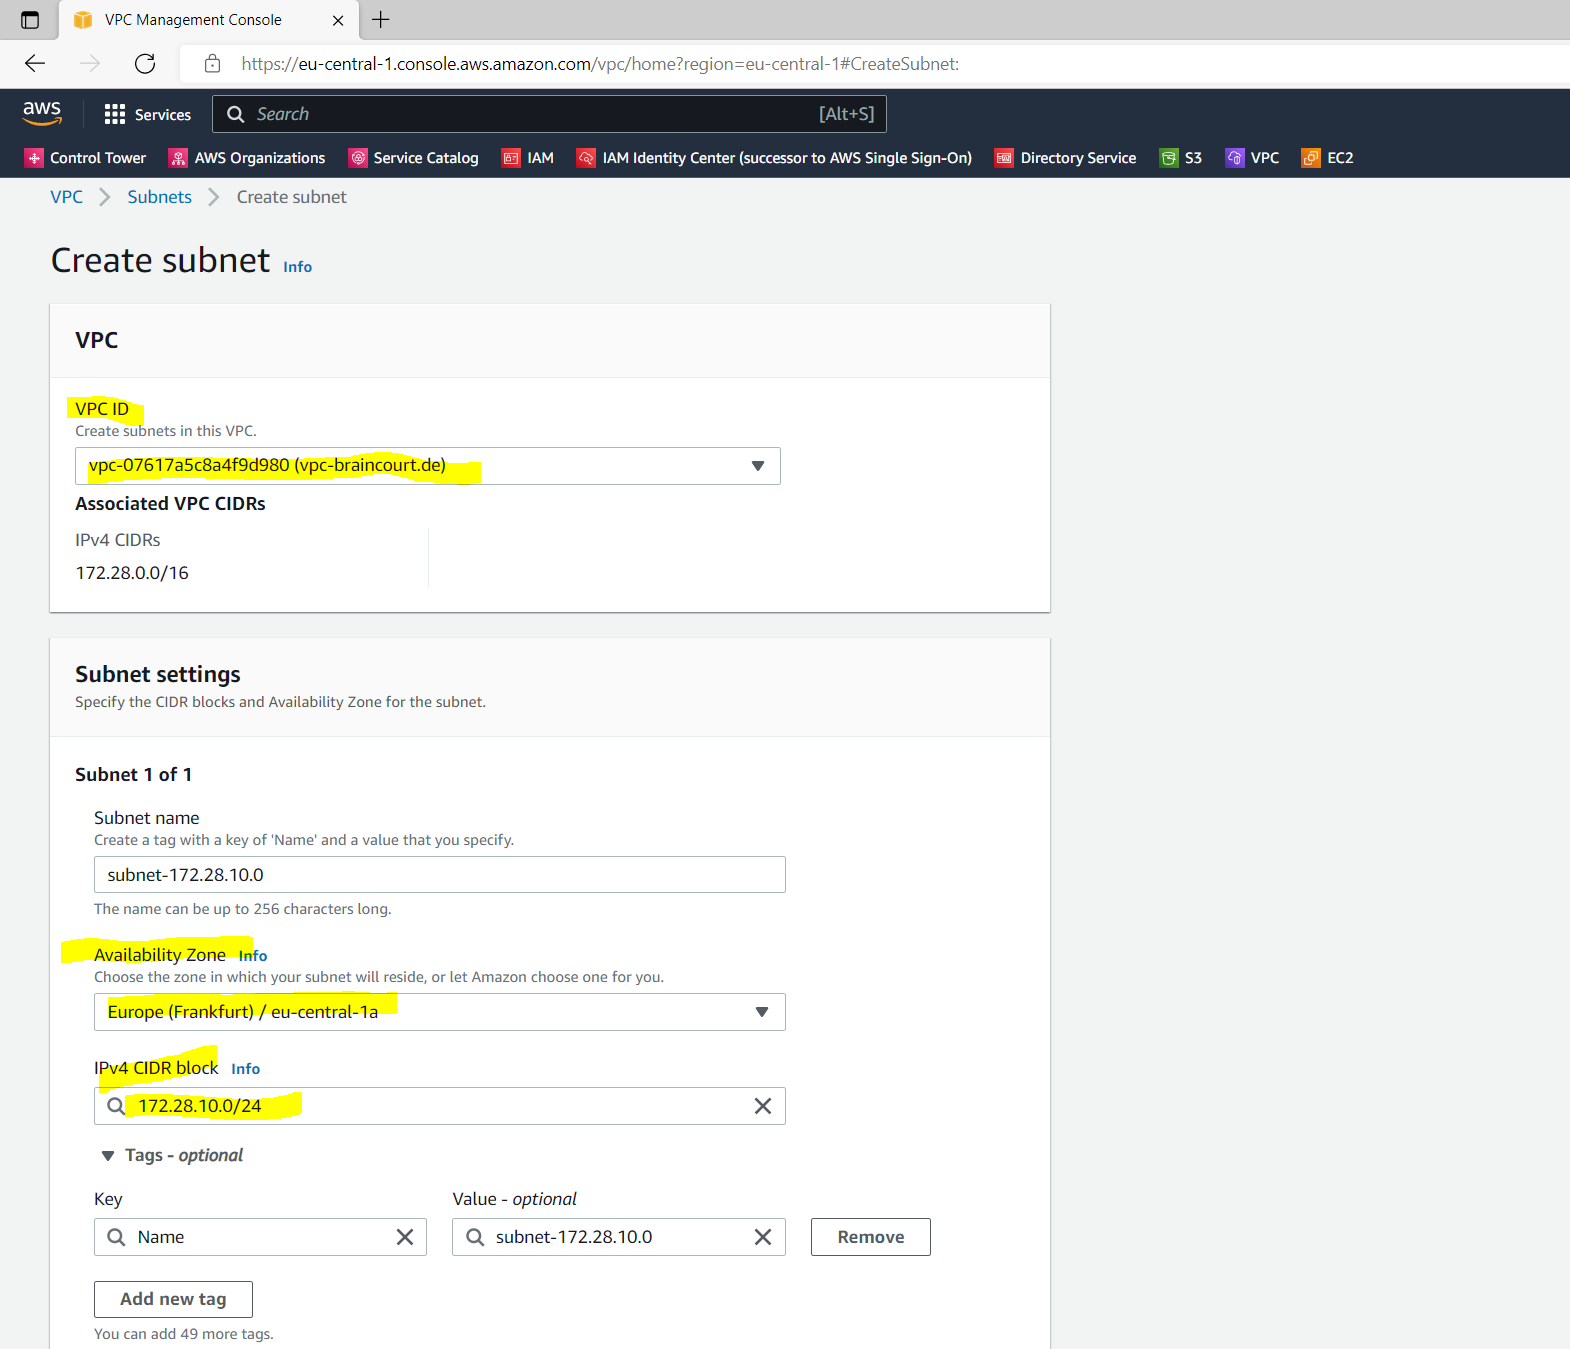
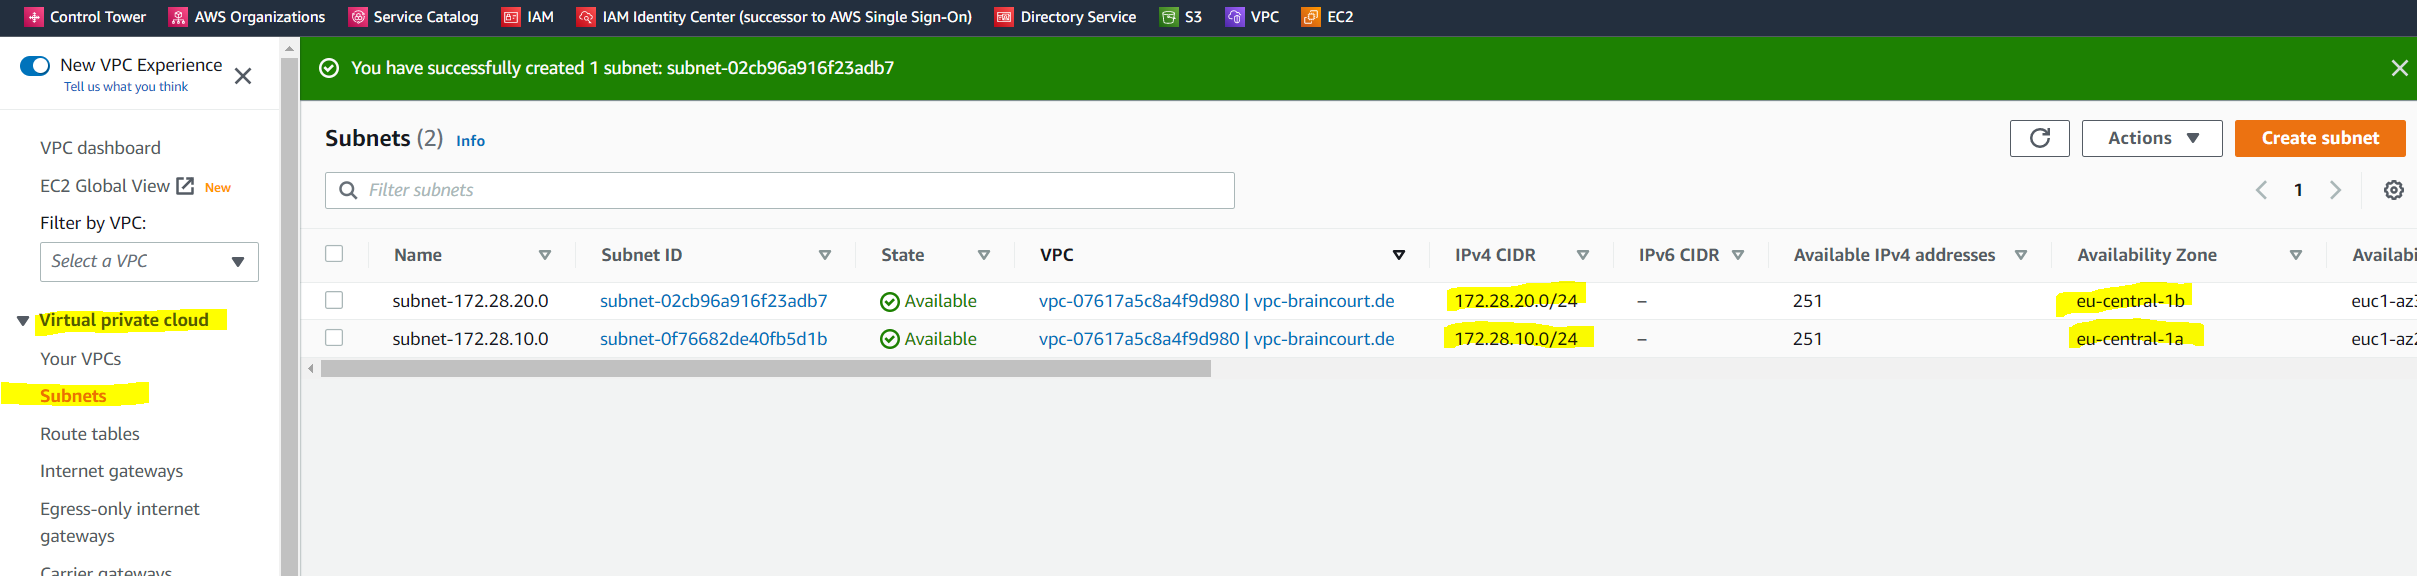
As mentioned we also need two subnets in our VPC. So we click on Create Subnet.
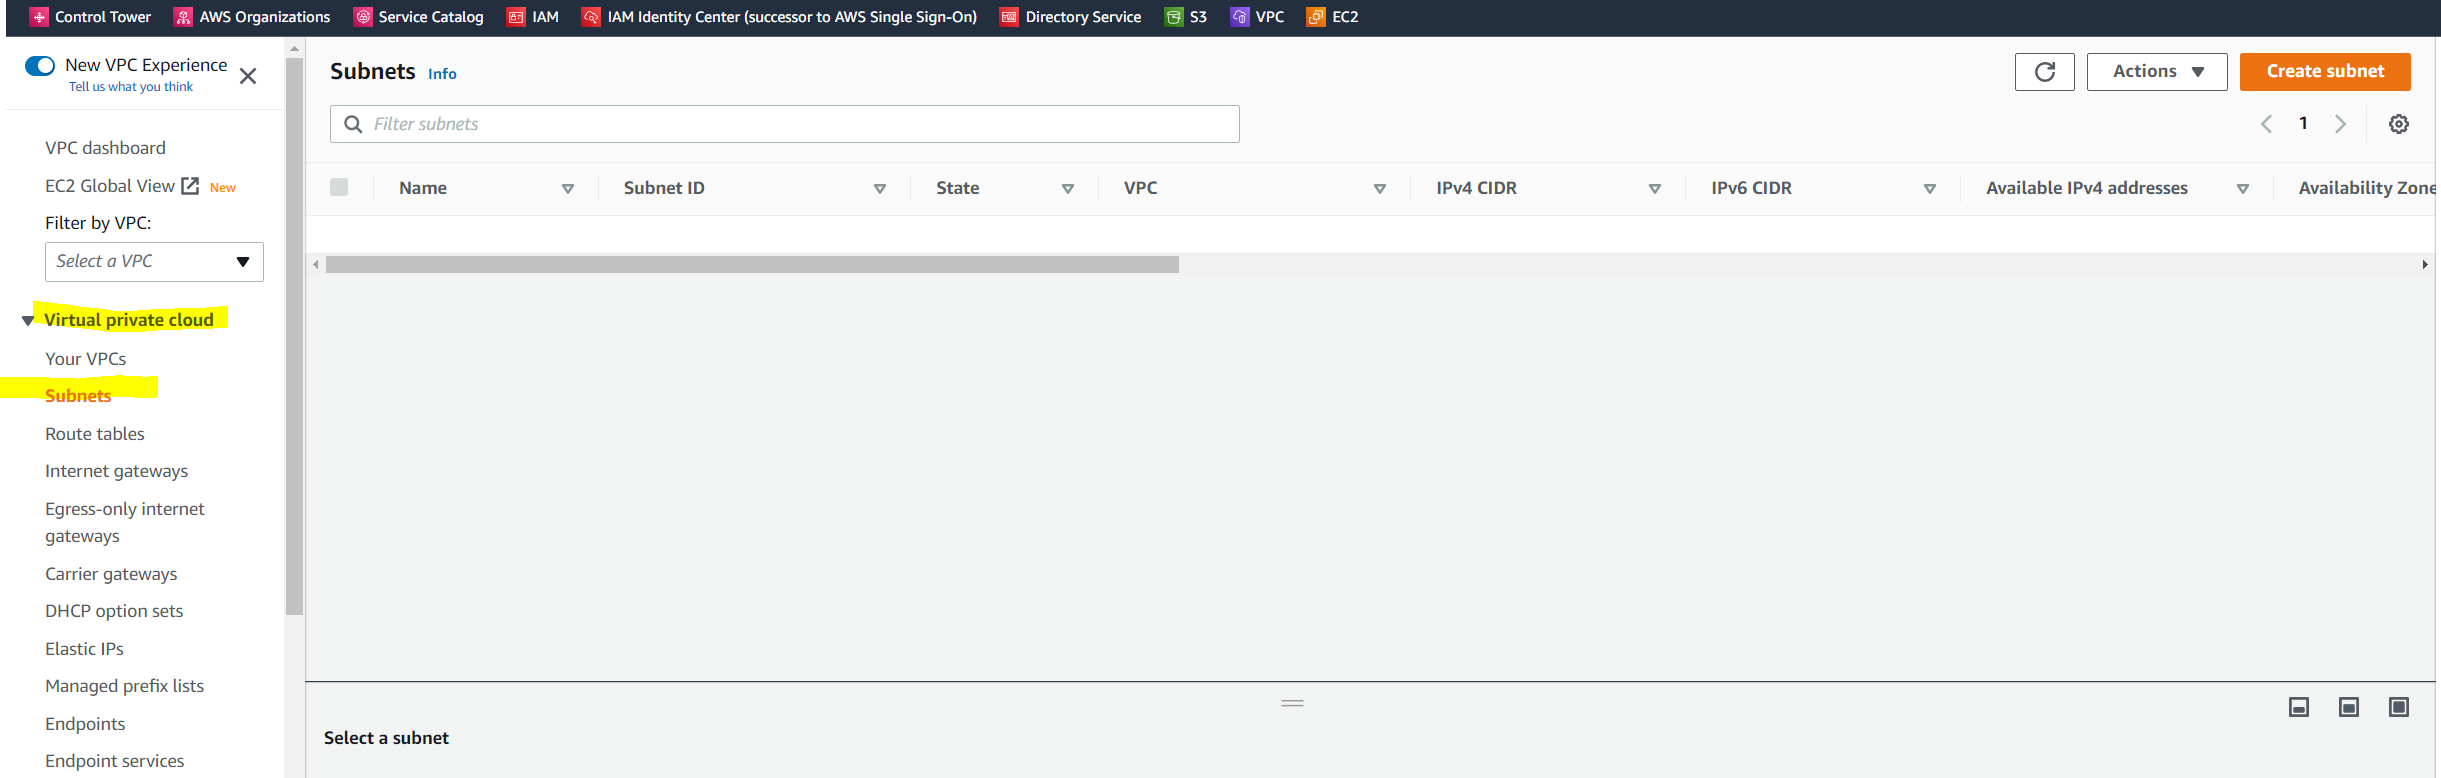
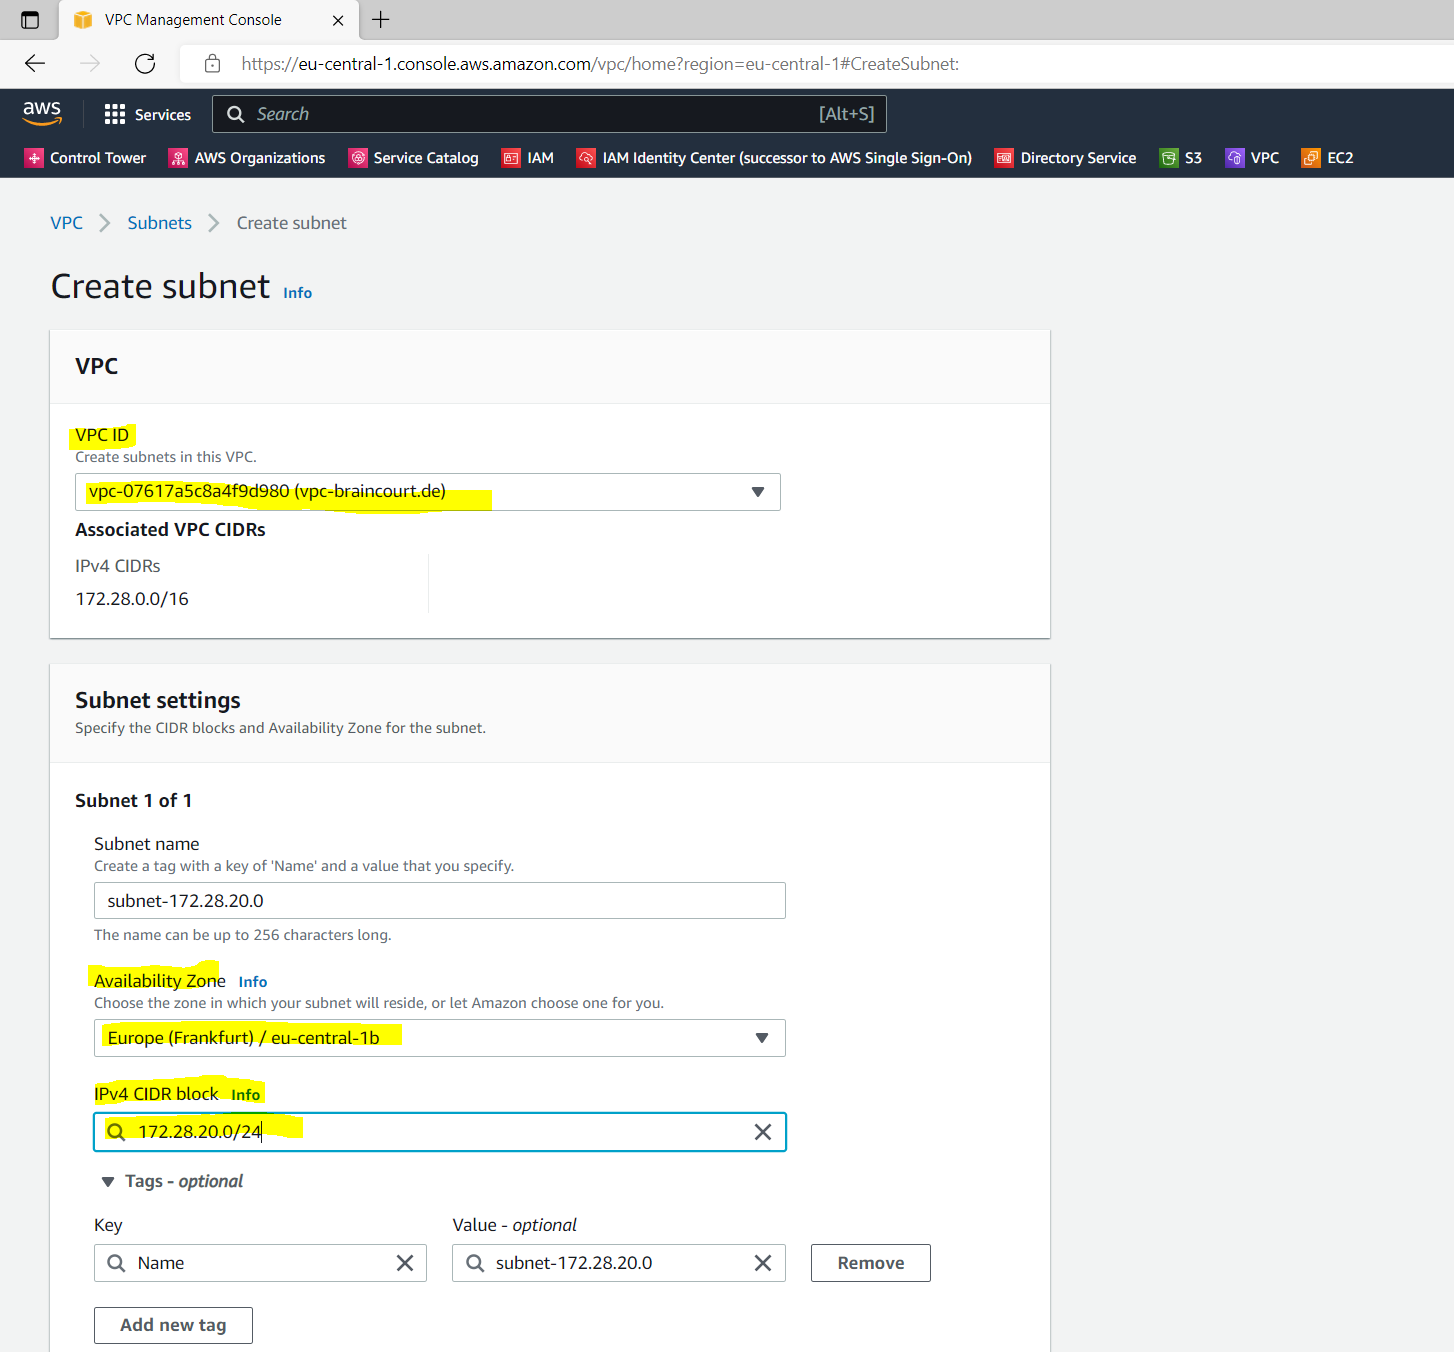
Each of them must be in a different Availability Zone.
First Subnet 172.28.10.0/24
Second Subnet 172.28.20.0/24
Create a Service Account in your existing on-premise AD
You must have credentials for a service account in the existing directory which has been delegated the following privileges:
- Read users and groups – Required
- Join computers to the domain – Required only when using Seamless Domain Join and WorkSpaces
- Create computer objects – Required only when using Seamless Domain Join and WorkSpaces
AD Connector uses Kerberos for authentication and authorization of AWS applications. LDAP is only used for user and group object lookups (read operations). With the LDAP transactions, nothing is mutable and credentials are not passed in clear text. Authentication is handled by an AWS internal service, which uses Kerberos tickets to perform LDAP operations as a user.
About how to create the service account and delegate privileges to it, you will see in the below article and section.
Delegate privileges to your service account
https://docs.aws.amazon.com/directoryservice/latest/admin-guide/prereq_connector.html
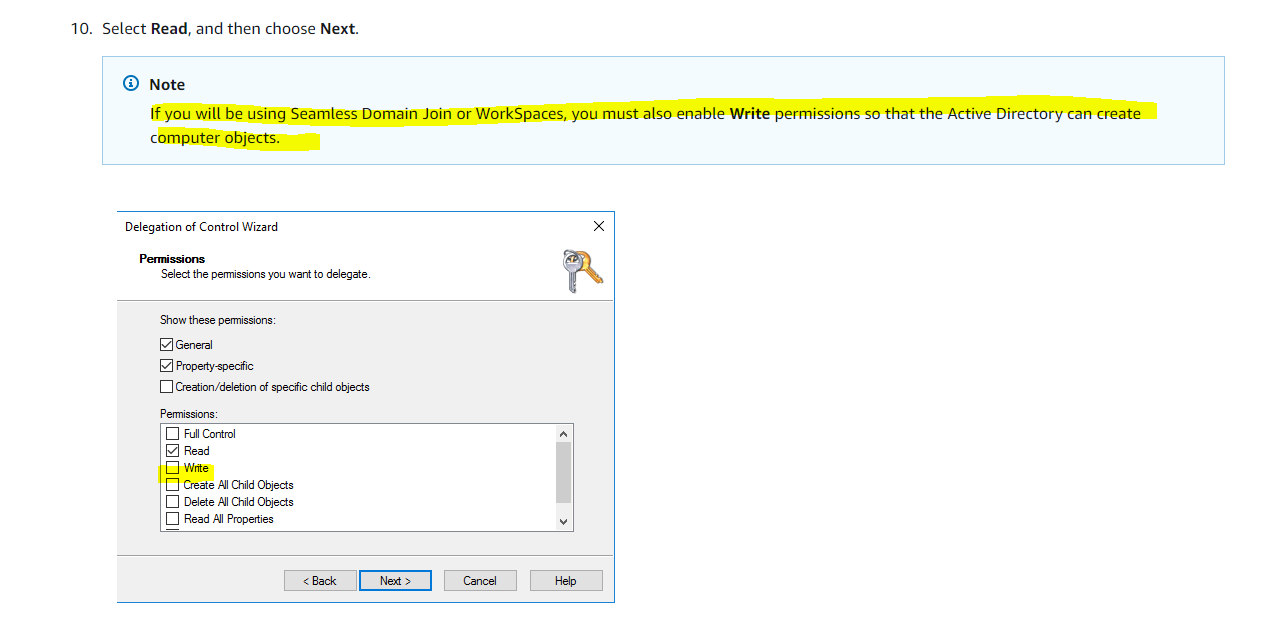
!!!! Note
If you will be using Seamless Domain Join or WorkSpaces, you must also enable Write permissions so that the Active Directory can create computer objects.
User permissions
All Active Directory users must have permissions to read their own attributes. Specifically the following attributes:
- GivenName
- SurName
- SamAccountName
- UserPrincipalName
- UserAccountControl
- MemberOf
By default, Active Directory users do have read permission to these attributes. However, Administrators can alter these permissions over time so you might want to verify your users have these read permissions prior to setting up AD Connector for the first time.
IP addresses
Get the IP addresses of two DNS servers or domain controllers in your existing directory.
AD Connector obtains the _ldap._tcp.<DnsDomainName> and _kerberos._tcp.<DnsDomainName> SRV records from these servers when connecting to your directory, so these servers must contain these SRV records. The AD Connector attempts to find a common domain controller that will provide both LDAP and Kerberos services, so these SRV records must include at least one common domain controller. For more information about SRV records, go to SRV Resource Records on Microsoft TechNet.
Kerberos preauthentication
Your user accounts must have Kerberos preauthentication enabled. For detailed instructions on how to enable this setting, see Ensure that Kerberos pre-authentication is enabled. For general information about this setting, go to Preauthentication on Microsoft TechNet.
If you plan to use IAM Identity Center with AD Connector, you need to ensure that the following are true:
- Your AD Connector is set up in your AWS organization’s management account.
- Your instance of IAM Identity Center is in the same Region where your AD Connector is set up.
For more information, see IAM Identity Center prerequisites in the AWS IAM Identity Center (successor to AWS Single Sign-On) User Guide.
Firewall Ports for communication between your AWS VPC and your on-premise domain controller
For AD Connector to redirect directory requests to your existing Active Directory domain controllers, be sure the following ports are open inbound from your AWS VPC to your on-premise network and domain controller.
To just establish the connection between the AD Connector and your on-premise domain controller, the following ports are enough.
- TCP/UDP 53 – DNS
- TCP/UDP 88 – Kerberos authentication
- TCP/UDP 389 – LDAP
But in order to later join computers from the AWS VPC to your on-premise domain, we need all the following ports to be open.
- TCP/UDP 53 – DNS
- TCP/UDP 88 – Kerberos authentication
- UDP 123 – NTP
- TCP 135 – RPC
- TCP/UDP 389 – LDAP
- TCP/UDP 445 – SMB
- TCP/UDP 464 – Kerberos authentication
- TCP 636 – LDAPS (LDAP over TLS/SSL)
- TCP 3268-3269 – Global Catalog
- TCP/UDP 49152-65535 – Ephemeral ports for RPC
SMBv1 is no longer supported.
For additional port requirements, see AD and AD DS Port Requirements on Microsoft TechNet.
If the DNS servers or Domain Controller servers for your existing Active Directory Domain are within the VPC, the security groups associated with those servers must have the below ports open to the CIDRs for both subnets in the VPC.
- TCP/UDP 53 – DNS
- TCP/UDP 88 – Kerberos authentication
- TCP/UDP 389 – LDAP
Create an AD Connector
Now we can create the AD Connector.
Directory Service –> Directories –> AD Connector
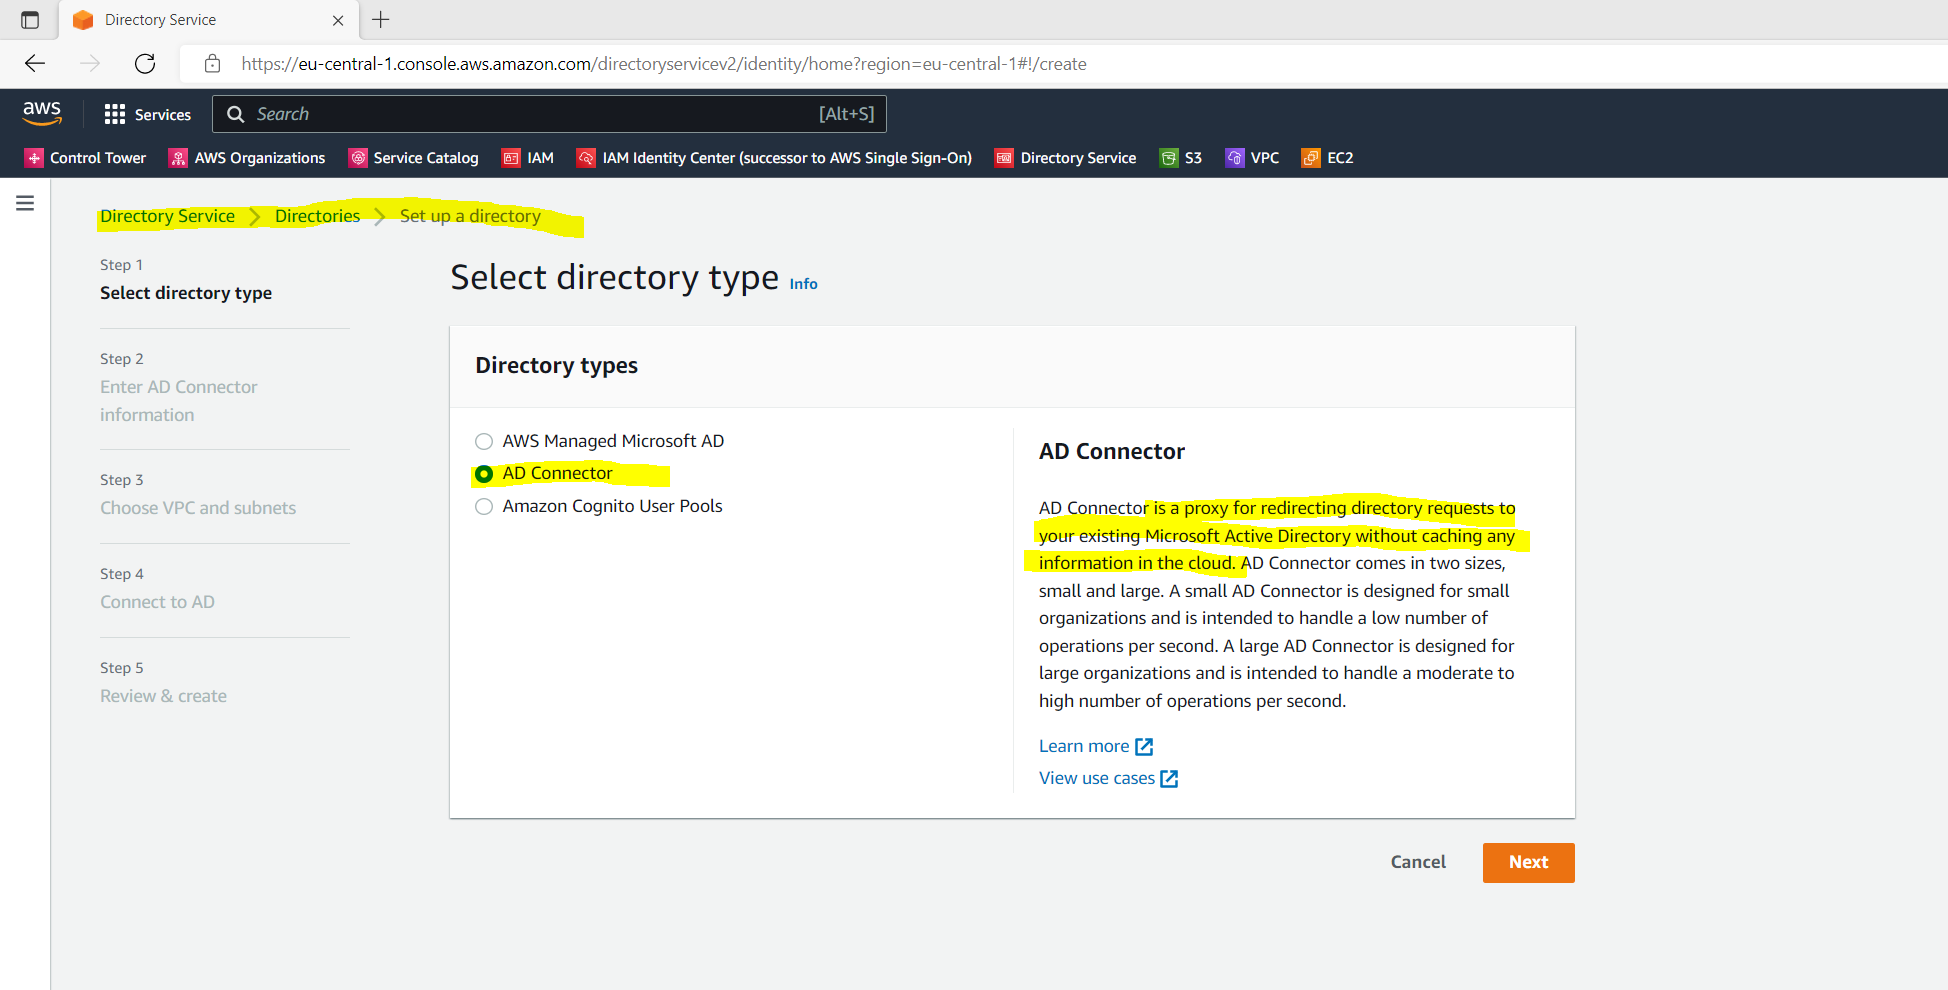

Here I will select my previously created VPC and the two subnets.

The AD Connector needs to connect to your on-premise DNS Servers which usually are the domain controller. So you need first to create a Site-to-Site IPSec VPN tunnel between your on-premise network and the AWS VPC.
About how to create a S2S VPN tunnel between your on-premise network and AWS VPC you can read my following post as mentioned at the beginning. There I will use on the on-premise network pfSense to establish the tunnel.
Below enter your domain information and the previously created service account created on the on-premise domain controller.

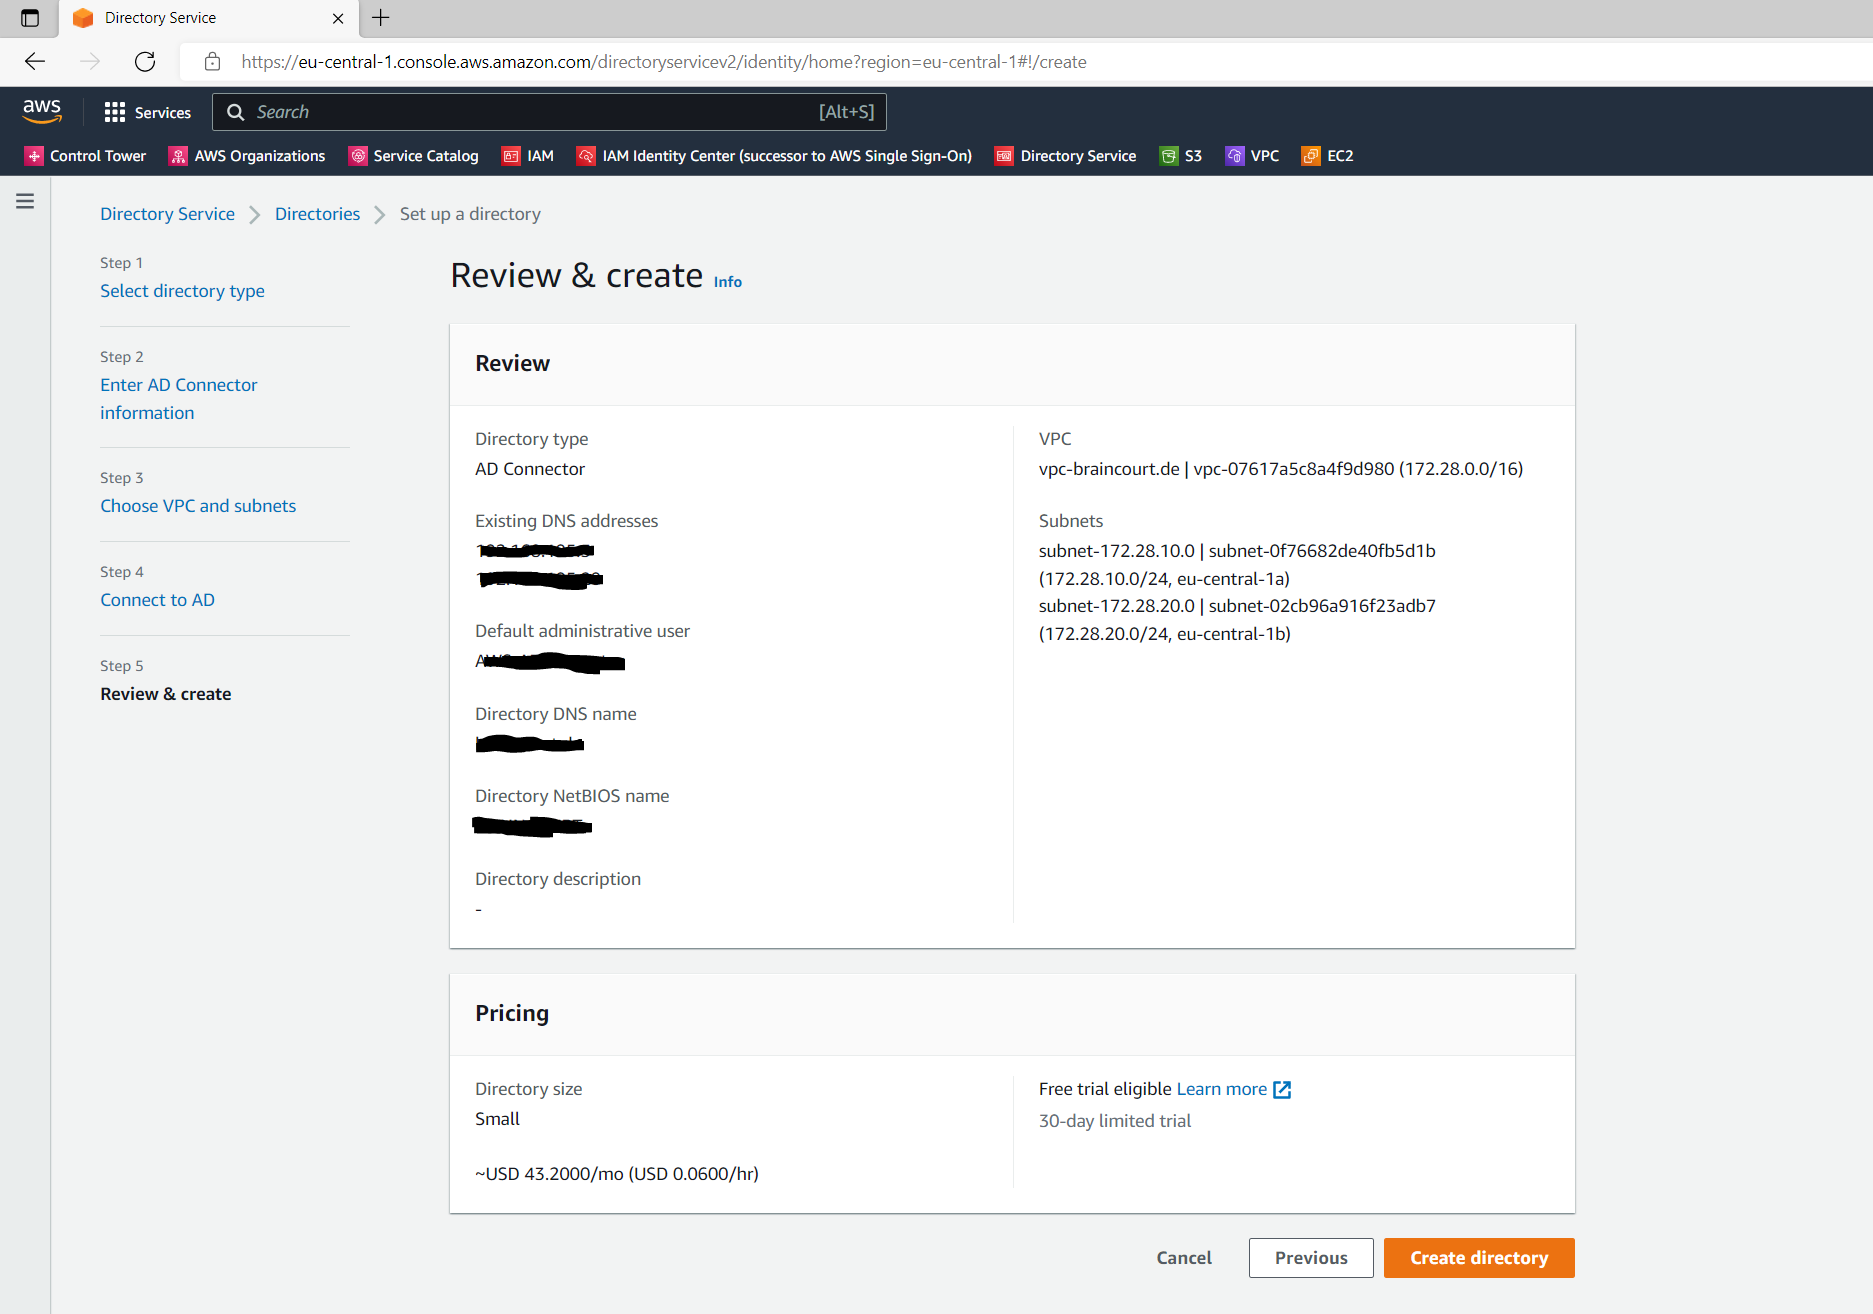
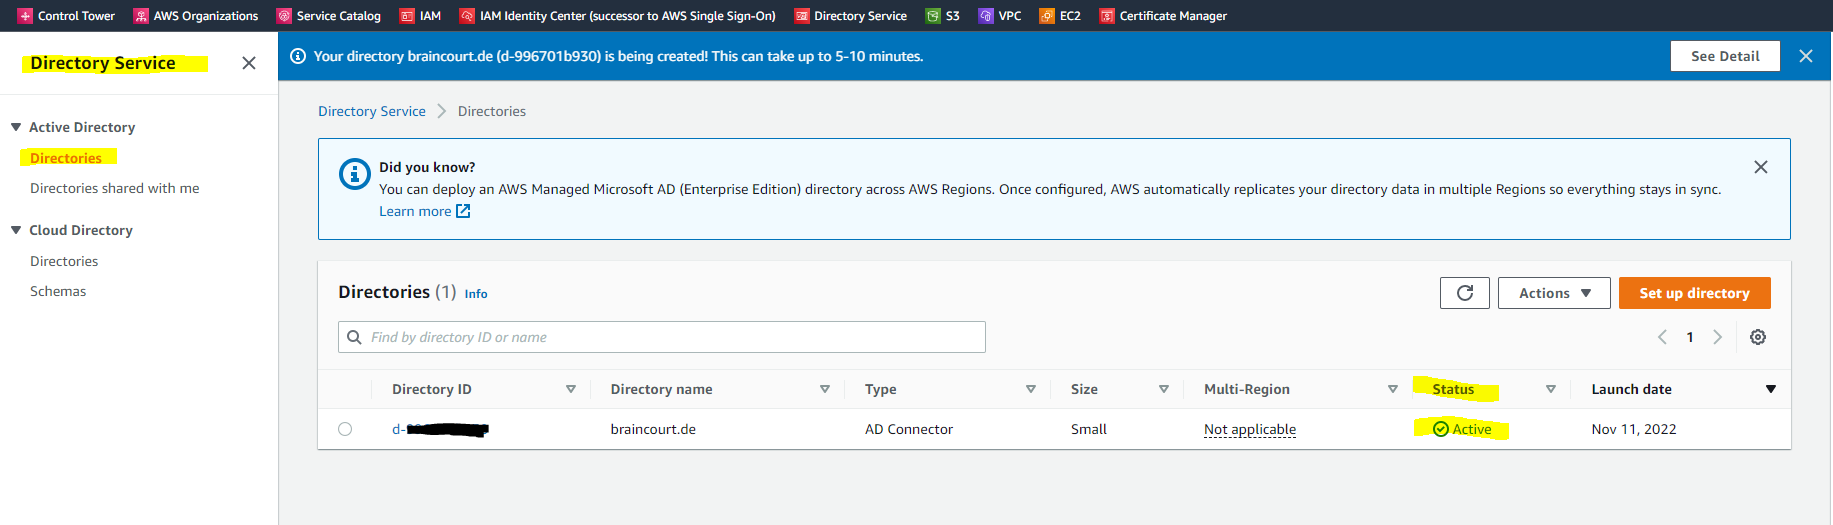
The creation of the AD Connector takes a few minutes.

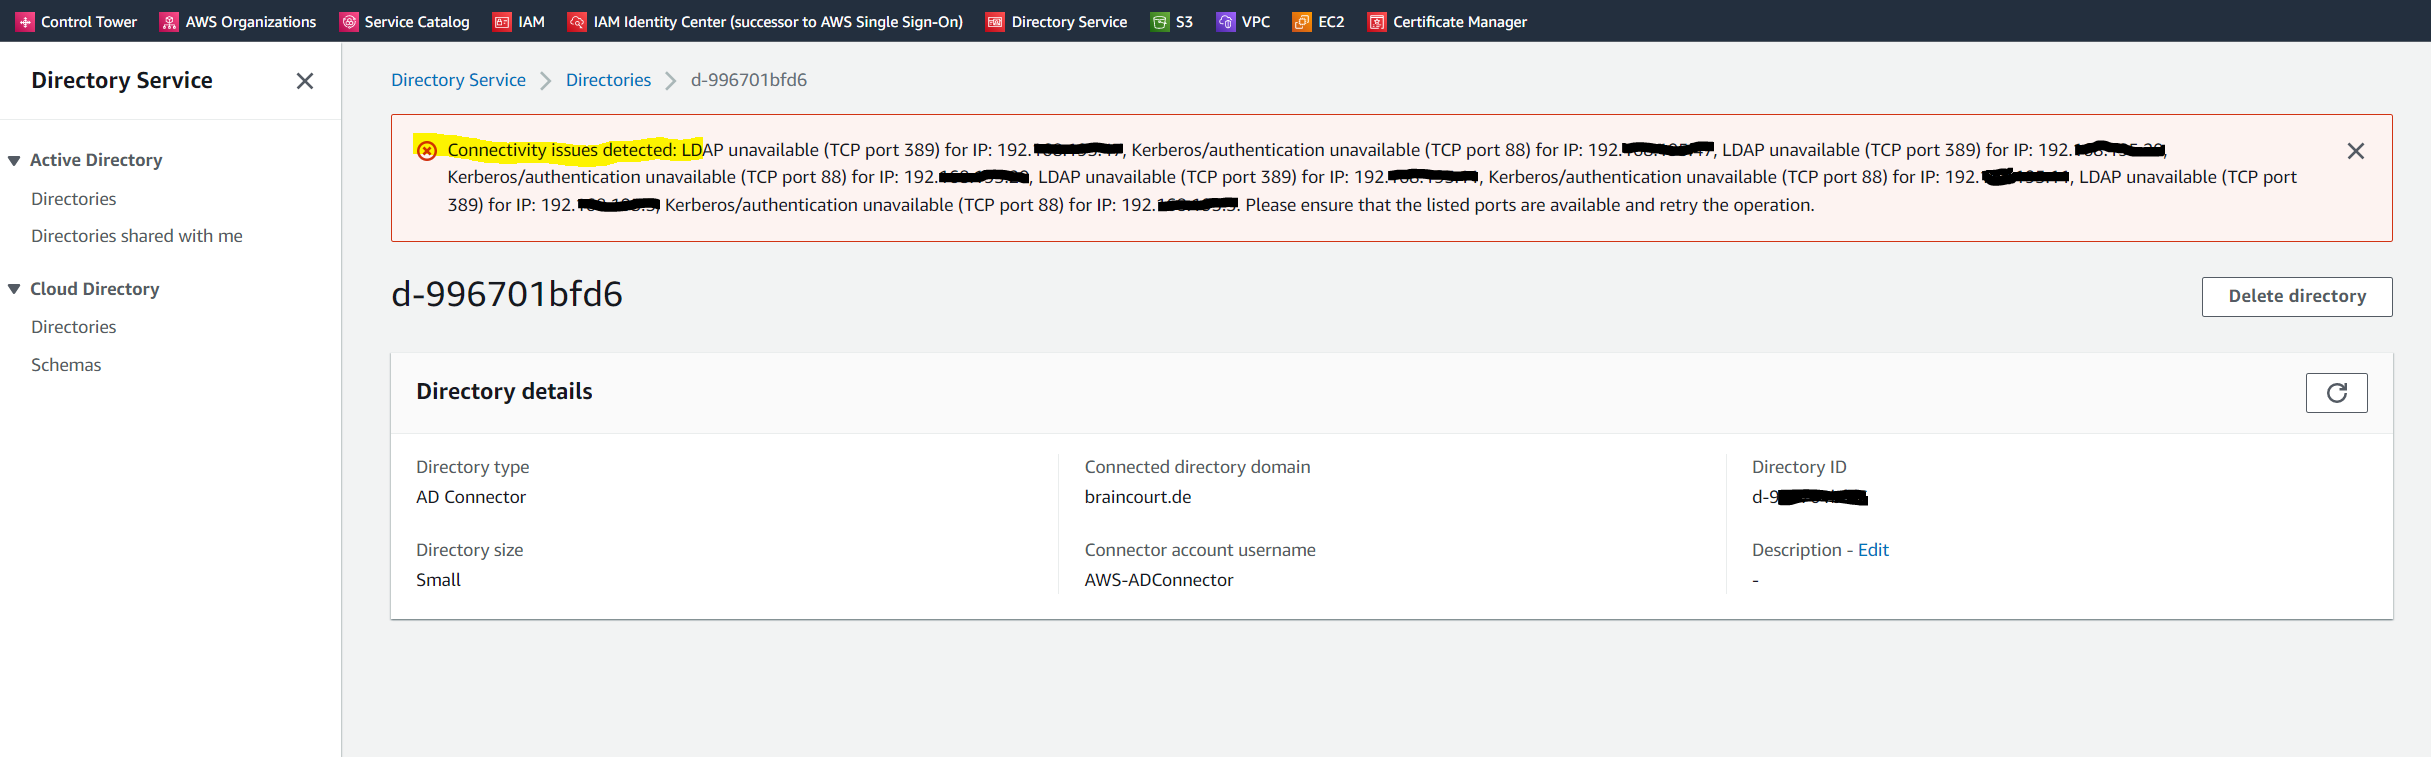
I was getting the following error message regarding connectivity issues for LDAP TCP port 389 and several IPs from my DCs.
Troubleshooting AD Connector
https://docs.aws.amazon.com/directoryservice/latest/admin-guide/ad_connector_troubleshooting.html
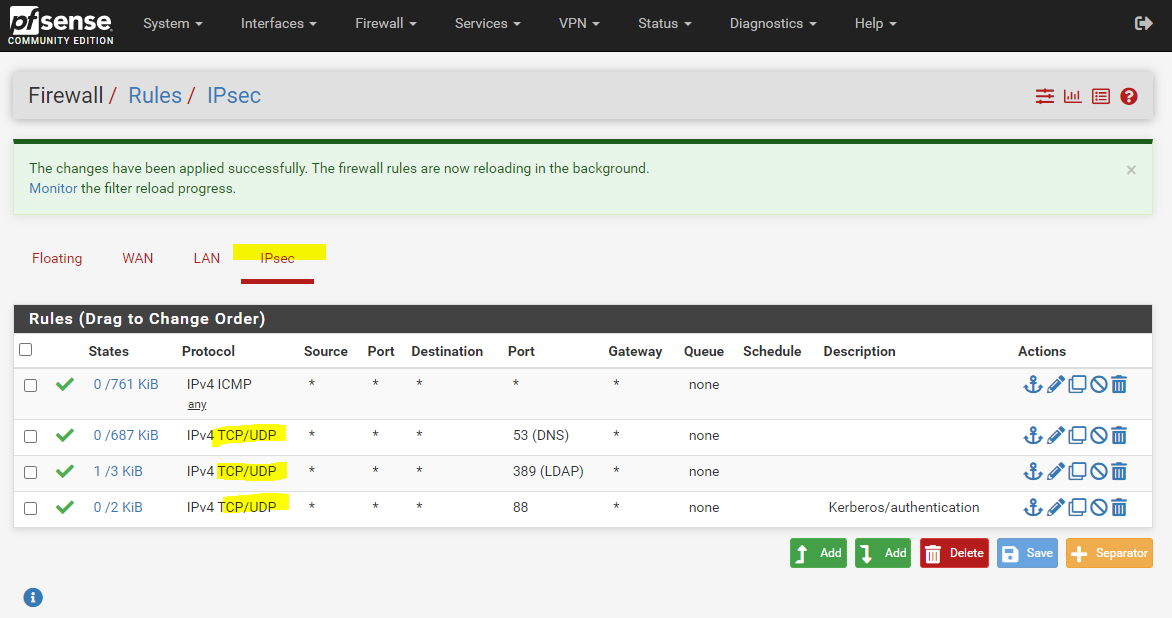
The reason for was that some of the DCs didn’t had the route to the AWS VPC and further so far I just allowed DNS TCP/UDP Port 53 for the VPN tunnel, so I also need to allow LDAP TCP Port 389 and Kerberos authentication TCP Port 88 on my pfSense appliance for the IPSec tunnel. Also I need to add on all on-premises DCs the route to the AWS VPC network.
In my case as the pfSense appliance is placed inside the perimeter network, I also had to allow these ports on the back firewall from the perimeter network.
!!! Note
As mentioned above, when you later want to join computers from your AWS VPC to your on-premise domain, you need to open a few more ports as listed further above.
After that I was recreating the AD Connector and now it works.

When you sign in to any AWS application or service integrated with an AD Connector (AWS IAM Identity Center (successor to AWS Single Sign-On) included), the app or service forwards your authentication request to AD Connector which then forwards the request to a domain controller in your self-managed AD for authentication. If you are successfully authenticated to your self-managed AD, AD Connector then returns an authentication token to the app or service (similar to a Kerberos token). At this point, you can now access the AWS app or service.
Source: https://docs.aws.amazon.com/directoryservice/latest/admin-guide/create_details_ad_connector.html
Links
Active Directory Connector
https://docs.aws.amazon.com/directoryservice/latest/admin-guide/directory_ad_connector.htmlAD Connector prerequisites
https://docs.aws.amazon.com/directoryservice/latest/admin-guide/prereq_connector.html