Set up IPSec route-based S2S VPN between pfSense and AWS VPC
In this post I want to show how you can set up an IPSec route-based S2S VPN between your AWS VPC and your on-premise network by using pfSense.
A Site-to-Site VPN connection on Amazon side is either an AWS Classic VPN connection or an AWS VPN connection. Any new Site-to-Site VPN connection that you create is an AWS VPN connection.
The AWS VPN service is a route-based solution. If, however, you are using a policy-based solution you will need to limit to a single SA, as the service is a route-based solution.
AWS supports only one pair of Phase 2 Security Associations (SAs) per VPN tunnel.
On the AWS side of the Site-to-Site VPN connection, a virtual private gateway or transit gateway provides two VPN endpoints (tunnels) for automatic failover.
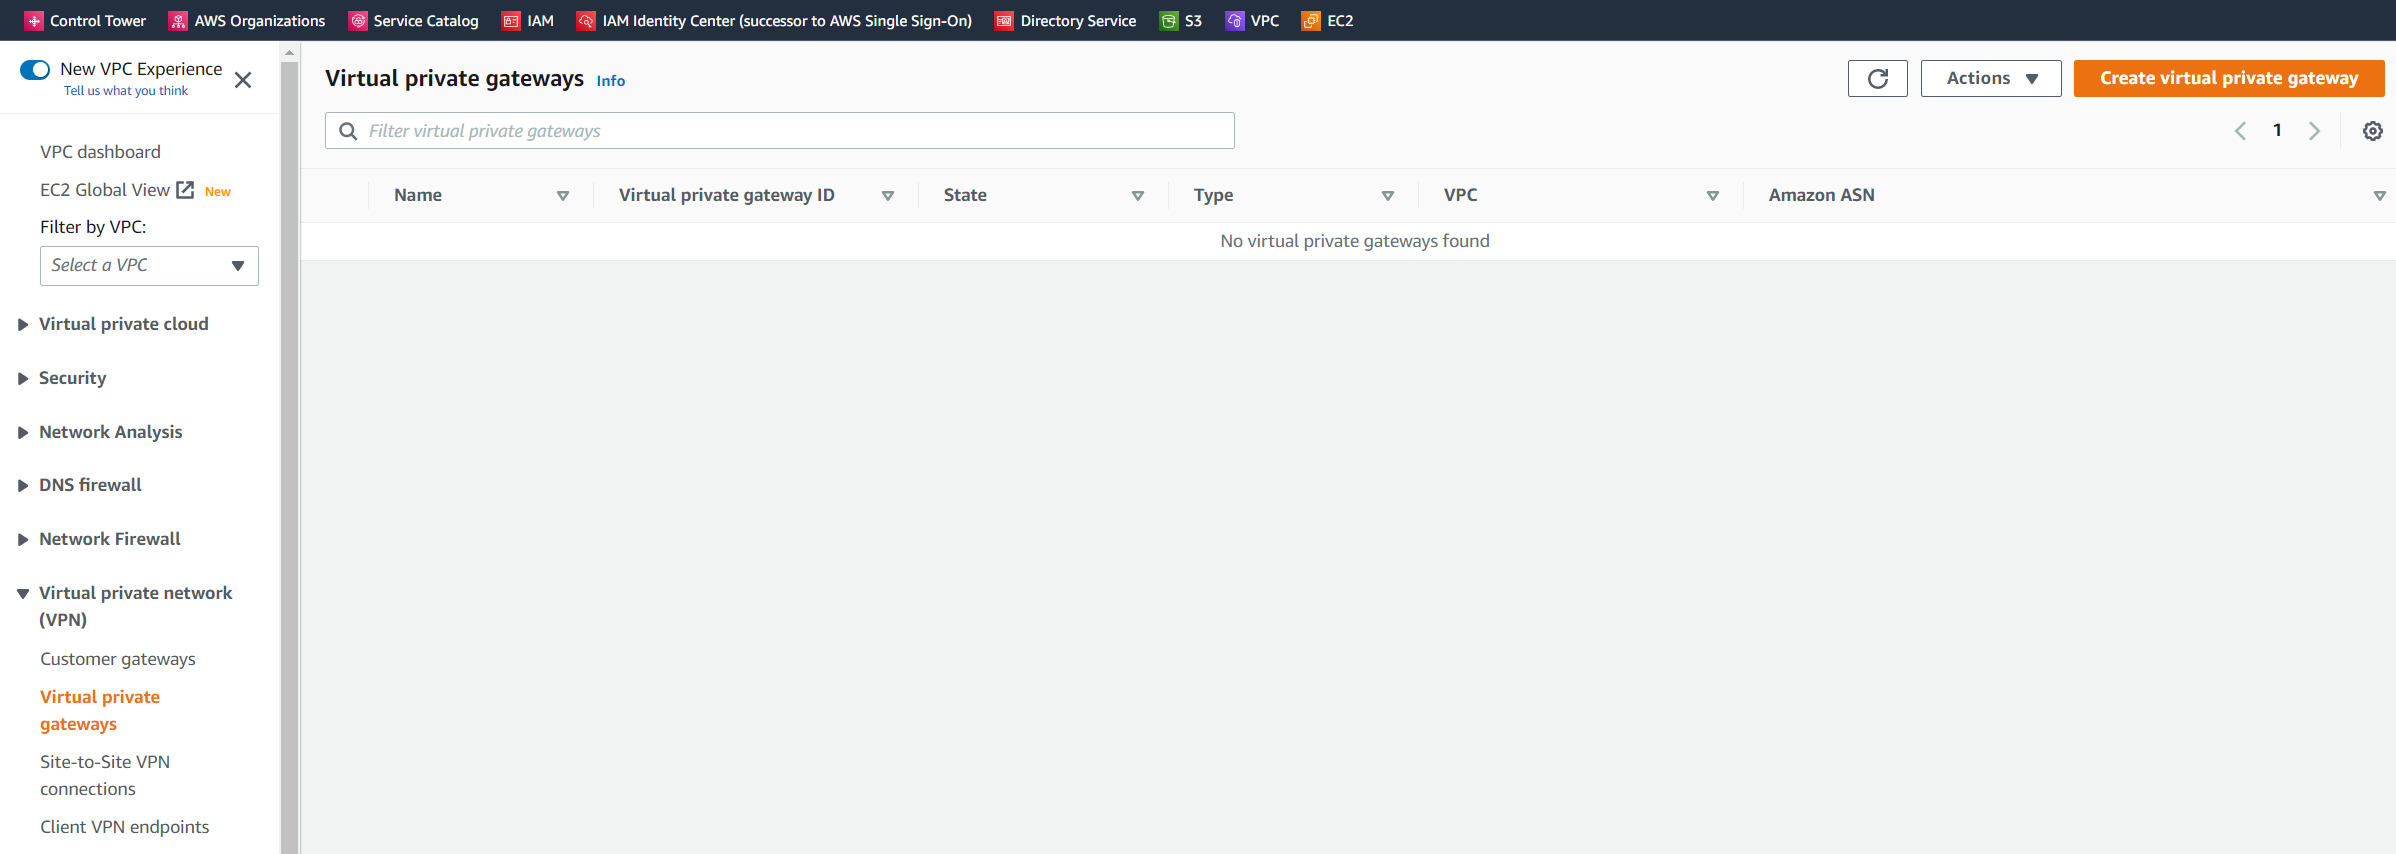
Virtual private gateway
A virtual private gateway is the VPN concentrator on the Amazon side of the Site-to-Site VPN connection. You create a virtual private gateway and attach it to the VPC from which you want to create the Site-to-Site VPN connection.
Source: https://docs.aws.amazon.com/vpn/latest/s2svpn/how_it_works.html
Transit Gateway
A transit gateway is a transit hub that you can use to interconnect your virtual private clouds (VPC) and on-premises networks. For more information, see Amazon VPC Transit Gateways. You can create a Site-to-Site VPN connection as an attachment on a transit gateway.
Source: https://docs.aws.amazon.com/vpn/latest/s2svpn/how_it_works.html
Create a Virtual Private Gateway in AWS
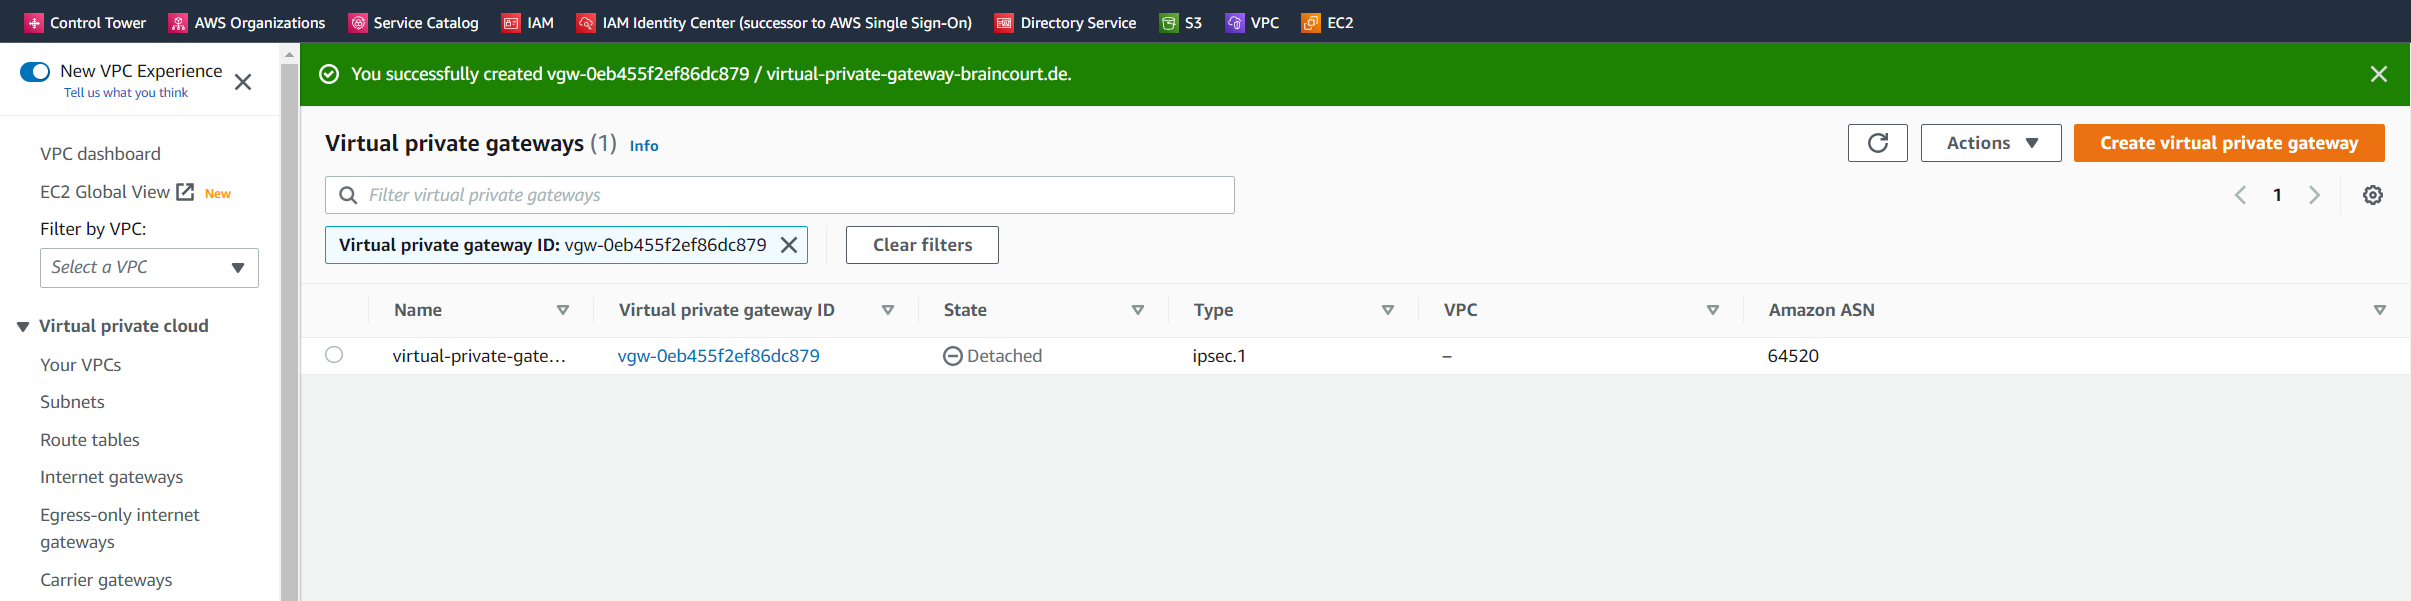
In my case, I just want to connect my VPC with my on-premise network, so on the Amazon side I will use and create first a virtual private gateway.
Below I will choose to use a custom ASN instead over the Amazon default ASN (64512).
You can use here a number from the reserved private use range which is from 64512 – 65534.
More about Autonomous system (Internet)
https://en.wikipedia.org/wiki/Autonomous_system_(Internet)

When you create a virtual private gateway, you can specify the private Autonomous System Number (ASN) for the Amazon side of the gateway. If you don’t specify an ASN, the virtual private gateway is created with the default ASN (64512). You cannot change the ASN after you’ve created the virtual private gateway. To check the ASN for your virtual private gateway, view its details in the Virtual Private Gateways screen in the Amazon VPC console, or use the describe-vpn-gateways AWS CLI command.
You can also use the AWS CLI to get information about the gateways.
to list all
C:> aws ec2 describe-vpn-gateways

to list a specific
C:> aws ec2 describe-vpn-gateways --vpn-gateway-ids <VPN ID>
We also need to attach the gateway to our VPC.


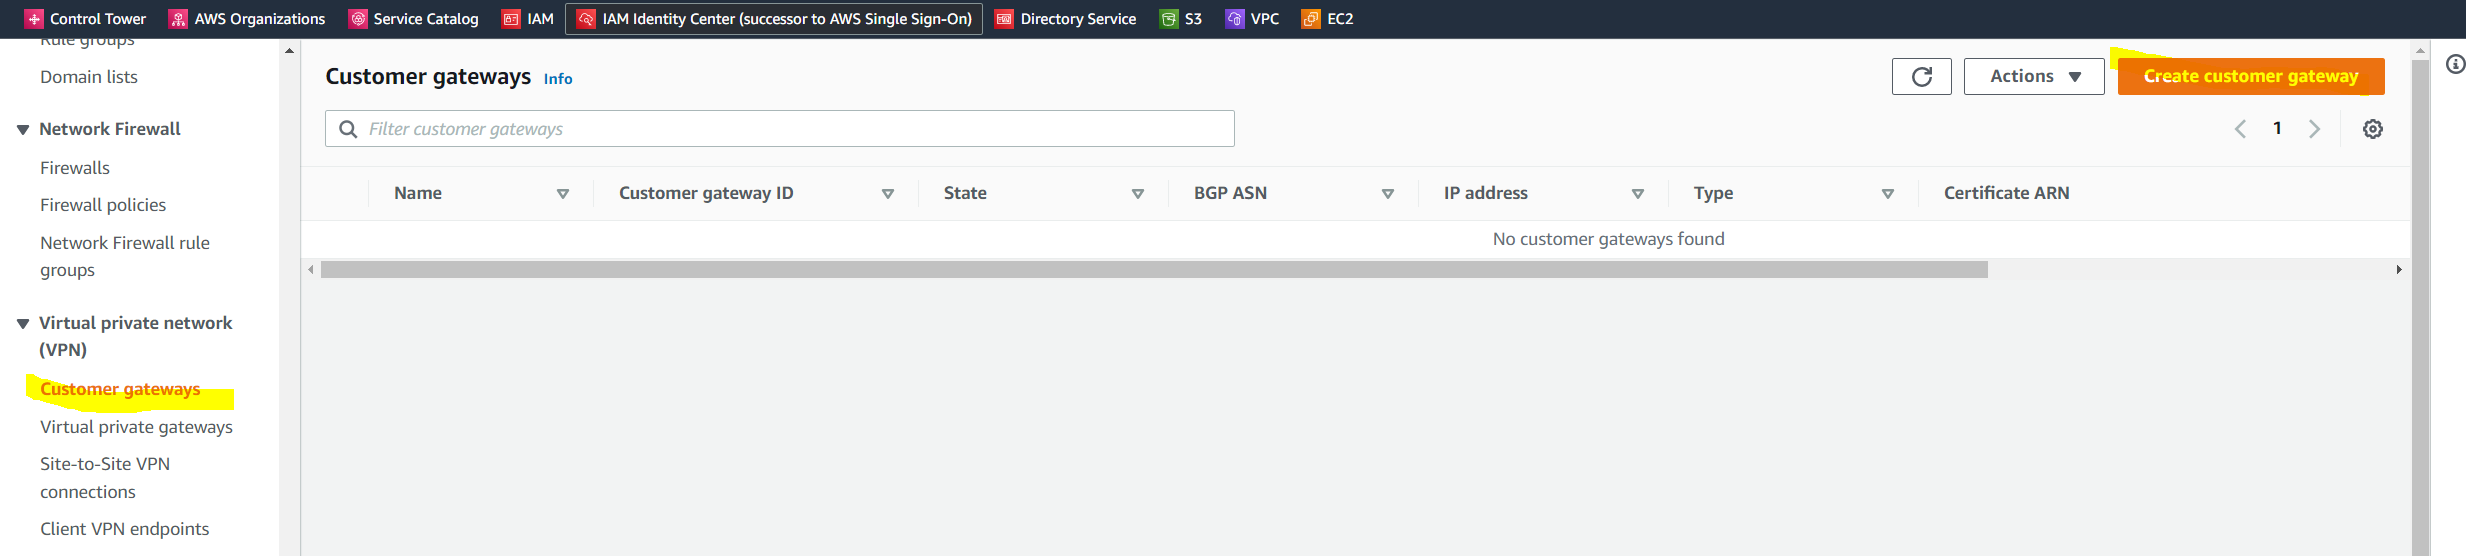
Create a Customer Gateway Object in AWS
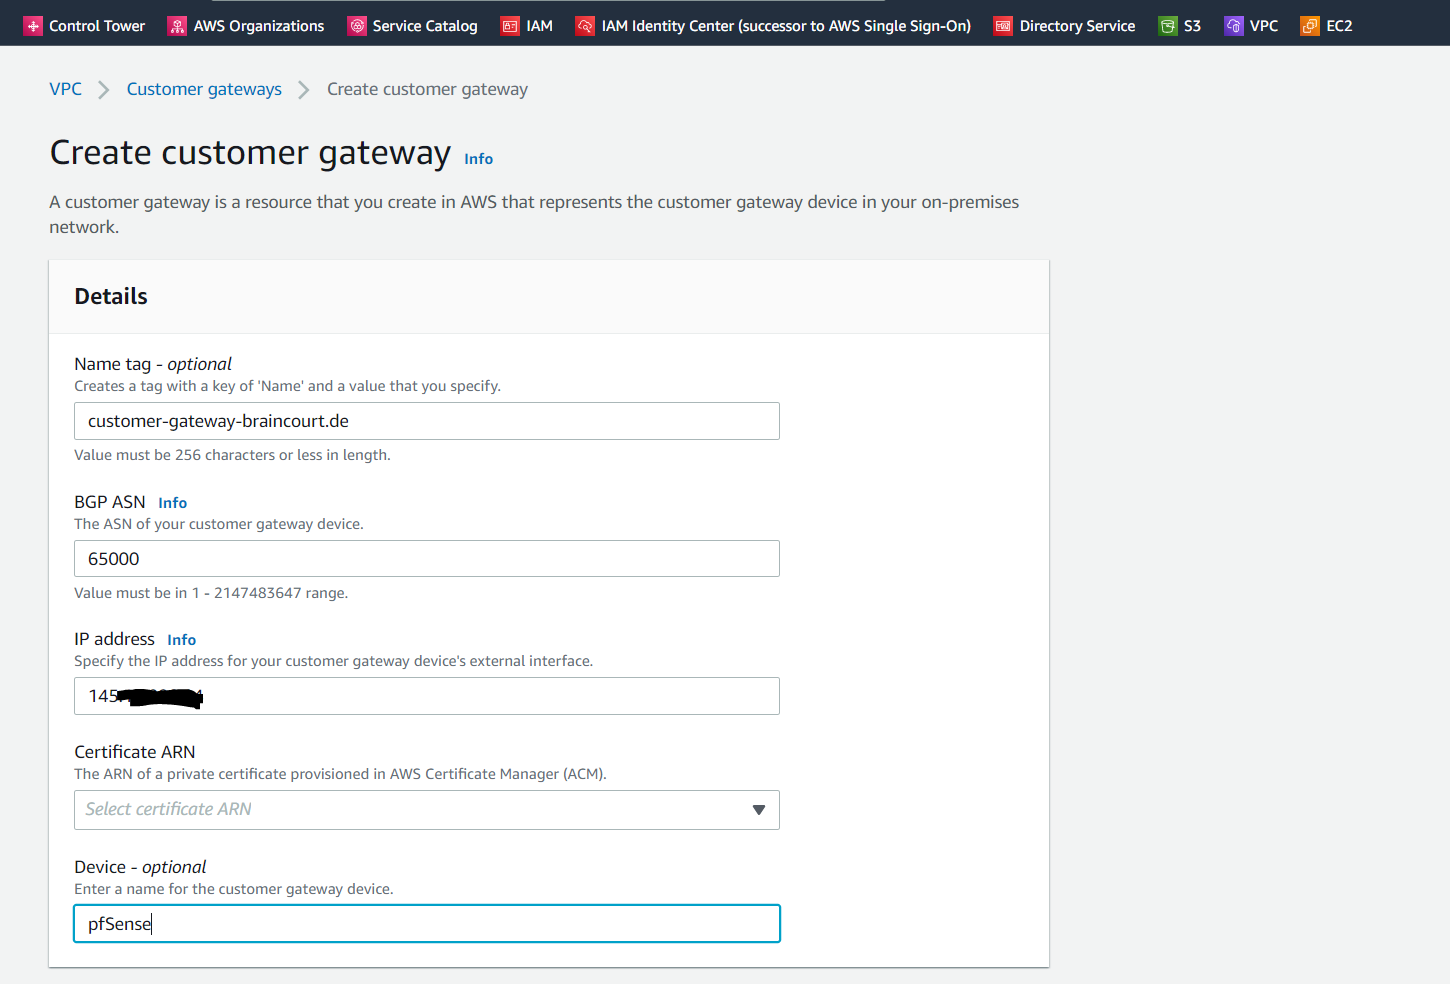
Next we also need to add our on-premise gateway (pfSense) under Customer gateways in AWS as follows.
Certificate ARN I can leave blank
BGP ASN I will use 65000 on pfSense

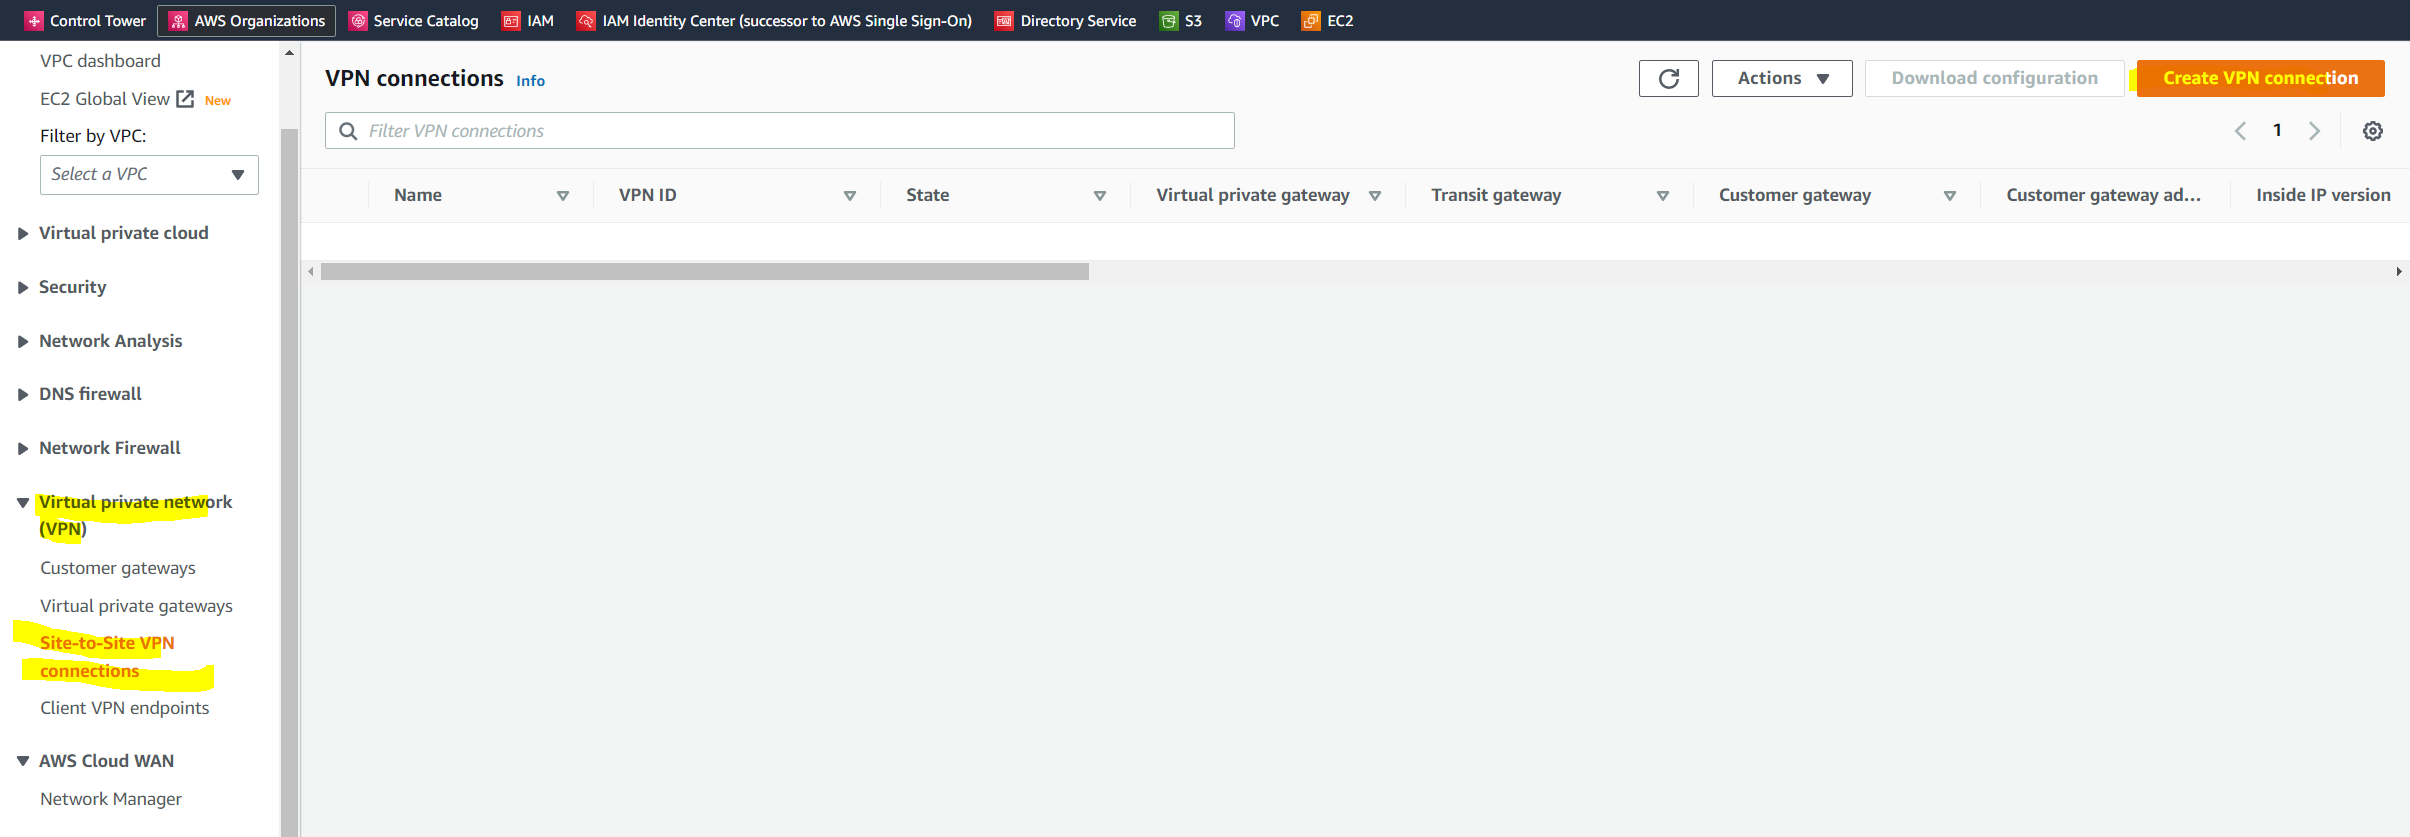
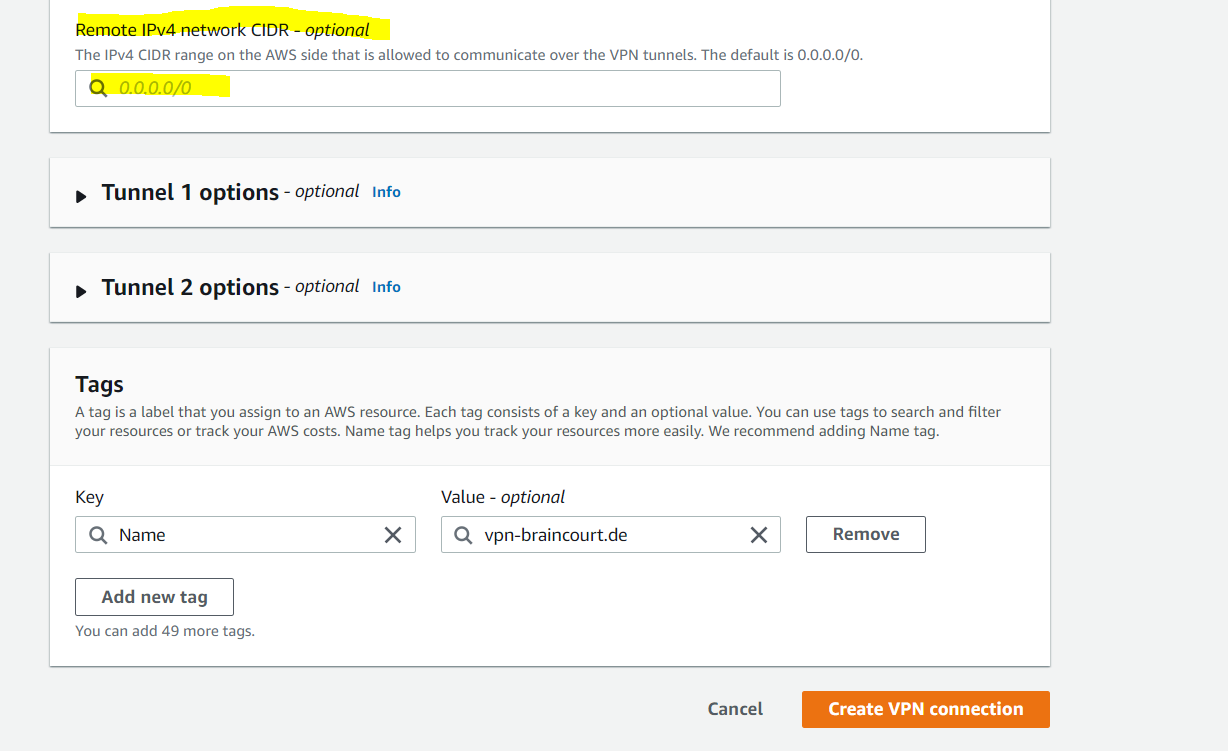
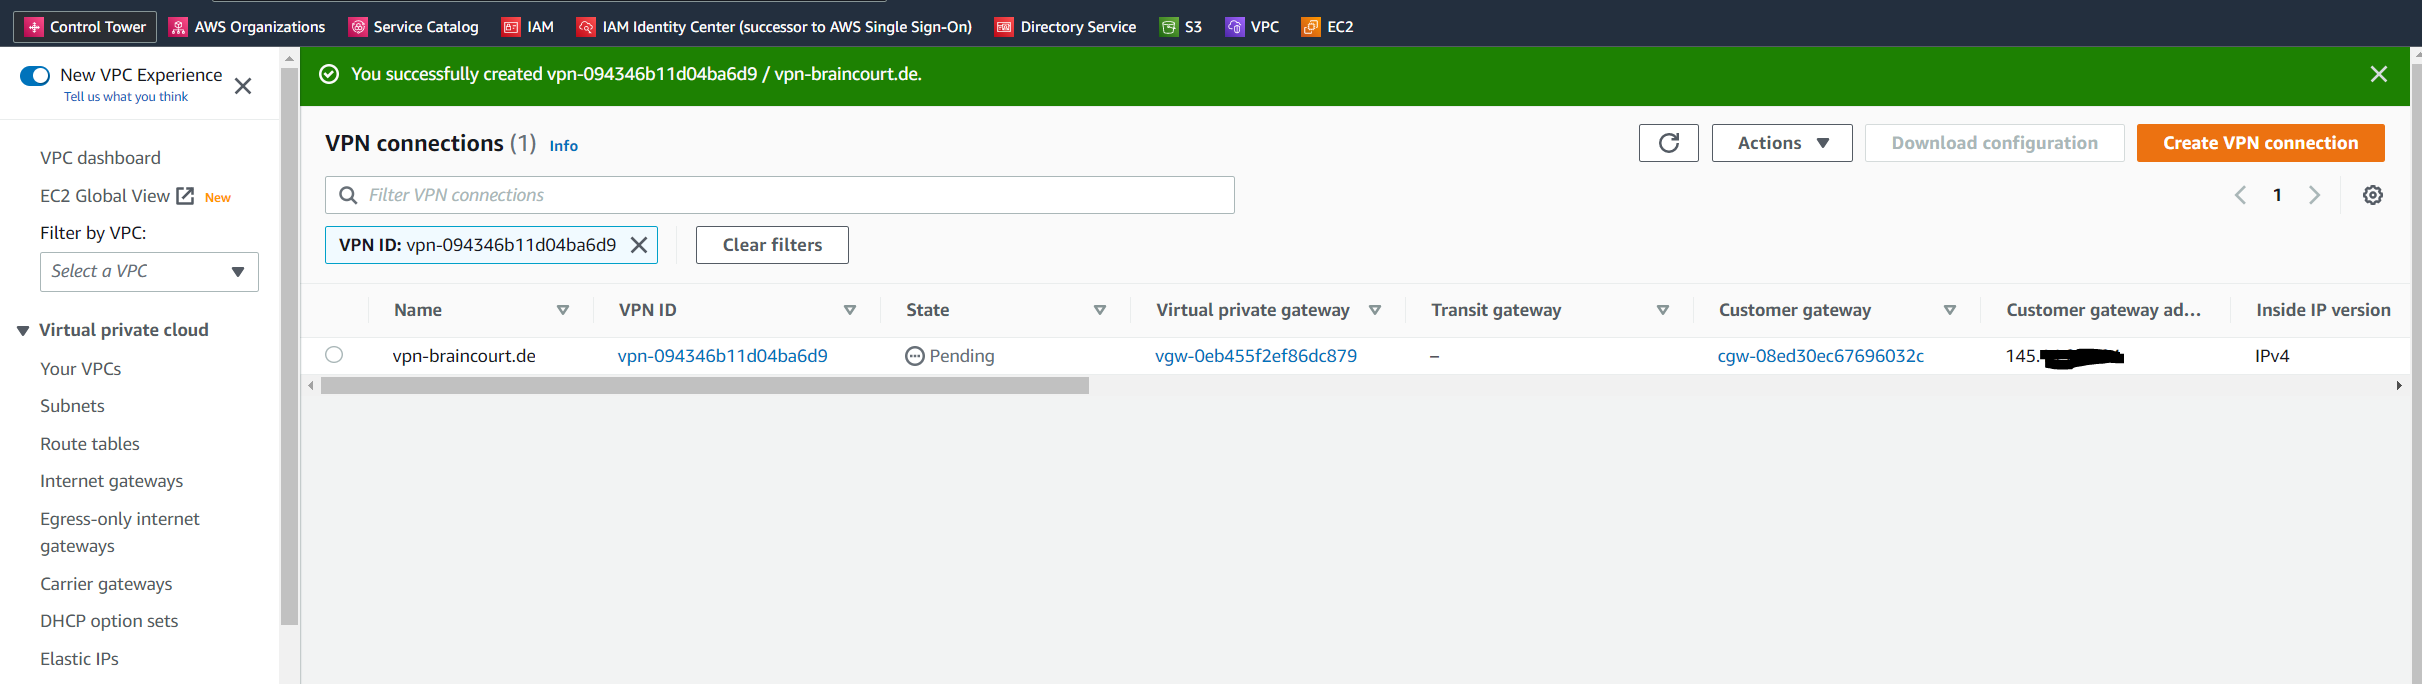
Now I can set up the actual Site-to-Site VPN connection.
The type of routing that you select can depend on the make and model of your customer gateway device. If your customer gateway device supports Border Gateway Protocol (BGP), specify dynamic routing when you configure your Site-to-Site VPN connection. If your customer gateway device does not support BGP, specify static routing.
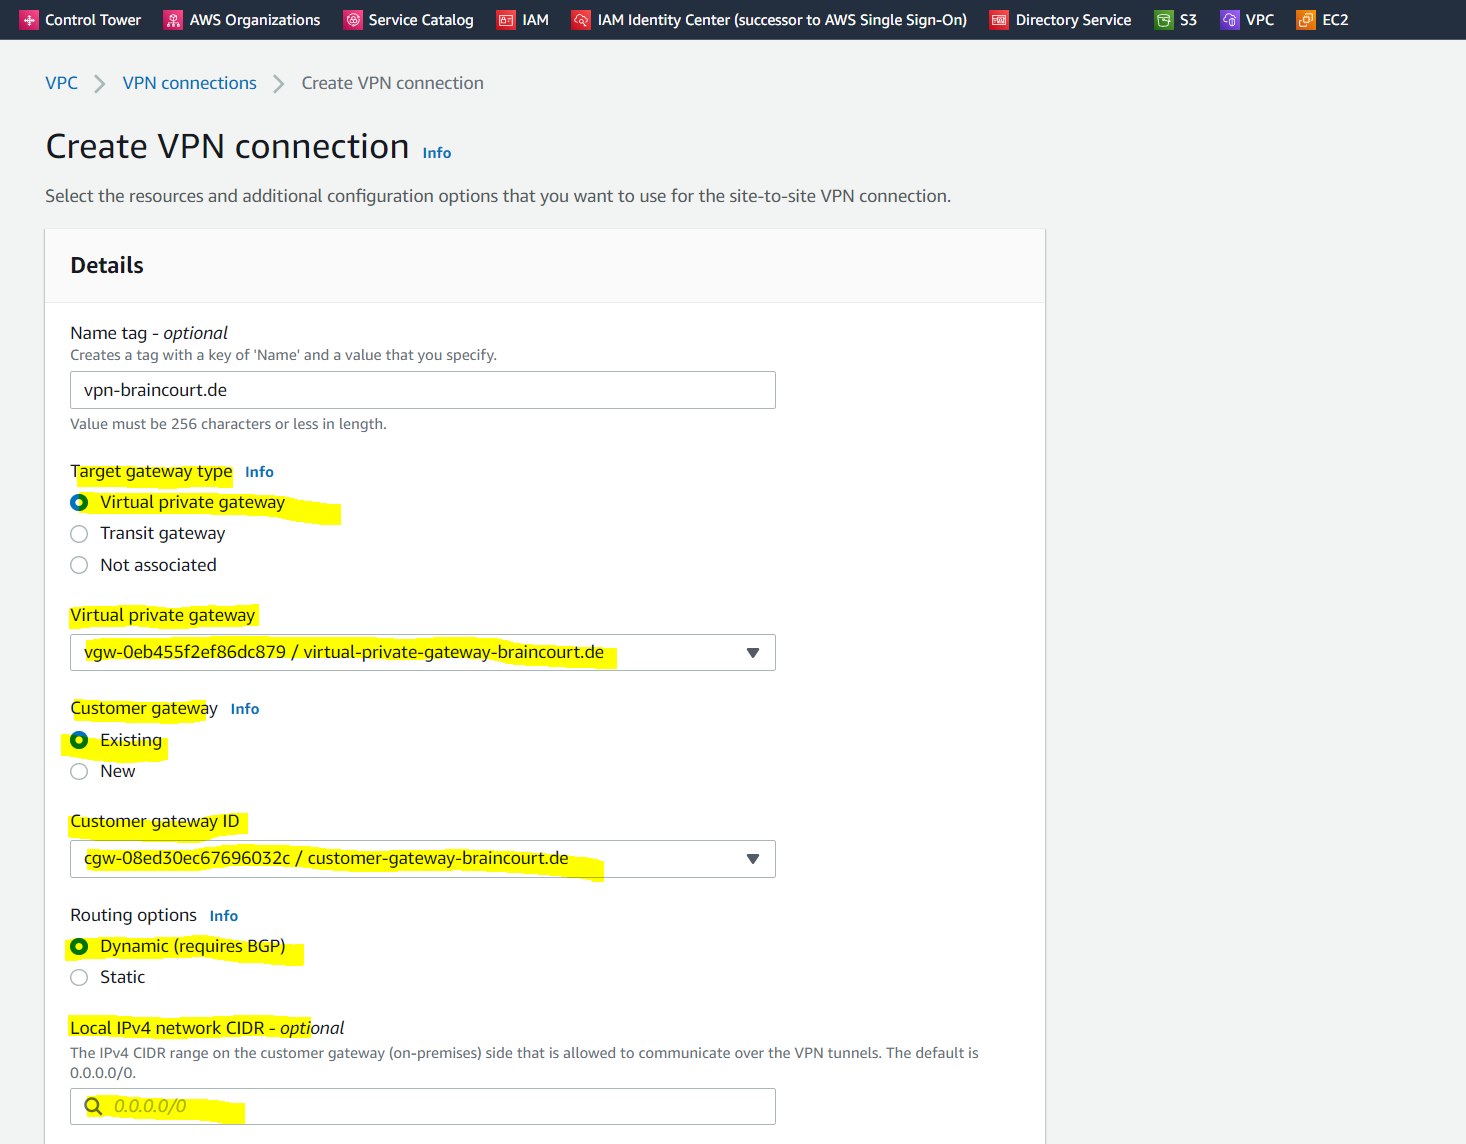
A Site-to-Site VPN connection offers two VPN tunnels between a virtual private gateway or a transit gateway on the AWS side, and a customer gateway (which represents a VPN device) on the remote (on-premises) side.
Set up the Tunnel on pfSense
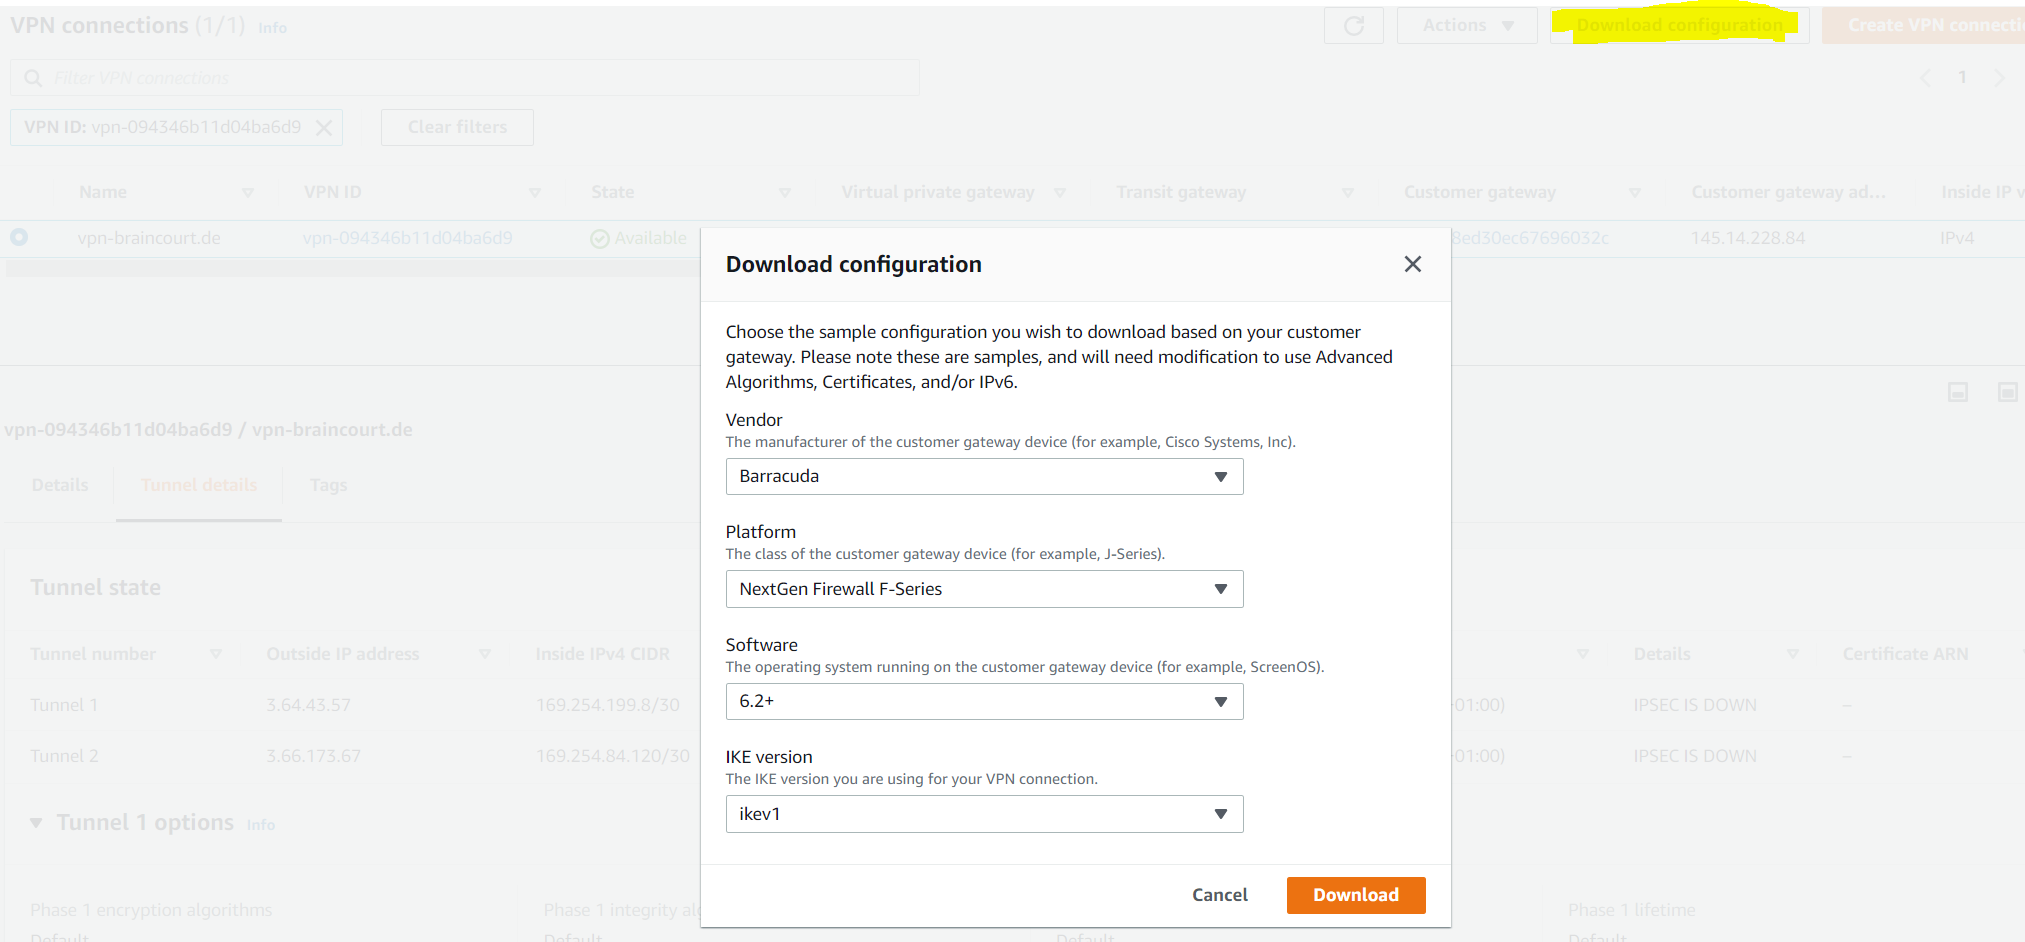
To get the pre-shared-key and configuration parameter from AWS, you can either download the configuration as shown below or better select the VPN connection and under Actions select Modify VPN tunnel options.
Please note, the sample configurations from AWS are for the minimum requirement of AES128, SHA1, and DH Group 2
Category VPN connections in the GovCloud region have a minimum requirement of AES128, SHA2, and DH Group 14.
You will need to modify these sample configuration files to take advantage of AES256, SHA256, or other DH groups like 2, 14-18, 22, 23, and 24.
! NOTE: If you customized tunnel options when creating or modifying your VPN connection, you may need to modify these sample configurations to match the custom settings for your tunnels.
Higher parameters are only available for VPNs of category VPN, and not for VPN-Classic.
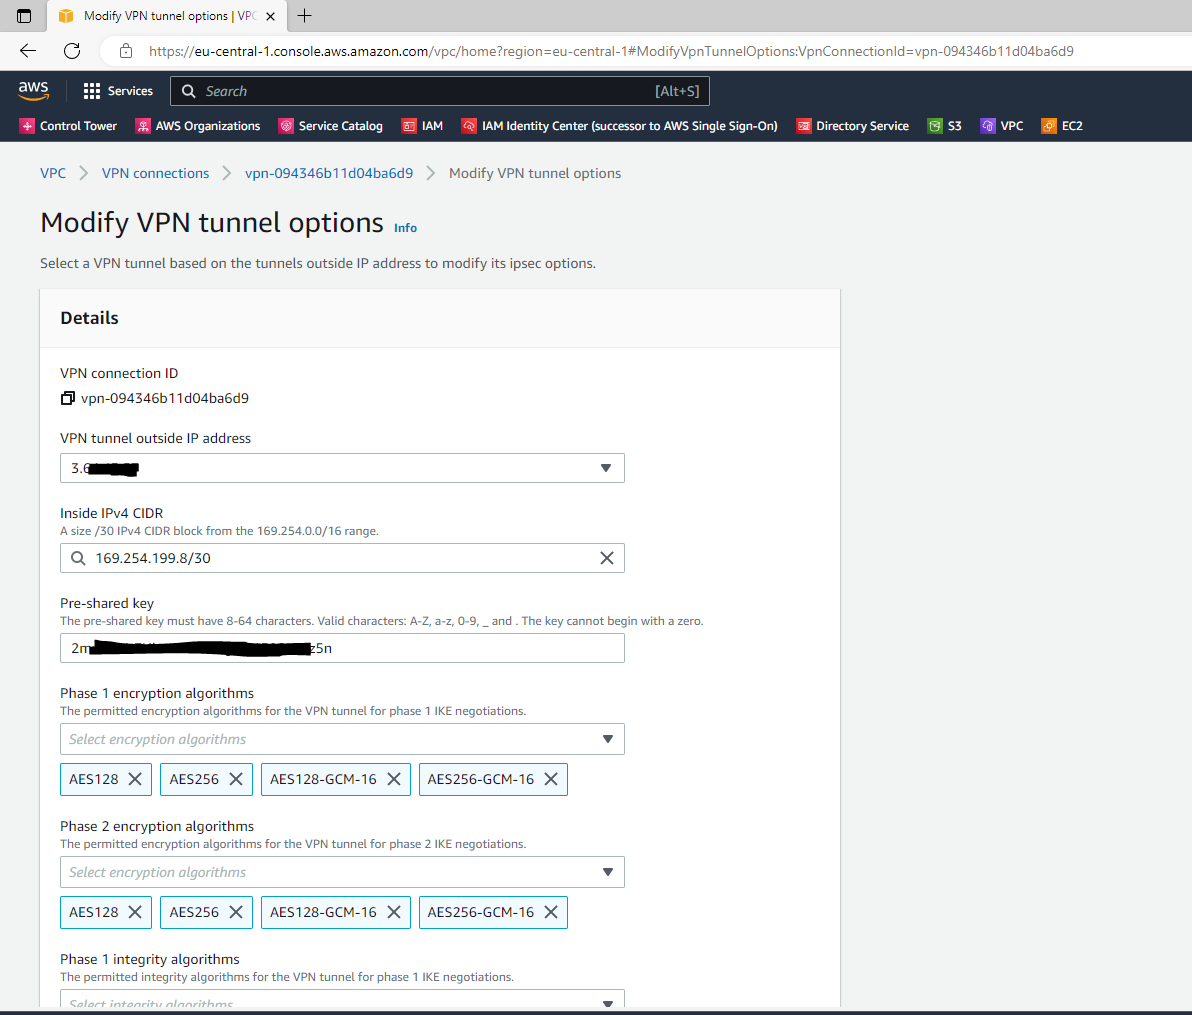
As mentioned best way to get all the parameters from your AWS tunnel configuration, you can click on Actions and select Modify VPN tunnel options.

Select the tunnel you want to see or configure the options for.
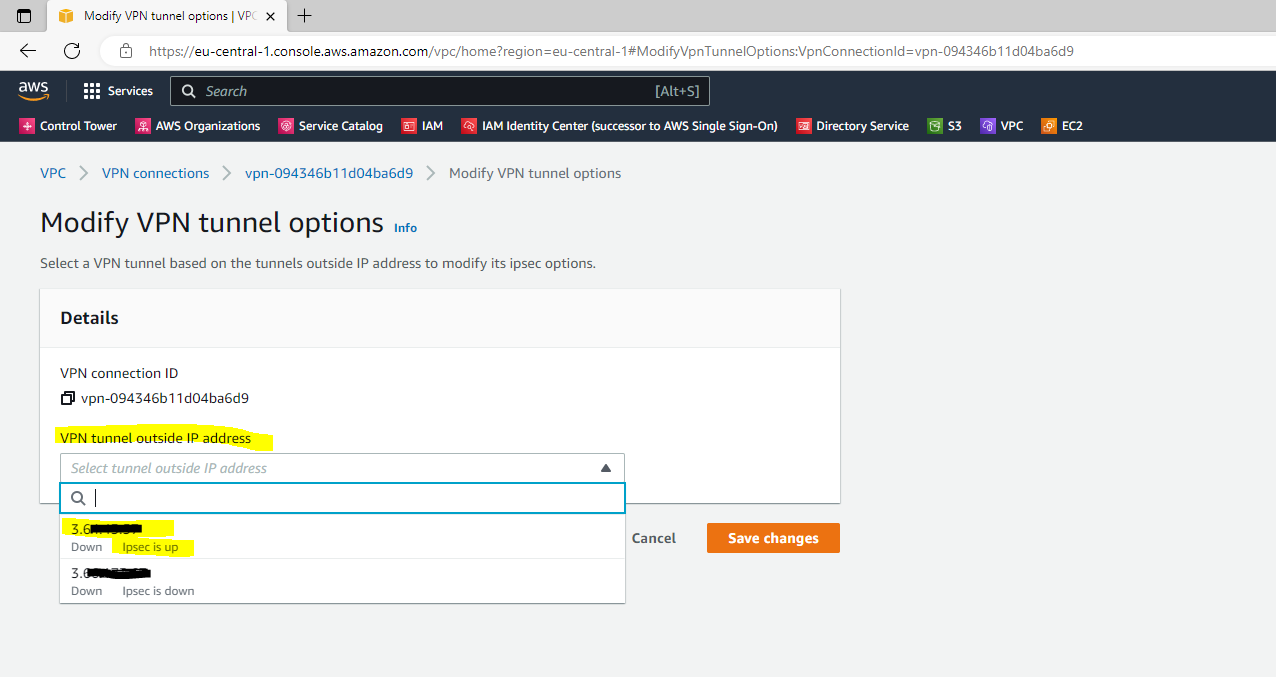
Here you can change the pre-shared key, add or remove encryption options, select which IKE version you want to use (ikev1 or ikev2) and other parameters for the tunnel.
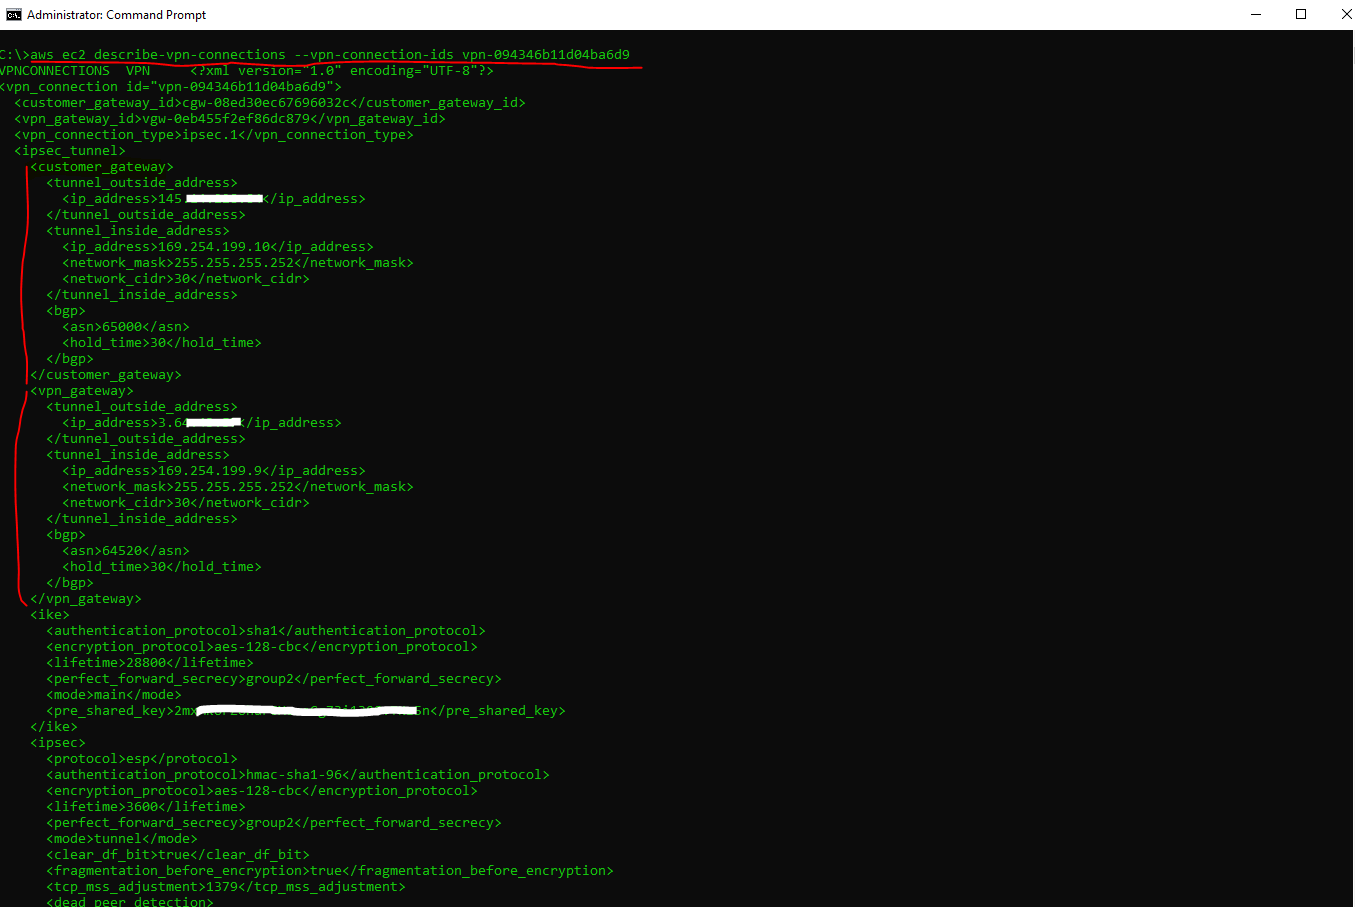
To get all details including the phase 2 tunnel IPs, use the AWS CLI and following command.
C:> aws ec2 describe-vpn-connections --vpn-connection-ids <VPN ID>
Below under customer gateway you will see the parameters you need to configure your on-premise gateway (pfSense) and under vpn gateway are the parameters from the AWS gateway (virtual private gateway) listed.
First you will see the customer gateway and vpn gateway configuration from Tunnel 1 and further down in the output from the AWS CLI you will see the configuration for Tunnel 2.
The AWS CLI output format here is text.
You can append the following command line option to change the output format just for the actual command by using –output json for example.
About how to configure and use the AWS CLI you can read my following post.
So in pfSense I need to configure later and further down in this post the following IPs for the phase 2 tunnel (transit network).
For local subnet (pfSense) I need to use the IP 169.254.199.10 listed above under customer gateway and for the remote subnet (AWS virtual private gateway) the IP 169.254.199.9 listed above under vpn gateway.
Also for the second failover Tunnel 2 I need to configure the transit network and IPs as determined by using the AWS CLI above.

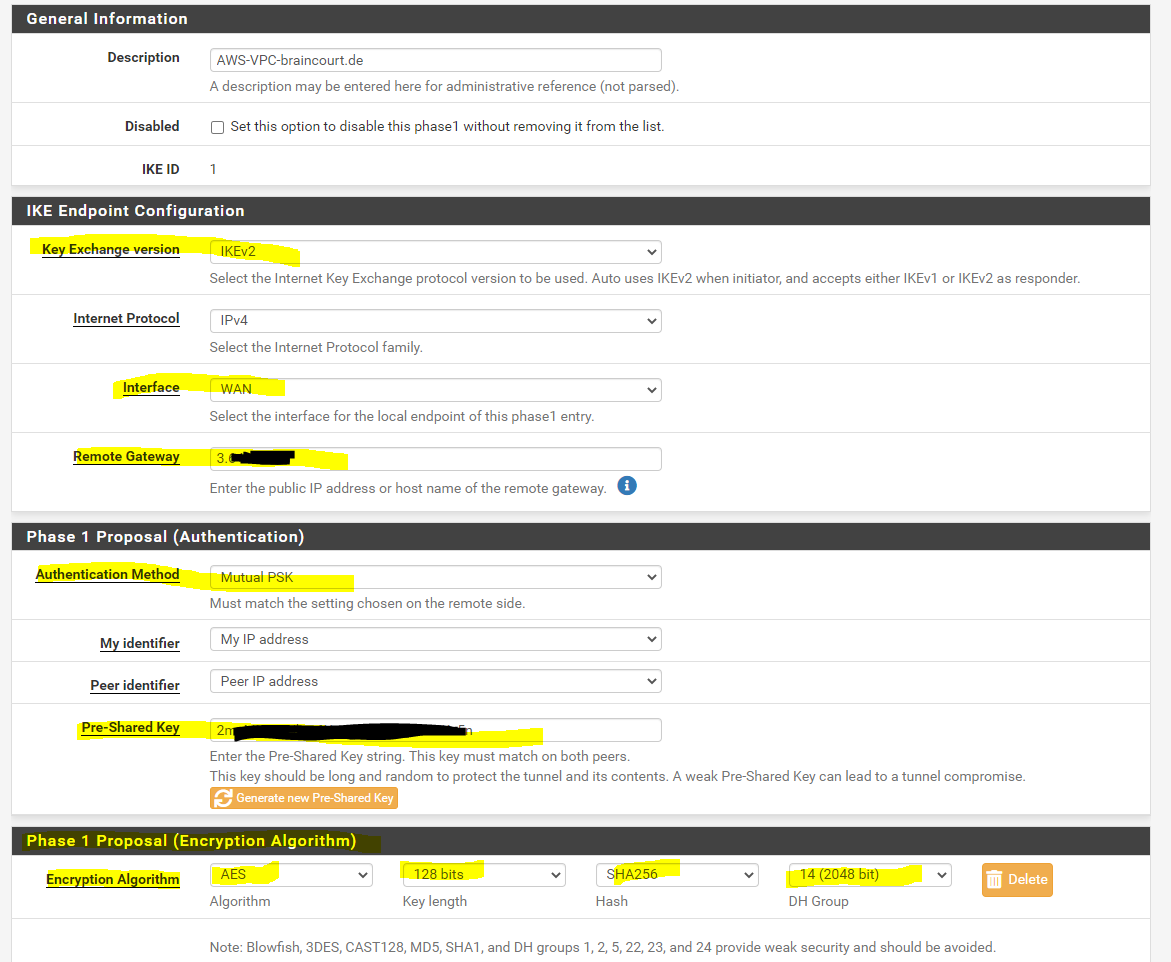
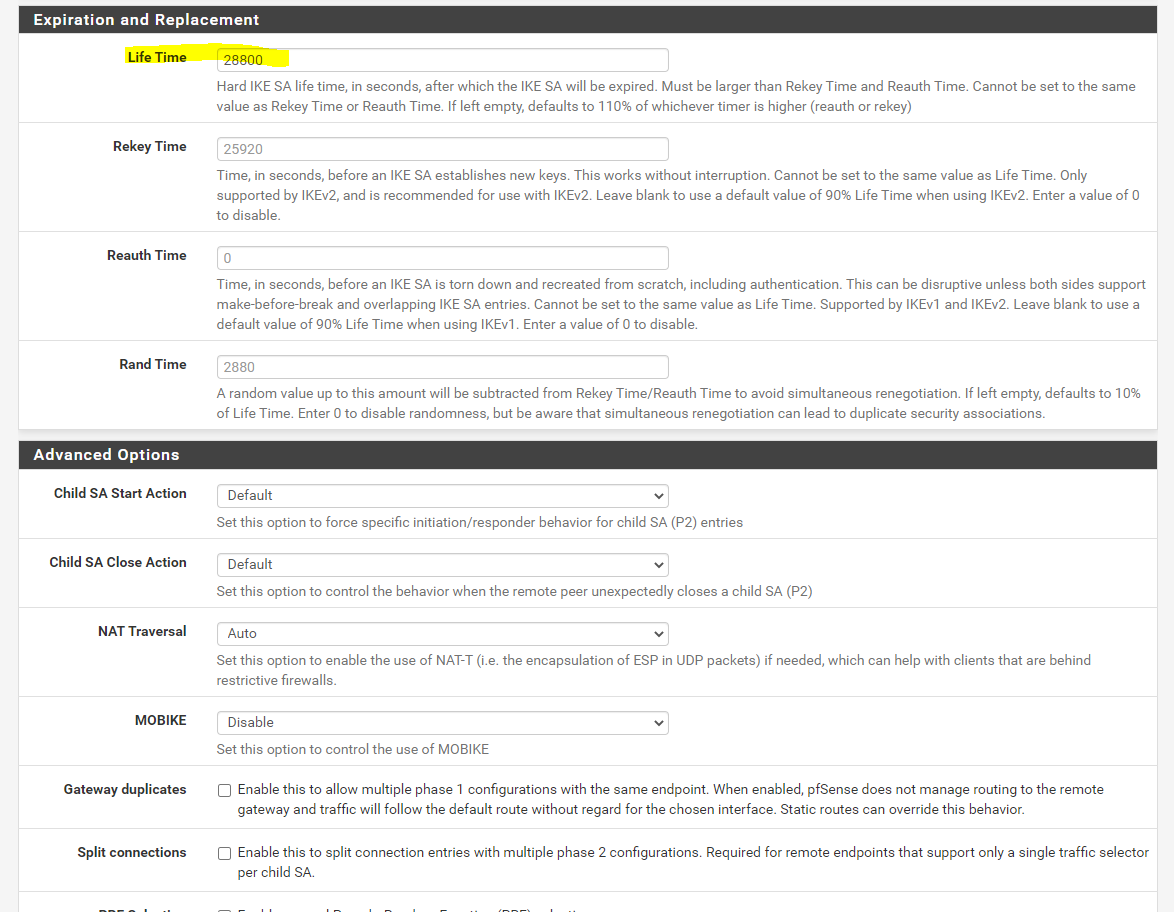
So with these parameters I can configure Phase 1 and Phase 2 on pfSense in my perimeter network. First we will add a phase 1.
pfSense –> VPN –> IPSec –>Add/Edit Phase 1
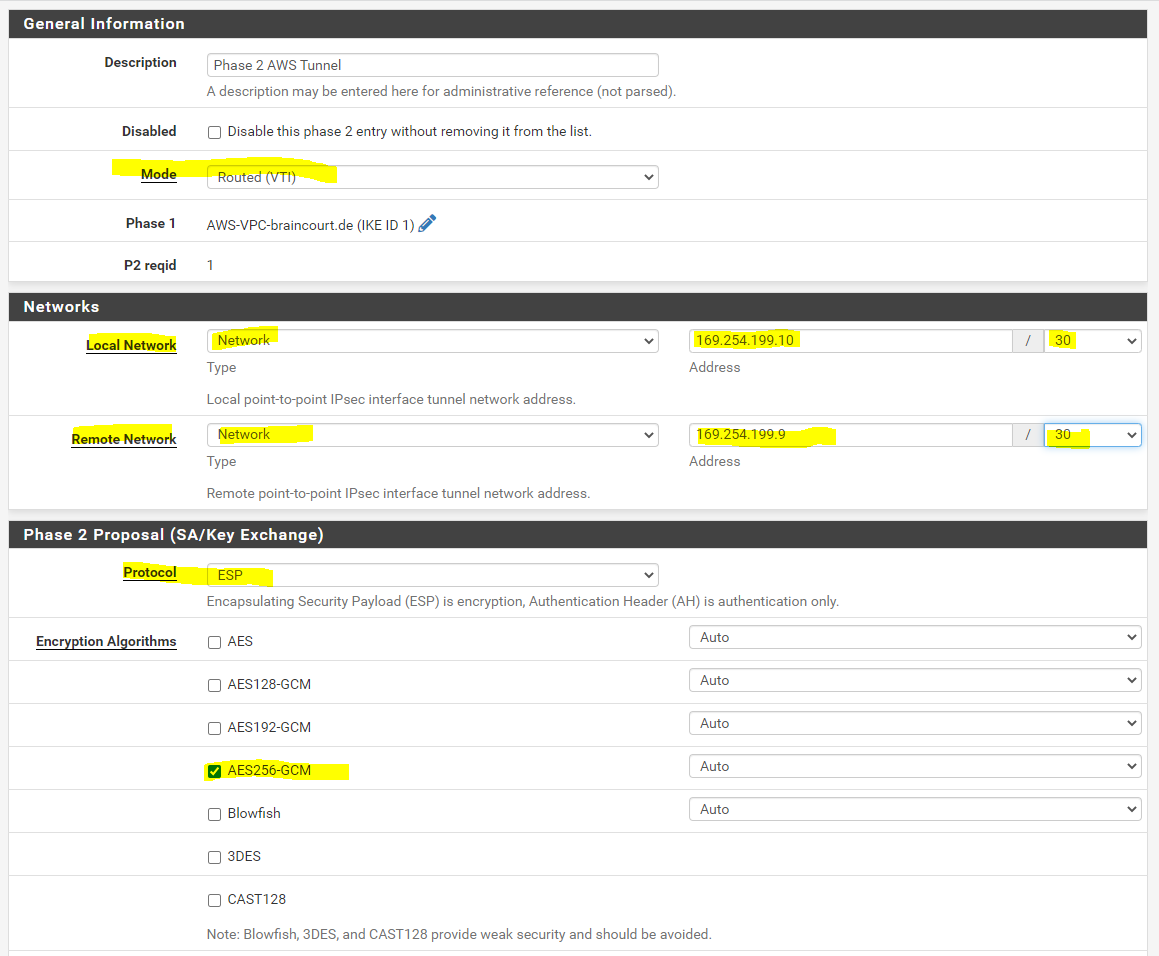
Now we can add the phase 2.
For Mode use Routed(VTI)
The IPs for the local network and remote network we determined by using the AWS CLI command above.

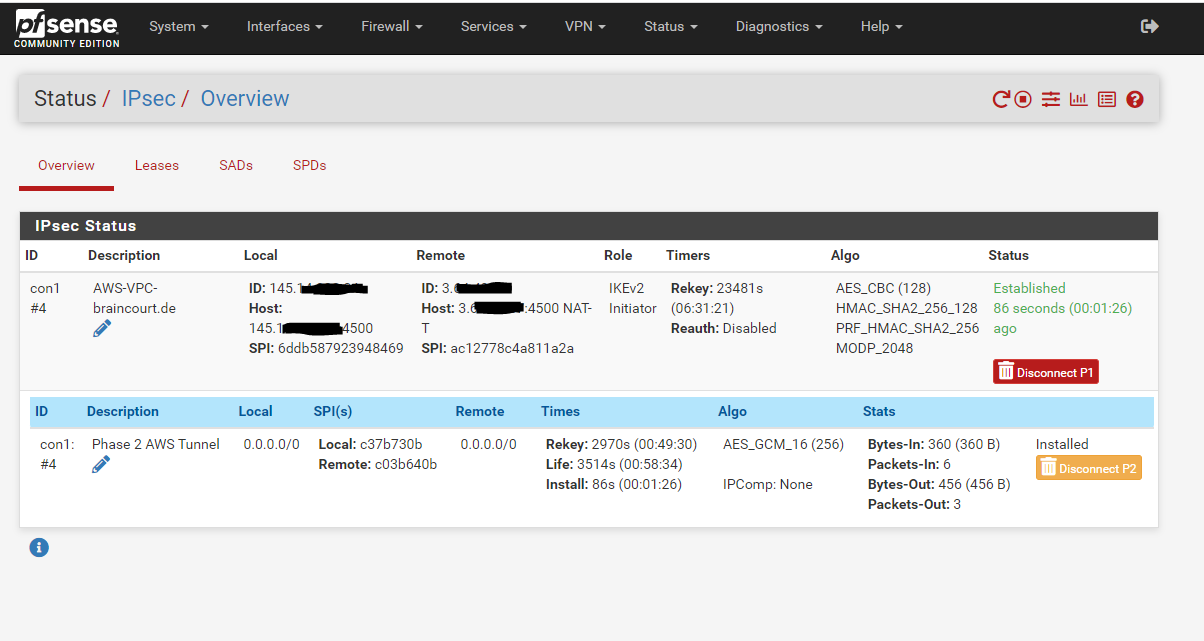
After that we can check if the tunnel is established under
pfSense –> Status –> IPSec
For the second failover Tunnel 2 you have to configure the same and just changing the public IP address from the second AWS tunnel and also you need to change the transit network IP addresses for Tunnel 2.
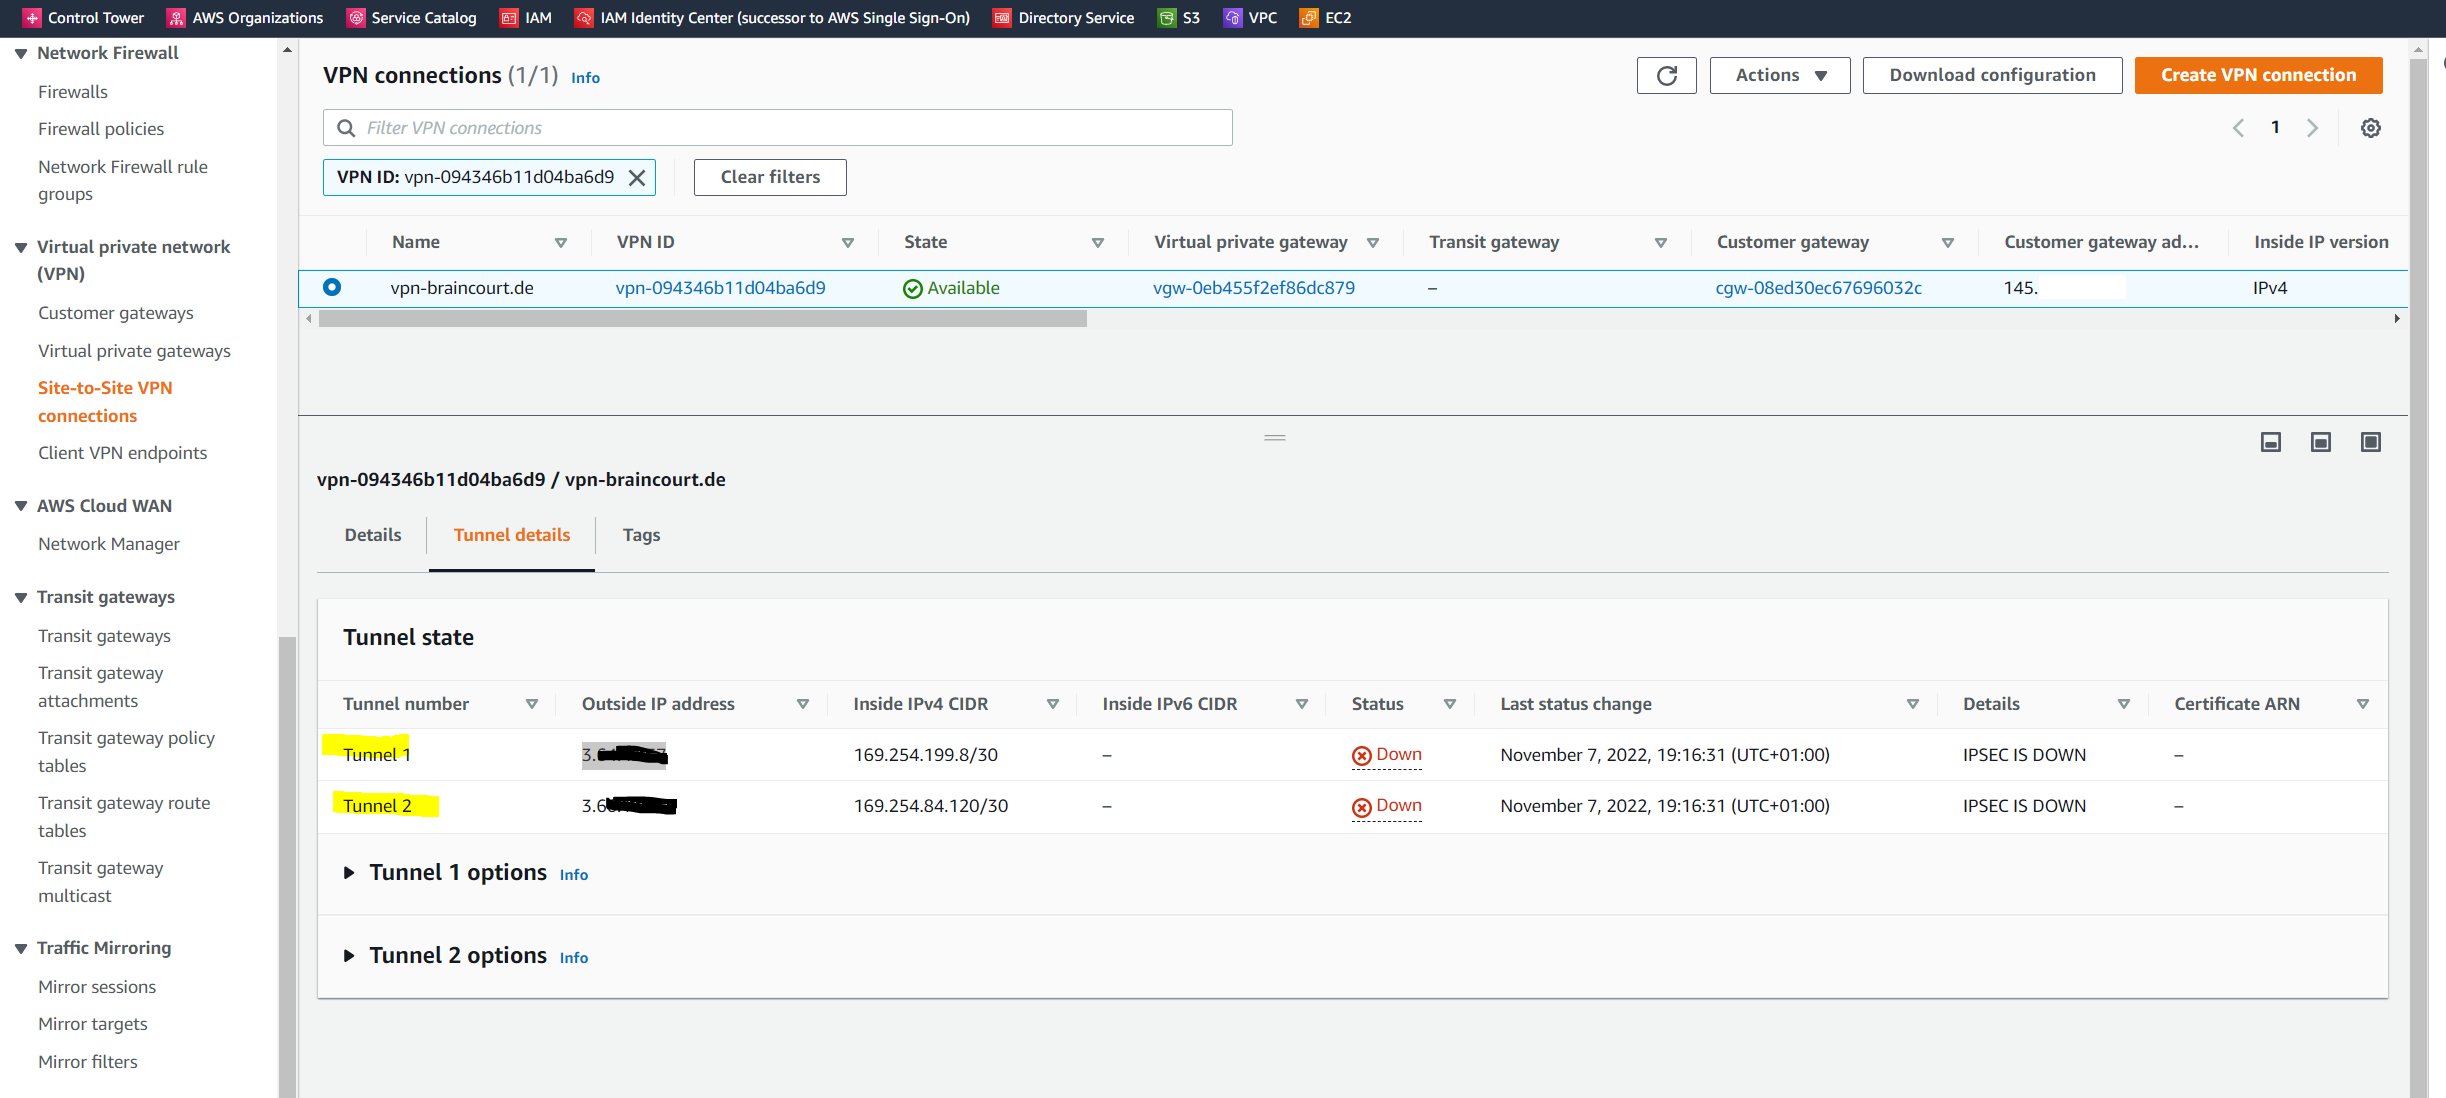
We can also check the status in AWS.
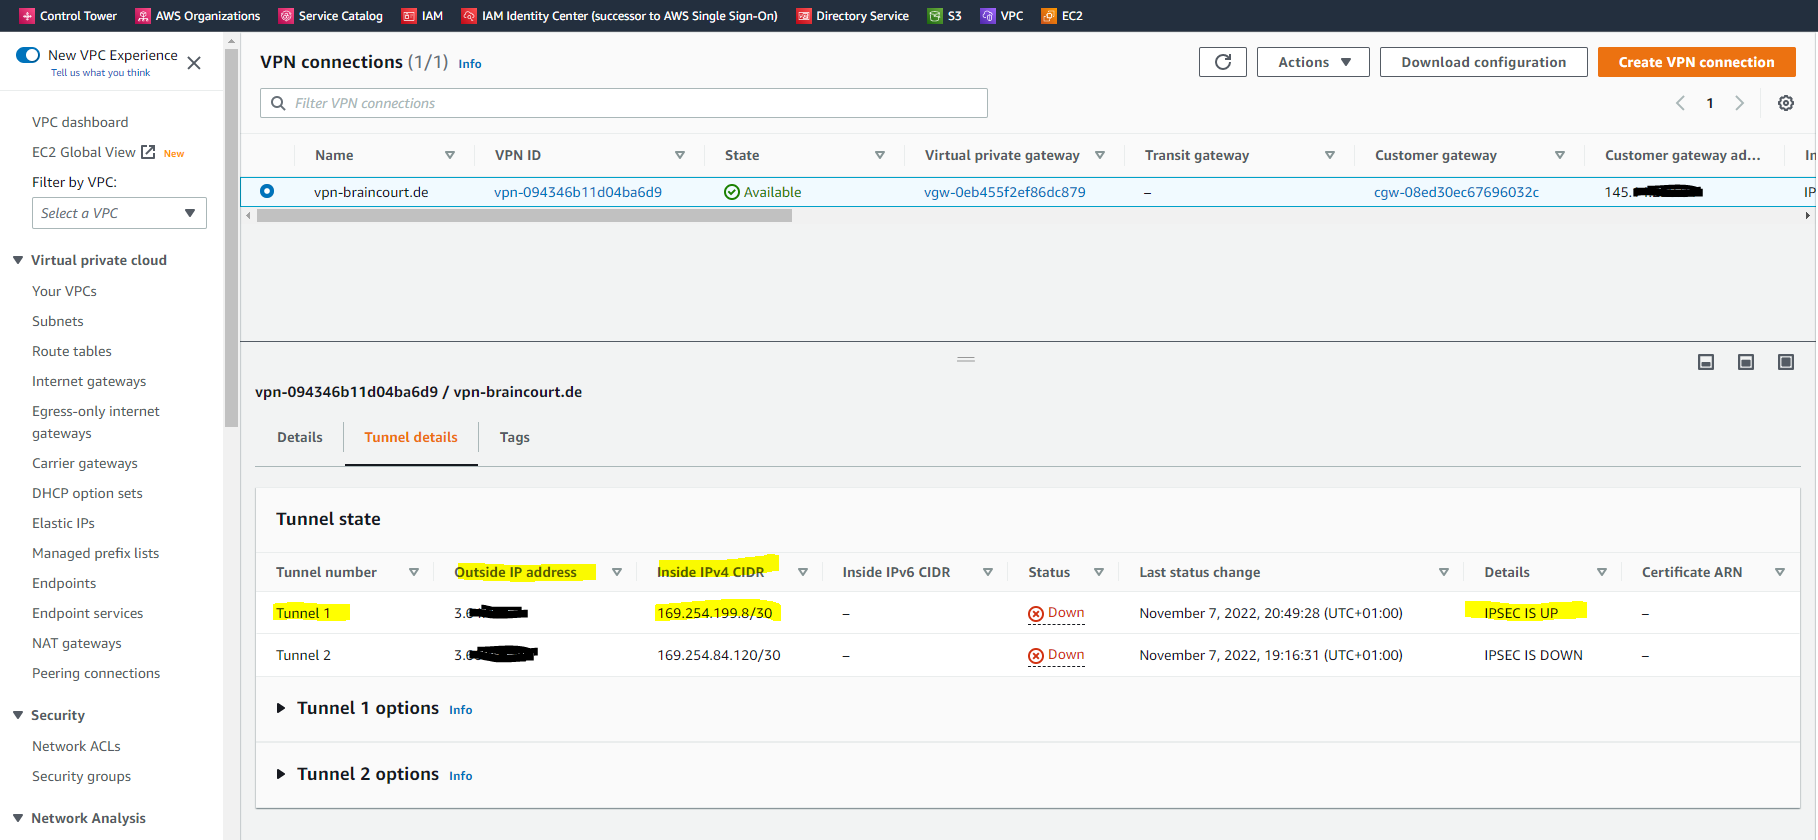
As you can see above, under Status the first tunnel is marked as Down but under Details it is listed with IPSEC IS UP. The reason for is that BGP so far is not installed and configured on pfSense.
With AWS site to site VPN, when the status on your AWS console shows IPSEC up and Tunnel Down, this is an indication that IPSEC has been successfully established between the two peers. However, since this is a dynamic (BGP) VPN, the tunnel will come up only if BGP session is established.
Source: https://repost.aws/questions/QUf9KYAbN-Rfe1bFZnaUXP6A/site-to-site-vpn-issue
That routing in pfSense finally works over the IPSec tunnel, we have to assign the IPSec Interface (VTI) which was automatically created after set the Tunnel Mode to Routed(VTI) in the Phase 2 settings.
Therefore go to the menu Interfaces – Assignments and add the ipsec Interface as follows.
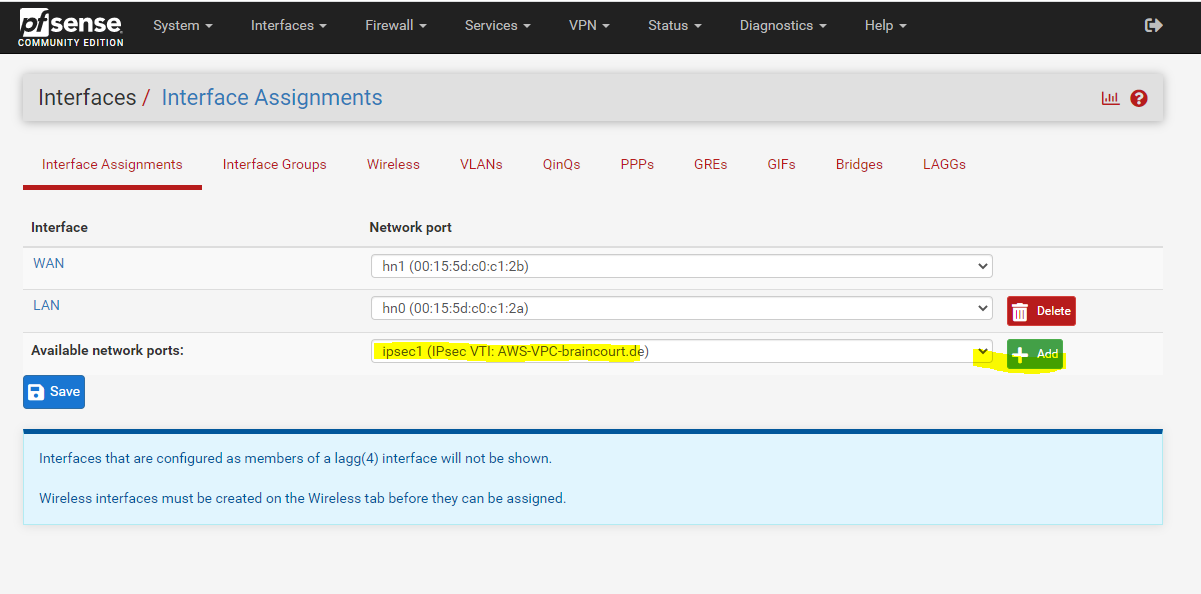
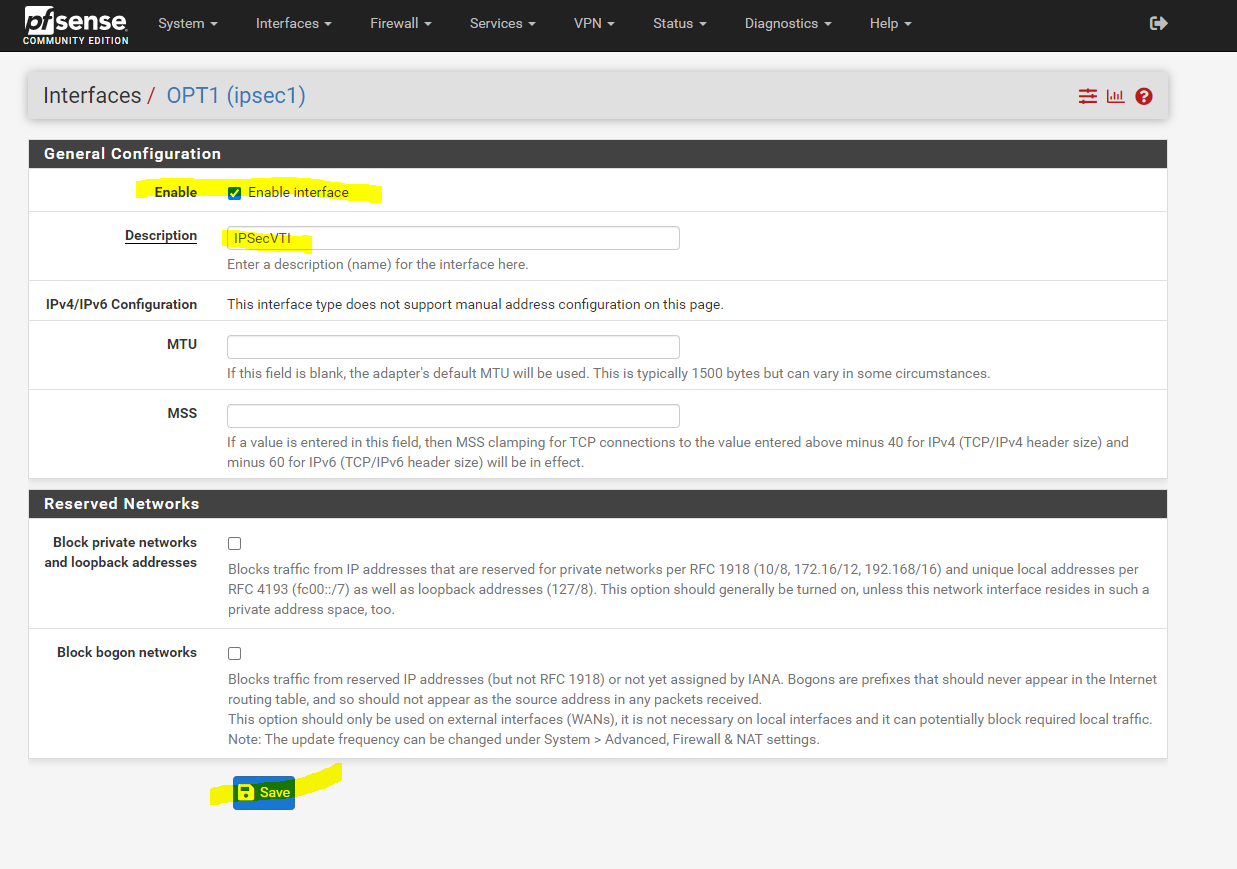
After the assignment you will find this interface with the name OPT1. I changed the name to IPSecVTI for a better understanding.
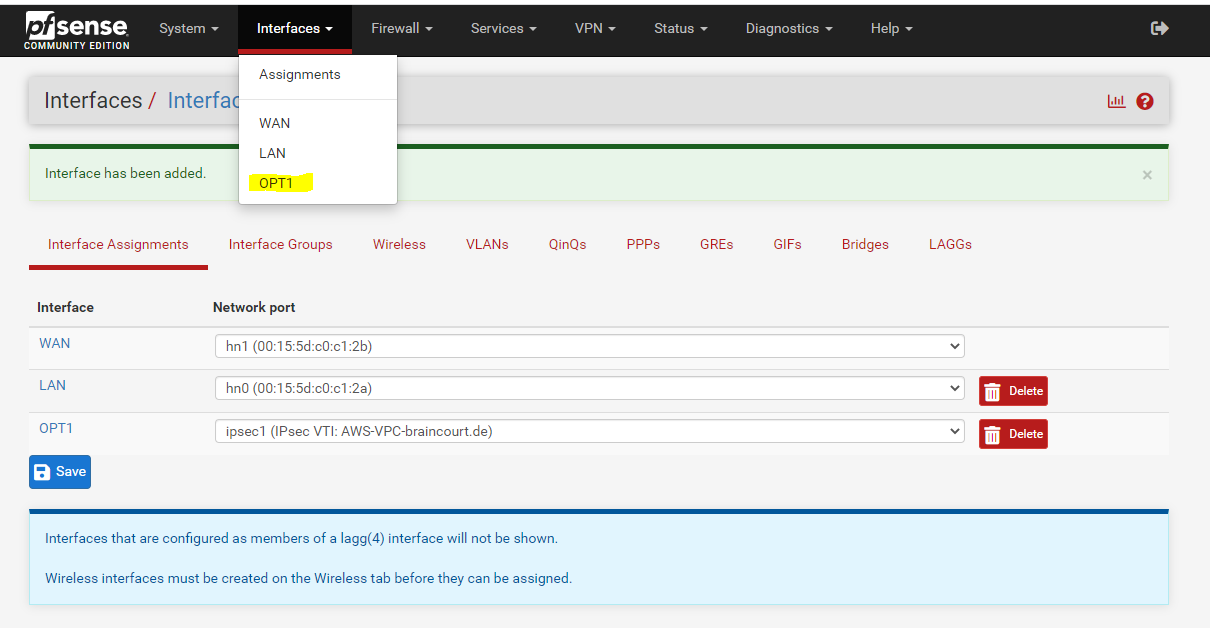
Per default the interface is not enabled, so don’t forget to also enable it!
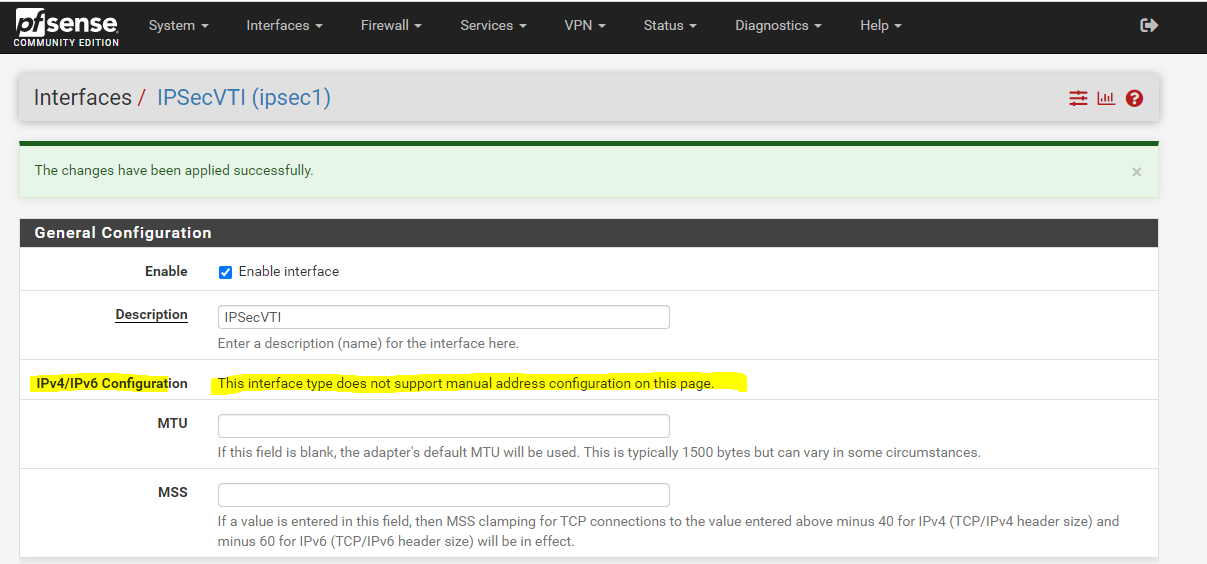
As you can read below, we cannot set manual an IP Configuration. The interface will get automatically an IP from the previous created transit network. This IP will represent the gateway to reach our AWS VPC.
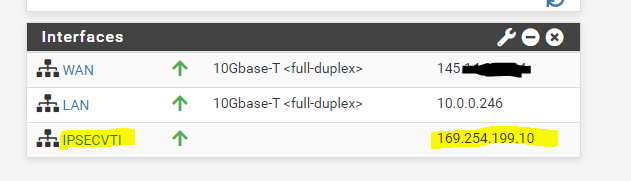
You can see the automatically assigned IP from the phase 2 tunnel local subnet on the status page (Dashboard) from pfSense.
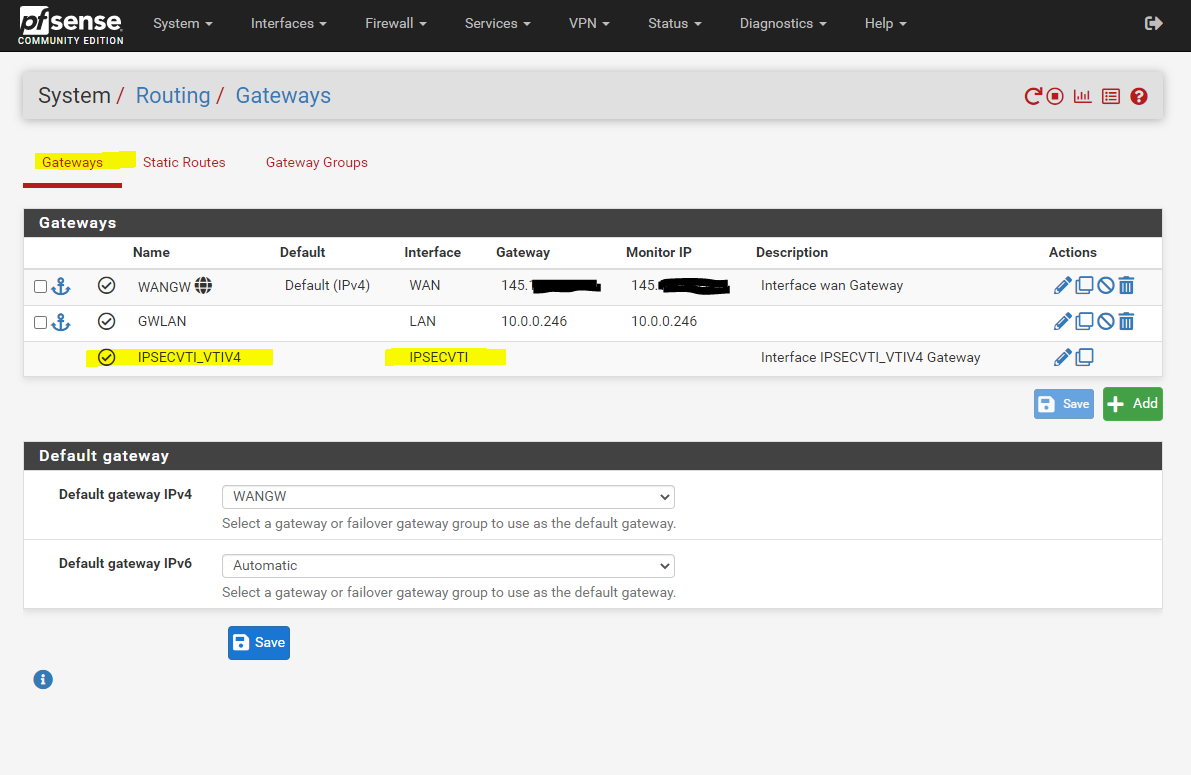
Under System – Routing the Interface is automatically added as Gateway.
We also need to allow traffic between AWS VPC and our on-premise network, in my case for testing I will allow all IPv4 traffic, in production use you will filter what is allowed.
Firewall –> Rules –> IPSec

The firewall rules for the IPsec tunnel should also allow the BGP protocol/service which is using and listening on TCP Port 179 and should not be blocked by the firewall.
Configure BGP (FRR) on pfSense
Now as the tunnel(s) are established, we also need to configure BGP on pfSense. Therefore you can use my following post.
Keep in mind that you need to set up two BGP neighbors in pfSense, one for Tunnel 1 and one for Tunnel 2 in AWS!
Configure BGP in your AWS VPC
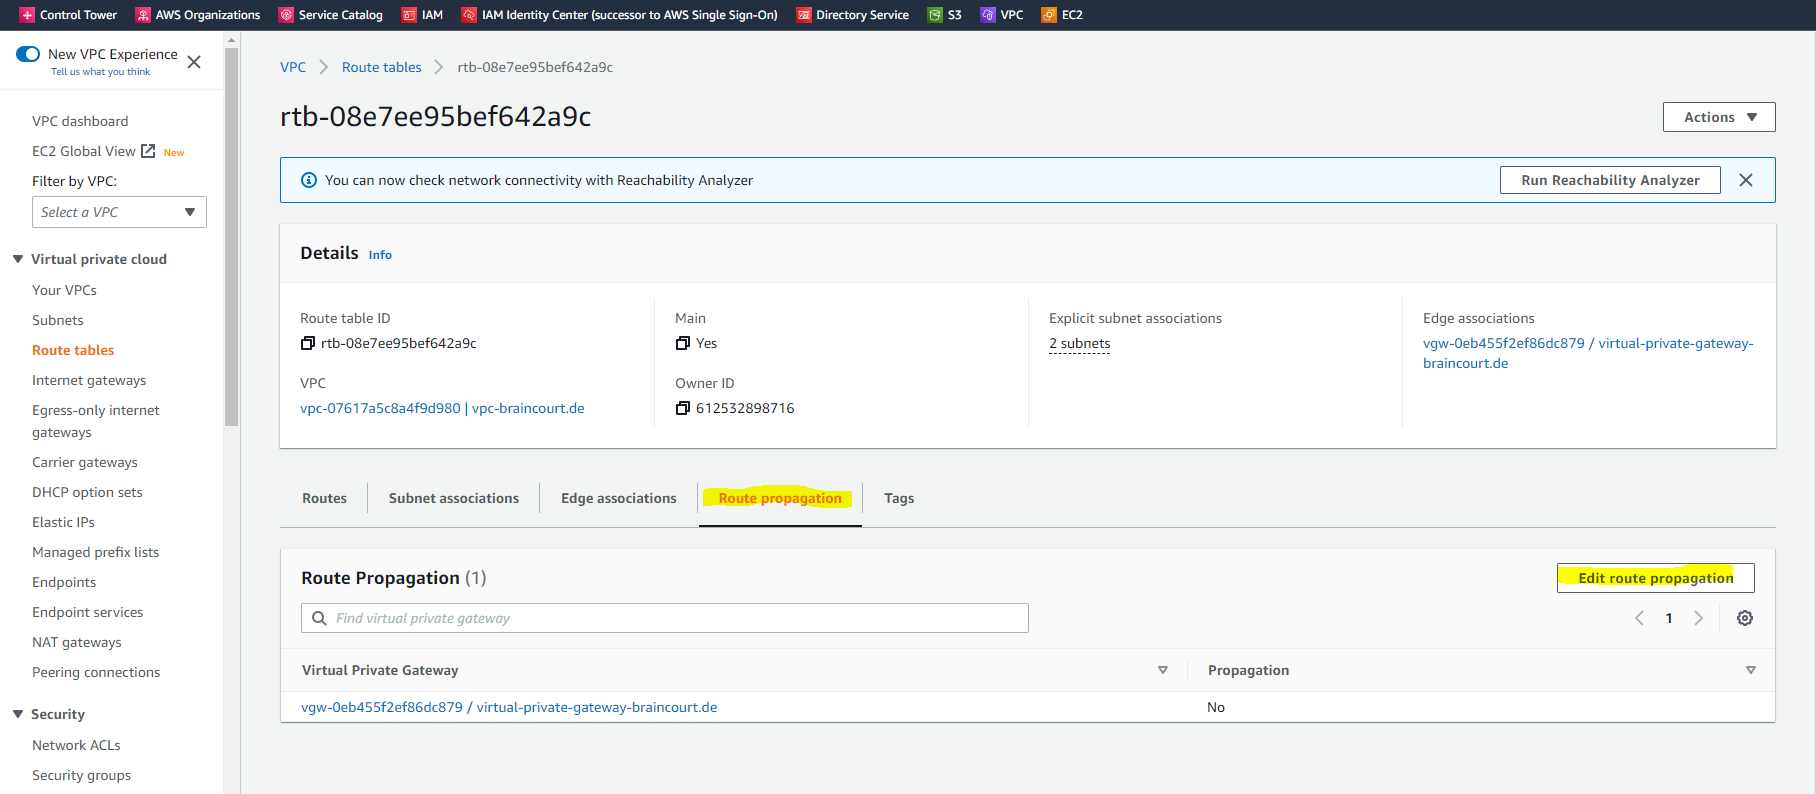
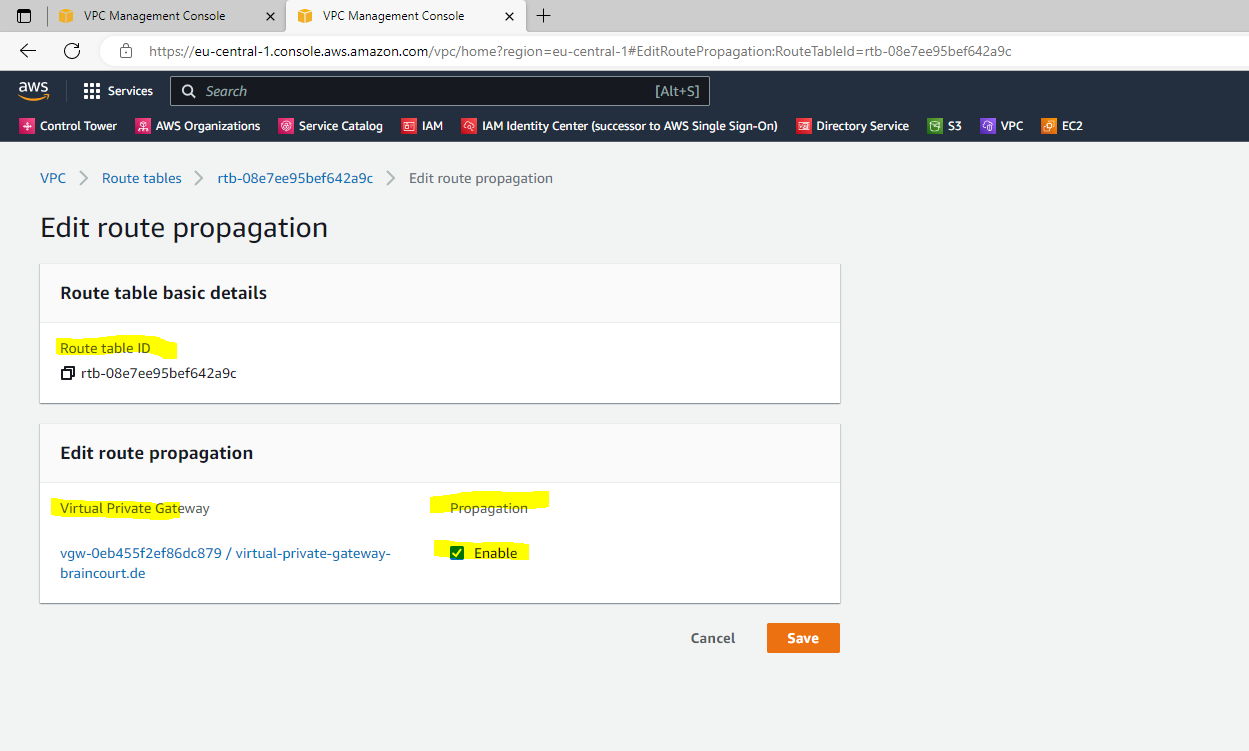
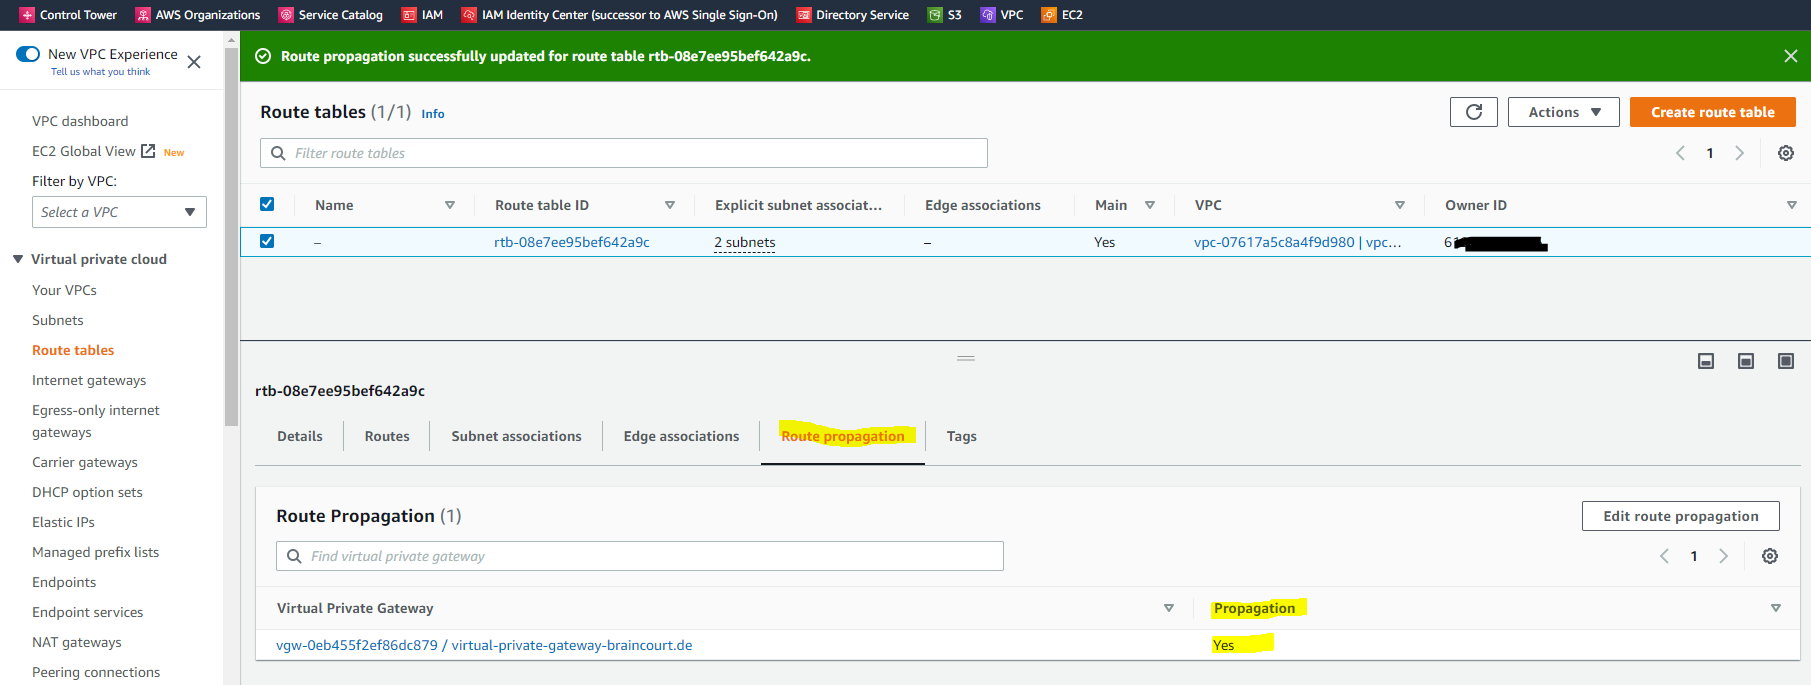
Here we just need to enable propagation from our VPC route table. Therefore go to VPC –> Route tables, select the route table and go to the Route propagation tab. Click on Edit route propagation and enable it for the virtual private gateway from your vpn tunnel.
Check if BGP is working on both sides
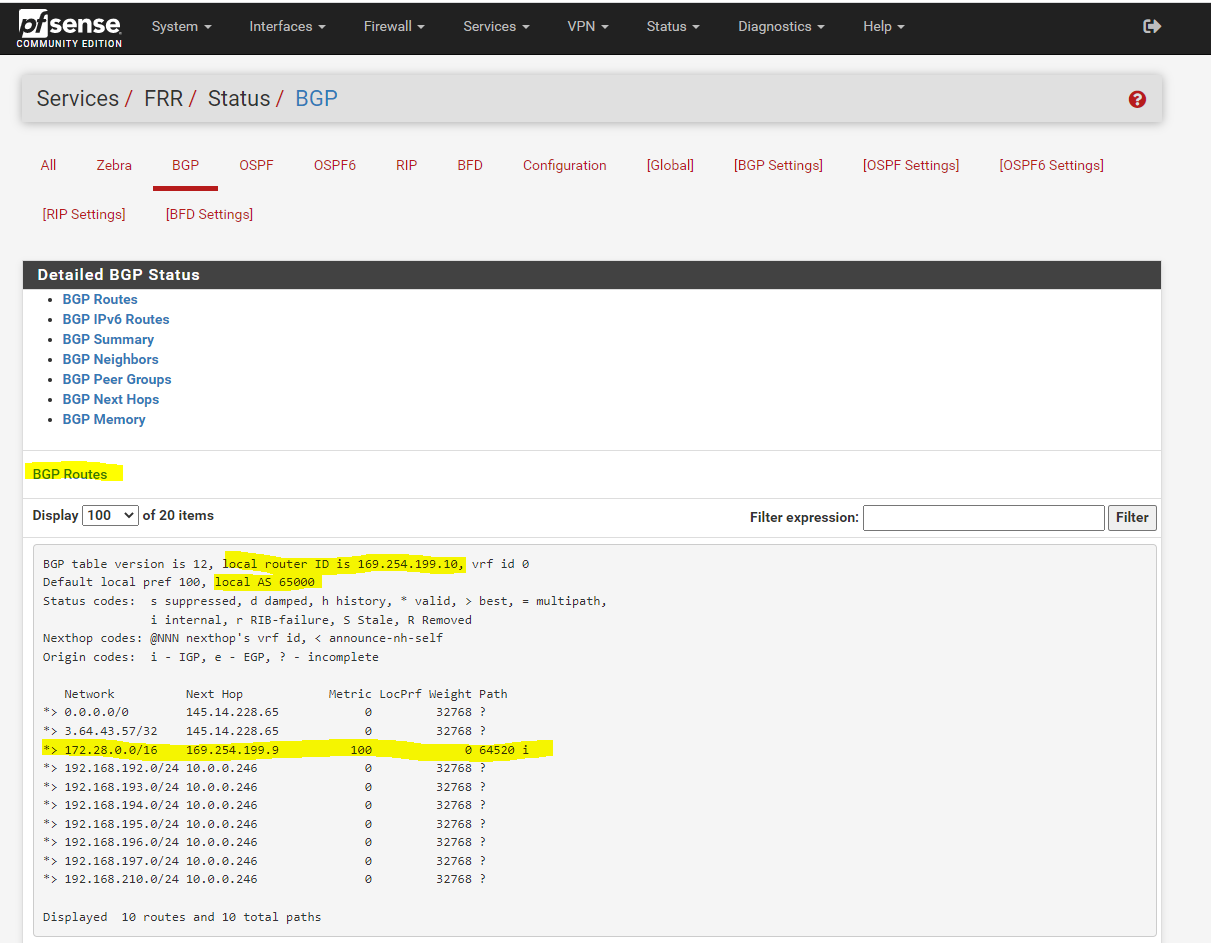
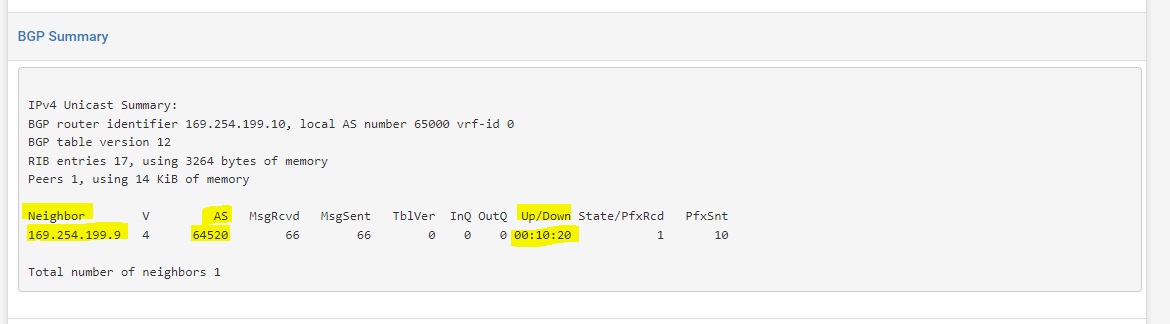
To check if BGP is working on pfSense, you can check the status under
Services –> FRR –> Status –> BGP
Below you will see the advertised routes from AWS for the VPC network 172.28.0.0/16 with the next hop 169.254.199.9 (phase 2 tunnel IP on AWS side).
On the AWS side you can check if BGP works under VPC –> Virtual private network (VPN) –> Site-to-Site VPN connections

As already mentioned previously, when you will see under Status the tunnel is marked as Down but under Details it is listed with IPSEC IS UP. The reason for is that BGP is not working.
The second tunnel I hadn’t configured so far.
With AWS site to site VPN, when the status on your AWS console shows IPSEC up and Tunnel Down, this is an indication that IPSEC has been successfully established between the two peers. However, since this is a dynamic (BGP) VPN, the tunnel will come up only if BGP session is established.
Source: https://repost.aws/questions/QUf9KYAbN-Rfe1bFZnaUXP6A/site-to-site-vpn-issue
The routes advertised from your on-premise network and pfSense to AWS VPC, you will see under VPC –> Route tables as follows.
In my case it is the main route table which is by default associated to the VPC.

Finally both tunnels are Up and running.

You should set up in any case two tunnels, besides the cumbersome warning messages when you just set up one tunnel, AWS will also frequently make changes to the tunnels which will result in one of the tunnels will go offline like notfied by an email notification like the below one.
Hello AWS VPN Customer,
Your VPN Connection vpn-094346b11d04ba6d9 in the eu-central-1 Region had a momentary lapse of redundancy as one of two tunnel endpoints was replaced. Connectivity on the second tunnel was not affected during this time. Both tunnels are now operating normally.
Replacements can occur for several reasons, including health, software upgrades, customer-initiated modifications, and when underlying hardware is retired. If you have configured your VPN Customer Gateway to use both tunnels, then your VPN Connection will have utilized the alternate tunnel during the replacement process. For more on tunnel endpoint replacements, please see our documentation [1].
If you have not configured your VPN Customer Gateway to use both tunnels, then your VPN Connection may have been interrupted during the replacement. We encourage you to configure your router to use both tunnels. You can obtain the VPN Connection configuration recommendations for several types of VPN devices from the AWS Management Console [2]. On the “Amazon VPC” tab, select “VPN Connections”. Then highlight the VPN Connection and choose “Download Configuration”.
Set up IPSec route based S2S VPN for Google Cloud VPC and Azure VNet
If you are also interested about how to set up the same for Google’s Cloud VPC, you can read my following post.
For an Azure VNet you can read my following posts.
Links
What is AWS Site-to-Site VPN?
https://docs.aws.amazon.com/vpn/latest/s2svpn/VPC_VPN.html
How AWS Site-to-Site VPN works
https://docs.aws.amazon.com/vpn/latest/s2svpn/how_it_works.html
Configure route tables
https://docs.aws.amazon.com/vpc/latest/userguide/VPC_Route_Tables.html#gateway-route-tables
Example routing options
https://docs.aws.amazon.com/vpc/latest/userguide/route-table-options.html
describe-vpn-connections
https://docs.aws.amazon.com/cli/latest/reference/ec2/describe-vpn-connections.htmlHow do I check the current status of my VPN tunnel?
https://aws.amazon.com/premiumsupport/knowledge-center/check-vpn-tunnel-status/