Installing SAP Data Intelligence on Azure Kubernetes Service – Part 3
In Part 3 we will install and configure the ingress controller to expose SAP Data Intelligence to the internet.
Expose SAP Data Intelligence System Management Externally through an Ingress
Below you will find the original SAP Installation Guide about how to expose SAP Data Intelligence through Ingress.
Expose SAP Data Intelligence System Management Externally through an Ingress
Source: https://help.sap.com/viewer/a8d90a56d61a49718ebcb5f65014bbe7/3.2.3/en-US/43951922bae74636bd057cc4b8ae088c.html
I will also use the following article from Microsoft about how to create an HTTPS ingress controller on Azure Kubernetes Services (AKS) and here especially the step about import the ingress images.
Create an HTTPS ingress controller on Azure Kubernetes Service (AKS)
https://docs.microsoft.com/en-us/azure/aks/ingress-tls?tabs=azure-cli
Import the images used by the Helm chart into your ACR
Source: https://docs.microsoft.com/en-us/azure/aks/ingress-tls?tabs=azure-cli
This article uses the NGINX ingress controller Helm chart, which relies on three container images.
Assign the following variables and afterwards execute the several az acr import commands to import the images from the Source Container Registries into your Azure Container Registry.
az acr import
https://docs.microsoft.com/en-us/cli/azure/acr?view=azure-cli-latest#az-acr-import
You only need to adjust the first variable REGISTRY_NAME to your environment, in my case:
REGISTRY_NAME=crK8s
REGISTRY_NAME=<REGISTRY_NAME>
SOURCE_REGISTRY=k8s.gcr.io
CONTROLLER_IMAGE=ingress-nginx/controller
CONTROLLER_TAG=v1.0.4
PATCH_IMAGE=ingress-nginx/kube-webhook-certgen
PATCH_TAG=v1.1.1
DEFAULTBACKEND_IMAGE=defaultbackend-amd64
DEFAULTBACKEND_TAG=1.5
CERT_MANAGER_REGISTRY=quay.io
CERT_MANAGER_TAG=v1.5.4
CERT_MANAGER_IMAGE_CONTROLLER=jetstack/cert-manager-controller
CERT_MANAGER_IMAGE_WEBHOOK=jetstack/cert-manager-webhook
CERT_MANAGER_IMAGE_CAINJECTOR=jetstack/cert-manager-cainjector

az acr import --name $REGISTRY_NAME --source $SOURCE_REGISTRY/$CONTROLLER_IMAGE:$CONTROLLER_TAG --image $CONTROLLER_IMAGE:$CONTROLLER_TAG
az acr import --name $REGISTRY_NAME --source $SOURCE_REGISTRY/$PATCH_IMAGE:$PATCH_TAG --image $PATCH_IMAGE:$PATCH_TAG
az acr import --name $REGISTRY_NAME --source $SOURCE_REGISTRY/$DEFAULTBACKEND_IMAGE:$DEFAULTBACKEND_TAG --image $DEFAULTBACKEND_IMAGE:$DEFAULTBACKEND_TAG
az acr import --name $REGISTRY_NAME --source $CERT_MANAGER_REGISTRY/$CERT_MANAGER_IMAGE_CONTROLLER:$CERT_MANAGER_TAG --image $CERT_MANAGER_IMAGE_CONTROLLER:$CERT_MANAGER_TAG
az acr import --name $REGISTRY_NAME --source $CERT_MANAGER_REGISTRY/$CERT_MANAGER_IMAGE_WEBHOOK:$CERT_MANAGER_TAG --image $CERT_MANAGER_IMAGE_WEBHOOK:$CERT_MANAGER_TAG
az acr import --name $REGISTRY_NAME --source $CERT_MANAGER_REGISTRY/$CERT_MANAGER_IMAGE_CAINJECTOR:$CERT_MANAGER_TAG --image $CERT_MANAGER_IMAGE_CAINJECTOR:$CERT_MANAGER_TAG
Now we can create and install the ingress controller by using the helm command. We will first add the ingress-nginx repository by using the following command.
helm repo add ingress-nginx https://kubernetes.github.io/ingress-nginx
Next we have to set the variable for our Azure Container Registry (ACR) location to use for pulling the images we previously above imported into from the source registries.
ACR_URL=<REGISTRY_URL>
ACR_URL=crk8s.azurecr.io
Now we can execute the following command to install the ingress controller finally.
# Use Helm to deploy an NGINX ingress controller
helm install nginx-ingress ingress-nginx/ingress-nginx
    --version 4.0.13
    --namespace ingress-basic --create-namespace
    --set controller.replicaCount=2
    --set controller.nodeSelector."kubernetes.io/os"=linux
    --set controller.image.registry=$ACR_URL
    --set controller.image.image=$CONTROLLER_IMAGE
    --set controller.image.tag=$CONTROLLER_TAG
    --set controller.image.digest=""
    --set controller.admissionWebhooks.patch.nodeSelector."kubernetes.io/os"=linux
    --set controller.admissionWebhooks.patch.image.registry=$ACR_URL
    --set controller.admissionWebhooks.patch.image.image=$PATCH_IMAGE
    --set controller.admissionWebhooks.patch.image.tag=$PATCH_TAG
    --set controller.admissionWebhooks.patch.image.digest=""
    --set defaultBackend.nodeSelector."kubernetes.io/os"=linux
    --set defaultBackend.image.registry=$ACR_URL
    --set defaultBackend.image.image=$DEFAULTBACKEND_IMAGE
    --set defaultBackend.image.tag=$DEFAULTBACKEND_TAG
    --set defaultBackend.image.digest=""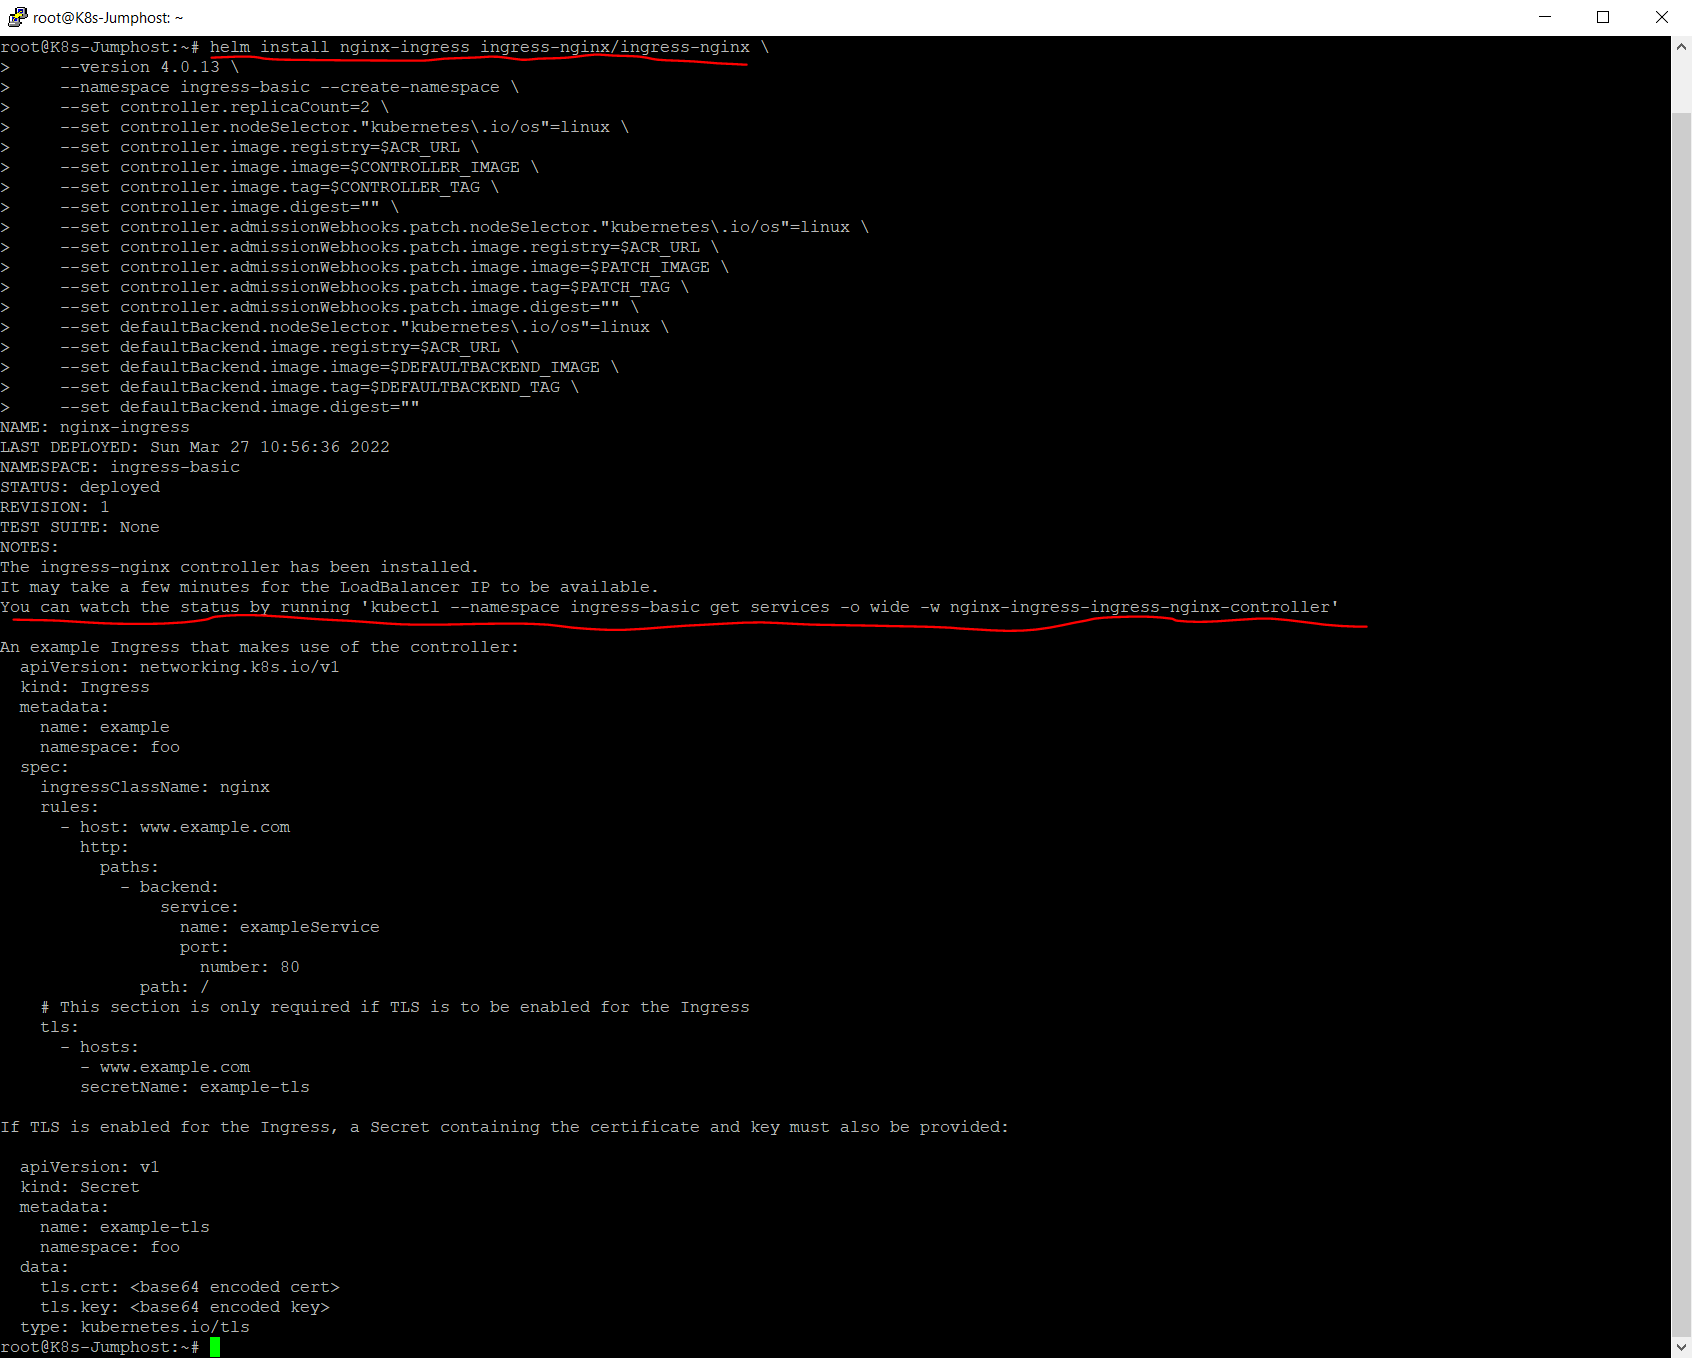
During the installation, an Azure public IP address is created for the ingress controller. This public IP address is static for the life-span of the ingress controller. If you delete the ingress controller, the public IP address assignment is lost. If you then create an additional ingress controller, a new public IP address is assigned. If you wish to retain the use of the public IP address, you can instead create an ingress controller with a static public IP address.
To get the public IP address, use the kubectl get service command. It takes a few minutes for the IP address to be assigned to the service.
kubectl –namespace ingress-basic get services -o wide -w nginx-ingress-ingress-nginx-controller

No ingress rules have been created yet. If you browse to the public IP address, the NGINX ingress controller’s default 404 page is displayed.
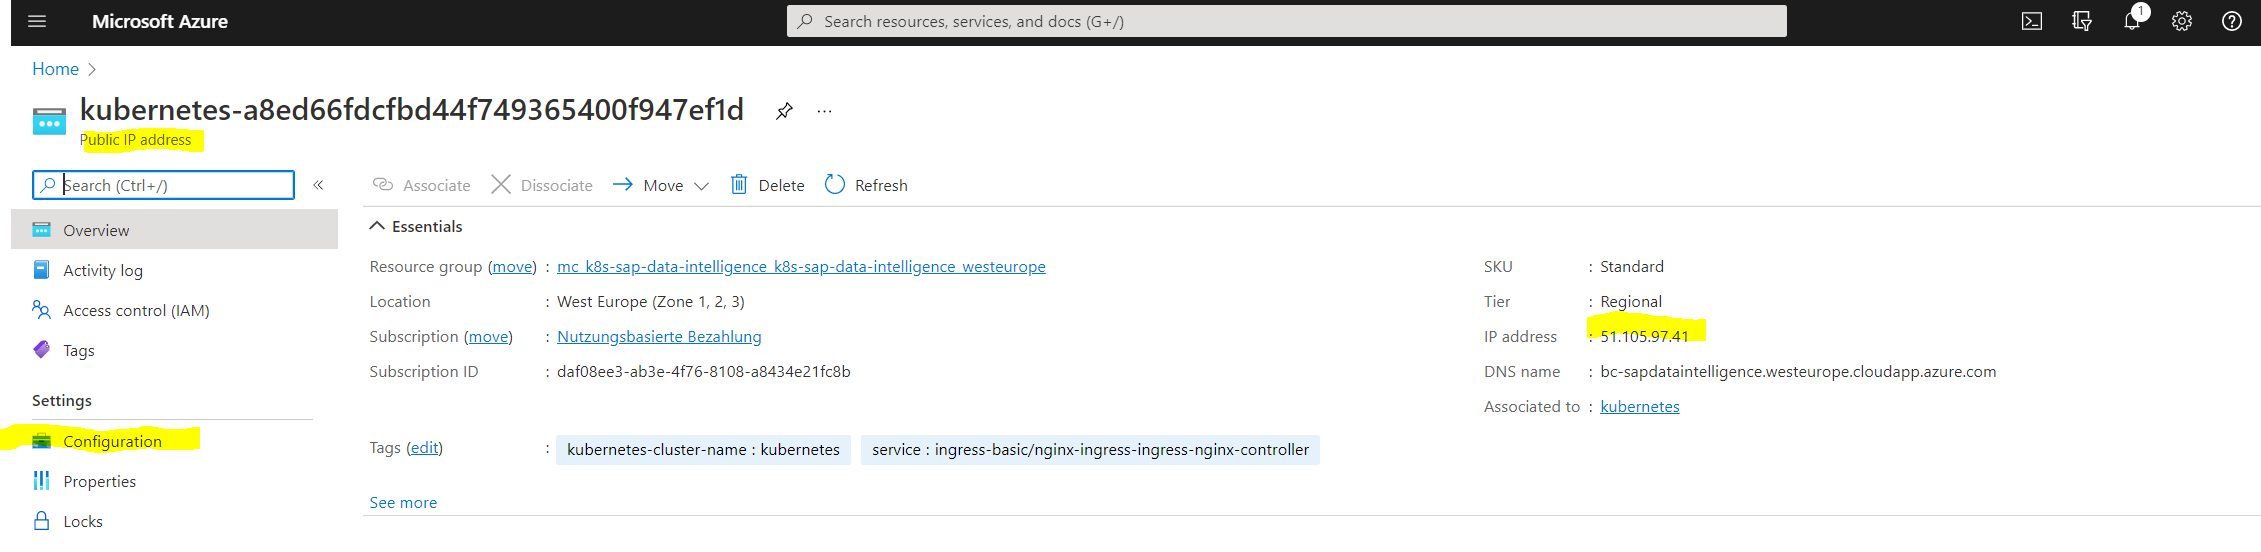
To be able to access the portal from the internet we finally need to configure three more steps. First we need to configure a DNS name label by using the Azure portal. Therefore go to the resource group where the load balancer was created. This resource group was created automatically and should be labeled with a prefix MC_ and the name of your manual first created resource group.
Inside this resource group find the Public IP address with the IP you determined above with the kubectl command assigned to the ingress controller.
Click on Configuration to configure the DNS label.
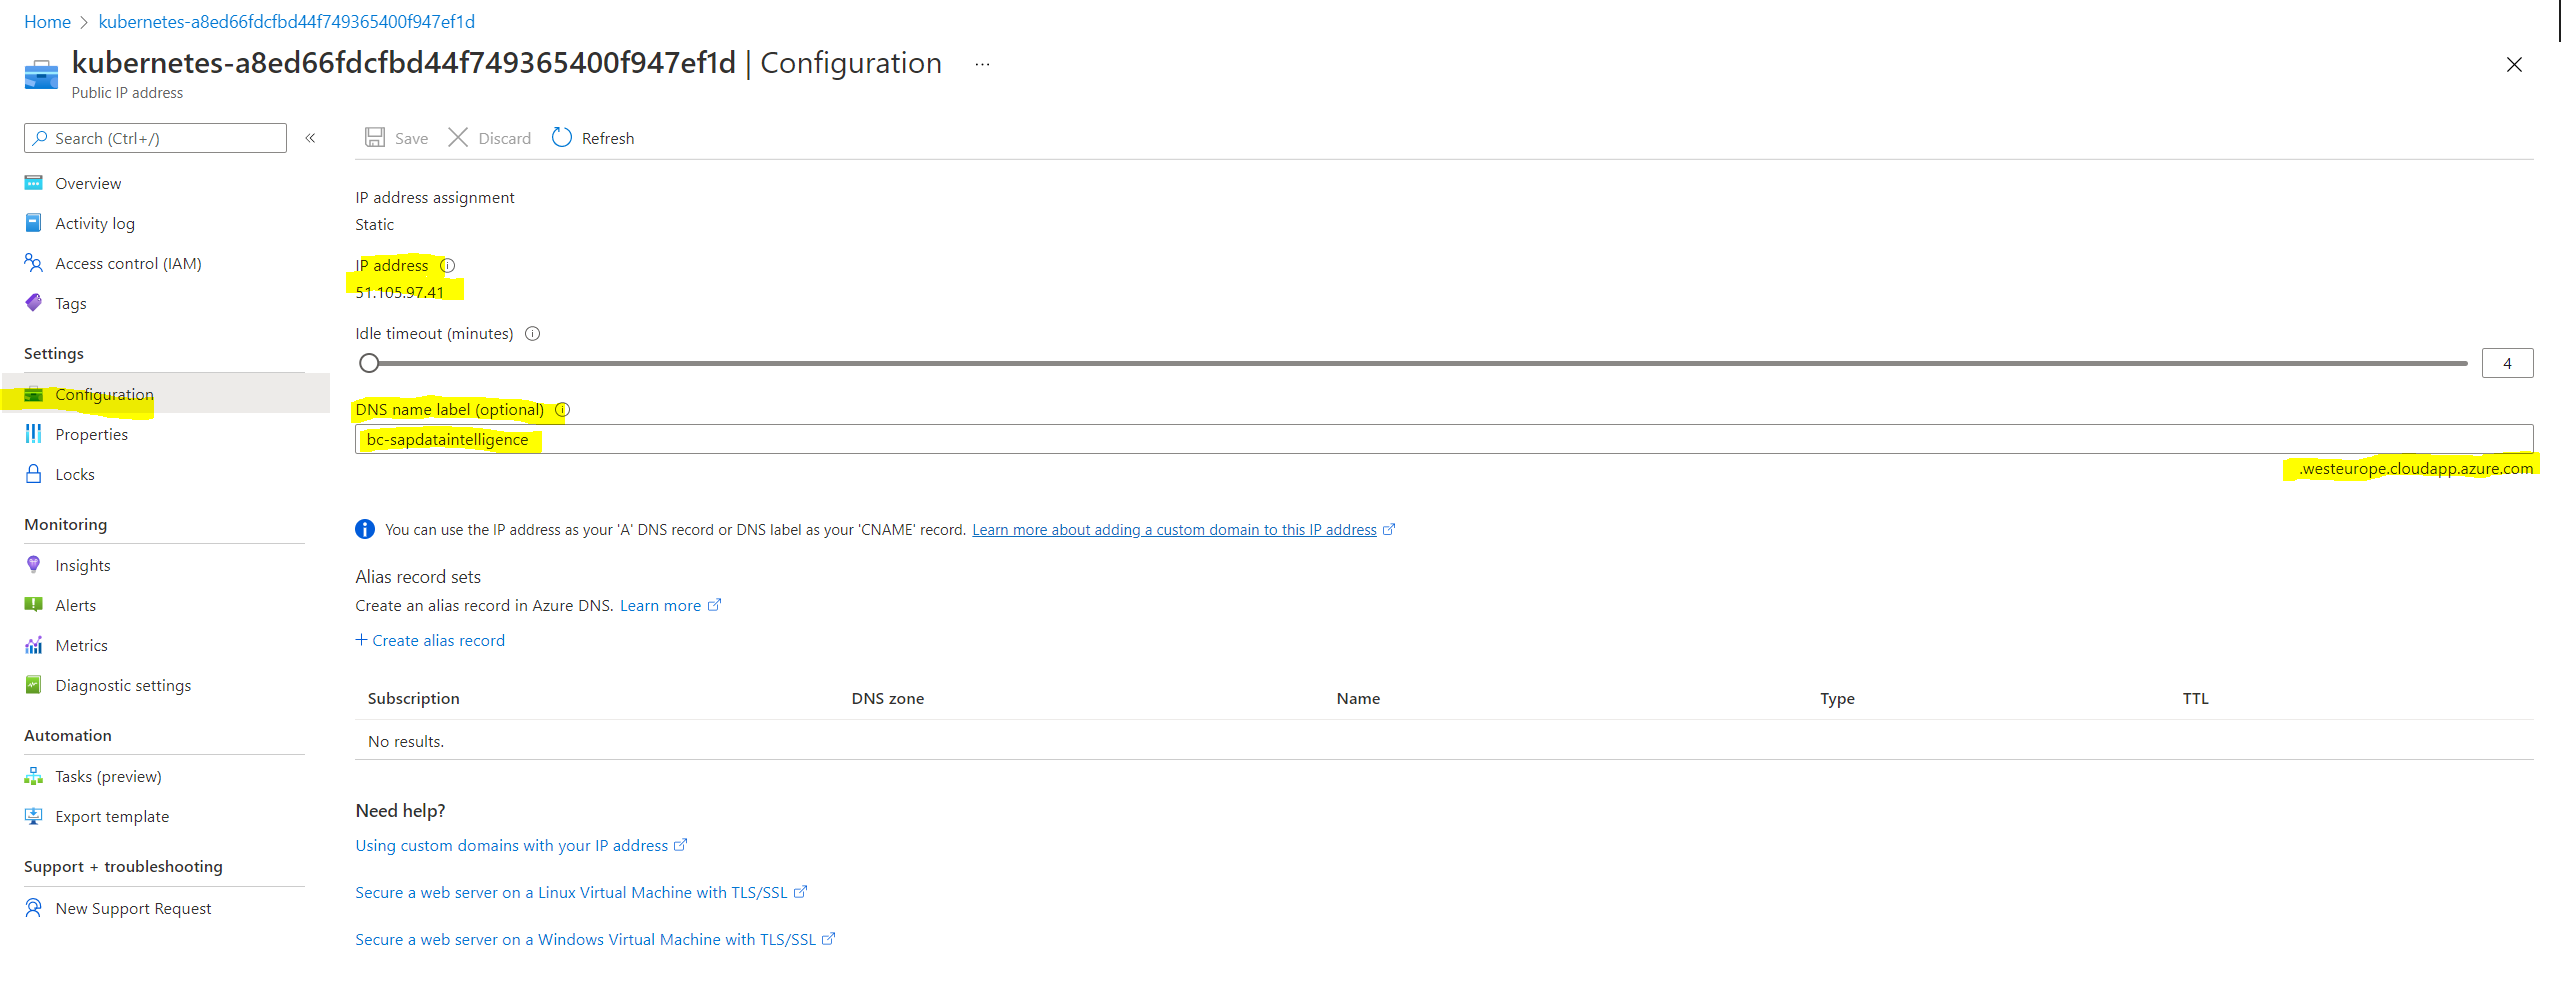
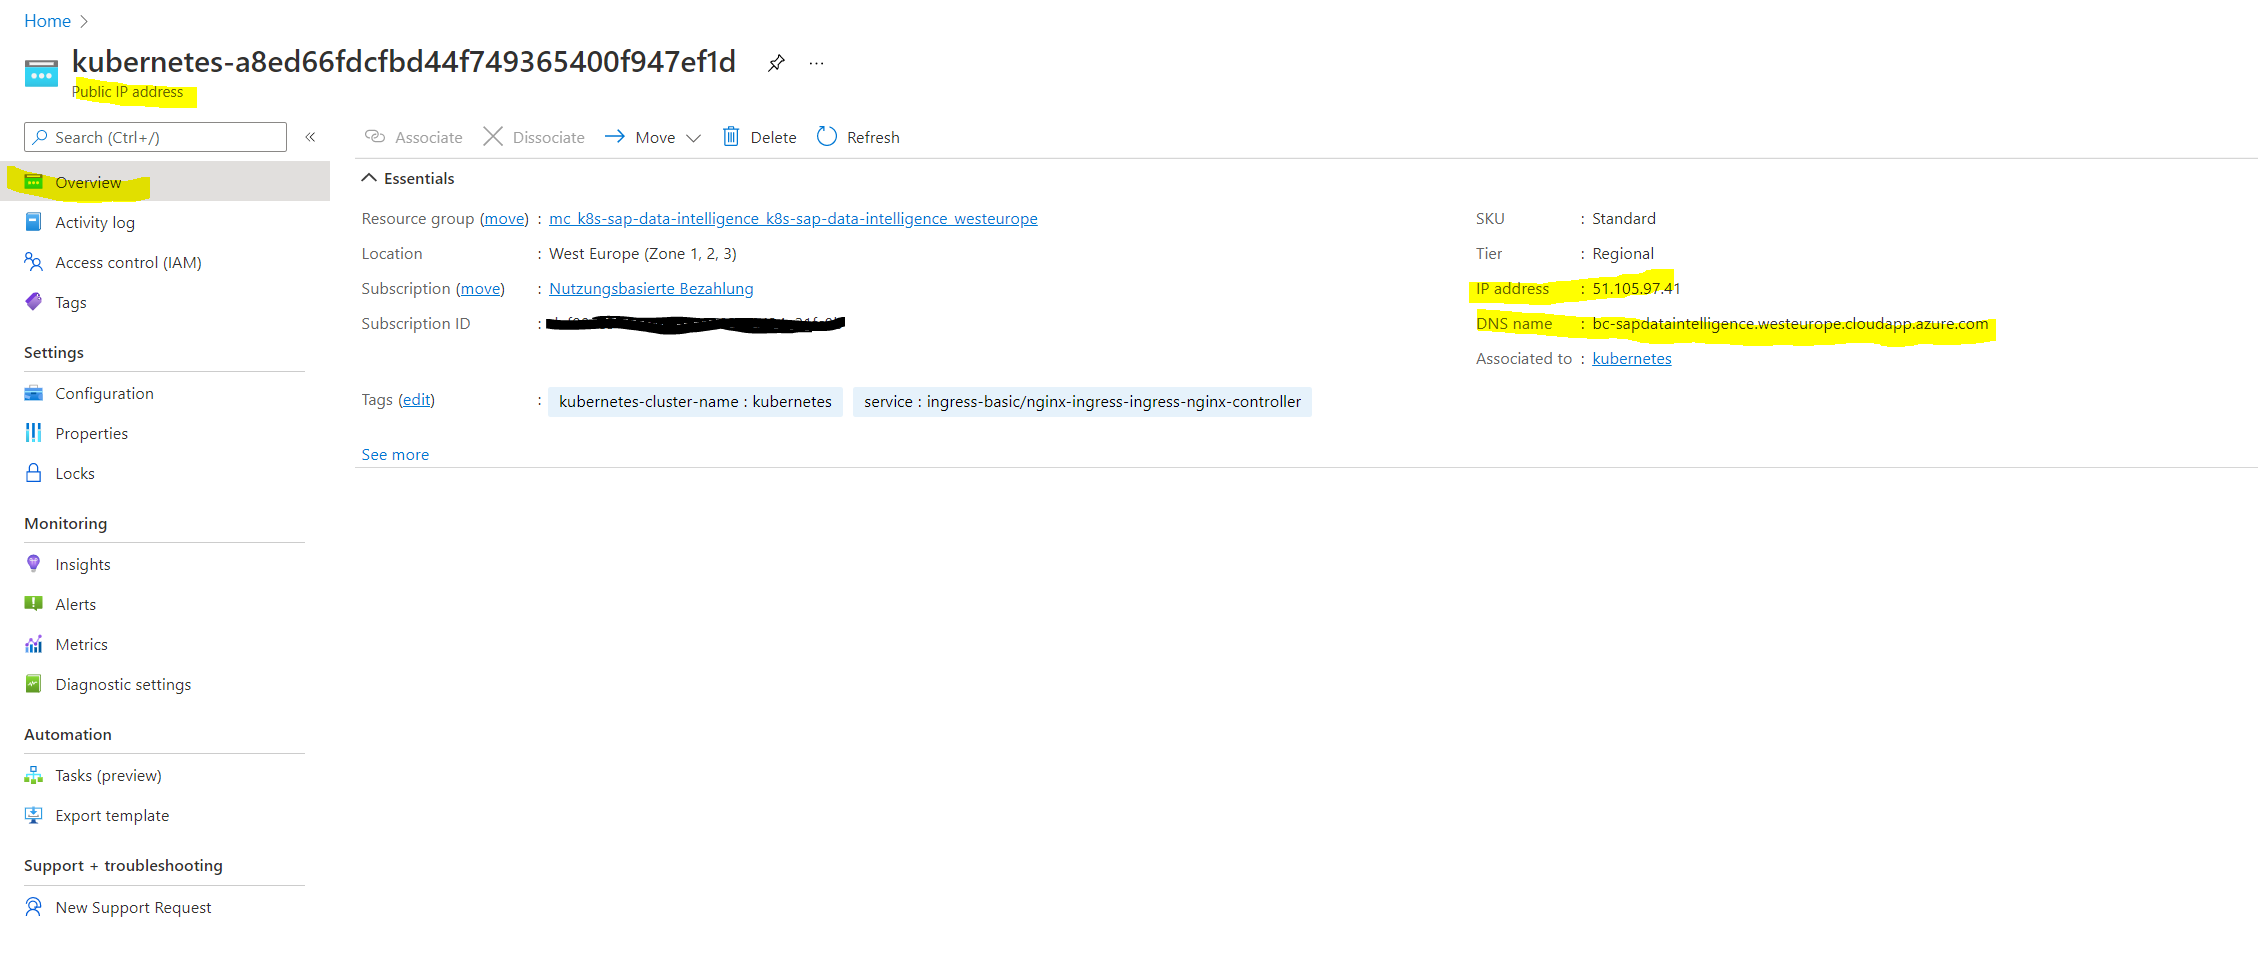
Now for this DNS label (FQDN of the portal) we also need to assign a TLS certificate.
For the purpos of this post I will use self-signed certificates. Adjust the FQDN to your DNS label.
openssl req -x509 -nodes -days 365 -newkey rsa:2048 -keyout tls.key -out tls.crt -subj “/CN= bc-sapdataintelligence.westeurope.cloudapp.azure.com”
Now we can create a TLS secret which we later apply by using a YAML template.
kubectl -n <your Kubernetes Namespace> create secret tls vsystem-tls-certs –key tls.key –cert tls.crt
kubectl -n bc-sapdataintelligence create secret tls vsystem-tls-certs –key tls.key –cert tls.crt
# to delete the secret use
kubectl -n bc-sapdataintelligence delete secret “vsystem-tls-certs”
TLS Secret
https://kubernetes.io/docs/concepts/configuration/secret/#tls-secrets
Kubernetes provides a builtin Secret type kubernetes.io/tls for storing a certificate and its associated key that are typically used for TLS.
After that we need to create a YAML template which will define the ingress rule. For the filename we will use vsystem-ingress.yaml.
<DNS_REPLACE> is used by Kubernetes, so do not replace this placeholder!
apiVersion: extensions/v1beta1
kind: Ingress
metadata:
 name: vsystem
 annotations:
   kubernetes.io/ingress.class: nginx
   nginx.ingress.kubernetes.io/secure-backends: "true"
   nginx.ingress.kubernetes.io/backend-protocol: HTTPS
   nginx.ingress.kubernetes.io/force-ssl-redirect: "true"
   nginx.ingress.kubernetes.io/proxy-body-size: "500m"
   nginx.ingress.kubernetes.io/proxy-connect-timeout: "30"
   nginx.ingress.kubernetes.io/proxy-read-timeout: "1800"
   nginx.ingress.kubernetes.io/proxy-send-timeout: "1800"
   nginx.ingress.kubernetes.io/proxy-buffer-size: "16k"
   nginx.ingress.kubernetes.io/ssl-passthrough: "true"
spec:
 tls:
 - hosts:
   - <DNS_REPLACE>
   secretName: vsystem-tls-certs
 rules:
 - host: <DNS_REPLACE>
   http:
     paths:
     - path: /
       backend:
         serviceName: vsystem
         servicePort: 8797
Now you should execute the following commands.
export dns_domain=<dns_domain>
export dns_domain=sapdataintelligence.westeurope.cloudapp.azure.com
Finally we need to apply the configuration to our ingress controller by executing.
# cat vsystem-ingress.yaml | sed "s/<DNS_REPLACE>/${dns_domain}/g" | kubectl -n <NAMESPACE> apply -f –

cat vsystem-ingress.yaml | sed "s/<DNS_REPLACE>/${dns_domain}/g" | kubectl -n bc-sapdataintelligence apply -f -
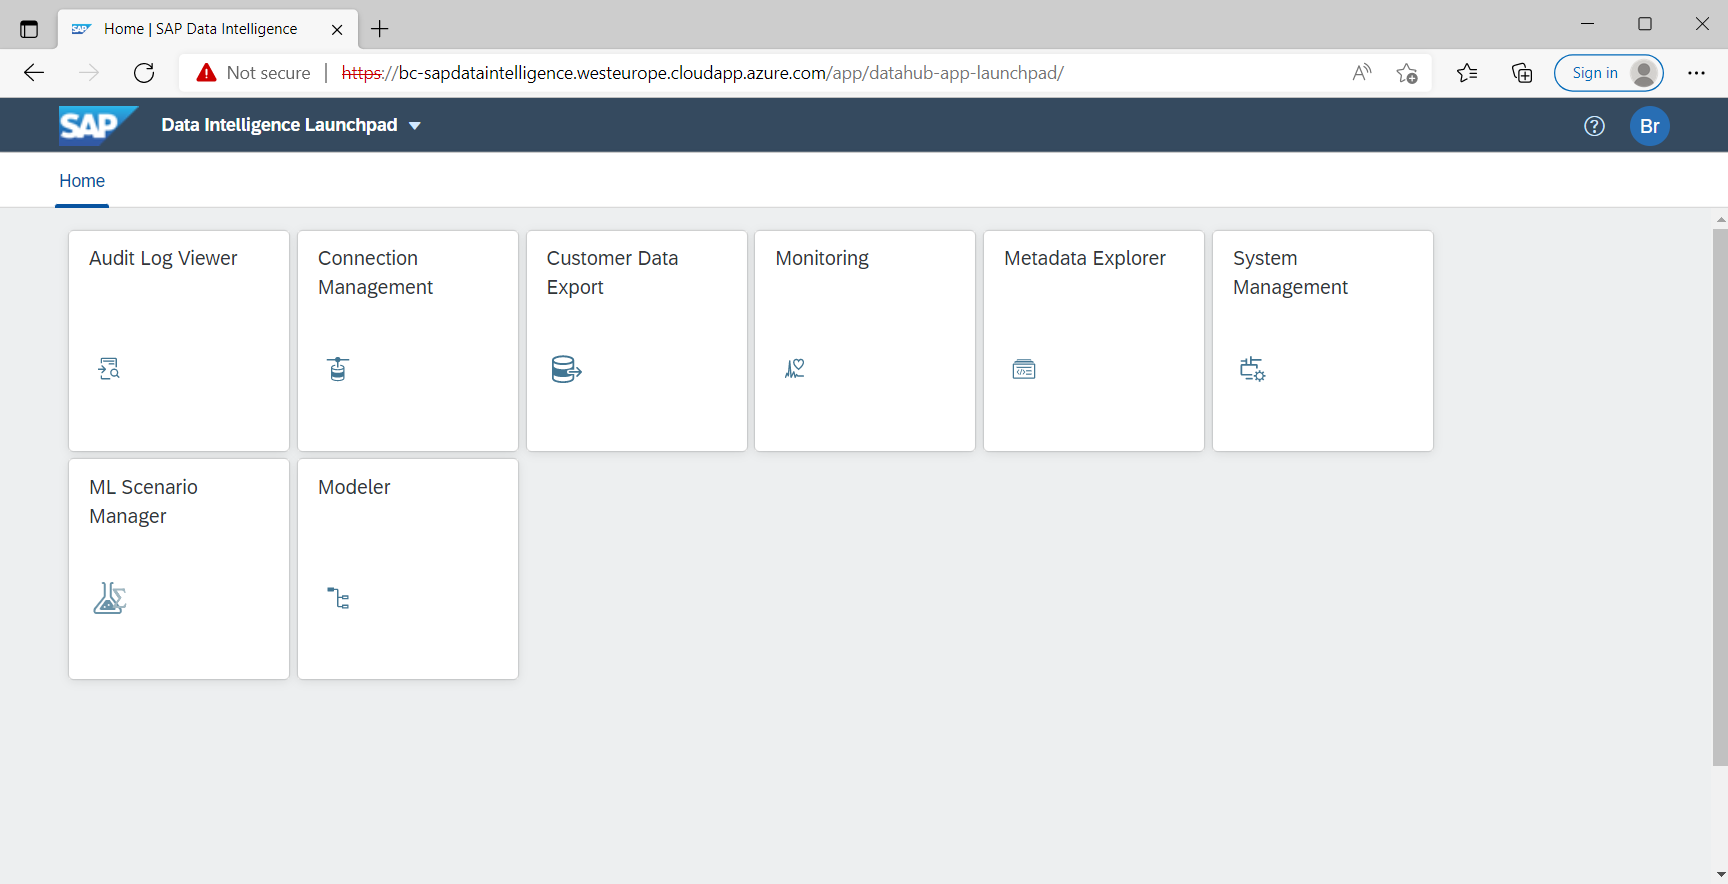
From now on we should be able to browse to the SAP Data Intelligence portal from external by using the URL https://bc-sapdataintelligence.westeurope.cloudapp.azure.com
For the Tenant Name we used by default:
default

Enter your credentials you set up in the SLCB tool previously.

Troubleshooting
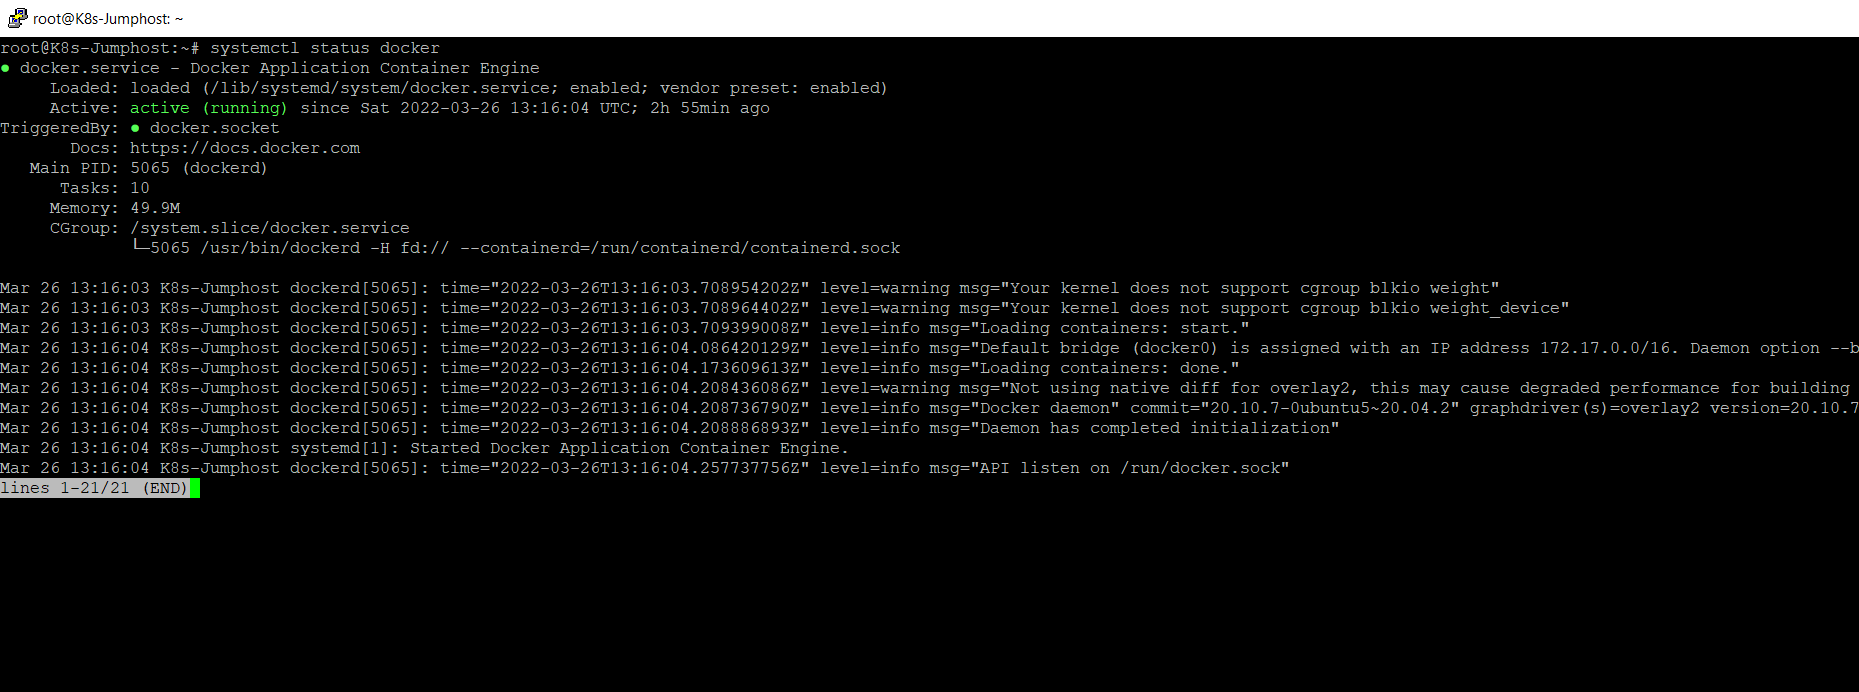
As still mentioned in Part 2, the first try to install SAP Data Intelligence by using the Basis Installation method, I was running into the following error despite the docker daemon was running.
error building docker image. Docker daemon error: Cannot connect to the Docker daemon at unix:///var/run/docker.sock. Is the docker daemon running?
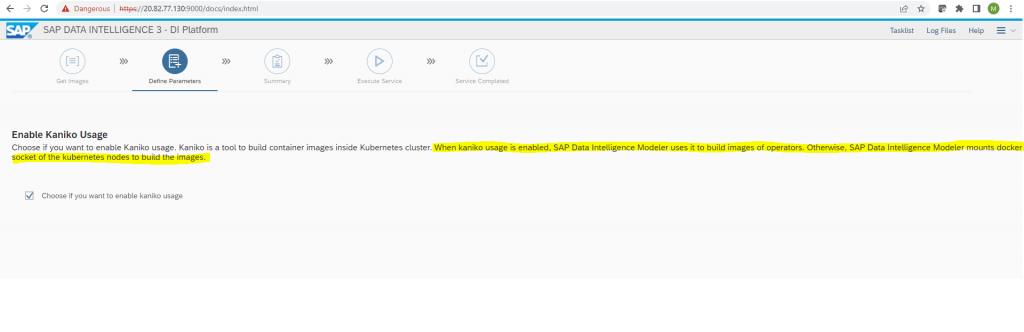
So with this Advanced Installation, I enabled Kaniko usage which seems to solved the problem.
It wil be used by SAP Data Intelligence Modeler to build images of operators instead to mount to a docker socket of the kubernetes nodes to build the images.
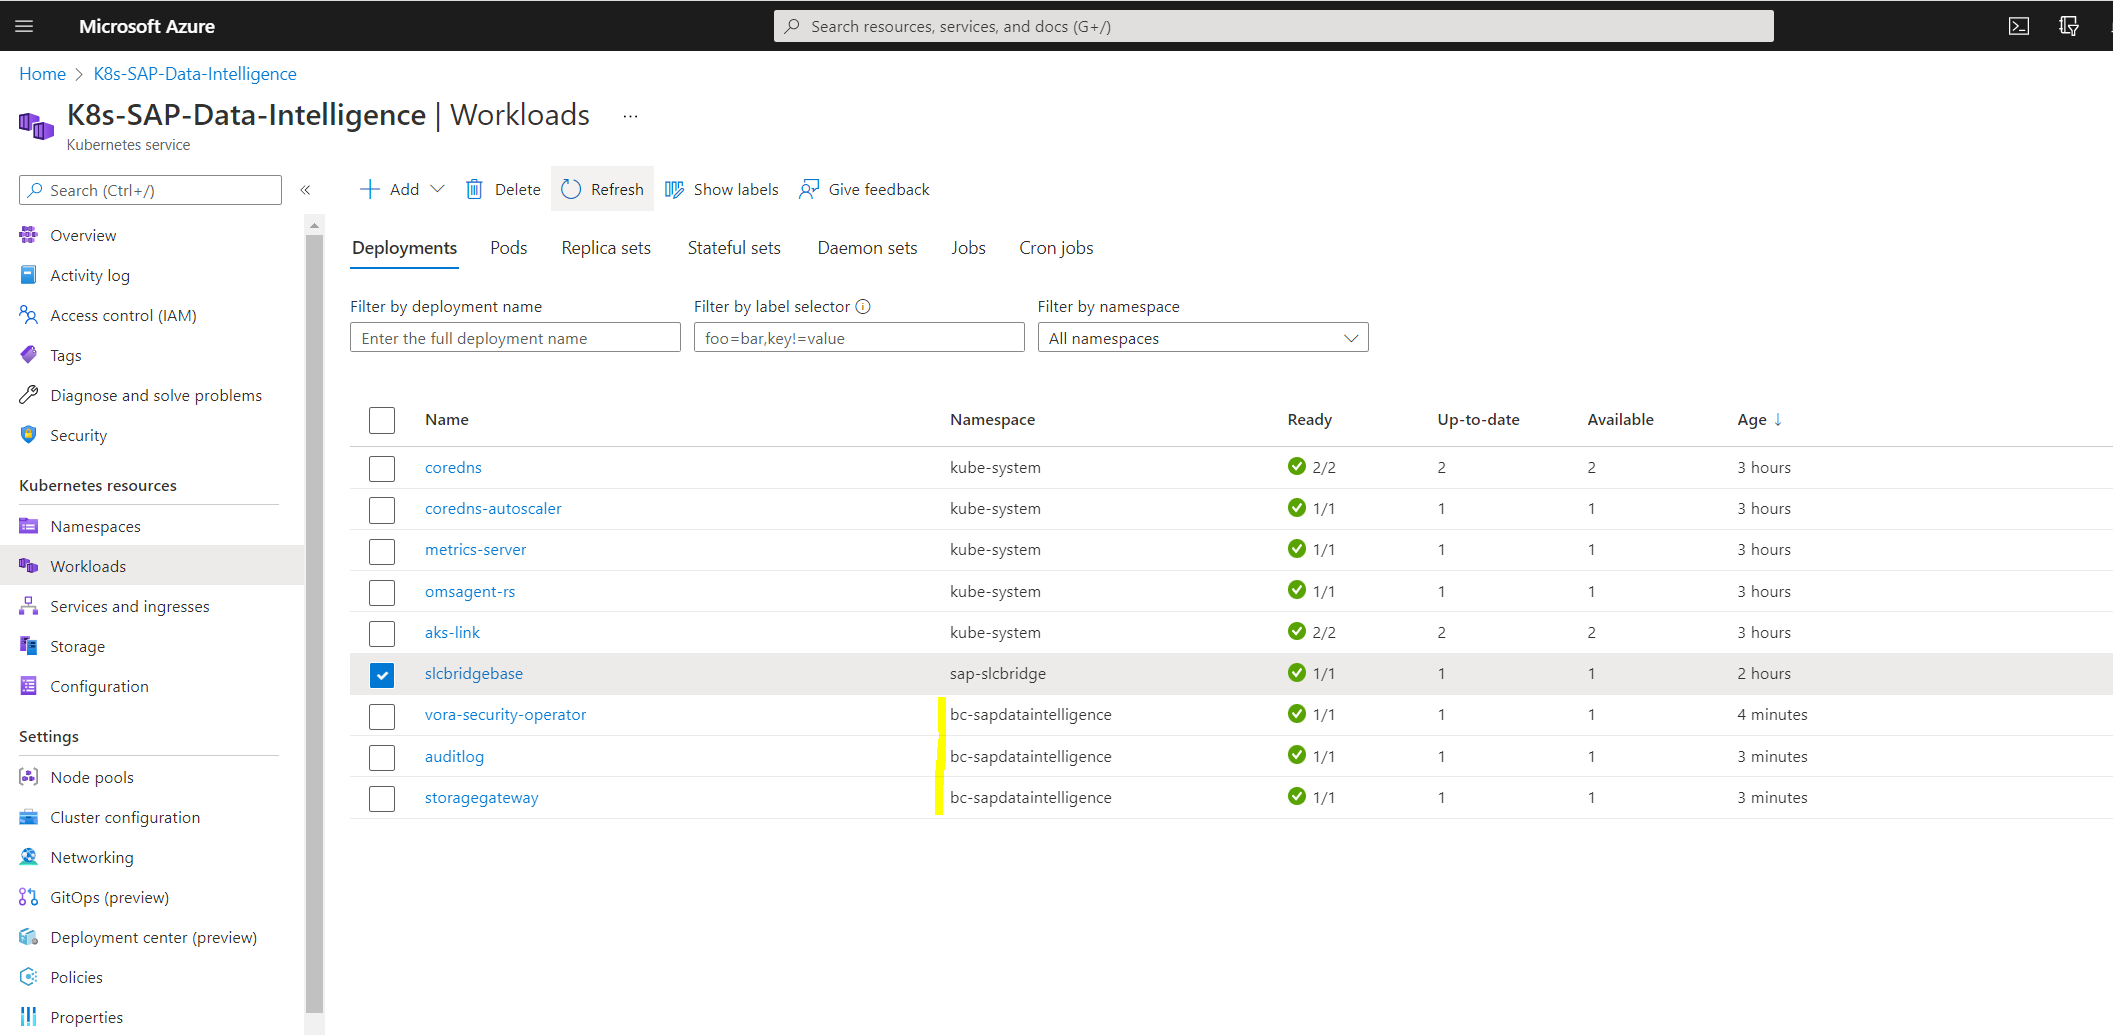
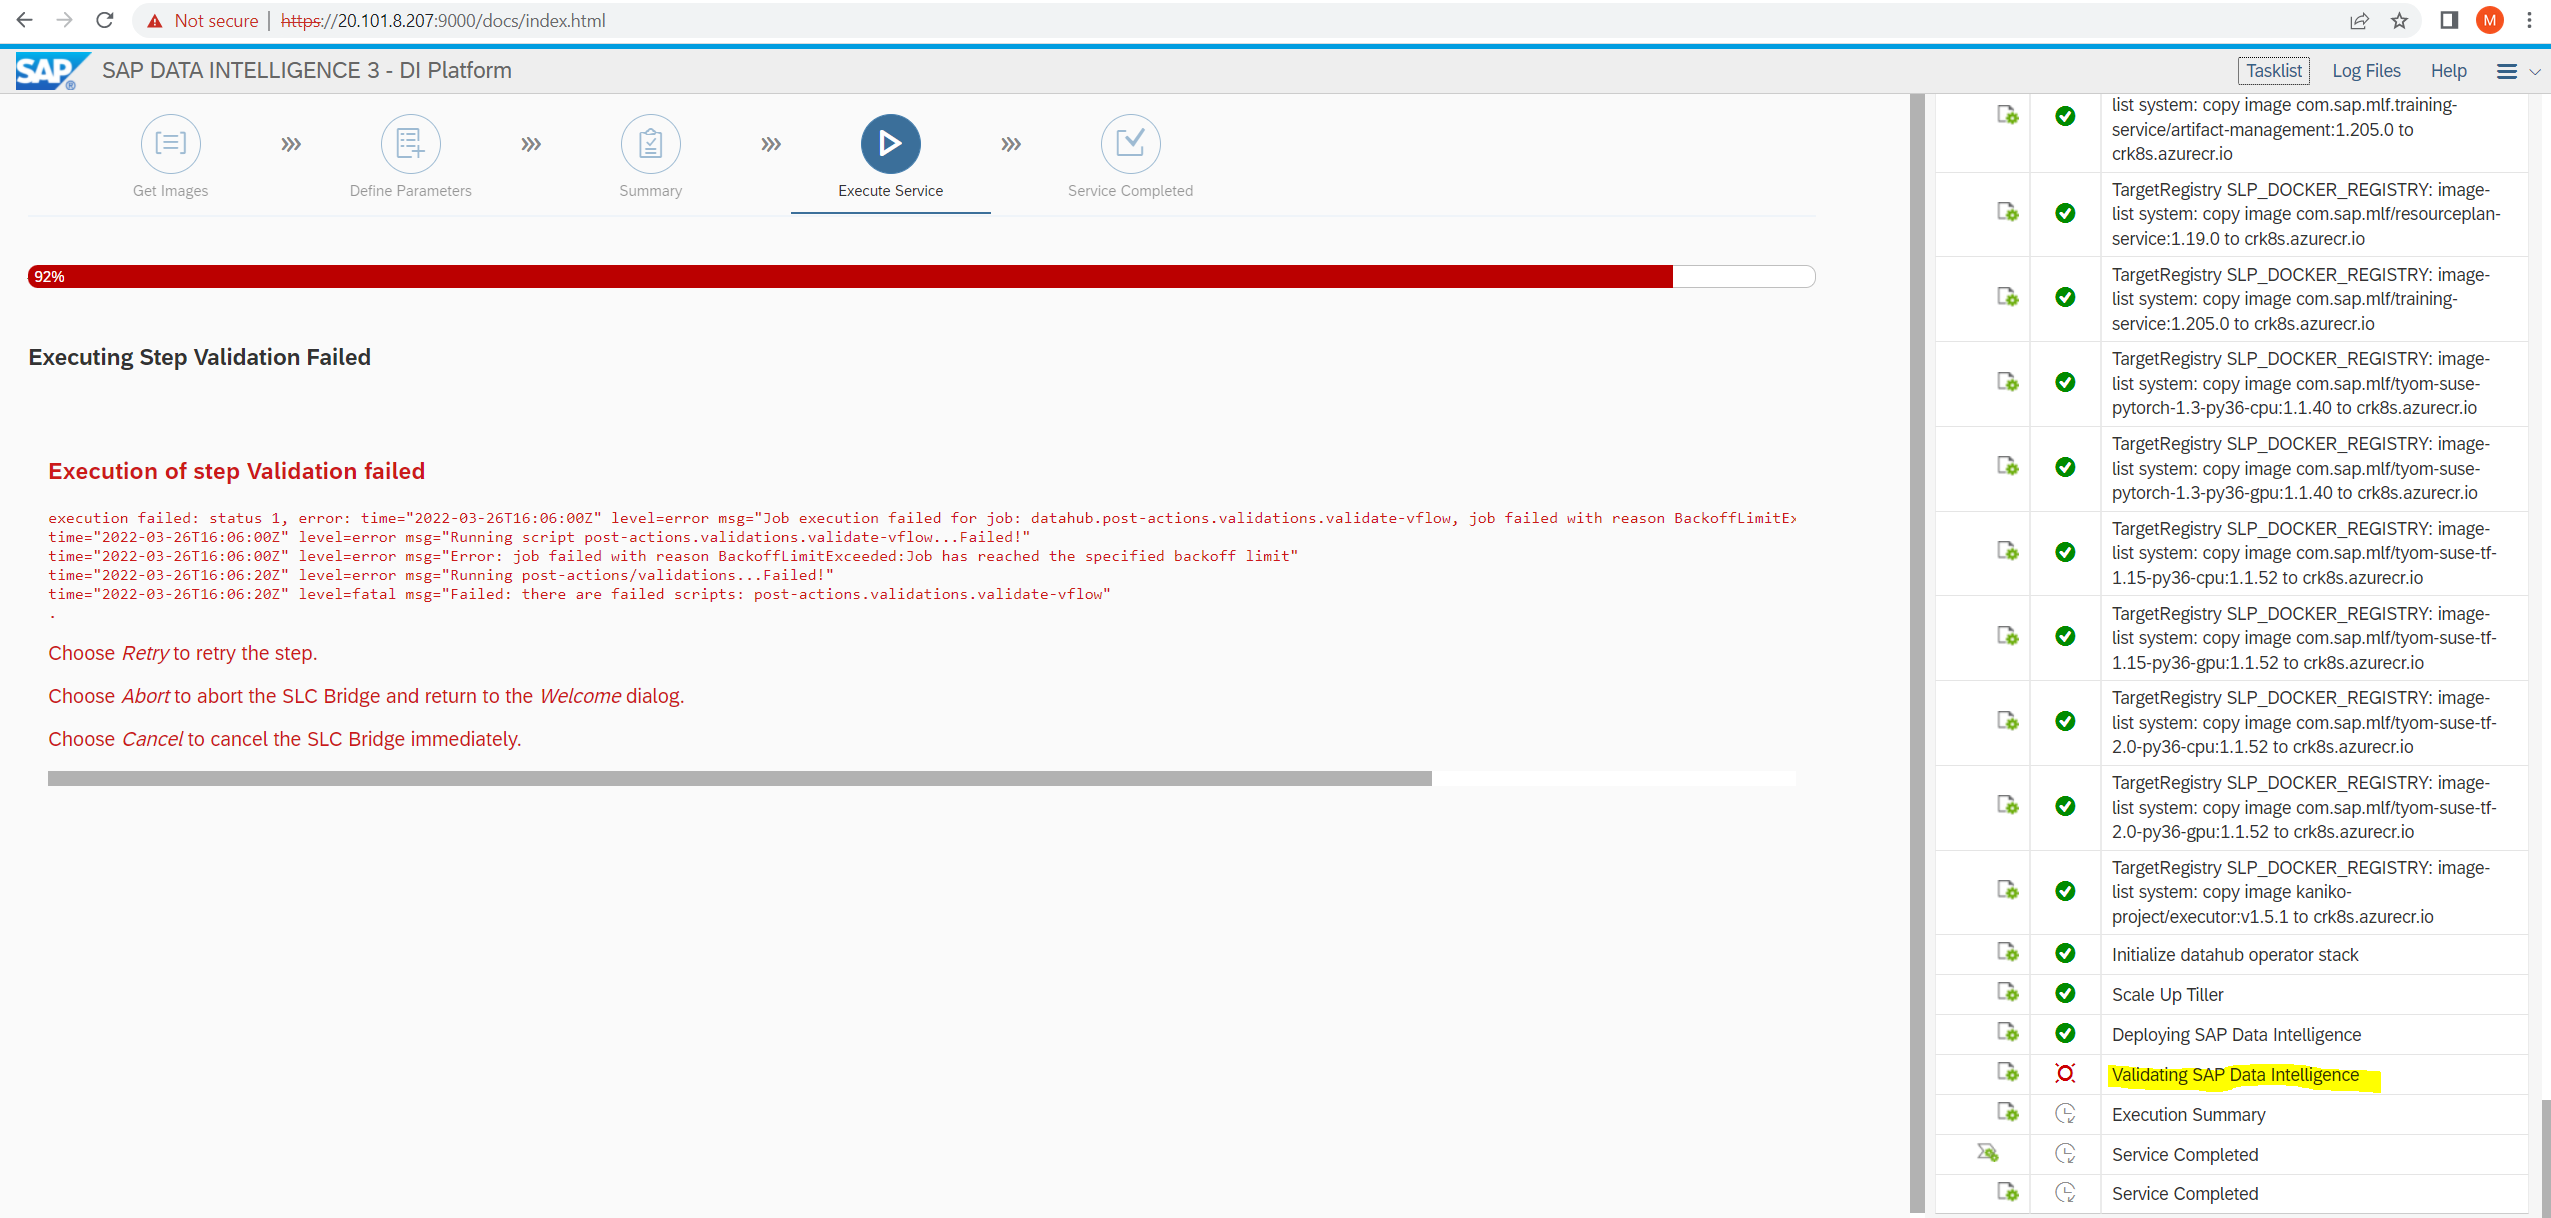
By using the Basis Installation method most of the workloads for my namespace still missing and the validation finally failed.
Validating SAP Data Intelligence at 92% and finally failed.

[INFO]  Starting Modeler graph for vflowvalidationtestuser user of default tenant...
[ERROR]  Couldn't start the graph!
INFO	cmd/cmd.go:324	1> The response: failed to deploy graph: failed to prepare graph images: failed to prepare image: error building docker image. Docker daemon error: Cannot connect to the Docker daemon at unix:///var/run/docker.sock. Is the docker daemon running?
Errors connecting to Docker socket
https://gitlab.com/gitlab-org/gitlab-runner/-/issues/2408
Links
Official Installation Guide SAP Data Intelligence 3.2.3
https://help.sap.com/viewer/a8d90a56d61a49718ebcb5f65014bbe7/3.2.3/en-US/c22b0ff1253a4687ba99fe6795d98e89.html
Introduction to Azure Kubernetes Service
https://docs.microsoft.com/en-us/learn/modules/intro-to-azure-kubernetes-service/?WT.mc_id=APC-Kubernetesservices
Quickstart: Create an Azure container registry using the Azure portal
https://docs.microsoft.com/en-us/azure/container-registry/container-registry-get-started-portal
Use the portal to create an Azure AD application and service principal that can access resources
https://docs.microsoft.com/en-us/azure/active-directory/develop/howto-create-service-principal-portal
Azure Container Registry authentication with service principals
https://docs.microsoft.com/en-us/azure/container-registry/container-registry-auth-service-principal
Authenticate with Azure Container Registry from Azure Kubernetes Service
https://docs.microsoft.com/en-us/azure/aks/cluster-container-registry-integration?tabs=azure-cli
How to install the Azure CLI
https://docs.microsoft.com/en-us/cli/azure/install-azure-cli
Install the Azure CLI on Linux
https://docs.microsoft.com/en-us/cli/azure/install-azure-cli-linux?pivots=apt
Sign in with Azure CLI
https://docs.microsoft.com/en-us/cli/azure/authenticate-azure-cli