AWS AD Connector Directory – Domain Join
In my last post I showed how to set up the AD Connector to redirect directory requests to your on-premises Microsoft Active Directory without caching any information in the cloud.
In this post we will see how we can join computers from our AWS VPC to our on-premise network and domain by using the AD Connector we created in my last post.
Firewall Ports for communication between your AWS VPC and your on-premise domain controller
As already mentioned in my last post, first check that the following ports inbound are open from your VPC to your on-premise network or better restricted to just to the on-premises domain controller open.
- TCP/UDP 53 – DNS
- TCP/UDP 88 – Kerberos authentication
- UDP 123 – NTP
- TCP 135 – RPC
- TCP/UDP 389 – LDAP
- TCP/UDP 445 – SMB
- TCP/UDP 464 – Kerberos authentication
- TCP 636 – LDAPS (LDAP over TLS/SSL)
- TCP 3268-3269 – Global Catalog
- TCP/UDP 49152-65535 – Ephemeral ports for RPC
SMBv1 is no longer supported.
For additional port requirements, see AD and AD DS Port Requirements on Microsoft TechNet.
Creating a new VM (aka Launch Instance in AWS)
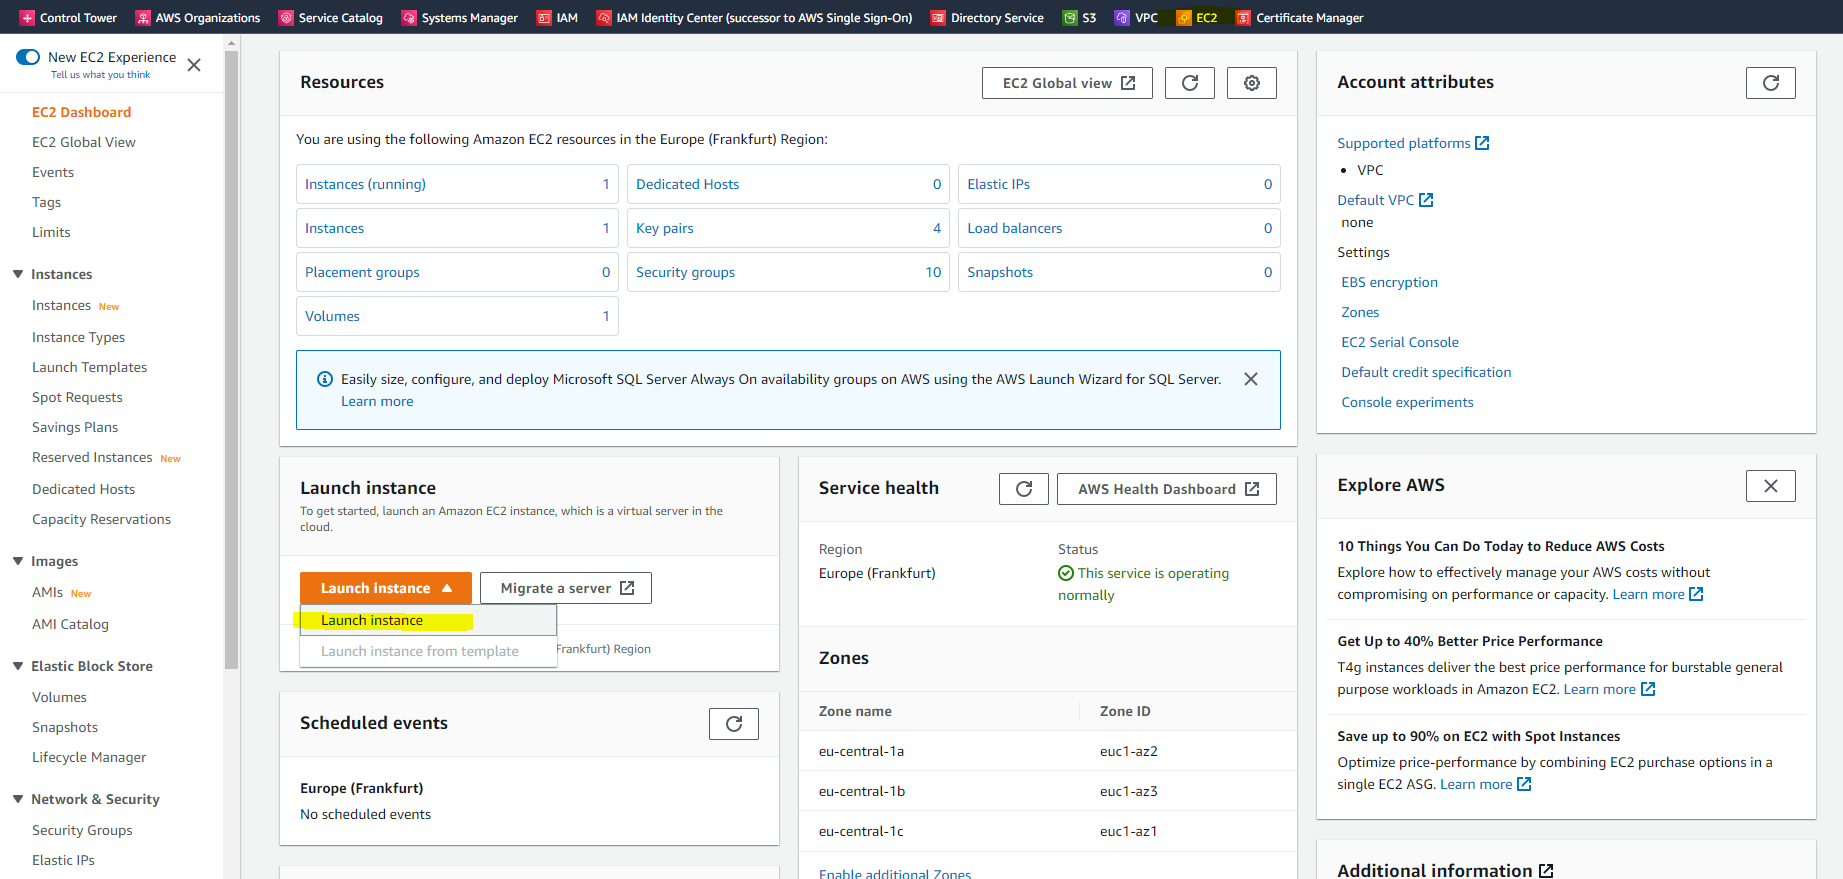
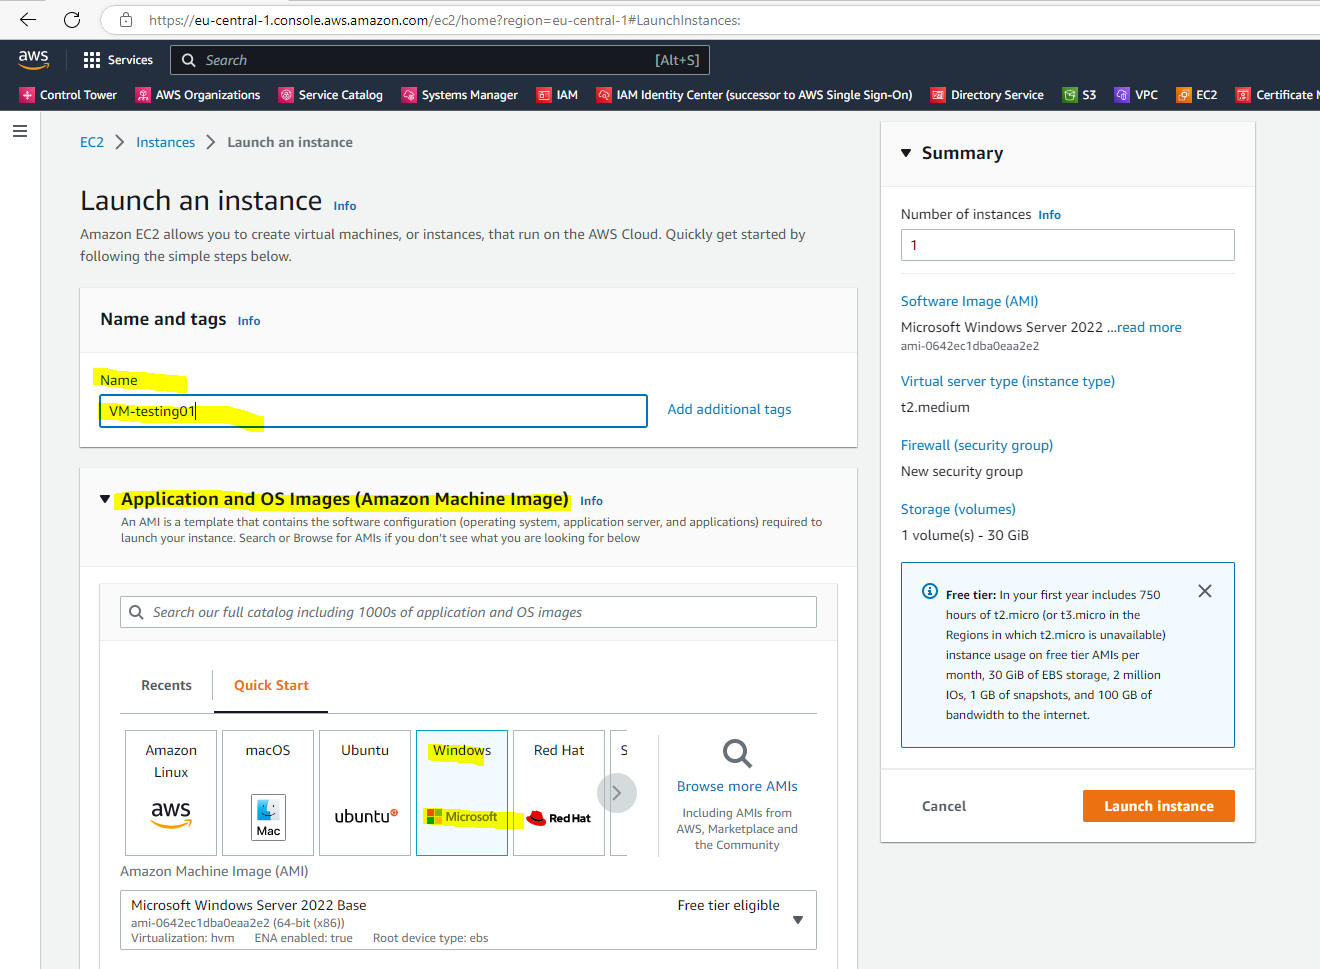
In AWS open the EC2 console and launch a new instance, in my case I will use a Windows Server 2022 Base AMI (Amazon Machine Images) t2.medium.
Open the Amazon EC2 console at https://console.aws.amazon.com/ec2/
Below we need to select an existing key pair or create a new one. The key pair will be used to encrypt and decrypt the administrator password. You then use the decrypted password to connect to your instance.
How do I retrieve my Windows administrator password after launching an instance?
https://aws.amazon.com/premiumsupport/knowledge-center/retrieve-windows-admin-password/
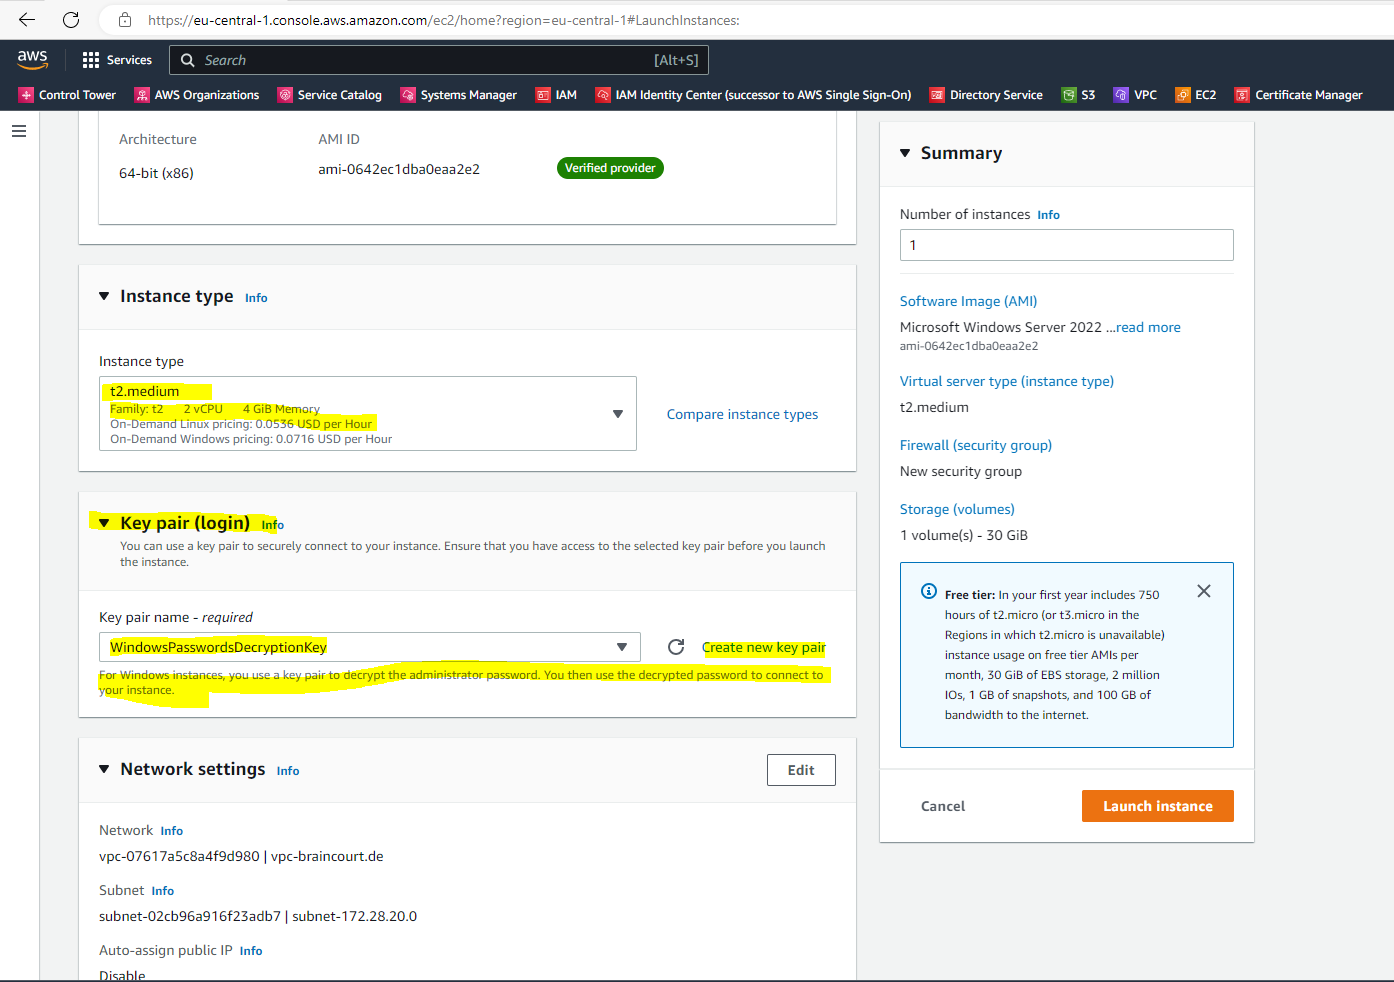
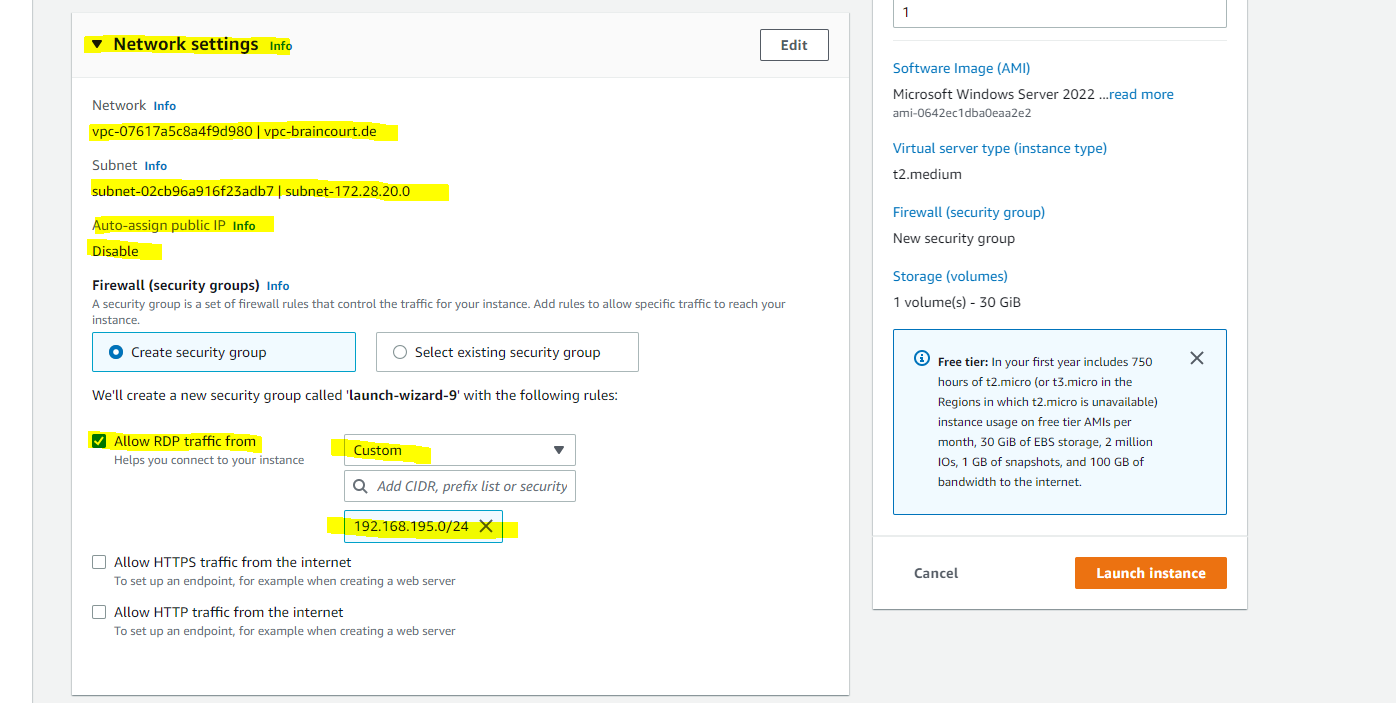
Under Network settings will automatically appear my VPC and one subnet from is pre-selected and fine for me. Further If I want to have internet access on the VM, I also need to assign a public IP address.
In AWS all EC2 instances (VMs) need an public IP address directly attached to it plus an internet gateway attached to the VPC the instance is homed in order to be able to access the internet.
This is different in contrast to Microsoft Azure. Here all VMs homed in a VNet can communicate outbound to the internet, by default.
Further I will restrict access to it from just one on-premise subnet.
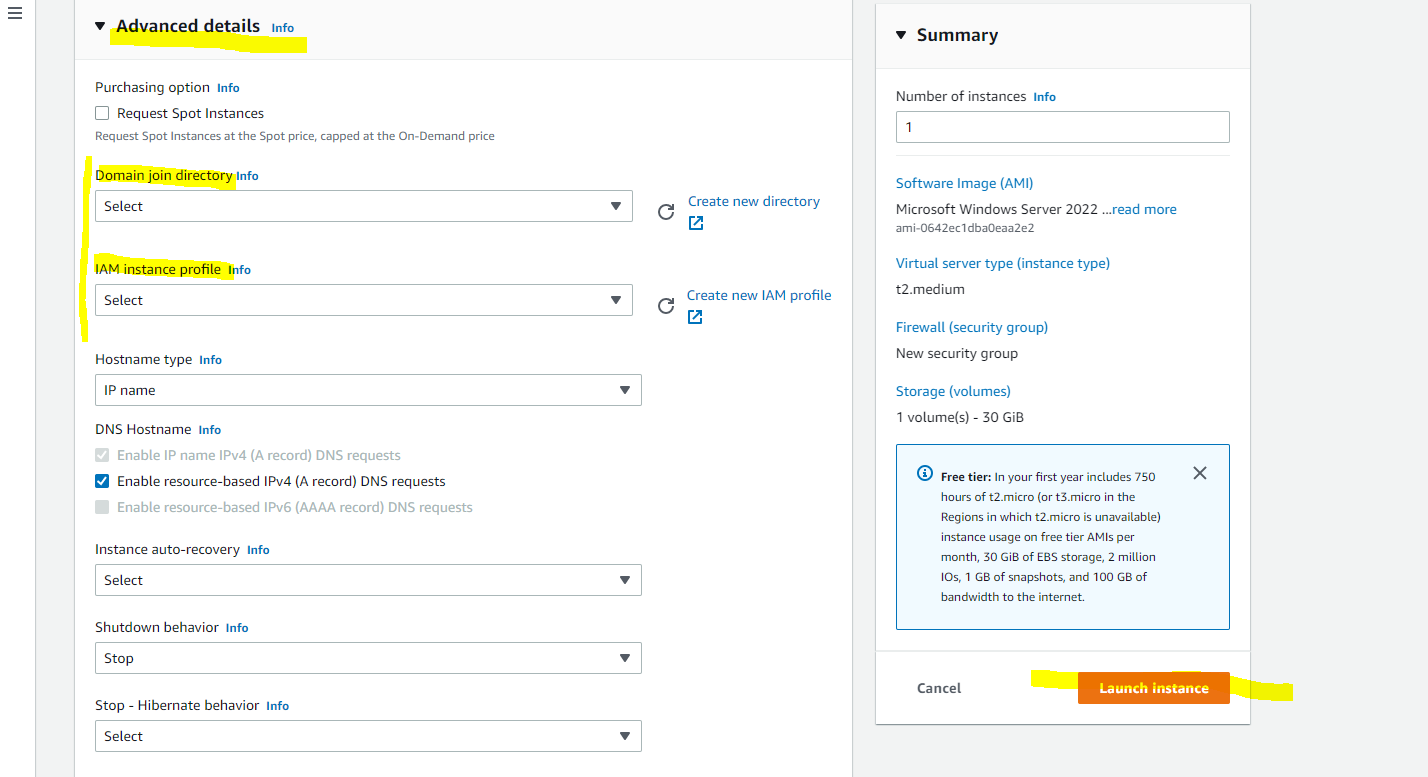
In the Advanced details we can enable Seamlessly domain join which will join the VM during launching it automatically to our on-premise domain.
I will first not enable it to show how you can manually join the VM to your on-premise domain.
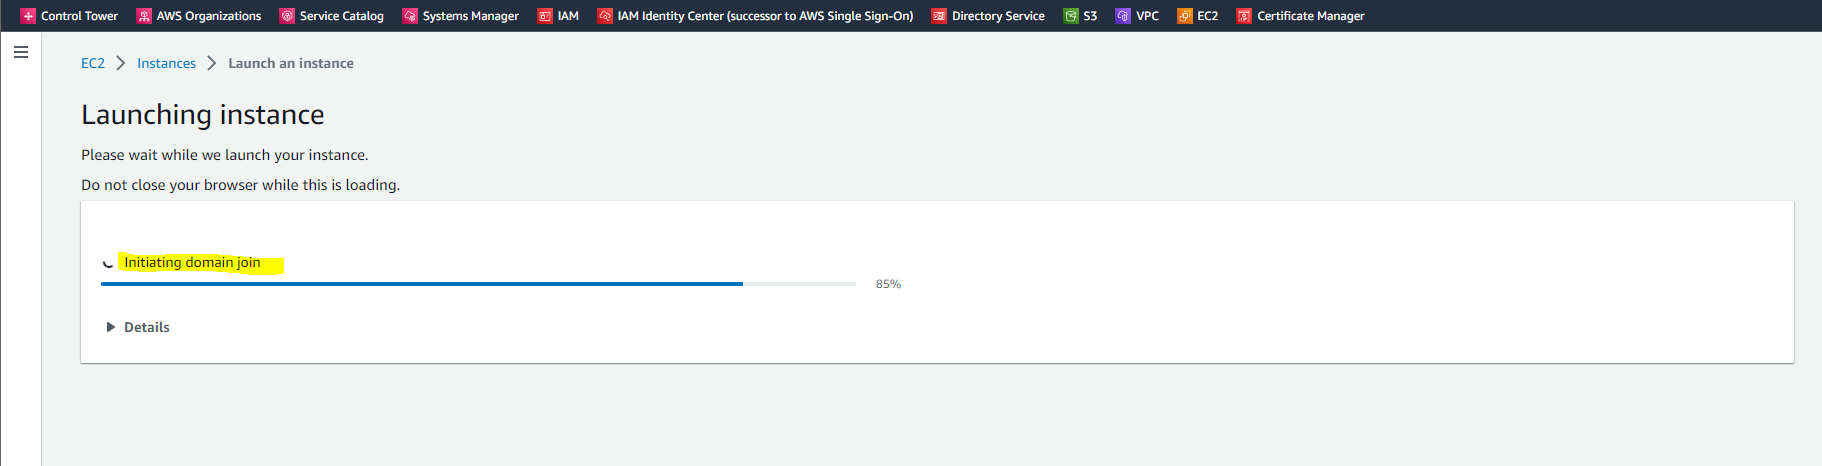
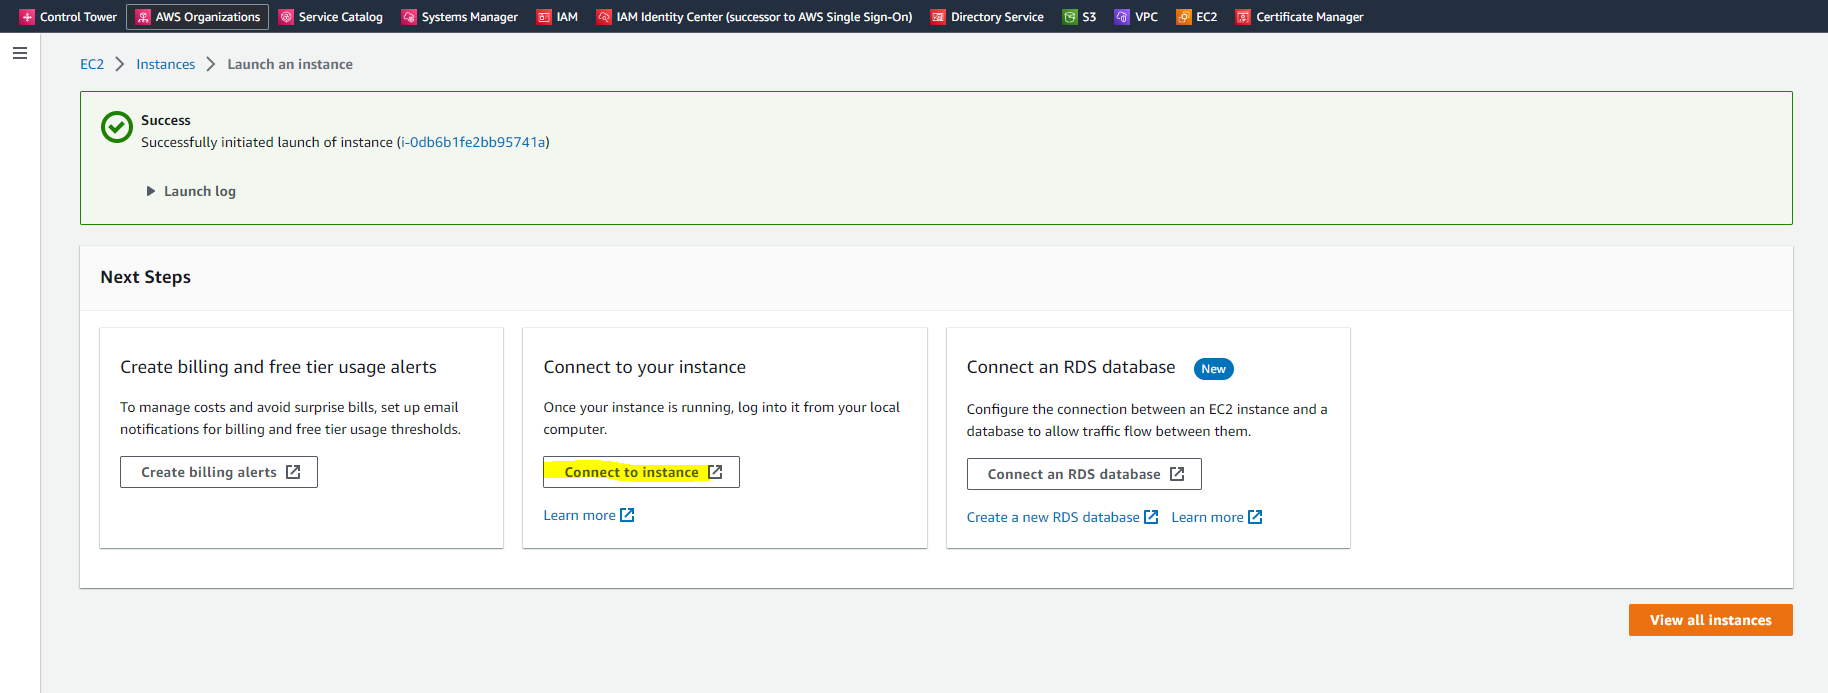
Finally I will click on Launch instance
Now we connect to our VM by clicking on the button below.

As I didn’t joined the VM so far to the on-premise domain, I will have to use the local Administrator account and decrypted password to connect.
As noted below
If you’ve joined your instance to a directory, you can use your directory credentials to connect to your instance.
if we had used previously the Seamlessly domain join under the advanced settings, we could use credentials from our on-premise network to connect to the AWS VM.

To decrypt the password for the local Administrator account I can use my private key from the key pair we selected or created previously.

After uploading the private key, we can decrypt the password from the local Administrator account.
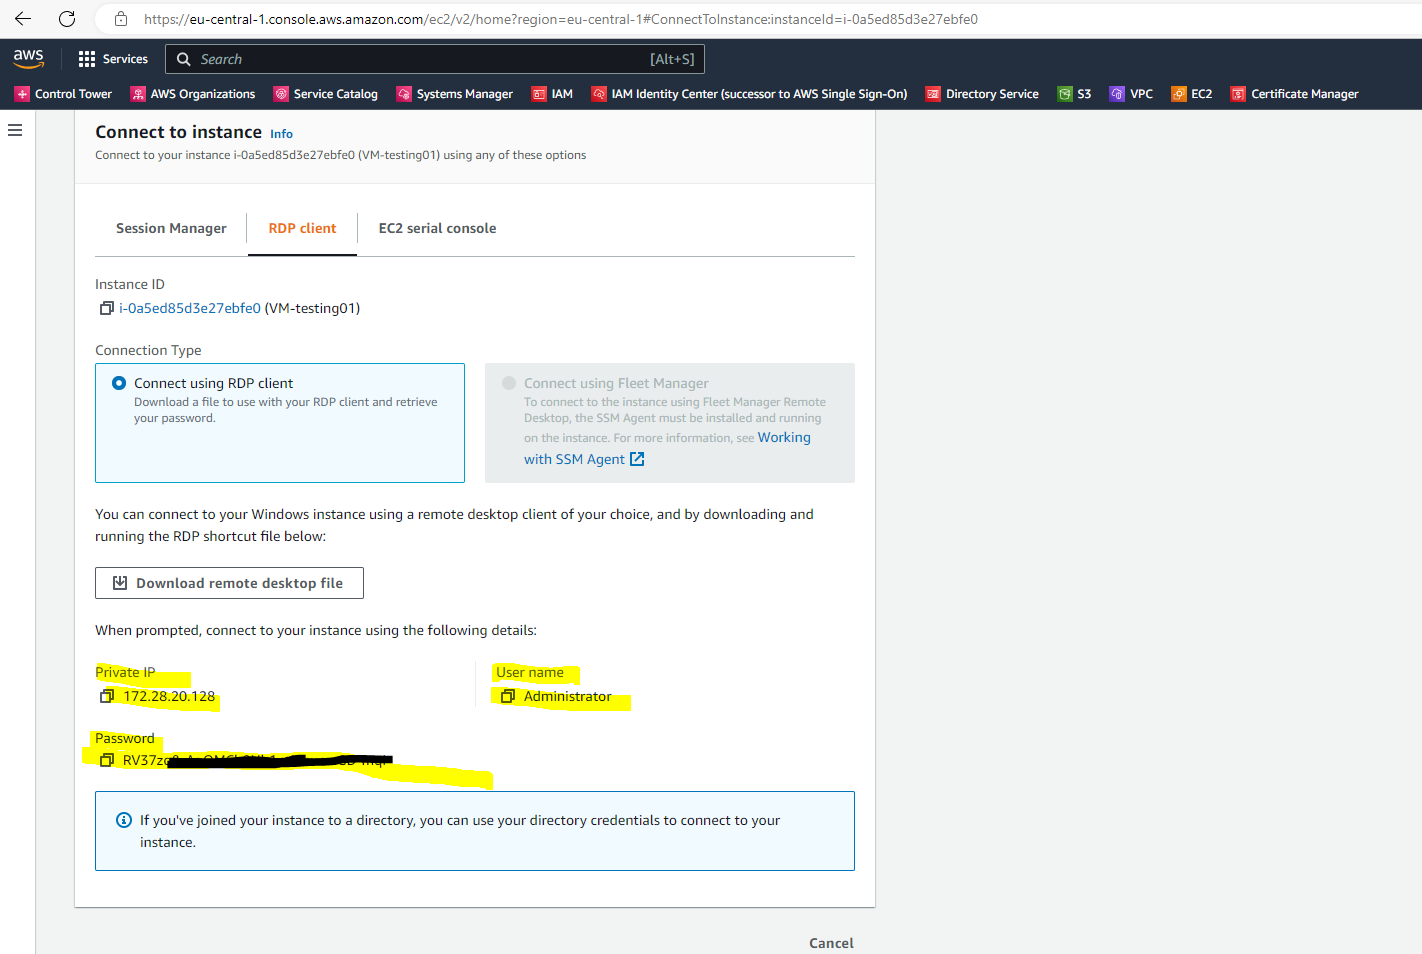
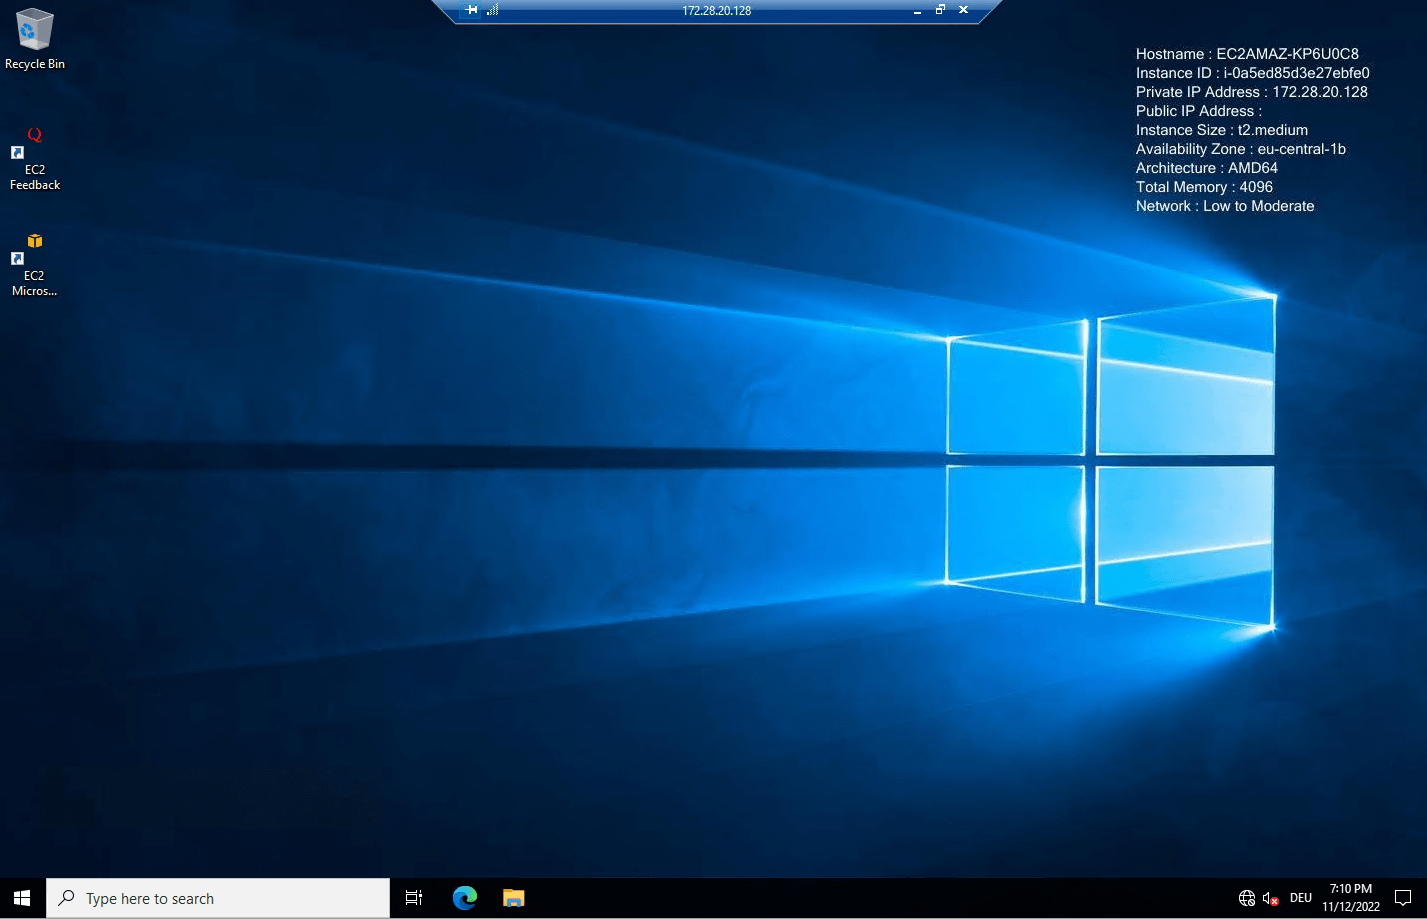
Now I can login with RDP and from my on-premise subnet 192.168.195.0/24 to the new AWS VM by using the local Administrator account.
Manually join the Windows VM to our on-premise Domain
In order to join the computer manually to our on-premise domain, the AWS VM needs to be able to resolve the on-premise domain in an IP address to one of my on-premise domain controllers.
Further for domain join it needs to resolve some SRV records to locate the domain controllers .
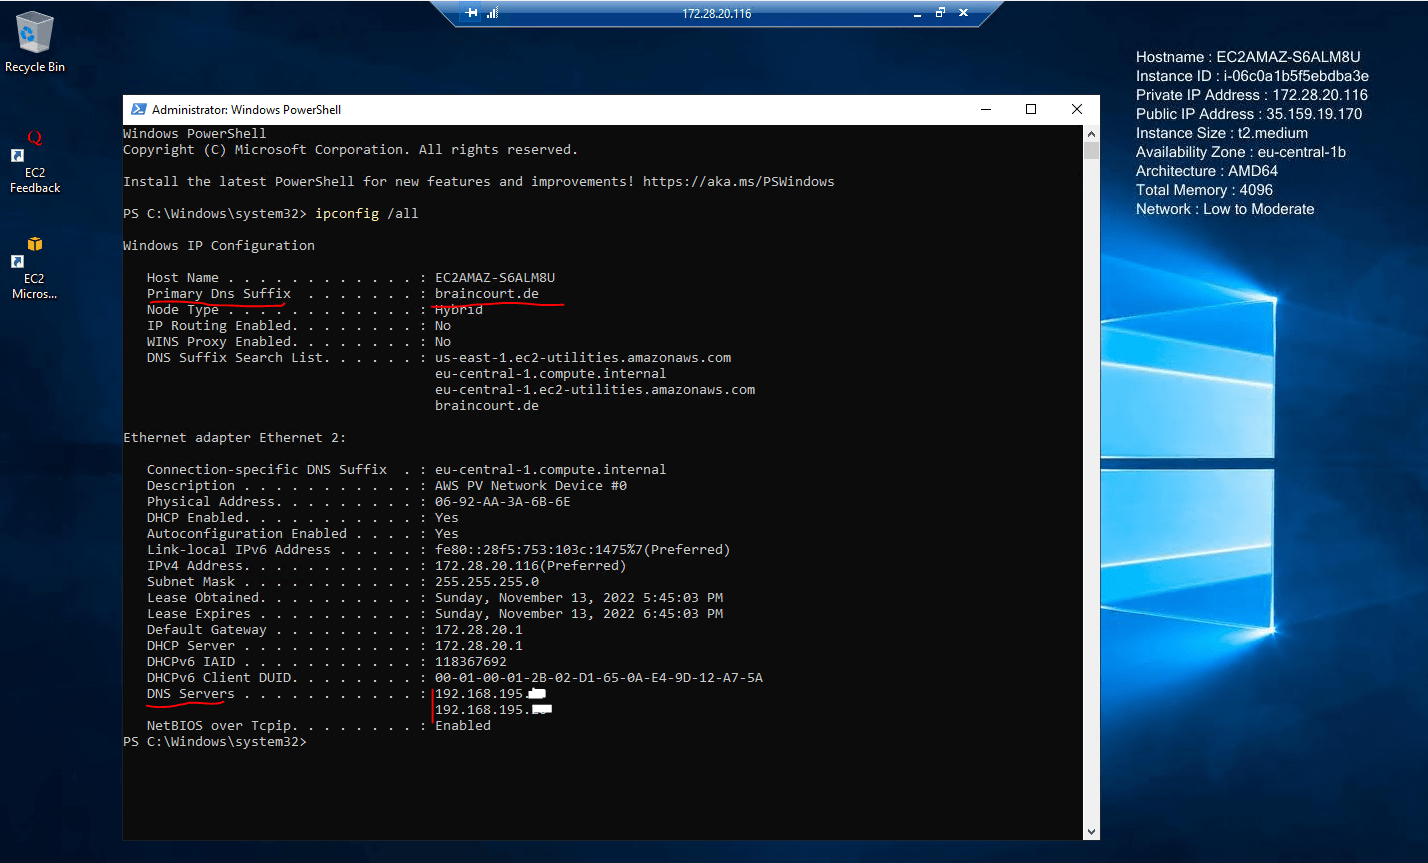
As you can see so far the VM couldn’t resolve the domain because it uses the DNS server from the VPC.
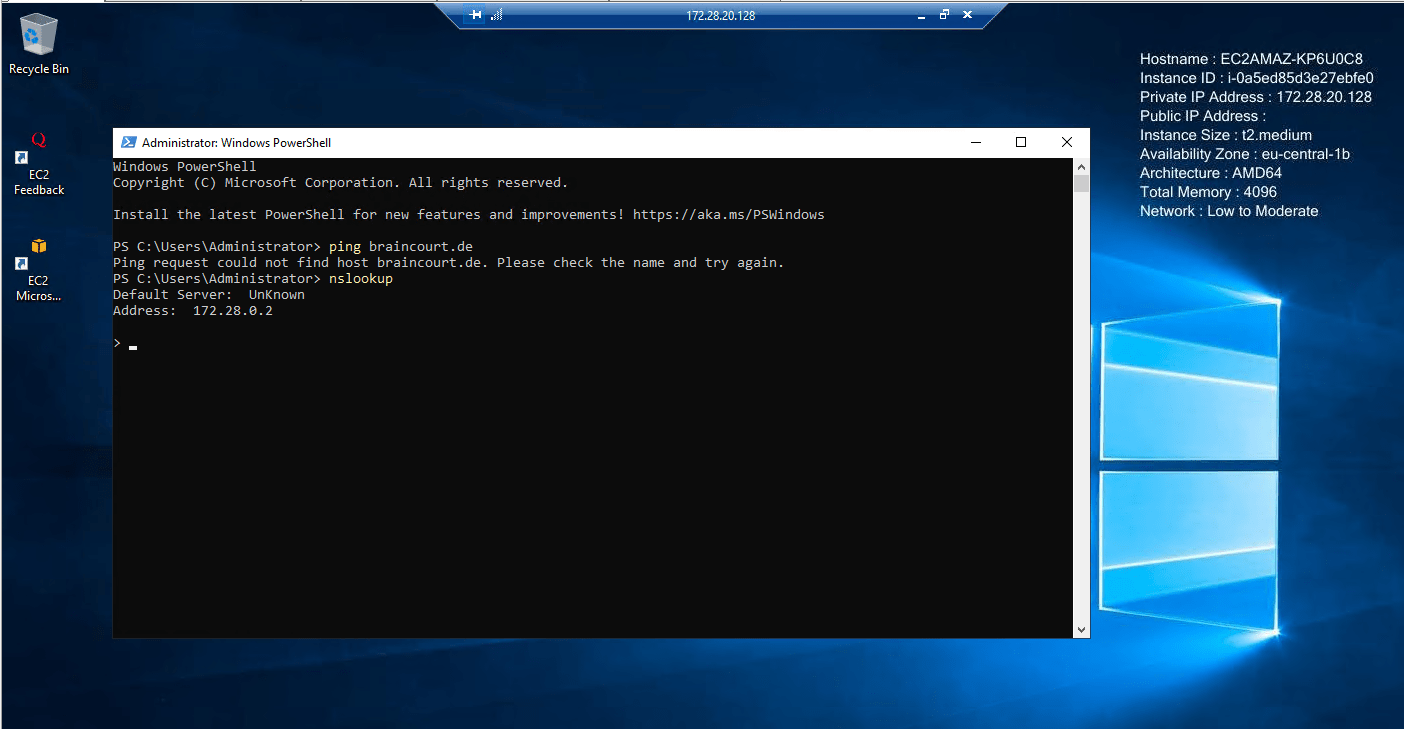
So we need to add the on-premise DNS servers as follows.
Note !!!
As still mentioned in order you can join the AWS VM to your on-premise domain, the on-premise domain controller needs to know the route to your AWS VPC subnet, where the AWS VM is homed and the previously mentioned tcp/udp ports need to be open between your DCs and the AWS VPC subnet.
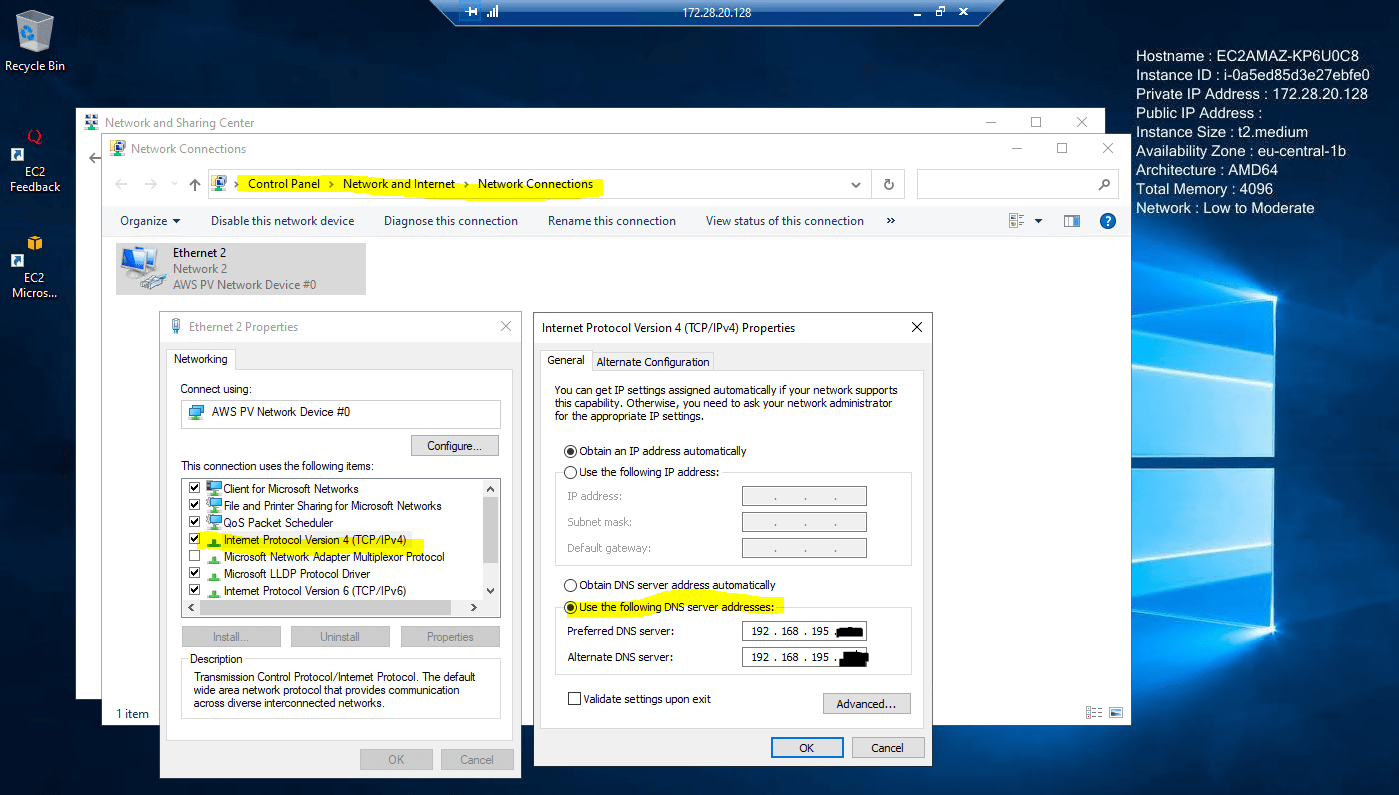
After setting the correct DNS servers from my on-premise network I was able to resolve the domain and also for the following SRV records I was getting all DCs back.
nslookup
set type=all
_ldap._tcp.dc._msdcs.braincourt.de
_kerberos._tcp.dc._msdcs.braincourt.de
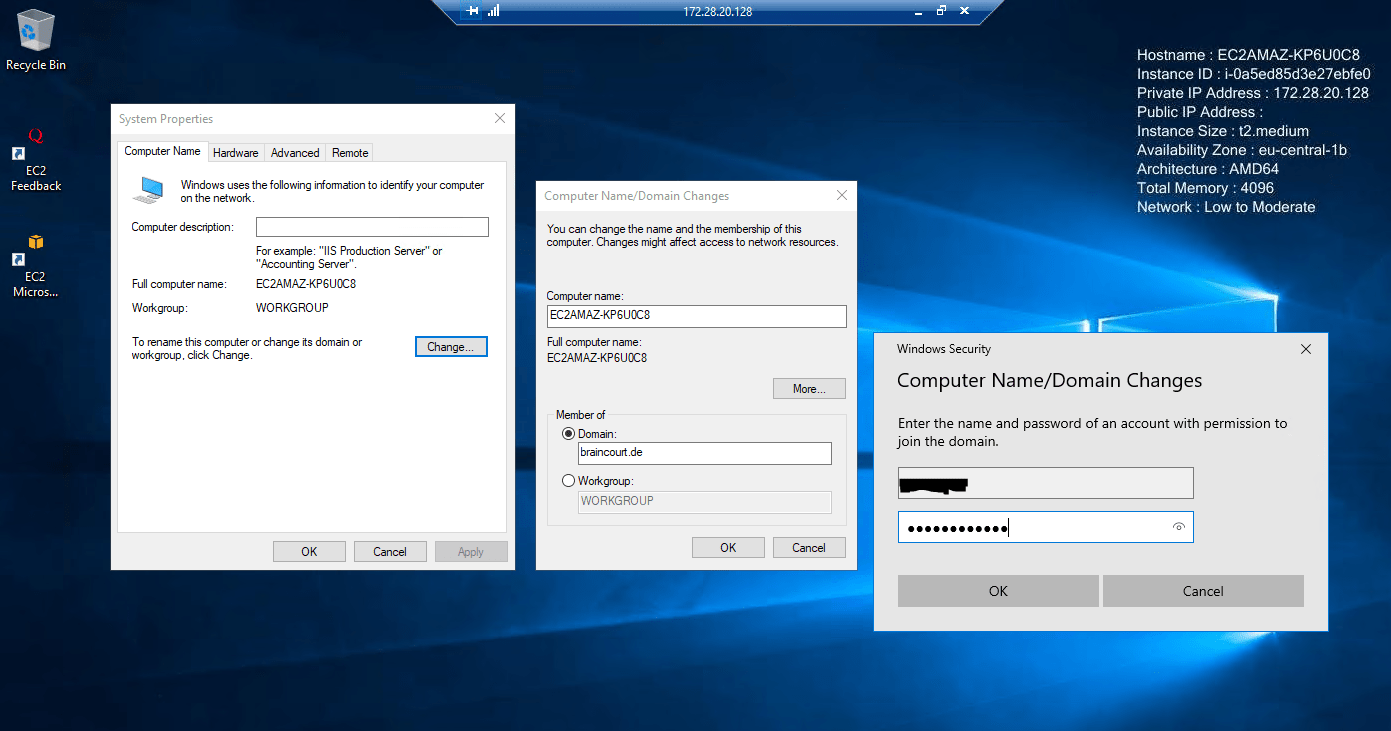
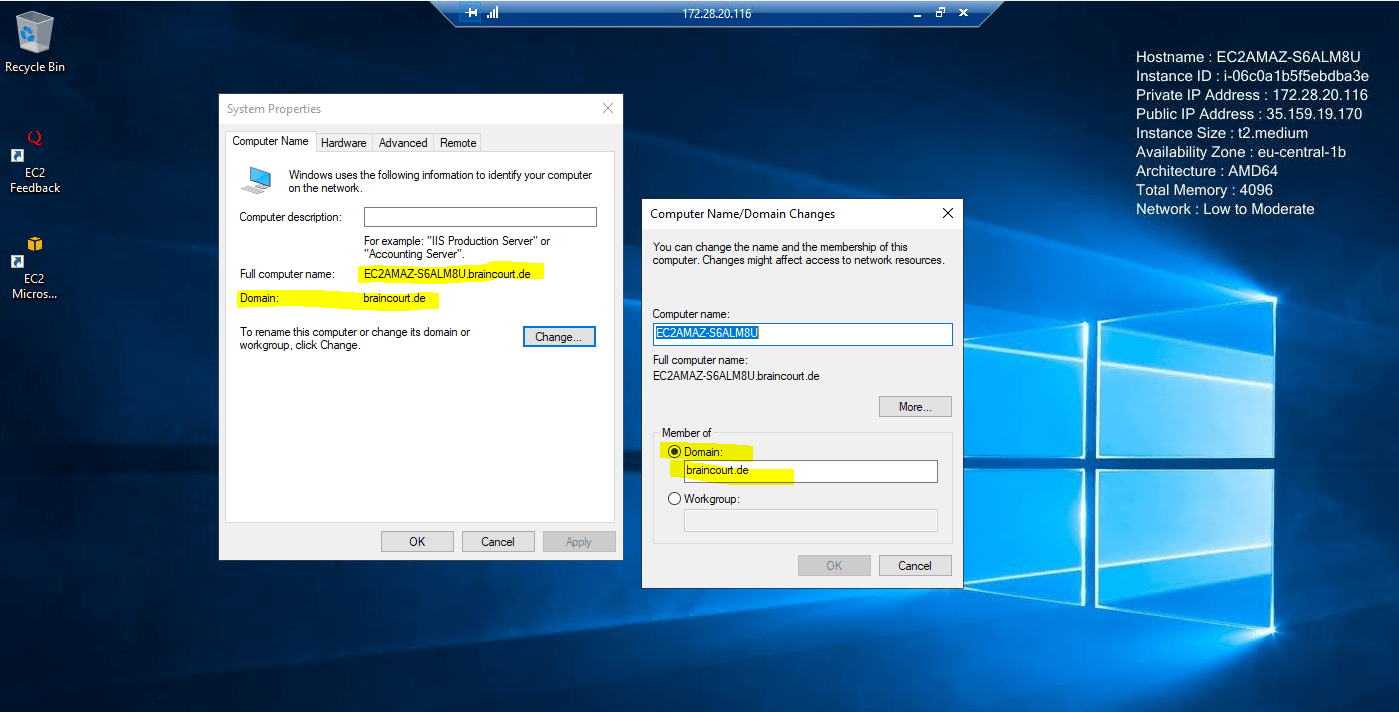
So we can try to join the VM manually as usual to our on-premise domain.
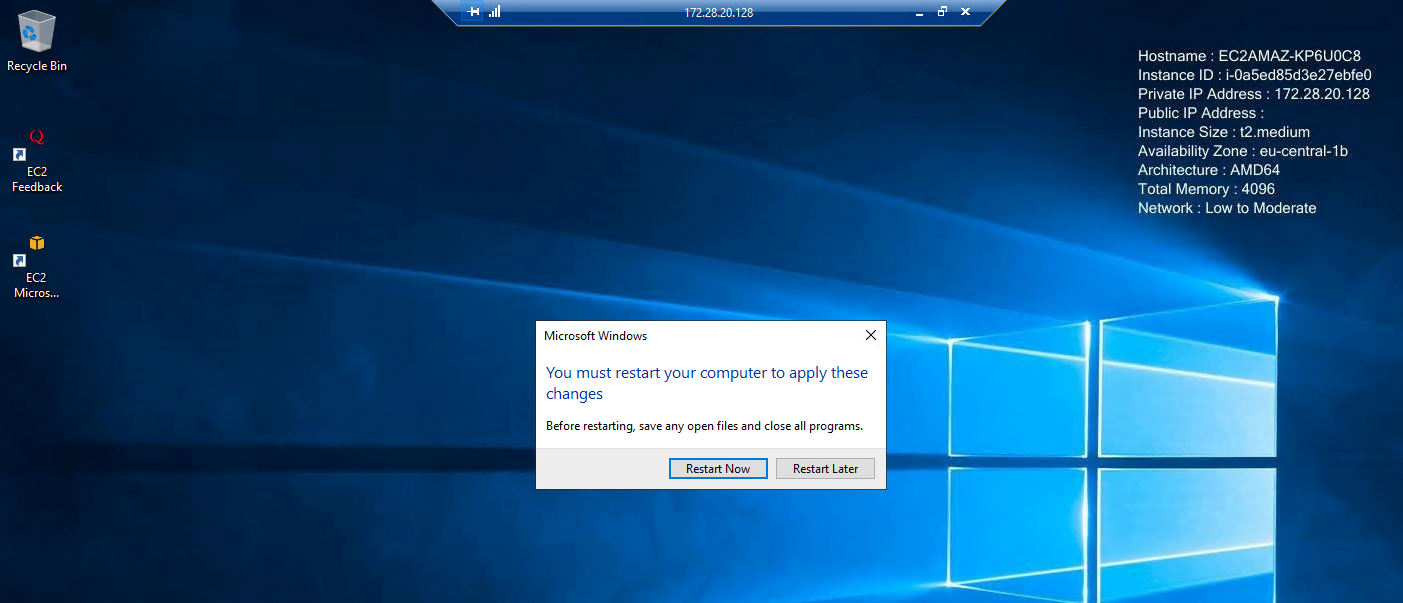
Finally to complete the domain join we need to restart the VM.
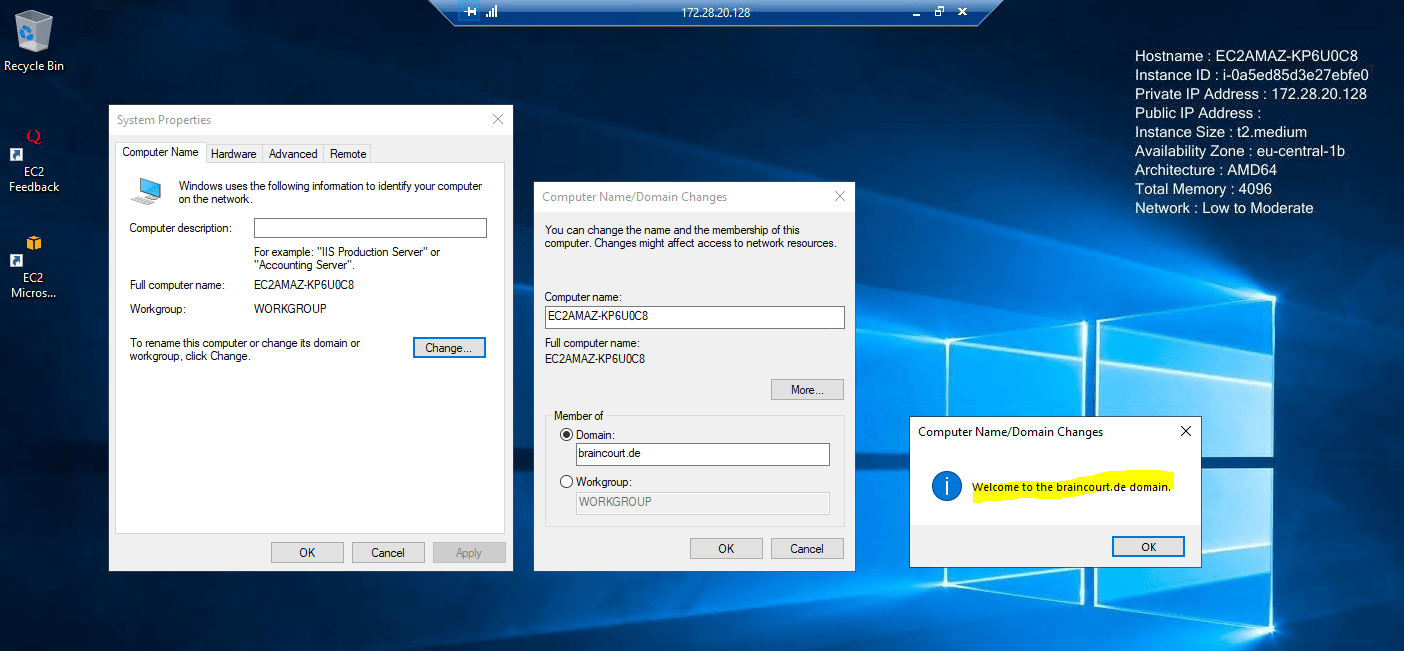
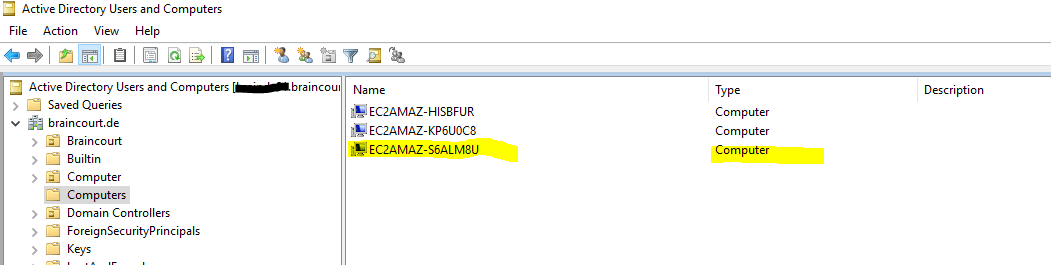
Computer account is created successfully in the on-premise Active Directory.
Once you join an instance to your self-managed Active Directory (on-premises), the instance communicates directly with your Active Directory and bypasses AD Connector.
Seamlessly joining the Windows VM to our on-premise Domain
You remember when we was setting up the VM further above for the manual domain join, in the Advanced details of Launch instances there was two selects shown below with Domain join directory and IAM instance profile.
You can use them to enable Seamlessly domain join which will join the VM during launching it automatically to our on-premise domain.
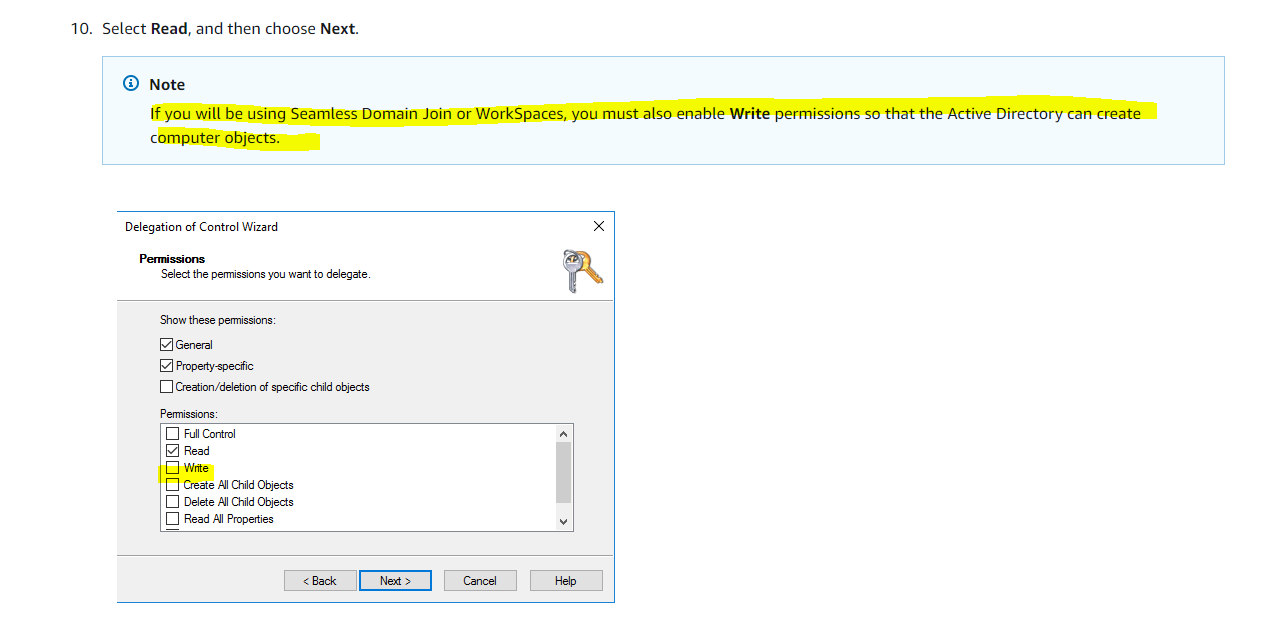
For seamlessly domain join also be sure that you when you created the AD Connector, you also assigned Write permission to the service account.
If you will be using Seamless Domain Join or WorkSpaces, you must also enable Write permissions so that the Active Directory can create computer objects.
Source: https://docs.aws.amazon.com/directoryservice/latest/admin-guide/prereq_connector.html
So to test seamlessly domain join I will launch a new instance named VM-testing02.

For instance type, key pair and network settings, I will use the same as previously for the VM we joined manually.
The only differences in launching the instance is that we this time also needs to attach a public IP address in the Network settings and further in the Advanced details setting the two select fields with Domain join directory and IAM instance profile as mentioned.
Assigning a public IP address to the instance.

Now I need to select my on-premise domain in the Advanced details which I was setting up during the AD Connector setup.
For the IAM role either select a role that has the following AWS managed policies attached to it.
- AmazonSSMManagedInstanceCore
- AmazonSSMDirectoryServiceAccess
or create them if not already done by clicking below on the Create new IAM profile link.

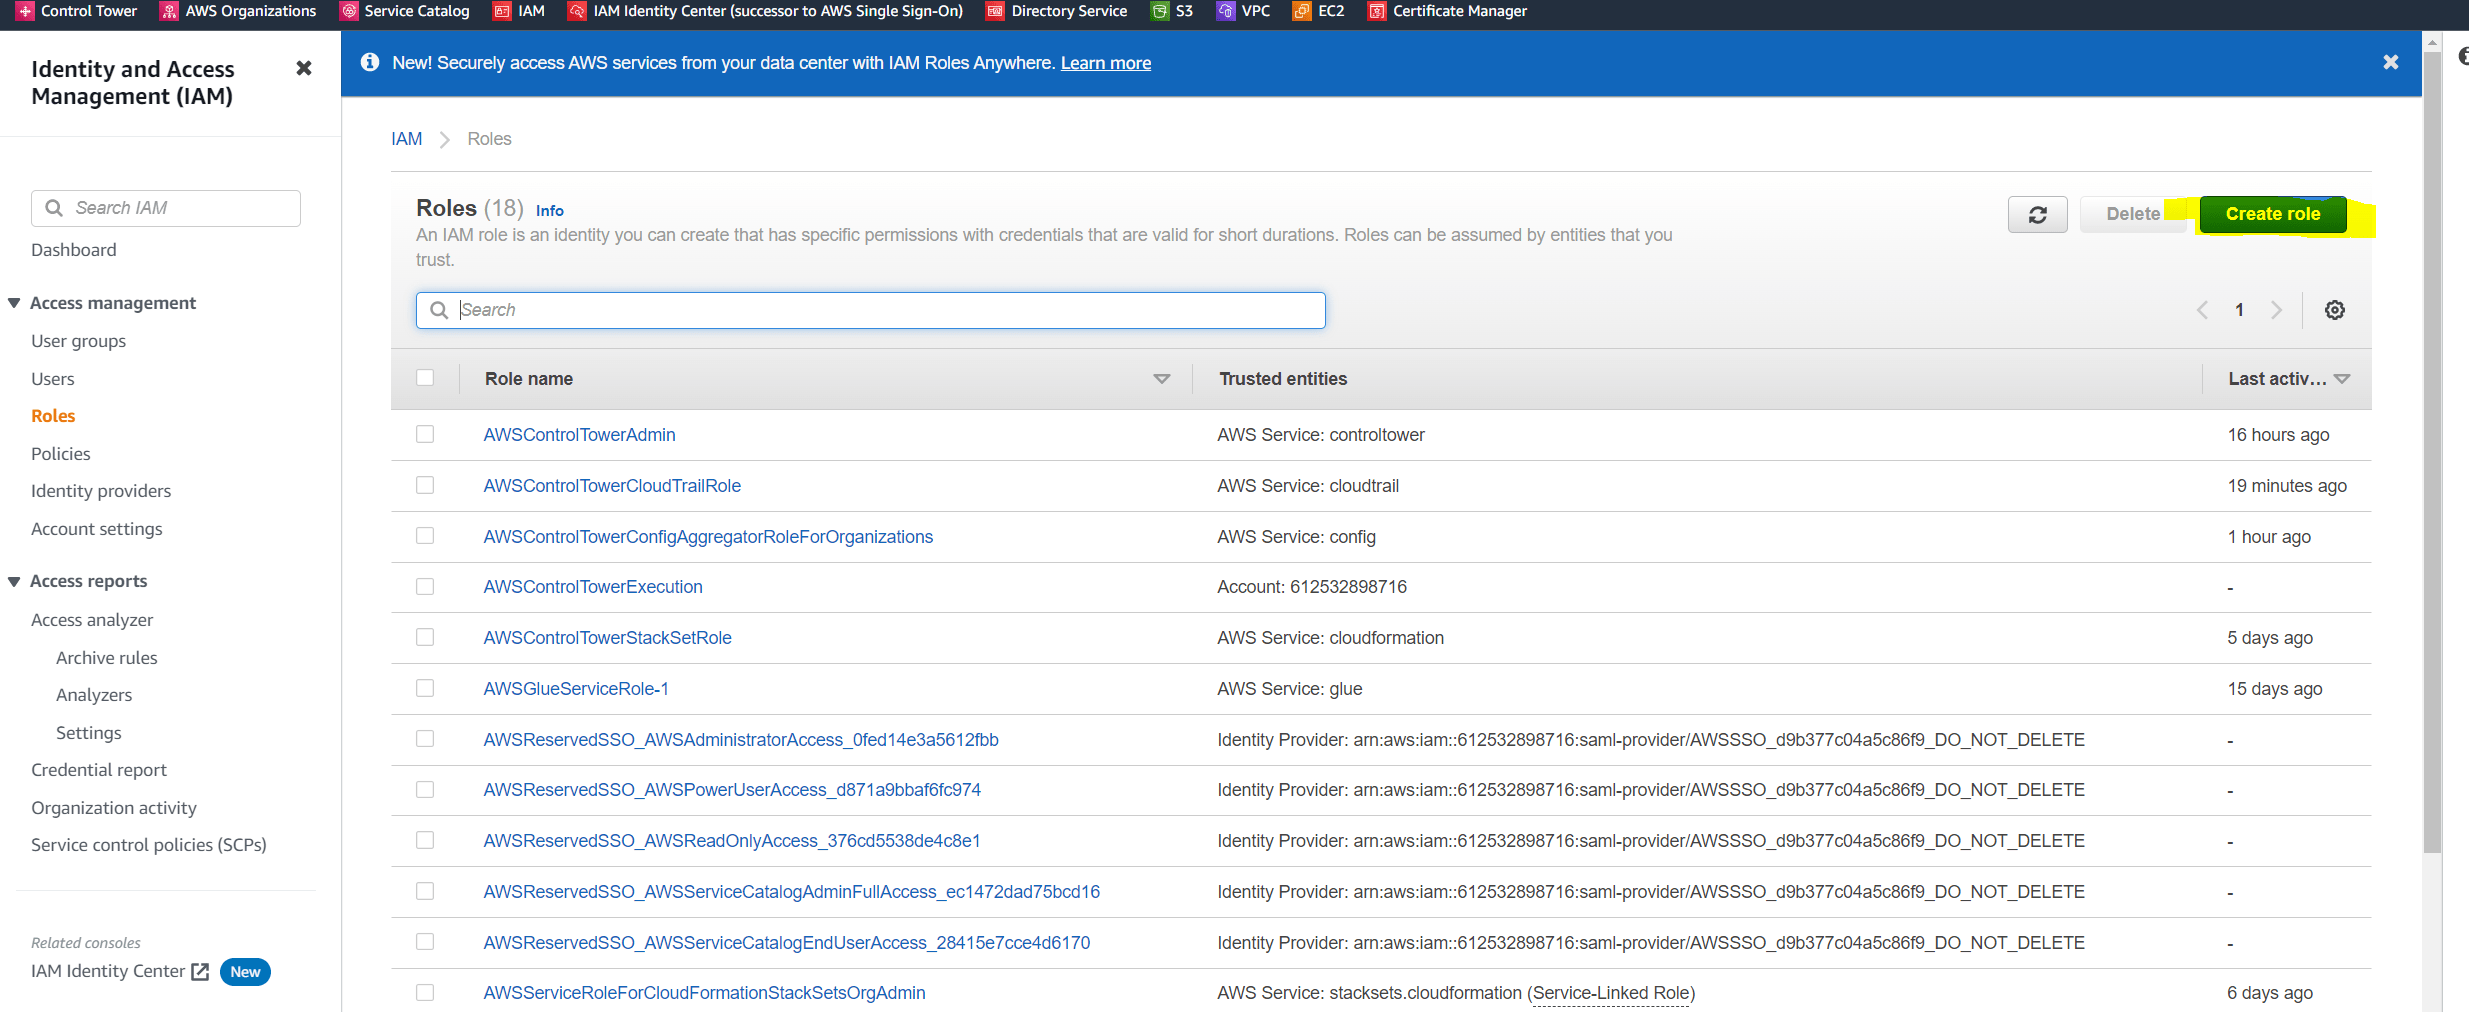
If you not already created an IAM role, below I will go through the steps to create one.
Choose Create role
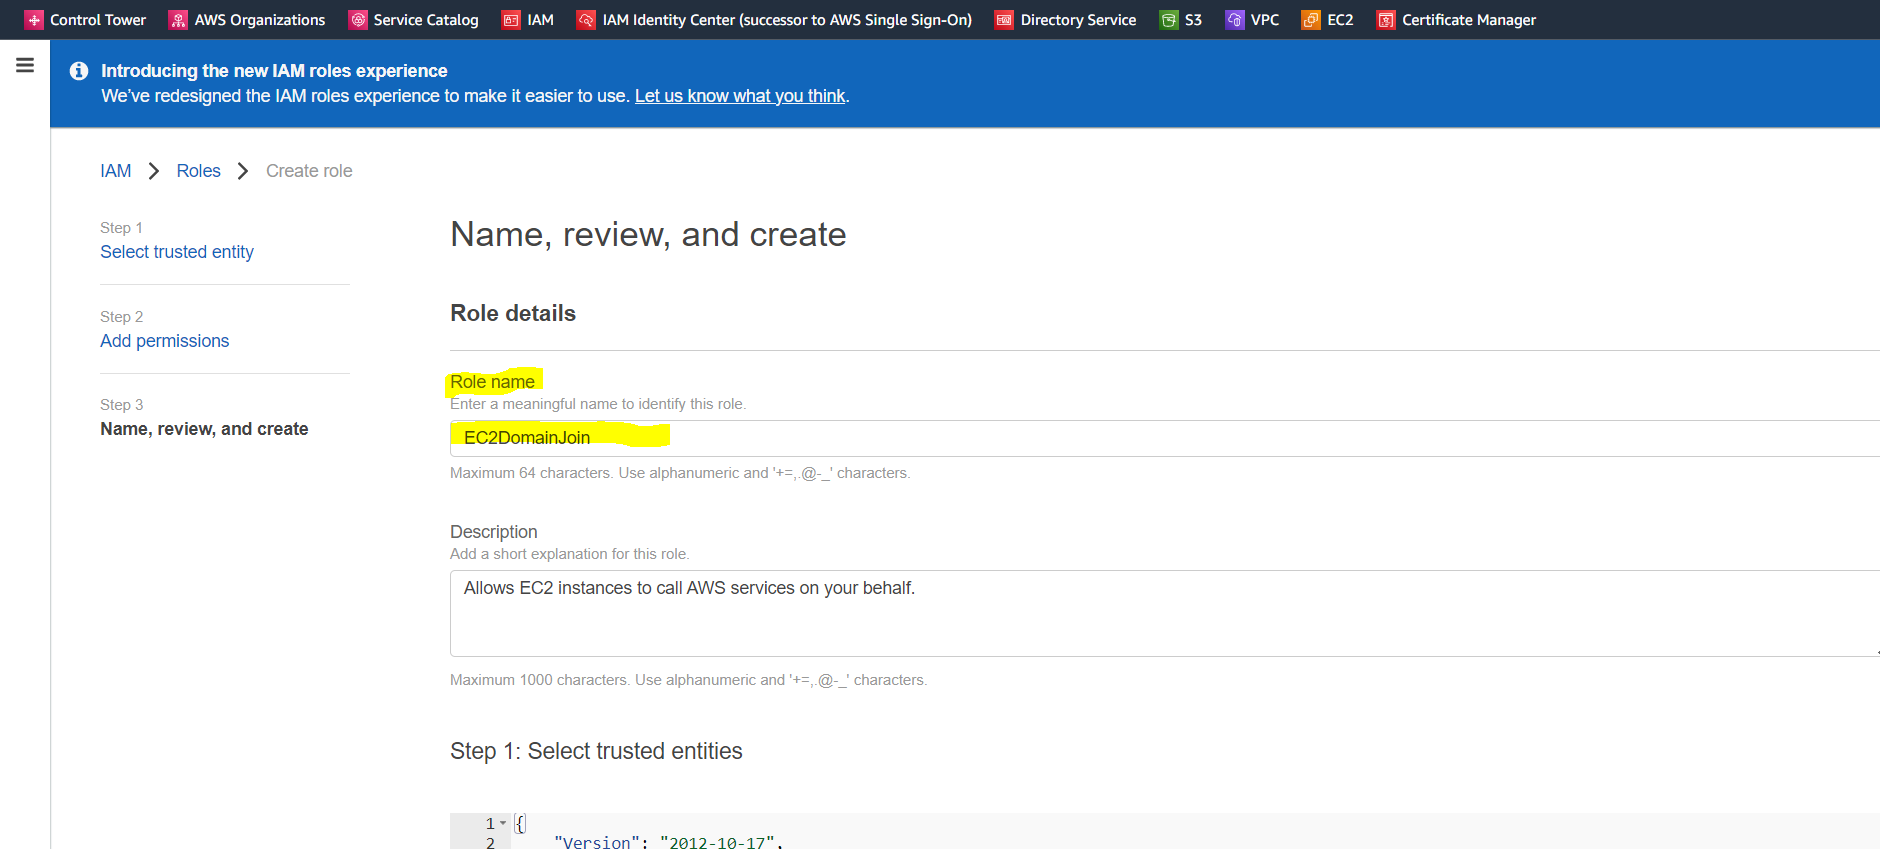
Under Select type of trusted entity, choose AWS service and under Use cases, choose EC2.

In the list of policies, select the AmazonSSMManagedInstanceCore and AmazonSSMDirectoryServiceAccess policies.

For Role name use for example EC2DomainJoin and click on Create role.
Now you can select this IAM role in the Advanced details section for the IAM instance profile. The rest of the settings can be left on default.
Now finally click on Launch instance

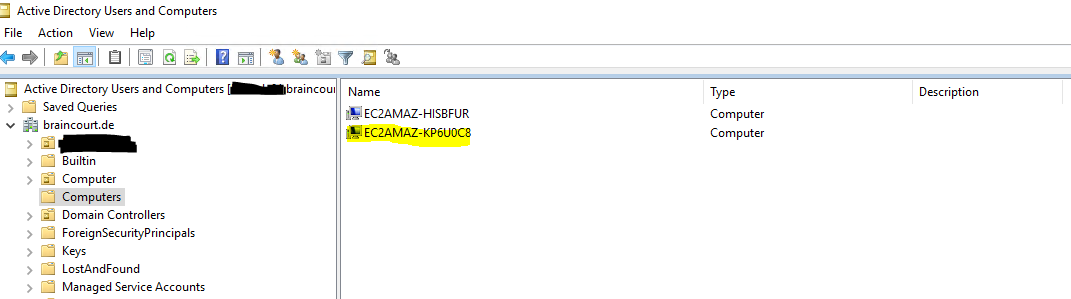
Before connecting to the VM, I can already see that the computer object was created in my on-premise Active Directory.
To login to the VM by using RDP, I can use this time one of my on-premise domain administrators as the VM is still joined to my on-premise domain. So I don’t need the local administrator account.
Finished domain join successfully without any manual interfere besides the settings at Launch instance.
Troubleshooting
Why can’t I seamlessly join my Amazon EC2 Windows instance to an AWS Managed Microsoft AD directory?
https://aws.amazon.com/premiumsupport/knowledge-center/ec2-windows-seamless-join-microsoft-ad/
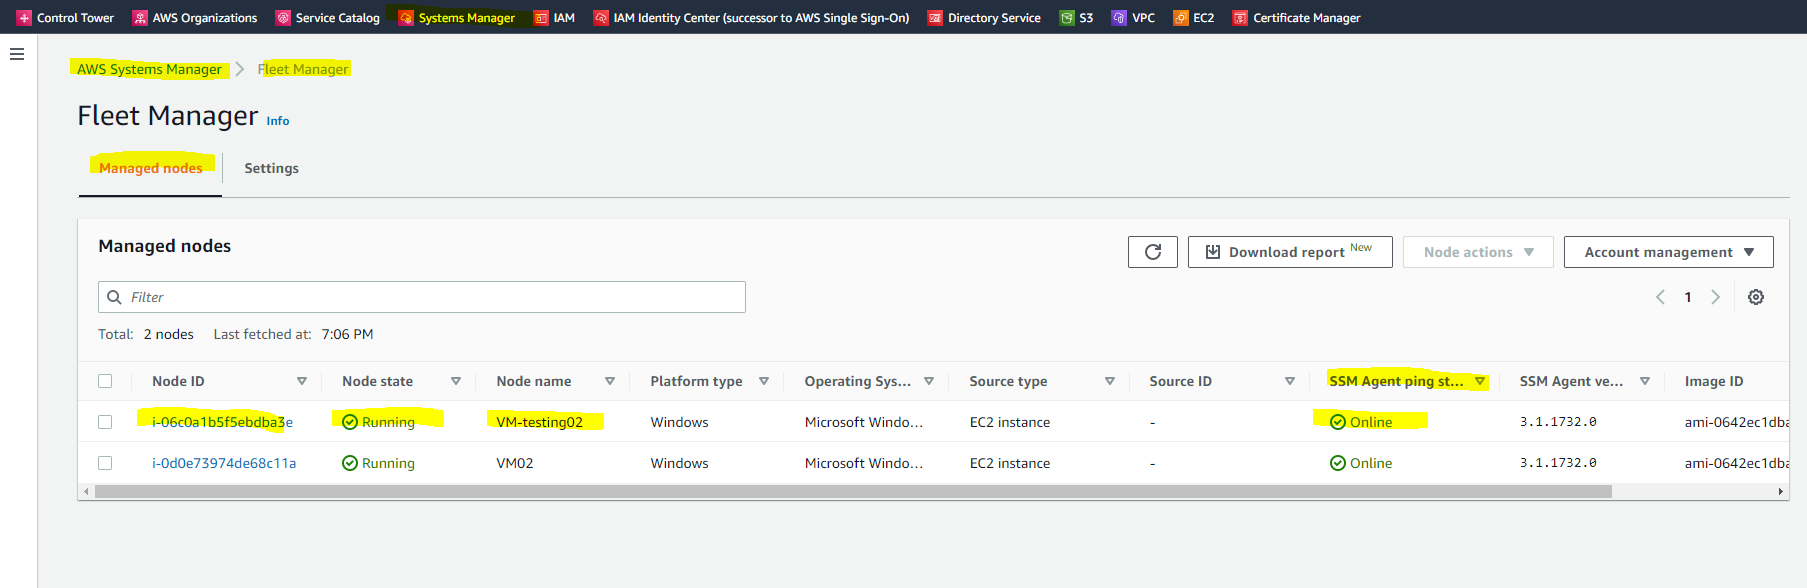
Verify that the instance is reporting as Managed
First, open the AWS Systems Manager console. Next, choose Fleet Manager from the navigation pane to view all managed instances, and confirm that the instance is listed and online.
AWS System Manager –> State Manager

Test seamlessly joining an EC2 instance for Windows Server to a domain
https://docs.aws.amazon.com/directoryservice/latest/admin-guide/step4_test_ec2_access.html
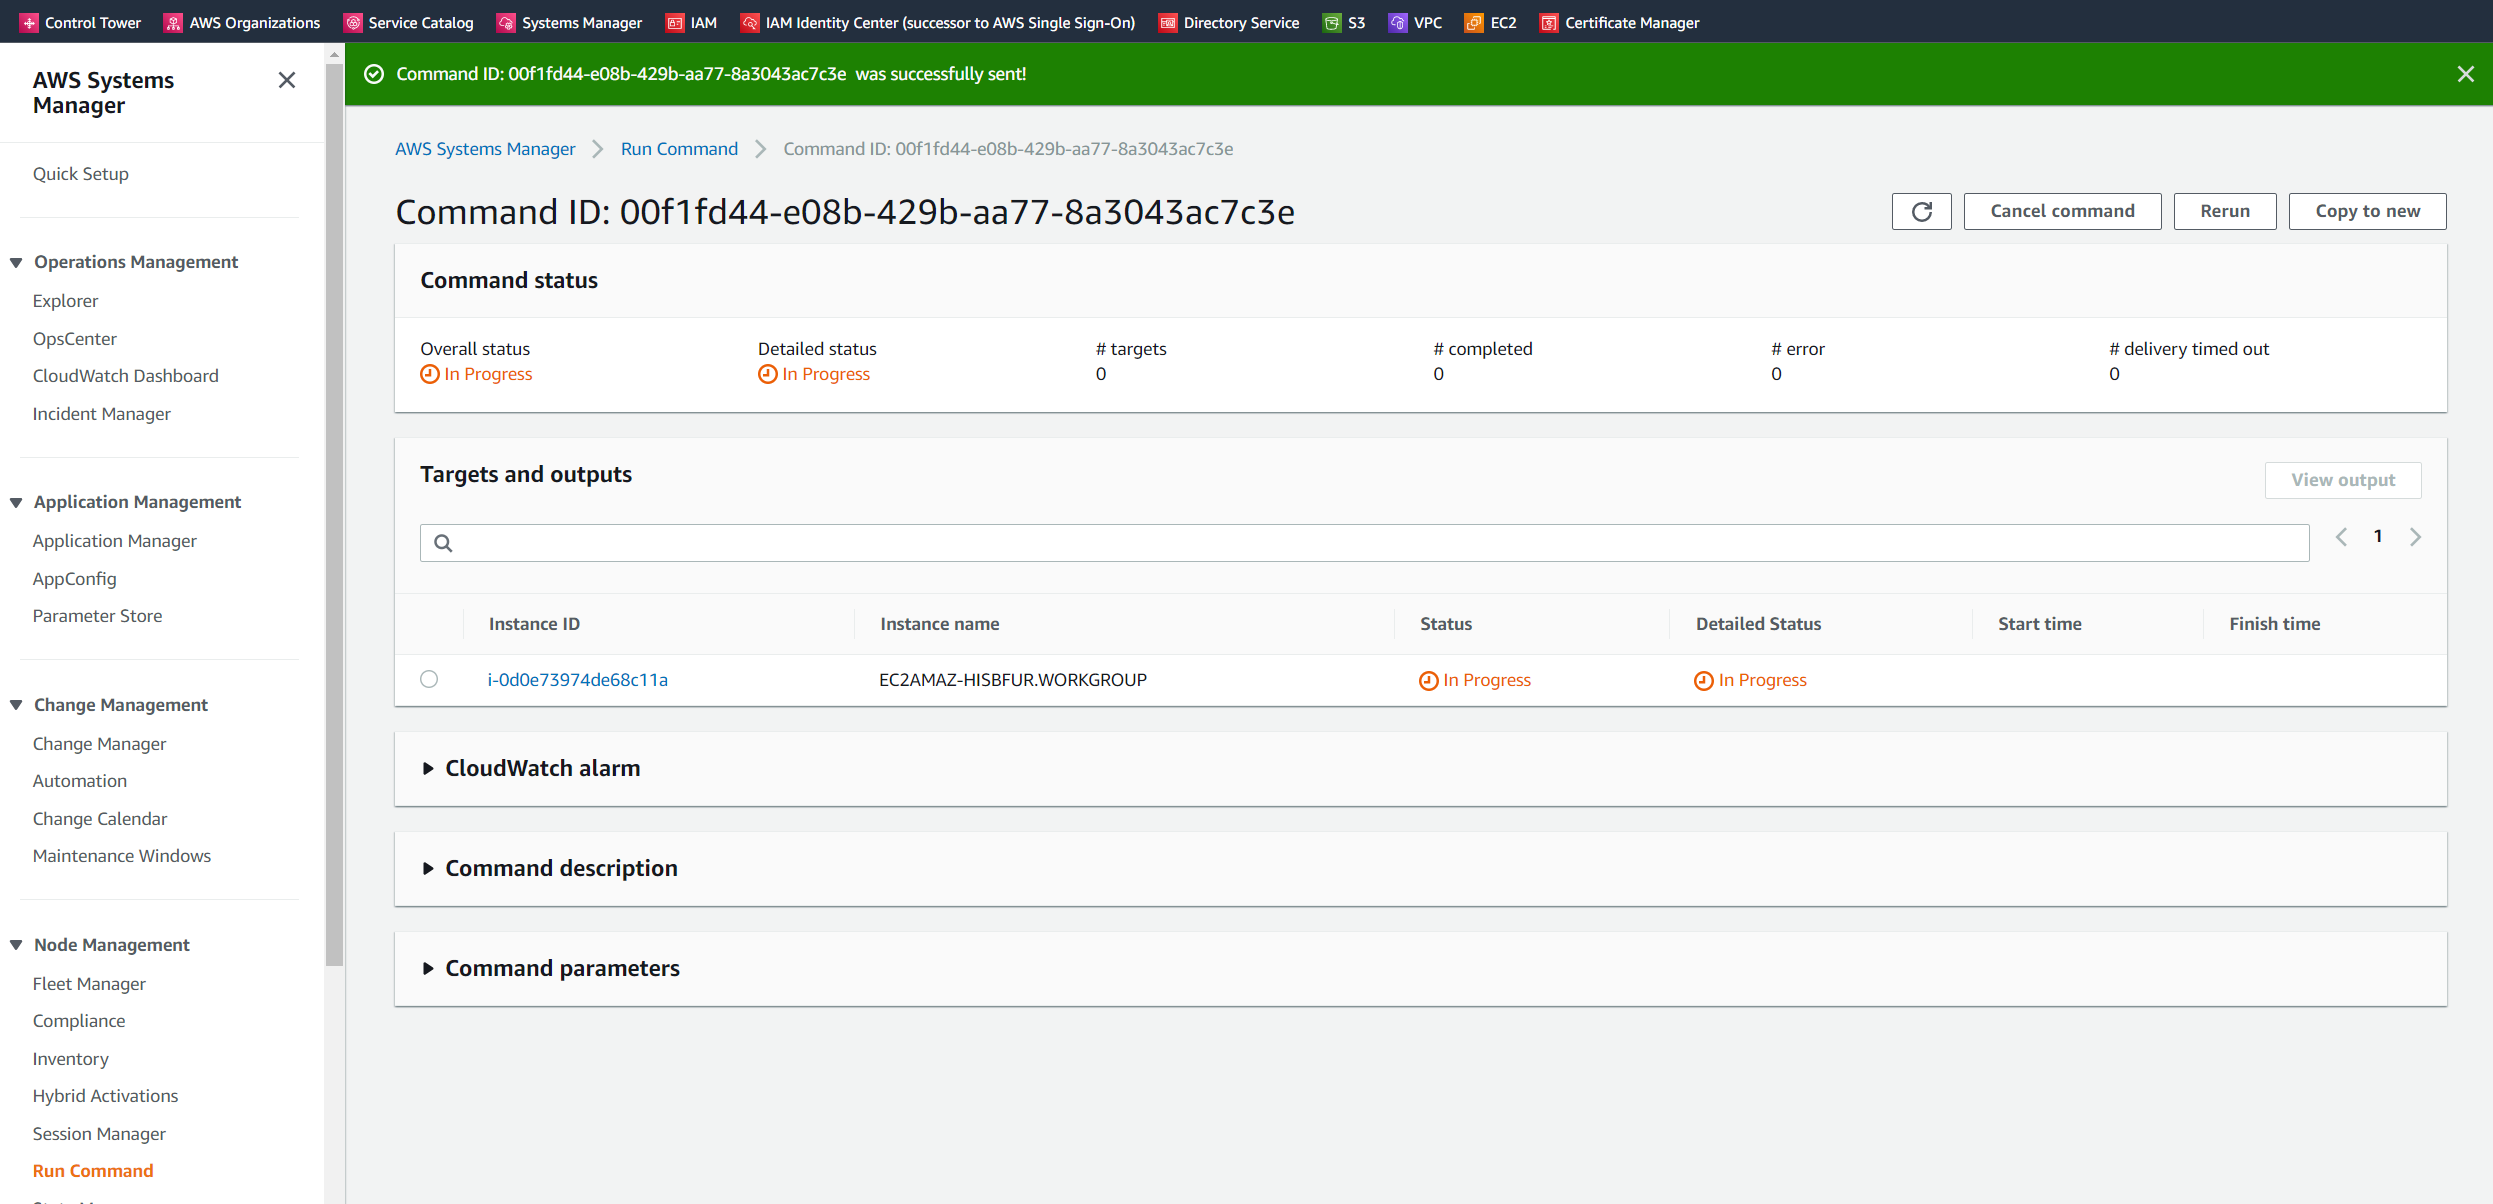
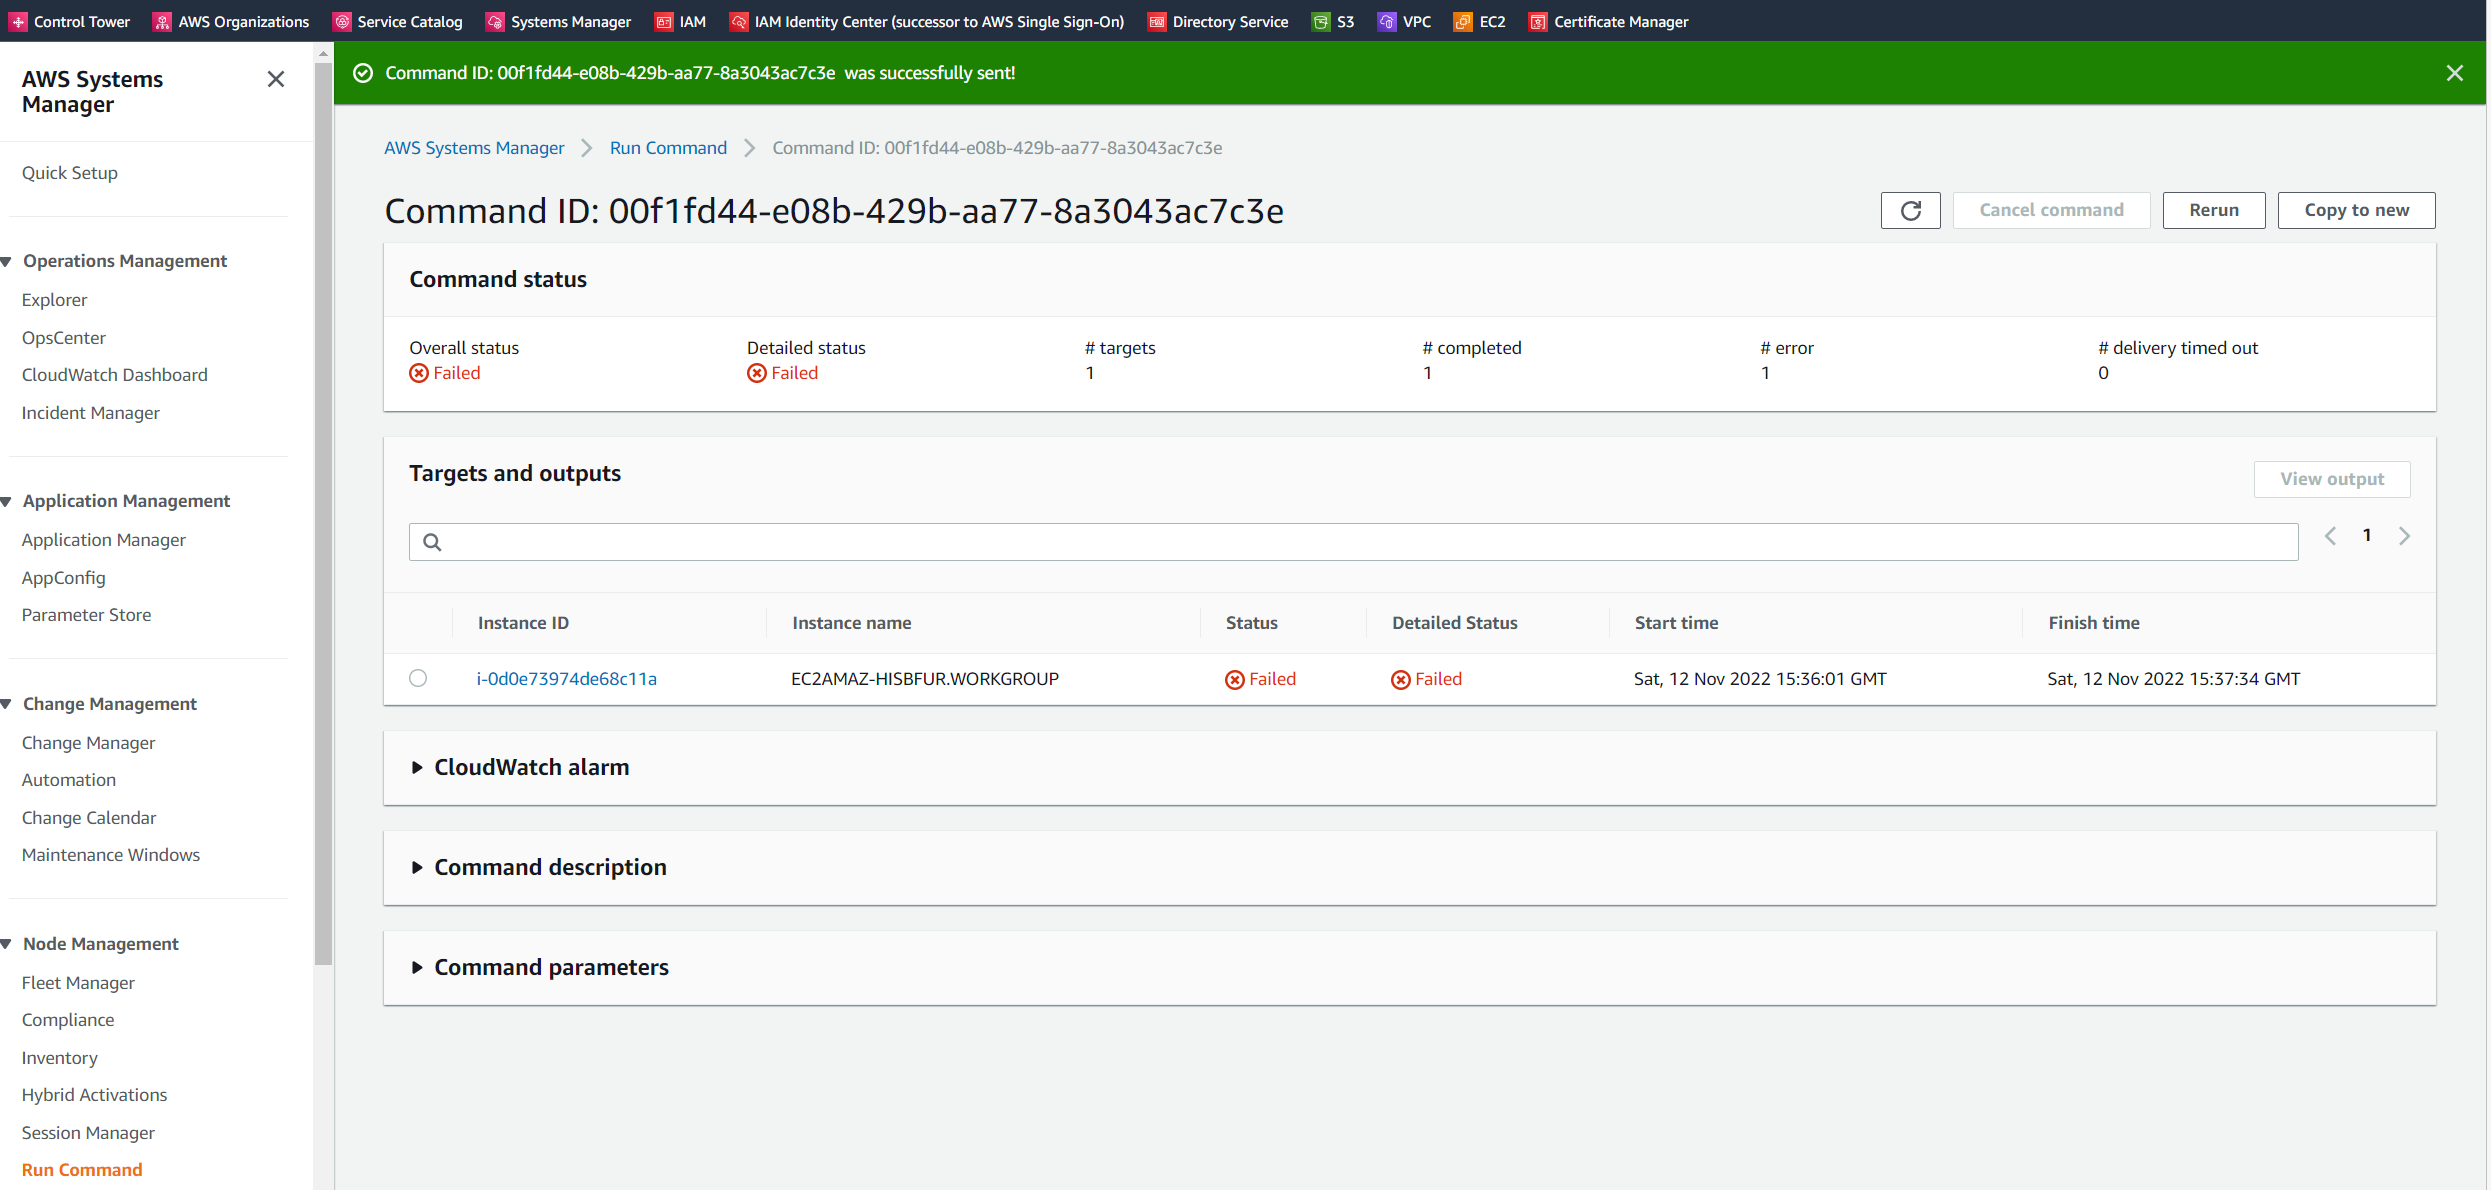
This test will give you more information about the reason it failed to join.
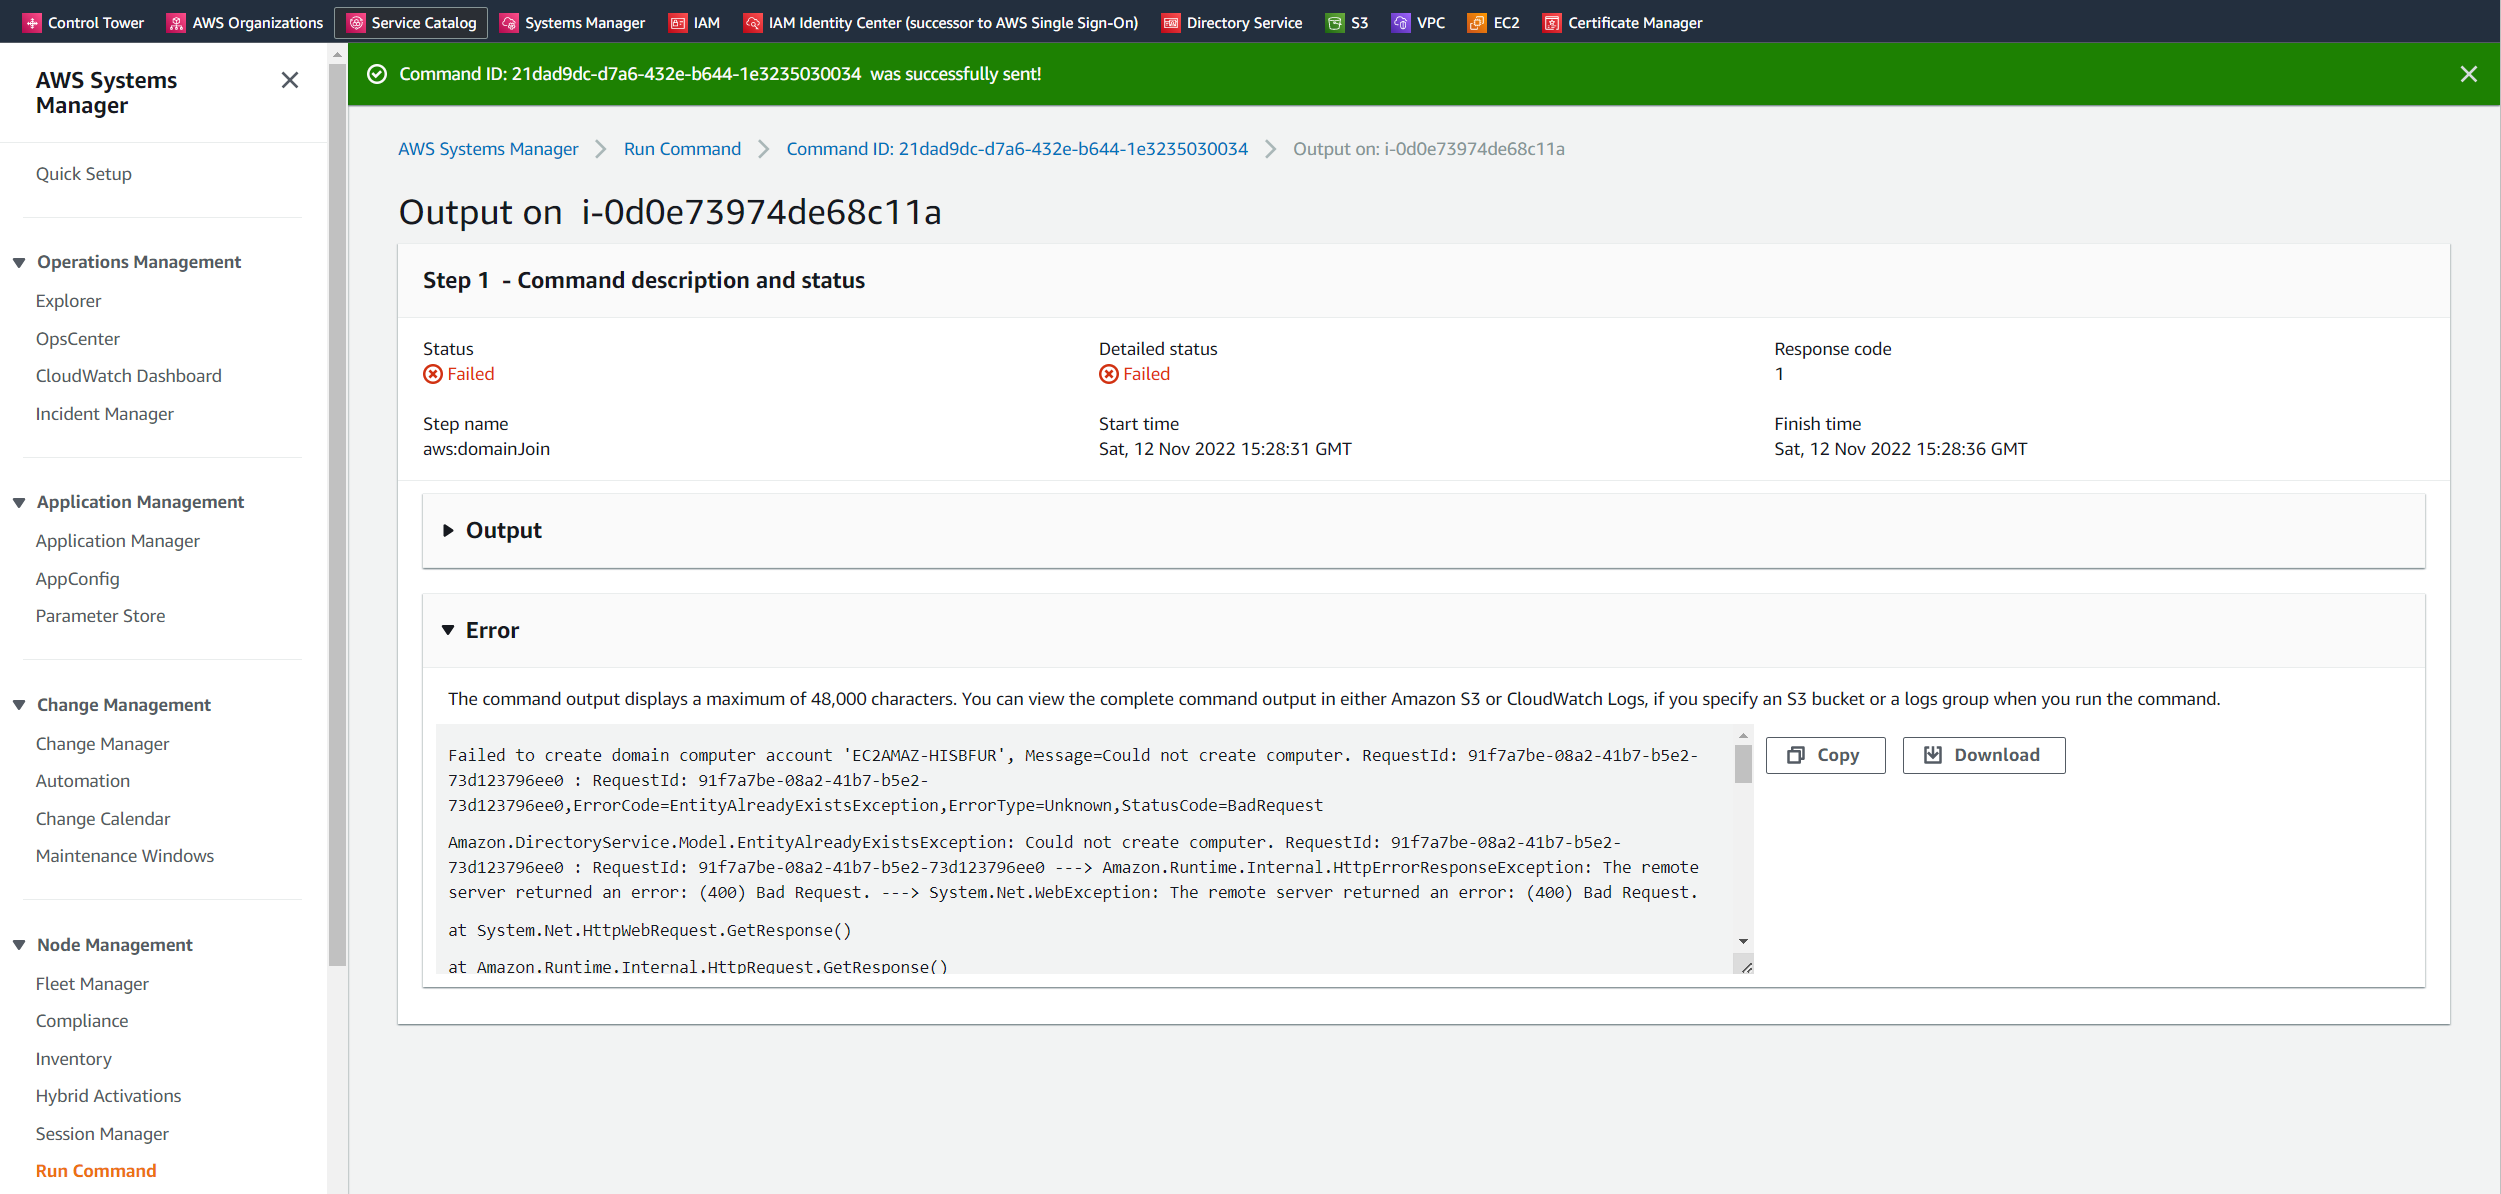
In my case the reason it could not create the the computer account was that not all needed ports from the VPC to my on-premise domain controllers was opened.
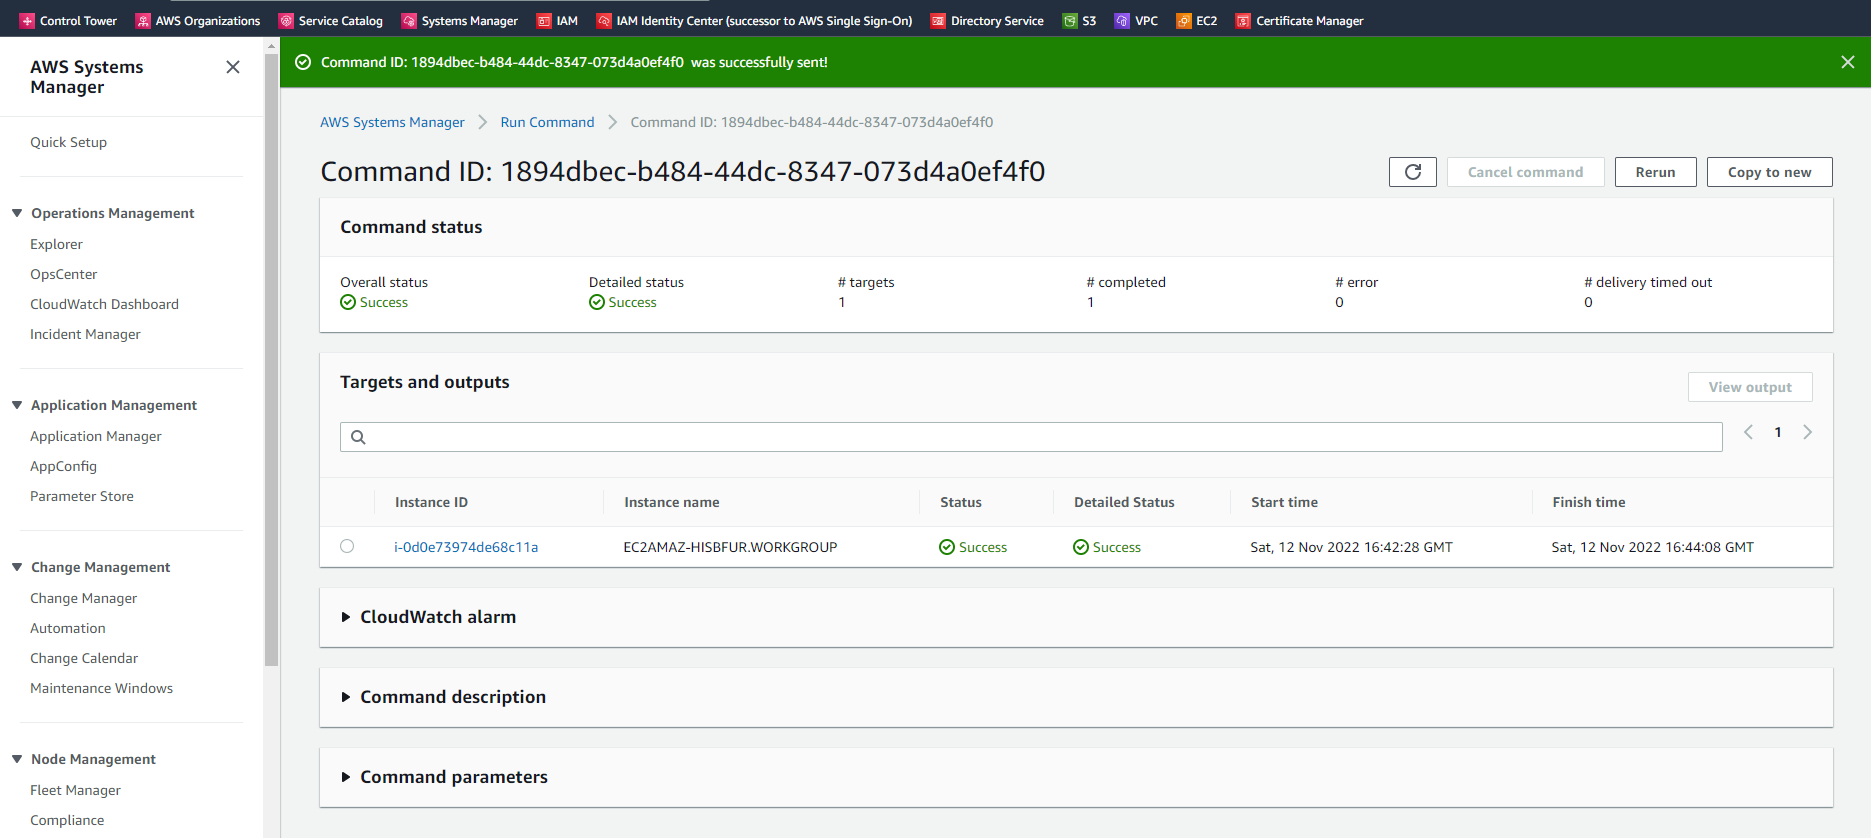
After adding all firewall ports as mentioned at the beginning of this post, the test succeeded.
Links
Join an EC2 instance to your AD Connector directory
https://docs.aws.amazon.com/directoryservice/latest/admin-guide/ad_connector_join_instance.htmlSeamlessly join a Windows EC2 instance
https://docs.aws.amazon.com/directoryservice/latest/admin-guide/ad_connector_launching_instance.html
min-password/Manually join a Windows instance
https://docs.aws.amazon.com/directoryservice/latest/admin-guide/join_windows_instance.htmlHow do I retrieve my Windows administrator password after launching an instance?
https://aws.amazon.com/premiumsupport/knowledge-center/retrieve-windows-ad