Secure WordPress with fail2ban
In a previously post I showed how to set up fail2ban on Ubuntu to prevent several services from brute-force attacks. To secure also your WordPress site from them you will first need to set up fail2ban itself on your server as follows for Ubuntu.
fail2ban supports out of the box several services like SSH, HTTP servers like Apache and nginx, Postfix, Dovecot and more. The services fail2ban will support and secure are so called Jails in fail2ban and can be configured in the jail.conf file resp. you should use a dedicated jail.local file to adjust settings.
You should provide a customizations in the jail.local file, or separate .conf files under jail.d/ directory
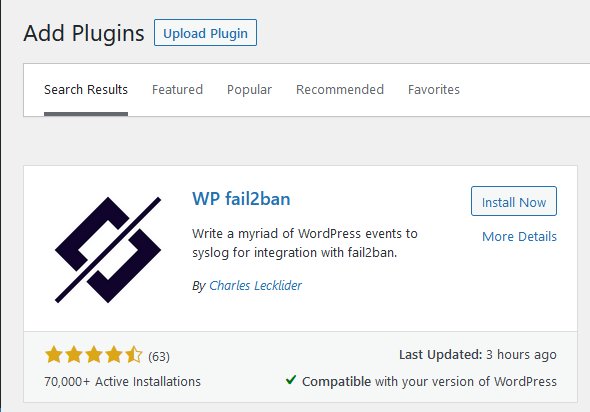
To also secure WordPress using fail2ban we need to install the WP fail2ban plugin.
WPf2b comes with three fail2ban filters: wordpress-hard.conf, wordpress-soft.conf, and wordpress-extra.conf. These are designed to allow a split between immediate banning (hard) and the traditional more graceful approach (soft), with extra rules for custom configurations.
Install the WP fail2ban plugin
If you already had set up fail2ban on your OS as mentioned above, then you now need to install and enable the following WP plugin.
WP fail2ban
https://de.wordpress.org/plugins/wp-fail2ban/
fail2ban is one of the simplest and most effective security measures you can implement to prevent brute-force attacks.
WP fail2ban logs all login attempts – including via XML-RPC, whether successful or not, to syslog using LOG_AUTH.
The key concept behind WPf2b is logging Events to syslog. If WPf2b doesn’t log an Event, or logs it to the wrong place, fail2ban won’t work as it should.
Fail2Ban operates by monitoring log files (e.g. /var/log/auth.log, /var/log/apache/access.log, etc.) for selected entries and running scripts based on them. Most commonly this is used to block selected IP addresses that may belong to hosts that are trying to breach the system’s security. It can ban any host IP address that makes too many login attempts or performs any other unwanted action within a time frame defined by the administrator. Includes support for both IPv4 and IPv6.
Configure fail2ban in Ubuntu
For typical settings we first need to download some new filter files into the /etc/fail2ban/filter.d directory as follows.
$ sudo wget https://plugins.svn.wordpress.org/wp-fail2ban/trunk/filters.d/wordpress-hard.conf -P /etc/fail2ban/filter.d/
$ sudo wget https://plugins.svn.wordpress.org/wp-fail2ban/trunk/filters.d/wordpress-soft.conf -P /etc/fail2ban/filter.d/
Then add the following config to the /etc/fail2ban/jail.local or /etc/fail2ban/jail.d/customisation.local file as shown in my post about set up fail2ban on Ubuntu.
[wordpress-hard]
enabled = true
filter = wordpress-hard
logpath = /var/log/auth.log
maxretry = 1
port = http,https

[wordpress-soft]
enabled = true
filter = wordpress-soft
logpath = /var/log/auth.log
maxretry = 3
port = http,https
maxretry is the number of failures before a host get banned.
Make sure you change logpath to the correct log for your OS. For Ubuntu this is fine.
bantime by default will be 1h, you can also adjust this either for the specified filter and section or in the default section of your jail.local file as shown in my post above.
For example this would set the default bantime for all jails to 3 days.
[DEFAULT]
bantime = 3d
Restart fail2ban
$ sudo systemctl restart fail2ban
wordpress-hard.conf and wordpress-soft.conf
There are some things that are almost always malicious, e.g. blocked users and pingbacks with errors. wordpress-hard.conf is designed to catch these so that you can ban the IP immediately.
Other things are relatively benign, like a failed login. You can’t let people try forever, but banning the IP immediately would be wrong too. wordpress-soft.conf is designed to catch these so that you can set a higher retry limit before banning the IP.
For the avoidance of doubt: you should be using both filters.
Source: https://docs.wp-fail2ban.com/en/4.4/configuration/fail2ban.html#typical-settings
Checking the log files and banned IPs
As mentioned fail2ban will log all login attempts, including XML-RPC, whether successful or not to syslog using LOG_AUT.
If find these entries immediately after enabling fail2ban for WordPress. The first Authentication failure log was me to test it.
/var/log/auth.log
wordpress(blog.matrixpost.net)[29251]: Authentication failure for admin from 87.190.8.194
wordpress(matrixpost.net)[29859]: XML-RPC authentication failure for admin from 64.42.179.51
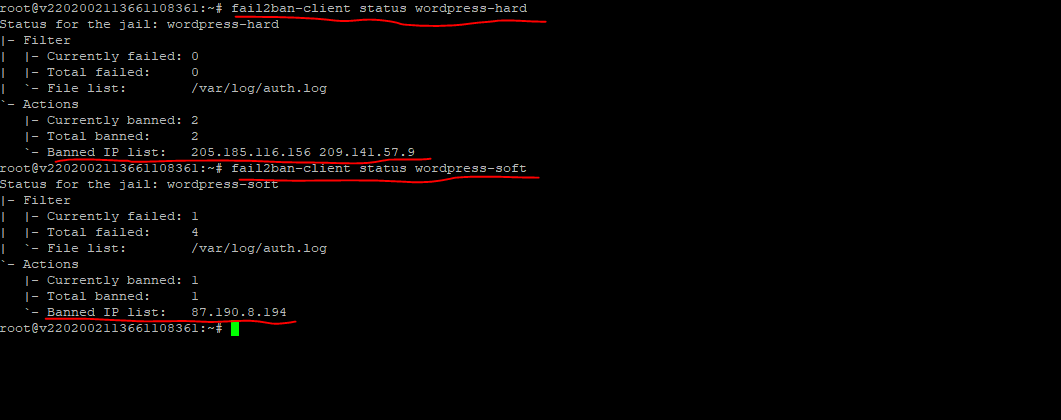
To check banned IPs from unsuccessful login attempts, you can use the following commands.
For the wordpress-hard.conf filter (Jail)
$ sudo fail2ban-client status wordpress-hard
For the wordpress-soft.conf filter (Jail)
$ fail2ban-client status wordpress-soft
To unban IPs you can use the following commands.
For the wordpress-hard.conf filter (Jail)
$ sudo fail2ban-client set wordpress-hard unbanip 87.190.8.194
For the wordpress-soft.conf filter (Jail)
$ sudo fail2ban-client set wordpress-soft unbanip 87.190.8.194
Links
WP fail2ban
https://wp-fail2ban.com/
WP fail2ban Manual
https://docs.wp-fail2ban.com/en/4.4/
Tags In
Related Posts
Latest posts
How Multicast Traffic Works in VMware vSphere – Testing VSS (Basic Multicast Filtering) vs VDS (IGMP/MLD Snooping) with Video Streaming – Part 2
Follow me on LinkedIn