Restore On-Premise Virtual Machines to Microsoft Azure by using Veeam Backup and Replication
In this post I want to show step by step how we can restore an on-premise virtual machine (Hyper-V or vSphere finally the same steps) to Microsoft Azure by using Veeam Backup and Replication.
Veeam Backup and Replication offers seamless integration with Microsoft Azure, enabling organizations to extend their backup and recovery capabilities to the cloud. With Veeam, you can effortlessly restore on-premise virtual machines to Azure, ensuring business continuity and data resilience. This integration streamlines the migration process, providing a reliable and efficient method for transitioning workloads to the Azure cloud environment while maintaining data integrity and security.
Introduction
Veeam Backup & Replication allows you to restore different workloads (VMs, Google VM instances, physical servers and so on) from backups to Microsoft Azure.
You can use Veeam Backup & Replication to complete the following tasks:
- Restore workloads from Veeam backups to Microsoft Azure.
- Migrate workloads from the on-premises infrastructure to the cloud.
- Create a test environment in the cloud for troubleshooting, testing patches and updates and so on.
Source: https://helpcenter.veeam.com/docs/backup/vsphere/restore_azure.html?ver=120
Restore on-premise Hyper-V virtual machine to Azure
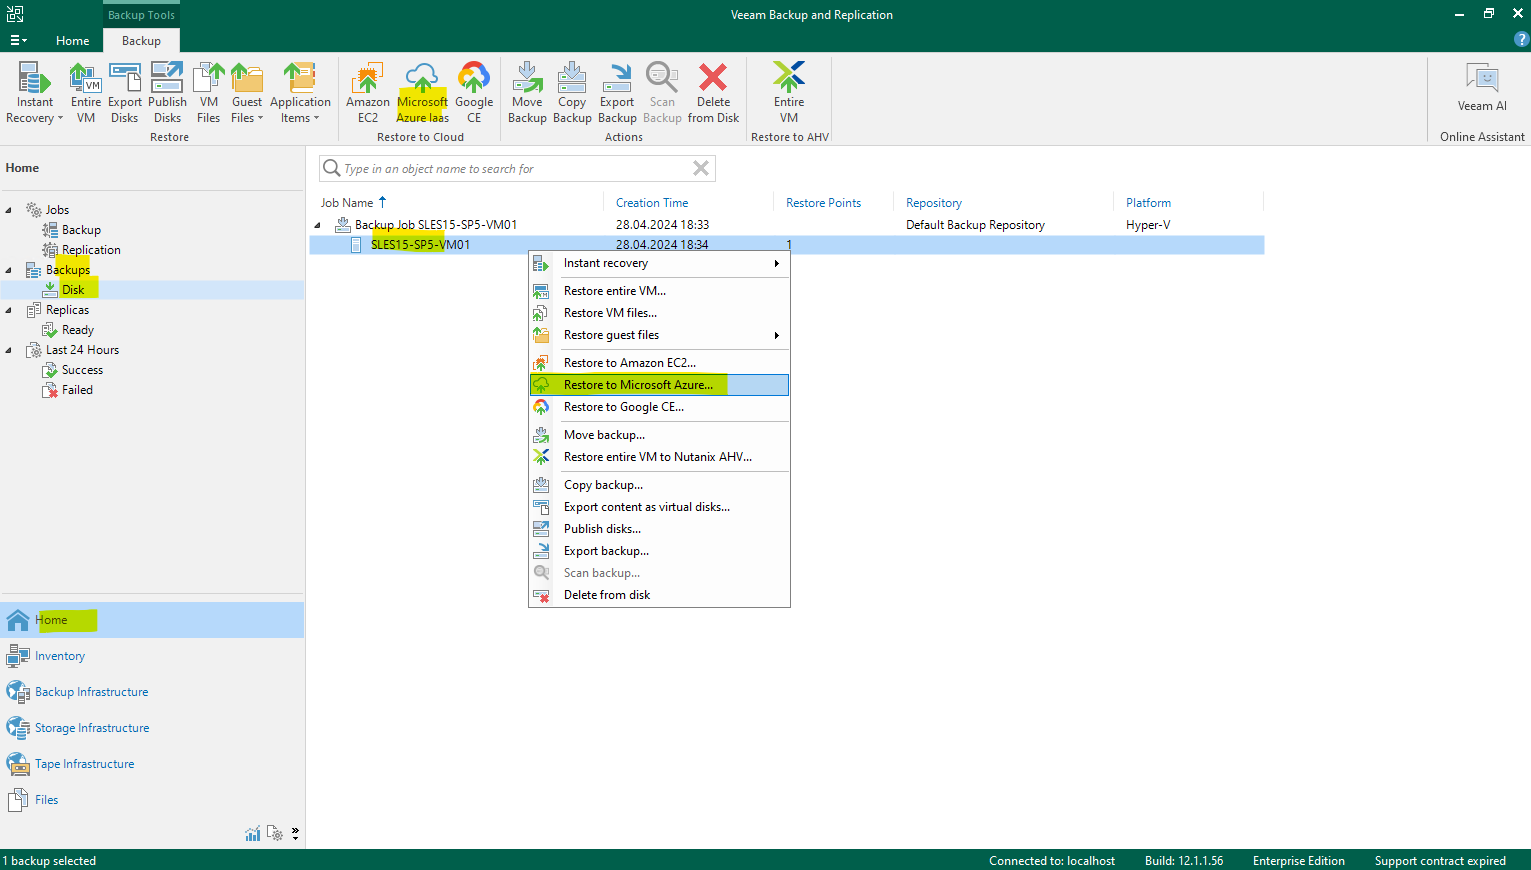
To restore a virtual machine from on-premise to Azure by using Veeam Backup and Replication, select an existing backup and disk of the virtual machine, right click on this disk and select Restore to Microsoft Azure … as shown below.
Before we can restore workloads to Azure, we first need add an Microsoft Azure Compute Account shown in the next section which will be used by Veeam to be able to access Azure.
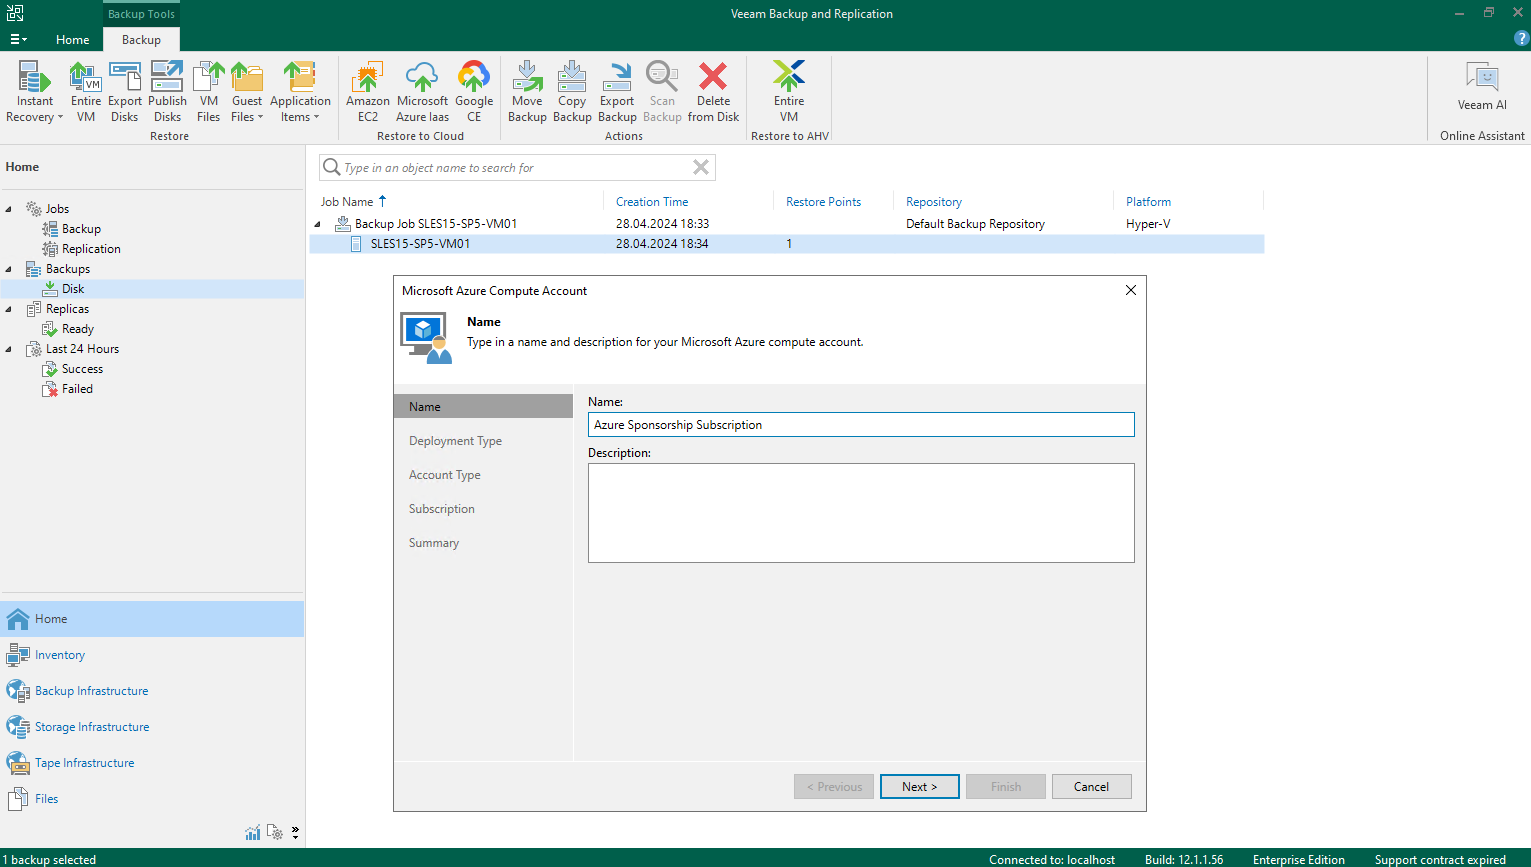
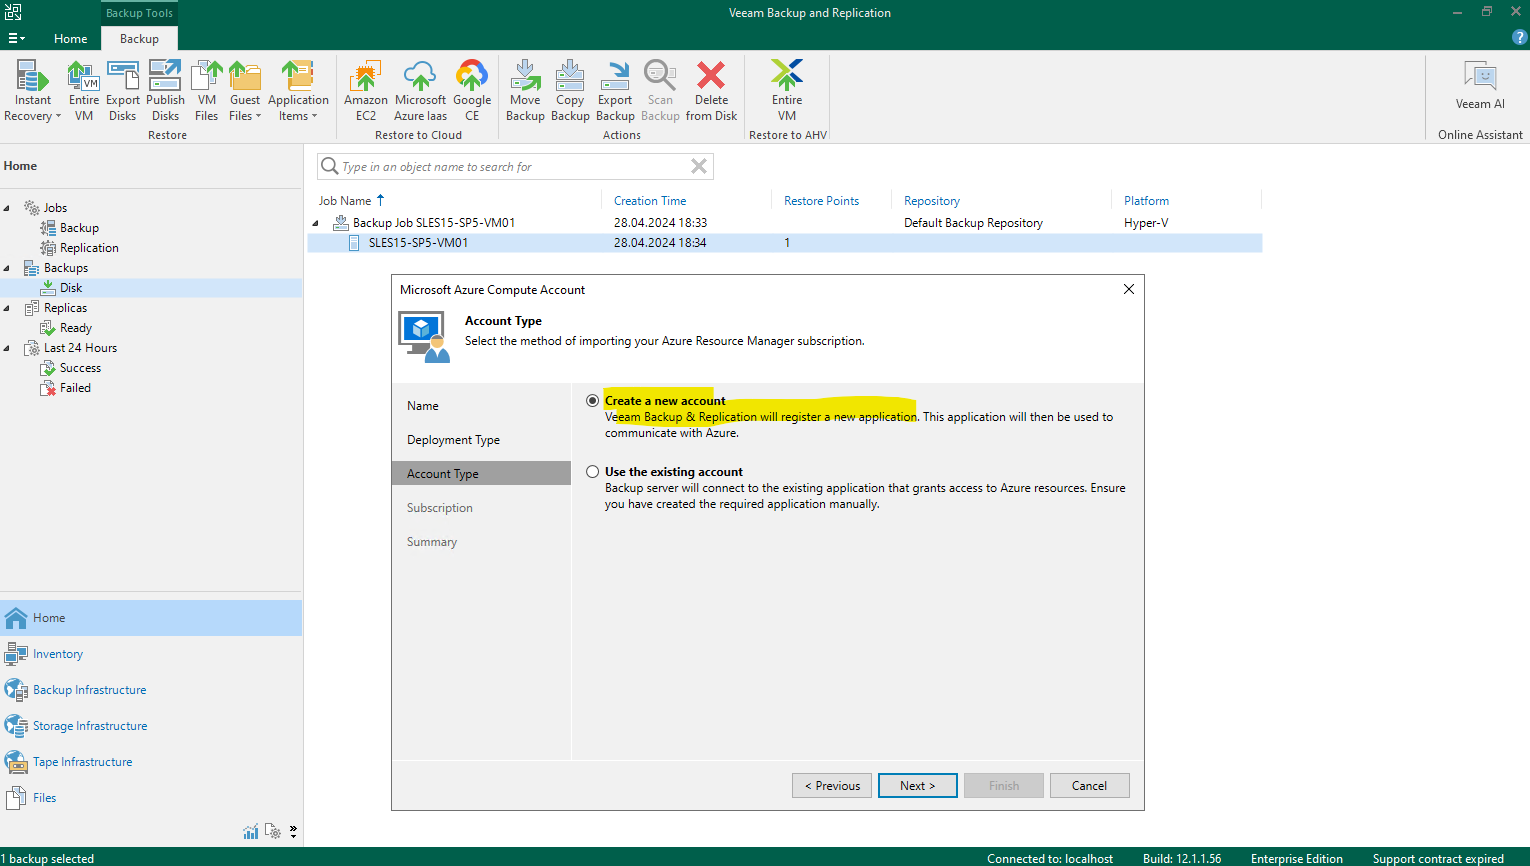
Create a Microsoft Azure Compute Account and Application to connect Veeam to Azure
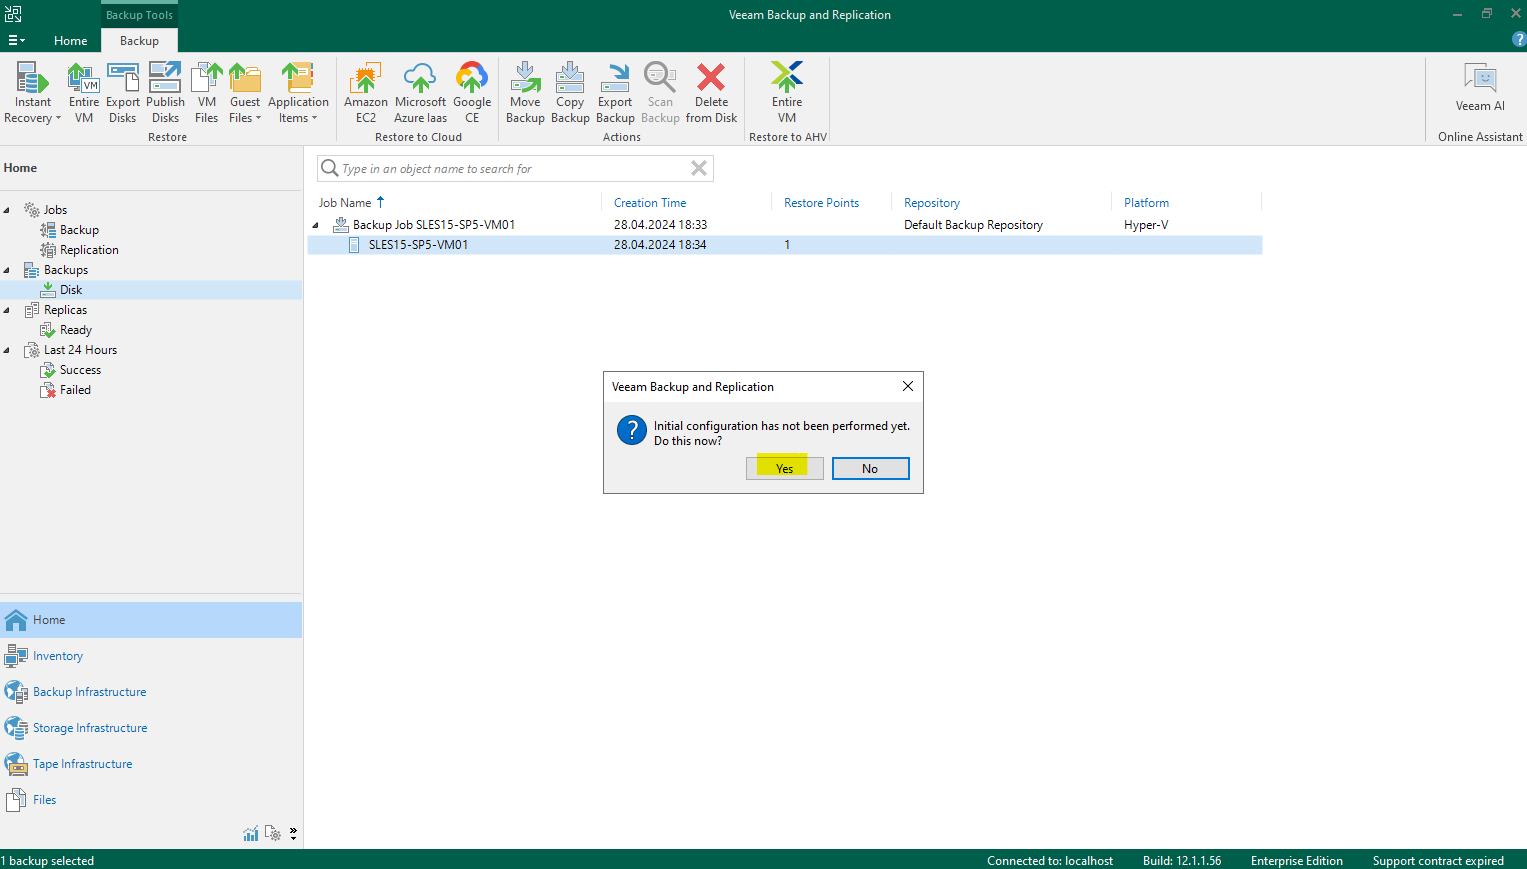
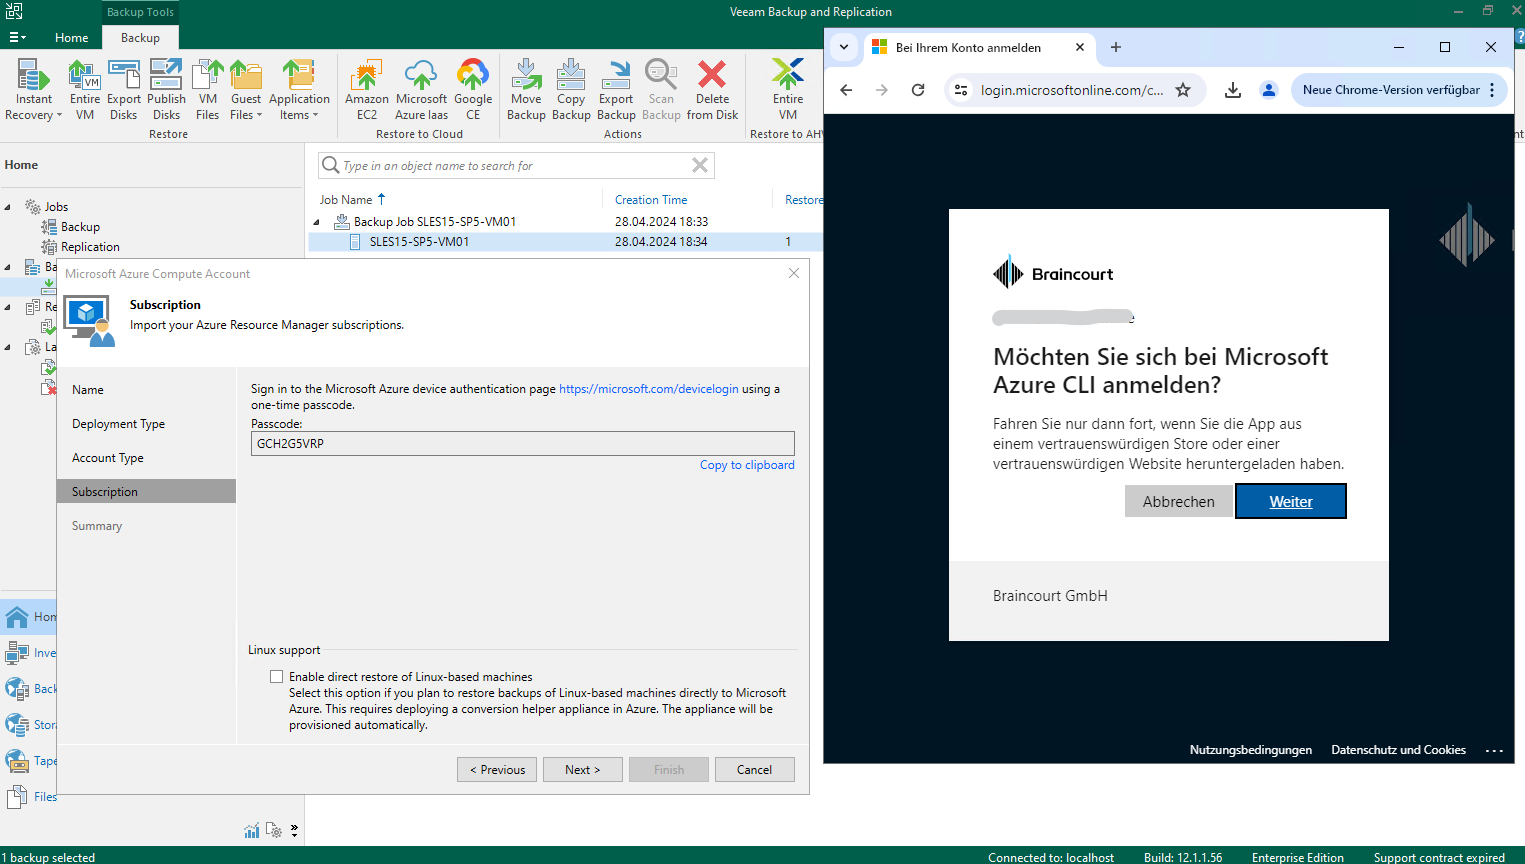
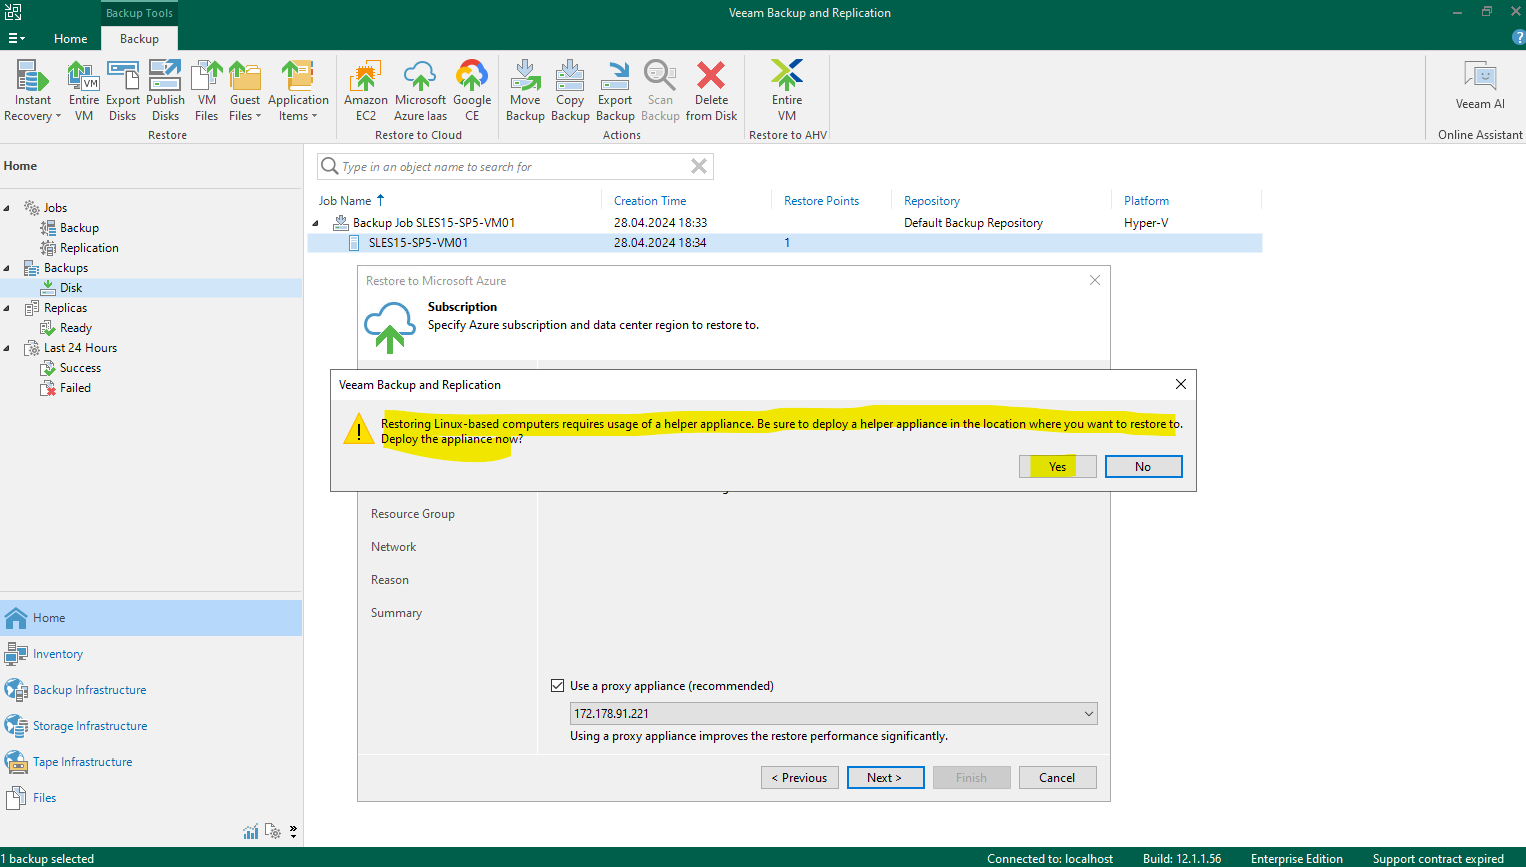
Click on Yes to perform the initial configuration where we finally configure the Microsoft Azure Compute Account to access Azure by Veeam.
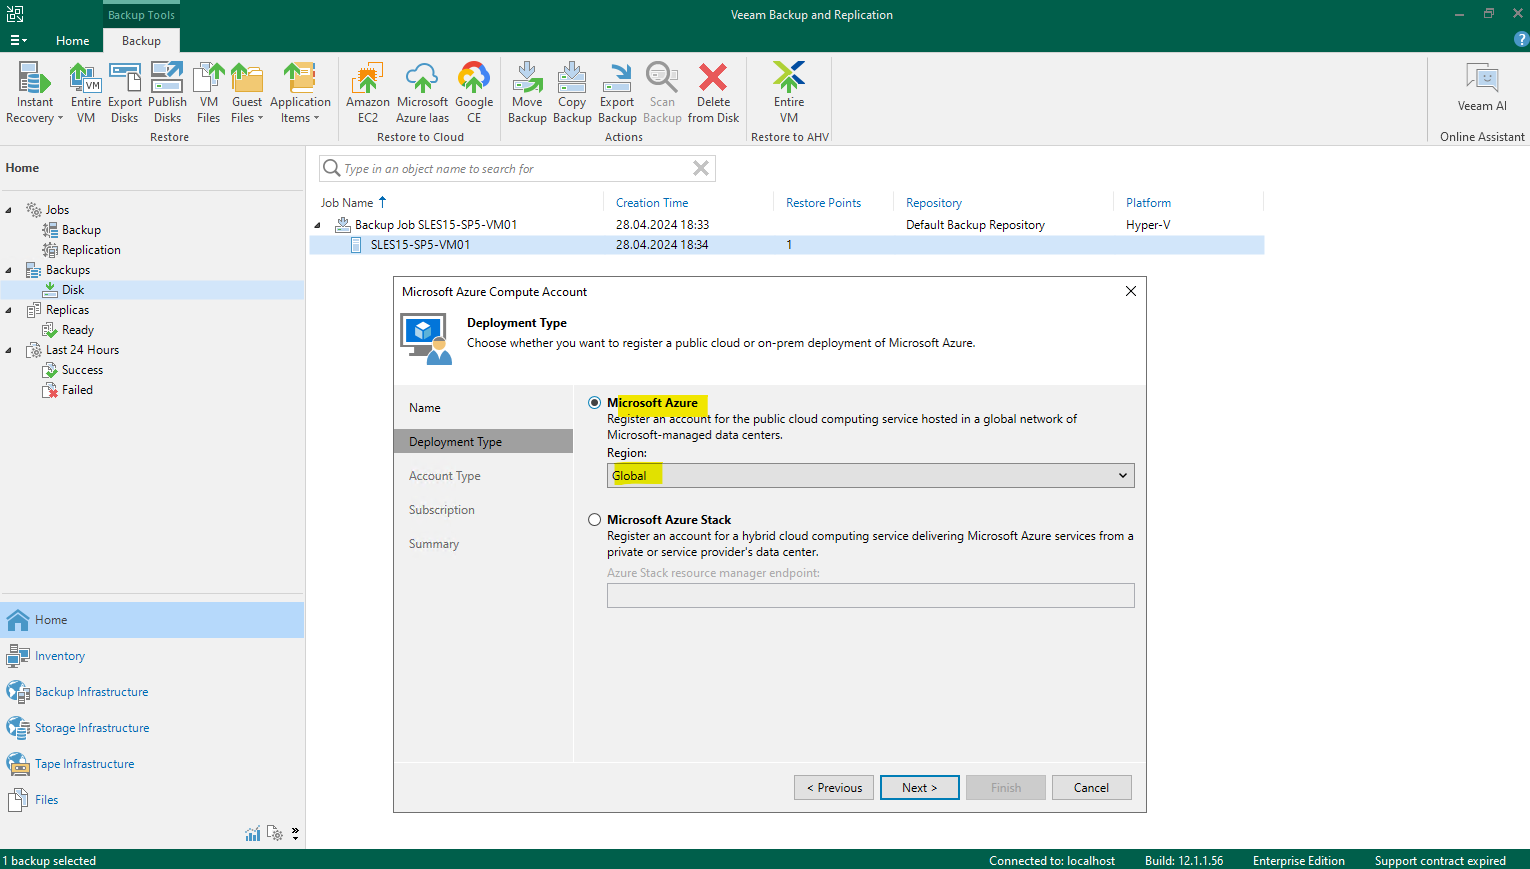
Usually we need to select here Microsoft Account – Global.
I will create a new account and application. More about Azure Enterprise Applications and App Registrations you will find in my following post.
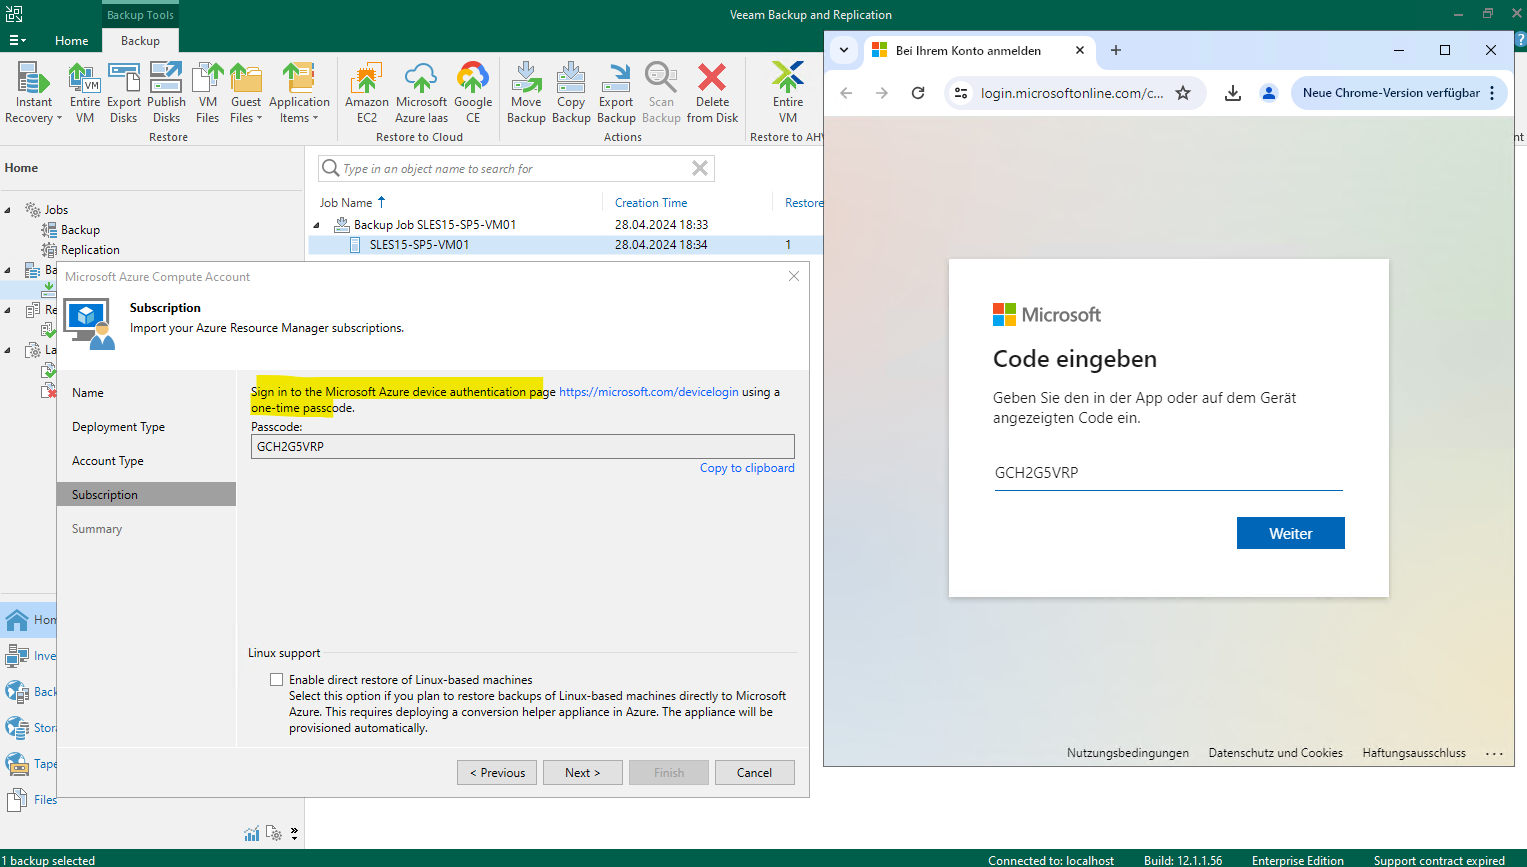
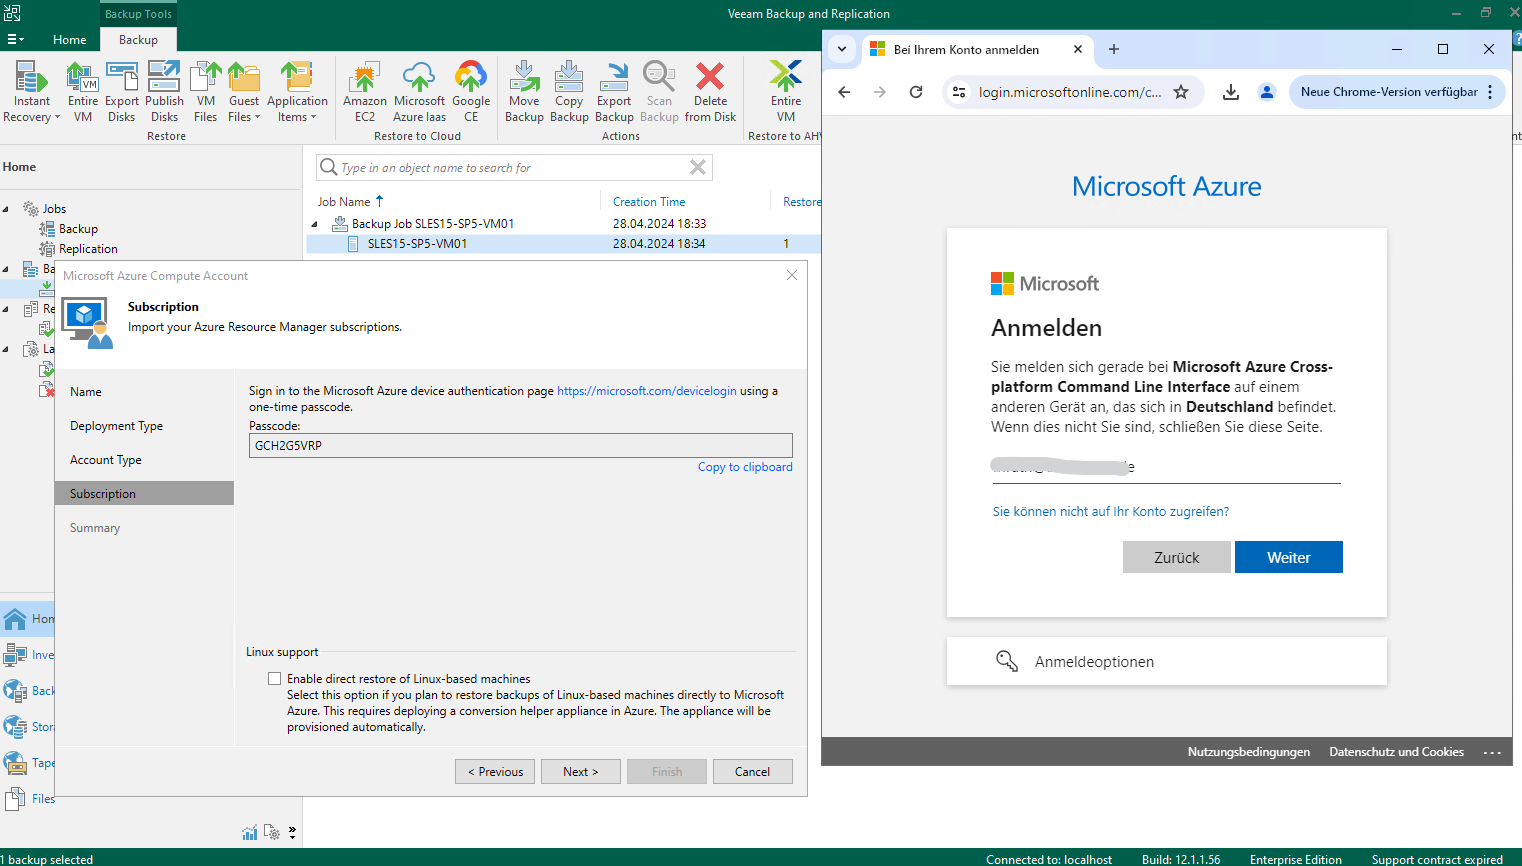
To access or create an Azure account you need to have installed Azure PowerShell on the Veeam Server.
Install Azure PowerShell on Windows
https://learn.microsoft.com/en-us/powershell/azure/install-azps-windows
The account must have the following privileges:
- To register applications. For this, you can assign the Global Administrator privileges to the user or enable the Users can register applications option for the user in Azure portal. For details, see Microsoft Azure Docs.
- To assign a role on the subscription level for the registered application. For this, you can use the Owner role or if the Owner role cannot be used, you can create a custom role with minimal permissions. To learn how to create a custom role, see Creating Custom Role for Azure and Azure Stack Hub Accounts.
More about the permissions this account must have you will find in the following article by Veeam https://helpcenter.veeam.com/docs/backup/vsphere/required_permissions.html?ver=120#azure_compute
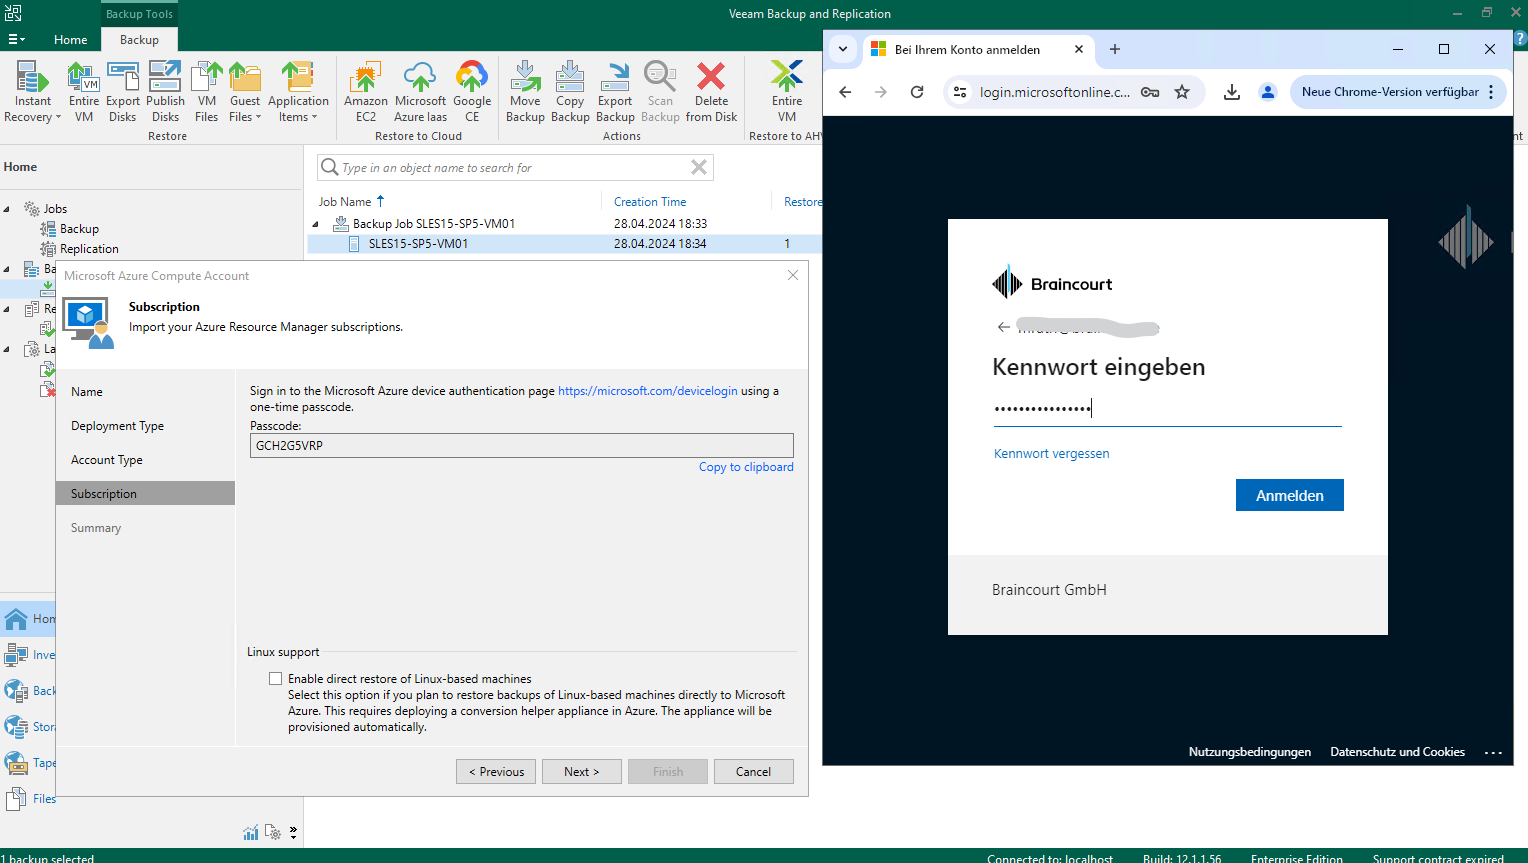
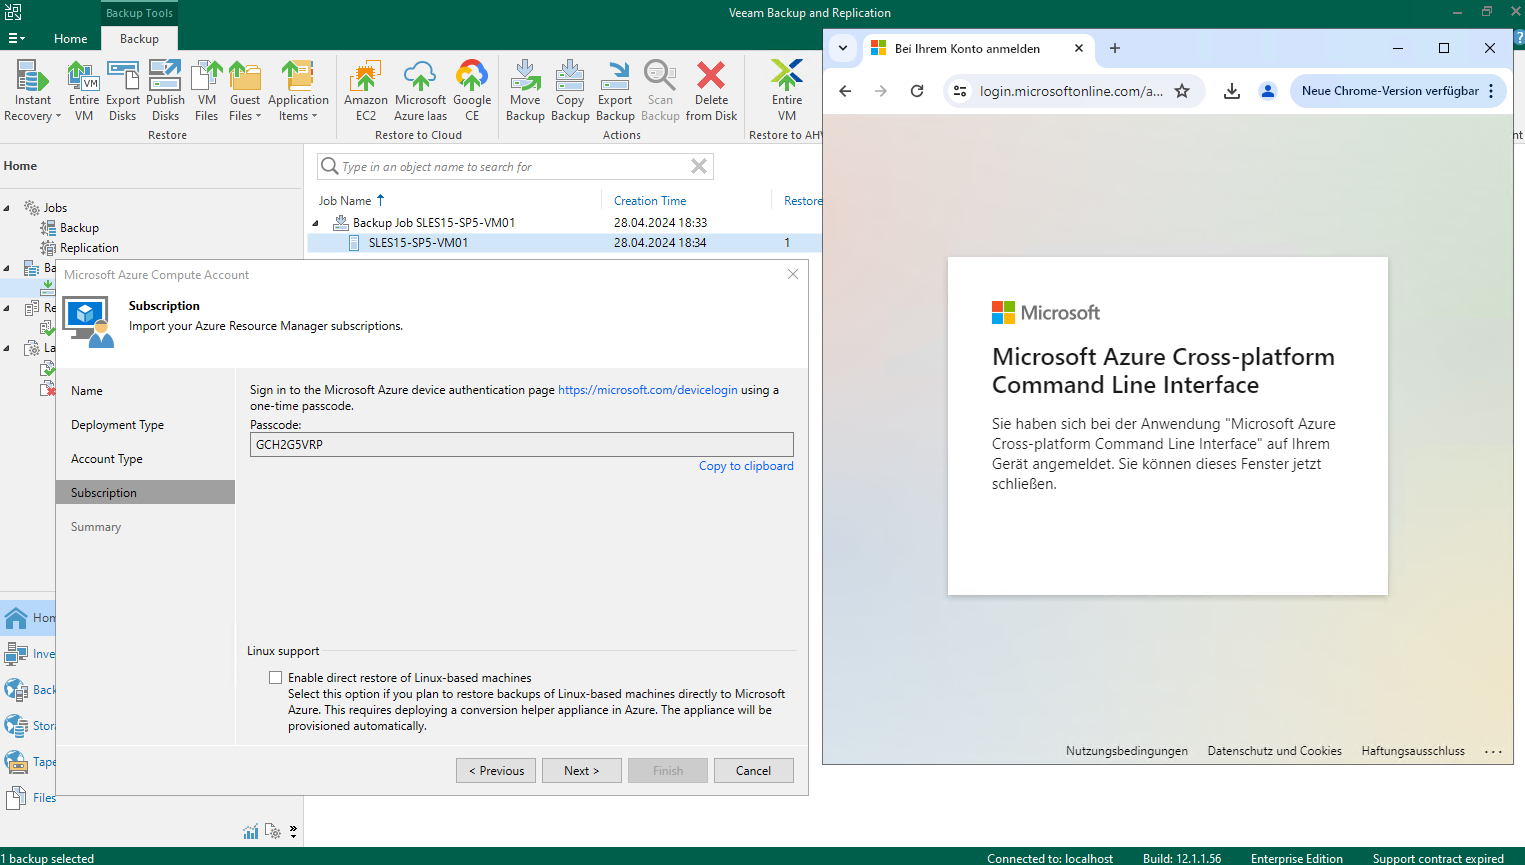
Close the browser and click on Next.
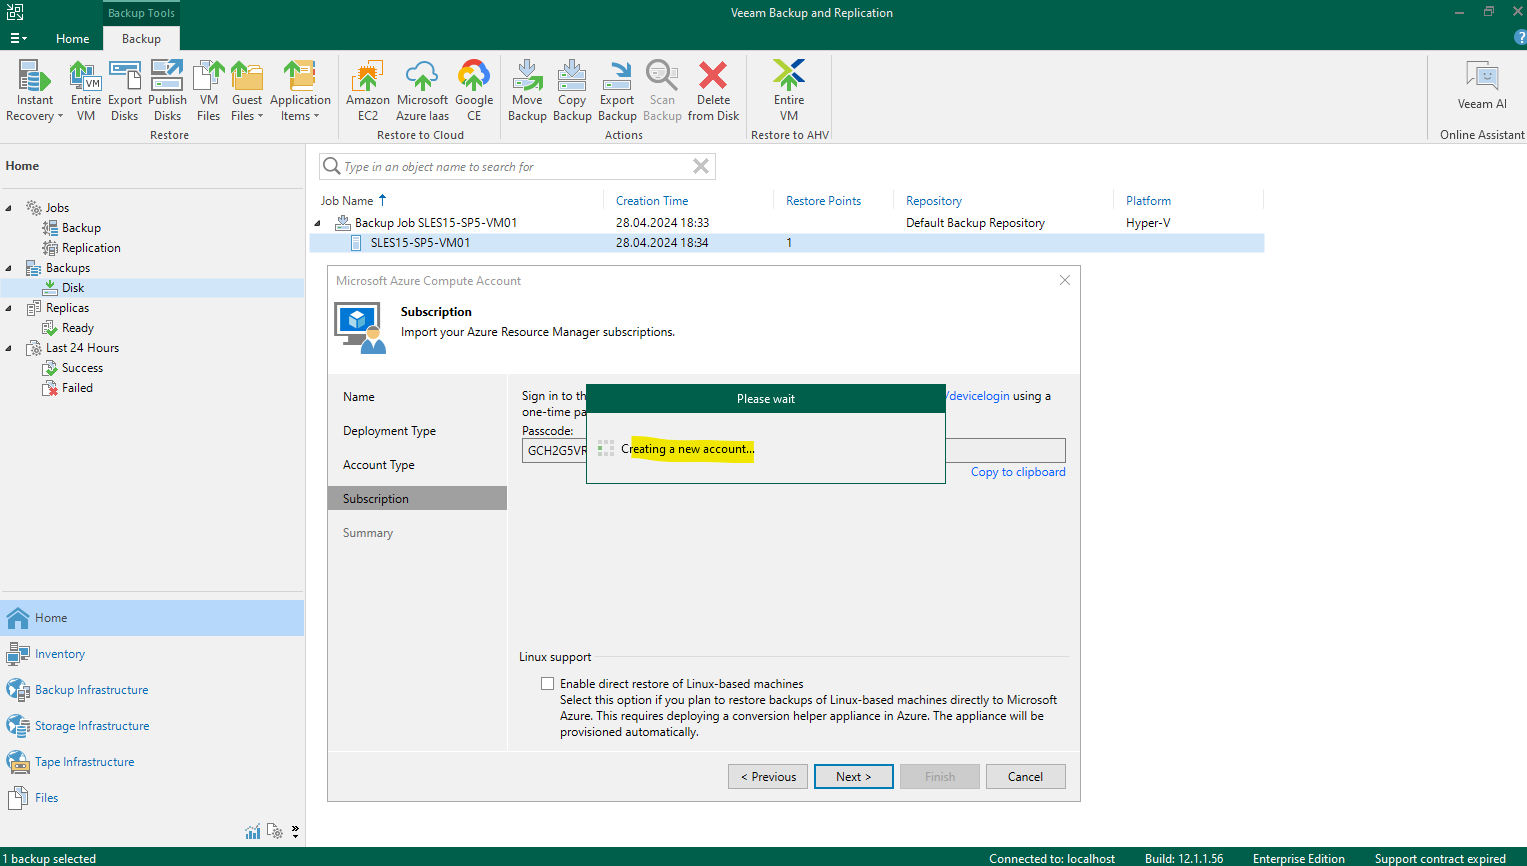
The new enterprise application in Microsoft Entra ID is now created which will later be used by Veeam to communicate with Azure.
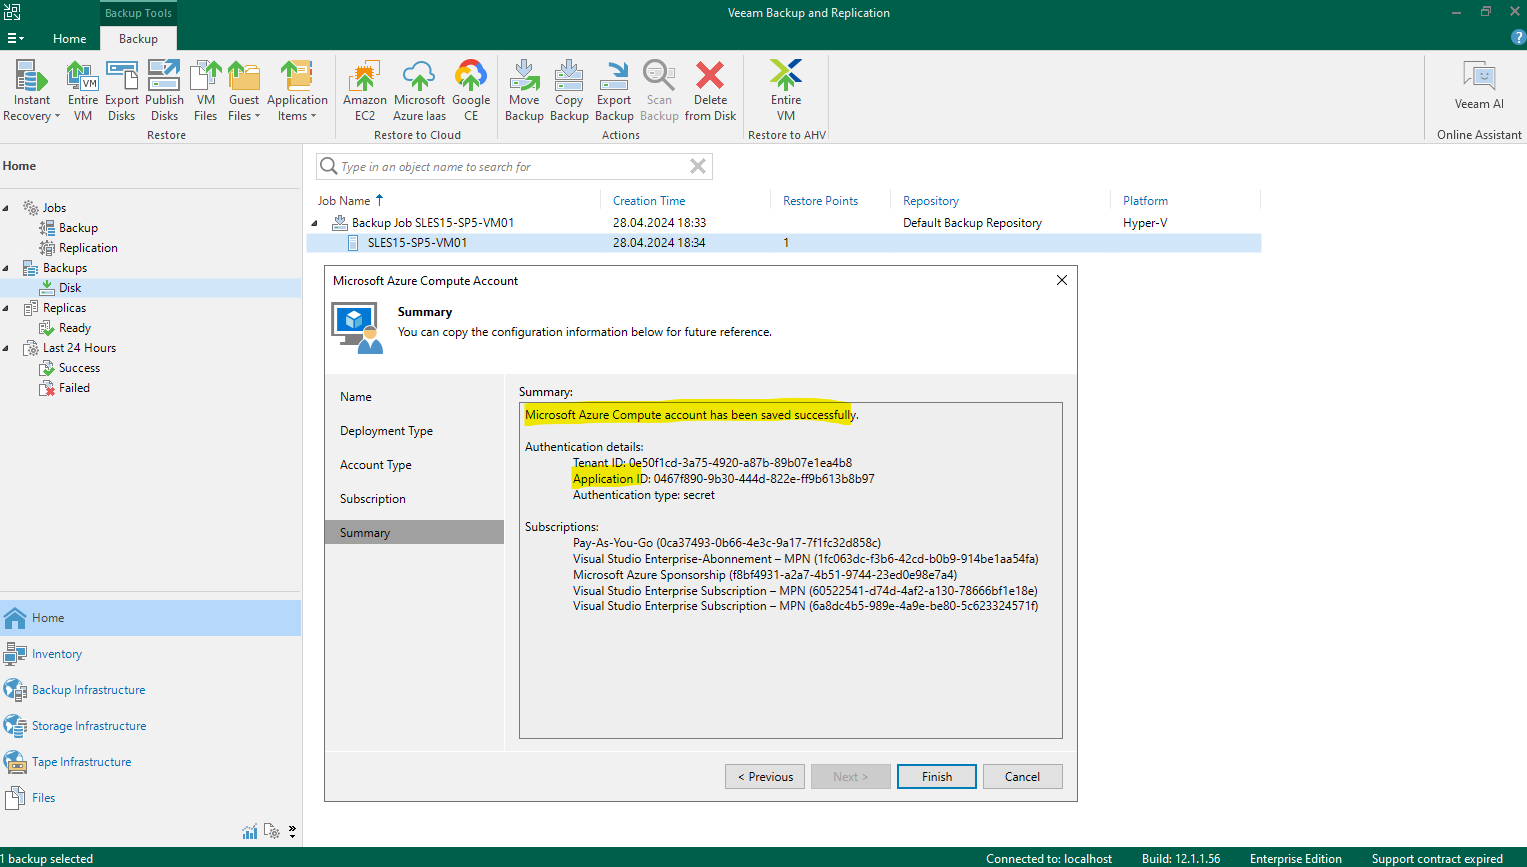
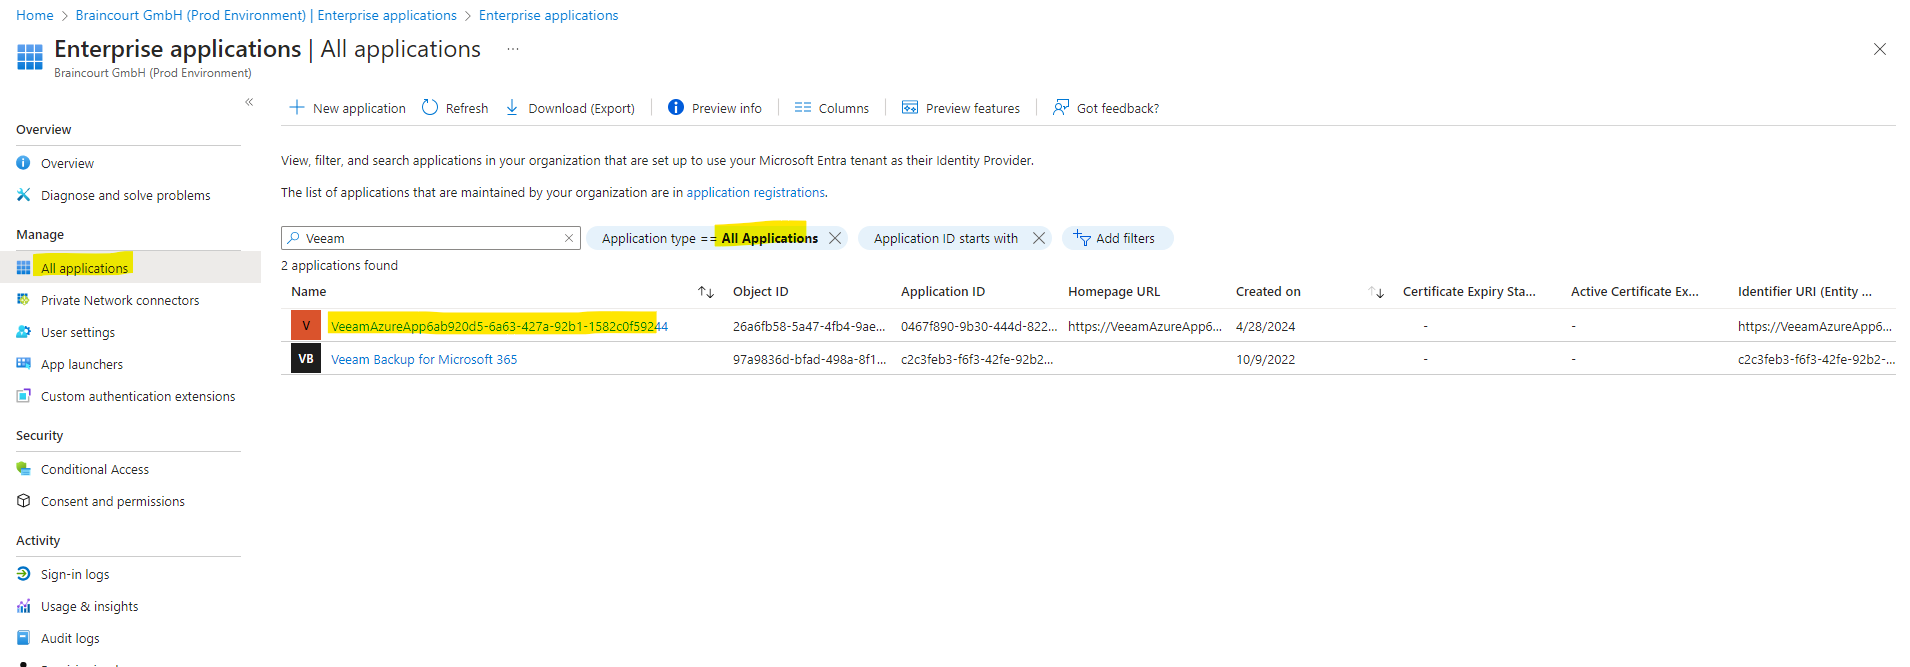
In Azure you will find the new application under Microsoft Entra ID -> Enterprise Applications and filter for All Applications as shown below.
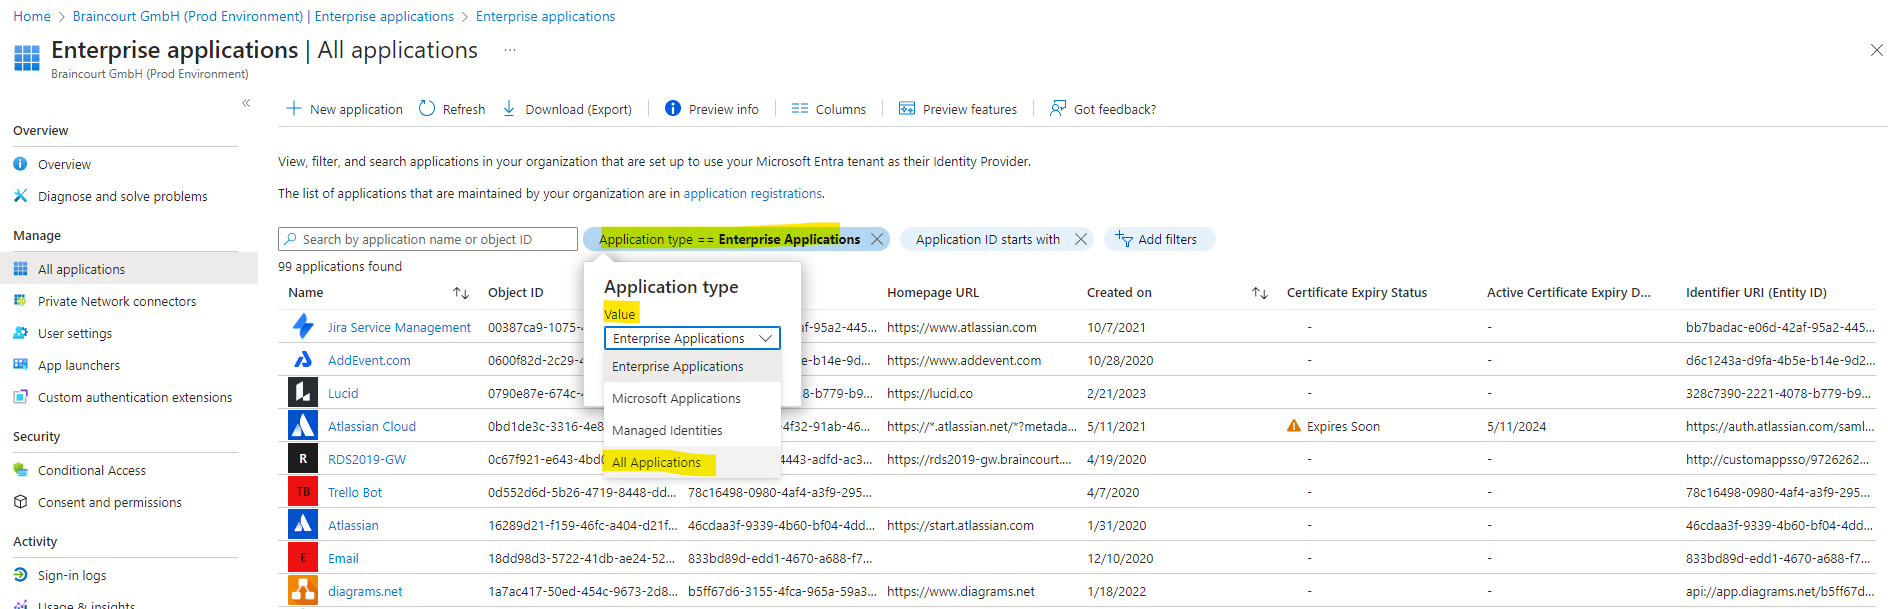
Search for Veeam. Here we can see the newly created application in Azure.
Restore to Microsoft Azure
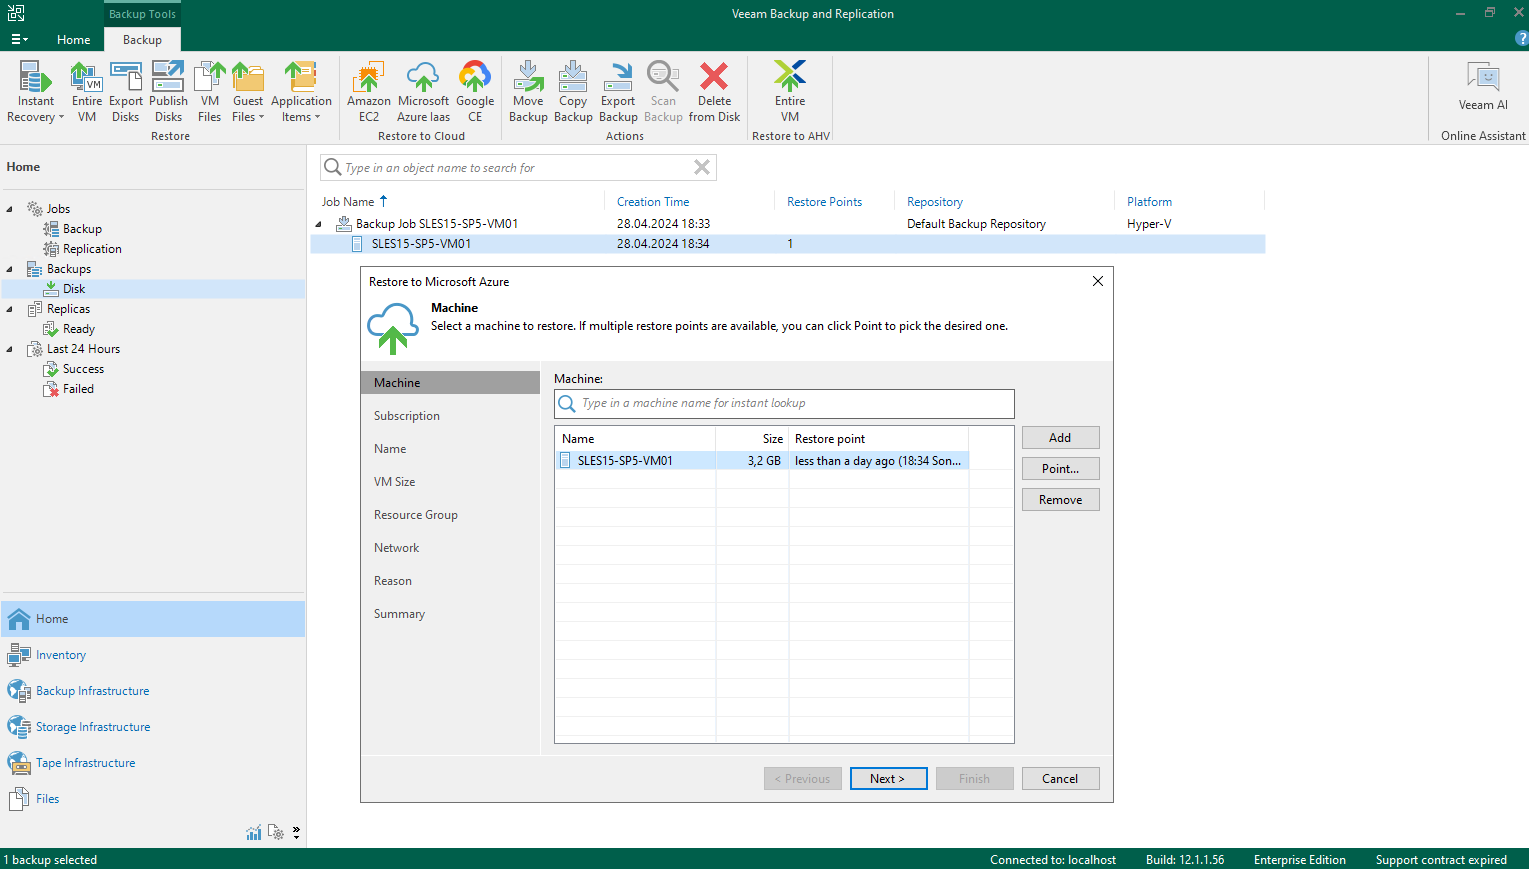
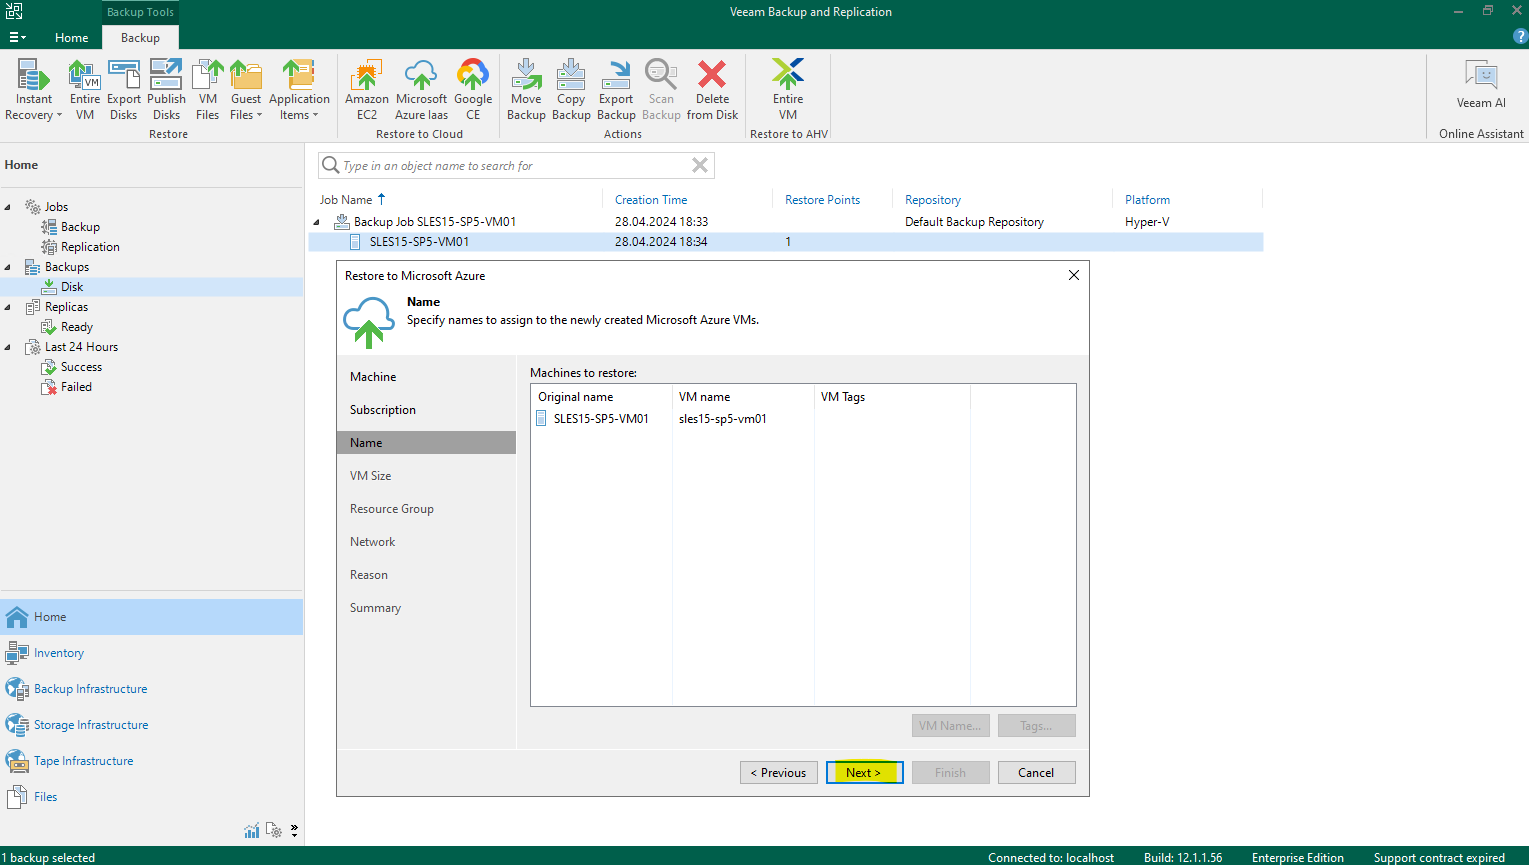
After clicking above within the Veeam wizard Microsoft Azure Compute Account on Finish, the Restore to Microsoft Azure wizard appears again. On the Machine page we can optional add further virtual machines to migrate to Azure.
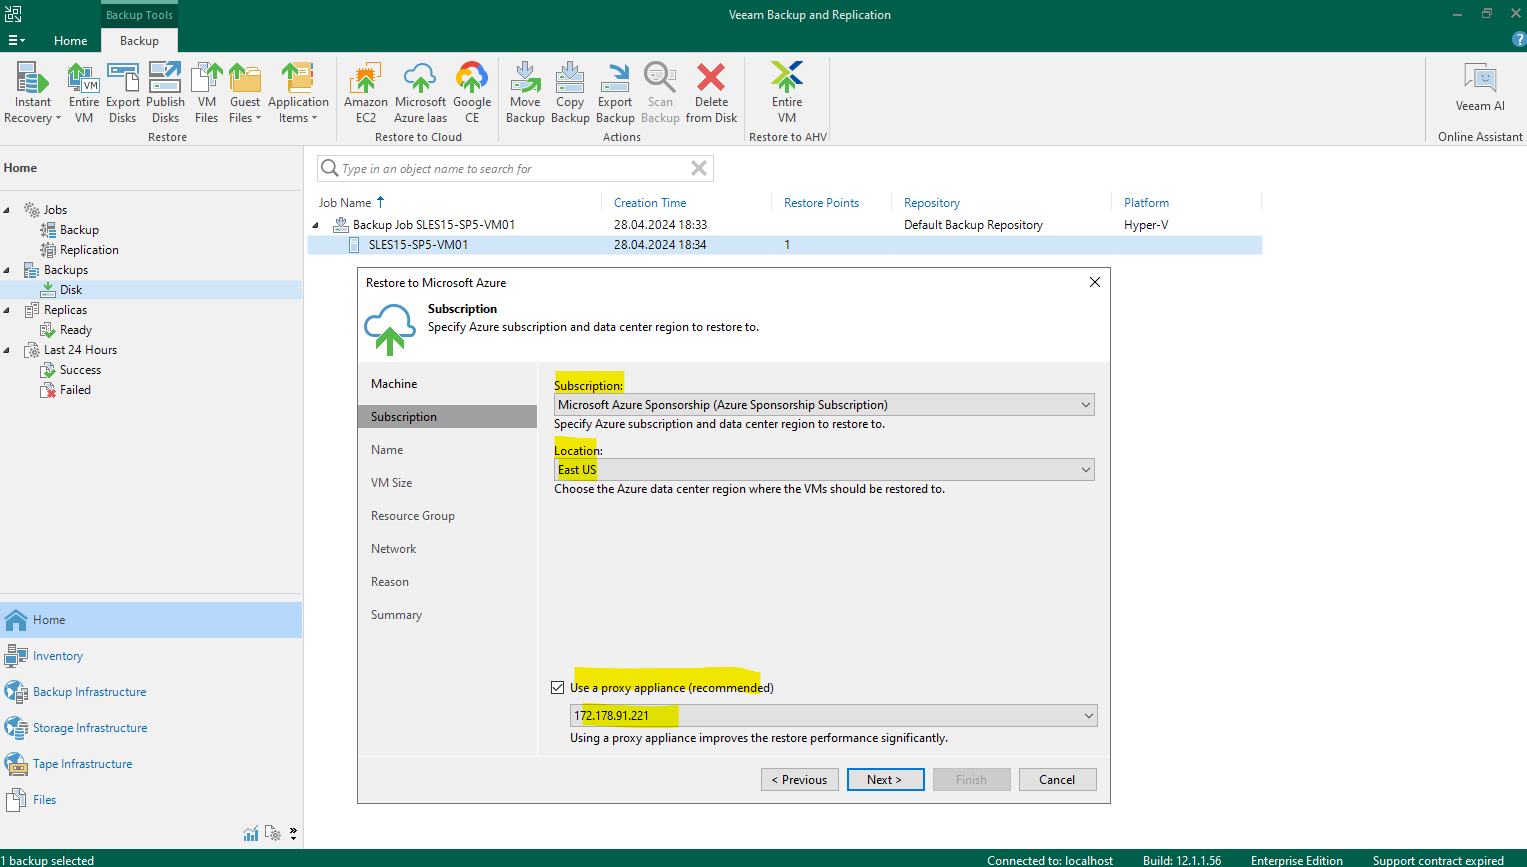
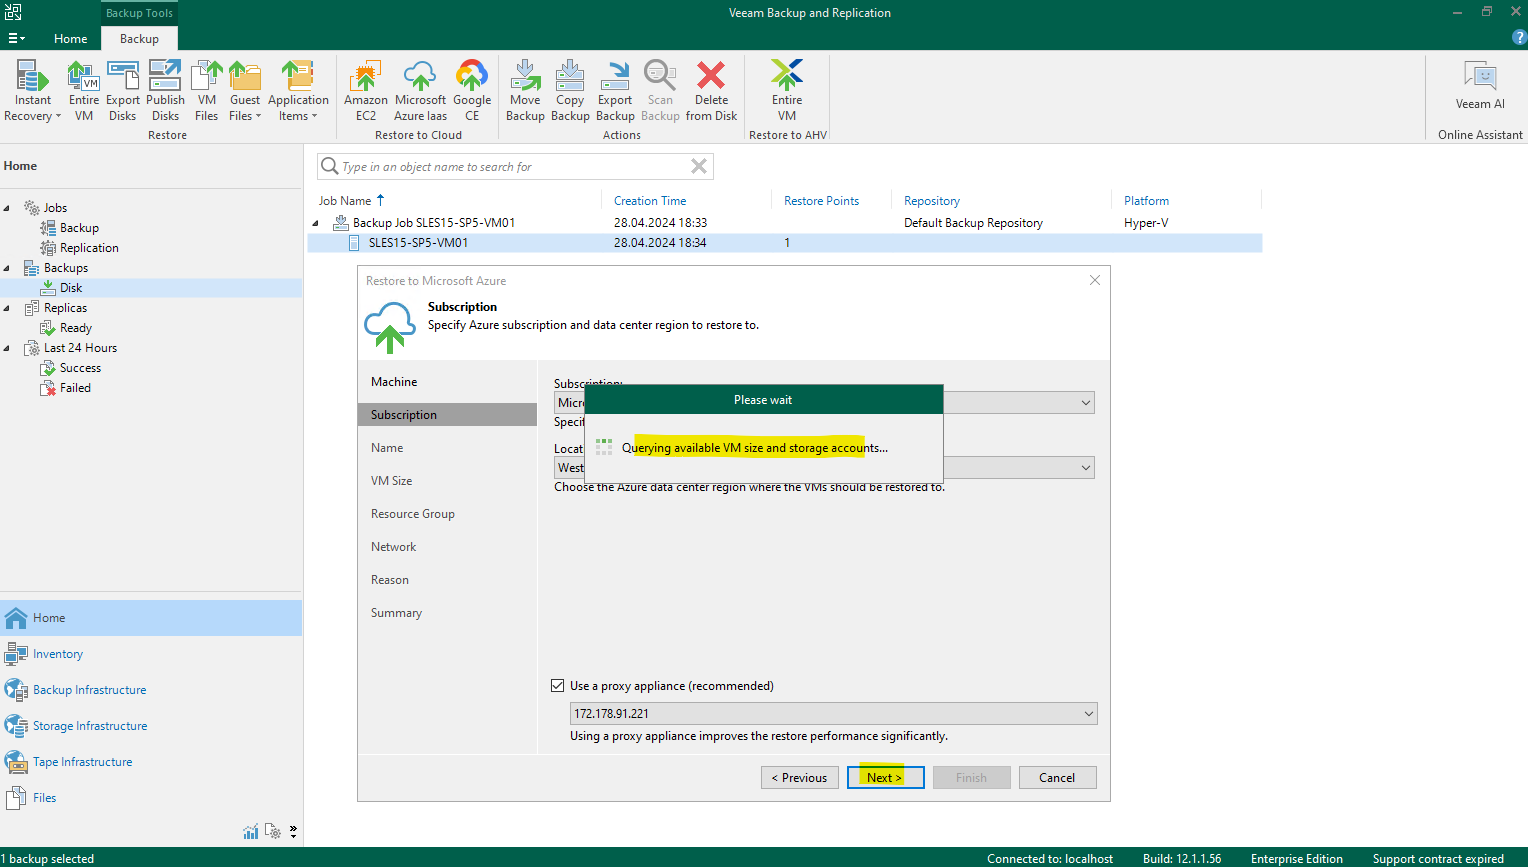
On the subscription page we need to select a subscription and location we want to use for the restored virtual machine to run later.
Further we can use a proxy appliance from Azure to improve the restored performance. In case you wonder from where Veeam will have this proxy appliance with the IP 172.178.91.221, you can read my following post about replicating virtual machines between different data center. This appliance is a Azure Hyper-V Server 2022 for nested virtualization which I already added to Veeam as managed server and therefore will be suggested by the wizard to use for. Finally this proxy can be each Windows or Linux virtual machine running within your Azure tenant you want to restore the virtual machine to.
More about these proxies you will also find in my following post.
Click on Next.
Create a Helper Appliance to restore Linux Workloads to Azure
Helper appliances are Linux-based VMs in Microsoft Azure registered by Veeam Backup & Replication. Helper appliances are required to restore Linux workloads to Microsoft Azure. During the restore process, Veeam Backup & Replication mounts disks of a backed-up workload to a helper appliance to prepare disks for restore.
When deploying the helper appliance, Veeam Backup & Replication analyzes the VM sizes available in the restore region and selects the cheapest and smallest size suitable for using the helper appliance.
Helper appliances are persistent. After the restore process finishes, helper appliances get powered off and remain in Microsoft Azure. The appliances remain in the powered off state until you start a new restore process. Note that Microsoft Azure will bill you for storing helper appliances disks in the storage account. To remove a helper appliance, follow the instruction provided in Removing Helper Appliances.
Source: https://helpcenter.veeam.com/docs/backup/vsphere/restore_azure_linux.html?ver=120
In order to create the helper appliance in Azure, we need to provide some information like the subscription we want to use for and the location. I will select here the same subscription and location where my already created Azure Hyper-V Server 2022 for nested virtualization was created as mentioned previously and therefore can use the same virtual network they will run all. To establish network connectivity between them I don’t need to connect different virtual networks therefore later.
All Azure resources are created in an Azure region and subscription. A resource can only be created in a virtual network that exists in the same region and subscription as the resource. You can however, connect virtual networks that exist in different subscriptions and regions.
Source: https://learn.microsoft.com/en-us/azure/virtual-network/virtual-network-vnet-plan-design-arm
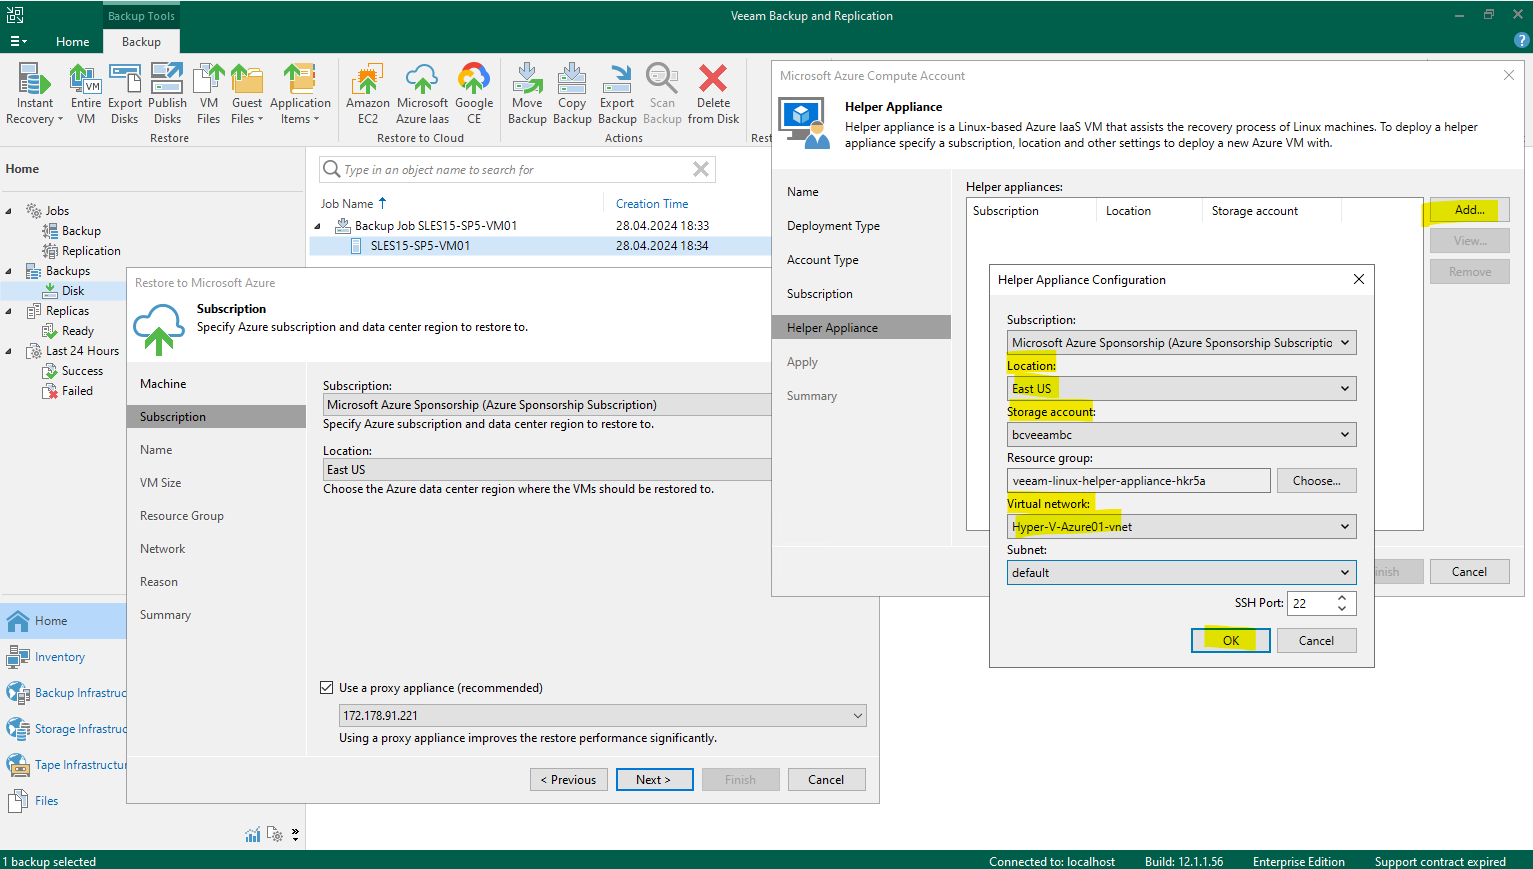
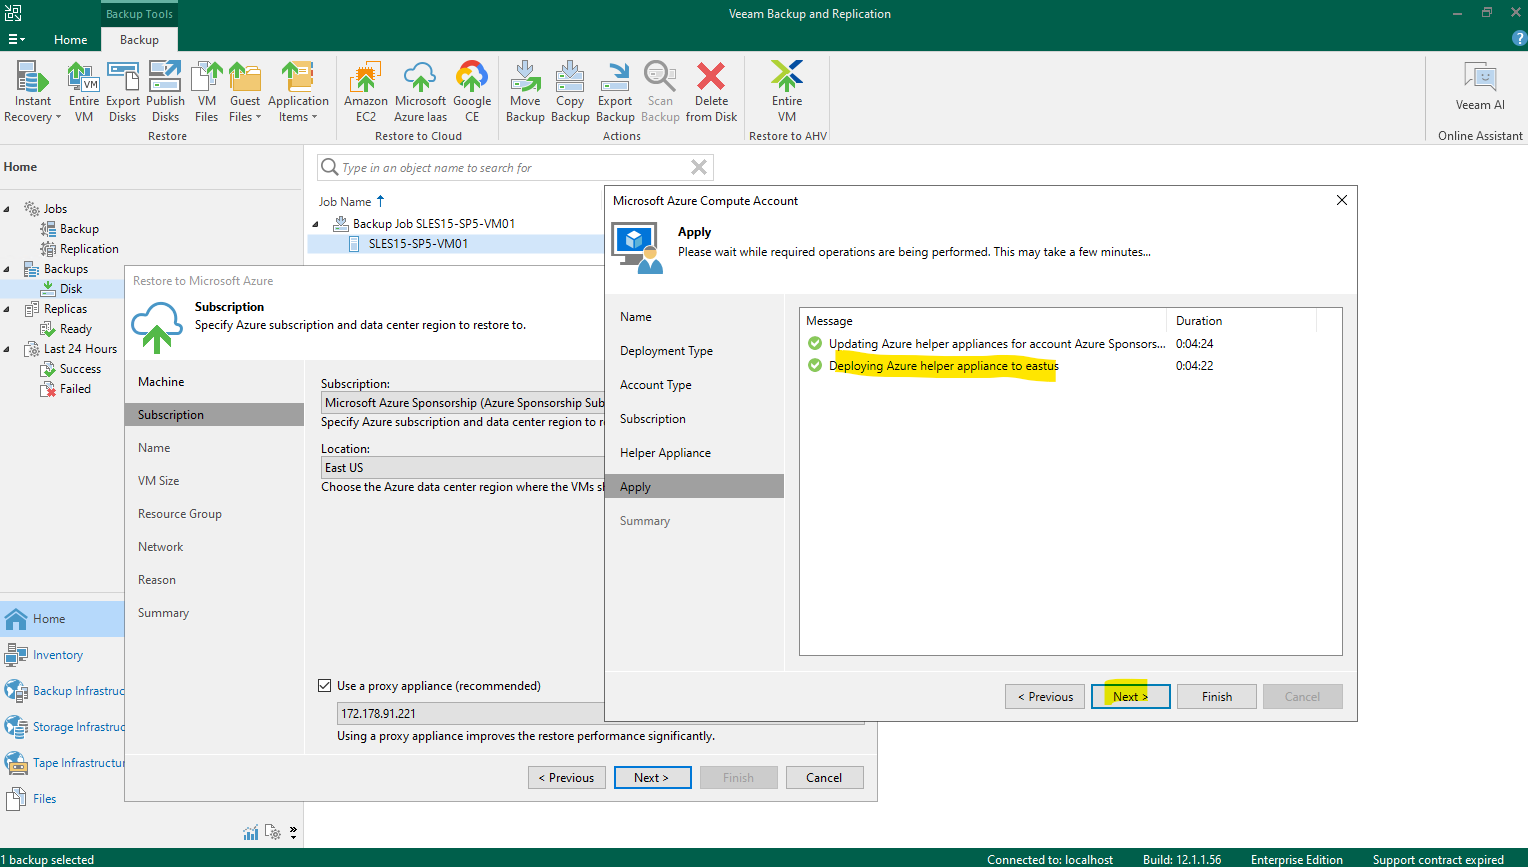
Click on Next to create and deploy the helper appliance finally in the subscription and location we set for.
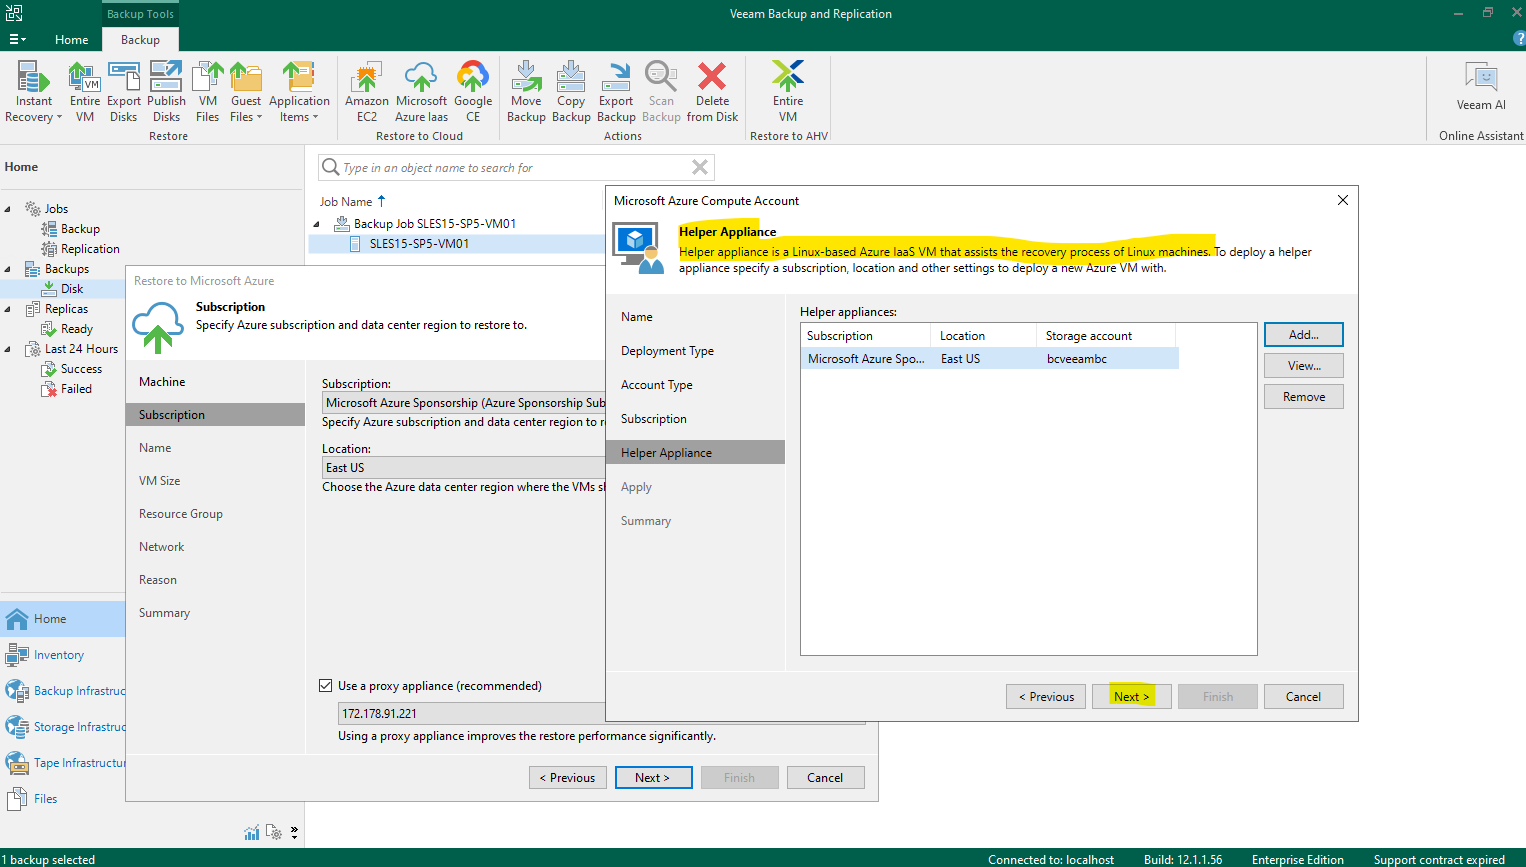
When the Azure helper appliance is deployed we can click on Next.
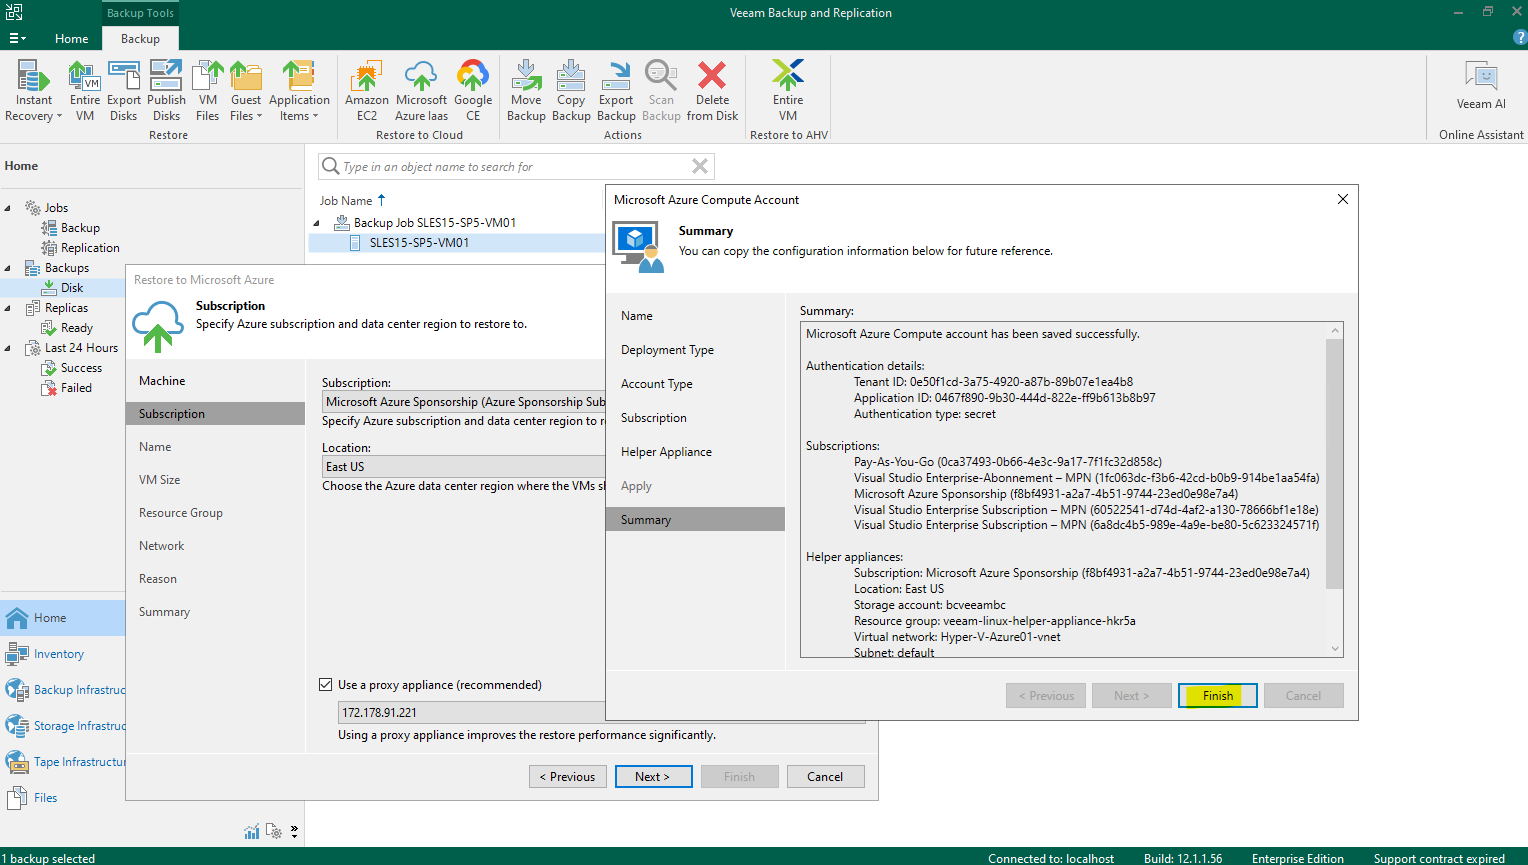
Finally click on Finish.
Finalize Restore to Microsoft Azure
Now we can go on with the actual restore process of our virtual machine to Azure. Click also on Next within this wizard.
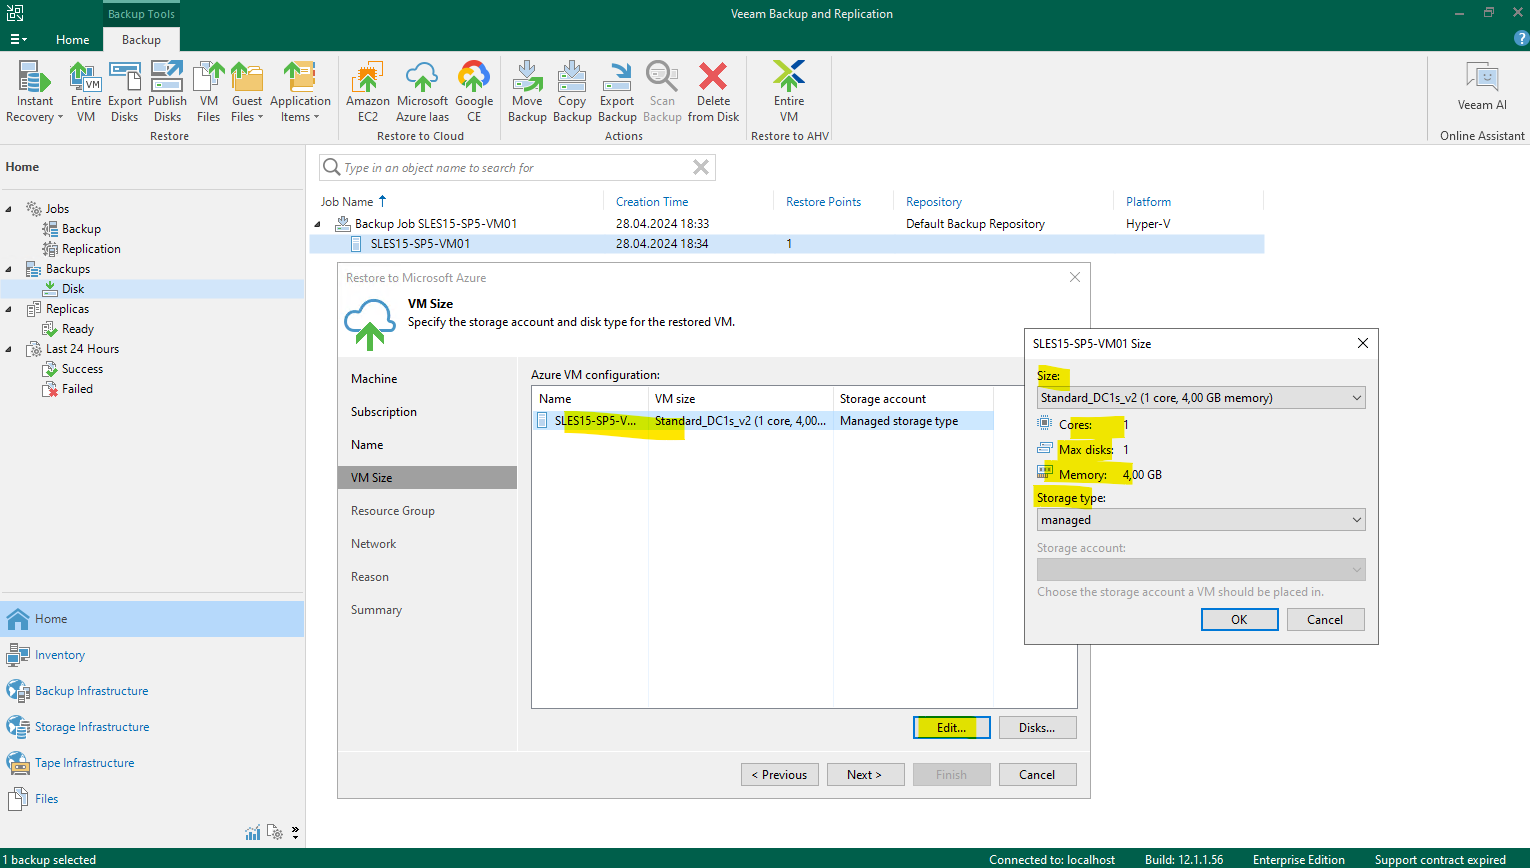
On the VM Size page we can set the new size for the restored virtual machine in Azure for cpu, storage (disks), memory and storage type as shown below. I will leave the suggested values.
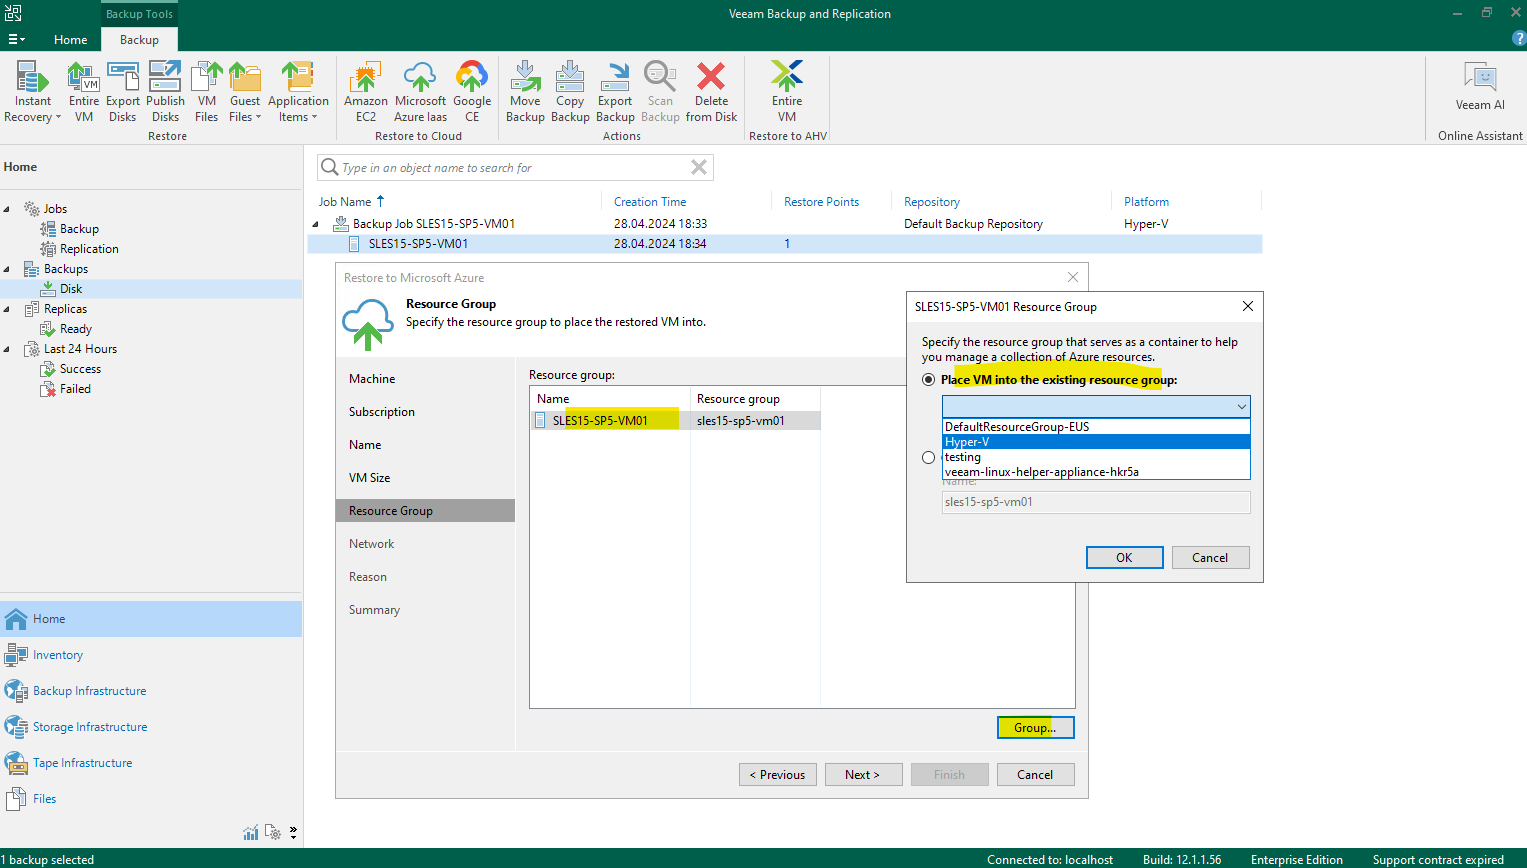
On the Resource Group page we can either create a new resource group to place the restored virtual machine to or we select an already existing resource group.
I want to place the restored virtual machine in the same resource group as my Azure Hyper-V Server 2022 mentioned previously.
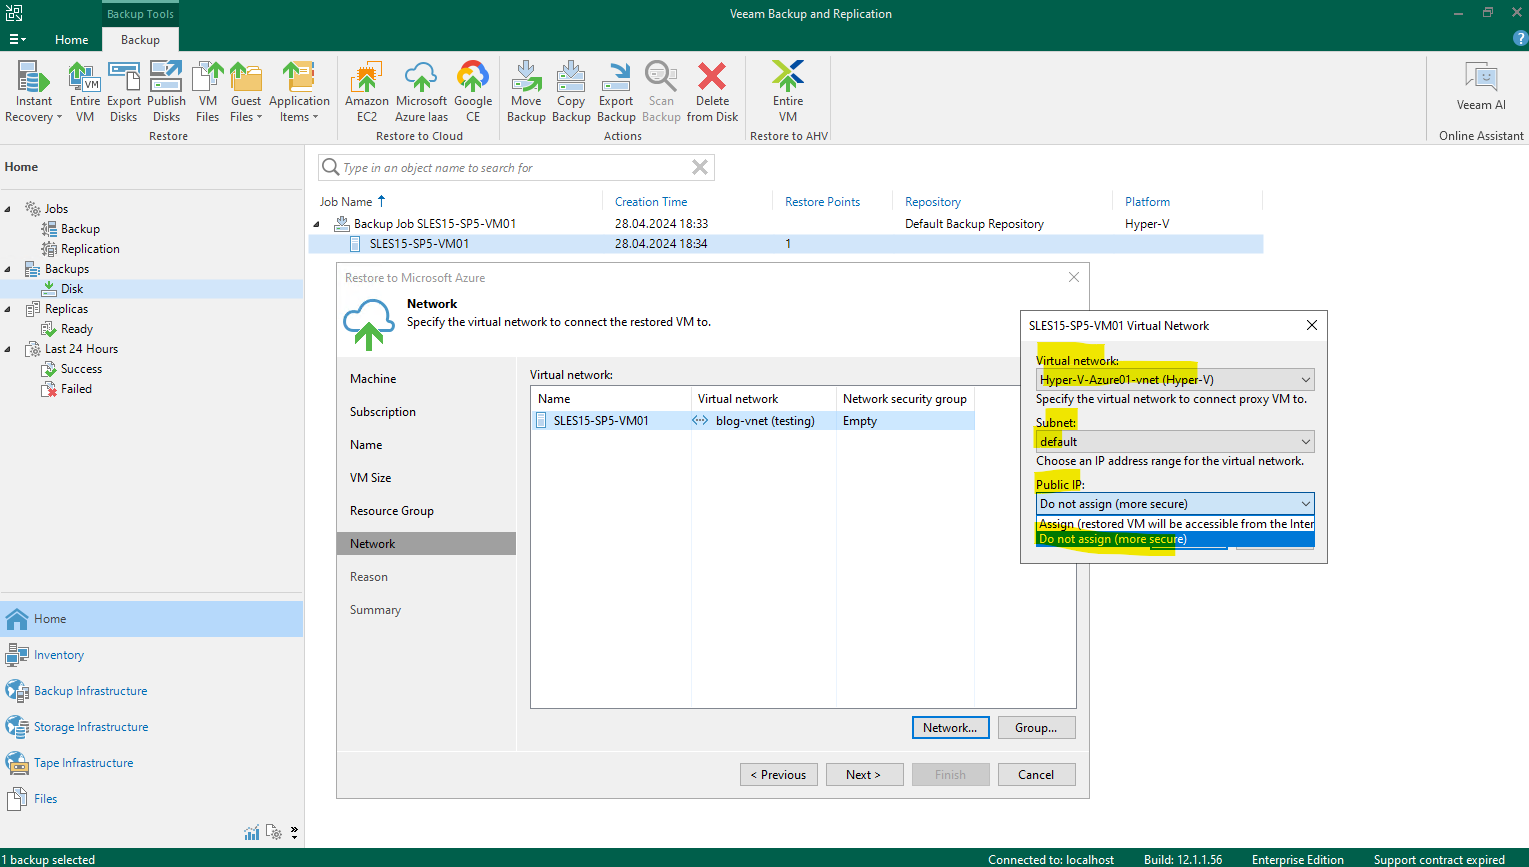
On the Network page we can set the virtual network and subnet our restored virtual machine should be placed to. Further we can select if the virtual machine will get a public IP address or not.
I will put it the restored virtual machine into the same VNet and subnet as my Azure Hyper-V Server 2022.
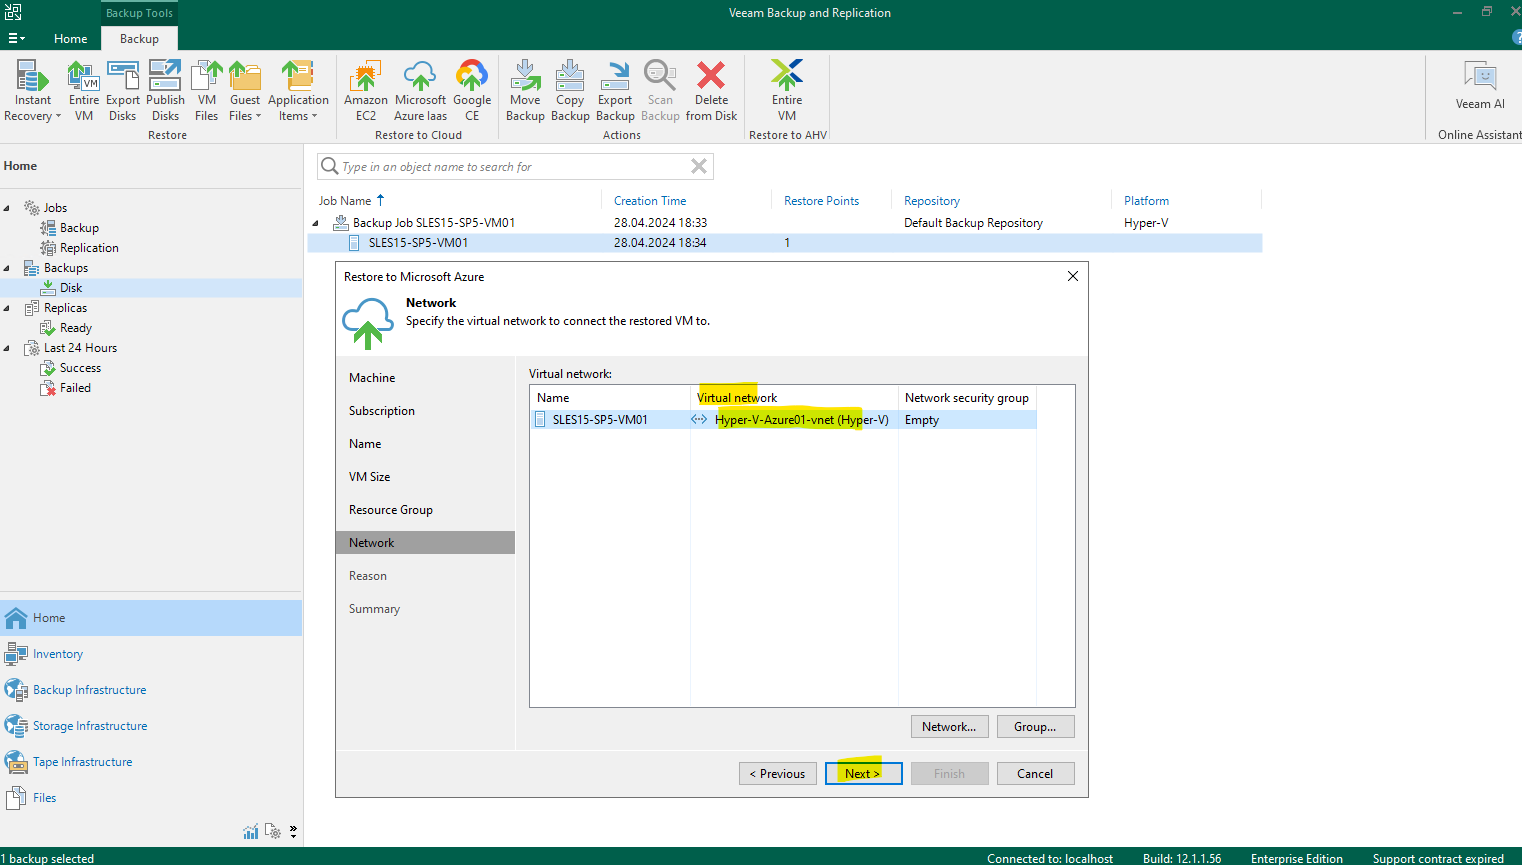
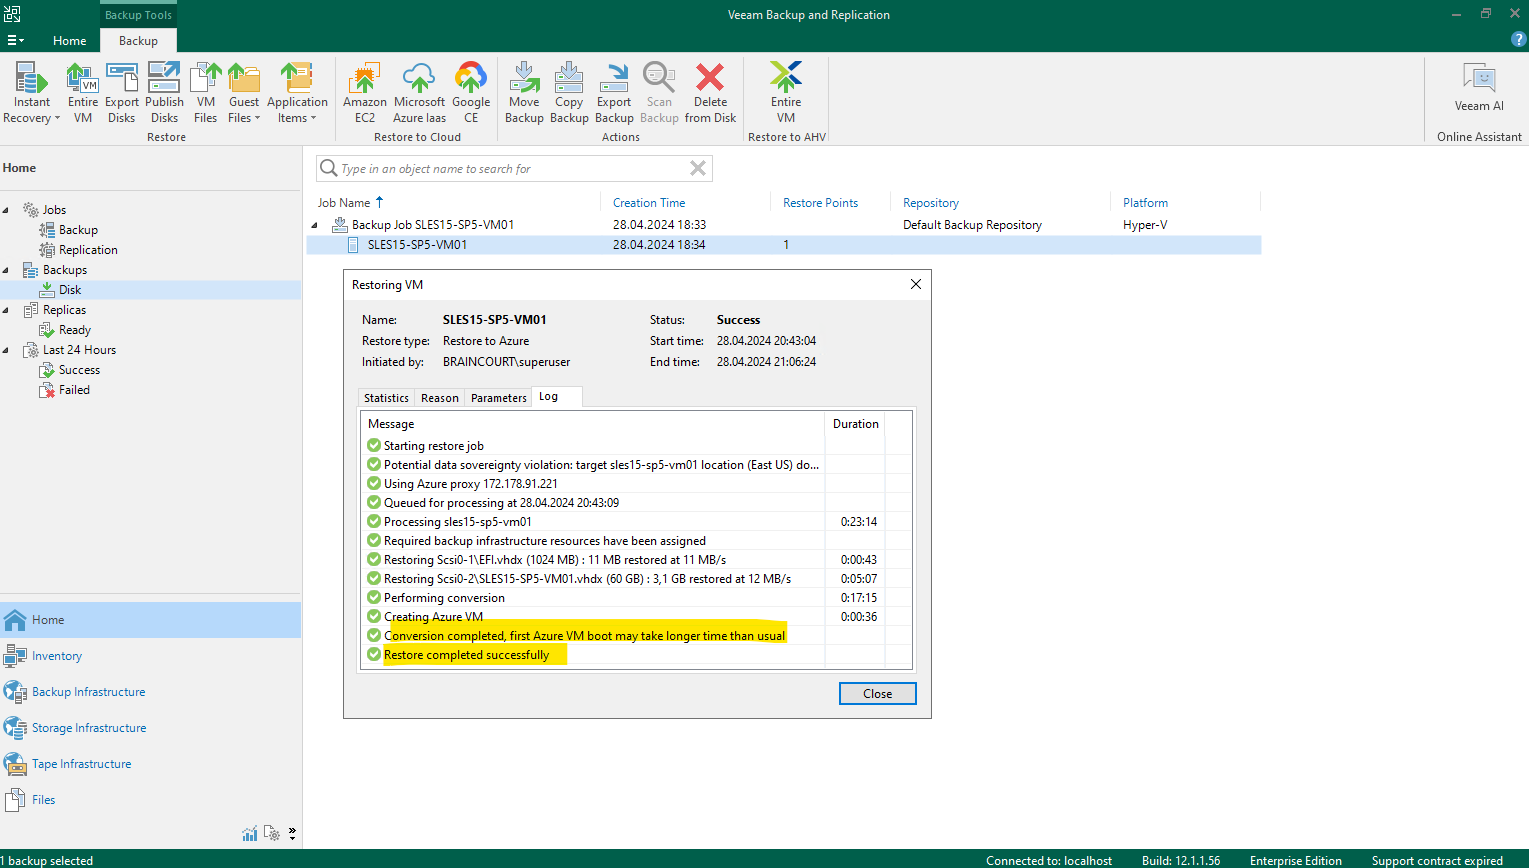
Finally we can click on Finish to start the restore process to Azure.

Finally the virtual machine is restored to my Azure tenant.
Check the IP Address Configuration of the restored Virtual Machine in Azure
In Azure we can now see the restored virtual machine and in my case also the helper appliance which is used to restore Linux workloads to Azure.
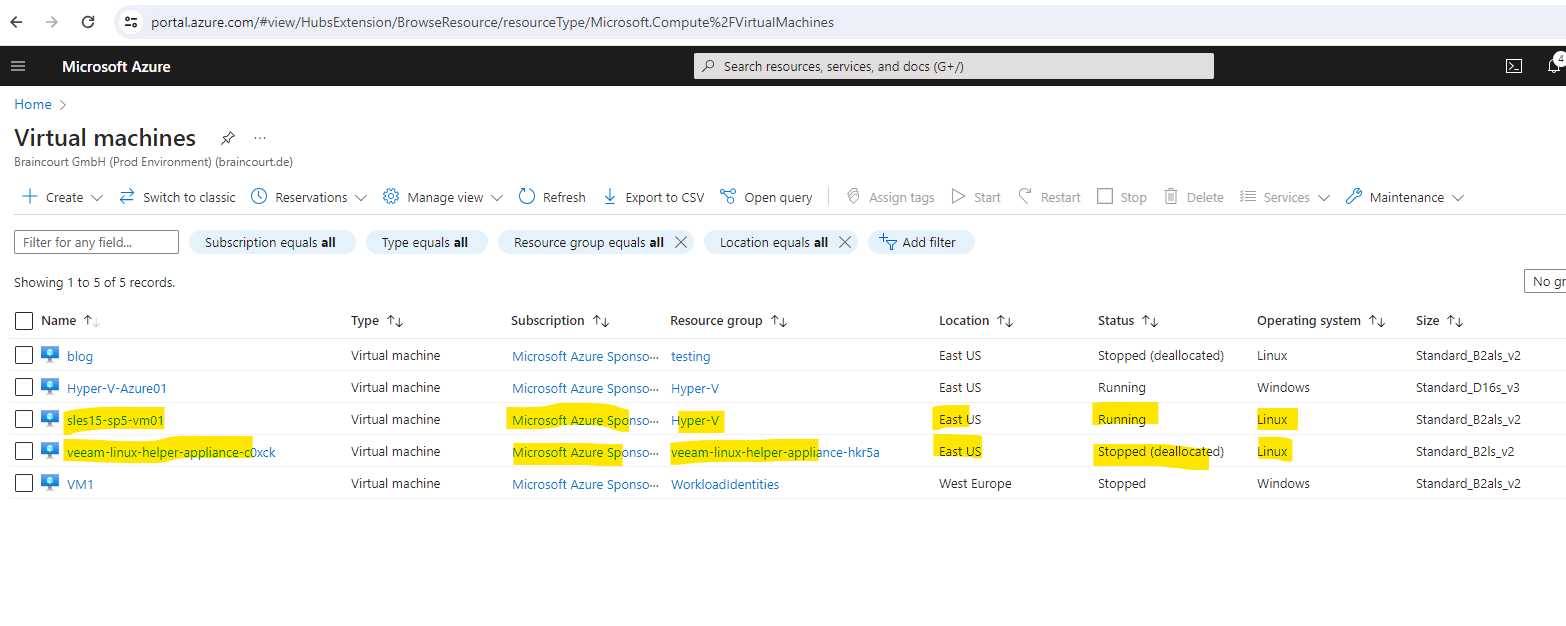
Actually I wanted to show here the IP address configuration of the restored virtual machine in Azure. Unfortunately the virtual machine is not able to boot the OS and the boot loader GRUB doesn’t find a boot image as shown below.
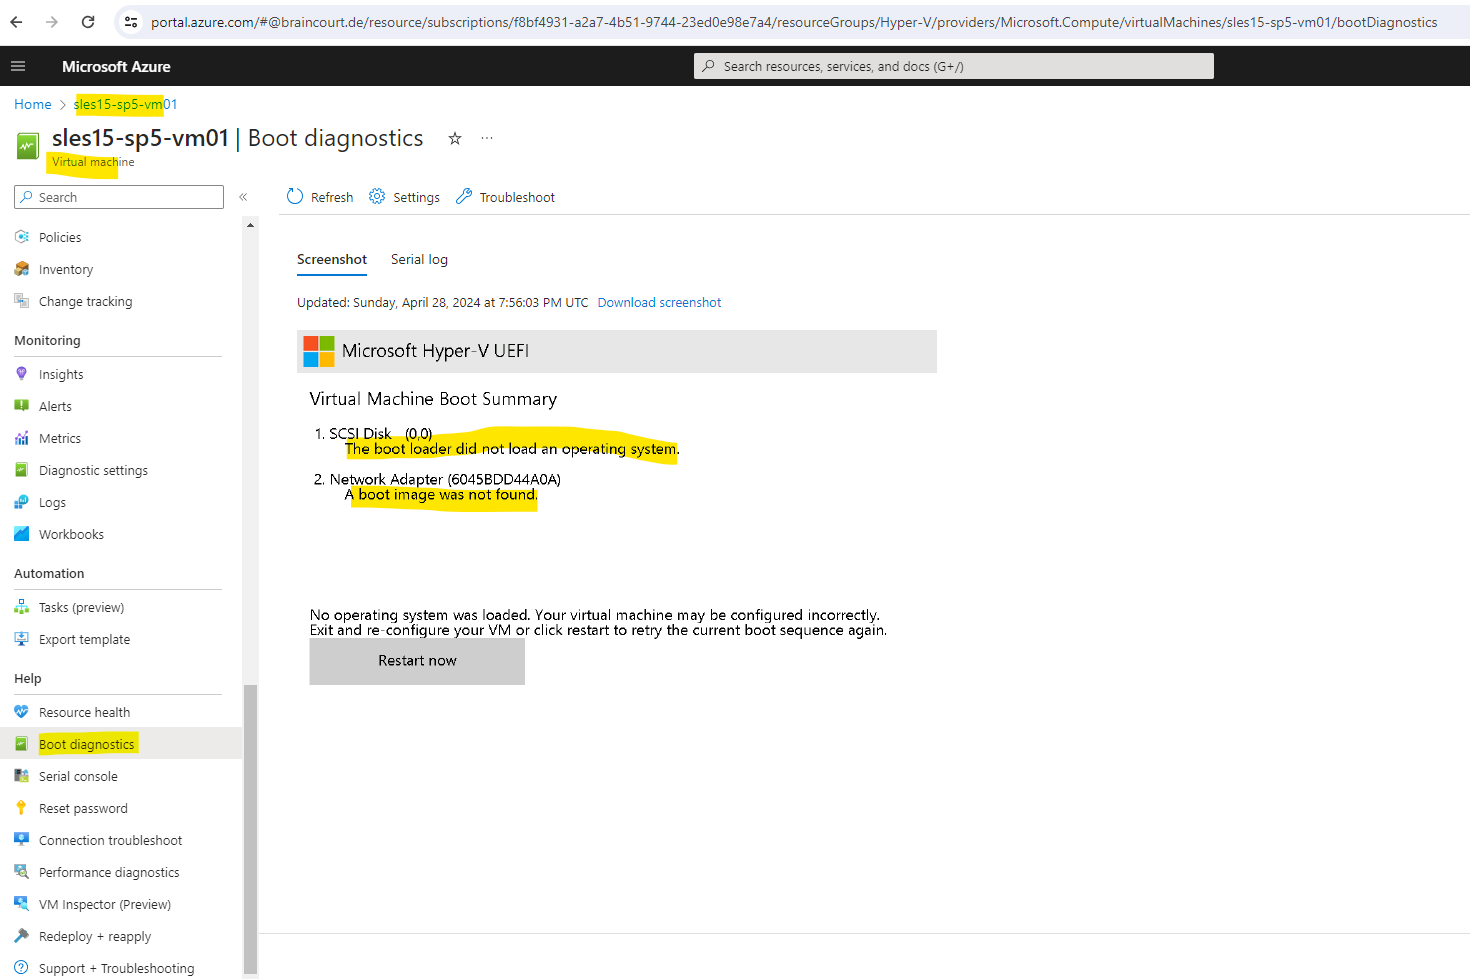
The problem here is not related to the restore itself but is related to the partition configuration of this virtual machine which is not working in Azure.
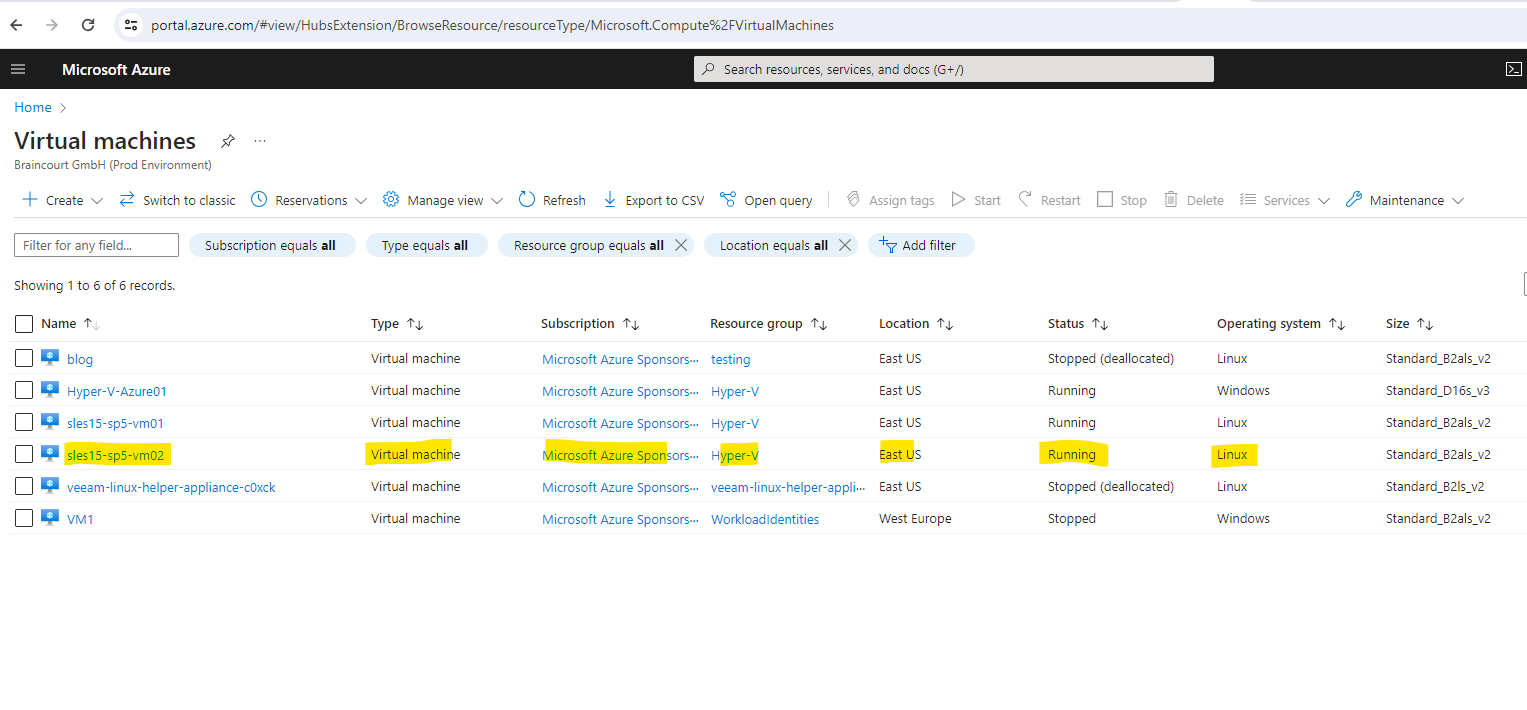
To finally show the IP address configuration of a restored virtual machine in Azure, I was also restoring another Linux virtual machine from on-premise to Azure as shown below. This time I was restoring the sles15-sp5-vm02 virtual machine.
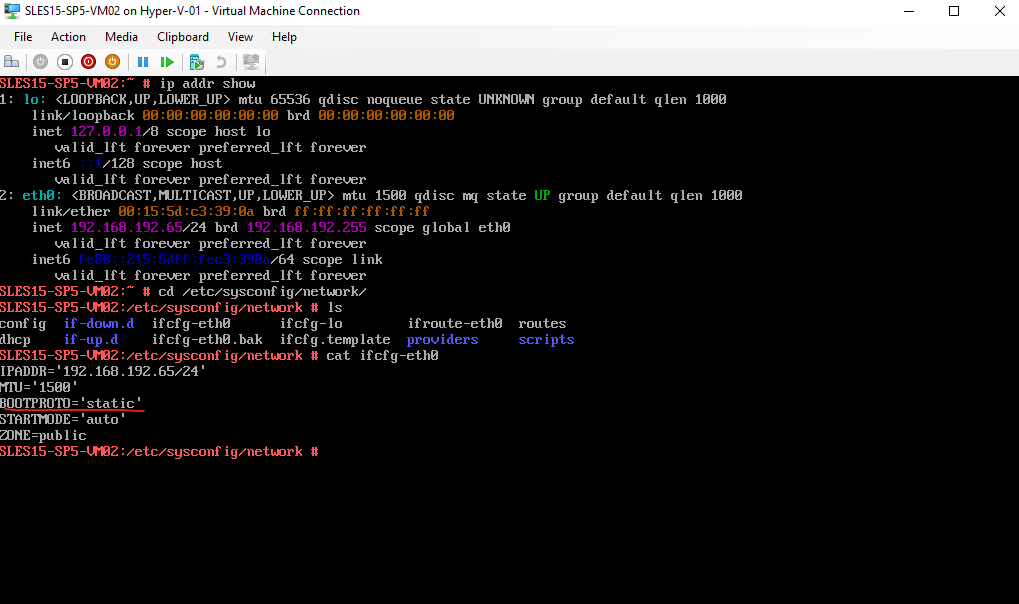
The on-premise virtual machine is configured with a static IP address and configured for the subnet 192.168.192.0/24 as shown below.
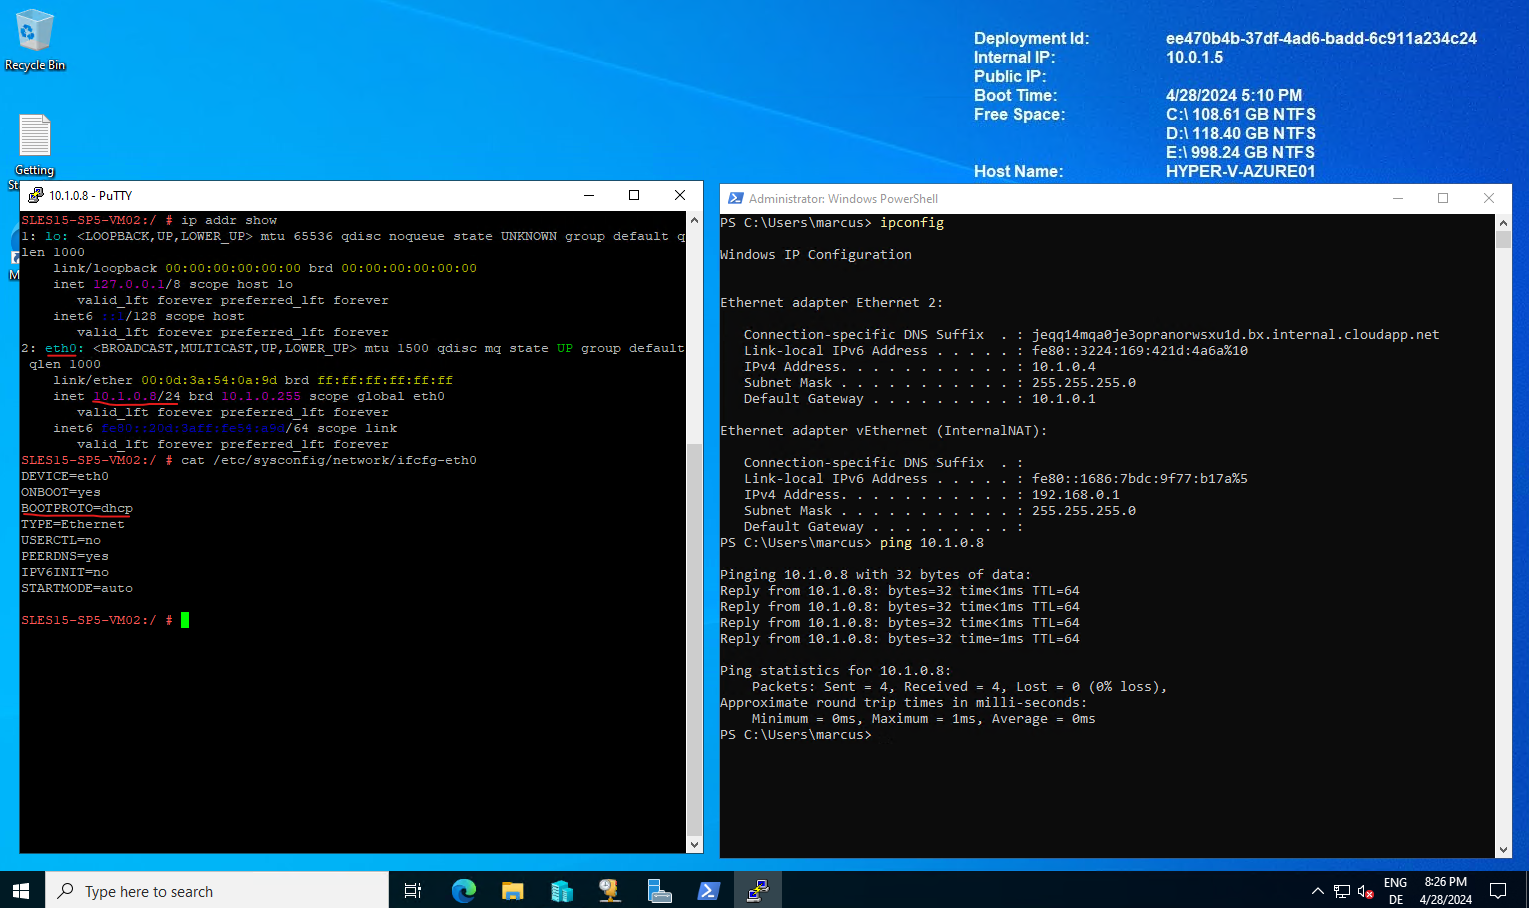
Now the restored virtual machine in Azure is configured by default with DHCP and an IP address by the virtual network “Hyper-V-Azure01-vnet” and its subnet “default” is assigned to.
Below I was using my Azure Hyper-V Server 2022 nested virtualization as jumphost to connect to the restored virtual machine which is also running in the same virtual network and subnet. Usually you would configure a site-to-site VPN tunnel to connect to your Azure virtual machines by using private IP addresses as shown in my following post.
Here you can see that by default the restored VM is set to DHCP and will get an IP address for the assigned VNet and subnet.
Links
Restore to Microsoft Azure
https://helpcenter.veeam.com/docs/backup/vsphere/restore_azure.html?ver=120How Restore to Microsoft Azure Works
https://helpcenter.veeam.com/docs/backup/vsphere/restore_azure_hiw.html?ver=120
Tags In
Related Posts
Latest posts
Behind the Scenes: How Cloud Volumes ONTAP Handles Azure Scheduled Maintenance
Follow me on LinkedIn