AWS – Create a new Linux VM Instance and connect to using SSH
Below we will see how to create a new Linux VM instance in AWS and connect to by using SSH.
To see how to create a new Windows VM instance you can read my post about AWS AD Connector Directory – Domain Join where I will also create a new Windows VM instance to demonstrate the domain join using the AD Connector in AWS.
Create a new Linux VM instance in EC2
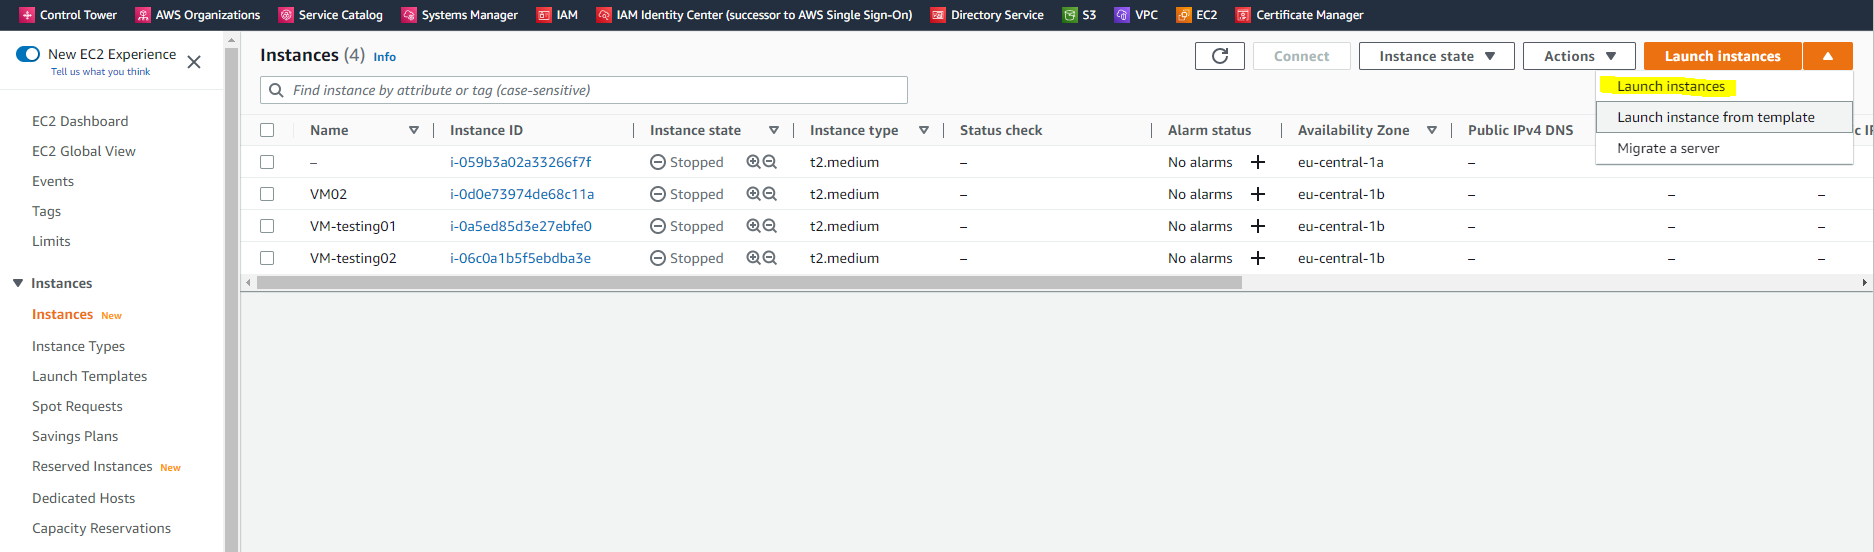
First we need to navigate to the EC2 (Elastic Computer Cloud) section in the AWS Management Console.
Here click on Launch instances to create a new Linux VM instance.
Enter a name for and select an Amazon Machine Image (AMI).
Amazon Machine Images (AMI)
https://docs.aws.amazon.com/en_us/AWSEC2/latest/UserGuide/AMIs.html

Select an Instance type which defines the vCPUs and Memory the instance will get provisioned.
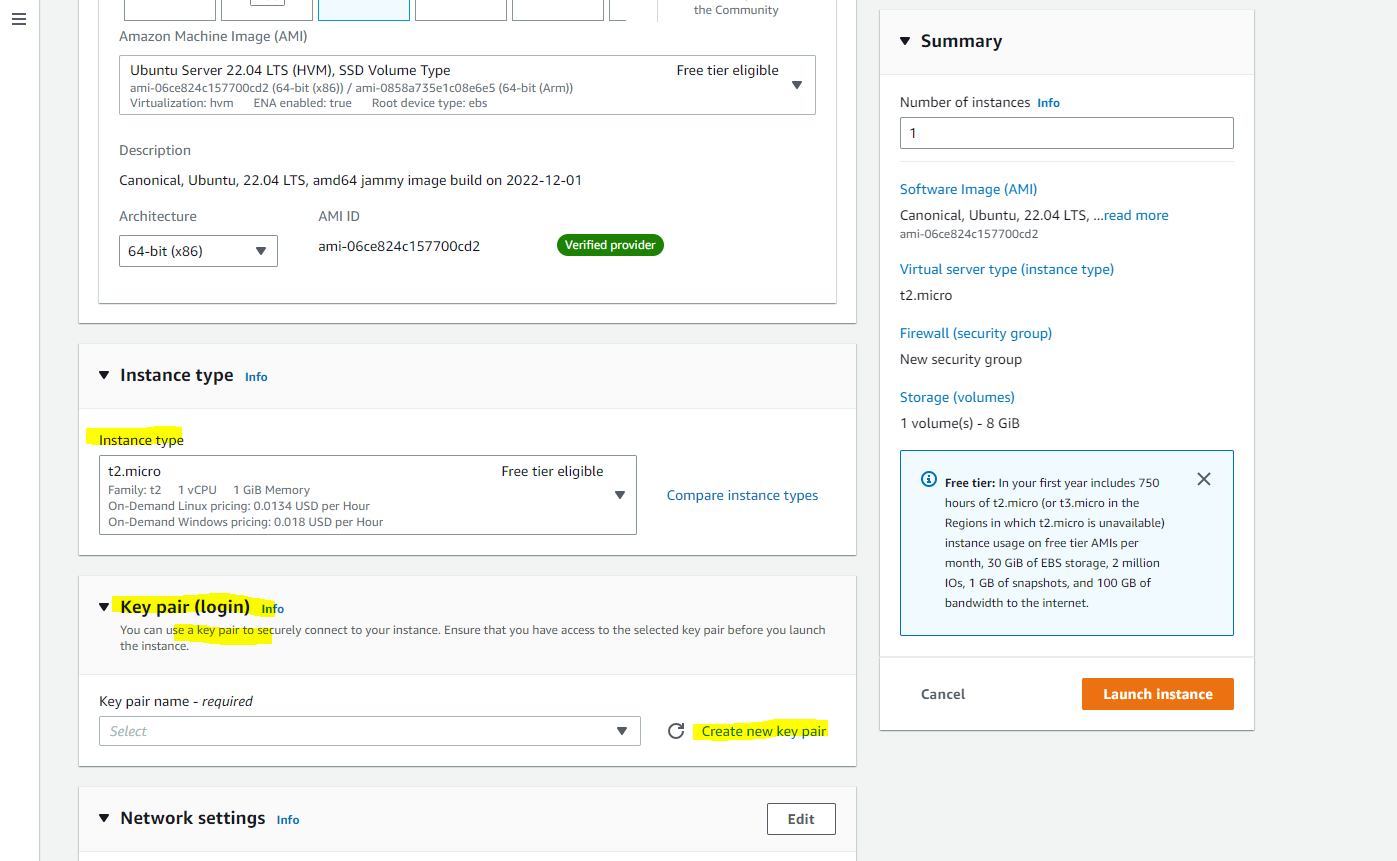
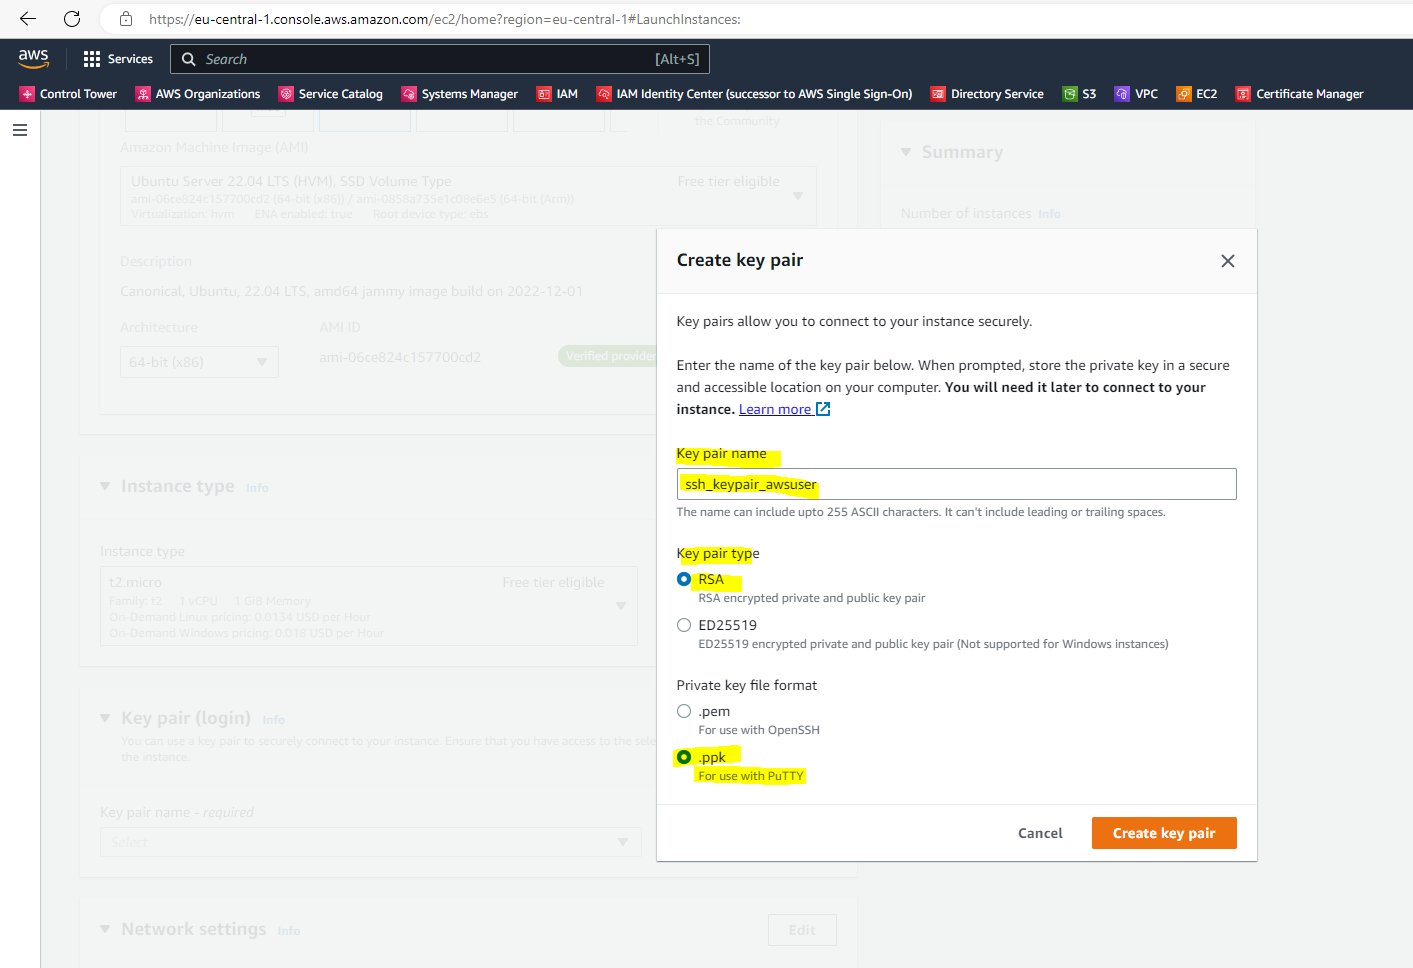
In AWS you can create directly a SSH key pair for use with PuTTY when connecting from Windows. I will create here a SSH key pair by clicking on the link shown in the screenshot above, which I can also use later for other Linux VMs.
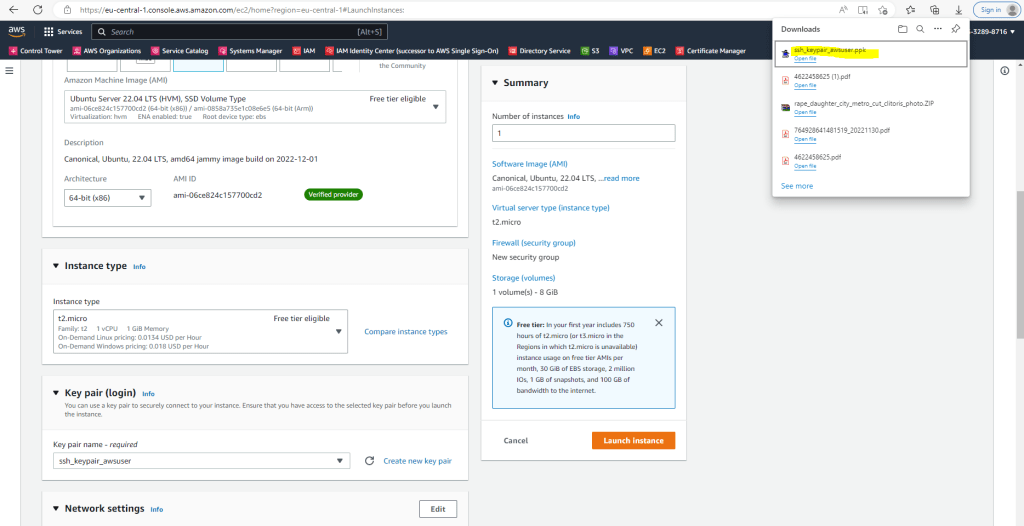
The private key file will be automatically downloaded to your computer.
In network settings you can choose the VPC and subnet you want to use, further I will assign a public IP address.
In case you just want to connect from your on-premise network and have set up an IPSec S2S VPN tunnel, as shown in my post below, you don’t need to setup a public IP address and can connect to the VM using the assigned private IP address.

By default inbound traffic TCP port 22 will be granted from any source.
Under Configure storage and Advanced details, I will leave the default settings and are fine for me.
In the Advanced details you can e.g. configure domain join as shown in my following post.
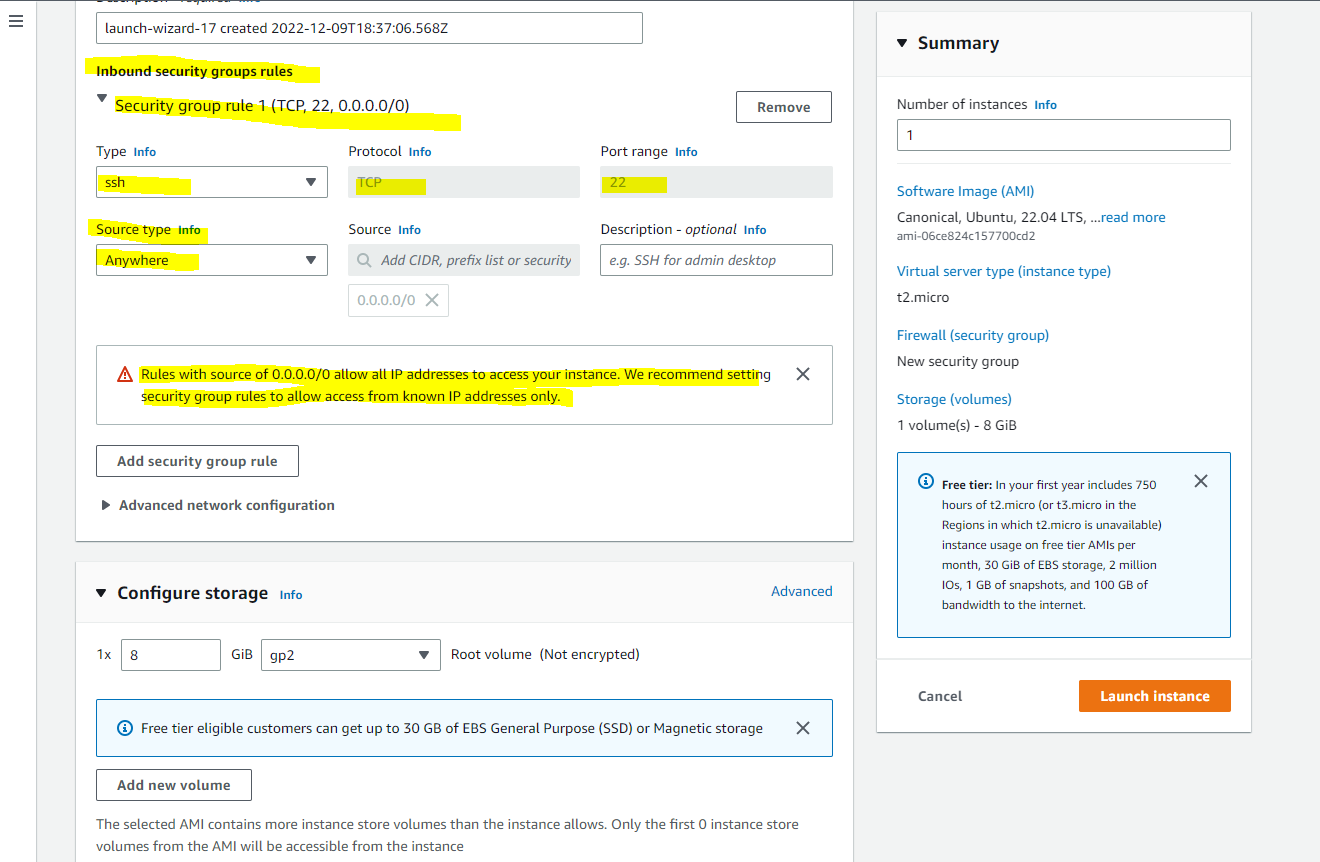
Finally click on the Launch instance button.
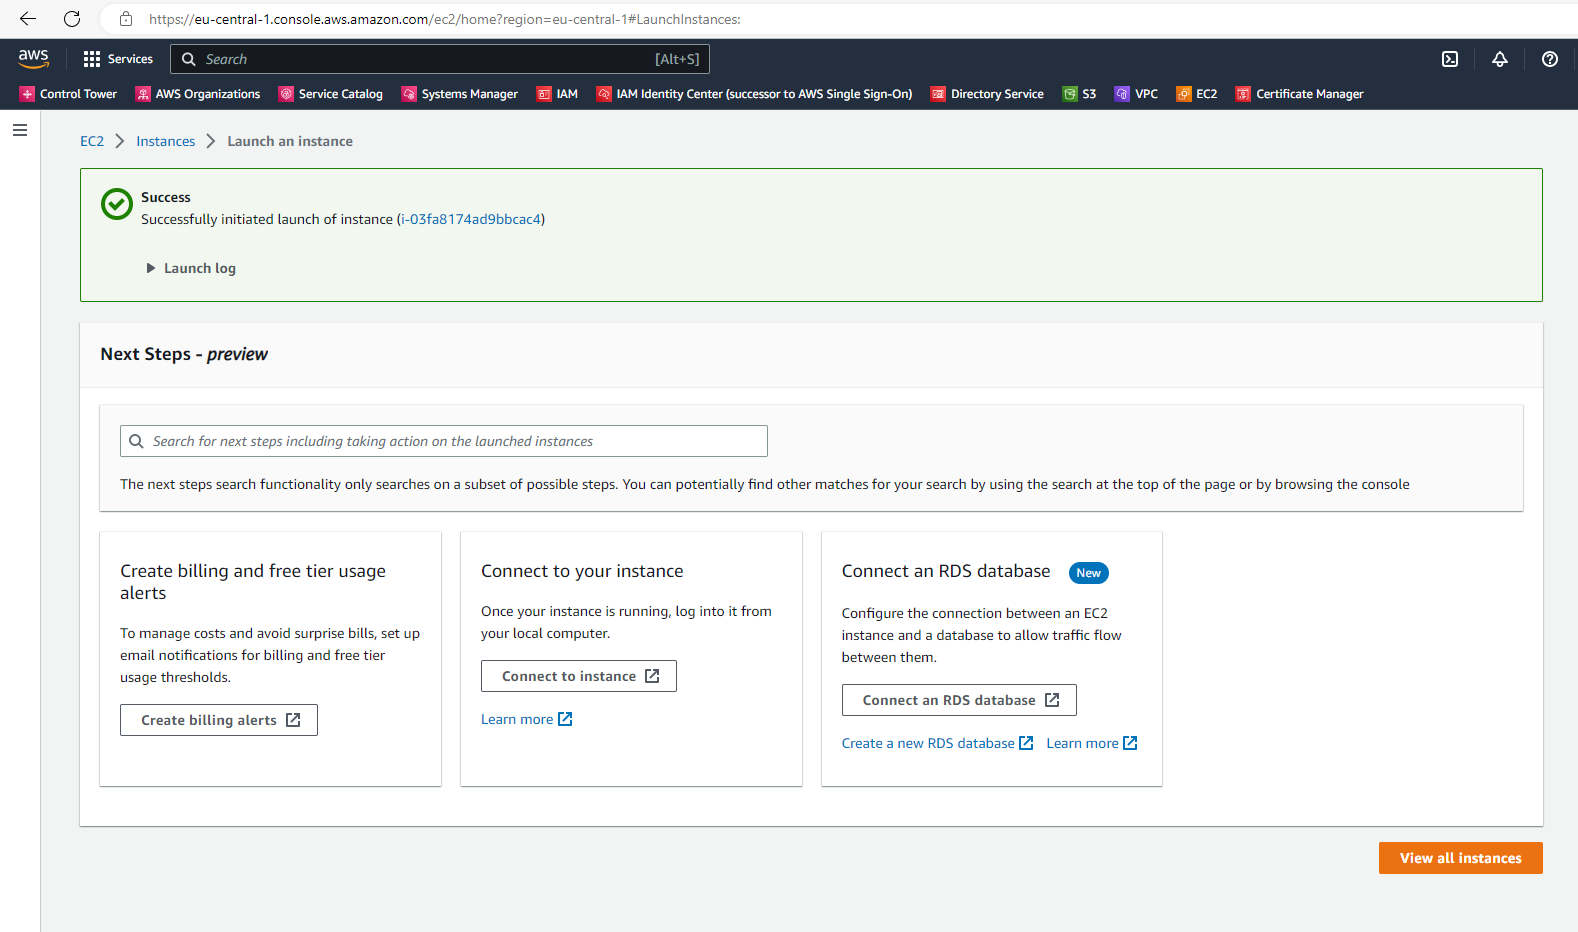
At the successfully initiated launch of instance page I can click on the Connect to instance button to see details like username and public IP to connect to.
Connect to the Linux instance using SSH
Each Linux instance launches with a default Linux system user account. You can add user accounts to your instance, and delete user accounts.
For the default user account, the default user name is determined by the Amazon Machine Images (AMI) that was specified when you launched the instance.
By default, password authentication and root login are disabled, and sudo is enabled. To log in to your instance, you must use a key pair.
Source: https://docs.aws.amazon.com/AWSEC2/latest/UserGuide/managing-users.html
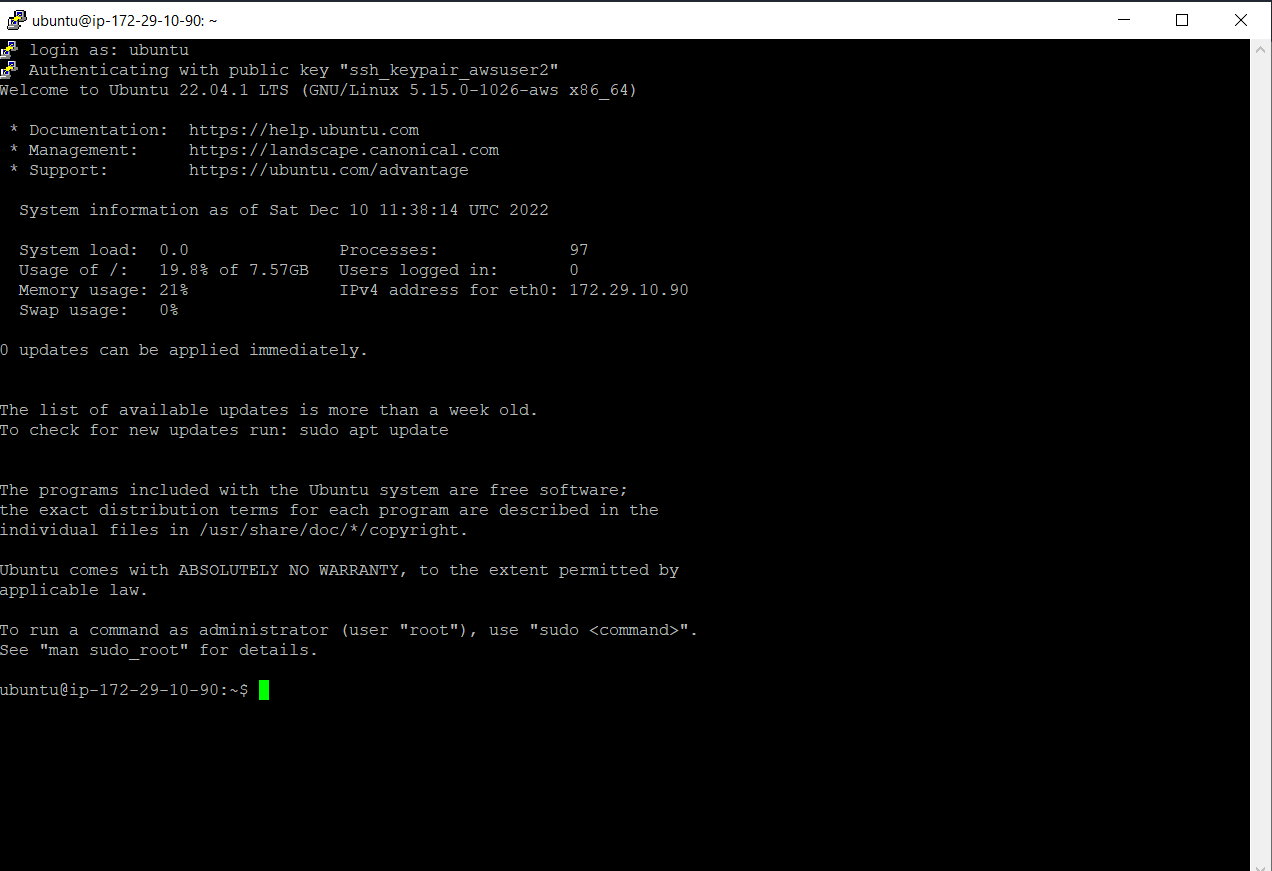
The default username for Ubuntu AMI is ubuntu as shown below.
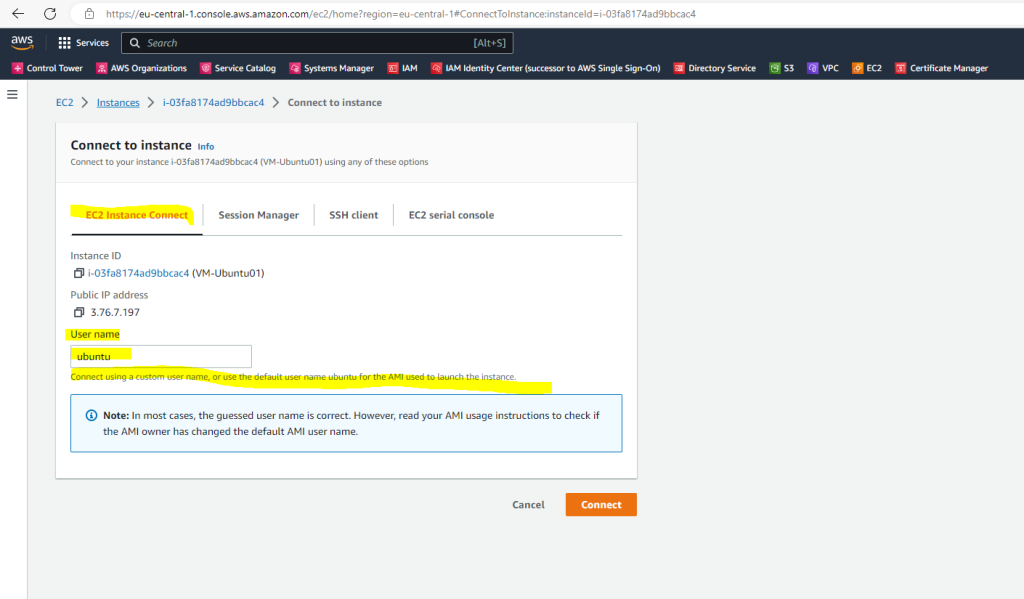
Below you will see a list of default usernames for differents AMIs.
- For Amazon Linux 2 or the Amazon Linux AMI, the user name is ec2-user.
- For a CentOS AMI, the user name is centos or ec2-user.
- For a Debian AMI, the user name is admin.
- For a Fedora AMI, the user name is fedora or ec2-user.
- For a RHEL AMI, the user name is ec2-user or root.
- For a SUSE AMI, the user name is ec2-user or root.
- For an Ubuntu AMI, the user name is ubuntu.
- For an Oracle AMI, the user name is ec2-user.
- For a Bitnami AMI, the user name is bitnami.
- Otherwise, check with the AMI provider.
Source: https://docs.aws.amazon.com/AWSEC2/latest/UserGuide/managing-users.html
In the tab SSH client you will find instructions about how to connect to the instance using a SSH client.
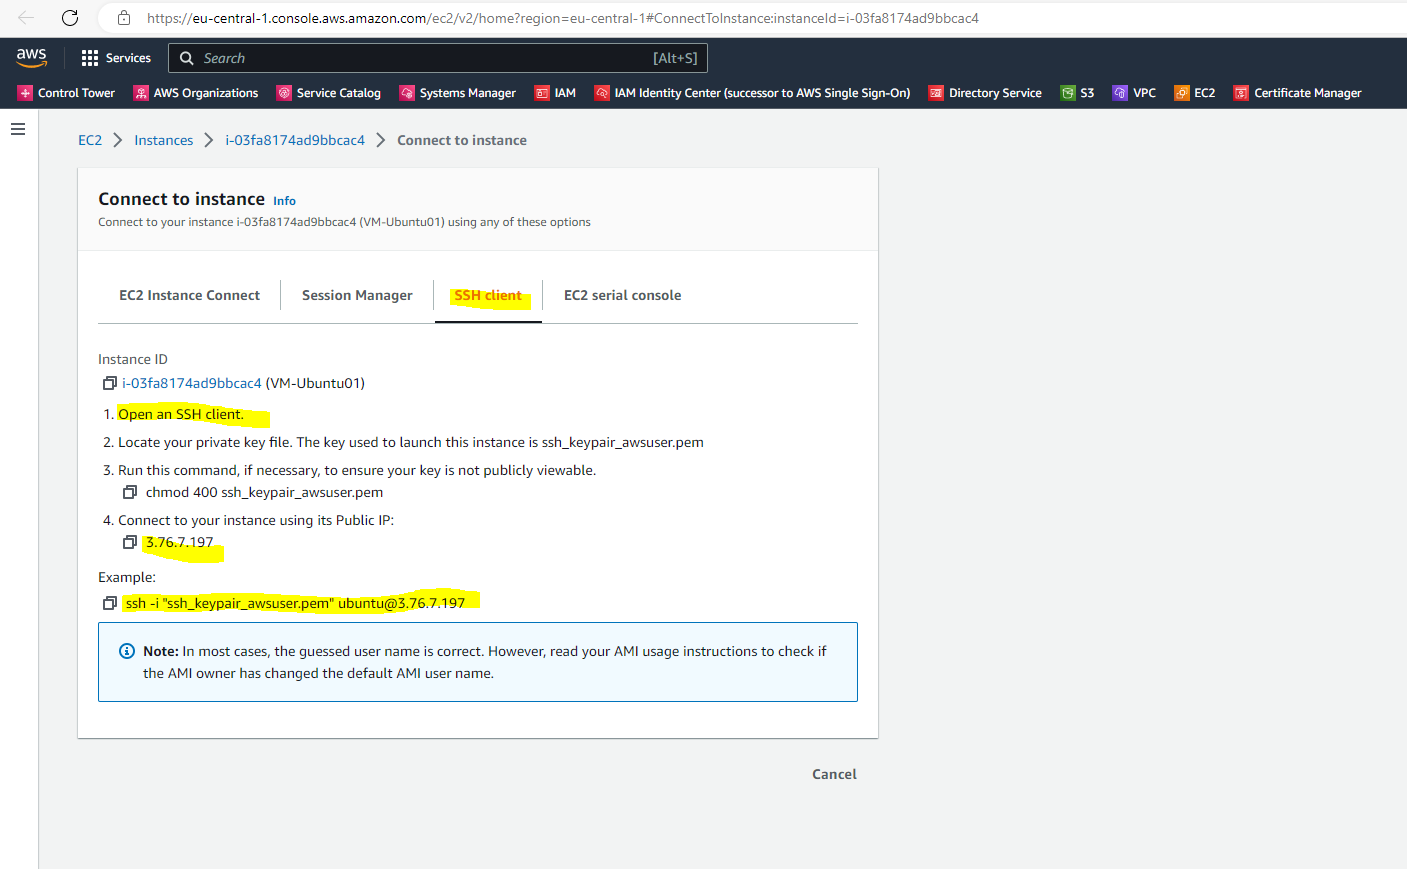
I will use PuTTY to connect to my Linux instance from a Windows computer. Create a new session by entering the public IP address, port number you can leave on default TCP 22 and a name for the new session. Then click on save.
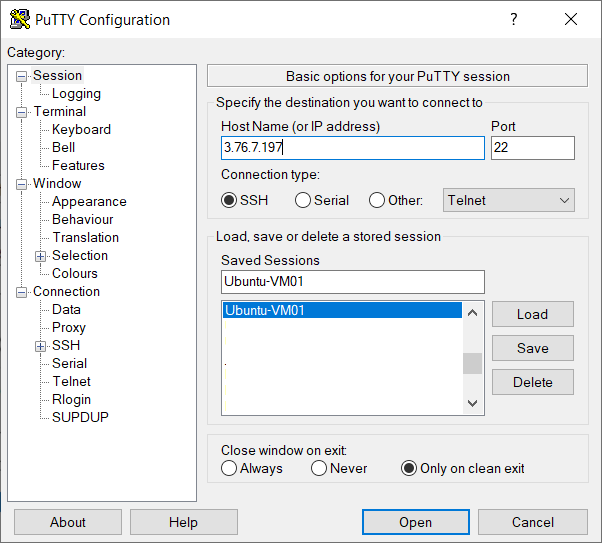
We also need to set our private SSH key under Connection –> SSH –> Auth –> Private key file for authentication, go back to Session and save it again.

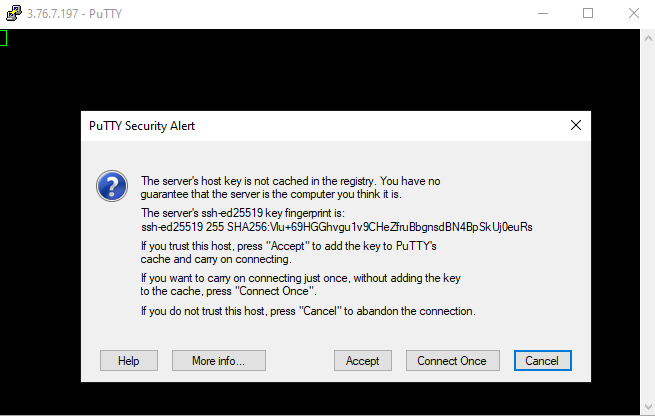
Now we can connect to the instance by clicking on Open.
login as: ubuntu (default user name for Ubuntu AMI)
Add user accounts to the Linux VM instance
Using the default user account is adequate for many applications. However, you may choose to add user accounts so that individuals can have their own files and workspaces. Furthermore, creating user accounts for new users is much more secure than granting multiple (possibly inexperienced) users access to the default user account, because the default user account can cause a lot of damage to a system when used improperly. For more information, see Tips for Securing Your EC2 Instance.
To enable users SSH access to your EC2 instance using a Linux system user account, you must share the SSH key with the user. Alternatively, you can use EC2 Instance Connect to provide access to users without the need to share and manage SSH keys. For more information, see Connect to your Linux instance using EC2 Instance Connect.
So before I will create a new user besides the default user, I will first create a new SSH keypair for the user to use to connect to the instance.
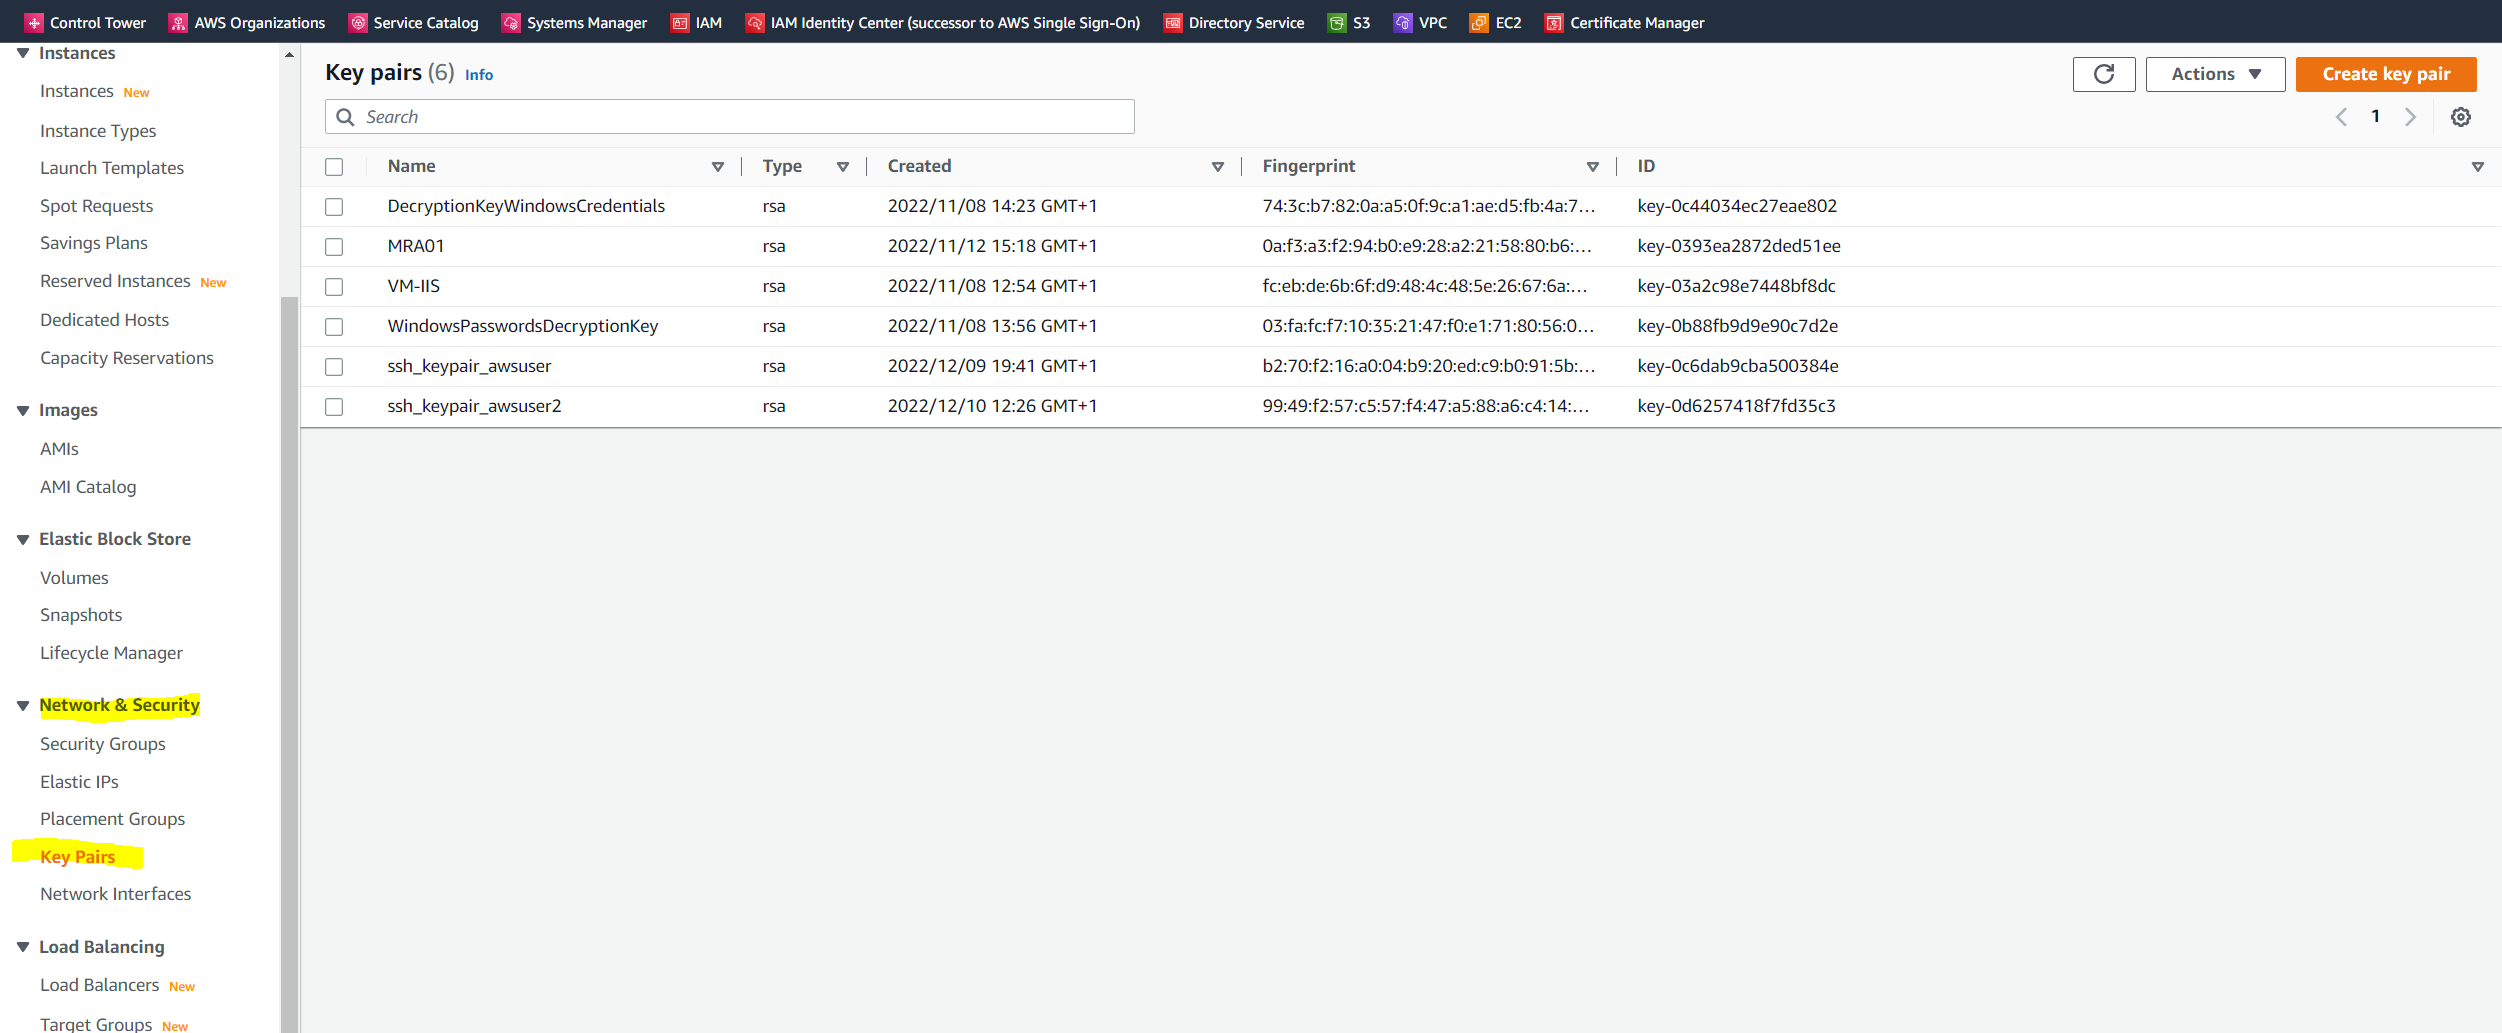
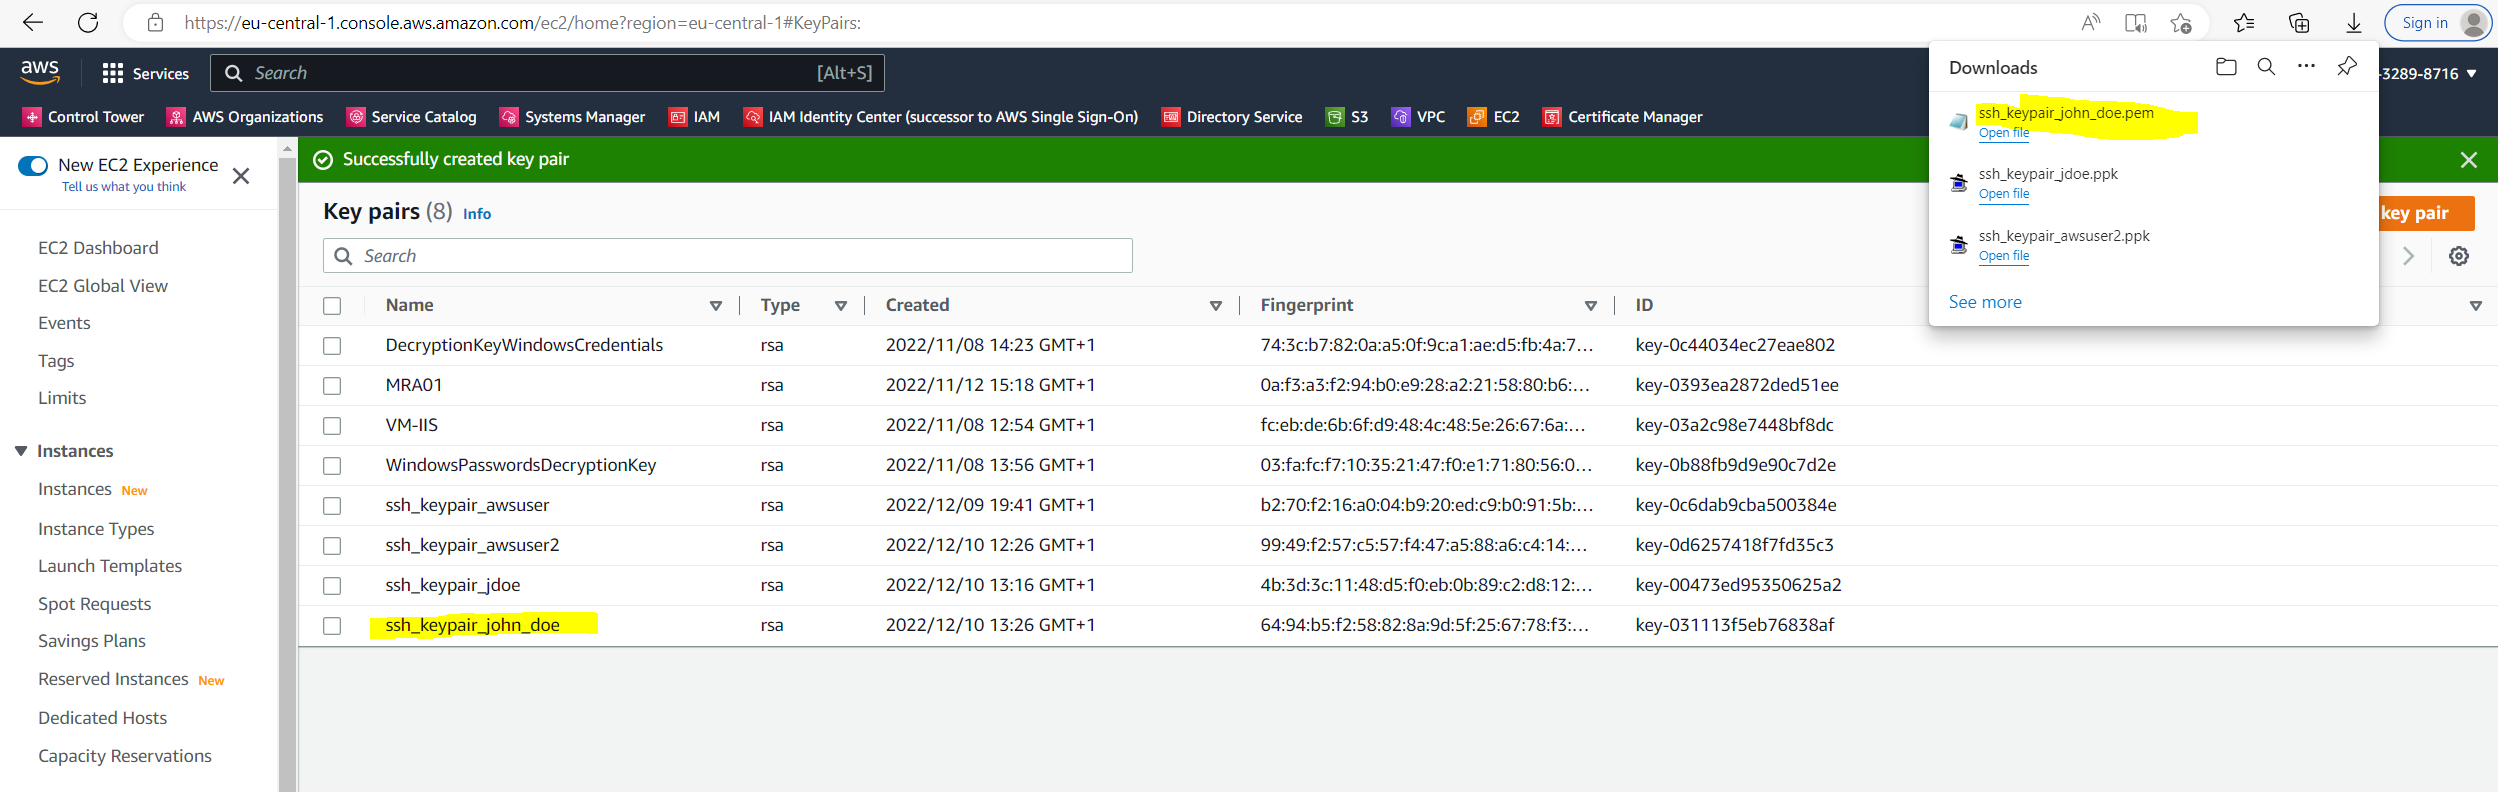
Therefore I will open the Key Pairs menu in the EC2 console under Network & Security and click on Create key pair.

The private key file is automatically downloaded by your browser. This is the only chance for you to save the private key file.
f you will use an SSH client on a macOS or Linux computer to connect to your Linux instance, use the following command to set the permissions of your private key file so that only you can read it.
$ chmod 400 key-pair-name.pem
If you do not set these permissions, then you cannot connect to your instance using this key pair. For more information, see Error: Unprotected private key file.
Retrieve the public key from the created key pair. The command returns the public key.
$ ssh-keygen -y -f /path_to_key_pair/key-pair-name.pem
-y This option will read a private OpenSSH format file and print an OpenSSH public key to stdout.
This public key we need further down when creating the new user.

The ssh-keygen command is built in in OpenSSH for Windows.
https://man.openbsd.org/ssh-keygen
OpenSSH is the open-source version of the Secure Shell (SSH) tools used by administrators of Linux and other non-Windows for cross-platform management of remote systems. OpenSSH has been added to Windows (as of autumn 2018), and is included in Windows Server and Windows client.
Source: https://learn.microsoft.com/en-us/windows-server/administration/openssh/openssh_overview
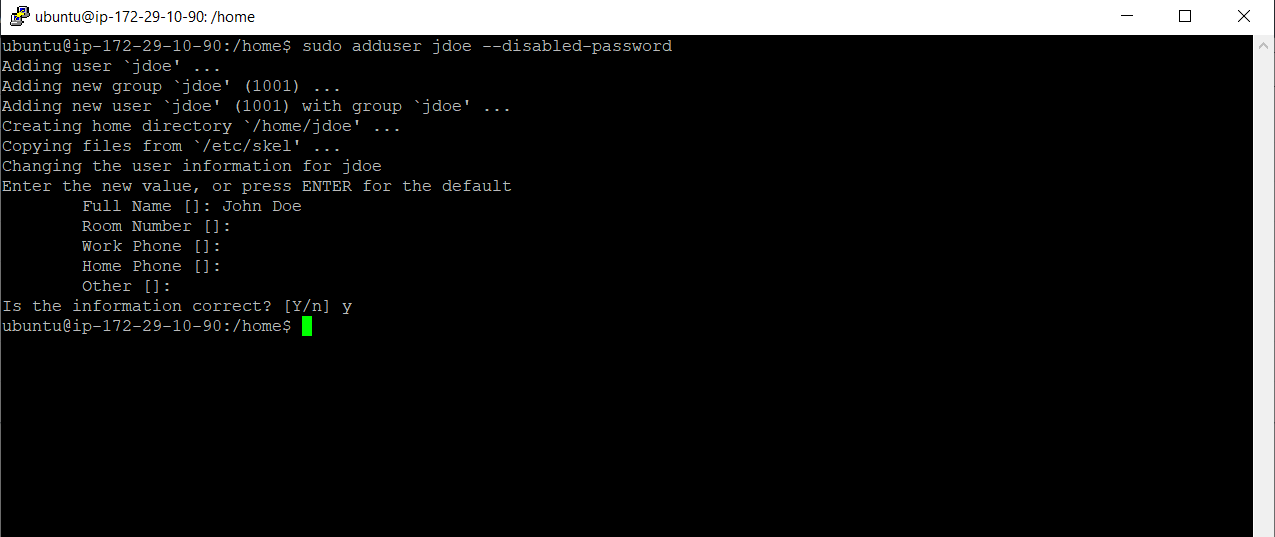
Now I will create a new user on my Linux instance named John Doe and for the username jdoe.
Include the –disabled-password parameter to create the user account with password authentication disabled.
$ sudo adduser jdoe --disabled-password
Switch to the new account so that the directory and file that you create will have the proper ownership.
$ sudo su – jdoe
Add the SSH public key to the user account. First create a directory in the user’s home directory for the SSH key file, then create the key file, and finally paste the public key into the key file, as described in the following sub-steps.
cd ~
mkdir .ssh

# Without these exact file permissions, the user will not be able to log in.
chmod 700 .ssh

touch .ssh/authorized_keys
chmod 600 .ssh/authorized_keys

# Open the authorized_keys file
nano .ssh/authorized

# paste the public key we retrieved previously using the ssh-keygen command into and save the changes.
# Ensure that you paste the public key in one continuous line. The public key must not be split over multiple lines.
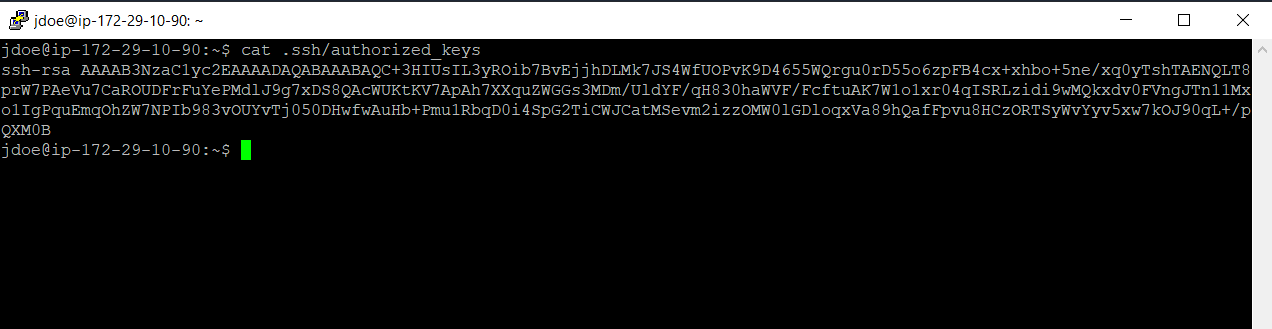
The user should now be able to log into the newuser account on your instance, using the private key that corresponds to the public key that you added to the authorized_keys file.
Source: https://docs.aws.amazon.com/AWSEC2/latest/UserGuide/managing-users.html
If you are interested in how this works in Google Cloud and Microsoft Azure, you can read my following post.
Links
Amazon Machine Images (AMI)
https://docs.aws.amazon.com/AWSEC2/latest/UserGuide/managing-users.htmlManage user accounts on your Linux instance
https://docs.aws.amazon.com/AWSEC2/latest/UserGuide/managing-users.htmlReset passwords and SSH keys on EC2 instances
https://docs.aws.amazon.com/systems-manager/latest/userguide/automation-ec2reset.htmlCreate key pairs
https://docs.aws.amazon.com/AWSEC2/latest/UserGuide/create-key-pairs.htmlOpenSSH for Windows overview
https://learn.microsoft.com/en-us/windows-server/administration/openssh/openssh_overview