Office 365 Cross-Tenant Mailbox Migration (Corporate Merger Scenario)
Because of a corporate merger from the parent company of a subsidiary, I need to move the user mailboxes from the subsidiary, homed in the Office 365 tenant or on-premise Exchange from the parent company, into a brand-new cloud only Office 365 tenant.
Some of the user mailboxes I had to move are still on the on-premise Exchange server and some of them are already in Exchange Online in an Exchange Classic Full Hybrid setup from the parent company.
Cross-tenant Exchange mailbox migrations are supported for tenants in hybrid or cloud only, or any combination of the two.
Note!
Users migrating must be present in the target tenant Exchange Online system as Mail User, marked with specific attributes to enable the cross-tenant moves. The system will fail moves for users that aren’t properly set up in the target tenant.
When the moves are complete, the source user mailbox is converted to a Mail User and the targetAddress (shown as ExternalEmailAddress in Exchange) is stamped with the routing address to the destination tenant. This process leaves the legacy Mail User in the source tenant and allows for coexistence and mail routing.When business processes allow, the source tenant may remove the source Mail User or convert them to a mail contact.
In my case of a merger from the parent company, I don’t use them anymore in the source tenant (parent company) and will delete them there later.
In Exchange Online organizations, mail users are similar to mail contacts. Both have external email addresses and both contain information about people outside your Exchange Online organization that can be displayed in the shared address book and other address lists. However, unlike a mail contact, a mail user has sign in credentials in your Microsoft 365 organization and can access resources. For more information about mail contacts and mail users, see Recipients in Exchange Online.
When a mailbox is migrated cross-tenant with this feature, only user visible content in the mailbox (email, contacts, calendar, tasks, and notes) is migrated to the target (destination tenant). After successful migration, the source mailbox is deleted. This means that after the migration, under no circumstances, is the source mailbox available, discoverable, or accessible in the source tenant.
Note!
Currently we are investigating an issue where in some scenarios, Teams chat data is also held in the mailbox, but the Teams chat data is not migrated. If Teams chat data must be preserved, do not use this feature to migrate the mailbox.Source: https://learn.microsoft.com/en-us/exchange/recipients-in-exchange-online/manage-mail-users
I will use for this cross-tenant mailbox migration the article and steps from Microsoft below.
Cross-tenant mailbox migration (preview)
https://learn.microsoft.com/en-us/microsoft-365/enterprise/cross-tenant-mailbox-migration?view=o365-worldwide
- Create a new Microsoft 365 Tenant
- Preparing Source and Target Tenants
- Prepare the target (destination) tenant
- Prepare the source (current mailbox location) tenant
- Move on-premises Mailboxes first to Exchange Online
- How do I know this worked?
- Prepare target user objects for migration
- Perform Mailbox Migration
- After the Migration (Move)
- Post Migration Teams
- Conclusion
- Link
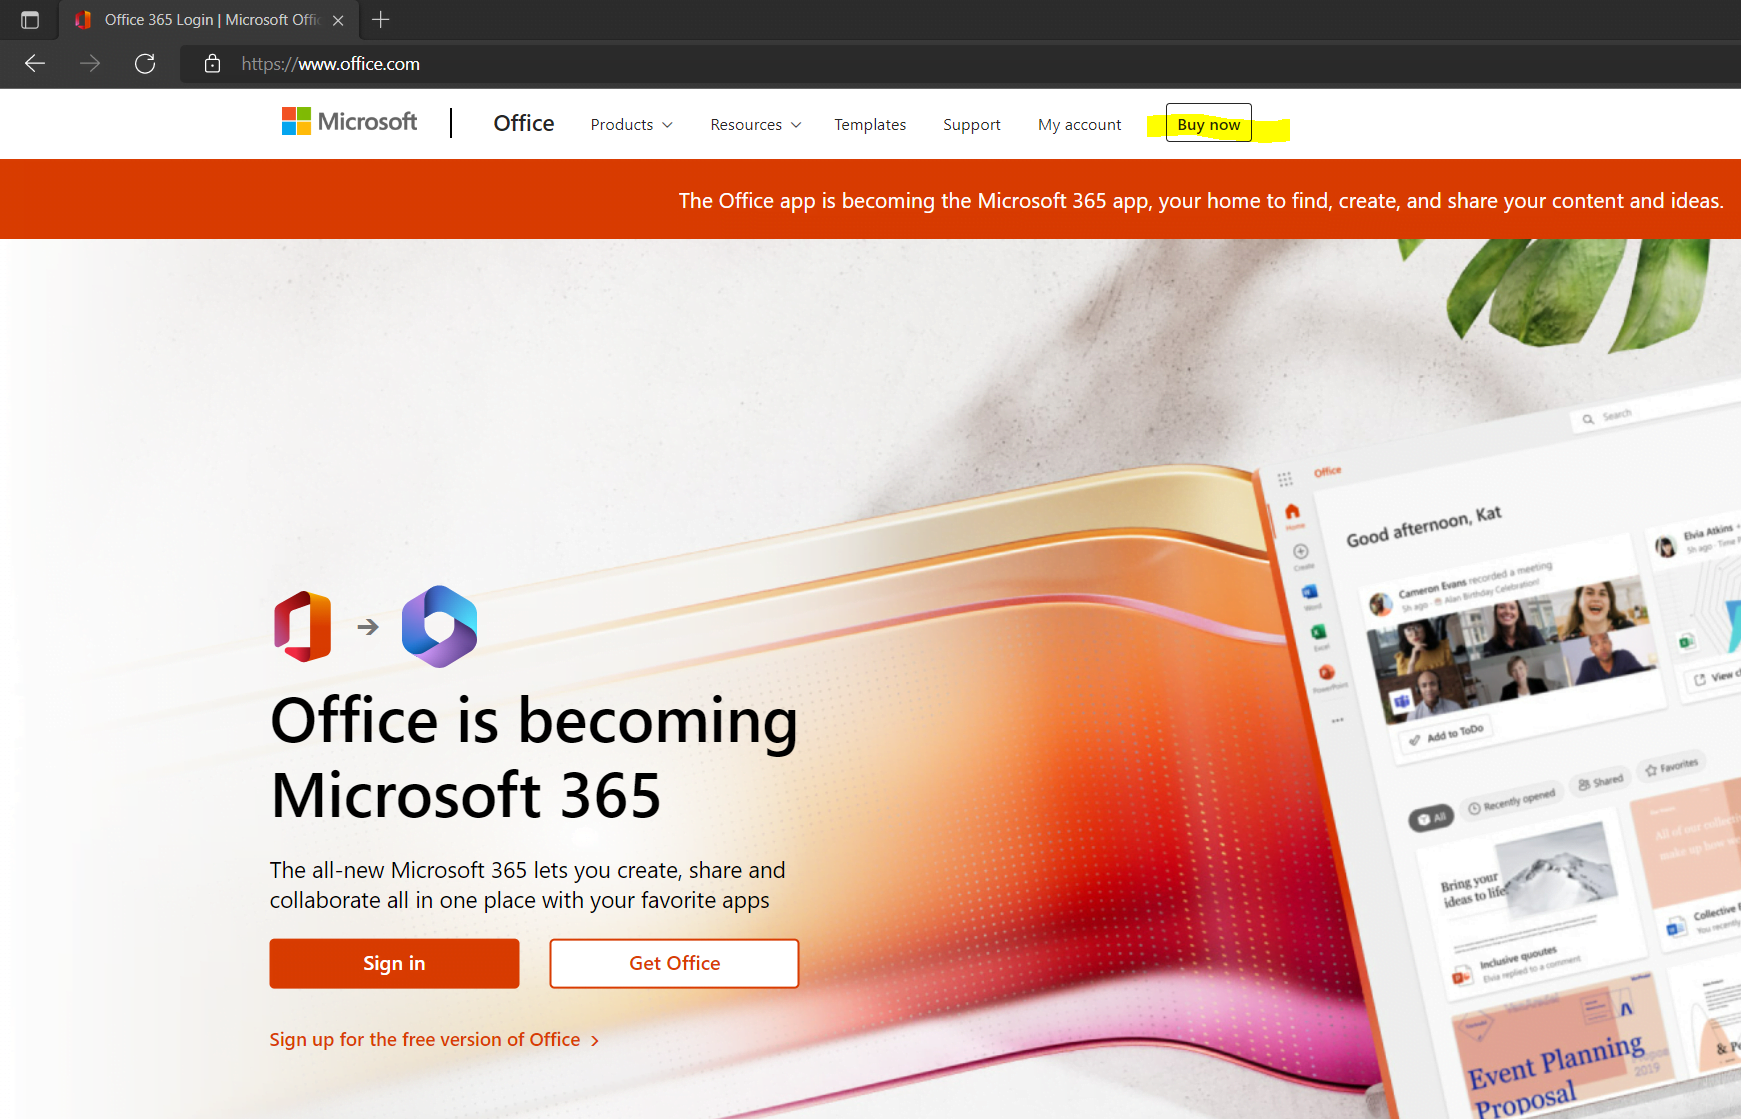
Create a new Microsoft 365 Tenant
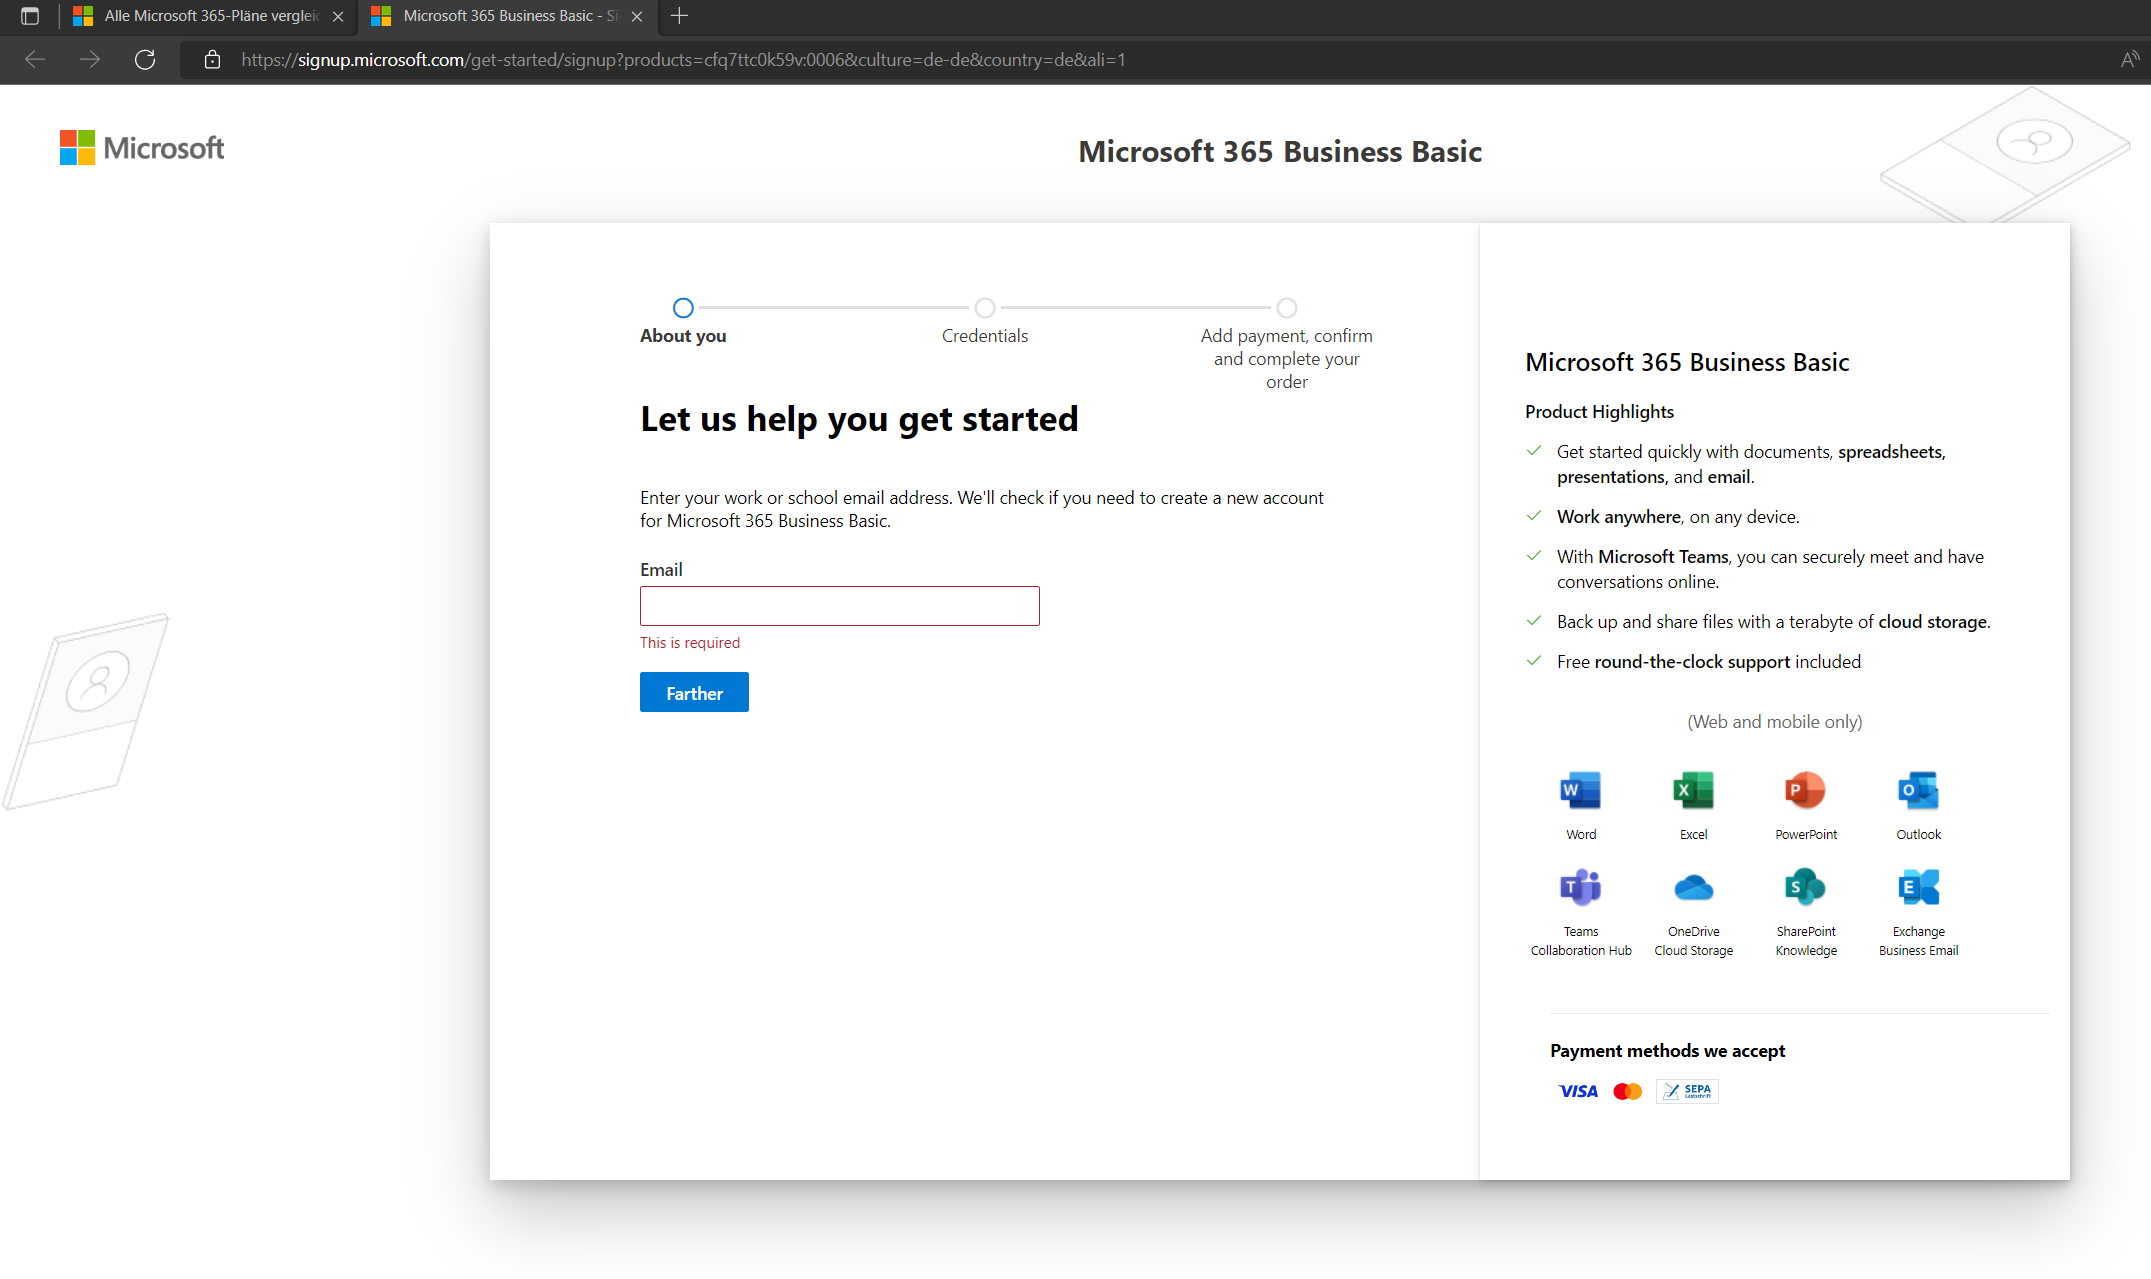
So the first I will do is to create a new Office 365 resp. now called Microsoft 365 tenant for the users from the subsidiary to move to.
Enter your email address.
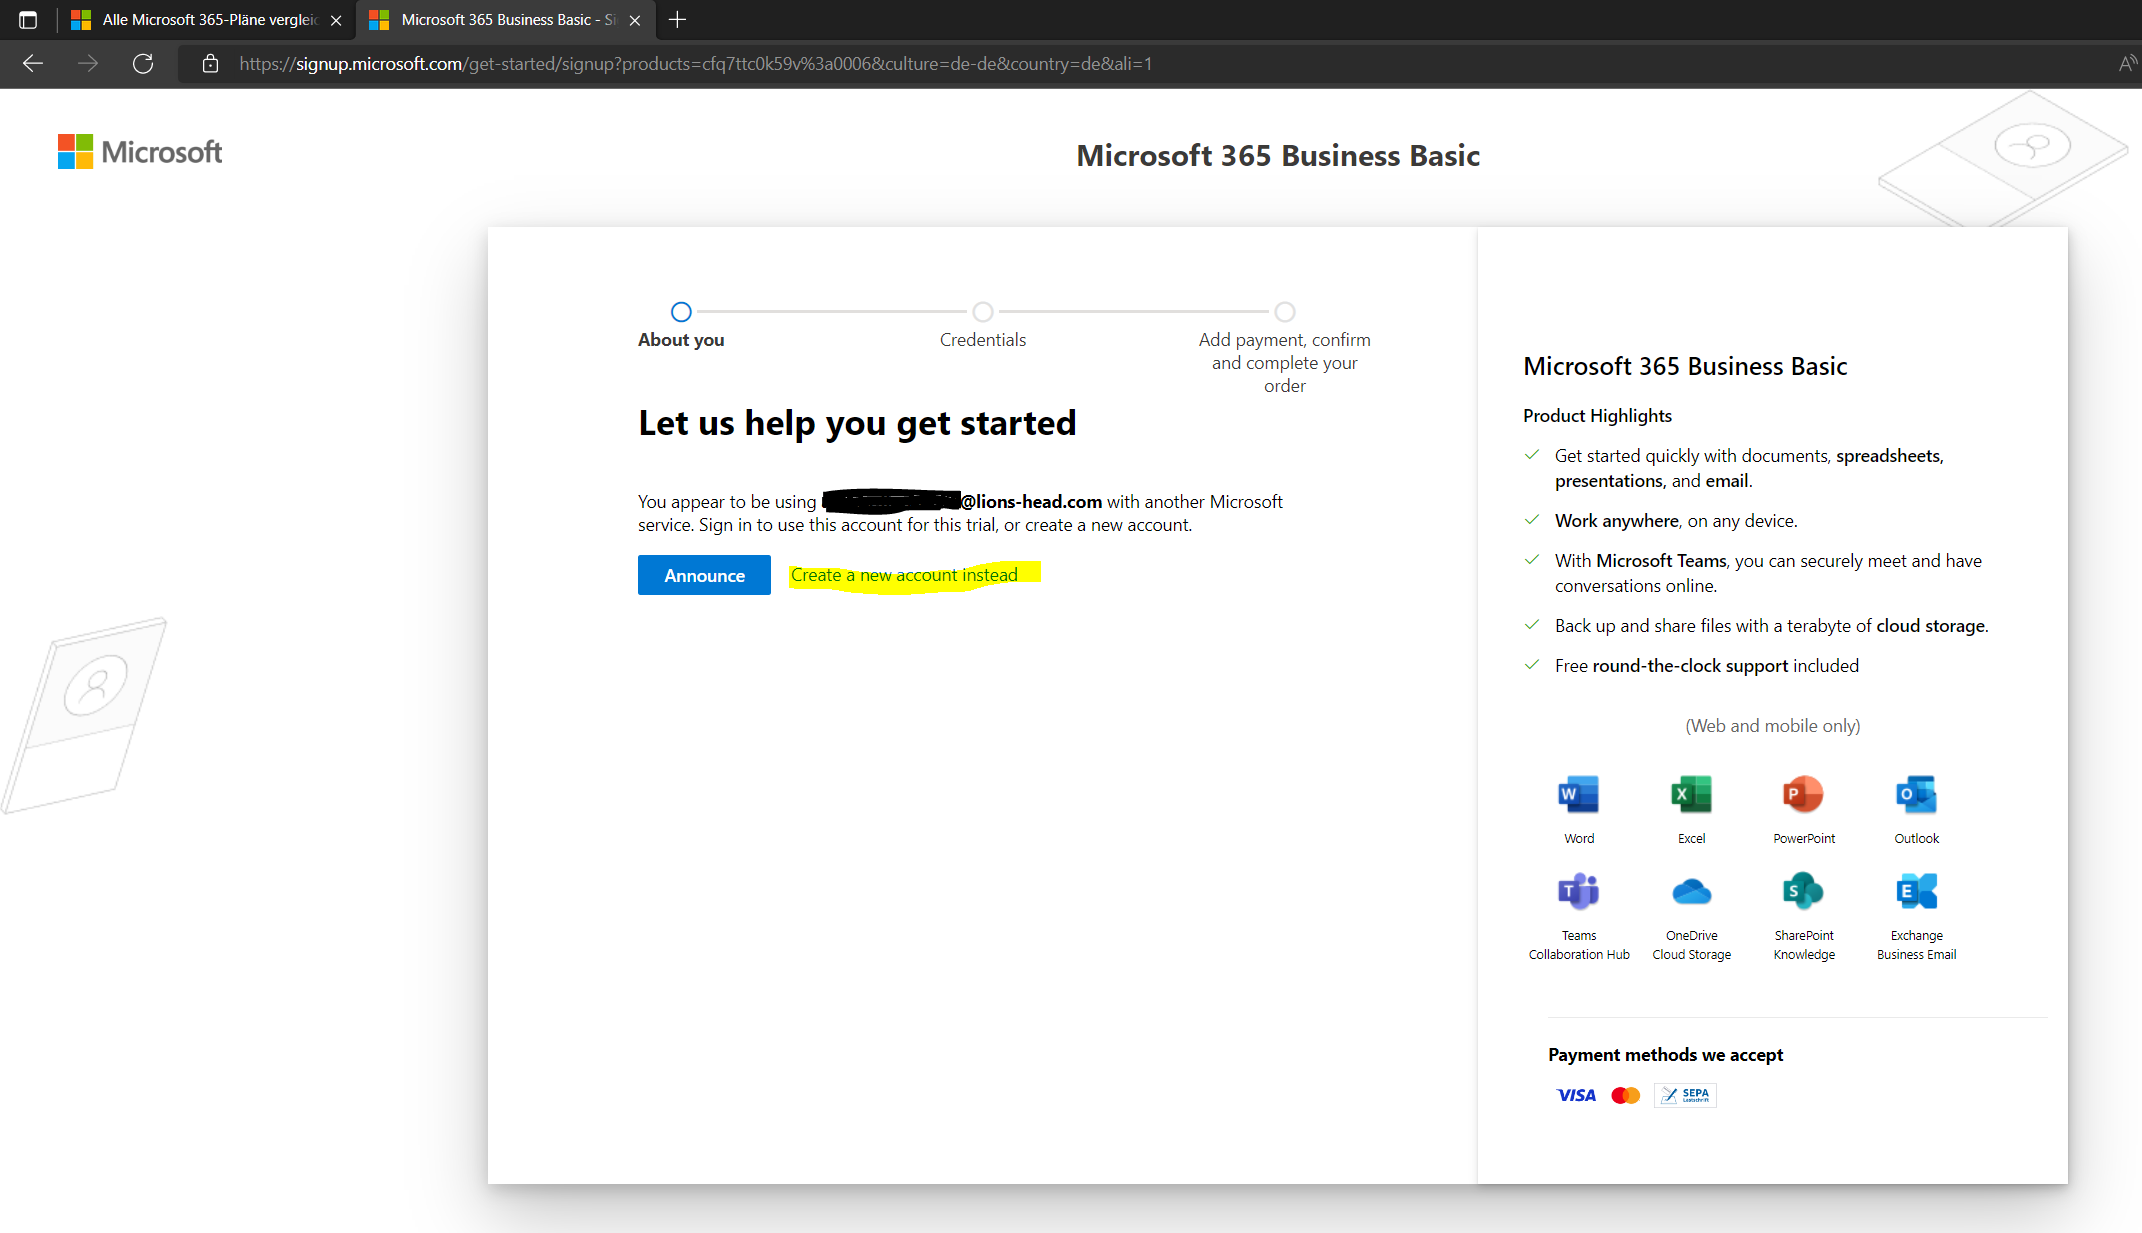
As the users and their accounts from the subsidiary already exists in the tenant from the partner company, I had to create here a new account instead.
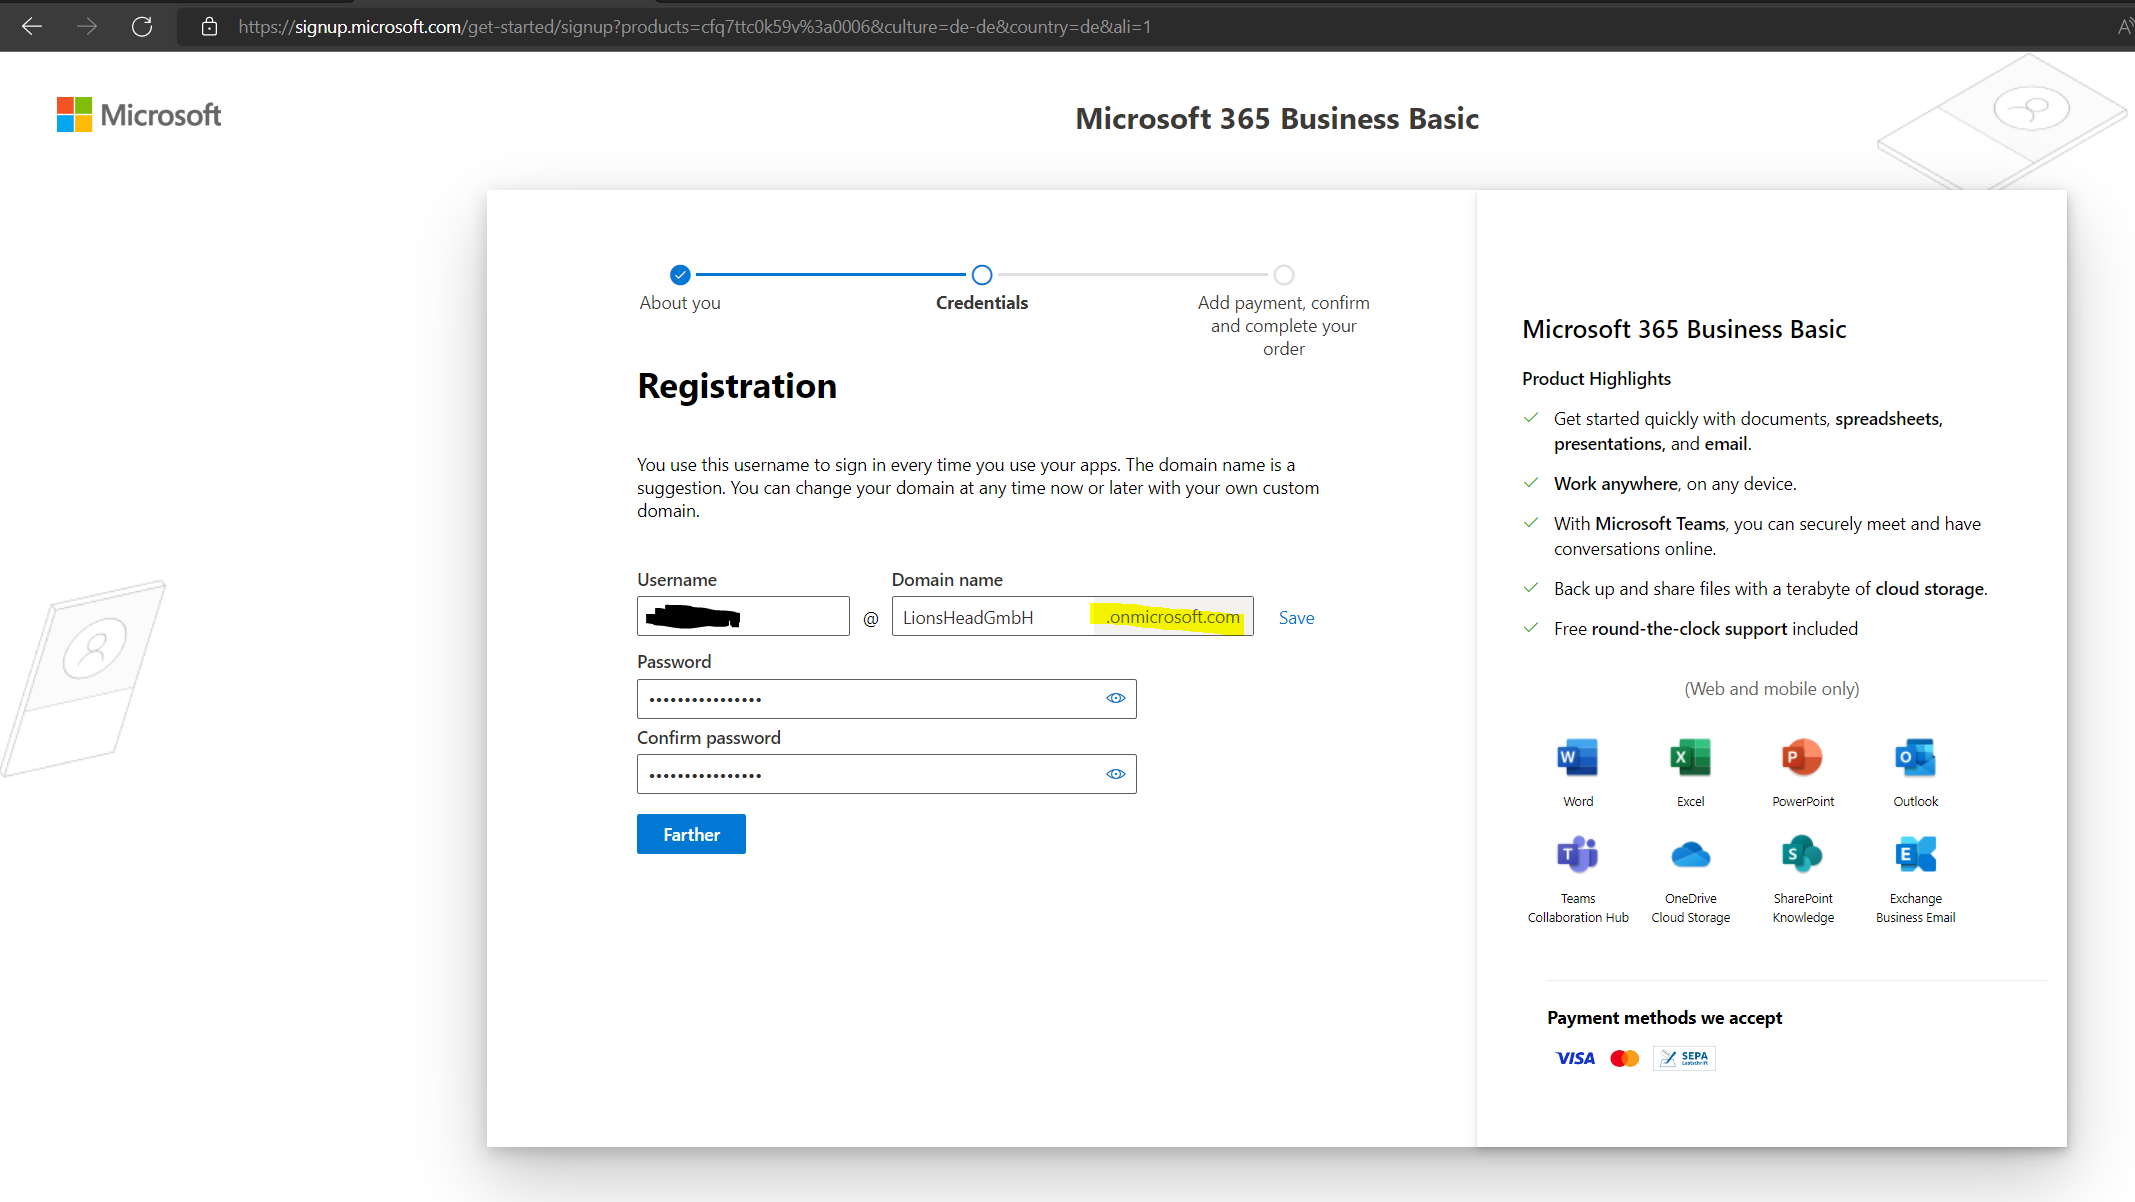
For the new account we need to enter a new username and domain name for it. The domain suffix is always .onmicrosoft.com.
Finally we also need to set a payment method and assign a product license to our account.
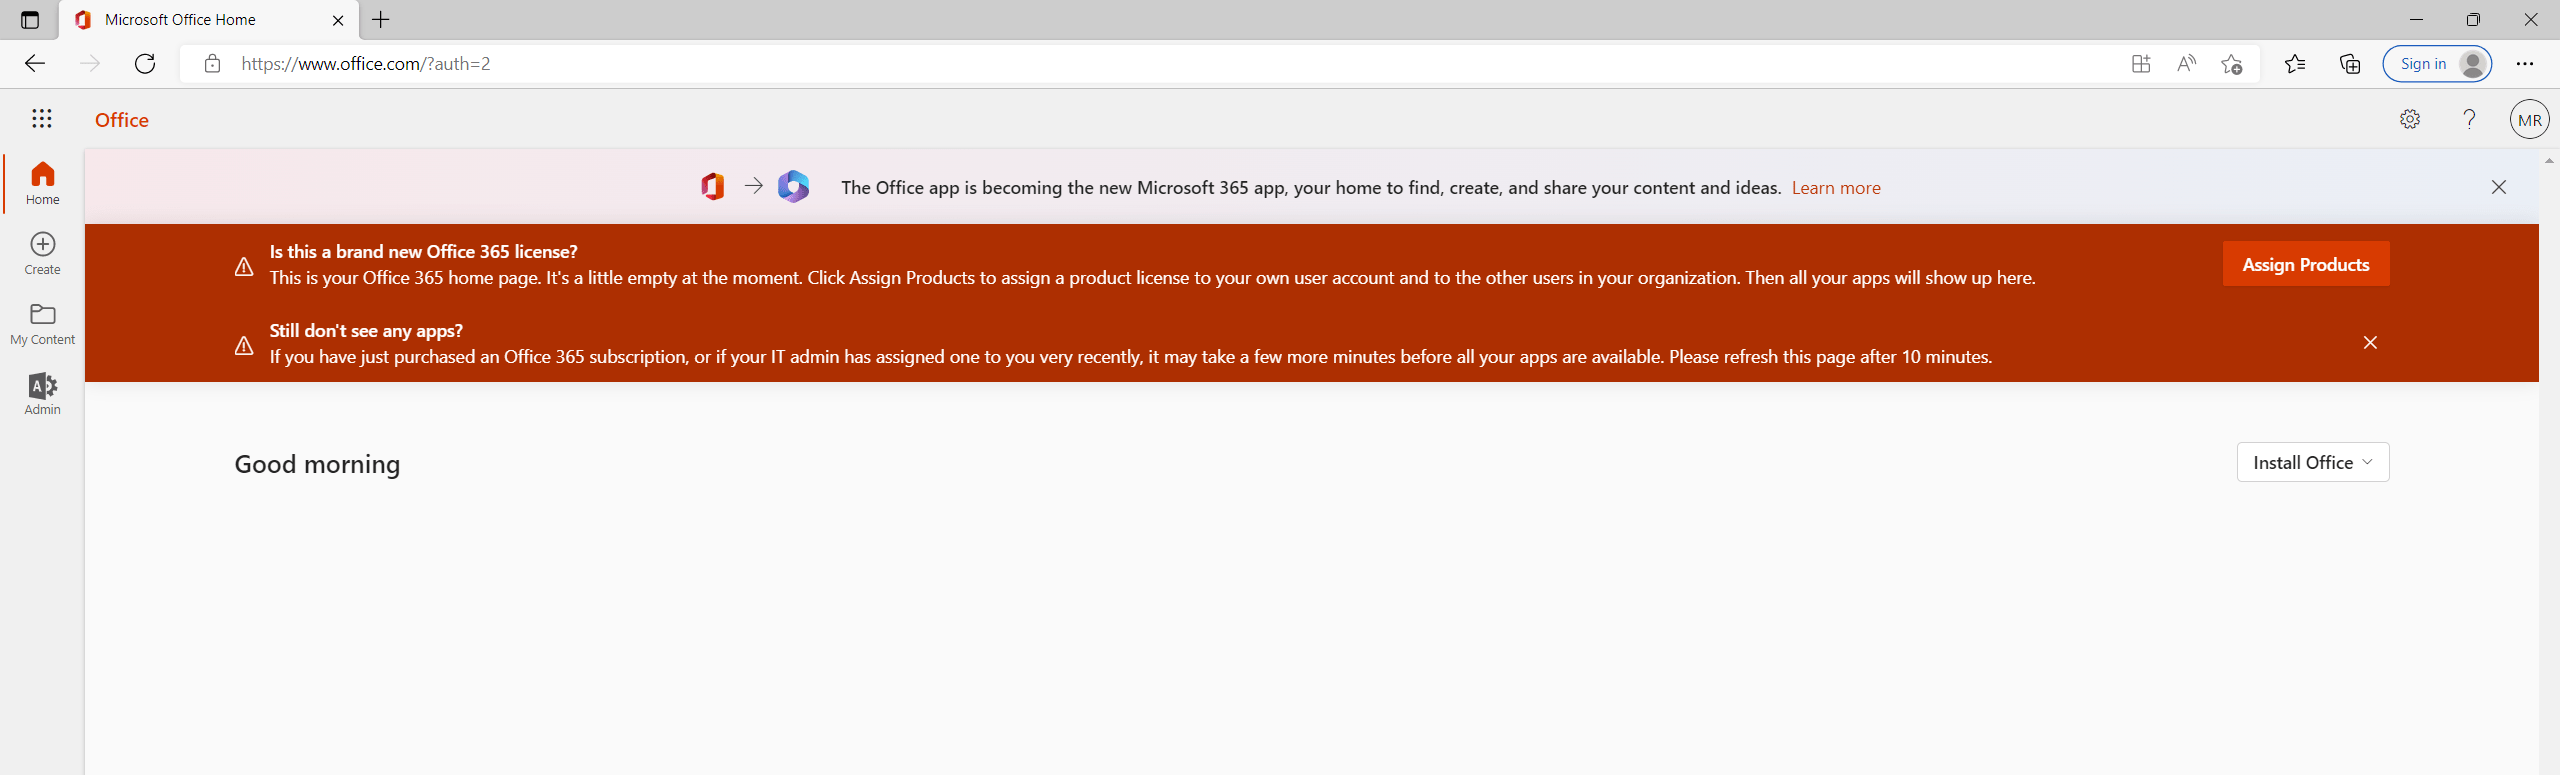
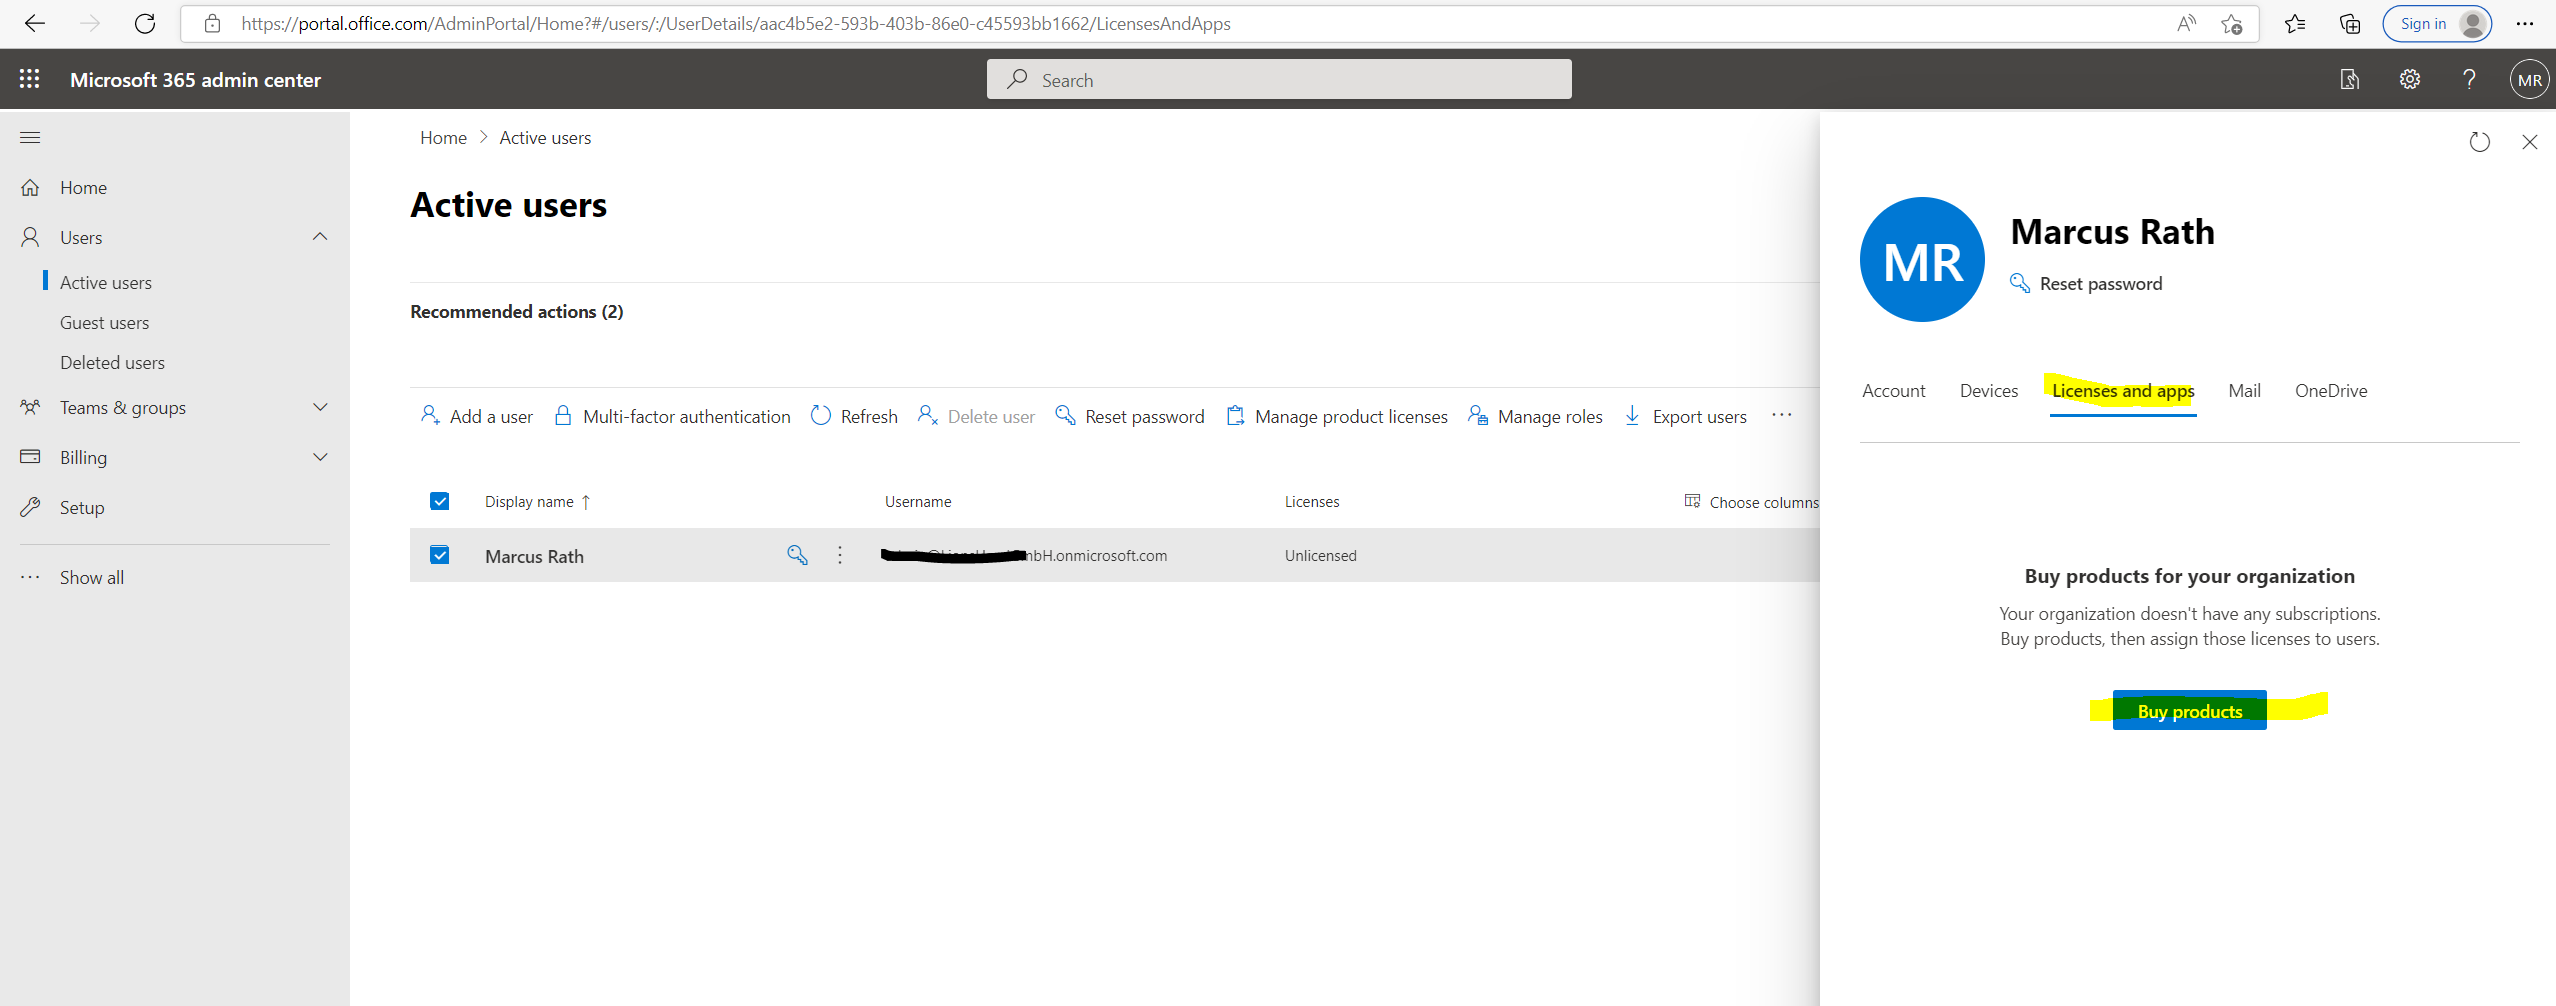
We need to set up later an App registration in order to prepare this target tenant for the cross-tenant mailbox migration. Therefore we need to assign a new permission to this App for Exchange Online.
Without assigning a product license for Exchange Online, we wouldn’t be able to assign this permission for the Exchange Online API, as the API wouldn’t be available without a minimum of one assigned license.
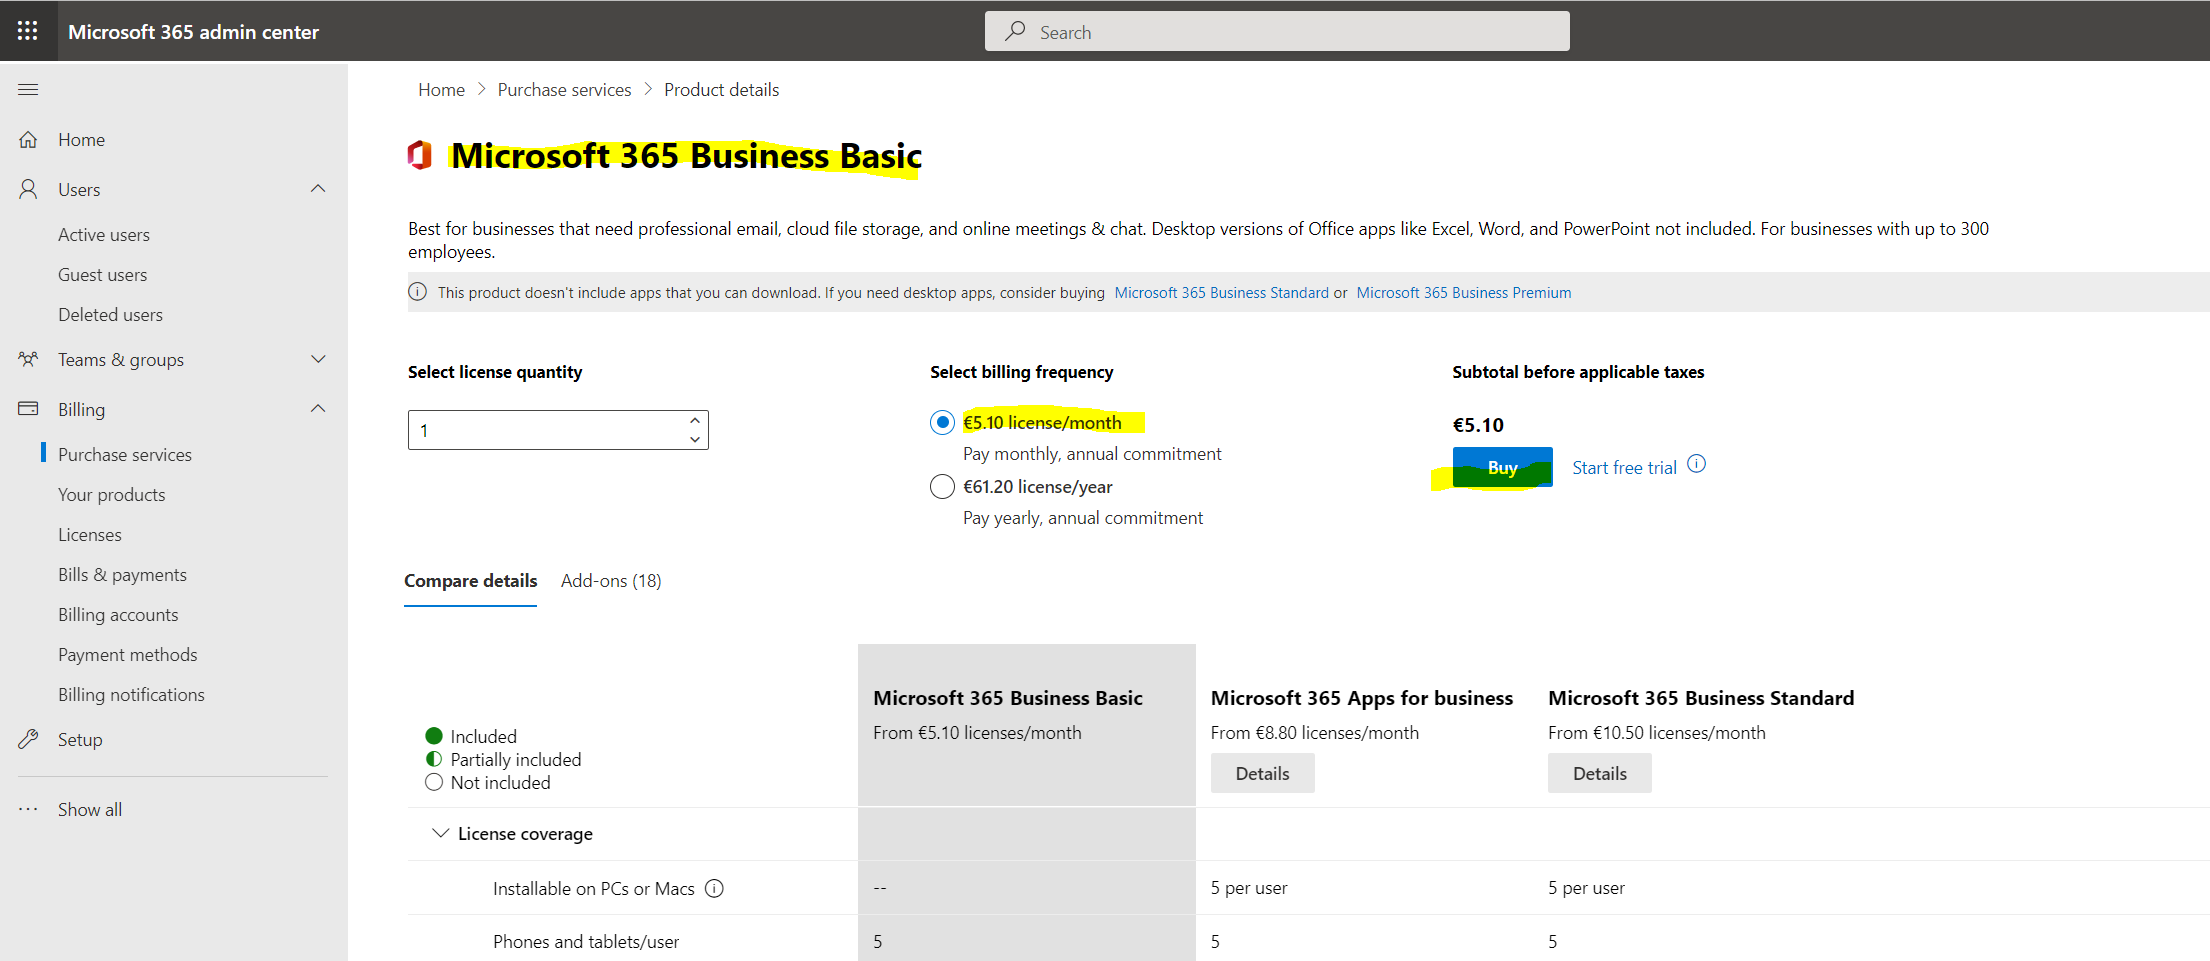
For this purpose, the Microsoft 365 Business Basic license would be good enough first.
Preparing Source and Target Tenants
Additionally, at least one mail-enabled security group in the source tenant is required. These groups are used to scope the list of mailboxes that can move from source (or sometimes referred to as resource) tenant to the target tenant. This allows the source tenant admin to restrict or scope the specific set of mailboxes that need to be moved, preventing unintended users from being migrated. Nested groups aren’t supported.
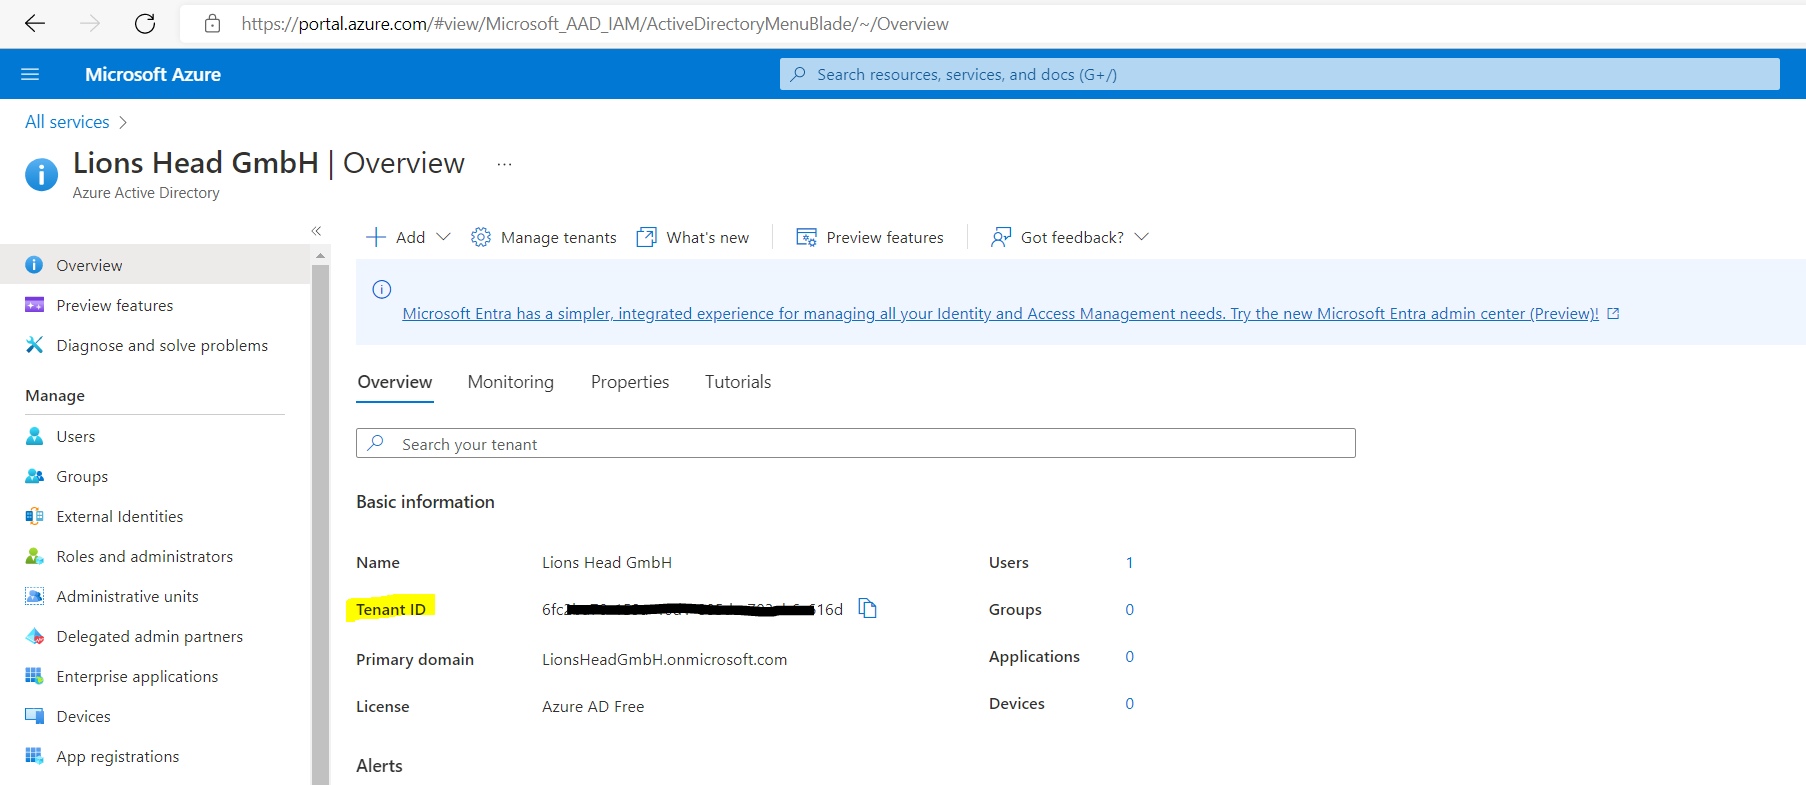
For the migration we need from both tenants the Microsoft 365 tenant ID.
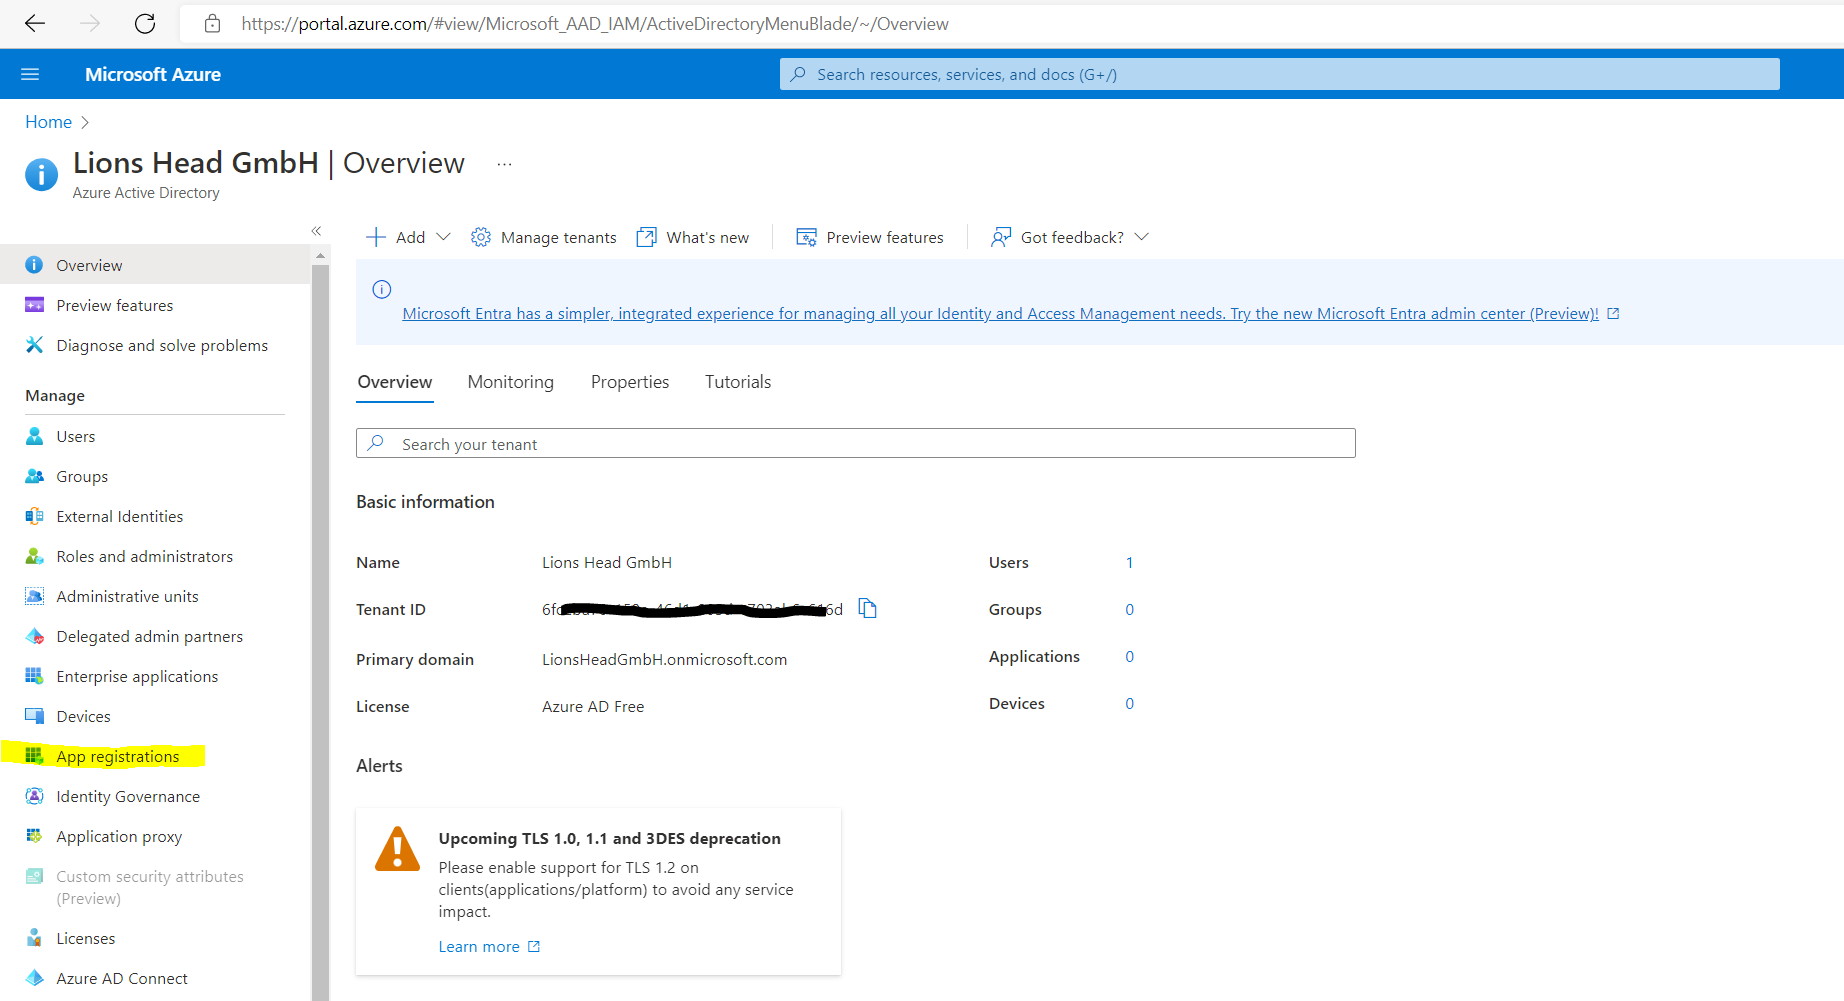
To obtain the ID you can sign in to the Azure Portal and there on the Overview page from the Azure Active Directory you will see the corresponding ID.
By the way regarding the blackened information like the Tenant ID below, Tenant IDs or App Client IDs aren’t generally considered as Personally Identifiable Information (PII) nor secrets. So its not really necessary to do.
They all are relative easy to obtain, for example to obtain the Tenant ID for a given domain, you can just enter the domain at the following page https://www.whatismytenantid.com/ to get in return the Tenant ID.Apart from that unfortunately because of the corporate merger both tenants wouldn’t exist anymore soon and also the new one is just temporary.
Prepare the target (destination) tenant
Now we first need to prepare the target (destination) tenant by creating the migration application and secret.
If already signed out from the Azure Portal, sign in again and click on Manage Azure Active Directory or directly on the Azure Active Directory Icon as shown below.

On the left navigation bar click on App registrations.
Select New registration.
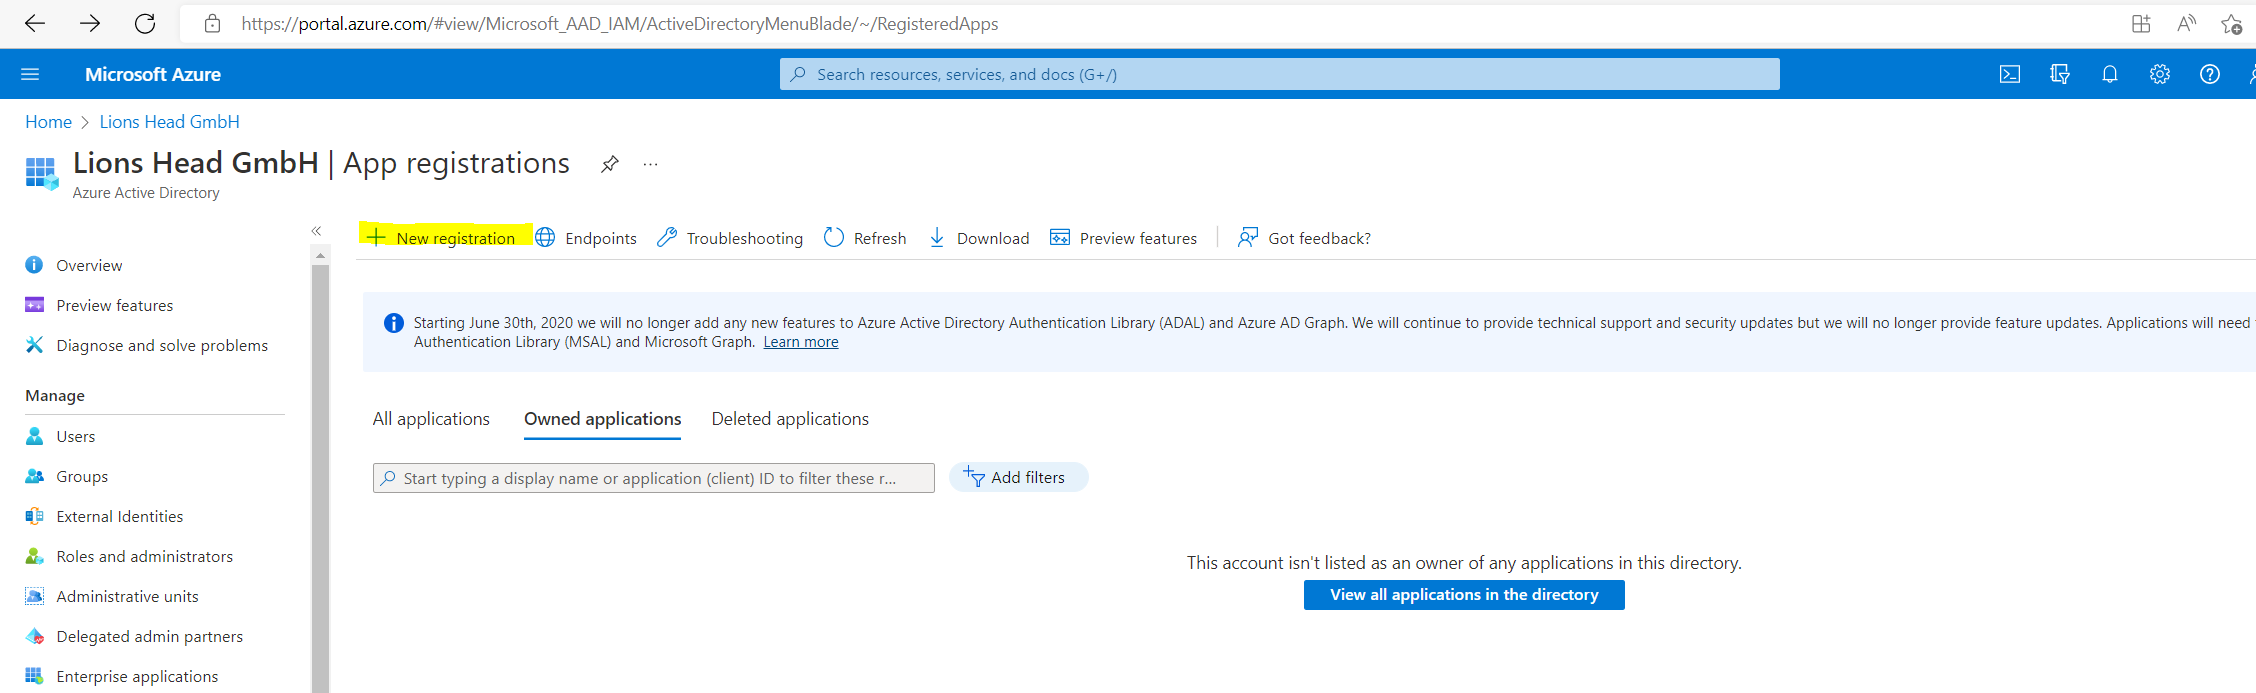
On the Register an application page, under Supported account types, select Accounts in any organizational directory (Any Azure AD directory – Multitenant). Then, under Redirect URI (optional), select Web and enter https://office.com. Lastly, select Register.

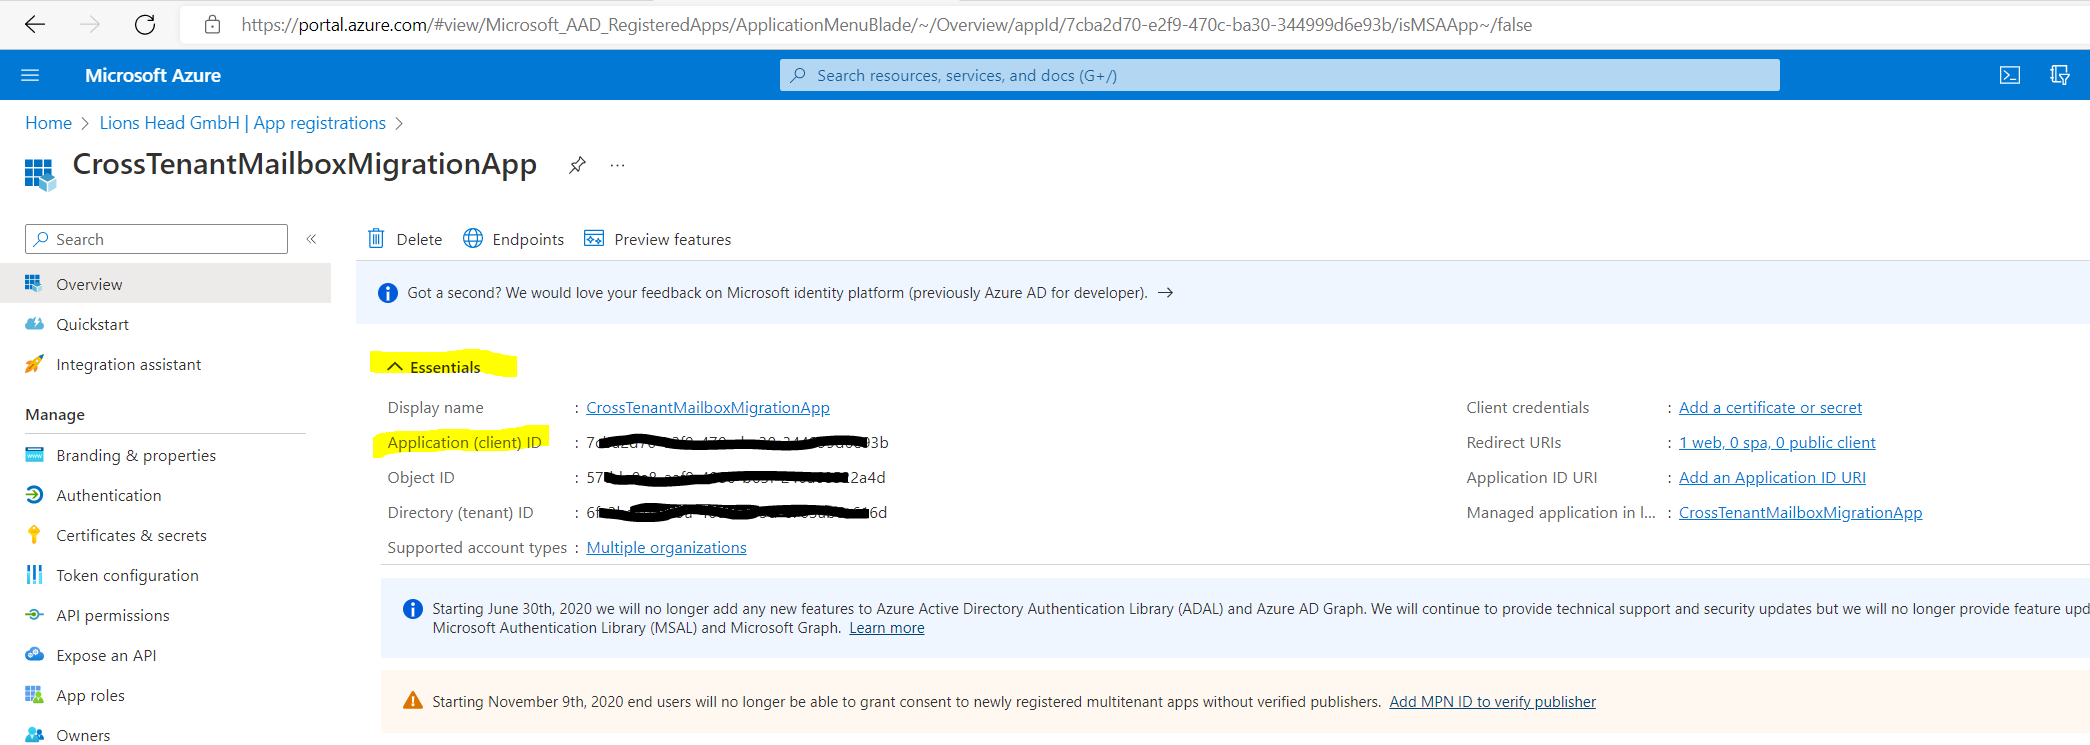
After the application was created successfully, go back to Home, Azure Active Directory and click on App registrations. Under Owned applications, find the app you created and click on it.
Under Essentials on the Overview page, you’ll need to copy down the Application (client) ID as you’ll need it later to create a URL for the target tenant.
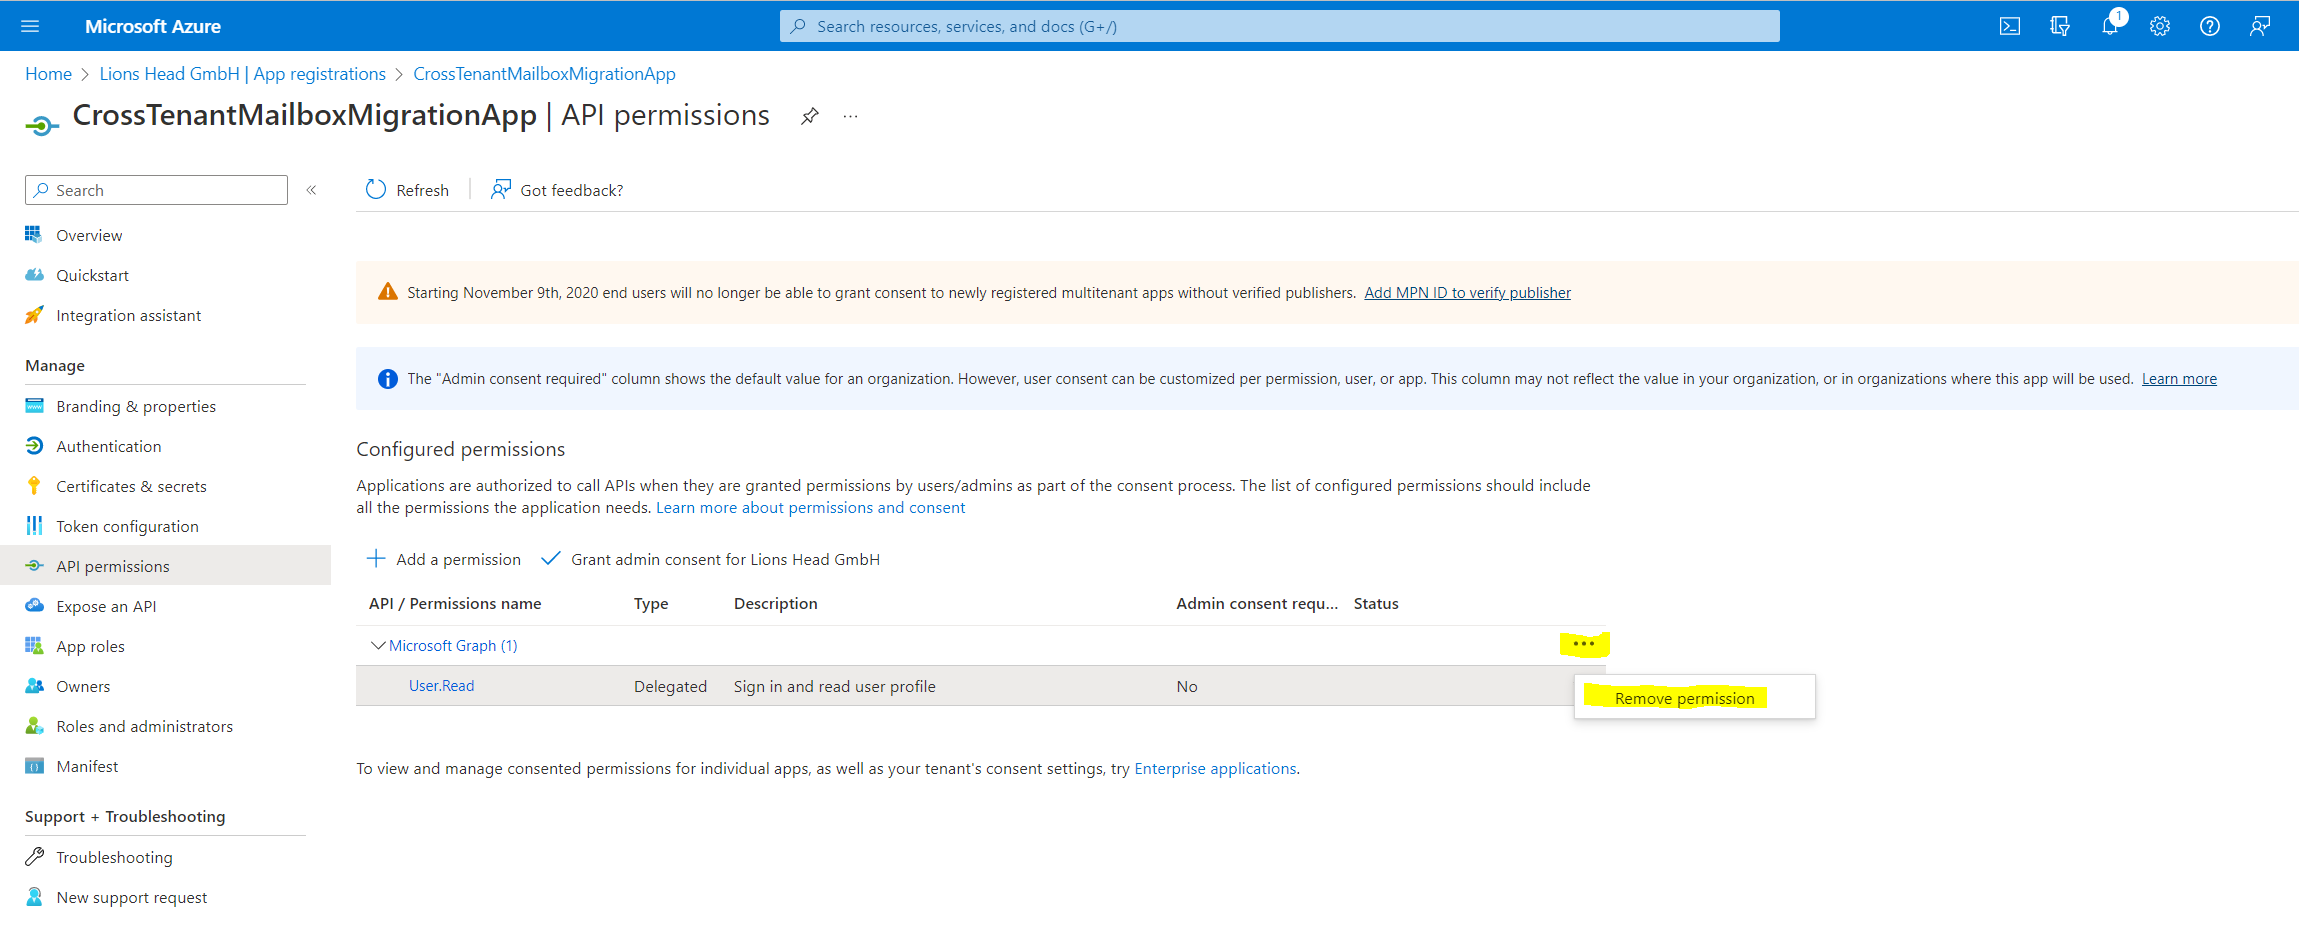
Now, on the left navigation bar, click on API permissions to view permissions assigned to your app. By default, User. Read permissions are assigned to the app you created, but we don’t require them for mailbox migrations, you can remove that permission.
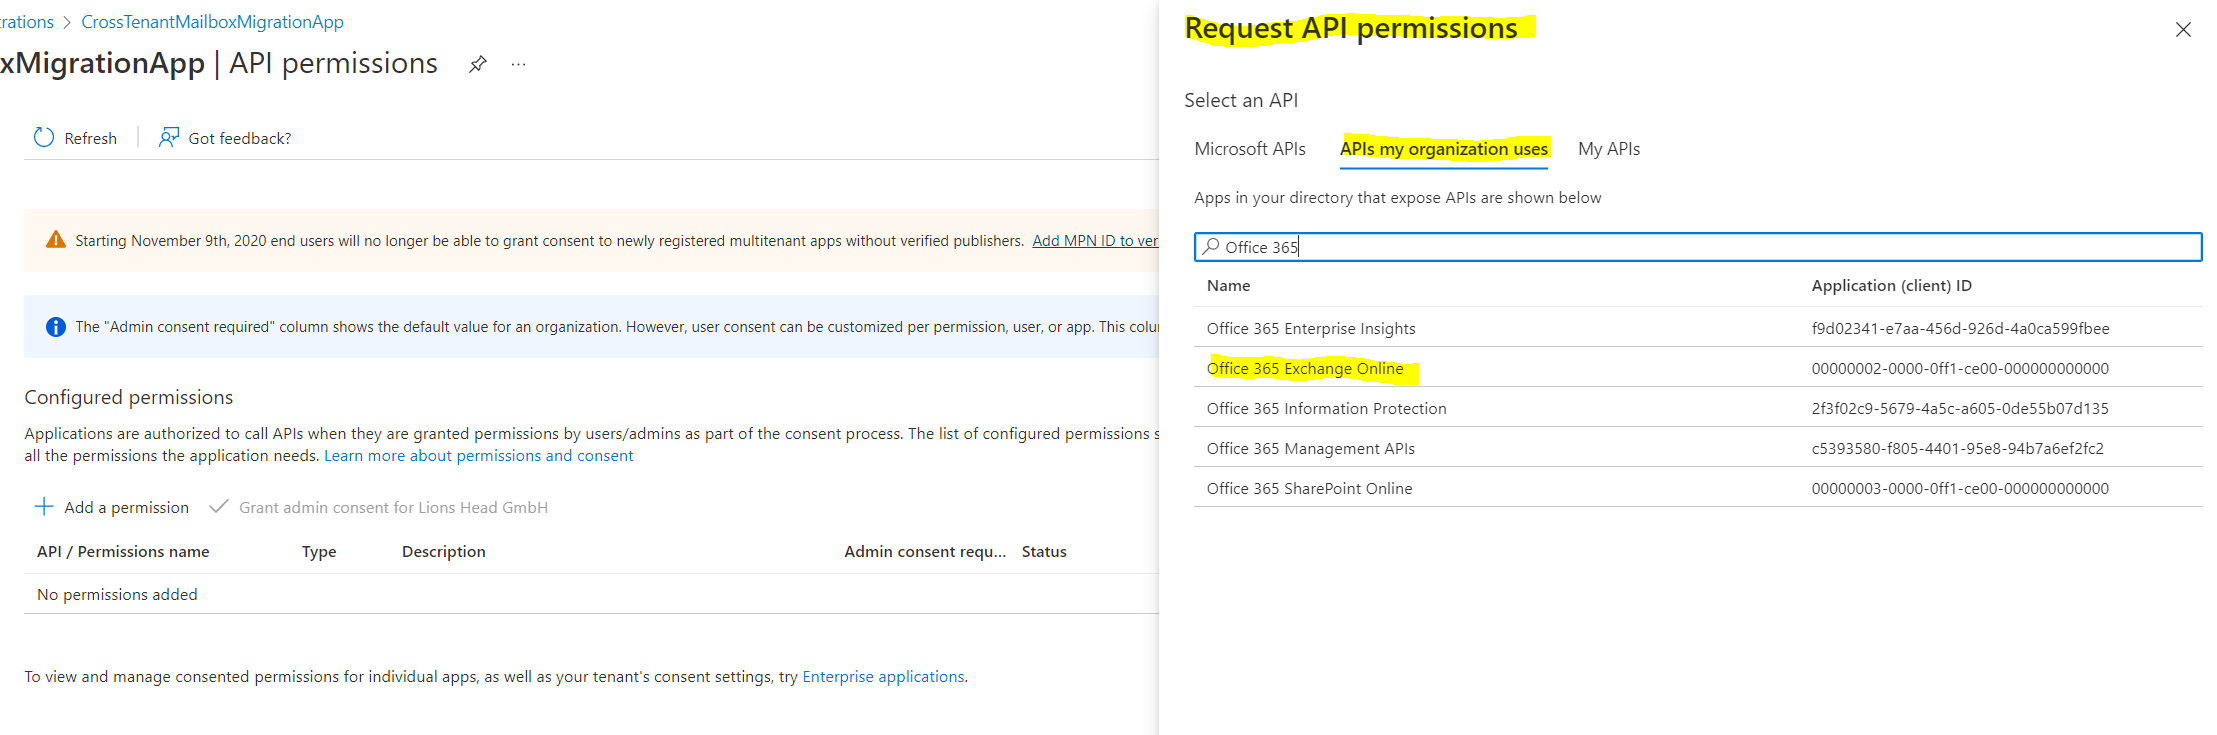
Now we need to add permission for mailbox migration, select Add a permission. In the Request API permissions windows, select APIs my organization uses, search for Office 365 Exchange Online, and select it.
As mentioned at the beginning under Create a new Microsoft 365 Tenant, you first need to purchase a product licence which includes Exchange Online in order you will be able to find the Office 365 Exchange Online API below.
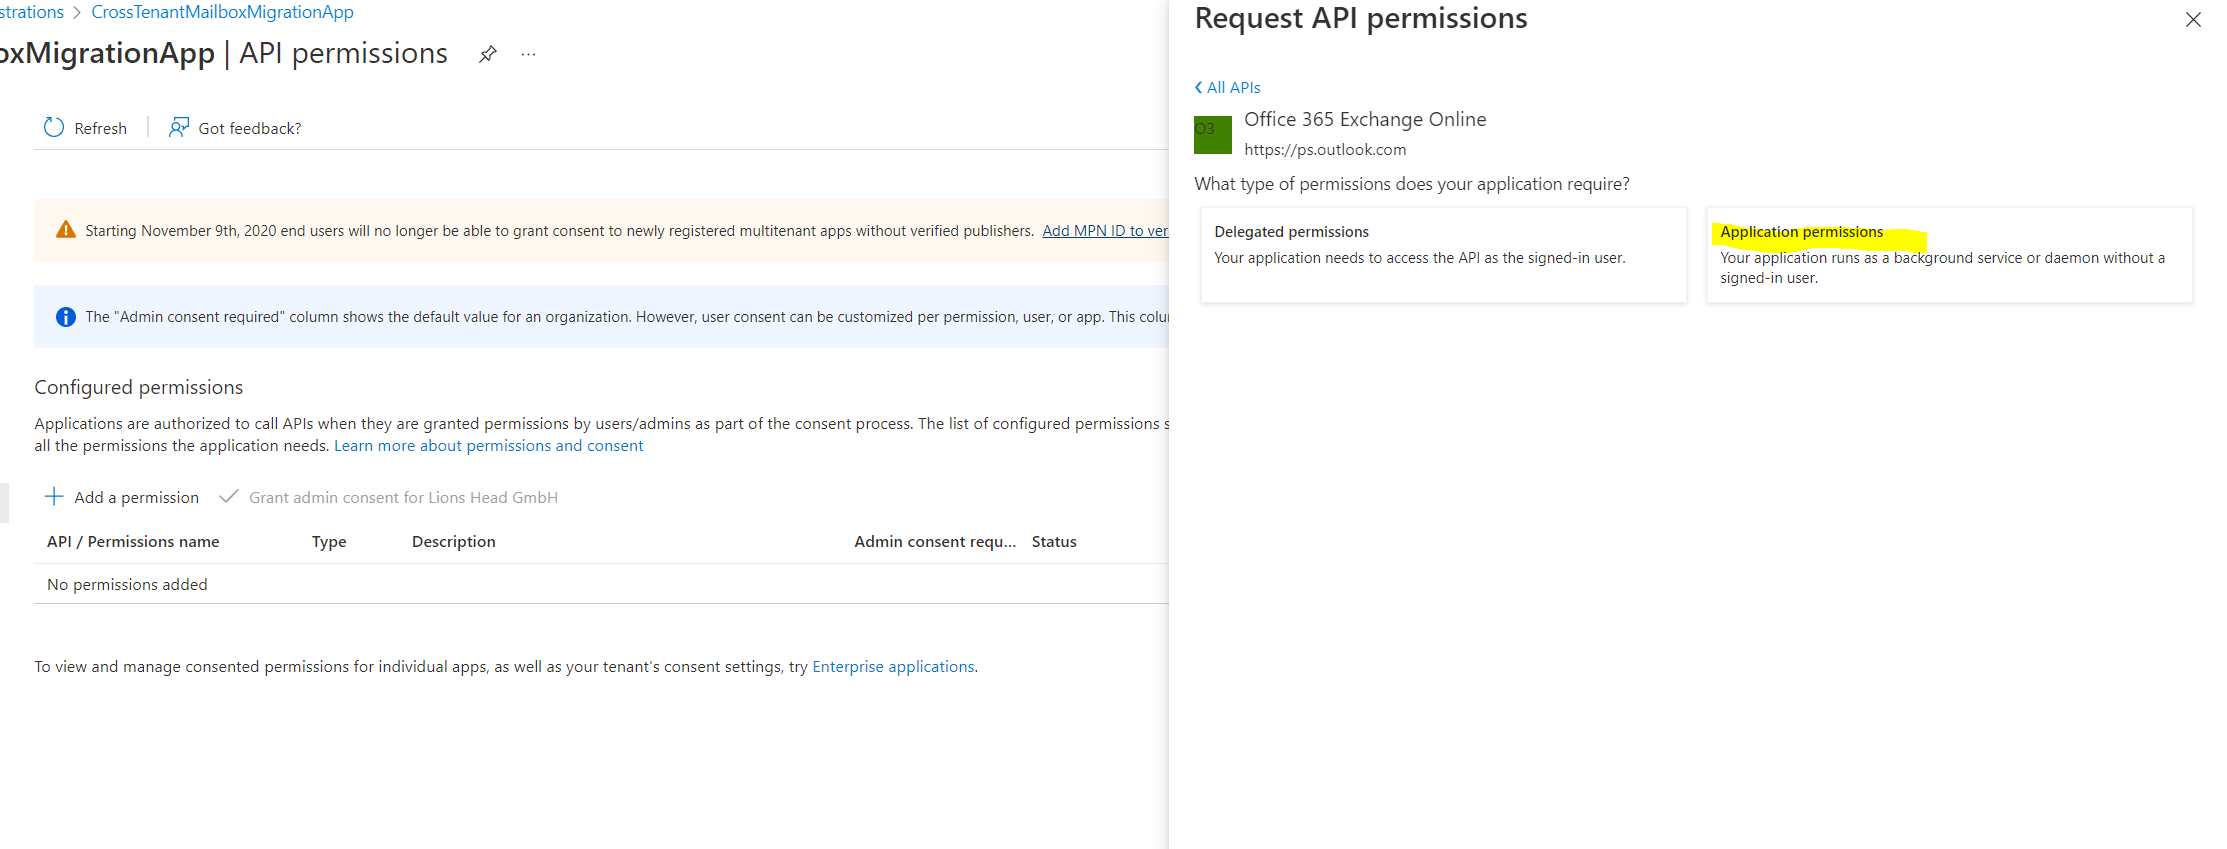
Next, select Application permissions
Then, under Select permissions, expand Mailbox, check Mailbox.Migration, and click on Add permissions at the bottom on the screen.

Now select Certificates & secrets on the left navigation bar for your application.

Under Client secrets, select new client secret.
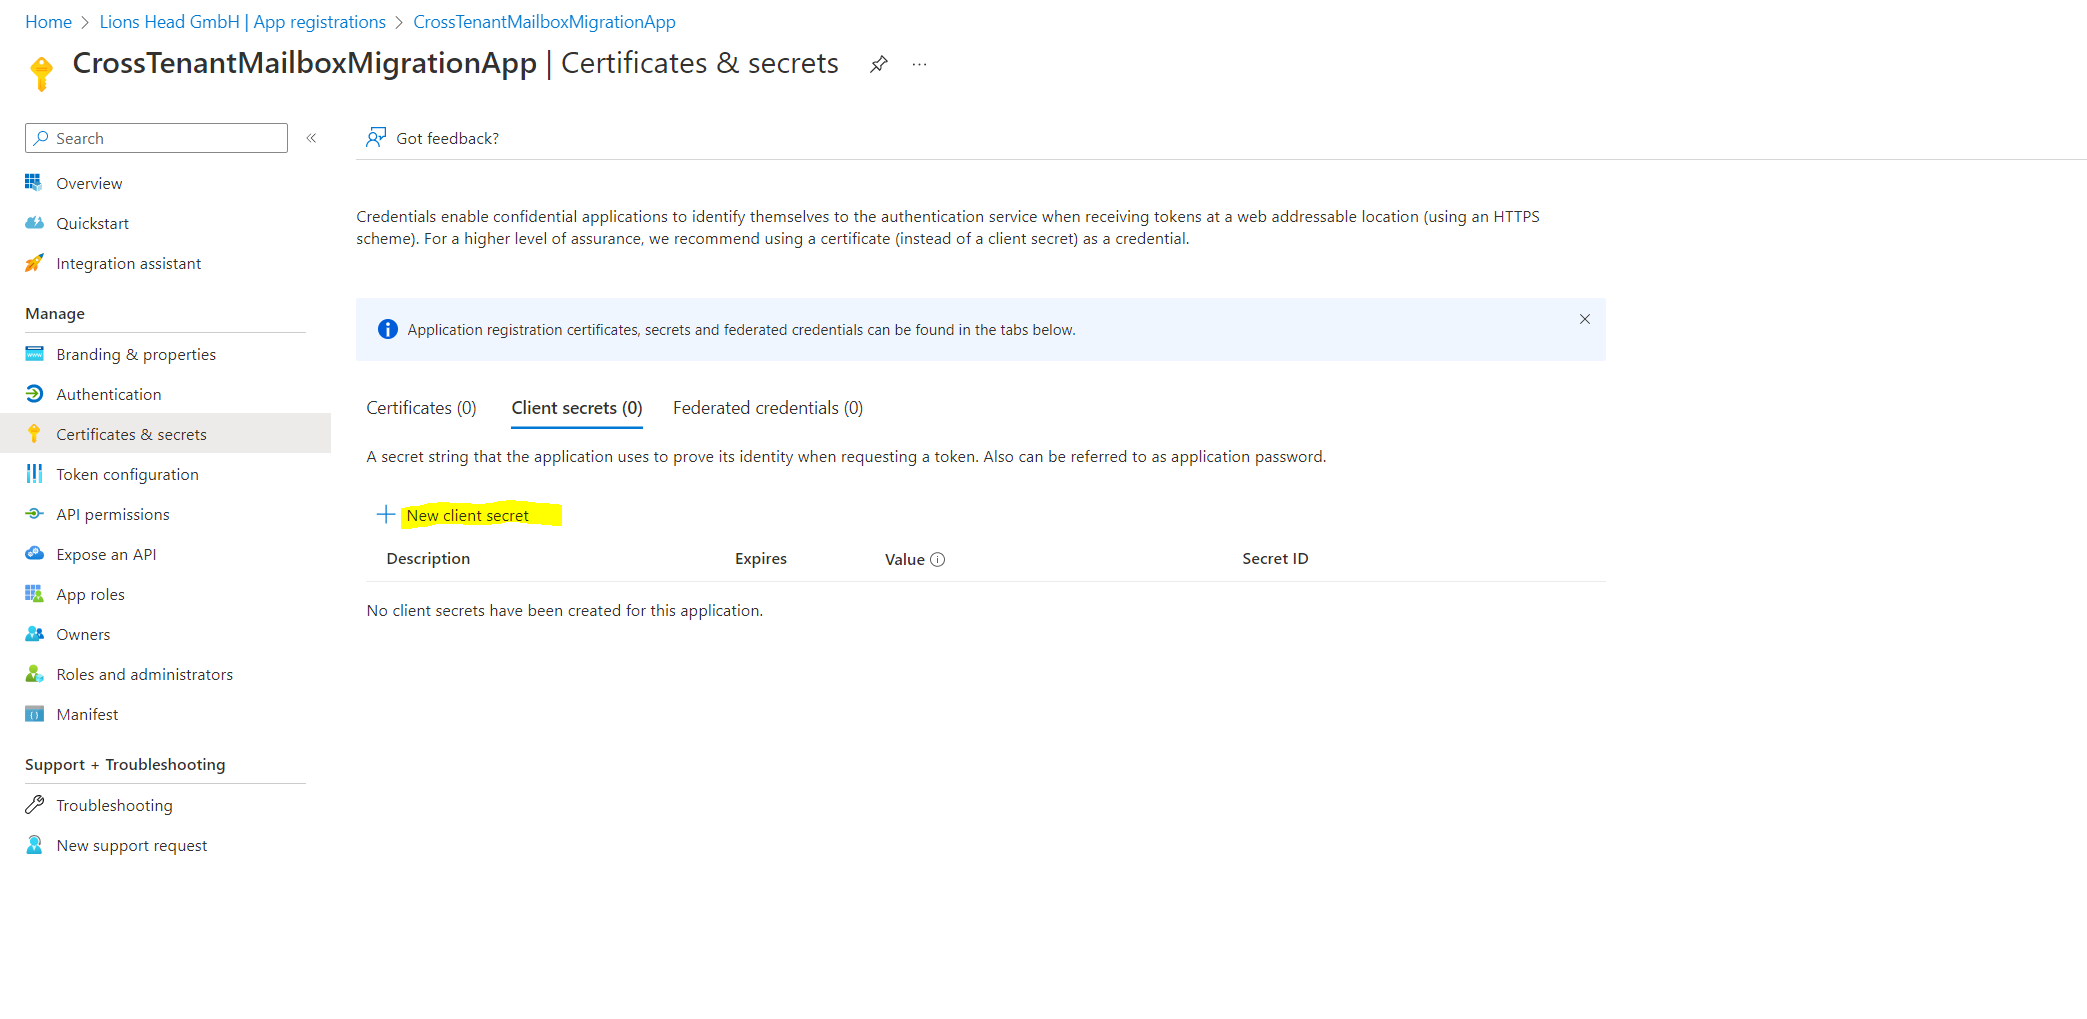
In the Add a client secret window, enter a description, and configure your desired expiration settings.
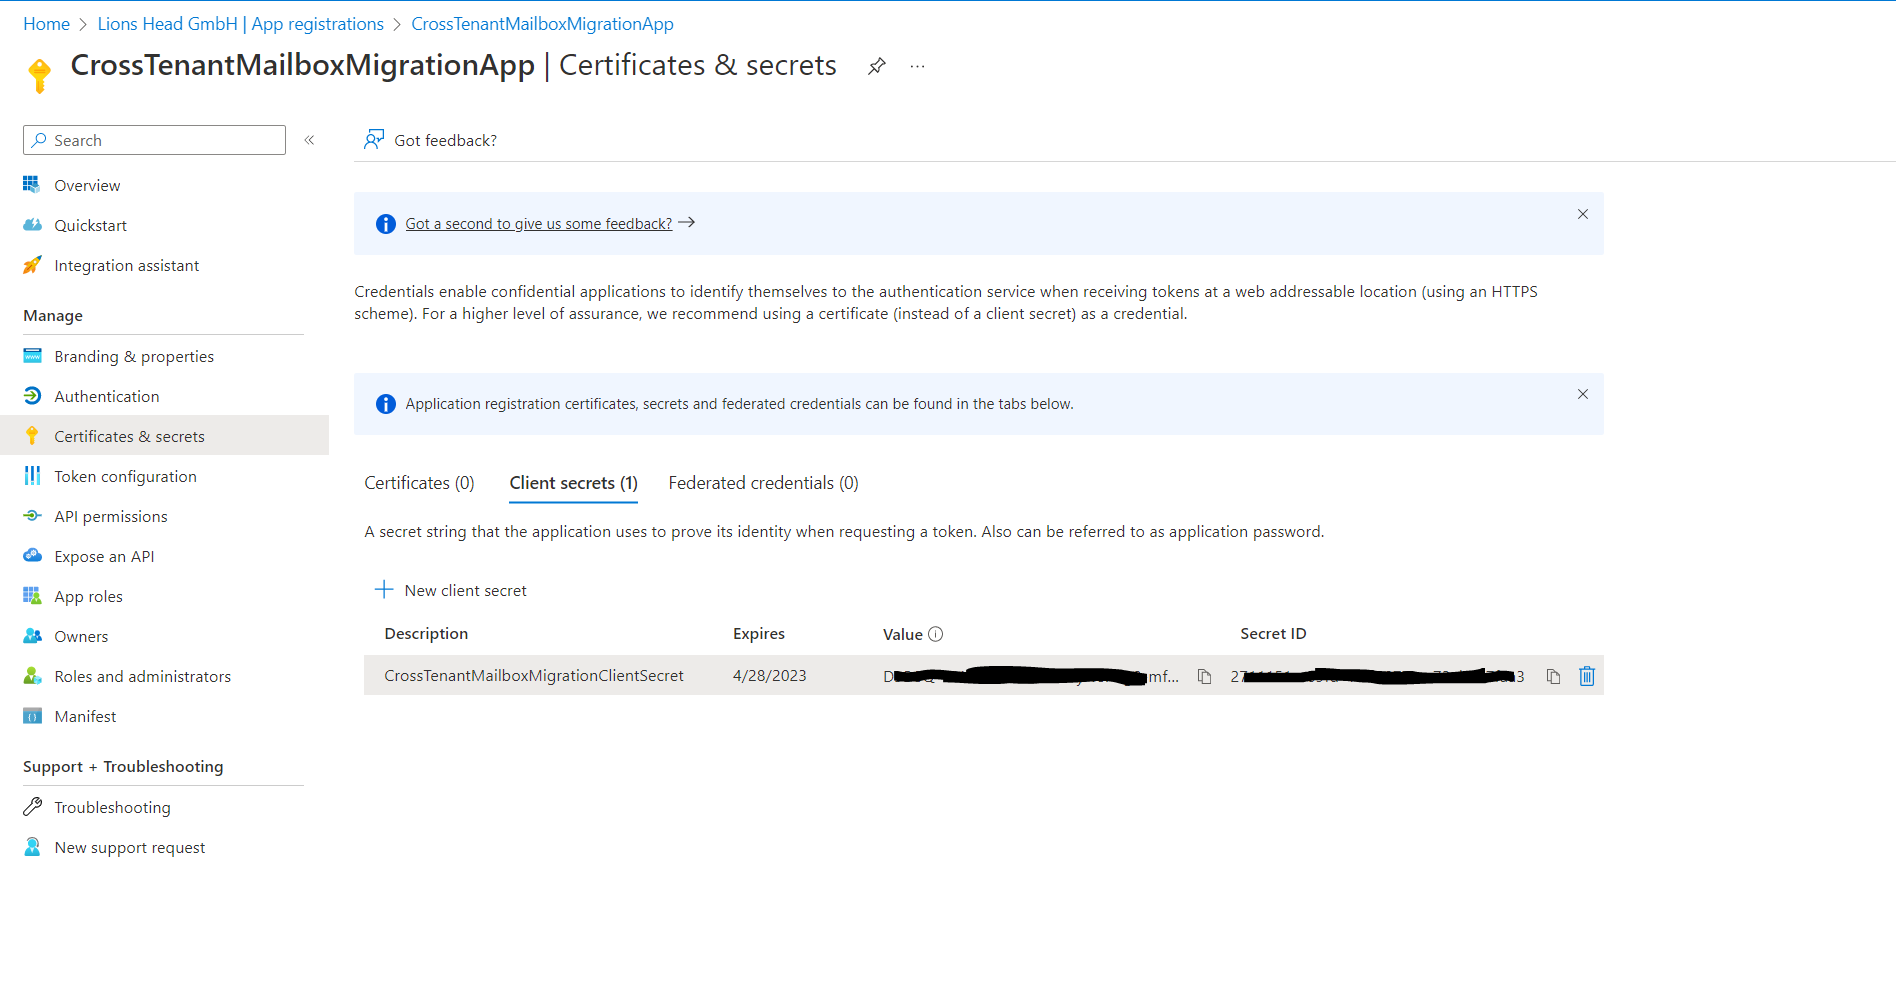
Note!
This is the password that will be used when creating your migration endpoint. It is extremely important that you copy this password to your clipboard and or copy this password to secure/secret password safe location. This is the only time you will be able to see this password! If you do somehow lose it or need to reset it, you can log back into our Azure portal, go to App registrations, find your migration app, select Secrets & certificates, and create a new secret for your app.
The actual password is what is shown under Value
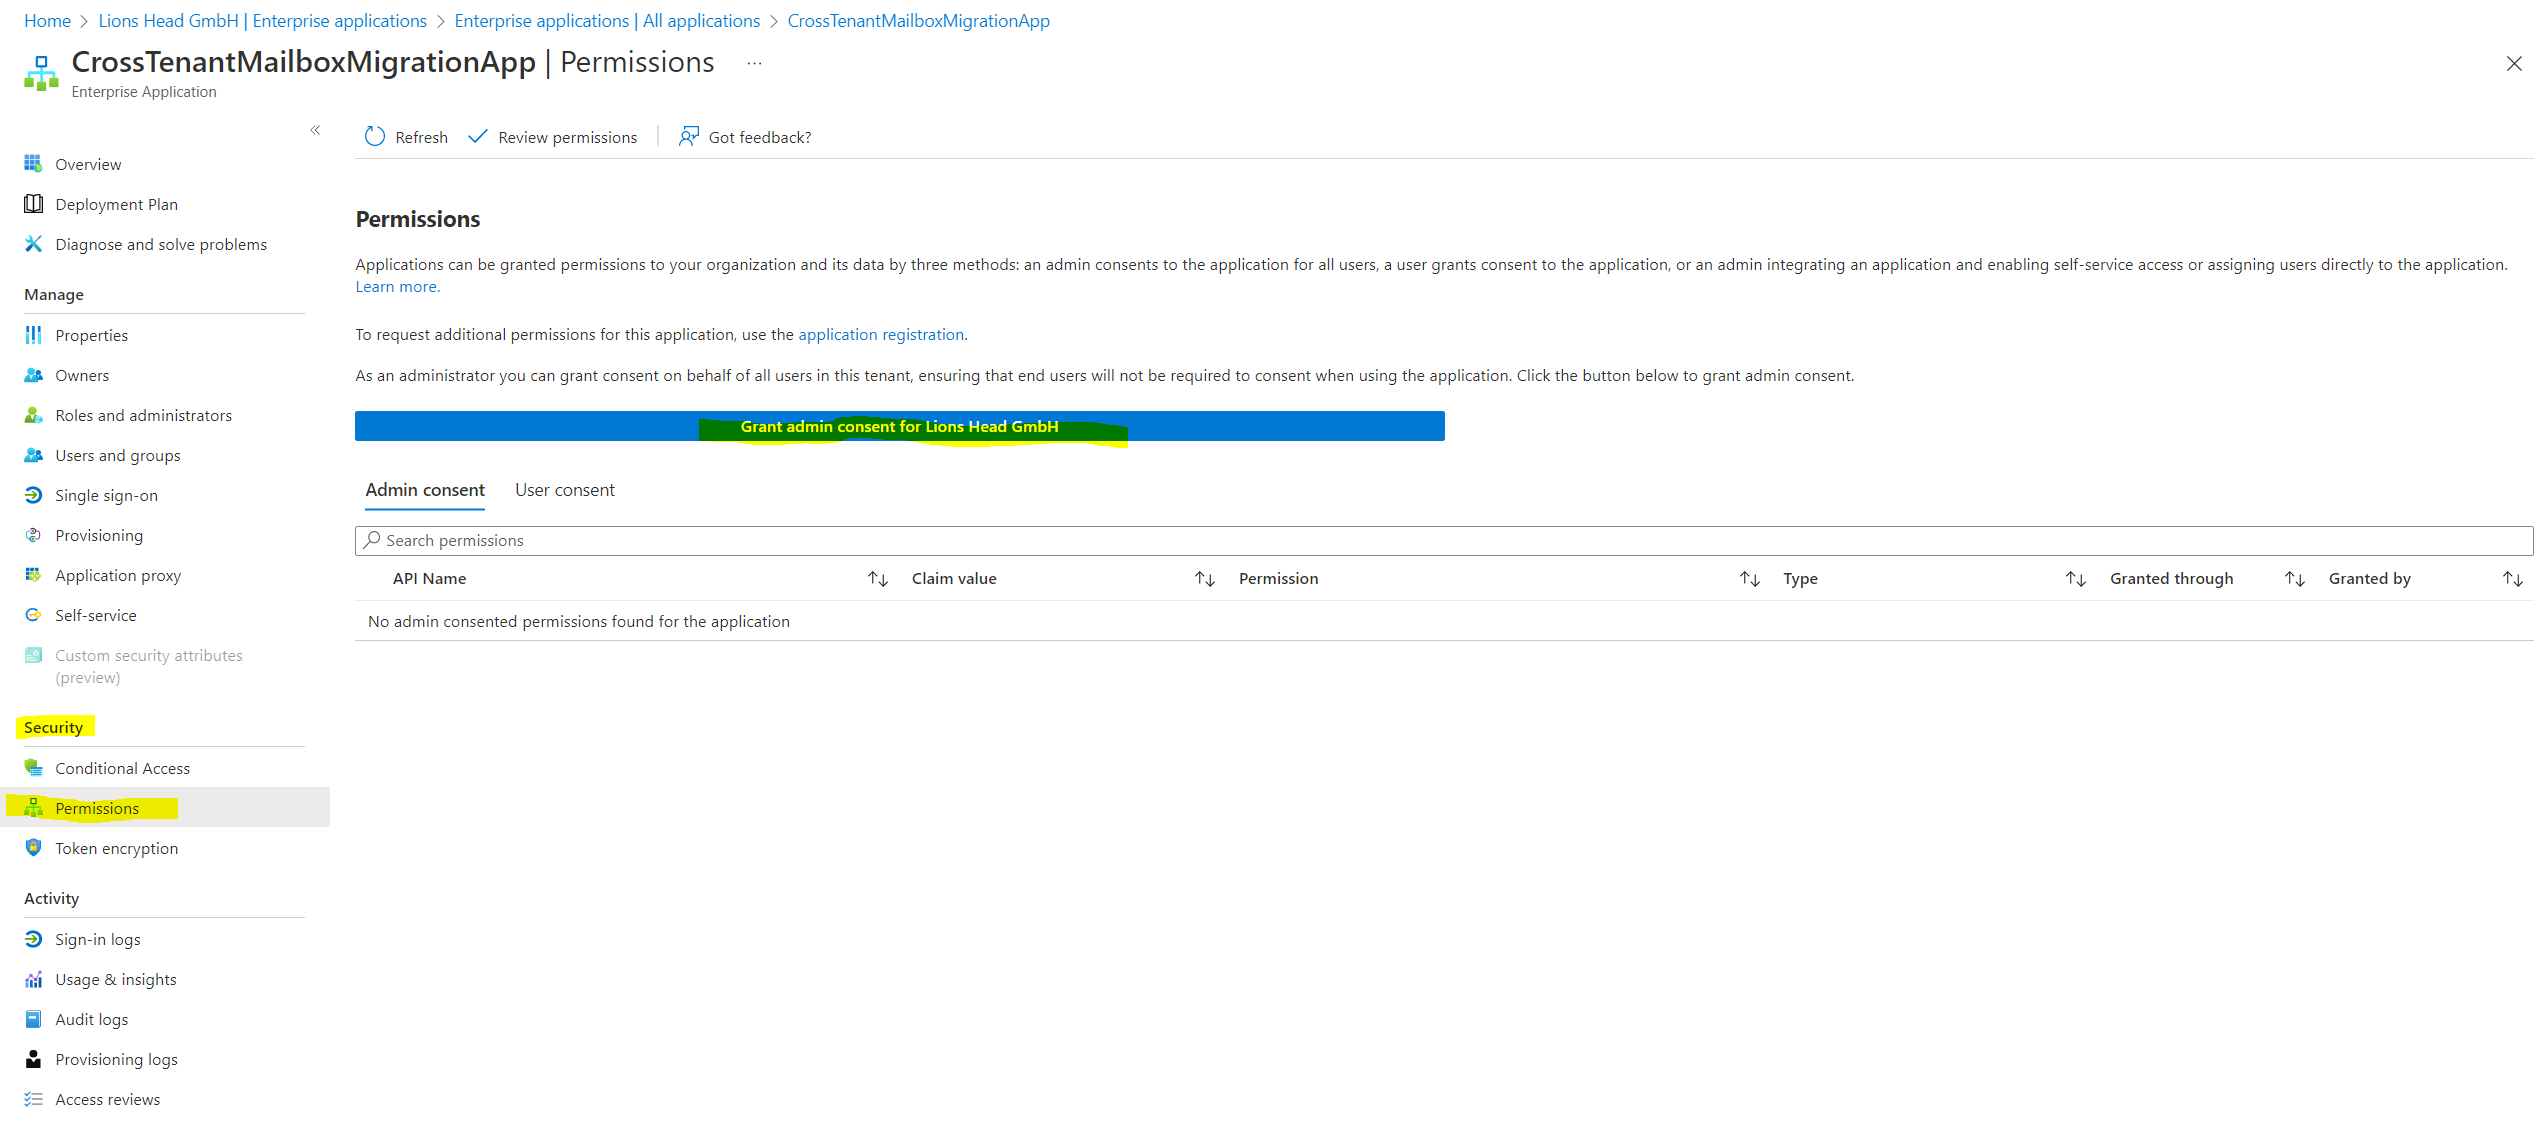
Now that you’ve successfully created the migration application and secret, you’ll need to consent to the application. To consent to the application, go back to the Azure Active Directory landing page, click on Enterprise applications in the left navigation, find your migration app you created, select it, and select Permissions on the left navigation.
Click on the Grant admin consent for [your tenant] button.
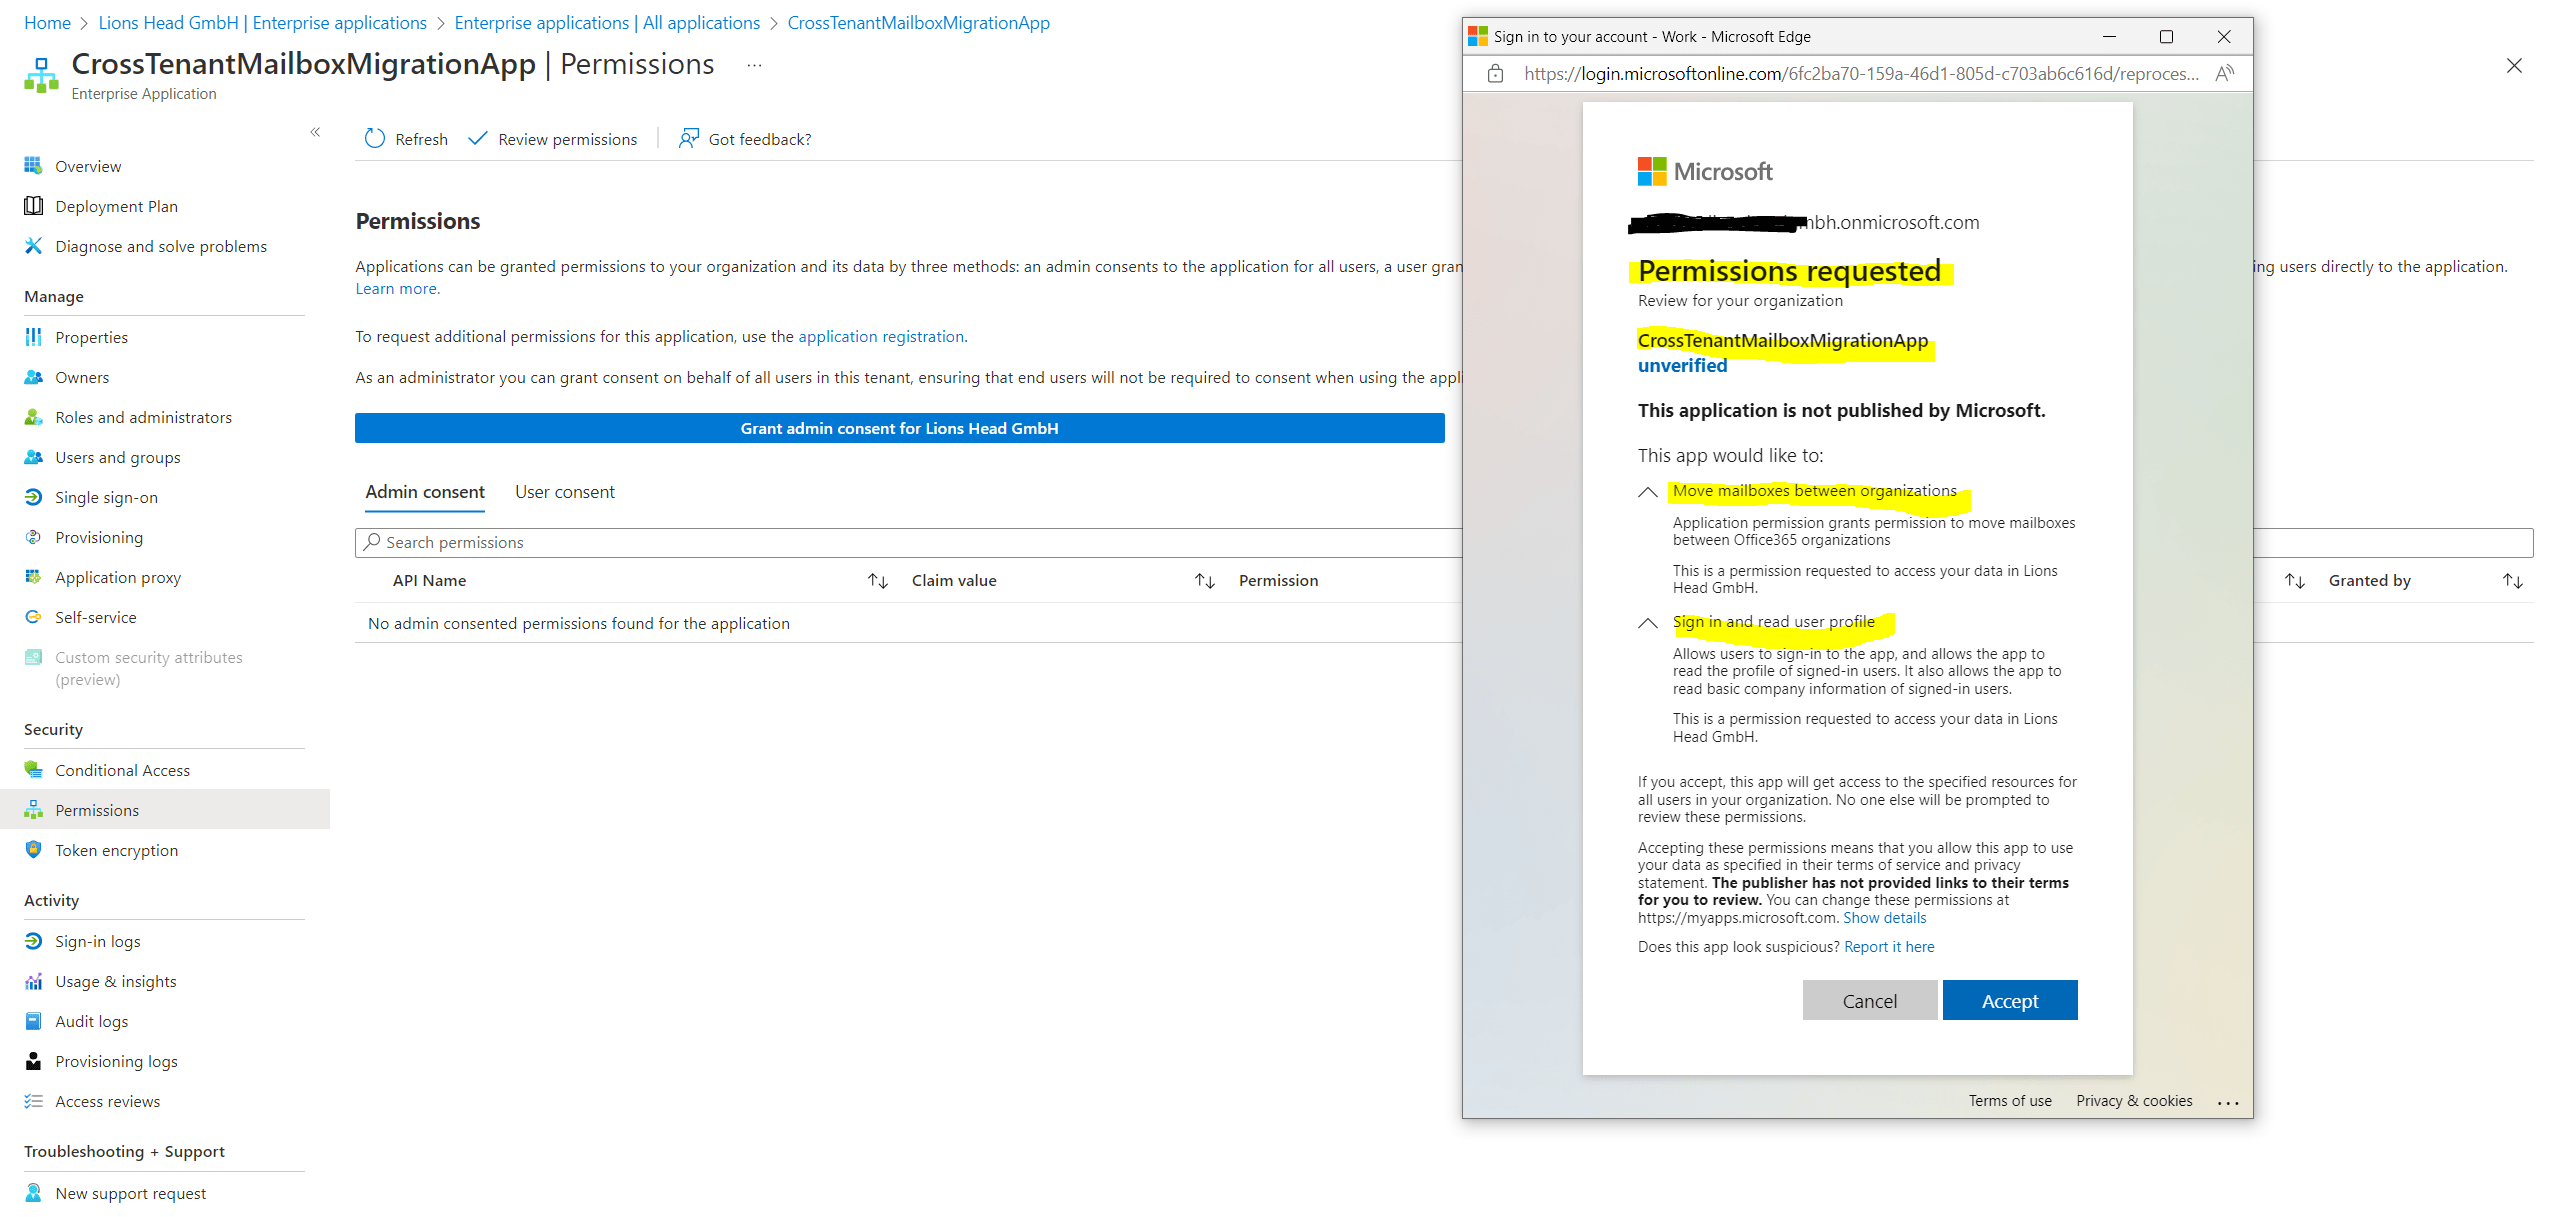
A new browser window will open and select Accept.
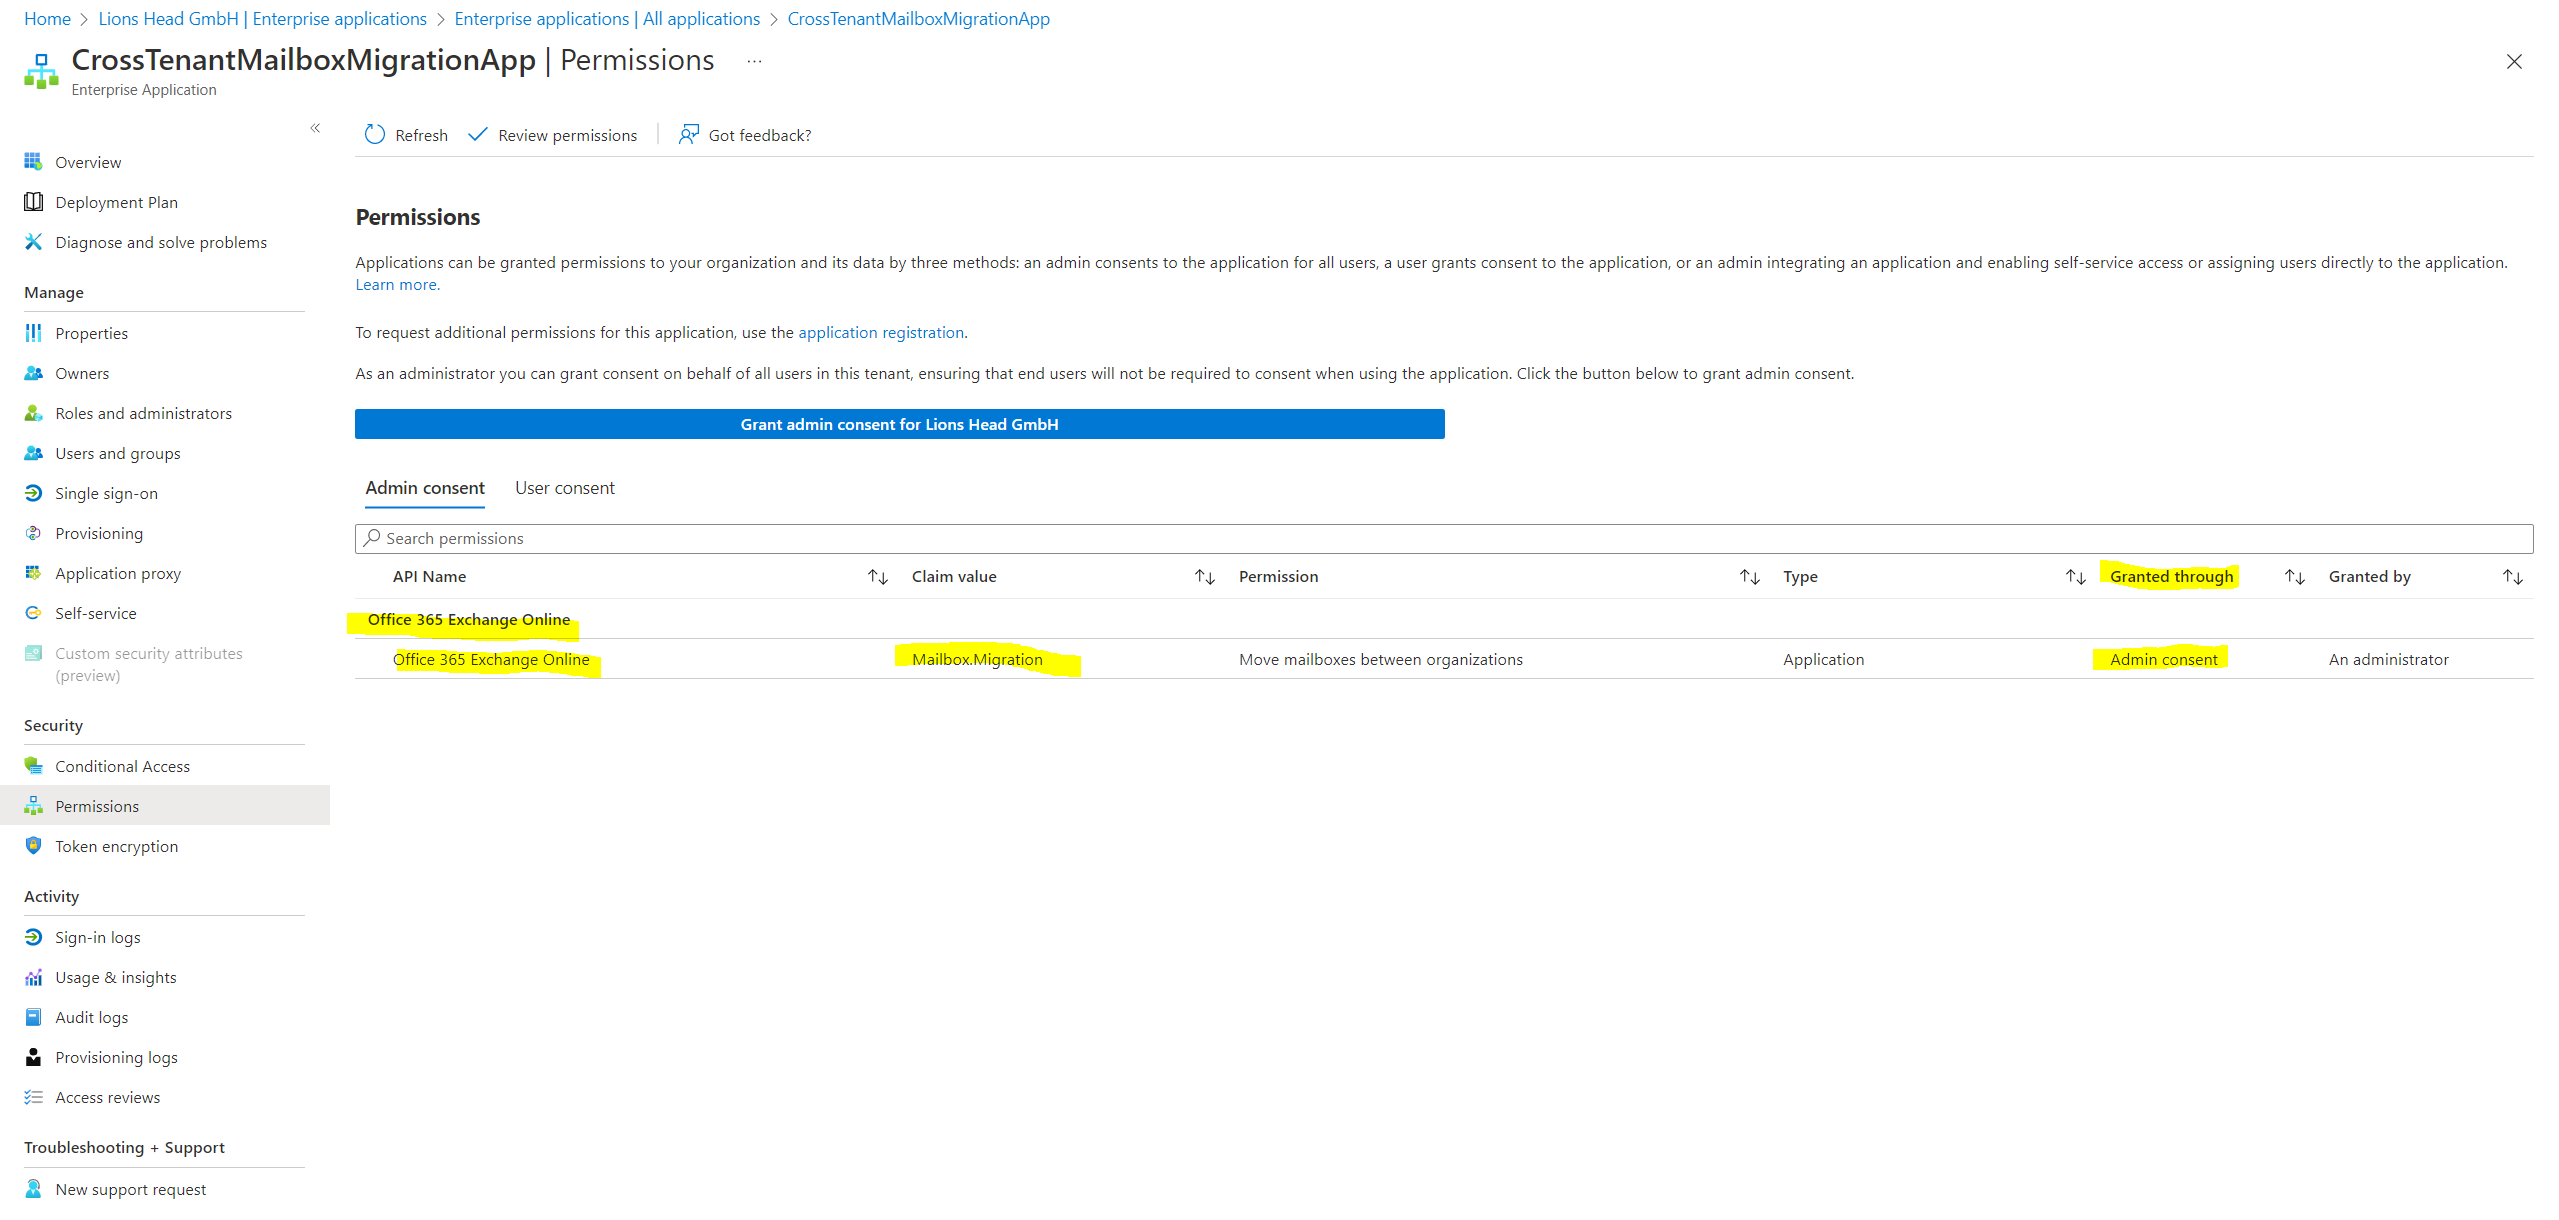
You can go back to your portal window and select Refresh to confirm your acceptance.
Formulate the URL to send to your trusted partner (source tenant admin) so they can also accept the application to enable mailbox migration. Here’s an example of the URL to provide to them you’ll need the application ID of the app you created:
https://login.microsoftonline.com/sourcetenant.onmicrosoft.com/adminconsent?client_id=[application_id_of_the_app_you_just_created]&redirect_uri=https://office.com
You will need the application ID of the mailbox migration app you just created.
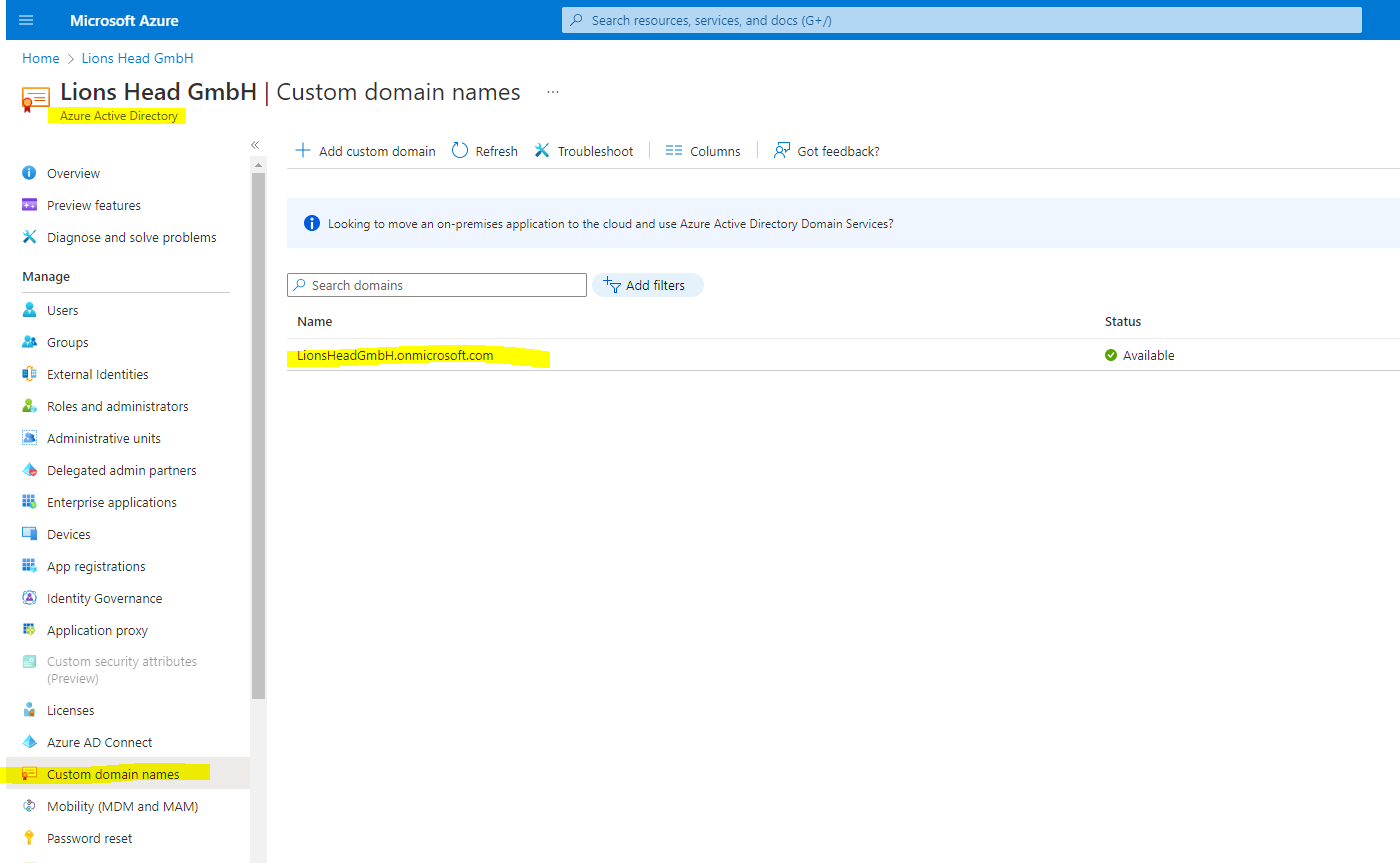
You will need to replace sourcetenant.onmicrosoft.com in the above example with your source tenants correct onmicrosoft.com name. You will find this FQDN under Azure Active Directory –> Custom domain names and there the one with the onmicrosoft.com suffix.
You will also need to replace [application_id_of_the_app_you_just_created] with the application ID of the mailbox migration app you just created.
Now we still stay at the target tenant and create here the Exchange Online migration endpoint and organization relationship.
Connect to Exchange Online PowerShell in the target Exchange Online tenant.
If not already installed, you first need to install the Exchange Online PowerShell module (V3 at the moment).
https://www.powershellgallery.com/packages/ExchangeOnlineManagement
Install-Module -Name ExchangeOnlineManagement
To force to upgrade to a new release
Install-Module -Name ExchangeOnlineManagement -Force
Connect to Exchange Online by running the following command.
Connect-ExchangeOnline
Create a new migration endpoint for cross-tenant mailbox moves
You will need the application ID of the mailbox migration app you just created and the password (the secret) you configured during this process. Also depending on the Microsoft 365 Cloud Instance you use your endpoint may be different. Please refer to the Microsoft 365 endpoints page and select the correct instance for your tenant and review the Exchange Online Optimize Required address and replace as appropriate.
Regarding Microsoft 365 endpoints and depending what Microsoft 365 Cloud Instance you will use, in most cases this will be Office 365 Worldwide (+GCC)
Office 365 URLs and IP address ranges – Exchange Online
Office 365 requires connectivity to the Internet. The endpoints below should be reachable for customers using Office 365 plans, including Government Community Cloud (GCC).
https://learn.microsoft.com/en-us/microsoft-365/enterprise/urls-and-ip-address-ranges?view=o365-worldwide#exchange-online
So for Office 365 worldwide (+GCC) the Exchange Online Optimize Required address is outlook.office.com or outlook.office365.com and we do not need to change it below.
For the new Migration Endpoint Name you can use anything you want, I will use here the name
Cross Tenant Mailbox Migration Endpoint
You should also change the Remote Tenant FQDN from sourcetenant.onmicrosoft.com to the FQDN from your source tenant where the mailboxes stored at the moment. To determine the FQDN you can go to the Azure Portal and here under Azure Active Directory –> Custom domains
Here it must the domain (FQDN) with the suffix *.onmicrosoft.com.
Below for example you will see the FQDN from my new target tenant where at the moment no custom domains are added.
Now after adjusting the PowerShell cmdlets to the above parameter, I will execute them.
# Enable customization if tenant is dehydrated
$dehydrated=Get-OrganizationConfig | select isdehydrated
if ($dehydrated.isdehydrated -eq $true) {Enable-OrganizationCustomization}
$AppId = "[guid copied from the migrations app]"
$Credential = New-Object -TypeName System.Management.Automation.PSCredential -ArgumentList $AppId, (ConvertTo-SecureString -String "[this is your secret password you saved in the previous steps]" -AsPlainText -Force)
New-MigrationEndpoint -RemoteServer outlook.office.com -RemoteTenant "sourcetenant.onmicrosoft.com" -Credentials $Credential -ExchangeRemoteMove:$true -Name "[the name of your migration endpoint]" -ApplicationId $AppId
Now we create or edit our existing organization relationship object to your source tenant.
Adjust the tenant id to your source tenant id where the mailboxes at the moment are stored. Further put in a name for the new organization relationship.
I will use here Cross Tenant Mailbox Migration Relationship
$sourceTenantId="[tenant id of your trusted partner, where the source mailboxes are]"
$orgrels=Get-OrganizationRelationship
$existingOrgRel = $orgrels | ?{$_.DomainNames -like $sourceTenantId}
If ($null -ne $existingOrgRel)
{
    Set-OrganizationRelationship $existingOrgRel.Name -Enabled:$true -MailboxMoveEnabled:$true -MailboxMoveCapability Inbound
}
If ($null -eq $existingOrgRel)
{
    New-OrganizationRelationship "[name of the new organization relationship]" -Enabled:$true -MailboxMoveEnabled:$true -MailboxMoveCapability Inbound -DomainNames $sourceTenantId
}
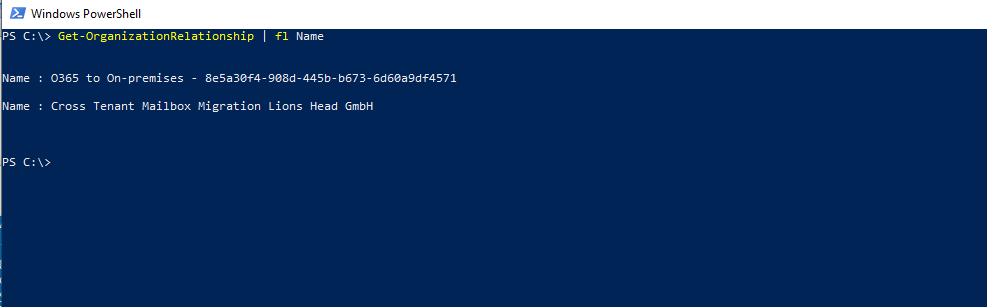
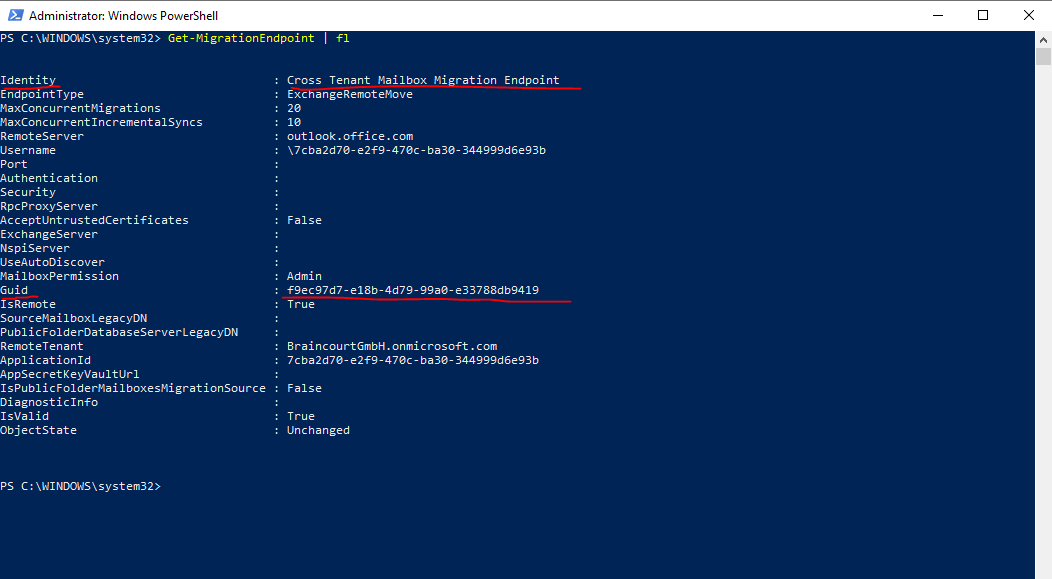
You can see the details with the following cmdlet
Get-OrganizationRelationship | fl
Prepare the source (current mailbox location) tenant
Previously we formulated the URL we need to send to our trusted partner (source tenant admin), in order they can accept the application we created for the cross tenant mailbox migration.
The application from the target tenant as shown below.
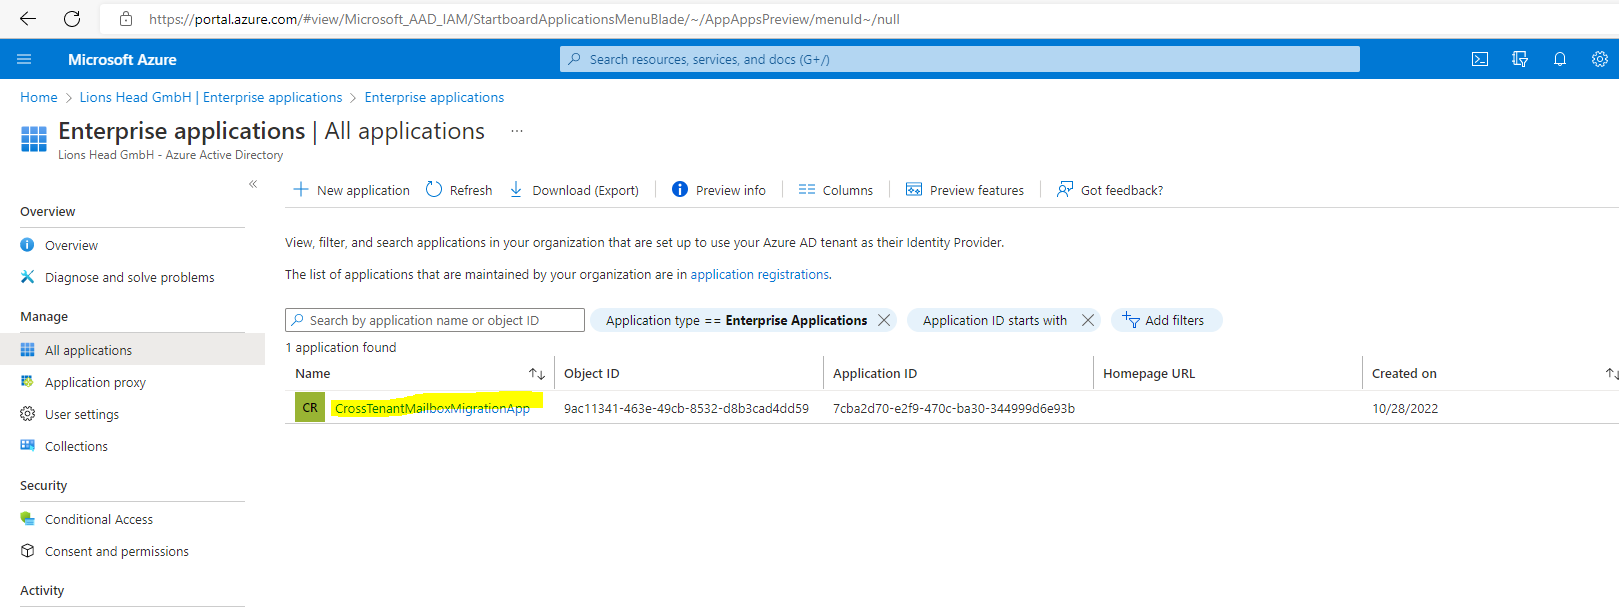
From a browser, go to the URL link provided by your trusted partner (source tenant) to consent to the mailbox migration application from the target tenant shown above. The URL will look like this:
https://login.microsoftonline.com/sourcetenant.onmicrosoft.com/adminconsent?client_id=[application_id_of_the_app_you_just_created]&redirect_uri=https://office.com
You will need the application ID of the mailbox migration app you just created. You will need to replace sourcetenant.onmicrosoft.com in the above example with your source tenants correct onmicrosoft.com name. You will also need to replace [application_id_of_the_app_you_just_created] with the application ID of the mailbox migration app you just created.
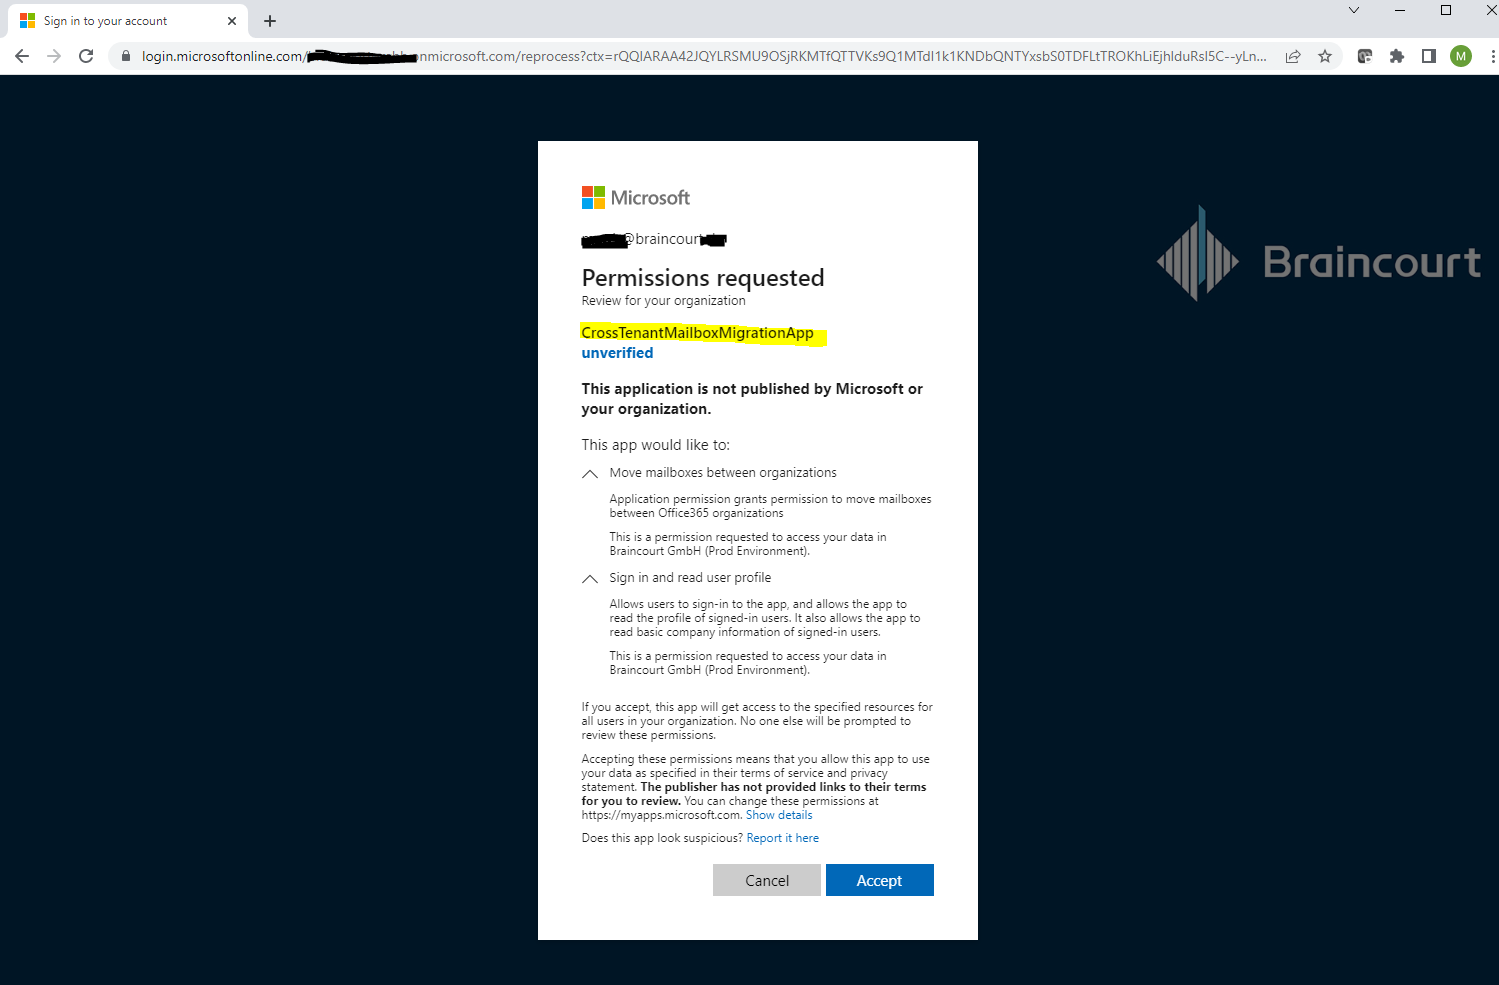
The trusted partner (source tenant admin) will now also see the application in its Enterprise applications and the Mailbox.Migration permission.
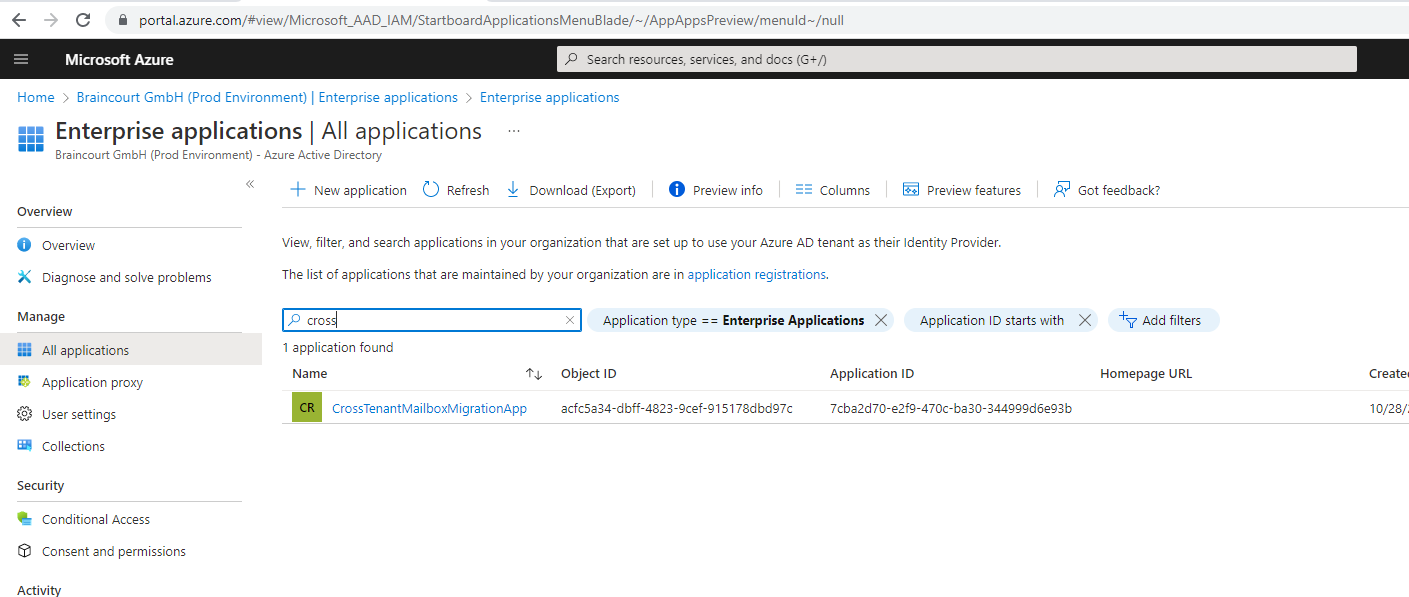
More in general about App Registrations and Enterprise Applications your can read in my following post.
Now connect to Exchange Online PowerShell in the source Exchange Online tenant.
If not already installed, you first need to install the Exchange Online PowerShell module (V3 at the moment).
https://www.powershellgallery.com/packages/ExchangeOnlineManagement
Install-Module -Name ExchangeOnlineManagement
To force to upgrade to a new release
Install-Module -Name ExchangeOnlineManagement -Force
Connect to Exchange Online by running the following command.
Connect-ExchangeOnline
Create a new organization relationship or edit your existing organization relationship object to your target (destination) tenant in Exchange Online PowerShell:
Manage mail-enabled security groups in Exchange Server
https://learn.microsoft.com/en-us/exchange/recipients/mail-enabled-security-groups?view=exchserver-2019
Manage mail-enabled security groups in Exchange Online
https://learn.microsoft.com/en-us/exchange/recipients-in-exchange-online/manage-mail-enabled-security-groups
Create a new mail-enabled security group in Exchange on-premise.

For testing I will first add one test user to the group
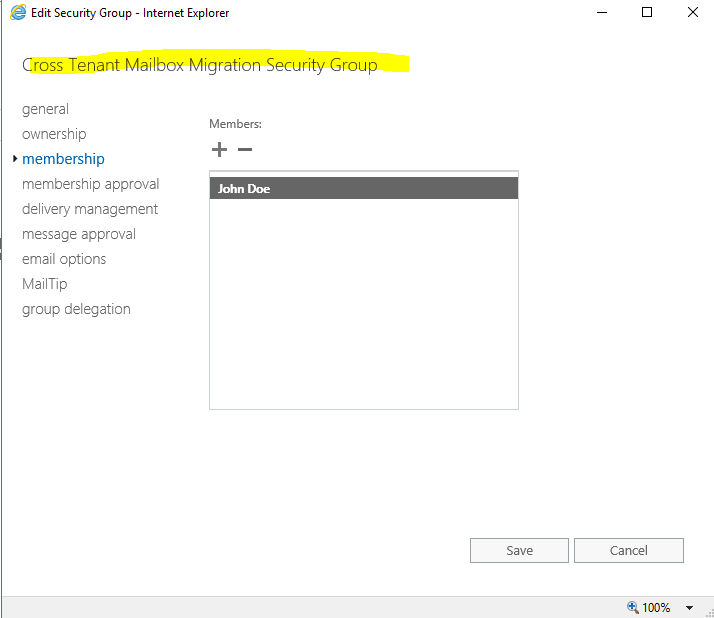
For the New-OrganizationRelationship cmdlet we need to provide a name, therefore I will use
Cross Tenant Mailbox Migration Lions Head GmbH
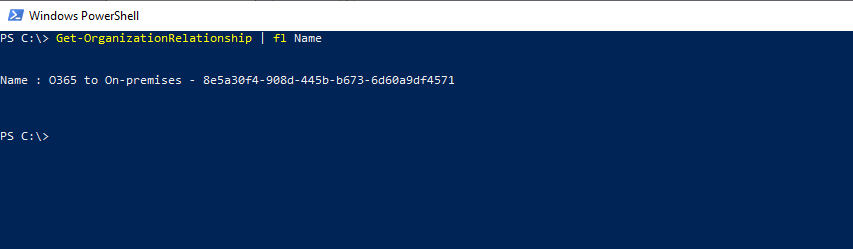
The source organization still had an organization relationship between Exchange on-premise and Office 365
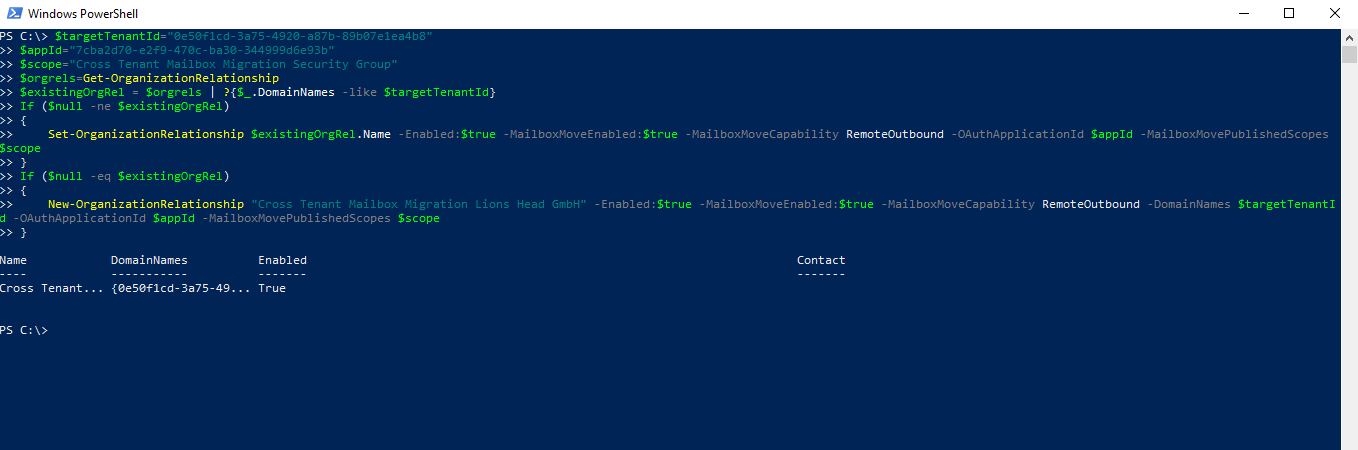
$targetTenantId="[tenant id of your trusted partner, where the mailboxes are being moved to]"
$appId="[application id of the mailbox migration app you consented to]"
$scope="[name of the mail enabled security group that contains the list of users who are allowed to migrate]"
$orgrels=Get-OrganizationRelationship
$existingOrgRel = $orgrels | ?{$_.DomainNames -like $targetTenantId}
If ($null -ne $existingOrgRel)
{
    Set-OrganizationRelationship $existingOrgRel.Name -Enabled:$true -MailboxMoveEnabled:$true -MailboxMoveCapability RemoteOutbound -OAuthApplicationId $appId -MailboxMovePublishedScopes $scope
}
If ($null -eq $existingOrgRel)
{
    New-OrganizationRelationship "[name of your organization relationship]" -Enabled:$true -MailboxMoveEnabled:$true -MailboxMoveCapability RemoteOutbound -DomainNames $targetTenantId -OAuthApplicationId $appId -MailboxMovePublishedScopes $scope
}
Move on-premises Mailboxes first to Exchange Online
In case you will also use an Exchange Classic Full Hybrid Setup, where some Mailboxes still resides on the on-premise Exchange Servers, you first need to move them to Exchange Online by using a Remote Move Migration as usual.
How do I know this worked?
From now on the relationship configuration is finished and we should be able to move (migrate) mailboxes from the source tenant to our new target tenant.
Provided we already created and prepared the target Mail User object in the target tenant as seen below!
You can verify cross-tenant mailbox migration configuration by running the Test-MigrationServerAvailability cmdlet against the cross-tenant migration endpoint that you created on your target tenant.
Run the cmdlet below on the target tenant, a remote move migration is always done from the target!
Test-MigrationServerAvailability -EndPoint “Migration endpoint for cross-tenant mailbox moves” -TestMailbox “Primary SMTP of MailUser object in target tenant”
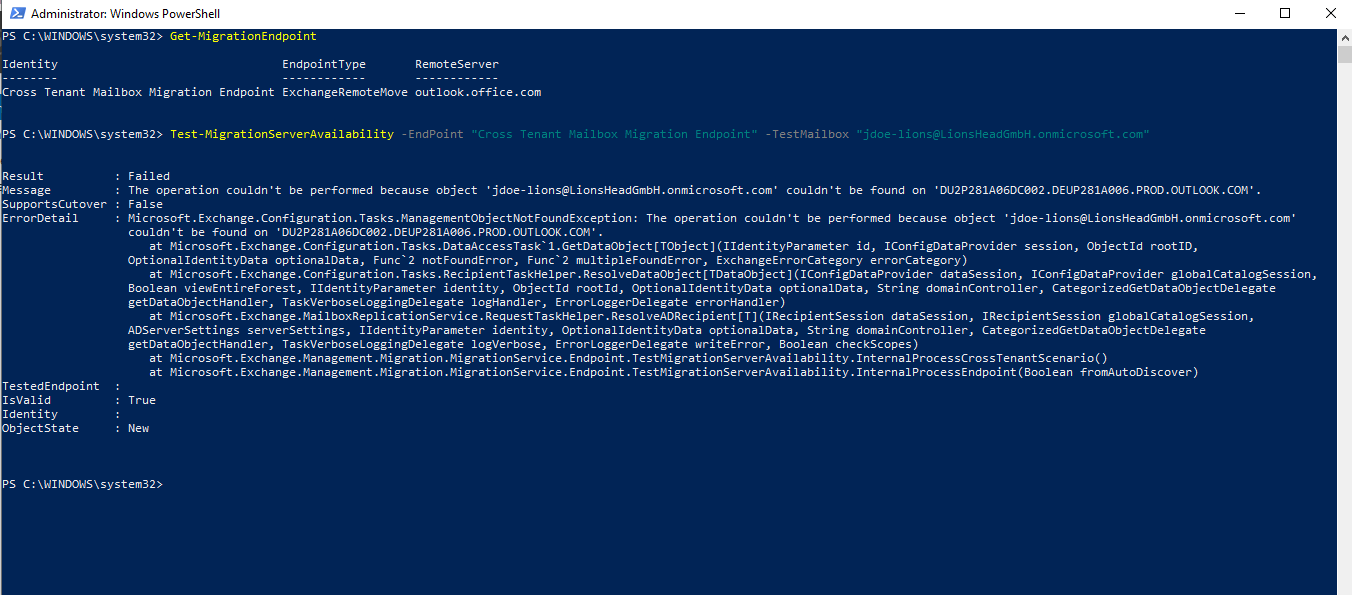
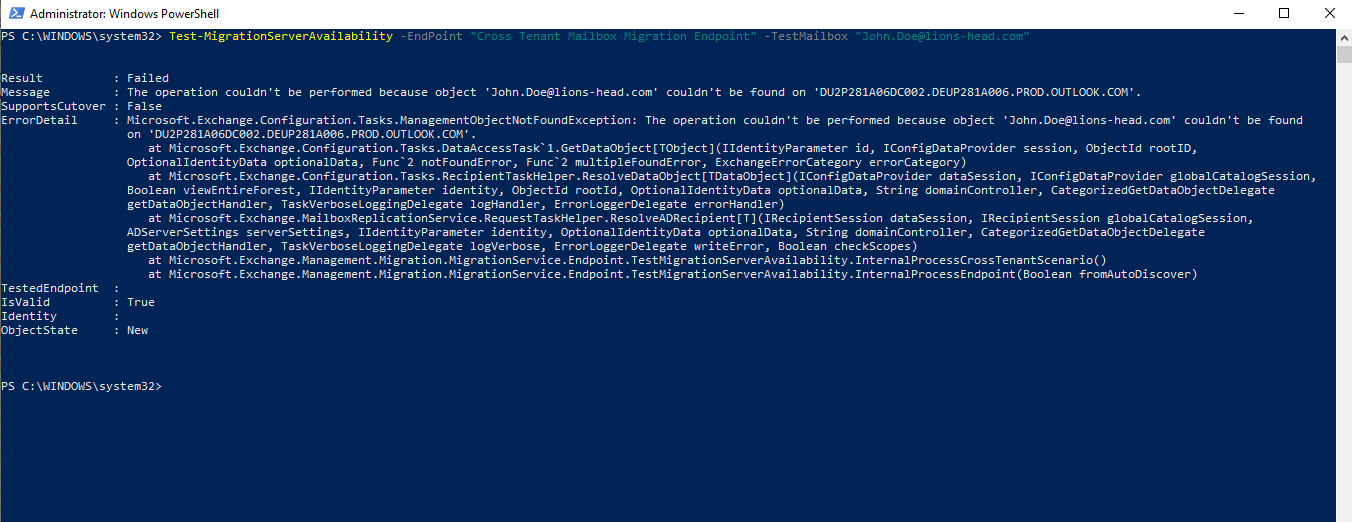
In my case the mailbox from the test user John Doe is still on the on-premise Exchange Server in a Exchange Classic Full Hybrid setup. So I first need to move the mailbox to Exchange Online.
More about Exchange Classic Full Hybrid and how to migrate from Exchange on-premise to Exchange Online, you can read in my following post.
Prepare target user objects for migration
Users migrating must be present in the target tenant and Exchange Online system (as Mail Users) marked with specific attributes to enable the cross-tenant moves. The system will fail moves for users that aren’t properly set up in the target tenant. The following section details the Mail User object requirements for the target tenant.
Microsoft is developing a feature to provide a secure automated method to set many of the attributes in the following section. This feature, named Cross-Tenant Identity Mapping, is currently looking for customers willing to participate in a small private preview. For more information about this pre-release feature and how it can simplify your cross-tenant migration processes, see the article Cross-Tenant Identity Mapping.
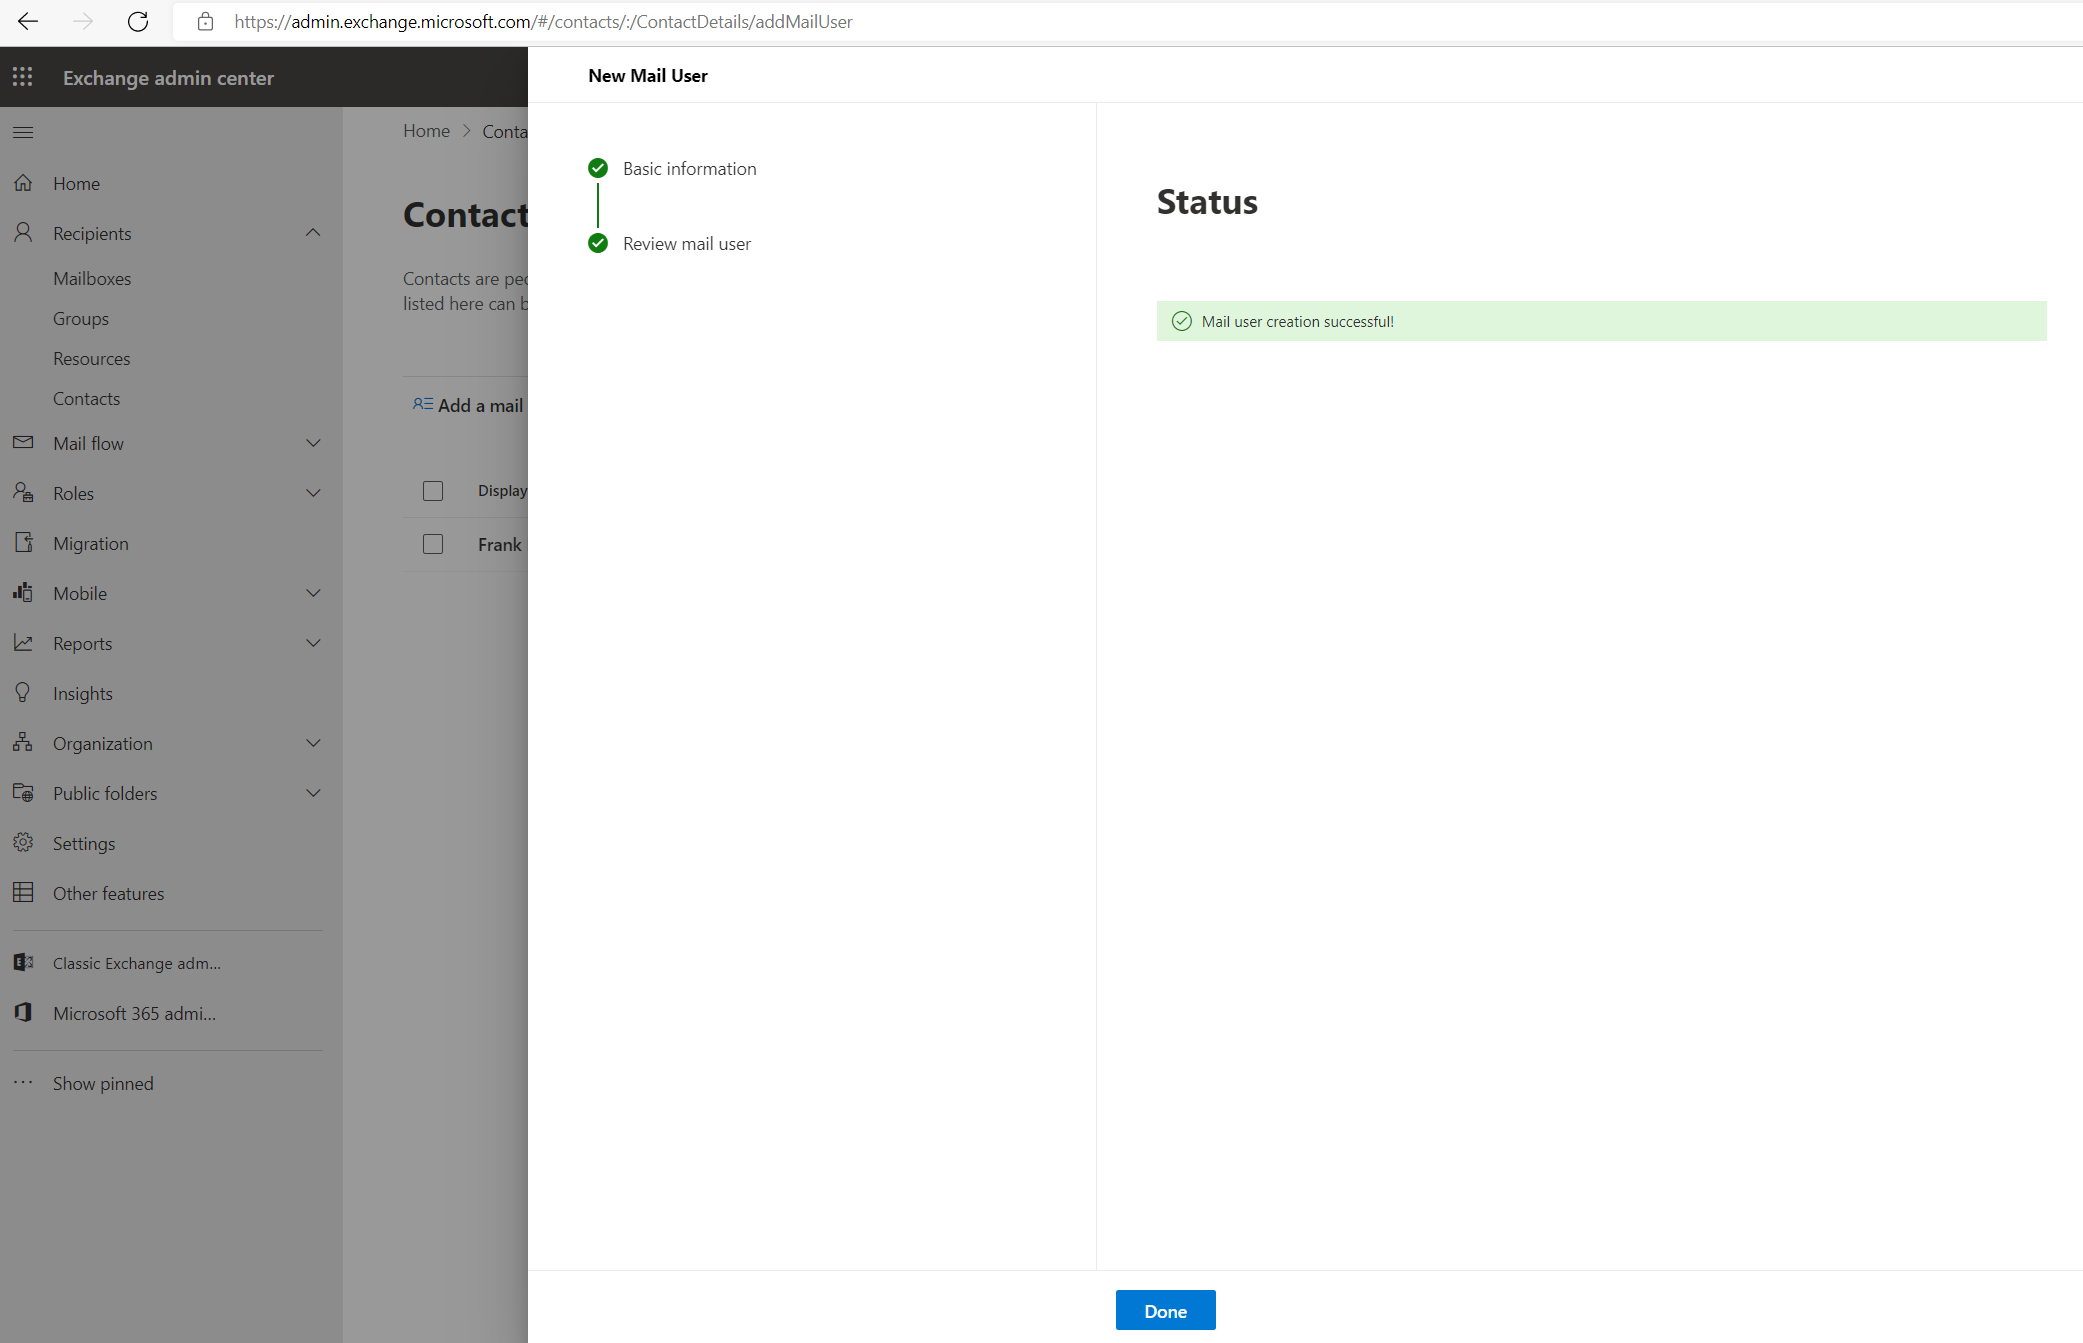
For any mailbox moving from a source organization, you must provision a MailUser object in the Target organization:
Therefore we can use the new Exchange admin center portal
and here under Recipients –> Contacts click on Add a mail user
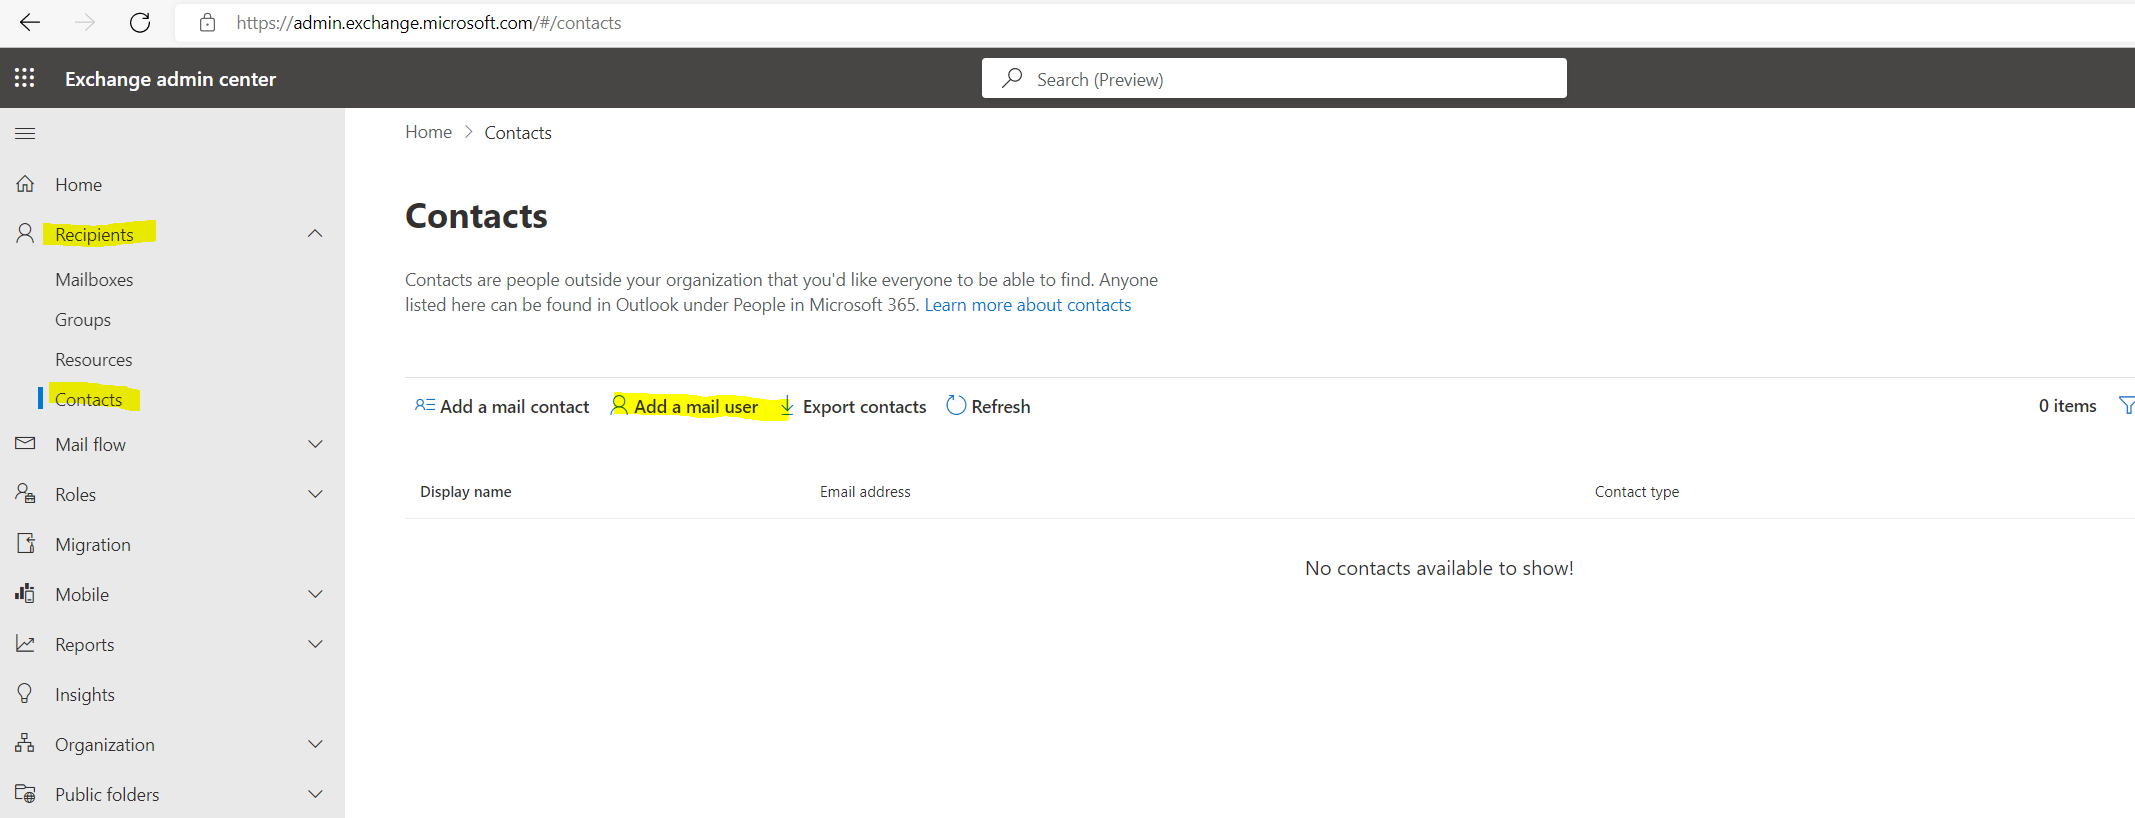
The User ID can be different from the source tenant user and the External email address here you can use an available address from the target tenant but actually it doesn’t matter what you will enter here, we will change it anyway further below. The mapping from the source mailbox will be done by using the ExchangeGUID later.

To check the Mail user object we just created in the new tenant we can use the following cmdlet.
PS C:> Get-MailUser -Identity “John Doe” | fl ExchangeGuid, LegacyExchangeDN, UserPrincipalName, PrimarySmtpAddress, ExternalEmailAddress

We need to set the ExchangeGUID from the source mailbox to the target MailUser object.
To first get the ExchangeGUID from the source mailbox execute the following cmdlet in the source tenant.
PS C:> Get-Mailbox -Identity “John Doe” | fl ExchangeGUID
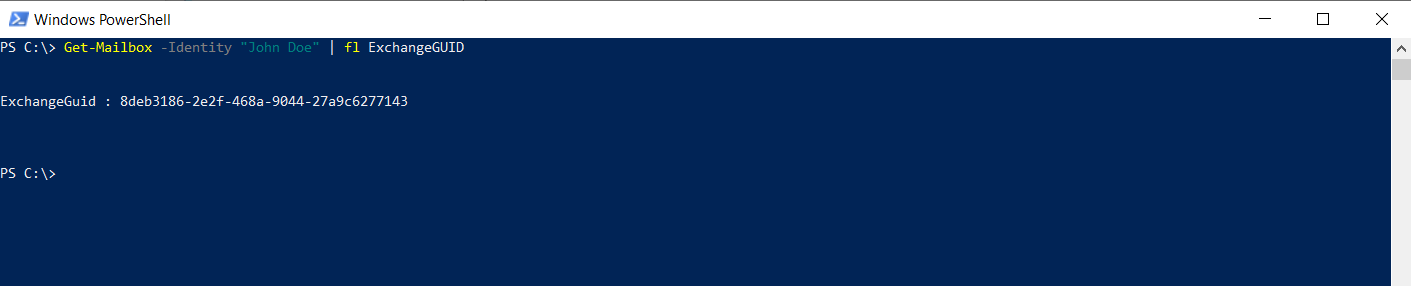
Then set the returned ExchangeGUID to the Mail user object in the new tenant as follows.
PS C:> Set-MailUser -Identity “John Doe” -ExchangeGuid 8deb3186-2e2f-468a-9044-27a9c6277143
This is also important and must be done before assigning an Exchange Online license to the Mail User object. If an appropriate Exchange Online license is assigned before, it will provision immediately a new Exchange Online mailbox for the Mail User what we need to prevent.

We also need to set the PrimarySmtpAddress to an address from the target source. As mentioned further above for enter the External email address during creating the Mail User object by using the portal.
PS C:> Set-MailUser -Identity “John Doe” -PrimarySmtpAddress “John.Doe@LionsHeadGmbH.onmicrosoft.com”

You also need to copy all x500 addresses and the LegacyExchangeDN address from the source mailbox to the target mail user. The move processes won’t proceed if these aren’t present on the target object.
First use the following cmdlets to get these addresses.
Run the following cmdlet in the source tenant to get all proxy addresses
Get-Mailbox -Identity jdoe-lions | select -expand emailaddressesTo get the legacyExchangeDN address from the source tenant run the following cmdlet
Get-Mailbox -Identity jdoe-lions| fl LegacyExchangeDN
The LegacyExchangeDN you also need to add to the proxy addresses using the -EmailAddresses parameter and for the type X500.
e.g adding the LegacyExchangeDN address to the proxy addresses
Set-MailUser -Identity “John Doe” -EmailAddresses @{add=”X500:/o=ExchangeLabs/ou=Exchange Administrative Group (FYDIBOHF23SPDLT)/cn=Recipients/cn=db4a9d31eda544a0b7587c466d8a5b31-e676f398-15″}
PS C:> Set-MailUser -Identity “John Doe” -EmailAddresses @{add=”SMTP:jdoe-lions@BraincourtGmbH.mail.onmicrosoft.com”,”SMTP:John.Doe2@braincourt.com”}
to remove use
PS C:> Set-MailUser -Identity “John Doe” -EmailAddresses @{remove=”SMTP:jdoe-lions@BraincourtGmbH.mail.onmicrosoft.com”,”SMTP:John.Doe2@braincourt.com”}
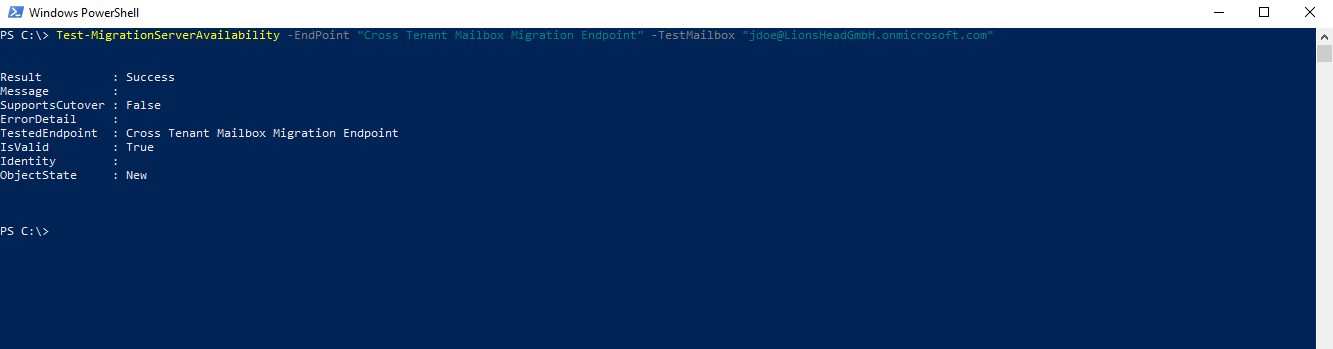
Now we can run the following cmdlet to test if a migration for the given test mailbox will succeed.
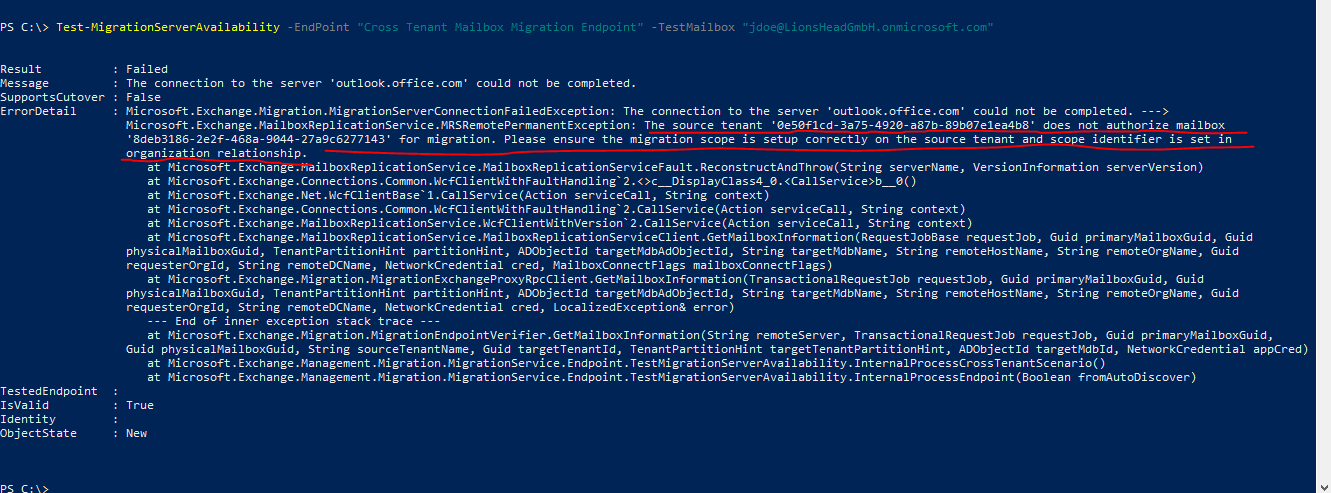
Test-MigrationServerAvailability -EndPoint “Cross Tenant Mailbox Migration Endpoint” -TestMailbox “jdoe@LionsHeadGmbH.onmicrosoft.com”
First I was getting also the Access Denied error as described in the post below, to solve it I was removing the existing Organization Relationship in the source tenant and then re-adding it without changing anything, just like turning off and on again 🙂
Cross Tenant Migration MRS Access Denied
https://techcommunity.microsoft.com/t5/exchange/cross-tenant-migration-mrs-access-denied/m-p/3036200
Remove-OrganizationRelationship
https://learn.microsoft.com/en-us/powershell/module/exchange/remove-organizationrelationship?view=exchange-psIn my case I was executing the following command to remove the Organization Relationship.
Remove-OrganizationRelationship -Identity “Cross Tenant Mailbox Migration Lions Head GmbH“
Then I was encounter another error after re-adding the Organization Relationship.
Below I was falsely testing the wrong John Doe test user in my production environment, I had two of them, one for Braincourt and one for Lions Head.
After testing the right one and executing the Test-MigrationServerAvailability cmdlet again, I was getting another error about missing X500 proxy addresses
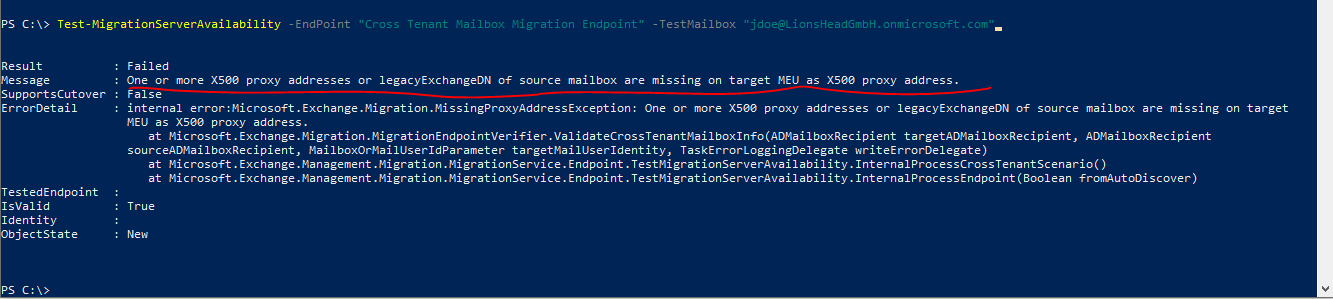
So I had to add the missing X500 and legacyExchangeDN addresses.
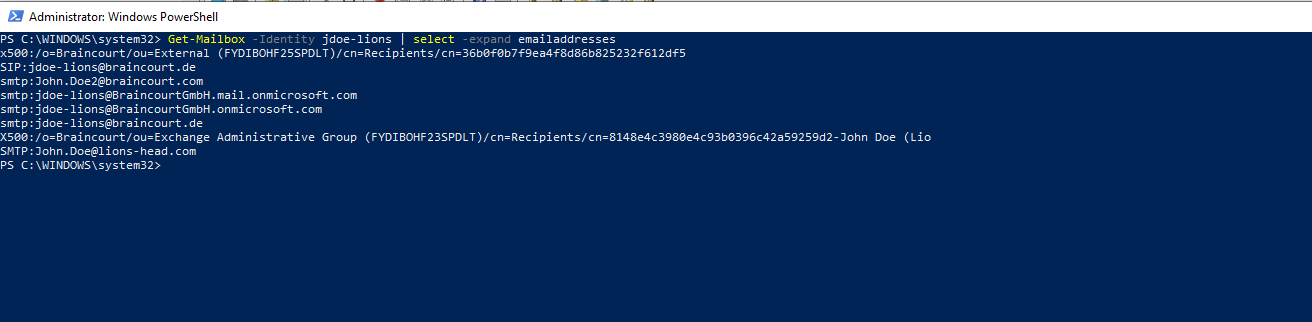
First I was executing the following command in the source tenant for the test user mailbox to get all proxy addresses
Get-Mailbox -Identity jdoe-lions | select -expand emailaddresses
To get the legacyExchangeDN address from the source tenant
Get-Mailbox -Identity jdoe-lions| fl LegacyExchangeDN
Proxy addresses from the source mailbox
After that I was adding the missing ones
PS C:> Set-MailUser -Identity jdoe@LionsHeadGmbH.onmicrosoft.com -EmailAddresses @{add=”x500:/o=ExchangeLabs/ou=Exchange Administrative Group (FYDIBOHF23SPDLT)/cn=Recipients/cn=a5db57602ec14f15b8e97aa17fd39b7a-02237646-8a”}
Set-MailUser -Identity jdoe@LionsHeadGmbH.onmicrosoft.com -EmailAddresses @{add=”X500:/o=Braincourt/ou=Exchange Administrative Group (FYDIBOHF23SPDLT)/cn=Recipients/cn=8148e4c3980e4c93b0396c42a59259d2-John Doe (Lio”}
Set-MailUser -Identity jdoe@LionsHeadGmbH.onmicrosoft.com -EmailAddresses @{add=”X500:/o=Braincourt/ou=Exchange Administrative Group (FYDIBOHF23SPDLT)/cn=Recipients/cn=8148e4c3980e4c93b0396c42a59259d2-John Doe (Lio”}
So now all Proxy addresses from the target Mail User looks like below
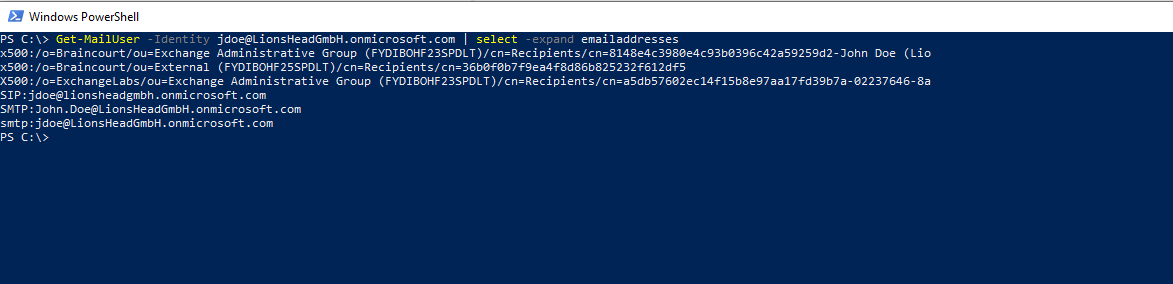
Finally after adding all X500 and legacyExchangeDN proxy addresses from the source mailbox to the target Mail user the Test-MigrationServerAvailability cmdlet finished successful.
Test-MigrationServerAvailability
https://learn.microsoft.com/en-us/powershell/module/exchange/Test-MigrationServerAvailability?view=exchange-ps
Test-MigrationServerAvailability -EndPoint “Cross Tenant Mailbox Migration Endpoint” -TestMailbox “jdoe@LionsHeadGmbH.onmicrosoft.com”
Users in the target organization must be licensed with appropriate Exchange Online subscriptions applicable for the organization. You may apply a license in advance of a mailbox move.
But ONLY once the target Mail User is properly set up with ExchangeGUID and proxy addresses!
Applying a license before the ExchangeGUID is applied will result in a new mailbox provisioned in target organization.
You must ensure that the target Mail User has no previous ExchangeGuid that does not match the source ExchangeGuid. This might occur if the target MEU was previously licensed for Exchange Online and provisioned a mailbox. If the target Mail User was previously licensed for or had an ExchangeGuid that does not match the Source ExchangeGuid, you need to perform a cleanup of the cloud MEU.
For these cloud MEUs, you can run
Set-User -PermanentlyClearPreviousMailboxInfo
This process is irreversible. If the object has a softDeleted mailbox, it cannot be restored after this point. Once cleared, however, you can synchronize the correct ExchangeGuid to the target object and MRS will connect the source mailbox to the newly created target mailbox.
Perform Mailbox Migration
Cross-tenant Exchange mailbox migrations are initiated from the target tenant as migration batches. This is like the way that on-boarding migration batches work when migrating from Exchange on-premises to.
So I will trigger the mailbox migration to the new tenant by adding a new migration batch in the new Exchange admin center portal. You can also use PowerShell and the New-MigrationBatch cmdlet, I will show this further below.
!!! Note
Be sure you had assigned a valid Exchange Online license to the target user object, otherwise the migration batch will fail!
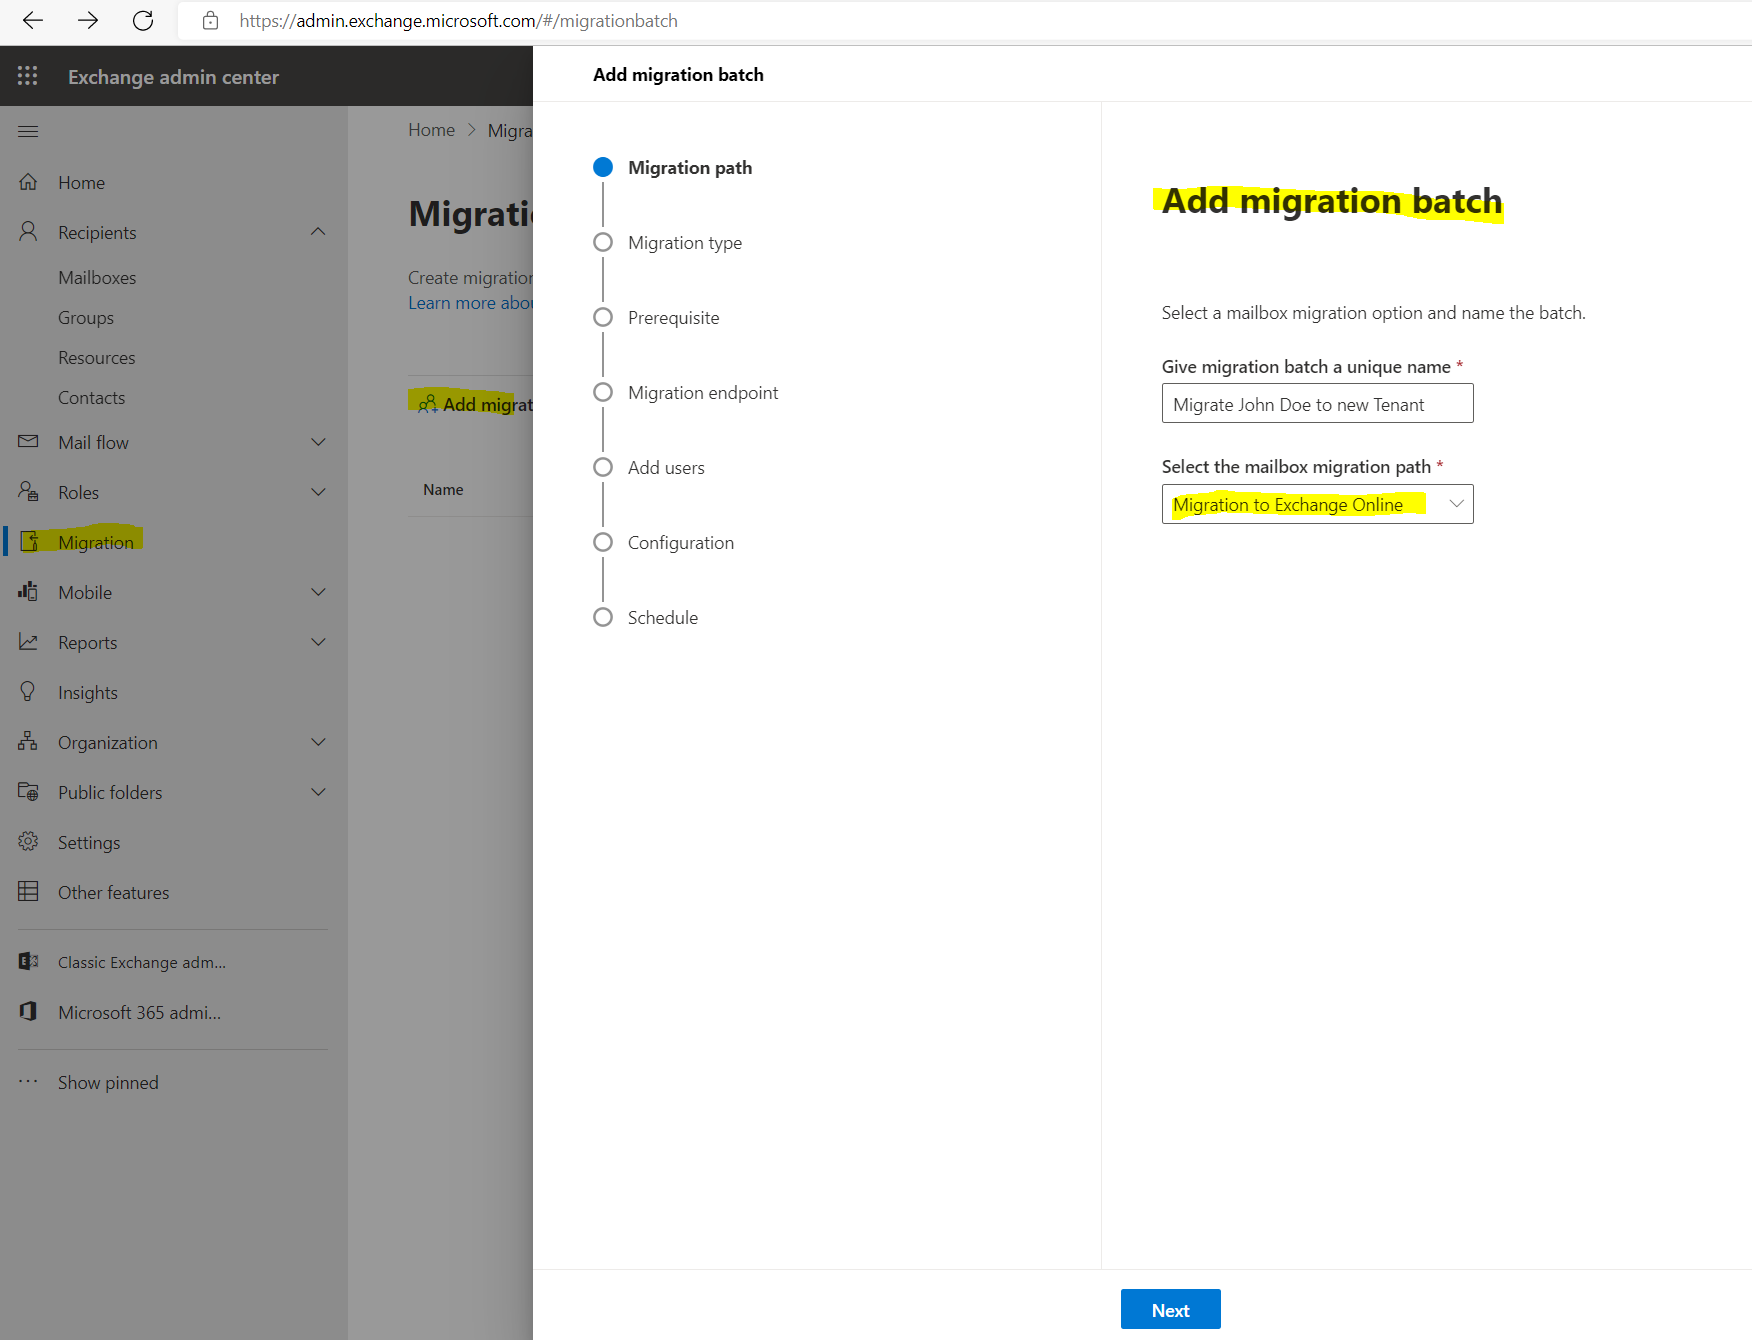
https://admin.exchange.microsoft.com/
Migration –> Add migration batch and for the path use Migration to Exchange Online
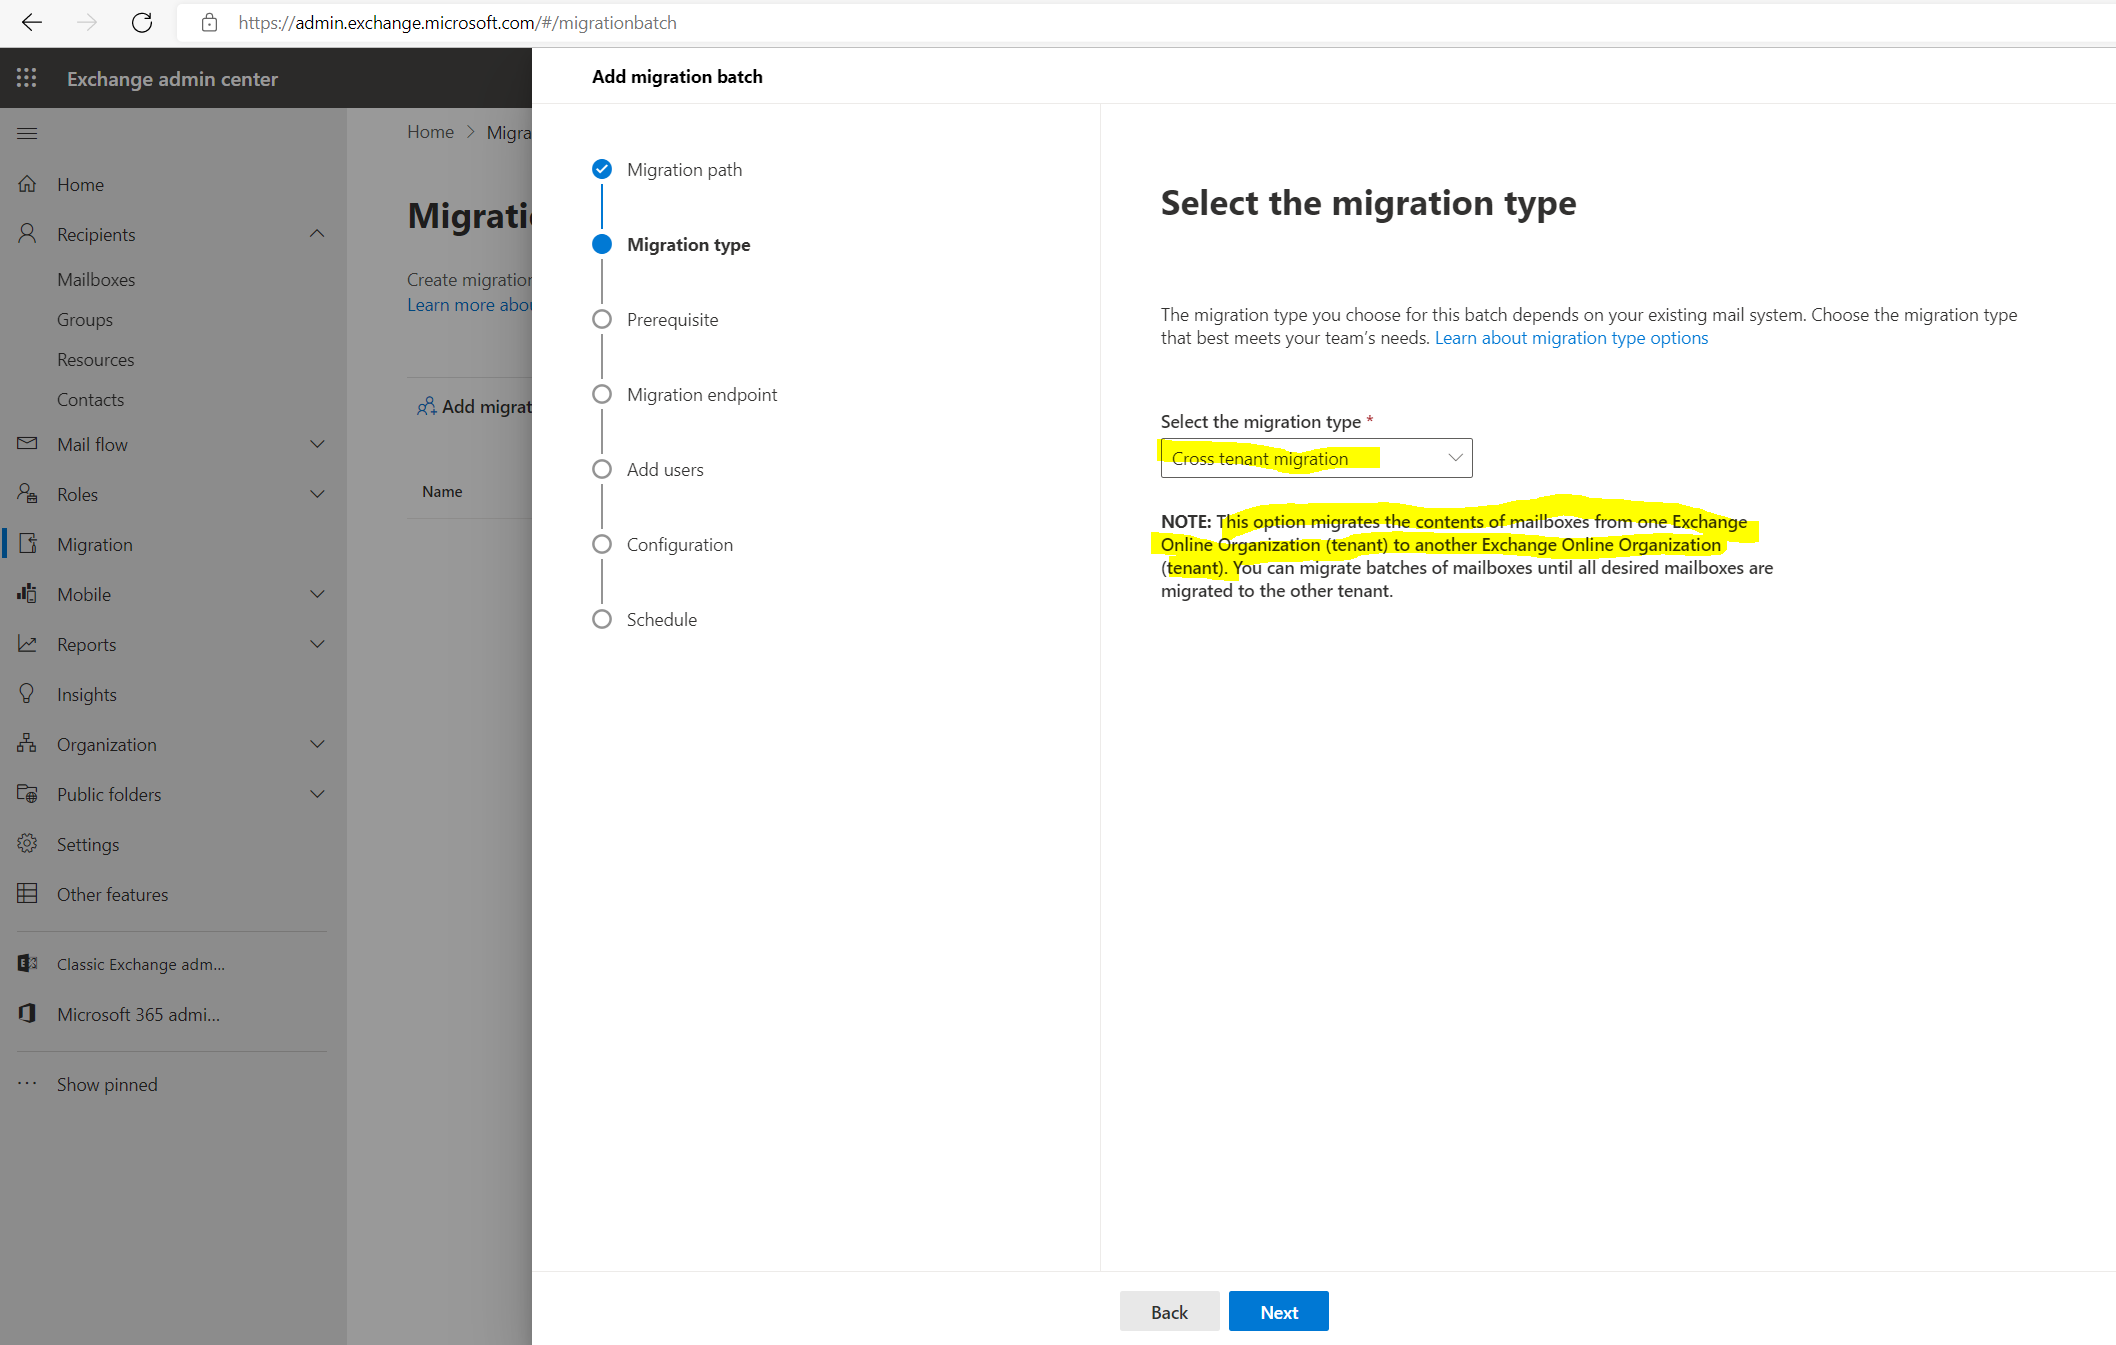
For the migration type use Cross tenant migration
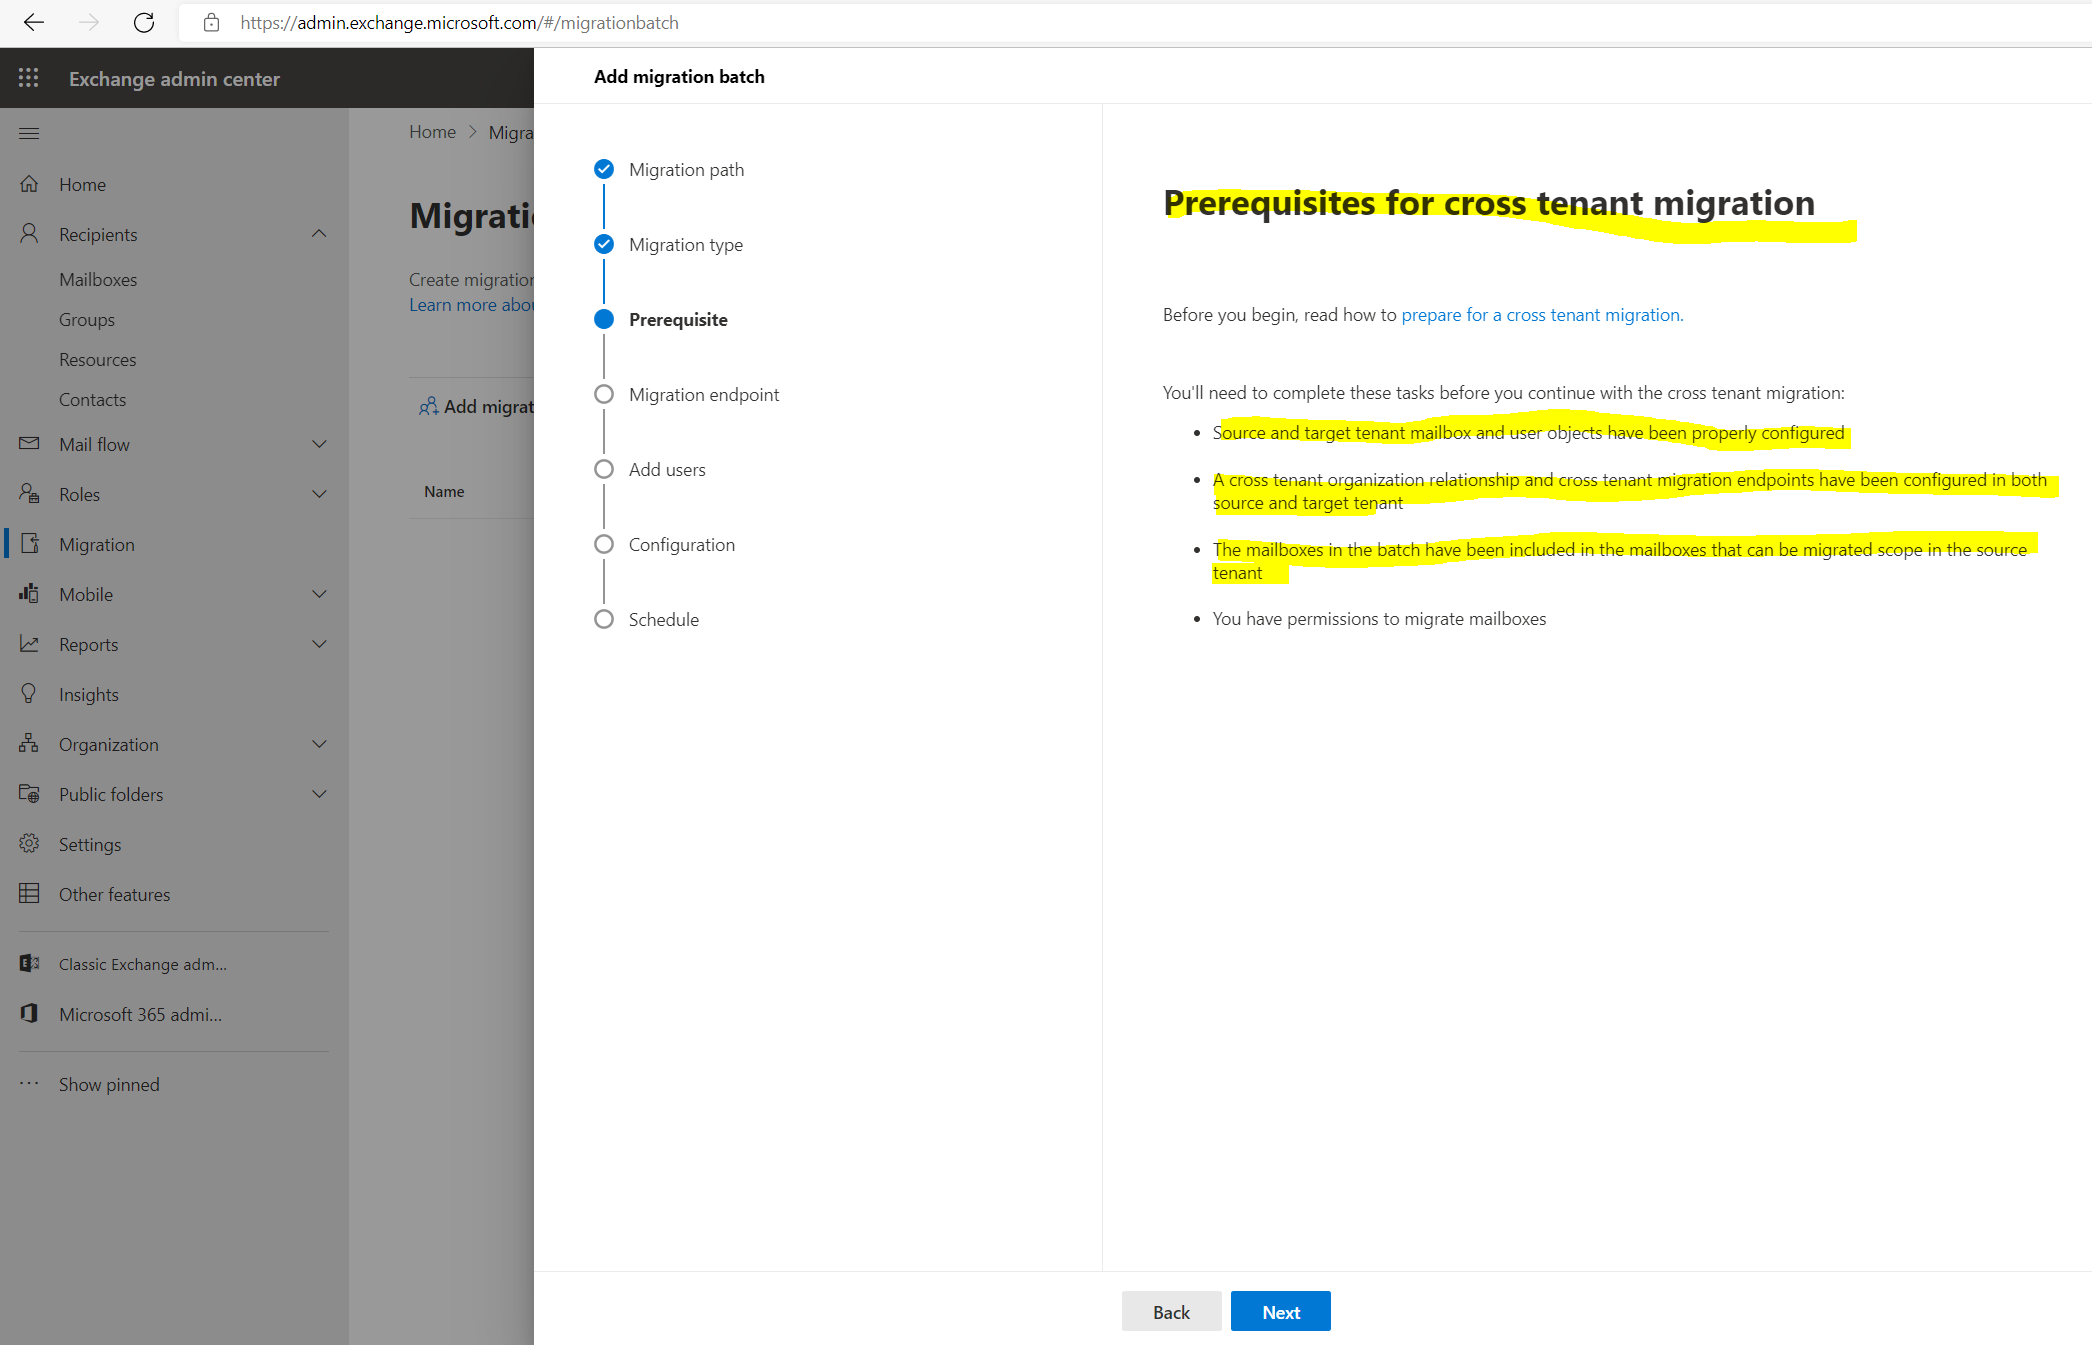
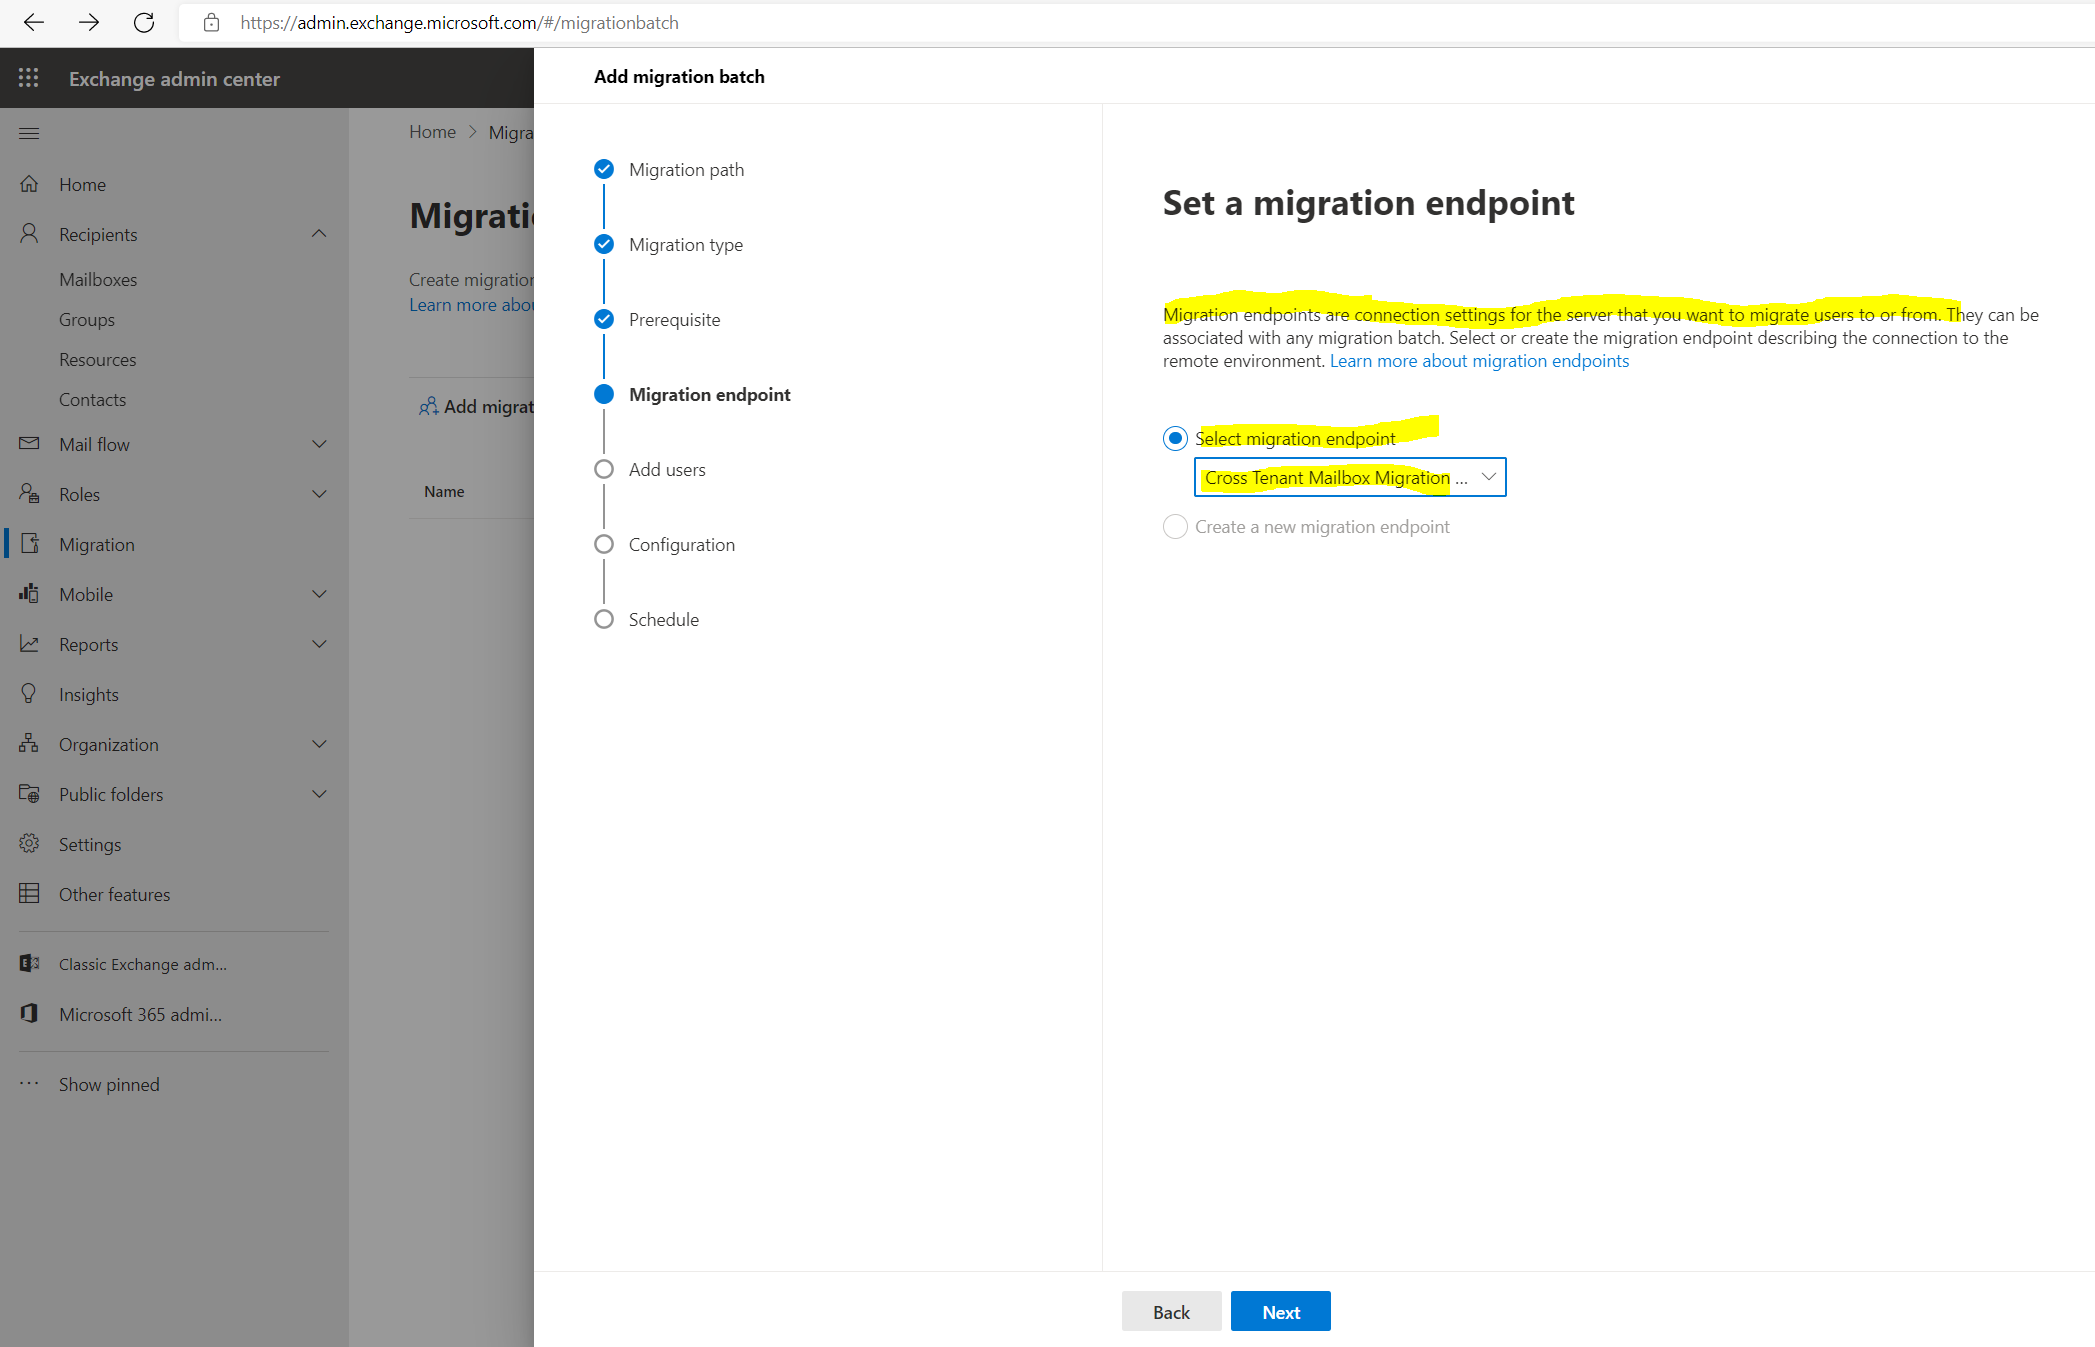
Below it will show the prerequisites we configured already previously.
Here I will select my previously created Migration Endpoint.
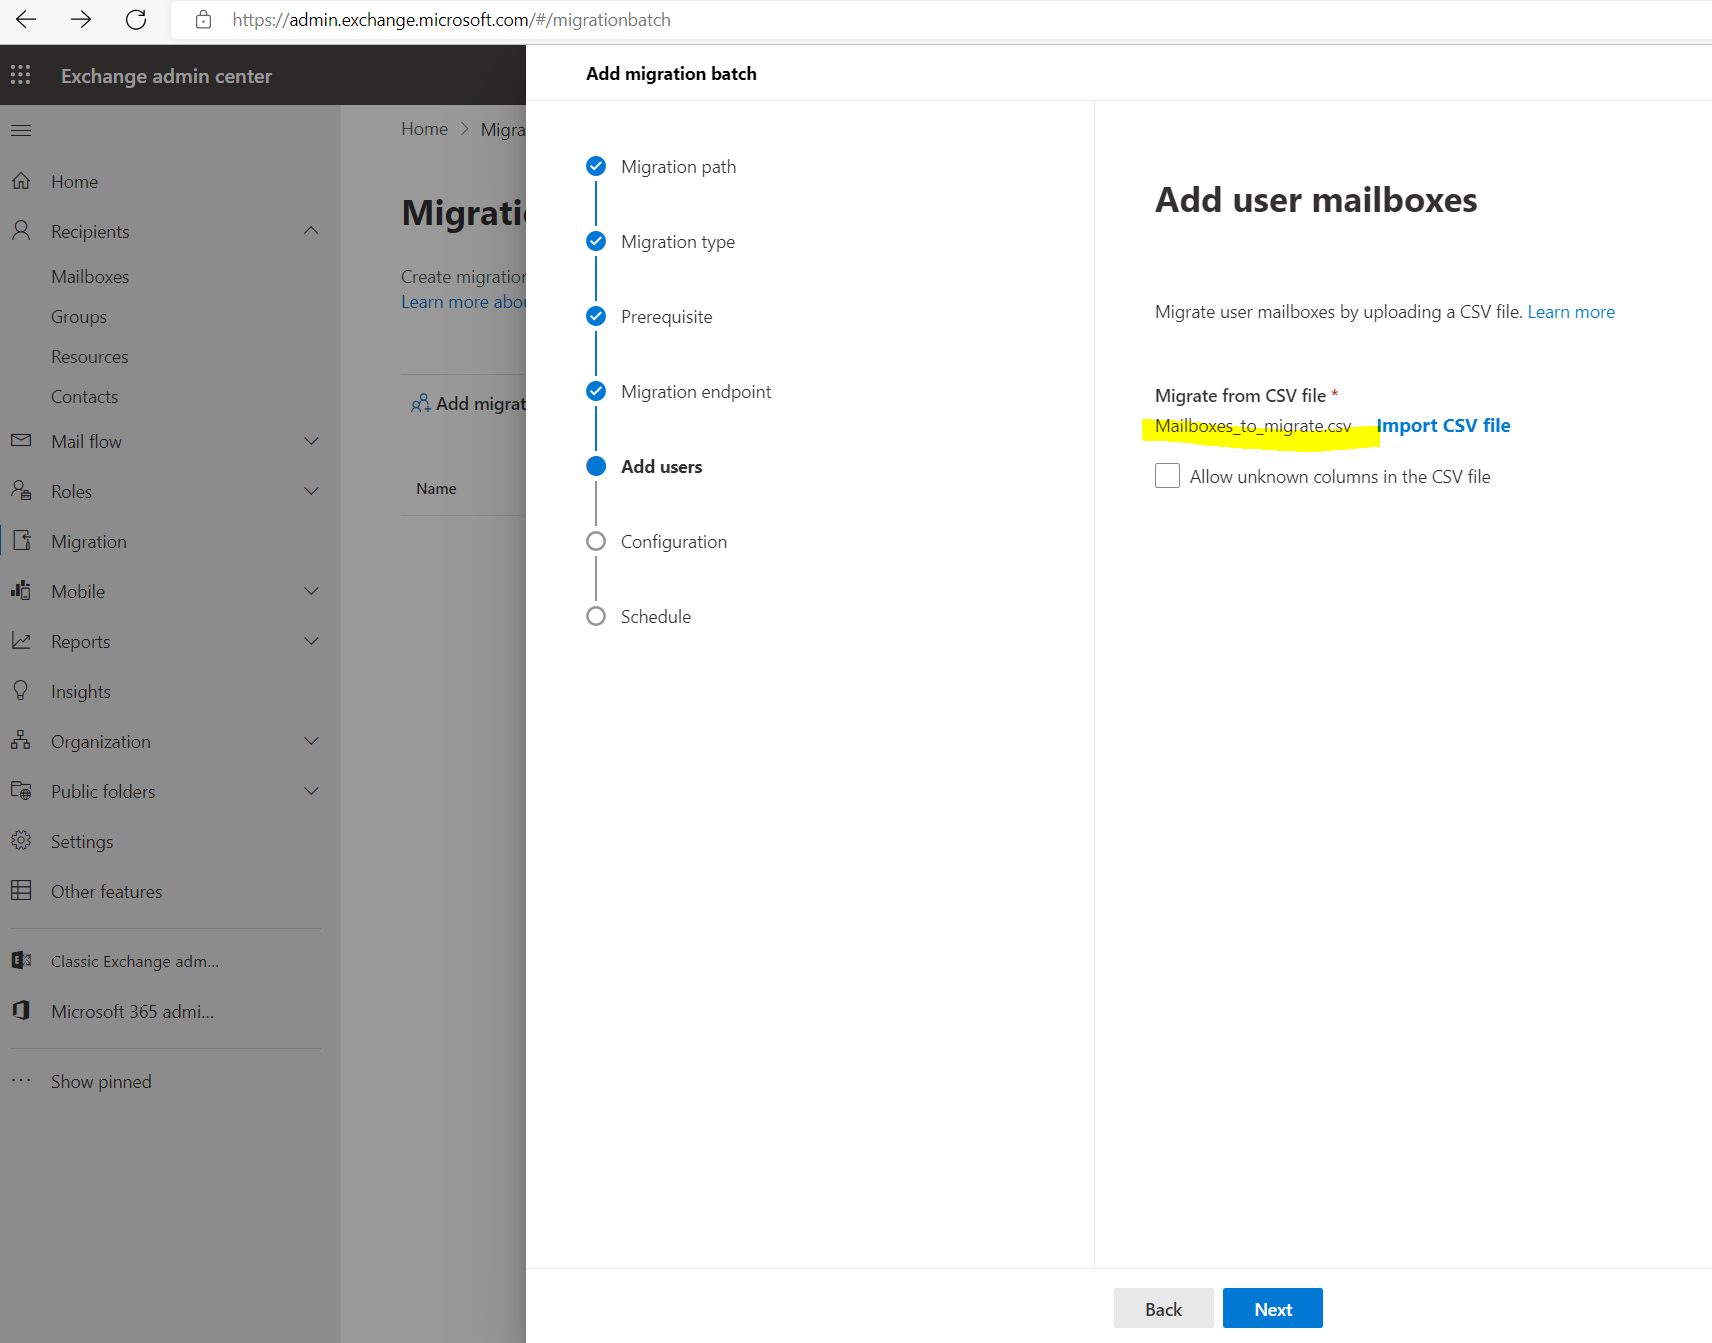
To select the mailboxes we want to migrate we need to provide a csv file as shown below.
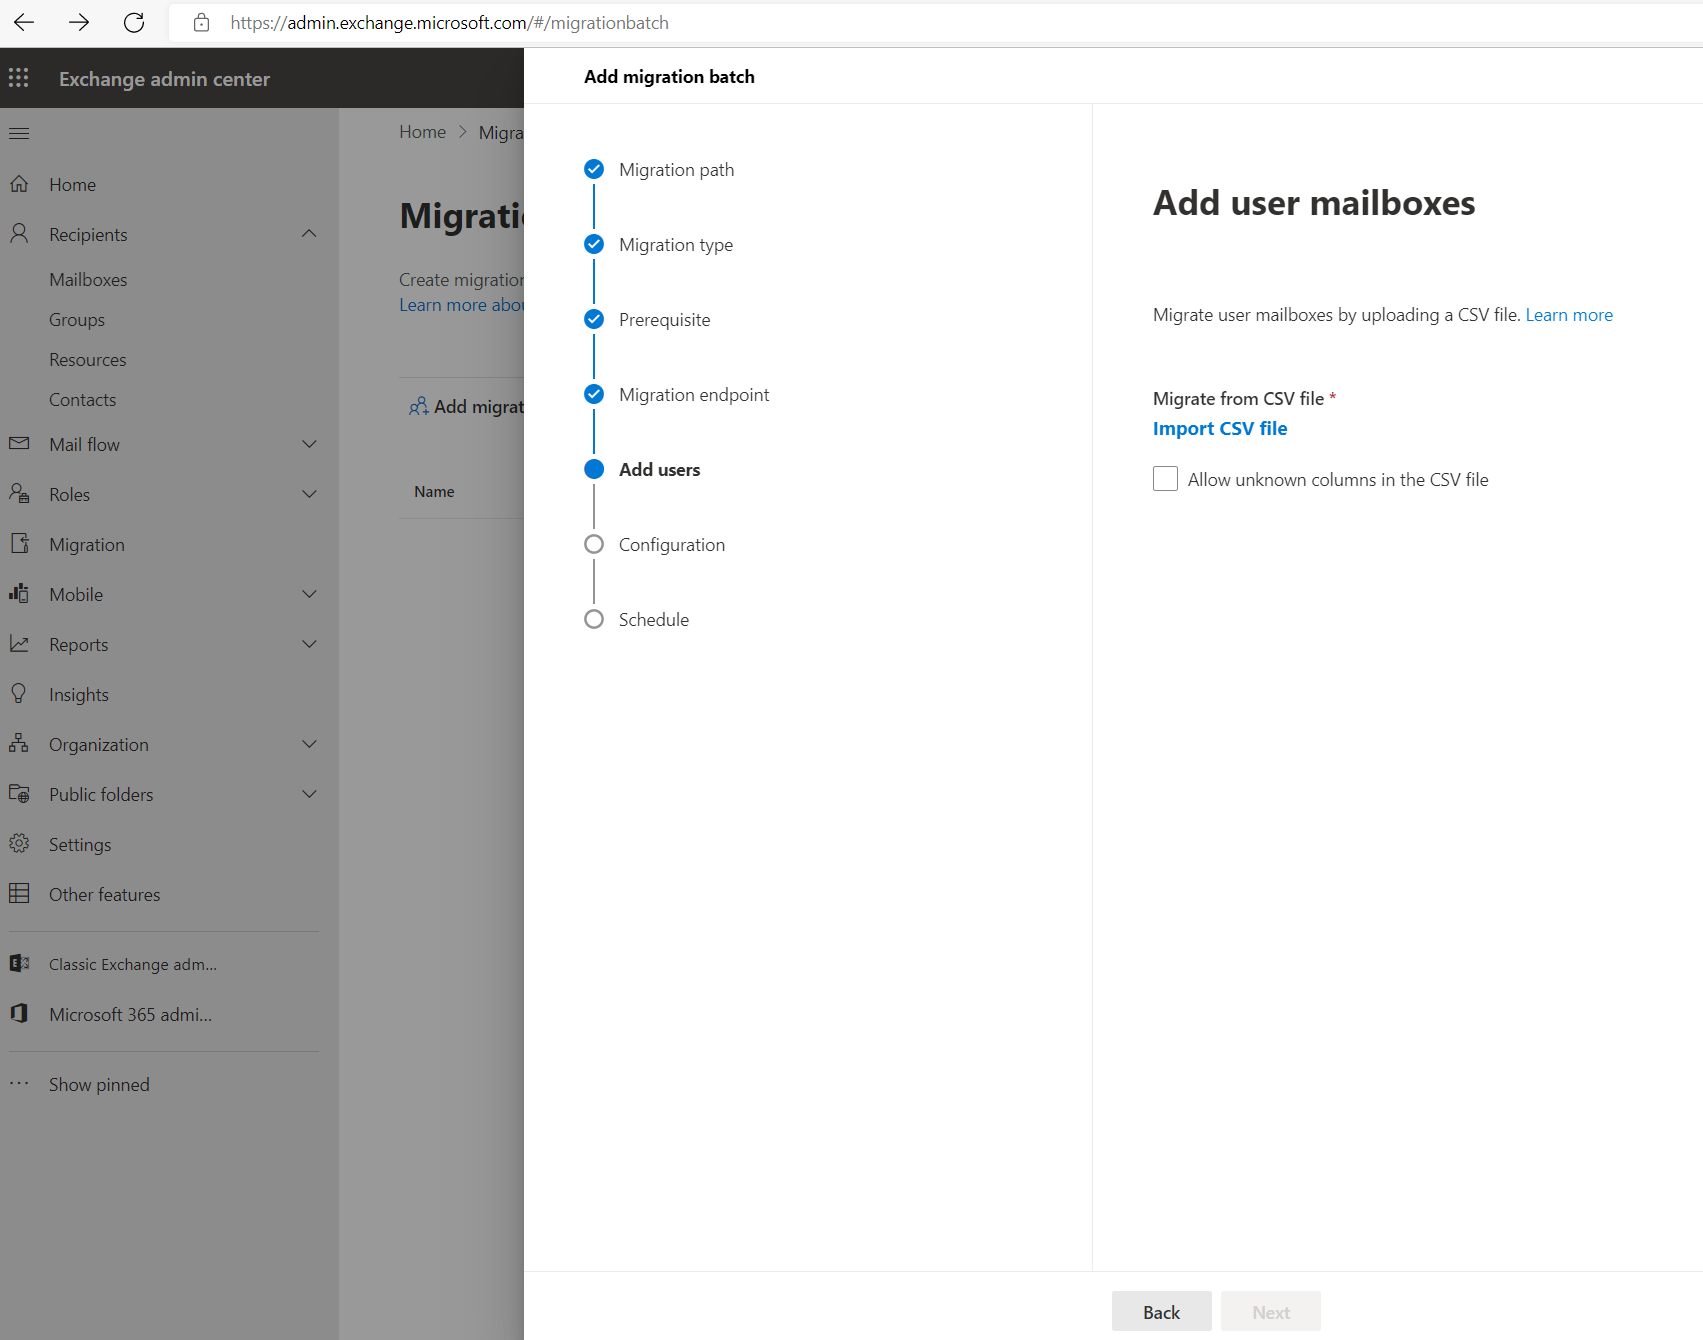
The email address in the CSV file must be the one specified in the target tenant, not the one in the source tenant!
Below a simple CSV file just for my test user, for more users put in further email addresses each of them in a new line.

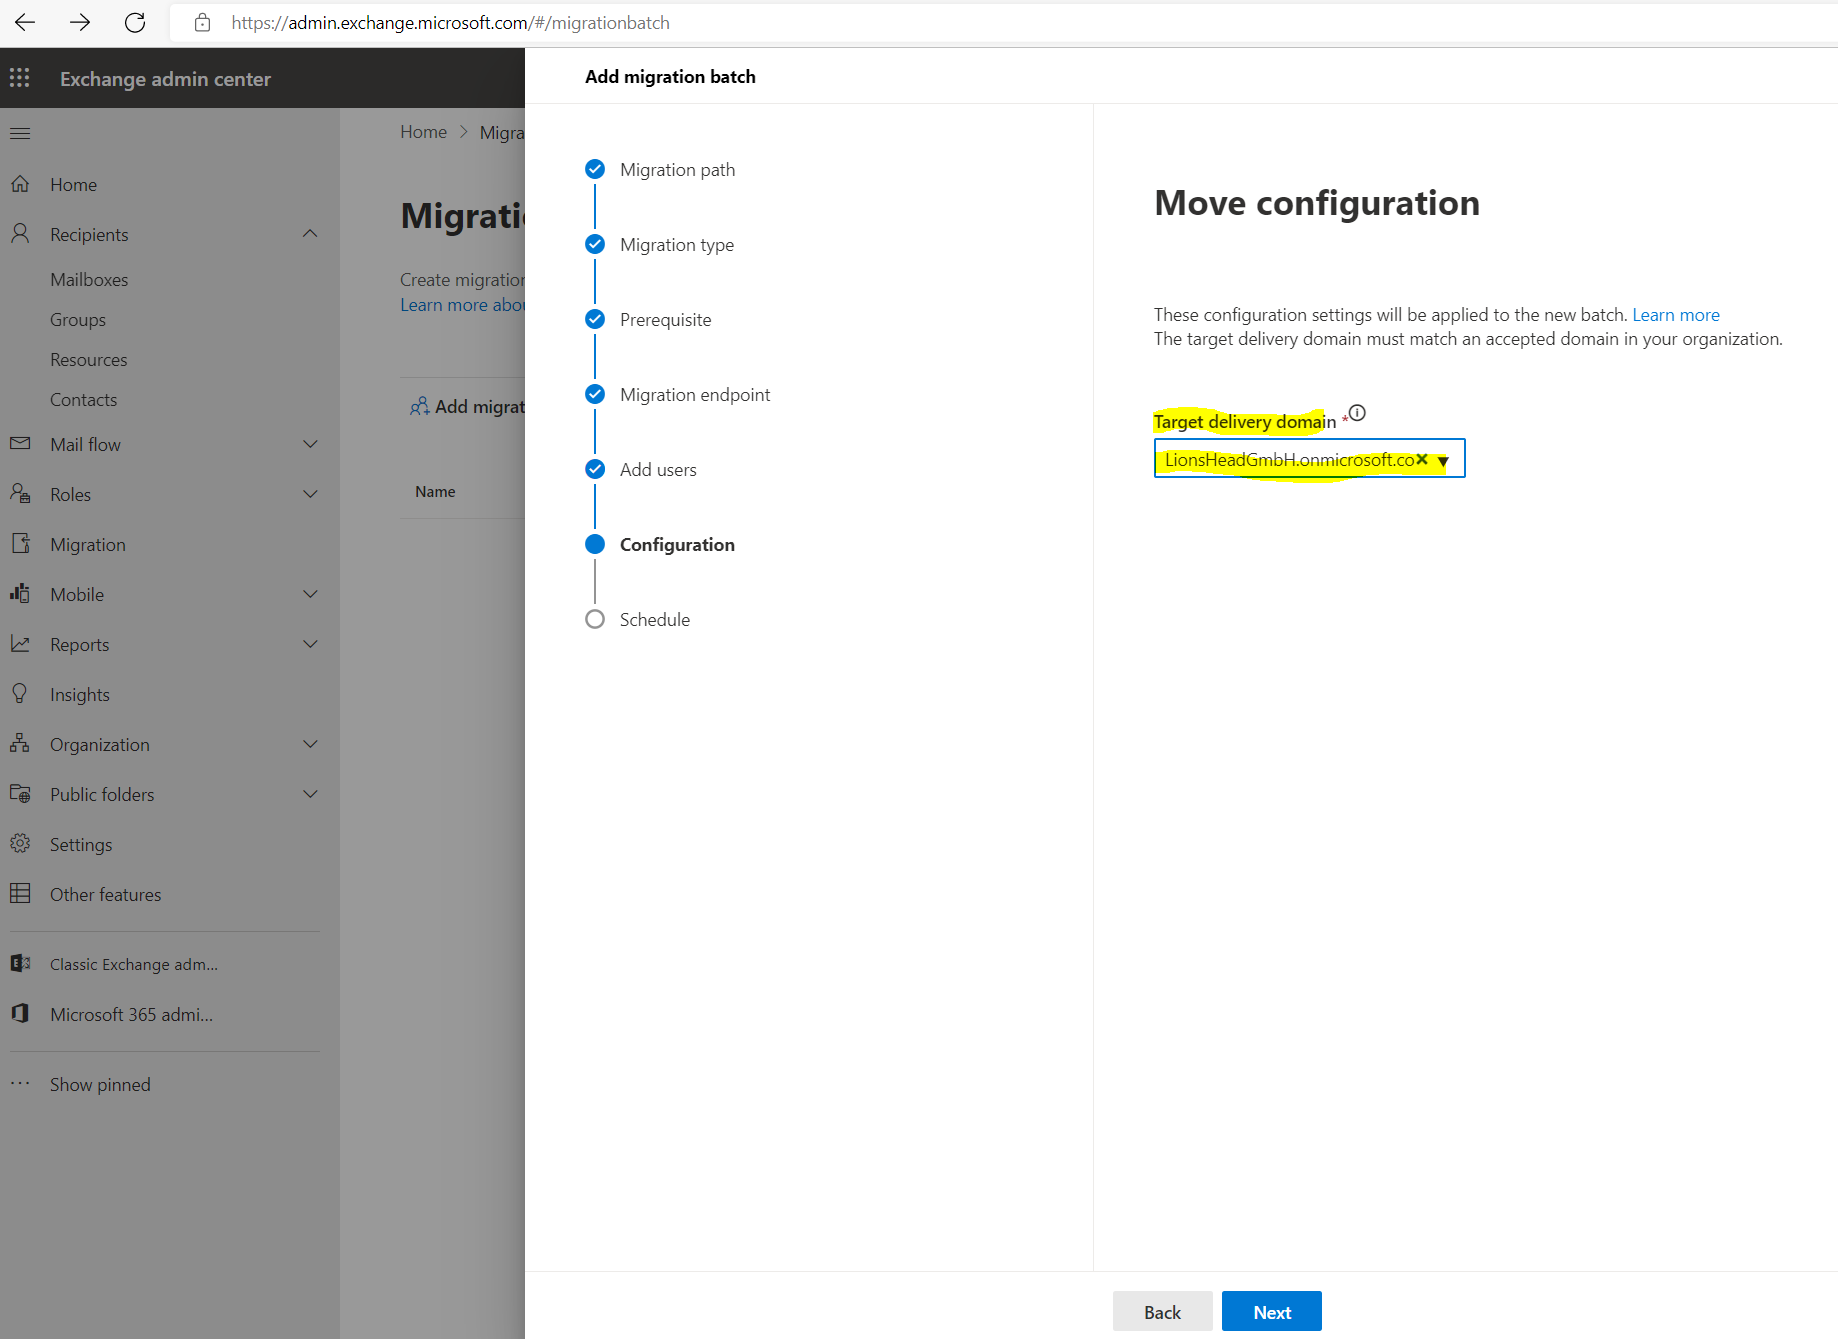
Select the target deliver domain.
I will selecte here to automatically start the batch after creating this batch and also automatically complete the migration batch. For production user mailboxes you may want to complete the switch from one tenant to another not during the business hours and just sync them.


And finished, by the way Microsoft must have done something regarding mailbox migrations performance, in past even for newly created mailboxes without content the migration process duration was about 30 minutes and now just a few minutes.
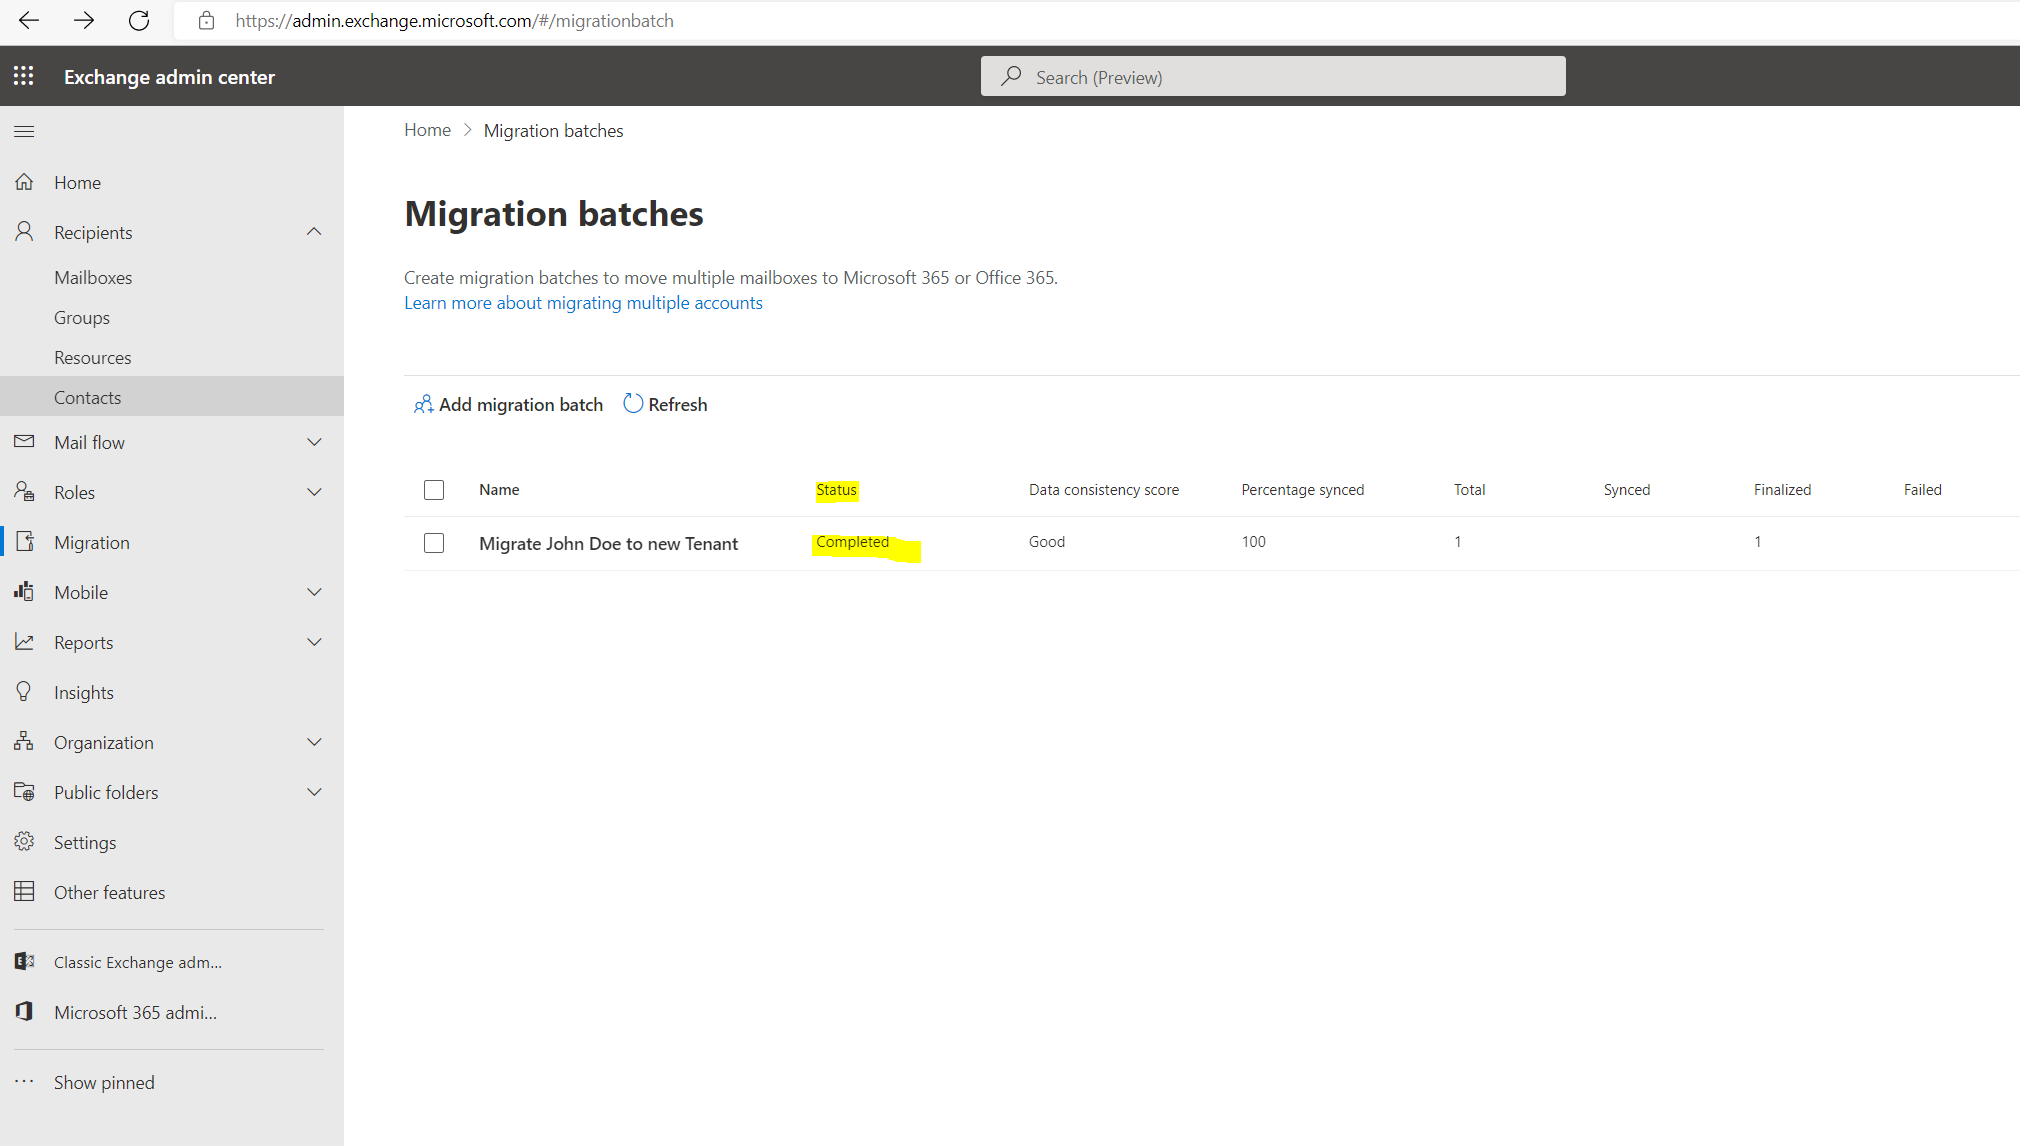
As this is just a test user mailbox from John Doe without any content, before migrating the mailbox to the new tenant, I was sending two test emails to verify the mailbox was really migrated to the new tenant.
Looks fine!

You can also check the status of migration requests in the target tenant by using
Get-MoveRequest -Flags “CrossTenant”
As mentioned previously, you can use instead of the Exchange admin center portal also PowerShell as follows.
New-MigrationBatch -Name MigrateToNewTenantBatch -SourceEndpoint “Cross Tenant Mailbox Migration Endpoint” -CSVData ([System.IO.File]::ReadAllBytes(‘C:Mailboxes_to_migrate.csv’)) -Autostart -TargetDeliveryDomain LionsHeadGmbH.onmicrosoft.com
SourceEndpoint Parameter –> You can use any value that uniquely identifies the migration endpoint. For example:
– Name (the Identity property value)
– GUID
New-MigrationBatch
https://learn.microsoft.com/en-us/powershell/module/exchange/new-migrationbatch?view=exchange-ps
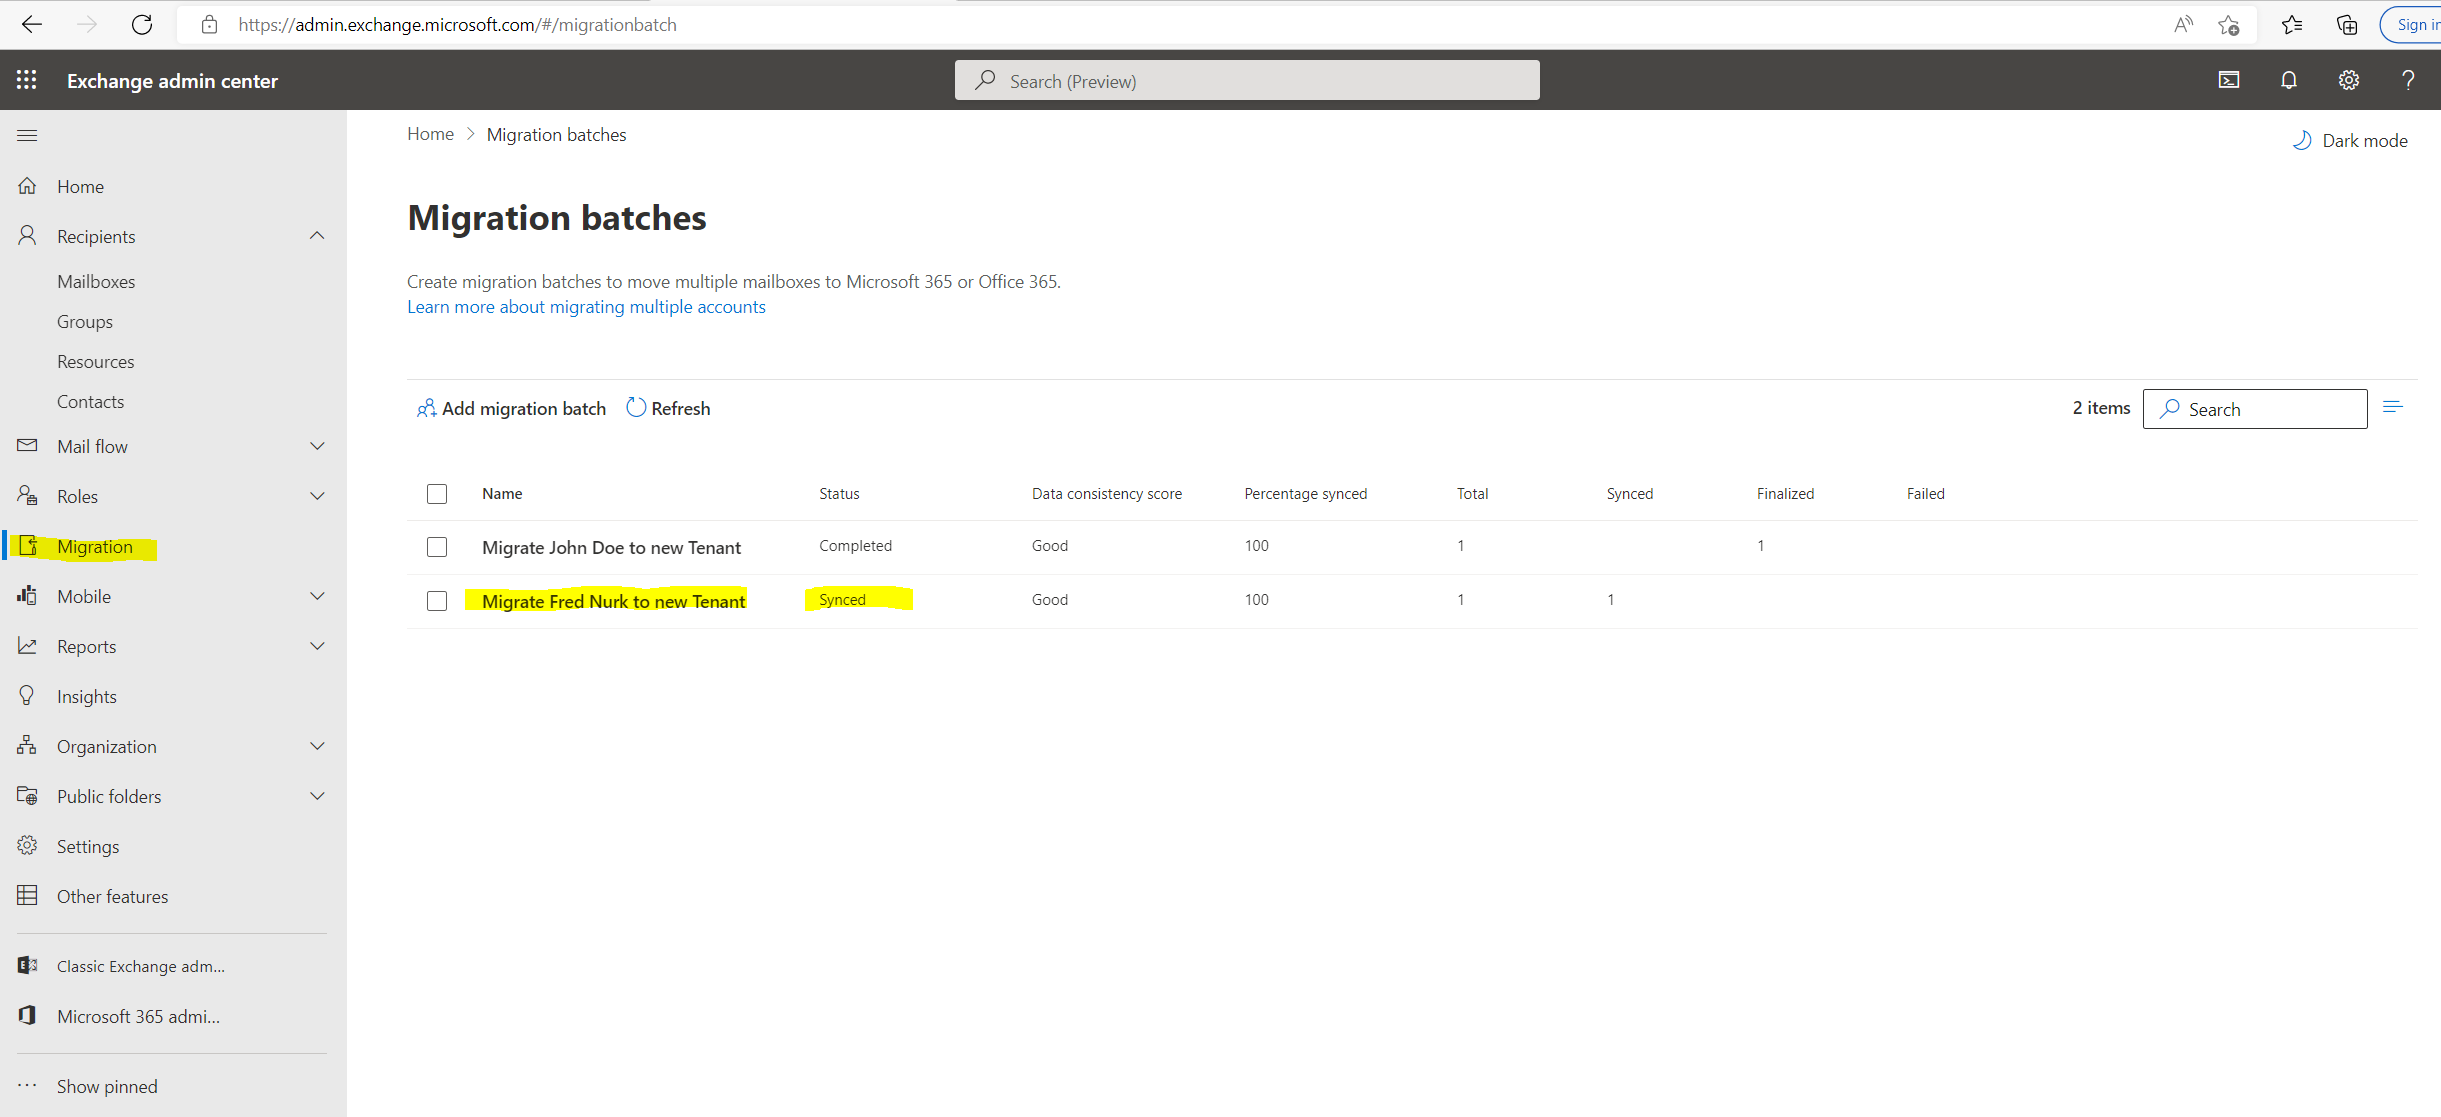
Here for example for a further test user Fred Nurk, I used PowerShell to move its mailbox to the new tenant.
New-MigrationBatch -Name “Migrate Fred Nurk to new Tenant” -SourceEndpoint “Cross Tenant Mailbox Migration Endpoint” -CSVData ([System.IO.File]::ReadAllBytes(‘D:Mailboxes_to_migrate.csv’)) -Autostart -TargetDeliveryDomain LionsHeadGmbH.onmicrosoft.com

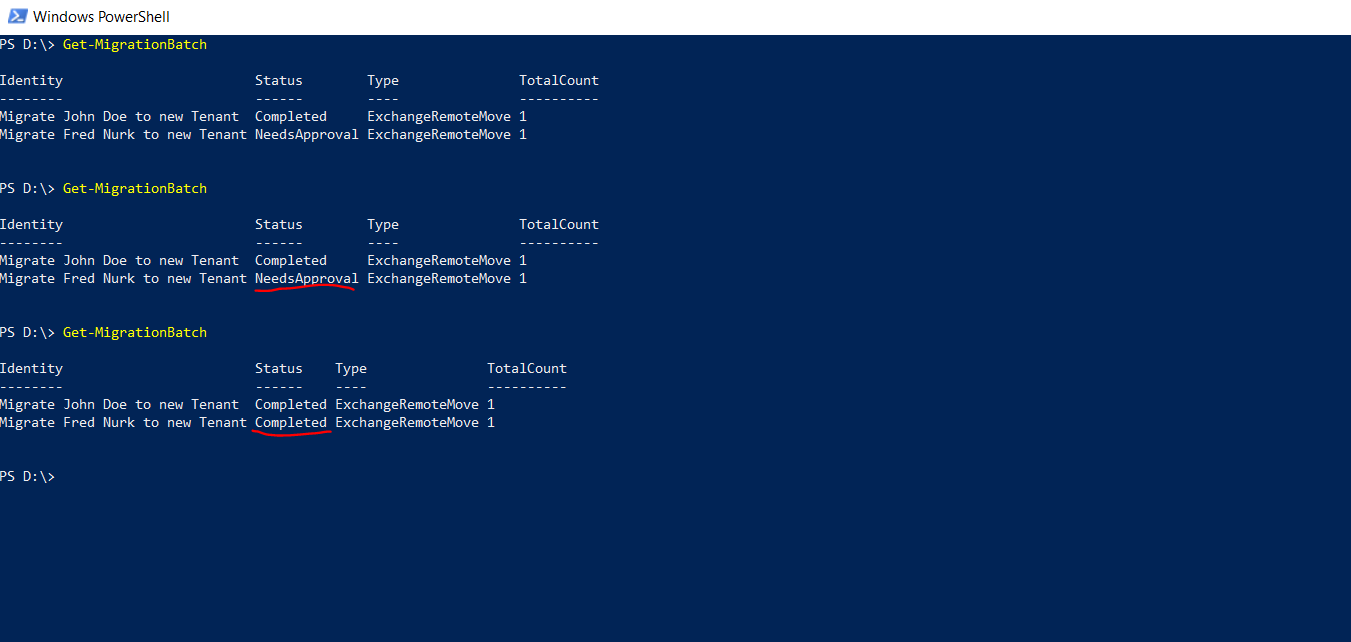
You will also see the migration batches triggered by PowerShell and the New-MigrationBatch cmdlet in the Exchange admin center under Migration.
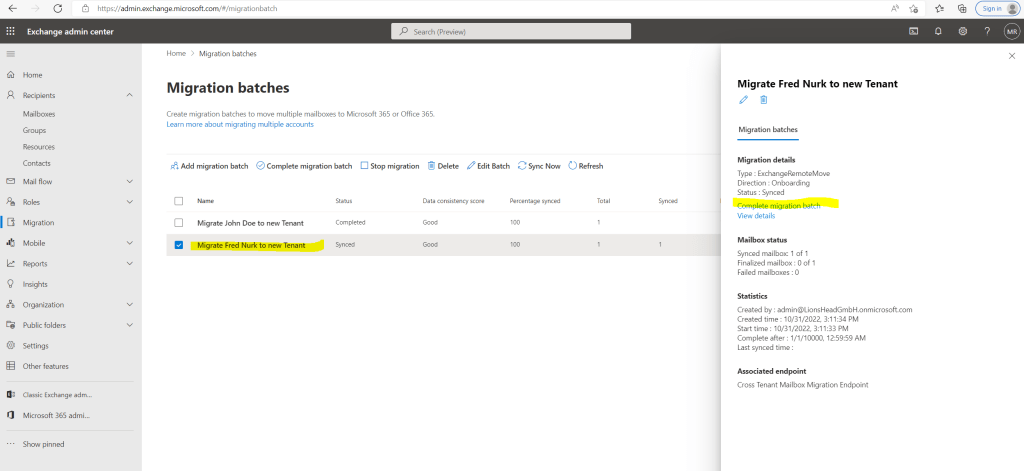
Finally we can complete the migration batch by using the Exchange admin center and click on Complete migration batch as follows.
Or by using PowerShell and the cmdlet Complete-MigrationBatch as follows.
You can also use for the New-MigrationEndpoint cmdlet the CompleteAfter paramter to automatically complete the batch.
e.g.
New-MigrationBatch -Name “Migrate Fred Nurk to new Tenant” -SourceEndpoint “Cross Tenant Mailbox Migration Endpoint” -CSVData ([System.IO.File]::ReadAllBytes(‘D:Mailboxes_to_migrate.csv’)) -Autostart -TargetDeliveryDomain LionsHeadGmbH.onmicrosoft.com -CompleteAfter “09/01/2018 7:00 PM”
Data migration for the batch will start, but won’t complete until 09/01/2018 7:00 PM (UTC). This method allows you to start a migration and then leave it to complete after business hours if your time zone is Coordinated Universal Time.
Source: https://learn.microsoft.com/en-us/powershell/module/exchange/new-migrationbatch?view=exchange-ps#example-8
Complete-MigrationBatch -Identity “Migrate Fred Nurk to new Tenant”
Complete-MigrationBatch
https://learn.microsoft.com/en-us/powershell/module/exchange/complete-migrationbatch?view=exchange-ps

After completing the batch, it shows under status NeedsApproval, this will finally automatically switch to Completed.

After the Migration (Move)
When I now try to sign in to Outlook on the web by using my actual user principal name (UPN) from the source tenant , I will get of course the following error message as the mailbox is still moved to the new tenant and new user principal name (UPN).

When using Outlook you will get disconnected from Exchange Online and the following error message pop up.
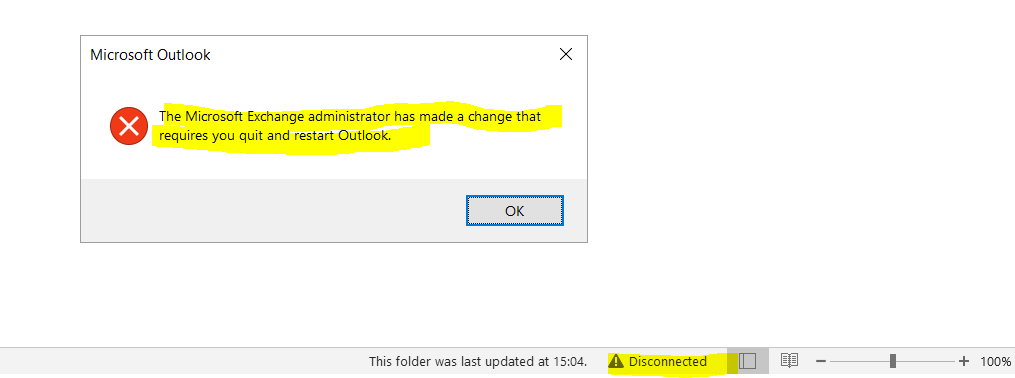
For this initial deployment, users will need to rebuild their profile with their new UPN, primary SMTP address and resync OST content.
For Outlook on the web the users just have to use their new UPN.
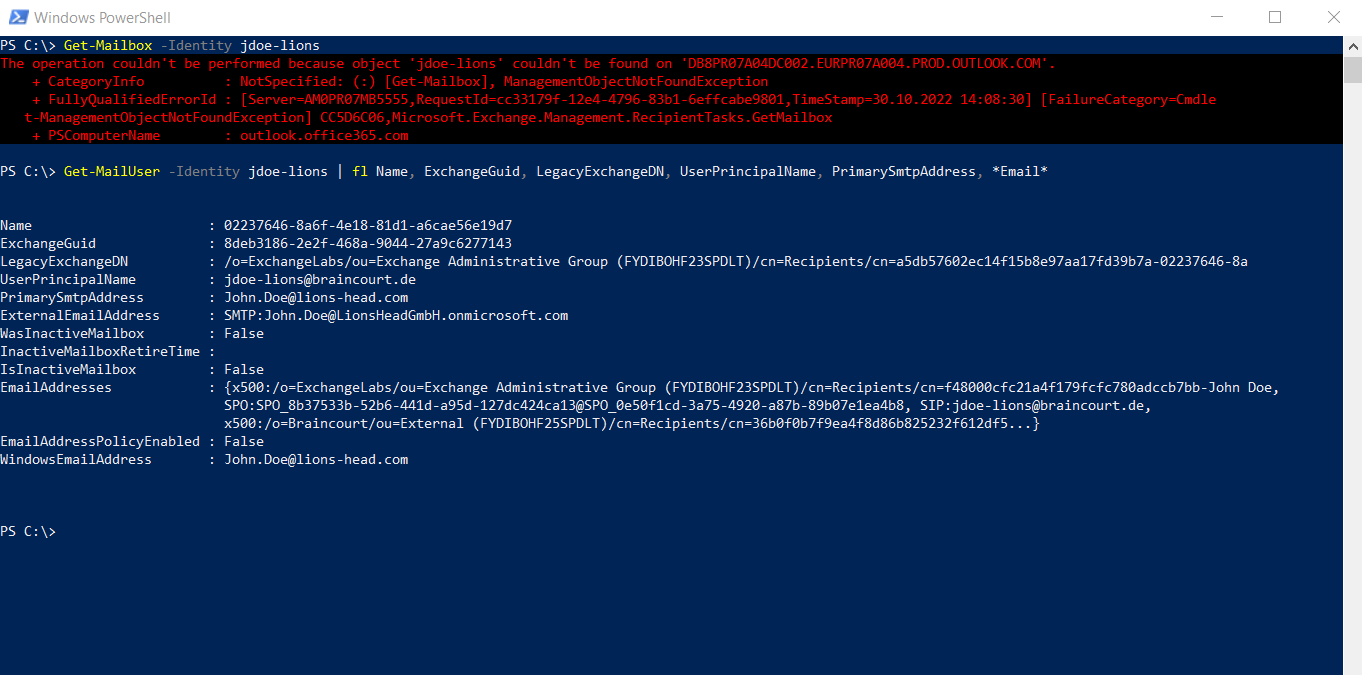
From now on the Mailbox in the source tenant has been converted to a Mail User object. You can check this by executing the following commands.
Get-Mailbox -Identity jdoe-lions
Get-MailUser -Identity jdoe-lions | fl Name, ExchangeGuid, LegacyExchangeDN, UserPrincipalName, PrimarySmtpAddress, Email
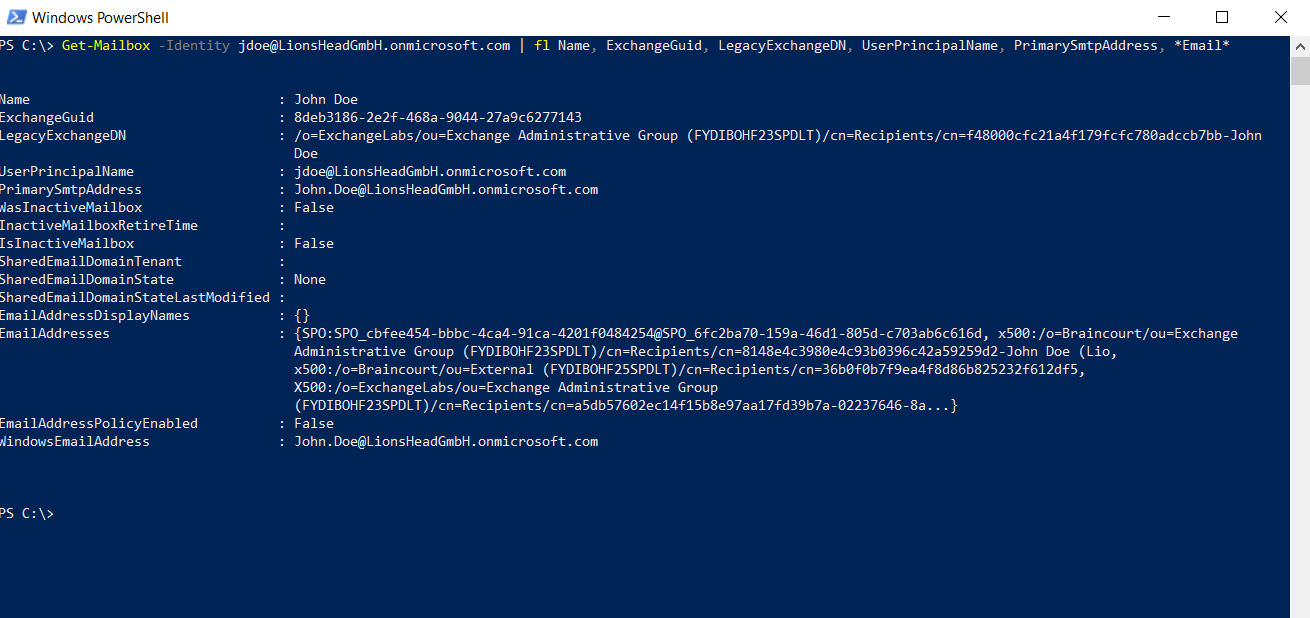
You can also check the mailbox in the target tenant
Get-Mailbox -Identity jdoe@LionsHeadGmbH.onmicrosoft.com | fl Name, ExchangeGuid, LegacyExchangeDN, UserPrincipalName, PrimarySmtpAddress, Email
Since only one tenant can own a domain, the former primary SMTPAddress will not be associated to the user in the target tenant when the mailbox move completes; only those domains associated with the new tenant. Outlook uses the user’s new UPN to authenticate to the service and the Outlook profile expects to find the legacy primary SMTPAddress to match the mailbox in the target system. Since the legacy address is not in the target System the outlook profile will not connect to find the newly moved mailbox.
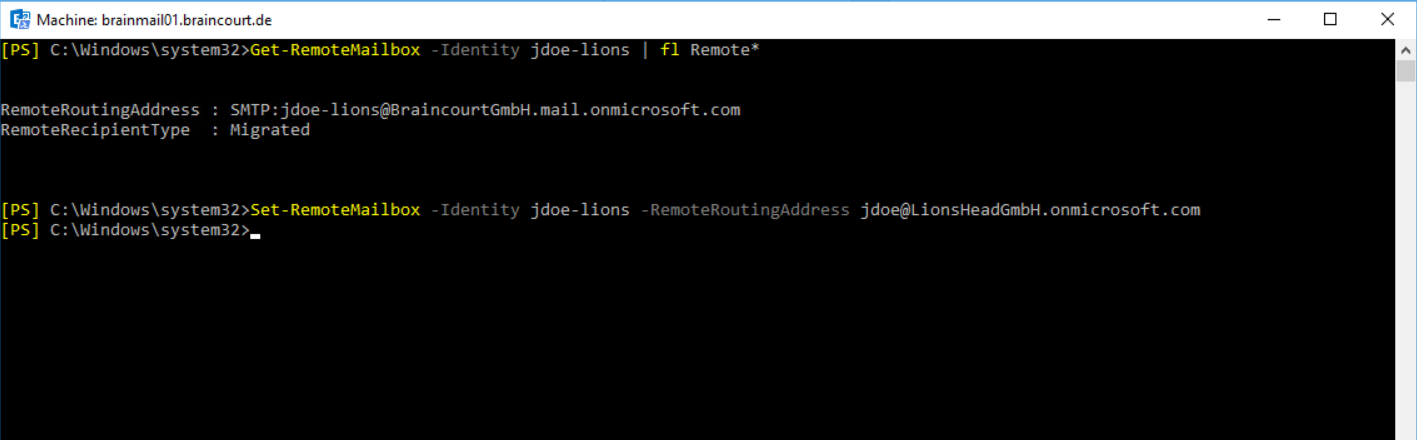
Once the mailbox moves from source to target, you should ensure that the on-premises mail users, in both the source and target, are updated with the new targetAddress.
In my case the targetDeliveryDomain used in the move is LionsHeadGmbH.onmicrosoft.com.
As I am using Exchange Classic Full Hybrid, I will execute the following command on the on-premise Exchange Server.
Set-RemoteMailbox -Identity jdoe-lions -RemoteRoutingAddress jdoe@LionsHeadGmbH.onmicrosoft.com
You should update the targetAddress (RemoteRoutingAddress/ExternalEmailAddress) of the source on-premises users when the source tenant mailbox moves to target tenant. While mail routing can follow the referrals across multiple mail users with different targetAddresses, Free/Busy lookups for mail users MUST target the location of the mailbox user. Free/Busy lookups will not chase multiple redirects.
Source: https://learn.microsoft.com/en-us/microsoft-365/enterprise/cross-tenant-mailbox-migration?view=o365-worldwide#do-we-need-to-update-remotemailboxes-in-source-on-premises-after-the-move
Note!!!
So by updating the remote routing address at the source tenant, you can ensure that mail users in the source tenant can still send email messages by using the former primary SMTPAddress, which domain is still assigned and registered in public DNS, to the source tenant.
This will also be true for external sender by using the former primary SMTPAddress. Their email messages will be send first to the source tenant because of the existing DNS records. The source tenant then will route them to the new target tenant by using the remote routing address.
In my case if all users migrated to the new tenant, I will remove the domain from the former primary SMTPAddress on the source tenant and add it to the new target tenant. Therefore you should also check the DNS records, if they still valid. As a domain could only be registered to one tenant, in most cases they will not change after moving to another tenant.
After that I will add the former primary SMTPAddress to the user object in the new target tenant.
Finally I will remove the converted Mail User on the source tenant.
The procedure with removing the domain from the source tenant and add it to the target tenant with finally removing the mail users in the source tenant, depends on your own requirements and type of merger.
Post Migration Teams
Post migration Teams functionality in the source tenant will be limited. After the mailbox is migrated to the target tenant, Teams in the source tenant will no longer have access to the user’s mailbox. So, if a user logs into Teams with the source tenant credential, then there will be a loss of functionality such as the inability to update your profile picture, no calendar application, and an inability to search and join public teams.
Source: https://learn.microsoft.com/en-us/microsoft-365/enterprise/cross-tenant-mailbox-migration?source=recommendations&view=o365-worldwide#known-issues
Conclusion
So even still in preview, Cross-tenant mailbox migration works fine. But as you can saw the procedure, where you need to prepare the target Mail user object to match specific attributes from the source Mailbox, is a little bit cumbersome at the moment, especially in case you have to migrate a lot of mailboxes. But as mentioned in the Microsoft article, they developing a feature to provide this automated in future.
Microsoft is developing a feature to provide a secure automated method to set many of the attributes in the following section. This feature, named Cross-Tenant Identity Mapping, is currently looking for customers willing to participate in a small private preview. For more information about this pre-release feature and how it can simplify your cross-tenant migration processes, see the article Cross-Tenant Identity Mapping.
Source: https://learn.microsoft.com/en-us/microsoft-365/enterprise/cross-tenant-mailbox-migration?view=o365-worldwide#prerequisites-for-target-user-objects
Link
Cross-tenant mailbox migration (preview)
https://learn.microsoft.com/en-us/microsoft-365/enterprise/cross-tenant-mailbox-migration?view=o365-worldwide
Cross-Tenant Identity Mapping (preview)
https://learn.microsoft.com/en-us/microsoft-365/enterprise/cross-tenant-identity-mapping?view=o365-worldwide
Microsoft 365 endpoints
https://learn.microsoft.com/en-us/microsoft-365/enterprise/microsoft-365-endpoints?view=o365-worldwide
Office 365 URLs and IP address ranges
https://learn.microsoft.com/en-us/microsoft-365/enterprise/urls-and-ip-address-ranges?view=o365-worldwide