How to enable Microsoft Entra ID Authentication for vCenter Server by using the VMware Identity Service (Entra ID App)
In my previous post below we saw how to enable Microsoft Entra ID Authentication for vCenter Server by using the on-premises SCIM App by Microsoft.
This on-premises SCIM App by Microsoft will also provide the Microsoft Entra Provisioning Agent which we need to install in our internal on-premises network.
By using this agent we doesn’t need to expose the vCenter-SCIM-App’s API used for user provisioning to the Internet. This agent will establish an outbound connection to Entra ID through which the user sync will happen.
Now in this post I will show another method how we can enable Microsoft Entra ID Authentication for vCenter Server and how to provision users from Entra ID to vCenter Server.
vCenter Server introduced support for Microsoft Entra ID authentication starting with vCenter Server 8.0 Update 2.
This method will require that we publish vCenter-SCIM-App’s API used for user provisioning to the Internet. I will do this by using the Microsoft Entra Application Proxy.
We can also use one more option to finally enable Microsoft Entra ID authentication and by just manually publishing users into the vCenter Identity Broker (vIDB) and not by SCIM.
Set up Microsoft Entra Application Proxy
We will first configure the Microsoft Entra Application Proxy through which we publish or vCenter Server to the Internet.
More about the Microsoft Entra Application Proxy and how to publish on-premise web applications you will find in my following post.
Sign in to the Microsoft Entra admin center as an Application Administrator of the directory that uses Application Proxy.
Select your username in the upper-right corner. Verify you’re signed in to a directory that uses Application Proxy. If you need to change directories, select Switch directory and choose a directory that uses Application Proxy.
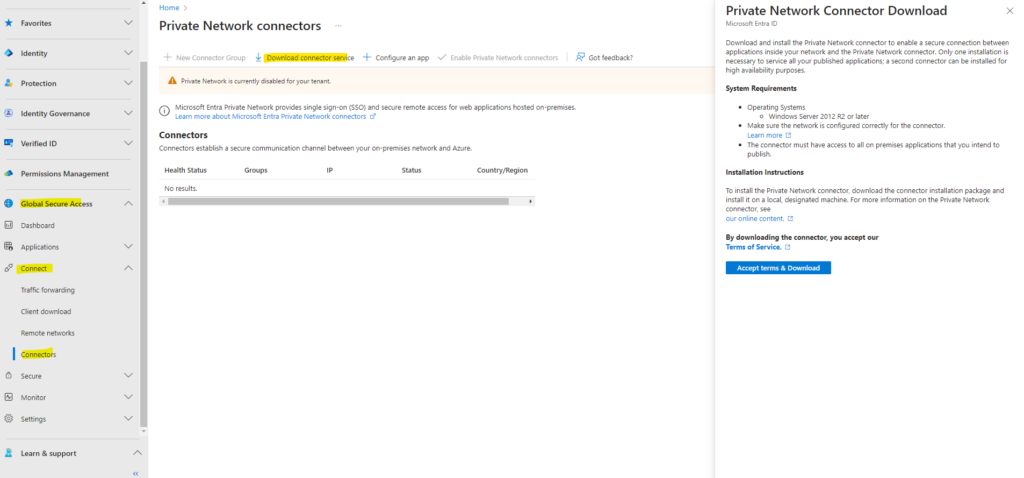
Browse to Global Secure Access > Connect > Connectors.
Select Download connector service.
The warning notification about Private Network is currently disabled for your tenant will disappear after installing the connector successfully in your on-premise environment.

Download and install the Private Network connector to enable a secure connection between applications inside your network and the Private Network connector. Only one installation is necessary to service all your published applications; a second connector can be installed for high availability purposes.
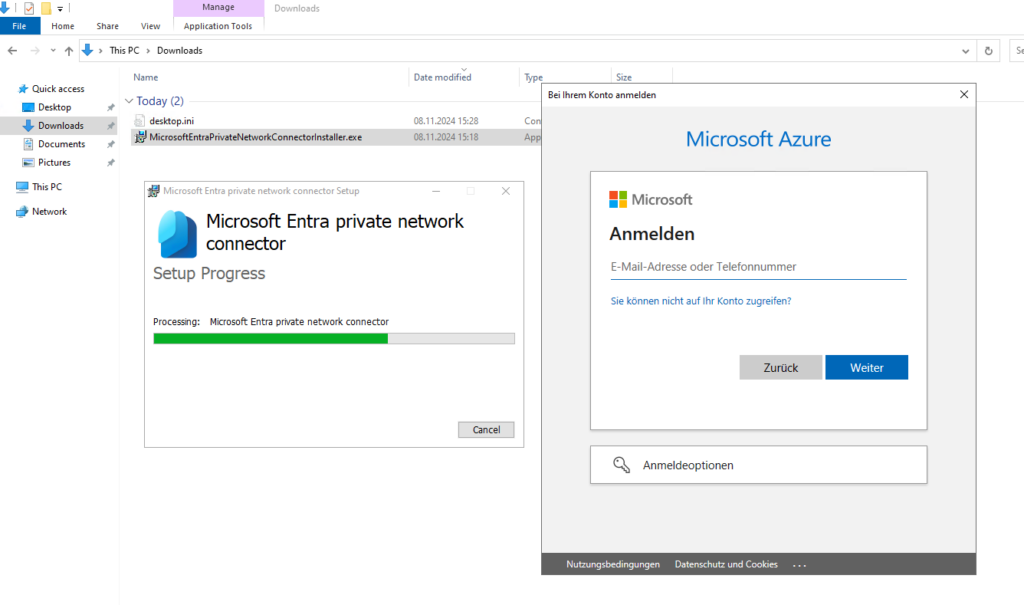
The Private Network connector I will install on a Window Server 2022 located in my internal LAN of my vSphere lab environment.
If there’s a firewall in the path, make sure it’s open. An open firewall allows the connector to make HTTPS (TCP) requests to the Application Proxy.
Open the following ports to outbound traffic.
-> TCP 80 Downloading certificate revocation lists (CRLs) while validating the TLS/SSL certificate
-> TCP 443 All outbound communication with the Application Proxy serviceAllow access to a set of URLs outbound as shown here https://learn.microsoft.com/en-us/entra/global-secure-access/how-to-configure-connectors#allow-access-to-urls.

Sign-in to Azure.

Verify that the following both services are running after the installation.
- Microsoft Entra private network connector
- Microsoft Entra private network connector updater

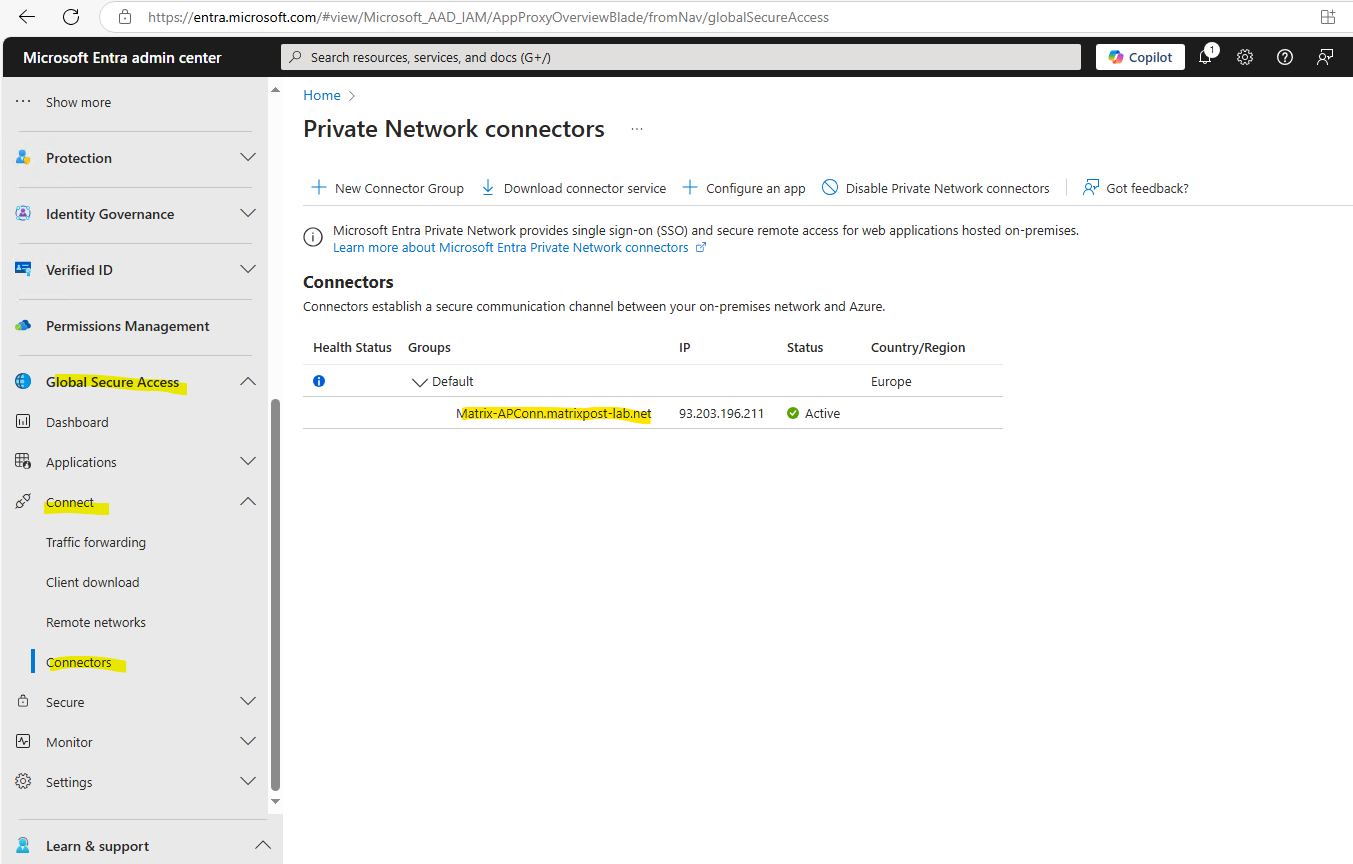
To confirm the connector is installed and registered correctly:
Back to the Microsoft Entra admin center where the warning notification about Private Network is currently disabled for your tenant is gone and we will therefore see our newly installed private network connector which runs in our on-premise environment.
An active green label indicates that your connector can connect to the service. However, even though the label is green, a network issue could still block the connector from receiving messages.
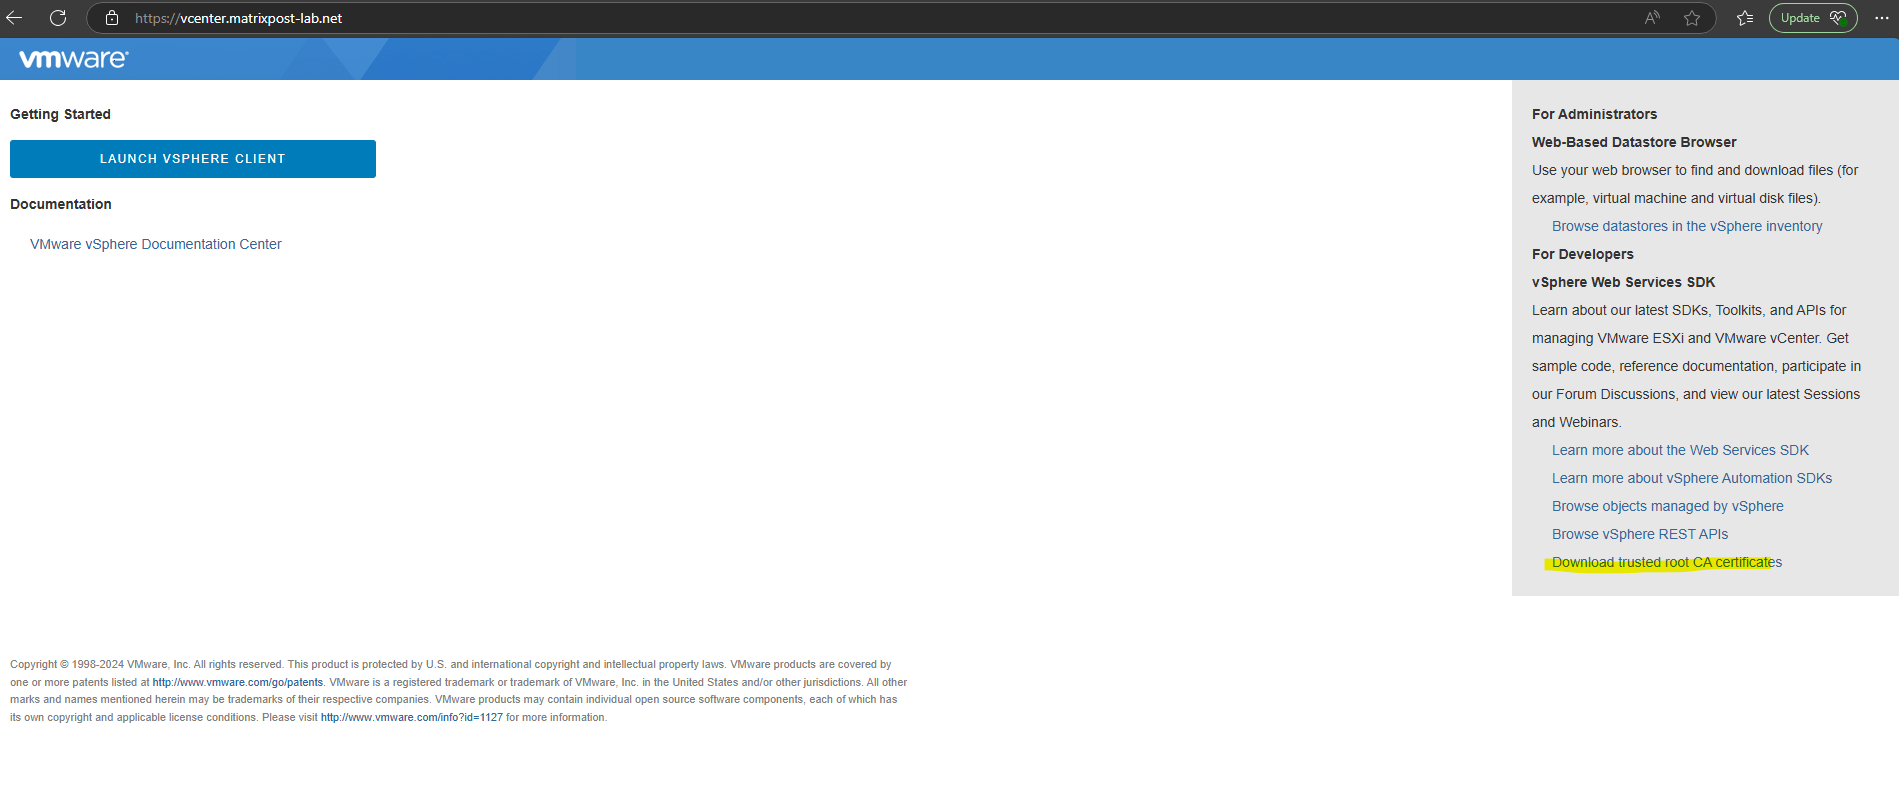
The Windows Server on which we installed the Private Network connector and is running on, needs to trust the vCenter Server SSL/TLS certificate. Therefore you can download these certificates as usual on the Launch vSphere Client page to install them into the local Trusted Root Certification Authorities store.
Publishing vCenter’s Tenant URL in Microsoft Entra Application Proxy
Later we need to create a new enterprise app for the SCIM user provisioning. This SCIM app needs to access directly our vCenter Server’s Tenant URL through the Internet. Therefore we need to create below a new app to publish this Tenant URL through the Internet.
In the Microsoft Entra admin center under Global Secure Access -> Connect -> Connectors click on + Configure app.

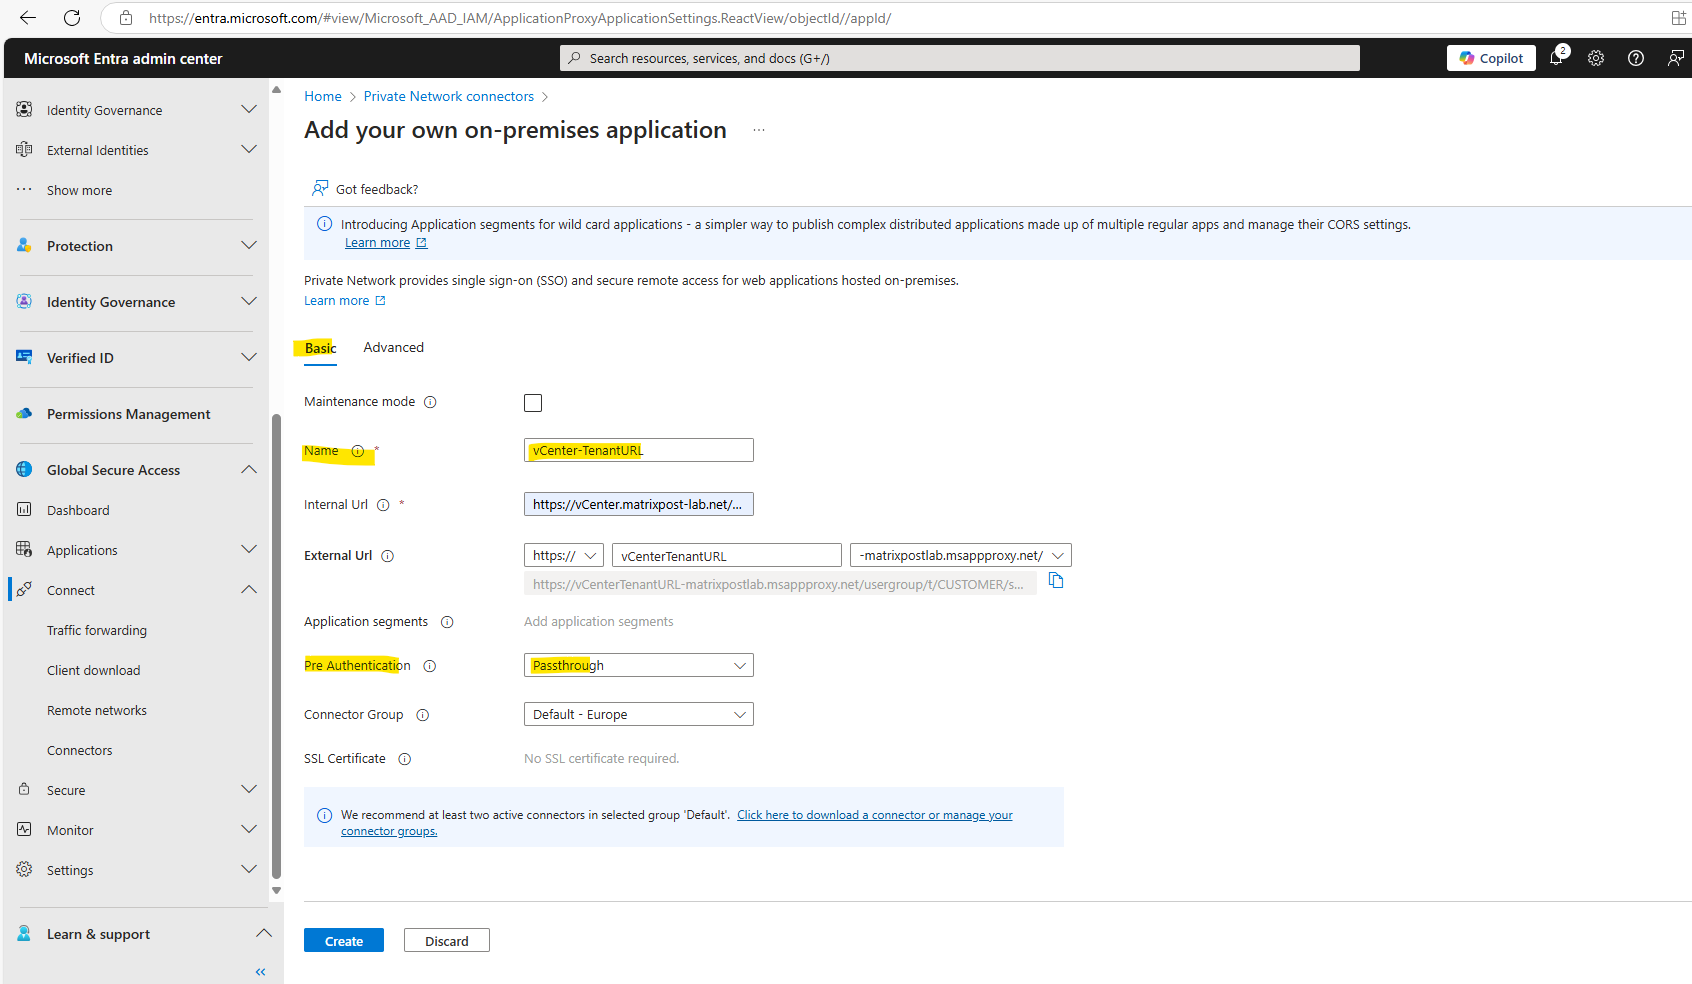
I will name this app vCenter-TenantURL because we finally publish the vCenter’s Tenant URL to the Internet by using the Microsoft Entra Application Proxy.
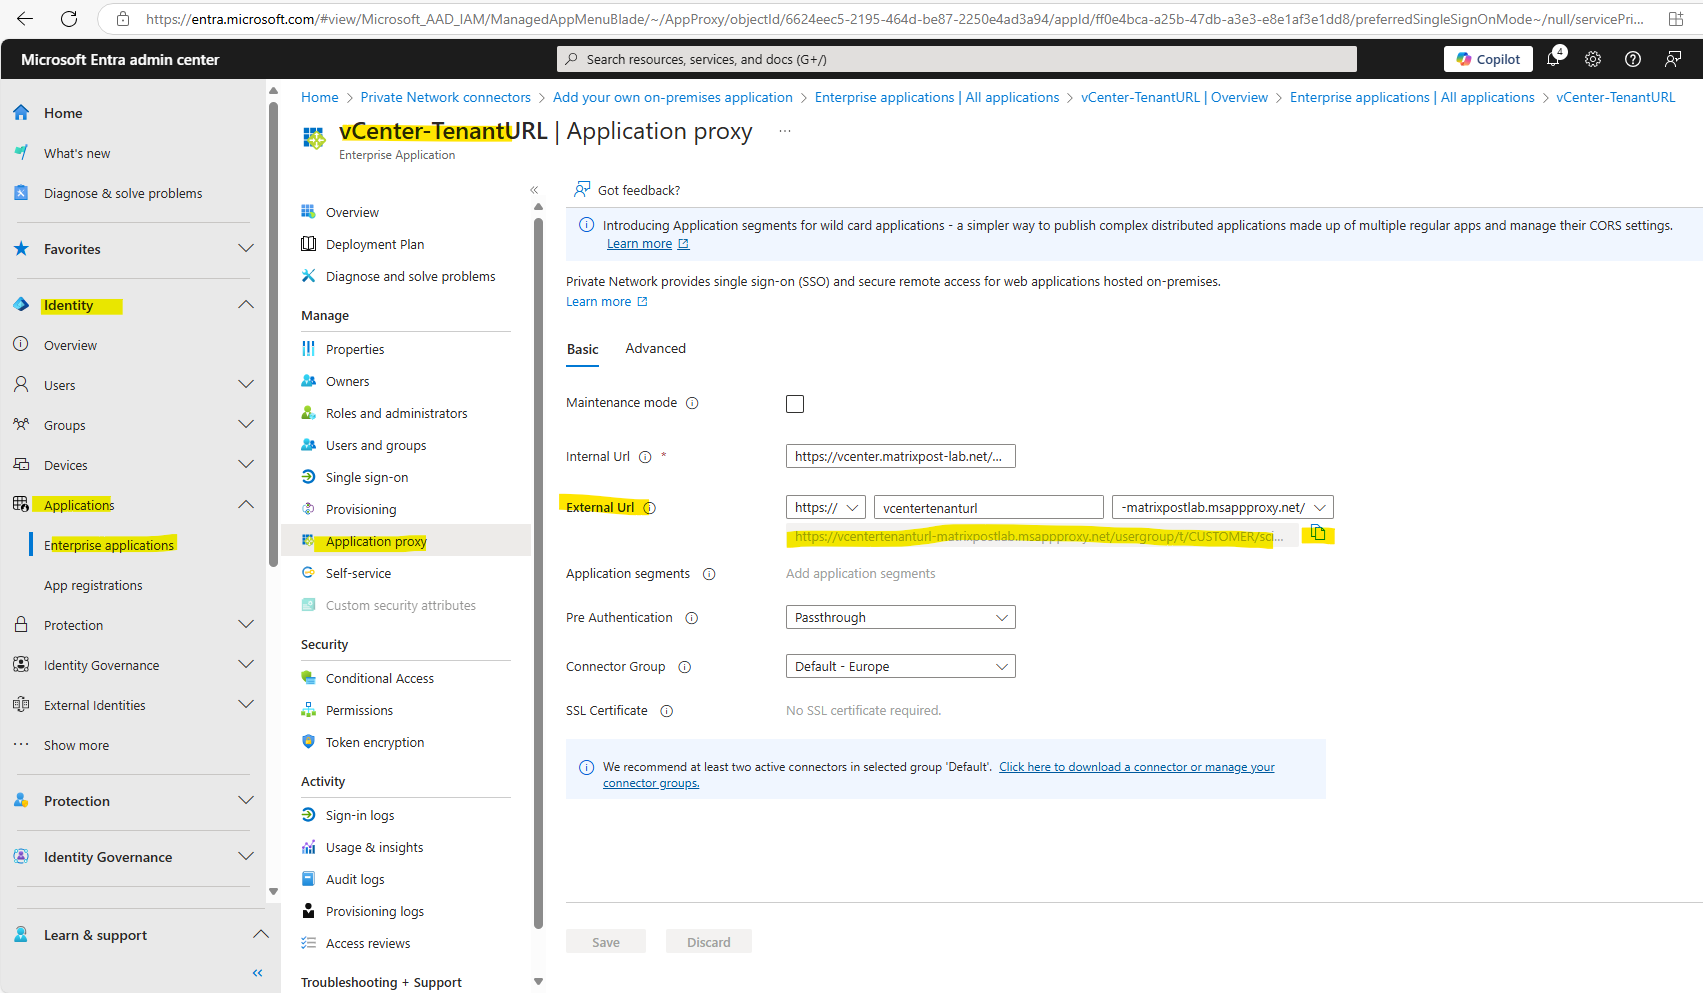
For the Internal Url enter https://vCenter.matrixpost-lab.net/usergroup/t/CUSTOMER/scim/v2/, adjust the FQDN to your own deployment.
The FQDN of the External Url we can also adjust, in my case I will leave it to the name of the app.
!! Note !!
For Pre Authentication we need to select Passthrough here because we need to use here the secret token provided by the vCenter Server to authenticate this app to vCenter-SCIM-App’s API and synchronize user data. We will see this further down.
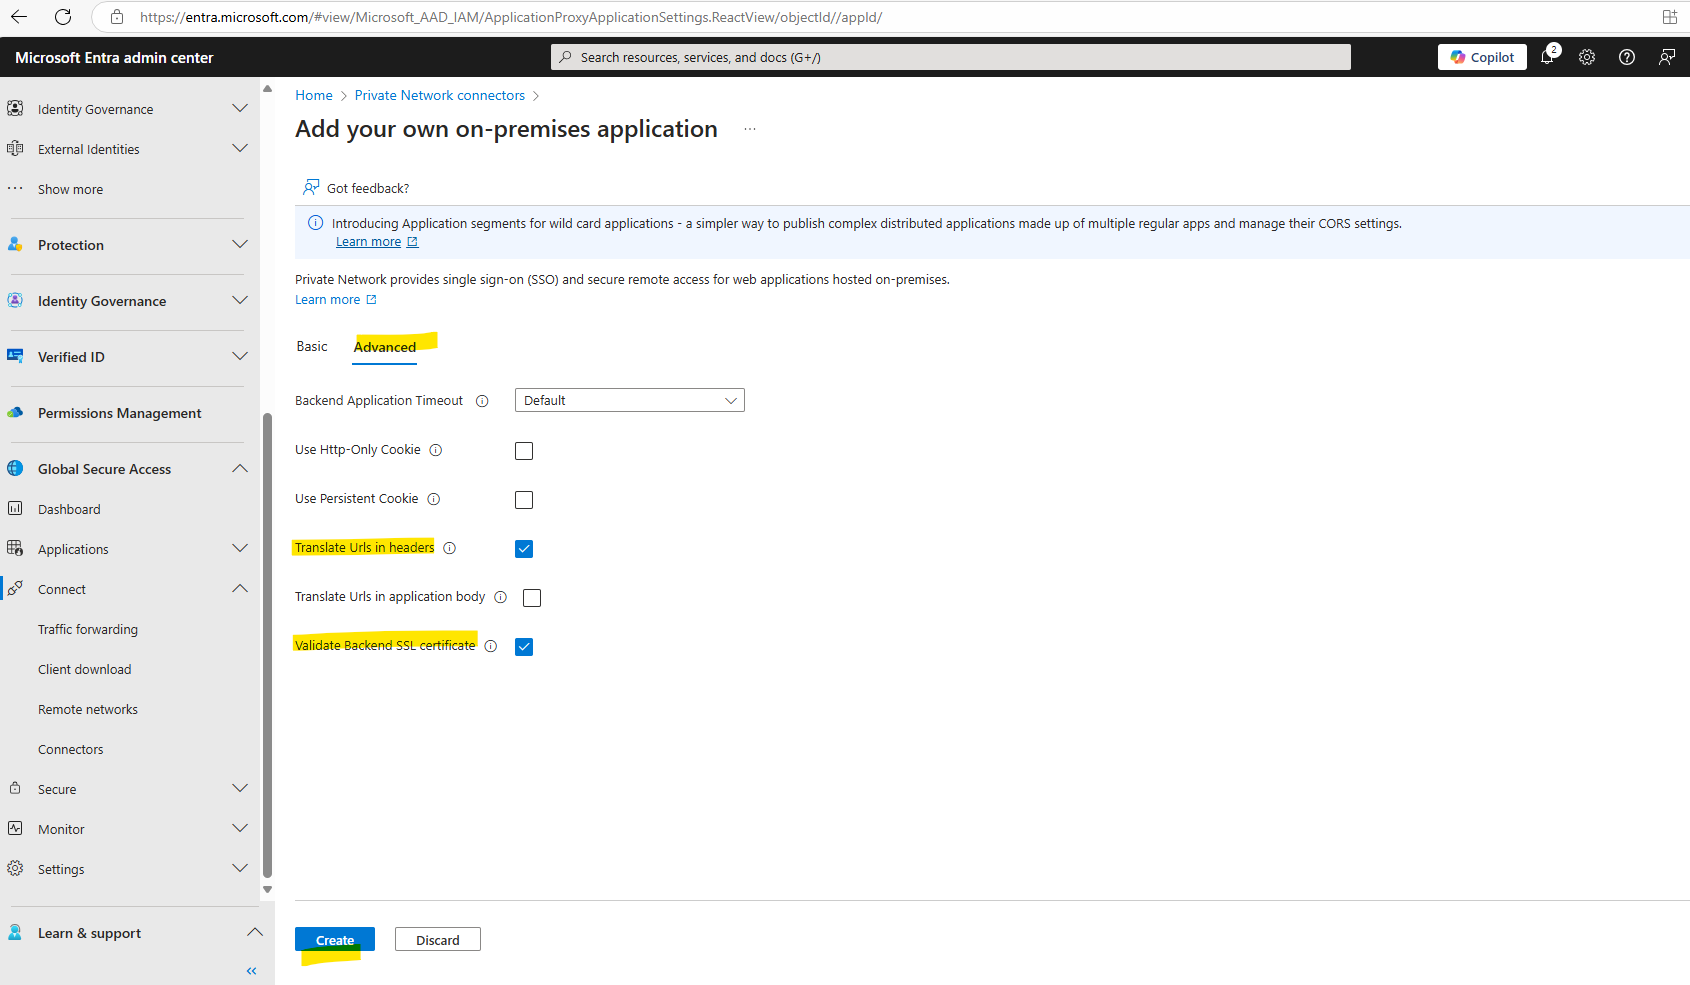
On the Advanced tab check that Translate Urls in headers is checked and finally click on Create.
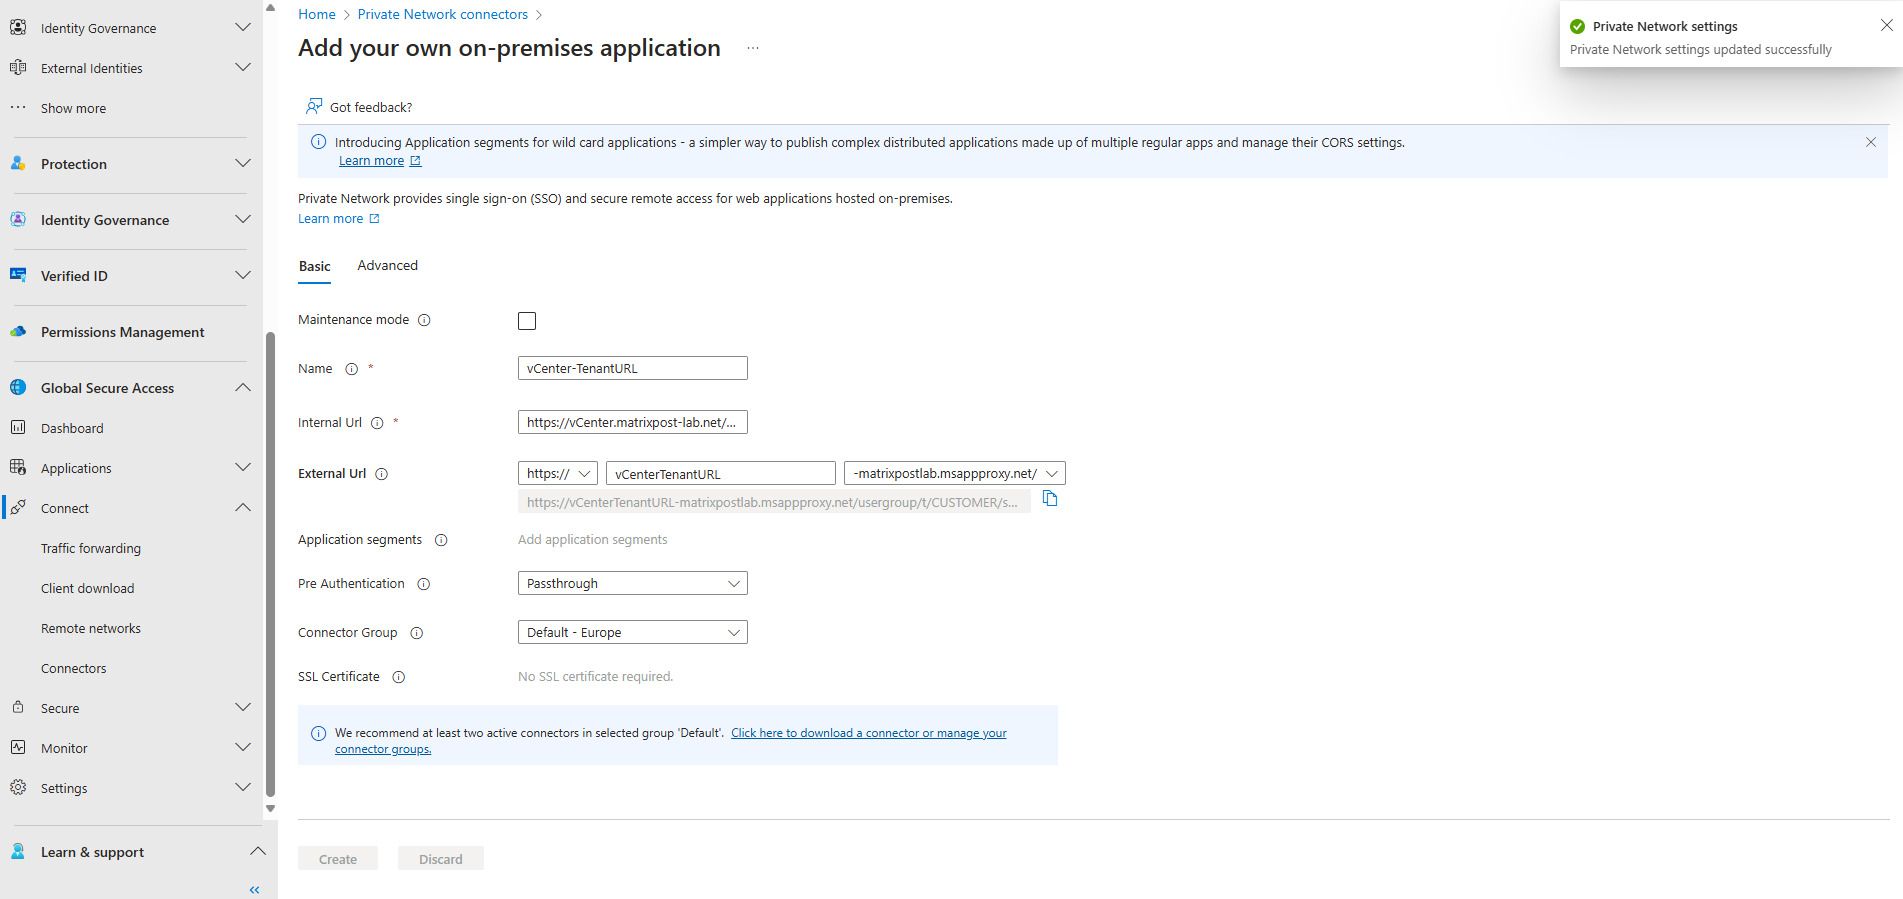
We also adding an Adminstrator account to the app.

Set up the vCenter Entra ID Authentication App
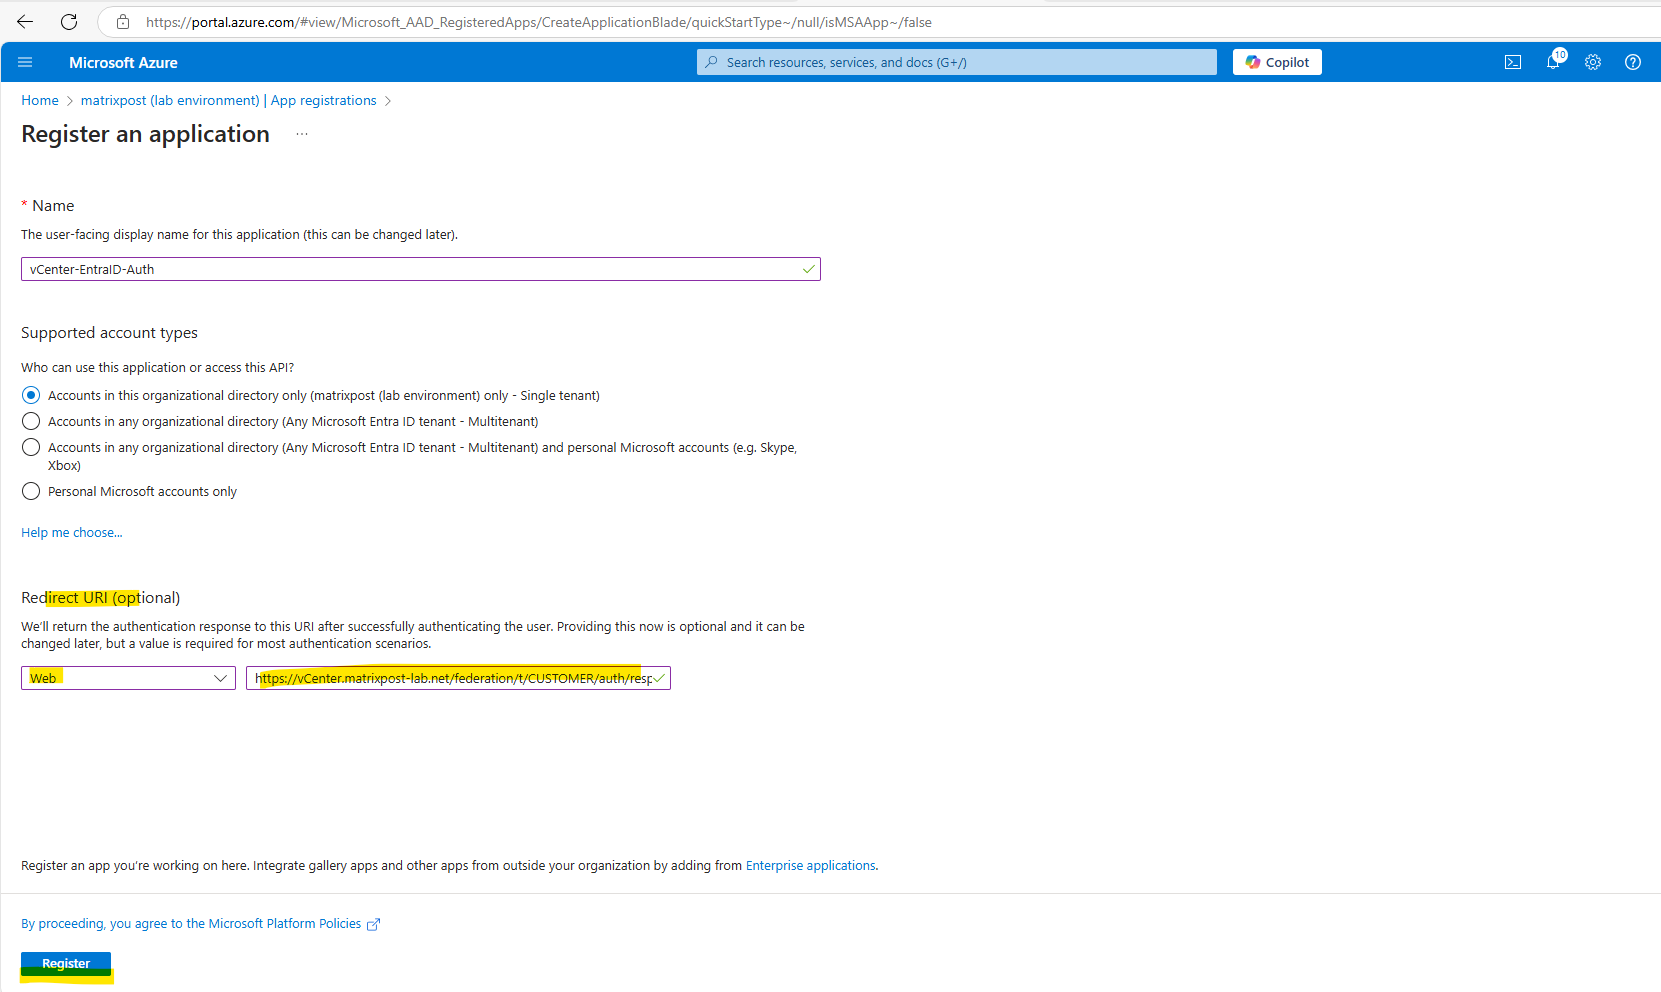
Now we create a new app registration for the vCenter Server’s WebGUI to authenticate to vCenter by using Microsoft Entra ID.
In the Azure portal navigate to Microsoft Entra ID -> Manage -> App registrations.
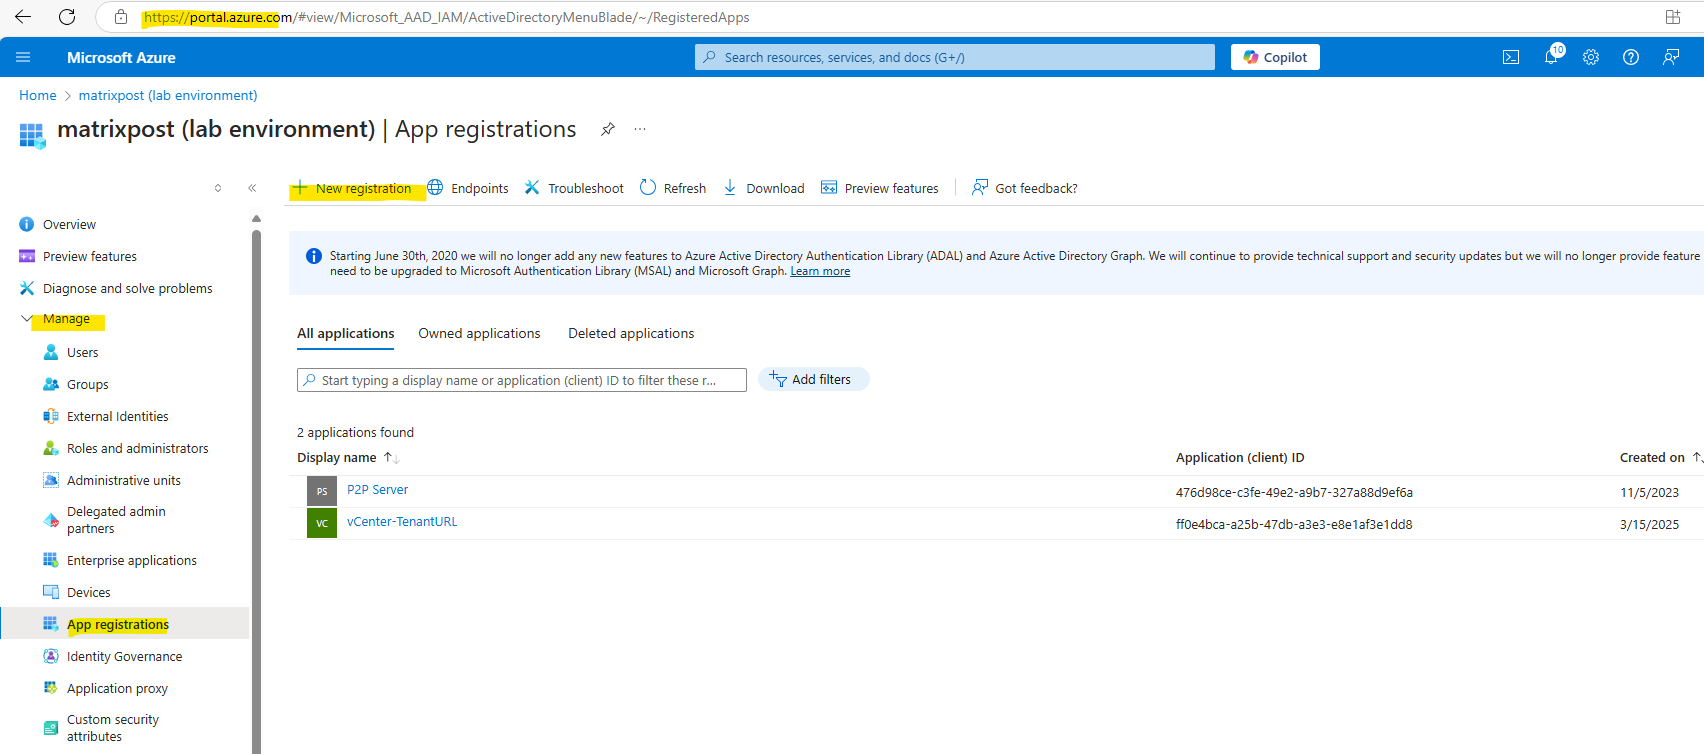
For the name I will use vCenter-EntraID-Auth because this app will finally handle the user authentication for vCenter by using Entra ID.
For the Redirect URI we need to enter the vCenter’s Redirect URI, this URI we will get when configuring the identity provider in vCenter.

Therefore we now first switch to vCenter’s WebGUI.
Set up Entra ID Identity Provider in VMware vSphere
Microsoft Entra ID can be used as an Identity Provider (IdP) for VMware vSphere authentication. This setup allows you to leverage modern authentication methods, such as SSO, MFA, and conditional access, to securely log in to vSphere.
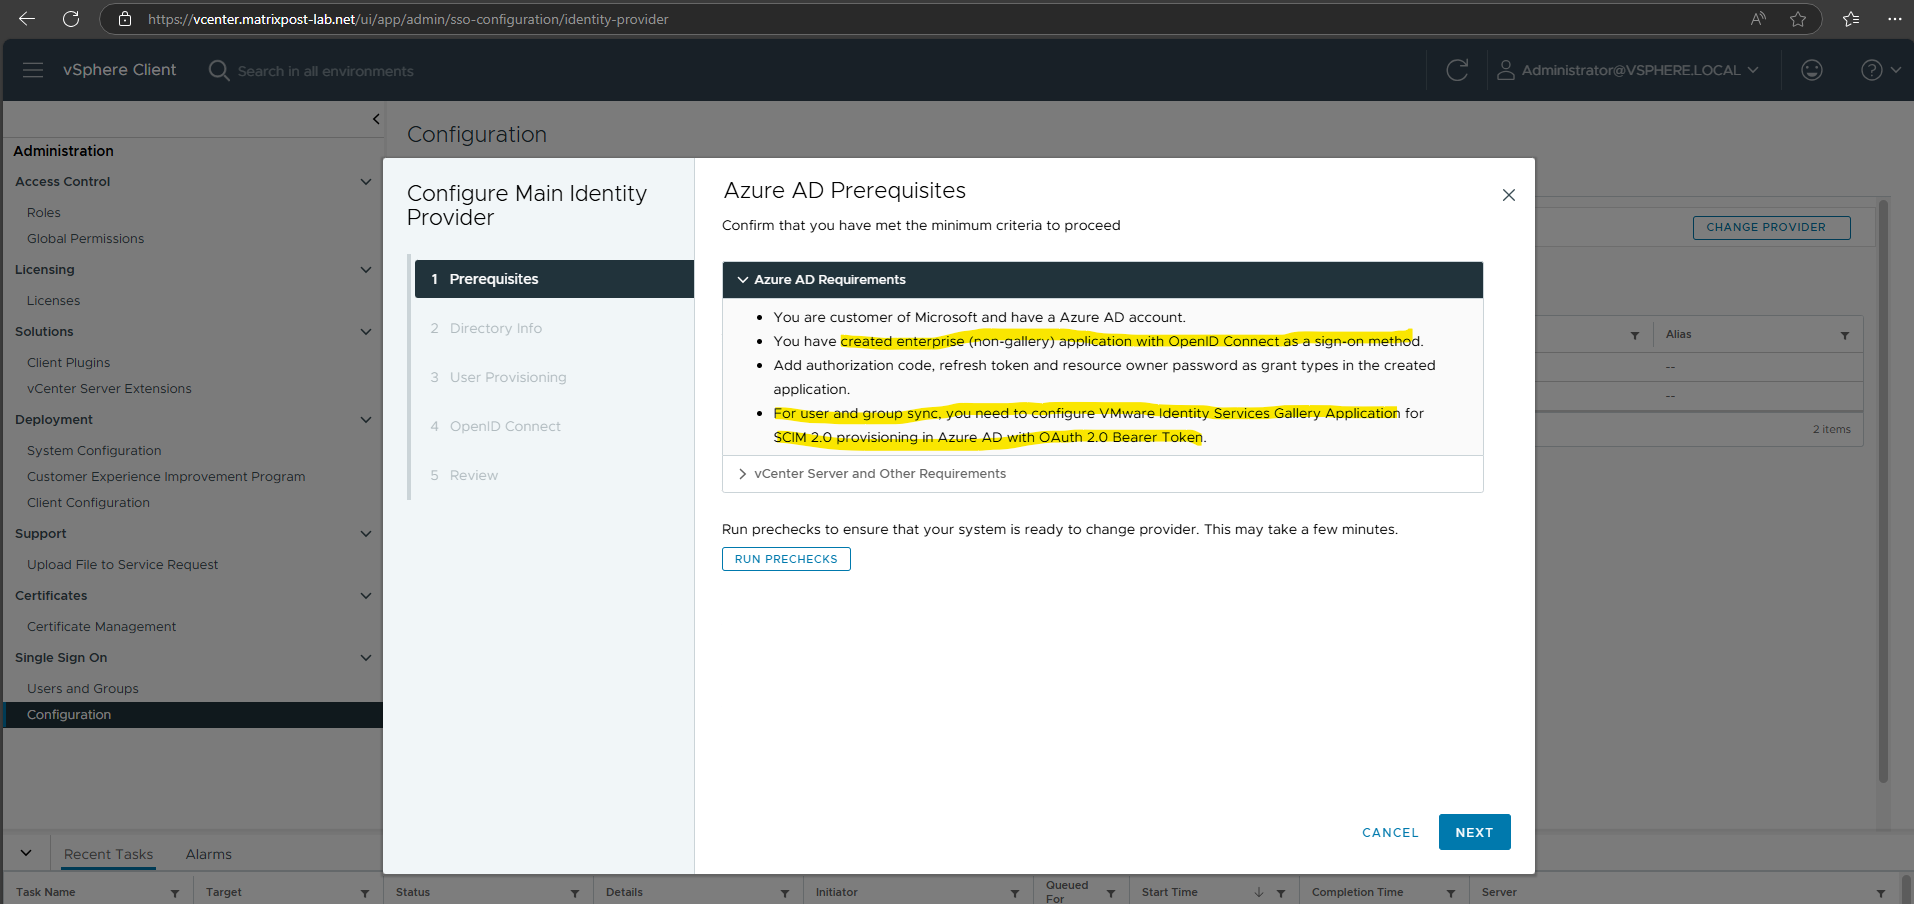
To setup Entra ID as an Identity Provider (IdP) for VMware vSphere, navigate in vSphere to Administration -> Single Sign On -> Configuration and within the Identity Provider tab click on Change Provider as shown below.

Entra AD Requirements
vCenter Server and Other Requirements
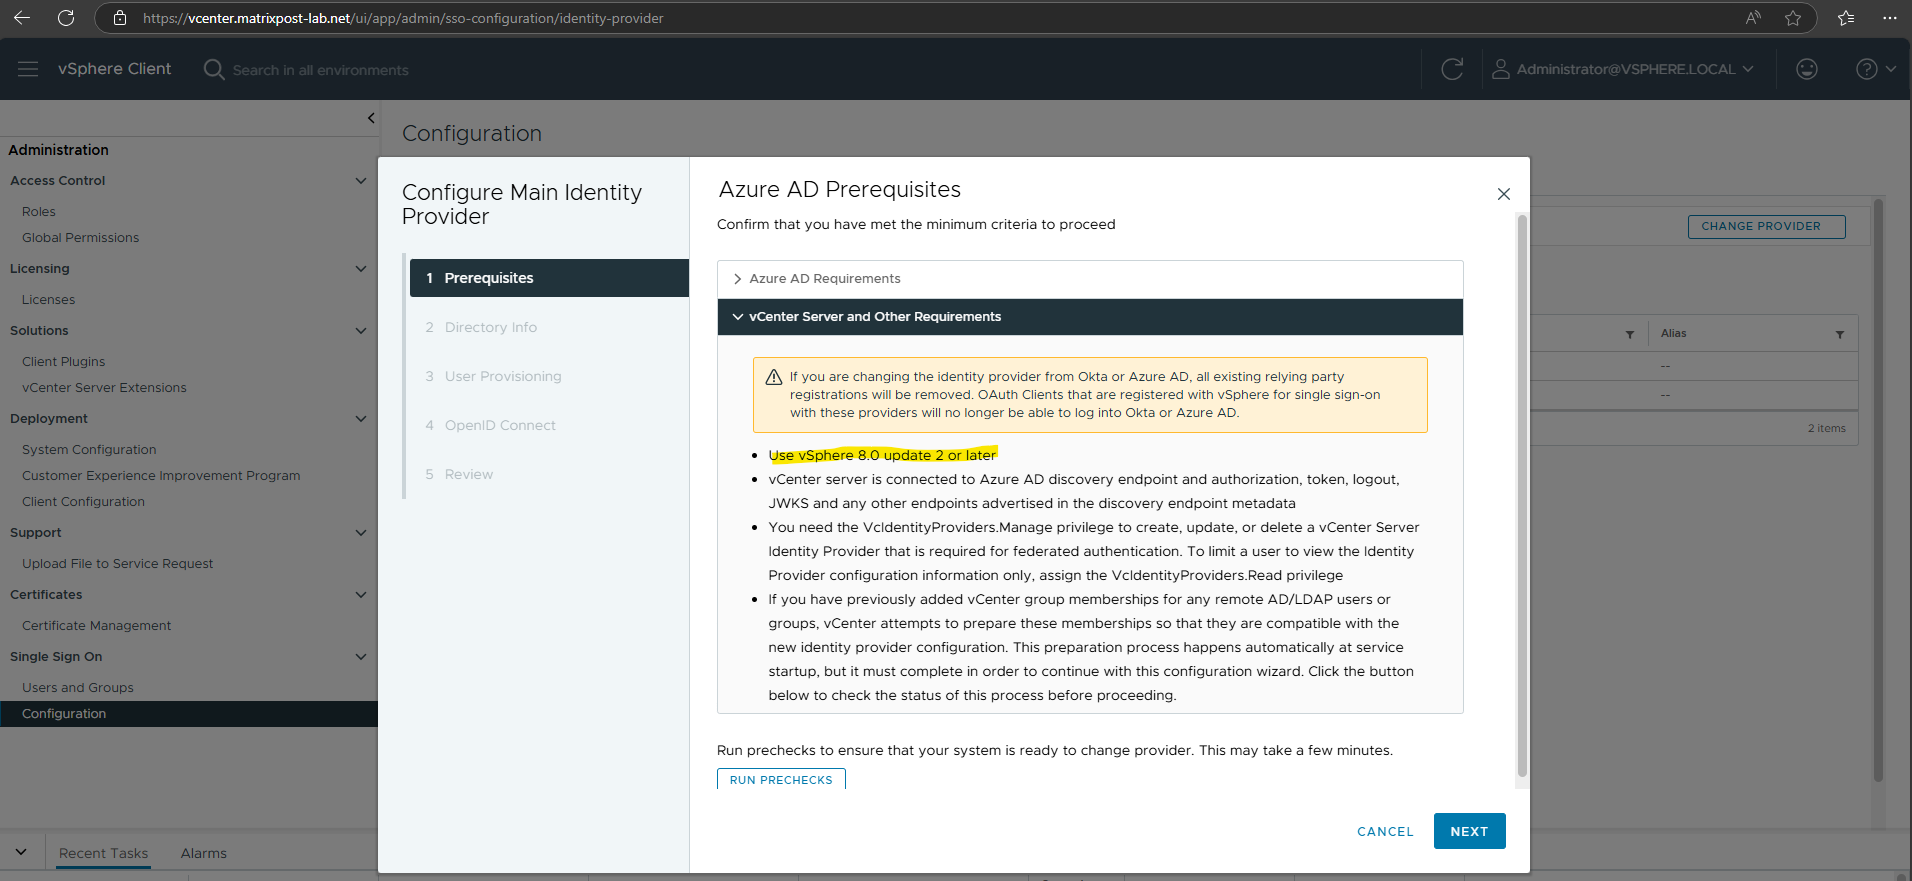
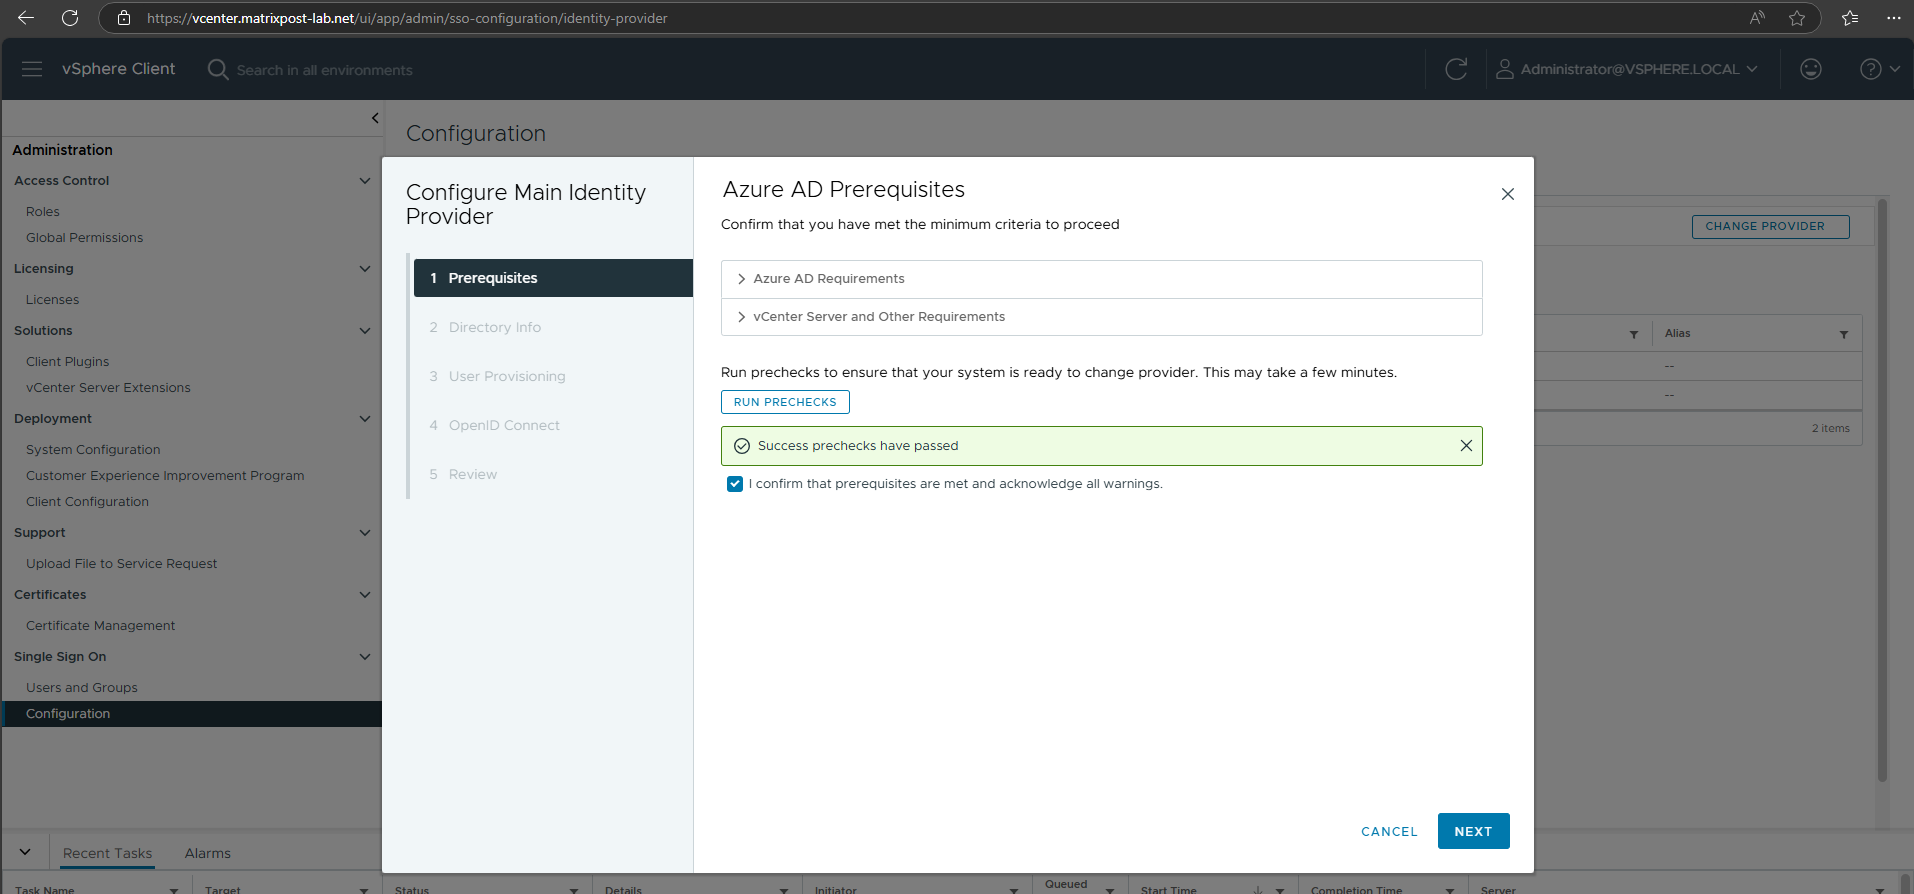
Click on Run Prechecks to ensure the system is ready to change the provider.
Click on the plus icon to add finally the domain name your users are configured for in Entra ID.
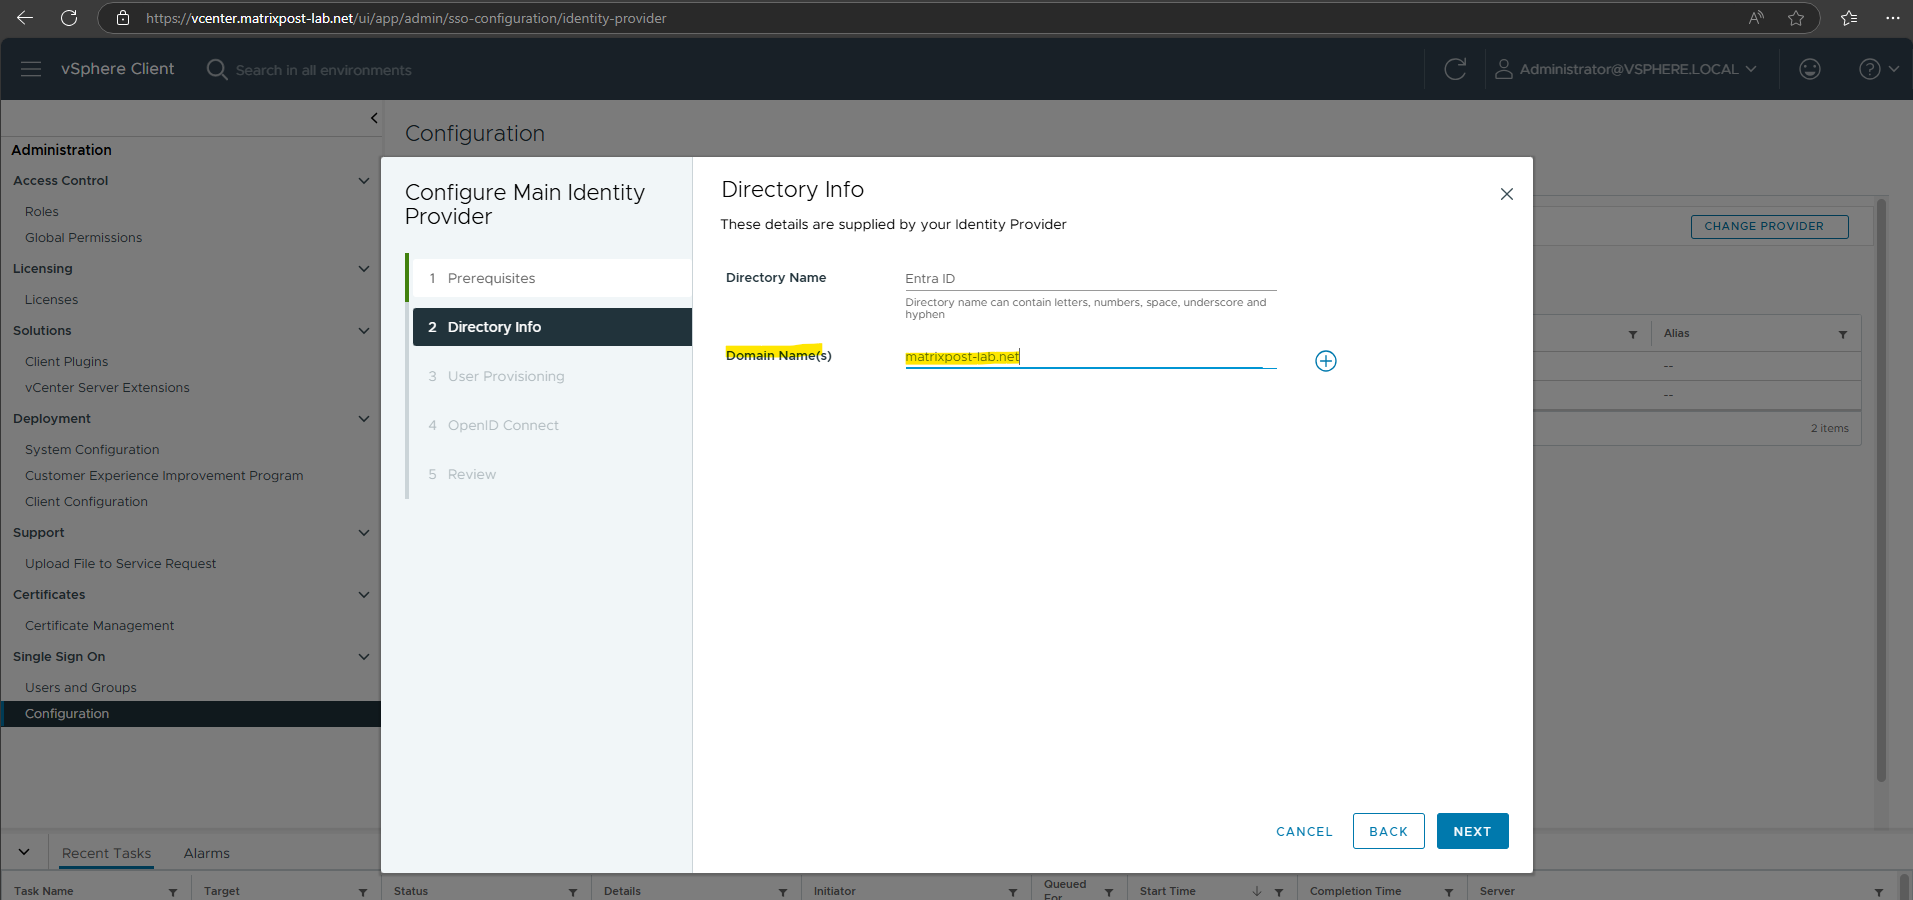
Click Next.

I will use the recommended token lifespan with 6 months.
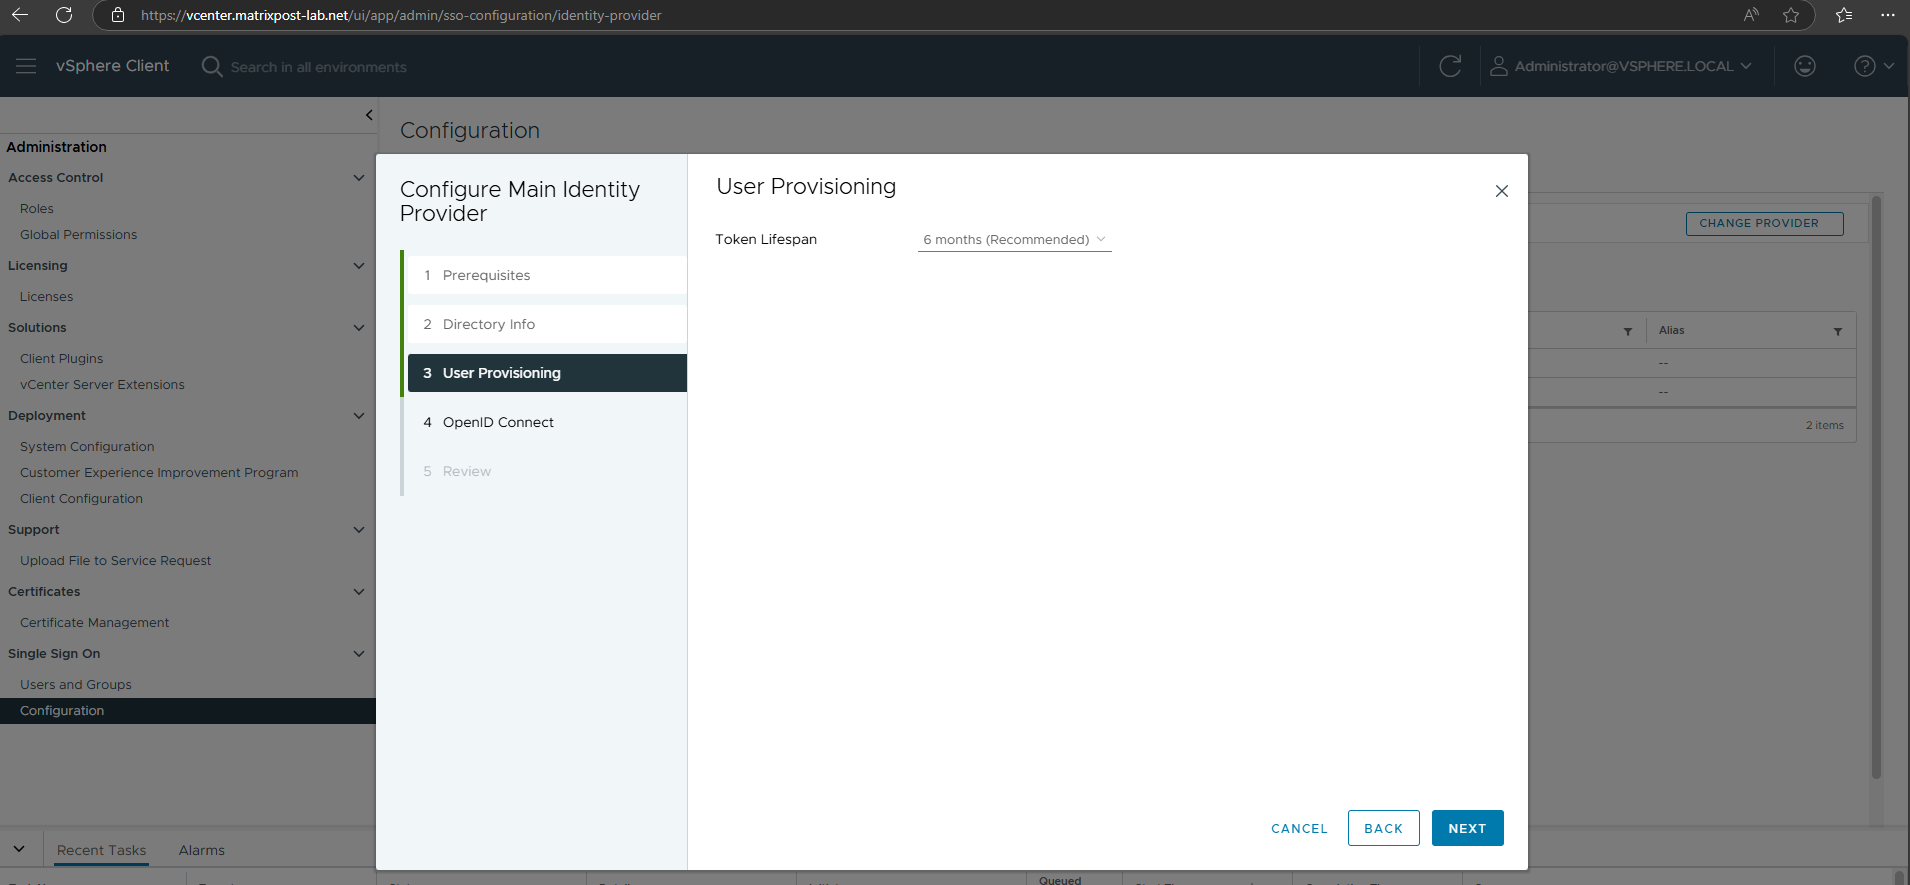
Next we need to copy the shown Redirect URI below and copy it to our previous interrupted new app registration (named vCenter-EntraID-Auth).
The Redirect URI tells Entra ID where to send the authentication response after a user successfully signs in.
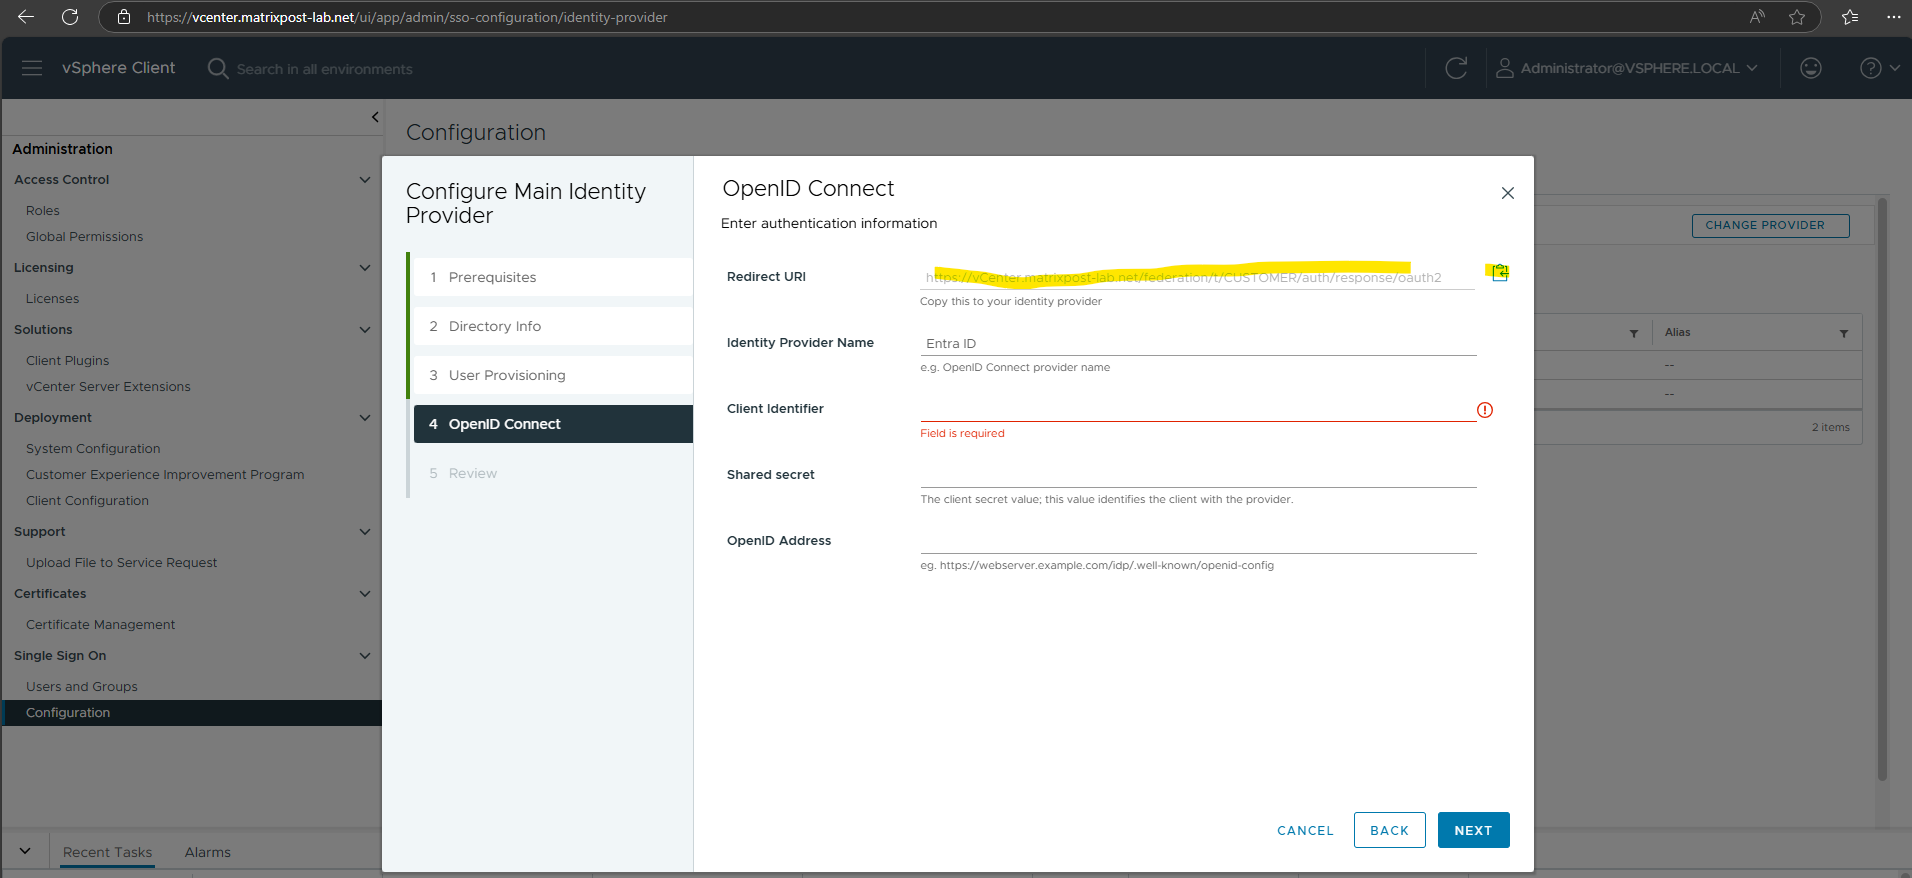
Enter this Redirect URI below to our app registration and select Web for the type. Finally click on Create.
When the app is created successfully, we need to copy the Application (client) ID on the Overview page below.
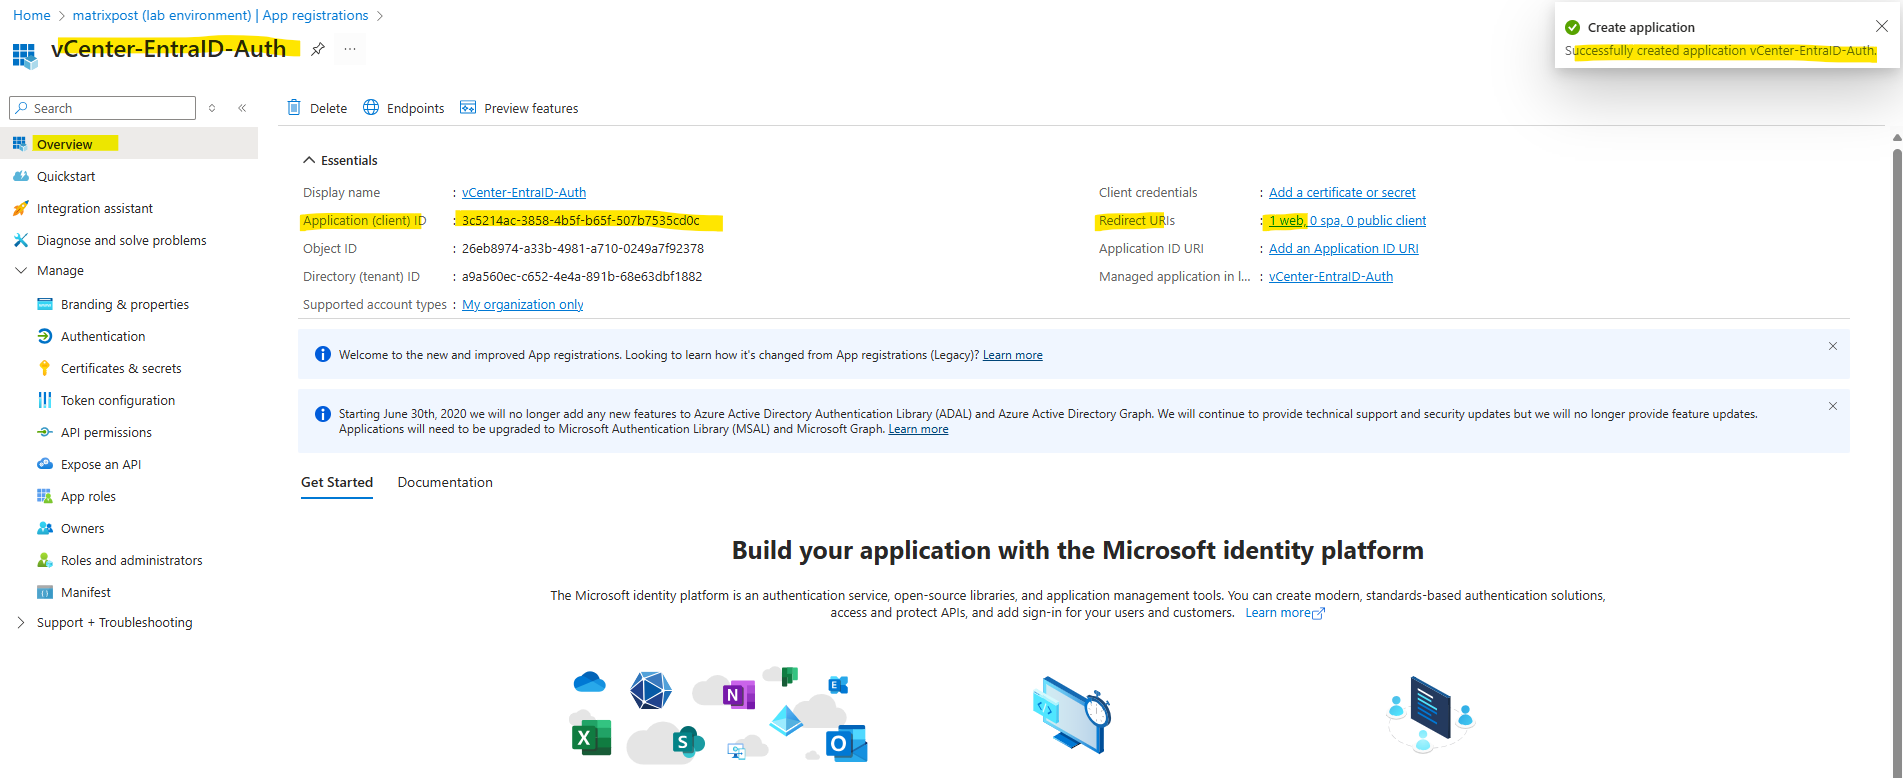
This Application (client) ID we need to copy to the Client Identifier field in vCenter’s wizard below.
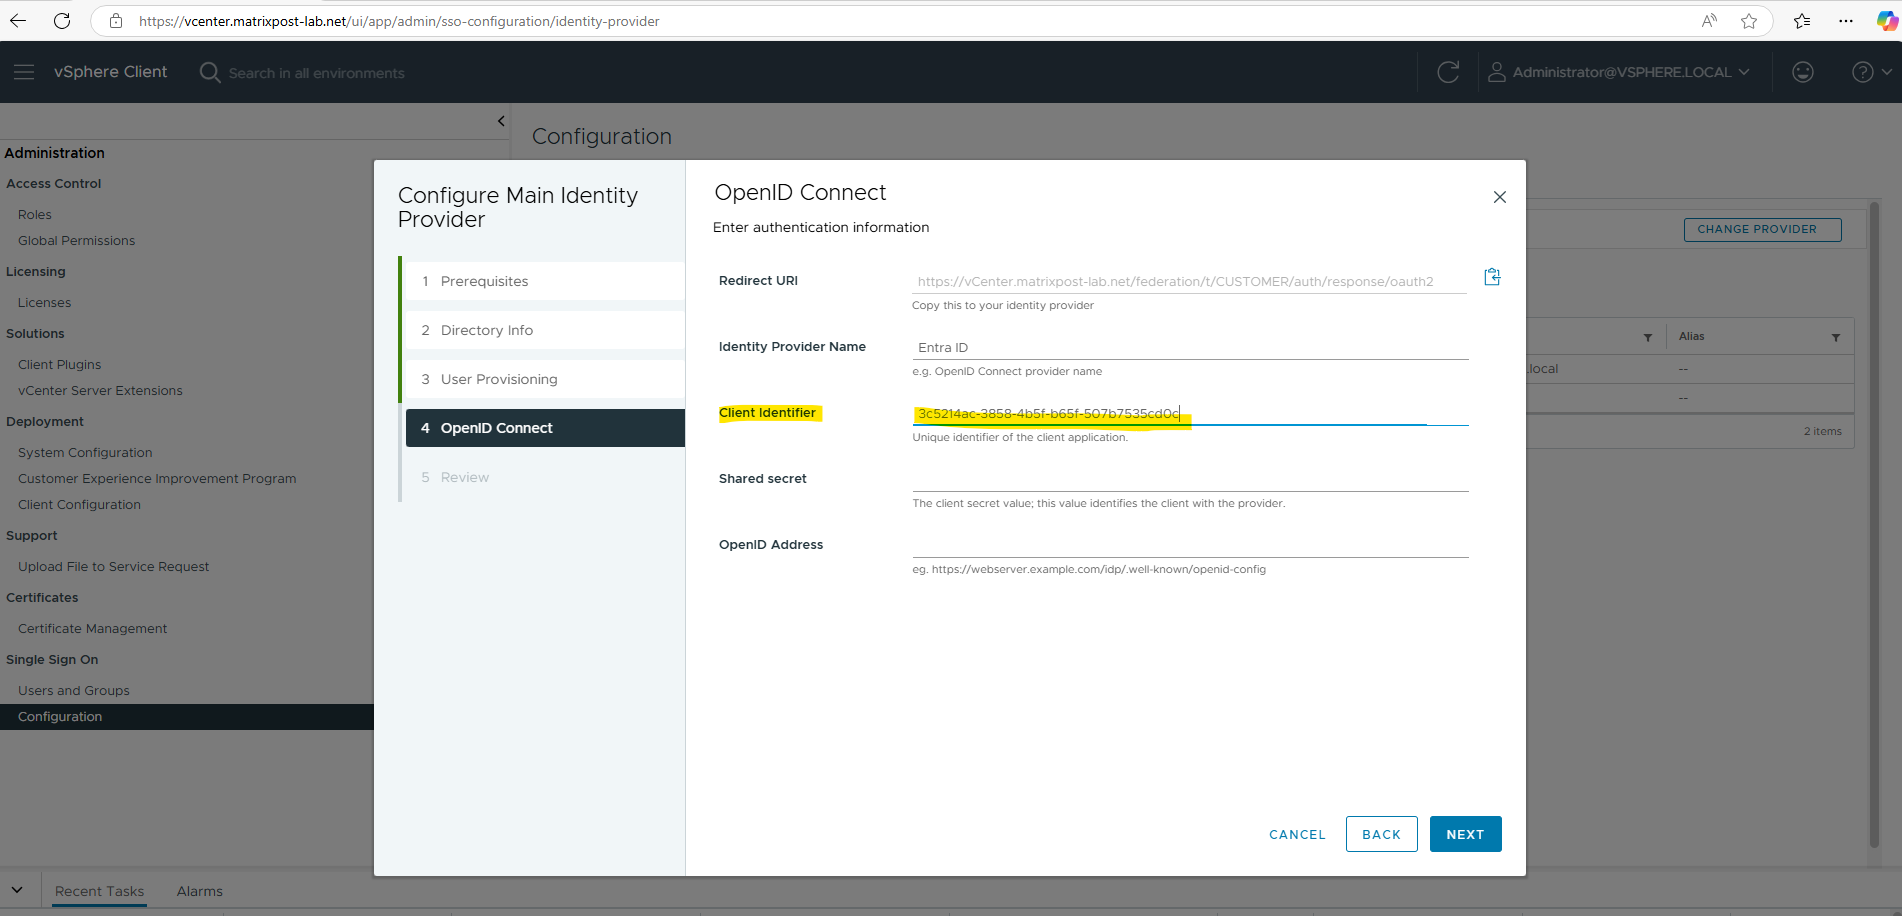
As you can above, we also need to provide here a shared secret to authenticate our new app with vCenter.
Therefore switch back to the Azure portal and our new app registration, here under Manage -> Certificates & secrets -> Client Secrets click on + New client secret.
Enter a name for and click on Add.
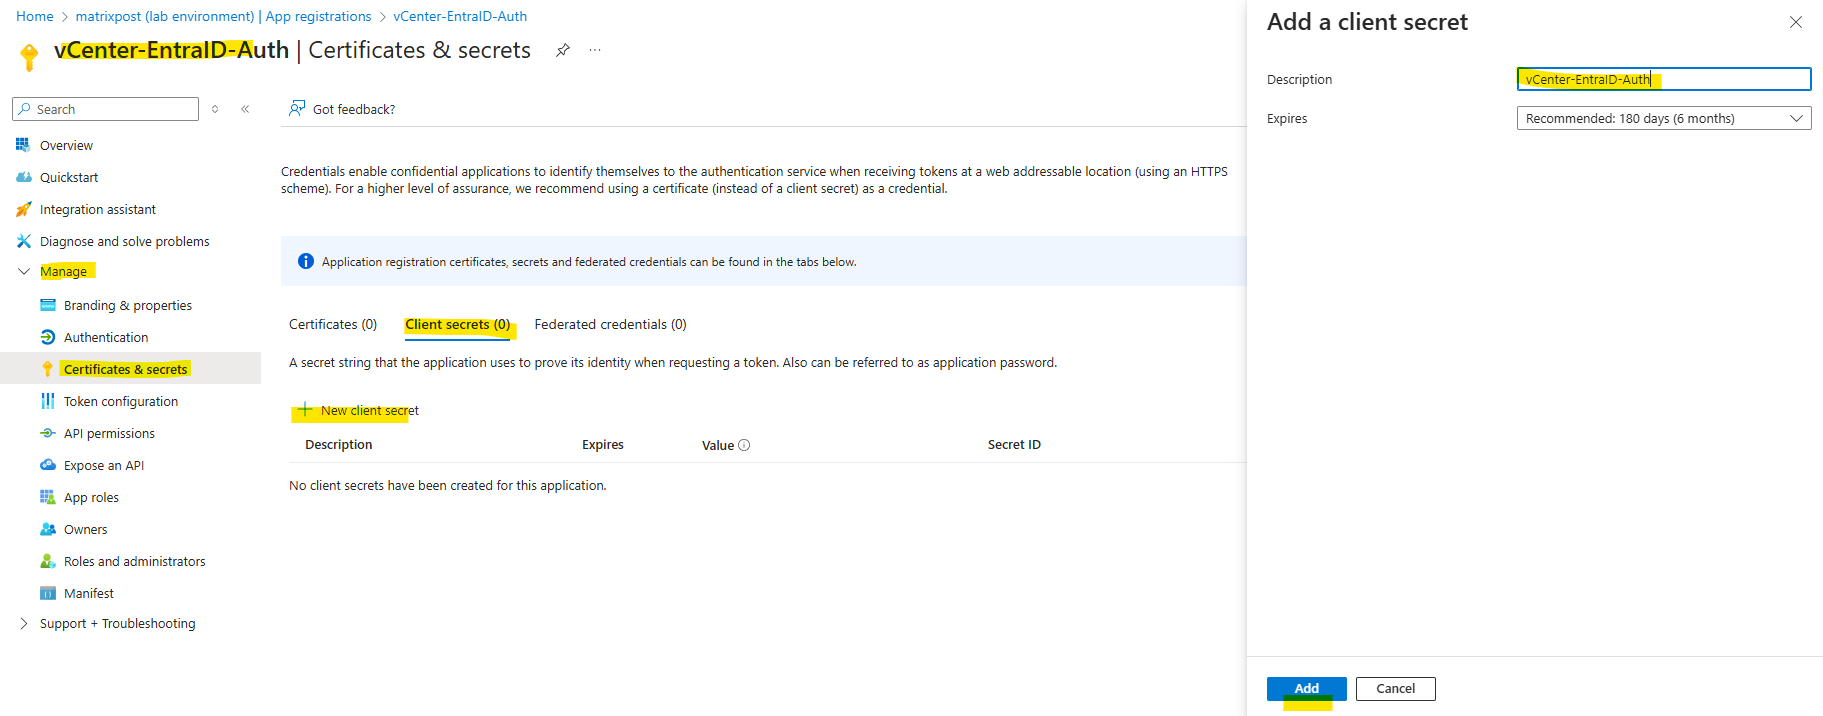
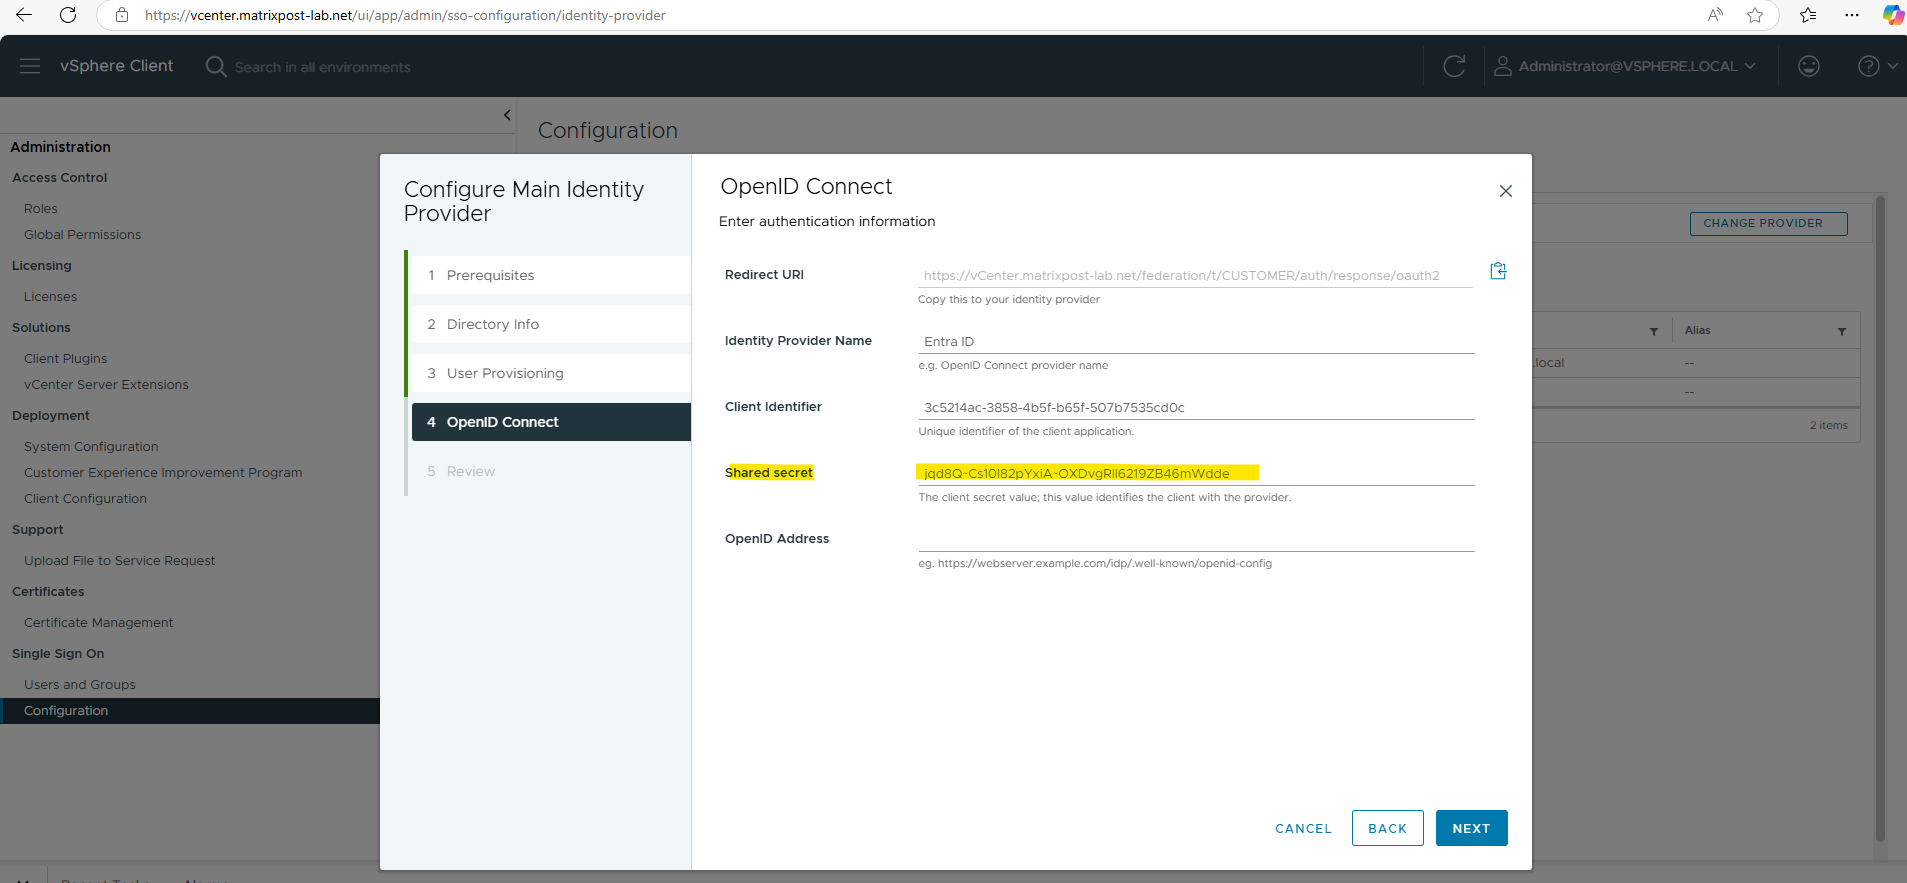
Copy the value of our new client secret, we need to enter this into vCenter’s wizard as shared secret.

Copy the client secret in the shared secret field on vCenter.
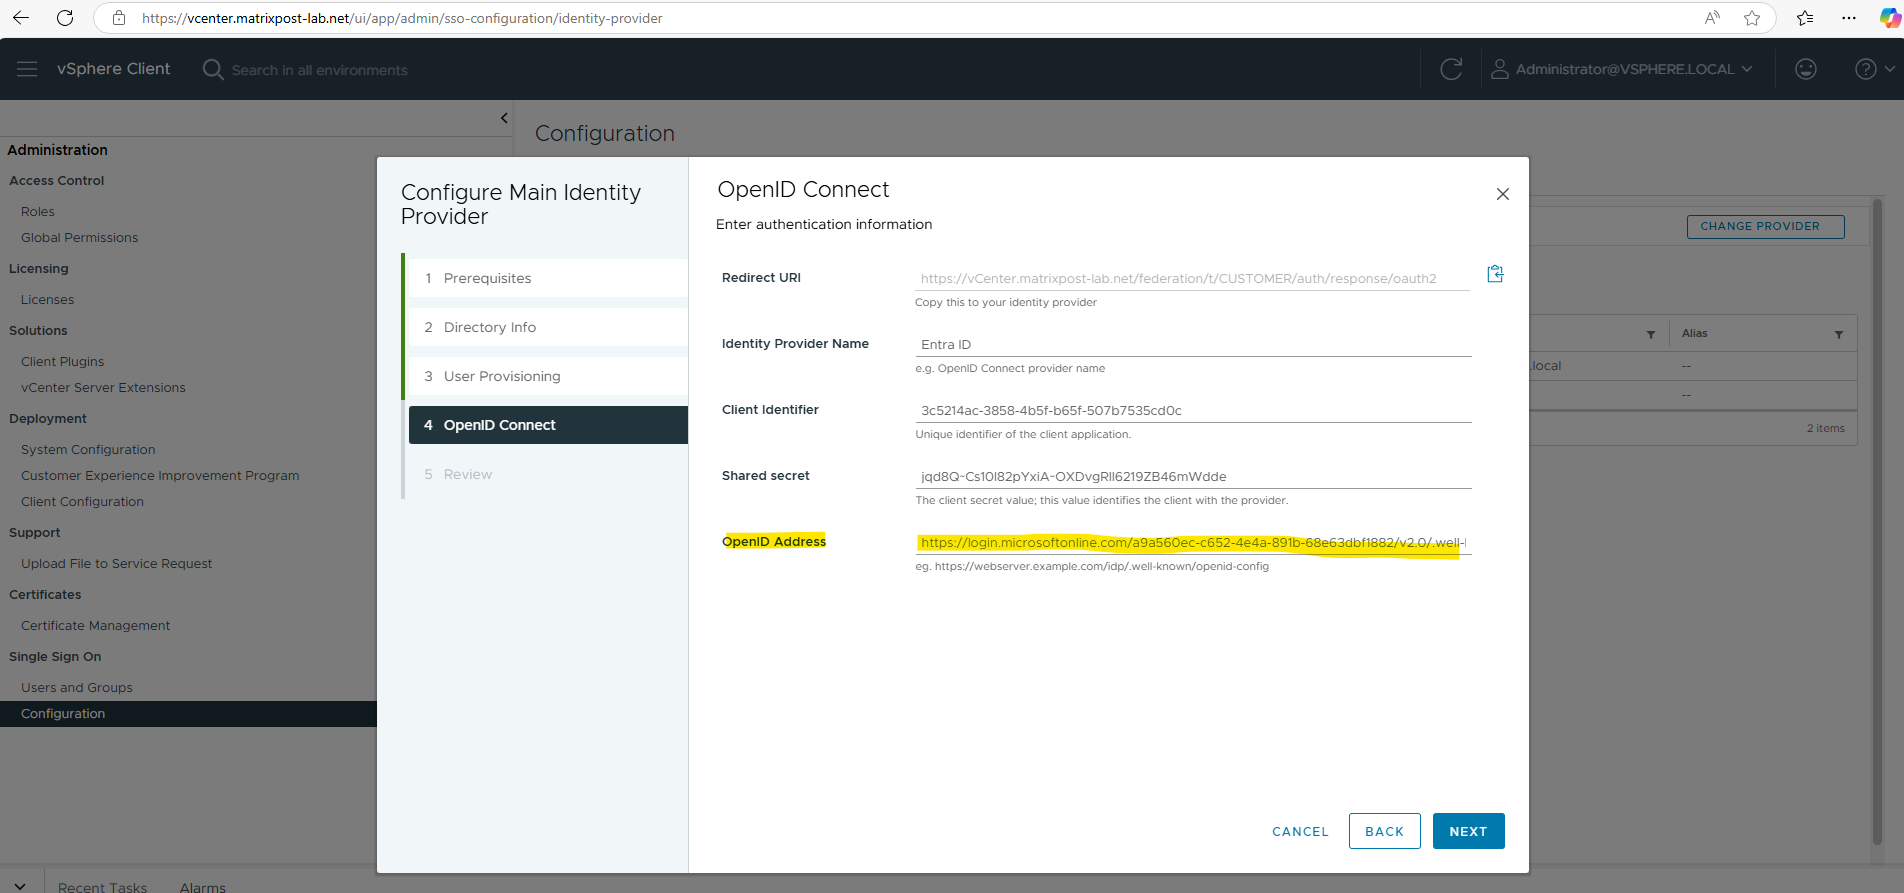
Now as you can see above we also need the OpenID Address to configure the Entra ID identity provider. This URI we also get from our new created app registration.
Switch back to Azure and copy the URI for the OpenID Connect metadata document endpoint. On the Overview page of the app registration, click on Endpoints on the top bar as shown below.

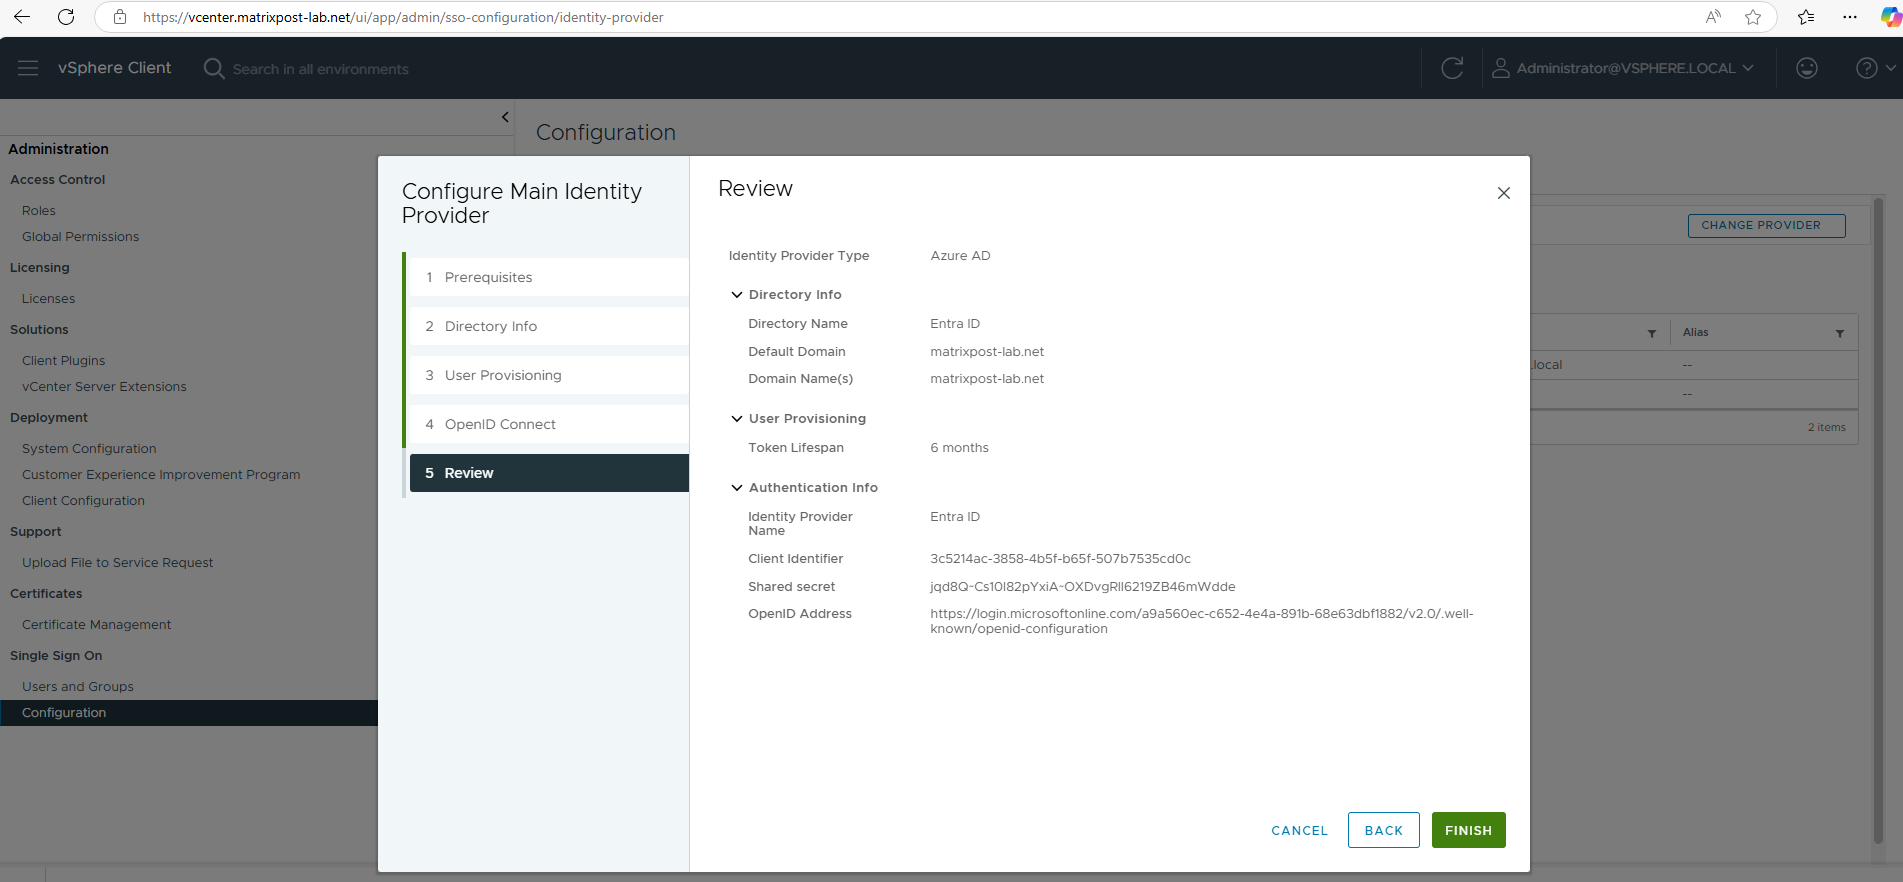
Finally copy this URI into the OpenID Address field of vCenter below and click on Next.
Finally click on Finish.
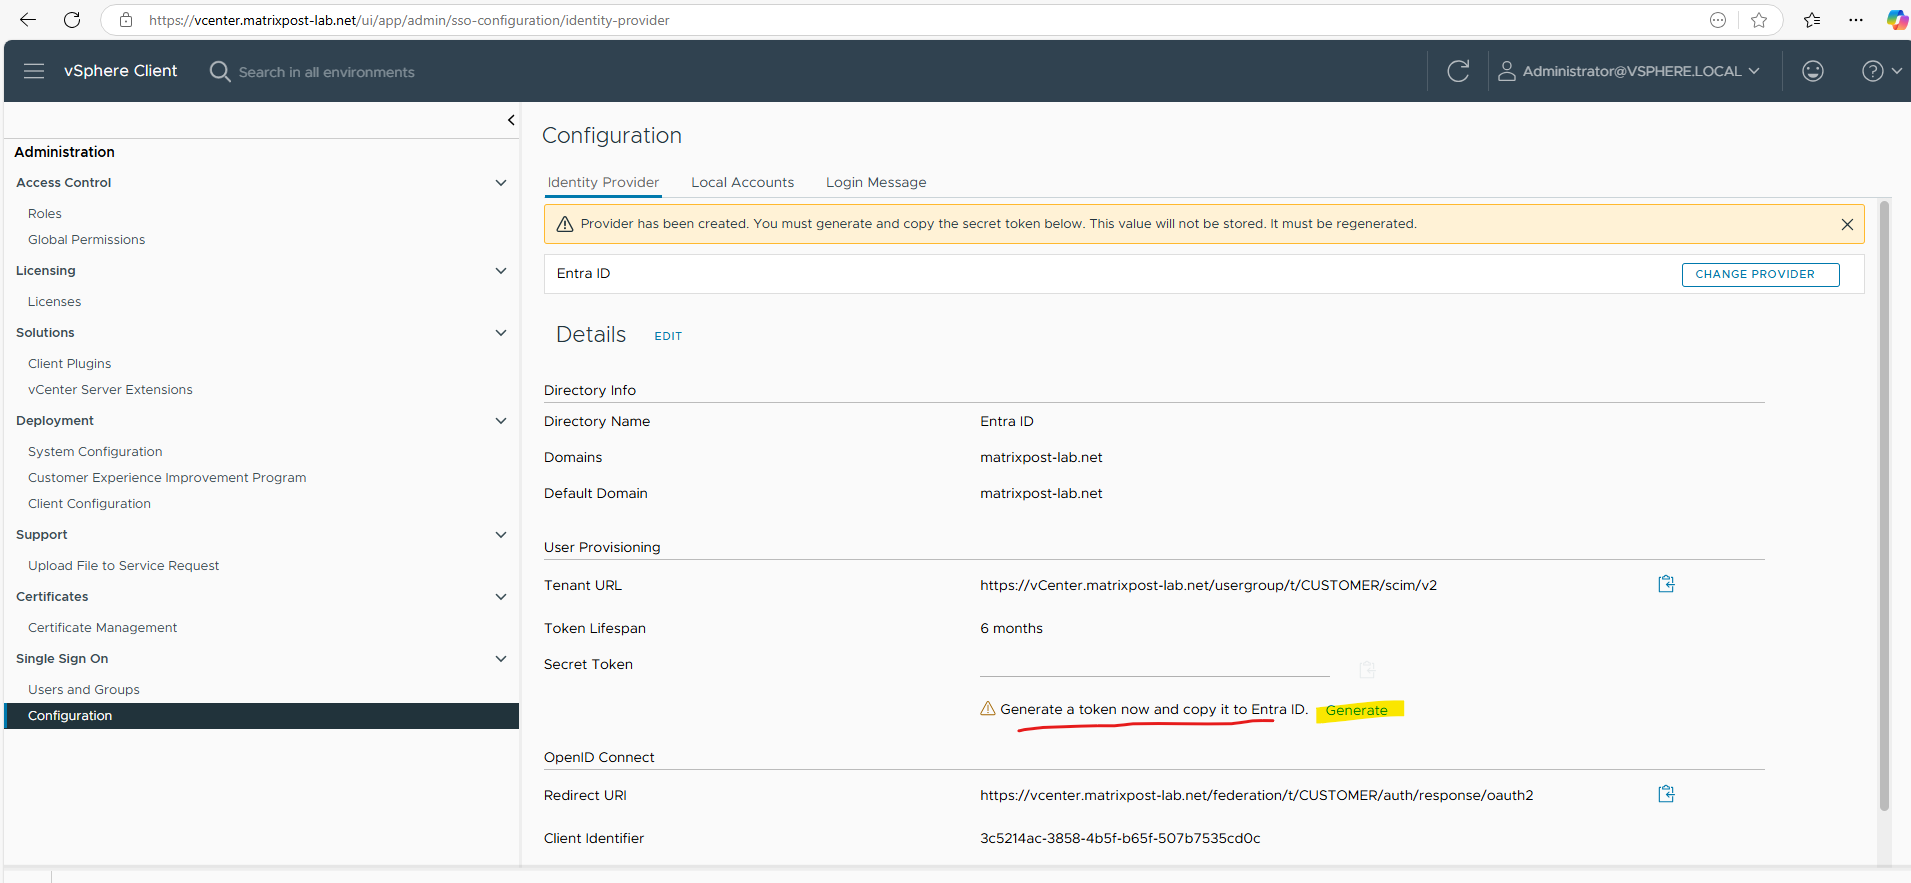
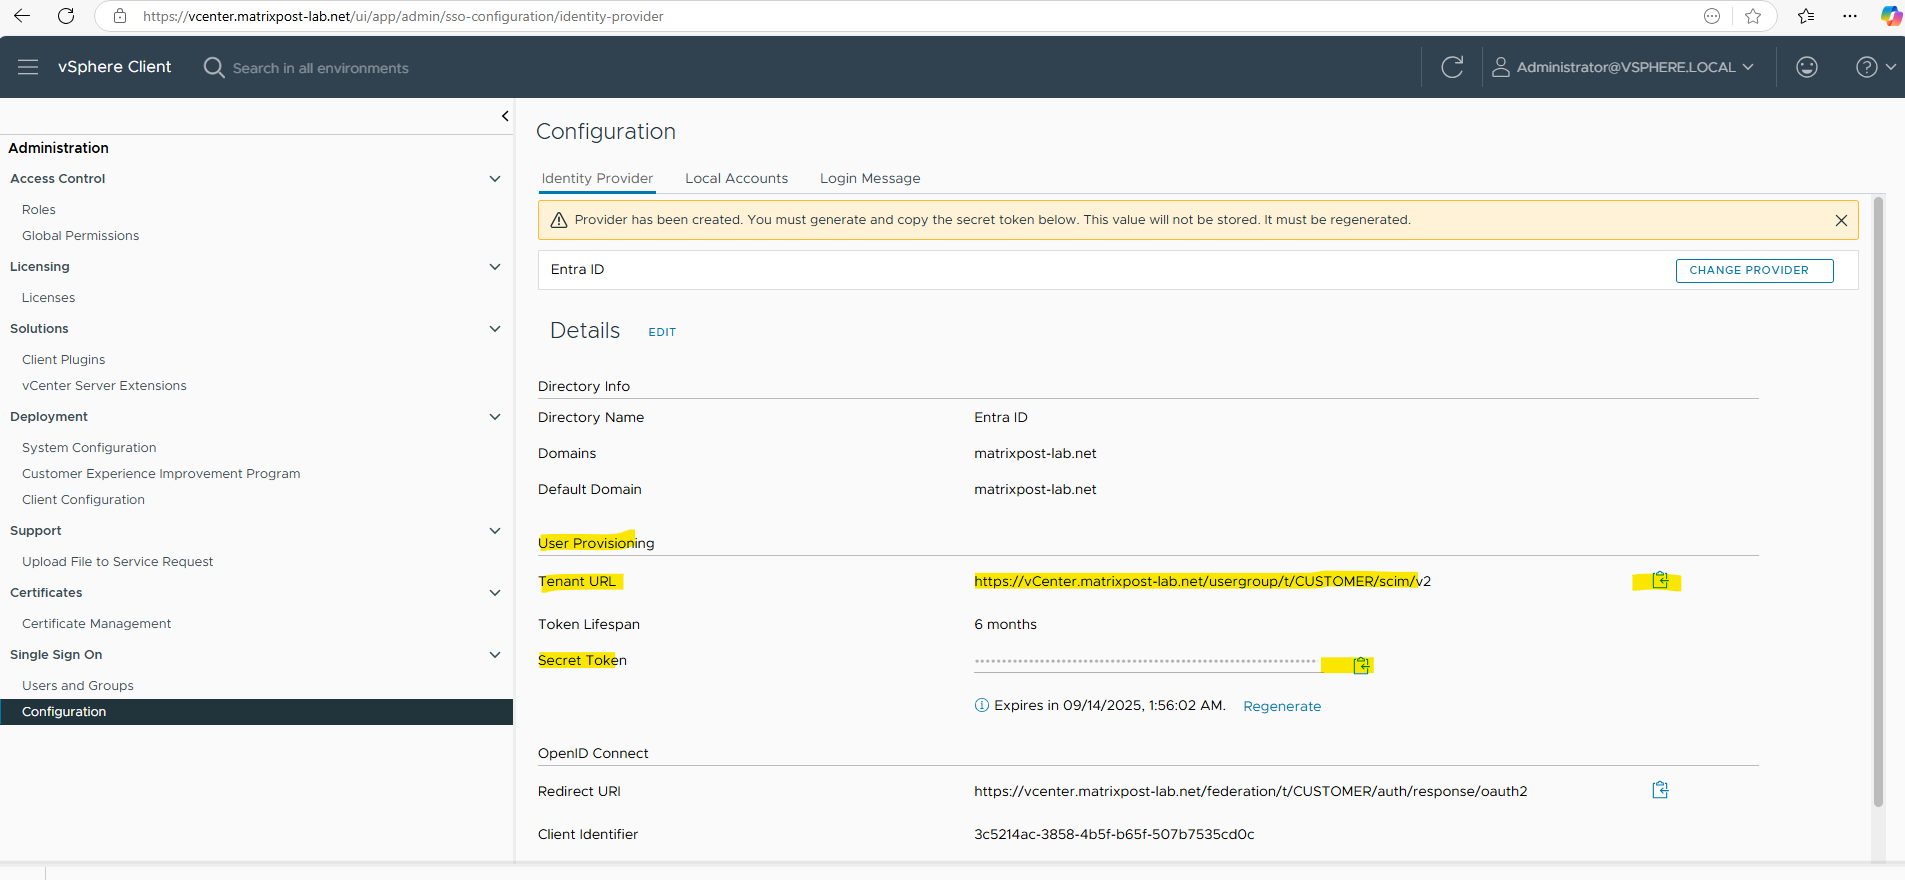
We now need to click on Generate to create a new secret token which later our SCIM app (named vCenter-SCIM-App) needs to authenticate against vCenter-SCIM-App’s API and synchronize user data.
You remember, the app for which we used Passthrough authentication because we need this secret token for instead Entra ID authentication.

Copy the secret to your clipboard or save it, we need this in the next section for configuring the user provisioning in Azure, as mentioned this is used by SCIM to authenticate to vCenter’s Tenant URL, we can also regenerate it each time in case we lost it.
Set up the VMware Identity Service (Entra ID App)
To provision and sync our Entra ID users to vCenter Server we will now create the SCIM app.
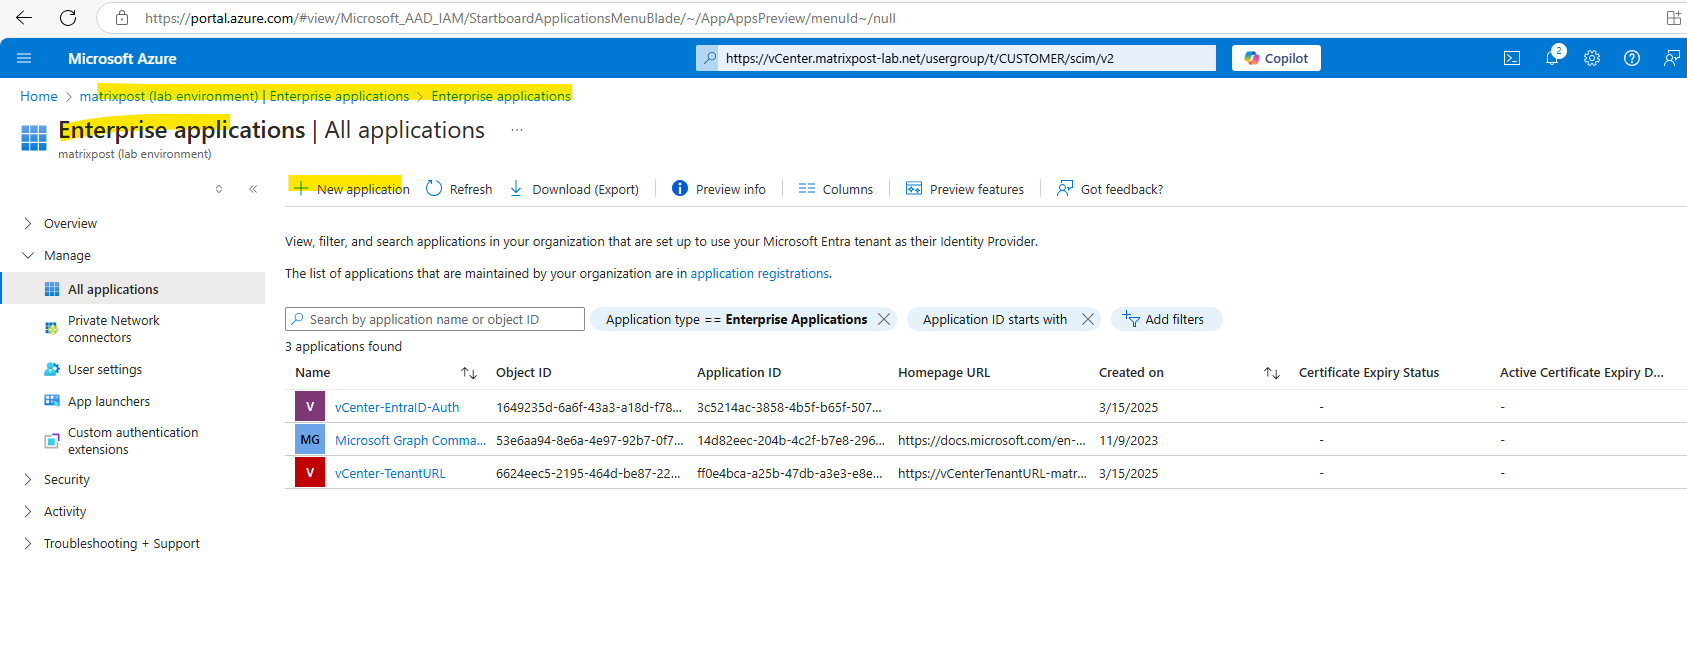
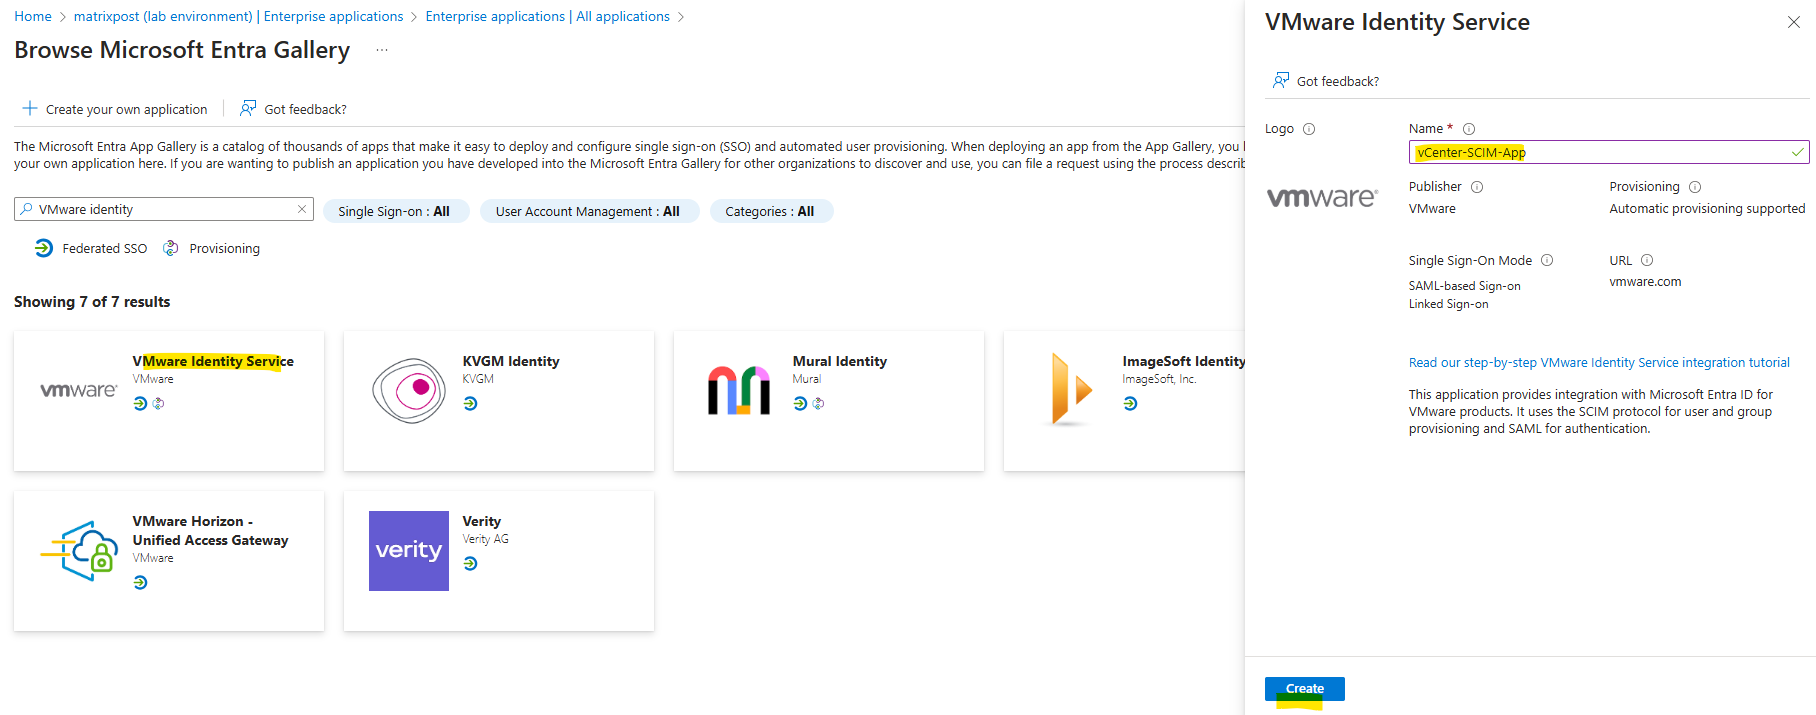
In the Azure portal navigate to Microsoft Entra ID -> Manage -> Enterprise Applications and click on + New application.
The Microsoft Entra Gallery will shown up, here search for VMware identity and select the below shown VMware Identity Service app.
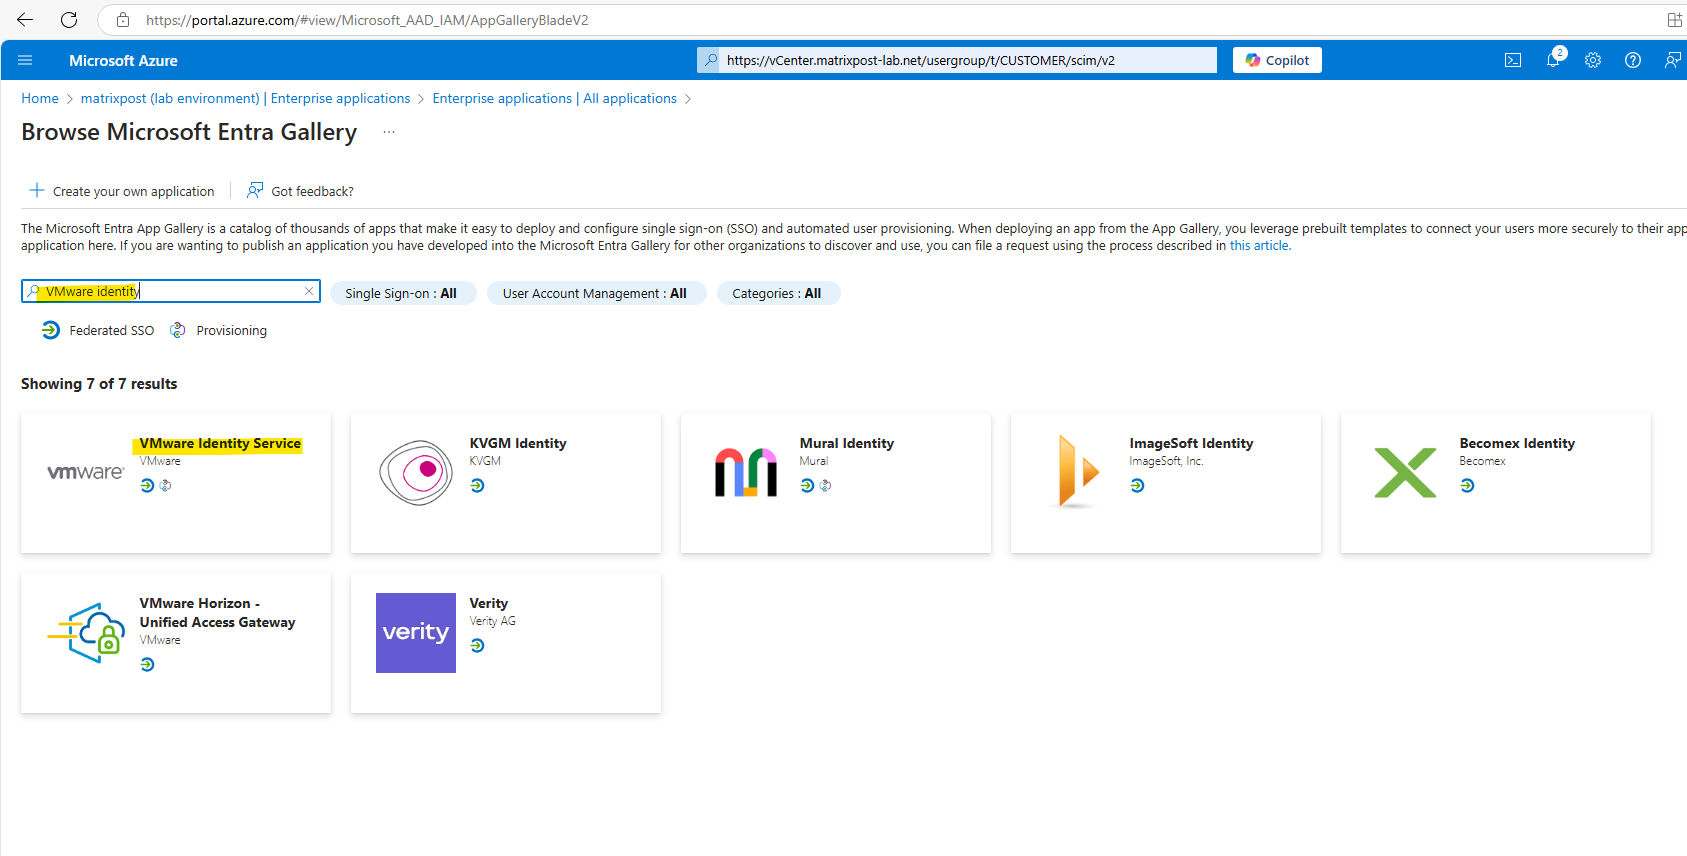
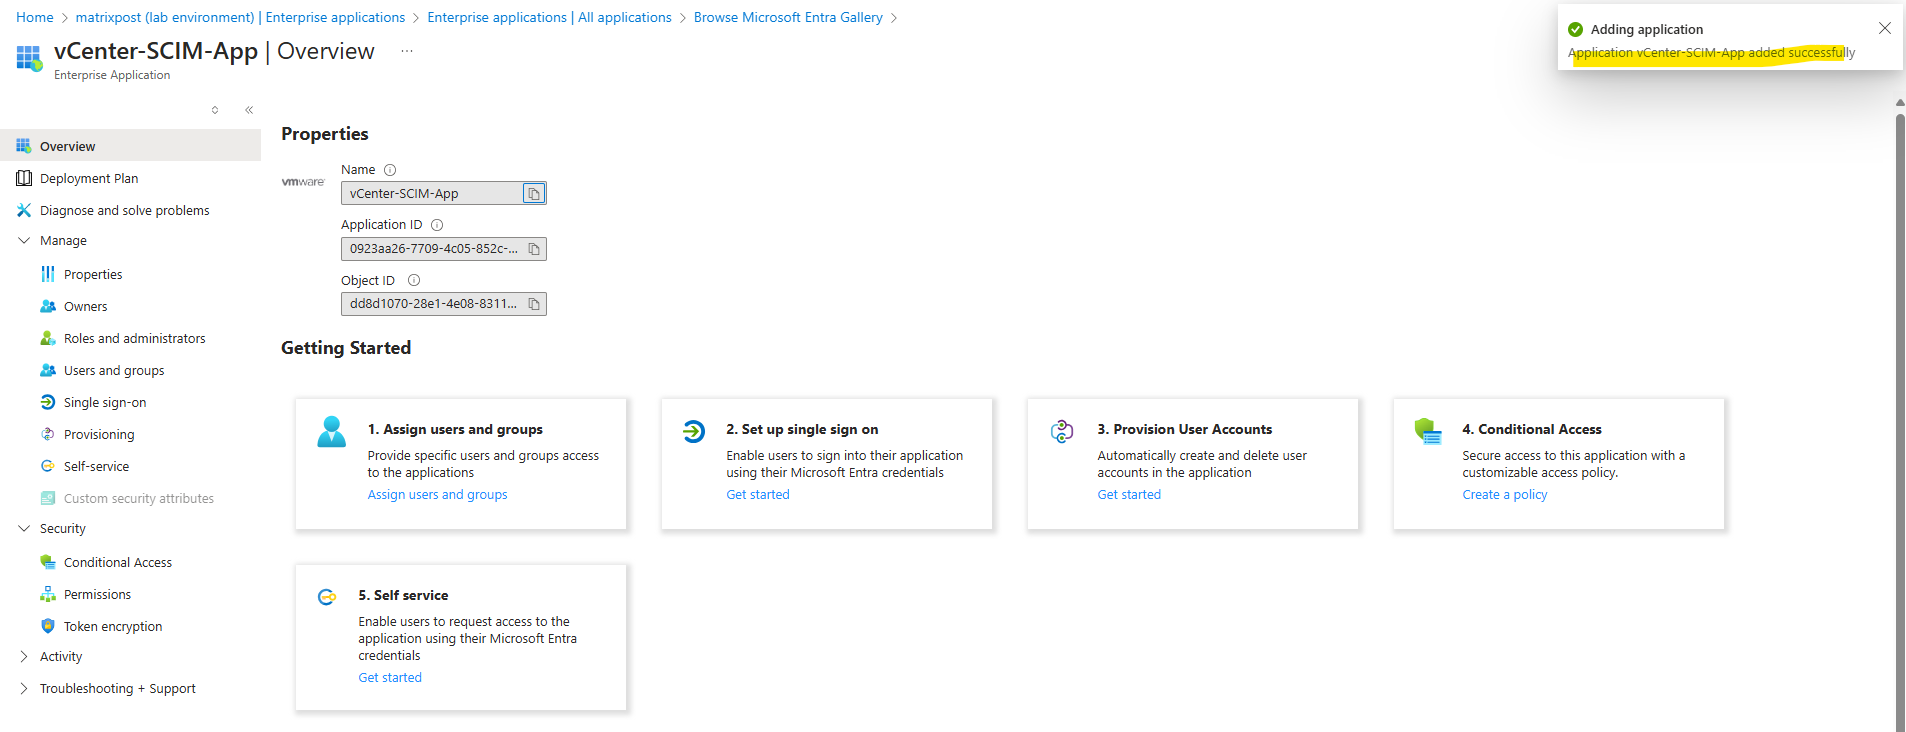
Enter a name for and click on Create. I will name it vCenter-SCIM-App.
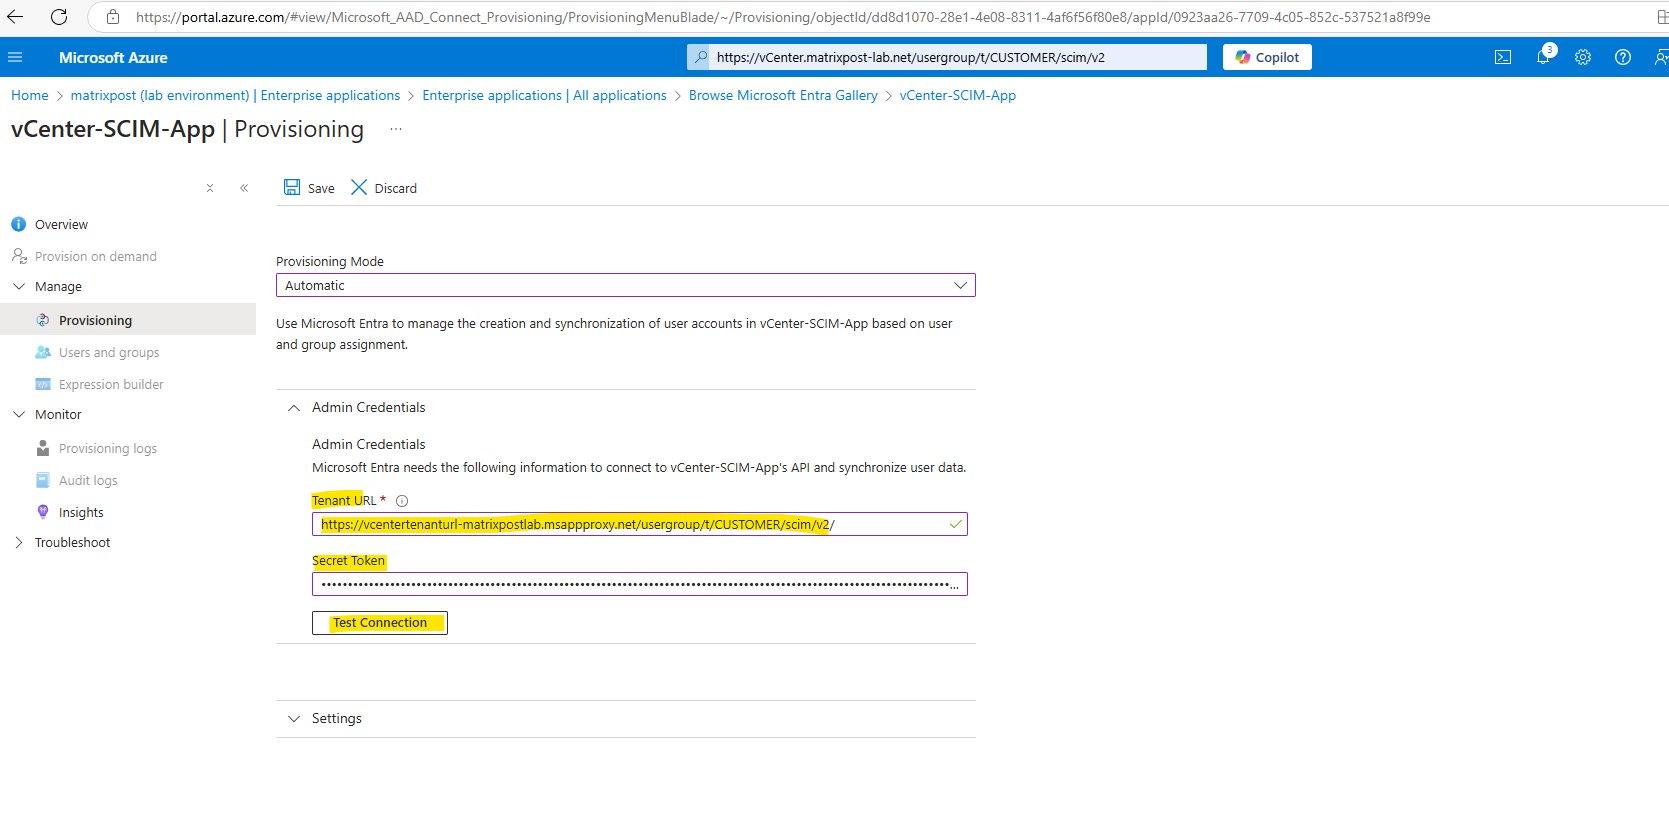
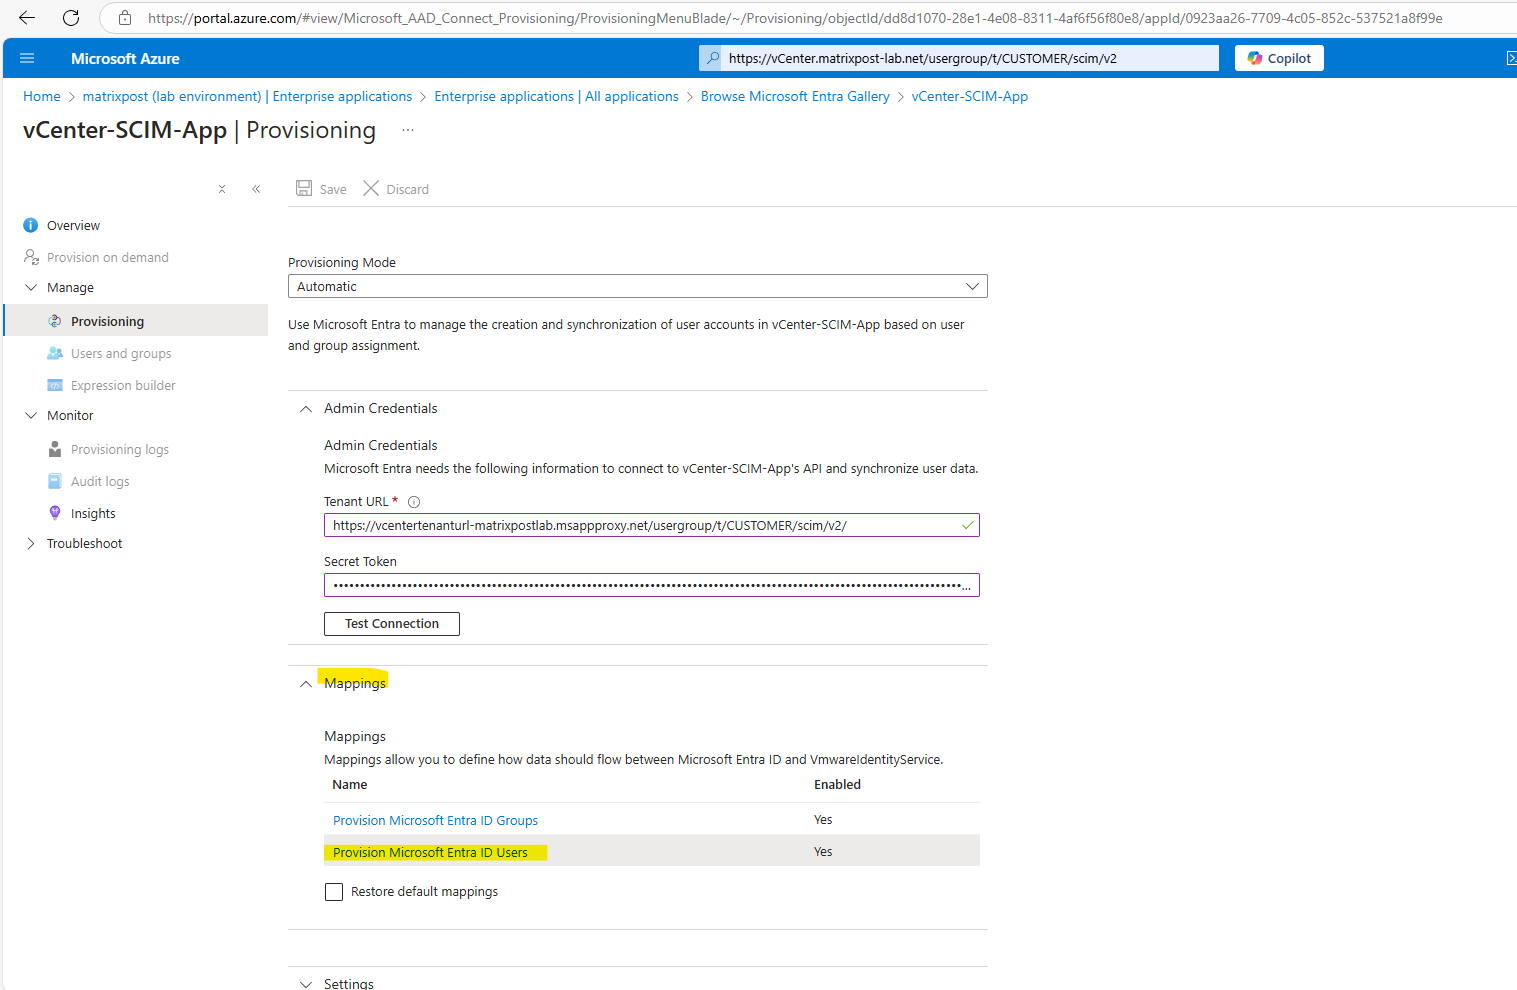
Navigate to Manage -> Provisioning and select for the provisioning mode here Automatic.
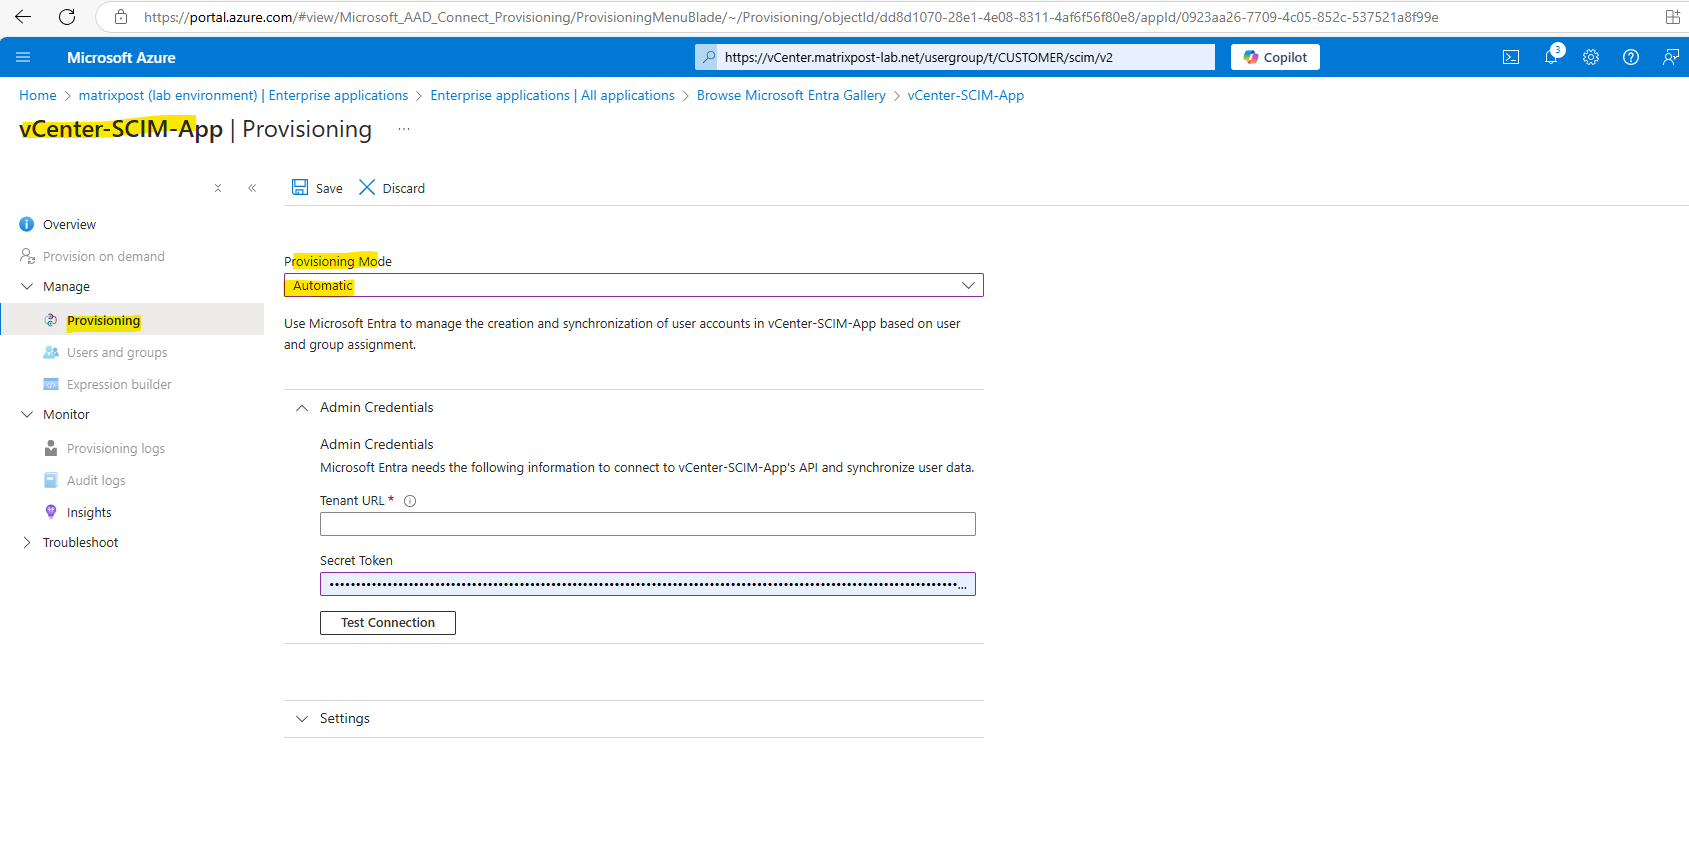
Here we need to enter the Tenant URL and shared secret from vCenter-SCIM-App’s API. The secret we previously copied. We can get this any time from vCenter again as shown below.
The Tenant URL above we can’t use here as it is just the internal URL which Azure and our VMware Identity Service app can’t access directly, we need to use here the External URL we configured to the beginning in Microsoft Entra Application Proxy to publish this Tenant URL in the Internet.
Therefore navigate to this app registration (in my case named vCenter-TenantURL).
Microsoft Entra admin center -> Identity -> Applications -> All applications and click on the app.
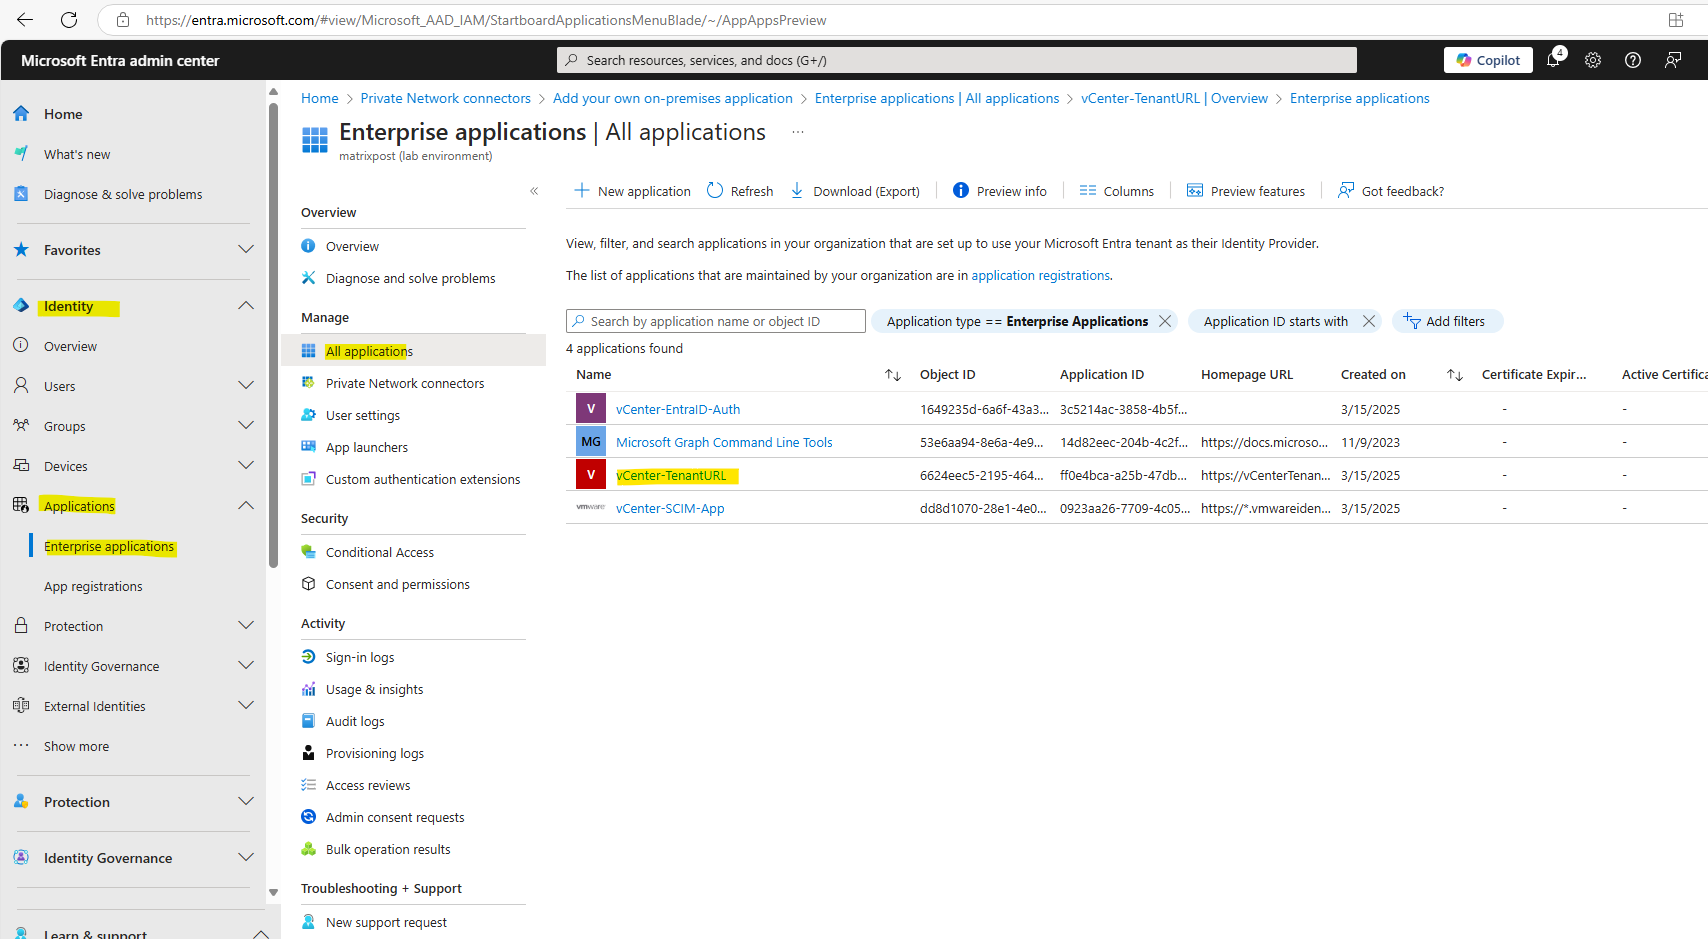
Copy the External Url as shown below.
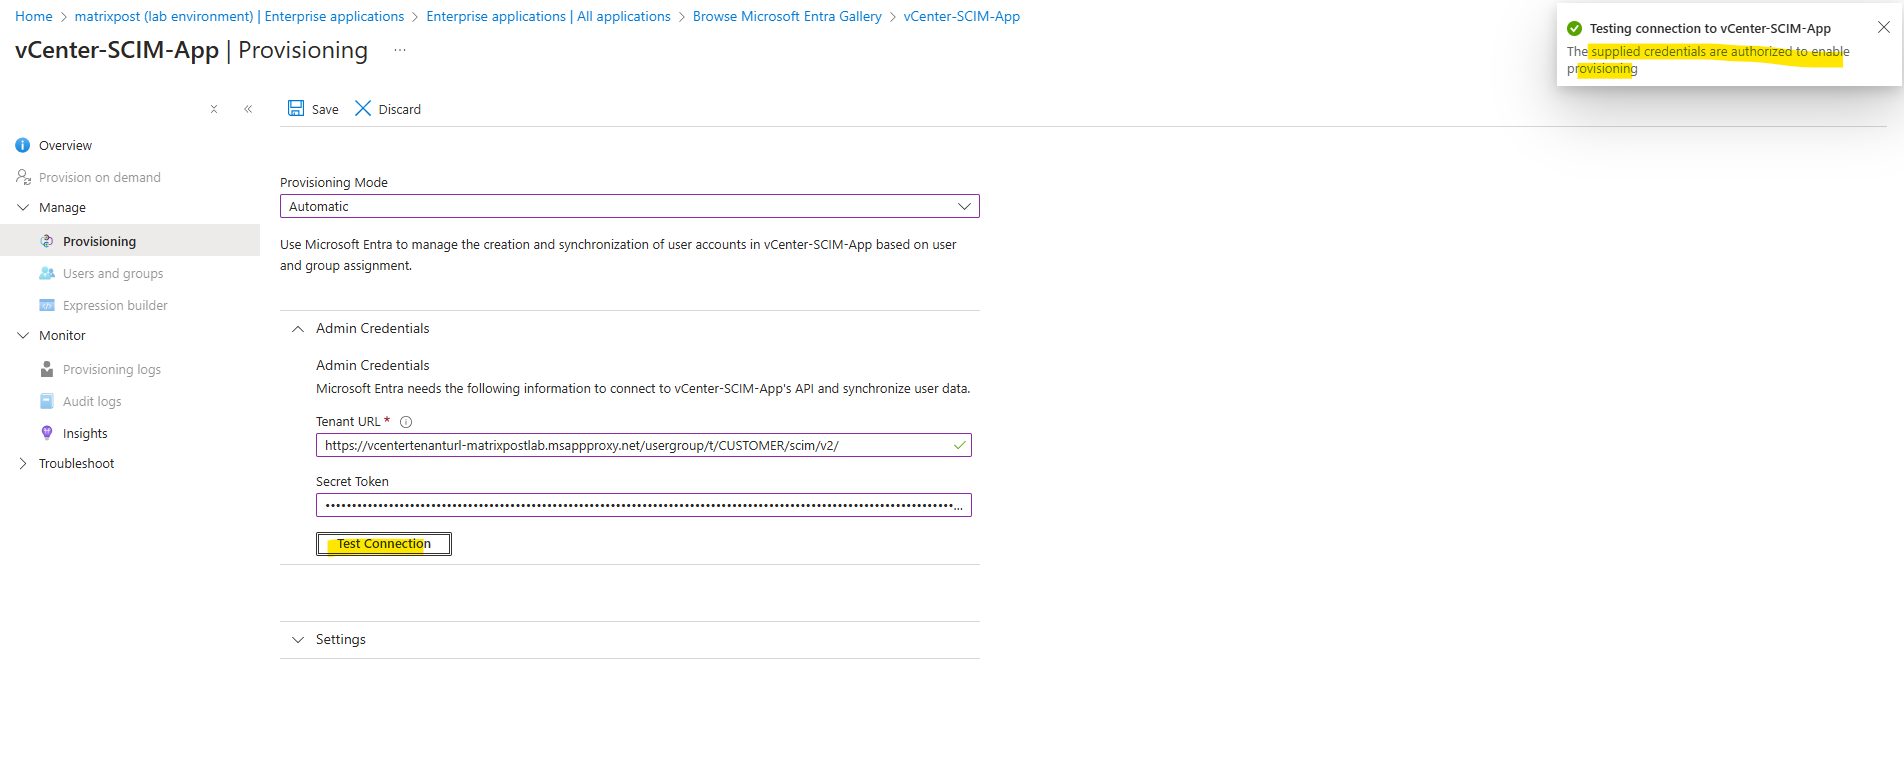
Switch back to the VMware Identity Service app and paste the External URL into the Tenant URL field below, also the shared secret and click on Test Connection.
Looks good! The connection is tunneled through the Microsoft Entra Application Proxy. Click on Save on the top bar to save the provisioning settings.
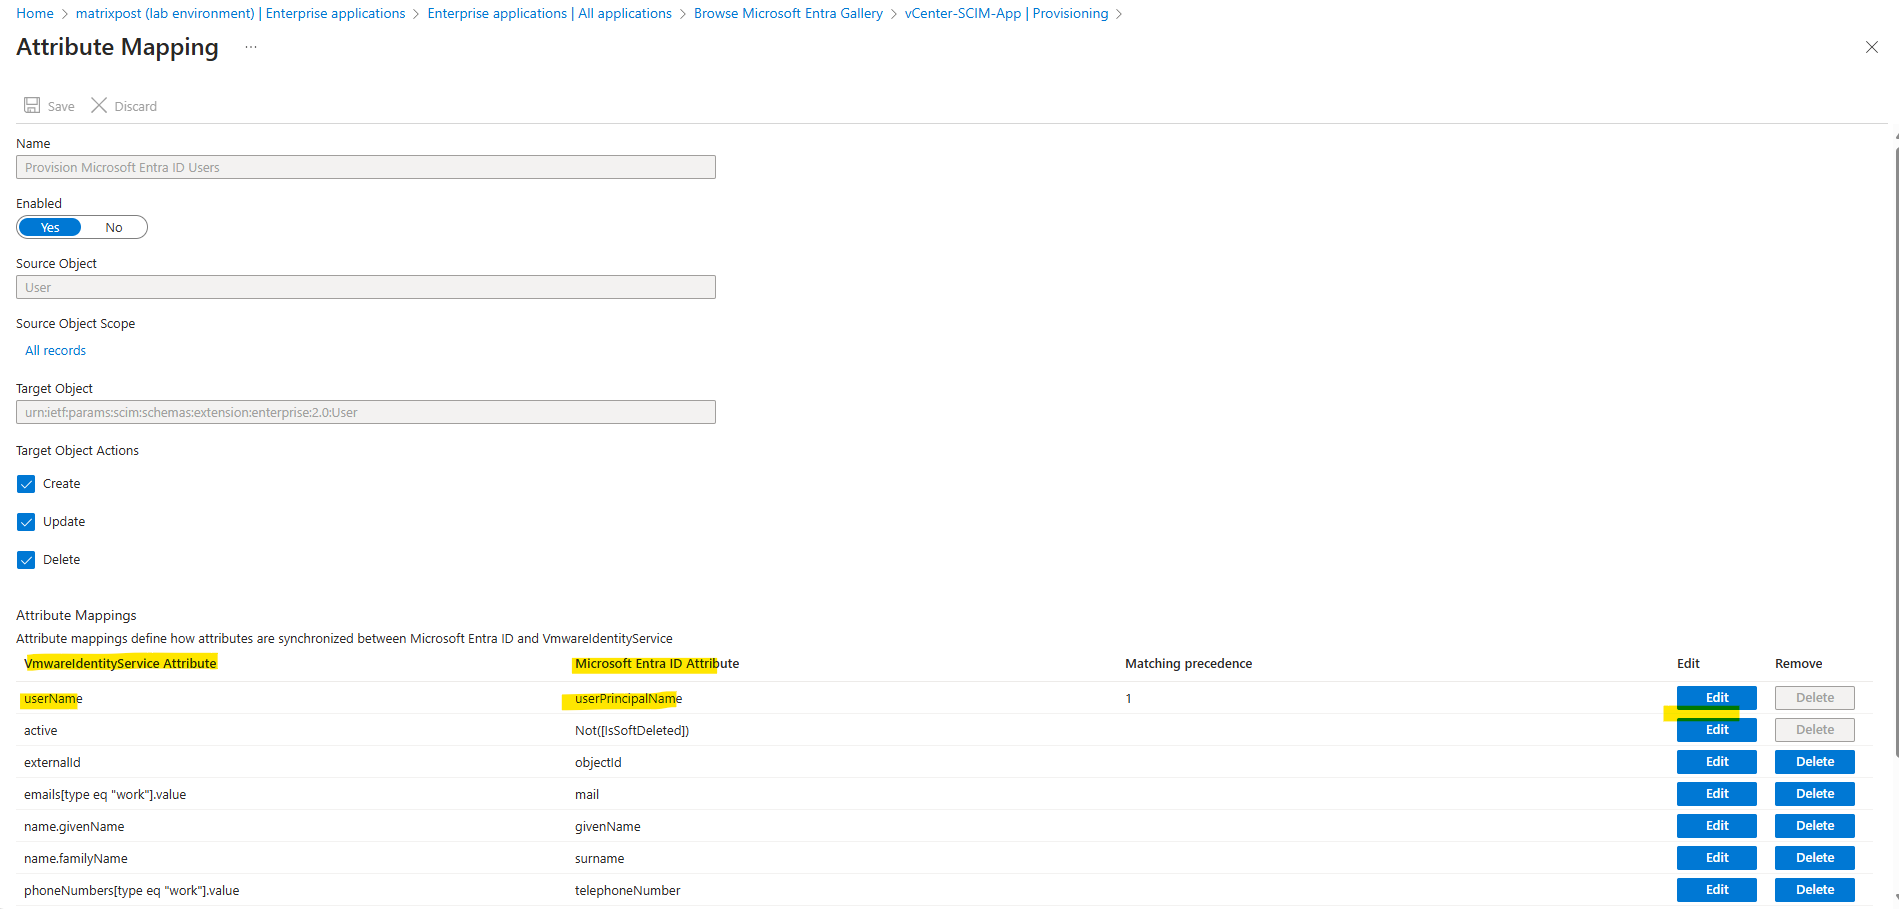
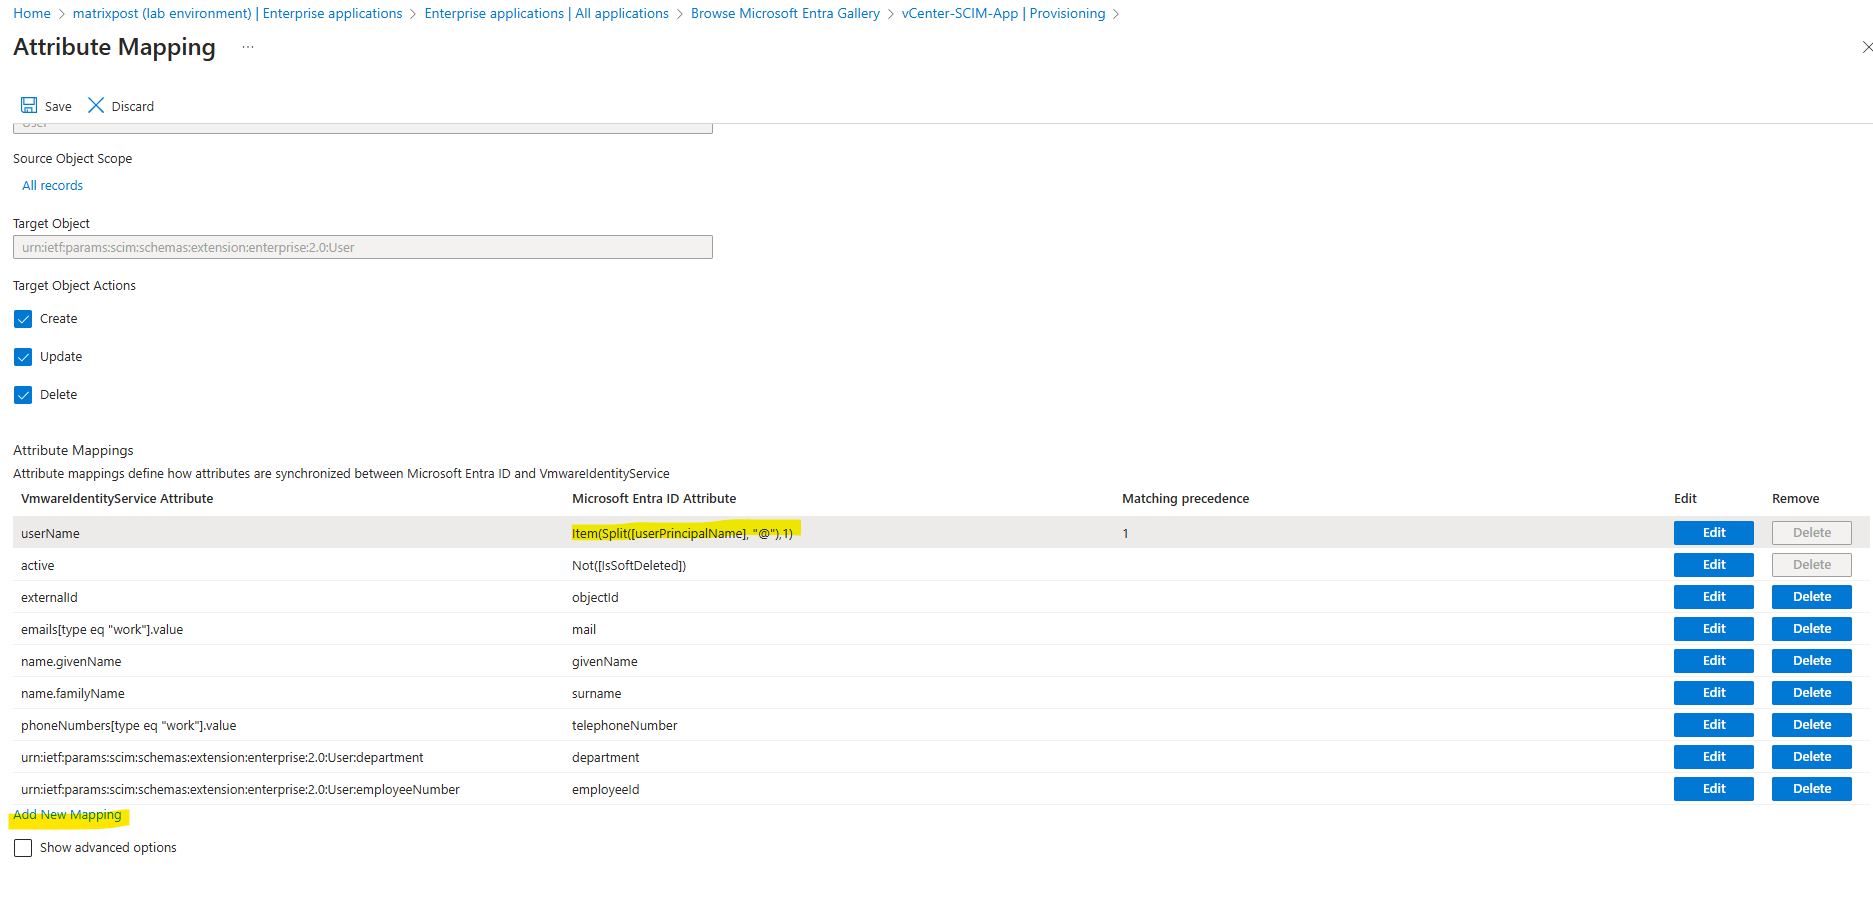
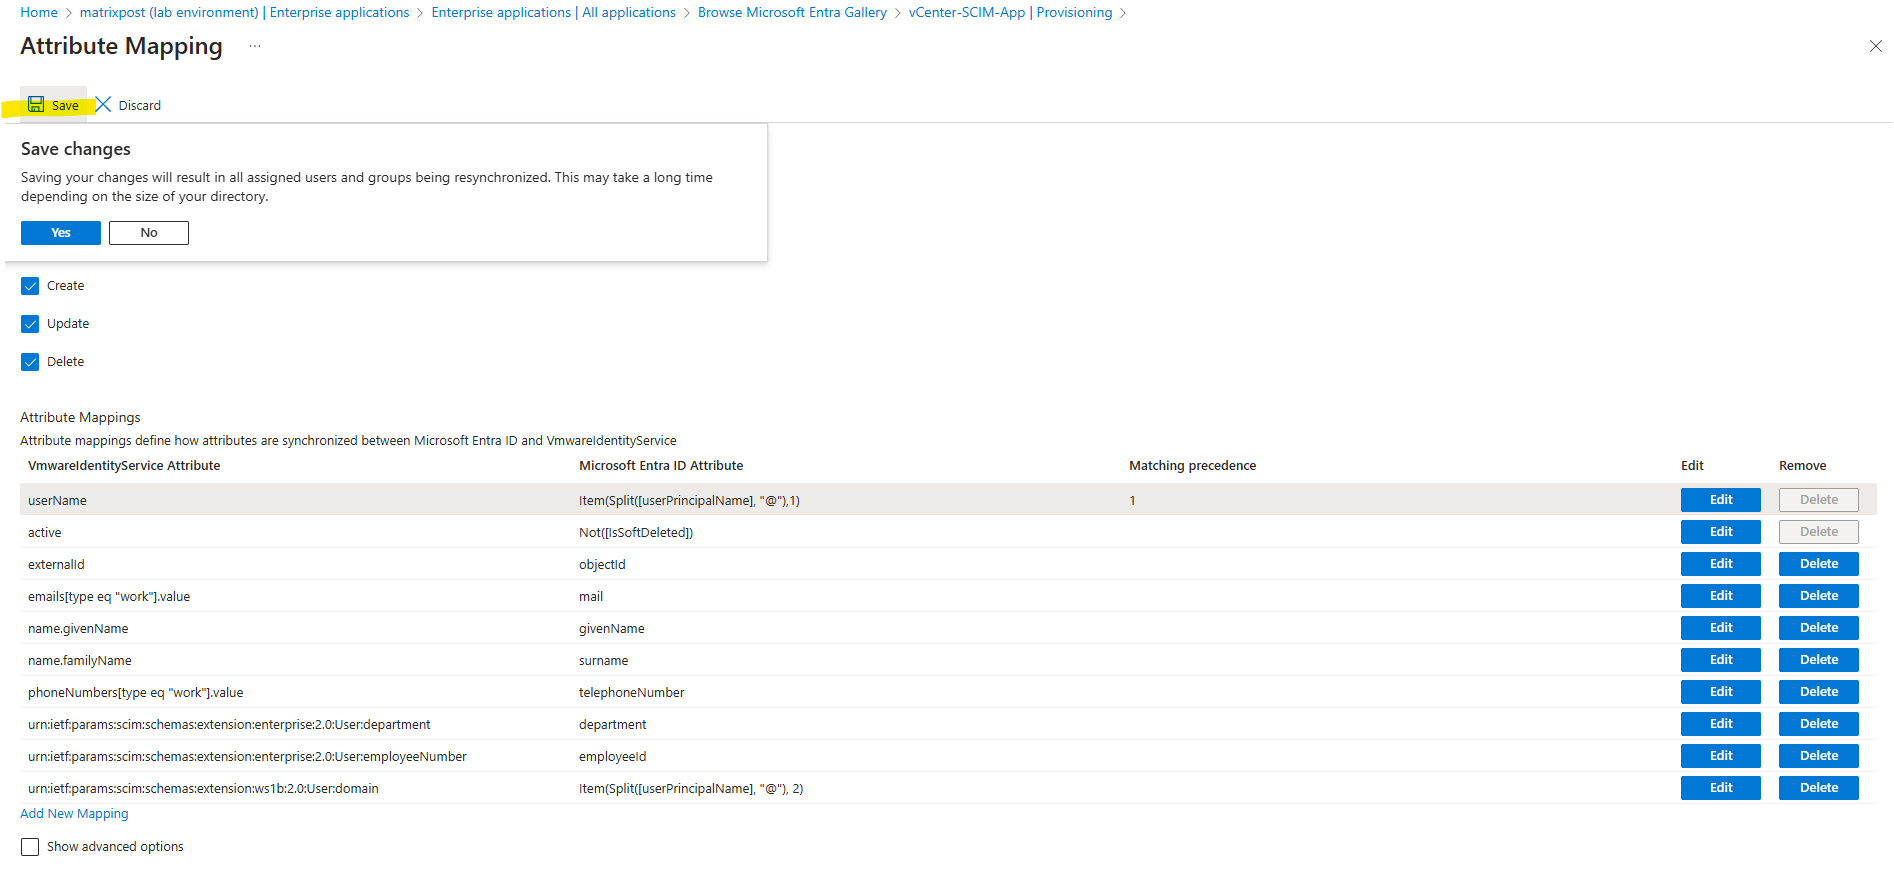
Expand the Mappings section and click on Provision Microsoft Entra ID Users.
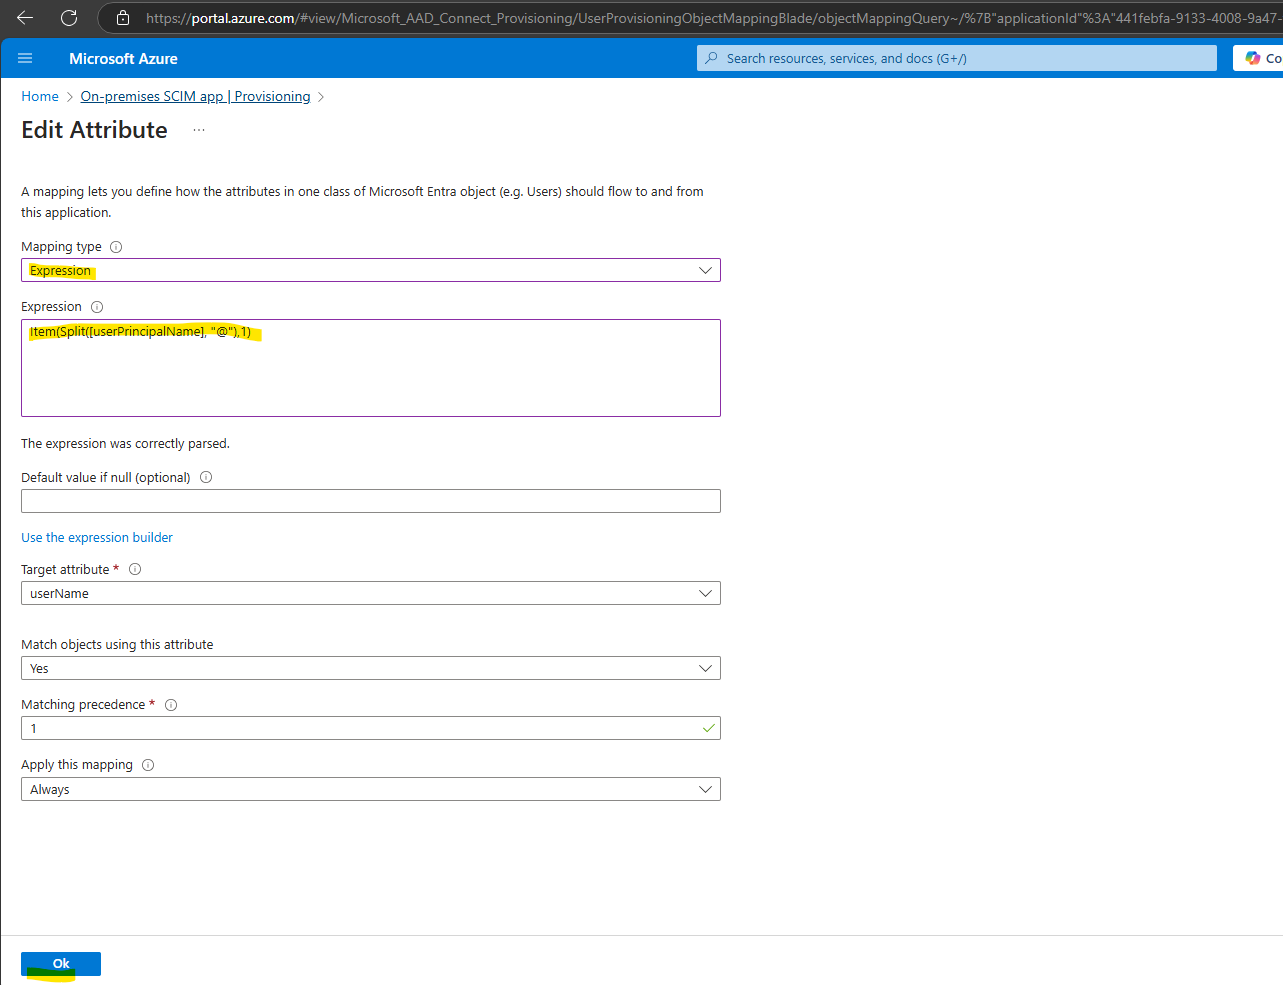
Edit the first entry for the userPrincipalName attribute in Microsoft Entra ID.
By the way below you see also the attribute mapping for the VMwareIdentityServices Attribute named externalID which is here by default correctly mapped to the Entra ID Attribute named objectID.
As mentioned to the beginning we can use a few options to configure SCIM 2.0 Push, another option is to use the on-premises SCIM App as shown in my previous post. Here I was first running into an access denied error.
The issue finally was a wrong attribute mapping and shown here. The AgentBasedScim attribute named externalID here was by default falsely mapped to the Entra ID Attribute named mailNickname.
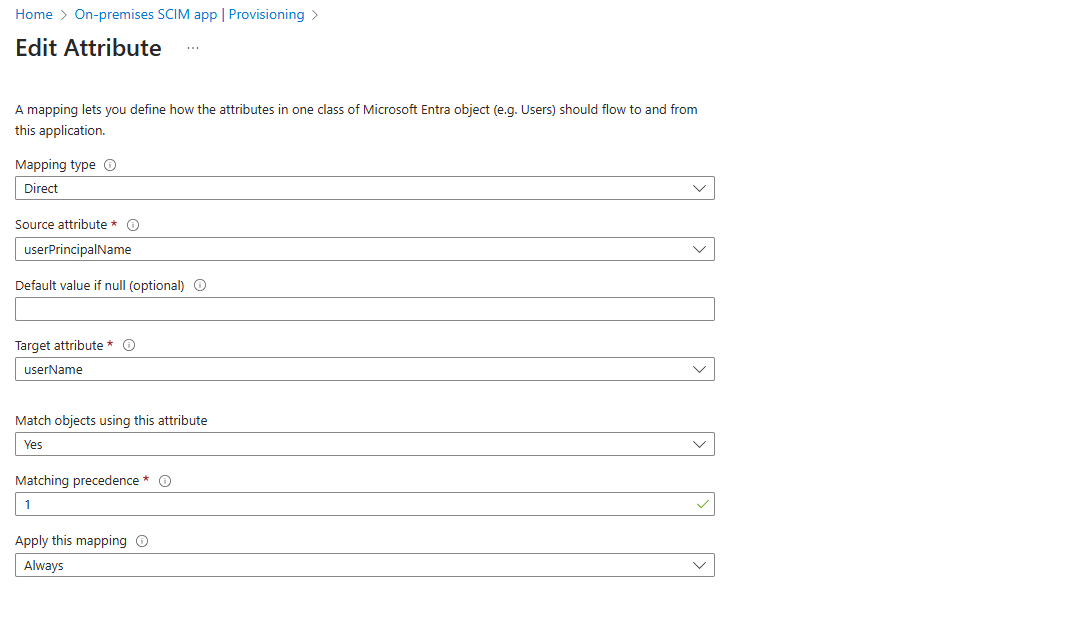
For the Mapping type switch from Direct to Expression.
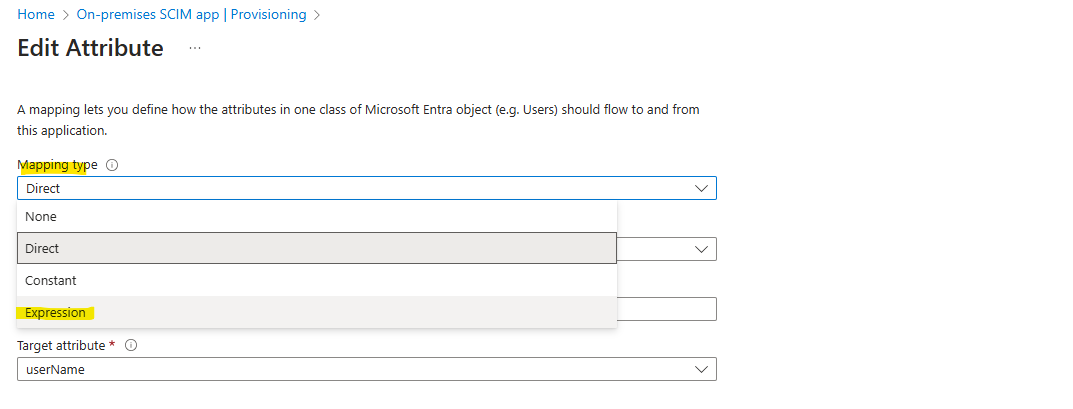
Replace [userPrincipalName] with the following expression and click on OK.
Item(Split([userPrincipalName], "@"),1)
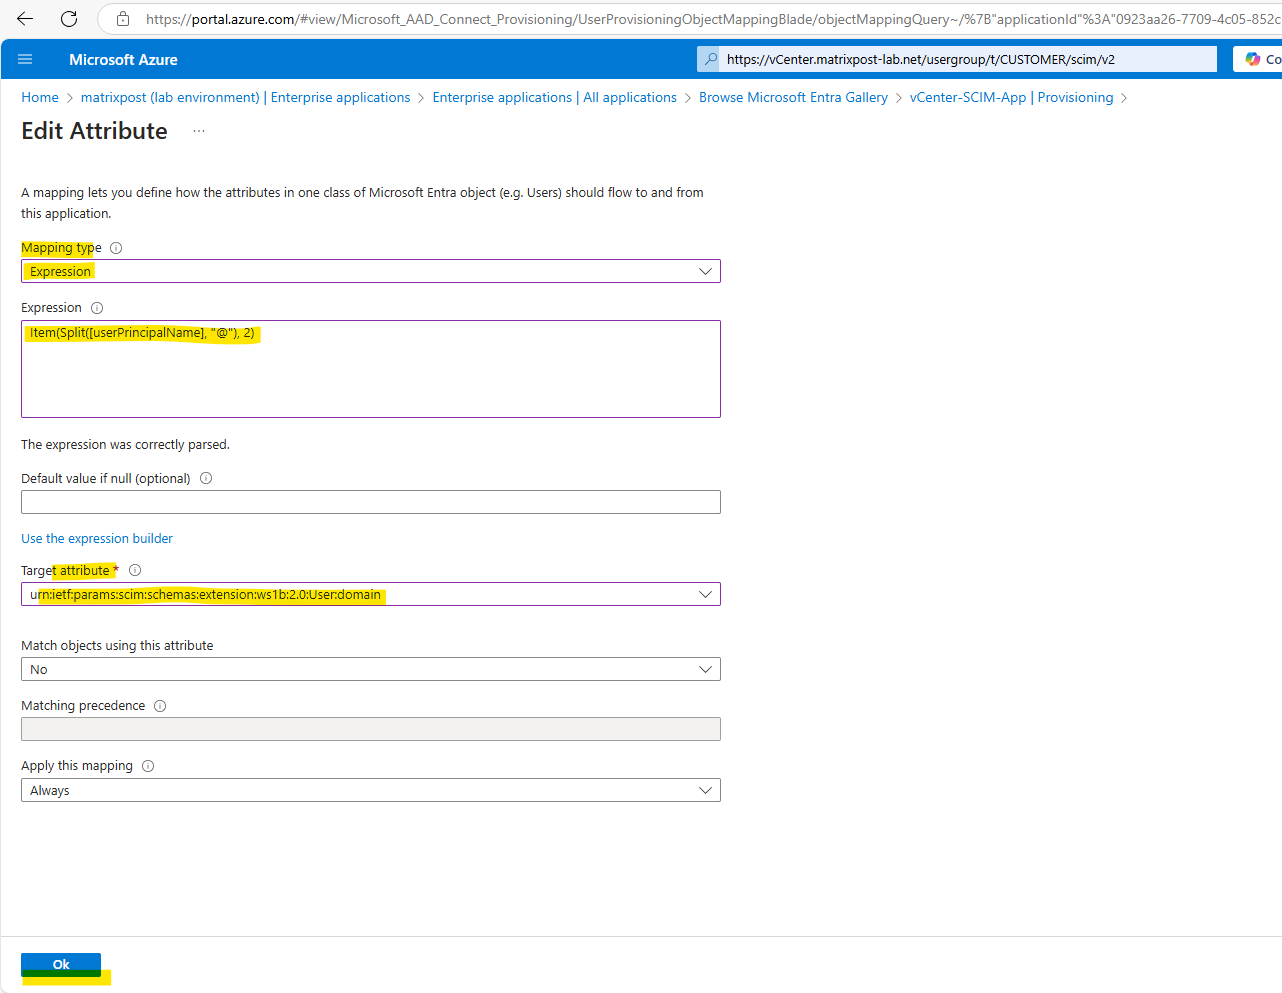
Next we need to add a new mapping, click below below on Add New Mapping.
For Mapping type select Expression and enter the following expression.
Item(Split([userPrincipalName], "@"), 2)
For the Target attribute select the following and click on OK.
urn:ietf:params:scim:schemas:extension:ws1b:2.0:User:domain
Finally it looks like this.
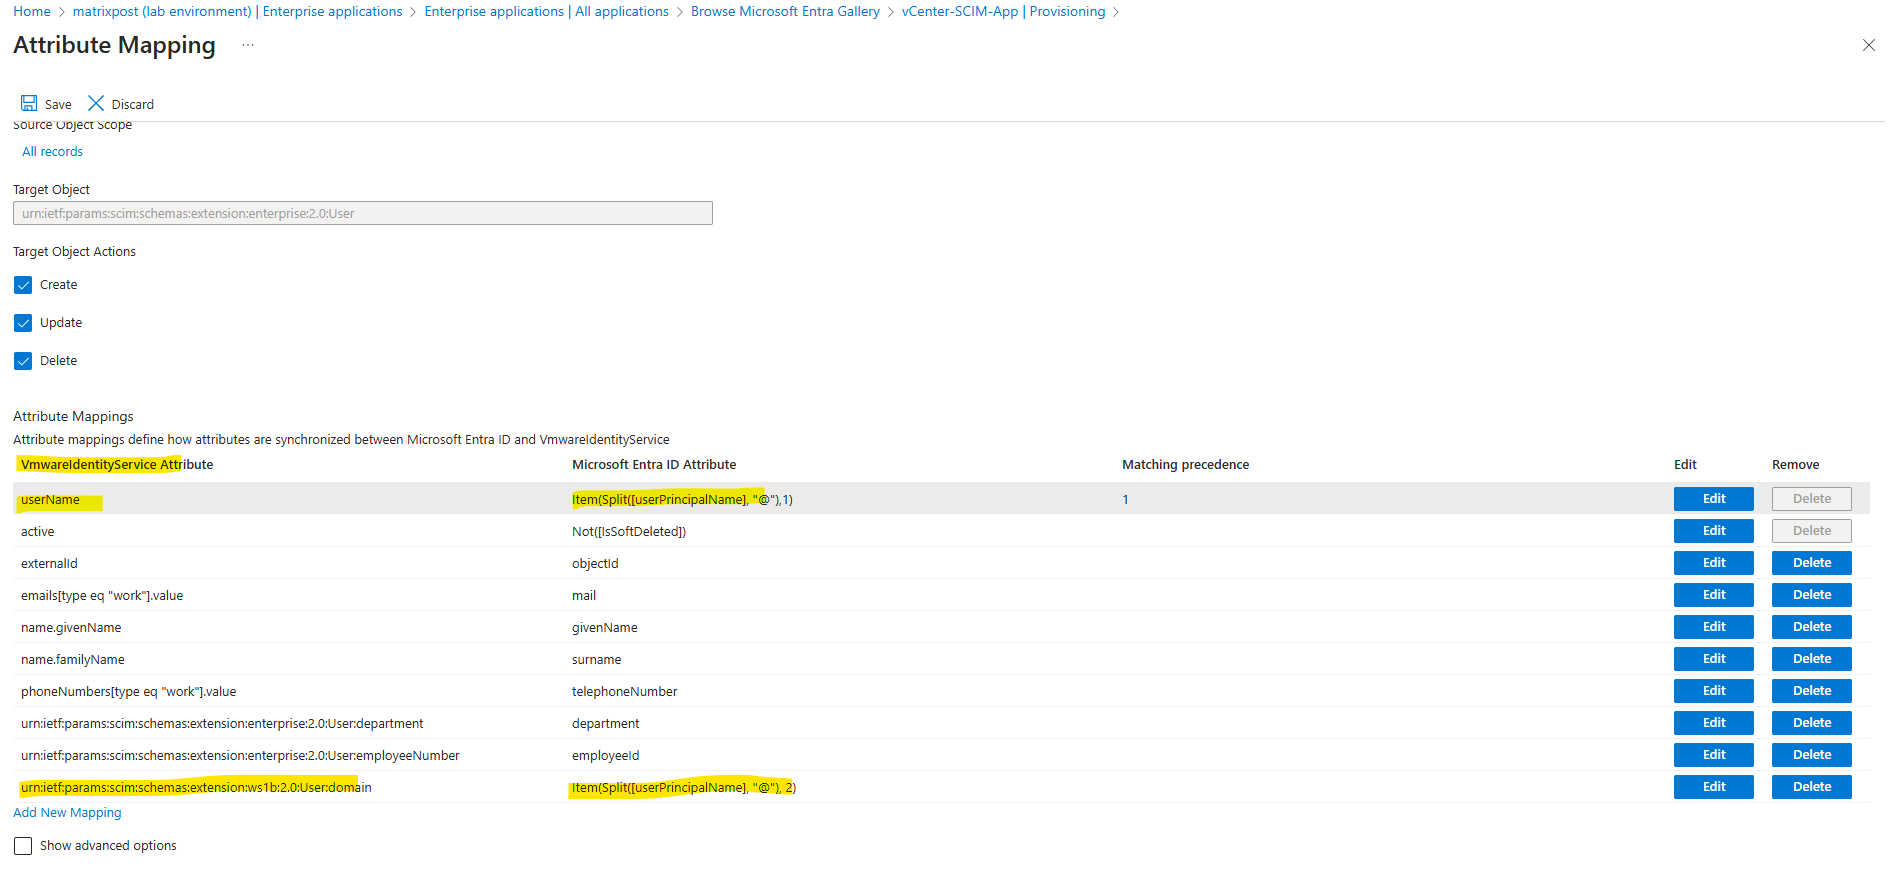
Click on Save.
Close the mappings section and navigate back to Provisioning.
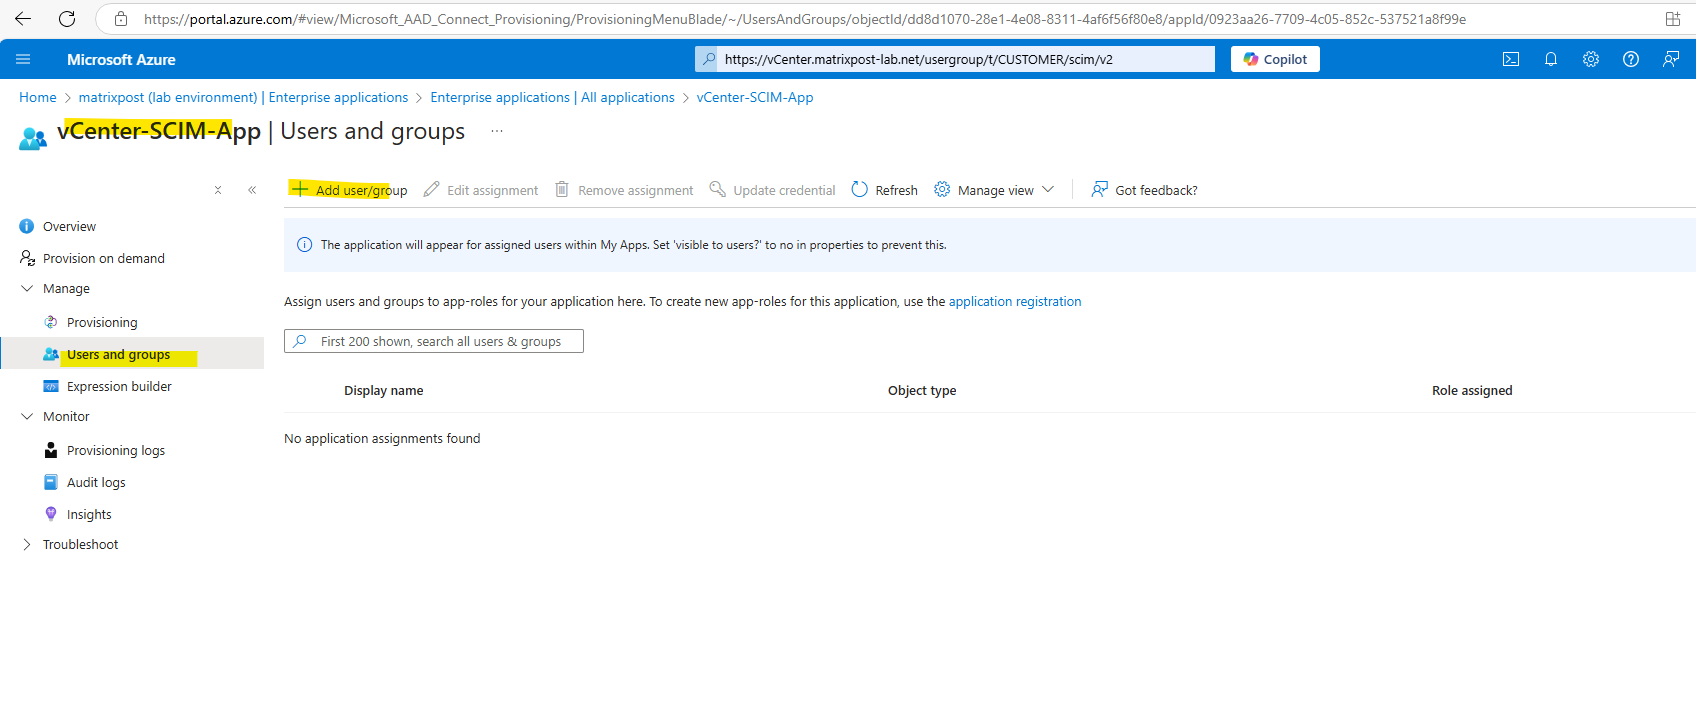
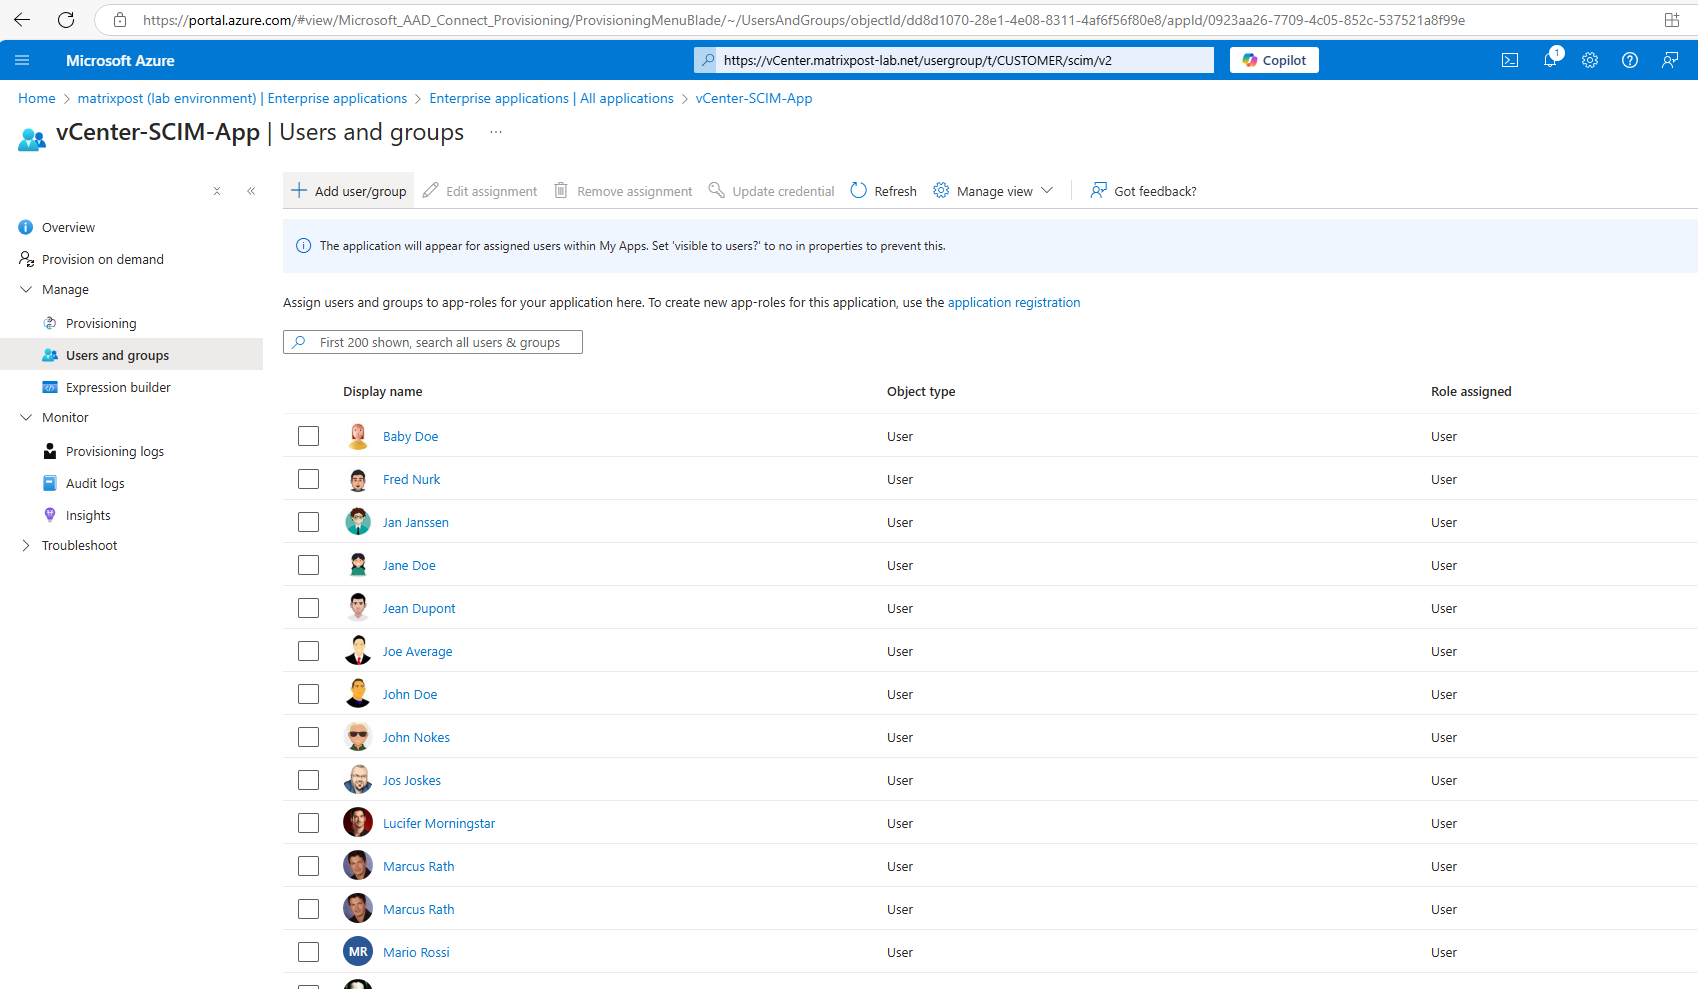
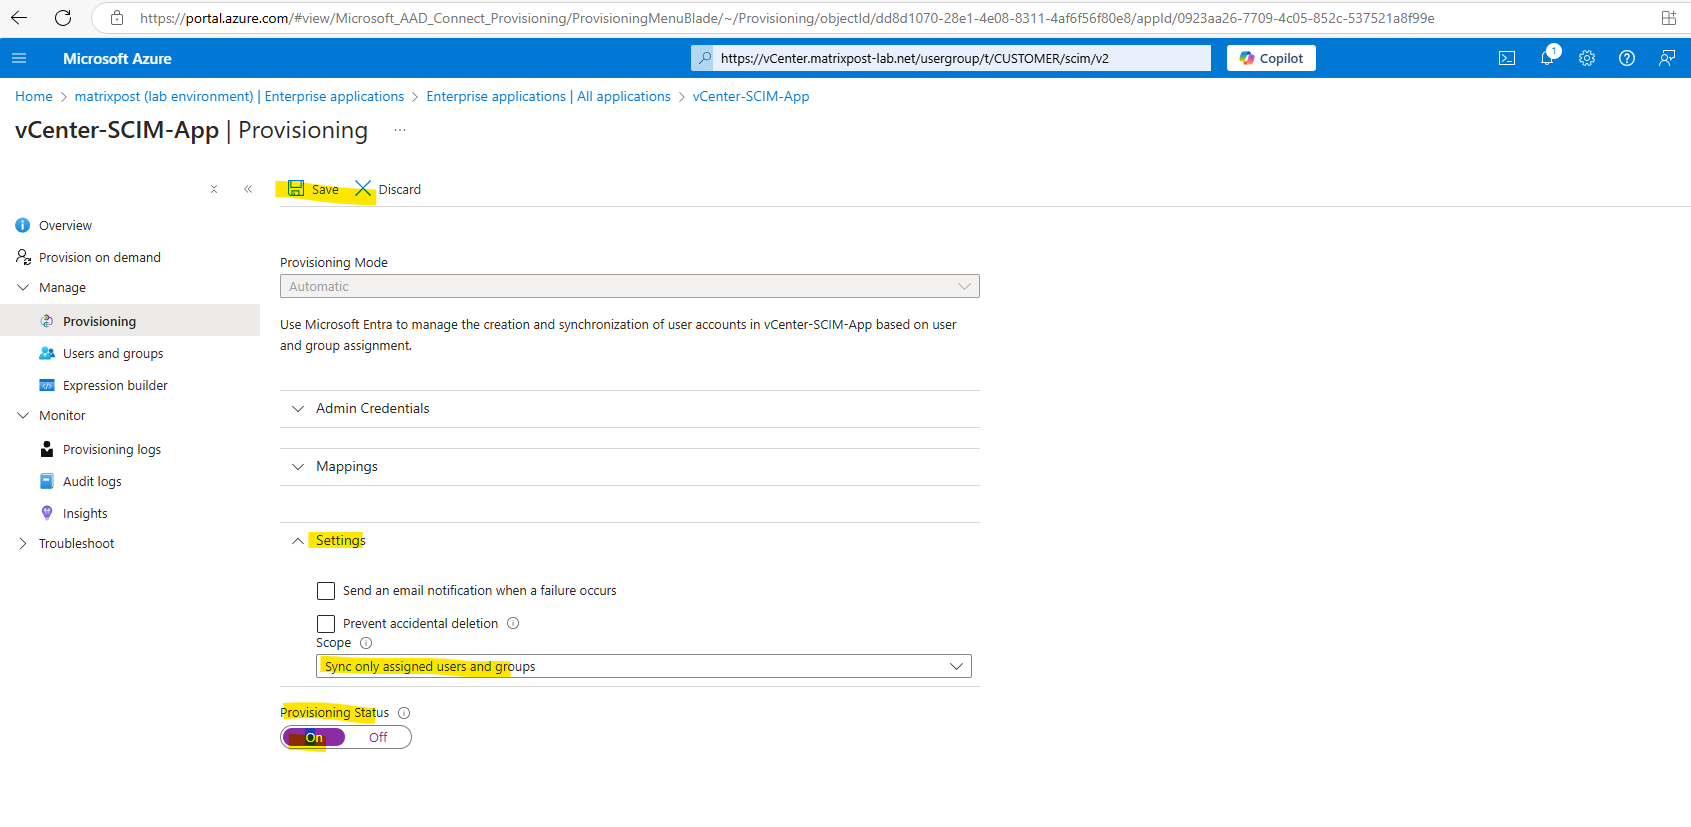
Before we finally enable the provisioning status, we first add the users and groups we want to provision and sync to our vCenter Server. Click below on + Add user/group.
On the Provisioning blade under settings we can select to either sync all users and groups from Entra ID or just the users we assigned to this app.
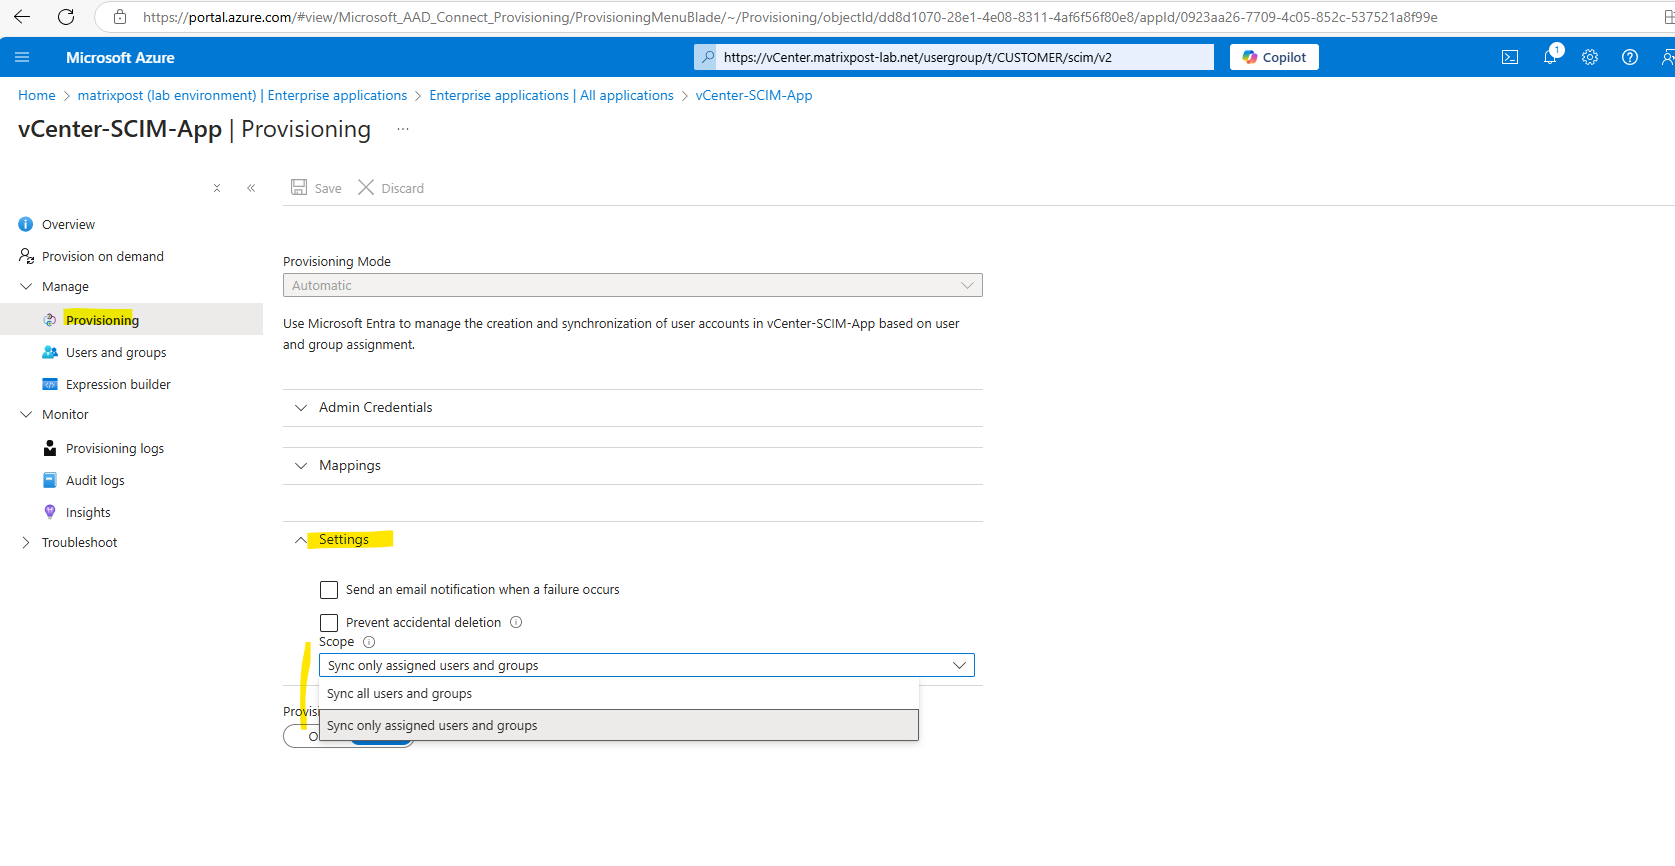
I will sync just the assigned users to my vCenter Server, finally we can enable the provisioning status which will trigger a initial sync to vCenter Server.
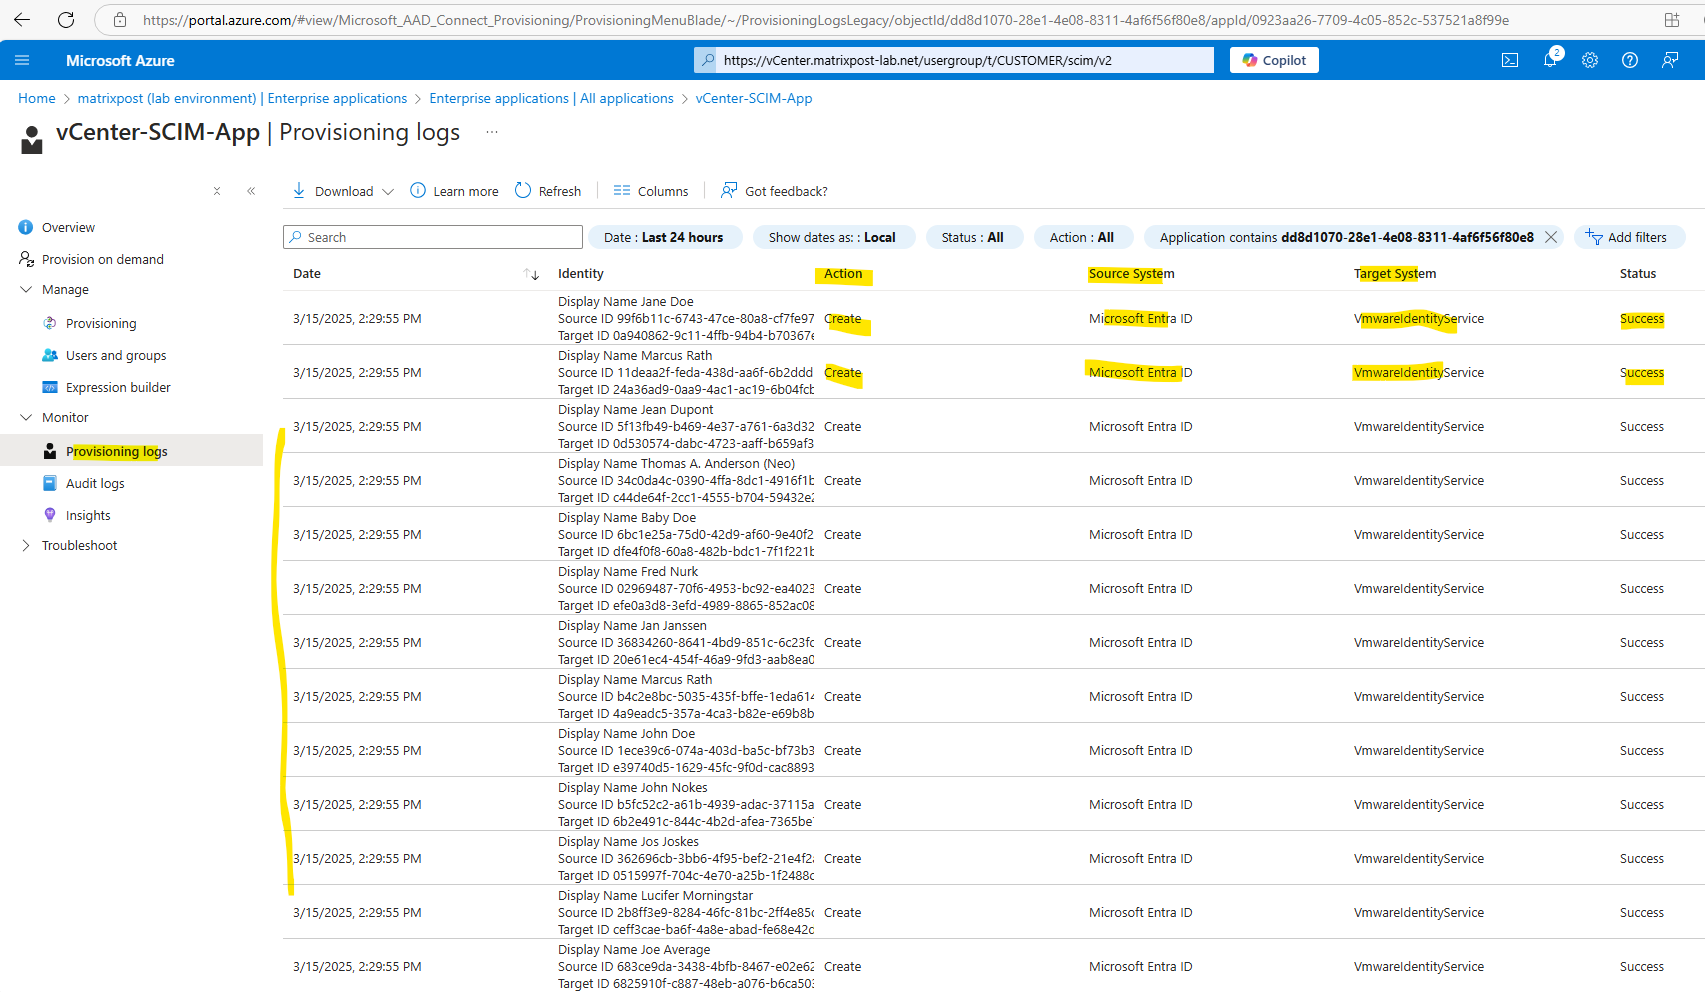
A few minutes later I will see the following provisioning logs.
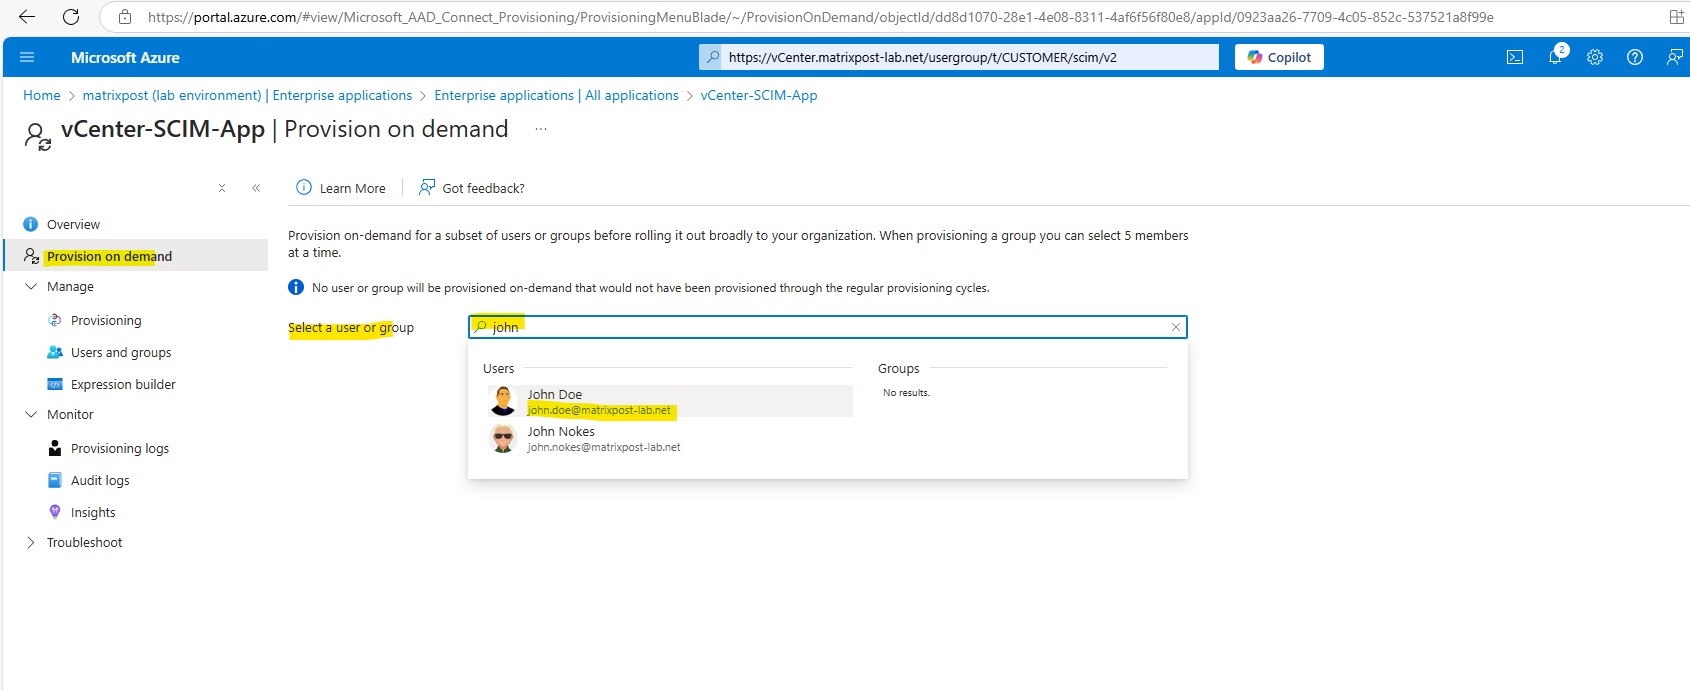
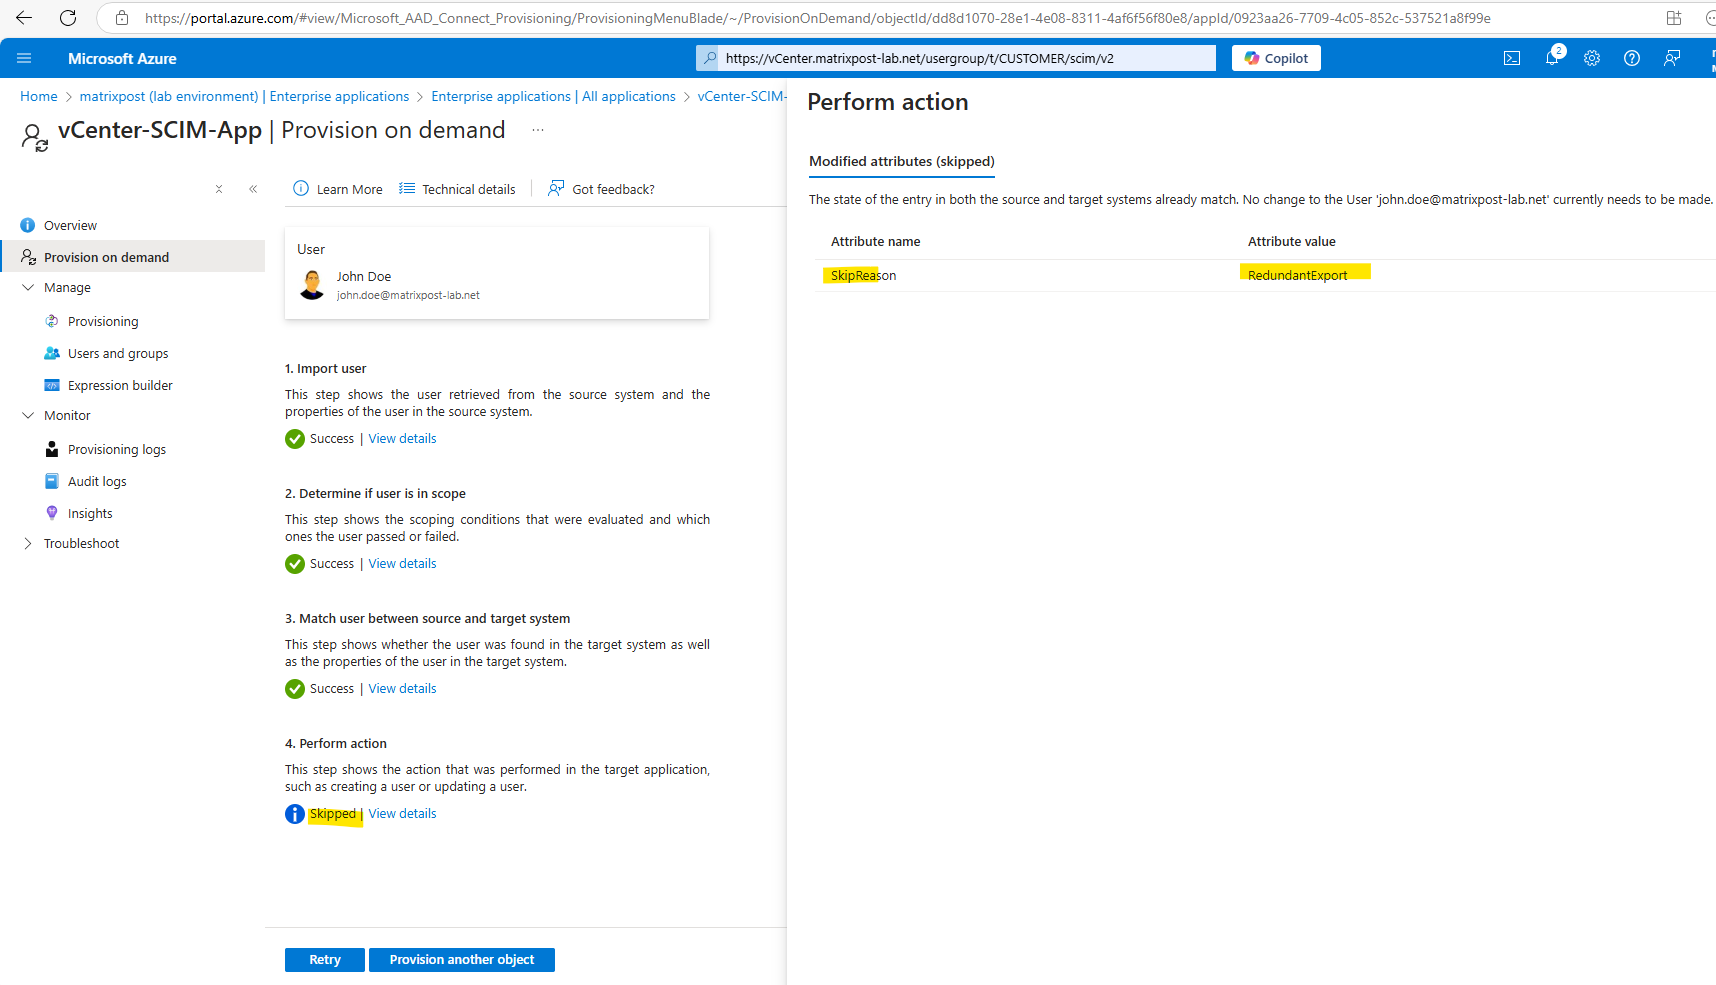
We can also provision individual users on demand. Below under Provisioning on demand search for the user you want to provision on demand.
Click on Provision.
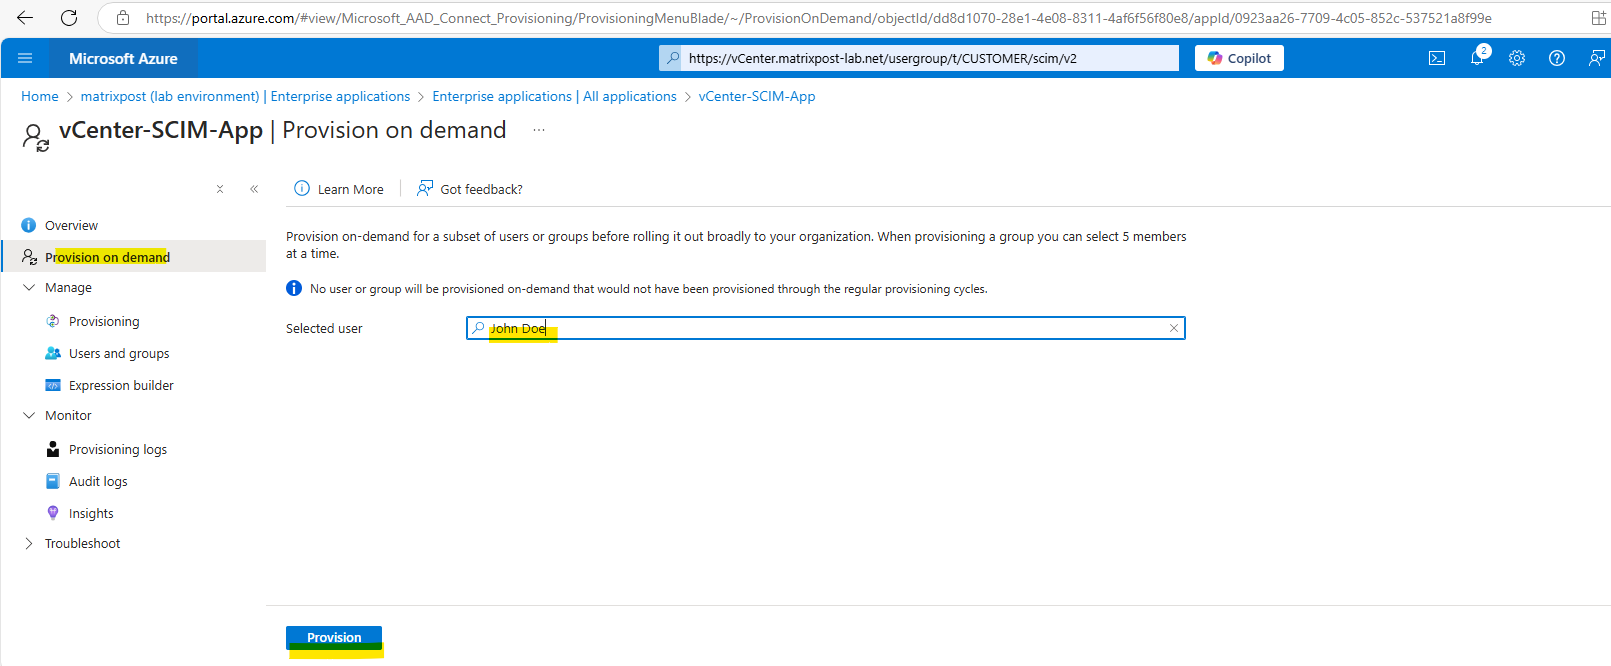
The user is skipped here because since the initial sync nothing changed and no delta is available to update the destination.
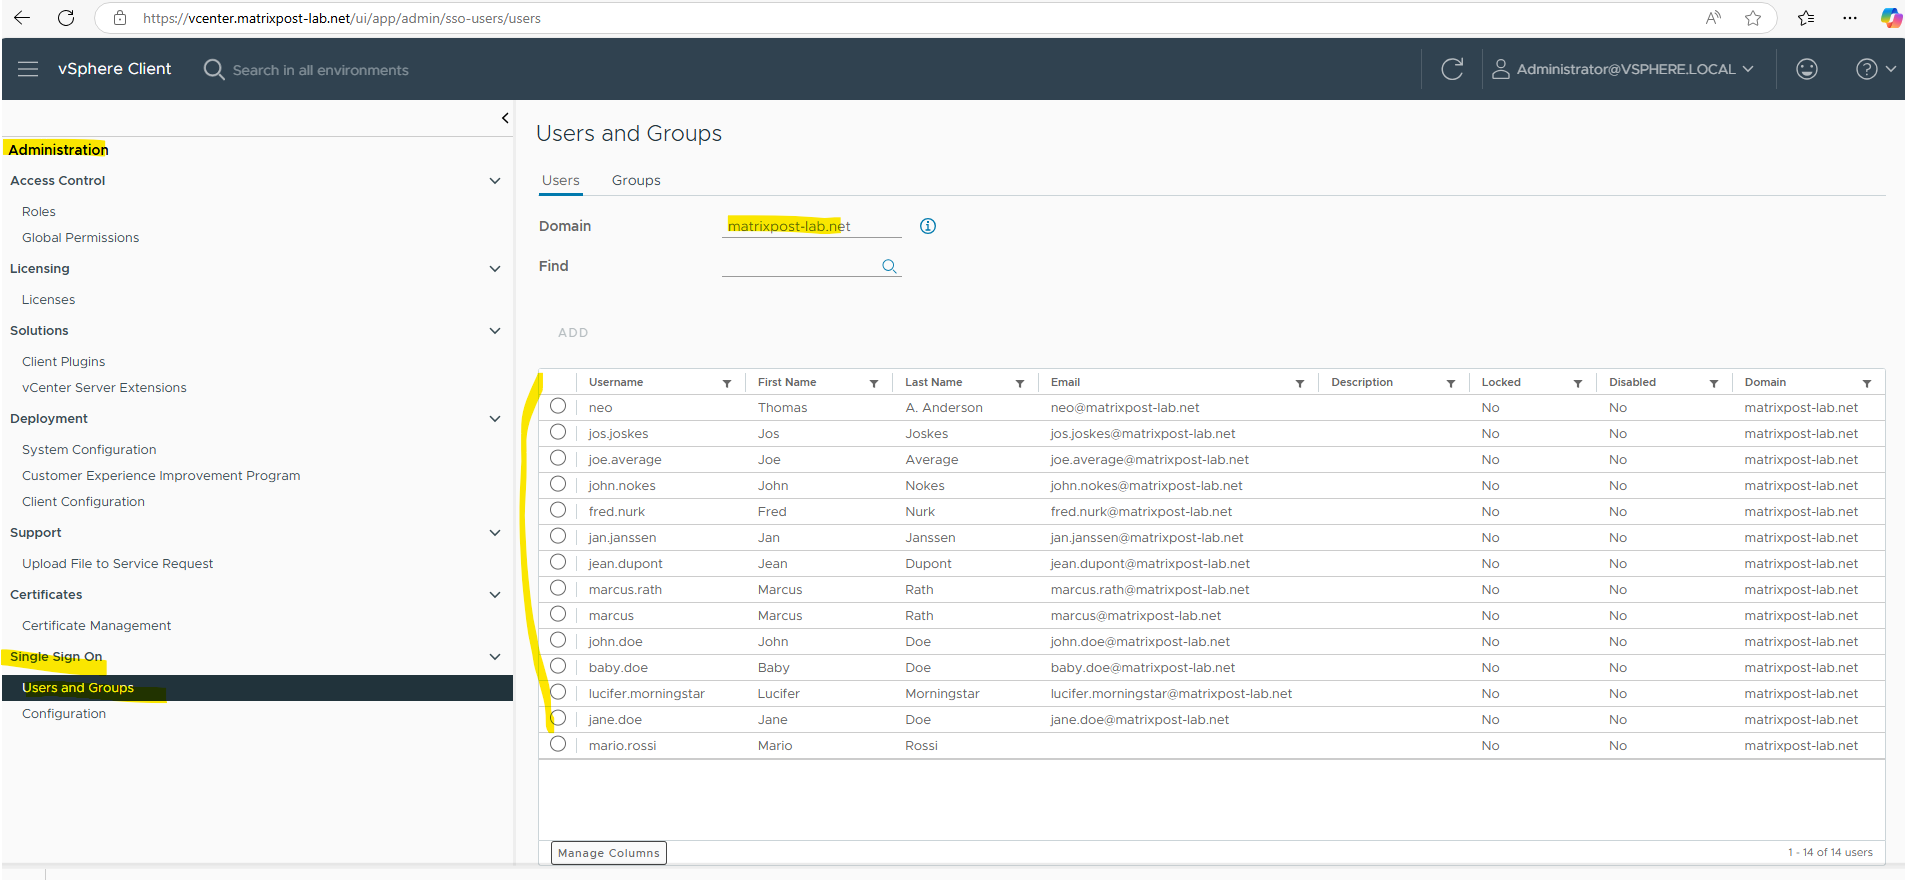
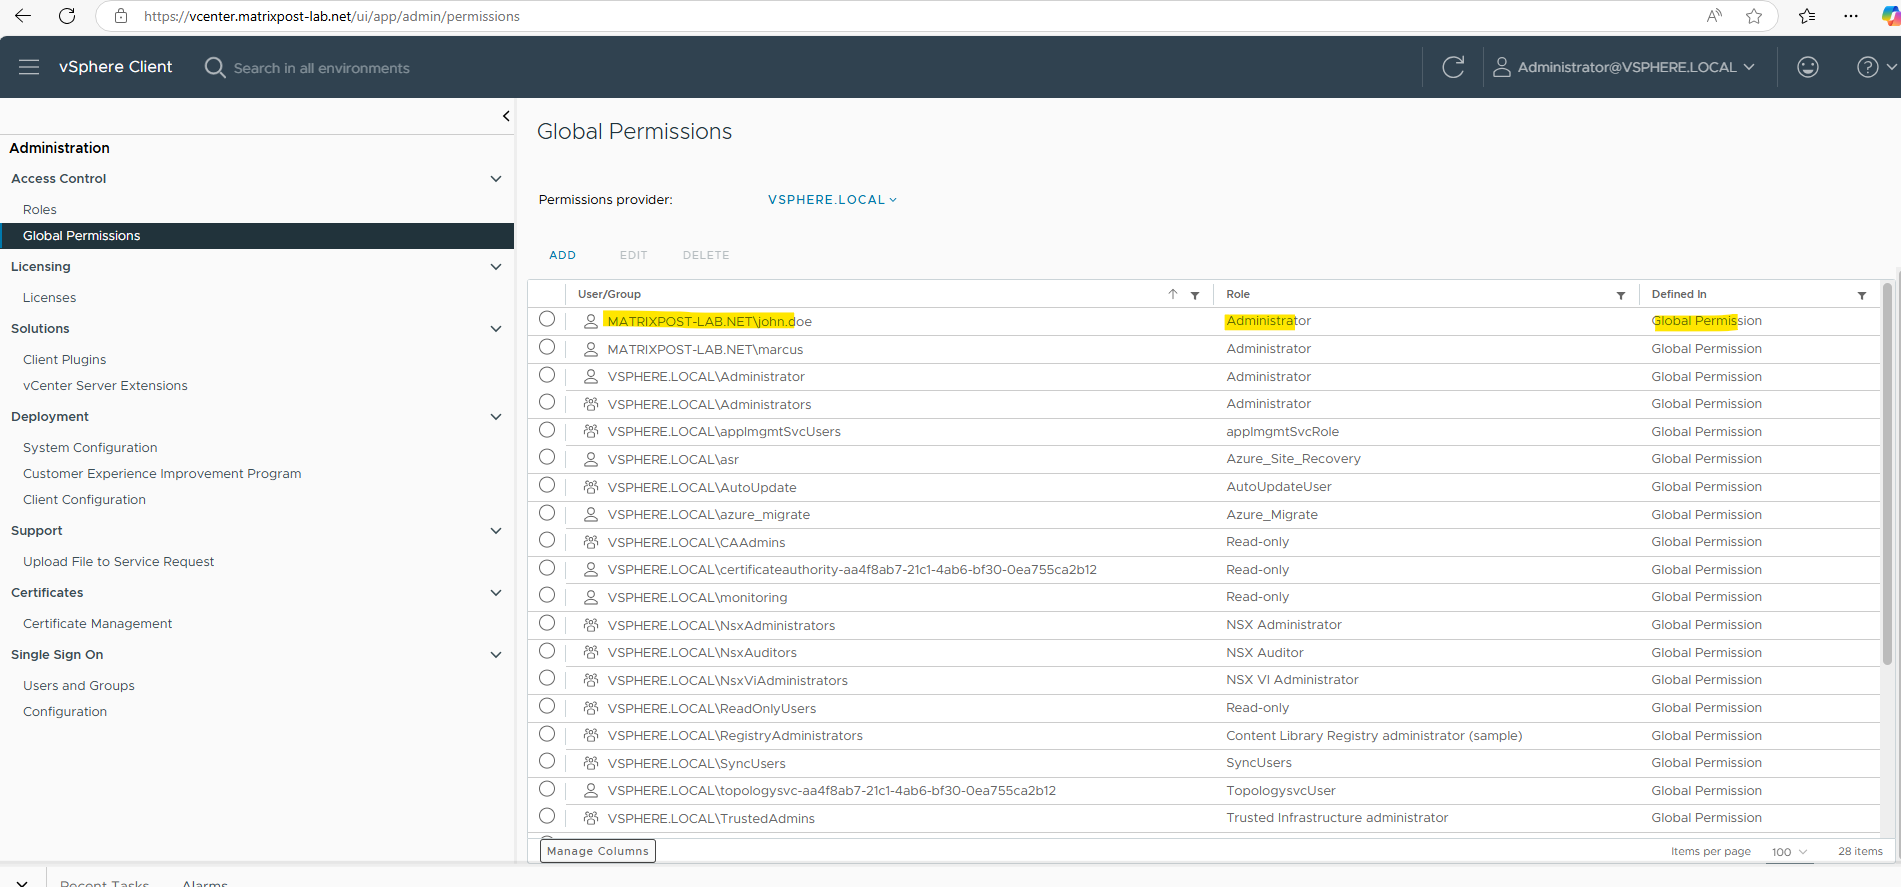
In vCenter Server we now should see our provisioned and synced users from Microsoft Entra ID. Looks good!
Set Permissions on vCenter Server
The users we provision to be synced with vCenter Server we also must empower on vCenter.
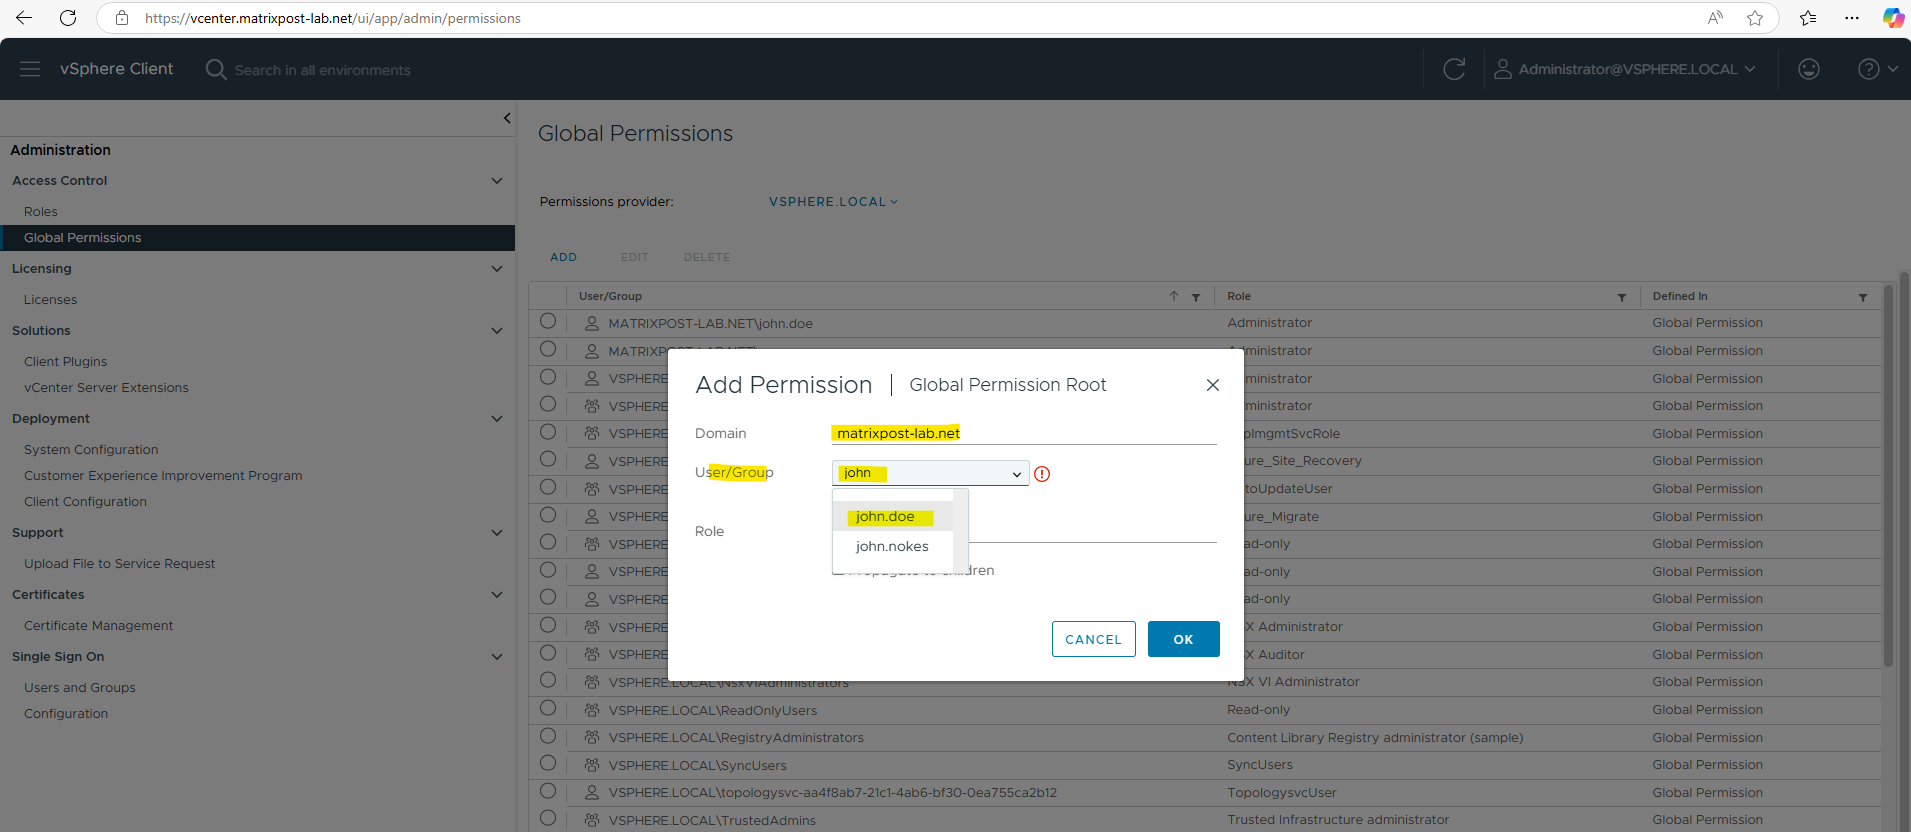
In vCenter navigate to Administration -> Access Control -> Global Permissions and click on Add.
Select the on-premise Active Directory / Entra ID domain and search for the user or group you want to assign permissions to.
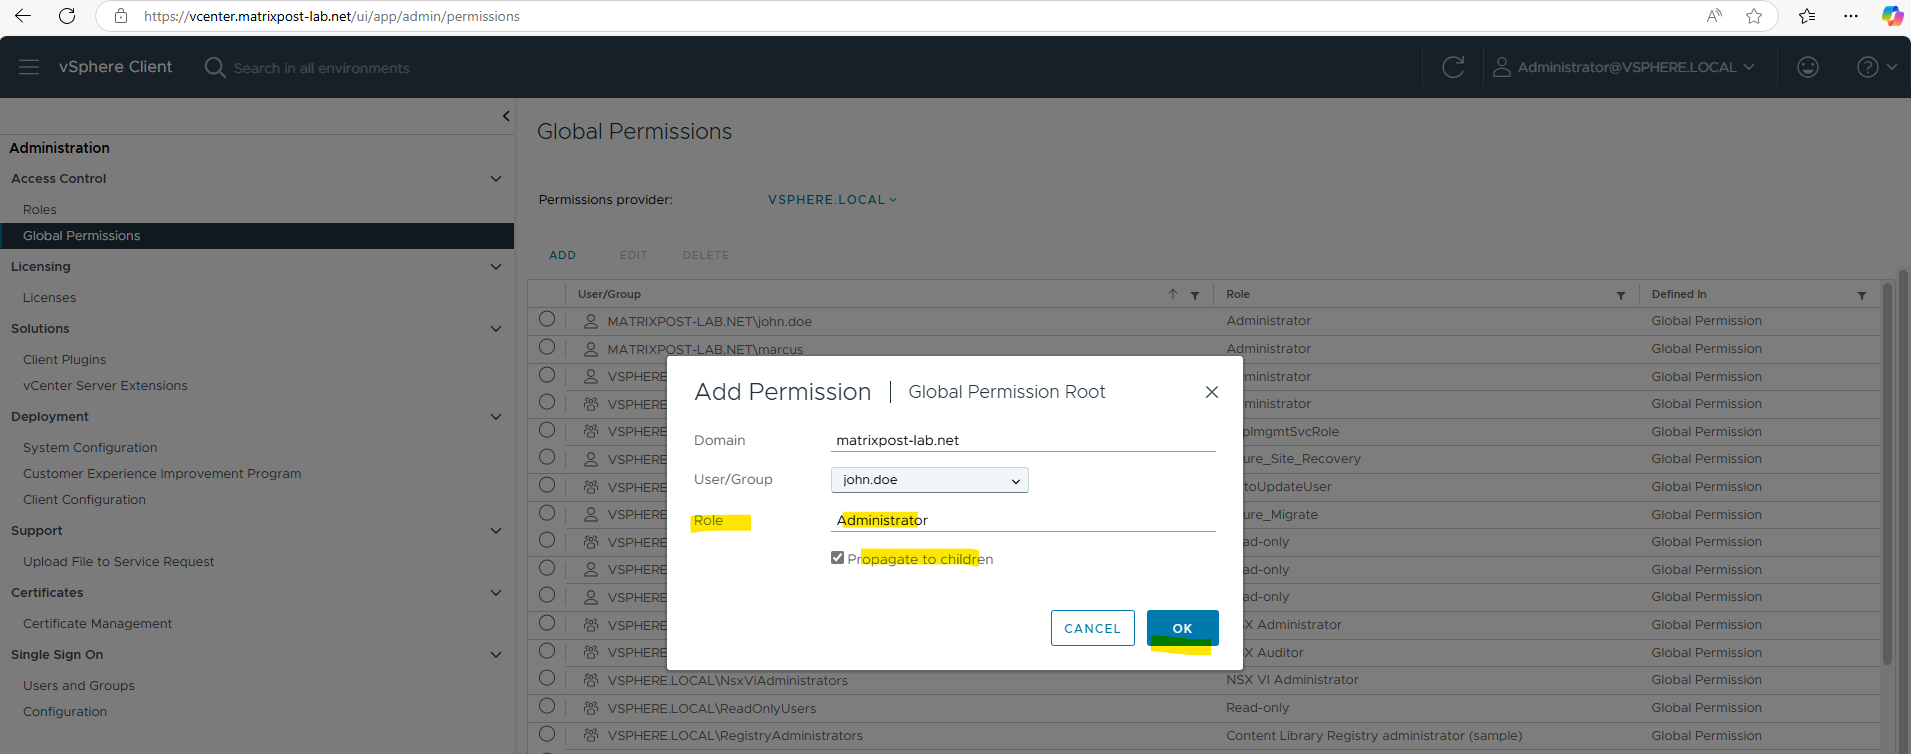
Select the Role and check Propagate to children.
If you set a permission at a vCenter Server level and propagate it to the children objects, the permission applies to data centers, folders, clusters, hosts, virtual machines, and similar objects in the vCenter Server instance.
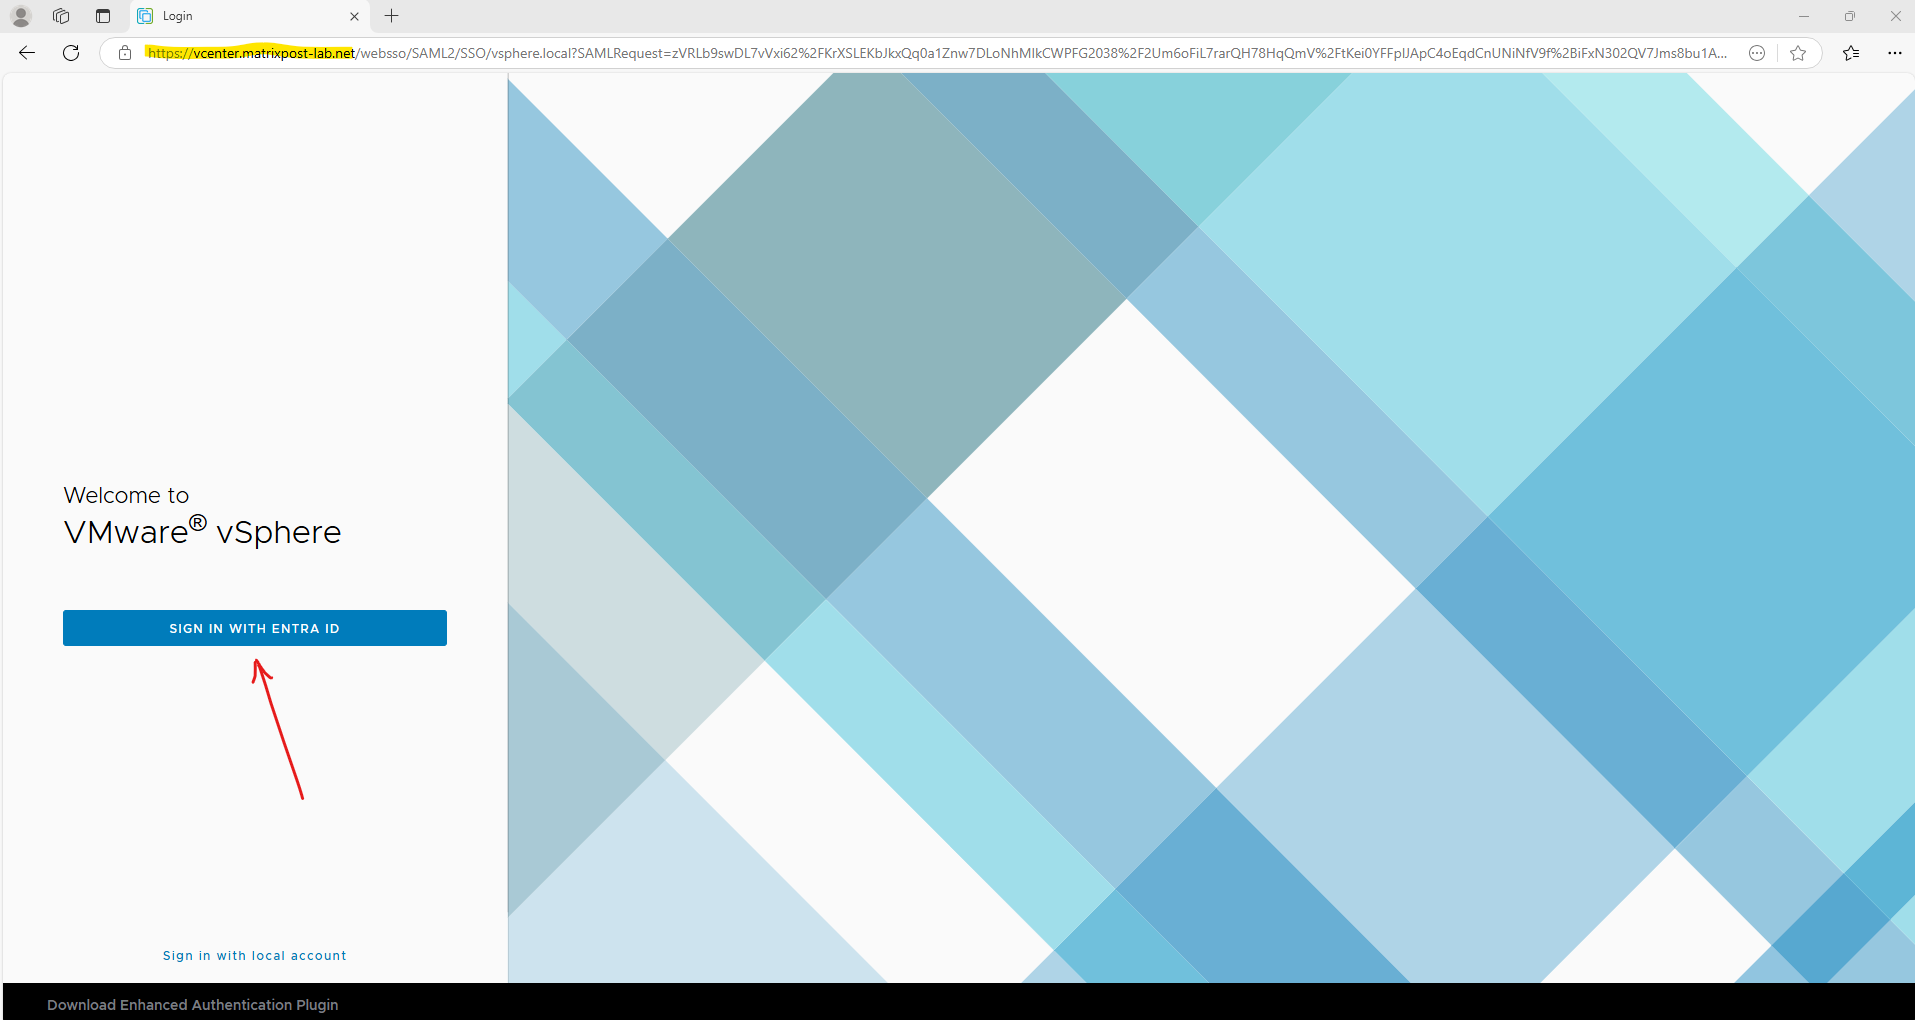
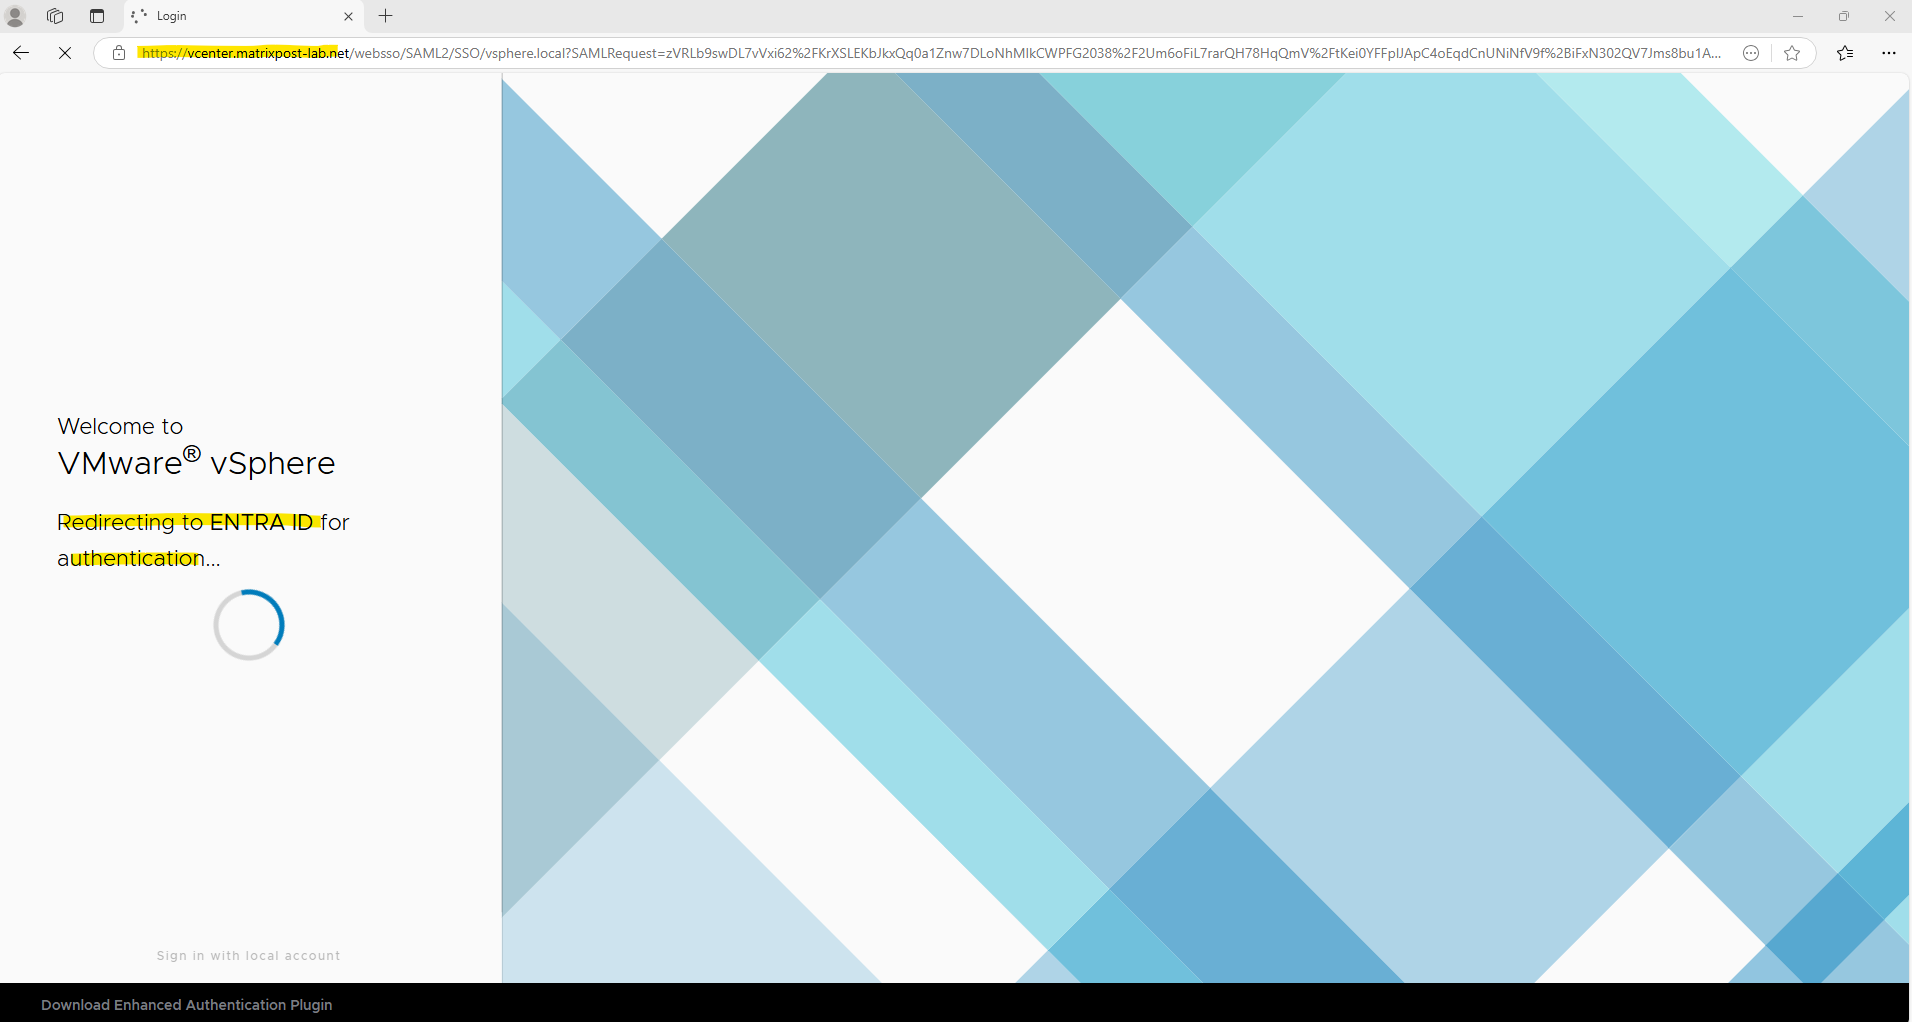
We can now try to sign-in to vCenter by using our provisioned and in vCenter authorized Entra ID user.
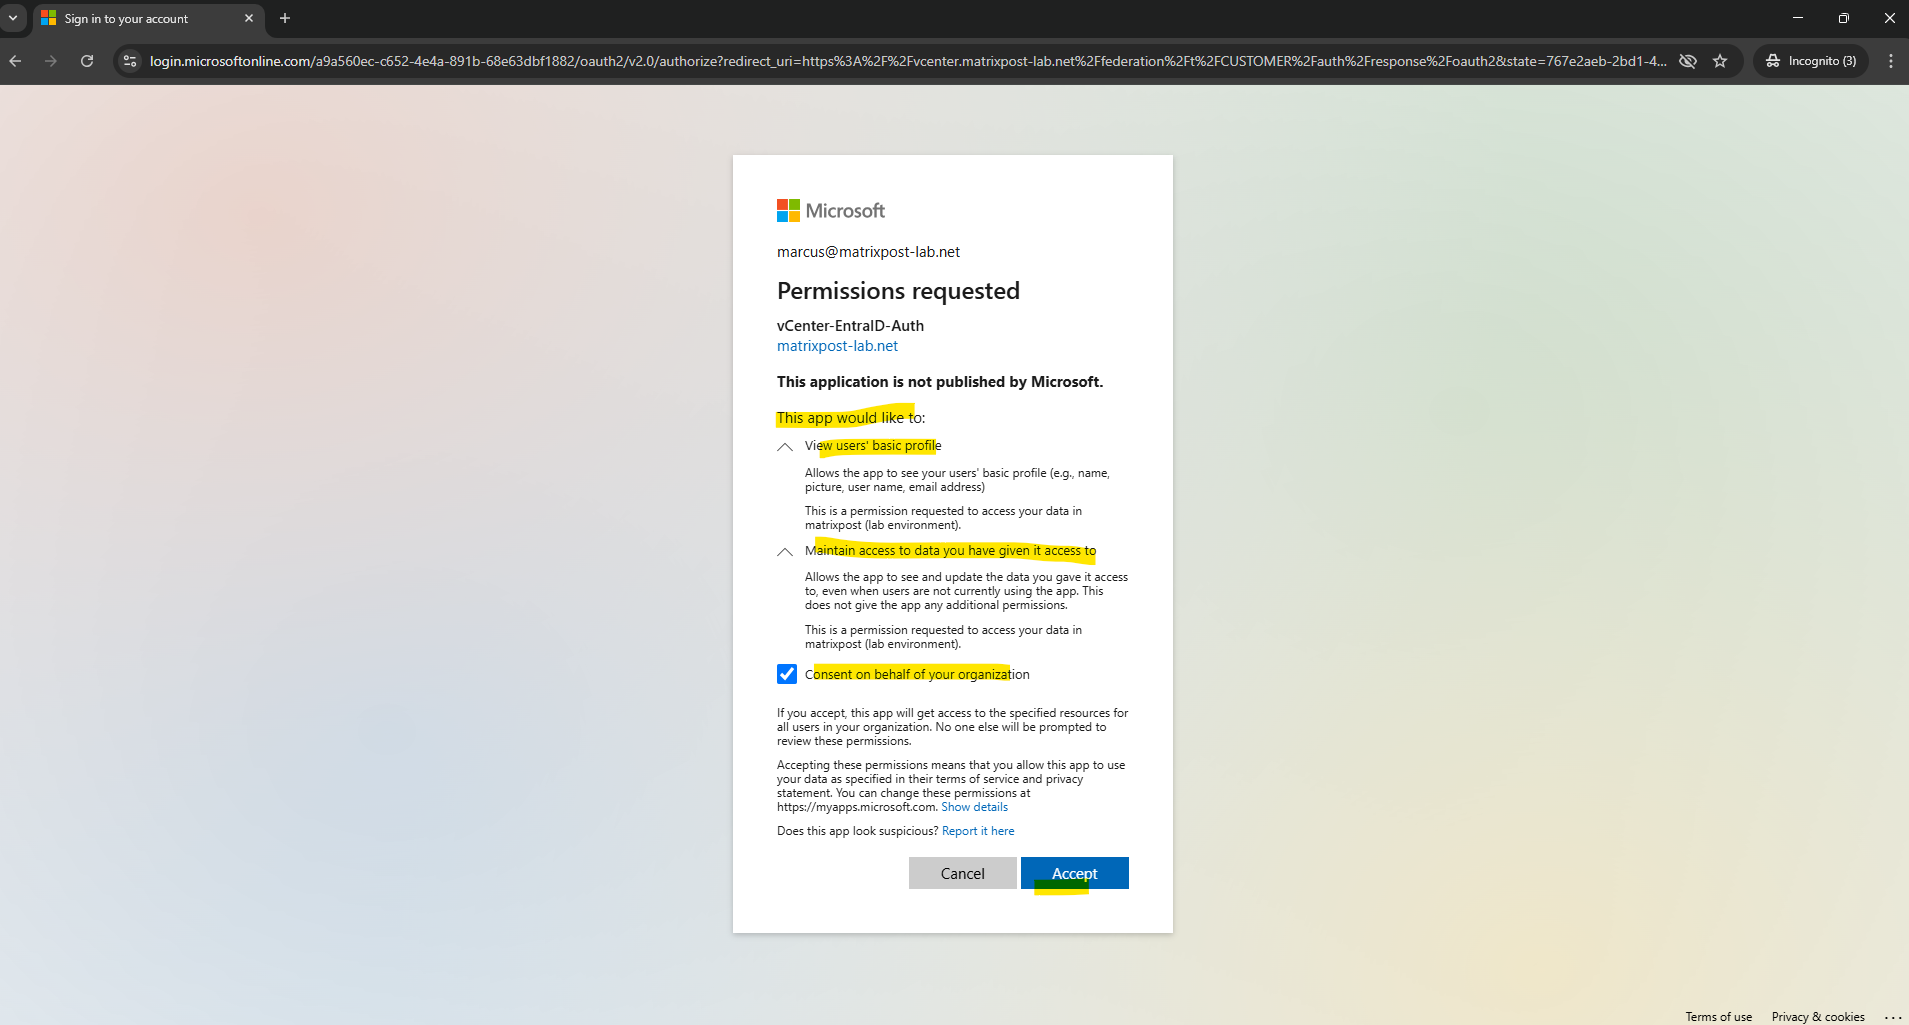
The first time a user is sign-in will be prompted to accept that our created vCenter Entra ID Authentication App (named vCenter-EntraID-Auth) wants to access the users basic profile and data.
By using a global administrator account in Entra ID, we can consent on behalf of our organization and therefore the normal users won’t need to consent to.
When integrating applications with Microsoft Entra ID, users and admins may encounter a “Consent on behalf of your organization” option during authentication. This setting determines whether an app can access data for multiple users without each user needing to grant consent individually.
Finally I am logged in by using my hybrid on-premise AD / Entra ID account.
Links
How to Enable Entra ID for vCenter Server
https://knowledge.broadcom.com/external/article/322179/how-to-enable-entra-id-for-vcenter-serve.htmlMicrosoft Entra SSO integration with VMware Identity Service
https://learn.microsoft.com/en-us/entra/identity/saas-apps/vmware-identity-service-tutorialWhat is OpenID Connect (OIDC)?
https://www.microsoft.com/en-us/security/business/security-101/what-is-openid-connect-oidc