Set up an IPSec route-based Site-to-Site VPN Tunnel between Azure and On-Premise (Home Network) where the VPN Gateway sits behind a NAT Router
Home NAT Router IPSec Site-to-Site VPN Tunnel Support
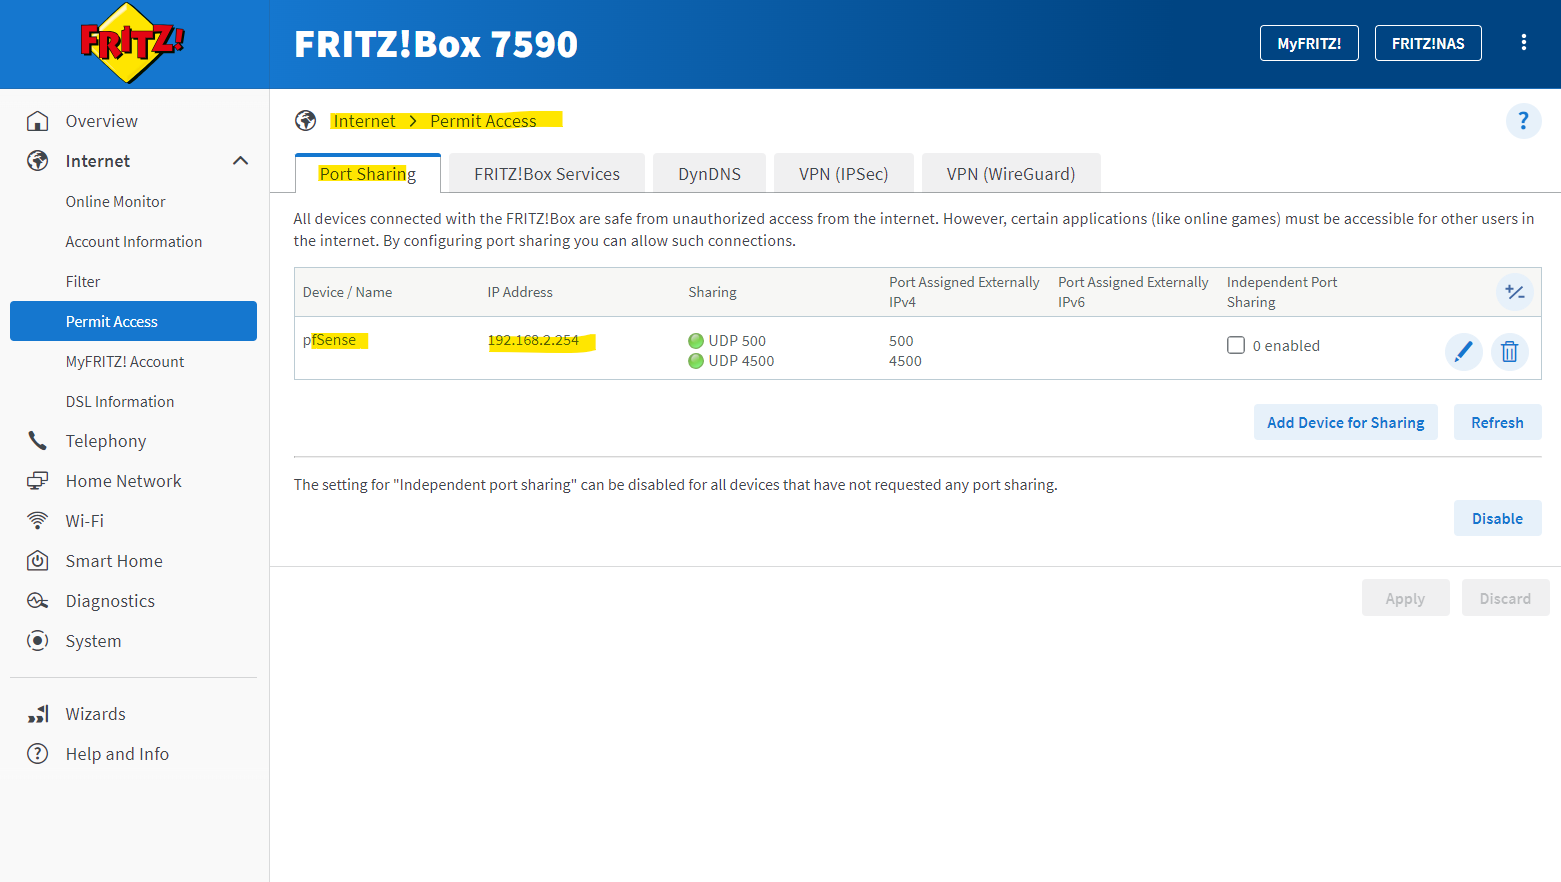
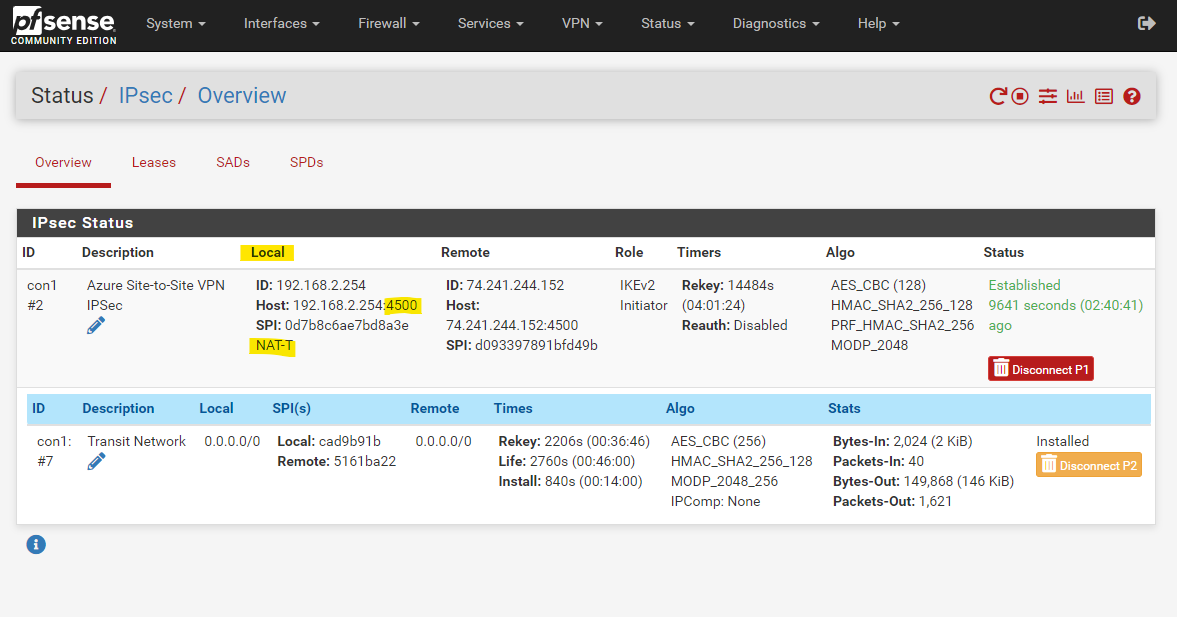
About NAT Traversal (NAT-T)
Set up the Tunnel in Azure
Configure the Azure Virtual Network (VNet)
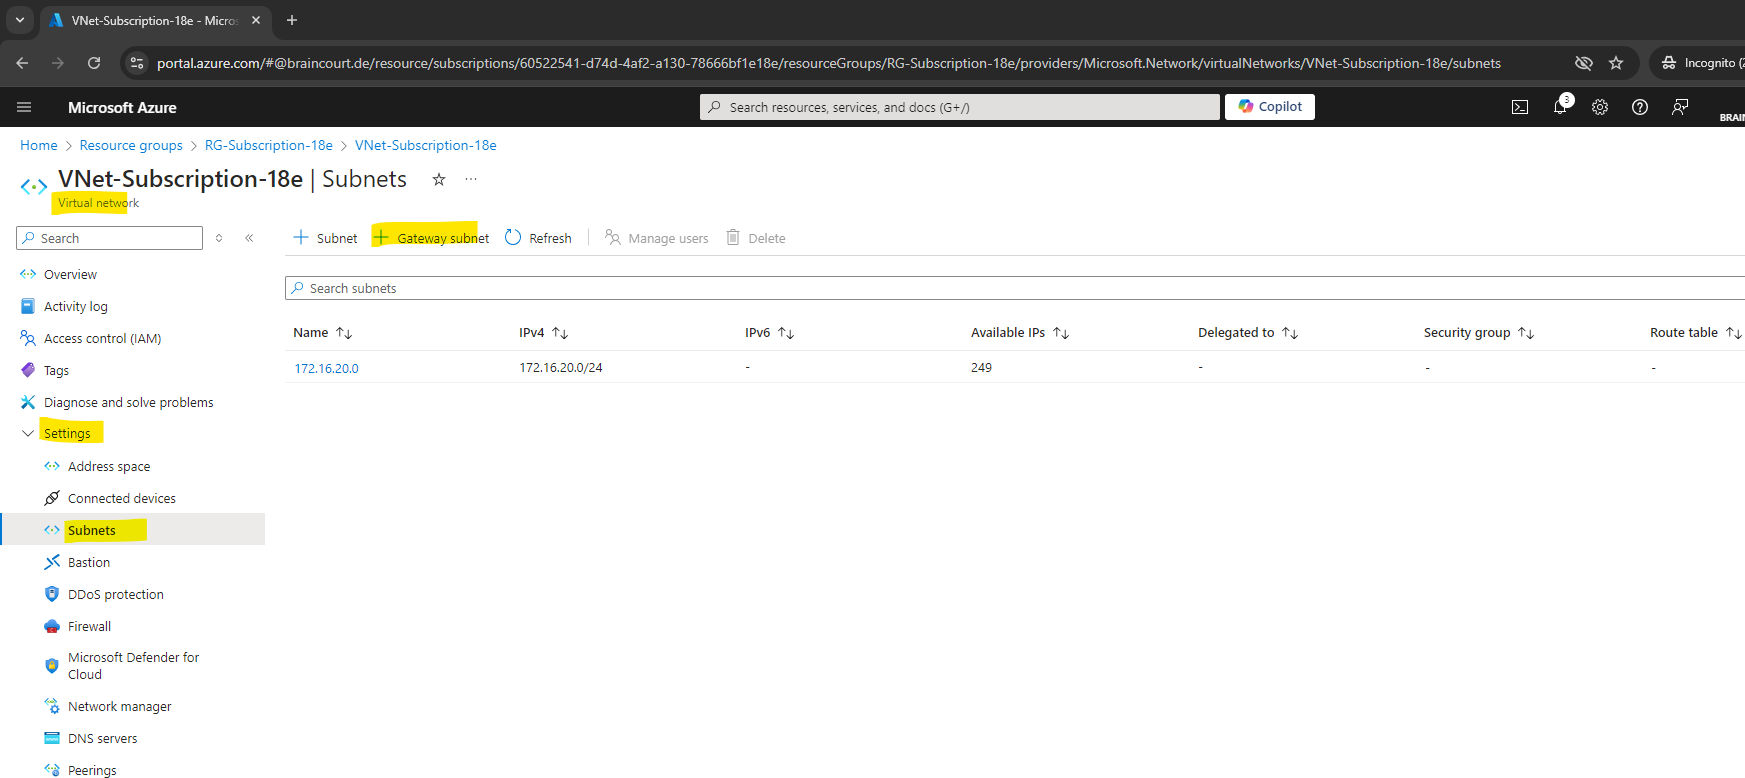
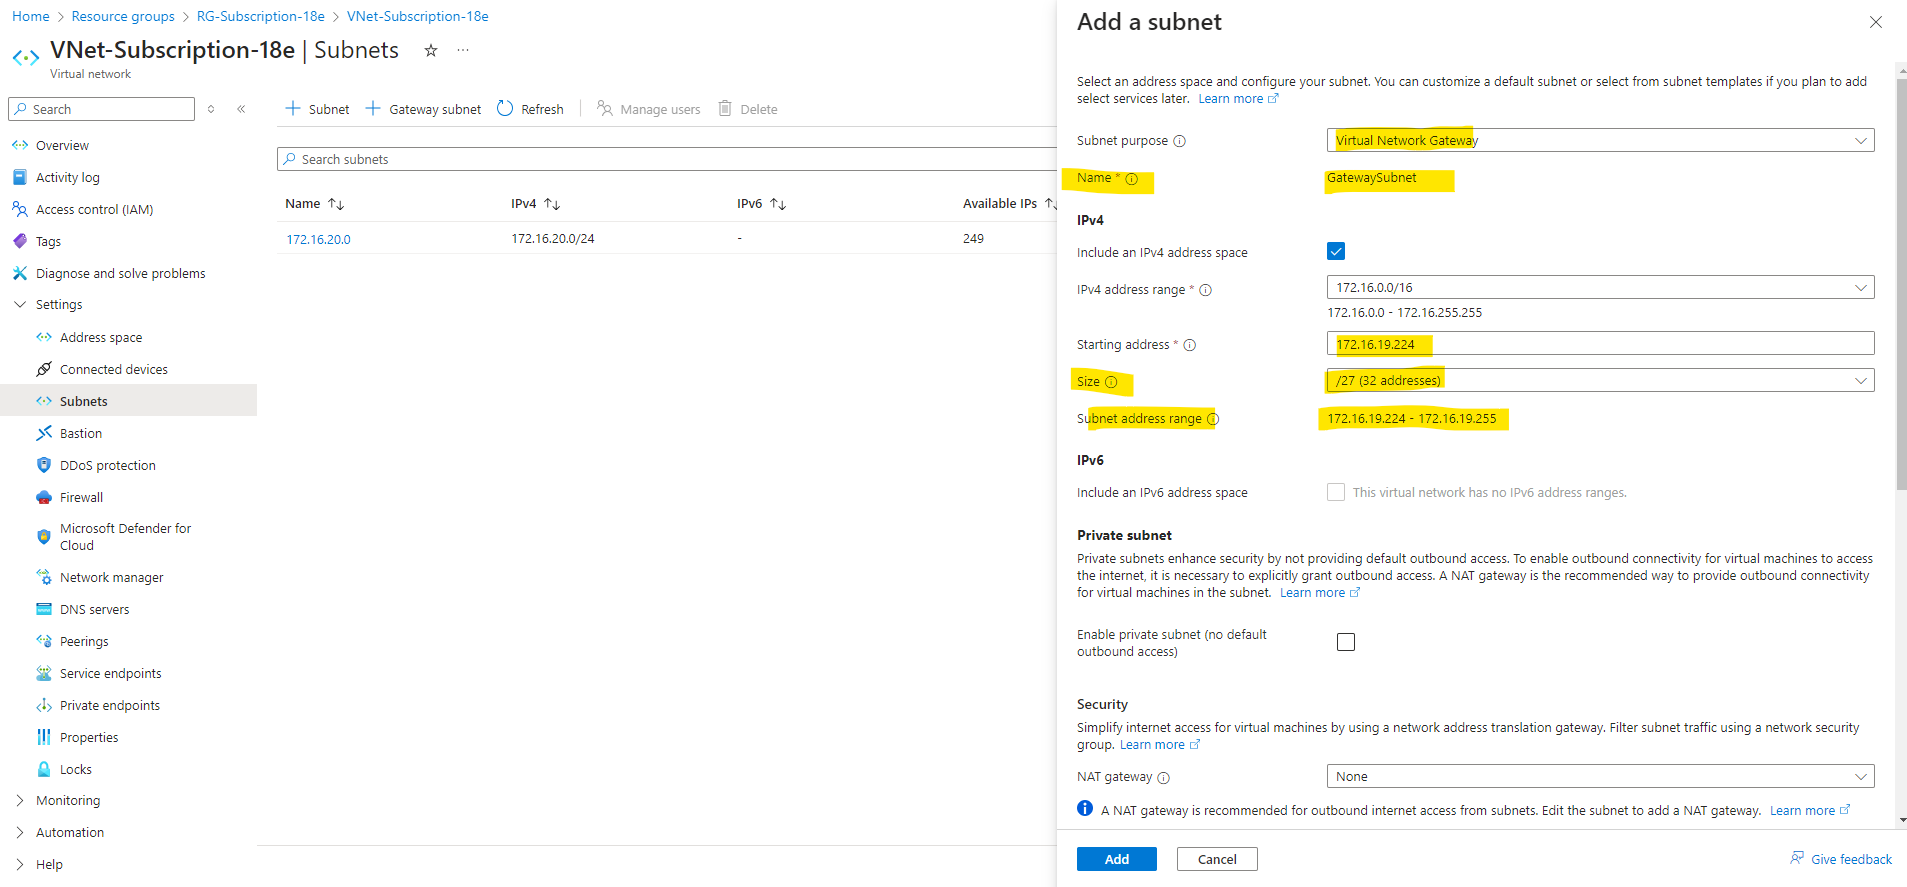
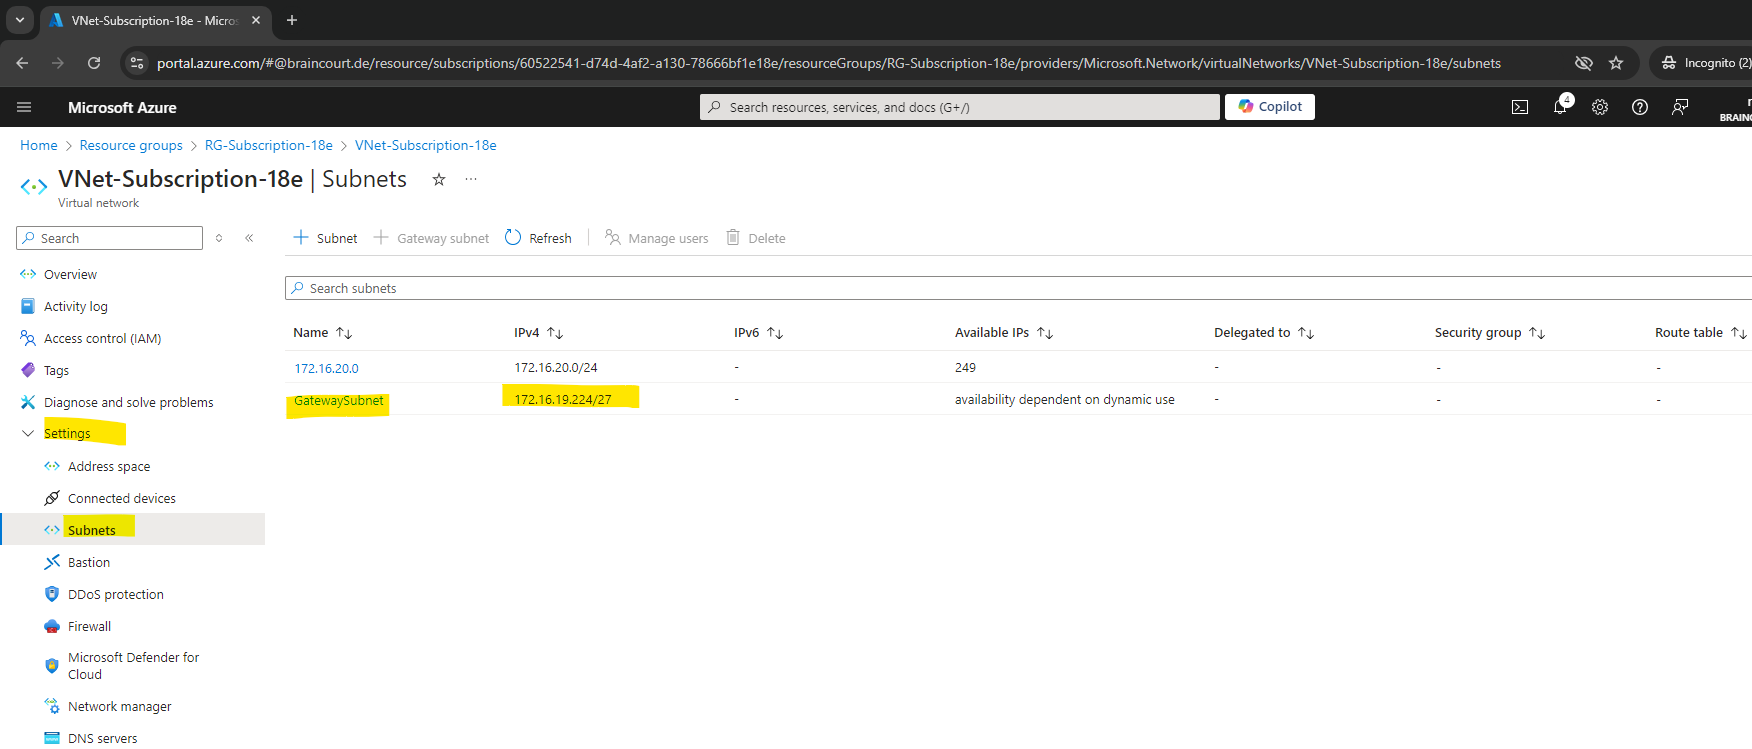
The gateway subnet contains the IP addresses that the virtual network gateway services use.
Traffic on this subnet, including IKE, IPsec, and BGP, is handled by Azure-managed gateway VMs, not subject to NSG filtering.So we do not need to configure here any NSG rules to allow traffic to establish the tunnel and its BGP session.
Further more it is not supported to create NSGs on the gateway subnet.
User-defined routes with a 0.0.0.0/0 destination and network security groups (NSGs) on the gateway subnet are not supported. Gateways with this configuration are blocked from being created. Gateways require access to the management controllers in order to function properly. Border Gateway Protocol (BGP) route propagation should be enabled on the gateway subnet to ensure availability of the gateway. If BGP route propagation is disabled, the gateway won’t function.
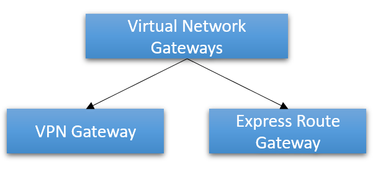
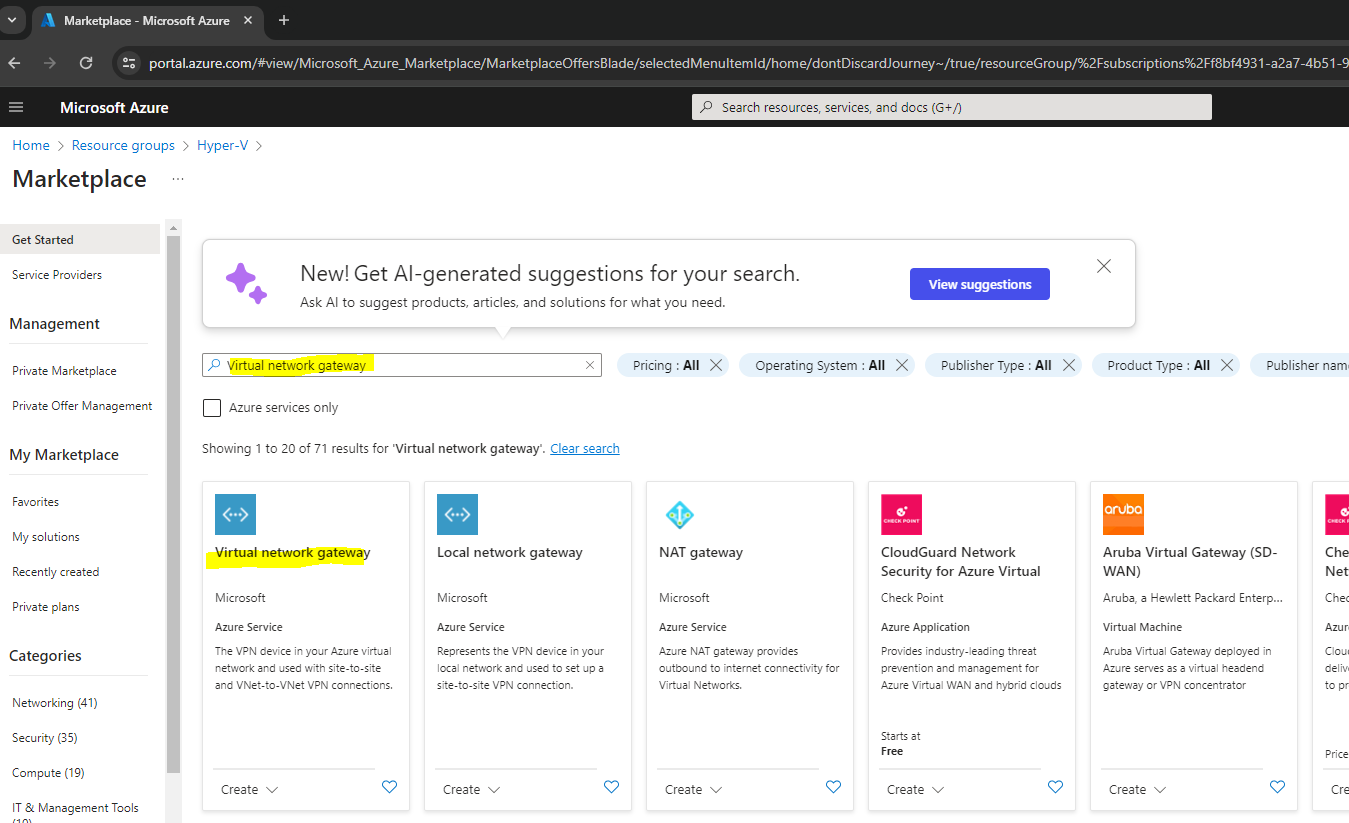
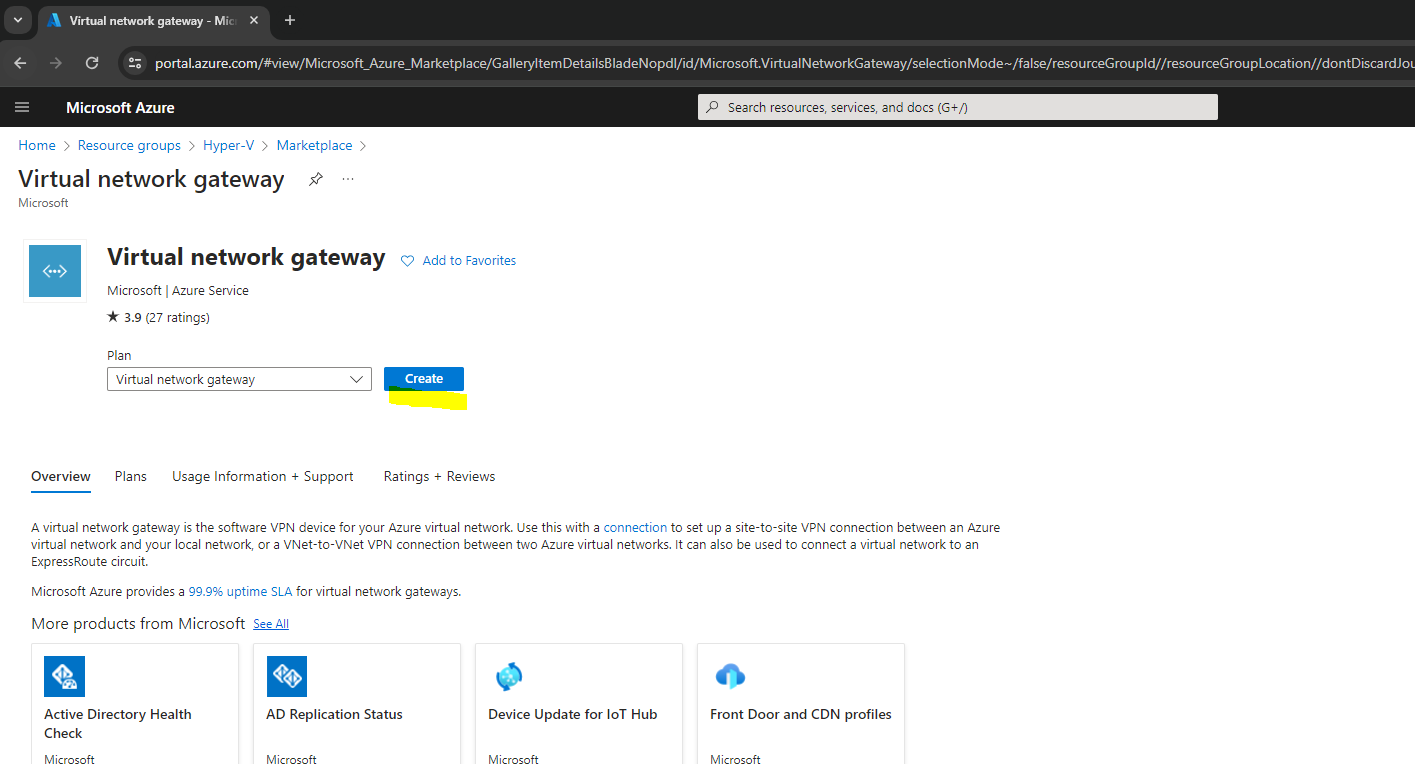
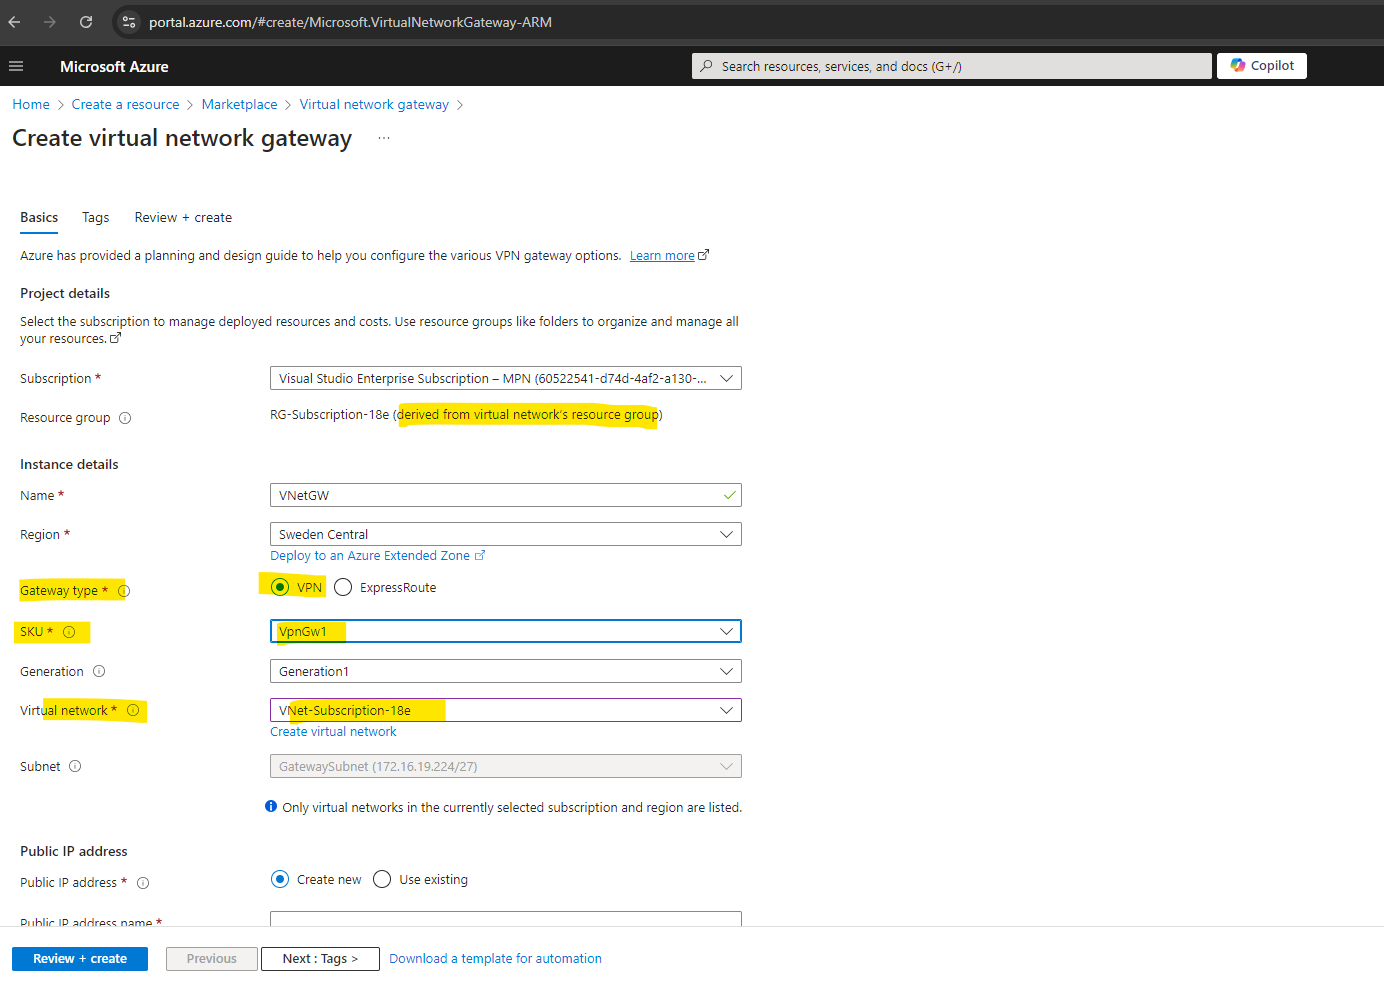
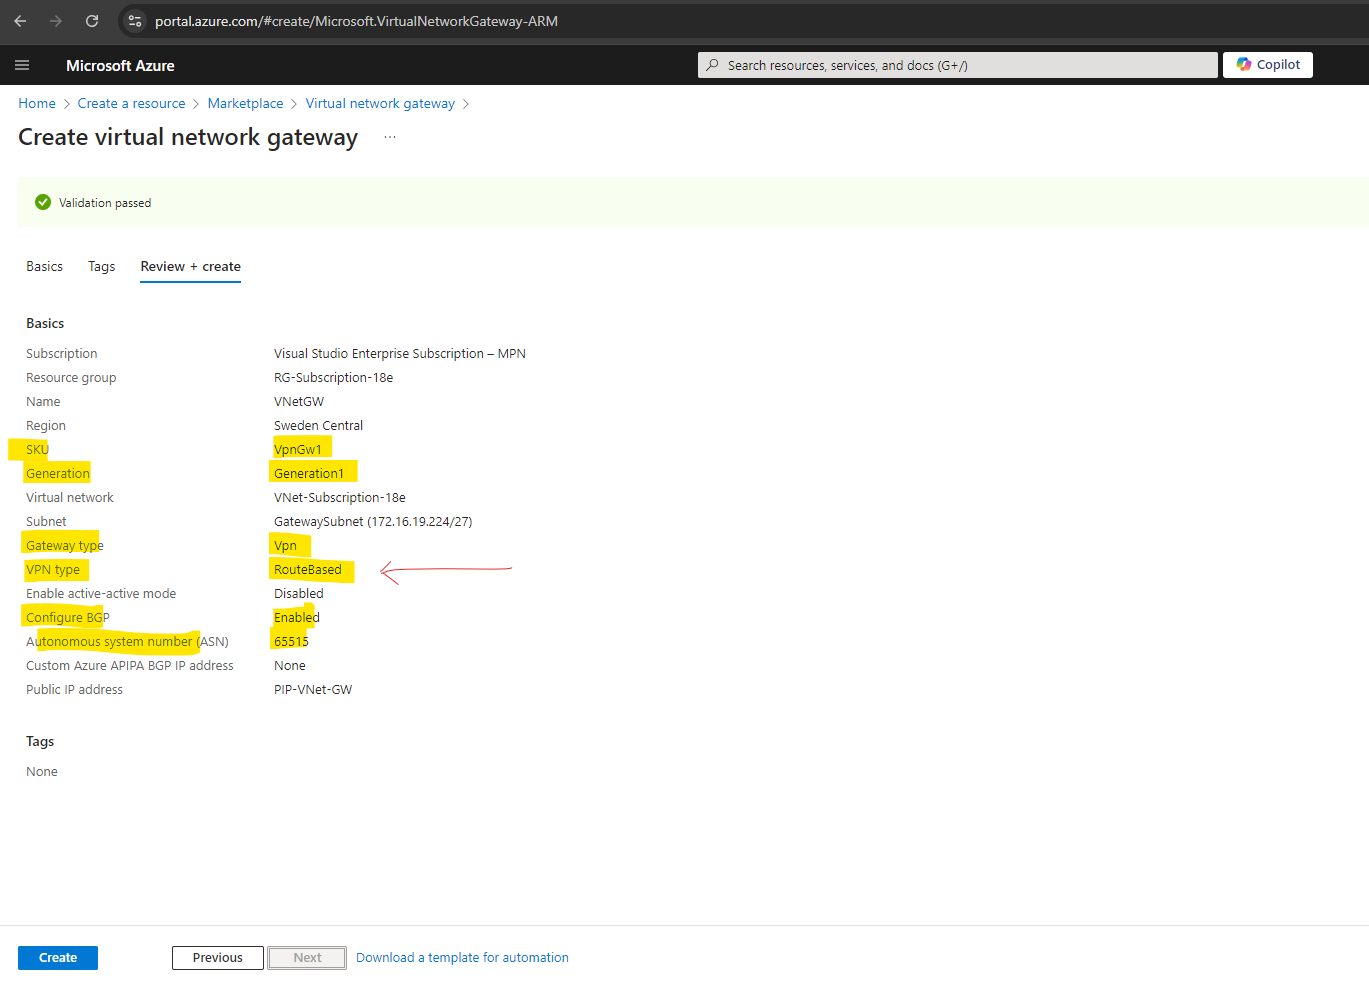
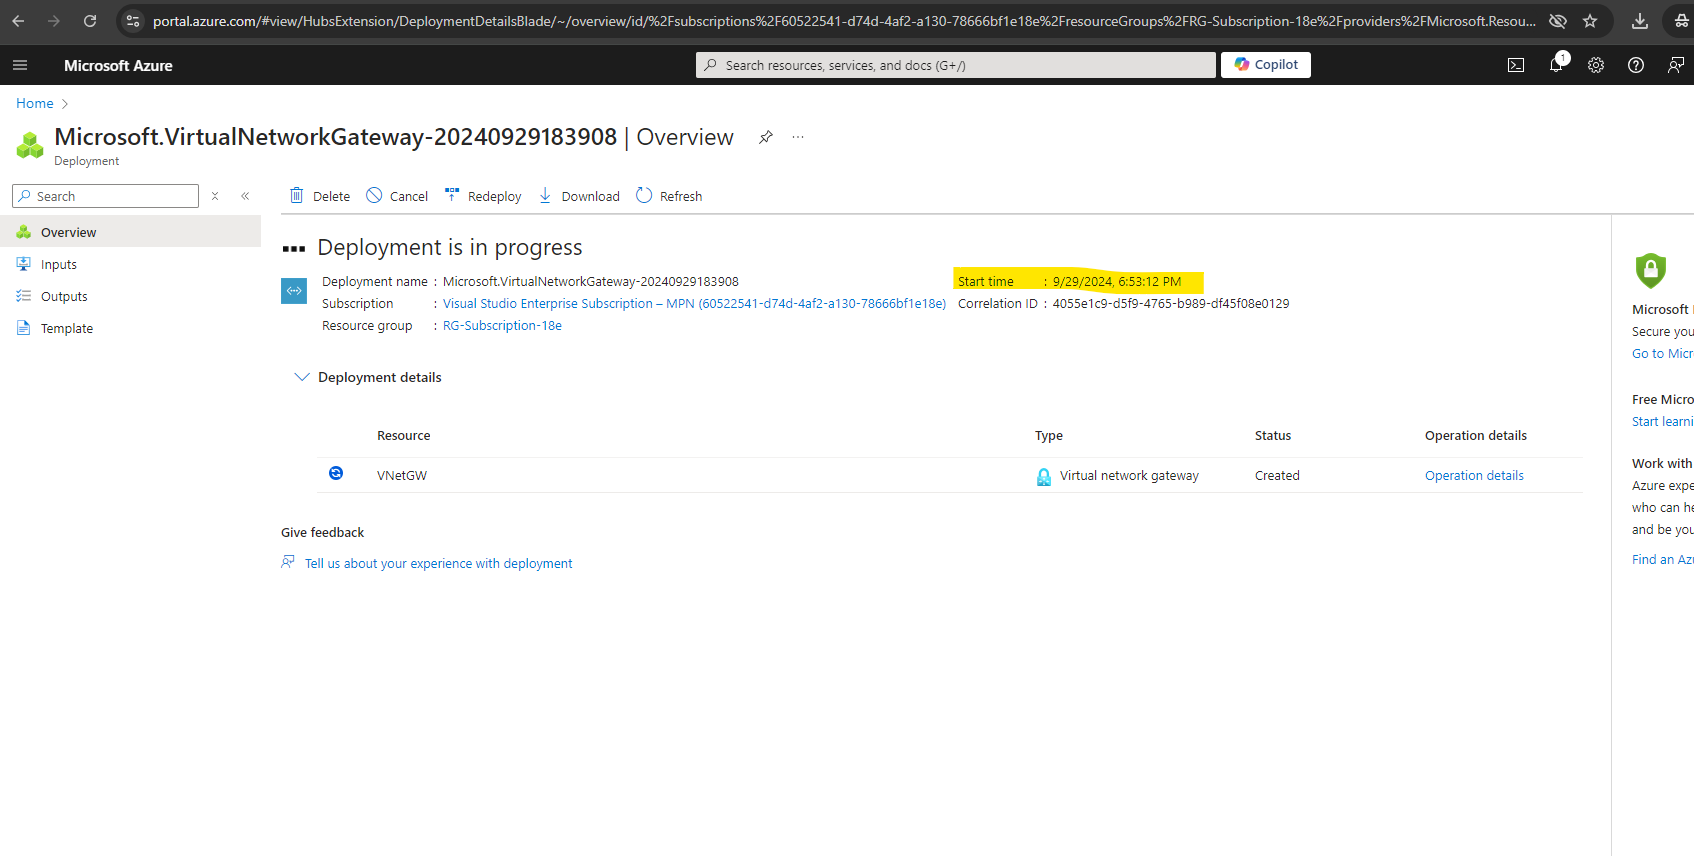
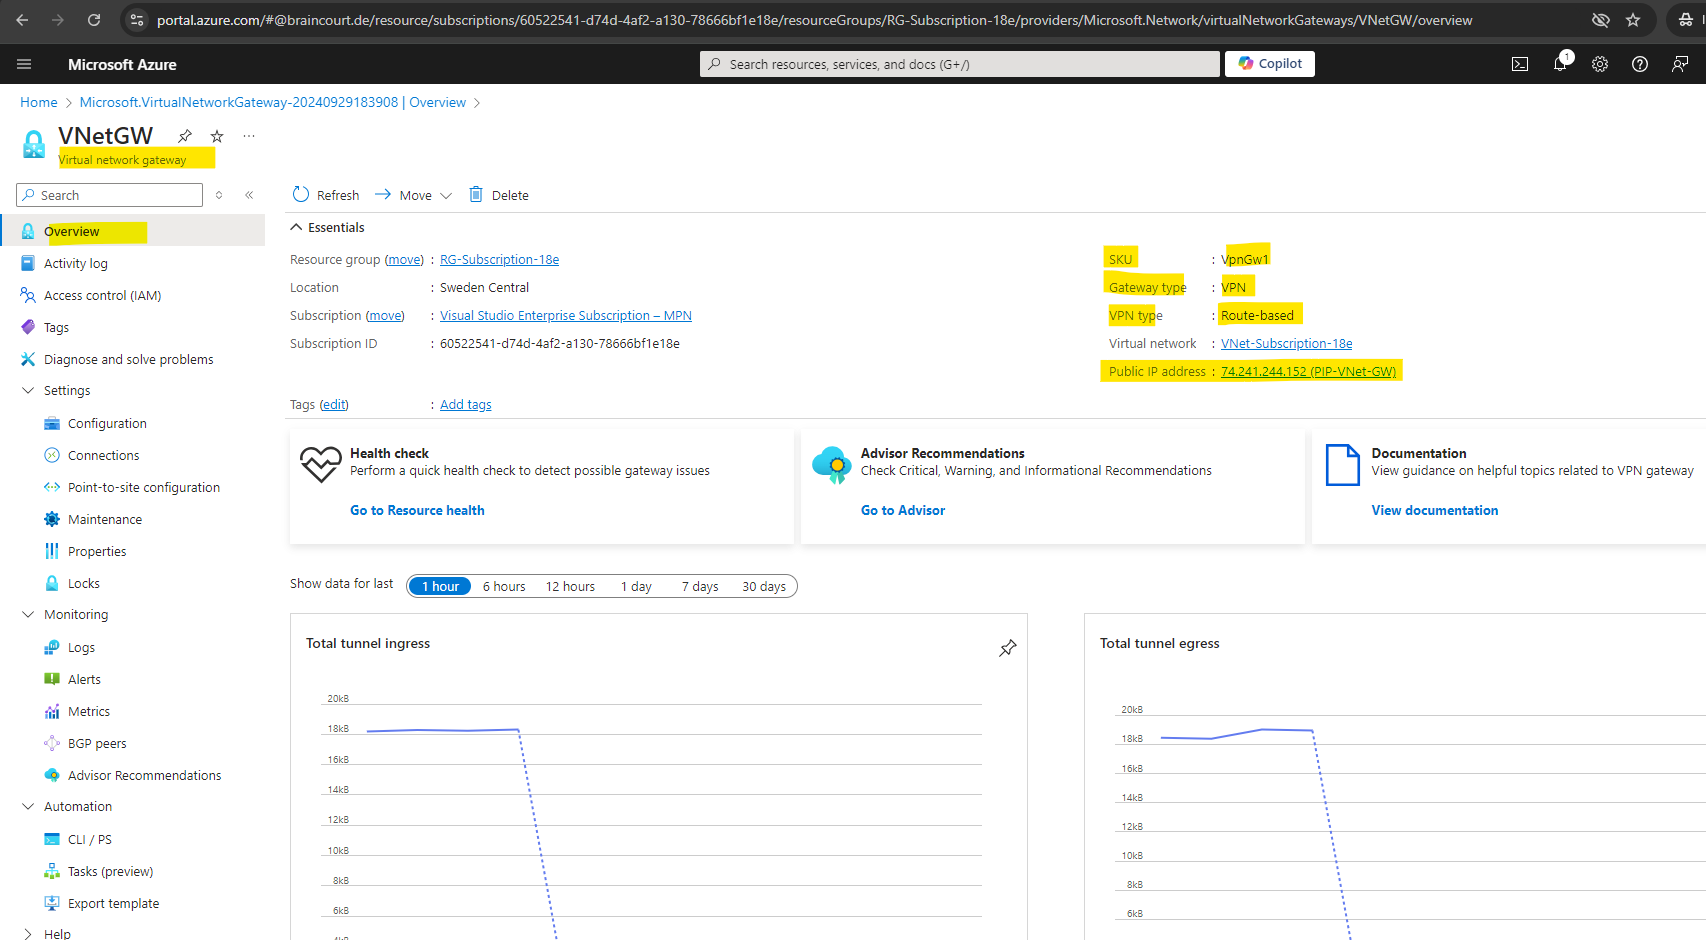
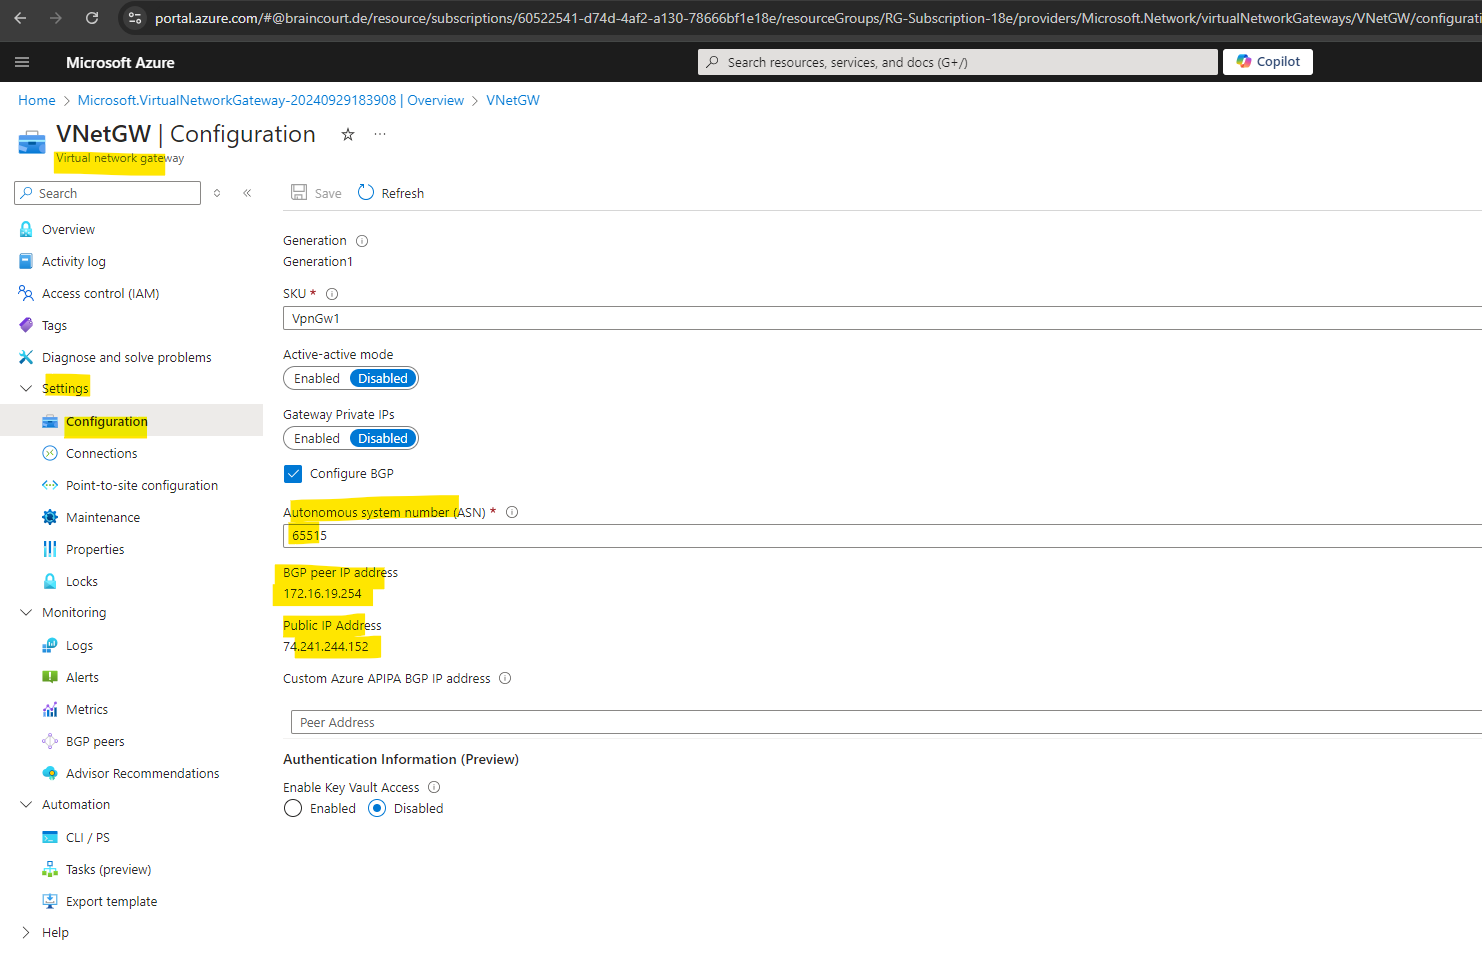
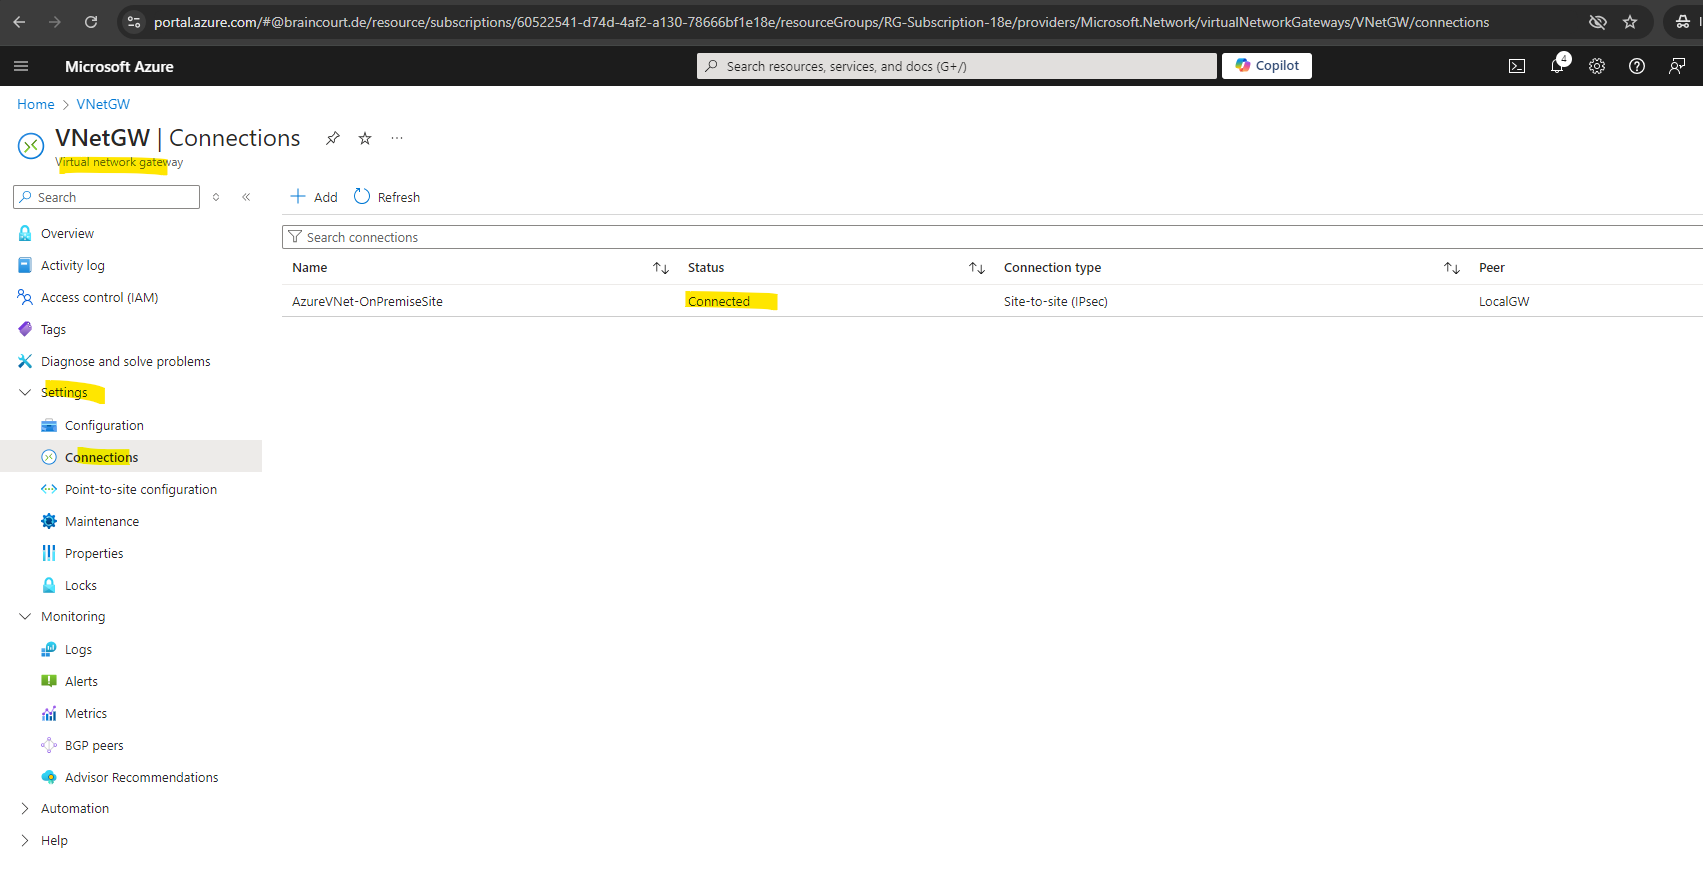
Create and Configure a Virtual Network Gateway in Azure
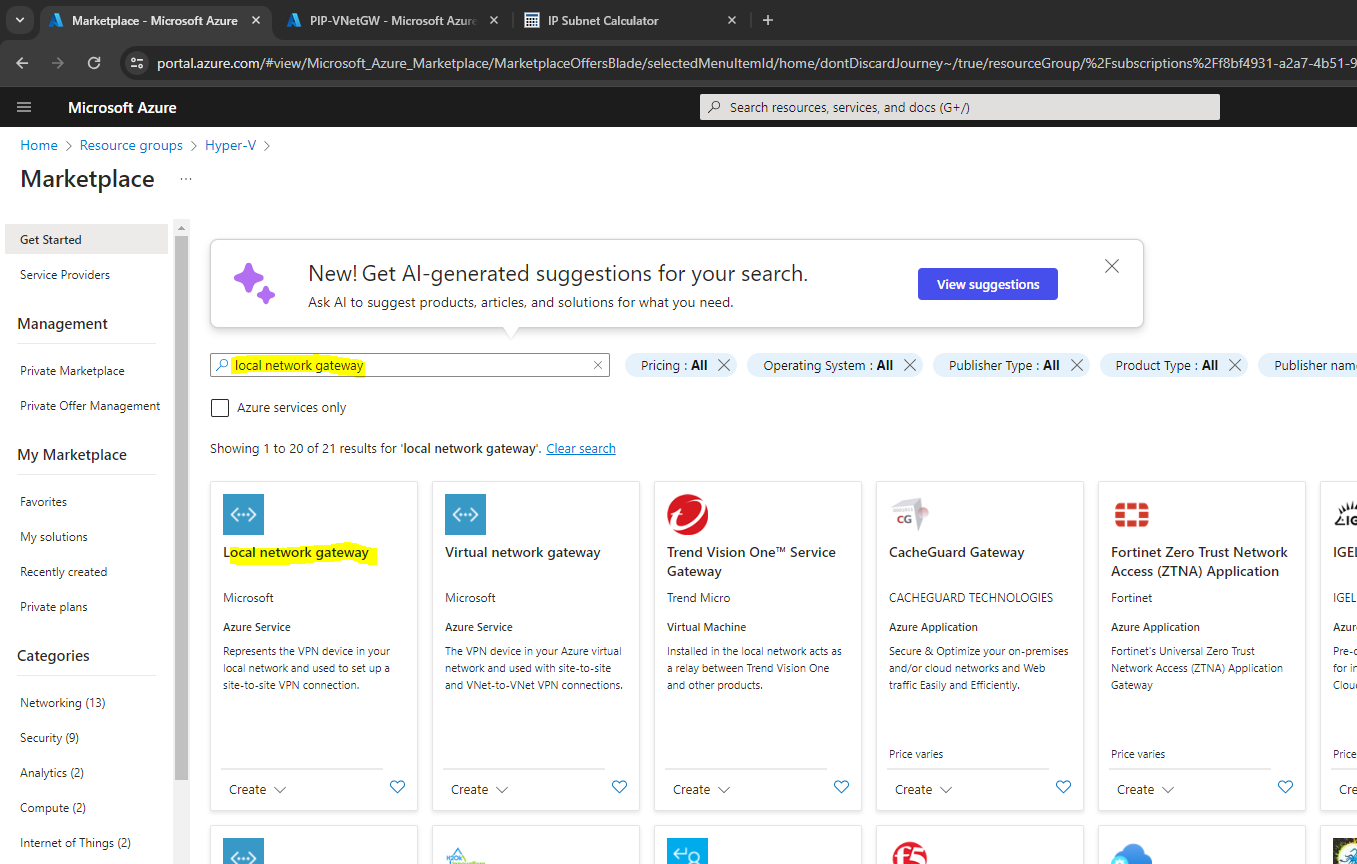
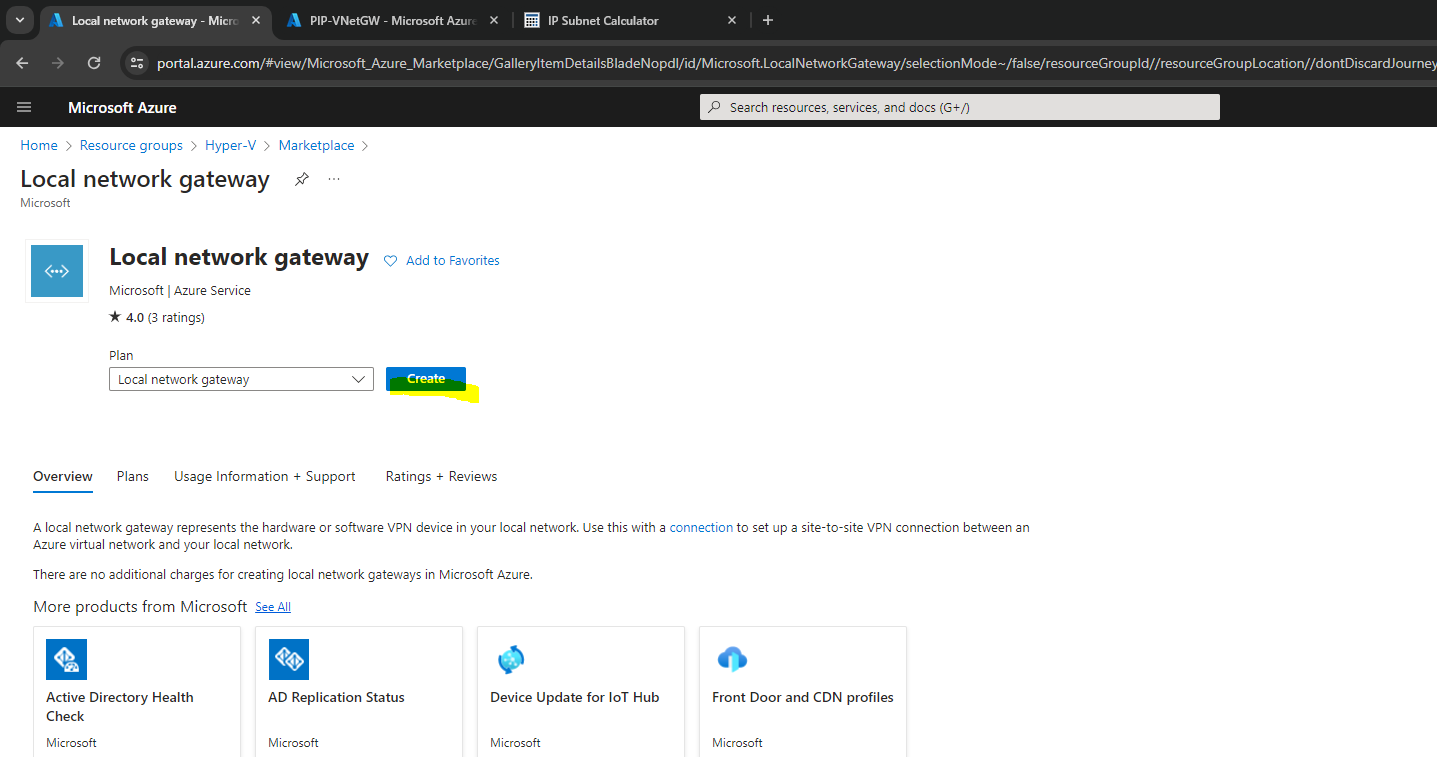
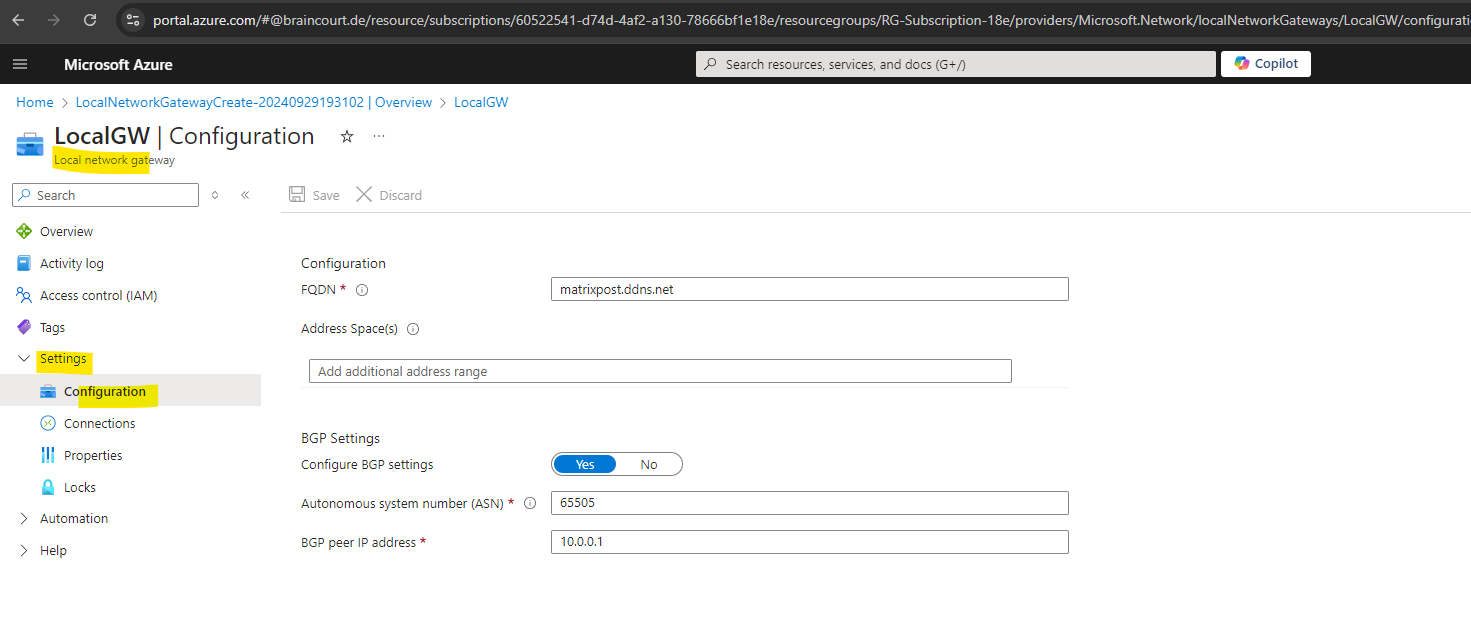
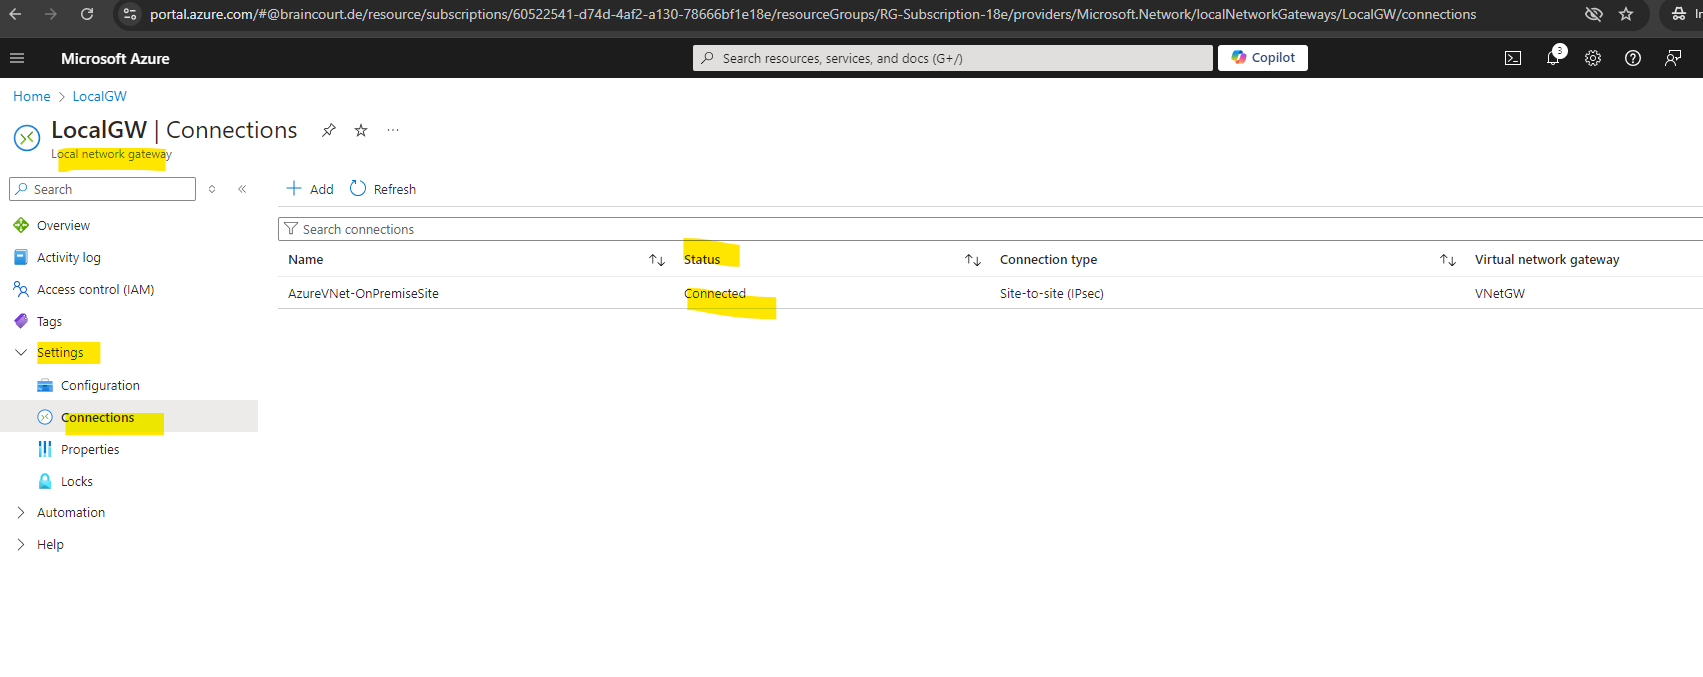
Create and Configure a Local Network Gateway
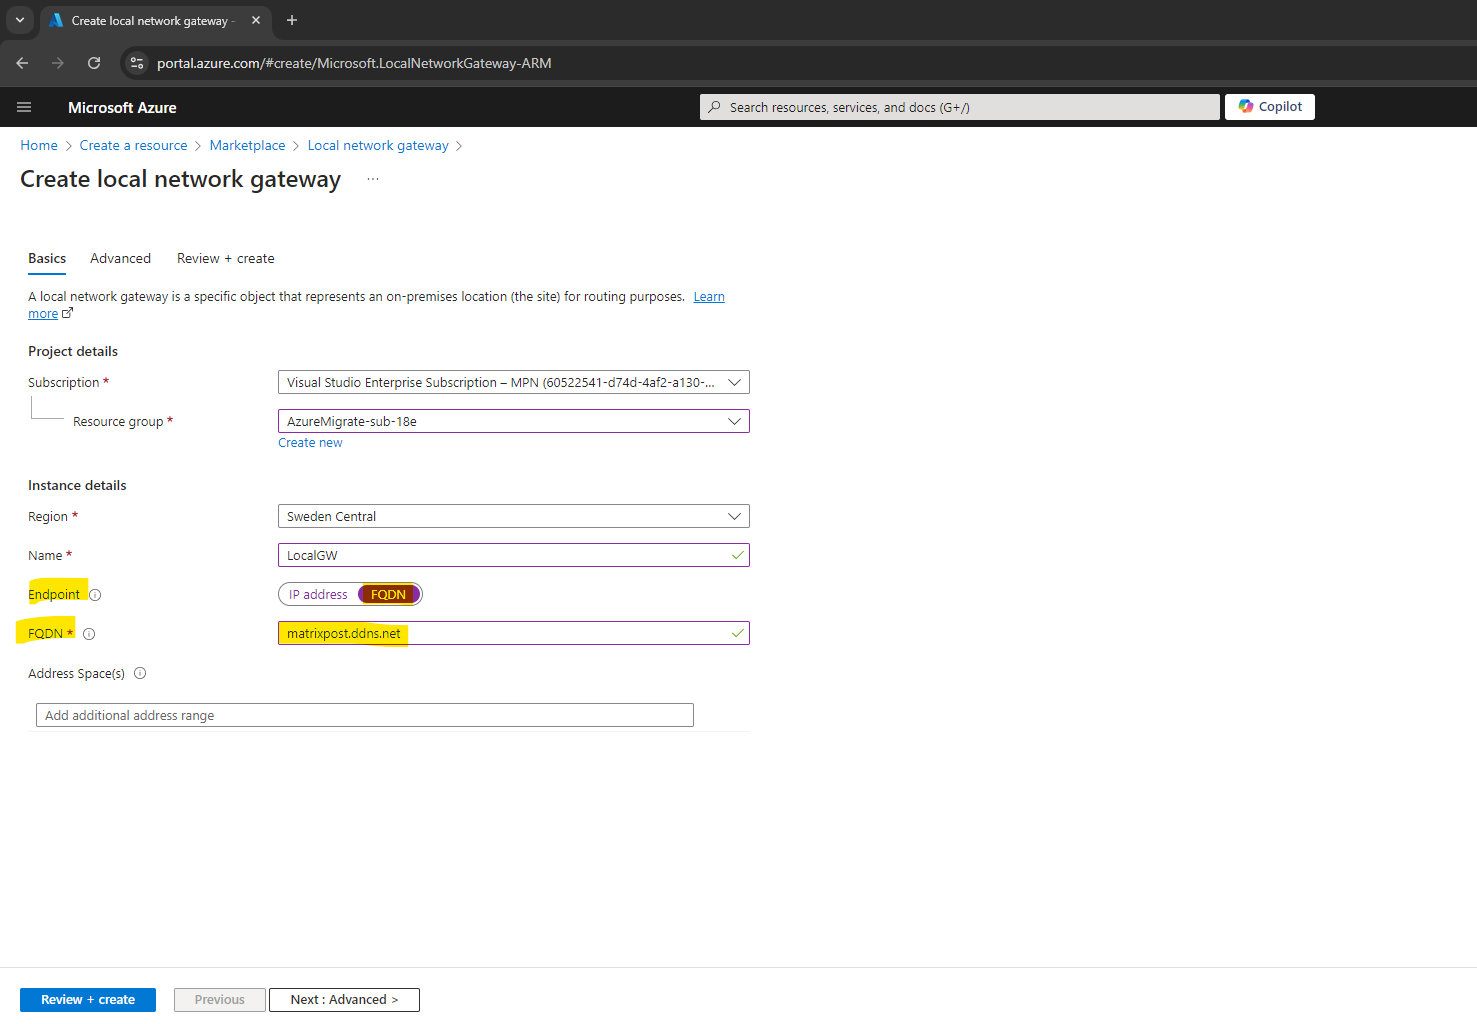
As mentioned, because we will use BGP to advertise the routes of our local network, we can leave the field for the address space(s) below blank.
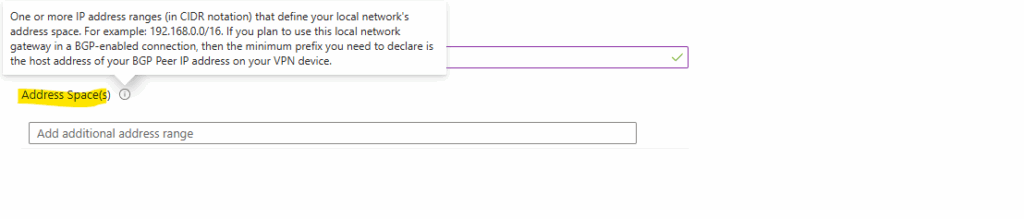
In case we do not want to use BGP and therefore want to define the networks/subnets we want to route through the tunnel by hand, we need to add here all on-premise local networks which should be routed through the tunnel with Azure.
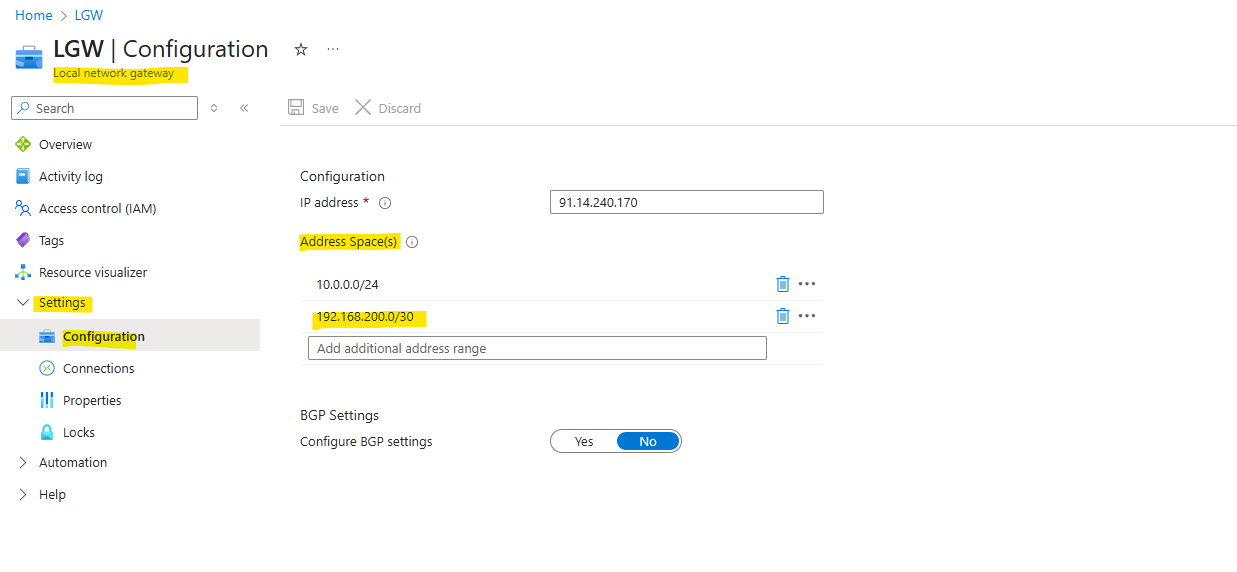
We also need to add here the transit network (IKEv2 phase 2 tunnel), configured on the local on-premise VPN device, through which the local networks and Azure networks will be routed.
For the transit network I will use below for example the network 192.168.200.0/30. This network will finally have two host addresses I can use for with 192.168.200.1 and 192.168.200.2 (192.168.200.0 is the network address and 192.168.200.3 the broadcast address.)
The transit network should not overlap with our on-premise local networks or the Azure networks.
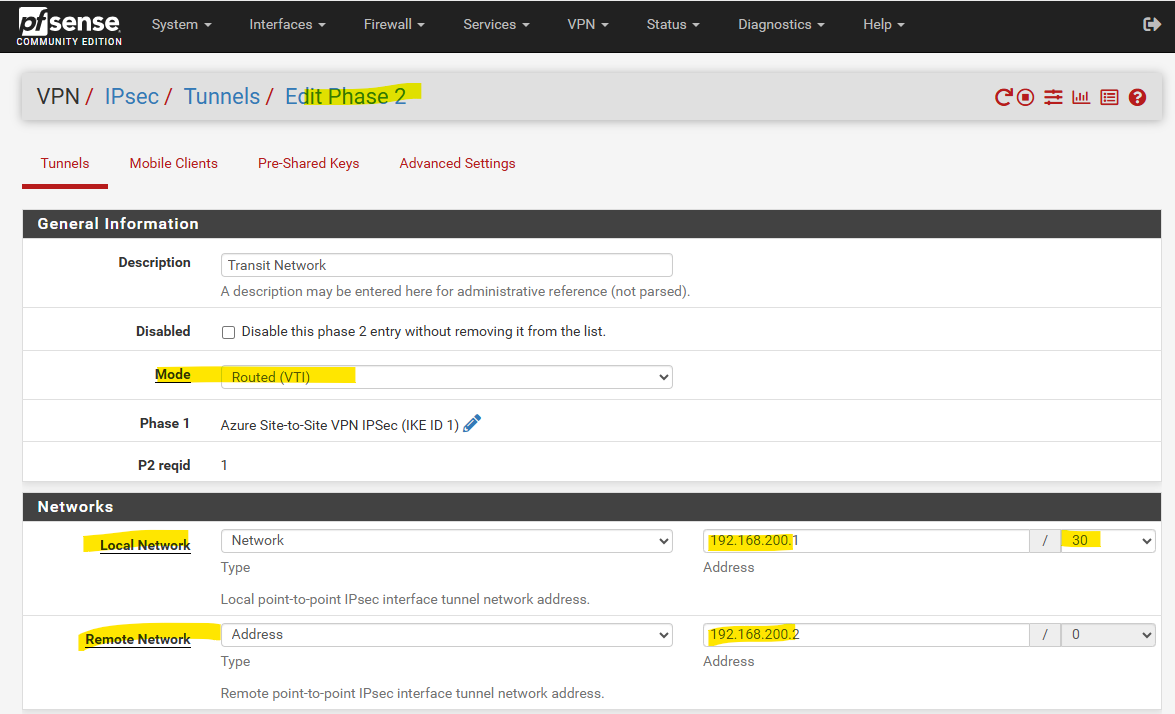
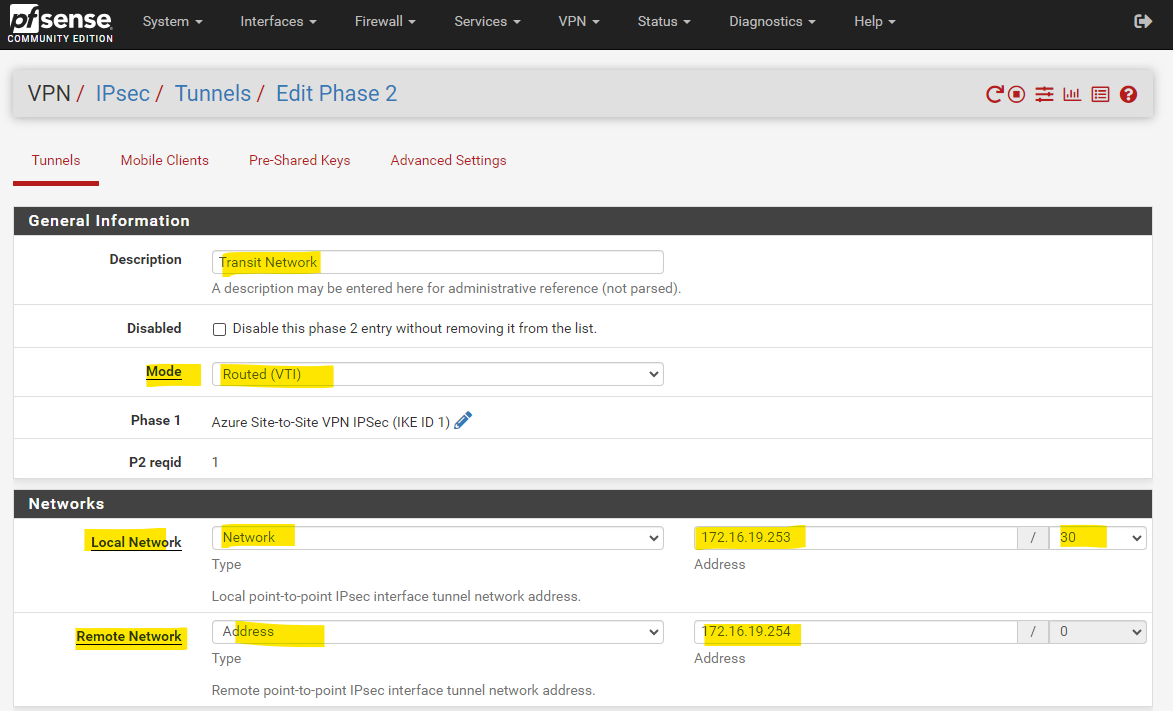
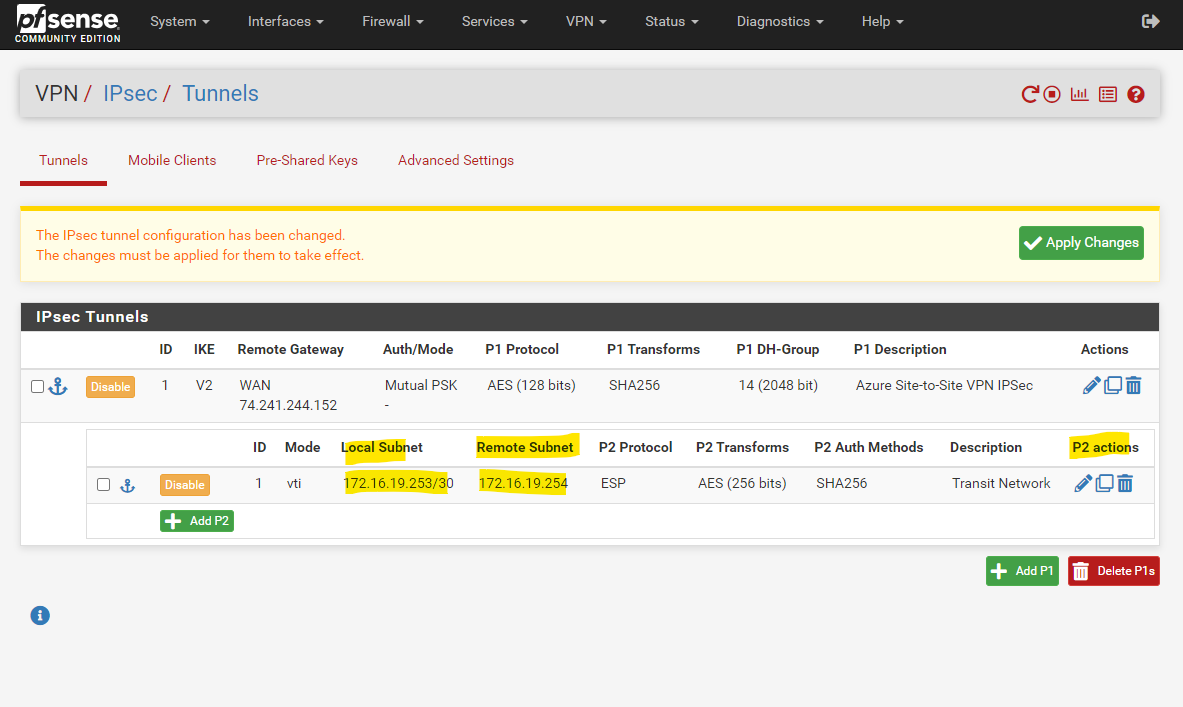
On the on-premise VPN device (in my case pfSense) the configuration for the transit network on the phase 2 tunnel will looks like this.
The remote network IP for the transit network below, we do not need to configure directly in Azure on the local network gateway, it just needs to be defined in the address space(s) field as shown above.
Now back to our configuration by using BGP.
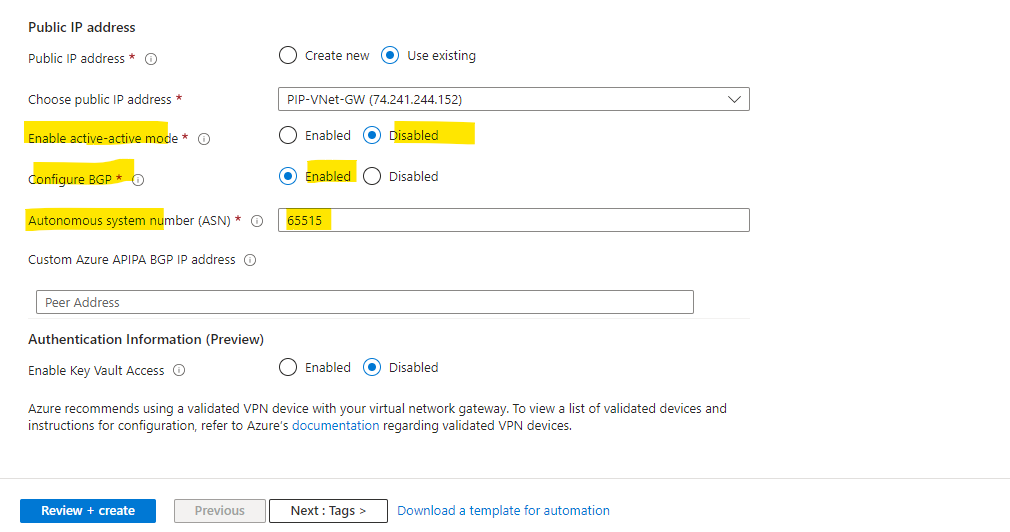
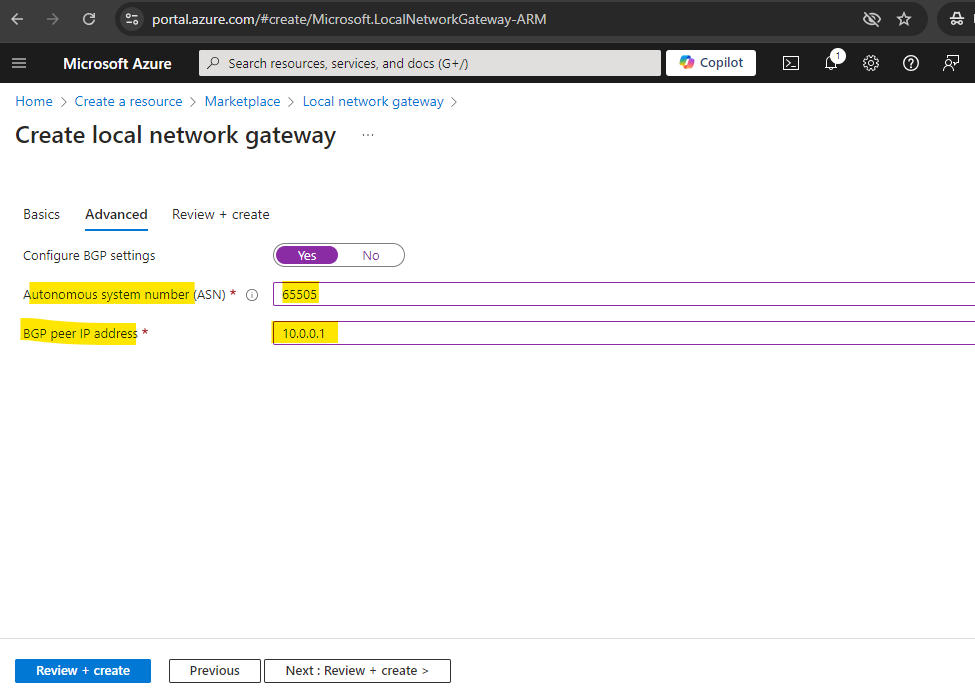
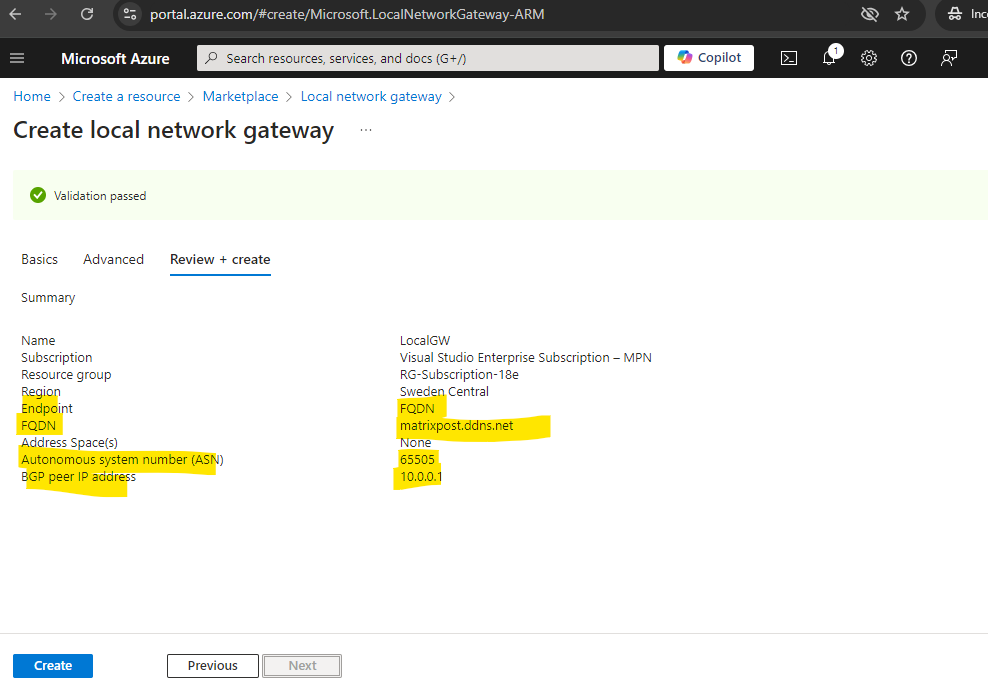
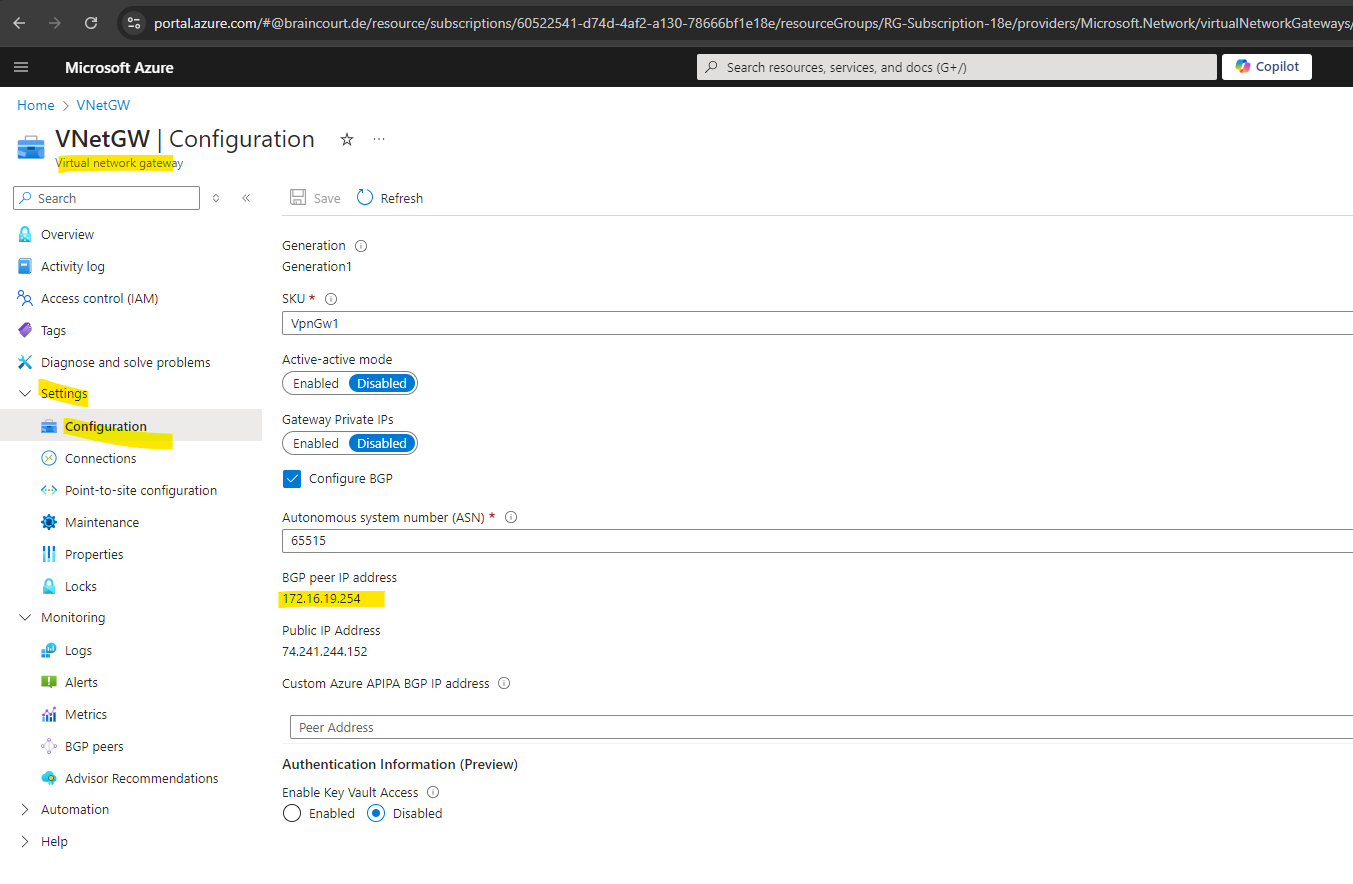
On the Advanced tab below enable BGP and enter the ASN number and BGP peer IP address of your local on-premise VPN device, in my case my pfSense appliance. Then click on Review + create.
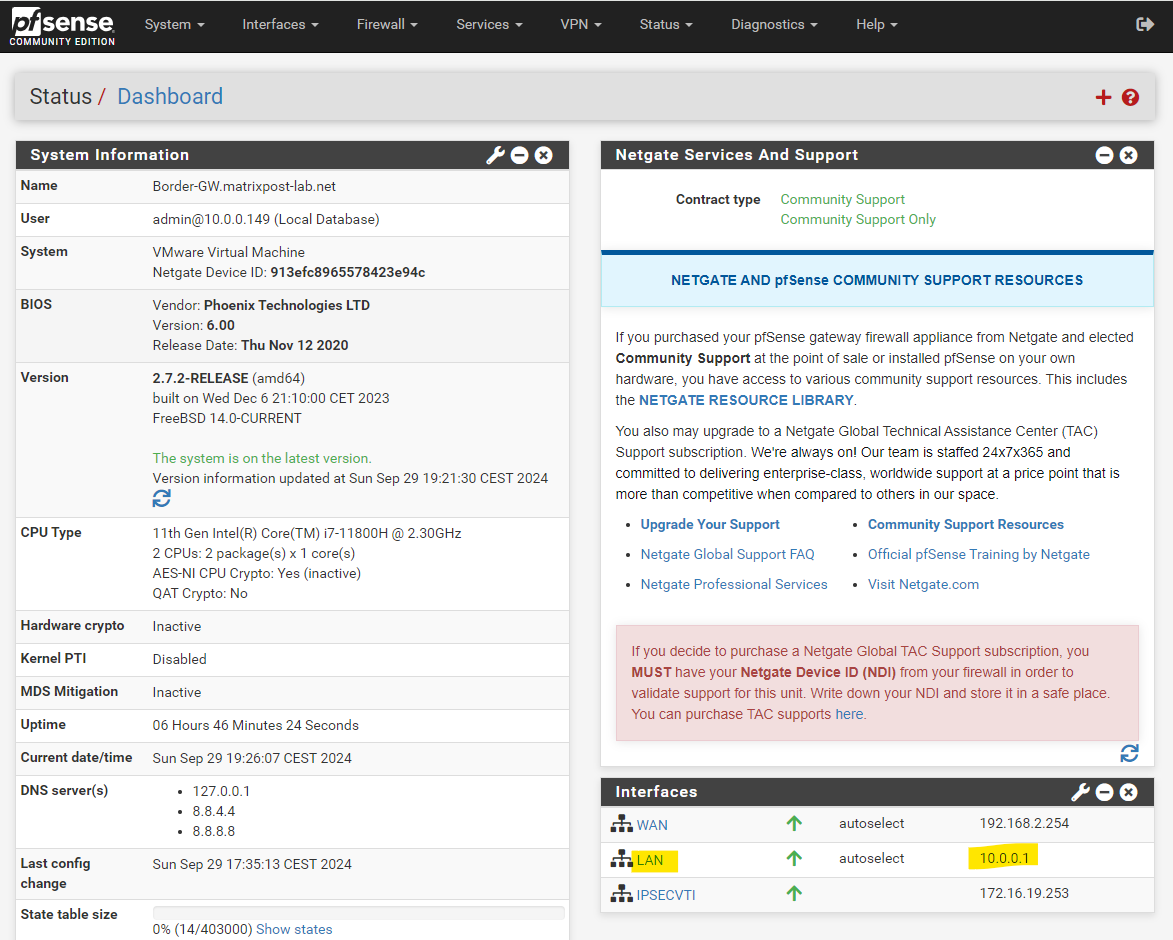
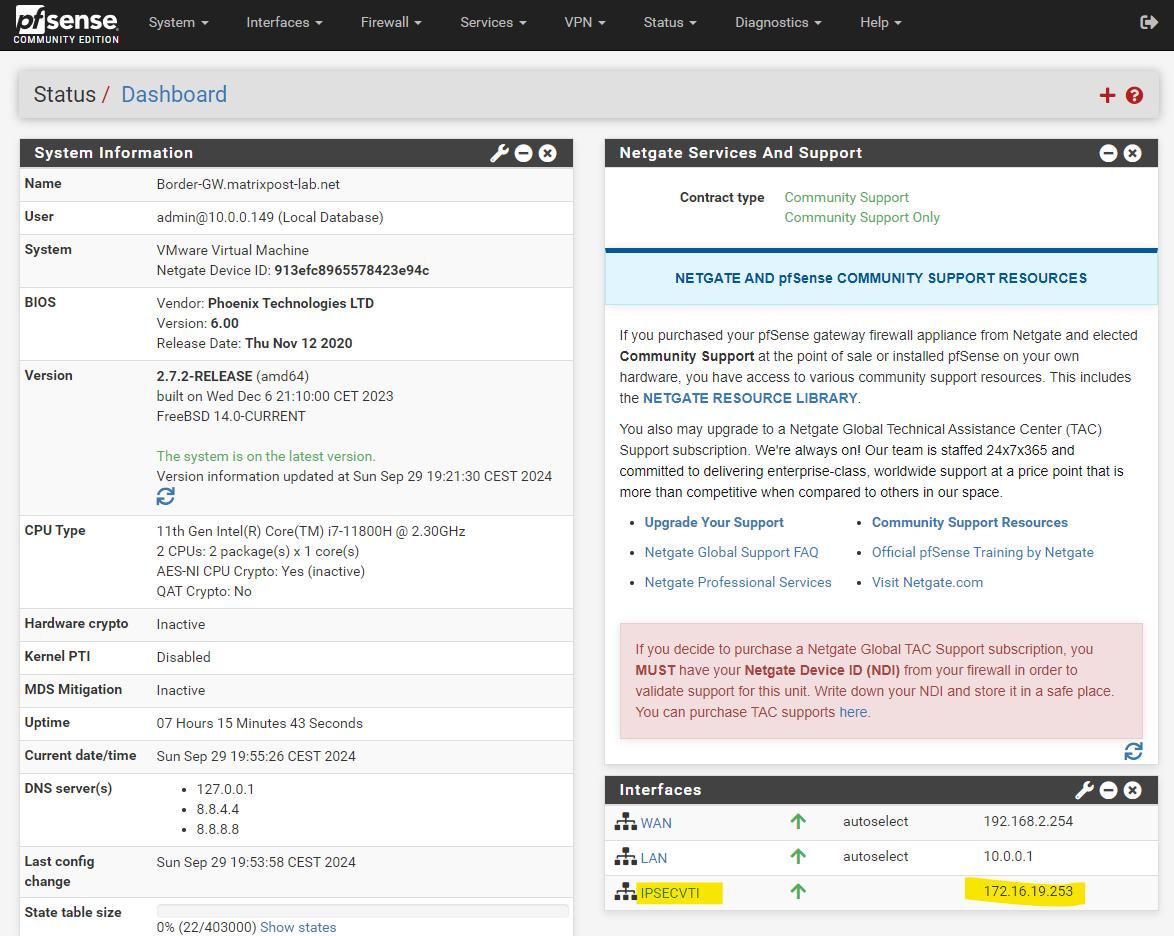
The ASN and BGP peer IP address of the local network gateway we will get from our on-premise VPN appliance, in my case here pfSense. The configuration of the pfSense IPSec site-to-site VPN tunnel we will see further down.

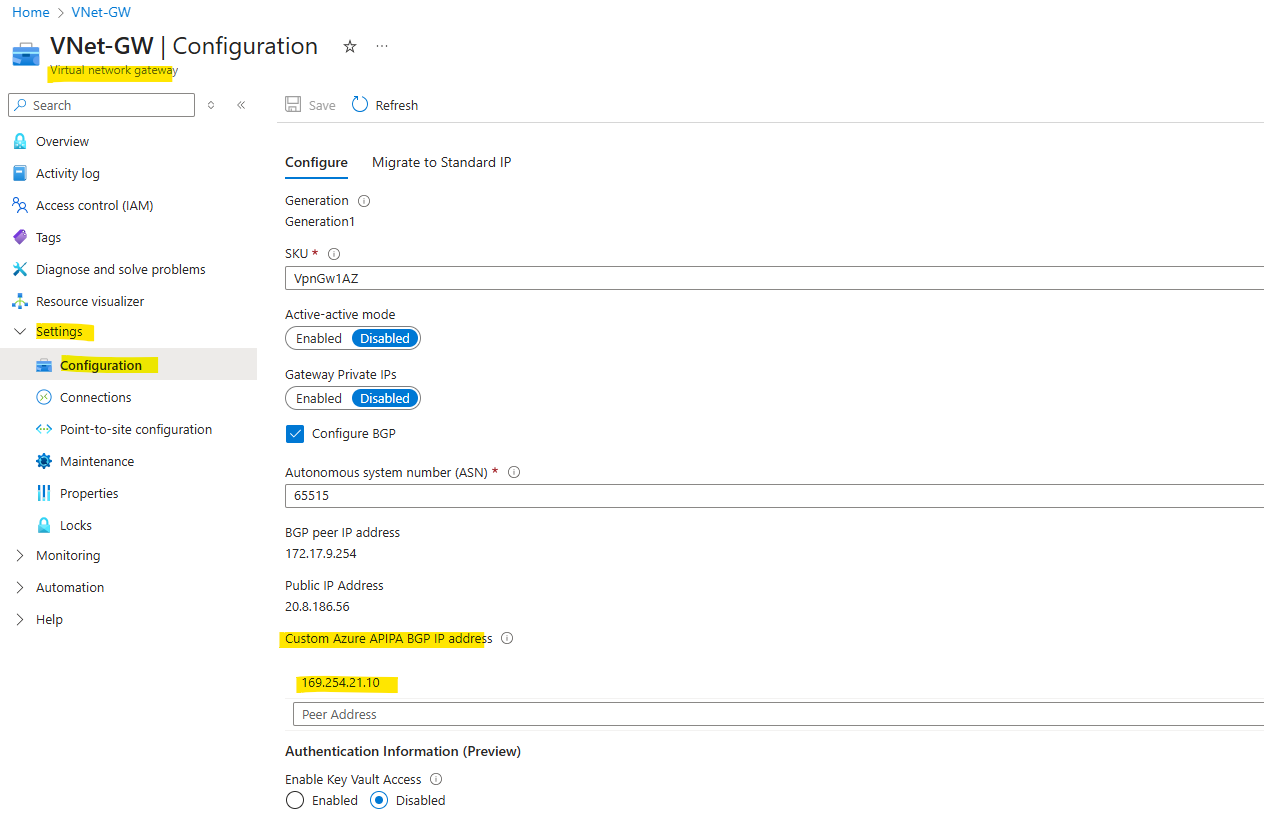
As already mentioned above and best practices, we can also use custom Azure APIPA BGP IP addresses as shown below.
When using link-local APIPA addresses on pfSense, we must first enable them on pfSense as shown in my following post https://blog.matrixpost.net/pfsense-and-apipa-169-254-16-enabling-link-local-transit-networks-for-ipsec-vti-and-bgp/.
Also read my following post about numbering (or unnumbered supported by Juniper, Cisco, Check Point, etc. but not pfSense) the phase 2 transit network https://blog.matrixpost.net/step-by-step-guide-setting-up-route-based-s2s-vpn-between-azure-and-on-prem-by-using-pfsense-part-2/.
The screenshots (and IP addresses) below are from a different deployment by using APIPA BGP IP addresses.
To use them we need to add it directly on the virtual network gateway as highlighted.
Azure supports BGP IP in the ranges 169.254.21.* and 169.254.22.*.
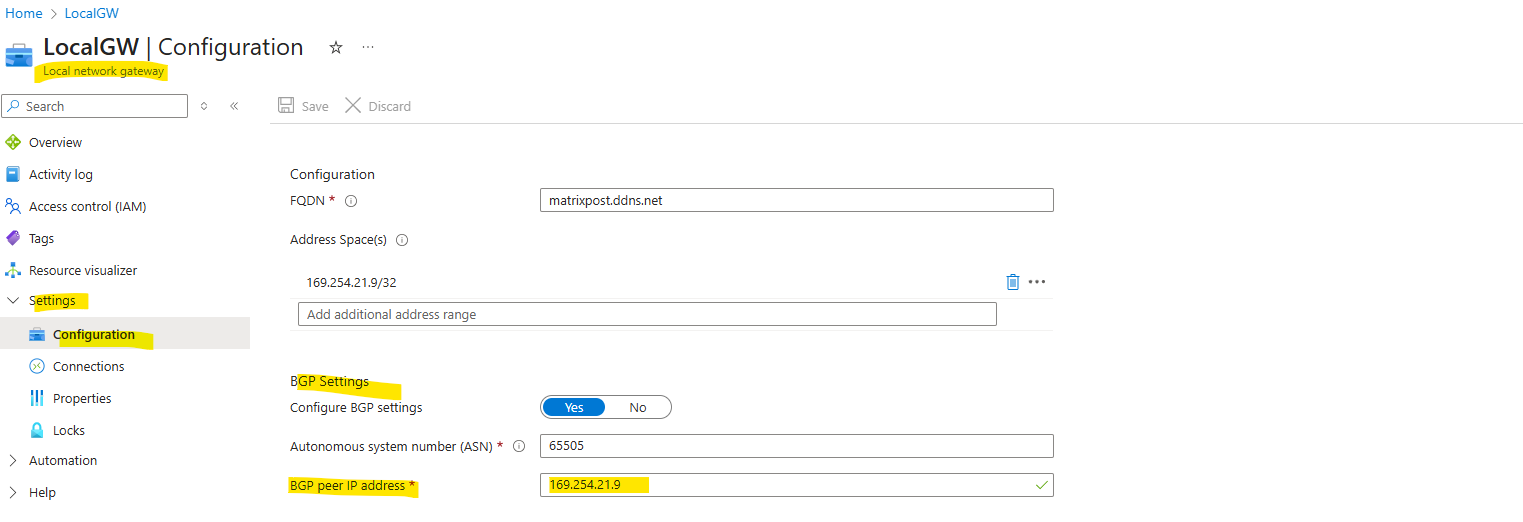
So below for the Azure side we can use e.g. 169.254.21.10 and because they will need to be configured as /30 subnet, in on-prem (here pfSense) we need to use 169.254.21.9 for the BGP peer IP.
The BGP peer IP (pfSense) with 169.254.21.9 we need to enter on the local network gateway as shown below.
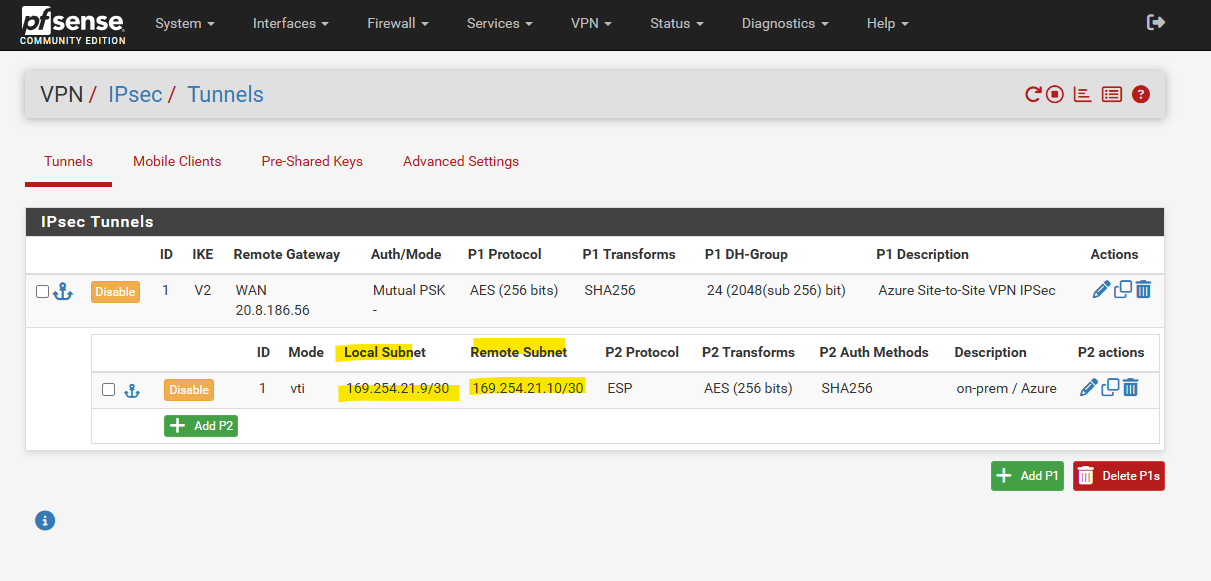
These BGP IP addresses we will use to configure in pfSense the IKEv2 phase 2 tunnel (transit network).
The BGP IP address will be assigned automatically to the VTI interface and therefore can be also used as BGP IP.

For the BGP neighbor in pfSense we use the custom Azure APIPA BGP IP address.
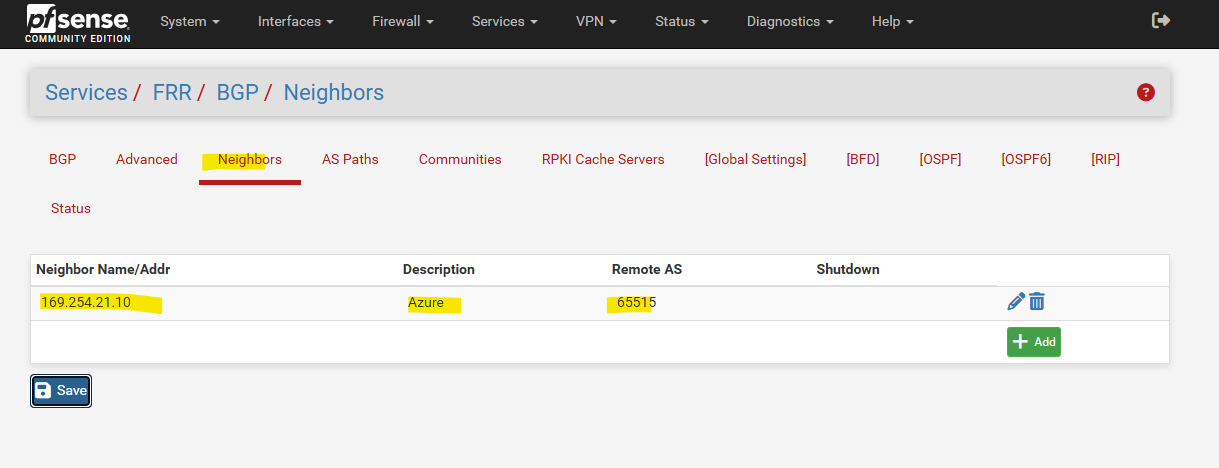
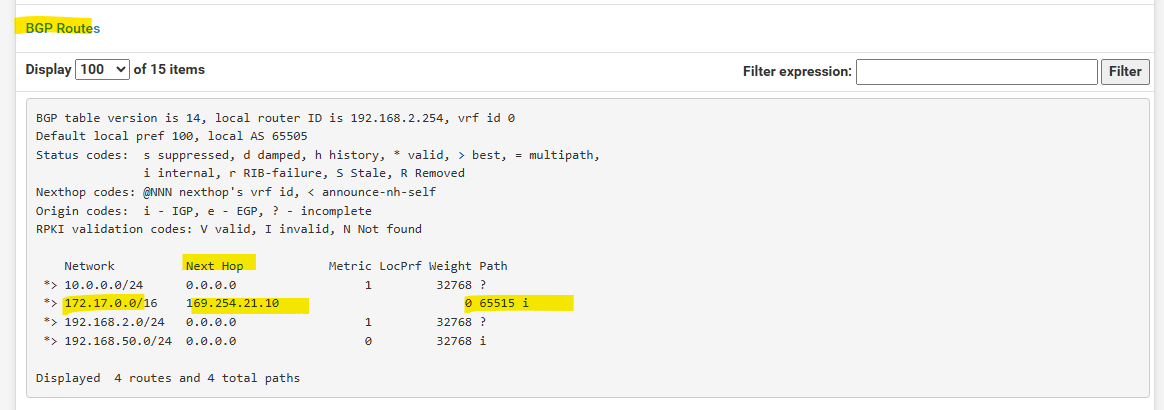
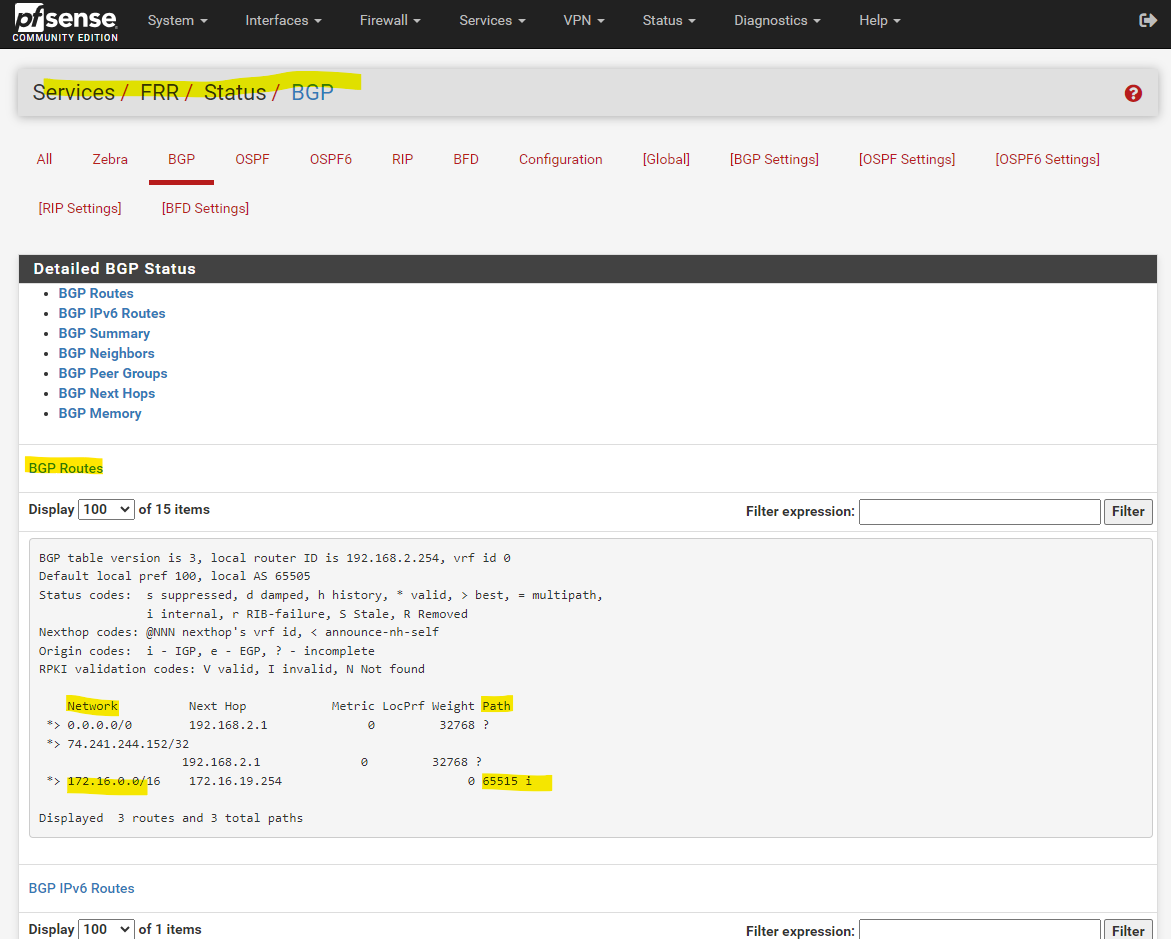
In pfSense we can already see under Status -> FRR -> BGP the advertised routes from Azure (Path 65515), here the Azure’s virtual network address space 172.17.0.0/16.
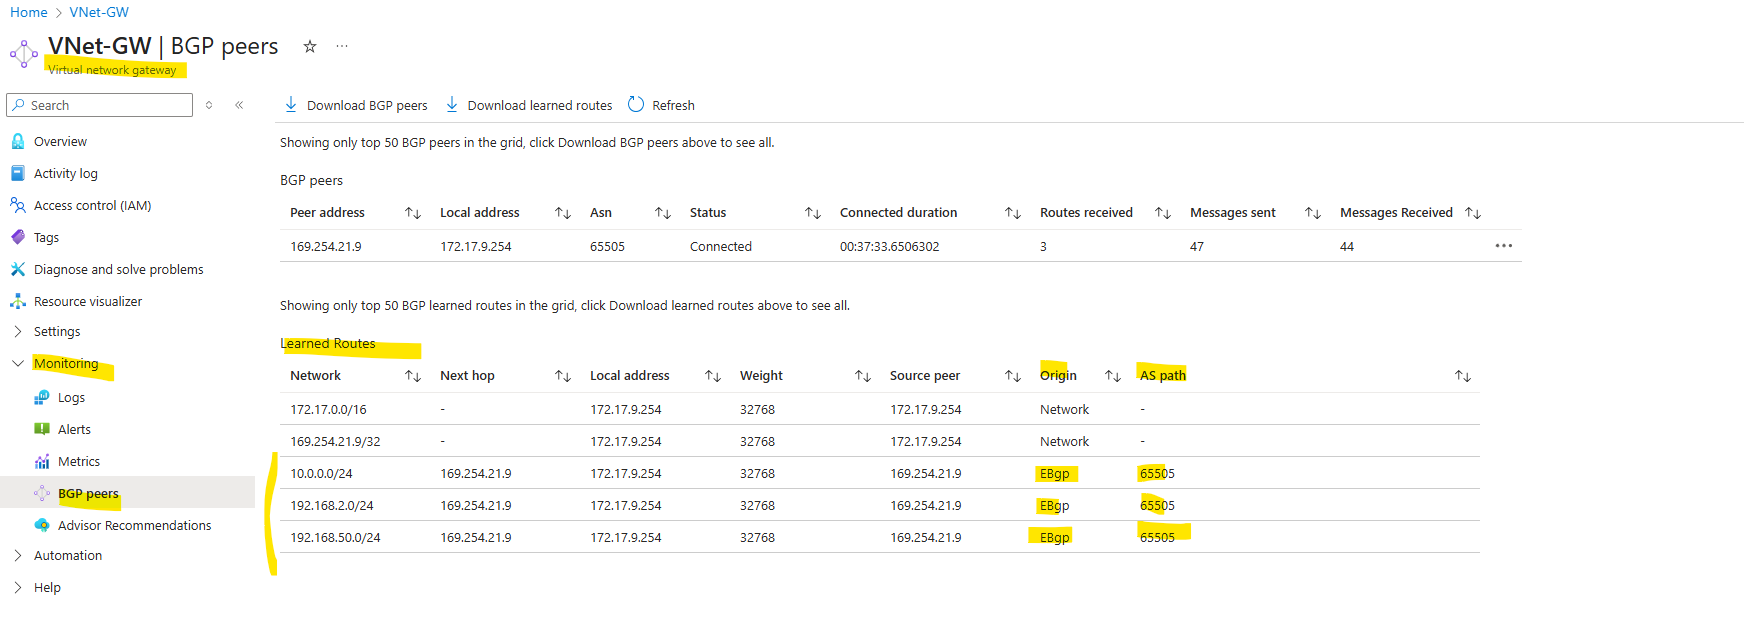
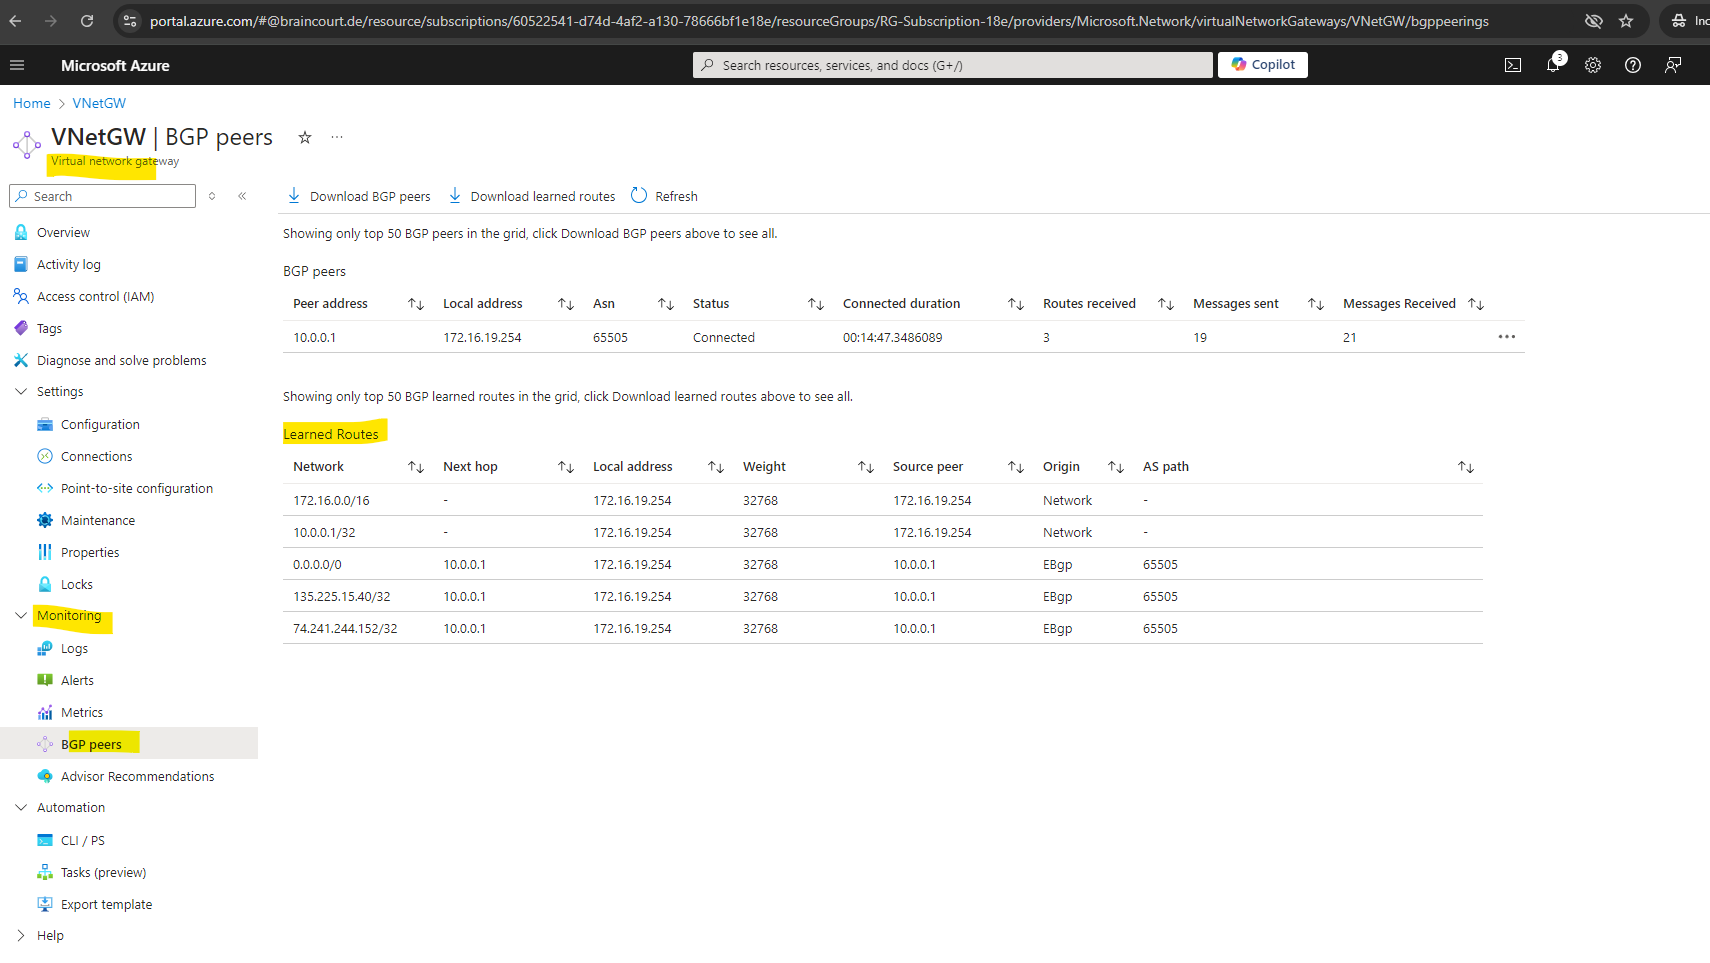
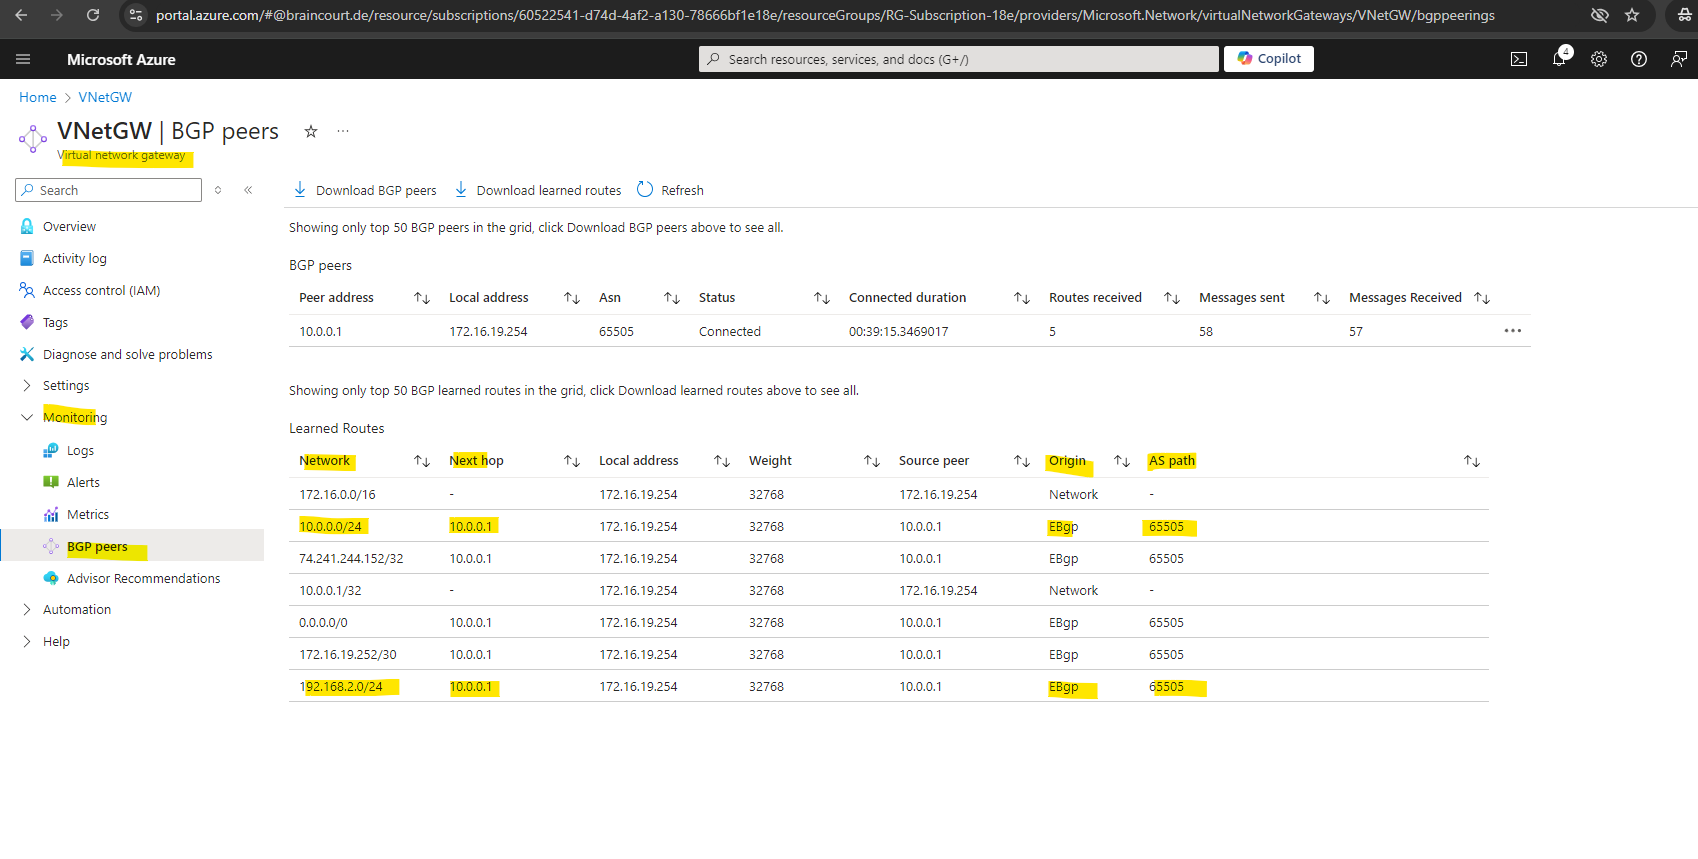
Also in Azure -> virtual network gateway -> Monitoring -> BGP peers we will see all advertised routes from on-prem by pfSense to Azure.
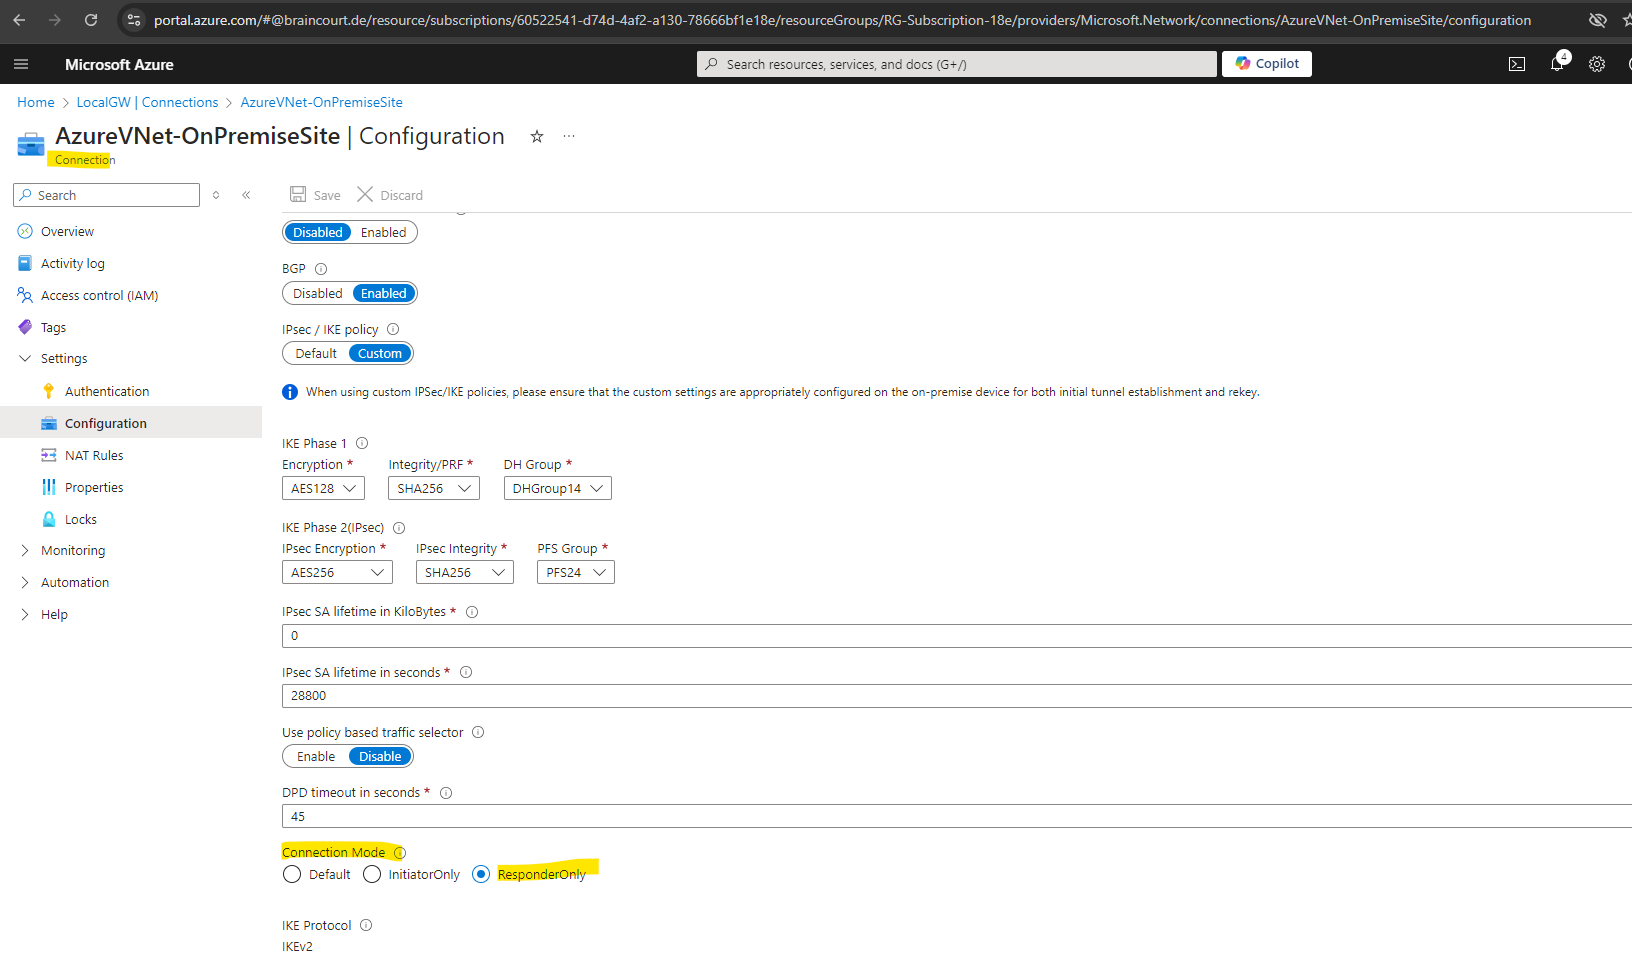
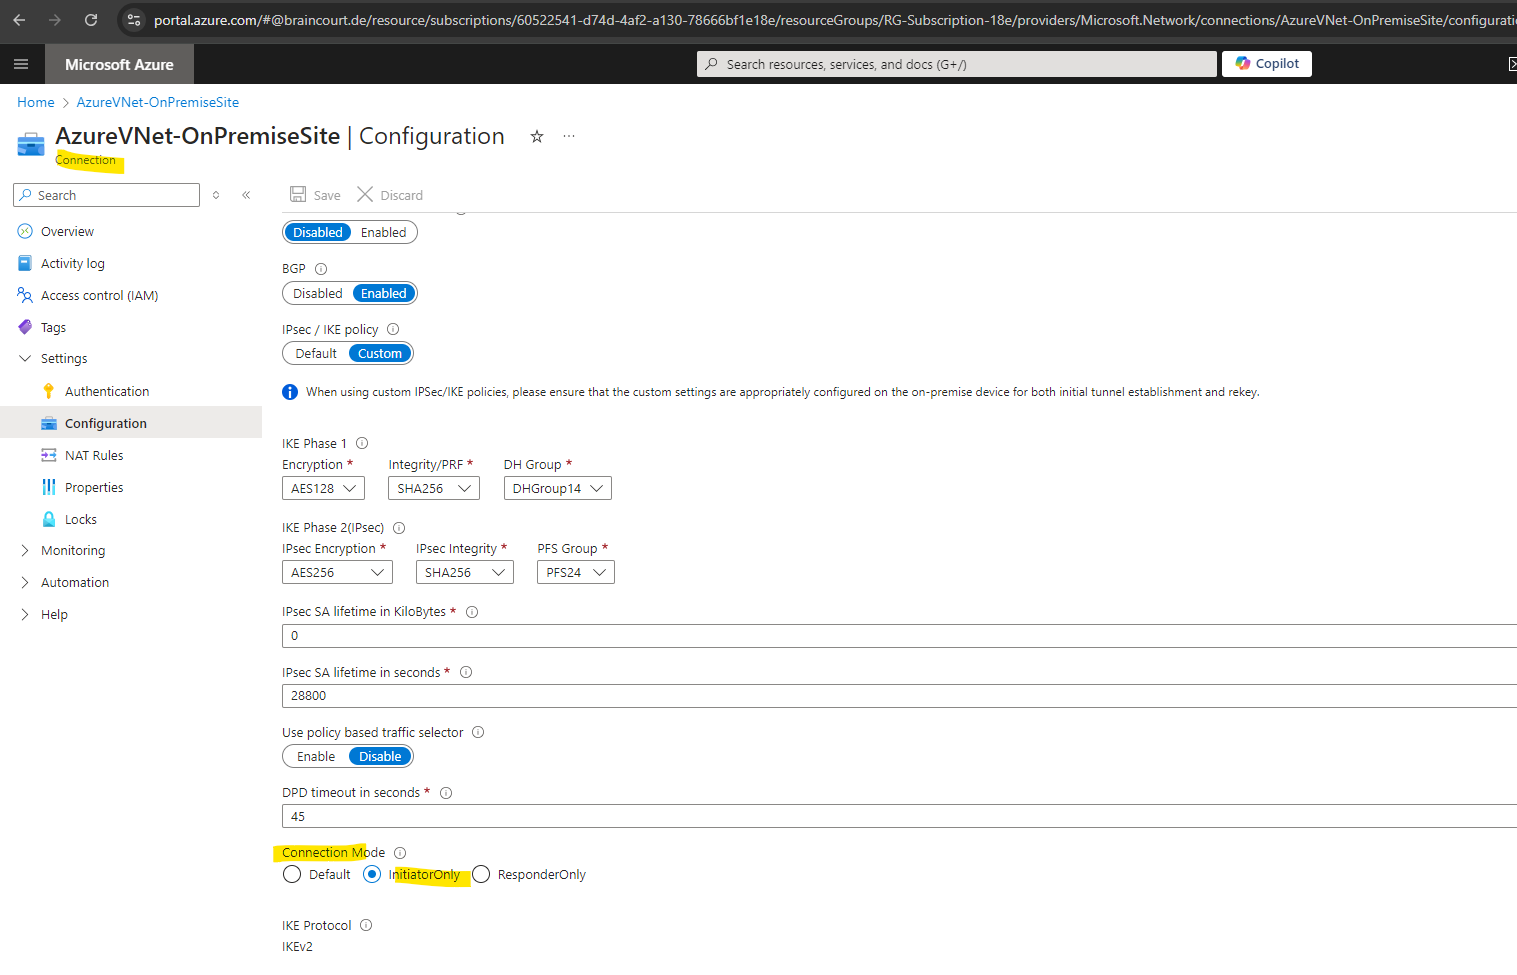
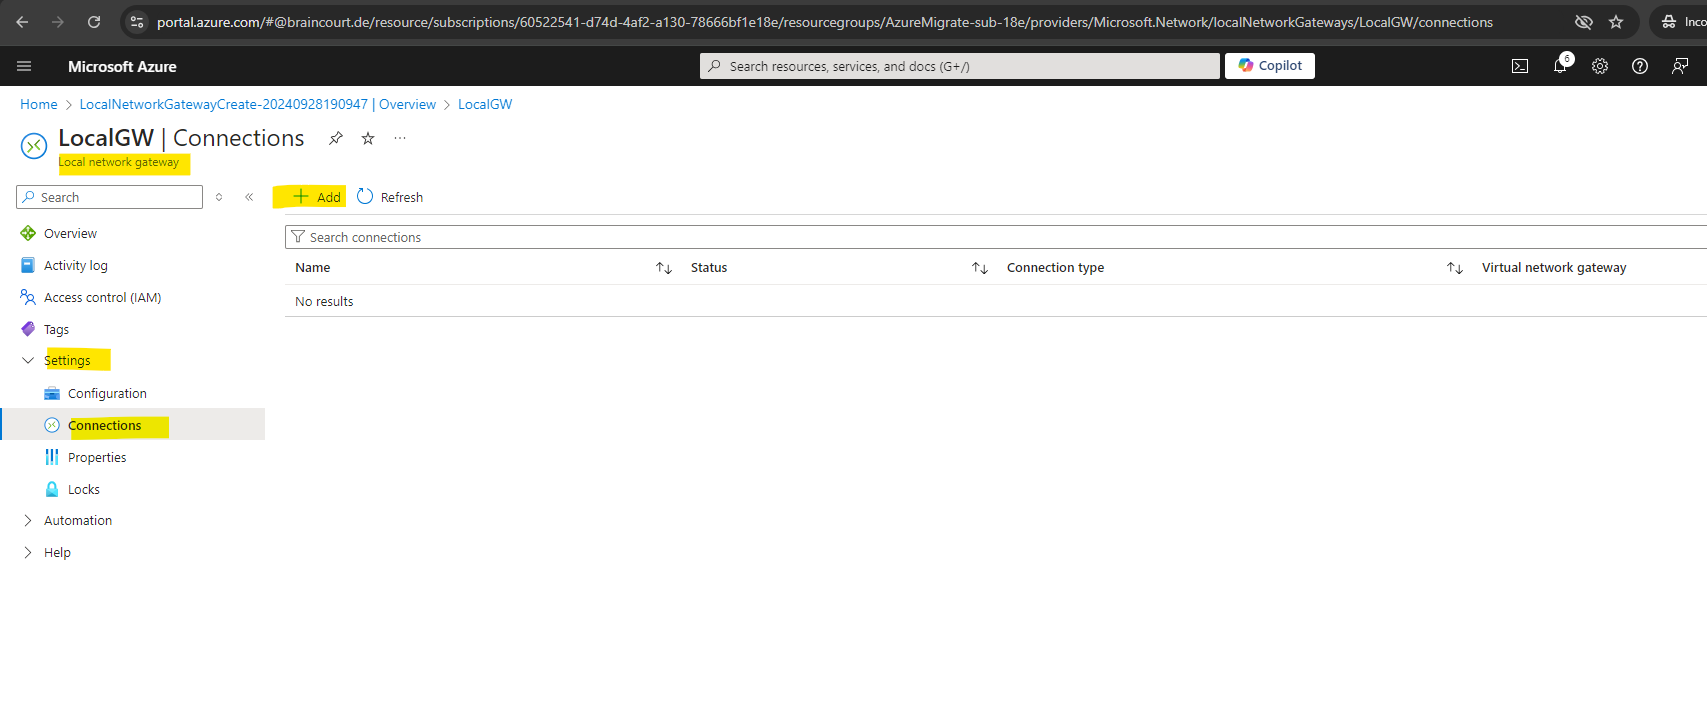
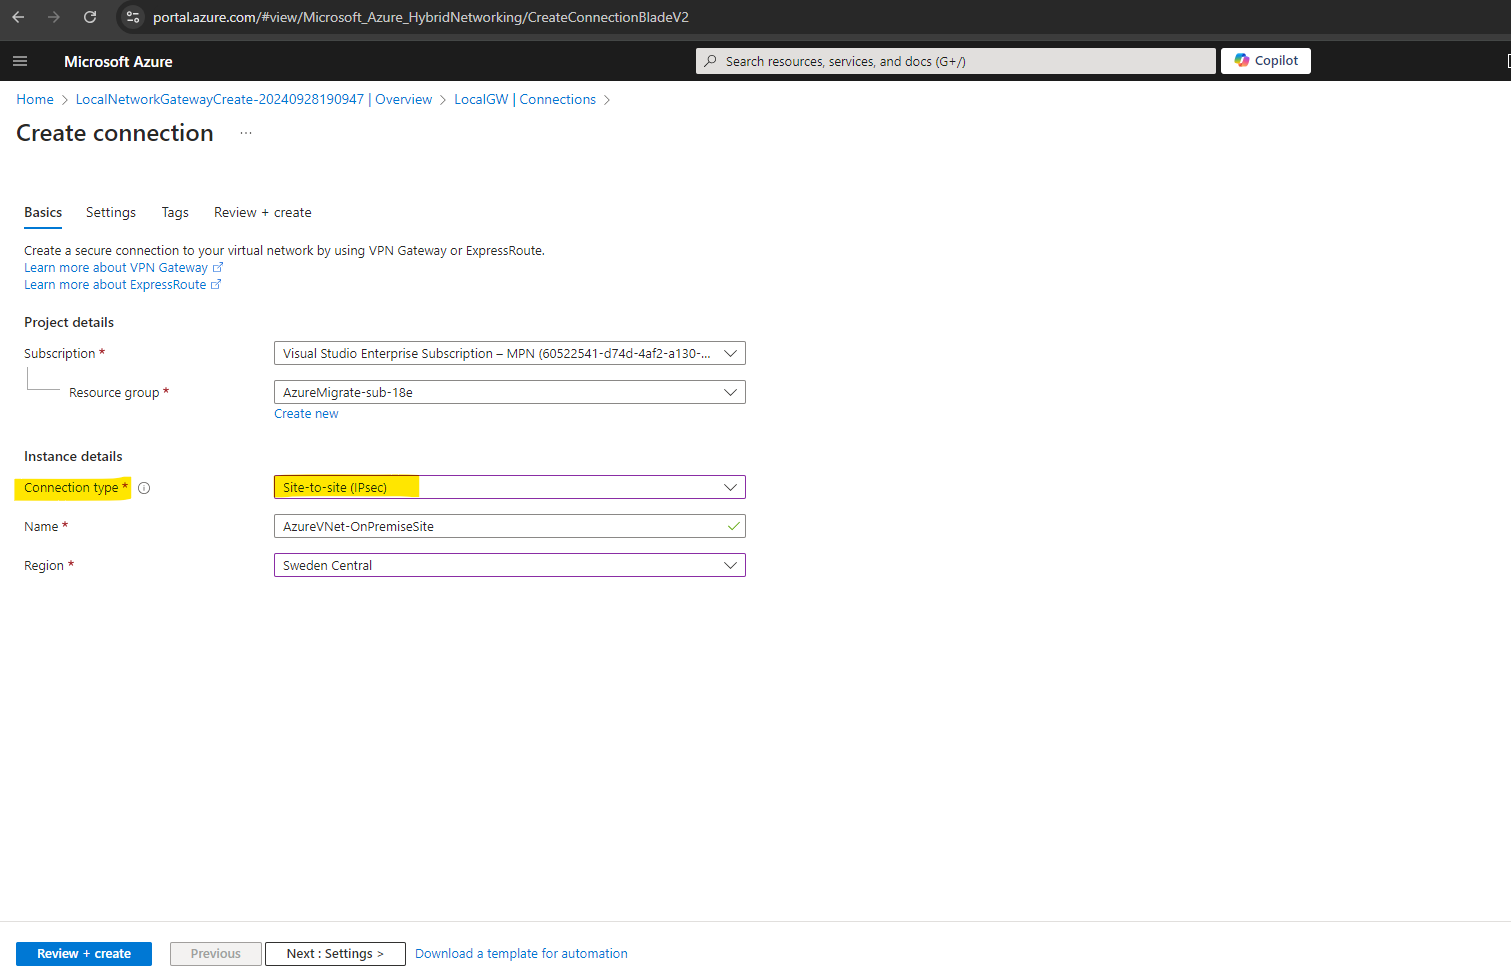
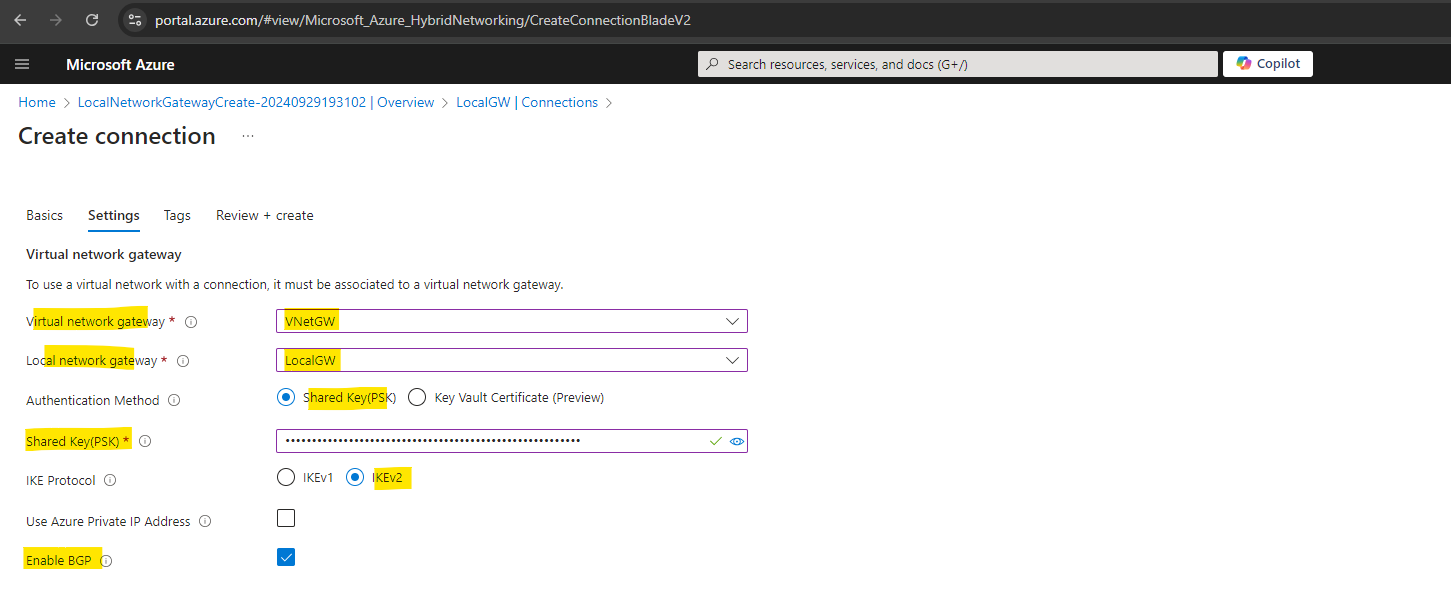
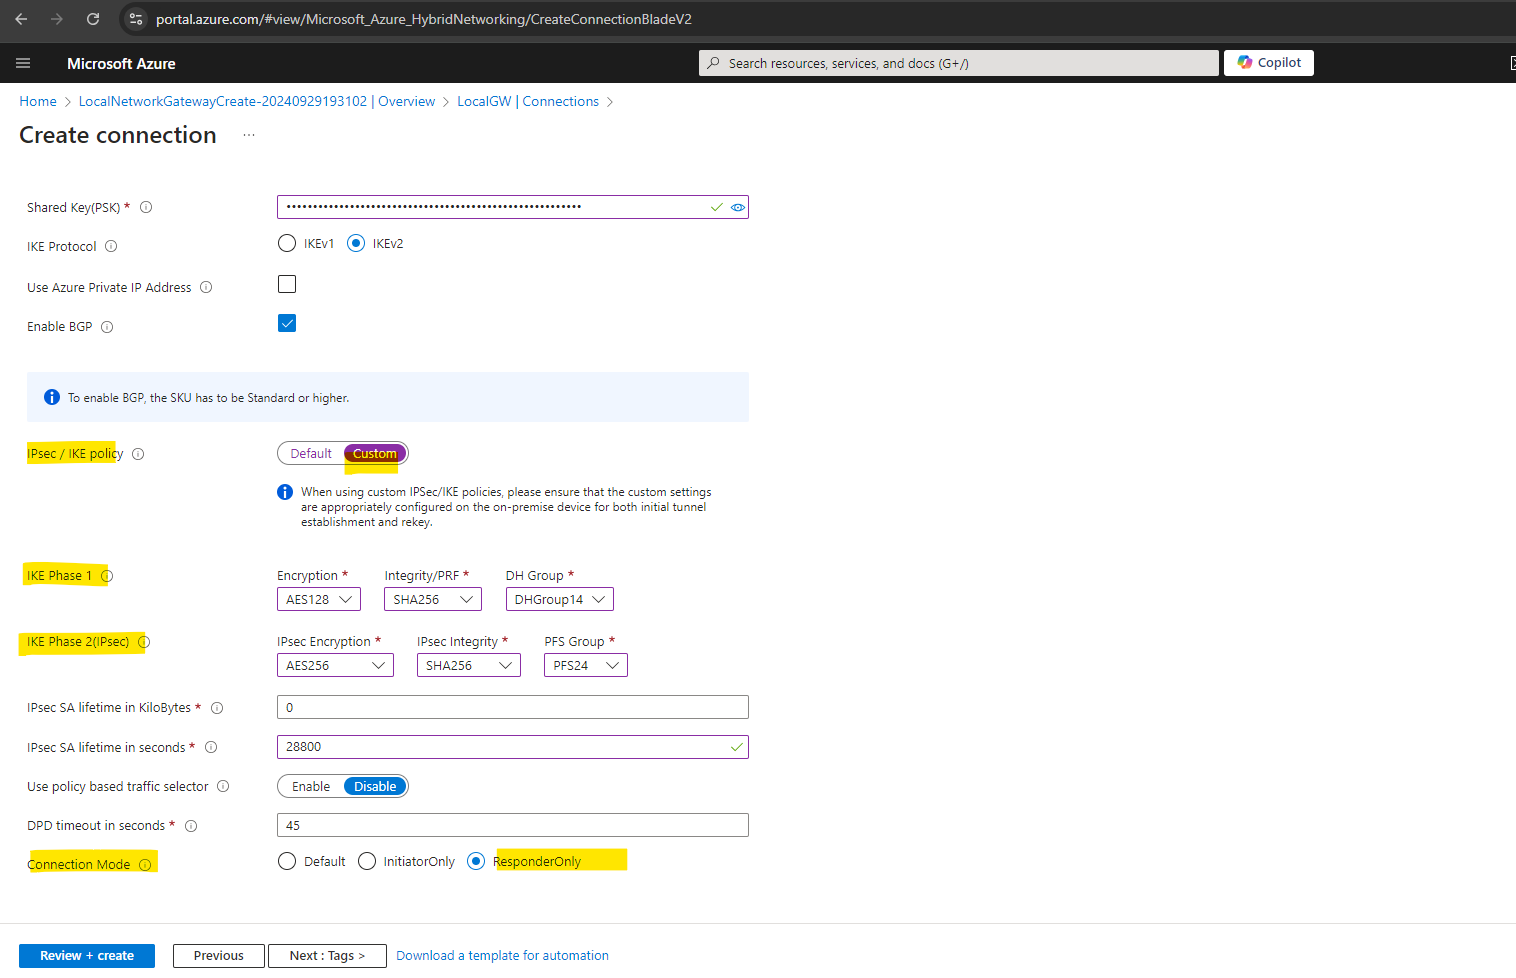
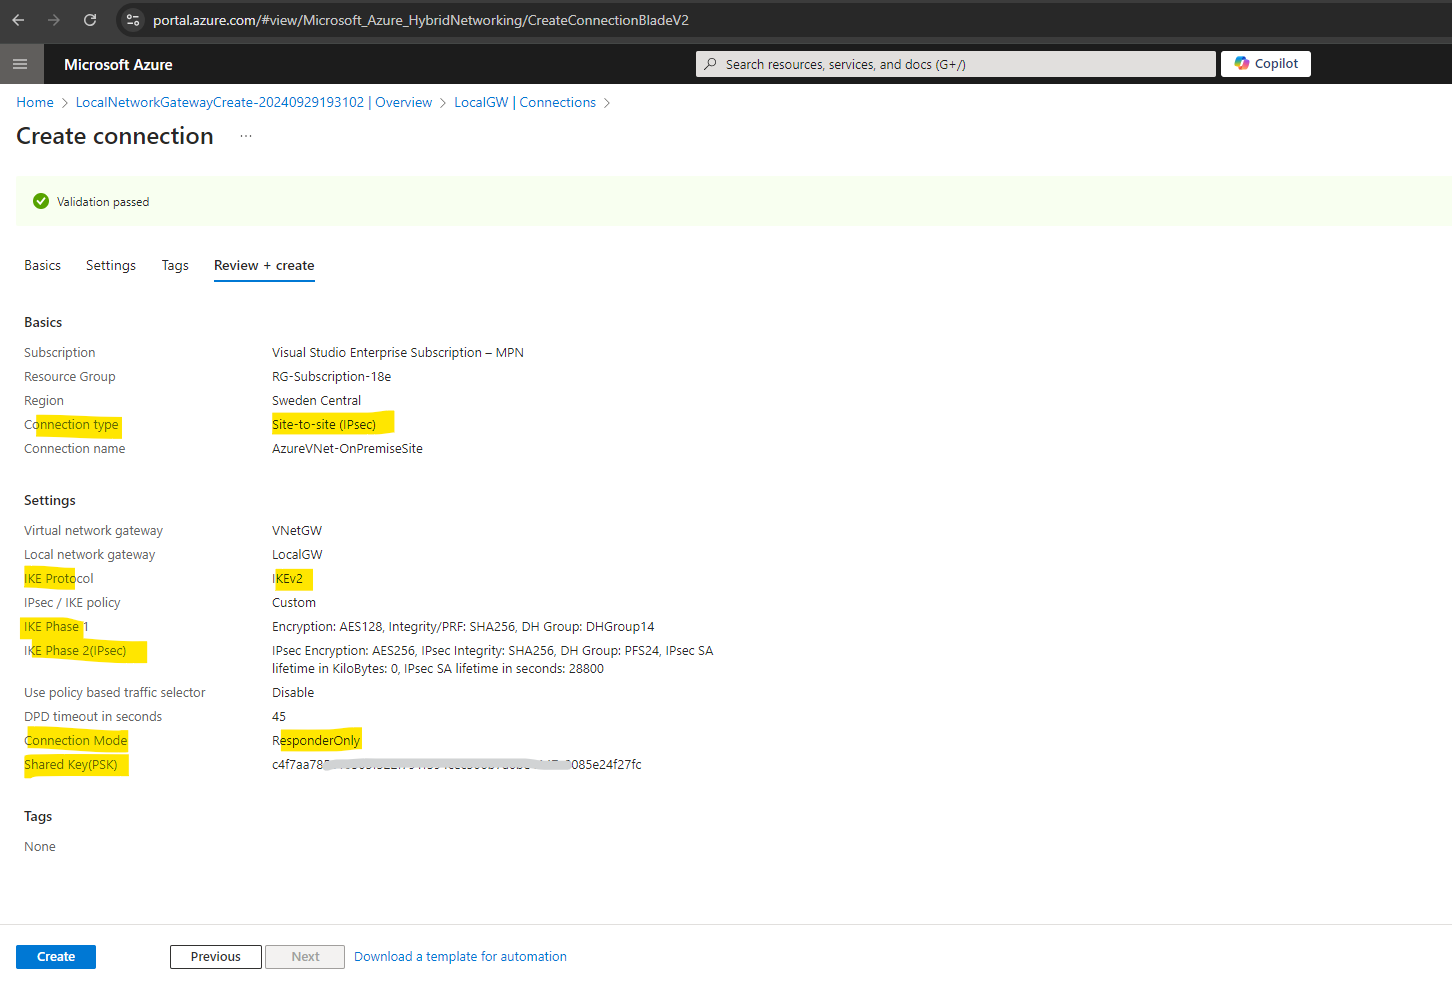
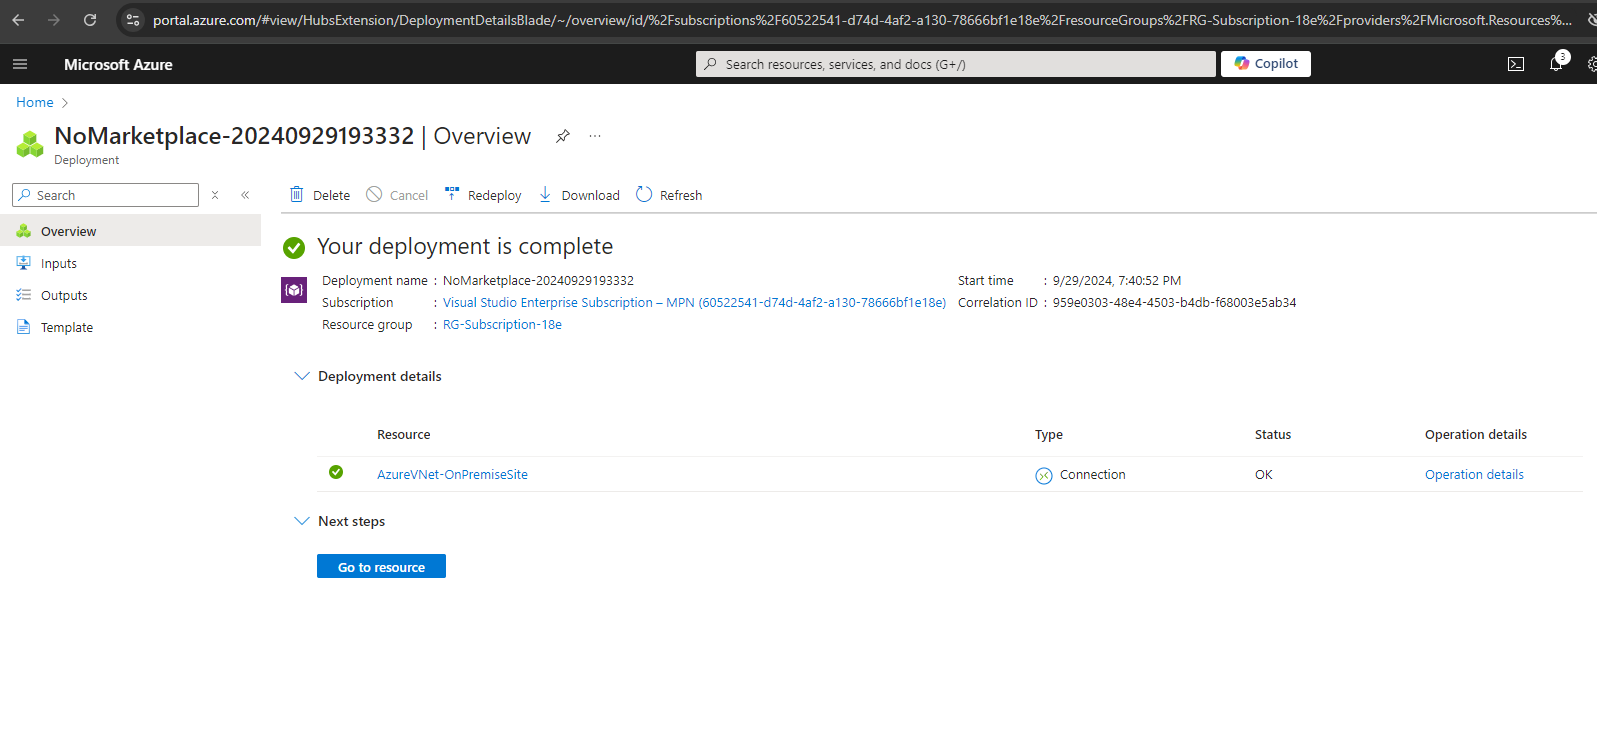
Configure a S2S connection with BGP enabled

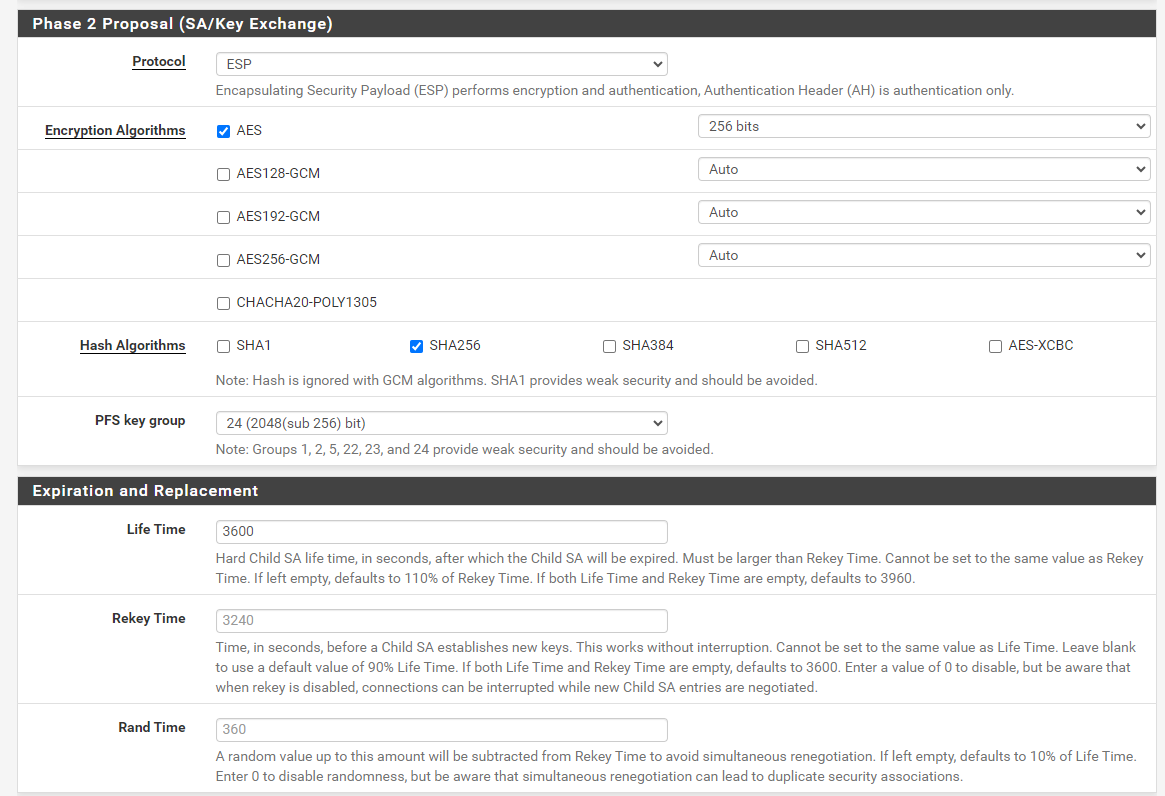
We can also download the Security Associations (SA’s) which lists the cryptographic policies and parameters negotiated between our on-premises VPN devices and the Azure VPN gateway.
Directly on the Connection under Help -> Security Associations.

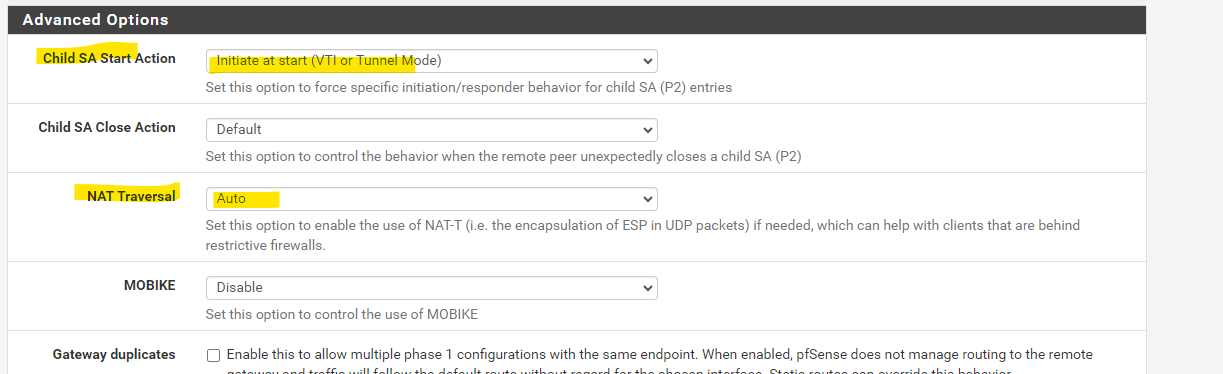
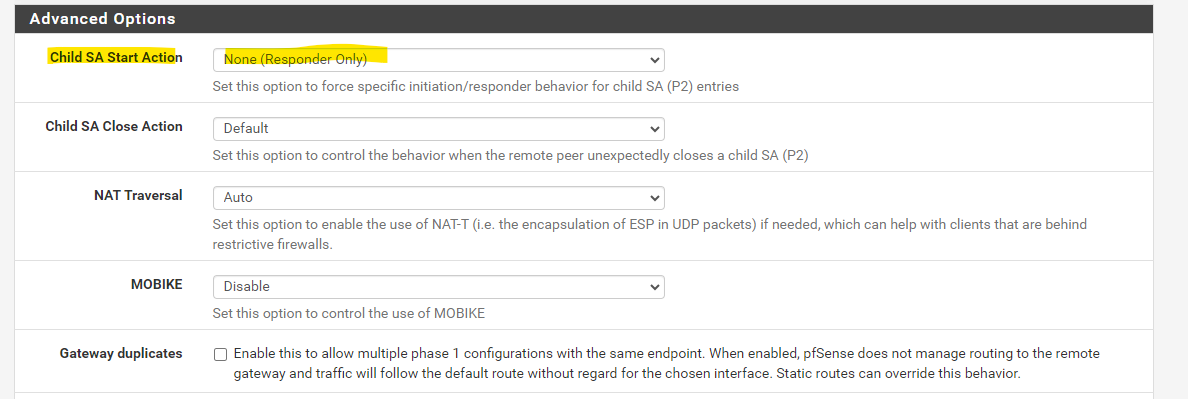
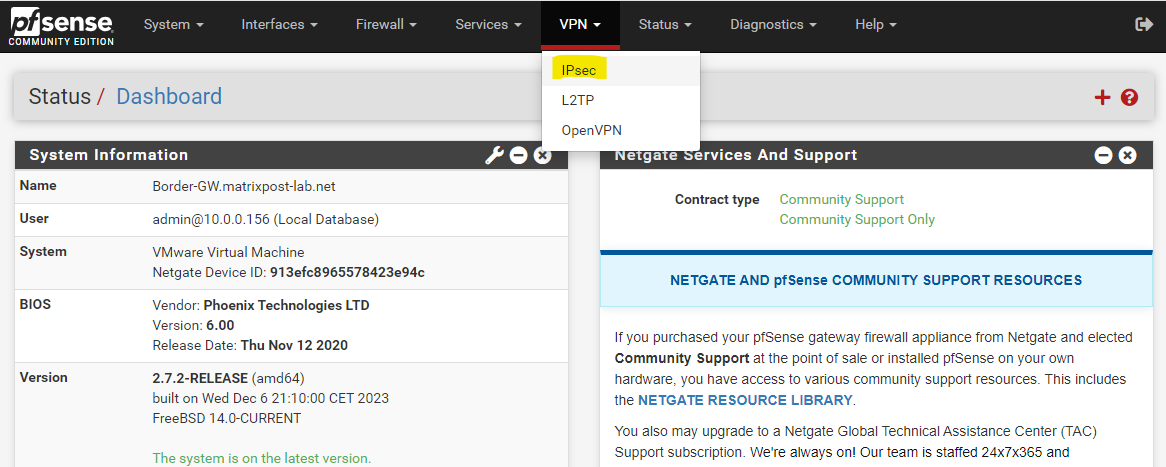
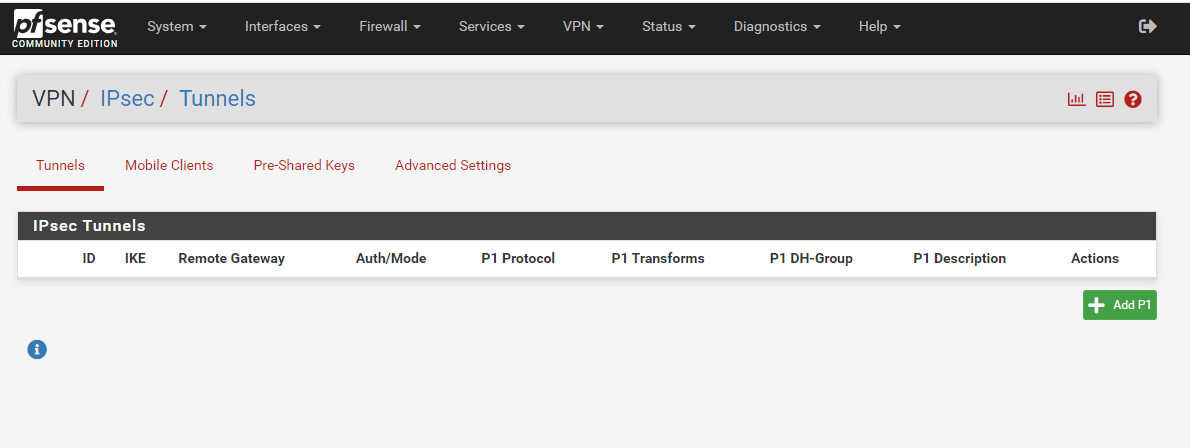
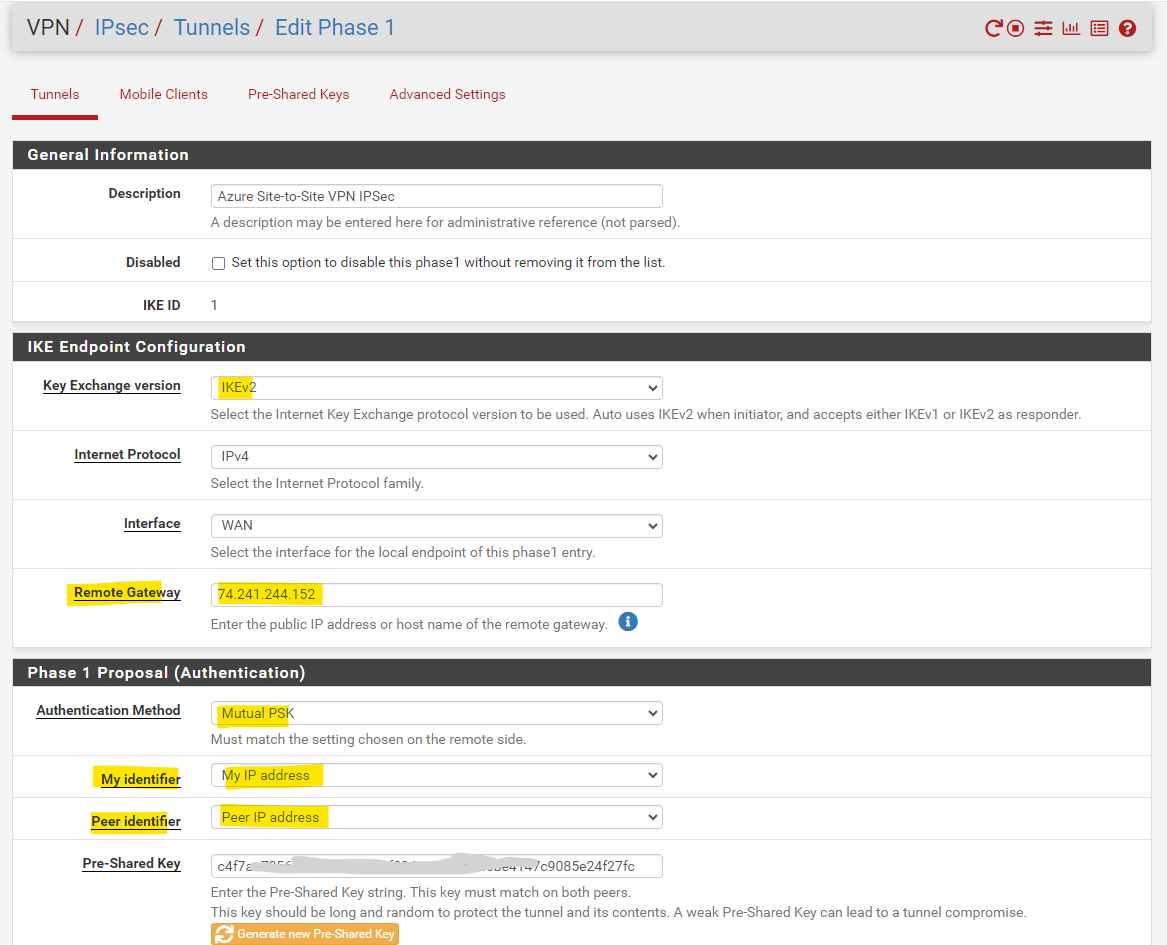
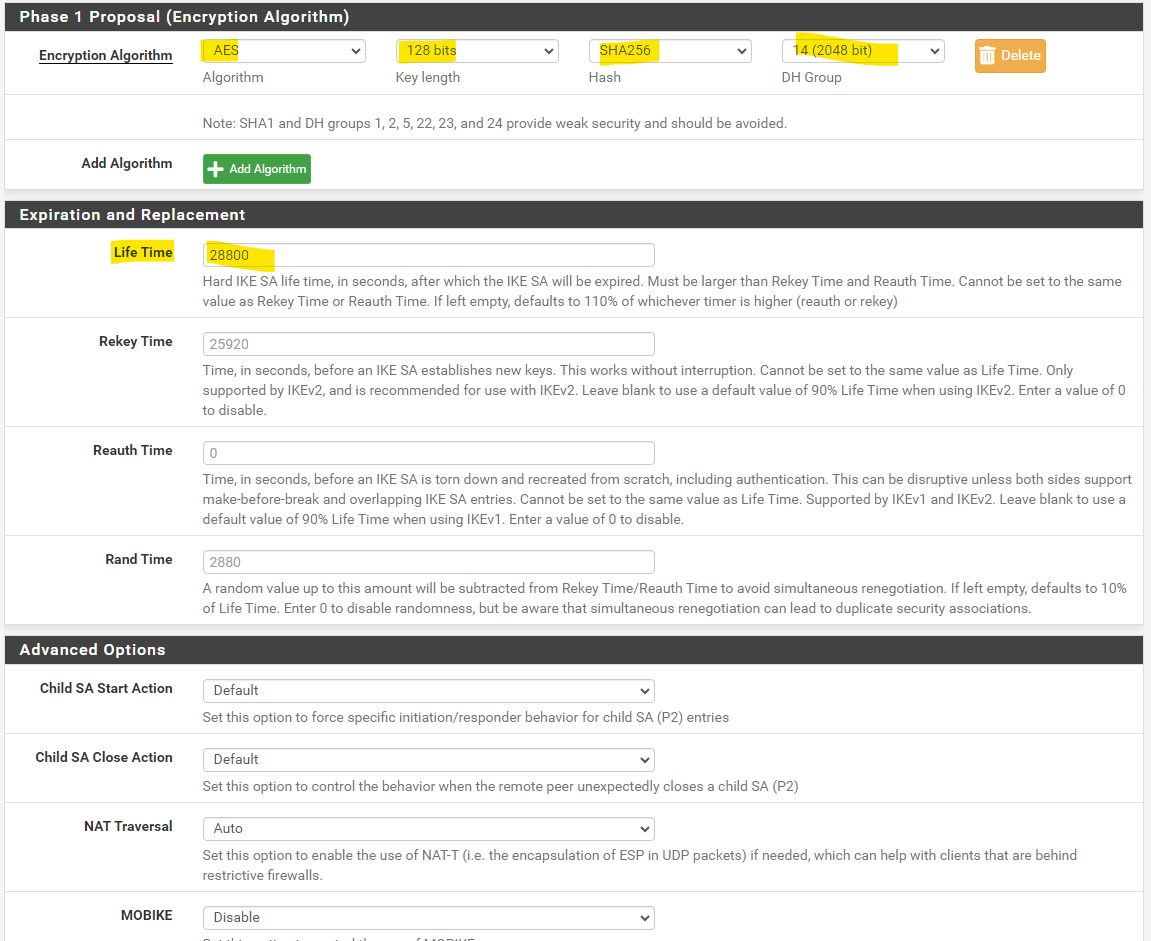
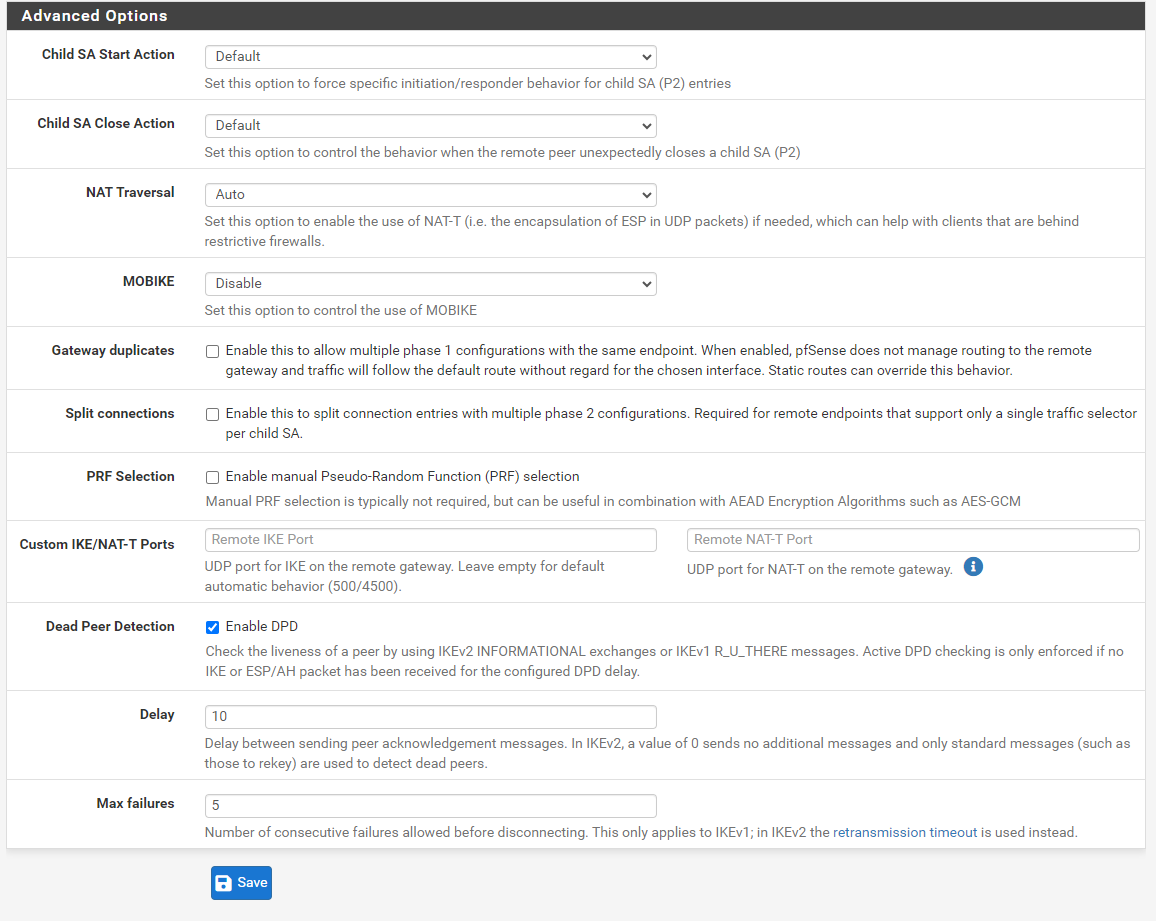
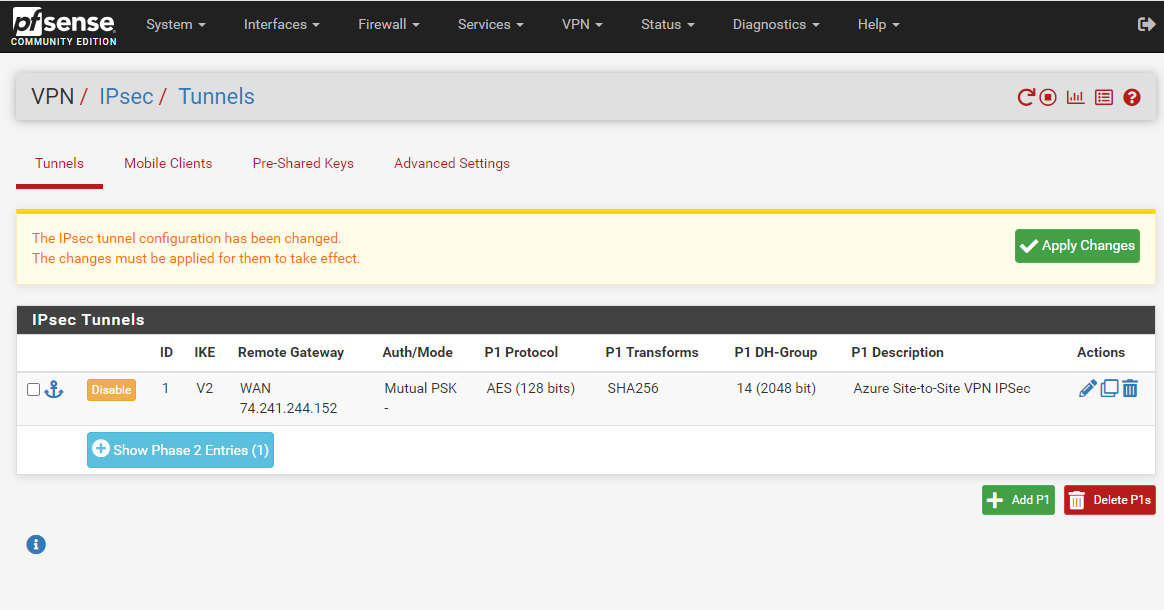
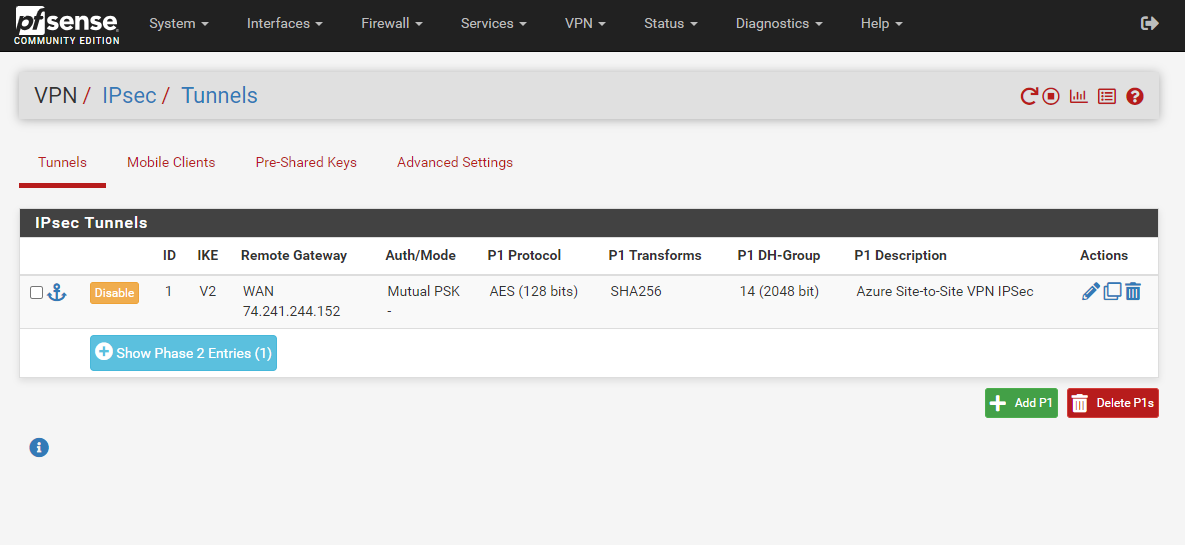
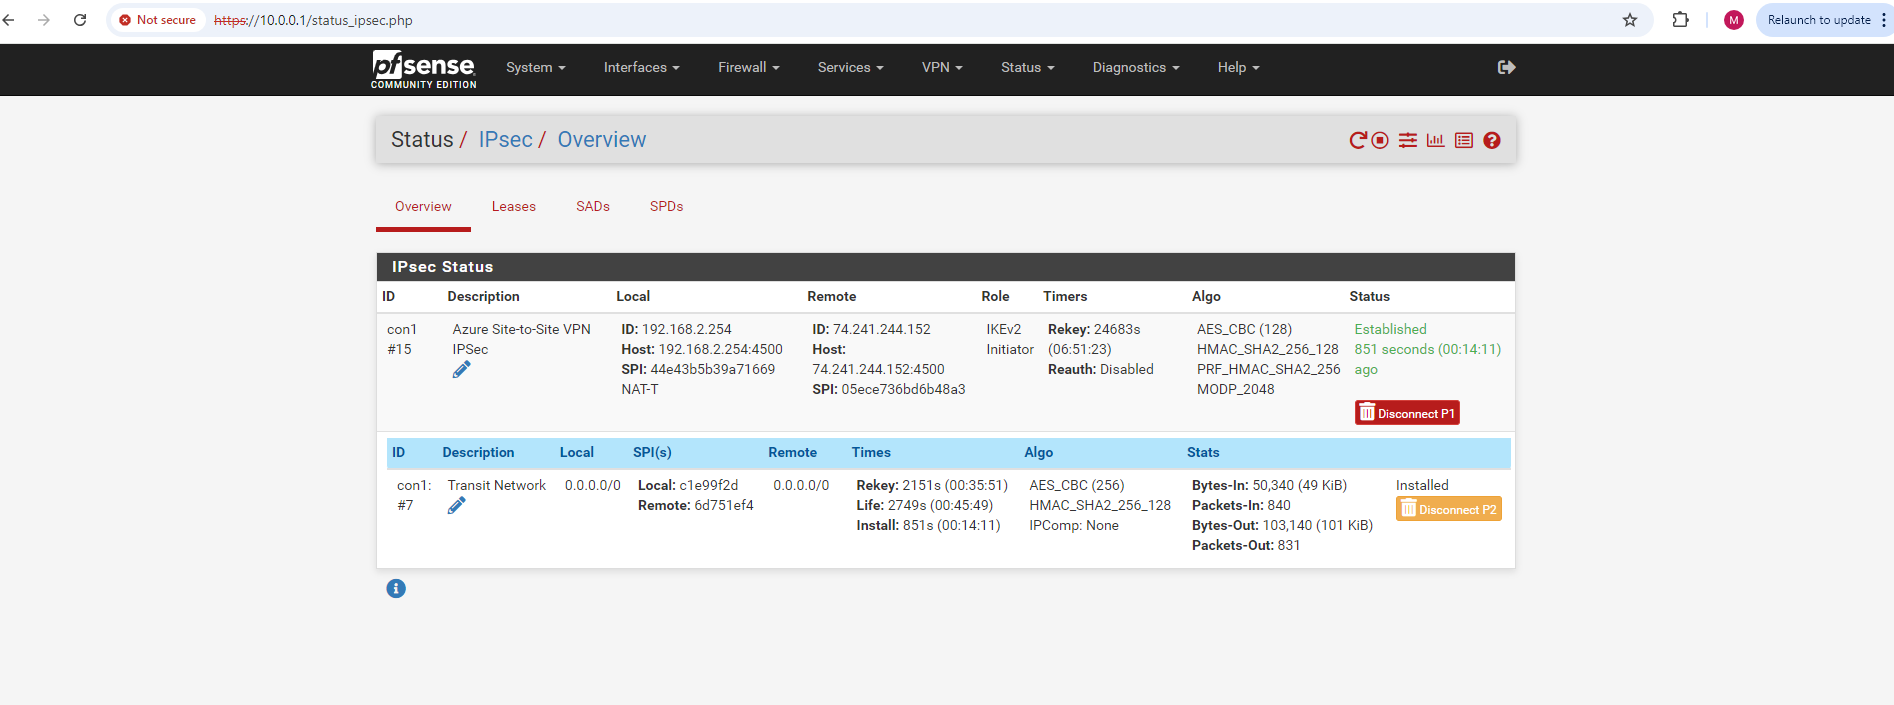
Set up the IPSec Tunnel in pfSense

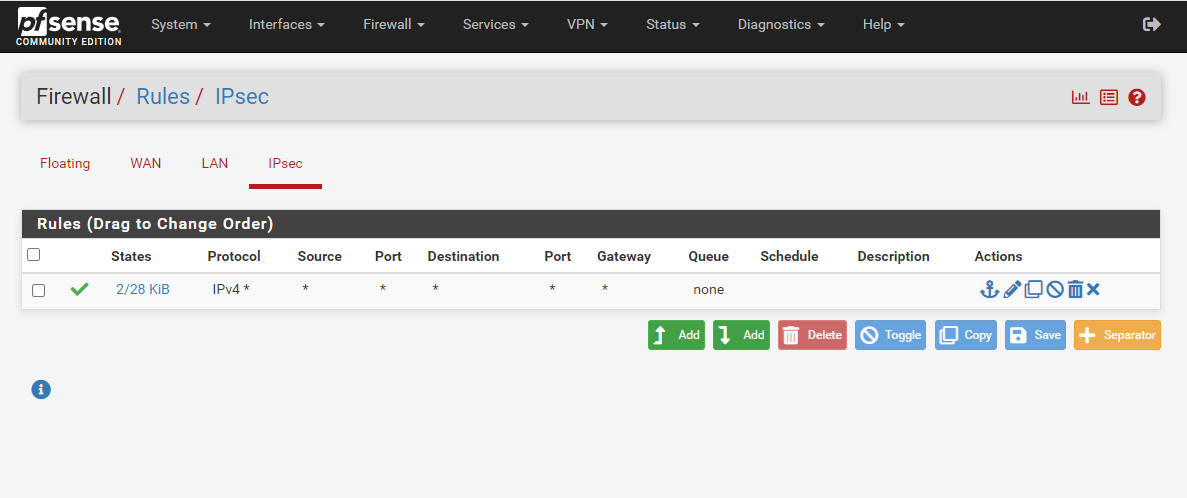
Allow Traffic for the Tunnel in pfSense
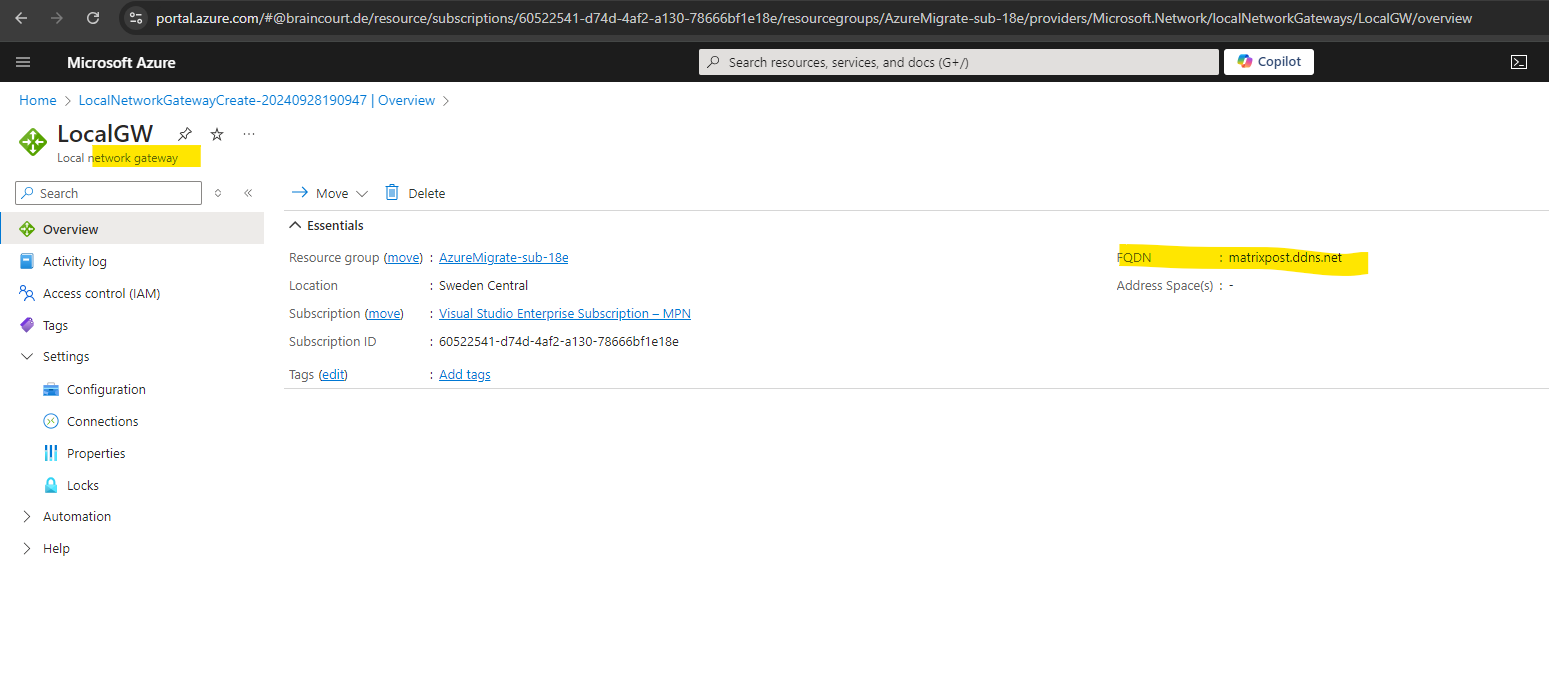
FQDN DNS Resolution
Troubleshooting
trap not found, unable to acquire reqid 5001
In my case on pfSense an IKE Phase1 DH Group different than in Azure was configured and the reason for this error and that the tunnel couldn’t be established. So I saw on pfSense under Status → System Logs → IPsec a bunch of these errors.
The error message “IPsec trap not found, unable to acquire reqid 5001” in pfSense typically indicates an issue with the IPsec configuration or a conflict in the IPsec Security Associations (SAs).
Incorrect settings in the IPsec Phase 1 (IKE) or Phase 2 (IPsec SA) configurations can lead to this issue.