Azure Migrate – How to migrate on-premises VMware vSphere Virtual Machines to Azure (agent-based) – Part 5
In Azure the Migration and modernization tool offers agentless and agent-based migration to migrate your source servers and virtual machines (VMs) to Azure.
Azure Migrate and often called the Azure Migration and Modernization Program (AMMP) offers companies tools to migrate their IT infrastructure from on-premise (VMware, Hyper-V, physical or other hyperscaler like AWS or GCP) to Azure.
Agent-based migrations require that you install Azure Migrate software (agents) on the source VMs that you’re migrating.
The agent-based option doesn’t rely on the virtualization platform for the replication functionality. It can be used with any server that runs an x86/x64 architecture and a version of an operating system that the agent-based replication method supports.
Agent-based migration treats your machines as physical servers for migration.
In all previous parts we saw the agentless migration, now in this part we will see step by step the agent-based migration.
Agent-based migration in Azure Migrate uses some backend functionality from the Azure Site Recovery service.
Consider using the agent-based scenario
Agentless migration offers more convenience and simplicity than agent-based replication options for VMware and Hyper-V VMs. However, you might want to consider using the agent-based scenario for the following use cases:
- Environments constrained by input/output operations per second (IOPS): Agentless replication uses snapshots and consumes storage IOPS/bandwidth. We recommend the agent-based migration method if there are constraints on storage/IOPS in your environment.
- No vCenter Server: If you don’t have a vCenter Server, you can treat your VMware VMs as physical servers and use the agent-based migration workflow.
To learn more, review Select a VMware migration option.
Another benefit when using the agent-based migration, before the installation of the Site Recovery Mobility service, will be installed on all virtual machines you want to migrate (replicate) to Azure, the virtual machine will be analyzed whether all requirements are met to migrate to Azure.
The Mobility service captures data, writes on the machine, and forwards them to the Site Recovery process server (appliance running in on-premise, this appliance is actually used for Azure Site Recovery but also for Azure Migrate agent-based migration).
Below for example, I wanted to migrate a Linux virtual machine (SLES) to Azure which is using the Logical Volume Manger (LVM).
Here the root file system and /boot folder is located on a logical volume group and logical volume which consists of two disks aka pv (/dev/sda & /dev/sdd) and is not supported by Azure.
Boot requirements (listed on the agentless migration but also true for agent-based)
Windows VMs:
OS Drive (C:\) and System Reserved Partition (EFI System Partition for UEFI VMs) should reside on the same disk.
If /boot is on a dedicated partition, it should reside on the OS disk and not be spread across multiple disks.
If /boot is part of the root (/) partition, then the ‘/’ partition should be on the OS disk and not span other disks.Linux VMs:
If /boot is on a dedicated partition, it should reside on the OS disk and not be spread across multiple disks.
If /boot is part of the root (/) partition, then the ‘/’ partition should be on the OS disk and not span other disks.
Source: https://docs.azure.cn/en-us/migrate/vmware/migrate-support-matrix-vmware-migration?view=migrate-classic#vm-requirements-agentless
By using the agentless migration, the virtual machines would be replicated to Azure and then running into an error during boot because of missing partitions which were finally placed by the LVM on the second disk.
So finally by using the agent-based migration, the virtual machines will be checked in detail if replication to Azure will be successful or not.

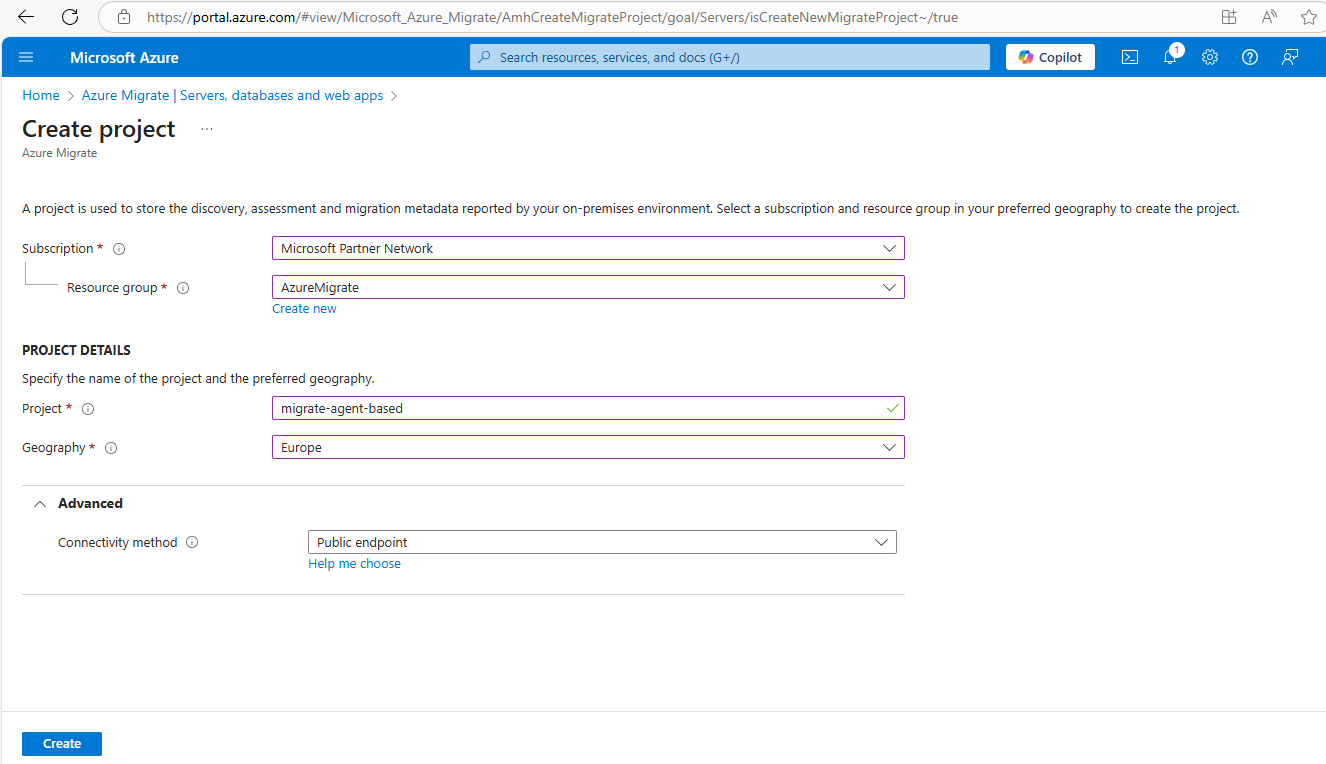
Create a new Azure Migrate Project
I already created a Azure Migrate Project previously for the agentless migration, now to use the agent-based migration, I need to create a new project below.

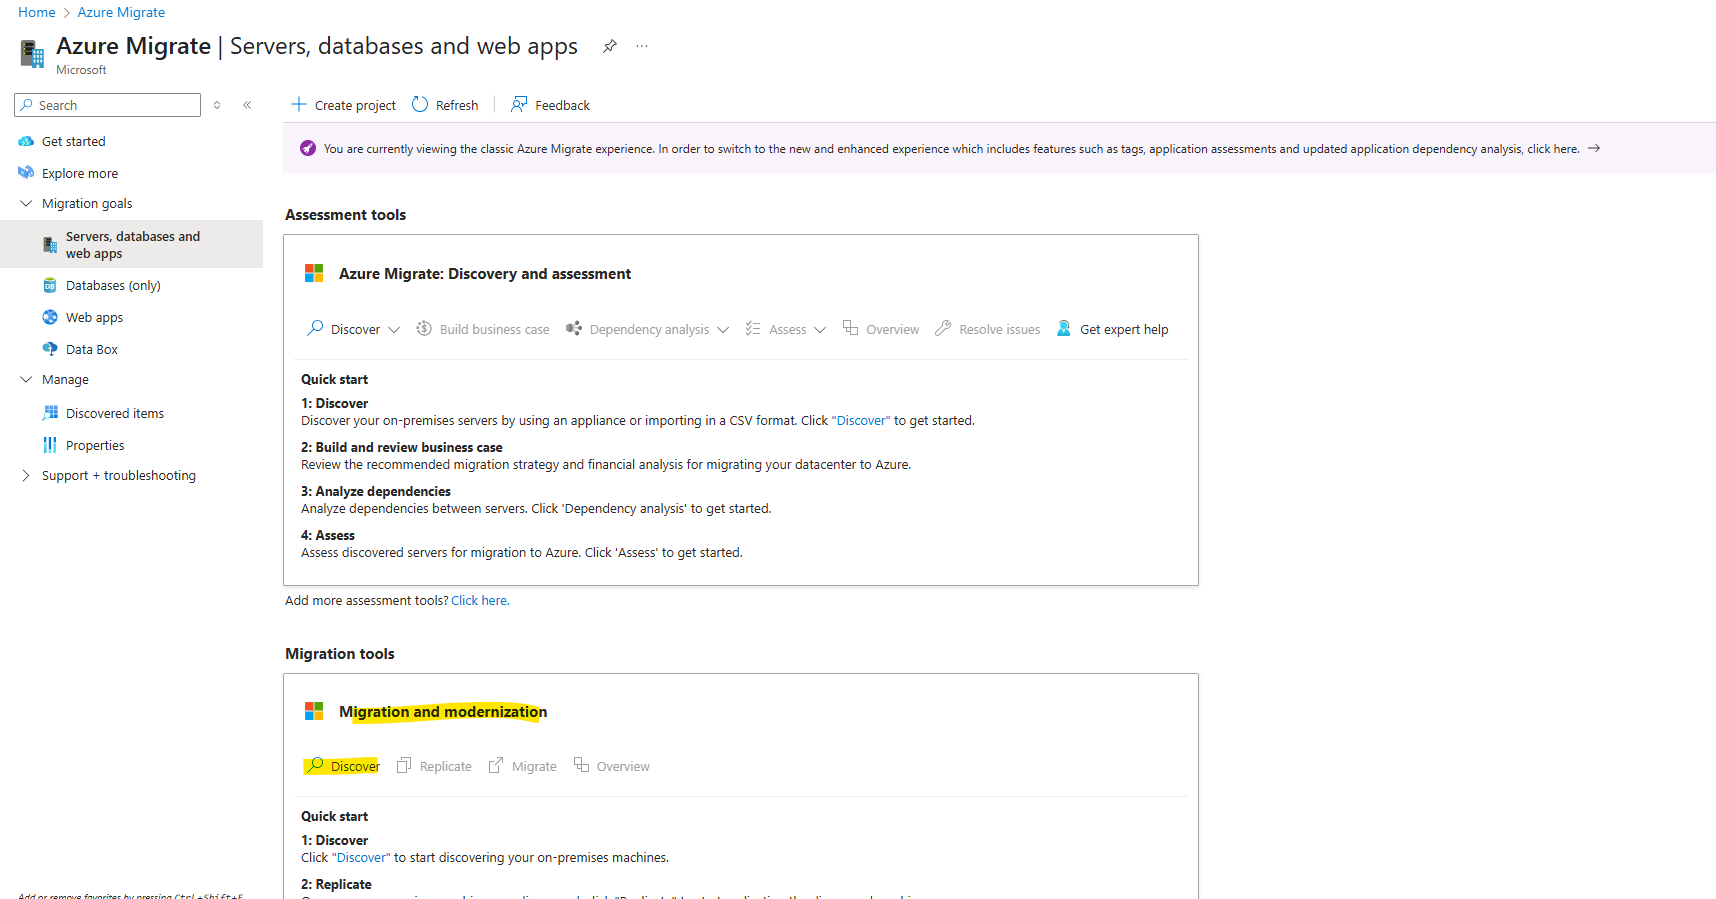
Set up the Azure Migrate Appliance in Azure
In Servers, databases and web apps, here within the Migration tools tile click on Discover as highlighted below.
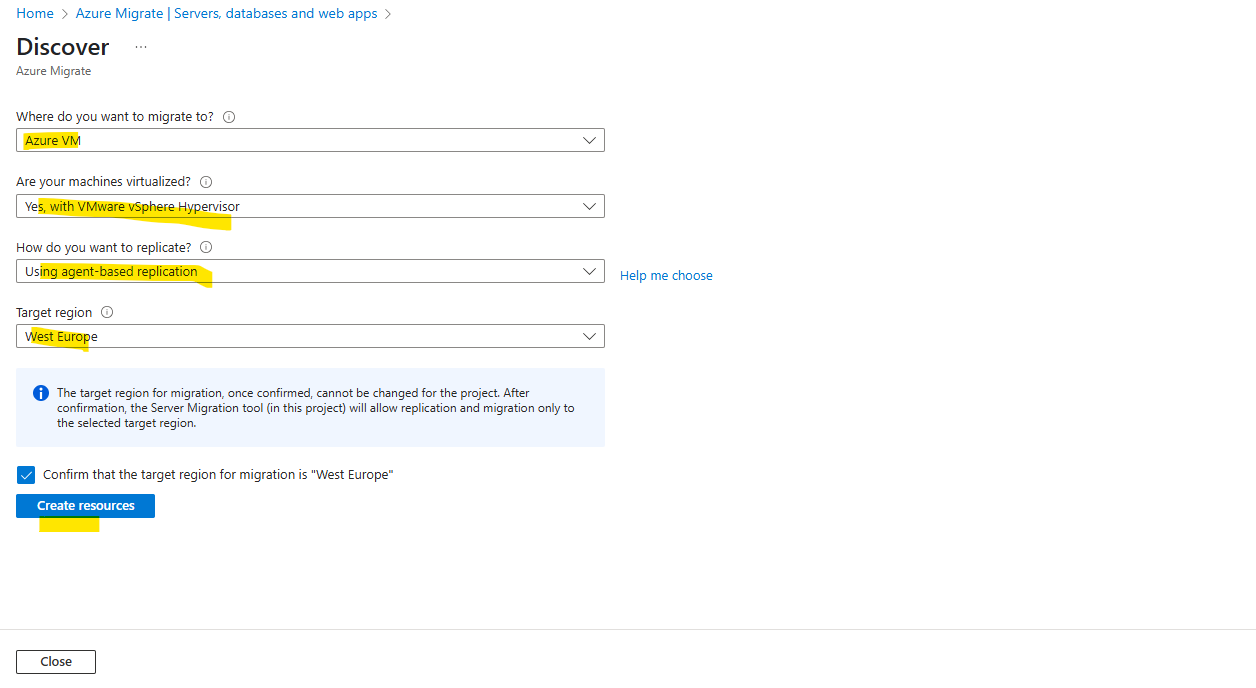
Below select using agent-based replication.
Select Create resources. This creates an Azure Site Recovery vault in the background. You can’t change the target region for this project after clicking this button, and all subsequent migrations are to this region.
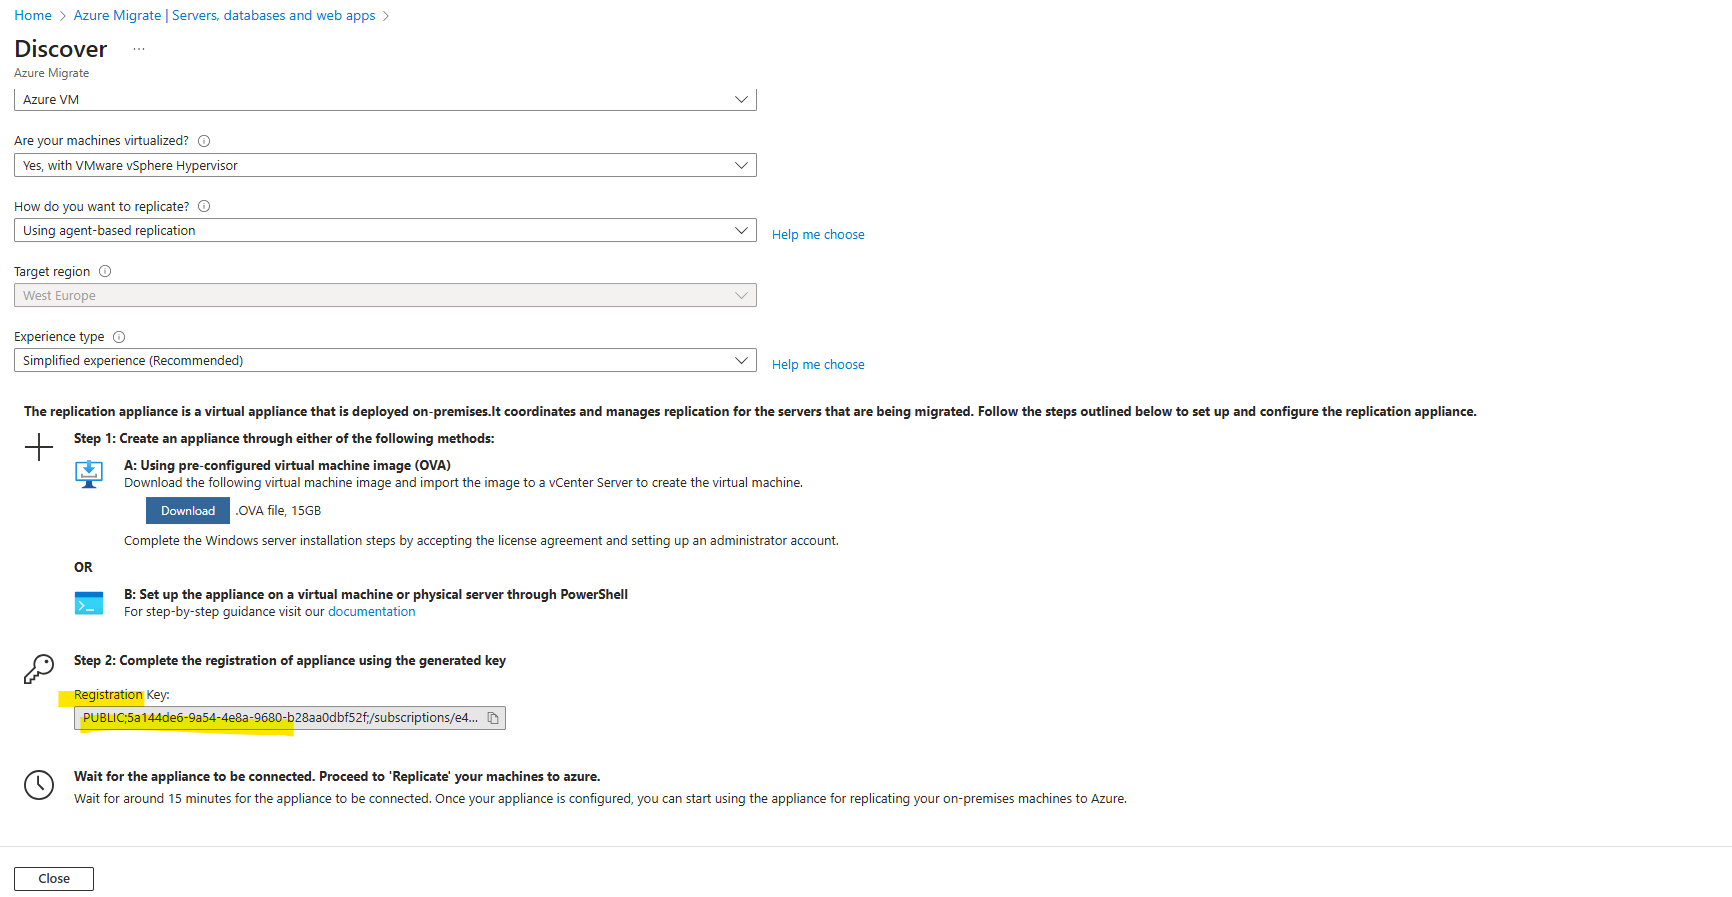
Next first select the experience type, I will use the recommended simplified. We can now download the appliance and click on Generate key.
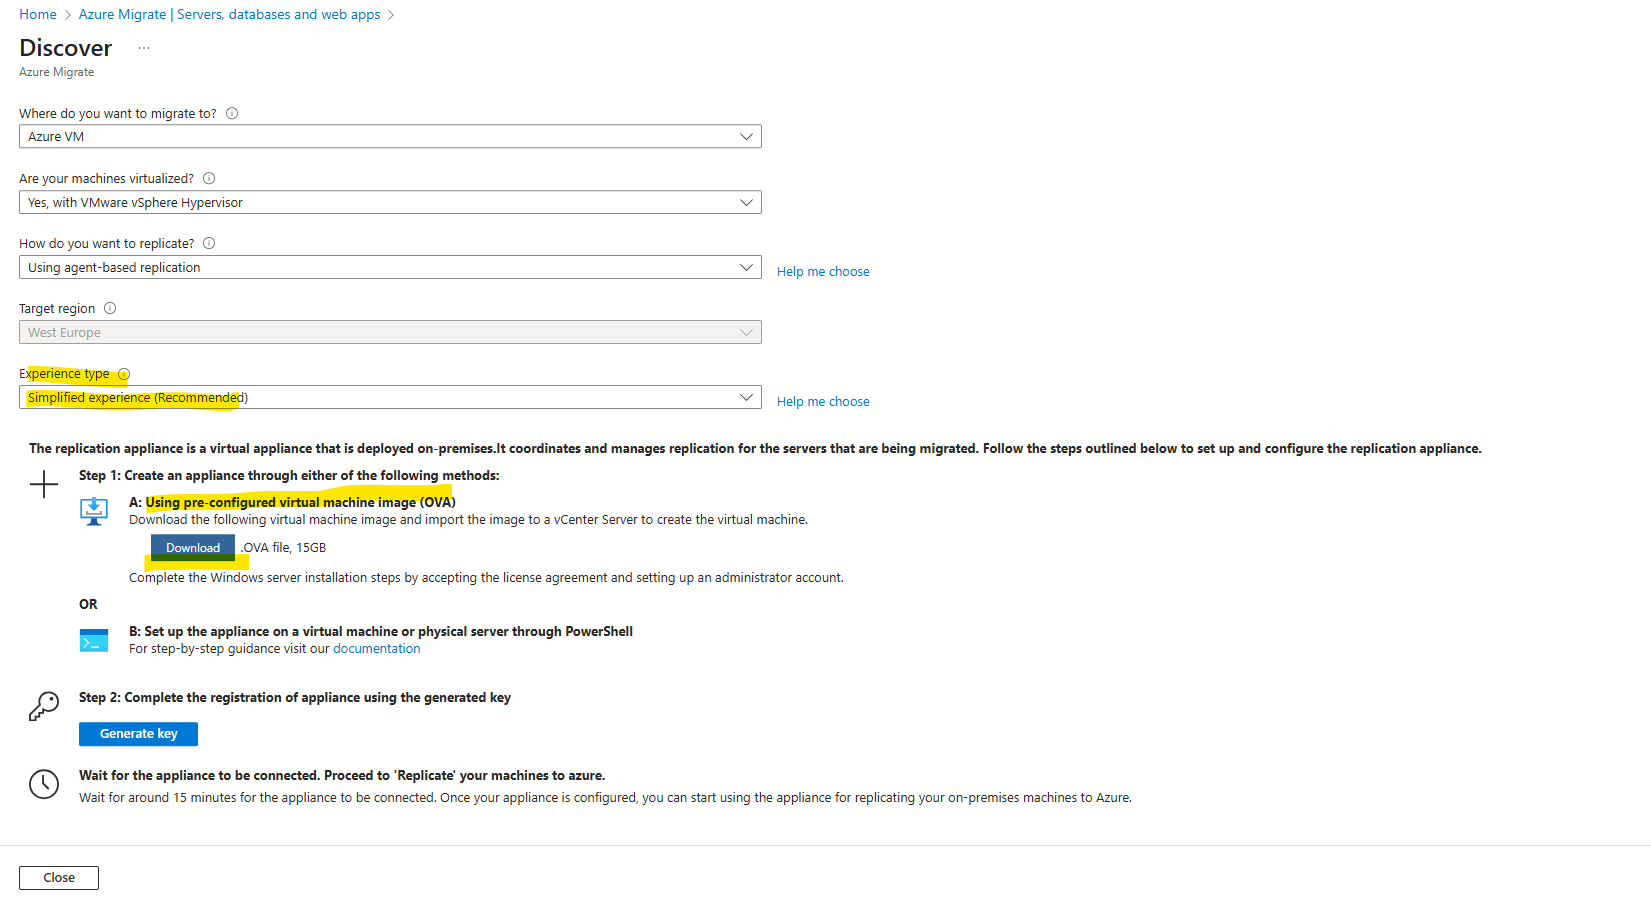
This key we later need to enter on the appliance to register it to Azure.
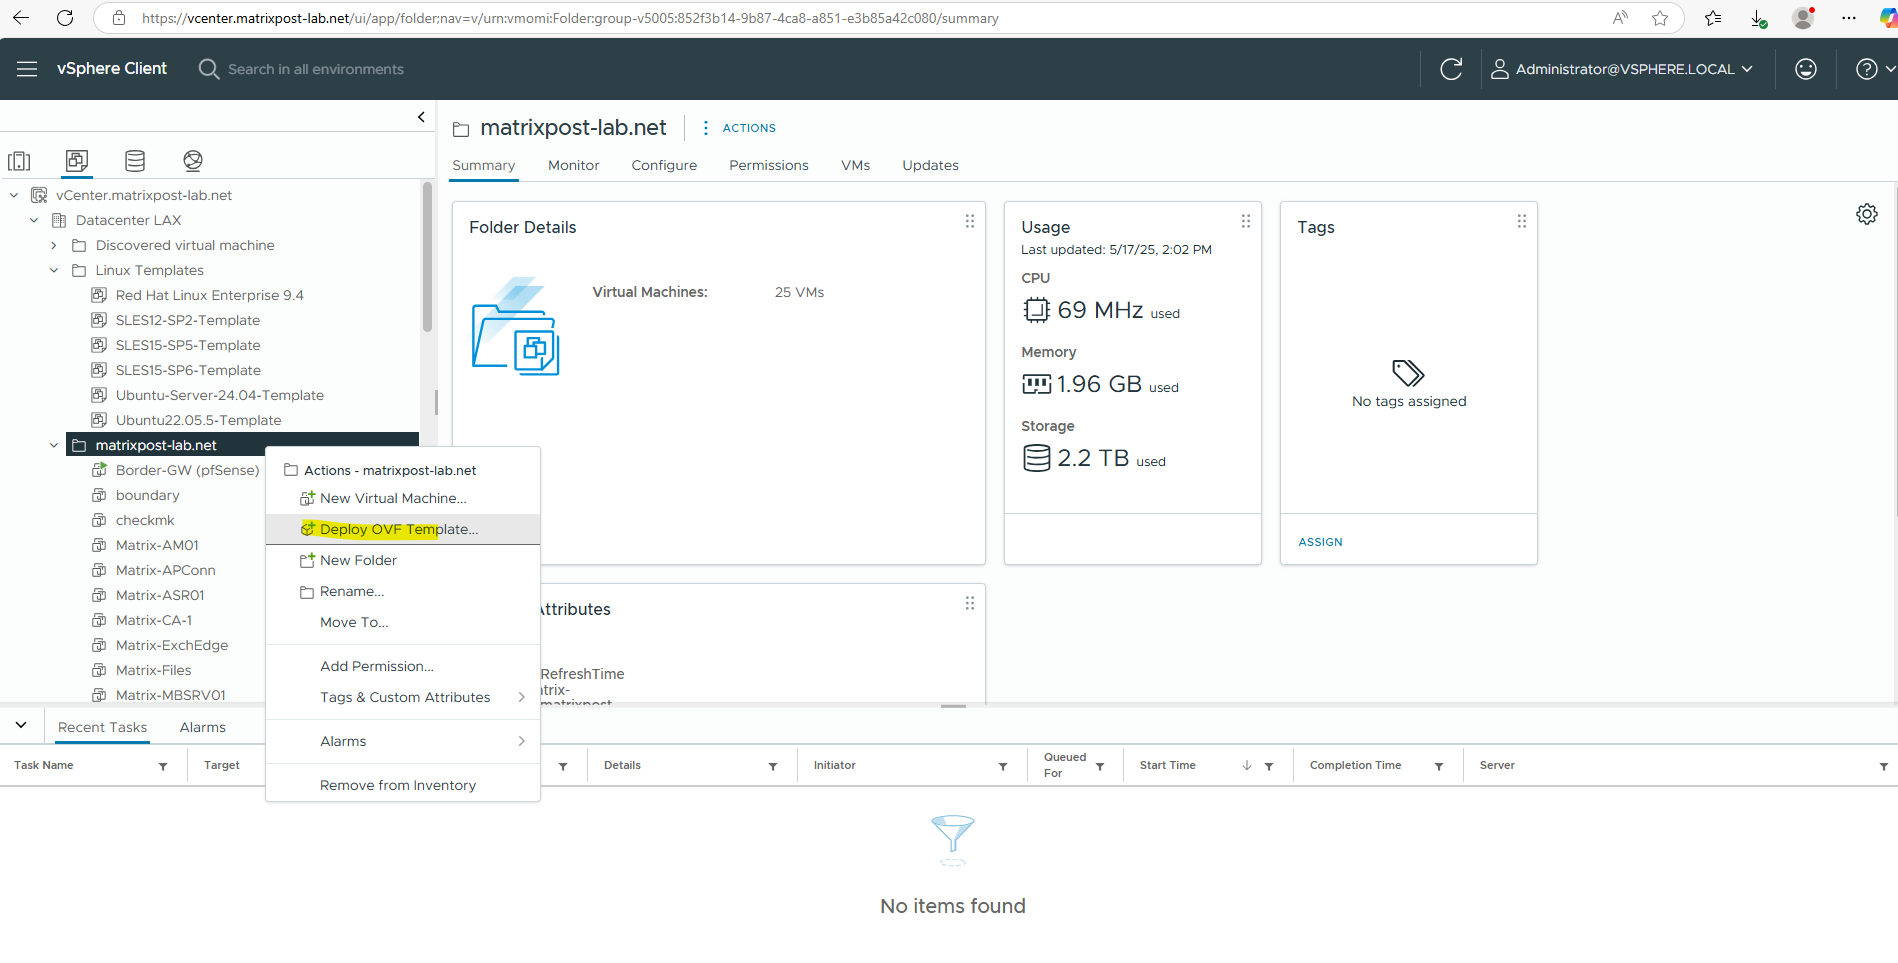
Deploy the Azure Migrate Appliance in On-Premises (vSphere)
After downloading the OVF template, you import it into VMware vSphere to create the replication application on a VMware vSphere VM running Windows Server 2022.

Agent-based migration is also using the ASR Appliance we need to deploy for Azure Site Recovery as shown in my following post.
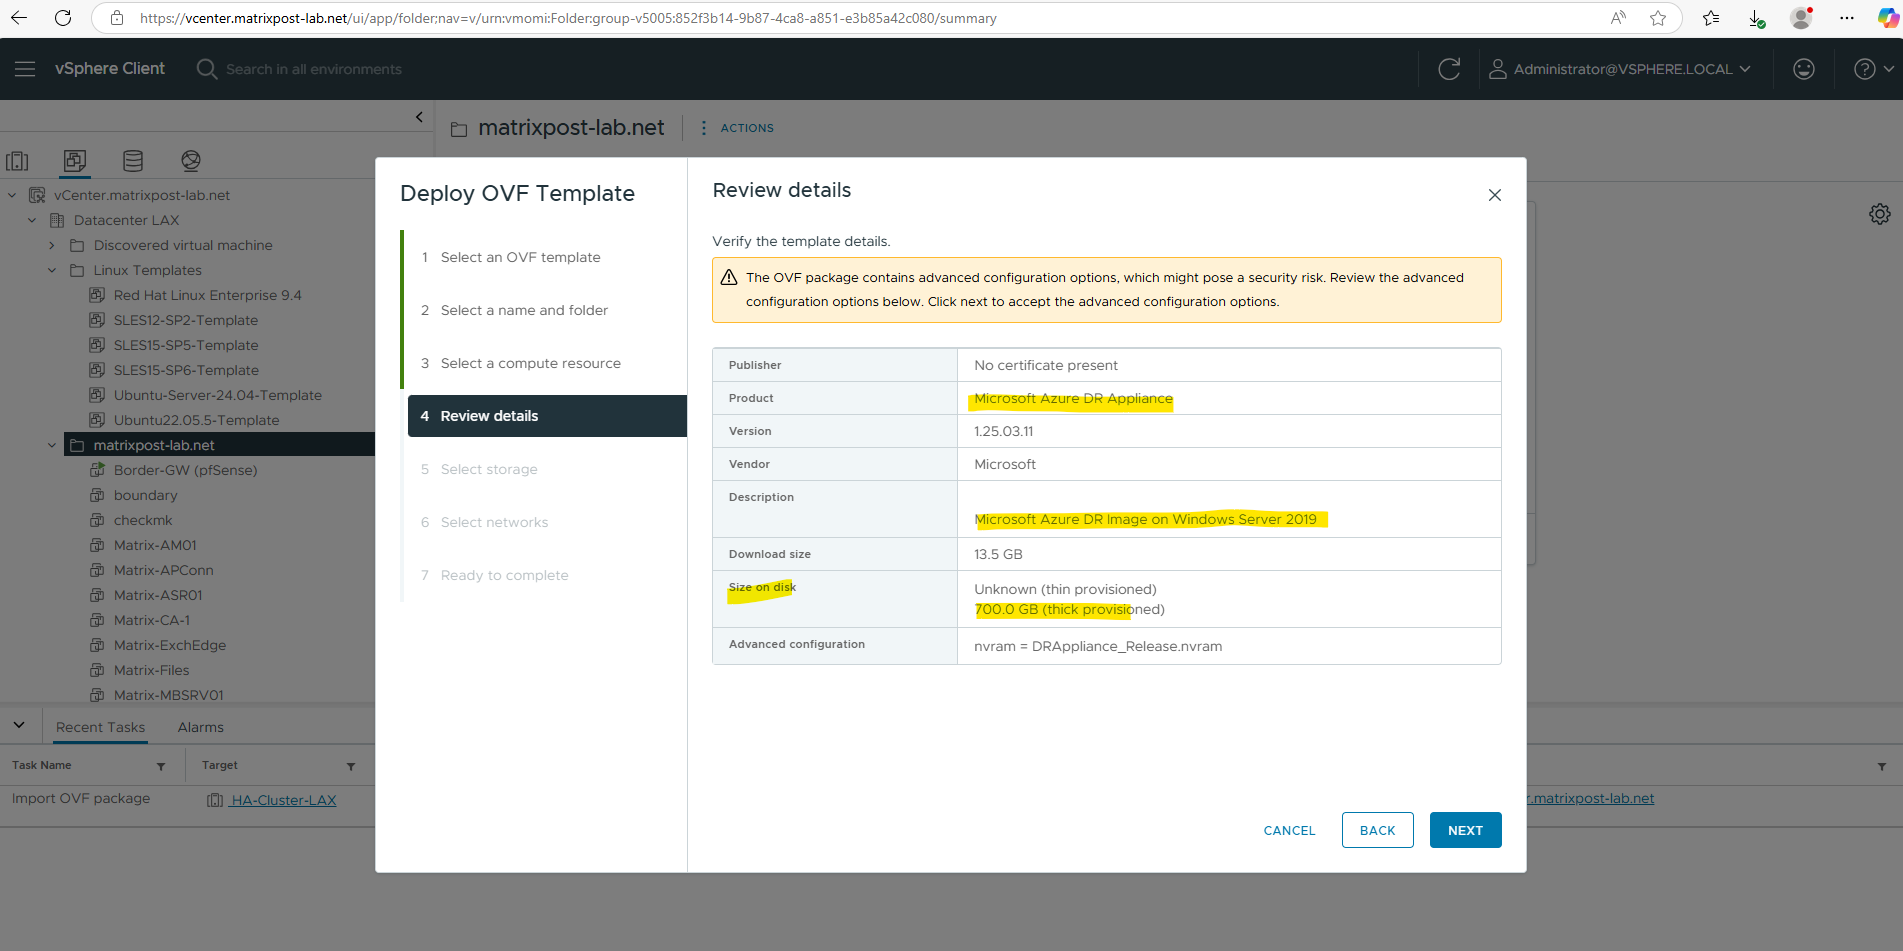
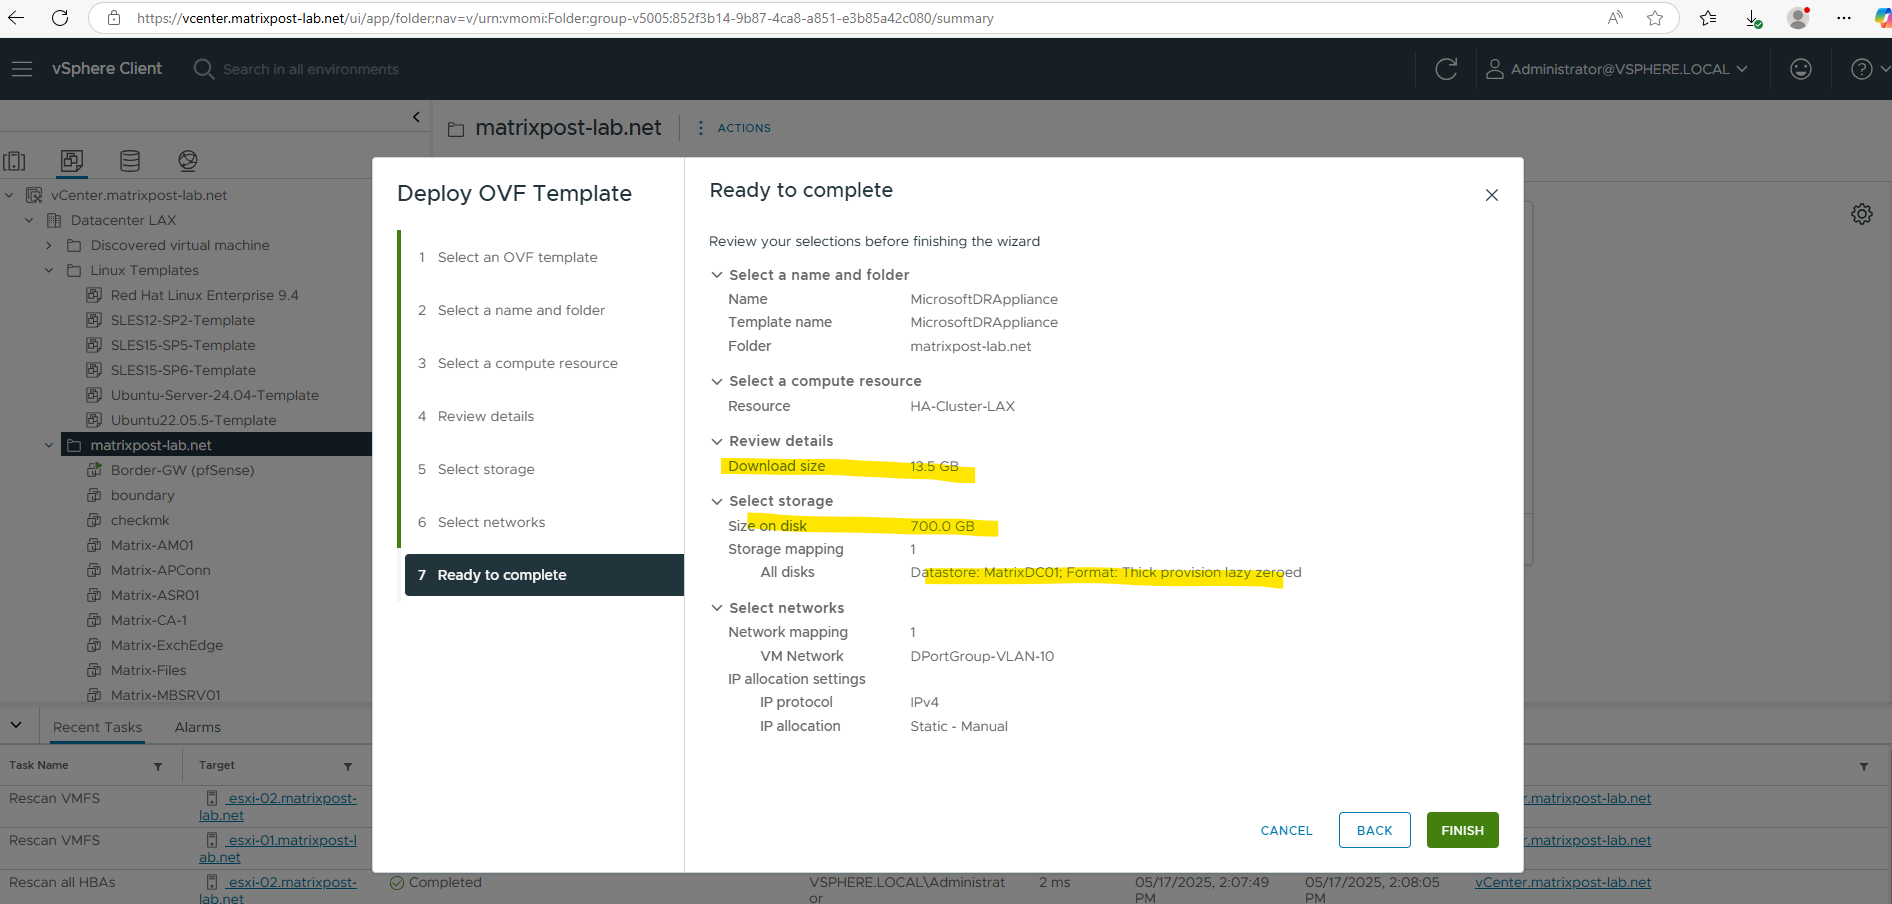
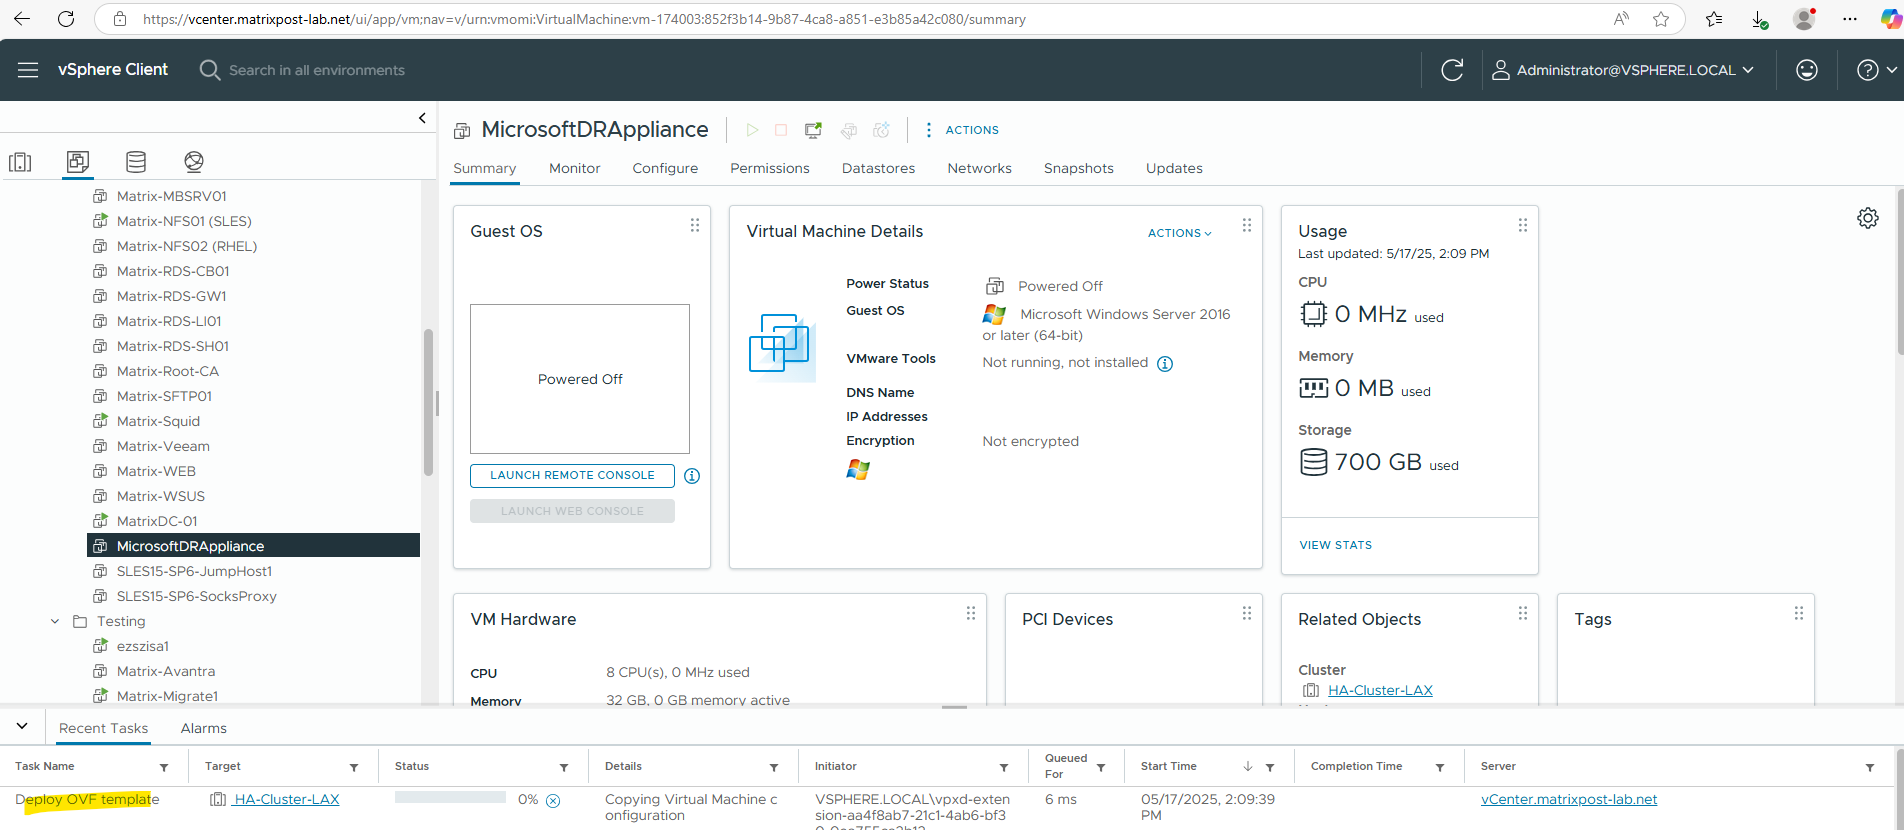
The appliance was deployed successfully.
We can now either power on the appliance and configure some settings like hostname, network, dns suffix, … by hand or we can apply in vSphere a so called VM Customization Specification which will do this automatically on the fly.
About how to create such a VM Customization Specification in vSphere you can read here https://blog.matrixpost.net/set-up-azure-site-recovery-for-on-premise-vmware-virtual-machines-modernized-part-1/#vm_customization_specification.
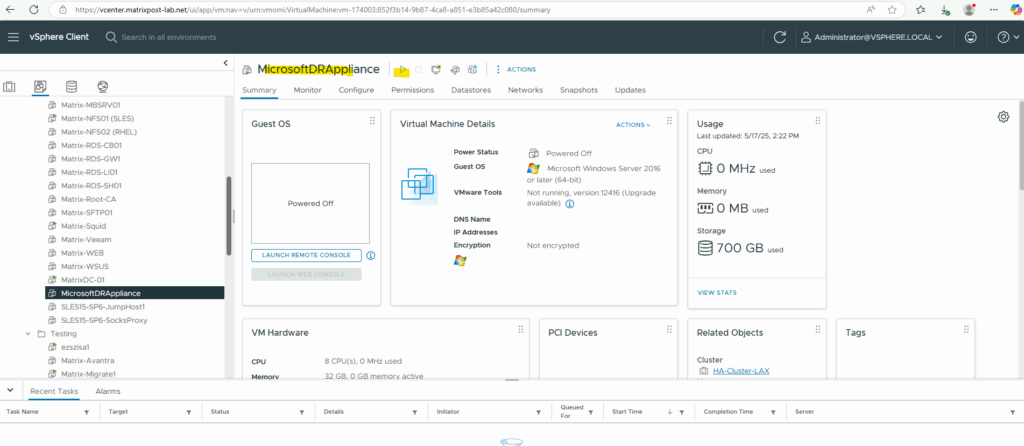
So I will use here my already created VM Customization Specification from the post above about Azure Site Recovery (ASR).
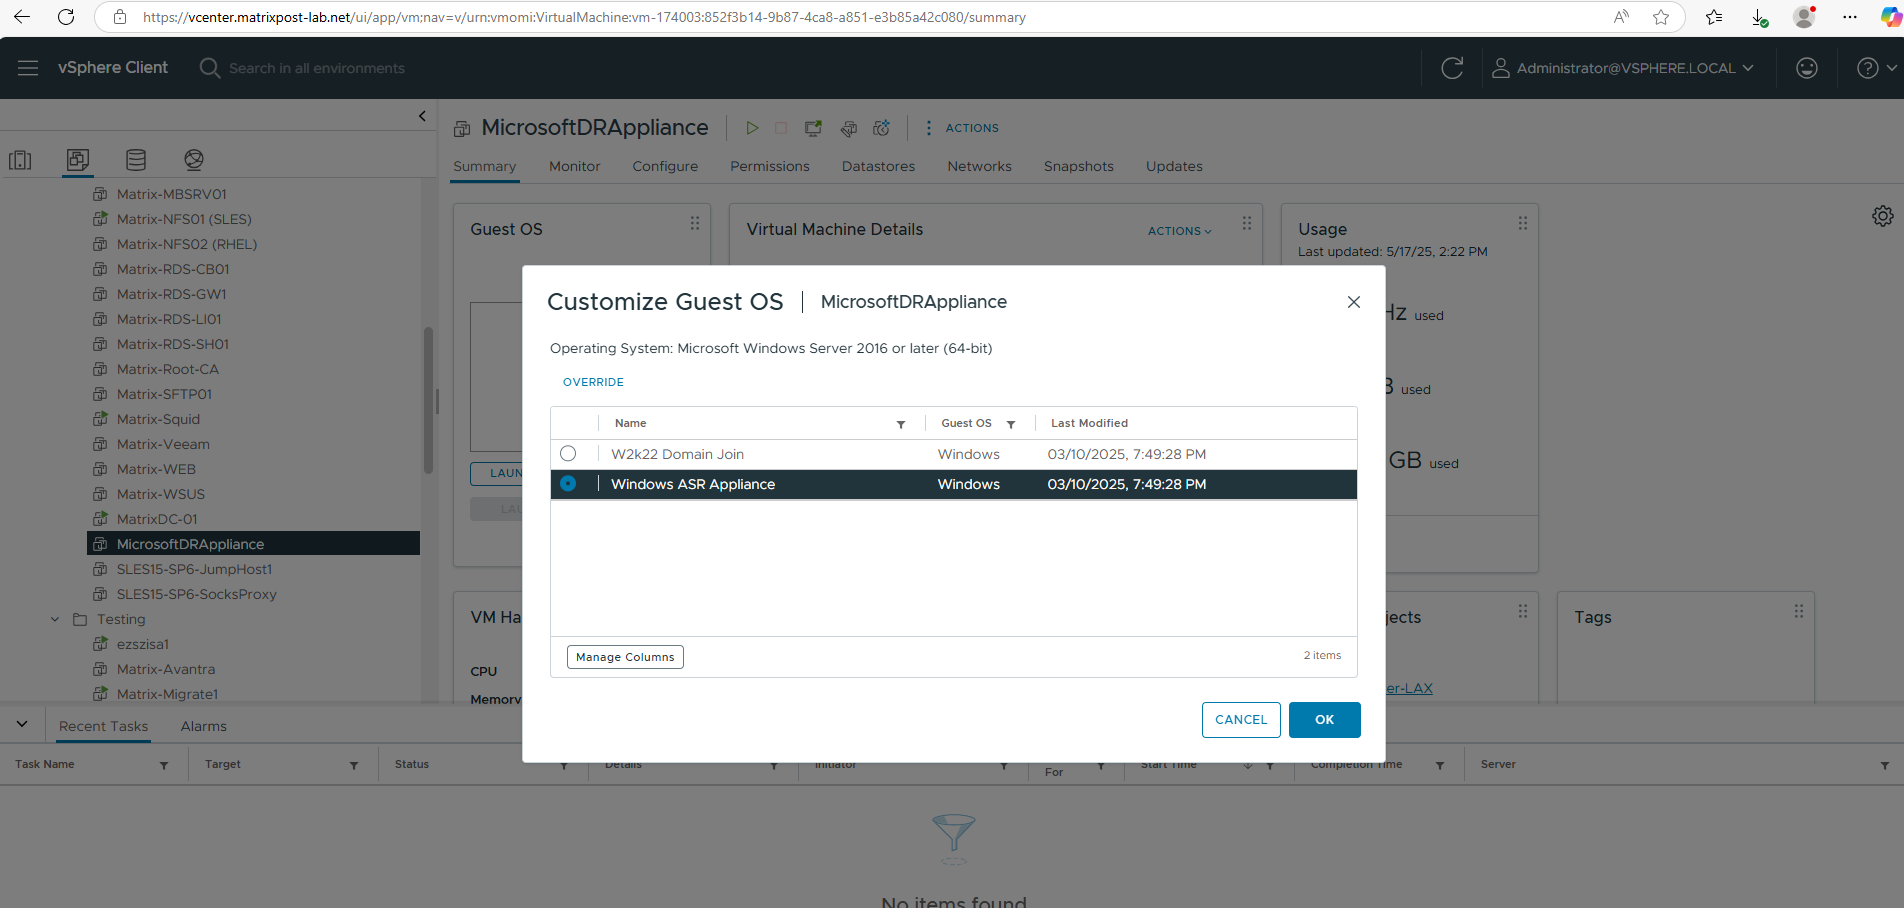
To apply it we can right click on our appliance and selecting Guest OS -> Customize Guest OS …
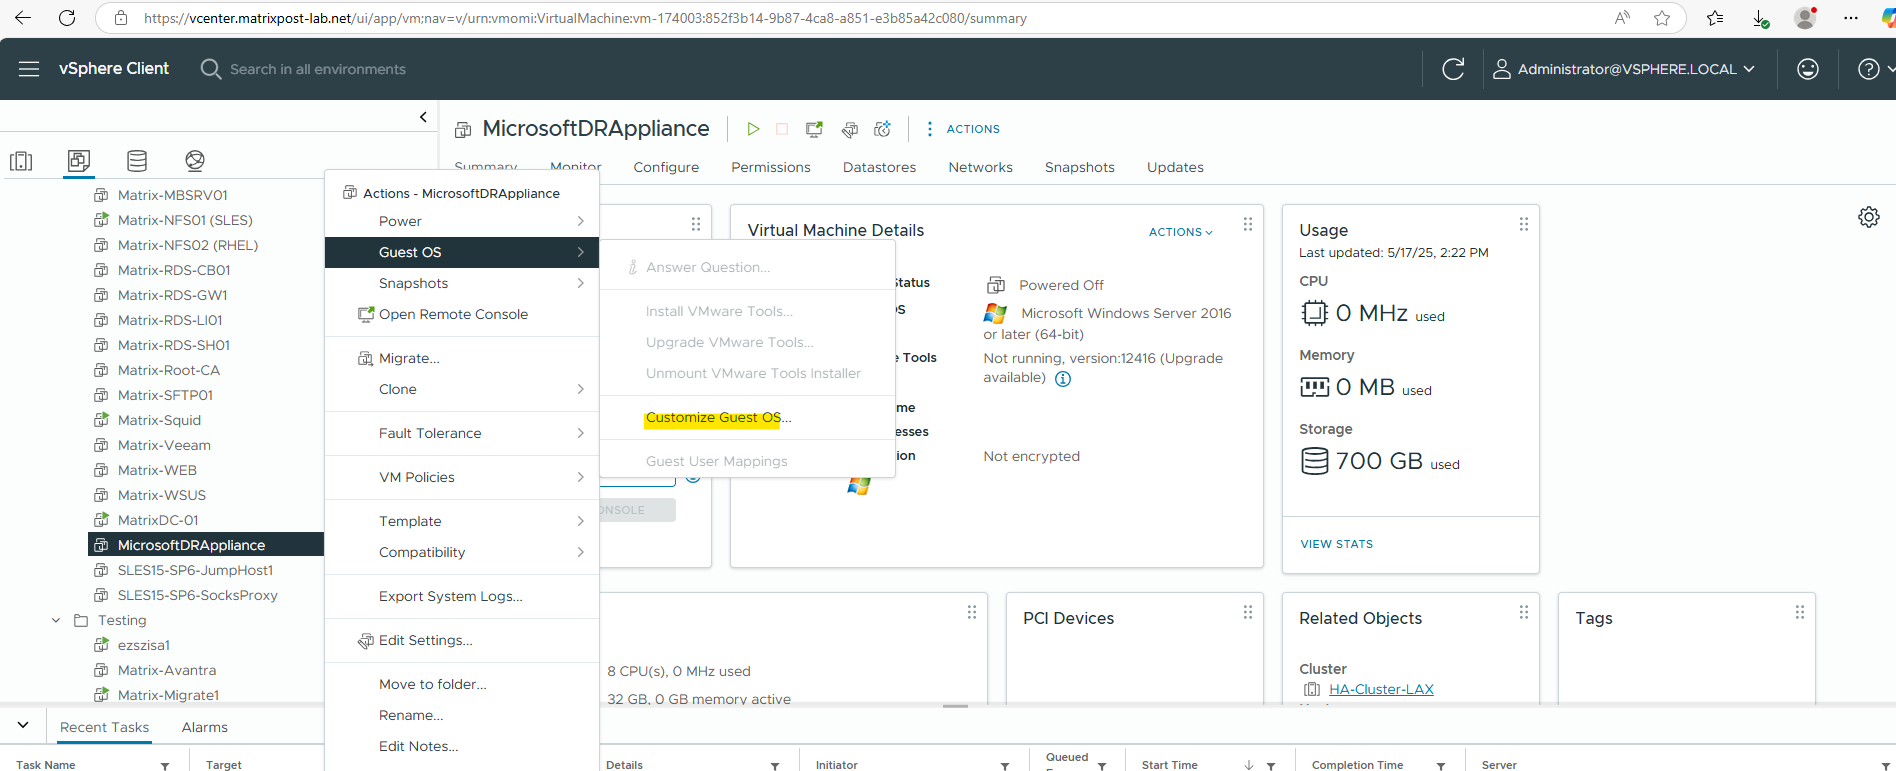
For the Windows operating system I have in my lab environment so far two VM Customization Specifications created.
One dedicated for the ASR appliance from my following post which I can finally also use here.
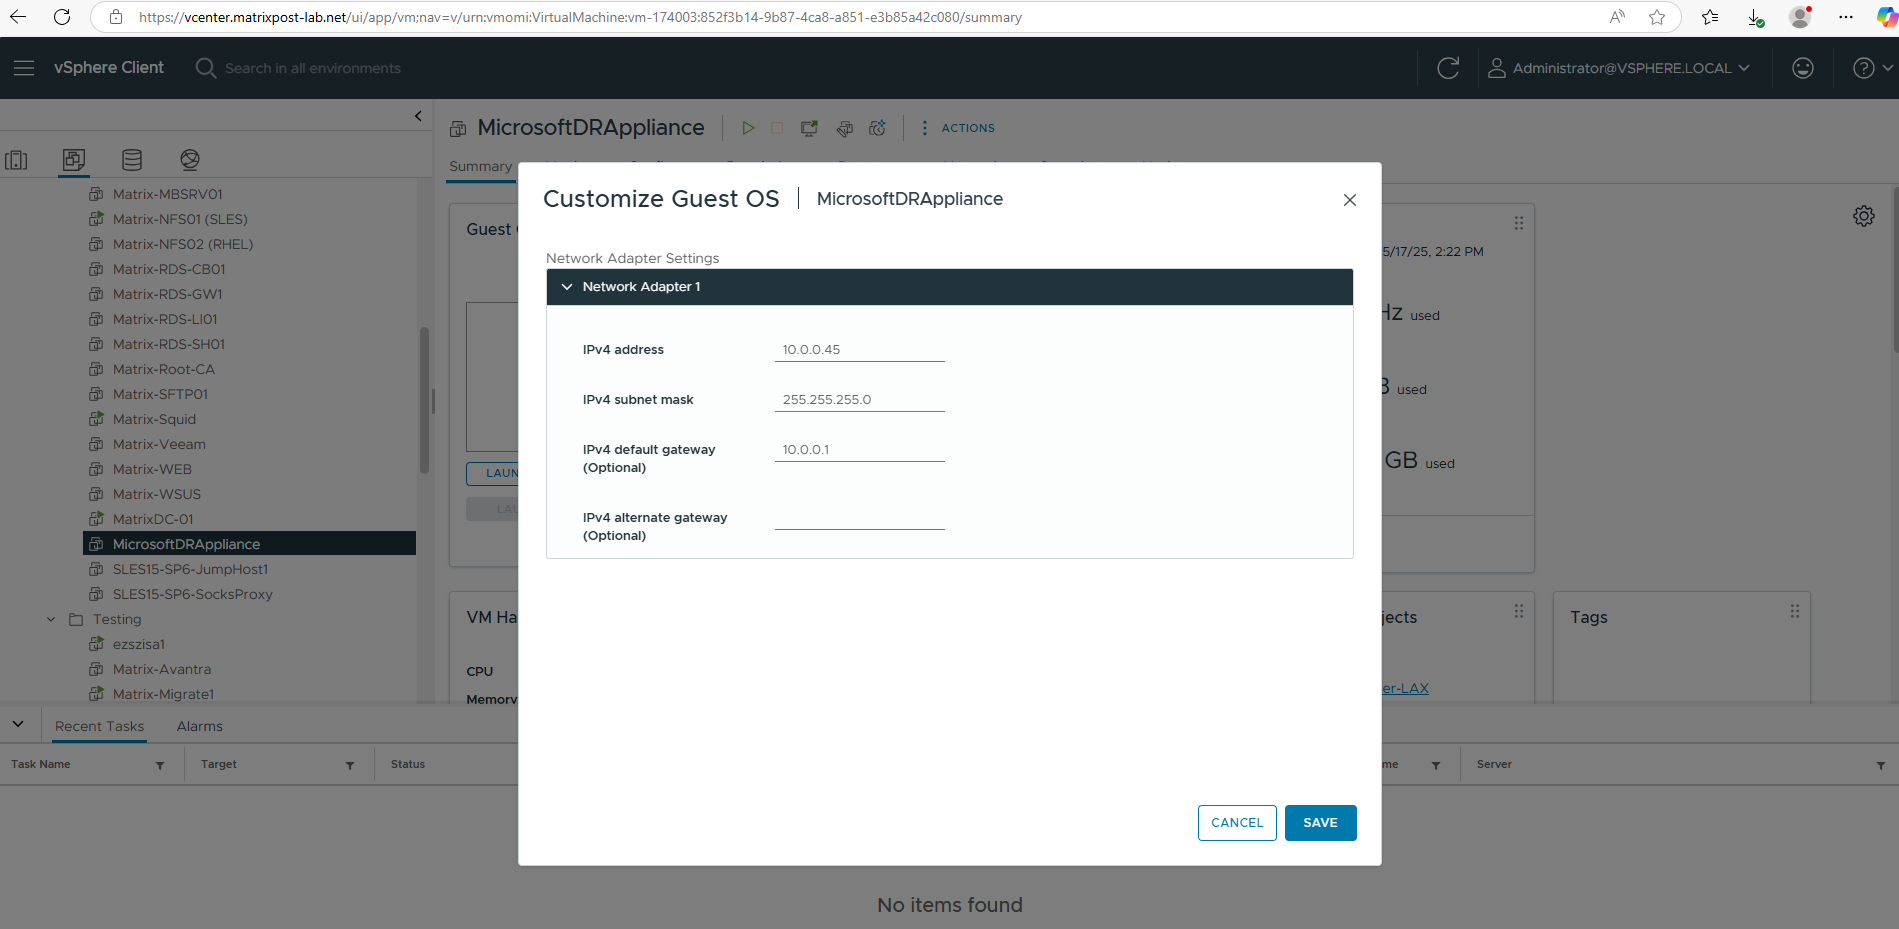
Enter a desired IP address for the appliance in your on-premise network and click on SAVE.
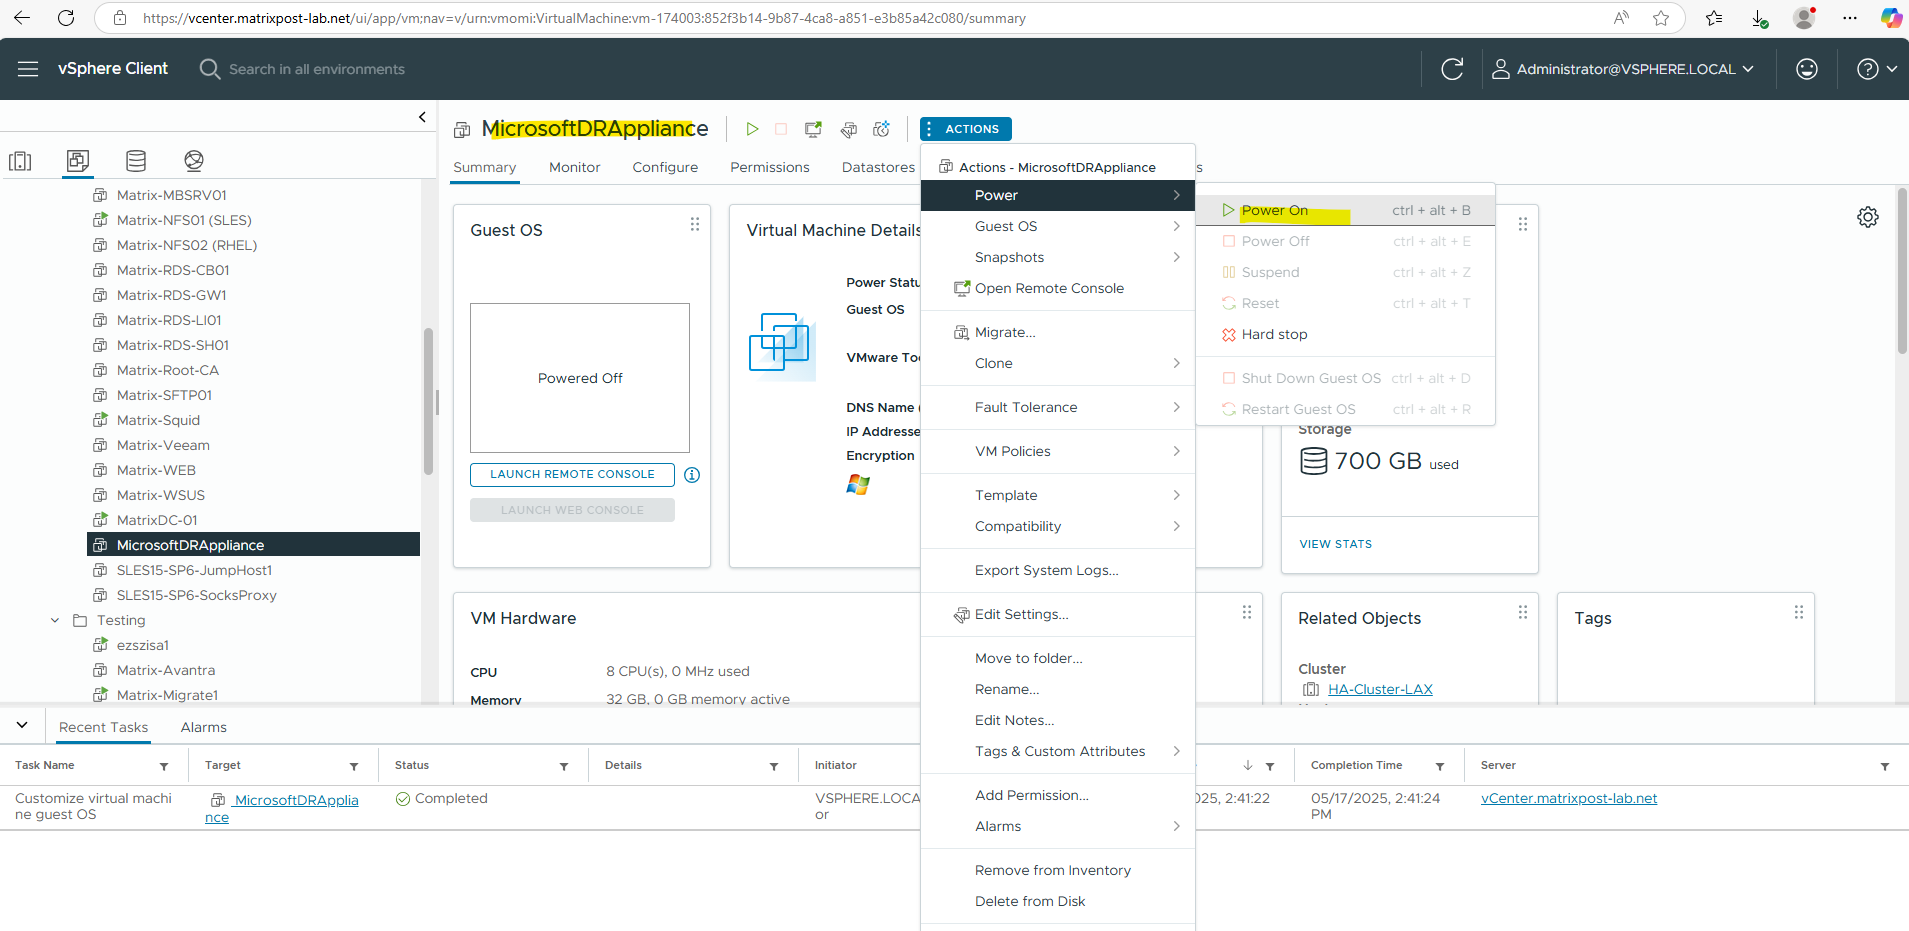
We can now finally power on the appliance (virtual machine).
Configure the Appliance by using its Configuration Manager
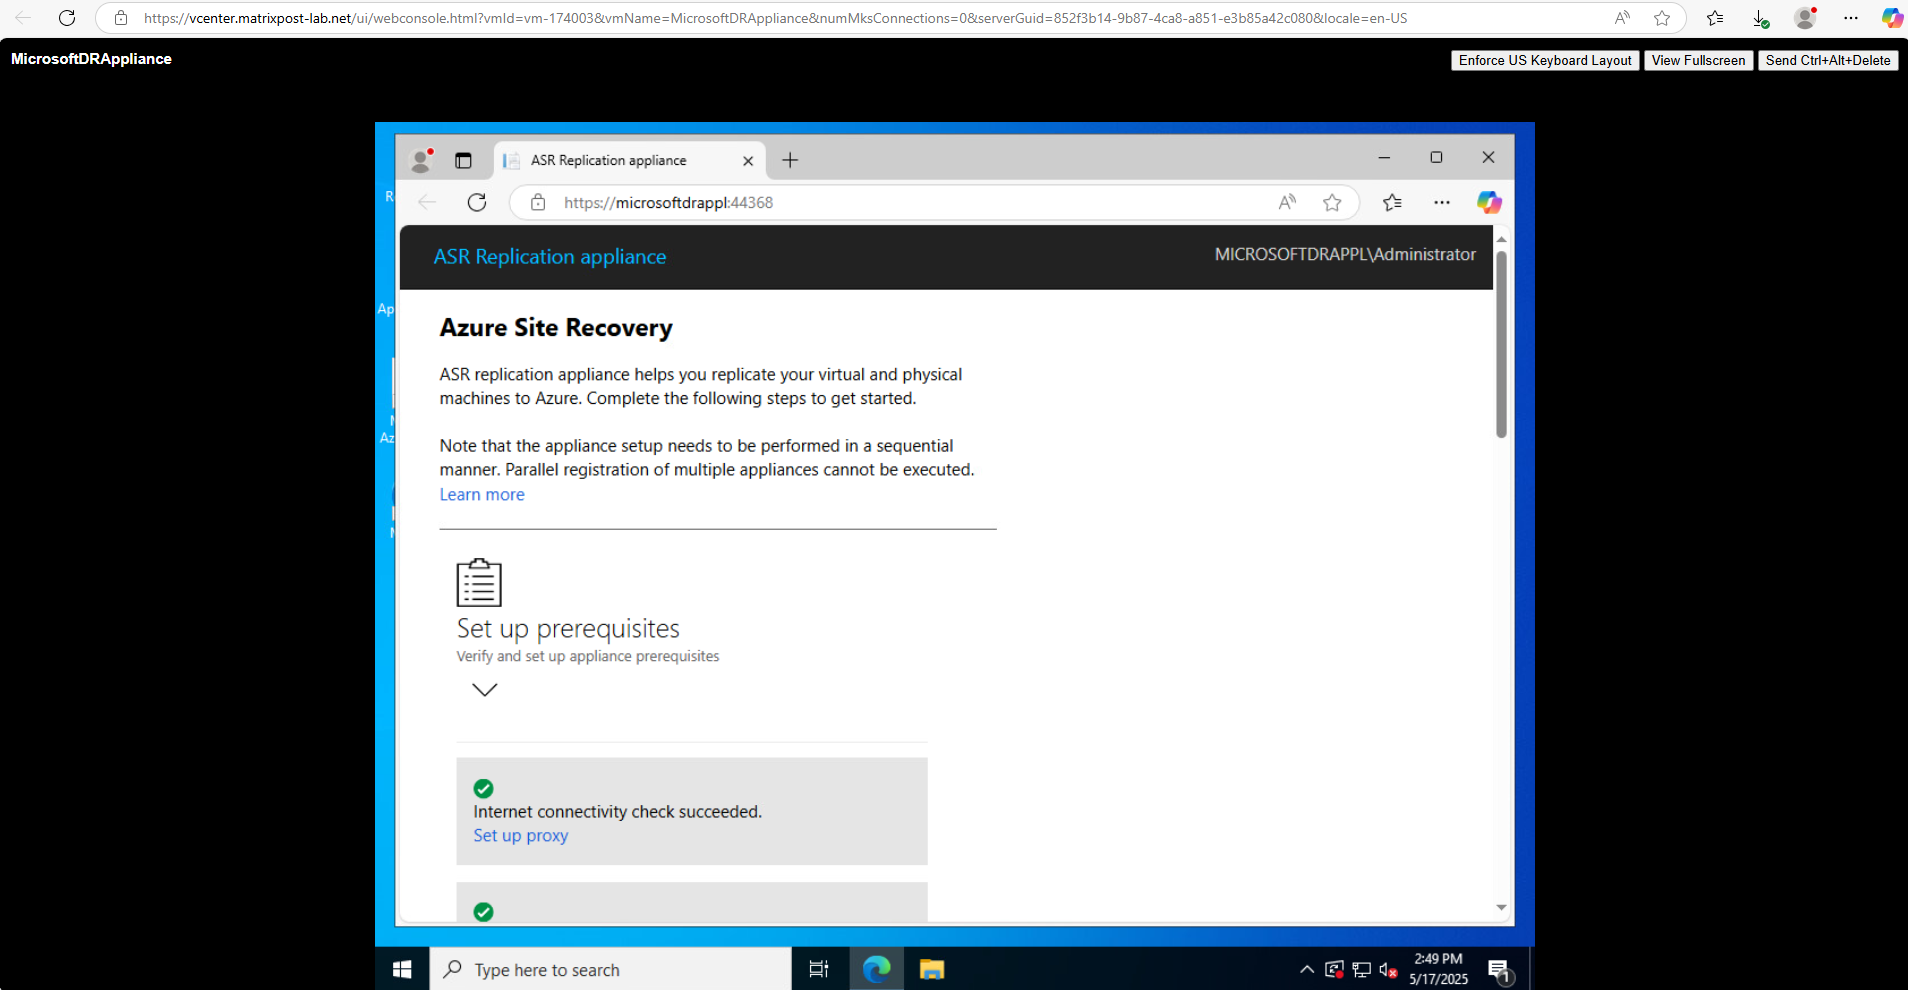
Access the appliance configuration manager from your browser and complete the configuration steps to initiate the discovery.
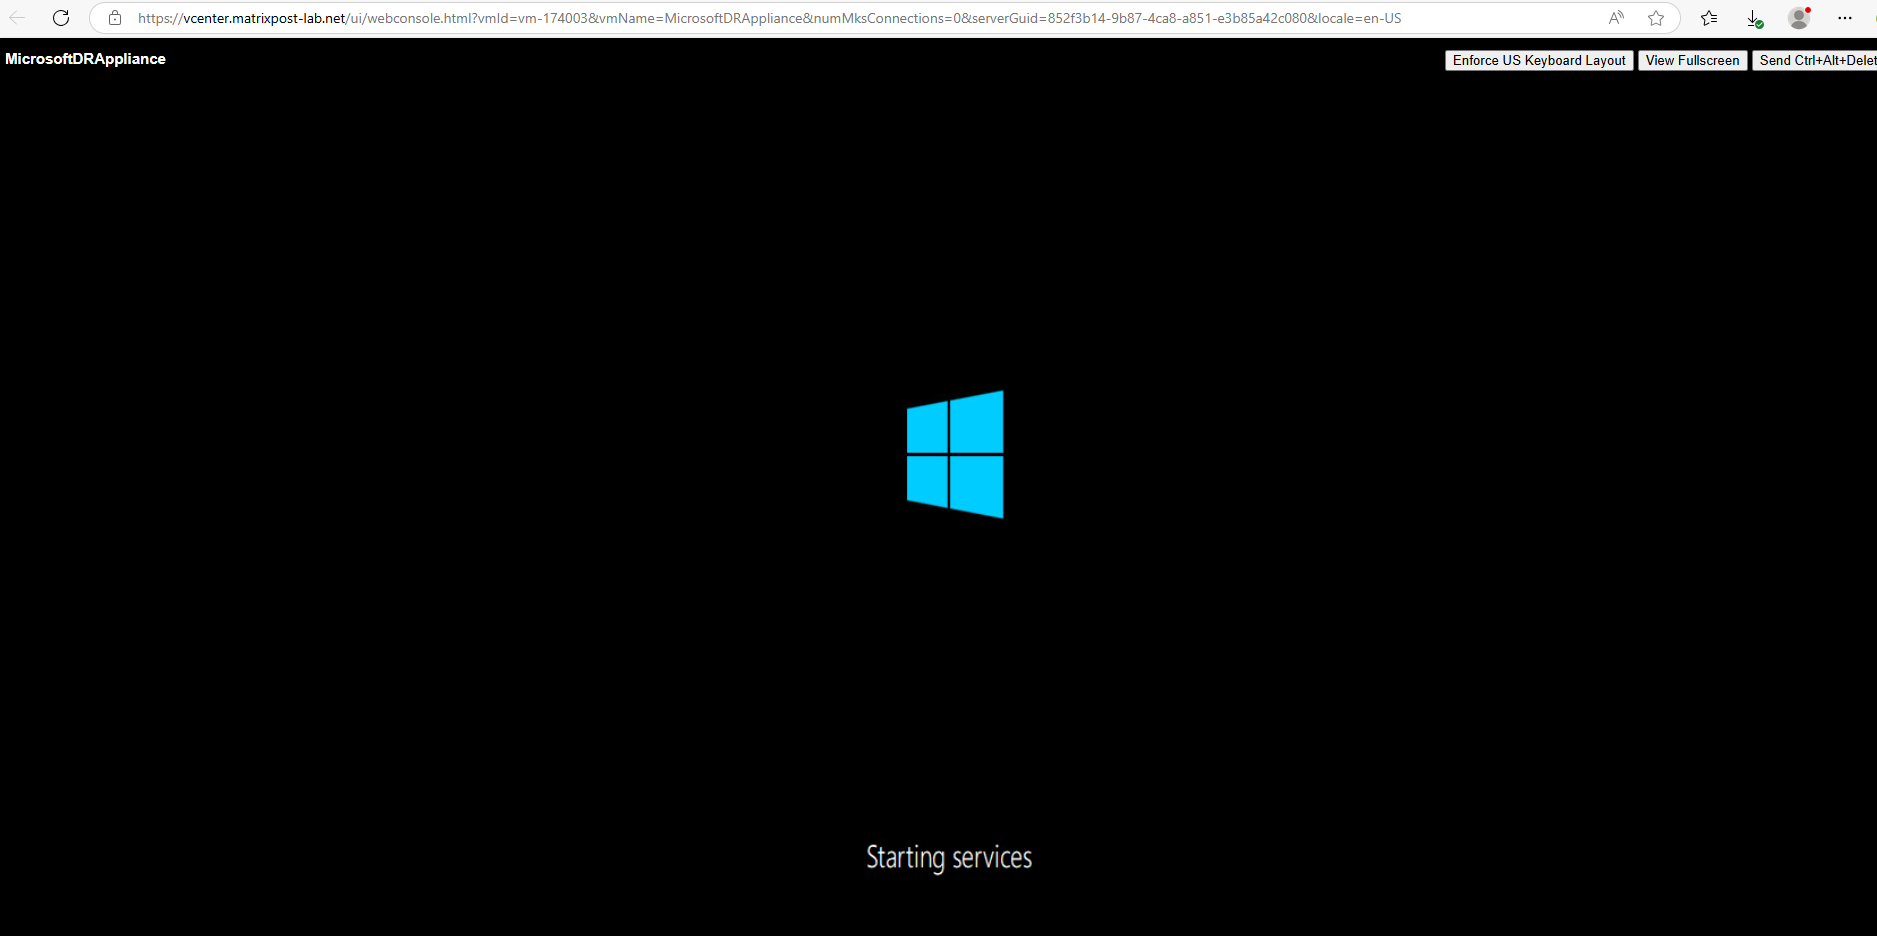
The appliance configuration manager will get started by default when the virtual machine booted successful.
We can also open the URL on any computer that can connect to the appliance by using https://<appliance name or IP address>: 44368.
Because the VM Customization Specification was also setting the local Administrator account password, I will now first switch to use a remote desktop connection.
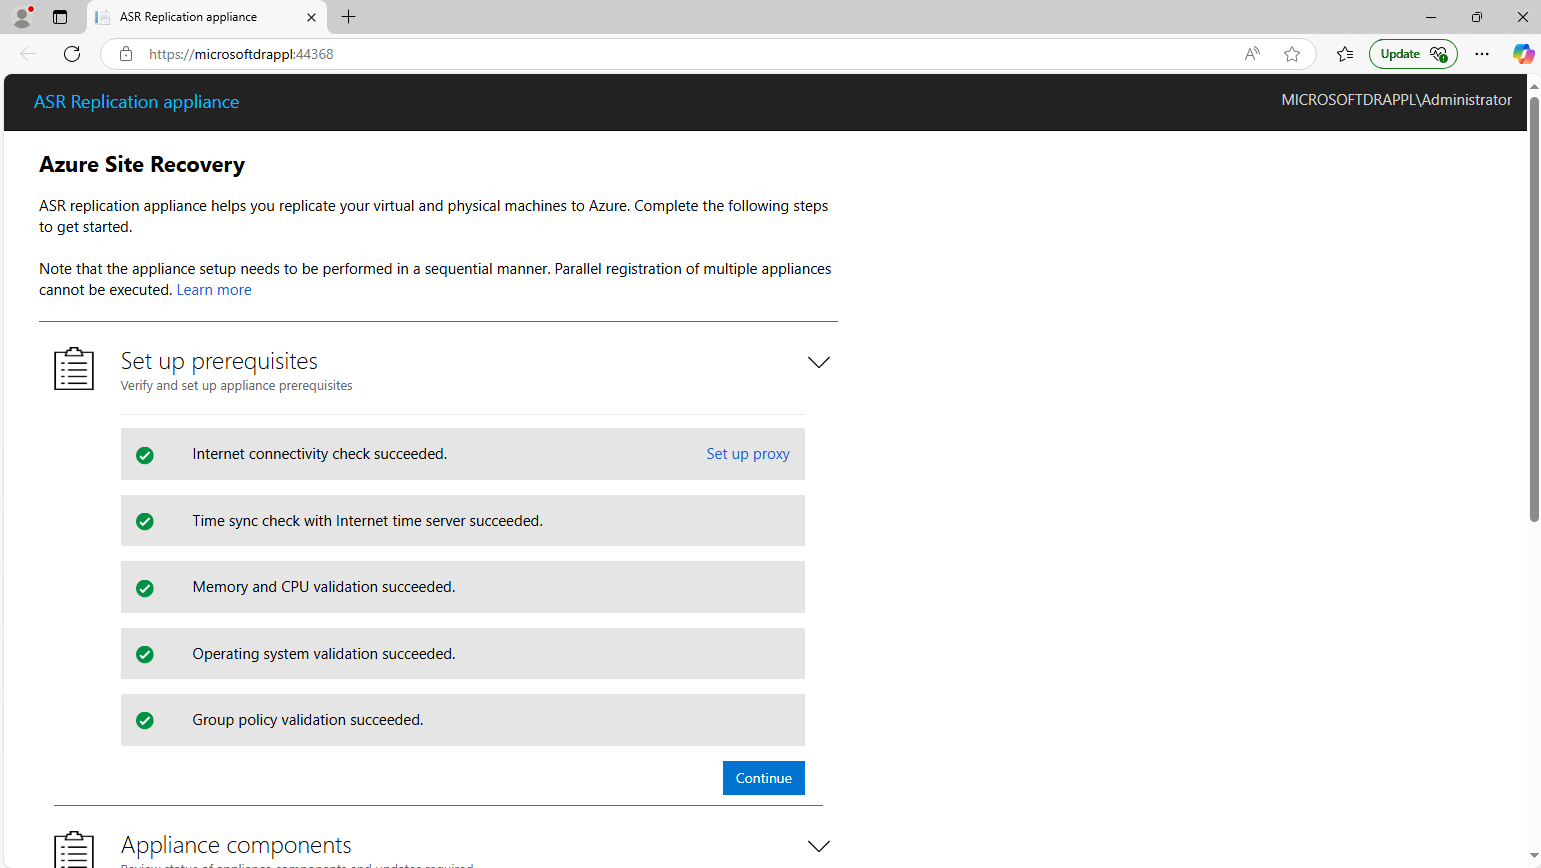
Click on Continue.
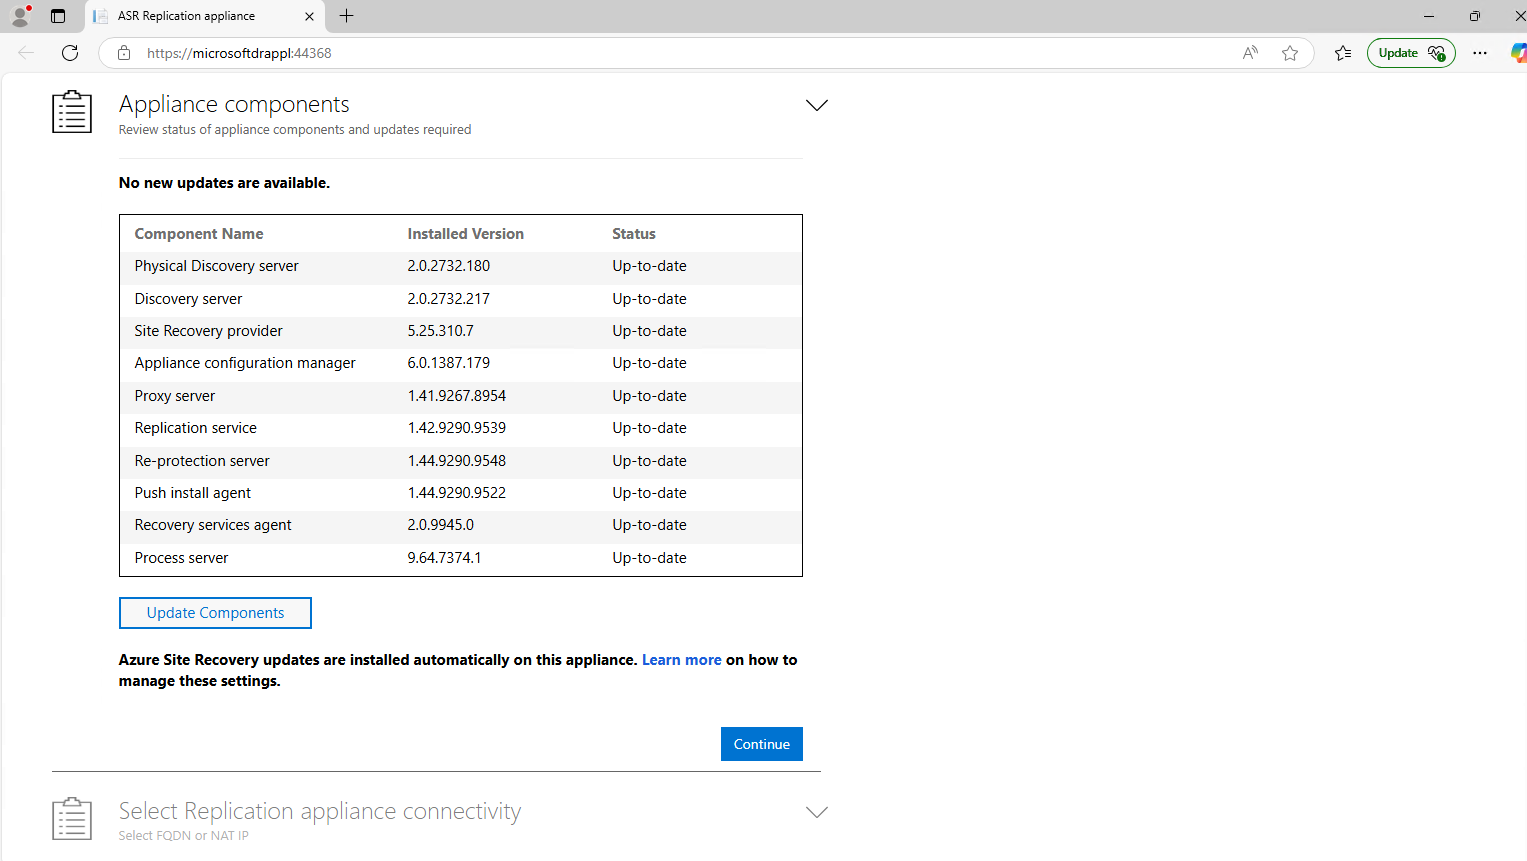
All components are up-to-date, so we can click on Continue.
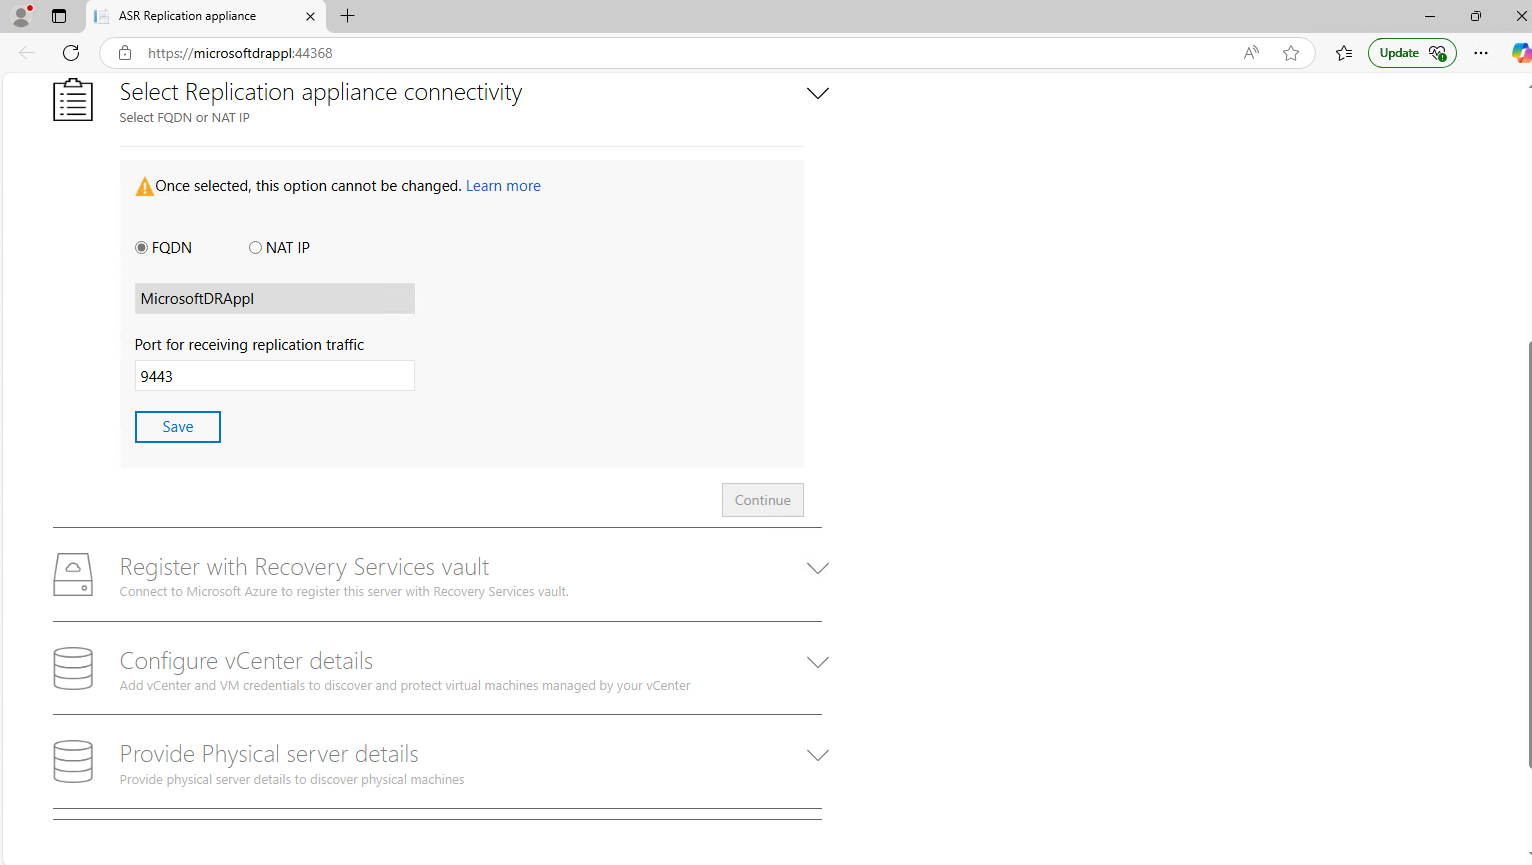
Proceed to choose the appliance connectivity below. Either FQDN or a NAT IP can be selected to define how the communication with the appliance would happen.
This will finally define how our deployed (pushed) Mobility Agents on our virtual machines we want to migrate will communicate with this replication appliance, either through FQDN or IP address.
Click on Save and Continue.
After saving connectivity details, select Continue to proceed to registration with Microsoft Azure.
To copy paste the appliance key and click on Login.
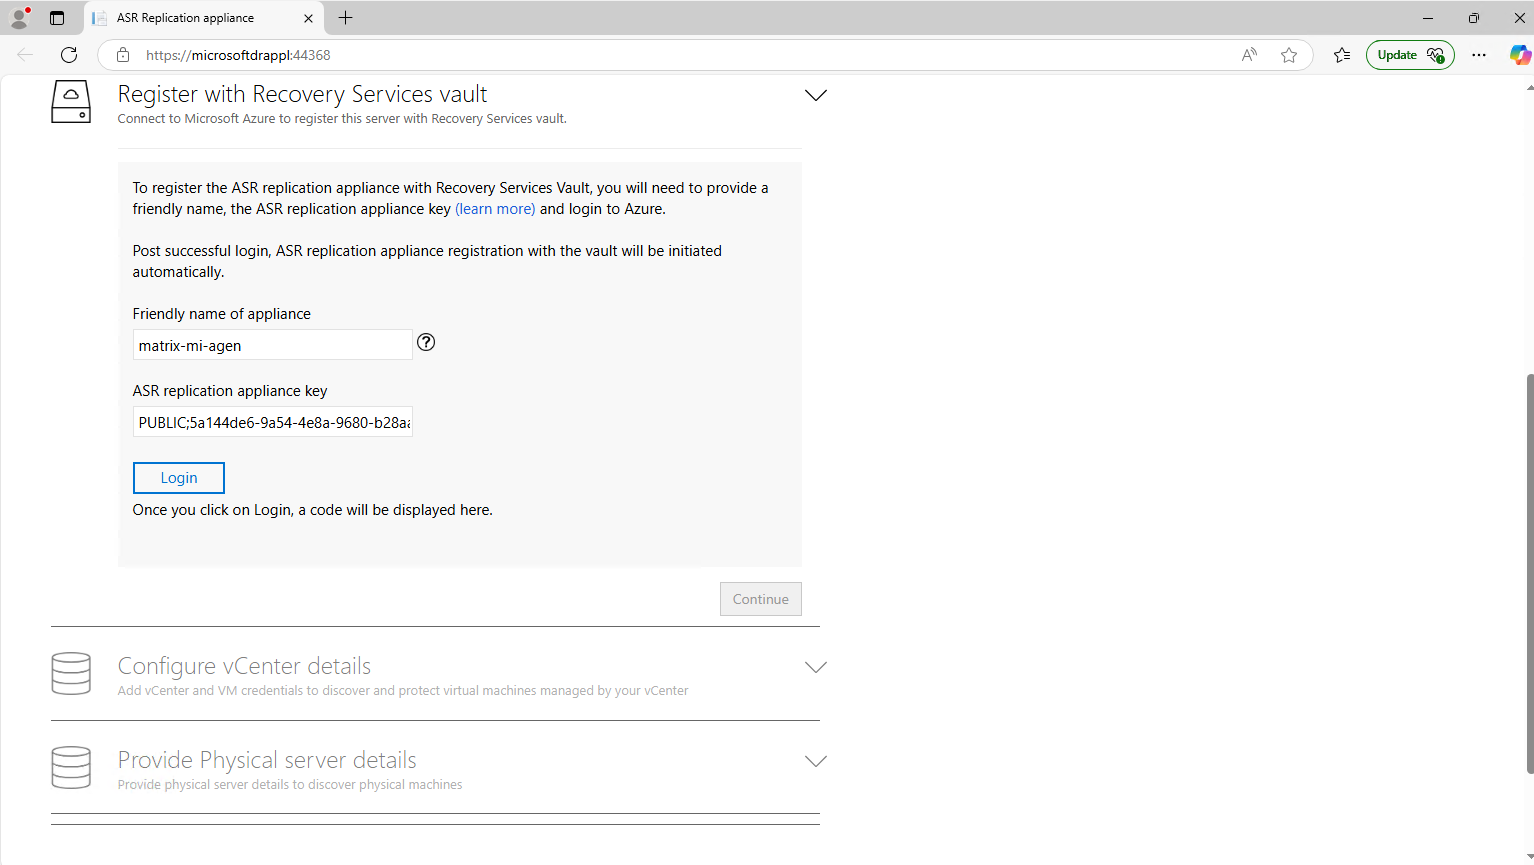
Click on Continue.

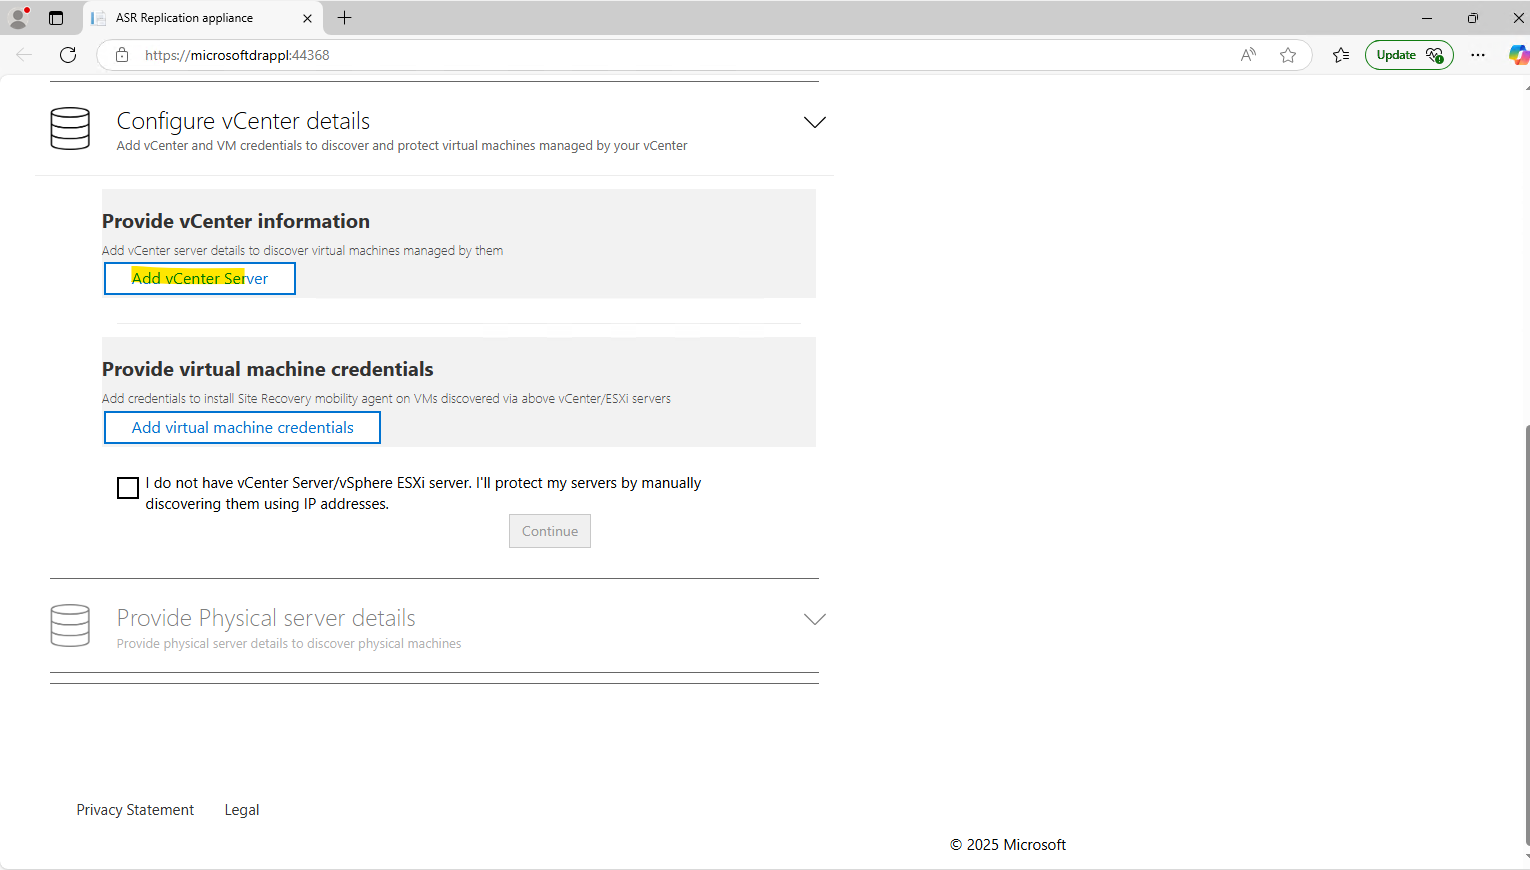
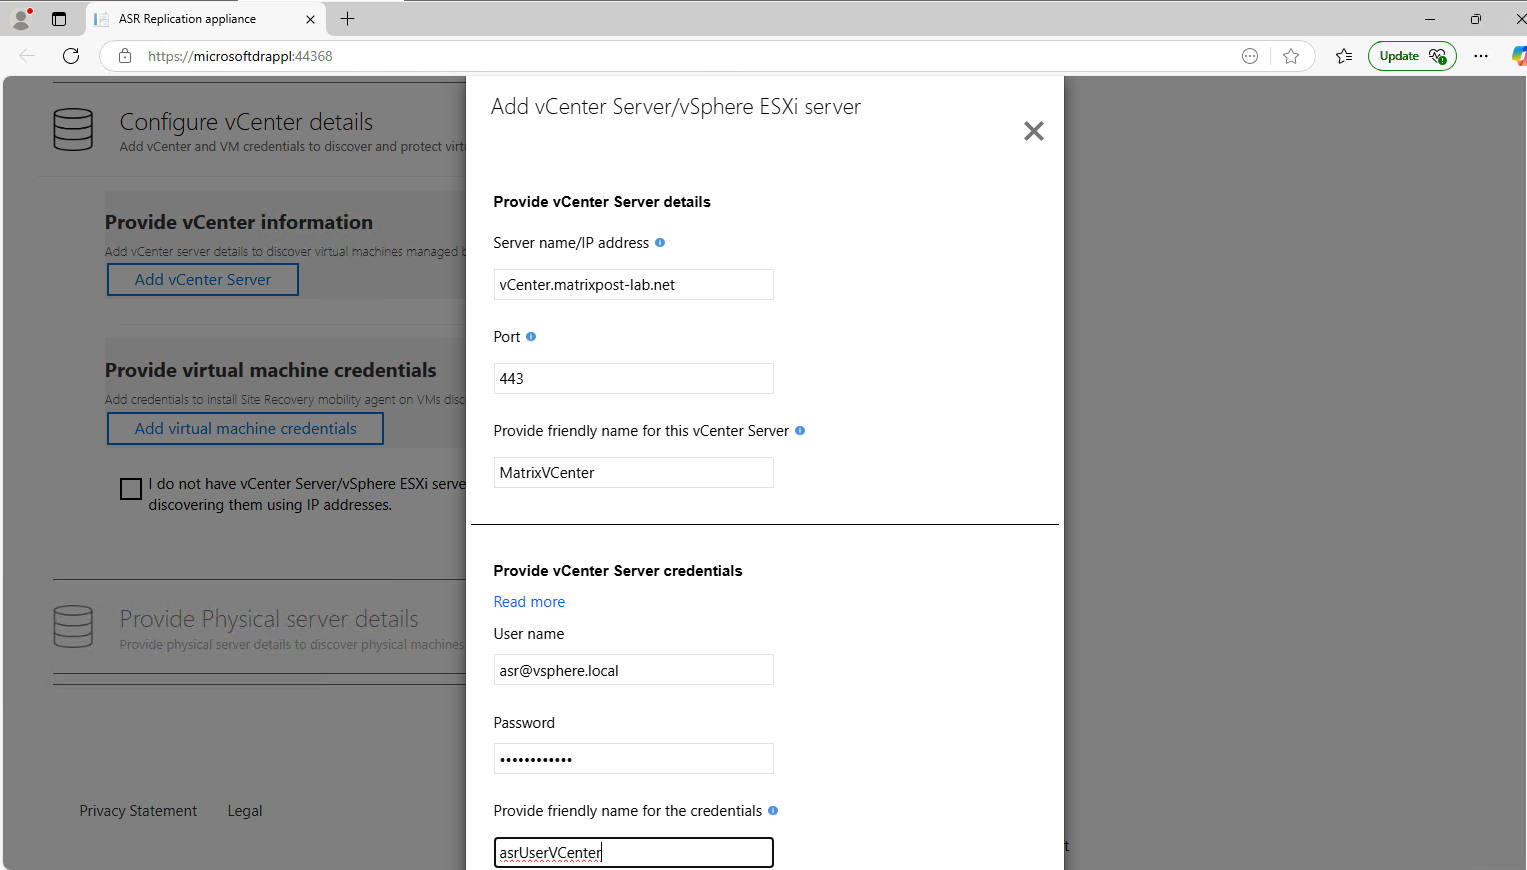
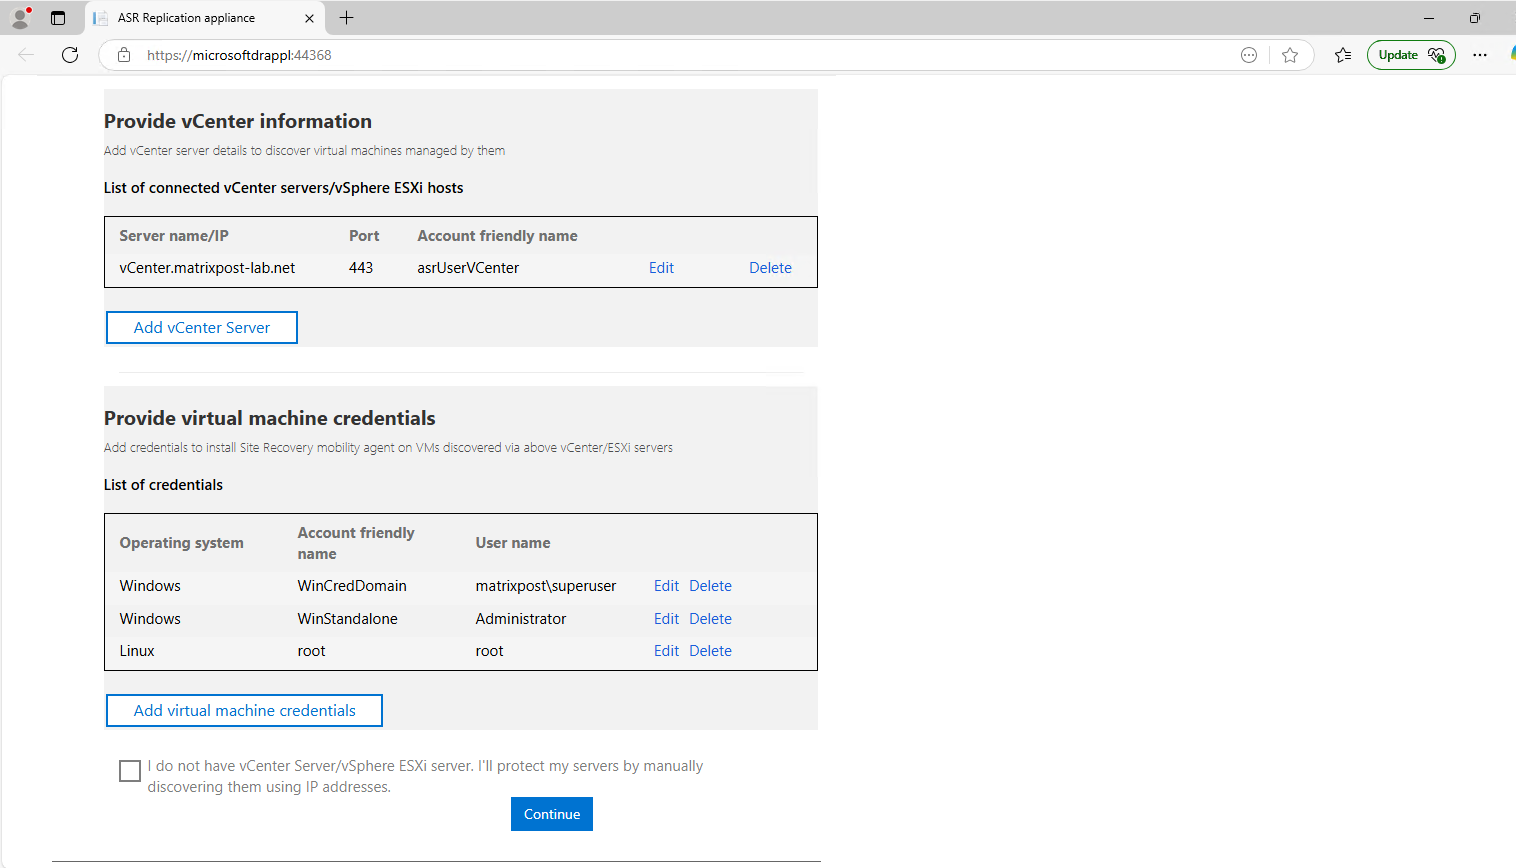
Click on Add vCenter Server.
The friendly name is the name which appears in Azure. The user we created previously in vSphere and read-only permissions.
Click on Add.
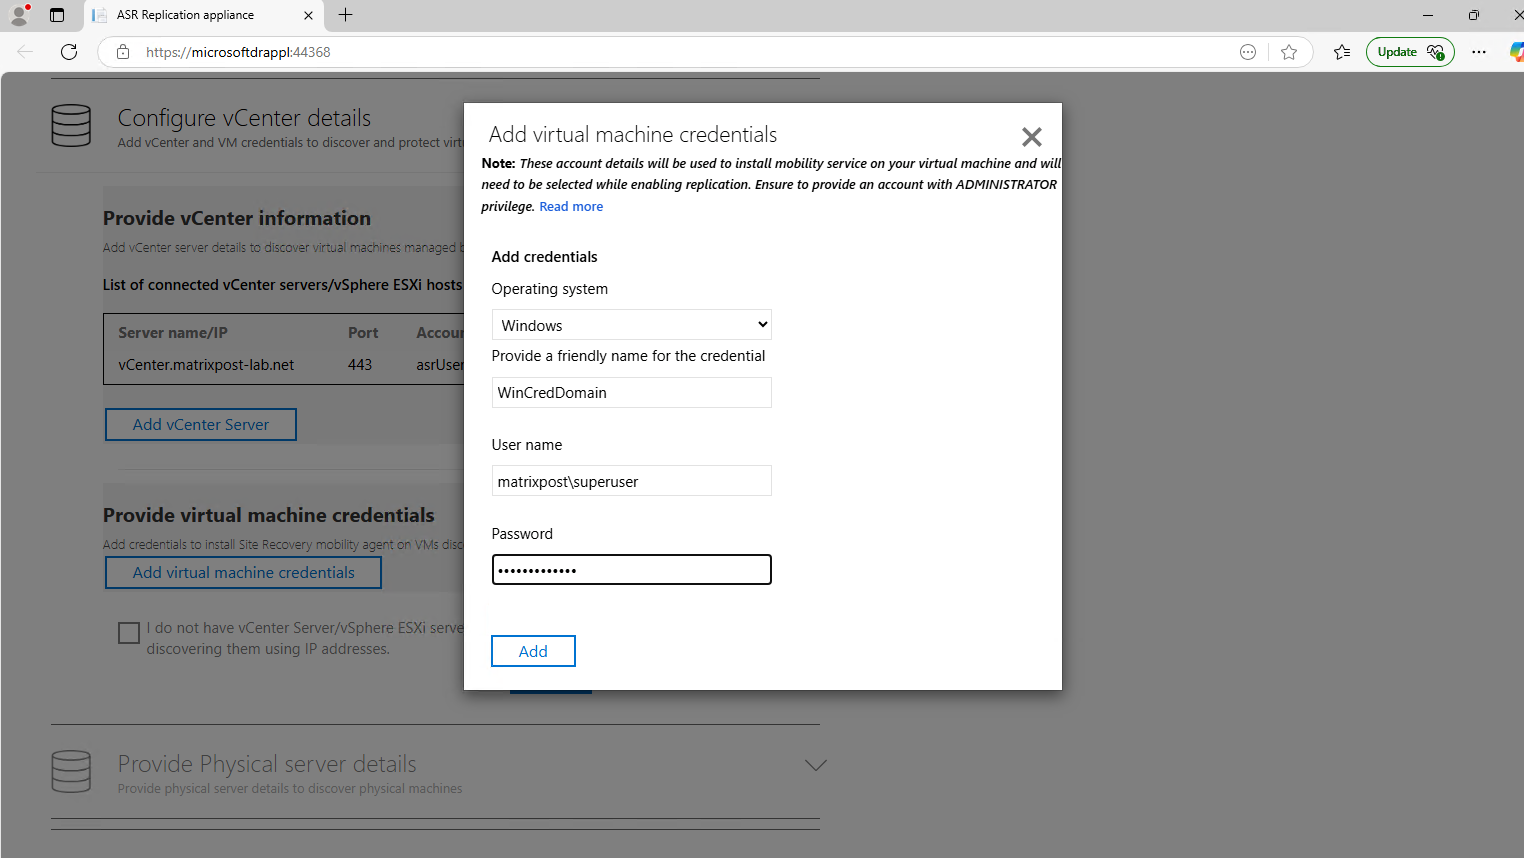
Click on Add virtual machine credentials.
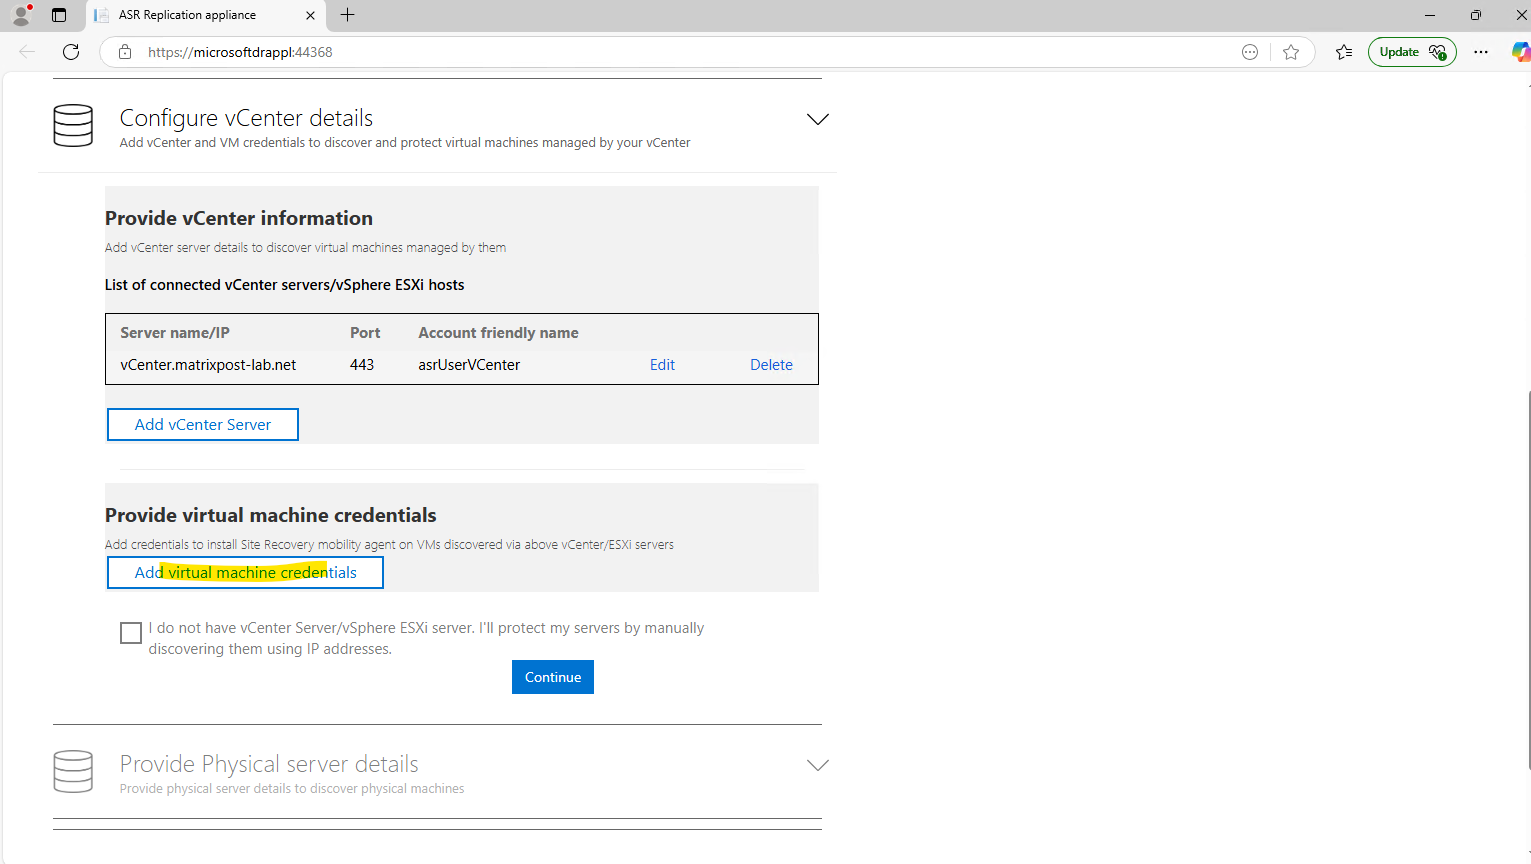
For Linux OS, ensure to provide the root credentials. For Windows OS, a user account with admin privileges should be added. These credentials will be used to push Mobility Service on to the source machine during enable replication operation.
Click on Continue.
I will not protect physical servers. Click on Continue.

After clicking above on Continue I was running into the following error.
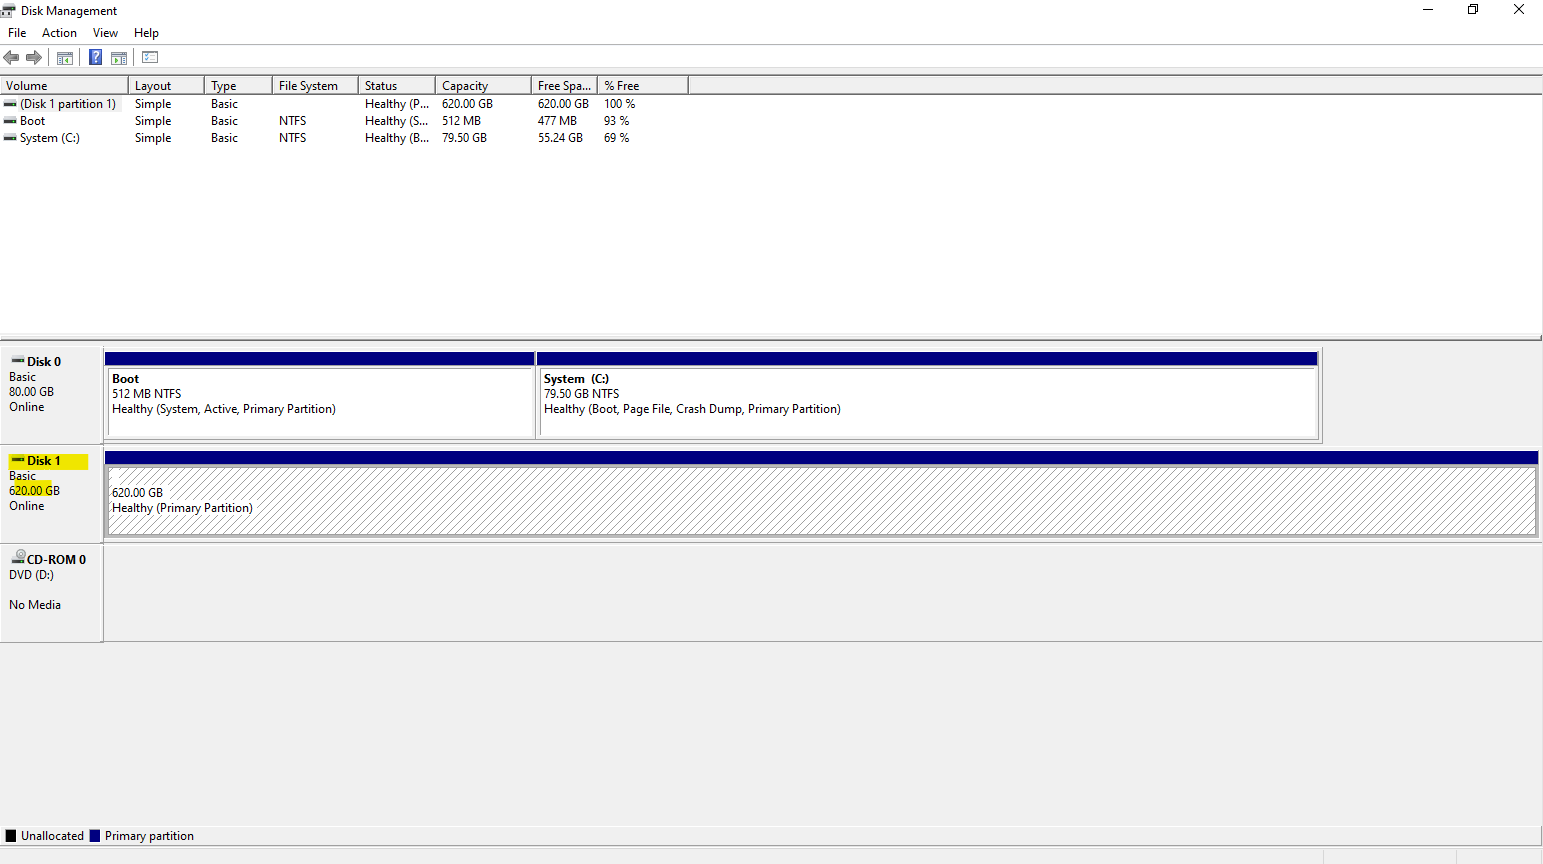
Cache drive E:\ is write protected.

The appliances E:\ drive was not really write protected but instead hadn’t assigned a drive letter. So I just had to assign the E:\ drive letter to this disk and click on Try Again.
The E:\ drive on the Azure Site Recovery (ASR) appliance, also known as the Configuration Server or Process Server, serves a crucial role in the replication process. Its primary purpose is to provide temporary caching and staging for replicated data from the on-premises infrastructure before the data is transferred to Azure.
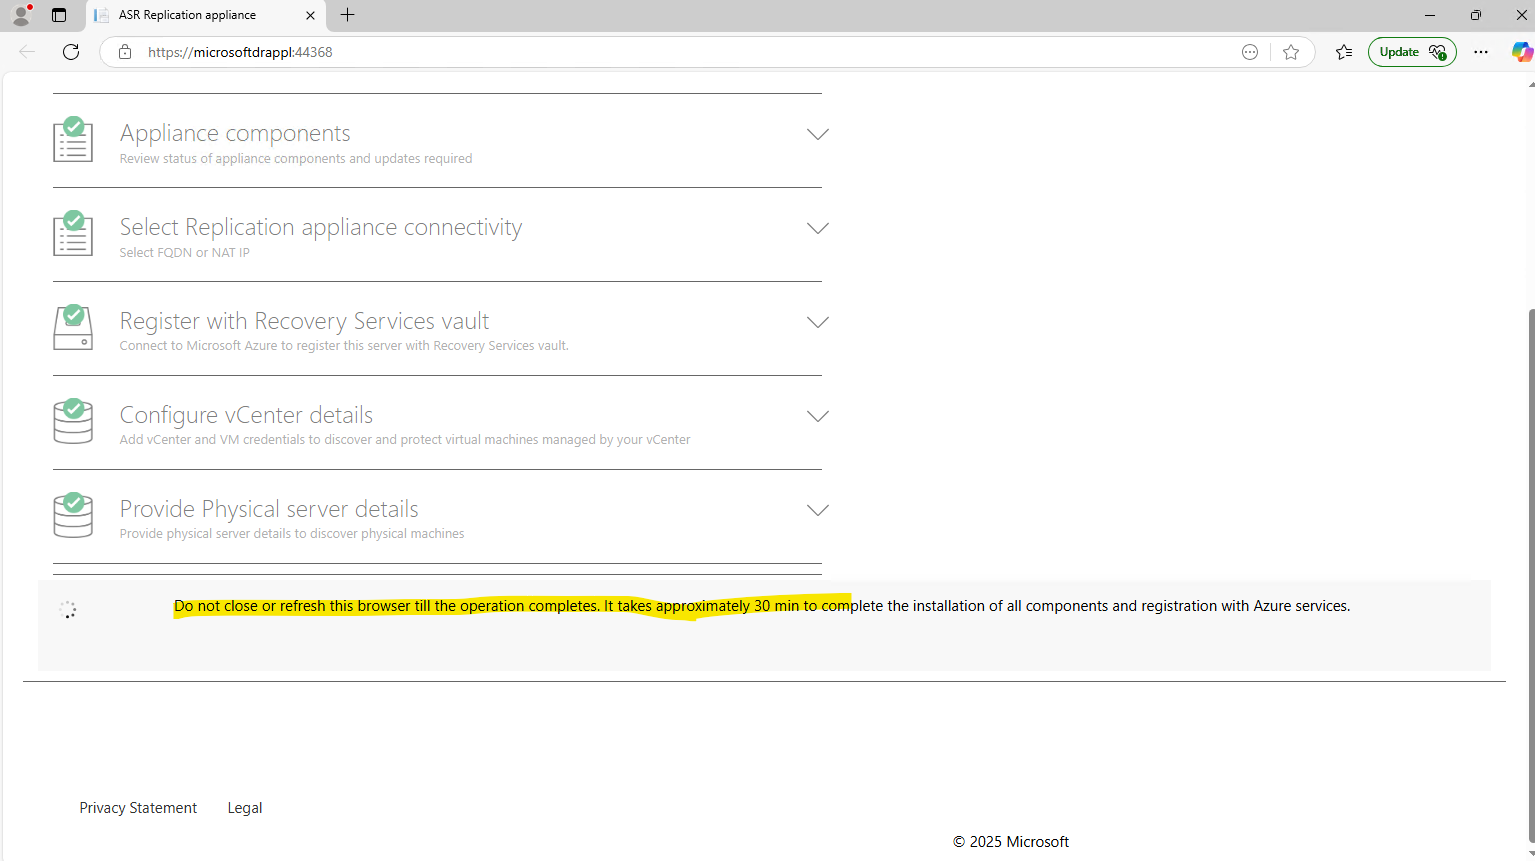
Do not close or refresh this browser till the operation completes. It takes approximately 30 min to complete the installation of all components and registration with Azure services.
I always run into the following generic failure the first time.
Process server’s registration has failed with the following error: The operation failed due to an internal error.
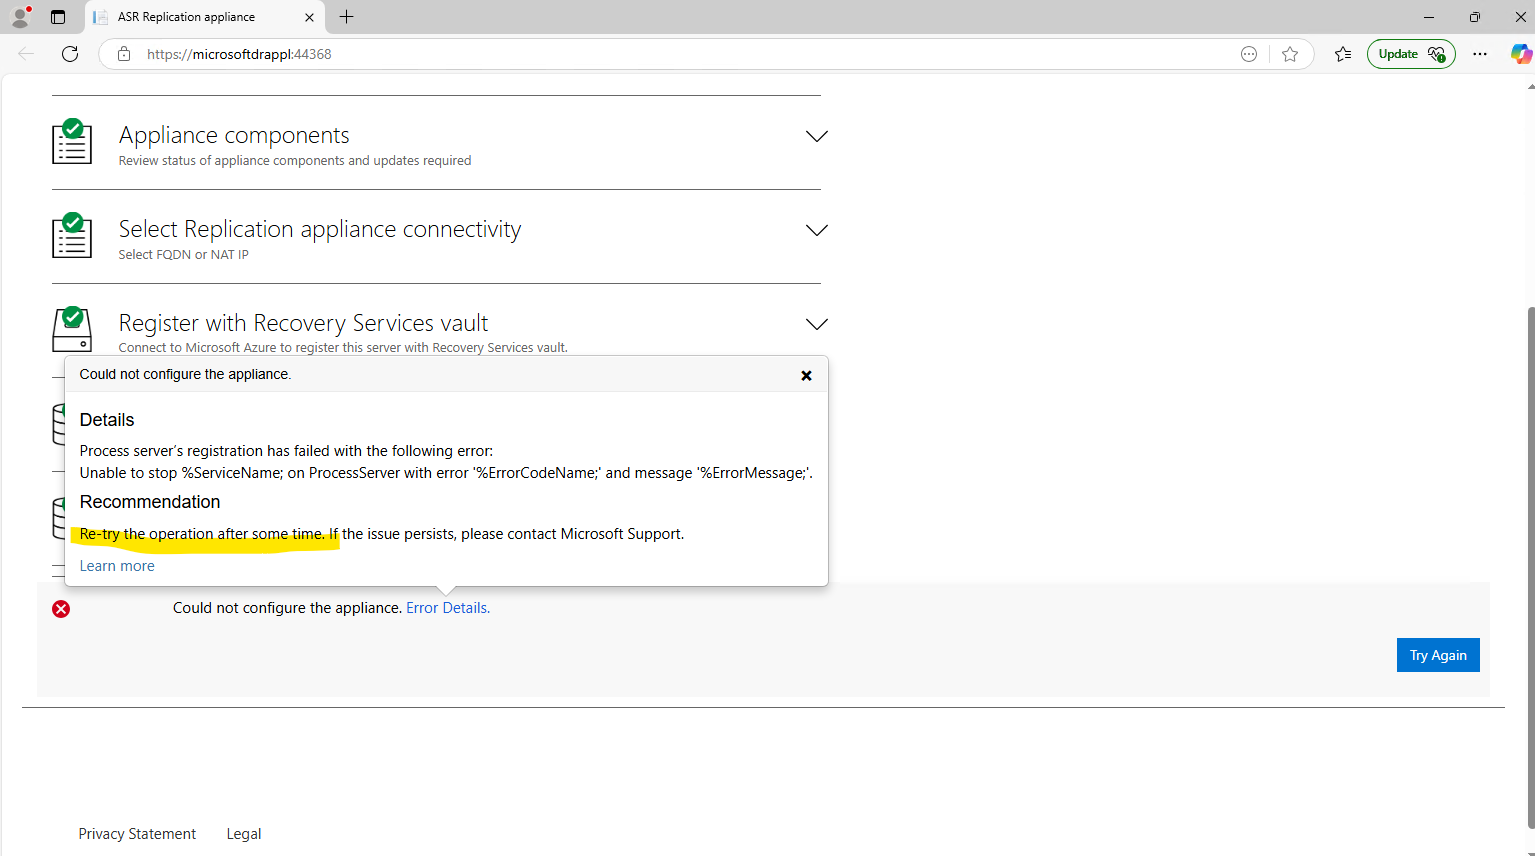
The second try is always successful, so no idea what the problem in the first place always is.
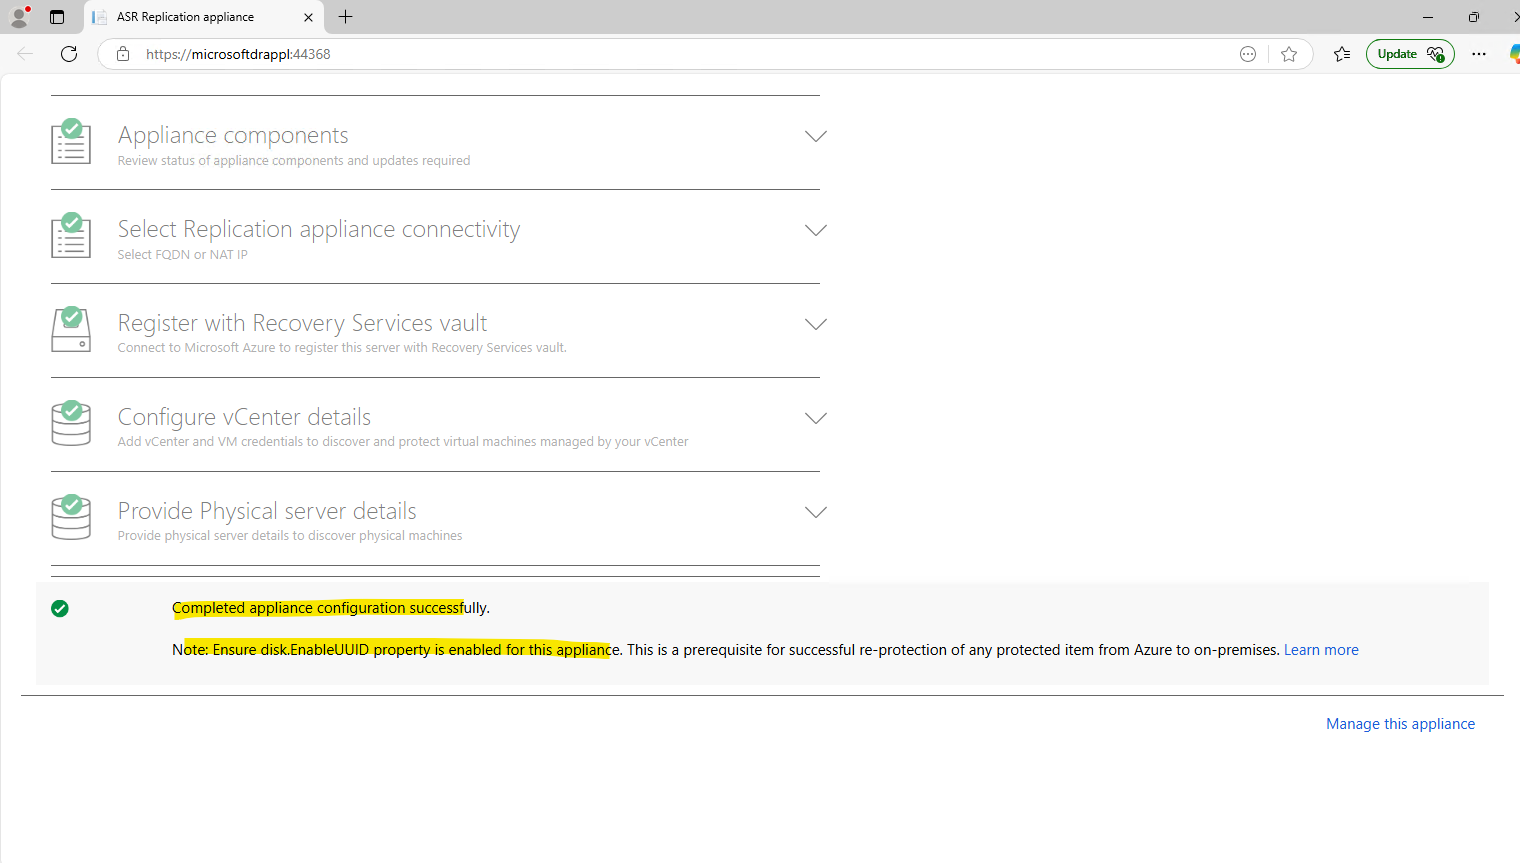
disk.EnableUUID was enabled by default.
The disk.EnableUUID setting is a VMware configuration parameter used primarily in virtual machines (VMs) to ensure consistent disk identification across reboots and migrations. This is especially important in clustered environments (like vSphere, ESXi, or Fusion) where disk UUIDs are used to prevent conflicts.

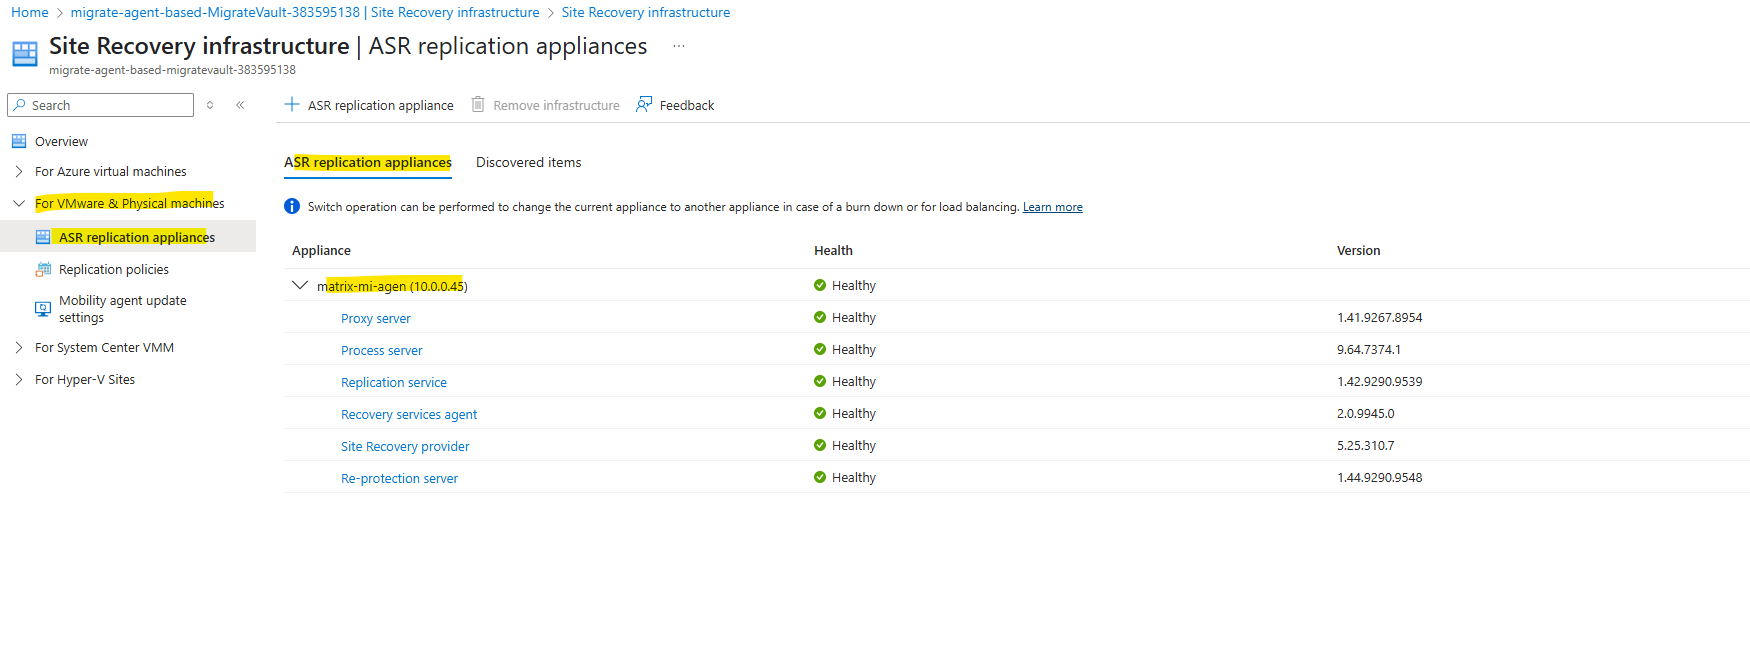
The appliance we will always find in Azure by clicking on the corresponding vault shown up within the Business Continuity Center.
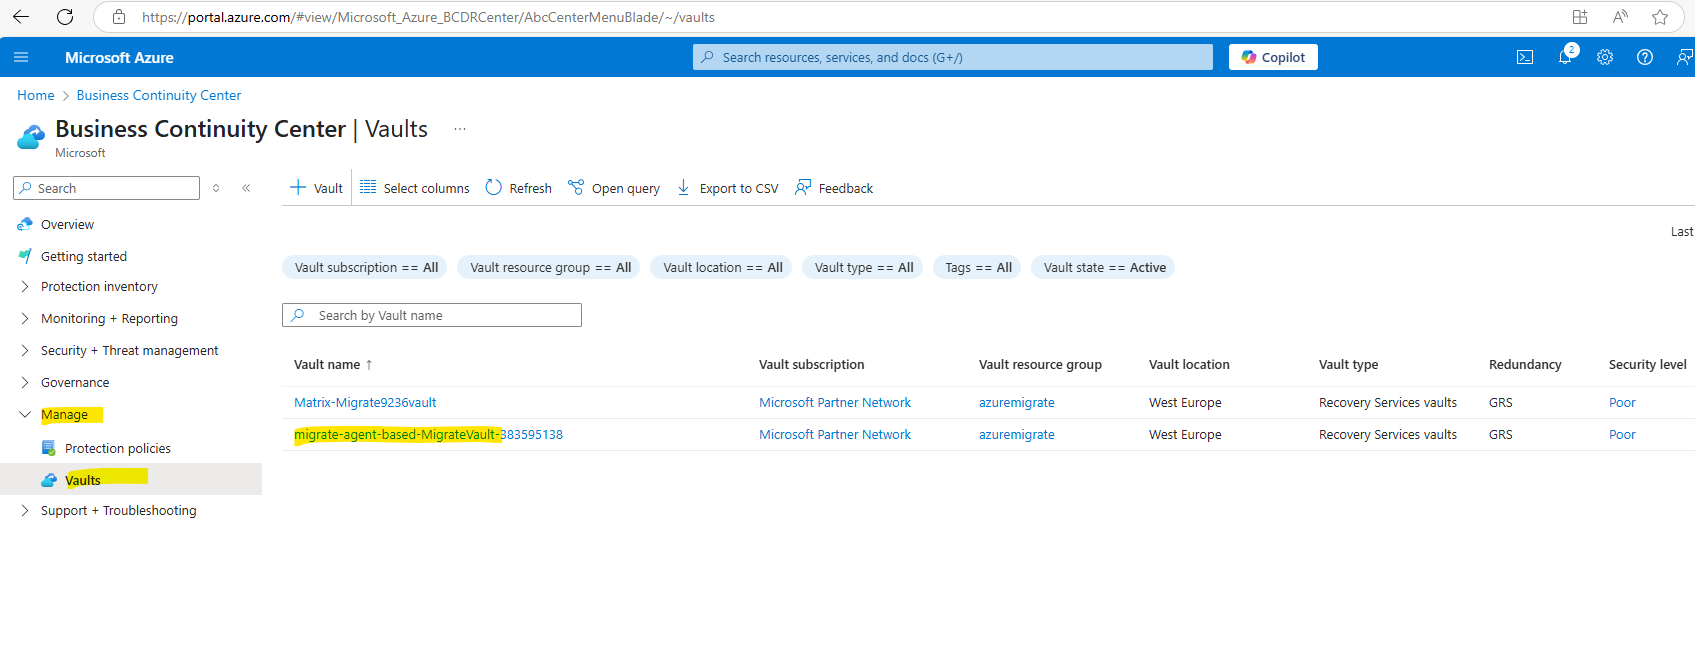
On the recovery services vault click on Manage -> Site Recovery infrastructure.
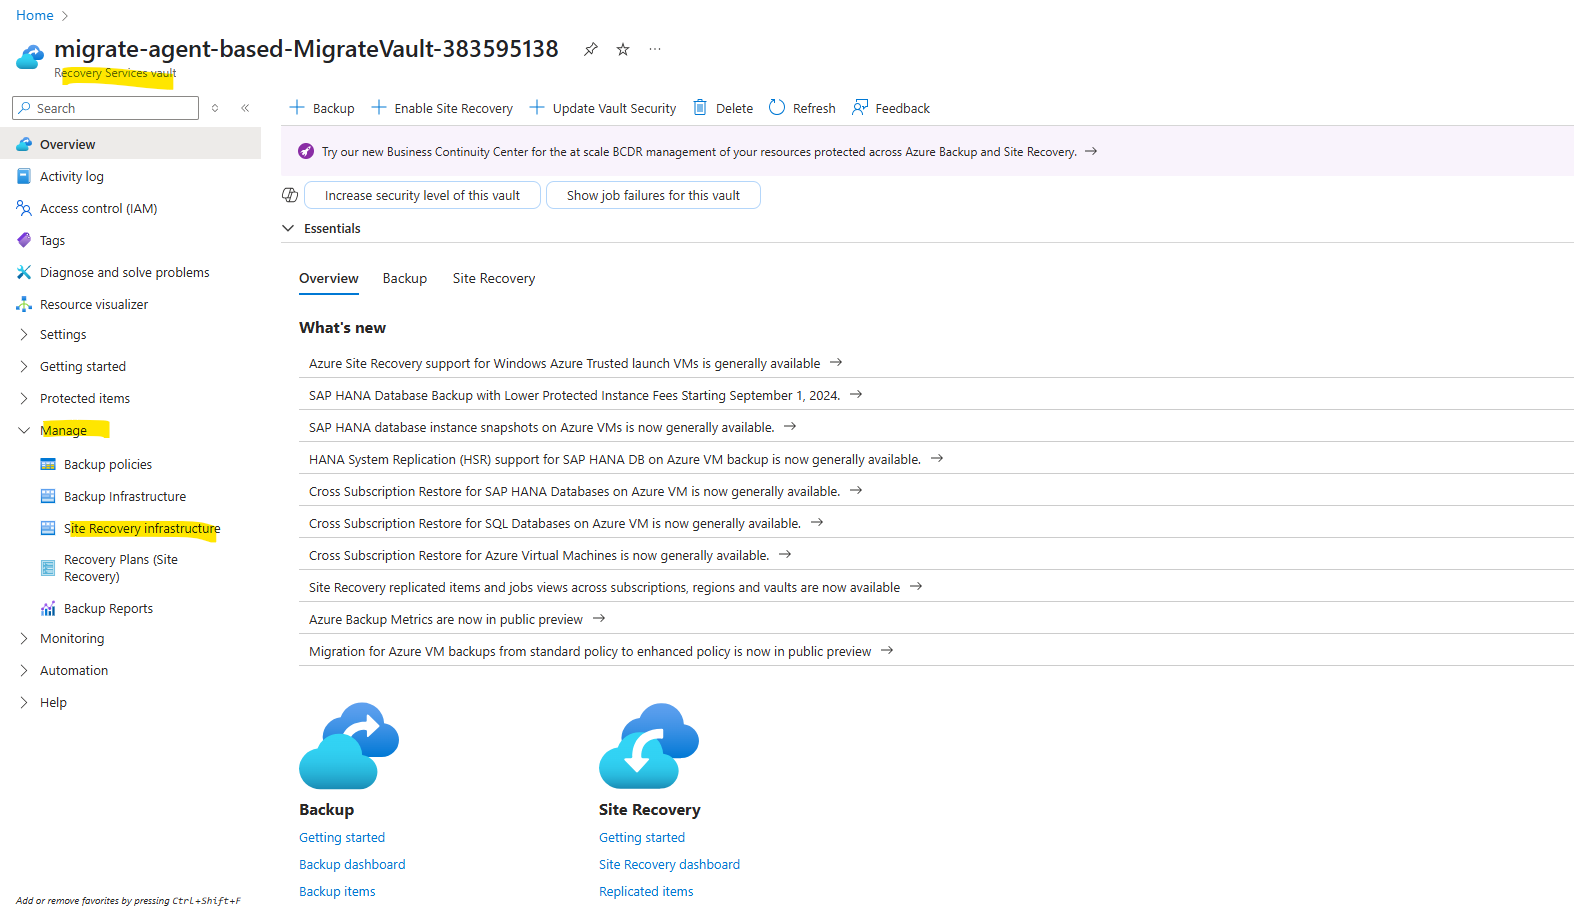
Here under For VMware & Physical machines -> ASR replication appliances we will find our appliance used by Azure Migrate to replicate the on-premise virtual machines to Azure.
Replicate VMs
In the Azure Migrate project > Servers, databases and web apps > Migration and modernization, click Replicate.

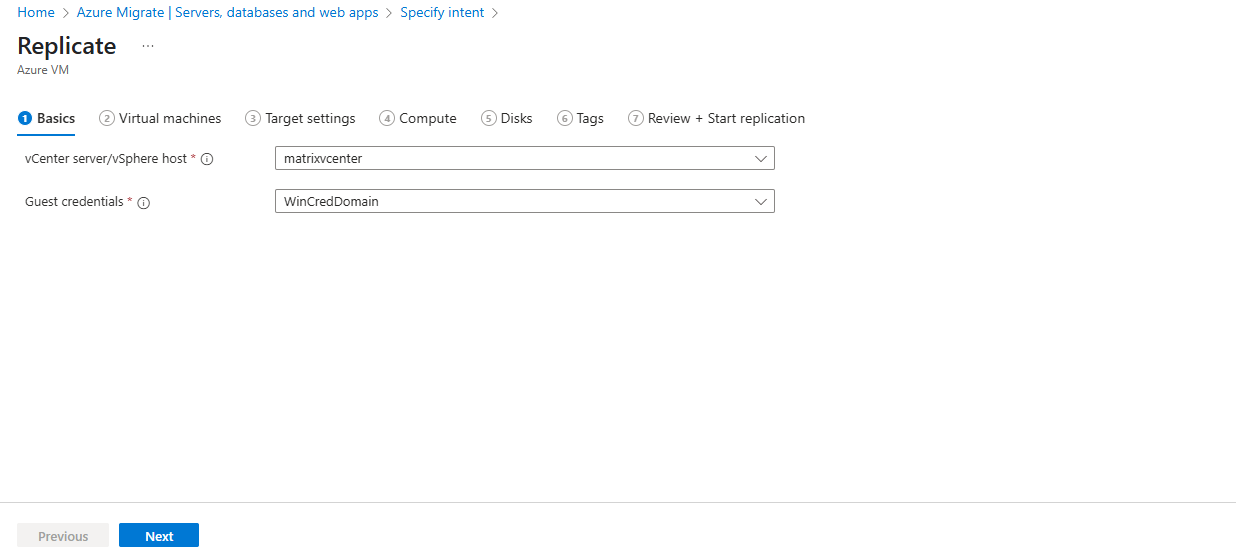
In Replicate, > Source settings > Are your machines virtualized?, select Yes, with VMware vSphere. In On-premises appliance, select the name of the Azure Migrate appliance that you set up.

In vCenter server, specify the name of the vCenter server managing the VMs, or the vSphere server on which the VMs are hosted.
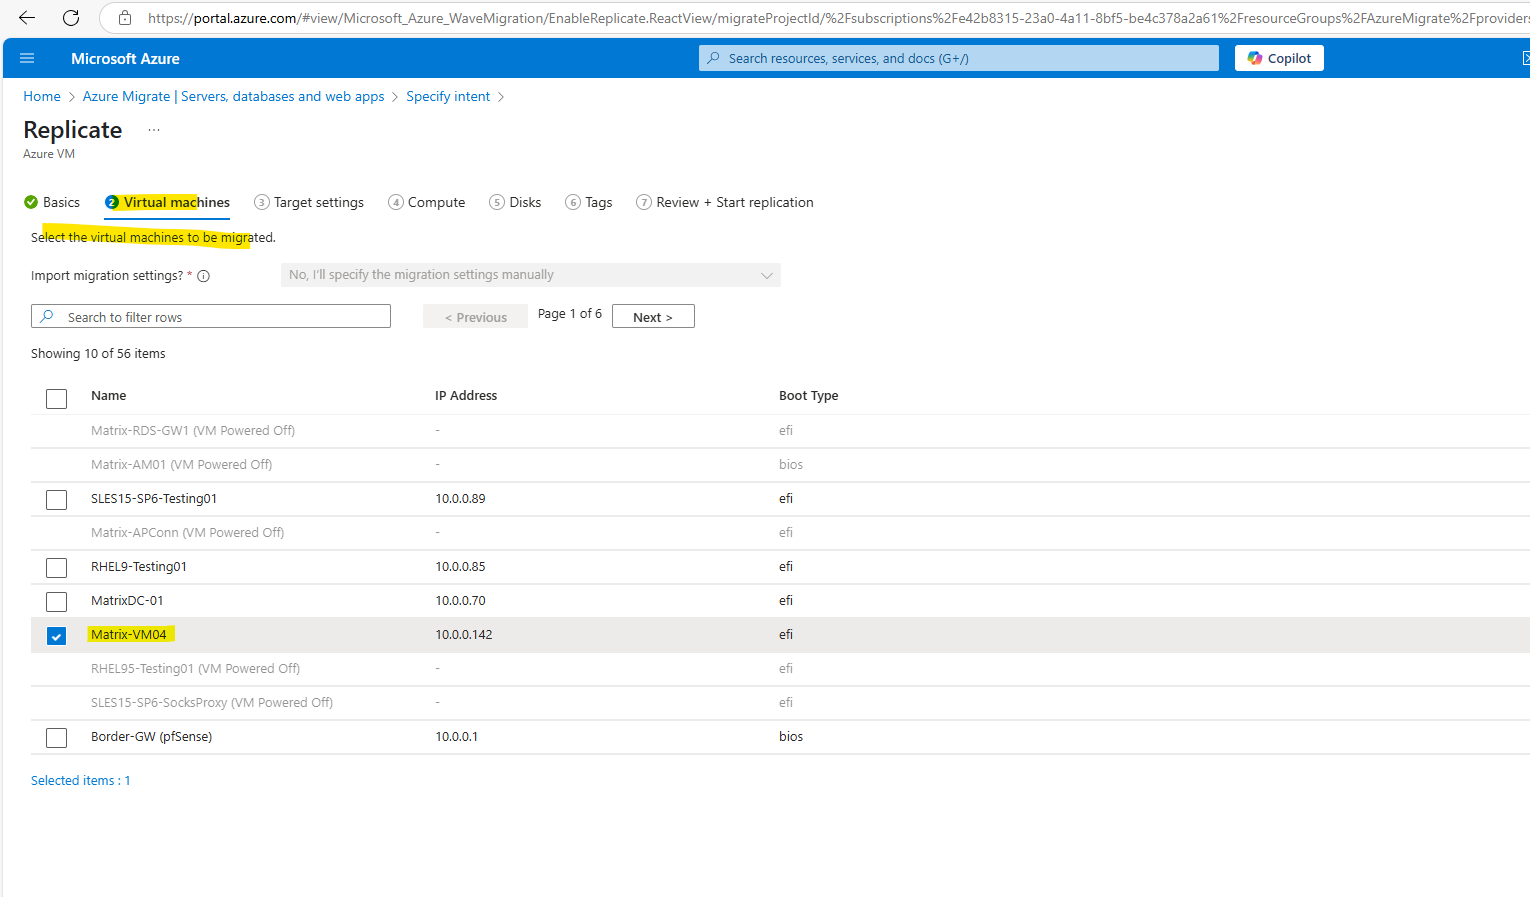
In Virtual Machines, select the machines that you want to replicate.
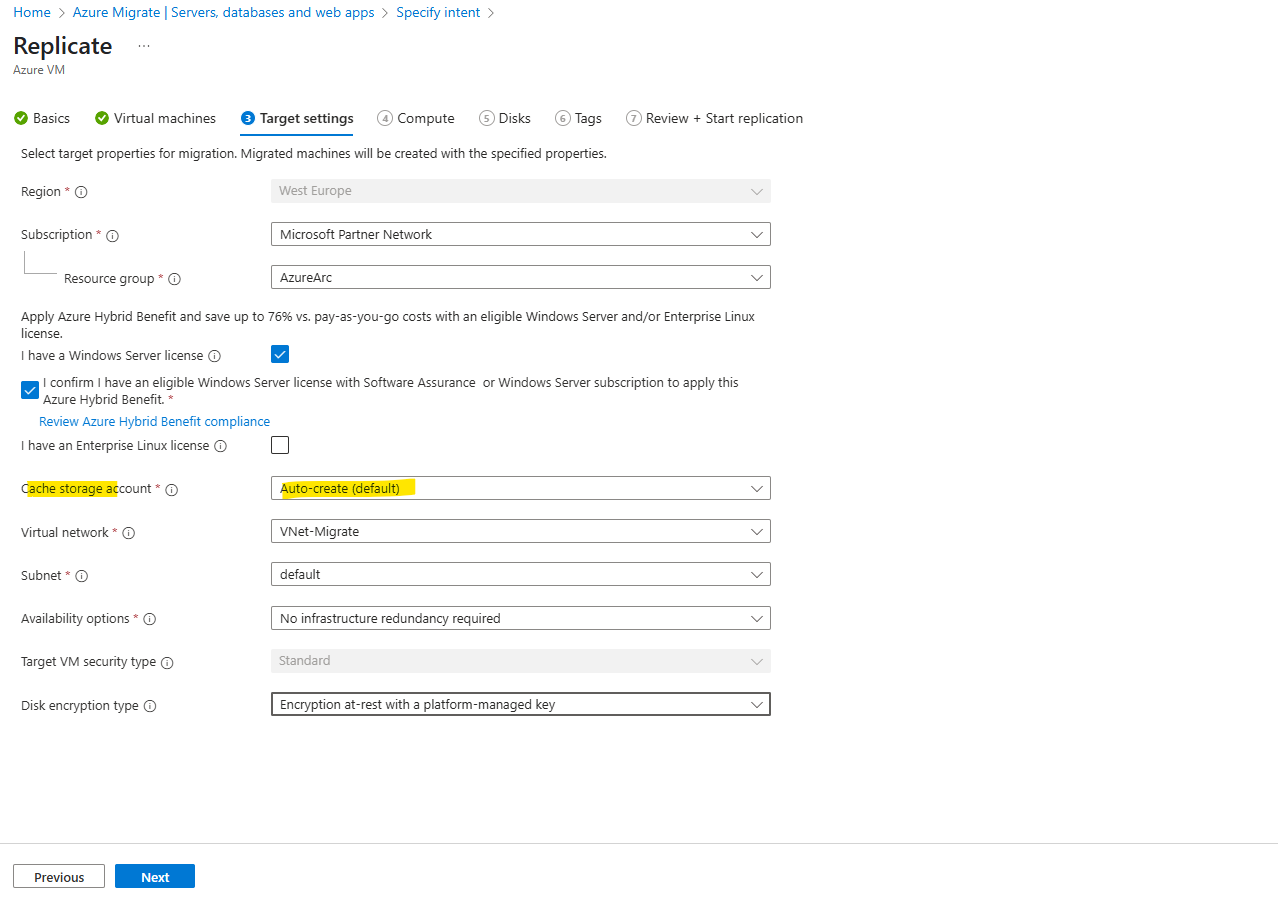
Select a cache storage account. Only the storage accounts in the currently selected subscription and region are listed.
For a test failover It is recommended that the networks selected for test failover and failover operations are different. So not jut the subnets, it is recommended to take a whole different network.
For my lab environment I will use here the same as failover network setting.
If you later want to test failover this virtual machine in a different virtual network, you must either also create here a new different virtual network or if already created select the different network for test
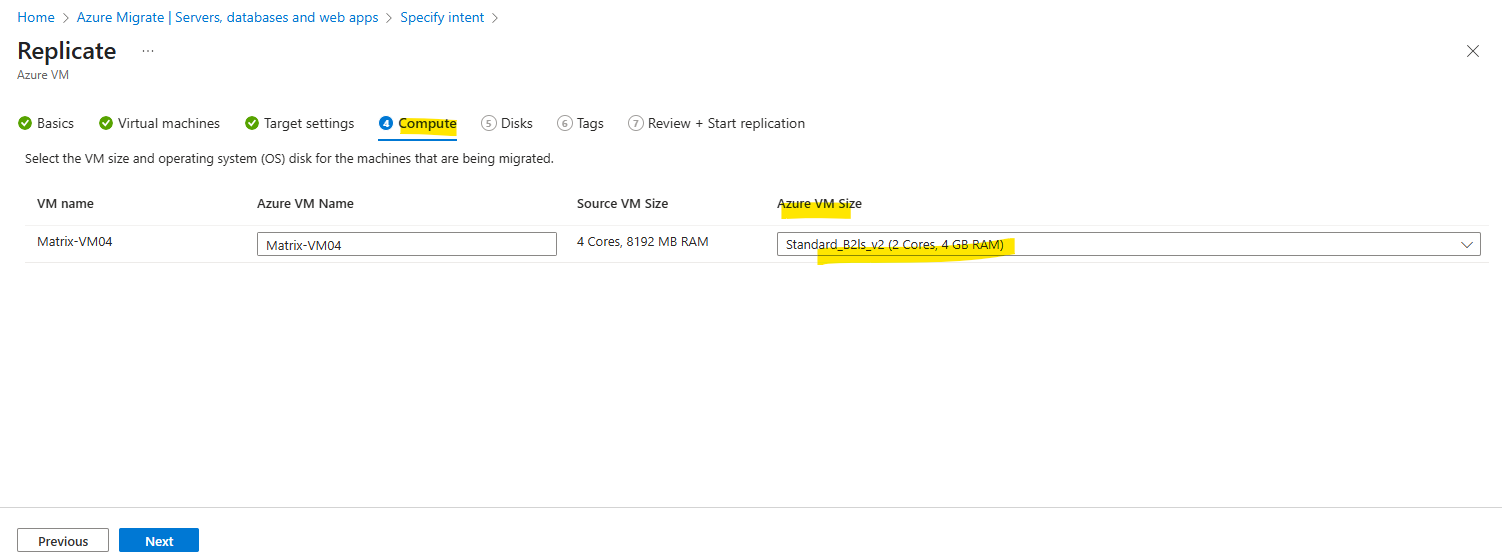
Next select the desired Azure VM Size.
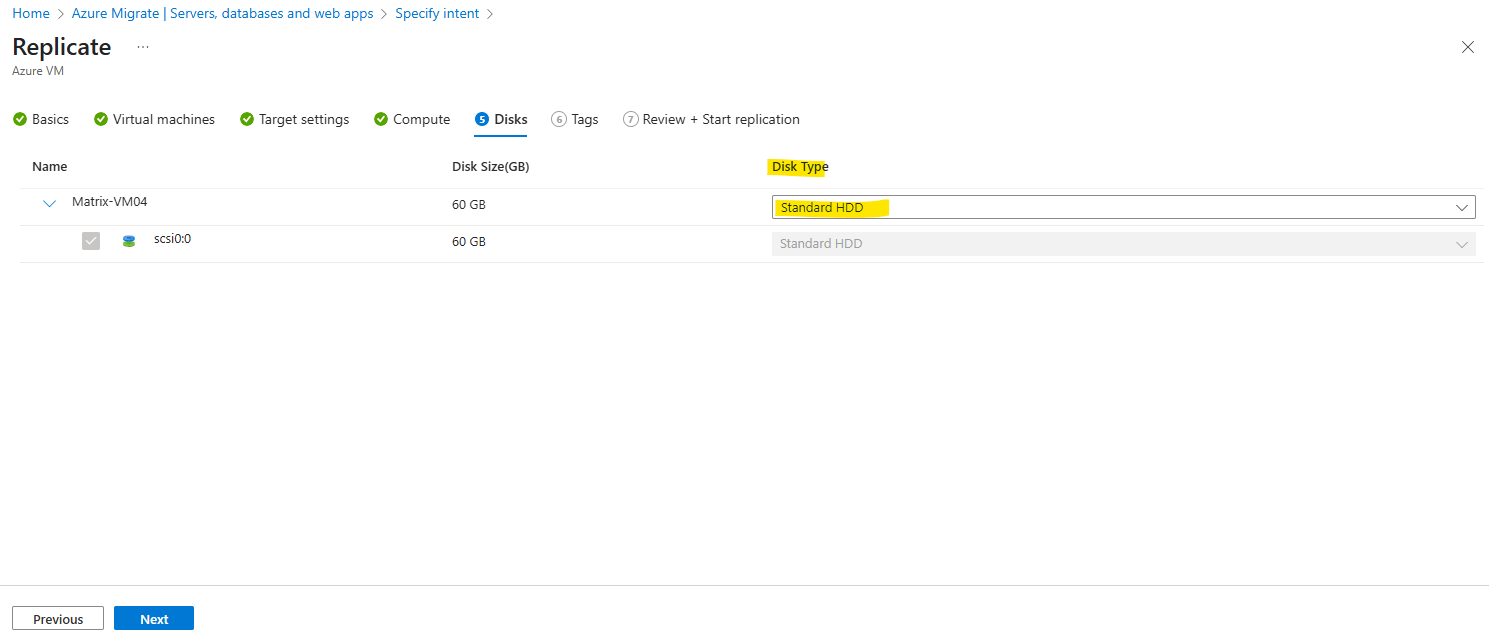
Select the desired Disk Type.
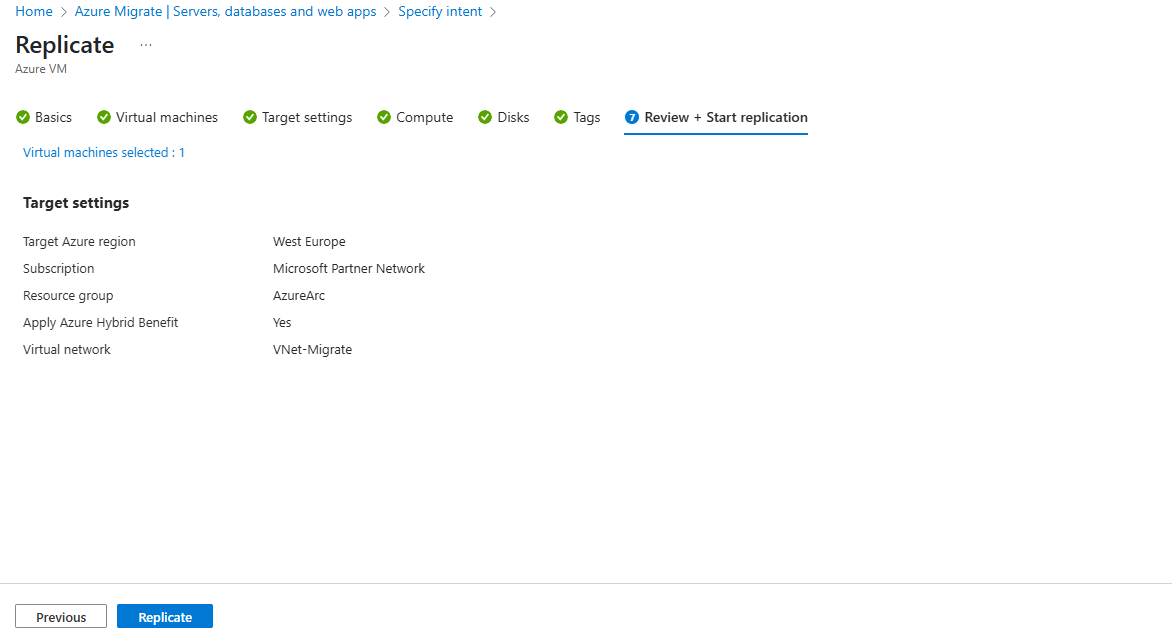
Finally we can start the replication to Azure.
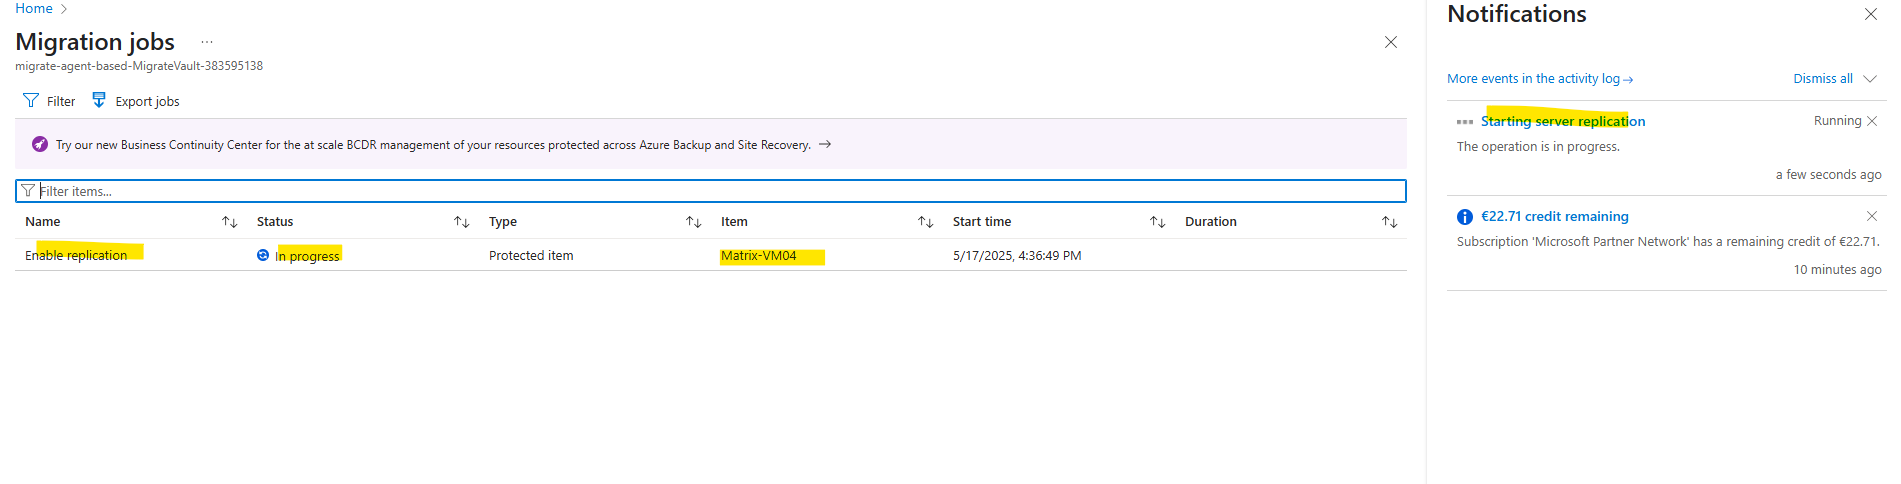
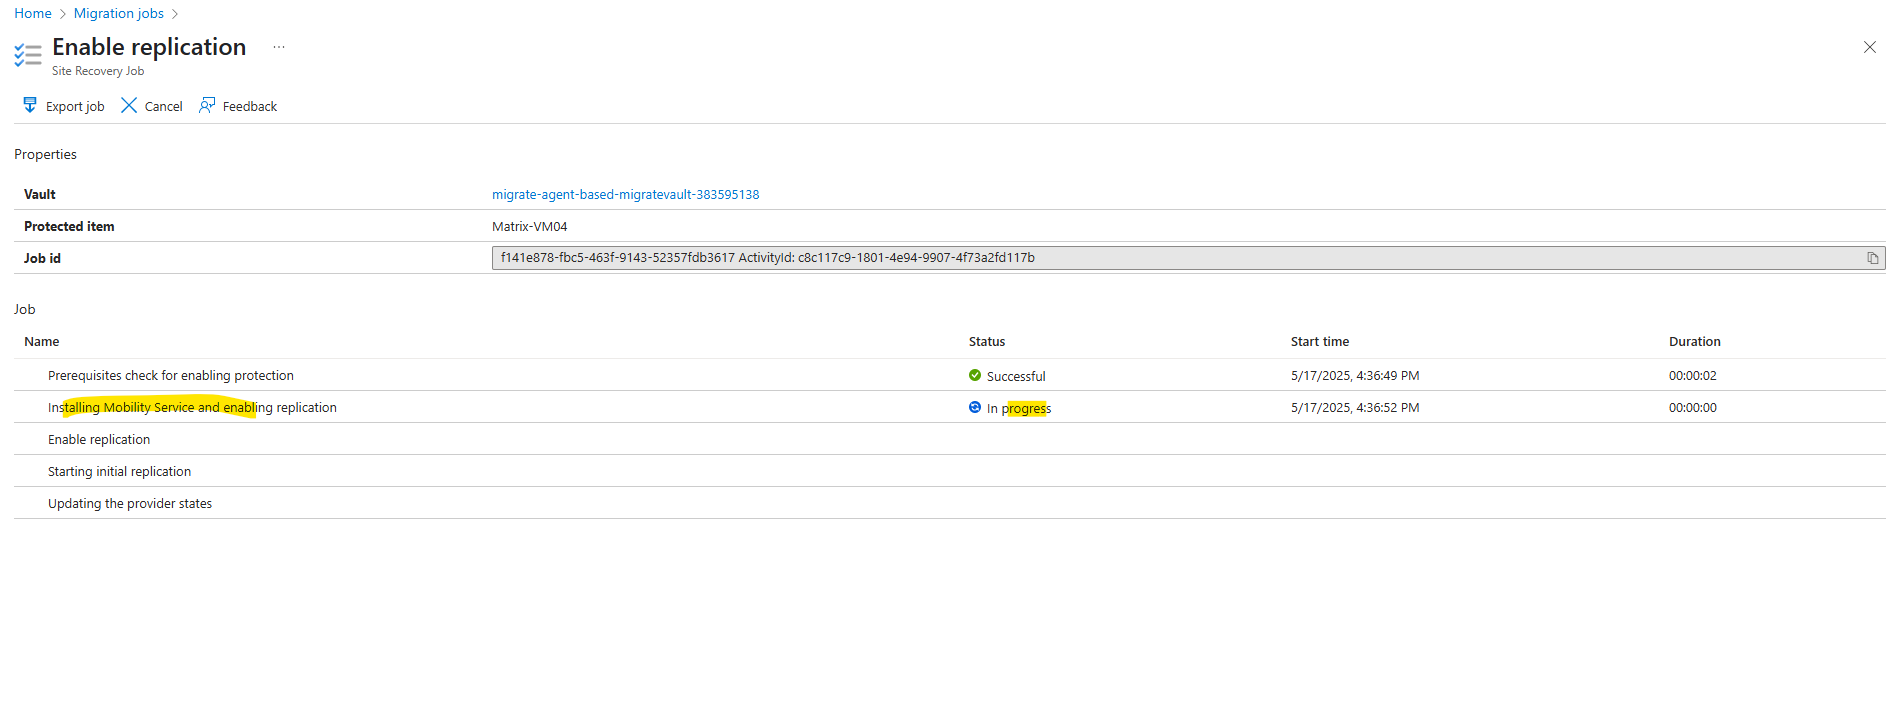
So at the moment the ASR appliance running my vSphere lab environment is installing (pushing) the Mobility Services Agent to the virtual machine for which I will enable replication.
The ASR appliance will first copy the ASR Mobility Agent to the virtual machine we want to protect.
This can last a while, in my case it was usually around 20 minutes.
In Part 4 of my post about Azure Site Recovery (ASR) you will see how the ASR appliance is establishing a new SMB TCP 445 connection to the protected virtual machine to copy the files of the ASR Mobility Agent to the protected virtual machine.
In Part 4 you will also find the troubleshooting section.
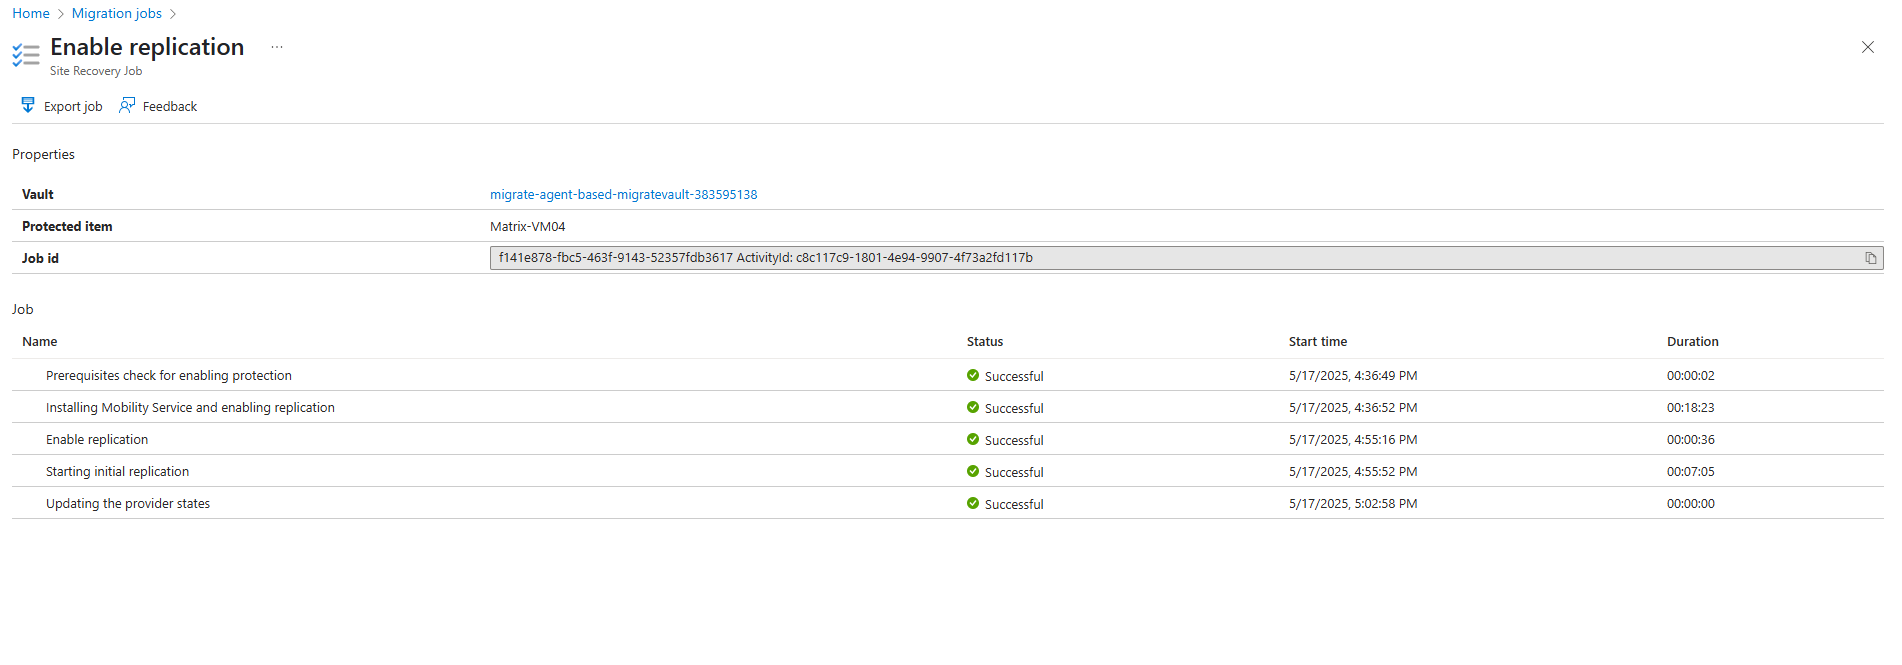
Finally the enable replication process was running successfully.
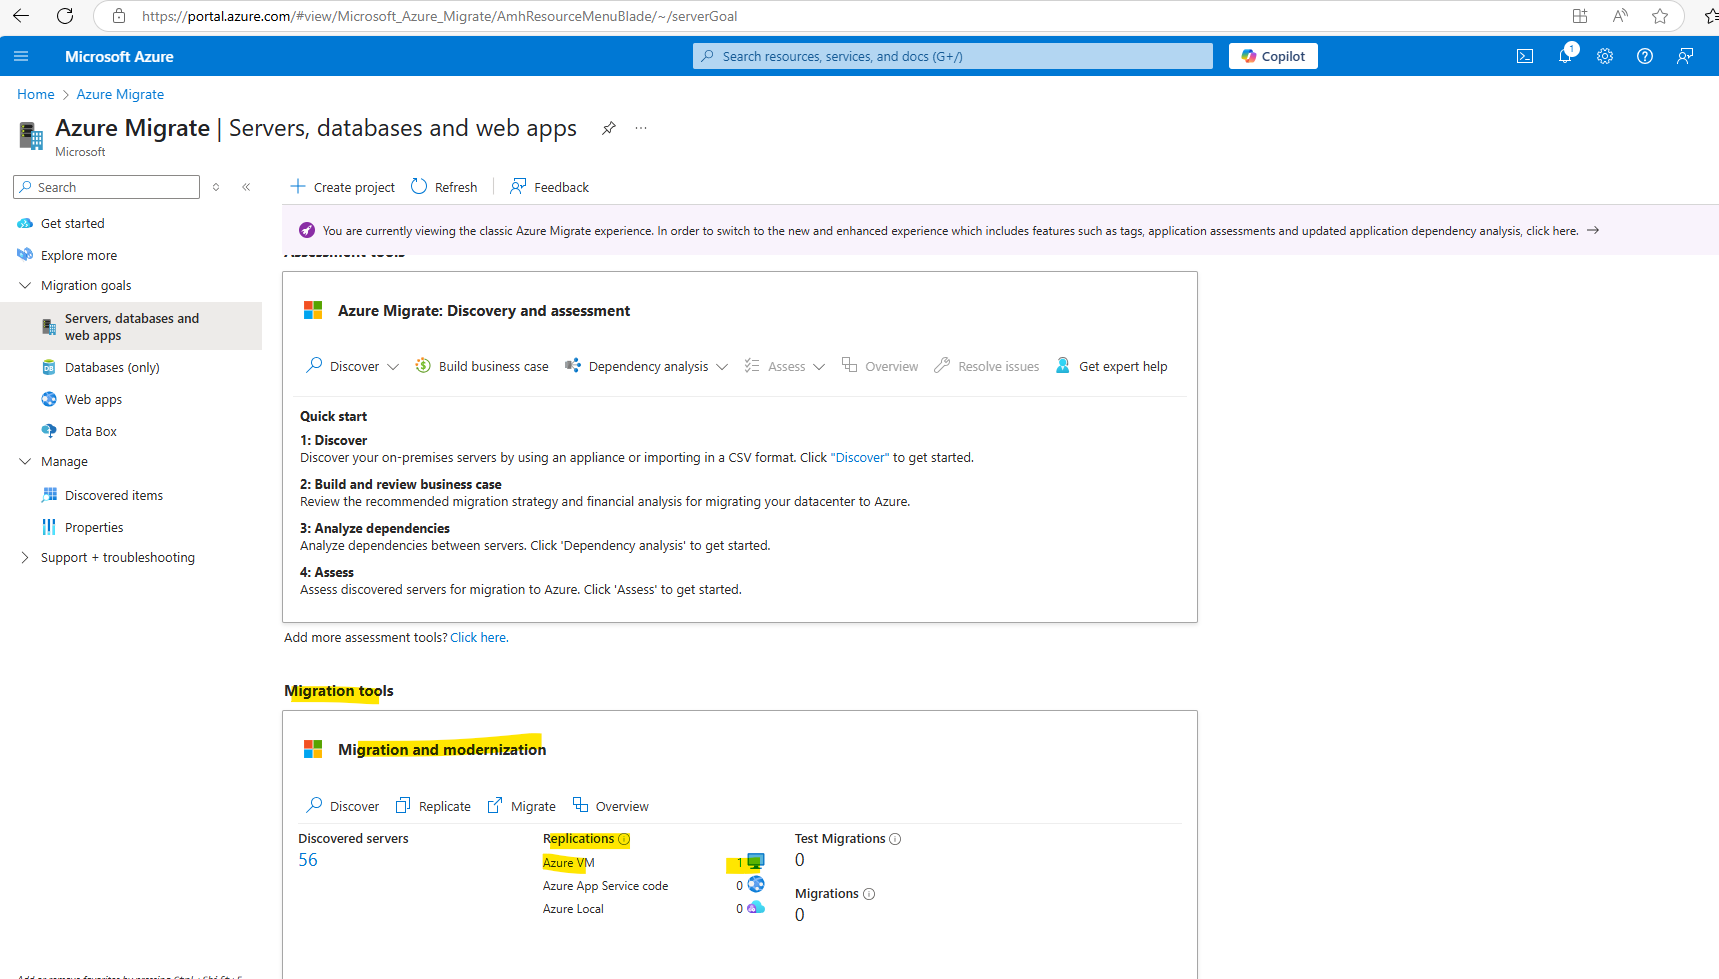
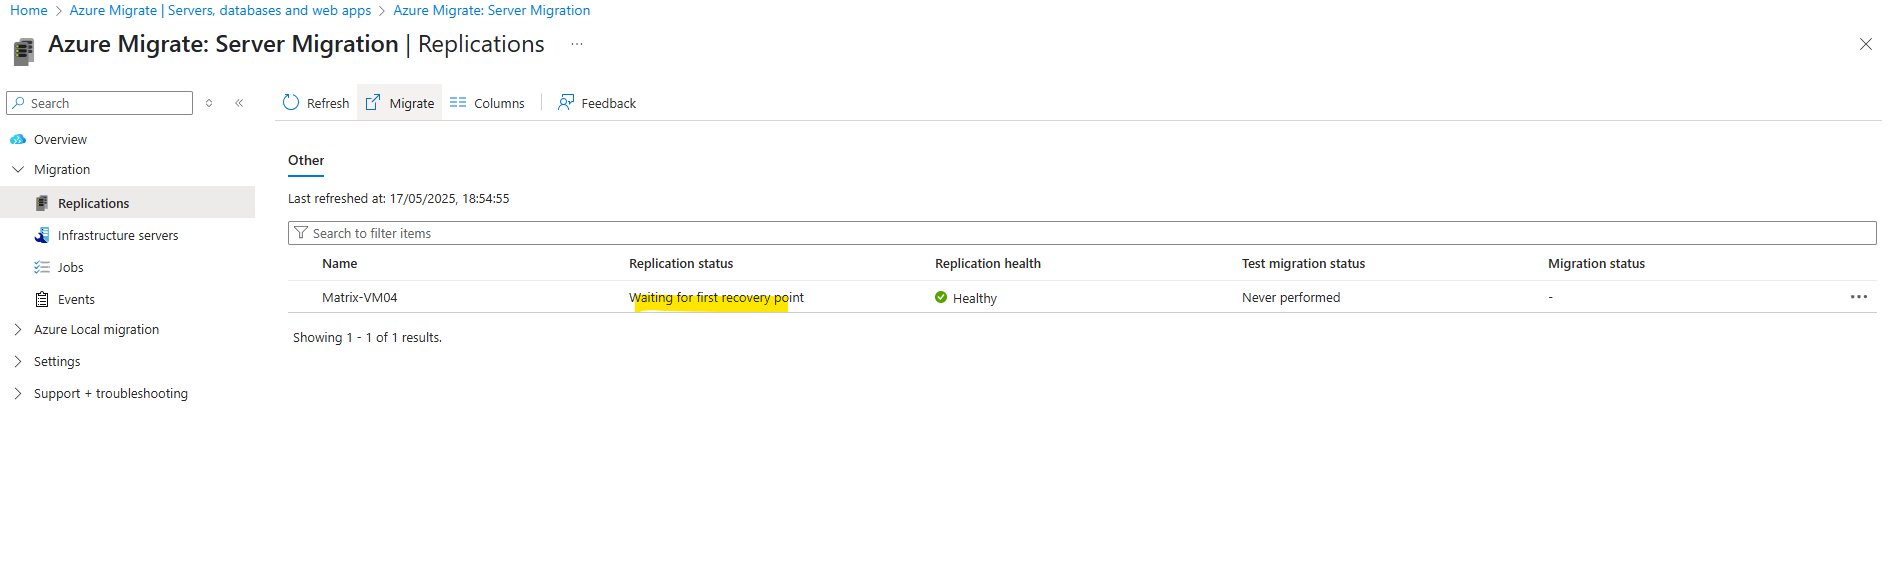
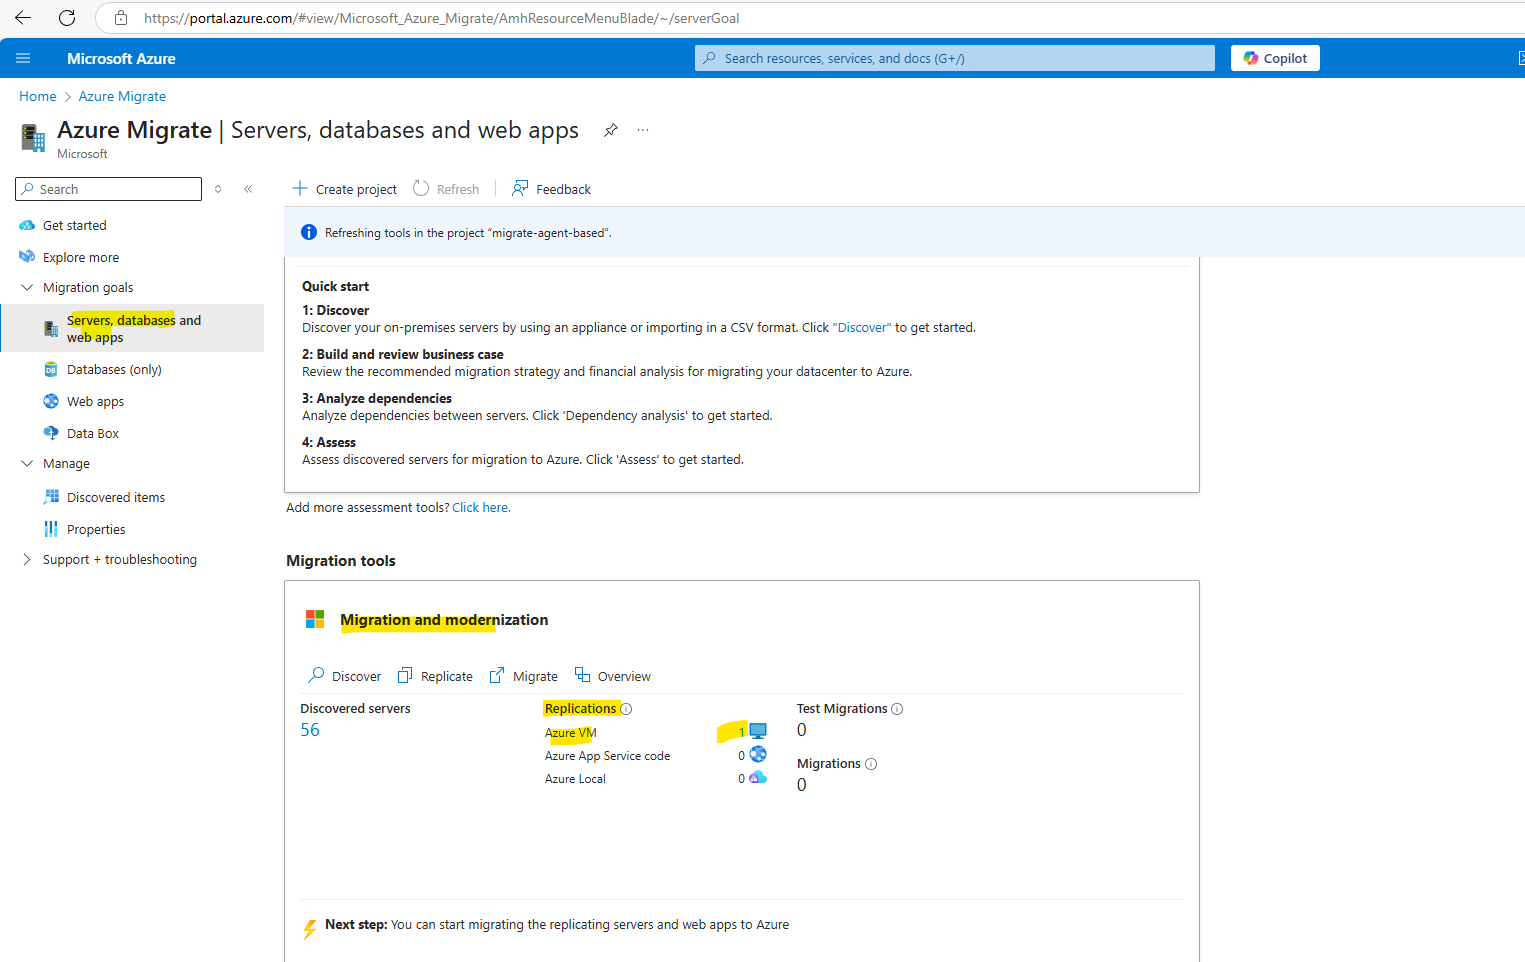
We will now see our protected virtual machine under Migration and modernization, here click on the digit for Replications -> Azure VM as shown below.
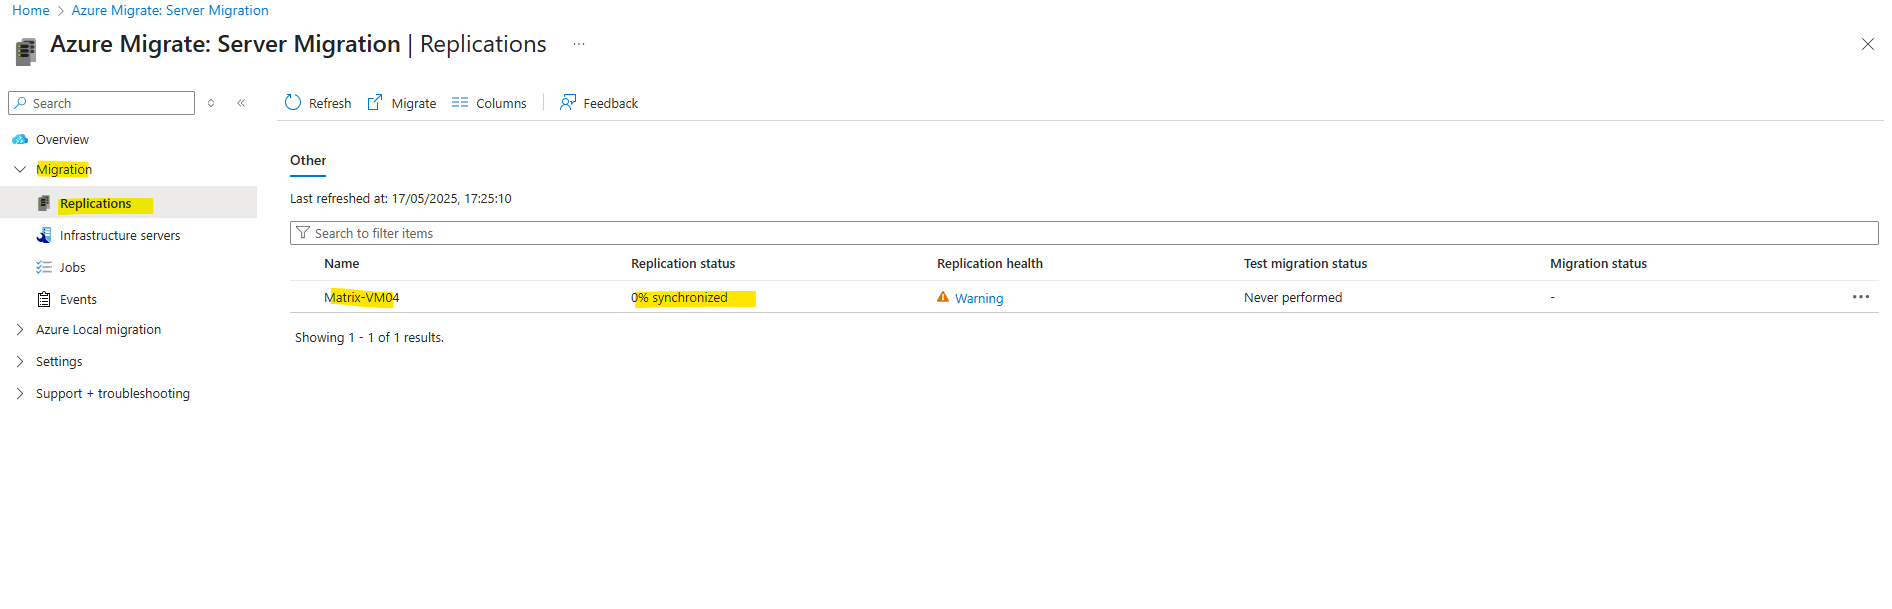
The virtual machine will be replicated initial to Azure.
After initial replication finishes, delta replication begins. Incremental changes to on-premises disks are periodically replicated to the replica disks in Azure.
We can also check the replication status directly on the vault, which by the way seems to show the real status more accurate.
Therefore in the Business Continuity Center under Manage -> Vaults select the corresponding vault.
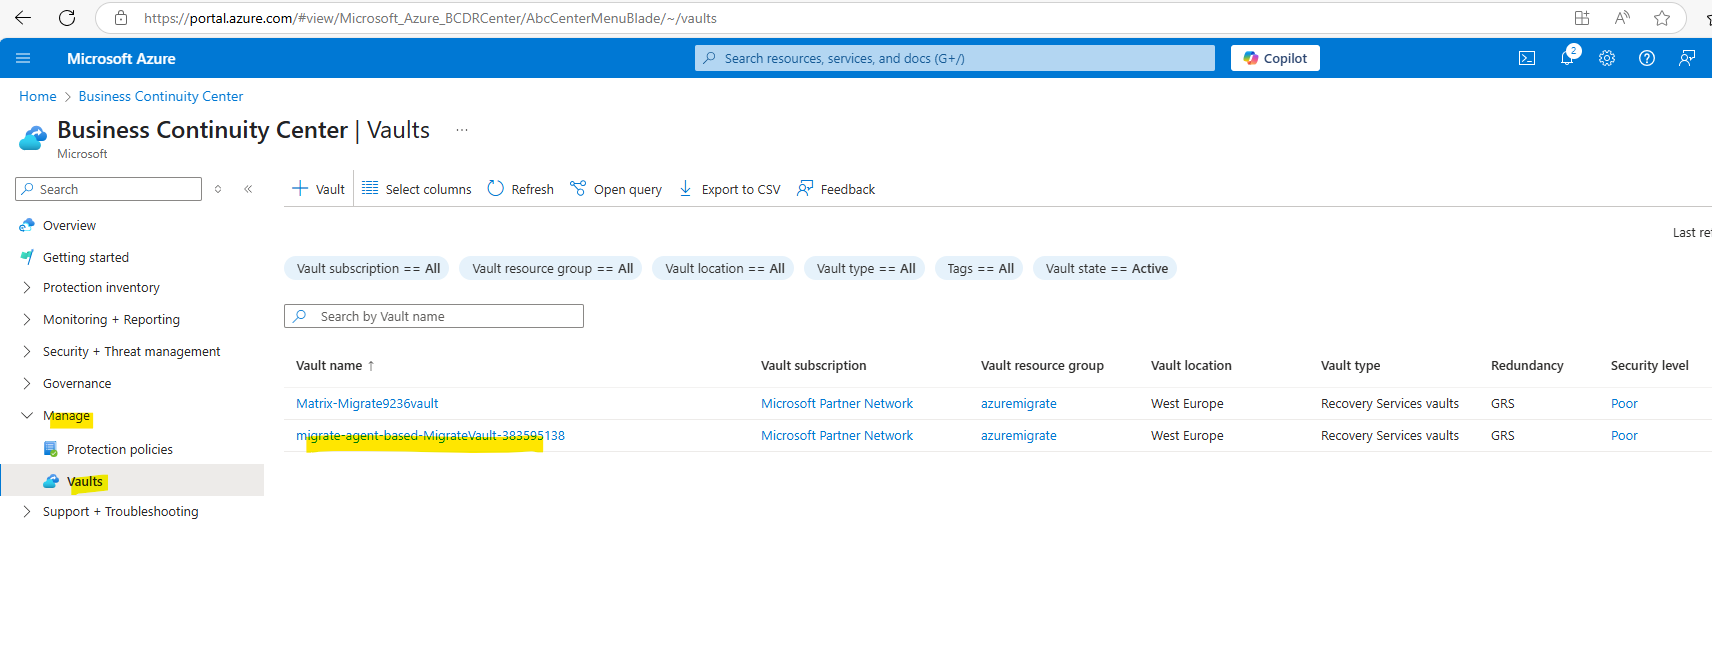
On the vault select Protected items -> Replicated items.
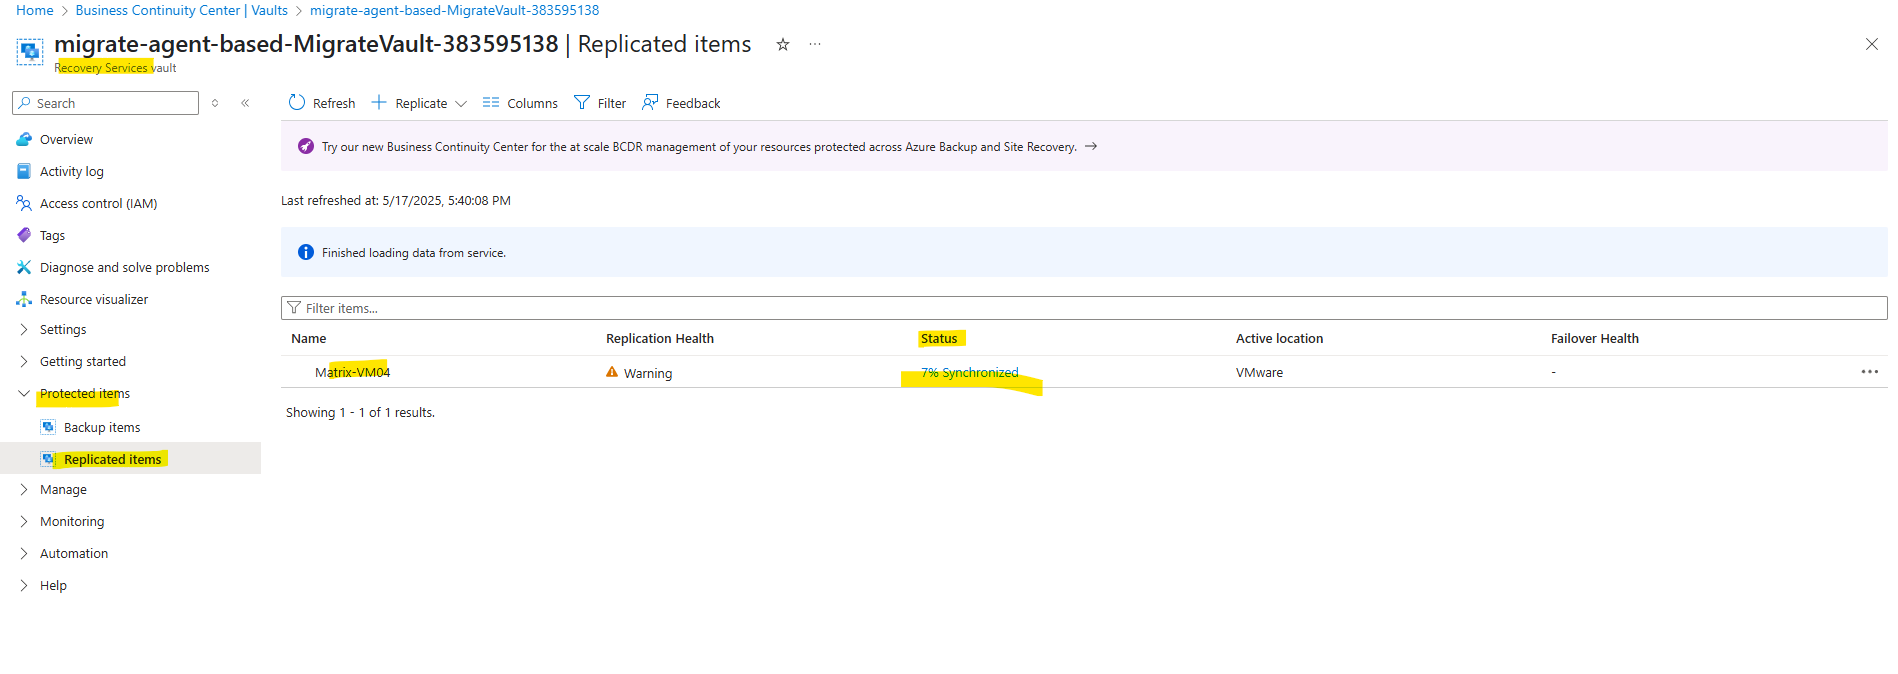
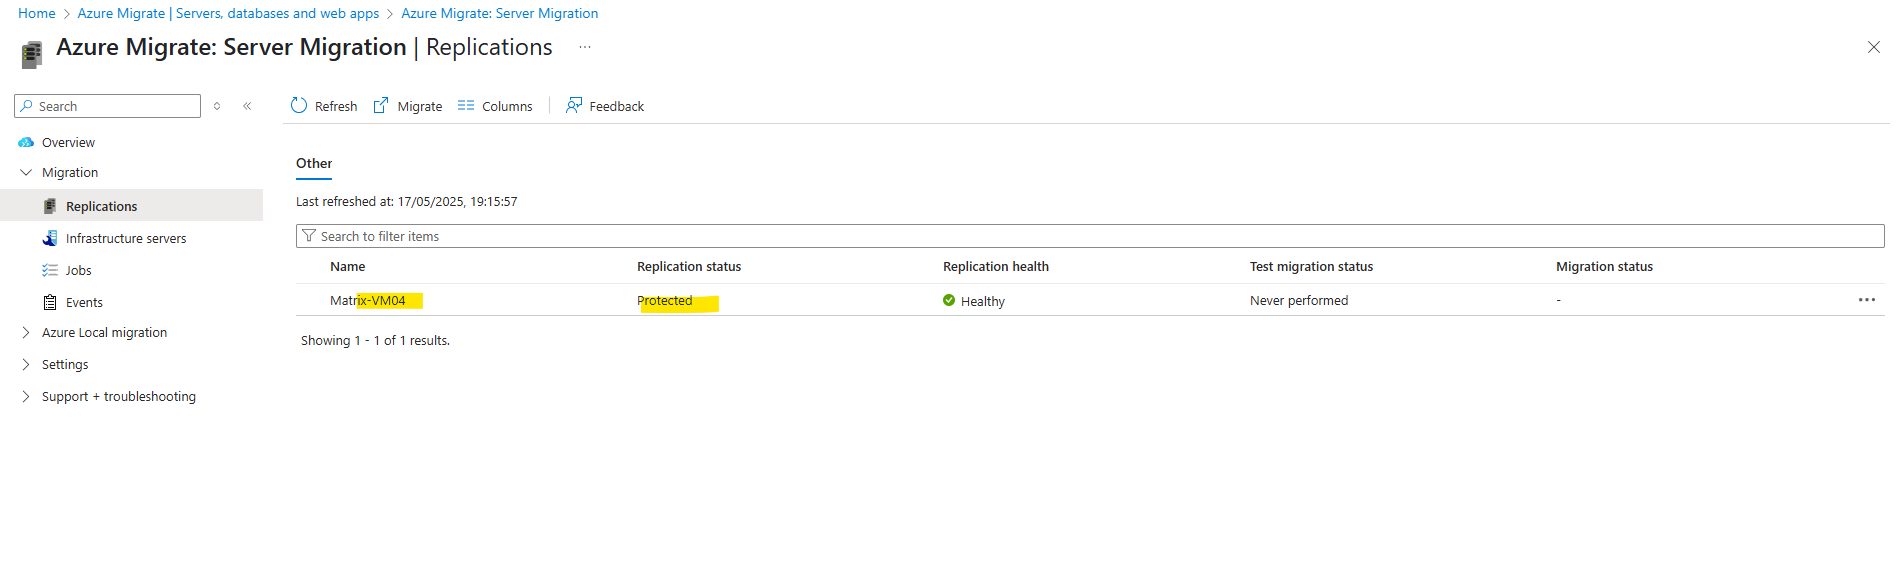
After the initial replication first a recovery point needs to be created.
Finally the machine is replicated to Azure and also a recovery point was created we can use to failover resp. migrate the virtual machine to Azure.
Run a test migration
When delta replication begins, we can run a test migration for the VMs, before running a full migration to Azure. We highly recommend that you do this at least once for each machine, before you migrate it.
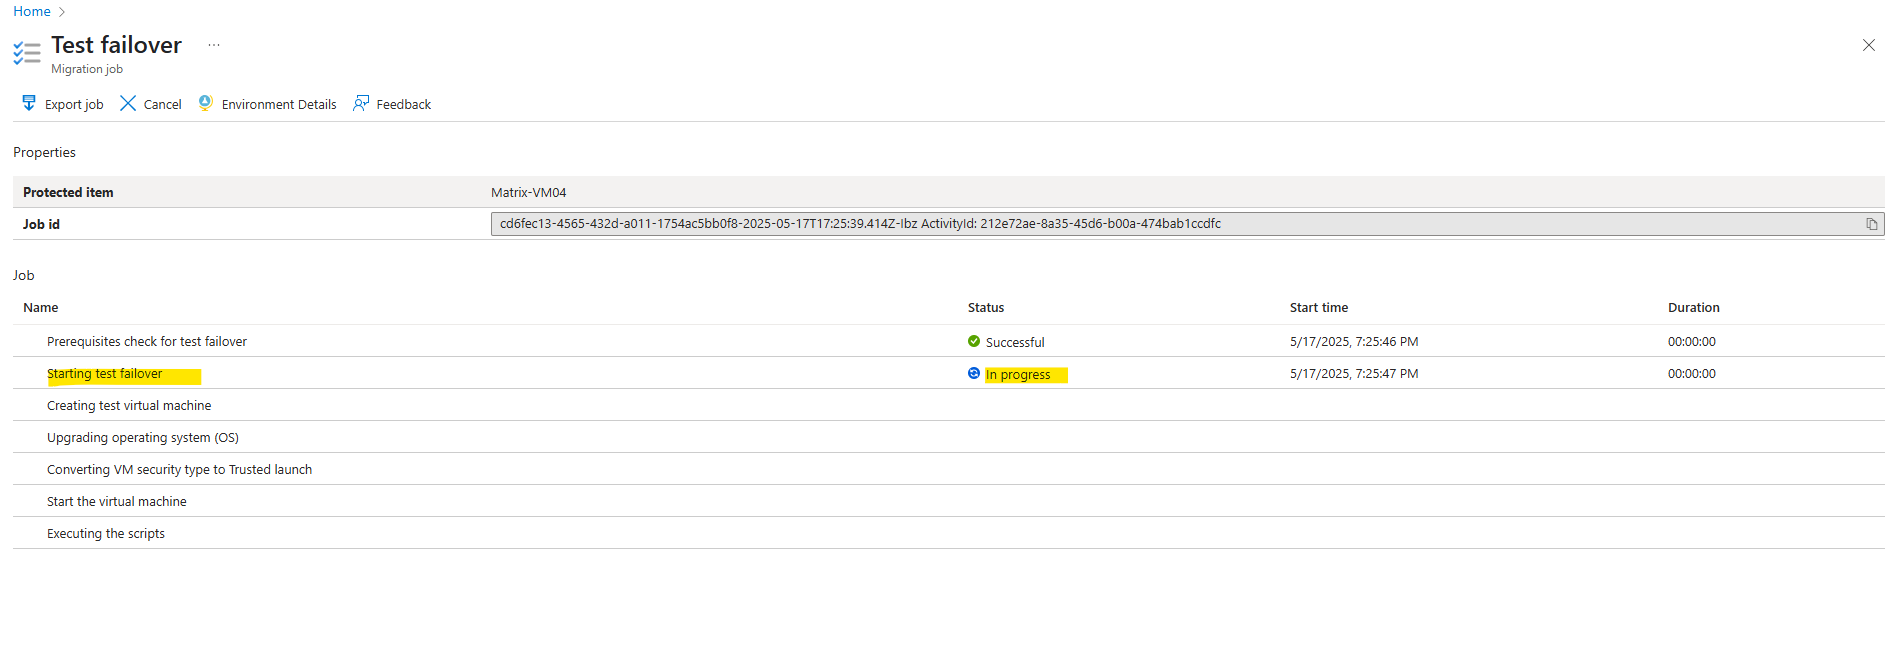
- Running a test migration checks that migration will work as expected, without impacting the on-premises machines, which remain operational, and continue replicating.
- Test migration simulates the migration by creating an Azure VM using replicated data (usually migrating to a non-production VNet in your Azure subscription).
- Test migration simulates the migration by creating an Azure VM using replicated data (usually migrating to a non-production VNet in your Azure subscription).
In Migration goals > Servers, databases and web apps > Migration and modernization, select the numerical value next to Azure VM as shown below.
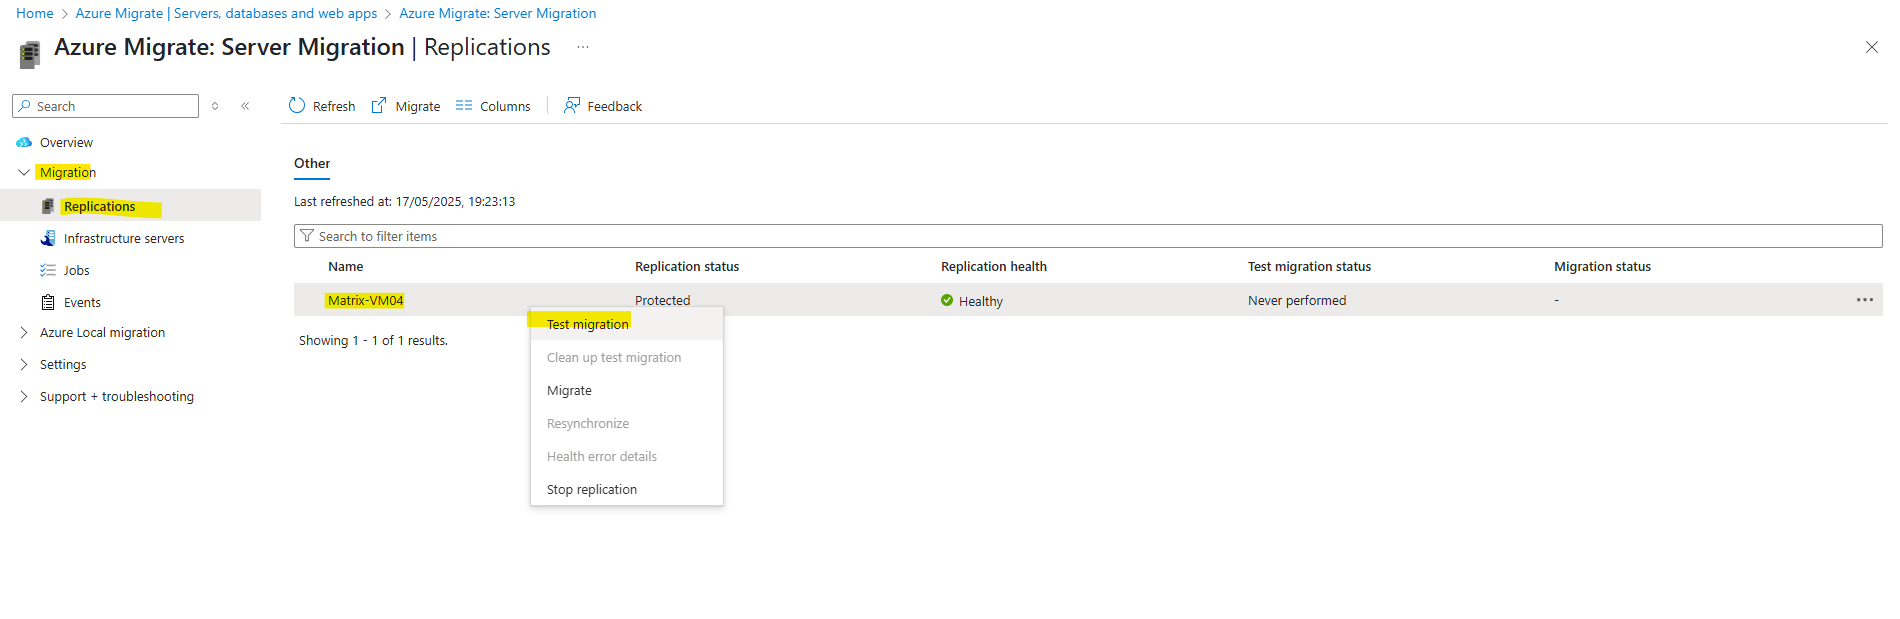
Right-click the VM or click on the three dots on the right side to test, and click Test migrate.
In Test migration, select the Azure VNet in which the Azure VM will be located during testing. We recommend you use a non-production VNet. Choose the subnet to which you would like to associate each of the Network Interface Cards (NICs) of the migrated VM.
For my lab-environment I will use the same VNet and subnet for both, test migration and productive.

Finally all the steps with the test- and productive migration are the same as when using the agentless migration and shown in Part 3, therefore I will skip these detailed steps here.
Links
Migrate VMware vSphere VMs to Azure (agent-based)
https://learn.microsoft.com/en-us/azure/migrate/tutorial-migrate-vmware-agent?view=migrate-classicCompare migration methods
https://learn.microsoft.com/en-us/azure/migrate/server-migrate-overview?view=migrate-classic#compare-migration-methodsSupport matrix for VMware vSphere migration
https://docs.azure.cn/en-us/migrate/vmware/migrate-support-matrix-vmware-migration?view=migrate-classic