Azure Migrate – How to migrate on-premises VMware vSphere Virtual Machines to Azure – Part 1
This blog post series (in 5 parts) will walk you through each step of migrating VMware VMs to Azure, including preparing your environment, using Azure Migrate to assess your current workloads, and executing a seamless migration.
We will use here the Migration and modernization tool with the agentless migration method.
Azure Migrate, Microsoft’s dedicated migration service, streamlines the entire process, from initial assessment to actual migration, making it easier than ever to bring your VMware workloads to Azure.
I also wrote a post about how to set up Azure Site Recovery for on-premise VMwarev virtual machines below.
Actually we can also use this Azure Site Recovery service to finally migrate on-premises VMware VMs to Azure and both services works similar. Nevertheless Microsoft recommends to use here the Azure Migrate service which is dedicated and optimized for this purpose.
Azure Migrate is a centralized hub tailored for assessing and planning migrations, providing a full inventory, compatibility checks, and cost analysis for transitioning workloads to Azure.
Azure Site Recovery, on the other hand, focuses on disaster recovery by enabling real-time replication and failover for critical workloads, ensuring business continuity.
While Azure Migrate helps you strategize and execute migrations, ASR is designed to protect and replicate essential workloads to keep your operations resilient in the face of unexpected disruptions.
More about you will find here https://learn.microsoft.com/en-us/azure/site-recovery/migrate-overview#which-service-to-use-for-migration.
About how how to migrate on-premises Hyper-V VMs to Azure by using Azure Migrate and the Migration and modernization tool you can read my following post.
This part will show the prerequisites for your vSphere environment, how to create a new Azure Migrate project and set up the Azure Migrate Appliance in Azure which we later need to deploy in our on-premise vSphere environment.
In Part 2 we will see how to deploy the Azure Migrate Appliance in our on-premise vSphere environment and how to configure it by using its configuration manager.
The Azure Migrate appliance is a virtual appliance that can be deployed on a server in your datacenter. The appliance collects the configuration and performance data for your servers and continually sends it to the Azure Migrate service.
For agentless migration, the Azure Migrate and Modernize tool uses the same appliance that’s used for discovery and assessment of servers.
For agent-based migration, the Azure Migrate and Modernize tool uses a replication appliance.
In Part 3 we will see how to first assess VMware VMs for migration to Azure VMs and then replicate and migrate them to Azure.
In Part 4 will see some troubleshooting in case something doesn’t work as expected.
In Part 5 we will see the agent-based migration, finally Azure Migrate is using here the Azure Site Recovery (ASR) appliance which is pushing its Mobility service agent to the virtual machines we want to migrate to Azure.
Introduction
When migrating VMware VMs to Azure, you have two main approaches to replication: agent-based (with an agent installed on each VM) and agentless (without needing an agent).
Each approach has its pros and cons depending on your migration scenario, infrastructure, and specific requirements.
In agent-based migration, an agent (such as the Mobility service used by Azure Site Recovery) is installed on each VMware VM to enable replication to Azure.
In agentless migration, VMware VMs are replicated to Azure without needing to install any agents on the guest OS. This is possible because the replication happens at the hypervisor level, using VMware’s APIs (such as vSphere Replication).
The Agentless vs Agent-based approach is based on the dependency analysis requirements you have. If you are looking for things like network latency information, number of connections and data transfer information in your dependency analysis reporting, then you will have to install the MMA agent and the dependency agent to capture these parameters.
Otherwise, you can proceed with the agentless appliance option which can do basic dependency analysis for your source environment. You can find the detailed difference between the agentless vs agent-based dependency analysis here. Here is the step-by-step guide for discovering your VMWare environment.
Prerequisites
Verify permissions for your Azure account – Your Azure account needs permissions to create a VM, and write to an Azure managed disk.
URL access
The Azure Migrate appliance needs connectivity to the internet.
- When you deploy the appliance, Azure Migrate does a connectivity check to the required URLs.
- You need to allow access to all URLs in the list. If you’re doing assessment only, you can skip the URLs that are marked as required for VMware agentless migration.
- If you’re using a URL-based proxy to connect to the internet, make sure that the proxy resolves any CNAME records received while looking up the URLs.
More including a list of the required URLs the appliance needs to access you will find here https://learn.microsoft.com/en-us/azure/migrate/migrate-appliance?view=migrate-classic#url-access.
Port requirements (agentless)
Ensure that the following traffic is allowed in your on-premise vSphere environment.
- Azure Migrate Appliance ==> Outbound connections on tcp port 443 to upload replicated data to Azure, and to communicate with Azure Migrate services orchestrating replication and migration.
- Azure Migrate Appliance ==> Inbound connections to vCenter on tcp port 443 to allow the appliance to orchestrate replication – create snapshots, copy data, release snapshots.
- Azure Migrate Appliance ==> Inbound connections to your ESXi Hosts on tcp port 902 for the appliance to replicate data from snapshots. Outbound on tcp port 902 from ESXi host is required for sending heartbeat traffic to vCenter.
VWware TCP Port 902
Network File Copy (NFC) provides a file-type-aware FTP service for vSphere components. ESXi uses NFC for operations such as copying and moving data between datastores by default.
vSphere Environment
On vCenter Server, check that your account has permissions to create a VM by using a VMware Open Virtualization Appliance (OVA) virtual machine (VM) installation file. You must have these permissions when you deploy the Azure Migrate appliance as a VMware VM by using an OVA file.
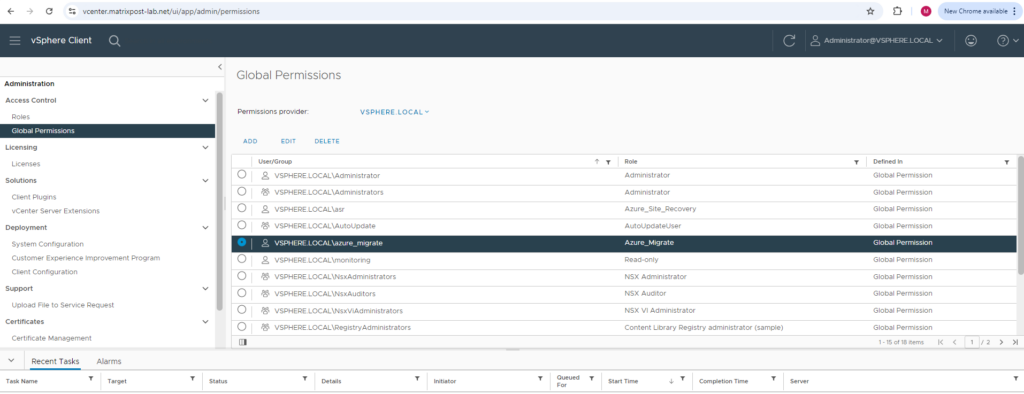
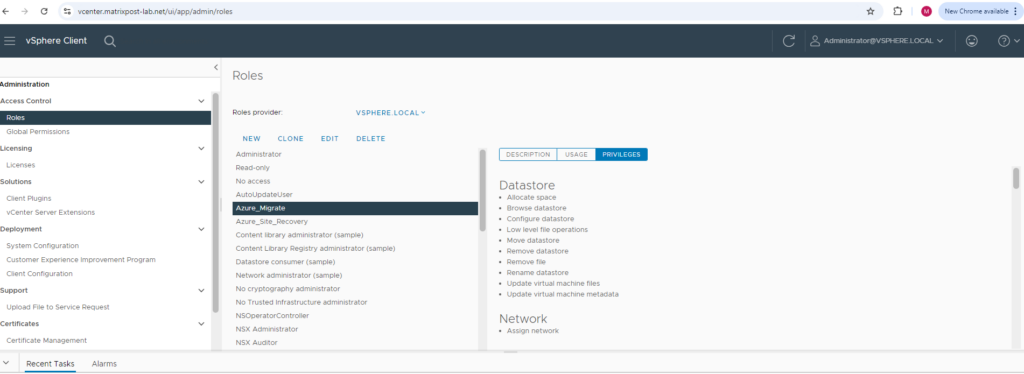
Further we also need to set up an account in our vSphere environment which later will be used by the Azure Migrate Appliance to access our vCenter Server in order to discover and assess servers running on. This account later also needs permissions to replicate virtual machines to Azure.
I will skip this step, the steps to create a user in vSphere and assign permissions to it you will also see in my following post.
https://blog.matrixpost.net/set-up-azure-site-recovery-for-on-premise-vmware-virtual-machines-modernized-part-1/#vSphere_accountOr here in the article by Microsoft https://learn.microsoft.com/en-us/azure/migrate/vmware/tutorial-discover-vmware#create-an-account-to-access-vcenter-server.
The permissions we need to assign to this account will be shown here https://learn.microsoft.com/en-us/azure/migrate/vmware/migrate-support-matrix-vmware-migration#vmware-vsphere-requirements-agentless.
Create a new Azure Migrate Project
To create a new Azure Migrate project just search for azure project and select Azure Project like shown below.
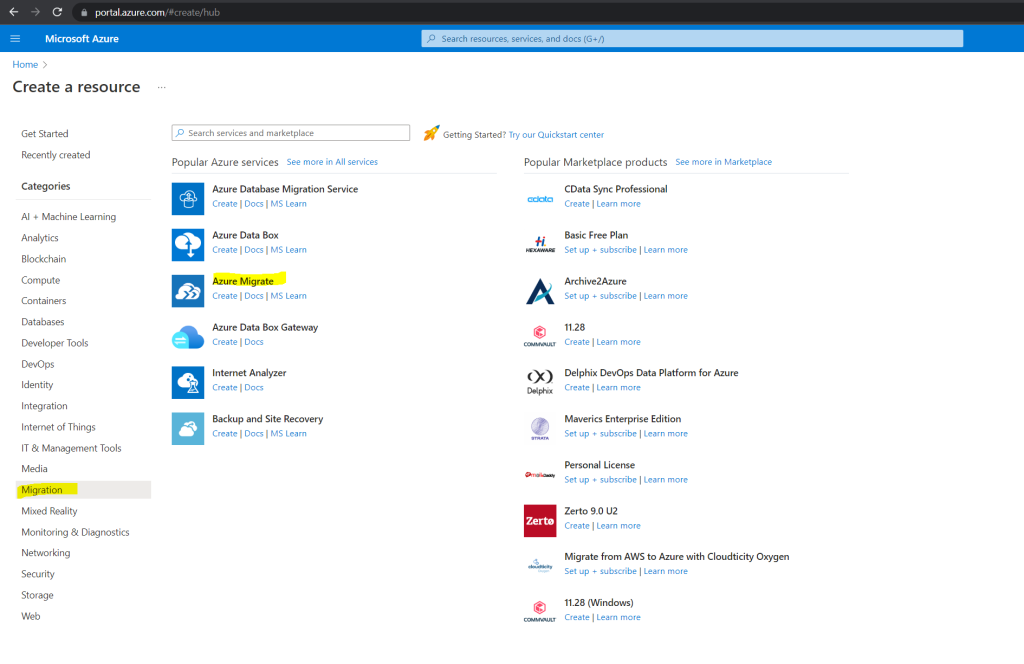
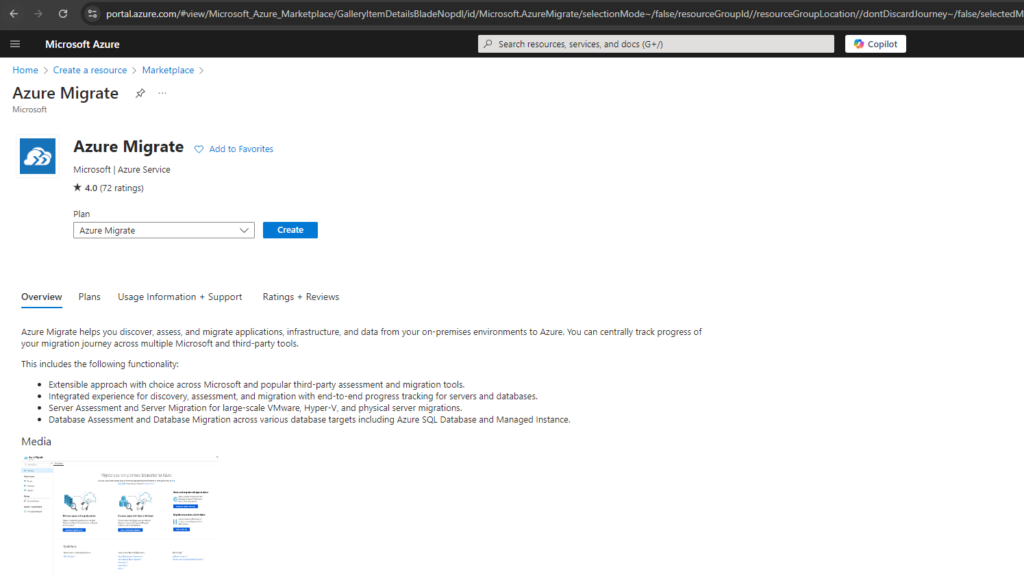
Click on Create.
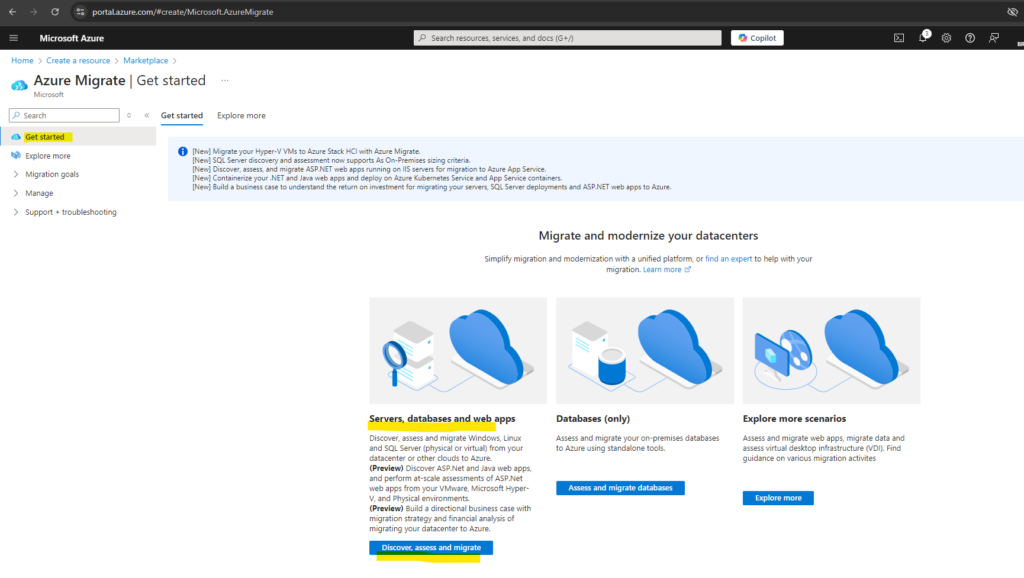
In Get started, select Discover, assess and migrate.
Discover, assess and migrate Windows, Linux and SQL Server (physical or virtual) from your datacenter or other clouds to Azure.
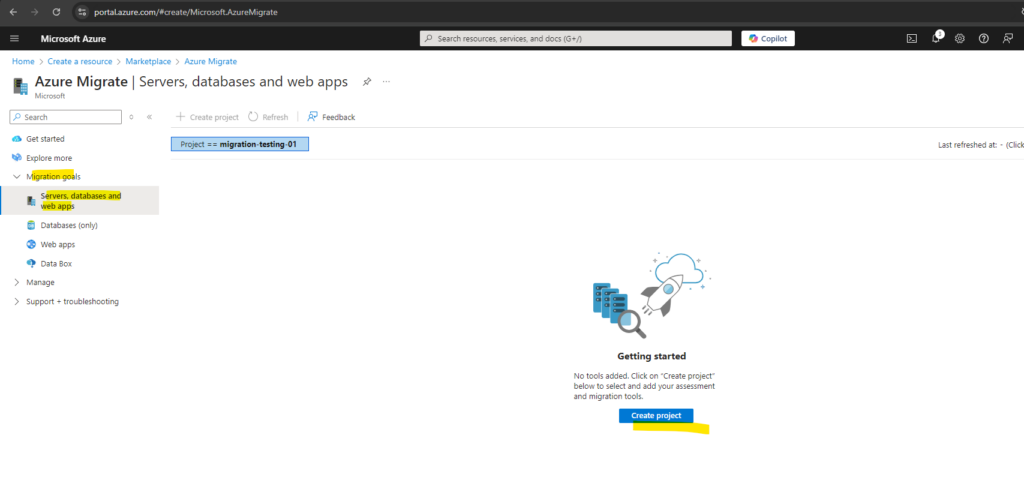
In Servers, databases and web apps, select Create project.
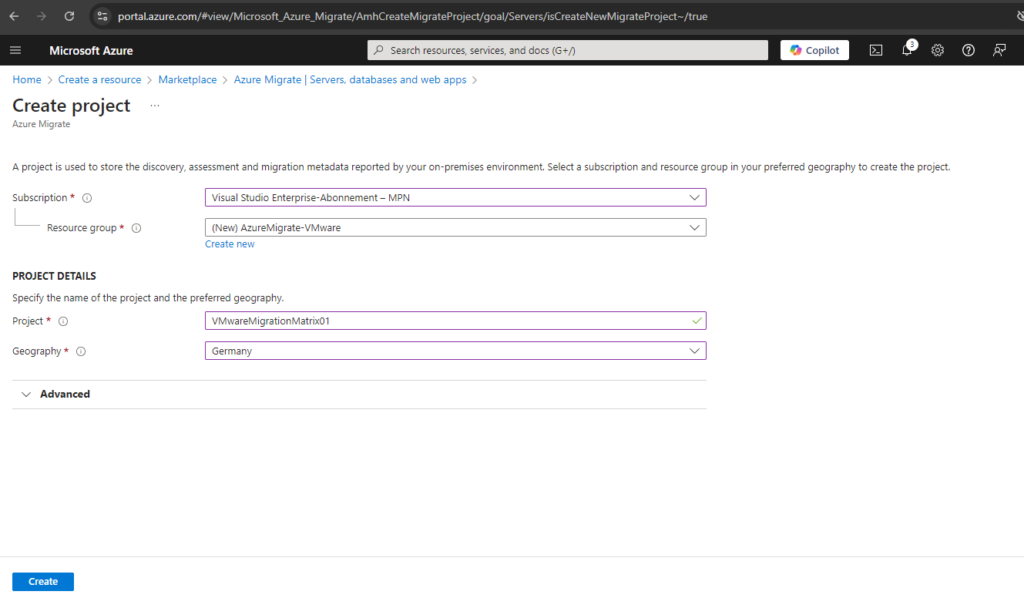
In Project Details, select a subscription and resource group you want to use for and specify the project name and the geography in which you want to create the project.
The metadata collected from the on-premises environment is stored in a location in this geography. You can still assess your machines for migration to a different target location in Azure.
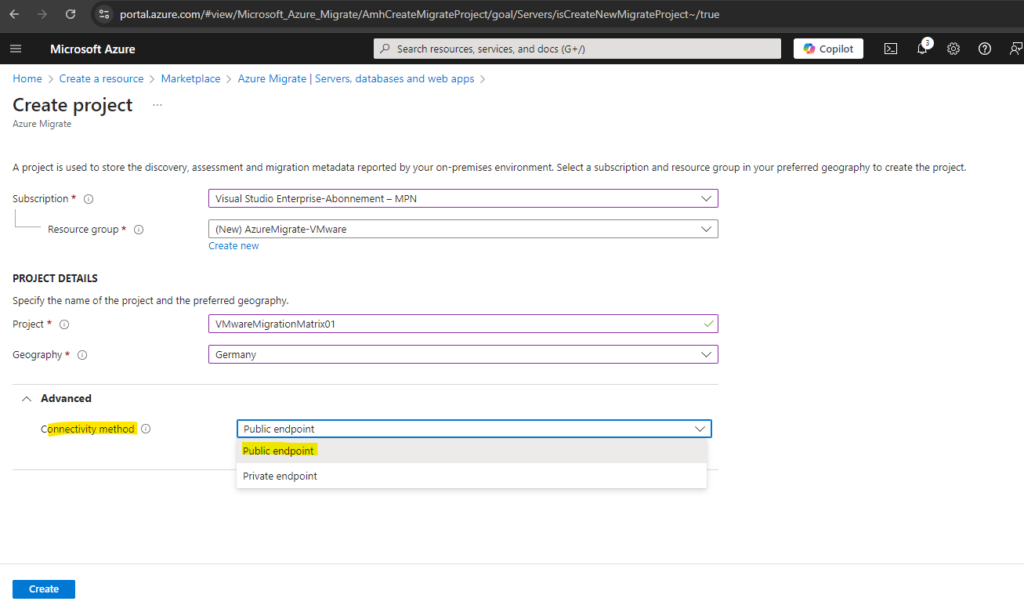
When we expand the Advanced section we can also configure to use private endpoint connectivity. For this post I will use the by default selected Public endpoint connectivity method.
You can’t change the connectivity method to private endpoint connectivity for existing Azure Migrate projects.
You can use the Azure Migrate: Discovery and assessment and Migration and modernization tools to connect privately and securely to Azure Migrate over an Azure ExpressRoute private peering or a site-to-site (S2S) VPN connection by using Private Link.
We recommend the private endpoint connectivity method when there’s an organizational requirement to access Azure Migrate and other Azure resources without traversing public networks.
Source: https://learn.microsoft.com/en-us/azure/migrate/how-to-use-azure-migrate-with-private-endpoints
More about setting up an IPSec VPN Tunnel between on-premise and Azure in order to use the private endpoint connectivity method, you will also find in my following posts.
https://blog.matrixpost.net/azure-ipsec-vpn-tunnel-onpremise/
https://blog.matrixpost.net/set-up-a-site-to-site-ipsec-route-based-vpn-tunnel-in-azure/
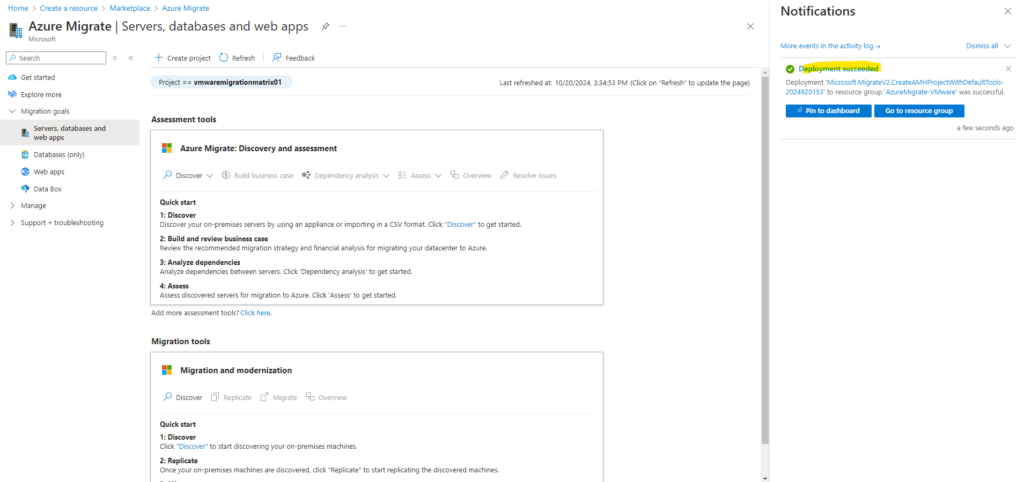
After clicking finally on Create above our new Azure Migrate project was deployed successfully.
Don’t close this page while the project creation is in progress.
If you’ve already created a project, you can use that project to register more appliances to discover and assess more servers. Learn how to manage projects.
Set up the Azure Migrate Appliance in Azure
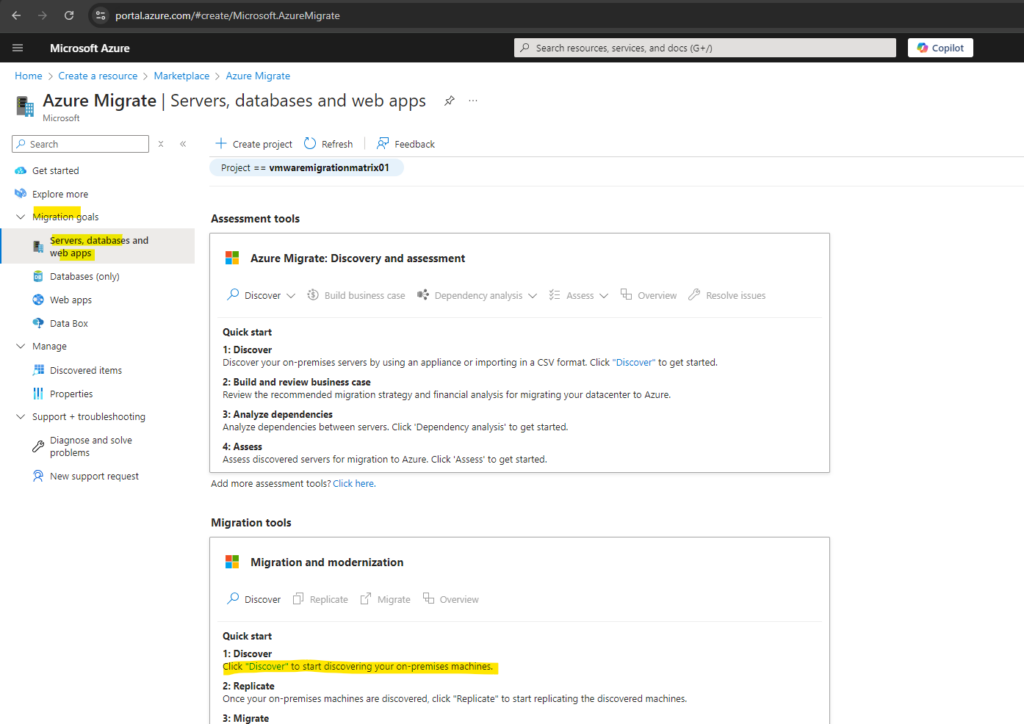
In Servers, databases and web apps, here within the Migration tools tile click on Discover as highlighted below.
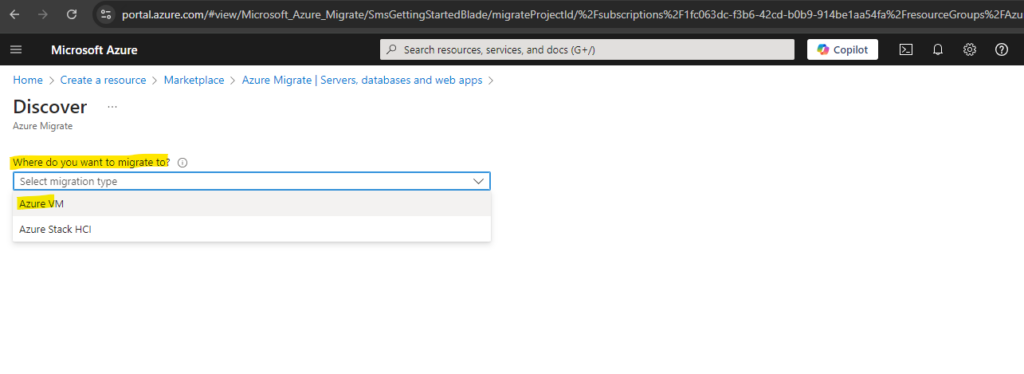
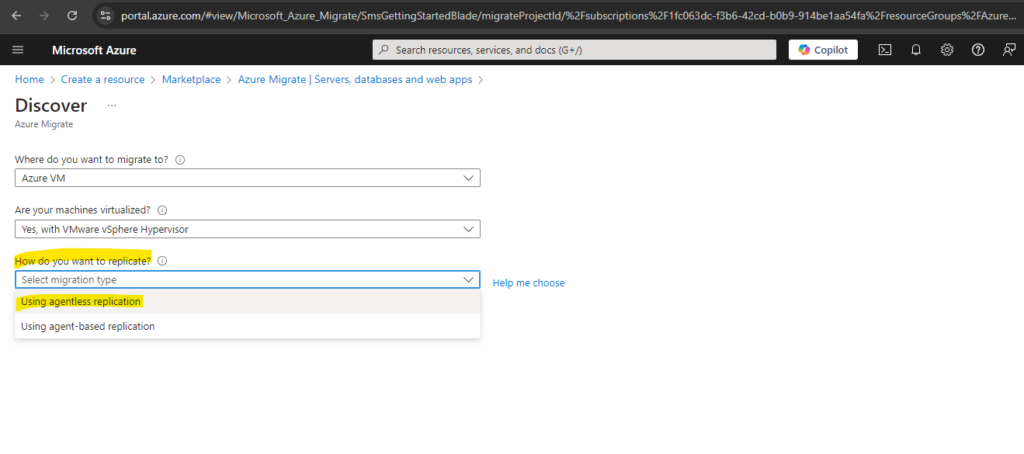
Here select the replication method to use for migration of VMware virtual machines, in my case I want to mirgrate to an Azure VM.
Further we need to select the type of virtual machines, in my case VMware vSphere Hypervisor.
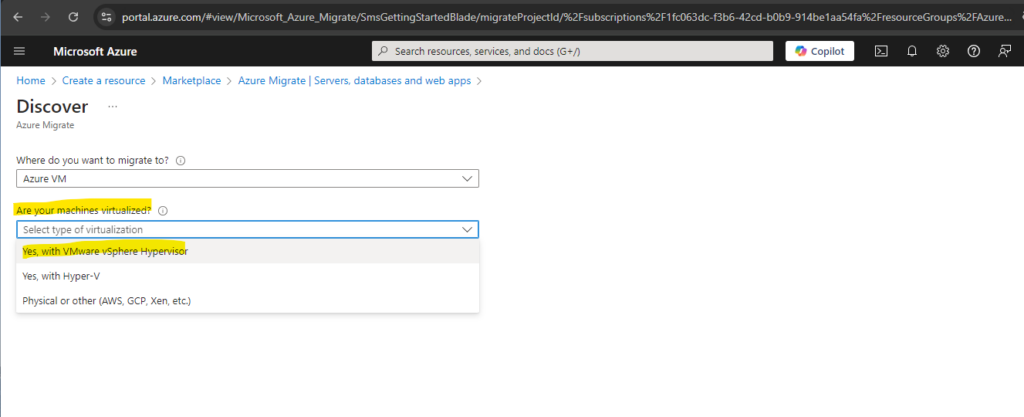
As mentioned to the beginning, we can choose between two main approaches to migrate our on-premise vSphere virtual machines to Azure, either agent-based or agentless, I will use here agentless.
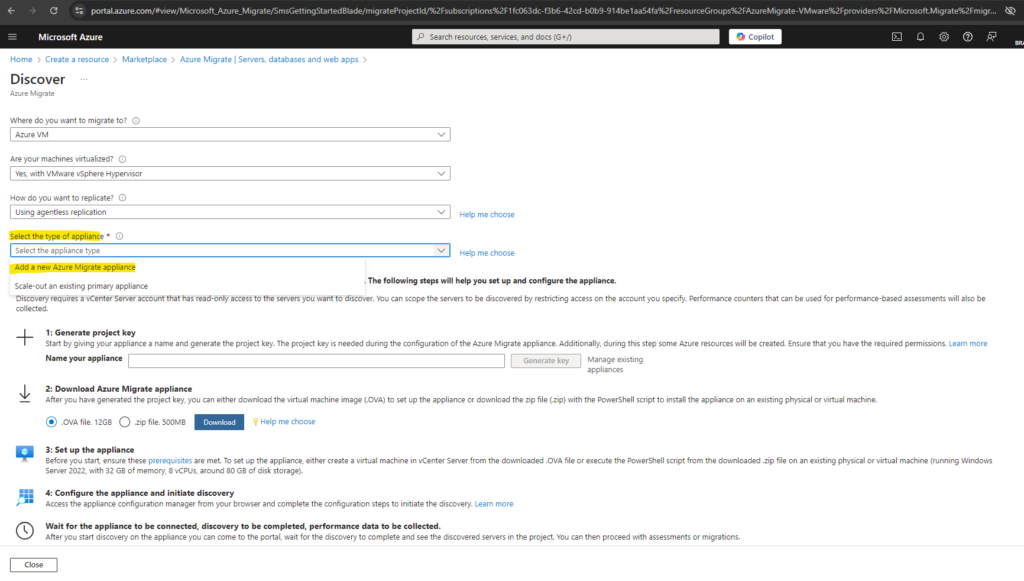
I will create and add a new Azure Migrate Appliance to this project.
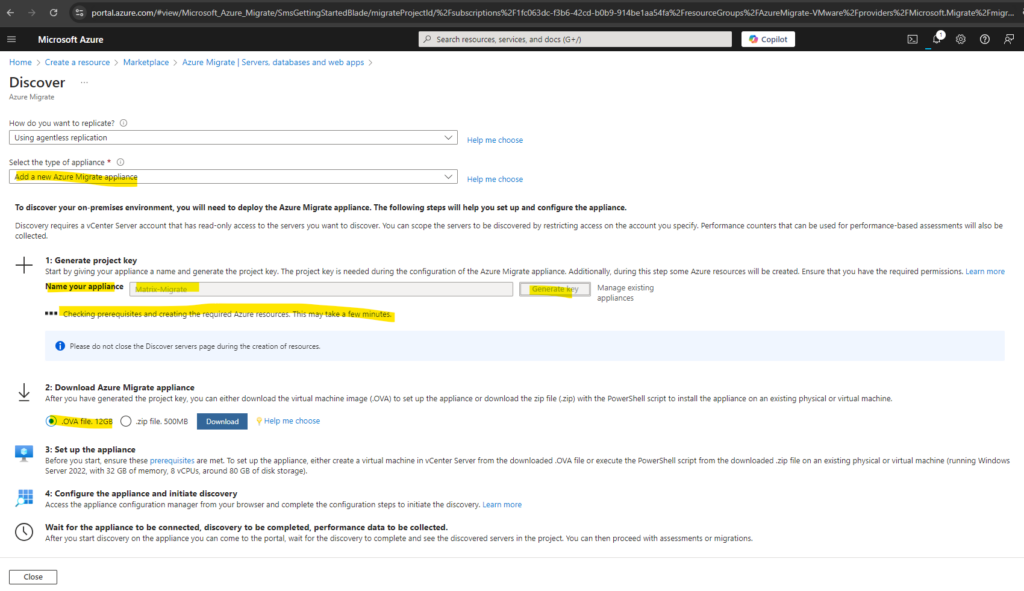
Enter a name for the appliance and click on Generate key.
Don’t close the Discover machines page during the creation of resources.
At this step, Azure Migrate creates a key vault, a storage account, a Recovery Services vault (only for agentless VMware migrations), and a few internal resources.
Azure Migrate also enables a managed identity for the migrate project and the Recovery Services vault and grants permissions to the managed identity to securely access the storage account.
When previously selected to use the private endpoint connectivity method, Azure Migrate attaches a private endpoint to each resource. The private endpoints are created in the virtual network selected during the project creation.
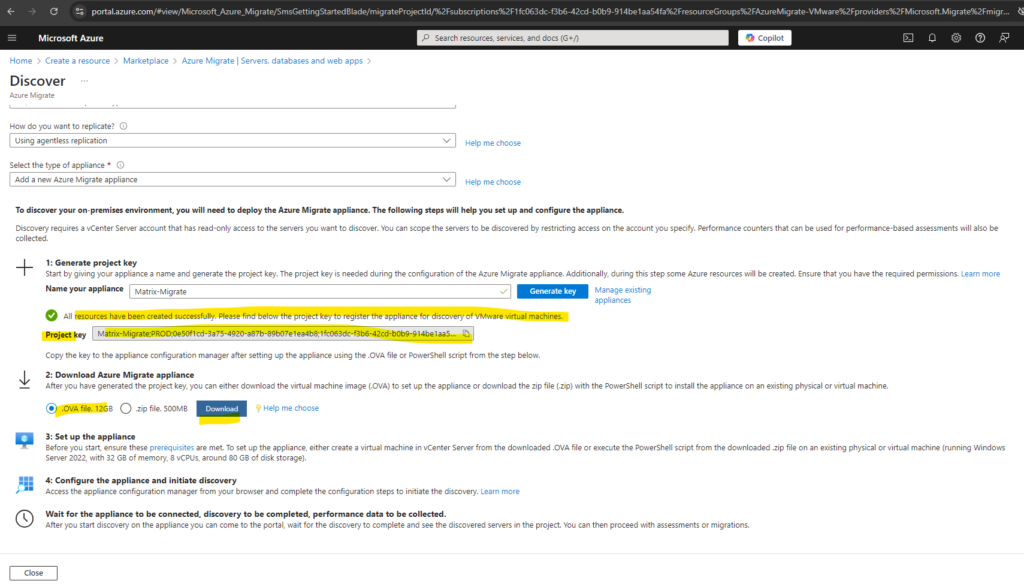
A few minutes later all needed resources in Azure have been created successfully.
We can now download the appliance in order to deploy it in on-premise and vSphere, further we can copy the project key to the clipboard now or we can also pick up the key later within our project.
The the zip file (.zip) we can use with the PowerShell script to install the appliance on an existing physical or virtual machine.
In Part 2 we will see how to deploy the Azure Migrate Appliance in our on-premise vSphere environment and how to configure it by using its configuration manager.
Links
About Azure Migrate
https://learn.microsoft.com/en-us/azure/migrate/migrate-services-overviewPrepare for VMware agentless migration
https://learn.microsoft.com/en-us/azure/migrate/vmware/prepare-for-agentless-migrationMigrate on-premises machines to Azure
https://learn.microsoft.com/en-us/azure/site-recovery/migrate-tutorial-on-premises-azureMigrate VMware VMs to Azure (agentless)
https://learn.microsoft.com/en-us/azure/migrate/vmware/tutorial-migrate-vmwareMigrate VMware vSphere VMs to Azure (agent-based)
https://learn.microsoft.com/en-us/azure/migrate/vmware/tutorial-migrate-vmware-agentTutorial: Discover servers running in a VMware environment with Azure Migrate
https://learn.microsoft.com/en-us/azure/migrate/vmware/tutorial-discover-vmwareGrouping servers
https://learn.microsoft.com/en-us/azure/migrate/how-to-create-a-groupAzure Migrate appliance
https://learn.microsoft.com/en-us/azure/migrate/migrate-appliance
Related Posts
Latest posts
Deploying NetApp Cloud Volumes ONTAP (CVO) in Azure using NetApp Console (formerly BlueXP) – Part 5 – Backup and Recovery
Follow me on LinkedIn


