How to repair an Azure VM offline
In my previous post below we saw how we can run Azure VMs in safe mode by using the Azure serial console and the Special Administration Console (SAC) which is provided by the Emergency Management Services (EMS) if enabled for the VM.
In case the Emergency Management Services (EMS) are not enabled and also couldn’t enabled by using the run command feature, like when the virtual machine was already rebooted in safe mode, finally we can also repair a virtual machine in Azure offline by attaching the OS disk to a second VM for offline repair.
Both methods we can use to repair a virtual machine in Azure which doesn’t successfully start anymore.
Below I will show how to attach the OS disk to a second VM for offline repair in general and how to perform the steps from my previous post offline.
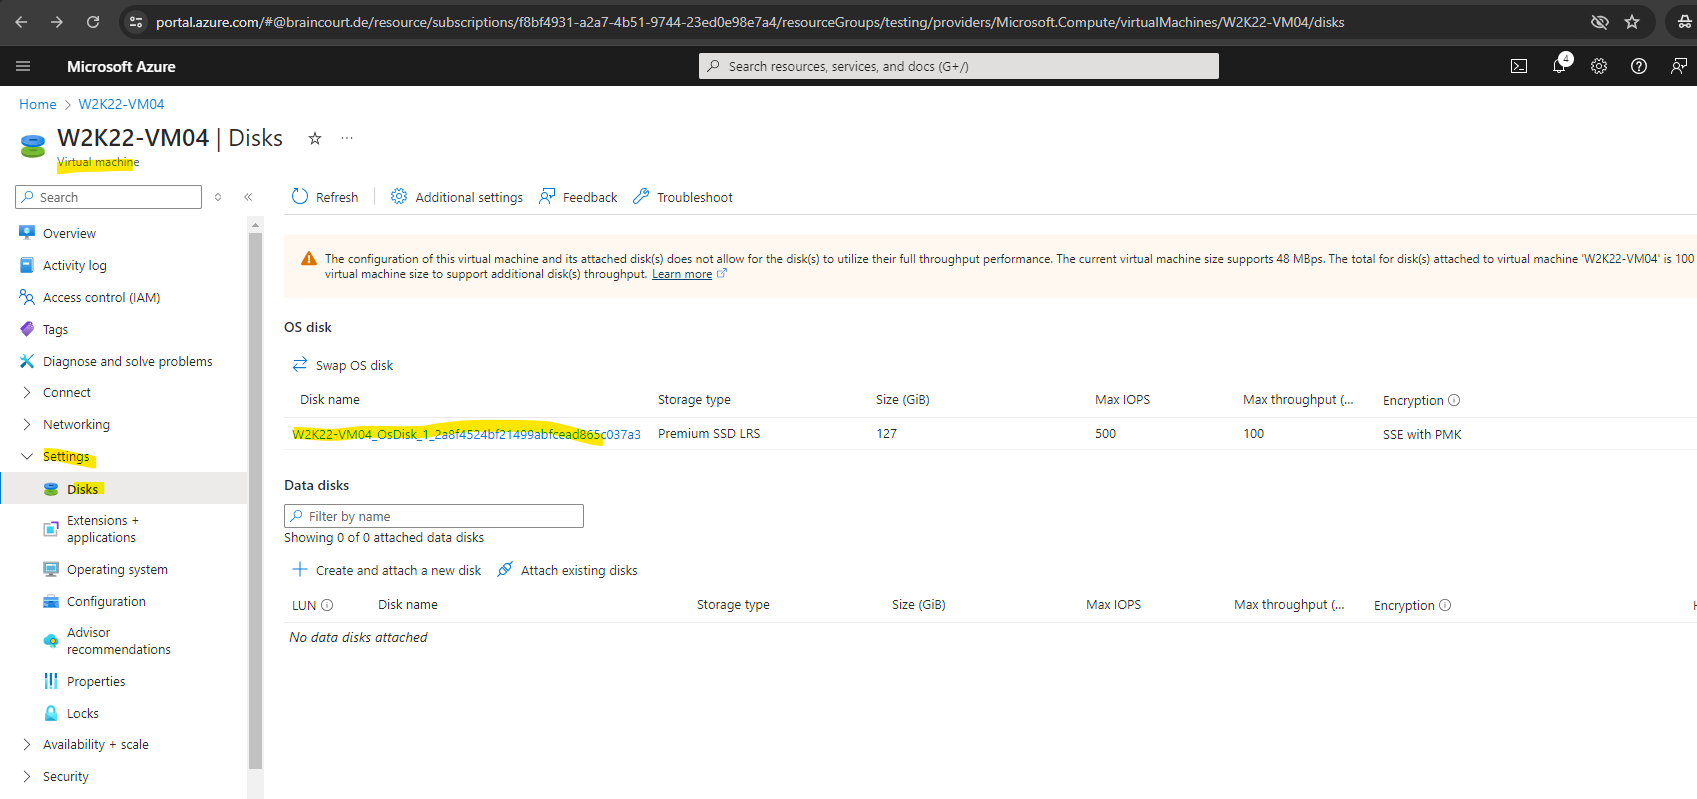
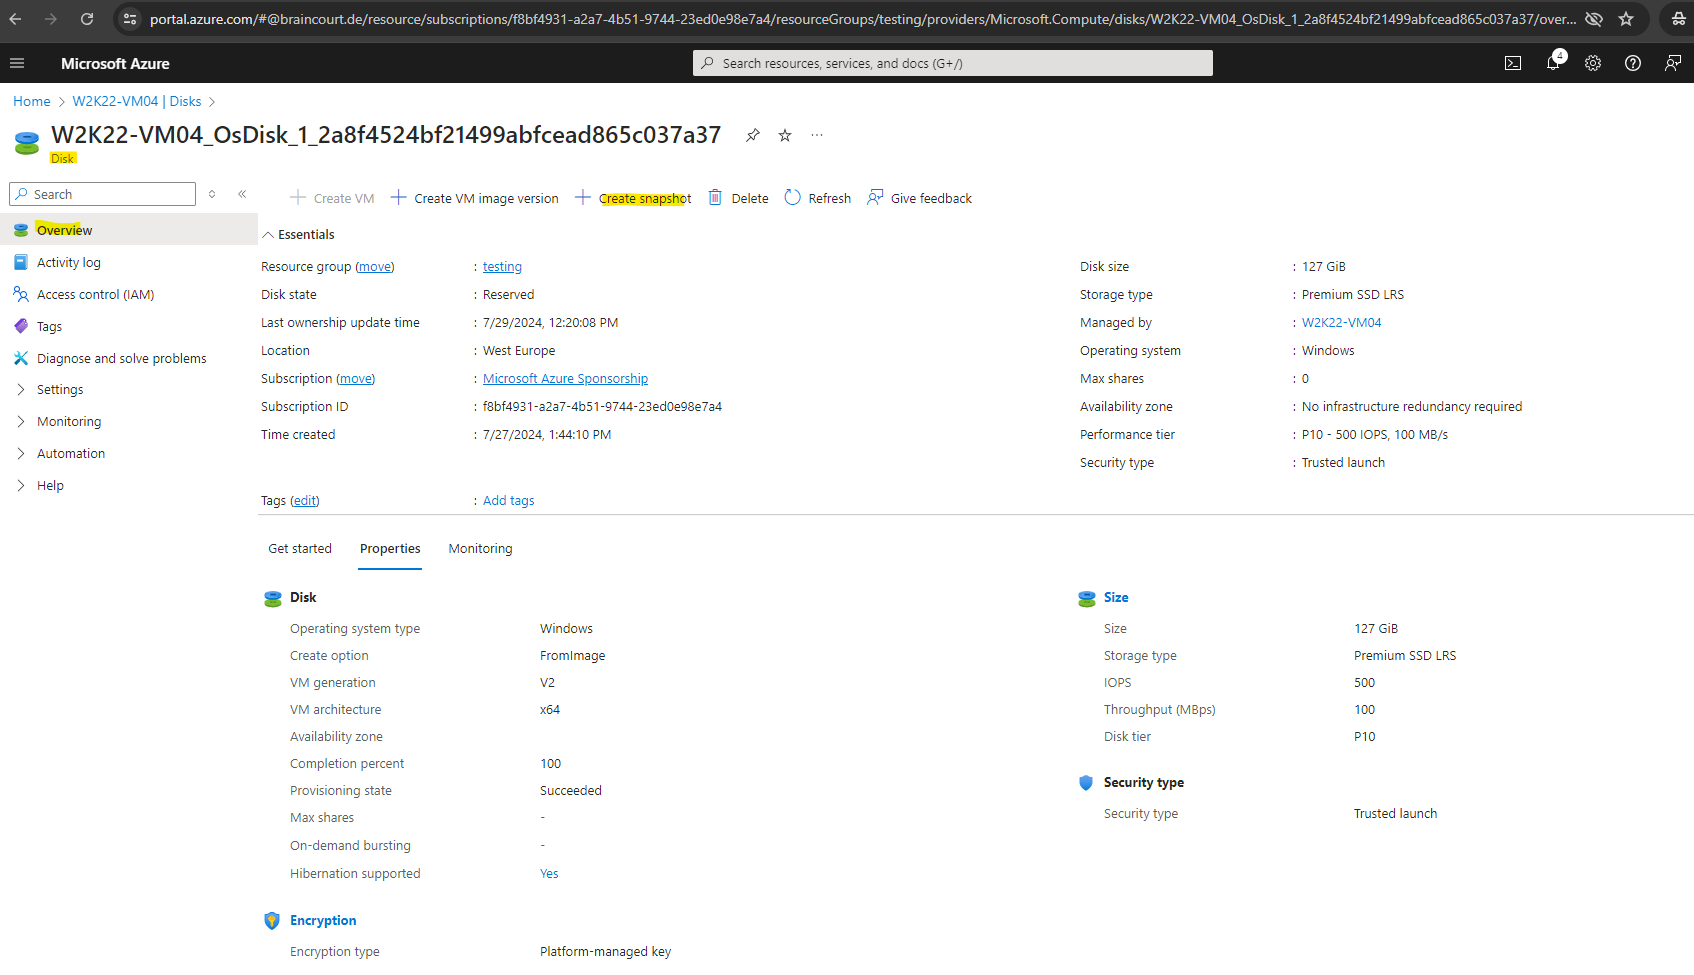
Prepare the OS Disk and take a Snapshot from
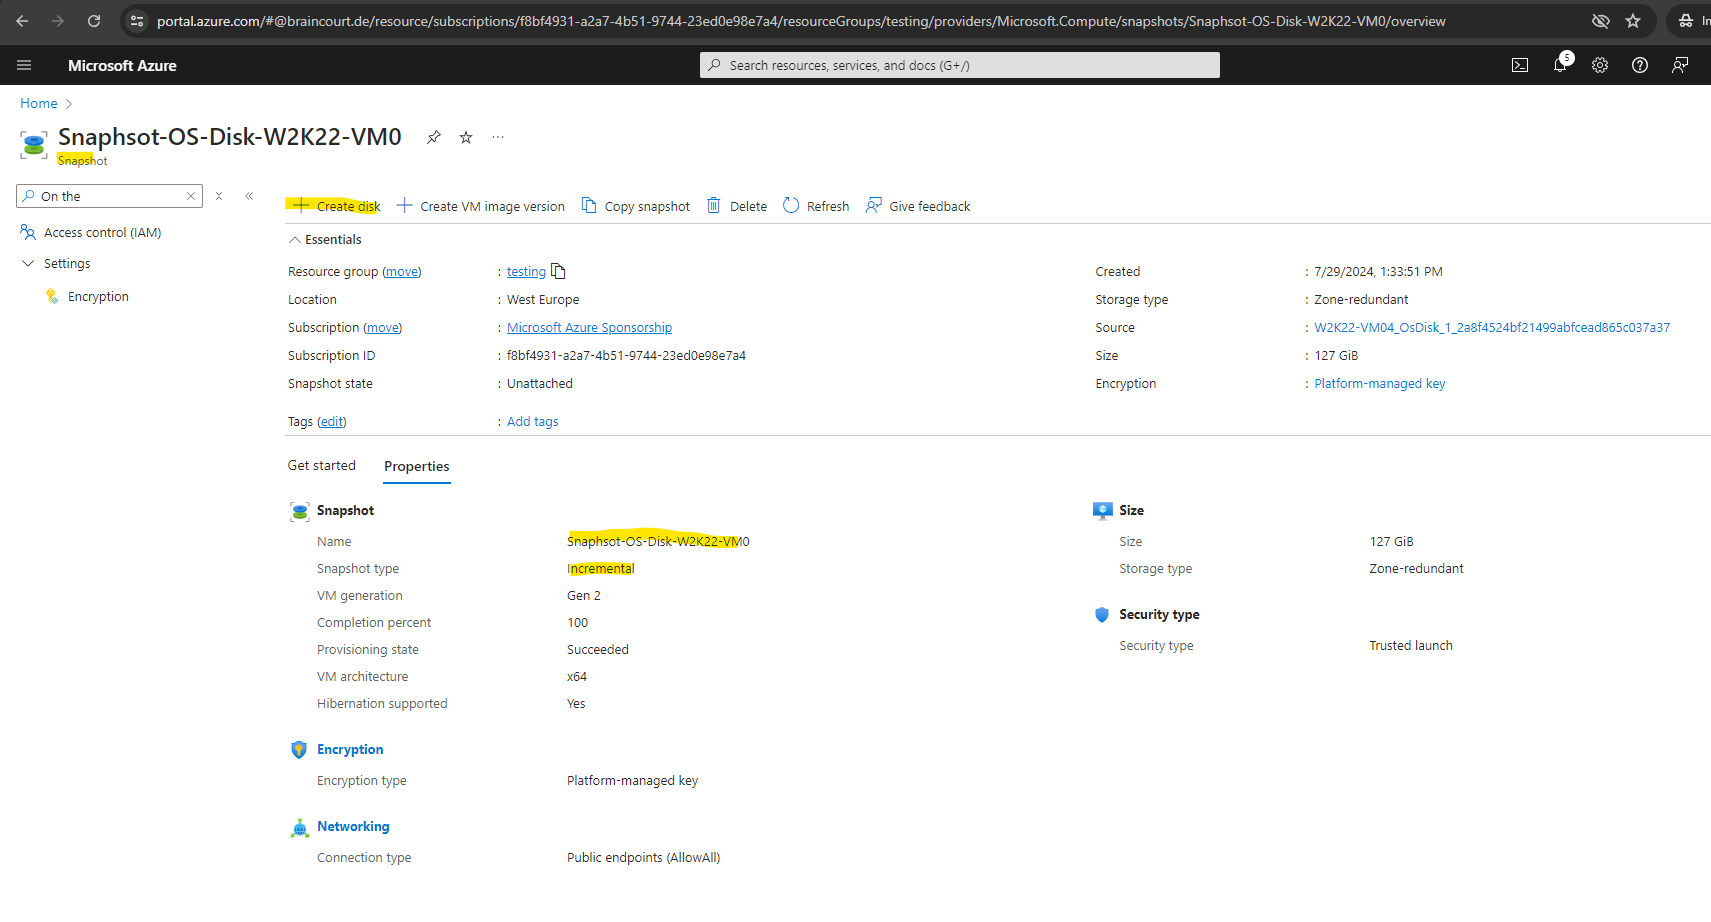
We first shutdown the virtual machine and then take a snapshot from the OS disk.
A snapshot is a full, read-only copy of a virtual hard disk. We recommend that you cleanly shut down the VM before taking a snapshot, to clear out any processes that are in progress.
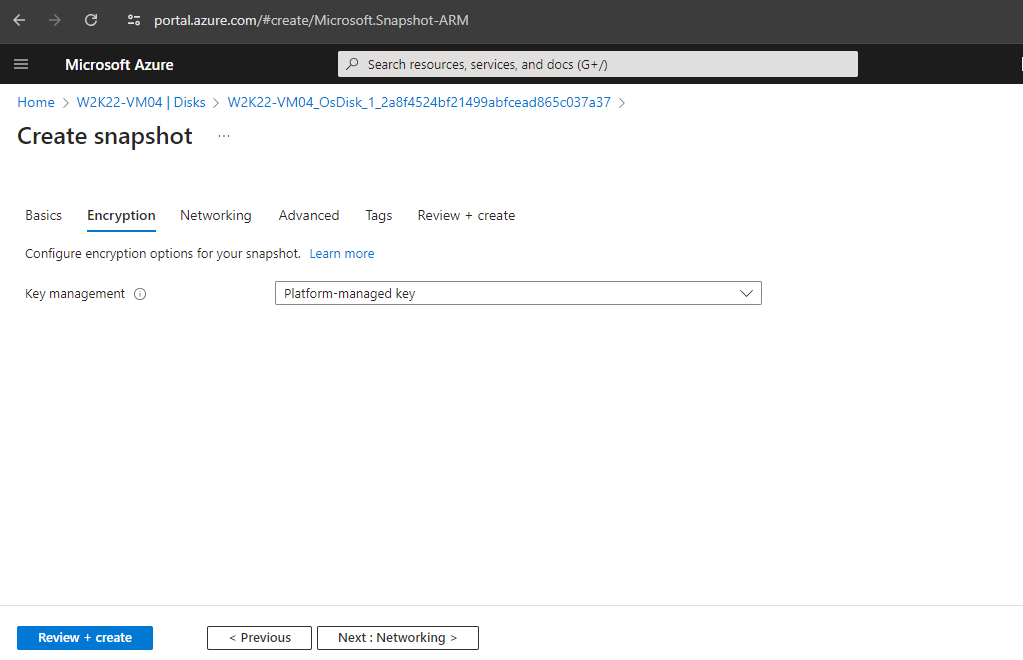
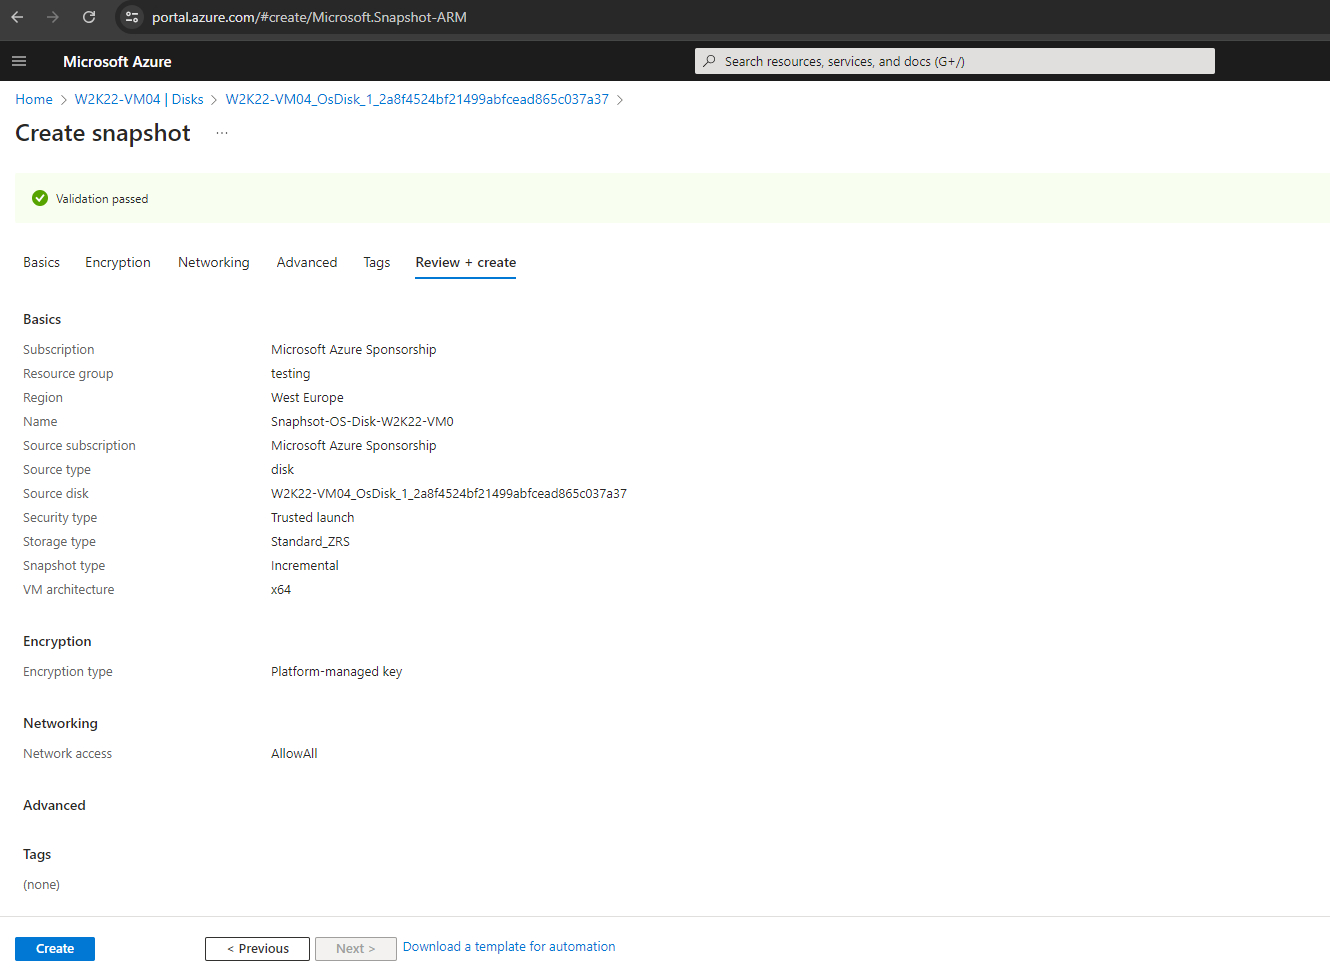
Click on Create snapshot and proceed with the default settings.
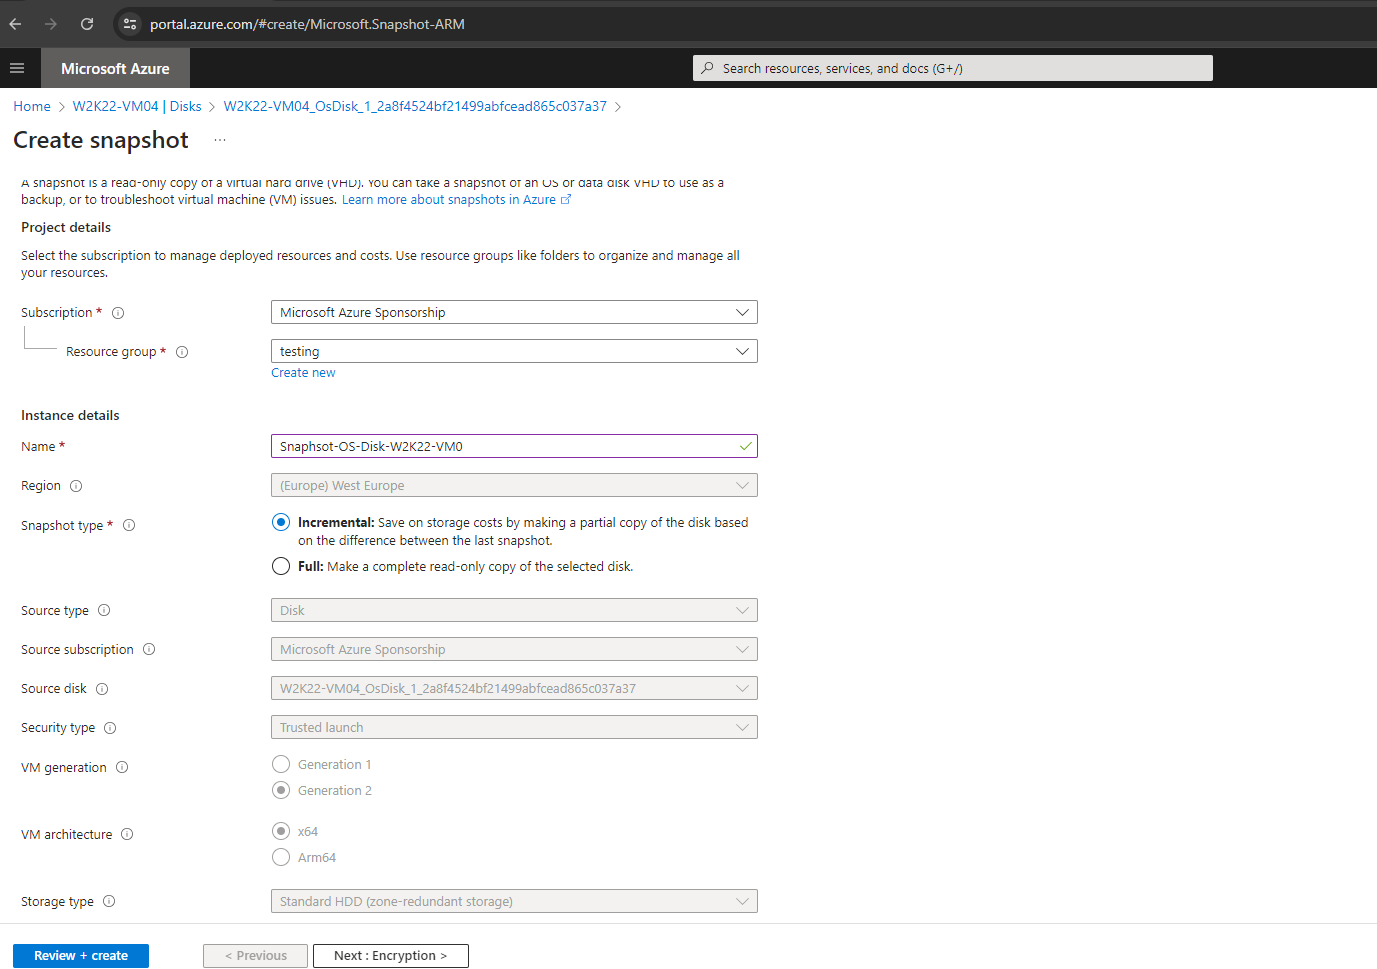
A disk encryption set stores the customer key that a disk or snapshot will use for encrypting its data. You must choose an existing disk encryption set during this step. Disk encryption sets require access to key vault and keys. Learn more
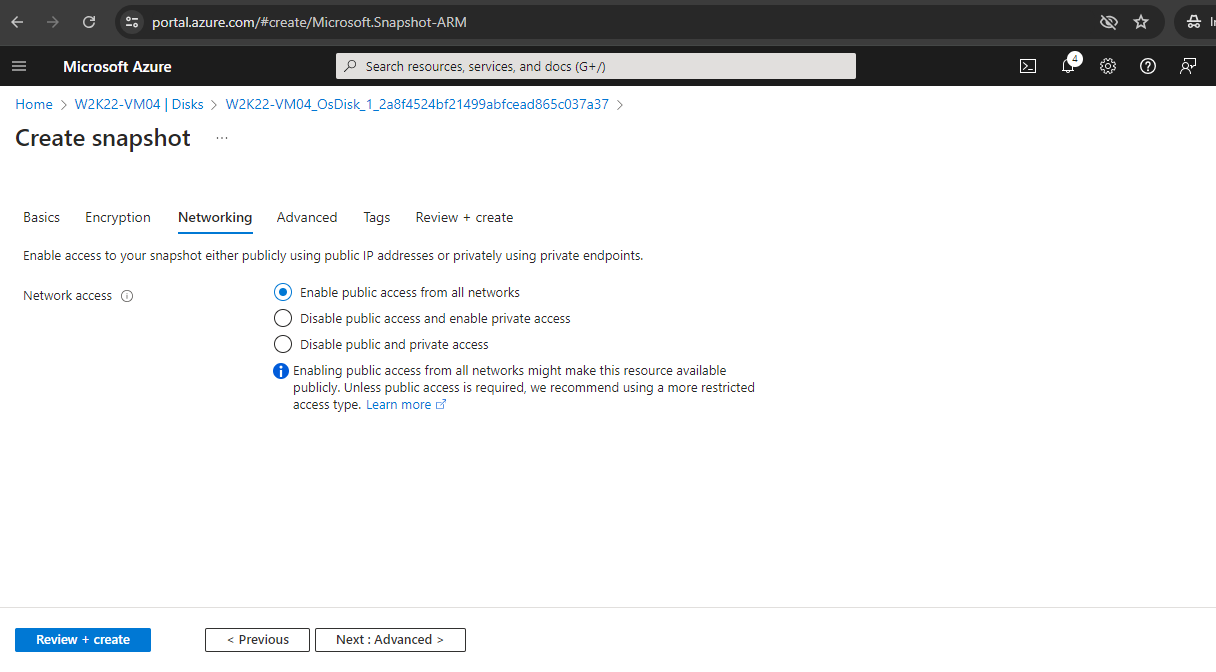
Allow access to your disk or snapshot. When public network access is disabled, the public endpoint on this disk or snapshot will not be accessible, and only private endpoint connections can be used for access. Learn more
Finally click on Create.
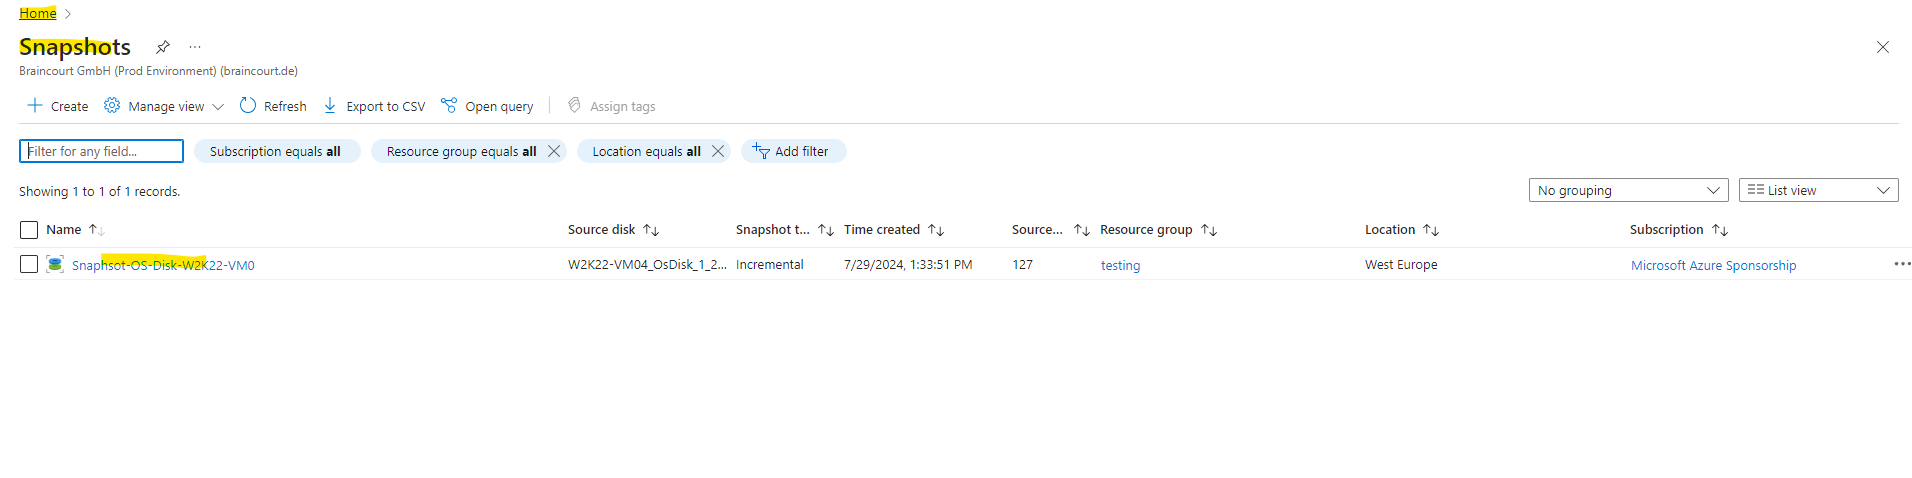
Under Home -> Snapshots in the Azure portal you will see all of your taken snapshots.
Create a new Disk from the Snapshot
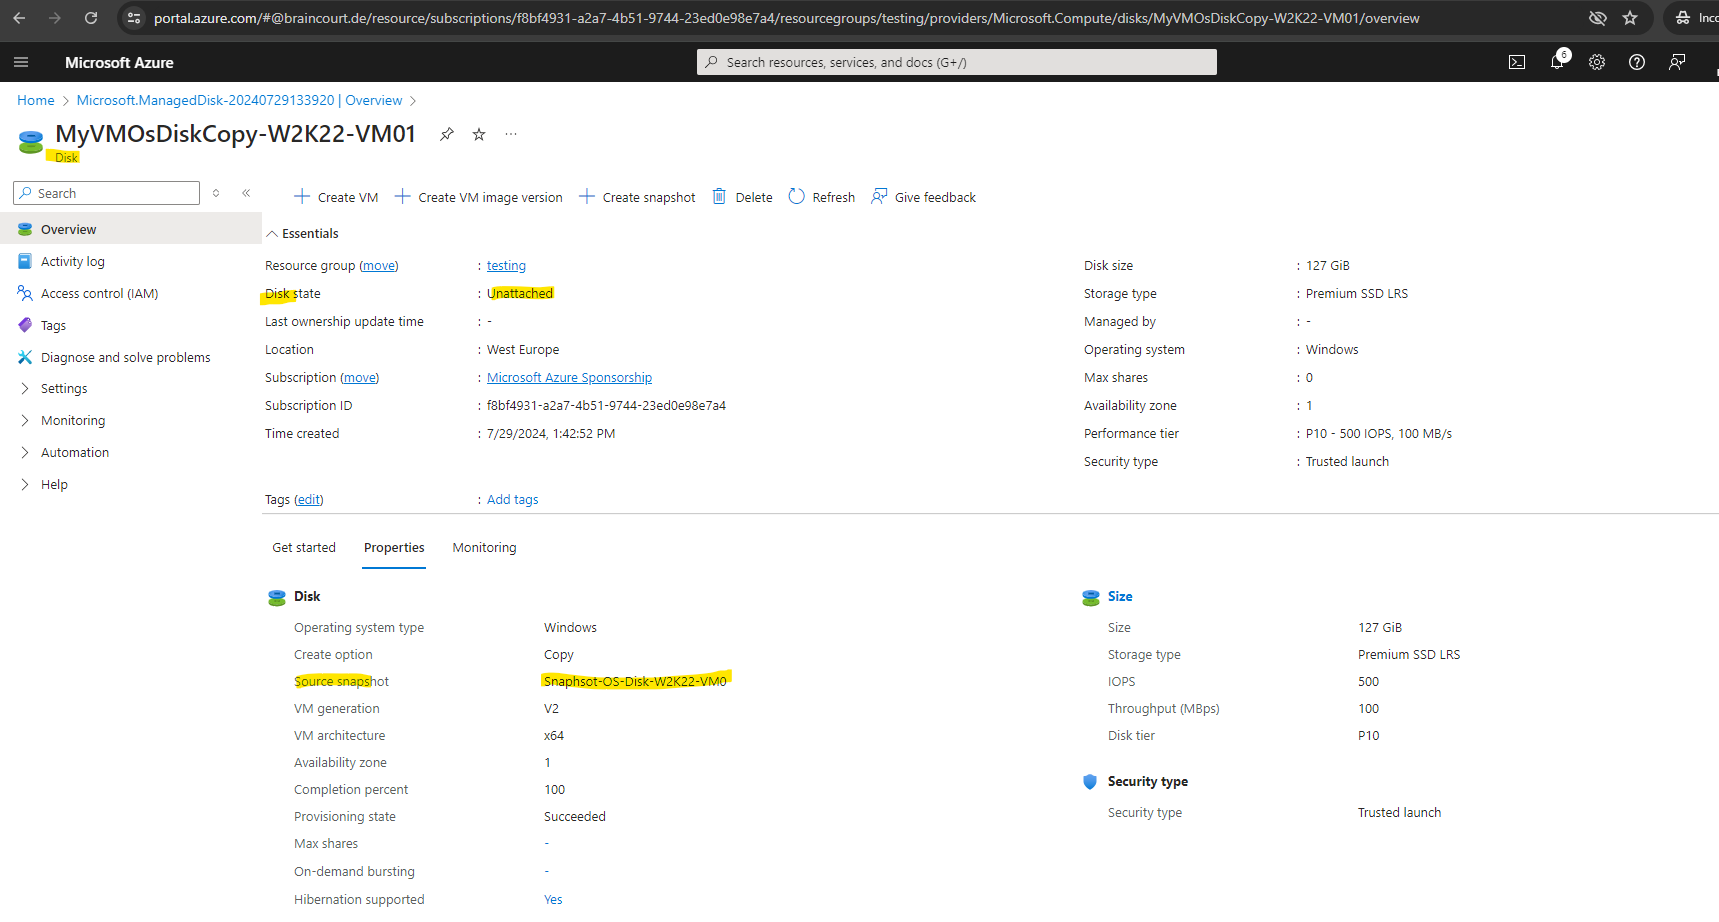
We can now create a new disk from snapshot of our OS disk which we than can later attach to our repair VM.
On the Overview blade of the new disk snapshot, select Create Disk.
On the Basics page of the Create a Managed Disk wizard, assign a descriptive name to the disk, such as MyVMOsDiskCopy.
Select a region and Availability zone, and record these choices. You will assign these same values to the repair VM.

Complete the Create a Managed Disk wizard with the default options as previously for the taken snapshot.
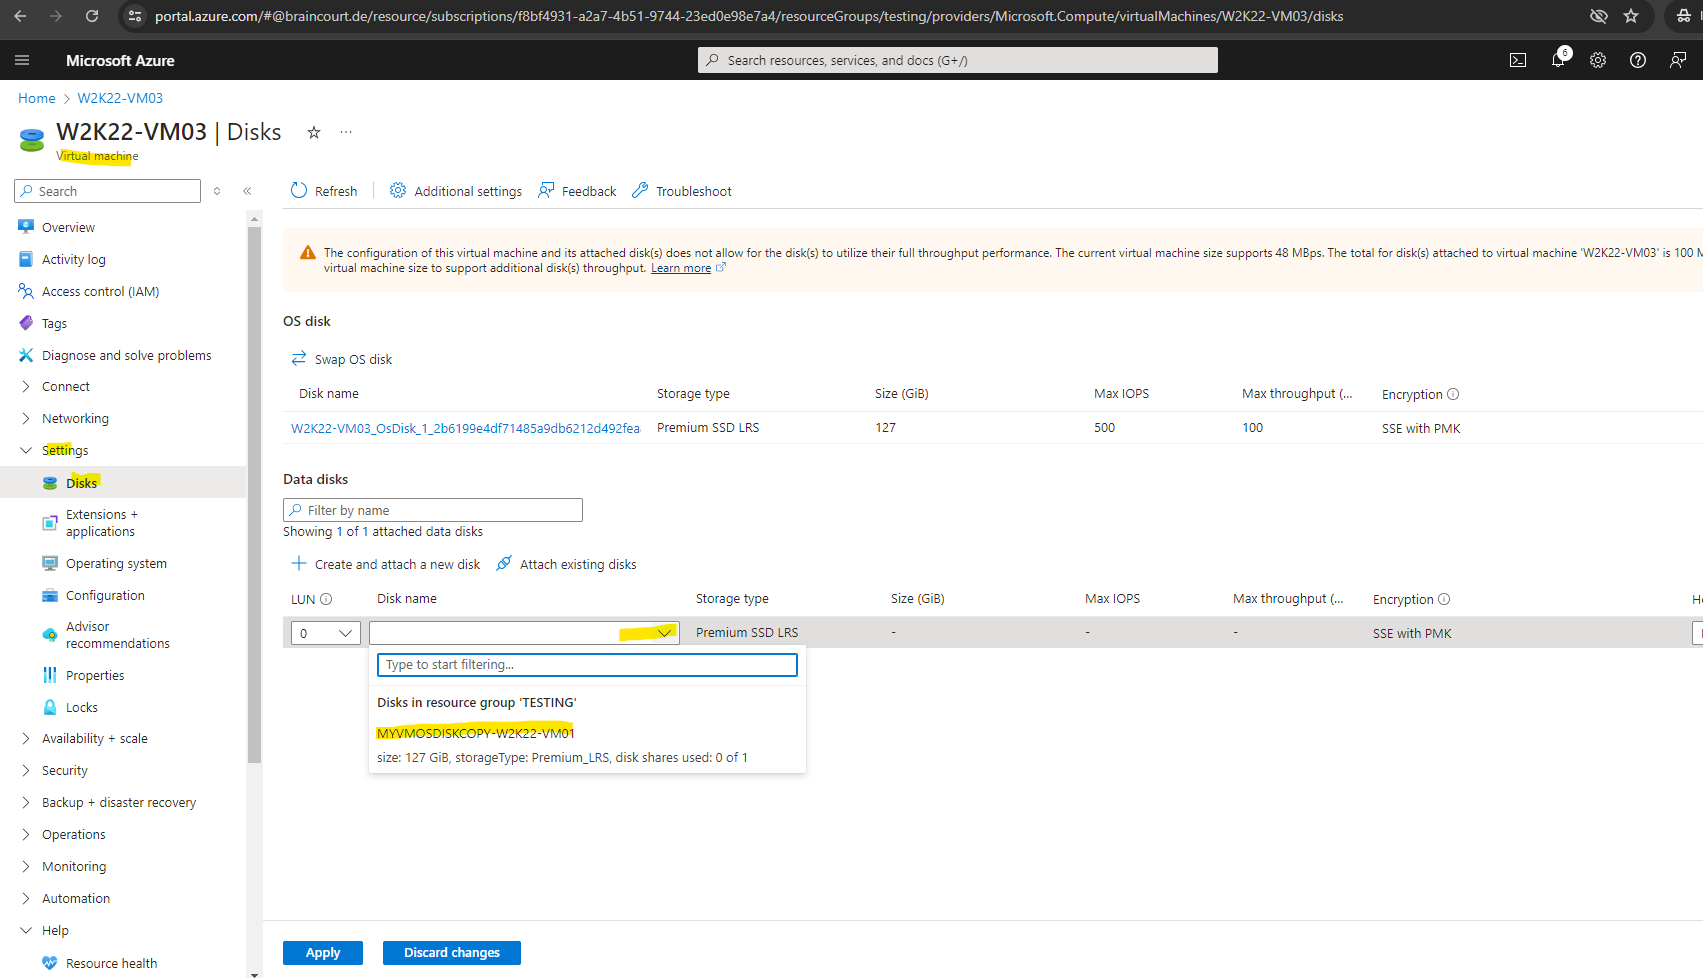
We now either need to create a new repair VM or in case we can use an existing one we just need to attach our created disk to.
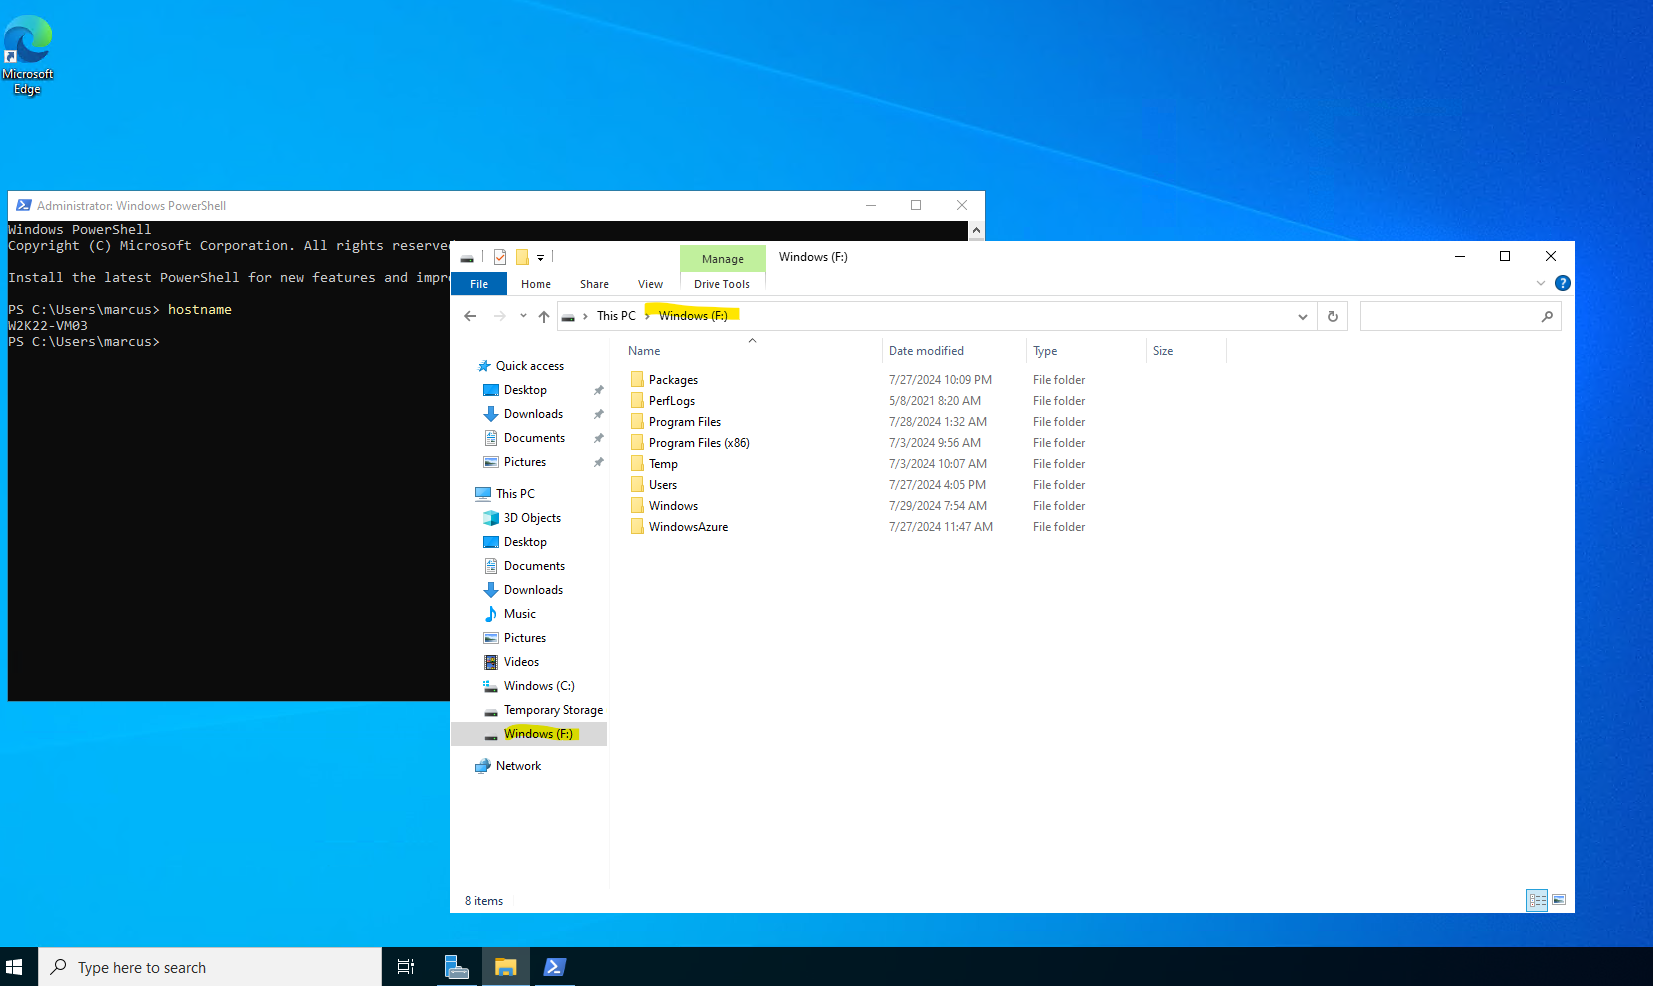
In my case I will use one of my existing VMs named W2K22-VM03 and attach the disk to.
Below I will click on Attach existing disks within the VM blade of my repair VM.
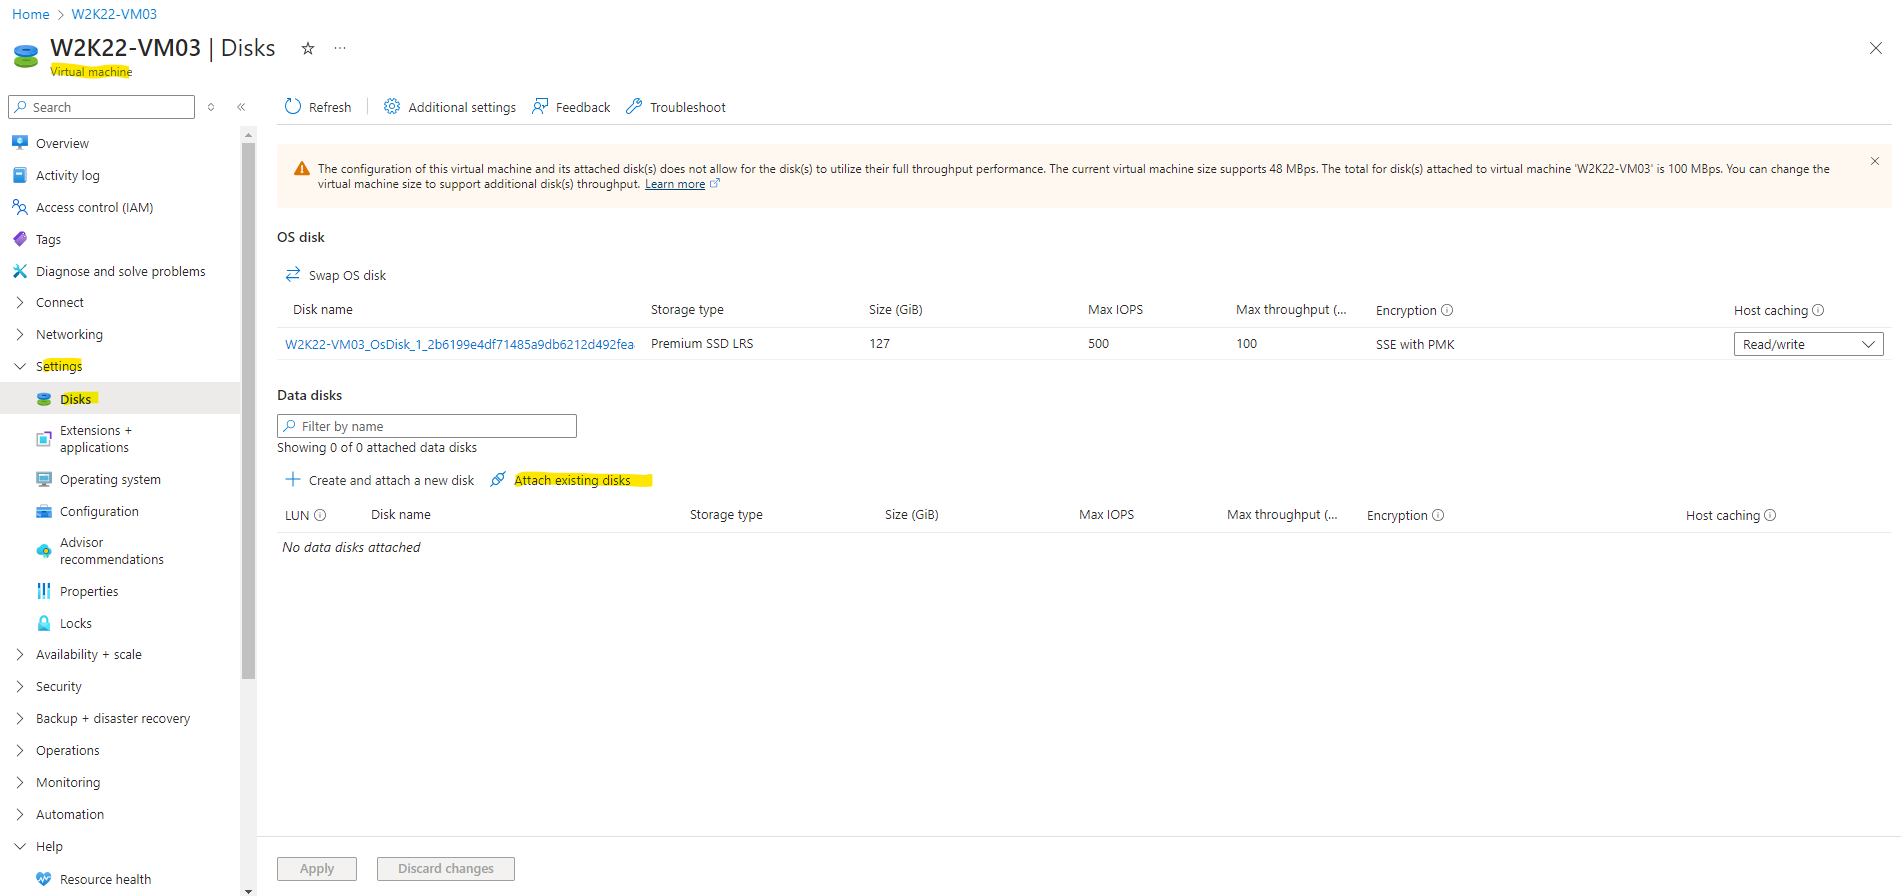
Select our previously created disk and click on Apply.
Performing Maintenance and Troubleshooting offline
With the copy of the OS disk mounted on our repair VM, we can now perform any maintenance and troubleshooting steps as needed.
In our case we need to change the Boot Configuration Data (BCD) to boot the VM later in normal mode again.
So now I will connect to my repair VM named W2K22-VM03 where we attached the OS disk of W2K22-VM04 on which safe mode currently is enabled in the Boot Configuration Data (BCD).
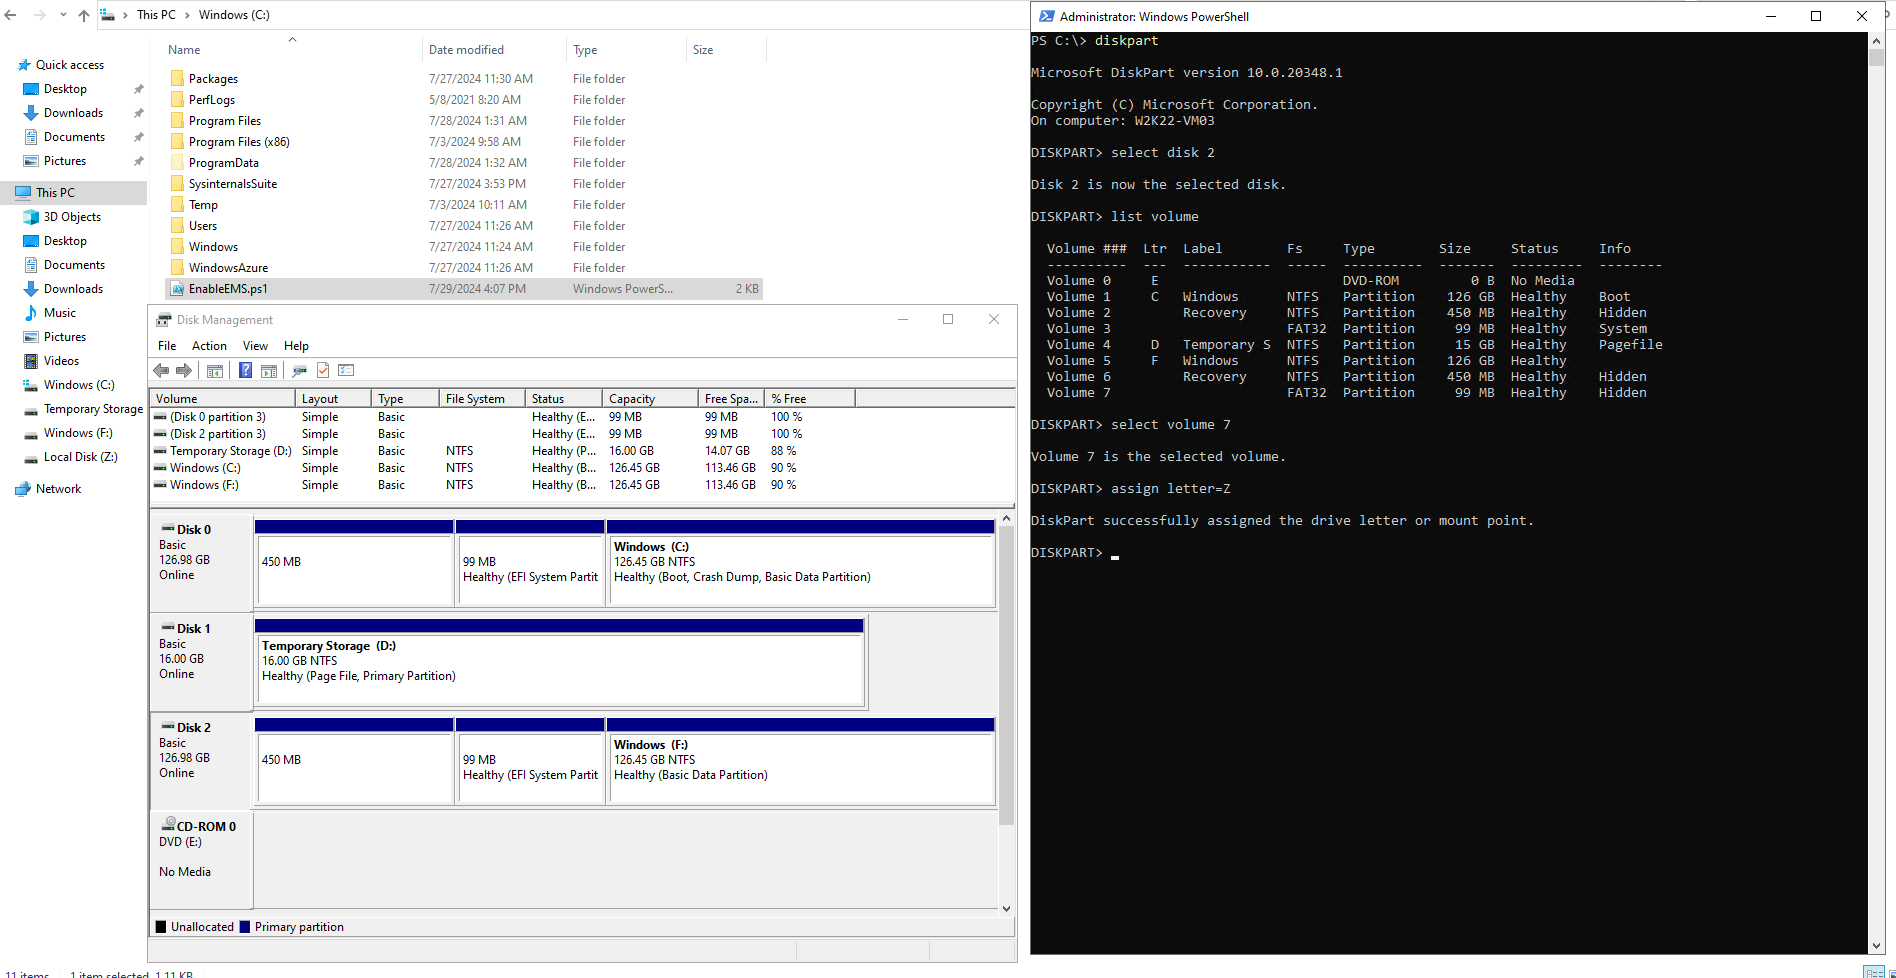
In my case the attached OS disk is assigned as drive F:\ as shown below. In order to access the Boot Configuration Data (BCD) we need to access the EFI boot partition.
The Boot Configuration Data (BCD) file is located as mentioned on the EFI boot partition which is in my case below on Disk 2 and volume 7.
We can use the diskpart tool to also assign a drive letter to the EFI boot partition, I will use therefore the drive Z:\.
The Boot Configuration Data (BCD) file’s full path is now Z:\EFI\Microsoft\Boot\BCD and therefore to check its settings we can use the bcdedit tool and its /store flag.
bcdedit /store <filename>
Specifies the file name of the boot configuration data store. If the file name contains spaces, it must be enclosed in quotation marks (“”).
bcdedit /store Z:\EFI\Microsoft\Boot\BCD /enum
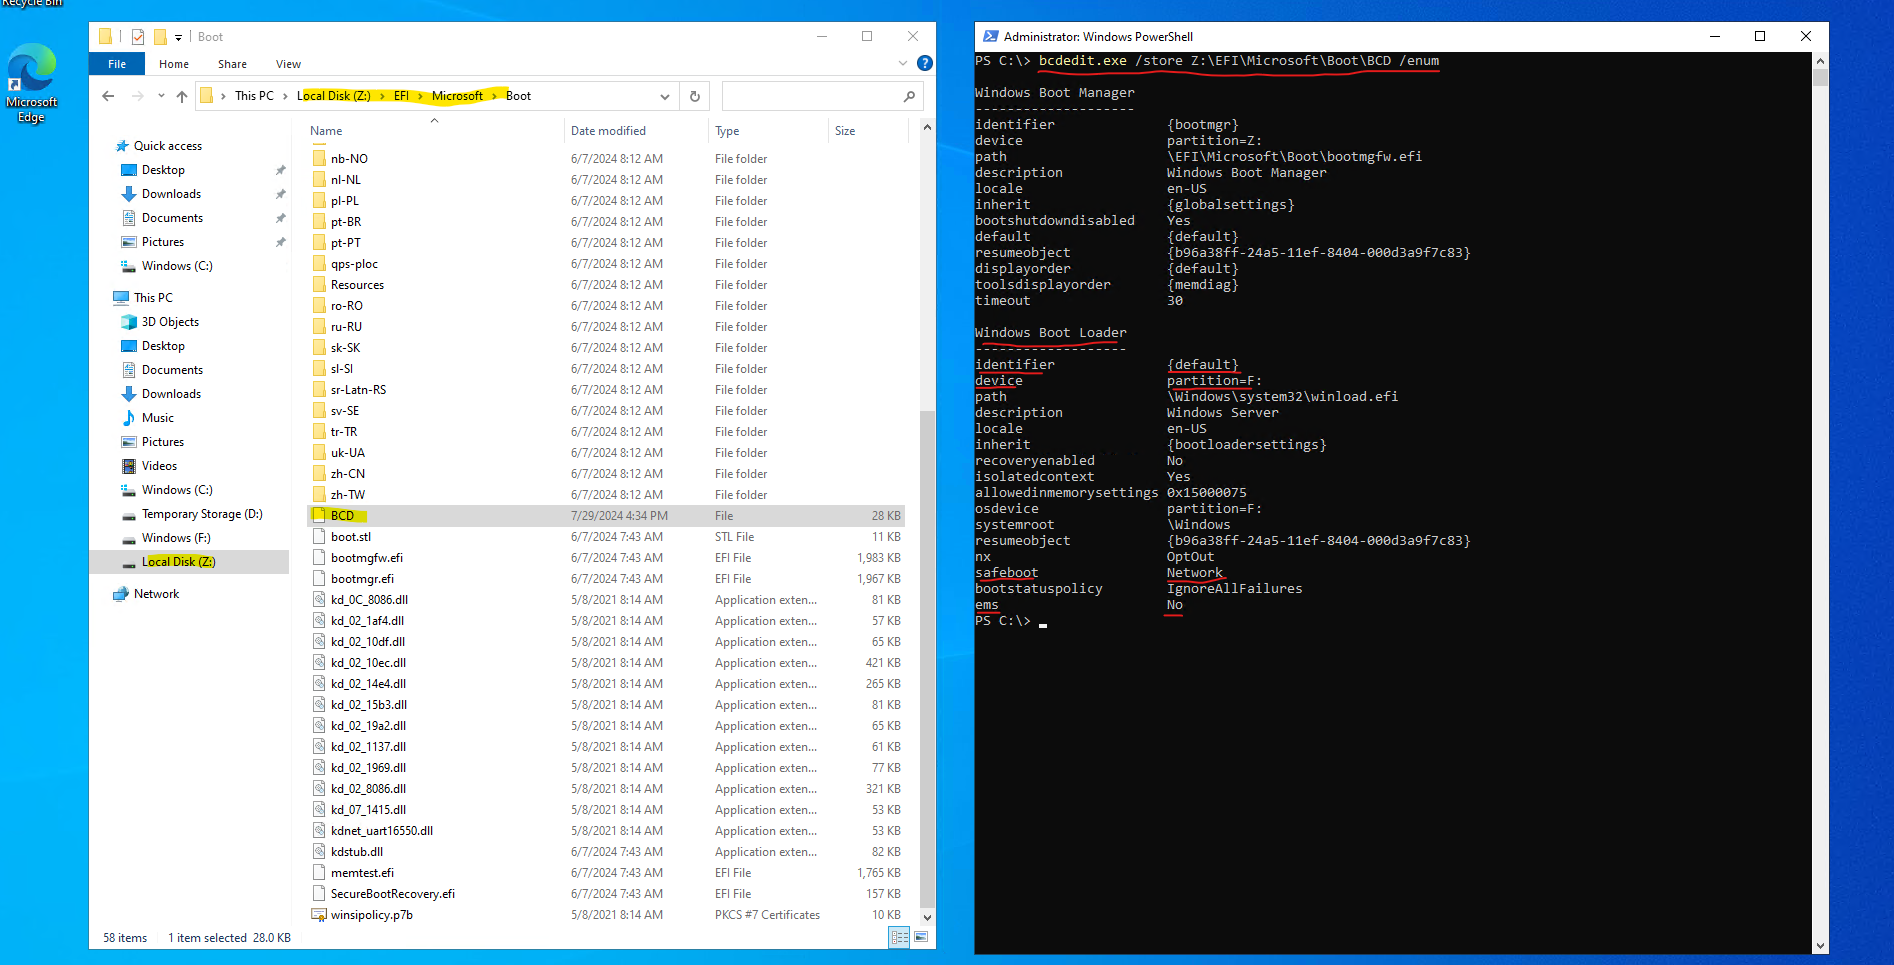
If the VM is configured to boot in Safe Mode, you will see an extra flag under the Windows Boot Loader section called safeboot.
So on the screenshot above we can see that Safe Mode (with network connection) is enabled and that the Emergency Management Services (EMS) and its Special Administration Console (SAC) is disabled as we already knew and want to change now offline.
We can remove Safe Mode and also enable Emergency Management Services (EMS) and its Special Administration Console (SAC) as usual by using the bcdedit.exe tool.
!! Note !!
Executing the bcdedit.exe tool in combination with the /deletevalue flag just works when using the command prompt, when using the PowerShell you will run into an error.
Below I will first remove the Safe Mode.
bcdedit /store Z:\EFI\Microsoft\Boot\BCD /deletevalue {default} safeboot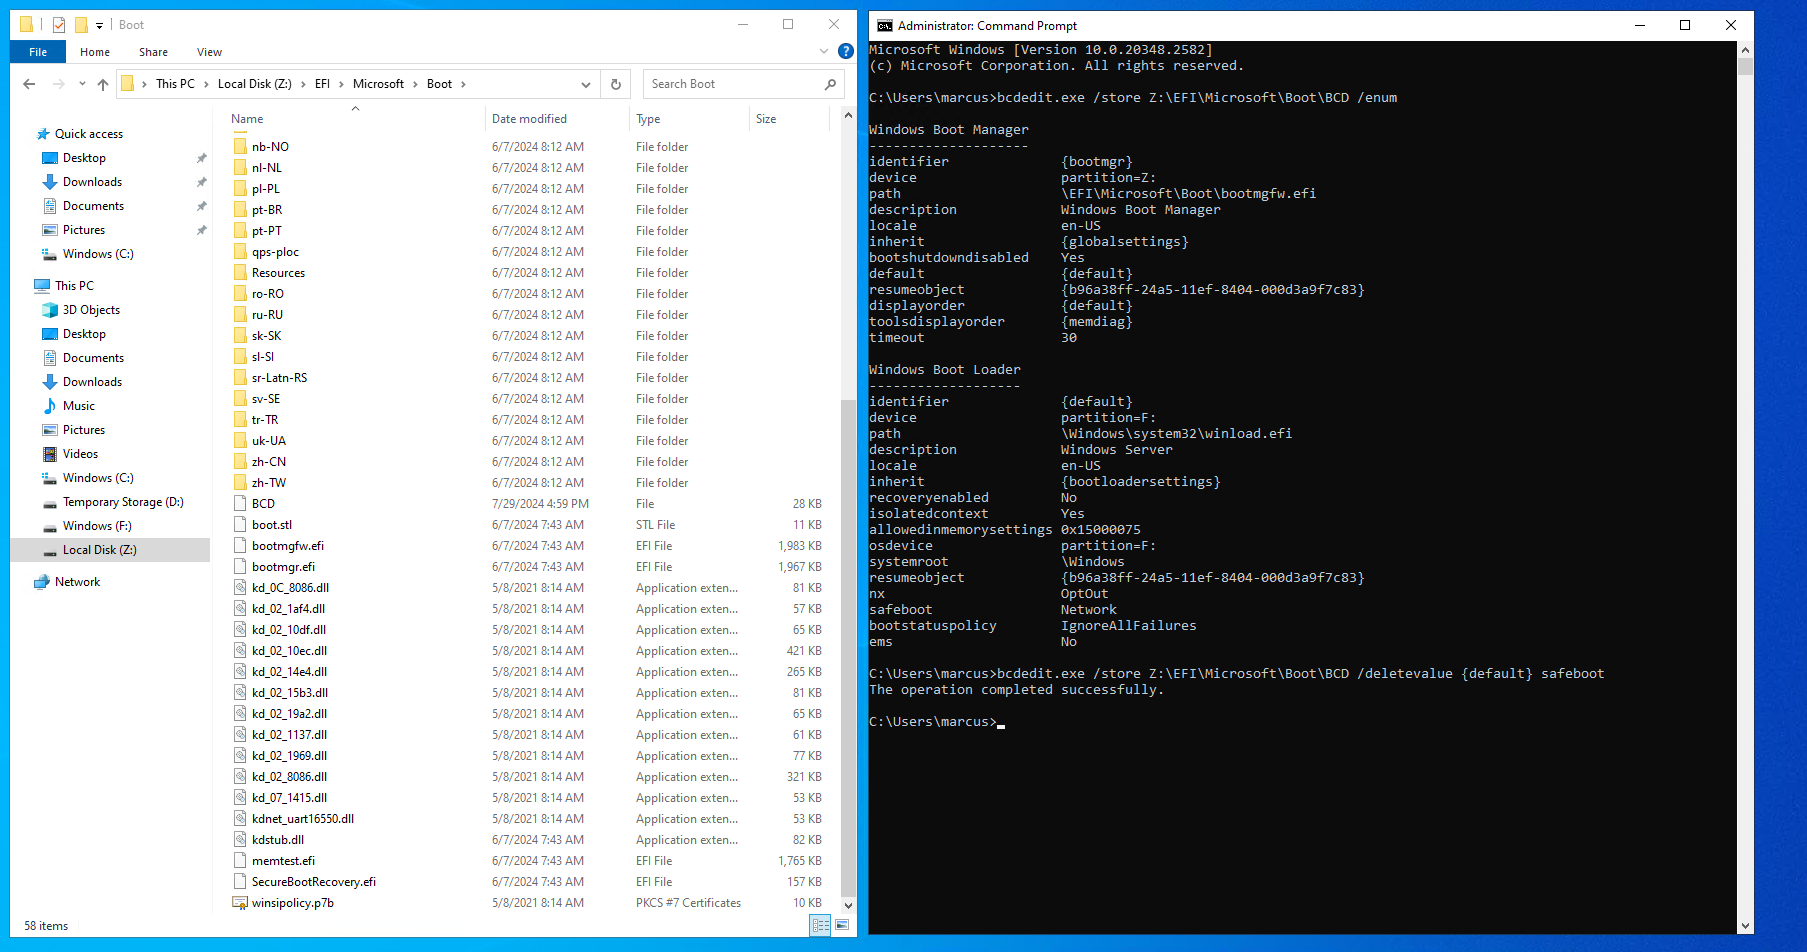
Finally we can also enable the Emergency Management Services (EMS) and its Special Administration Console (SAC) by executing the following command.
bcdedit /store Z:\EFI\Microsoft\Boot\BCD /ems {default} on
bcdedit /store Z:\EFI\Microsoft\Boot\BCD /emssettings EMSPORT:1 EMSBAUDRATE:115200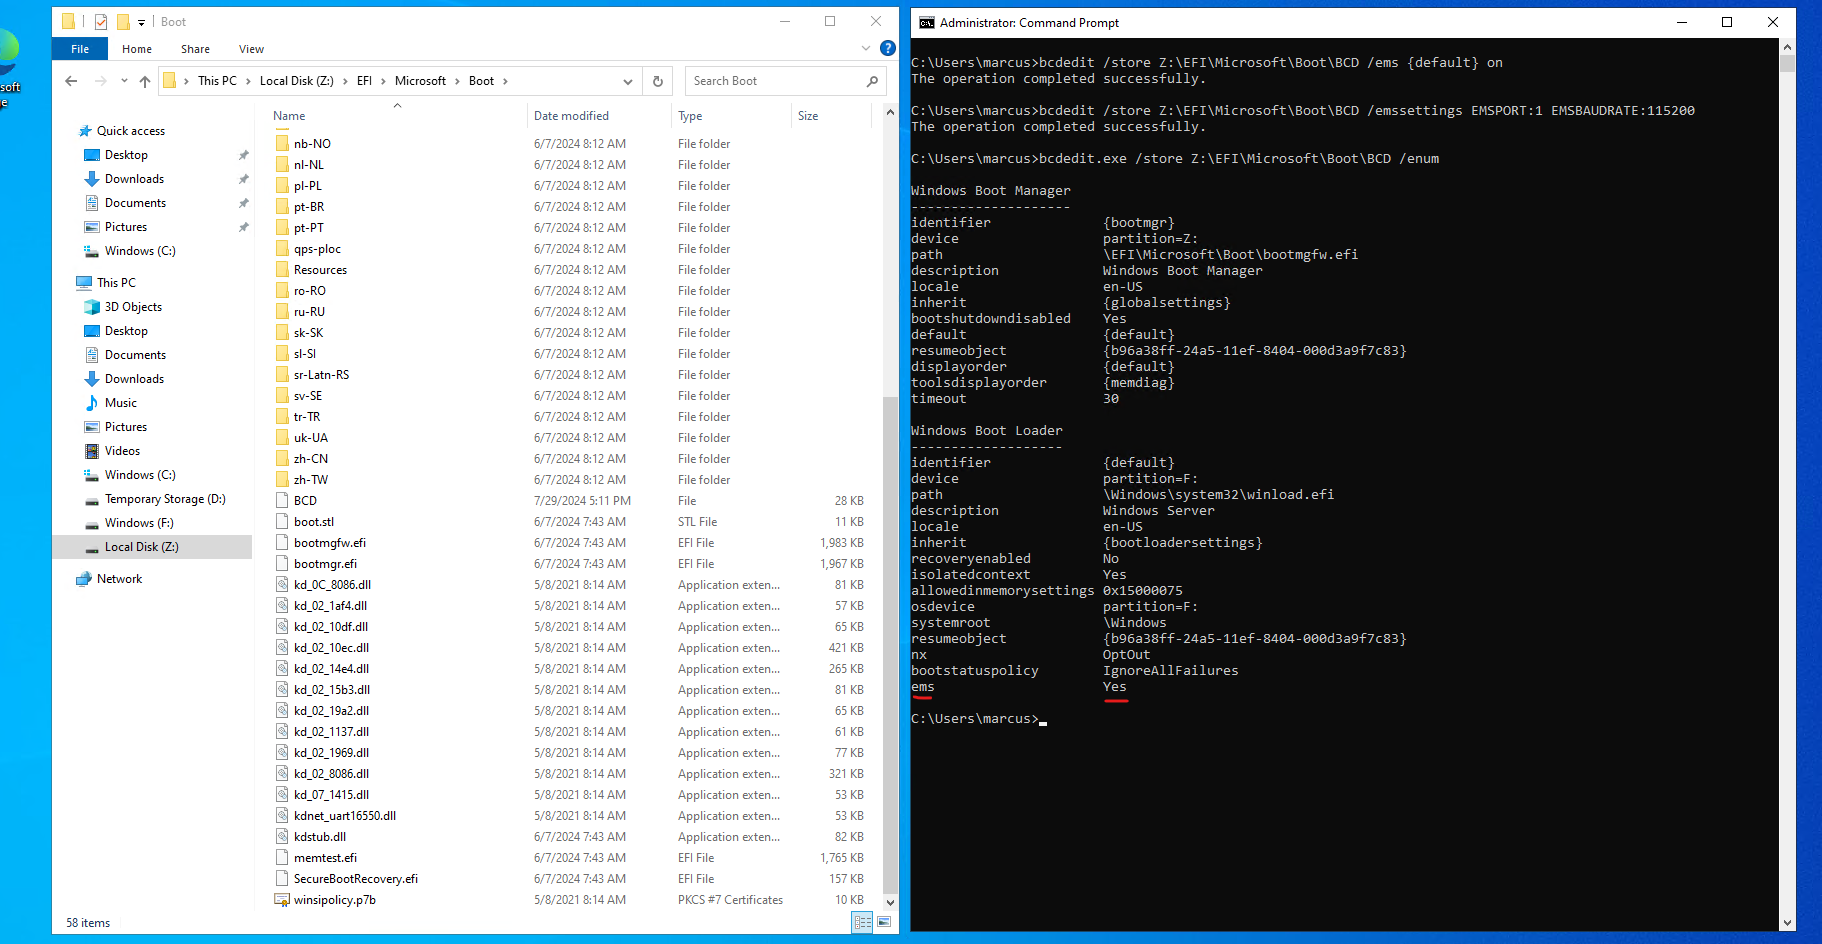
Detach the OS Disk
We can now detach the modified OS disk (here in my case the EFI boot partition) from our repair VM. Locate the row for the associated disk name under Data Disks, select the disconnect icon at the right side of that row and click on Apply.

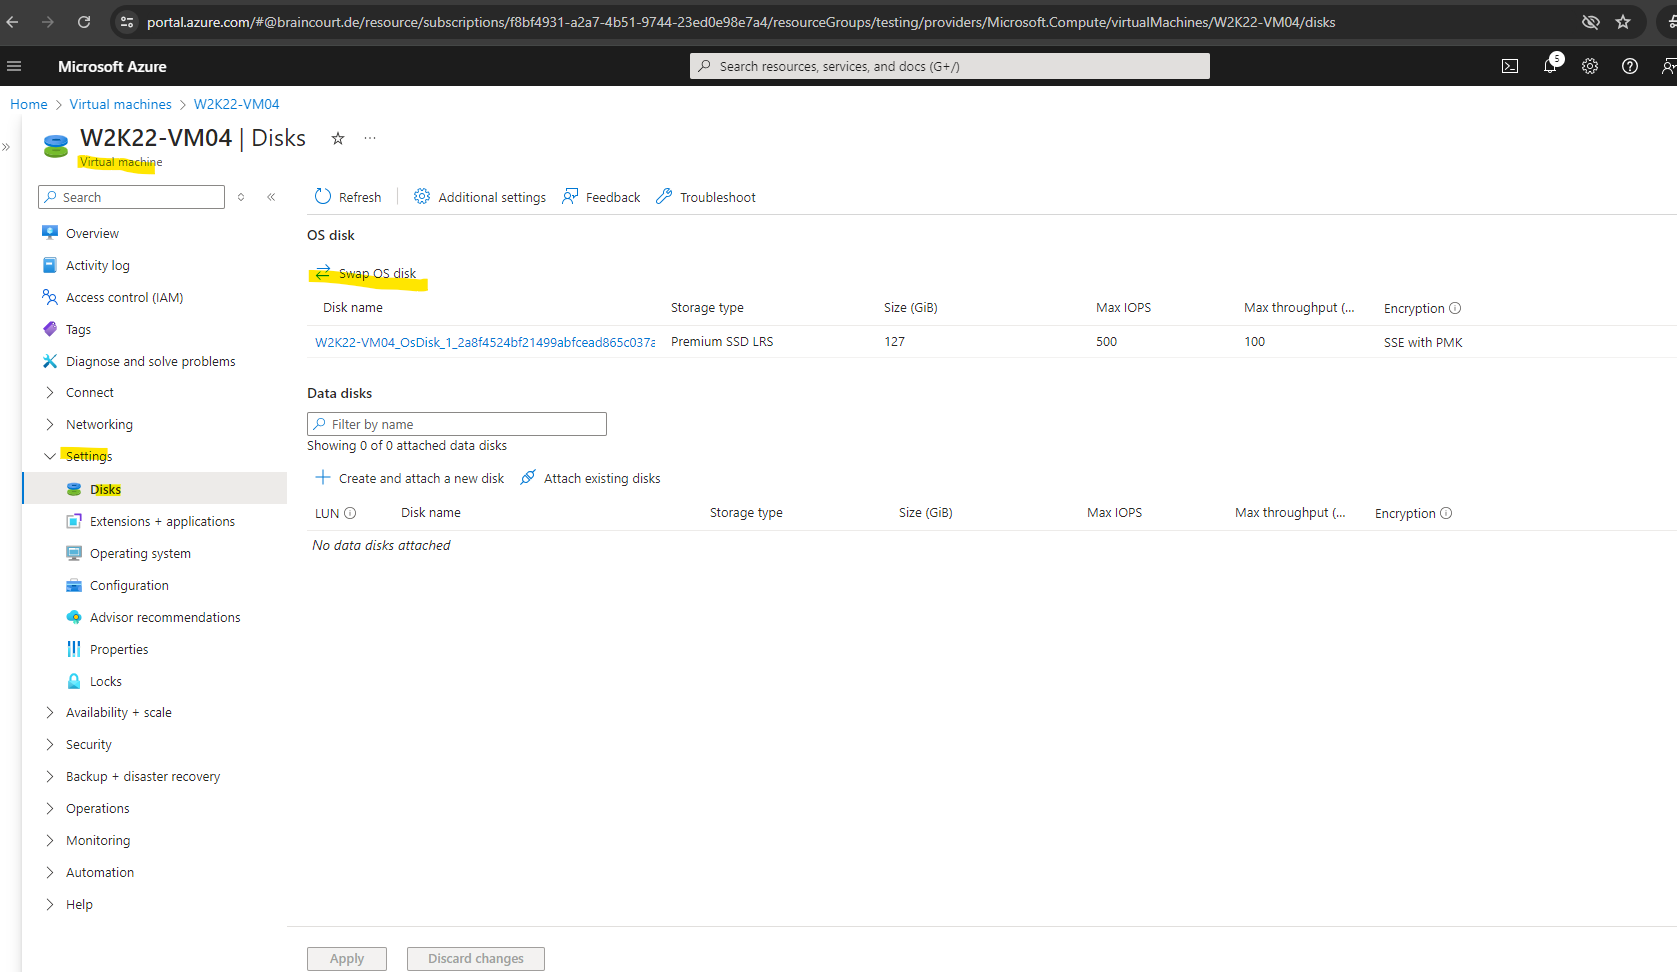
Replacing the existing OS Disk on the failed VM with the repaired OS Disk
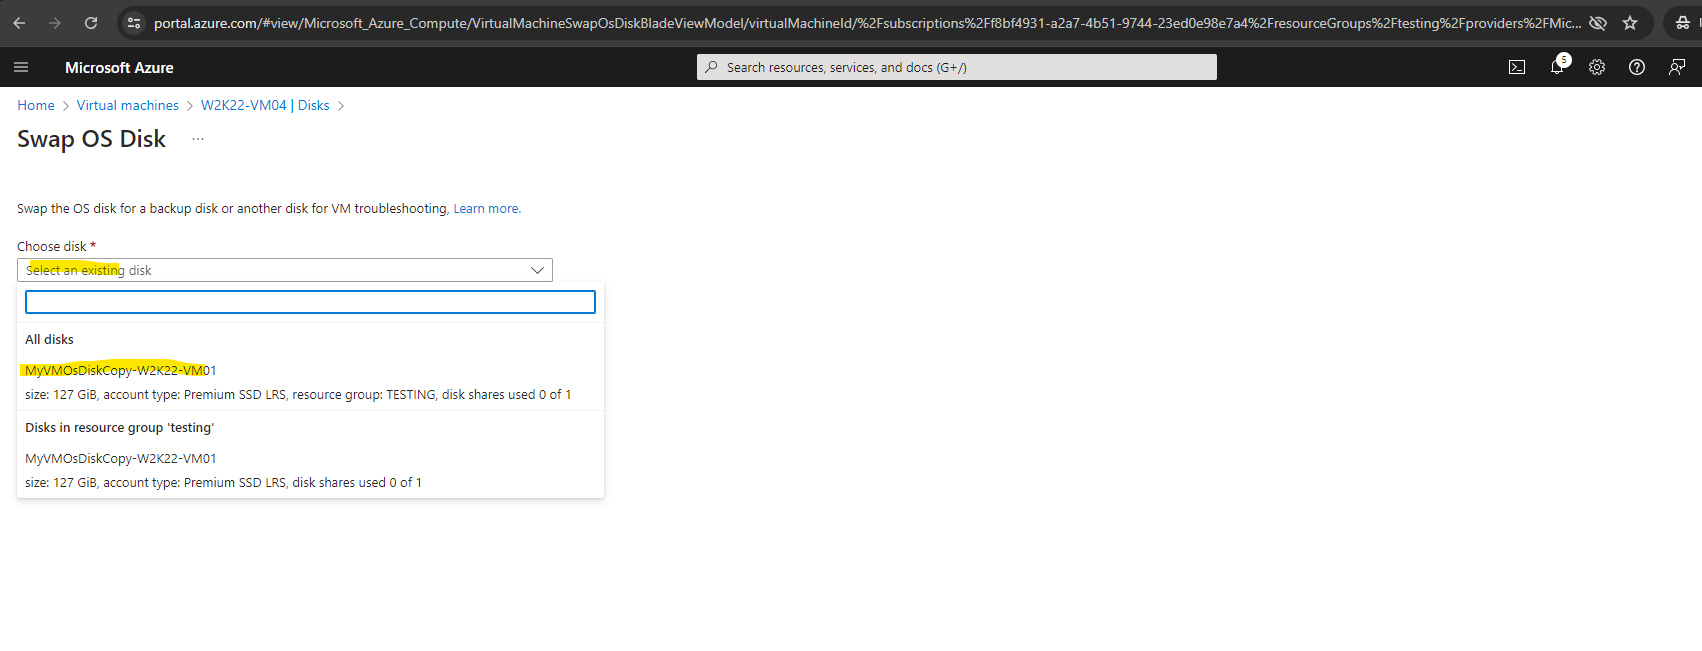
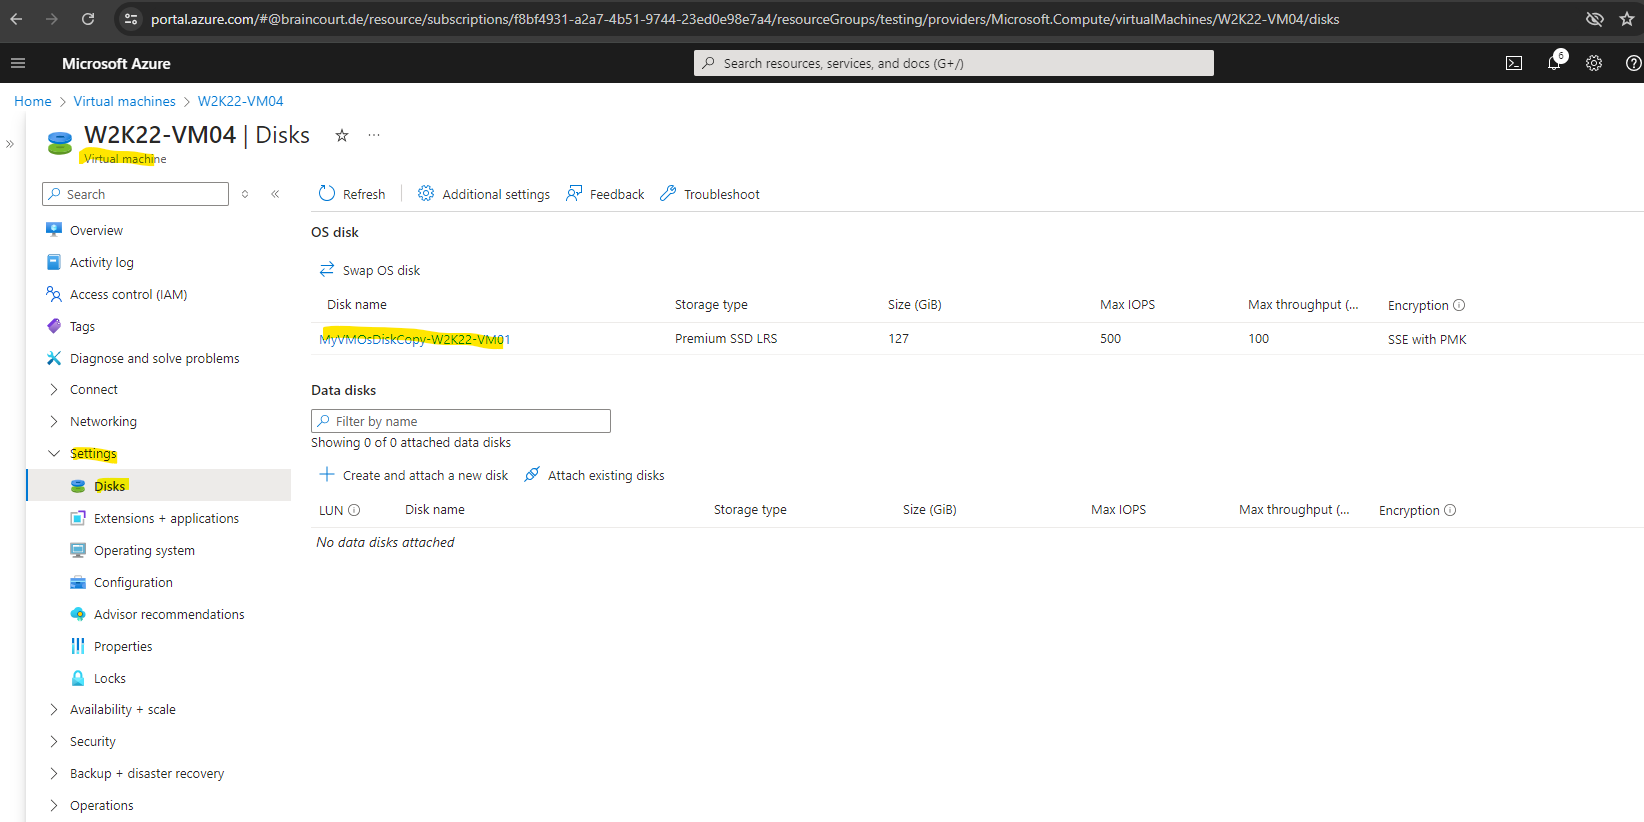
In the Azure portal, we now navigate to the source (failed) VM and open the Disks blade. Click Swap OS disk to replace the existing OS disk with the one you have just repaired.
Choose the new disk that you repaired, and then enter the name of the VM to confirm the change. If you don’t see the disk in the list below, wait 10 to 15 minutes after you detach the disk from the repair VM.
In my case the swapping was done successfully within seconds.
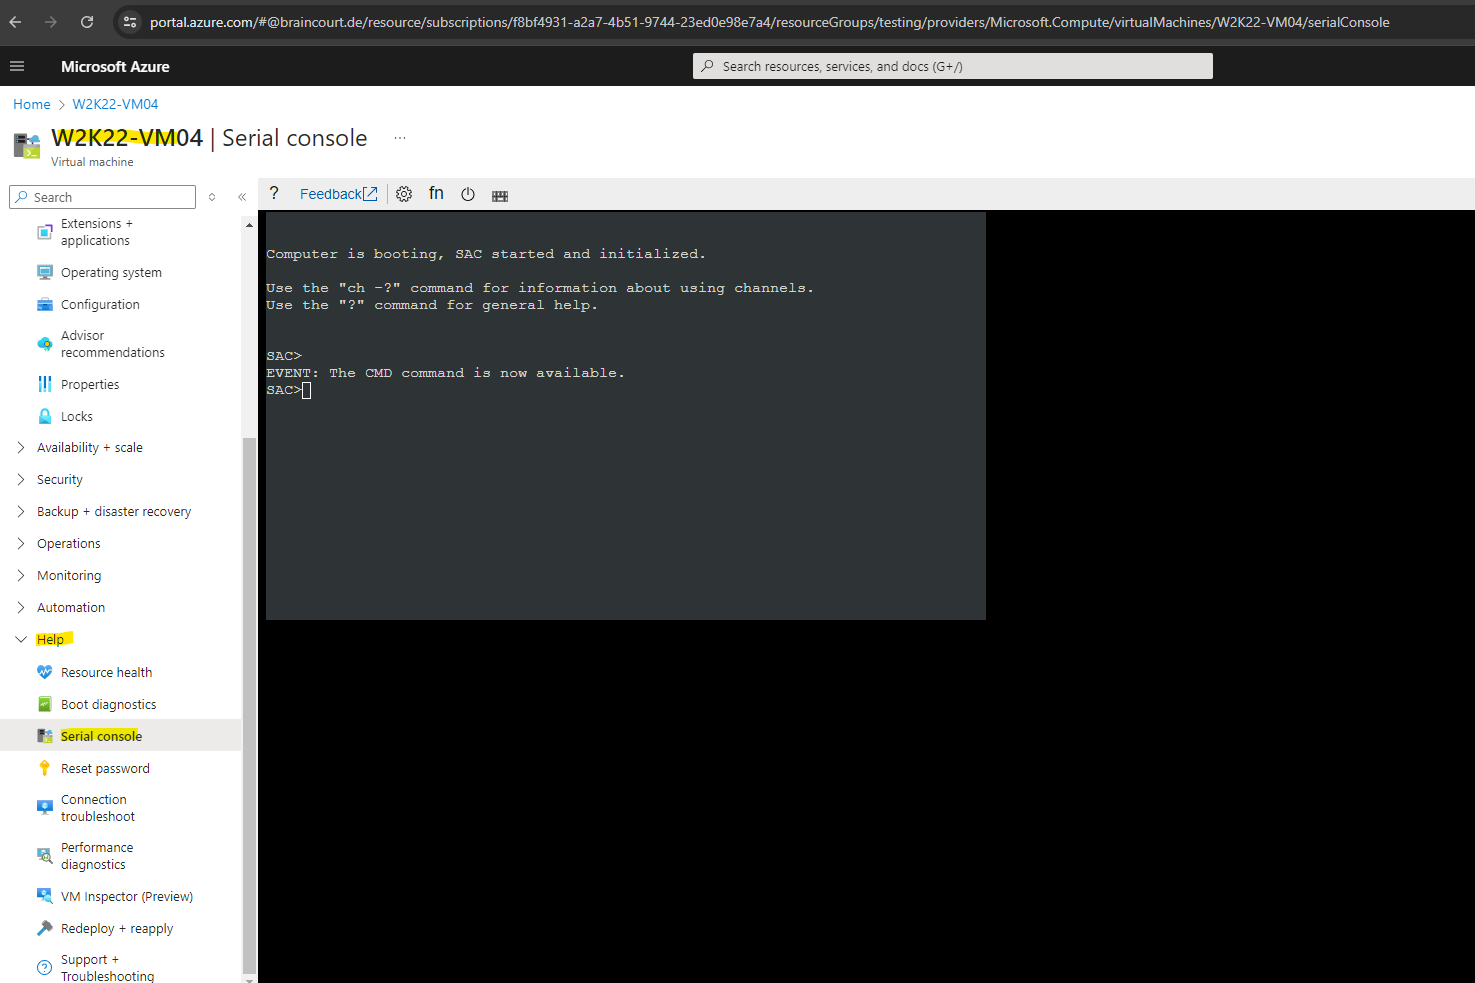
Finally we can start the virtual machine and this time it should boot in normal mode and successfully.
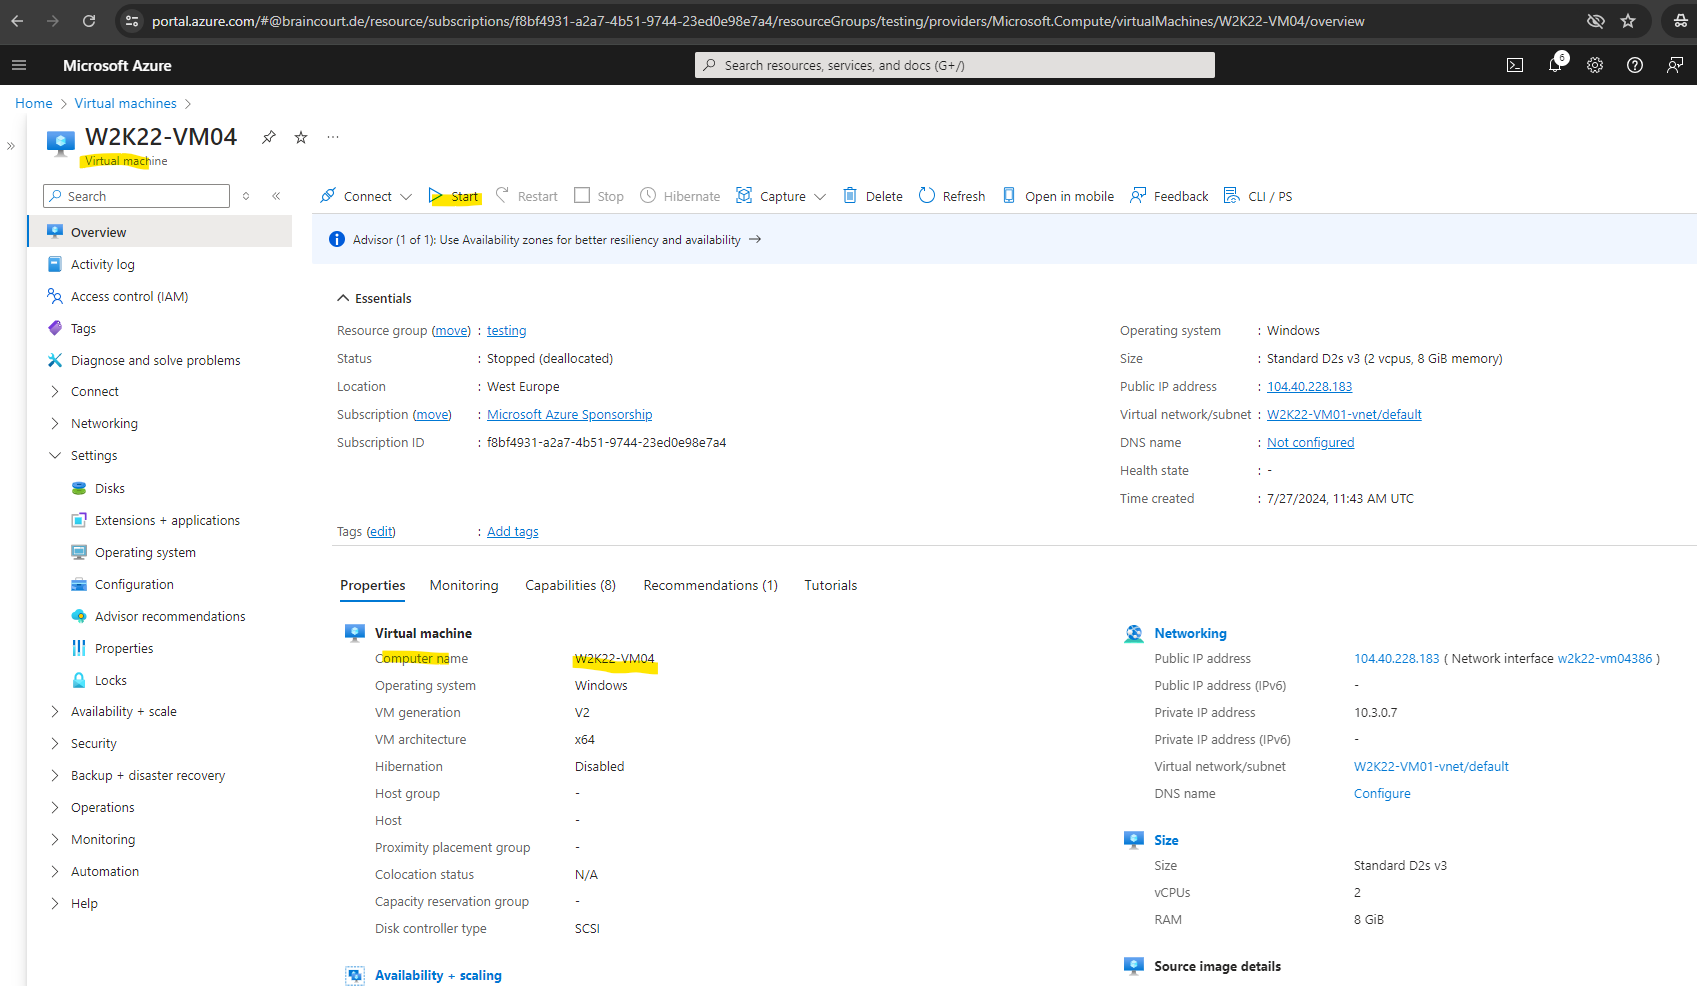
Further the serial console and Special Administration Console (SAC) is enabled.
Links
Troubleshoot a Windows VM by attaching the OS disk to a repair VM through the Azure portal
https://learn.microsoft.com/en-us/troubleshoot/azure/virtual-machines/windows/troubleshoot-recovery-disks-portal-windowsCannot RDP to a VM because the VM boots into Safe Mode
https://learn.microsoft.com/en-us/troubleshoot/azure/virtual-machines/windows/troubleshoot-rdp-safe-mode#repair-the-vm-offline