Mastering Linux NetworkManager and its nmcli
History of the NetworkManager
Key Components
NetworkManager in SUSE Linux
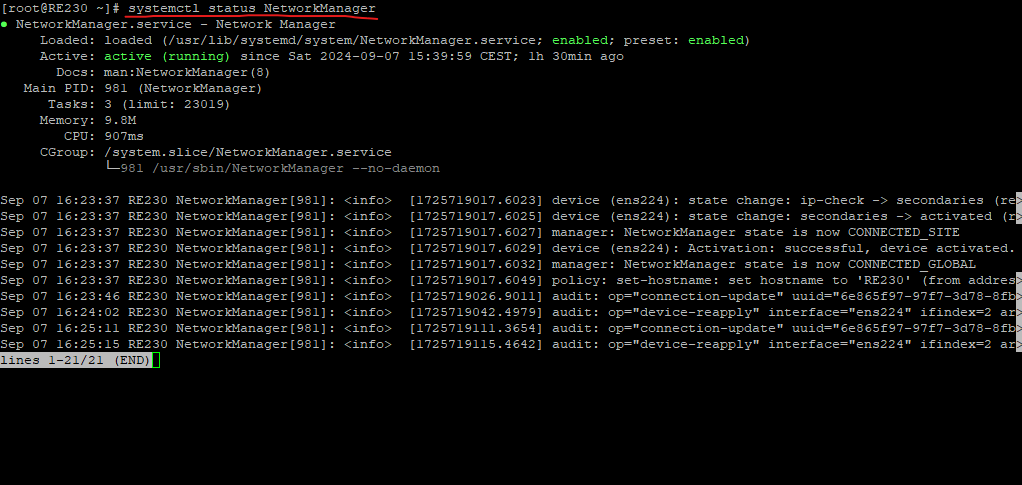
Checking the Status of NetworkManager
# systemctl status NetworkManager
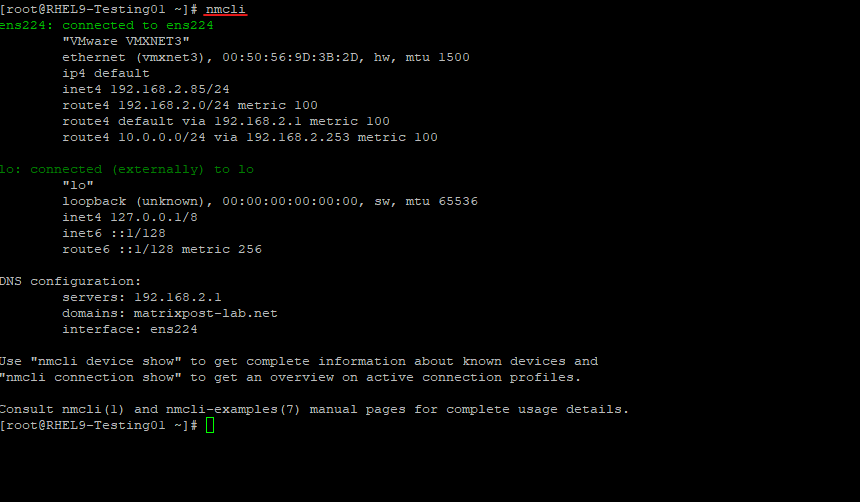
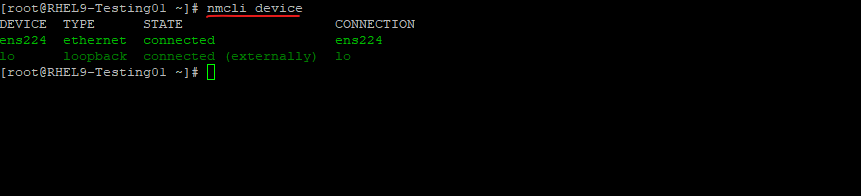
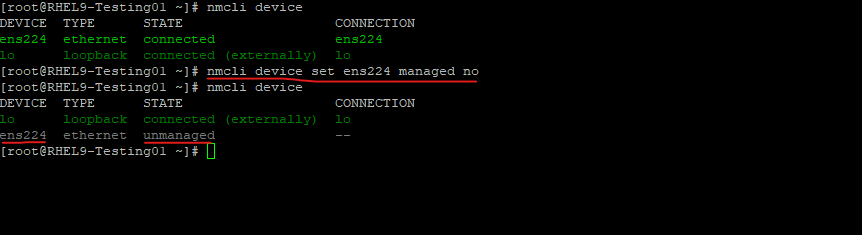
# nmcli device
# nmcli device set <interface_name> managed no
# nmcli device set ens224 managed no
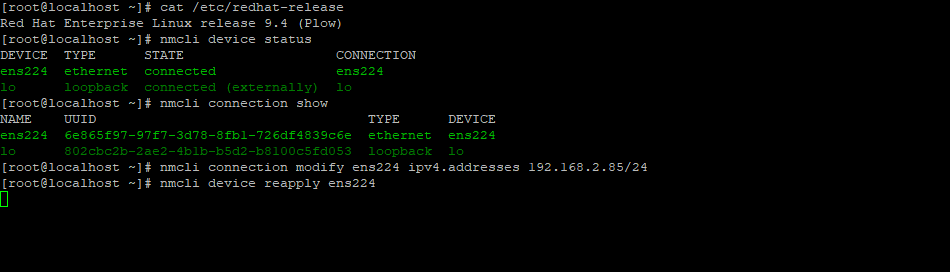
Change IP Address and Subnet Mask by using the nmcli
# nmcli device status
# nmcli connection show

# sudo nmcli connection modify <connection_name> ipv4.addresses <xxx.xxx.xxx.xxx/xx>
# sudo nmcli connection modify ens224 ipv4.addresses 192.168.2.85/24

# sudo nmcli device reapply <interface_name>
# sudo nmcli device reapply ens224
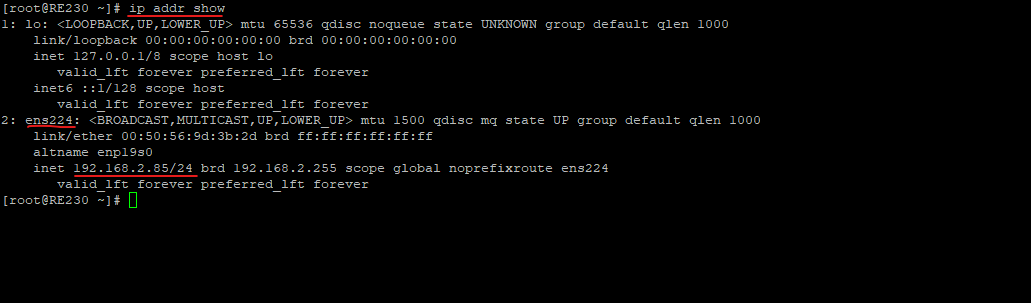
Check if the new IP address and subnet mask was correctly applied.
# ip addr show
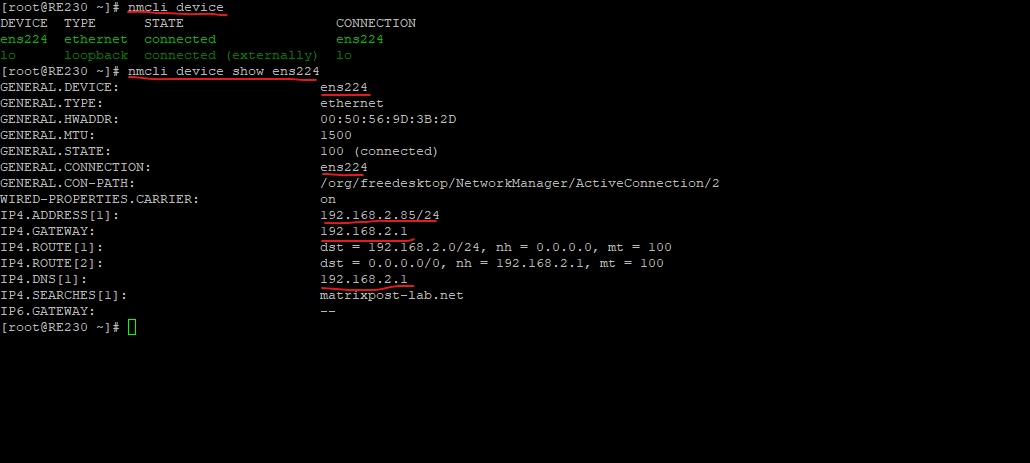
List devices managed by NetworkManager
# nmcli device

List details for all devices
# nmcli device show

List details for a given device
# nmcli device <interface_name>
# nmcli device ens224
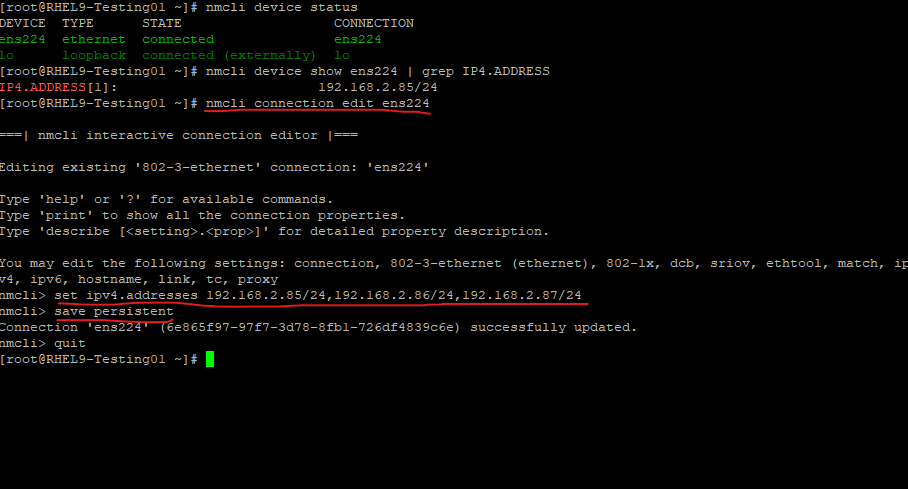
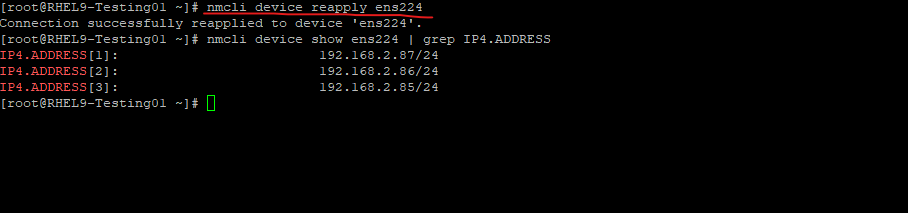
Assign multiple IP addresses to a single Network Interface
# nmcli device status

# nmcli connection edit <connection_name>
# nmcli connection edit ens224

nmcli> set ipv4.addresses 192.168.2.85/24,192.168.2.86/24,192.168.2.87/24
nmcli> save persistent
nmcli> quit
# sudo nmcli device reapply <interface_name>
# sudo nmcli device reapply ens224
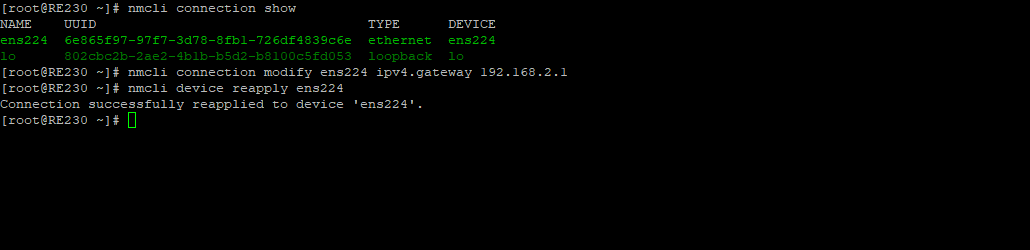
Change the Default Gateway by using the nmcli
# nmcli connection modify <connection_name> ipv4.gateway <IPv4_gateway_address>
# nmcli connection modify <connection_name> ipv6.gateway <IPv6_gateway_address>

# nmcli connection modify ens224 ipv4.gateway 192.168.2.1

In order the changes to take effect we can either reapply the settings or restart the network connection
# nmcli device reapply <interface_name>
# nmcli device reapply ens224

or

Restart network connection
# nmcli connection up <connection_name>
# nmcli connection up ens224
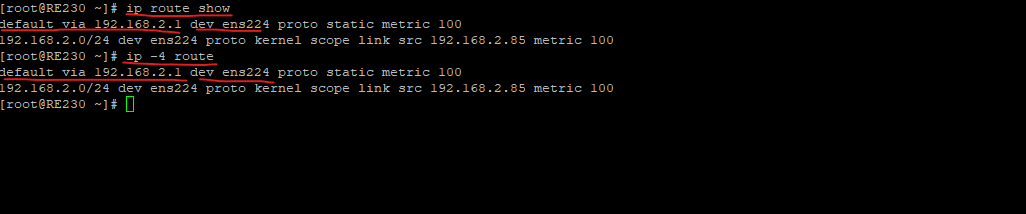
# ip route show

or

# ip -4 route
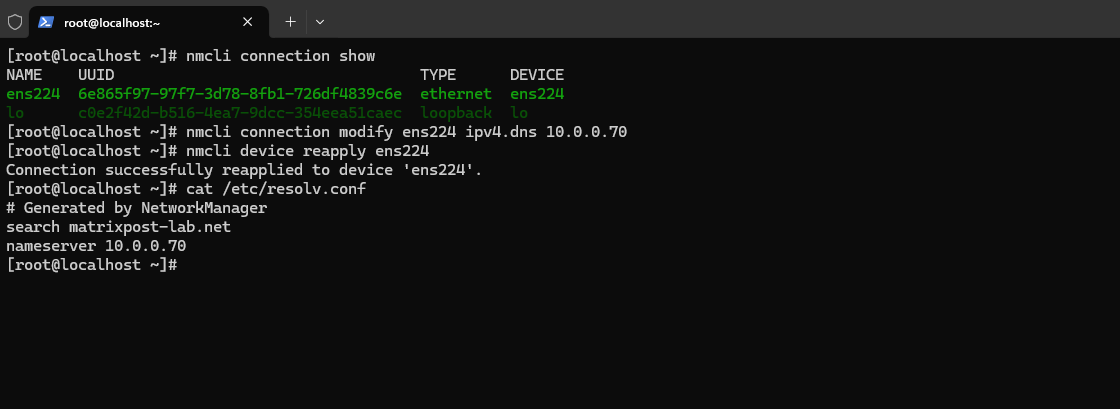
Change DNS Server by using the nmcli
To set or change the IPv4 DNS Server, enter:
# nmcli connection modify <connection name> ipv4.dns <"8.8.8.8 8.8.4.4">
# nmcli connection modify ens224 ipv4.dns 10.0.0.70

In order the changes to take effect we can either reapply the settings or restart the network connection
# nmcli device reapply <interface_name>
# nmcli device reapply ens224
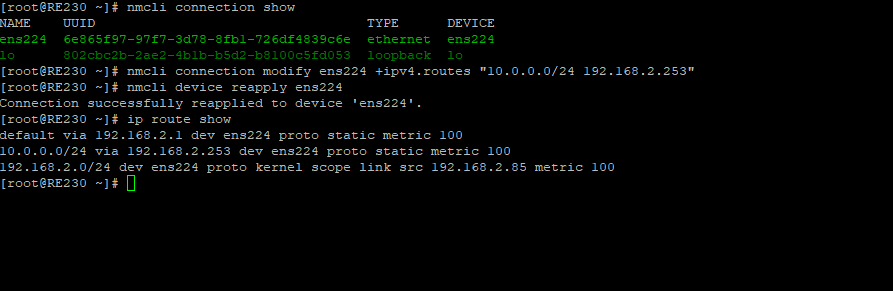
Configuring Static Routes Using nmcli
nmcli connection modify <connection_name> +ipv4.routes "<destination subnet> <IPv4_gateway_address>"
# nmcli connection modify ens224 +ipv4.routes "10.0.0.0/24 192.168.2.253"
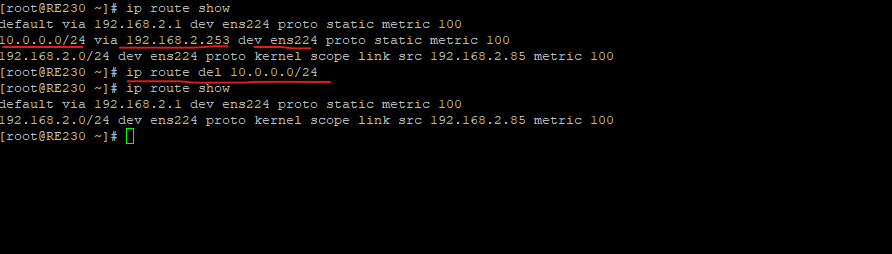
Delete a static route
# ip route del 10.0.0.0/24

To delete default route run:
# sudo ip route del default
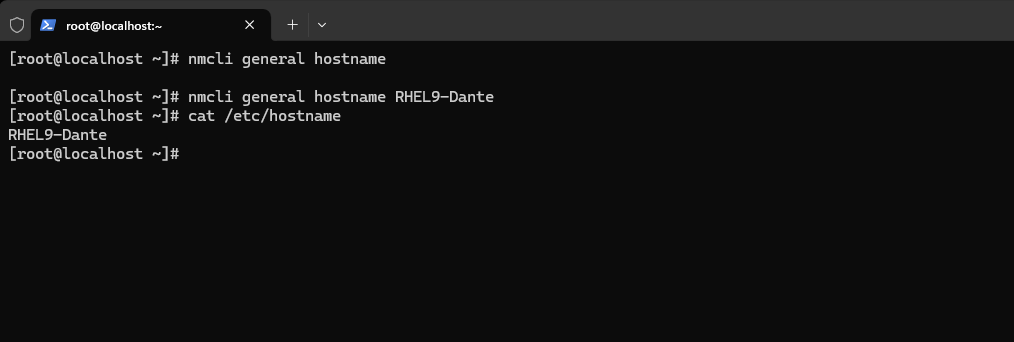
Configuring Host Names Using nmcli
To query the static host name, issue the following command:
# nmcli general hostname

To set the static host name to my-server, issue the following command as root:
# nmcli general hostname my-server
Using the nmcli Interactive Mode to configure the Network
Open the nmcli interactive mode for the required connection:
# nmcli connection edit <connection_name>

We are now in the nmcli shell:
nmcli> set ipv4.gateway <IPv4_gateway_address>
nmcli> set ipv6.gateway <IPv6_gateway_address>

verify the changes:
nmcli> print

Save the configuration:
nmcli> save persistent

Restart the network connection for changes to take effect:
nmcli> activate <connection_name>

Leave the nmcli interactive mode:
nmcli> quit
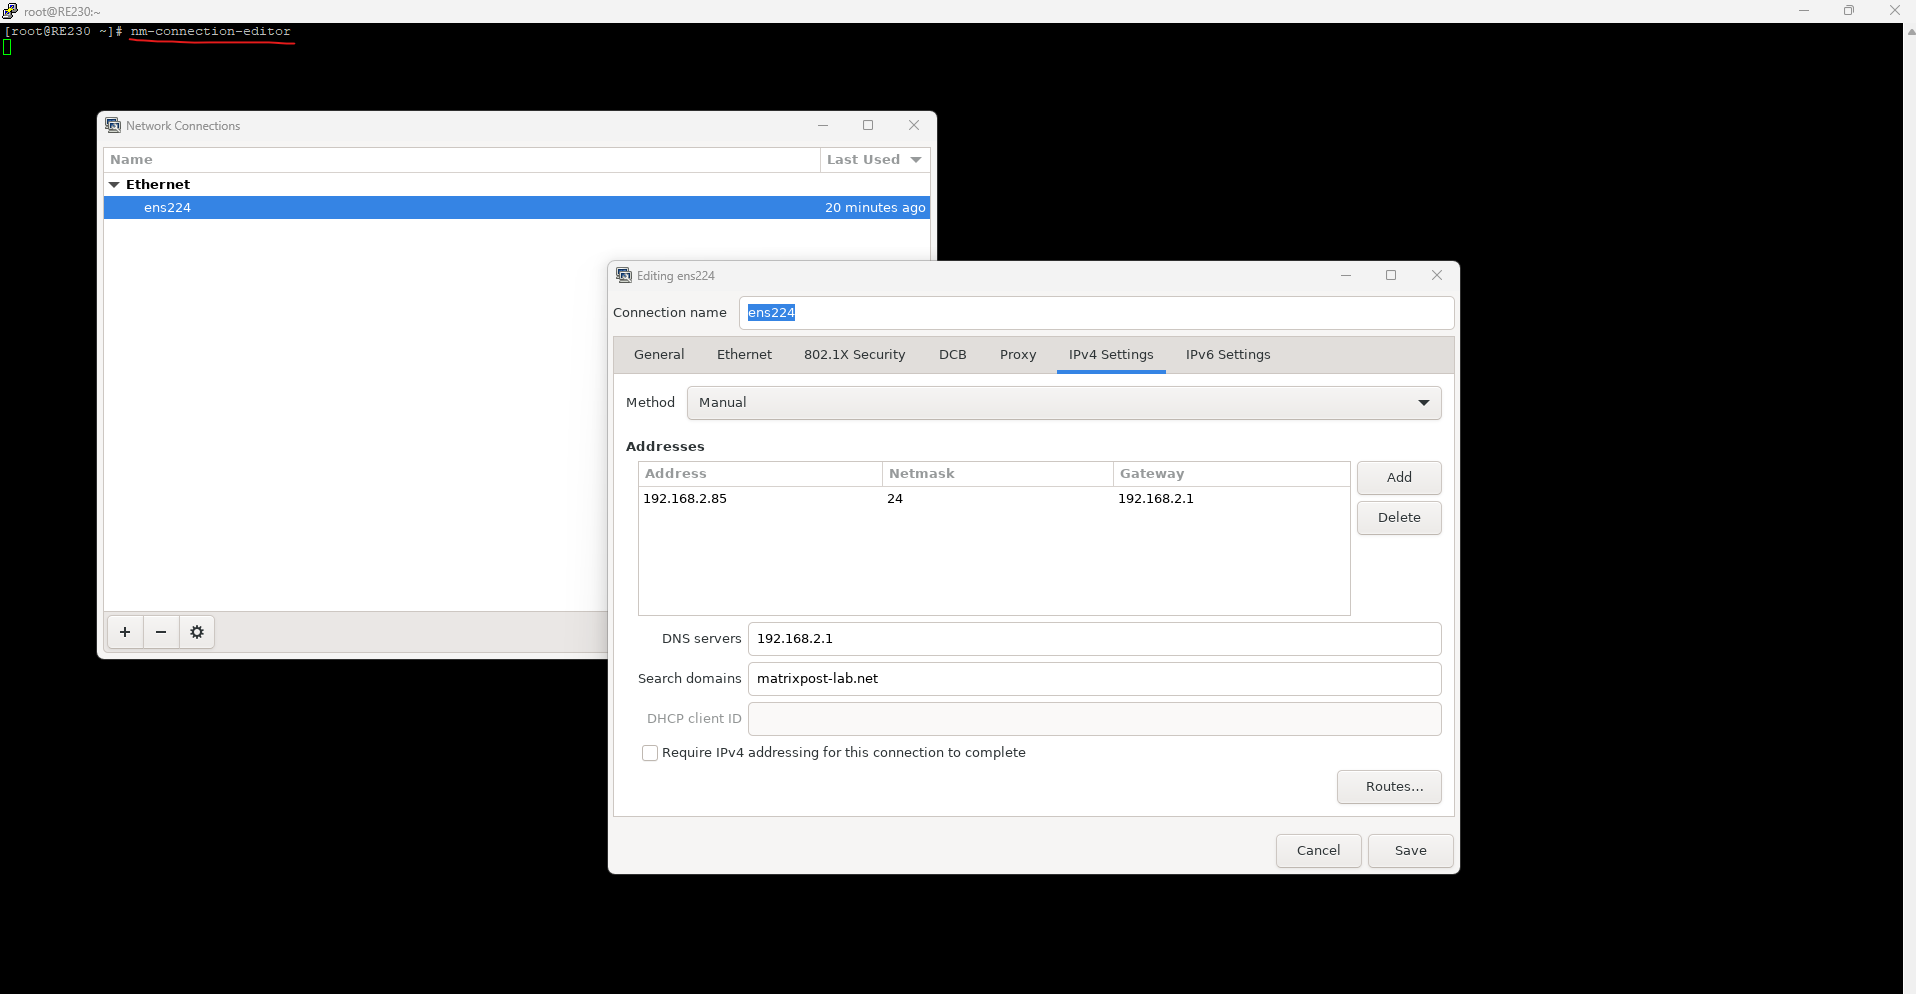
Using the nm-connection-editor to configure the Network
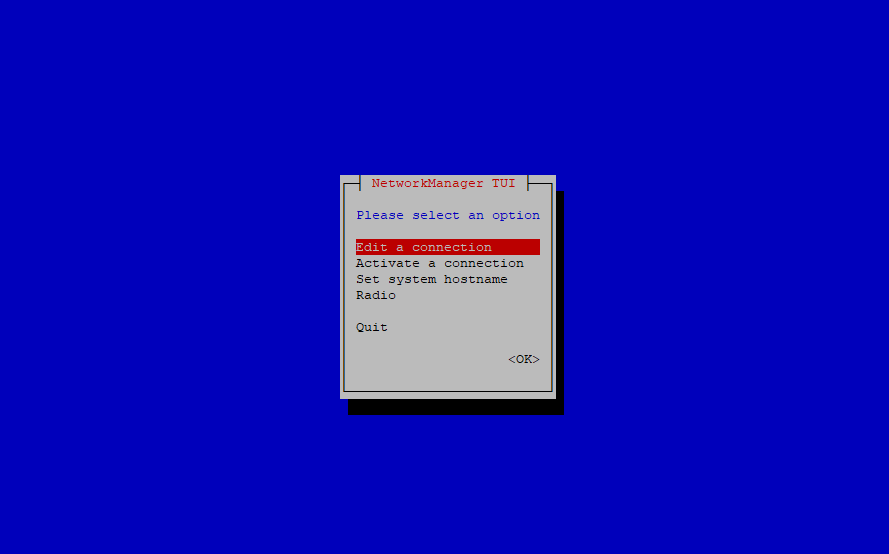
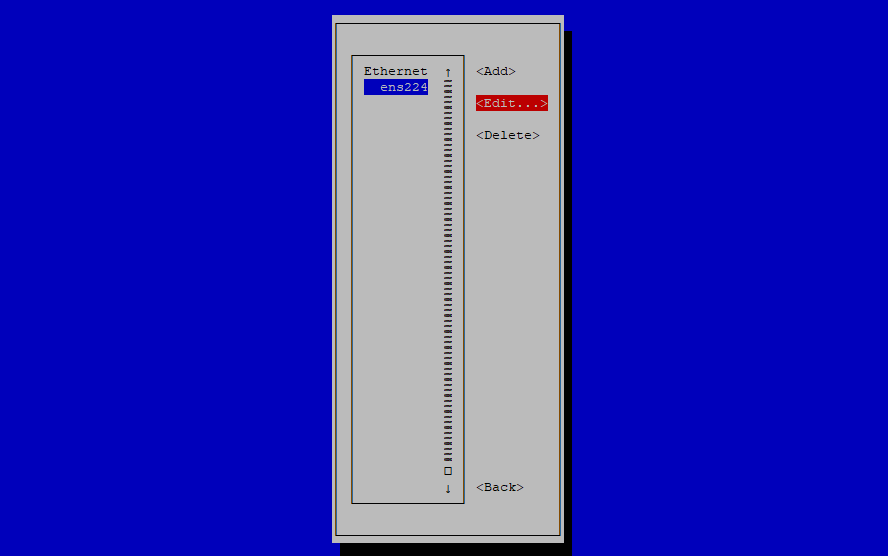
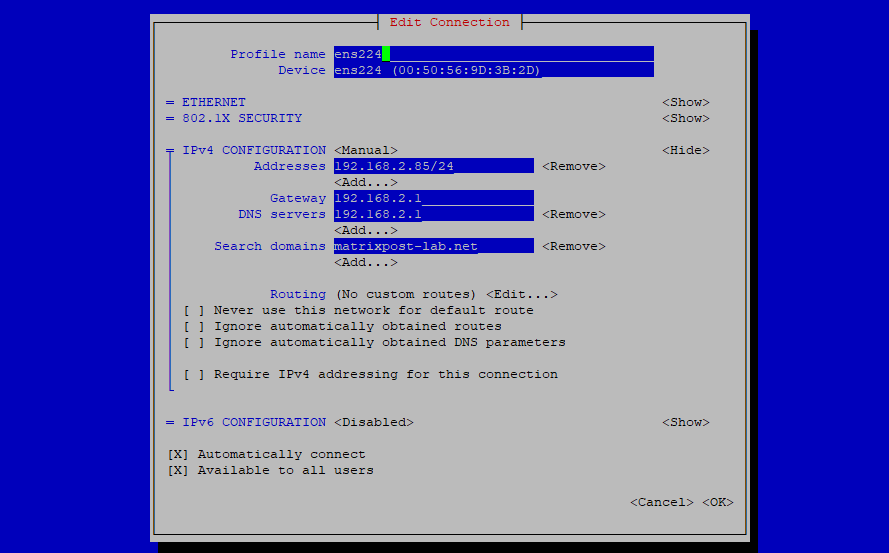
Using the nmtui tool to configure the Network
# yum install NetworkManager-tui
# nmtui
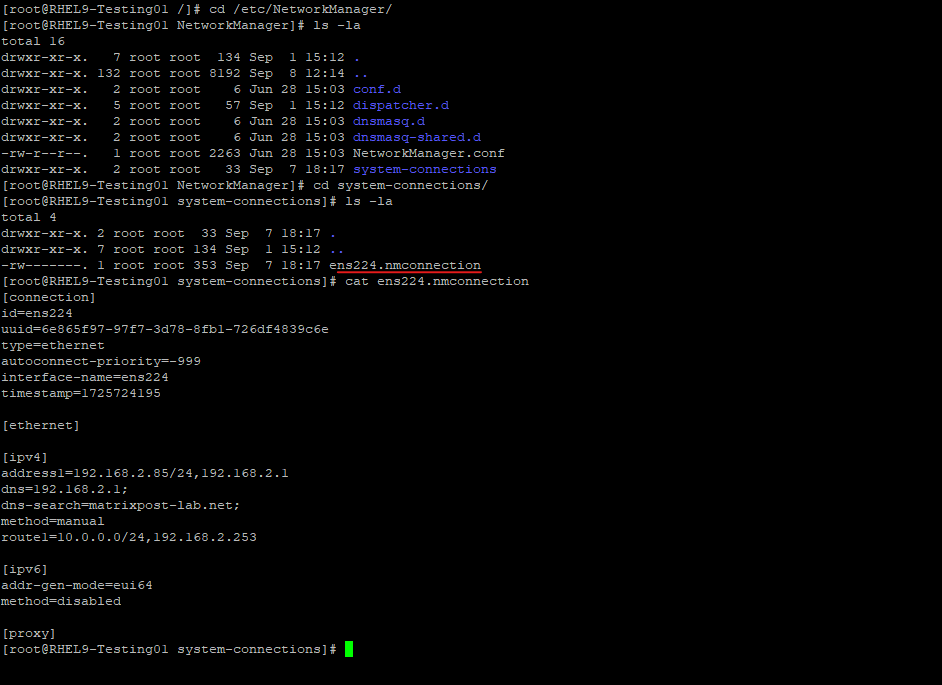
Where does NetworkManager store the Configuration
# nmcli connection migrate
# nmcli connection migrate <profile_name|UUID|D-Bus_path>