Running System Center 2022 Virtual Machine Manager (SCVMM)
In this post I want to show how we can use the System Center 2022 Virtual Machine Manager (SCVMM) to manage, create and running virtual machines on Microsoft Hyper-V.
VMM is part of the System Center suite and supports both Hyper-V and VMware environments, allowing administrators to efficiently handle virtualization tasks across different platforms. It provides robust features for managing virtual machines, hosts, storage, and network resources, all through a unified interface. Key enhancements in this version include improved scalability, enhanced security features, and advanced automation capabilities, making it an essential tool for modern data center management.
Adding Hyper-V Hosts and Clusters to VMM
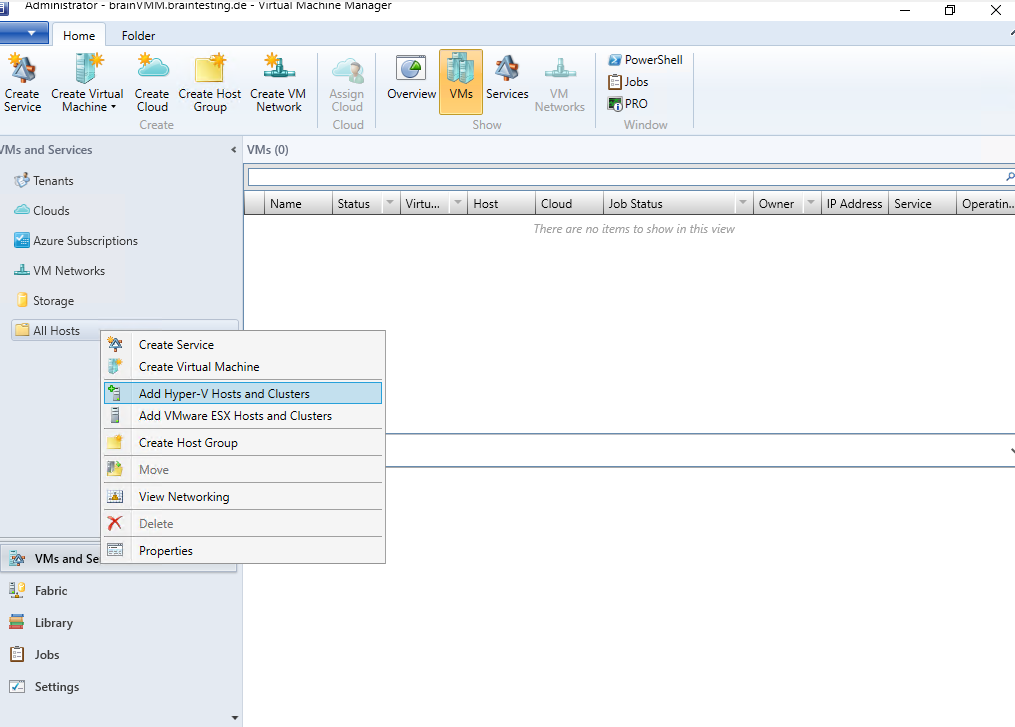
In order to manage Hyper-V cluster nodes in VMM we first need to add them as shown below. Under VMs and Services right click on All Hosts and select Add Hyper-V Hosts and Clusters.
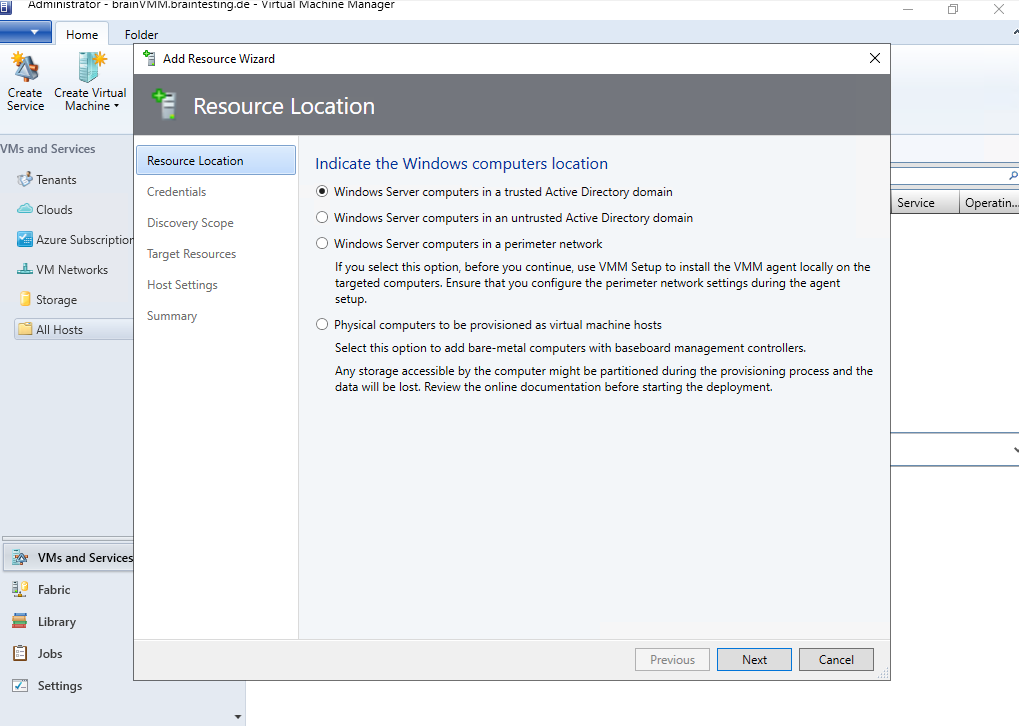
Select Windows Server computers in a trusted Active Directory domain.
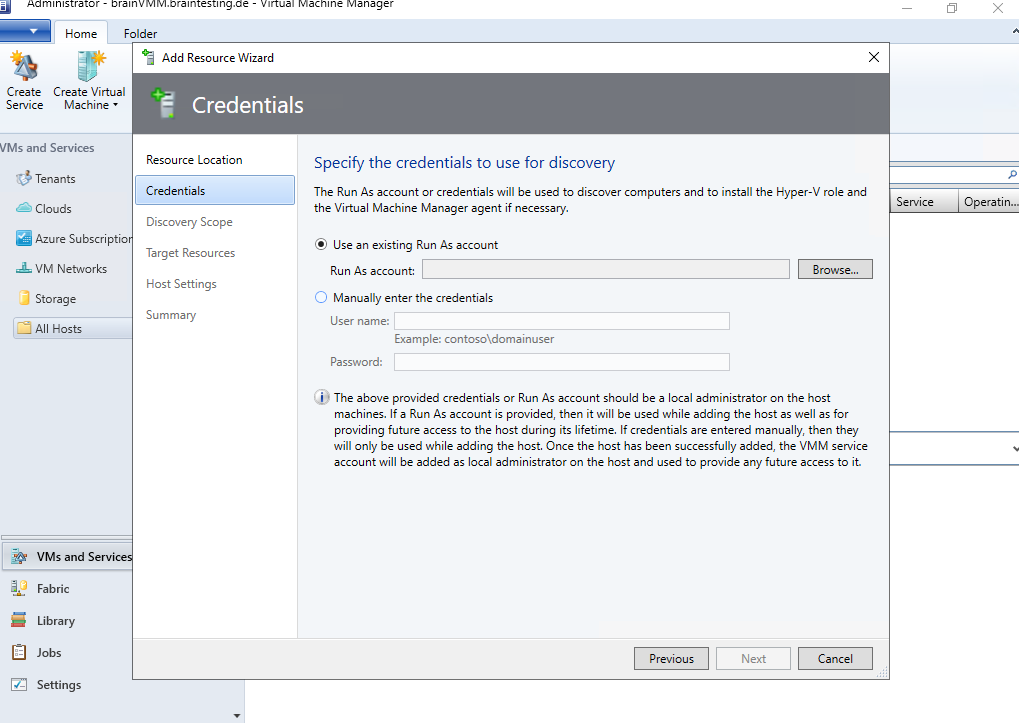
Select or create a Run As account to discover the Hyper-V hosts and cluster.
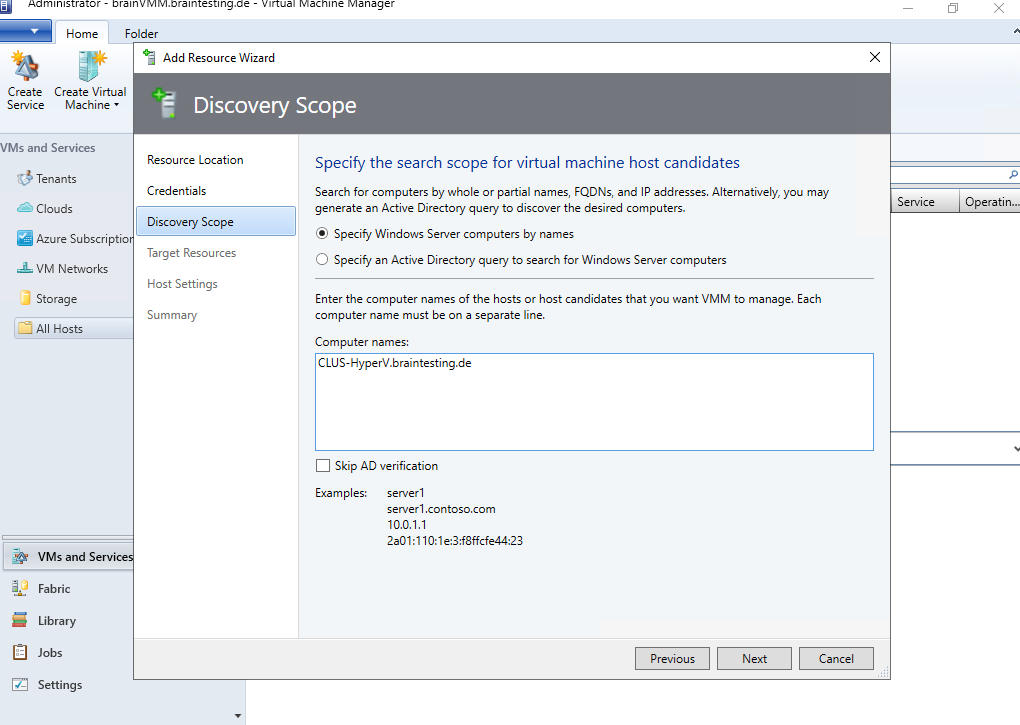
Verify that the ports used by VMM are not blocked by a firewall on the computes you enter to discover. By default, VMM uses the following ports to communicate with the Hyper-V host: TCP ports 443, 5985 and 5986.
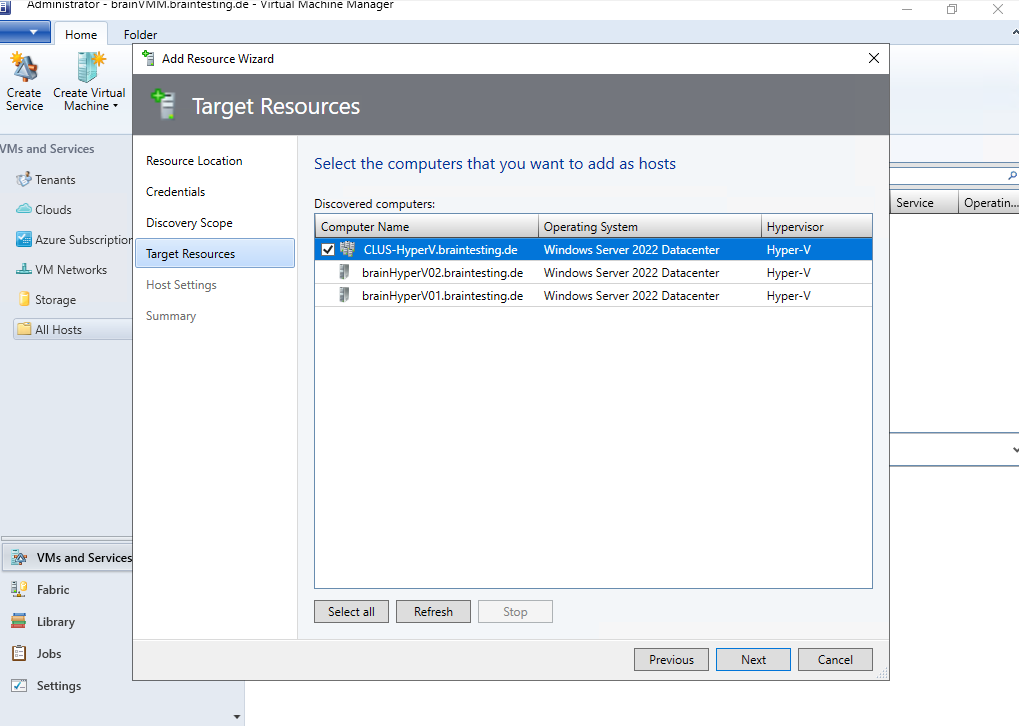
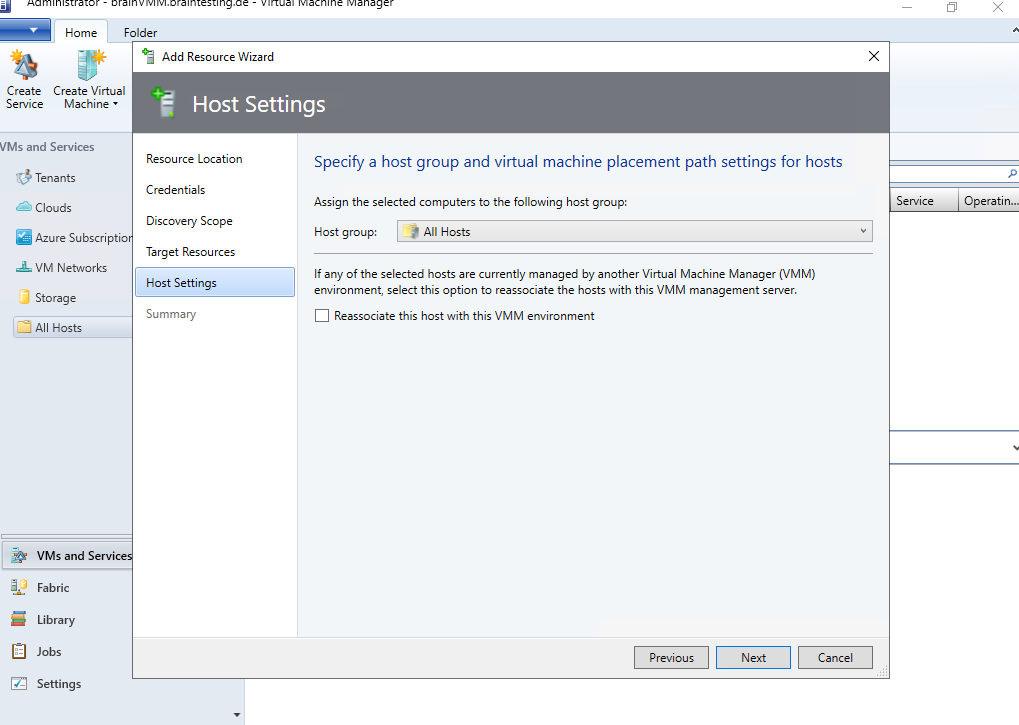
I will add them to the default All Hosts group. We can also create subgroups.
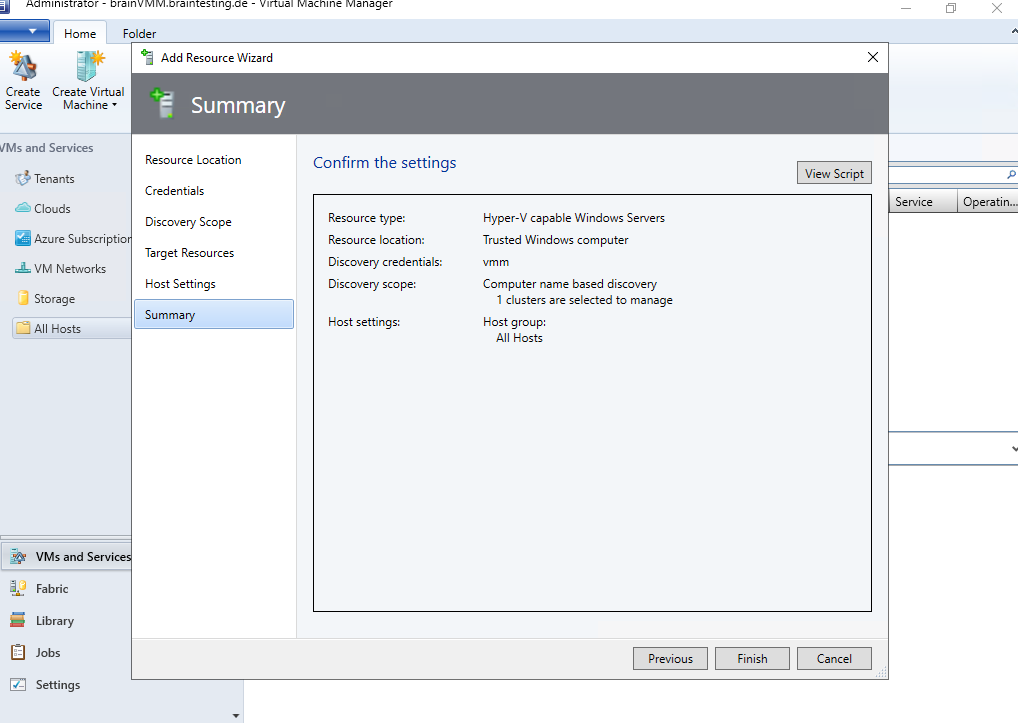
Finally we can click on Finish to add our Hyper-V cluster and its hosts.
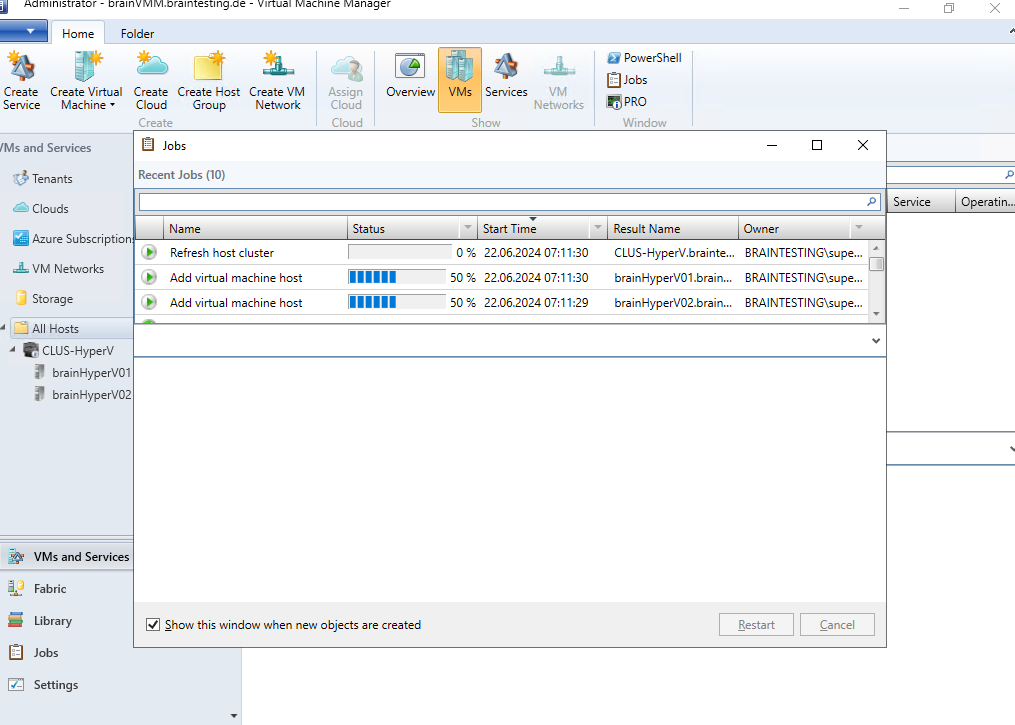
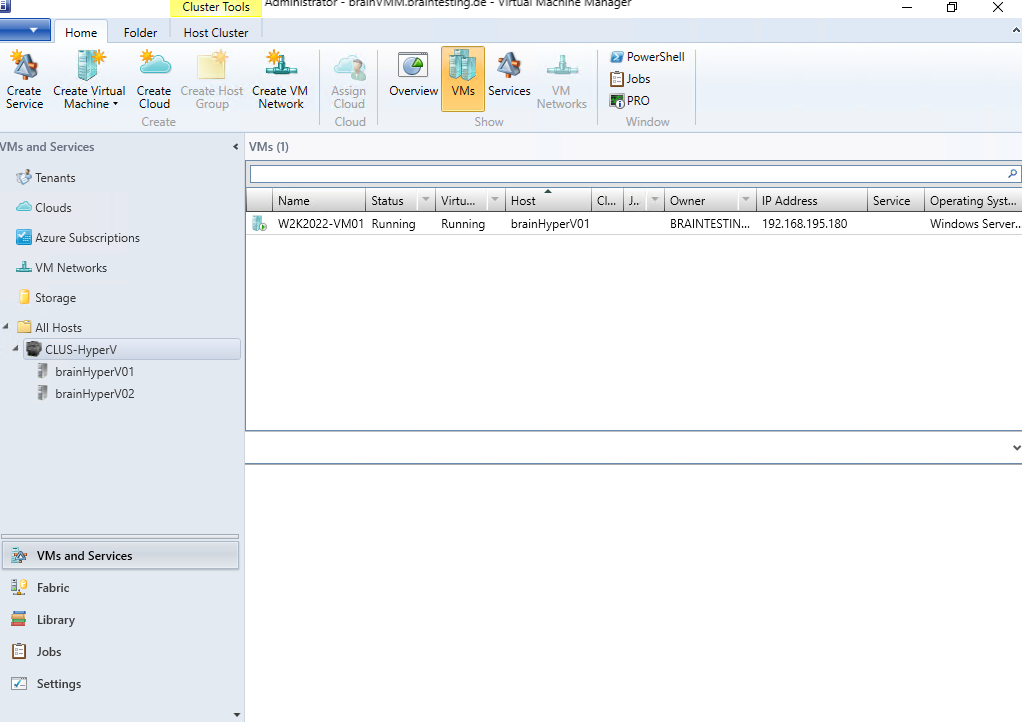
It can take a few minutes before the virtual machines running on the Hyper-V cluster are shown up below.
Create a VM Template
VM templates help you to create VMs with consistent settings. VMM provides two types of templates:
- VM templates are database objects that are stored in the VMM library. They’re used to quickly set up VMs.
- Service templates define how a service is configured. They include information about the VMs that are deployed as part of the service, which applications to install on VMs, and the network settings that should be used. Service templates usually contain VM templates.
There are two methods for creating a VM template:
- From an existing virtual hard disk or VM template in the VMM library.
- From an existing VM deployed on a host.
Source: https://learn.microsoft.com/en-us/system-center/vmm/library-vm-templates?view=sc-vmm-2022
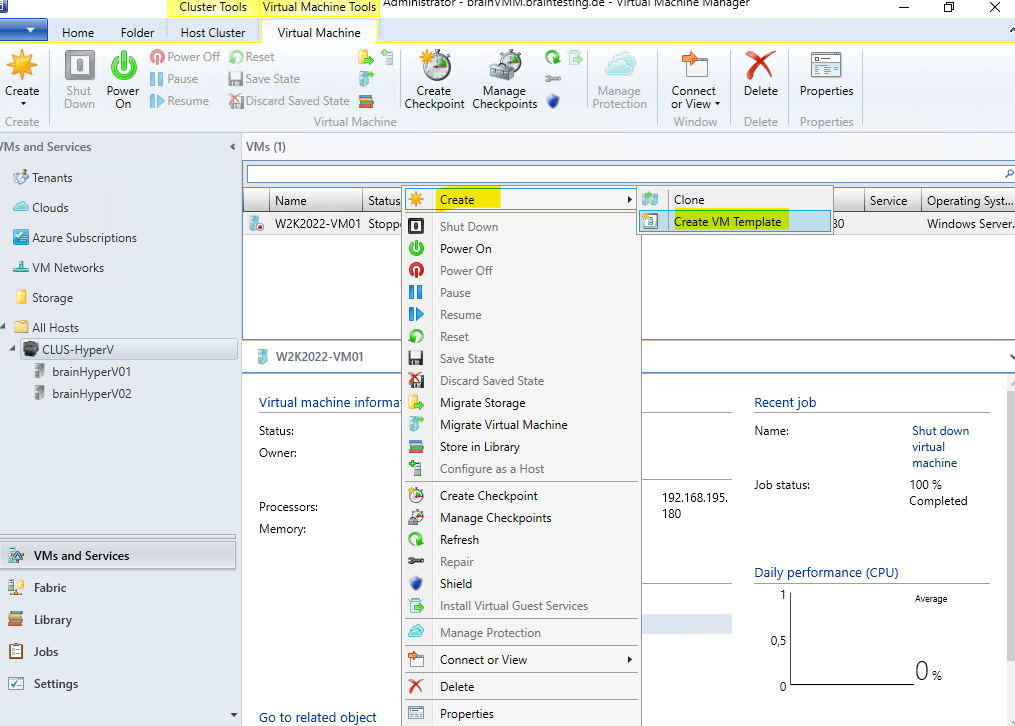
Below I will create a new VM template from an existing VM deployed in my Hyper-V cluster.
The virtual machine you want to use to create a template from must be powered off.
Right click on the virtual machine and select Create -> Create VM Template.
We can also create a new VM template within the Library blade and here click on Create -> Create VM Template.
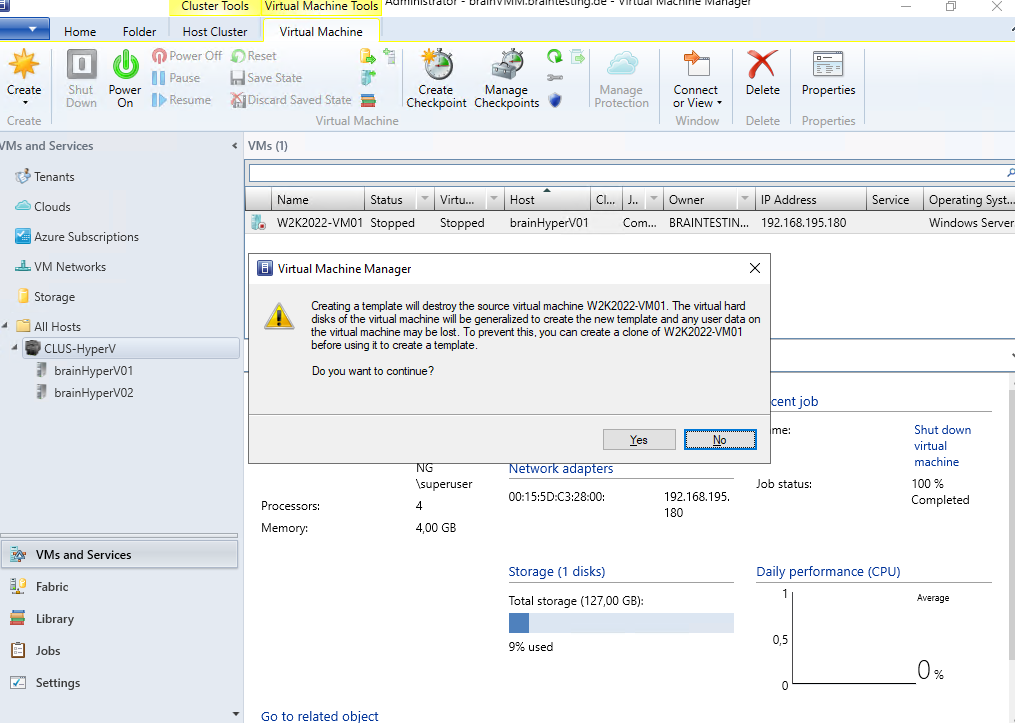
When creating a template from an existing VM deployed on a host, this VM will be destroyed on the host in order to generalize the virtual hard disk of the virtual machine.
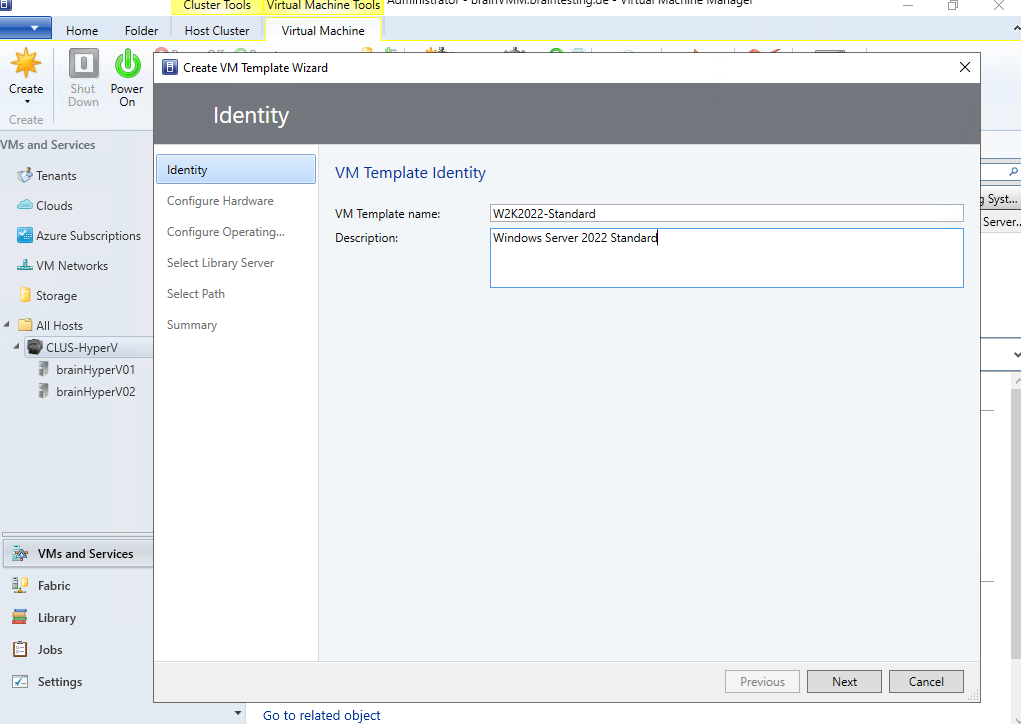
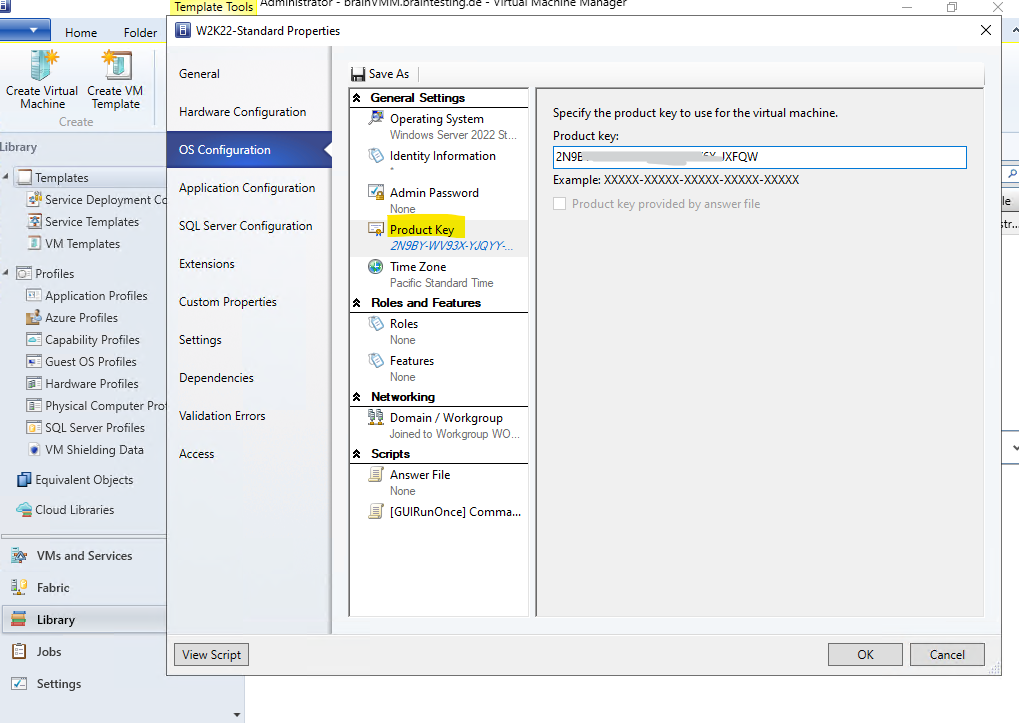
Enter a name for the VM template.
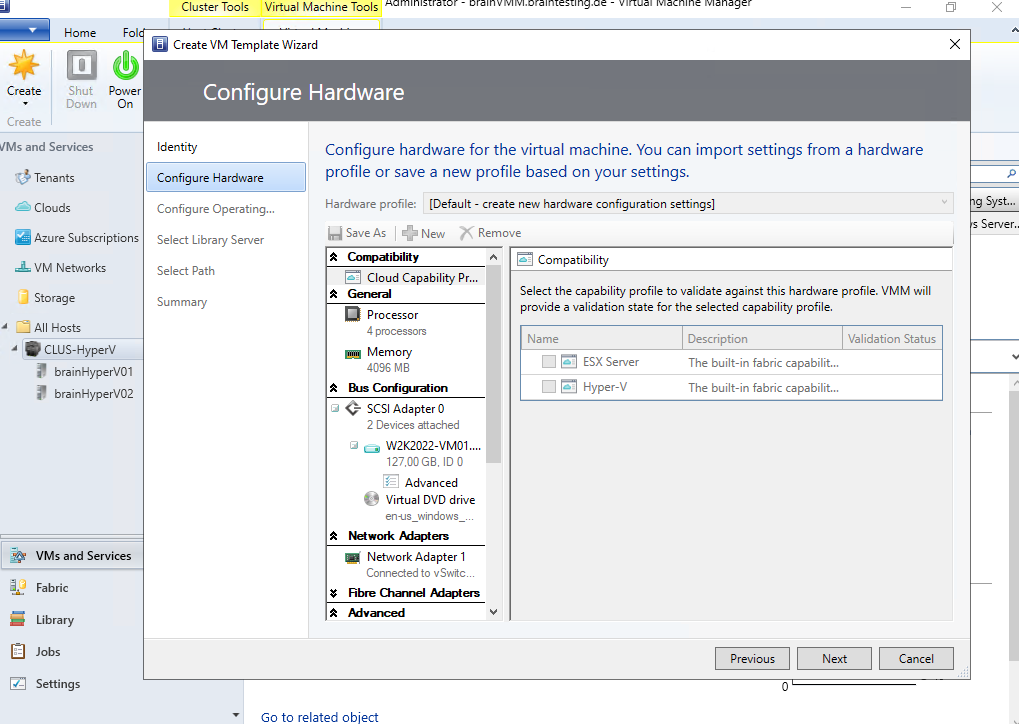
In Configure Hardware, select Next.
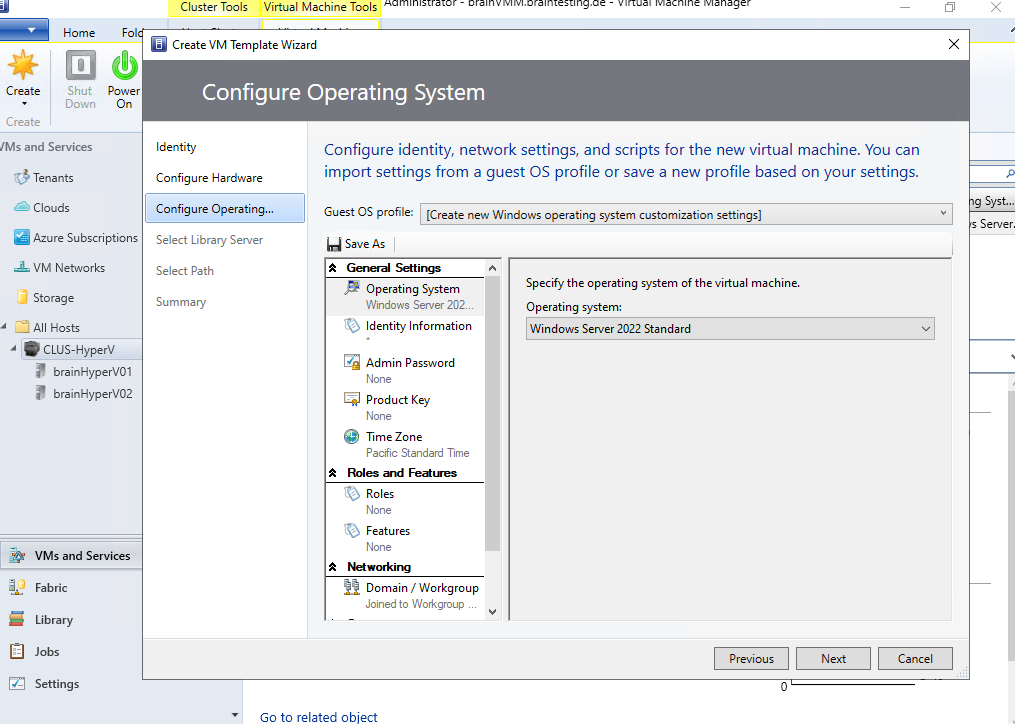
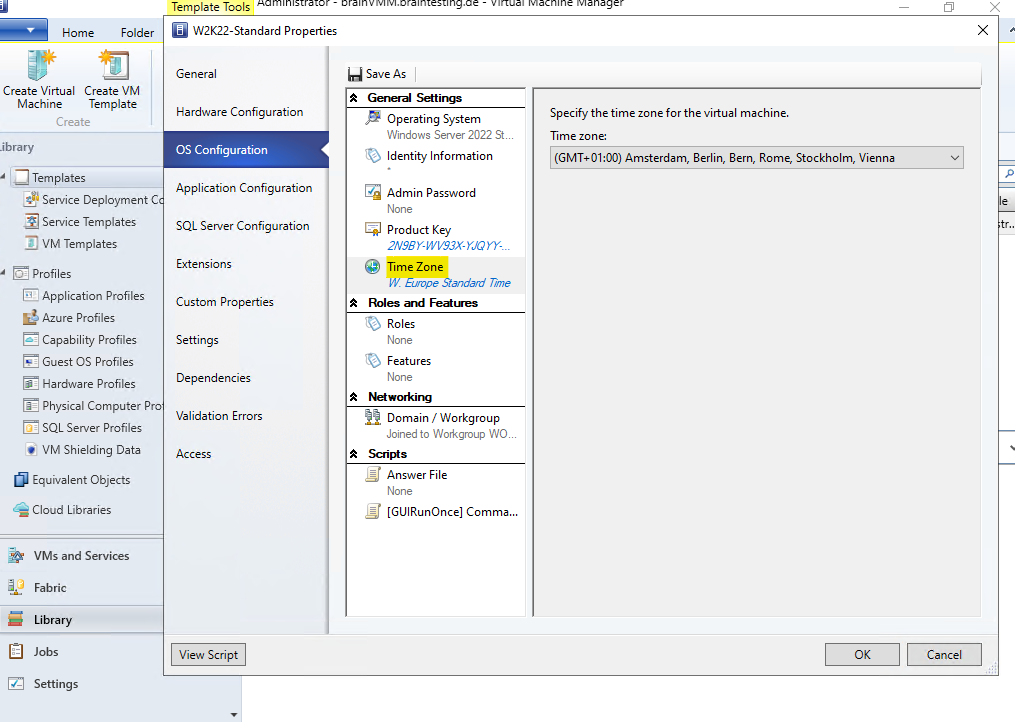
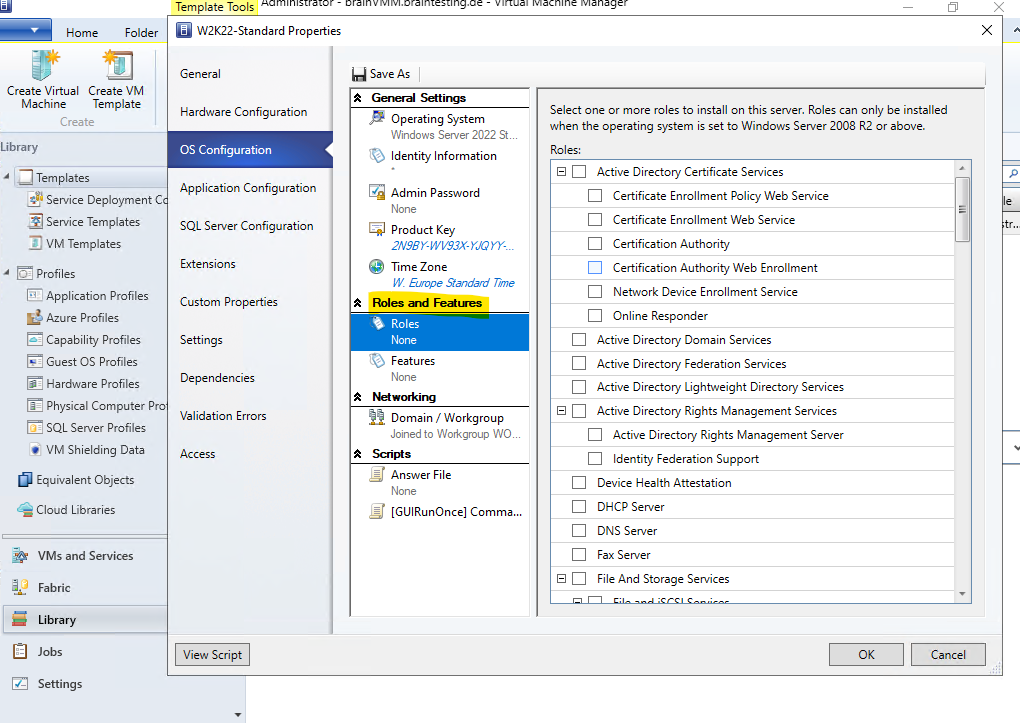
In Configure Operating System, specify the guest operating system settings. You can use a guest OS profile or configure specific settings. To learn more, review how to create a guest OS profile.
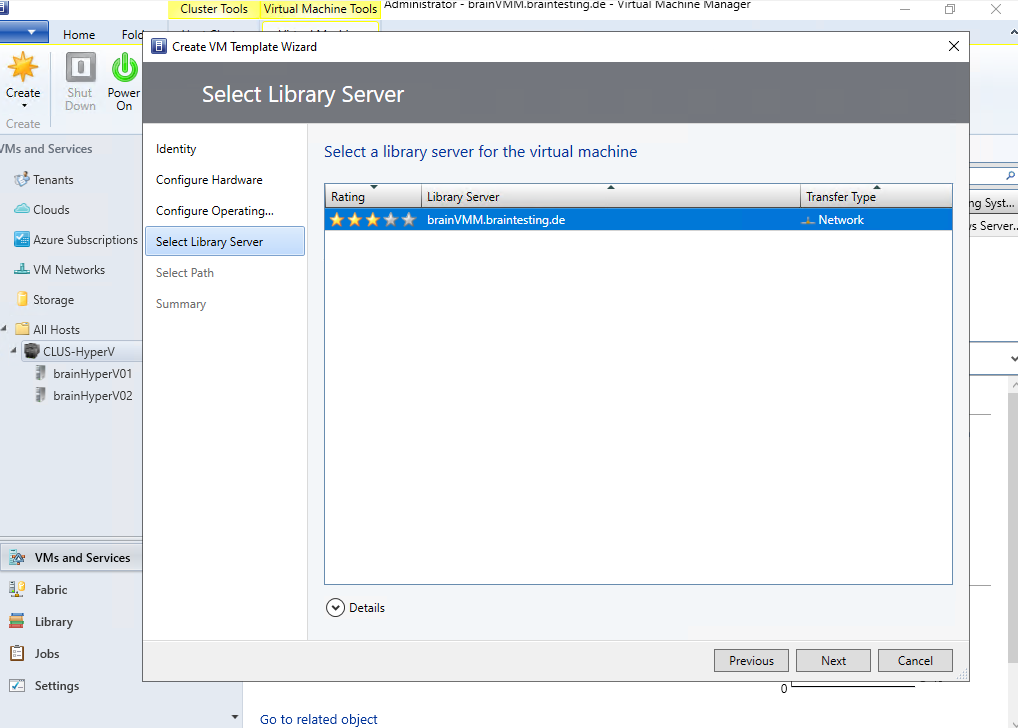
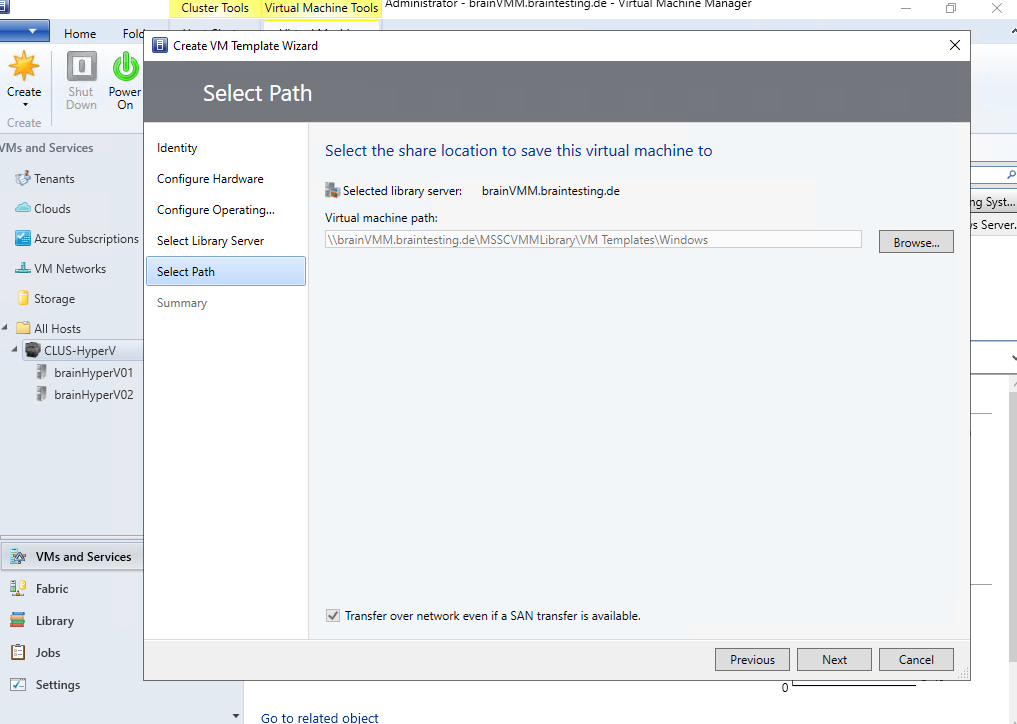
In Select Library Server, select the library server for the VM you’re using for the template and in Select Path, specify the share/folder.
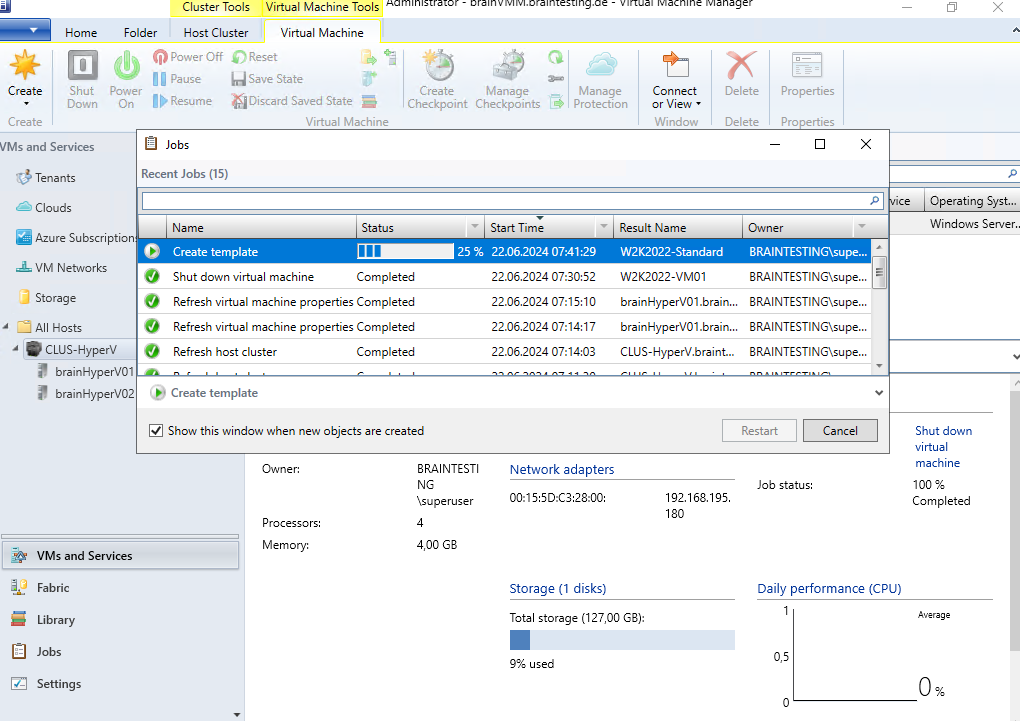
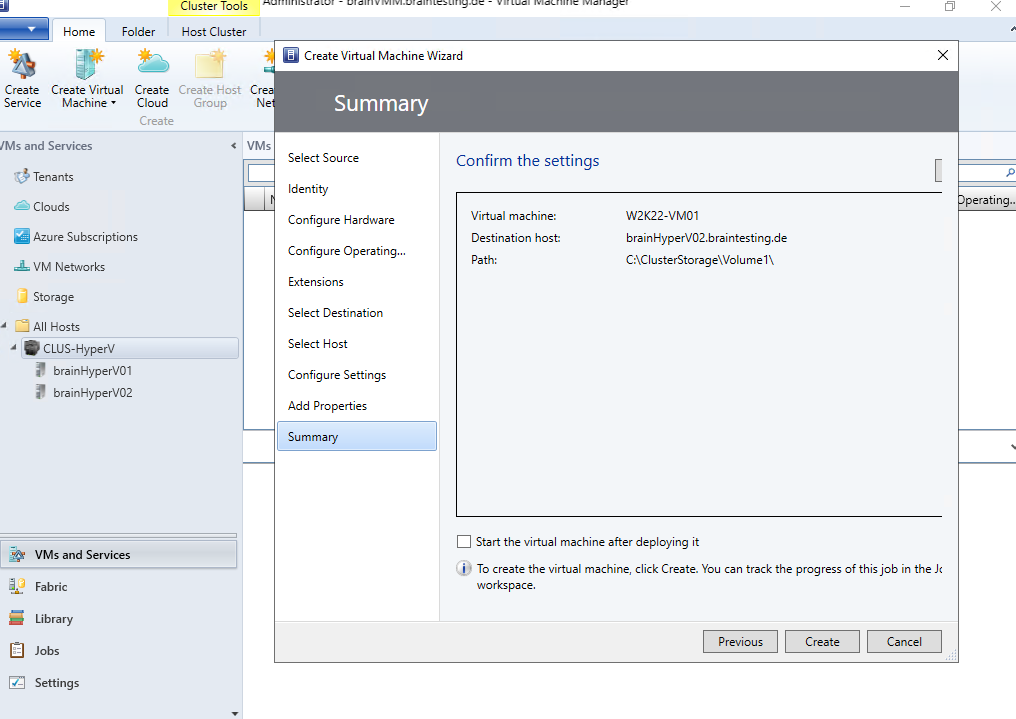
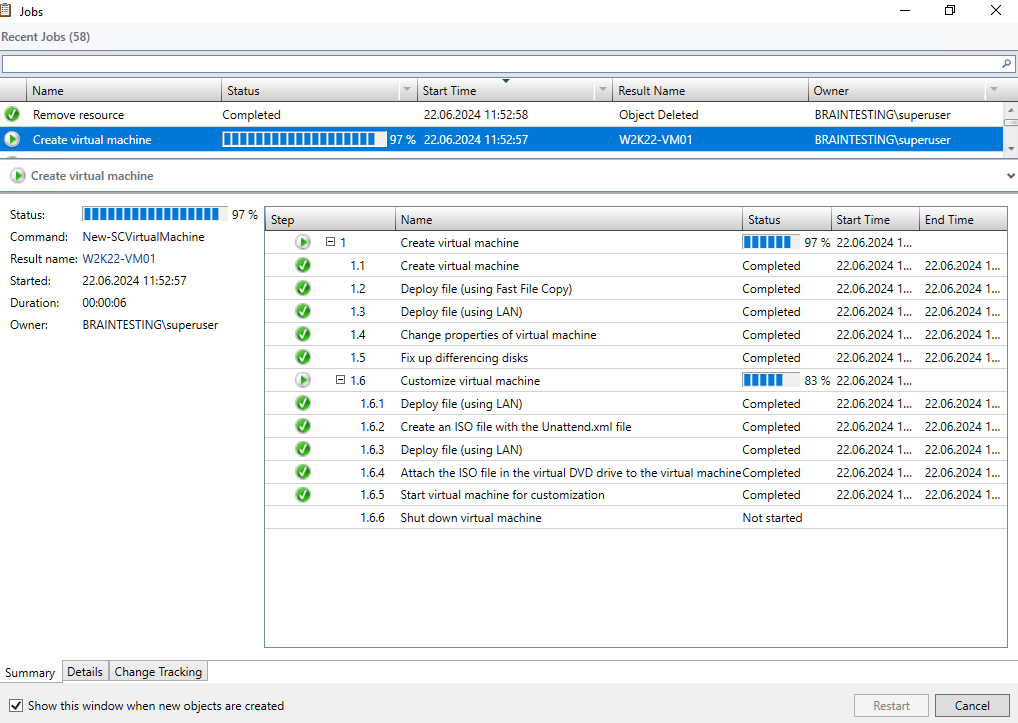
In Summary, review the settings and select Create. In Jobs, you can track the template being created. Wait for the Completed status.
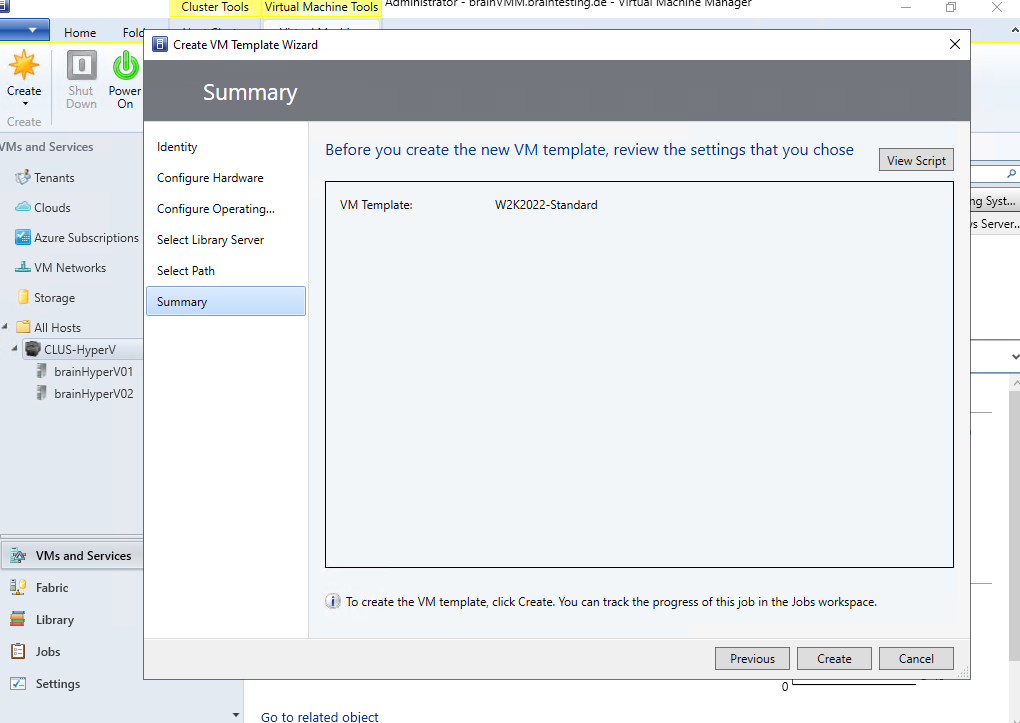
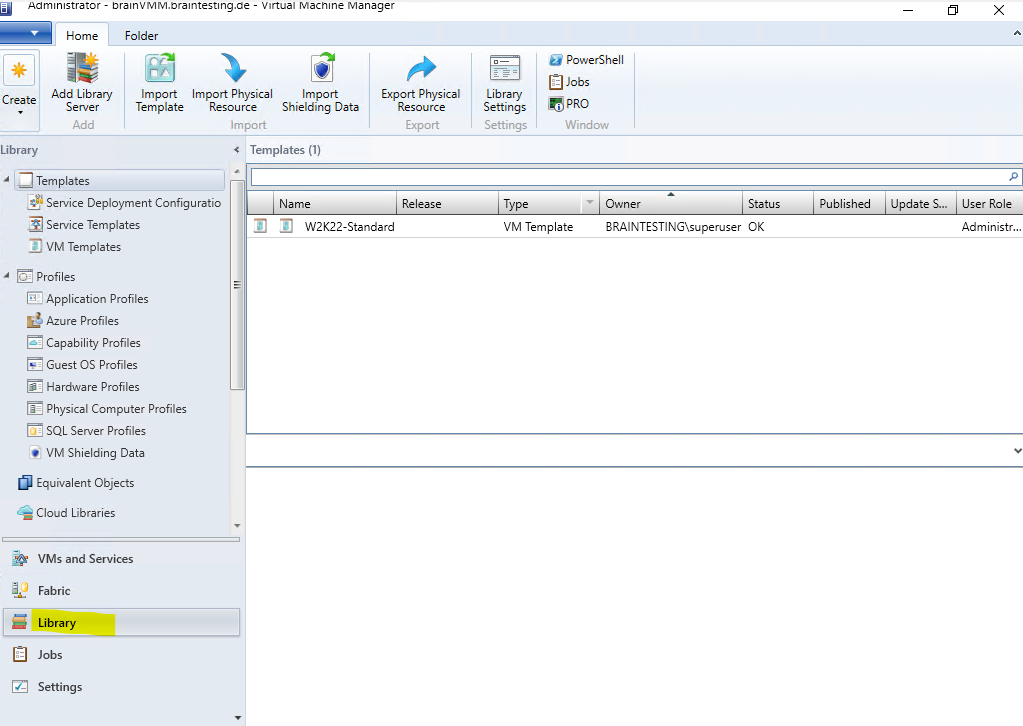
Our VM template was created successfully.
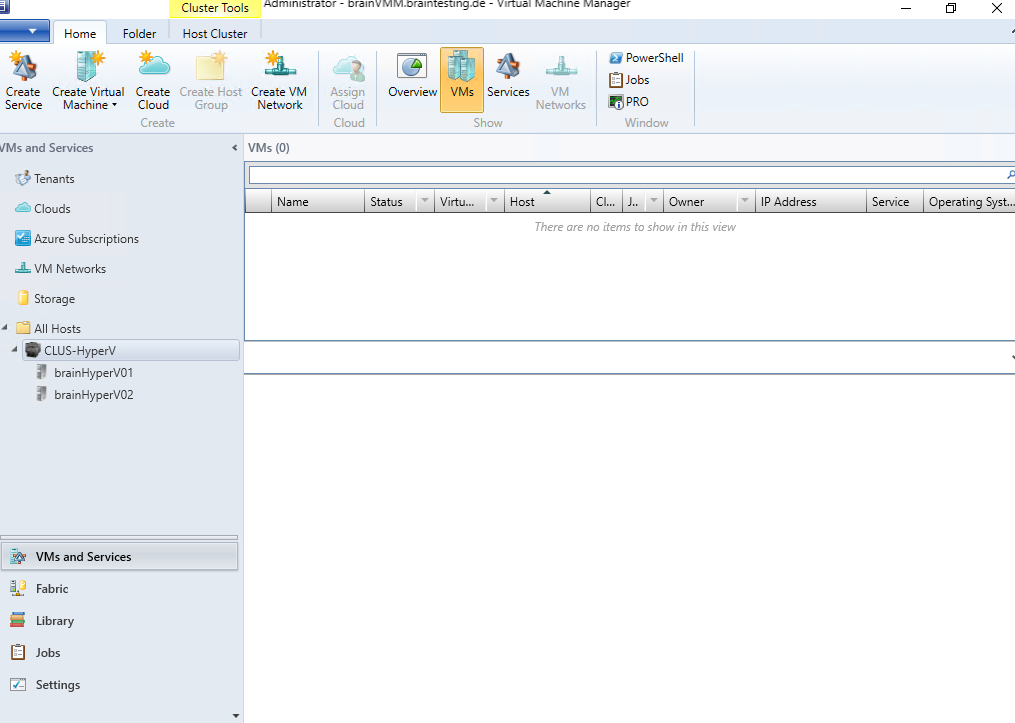
As mentioned previously creating a template from an existing VM deployed on a host, will destroy this virtual machine on the host. So the virtual machine is now not running anymore in the Hyper-V cluster and was removed.
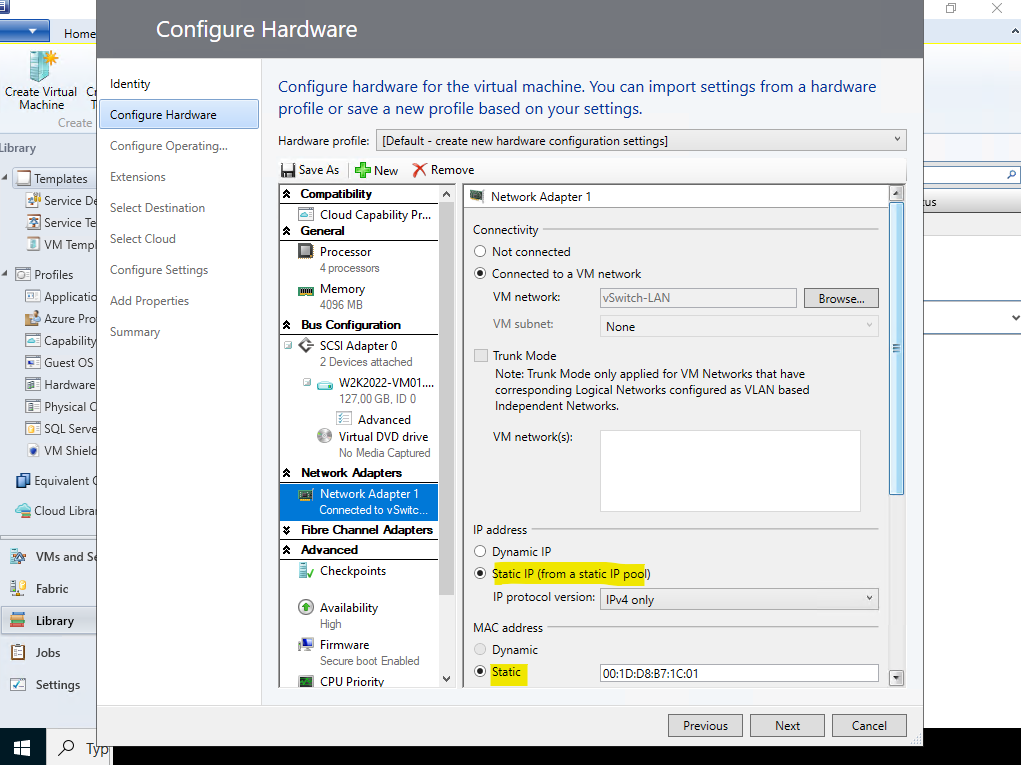
Adjust Settings for the VM Template
We can now configure hardware settings, guest operating system settings, application installation, and Microsoft SQL Server instances. We can configure each of these settings manually or we can import the settings from an existing profile.
Static IP address settings are available only when you deploy a VM from a VM template.
If you create a VM template based on Linux, some of the Linux-specific settings, such as operating system specialization, work only if you deploy the Linux-based VM on a Hyper-V host.
The option to create a VM template that’s based on an existing VM on a host isn’t applicable for Linux-based virtual machine templates.
Source: https://learn.microsoft.com/en-us/system-center/vmm/library-vm-templates?view=sc-vmm-2022
To adjust the settings for our VM template right click on and select Properties.

When you set up the logical network, you’ll need to configure a static IP address pool if you’re not using DHCP.
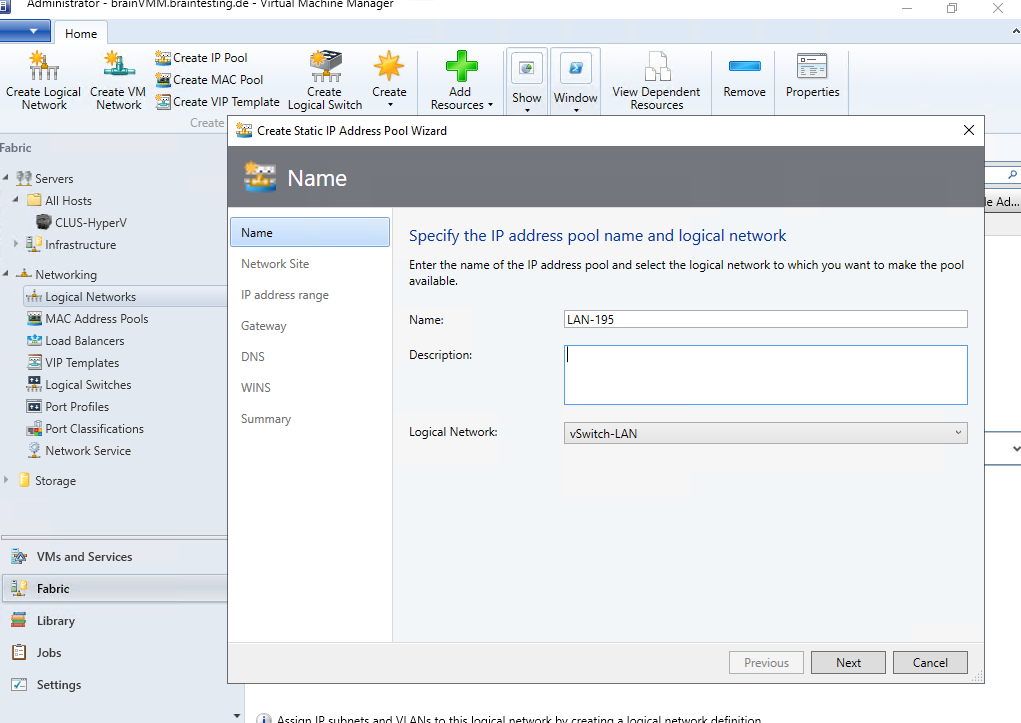
Therefore below I will first need to create a new static IP address pool.
Create an IP Pool
To create a new static IP address pool, navigate to Fabric -> Networking -> Logical Networks and select the logical network you want to create an IP Pool for.
Below I will create a new static IP address pool for the Hyper-V virtual switch my VM template is using.
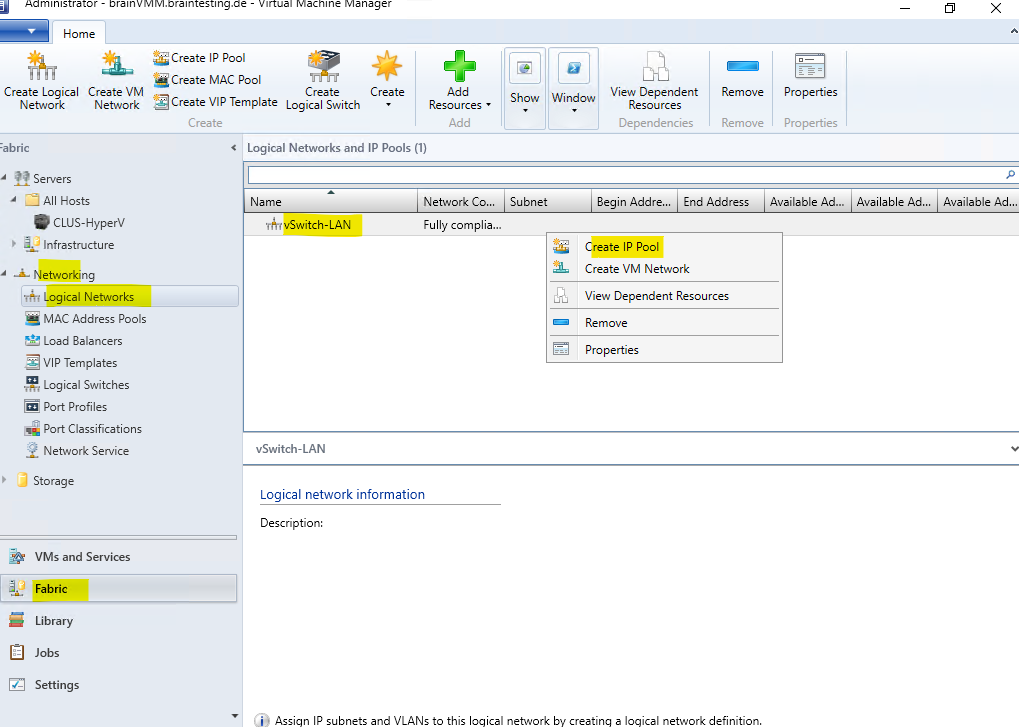
So far I haven’t created a network site in my lab environment and therefore need to create a new site for.
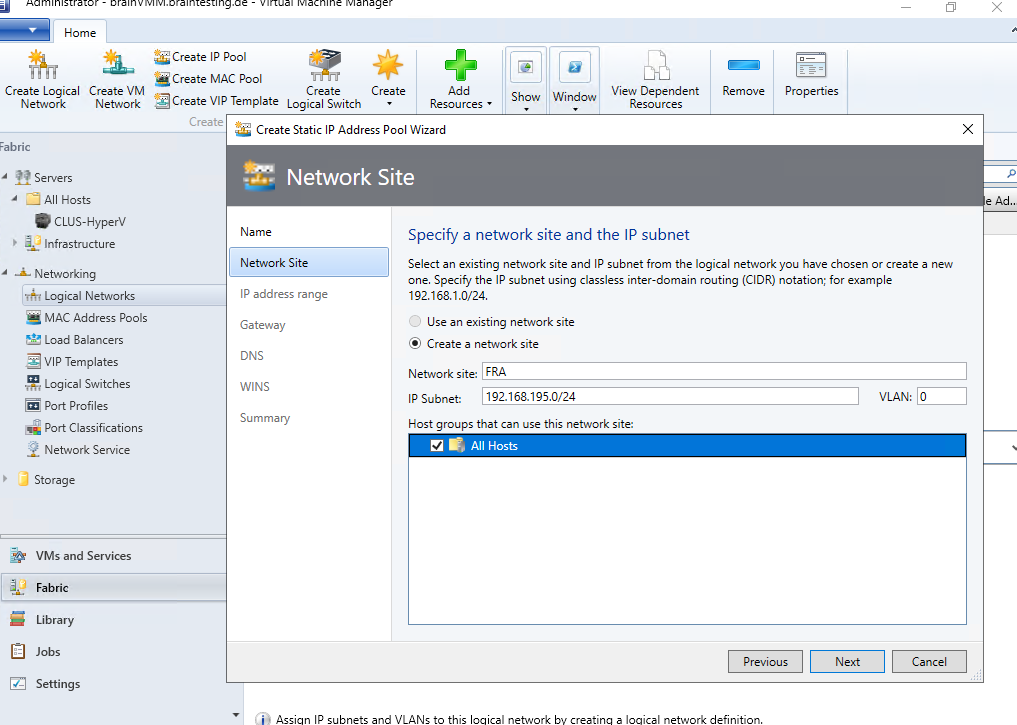
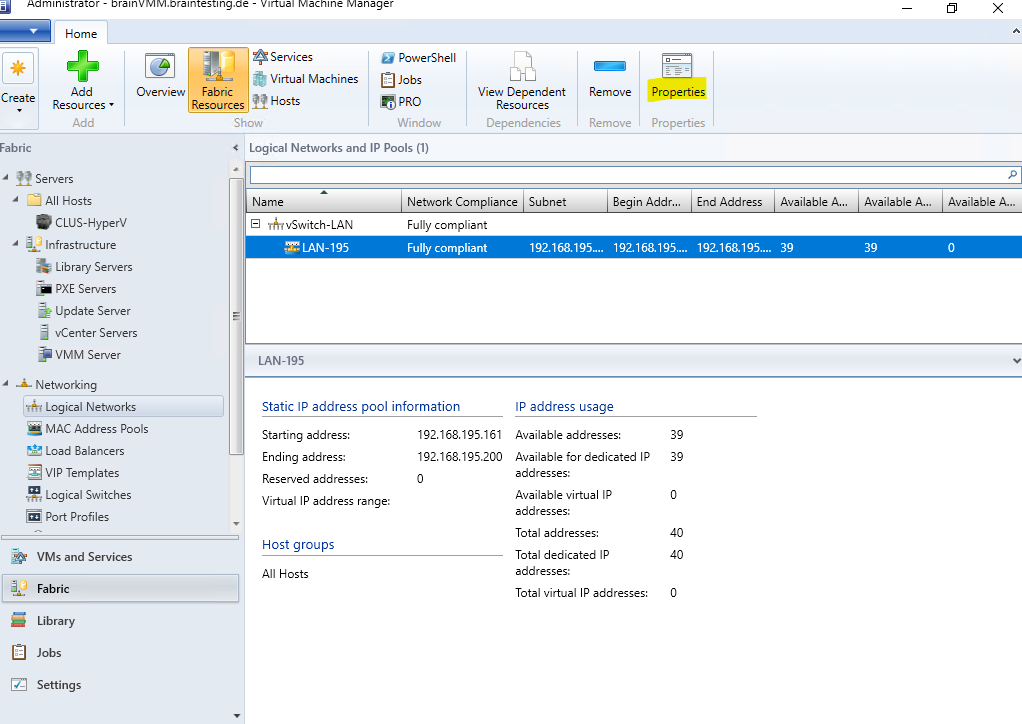
Specify the range of IP addresses for this pool.
While creating a static IP address pool in VMM, don’t use the IP address range (that is managed by the pool) outside of VMM, in the same environment.
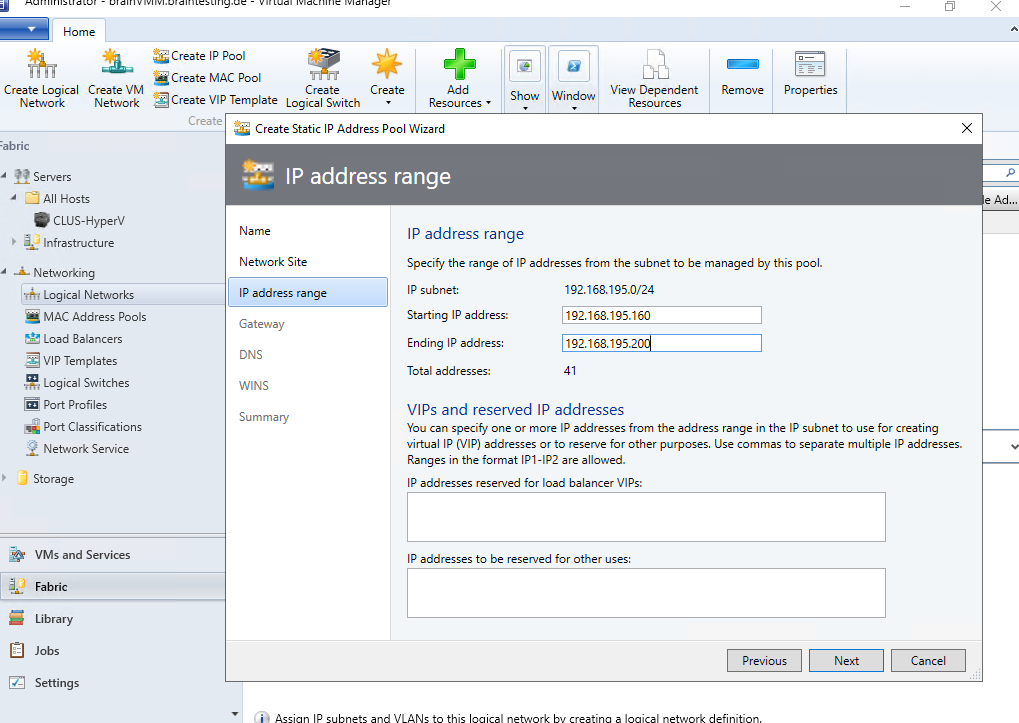
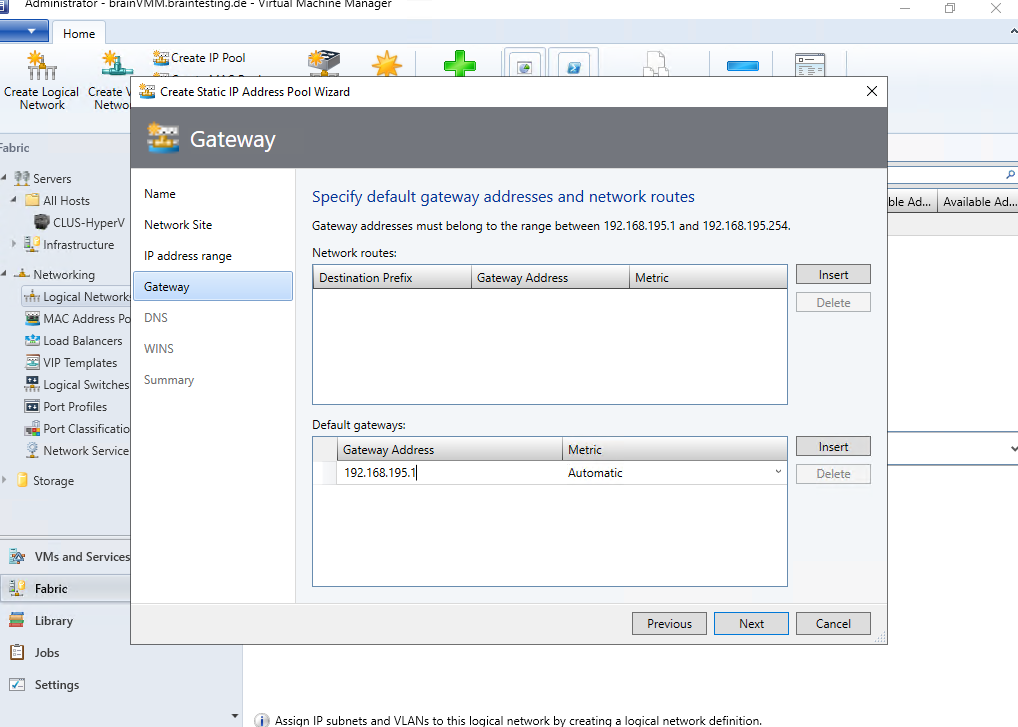
I will also specify a default gateway for this IP Pool. Further if needed you can also add static routes to.
We can also specify a DNS server and DNS suffix for this IP Pool.

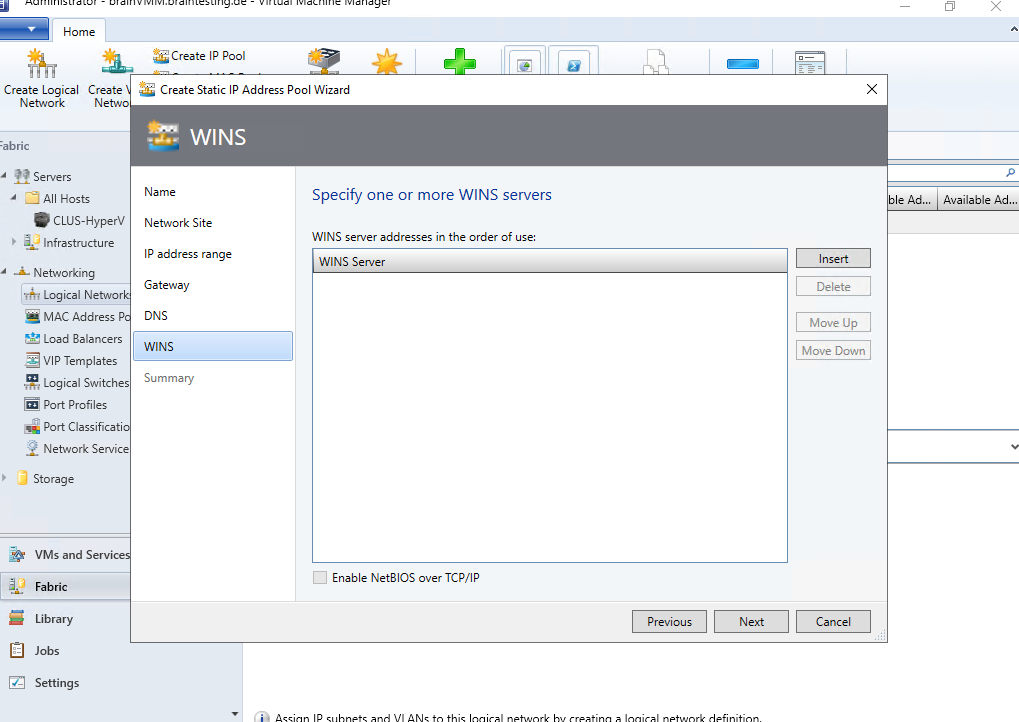
In case you are still using WINS server you can here also specify one.

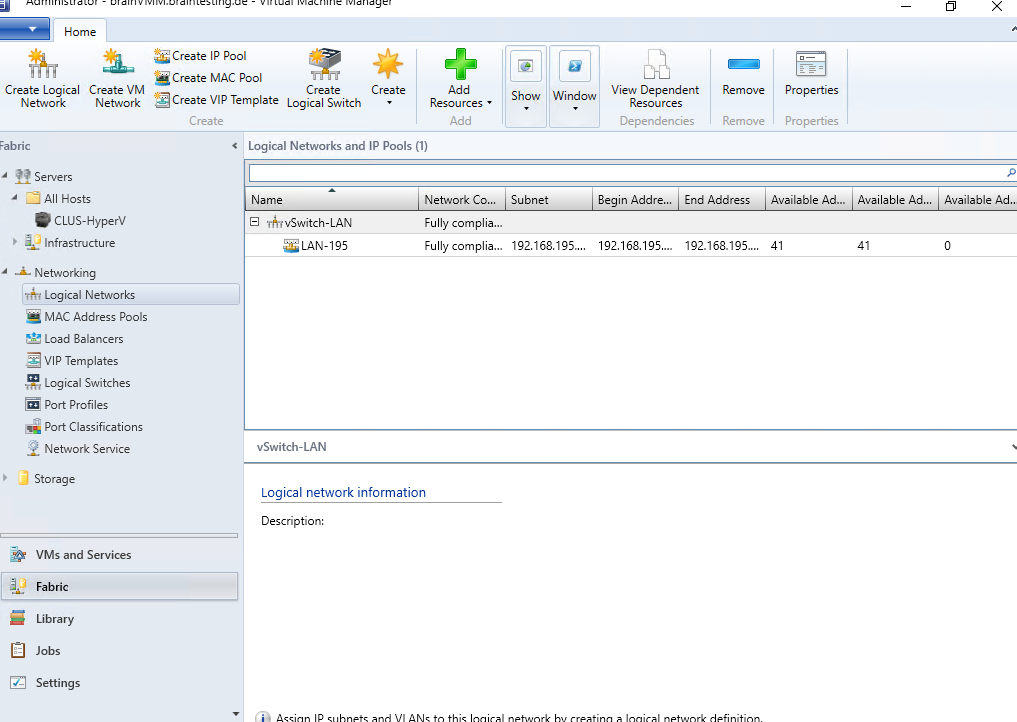
Finally I have associated a new IP Pool to my existing logical network the virtual machines are using.
Source: https://learn.microsoft.com/en-us/system-center/vmm/library-vm-templates?view=sc-vmm-2022
Create a Virtual Machine from a VM Template
Below I will now create a new virtual machine by using the previously created VM template.
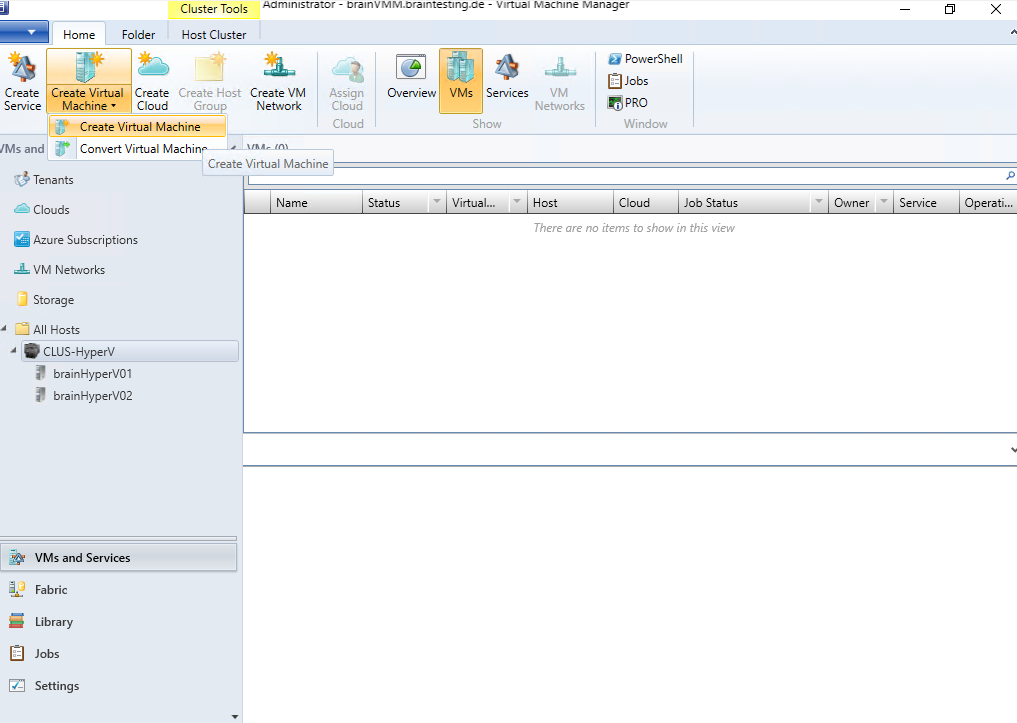
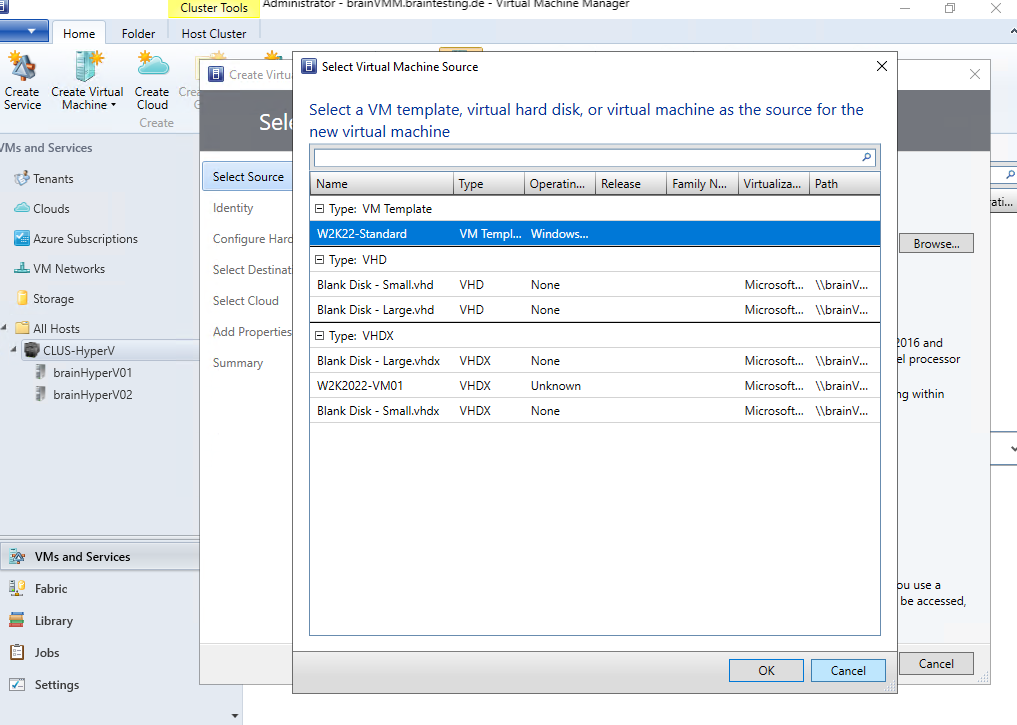
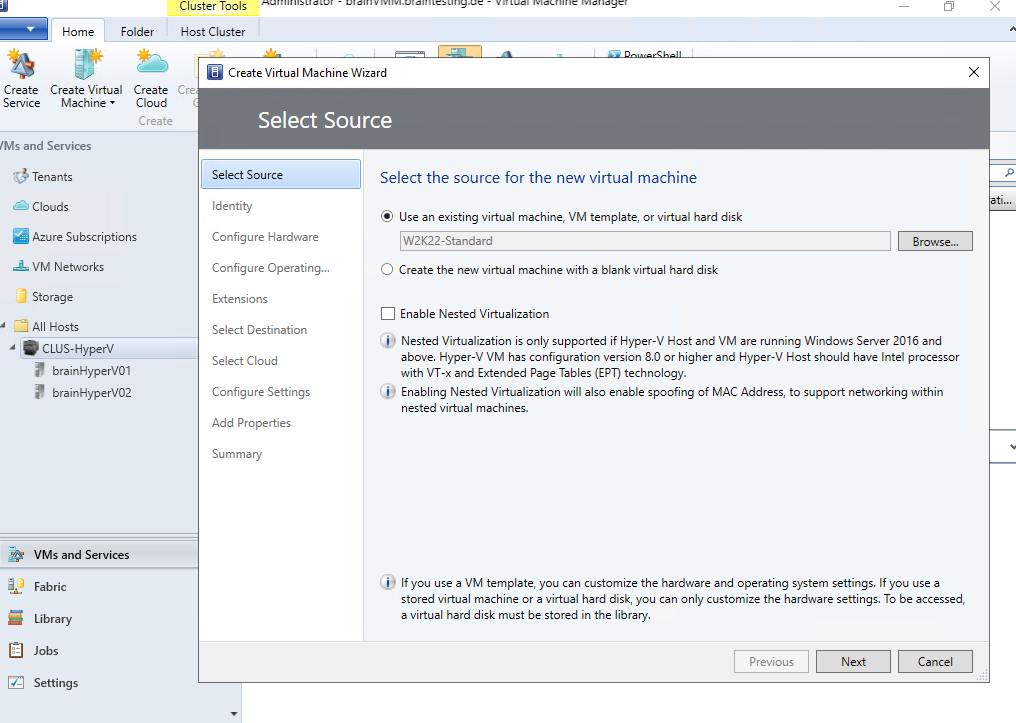
We can create either a new virtual machine by using a new blank virtual hard disk or we can use another existing virtual machine, virtual hard disk or VM template which I will select here.
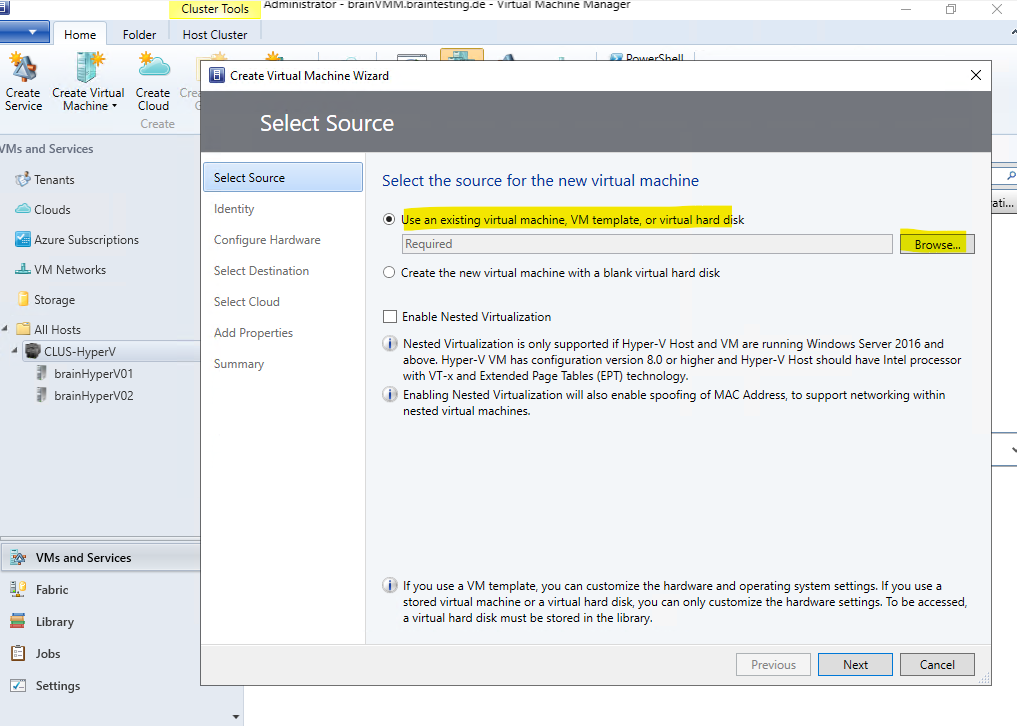
I will select my VM template created previously.
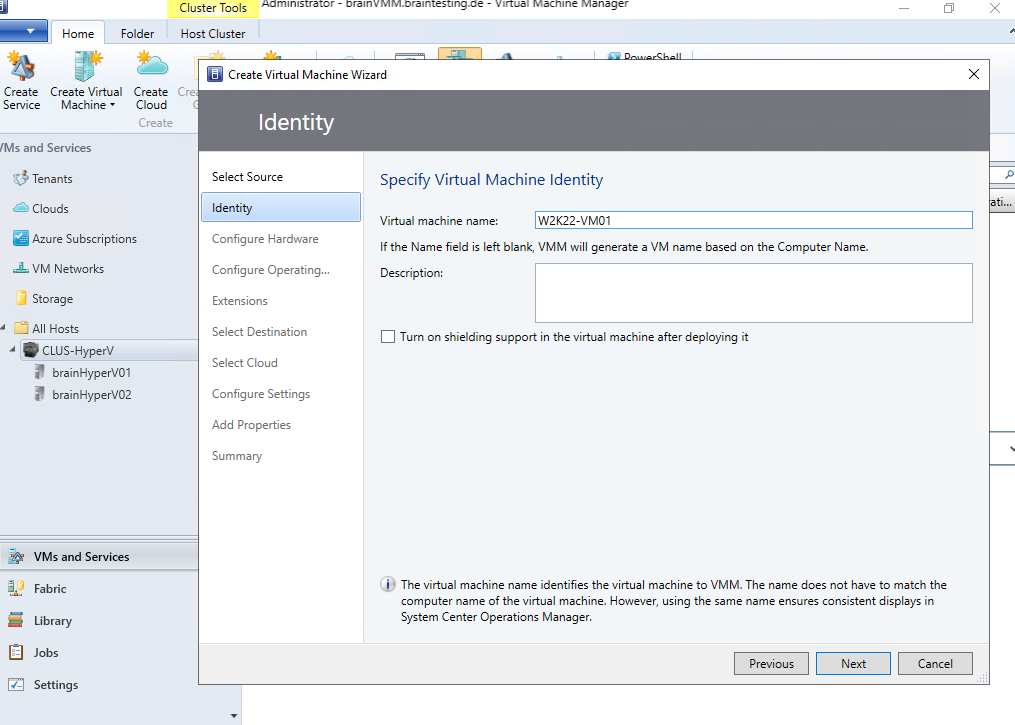
Here we need to specify the virtual machine name which is not the computer name finally.
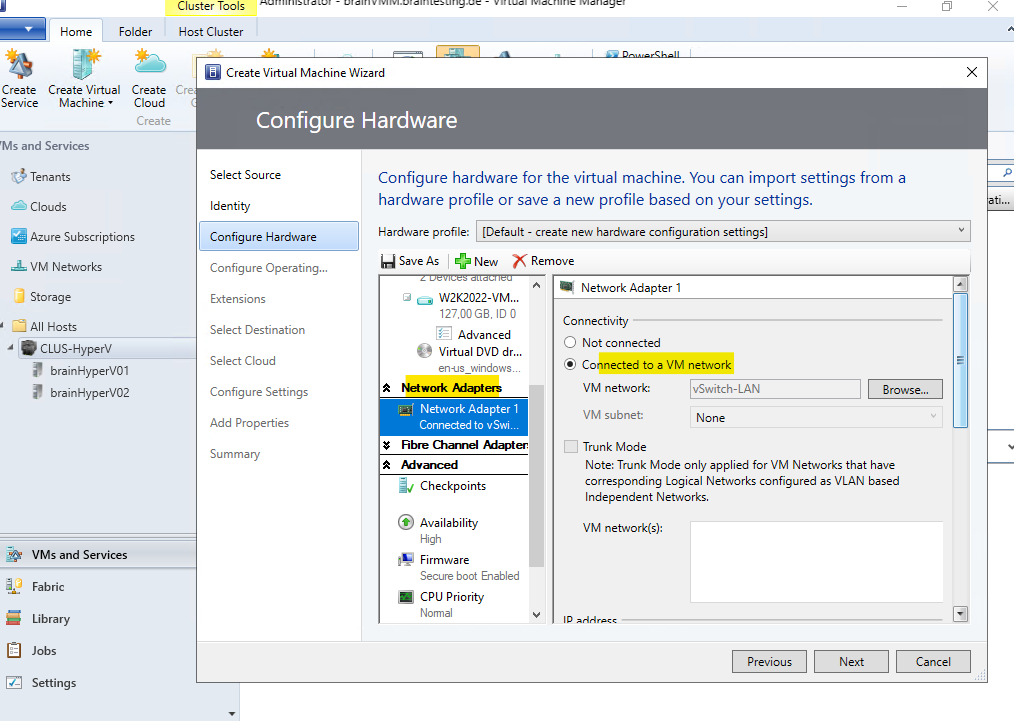
For the network configuration I will use the logical network (virtual switch in Hyper-V).
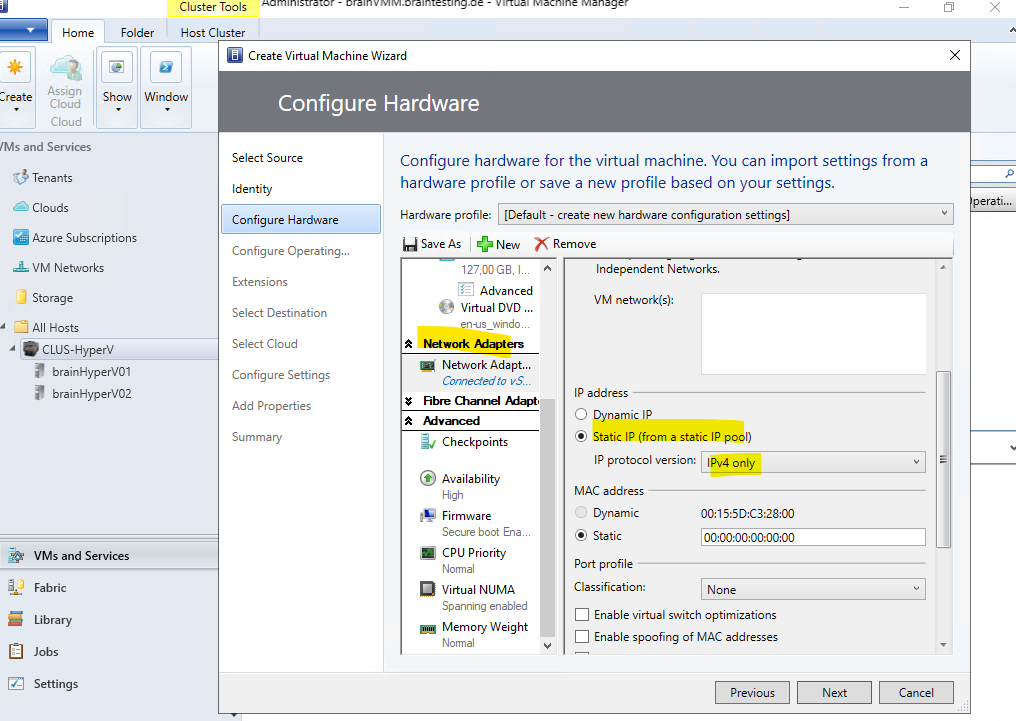
Because we created previously an IP Pool for this logical network, we can use static IP addresses below.
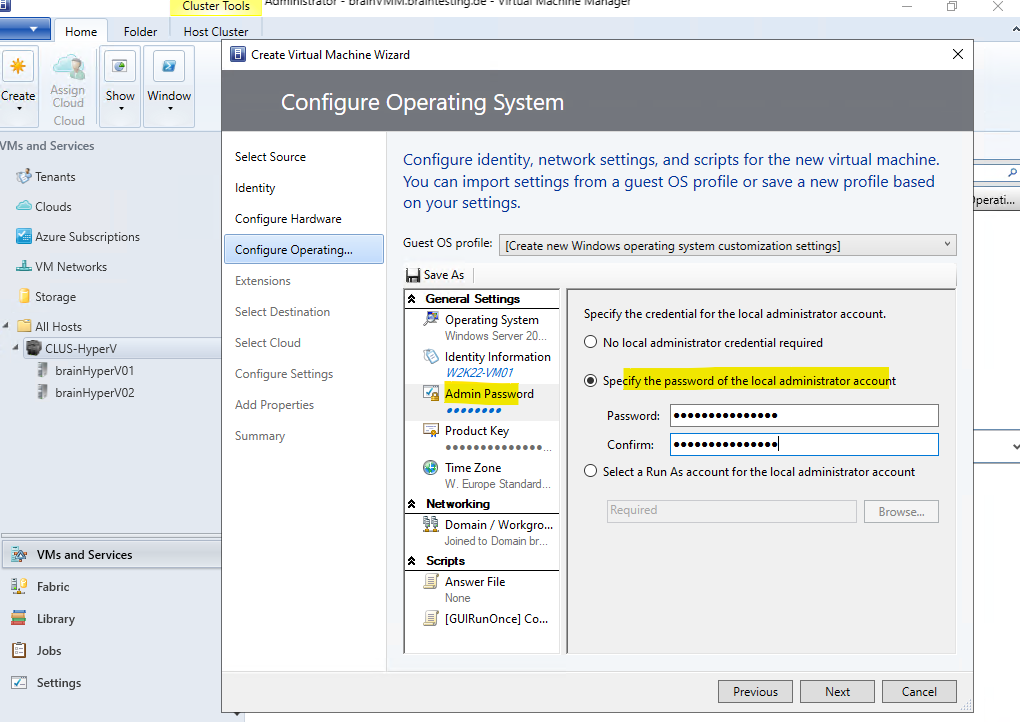
For the Admin password we can specify one or select not required.
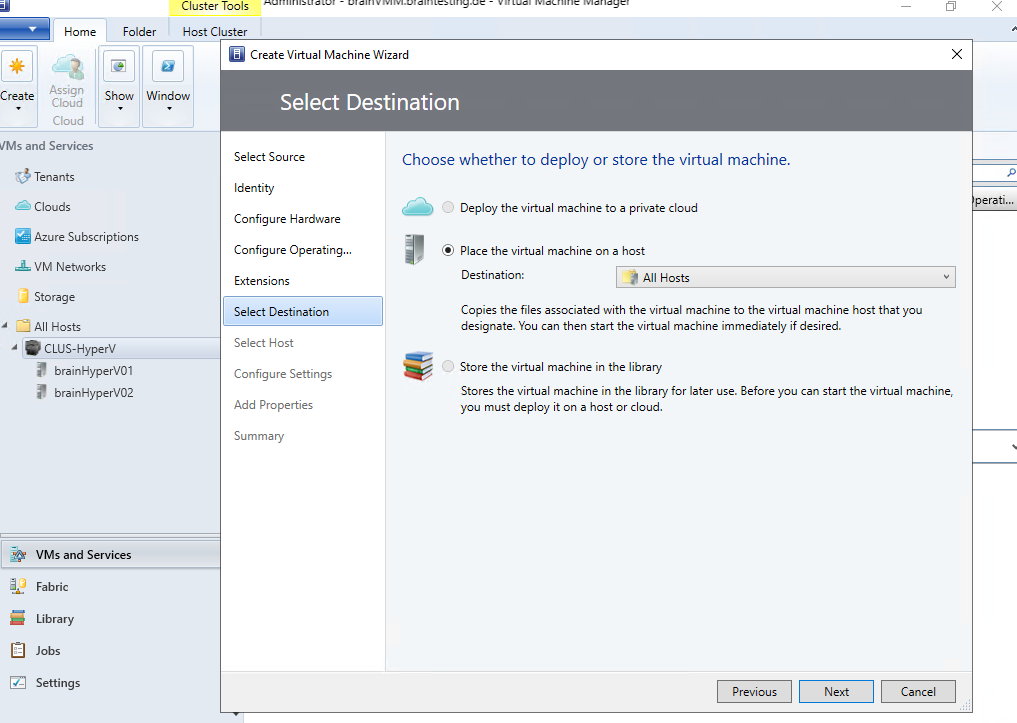
We also need to select a destination for our VM, I will place it to the All Hosts group in VMM.
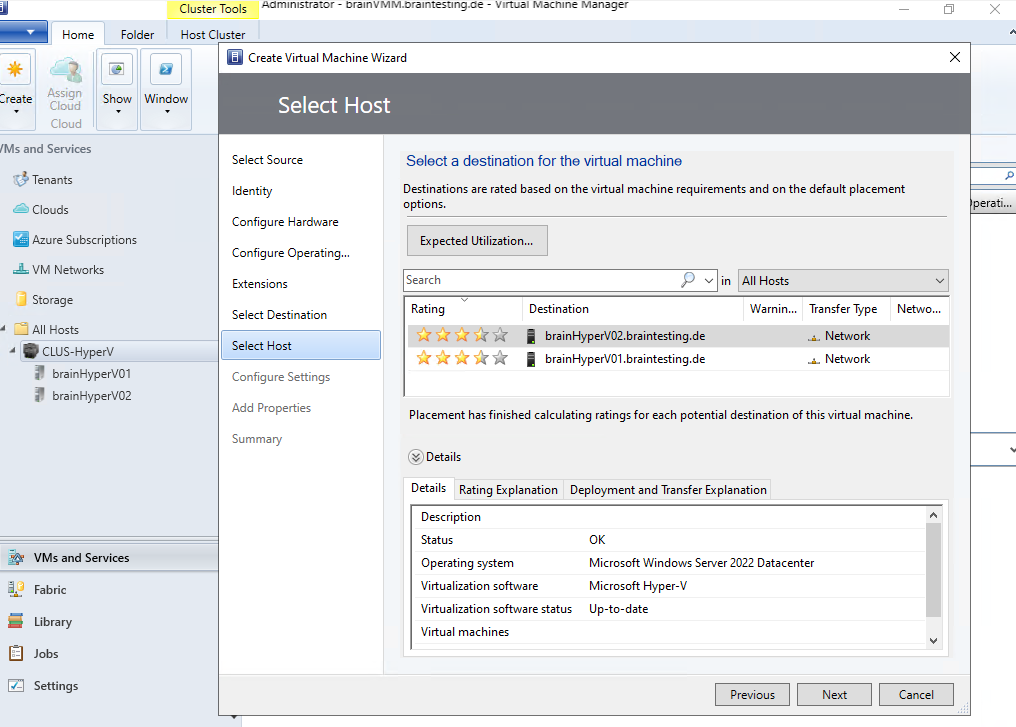
Below we need to select the host where our virtual machine is running on later.
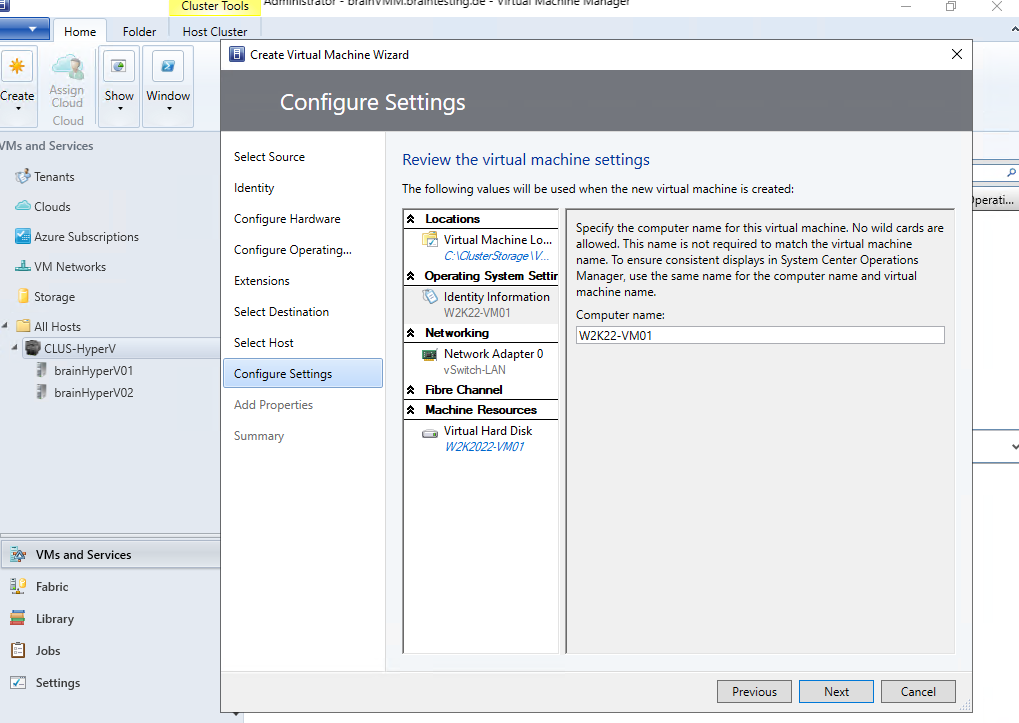
Specify the computer name for this virtual machine.
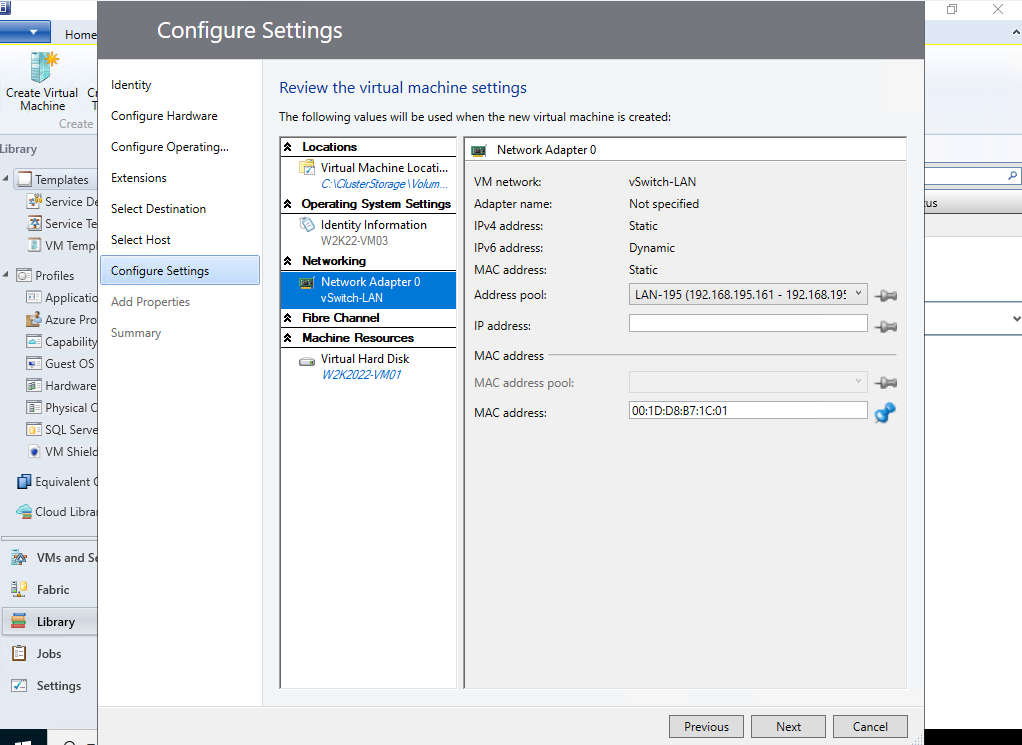
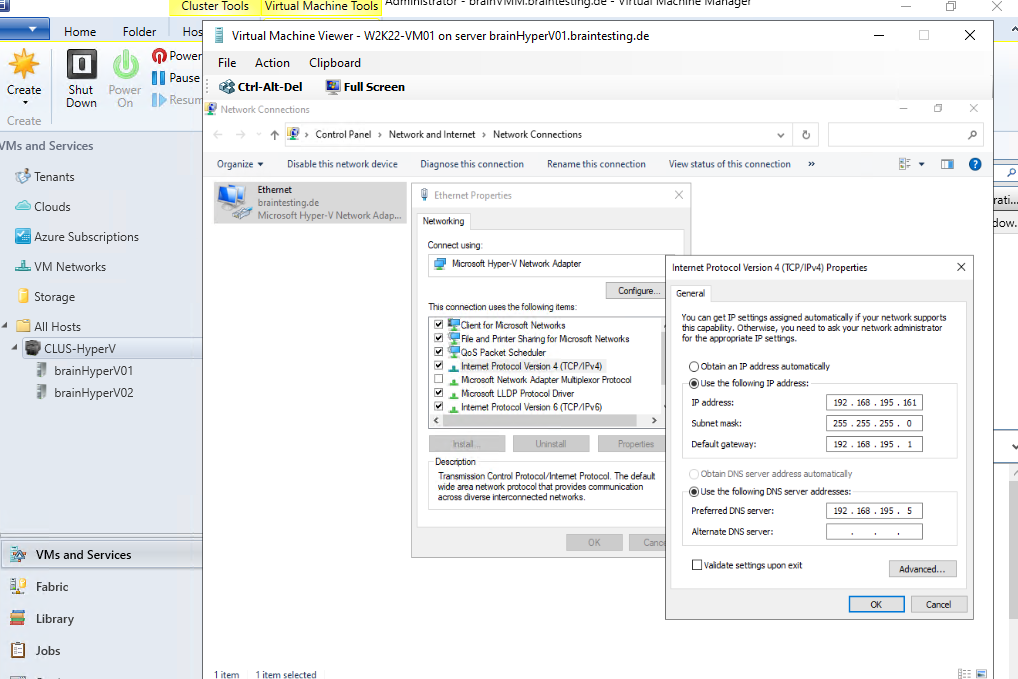
For the virtual network adapter an IP address, gateway and DNS server will be assigned by the previously created IP Pool.
Select the desired automatic actions below.
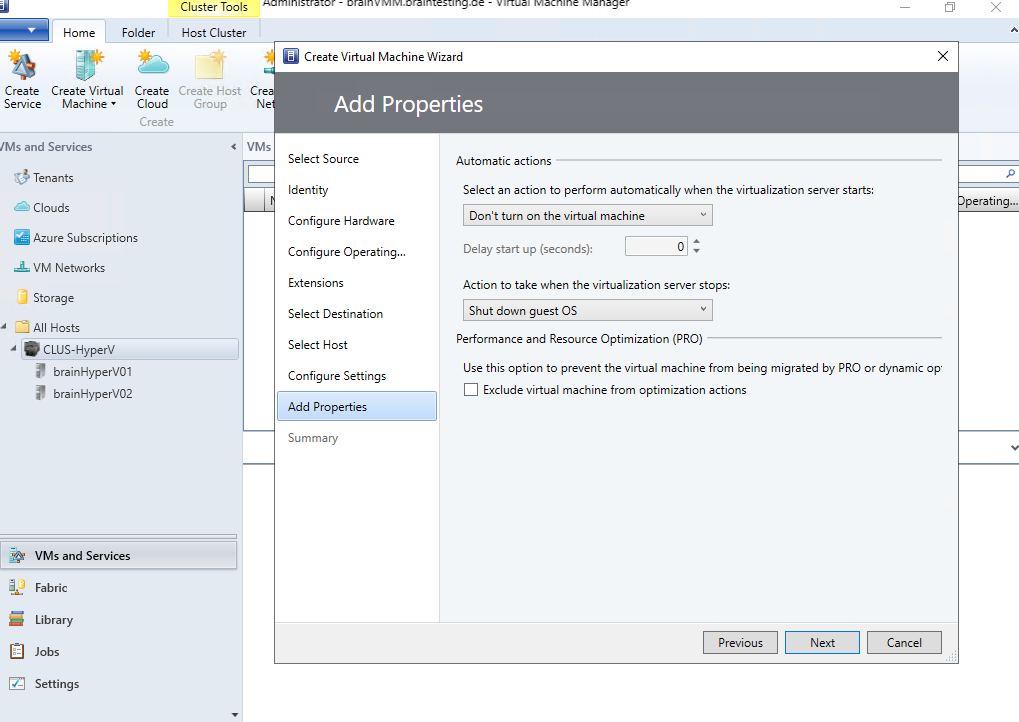
Finally click on Create.
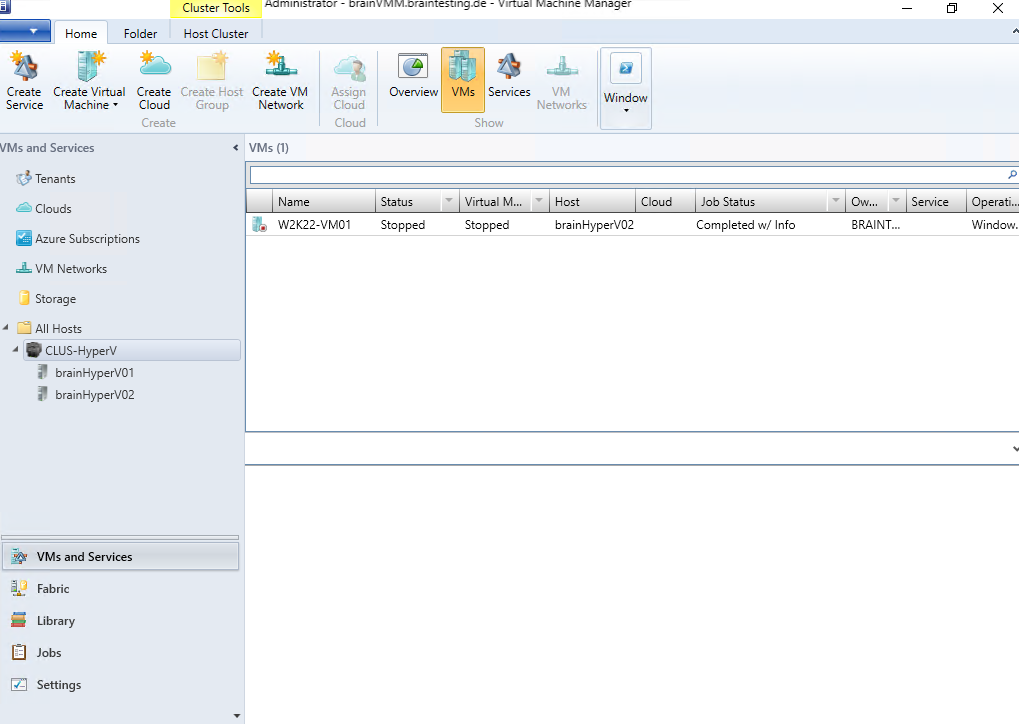
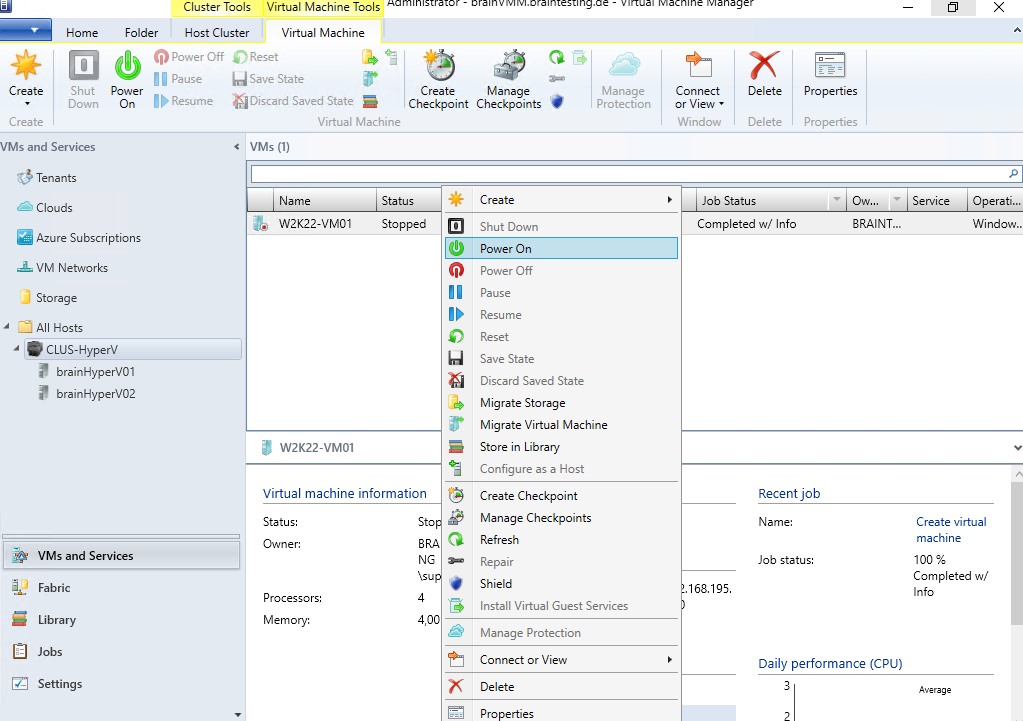
Our new virtual machine was created successfully.
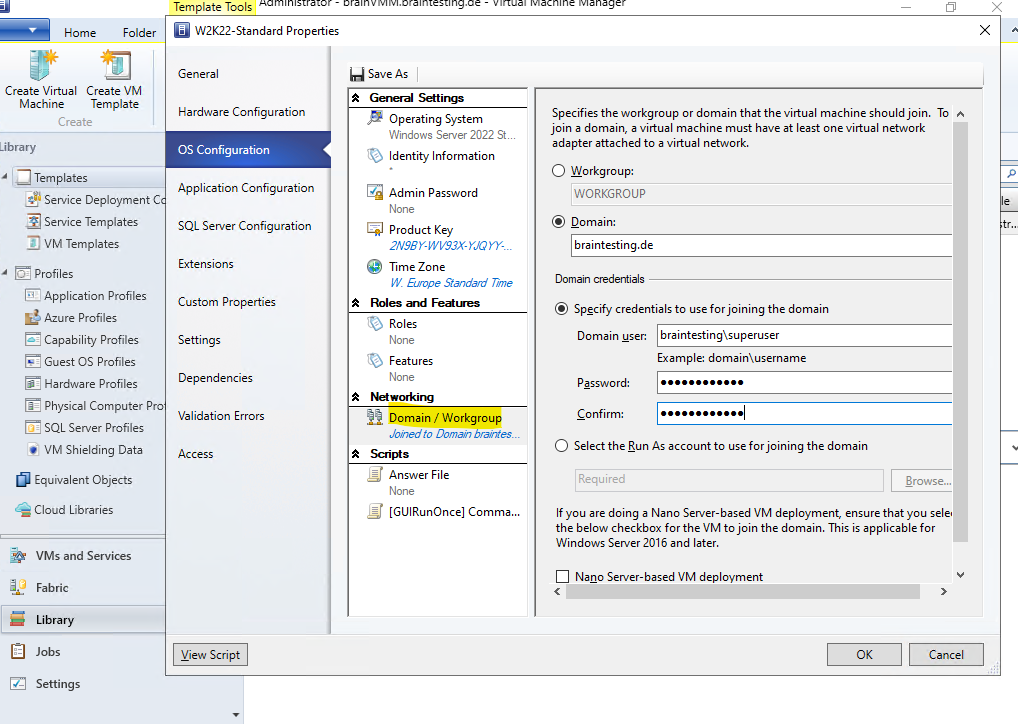
Because we configured domain join for the VM template, our newly created virtual machine was also joined successfully to our domain.
We can now power on the virtual machine.
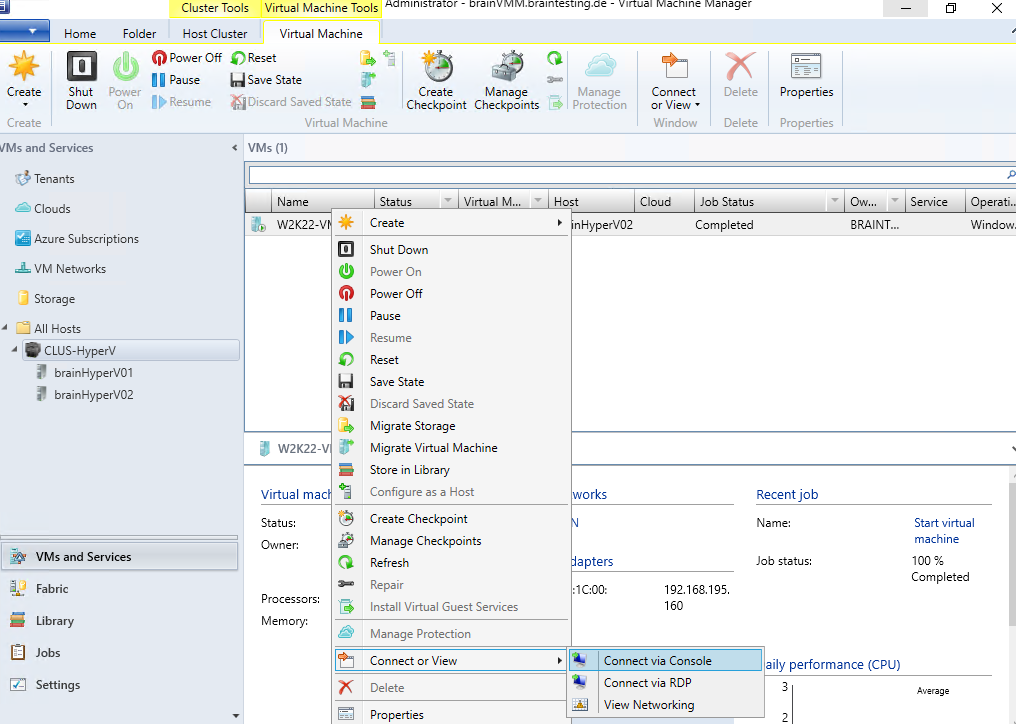
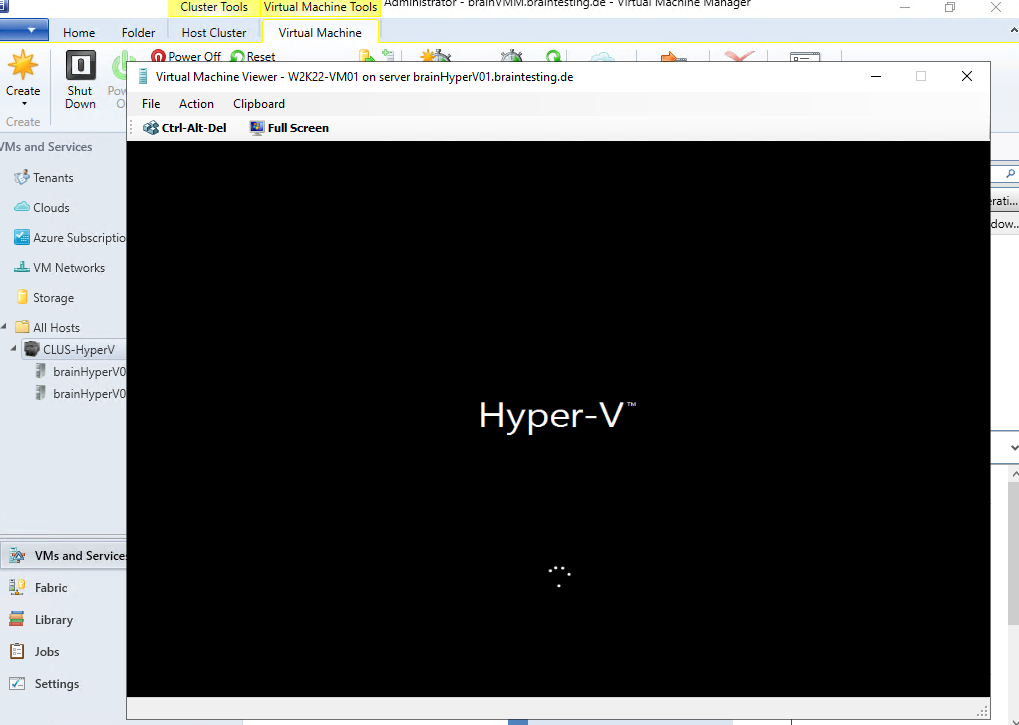
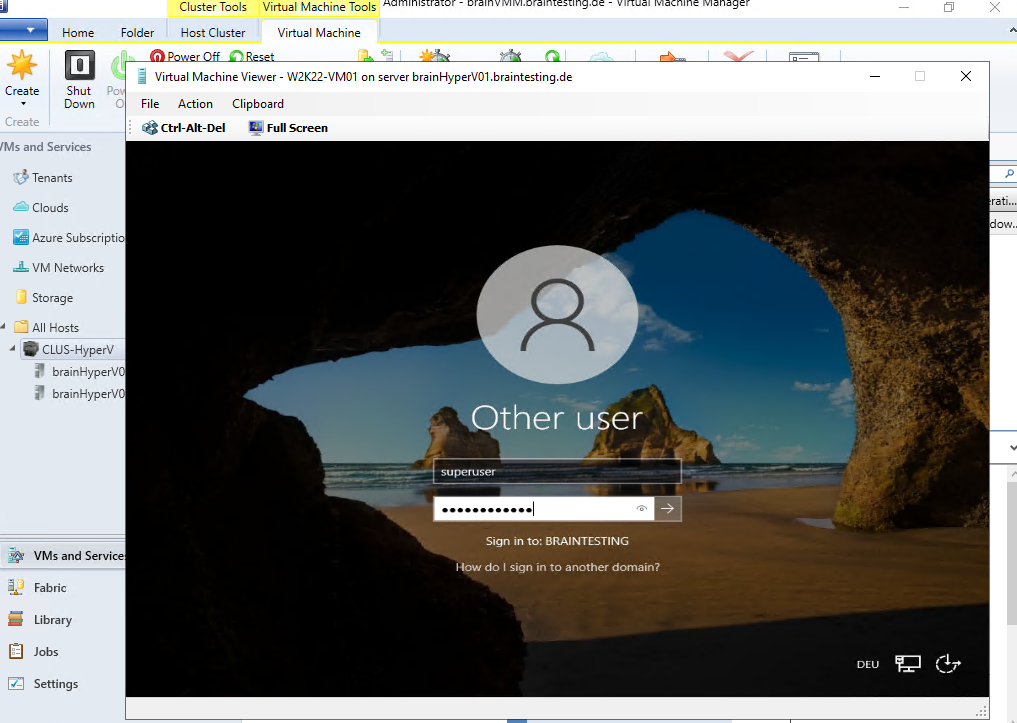
To connect to the virtual machine we can also use the VMM console in case the connection through the network isn’t working or allowed so far.
We can now sign-on by using a domain account.
IP address was assigned by the the VMM IP Pool we created previously.
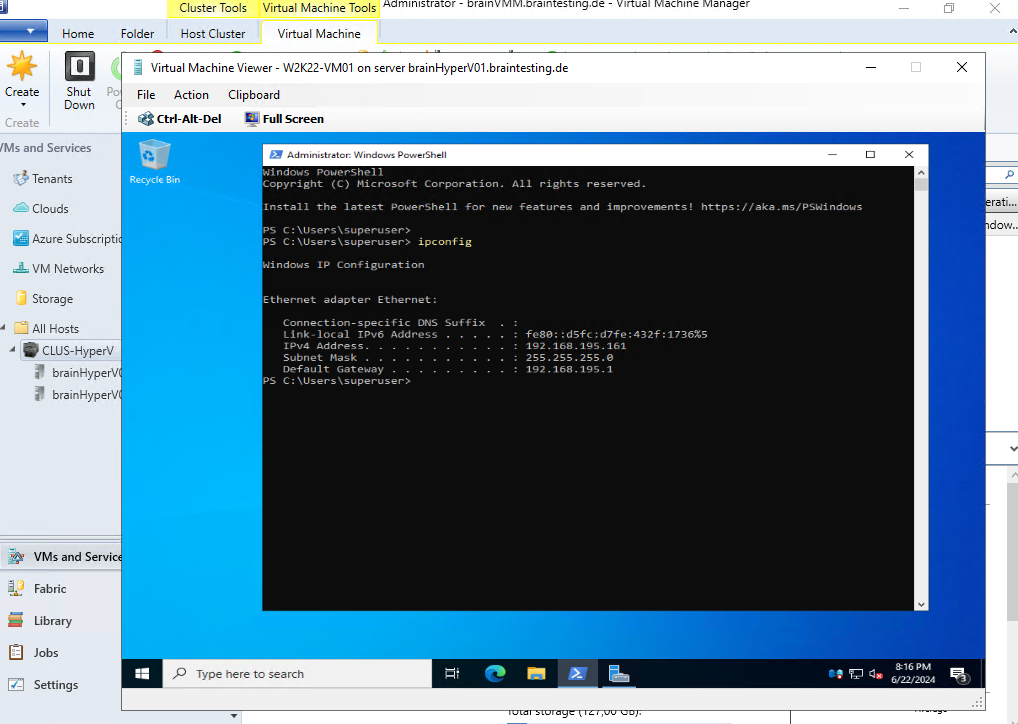
The IP address is assigned as a static IP address as desired.
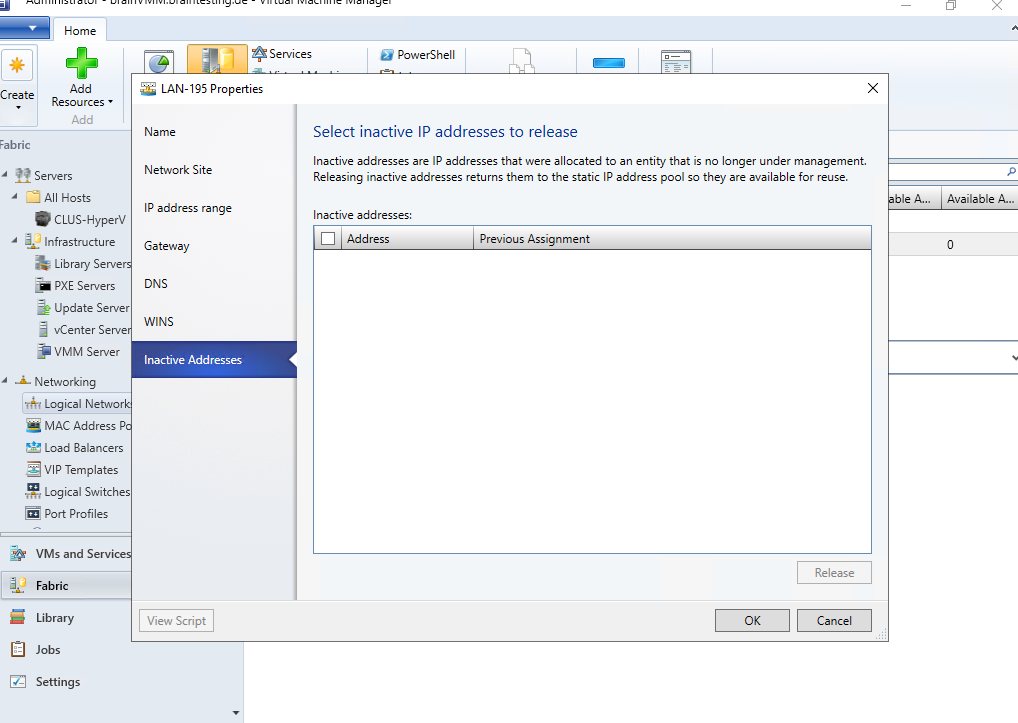
Revoke IP and MAC Addresses from a Pool
You can release inactive addresses. When you do, VMM returns the address to the static IP, or MAC address pool and considers it available for reassignment. An address is considered inactive if:
- A host that was assigned a static IP address through the bare-metal deployment process is removed from VMM management. When you remove the host, any IP and MAC addresses that were statically assigned to virtual machines on the host are also marked as inactive.
- A virtual machine goes into a missing state because it was removed outside VMM.
Source: https://learn.microsoft.com/en-us/system-center/vmm/network-pool?view=sc-vmm-2022
Select Home > Properties > Inactive addresses and select the inactive IP addresses that you want to release.
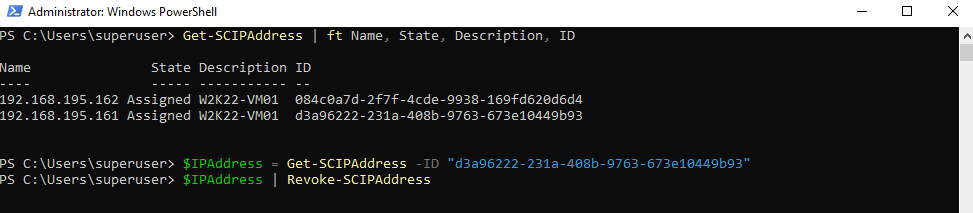
We can also use PowerShell to revoke IP and MAC addresses.
Below I want to revoke the IP address 192.168.195.161 for example.
> Get-SCIPAddress | ft Name,State,Description,ID
> $IPAddress = Get-SCIPAddress -ID <ID SCIP Address>
> $IPAddress | Revoke-SCIPAddress
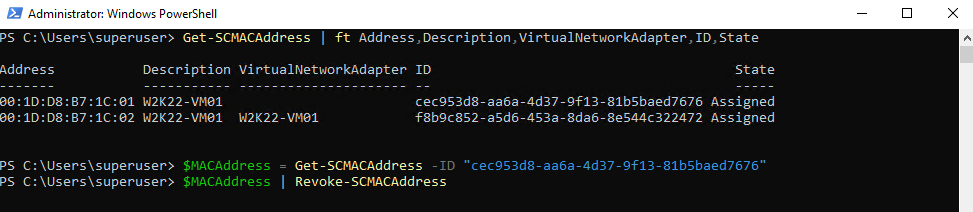
Below I want to revoke the MAC address 00:1D:D8:B7:1C:01 for example.
> Get-SCMACAddress | ft Address,Description,VirtualNetworkAdapter,ID,State
> $MACAddress = Get-SCMACAddress -ID <ID MAC Address>
> $MACAddress | Revoke-SCMACAddress
Links
What is Virtual Machine Manager?
https://learn.microsoft.com/en-us/system-center/vmm/overview?view=sc-vmm-2022What’s new in System Center Virtual Machine Manager
https://learn.microsoft.com/en-us/system-center/vmm/whats-new-in-vmm?view=sc-vmm-2022Add VM templates to the VMM library
https://learn.microsoft.com/en-us/system-center/vmm/library-vm-templates?view=sc-vmm-2022Set up VMware servers in the VMM compute fabric
https://learn.microsoft.com/en-us/system-center/vmm/manage-vmware-hosts?view=sc-vmm-2022
Related Posts
Follow me on LinkedIn