Set up a SFTP Server on SUSE Linux Enterprise Server
Introduction
Configure/Adjusting SSH (sshd_config file)
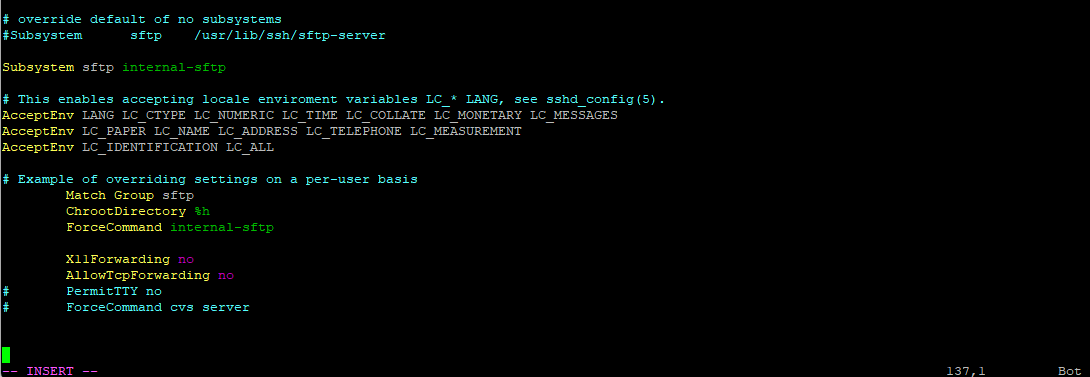
# override default of no subsystems
Subsystem       sftp    /usr/lib/ssh/sftp-server

# This enables accepting locale enviroment variables LC_* LANG, see sshd_config(5).
AcceptEnv LANG LC_CTYPE LC_NUMERIC LC_TIME LC_COLLATE LC_MONETARY LC_MESSAGES
AcceptEnv LC_PAPER LC_NAME LC_ADDRESS LC_TELEPHONE LC_MEASUREMENT
AcceptEnv LC_IDENTIFICATION LC_ALL

# Example of overriding settings on a per-user basis
#Match User anoncvs
#       X11Forwarding no
#       AllowTcpForwarding no
#       PermitTTY no
#       ForceCommand cvs server
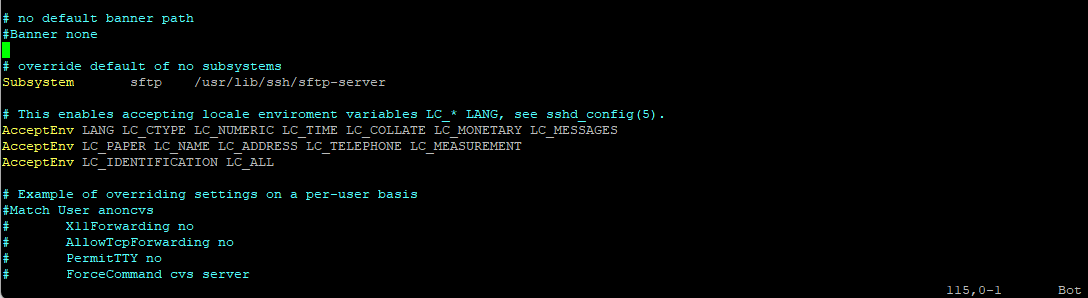
# override default of no subsystems
#Subsystem sftp /usr/lib/ssh/sftp-server
Subsystem sftp internal-sftp
# This enables accepting locale enviroment variables LC_* LANG, see sshd_config(5).
AcceptEnv LANG LC_CTYPE LC_NUMERIC LC_TIME LC_COLLATE LC_MONETARY LC_MESSAGES
AcceptEnv LC_PAPER LC_NAME LC_ADDRESS LC_TELEPHONE LC_MEASUREMENT
AcceptEnv LC_IDENTIFICATION LC_ALL
# Example of overriding settings on a per-user basis
Match Group sftp
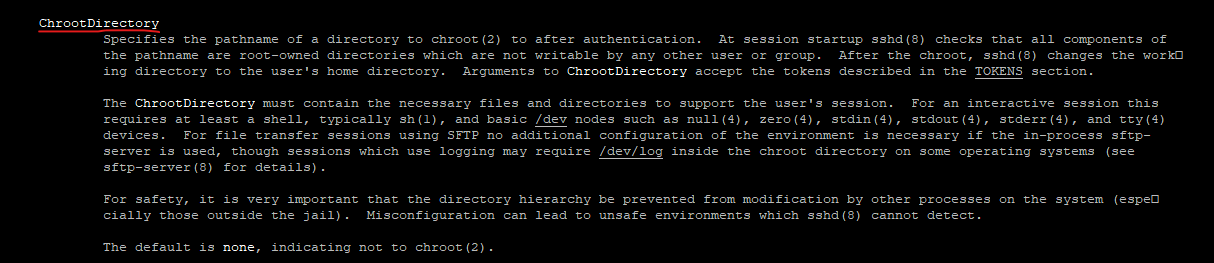
ChrootDirectory %h
ForceCommand internal-sftp
X11Forwarding no
AllowTcpForwarding no
# PermitTTY no
# ForceCommand cvs server
# systemctl restart sshd.service

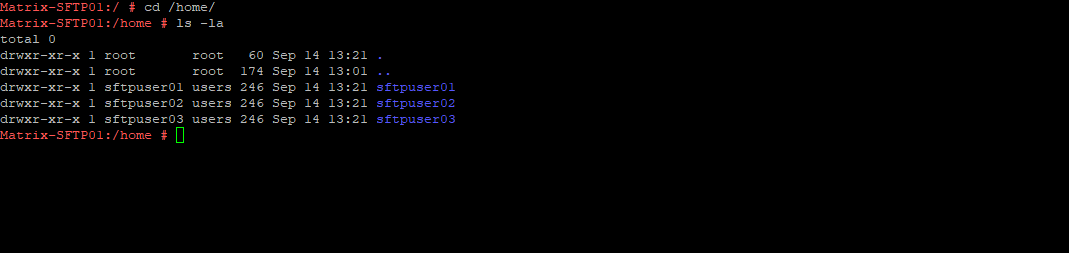
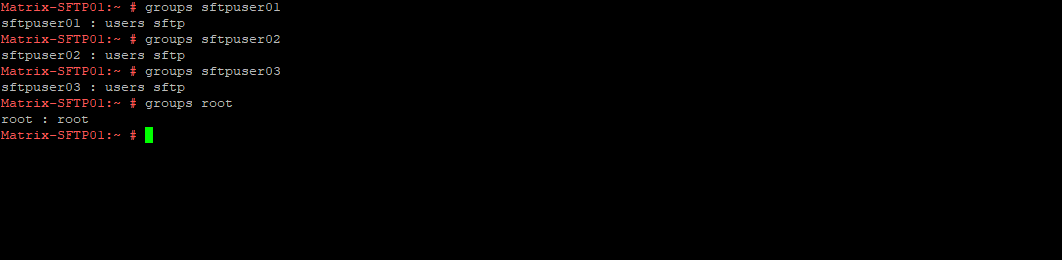
Creating SFTP Users and SFTP Group
# groupadd sftp
# useradd -m -s /bin/false -G sftp sftpuser01
# useradd -m -s /bin/false -G sftp sftpuser02
# useradd -m -s /bin/false -G sftp sftpuser03

# passwd sftpuser01
# passwd sftpuser02
# passwd sftpuser03
# usermod -G sftp user123
# usermod -s /bin/false user123
# groups sftpuser01
# getent group sftp

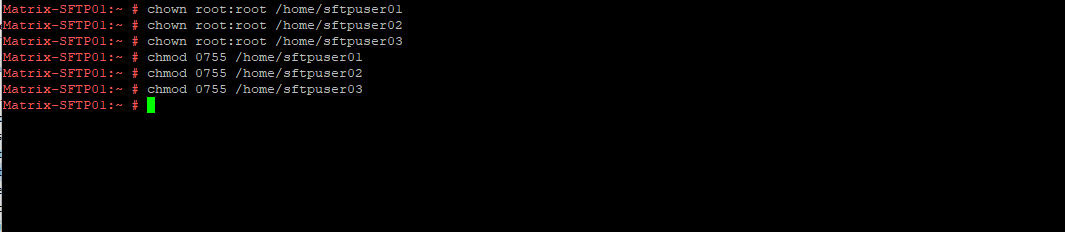
Set Permissions for the Home Directory
# man sshd_config

# chown root:root /home/sftpuser01
# chmod 0755 /home/sftpuser01

# chown root:root /home/sftpuser02
# chmod 0755 /home/sftpuser02

# chown root:root /home/sftpuser03
# chmod 0755 /home/sftpuser03
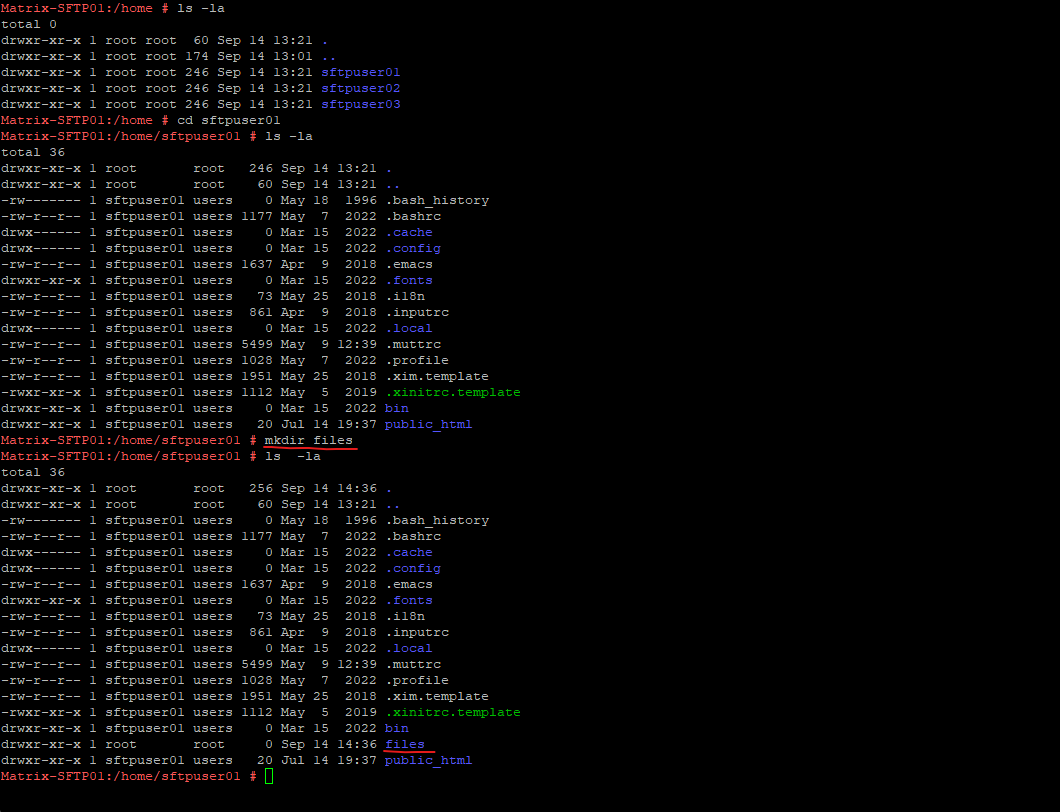
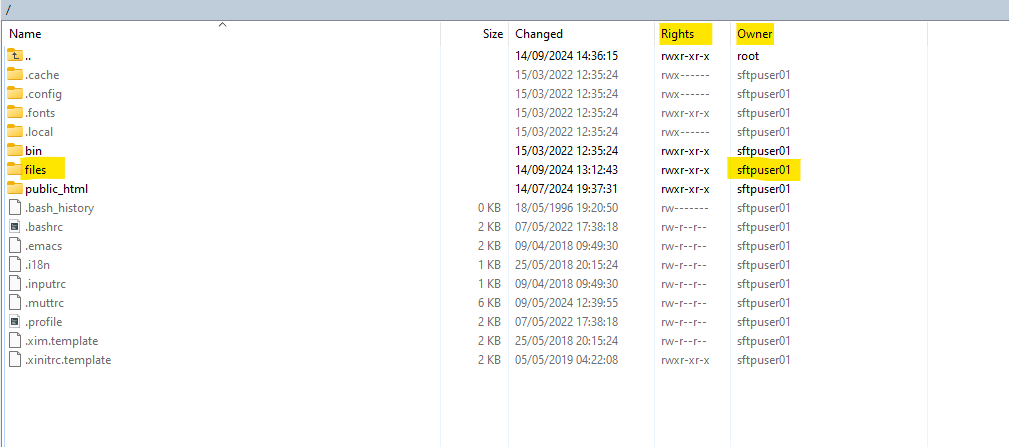
# mkdir /home/sftpuser01/files
# chown sftpuser01:root /home/sftpuser01/files

# mkdir /home/sftpuser02/files
# chown sftpuser02:root /home/sftpuser02/files

# mkdir /home/sftpuser03/files
# chown sftpuser03:root /home/sftpuser03/files

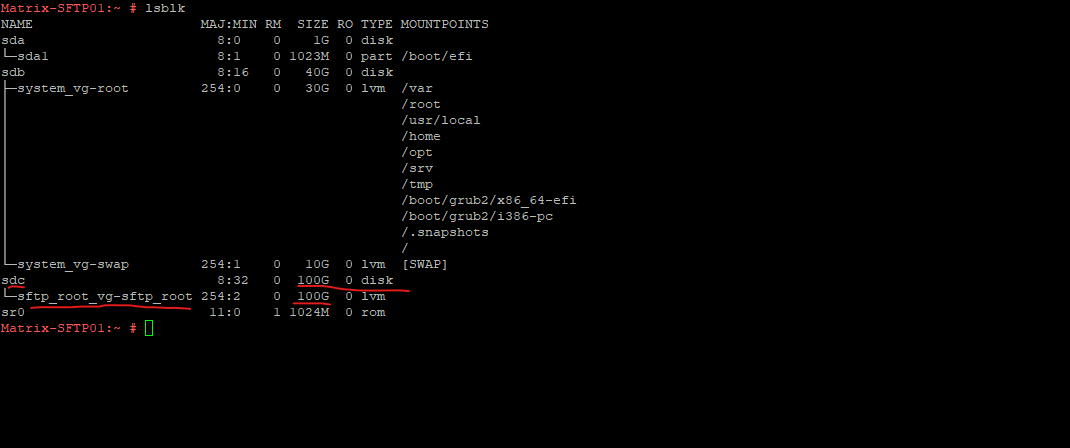
Mounting the dedicated File Upload/Download Folders to the Users Home Directories
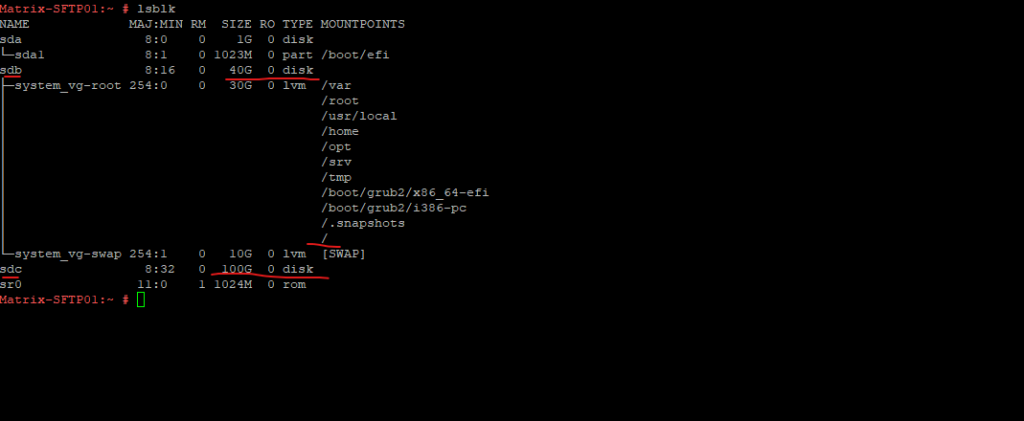
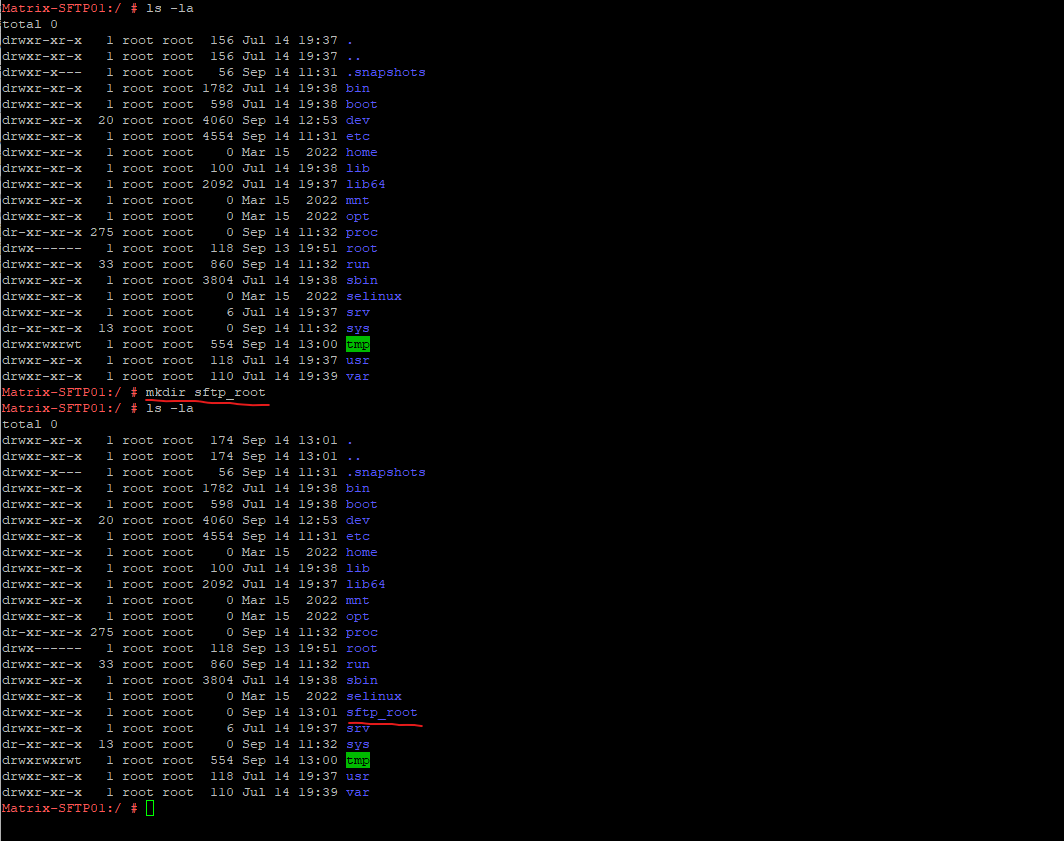
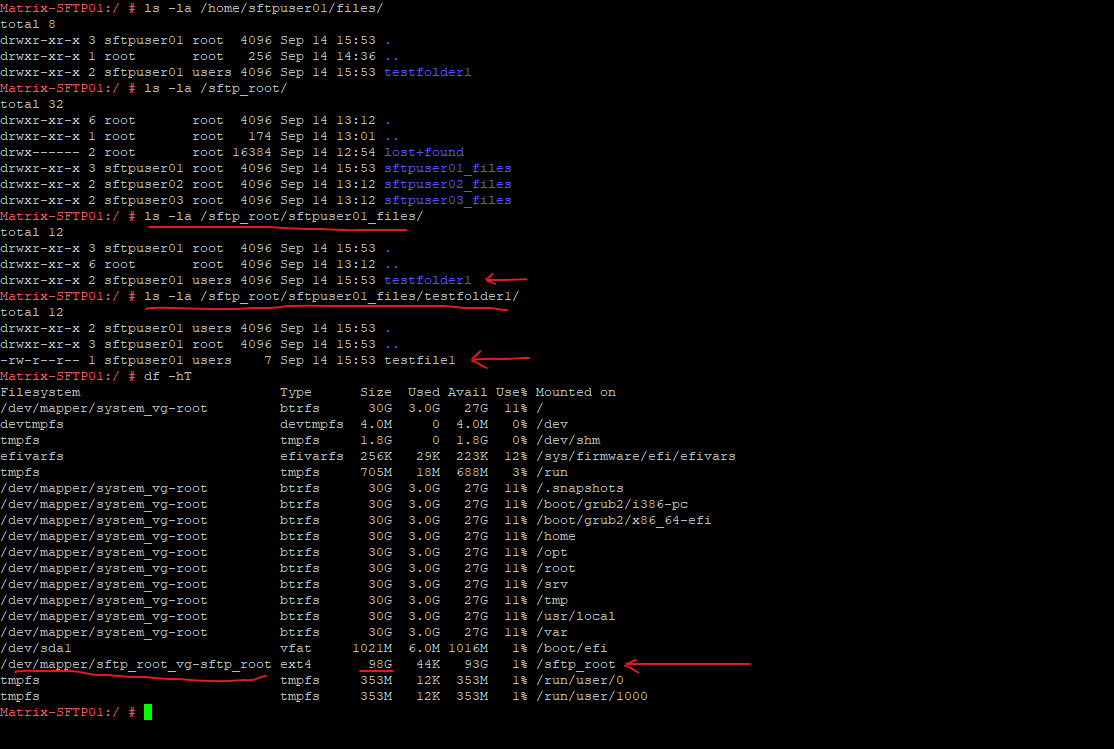
# mkdir sftp_root
# mount /dev/mapper/sftp_root_vg-sftp_root /sftp_root/
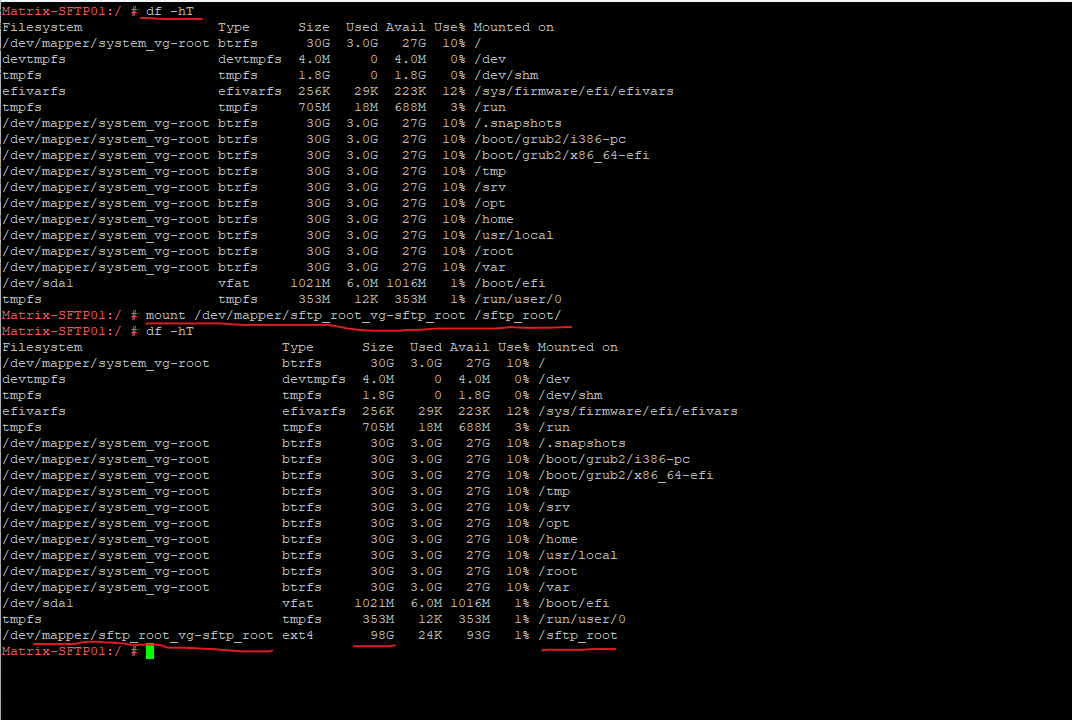
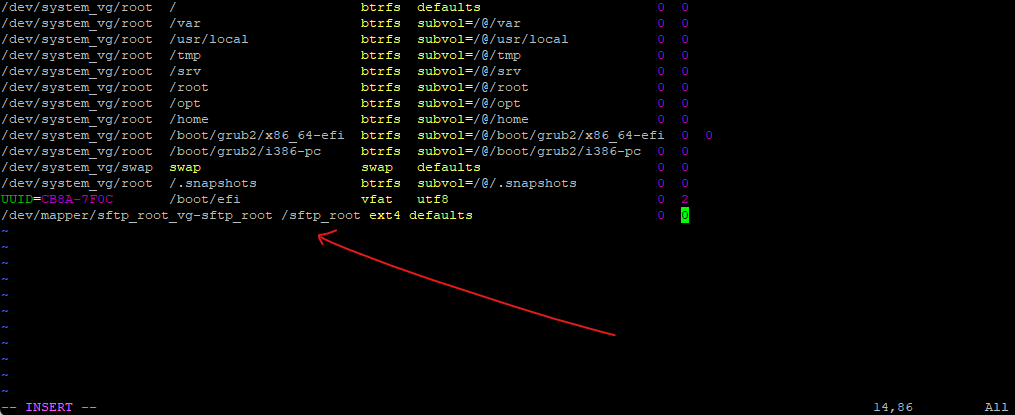
/dev/mapper/sftp_root_vg-sftp_root /sftp_root ext4 defaults 0 0
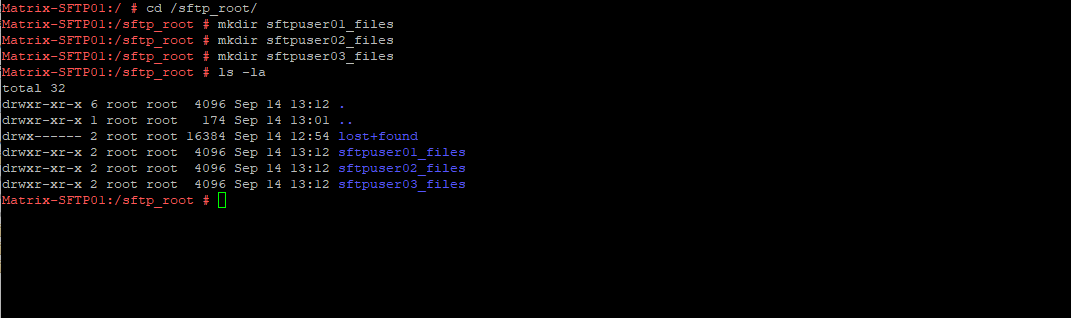
# cd /sftp_root

# mkdir sftpuser01_files
# mkdir sftpuser02_files
# mkdir sftpuser03_files
# mount --bind /sftp_root/sftpuser01_files /home/sftpuser01/files
# mount --bind /sftp_root/sftpuser02_files /home/sftpuser02/files
# mount --bind /sftp_root/sftpuser03_files /home/sftpuser03/files

# chown -R sftpuser01:root /home/sftpuser01/files
# chown -R sftpuser02:root /home/sftpuser02/files
# chown -R sftpuser03:root /home/sftpuser03/files

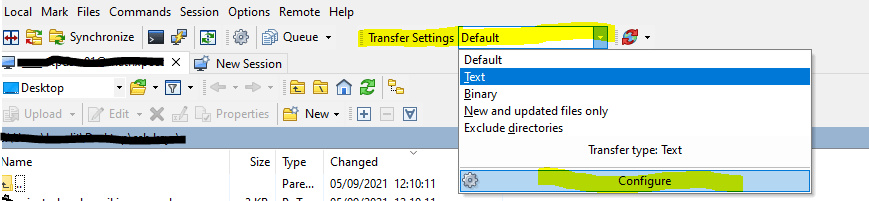
Testing the SFTP Server by using WinSCP

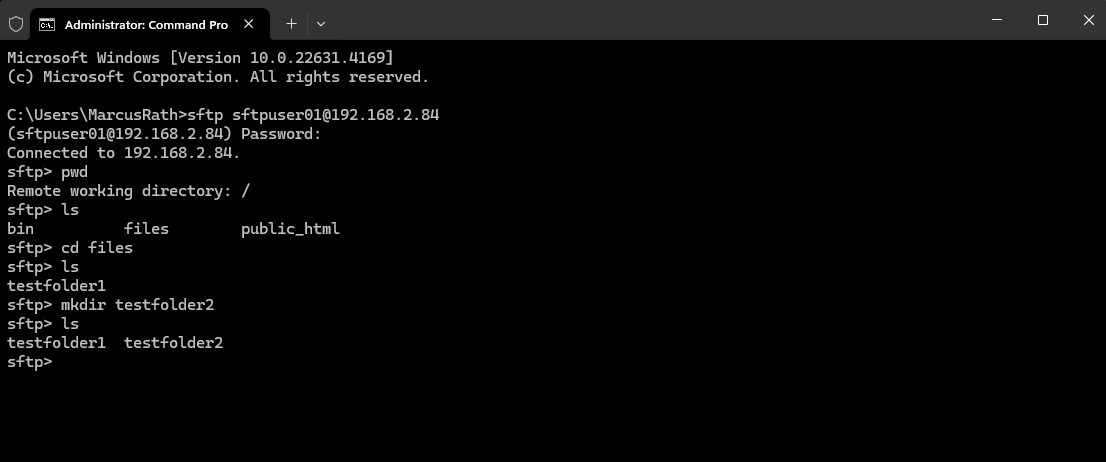
Testing the SFTP Server by using the Command Line in Windows
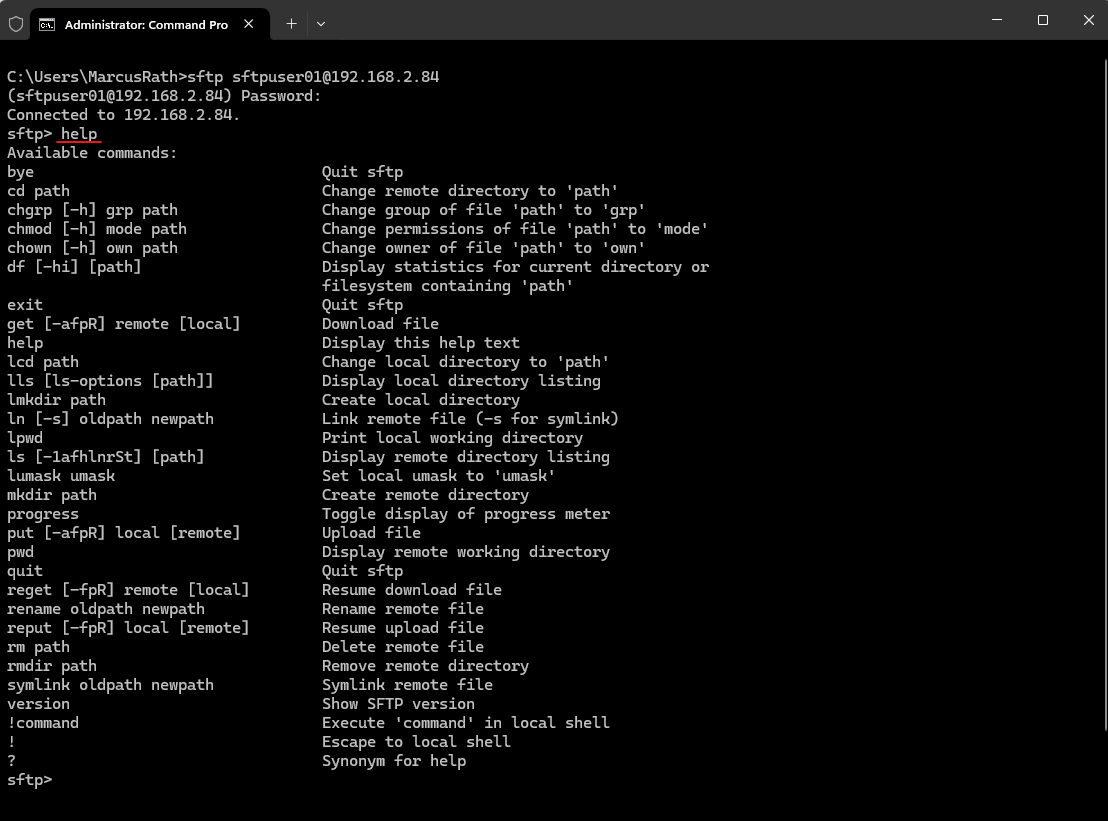
> sftp <sftp user>@<FQDN or IP SFTP Server>
> sftp sftpuser01@192.168.2.84

Prints the current working directory on the remote server
sftp> pwd

Prints the current working directory on the local computer
sftp>lpwd

List information about the FILEs (the current directory by default)
sftp> ls

It create a directory on the remote server
sftp> mkdir testfolder2

# change local directories path
sftp> lcd /new/path

# download file
sftp> get remoteFile

#download directory and all of its content recursive
sftp> get -r someDirectory
Troubleshooting