Set up an Azure SQL Managed Instance and connect over a S2S IPSec VPN from onPrem network
In this post you will see how to set up an Azure SQL Managed Instance and connect to over your onPrem network without a public endpoint published in Azure.
Install Azure SQL Managed Instance (PaaS)
In the Databases category select Azure SQL Managed Instance

For this LAB environment I throttel the controller for vCores and Storage to a minimum available and it is also spendy enough.

The Administrator account (Managed Instance admin login) will be the SQL Server Sysadmin account you can later login with the SQL Management Studio.
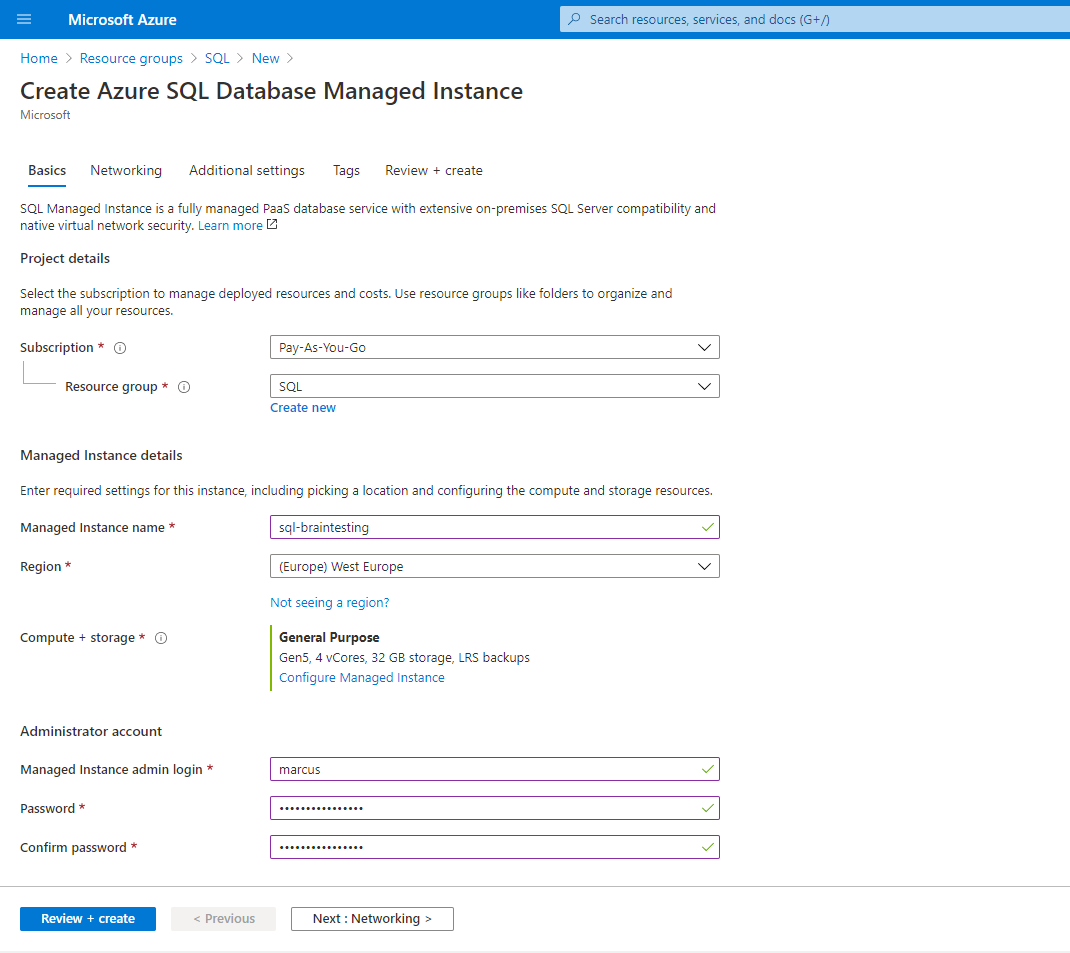
As you can see the managed instance needs a dedicated subnet in your VNet.
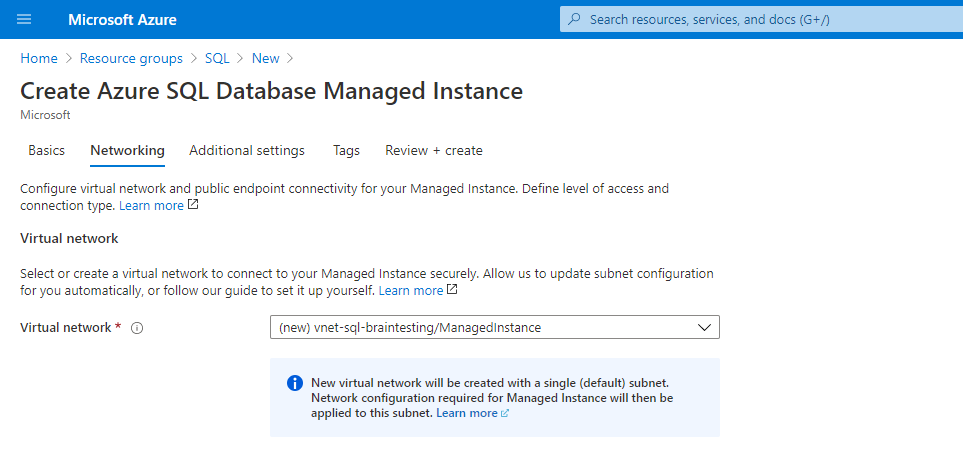
By now I only have one subnet in my VNet which is used by a virtual machine. So because the managed instance needs a dedicated subnet without any existing resource in it, I can’t select this one. But in case to access the managed instance without a public endpoint and instead the existing IPSec VPN tunnel from my onPrem network, I need to use a subnet within the VNet which is tunneled to my onPrem network.
Network requirements
https://docs.microsoft.com/en-us/azure/azure-sql/managed-instance/connectivity-architecture-overview#network-requirements
The SQL Managed Instance subnet can’t contain any other cloud service that’s associated with it, and it can’t be a gateway subnet. The subnet can’t contain any resource but SQL Managed Instance, and you can’t later add other types of resources in the subnet.
High-level connectivity architecture
At a high level, SQL Managed Instance is a set of service components. These components are hosted on a dedicated set of isolated virtual machines that run inside the customer’s virtual network subnet. These machines form a virtual cluster.
The SQL Managed Instance subnet needs to be delegated to the Microsoft.Sql/managedInstances resource provider.
Source: https://docs.microsoft.com/en-us/azure/azure-sql/managed-instance/connectivity-architecture-overview#high-level-connectivity-architecture
Validate and modify an existing virtual network
https://docs.microsoft.com/en-us/azure/azure-sql/managed-instance/vnet-existing-add-subnet#validate-and-modify-an-existing-virtual-network
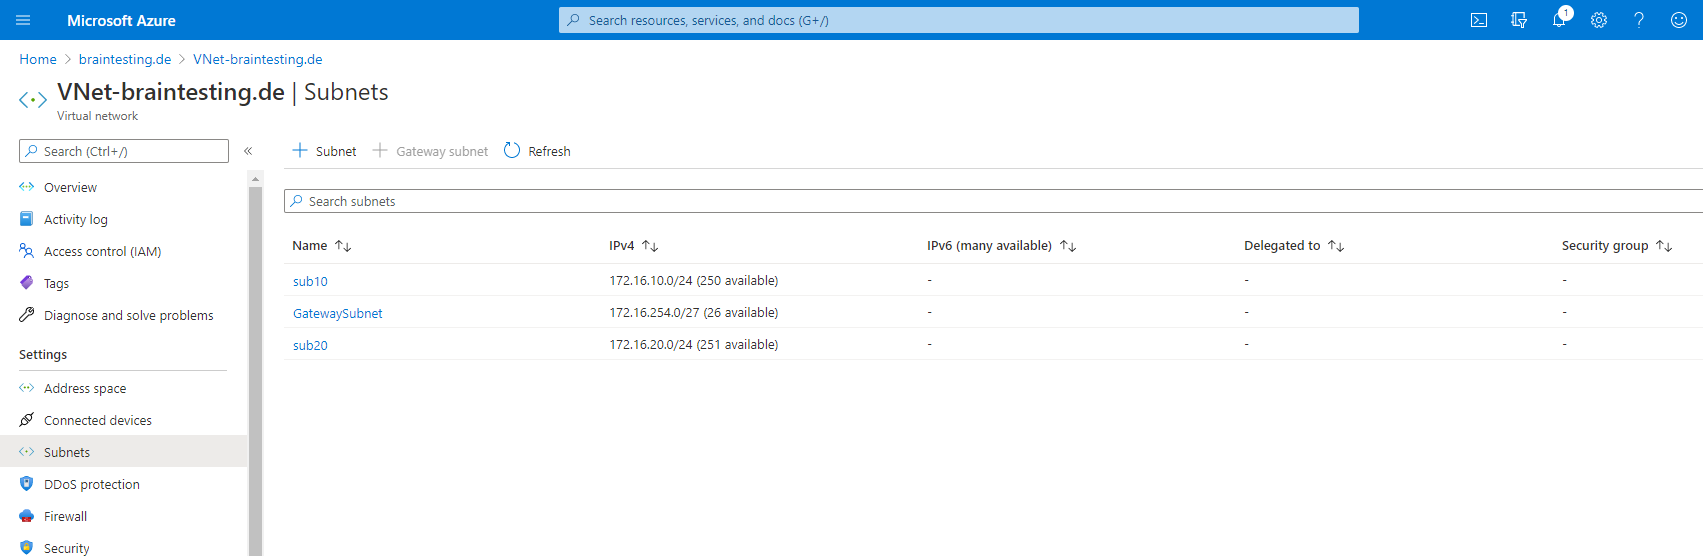
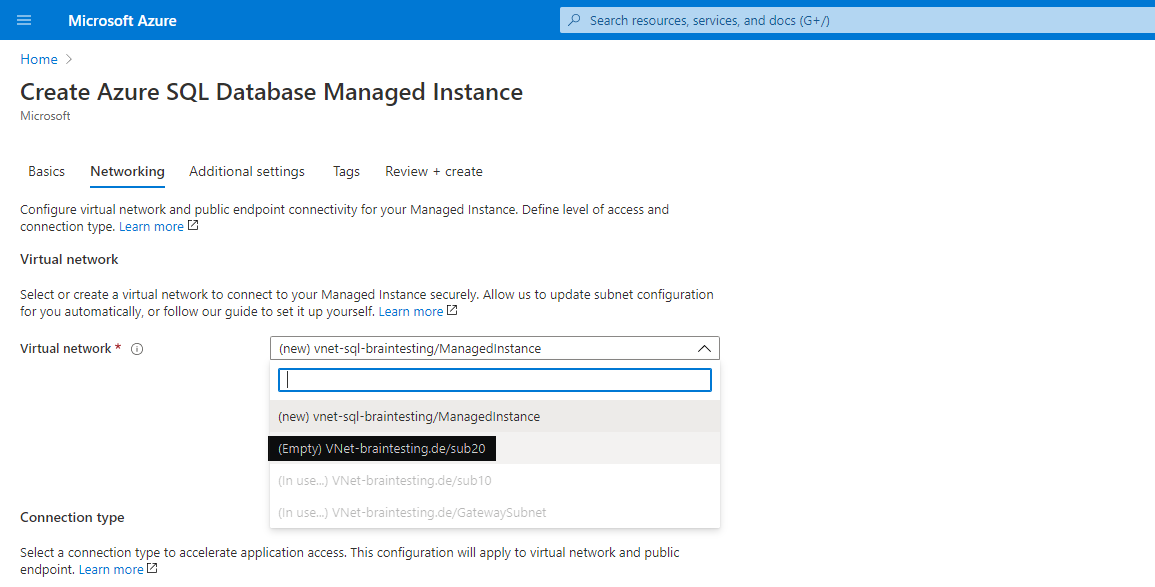
Here you can see the existing subnets by now, sub10 is the one with the virtual machine.

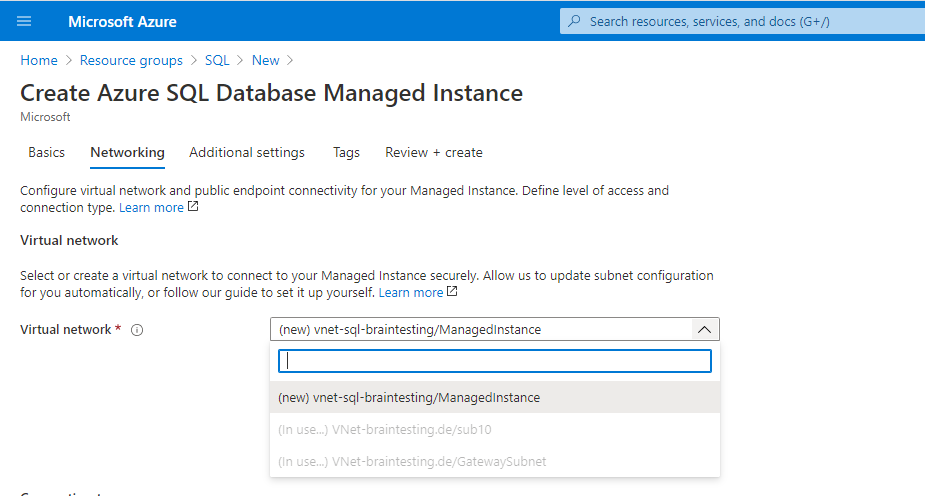
So I created a new subnet sub20 to use dedicated for the Azure SQL managed instance.
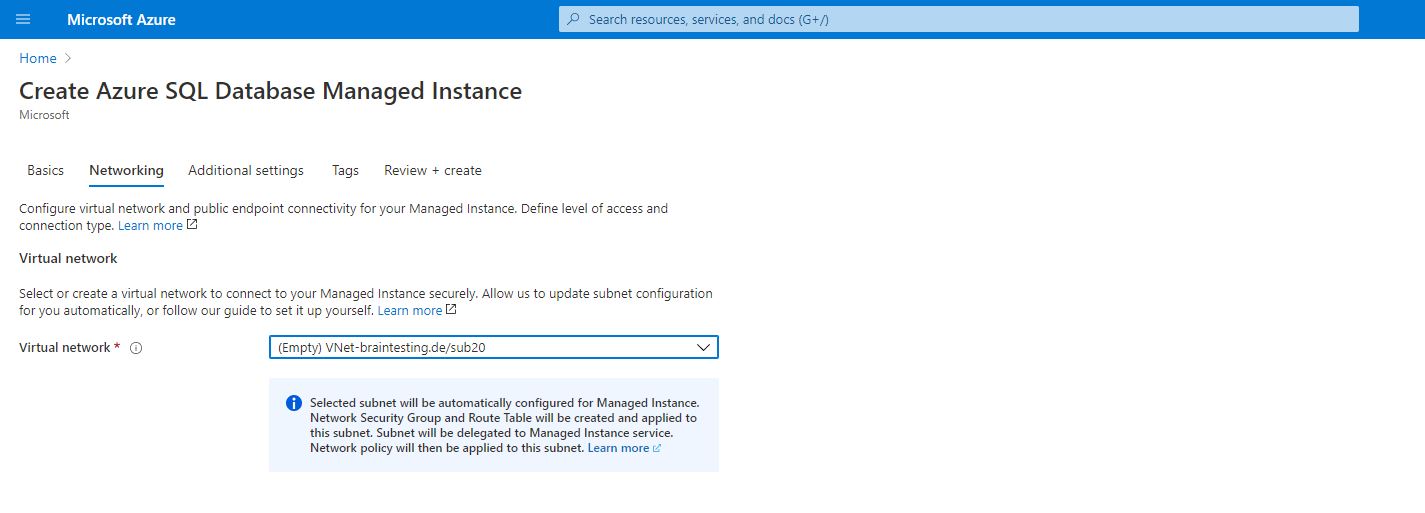
You can see that Azure can determine if a subnet is in use or empty, so the newly created sub20 subnet is empty and therfore can be selected for the managed instance to use.
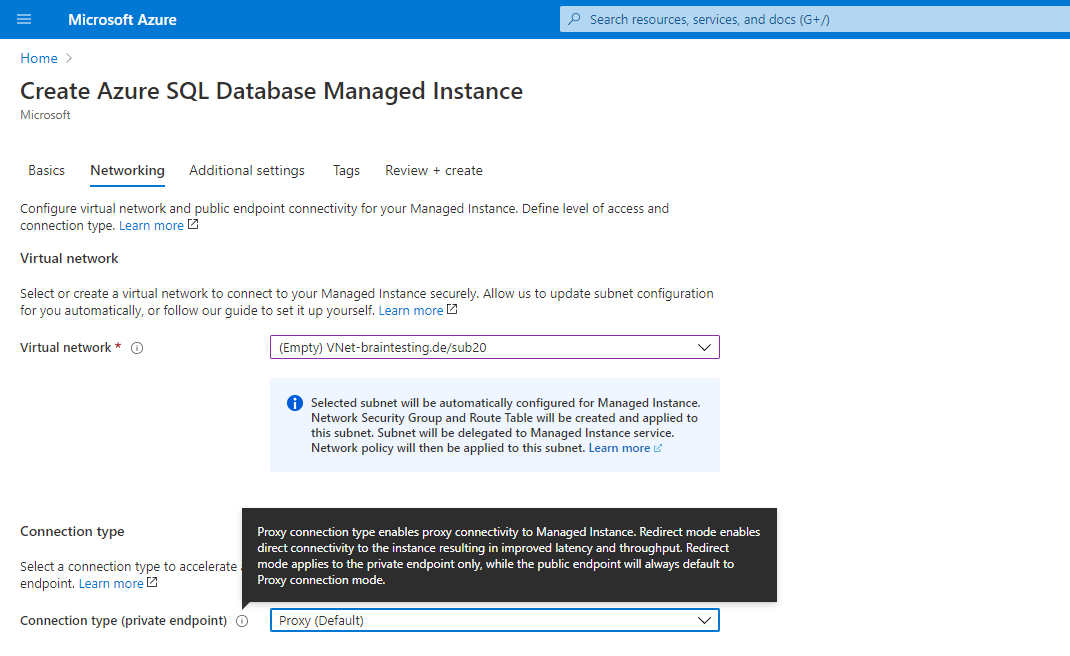

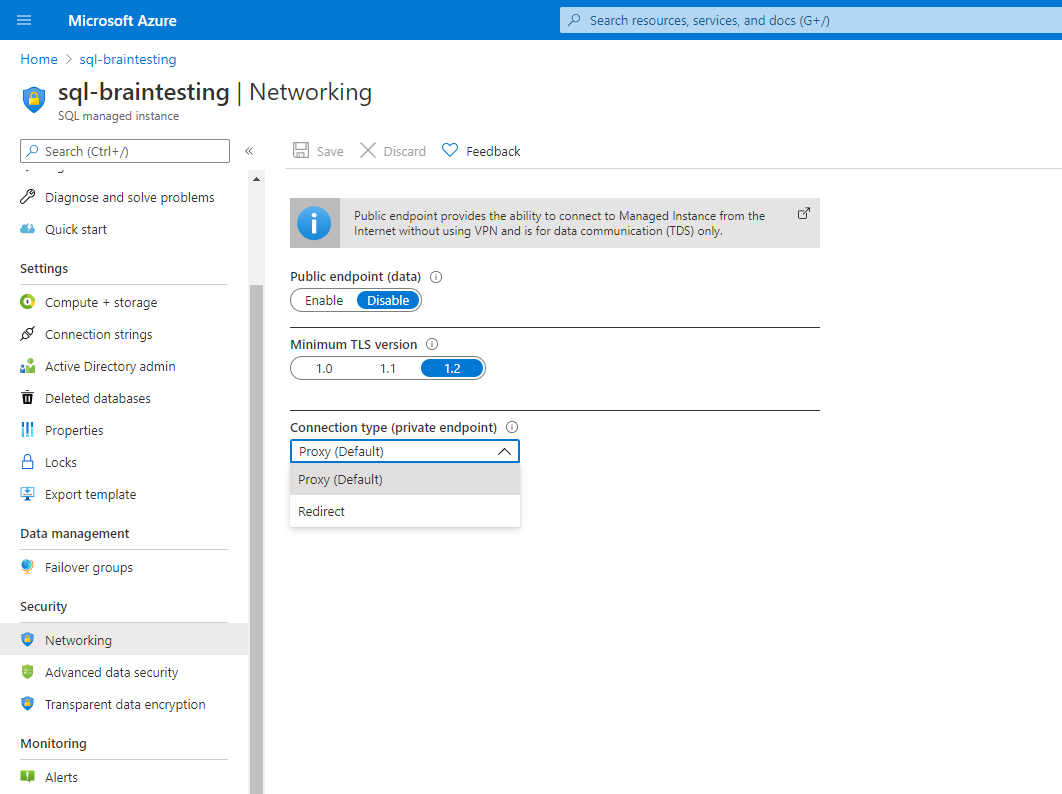
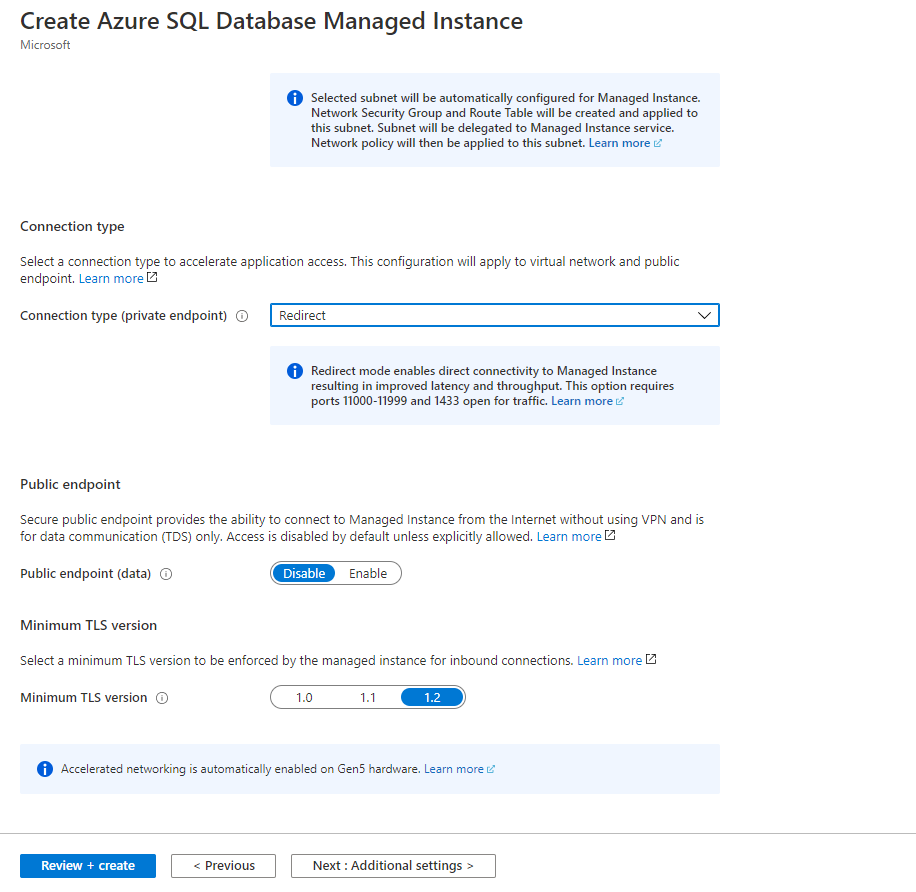
The Connection type (private endpoint) you can change later on the fly between Proxy (default) and Redirect (recommended) in the SQL managed instance under Security – Networking. Screenshot below!
Azure SQL Managed Instance connection types
https://docs.microsoft.com/en-us/azure/azure-sql/managed-instance/connection-types-overview
The redirect connection type currently works only for a private endpoint. Regardless of the connection type setting, connections coming through the public endpoint would be through a proxy.
Azure SQL Managed Instance supports the following two connection types:
- Redirect (recommended): Clients establish connections directly to the node hosting the database. To enable connectivity using redirect, you must open firewalls and Network Security Groups (NSG) to allow access on ports 1433, and 11000-11999. Packets go directly to the database, and hence there are latency and throughput performance improvements using redirect over proxy.
- Proxy (default): In this mode, all connections are using a proxy gateway component. To enable connectivity, only port 1433 for private networks and port 3342 for public connection need to be opened. Choosing this mode can result in higher latency and lower throughput, depending on nature of the workload. We highly recommend the redirect connection policy over the proxy connection policy for the lowest latency and highest throughput.
Changing the Connection type afterwards.

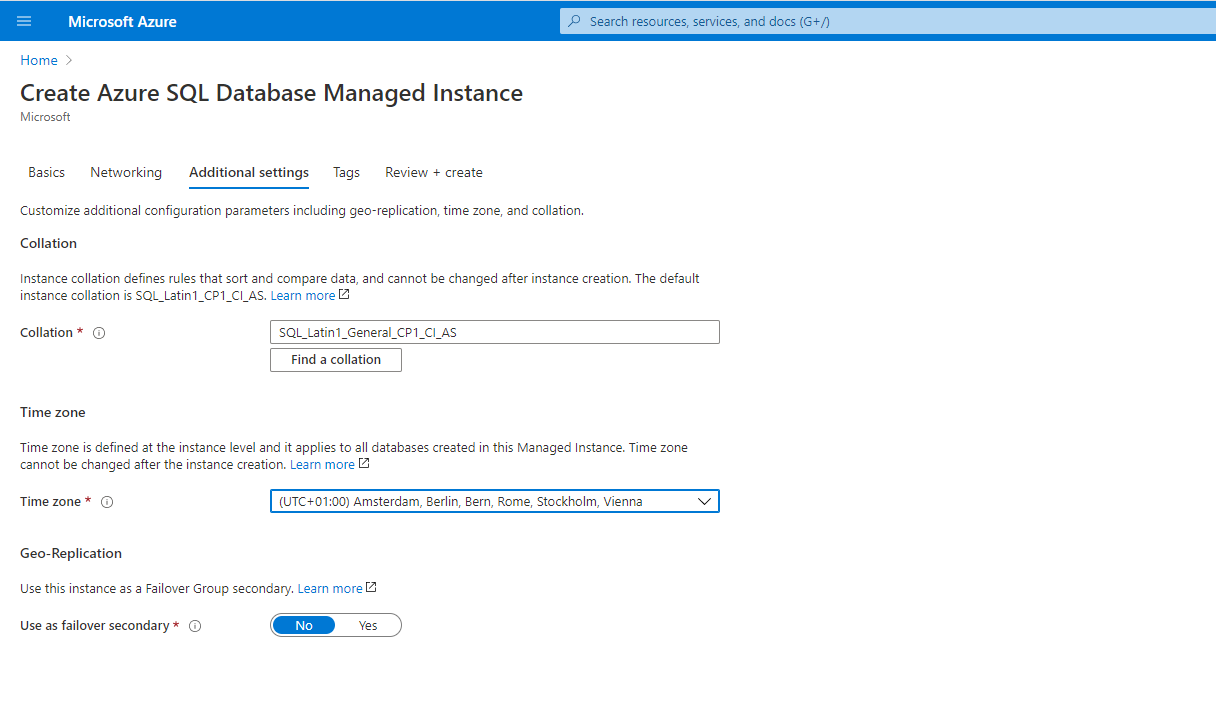
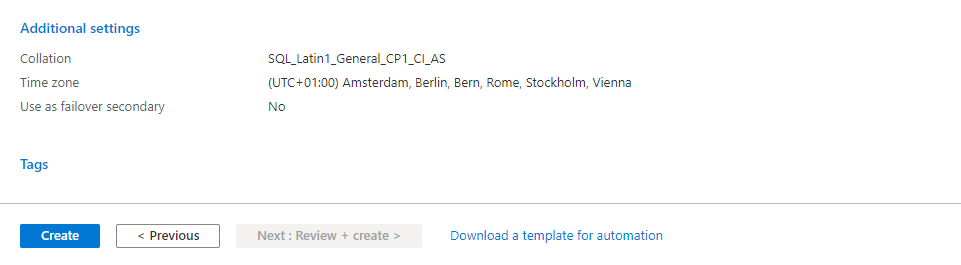
Under Additional settings you can change the Collation, the Time zone and the replication settings of your database instance.

Quickstart: Create a managed instance of SQL Managed Instance
https://docs.microsoft.com/en-us/azure/azure-sql/managed-instance/instance-create-quickstart
Creation of SQL Managed Instance is a long-running operation that might take a few hours at a time, depending on specific circumstances
In my lab environment this takes about 4 hours, so grab a coffee ☕ …
The deployment is based on a virtual cluster which contains of a set of isolated virtual machines that run inside your VNet subnet. So no matter what resource group you choose for the managed instance, this virtual cluster will be created in the resource group of your VNet. The other components will be created in the resource group you selected. You will see this in the screenshots below.
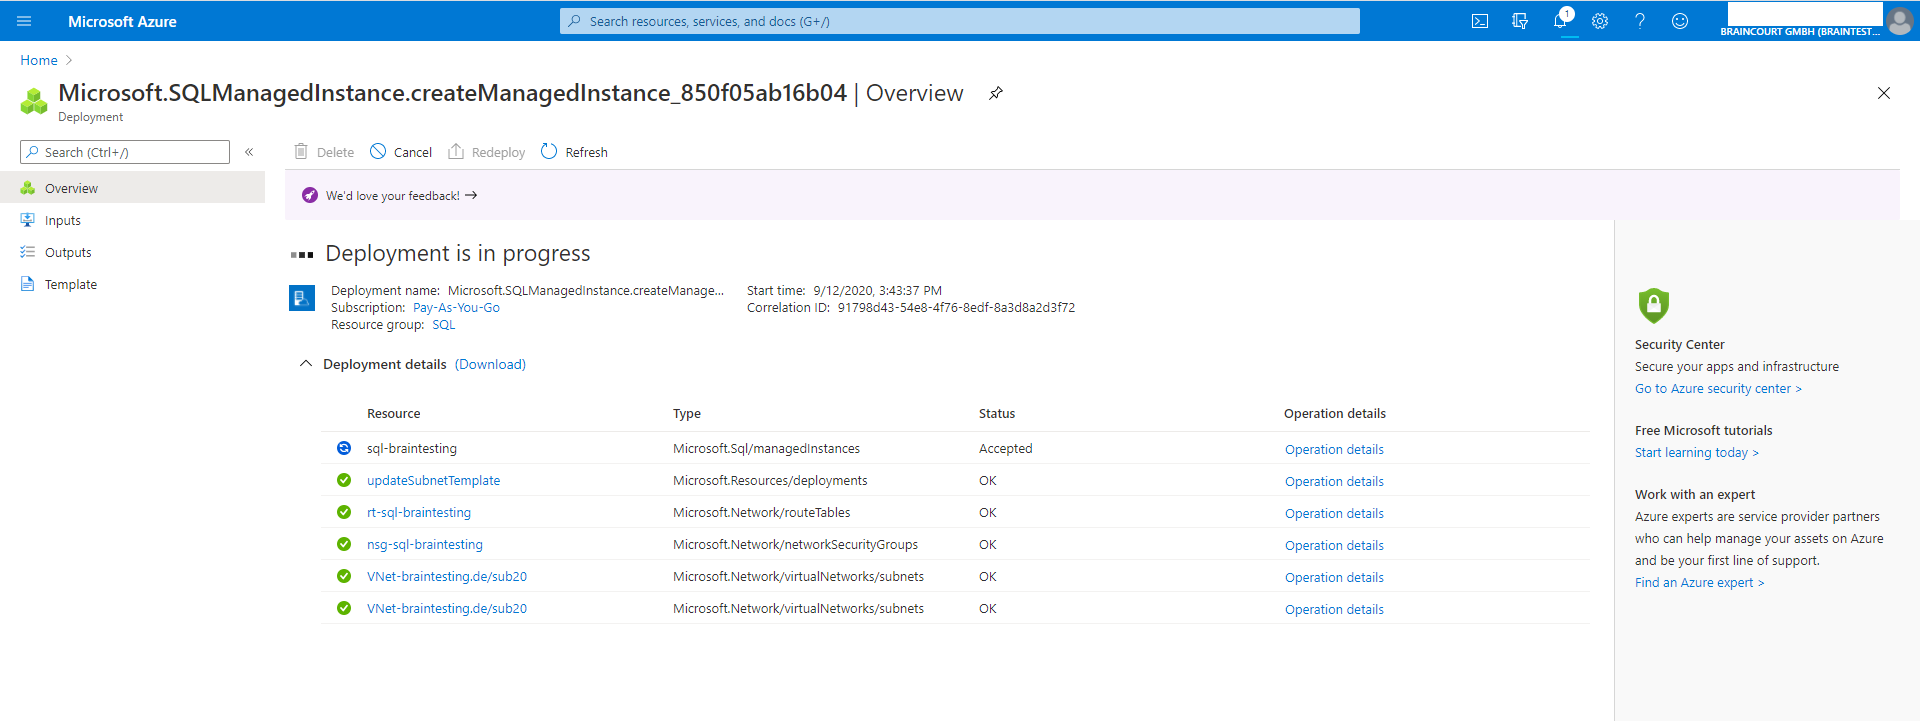
After finishing the deployment of the managed instance, you will have the following further objects in your Azure tenant/directory.
- Azure sql managed instance
- nsg network security group
- Routing table
- Virtual Cluster (created automatically in the resource group of your VNet)
Virtual Cluster
https://docs.microsoft.com/en-us/azure/azure-sql/managed-instance/connectivity-architecture-overview#high-level-connectivity-architecture
At a high level, SQL Managed Instance is a set of service components. These components are hosted on a dedicated set of isolated virtual machines that run inside the customer’s virtual network subnet. These machines form a virtual cluster.
A virtual cluster can host multiple managed instances. If needed, the cluster automatically expands or contracts when the customer changes the number of provisioned instances in the subnet.
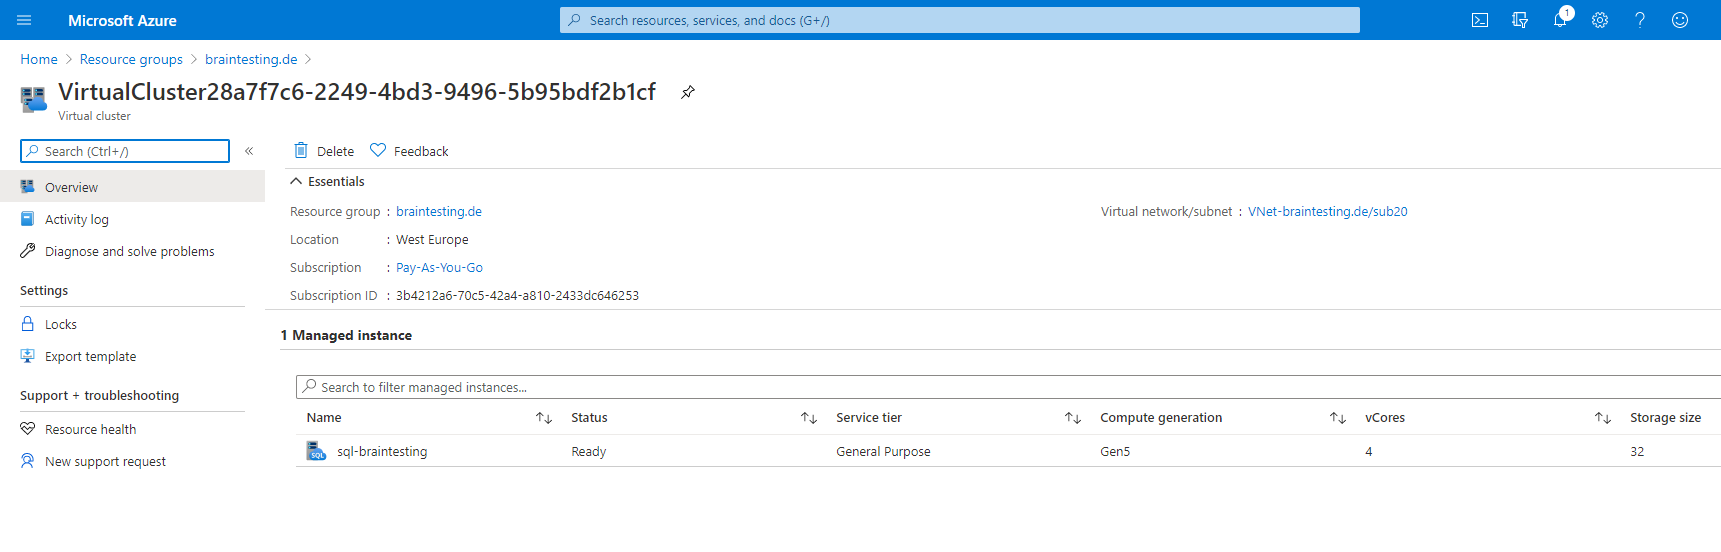
Here you will see the created virtual cluster for the SQLmanaged instance which will be placed automatically inside the resource group of the VNet.
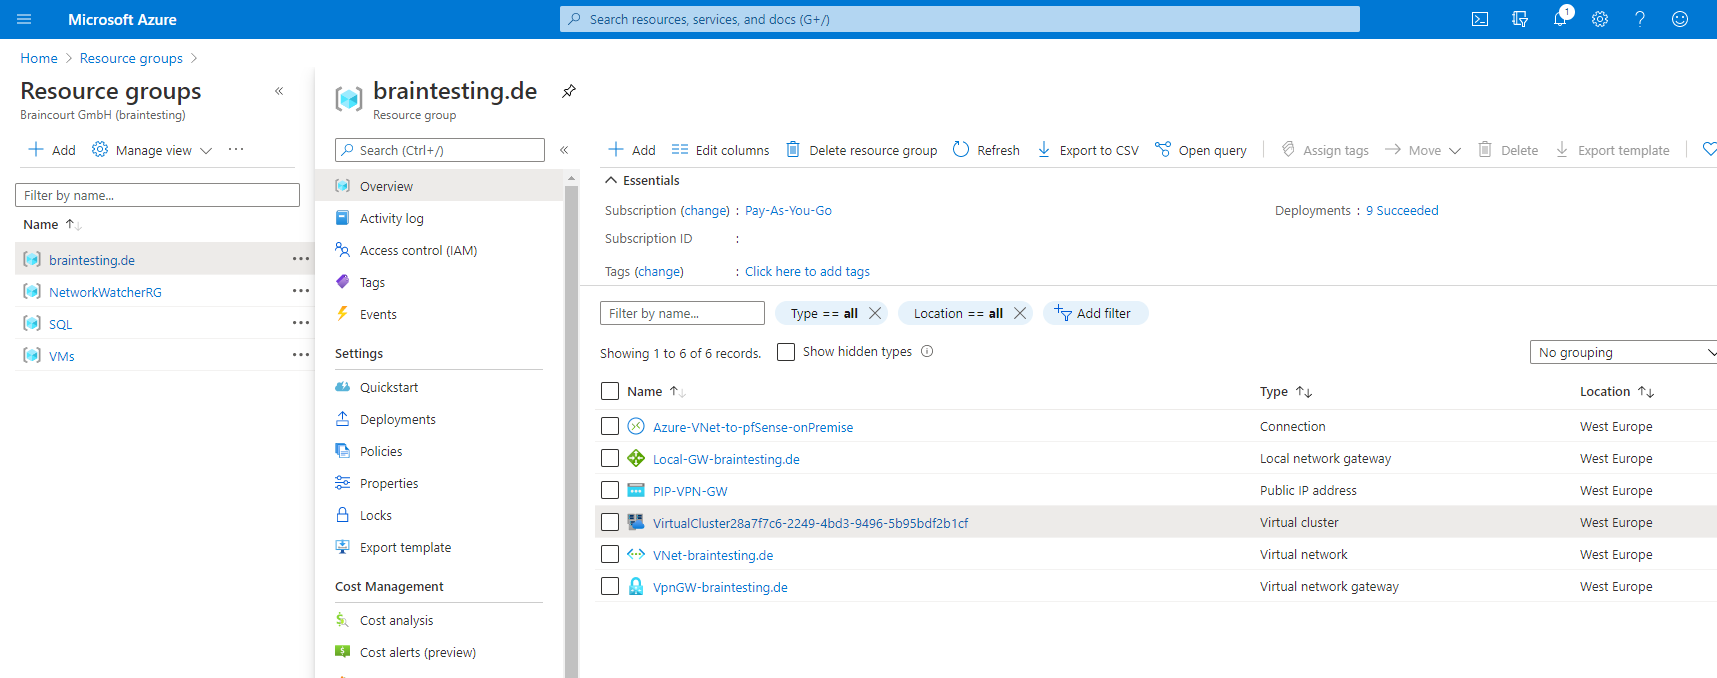
When you click above on the virtual cluster you will find inside the virtual cluster overview page the created SQL managed instance.
All other resources like network security group, route table and the SQL managed instance will be created in the selected resource group.

Connect to Azure SQL Managed Instance from onPrem network over policy-based vpn
There is no need to adjust the routing table or inbound/outbound rules in the network security group.
By default the routing between the SQL managed instance subnet and your onPrem network, in case it is in the same VNet you have set up your S2S VPN tunnel with the Gateway Subnet, will do the Gateway subnet.
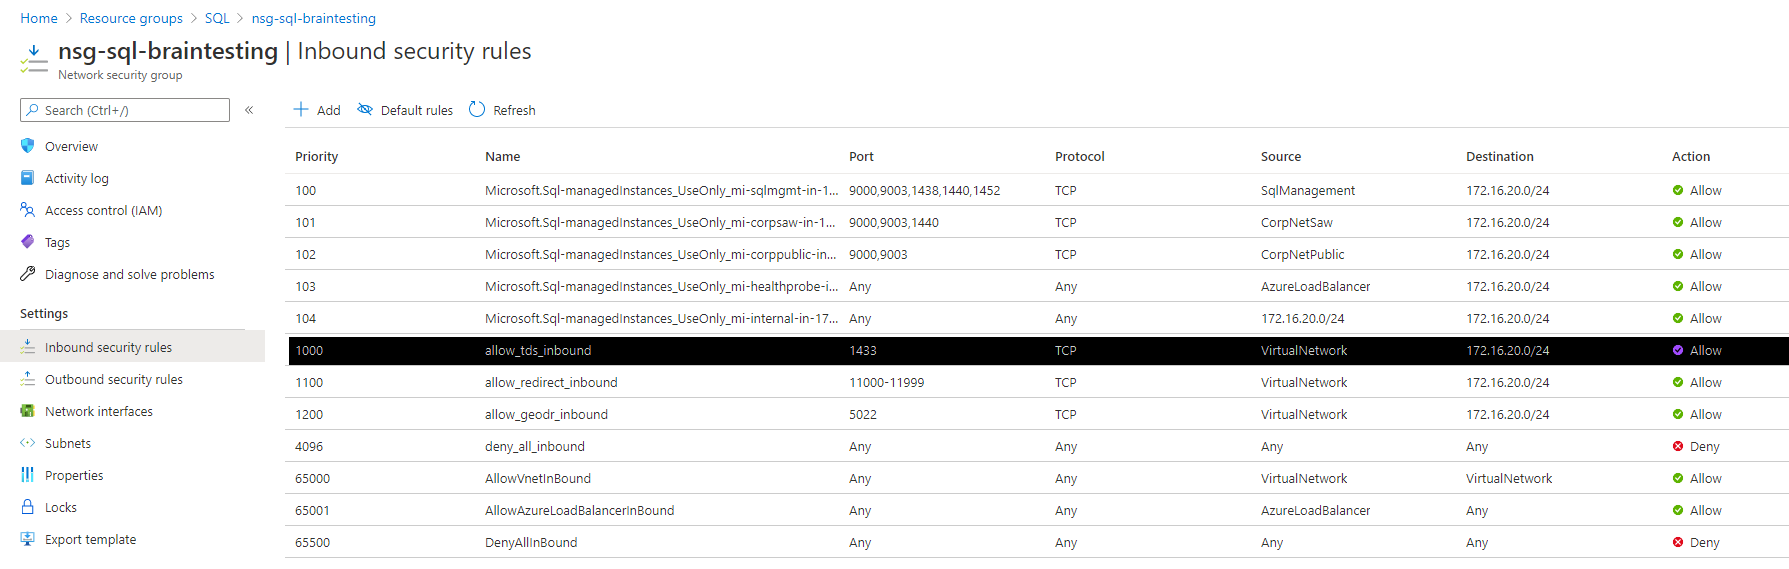
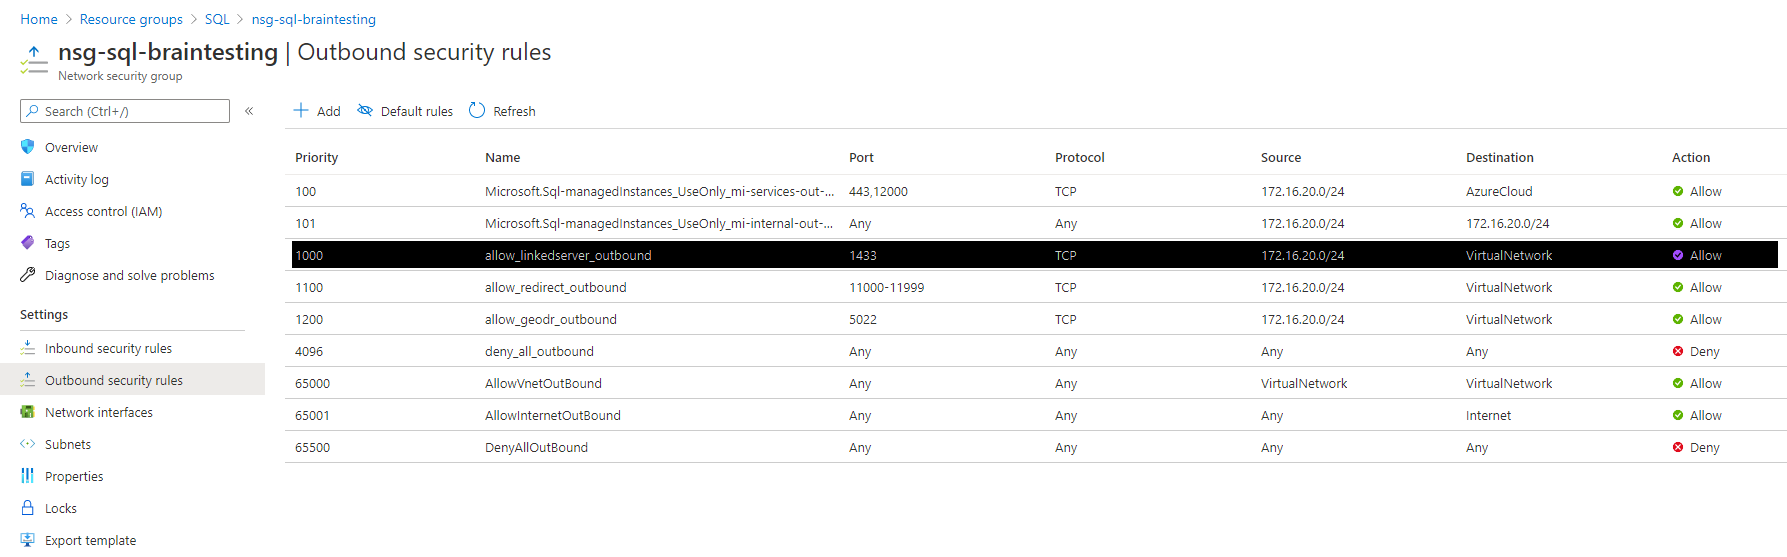
In the network security group there are by default an inbound and outbound rule for Port 1433 and also for Port 11000-11999 with source and destination tag VirtualNetwork.
The service tag VirtualNetwork includes the virtual network address space (CIDR ranges defined in Azure), all connected on-premises address spaces, and connected Azure VNets (Peering or VPN Gateway).
Virtual network service tags
A service tag represents a group of IP address prefixes from a given Azure service. Microsoft manages the address prefixes encompassed by the service tag and automatically updates the service tag as addresses change, minimizing the complexity of frequent updates to network security rules.
VirtualNetwork –> The virtual network address space (all IP address ranges defined for the virtual network), all connected on-premises address spaces, peered virtual networks, virtual networks connected to a virtual network gateway, the virtual IP address of the host, and address prefixes used on user-defined routes. This tag might also contain default routes.
Source: https://docs.microsoft.com/en-us/azure/virtual-network/service-tags-overview
So your onPrem network traffic to the managed instance by default will not be filtered on Azure site, but keep in mind, that you need to open the ports outbound on your onPrem Firewall.
Inbound security rules of the Network security group (NSG) –
Outbound security rules of the Network security group (NSG)
NSG Best practice
http://gowie.eu/index.php/azure/best-practice/23-nsg-best-practice
Connect with SQL Management Studio from onPrem
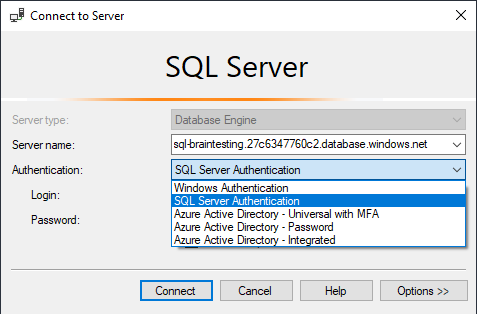
Determine the Host (FQDN) from the overview page of Azure SQL managed instance.

Enter this host FQDN and you credentials you entered at creating the instance below. Therefore switch in SQL Management Studio from Windows Authentication to SQL Server Authentication.

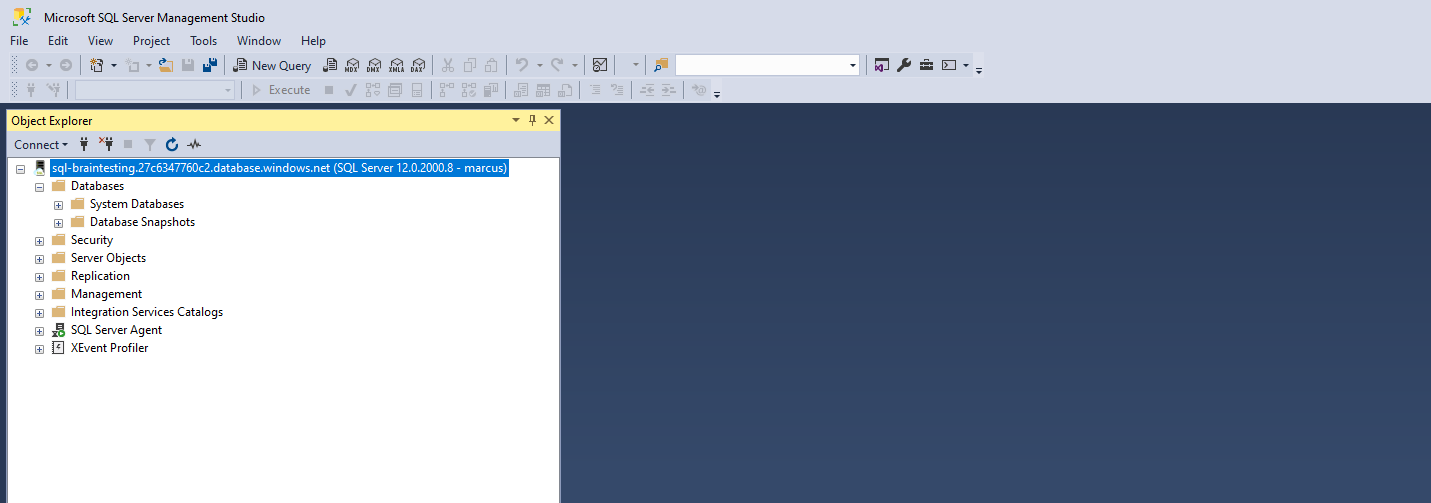
And connected! From now on I can create the first dabase in my managed instance (PaaS).
Links
Quickstart: Create a managed instance of SQL Managed Instance
https://docs.microsoft.com/en-us/azure/azure-sql/managed-instance/instance-create-quickstartConnectivity architecture for Azure SQL Managed Instance
https://docs.microsoft.com/en-us/azure/azure-sql/managed-instance/connectivity-architecture-overviewConnect your application to Azure SQL Managed Instance
https://docs.microsoft.com/en-us/azure/azure-sql/managed-instance/connect-application-instance