Set up Microsoft Entra Application Proxy to publish Remote Desktop (RDS)
Remote Desktop Service and Microsoft Entra application proxy works together to improve the productivity of workers who are away from the corporate network.
In my previous post I was walking through each step of setting up the Microsoft Entra Application Proxy to publish on-premise web applications which doesn’t requires you to open any inbound connections through your firewall.
When you so far hasn’t set up the Microsoft Entra Application Proxy and installed the private Network connector in your on-premise environment, please first read my previous post about how to.
The only cost for Application Proxy is the Microsoft Entra ID P1 licence, there are no other costs.
Set up the Application in Microsoft Entra
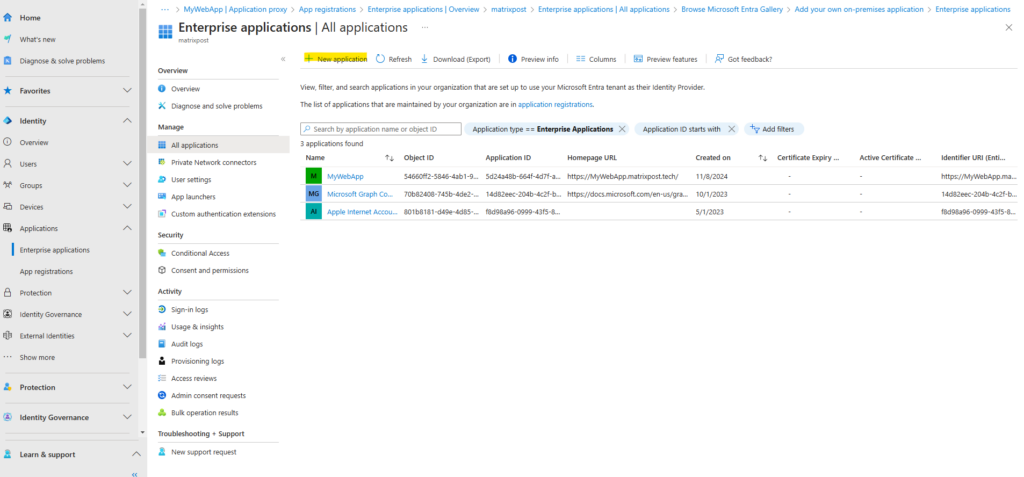
Navigate to the Microsoft Entra admin center -> Identity -> Application -> Enterprise application.
Both the RD Web and RD Gateway endpoints must be located on the same machine, and with a common root. RD Web and RD Gateway are published as a single application with application proxy so that you can have a single sign-on experience between the two applications.
Click on + New application.
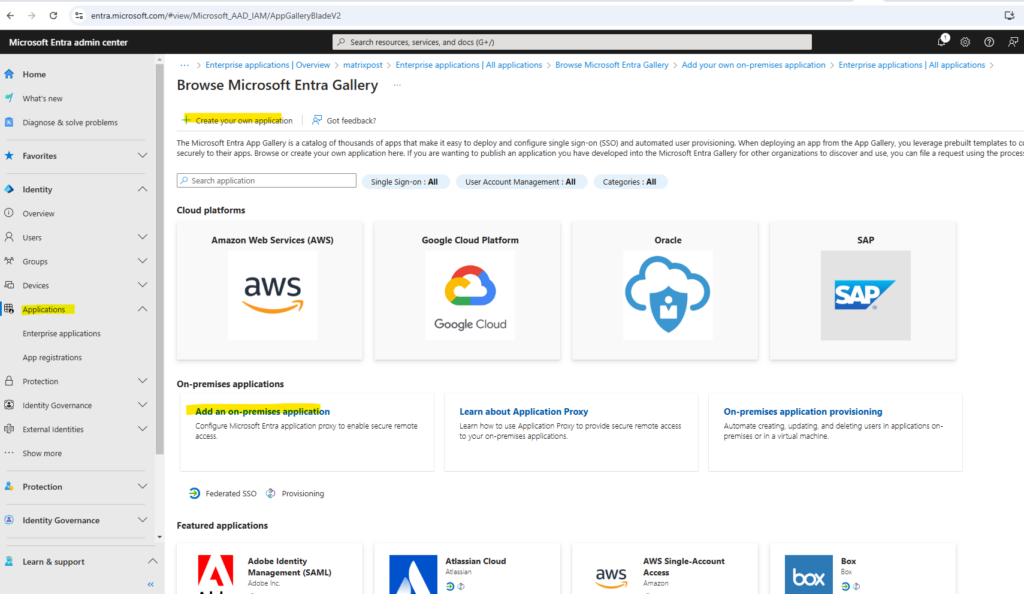
Select Add an on-premises application button below.
Alternatively, you can select Create your own application at the top of the page and then select Configure application proxy for secure remote access to an on-premises application.
When publishing RD Web, use the same internal and external Fully Qualified Domain Name (FQDN) when possible.
If the internal and external Fully Qualified Domain Names (FQDNs) are different, disable Request Header Translation to avoid the client receiving invalid links.
If you’re using the RD Web client, you must use the same internal and external FQDN. If the internal and external FQDNs are different, you encounter websocket errors when making a RemoteApp connection through the RD Web client.
All requirements you will see in the article by Microsoft https://learn.microsoft.com/en-us/entra/identity/app-proxy/application-proxy-integrate-with-remote-desktop-services#requirements.
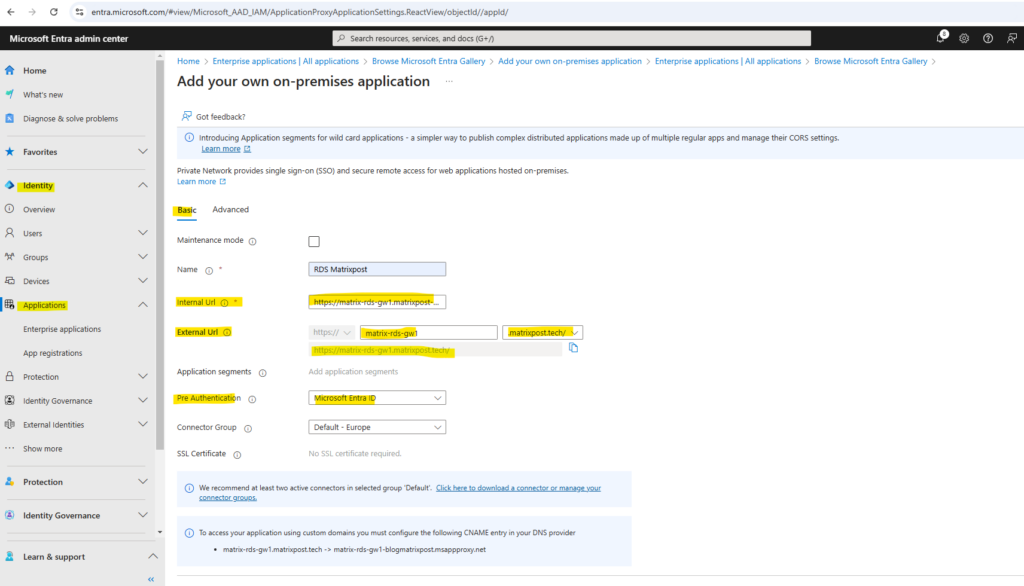
Publish a new application proxy application with the following values.
- Internal URL: https://<rdhost>.com/, where <rdhost> is the common root that RD Web and RD Gateway share.
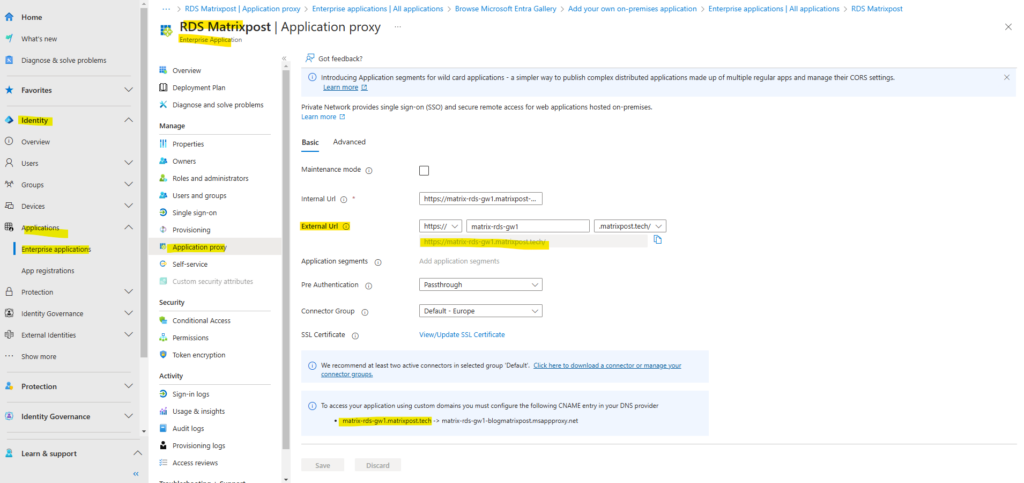
- External URL: This field is automatically populated based on the name of the application, but you can modify it. Your users go to this URL when they access RDS.
- Pre authentication method: Microsoft Entra ID.
- Translate URL headers: No.
- Use HTTP-Only Cookie: No.
For the internal URL I will use https://matrix-rds-gw1.matrixpost-lab.net/, this is the FQDN of my RD Web and RD Gateway host, both roles are as mandatory on this host. I will redirect all request to /RDWeb/Pages directly on the IIS of the rdhost. For the external URL I will select my custom domain matrixpost.tech.
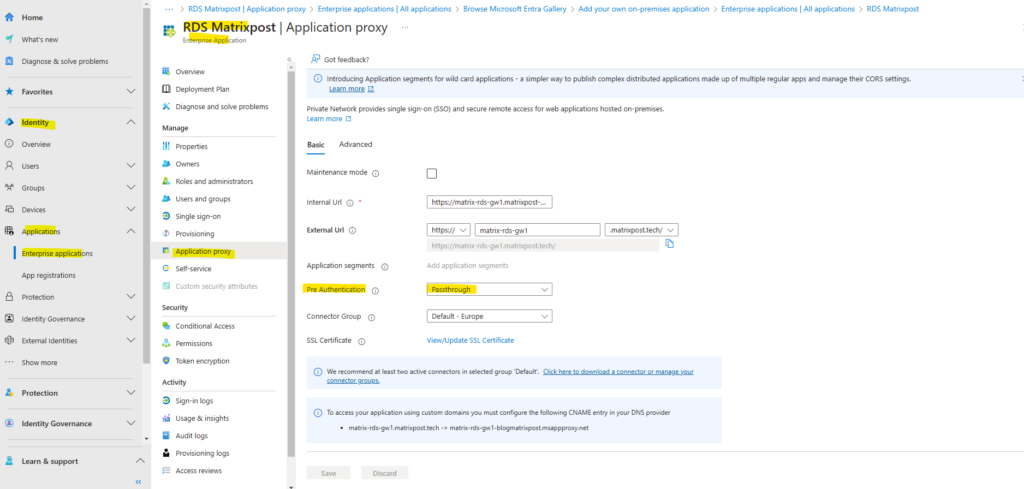
In my case I will use for pre-authentication actually Passthrough, so far I doesn’t synchronize my on-premise accounts to Azure which are the only ones who are authorized to logon to my RDS environment.
When we configure here Microsoft Entra ID for pre-authentication, we also need to set pre-authentication for the RD Session Collection as shown here https://learn.microsoft.com/en-us/entra/identity/app-proxy/application-proxy-integrate-with-remote-desktop-services#direct-rds-traffic-to-application-proxy.
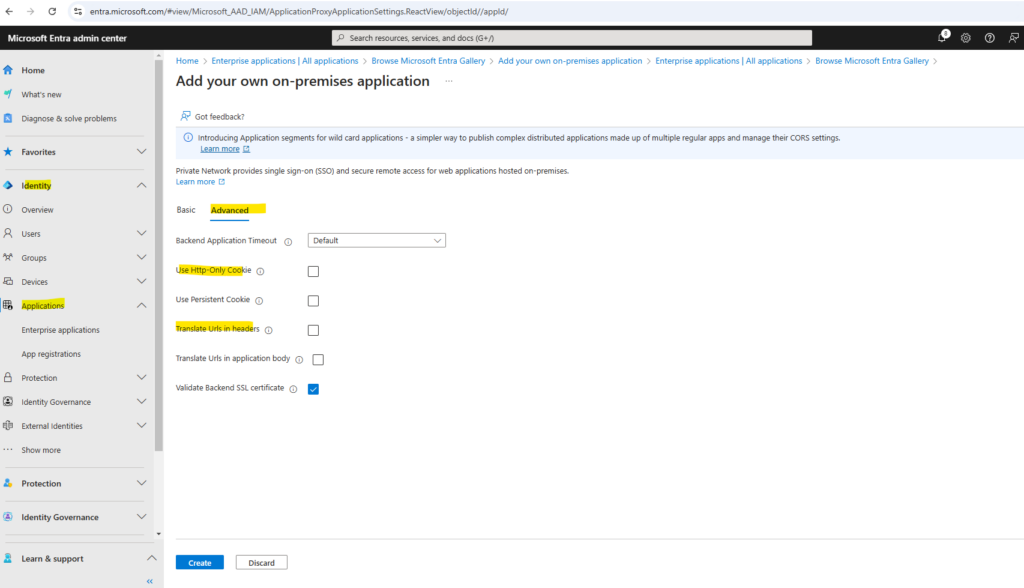
Under the Advanced tab.
- Translate URL headers: No.
- Use HTTP-Only Cookie: No.
Because in my case the internal and external Fully Qualified Domain Names (FQDNs) are different, I have to uncheck the by default enabled Translate URL headers below.
Click on Create.
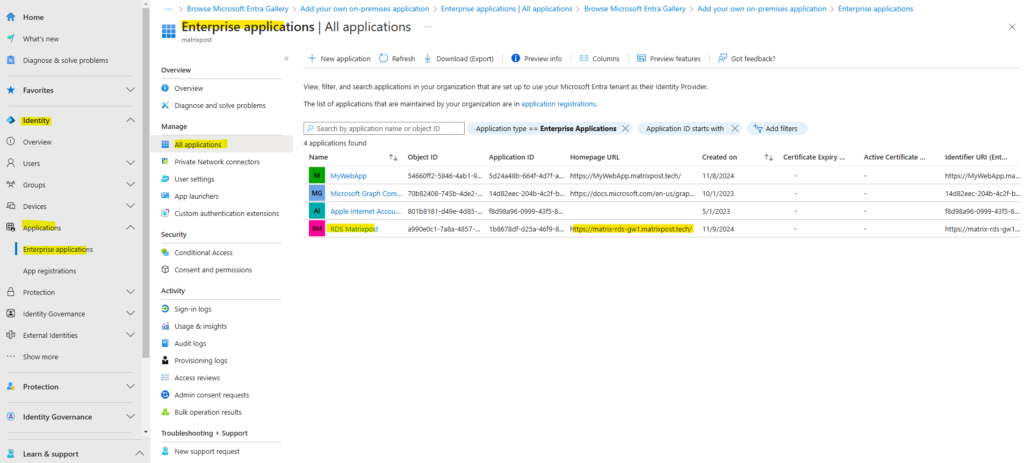
Our new application is now created and shown up under enterprise applications.
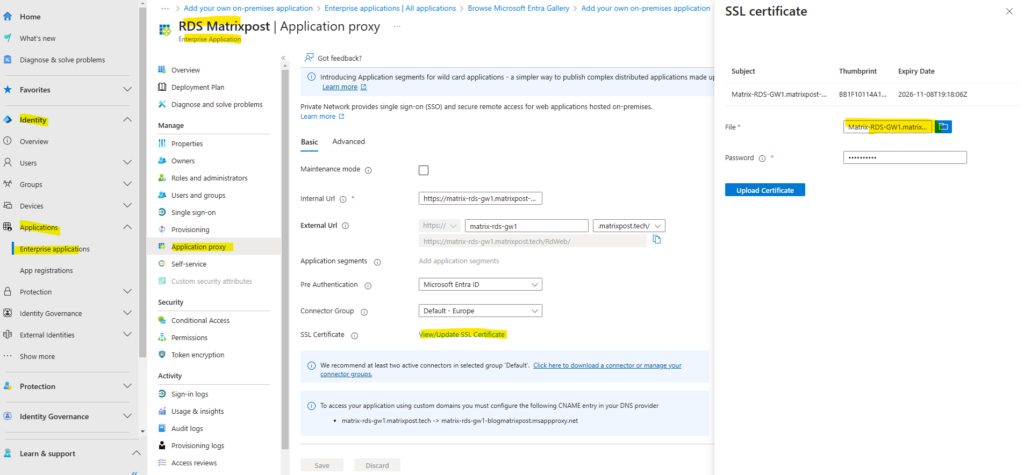
When clicking above on our newly created app, we need to navigate to the Application proxy menu in order to upload the SSL certificate for.
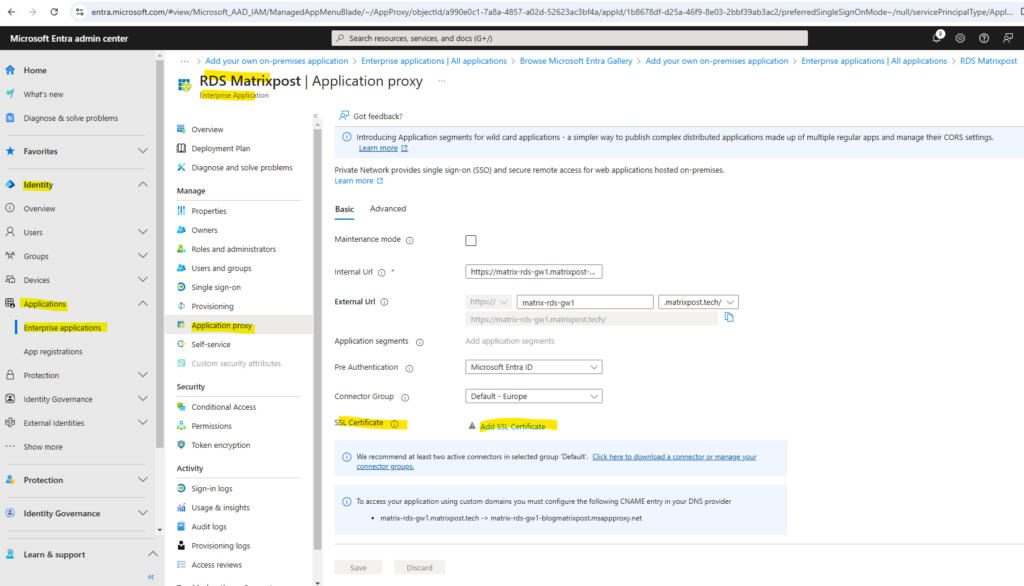
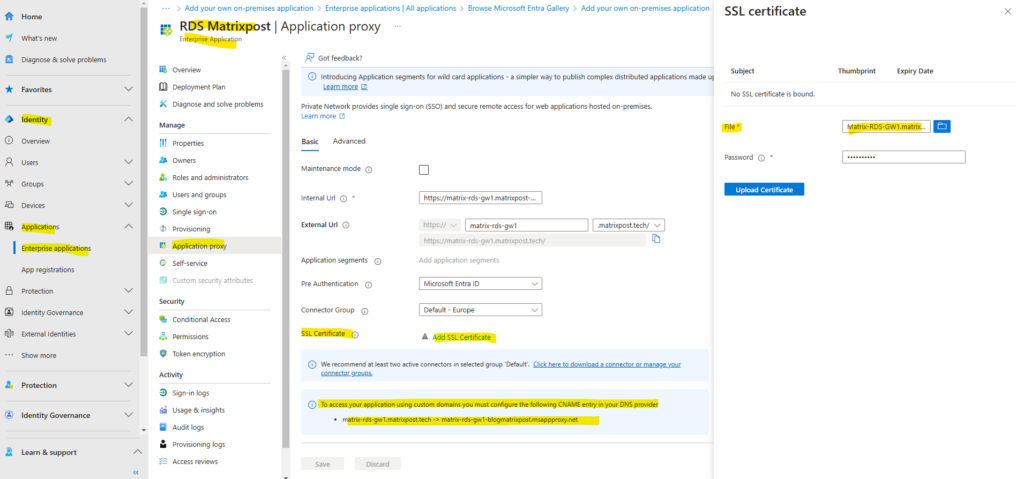
I will use here SSL certificates from my own PKI in Active Directory. More about how to set up a PKI in Active Directory Certificate Services (AD CS) you will find in my following post.
To access your application using custom domains you must configure the following CNAME entry in your DNS provider.
matrix-rds-gw1.matrixpost.tech -> matrix-rds-gw1-blogmatrixpost.msappproxy.net
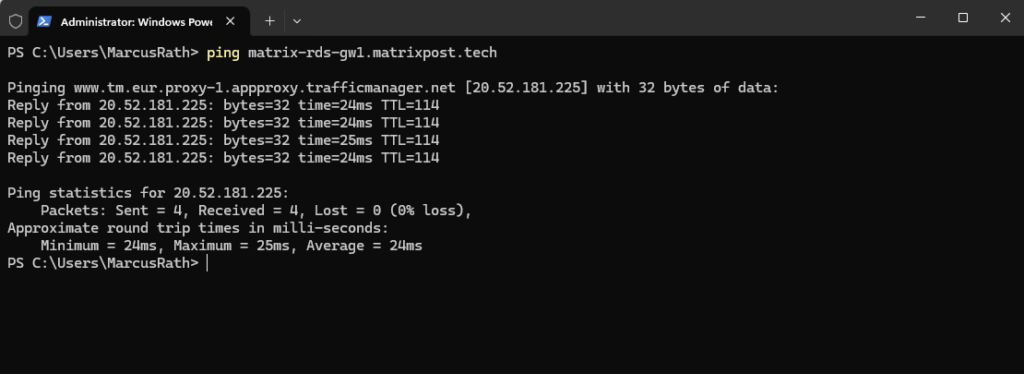
After adding the above CNAME record within my matrixpost.tech domain, I will first check again if the public FQDN of my RD Web Access site will be resolved successful into one of Microsoft’s chained CNAME records.
Looks good!
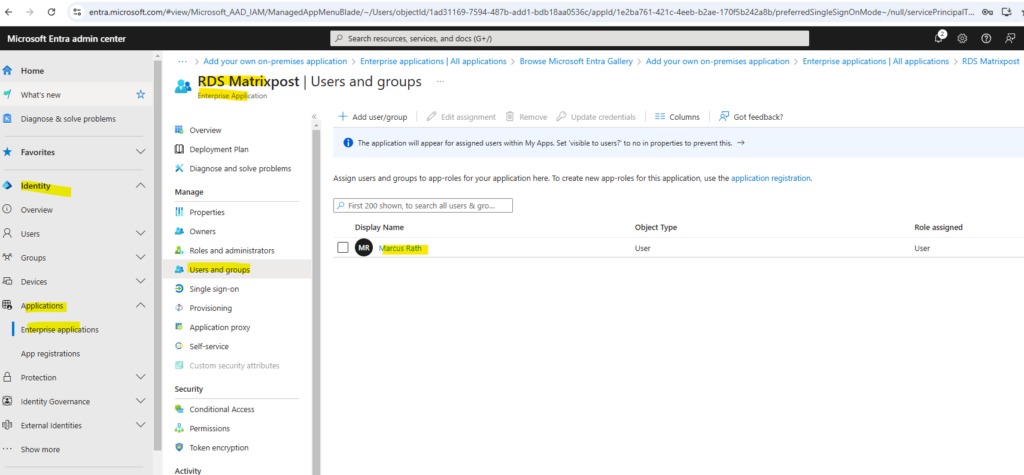
We also need to authorize the user to access this RD Web Access site.
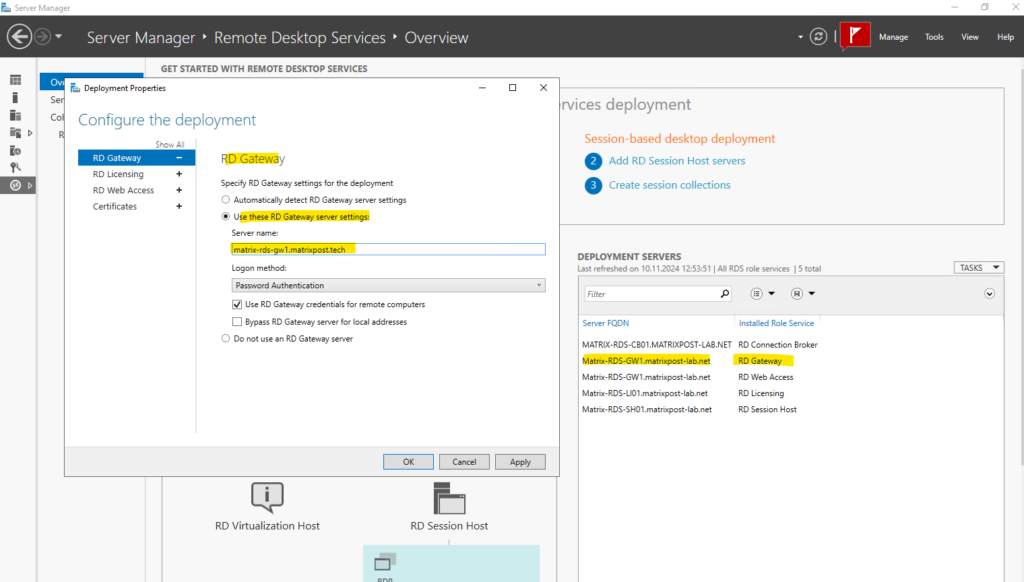
Adjust the RD Gateway Server Name
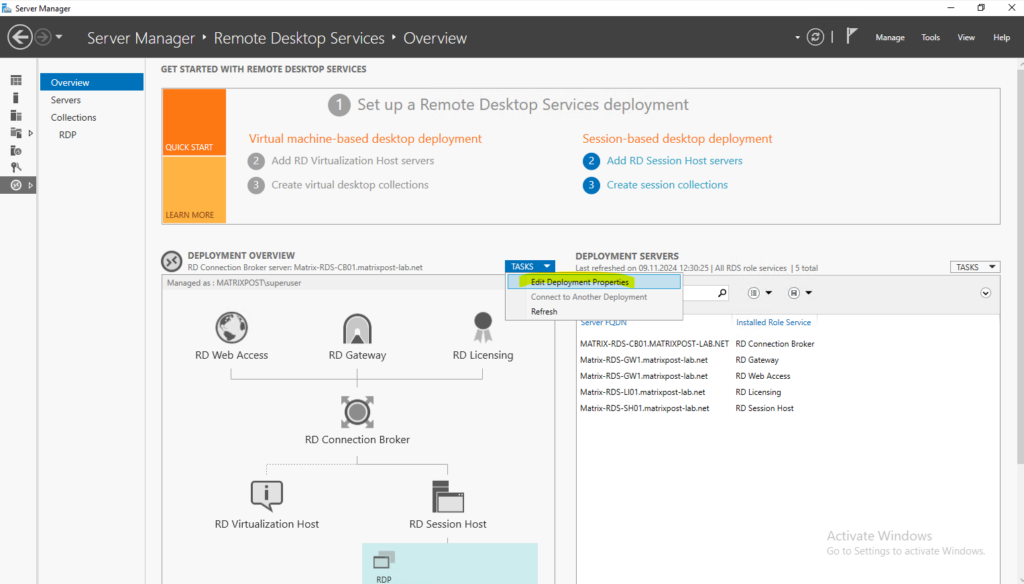
Connect to the RDS deployment as an administrator and change the RD Gateway server name for the deployment. This configuration ensures that connections go through the Microsoft Entra application proxy service.
Connect to the RDS server running the RD Connection Broker role.
In the RD Gateway tab, change the Server name field to the External URL that you set for the RD host endpoint in application proxy.
This is the FQDN marked below. In my case matrix-rds-gw1.matrixpost.tech.
Also change the Logon method field to Password Authentication if not already set.

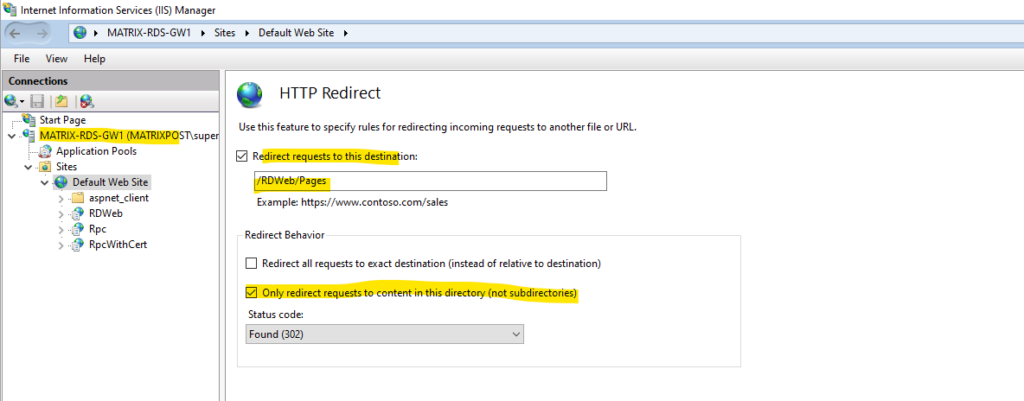
I will also redirect traffic to /RDWeb/pages so users just can browse to the root URL.
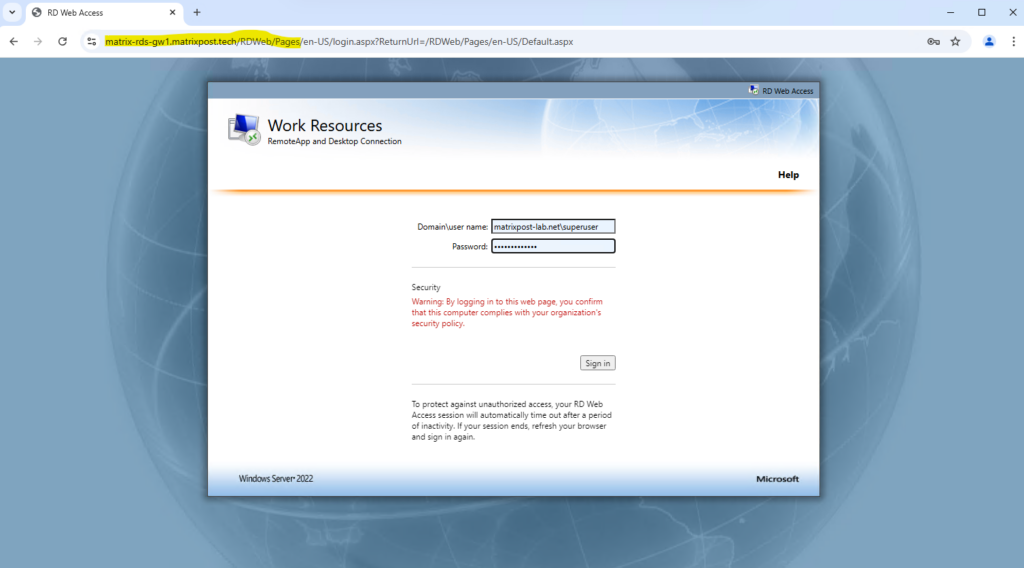
Testing Remote Desktop Access through Microsoft Entra application proxy
I can now browse to my custom domain, because I will use for pre-authentication so far Passthrough as mentioned, I will be presented directly with the Remote Desktop Services (RDS) login page.
Here all published remote apps and remote desktop session hosts will be shown up. For testing purpose so far just my RD Session Host is published here.
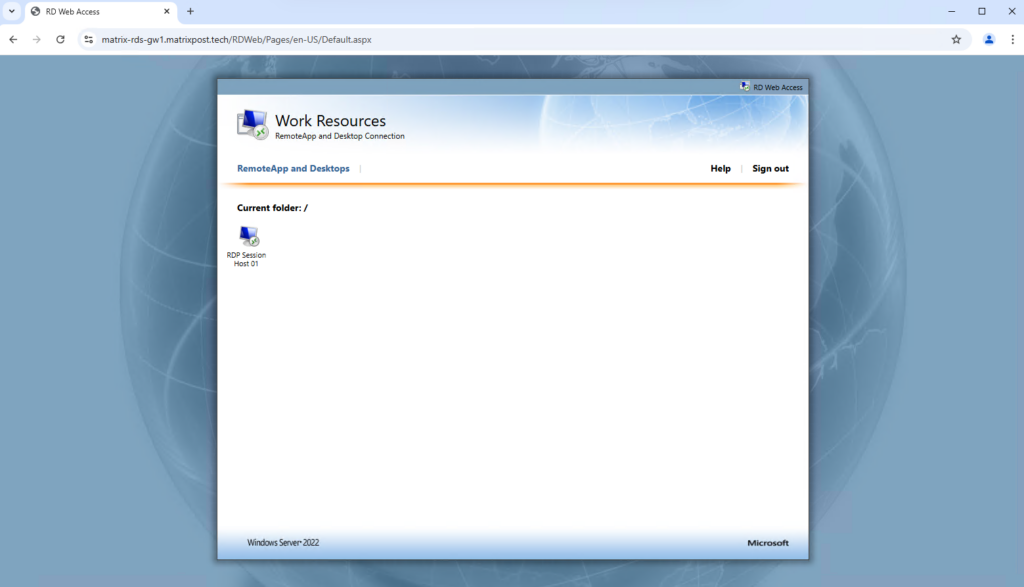
I will now test if I can logon to this host using the Azure Application Proxy.
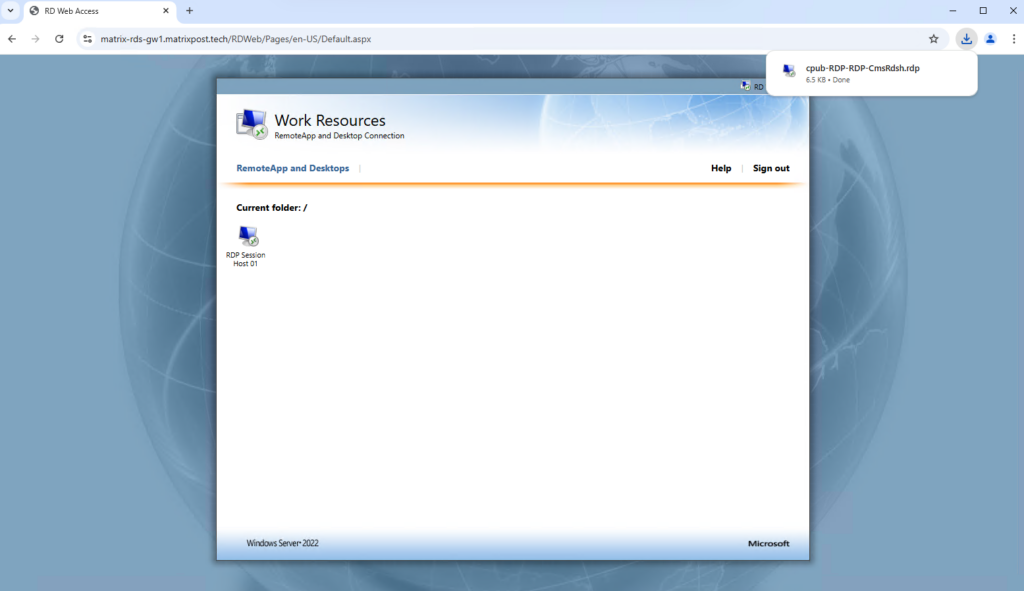
Connecting to my RD Session Host.
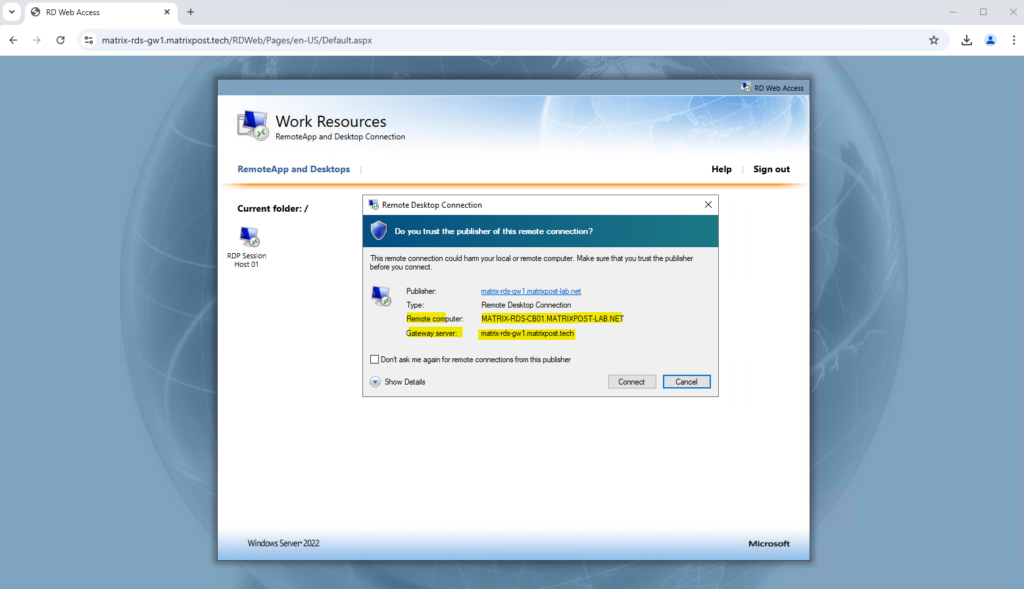
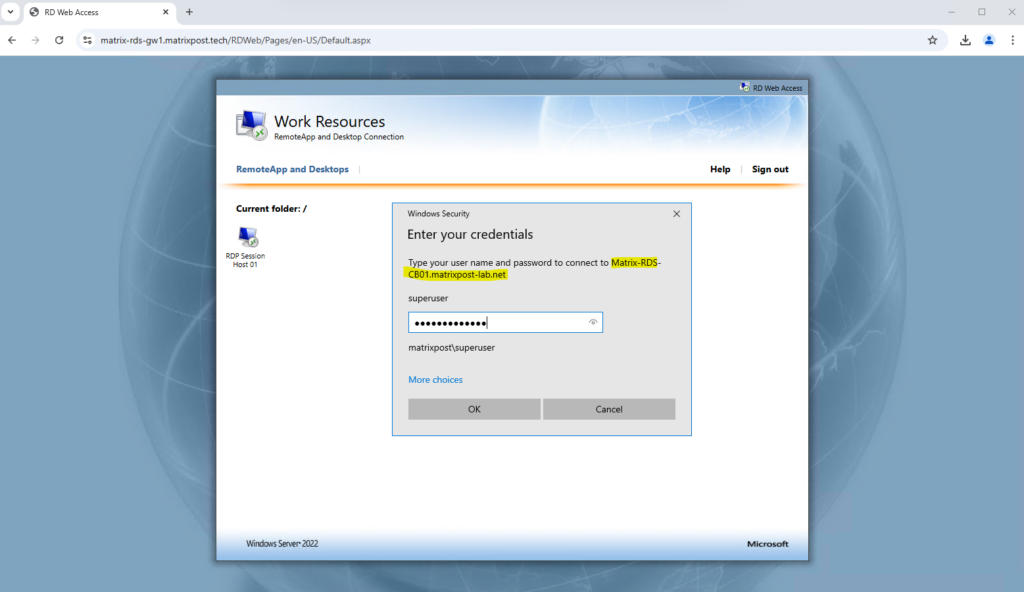
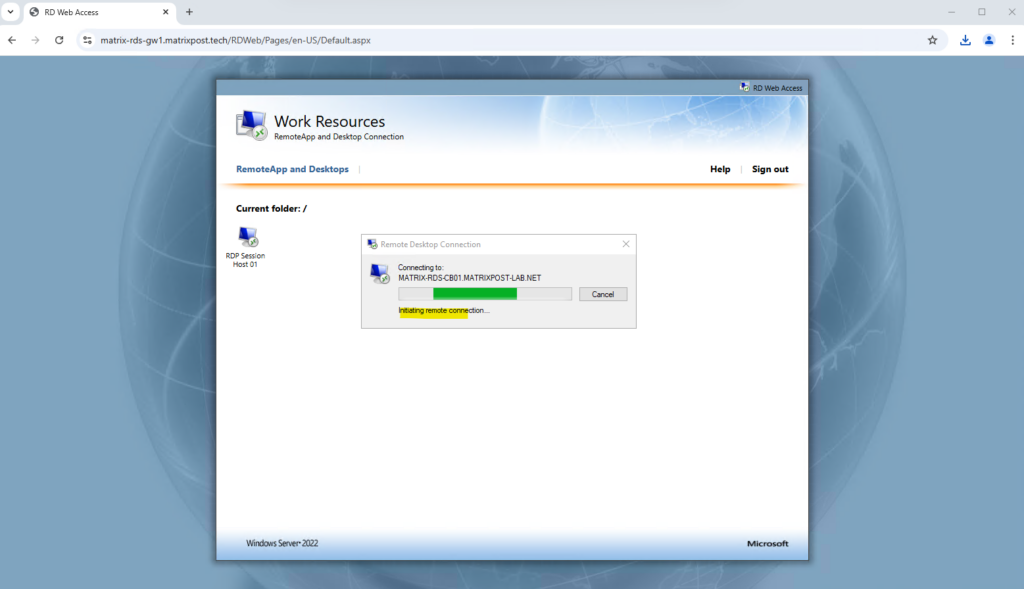
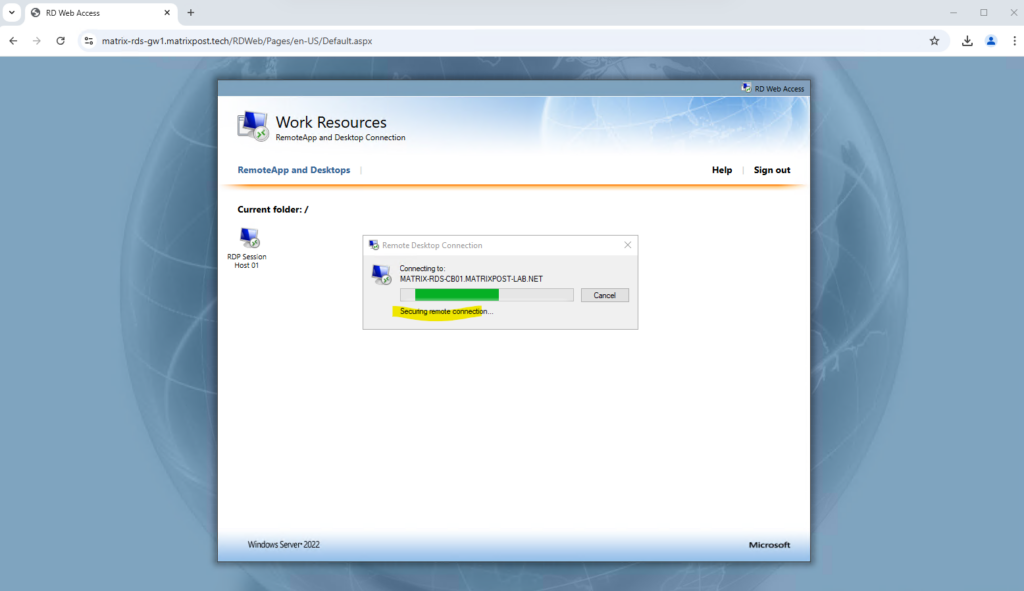
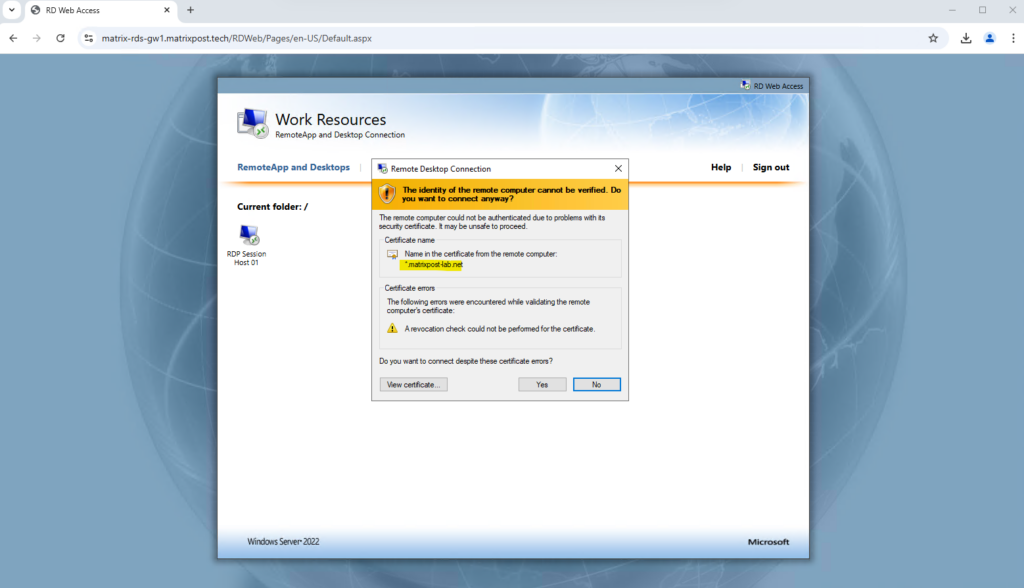
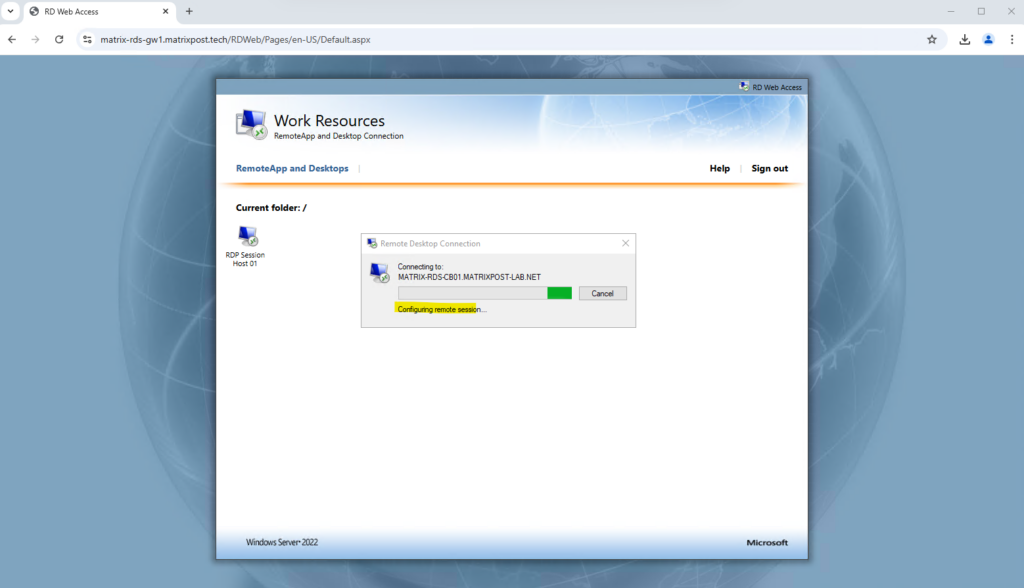
Looks good!
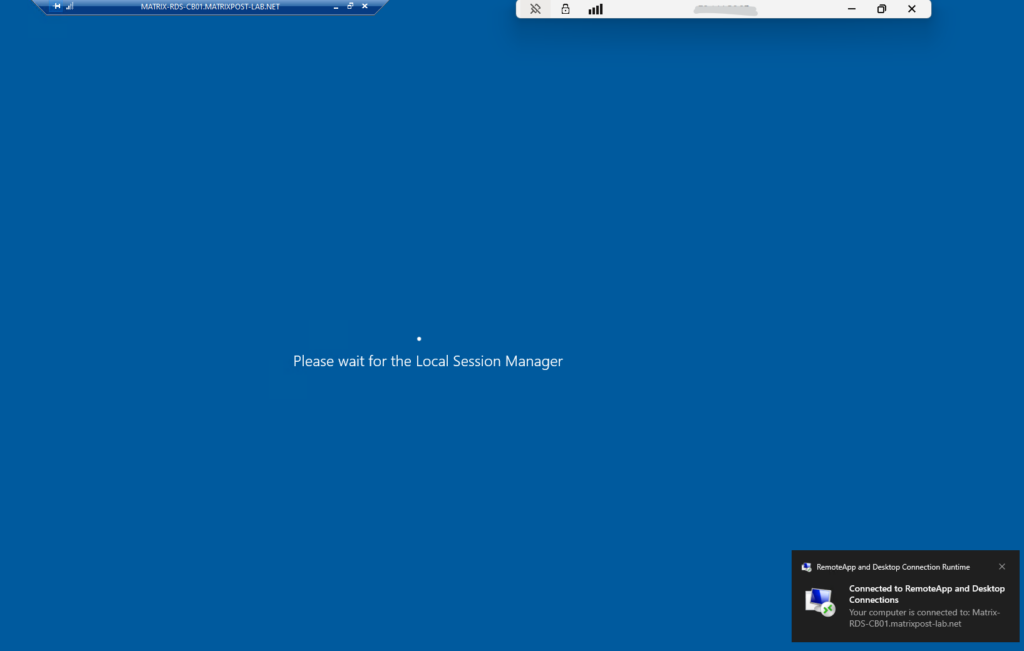

Troubleshooting
net::ERR_CERT_COMMON_NAME_INVALID
On the IIS of the Remote Desktop Gateway which will also host the RDWeb app, I associated a wilcard certificate for my internal *.matrixpost-lab.net domain.
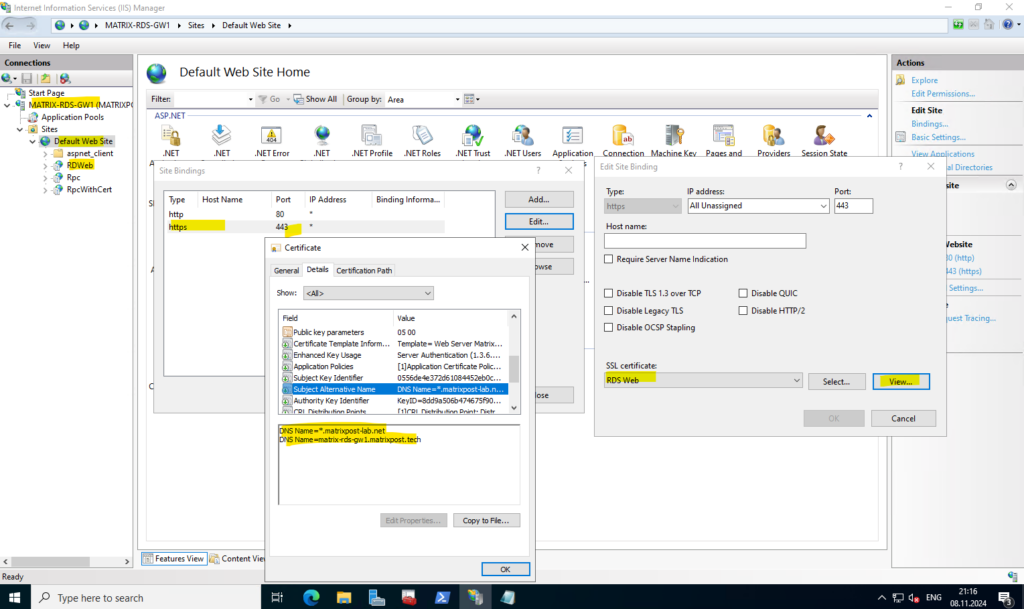
I also have to include the external matrixpost.tech domain as subject alternative name.
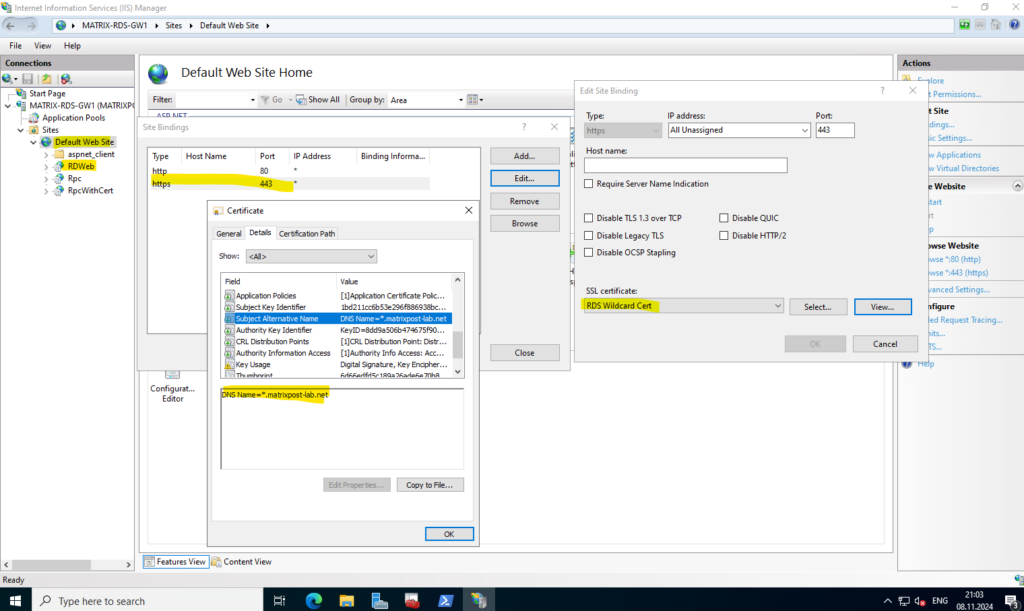
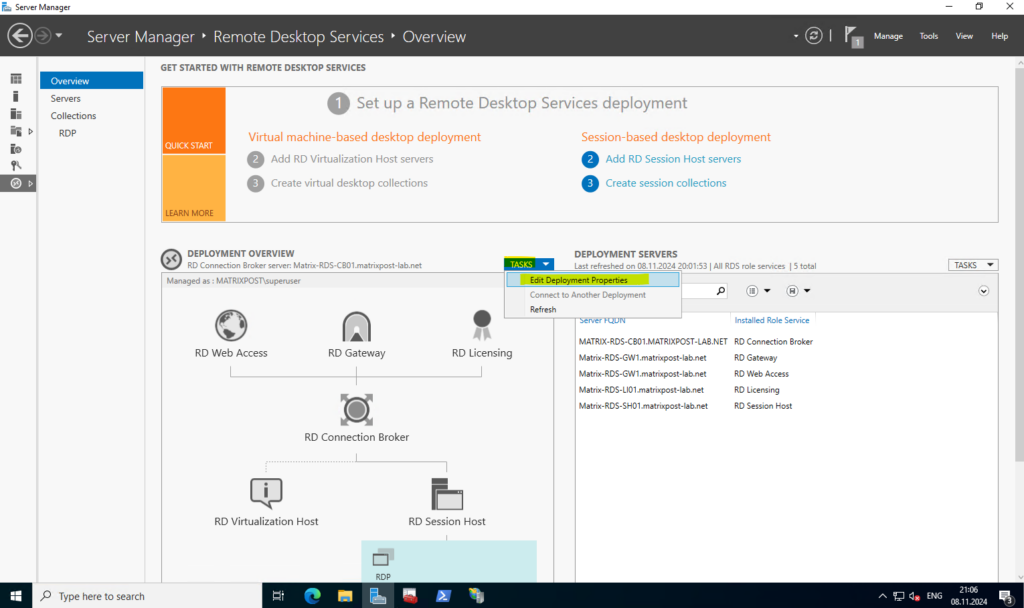
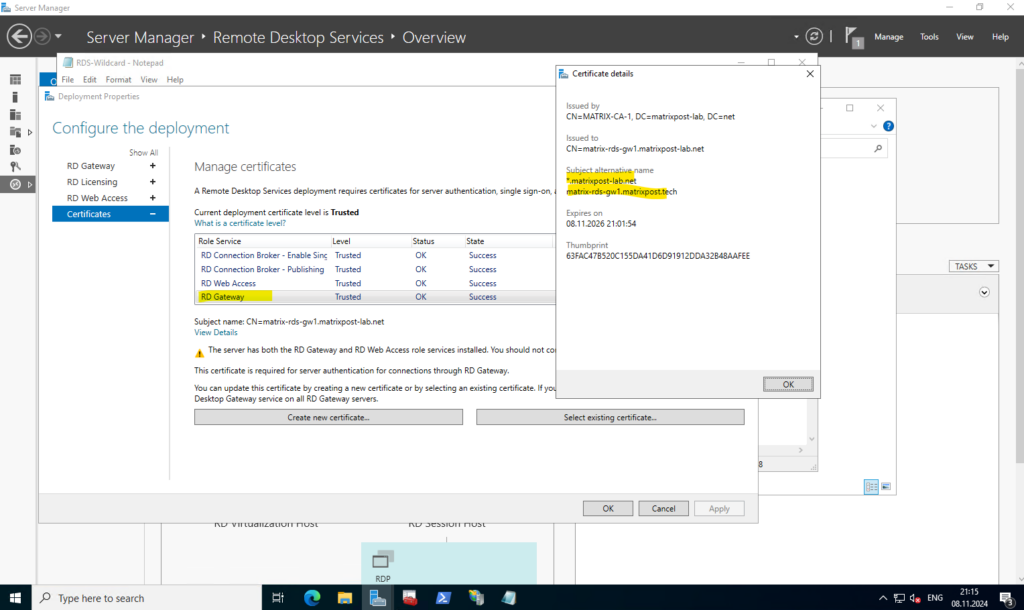
This will finally replace the certificate on the IIS.
Now we also need to replace the certificate on the application proxy. By uploading the new certificate the existing will be replaced on the application proxy.
Links
Publish Remote Desktop with Microsoft Entra application proxy
https://learn.microsoft.com/en-us/entra/identity/app-proxy/application-proxy-integrate-with-remote-desktop-services
Tags In
Related Posts
Latest posts
Deploying NetApp Cloud Volumes ONTAP (CVO) in Azure using NetApp Console (formerly BlueXP) – Part 5 – Backup and Recovery
Follow me on LinkedIn


