SQL Server Integration Services (SSIS) Basics – Script Task
I will using SQL Server 2019 and Visual Studio 2019 with SQL Server Integrations Services Projects installed to demonstrate the SSIS Basics – Script Task.
Create first a simple Hello World SSIS Project with a Script Task
Drag a Script Task to the Control Flow.
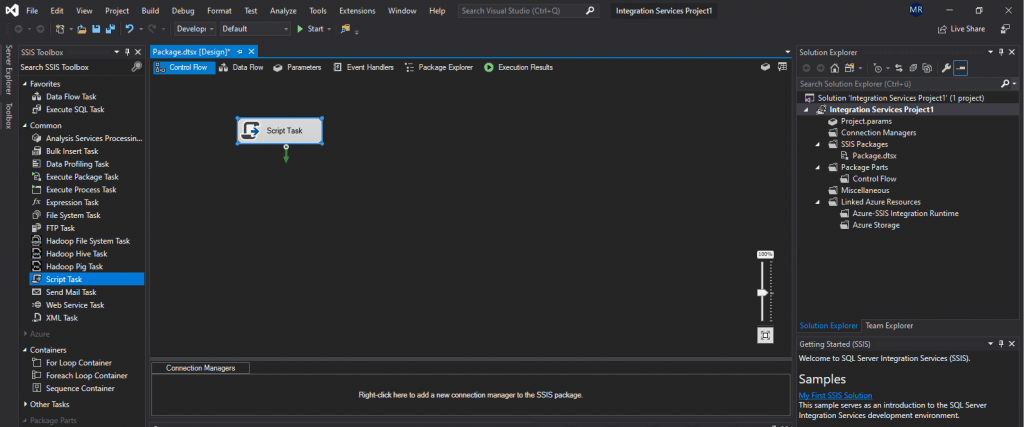
Double-click on the Script Task and optional rename it to a reasonable name for this task.
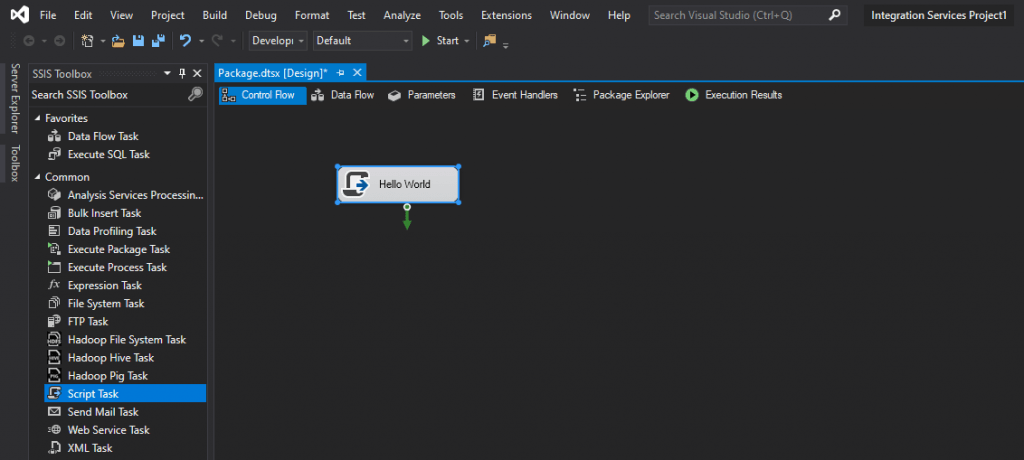
We can write our SSIS scripts with the Microsoft Visual Studio Tools for Applications (VSTA) and can choose between Visual Basic and C#.
Visual Studio Tools for Applications (VSTA)
https://en.wikipedia.org/wiki/Visual_Studio_Tools_for_Applications
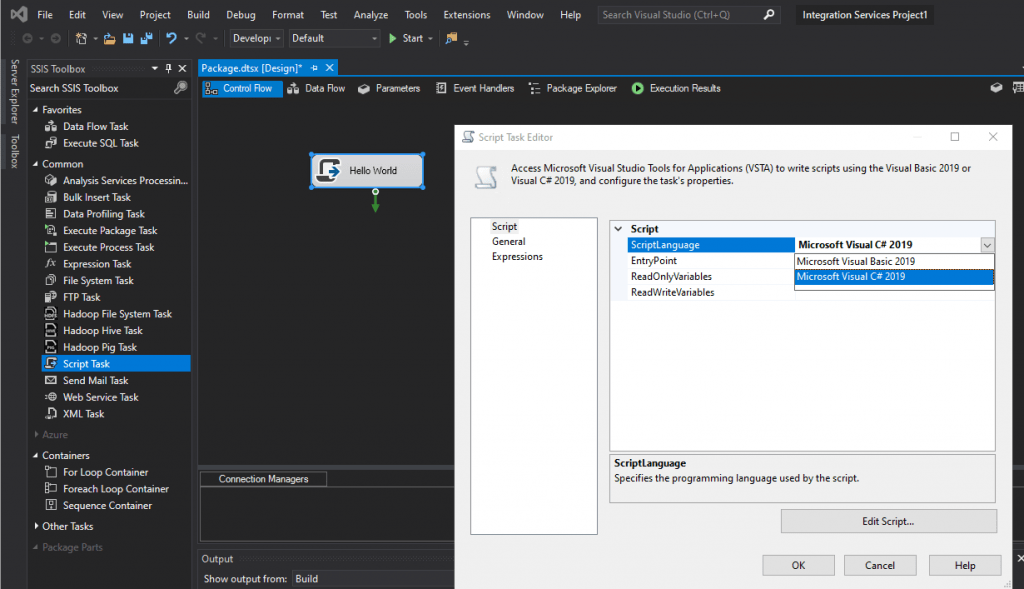
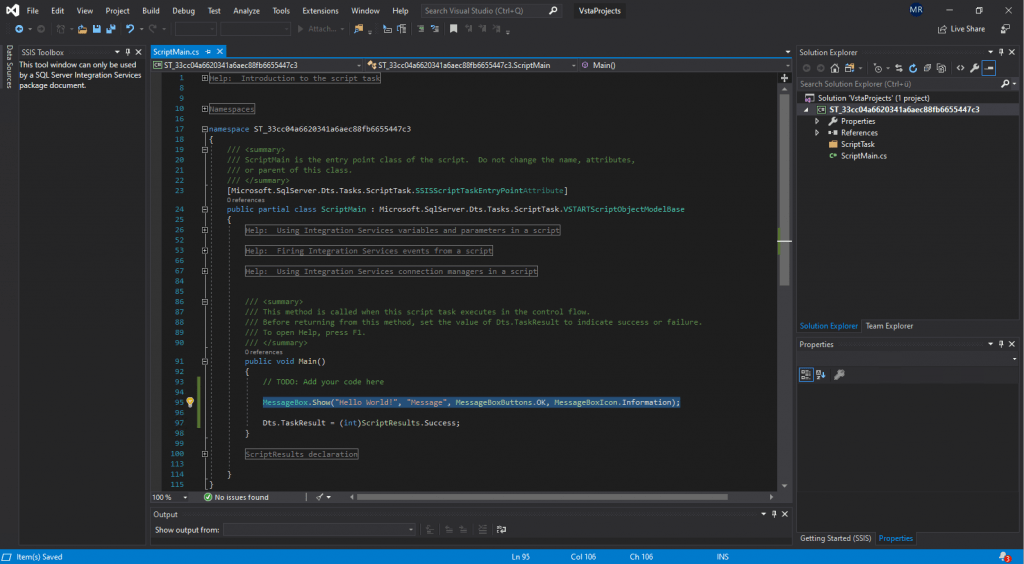
As used from classic .Net apps we have here the main method which is called when the script task is executed in the control flow.
So we add a MessageBox class as used.
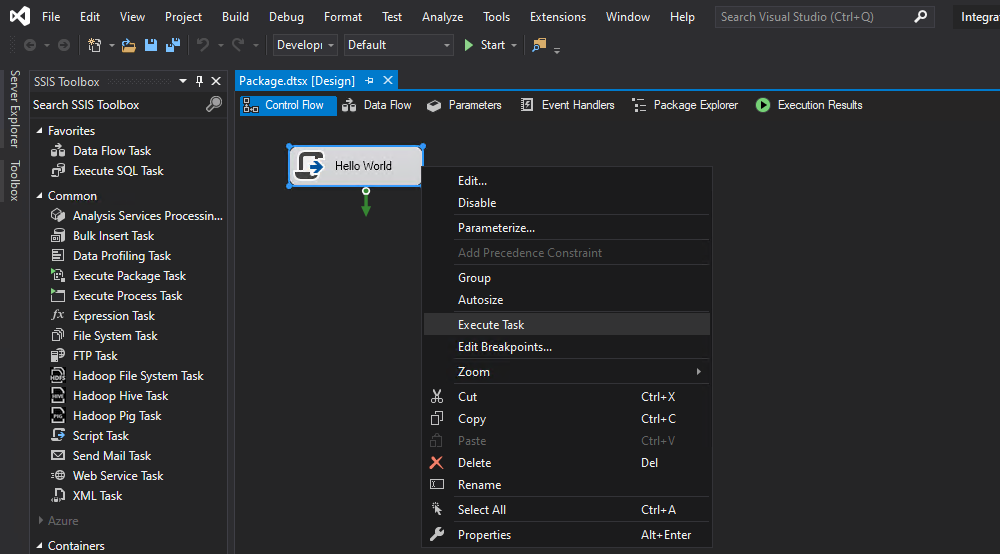
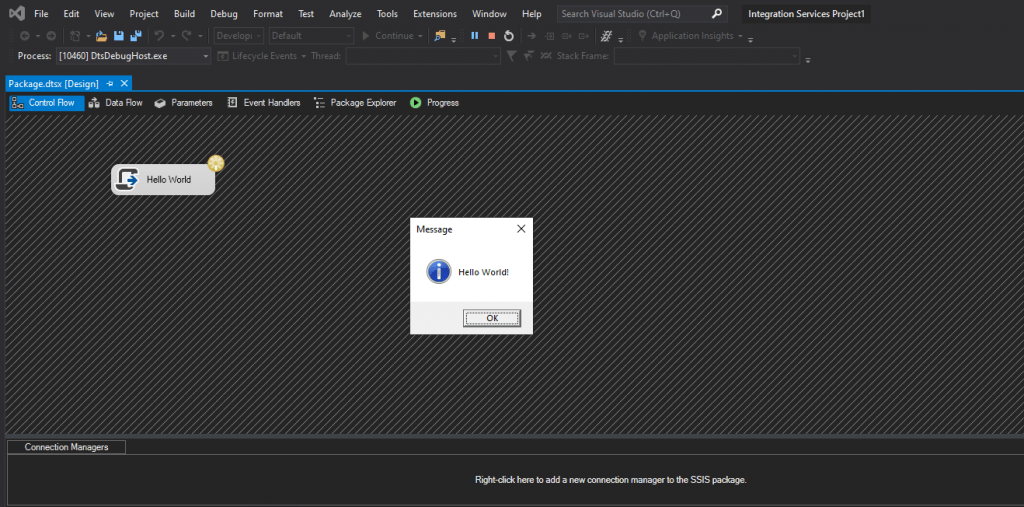
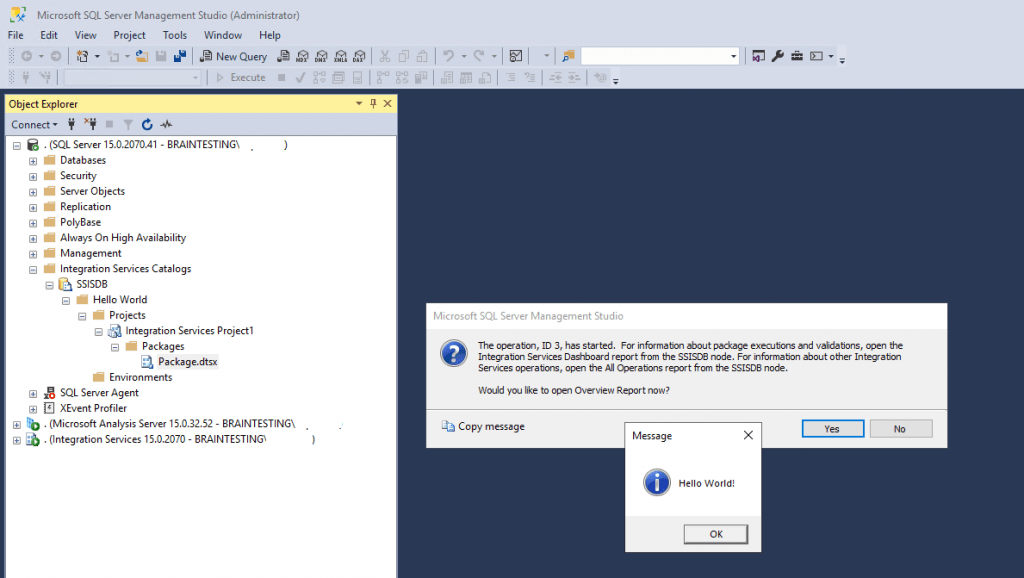
After execution of this Script Task we will see our Message Box.
The yellow circle only means that the task is still running and in this case waiting for user action, after clicking on OK in will change to green.
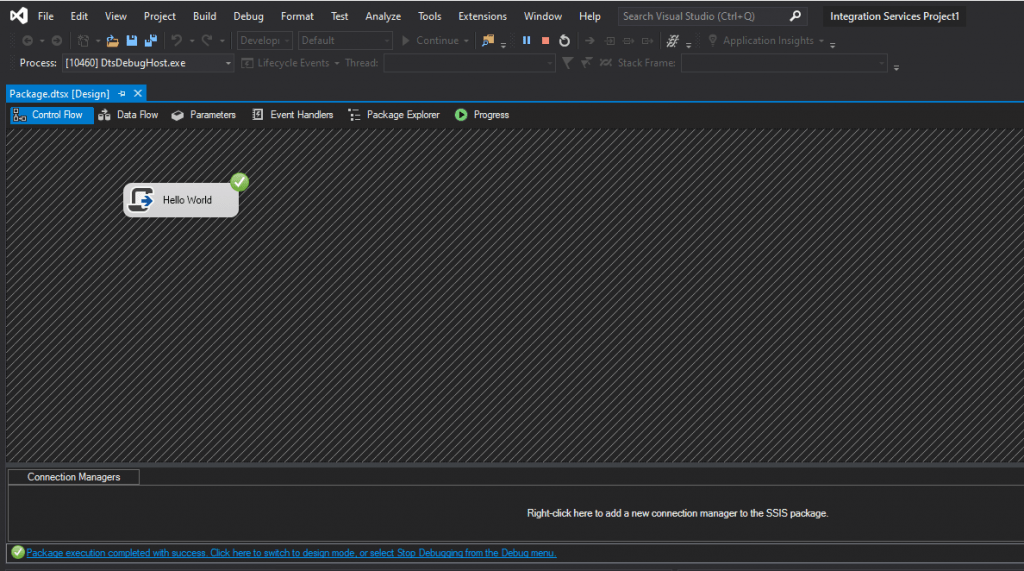
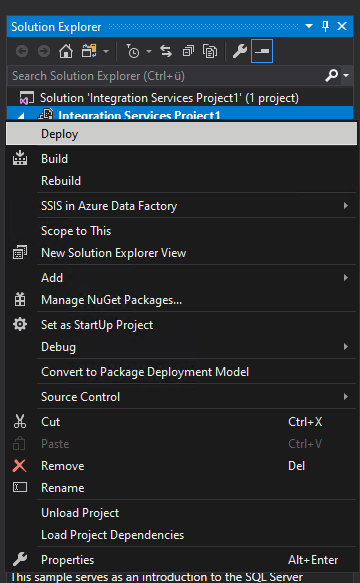
Pretending our project is already finished here, the next step is to deploy it to our SQL Server.
Deploy your Project
Deploy Integration Services (SSIS) Projects and Packages
https://docs.microsoft.com/en-us/sql/integration-services/packages/deploy-integration-services-ssis-projects-and-packages
Integration Services supports two deployment models, the project deployment model and the legacy package deployment model. The project deployment model enables you to deploy your projects to the Integration Services server.
For more information about the legacy package deployment model, see Legacy Package Deployment (SSIS).
The project deployment model was introduced in SQL Server 2012 Integration Services (SSIS). With this deployment model, you were not able to deploy one or more packages without deploying the whole project. SQL Server 2016 Integration Services (SSIS) introduced the Incremental Package Deployment feature, which lets you deploy one or more packages without deploying the whole project.
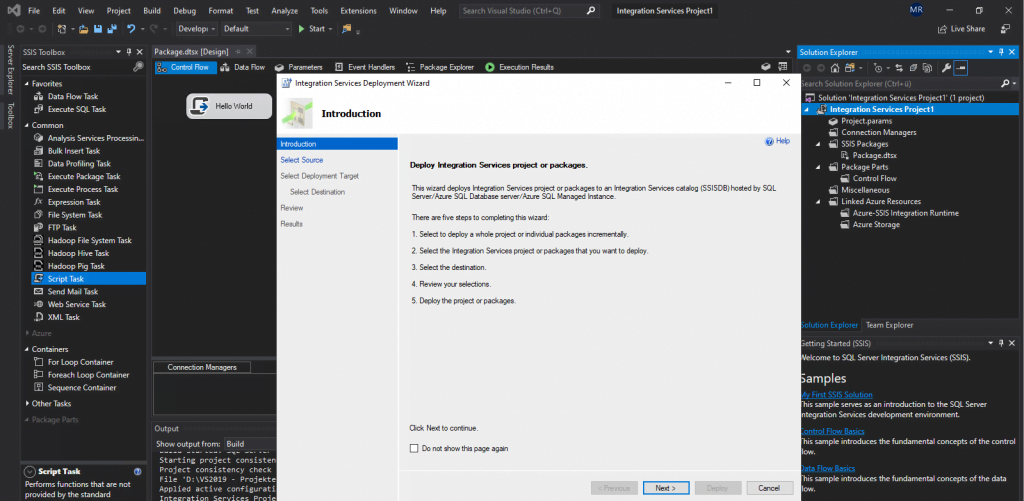
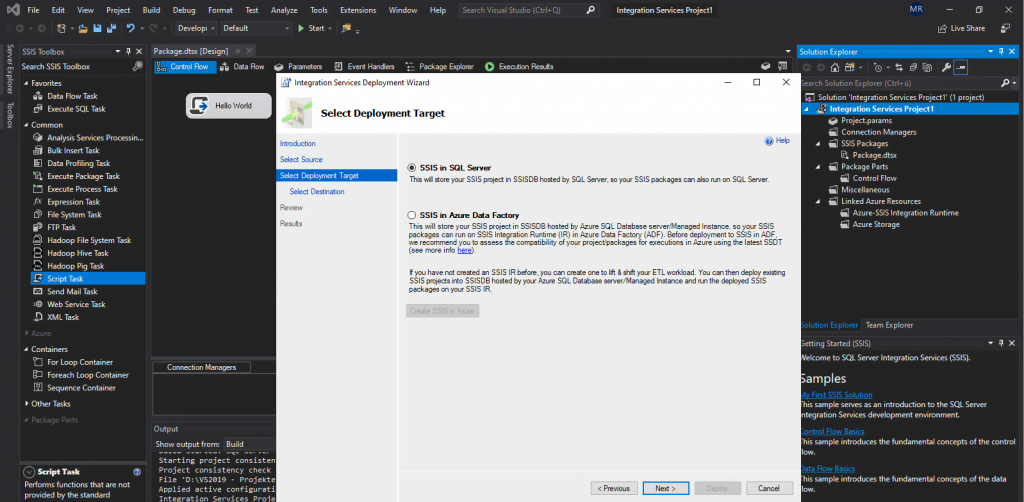
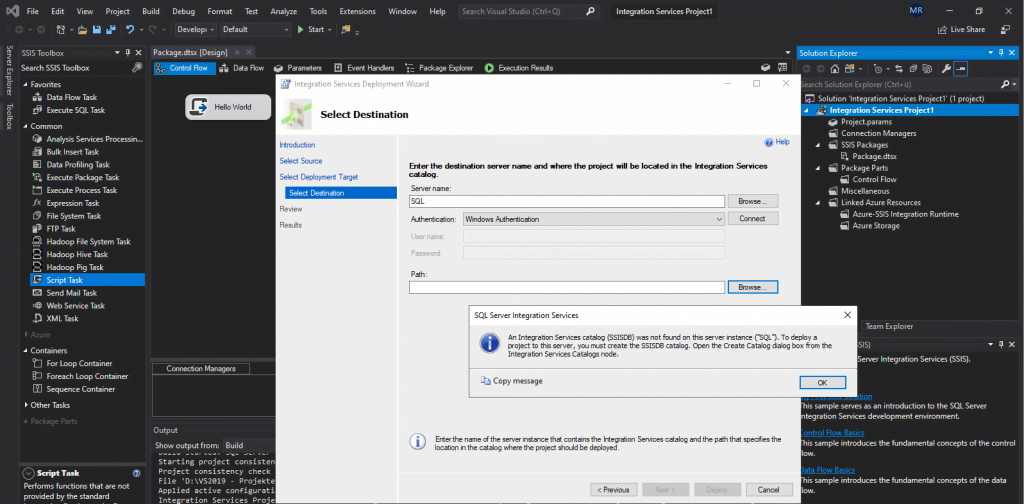
By default the, the SSIS catalog is not created during the SQL Server installation process of SSIS. So we need first to create the SSIS catalog which is done in a few seconds.
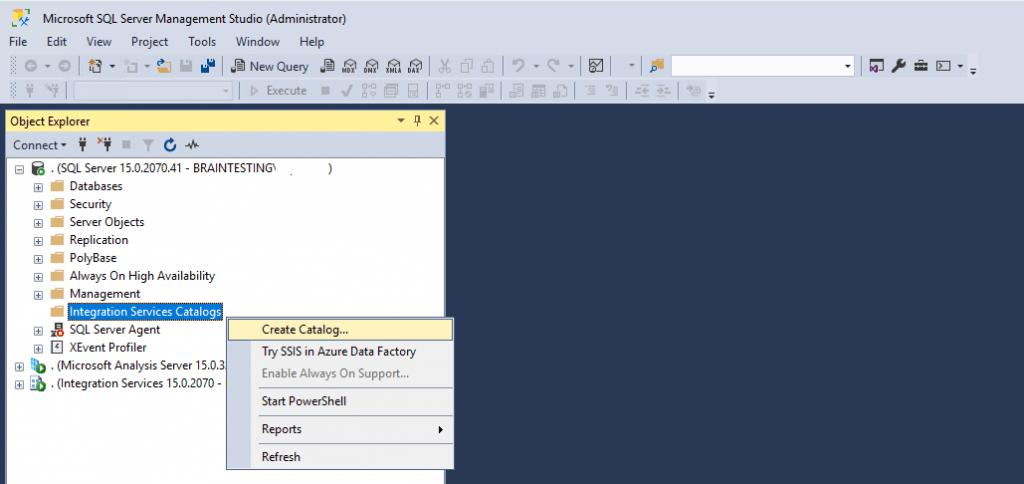
- Enable CLR integration. This is a required setting, as SQL CLR must be enabled on this instance to create the SSIS catalog. This box must be checked to continue.
- Enable automatic execution of Integration Services stored procedure at SQL Server startup. This optional setting allows the execution of startup procedures for background SSIS processes, such as cleaning up from a failed execution. So just in case I check this option.
- Name of the catalog database. The catalog will always be named SSISDB.
- Password. This is the password used to encrypt sensitive values such as stored passwords. Although you won’t need to use this password in day-to-day interaction with the SSIS catalog, you’ll need it in cases of disaster recovery, or if the SSISDB database needs to be moved. Use a secure password, and make sure you store it in your password management tool.
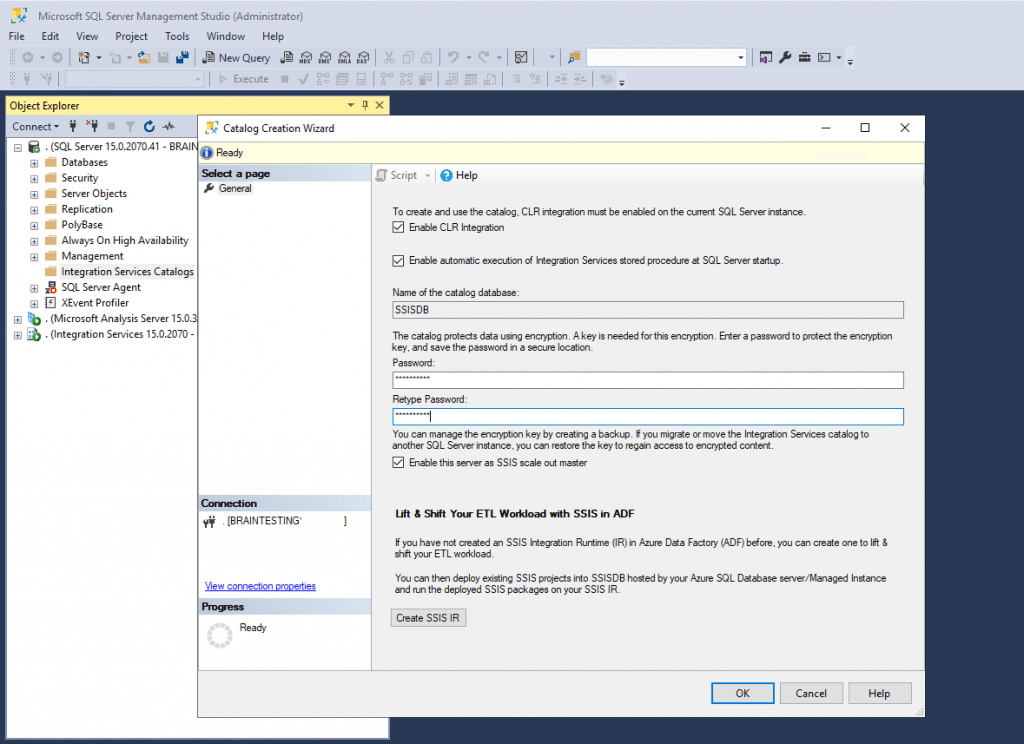
After click on OK, the catalog will be created.
When finishing you will see two new items, a relational database named SSISDB and our Catalog also named SSISDB.
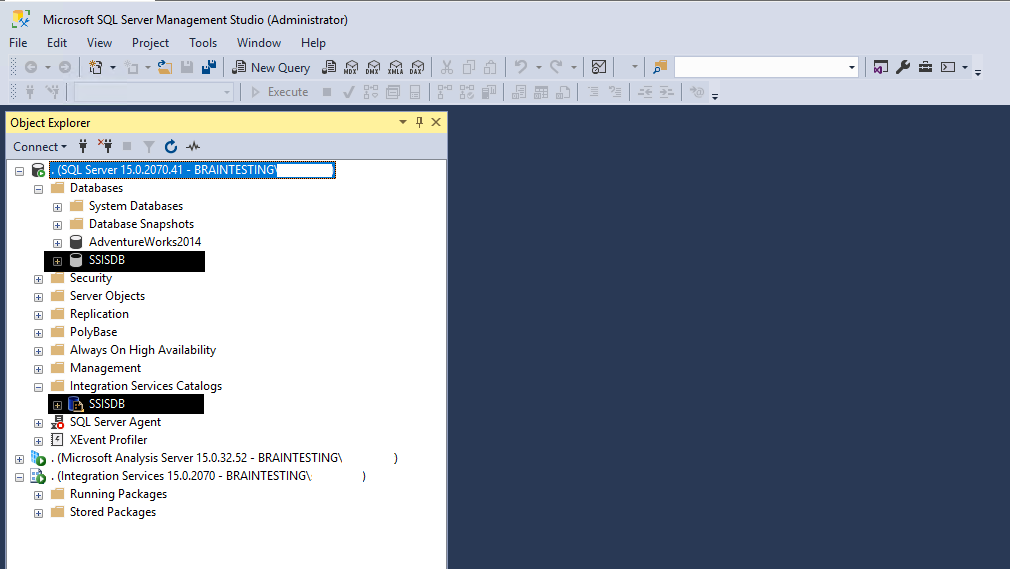
Now we can go back to our SSIS project to start the deployment.
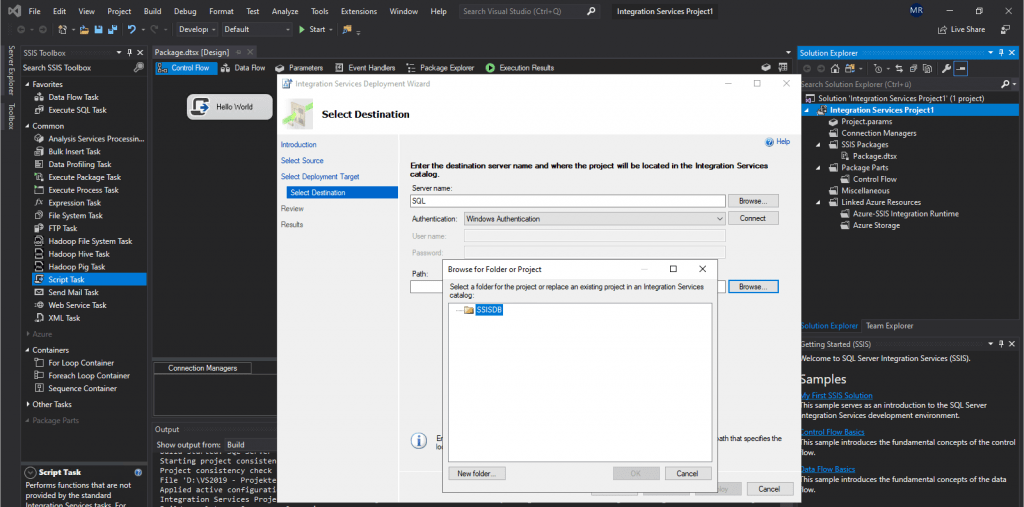
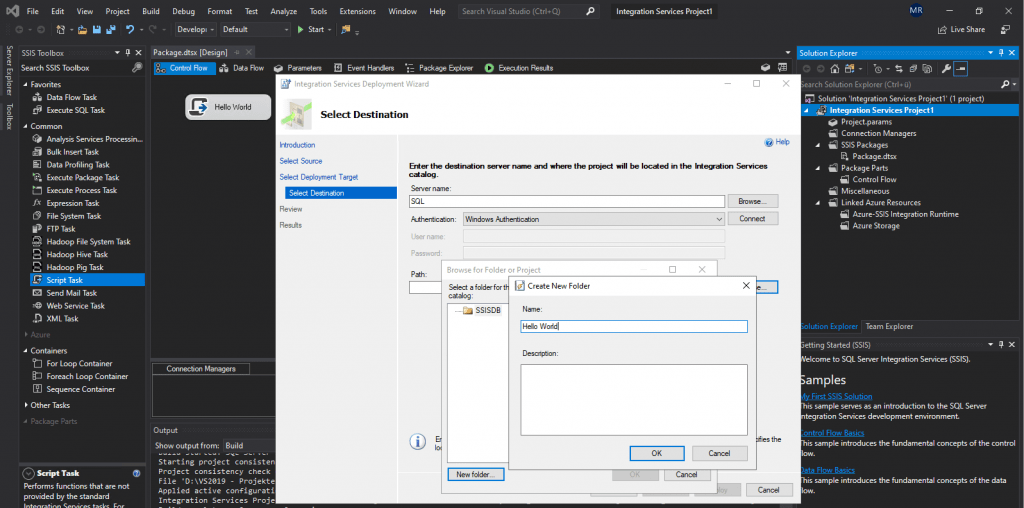
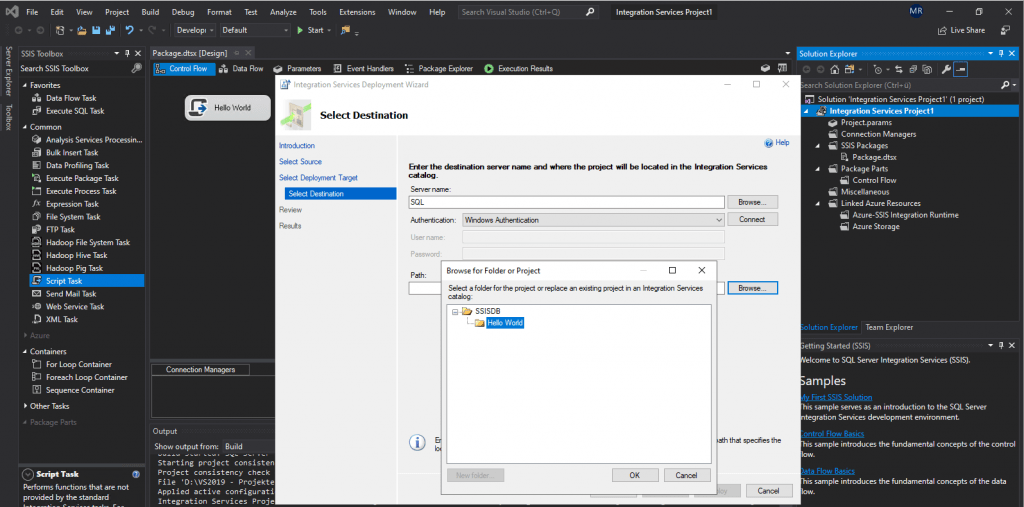
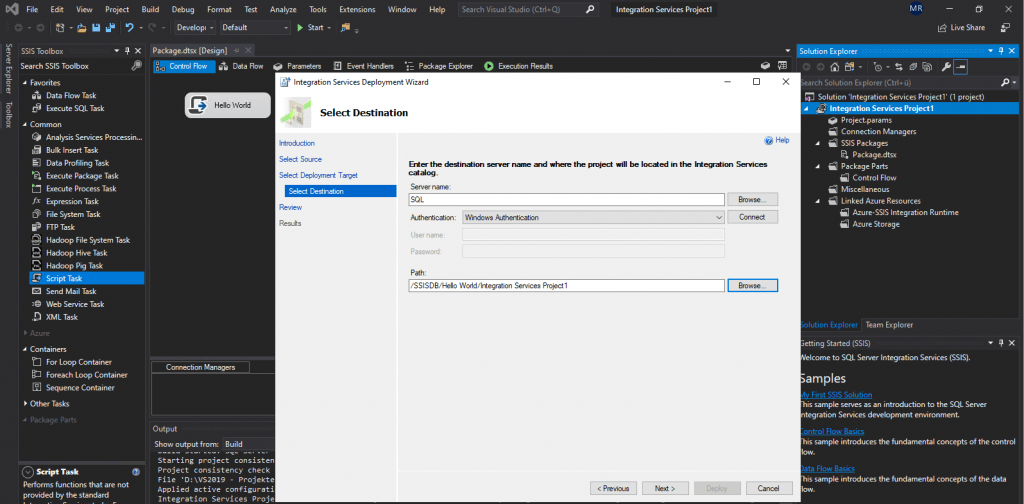
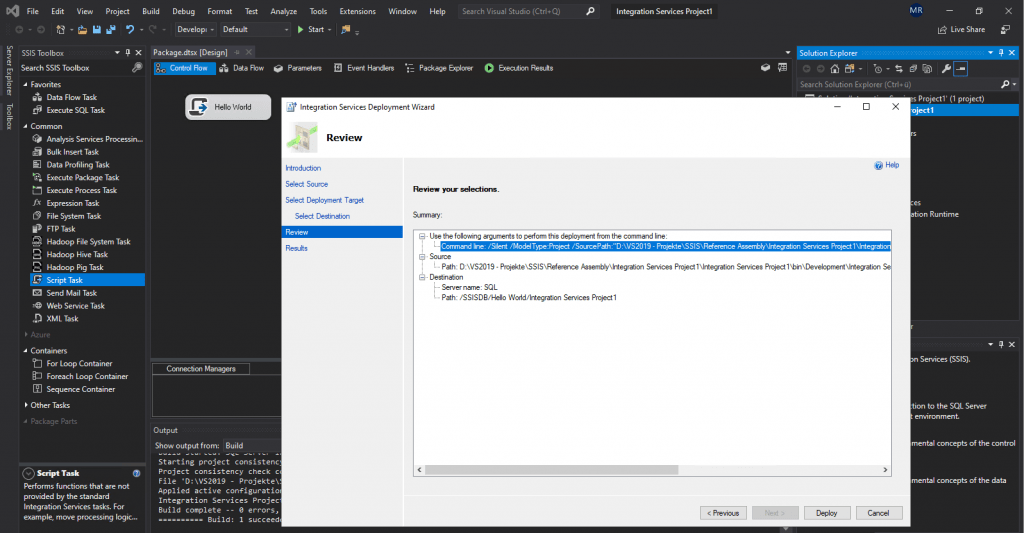
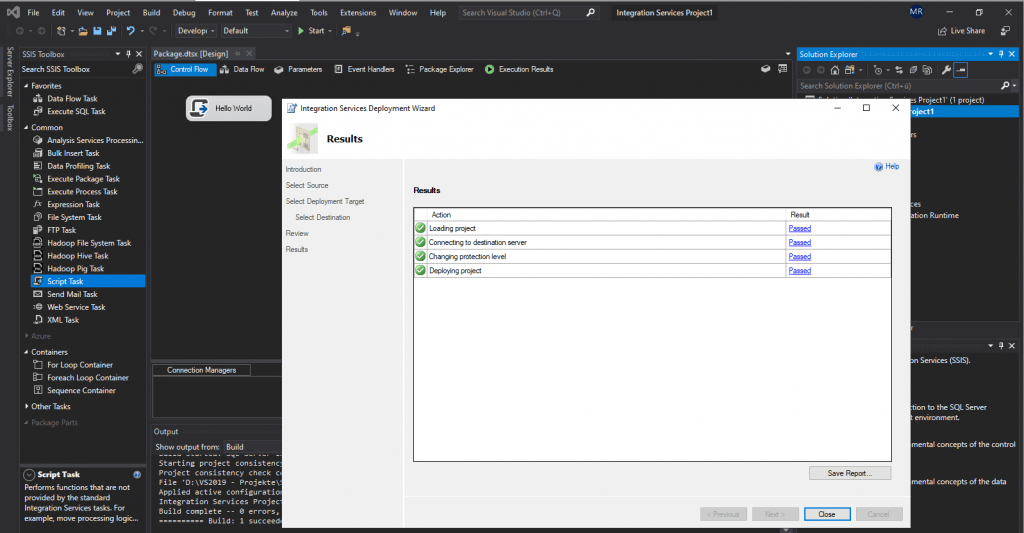
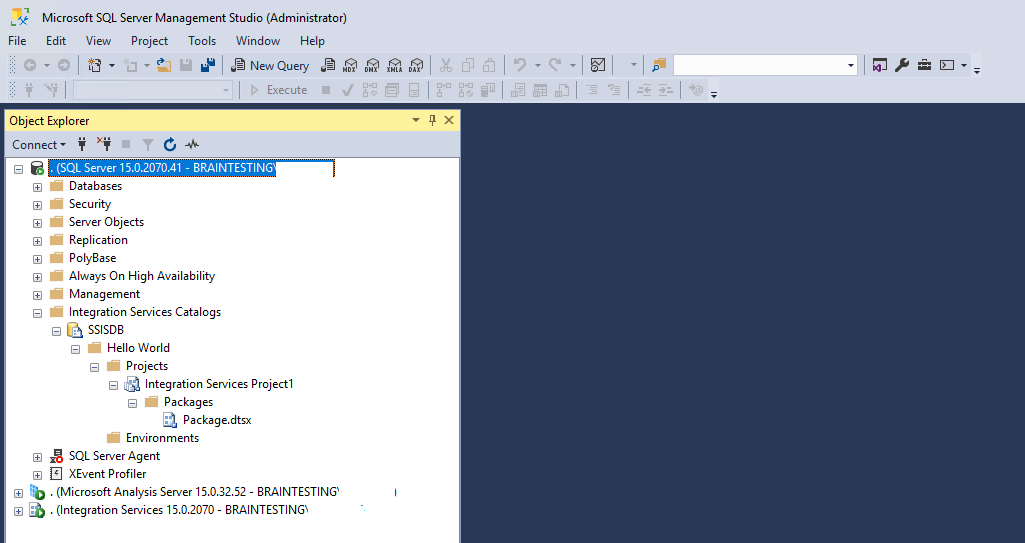
Now after successfully deployed our project to the SSIS catalog from our specified SQL Server, we should see our Hello World project inside the catalog.
Execute the Project in SSIS
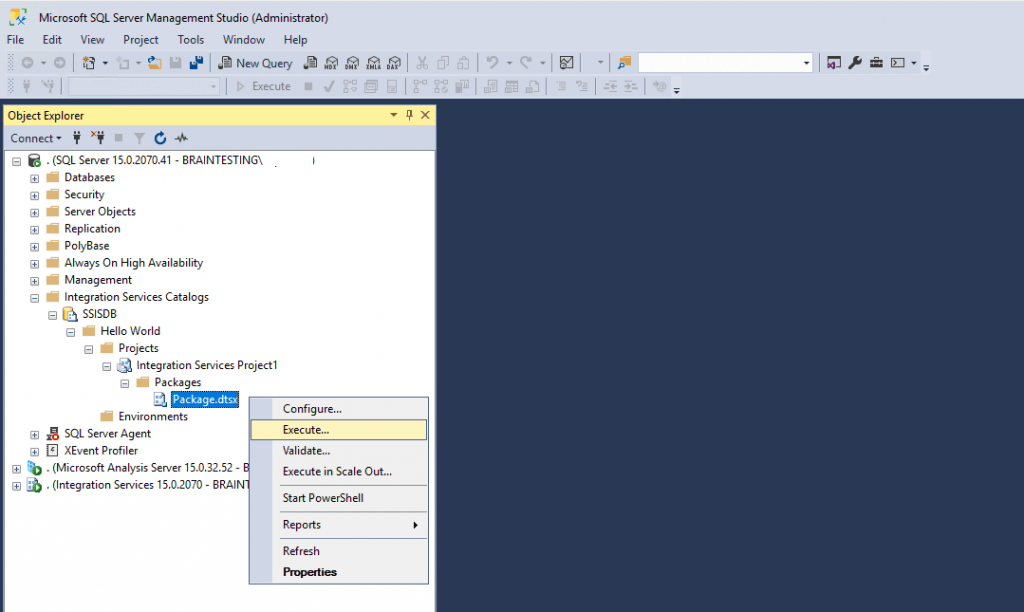
Now we can right click on our Package.dtsx to execute it.
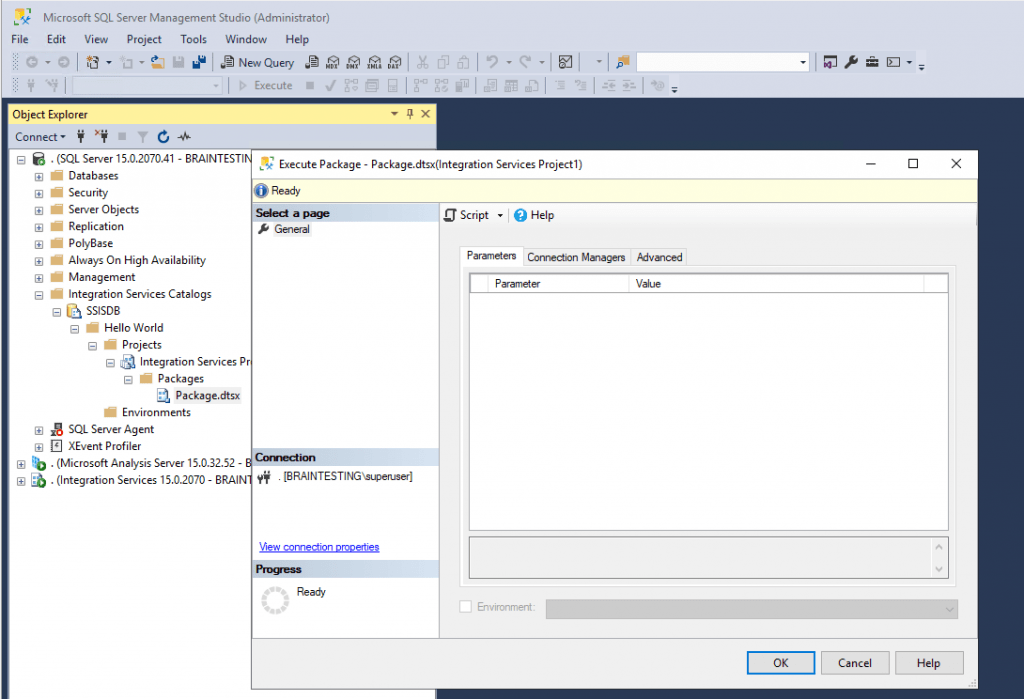
Here click on OK to start it.
Links
Creating Your First SQL Server Integration Services (SSIS) Project
https://www.c-sharpcorner.com/UploadFile/ff0d0f/creating-your-first-ssis-project/Creating the SSIS Catalog
https://www.timmitchell.net/post/2017/07/03/creating-the-ssis-catalog/Top 20 NuGet ssis Packages
https://nugetmusthaves.com/Tag/ssis
Related Posts
Follow me on LinkedIn


