Step-by-Step Guide Part 3: How to build your own NetApp ONTAP 9 LAB – Using NetApp ONTAP as iSCSI Storage for vSphere
In part 1 we saw how to get the ONTAP Simulate appliance and how to deploy it in vSphere. Further we saw the initial cluster setup by using a 2-node cluster (virtual appliances).
In part 2 we saw building the foundational storage setup: aggregates, Storage Virtual Machines (SVMs), logical interfaces (LIFs), and volumes.
In this part, we will see step by step how to provide block-based storage from a NetApp ONTAP system to VMware vSphere using iSCSI.
While NFS is commonly used for datastores, iSCSI remains a reliable and widely supported protocol especially when VMFS is preferred or required.
Unlike file-based protocols where a volume is directly exported (e.g., NFS), iSCSI uses LUNs (Logical Unit Numbers) as the actual block devices that are presented to the ESXi hosts.
These LUNs are created inside ONTAP volumes and then mapped to initiator groups (igroups) which define access for one or more ESXi initiators.
By the end of this post, we will have a functioning iSCSI target on our ONTAP Simulator or production system, ready to serve as a VMFS datastore in vSphere.
Aggregate → SVM → Volume → LUN → Mapped to Initiator (ESXi host)
Introduction
For iSCSI in ONTAP, when providing storage to vSphere (or any block-based consumer) like Windows or Linux, you create a LUN inside a volume, not just a volume alone.
In order to create a new LUN to provide block-based storage to our vSphere environment (connected to the ESXi hosts), we first need to create a new volume on which we then can create the LUN.
The volume acts as a container for the LUN. It must reside in a Storage Virtual Machine (SVM) with iSCSI protocol enabled.
A volume in ONTAP is a logical container, not a block device. For iSCSI, the LUN is the actual SCSI device presented to vSphere.
Before creating a new volume, we first will determine the available space on our aggregates we can use for.
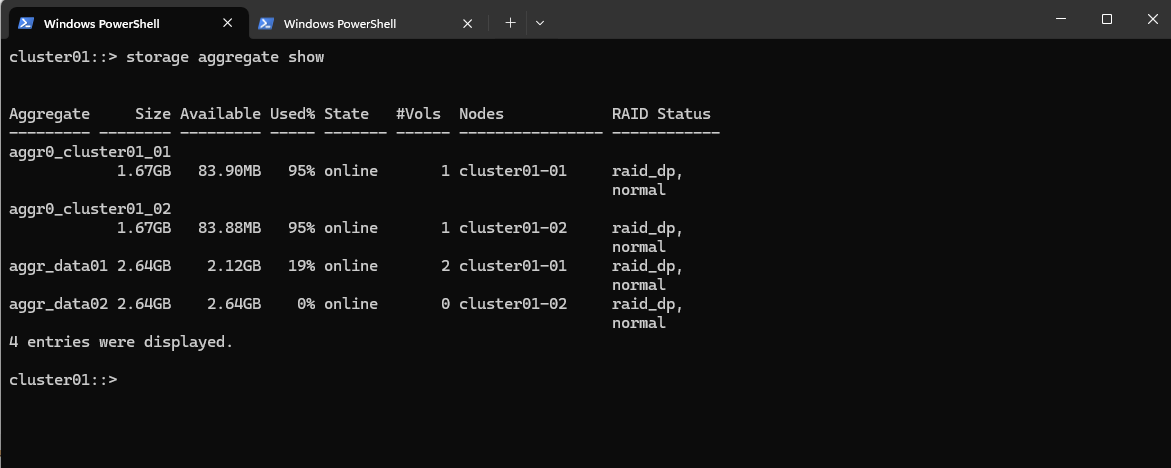
To list all aggregates and their available space, run the following command.
cluster01::> storage aggregate show
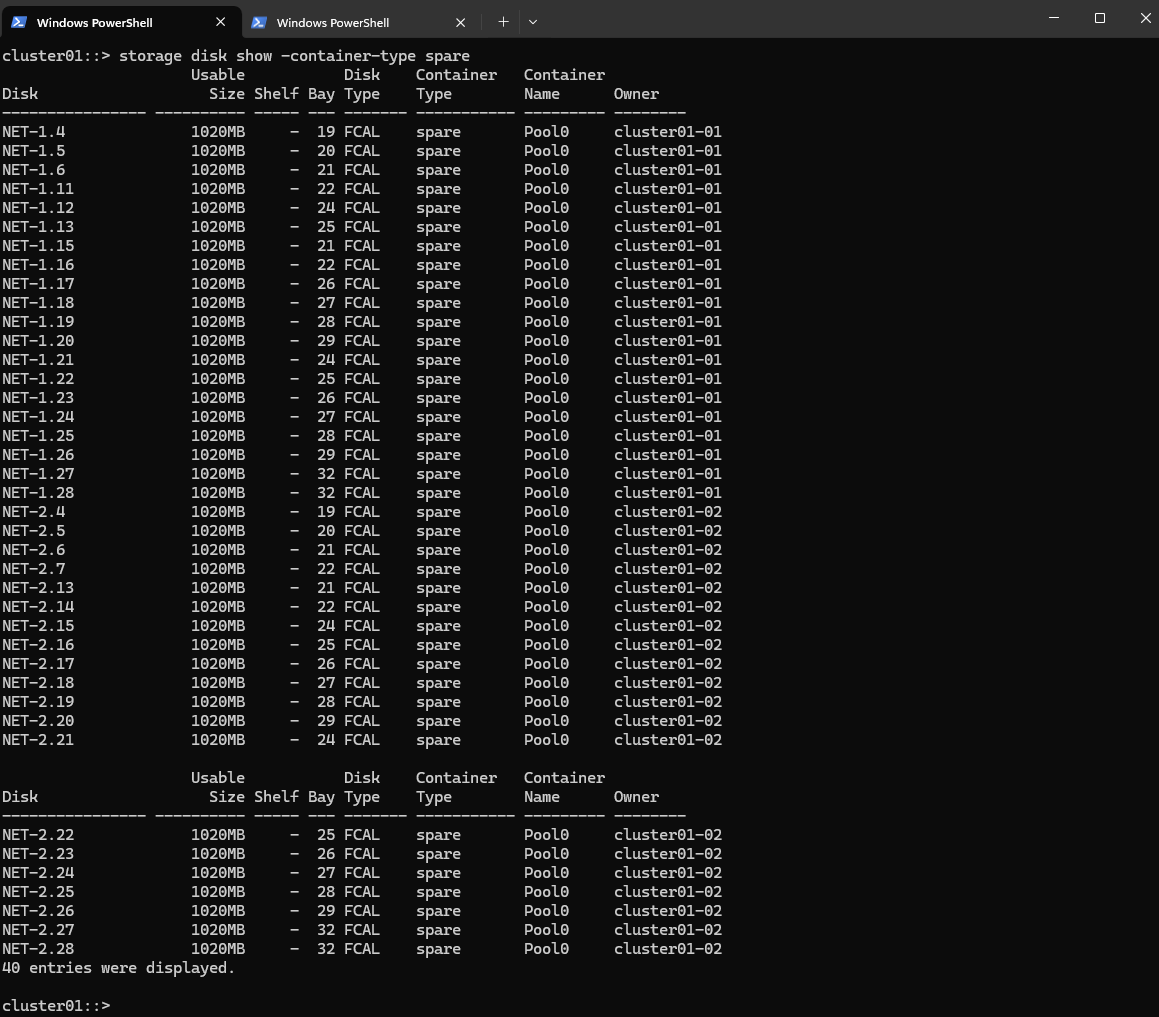
Determine available spare disks we can use to create a new aggregate or assign them to an existing to extend by running.
cluster01::> storage disk show -container-type spare
I will create a new aggregate just for the new volume and LUN we later want to connect to our vSphere environment to provide block storage and creating a new datastore on.
To create a new aggregate run the following command.
cluster01::> storage aggregate create -aggregate aggr_vsphere01 -node cluster01-01 -diskcount 10 -raidtype raid_dp
About best practice overview between creating more aggregates vs. adding more disks to existing aggregates:
When to Create a New Aggregate
Isolating I/O-heavy workloads (e.g., databases, backup)
Segmenting storage tiers (SATA/SSD/FC)
Better failover and rebuild performanceRecommended: At least one aggregate per node in small clusters, and use multiple aggregates to isolate critical or latency-sensitive applications.

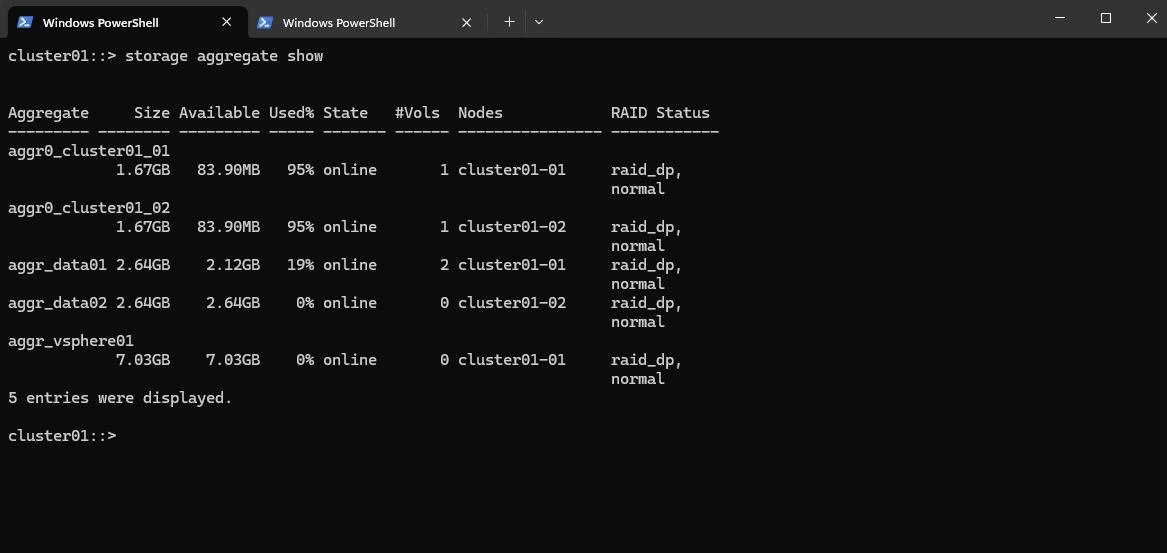
Check the aggregates. I will now have a new one which provides 7 GB space. So the next first step is to create a new SVM on which iSCSI is enabled to later connect the new LUN to our vSphere environment to provide block storage to.
cluster01::> storage aggregate show
Create a Storage Virtual Machine (SVM)
I will create a new dedicated SVM on which I will enable the iSCSI protocol.
cluster01::> vserver create -vserver svm_vsphere01 -aggregate aggr_vsphere01 -rootvolume root_vol_svm_vsphere01 -rootvolume-security-style unix
-aggregate: Which aggregate will host the SVM root volume (small internal vol)
-rootvolume-security-style: Use unix for NFS, ntfs for CIFS, or mixed for both, we can also change this later

Create a Logical Interface (LIF)
Next we need to create and assign a new LIF to our SVM.
A LIF (Logical Interface) in NetApp ONTAP is a virtual network interface, an IP address or FC/IB WWPN that clients use to access storage. It is bound to a SVM (not the node directly).
In this lab environment, the LIF is created using the legacy
-role dataparameter, which is still supported in ONTAP. In modern deployments, however, NetApp recommends creating LIFs using service policies (for exampledefault-data-files) together with parameters like failover policies and auto-revert, which provide more flexible network behavior and proper failover handling in HA environments.
# Legacy command
cluster01::> network interface create -vserver svm_vsphere01 -lif lif_iscsi01 -role data -home-node cluster01-01 -home-port e0c -address 10.0.0.227 -netmask 255.255.255.0

# For a production ONTAP system we would use
cluster01::> network interface create -vserver svm_vsphere01 -lif lif_iscsi01 -service-policy default-data-files -home-node cluster01-01 -home-port e0c -address 10.0.0.227 -netmask 255.255.255.0 -failover-policy system-defined -auto-revert true
That warning is expected and harmless in many lab/simulator environments.
ONTAP tried to set a failover-policy (usually system-defined) that expects more than one port on different nodes in the same broadcast domain.
But our LIF was created on port e0c of cluster01-01, and ONTAP didn’t find a matching failover target on cluster01-02.
So the LIF is created, but it doesn’t have a valid failover path to another node, which would be important for HA in production.

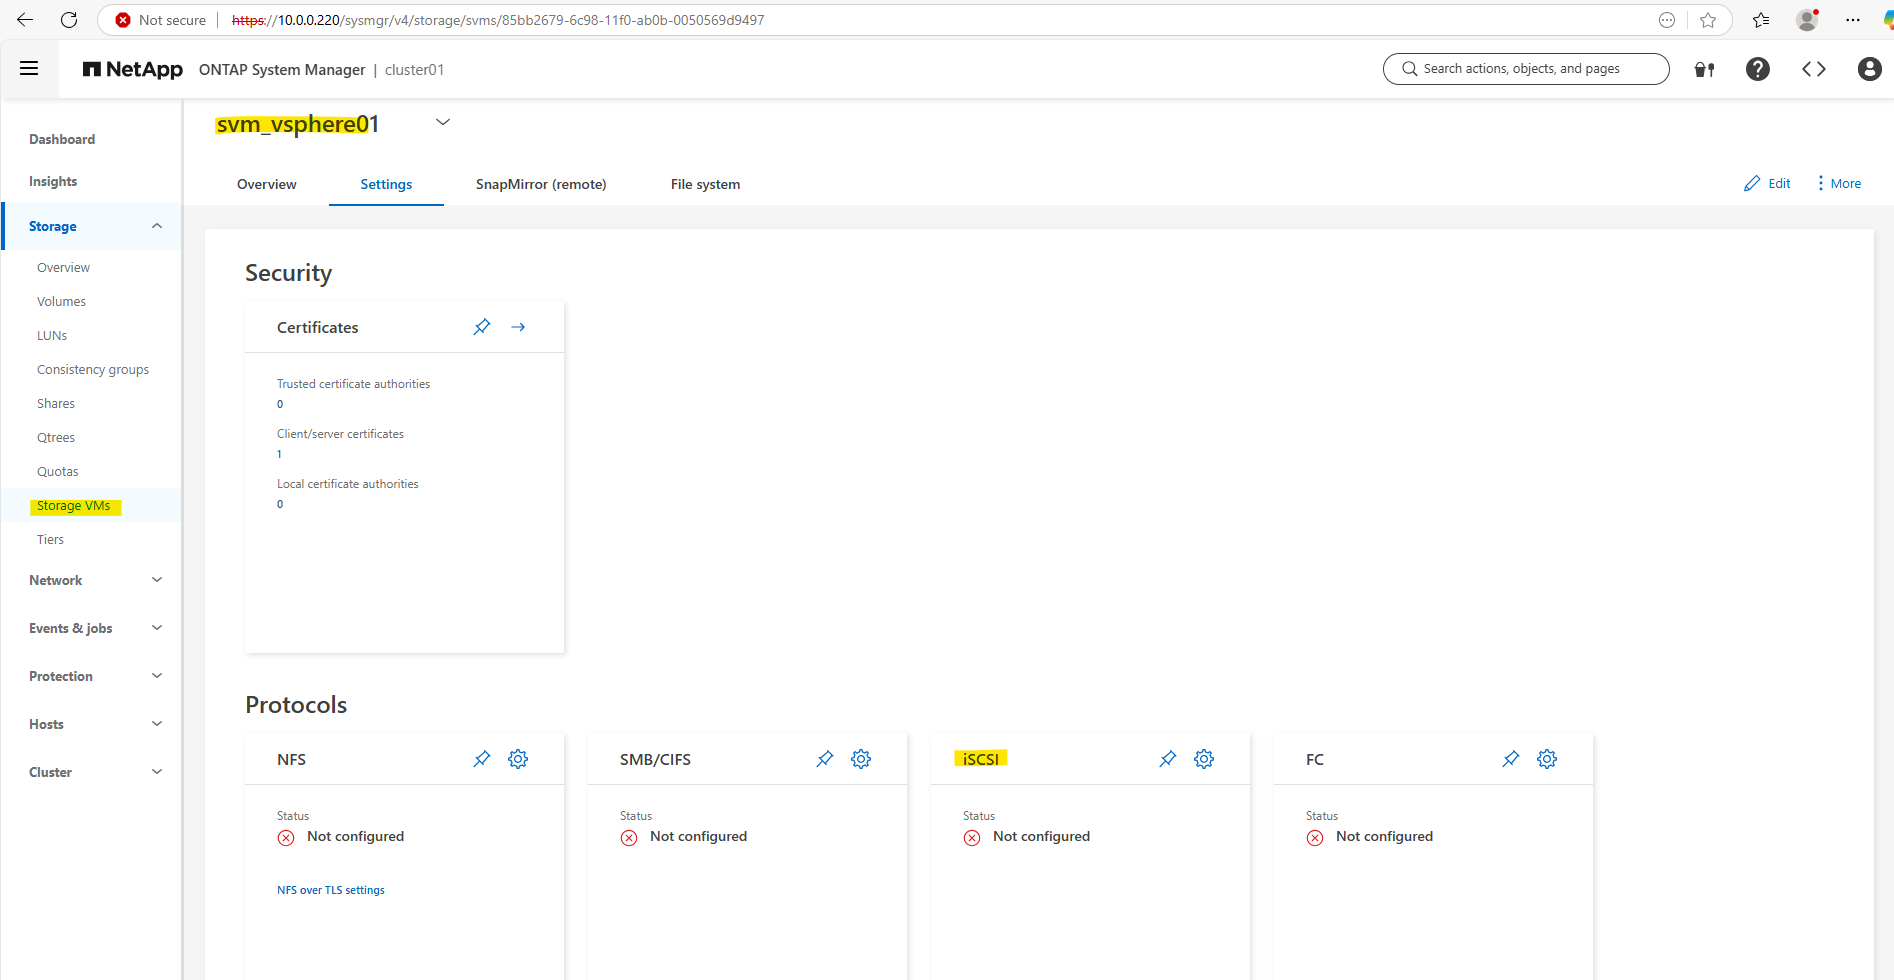
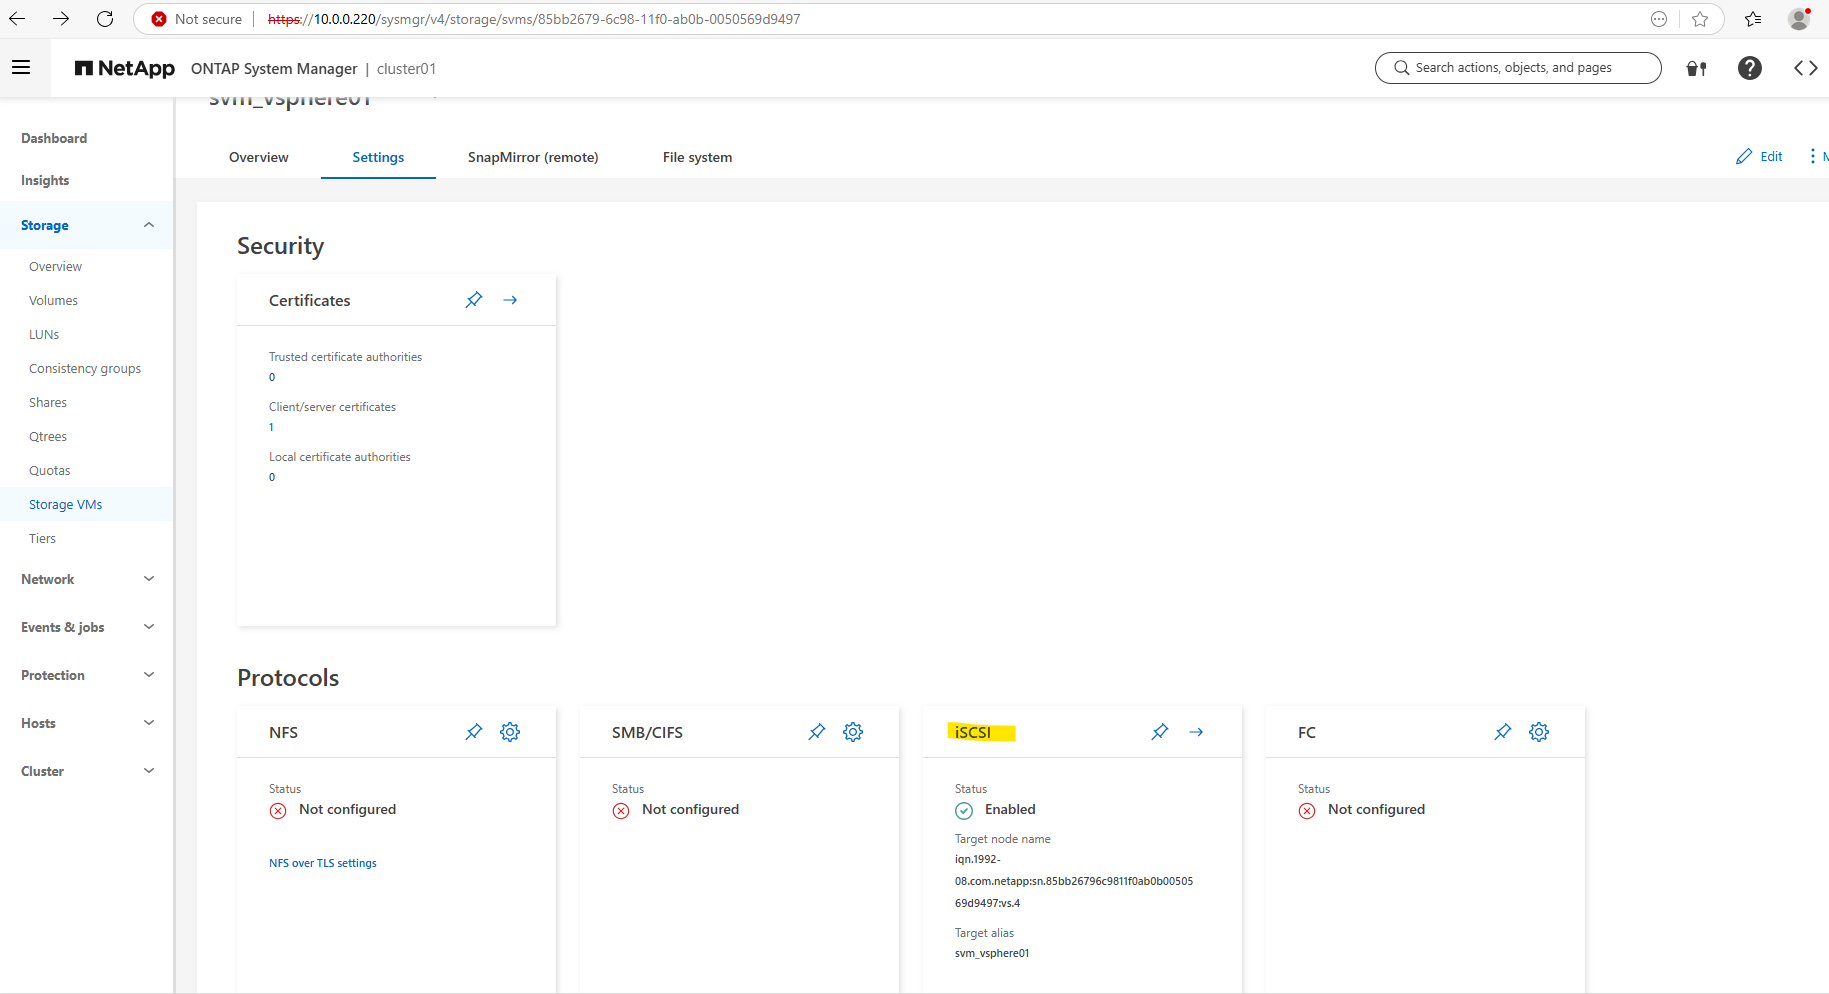
We can also see our new SVM by using the Web UI (System Manager).
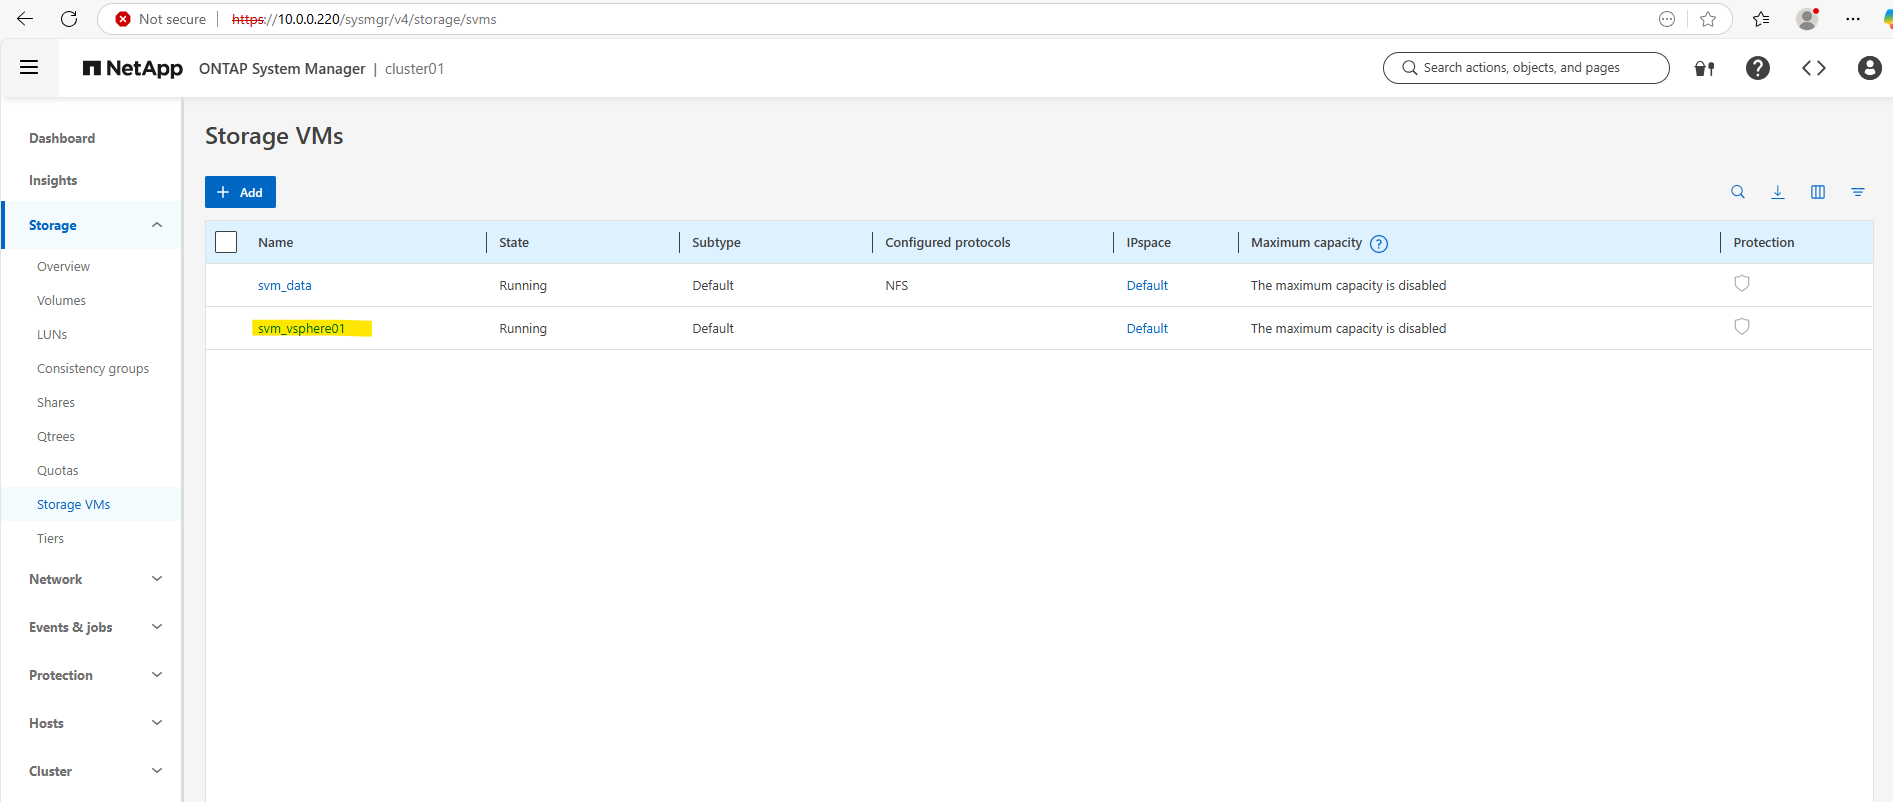
So far no protocols are enabled on our new SVM.
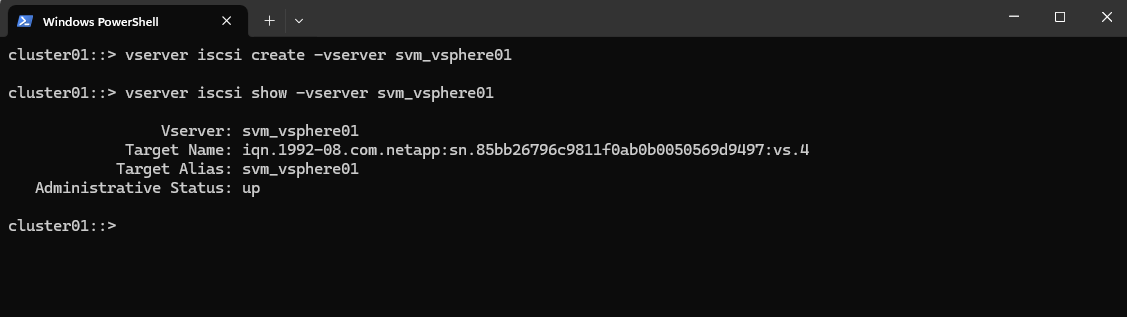
To enable iSCSI on our SVM by using the CLI, we can run.
cluster01::> vserver iscsi create -vserver svm_vsphere01
cluster01::> vserver iscsi show -vserver svm_vsphere01
A network interface wasn’t created, so the client can’t access iSCSI service.
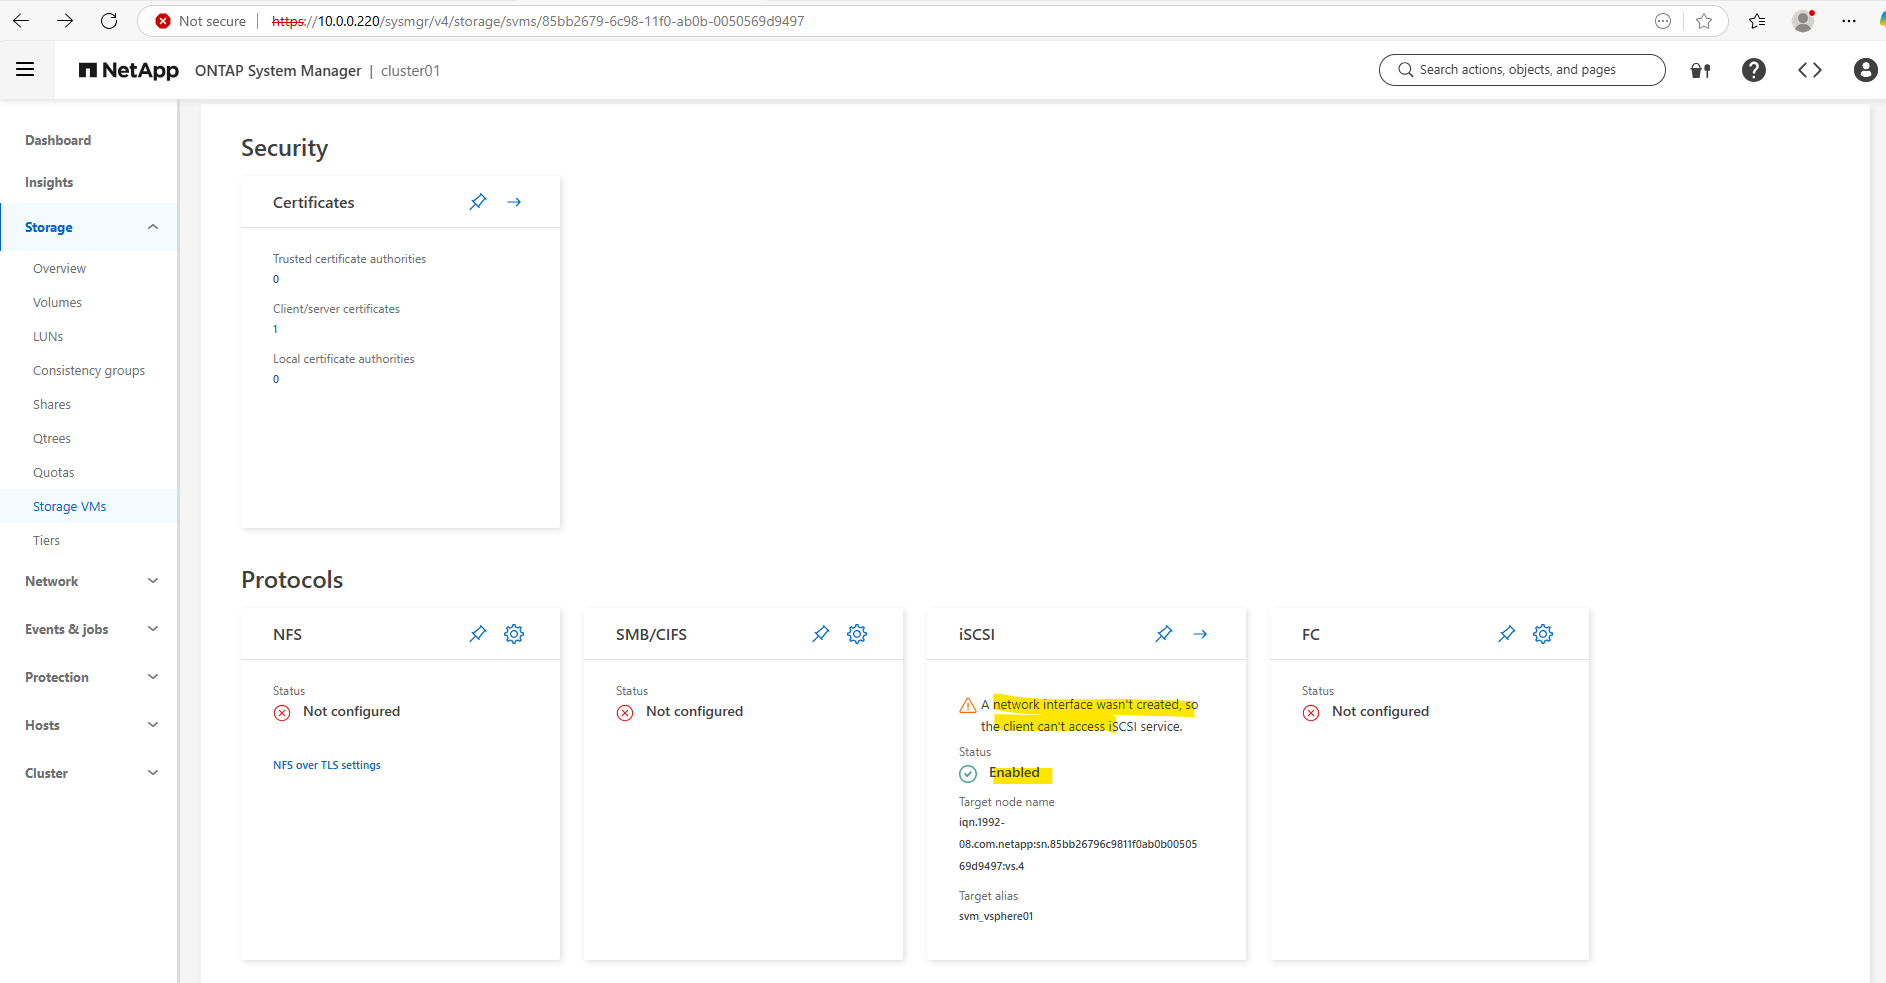
In our case we already created and assigned a LIF to our SVM but is currently not configured for iSCSI access.
So far the Data Protocol is just set to: nfs, cifs, fcache, but not iscsi
cluster01::> network interface show -vserver svm_vsphere01 -lif lif_iscsi01
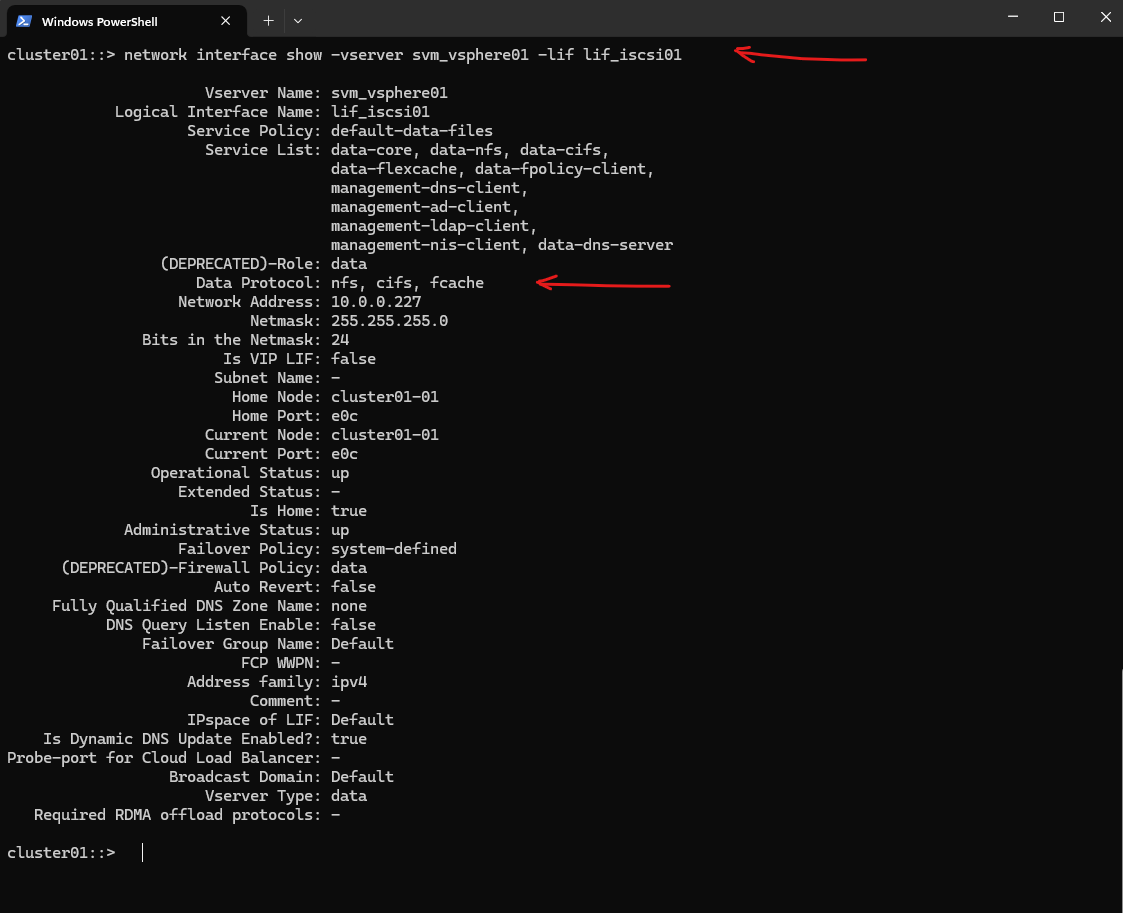
We must modify the LIF to allow the iSCSI protocol, by assigning the correct service policy.
cluster01::> network interface service-policy show
Look for one like default-data-iscsi or similar.
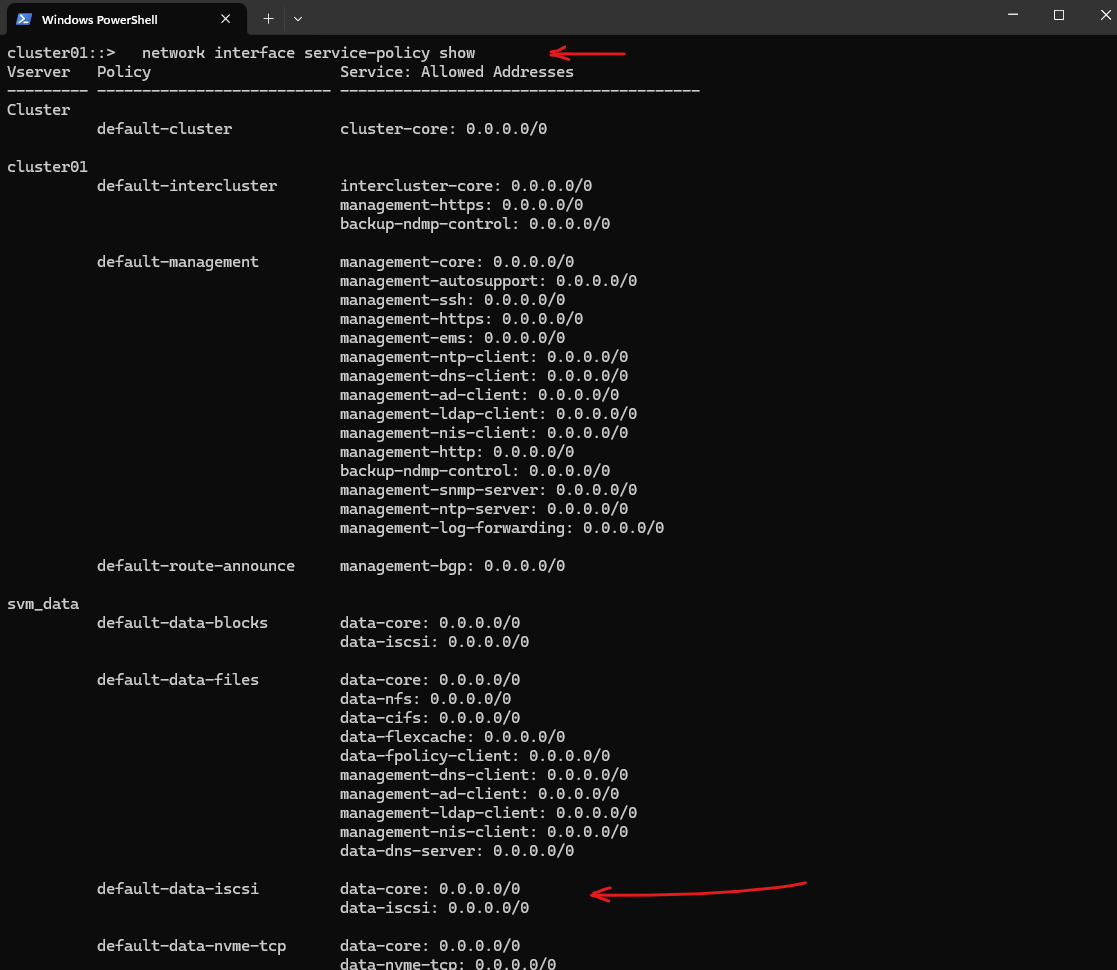
Then assign the LIF to this policy.
cluster01::> network interface modify -vserver svm_vsphere01 -lif lif_iscsi01 -service-policy default-data-iscsi
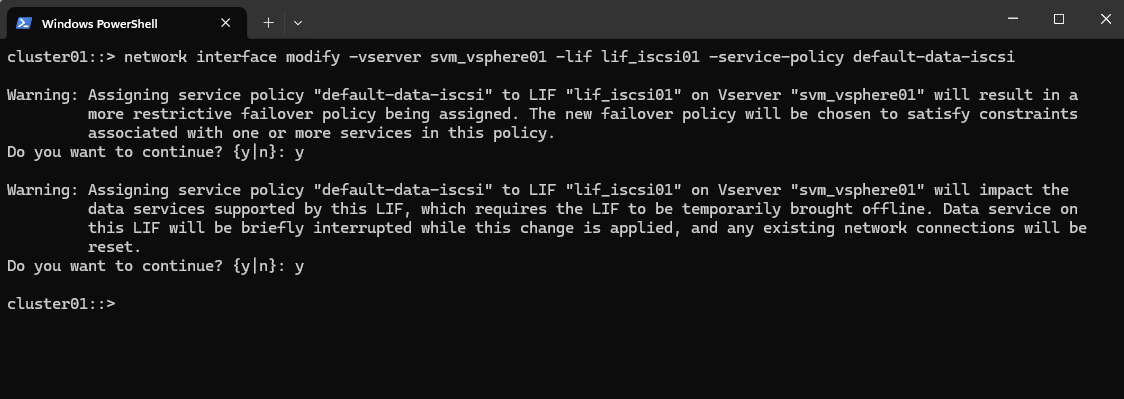
Now it looks good.
Create a volume for the LUN
A volume in NetApp ONTAP is a logical, mountable unit of storage that resides inside an aggregate, is served by a Storage Virtual Machine (SVM), and is accessible to clients via NFS, SMB, iSCSI, or FC.
cluster01::> volume create -vserver svm_vsphere01 -volume vol_esxi_lun01 -aggregate aggr_vsphere01 -size 7G -state online -policy default -space-guarantee none
Repeat with aggr_data02 for HA if desired

Create the LUN inside the volume
A LUN (Logical Unit Number) is a block-level storage object presented by NetApp to a host (like ESXi, Windows, or Linux) over iSCSI or Fibre Channel (FC).
It acts like a virtual hard disk to the host. The host formats it with a filesystem (e.g., VMFS on ESXi, NTFS on Windows). It is used as a datastore, shared disk, or raw device.
To create the LUN run the following command.
cluster01::> lun create -vserver svm_vsphere01 -path /vol/vol_esxi_lun01/lun_esxi01 -size 7G -ostype vmware -space-reserve disabled
You must provide the correct volume path under the
/vol/directory with the actual volume name.-ostype vmware ==> Aligns LUN geometry for VMware use
-space-reserve ==> disabled means thin provisioning

Create an igroup for ESXi
After creating the LUN, the next step is to create an igroup to control which iSCSI initiators (like ESXi hosts) are allowed to access it.
Once the igroup is ready, the next step is to map the LUN to the igroup so your ESXi host can discover and access it.
Below I will add both iSCSI initiators of my ESXi hosts comma separated.
cluster01::> igroup create -vserver svm_vsphere01 -igroup esxi_hosts -protocol iscsi -ostype vmware -initiator iqn.1998-01.com.vmware:esxi-01.matrixpost-lab.net:1736772152:64,iqn.1998-01.com.vmware:esxi-02.matrixpost-lab.net:692947689:64
-ostype ==> is used to specify the operating system type of the initiators in the igroup.
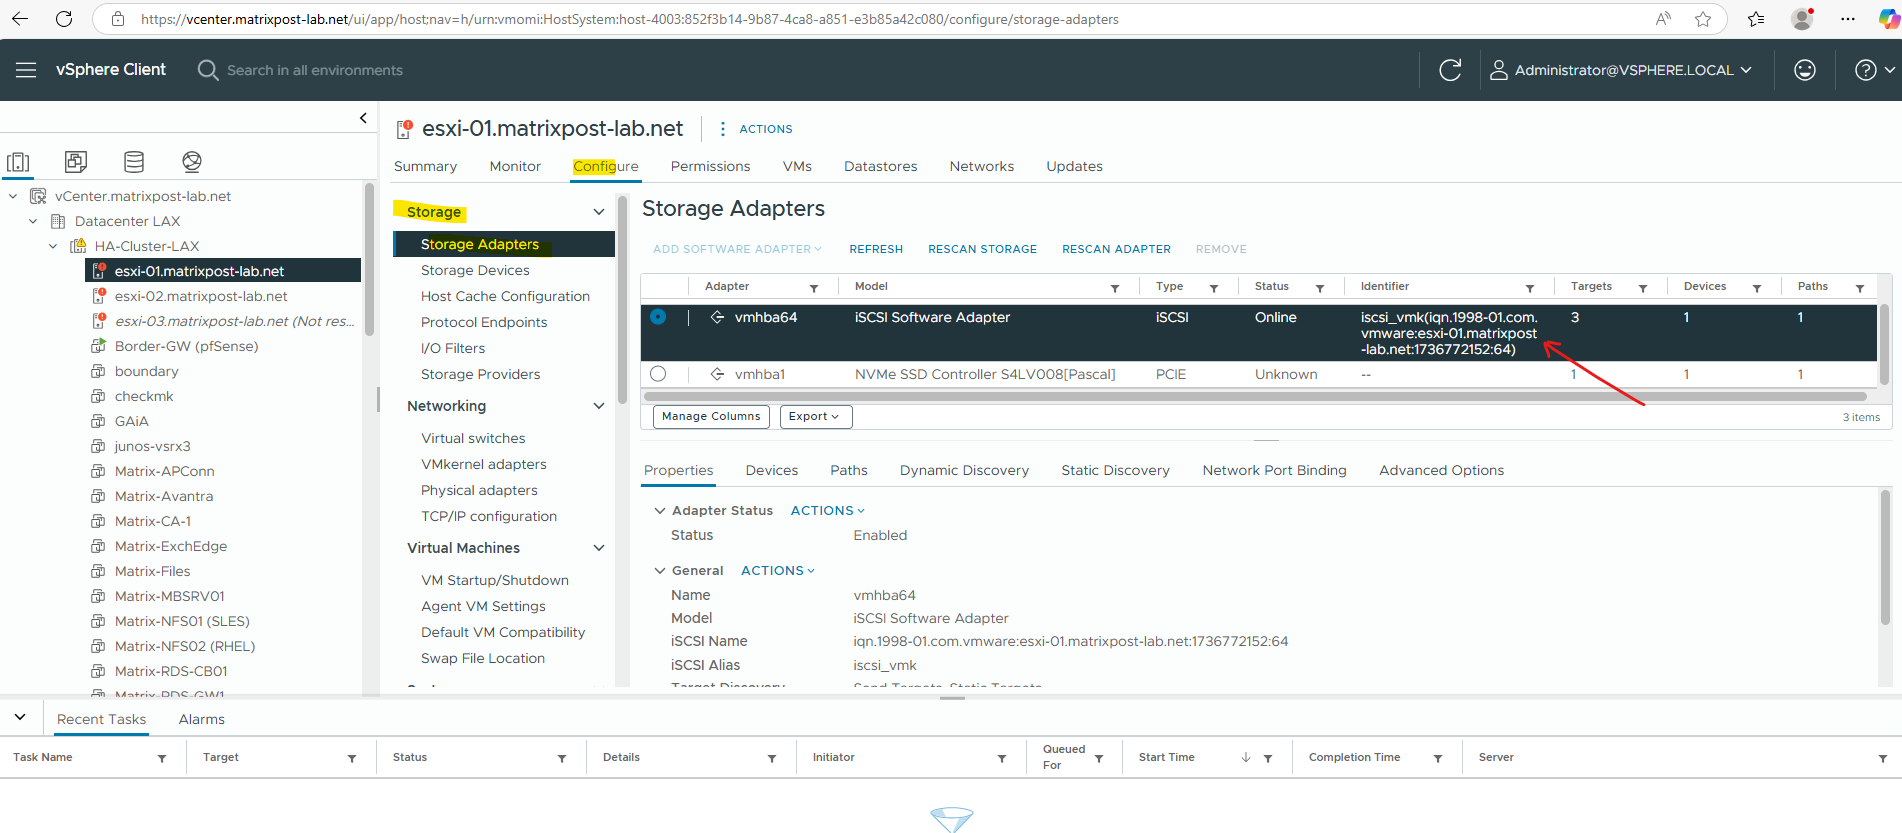
-initiator ==> specifies the iSCSI initiator IQN that will be granted access to LUNs mapped to that igroup.

The corresponding iSCSI initiator IQN for each ESXi host we can determine directly in the vSphere client as shown below. Select your ESXi Host and navigate to Configure -> Storage -> Storage Adapters and check the iSCSI Software Adapter.
Map the LUN to the igroup
Now we need to map the LUN to our igroup so that our ESXi hosts can discover and access it.
Therefore run the following command.
cluster01::> lun map -vserver svm_vsphere01 -path /vol/vol_esxi_lun01/lun_esxi01 -igroup esxi_hosts

Connecting the LUN to our ESXi Hosts
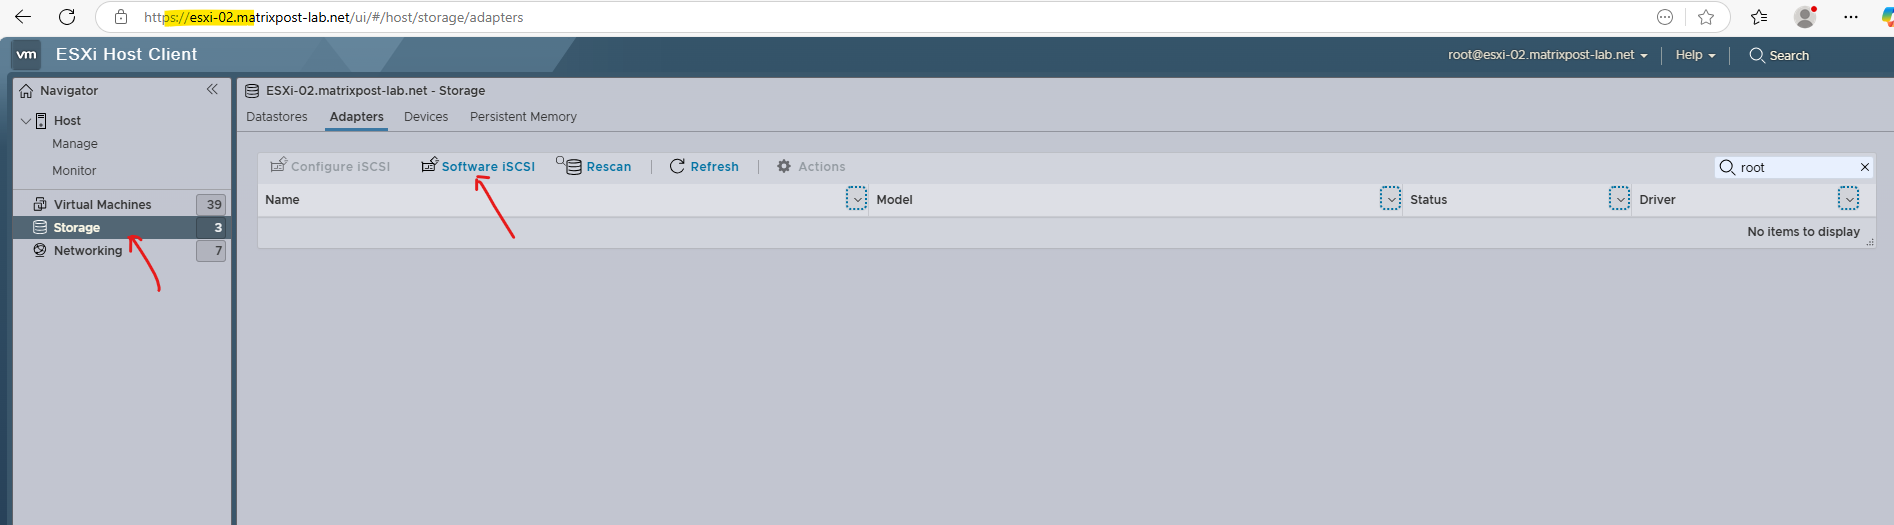
Now finally we need to connect our new LUN to our ESXi hosts. Therefore you can use either the vSphere (vCenter) Client or the ESXi Host Clients.
If not already done, we first need to enable ISCSI below. More about you will find also in my following post.
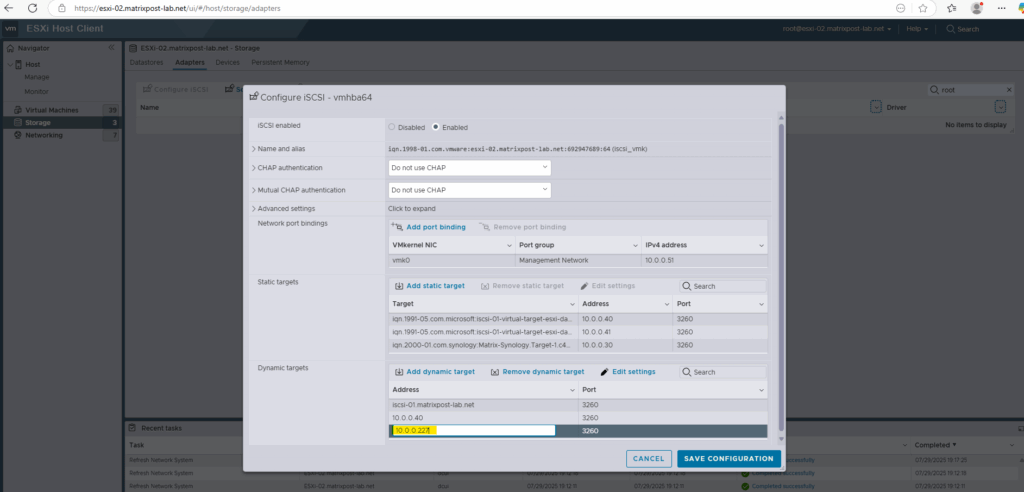
Below we need to add a new iSCSI target, we need to perform these steps on all ESXi hosts we want to connect the LUN to and previously allowed within the igroup. I will add here a dynamic target and finally save the configuration. The IP address I need to provide here is our NetApp’s SVM where the LUN was created for.
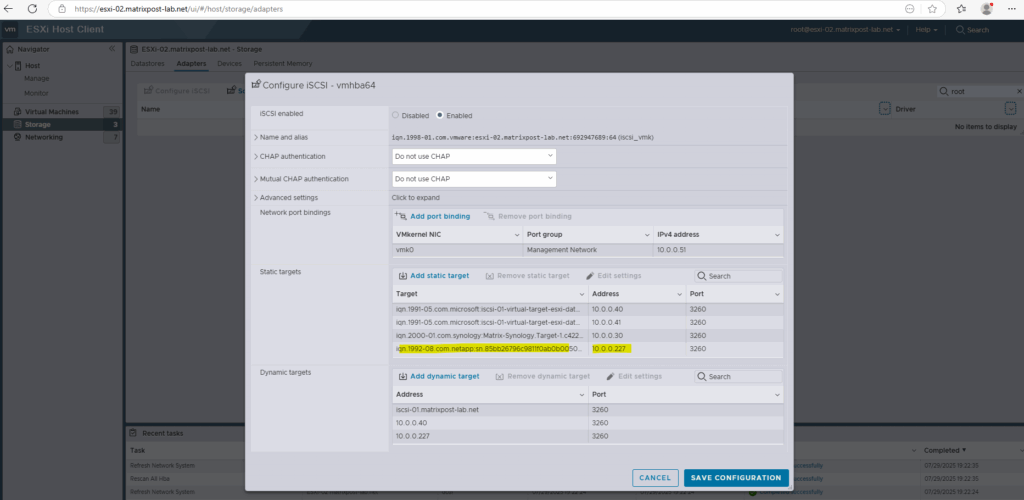
Also known as SendTargets discovery. Each time the initiator contacts a specified iSCSI server, the initiator sends the SendTargets request to the server. The server responds by supplying a list of available targets to the initiator. The names and IP addresses of these targets appear on the Static Discovery tab. If you remove a static target added by dynamic discovery, the target might be returned to the list the next time a rescan happens, the storage adapter is reset, or the host is rebooted.
In addition to the dynamic discovery method, you can use static discovery and manually enter information for the targets. The iSCSI or iSER adapter uses a list of targets that you provide to contact and communicate with the iSCSI servers.
When you set up static or dynamic discovery, you can only add new iSCSI targets. You cannot change any parameters of an existing target. To make changes, remove the existing target and add a new one.
You can see here that my target also appears on the Static Discovery tab because of the SendTargets request of the dynamic targets configuration as mentioned above.
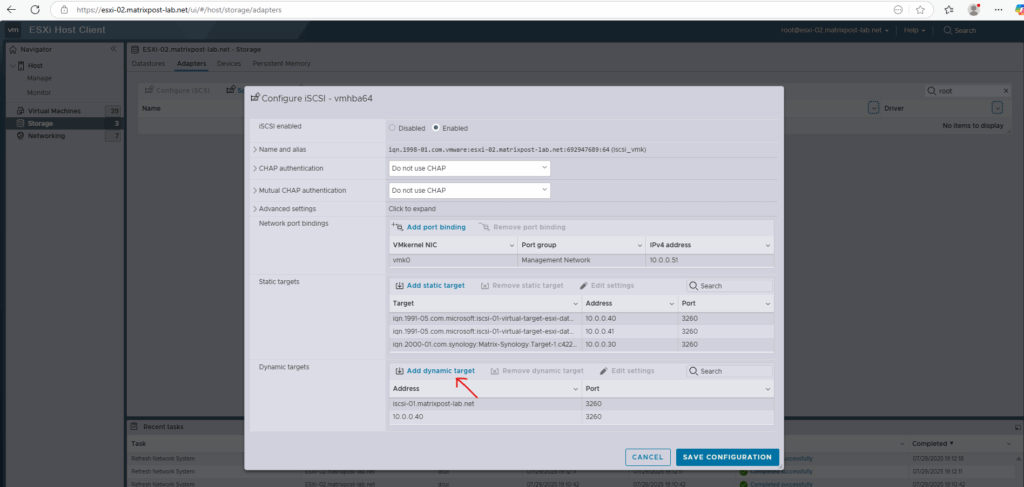
Adding the NetApp’s SVM IP address and click on Save Configuration.
The LUN is now connected.
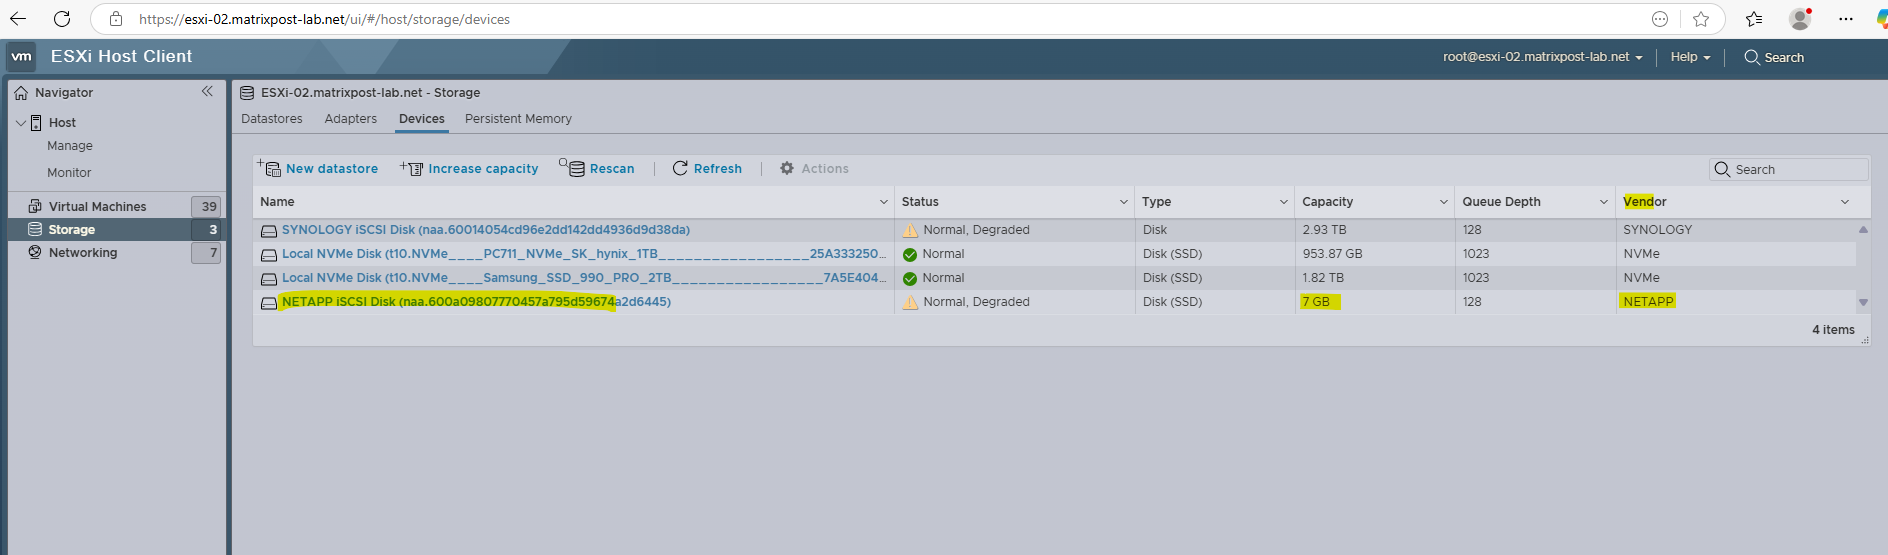
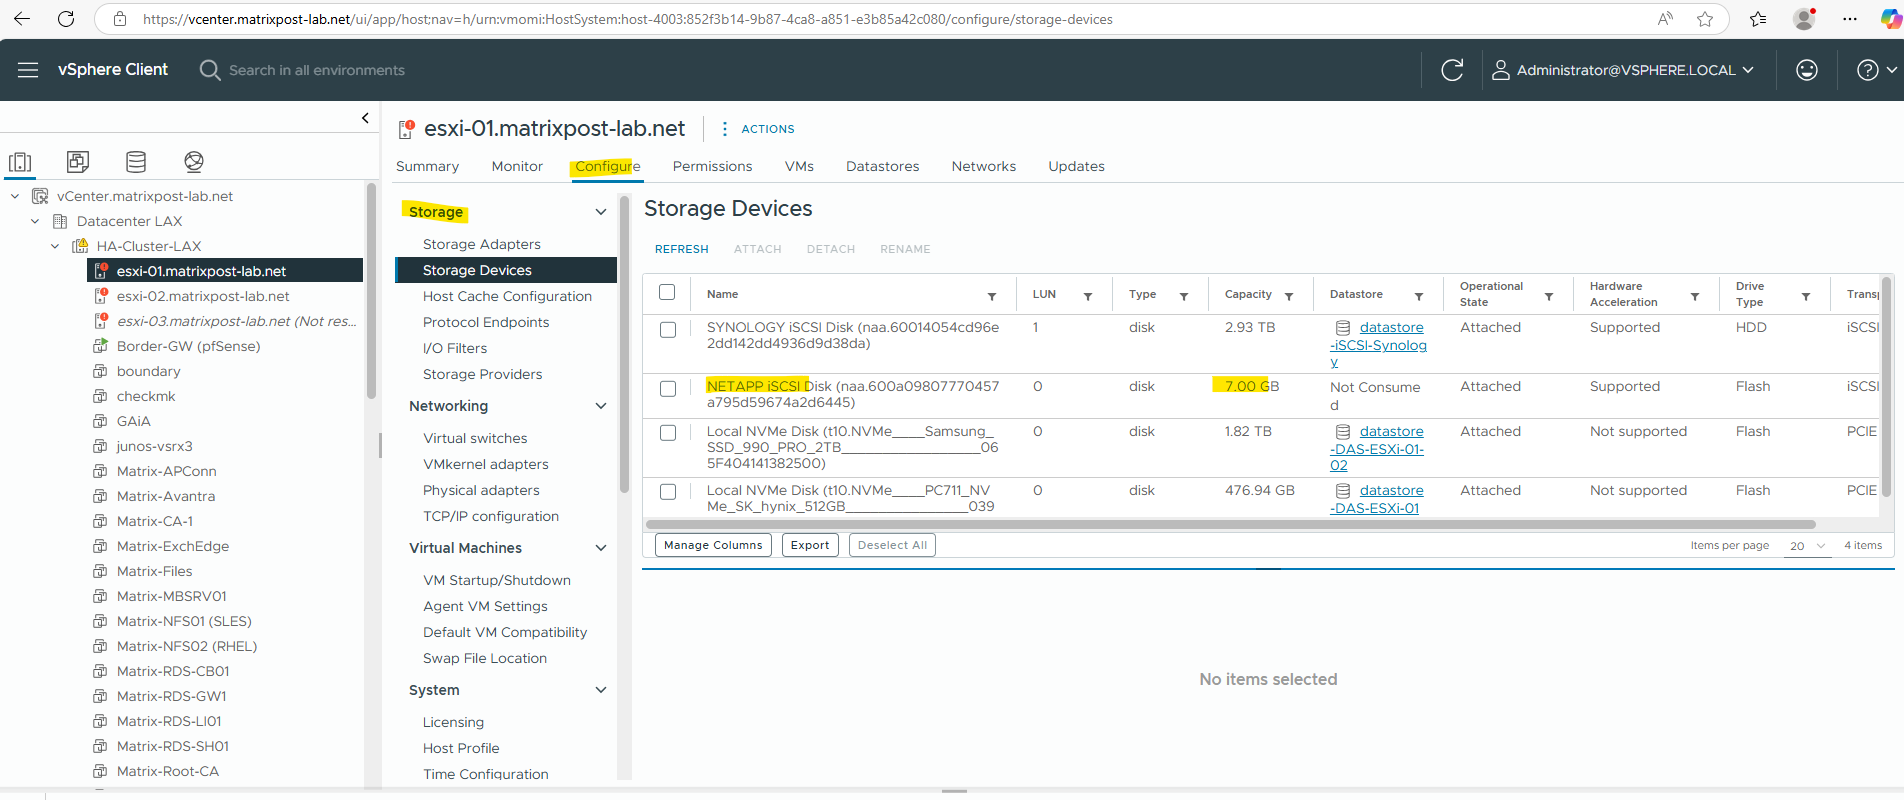
We can also see our new LUN in the vSphere client.
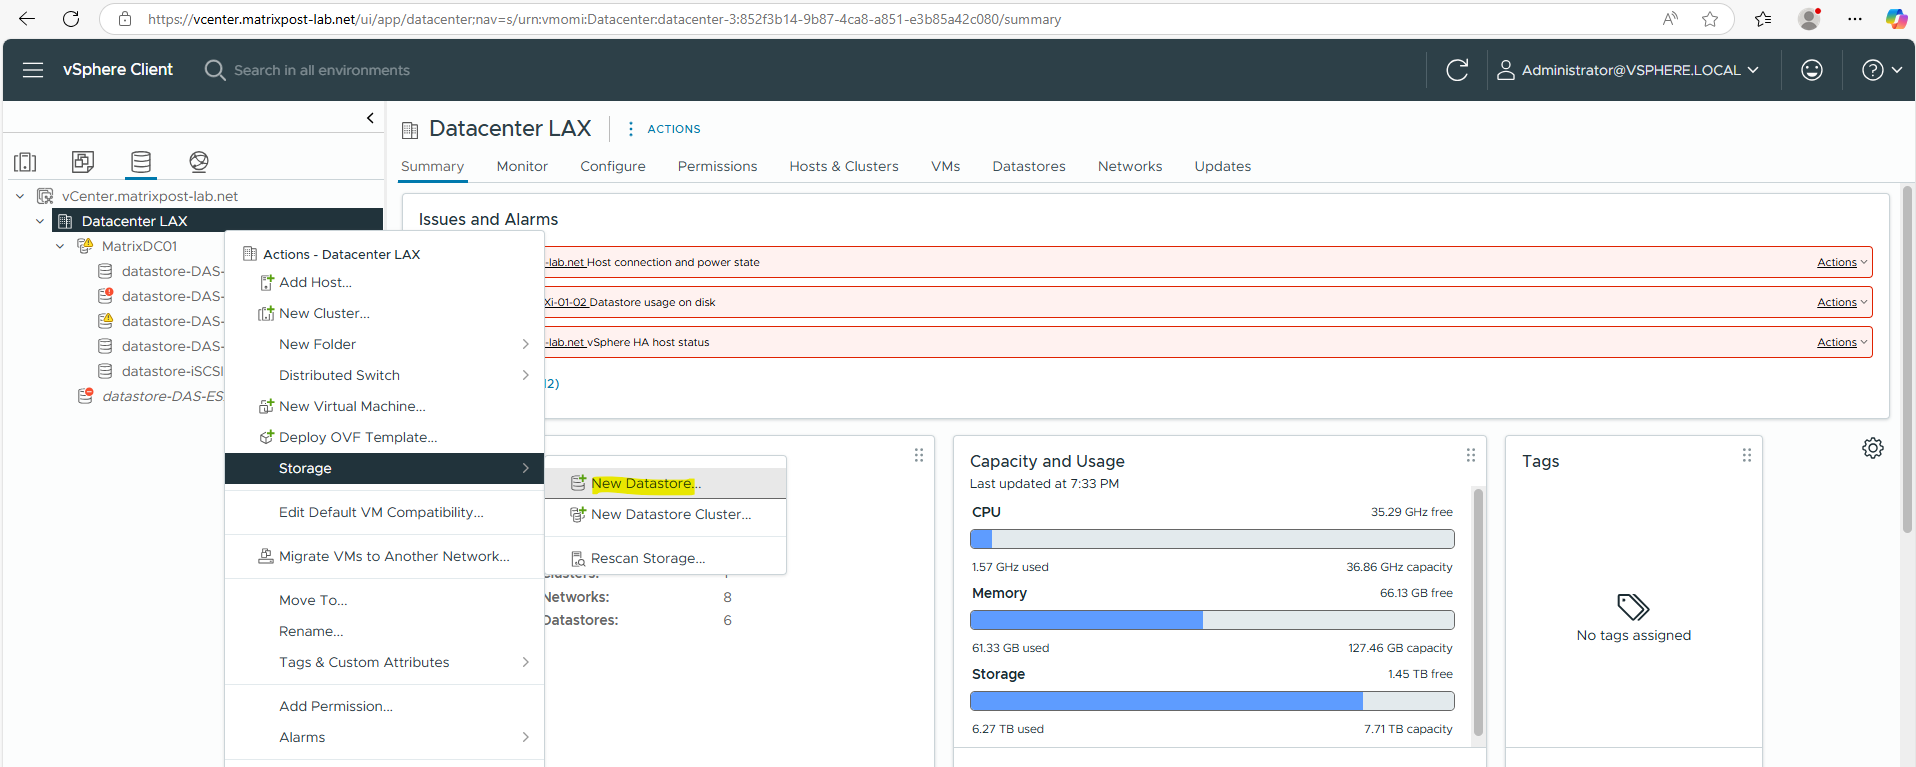
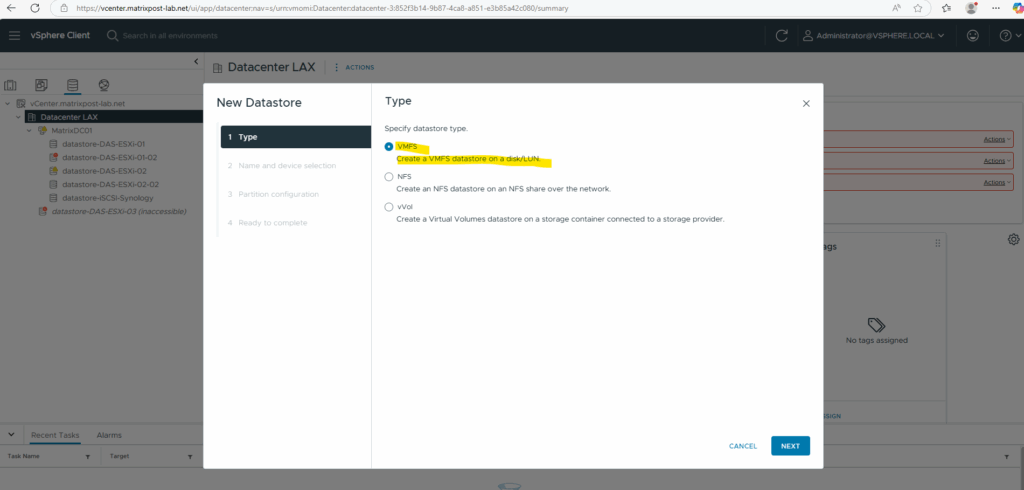
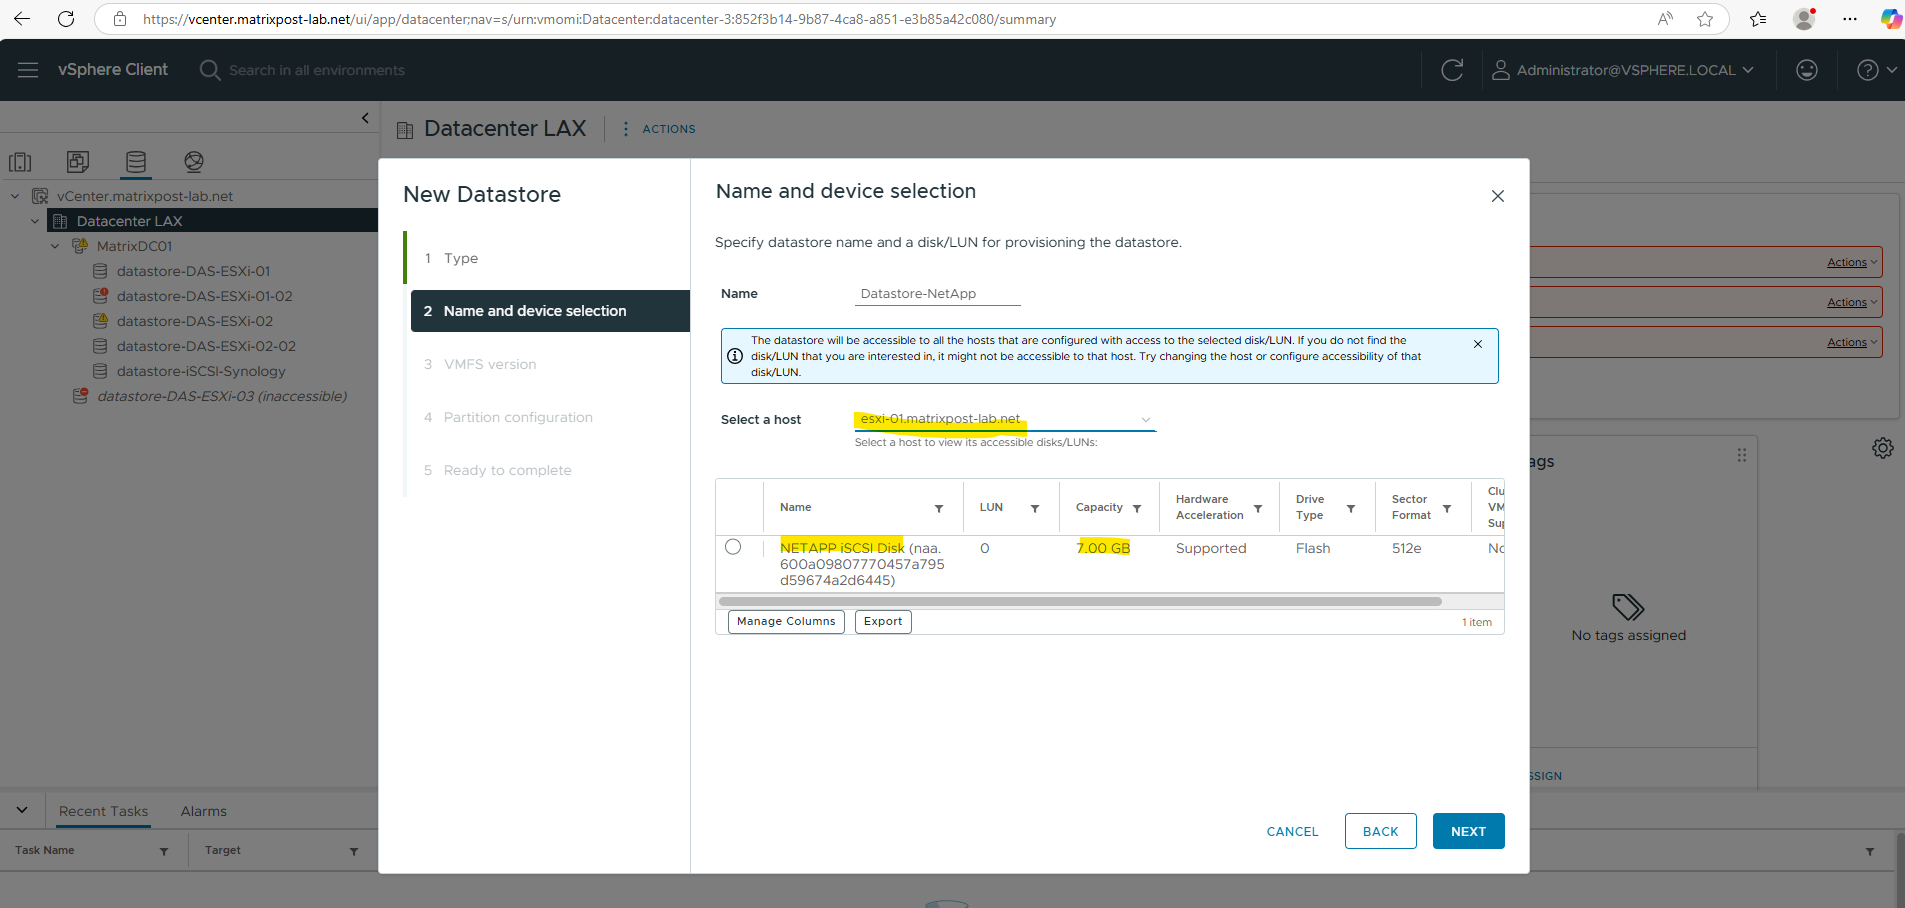
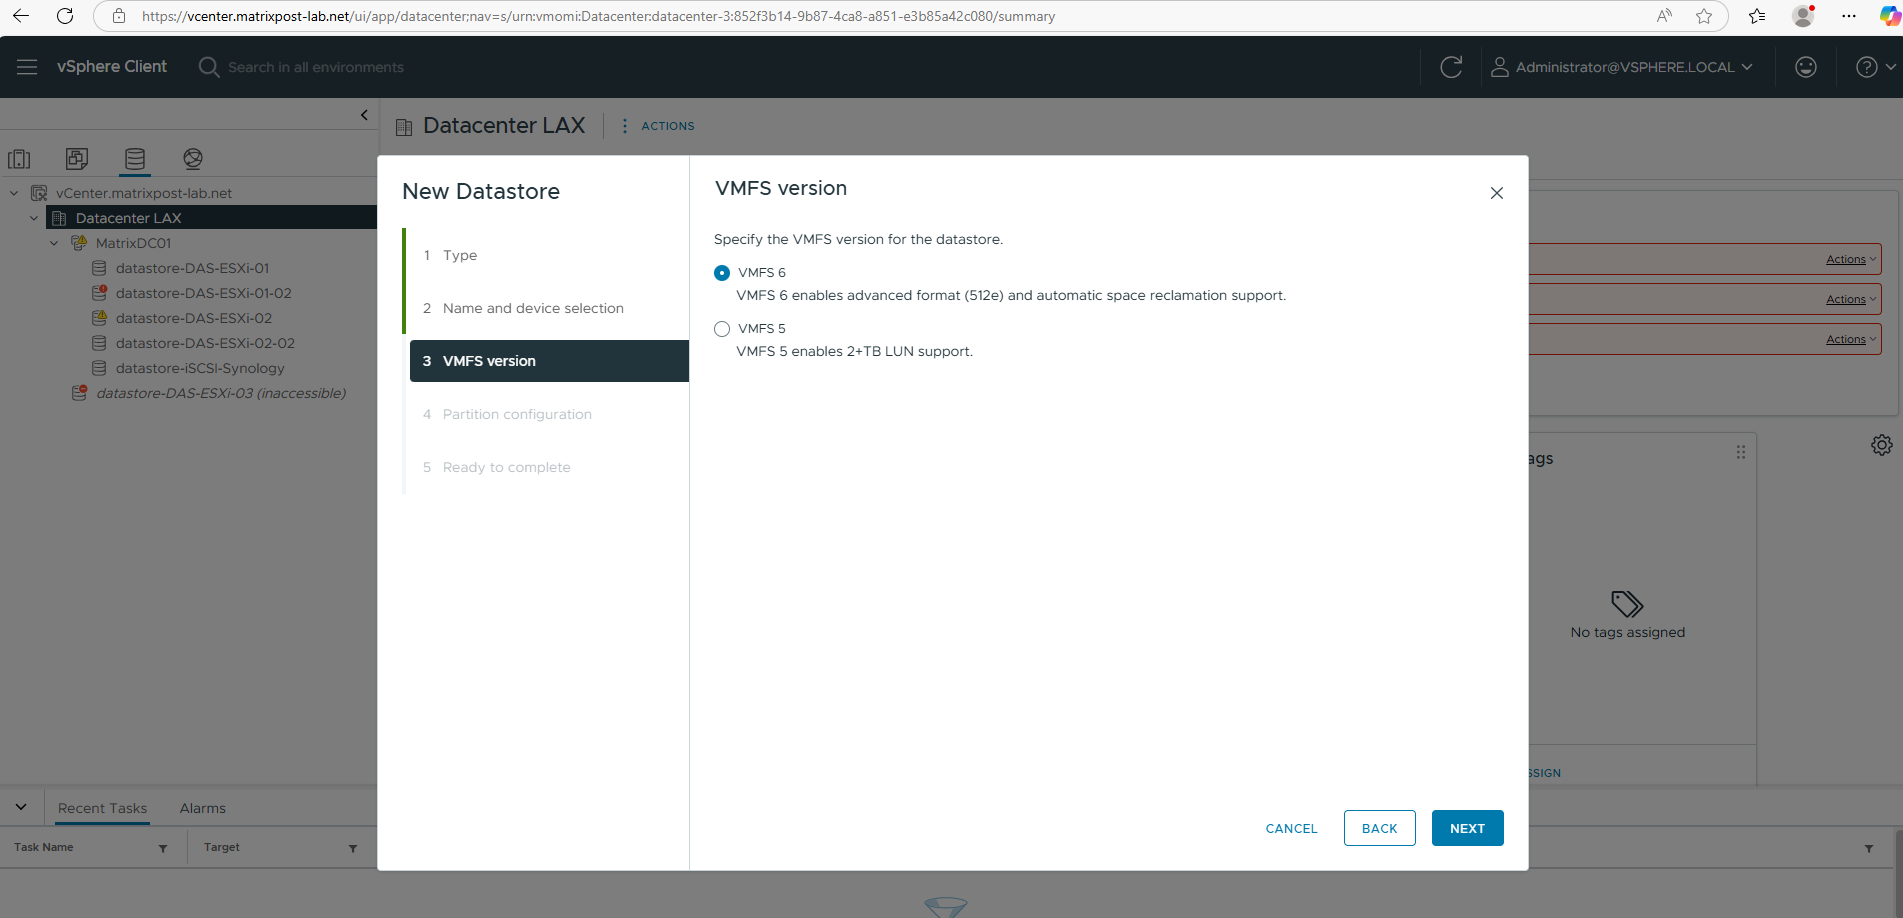
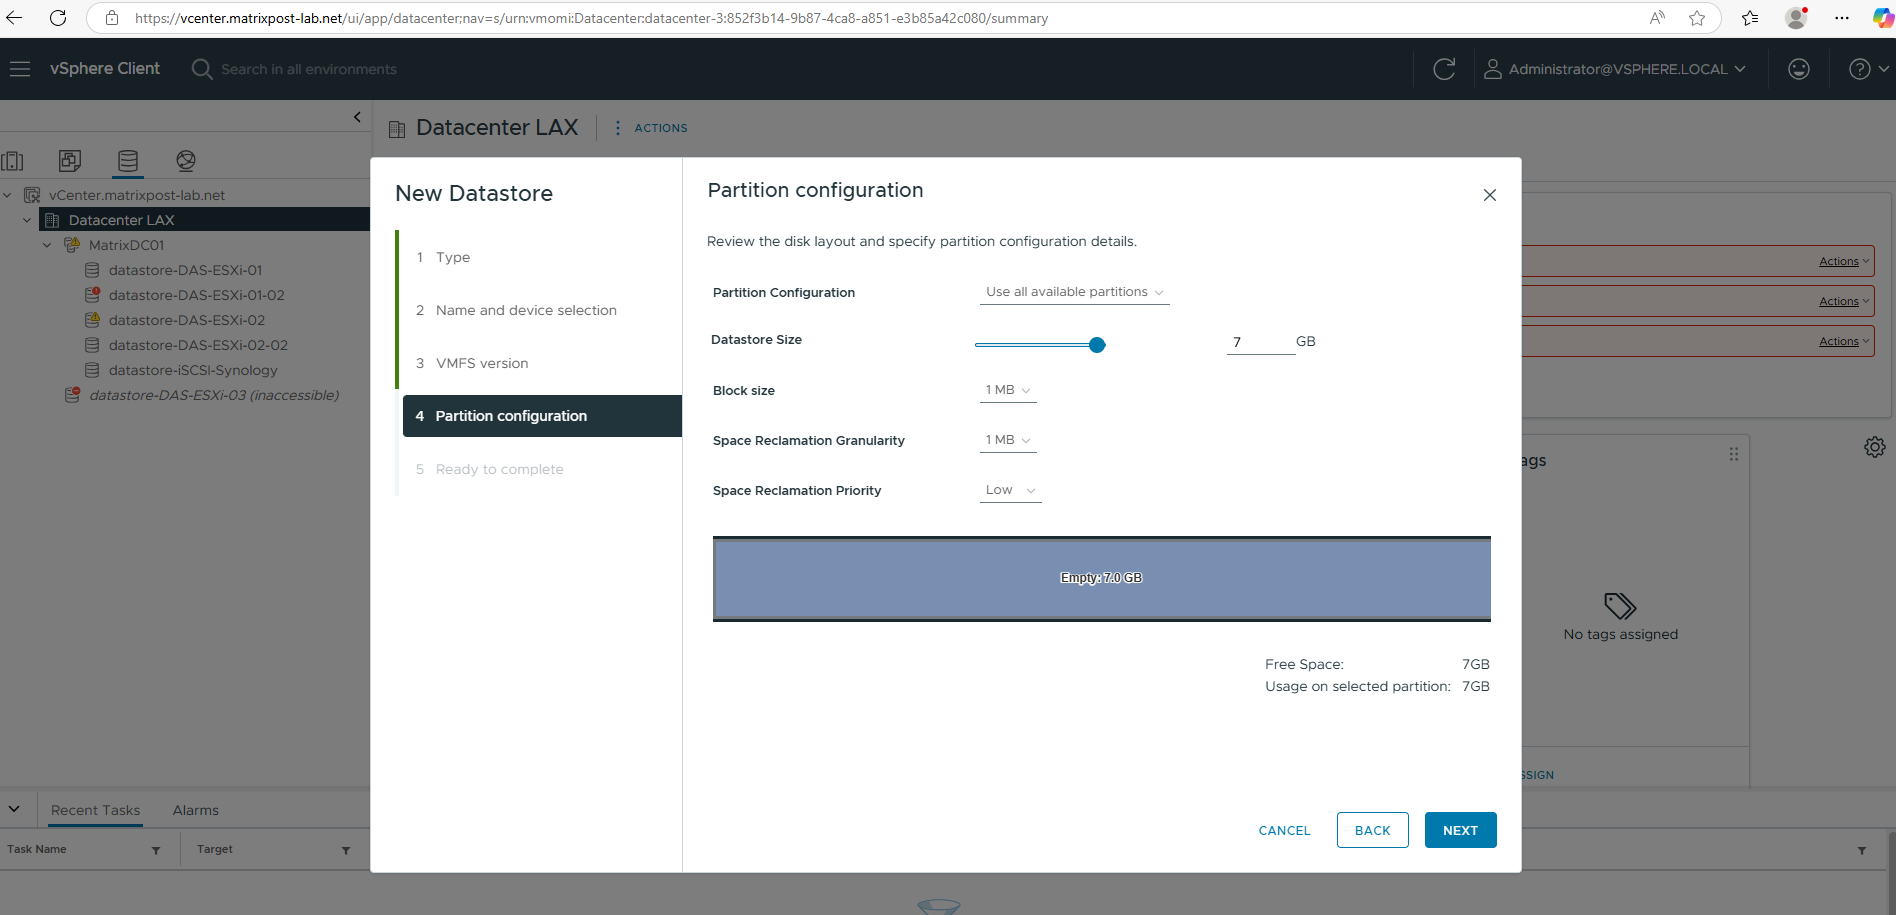
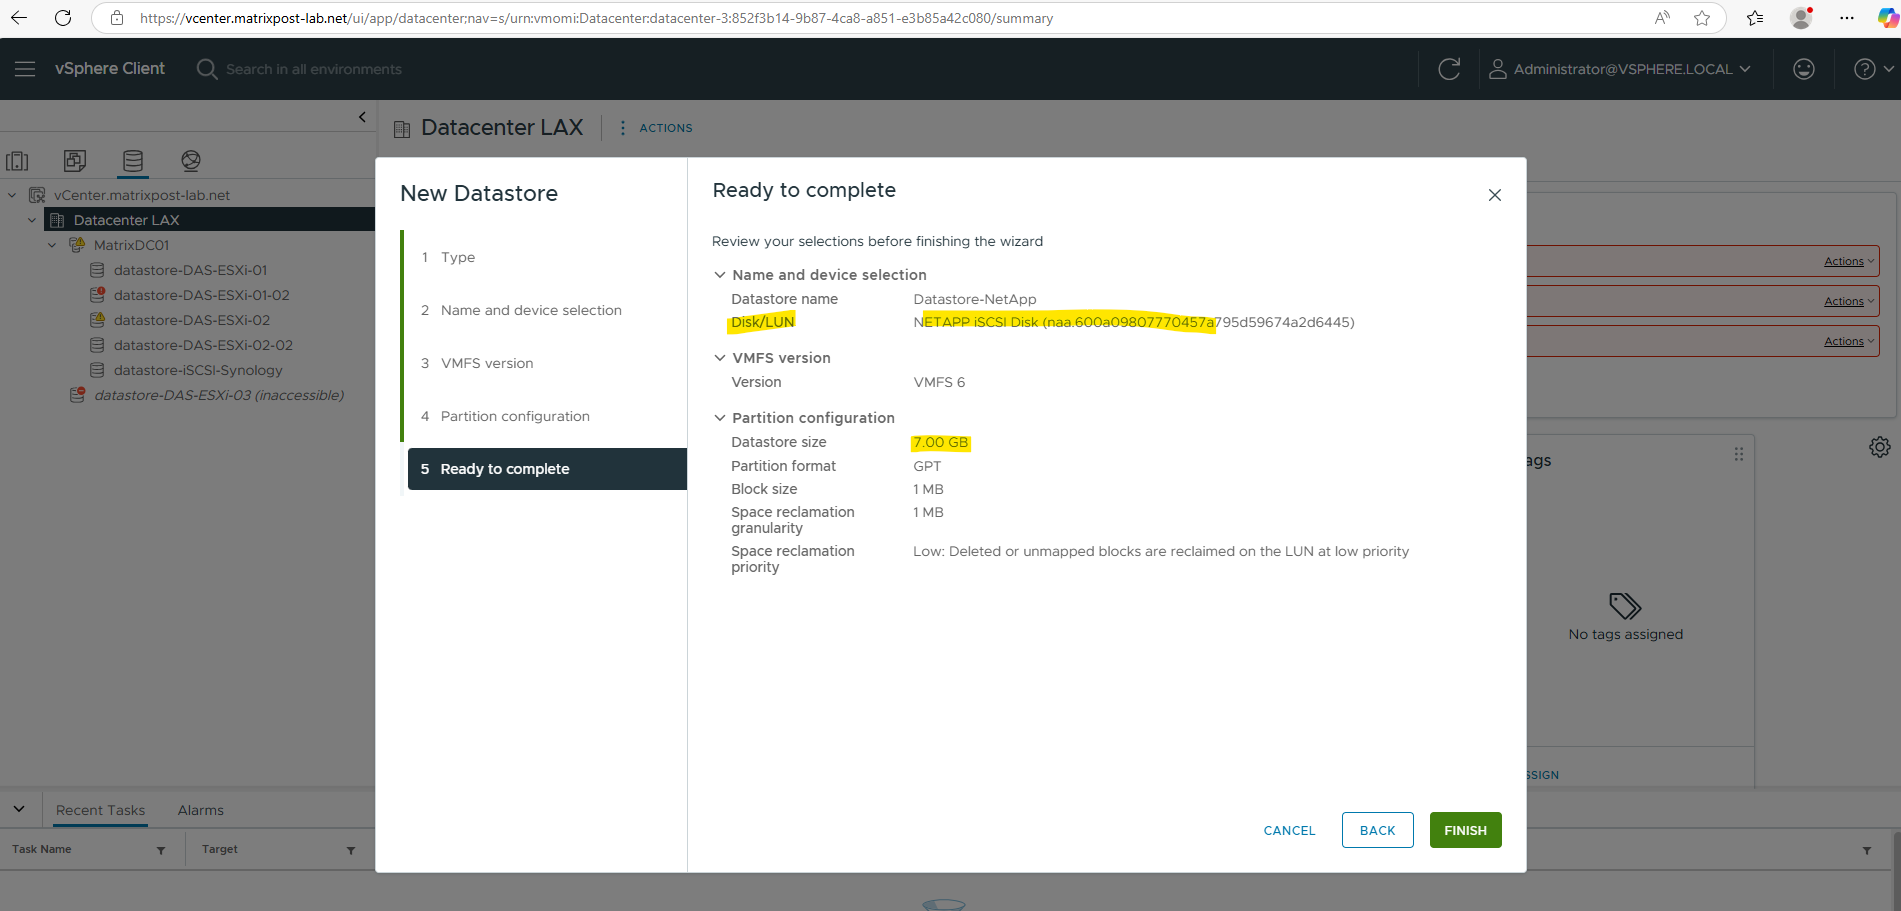
Finally we can create a new datastore by using the new LUN (block storage device) as usual in vSphere.

More about iSCSI you will find also in my blog under https://blog.matrixpost.net/?s=iscsi.
Now that the basic infrastructure is in place, it’s time to explore the practical, day-to-day operations you’ll perform when managing a NetApp system.
In part 4, we’ll cover common administrative tasks such as:
- Creating and managing new volumes
- Configuring NFS exports for Linux and UNIX-based access
- Publishing CIFS/SMB shares for Windows environments
- Introducing Qtrees to support quota enforcement, multi-tenancy, or directory-level access control within a volume
Links
NetApp ONTAP 9 simulator download and support
https://kb.netapp.com/on-prem/ontap/Ontap_OS/OS-KBs/Where_can_the_NetApp_ONTAP_9_Simulator_be_downloadedONTAP 9 Documentation
https://docs.netapp.com/us-en/ontap/index.htmlONTAP licensing overview
https://docs.netapp.com/us-en/ontap/system-admin/manage-licenses-concept.html#licenses-included-with-ontap-one