Step-by-Step Guide: Setting Up Check Point GAiA as Security Gateway
Gaia is the Check Point next generation operating system for security applications. In Greek mythology, Gaia is the mother of all, which represents closely integrated parts to form one efficient system.
The Gaia Operating System supports the full portfolio of Check Point Software Blades, Gateway and Security Management products.
Gaia is a unified security Operating System that combines the best of Check Point original operating systems, and IPSO, the operating system from appliance security products.
Gaia is available for all Check Point Security Appliances and Open Servers.
In this post we will see step by step the initial setup and network interface assignment to enabling core blades like Firewall and VPN.
In Check Point GAiA, blades are modular software components that enable specific security functions on a Security Gateway or Management Server. Think of blades like plugins or feature sets, you can enable or disable them based on your security needs.
Further we will see how to configure the Firewall to allow outbound internet access and how to publish internal services like a web server to Internet.
Introduction
What is Check Point GAiA
GAiA is the underlying Linux-based operating system that runs on Check Point appliances (or VMs). It provides the core management, networking, and system functionality.
Check Point’s Gaia operating system is based on Red Hat Enterprise Linux (RHEL). Specifically, Gaia incorporates elements from RHEL, but it’s not a direct installation of RHEL. It’s a custom operating system built by Check Point that includes features from both SecurePlatform and IPSO operating systems.
SecurePlatform (SPLAT) was Check Point’s previous OS based on Red Hat Linux, while IPSO was used on Nokia appliances.
Gaia was created by merging the best parts of both.
Gaia versions, like R81.20, are based on specific Red Hat versions (e.g., R81.20 is based on Red Hat 7.9 with Linux kernel 3.10.0-1160) according to Check Point Software.
Check Point uses a modular architecture called Software Blades. These blades can be activated on top of GAiA to deliver specific security functionalities. Some common ones include:
- Firewall
- VPN (IPSec, SSL)
- IPS (Intrusion Prevention System)
- Antivirus / Anti-Bot
- Application Control
- URL Filtering
- Threat Emulation / Threat Extraction
- DLP (Data Loss Prevention)
- Identity Awareness
- Security Management
You choose and license the blades you need. Many appliances support running multiple blades simultaneously but that depends on the model’s hardware resources and your licenses.
Some Check Point appliances (like the 3000, 6000, 16000, etc.) can be configured to act as all-in-one devices, meaning they:
- Run GAiA,
- Act as a gateway (doing firewall, IPS, etc.),
- And also manage policies (Management Server role).
But in large deployments, you usually split roles for performance:
- One appliance as Security Management
- Others as Security Gateways
So finally GAiA is the base OS, not a bundle of all products. You add features by enabling licensed Software Blades.
Some appliances can run multiple blades, even acting as both gateway and management server, but it depends on the use case and hardware.
Download the recommended version R81.20 (as of June 25) for deployments under https://support.checkpoint.com/results/download/124397.
The latest as of June 25 is R82 GA which includes Gaia OS build 777, based on a Linux 4.18 kernel under https://support.checkpoint.com/results/download/135012
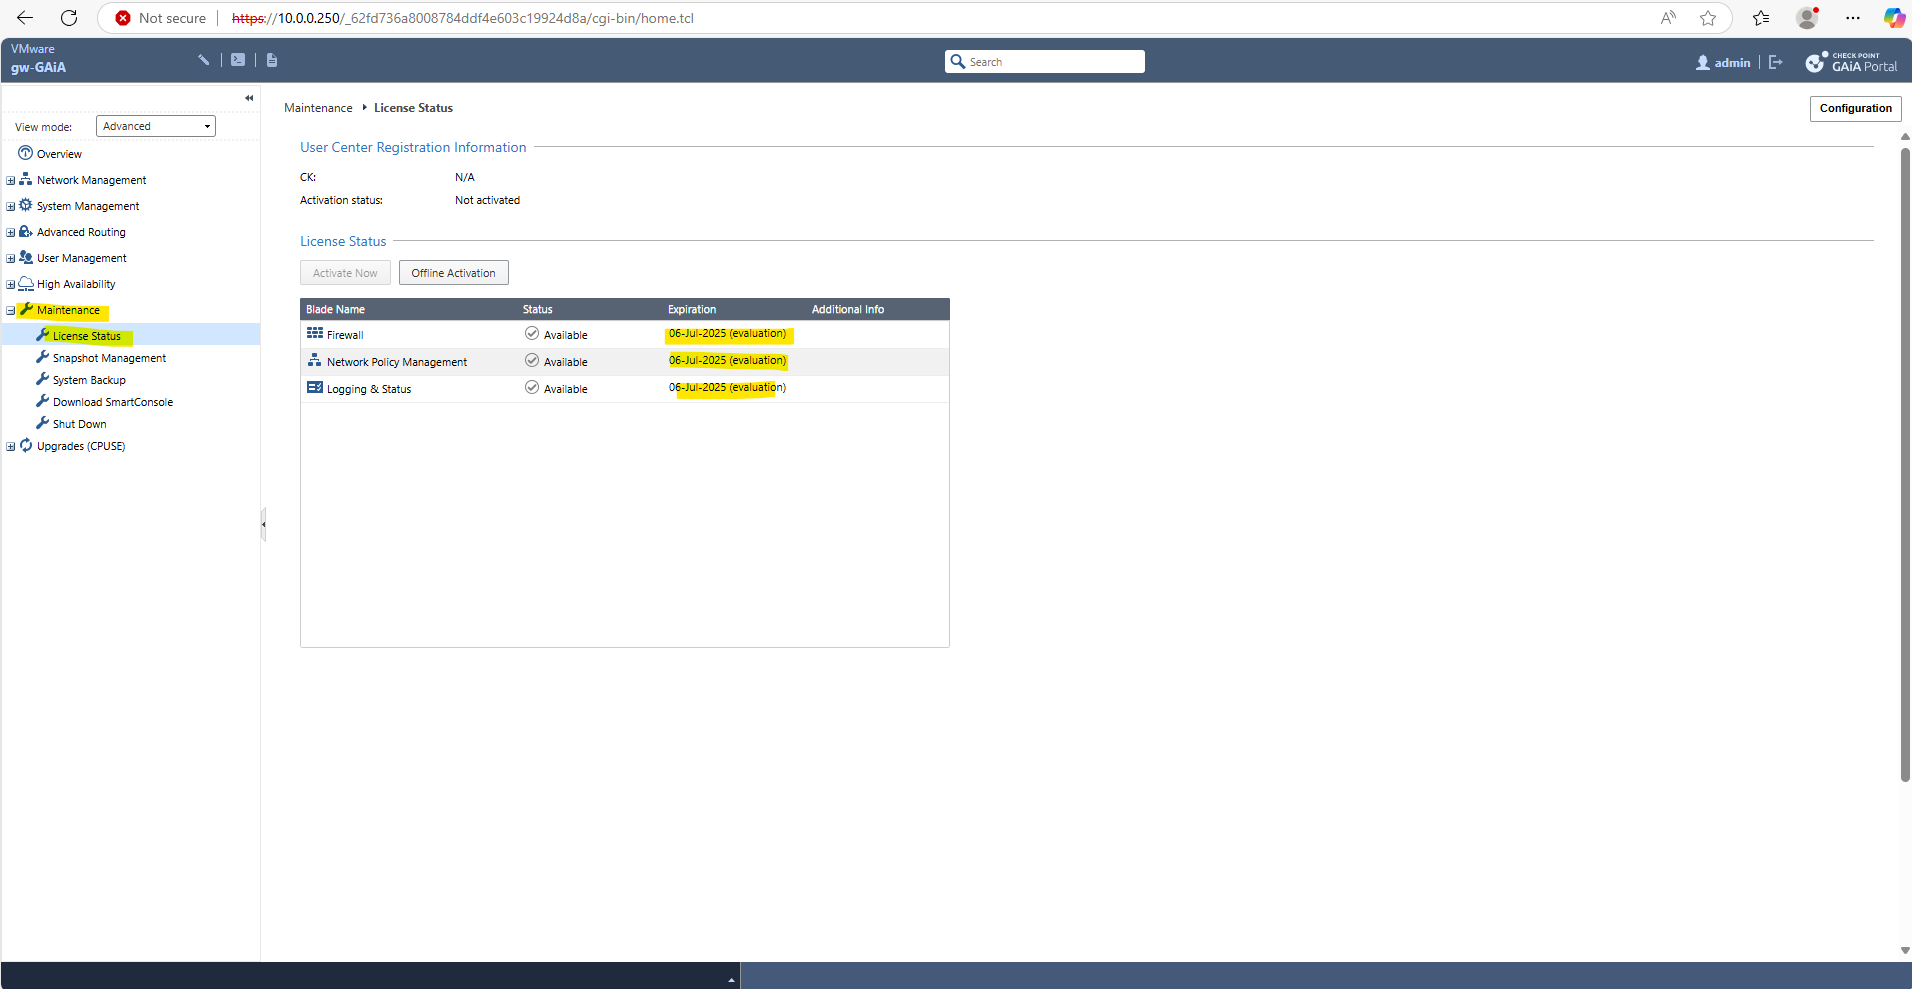
By default the GAiA appliance will be installed with a trial licence valid for 1 month.
This release brings substantial updates to both Quantum appliances and CloudGuard Network Security platforms.
Set up GAiA in vSphere
Below I will go step by step through the installation and configuration process of GAiA version R81.20 (as of today the latest version).
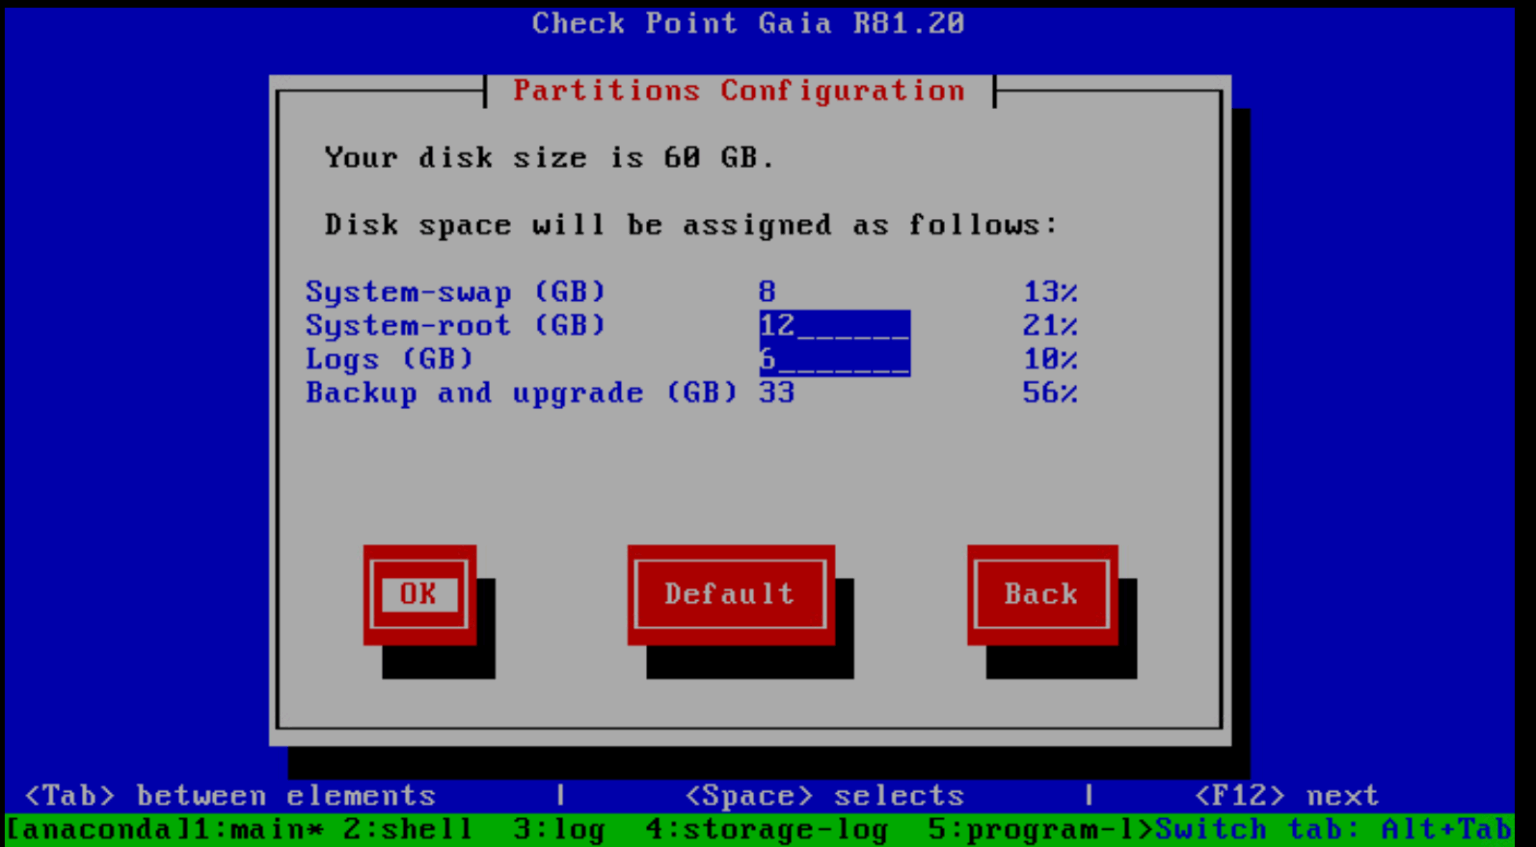
For the new virtual machine in my lab environment I will use 4 x vCPUs, 6 GB RAM and a virtual hard disk with 60 GB.
Minimum System Requirements for Standalone (Gateway + Management on same machine) are:
- CPU ==> 4 cores
- RAM ==> 8-16 GB
- Disk Space ==> 250 GB (I was using here just 60 GB to show later further down how to resize the disk afterwards)
- SCSI Typ ==> LSI Logic Parallel
- vSphere Hardware Compatibility ==> ESXi 8.0 U2 and later (VM version 21) is supported
- vSphere Guest OS ==> Red Hat Enterprise Linux 9 (64-bit) supported
- NICs ==> At least 2 (management + internal trusted LAN + external)
- In vSphere -> VM Options -> Boot Options -> Firmware -> Select BIOS
For a basic deployment we need a minimum of 2 interfaces, eth0 for internal/trusted LAN and eth1 for external/untrusted WAN or Perimeter.
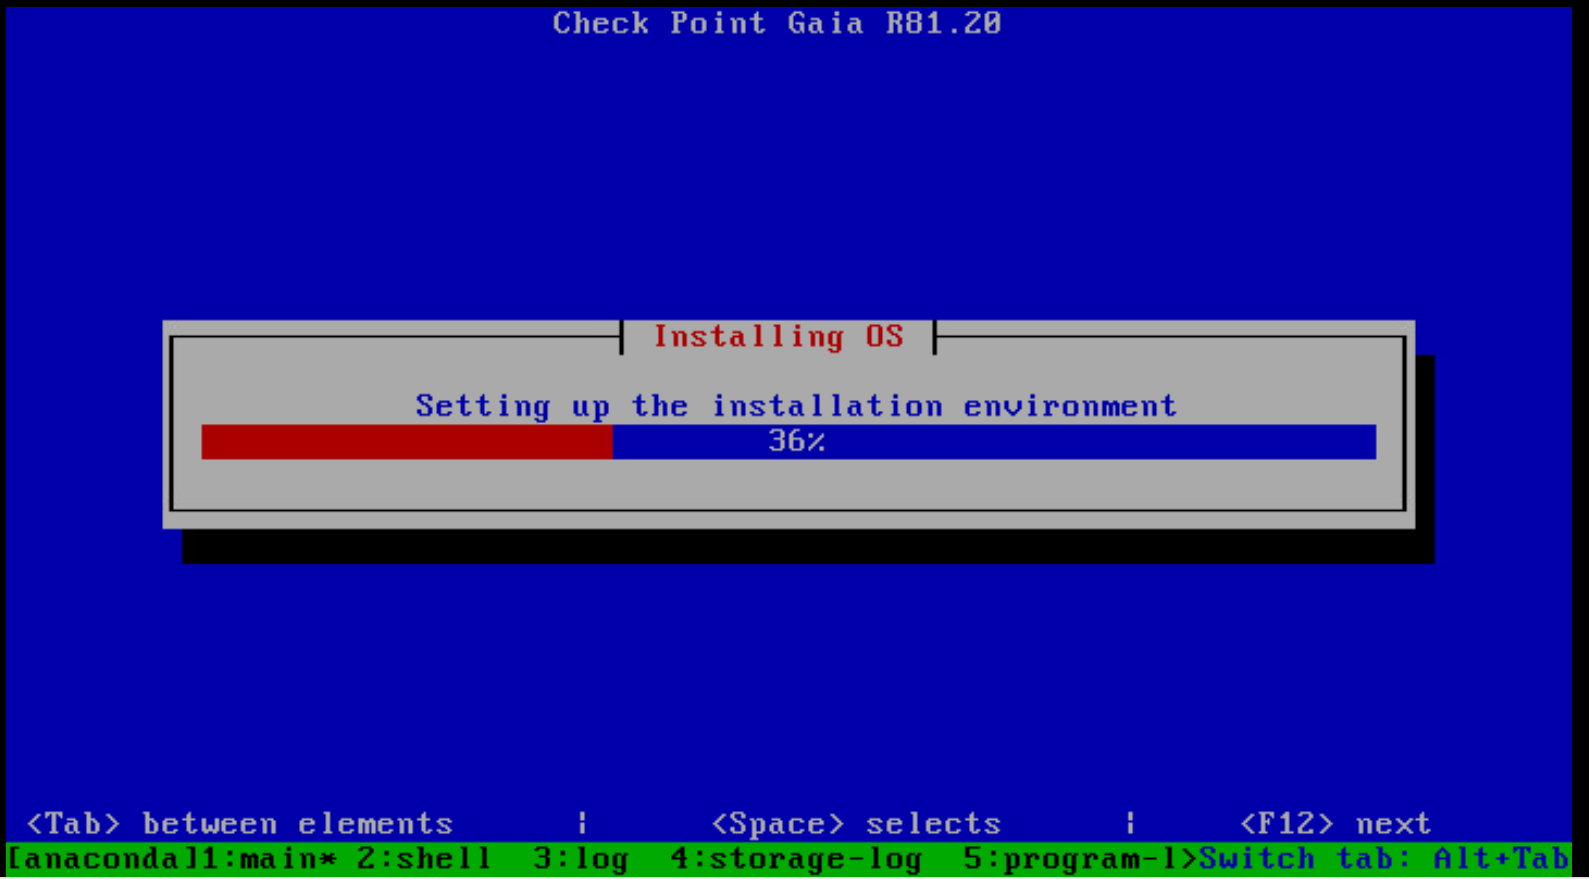
Mount the downloaded ISO image and boot from.
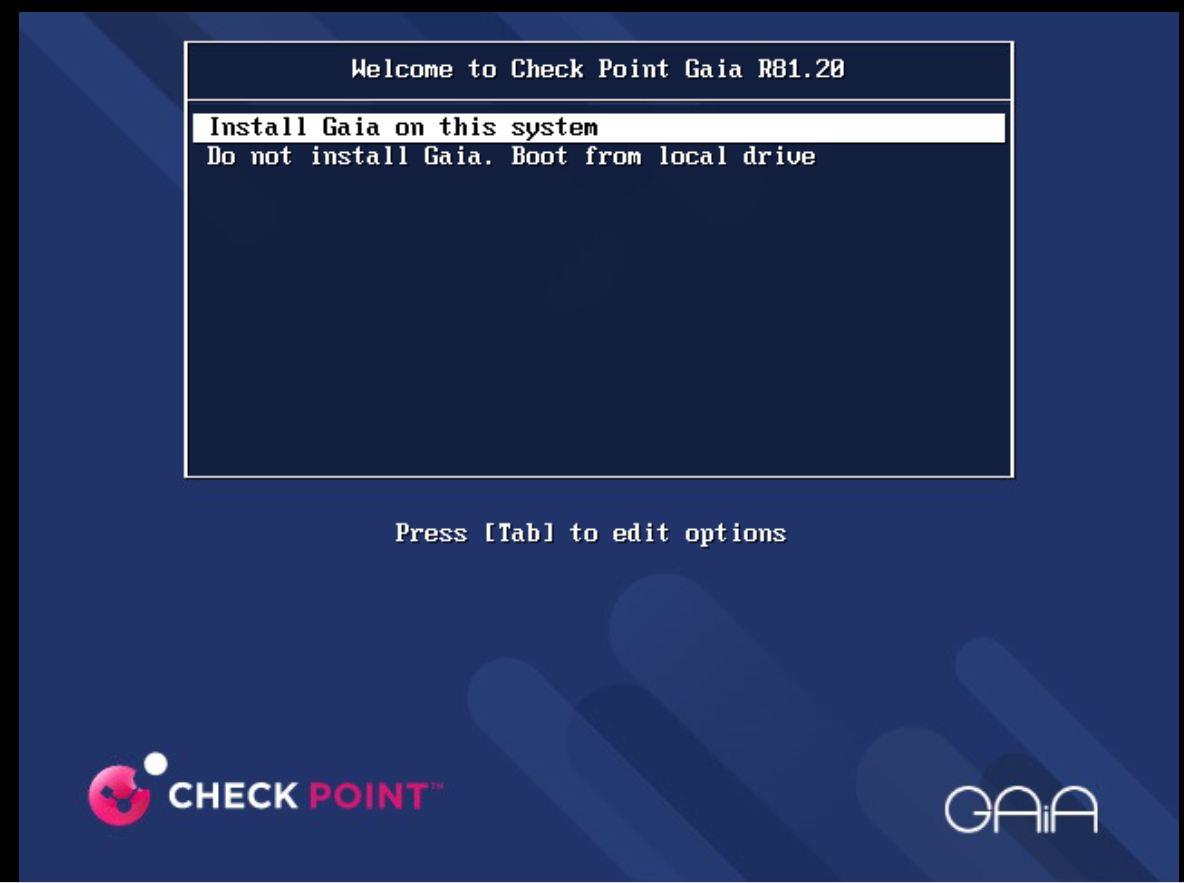
Select the Install menu entry.
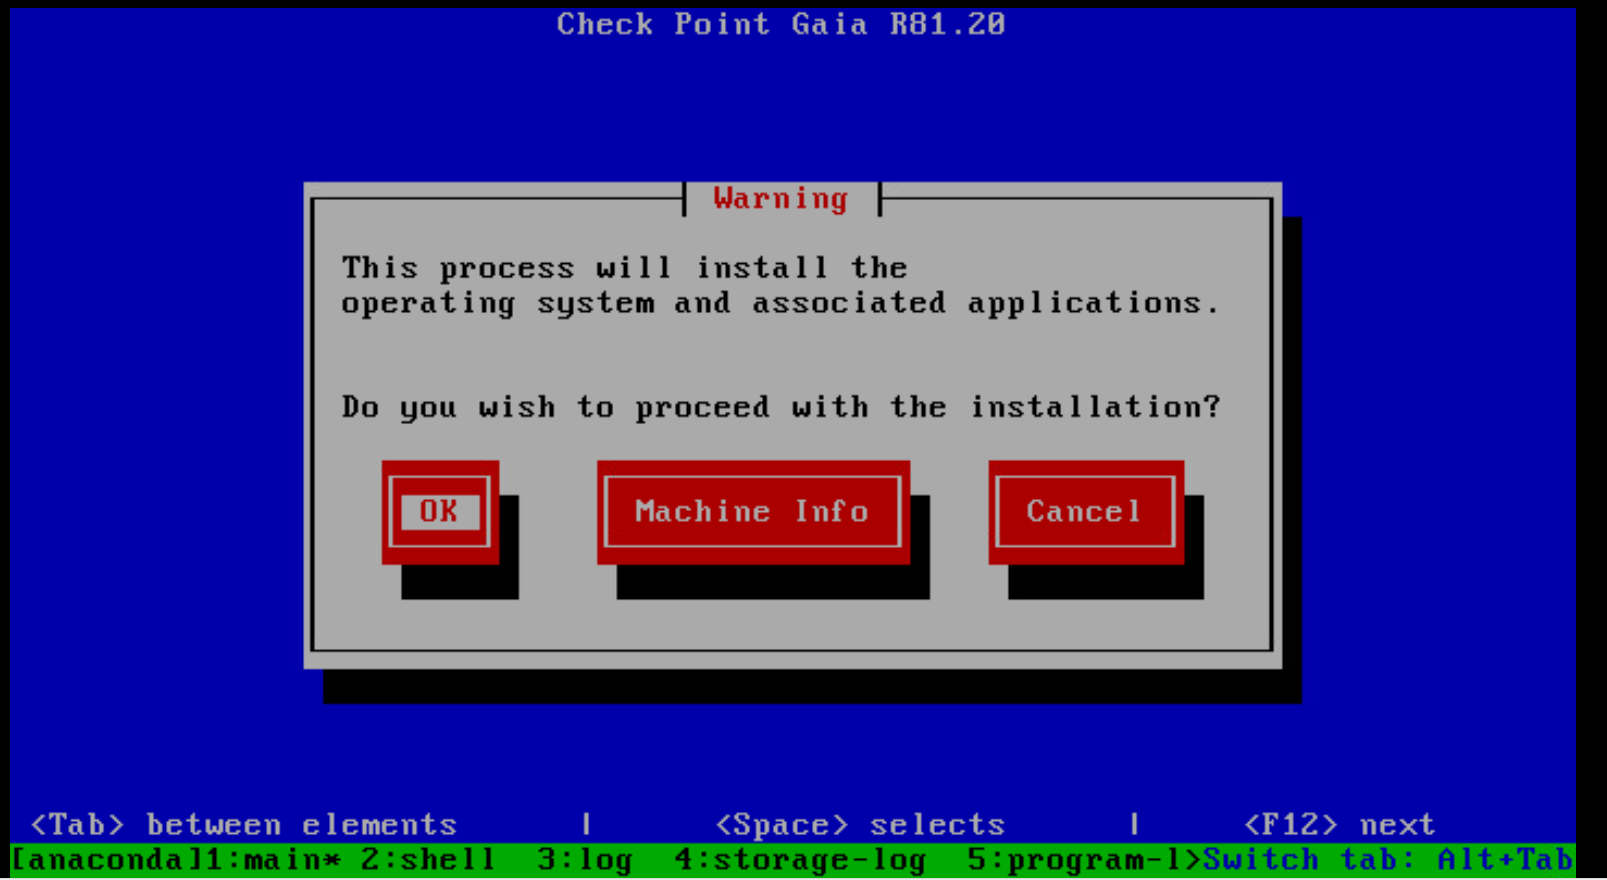
Click on OK to process with the installation of GAiA.
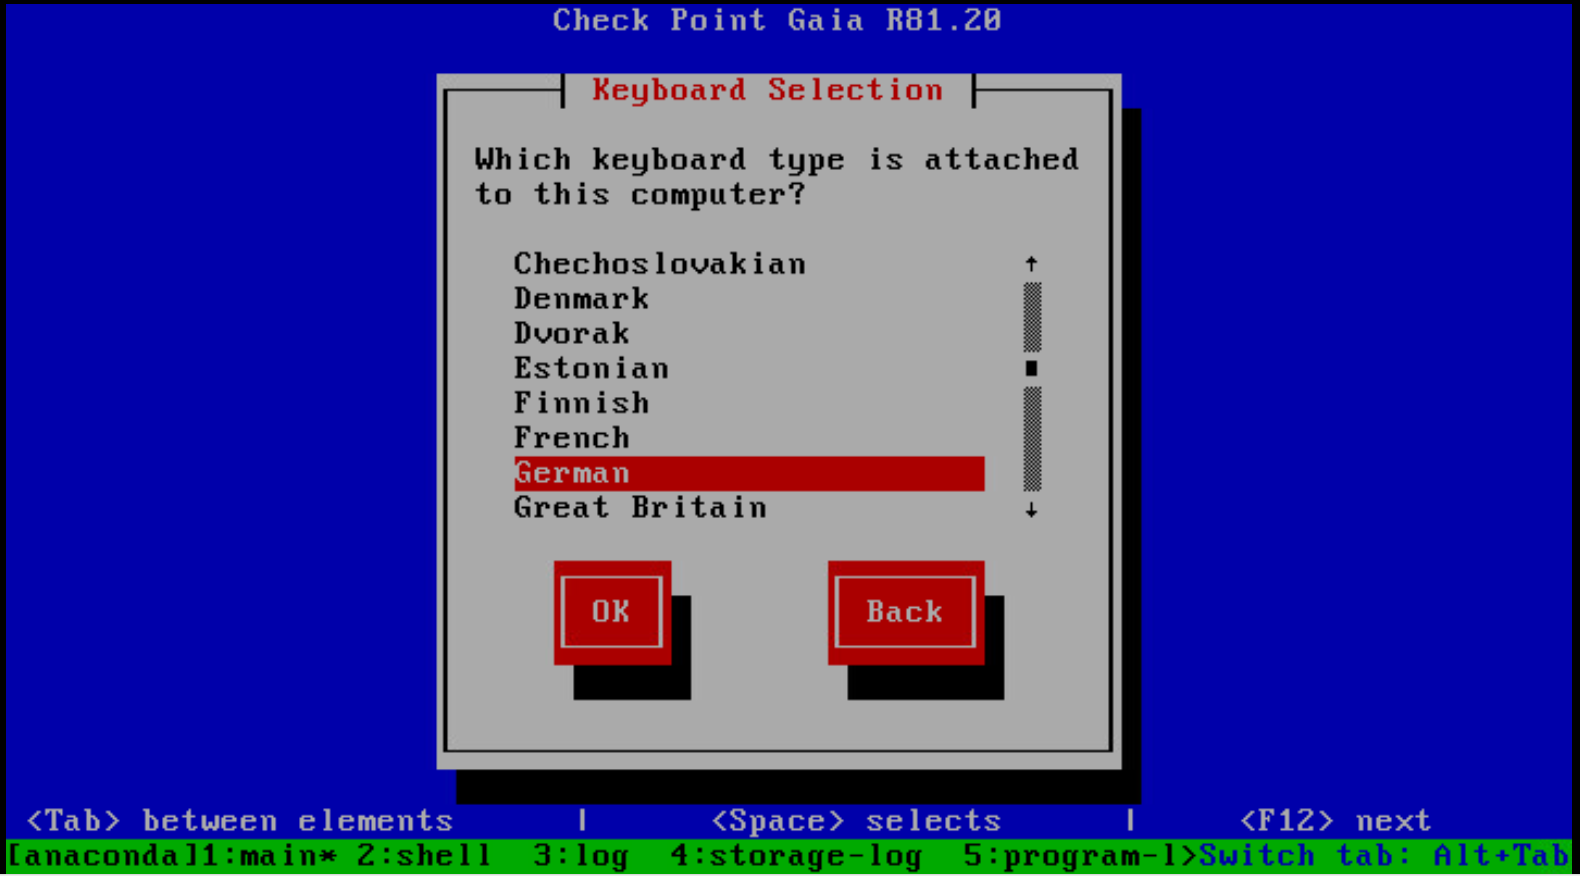
Select your keyboard language.
Partition the disk.

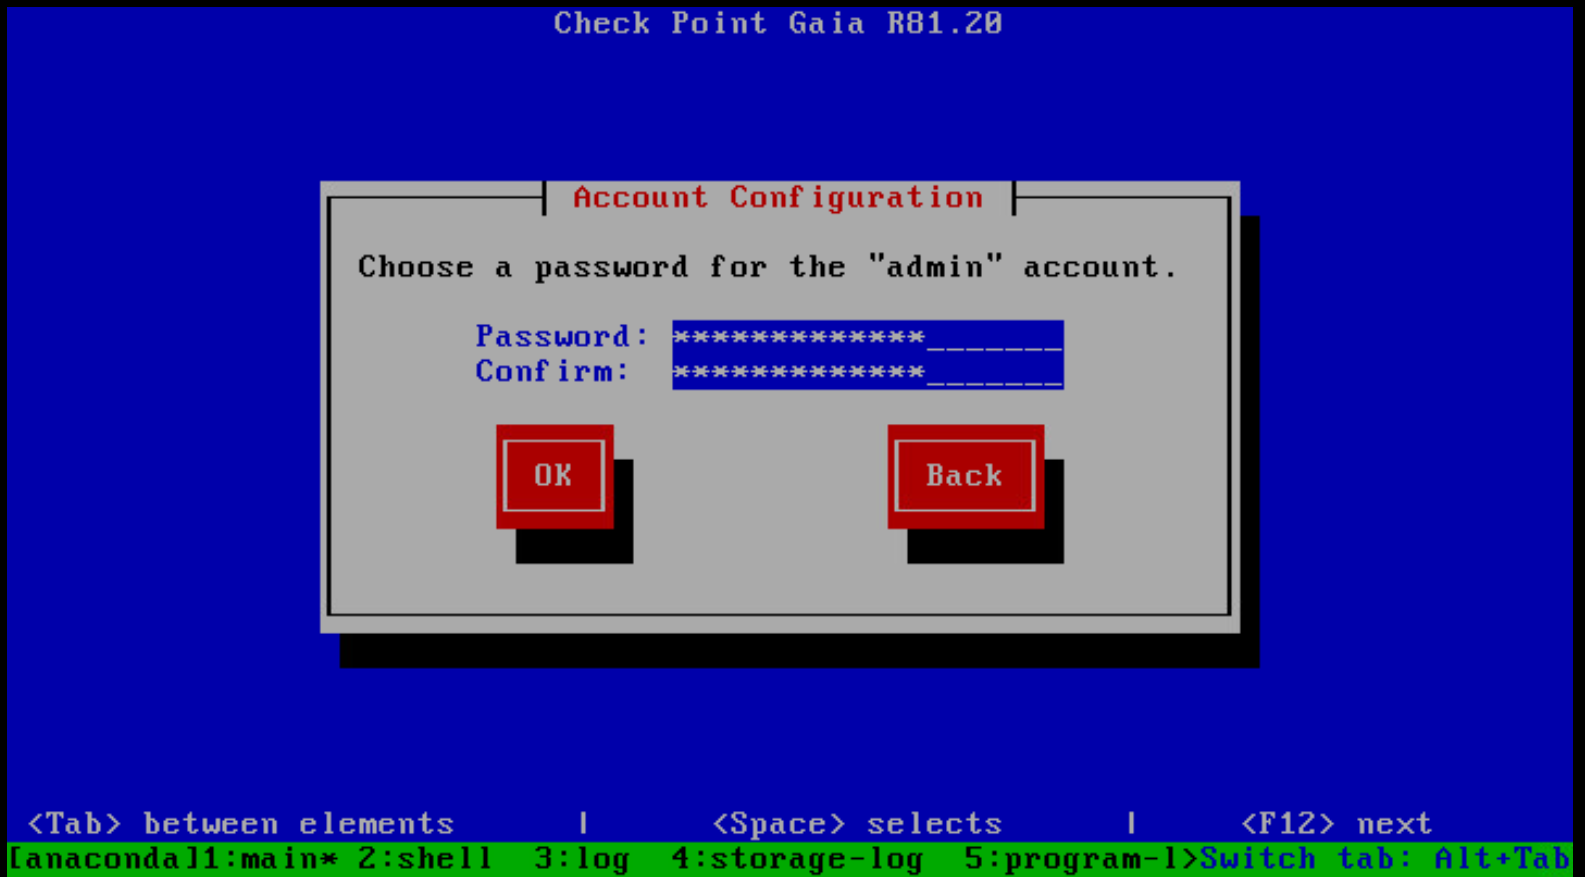
Create a password for admin account.
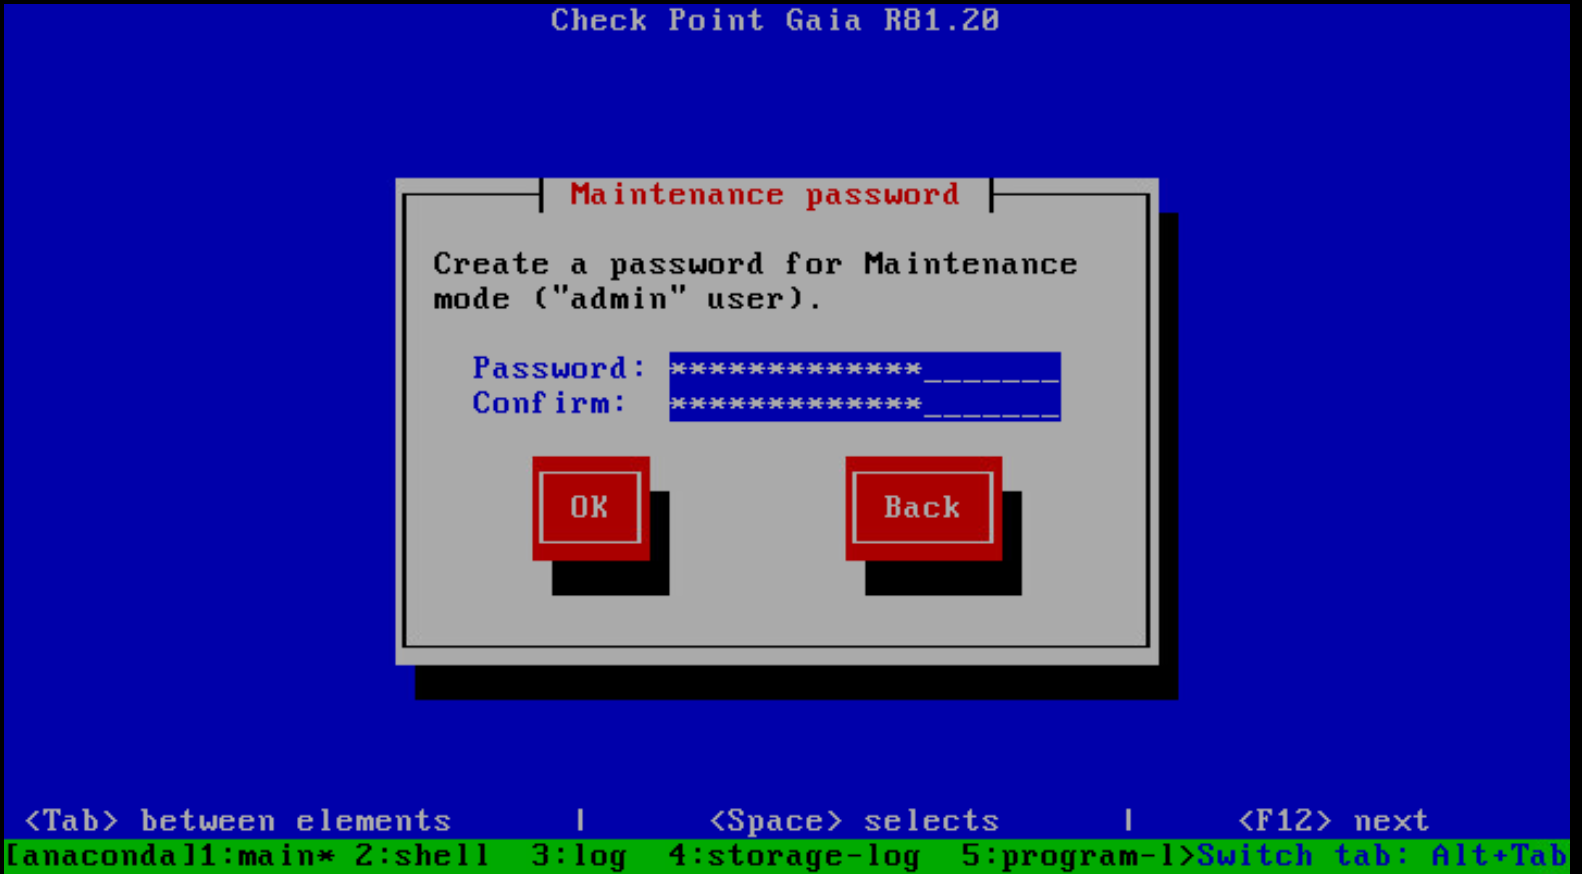
Create a password for Maintenance mode.
In Check Point GAiA, Maintenance Mode is a special boot mode used primarily for system recovery, troubleshooting, or password resets. When you boot into this mode, you’re essentially running a minimal version of the operating system, like a rescue shell, without loading the full Check Point services (such as the firewall, security blades, or management processes).
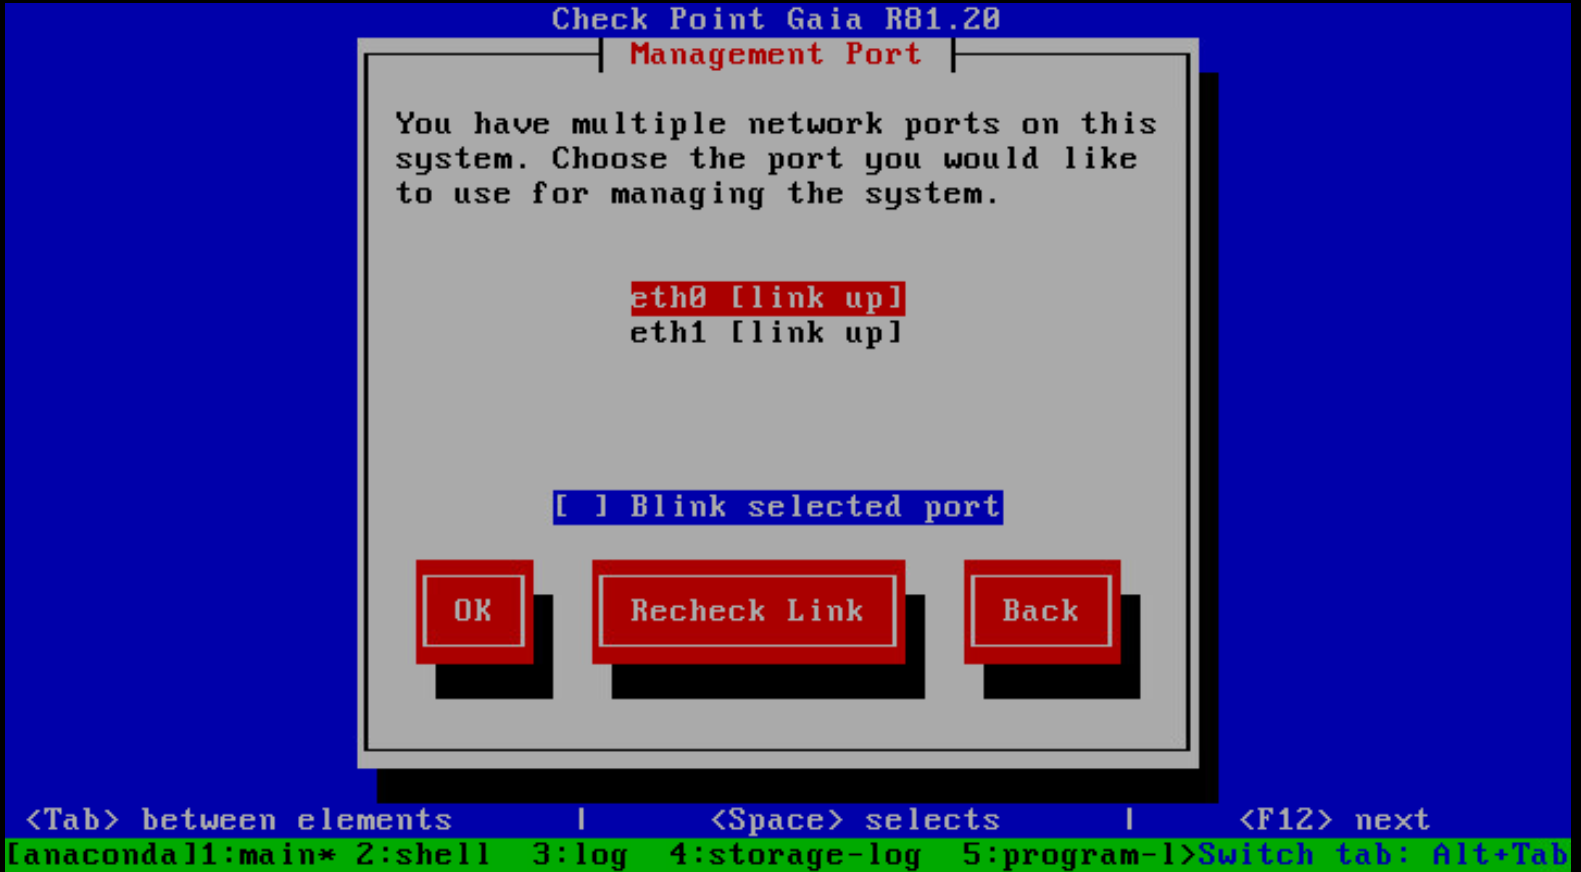
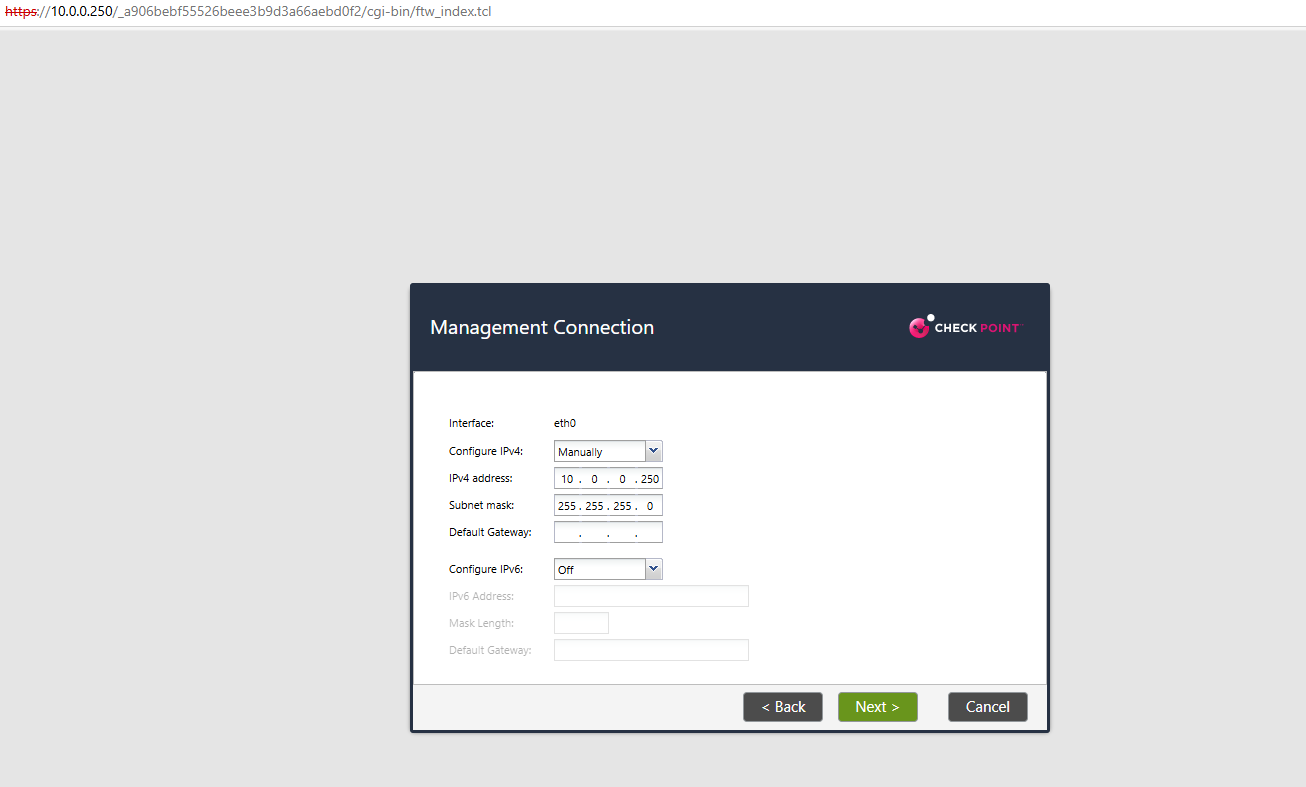
In case of multiple network cards (virtual NICs), select which one you will use for managing the system. I will use therefore eth0 which is connected to the internal network and subnet 10.0.0.0/24.
When installing Check Point GAiA as a Security Gateway, planning your network interfaces carefully is crucial for performance, scalability, and security.
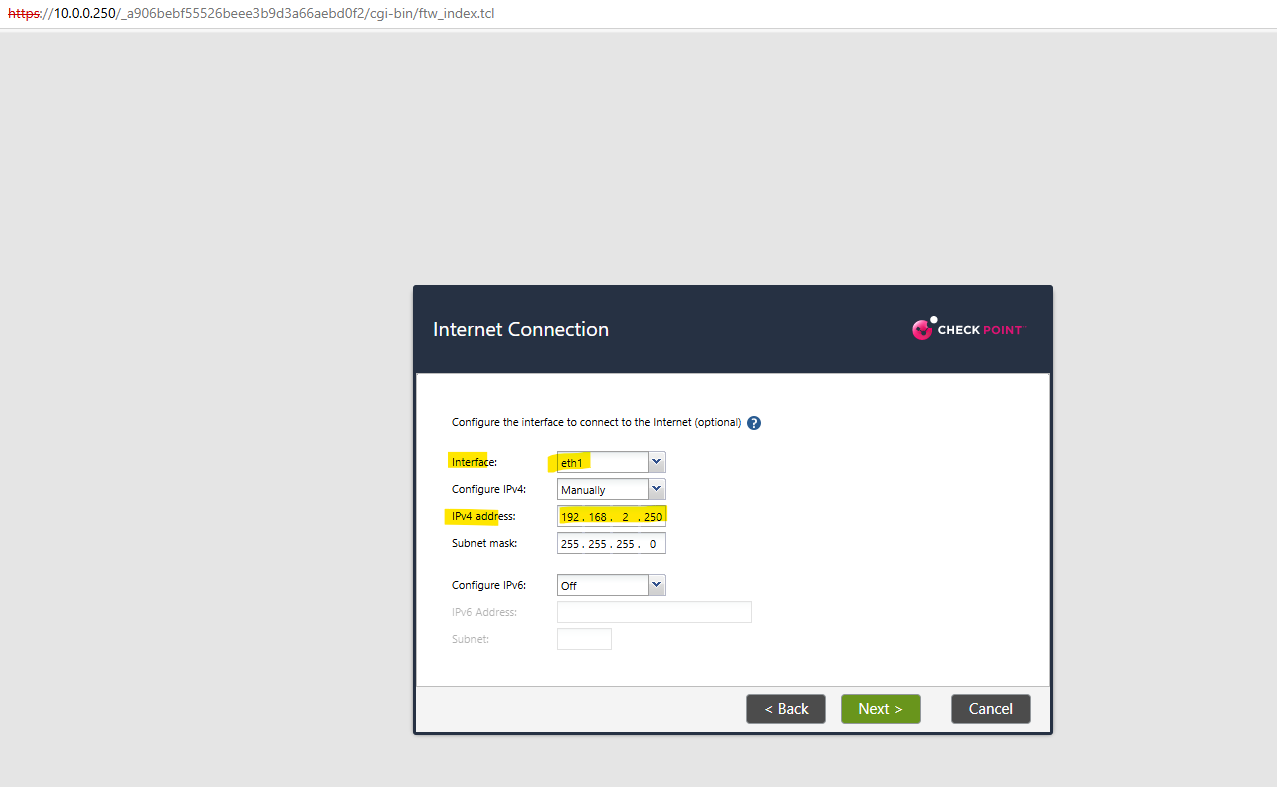
For a basic deployment we need a minimum of 2 interfaces, eth0 for internal/trusted LAN and eth1 for external/untrusted WAN or Perimeter.
This setup is acceptable for small environments or labs, but limits segmentation and scalability.
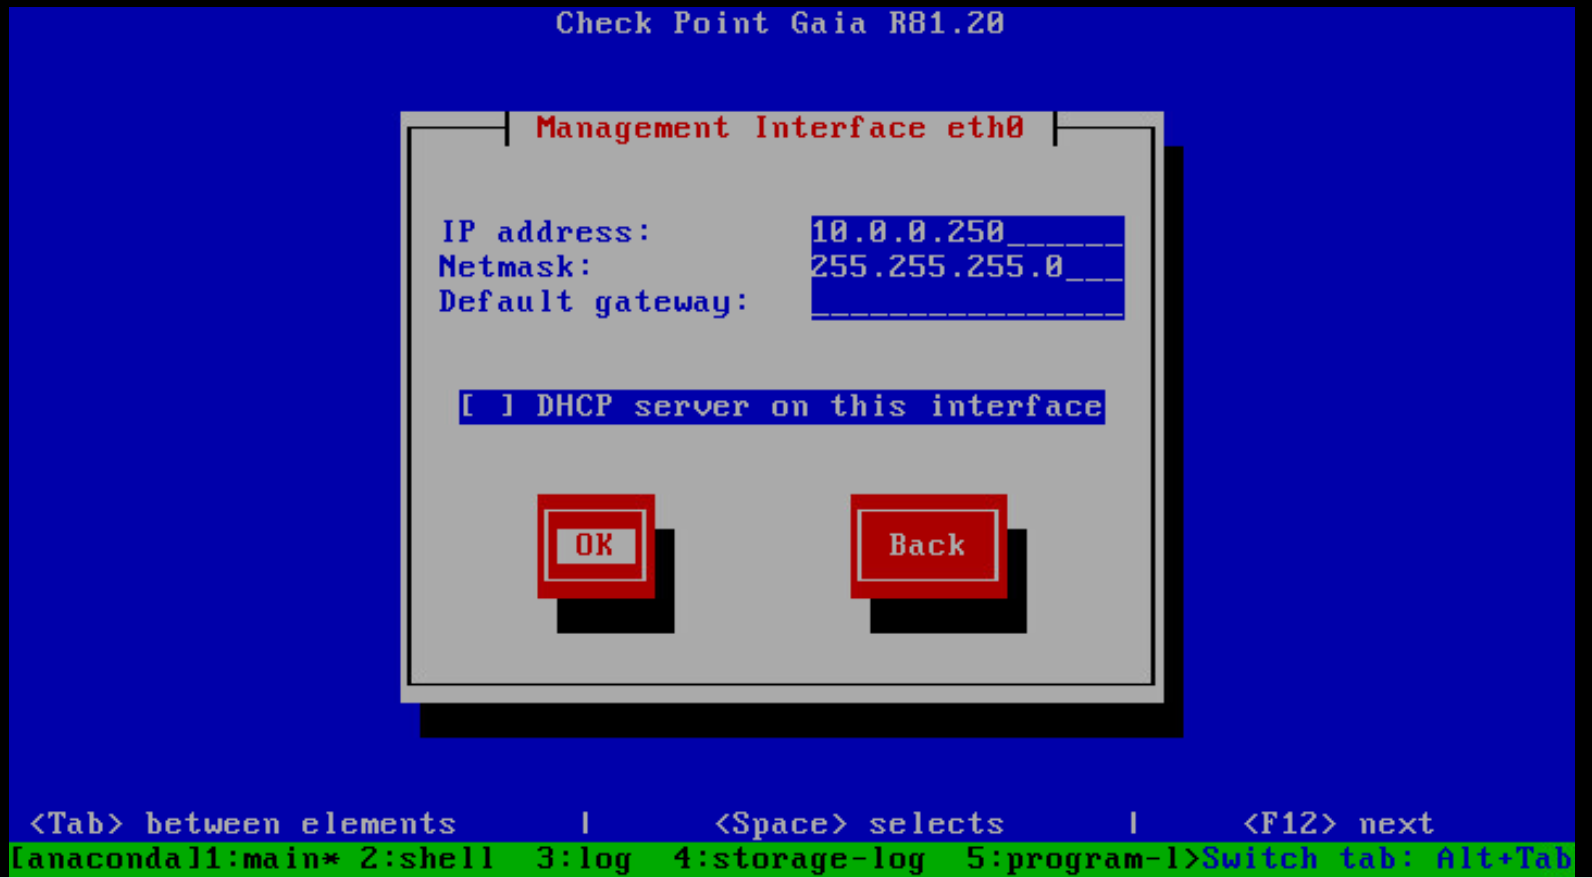
On the management interface I don’t need a default gateway in my case, outbound internet access I will configure later on my second eth1 network interface.
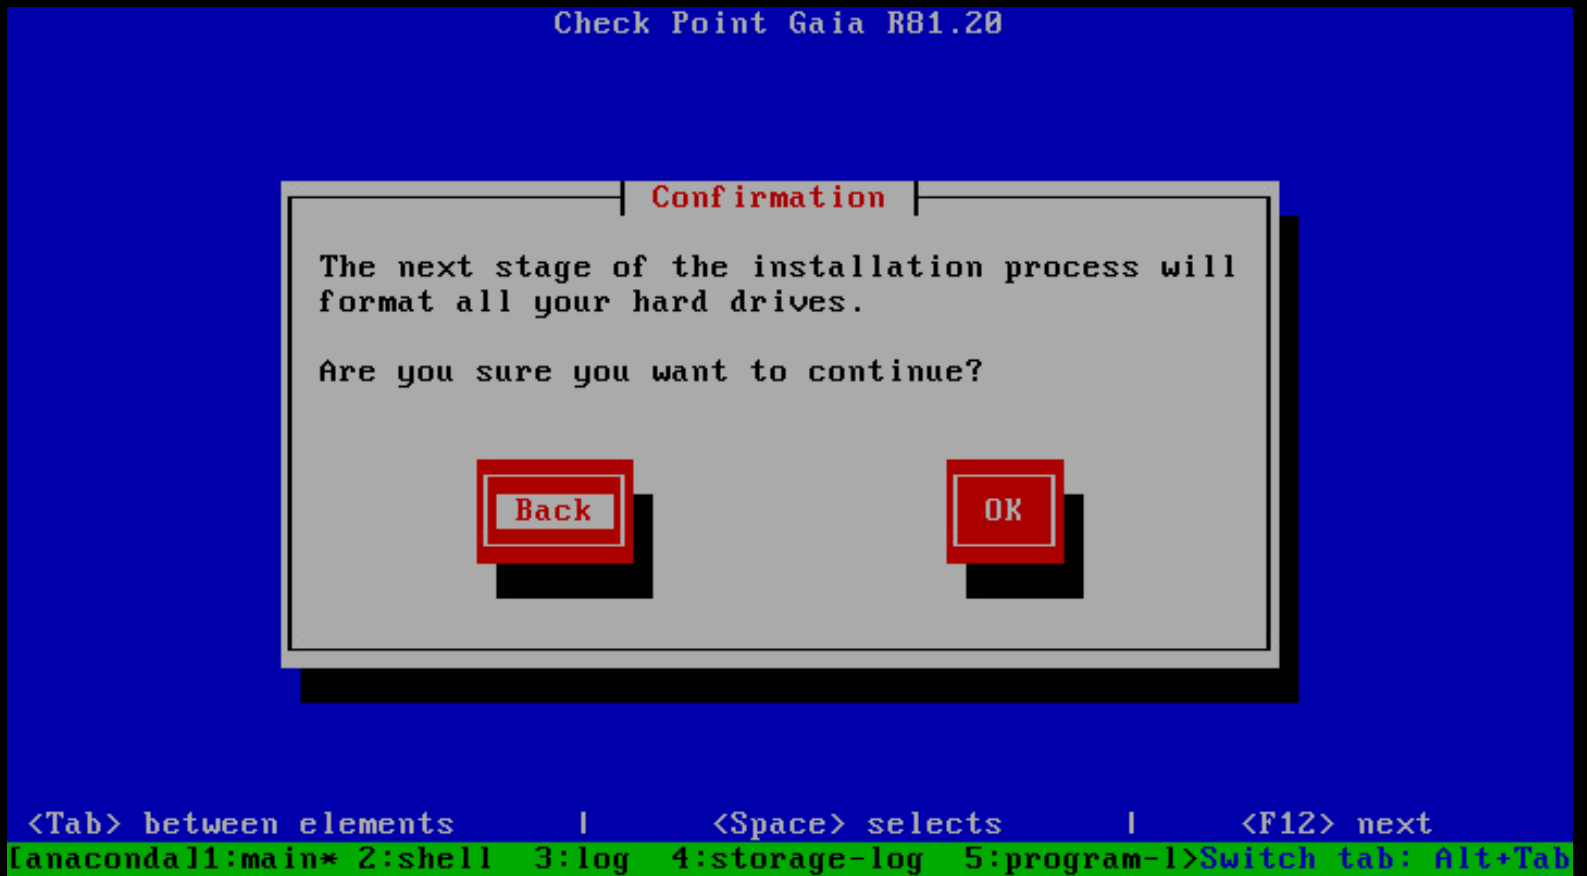
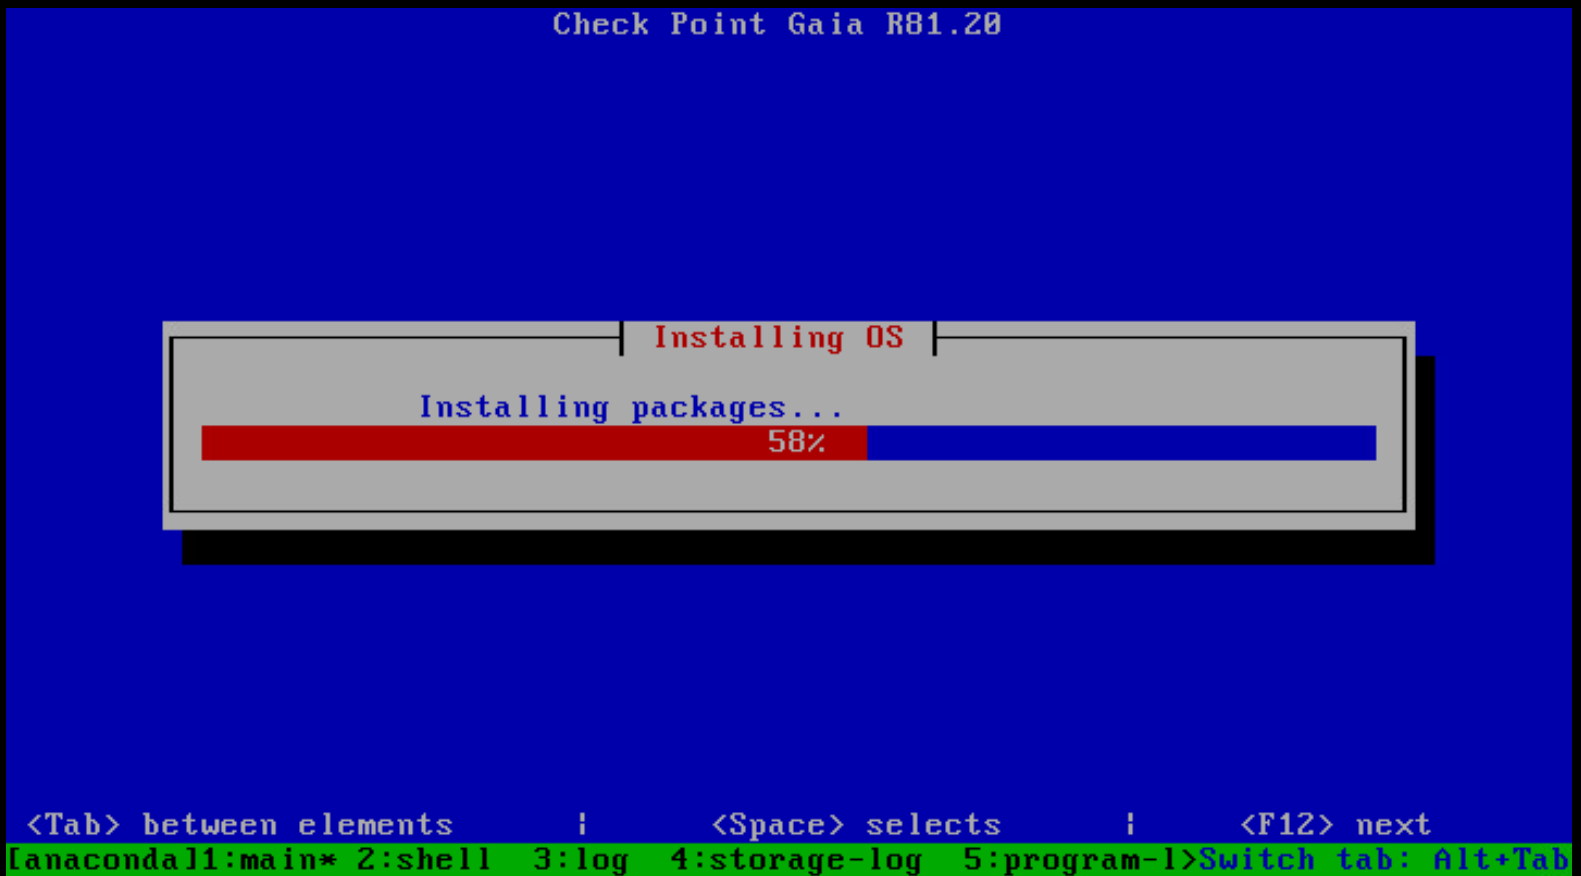
Click on OK to finally install the OS on the disk.
Press return to reboot the OS.
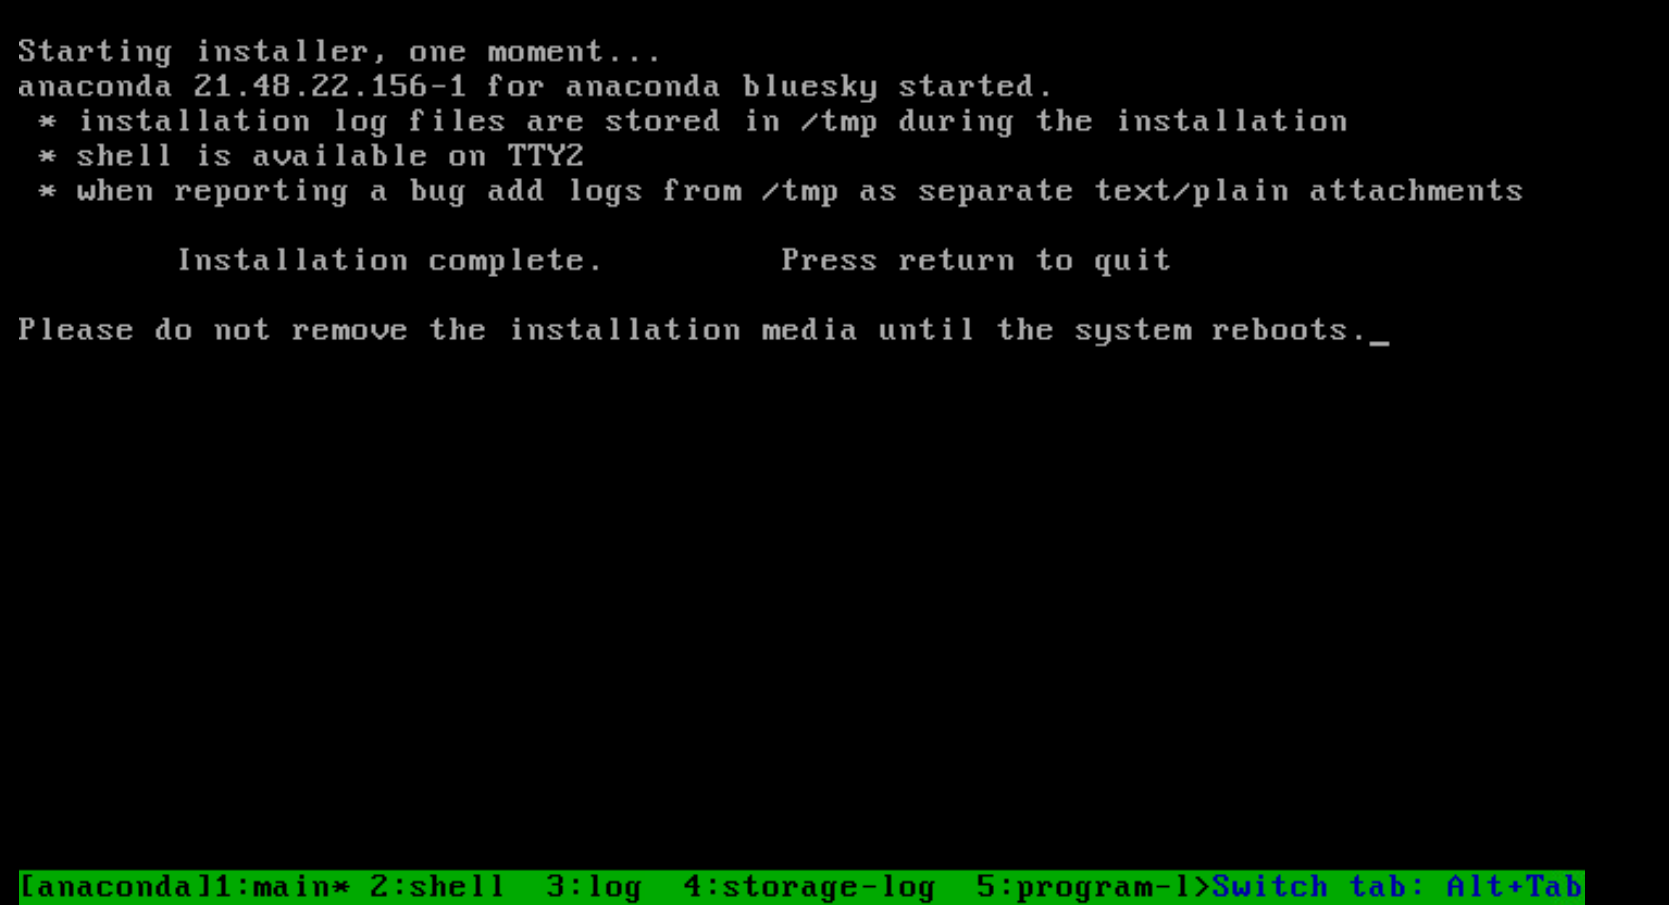
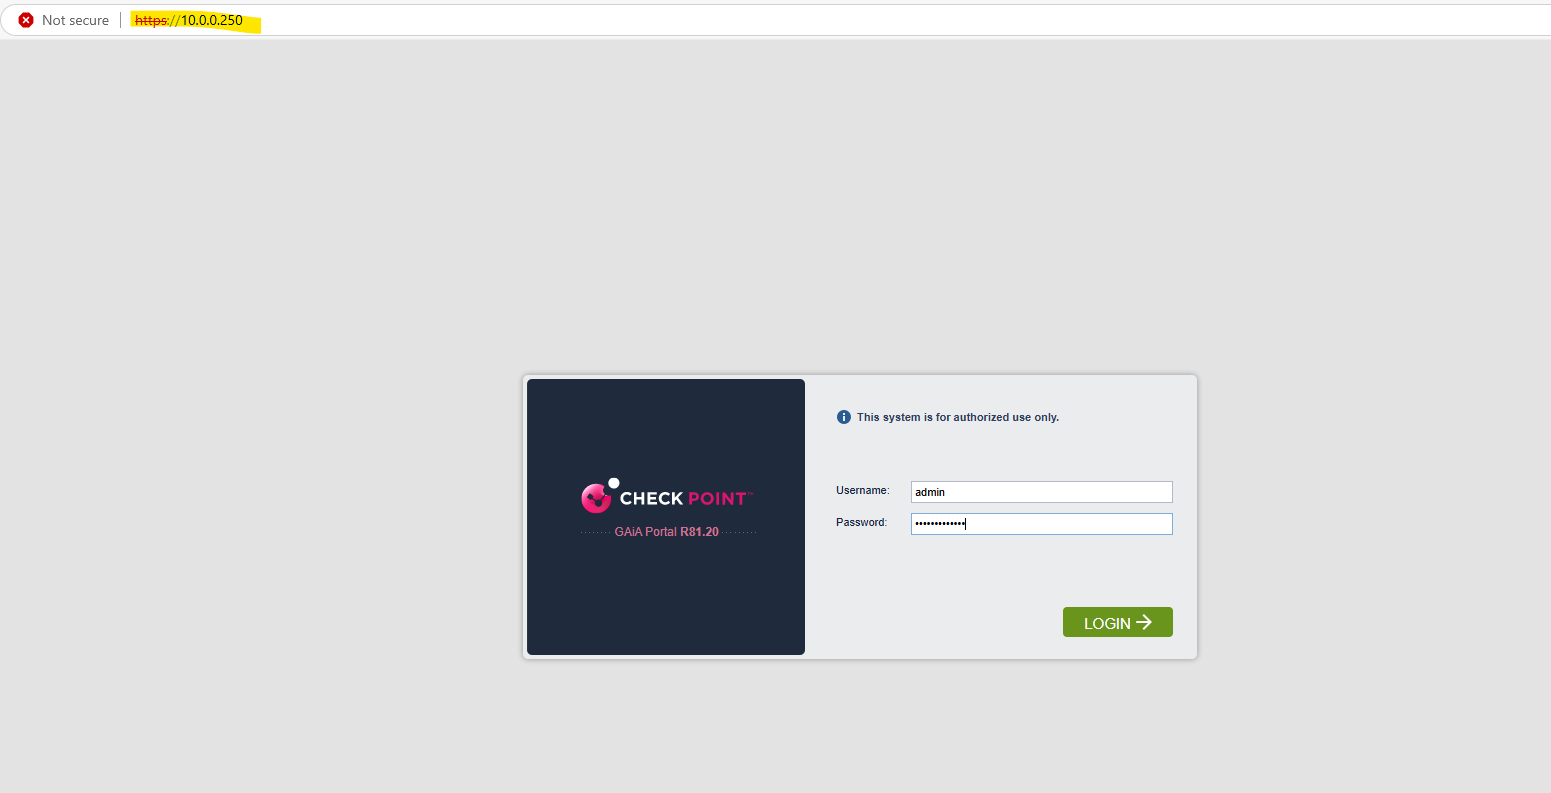
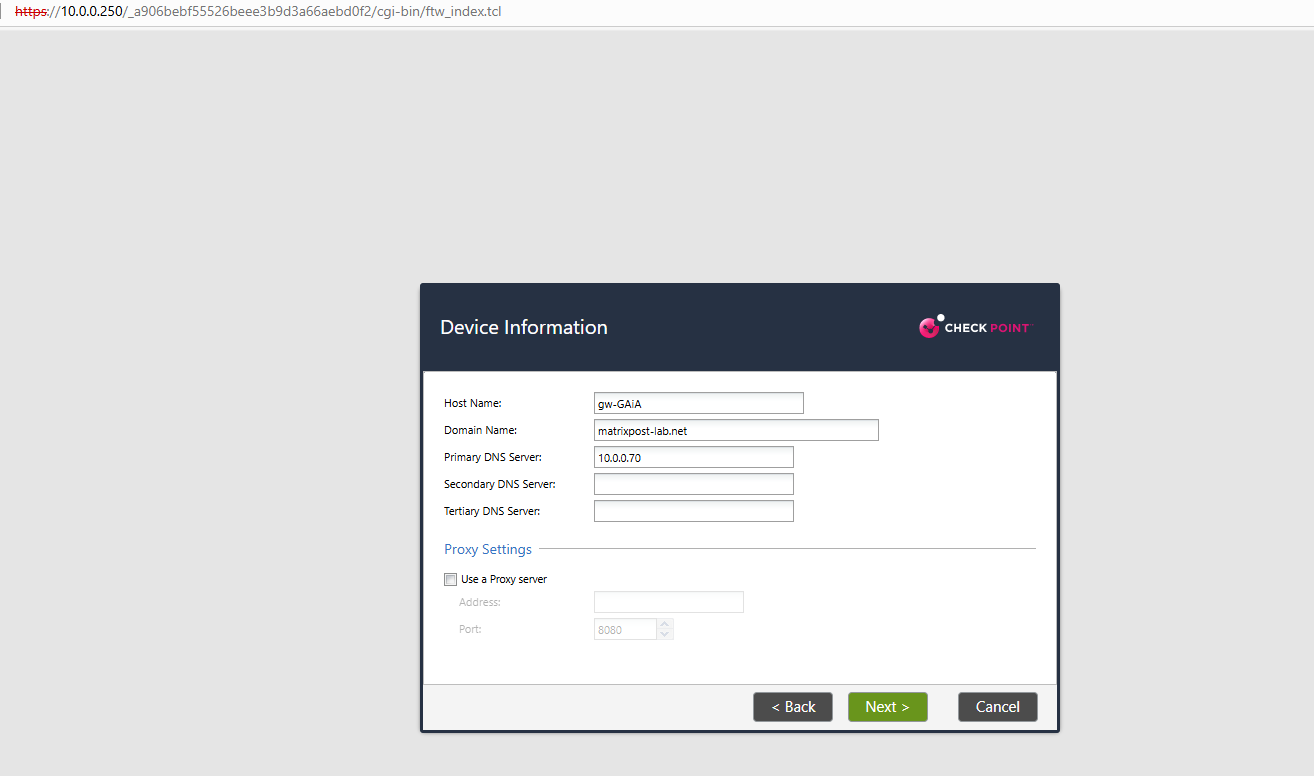
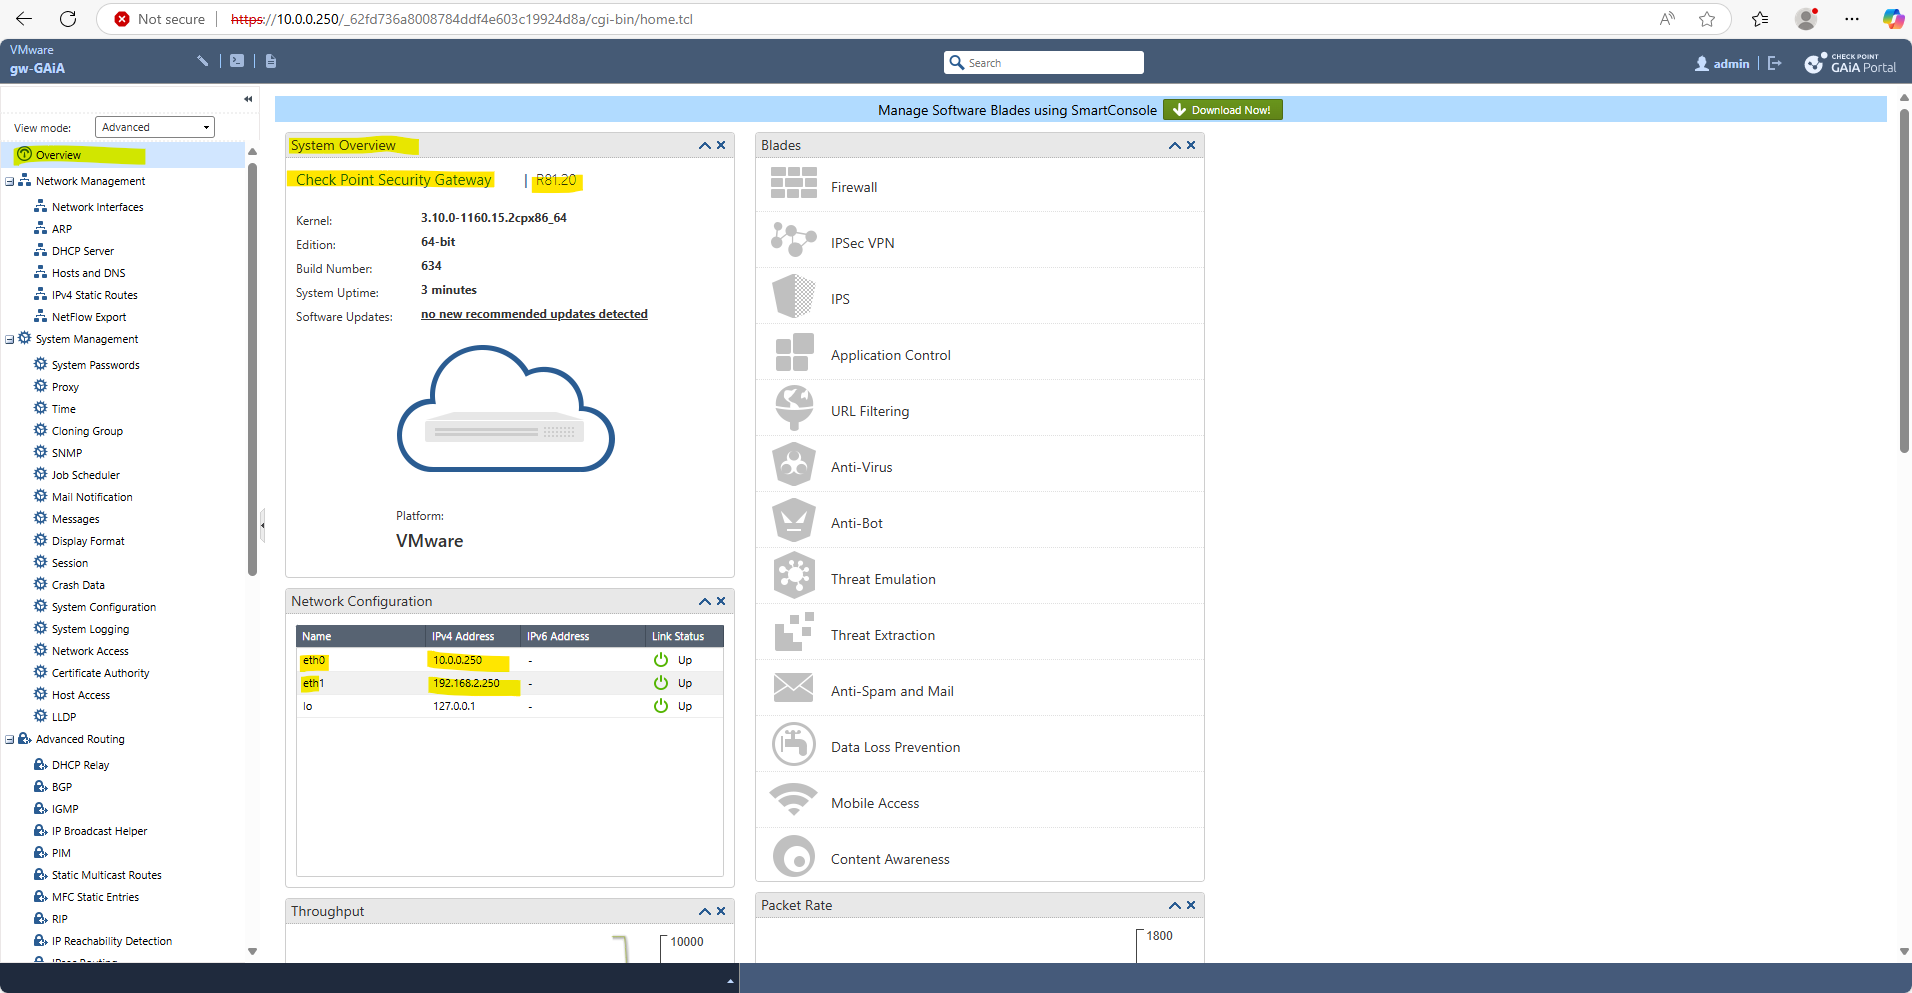
In order to configure your system, please access the Web UI and finish the First Time Wizard.
Configure GAiA by using the WEB UI
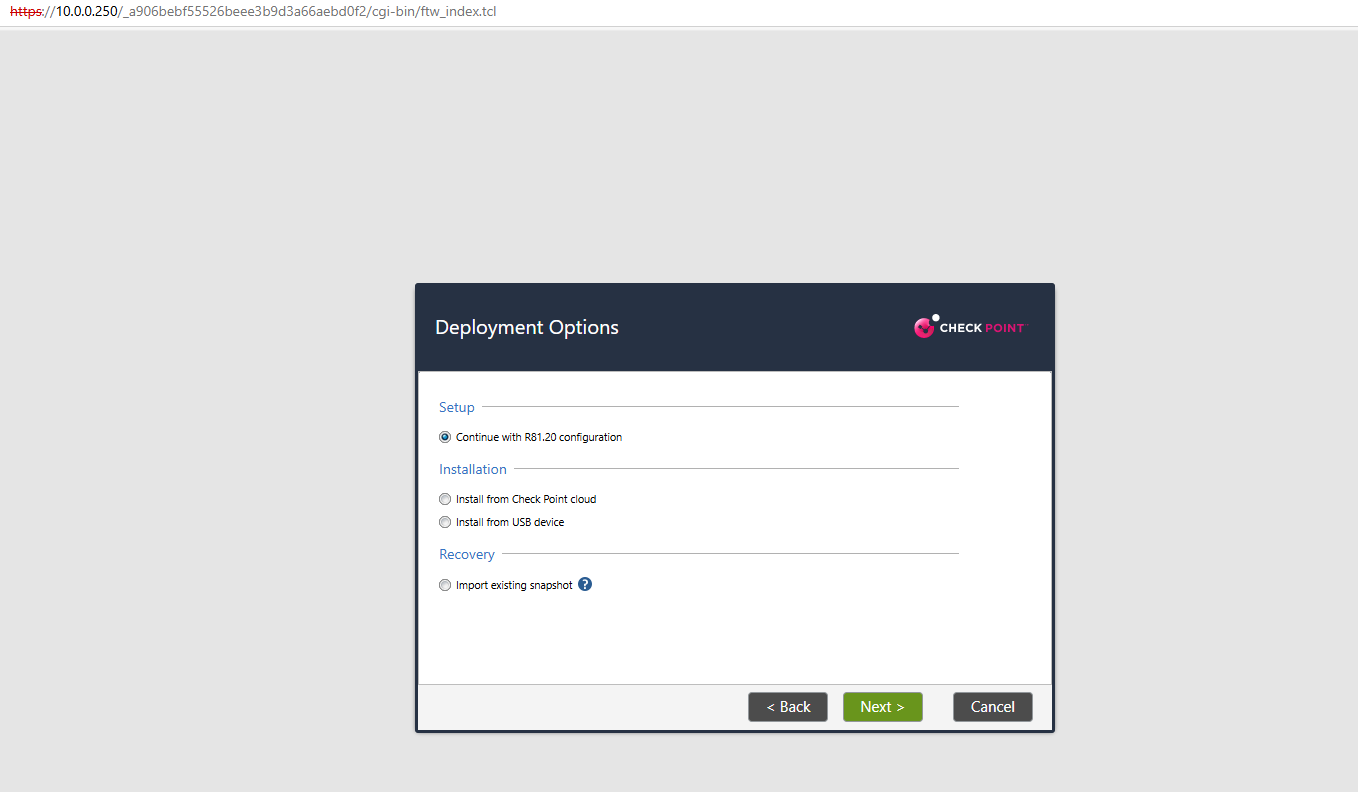
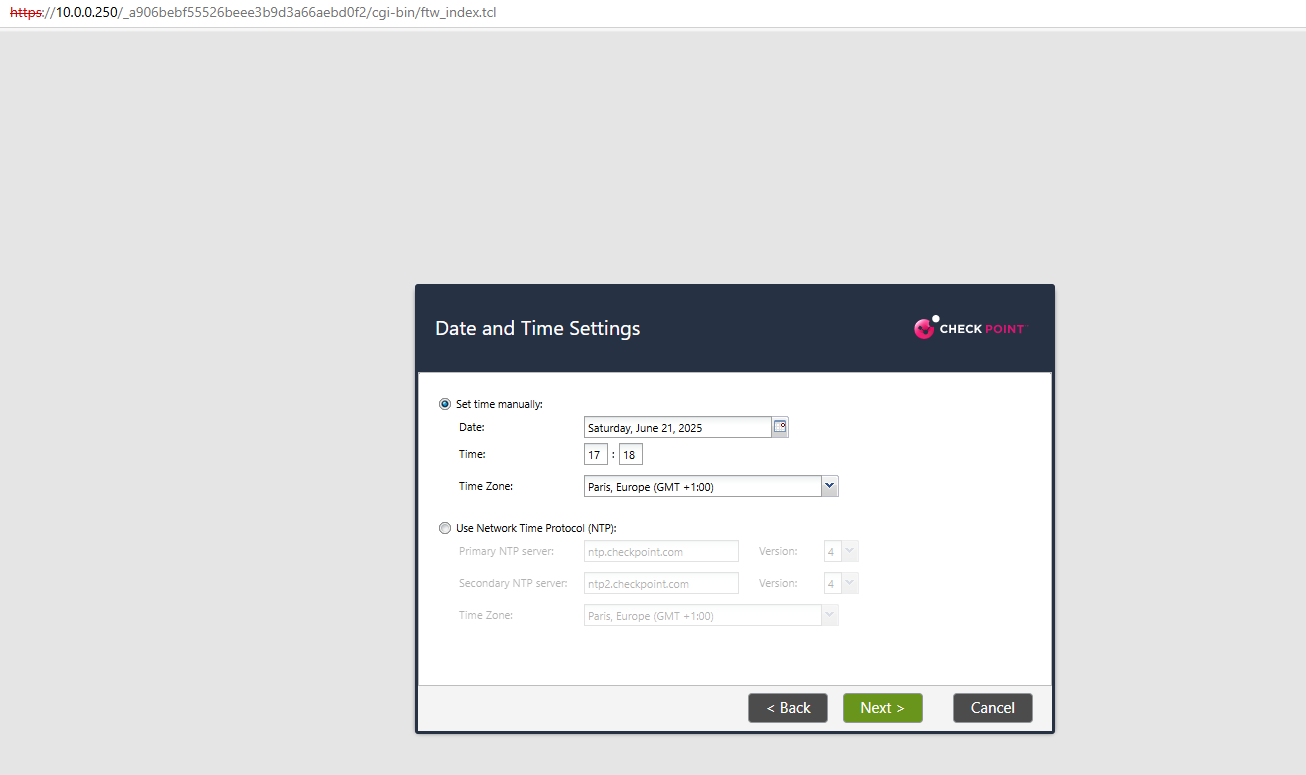
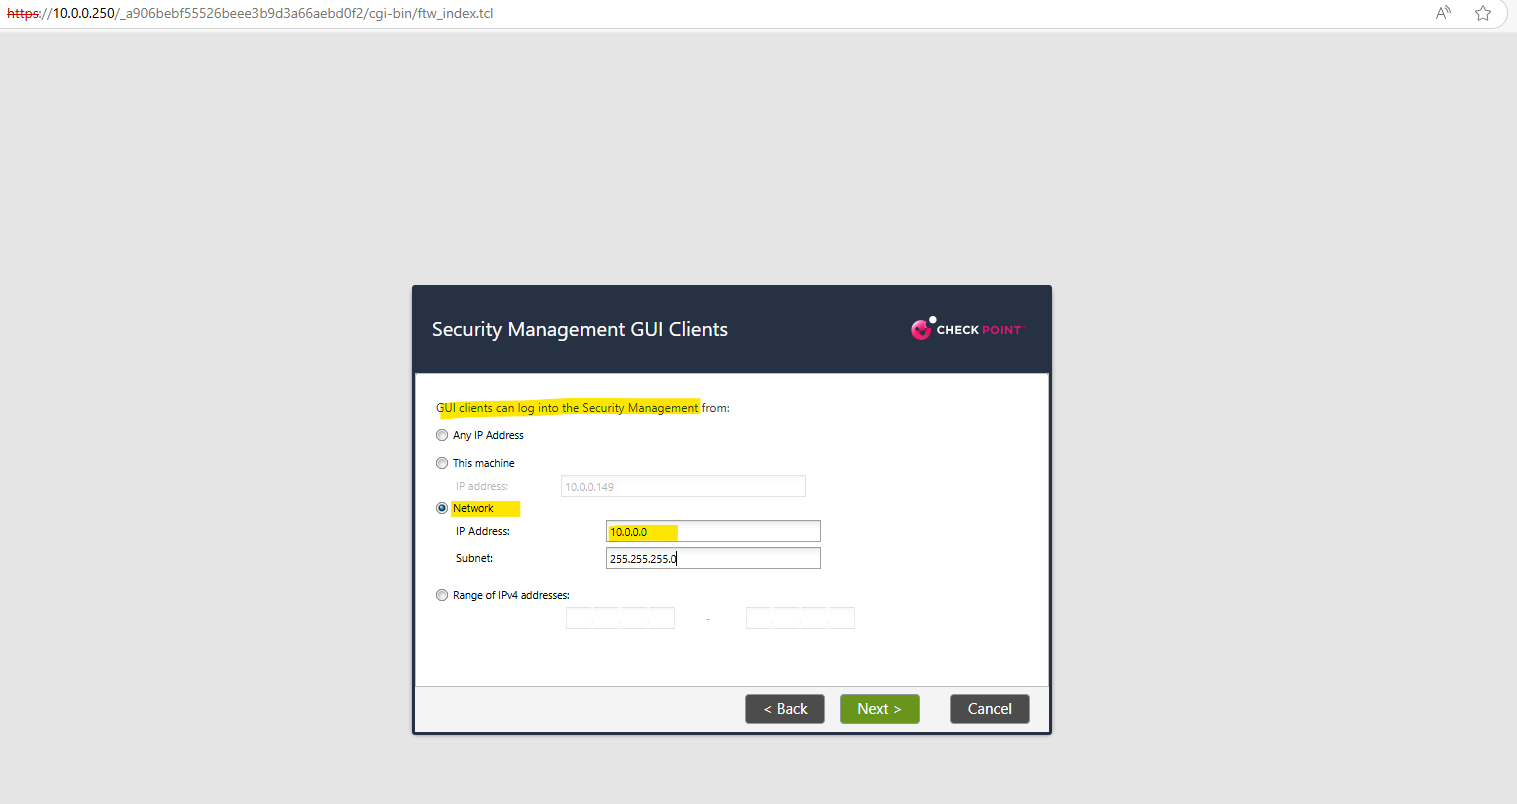
Browse to the Web UI (Management Interface IP we set previously) and finish the First Time Wizard

Select Continue with R81.20 configuration.
The IP configuration for the management connection we can change here, I will leave it as previously set.
In my case the eth1 network interface is connected to my on-premises lab environments perimeter network for outbound internet access, this interface is connected to the subnet in which the internal NIC of my NAT router (FRITZ!Box) is.
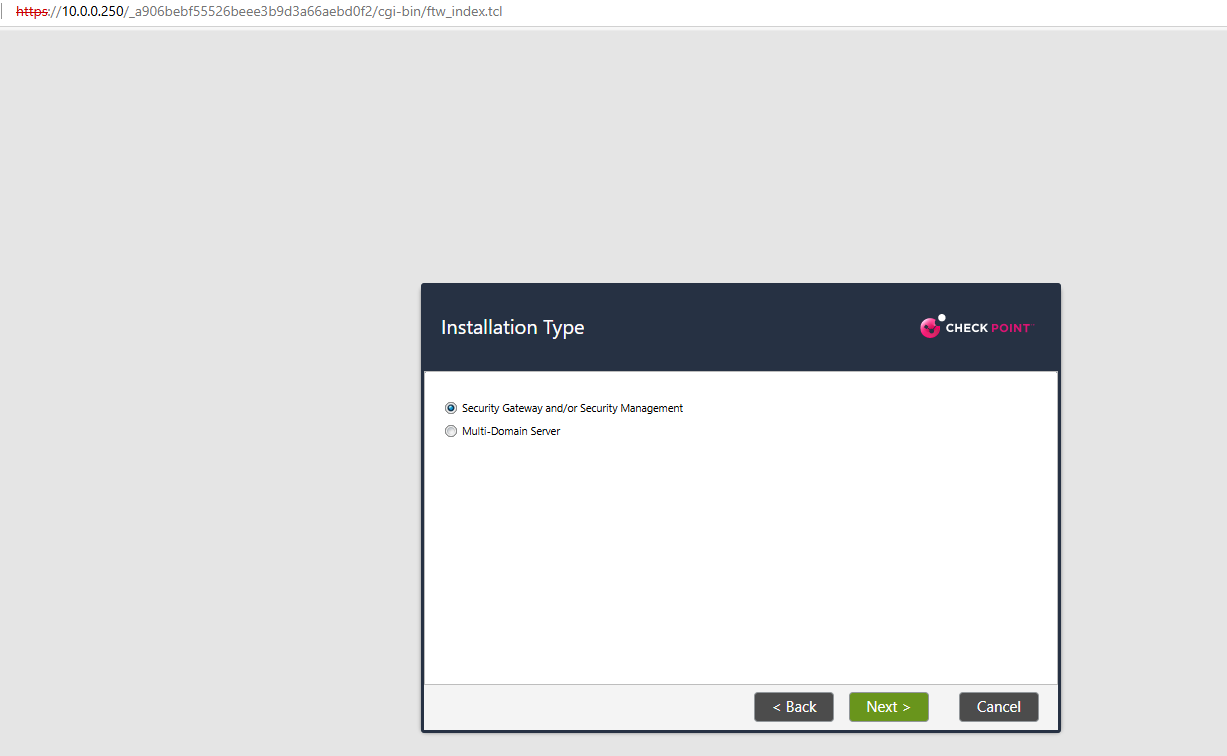
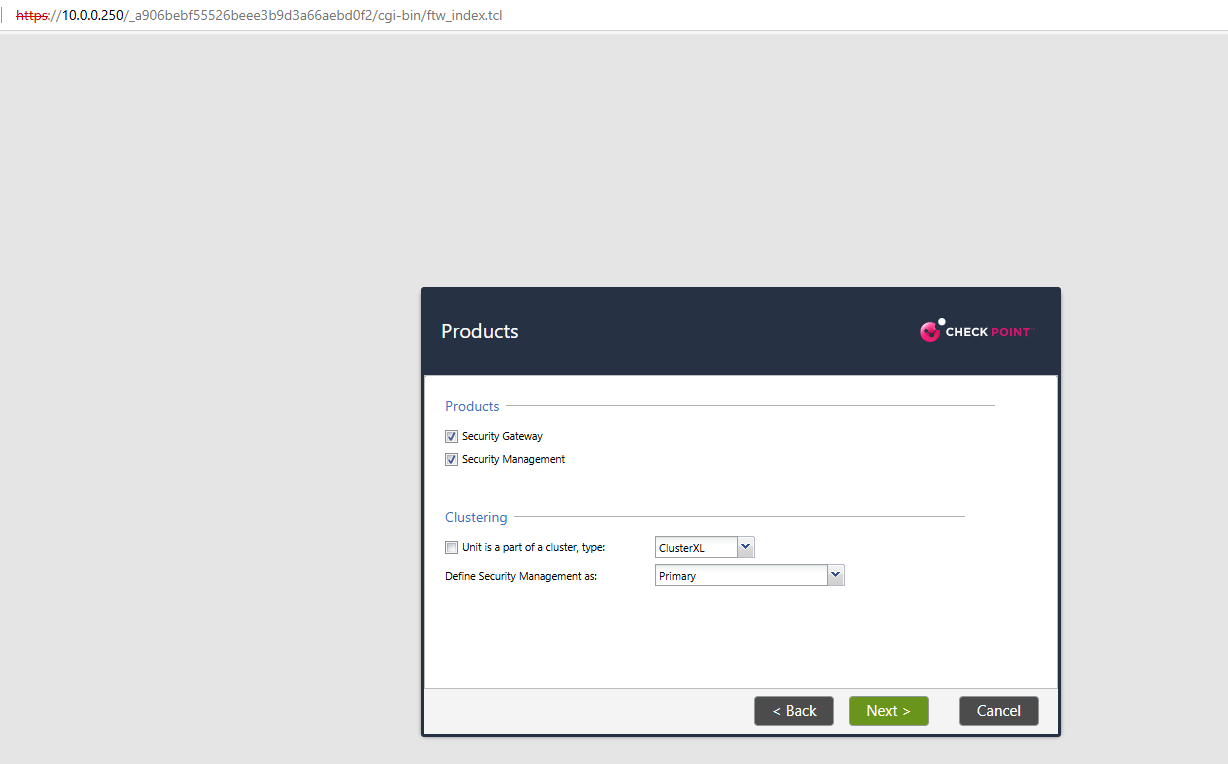
I want to setup finally a security gateway for the installation type which is responsible for inspecting, filtering, and securing traffic between different networks, such as between your internal LAN and the internet.
When choosing for the installation type here security gateway, the firewall blade will already be enabled on the appliance as shown below.
Security Gateway ==> Handles network traffic filtering (firewall, VPN, IPS, etc.).
Security Management Server ==> Manages policy and configurations for one or more gateways.
Multi-Domain Server (MDS) ==> This is used to deploy a Multi-Domain Security Management (MDSM) system. Also known as Provider-1, it’s designed for large enterprises, MSSPs, or organizations needing segregated management domains (tenants, departments, regions).


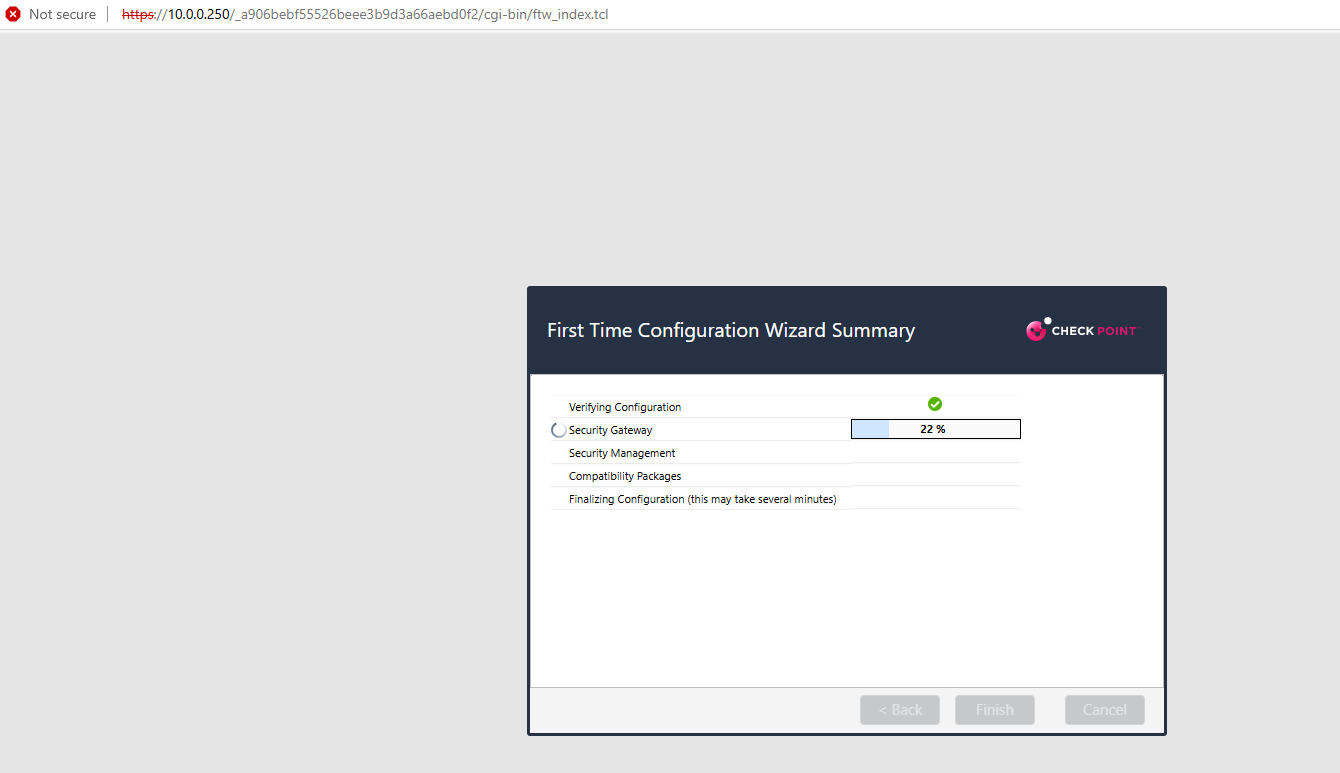
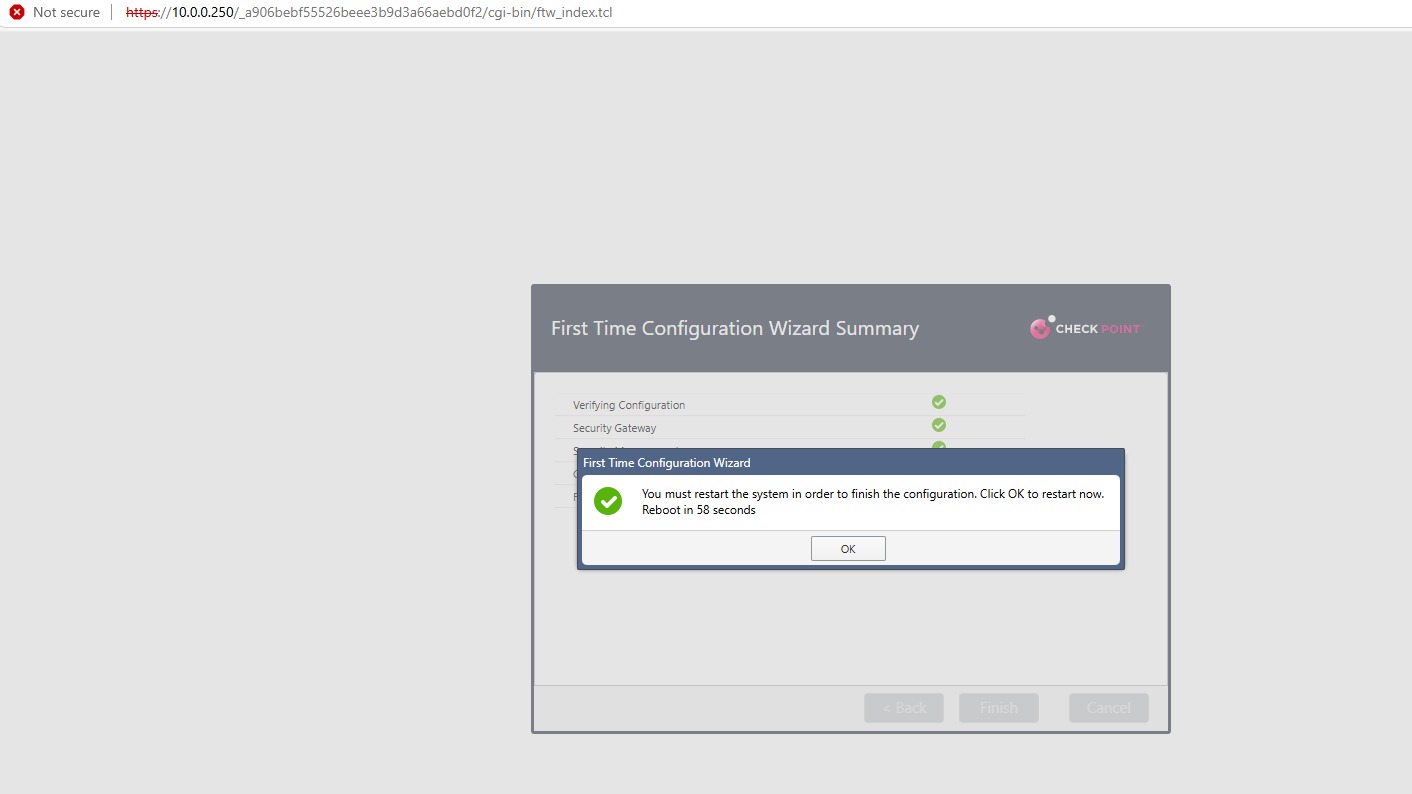
Click on OK to restart the system.

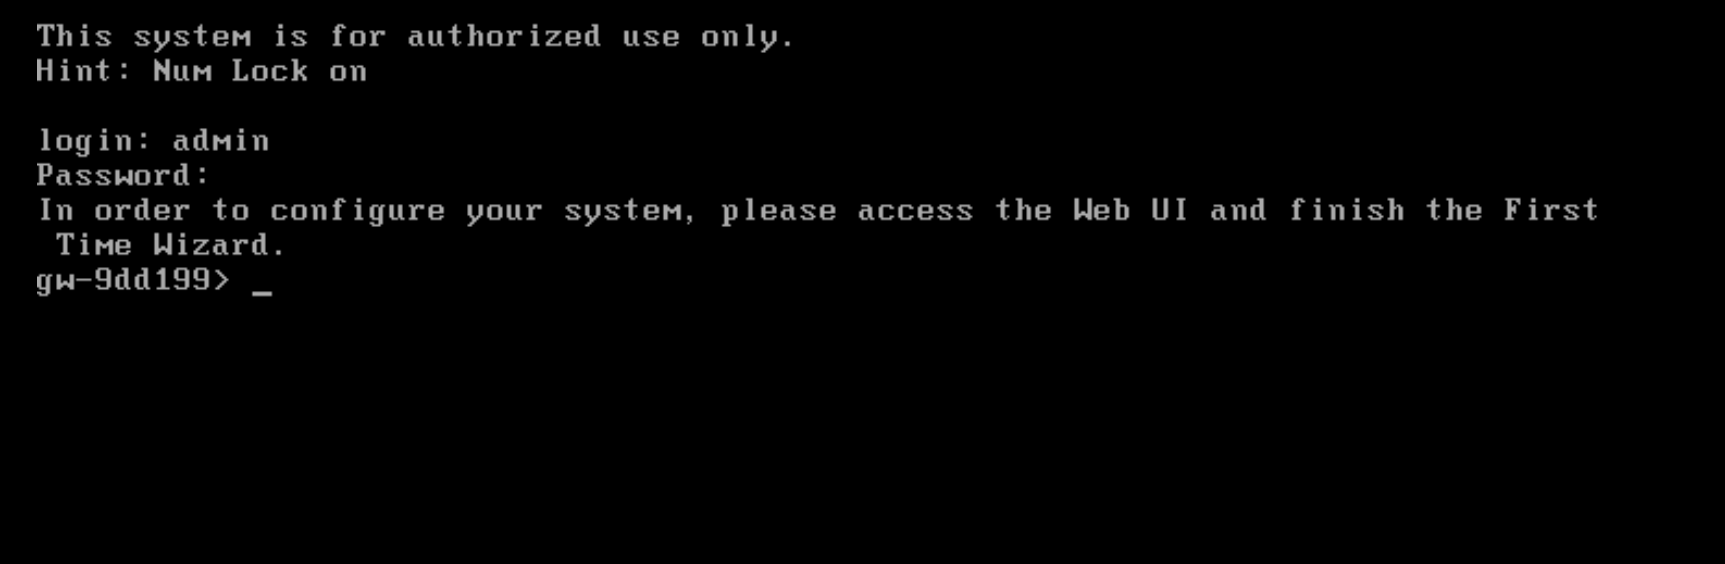
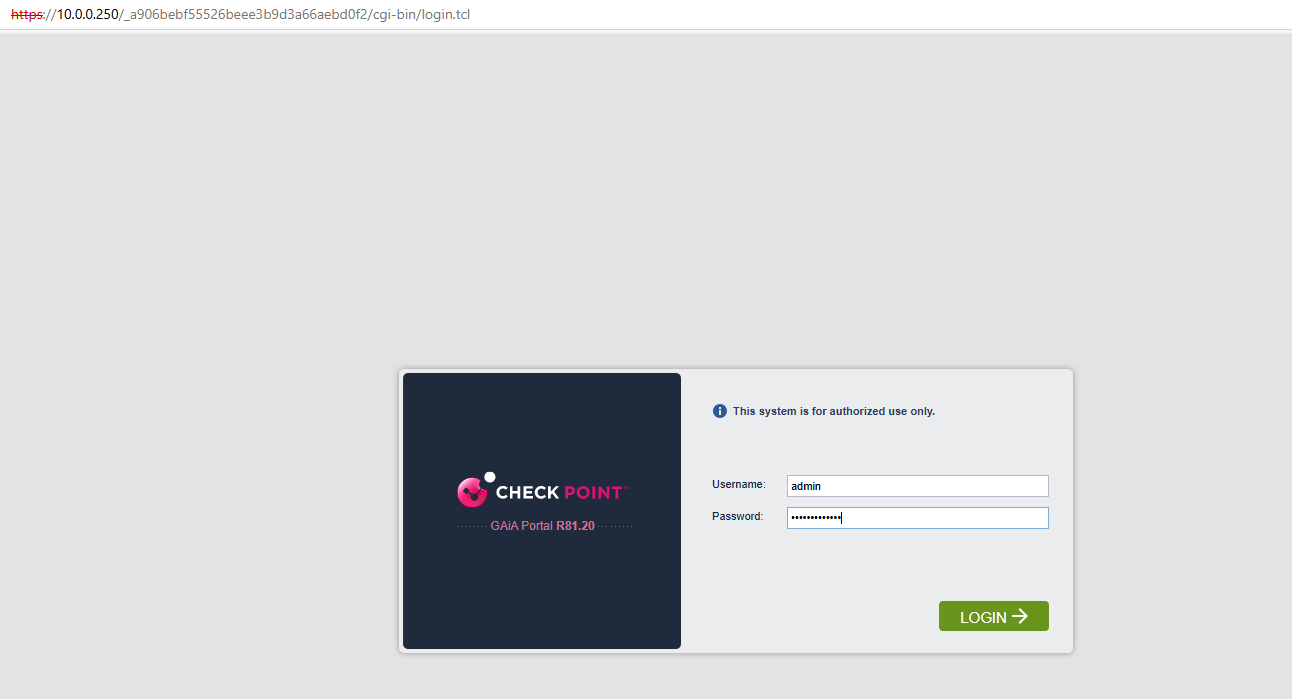
After a reboot we can finally login.
By default the GAiA appliance will be installed with a trial licence valid for 1 month.
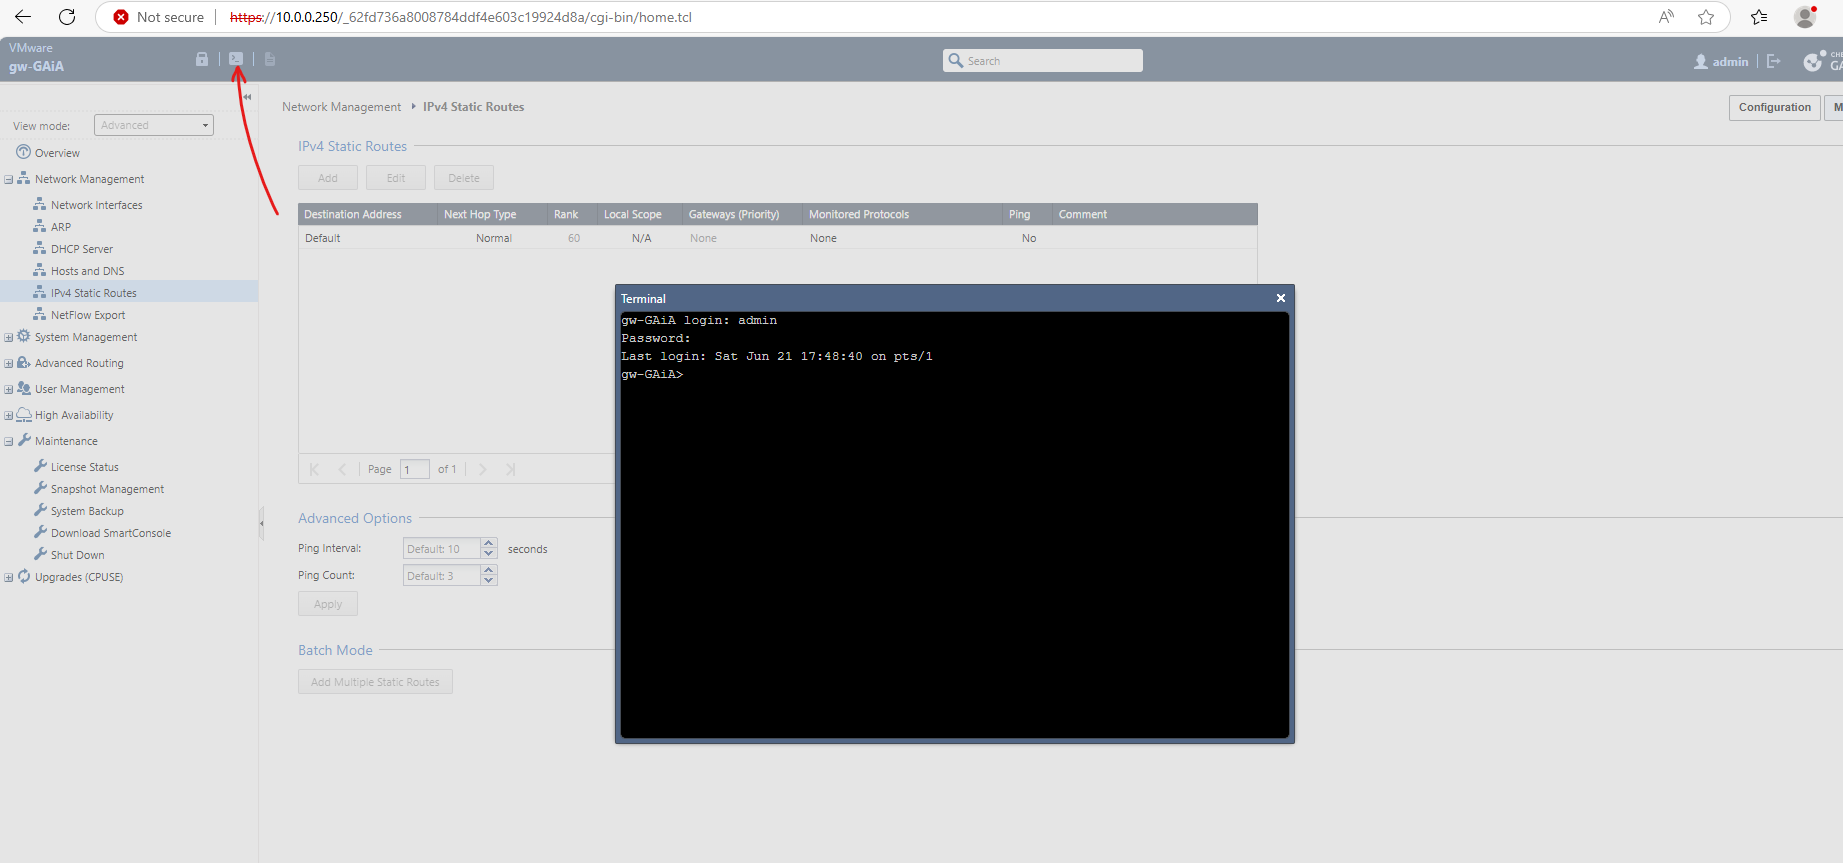
We can also either establish a new SSH connection to GAiA with an external console or we can use the integrated console shown below.
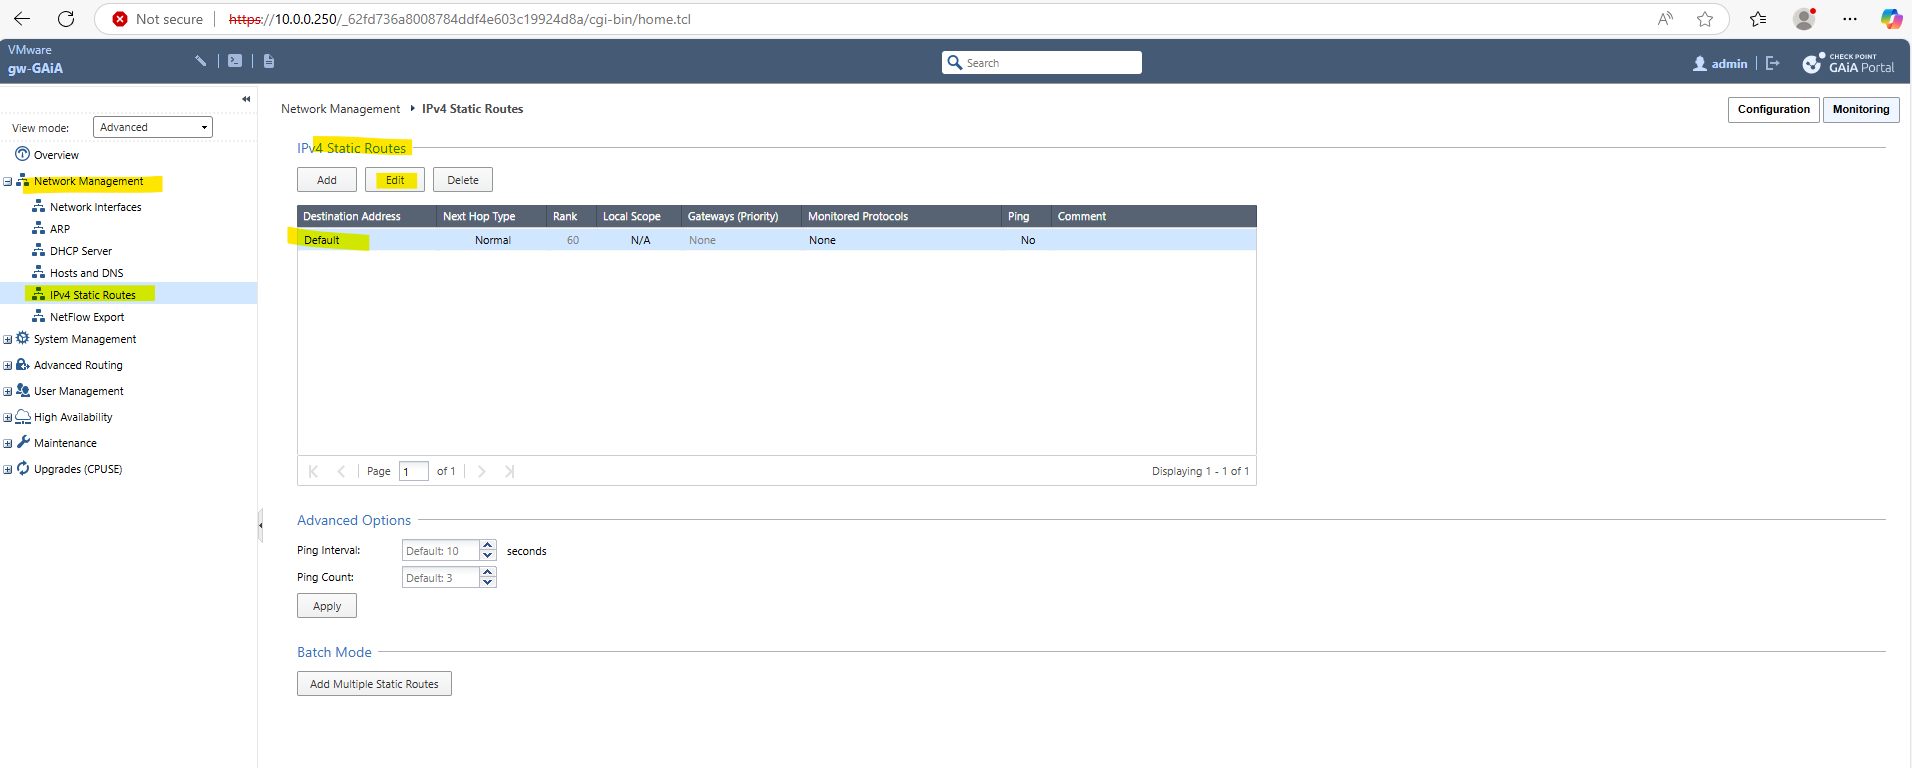
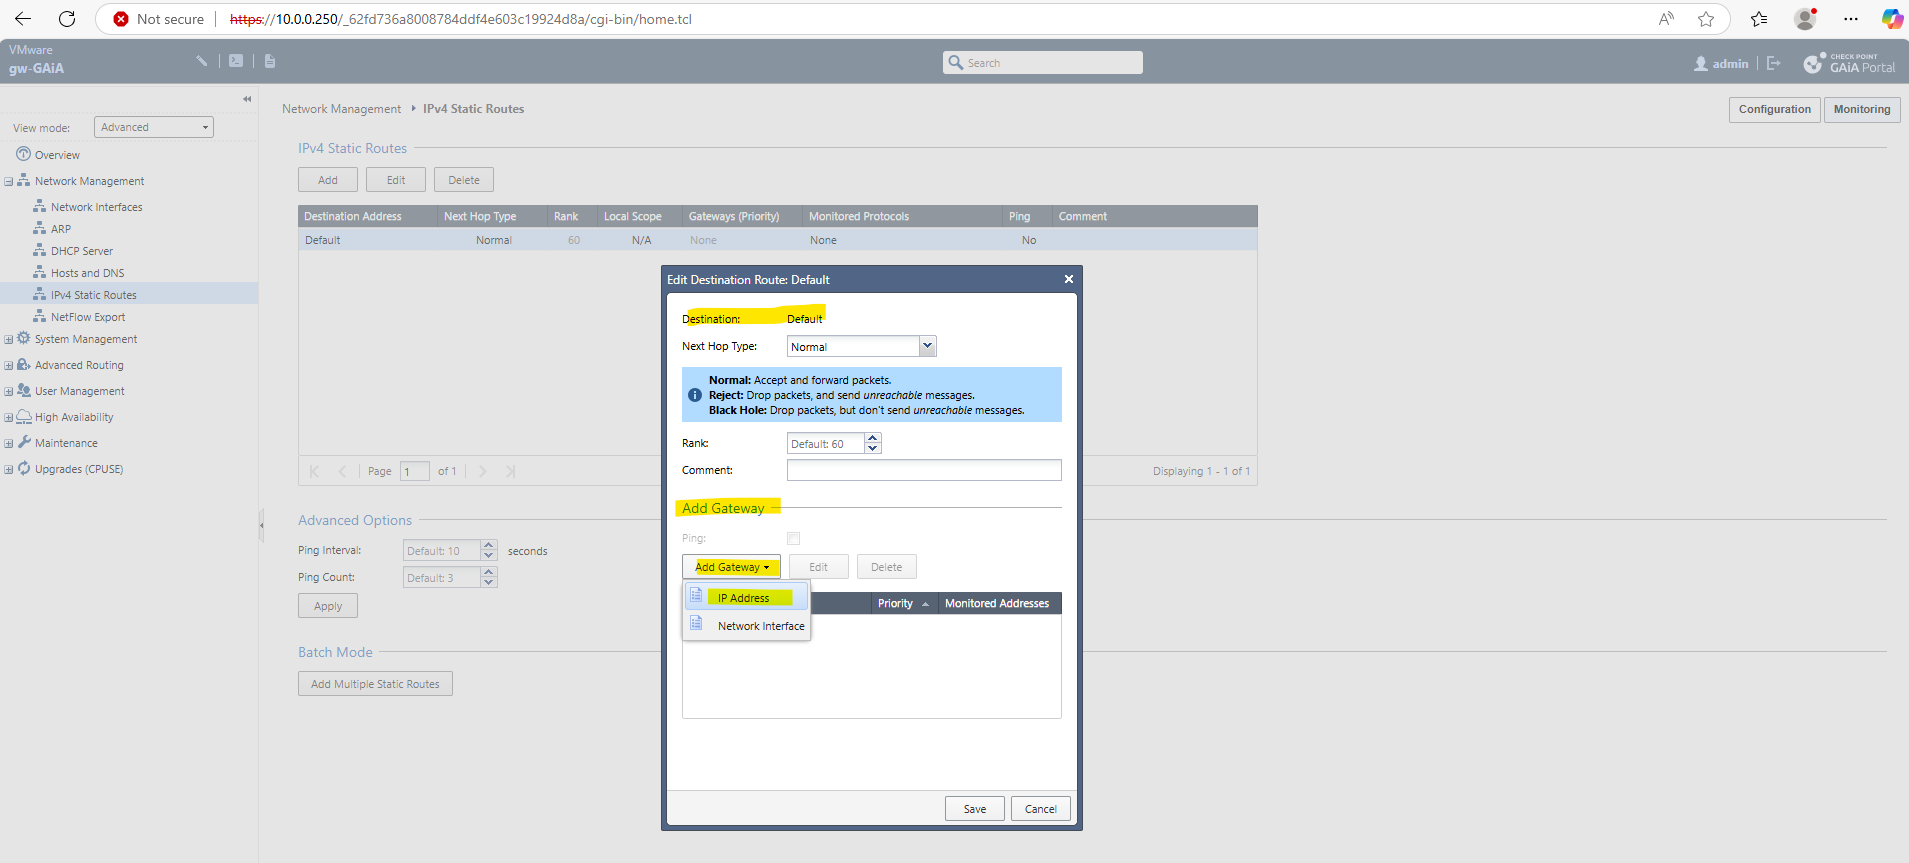
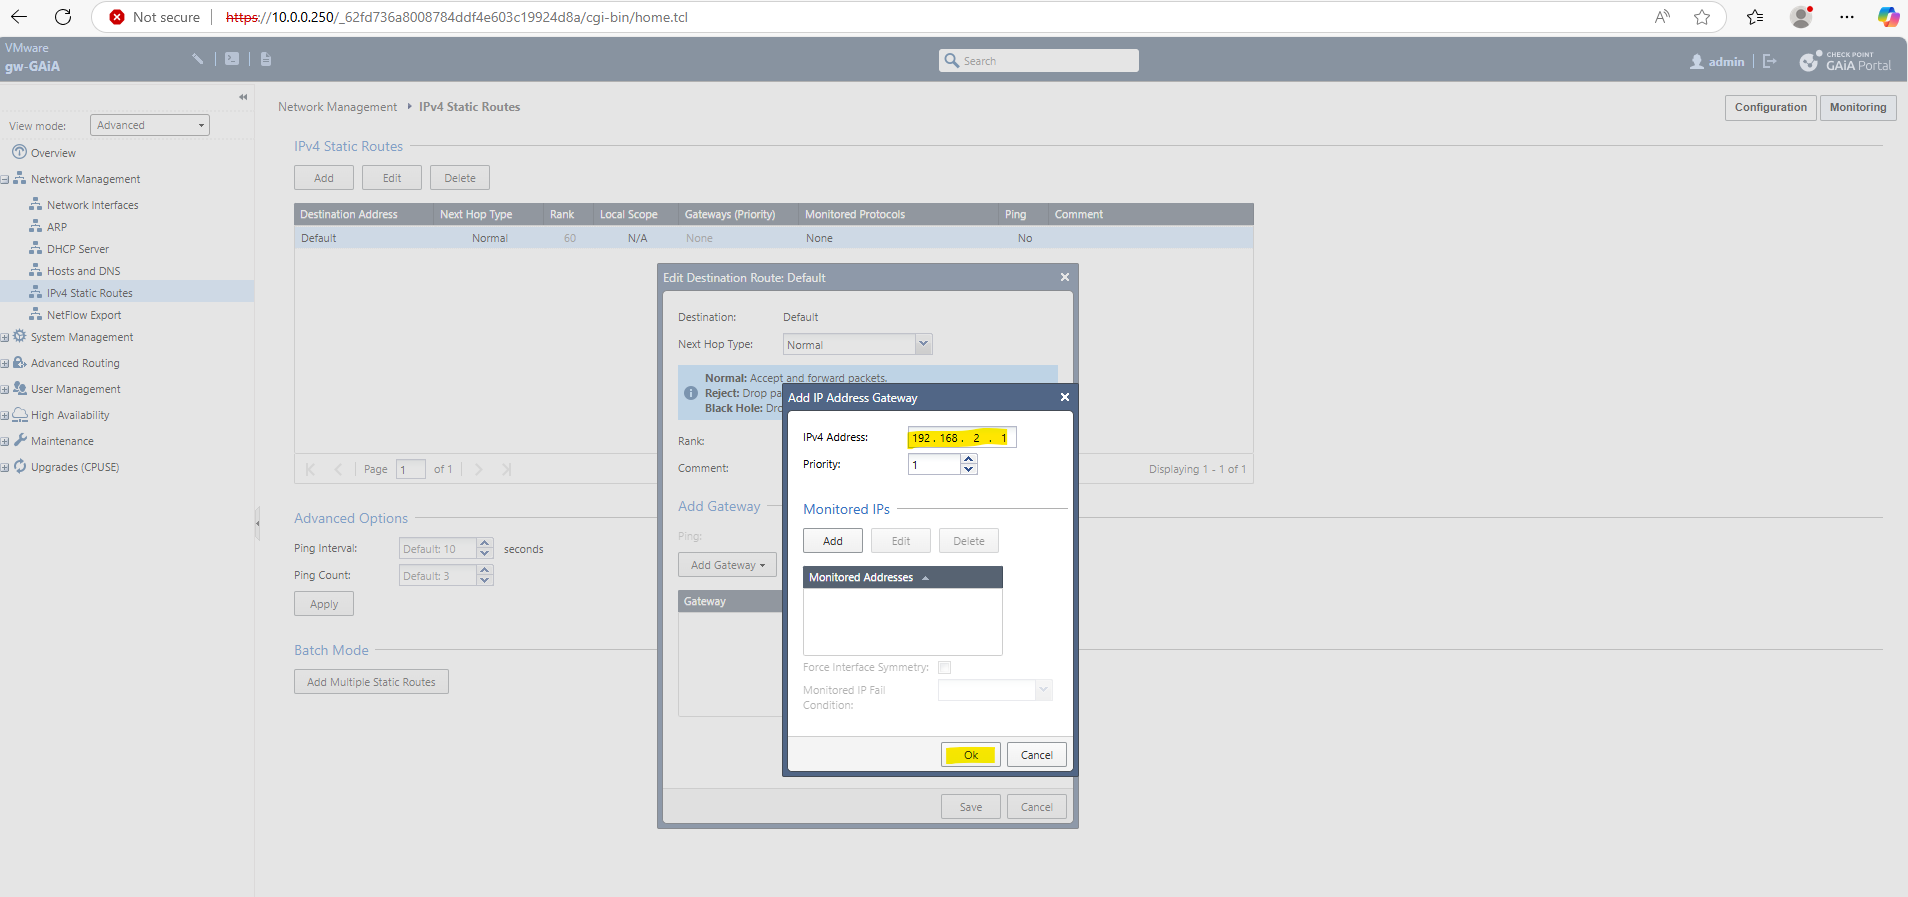
Adding/Changing the Default Gateway
To add change the gateway of the internal interface, we can use the Web UI and its Network Management section as shown below.
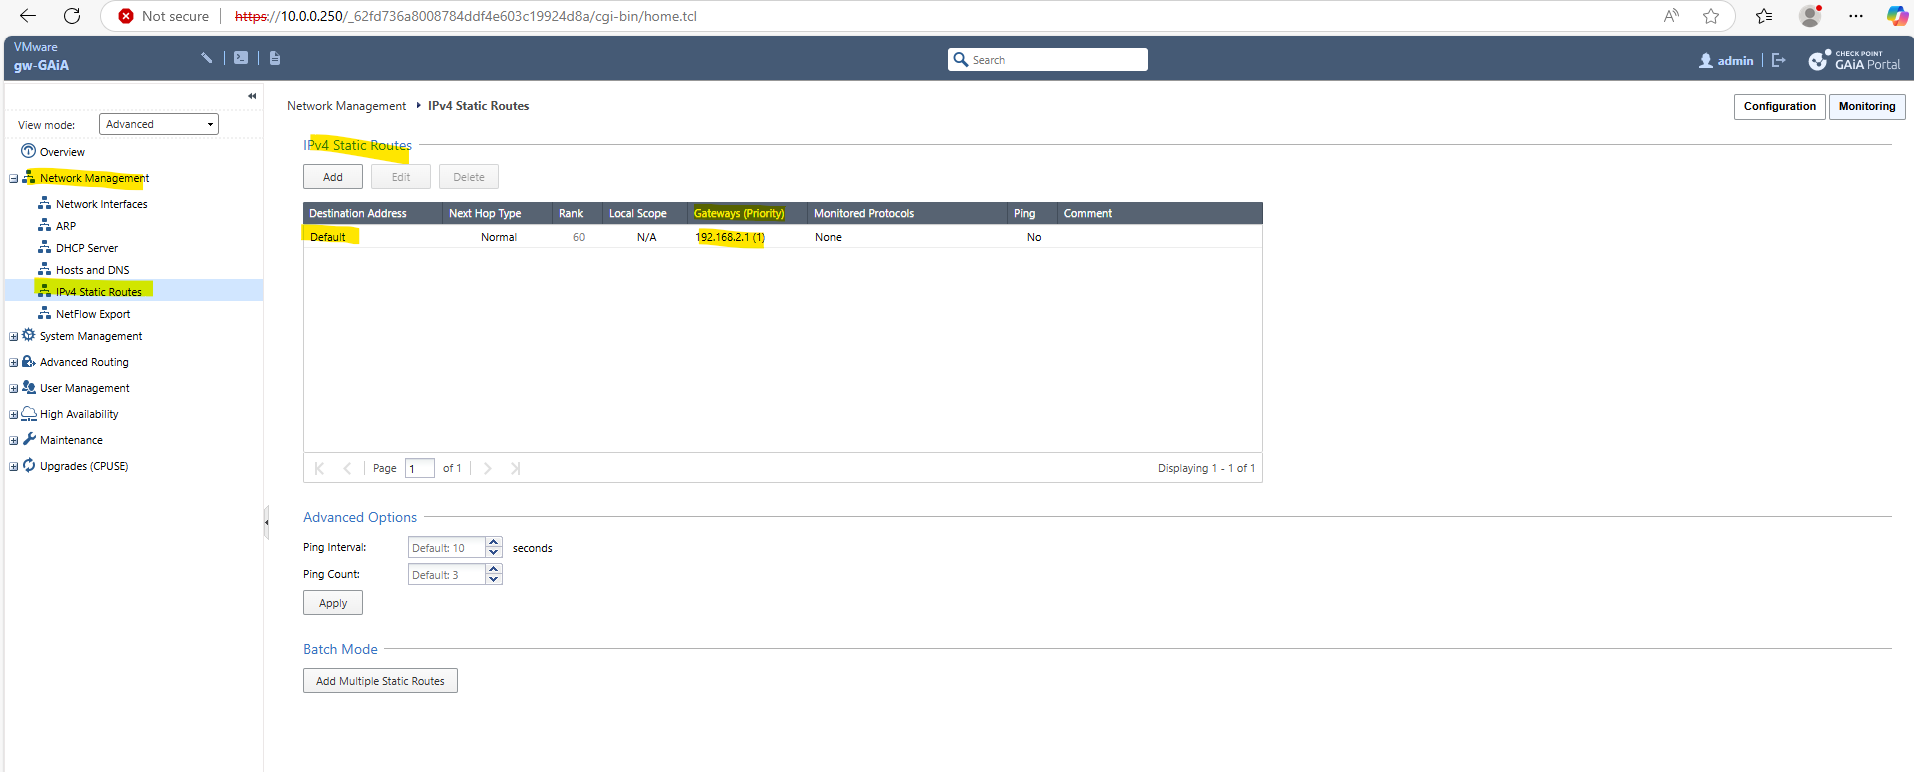
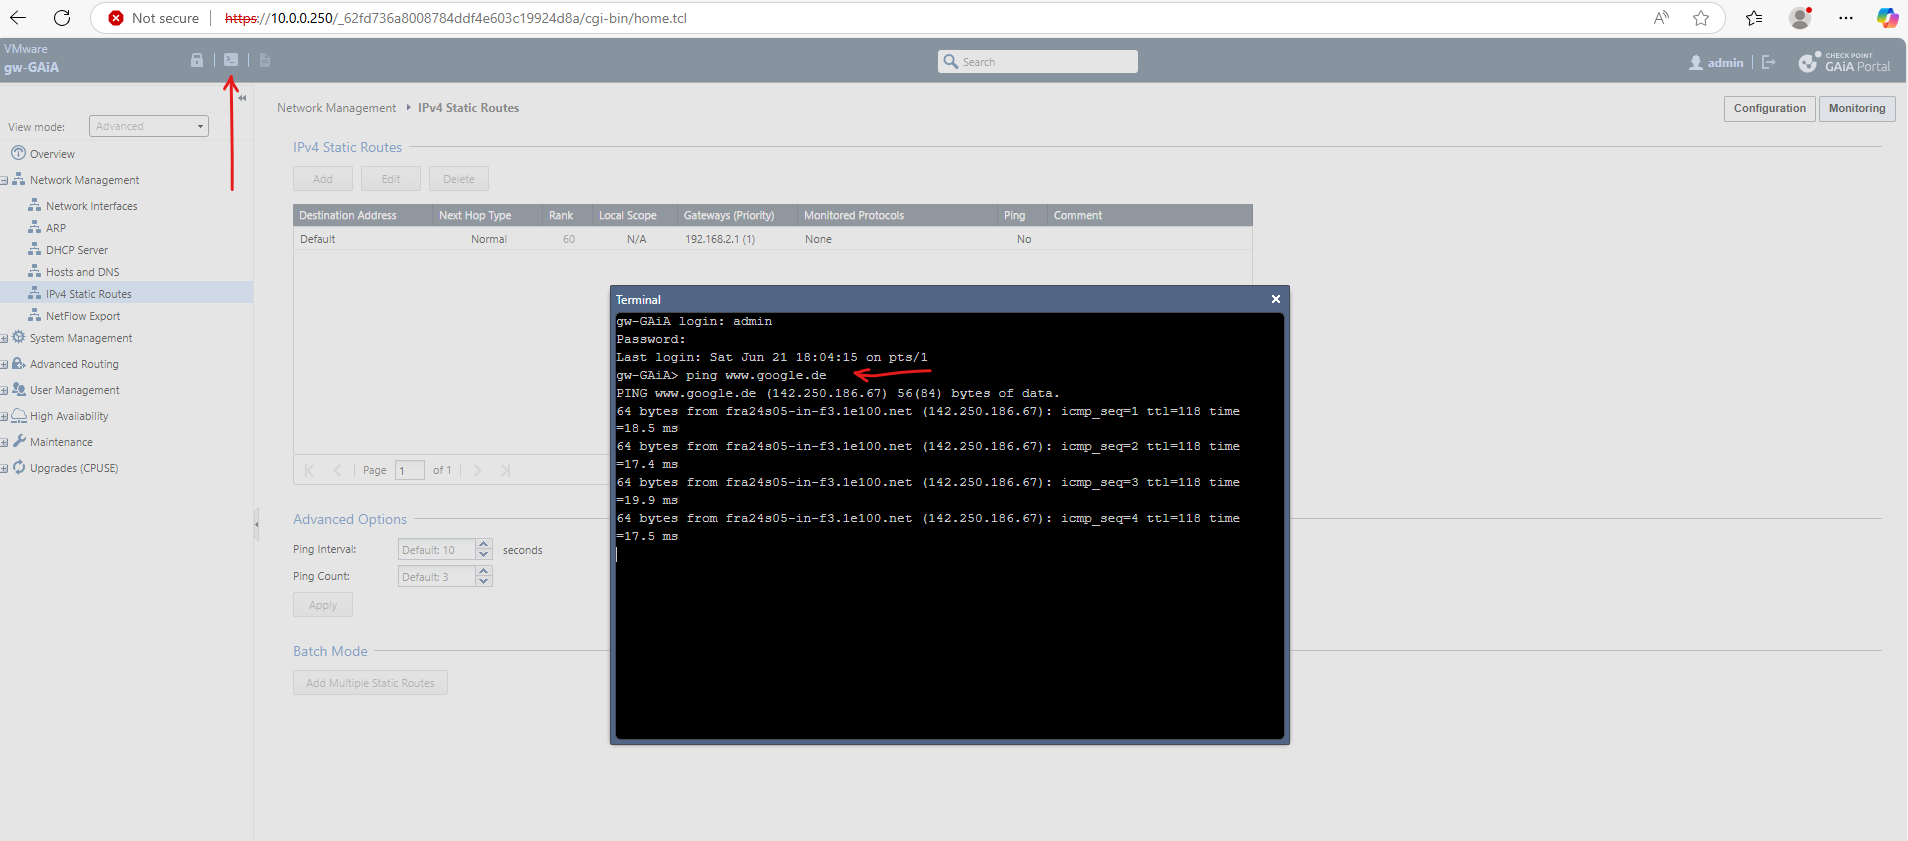
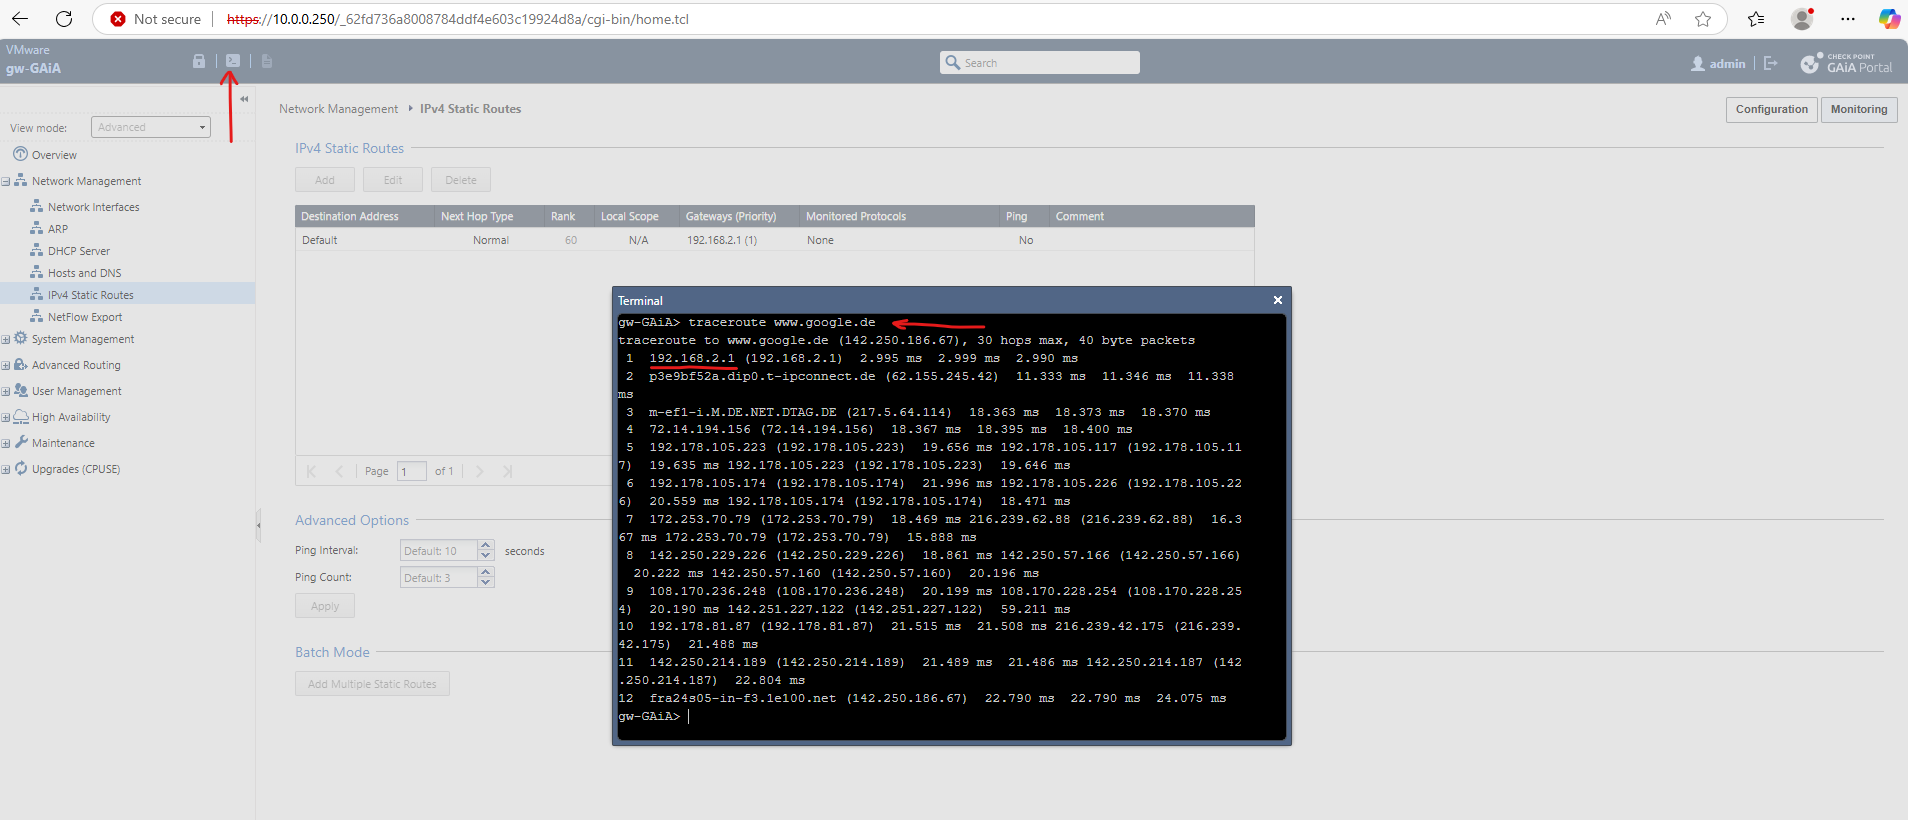
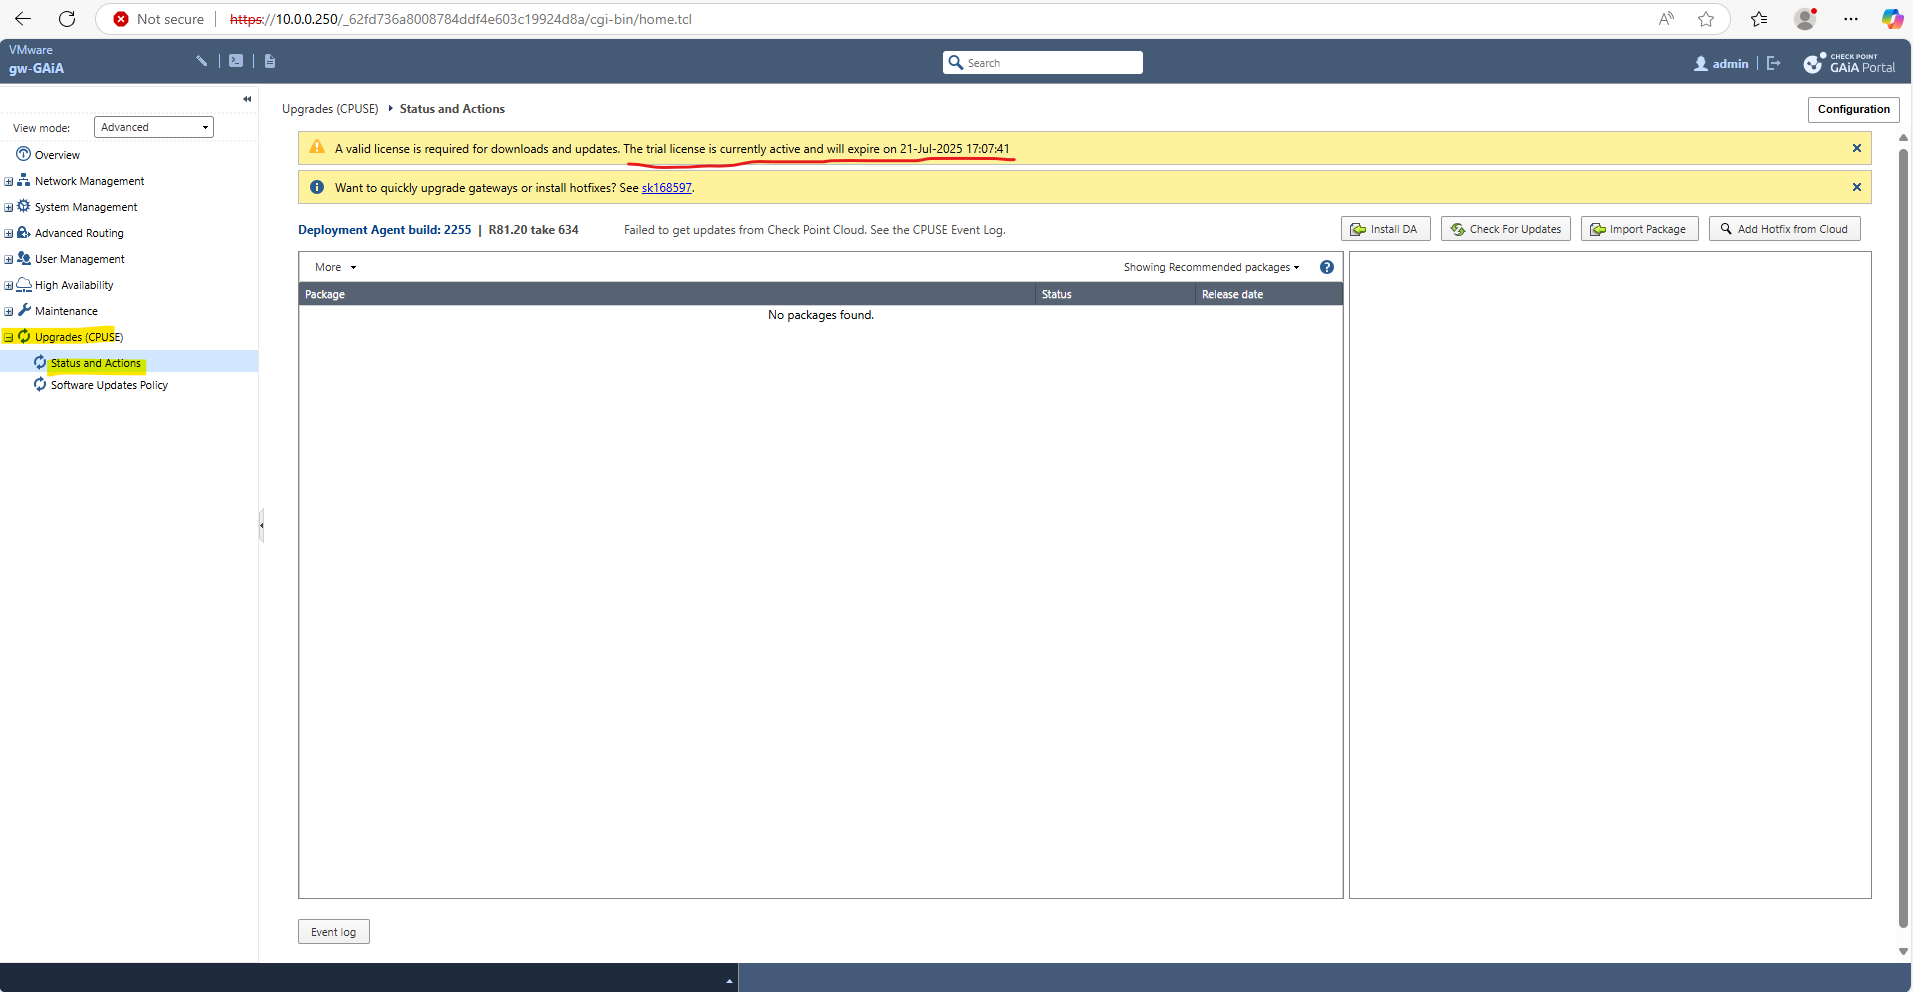
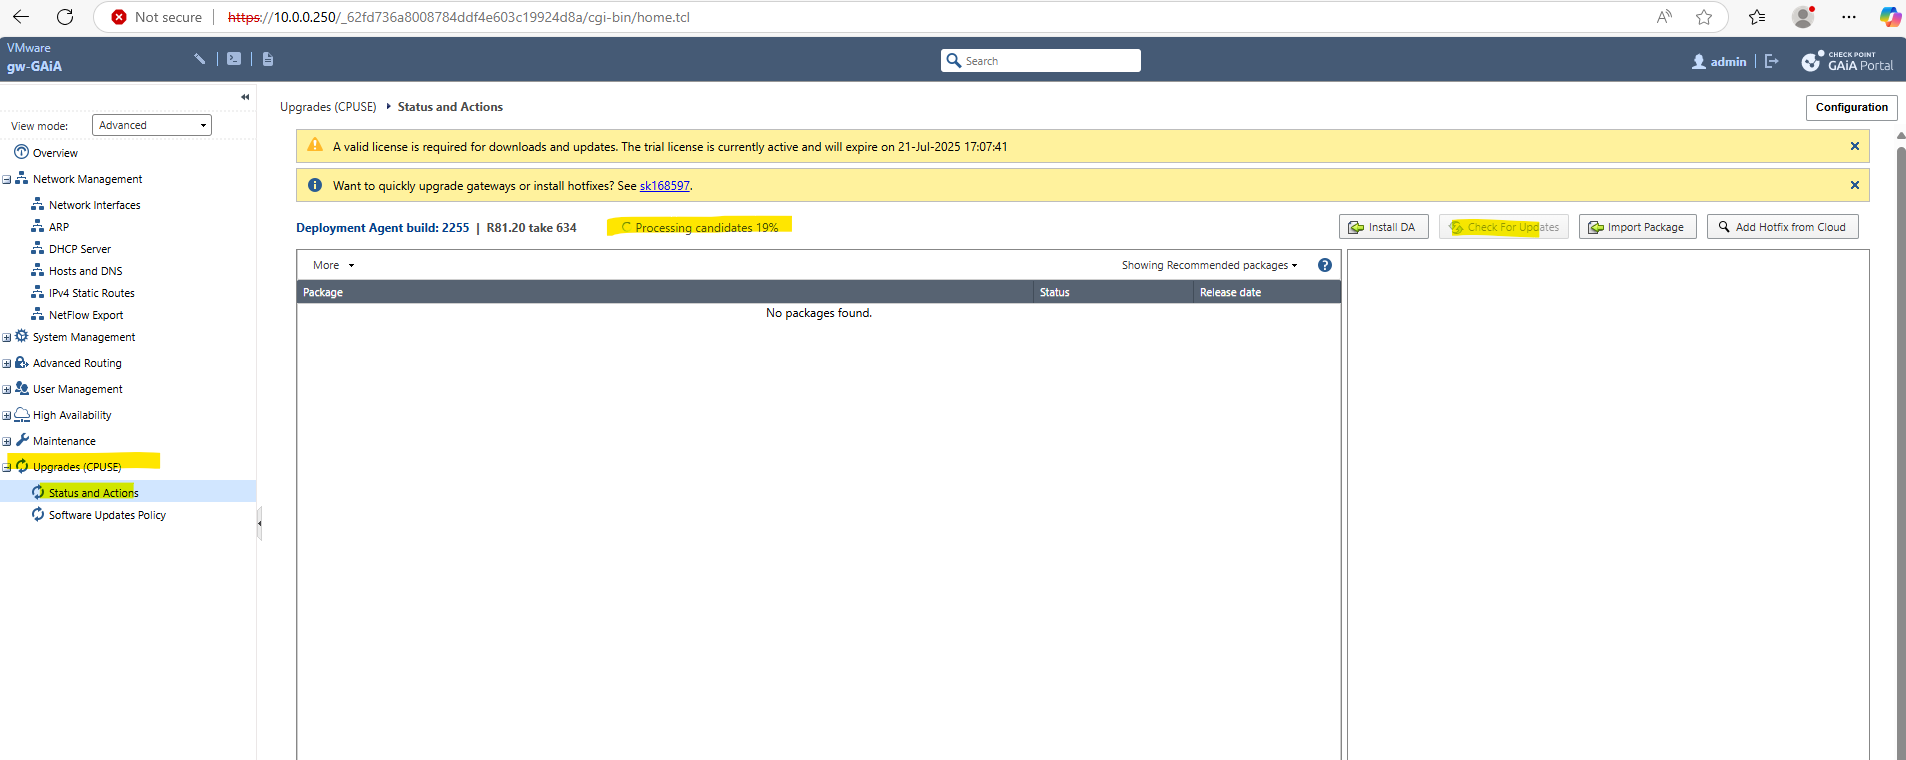
So far outbound internet access is working, we can also check for new updates.

Configure Firewall
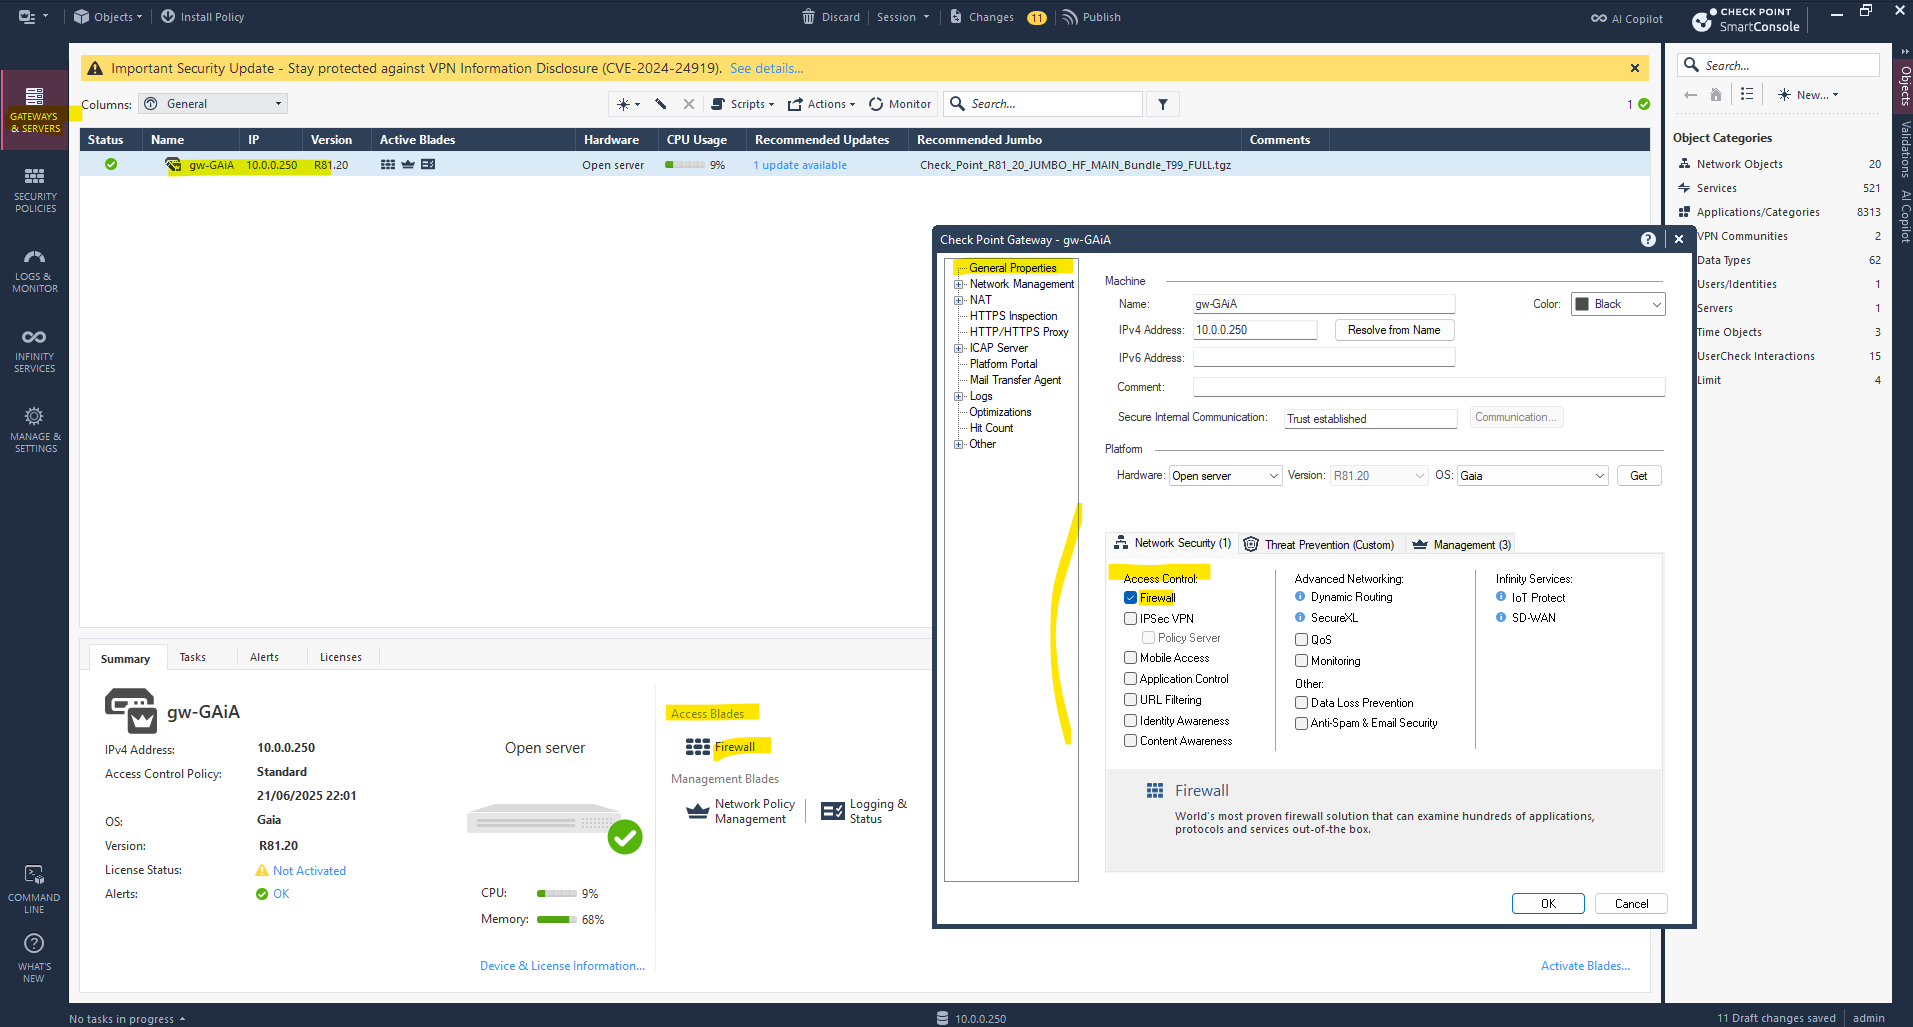
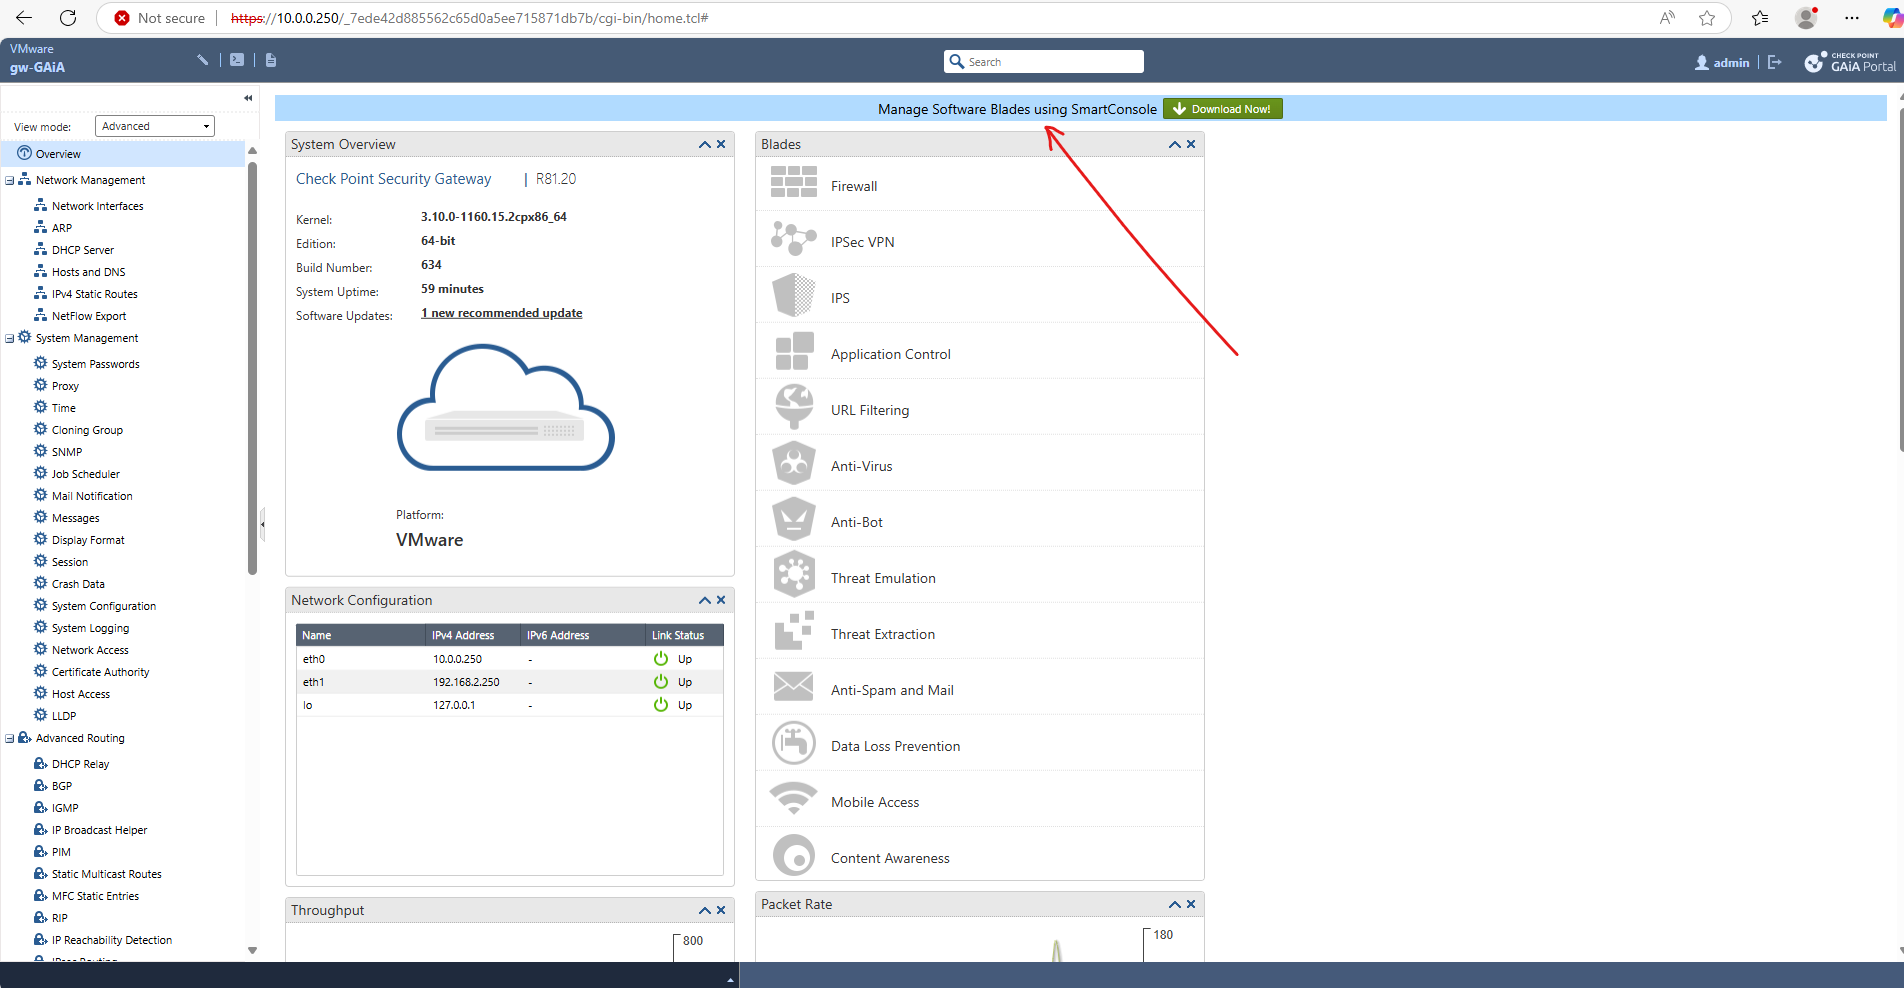
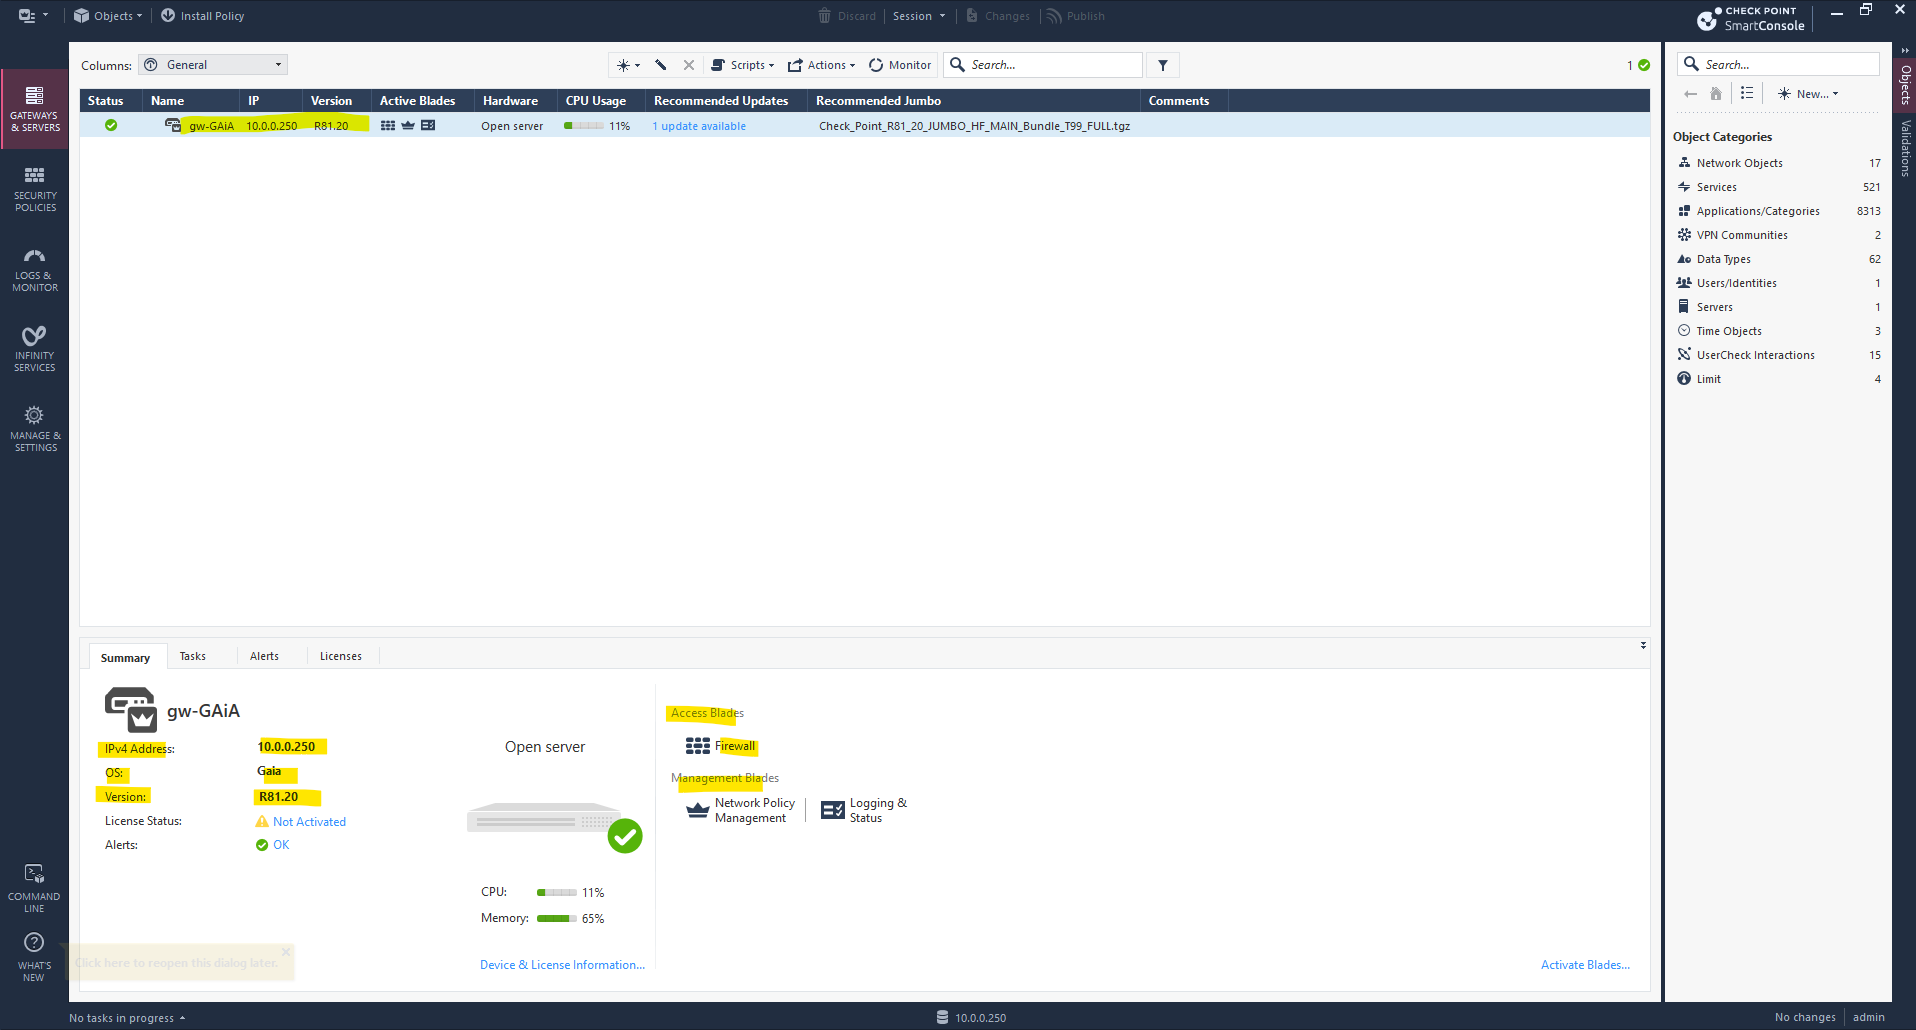
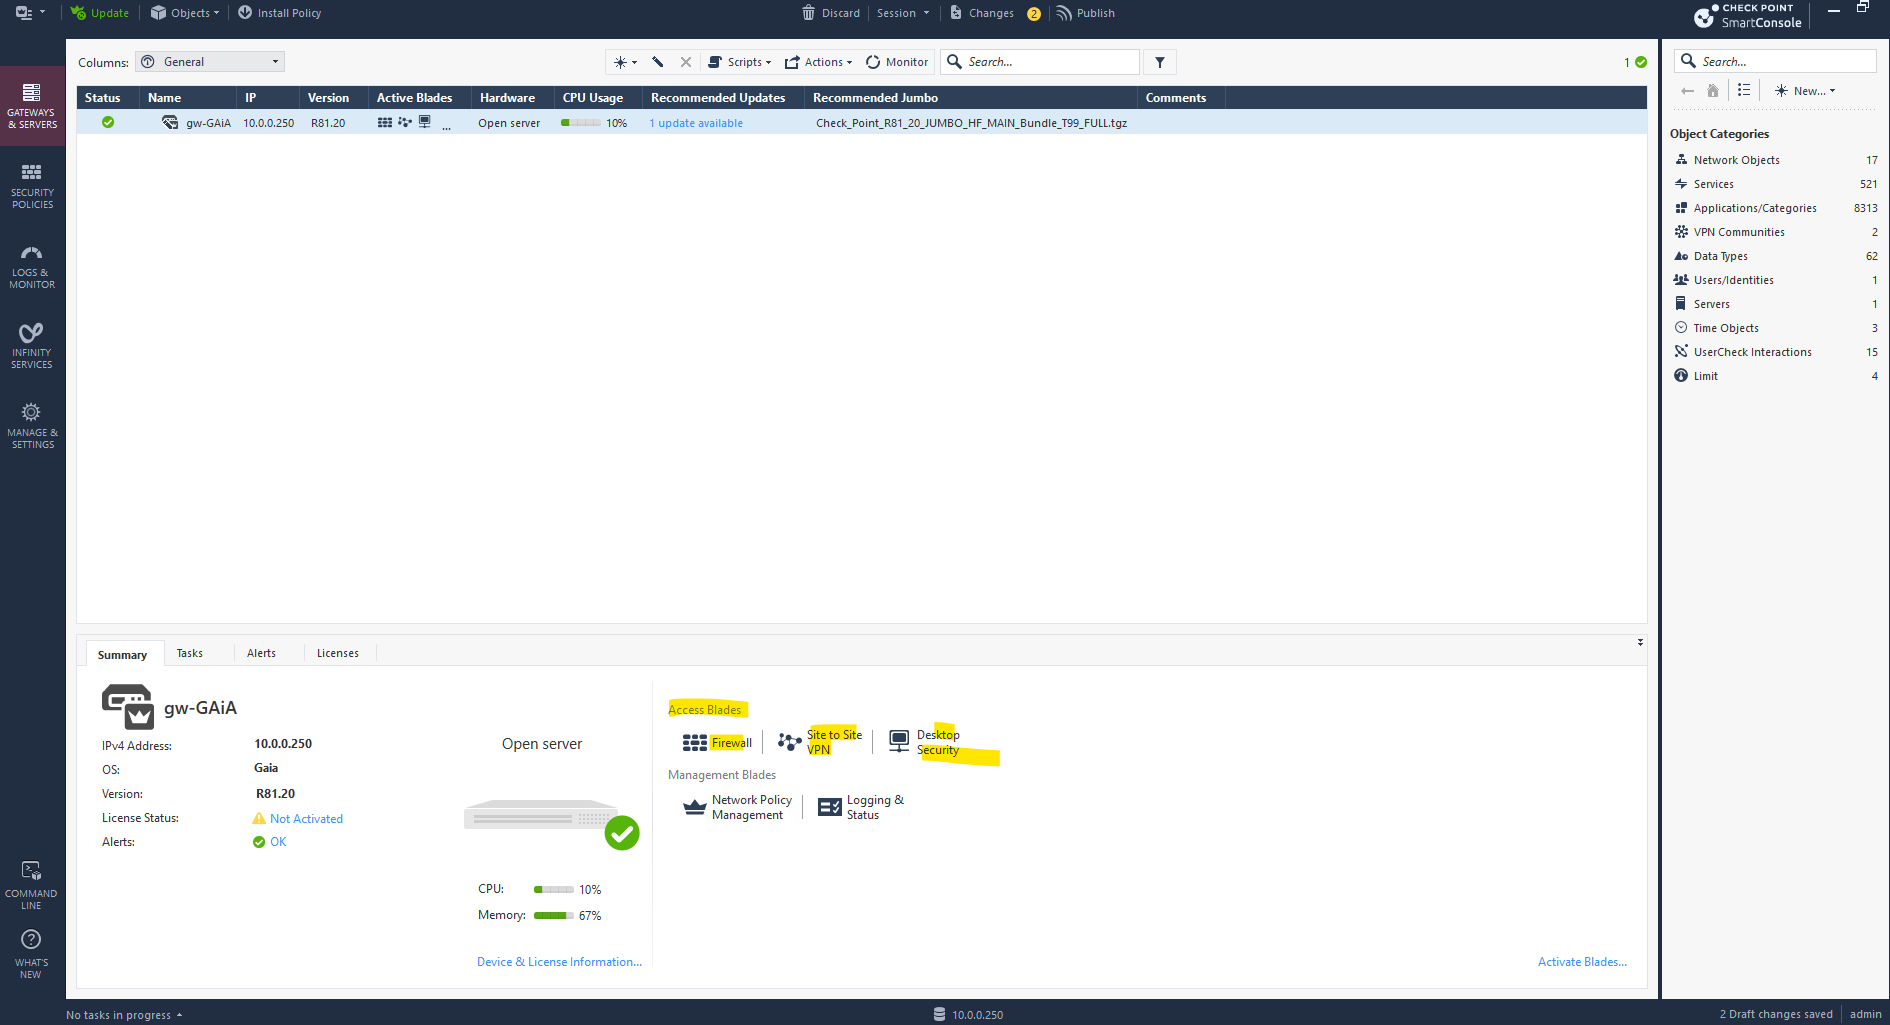
If the blades (e.g., Firewall, IPSec VPN) are greyed out on the Overview page like shown below, it usually means that they are not enabled on the Security Gateway object. This is a common post-installation step that needs to be manually configured.
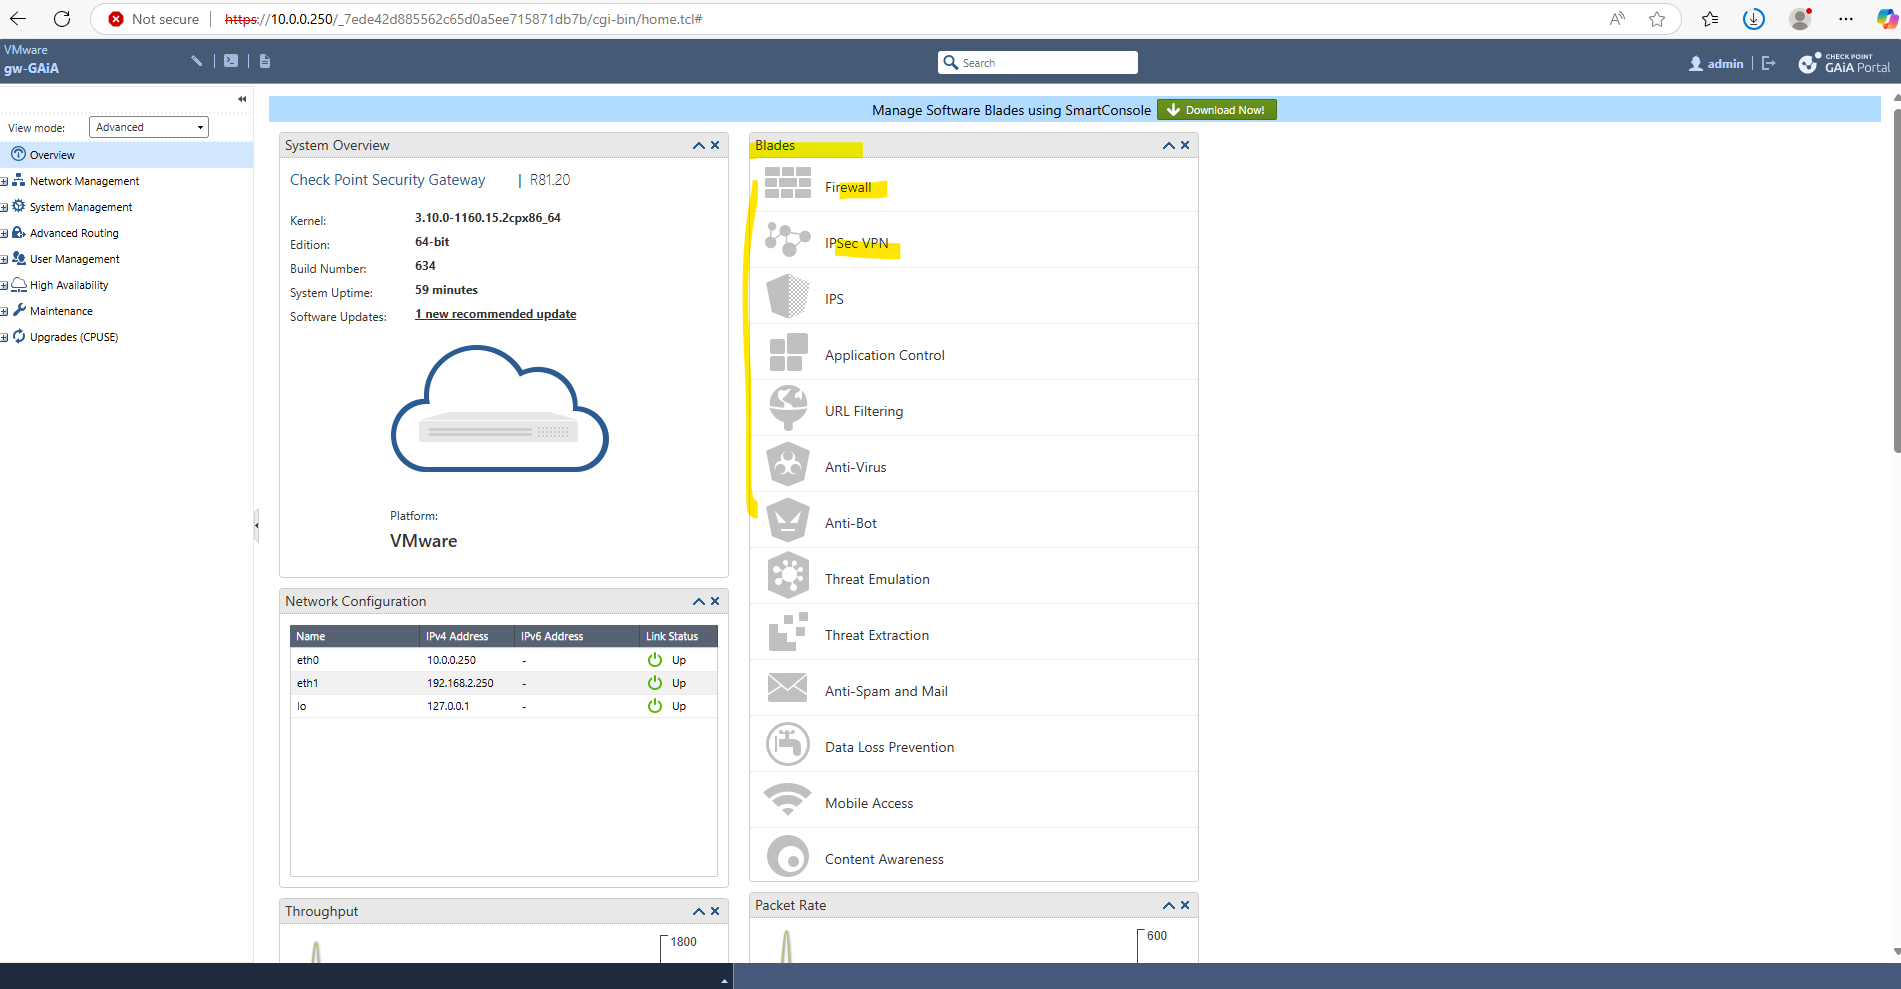
Enabled blades will looks here like below.

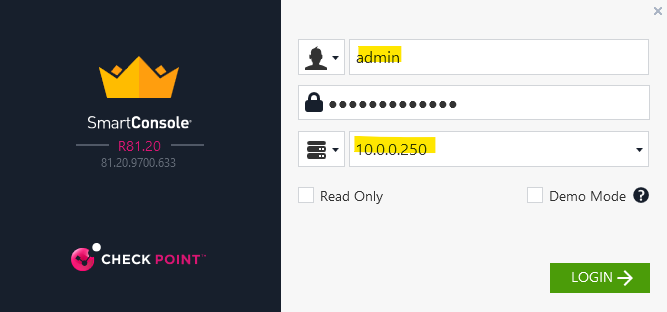
We can use the SmartConsole to enable them.
Using the SmartConsole to configure the Check Point Appliance
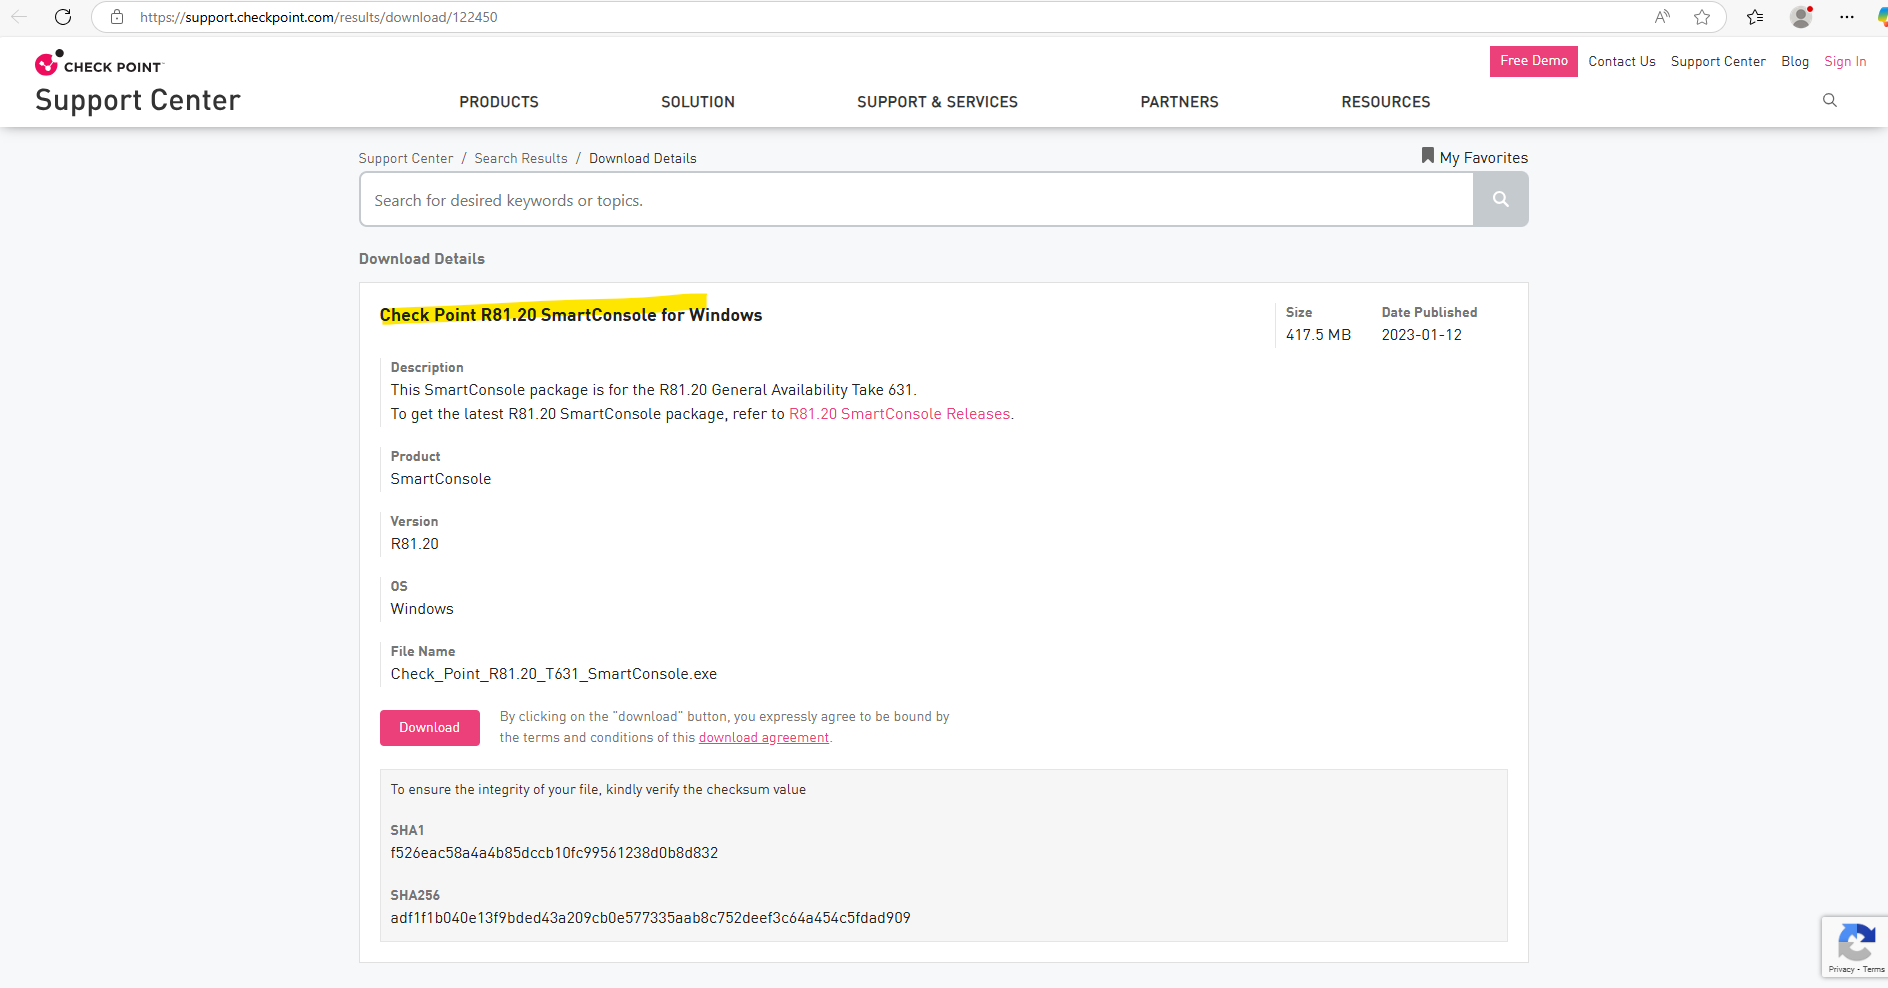
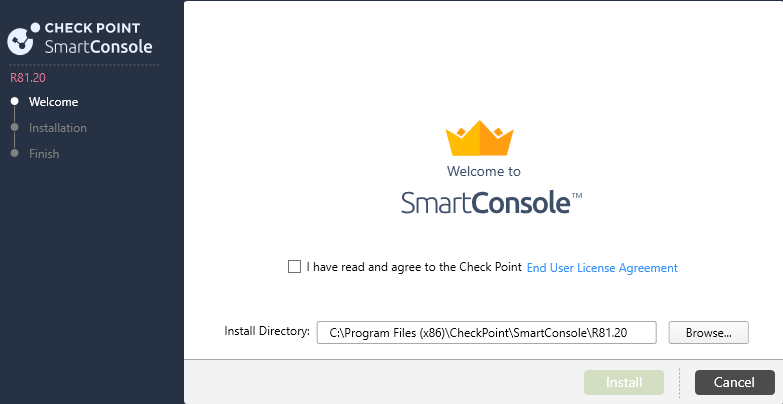
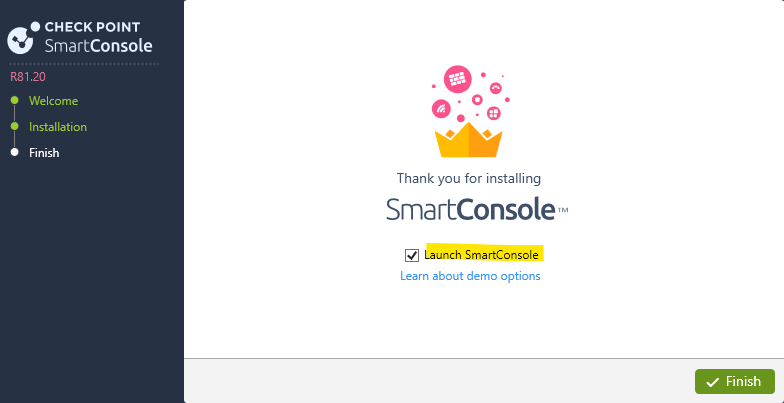
We can click on the button within the WEB UI as shown below to download the SmartConsole.

!! Note !!
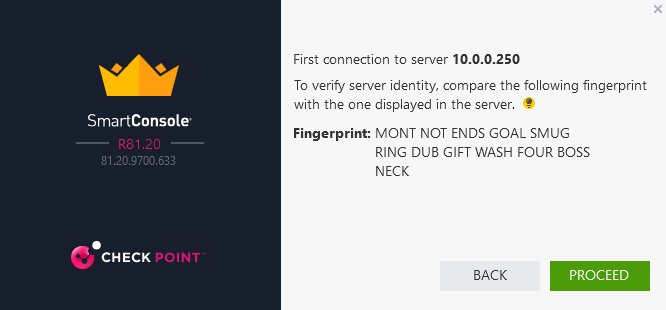
When Check Point is booting, to be able to connect to by using the SmartConsole can take some time till all services are running and the Web UI is faster up, so just wait to be able to connect to.
The Firewall blade is already enabled when choosing for the installation type here Security Gateway as mentioned further above.
To also enable other blades like IPSec VPN which I want to use, under Gateways & Servers double-click on the appliance we want to enable it.
In the new opened dialog on the left pane, go to General Properties, here check the boxes for the blades you want to enable.
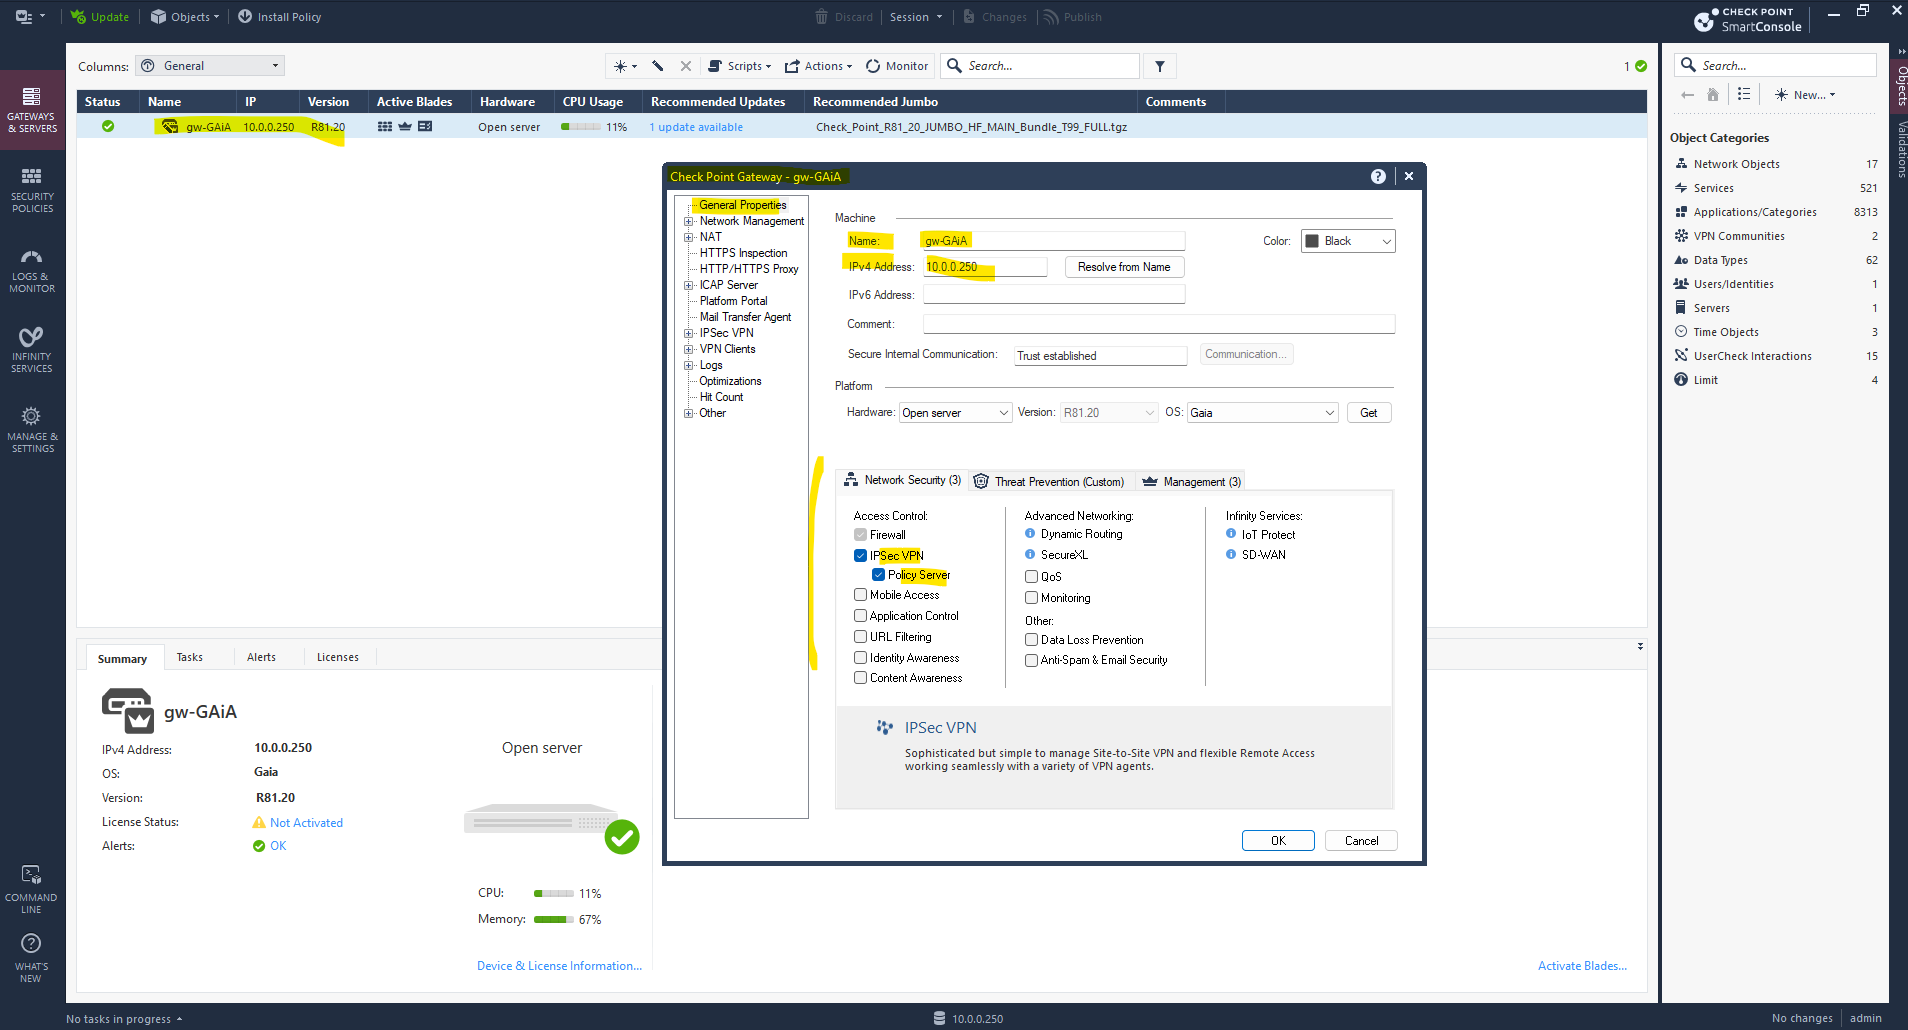
Below we can see that the Site to Site VPN blade now is also enabled.
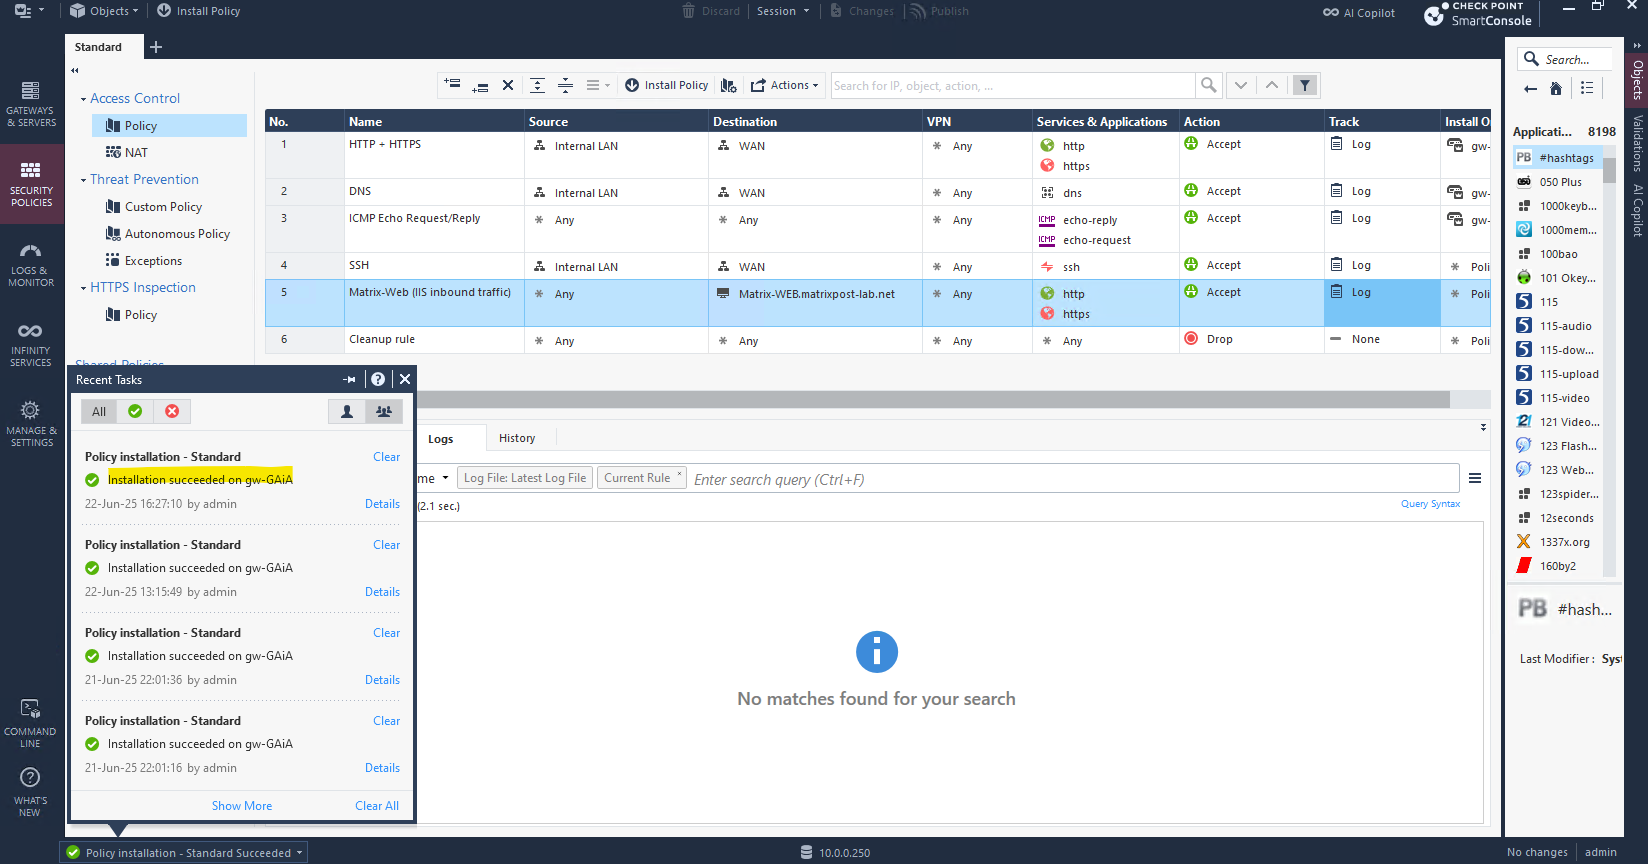
Configure/Adding Security Policies to allow Traffic
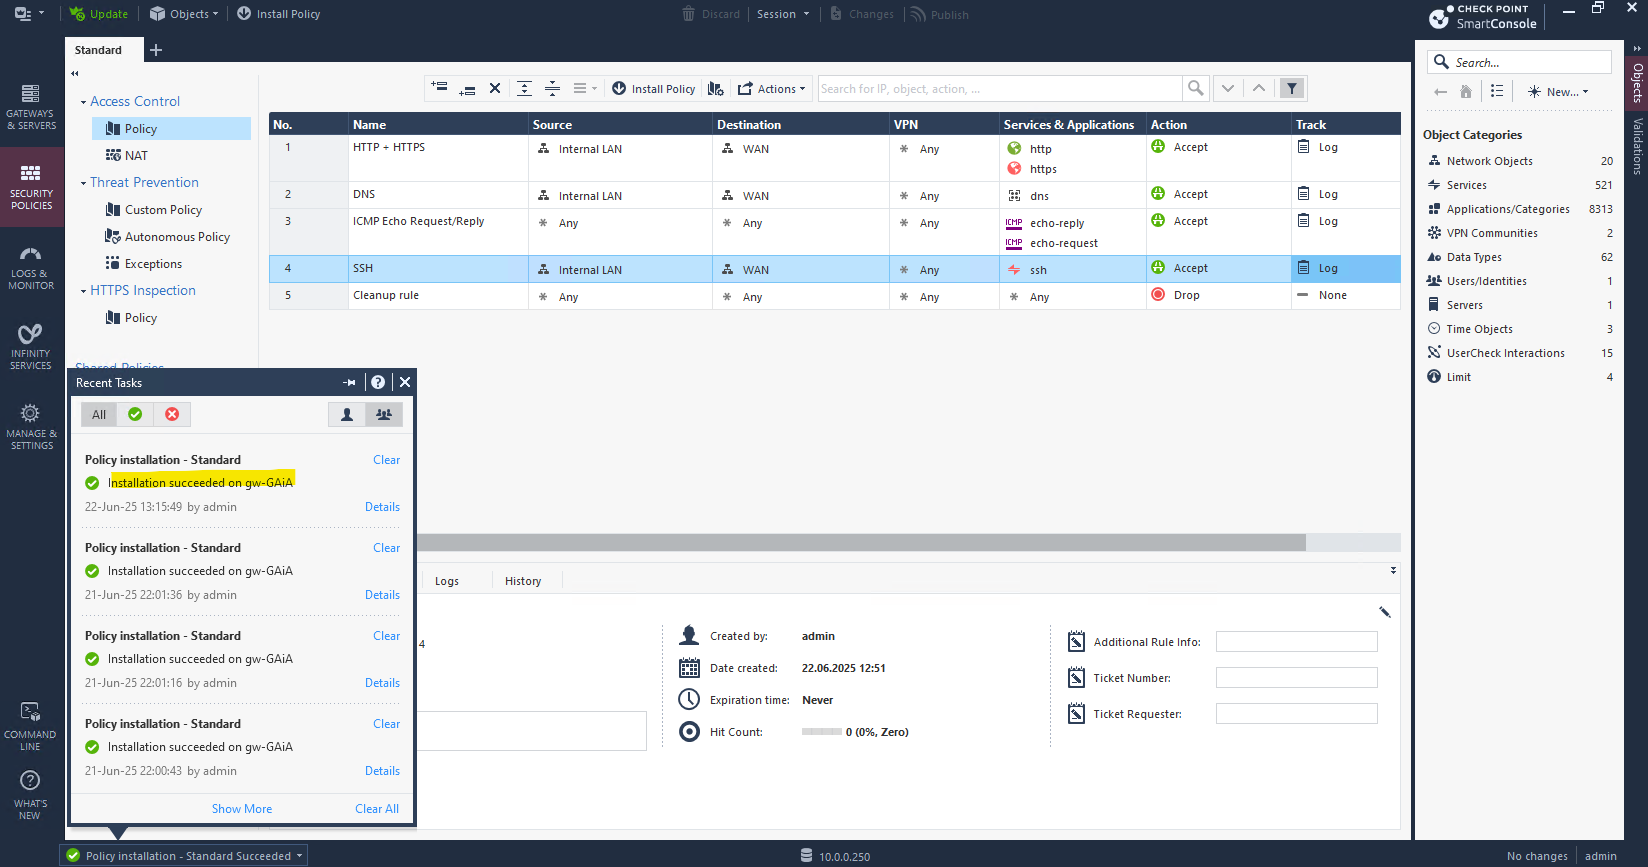
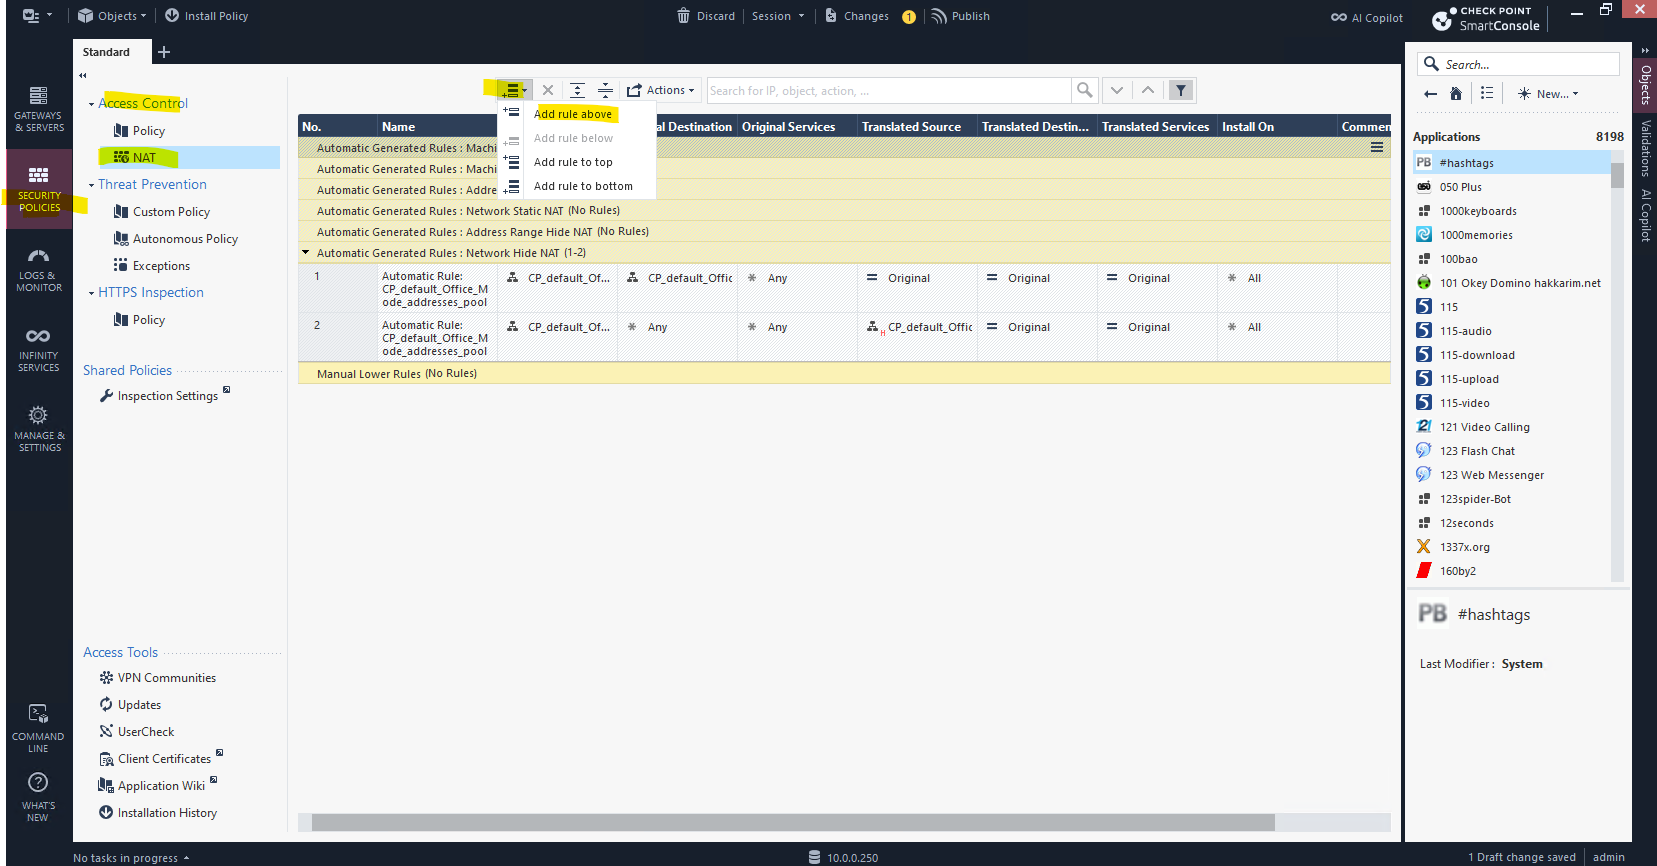
To allow traffic on the firewall we need to configure and adding security policies. On the left pane click on Security Policies.
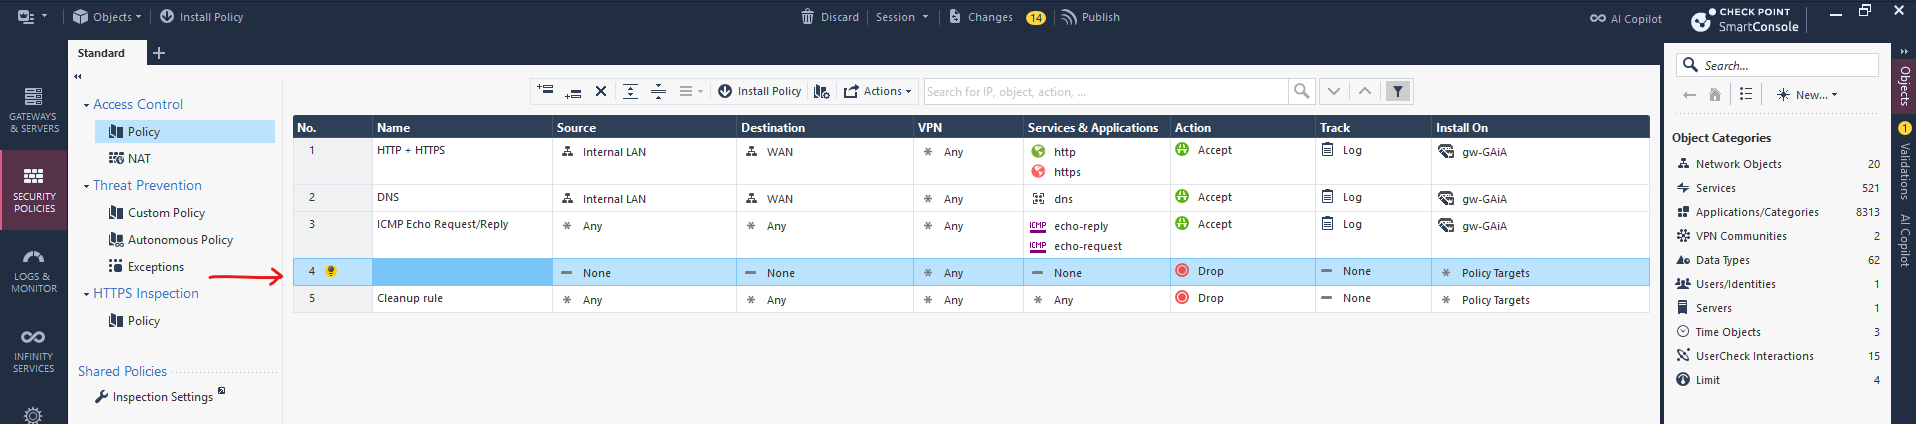
In the Access Control section click on Policy. By using the top bar and the first two icons, we can either adding a new rule above the selected or below.

Here I was on the 3 rule and then clicking on Add rule below.
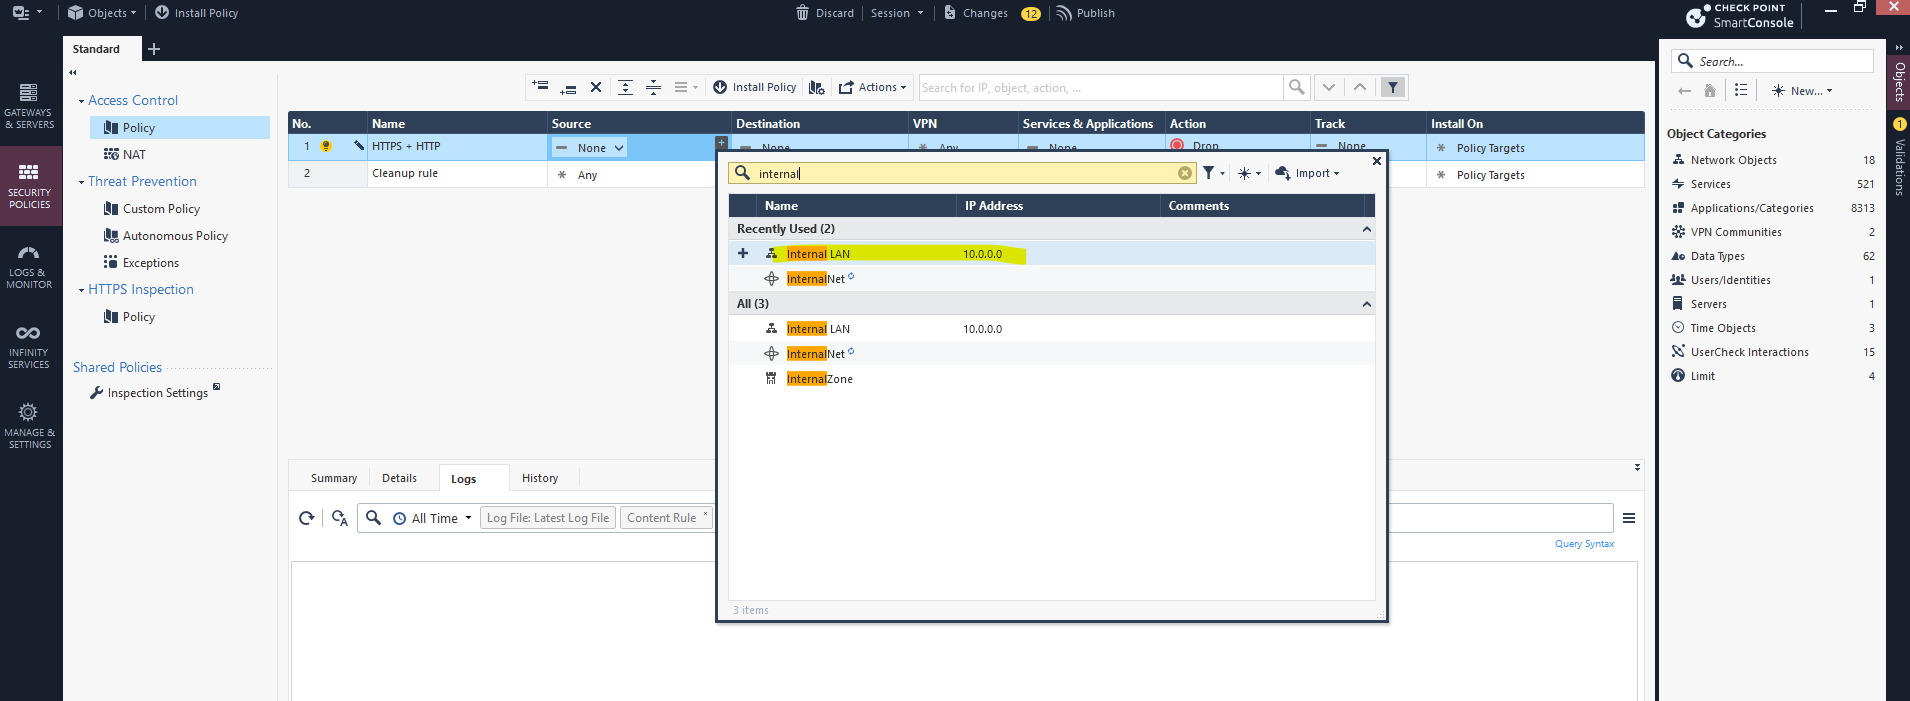
You can add networks like above my internal LAN (10.0.0.0/24) or external WAN network (0.0.0.0/0.0.0.0), by clicking below in the opened dialog for source or destination, on the highlighted icon and select Network …

Enter a name for, the network address and net mask.
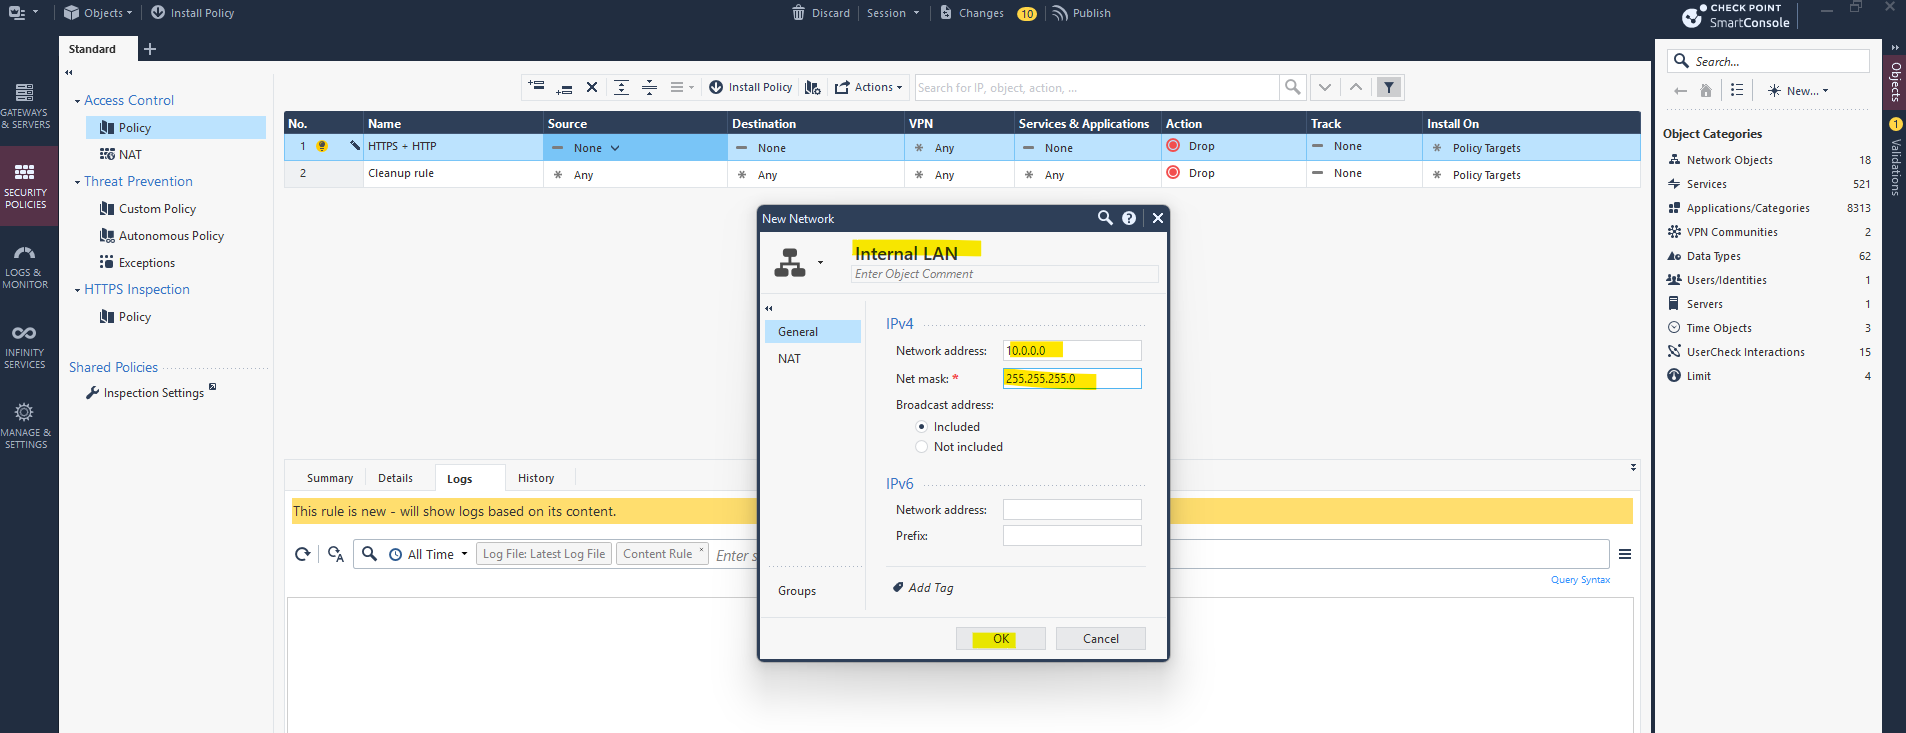
After that you can select it e.g. when creating rules.
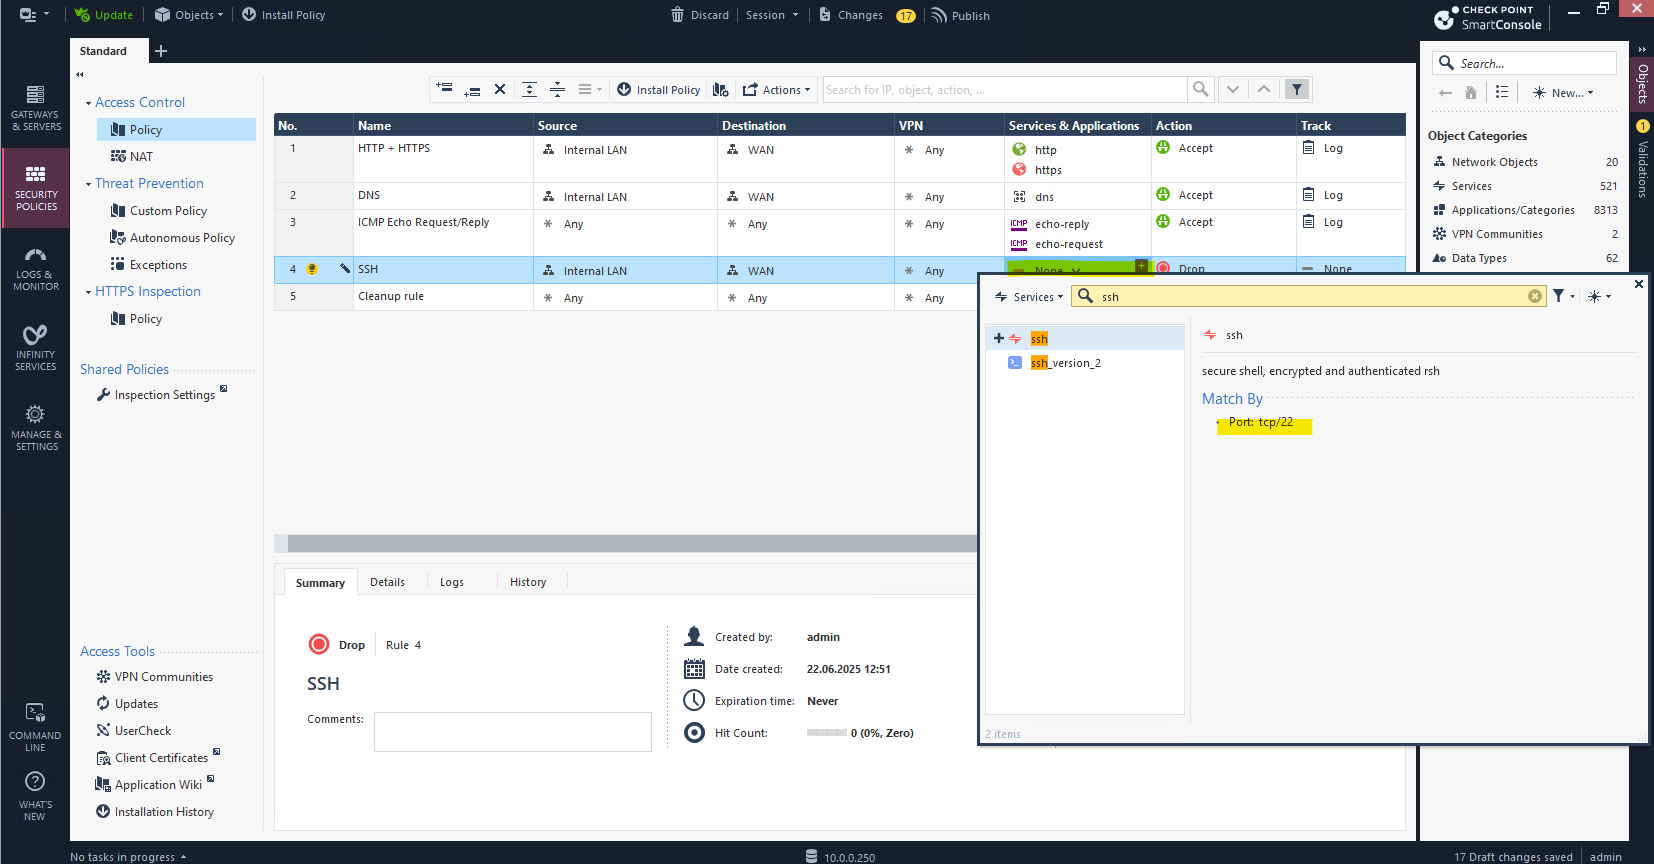
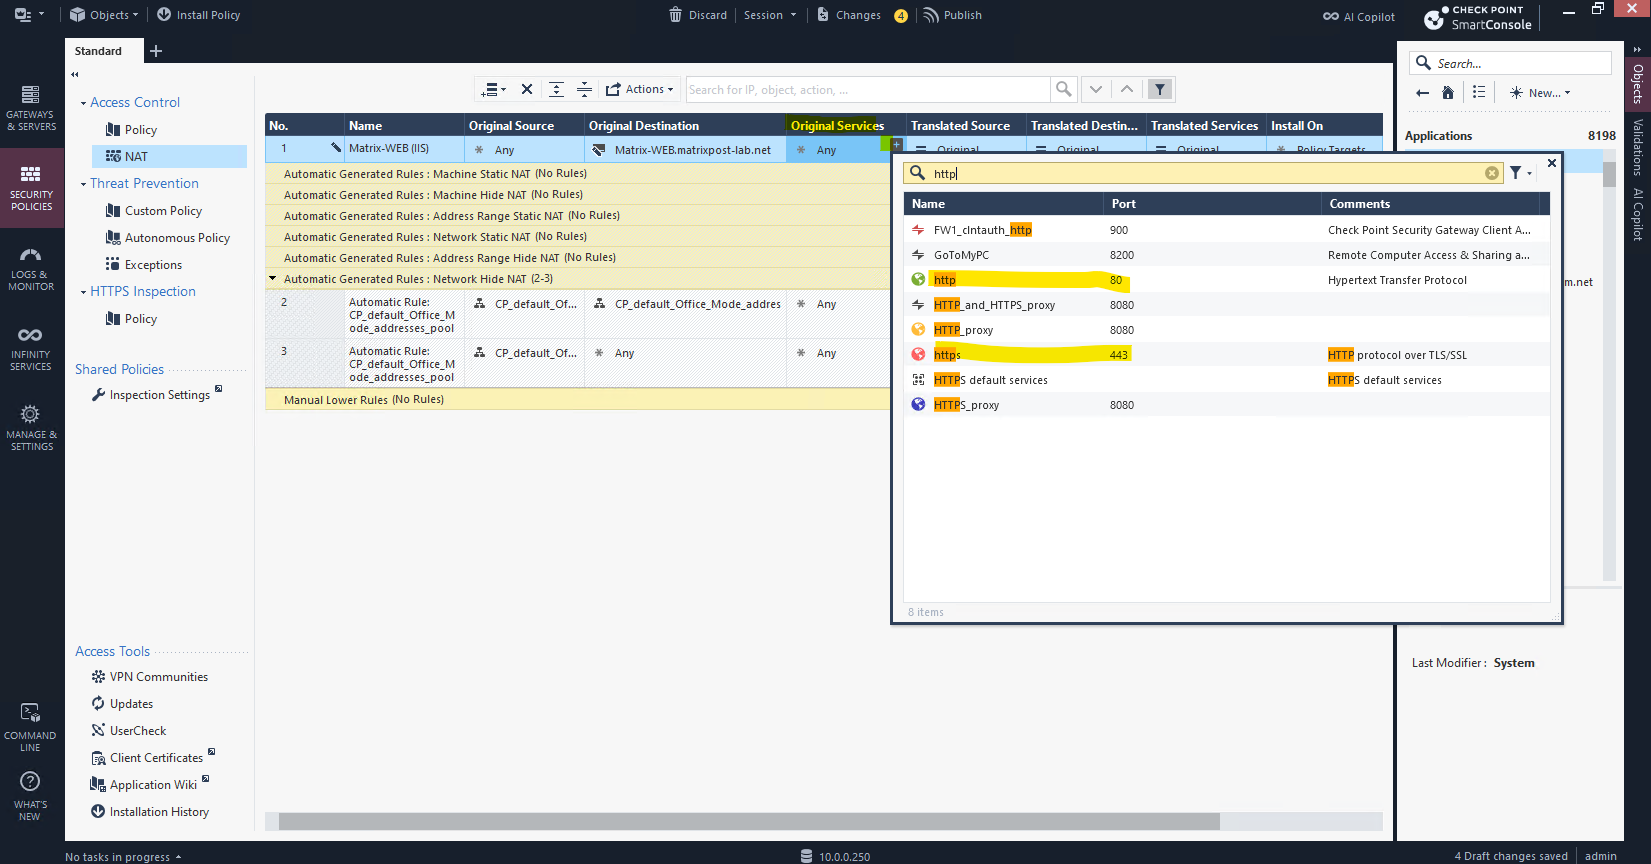
Adding the source and destination for the new rule and for which services & applications (protocol and port) it should deny or accept traffic. We can either select here any or none or we can add specific services by clicking on the + icon and search for like shown below.
Here I want to add SSH TCP port 22 to be allowed from my internal LAN outbound to the Internet.
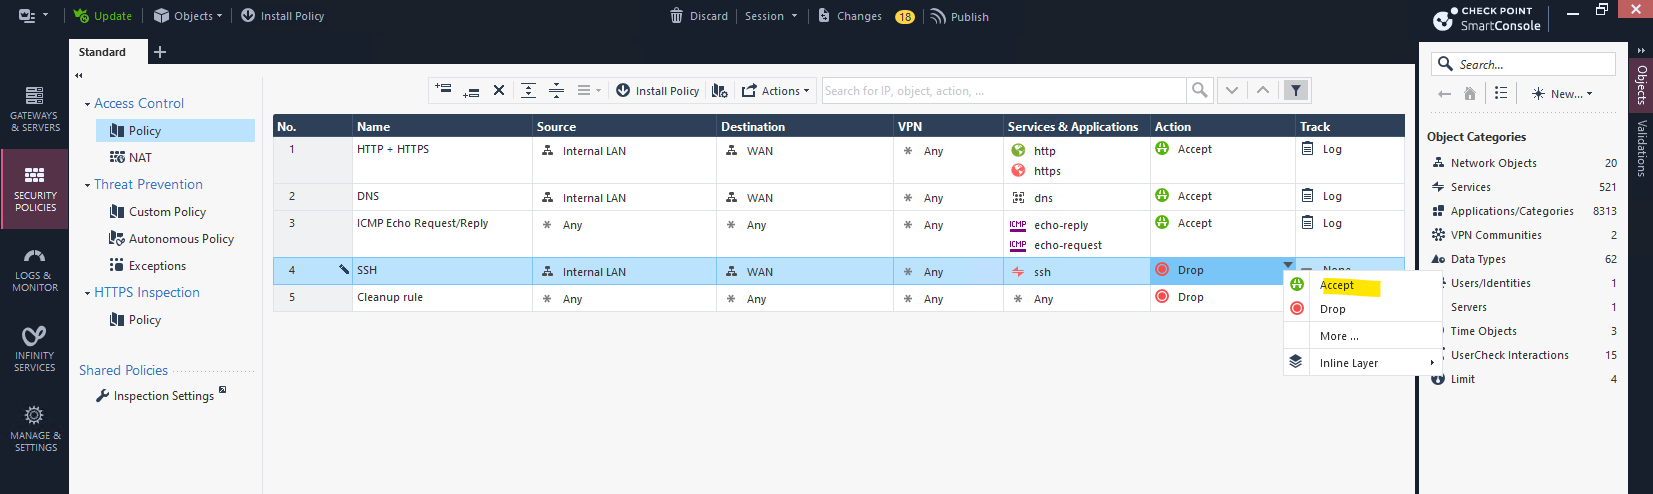
To allow the traffic outbound we need to select Accept under Action.
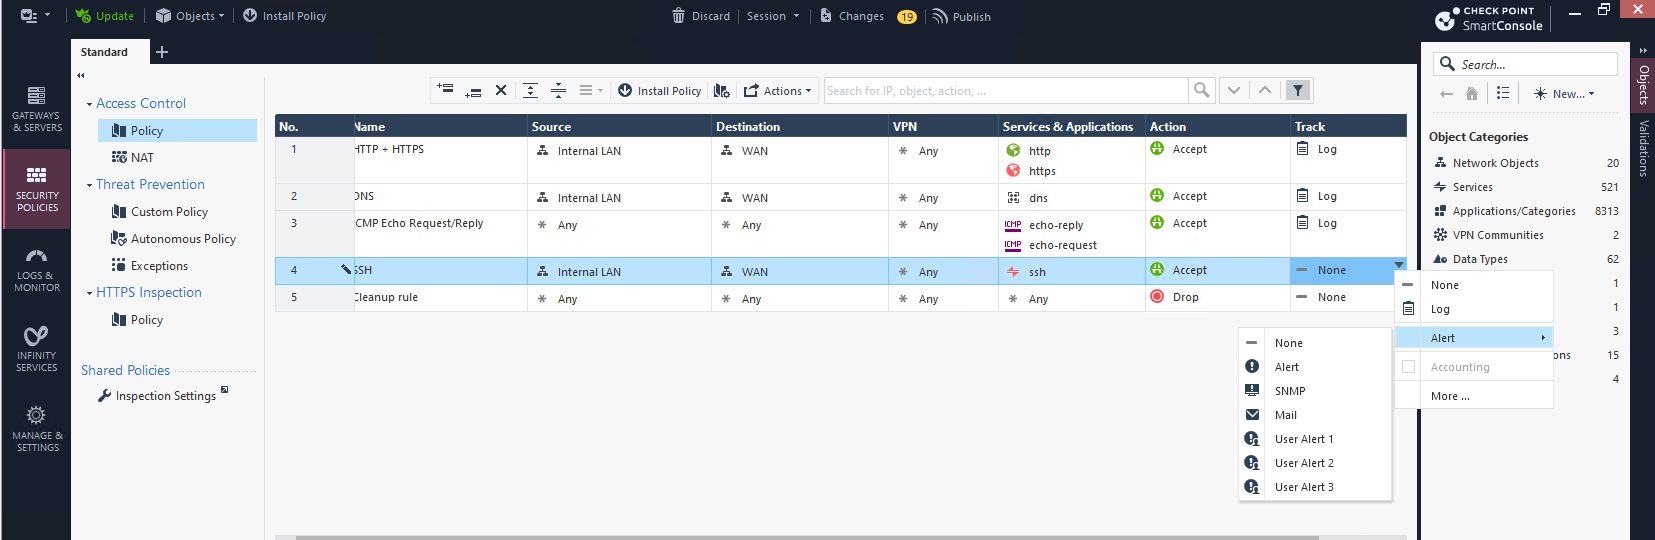
On the Track column we can select what kind of logging or alerting will happen when a rule is matched. This is crucial for monitoring, auditing, and troubleshooting network traffic and security events.
The Track column in a rule tells the firewall what to do after a rule matches: Log it, Send an alert or Ignore it. It controls how and where the event is recorded, in SmartLog, Syslog, or alerts like emails or SNMP traps.
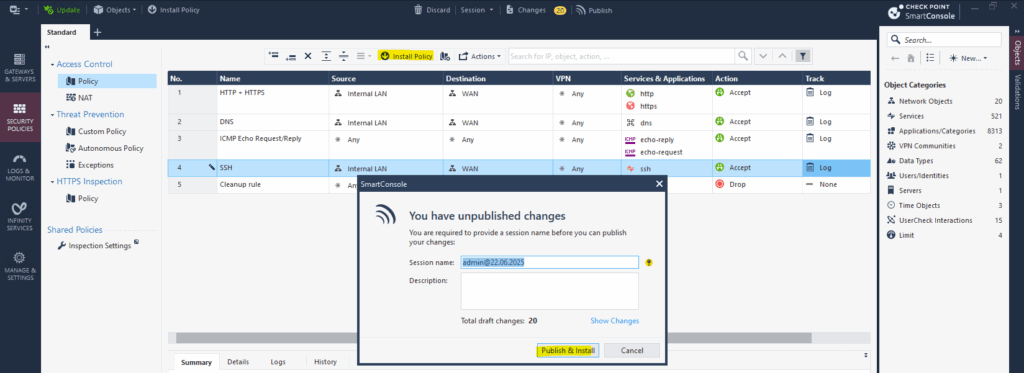
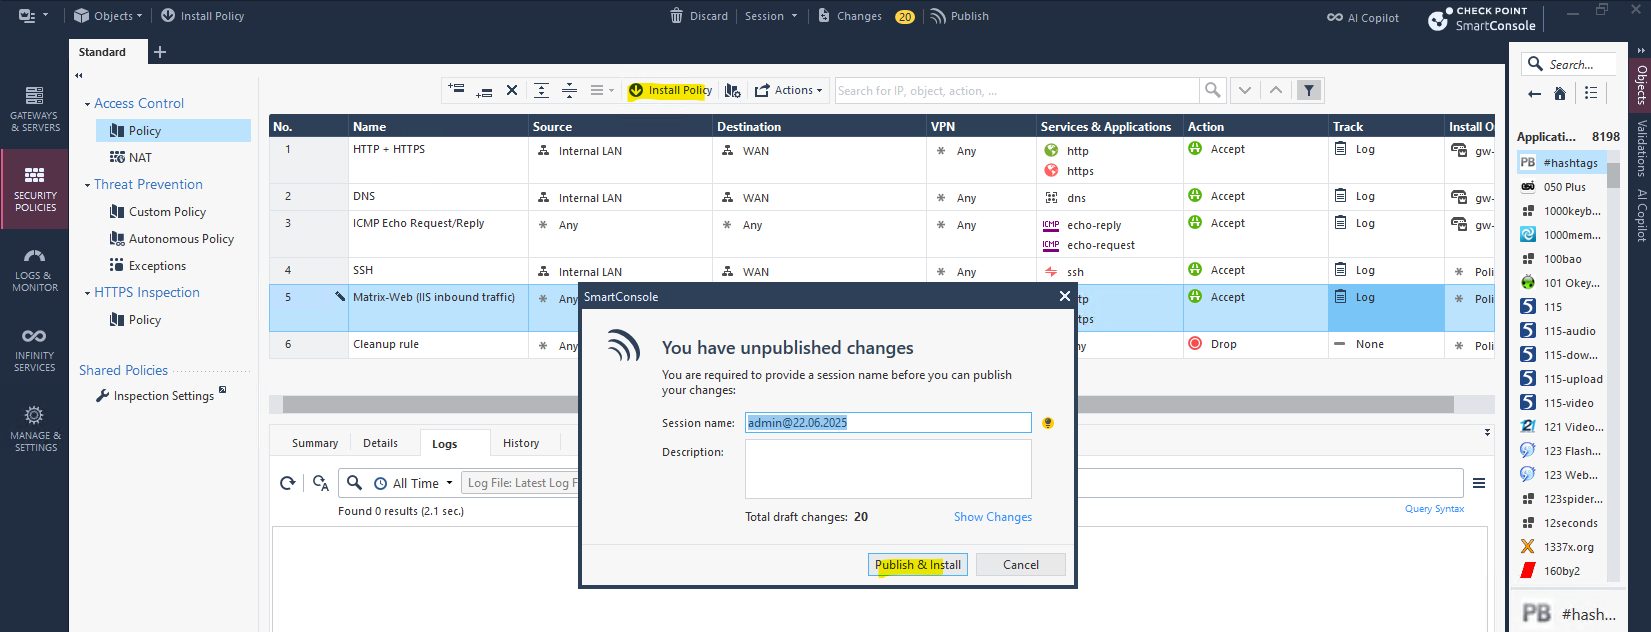
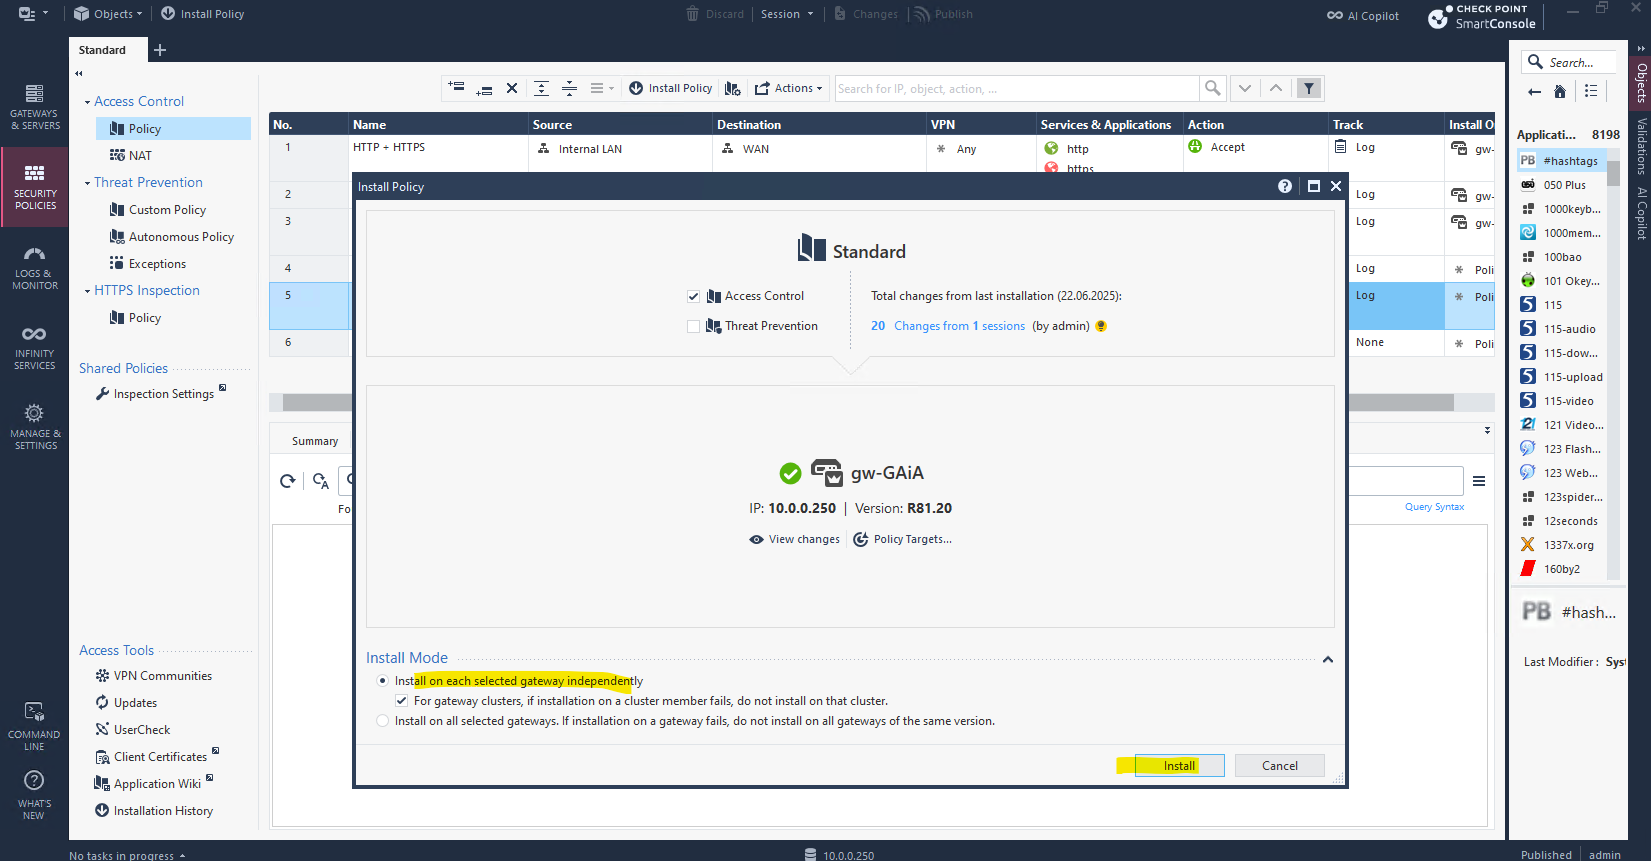
In order the new rule will be activated on the firewall we now first need to click on Install Policy like shown below.
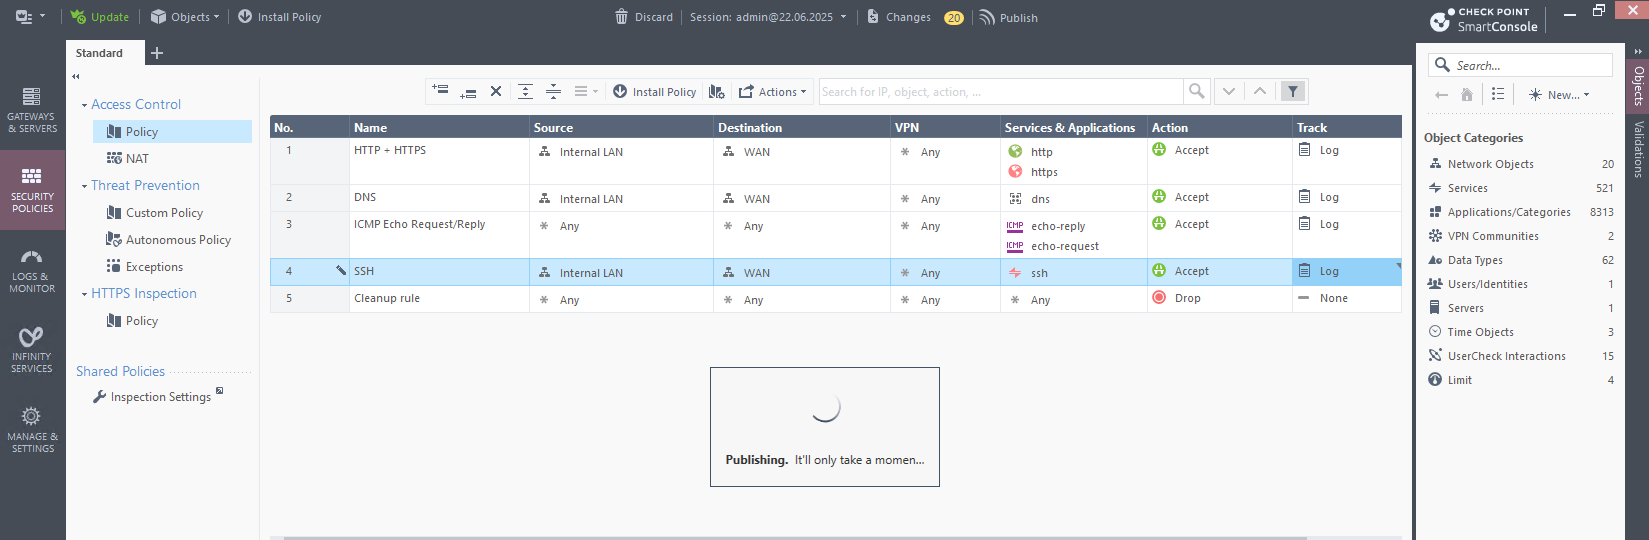
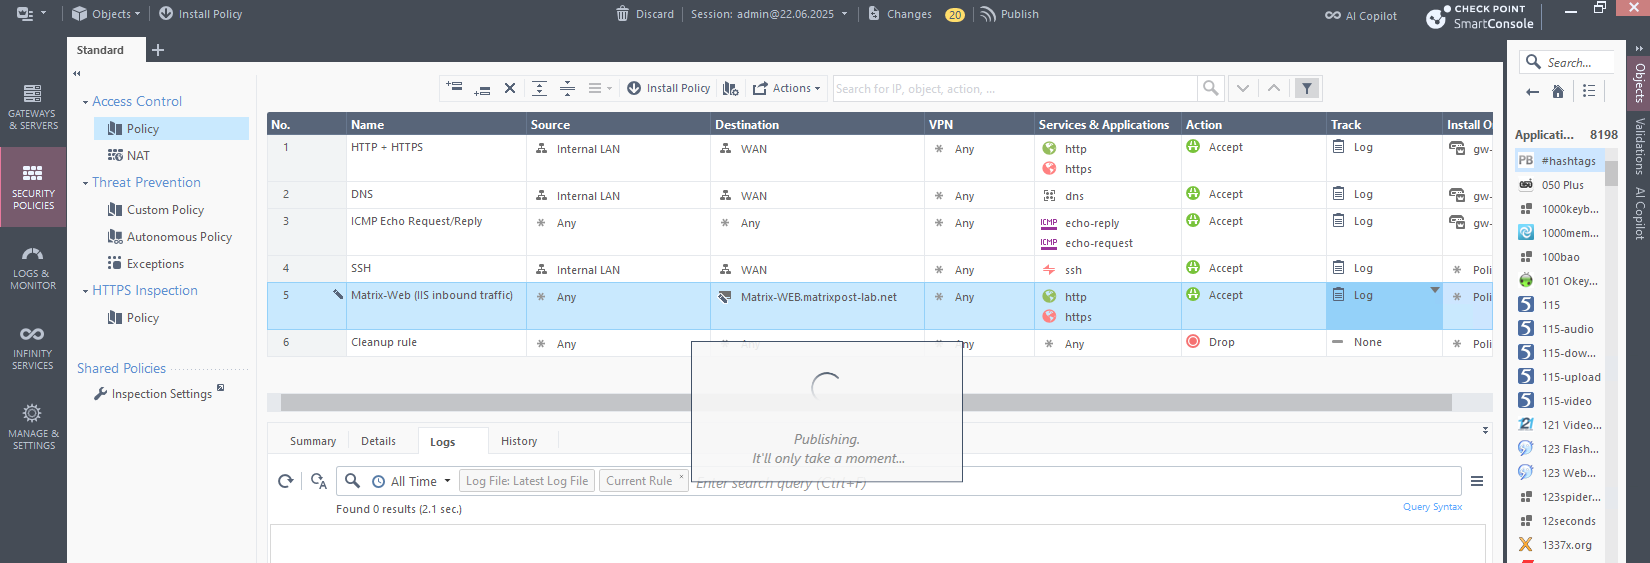
Click on Publish & Install in the opened dialog.
You must publish first (top bar) — you can’t install unpublished changes.
Publish ==> Saves your changes to the Security Management Server
Install Policy ==> Sends the published policy to the Security Gateway(s) for enforcement. Actually pushes the policy to a specific Gateway or Cluster.
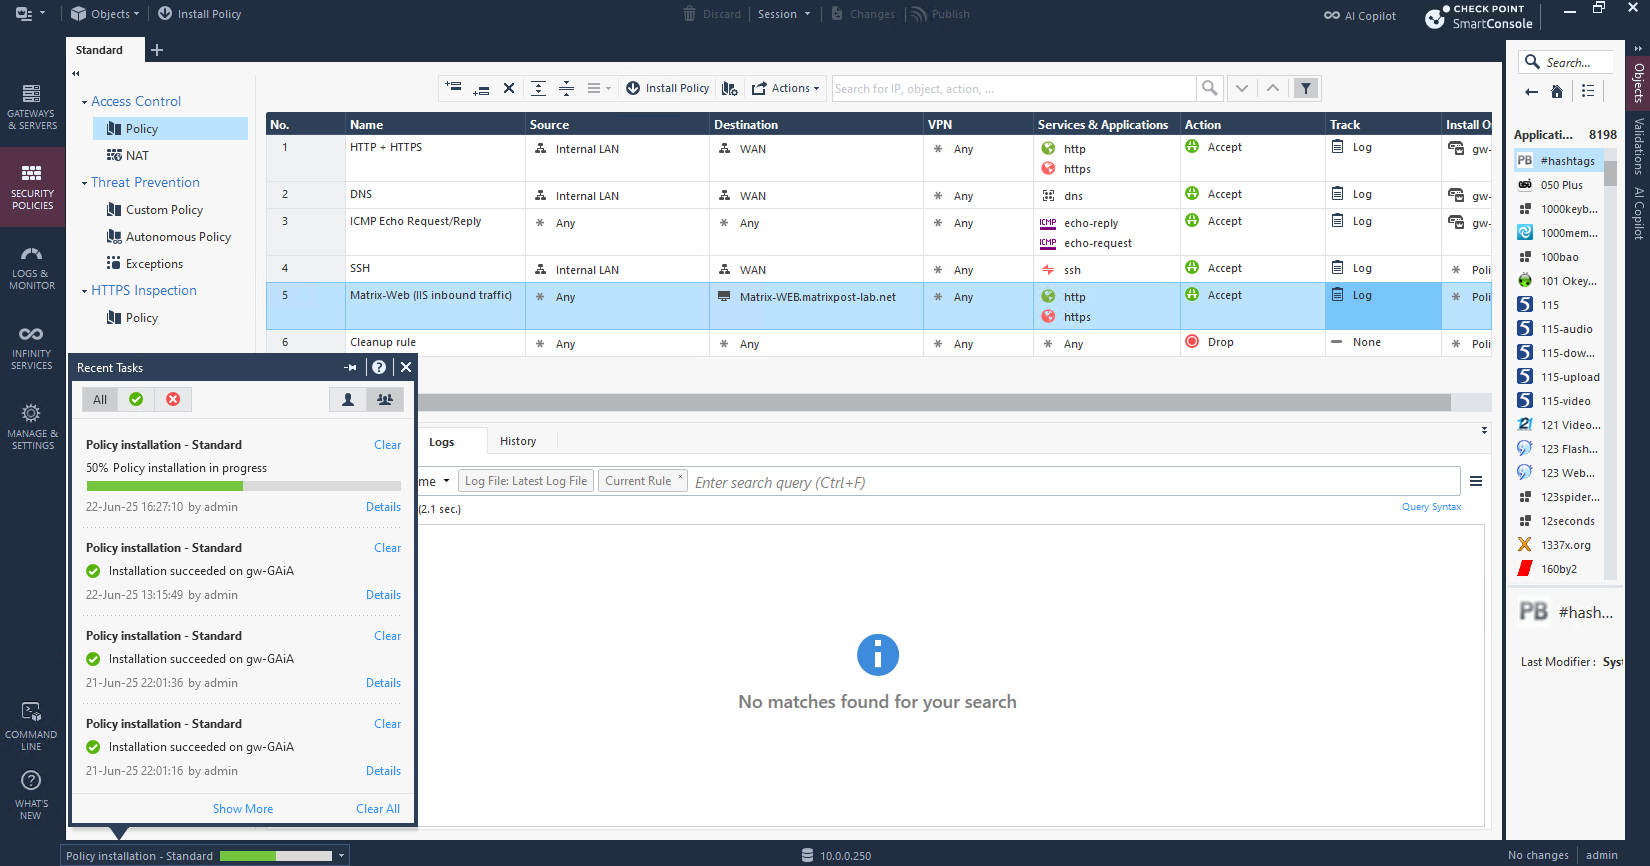
Click on Install.
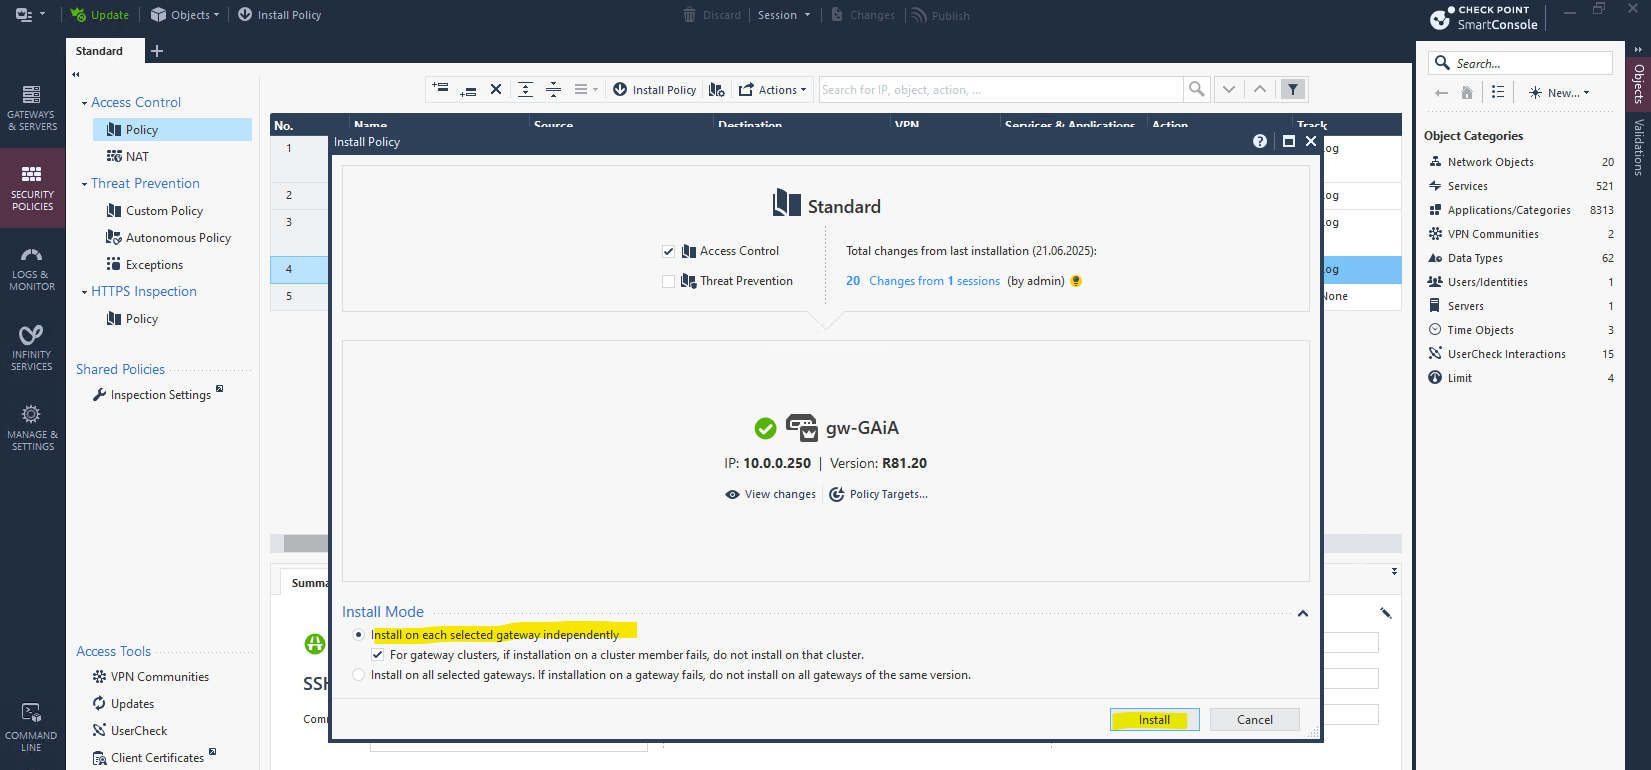
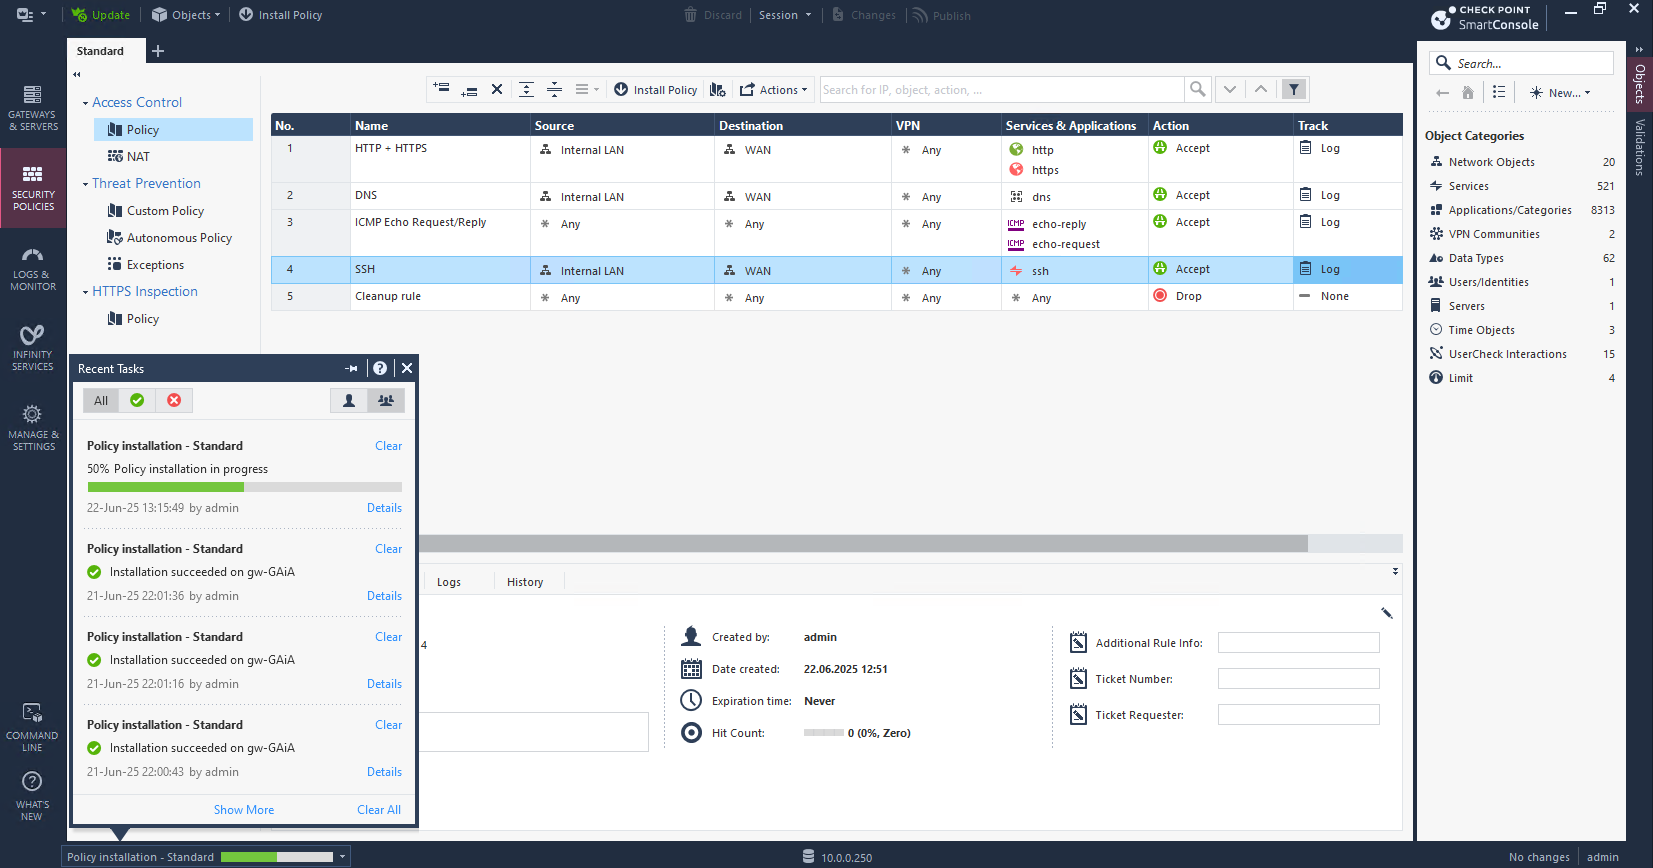
Installation succeeded on the firewall and the new rule is now active and should allow SSH traffic outbound from the internal LAN to the Internet.
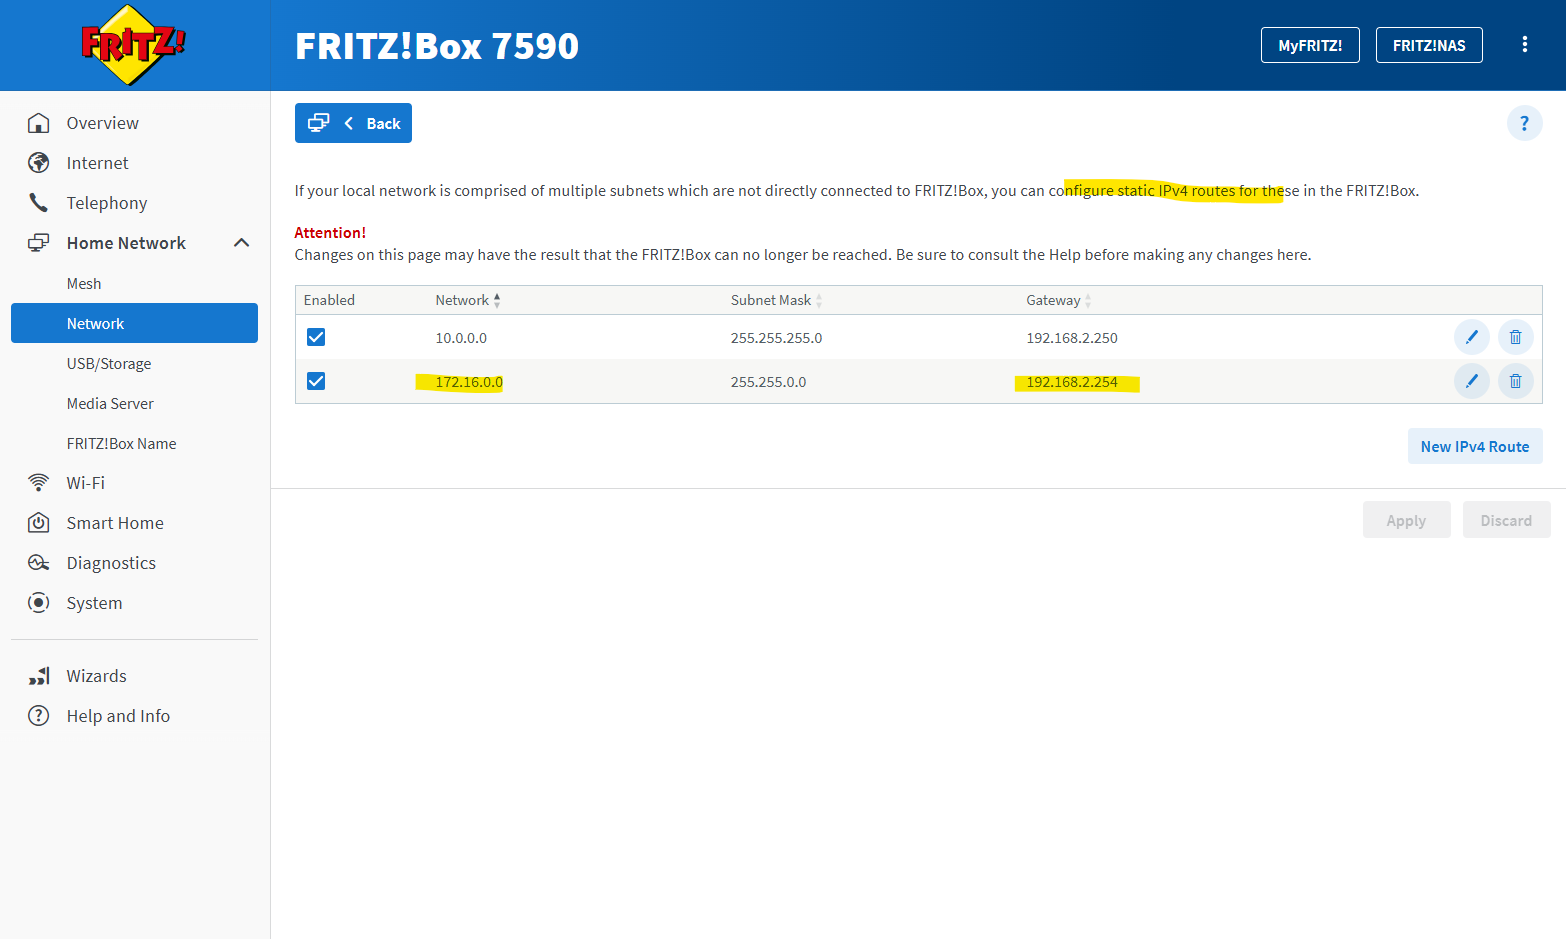
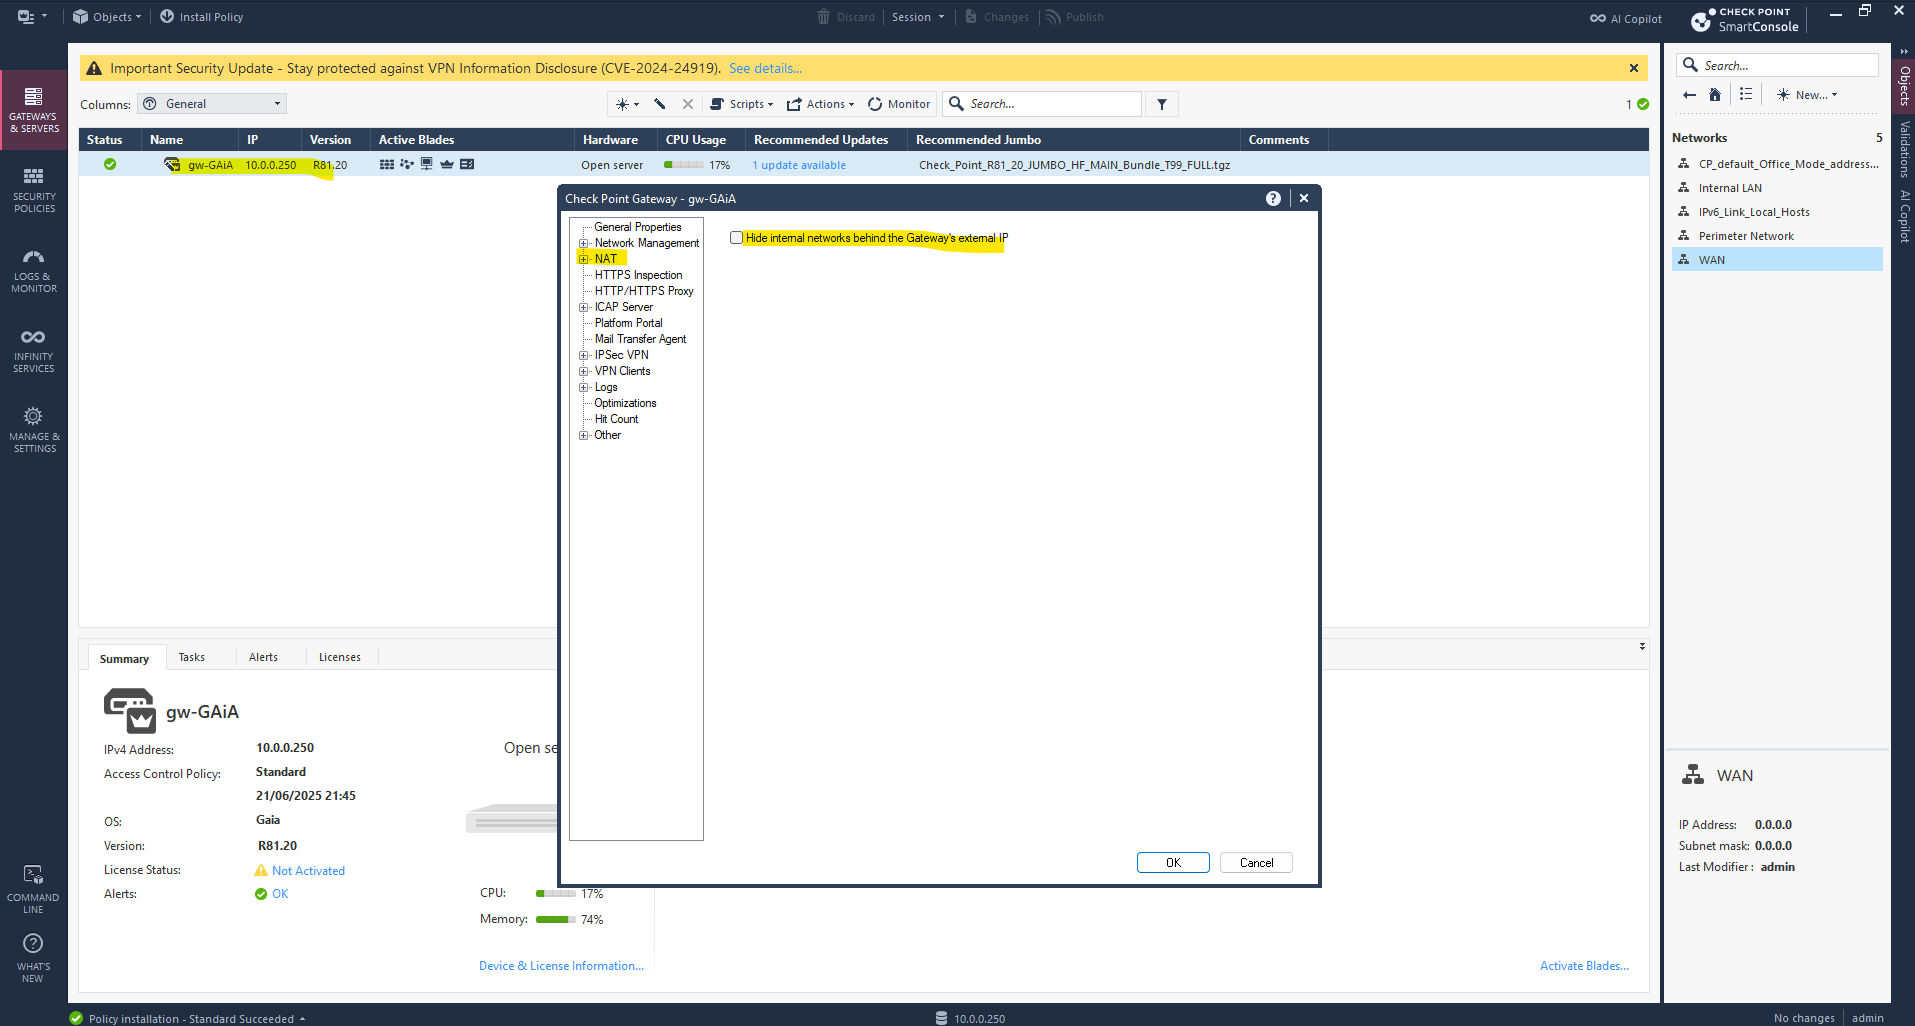
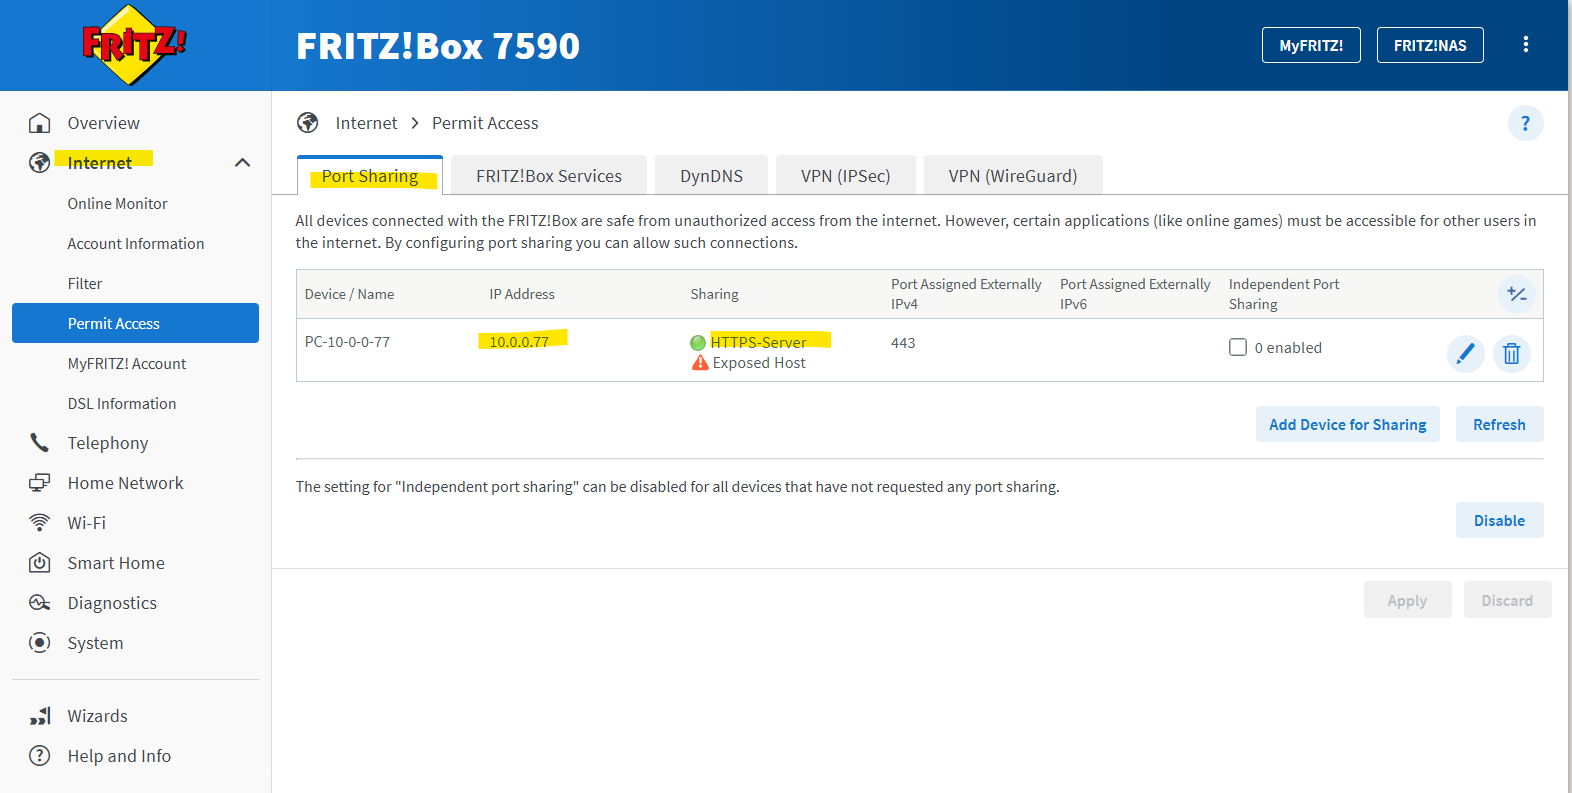
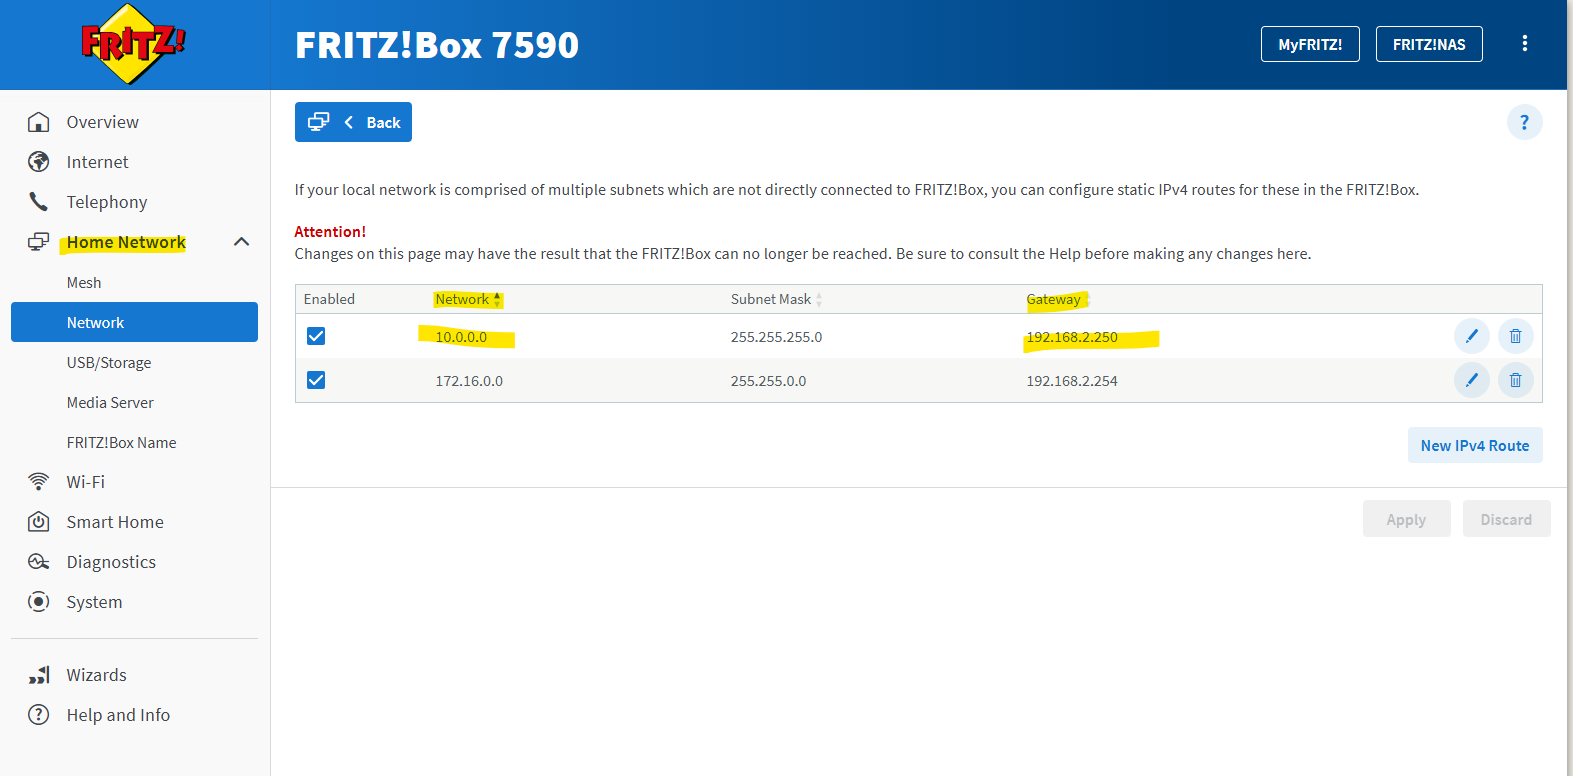
In my case in order my NAT router (FRITZ!Box) in my on-premise lab environment can reply to traffic initiated from the internal network and subnet 10.0.0.0/24 (my vSphere lab environment), either I will have to add a static route on the NAT router (FRITZ!Box) as shown below, or I will have to hide the internal networks behind the Check Point Gateway’s external IP, in my case the 192.168.2.250.
More about this home network scenario by using a NAT Router you will find in my following post.
By hiding the internal networks behind the Check Point Gateway’s external IP.
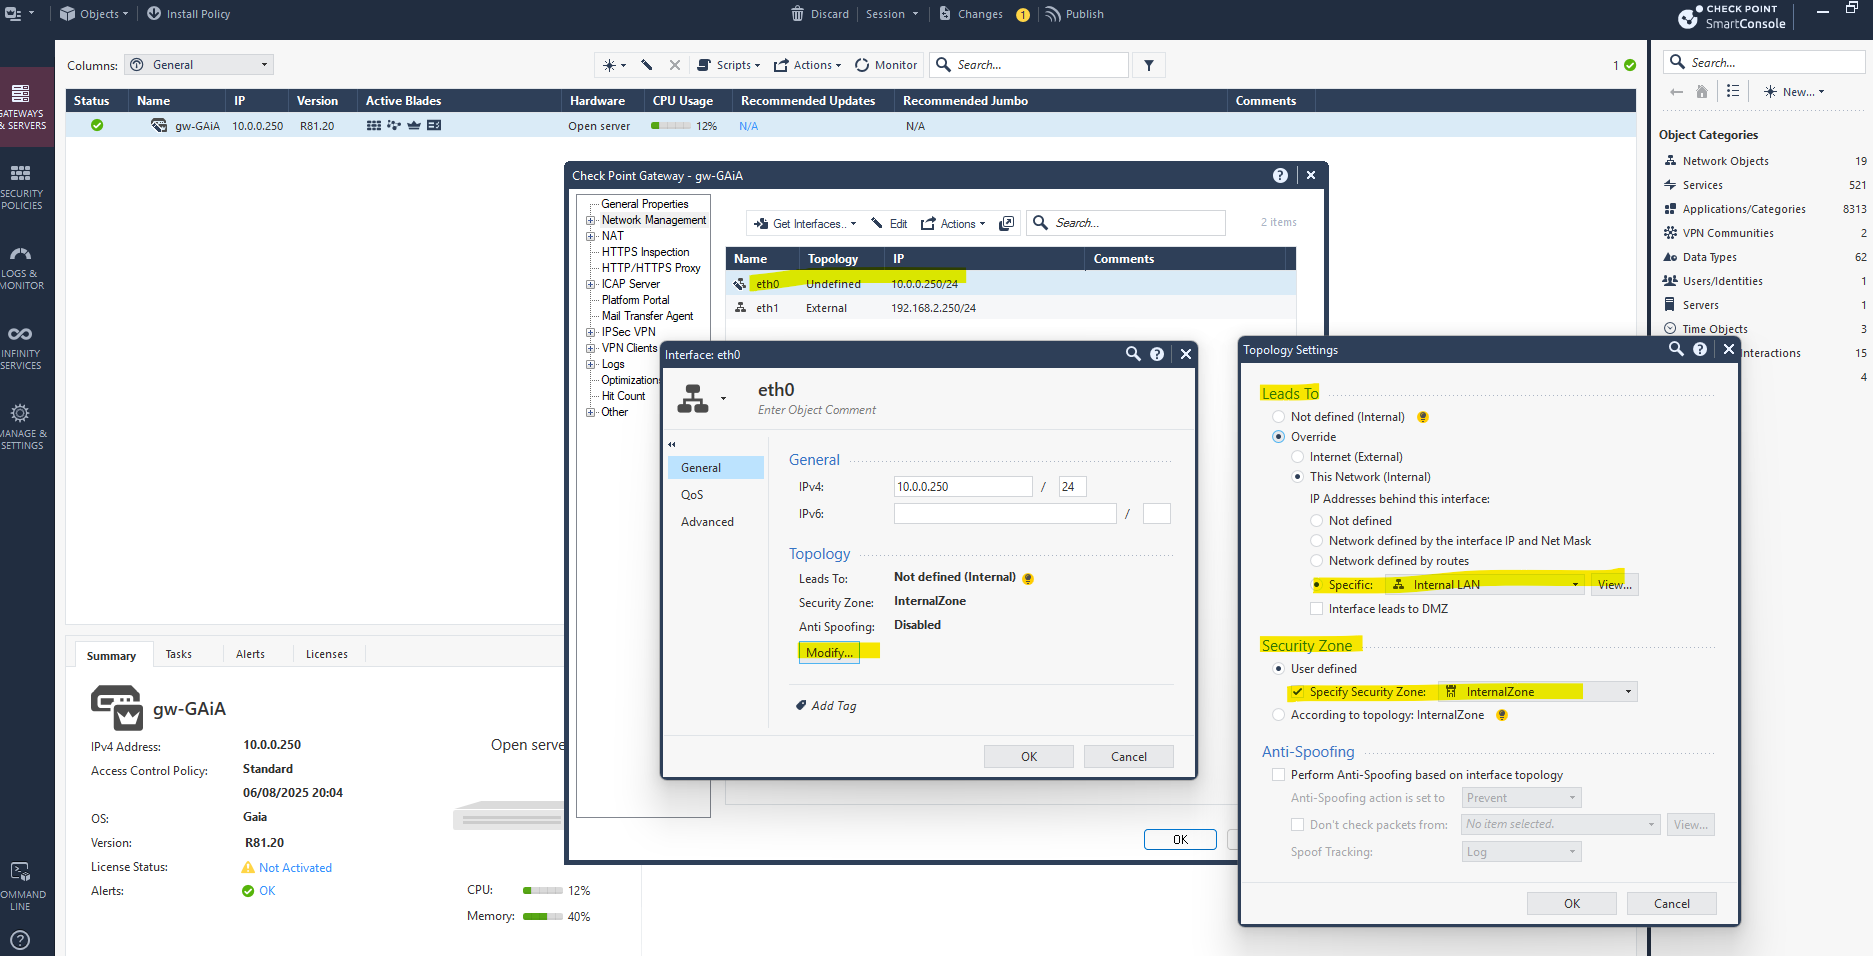
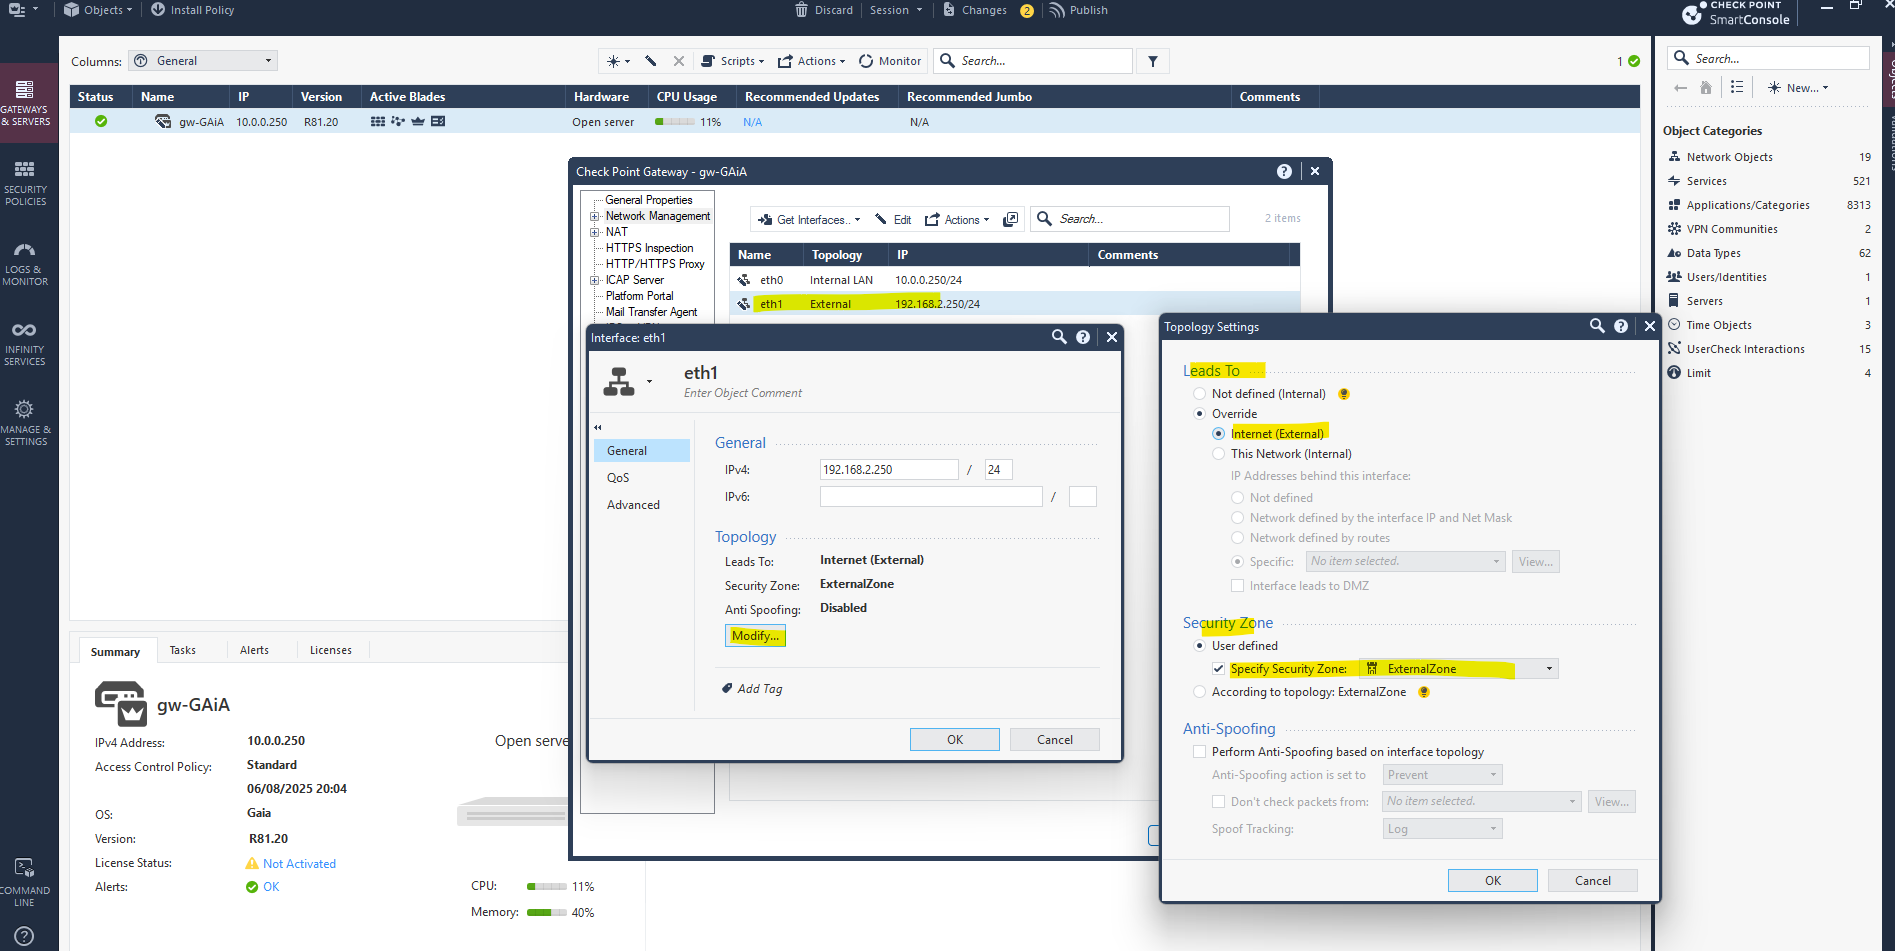
Define Network Topology
The Check Point GAiA Security Gateway Topology refers to the network layout and interface roles that you define within the gateway’s configuration.
If you’re seeing “interface topology undefined” with a checkbox next to an interface in Check Point SmartConsole, it means the topology for that interface hasn’t been properly defined in the gateway object. This is a critical step, without it, features like anti-spoofing, NAT, and firewall policy might not behave correctly.
It tells the Security Gateway what networks it’s connected to, what direction traffic flows, and how to apply security controls like anti-spoofing.
Topology is the way you define:
- Which interface connects to which network or zone
- Whether the interface is internal, external, or DMZ
- What IP range lies behind each interface
- Whether anti-spoofing should be enforced
This is set inside the Security Gateway object in SmartConsole.
Double-click on the gateway in the left pane under Gateways & Servers. In the opened dialog select Network Management and double click on each interface to define the topology for.
Here for my internal interface.
The network interfaces are associated with Security Zones, which are logical groupings of networks, and this association influences how traffic is handled and secured. When you configure a network interface, you define its “Leads To” setting (Internal or External) and its Security Zone. The Security Zone determines which access control policies are applied to traffic traversing that interface.
Here for my external interface.
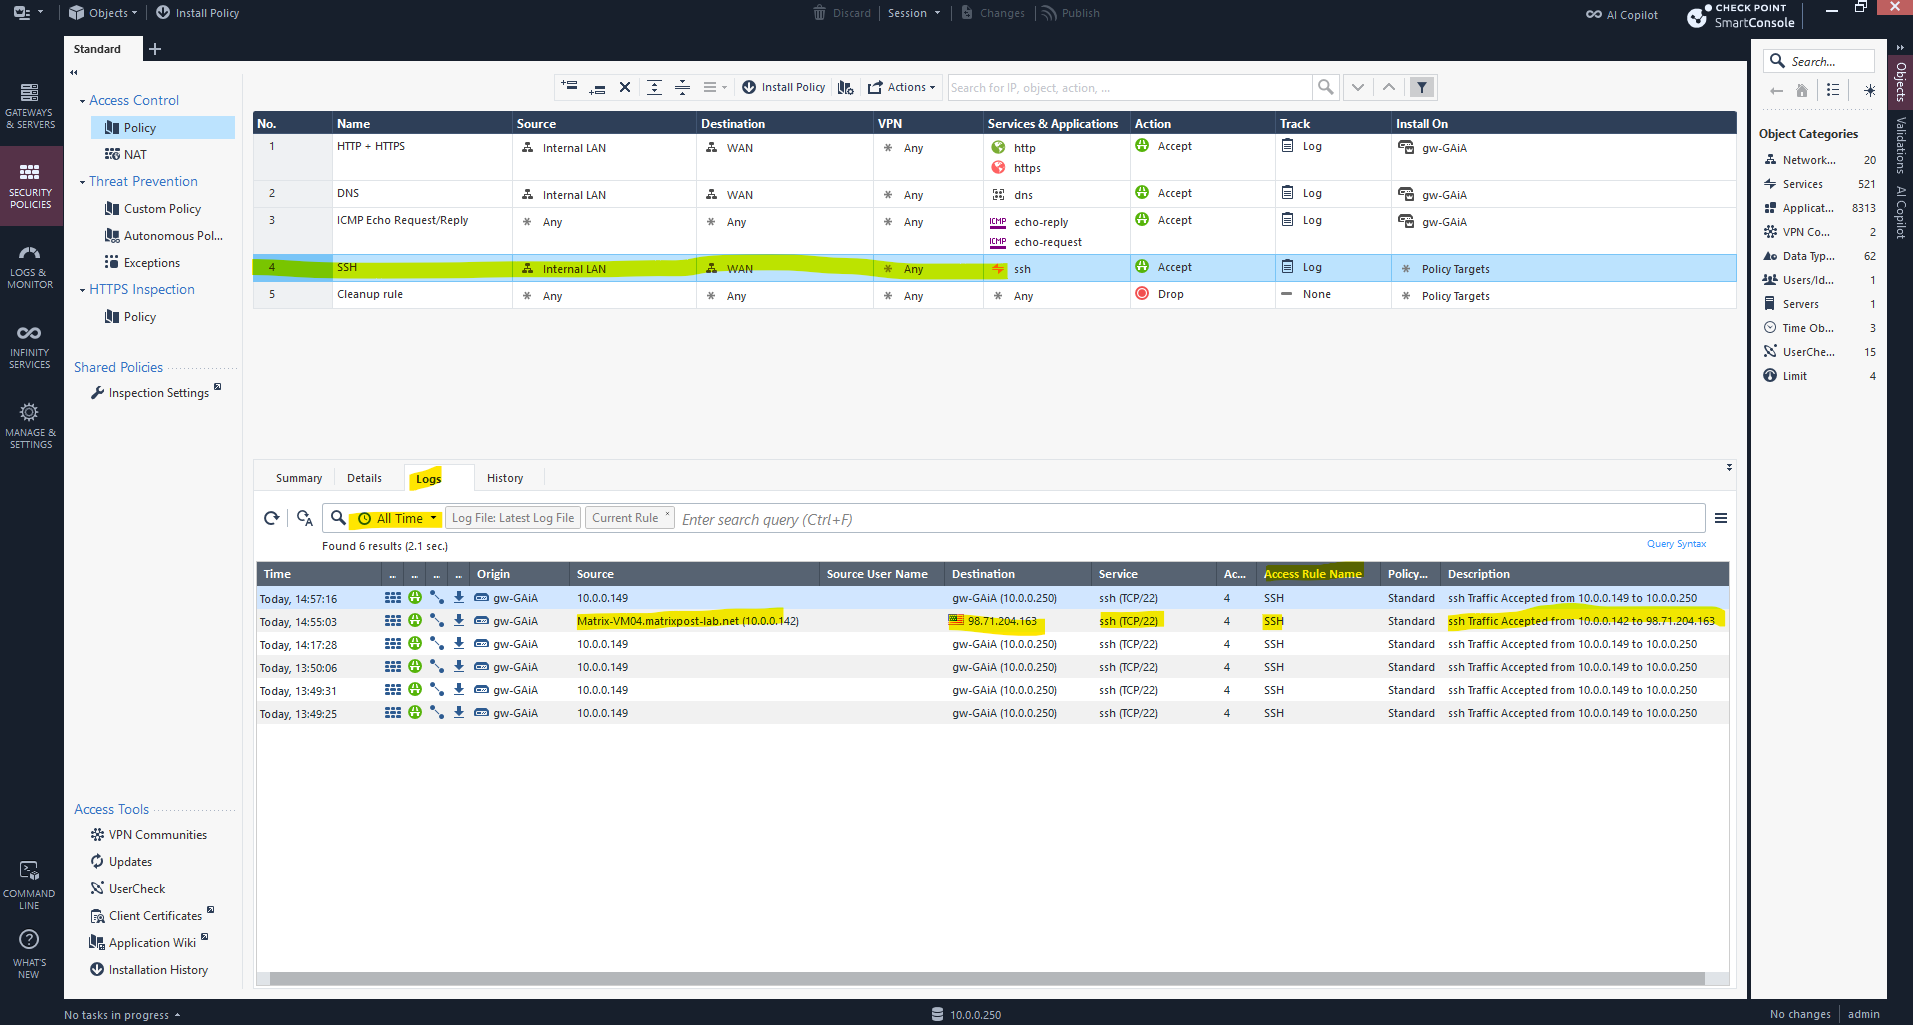
Check Point GAiA SmartLog
Check Point GAiA SmartLog is a log indexing and search engine built into the Check Point security management architecture. It allows for real-time, high-speed search and analysis of security logs generated by firewalls, gateways, and other Check Point security blades.
SmartLog is part of the SmartEvent suite and is used to:
- Index security logs as they’re generated
- Enable fast, granular searching by fields (IP, action, service, etc.)
- Provide detailed visibility into network activity, threats, and user behavior
- Support compliance reporting and incident investigation
It’s accessible via the Logs & Monitor tab in SmartConsole or as shown below directly on the desired rule and Logs tab.
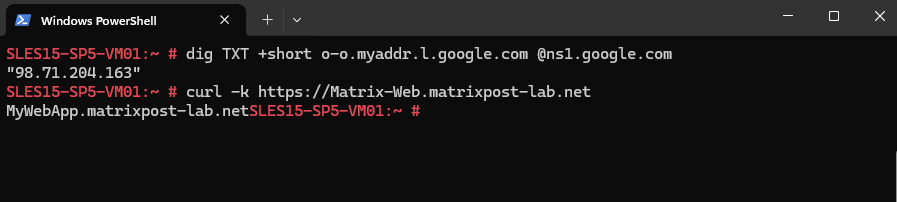
Below for example we can see traffic matched the SSH rule no. 4.
Here I was connecting by using SSH from my internal Matrix-VM04 and its internal IP 10.0.0.142 to an Azure Linux VM with the public IP address 98.71.204.163.
Or as mentioned to see all logs select on the left pane Logs & Monitor.
Publish internal Services (like a web server, mail server, etc.) by using Destination NAT (DNAT) rules
This allows external users (e.g., from the internet) to access your internal service through the firewall’s public IP.
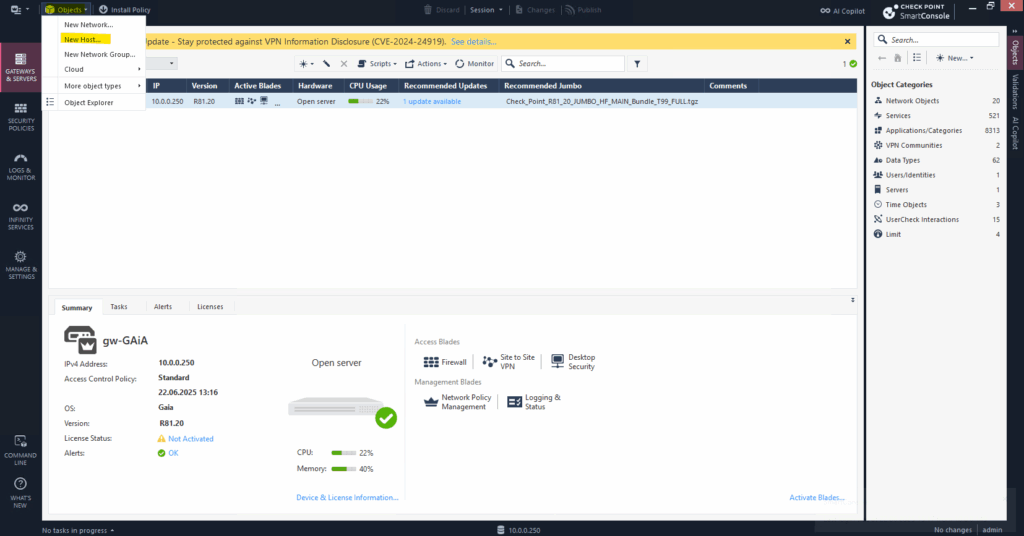
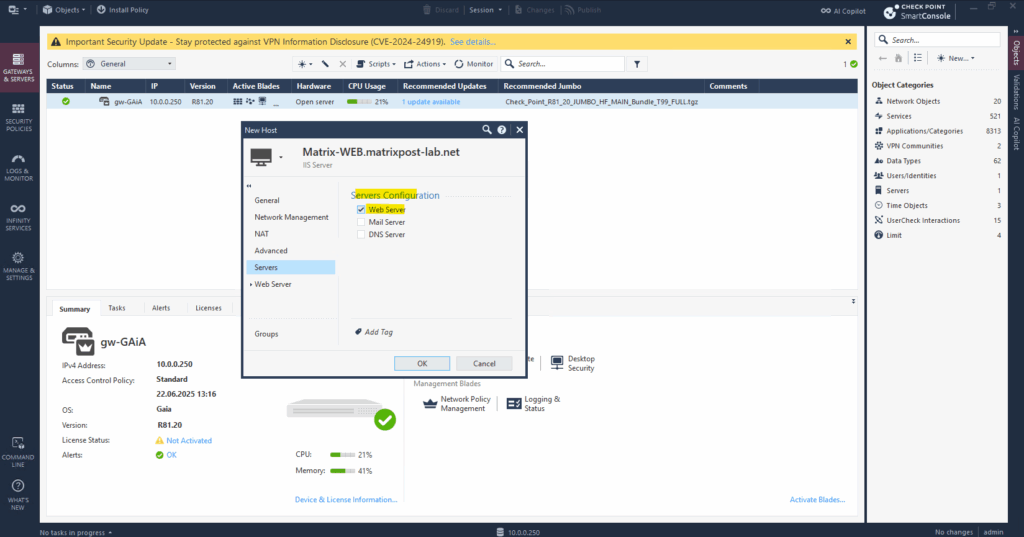
First we need to define the internal server as a host object in GAiA.
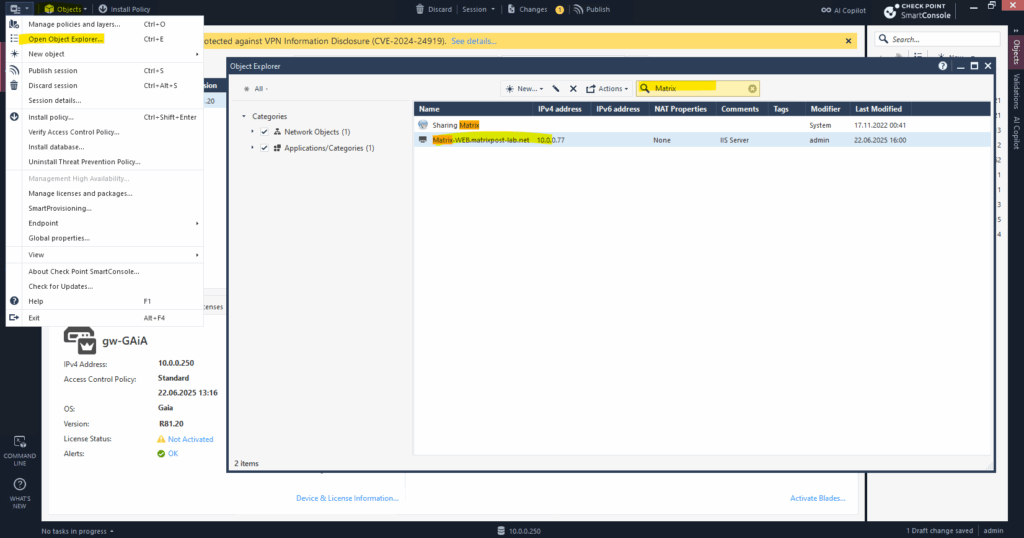
To create a new host object we can use the top bar menu Objects -> New Host … as shown below.
For the name we can use the FQDN and then resolve the IP address by clicking on the button below.
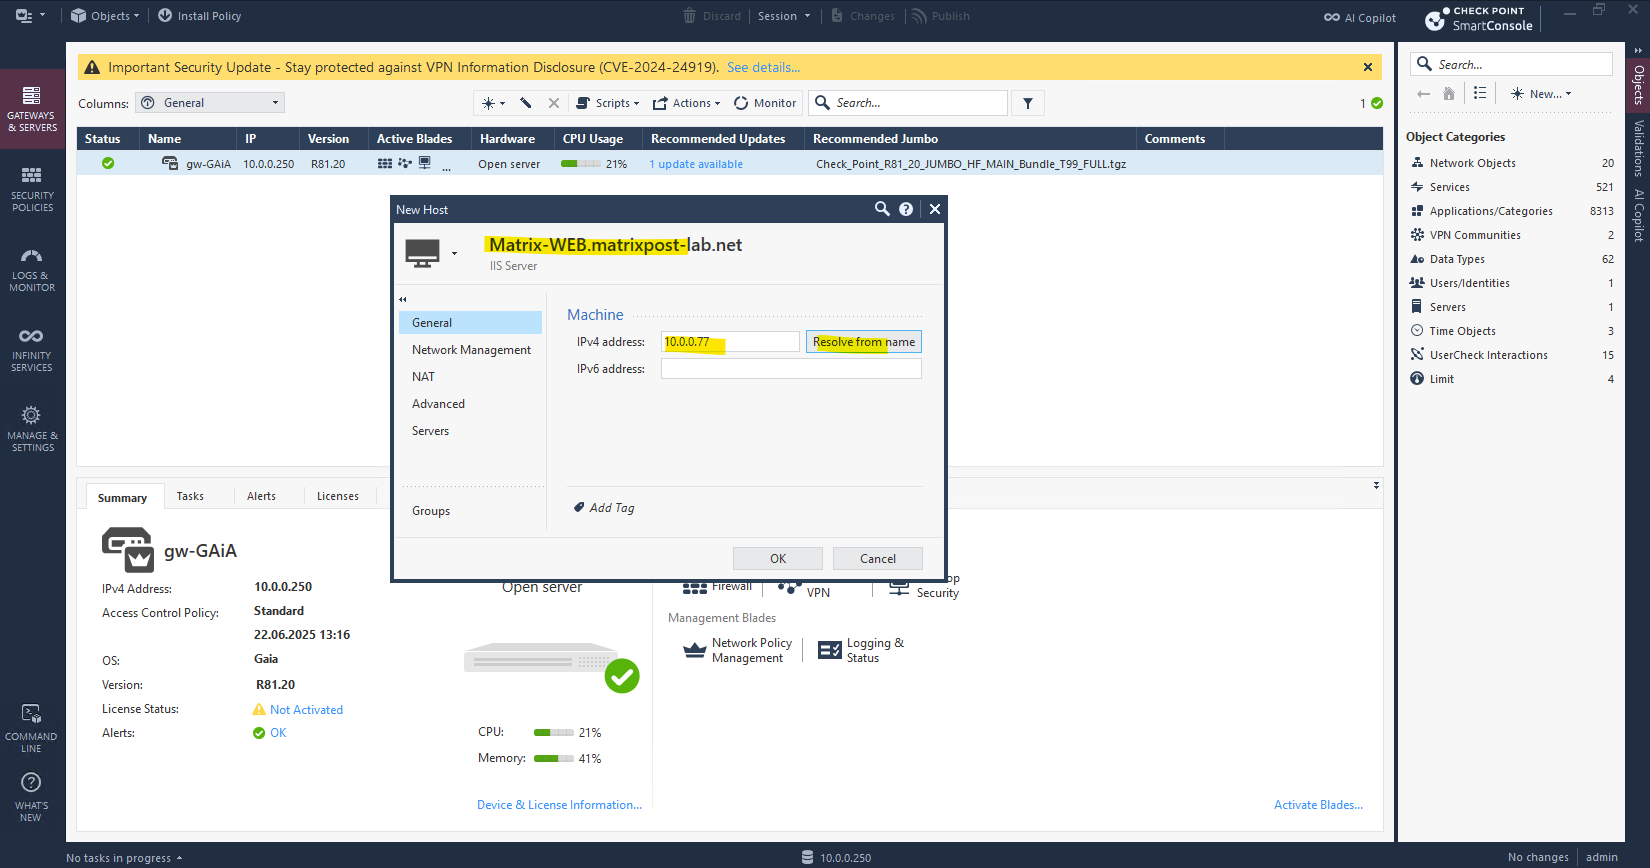
After creating the new host object, we will find it by using the object explorer as shown below.
By right-click on it we can edit the configuration for.

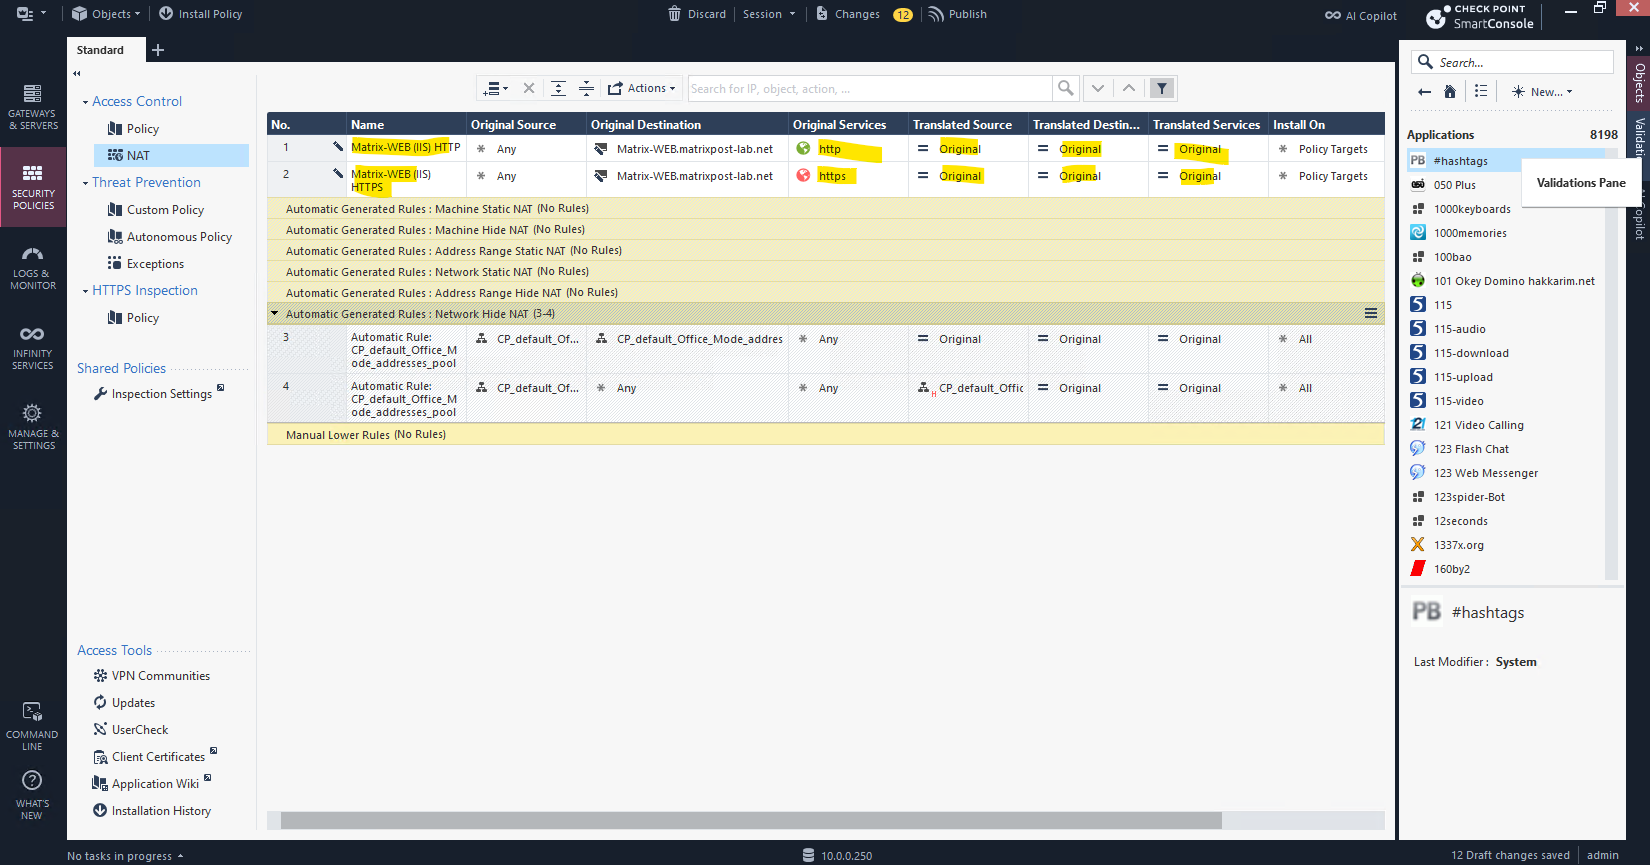
Next we need to create a NAT rule for the new host object.
Go to Security Policies > NAT and add a new rule as shown below.
For the source I will select Any to allow access from all networks finally and for the destination I will click on the + icon to select my IIS Web Server (Matrix-Web.matrixpost-lab.net), the new host object we created previously.

For the original services I will select HTTP (tcp port 80) and HTTPS (tcp port 443). For the DNAT rules we can just select one service per rule.
So finally we need to create two new DNAT rules here.
For the translated source, destination and services I will leave the original settings. In case the internal web server here will not listen on the default ports for HTTP(80) and HTTPS(443), we can set under Translated Services the different ports on which the internal web server listens for example.
Finally these both DNAT rules tells the gateway to forward external traffic to the internal web server.
Because traffic from the Internet is already forwarded by my NAT router (FRITZ!Box) to the internal IP of the web server, we doesn’t need to translate the public IP address of the website (the NAT routers public IP address) into the private IP address of the web server.
Finally we also create a new access control policy.
Go to Security Policies > Access Control and add a new rule:
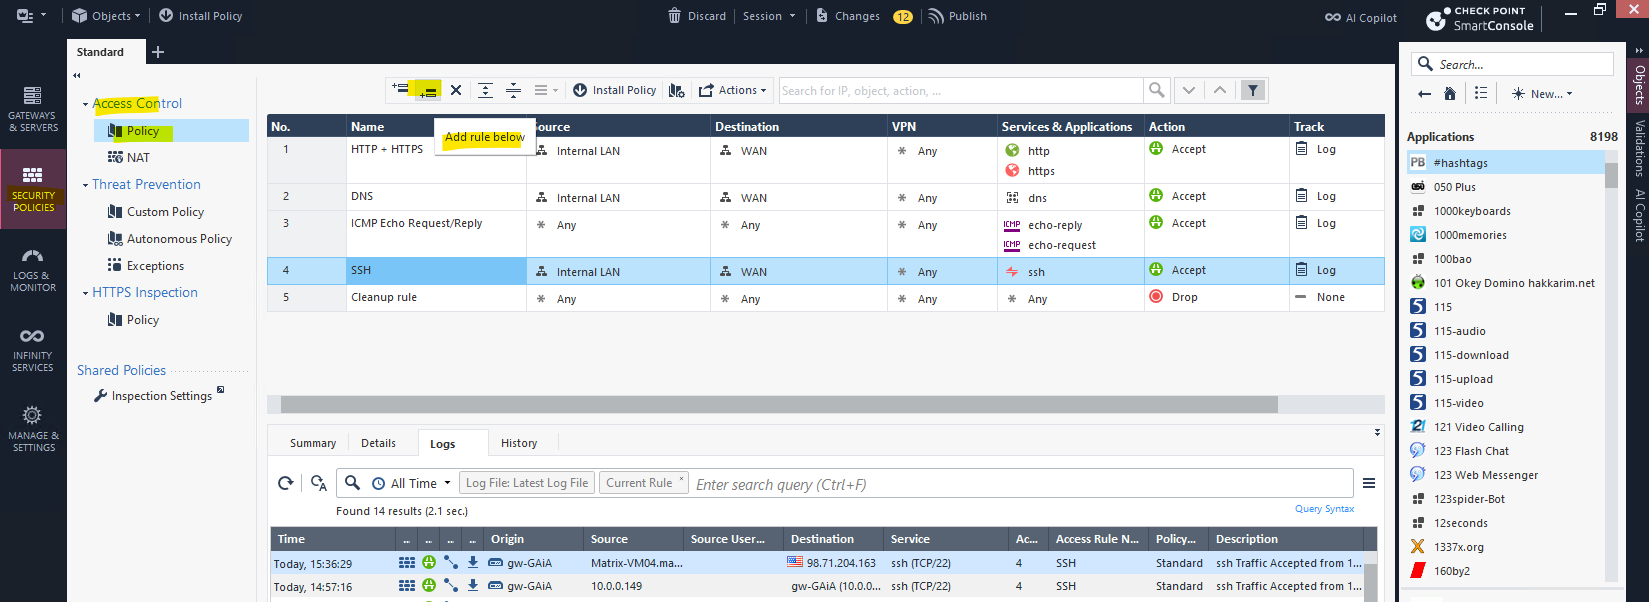
For the source select any, for the destination select our new host object we created previously.
Further for the services we select http(80) and https(443) and for the Action we select Accept .
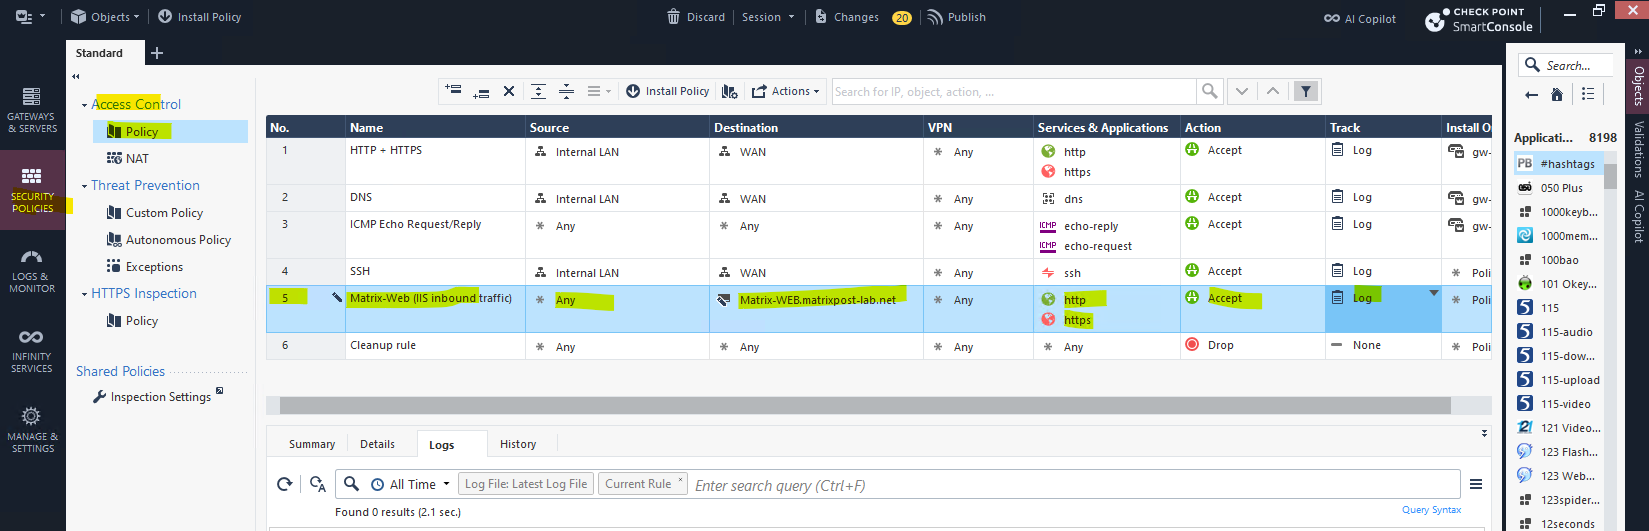
Then as usual for the access control policies, we finally need to install the policy.
The policy is now active and accessing the web server and its running web page should work from externally.
Finally before this can work in my lab environment, by using a NAT router (FRITZ!Box) in front of the Check Point GAiA appliance, I also need to enable port forwarding on my NAT router (FRITZ!Box) to forward all incoming HTTPS traffic to my internal virtual machine (Matrix-Web.matrixpost-lab.net IIS VM).
Further as mentioned to the beginning, my NAT router (FRITZ!Box) need to know the route for my internal network 10.0.0.0/24 where the next hop with 192.168.2.250 is the external network interface of my Check Point GAiA Security Gateway.
To test if the published IIS finally works from externally, I will use an Azure Linux VM as shown below.

I will first add a new host entry with the public IP address of my NAT router (FRITZ!Box), my Check Point firewall sits behind this NAT router.
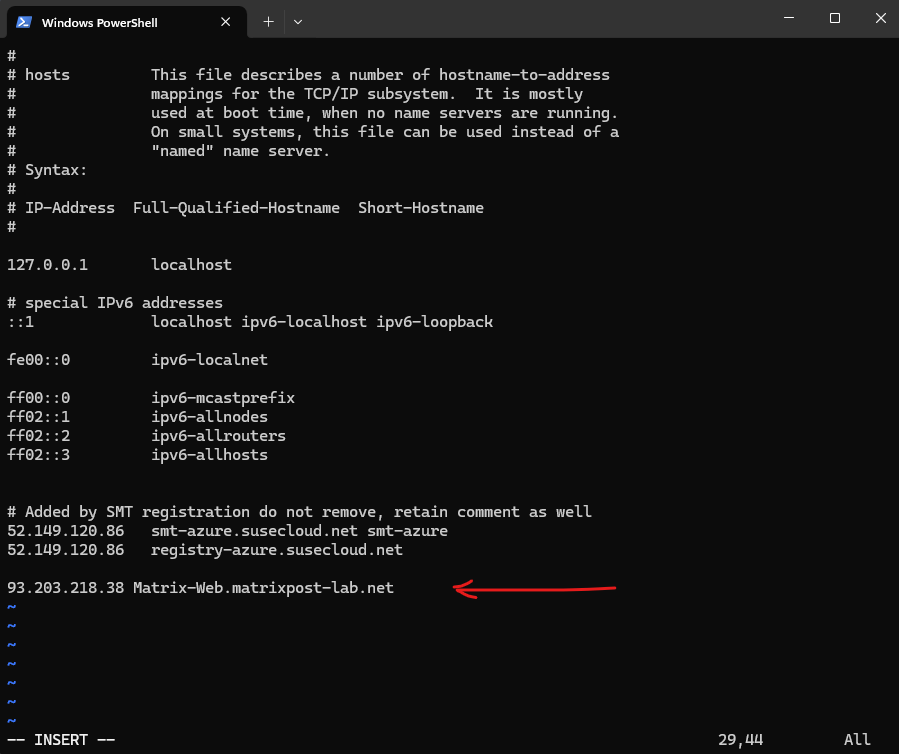
By the way in case you wonder about the two already existing entries with Added by SMT registration, you can also read my following post about Azure Update Manager.
SMT is a SUSE Linux Enterprise Server (SLES) tool used to mirror SUSE update repositories locally and act as a proxy for SUSE Customer Center (SCC).
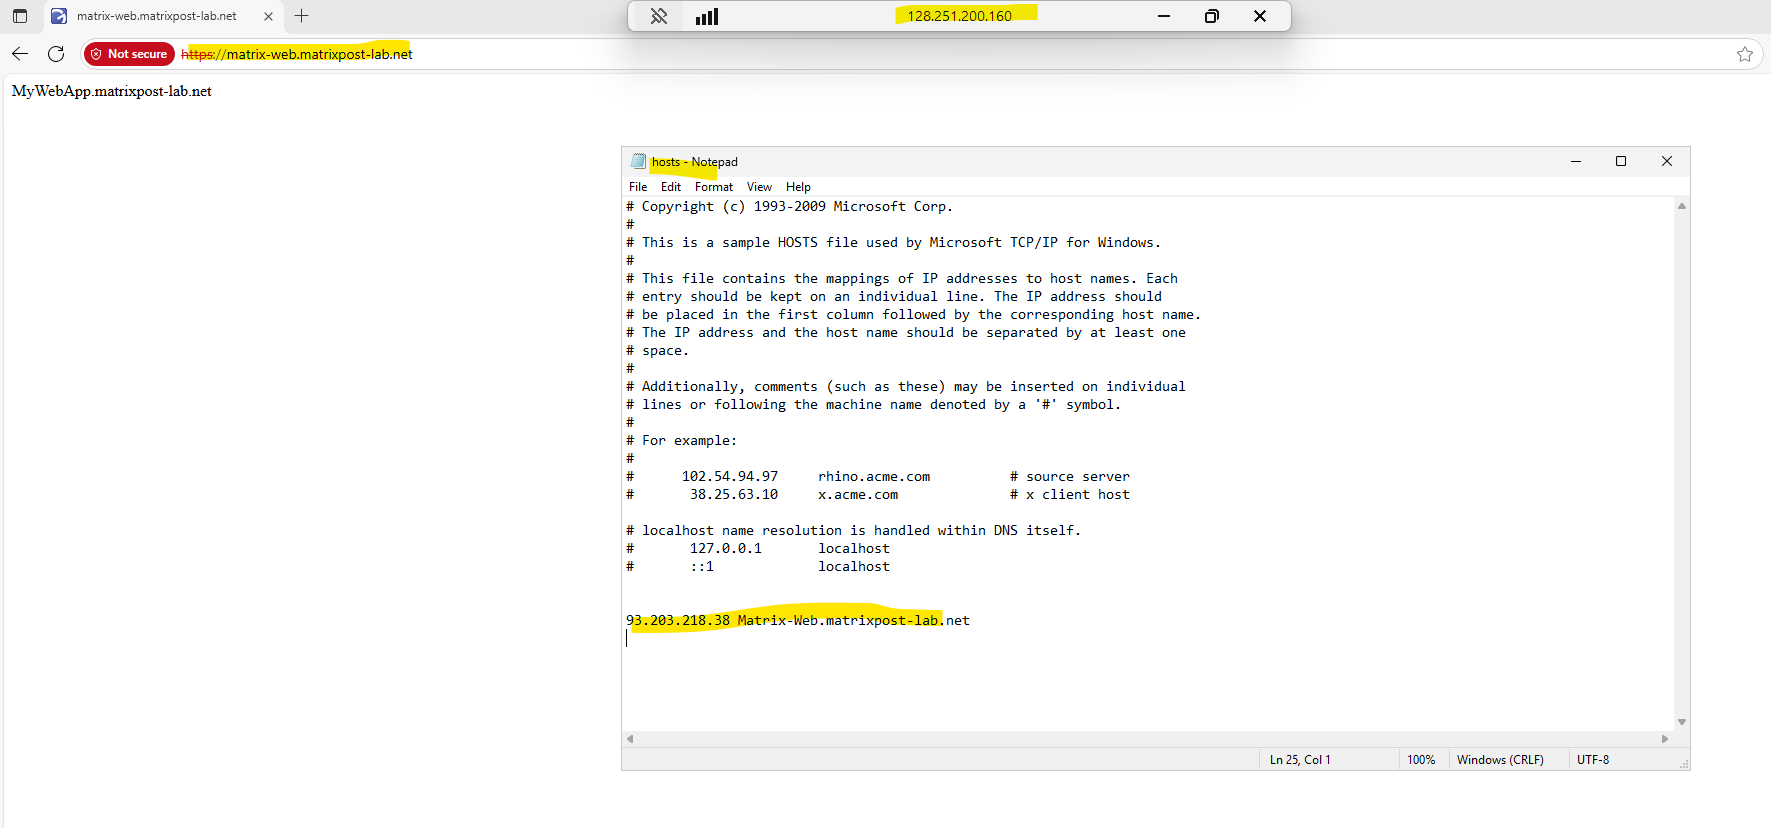
So now a quick test from the Azure Linux VM and its public IP address 98.71.204.163 looks good an I can access the internal web page.
I will also use an W2K25 Azure VM to test the same by using a browser.
Looks also good.
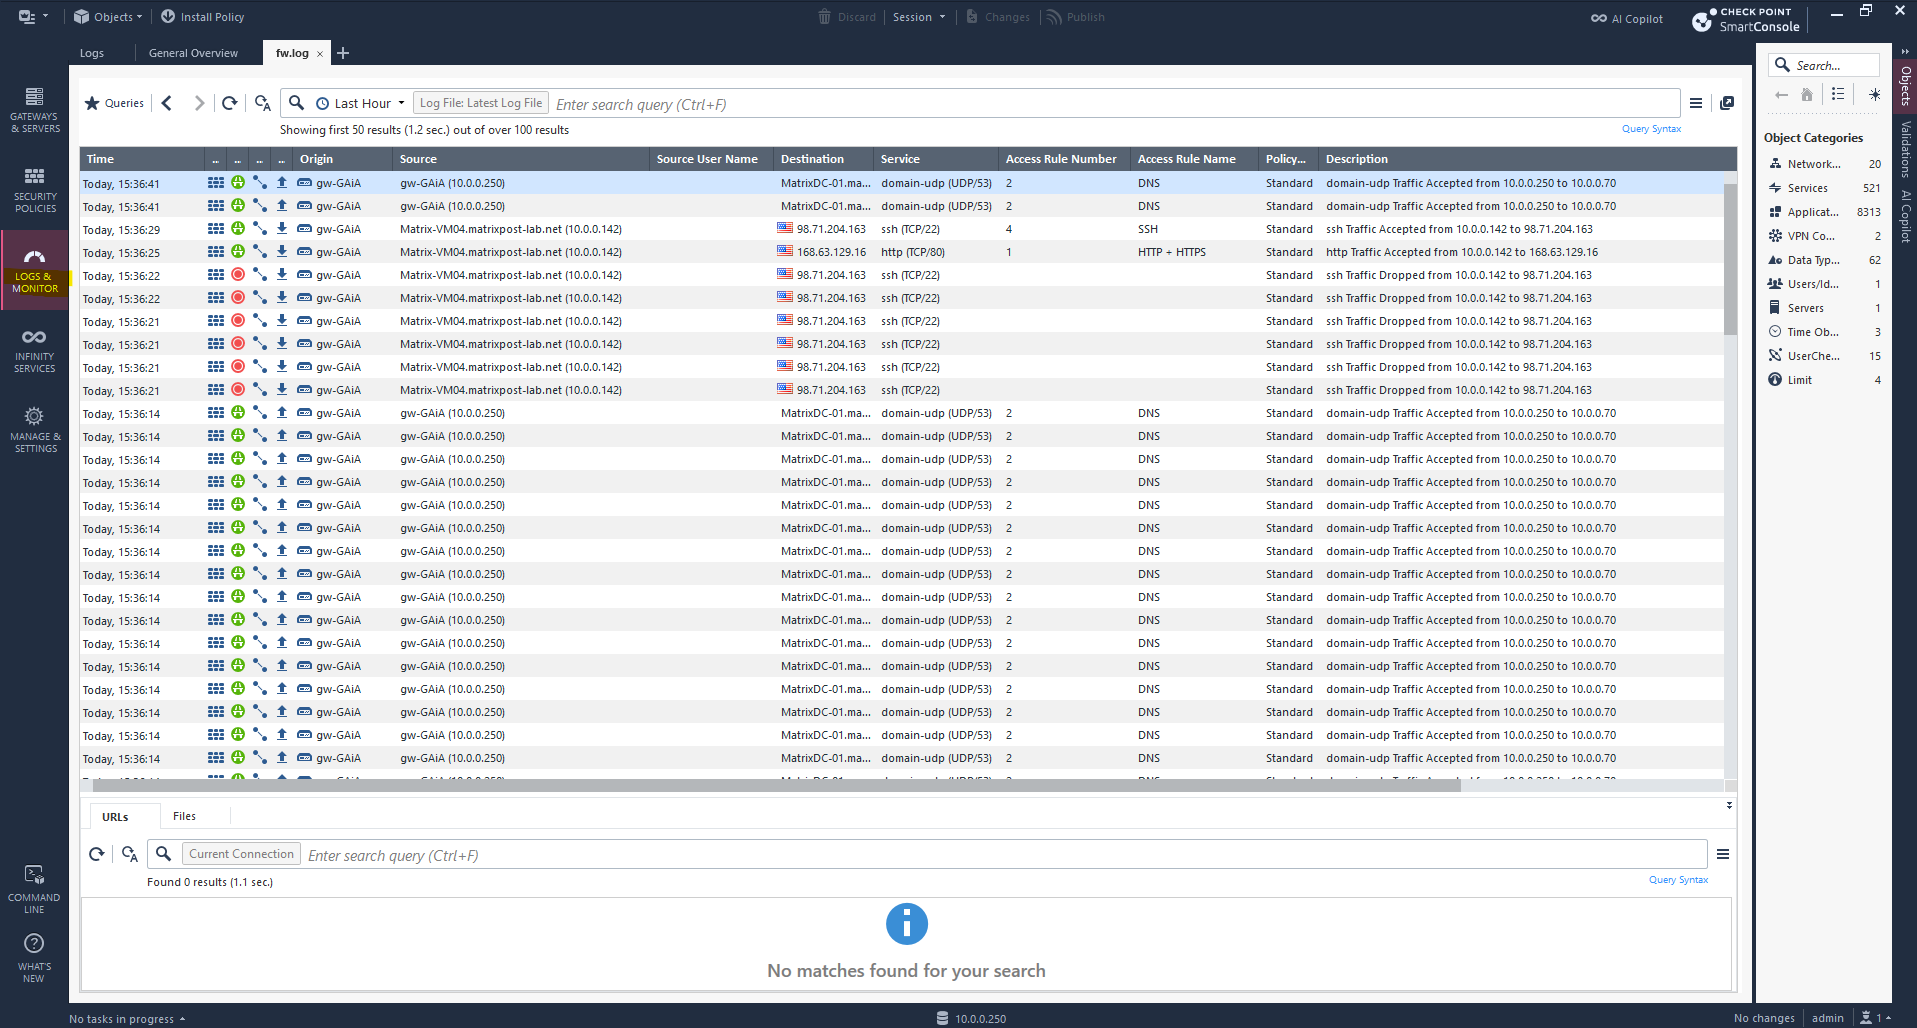
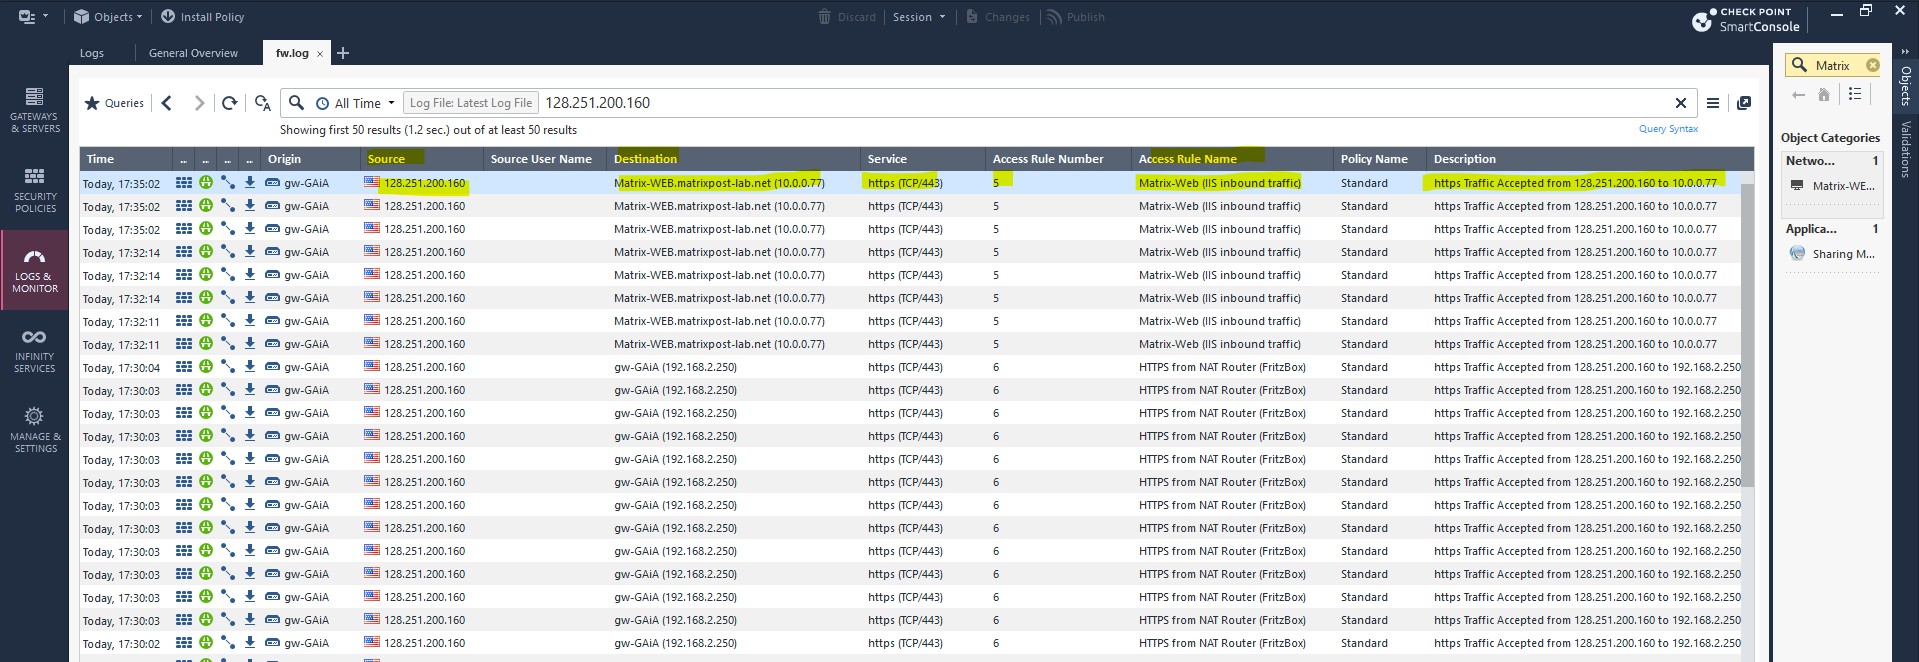
In case something went wrong, first look into the logs if something is dropped. Below you can see the last access by using the Azure Windows VM which was successfully.
GAiA Appliance Expert Mode
Check Point GAiA, Expert Mode is a privileged shell environment that gives you full Linux root access to the system.
It’s used for advanced troubleshooting, system-level changes, and CLI-based configurations that aren’t available in the default (clish) mode.
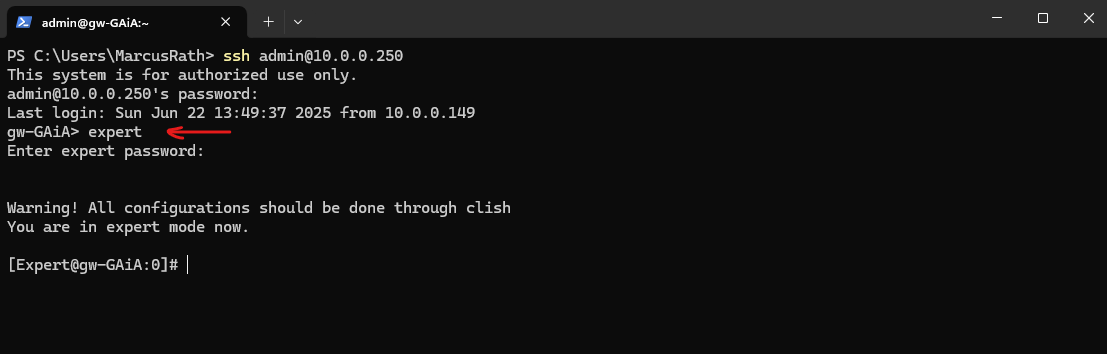
To use the expert mode, we first need to set the expert mode password.
> expert
> set expert-password
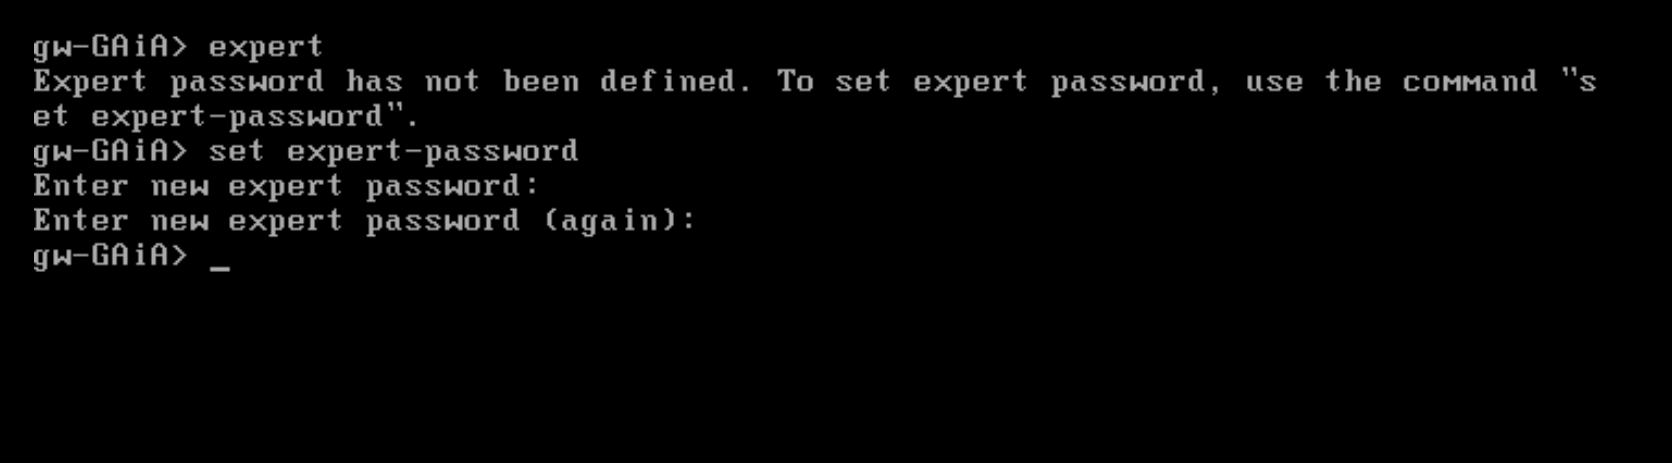
We can now switch to the expert mode.
> expert
Extend Partition
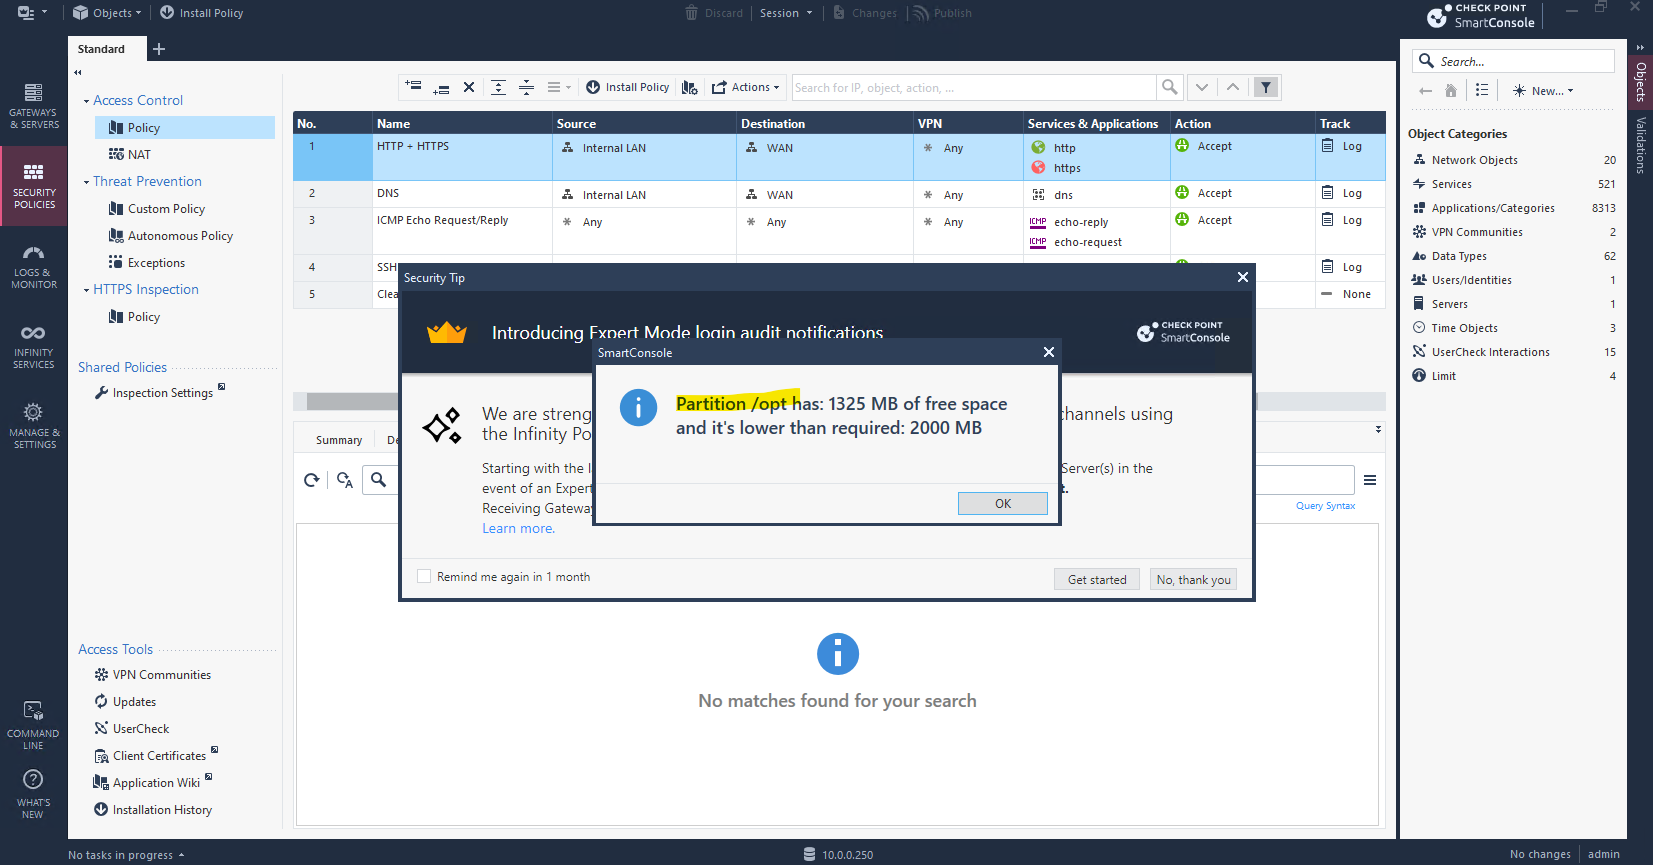
Below I was getting a notification that the partition /opt has just left 1325 MB of free space.
/opt is located on the root files system, below we will see how we can extend the root file system of the GAiA appliance.
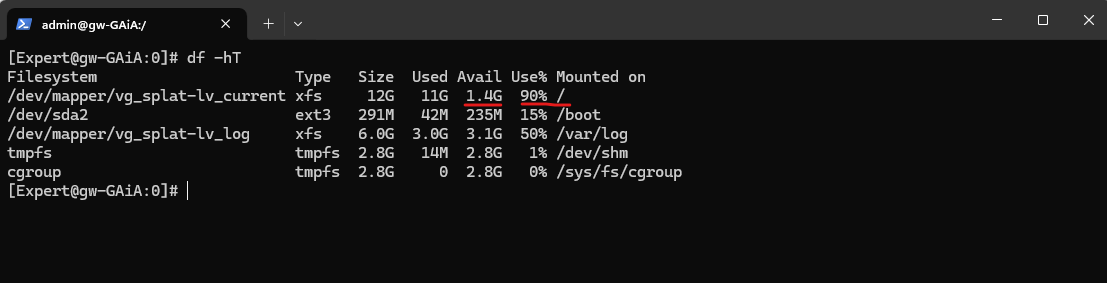
To check the file system of our GAiA appliance we can switch on the console to the export mode and running the df command.
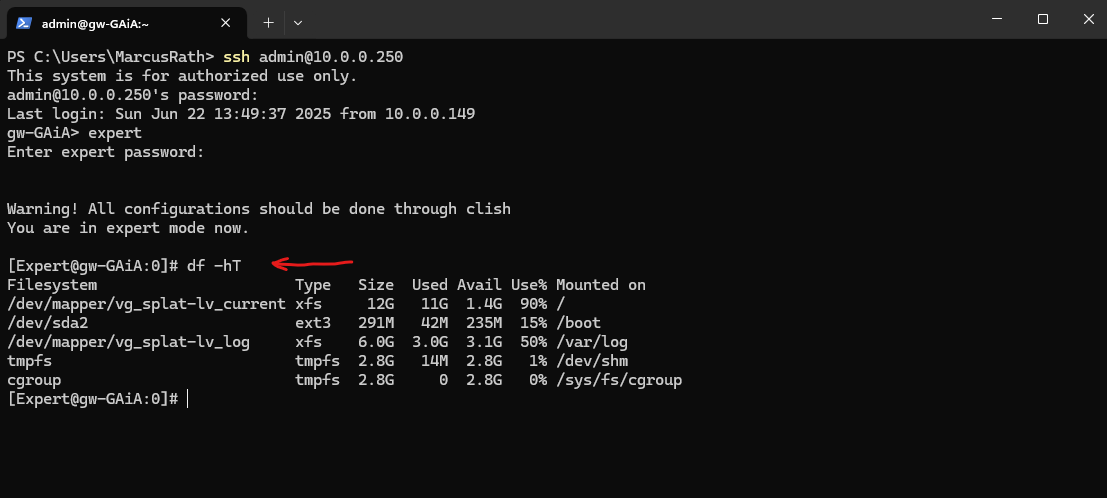
The /opt folder is located directly on the / root volume where we can see blow that only 1.4 GB is left.
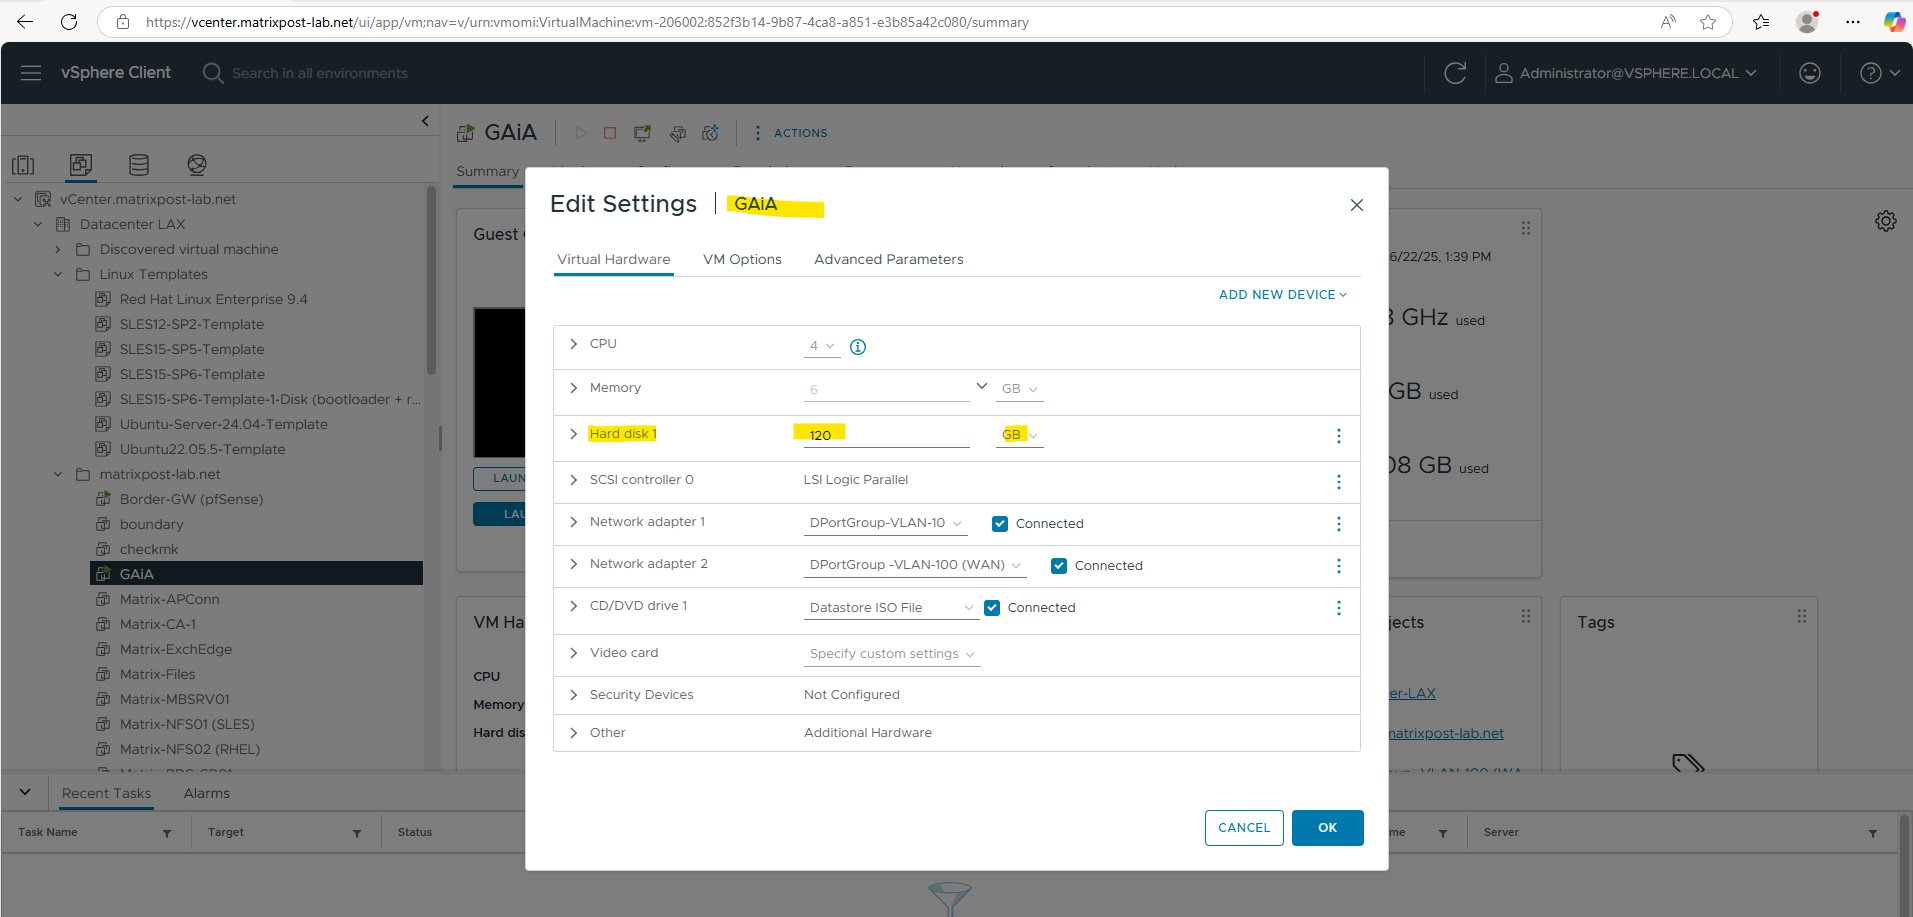
First we need to resize the virtual disk in vSphere, I will increase here the size from 60 GB to 120 GB.
To make the OS aware of this change, we first need to trigger a rescan of a SCSI (or SATA) disk by using the echo 1 > /sys/block/<disk label>/device/rescan command.
After that we can resize the physical volume (PV). Fortunately the GAiA appliance will use the Logical Volume Manager (LVM) which makes it easy and convenient to expand its partitions.
More about the LVM and expanding partitions you will find in my following post https://blog.matrixpost.net/vsphere-linux-virtual-machines-extend-disks-logical-volumes-and-the-file-system/.
# fdisk -l
# echo 1 > /sys/block/sda/device/rescan
# pvresize /dev/sda
# fdisk -l
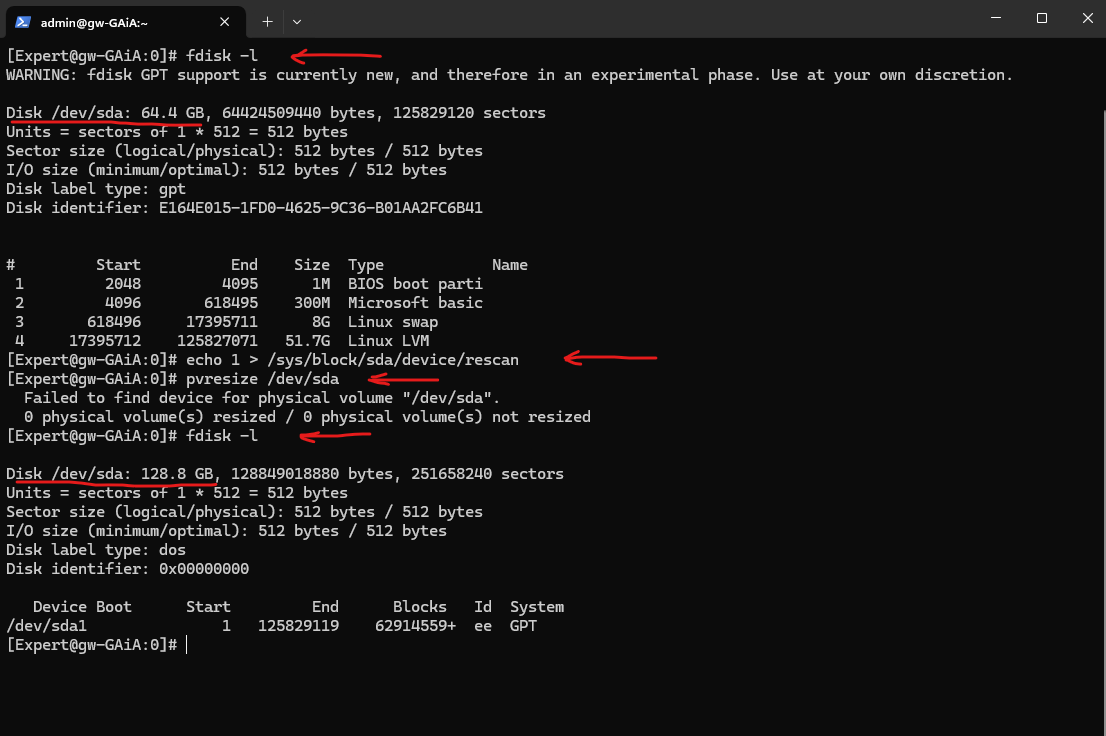
So now we have extended the virtual disk and its for LVM initialized physical volume (PV), next we also need to extend the logical volume (LV) on which the root file system and our /opt folder is located.
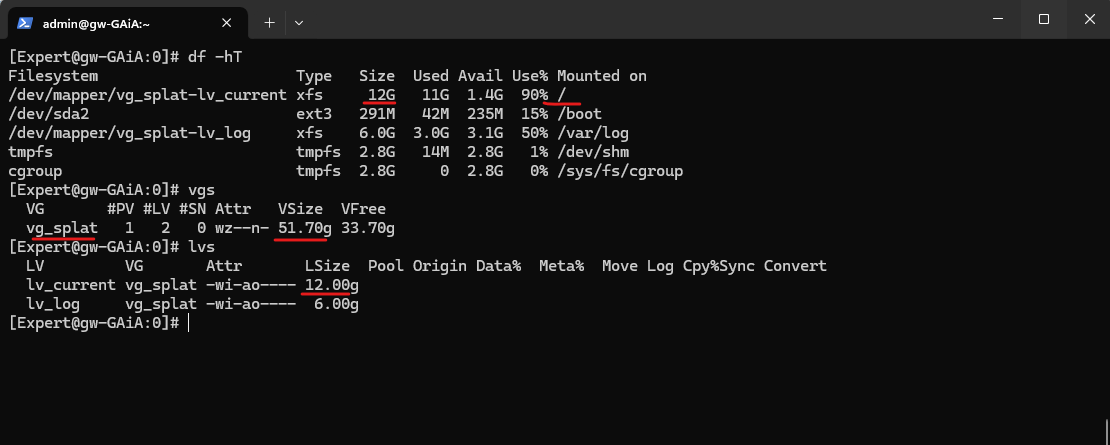
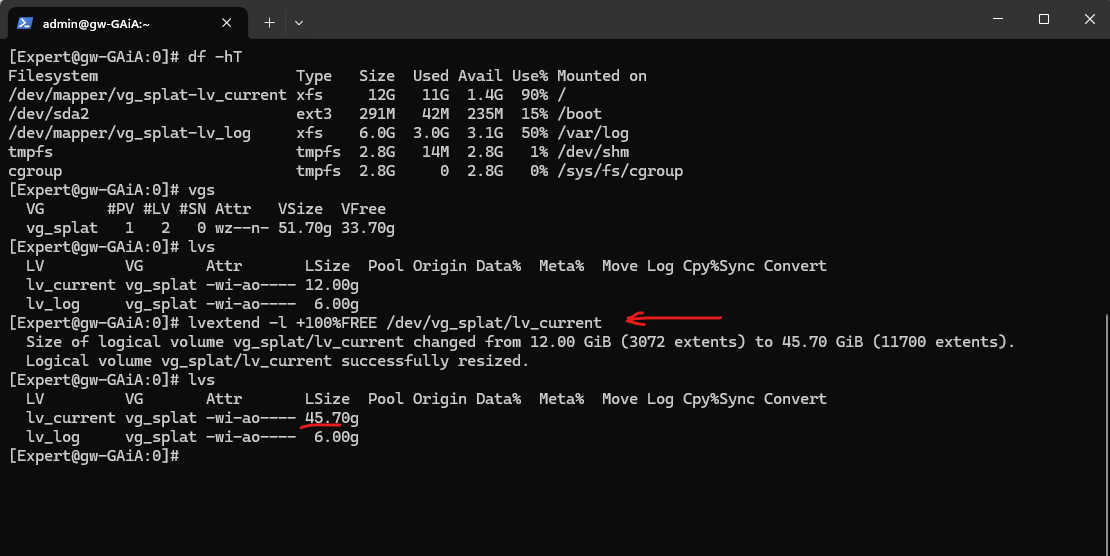
Above we can see that even we extended the disk in vSphere from 60 GB to 120 GB, we now just have 33.70 GB left and free to use for the volume group in which our logical volume with the root files system we need to extend is.
The reason for is that during the installation of the appliance we set the percentage to use for the partitions as shown below.
By using the following command we will expand the logical volume on which the root file system is stored. We will expand the volume by using all available free space.
# lvextend -l +100%FREE /dev/vg_splat/lv_current
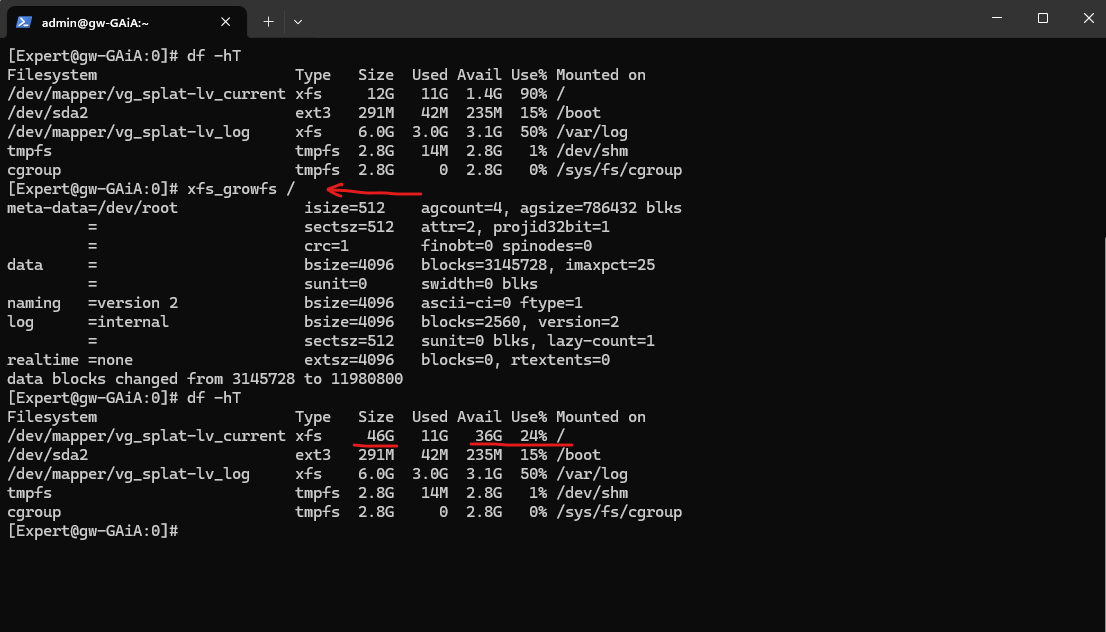
Finally we also need to resize the underlying file system, to resize the xfs file system we can use the xfs_growfs command as shown below.
# xfs_growfs /
As mentioned more about vSphere Linux Virtual Machines – Extend Disks, LVM Logical Volumes and the File System you will find in my following post.
Links
Check Point
https://www.checkpoint.com/5TH GENERATION CYBER ATTACKS ARE HERE AND MOST BUSINESSES ARE BEHIND
https://www.checkfirewalls.com/datasheets/solutions/preventing-the-next-mega-cyber-attack.pdfFifth-generation cyberattacks are here. How can the IT industry adapt?
https://www.weforum.org/agenda/2021/02/fifth-generation-cyberattacks/How to configure static routes in CLISH on Gaia OS and IPSO OS
https://support.checkpoint.com/results/sk/sk39746R81.10 Gaia Administration Guide
https://sc1.checkpoint.com/documents/R81.10/WebAdminGuides/EN/CP_R81.10_Gaia_AdminGuide/Topics-GAG/Gaia-Overview.htm