Using a Jump Host (Bastion Host) for SSH (Secure Shell)
When managing remote servers, SSH (Secure Shell) is the go-to protocol for secure, encrypted connections. However, in enterprise environments, direct SSH access to critical systems is often restricted for security reasons.
This is where a Jump Host (Bastion Host) comes in, a dedicated server that acts as an intermediary, allowing controlled access to internal systems.
About setting up an Azure Bastion Host which provides secure and seamless RDP/SSH connectivity to your virtual machines, you can also read my following post.
Using a Jump Host improves security by centralizing access and reducing exposure of internal servers to the internet. With SSH, you can streamline connections through a Jump Host using ProxyJump or SSH Agent Forwarding, making access seamless and efficient.
Both ProxyJump (-J) and Agent Forwarding (-A) help you connect to remote systems via a jump host, but they differ in security.
ProxyJump (-J) is more secure than Agent Forwarding (-A), so use ProxyJump whenever possible for a safer, more streamlined SSH connection! If you must use agent forwarding, limit risk as shown further down.
Below in this post we will see how to set up SSH with a Jump Host and securely navigate through multiple servers with ease.
Introduction
In the realm of network security, a bastion host serves as a gateway, acting as the first line of defense for accessing sensitive systems or private networks.
A realm is a term used in authentication, authorization, and security contexts to define a security boundary where users, credentials, and permissions are managed. For example in kerberos a realm is the administrative domain that manages authentication. e.g. corp.domain.tld.
Often referred to as a jumphost, this specialized server is exposed to the internet or external networks, while the rest of the infrastructure remains securely tucked away behind firewalls and other protective measures.
By routing all remote access through a bastion host, organizations can minimize attack surfaces, enforce strict access controls, and monitor traffic more effectively. Whether you’re managing cloud environments, securing internal networks, or administering remote servers, understanding the role and configuration of a bastion host is essential for maintaining a secure and efficient workflow.
Using SSH ProxyJump
To connect to a destination server by using SSH and which is placed behind a JumpHost (bastion host), we can leverage the ProxyJump (or -J flag) feature of SSH, introduced in ssh version 7.3.
Below for example finally I want to connect to the virtual machine named RHEL9-Testing01 with the IP address 10.0.10.85.
To this virtual machine I can’t connect directly from my client because both are in different VLANs and subnets which are not routed.
Nevertheless to connect to this virtual machine, I can use a Jump Host which is connected to both VLANs and subnets and finally routes the traffic to the destination machine.
On the Jump Host we doesn’t need to enable IPv4 Forwarding by the way, the jump host using here SSH’s built-in functionality, not by routing IP packets.
When you use the -J flag or configure a jump host in your SSH client, the SSH client establishes a connection to the jump host and then creates a new SSH connection from the jump host to the final destination. This is done using SSH’s port forwarding or ProxyJump feature, which does not require IP forwarding at the kernel level.
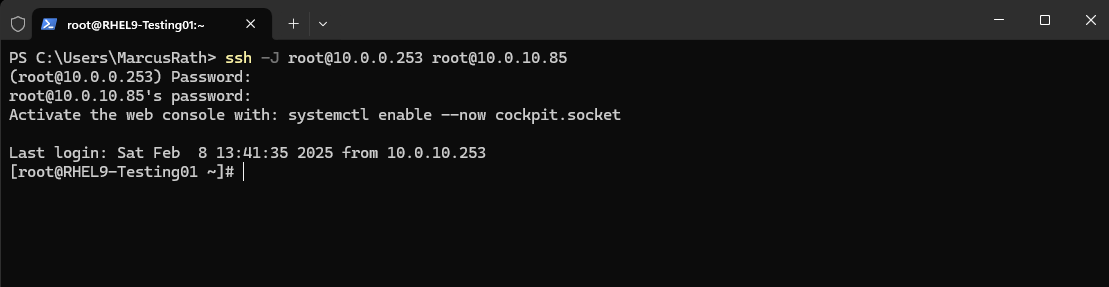
# ssh -J user@JumpHost user@RemoteHost

# ssh -J root@10.0.0.253 root@10.0.10.85
In case for both, the Jump Host and the destination machine, here password authentication will be used, we also need to provide for both the password as shown below.
We can also use the -J flag in combination with the -i flag (identity file) to set the private ssh key for ssh public key authentication as shown below.
> ssh -i C:\Users\MarcusRath\.ssh\root_matrixlab_private_key_openssh -J root@10.0.0.253 root@10.0.10.85
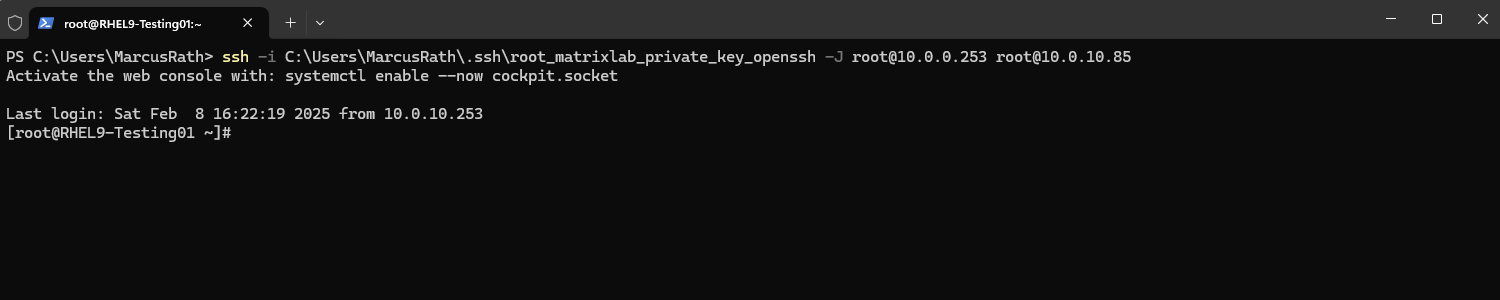
Unfortunately this doesn’t work if the Jump Host and the destination host are using different private/public key pairs as we cannot use the -i flag twice for different private keys.
In that case we can use instead the ~/.ssh/config file on the client as described below. Here we can set for each Jump Host and remote hosts dedicated private keys.
By using the -J flag here we can easily specifying the Jump Host and remote hosts as needed, but if a specific bastion host is regularly used to connect to a specific remote host, the ProxyJump configuration can also be set in the ~/.ssh/config file to automatically make the connection to the bastion and to route to the remote host.
For the user I will use for both the root user but finally you can of course also use other users they authorized on the systems.
### The Jump Host
Host jump-host-nickname
  HostName jump-hostname
  user root


### The Remote Host
Host remote-host-nickname
  HostName remote-hostname
  user root
  ProxyJump jump-host-nickname
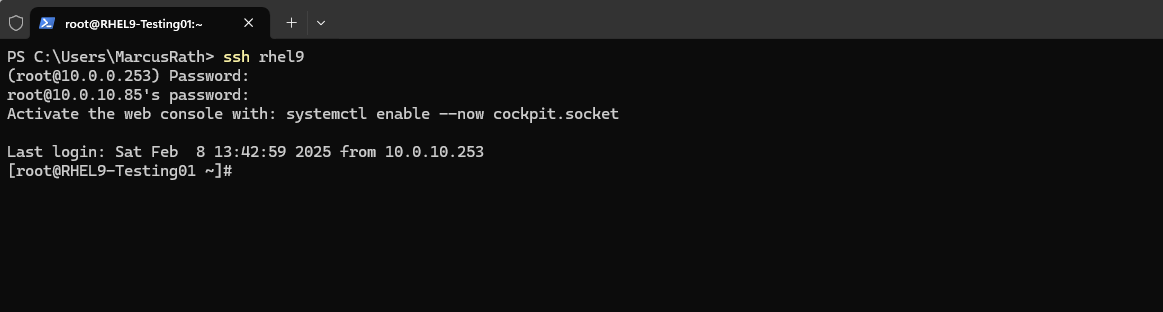
When using my Jump Host and remote host we previously used when connecting by using the -J flag, this will looks like below when using therefore now the ~/.ssh/config file. For the HostName we can also use IP addresses.
### The Jump Host
Host my-jumphost
  HostName 10.0.0.253
  user root


### The Remote Host
Host rhel9
  HostName 10.0.10.85
  user root
  ProxyJump my-jumphost
From now on I can connect to the destination computer by just using the nickname we configured in the ~/.ssh/config file. In this file finally also the corresponding Jump Host we want to use for our destination computer is configured.
We can configure here multiple remote hosts and corresponding jump hosts.
# ssh rhel9
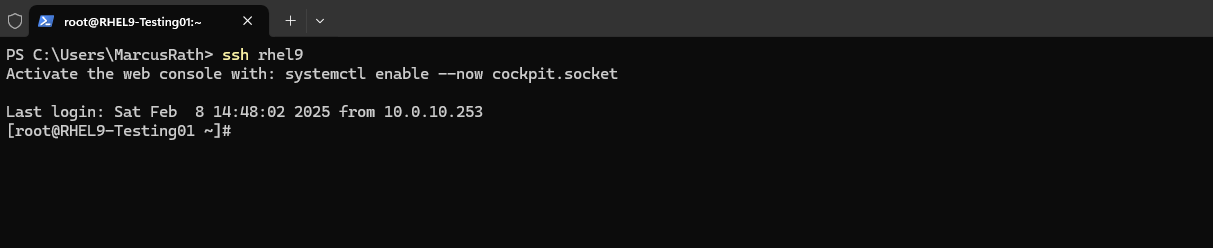
By using the ~/.ssh/config file we can also configure ssh public key authentication by setting the path to the ssh private keys as value for the identityfile parameter shown below.
### The Jump Host
Host my-jumphost
  HostName 10.0.0.253
  identityfile ./root_matrixlab_private_key_openssh
  user root


### The Remote Host
Host rhel9
  HostName 10.0.10.85
  identityfile ./root_matrixlab_private_key_openssh
  user root
  ProxyJump my-jumphost
Using Agent Forwarding
SSH-agent forwarding is used to automatically pass any authentication requests coming from other servers back to your own system’s agent.
Agent forwarding does not pass your secret key to the remote server but it does all the authentication on your system and only the results are sent to the remote server through an intermediate host.
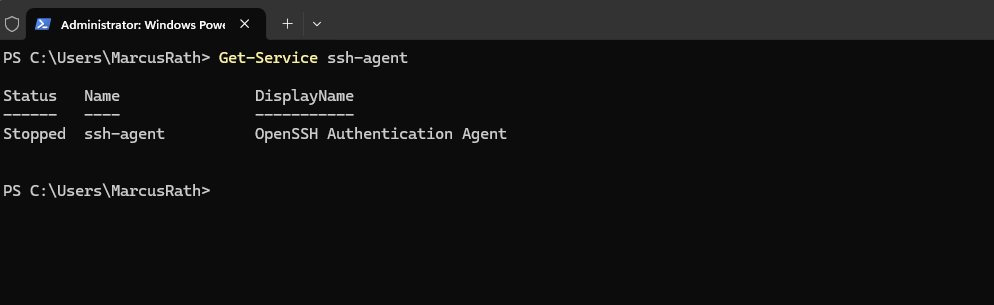
On Windows we first need to make sure, the ssh-agent is running.
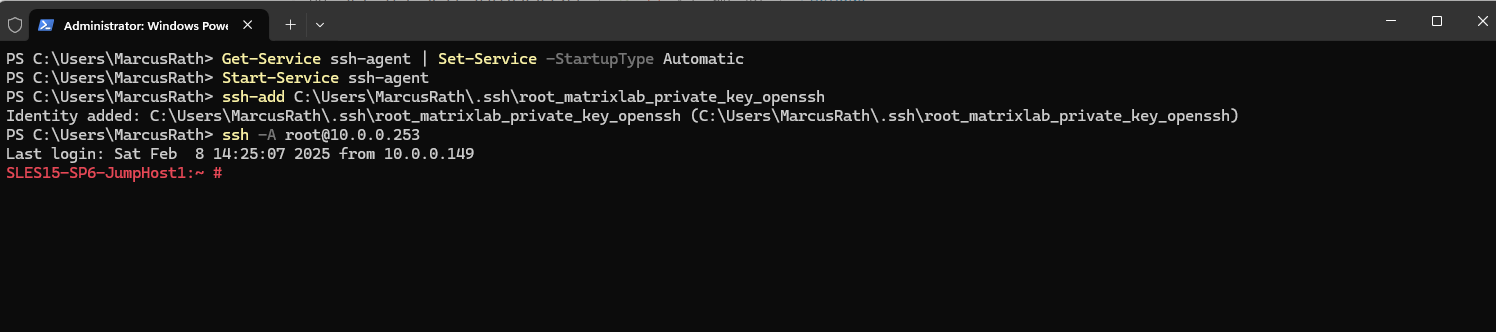
> Get-Service ssh-agent

Enable automatic startup and start the agent:
> Get-Service ssh-agent | Set-Service -StartupType Automatic
> Start-Service ssh-agent
ssh-add <path to ssh private key> ==> Adds your private key to your local SSH agent.
> ssh-add C:\Users\MarcusRath\.ssh\root_matrixlab_private_key_openssh

Use the -A flag to enable agent forwarding when connecting to the jump host.
ssh -A ==> will force your local SSH agent (ssh-agent) keeps your private keys securely stored (instead of copying them to the remote server).
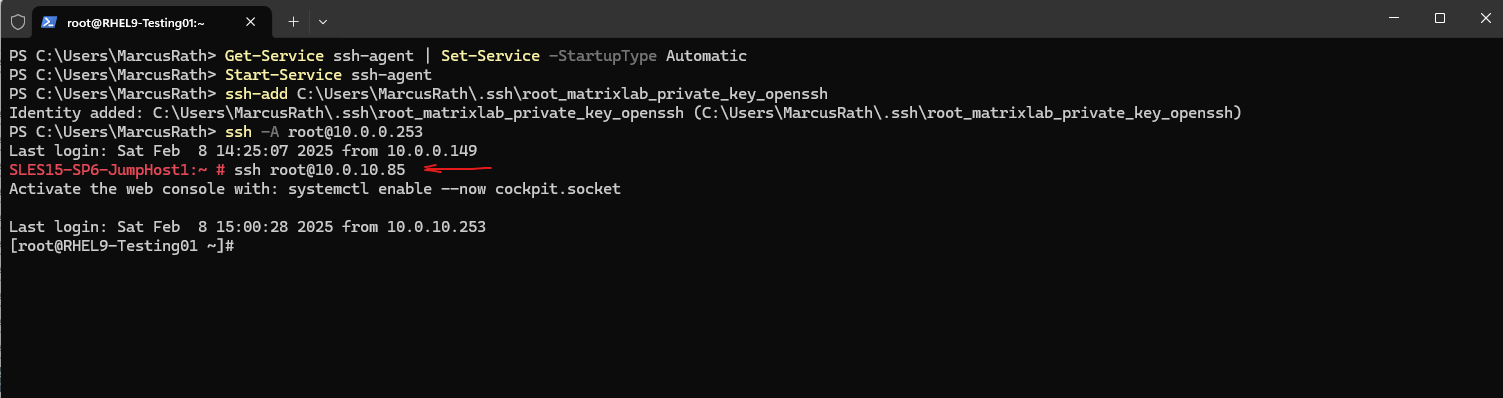
When you try to SSH from the jump host to another remote server, the request is forwarded back to your local SSH agent.
The local SSH agent signs the request using your private key and sends the response back, allowing authentication without exposing your private key.
> ssh -A root@10.0.0.253
Once connected to the jump host, you can SSH to the destination host, and the jump host will use your forwarded keys for authentication against the destination host.
# ssh root@10.0.10.85
While SSH agent forwarding is convenient, it introduces some security risks:
- If the jump host is compromised, an attacker could use your forwarded agent to authenticate to other servers.
- Only enable agent forwarding on trusted jump hosts.
- A malicious user with root access on the jump host could potentially hijack your forwarded agent.
- Use agent forwarding only when necessary and disable it when not in use.
To disable ssh agent forwarding we can add the following into our ~/.ssh/config file.
This disables agent forwarding for all SSH connections.
Host *
    ForwardAgent no
If you want to disable it only for a specific host.
Host remotehost
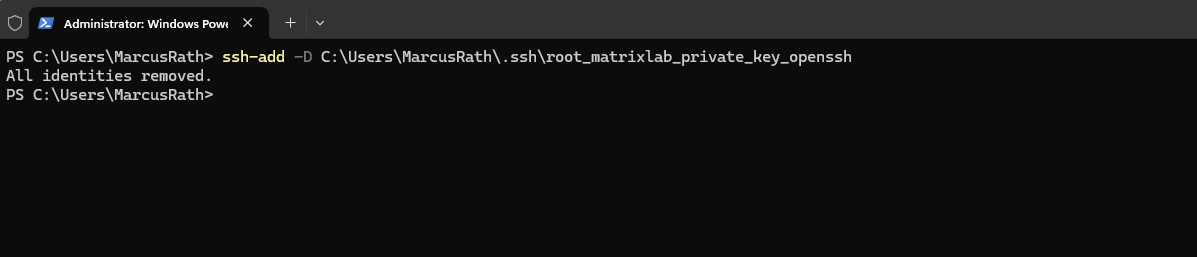
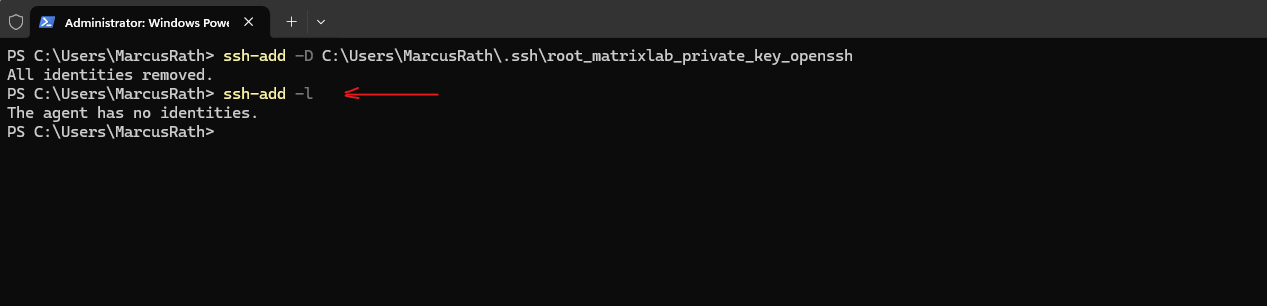
ForwardAgent noTo remove identities from the local ssh agent, we can use the -D flag as shown below.
> ssh-add -D C:\Users\MarcusRath\.ssh\root_matrixlab_private_key_openssh
We an also check if the key has been removed successfully by using the -l flag.
> ssh-add -l
Links
SSH to remote hosts through a proxy or bastion with ProxyJump
https://www.redhat.com/en/blog/ssh-proxy-bastion-proxyjumpAbout OpenSSH
https://www.openssh.com/OpenSSH Features
https://www.openssh.com/features.htmlGet started with OpenSSH for Windows
https://learn.microsoft.com/en-us/windows-server/administration/openssh/openssh_install_firstuse?tabs=gui&pivots=windows-server-2025