Legacy Linux VMs and the udev NIC Trap: Why VMware Clones and OVF Exports Lose Networking
Whether you clone a legacy Linux VM (e.g. SLES11) in vSphere or export it as an OVF template and redeploy, you may end up with the same issue: the guest shows two NICs, one with the old IP but no device, and another one without any configuration.
The culprit is udev’s persistent net rules, which keep stale MAC address bindings and confuse the OS after a new MAC is assigned.
SLES11 still uses the legacy udev persistent net rules, which bind MAC addresses permanently to interface names like eth0 or eth1. When a VM is cloned or deployed from an OVF template with a new MAC, udev treats it as a new device and creates another interface (e.g. eth1), while the old one (eth0) remains as a ghost NIC.
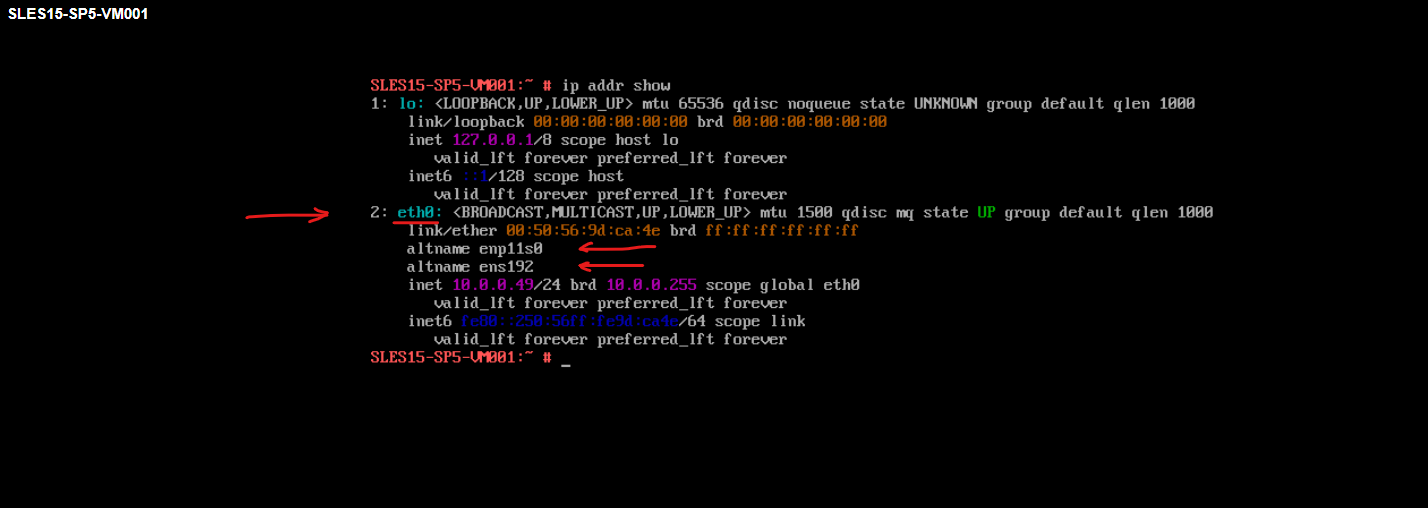
Starting with SLES12 (SP2 and later), SUSE adopted systemd’s Predictable Network Interface Names (e.g. ens160), which are based on PCI topology instead of MAC addresses. This prevents duplicate NICs after cloning or exporting, and the issue no longer occurs in SLES12+ or SLES15.
RHEL / CentOS / Oracle Linux 6 and older use udev persistent rules, same problem. Also for Debian 6/7, Ubuntu ≤ 14.04.
SLES15 (and SLES12 SP2+) for example use systemd-udevd with predictable network interface names. By design, systemd assigns stable names like enp11s0 (based on PCI slot) or ens192.
However, SUSE still provides compatibility naming (via a udev rule or a kernel parameter) so the NIC can also appear as the traditional eth0.
Fix for a VM already deployed from template
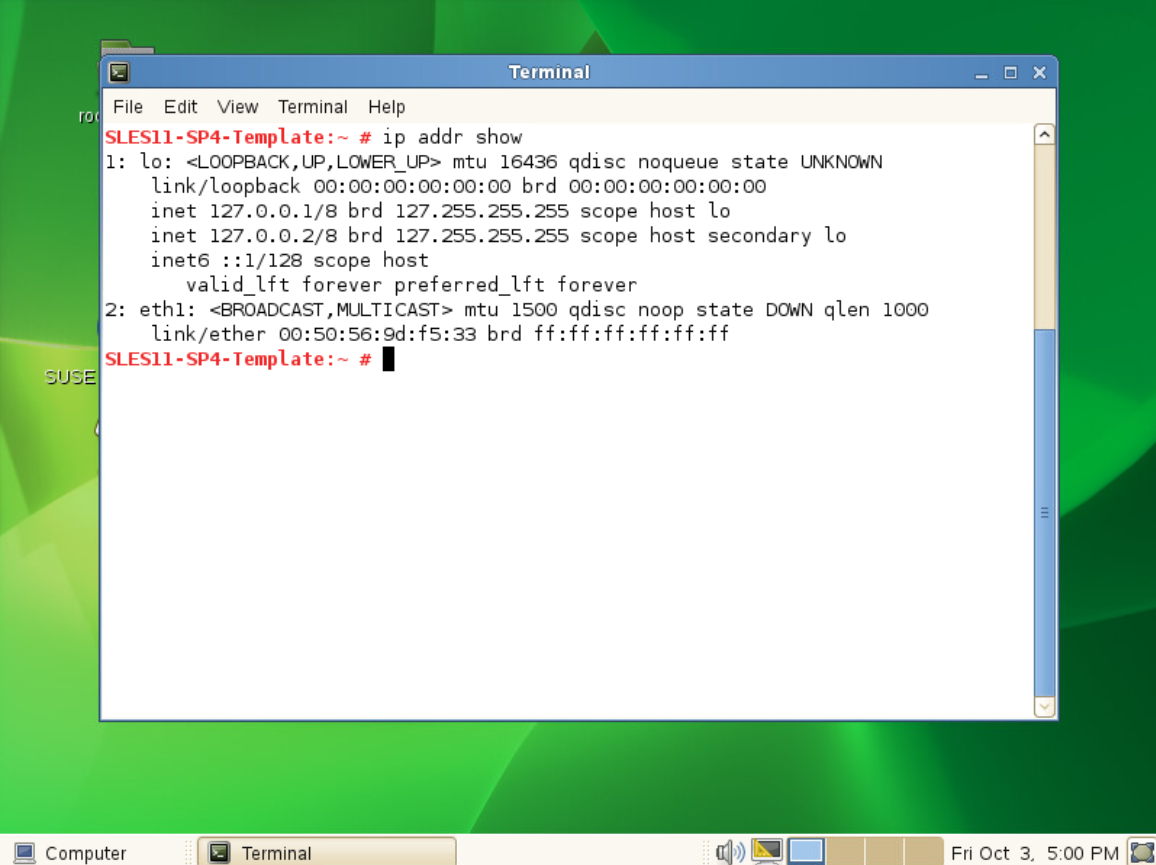
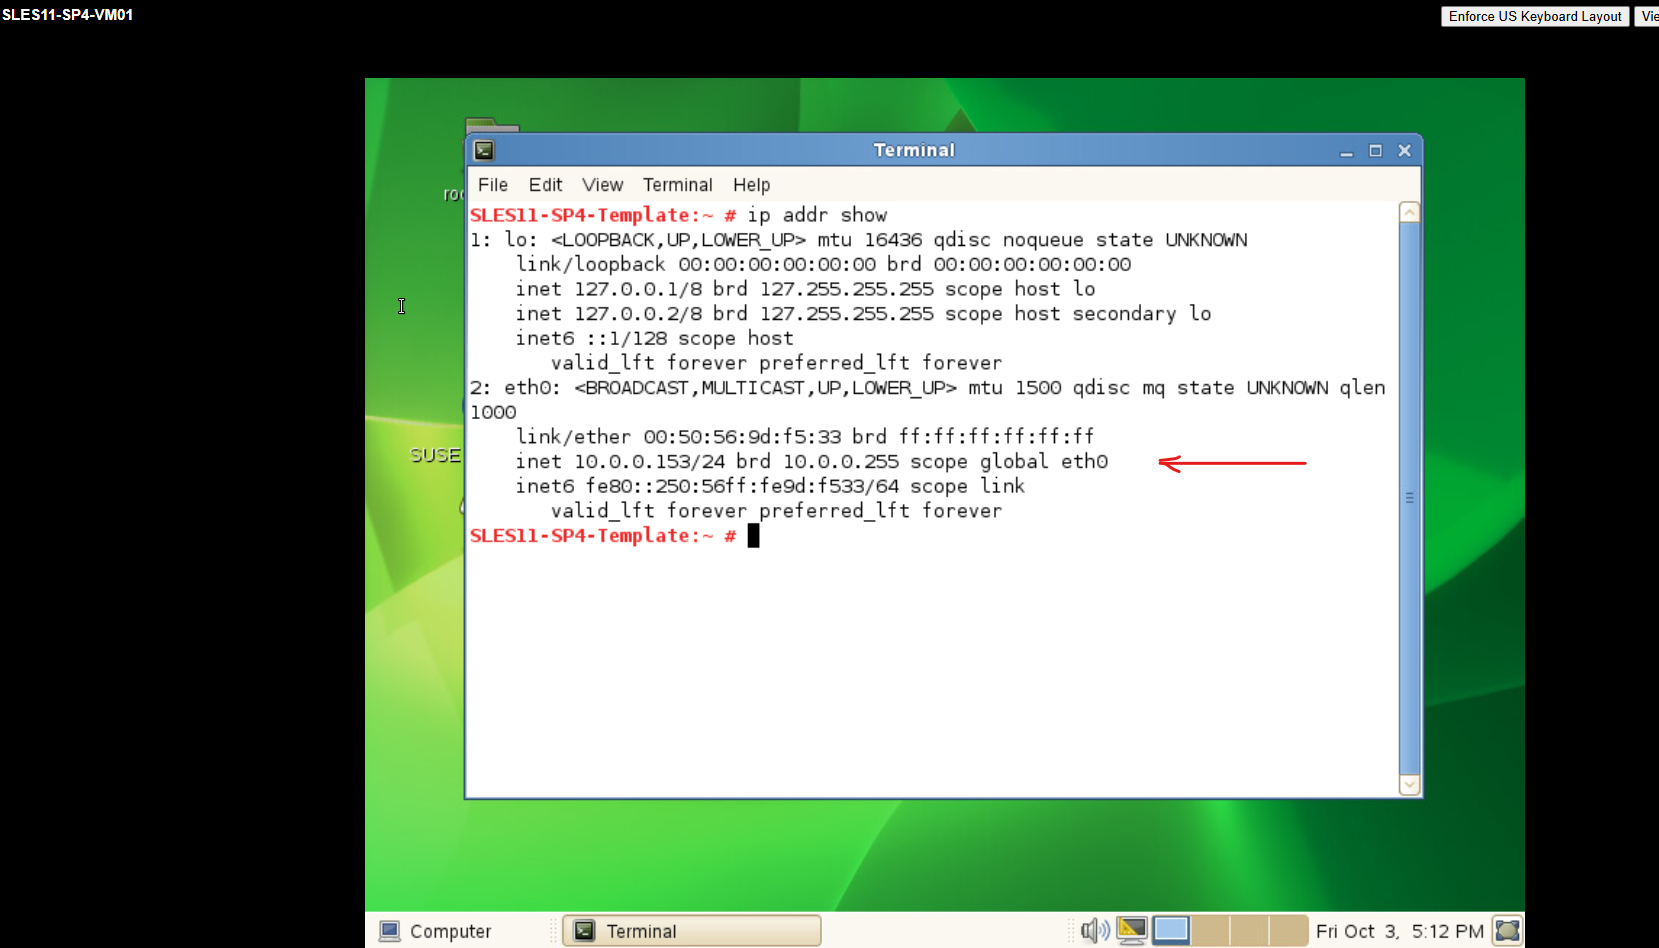
You’ll probably only see the new NIC (eth1) without an IP.
# ip addr show
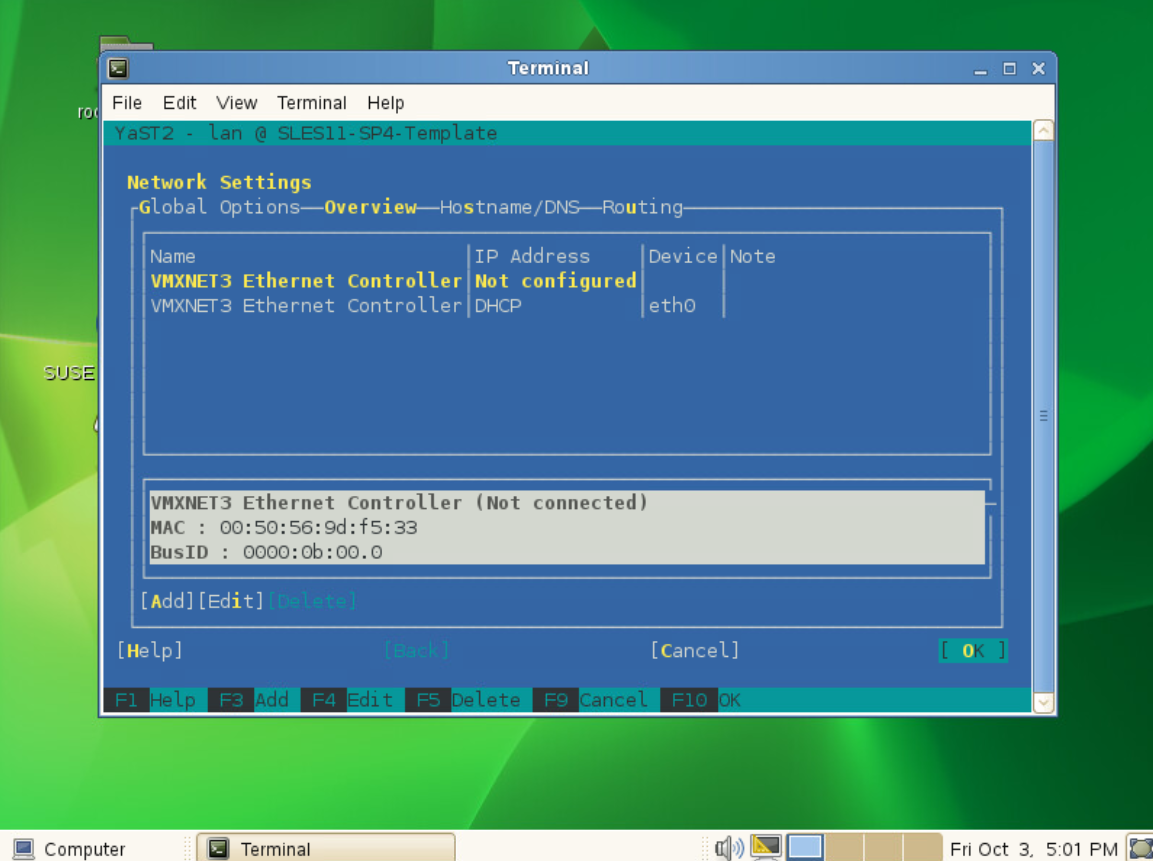
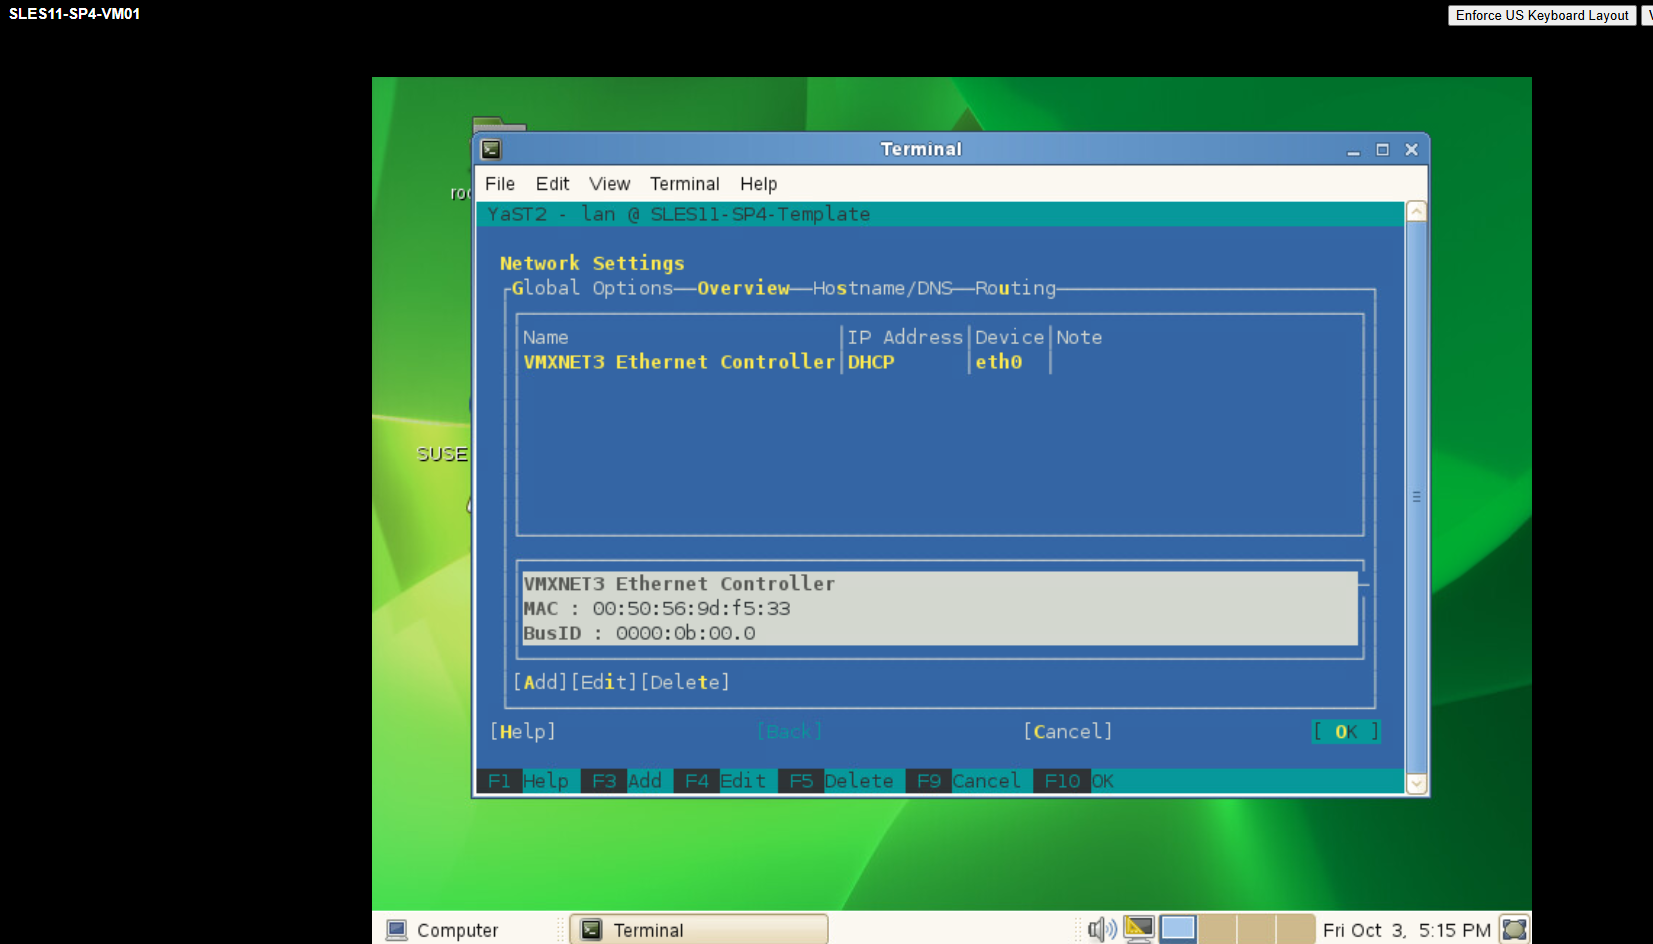
When running YaST we can see the origin eth0 NIC which is not shown up when running the above ip addr show command.
The Linux kernel + ip addr show only list actual network interfaces that exist right now. YaST doesn’t look at the live kernel interfaces, it reads the static configuration under /etc/sysconfig/network/ifcfg-*. Since the template VM originally had a NIC called eth0, there was still an ifcfg-eth0 with the old IP/MAC in it → so YaST happily showed “eth0” as configured.
After the MAC changed (due to the clone/template), the original eth0 device could no longer be created. udev instead created a new device (eth1) for the new MAC.
Result: only eth1 appeared in ip addr show, with no IP (since no config matched).
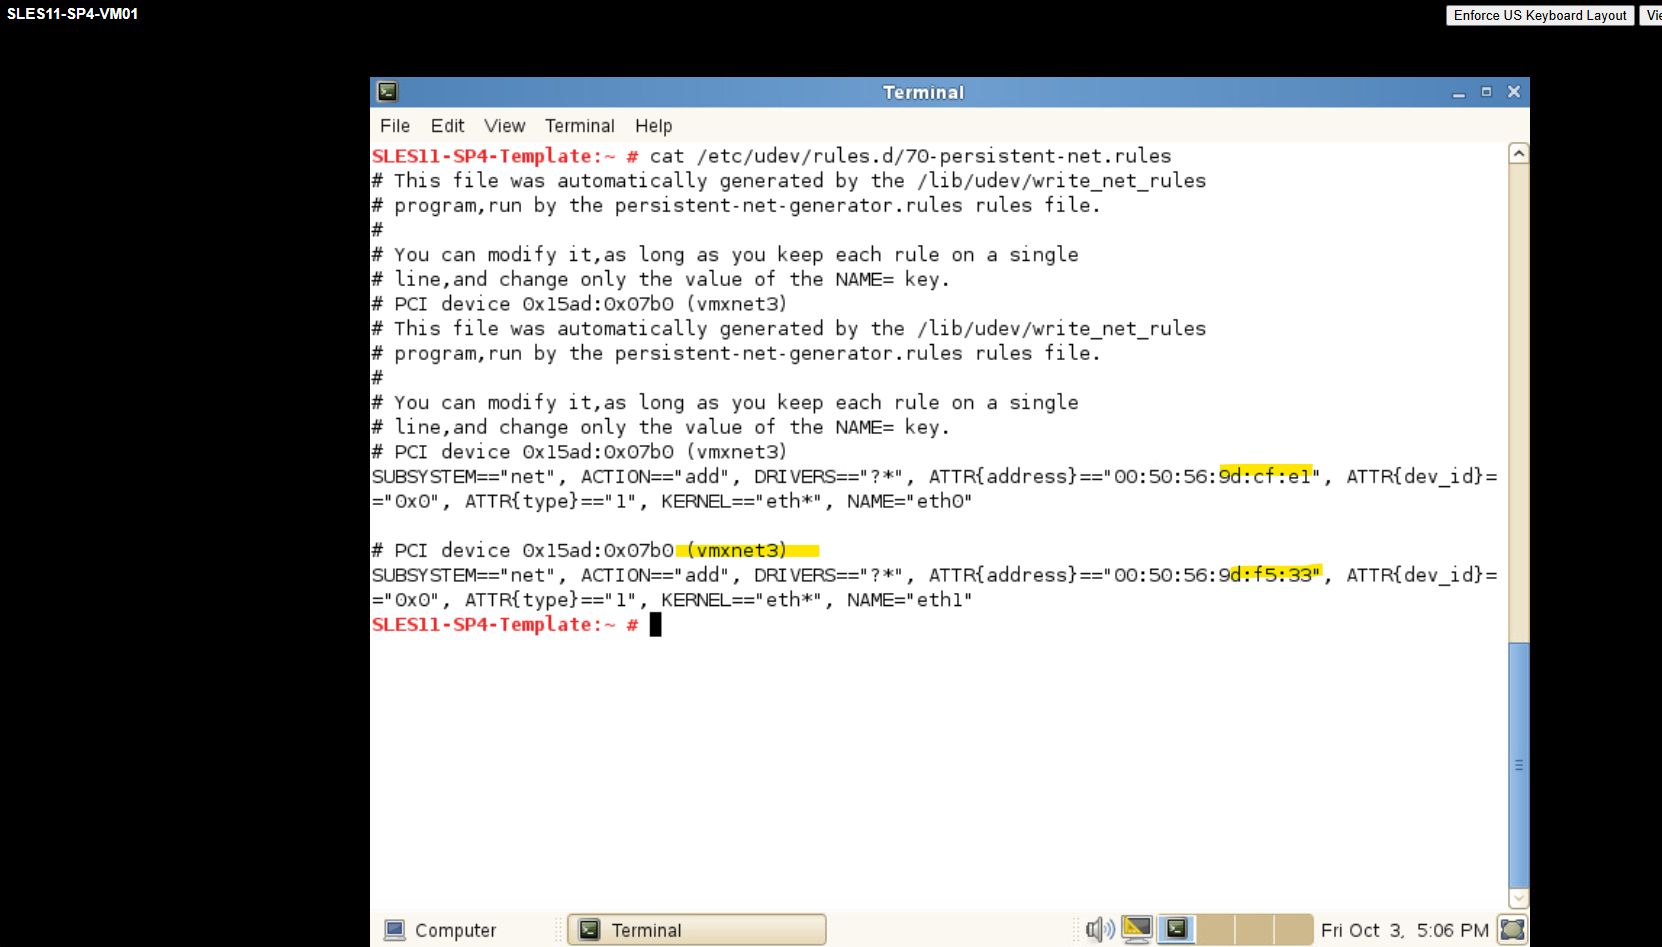
Below we can see the new automatic assigned MAC address.

Below we can see that the second entry is our newly assigned MAC address (shown above) when creating the VM out of the template. The first one was the origin MAC address when creating the VM from the scratch and then converting into a template.
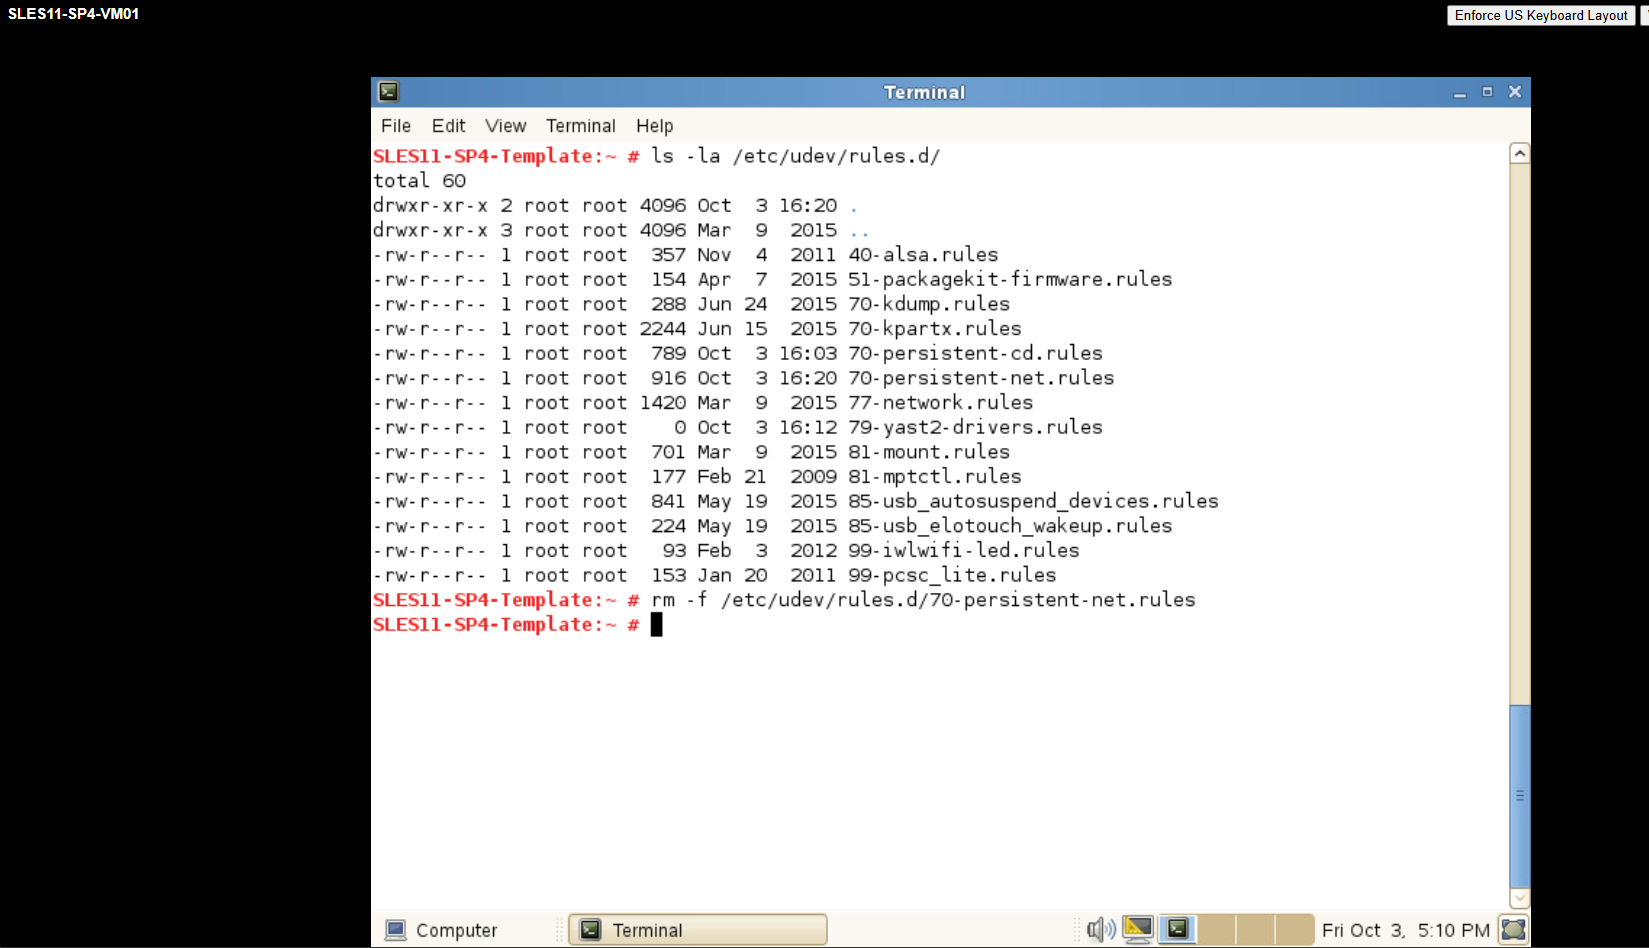
To fix this for the running virtual machine, we will remove this udev net rules file. Afterwards reboot the virtual machine.
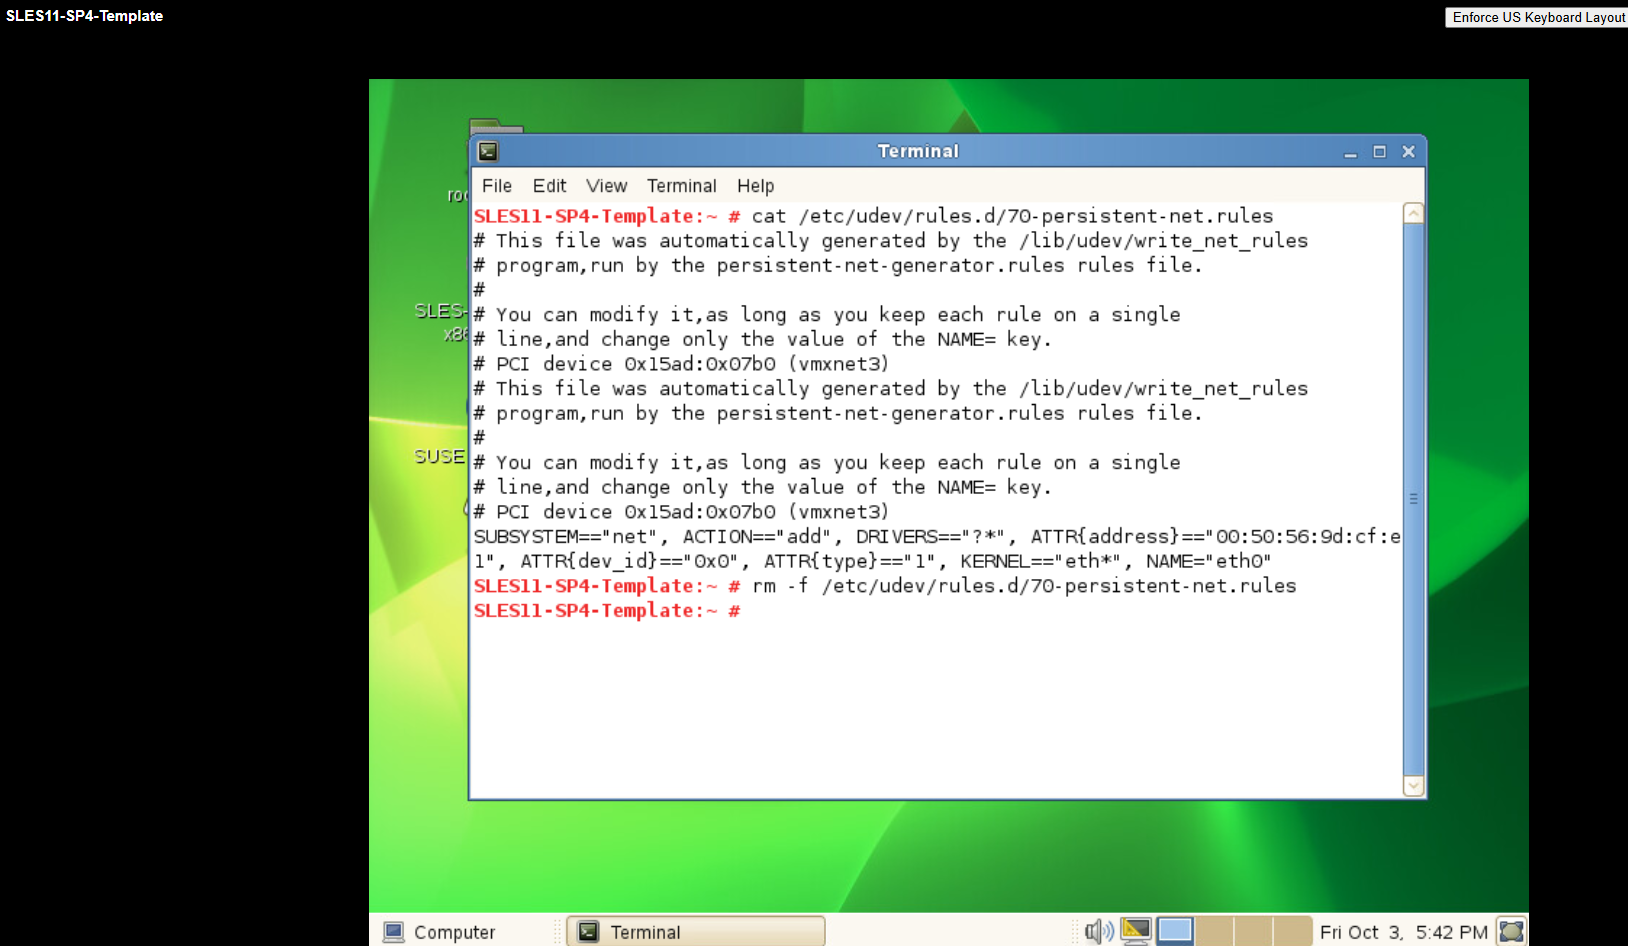
# rm -f /etc/udev/rules.d/70-persistent-net.rules
After a reboot the virtual machine now is successfully getting an IP address from my DHCP server.
When running YaST again, we now only see our origin eth0 NIC as expected and wanted.
So if a VM has already been created from a SLES11 template and ends up with multiple NICs (one ghost NIC and one unconfigured), the quickest fix is simply to delete the /etc/udev/rules.d/70-persistent-net.rules file.
After a reboot, the udev (device manager) regenerates the mapping, the NIC comes back as eth0, and if DHCP is enabled, the VM will automatically receive a valid IP address again.
Fix before turning a VM into a template / OVF export
For SLES11 templates the fix is really just one preparation step before you convert a VM into a template or export it as OVF.
That way, when you later create a new VM from it, you won’t run into the “ghost NIC” / no-IP trap.
Just delete udev’s persistent NIC rules like before for the running virtual machine.
# rm -f /etc/udev/rules.d/70-persistent-net.rules
We can now shut down the VM and convert it again to a template or export as OVF.
Final Thoughts
What happens when you remove the /etc/udev/rules.d/70-persistent-net.rules file from a running machine?
That file is only used at boot time to map NIC MAC addresses → interface names (eth0, eth1, etc.).
If you delete it while the VM is running, nothing changes immediately: your active NIC keeps working, IP stays up.
On the next reboot, udev won’t find the old mapping, it will create a fresh one for the current NIC MAC and assign it as eth0.
So the effect is simply: on reboot, the VM will re-detect its current NIC and call it eth0 again.
The NIC still has the same MAC address (which it will, since you’re not cloning or redeploying this VM). The network config file (/etc/sysconfig/network/ifcfg-eth0) exists.
Then udev regenerates the rule with the same mapping (MAC → eth0). Your VM comes back up with the same interface and same IP (DHCP or static).
Links
Dynamic Kernel Device Management with udev
https://documentation.suse.com/en-us/sles/12-SP5/html/SLES-all/cha-udev.htmlEnabling Predictable Naming Scheme for Network Interfaces
https://documentation.suse.com/smart/network/html/network-interface-predictable-naming/index.htmludev creates 70-persistent-net.rules with unexpected information for network devices
https://access.redhat.com/solutions/890273How to ensure predictable network device names with AutoYaST
https://www.suse.com/support/kb/doc/