Create Anchor (aka Jump) Links in WordPress
Today I want show step by step how we can create and use so called anchor or jump links in WordPress.
Anchor links can enhance the user experience by providing easy navigation within a webpage. When users can quickly jump to specific sections of a page, they are more likely to stay longer on the site, reducing bounce rates and signaling to search engines that the content is valuable.
Anchor links are often used for internal linking within a website, connecting different pages or sections. Internal linking helps search engines discover and index content more effectively, and it distributes page authority and ranking power throughout the site.
When other reputable websites link to your content using anchor text, it can improve your site’s authority and credibility in the eyes of search engines. This can positively impact your SEO ranking, especially if the linking sites are relevant to your content and have high authority themselves.
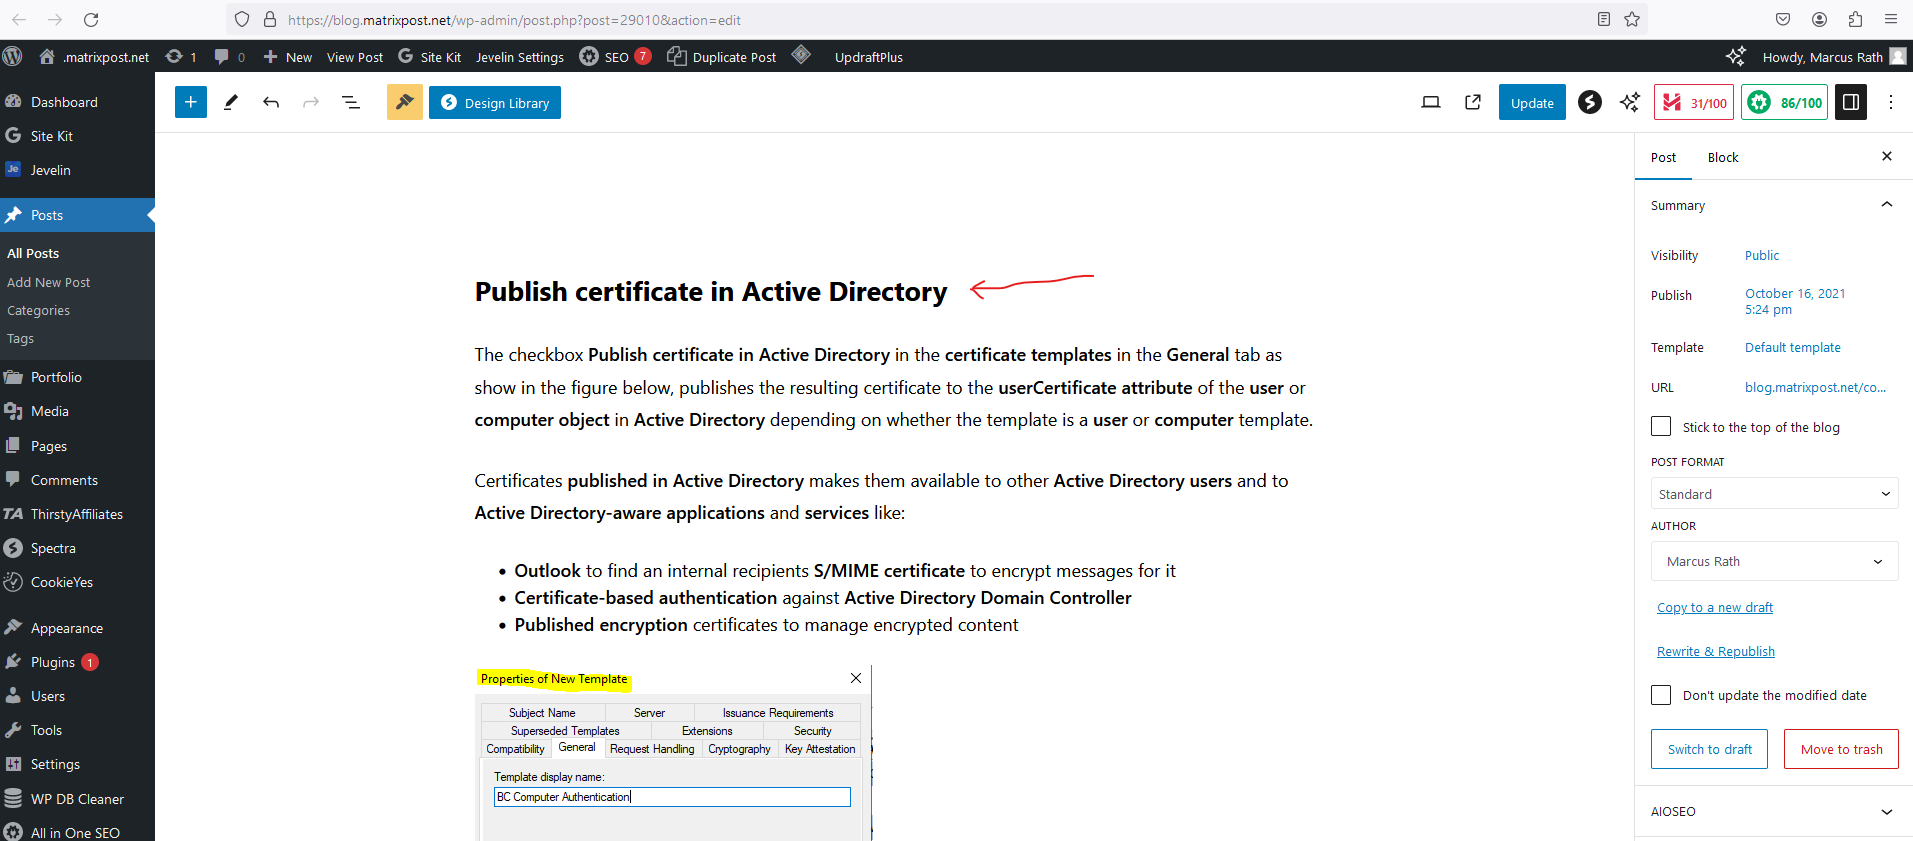
Below for example I want to create a new anchor link which will link from a different post on my blog to my following post and here the user’s browser should jump directly to the section shown below named Publish certificate in Active Directory.
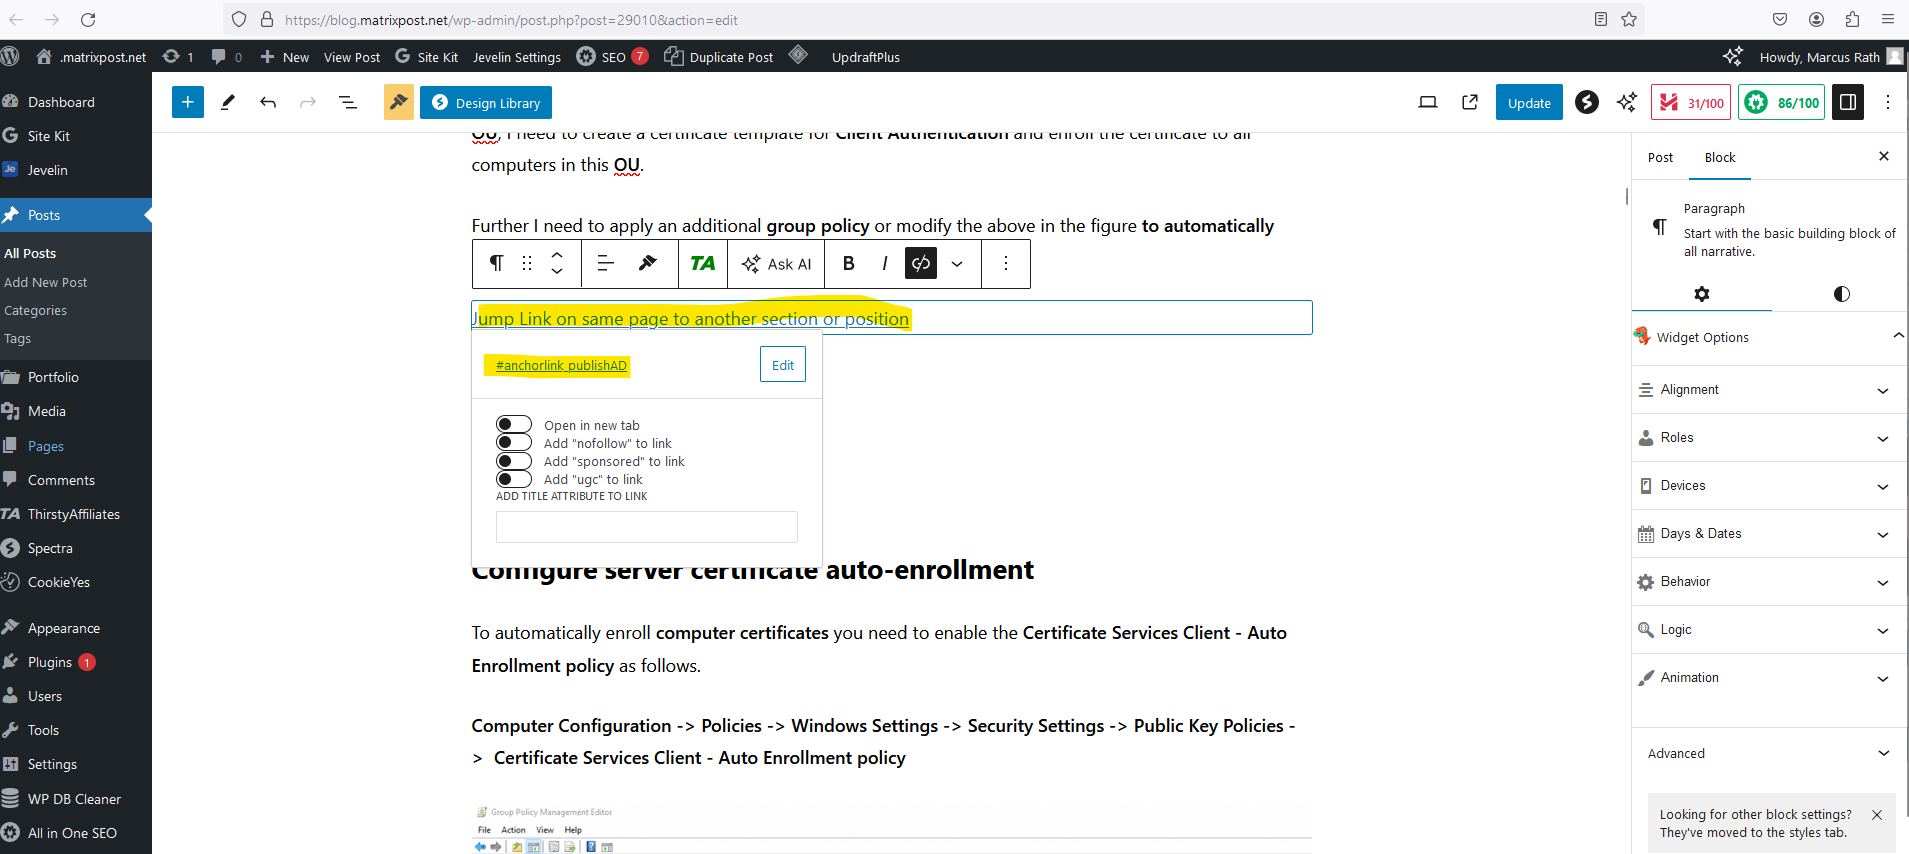
You can also use anchor links on the same page to just jump to another position or section within this page.
To do so we first need to create the anchor itself on the destination page and position/section we want the user will jump to when clicking on the anchor link either from a different page or on the same page just to jump to another section on.
Navigate to the position/section on the page you want to directly link to, in my case I want the user’s browser should jump to the following section and H2 tag (Publish certificate in Active Directory).
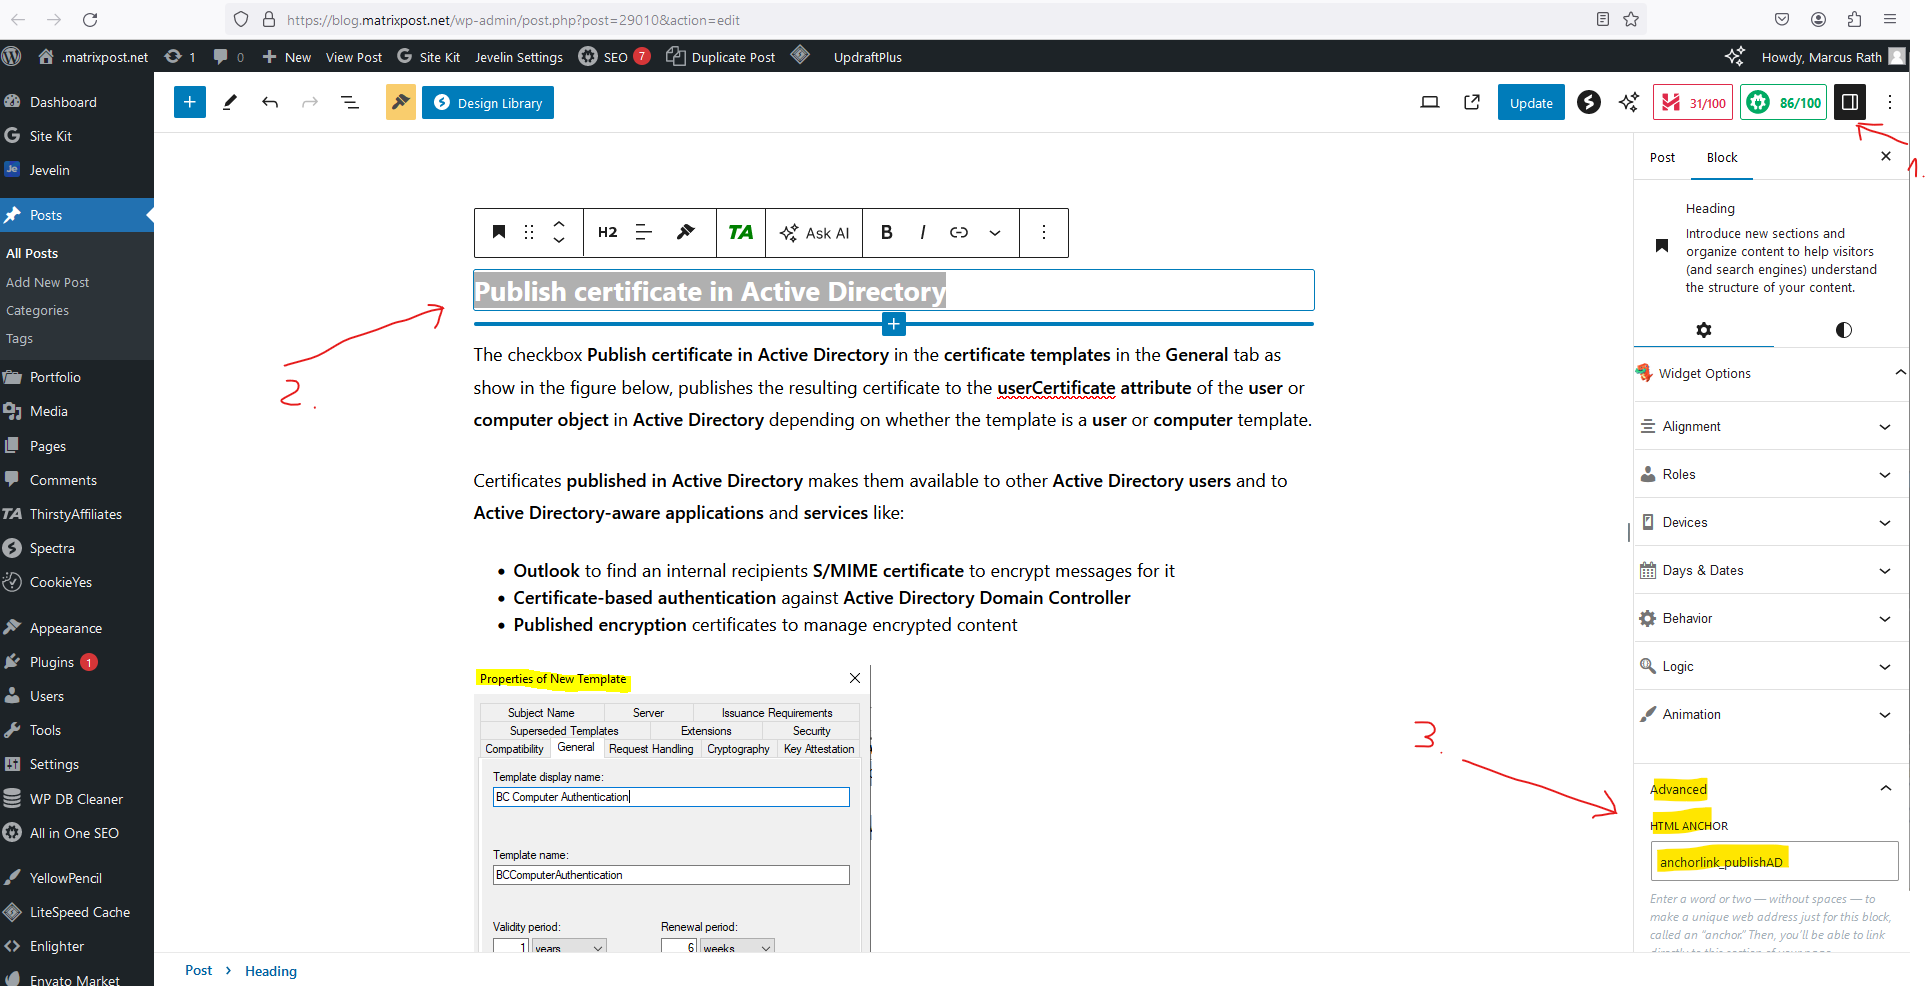
To create an anchor for this H2 tag I will first open the right settings menu bar by clicking on the icon on the right top marked with 1 below. Then I will select my H2 tag and finally navigate on the right settings menu to the Advanced section and here I will enter a name for my new anchor in the HTML ANCHOR field.
For the anchor name be sure to use a unique word that isn’t already being used as an anchor on this page already.
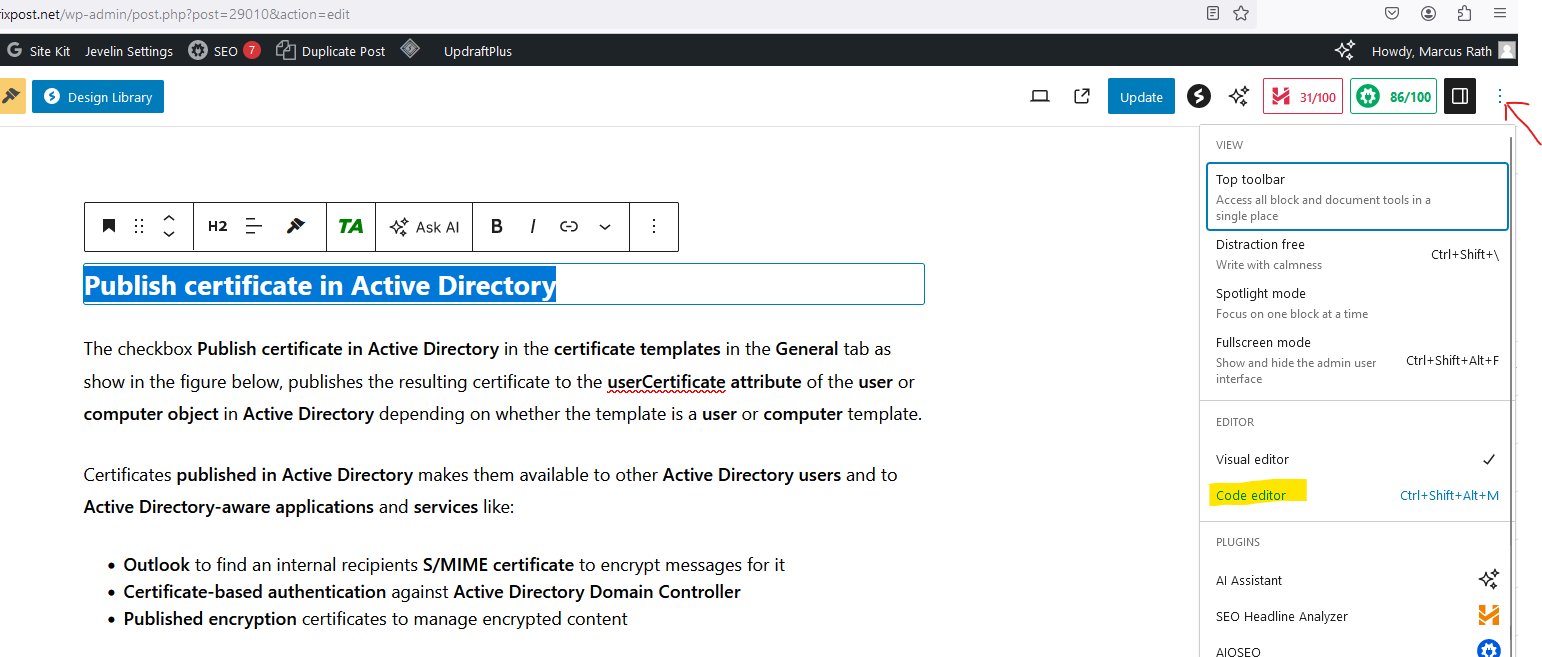
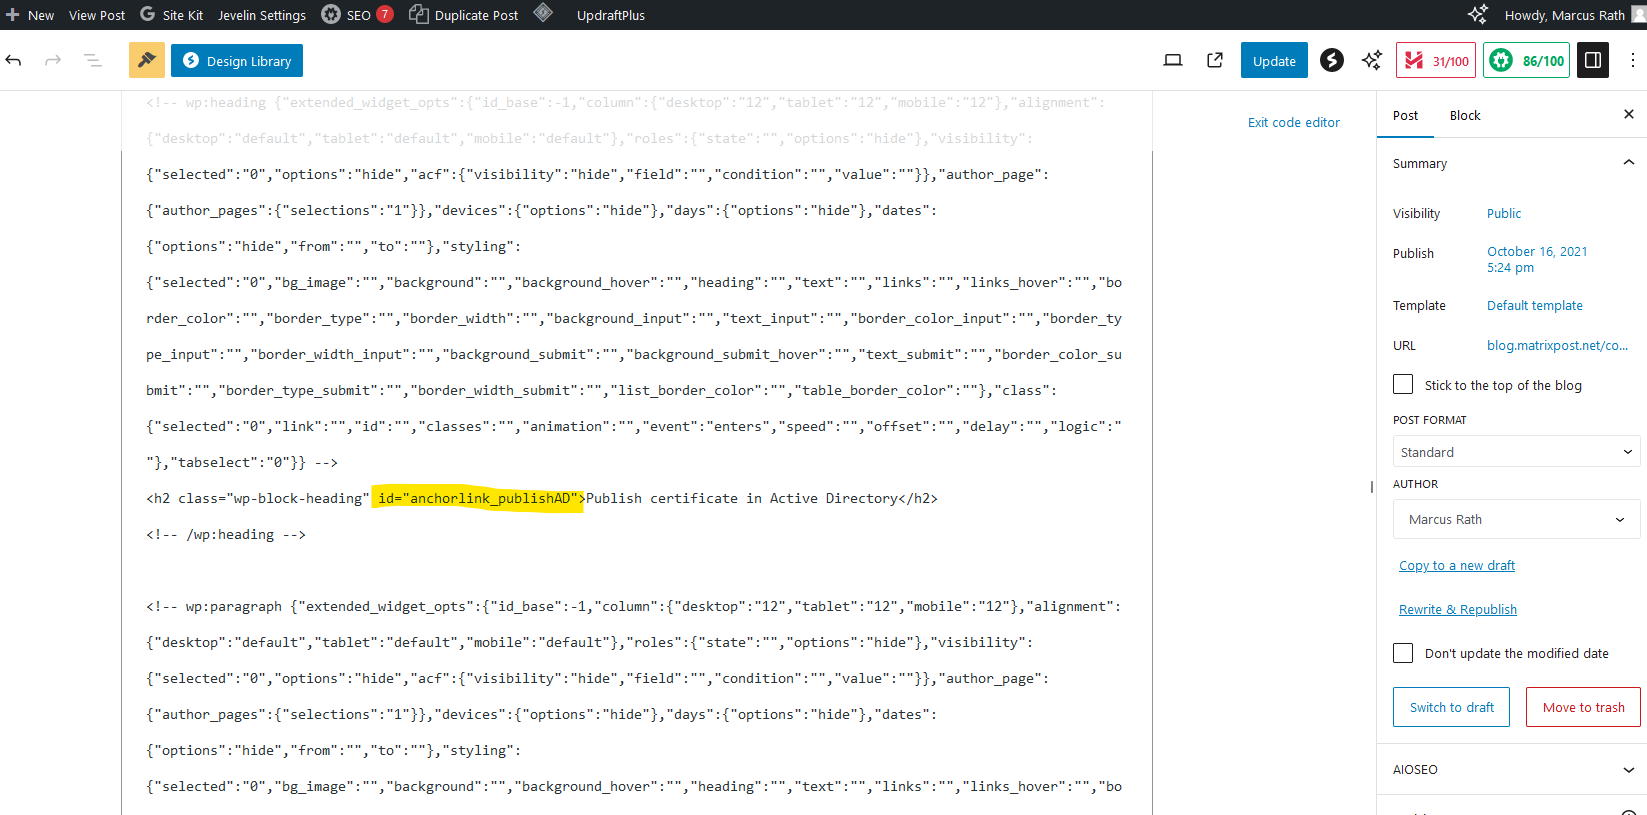
By switching to the Code Editor view as shown below we can check what this HTML ANCHOR field will finally add to our HTML code.
So finally the anchor here is nothing else than an id attribute in HTML which can also be used to point to a specific CSS style declaration or by JavaScript to access and manipulate the element with the specific id.
HTML id Attribute
https://www.w3schools.com/html/html_id.asp
So finally to add this anchor to the desired position/section you can also directly switch to the Code Editor view and add it by hand.
Now the next step is to create the link from the source page/position we want the user’s browser to jump to this anchor position and page.
In case you just want the user to jump from the same page to a specific position/section on this page, create a link which is nothing else than the # symbol plus the name of the anchor, so in my case #anchorlink_publishedAD as shown below.
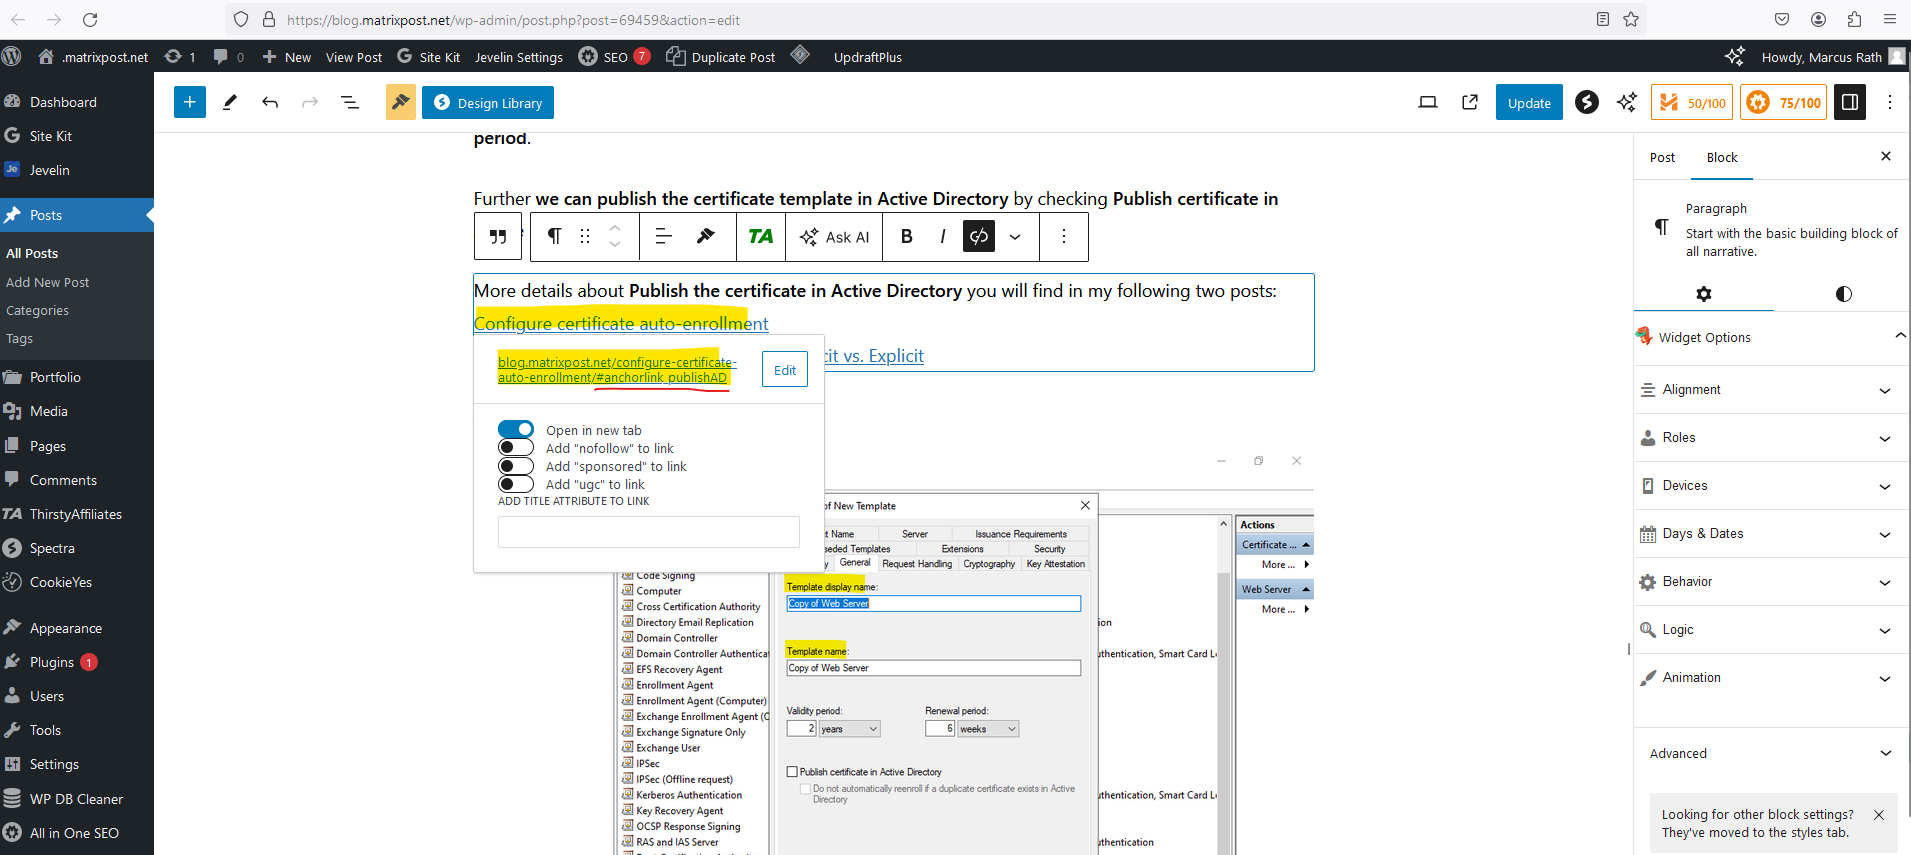
In case you want the user to jump to this page and specific position/section from a different page, the link you will create on the starting page will look like this.
Create the whole link for the referred page and append the anchor after the slash -> /#<anchor name> like shown below.
https://blog.matrixpost.net/configure-certificate-auto-enrollment/#anchorlink_publishAD
That’s it!
Links
Create Page Jumps
https://wordpress.com/support/page-jumps/Link best practices for Google
https://developers.google.com/search/docs/crawling-indexing/links-crawlableHTML id Attribute
https://www.w3schools.com/html/html_id.asp
Tags In
Latest posts
Protecting NetApp ONTAP Workloads with Autonomous Ransomware Protection (ARP) – Part 4 – Detecting and Recovering SMB Workloads from Ransomware
Follow me on LinkedIn