Set up a 2-tier PKI in Active Directory Certificate Services (AD CS) – Part 4
In this part of my blog post series we will set up a Windows 11 client virtual machine and one Windows Server 2022 virtual machine to see the Active Directory Certificate Services (AD CS) in action.
- Installing a Windows 11 Client and Windows Server 2022 for PKI Testing
- Create a Certificate for the IIS Web Server and Web Page
- Request a new Certificate by using the MMC Certificates Snap-In
- Code Signing in Visual Studio
- Certificate Templates
- Configure certificate auto-enrollment
- Blog Post Series – Parts Summary
- Links
Installing a Windows 11 Client and Windows Server 2022 for PKI Testing
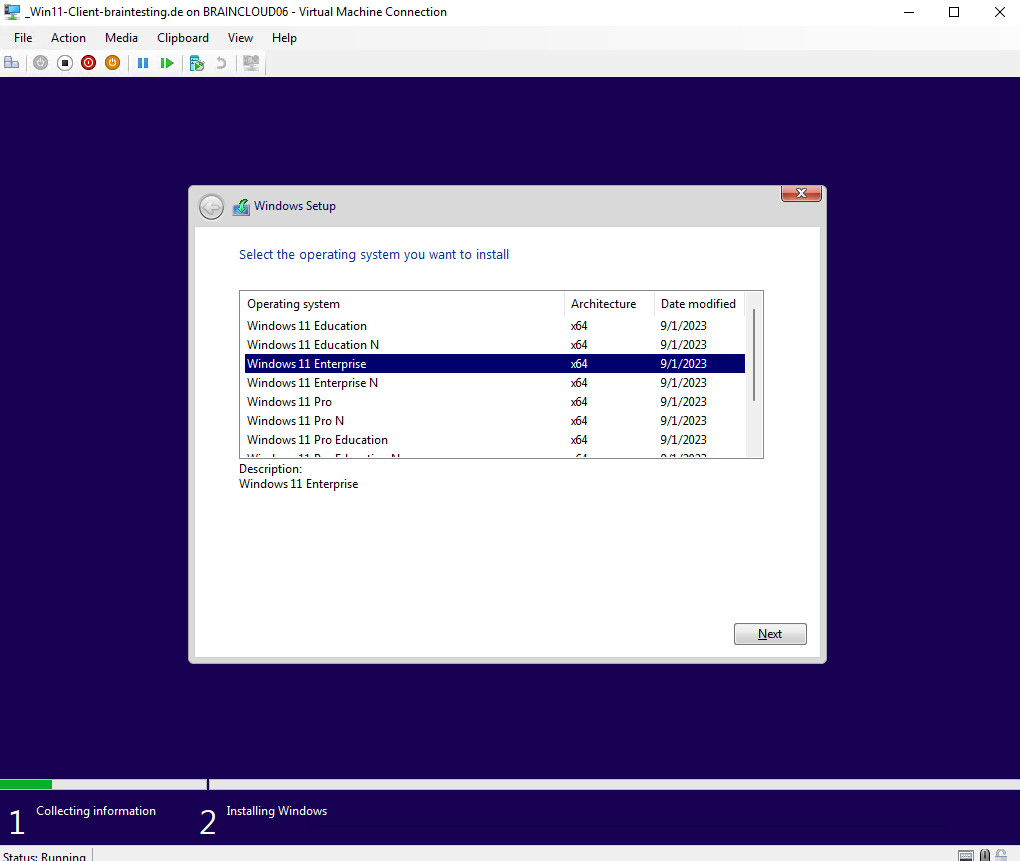
In order to test my new PKI I will first install a new Windows 11 virtual machine on Microsoft Hyper-V.
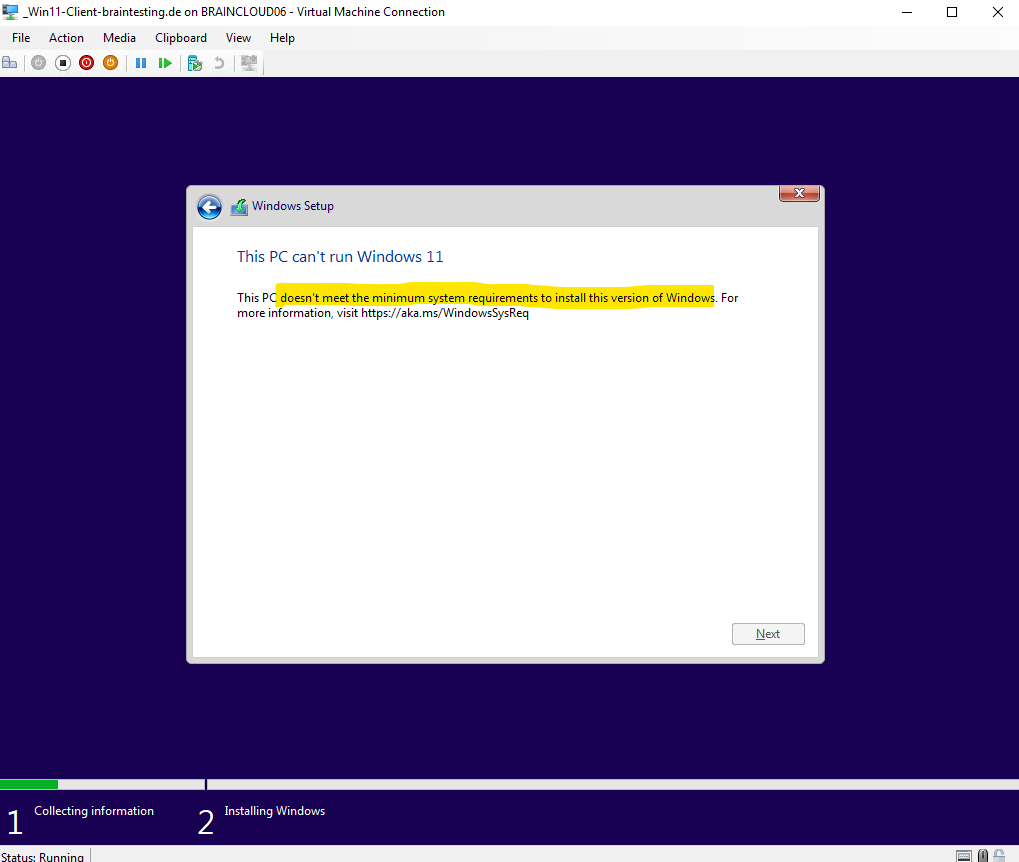
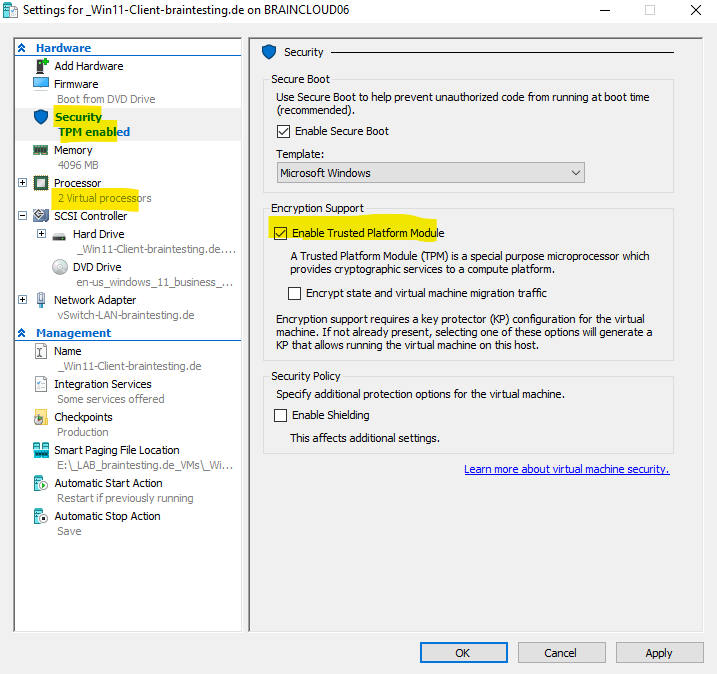
For Windows 11 we first need to enable the Trusted Platform Modul (TPM) under the settings for the virtual machine and further Windows 11 needs a minimum of 2 or more CPU cores.
This PC doesn’t meet the minimum system requirements to install this version of Windows (Windows 11).
More about under the following link https://www.microsoft.com/en-us/windows/windows-11-specifications?r=1.
So I have to adjust the following settings for my virtual machine running on Microsoft Hyper-V.
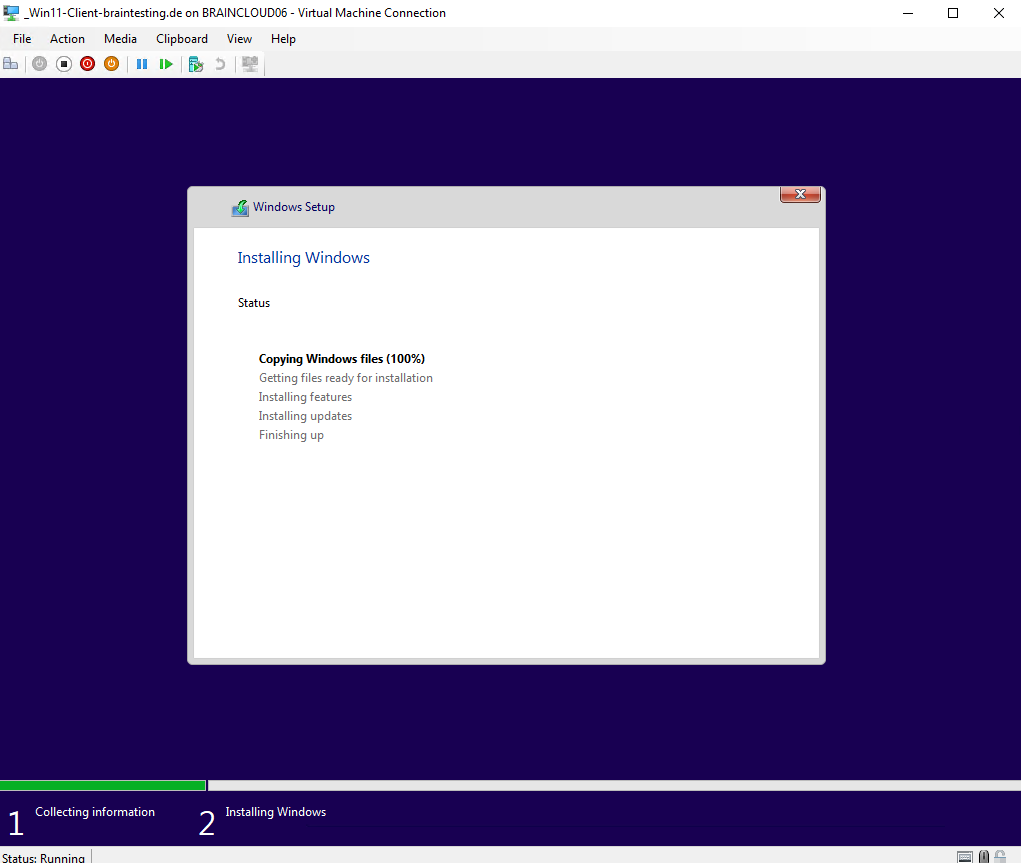
Now I can install Windows 11 on the virtual machine.
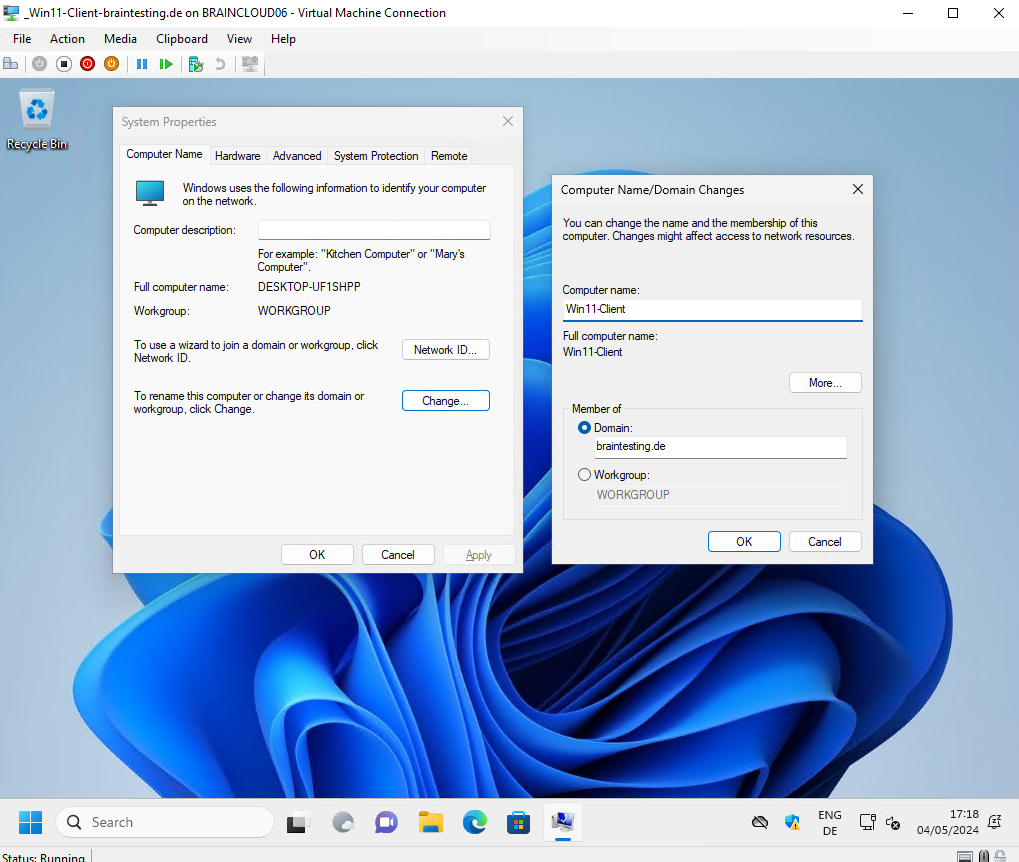
Finally I can join my new Windows 11 virtual machine to my lab domain the PKI resp. my Subordinate CA (Intermediate CA) is running within.
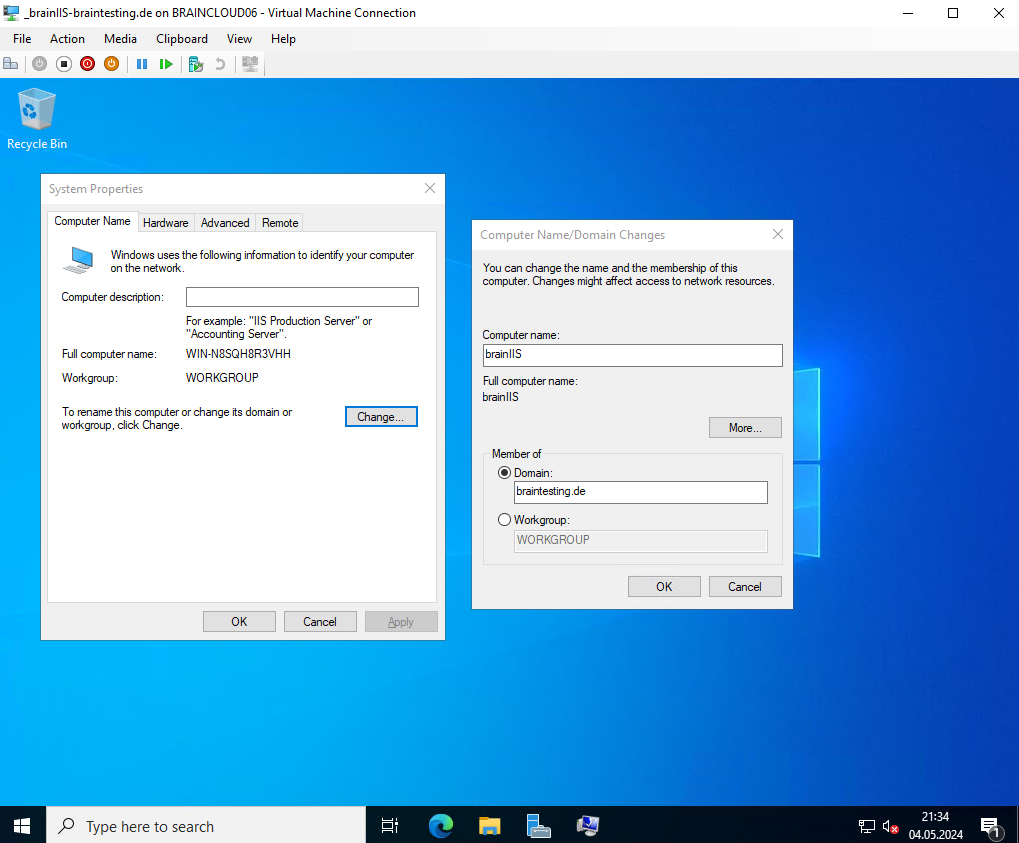
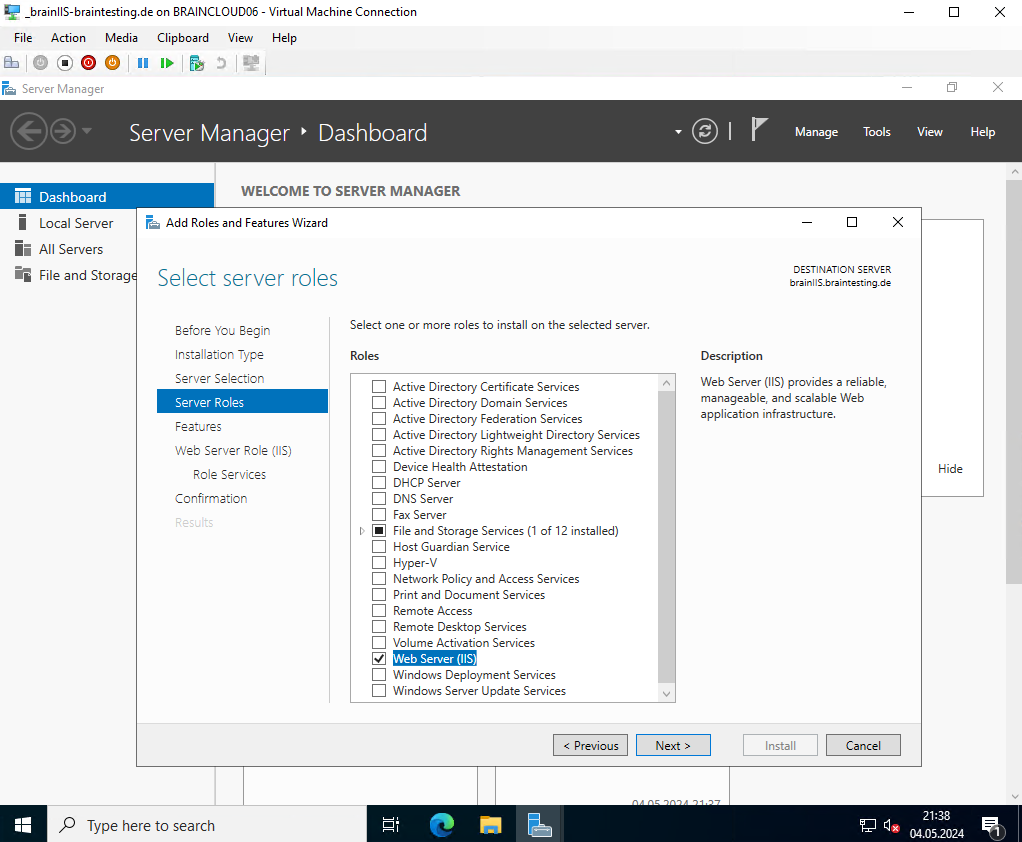
Next I will also install one Windows Server 2022 on which I will install the Web Server (IIS) server role which will finally serve website by using a SSL/TLS certificate issued by our Subordinate CA (Intermediate CA).
Create a Certificate for the IIS Web Server and Web Page
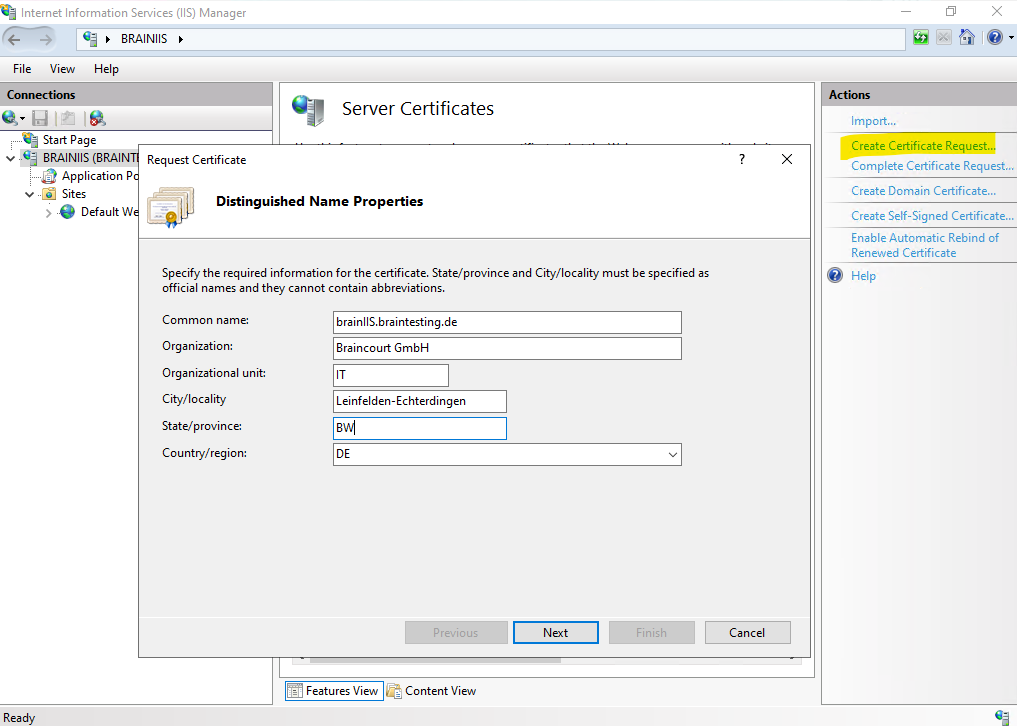
Below I will go through the steps to create a new certificate for a website running on IIS. Within the IIS console click on the server node and then on Server Certificates -> Create Certificate Request … as shown below.
Enter a common name and some organization details. For the common name use the FQDN you want to use to browse to the website.
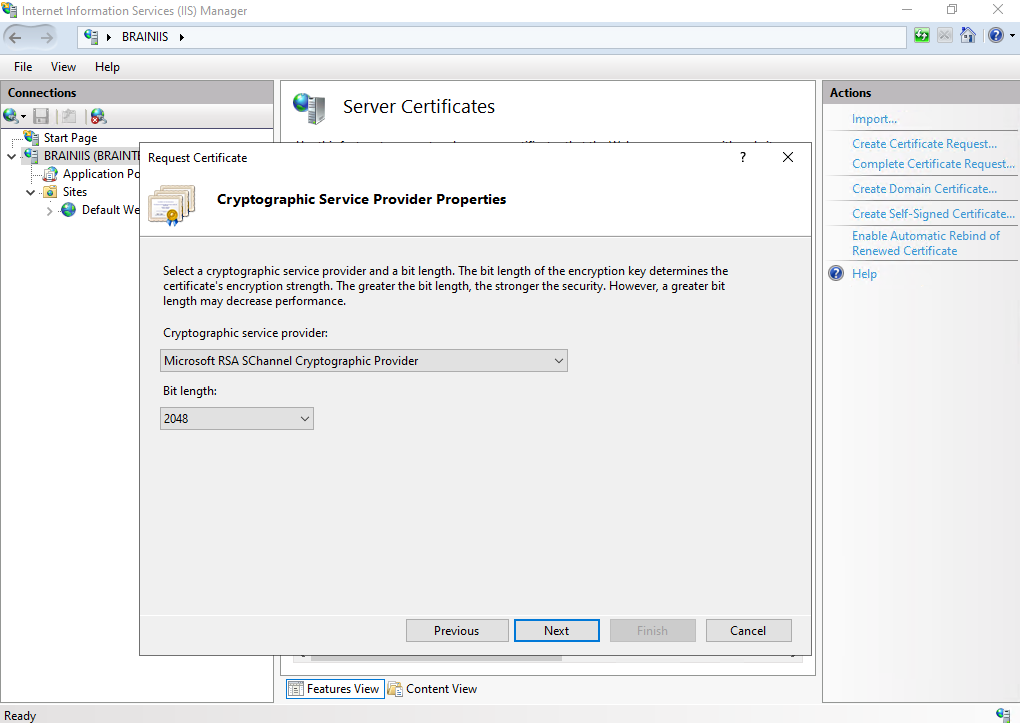
Specify the cryptographic service provider and bit length.
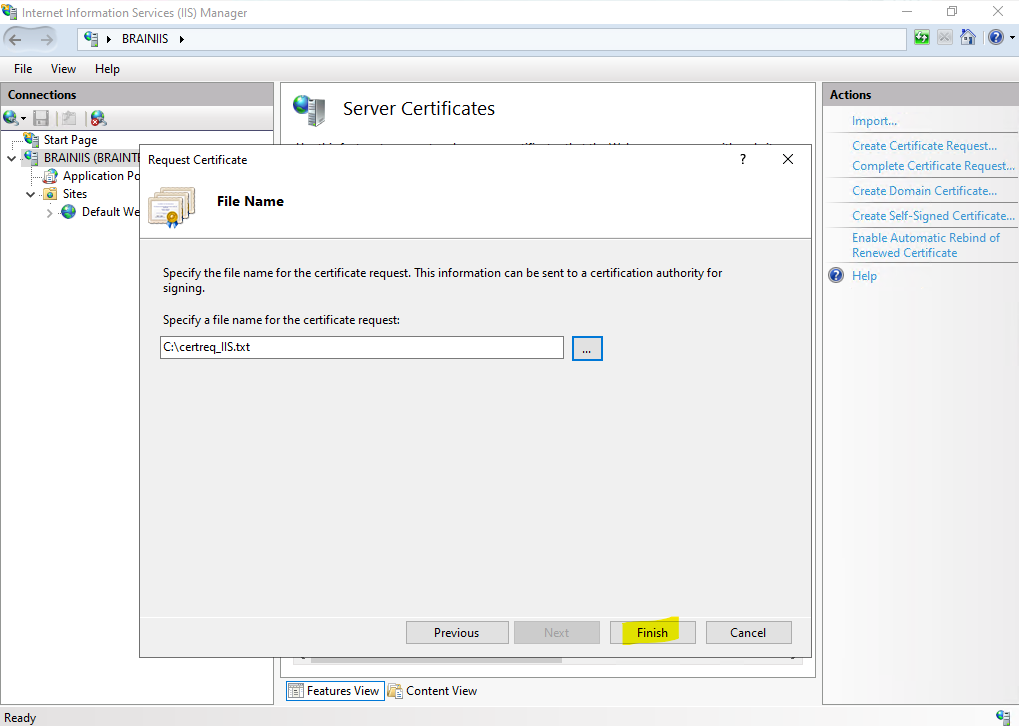
Specify a file name for certification request.
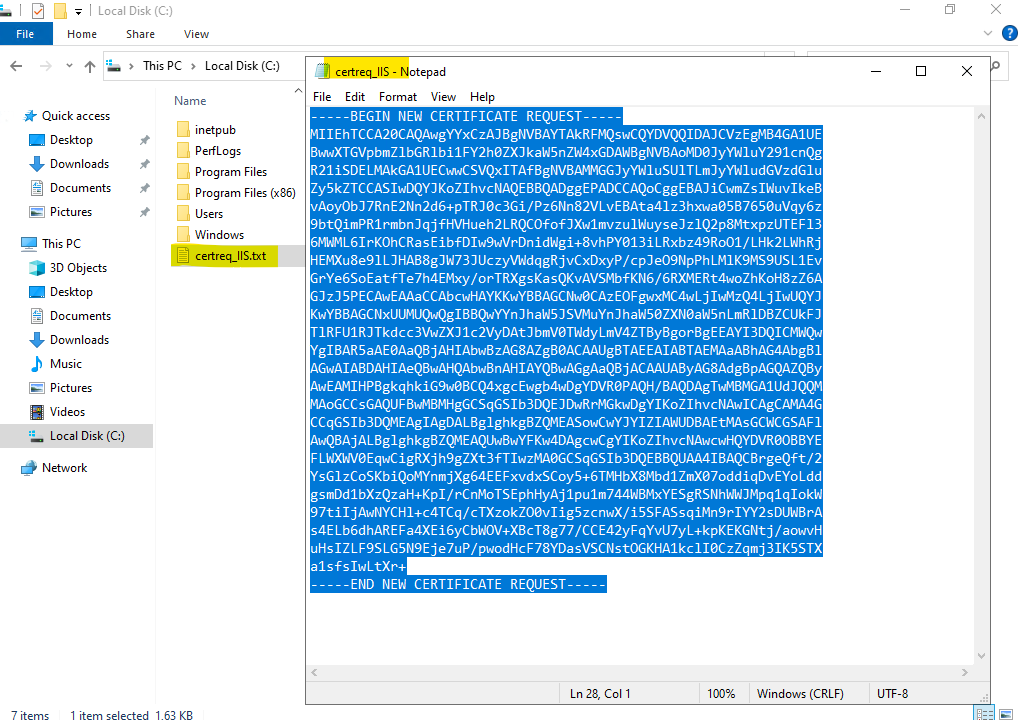
Copy the content of the certification request to the clipboard.
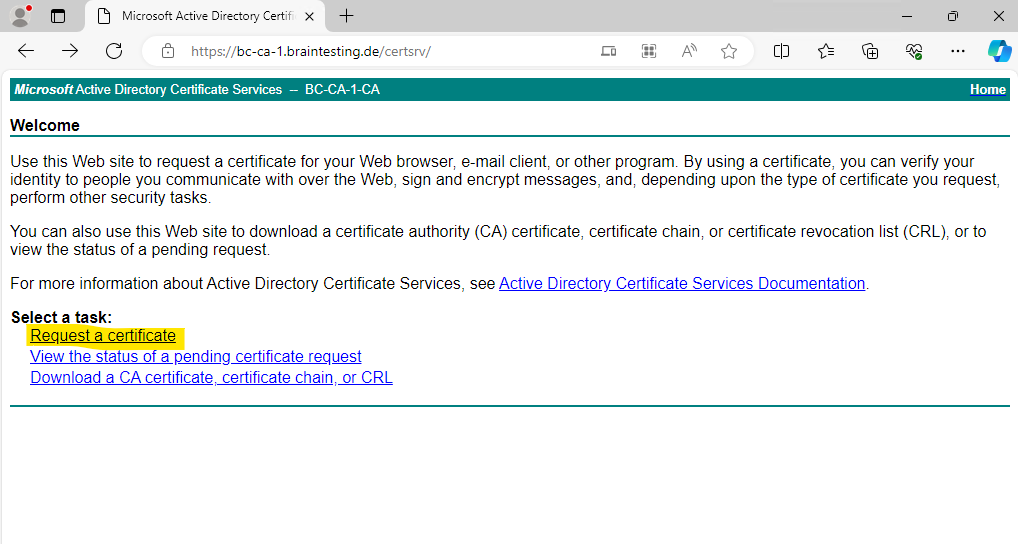
Browse to the CA Web Enrollment role service page and enter the credentials of an account which is a member of either Domain Admins or Enterprise Admins.
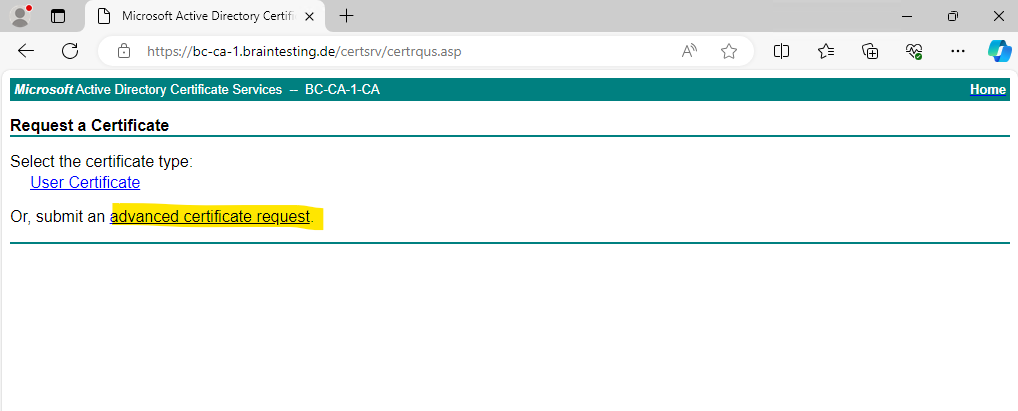
Click on Request a certificate.
Click on advanced certificate request.
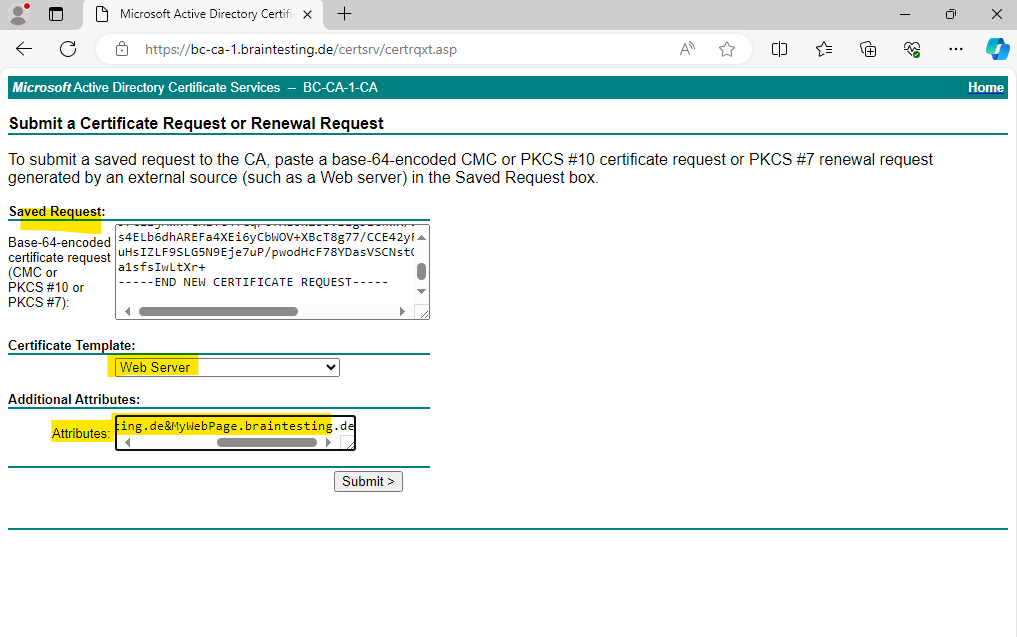
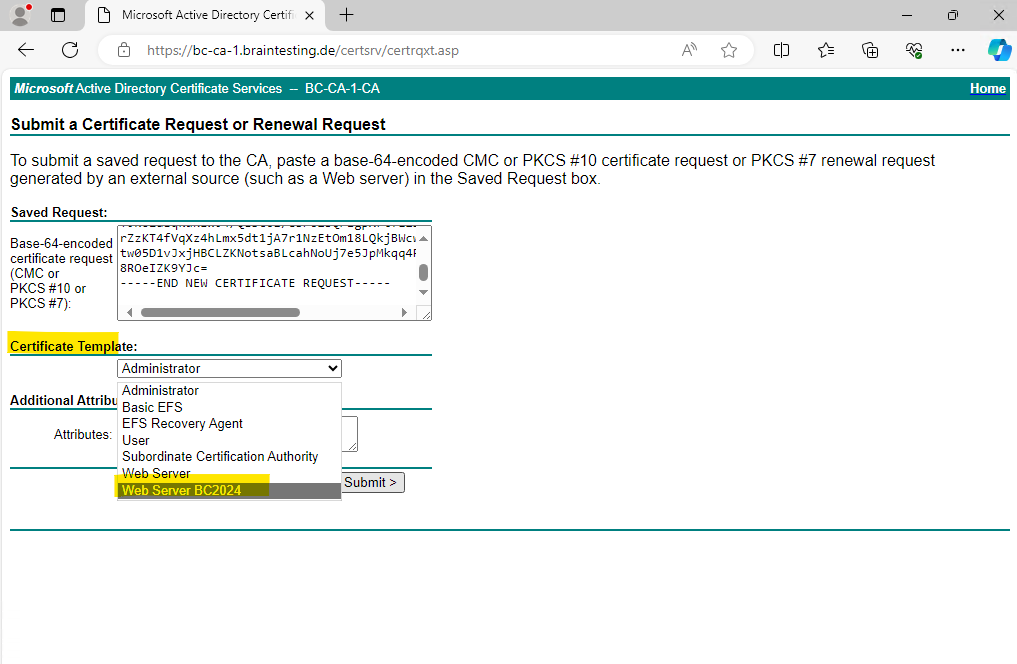
Now we can paste the previously copied content of the certificate request file into the Saved Request field below, further we need to select the Web Server certificate template and because we enabled user-defined SANs we can now also enter the FQDN of our CA Web Enrollment role service page as SAN. Finally we can click on Submit.
san:dns=brainIIS.braintesting.de&MyWebPage.braintesting.de
Multiple DNS names are separated by an ampersand (&). For example, if the name of the domain controller is corpdc1.fabrikam.com and the alias is ldap.fabrikam.com, both names must be included in the SAN attributes. The resulting attribute string is displayed as follows:
san:dns=corpdc1.fabrikam.com&dns=ldap.fabrikam.com
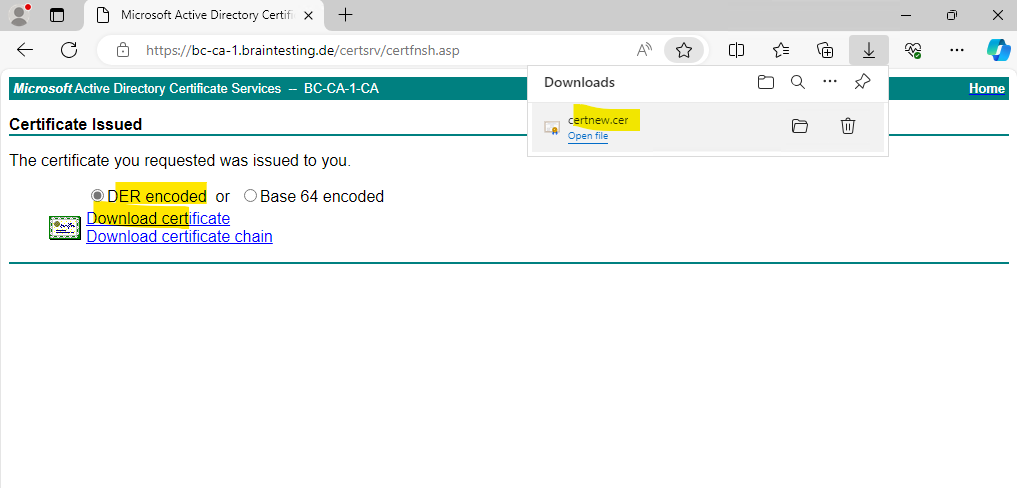
For Windows OS we can use and download the DER encoded certificate which is a binary format. For Linux OS you will use usally the Base64 encoded format which converts the binary certificate into ASCII format.
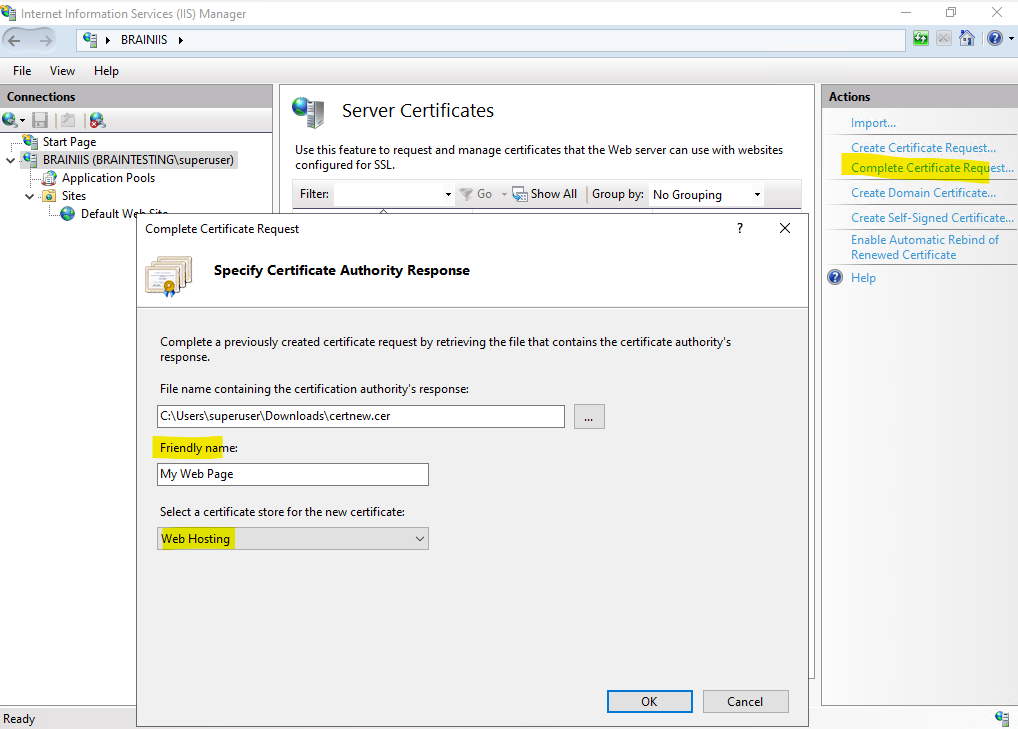
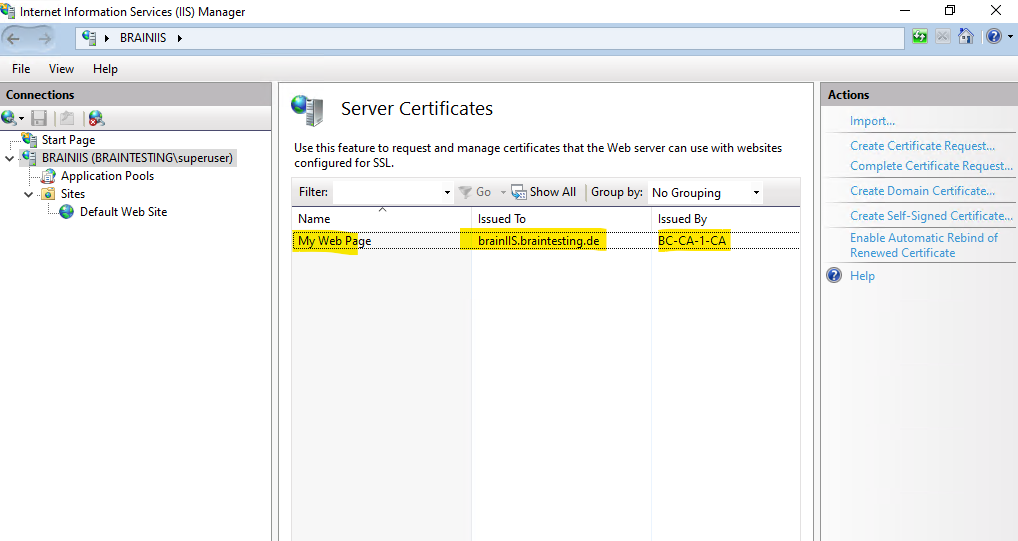
We now need to complete the certificate request by clicking on Complete Certificate Request … under IIS Manager console -> CA node -> Server Certificates as shown below.
We can now use this certificate to create a new HTTPS binding for the CA Web Enrollment role service page.
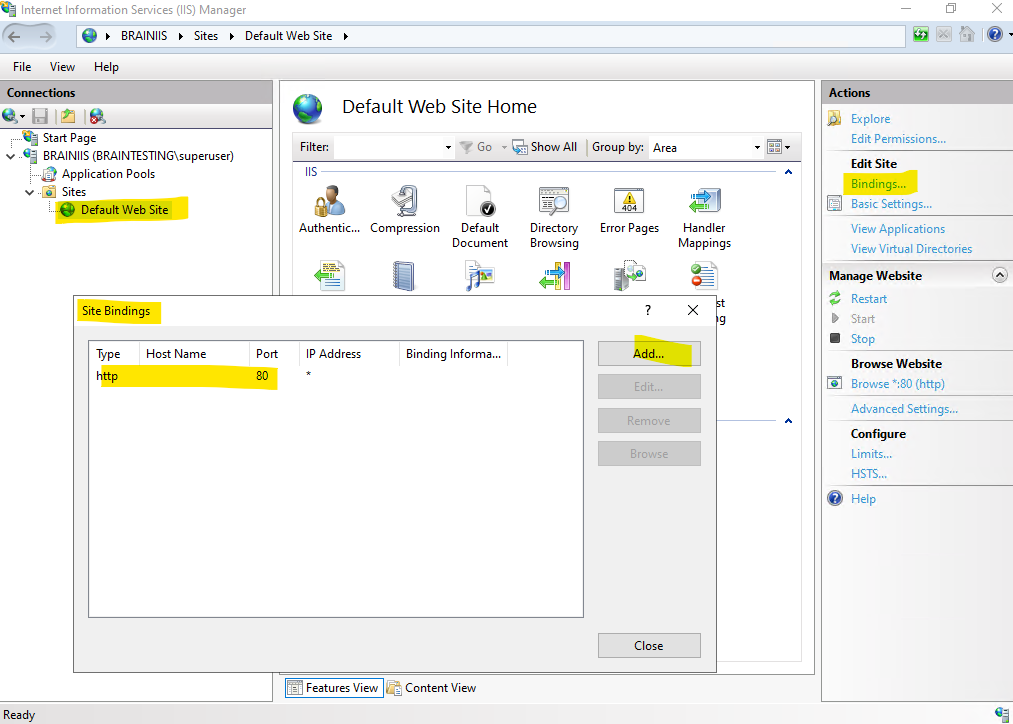
Select the Default Web Site and click on Bindings and then on Add … as shown below.
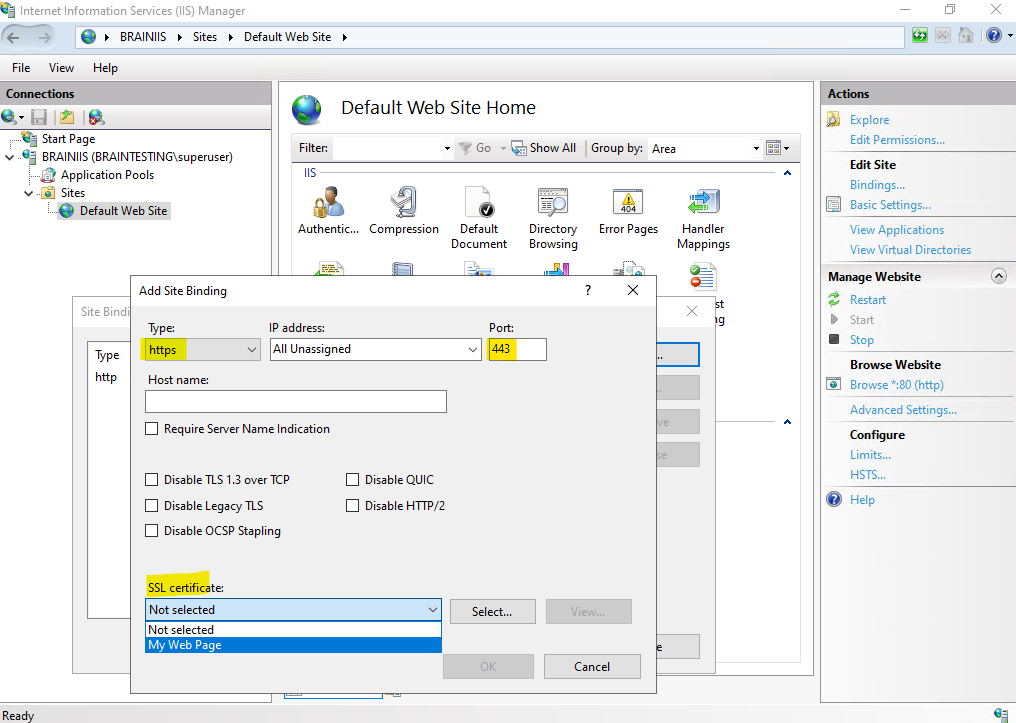
Select https for the new binding type and under SSL certificates select our newly created certificate.
When you want to host multiple https websites using different server certificates on the same IP address and port, you have to set also a dedicated host name for each website below and check Require Server Name Indication.
Server Name Indication allows multiple Internet Information Server (IIS) websites with unique host headers and unique server certificates to share the same SSL port. The server examines the server name specified by the client during the SSL handshake to determine, which server certificate should be used to complete the connection. Your IIS web site must have a host header and must use SSL to use Server Name Indication. If Server Name Indication isn’t used, all IIS websites sharing the same SSL port must share the same server certificate.
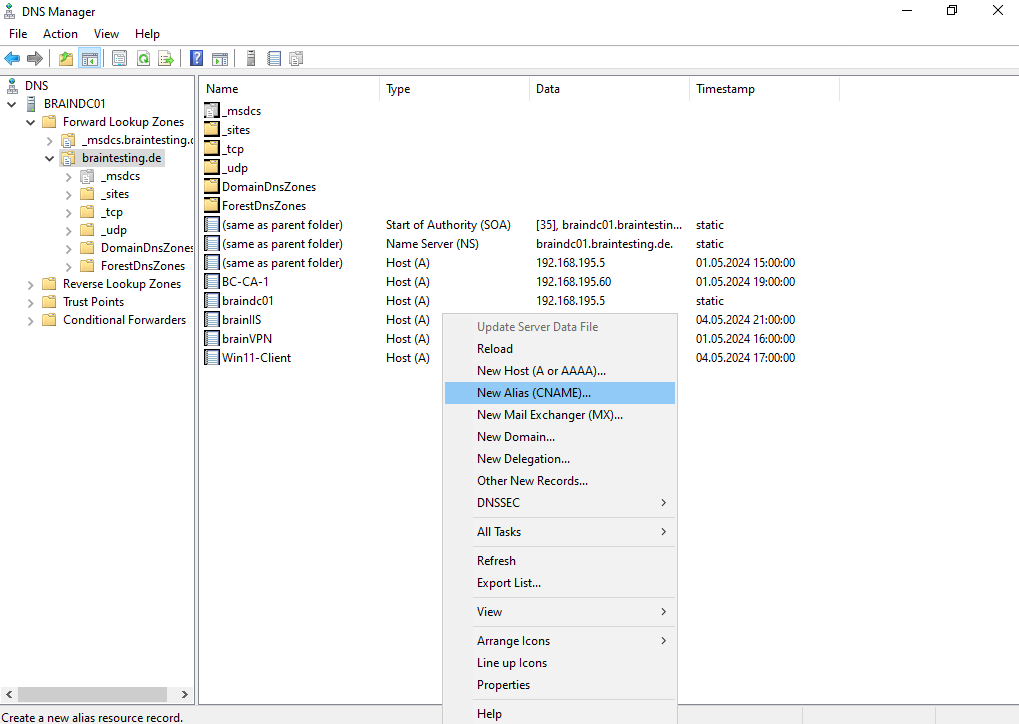
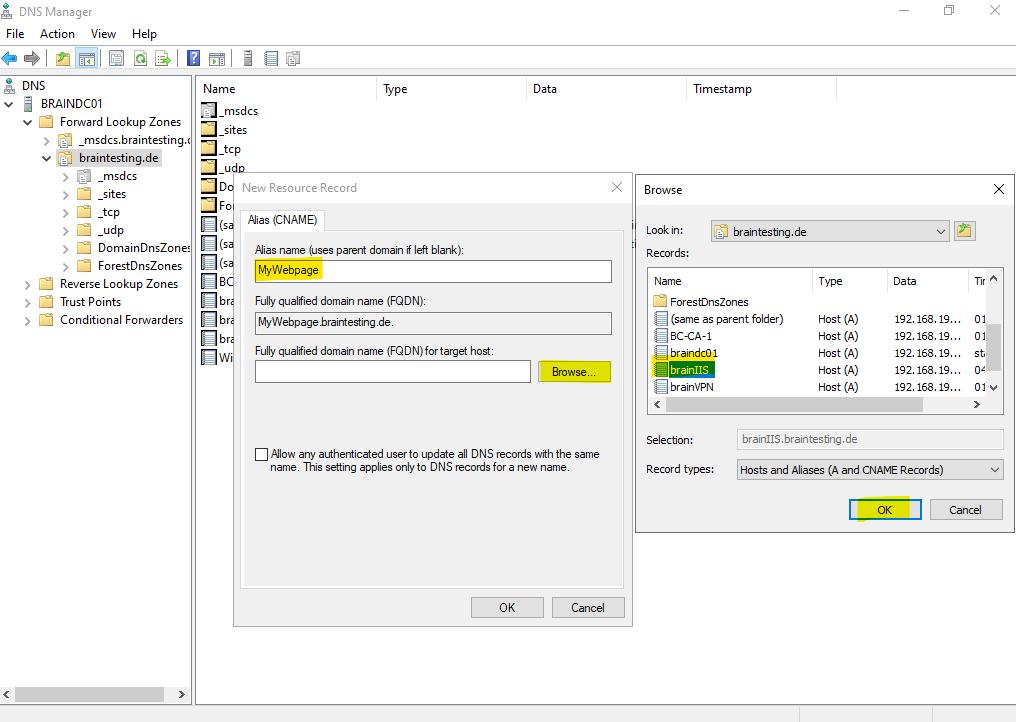
In order the website will also be available under the new FQDN MyWebPage.braintesting.de, I also need to add a new DNS A record or CNAME record pointing to the hostname brainIIS.braintesting.de.
I will create a CNAME record for.
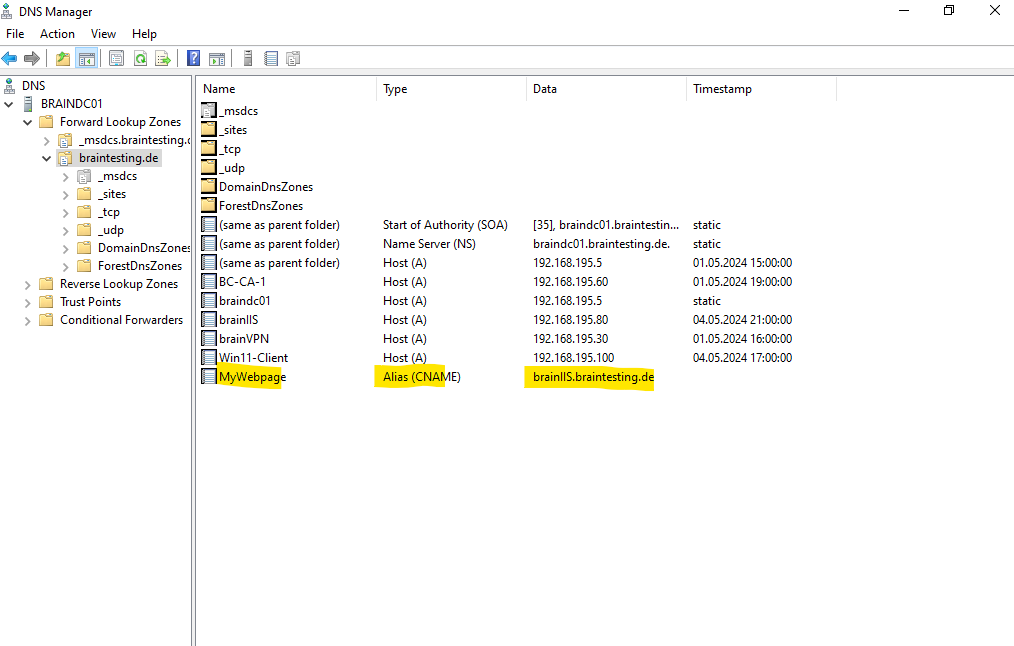
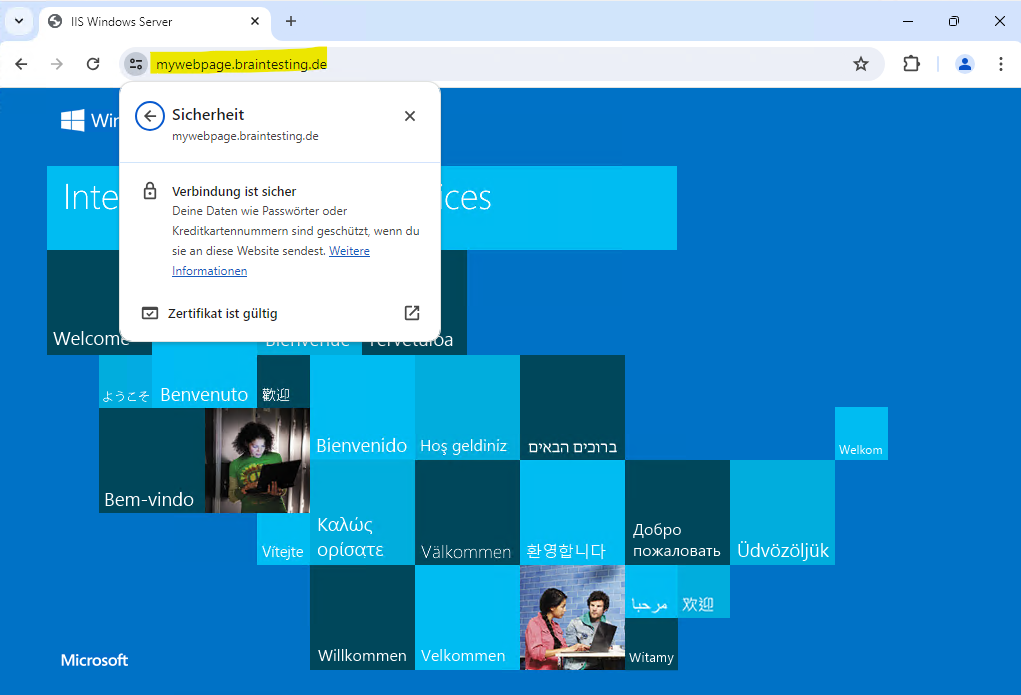
Finally I can browse to the website by using HTTPS and the CNAME.
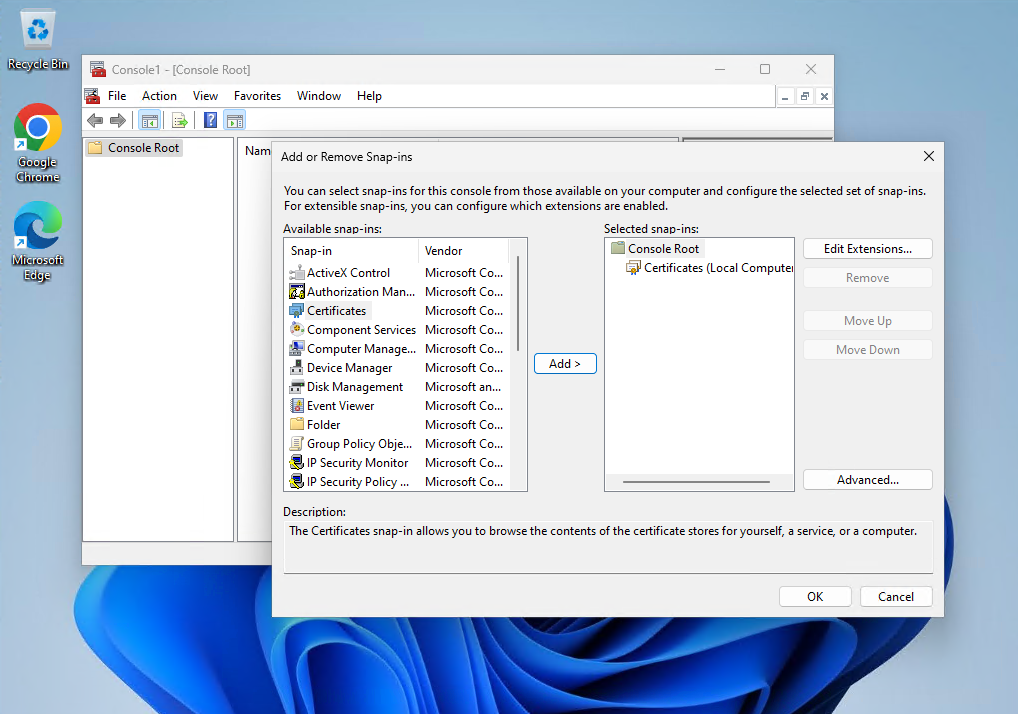
Request a new Certificate by using the MMC Certificates Snap-In
We can also use the Certificates Snap-In on a client to request certificates from our Subordinate CA (Intermediate CA).
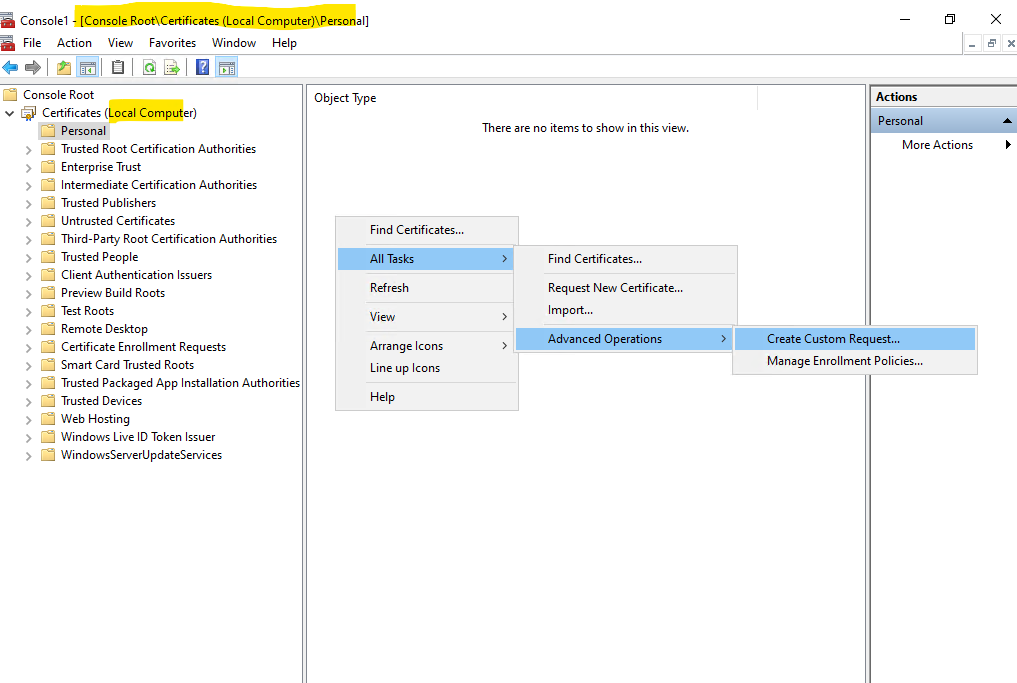
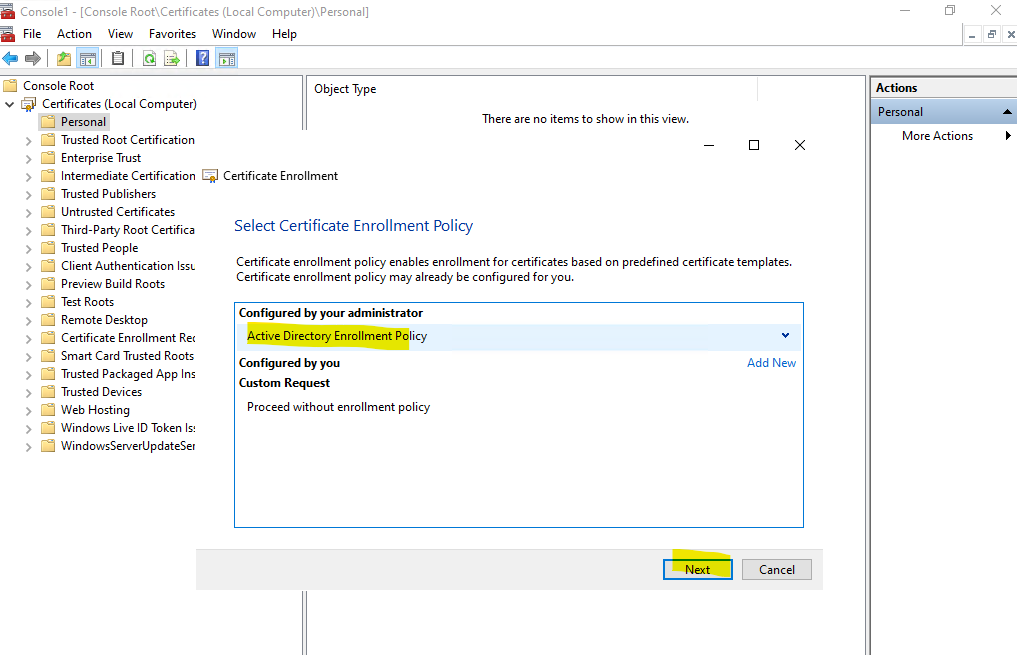
Because its for the IIS and a website, I will use here the Local Computer certificate store for. Right click within the Personal folder and select All Tasks -> Advanced Operations -> Create Custom Request …
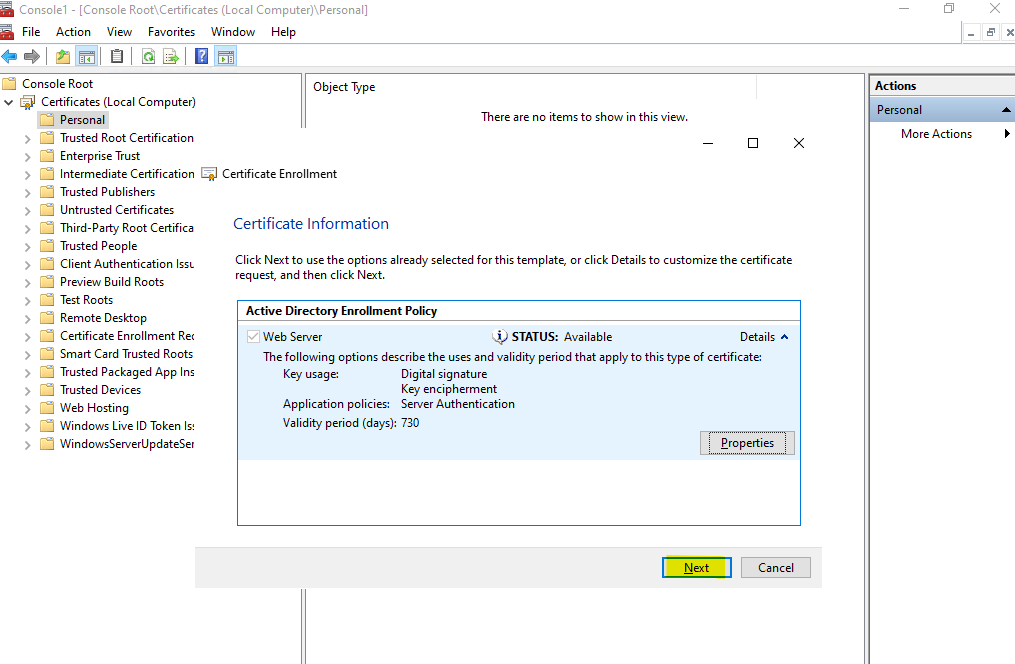
Leave the default selection and click on Next.
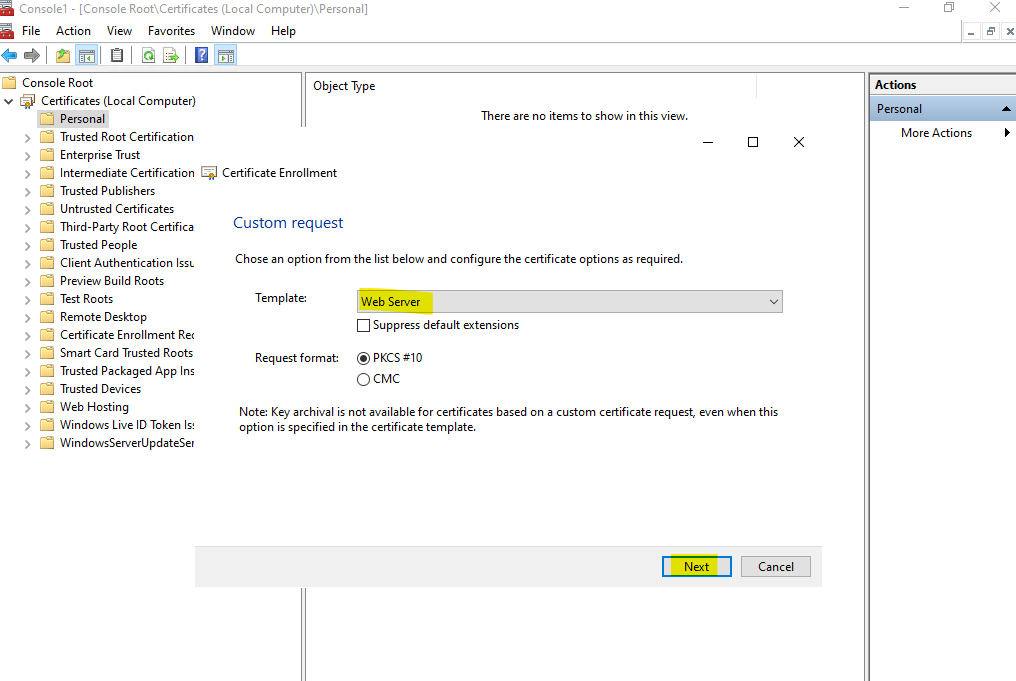
Select the Web Server Template.
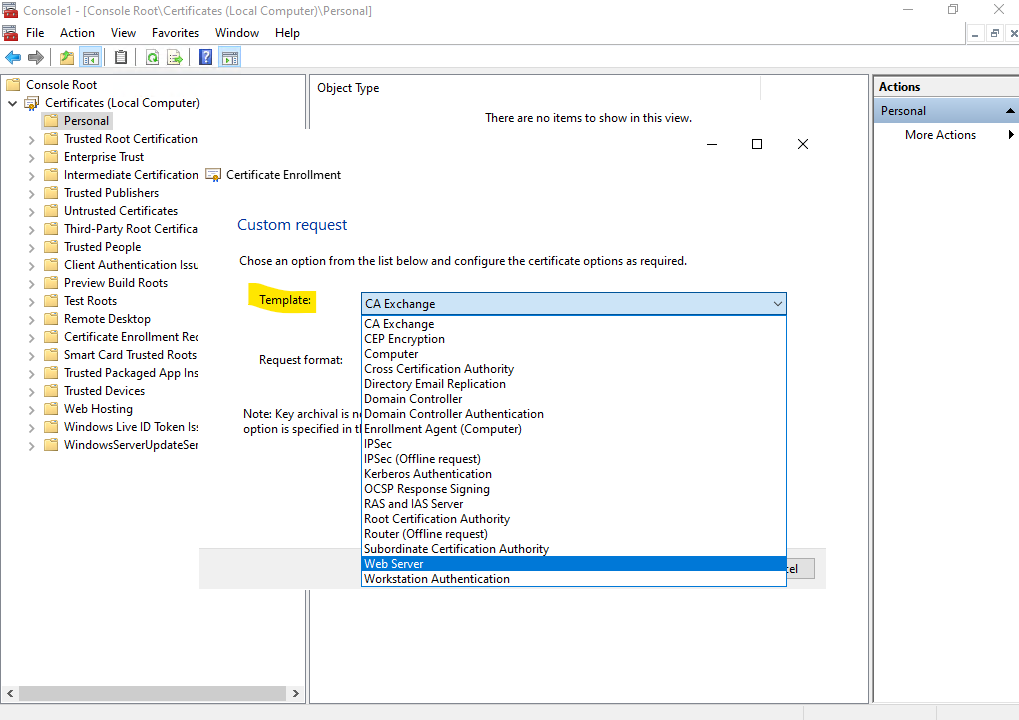
Click on Next.
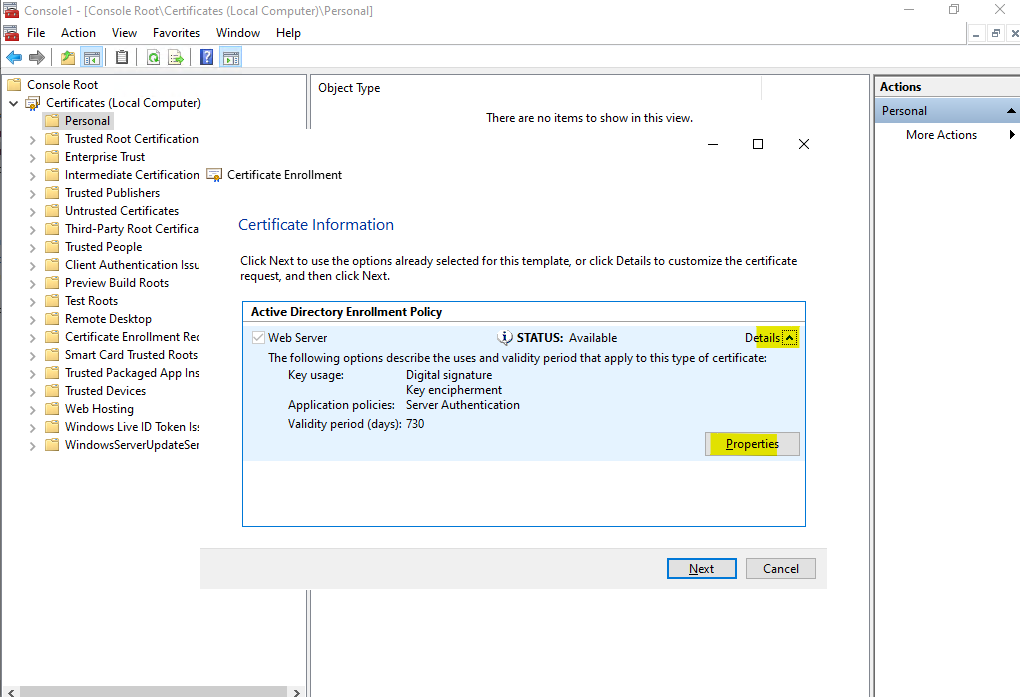
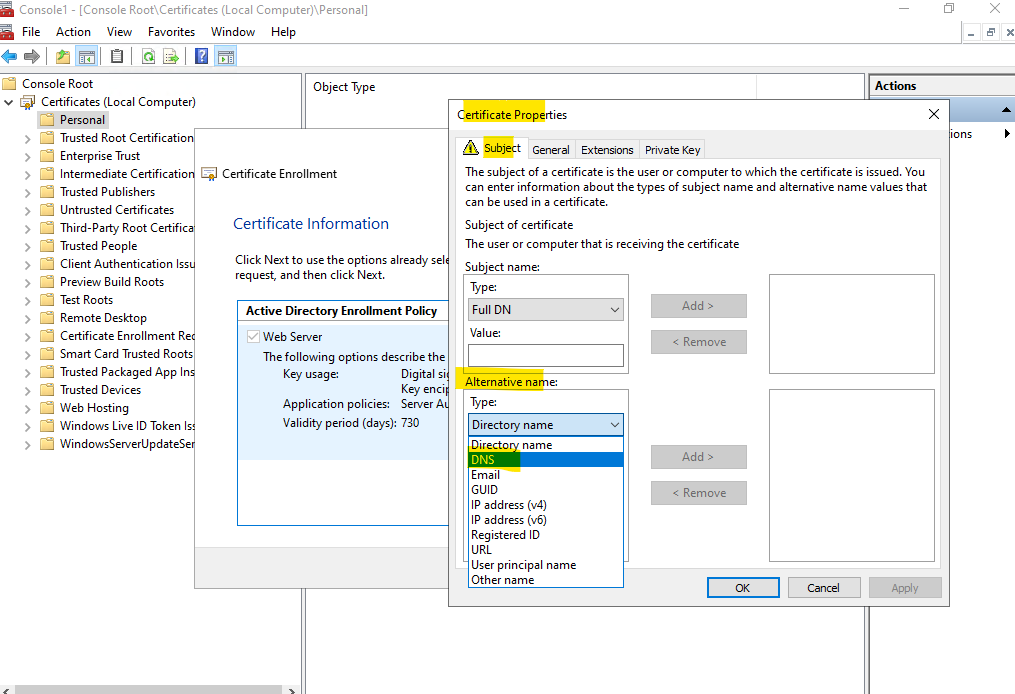
Expand the Details section and click on Properties.
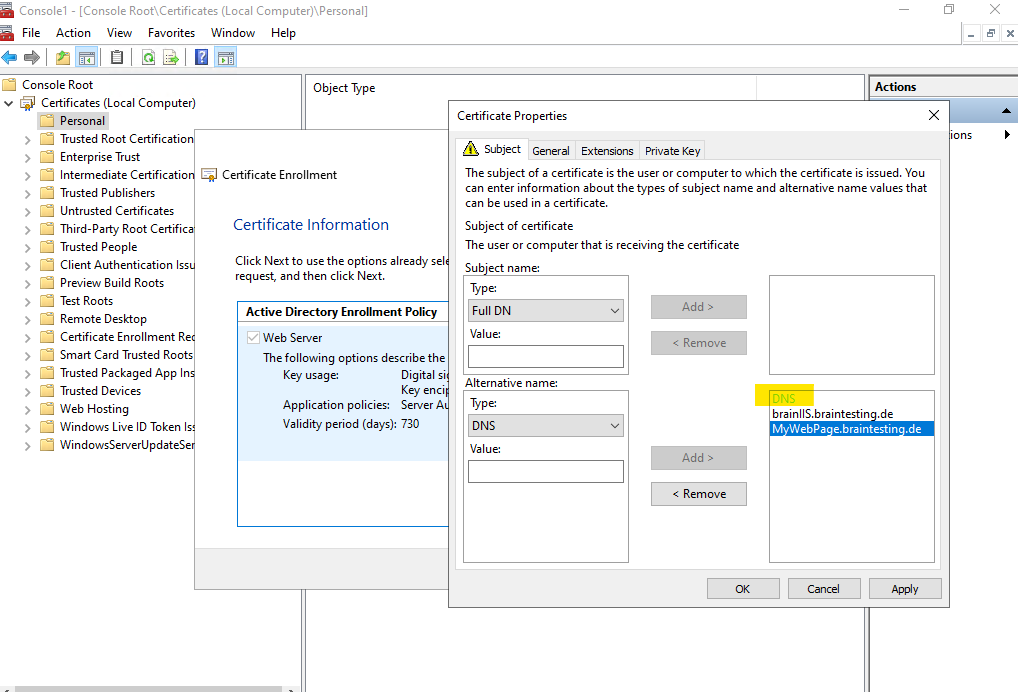
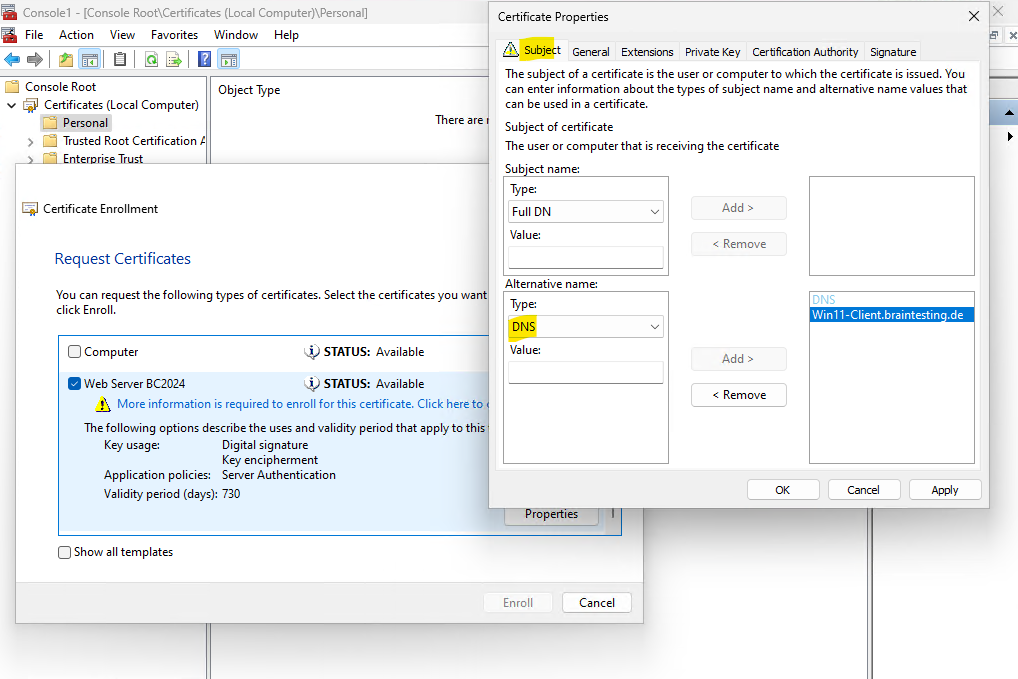
Select DNS under Alternative name.
Here I will add both of my subject alternative names for which the website should be delivered.
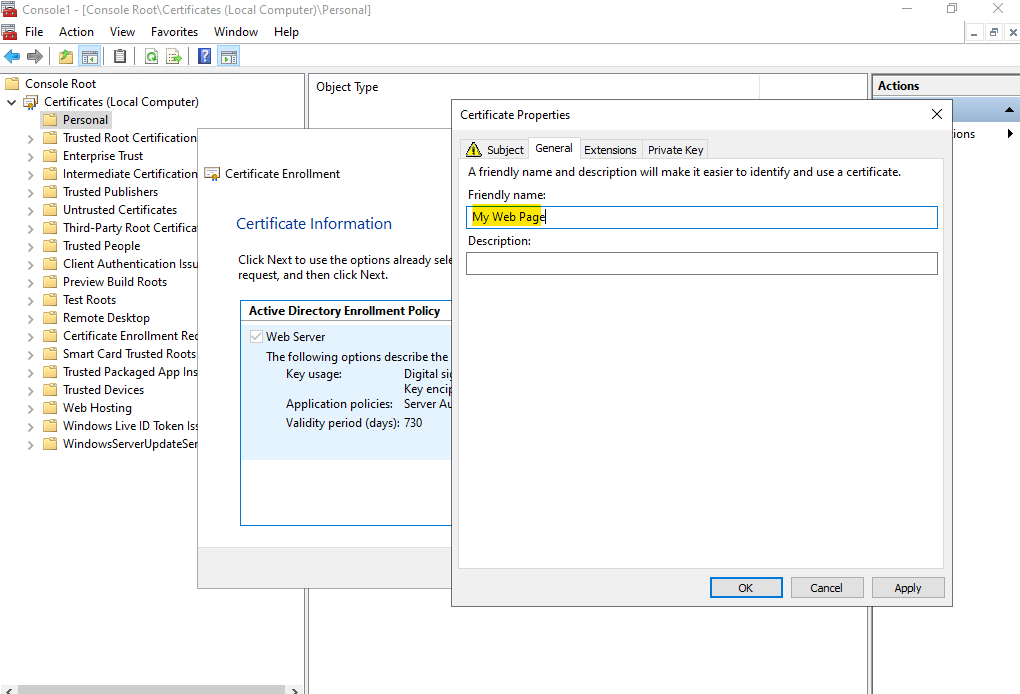
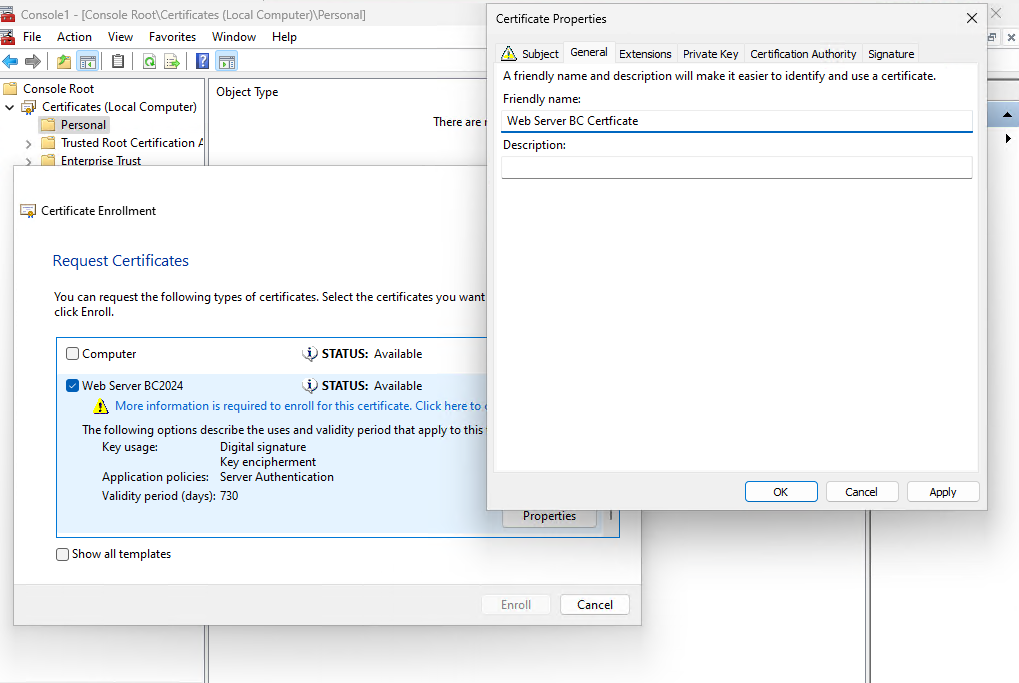
Enter a friendly name for the certificate.
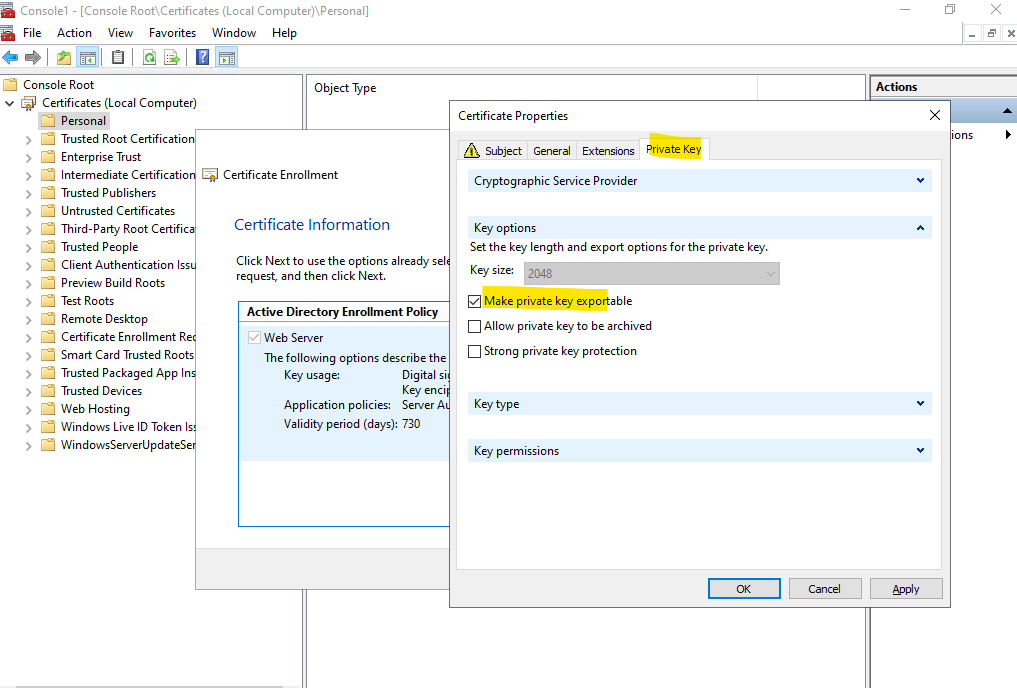
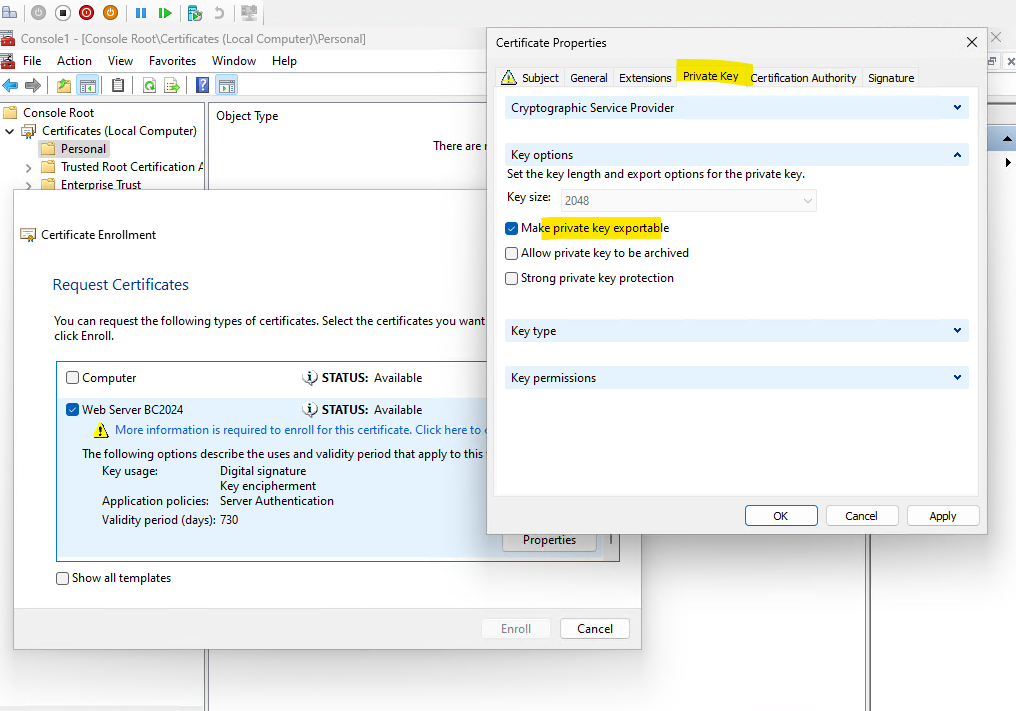
Within the Private Key tab I will check to make the private key exportable in case I want to use it on another server. Click on Apply.
Click on Next.
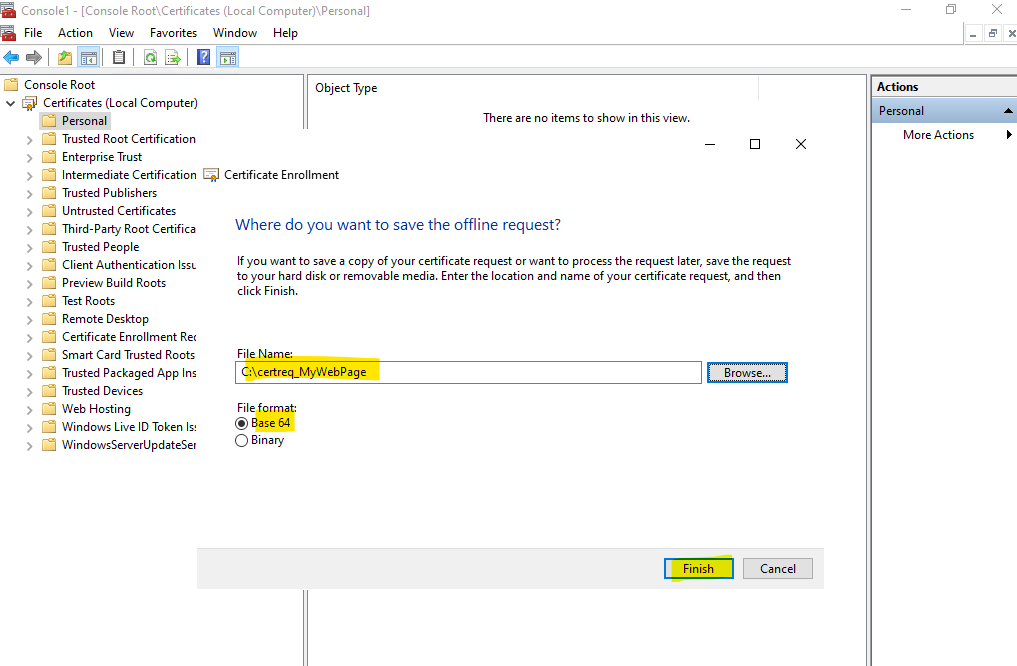
Enter the location and name for the certificate request and the file format. Finally click on Finish.
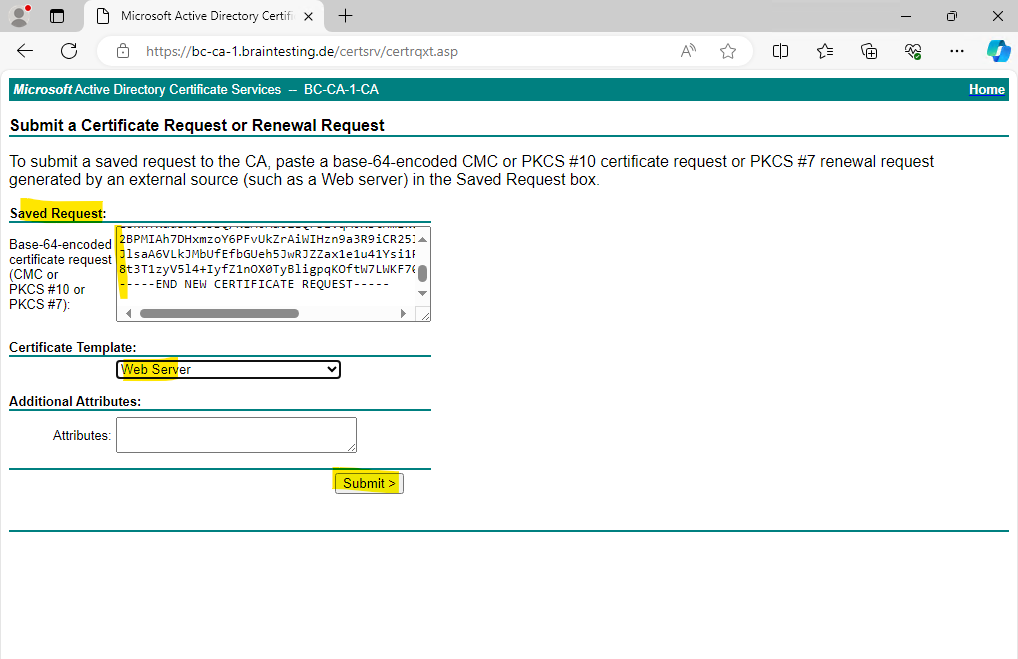
Now as previously we can submit a new request by using the CA Web Enrollment role service page. This time we do not need to specify any additional attributes regarding the subject alternative names, they are already included in the request.
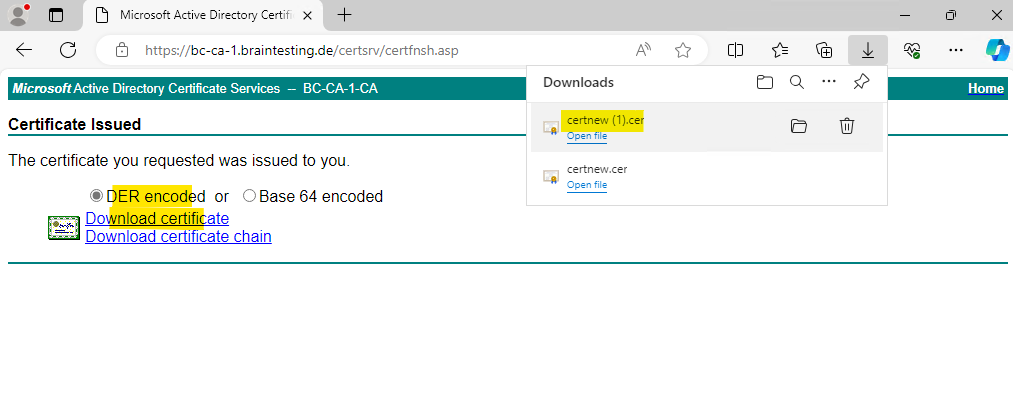
As previously for Windows OS we can use and download the DER encoded certificate which is a binary format. For Linux OS you will use usally the Base64 encoded format which converts the binary certificate into ASCII format.
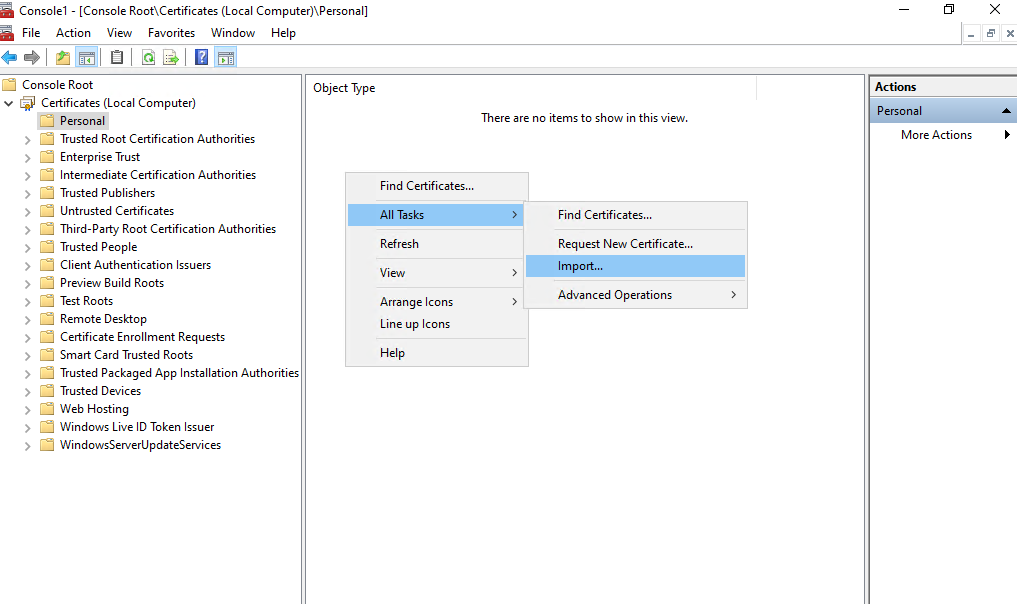
Now we need to complete the certificate request also like previously using the IIS console. Therefore we need to go back to the Certificates Snap-In.
Right click within the Personal folder and select All Tasks -> Import …
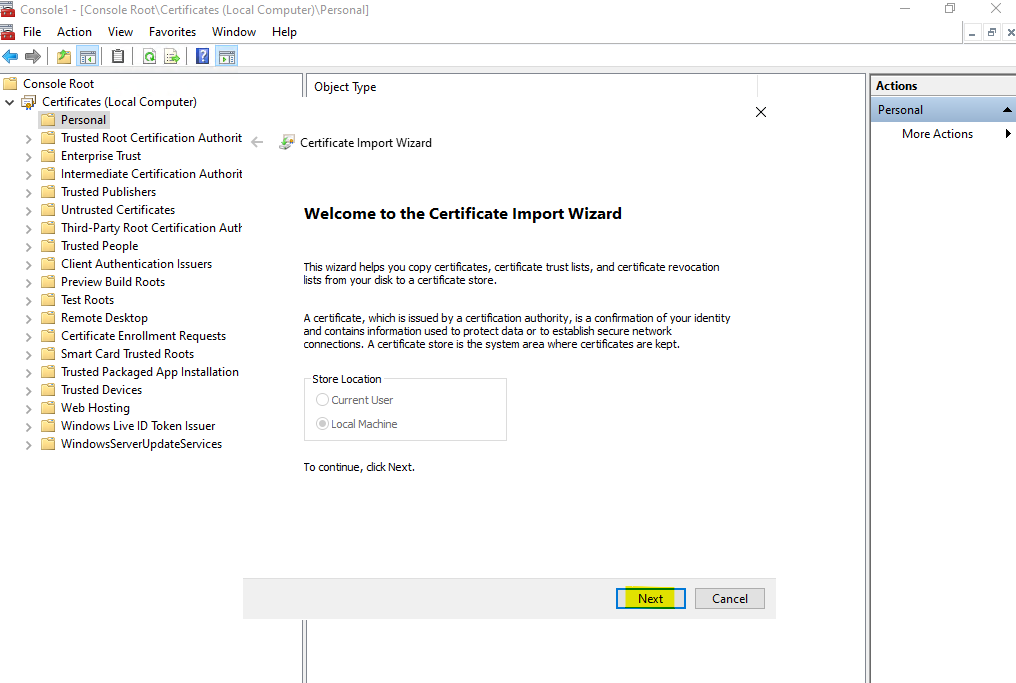
The Local Computer store location is already selected.
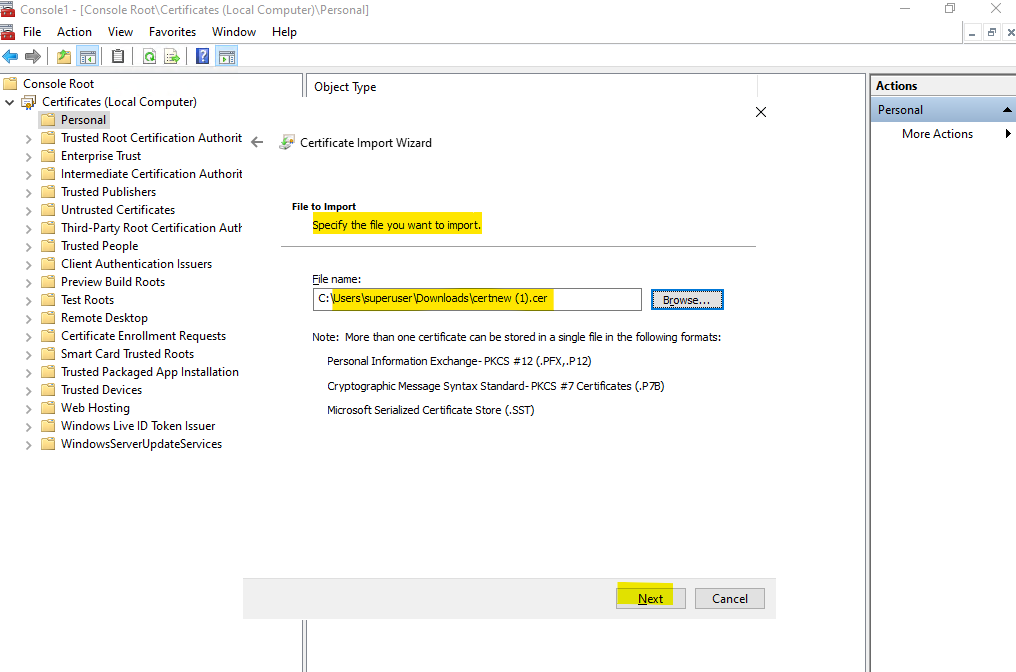
Browse to the previously downloaded certificate file.
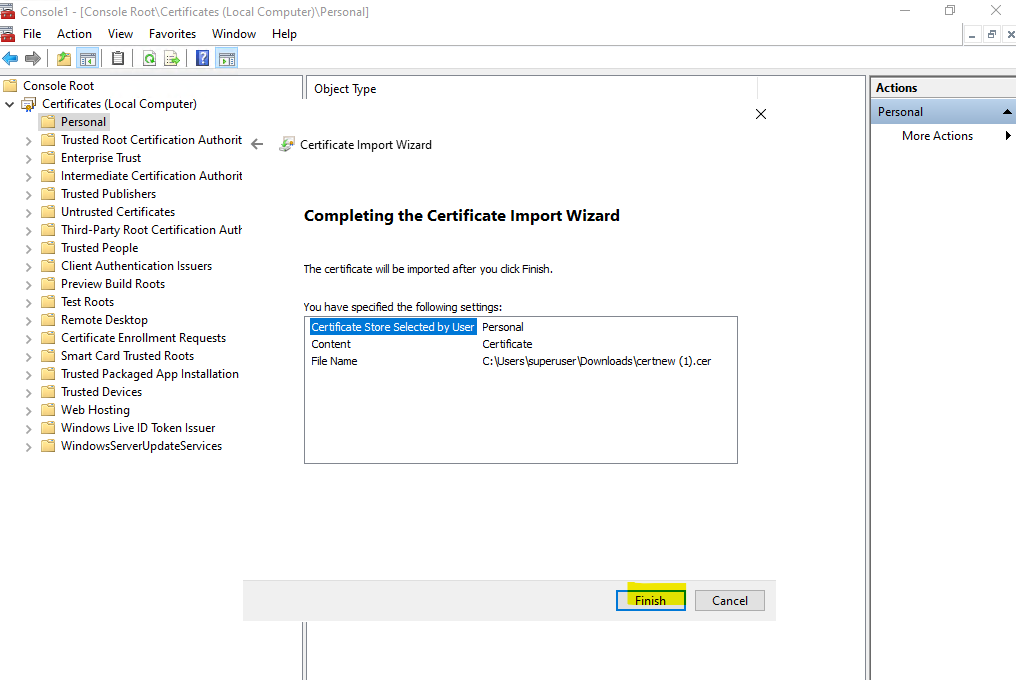
Below the correct certificate store is already pre-selected.
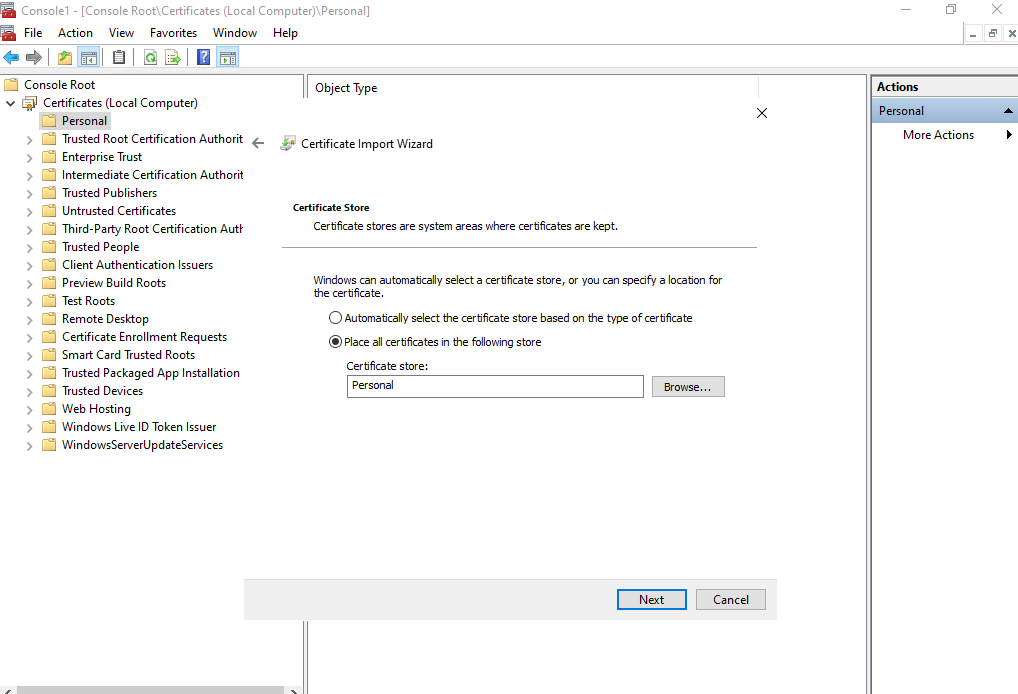
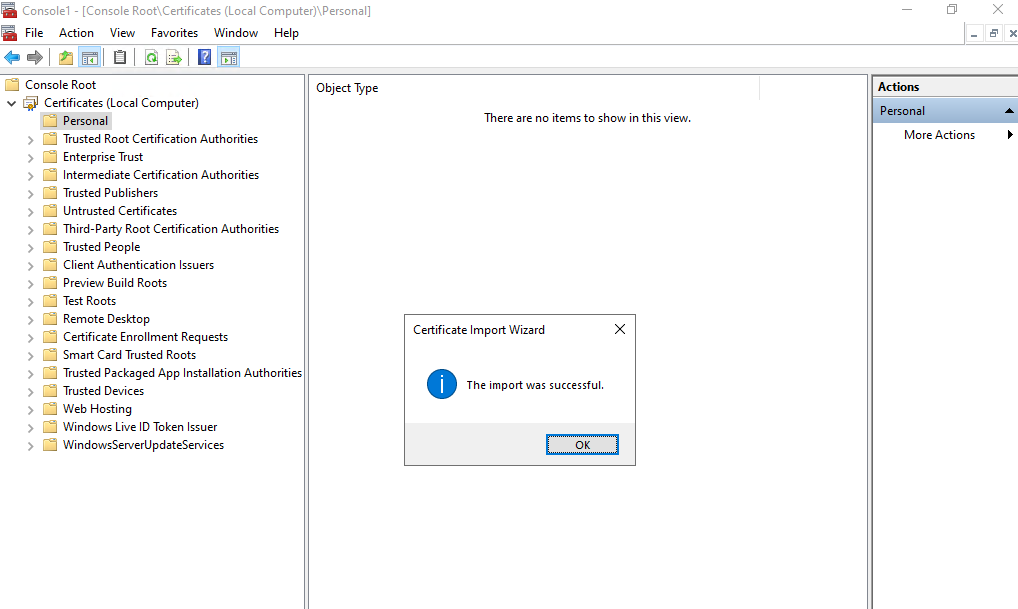
Finally click on Finish.
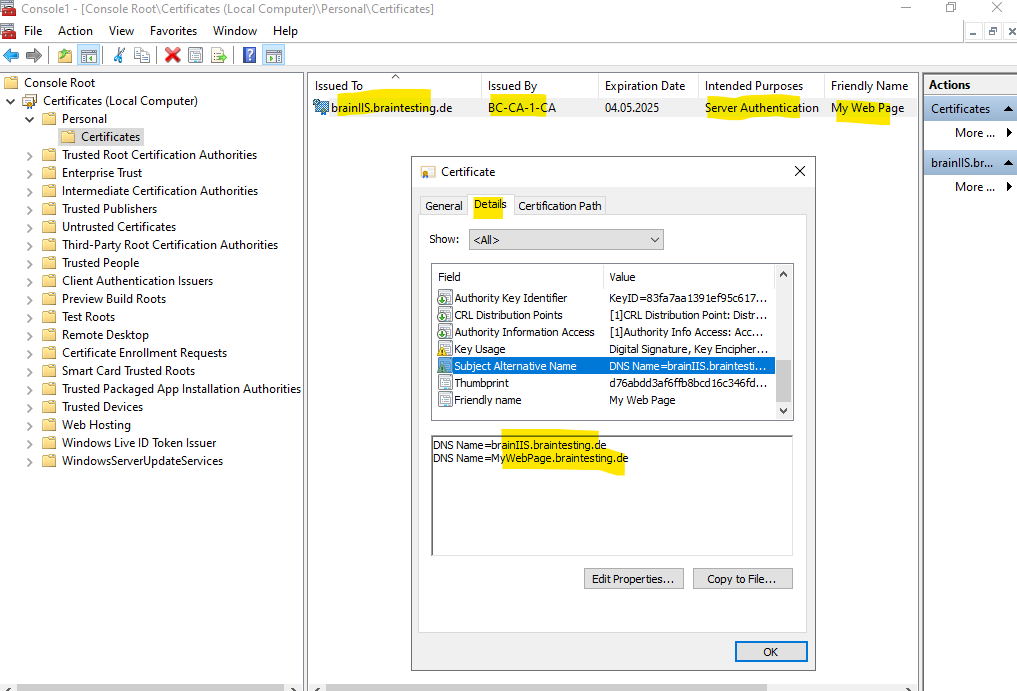
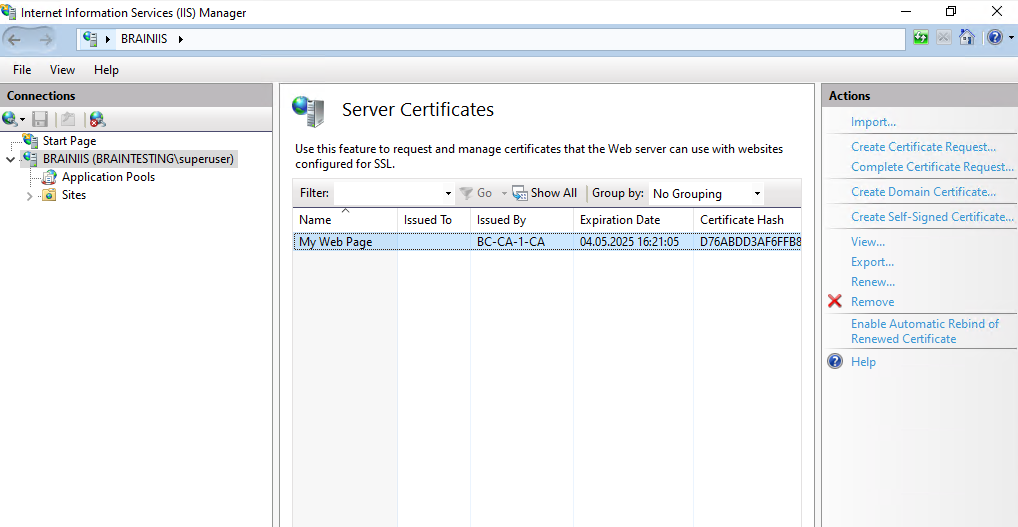
Because we created the certificate in the local machine store the certificate is also available within the IIS console to use for our website.
Code Signing in Visual Studio
You can also use X.509 certificates issued by your PKI to sign Visual Studio applications.
By using a X.509 code sign certificate to sign your application, you can avoid warning messages during download and installation of your software. The signing will establish a chain of trust and also prevents from altering code after creation.
More about in my following post.
Certificate Templates
Certificate templates can greatly simplify the task of administering an Active Directory Certificate Services (AD CS) certification authority (CA) by allowing an administrator to issue certificates pre-configured for selected tasks. The Certificate Templates snap-in allows an administrator to perform the following tasks:
- View properties for each certificate template.
- Copy and modify certificate templates.
- Control which users and computers can read templates and enroll for certificates.
- Perform other administrative tasks relating to certificate templates.
Certificate templates are the sets of rules and settings that are configured on a CA to be applied against incoming certificate requests. Certificate templates also give instructions to the client on how to create and submit a valid certificate request.
Only an enterprise CA can issue certificates based on a certificate template. The templates are stored in Active Directory Domain Services (AD DS) for use by every CA in the forest. This allows the CA to always have access to the current standard template and ensures consistent application of the certificate policy across the forest.
Source: https://learn.microsoft.com/en-us/windows-server/identity/ad-cs/certificate-template-concepts
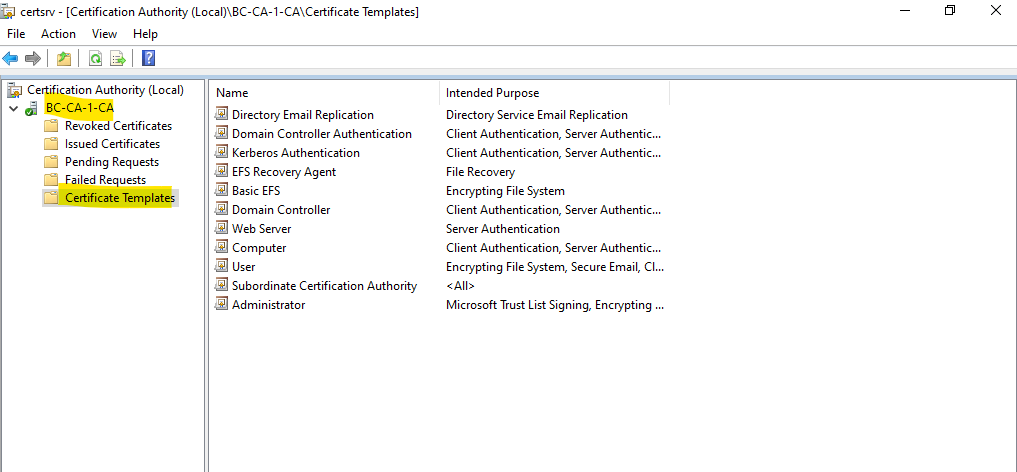
By default there are already some pre-populated default certificate templates available as shown below.
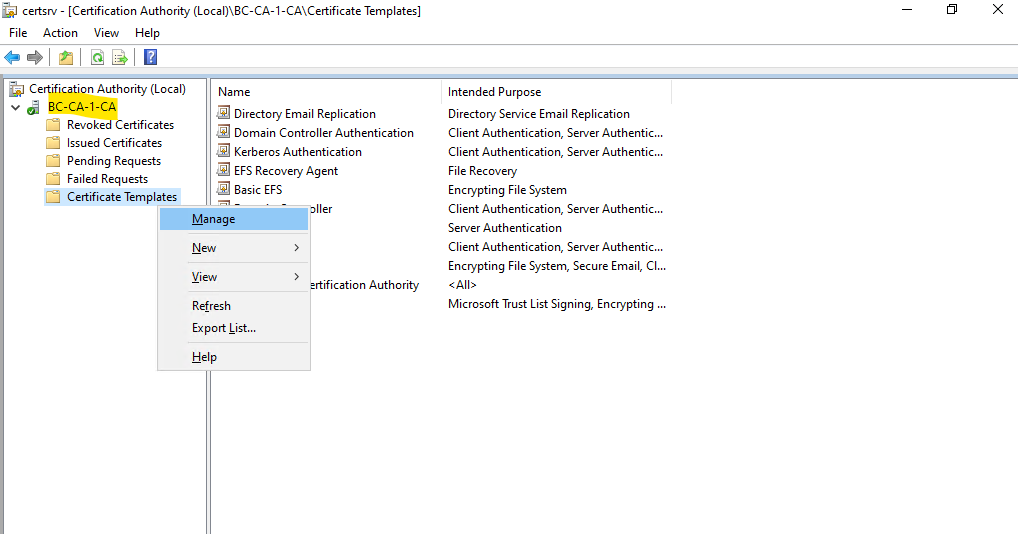
In order to create a new certificate template, right click on Certificate Templates and select Manage as shown below.
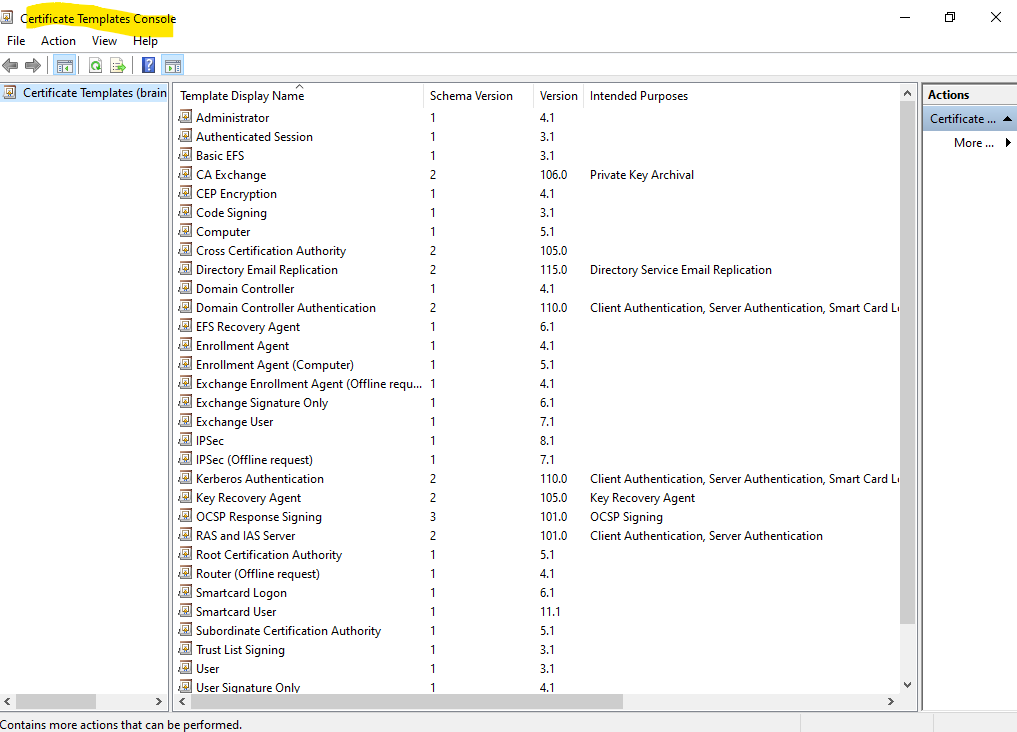
The Certificate Templates console will get opened. Here you can see a list of default certificate templates.
Create a new certificate template
You can create a new certificate template by duplicating an existing template and using the existing template’s properties as the default for the new template. Review the list of default certificate templates, and examine their properties to identify the existing certificate template that most closely meets your needs. Membership in Domain Admins, or equivalent, is the minimum required to complete this procedure.
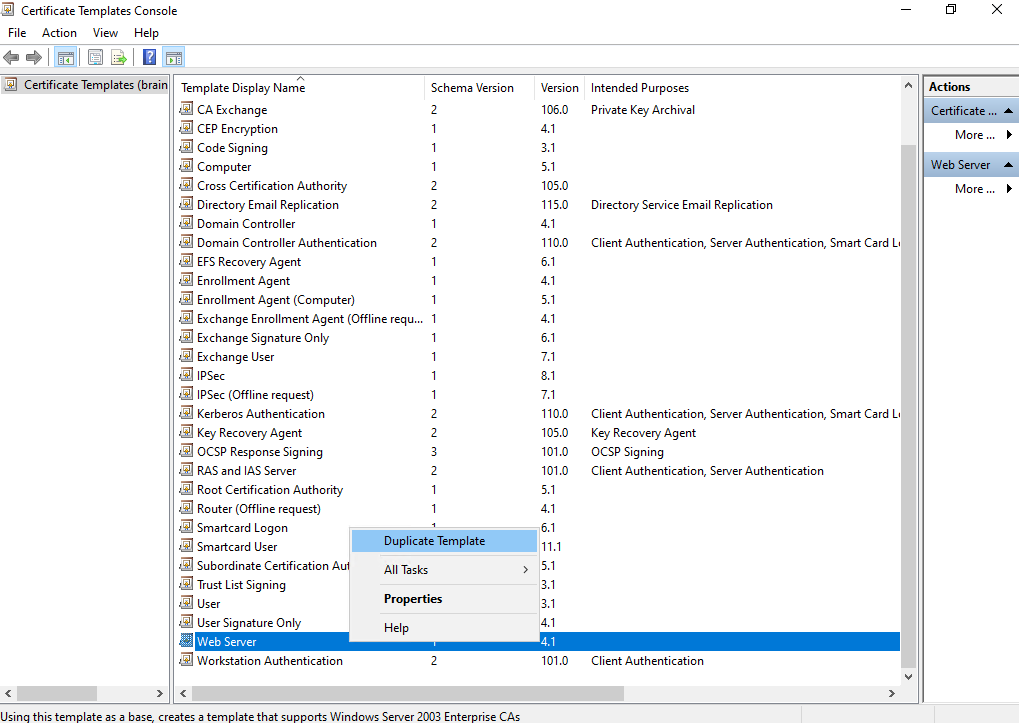
Below I will create a new Web Server certificate to demonstrate the process of creating a new custom certificate template that will finally fit with your requirements.
Therefore I will select the already existing pre-configured Web Server certificate template by right click on it and selecting Duplicate Template as shown below.
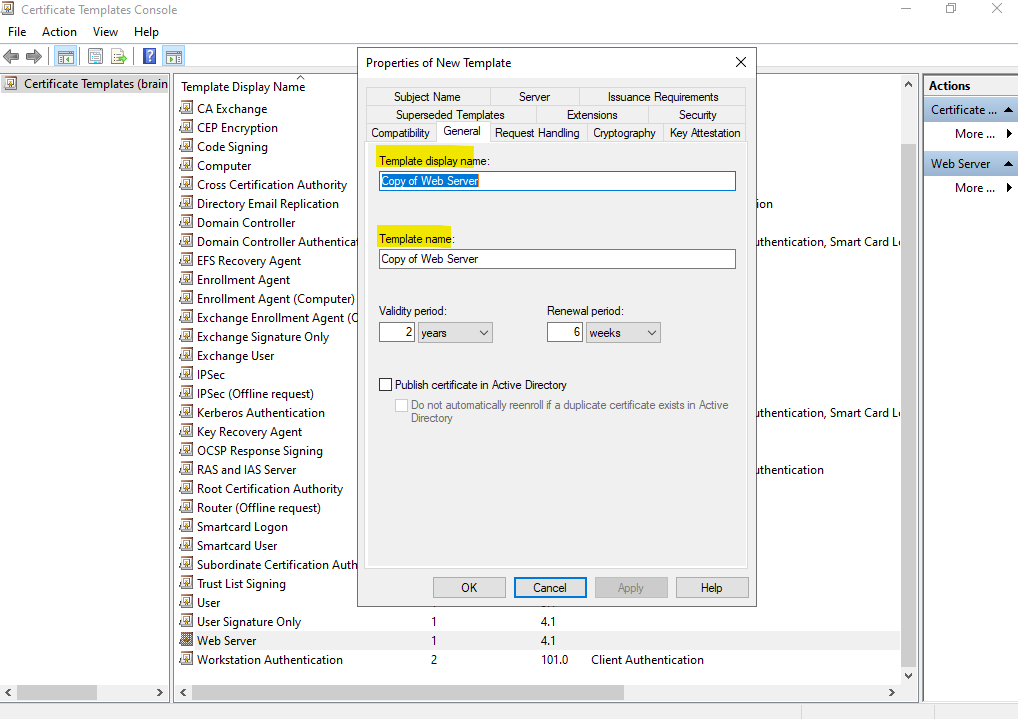
The properties dialog for the new template will be shown up.
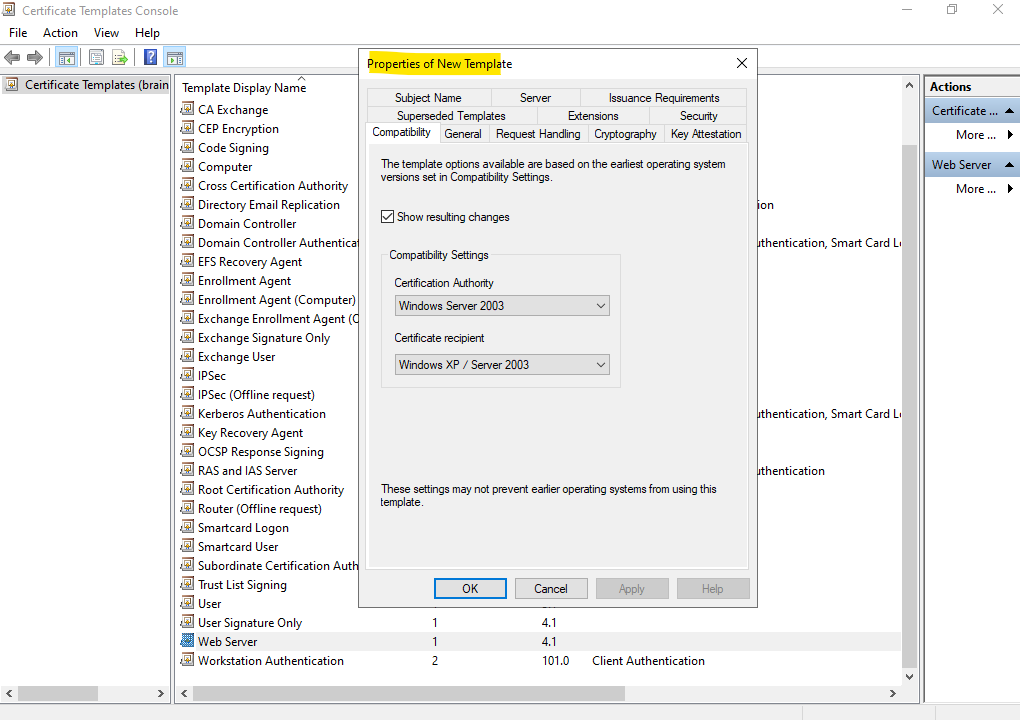
Within the General tab we can change the new templates name and we can also change its validity period.
Further we can publish the certificate template in Active Directory by checking Publish certificate in Active Directory below.
More details about Publish the certificate in Active Directory you will find in my following two posts:
Configure certificate auto-enrollment
Active Directory Certificate Mapping – Implicit vs. Explicit
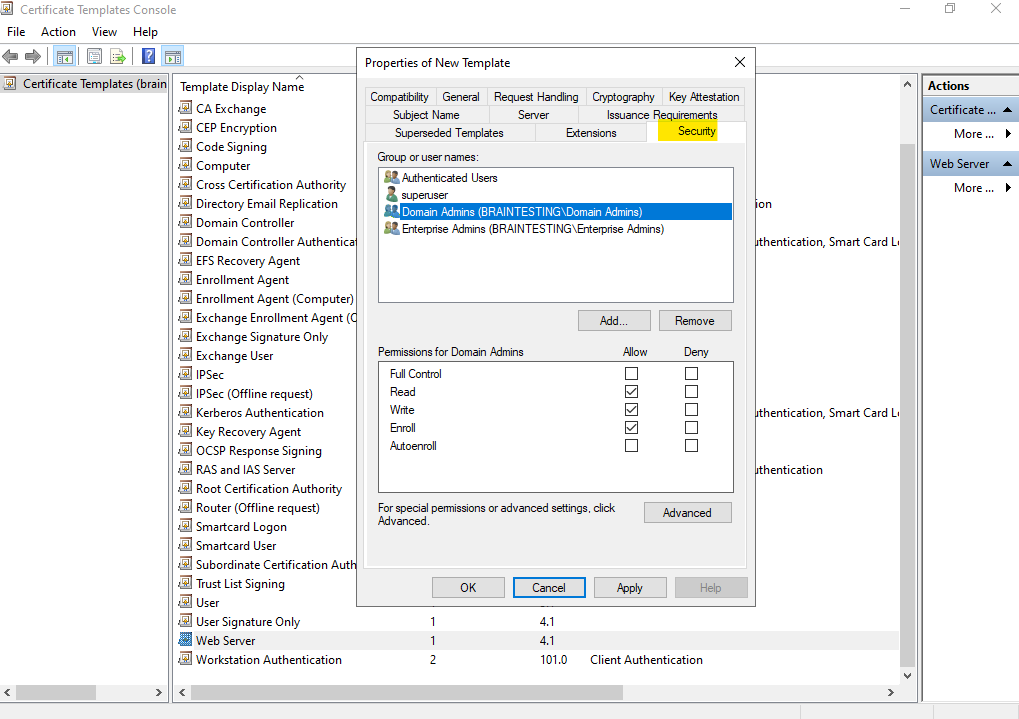
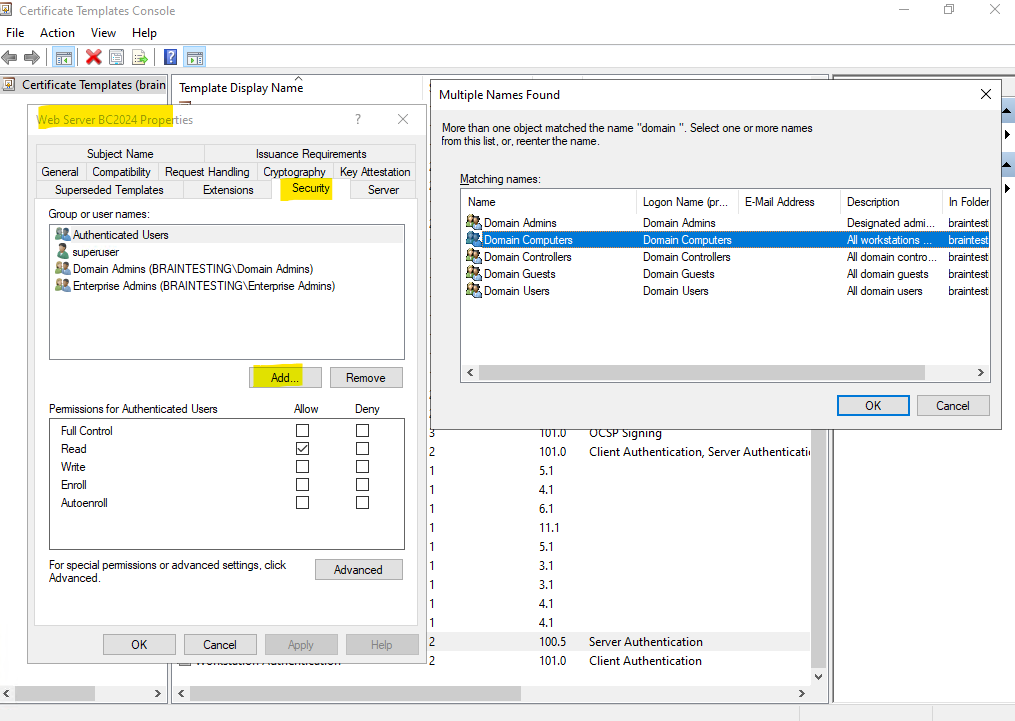
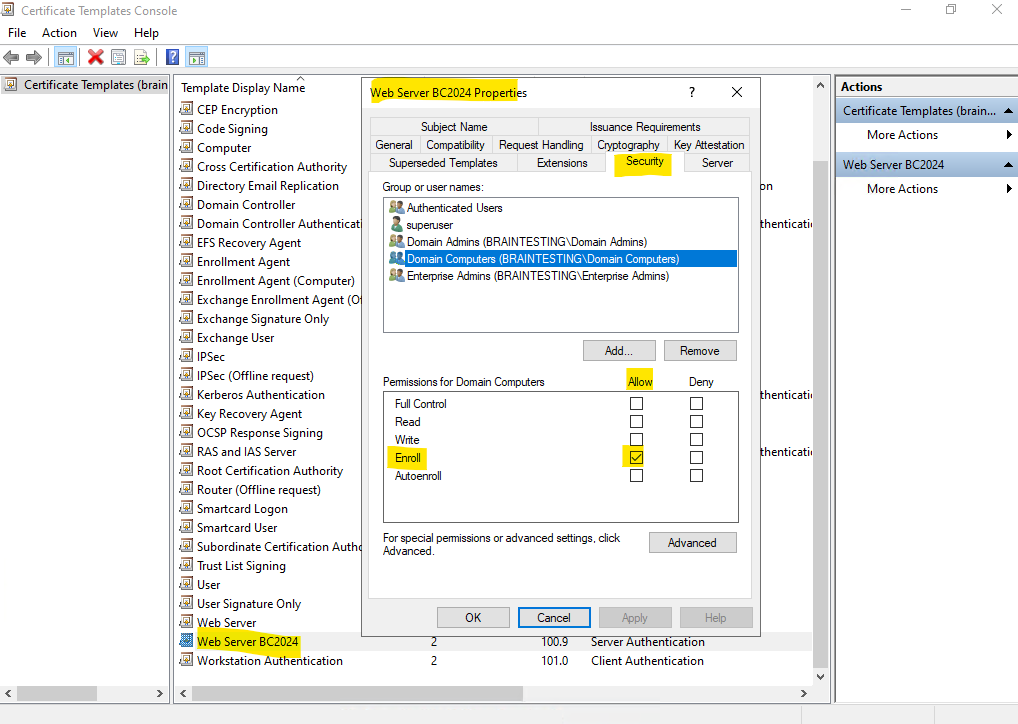
On the Security tab we can set permission who finally can request a new certificate by using this template.
Members within the domain admin group are already able to enroll this certificate.
On the Issuance Requirements tab we can also ensure that certificates will not issued automatically and first someone have to approve the request by checking below CA certificate manager approval.

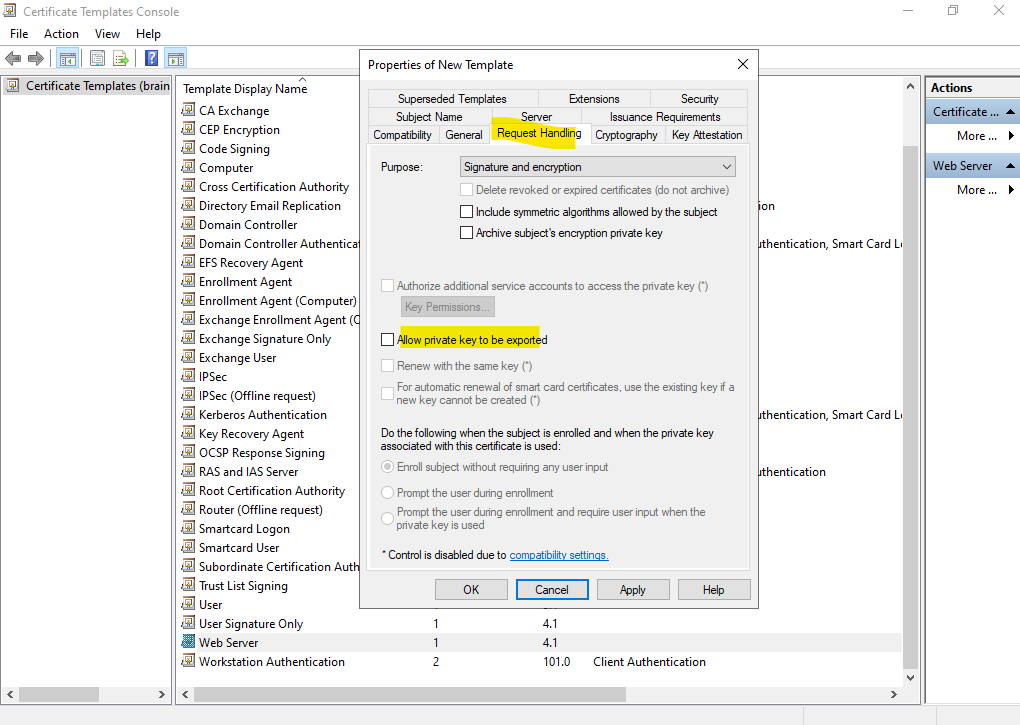
A further important setting is within the Request Handling tab, here we can allow that the private key of the certificate can be exported.
In case you want to use the same certificate on different computers for example, you need to be able to export the private key in order to import the certificate on different computers. By default the private key is created on the computer on which the certificate request is executed.
If we configured all settings we can click on OK and then close the Certificate Templates console.
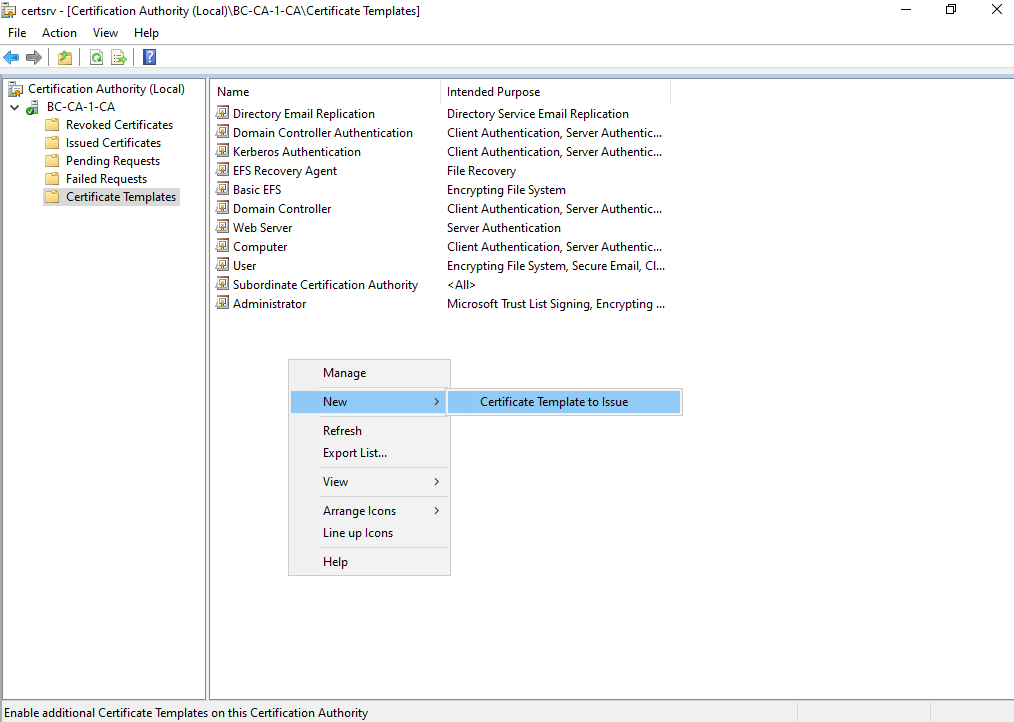
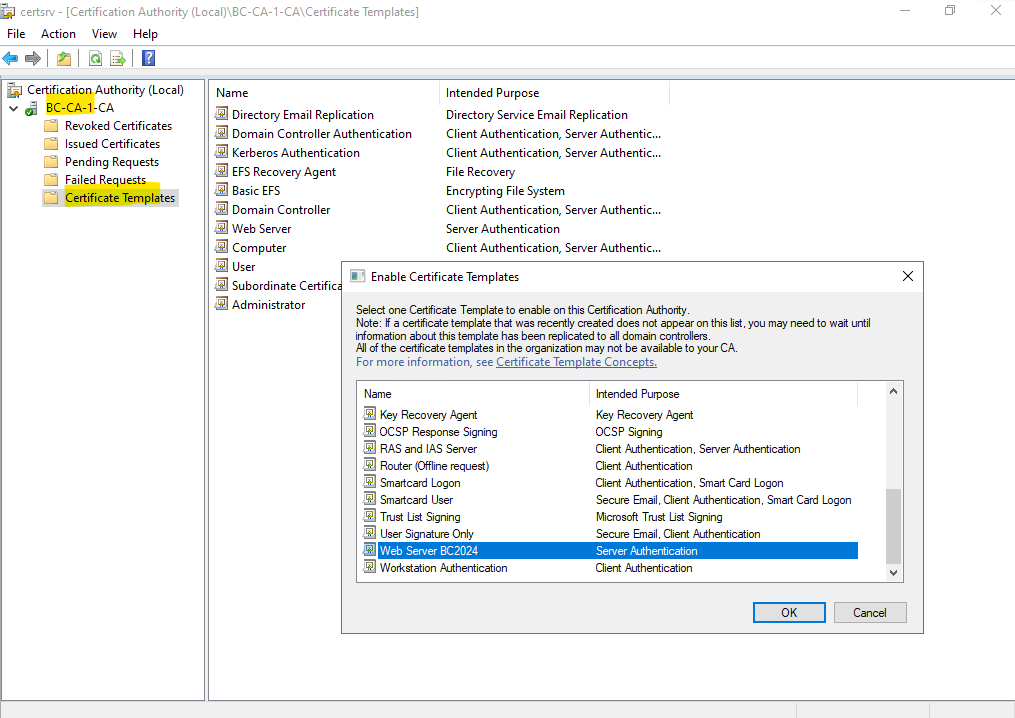
Back on the Certification Authority interface/console, we first need to issue our newly created certificate template to be able to request certificates by using this template.
Therefore right click within the Certificate Templates folder and select New -> Certificate Template Issue as shown below.
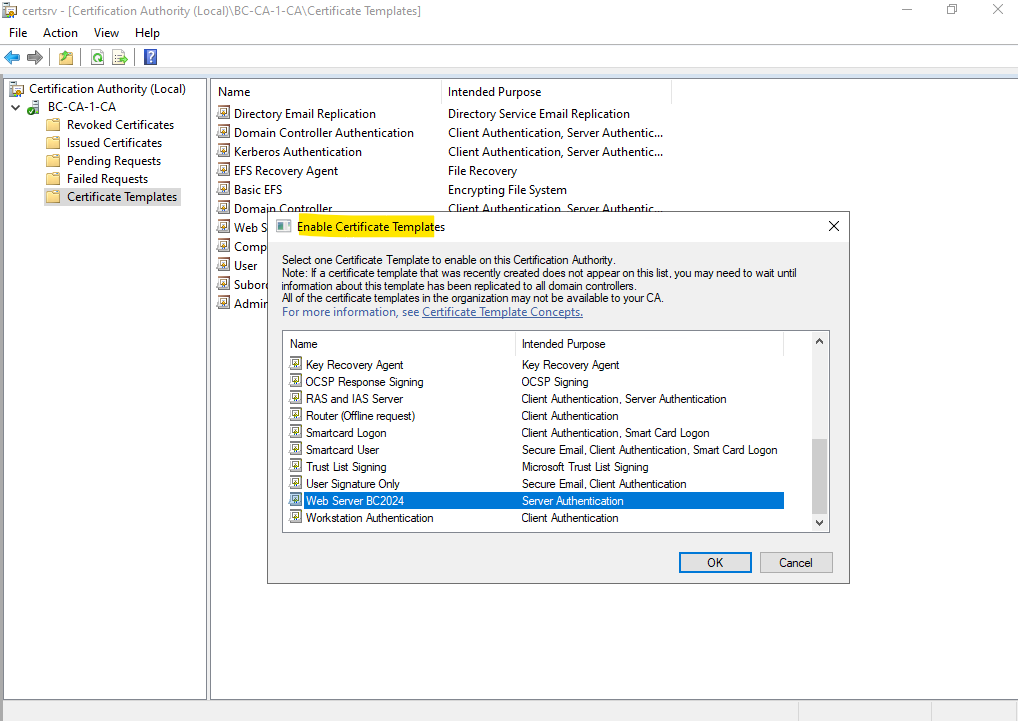
Select your newly created certificate template and click on OK, in my case the Web Server BC2024 template.
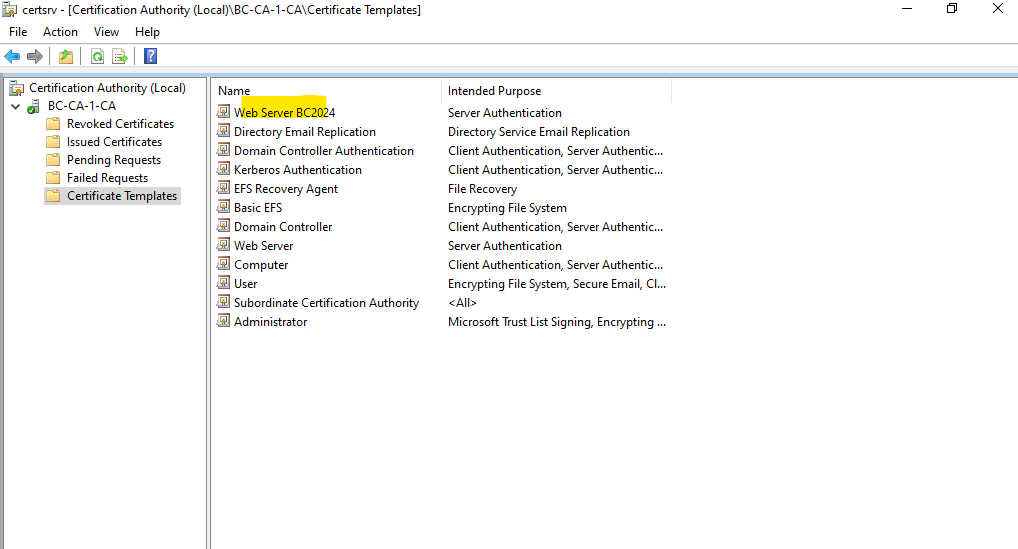
Finally we have created a new certificate template which we can use to request a new web server certificate.
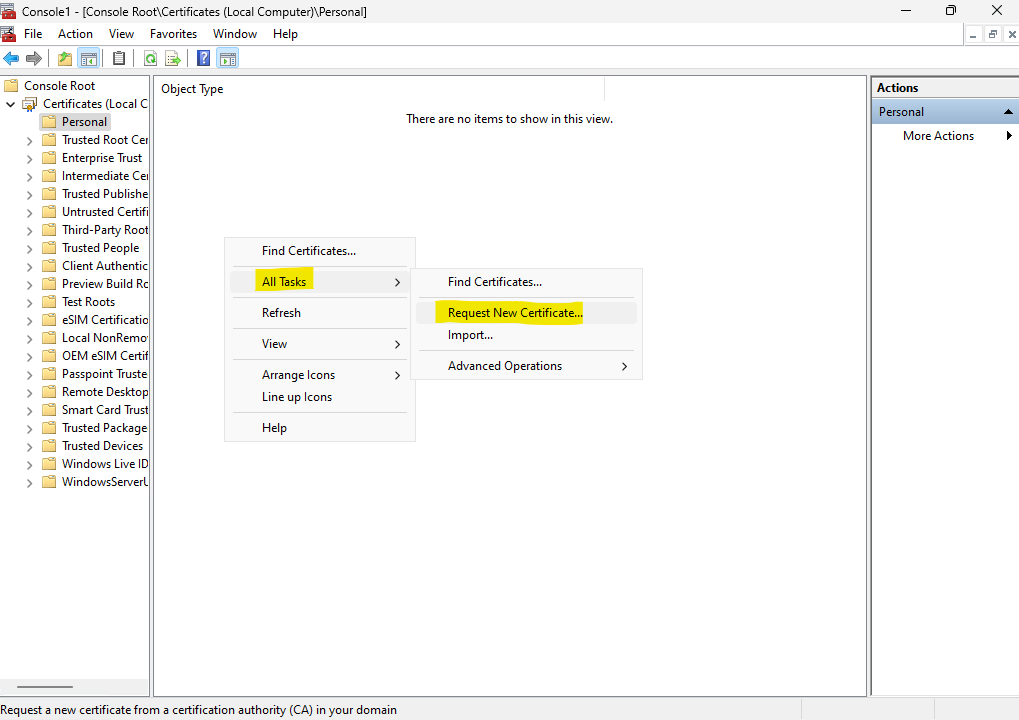
Another way to request new certificates is by using the MMC console and the Certificates Snap-in as shown previously further above. Previously we used here All Tasks -> Advanced Operations -> Create Custom Request …
This time we just want to use All Tasks -> Request New Certificate … where we can send the request to our CA directly from the MMC console and Certificate Snap-in and not have to first copy the Base-64-encoded certificate request for using it later in the CA Web Enrollment role service page to finally request and download the certificate.
Select to add certificates for the local computer or user. I want to add a new web server certificate and therefore select the local computer store.
Here we select as mentioned to request a new certificate where we can directly request and enroll our certificate to the local computer store.
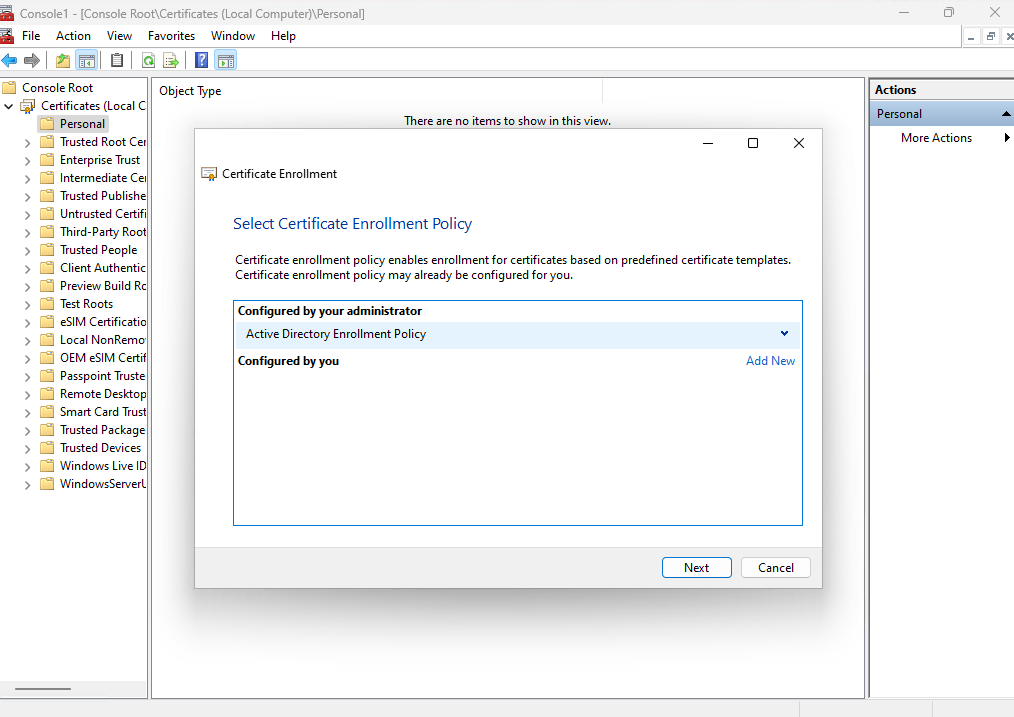
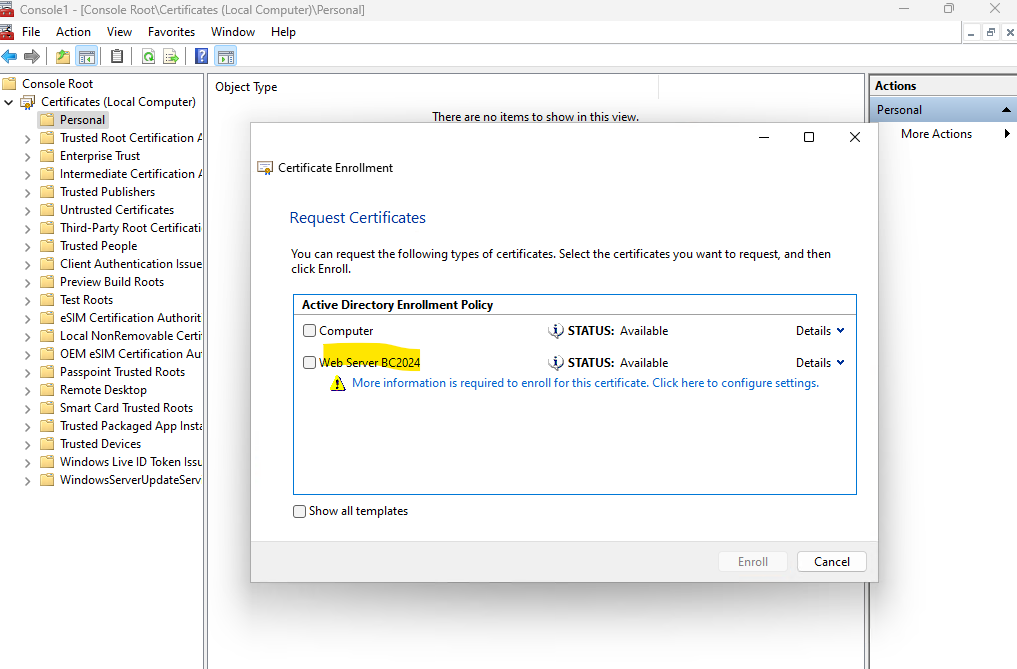
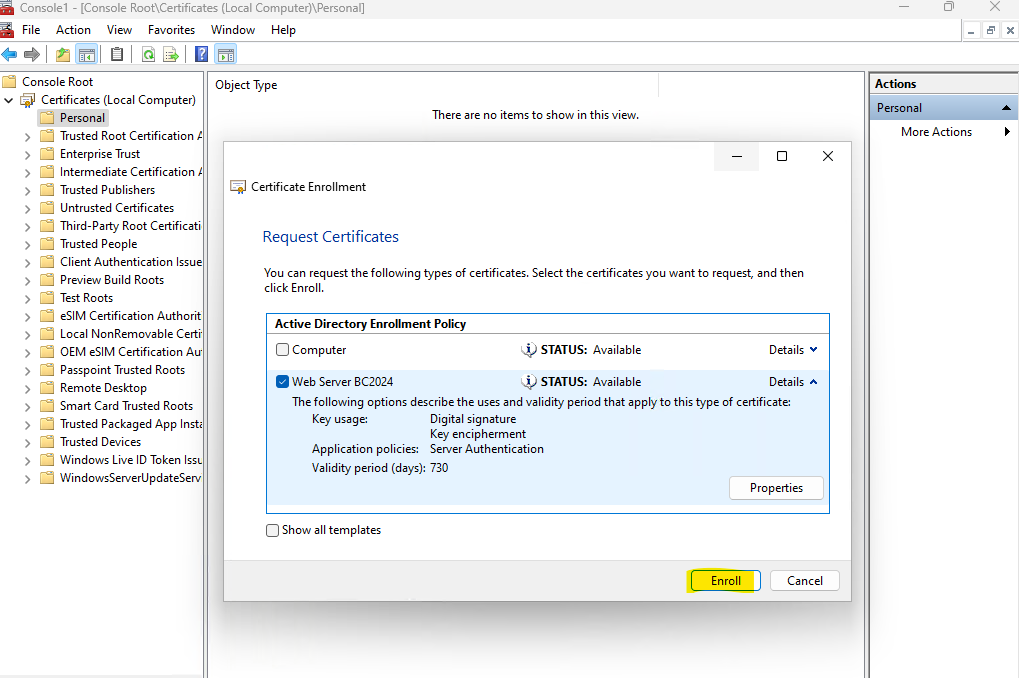
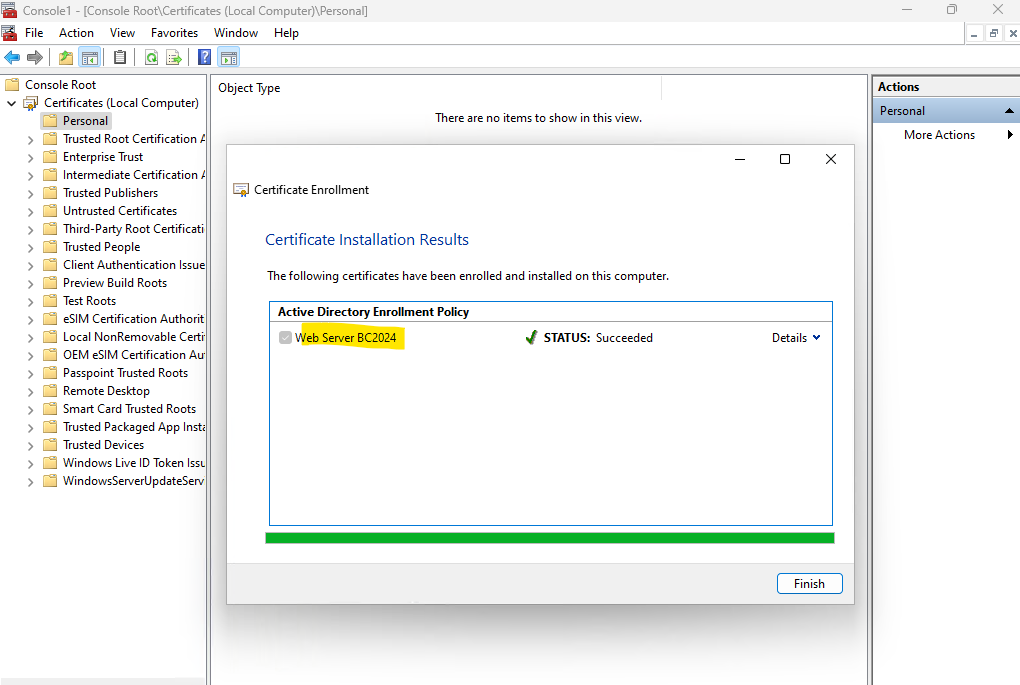
Confirm the Active Directory Enrollment Policy.
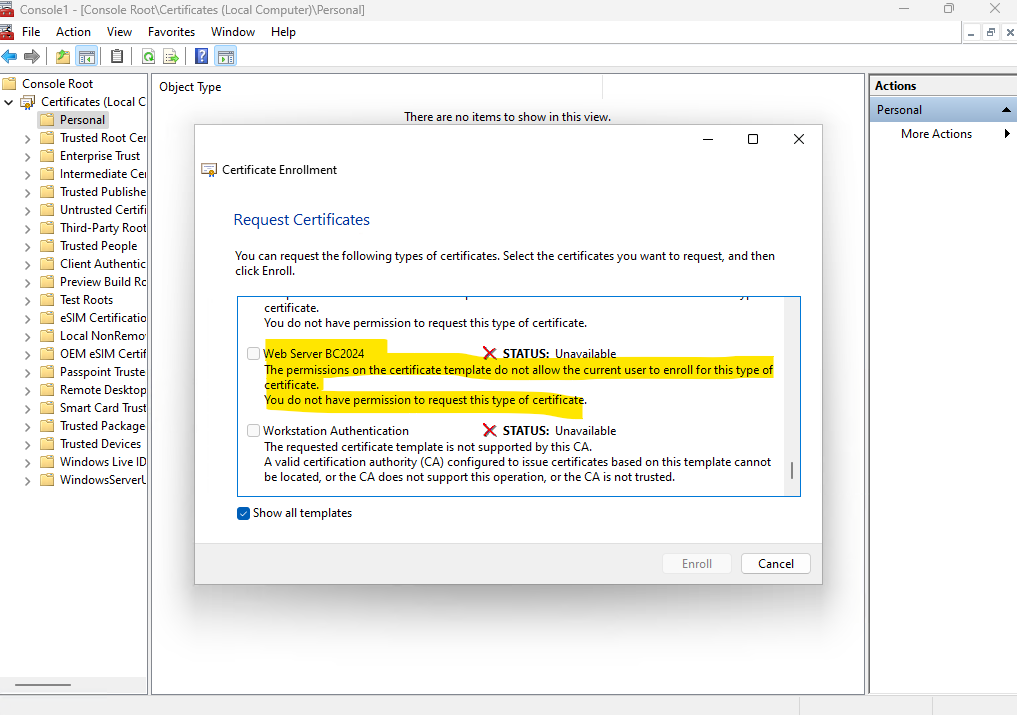
So far we are not able to request and enroll our new Web Server certificate because of the lack of permissions. Actually we are not using a user here but instead the computer account on which I will request the certificate because we are requesting here a certificate for the local computer store.
The permissions on the certificate template do not allow the current user to enroll for this type of certificate. You do not have permissions to request this type of certificate.
So we first need to add permissions here for our computer account. I will add here the Domain Computers group to the enroll permissions of the certificate template but finally you should be more restrictive to just allow computer accounts they really need to auto-enroll certificates, just for demonstration purpose here this is fine.
We now first need to delete the certificate template in the Certification Authority interface and then re-issue it as shown previously further above.
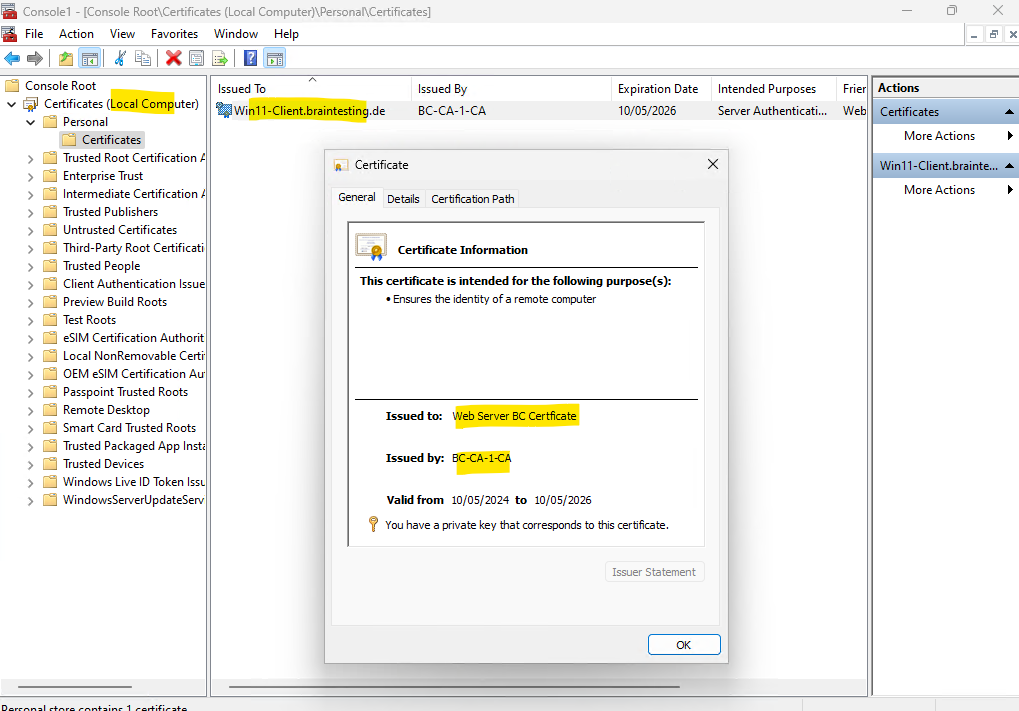
Finally we just need to configure some settings for our web server certificate.
For demonstration purpose I will just add a friendly name and the subject alternative name.
Here you can also see that the private key will be exportable by default as we previously set for this new certificate template.
We can now finally enroll the certificate by clicking on Enroll.
In the next section we will see how to configure certificate auto-enrollment.
Configure certificate auto-enrollment
About how to configure certificate auto-enrollment you can read my following post.
Blog Post Series – Parts Summary
Set up a 2-tier PKI in Active Directory Certificate Services (AD CS) – Part 1
Set up a 2-tier PKI in Active Directory Certificate Services (AD CS) – Part 2
Set up a 2-tier PKI in Active Directory Certificate Services (AD CS) – Part 3
Set up a 2-tier PKI in Active Directory Certificate Services (AD CS) – Part 4
Links
What is Active Directory Certificate Services?
https://learn.microsoft.com/en-us/windows-server/identity/ad-cs/active-directory-certificate-services-overviewImplement and manage Active Directory Certificate Services
https://learn.microsoft.com/en-us/training/modules/implement-manage-active-directory-certificate-services/What is the Certification Authority Role Service?
https://learn.microsoft.com/en-us/windows-server/identity/ad-cs/certification-authority-roleCertificate templates concepts
https://learn.microsoft.com/en-us/windows-server/identity/ad-cs/certificate-template-conceptsManage certificate templates
https://learn.microsoft.com/en-us/windows-server/identity/ad-cs/manage-certificate-templatesConfigure certificate auto-enrollment
https://learn.microsoft.com/en-us/windows-server/networking/core-network-guide/cncg/server-certs/configure-server-certificate-autoenrollment
Tags In
Related Posts
Latest posts
Protecting NetApp ONTAP Workloads with Autonomous Ransomware Protection (ARP) – Part 3 – Extending Protection with NetApp Console Ransomware Resilience
Follow me on LinkedIn