Set up a 2-tier PKI in Active Directory Certificate Services (AD CS) – Part 2
In this part of my blog post series we will set up the standalone offline Root CA which is not domain joined.
In the event that a subordinate CA is compromised, having an offline root CA provides a mechanism for mitigating the impact. The offline root CA can be used to revoke the compromised subordinate CA’s certificate and issue a new one, helping to contain the damage and restore trust in the PKI.
Set up the Root CA as Offline root CA
Before we usually first install and configure the AD CS server role on the Root CA host, we can optionally first create a CAPolicy.inf file to adjust and modify the default settings for a Root CA as shown below.
The validity period for Subordinate CAs certificates which are by default one year, we can also change after the installation of the AD CS server role and without the CAPolicy.inf file. Also how long CRLs from the Root CA are valid we can configure afterwards like shown further down in the section Adjust Subordinate Certification Authority Certificate Validation Period.
Create a CAPolicy.inf File on the Root CA Host
The CAPolicy.inf is a configuration file that defines the extensions, constraints, and other configuration settings that are applied to a root CA certificate and all certificates issued by the root CA. The CAPolicy.inf file must be installed on a host server before the setup routine for the root CA begins. When the security restrictions on a root CA are to be modified, the root certificate must be renewed and an updated CAPolicy.inf file must be installed on the server before the renewal process begins.
The following CAPolicy.inf file is an example for a standalone Root CA.
[Version]
Signature="$Windows NT$"
[PolicyStatementExtension]
Policies=InternalPolicy
[InternalPolicy]
OID=1.2.3.4.1455.67.89.5
[Certsrv_Server]
RenewalKeyLength=2048
RenewalValidityPeriod=Years
RenewalValidityPeriodUnits=5
CRLPeriod=months
CRLPeriodUnits=12
LoadDefaultTemplates=0
AlternateSignatureAlgorithm=1
The file needs to be saved to the %systemroot% folder.
Be sure to save the CAPolicy.inf with the inf extension. If you do not specifically type .inf at the end of the file name and select the options as described, the file will be saved as a text file and will not be used during CA installation.
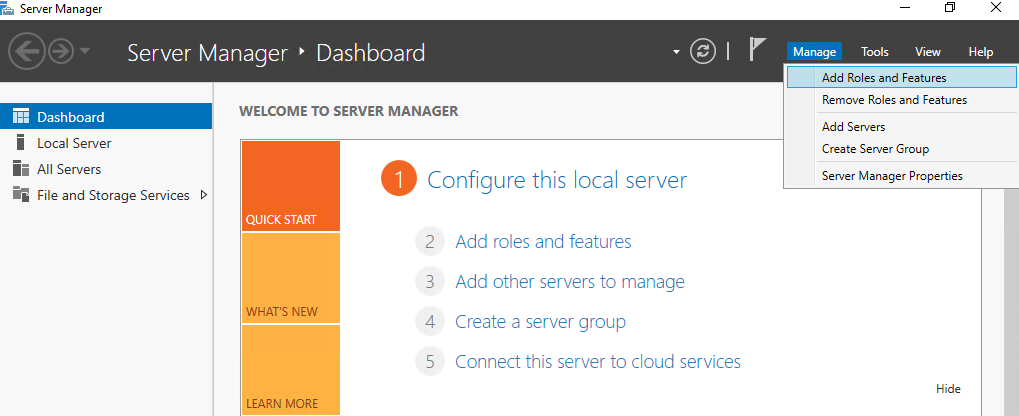
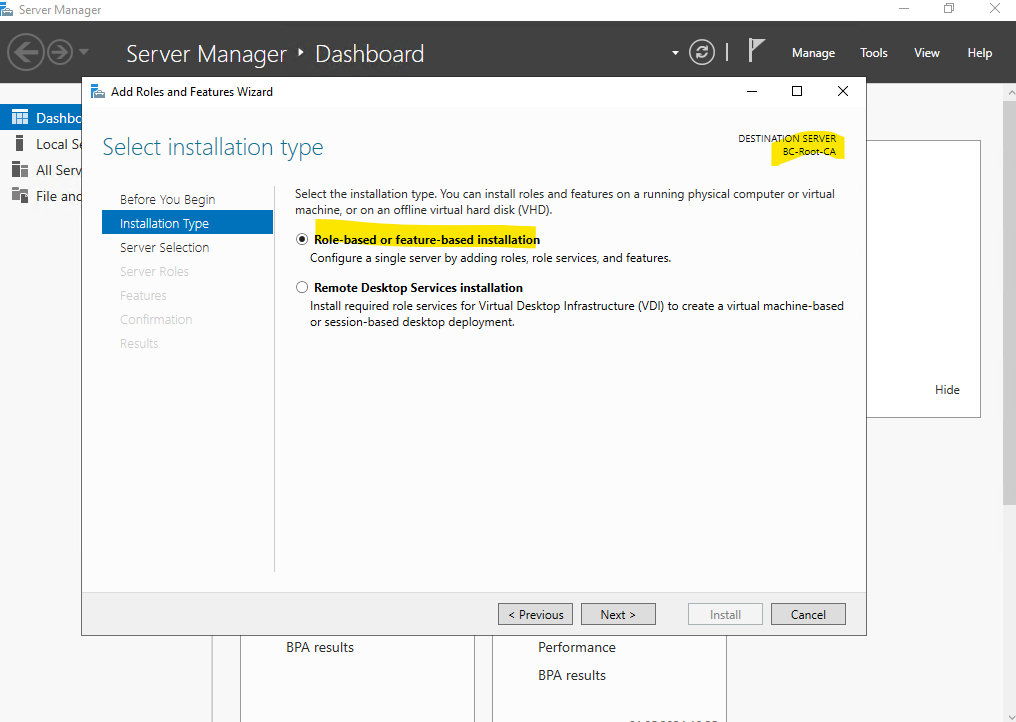
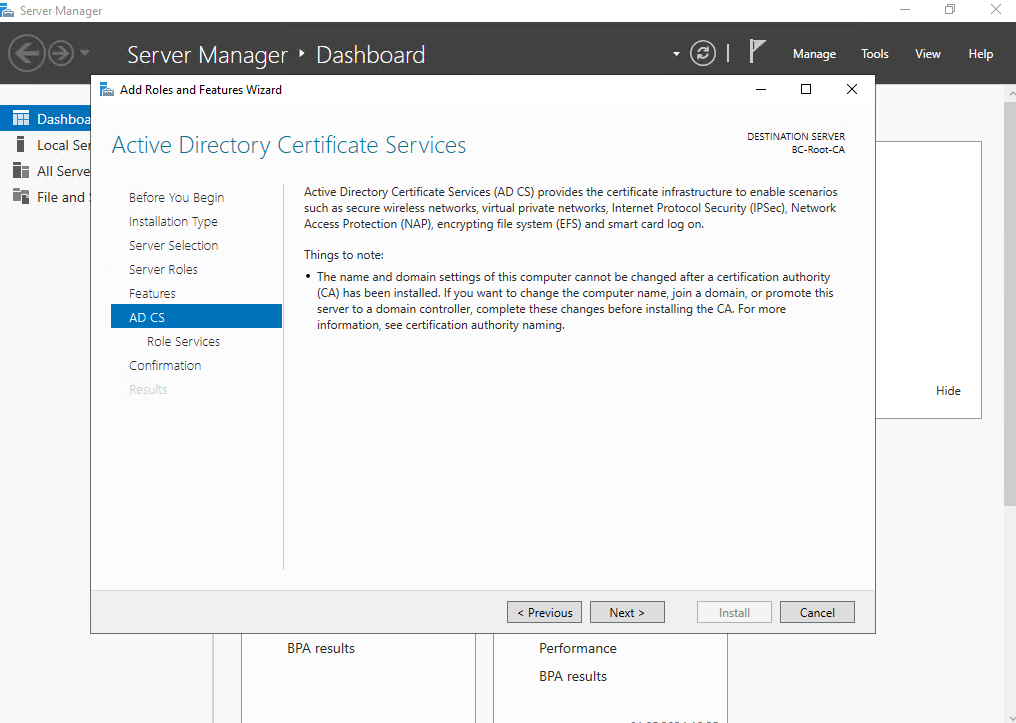
Install the AD CS Server Role
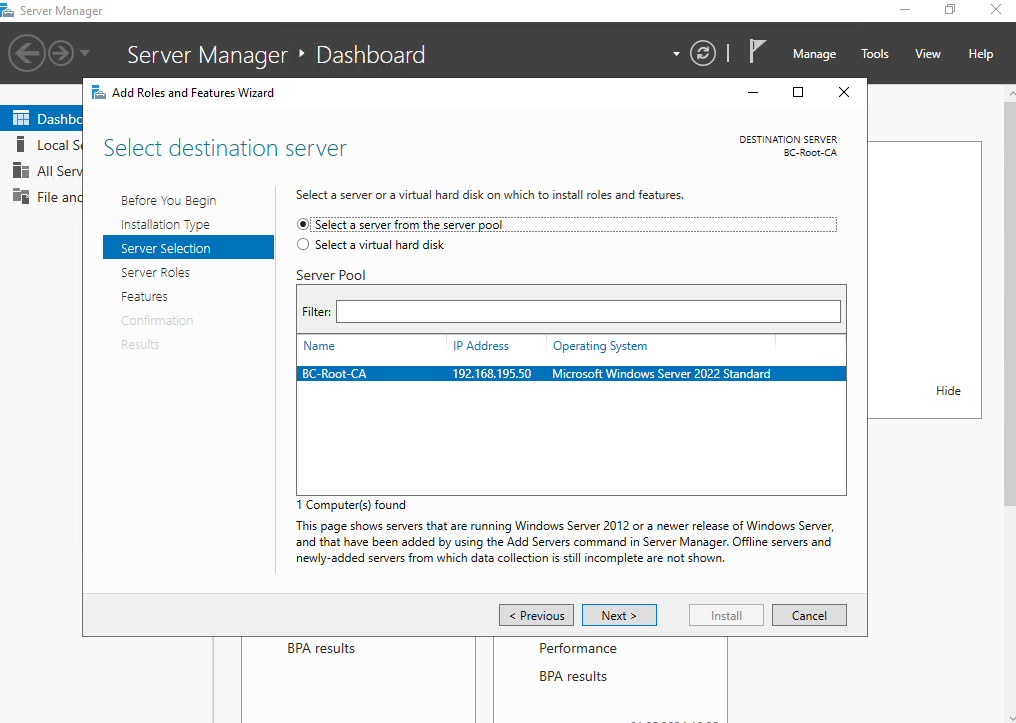
We will first install on a dedicated Windows Server 2022 the AD CS server role. This server is not joined to my Active Directory domain
Select the Active Directory Certification Services server role to install.
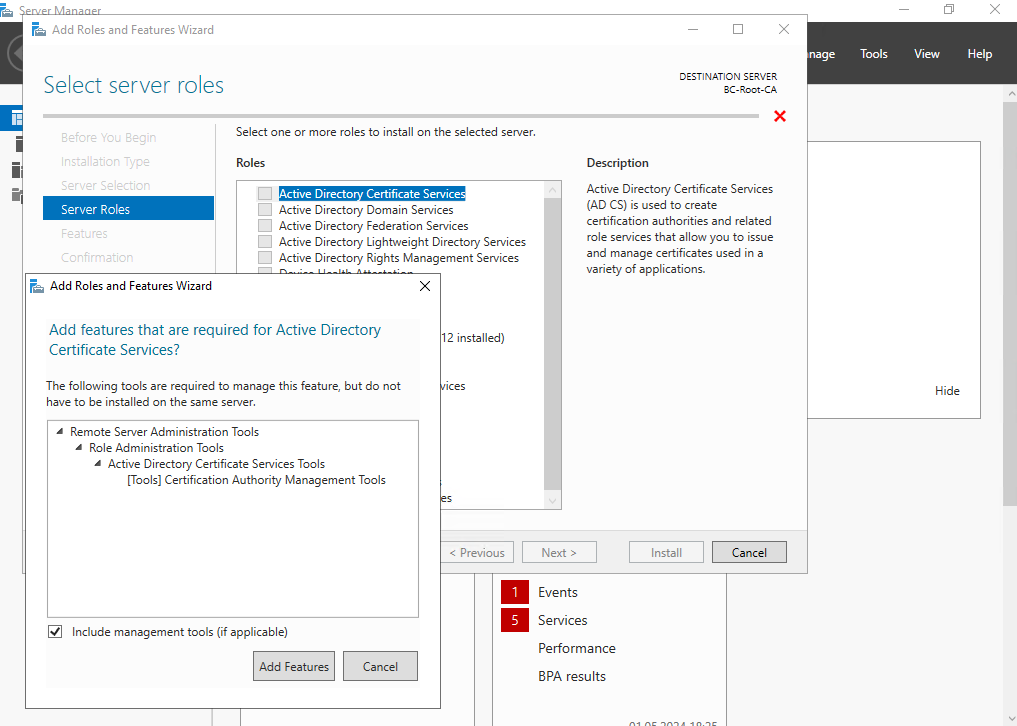
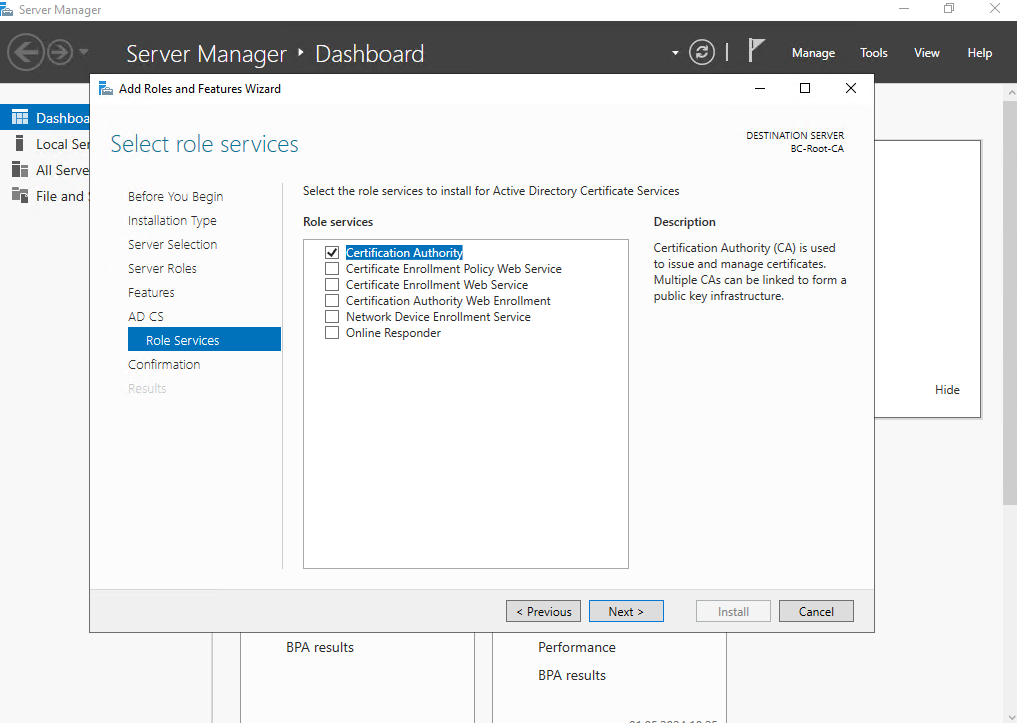
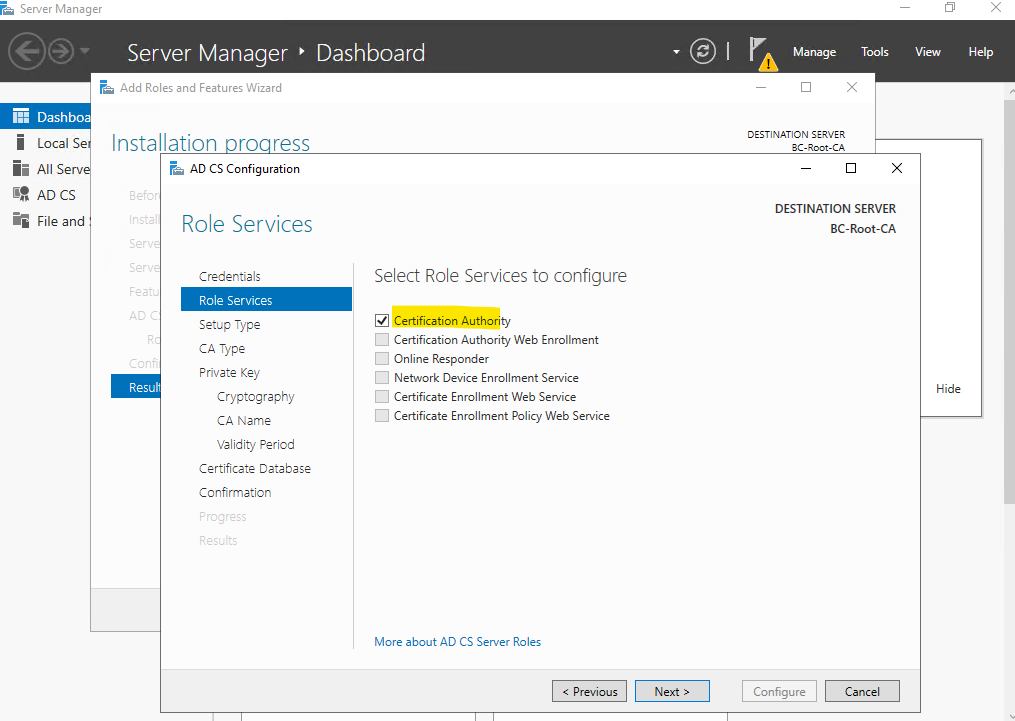
For the root-CA (standalone offline) we just need to install Certification Authority role, leave the rest blank.
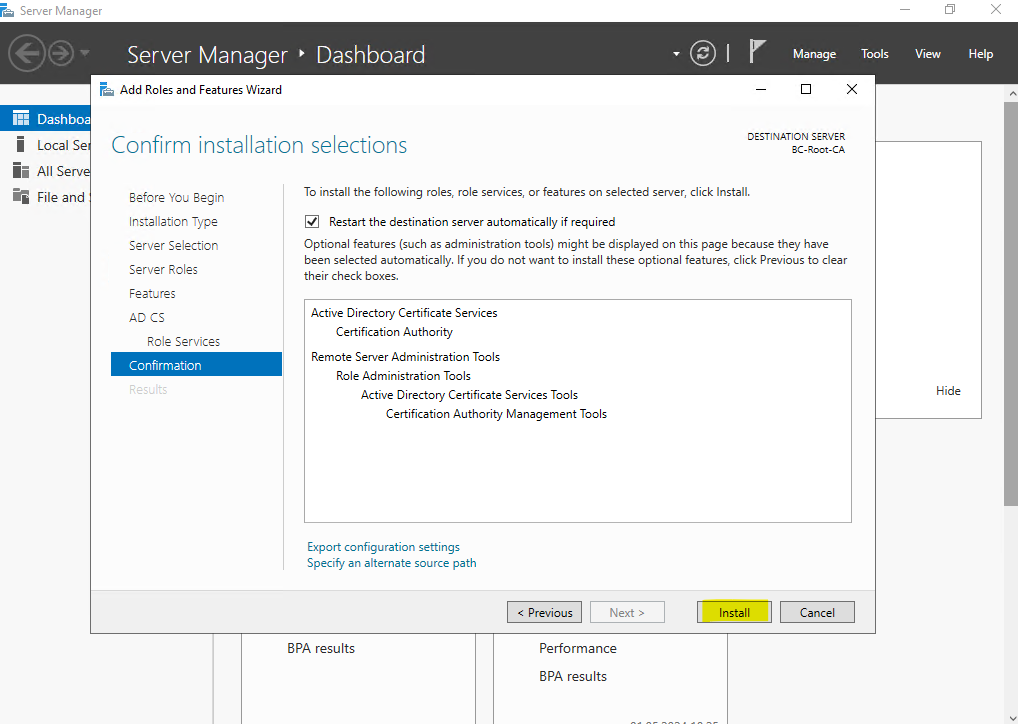
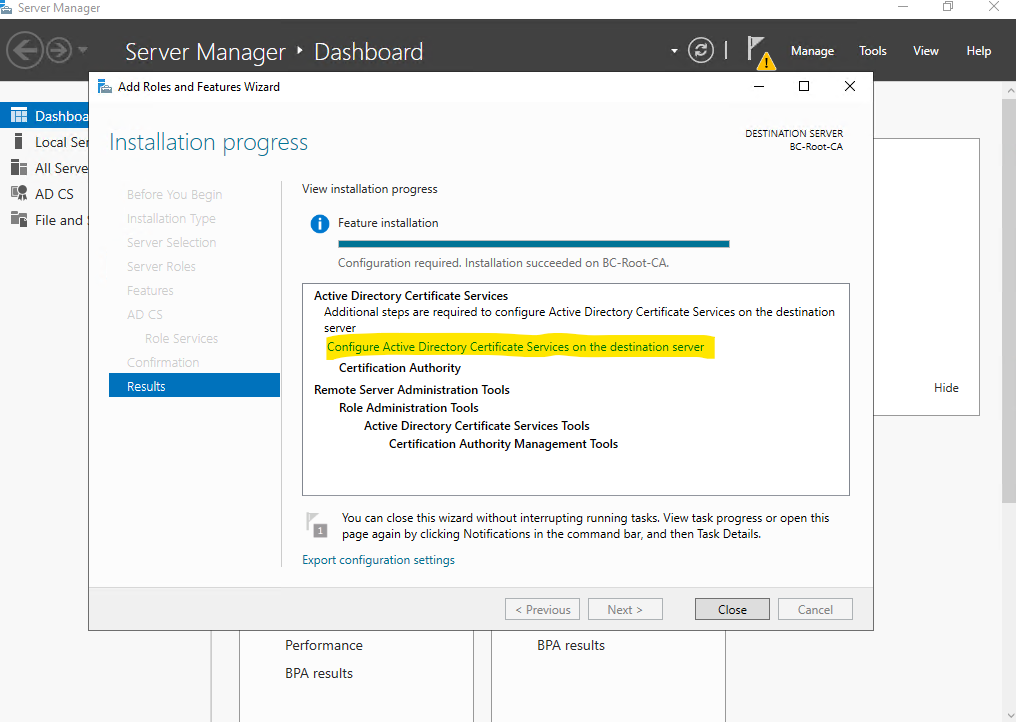
Finally click on Install.
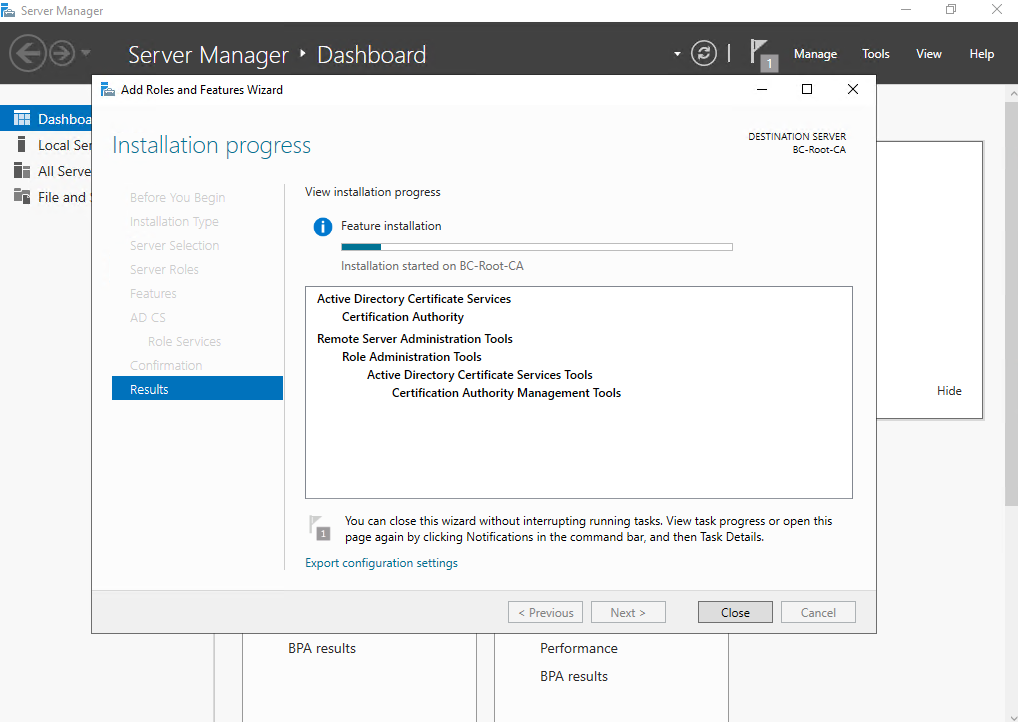
To configure the root CA and its Active Directory Domain Services (AD DS) we can either click on the link in the still opened wizard or by clicking on the yellow warning triangle icon as shown below.
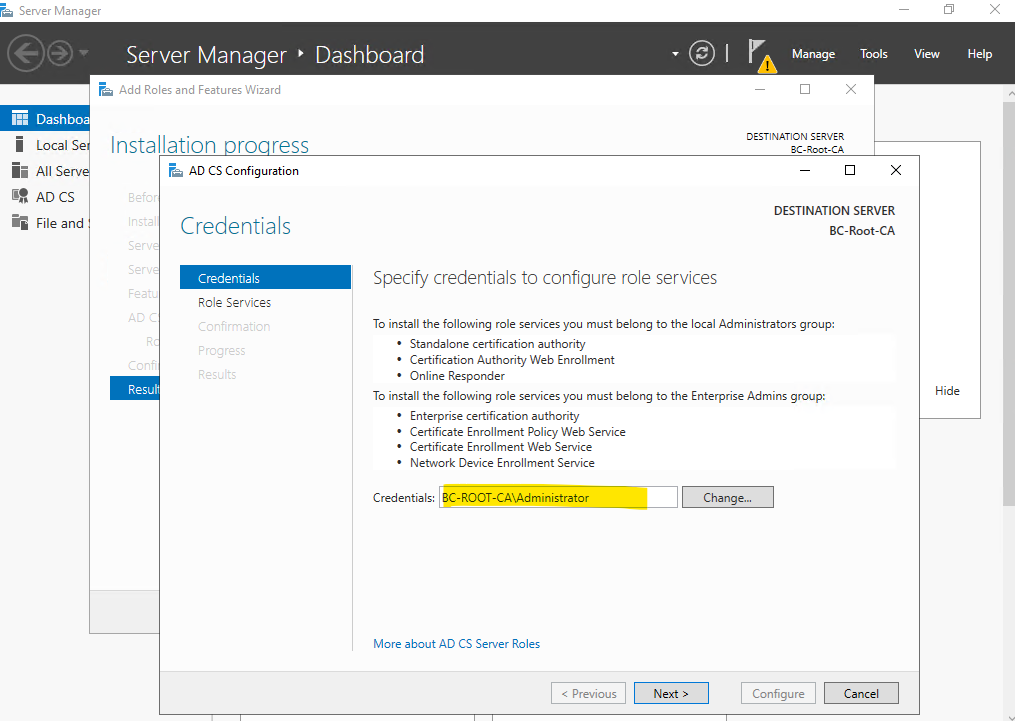
For the installed services I will use my local administrator account.
As mentioned for the root-CA we just need the Certification Authority role and because we just selected this to install previously we can just configure this role here.
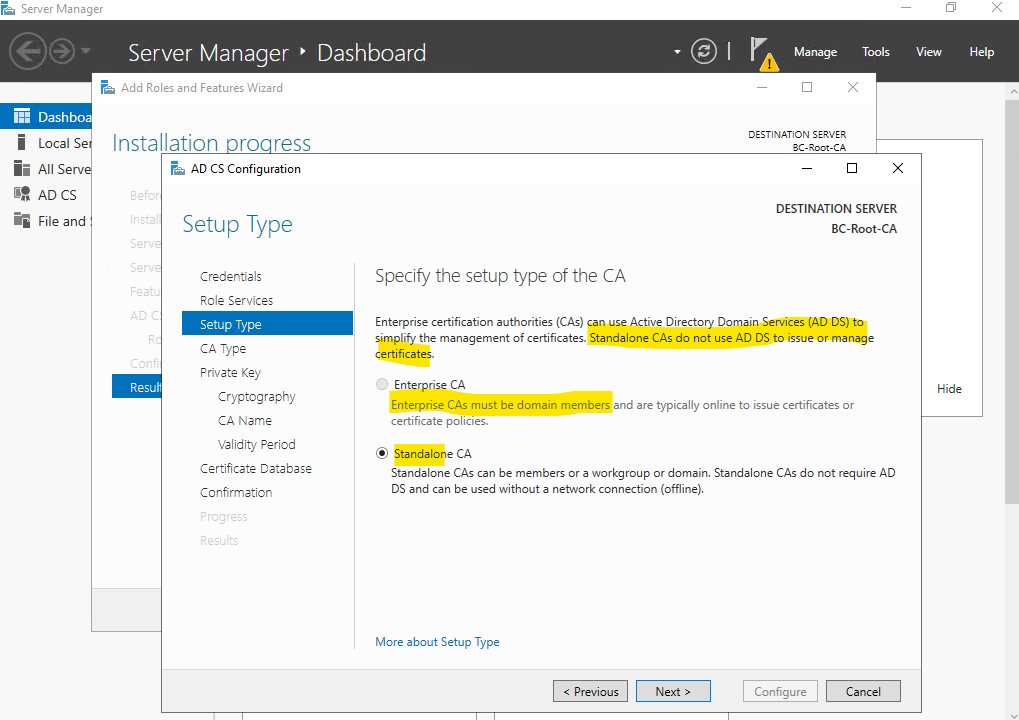
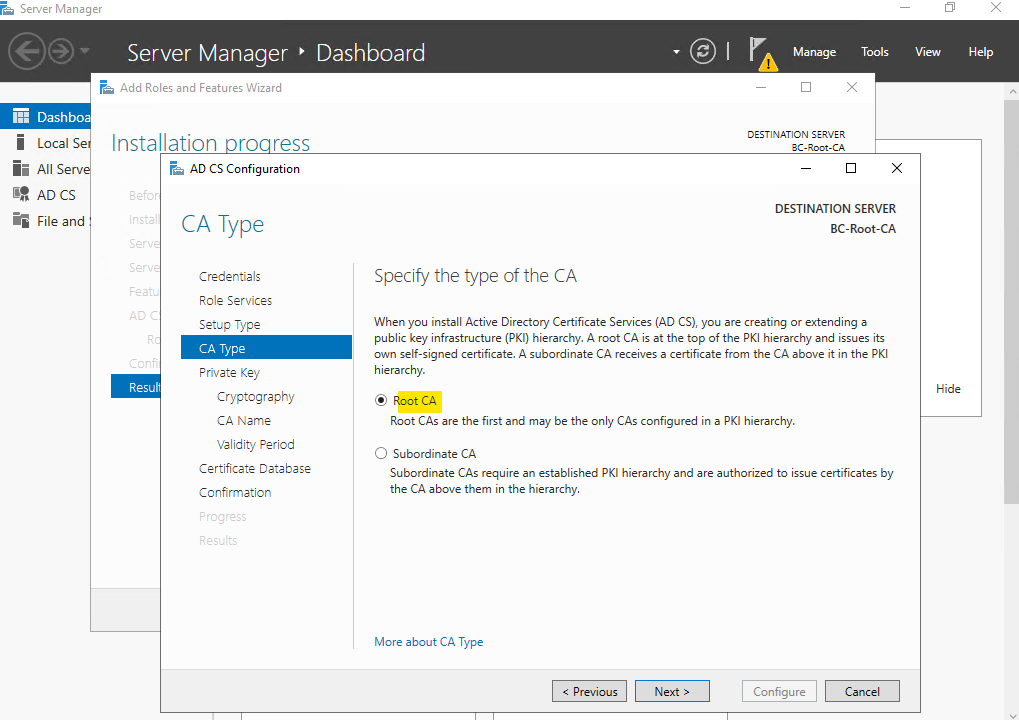
Because this server is not member in a domain, we just can select a standalone CA which is also what we want to install.
We first want to install a Root CA.
Because we set up a PKI from the scratch, select create a new private key.

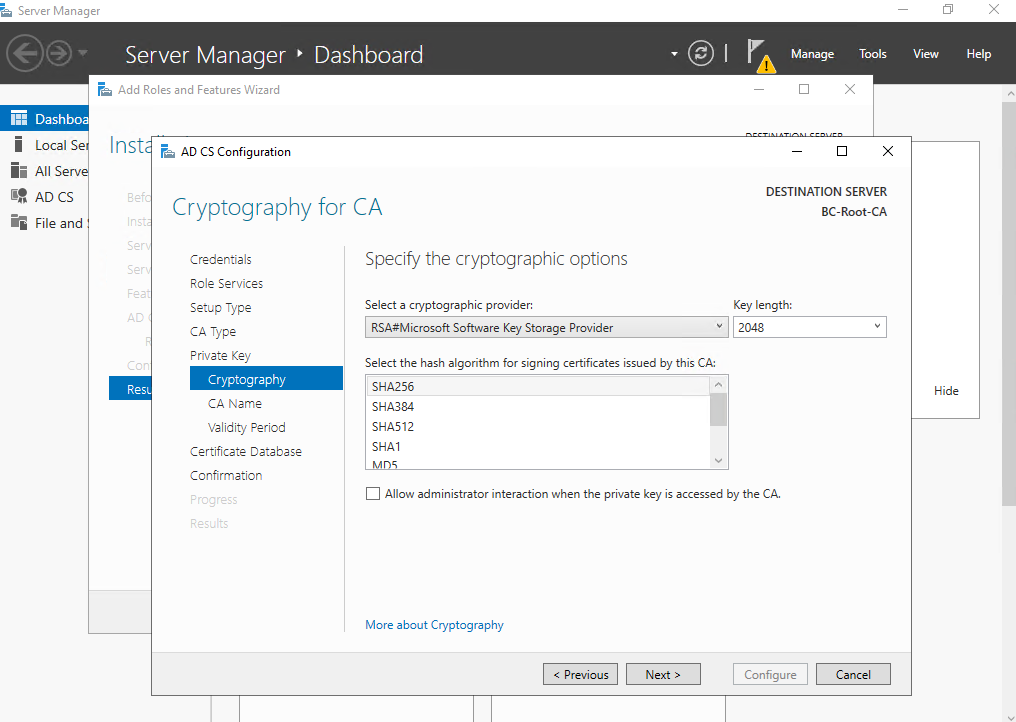
Select a cryptographic provider for the root-CA, I will leave the by default selected SHA256 RSA Microsoft Software Key Storage Provider. More about the built-in cryptographic providers you will find on the following article by Microsoft https://learn.microsoft.com/en-us/previous-versions/windows/it-pro/windows-server-2012-R2-and-2012/hh831574(v=ws.11)#select-cryptographic-options.
Allow administrator interaction when the private key is accessed by the CA is an option that is typically used with hardware security modules (HSMs). This allows the cryptographic provider to prompt the user for additional authentication when the private key of the CA is accessed. This option can be used to help prevent unapproved use of the CA and its private key by requiring the administrator to enter a password before every cryptographic operation.
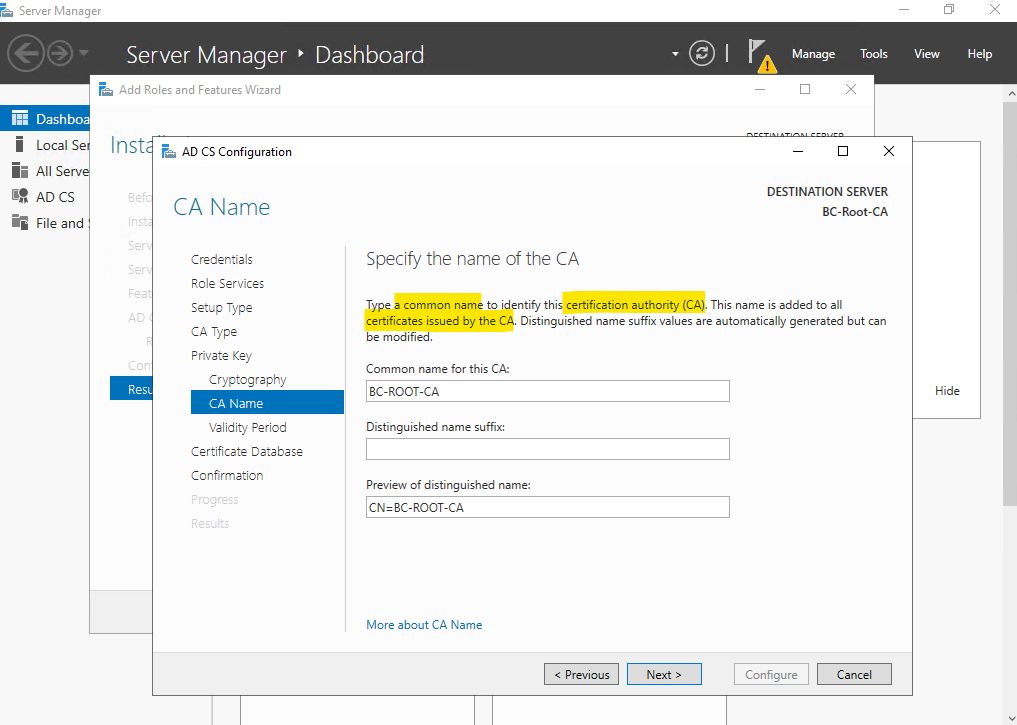
Specify the name of the Root-CA, more about CA naming conventions you will find in the following article by Microsoft https://learn.microsoft.com/en-us/previous-versions/windows/it-pro/windows-server-2012-R2-and-2012/hh831574(v=ws.11)#establish-a-ca-name.
By the default the CA suffix will be appended to the host name, so in my case I have to remove this suffix as I already use it in the name of my host.
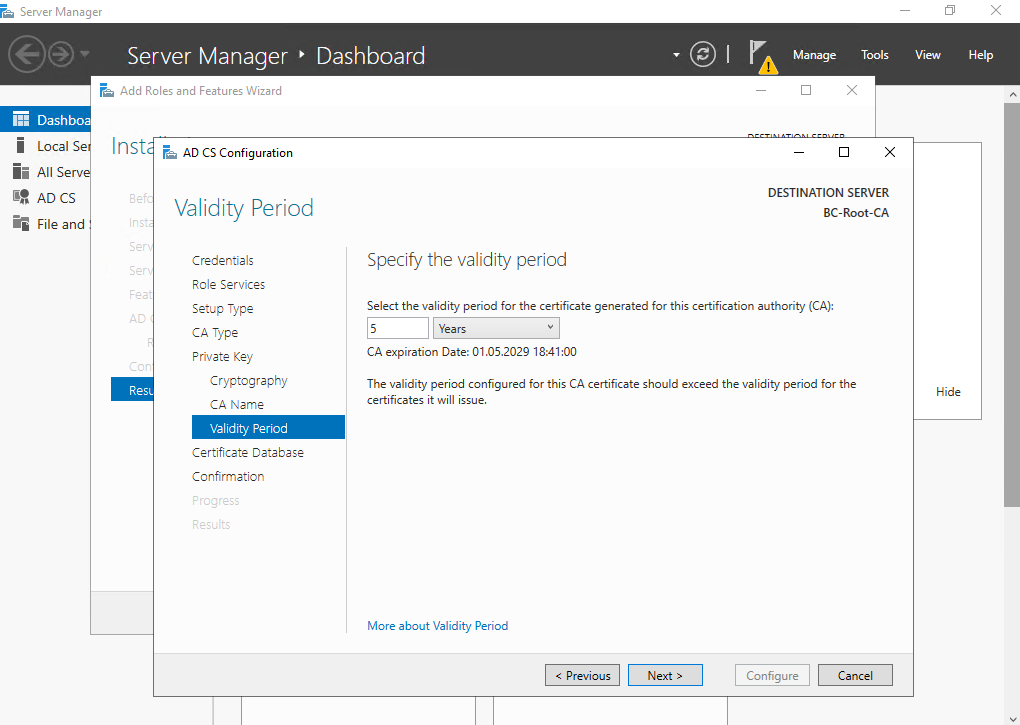
Specify the validity period, I will use here the default of 5 years. More about you will find in the following Microsoft article https://learn.microsoft.com/en-us/previous-versions/windows/it-pro/windows-server-2012-R2-and-2012/hh831574(v=ws.11)#verify-the-validity-period.
CAs cannot issue certificates that are valid beyond their own validity period. A best practice is to renew the CA certificate when half of its validity period is expired. When installing a CA, you should plan this date and ensure that it is recorded as a future task.
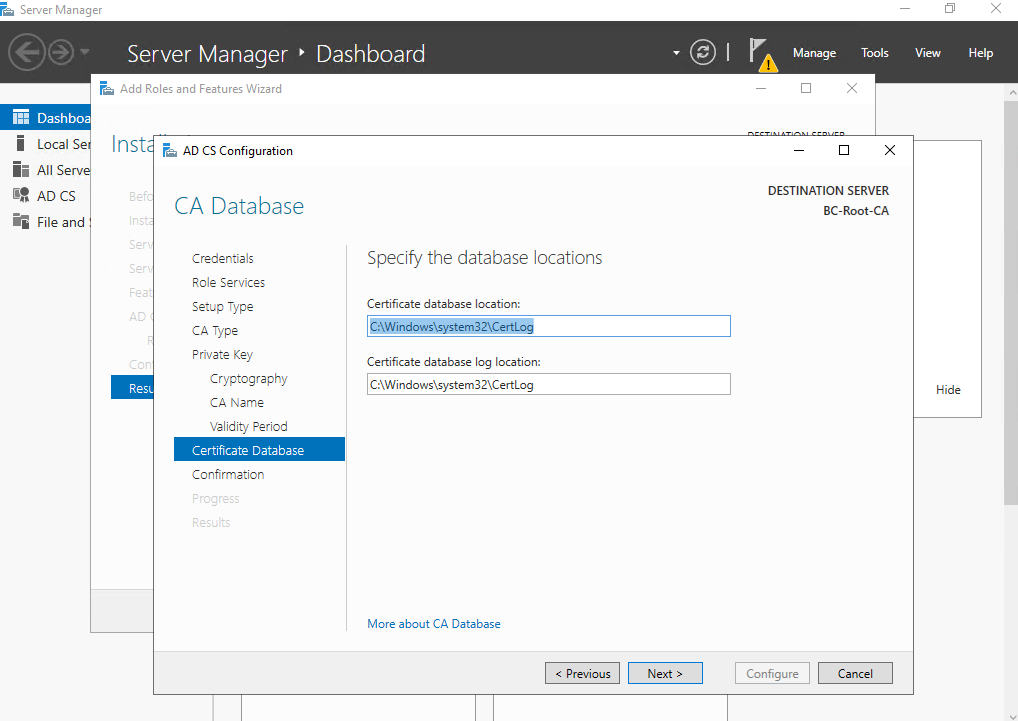
Specify the database location, I will leave the default location.
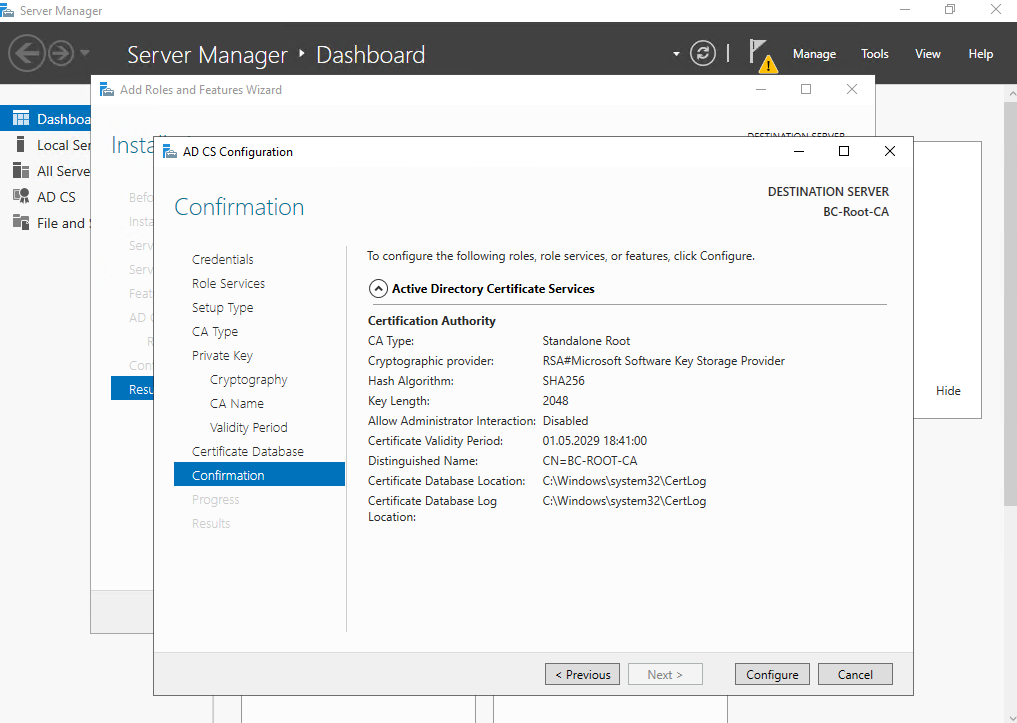
On the confirmation page we can finally click on Configure.
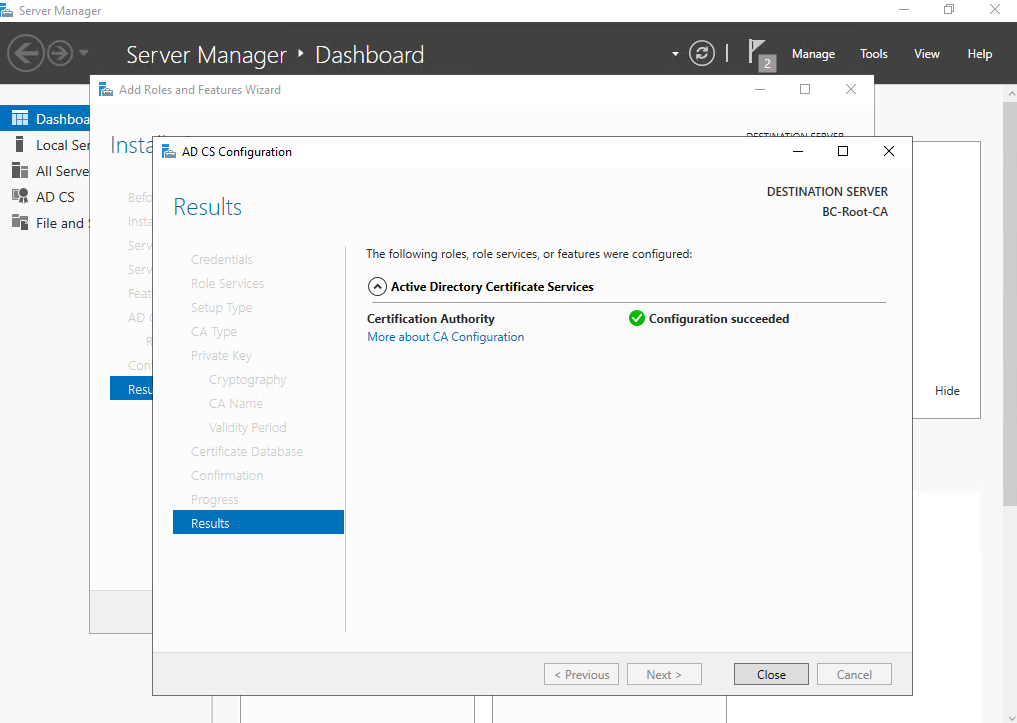
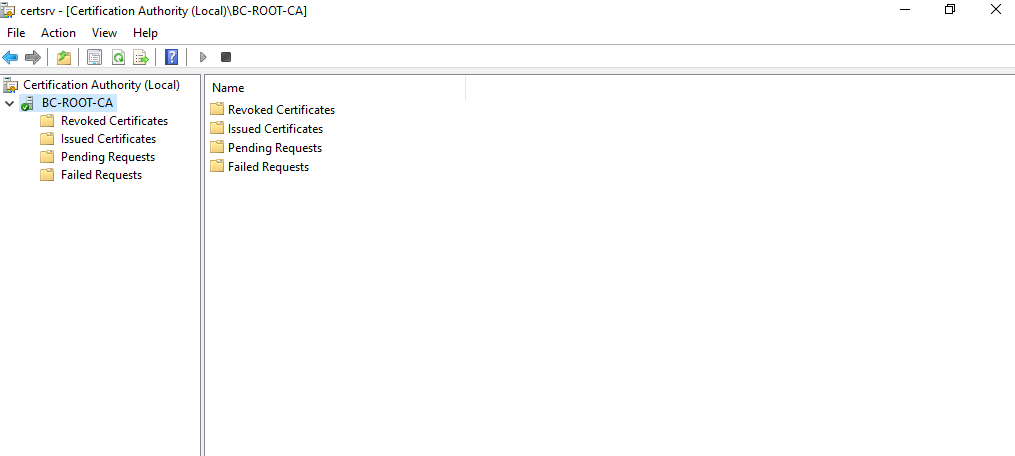
Now we have set up our root-CA successfully.
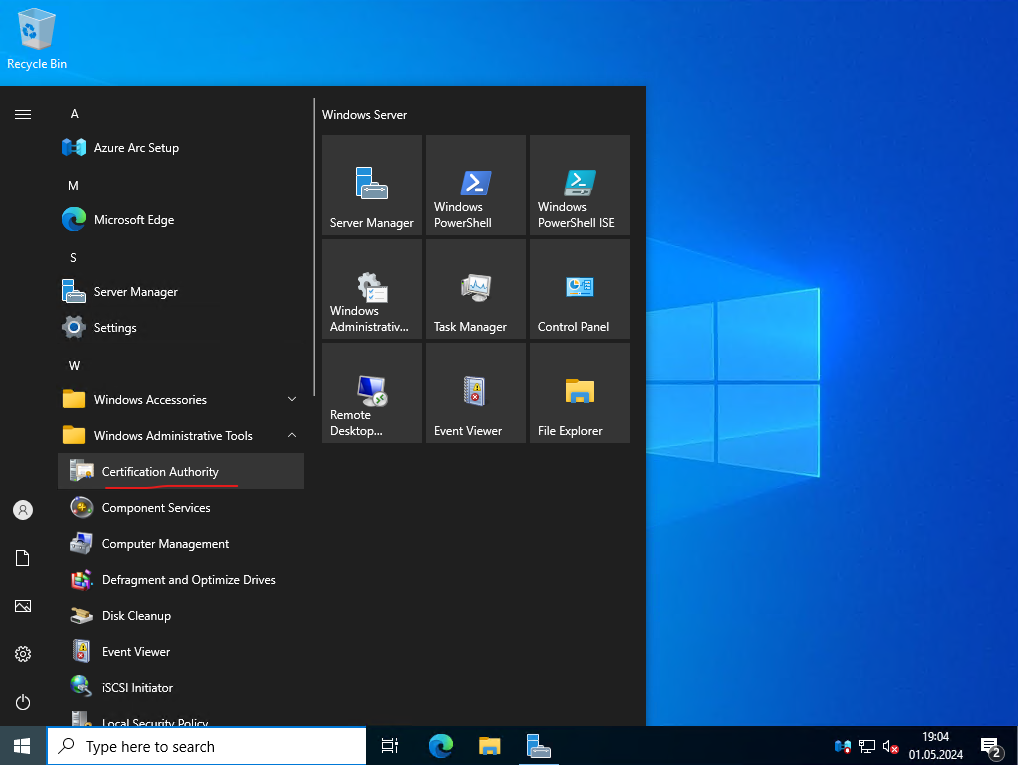
From now on we have a new entry Certification Authority under Windows Administrative Tools for our root CA.
Adjust Subordinate Certification Authority Certificate Validation Period
By default issued Subordinate CAs certificates will expire yearly if not already changed by using the CAPolicy.inf before installing the AD CS server role.
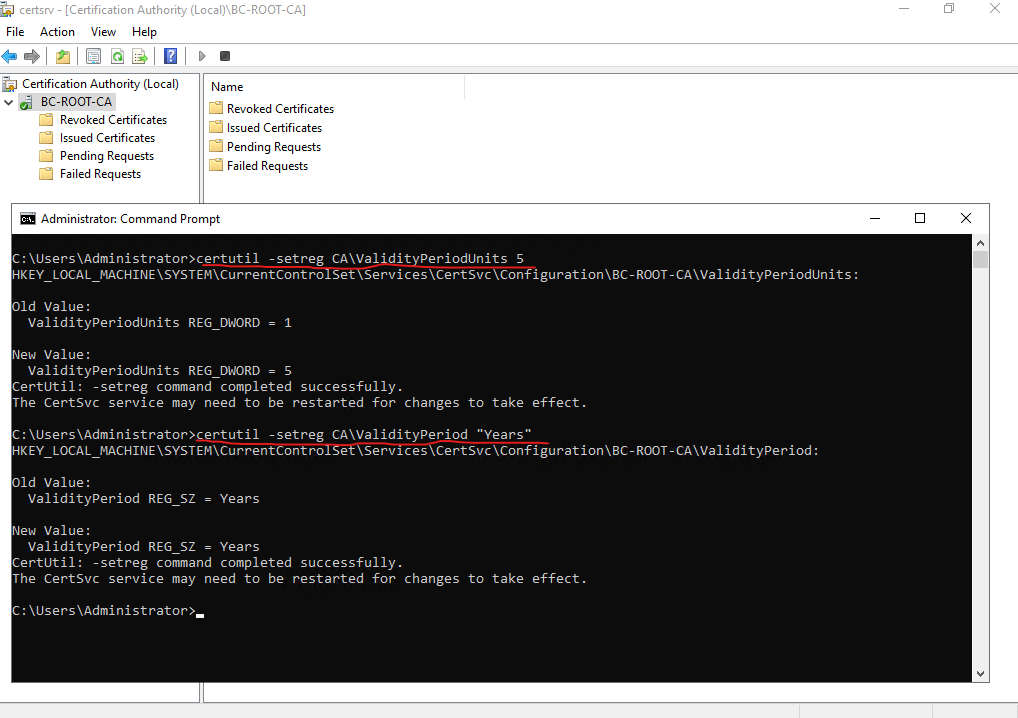
In order to change this period after the installation (in case not already configured by using the CAPolicy.inf configuration file as mentioned to the beginning) of the AD CS server role, we need to run the following commands directly on the Root CA. Below I will set that these certificates will expire after 5 years like also the default period for the Root CA certificate.
certutil -setreg CAValidityPeriodUnits 5
certutil -setreg CAValidityPeriod "Years"

Finally restart the Certification Services:
net stop certsvc && net start certsvc
You can also adjust the period how long CRLs from the Root CA are valid. By default they are valid for one week which is in case of a standalone offline Root CA much to short.
In case the Root CA CRL is expired, this will have negative impact on your whole PKI. Any certificate in the PKI hierarchy will fail revocation checking and many applications rely on CRL availability and fail if the CRL is inaccessible or out-of-date.
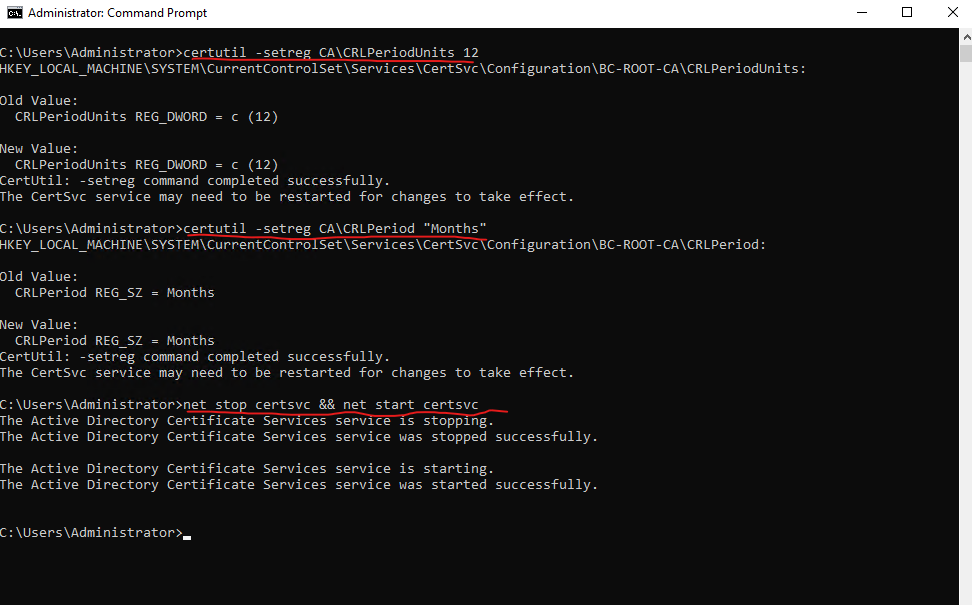
So because the Root CA is usually offline, we want to set the period (CRL publication interval) pretty long in order to not frequently power-on the Root CA to renew an re-publish the CRL to our Subordinate CAs. Usually for an offline CA you will set the CRL publication interval between 6 months and 1 year.
certutil -setreg CA\CRLPeriodUnits 12
certutil -setreg CA\CRLPeriod "Months"

Finally restart the Certification Services:
net stop certsvc && net start certsvc
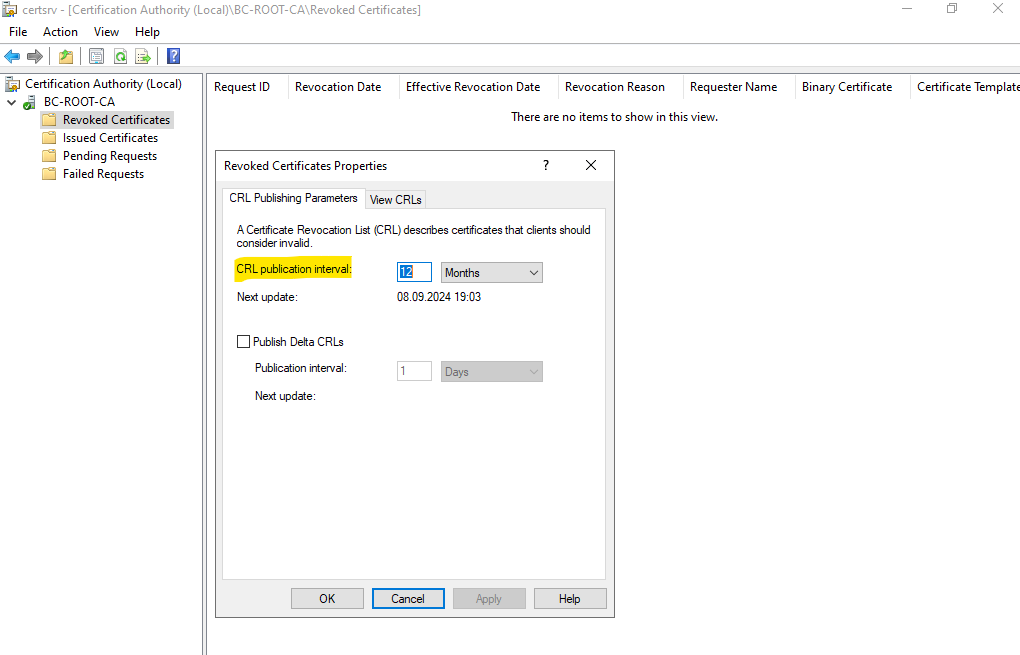
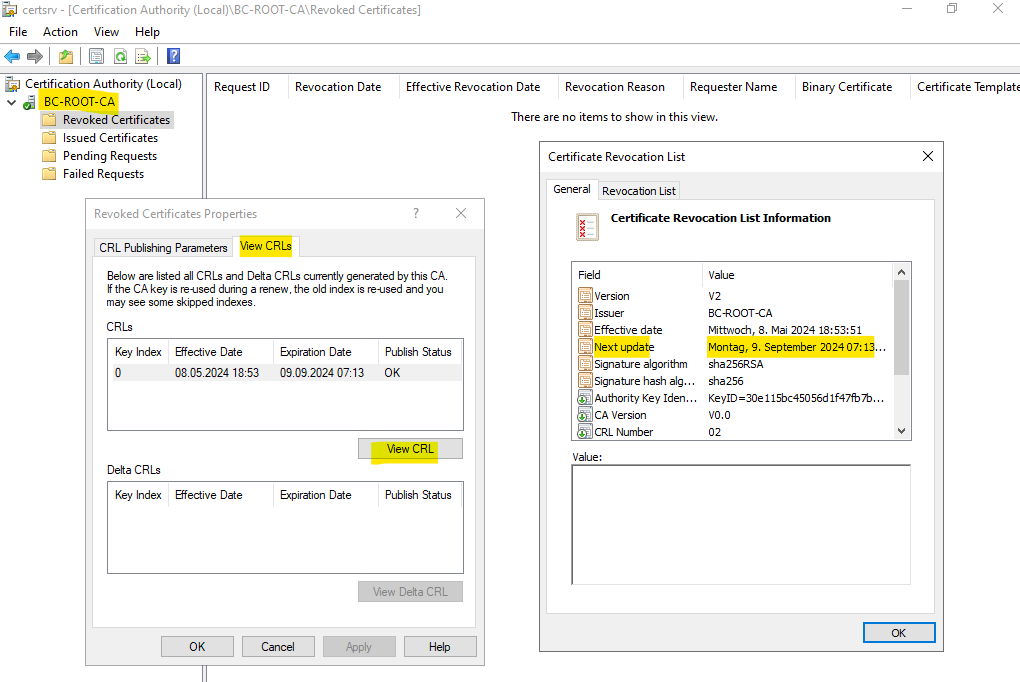
You can also change the CRL publication interval by using the Certification Authority console as shown below.

On a standalone offline Root CA you should btw. leave Publish Delta CRLs unchecked.
When switching to the View CRLs tab you can verify the period the CRL is valid. So far in my case the CRL is just valid for 4 months.
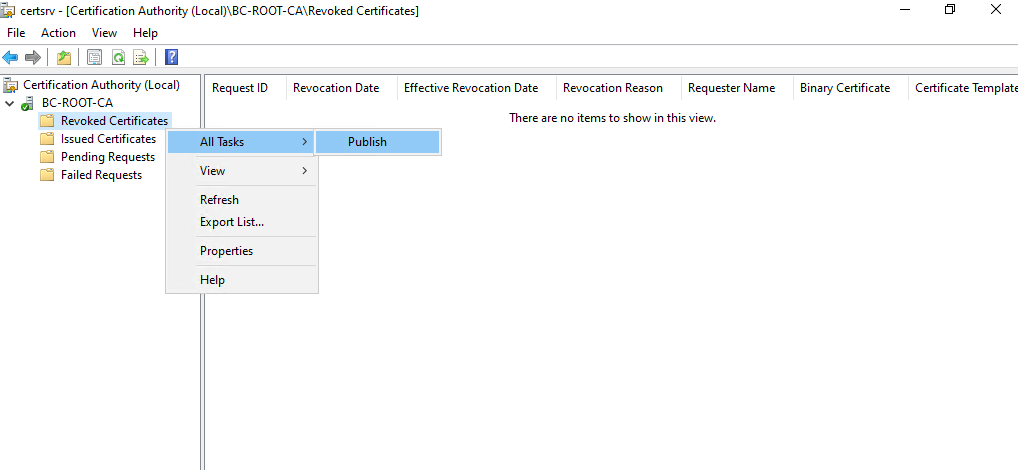
To renew and re-publish the CRL, we can right click on Revoked Certificates and select All Tasks -> Publish as shown below.

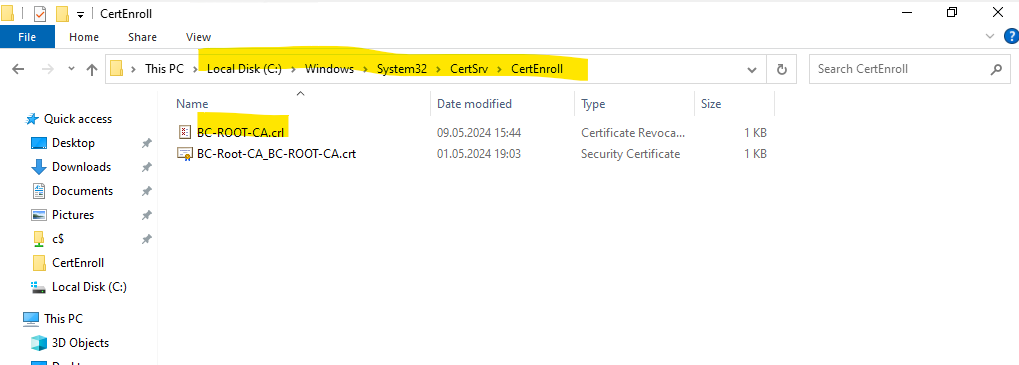
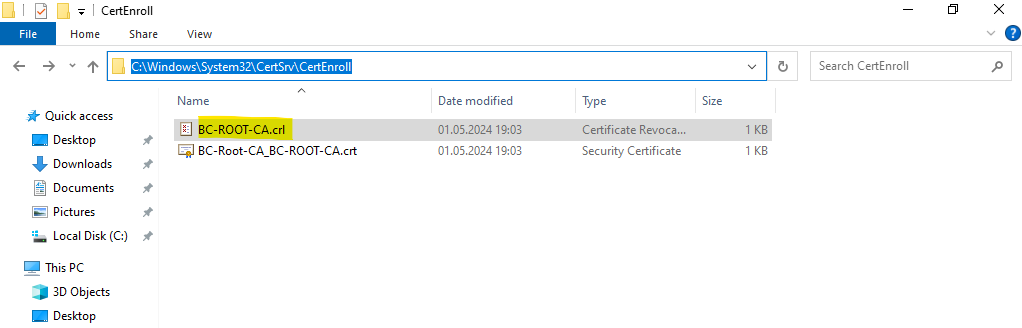
The new CRL will override the existing one on the Root CA under C:Windows\System32\CertSrv\CertEnroll directory as shown below.
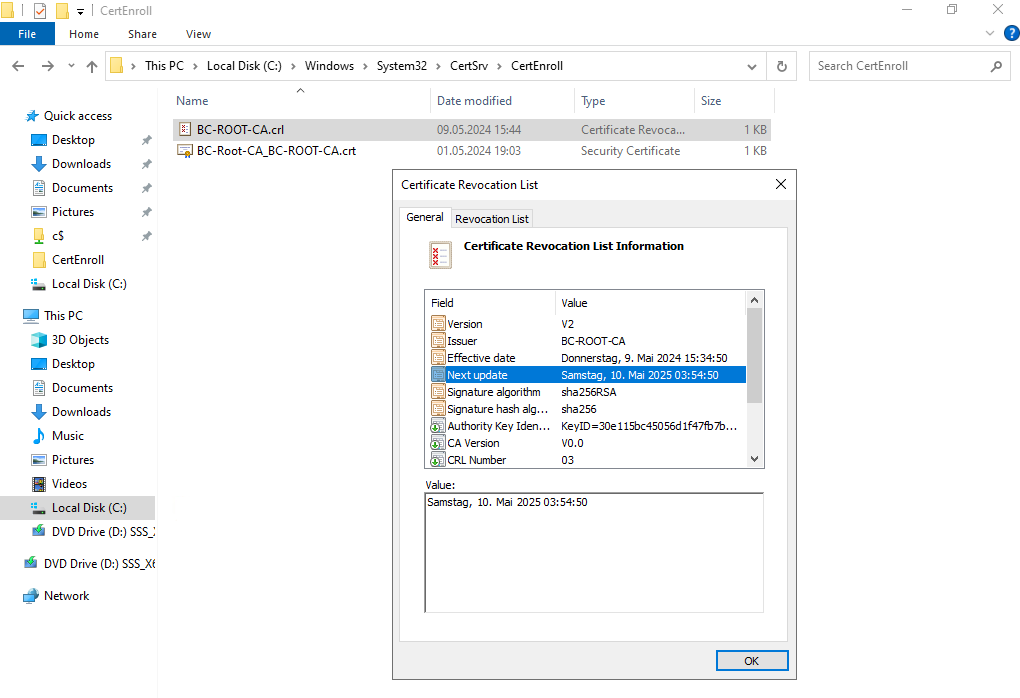
The new CRL is now valid for 1 year.
Now we need to copy the new Root CA CRL to our Subordinate CA and then executing the following command on the Subordinate CA.
certutil -f -dspublish <Root CRL file> <Hostname Root CA>
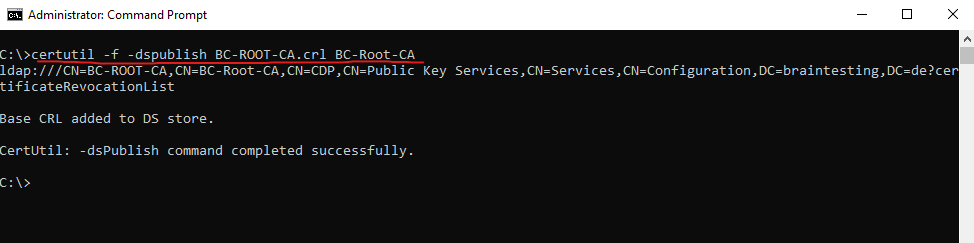
Finally we also need to copy the new Root CA CRL to our Subordinate CAs and the local path C:Windows\System32\CertSrv\CertEnroll.
Configure the Certification Revocation List (CRL)
A Certification Revocation List (CRL) is a list of digital certificates that have been revoked by the issuing Certificate Authority (CA) before their scheduled expiration date. Digital certificates are typically used in secure communication protocols like SSL/TLS to authenticate the identity of parties involved. However, there are instances where a certificate needs to be revoked, such as if it’s compromised, if the private key associated with it is lost or stolen, or if the certificate holder’s affiliation changes.
The CRL contains information about revoked certificates, including their serial numbers and the reason for revocation. It is periodically updated and made available by the CA so that relying parties, such as web browsers or email clients, can check whether a particular certificate is still valid or if it has been revoked.
When a digital certificate is presented, the relying party can check its validity by consulting the CRL. If the certificate is listed in the CRL, it is considered revoked, and the relying party can deny access or take other appropriate actions based on its security policies.
To configure the Certification Revocation List (CRL), right click on the CA node and select Properties.

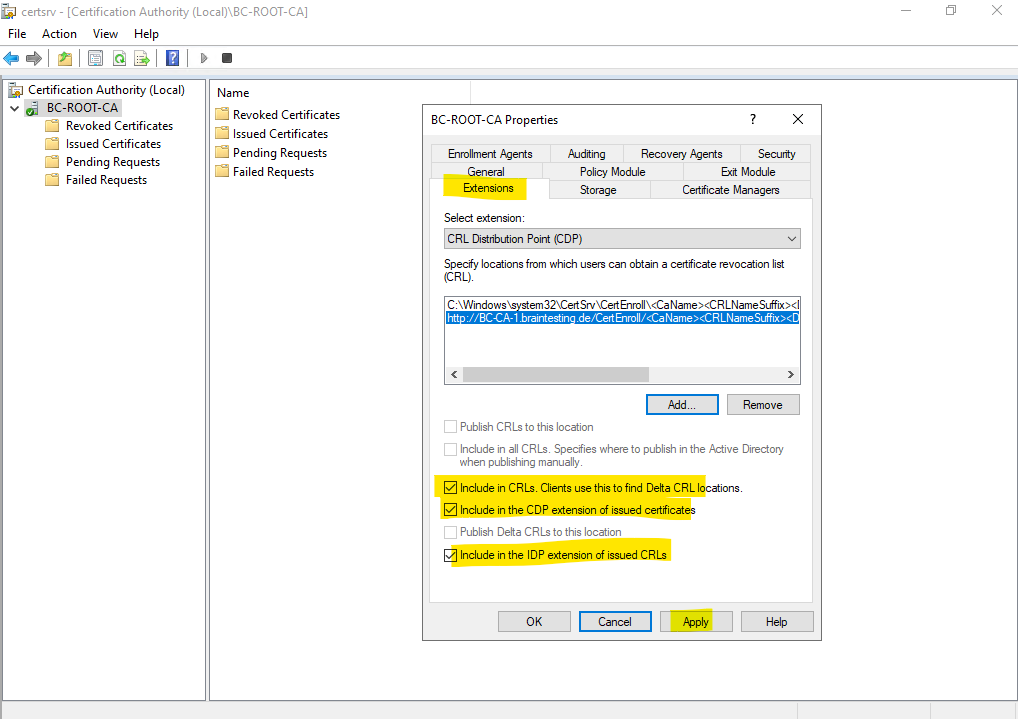
Switch to the Extensions tab and select the extension CRL Distribution Point (CDP) if not already selected by default.
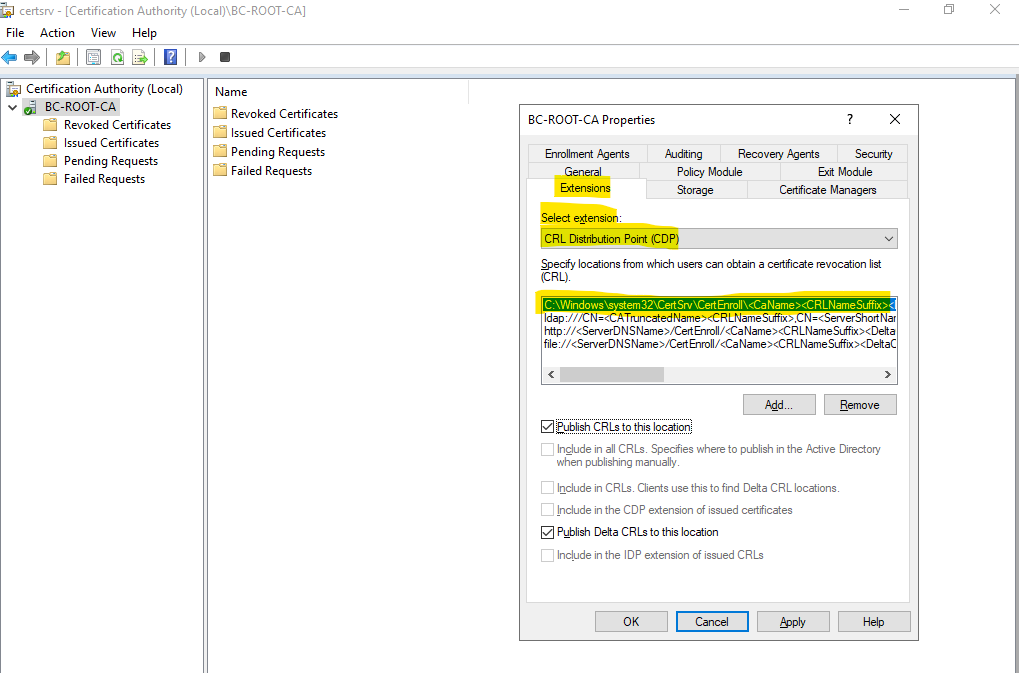
By default you will find here four default locations where the CRLs can be published and be available. Because we will use for the Root CA a standalone offline Root CA, we can just use here the first location locally on the server and the following default path: C:Windows\System32\CertSrv\CertEnroll.
Further we also need to specify here a public available source resp. distribution point (CDP), where the clients will have access to our Certificate Revocation List (CRL).
Therefore I will use the FQDN of my Subordinate CA (Intermediate CA) server which is shown in Part 3. The complete URL is:
http://BC-CA-1.braintesting.de/CertEnroll/<CaName>/<CRLNameSuffix>/<DeltaCRLAllowed>.crl
Also consider to use for the distribution point (CDP) a dedicated web server instead using directly the Subordinate CA (Intermediate CA). In case the Subordinate CA will get compromised and you have to revoke the Subordinate CAs certificate and finally replace the Subordinate CA, you then also first need to set up an new distribution point (CDP) which clients can use to access the CRL so far.
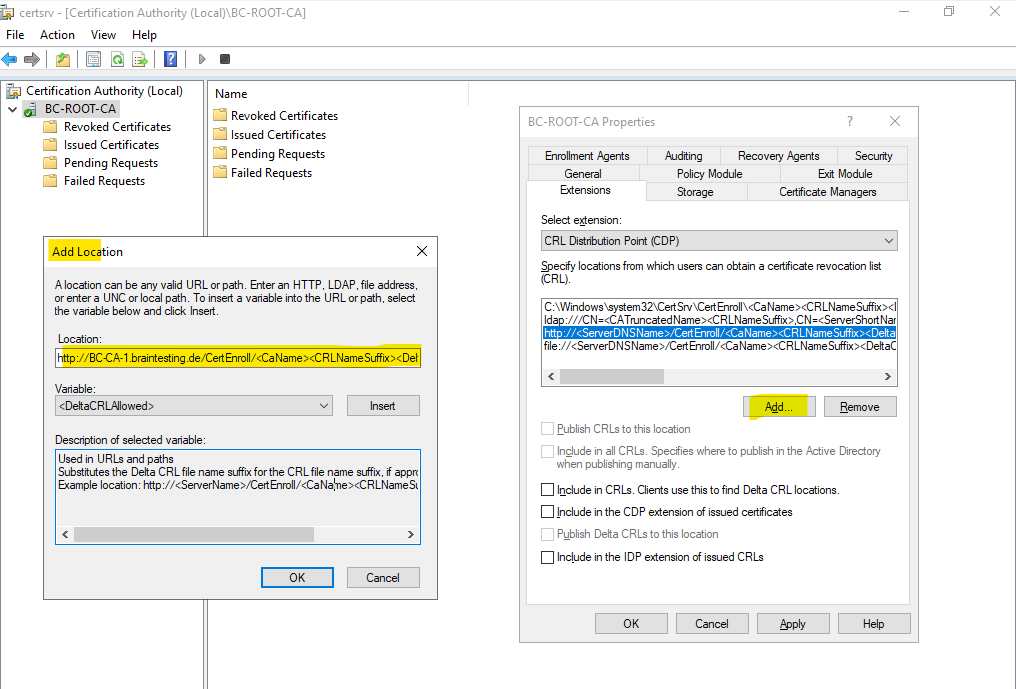
For the Certificate Revocation List (CRL) location also check the Include in CRLs, CDP extensions and IDP extension as shown below.
Finally I will also remove all other locations which will not be used.
Reasons to temporarily power-on again the Standalone Offline Root CA
- The Root CA certificate will expire soon
- Issuing a new Subordinate CA certificate
- Renew a Subordinate CA certificate
- The Root CA CRL is about to expire and must be renewed and re-published to the Subordinate CAs
In Part 3 we will see how to set up the Subordinate CA (Intermediate CA).
Blog Post Series – Parts Summary
Set up a 2-tier PKI in Active Directory Certificate Services (AD CS) – Part 1
Set up a 2-tier PKI in Active Directory Certificate Services (AD CS) – Part 2
Set up a 2-tier PKI in Active Directory Certificate Services (AD CS) – Part 3
Set up a 2-tier PKI in Active Directory Certificate Services (AD CS) – Part 4
Links
What is Active Directory Certificate Services?
https://learn.microsoft.com/en-us/windows-server/identity/ad-cs/active-directory-certificate-services-overviewImplement and manage Active Directory Certificate Services
https://learn.microsoft.com/en-us/training/modules/implement-manage-active-directory-certificate-services/What is the Certification Authority Role Service?
https://learn.microsoft.com/en-us/windows-server/identity/ad-cs/certification-authority-roleCAPolicy.inf Syntax
https://learn.microsoft.com/en-us/windows-server/networking/core-network-guide/cncg/server-certs/prepare-the-capolicy-inf-fileConfigure the CDP and AIA Extensions on CA1
https://learn.microsoft.com/en-us/windows-server/networking/core-network-guide/cncg/server-certs/configure-the-cdp-and-aia-extensions-on-ca1Resolving Issues Starting a CA due to an Offline CRL
https://stealthpuppy.com/resolving-issues-starting-ca-offline-crl/Configure CRL Publication
https://learn.microsoft.com/en-us/previous-versions/windows/it-pro/windows-server-2003/cc737180(v=ws.10)?redirectedfrom=MSDNSchedule the publication of the certificate revocation list
https://learn.microsoft.com/en-us/previous-versions/windows/it-pro/windows-server-2003/cc781735(v=ws.10)?redirectedfrom=MSDN
Tags In
Related Posts
Latest posts
How Multicast Traffic Works in VMware vSphere – Testing VSS (Basic Multicast Filtering) vs VDS (IGMP/MLD Snooping) with Video Streaming – Part 2
Follow me on LinkedIn