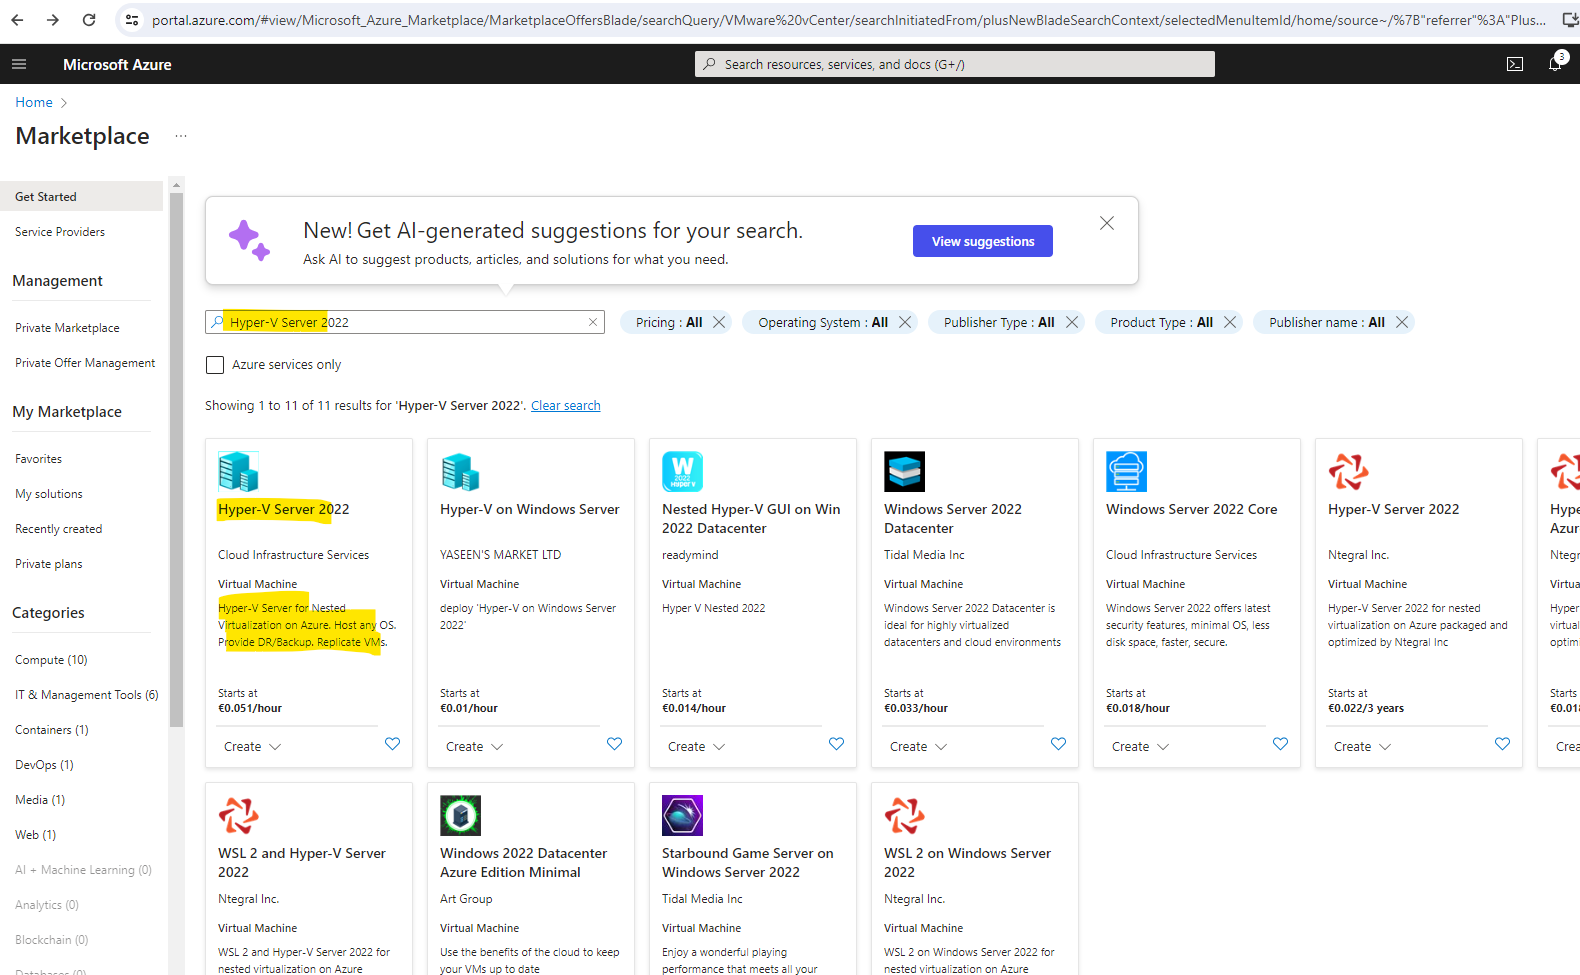
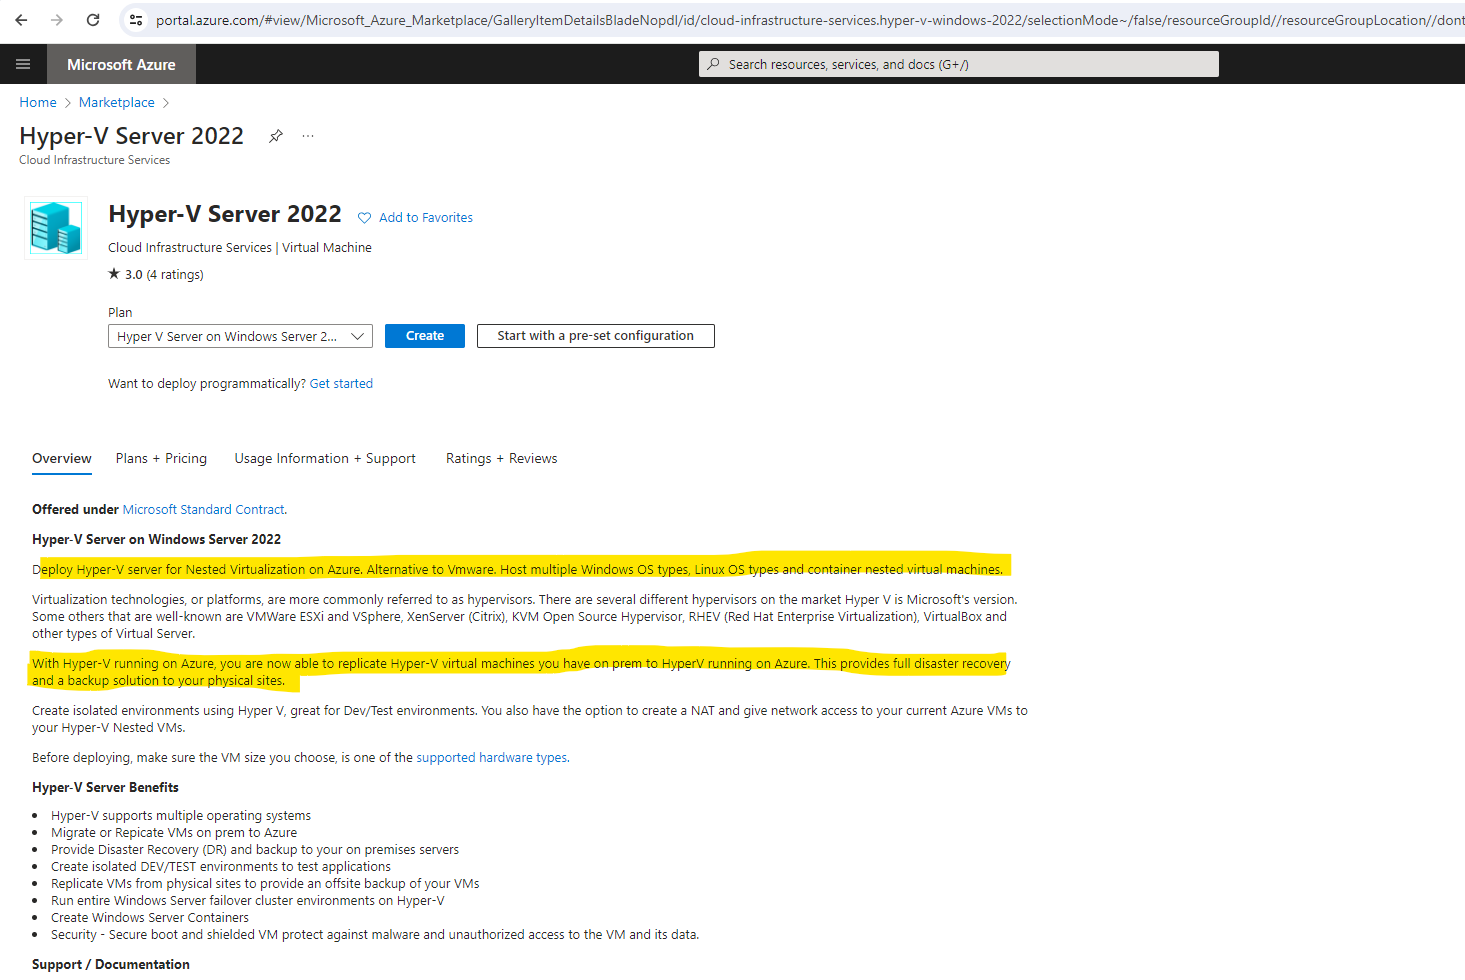
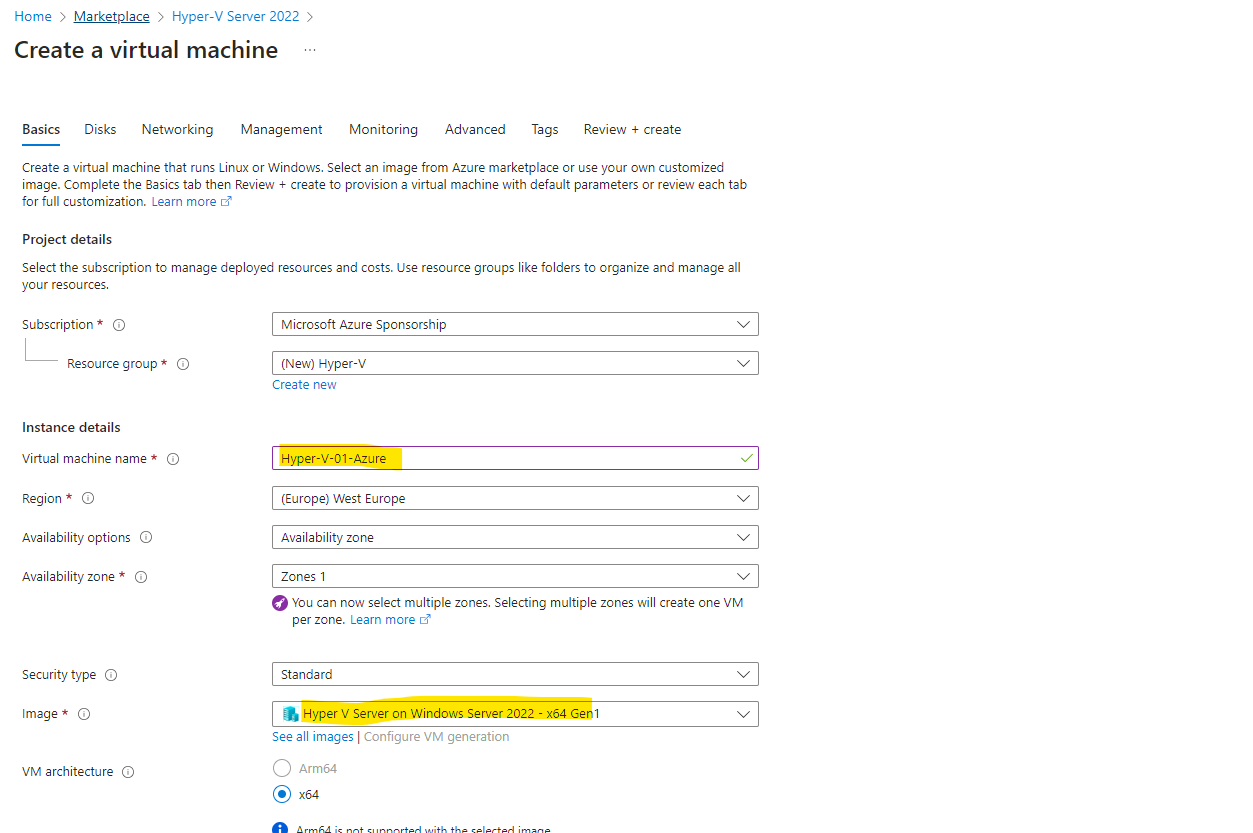
In order to demonstrate the replication of virtual machines between different data center as shown in my post below, I will create therefore in Azure a new Hyper-V server 2022 (virtual machine) for nested virtualization which then will act as a second data center besides my on-premise lab environment.


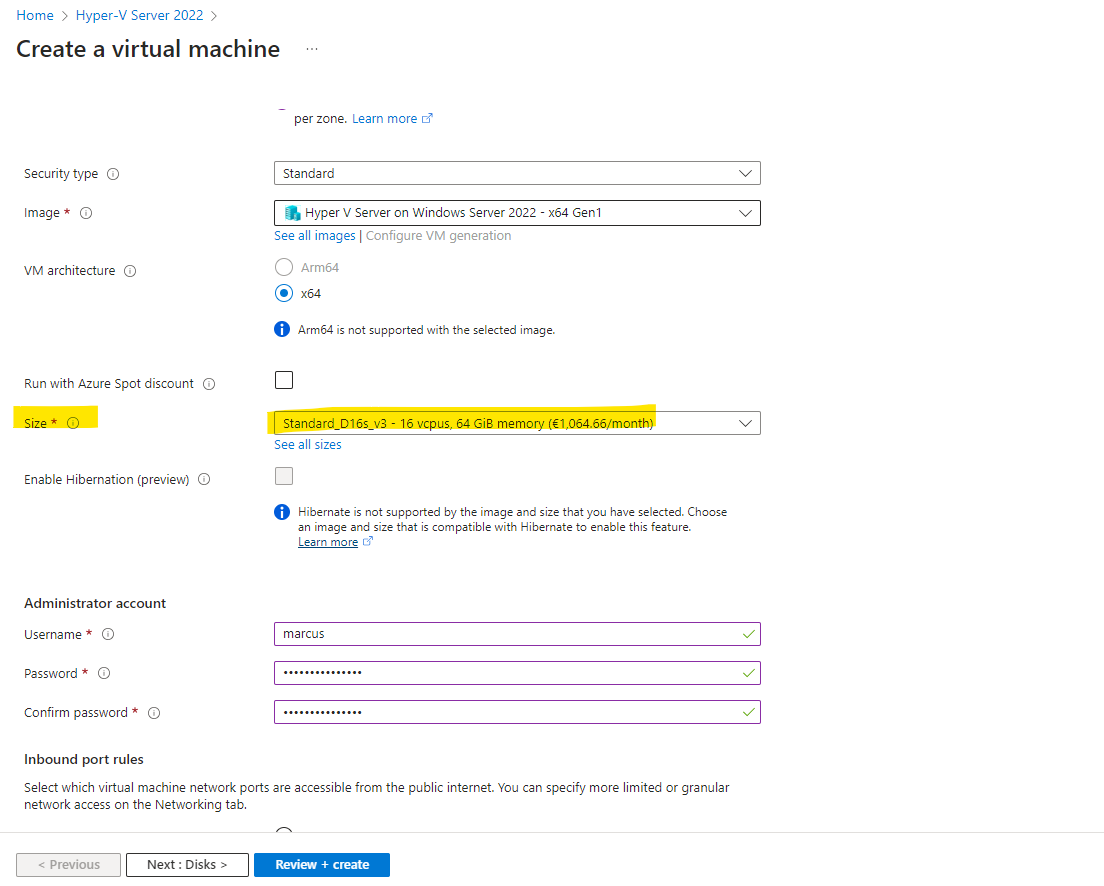
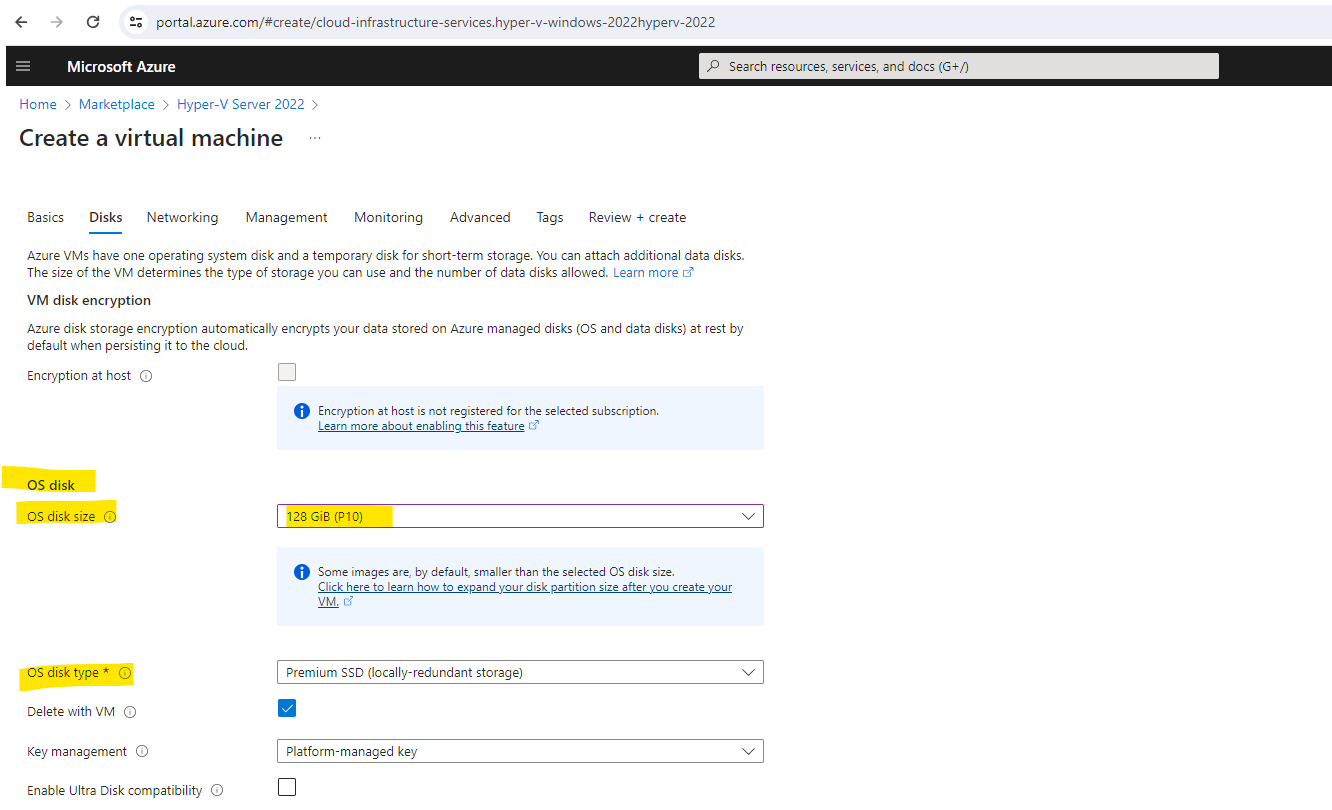
Create an Azure Hyper-V 2022 Virtual Machine for Nested Virtualization

In the Azure portal we can therefore search in the Marketplace for Hyper-V Server 2022 and select the template as shown below.


With Hyper-V running on Azure, you are now able to replicate Hyper-V virtual machines you have on prem to HyperV running on Azure. This provides full disaster recovery and a backup solution to your physical sites.


Deploy a Dv3 and Ev3 series Windows Server VM in Azure that supports nested virtualization, see article about the VM sizes here…

Source: https://techcommunity.microsoft.com/t5/itops-talk-blog/how-to-setup-nested-virtualization-for-azure-vm-vhd/ba-p/1115338


Create and attach a new disk for the virtual machines and their virtual disks and configuration files to be stored on later.


We also need to configure the virtual network our Hyper-V virtual machine will be placed to.


Configure the Hyper-V and DHCP Server Role

Now after the virtual machine is running we first have to install the Hyper-V role. I will further install the DHCP server role on the server in order to provide dynamic IP addressing for the virtual machines running on this Hyper-V server and virtual network.

Install-WindowsFeature -Name DHCP,Hyper-V –IncludeManagementTools


After a reboot we can start to configure Hyper-V.


The commands below will create a Hyper-V internal switch and set a nat rule and gateway for that virtual switch.

Source: https://techcommunity.microsoft.com/t5/itops-talk-blog/how-to-setup-nested-virtualization-for-azure-vm-vhd/ba-p/1115338


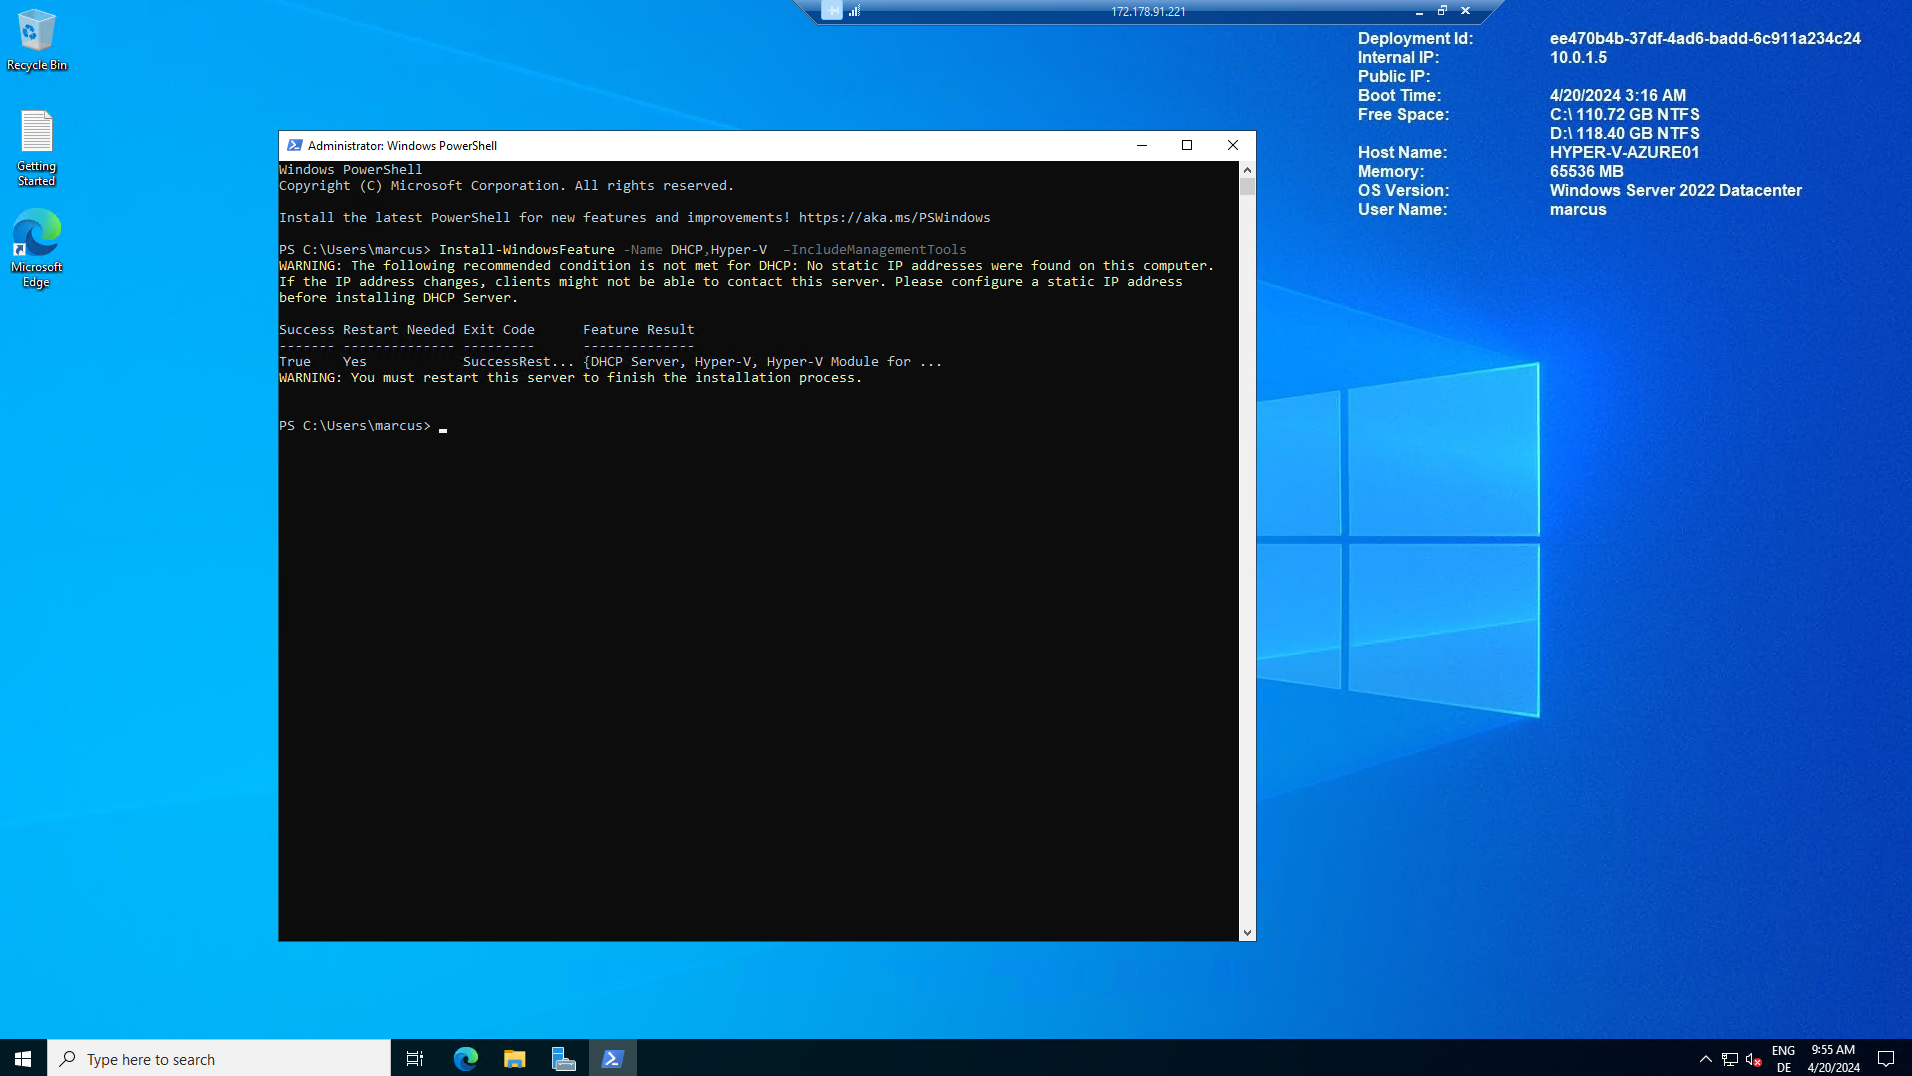
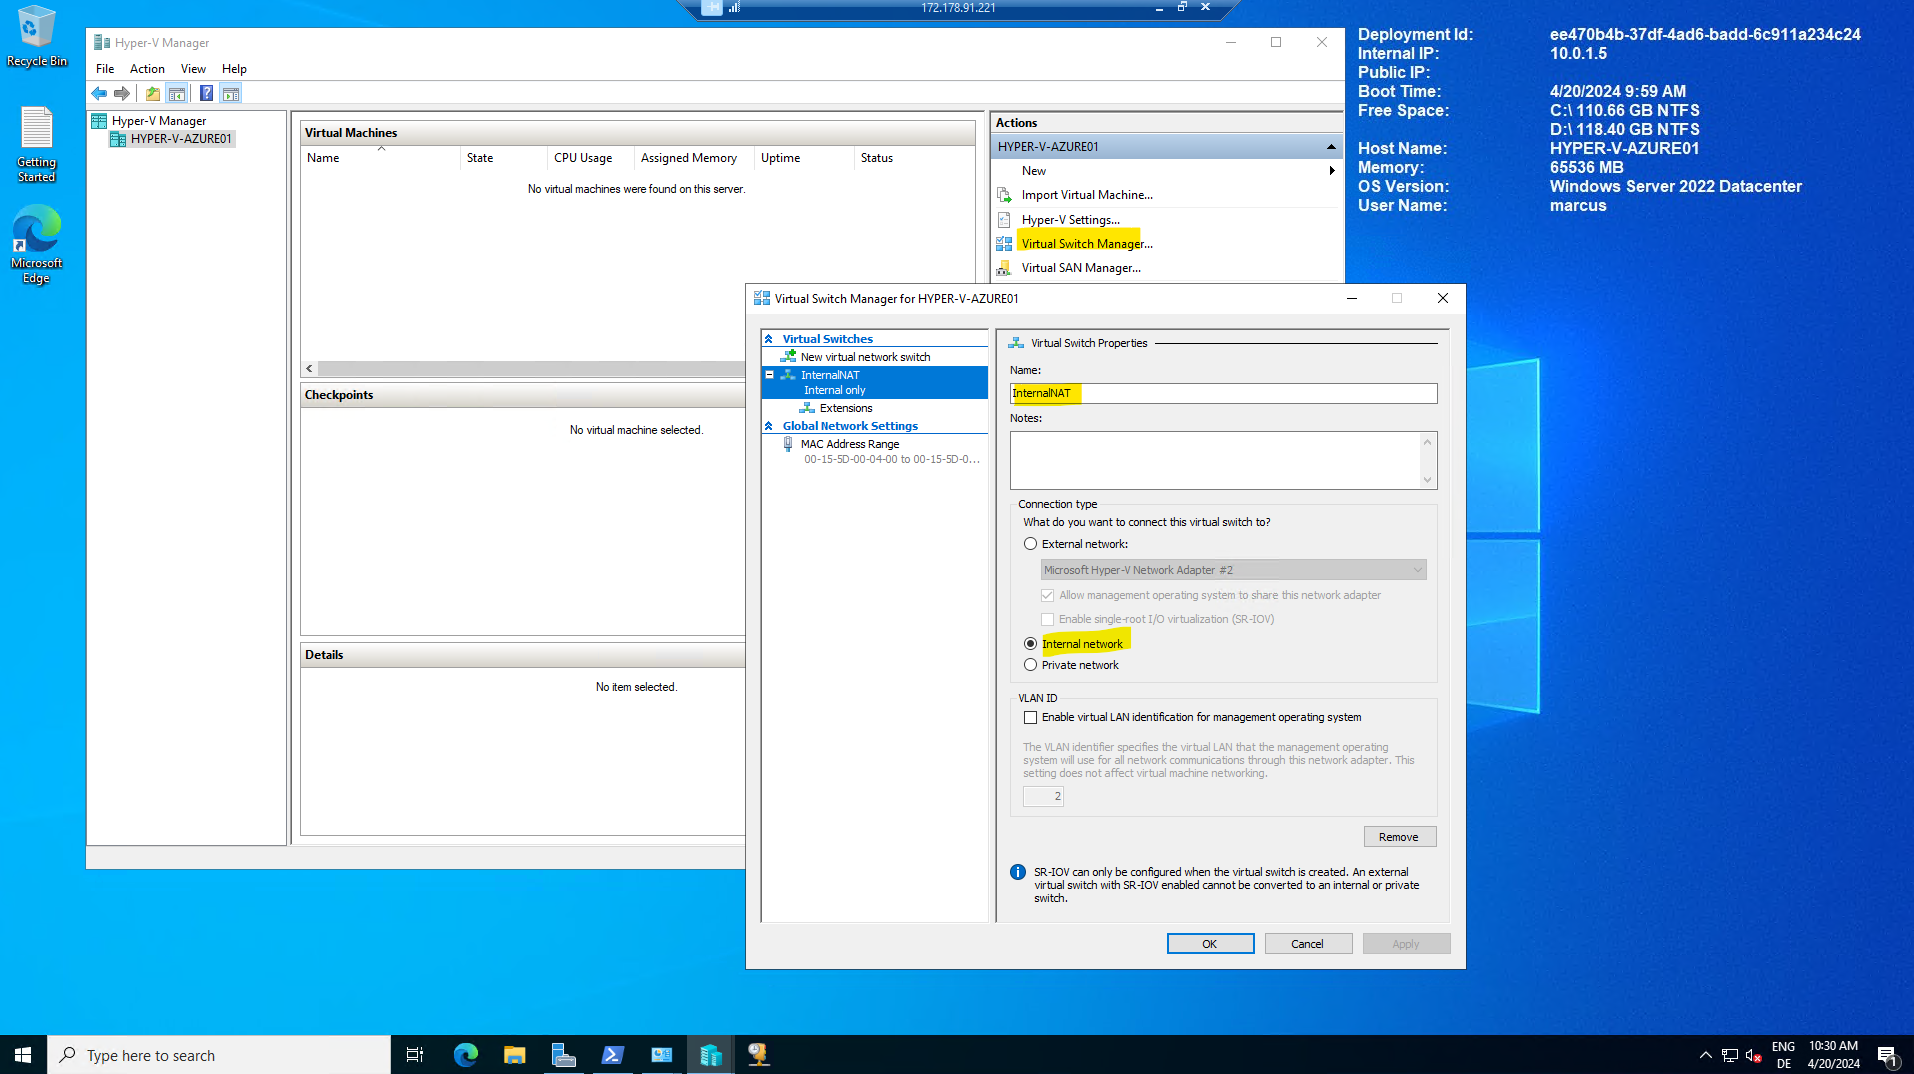
$switchName = "InternalNAT"
New-VMSwitch -Name $switchName -SwitchType Internal
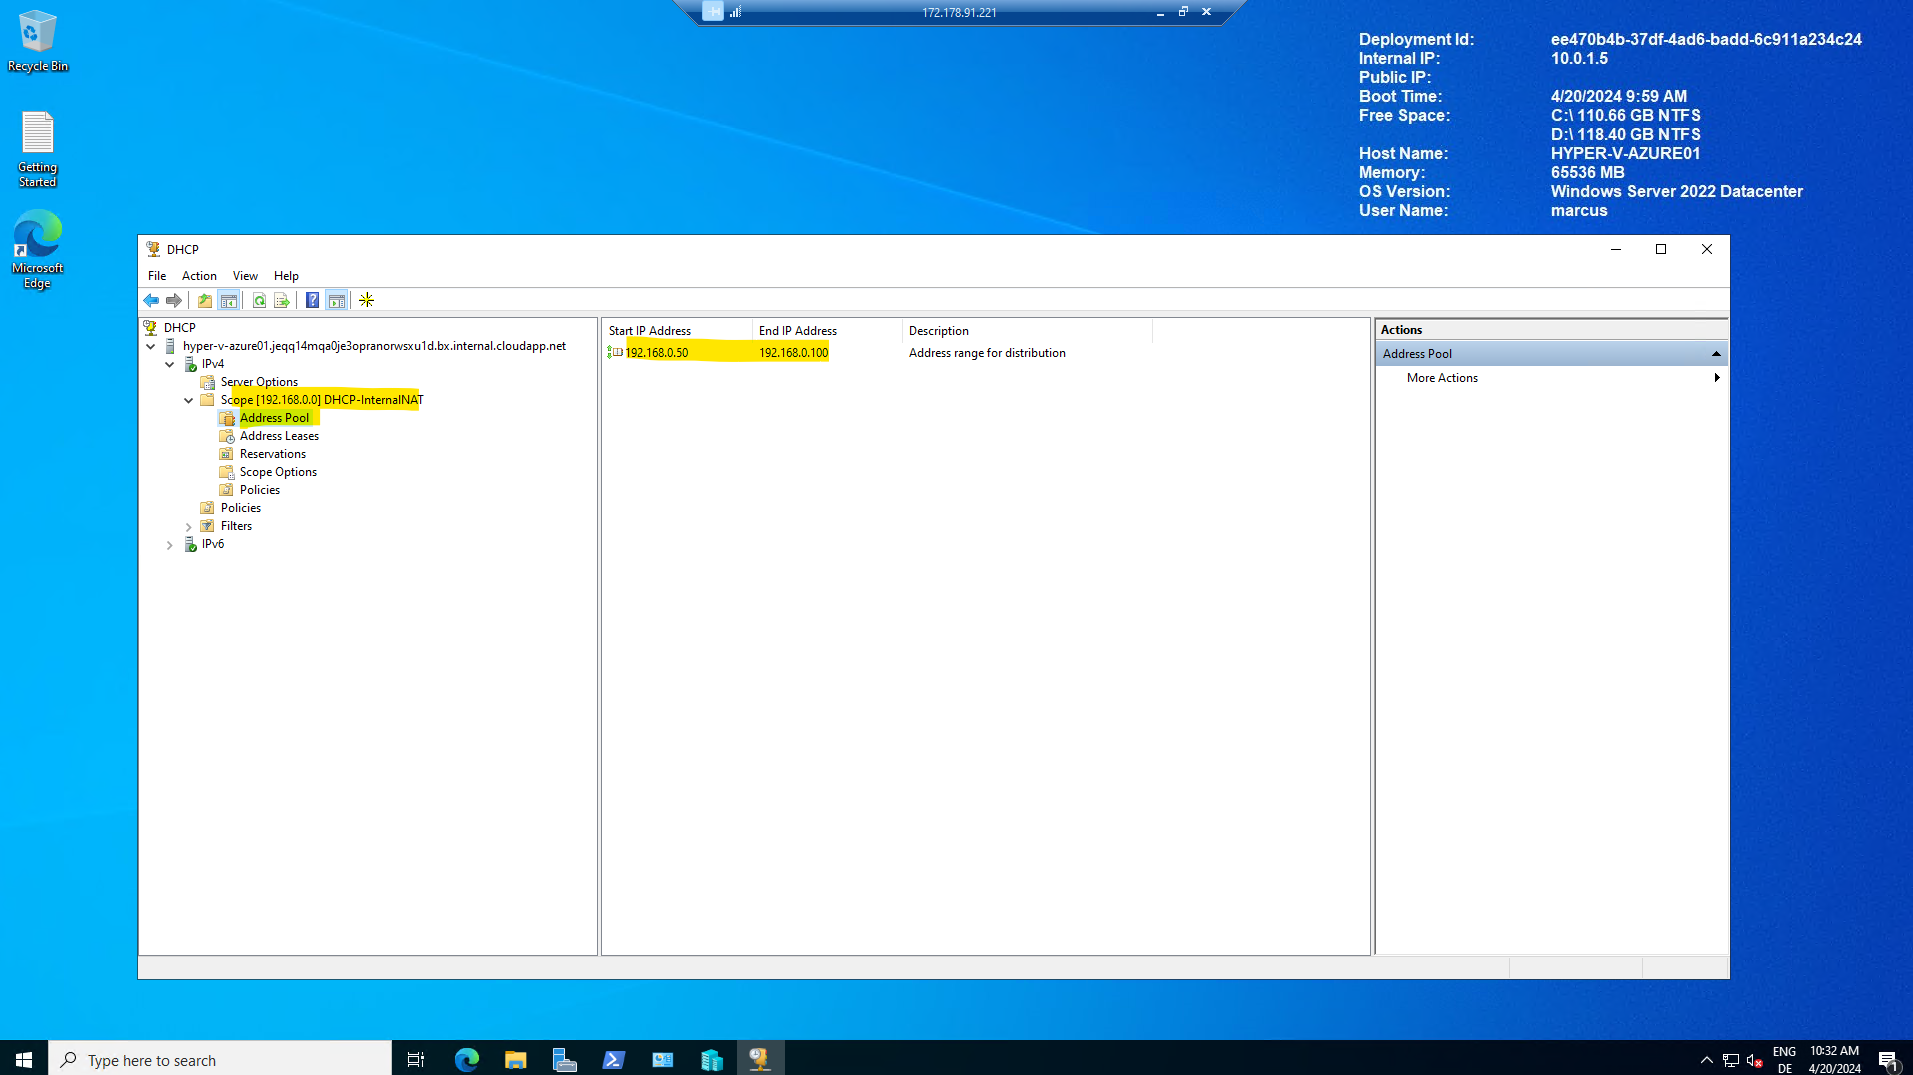
New-NetNat –Name $switchName –InternalIPInterfaceAddressPrefix “192.168.0.0/24”
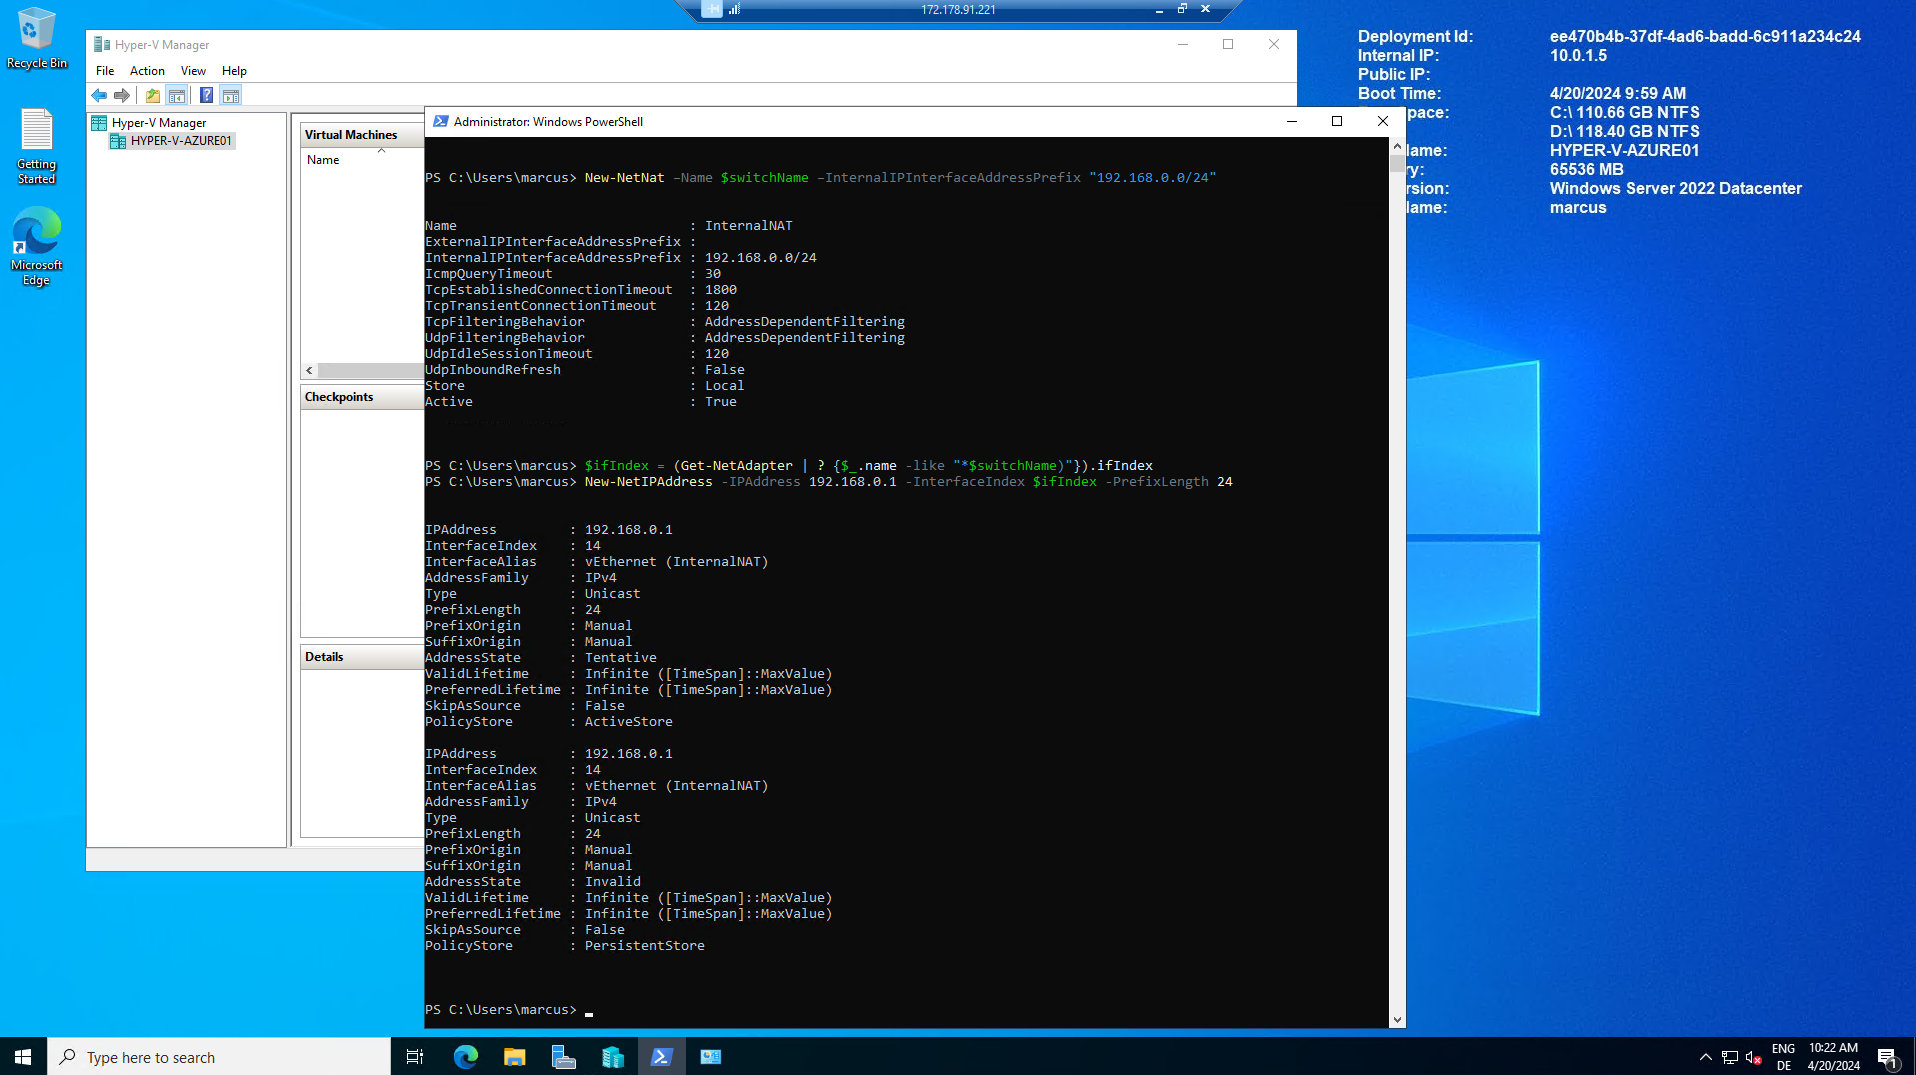
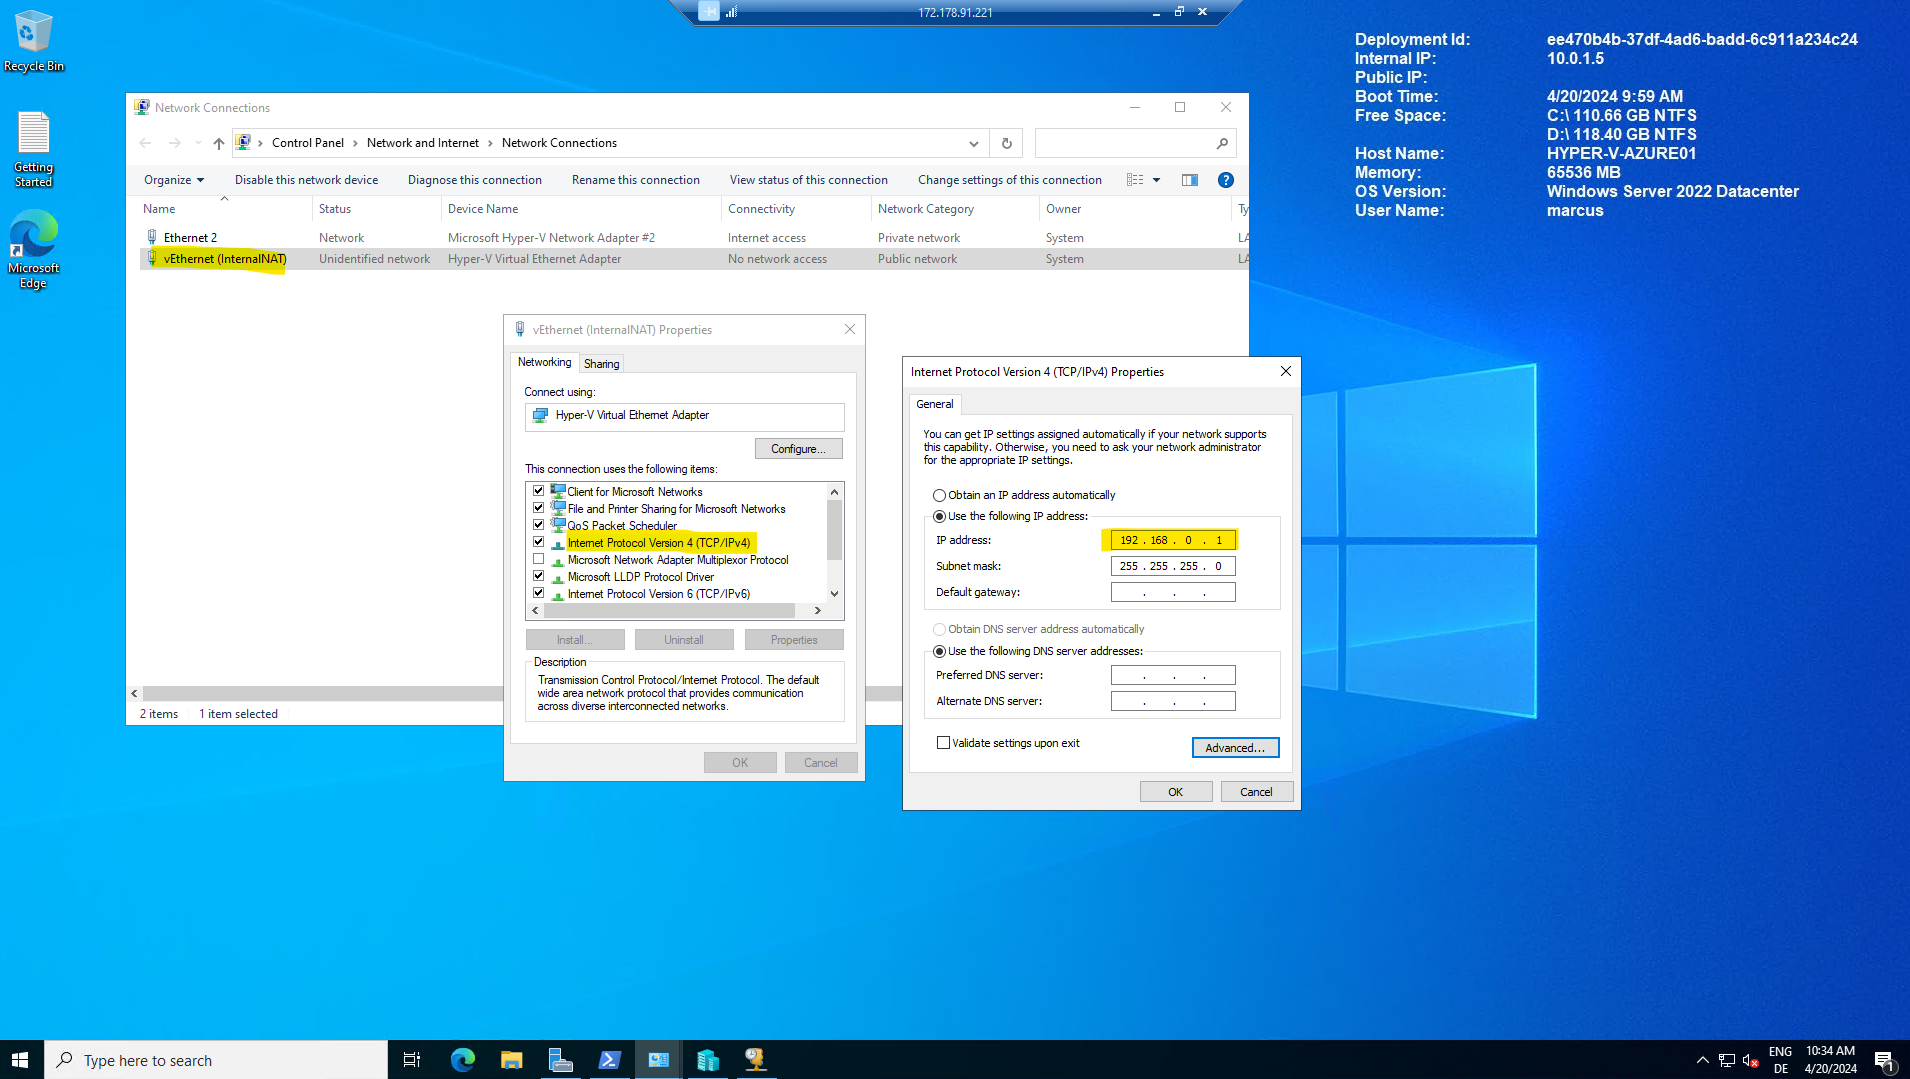
$ifIndex = (Get-NetAdapter | ? {$_.name -like "*$switchName)"}).ifIndex
New-NetIPAddress -IPAddress 192.168.0.1 -InterfaceIndex $ifIndex -PrefixLength 24

More details about how to set up a NAT network you can read the following article from Microsoft.
Set up a NAT network
https://learn.microsoft.com/en-us/virtualization/hyper-v-on-windows/user-guide/setup-nat-network


In order new virtual machines using this internal switch getting by DHCP an IP address by default, we will configure below a new DHCP scope.

The commands below will create a DHCP scope for Hyper-V nat, assign gateway IP, DNS IP for that scope on the DHCP service and restart dhcp service.

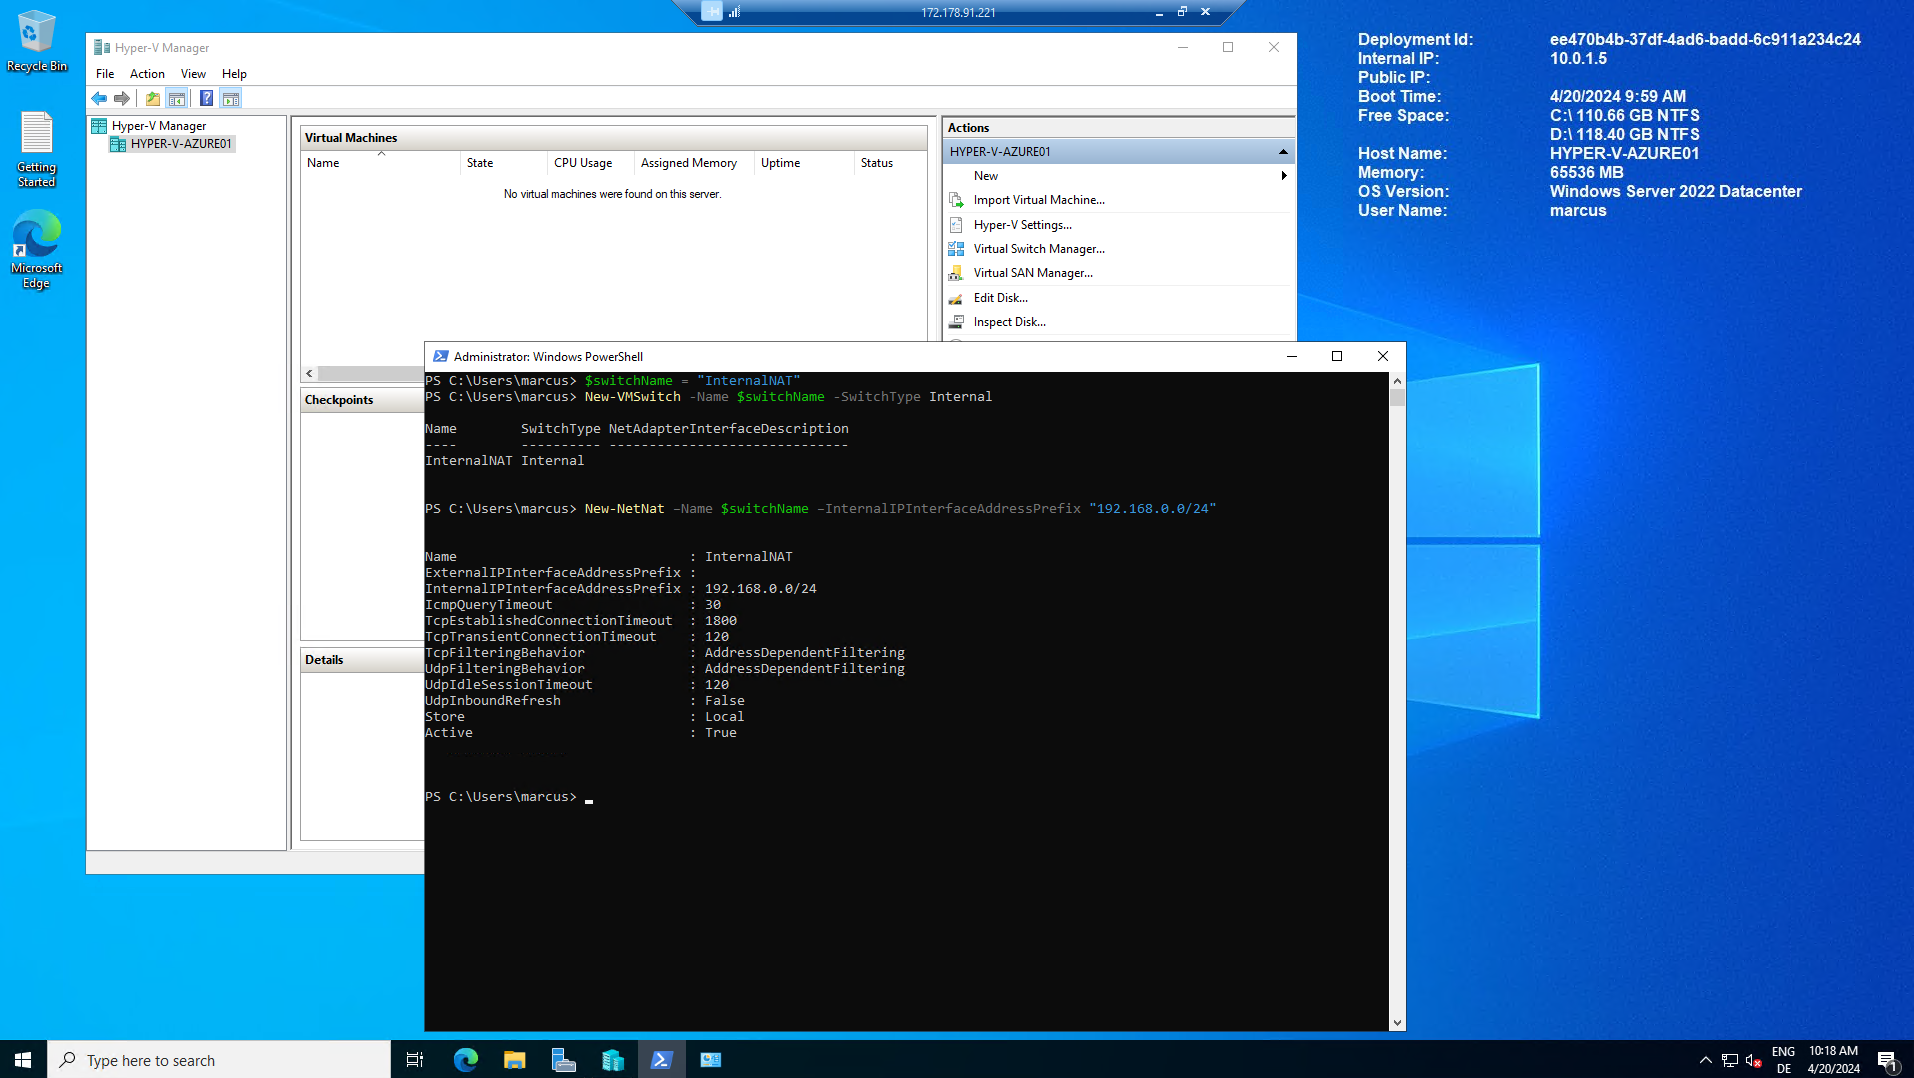
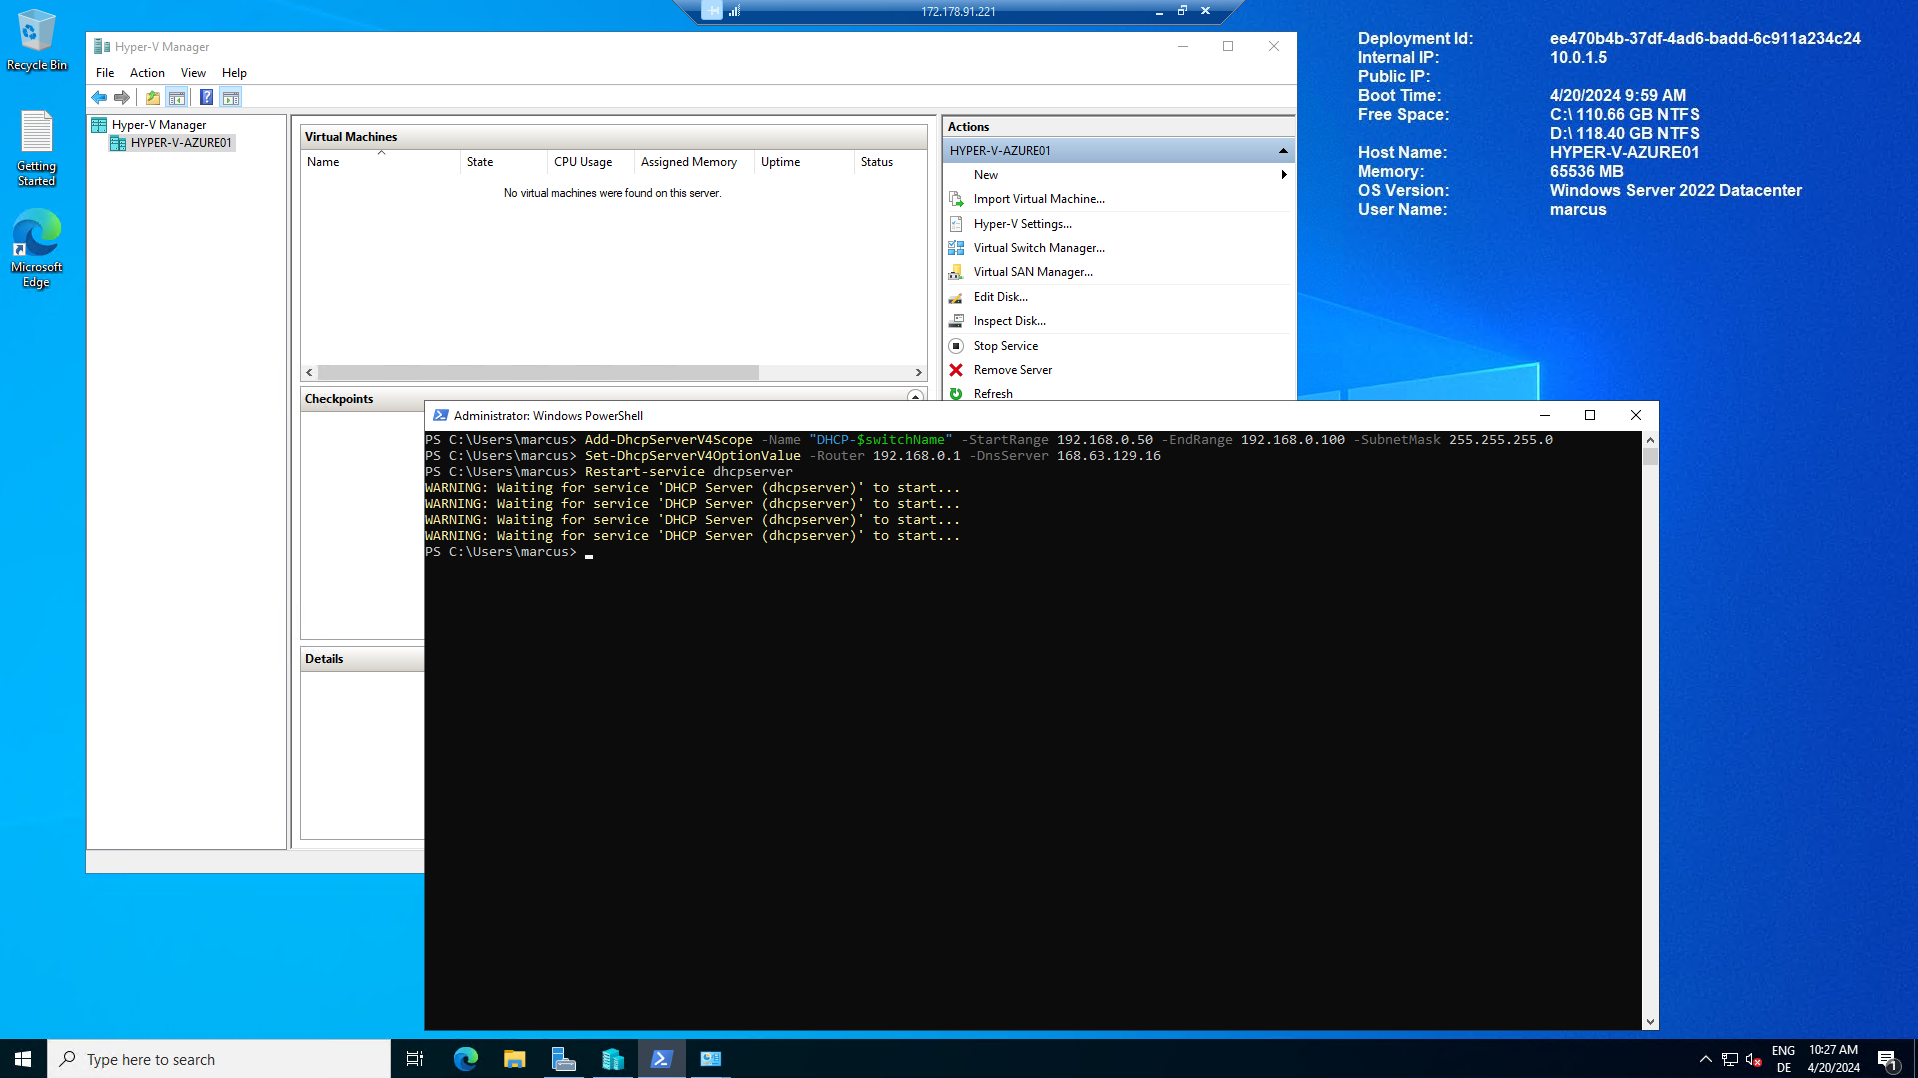
Add-DhcpServerV4Scope -Name "DHCP-$switchName" -StartRange 192.168.0.50 -EndRange 192.168.0.100 -SubnetMask 255.255.255.0
Set-DhcpServerV4OptionValue -Router 192.168.0.1 -DnsServer 168.63.129.16
Restart-service dhcpserver


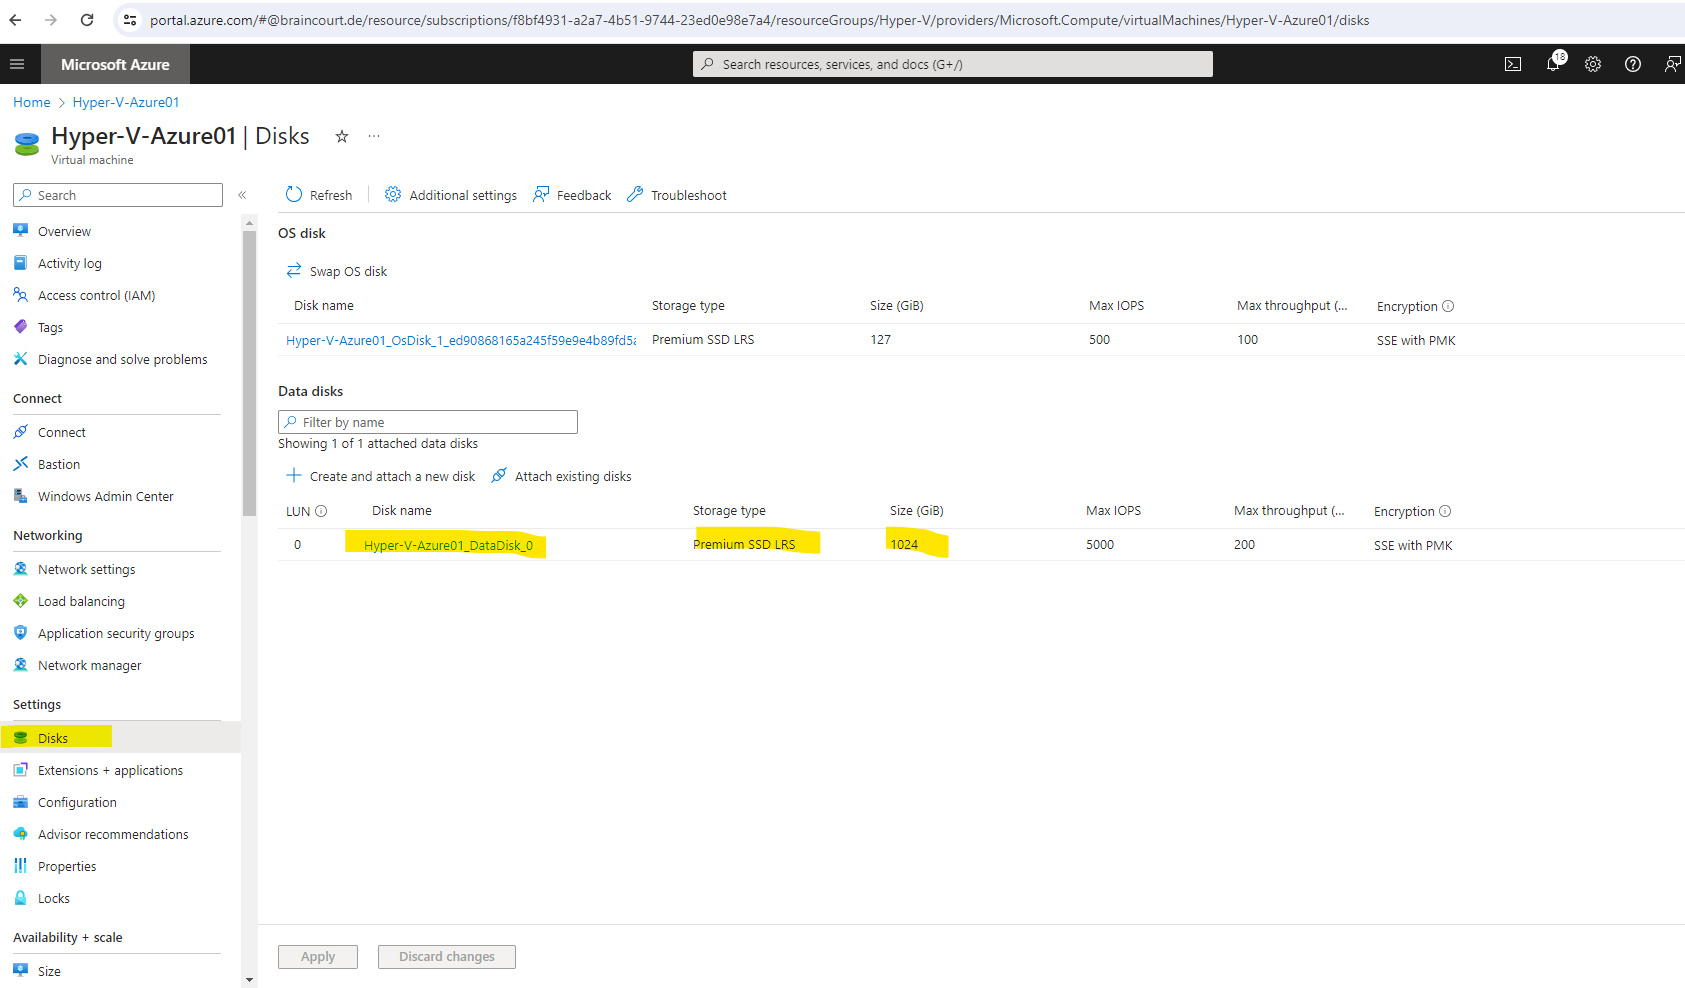
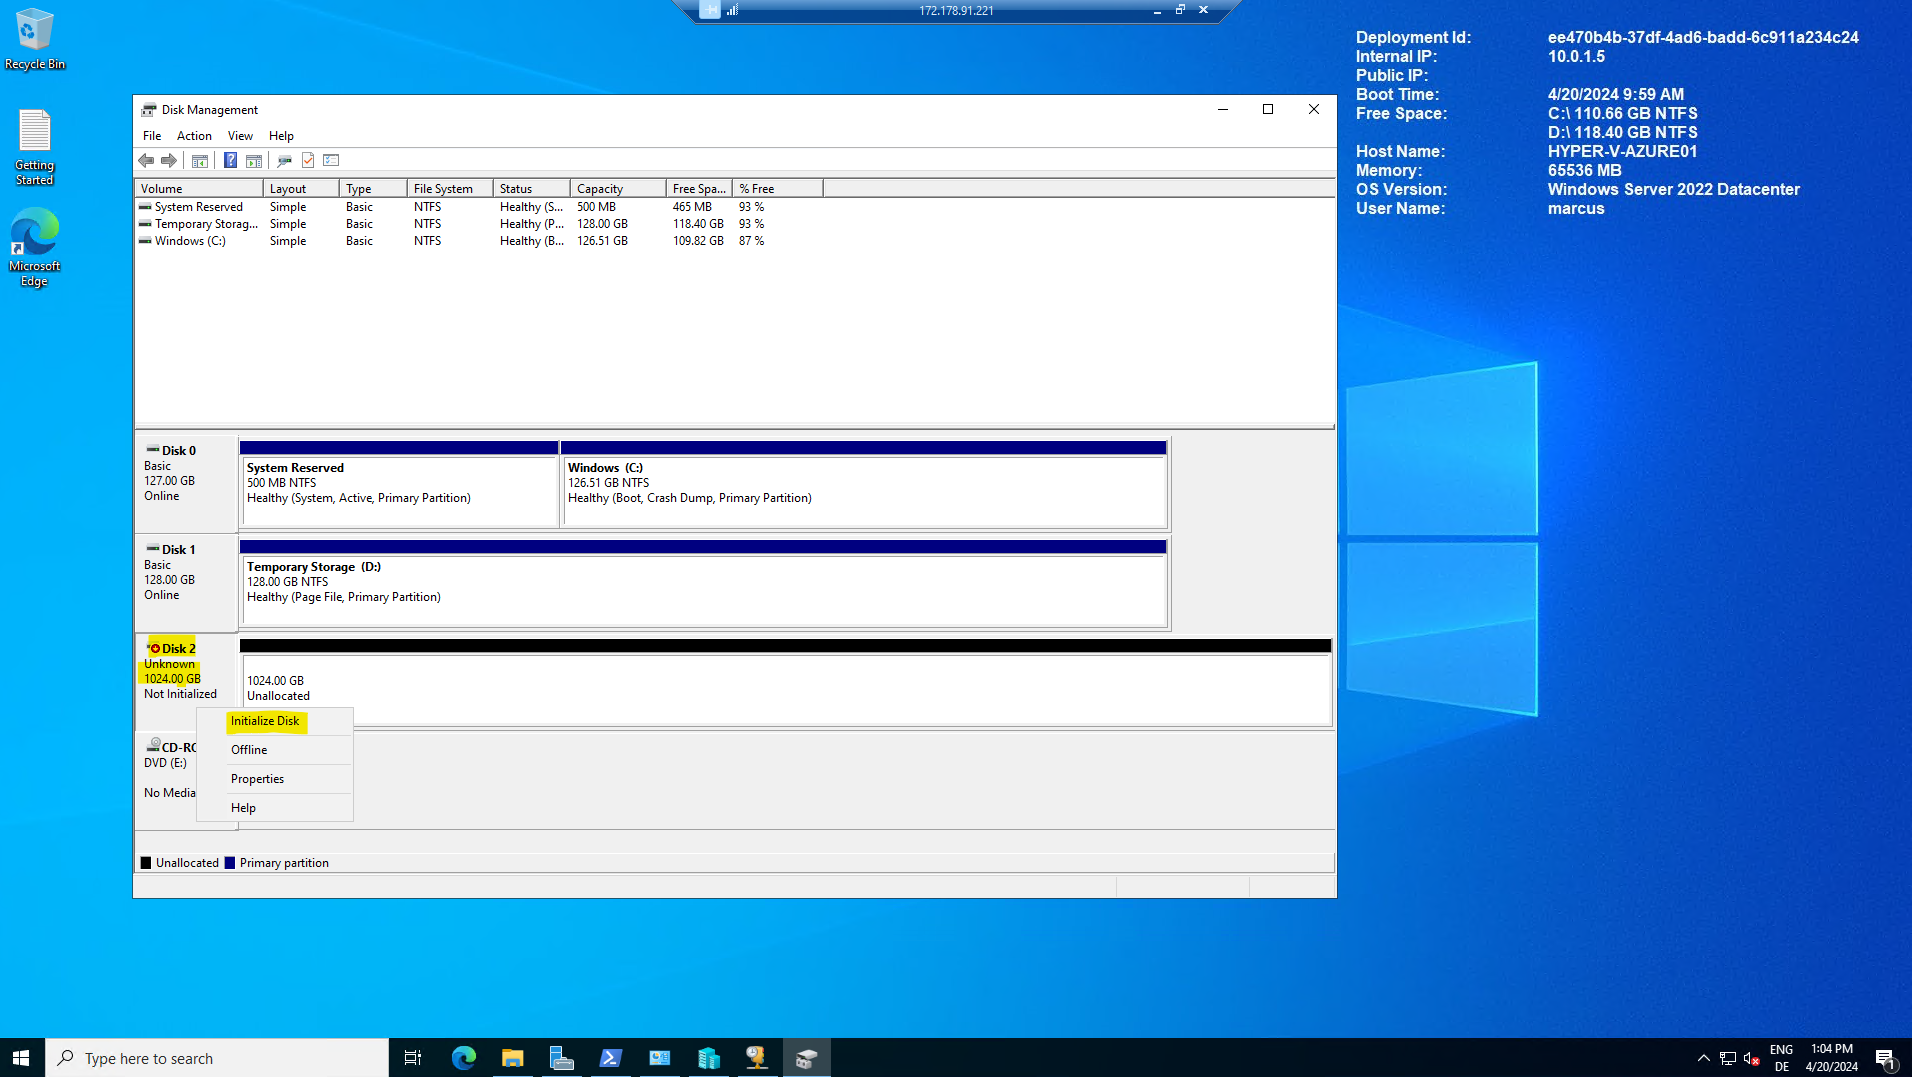
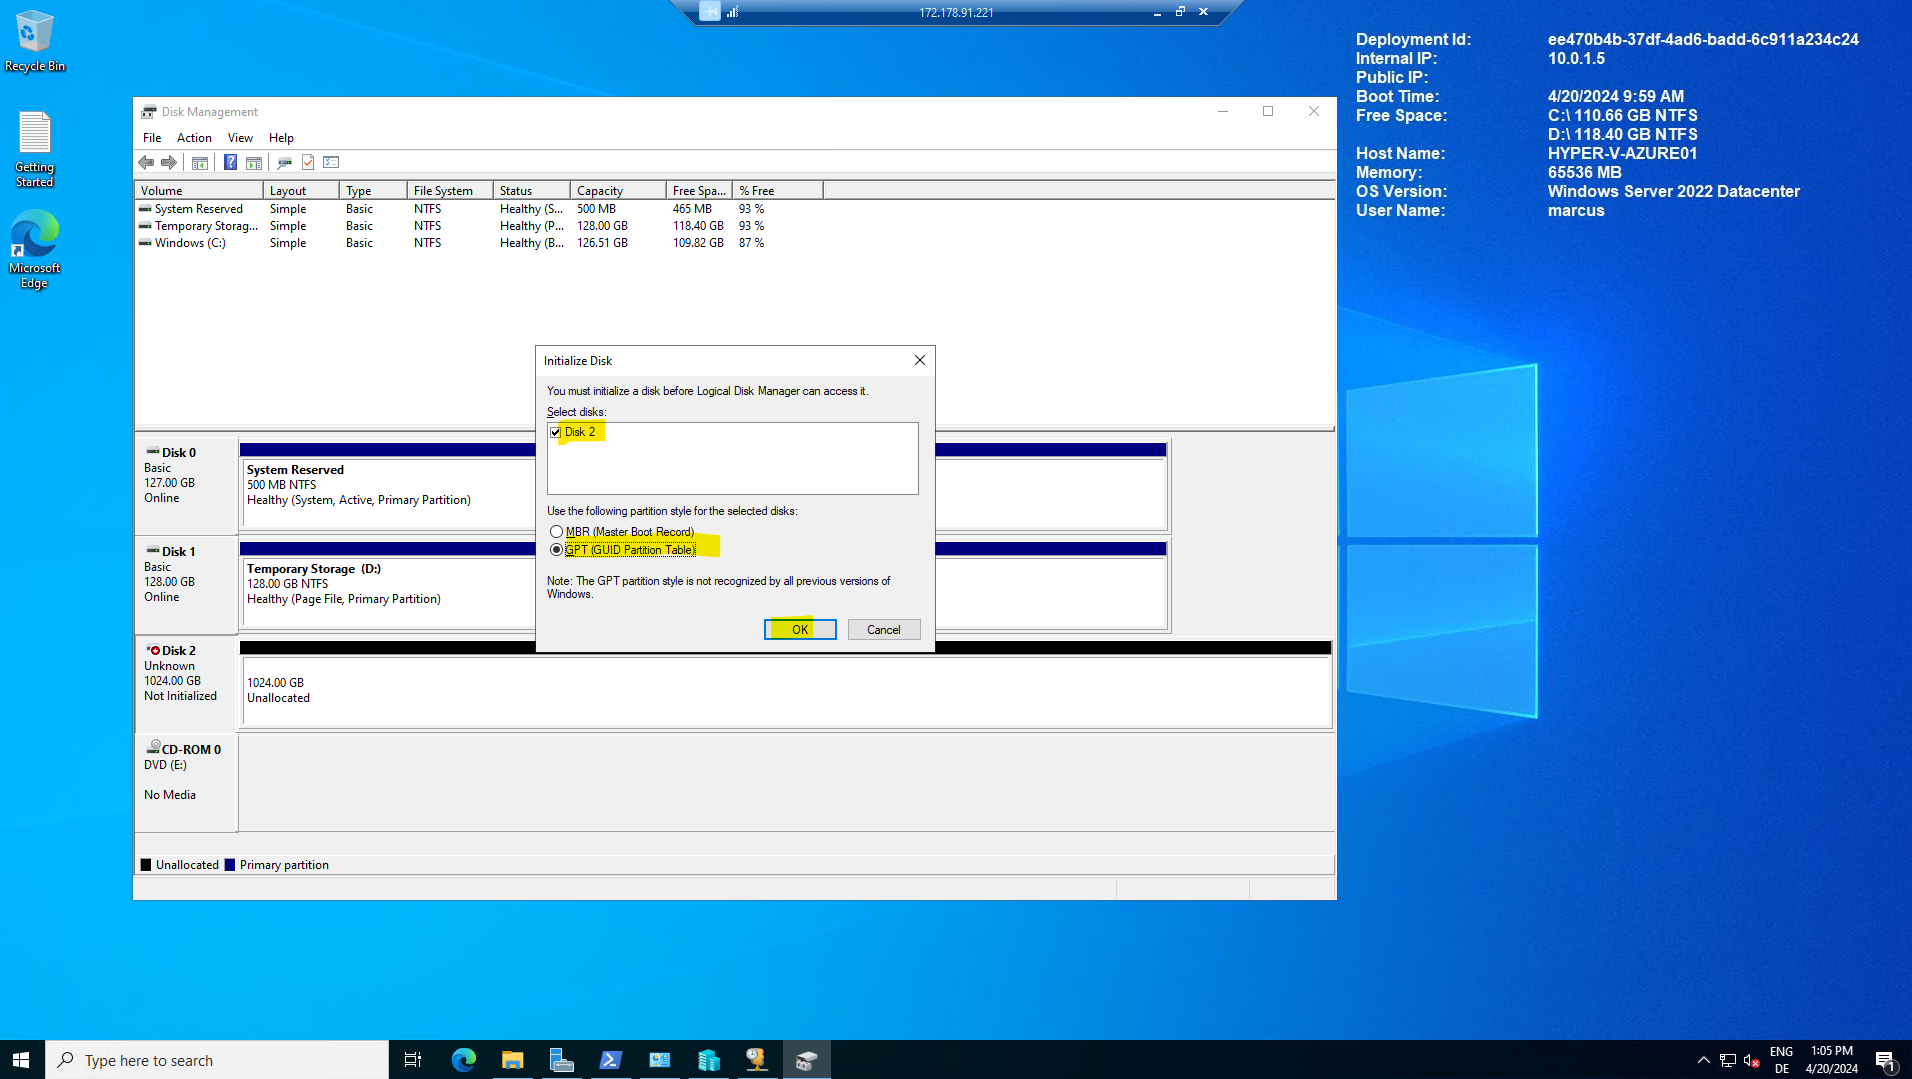
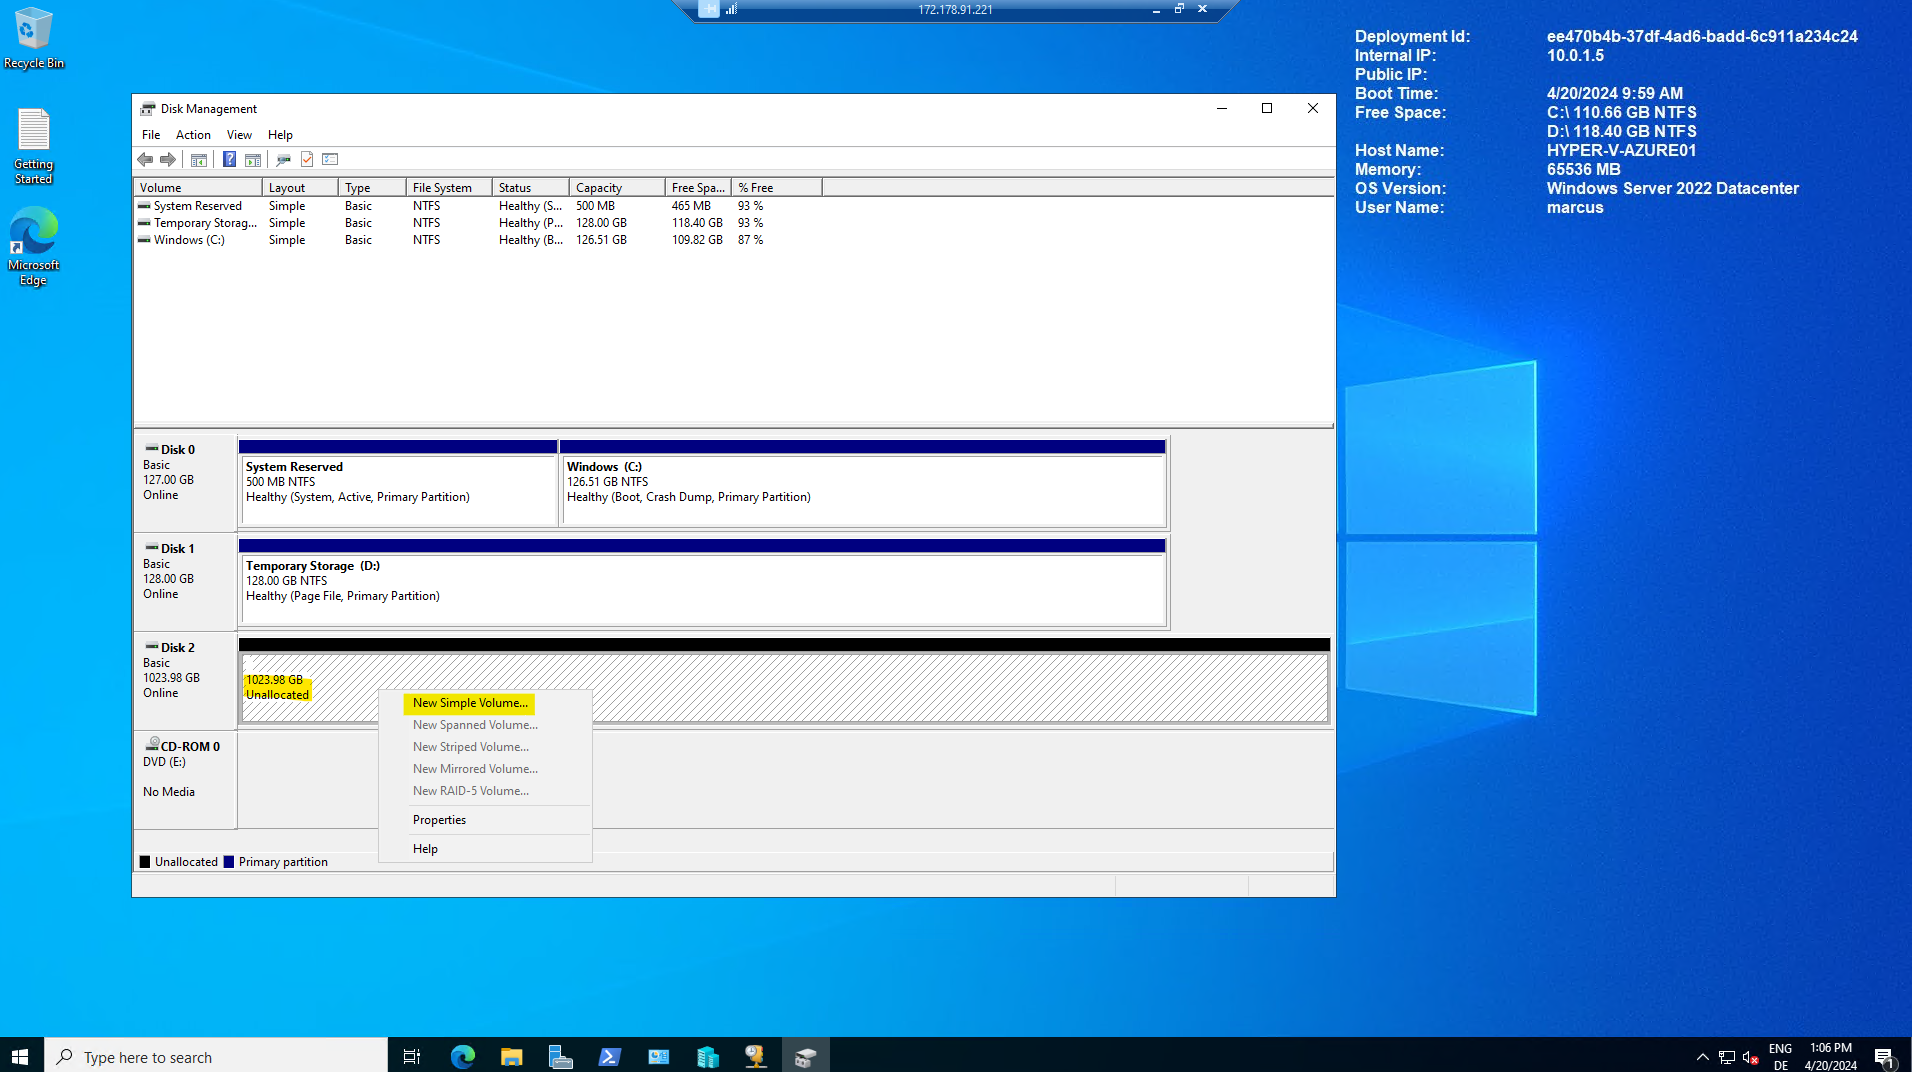
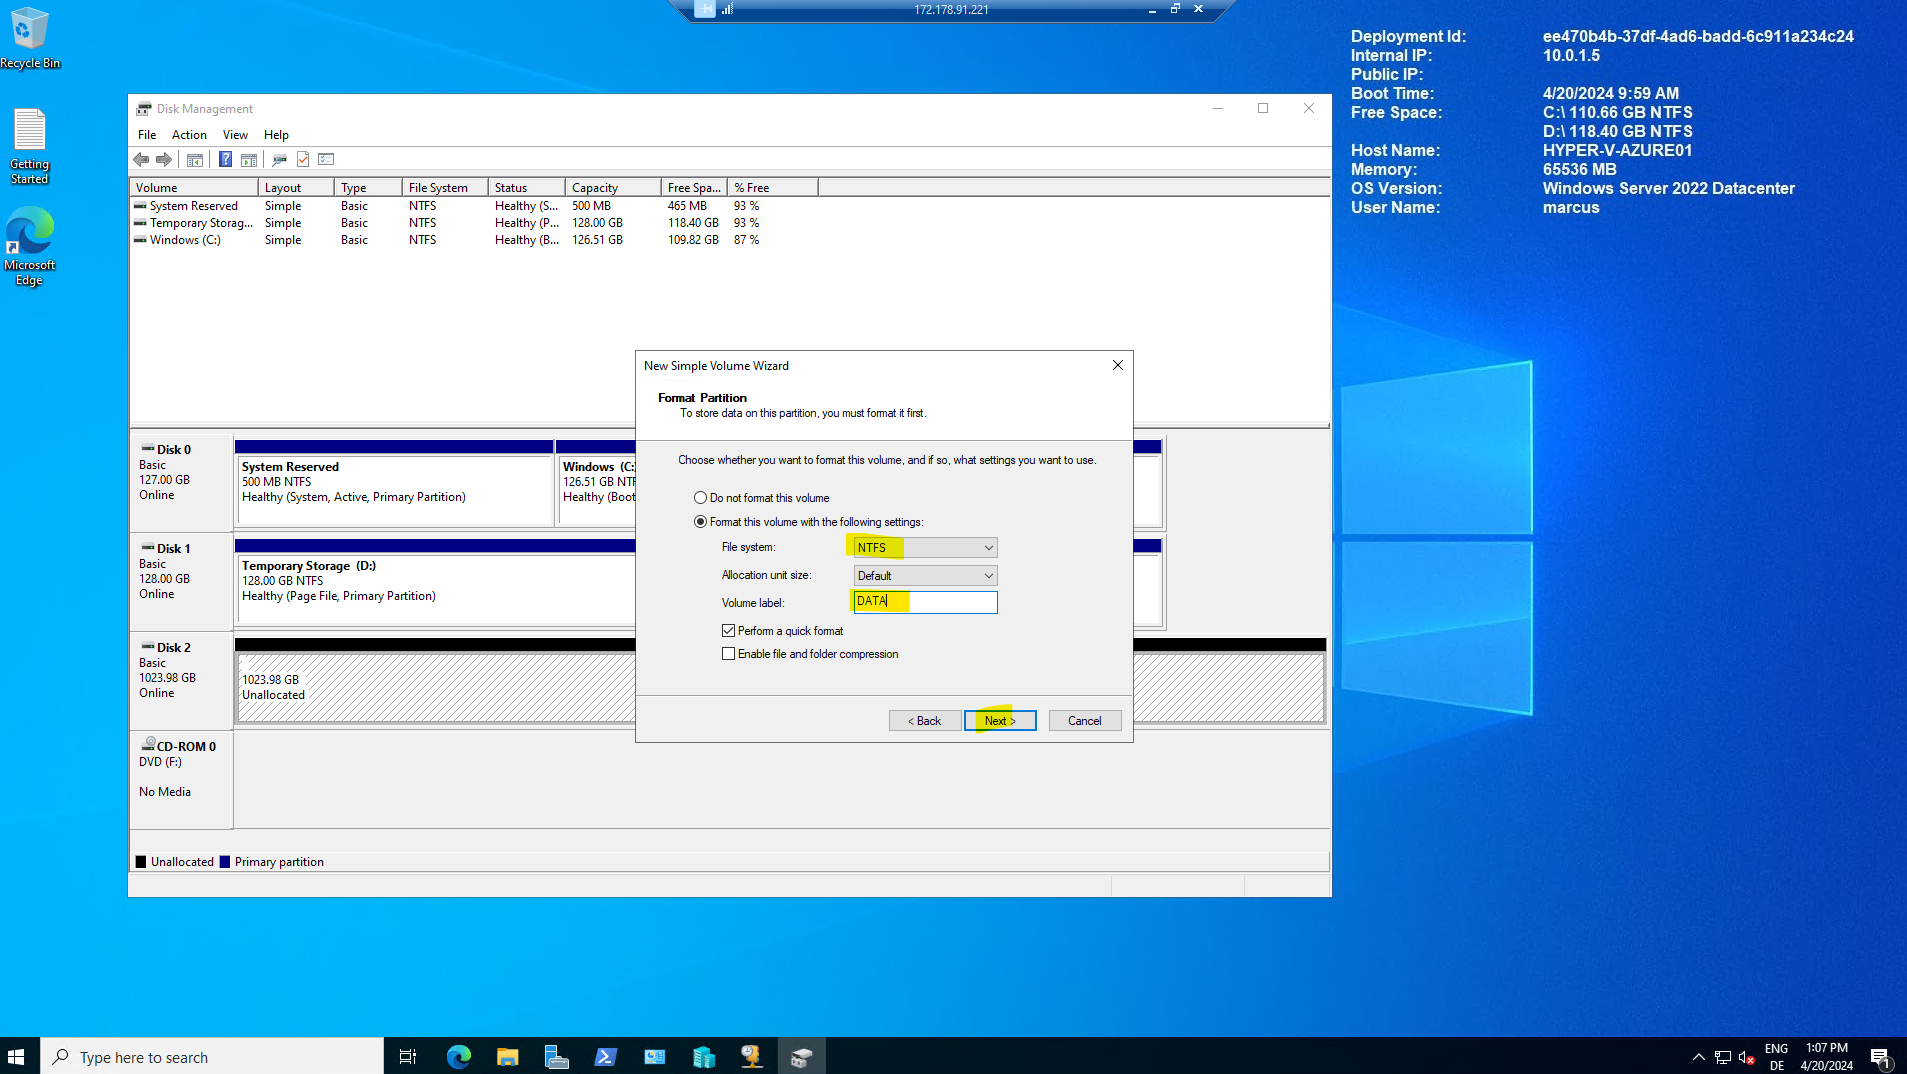
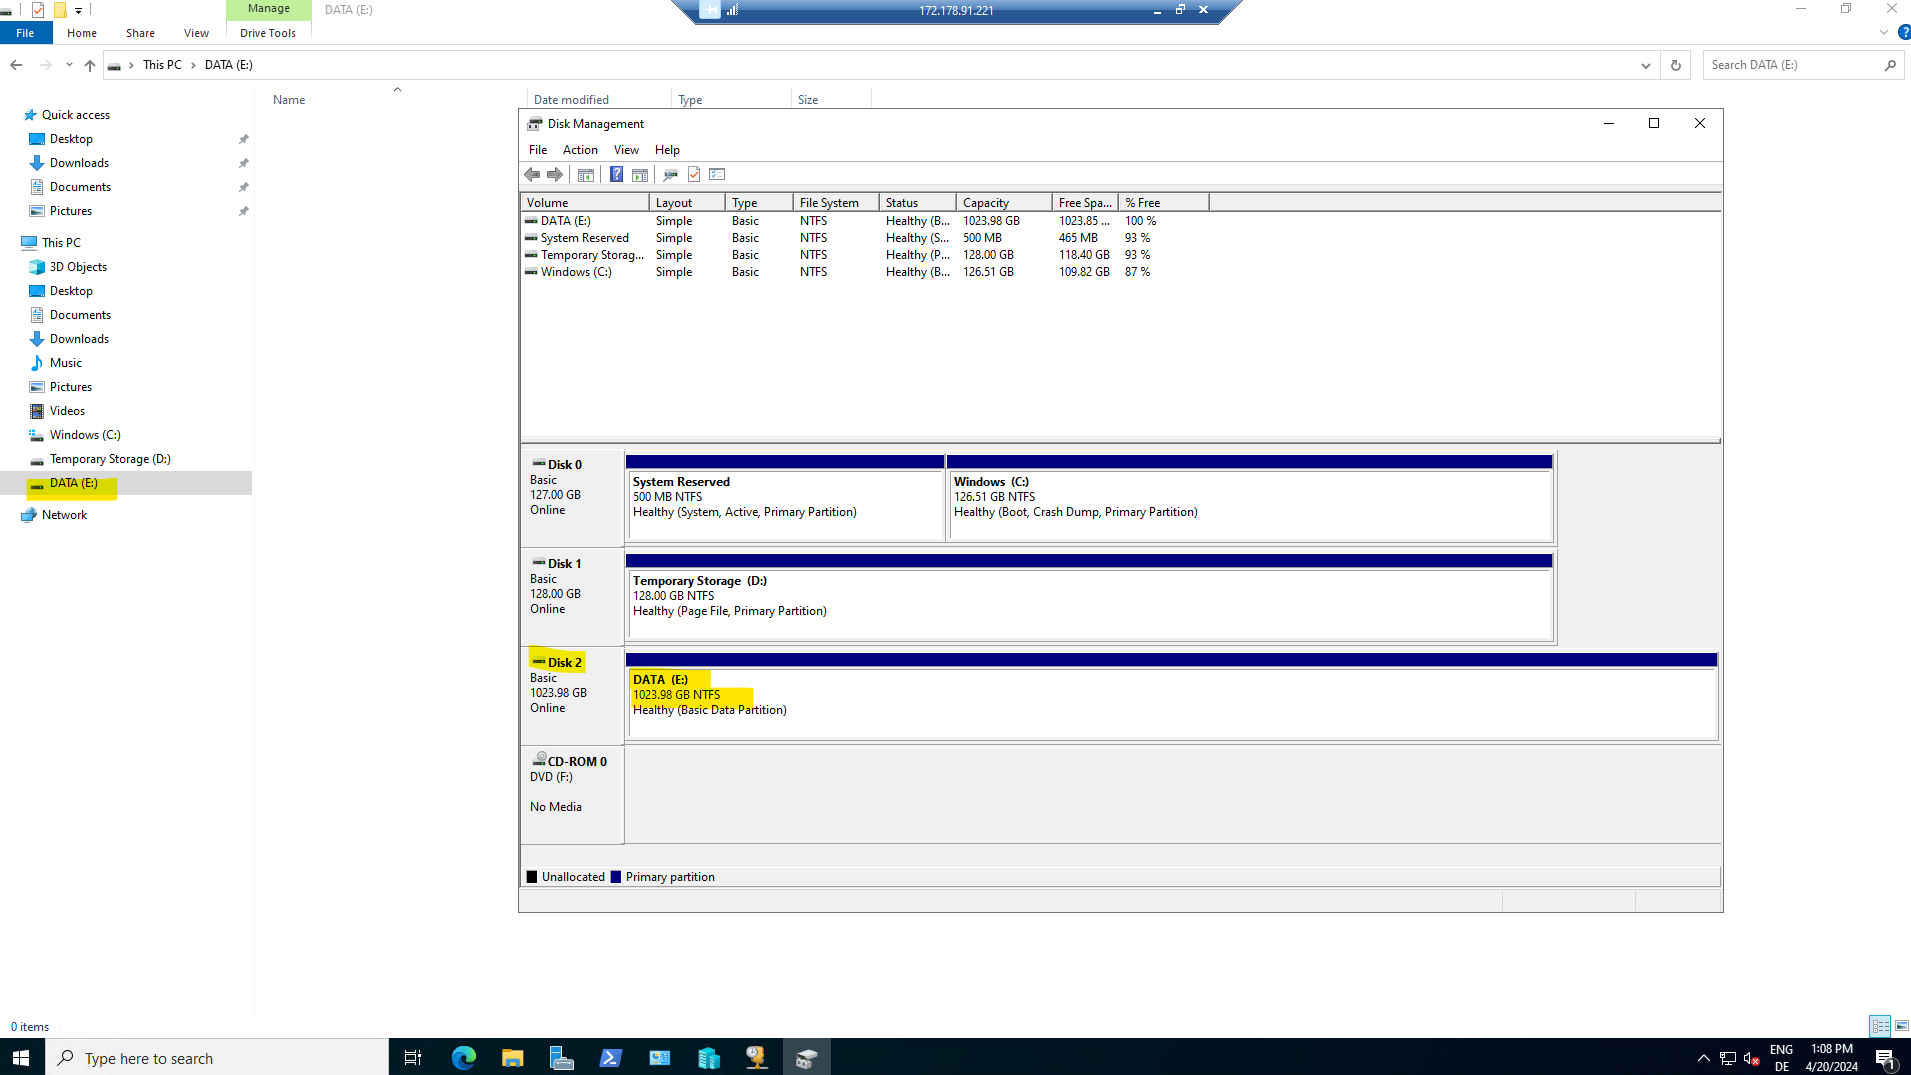
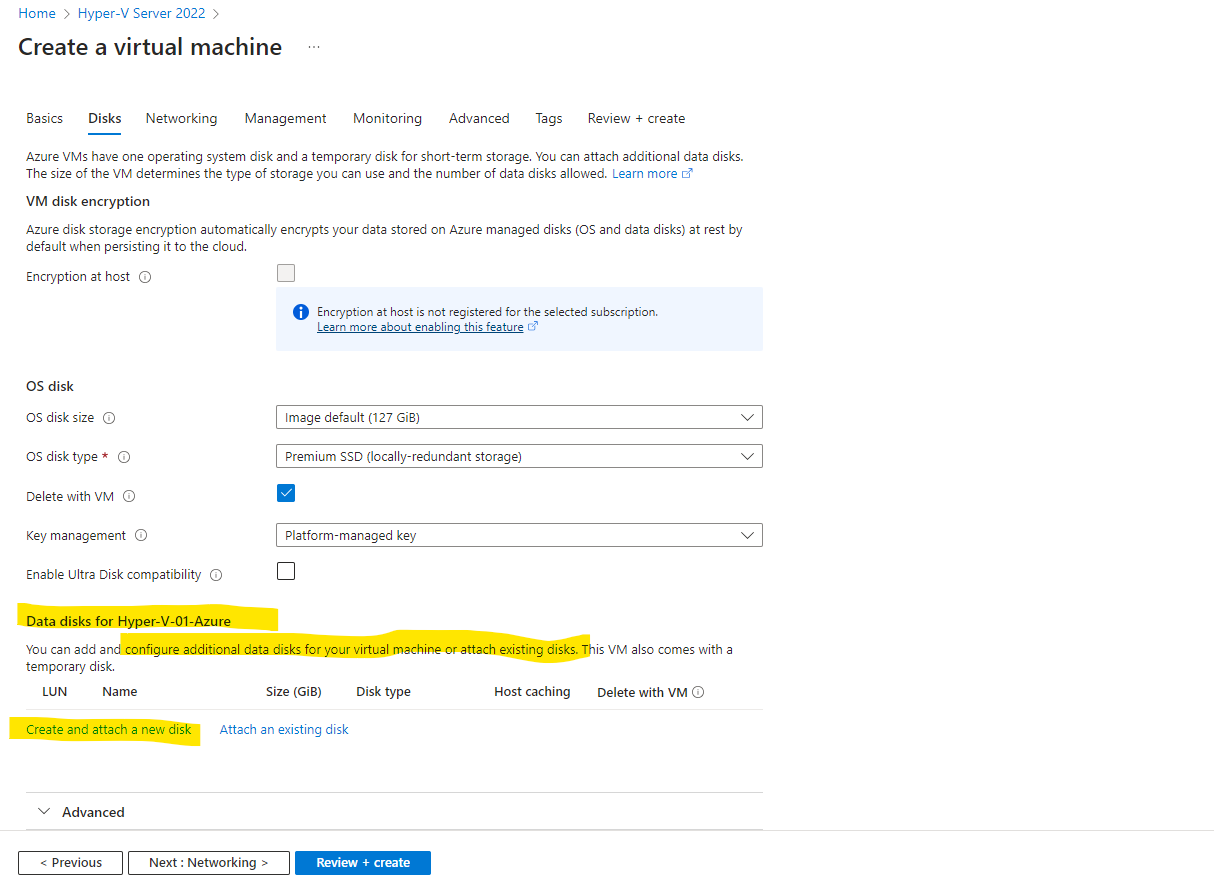
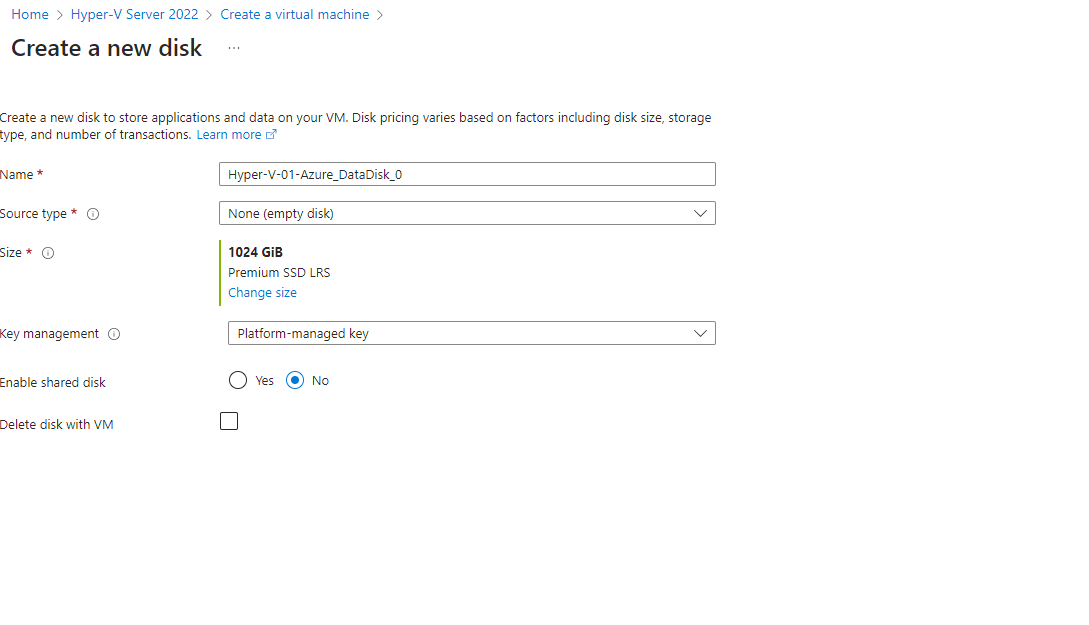
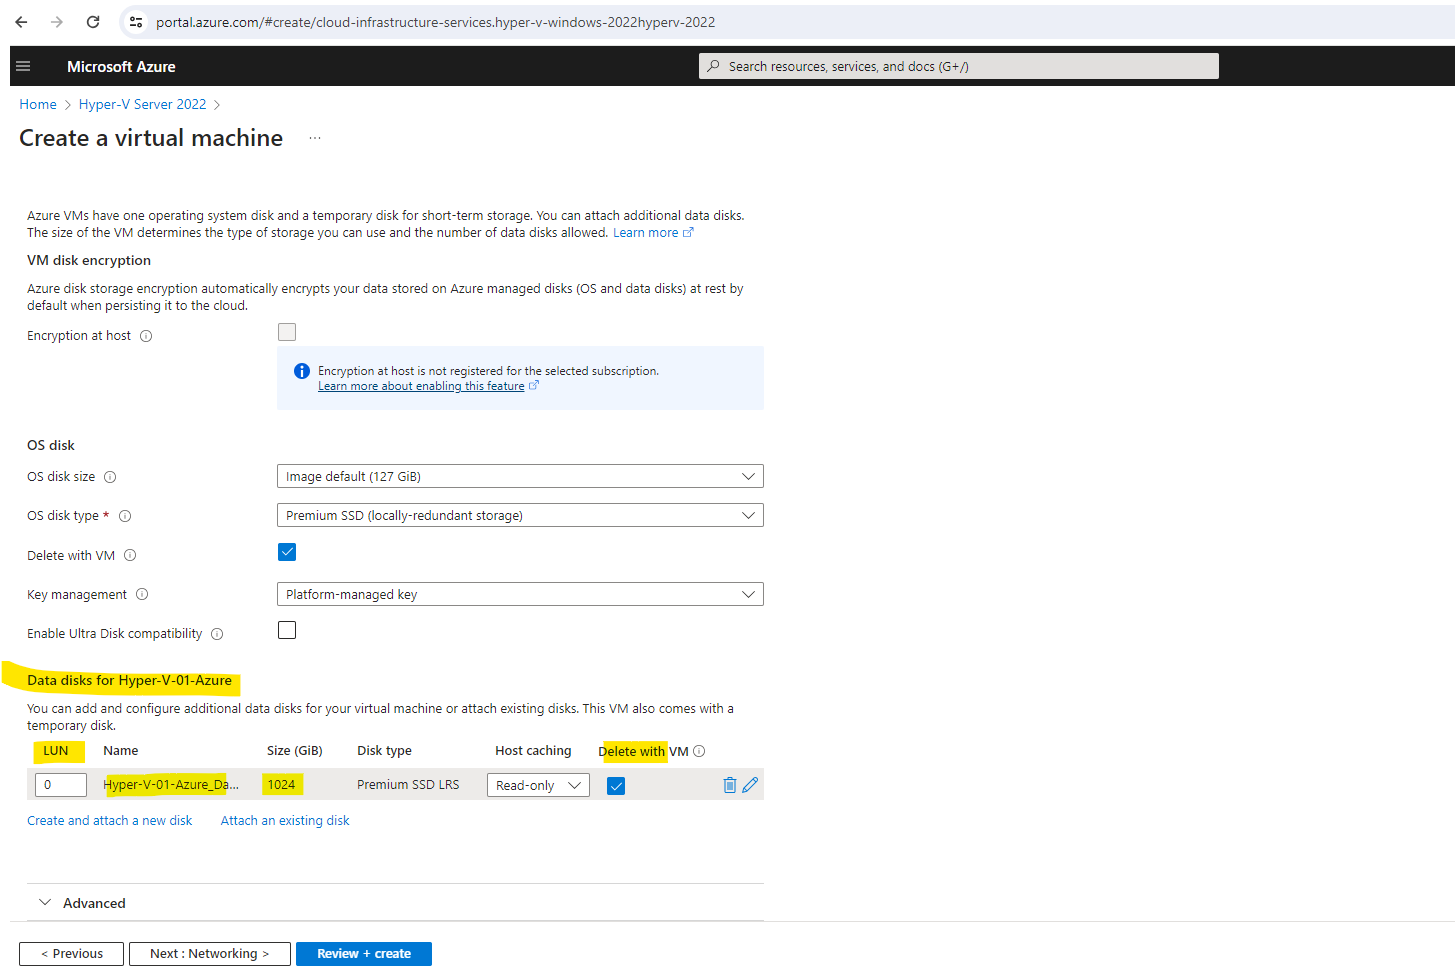
Configure the dedicated SSD Disk to store Virtual Machines on

We also need to configure our previously added 1 TB SSD as storage for our virtual machines.


Here you can see the 1 TB SSD appearing in the Disk Management console of the virtual machine as Disk 2 below. In order to use it we first need to initialize it and then create a new NTFS volume on it.


Links

How to Setup Nested Virtualization for Azure VM/VHD
https://techcommunity.microsoft.com/t5/itops-talk-blog/how-to-setup-nested-virtualization-for-azure-vm-vhd/ba-p/1115338

Set up a NAT network
https://learn.microsoft.com/en-us/virtualization/hyper-v-on-windows/user-guide/setup-nat-network