Deploying NetApp Cloud Volumes ONTAP (CVO) in Azure using NetApp Console (formerly BlueXP) – Part 2 – Deployment in Microsoft Azure
In Part 1 of this series, we completed the initial preparation and onboarding within the NetApp Console (formerly BlueXP), including Azure subscription setup, feature registration, and account associations.
With the foundation in place, it’s now time to move on to the actual deployment of a Cloud Volumes ONTAP HA pair in Microsoft Azure directly from the NetApp Console.
In this part, we’ll walk through the Cloud Volumes ONTAP system creation wizard step by step, including configuration choices for high availability, networking, VM sizes, and services.
In Part 3 of this series, the focus shifts to configuring the actual data services on the Cloud Volumes ONTAP system. Further, we also covers how the Azure networking side fits into the picture, including VNet peering with an existing hub network (which is connected to my on-prem lab), as well as the Internal Load Balancer (ILB) setup.
In Part 4 of the series, we shift the focus to security and take a closer look at how antivirus protection is implemented in Cloud Volumes ONTAP using ONTAP VSCAN.
In Part 5 we will configure snapshot and backup policies, validate protection workflows, and perform real restore operations to ensure data can be recovered quickly and reliably.
In Part 6 we walk through the process of performing a Non-Disruptive Upgrade (NDU) of a NetApp Cloud Volumes ONTAP (CVO) HA pair in Microsoft Azure.
In Part 7 we dive into NetApp AutoSupport, the critical telemetry system that acts as the heartbeat of our CVO instance.
In Part 8 we focus on Disaster Recovery and explore how to protect Cloud Volumes ONTAP in Azure against outages and unexpected failures.
How CVO HA Works in Azure (2026 Edition)
The modern CVO HA architecture in Azure relies on a “Shared Storage” model rather than the traditional “Shared Nothing” approach used in other clouds.
In this setup, two ONTAP nodes are deployed into a Virtual Machine Scale Set across different Availability Zones. Both nodes are physically attached to the same set of Azure Managed Disks simultaneously.
The system maintains high availability through a mechanism called SCSI-3 Persistent Reservations. Instead of needing a third-party VM to act as a referee (Mediator), the nodes use the Azure storage layer itself to manage ownership. If one node fails, the surviving node issues a command to the storage to “break” the lock held by the failed partner and takes over the data services.
To ensure the clients stay connected during this transition, an Azure Internal Load Balancer monitors the health of the nodes and automatically redirects traffic to the active controller. This results in a highly resilient system that offers regional protection and zero data loss, all while reducing the overhead of managing extra infrastructure like mediator VMs.
Once your CVO instance is up and running, you can verify the health of the cluster and its unique cloud architecture directly through the ONTAP CLI.
By running the command storage failover show -instance, you can see the deep technical details of the HA pair.
The most important line to look for is HA Type: shared_storage.
matrixcvo::> storage failover show -fields ha-type, possible, state
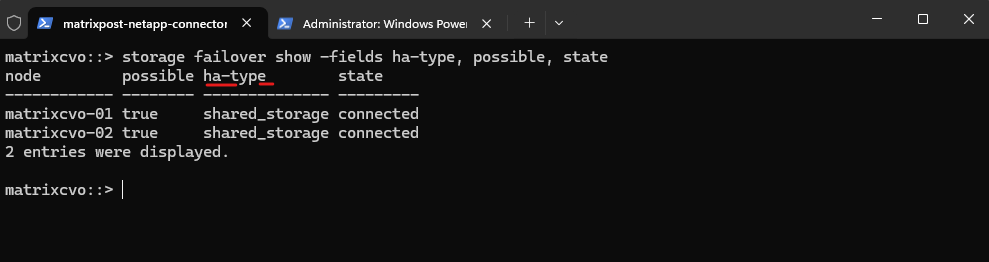
This confirms that you are using the modern Azure architecture where the nodes share disks rather than relying on an external mediator VM.
It also shows you that Takeover Possible is set to true, meaning the system is ready to handle a failure right now.
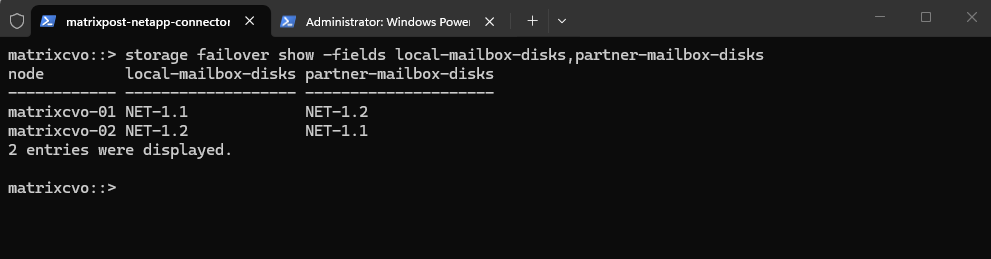
To dive even deeper into how the nodes stay in sync, we can run the command below. This command displays the “Mailbox Disks,” which act as the heartbeat of the cluster.
In this shared storage model, we will see each node cross-referencing its partner’s disks. This confirms that the SCSI-3 locking mechanism is active and that both nodes are correctly communicating through the Azure storage layer to prevent any data conflicts.
Mailbox disks are small, reserved partitions on our Azure Shared Managed Disks that act as a “dead man’s switch” for the HA pair.
They allow each node to write “heartbeat” timestamps and manage SCSI-3 persistent reservations, ensuring only one node can control the data at a time.
This on-disk locking mechanism is what enables our cluster to maintain quorum and prevent data corruption without needing a separate Mediator VM.
matrixcvo::> storage failover show -fields local-mailbox-disks,partner-mailbox-disks
More about Azure shared disks in general you will find in the article below.
Azure shared disks is a feature for Azure managed disks that allows you to attach a managed disk to multiple virtual machines (VMs) simultaneously. This capability enables you to deploy new or migrate existing clustered applications to Azure without modifying your architecture. Shared disks ensure high availability for clustered applications, as other VMs in the cluster retain full access to the disk if one VM fails.
Source: https://learn.microsoft.com/en-us/azure/virtual-machines/disks-shared
Deploy a Cloud Volumes ONTAP HA pair in Azure
If you want to deploy a Cloud Volumes ONTAP HA pair in Azure, you need to create an HA system in the NetApp Console as shown below.
While on-premises ONTAP clusters can scale to many nodes (up to 24 for NAS), Cloud Volumes ONTAP in Azure is strictly limited to two deployment models: a Single Node or a 2-node HA Pair.
More about here https://docs.netapp.com/us-en/storage-management-cloud-volumes-ontap/task-deploying-otc-azure.html.
Determine the maximum supported nodes per cluster for on-prem model
https://hwu.netapp.com/DetailViews/Home.aspx.
In ONTAP on-premises, scaling from a 2-node HA pair to a 4-, 8-, or even 24-node cluster is about increasing performance and capacity, not extending failover domains.High availability always remains strictly pair-based: each node can only take over its designated HA partner. Additional HA pairs simply add compute, memory, network bandwidth, and aggregate capacity to the shared cluster namespace, enabling horizontal scaling and non-disruptive workload mobility, but they do not create multi-node failover groups.
NetApp uses a strict 2-node HA pair architecture to keep failover deterministic, fast, and low-latency, since writes are synchronously mirrored only between two NVRAM partners before being acknowledged. Expanding a failover group beyond two nodes would require multi-way write replication and complex consensus handling, increasing latency and architectural complexity without improving availability.
NVRAM (Non-Volatile RAM) is protected memory inside each ONTAP controller that temporarily stores write operations before they are written to disk.
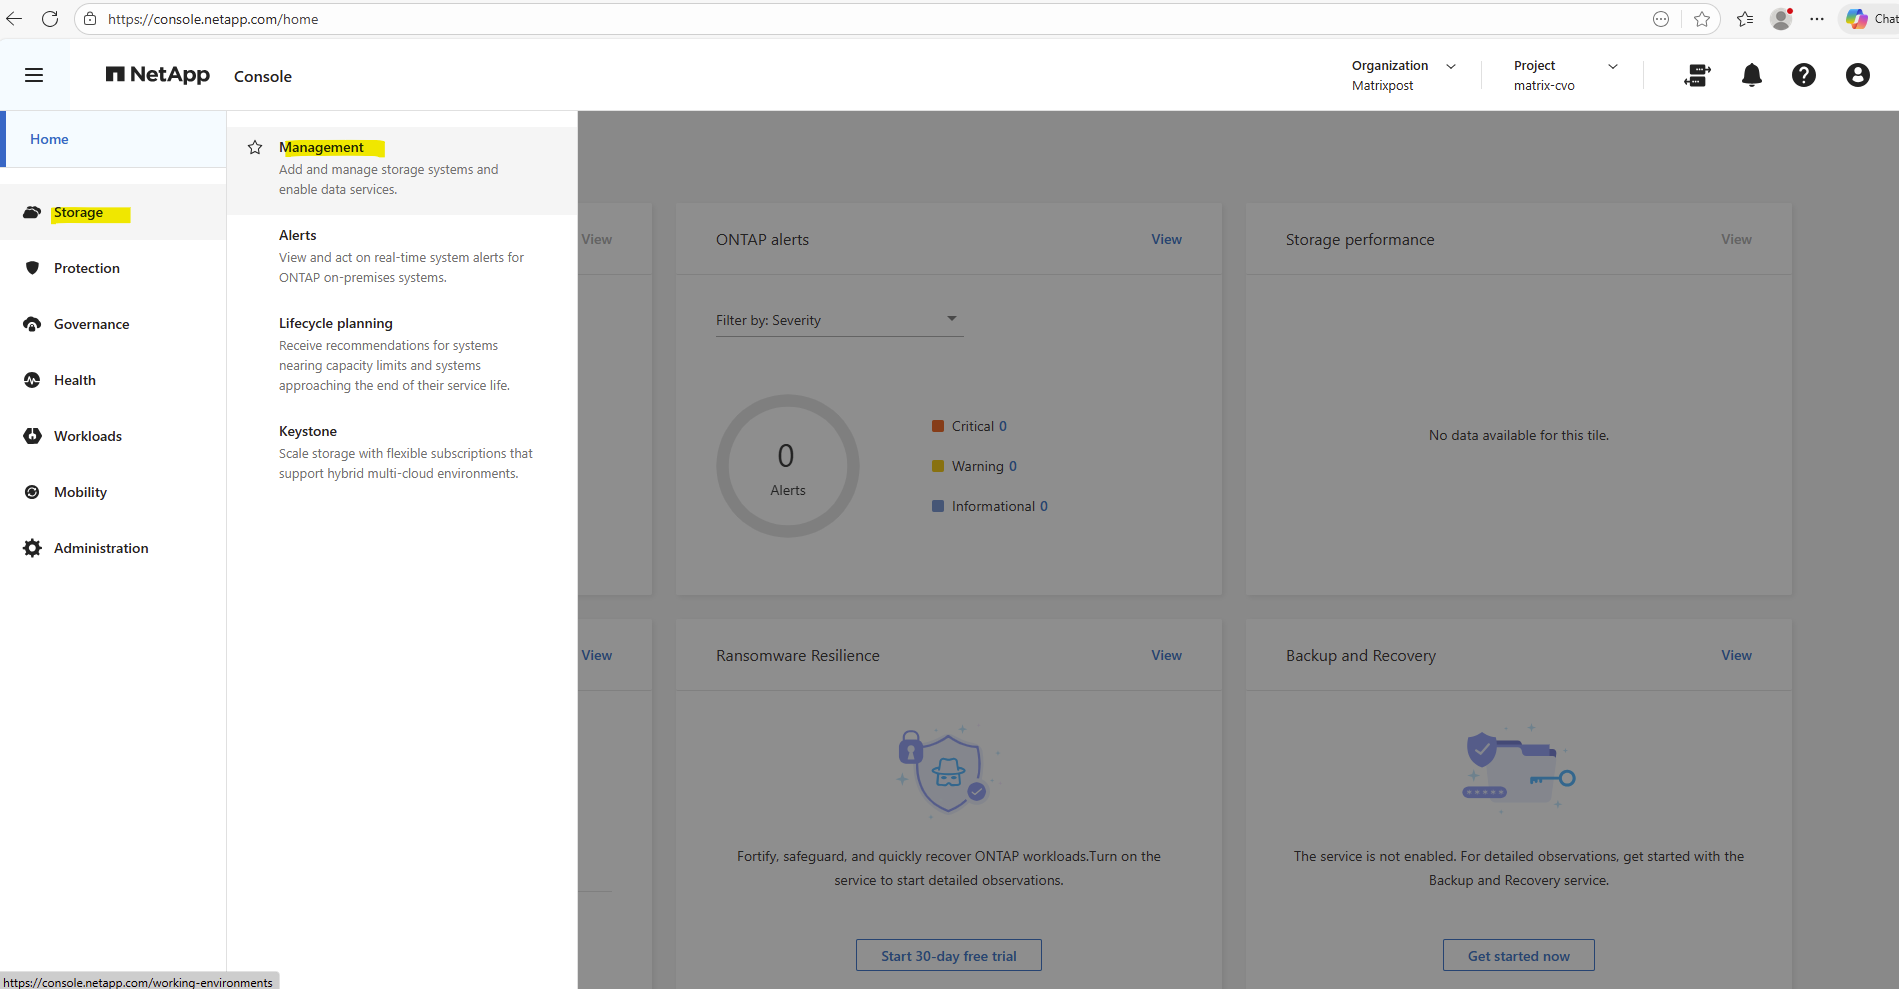
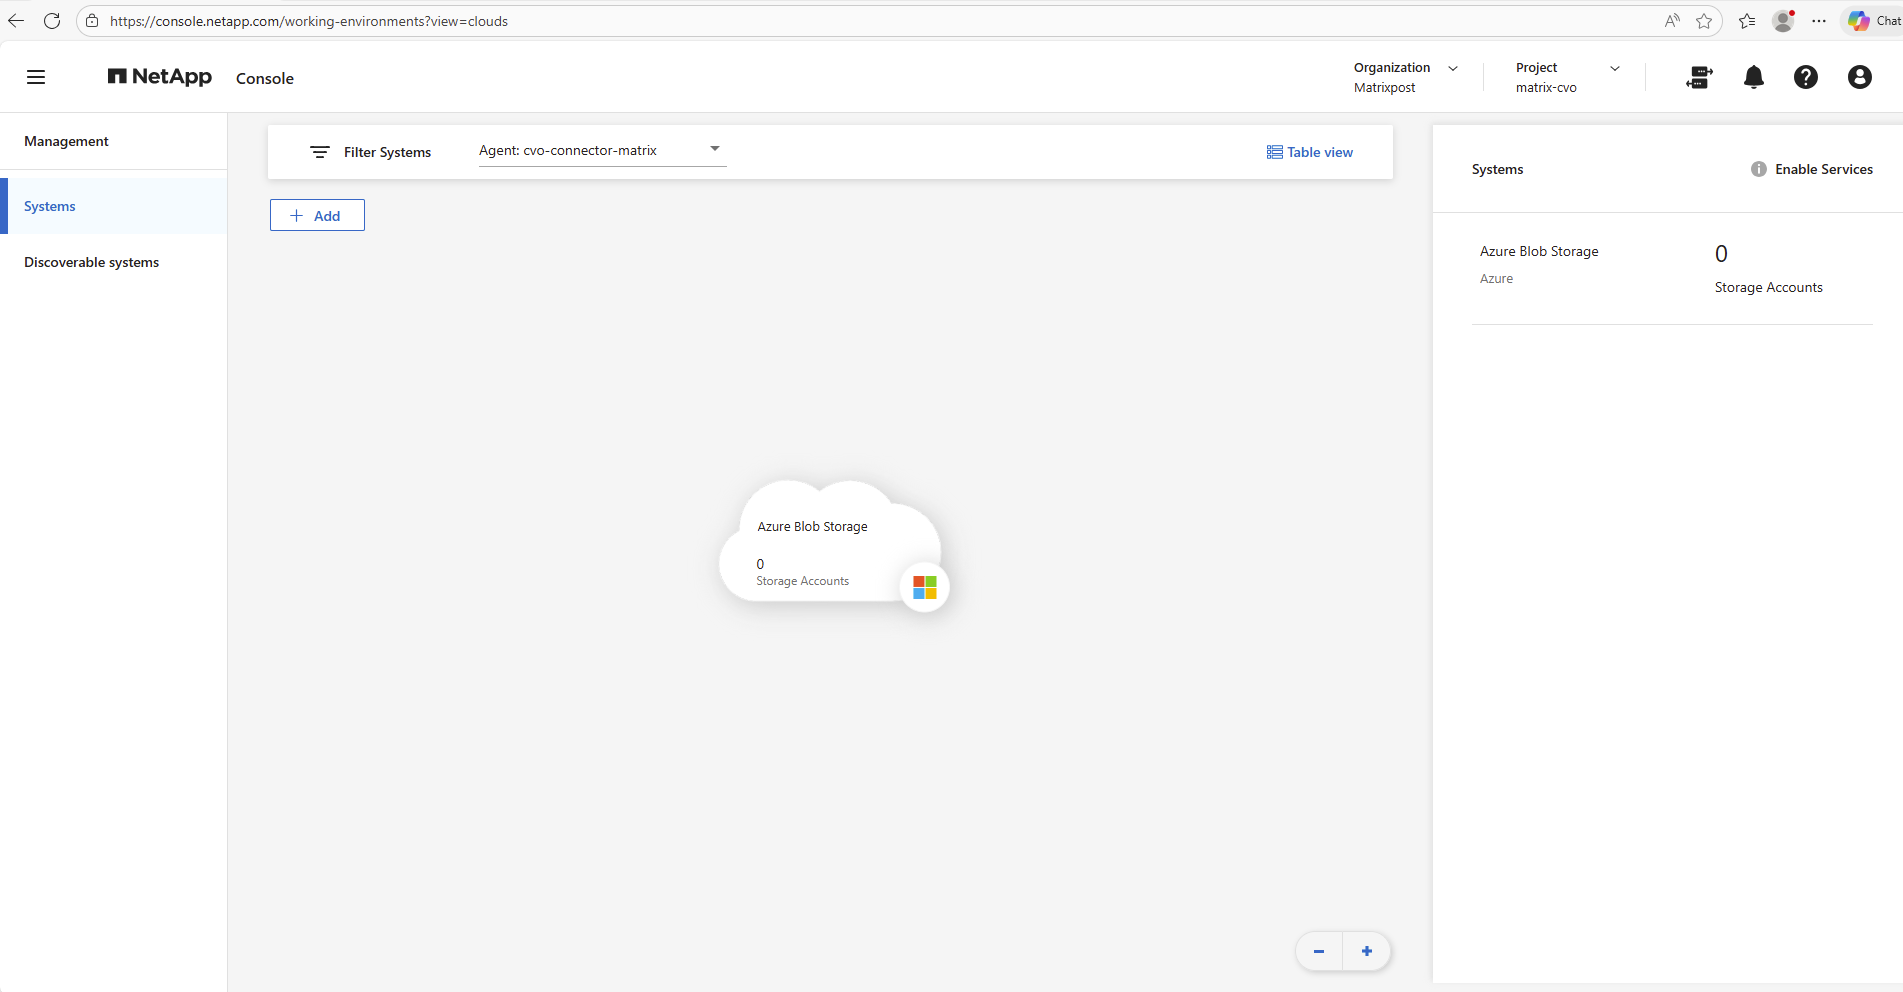
From the left navigation menu, select Storage > Management.
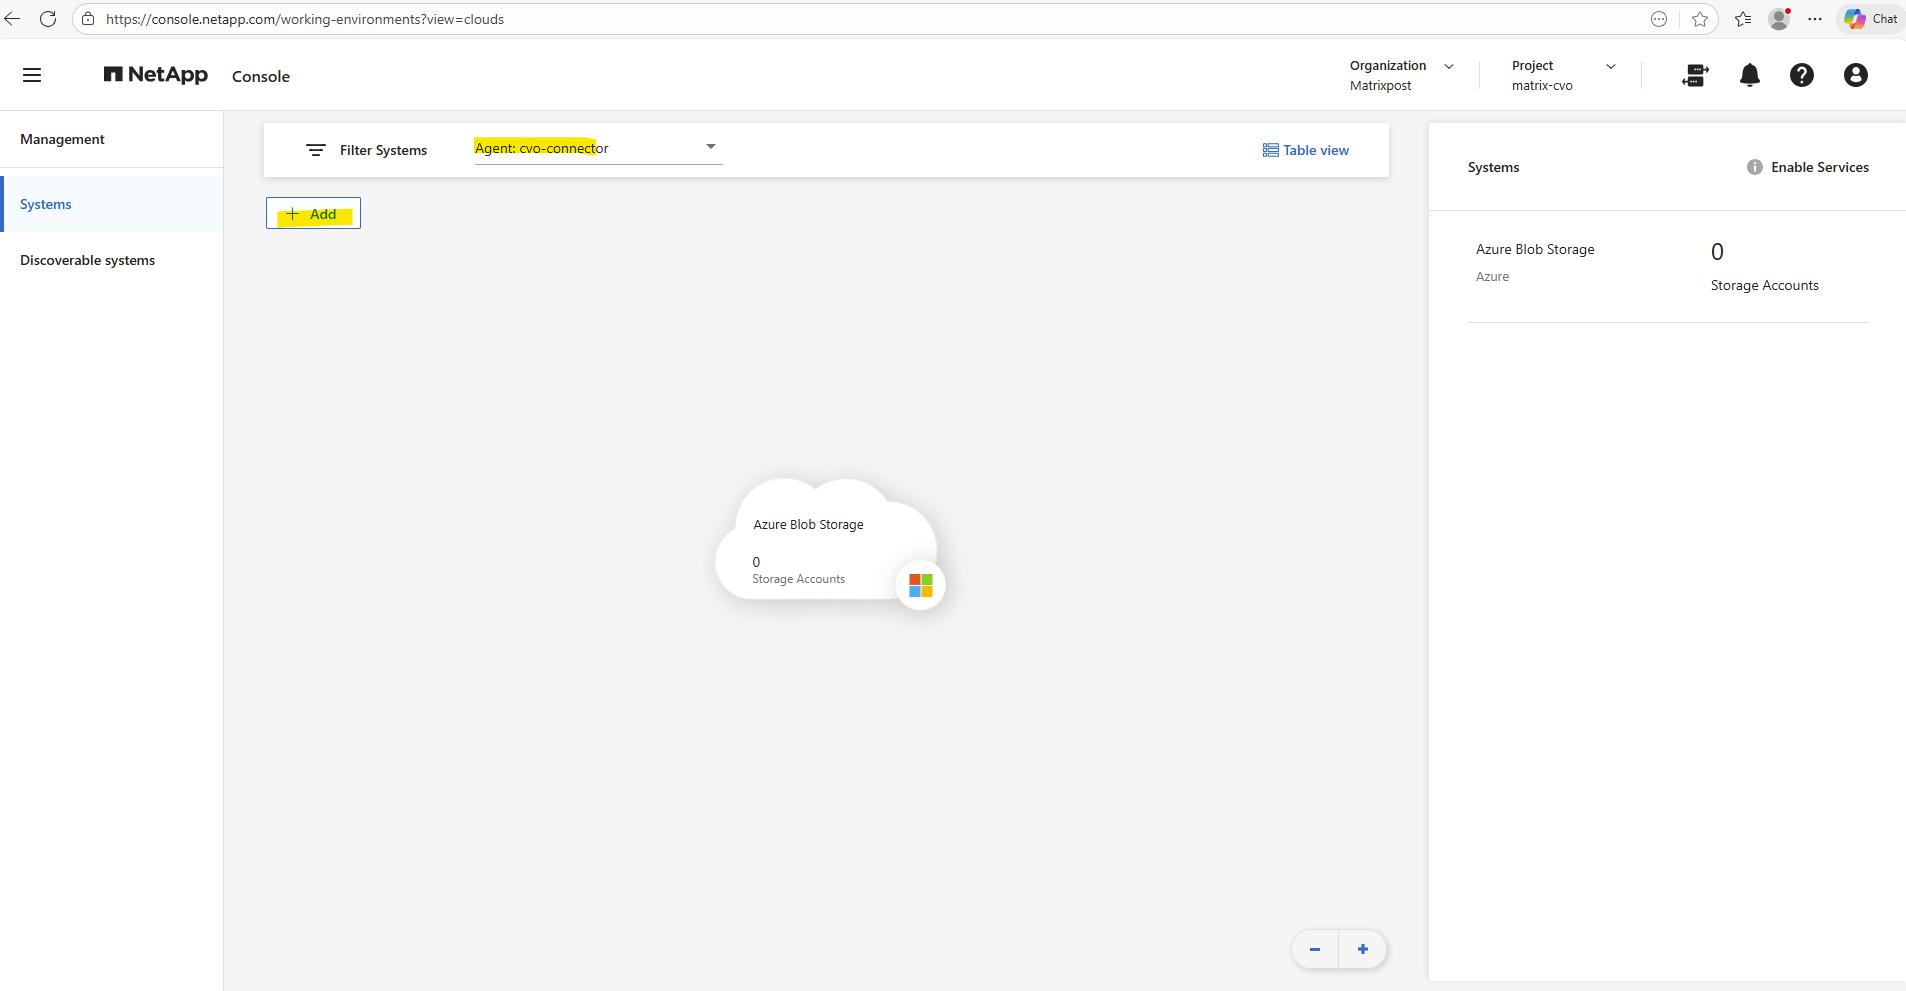
Select your previously deployed Agent (Connector VM) in your Azure subscription and click on + Add.
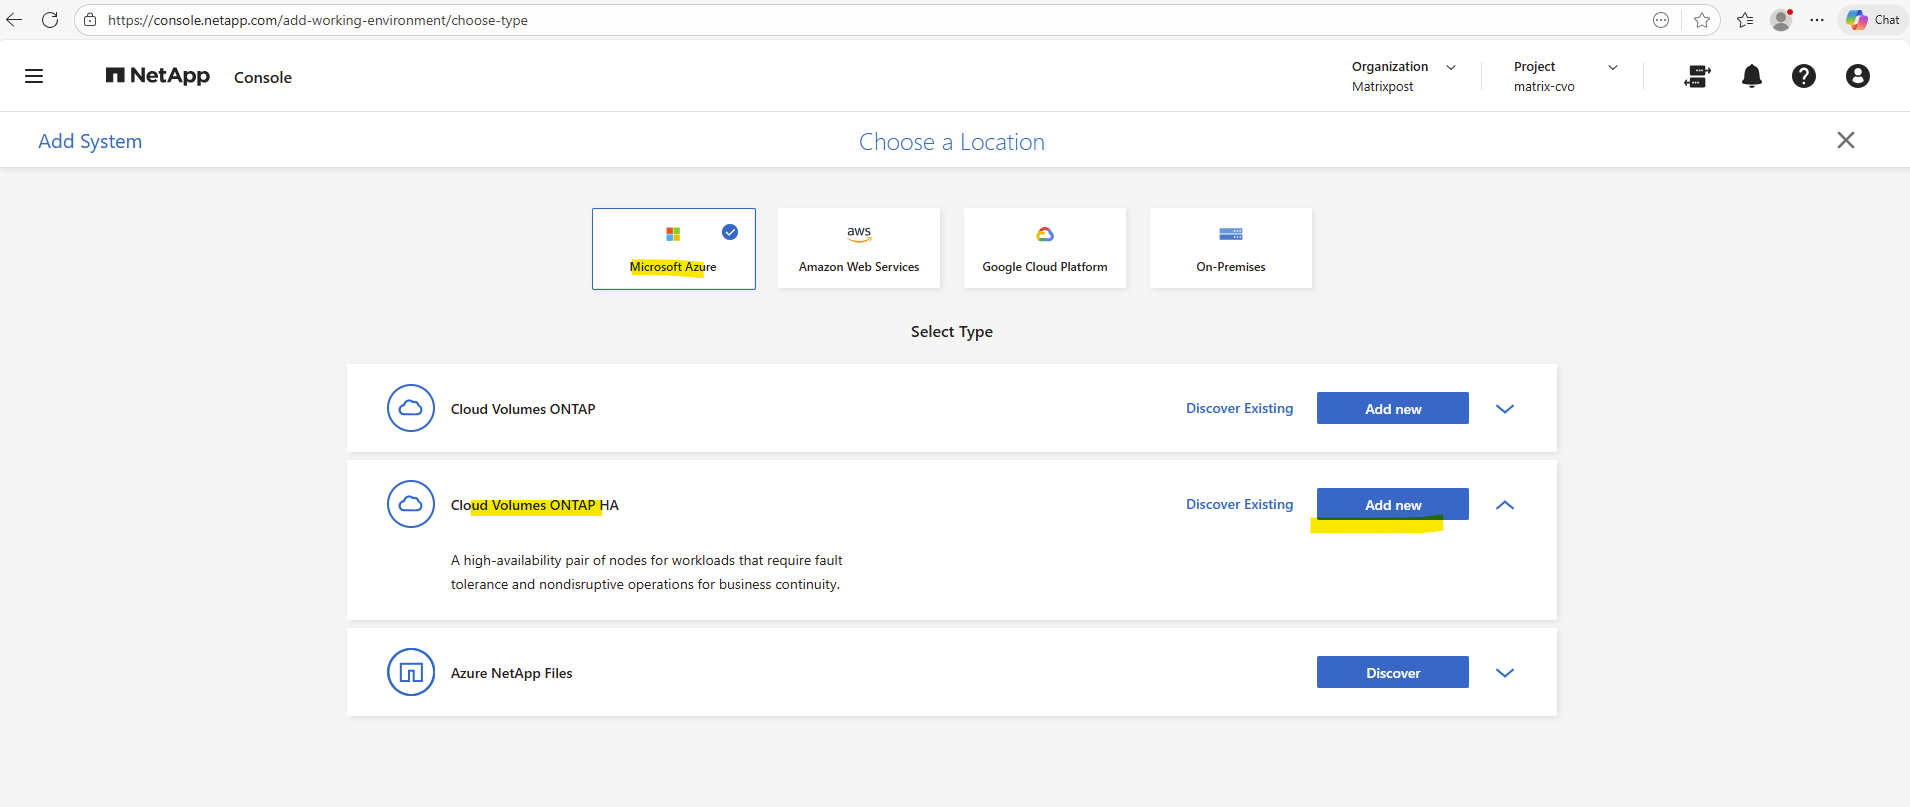
Below select Microsoft Azure and within Cloud Volume ONTAP HA click on Add new.
Cloud Volume ONTAP HA will provisions a two-node high-availability pair in Azure. This deployment creates two synchronized CVO instances that mirror writes between each other, forming a single HA pair to ensure continuous availability and protection against node failure.
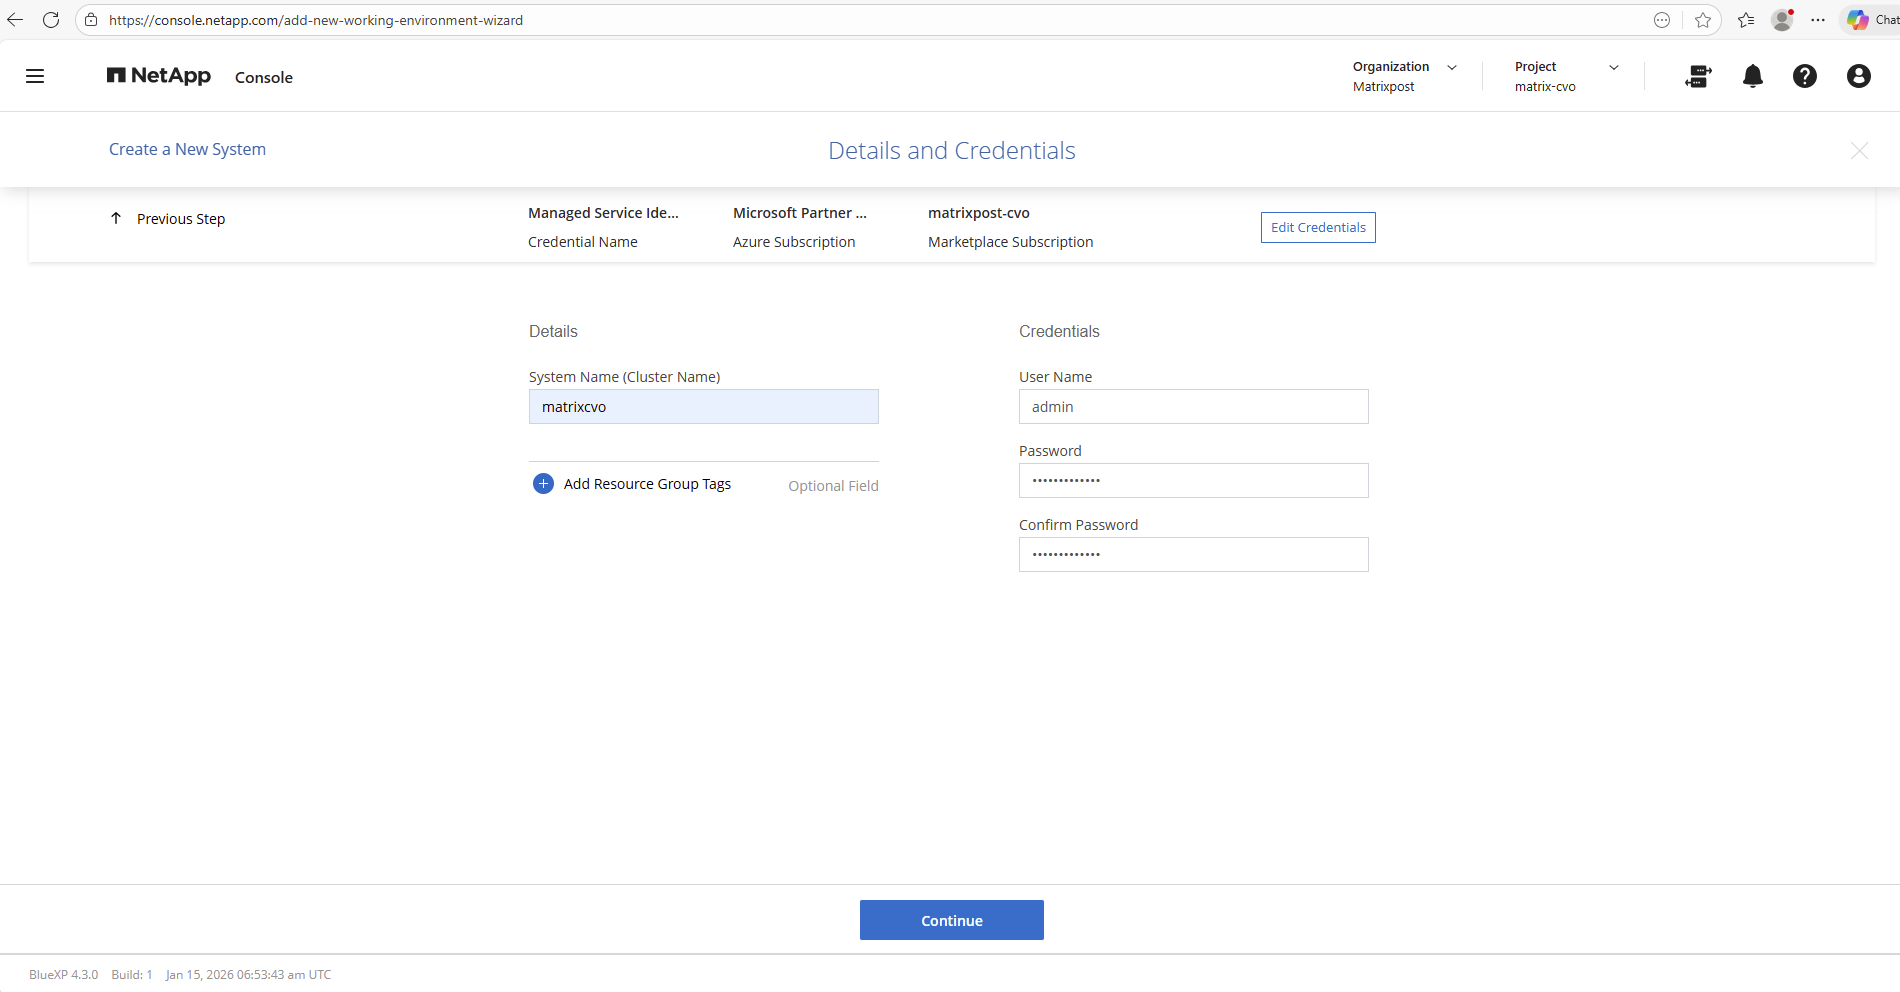
Define the cluster name and set the administrator credentials that will be used to manage the ONTAP operating system.
While
adminis the default and most commonly used username, you can choose a different name if required by your security or naming standards.
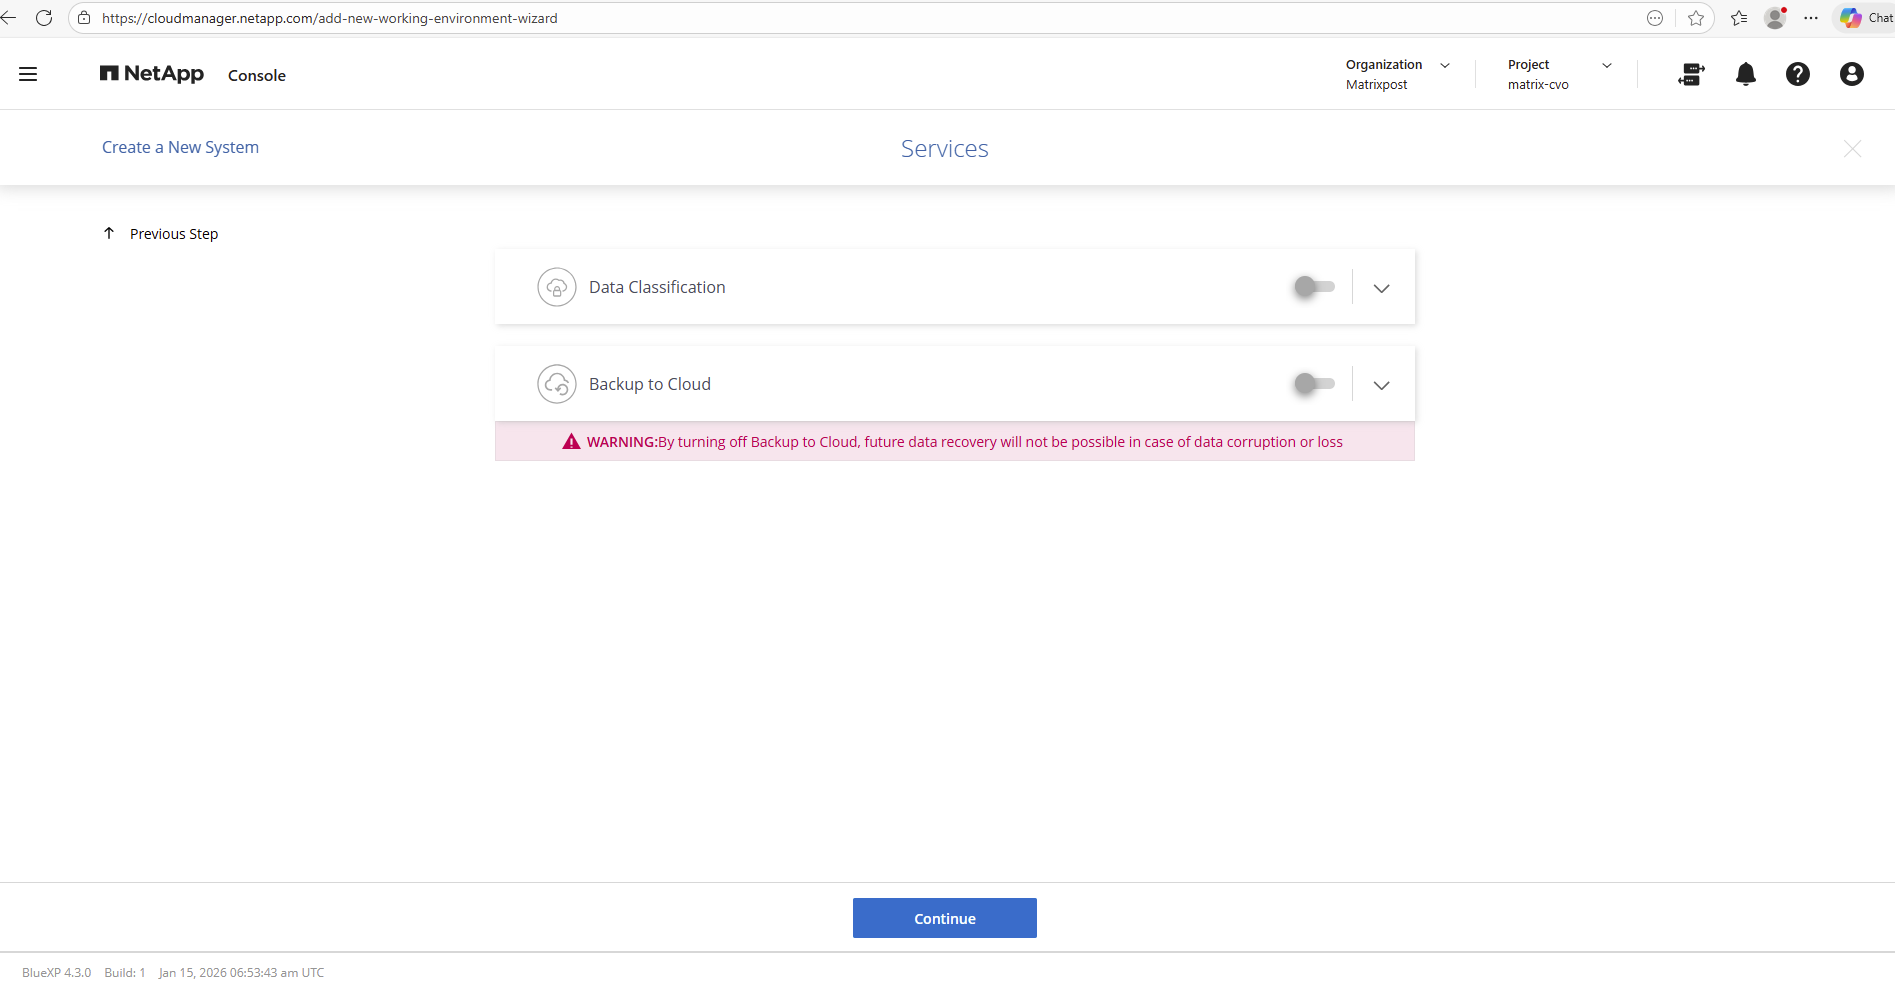
The features Data Classification and Backup to Cloud below I will first disable for my lab environment.
Data Classification provides visibility into the data stored on Cloud Volumes ONTAP by automatically scanning volumes and identifying sensitive information, data types, and usage patterns. This helps with compliance, security assessments, and understanding where critical or personal data resides.
Backup to Cloud enables automated, policy-based backups of ONTAP volumes to low-cost object storage, providing an additional layer of protection for disaster recovery and long-term retention independent of the primary system.
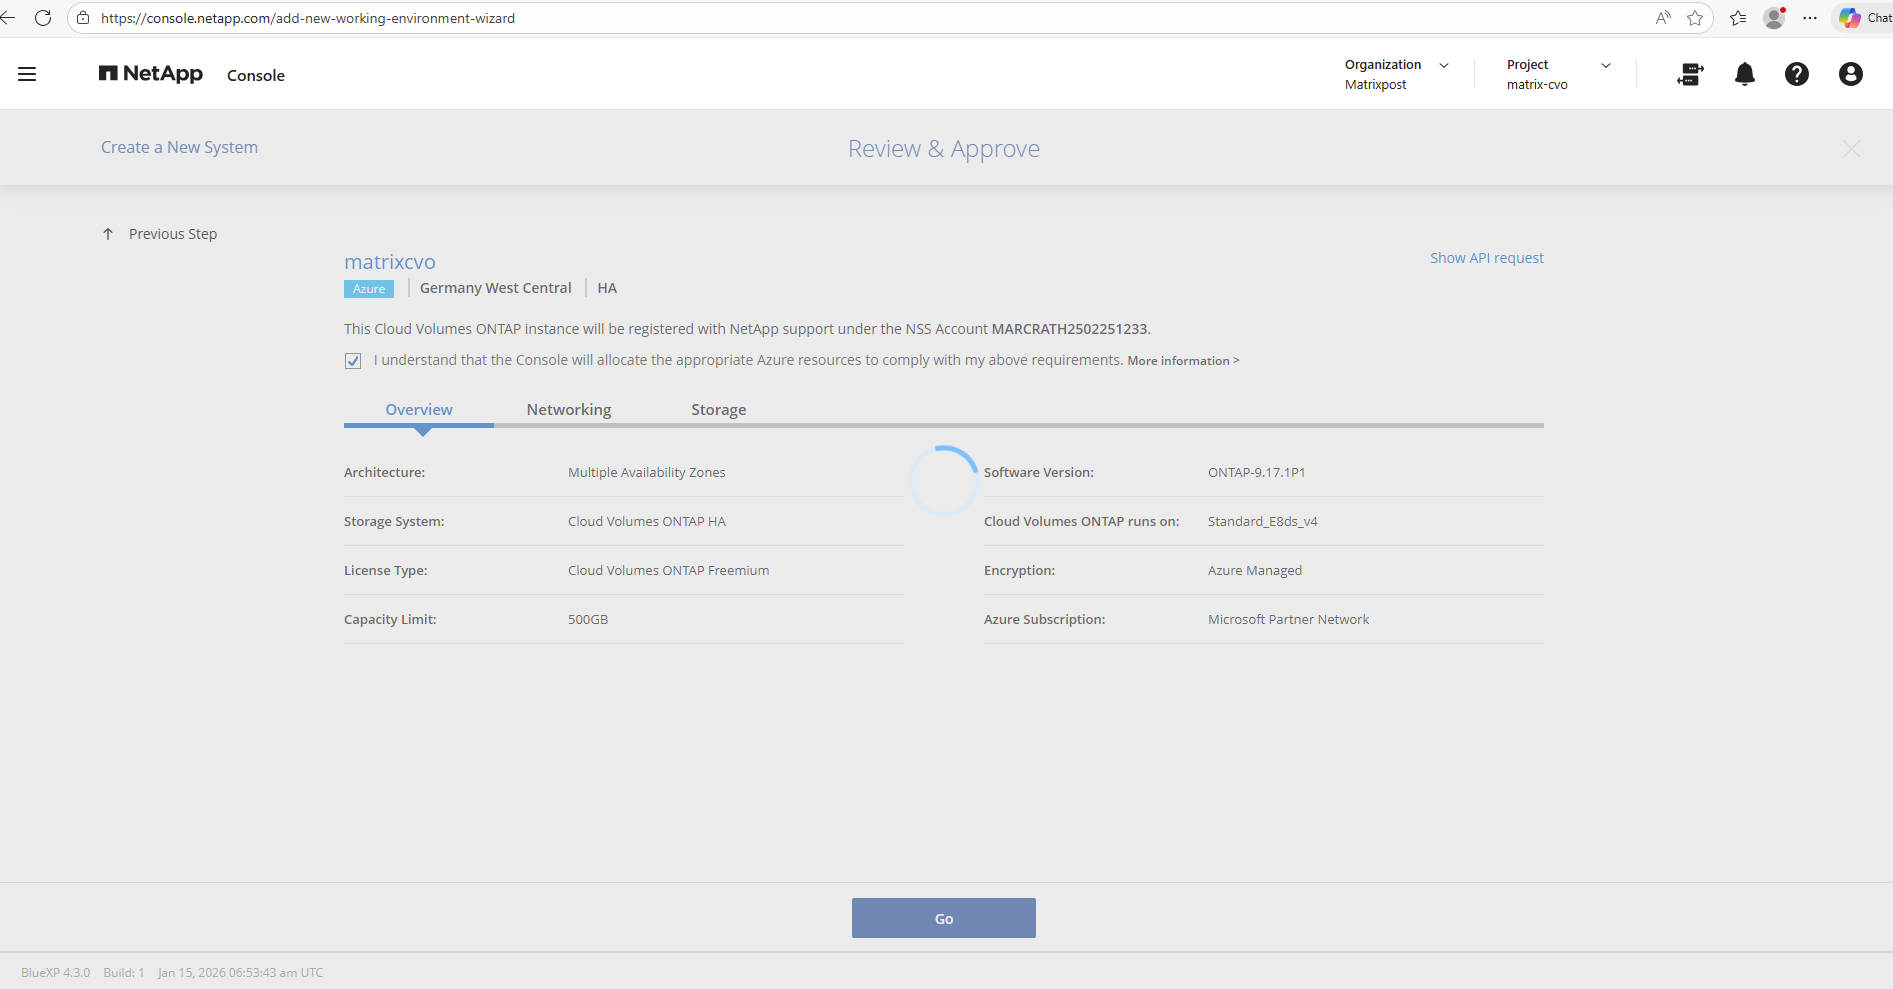
For the HA Deployment Mode I want to deploy the nodes into multiple availability zones.
For the HA deployment mode, the Cloud Volumes ONTAP nodes are deployed across multiple Azure Availability Zones to ensure high availability and fault tolerance.
This setup protects the system against zone-level failures by distributing the nodes and storage infrastructure across physically separate data centers. In the event of an outage in one zone, services can continue running from the remaining zone without manual intervention.

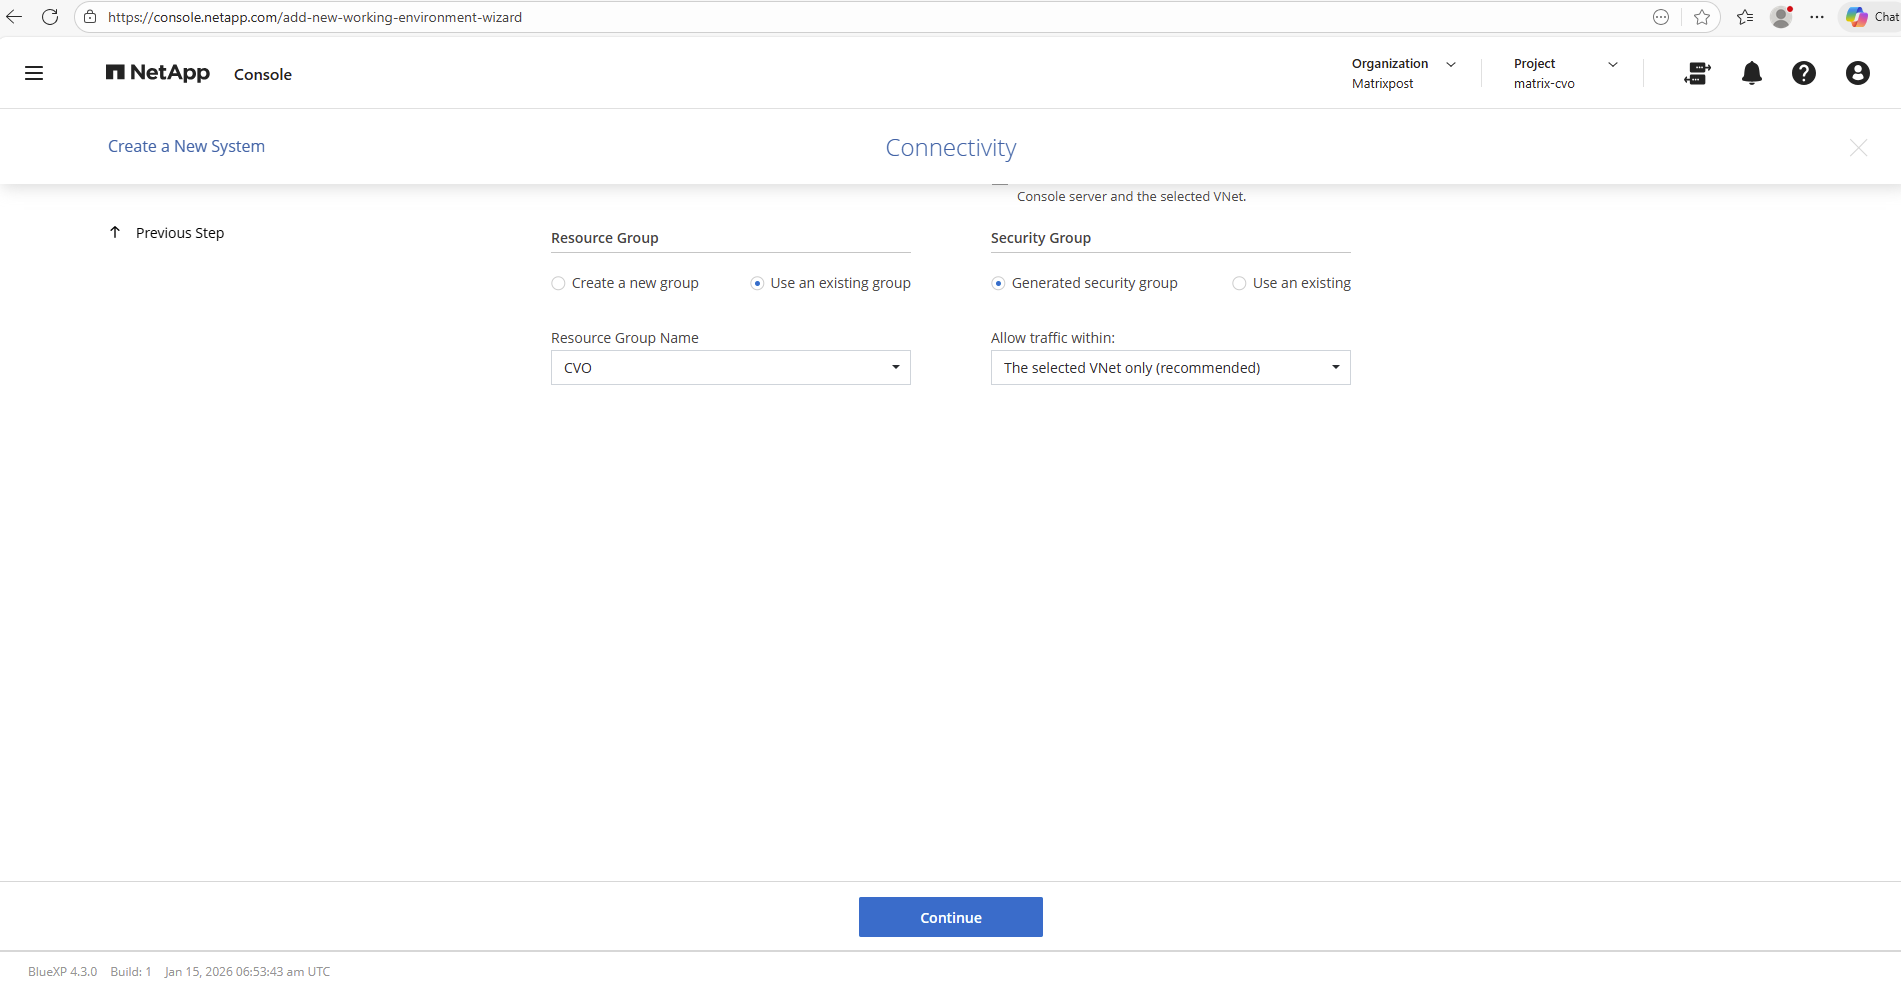
Below I will select for the security group to generate a new dedicated one.
During deployment, Cloud Volumes ONTAP allows you to either automatically generate the required security groups or use existing ones.
Choosing “Generate Security Groups” lets NetApp create all necessary inbound and outbound rules automatically based on best practices, which simplifies the setup and reduces the risk of misconfiguration.
Alternatively, using existing security groups is useful in environments with strict networking or security policies where firewall rules must be managed manually.
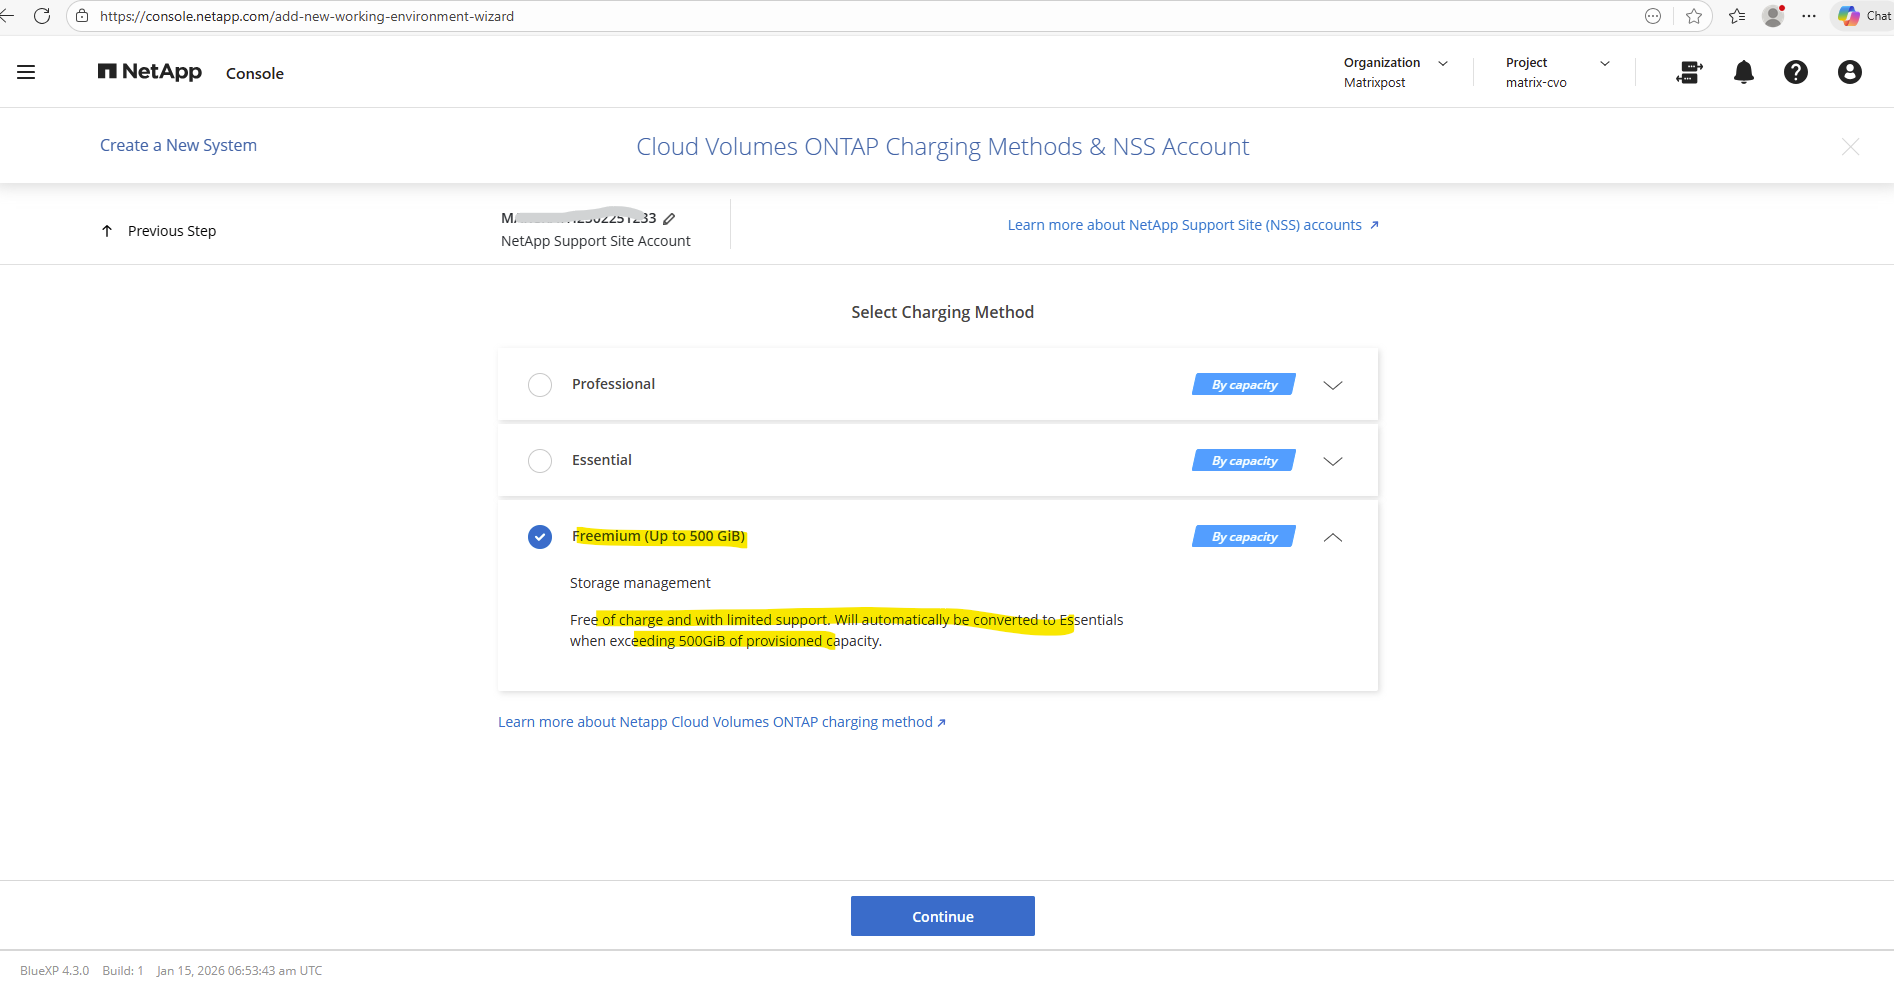
For my lab environment, I selected the Freemium charging model, which allows usage of Cloud Volumes ONTAP with up to 500 GiB of provisioned capacity at no cost.
This option is ideal for testing, learning, and proof-of-concept scenarios, as it provides full functionality without incurring licensing charges. It’s a convenient way to explore ONTAP features before moving to a paid subscription model.
However, standard Azure infrastructure costs (compute, storage, networking, and load balancer resources) will still apply.
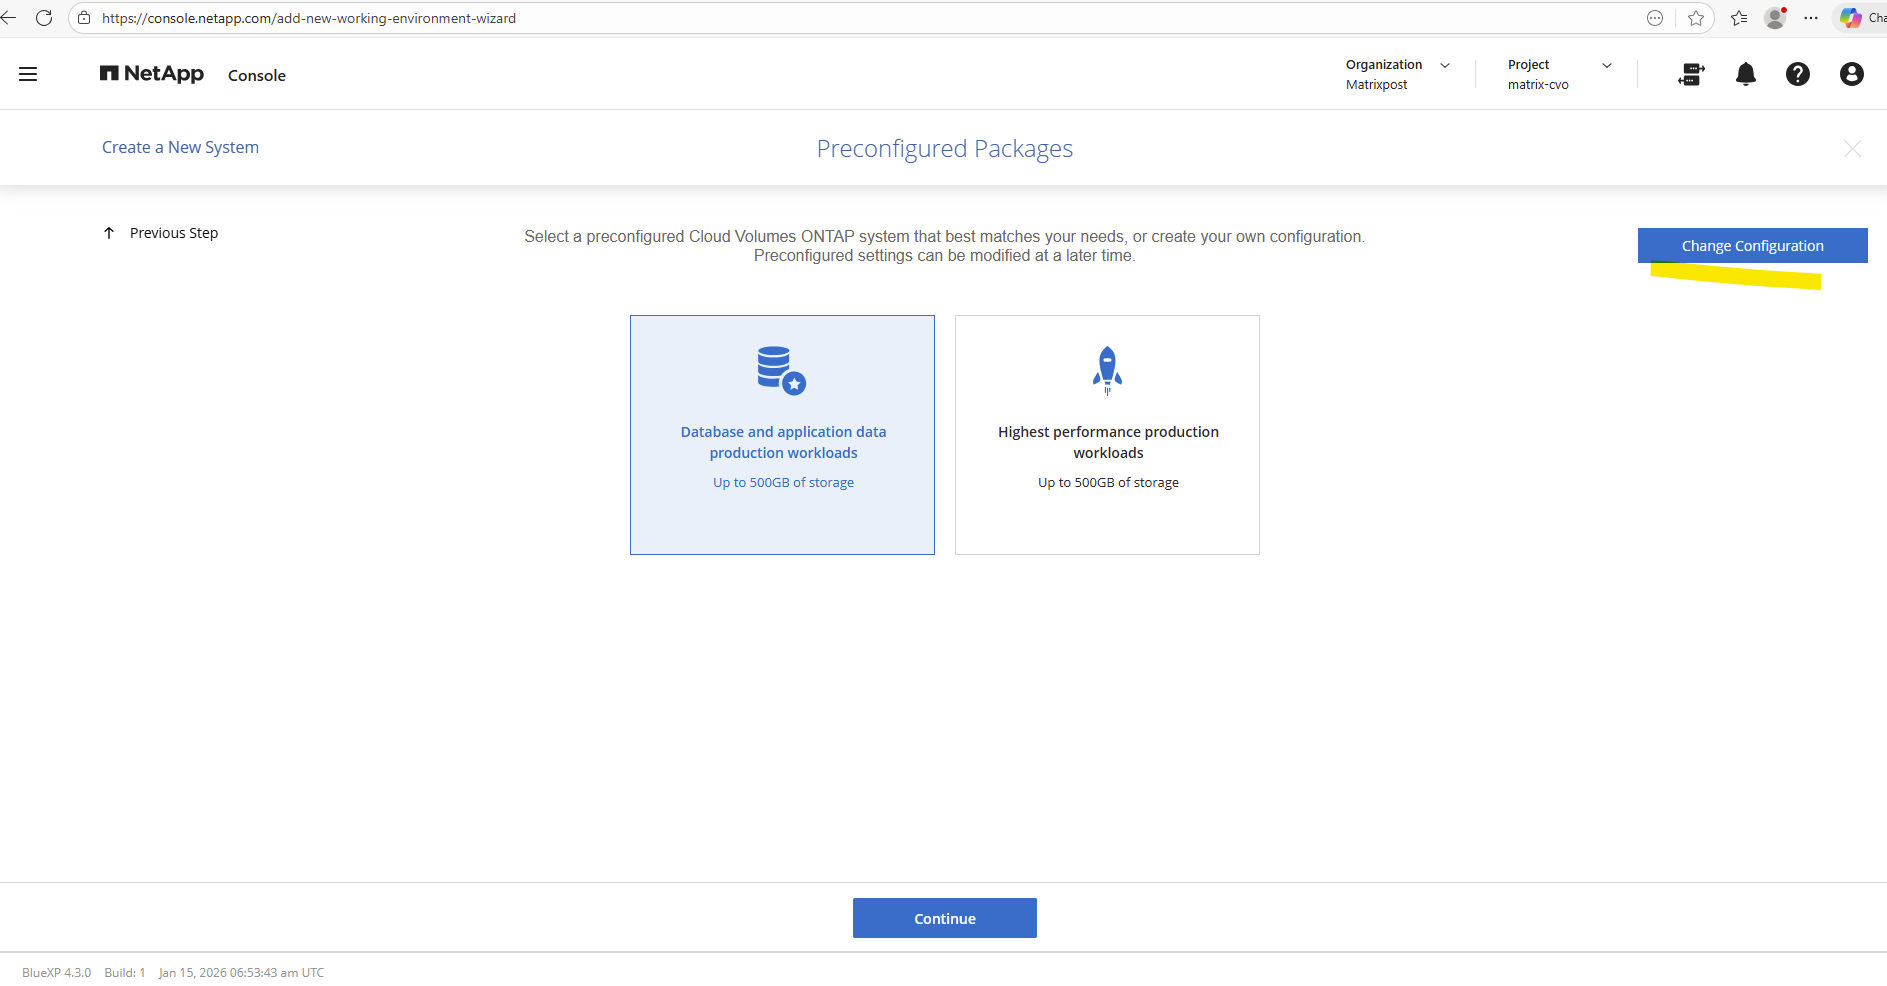
Click on Change Configuration to manually select a desired VM size for the deployed nodes (VMs).
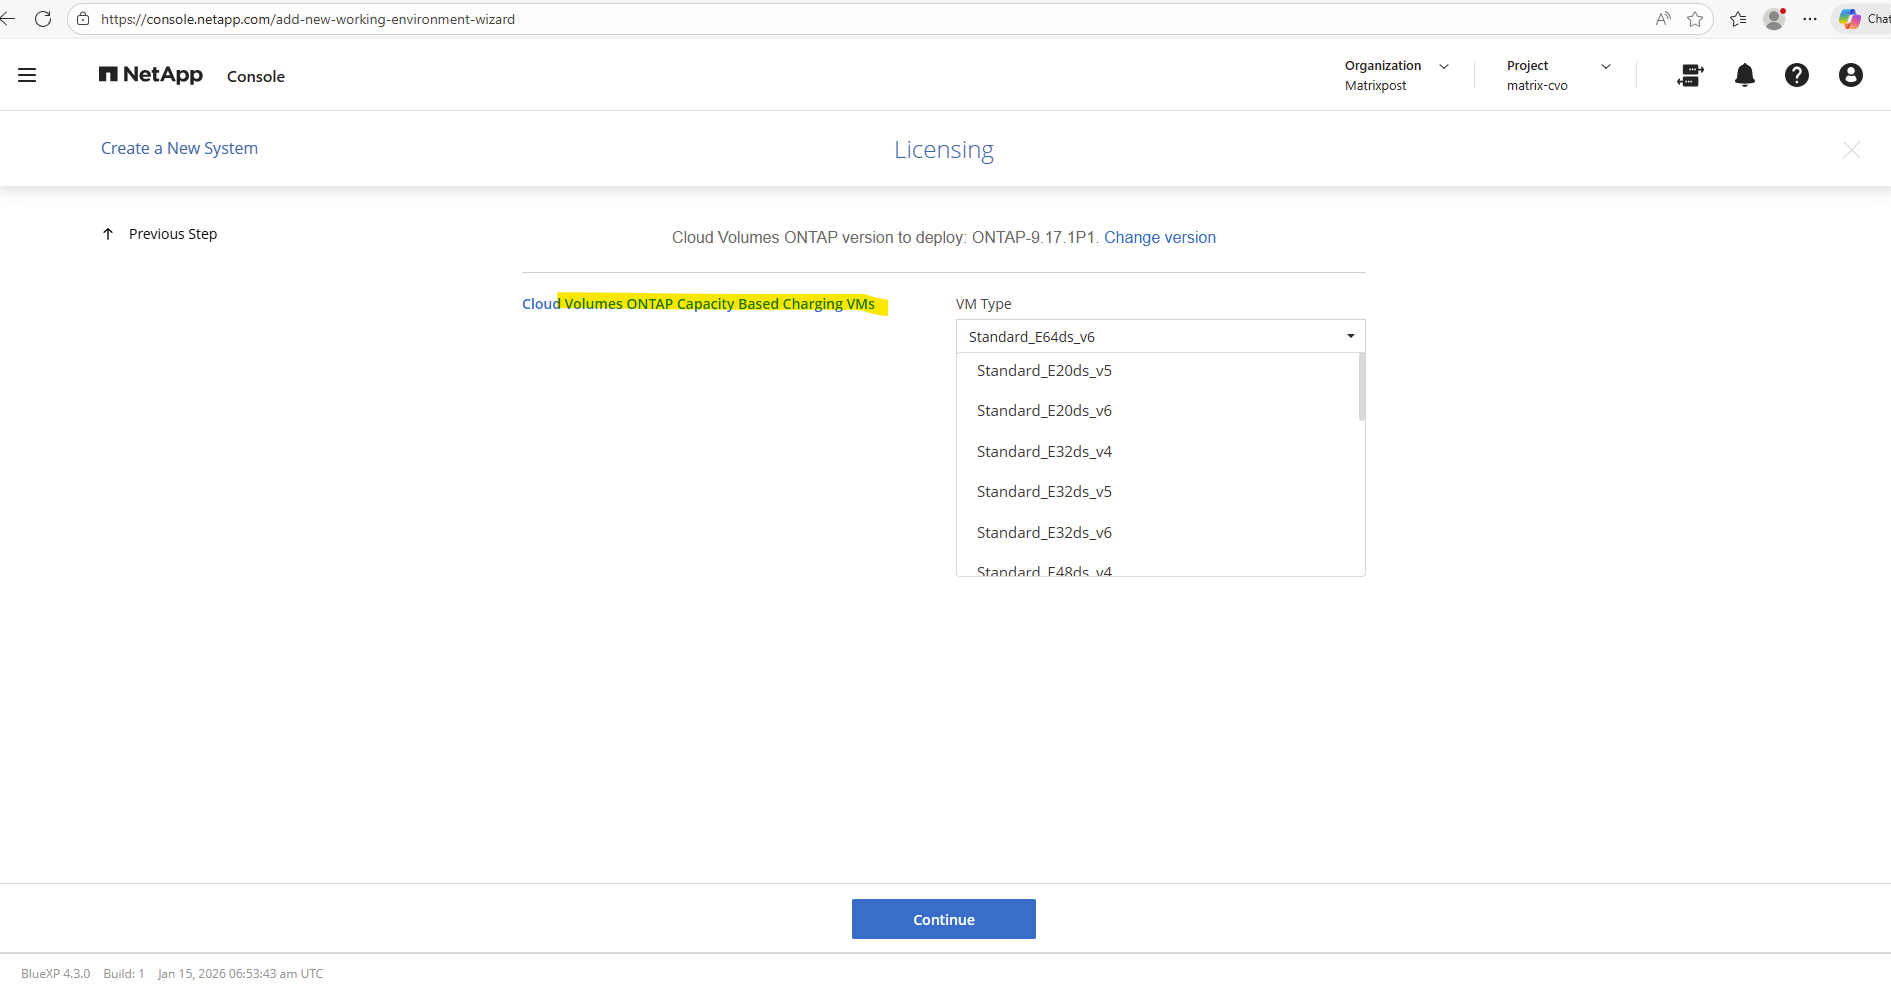
Select the desired VM Type.
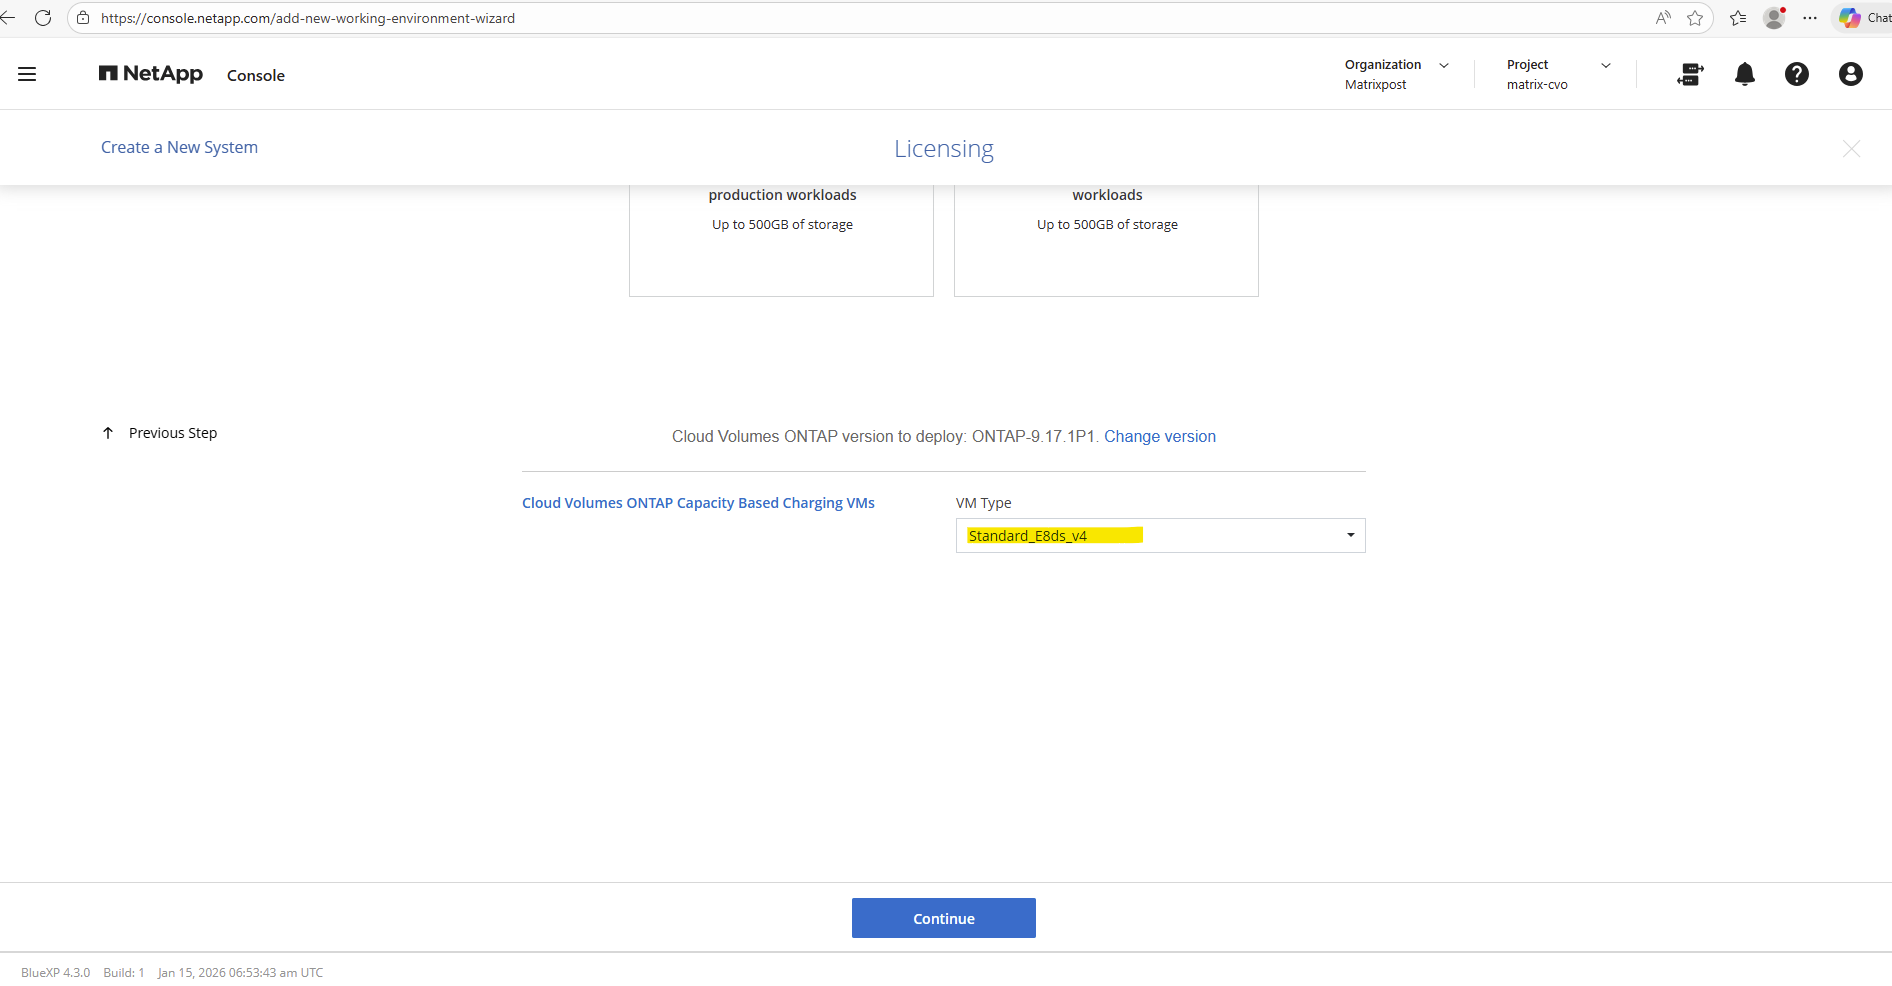
For the virtual machine size, I selected Standard_E8ds_v4, which provides a solid balance of CPU, memory, and overall performance for Cloud Volumes ONTAP in a lab environment. This VM size is a good fit for testing and evaluation while keeping Azure infrastructure costs reasonable.
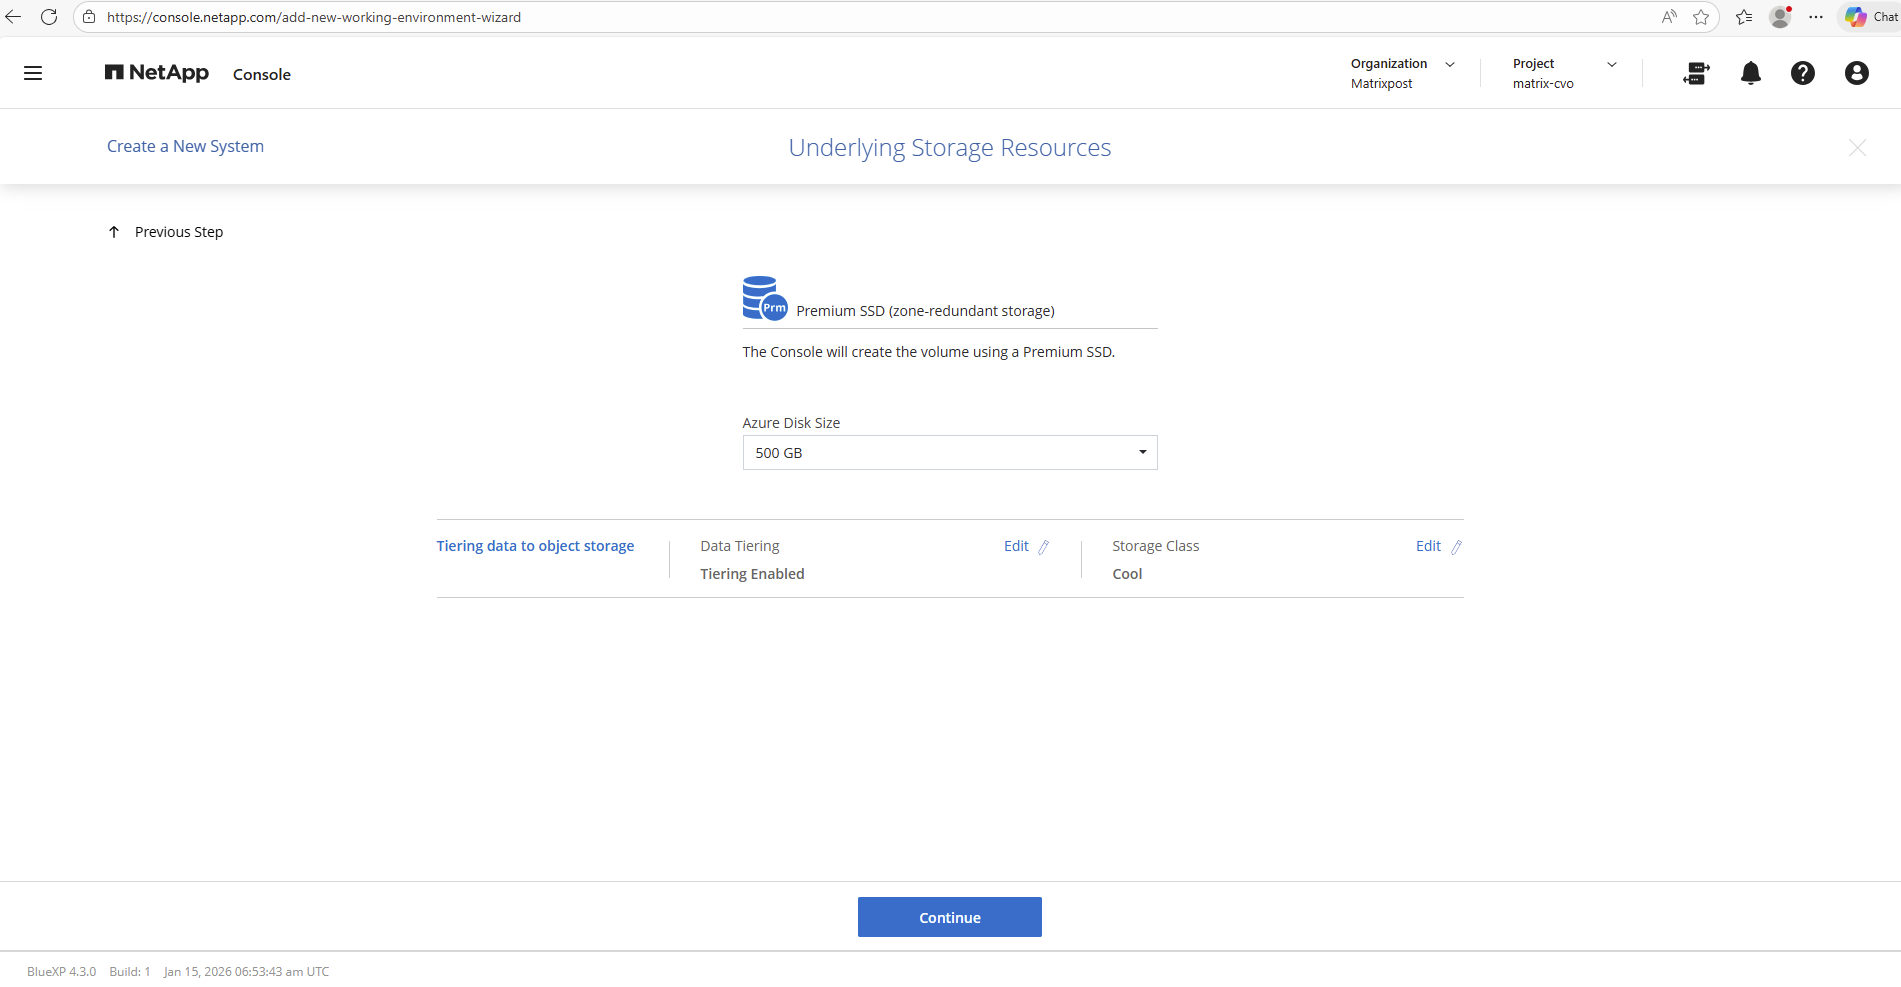
For data tiering, I enabled automatic tiering to Azure Blob Storage and selected the Cool storage tier. This allows inactive data blocks to be moved from performance disks to lower-cost object storage, reducing overall storage costs while keeping active data on high-performance tiers. It’s an efficient way to optimize storage usage in a lab or production environment without impacting performance-critical workloads.
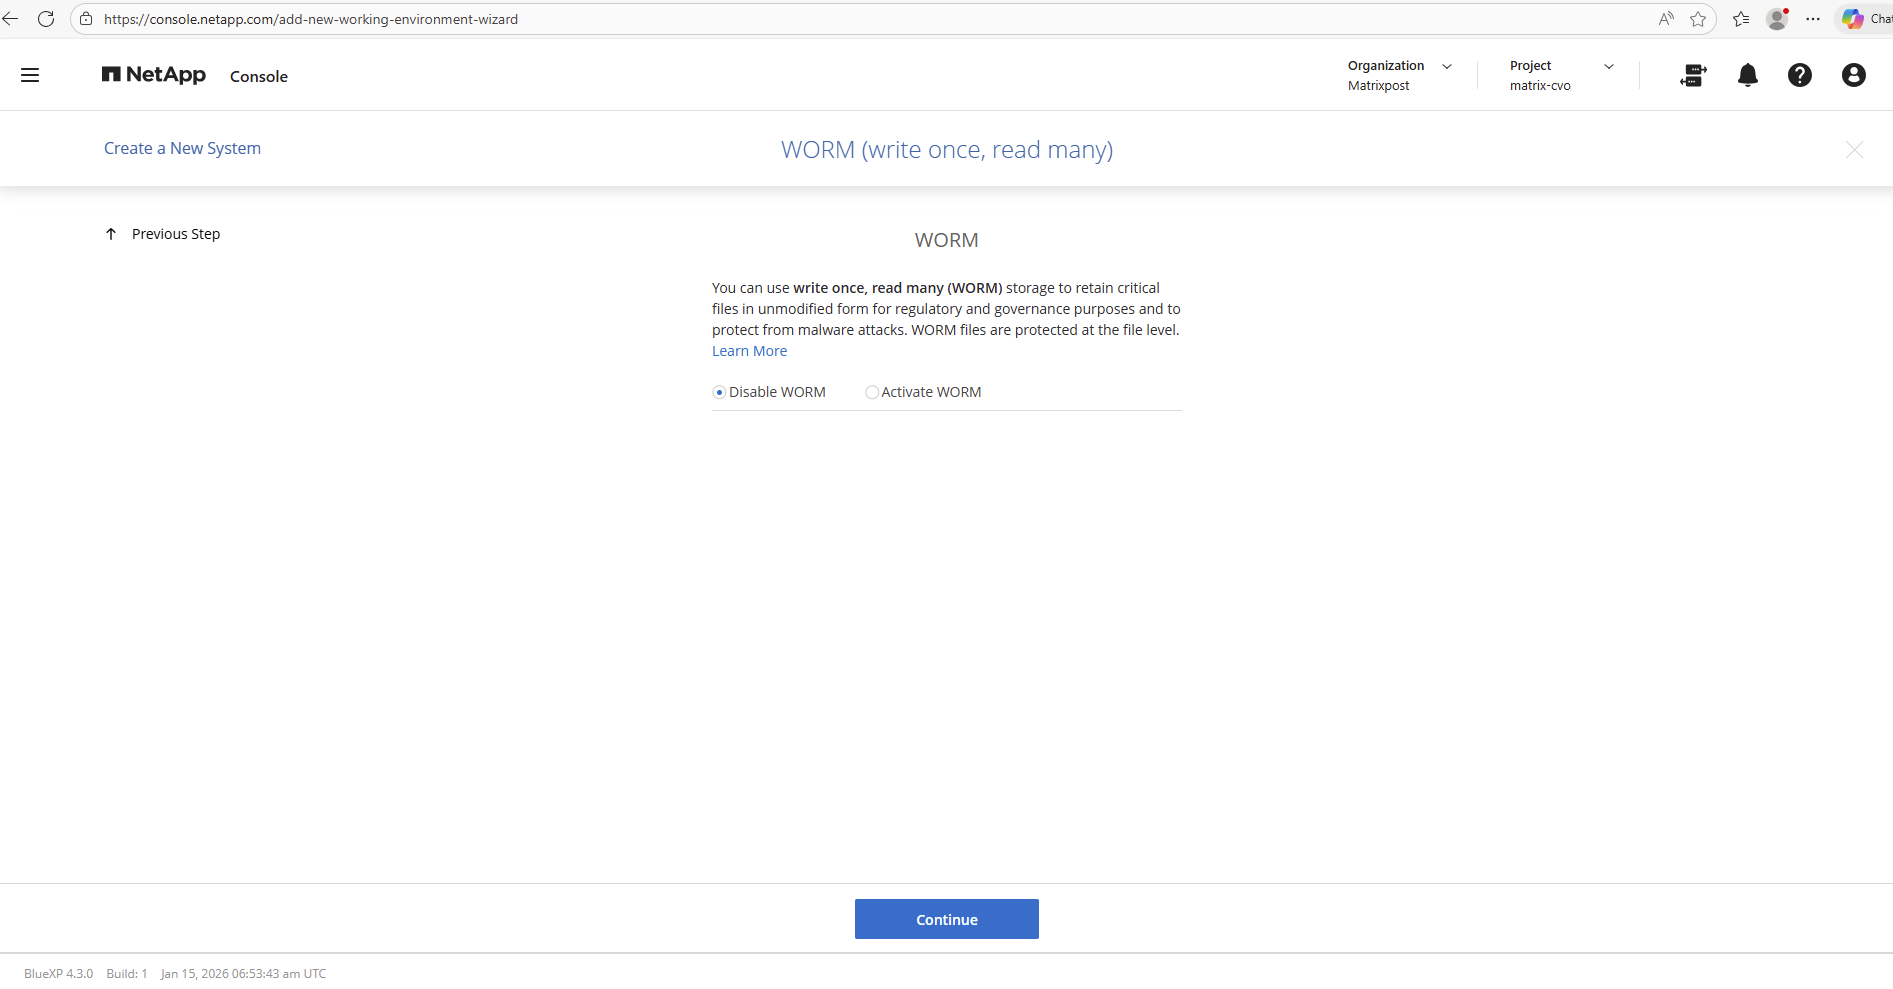
The WORM (Write Once, Read Many) feature, which provides immutable storage for compliance and data protection use cases, was disabled for this deployment.
Since this is a lab environment, immutability and regulatory retention requirements were not necessary. Disabling WORM also keeps the setup more flexible for testing and reconfiguration scenarios.
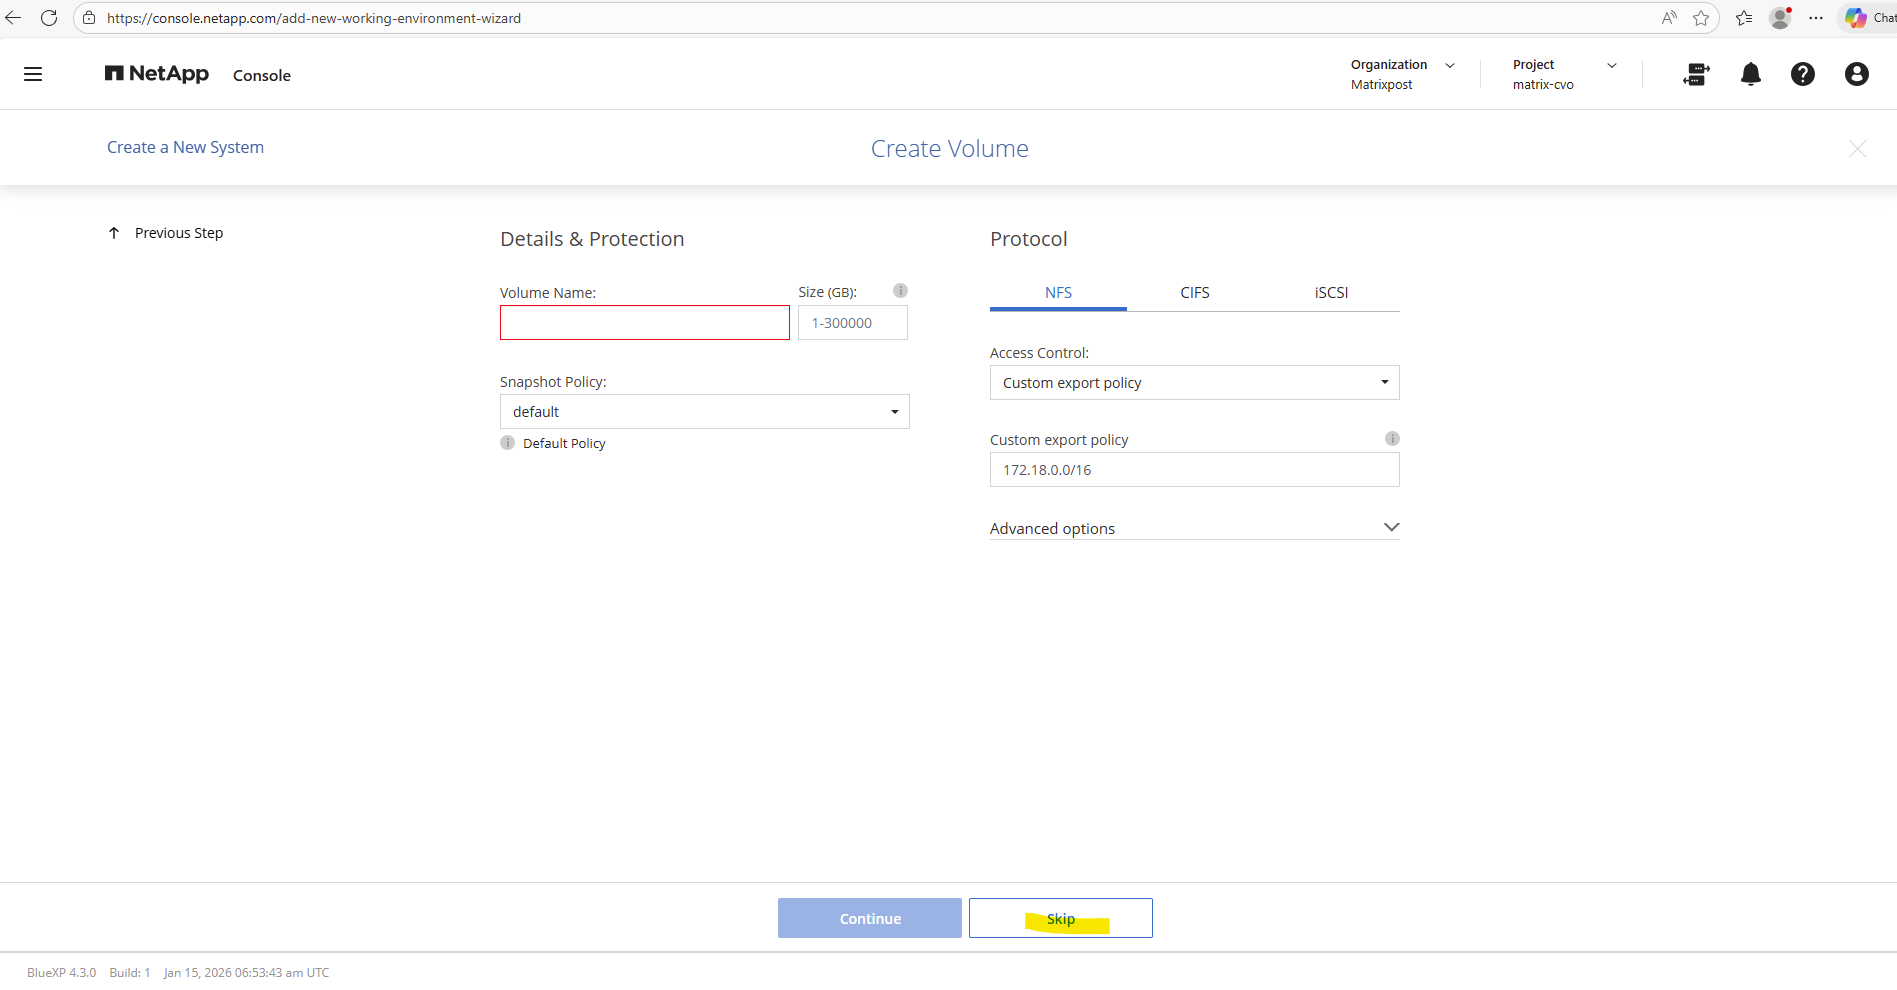
The Volume creation section I will skip here.
Volumes can be created later directly from the Cloud Manager or ONTAP System Manager once the environment is fully deployed and configured.
This approach keeps the initial setup minimal and allows more flexibility when defining storage requirements.
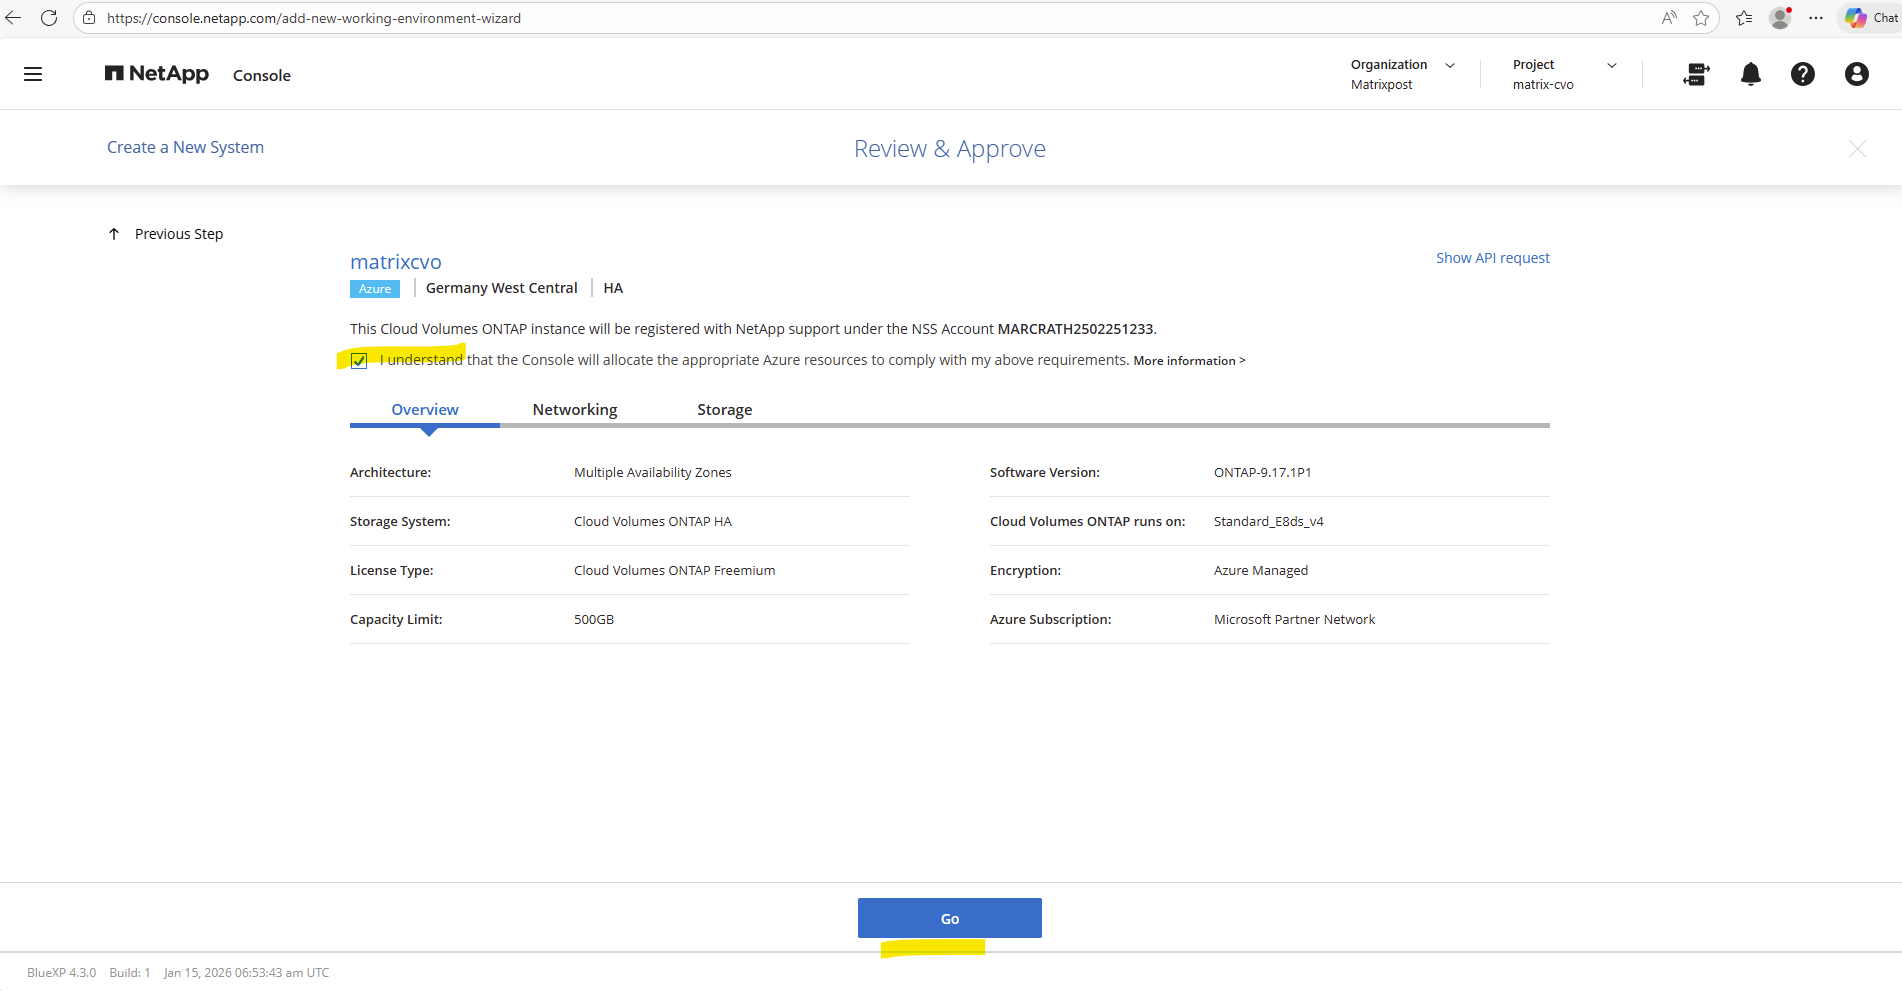
Finally we can click on Go to deploy the system in Azure.
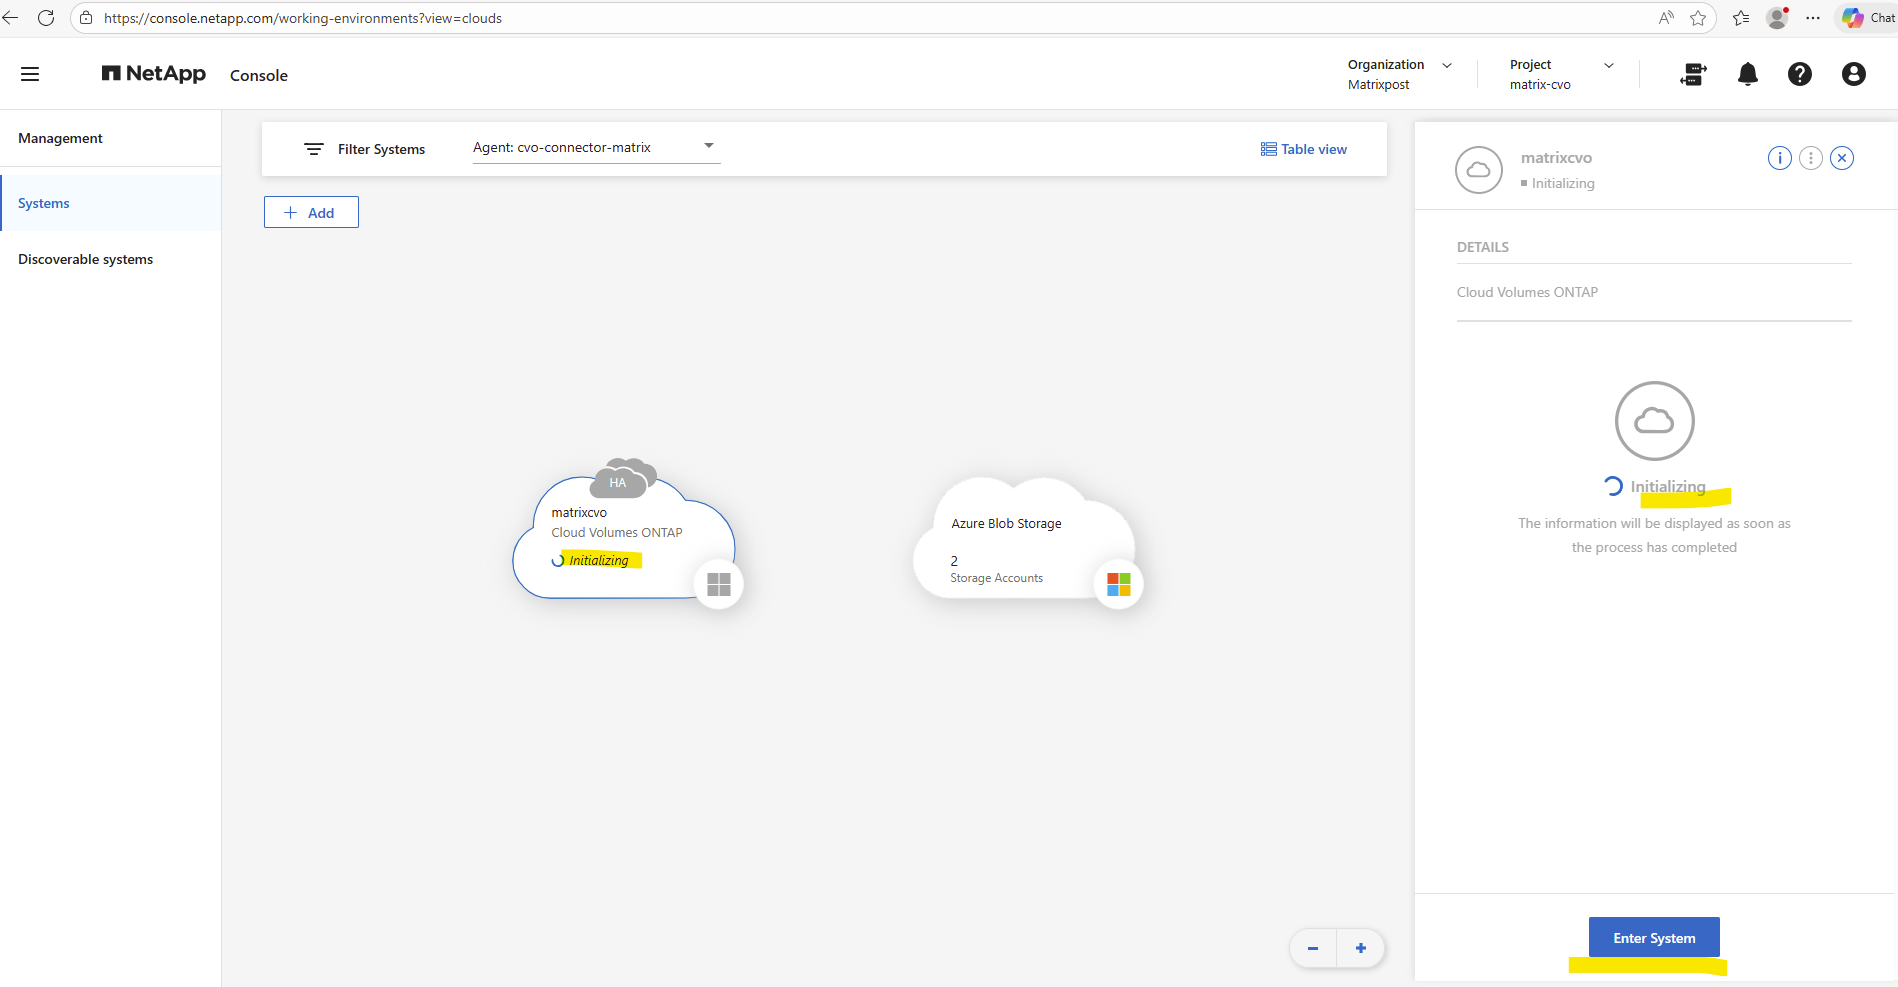
The deployment triggered and orchestrated from the NetApp console starts.
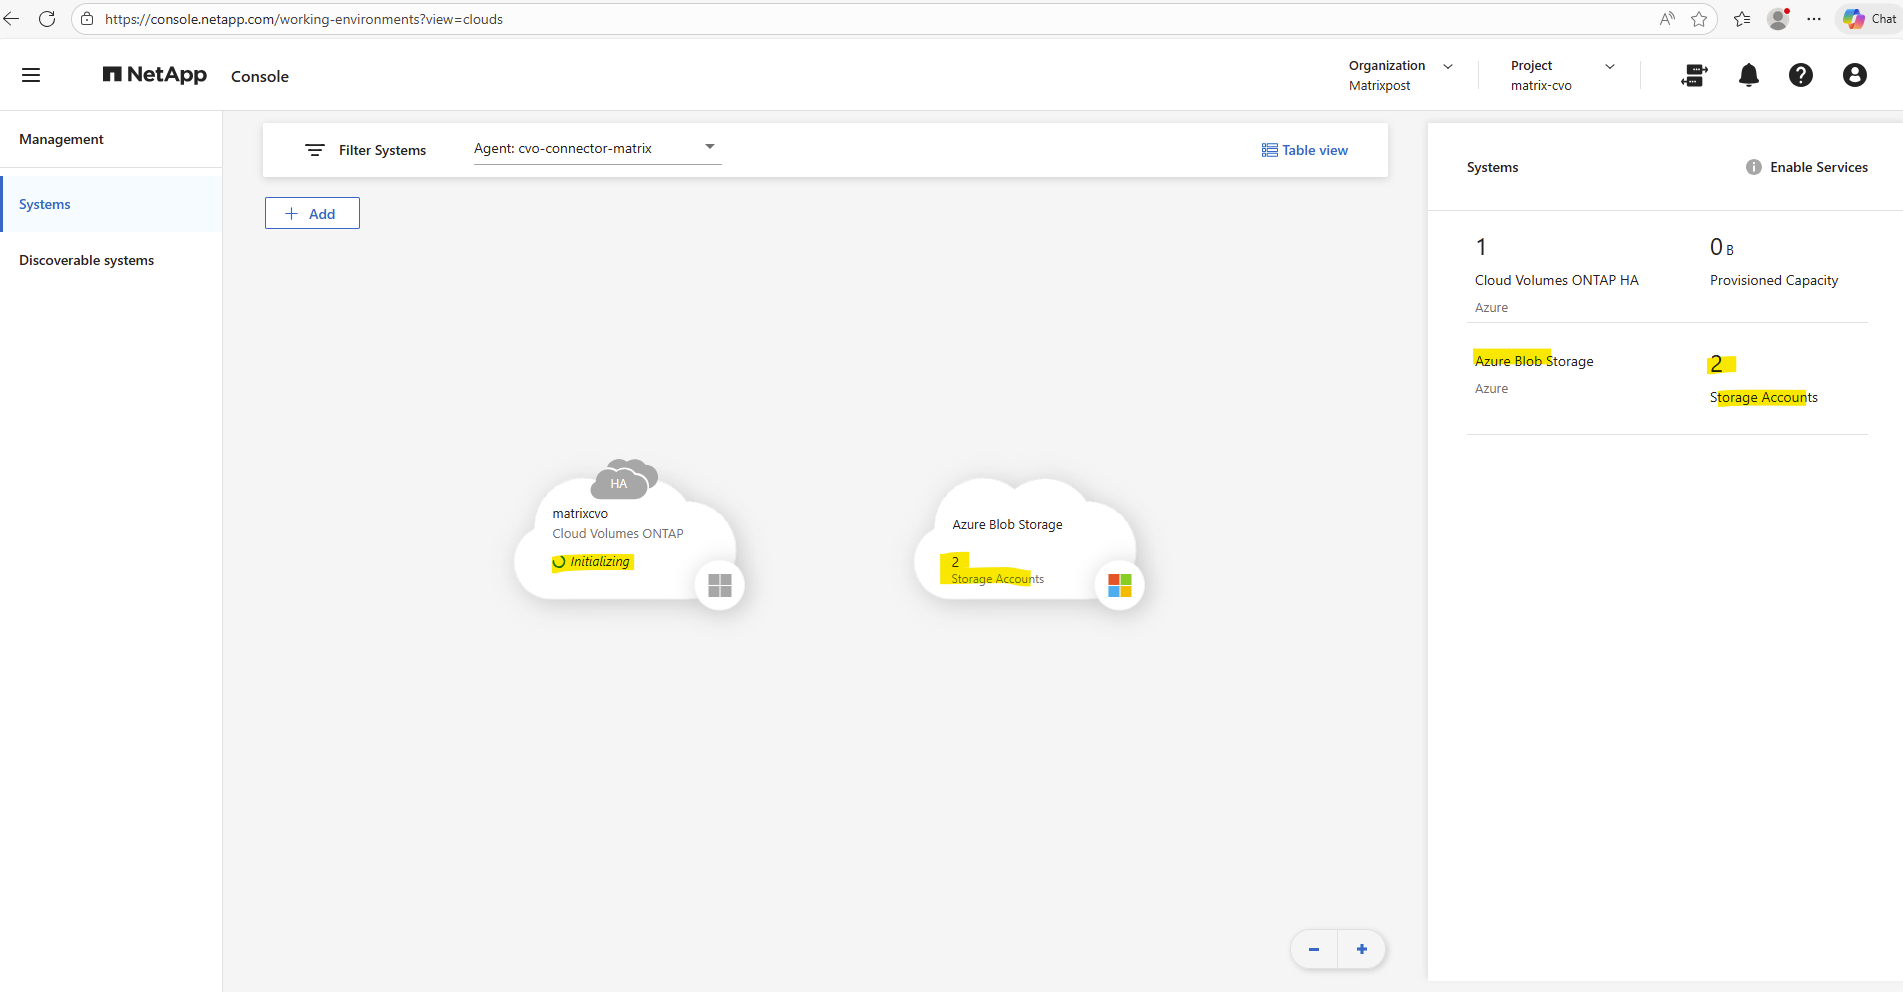
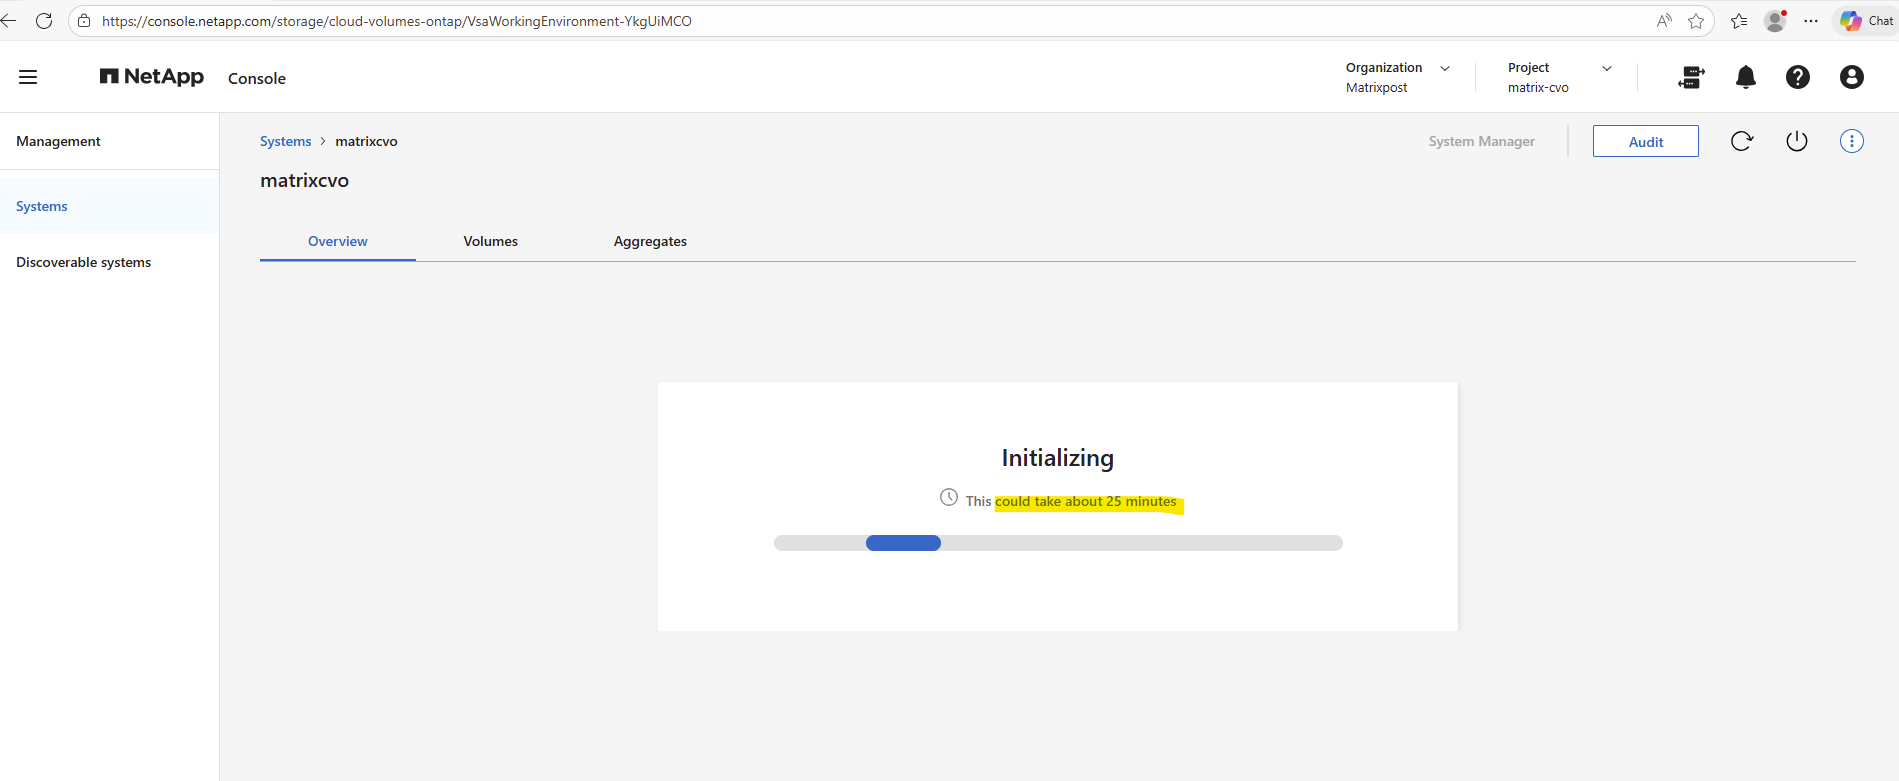
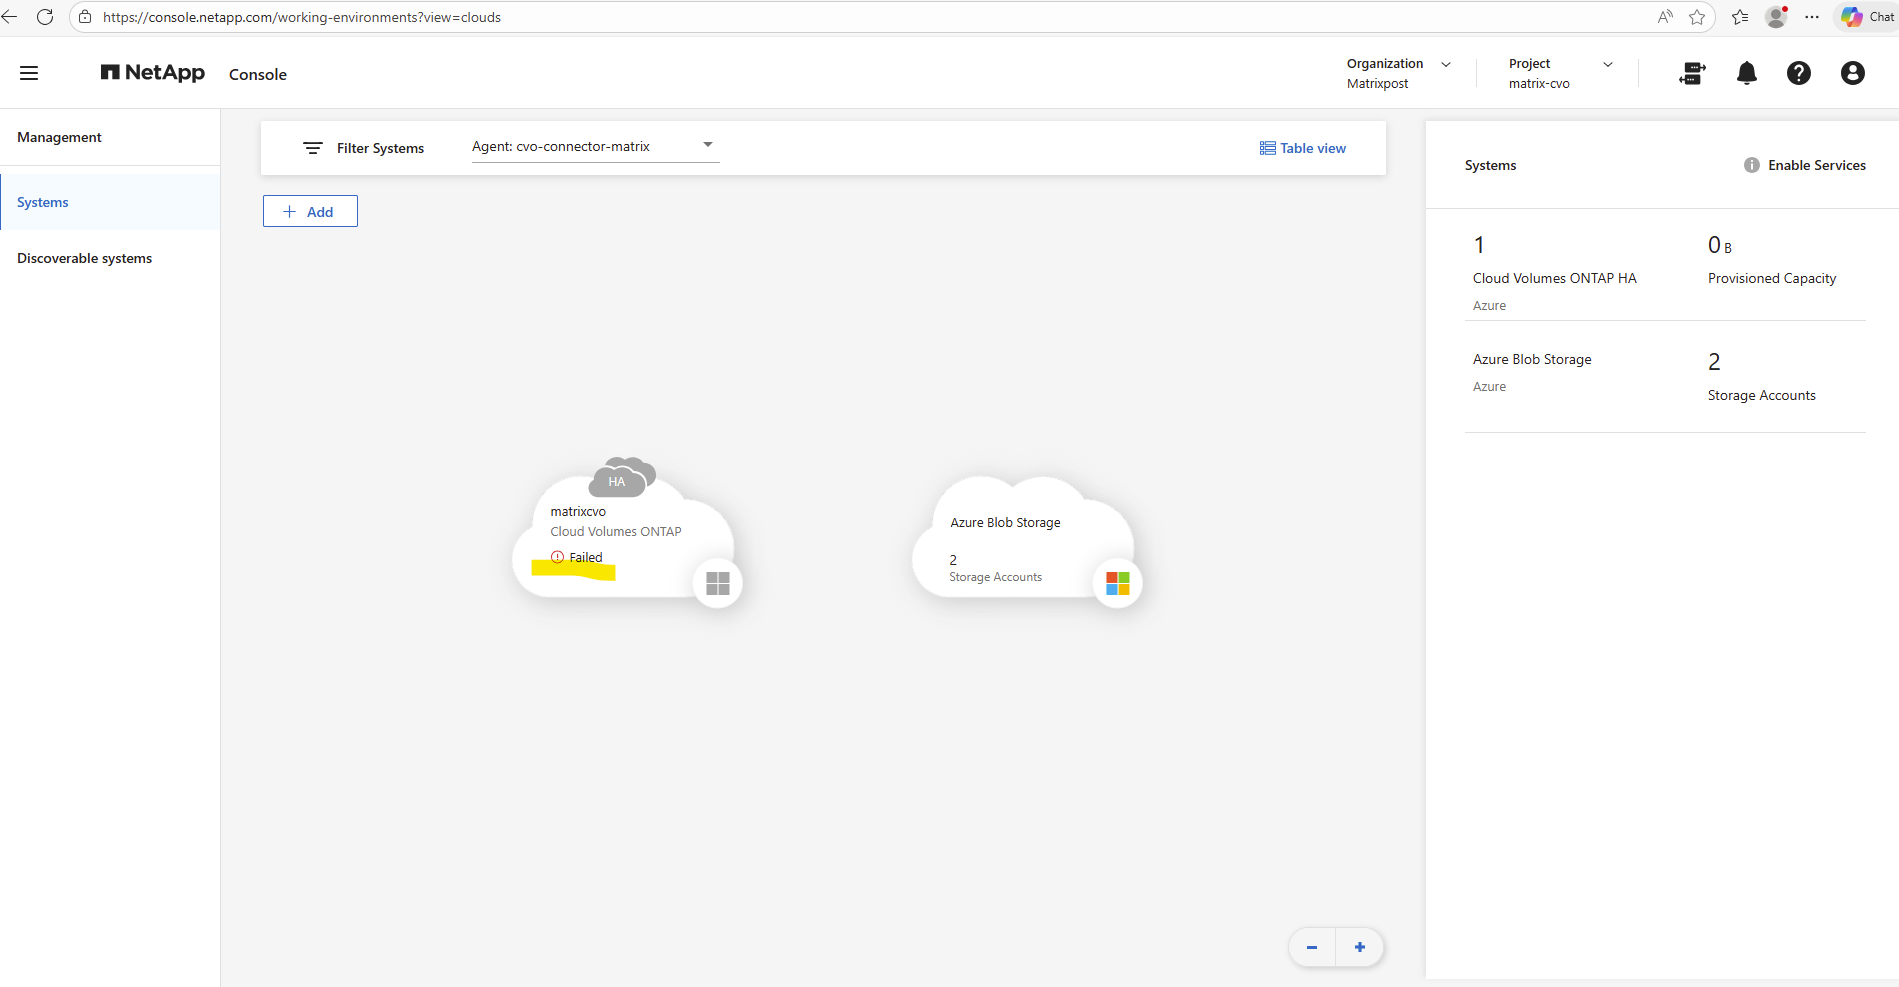
During deployment we can see below its state in Initializing.

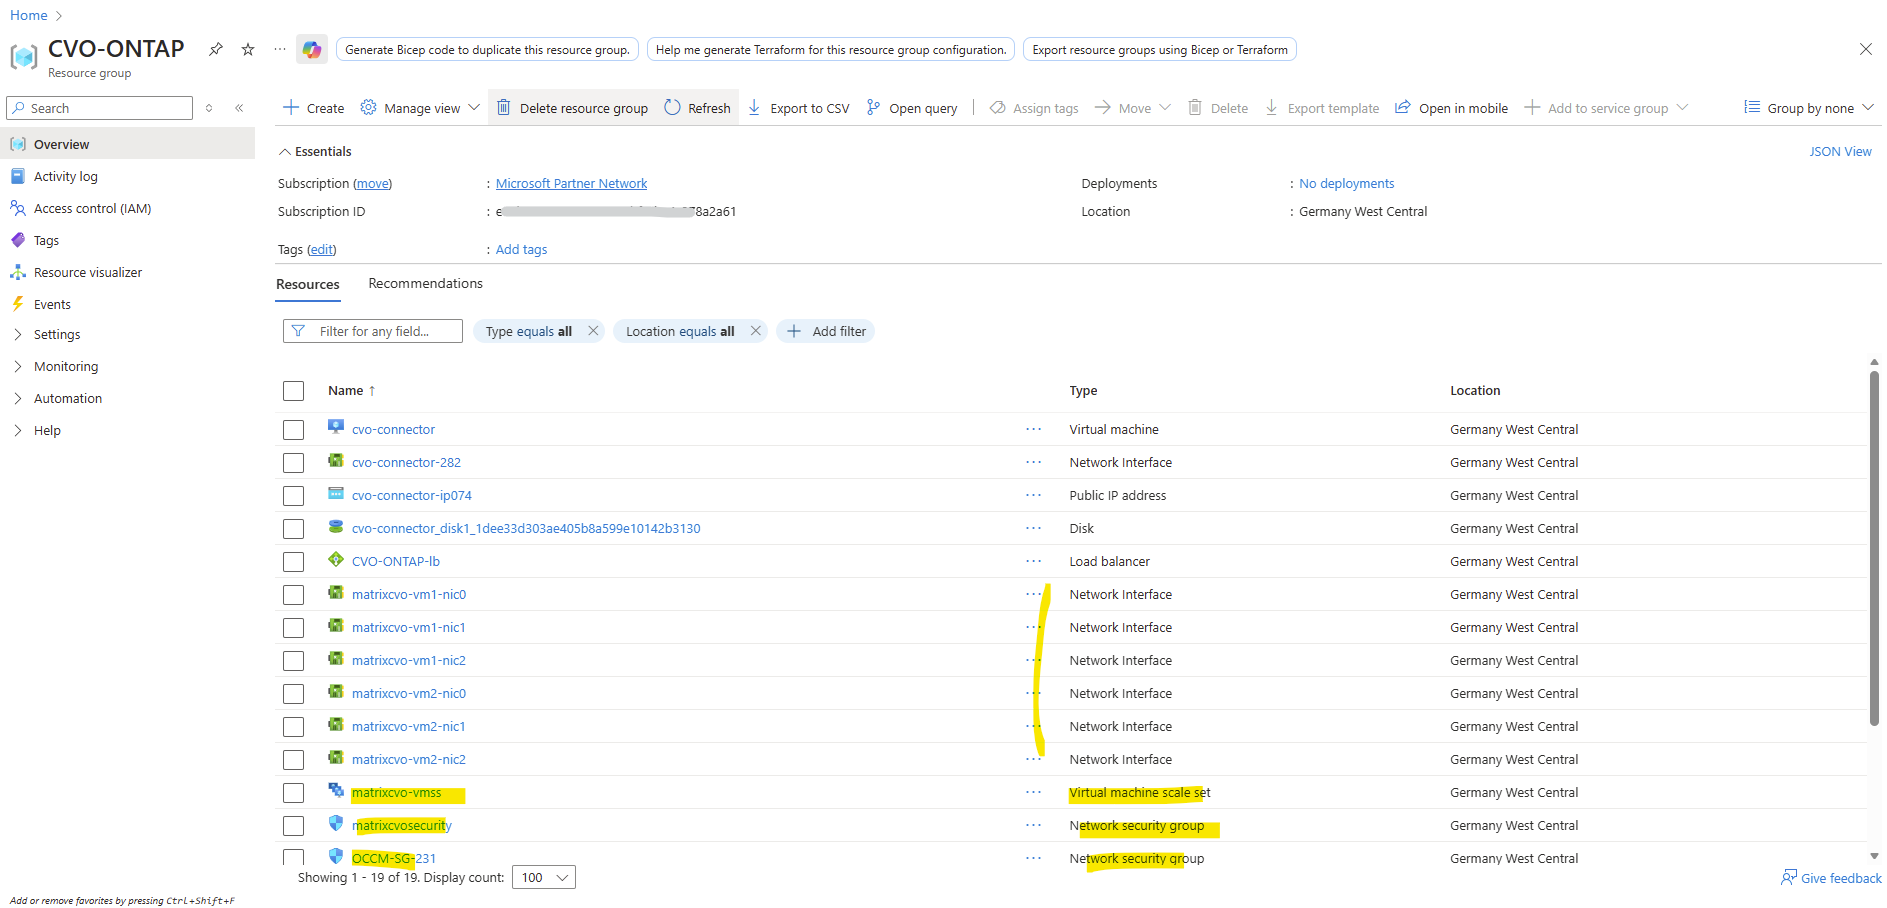
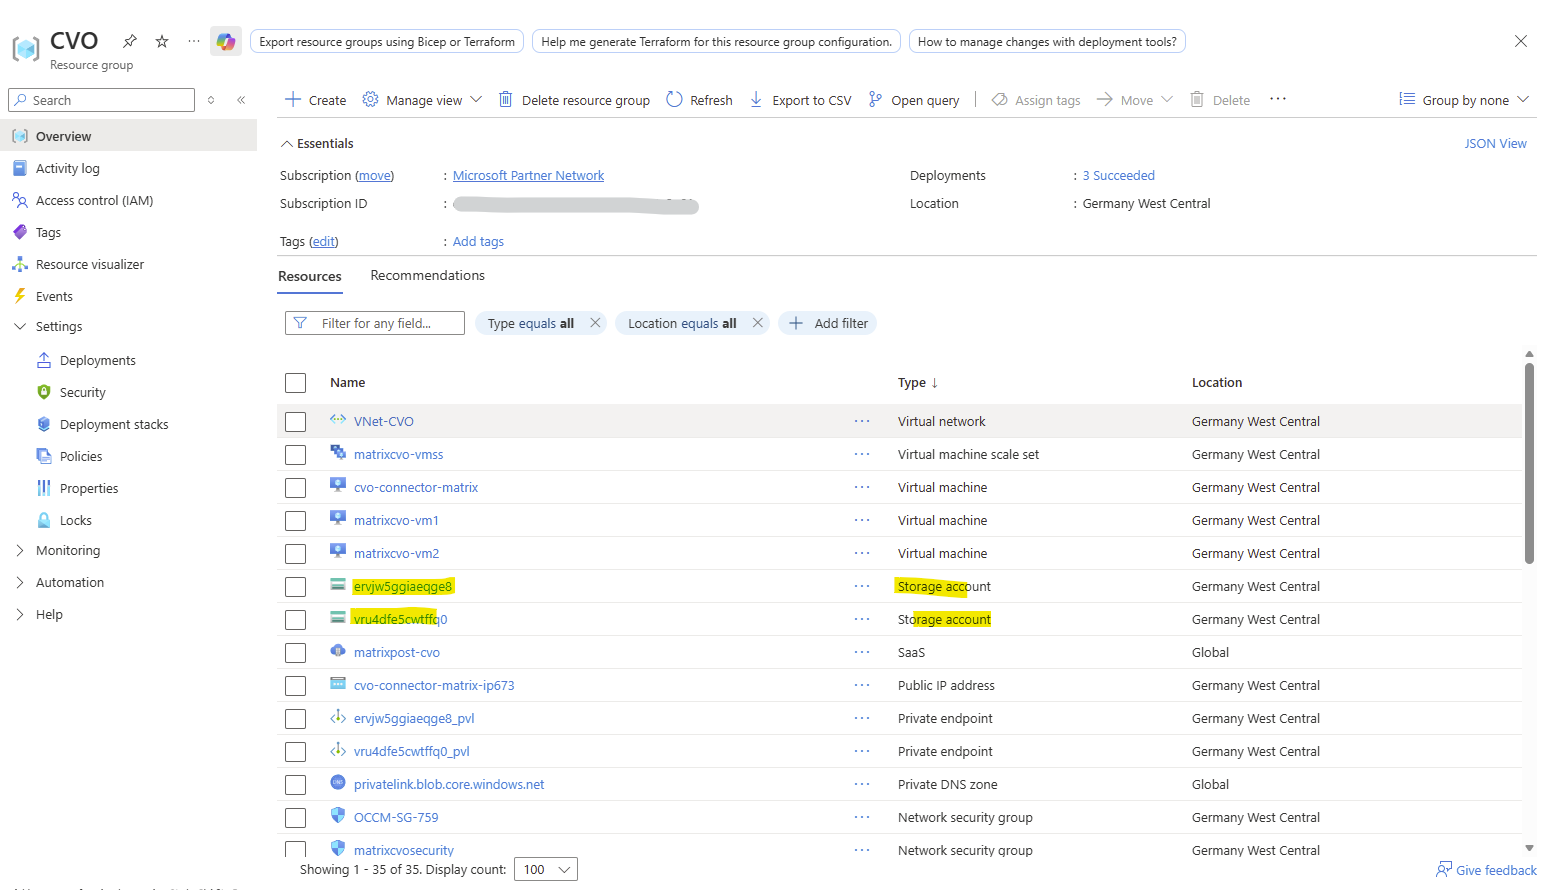
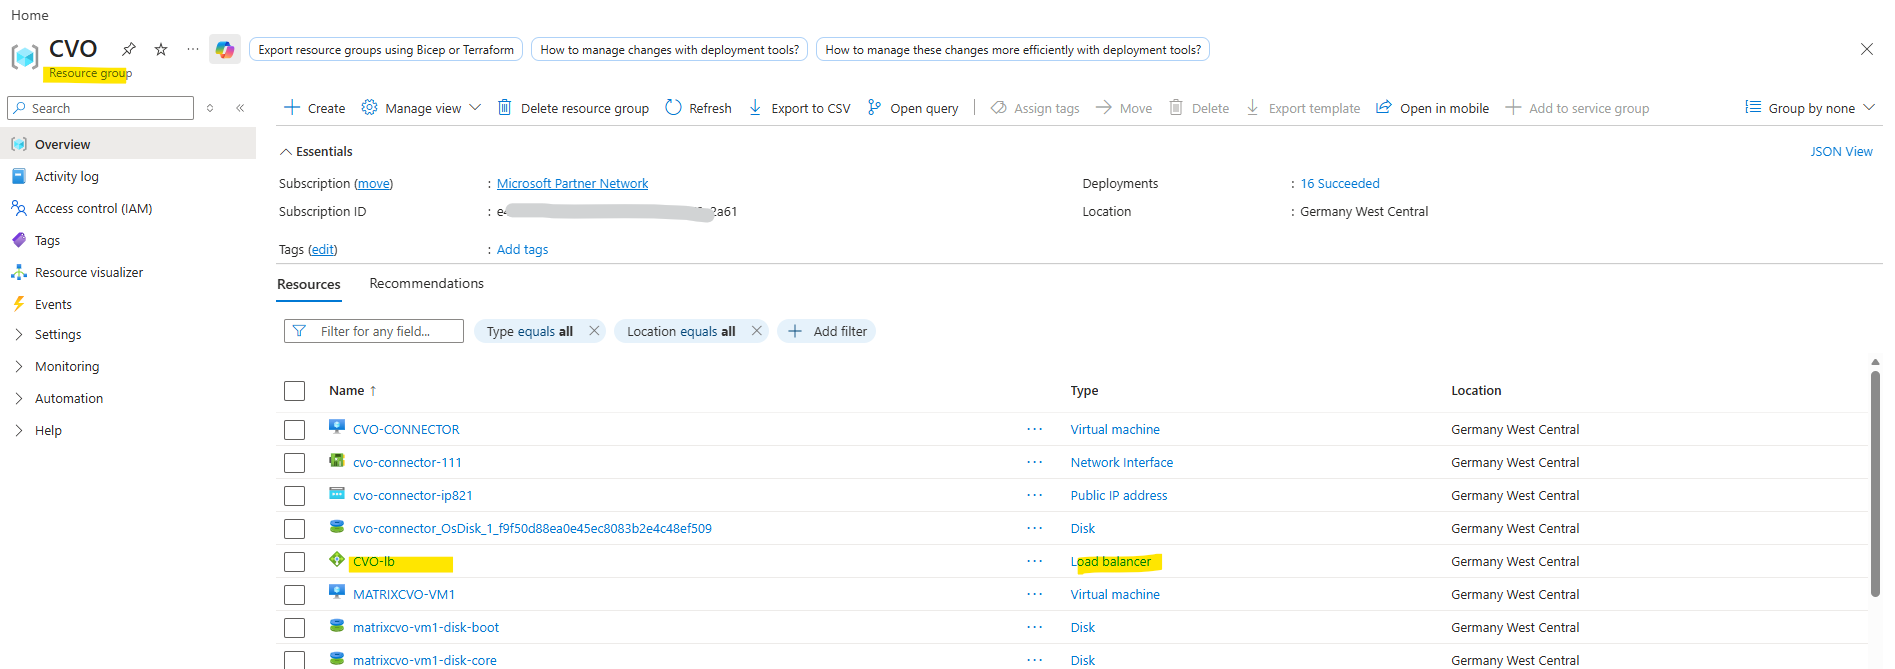
Meanwhile in Azure during the above initialization in the Netapp console we can already see that the resources will be created.
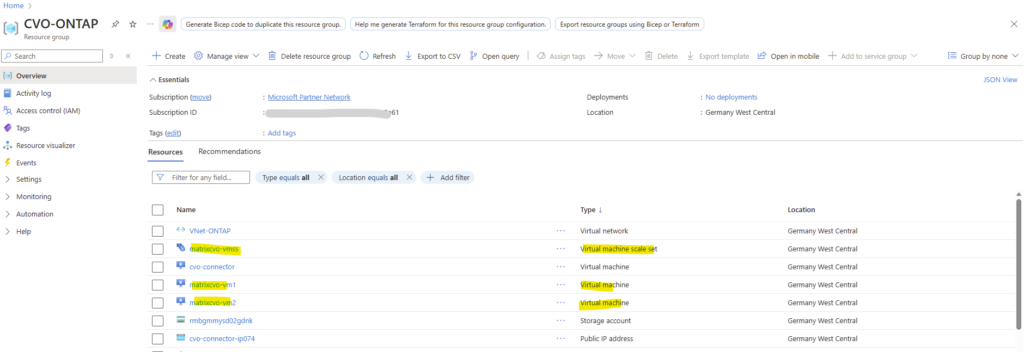
Meanwhile also an Azure storage accounts were provisioned.
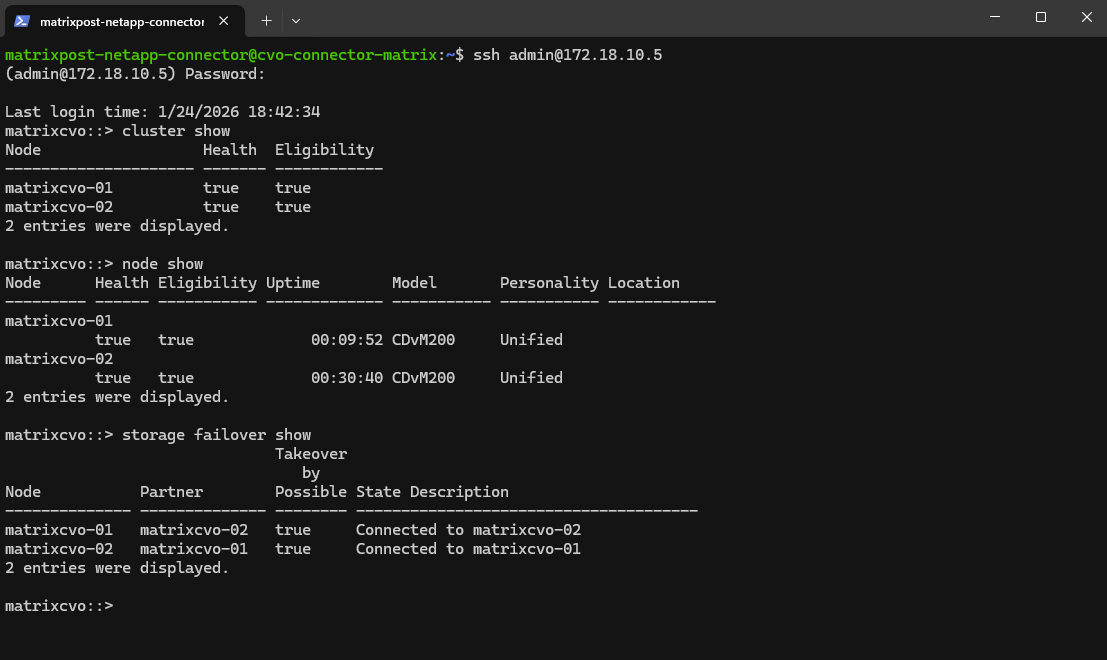
While the NetApp console is still in state Initializing, in ONTAP itself it looks already fine.
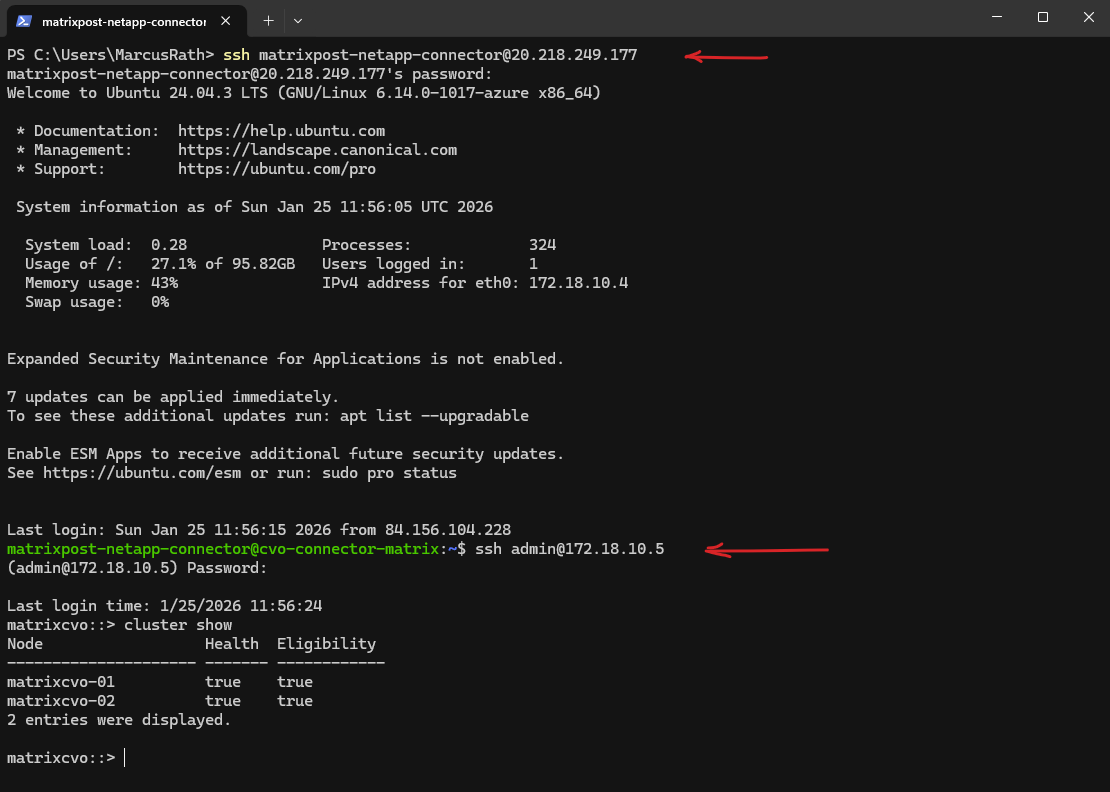
Below I will SSH into the ONTAP cluster directly from the Agent (Connector VM) where I am connected through the internet by using SSH and the Agent’s public IP address.
matrixcvo::> cluster show
matrixcvo::> node show
matrixcvo::> storage failover show
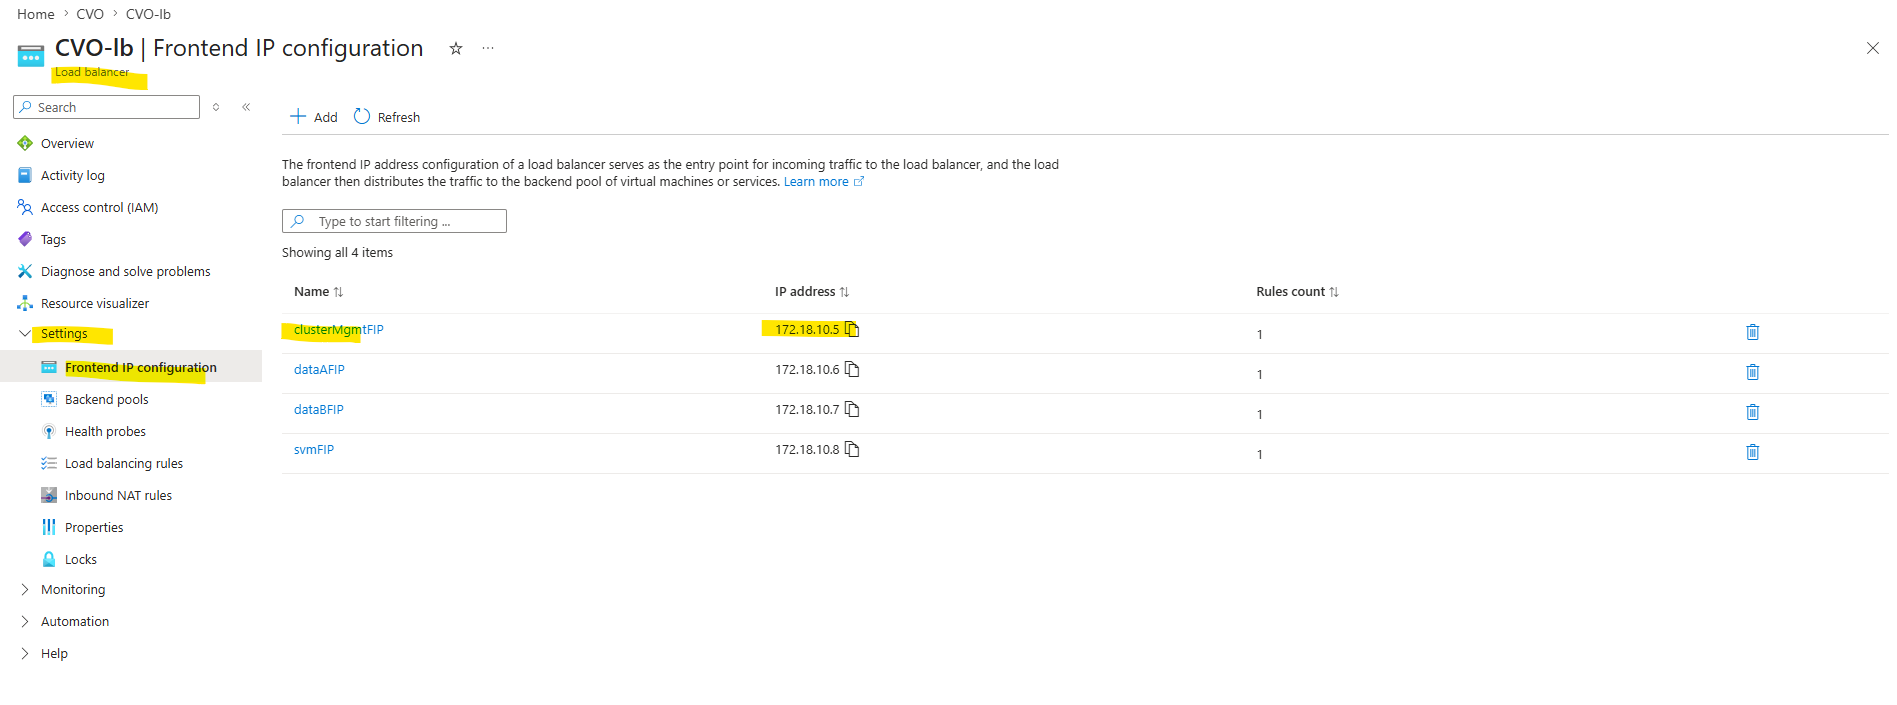
Even while the Cloud Volumes ONTAP deployment is still in progress, we can already connect to the ONTAP cluster. To determine the cluster management IP address, open the Azure Load Balancer created for the deployment and check the Frontend IP configuration named clusterMgmtFIP.
This IP address can then be used to access ONTAP System Manager or connect through the CLI.
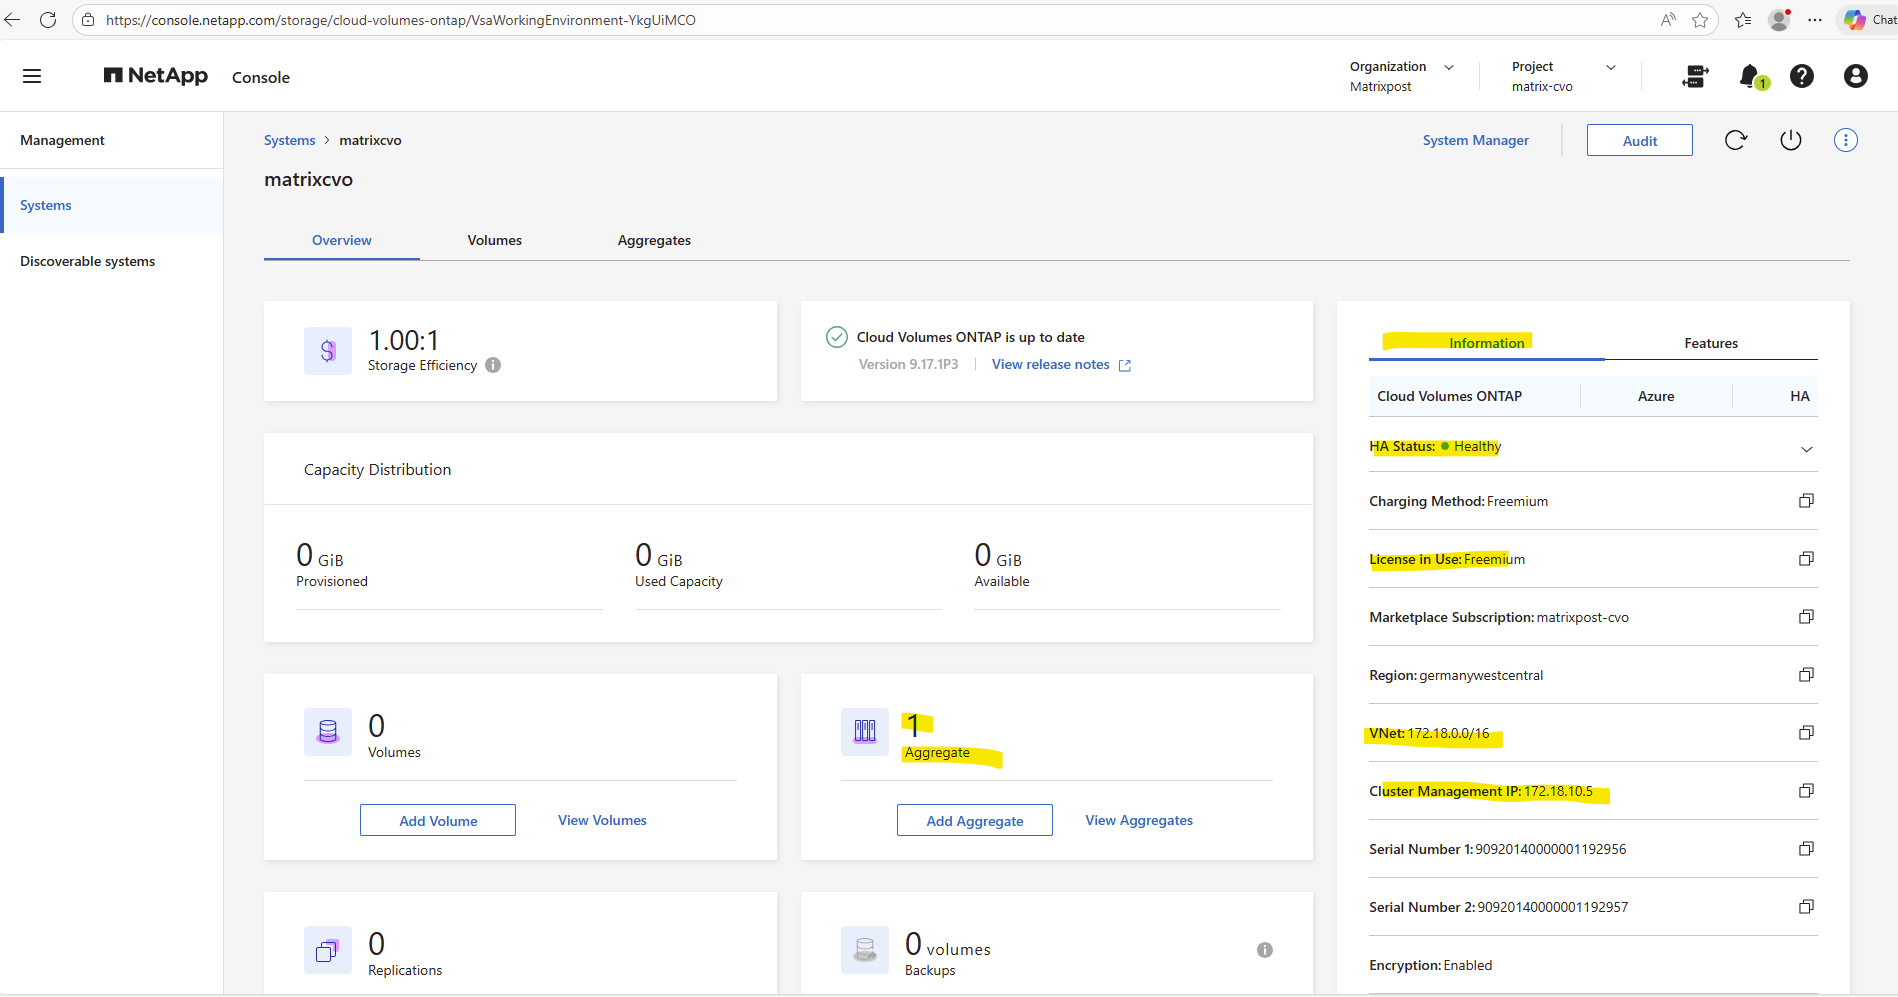
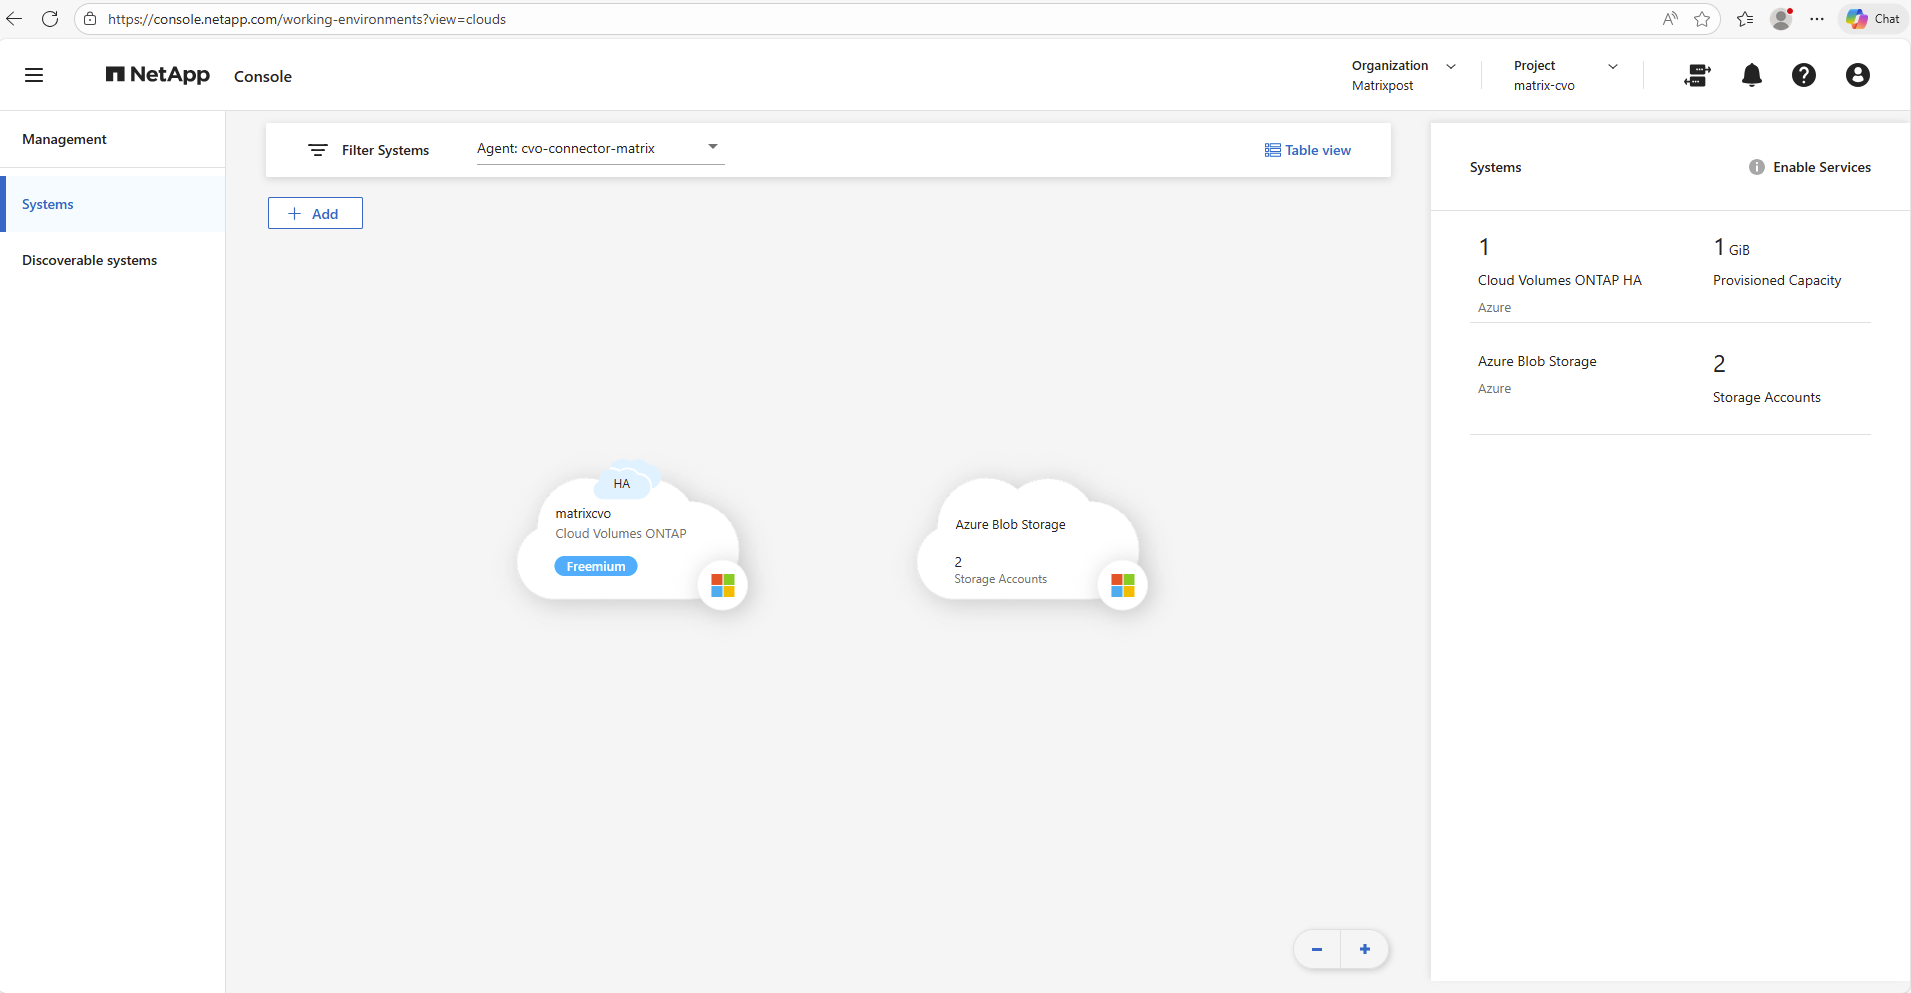
In my case, finally after around 70 Minutes instead of estimated 25 minutes also the NetApp console shows the Cloud Volumes ONTAP (Freemium) system in normal healthy state.

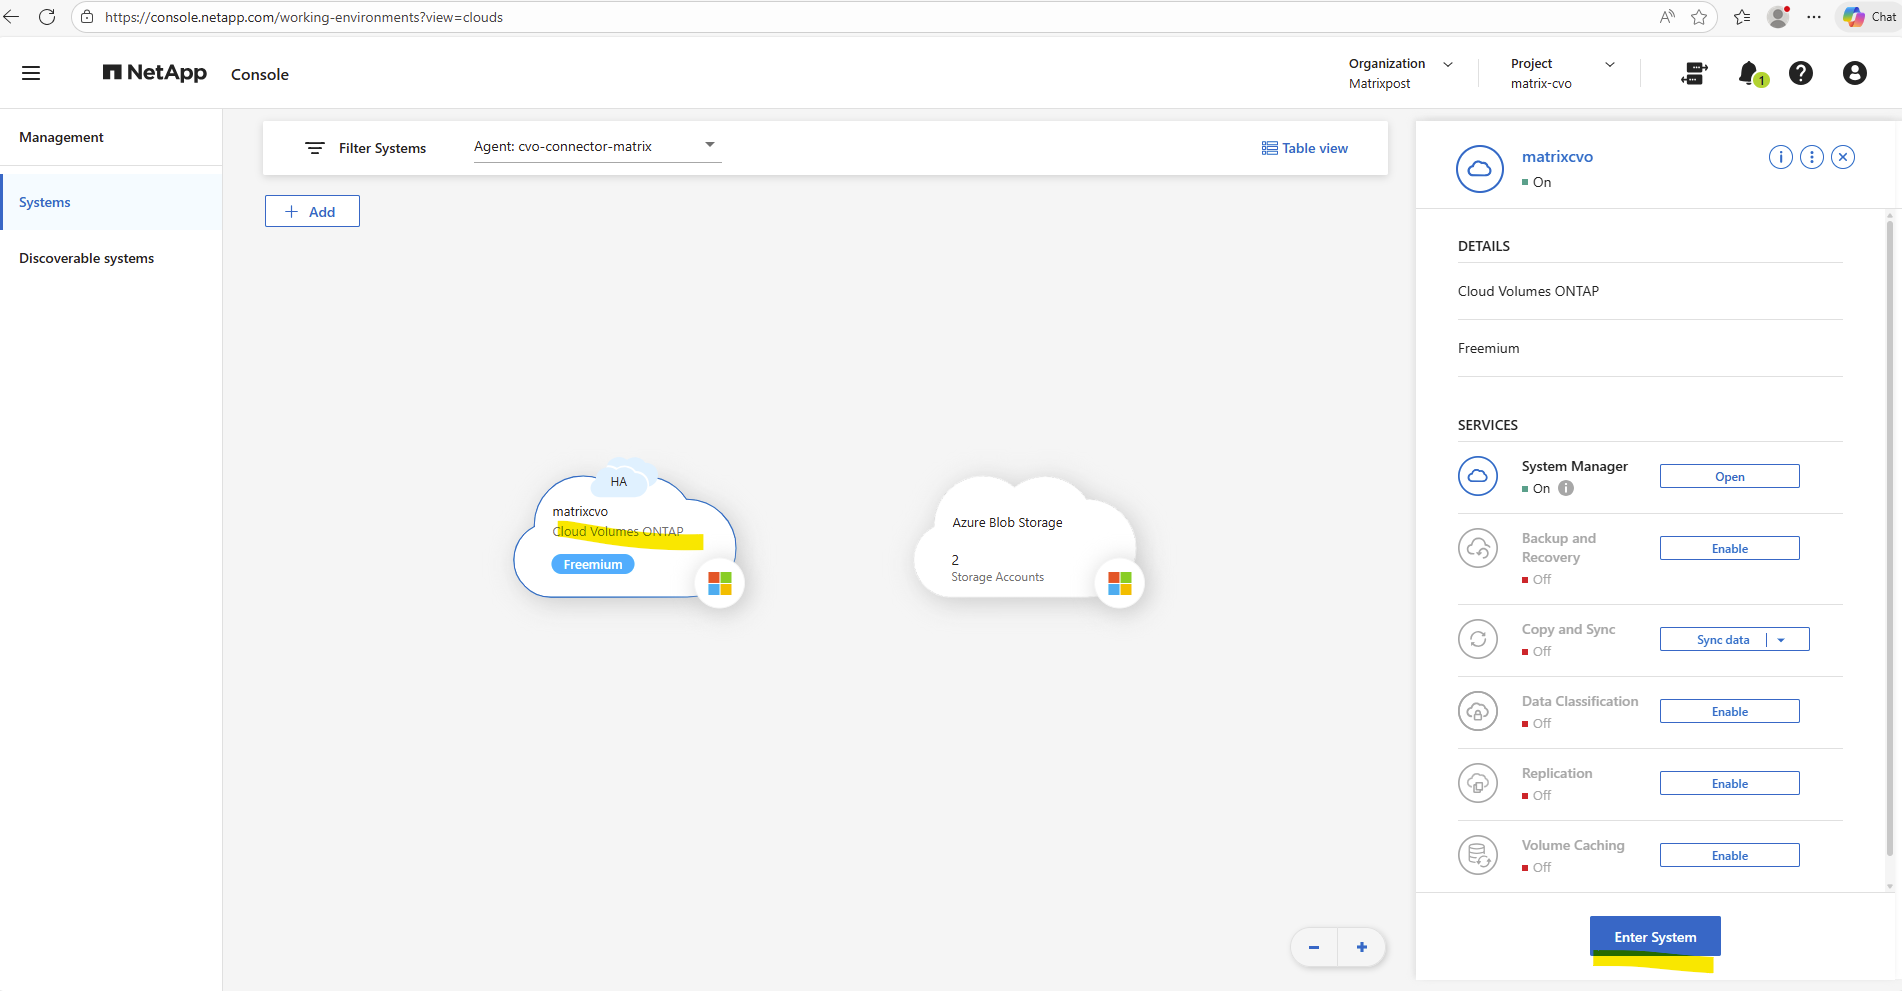
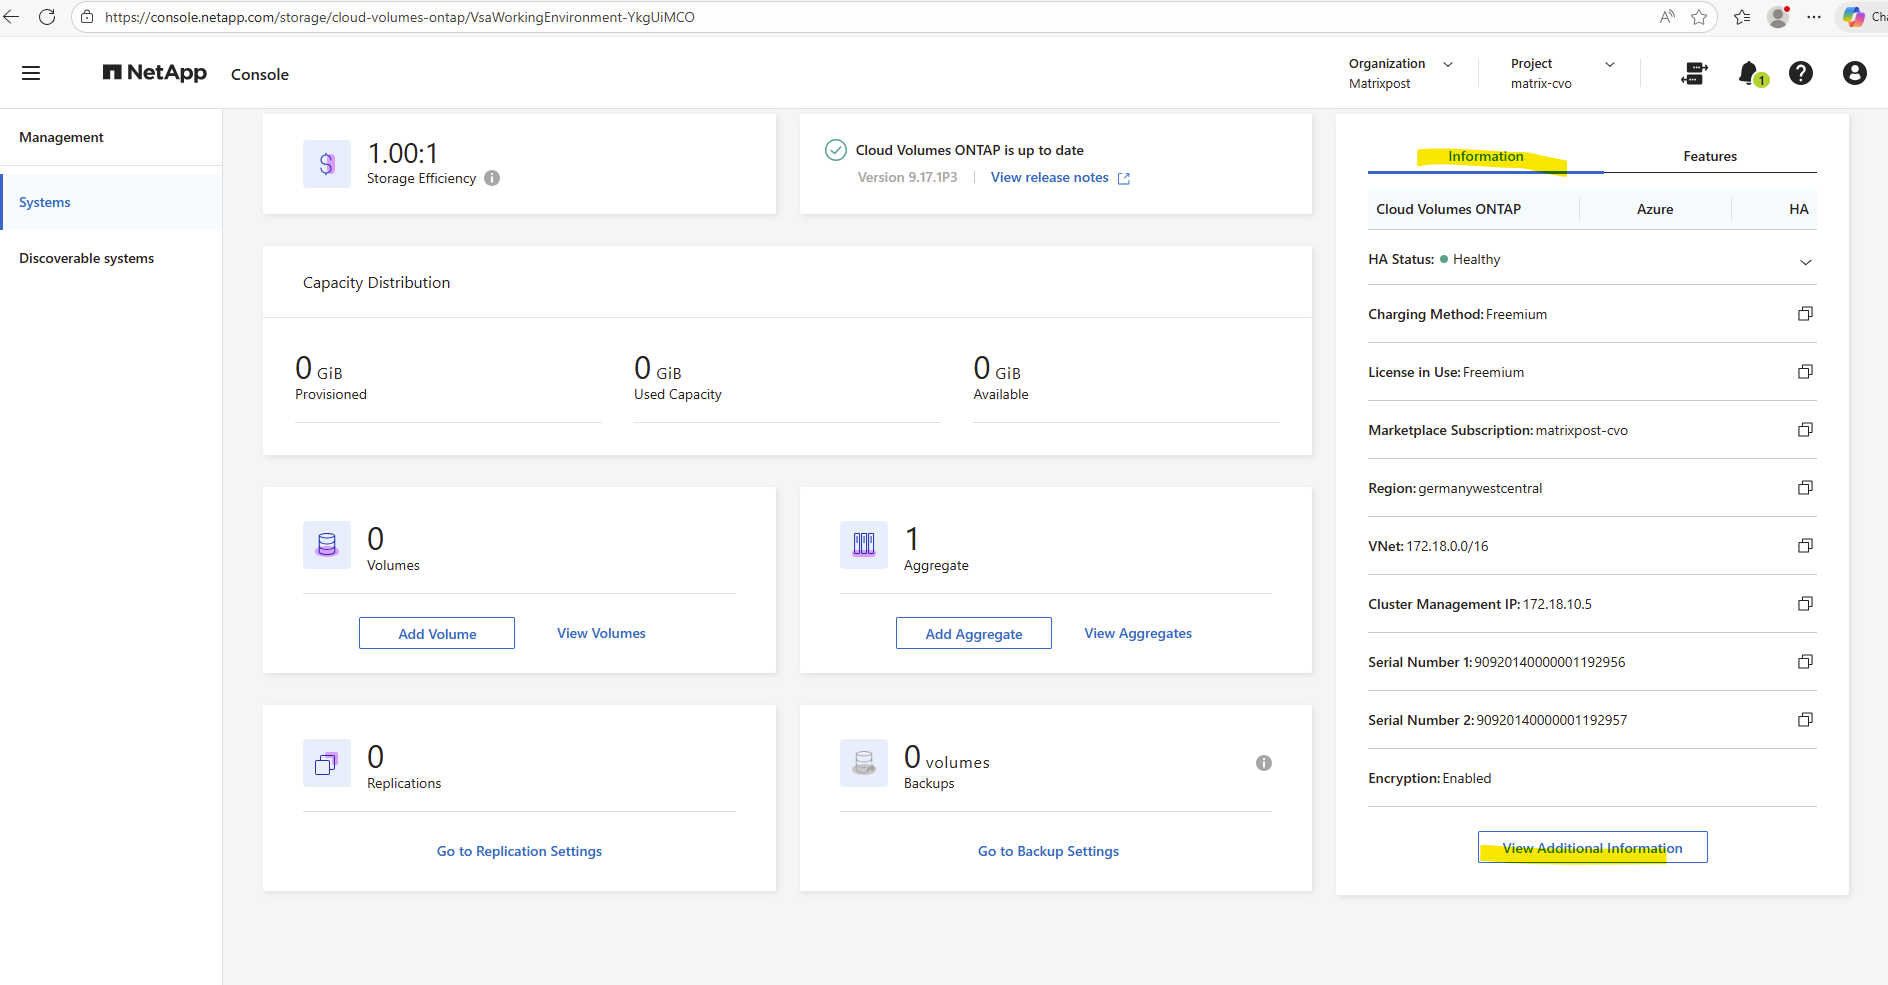
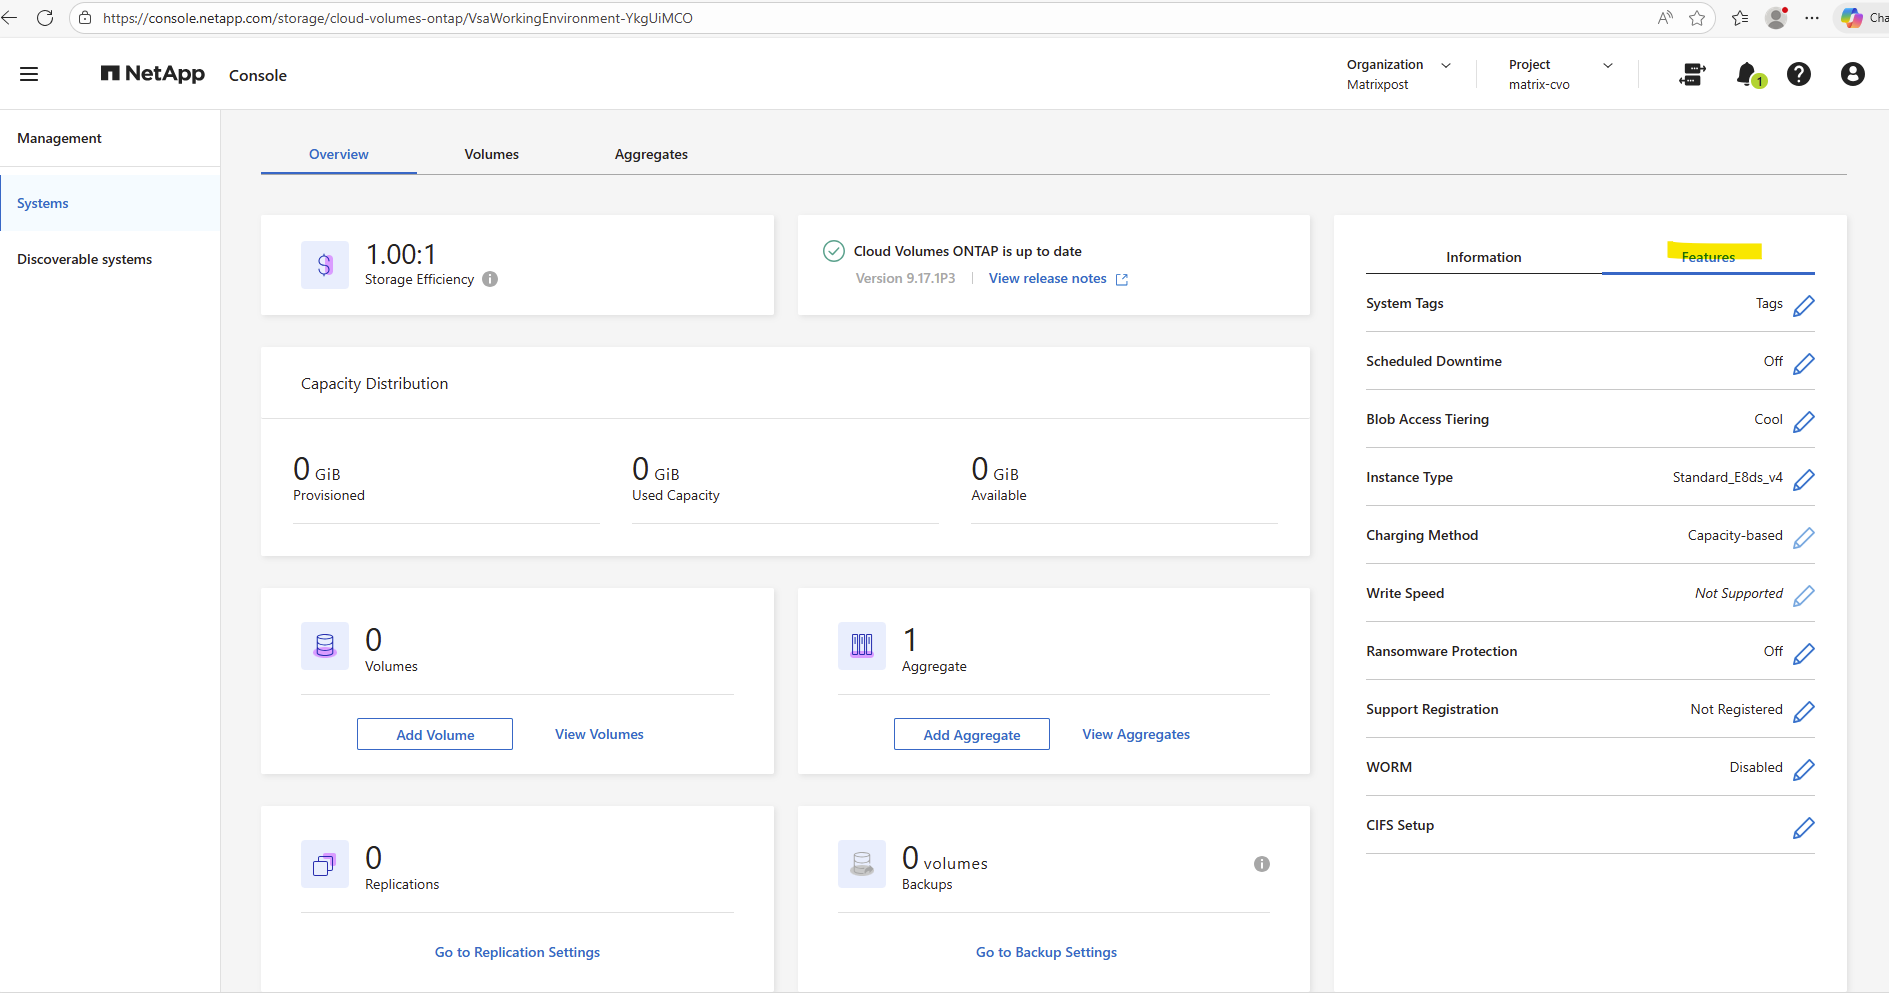
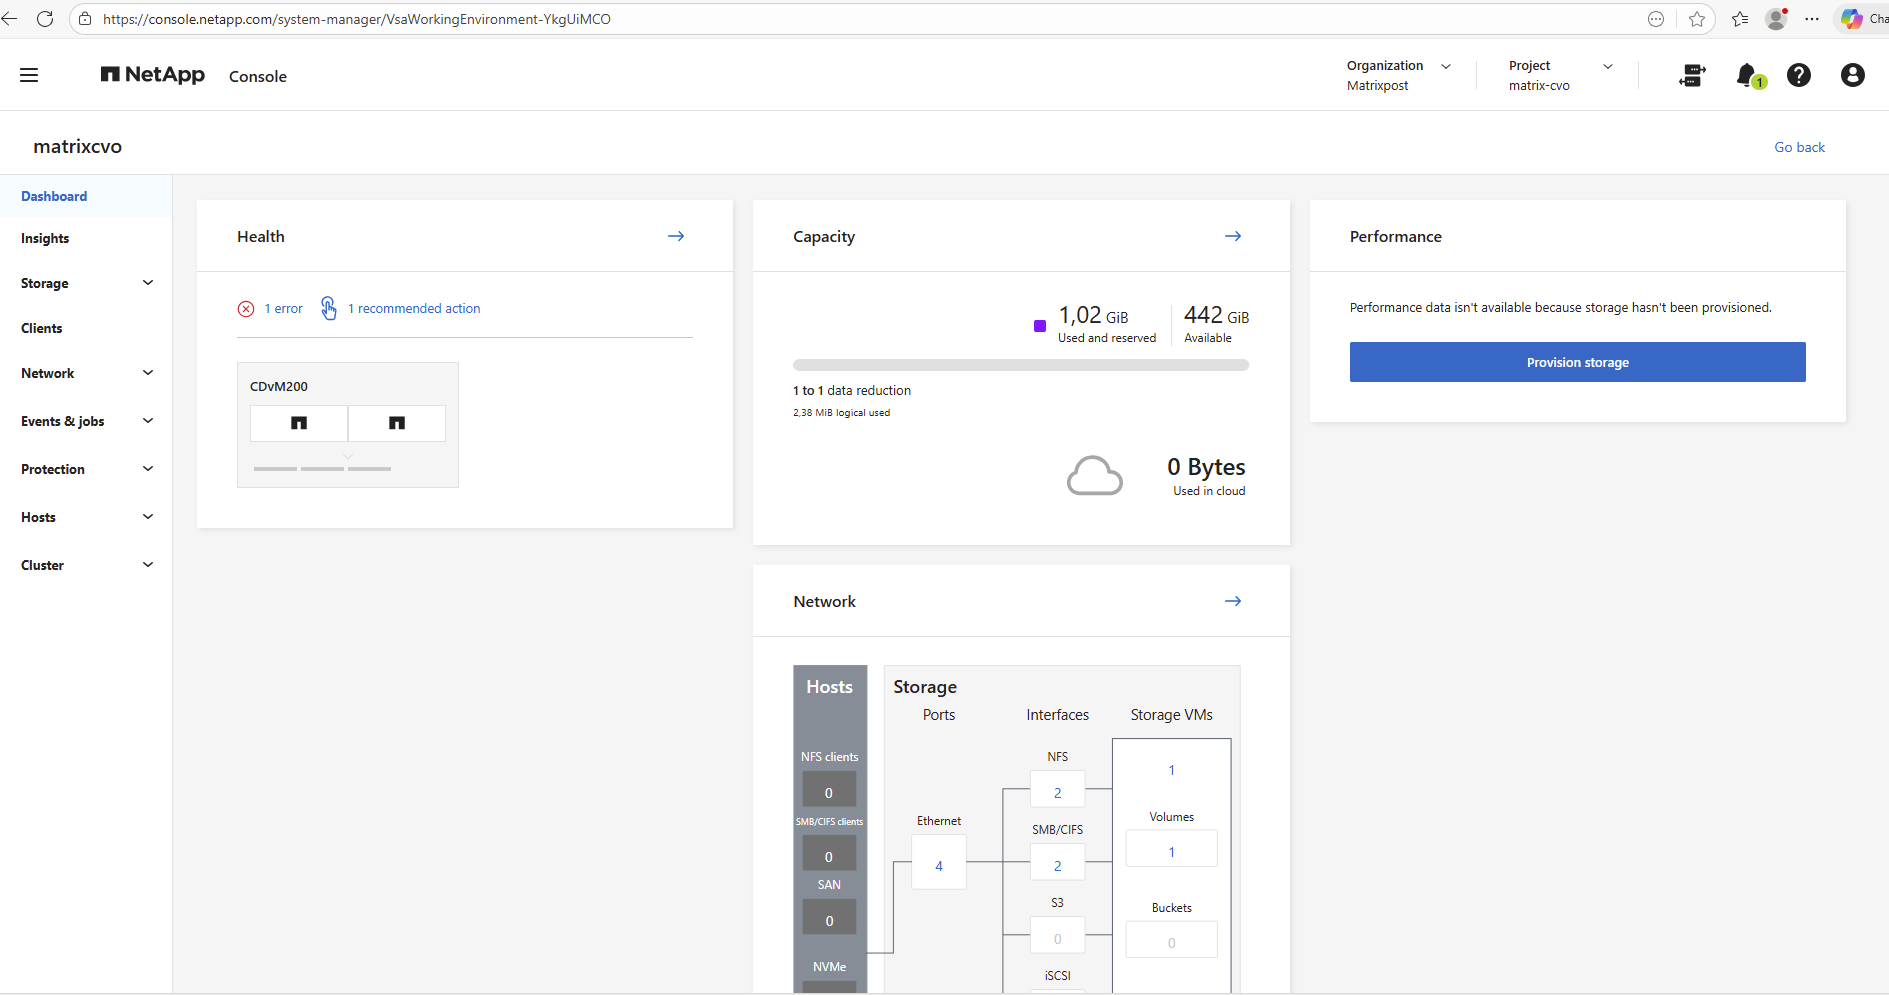
Below under Management -> Systems, selecting the Cloud Volume ONTAP tile and clicking on Enter System on the right-hand side, will open the ONTAP System Manager interface.
From there, the cluster can be fully managed, including storage, networking, and system configuration.
Click on View Additional Information.
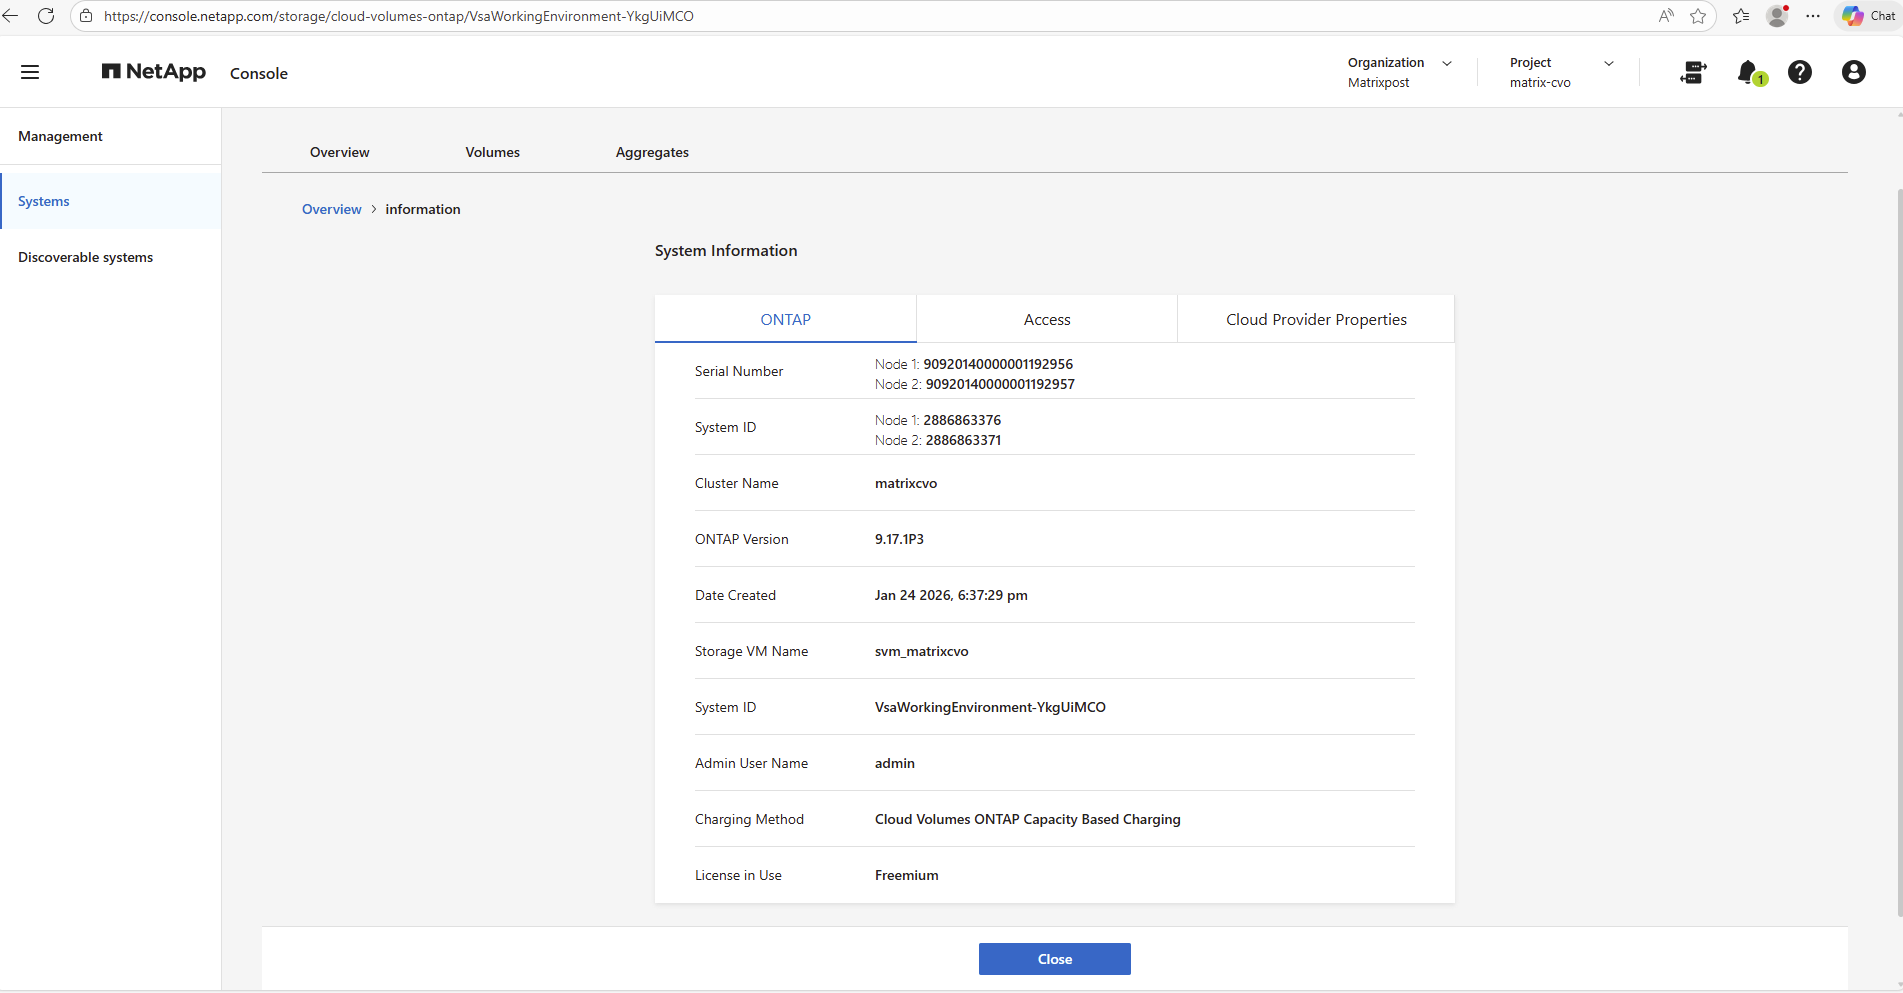
By clicking on the Cloud Volumes ONTAP tile and selecting System Manager from the right-hand panel, the ONTAP System Manager web interface is opened. This provides full access to cluster configuration, storage management, networking, and monitoring features.
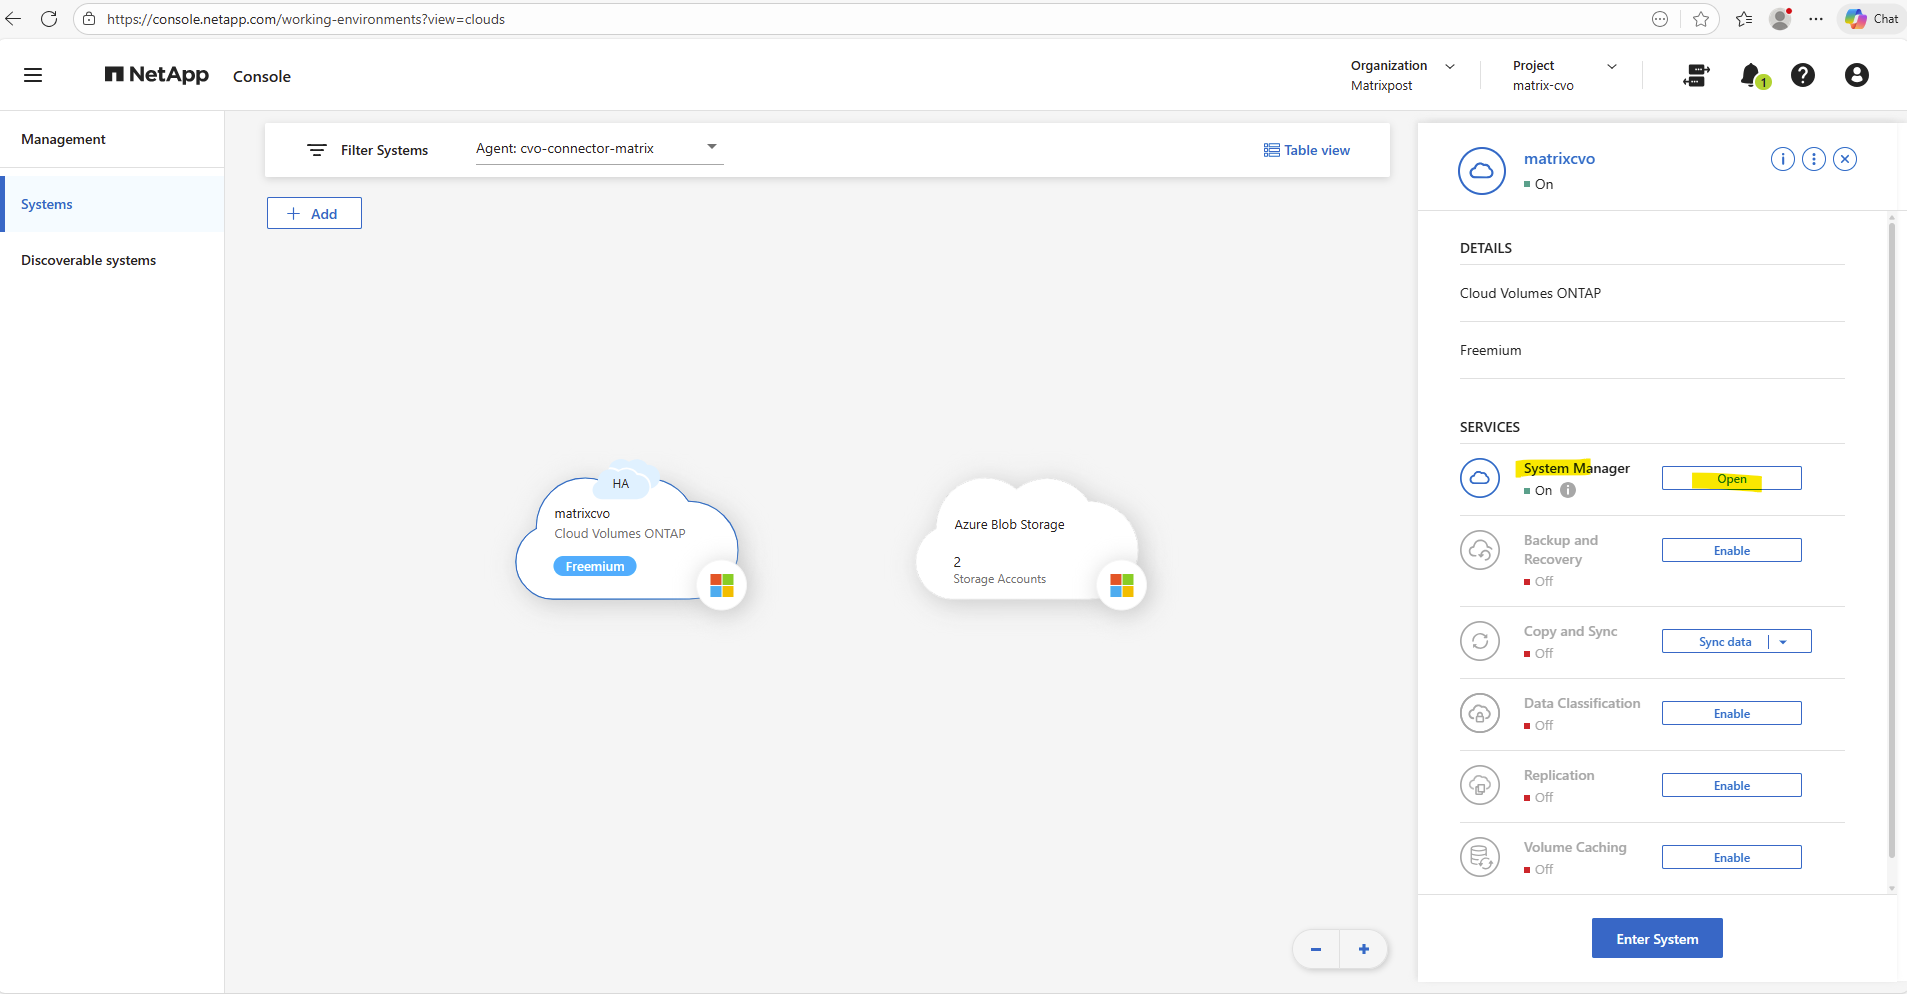
The well-known ONTAP web interface opens up, offering the same experience and management capabilities as a traditional on-premises deployment.
Access to ONTAP System Manager from the NetApp Console is provided through the Connector VM, which establishes an outbound, secure connection to NetApp services.
The web session is proxied through this connection, allowing access to the ONTAP Web UI without exposing the management interface directly to the internet.
Shut down the HA pair gracefully in Azure
For lab environments, it’s recommended to shut down the Cloud Volumes ONTAP HA pair when not in use to avoid unnecessary Azure infrastructure costs.
Since the HA nodes run on dedicated virtual machines, keeping them powered on 24/7 can quickly generate avoidable expenses.
Performing a graceful shutdown ensures data consistency while helping to significantly reduce ongoing cloud costs.
When using
system node halt -node *, ONTAP performs a coordinated shutdown and requires healthy HA communication and successful LIF migration between nodes.
matrixcvo::> system node halt -node * -inhibit-takeover true -ignore-quorum-warnings true
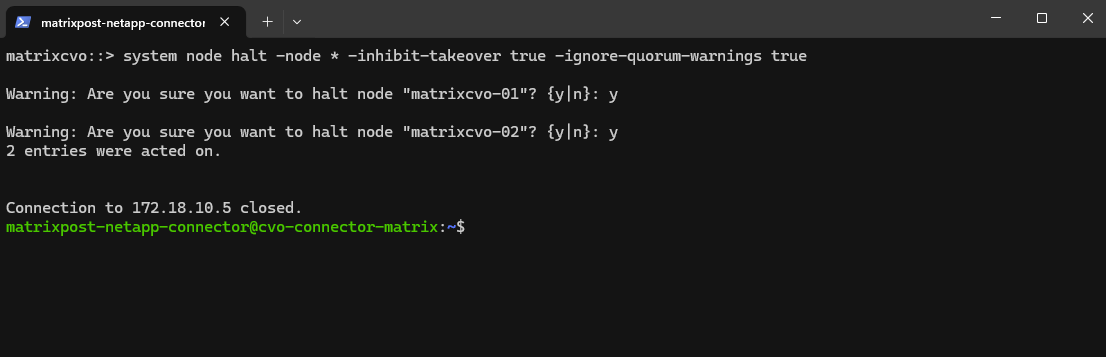
If one node is already down or unreachable, the command fails by design to prevent data or management loss.
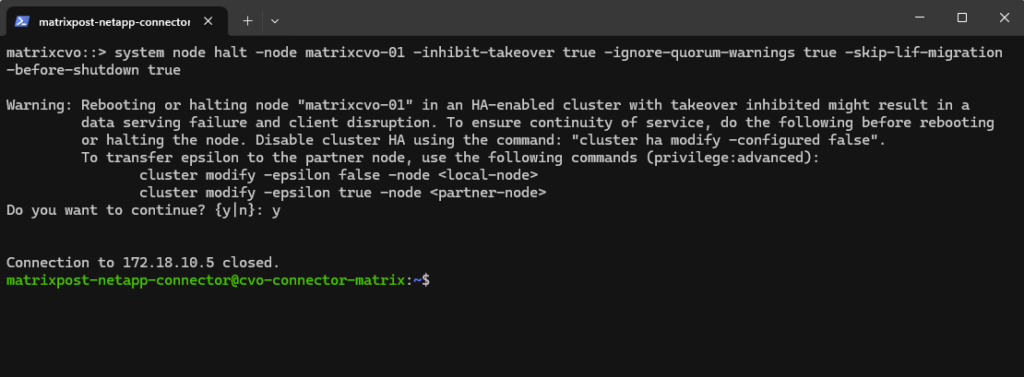
In such cases, a forced single-node shutdown like shown below for the first command using -skip-lif-migration-before-shutdown is required, but should only be used when HA is already broken and downtime is acceptable.
matrixcvo::> system node halt -node matrixcvo-01 -inhibit-takeover true -ignore-quorum-warnings true -skip-lif-migration-before-shutdown true
When Cloud Volumes ONTAP is shut down using the ONTAP CLI, the system enters a safe halted state indicated by
SRM_F_POWEROFF-VM.This is expected behavior and confirms that the storage system was cleanly stopped before deallocating the virtual machines.
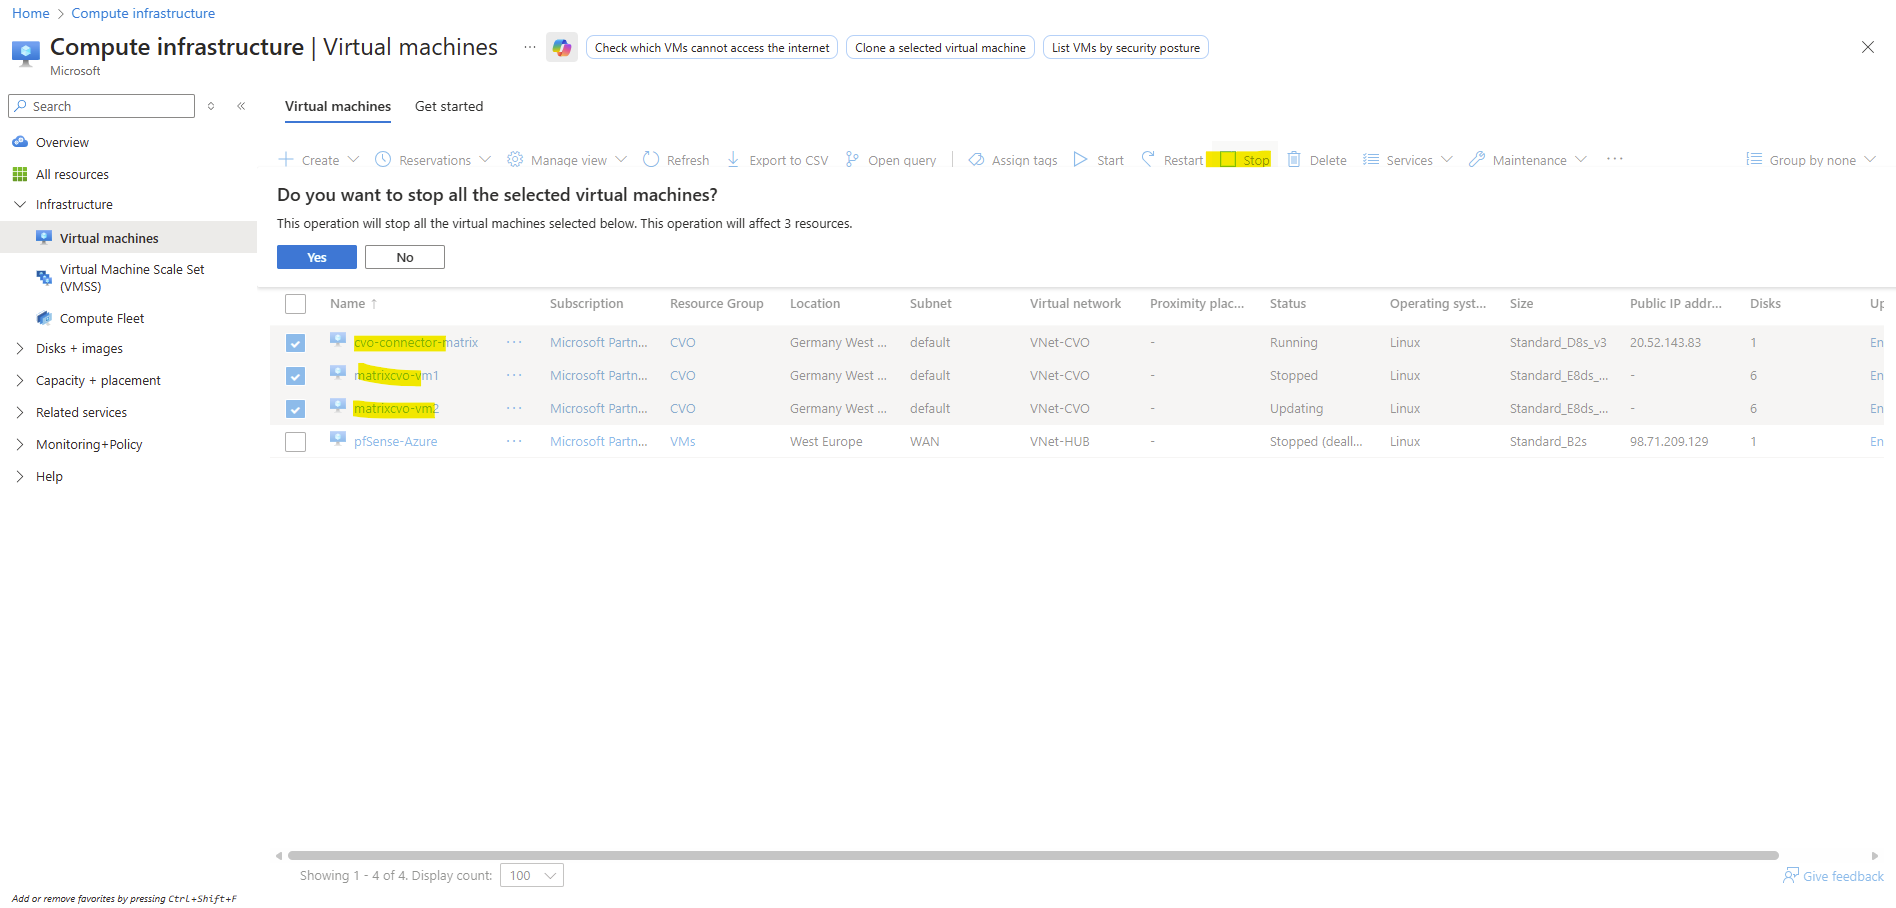
To finally deallocate both nodes (VMs) and also the Connector VM, click on Stop. The public IP address from the Connector VM we can release to avoid costs.
The public IP assigned to the BlueXP Connector is only required for administrative SSH access and is not used for any NetApp or Cloud Volumes ONTAP communication. Also not for the NetApp console.
BlueXP operates as a SaaS control plane that communicates with the Connector over outbound HTTPS, while all management of Cloud Volumes ONTAP occurs privately within the Azure virtual network.
The BlueXP Connector establishes an outbound HTTPS connection to the NetApp SaaS platform, allowing management of Cloud Volumes ONTAP without any inbound access to the Azure environment.
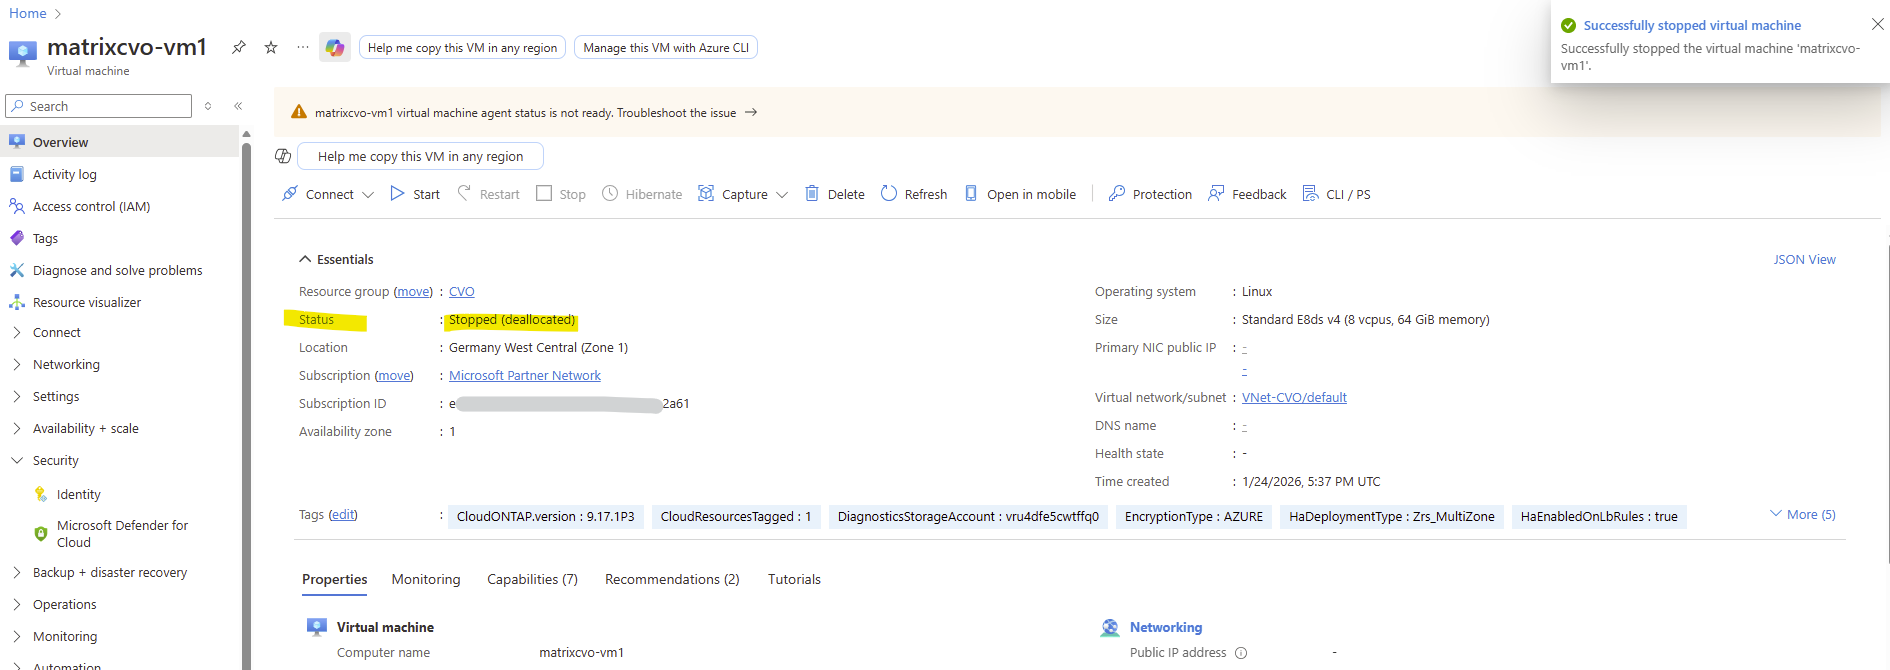
Stopped means the VM is powered off but still allocated to the host, so compute charges may continue to apply.
Stopped (deallocated) releases the VM’s compute resources back to Azure, stopping all compute costs while preserving disks and configuration.
For cost savings, especially in labs, always ensure VMs are in the Stopped (deallocated) state.
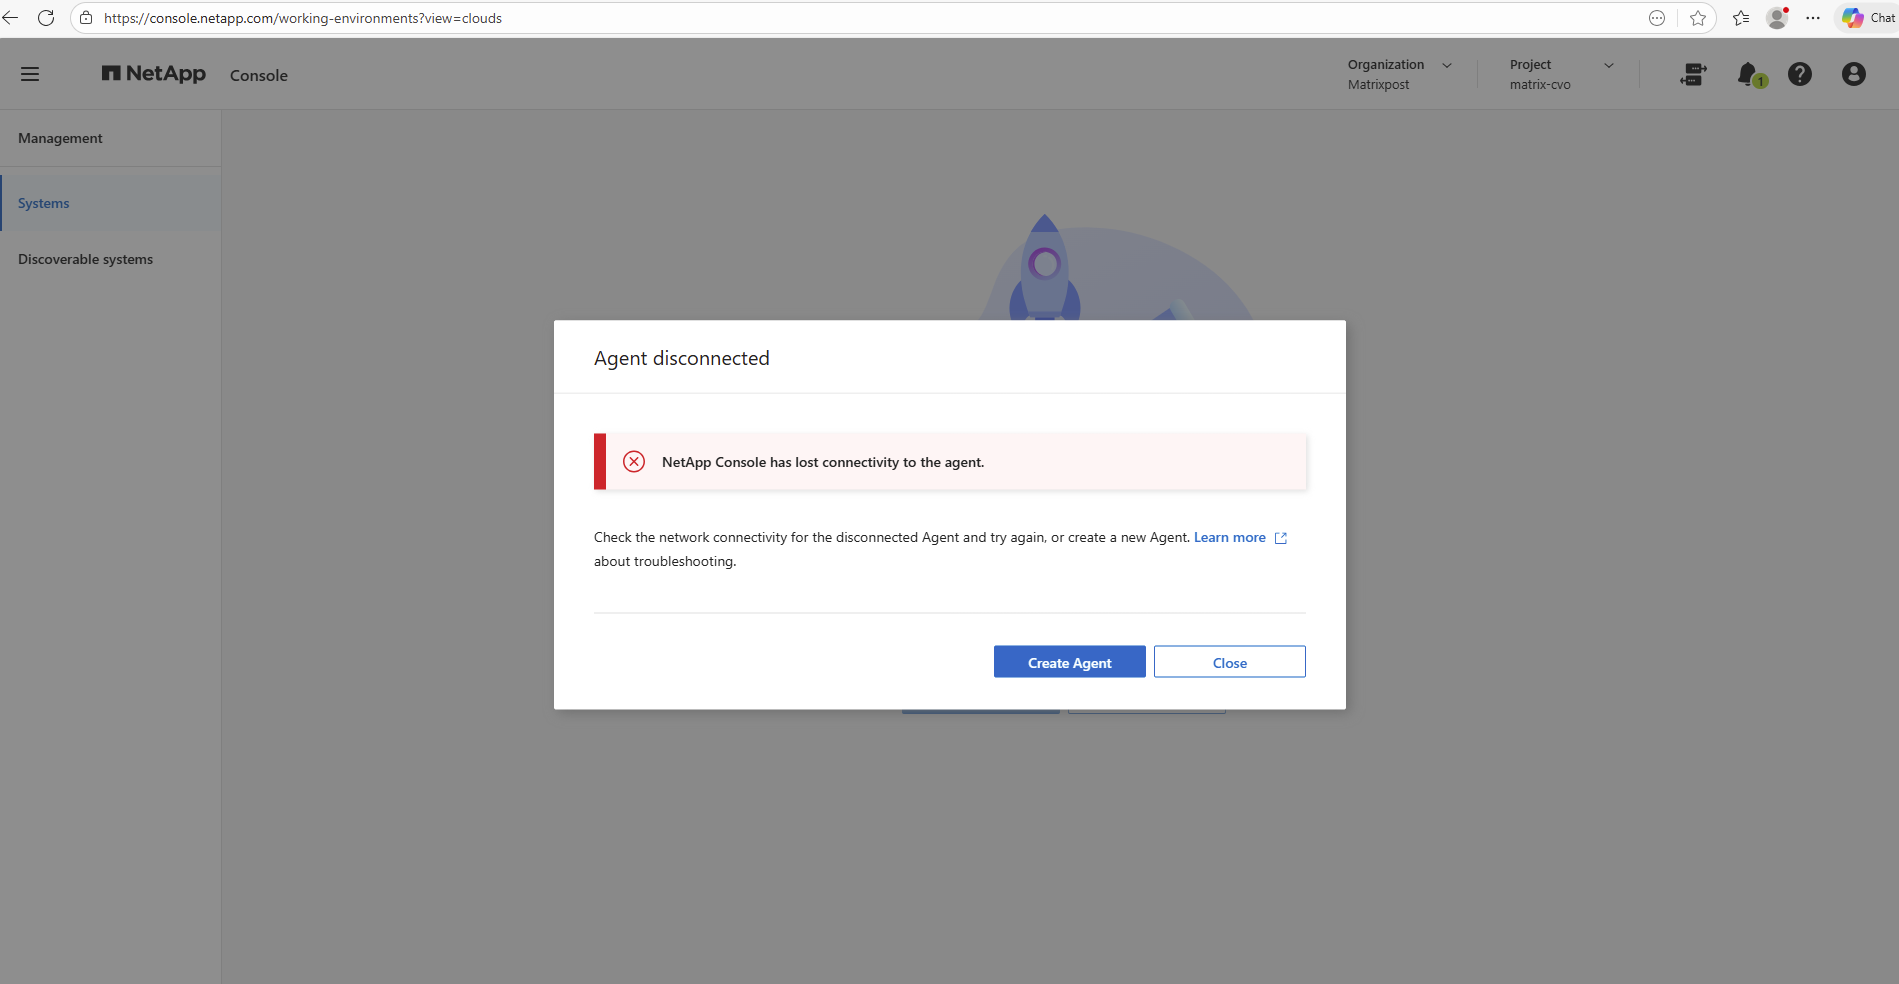
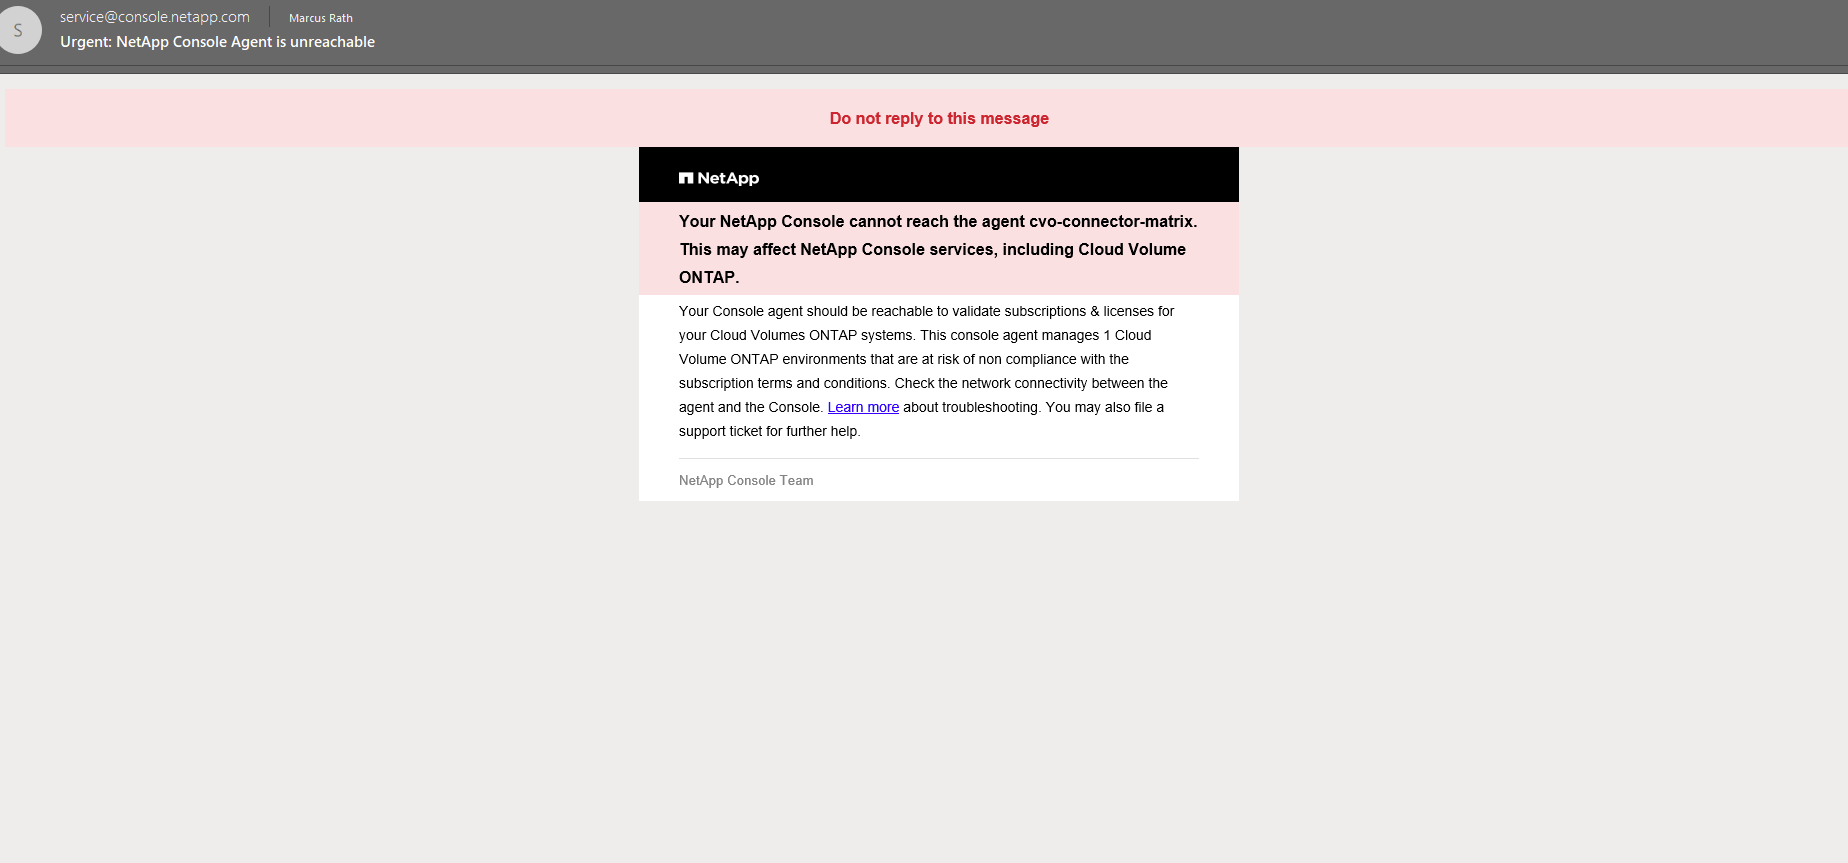
After shutting down all three VMs (both CVO nodes and the Connector), the NetApp console correctly reports that it has lost connectivity to the agent.
This is expected behavior, as the Connector VM is responsible for maintaining the outbound connection to the NetApp console, and once it is stopped, management access is temporarily unavailable.
A few hours later after shutting down the Agent (connector VM), we also get an email that the NetApp console cannot reach our Agent (connector VM).
Power On the Azure HA pair (ONTAP Nodes) and Agent (Connector VM)
In a lab environment like in my case, it’s common to shut down Cloud Volumes ONTAP and the Connector VM to avoid unnecessary costs.
After starting the CVO nodes and the Connector again, the system can be verified by connecting to the ONTAP CLI and checking the cluster, node, and HA status to ensure everything is up and running as expected.
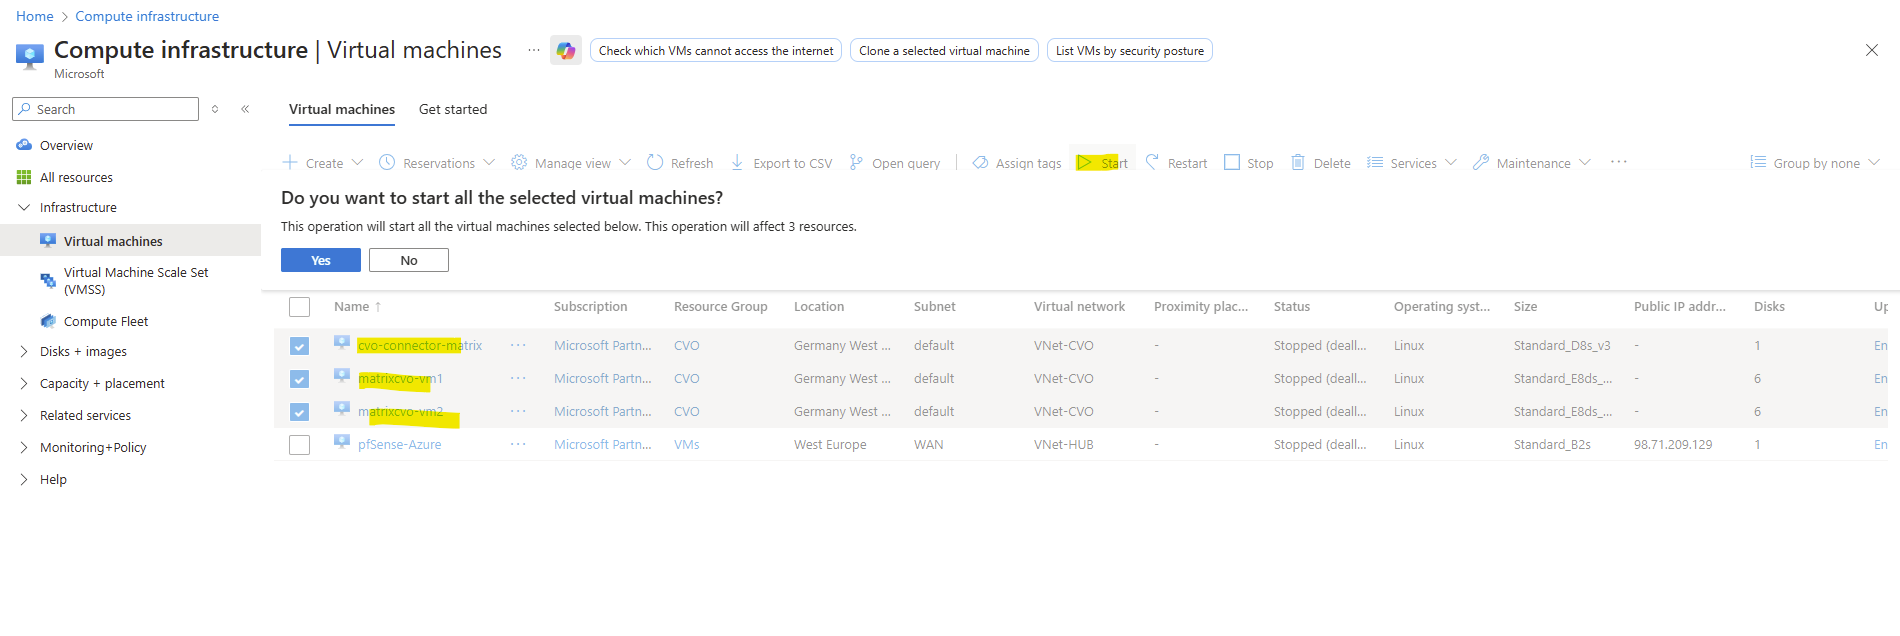
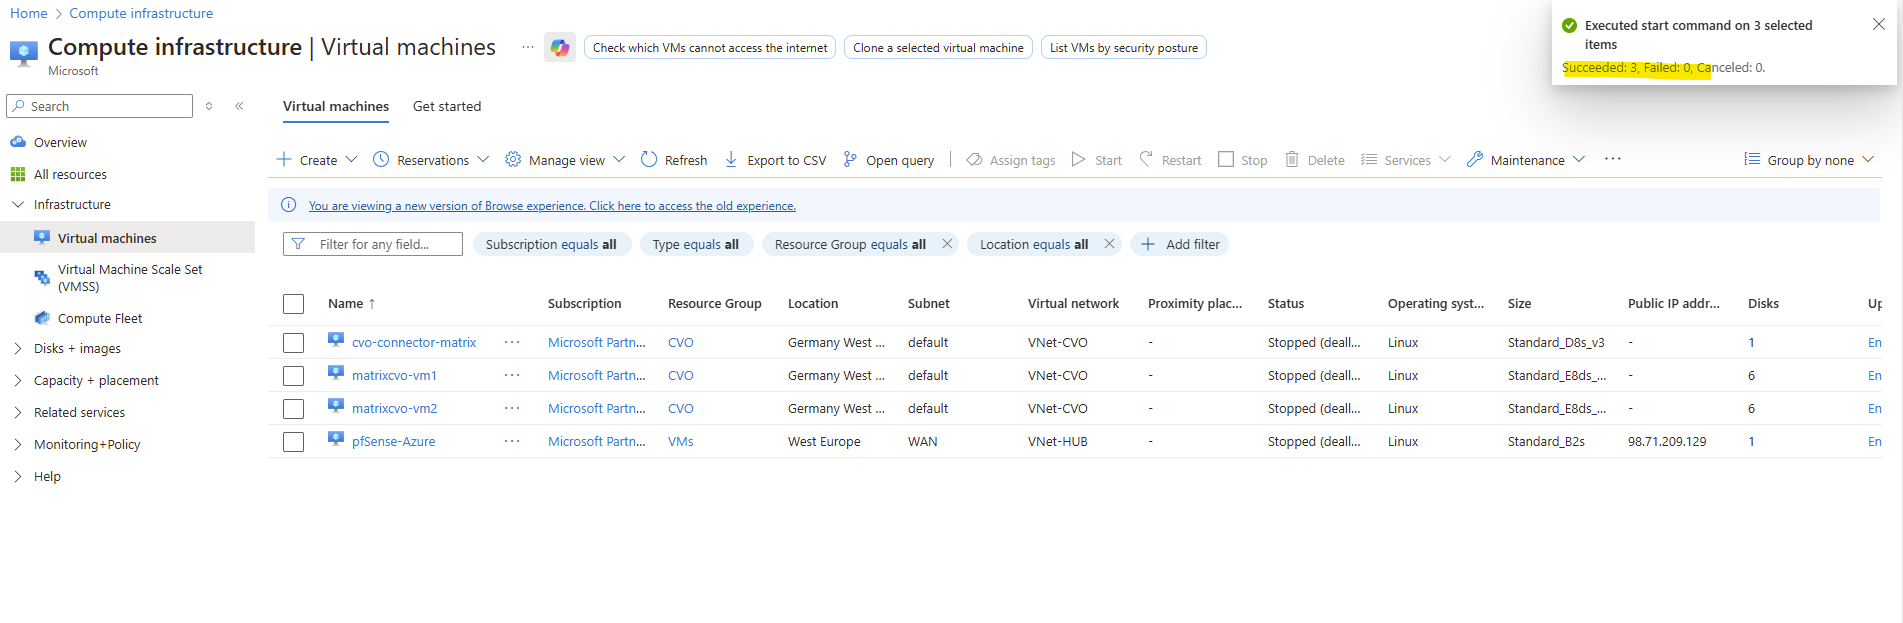
So first I will start all three Azure VMs again.
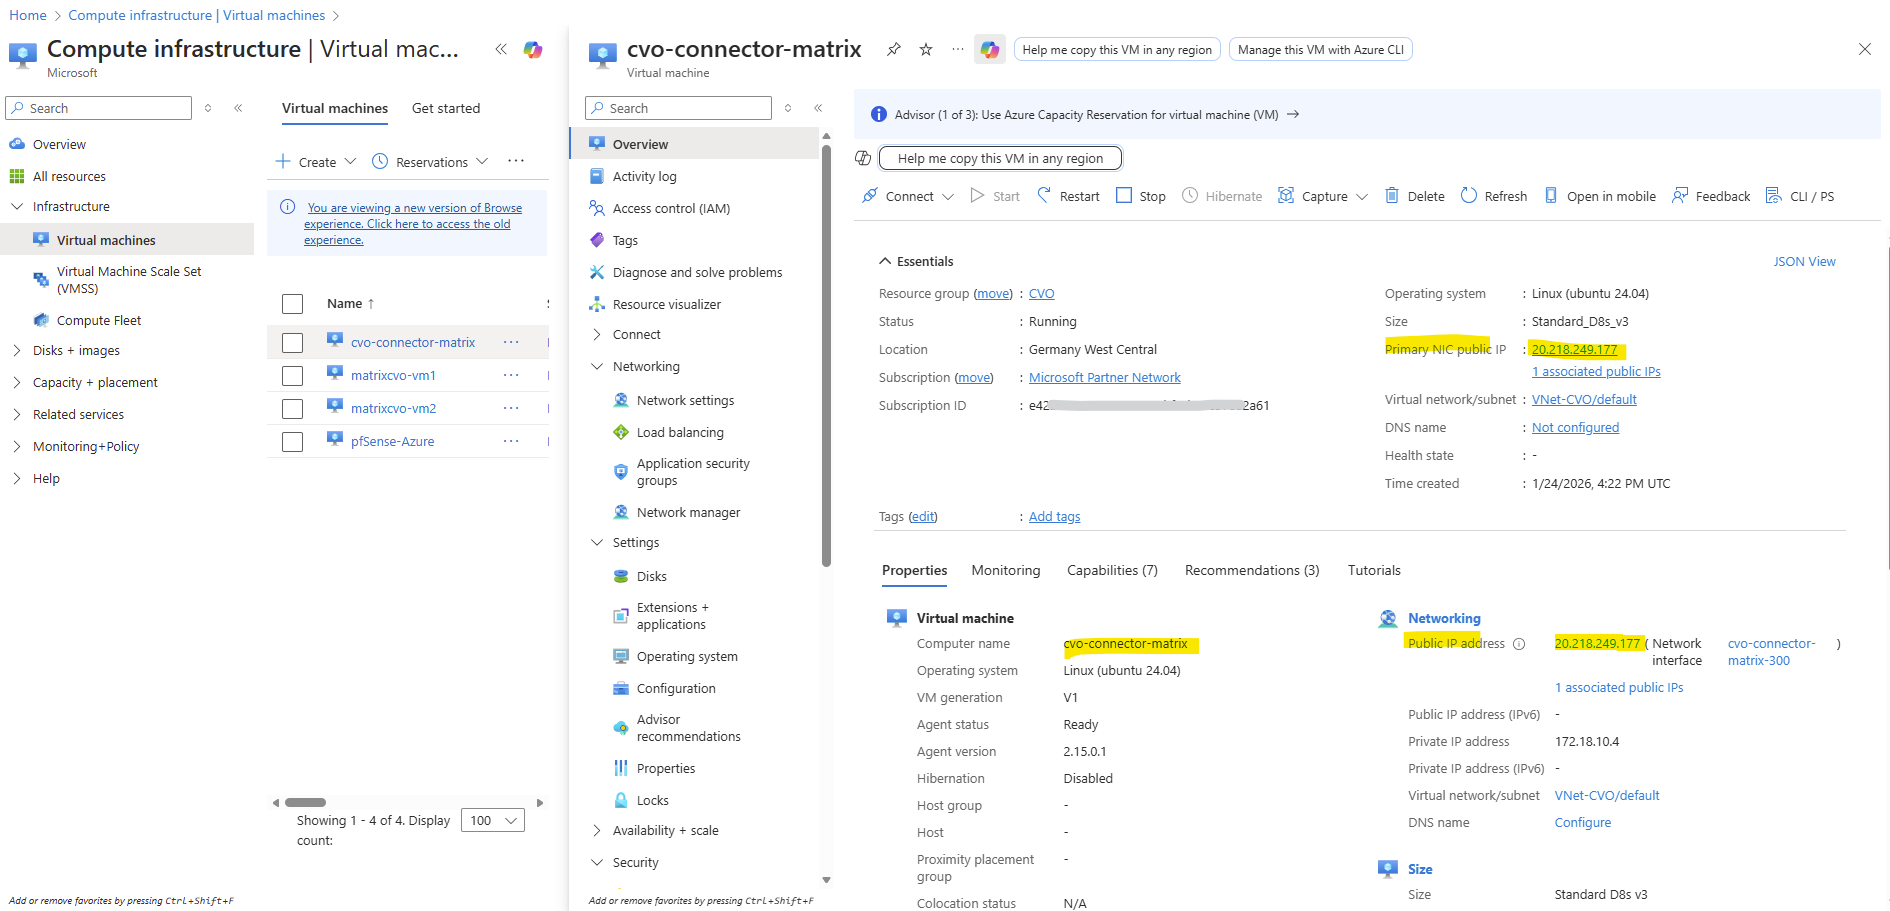
I will connect to the Agent (Connector VM) by using SSH and the new public IP address.
To avoid unnecessary costs in the lab environment, the public IP address of the Connector VM is released when the VM is shut down.
When the Connector is started again and SSH access is required, a new public IP is assigned and must be determined before connecting to the VM.
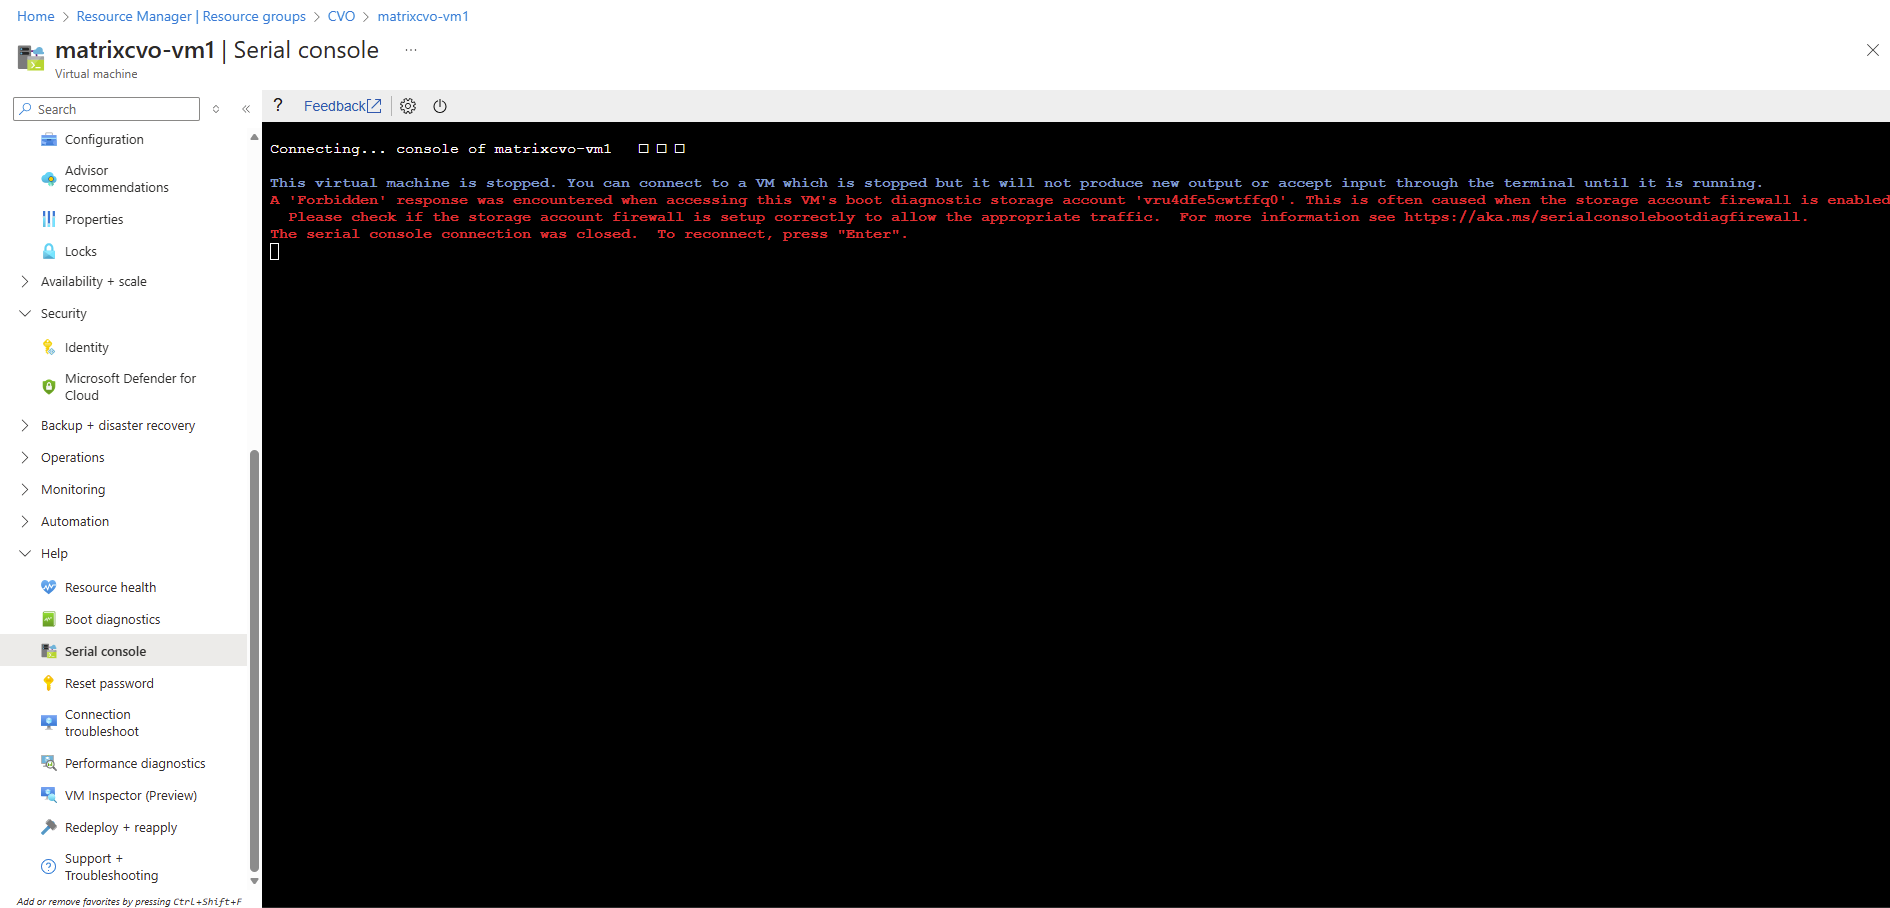
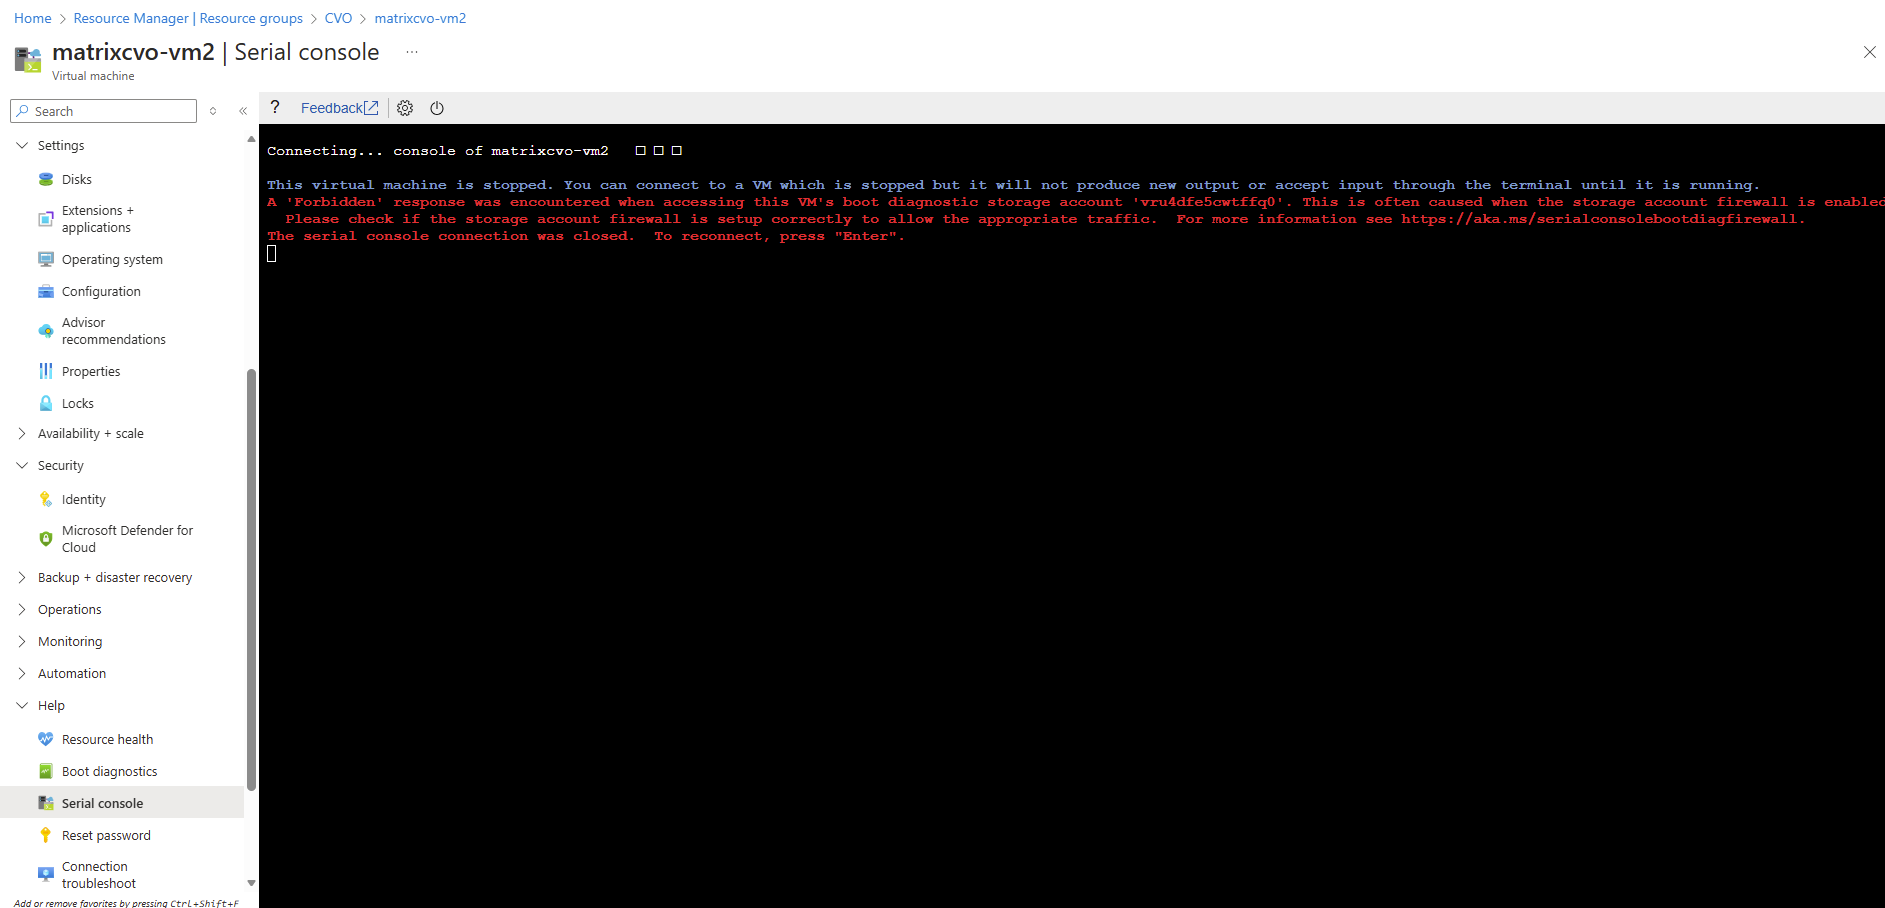
To connect to the Agent (Connector VM) we can use either the serial console in the Azure portal (no public IP needed) or connecting from remote through SSH and the public IP of the Agent VM.
By using the serial console we first need to enable boot diagnostics for the Agent VM.
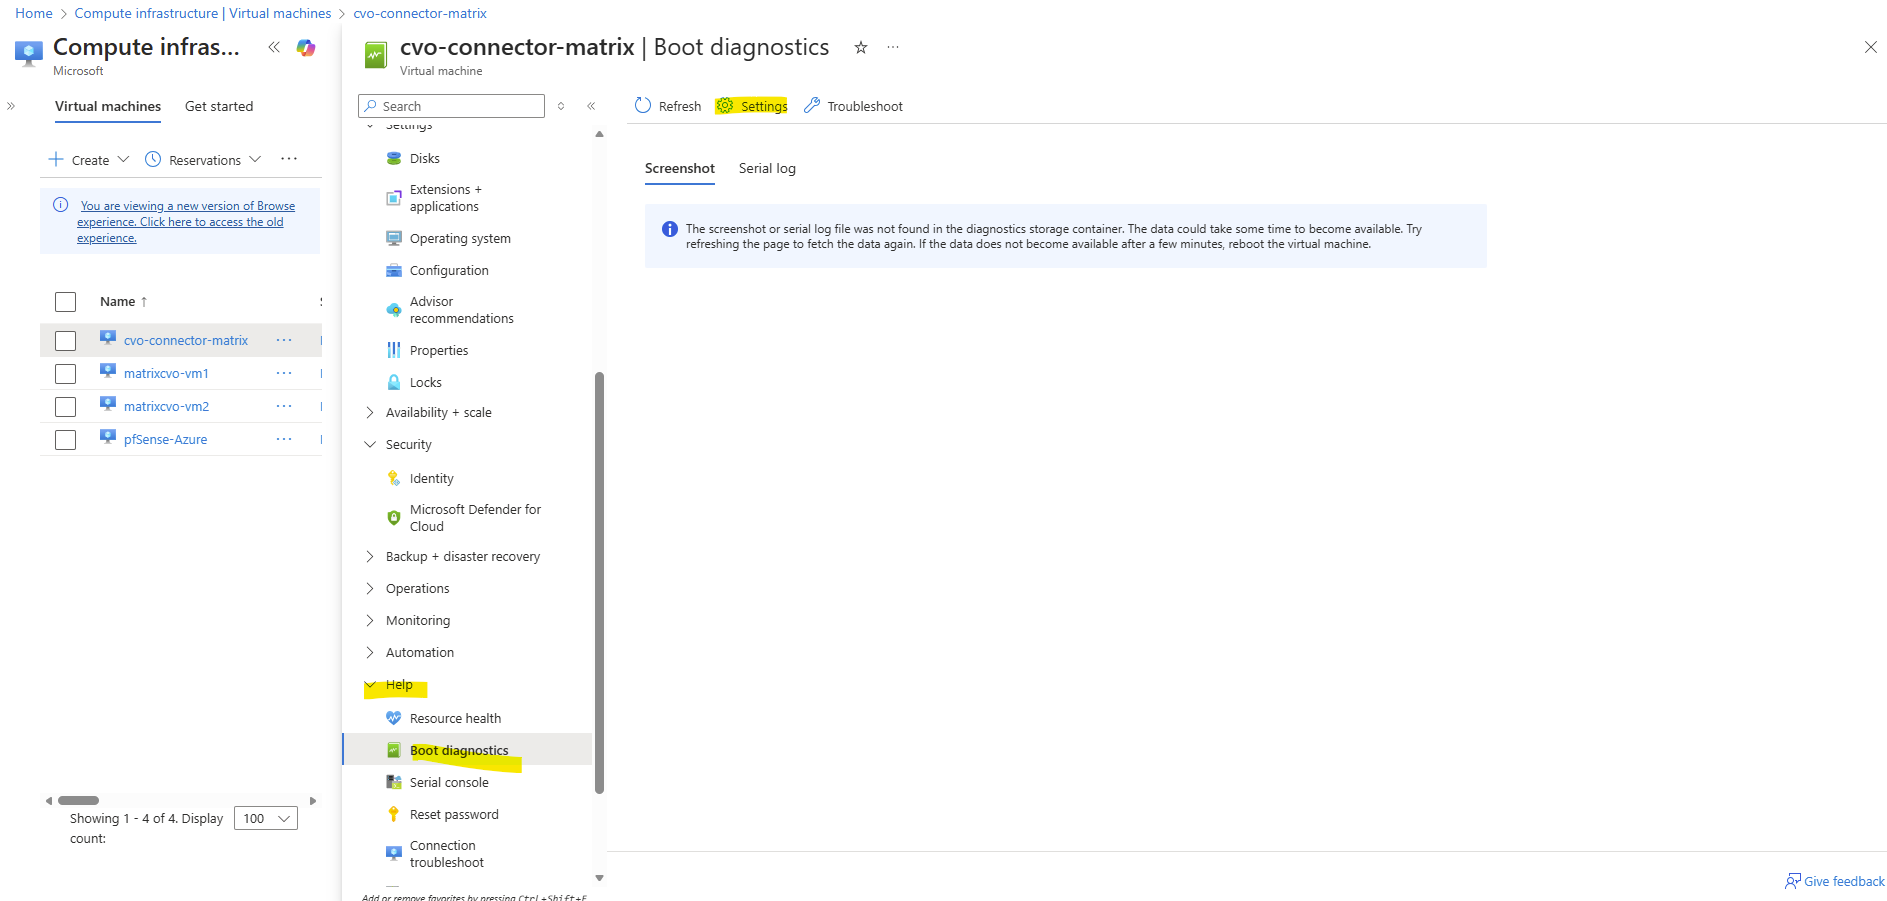

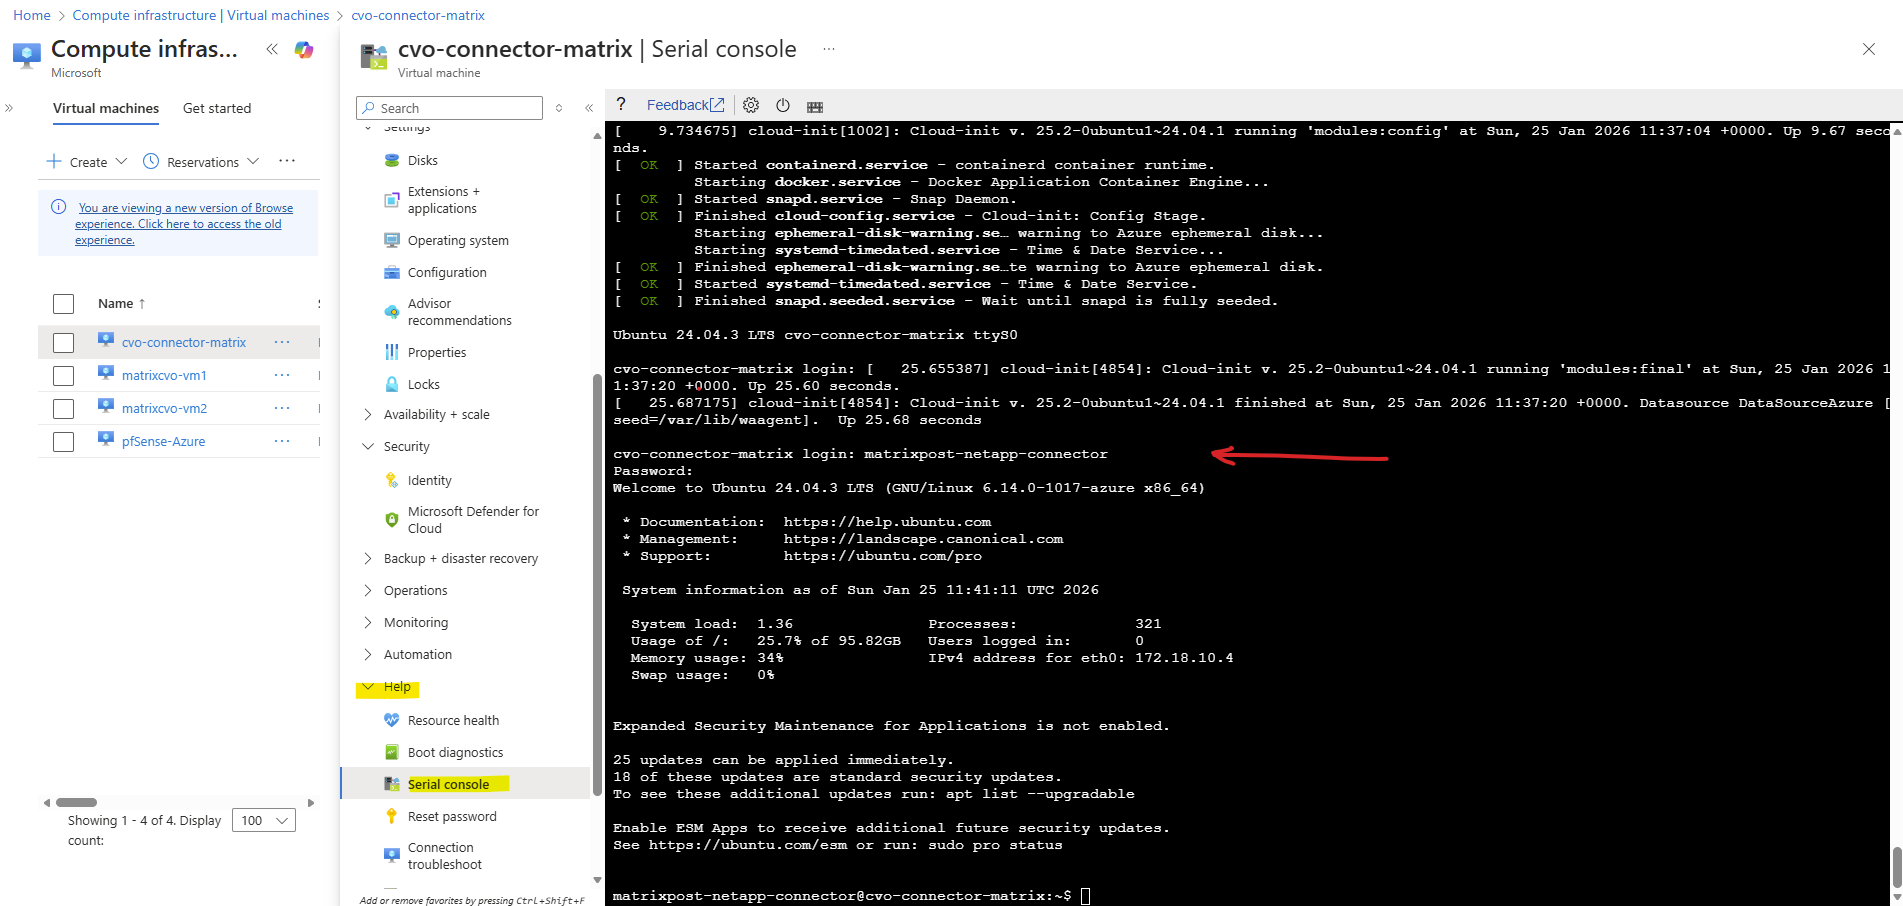
Finally we can login to the Agent by using the serial console.
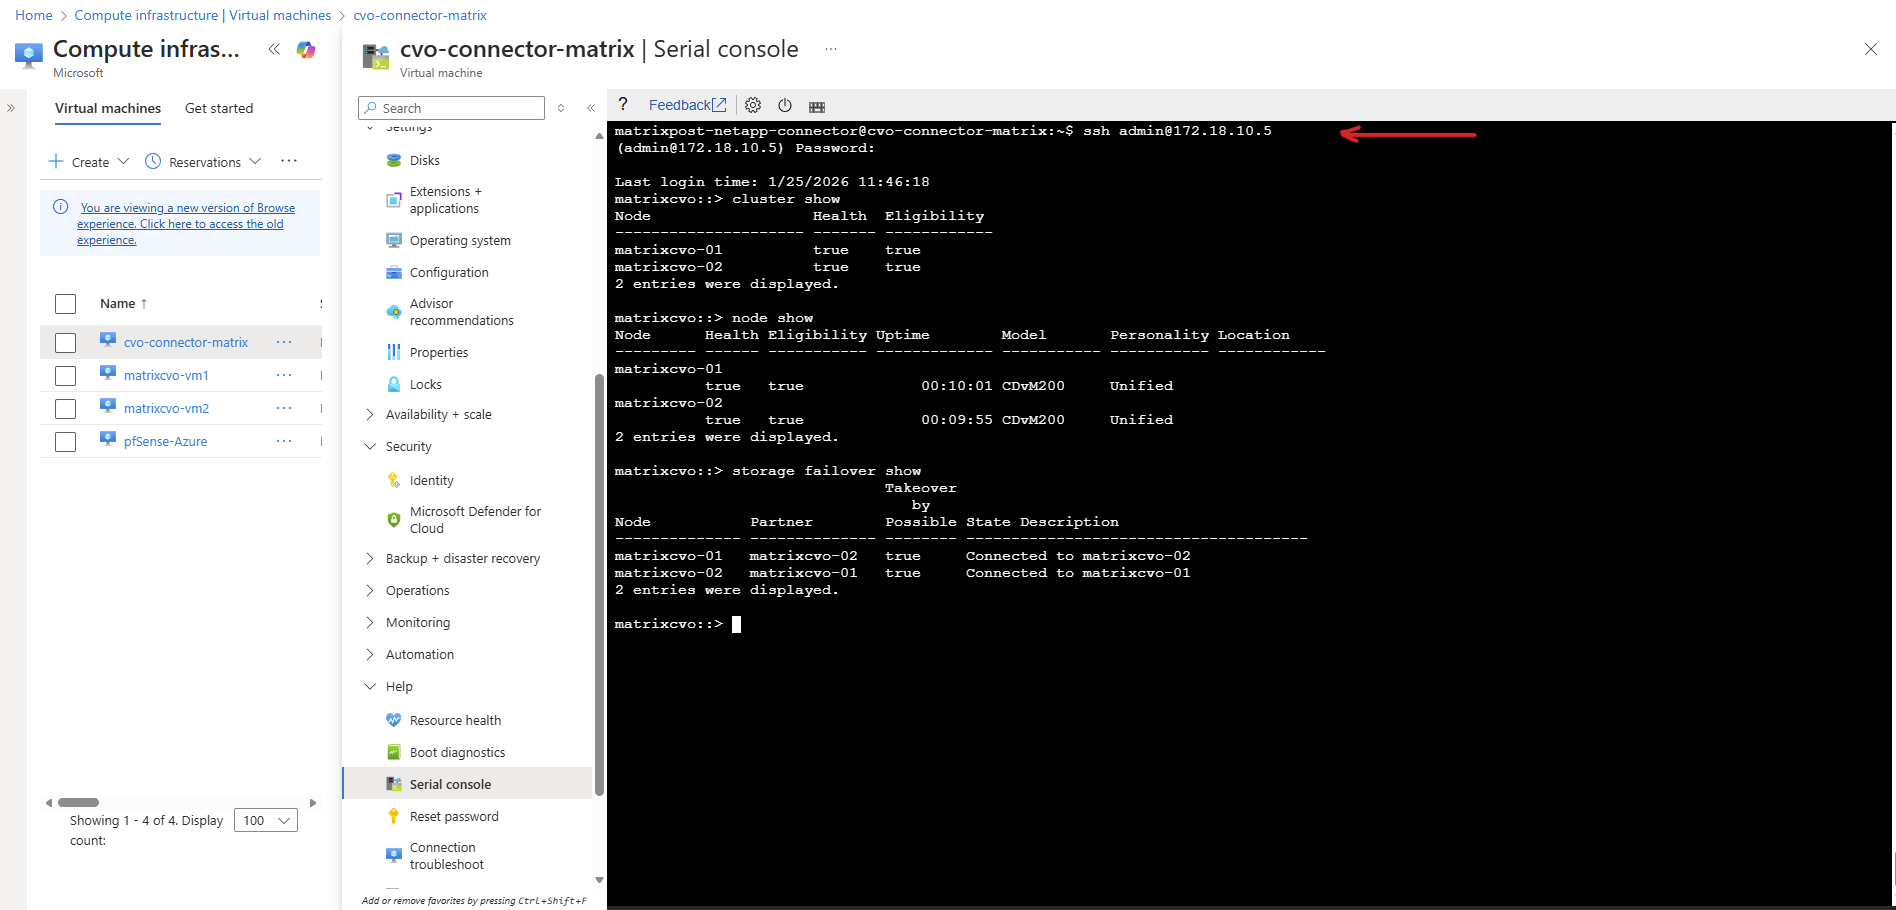
And connecting to the ONTAP cluster by using SSH and the cluster IP finally.
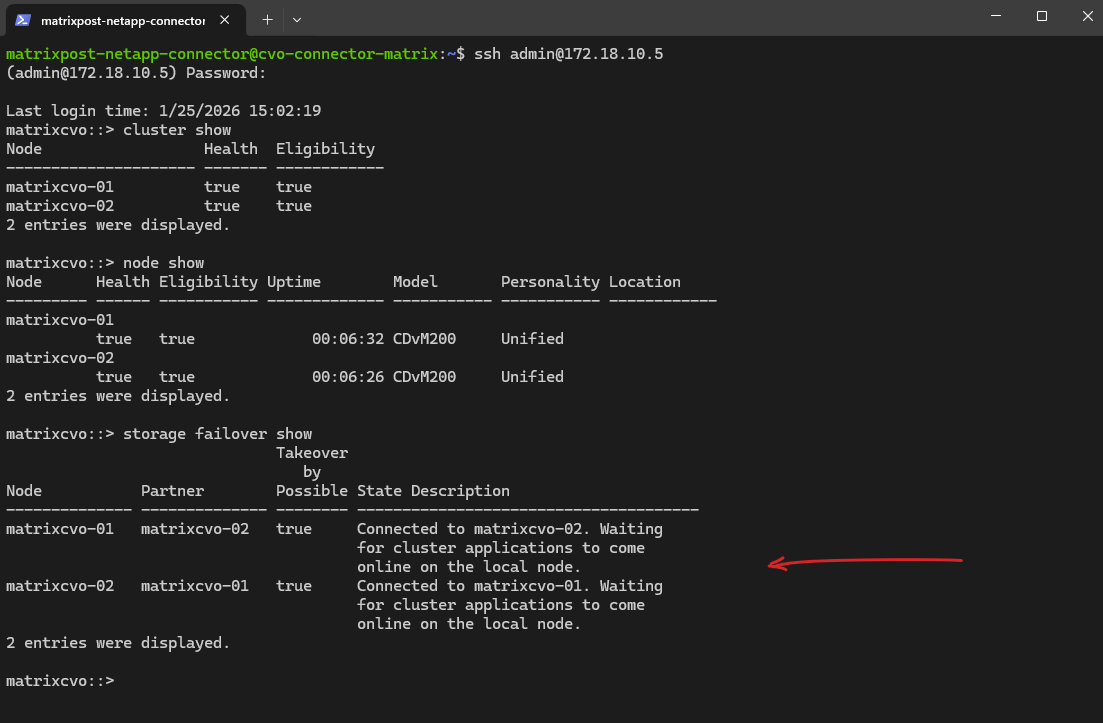
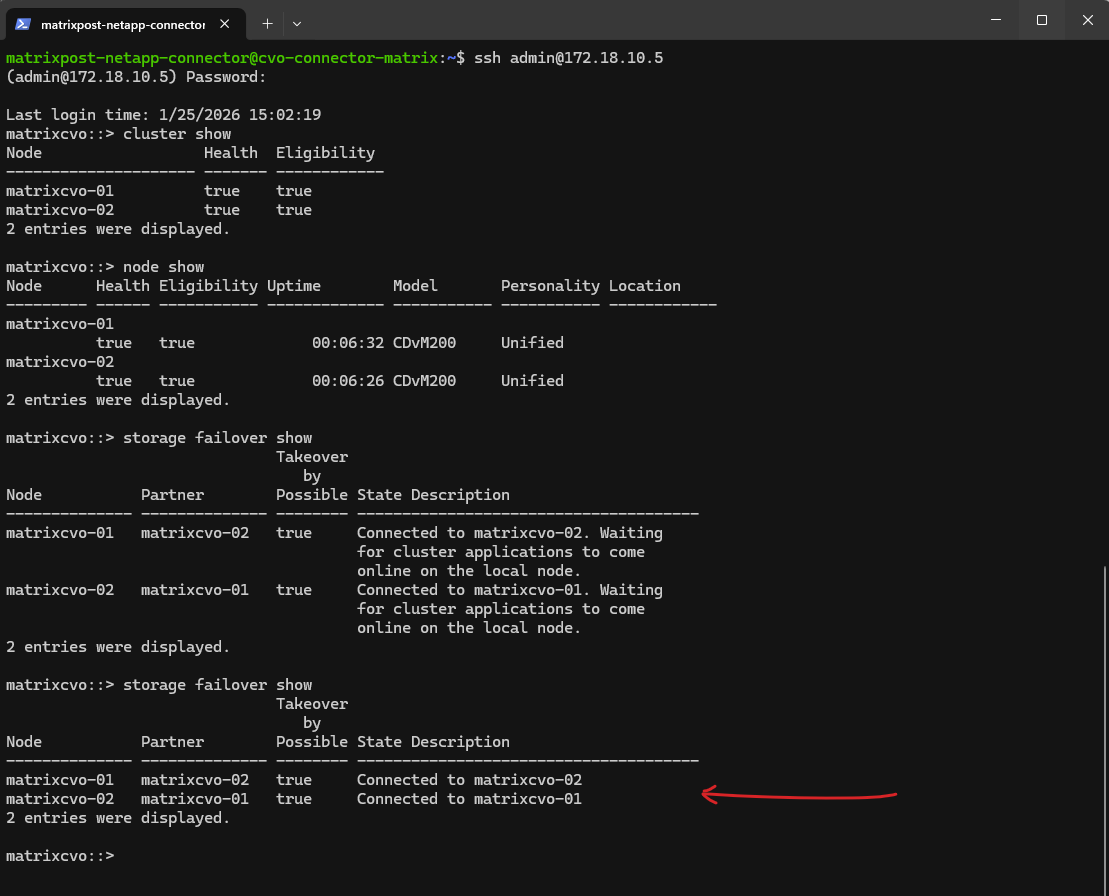
In ONTAP we can run the following commands to ensure everything is up and running as expected.
After starting the Cloud Volumes ONTAP nodes, the
cluster showandnode showcommands confirm that both nodes are online and healthy.The
storage failover showoutput indicates that the HA relationship is established and that both nodes are waiting for all cluster services to fully come online, which is expected shortly after startup.
matrixcvo::> cluster show
matrixcvo::> node show
matrixcvo::> storage failover show
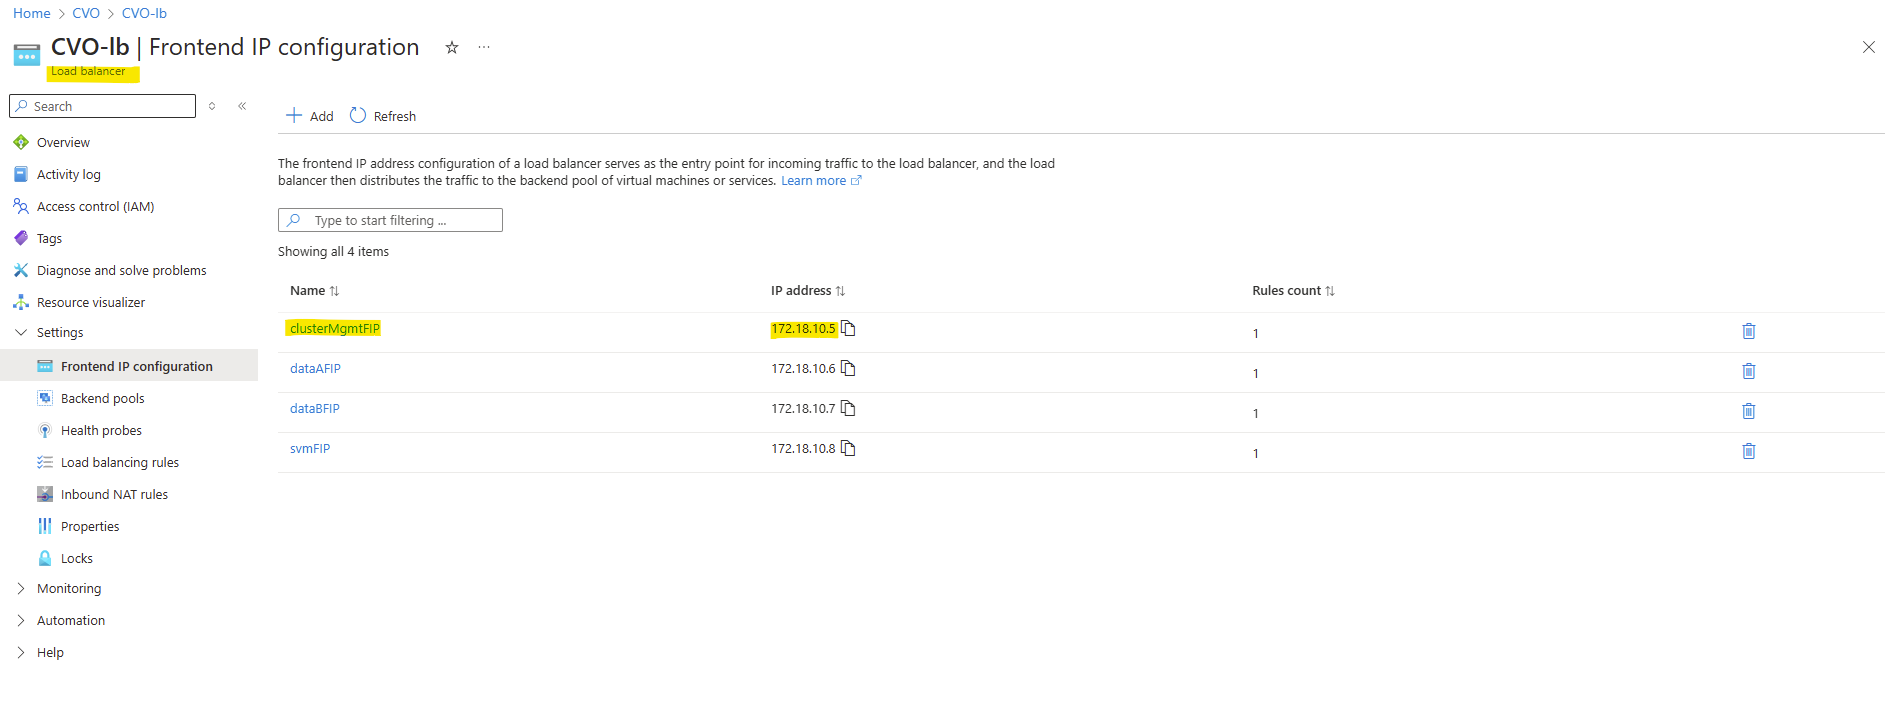
The cluster IP we can obtain from the in Azure created load balancer like shown below.
Azure automatically creates an internal Load Balancer for the Cloud Volumes ONTAP HA pair, which is used to provide a stable access point for cluster management and inter-node communication.
The frontend IP configuration contains the clusterMgmtFIP, which represents the floating management IP of the ONTAP cluster and transparently moves between nodes during failover.
The floating IP on the Azure Load Balancer ensures that the active ONTAP node can retain the same frontend IP address during failover, enabling seamless connectivity without client-side reconfiguration.
This abstraction ensures continuous management access even when a node becomes unavailable.
Or as mentioned by connecting from remote through SSH also first to the Agent (Connector VM) and then to the ONTAP cluster.
After starting the virtual machines, it may take a few minutes before the Cloud Volumes ONTAP system appears in a healthy state within the NetApp console.
A few minutes later the Cloud Volumes ONTAP HA system appears healthy again within the NetApp console.
If the following message shown up when running the command below shortly after starting the VMs (nodes), the cluster initialization is not already finished.
matrixcvo::> storage failover show
Connected to matrixcvo-02. Waiting for cluster applications to come online on the local node.
The “waiting for cluster applications to come online” message indicates that both nodes are up and connected, but ONTAP is still completing the startup of internal cluster services. This is normal shortly after a reboot and typically resolves automatically once all services are fully initialized.
Once initialization is complete, the status changes to “Connected”, indicating that both nodes are fully operational and the HA configuration is healthy.
Troubleshooting
An error occurred while retrieving manifests. Cannot create a new Cloud Volumes ONTAP. You can still discover an existing System
Also I will run for some deployments into this error, after clicking on Add new Cloud Volume ONTAP HA shown below.
An error occurred while retrieving manifests. Cannot create a new Cloud Volumes ONTAP. You can still discover an existing System
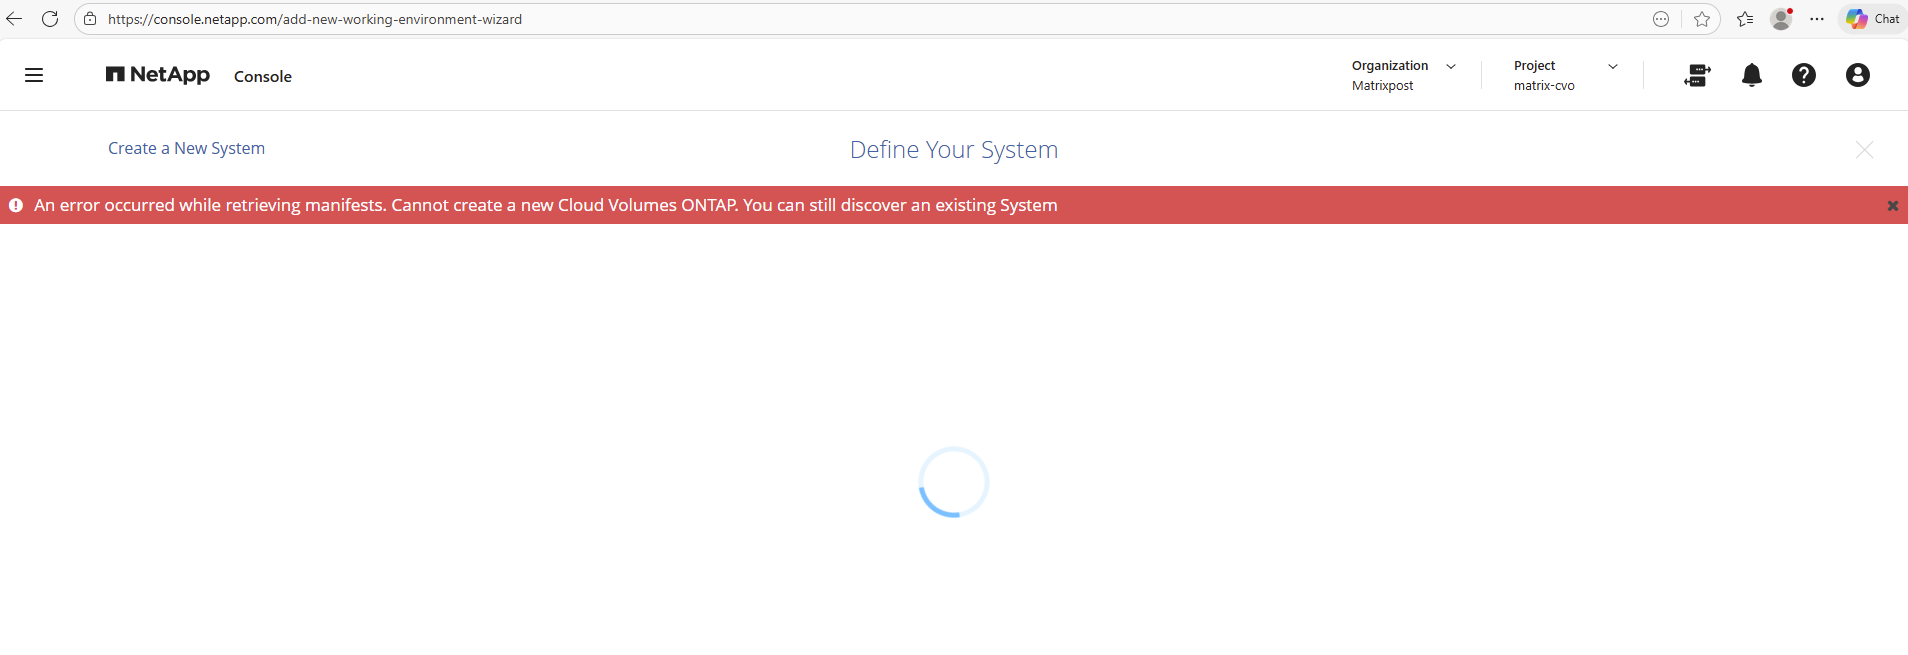
This error indicating that the NetApp Connector could not access the required resources.
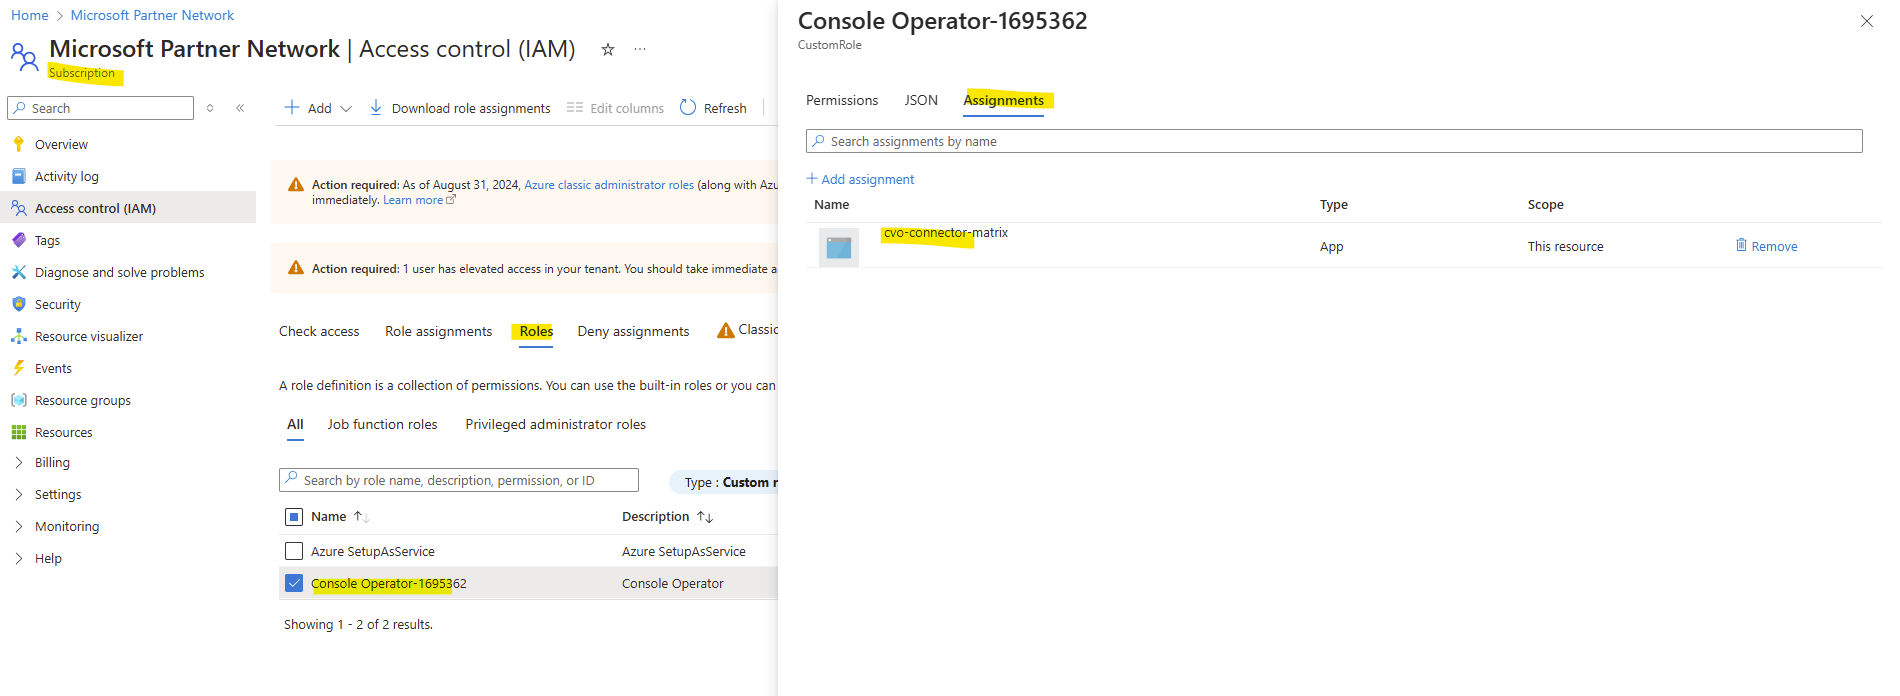
The root cause was that the Connector VM’s managed identity was no longer associated with the custom “Console Operator” role created via JSON in Part 1.
Reassigning the role to the managed identity immediately resolved the issue and allowed the deployment to proceed successfully.
In the Azure Portal, go to Subscription > Access Control (IAM) > Role Assignments. Find every eventual entry labeled “Identity not found” and remove it.
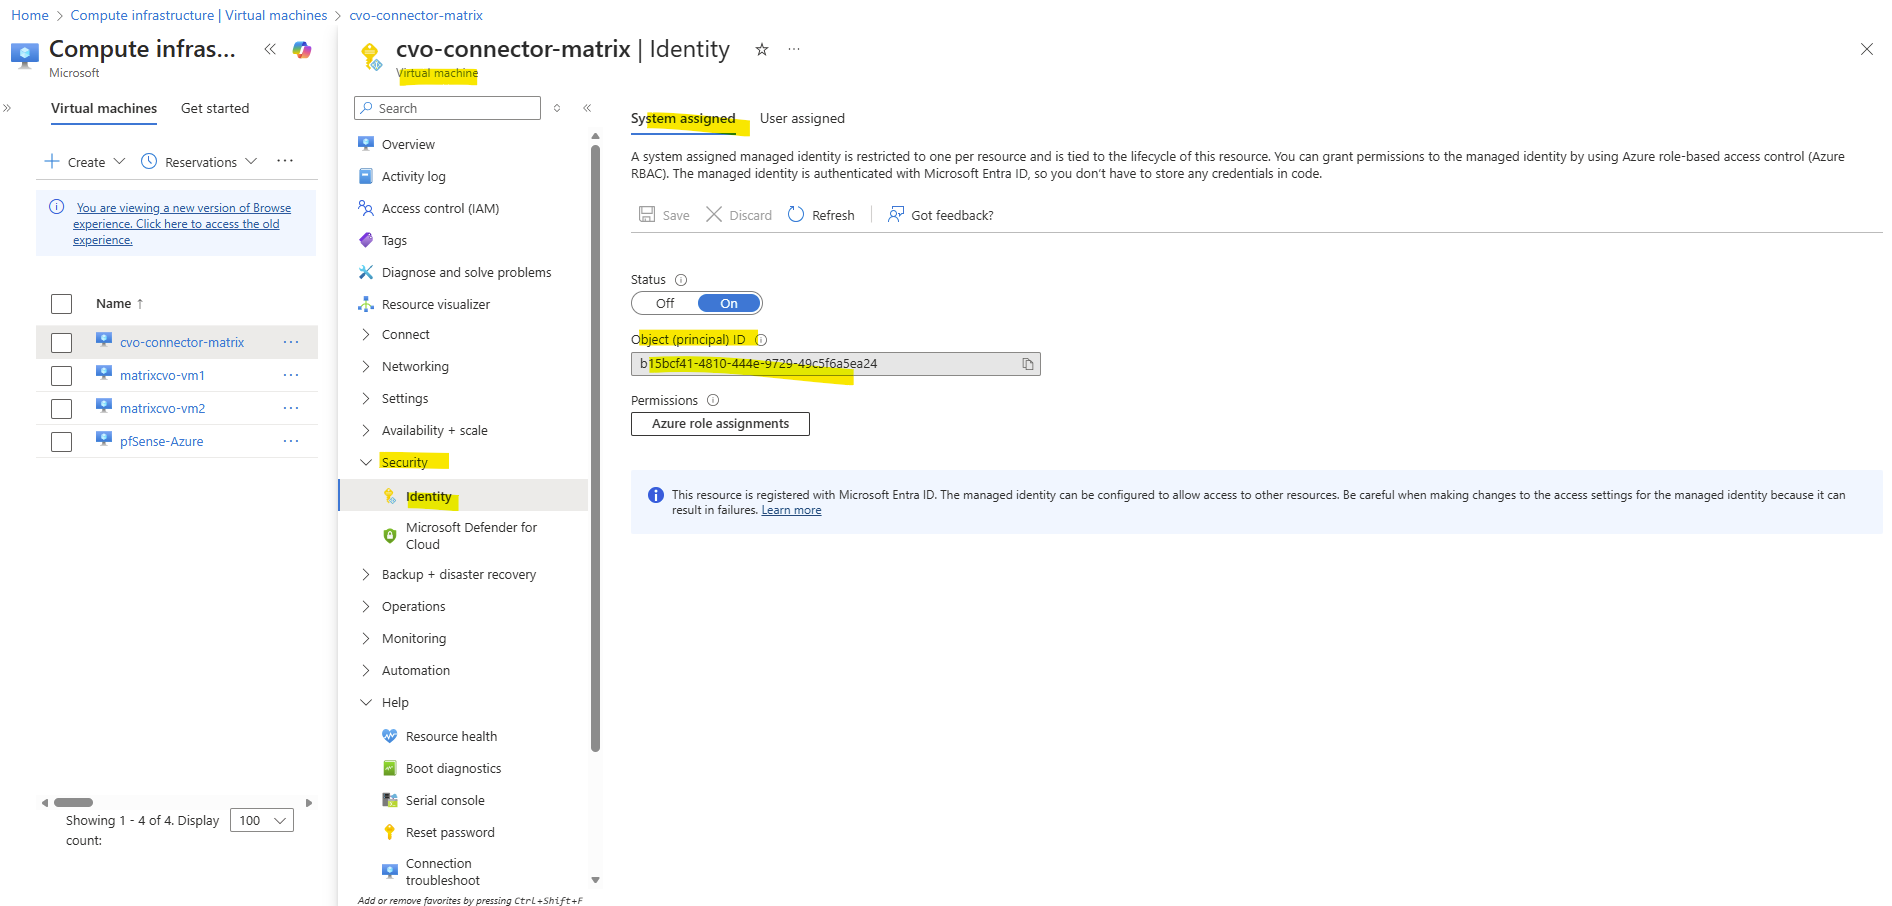
Verify that our VM (Connector VM) Identity is associated with this role.
Go to your Connector VM > Identity and check its identity.
Next go to your Subscription > Access Control (IAM) > Roles, for Type filter for Custom role, select your previously via JSON created custom role in Part 1 and check if the identity from the Connector VM is associated like shown below.
If not click on + Add assignment and add it.
Even after fixing Azure, the Connector often “remembers” the old failure. You need to force it to re-scan its permissions by running the following command on the Connector VM.
$ sudo systemctl restart netapp-service-manager.service

Afterwards the connector VM is recognized again under Management -> Systems.
With the Cloud Volumes ONTAP HA system now successfully deployed in Azure, the core infrastructure and ONTAP environment are in place.
At this stage, no storage objects or data services such as NFS or CIFS/SMB have been configured yet.
In Part 3 of this series, the focus shifts to configuring the actual data services on the Cloud Volumes ONTAP system.
Links
Plan your Cloud Volumes ONTAP configuration in Azure
https://docs.netapp.com/us-en/storage-management-cloud-volumes-ontap/task-planning-your-config-azure.htmlLaunch Cloud Volumes ONTAP in Azure
https://docs.netapp.com/us-en/storage-management-cloud-volumes-ontap/task-deploying-otc-azure.htmlLaunch a Cloud Volumes ONTAP HA pair in Azure
https://docs.netapp.com/us-en/storage-management-cloud-volumes-ontap/task-deploying-otc-azure.html#launch-a-cloud-volumes-ontap-ha-pair-in-azureSupported configurations for Cloud Volumes ONTAP in Azure
https://docs.netapp.com/us-en/cloud-volumes-ontap-relnotes/reference-configs-azure.htmlLicensing for Cloud Volumes ONTAP
https://docs.netapp.com/us-en/storage-management-cloud-volumes-ontap/concept-licensing.htmlAzure region support
https://bluexp.netapp.com/cloud-volumes-global-regionsLearn about NetApp Console agents
https://docs.netapp.com/us-en/console-setup-admin/concept-agents.html