Protecting On-Prem ONTAP with NetApp Console Backup and Recovery
Once an on-premises ONTAP system is connected to the NetApp Console, additional cloud services can be enabled for the cluster.
One of these services is Backup and Recovery, which allows ONTAP volumes to be backed up to object storage for long-term protection and disaster recovery. In my case, the backups are stored in Azure object storage.
In this post, I’ll show how to enable Backup and Recovery for an on-premises ONTAP system and configure the first backup policy.
About bringing ONTAP On-Prem into NetApp Console, you can also read my following post.
About setting up Backup and Recovery for Cloud Volume ONTAP (CVO), you can read my following post.
Prerequisite: Configuring Azure Credentials for Backup and Recovery
First we need to enable Backup and Recovery in the NetApp Console (formerly BlueXP) to establish a comprehensive data protection strategy for our on-premises ONTAP (in my case just a simulator) system.
We configure local Snapshot copies for fast, space-efficient restores and define backup policies to object storage for long-term retention and protection against data loss.
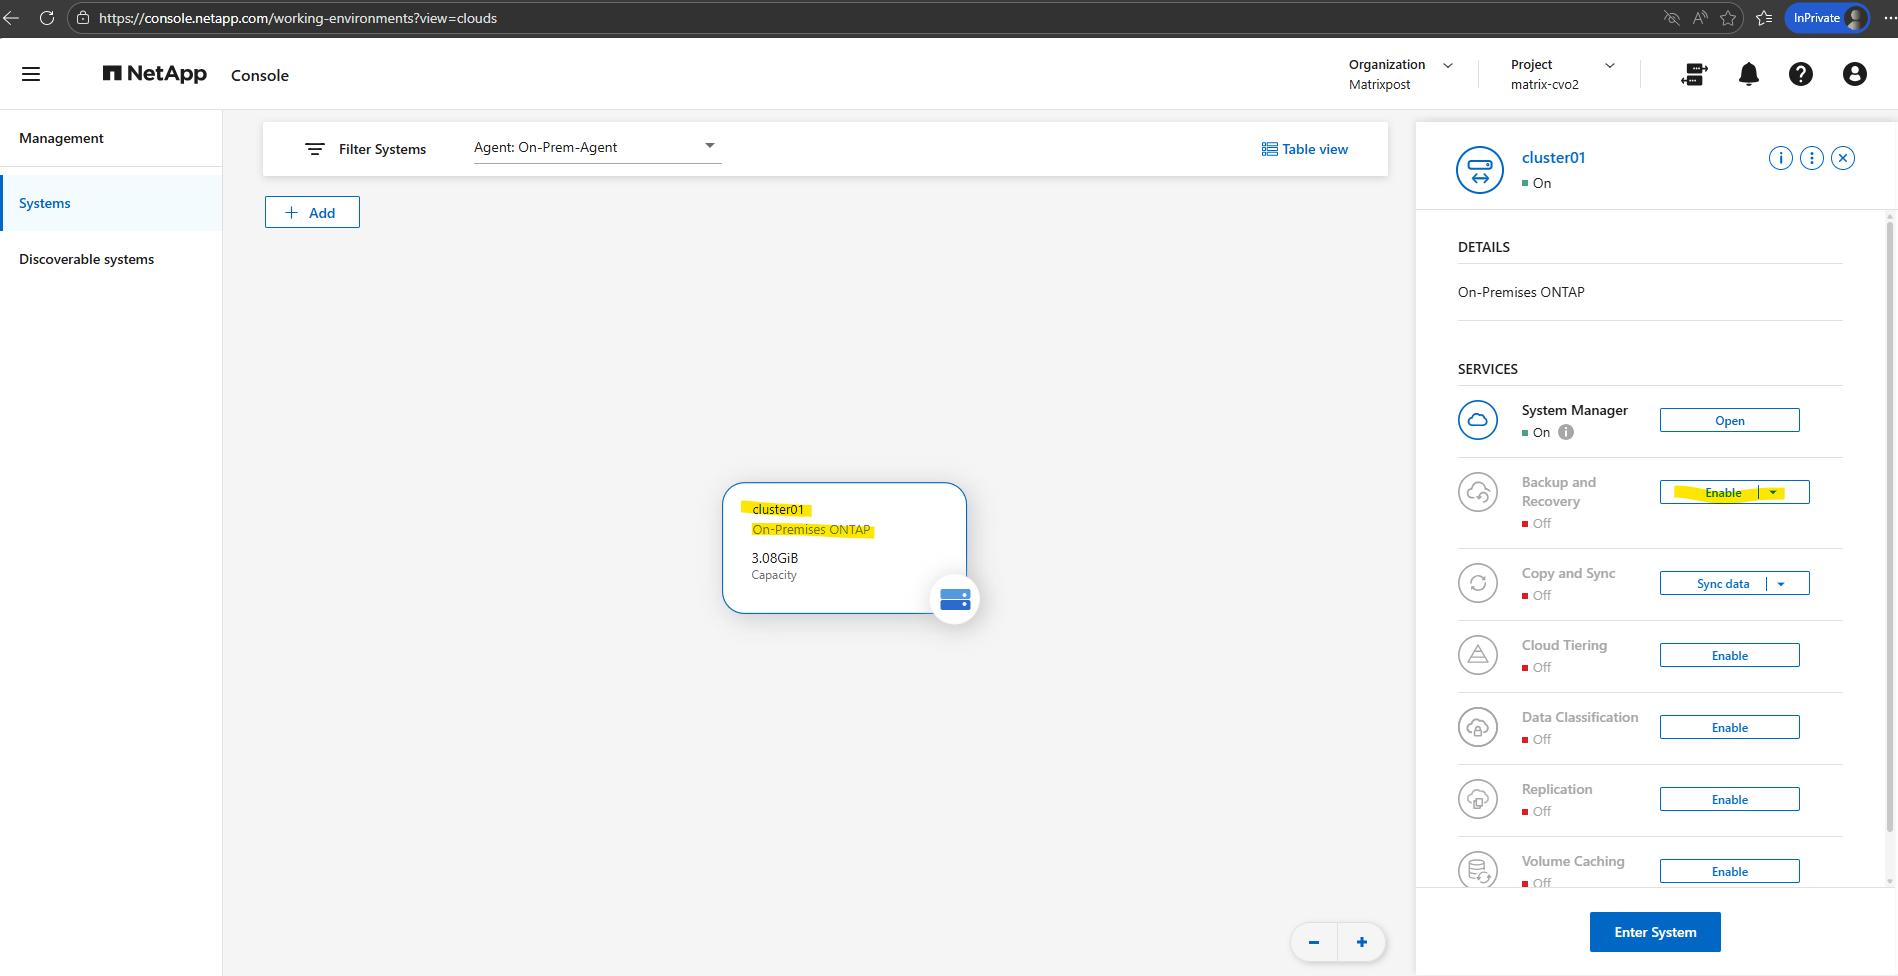
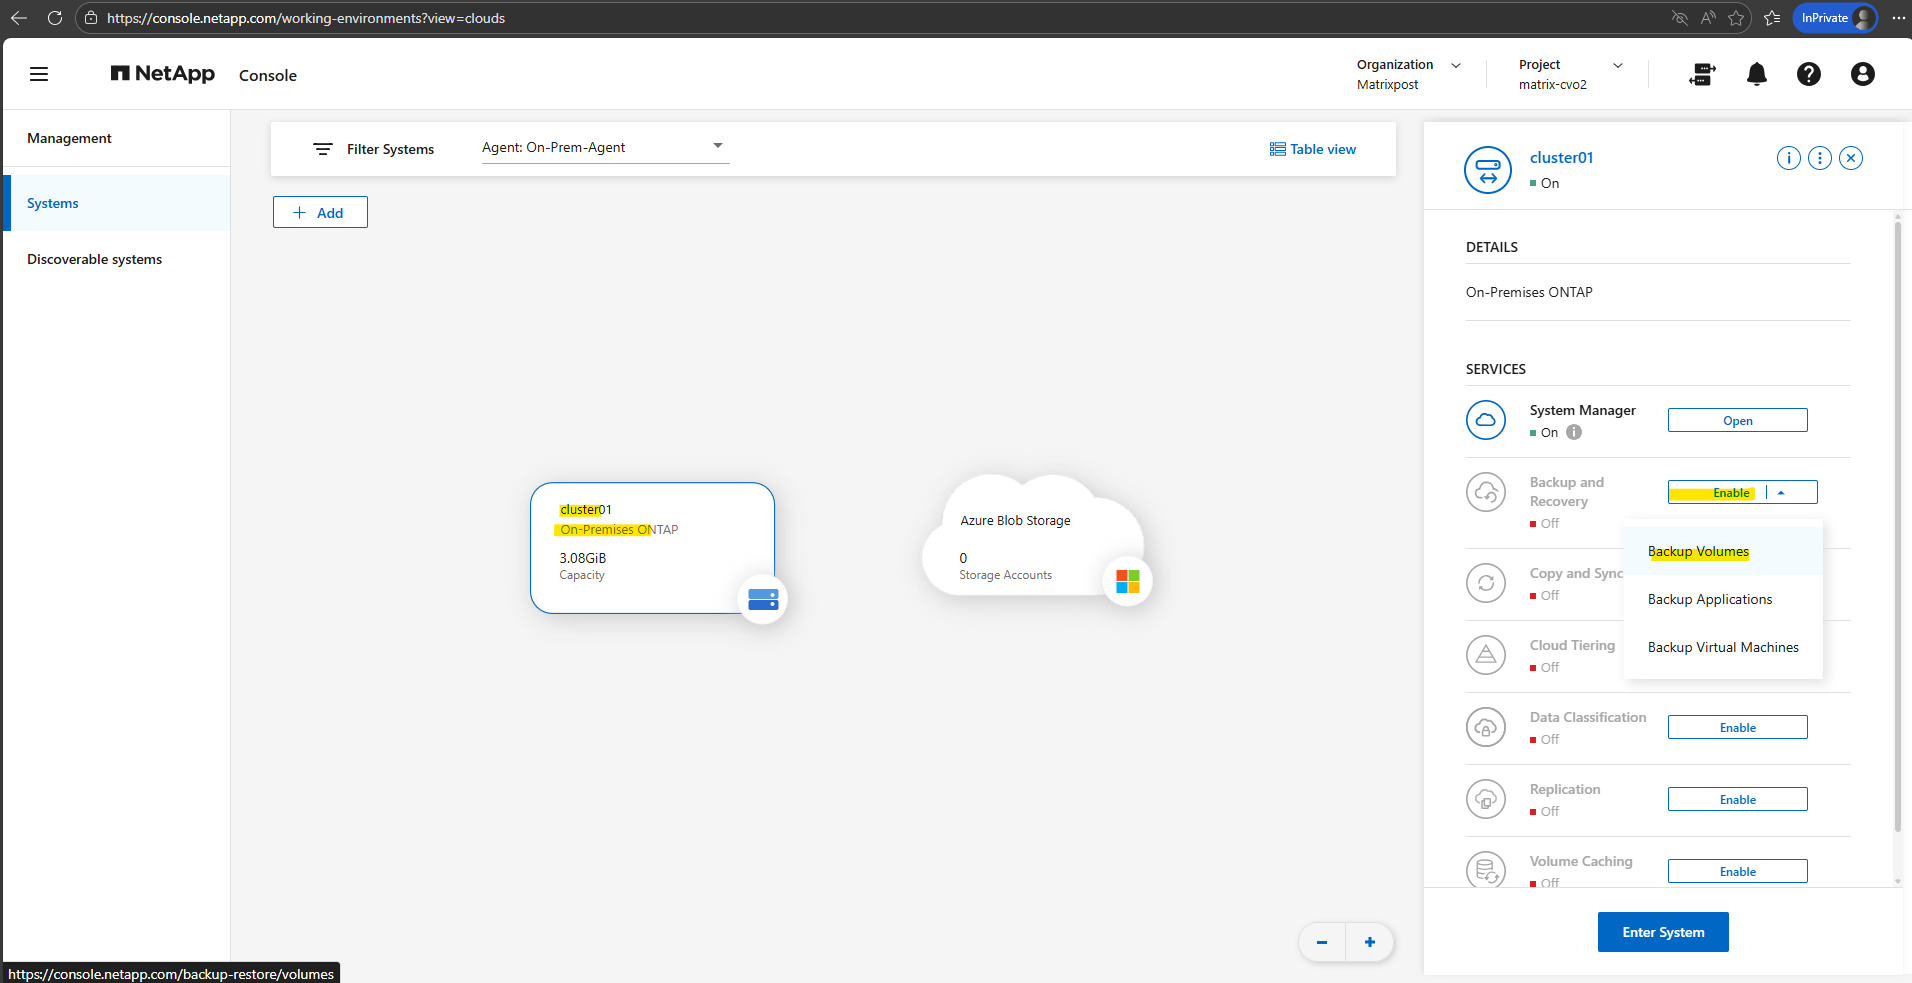
In the NetApp console navigate to Storage -> Management, select the OnPrem ONTAP system you want to enable Backup and Recovery and on the shown up right bar click on Enable for Backup and Recovery as shown below.
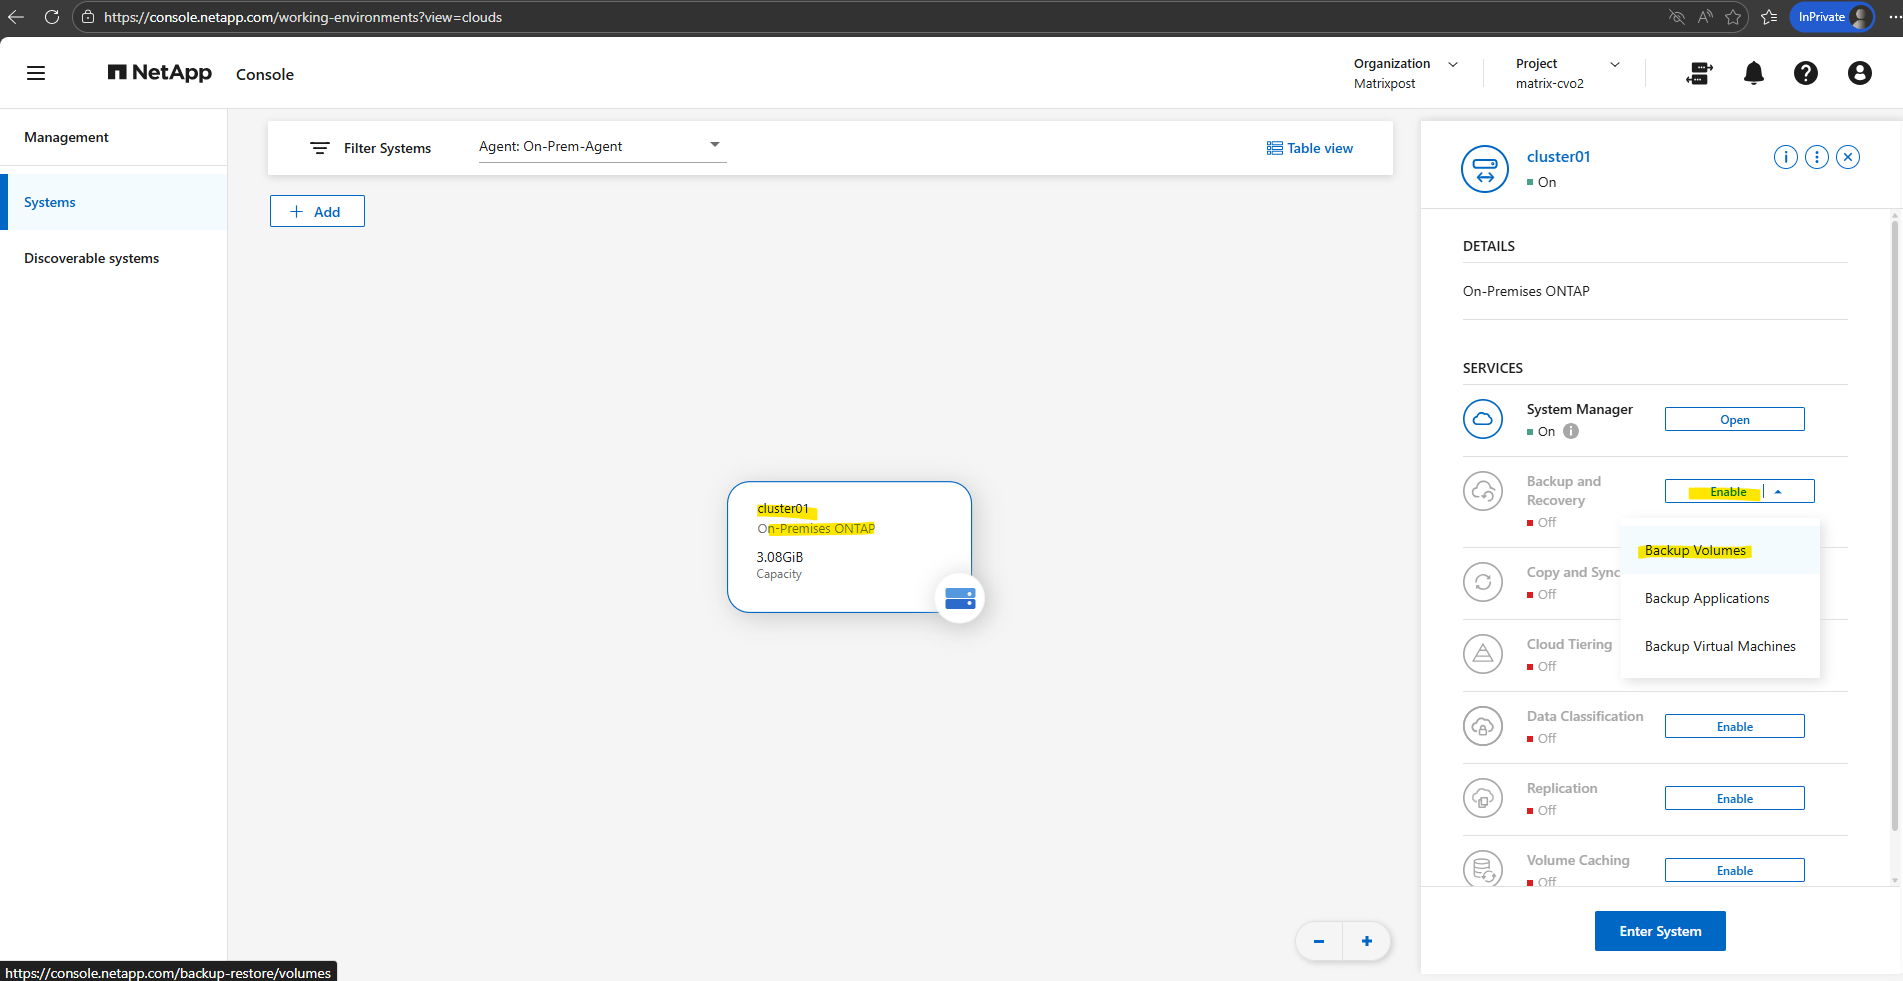
Select Backup Volumes.
Backup and Recovery in the NetApp Console is not limited to protecting individual ONTAP volumes. The service also supports protecting applications and virtual machines, enabling consistent backups for workloads such as databases or VM environments in addition to standard volume-level protection.
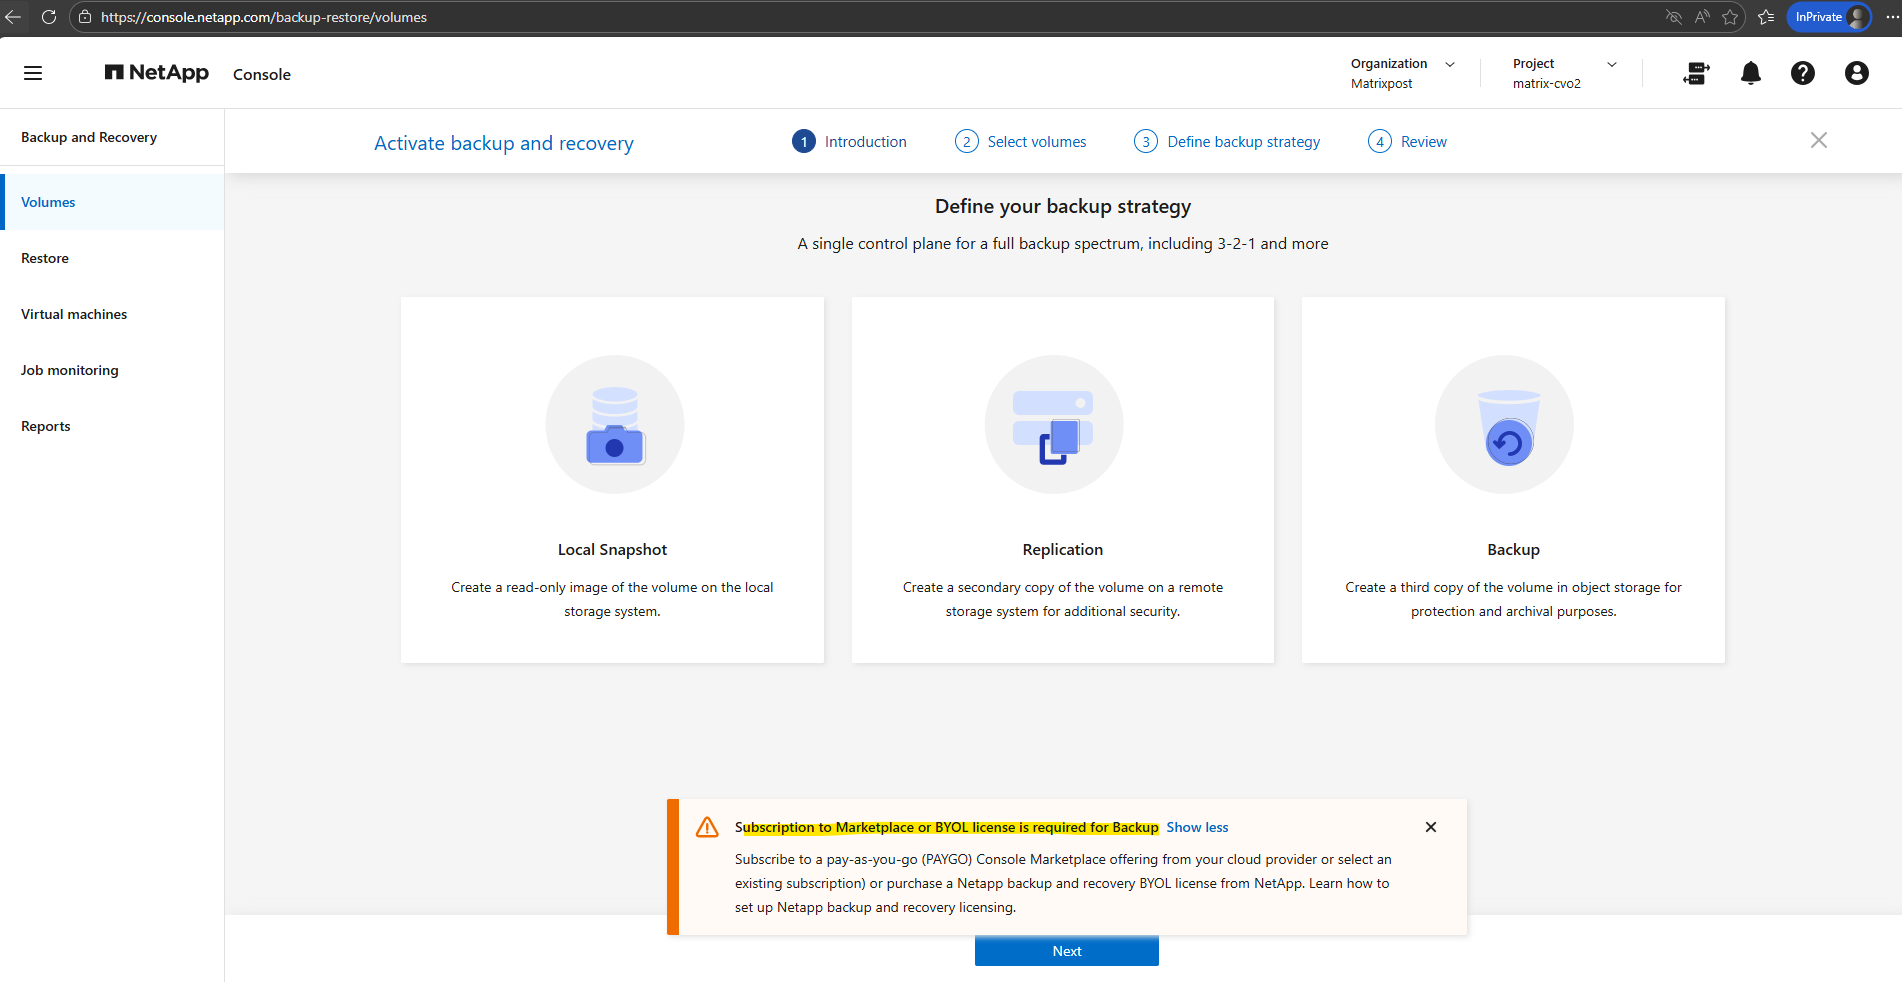
During the initial configuration, the wizard returned the error shown below. This occurred because no Azure credentials were configured yet, so the on-premise Console Agent was unable to access the Azure subscription.
Before continuing with the Backup and Recovery setup, these Azure credentials must first be configured in the NetApp Console. This allows the on-prem Console Agent to authenticate with Azure and access the required subscription and resources.
Subscribe to a pay-as-you-go (PAYGO) Console Marketplace offering from your cloud provider or select an existing subscription) or purchase a Netapp backup and recovery BYOL license from NetApp.
Configuring the Microsoft Entra ID App Registration and Custom Role
Before the NetApp Console Agent can interact with Azure resources, an App Registration (Service Principal) must be created in Microsoft Entra ID. In addition, a custom Azure role with the required permissions must be assigned so the Agent can access and manage the resources needed for Backup and Recovery.
When the Console agent is installed on-premises like in our case, we need to provide the Console agent with Azure permissions by setting up a service principal in Microsoft Entra ID and obtaining the Azure credentials that the Console agent needs.
From the Azure portal, open the Microsoft Entra ID service. In the menu, select App registrations and there click on + New registration.
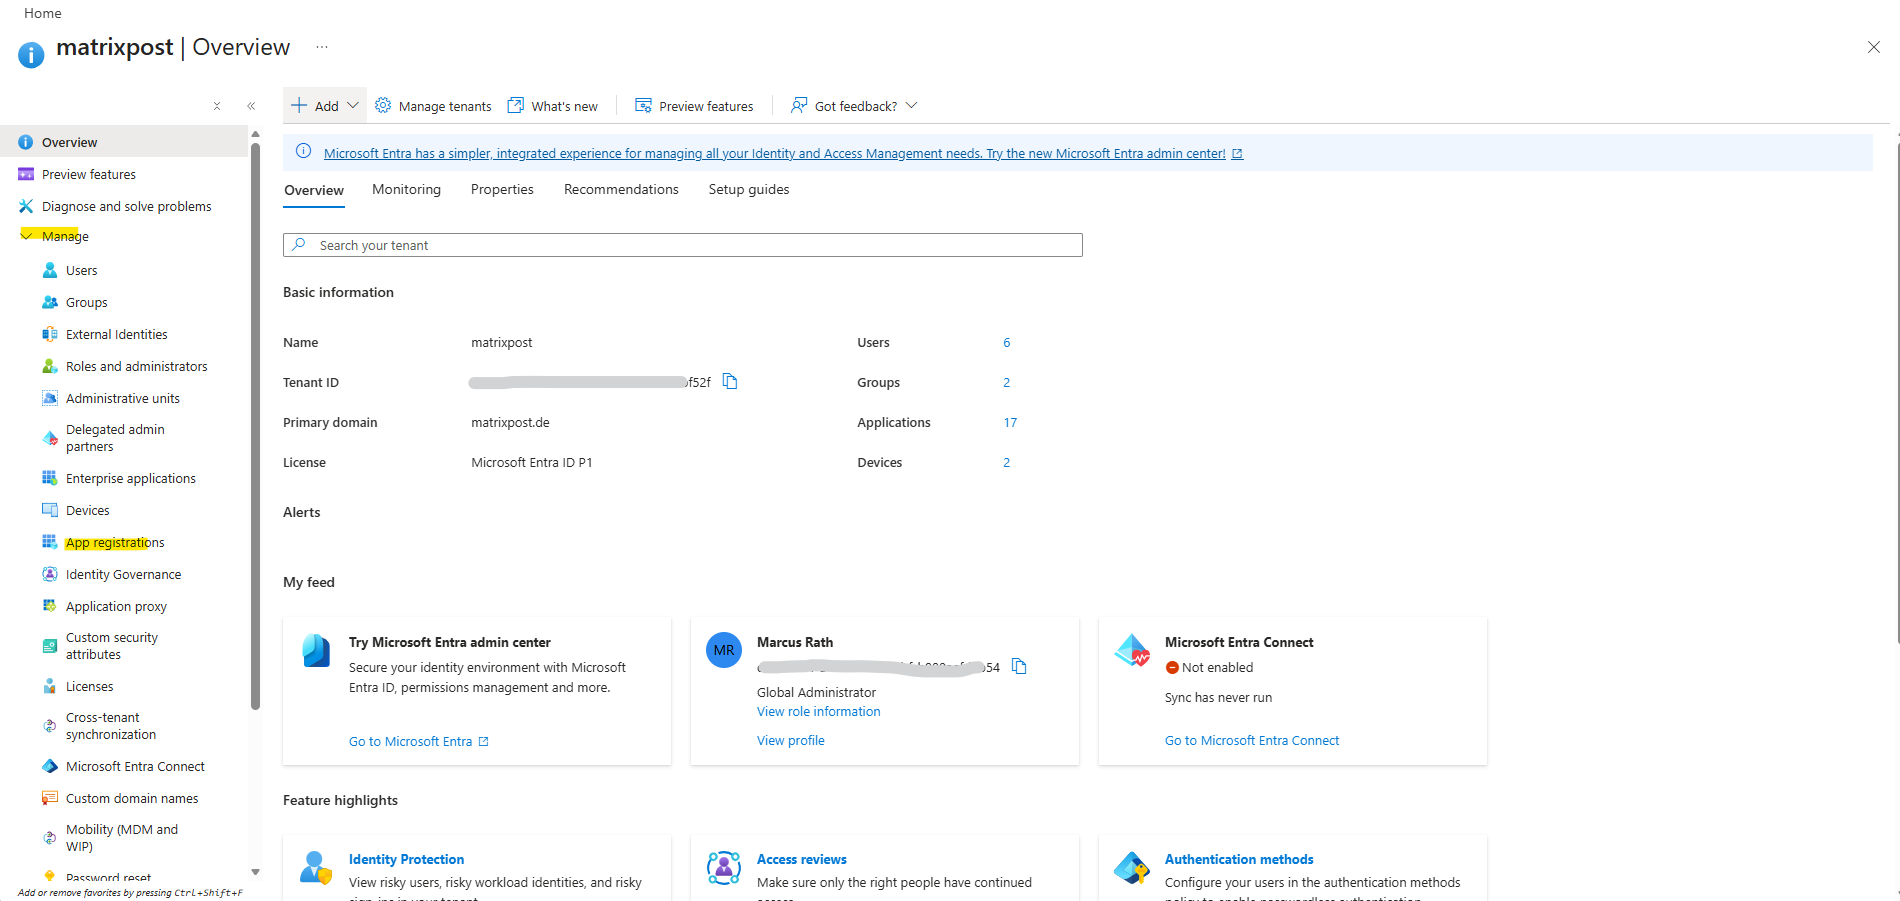
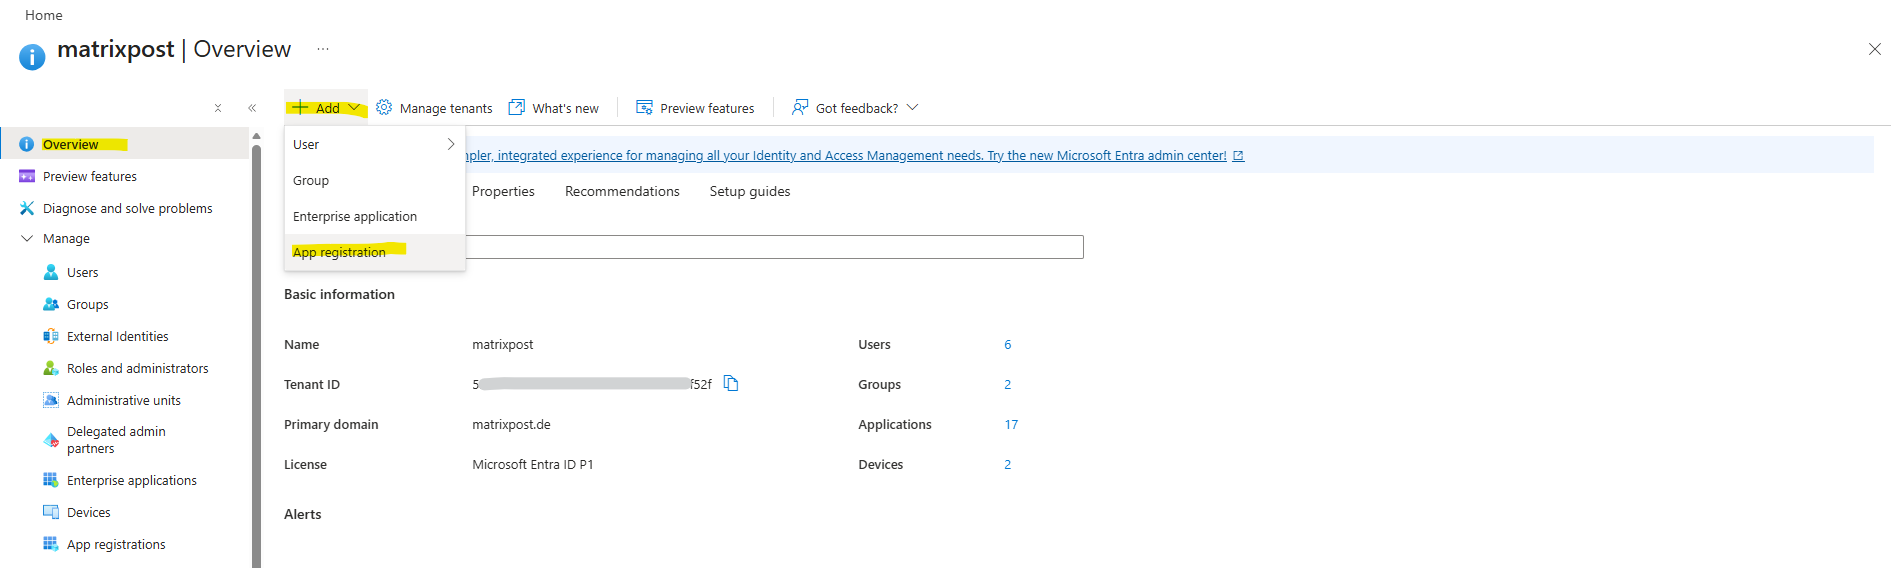
Or directly on the Entra ID overview page click on + Add -> App registration as shown below.
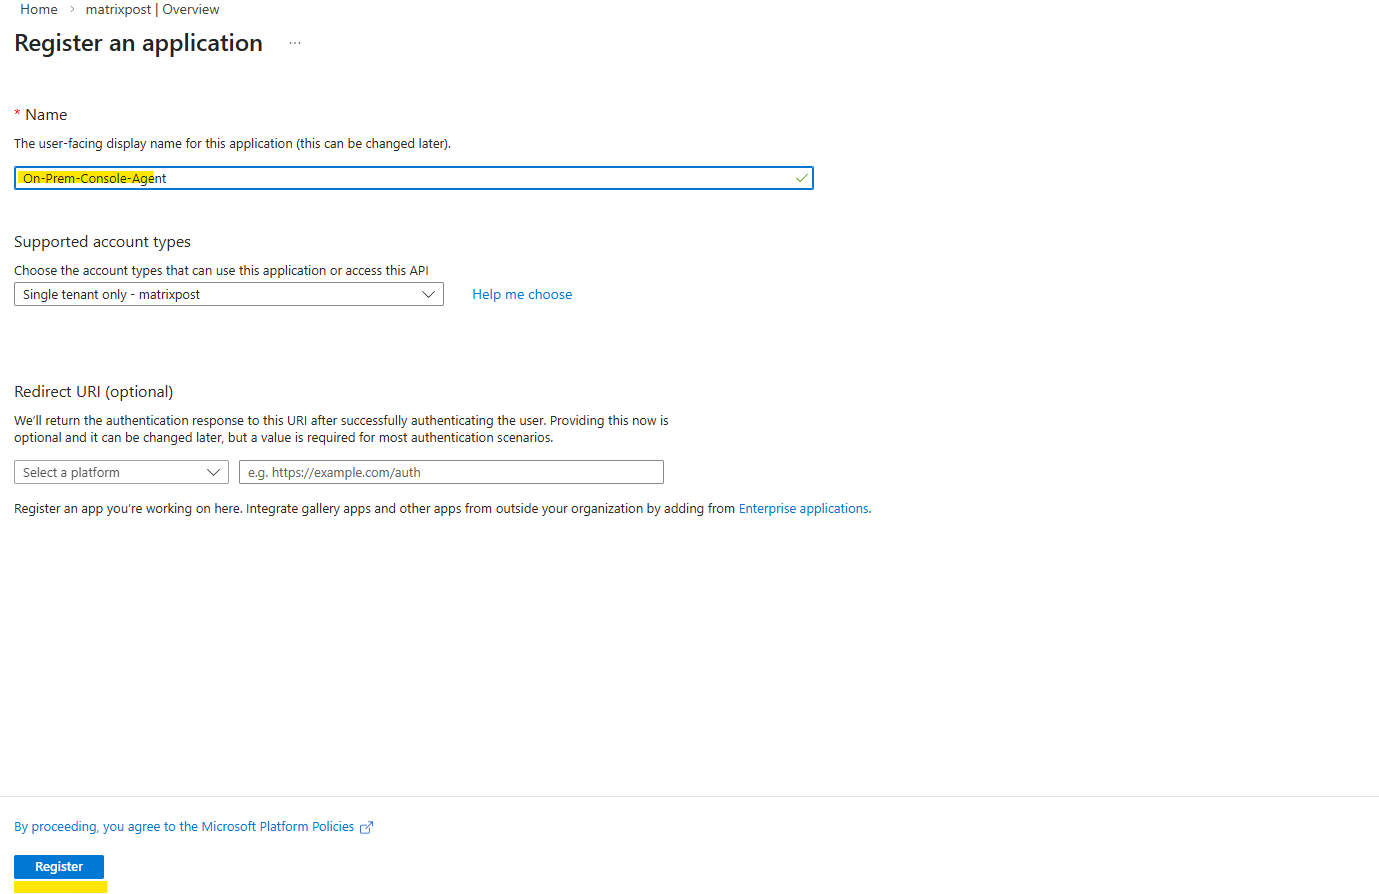
Specify details about the application: Enter a name for the application and select an account type (any will work with the NetApp Console). The Redirect URI we can leave blank.
Click on Register.
The Application (client) ID and Directory (tenant) ID shown below we can already note down and need them later.
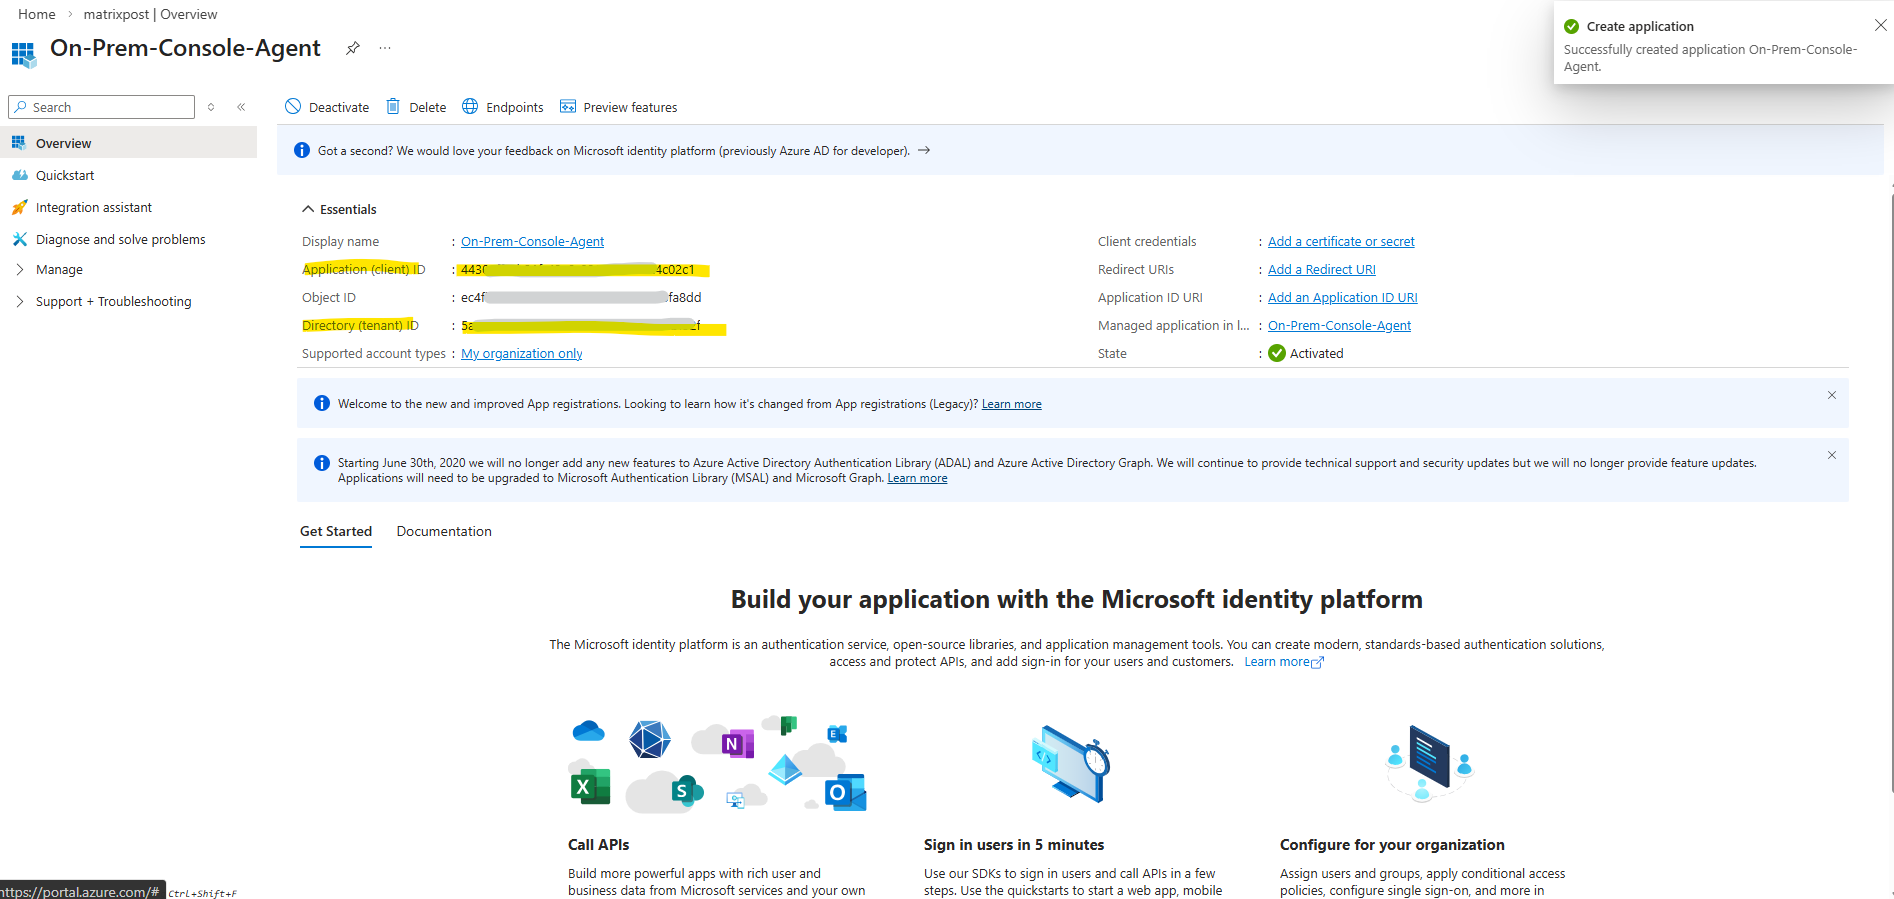
We now have created the AD application and service principal.
Next we need to create a custom role.
Creating the Azure Custom Role for the On-Prem Console Agent
When deploying the on-prem Console Agent and enabling cloud services like Backup and Recovery, NetApp recommends creating a custom role in Azure that grants the permissions required for the Agent to manage resources within the subscription.
This role allows the Agent to perform operations such as creating and managing storage and other cloud resources needed by the NetApp Console services.
Source: https://docs.netapp.com/us-en/console-setup-admin/reference-permissions.html
In my case, this configuration was essentially the same as the custom role and permissions I already created for the Agent used with my Cloud Volumes ONTAP deployment in a previous post.
Note that you can create an Azure custom role using the Azure portal, Azure PowerShell, Azure CLI, or REST API. The following steps show how to create the role using the Azure CLI. If you would prefer to use a different method, refer to Azure documentation.
Copy the contents of the custom role permissions for the Console agent and save them in a JSON file.
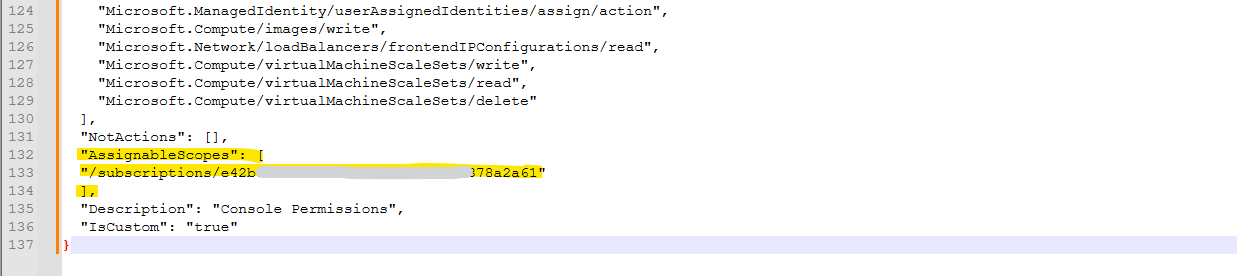
Modify the JSON file by adding Azure subscription IDs to the assignable scope.
You should add the ID for each Azure subscription from which users will create Cloud Volumes ONTAP systems. (In our case here On-Premises ONTAP systems, my ONTAP simulator).
Use the JSON file to create a custom role in Azure.
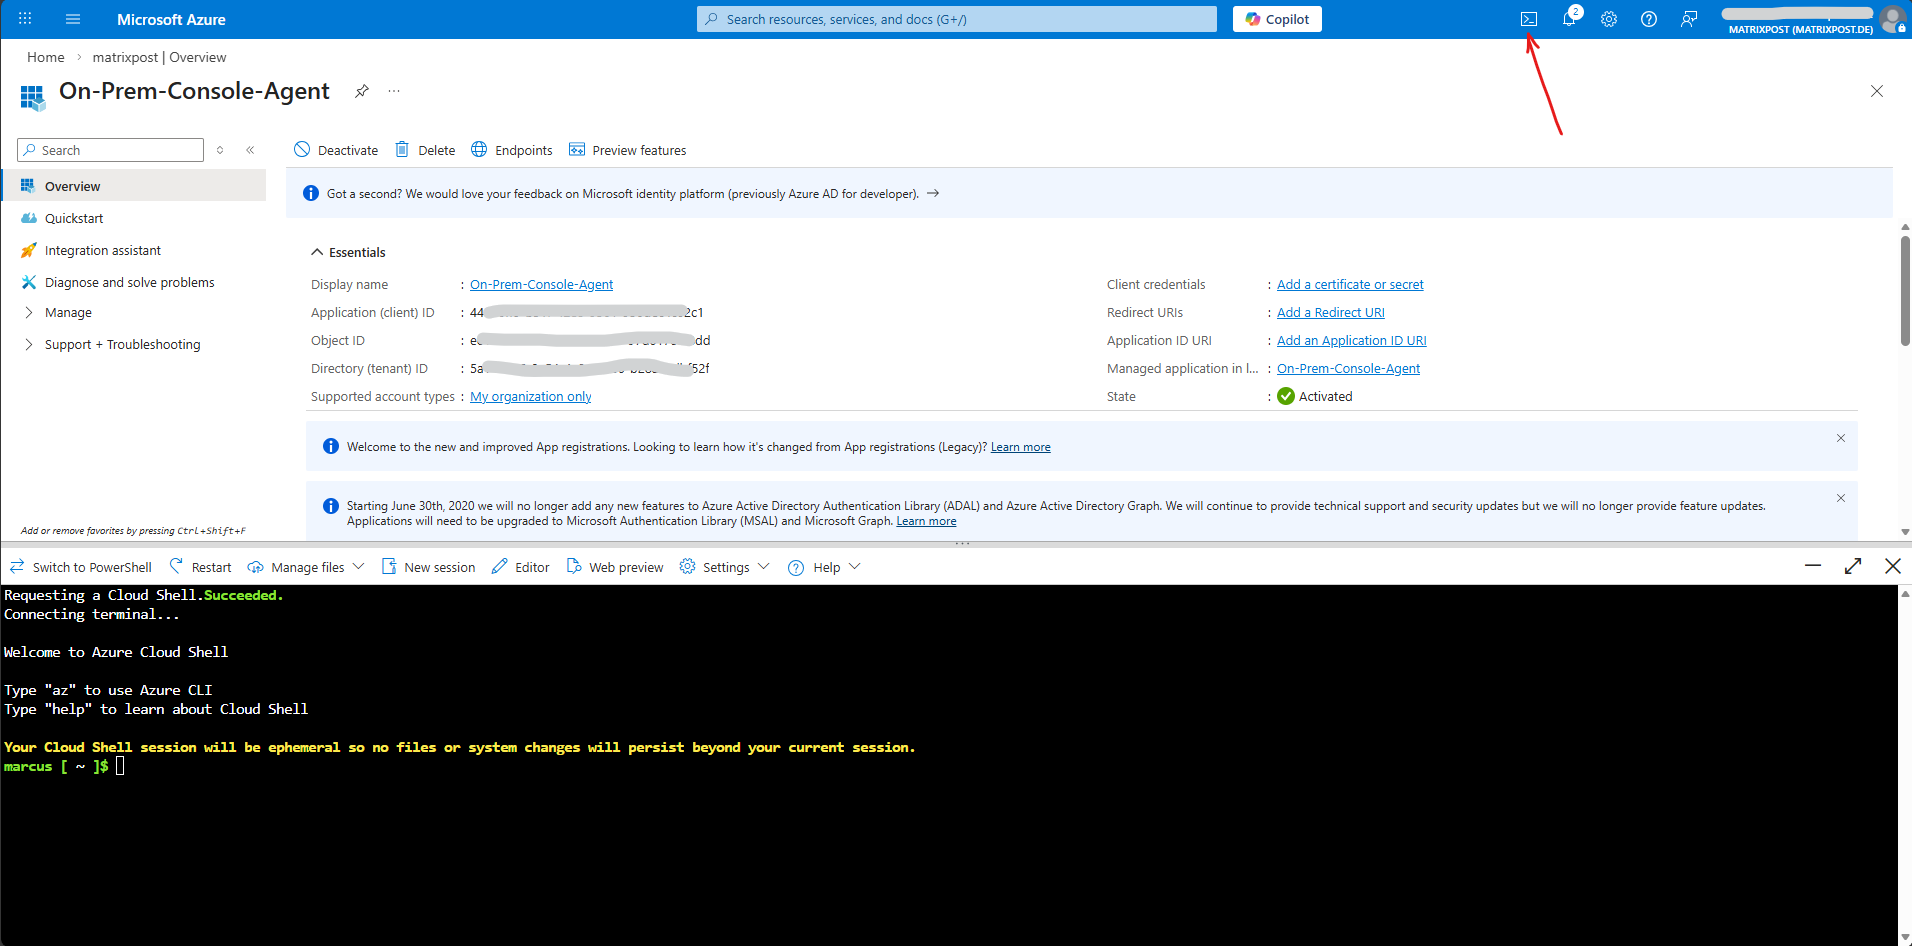
Open the Azure Cloud Shell and select the Bash.
Choose or create a storage account if prompted for.
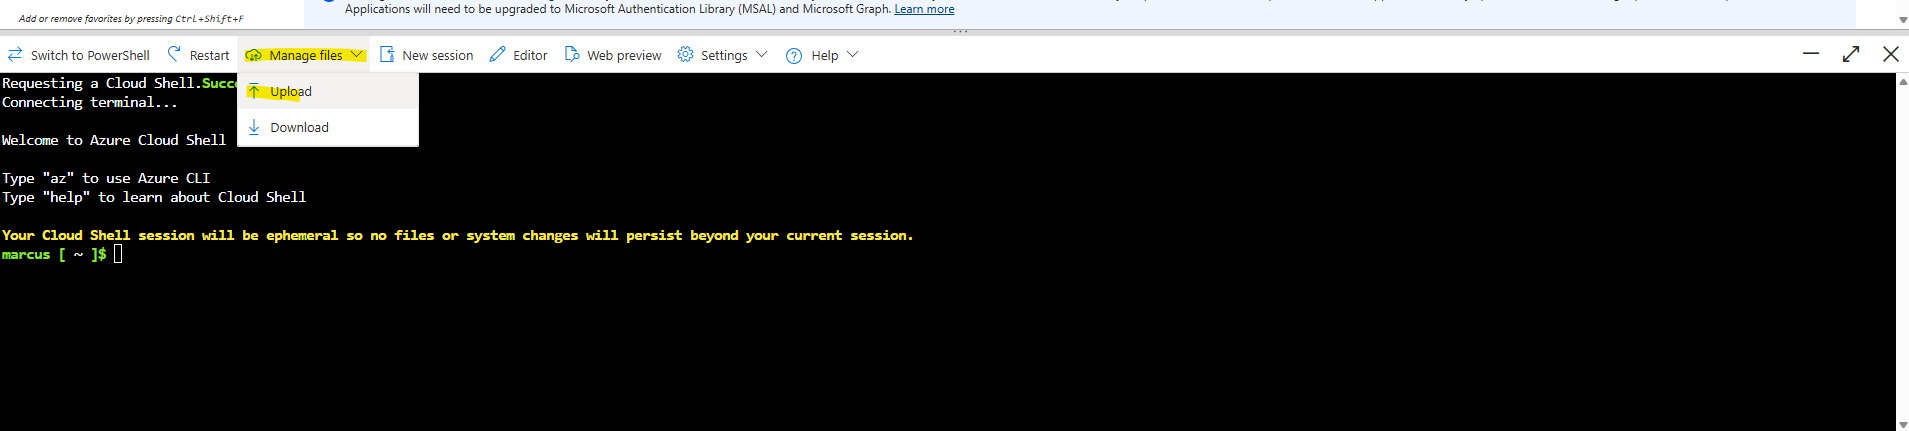
Click on Manage files -> Upload.
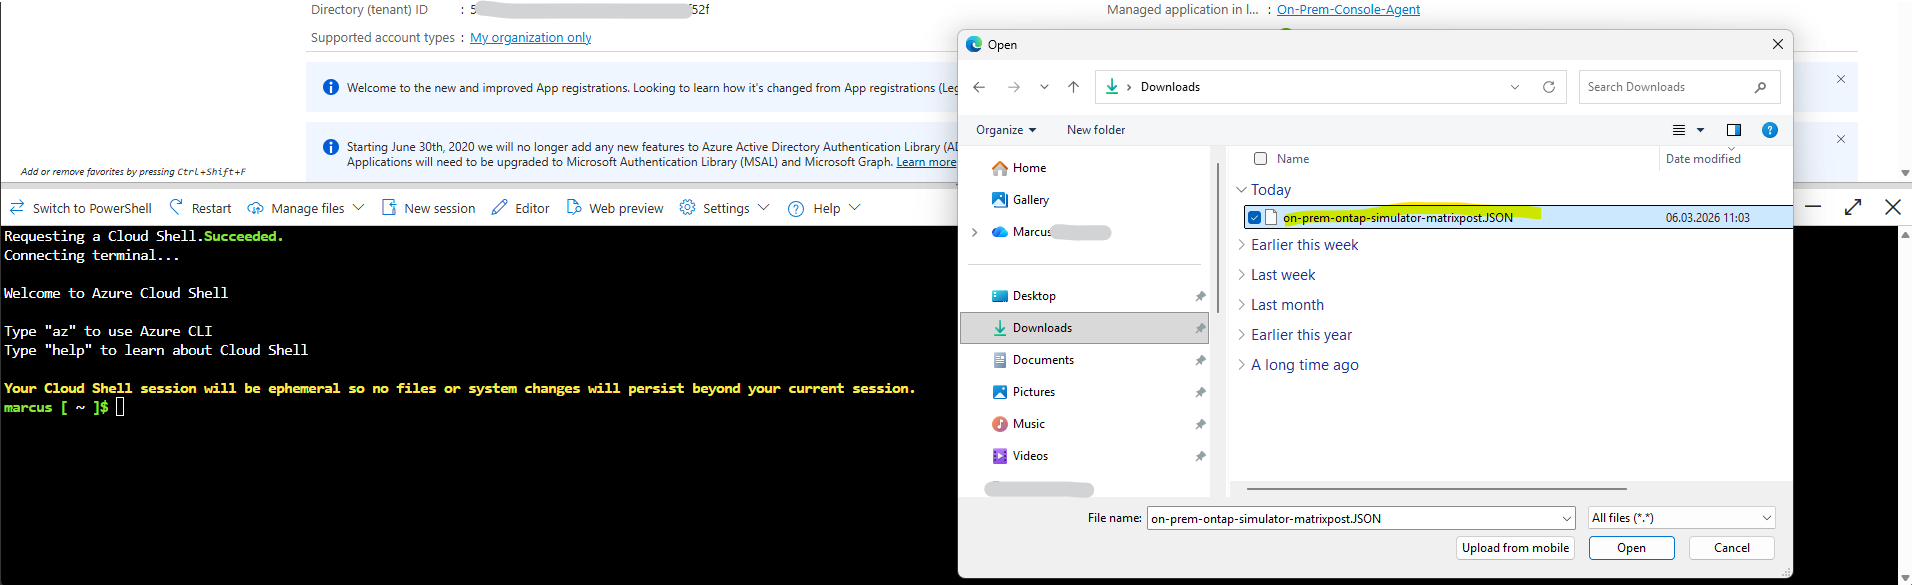
Select the adjusted JSON file.
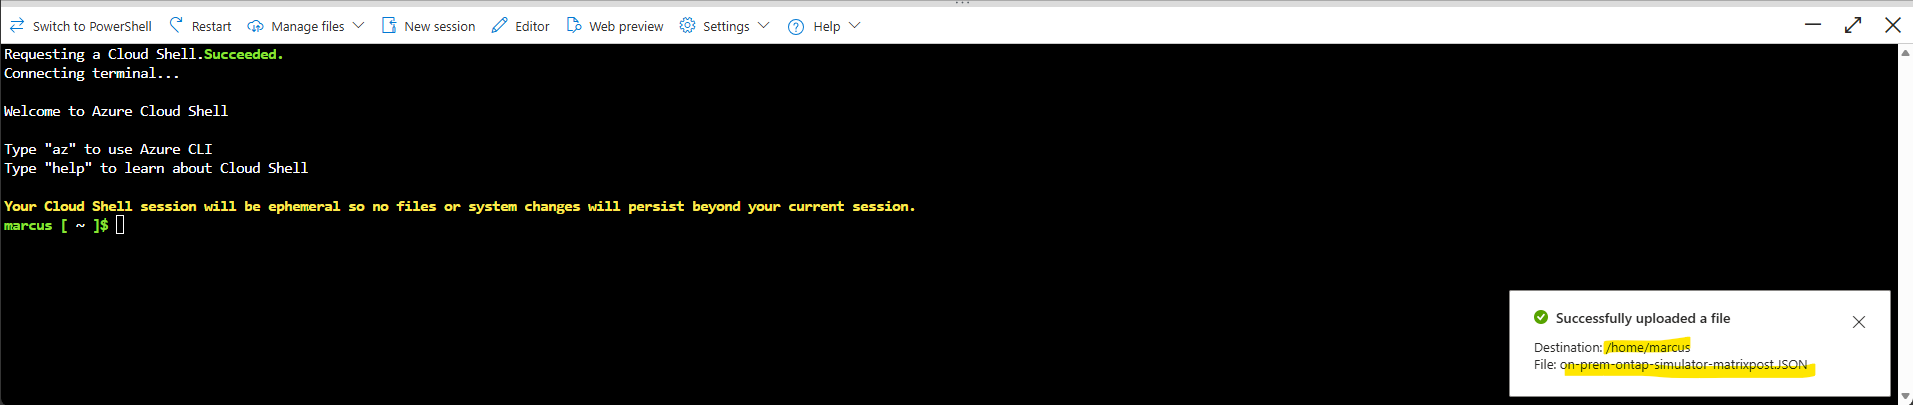
The JSON file was successfully uploaded.
Now run this command:
Adjust the path and JSON file name to your environment.
$ az role definition create --role-definition /home/marcus/on-prem-ontap-simulator-matrixpost.JSON
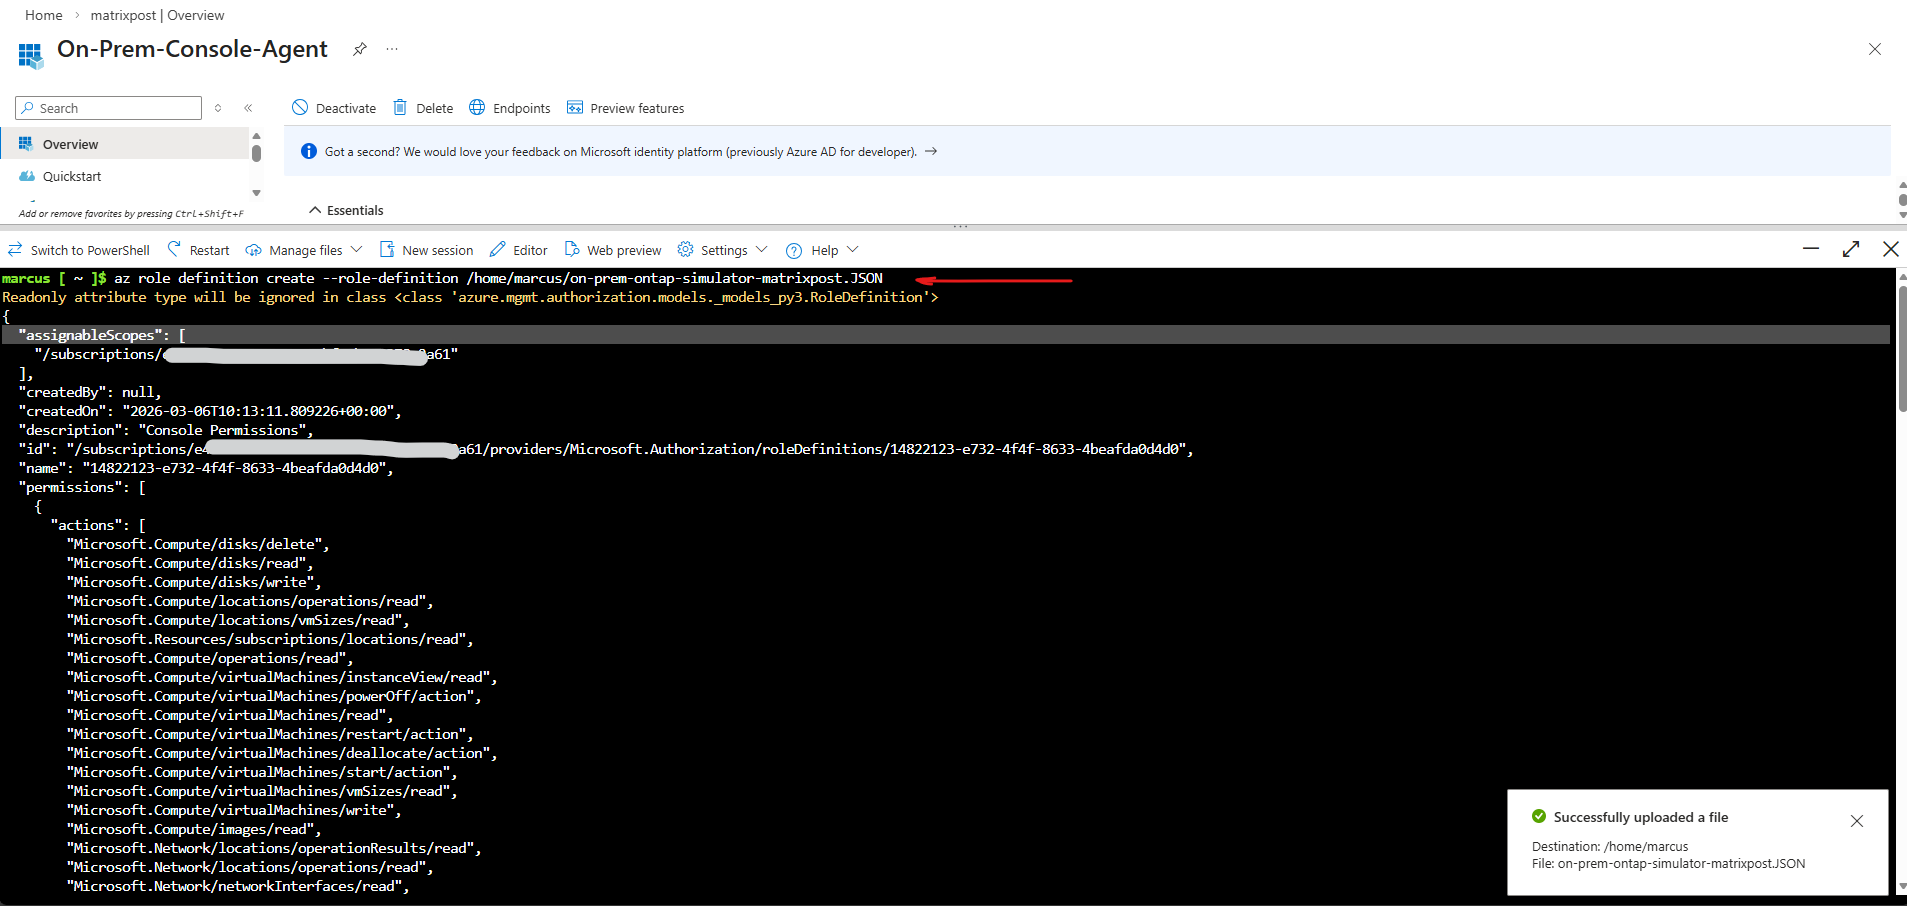
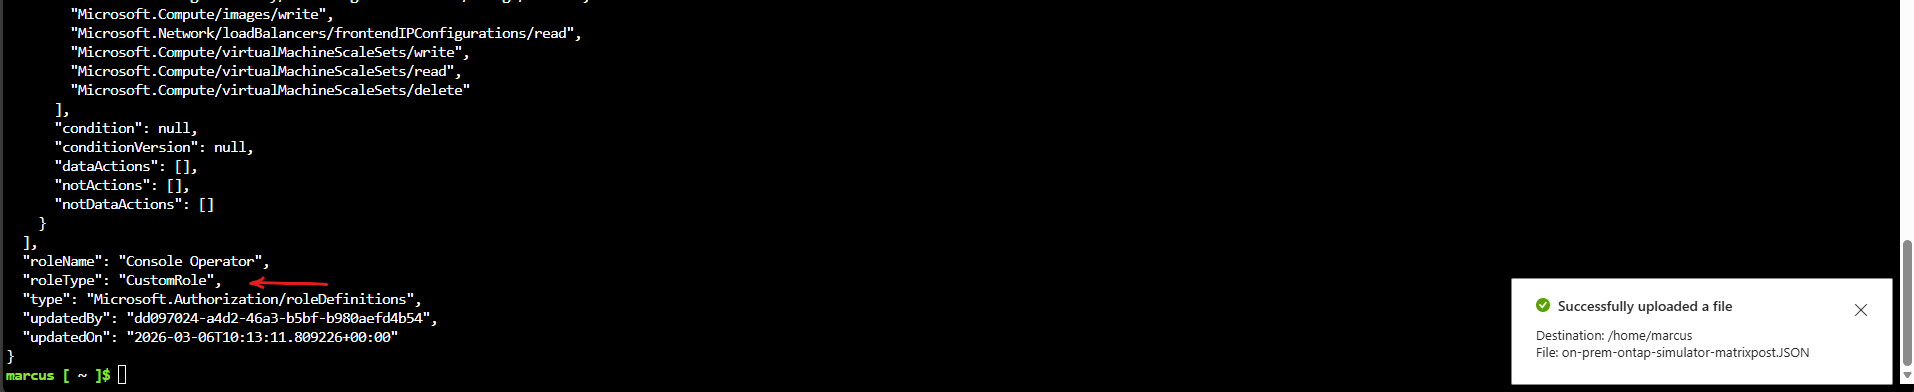
The custom role was created successfully.
We should now have a custom role called Console Operator that we can assign to the Console agent virtual machine.
Next we need to assign the application to the role.
Assigning the Custom Role to the Service Principal
After creating the custom role, it must be assigned to the App Registration (Service Principal) within the Azure subscription. This allows the on-prem Console Agent to use the application identity to access and manage the Azure resources required for Backup and Recovery.
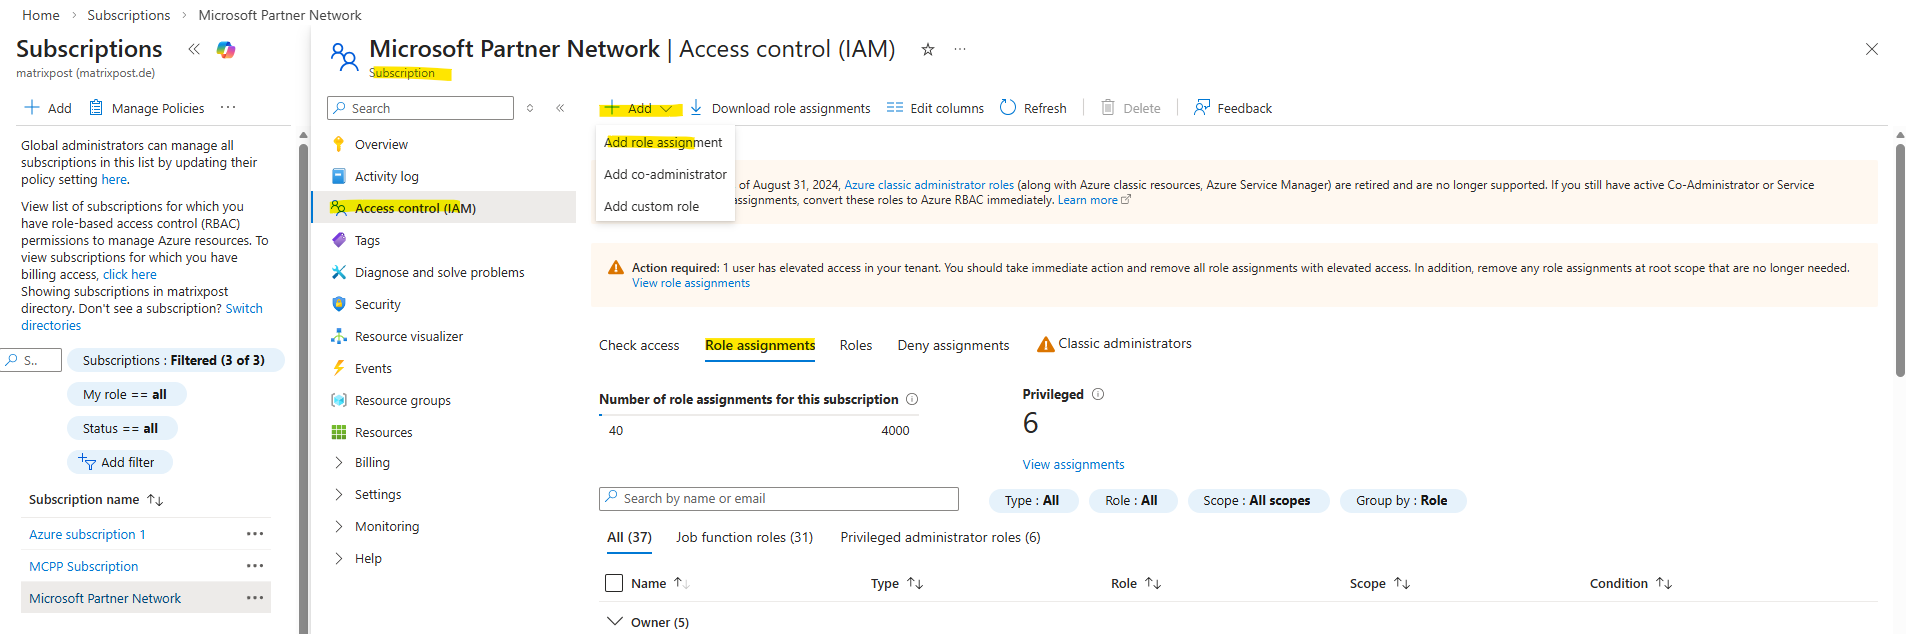
From the Azure portal, navigate to your subscription and the Access control (IAM) blade.
Within the Role assignments tab click on + Add -> Add role assignment as shown below.
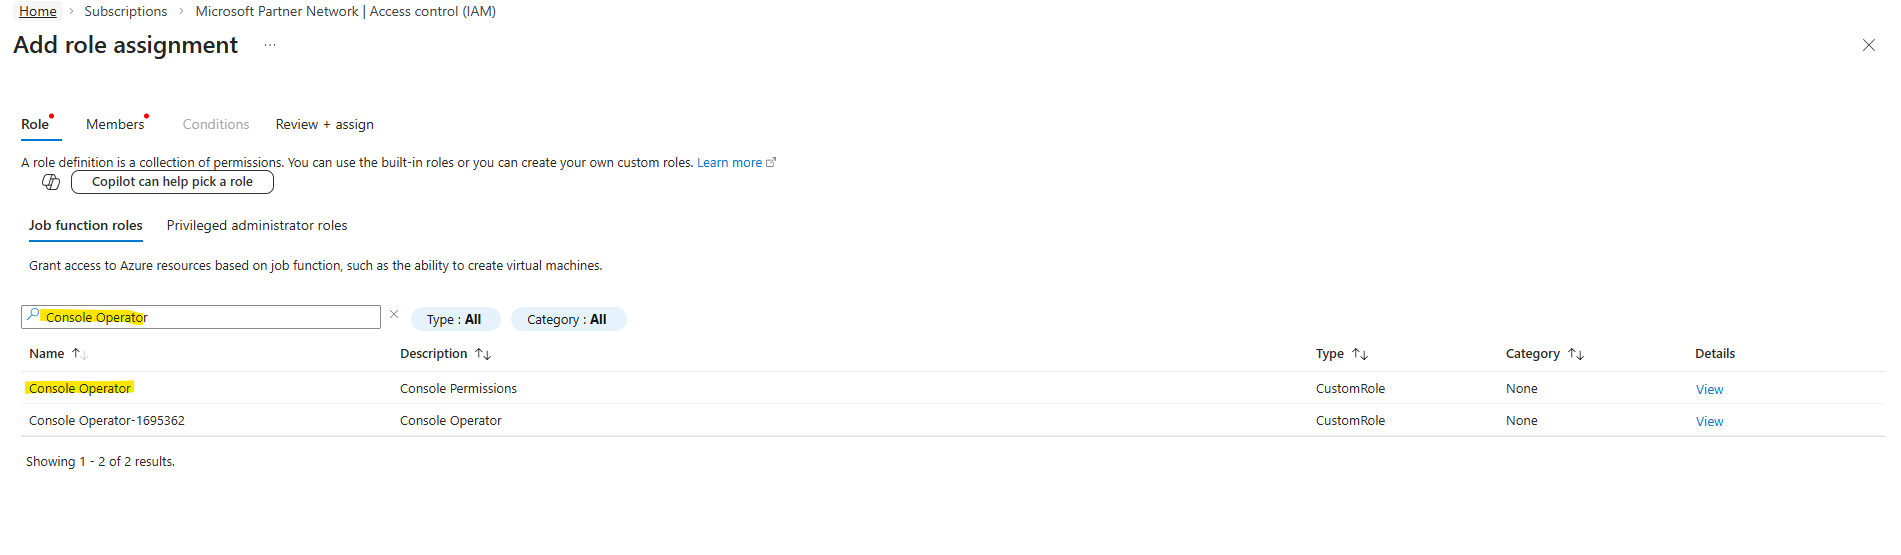
In the Role tab, search for our newly created custom role named Console Operator, select the role and click on Next.
In my case we see also a further custom role named Console Operator-1695362, this is the role which I was creating for a Azure Agent (connector VM) to deploy Cloud Volume ONTAP (CVO) in Azure and shown here.
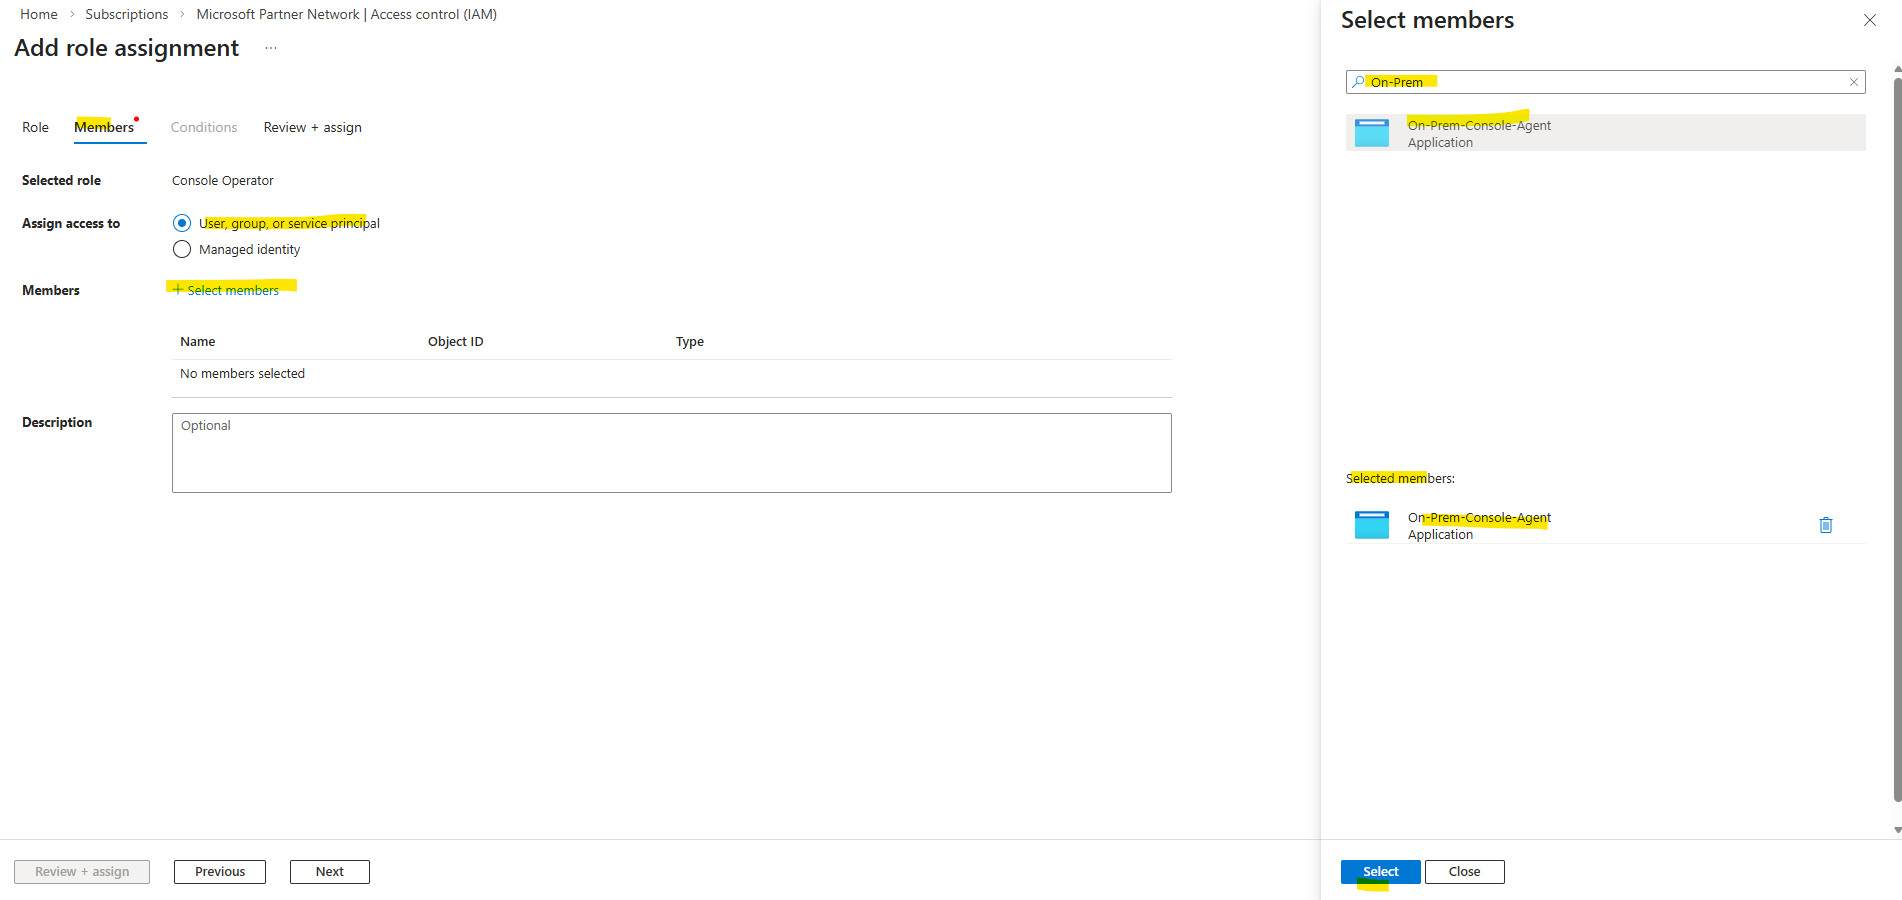
In the Members tab, keep User, group, or service principal selected, click on + Select members and search for our previously created Entra ID application (app registration).
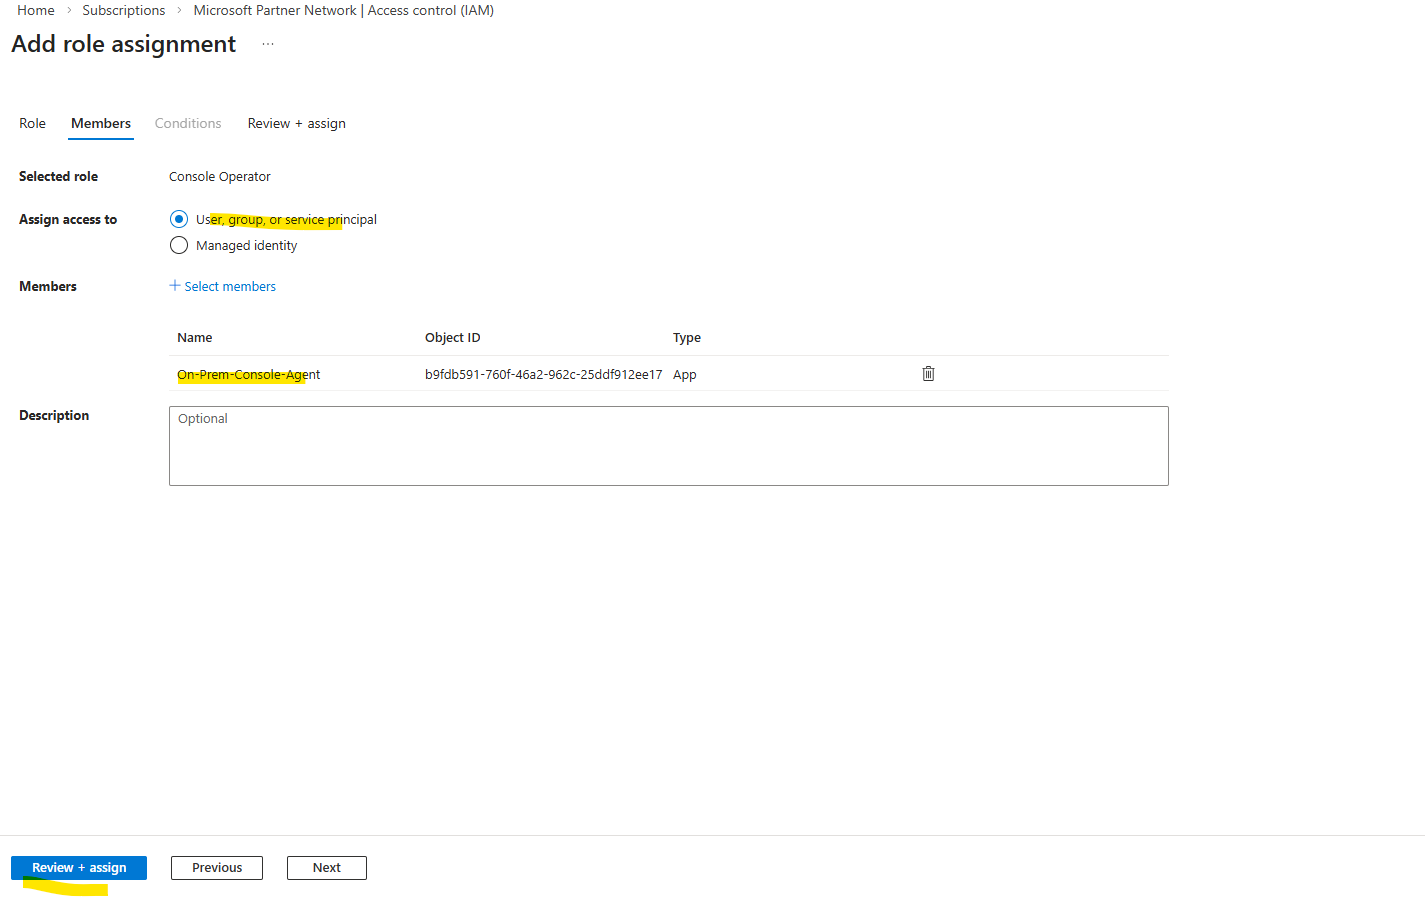
Select the application and click on Select.
Click on Review + assign.
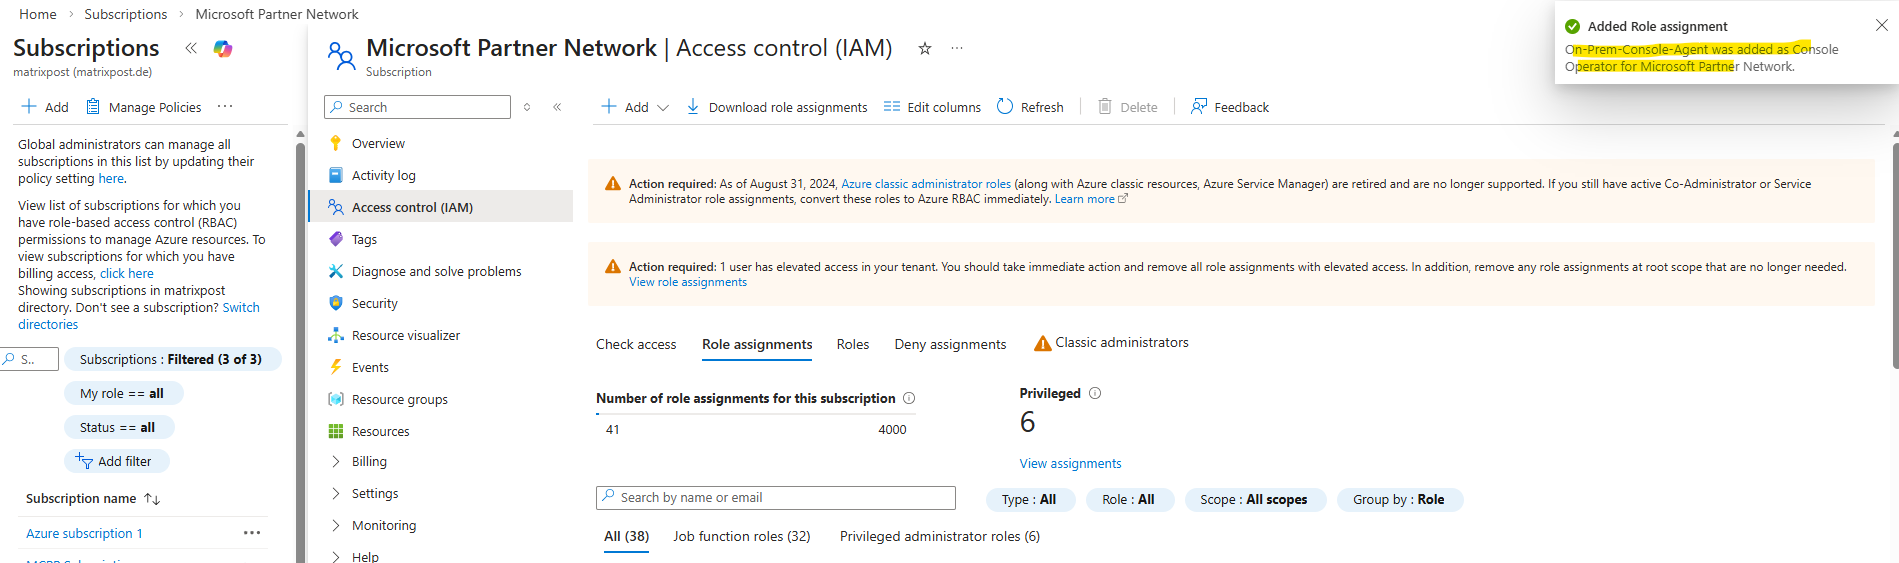
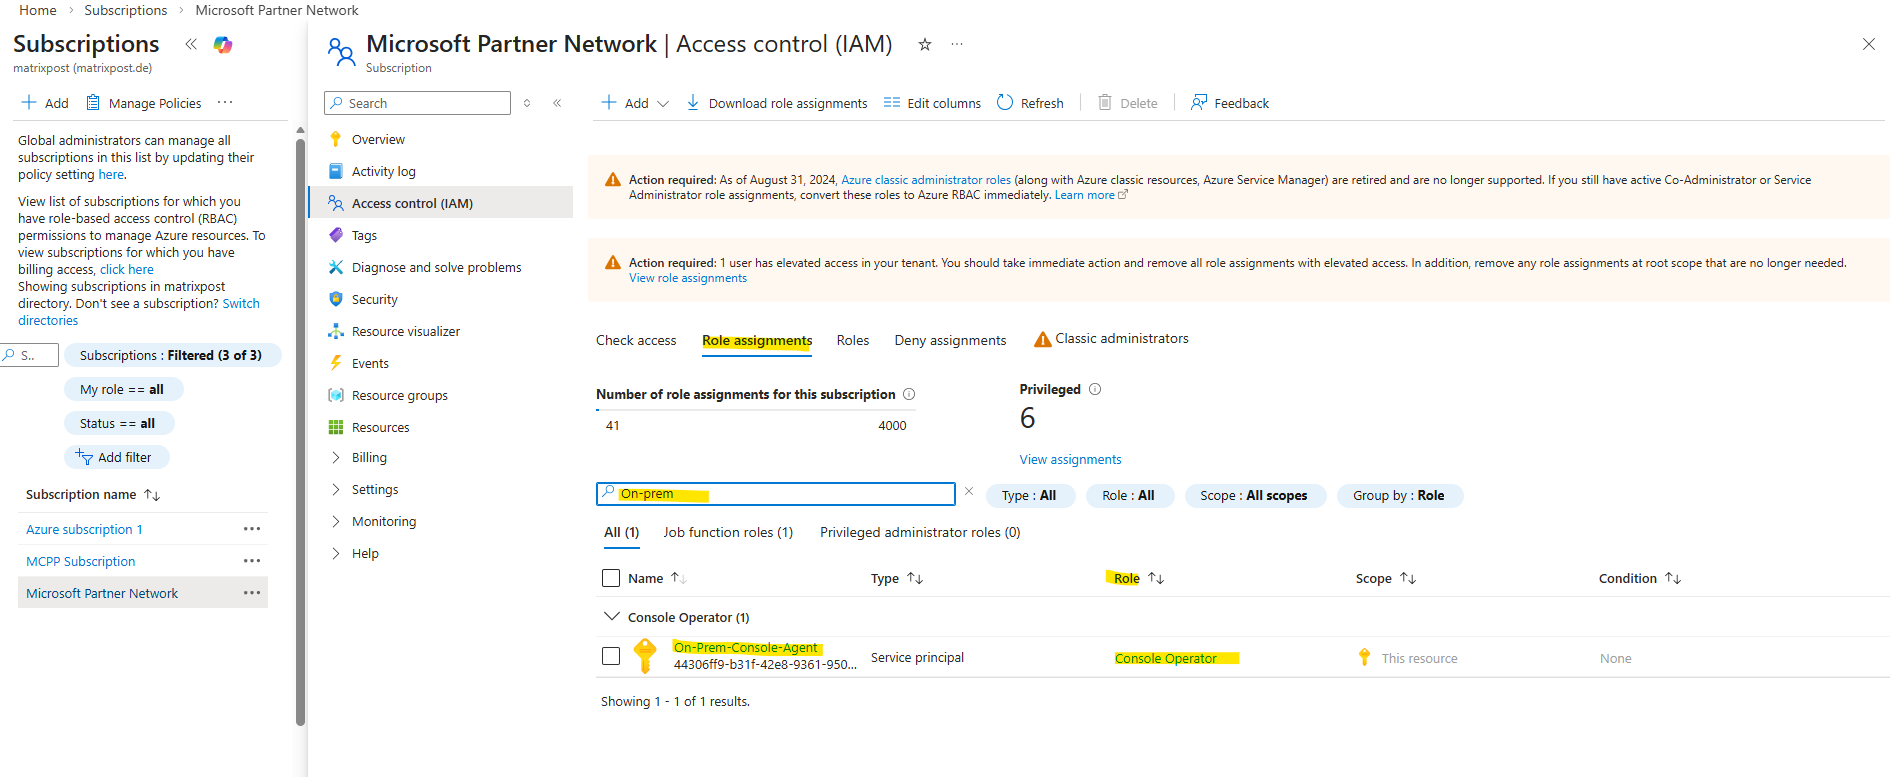
Our new custom role was successfully assigned to the application (service principal).
The service principal now has the required Azure permissions for our on-premises console agent.
If not already noted, we now need to obtain the application ID and directory ID for the application (service principal).
Navigate to Entra ID -> Manage -> App registrations -> All applications and search for our newly created application (service principal) and click on it.
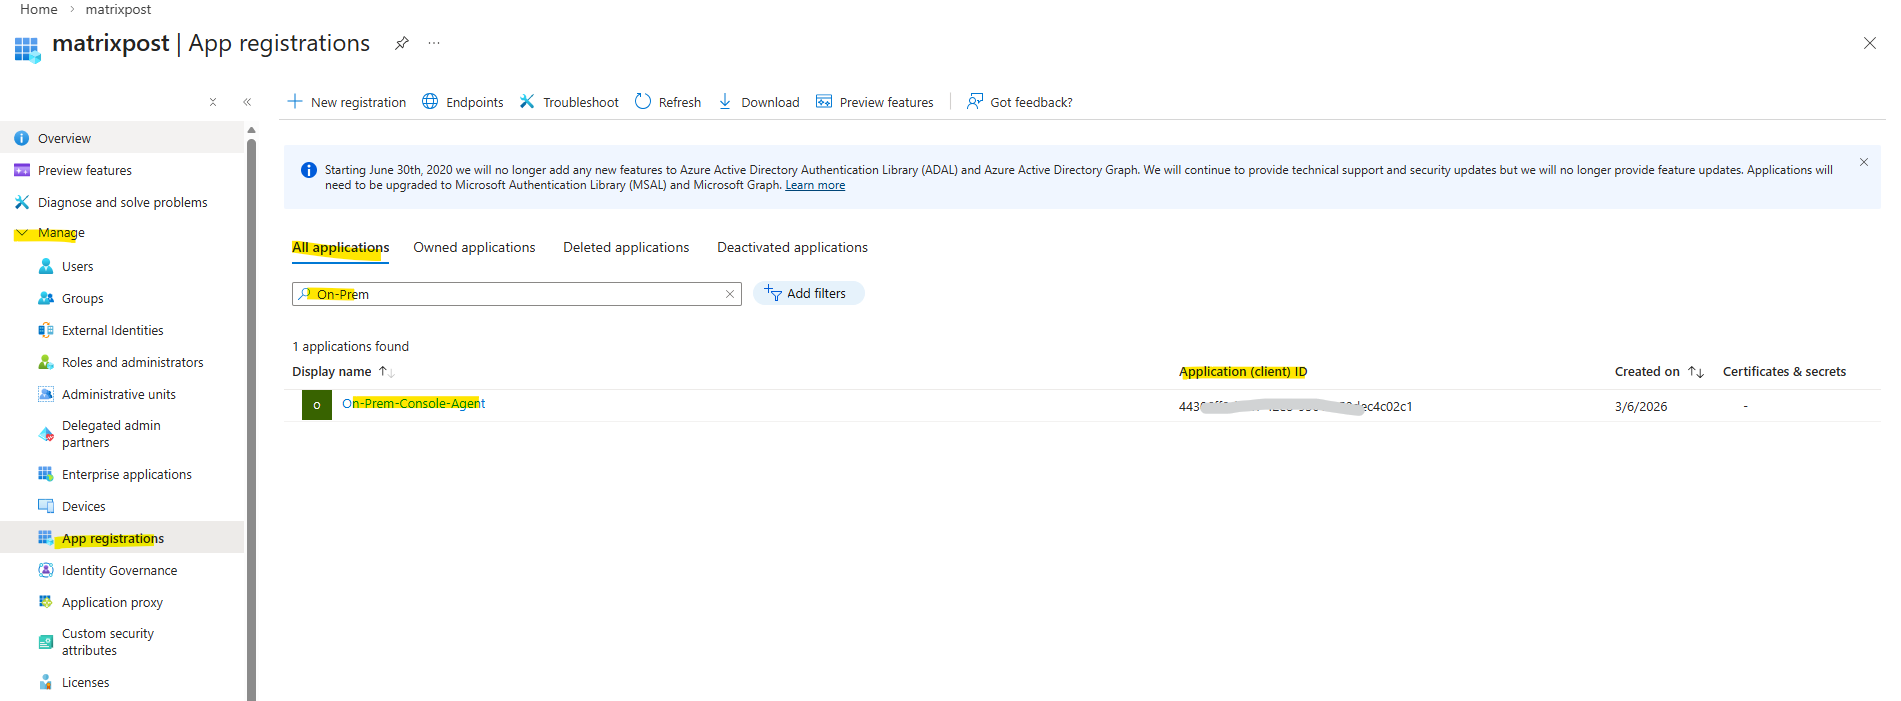
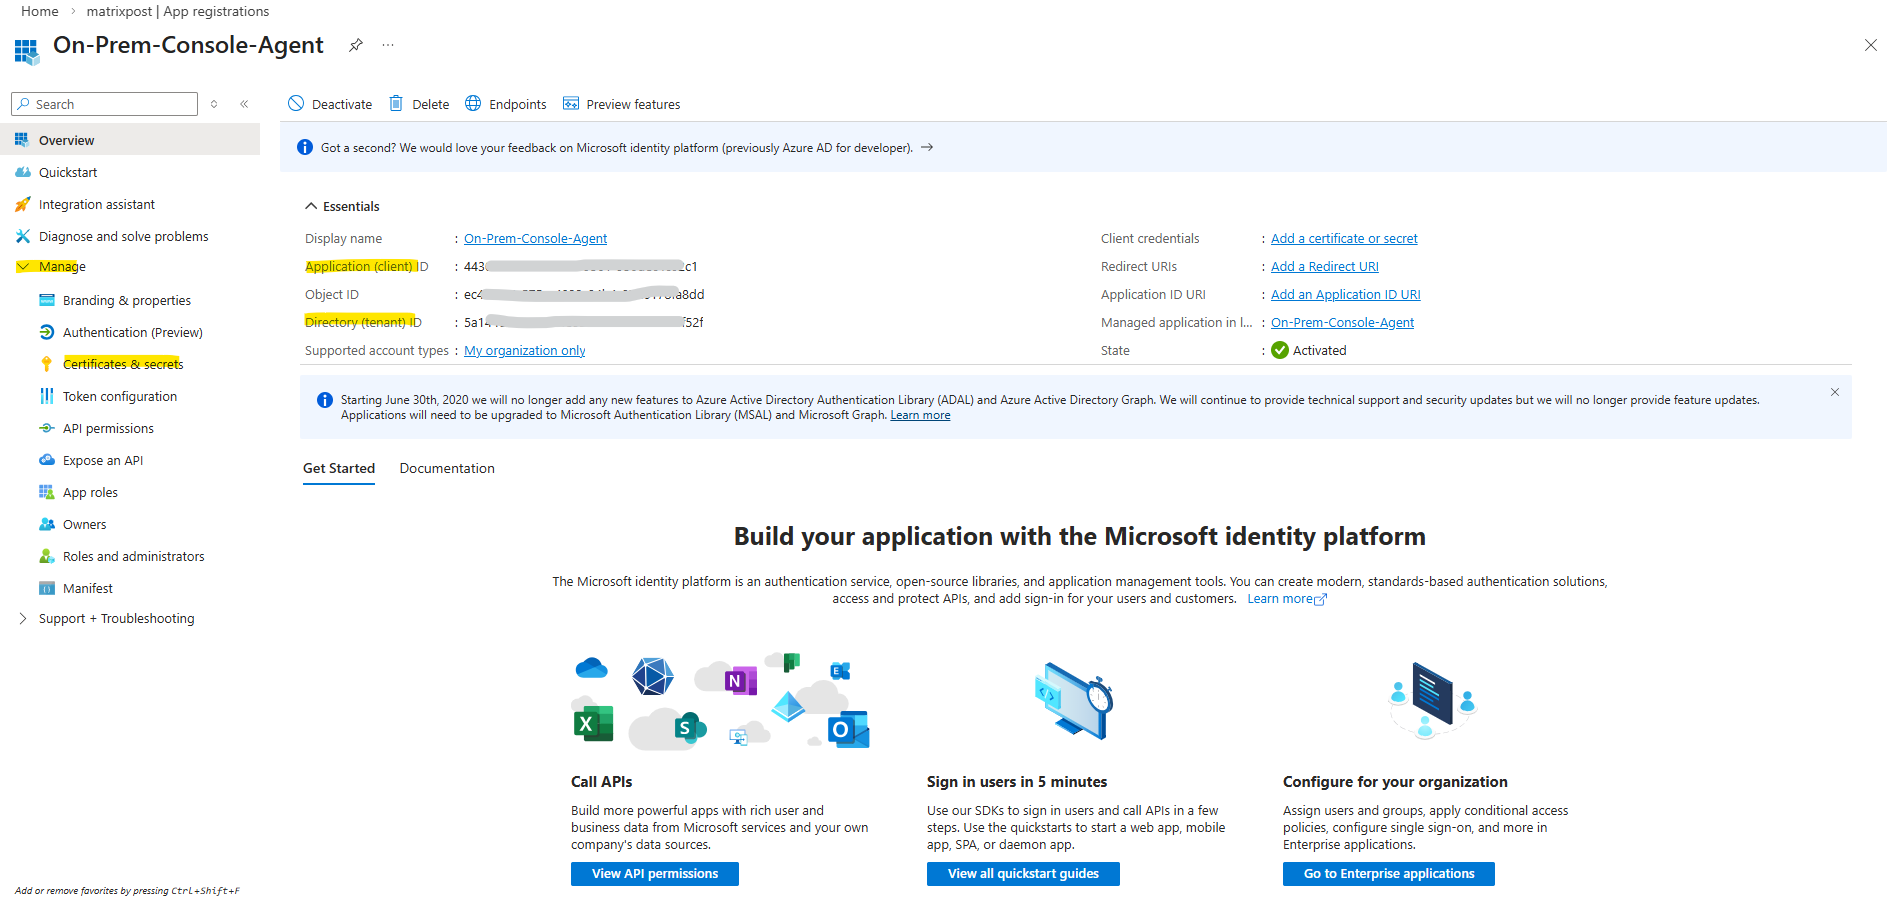
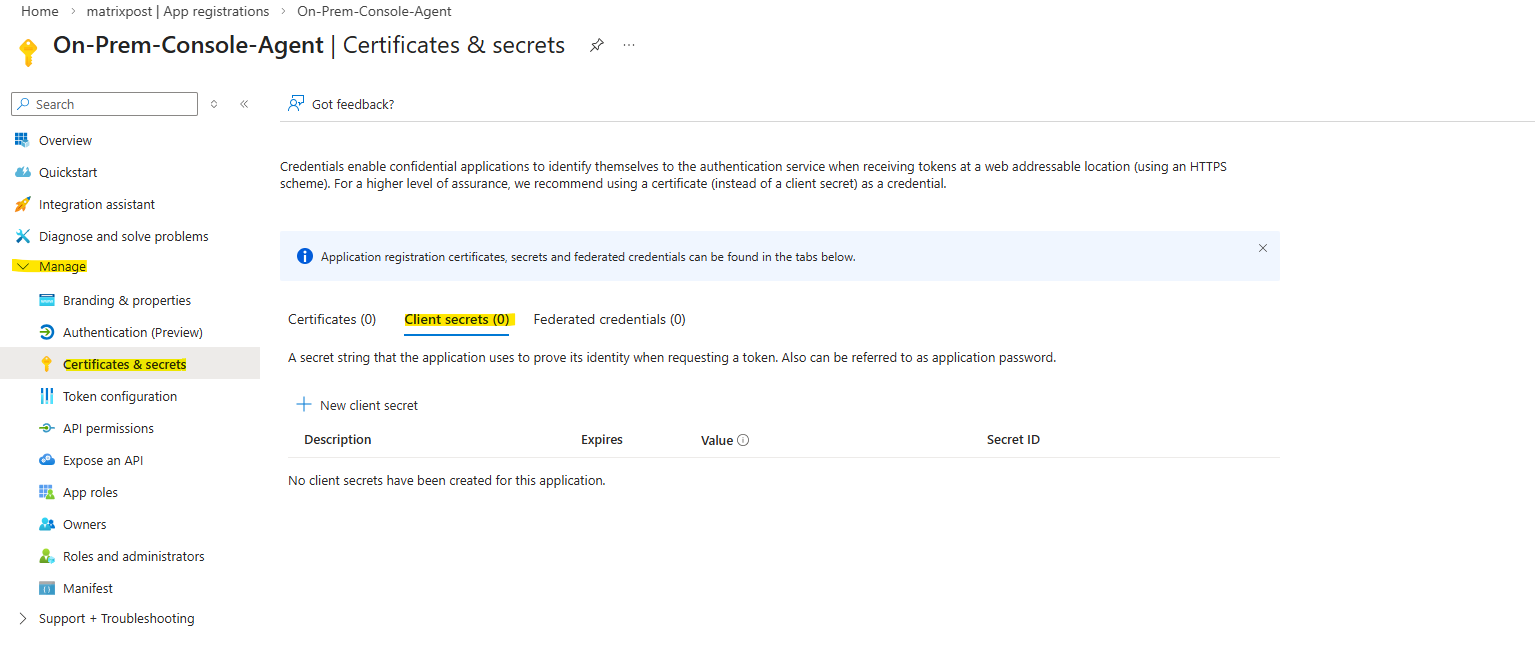
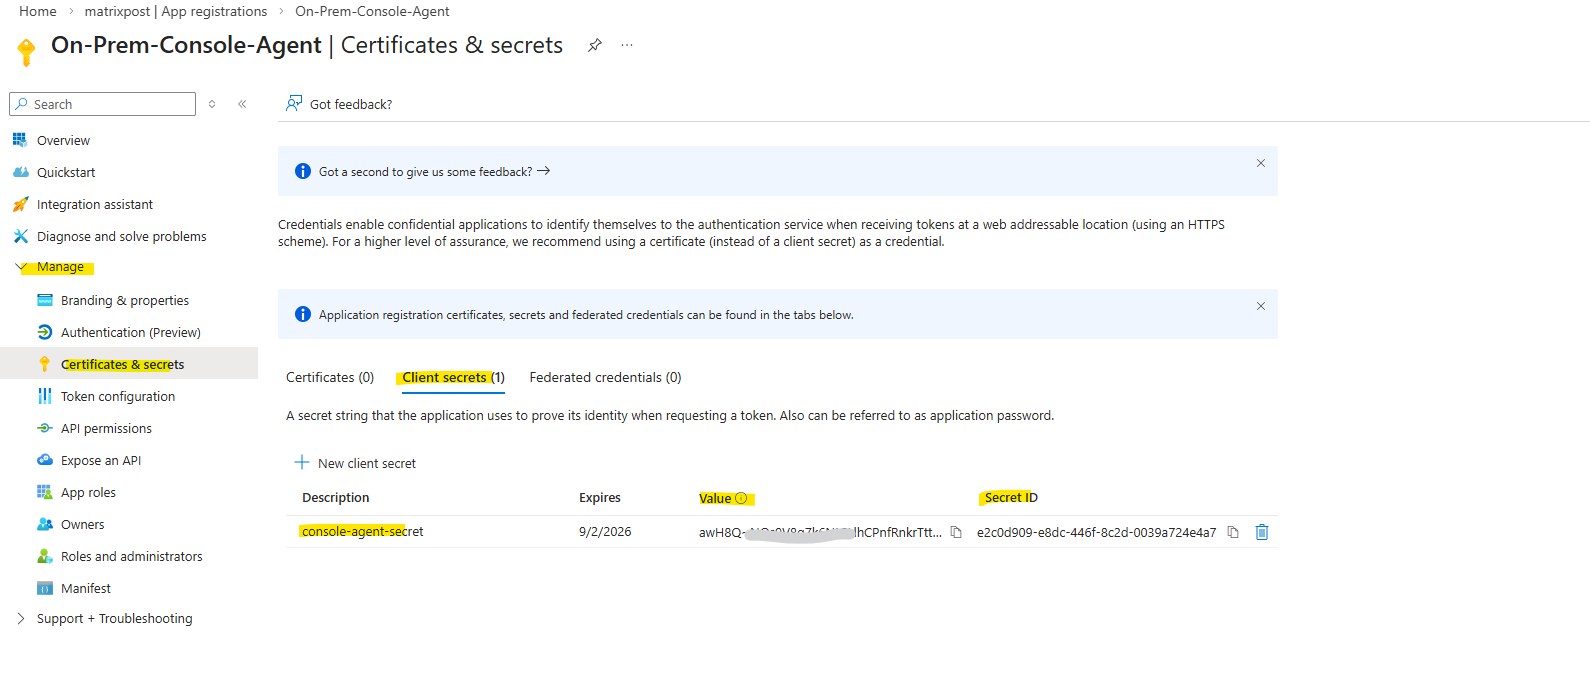
Copy the Application (client) ID and the Directory (tenant) ID. Next we also need to create a new client secret for the application, therefore navigate to Manage -> Certificates & secrets.
Within Client secrets tab click on + New client secret below.
Provide a description of the secret and a duration. Select Add.
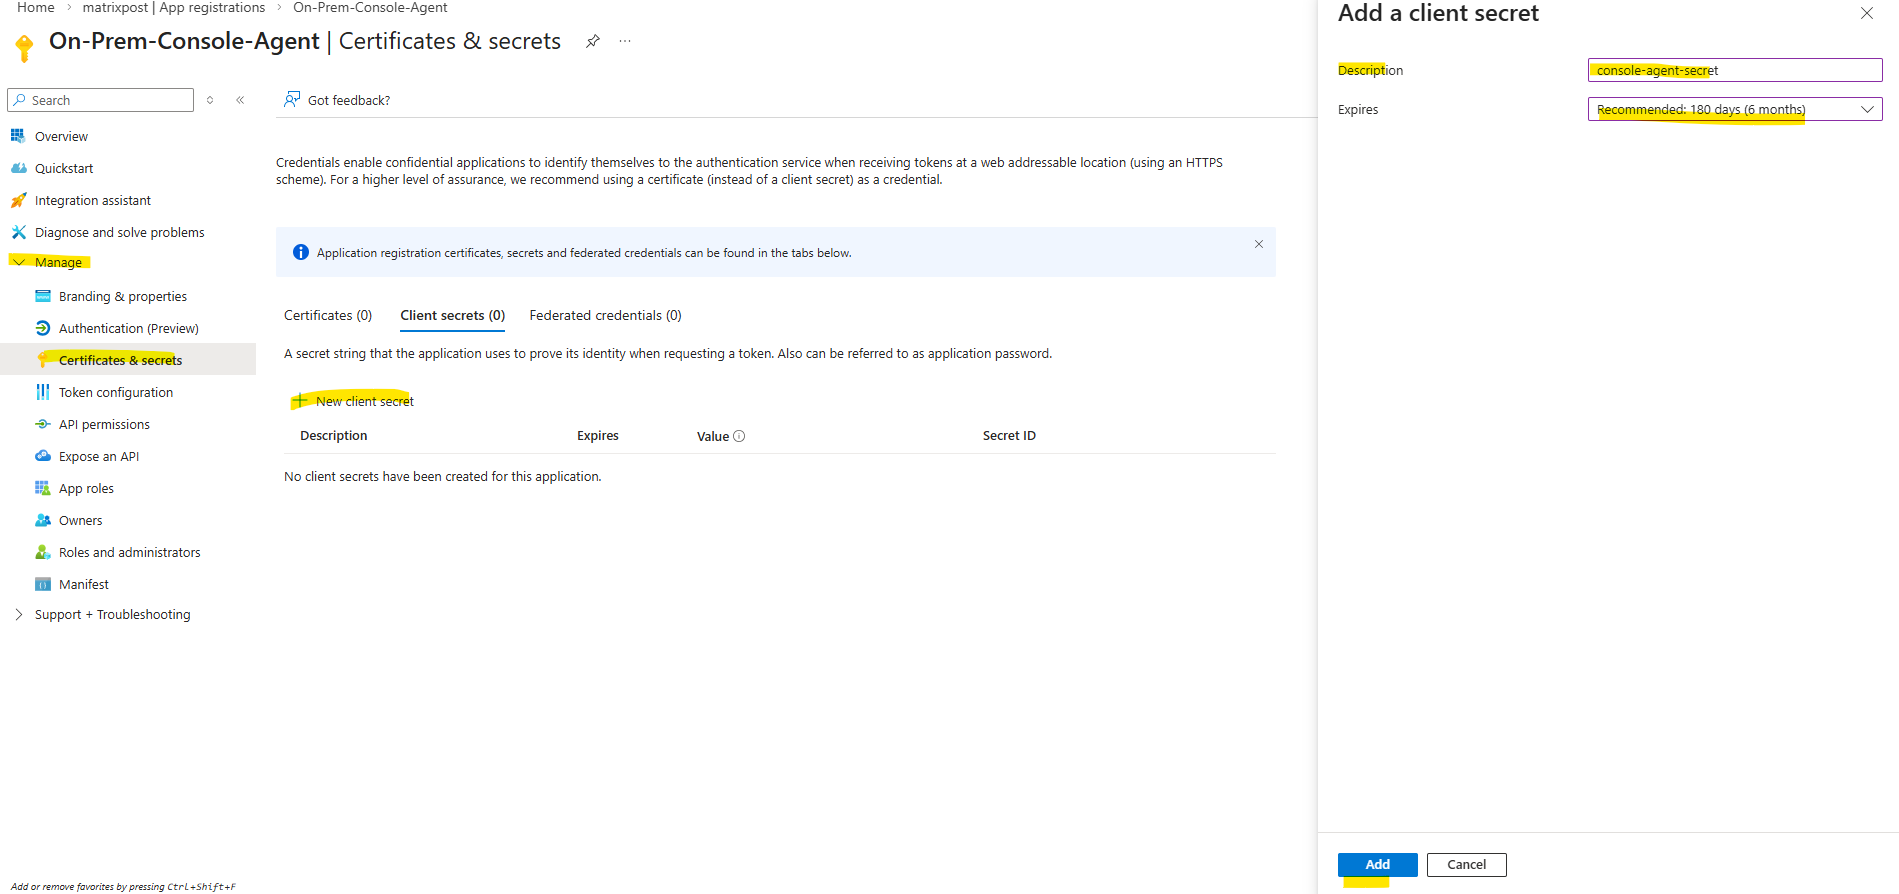
Copy the value of the client secret.
Now we can provide our newly created cloud provider credentials to NetApp Console and our on-premise Console agent.
Adding the Azure Credentials (Service Principle) in the NetApp Console
Before the Backup and Recovery service can access Azure resources, the Service Principal credentials must be added to the NetApp Console.
These credentials allow the on-prem Console Agent to authenticate with Azure and manage the required resources within the selected subscription.
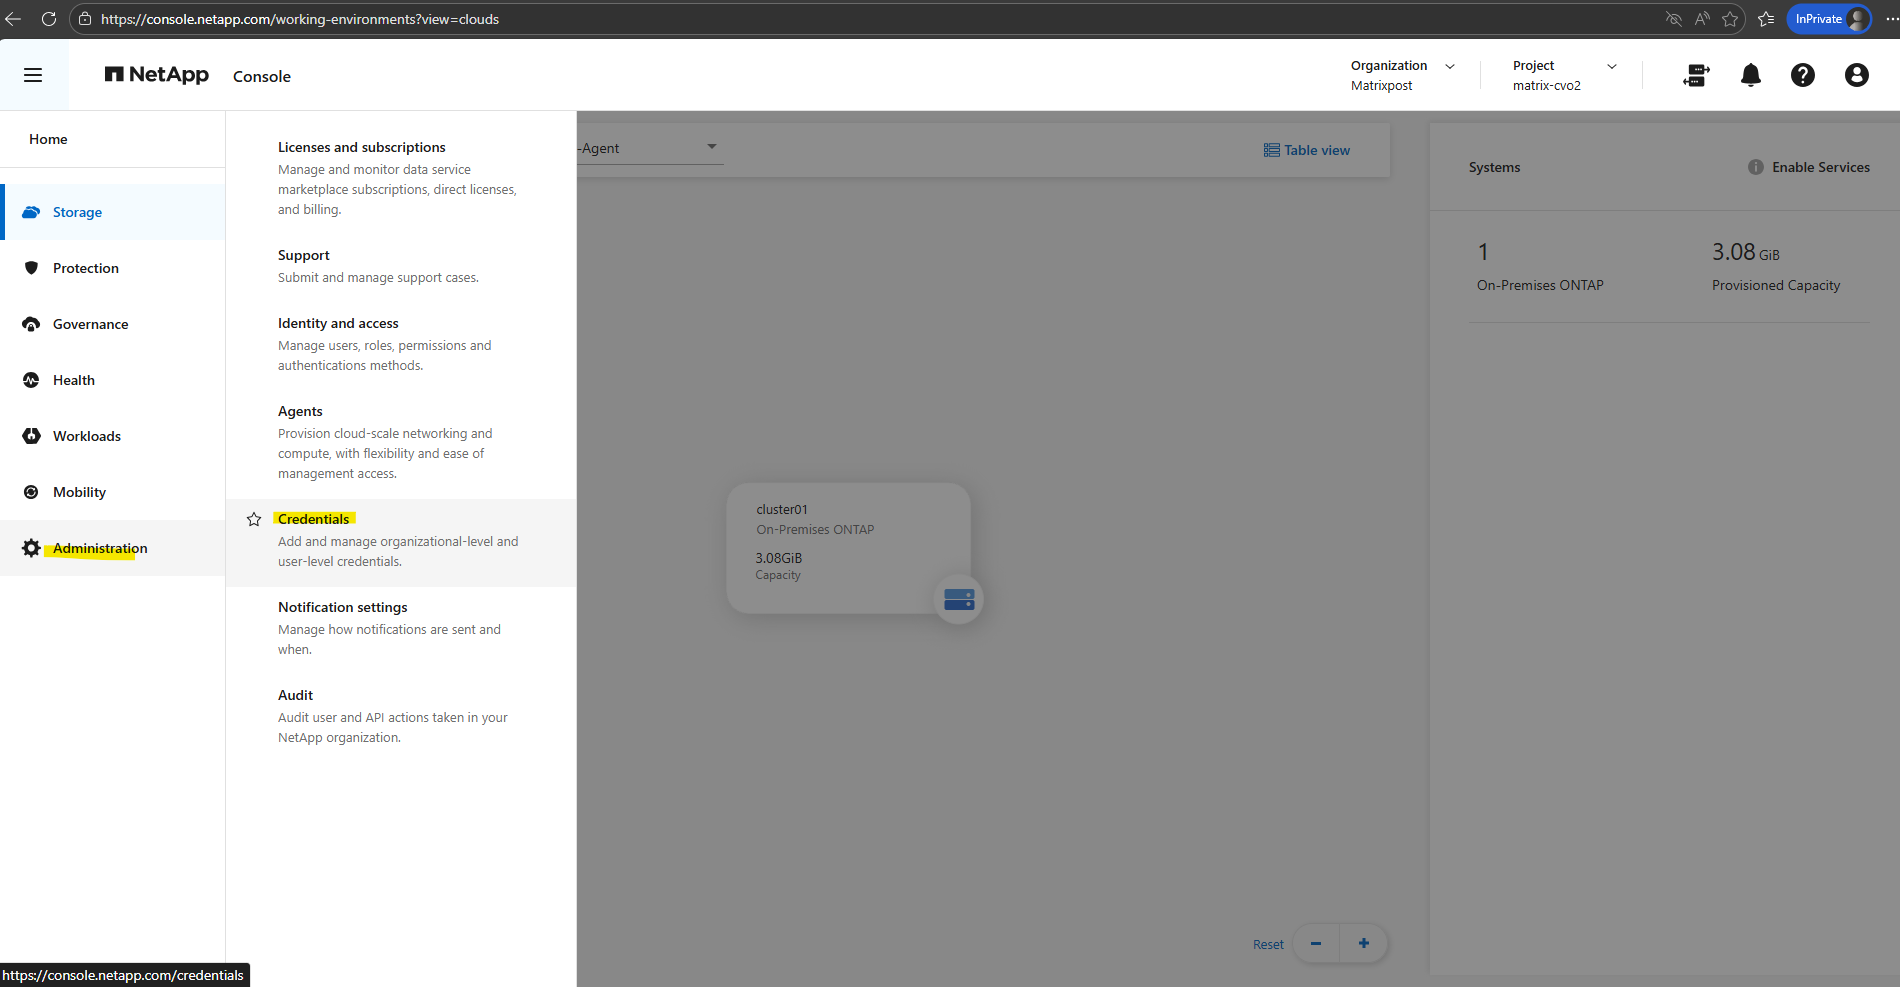
In the NetApp console navigate to Administration -> Credentials.
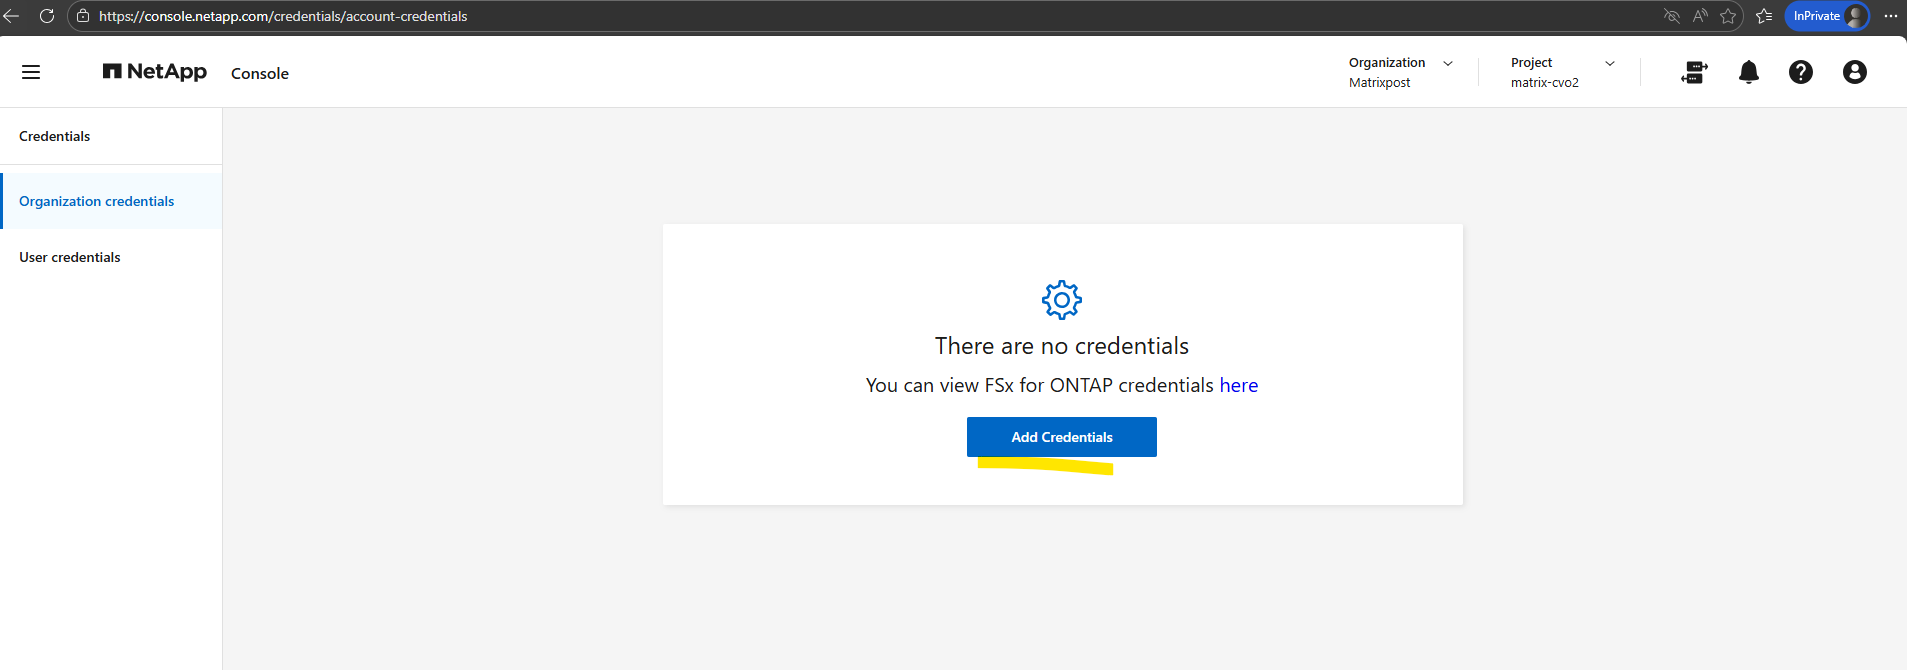
Click on Add Credentials.
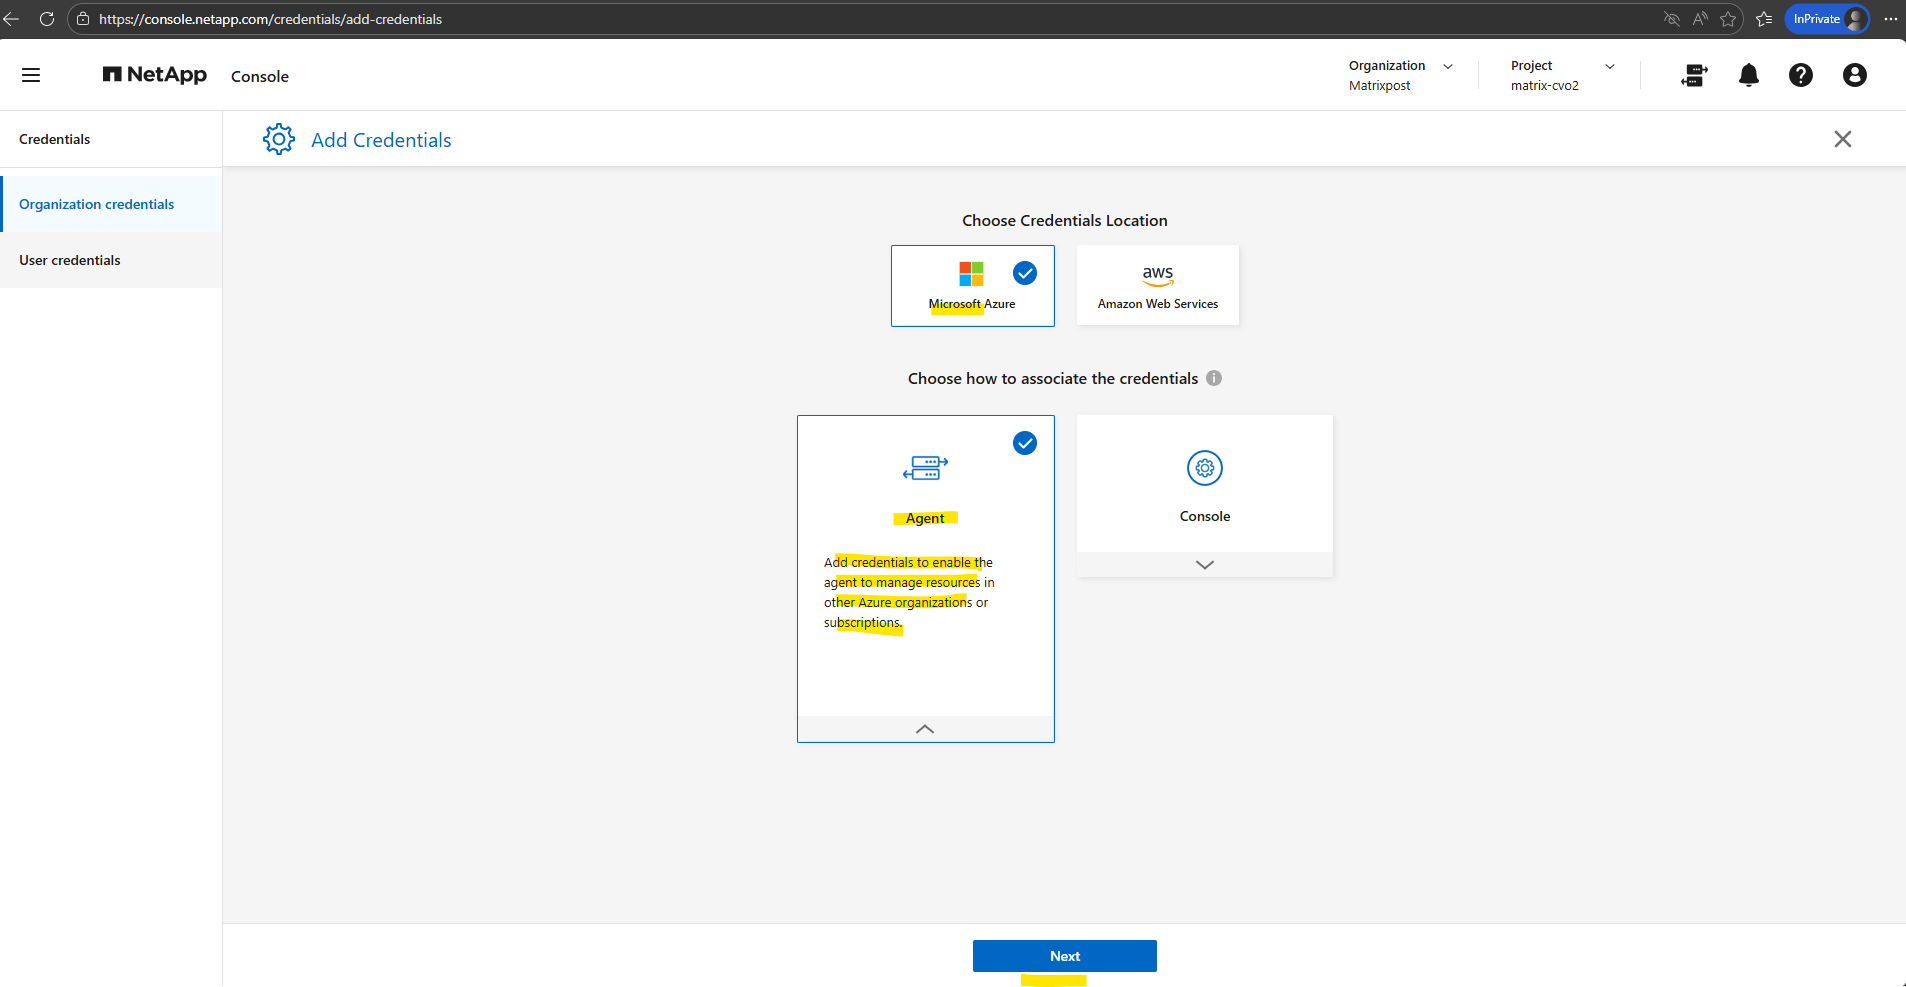
For the Credentials Location: Select Microsoft Azure > Agent. Click on Next.
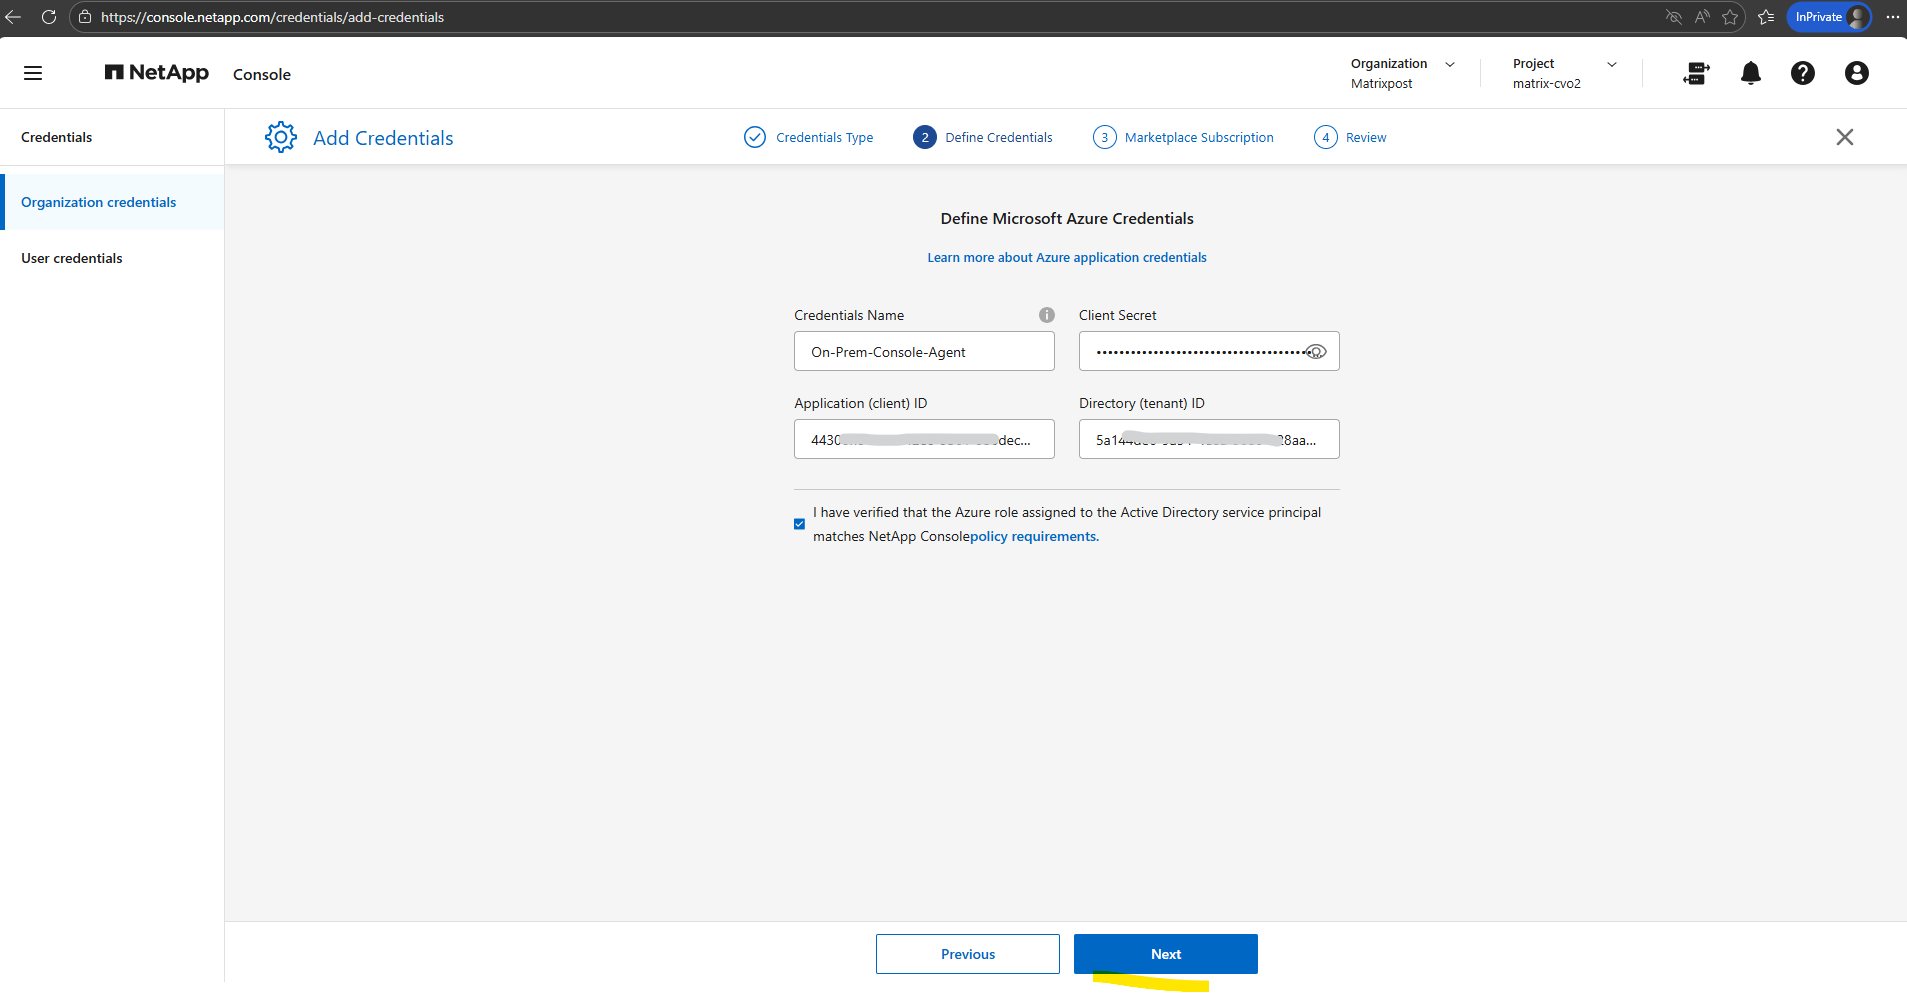
Define Credentials: Enter information about the Microsoft Entra service principal that grants the required permissions:
- Application (client) ID
- Directory (tenant) ID
- Client Secret
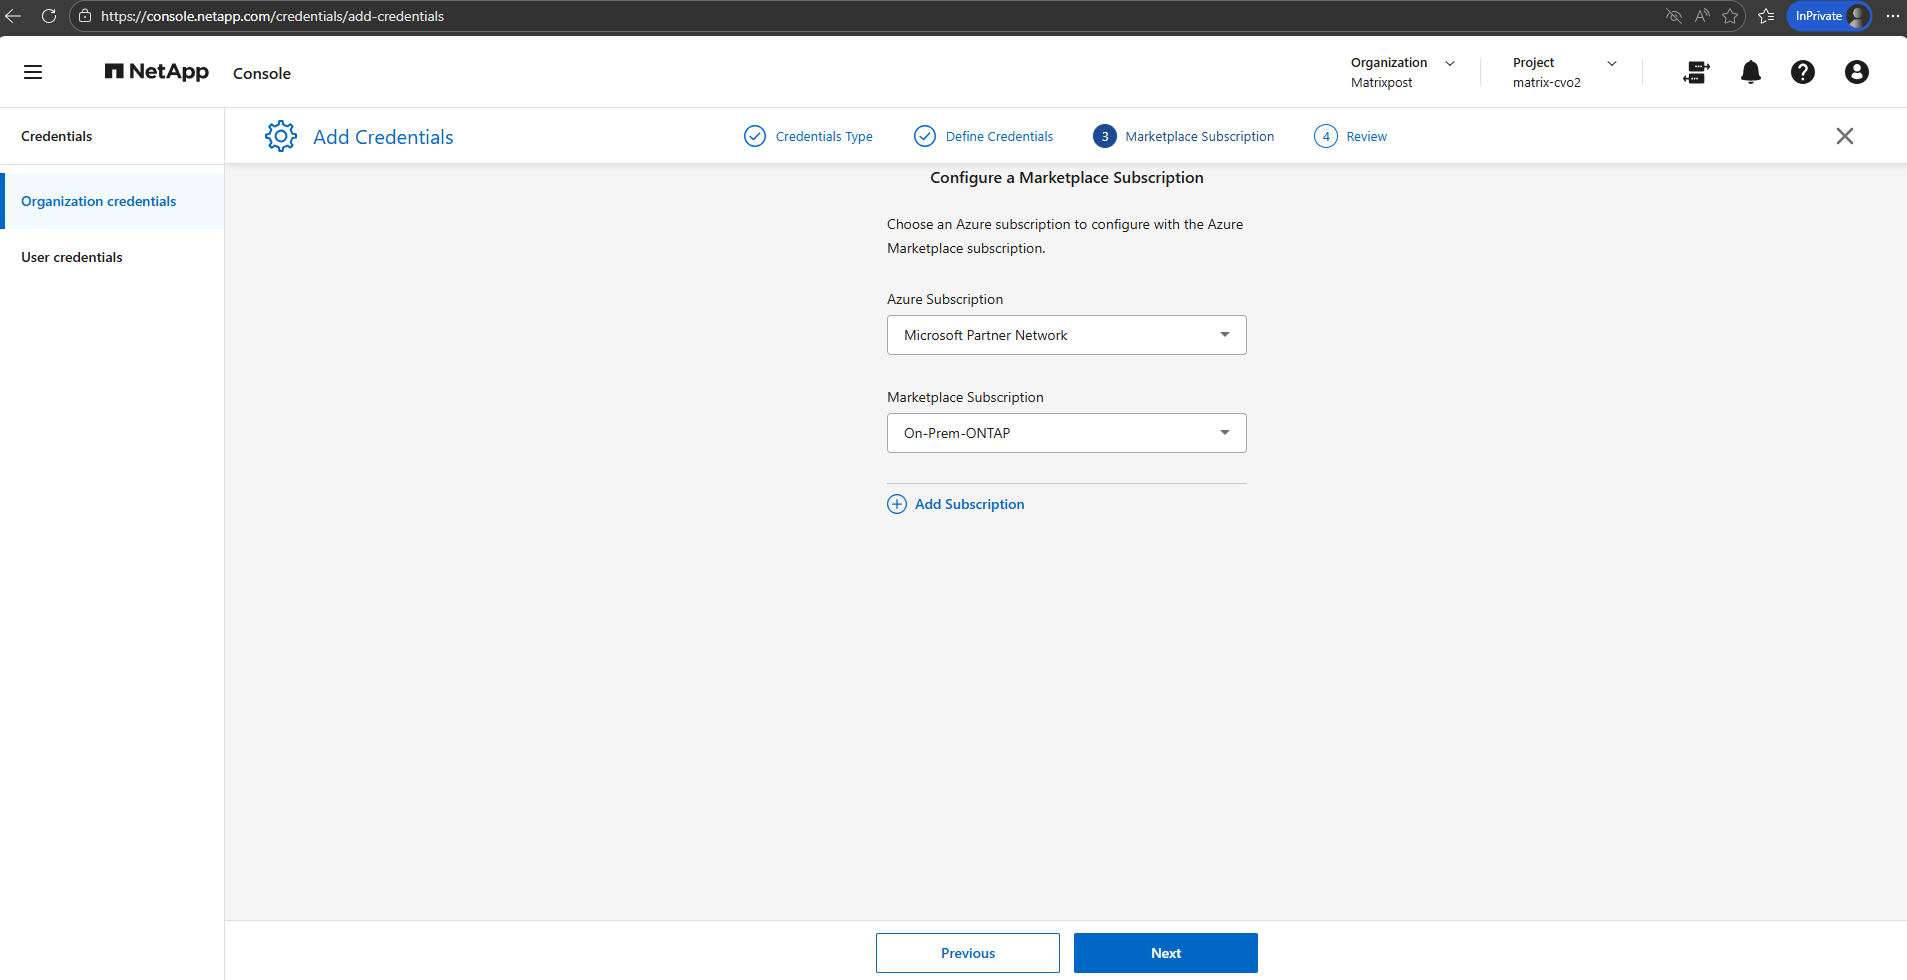
Associate a Marketplace subscription with these credentials by subscribing now or by selecting an existing subscription.
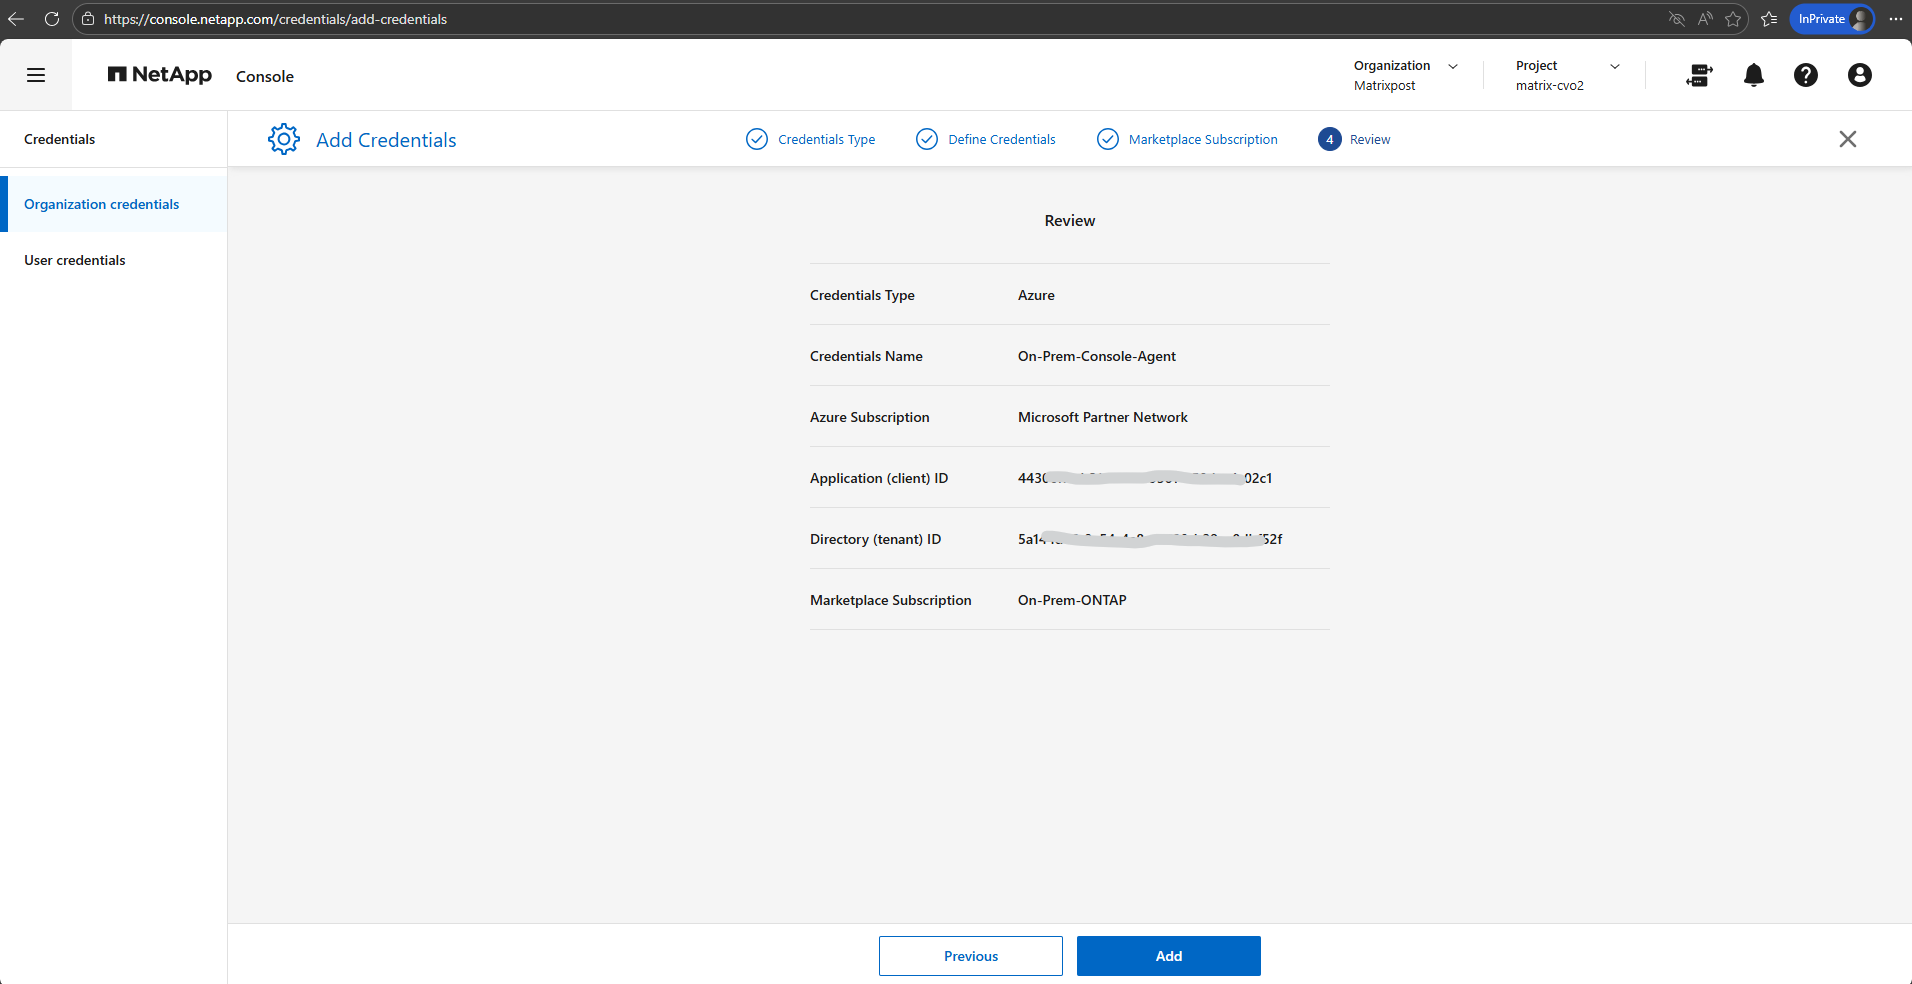
Confirm the details about the new credentials and select Add.
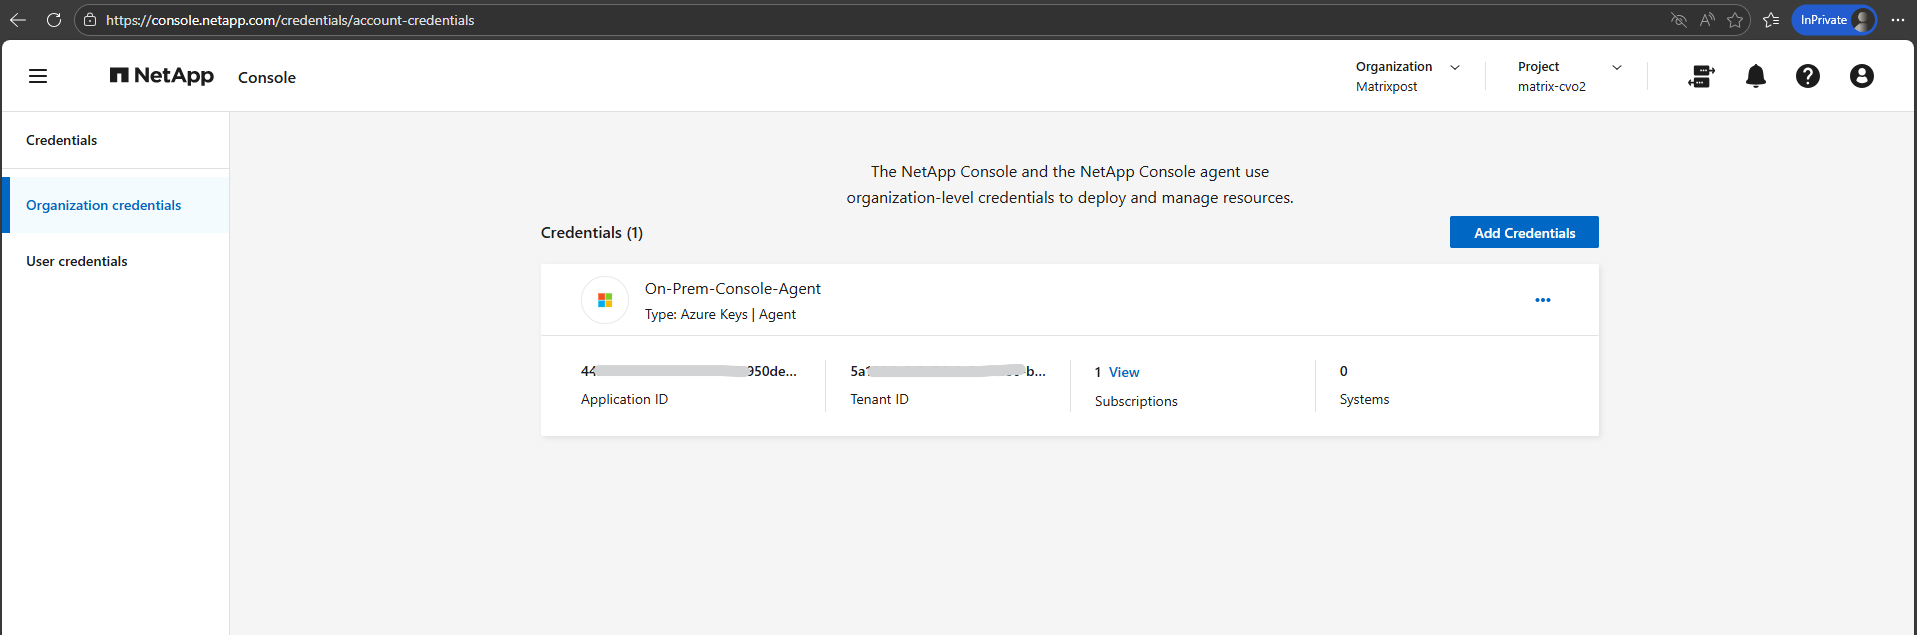
The Console agent now has the permissions that it needs to perform actions in Azure on your behalf. You can now go to the NetApp Console to start using the Console agent.
Enable Backup and Recovery
Finally we can now enable Backup and Recovery in the NetApp Console (formerly BlueXP) to establish a comprehensive data protection strategy for our on-premises ONTAP (in my case just a simulator) system.
We configure local Snapshot copies for fast, space-efficient restores and define backup policies to object storage for long-term retention and protection against data loss.
In the NetApp console navigate to Storage -> Management, select the OnPrem ONTAP system you want to enable Backup and Recovery and on the shown up right bar click on Enable for Backup and Recovery as shown below.
Select Backup Volumes.
Backup and Recovery in the NetApp Console is not limited to protecting individual ONTAP volumes. The service also supports protecting applications and virtual machines, enabling consistent backups for workloads such as databases or VM environments in addition to standard volume-level protection.
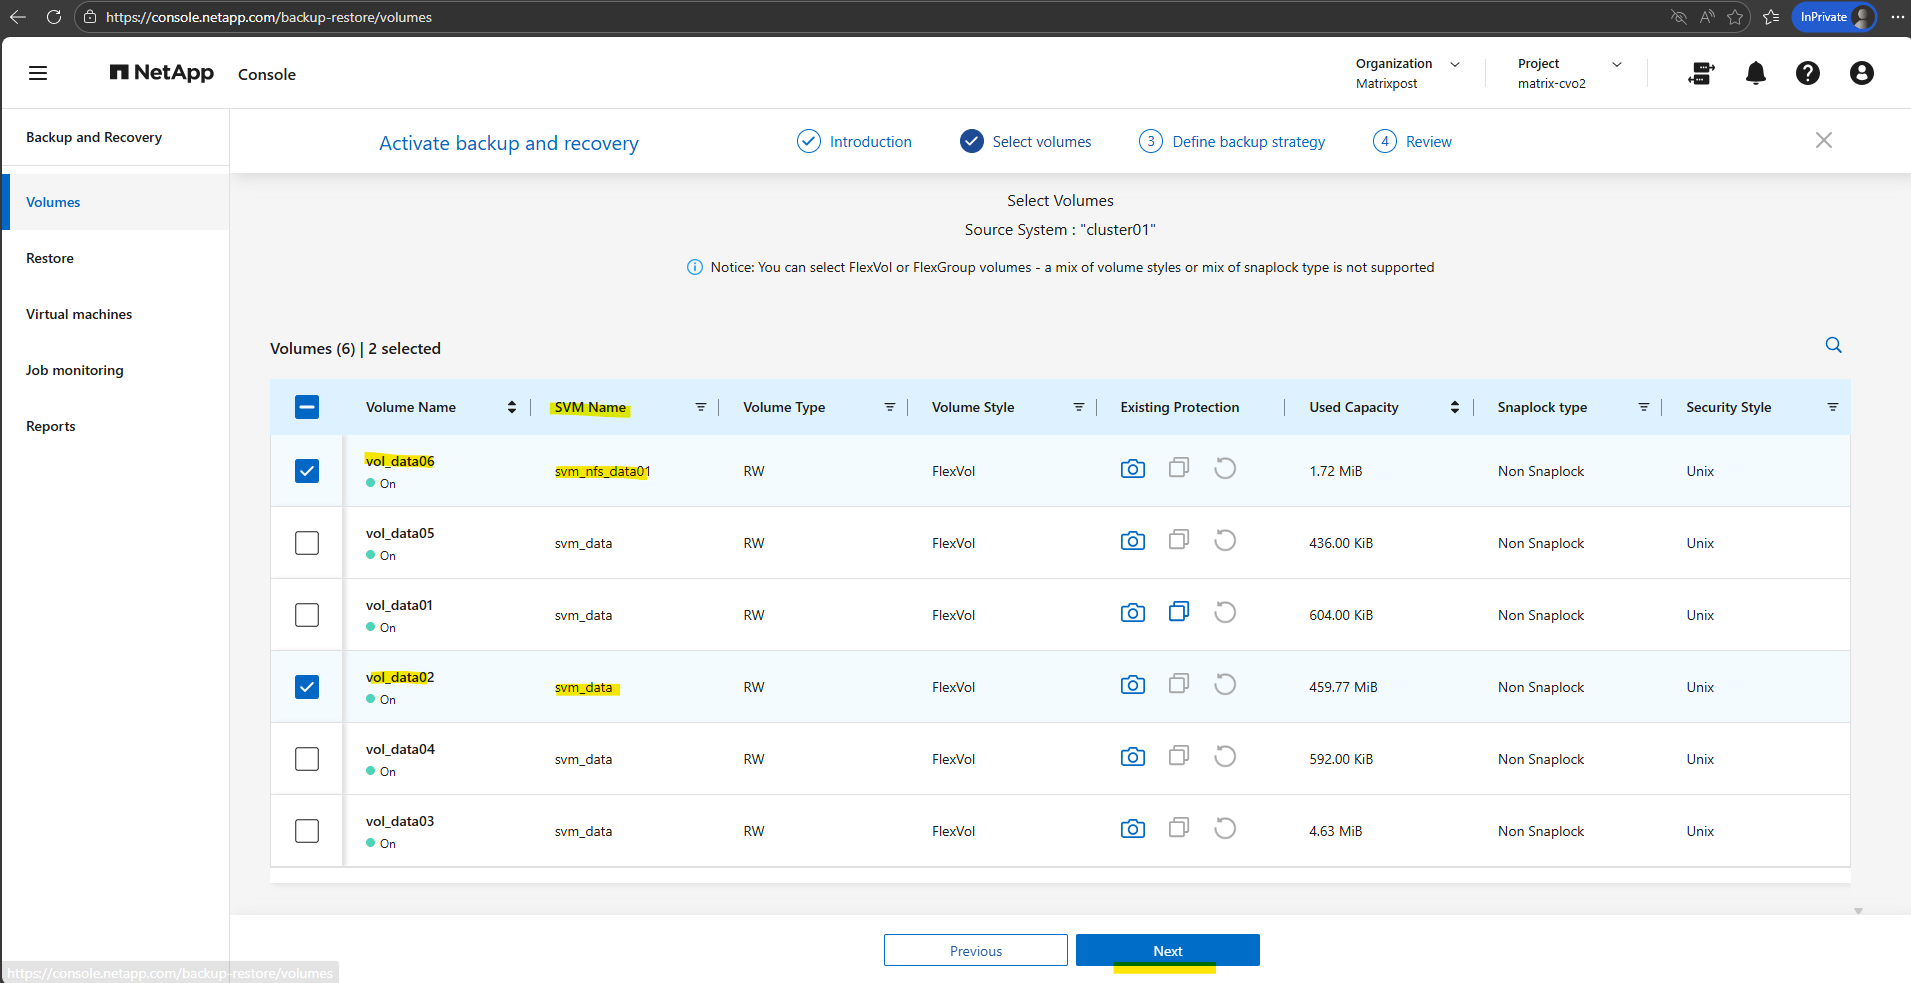
Select the volumes you want to protect and click on Next. I will select below the two highlighted volumes, the volume for NFS exports and the volume for CIFS shares.
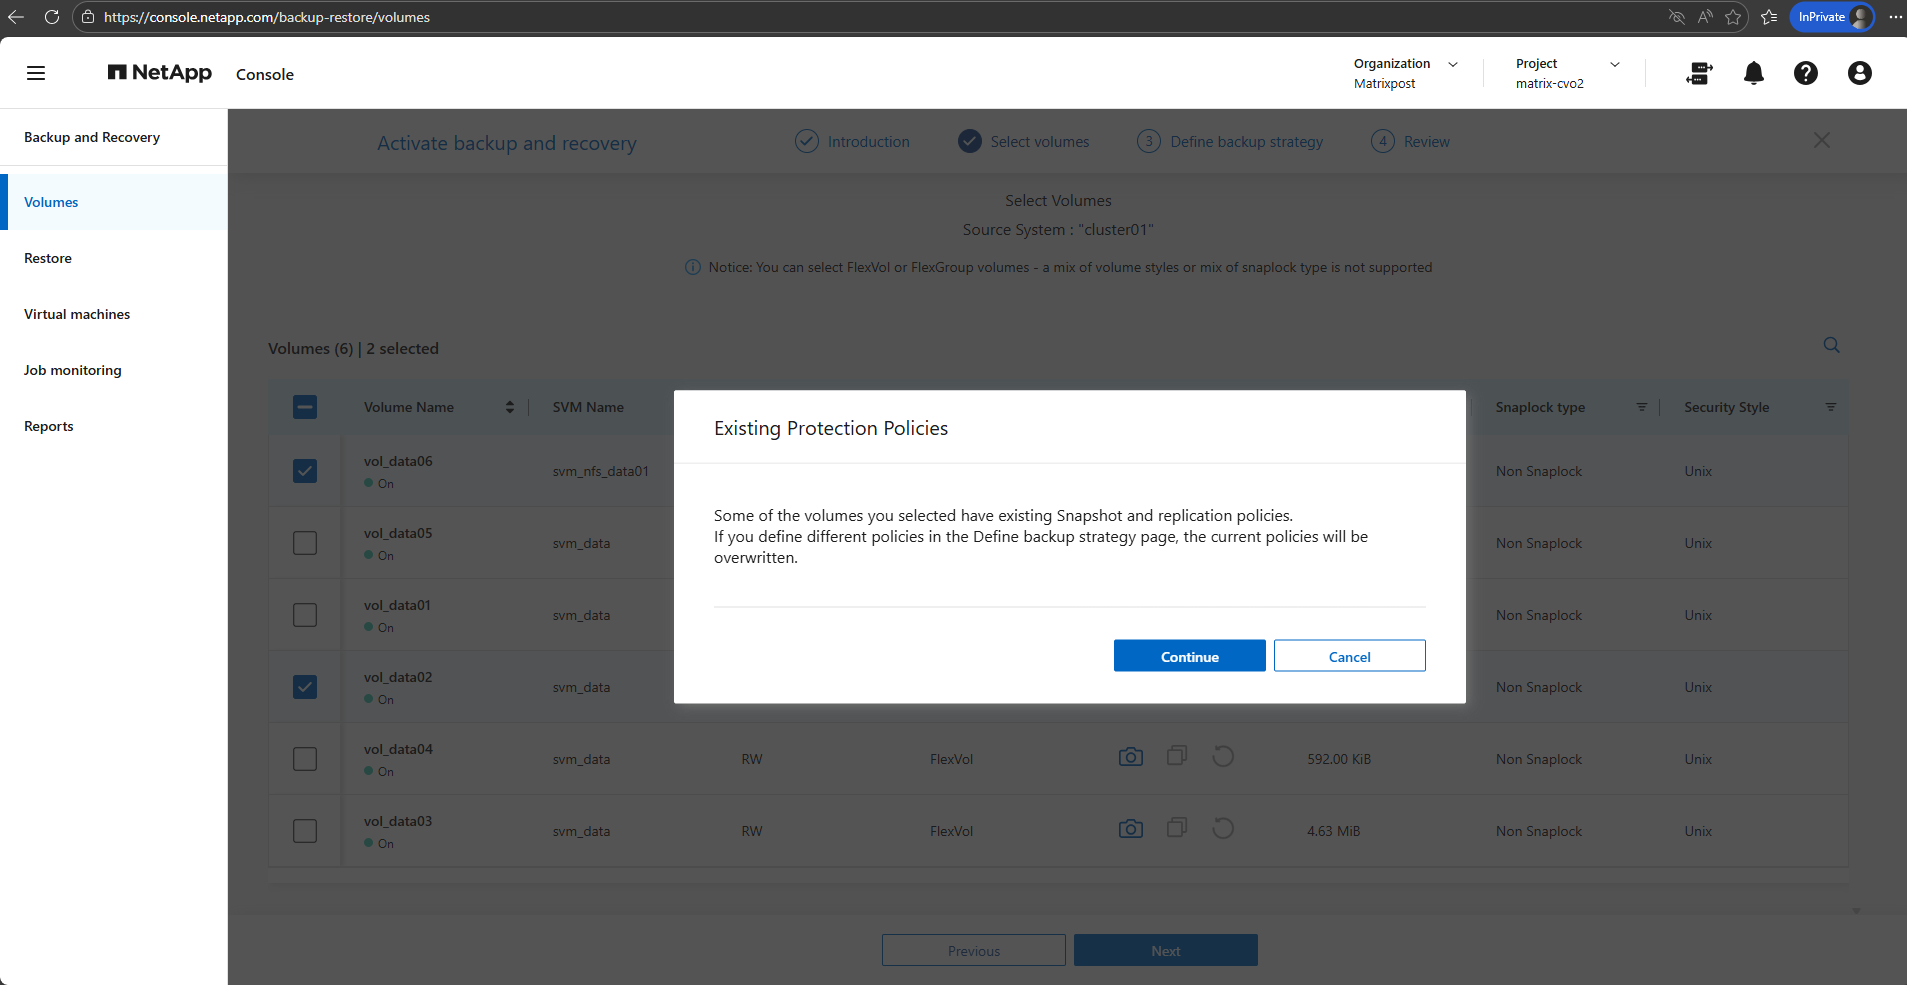
When selecting the volumes above to protect, we may see a notification like below stating that some volumes already have Snapshot and replication policies assigned.
This warning indicates that any policies defined in the Define Backup Strategy step will replace the existing configurations, ensuring that the selected volumes follow a consistent protection model.
Before proceeding, it is recommended to review the current policies to avoid unintentionally changing retention settings or overwriting an established data protection approach.
- Local Snapshots: If you already had a policy (e.g., “keep 5 daily snapshots”), the wizard will overwrite that with whatever you select in the “Local Snapshots” step of the wizard.
- Backup (Cloud): This adds the rule to send those snapshots to Azure Blob storage (the part that costs ~$0.05/GiB).
- Policy Conflict: If you click Continue and finish the wizard, the NetApp console will push a new configuration to the OnPrem ONTAP instance. Existing snapshots aren’t usually deleted immediately, but the schedule that creates them will change
The “Backup” vs. “Snapshot” Distinction: * Snapshots are local (stored on the OnPrem ONTAP system disks). They are fast but don’t protect you if the OnPrem ONTAP system disk/instance fails.
Backups are the ones sent to Azure Blob. This is what triggers the extra billing.
CIFS/NFS Differences: * For your CIFS (SMB) shares, snapshots are what allow Windows users to use the “Previous Versions” tab to recover files. If you change the policy here, just ensure you keep enough “Local Snapshots” so users can still do self-service recovery without you having to pull data back from the Cloud (which costs money).
Configure and Activate Backups and Local Snapshots
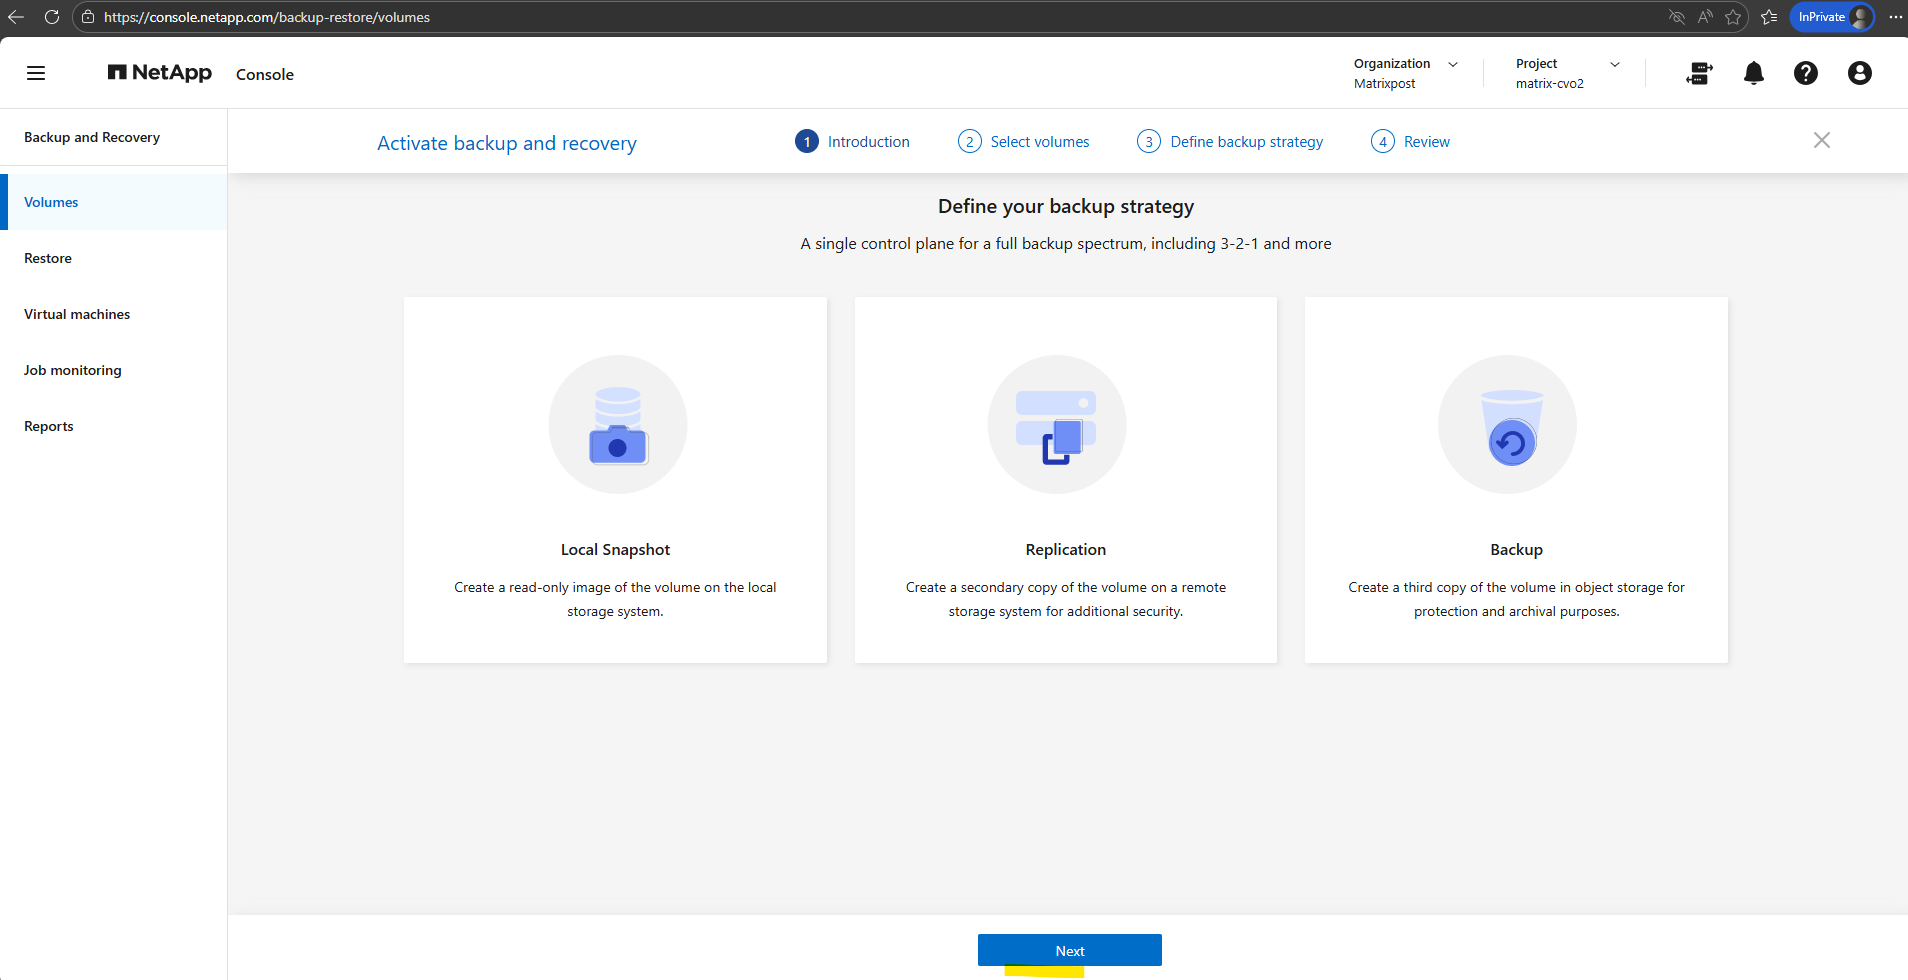
Now we need to choose which protection methods to enable, local Snapshots, replication, and backup, and either assign existing policies or create new ones aligned with our retention requirements.
We also provide the necessary details for the NetApp Console to automatically deploy the Azure Storage account and finalize the setup by activating the backup.
All protection options are selected by default. Select the options that you want to use for this system.
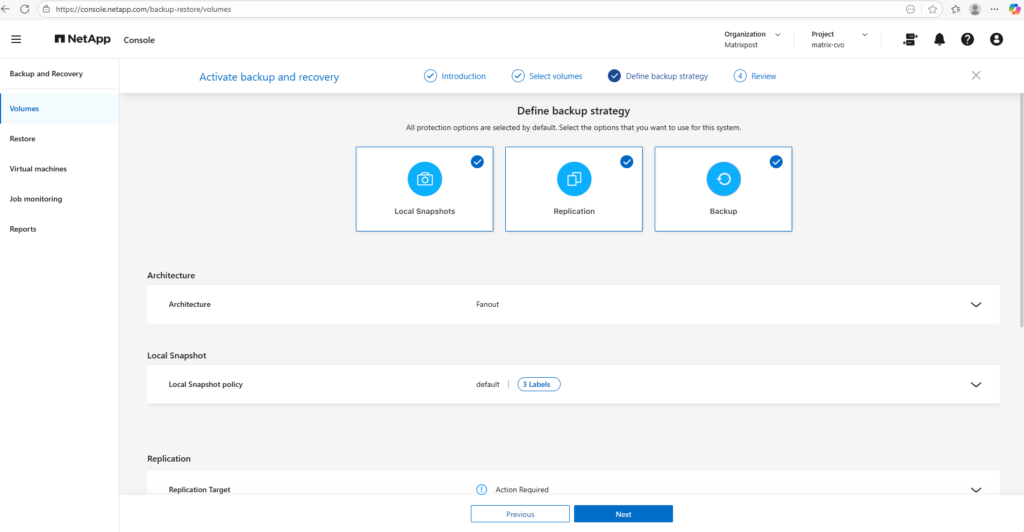
I will just use local snapshots and backups below.
Replication is intentionally skipped in this lab, as it is typically used for cross-system disaster recovery scenarios and our setup currently consists of a single OnPrem ONTAP system instance.
If you uncheck Local Snapshots but leave Backup checked, ONTAP will still create a snapshot temporarily to move the data to the cloud, but it won’t keep a permanent copy on your OnPrem ONTAP system disks for fast recovery.
Replication: This is for sending data to another ONTAP system (DR). Since you likely only have one OnPrem ONTAP system instance, you should uncheck this one to keep things simple.
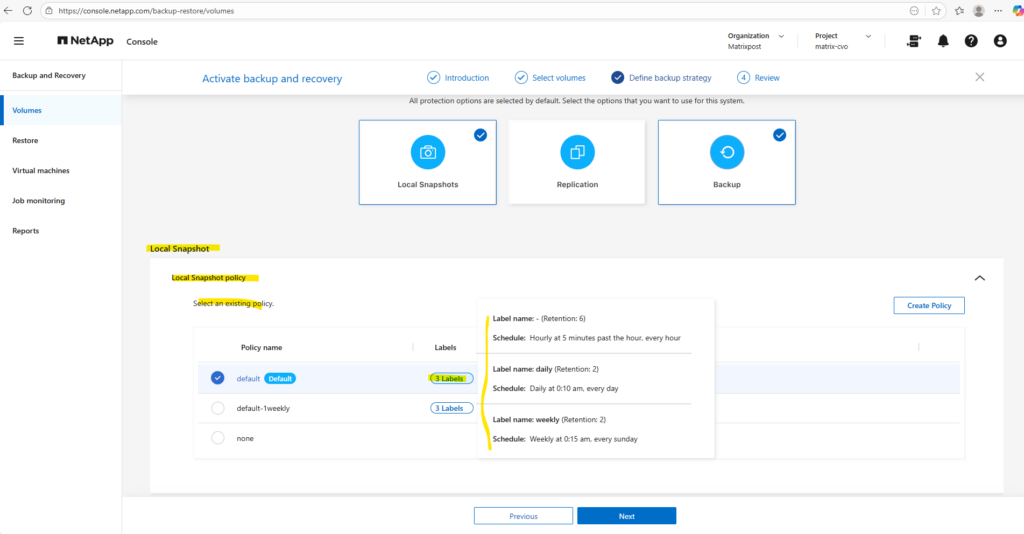
I will leave the default policy with the settings you can see below when moving the mouse over the corresponding label. By clicking on the Create Policy button on the right, we can create a new custom policy.
Those labels are how ONTAP links a specific schedule (when it runs) to a retention (how many it keeps).
For the backup settings we first need to configure the cloud backup target.
In this step, I linked my On-Premises ONTAP instance to an Azure Blob storage account, which serves as the secure, off-site repository for all volume backups.
I opted for NetApp console to automatically create a new storage account, ensuring it was provisioned with cost-optimized Locally Redundant Storage (LRS) and the “Cool” access tier to match my lab environment requirements.
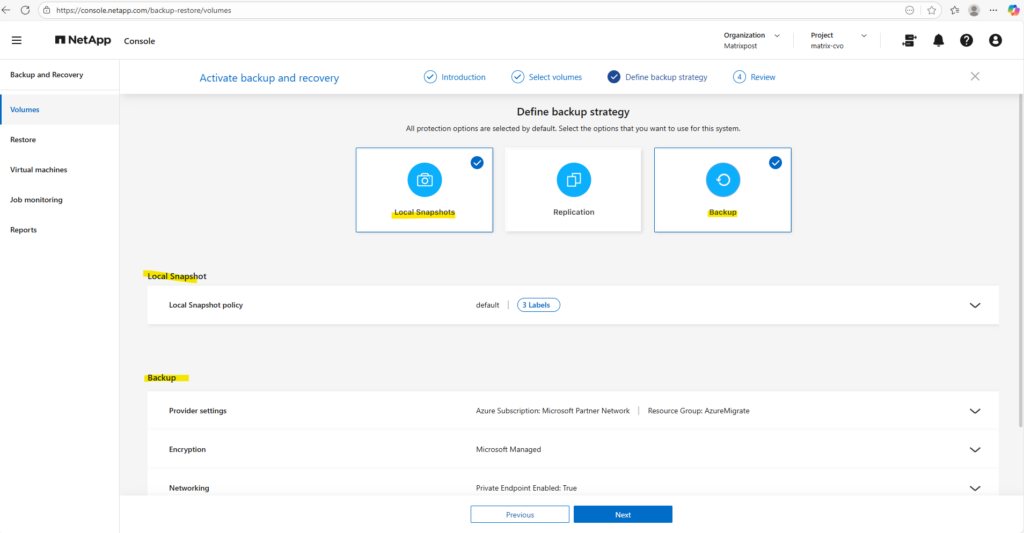
After adding the Azure credentials and linking the subscription, they become available in the Enable Backup and Recovery wizard under Backup → Provider Settings.
The wizard can now list the Azure subscription, region, and resource group, allowing the backup destination to be configured.
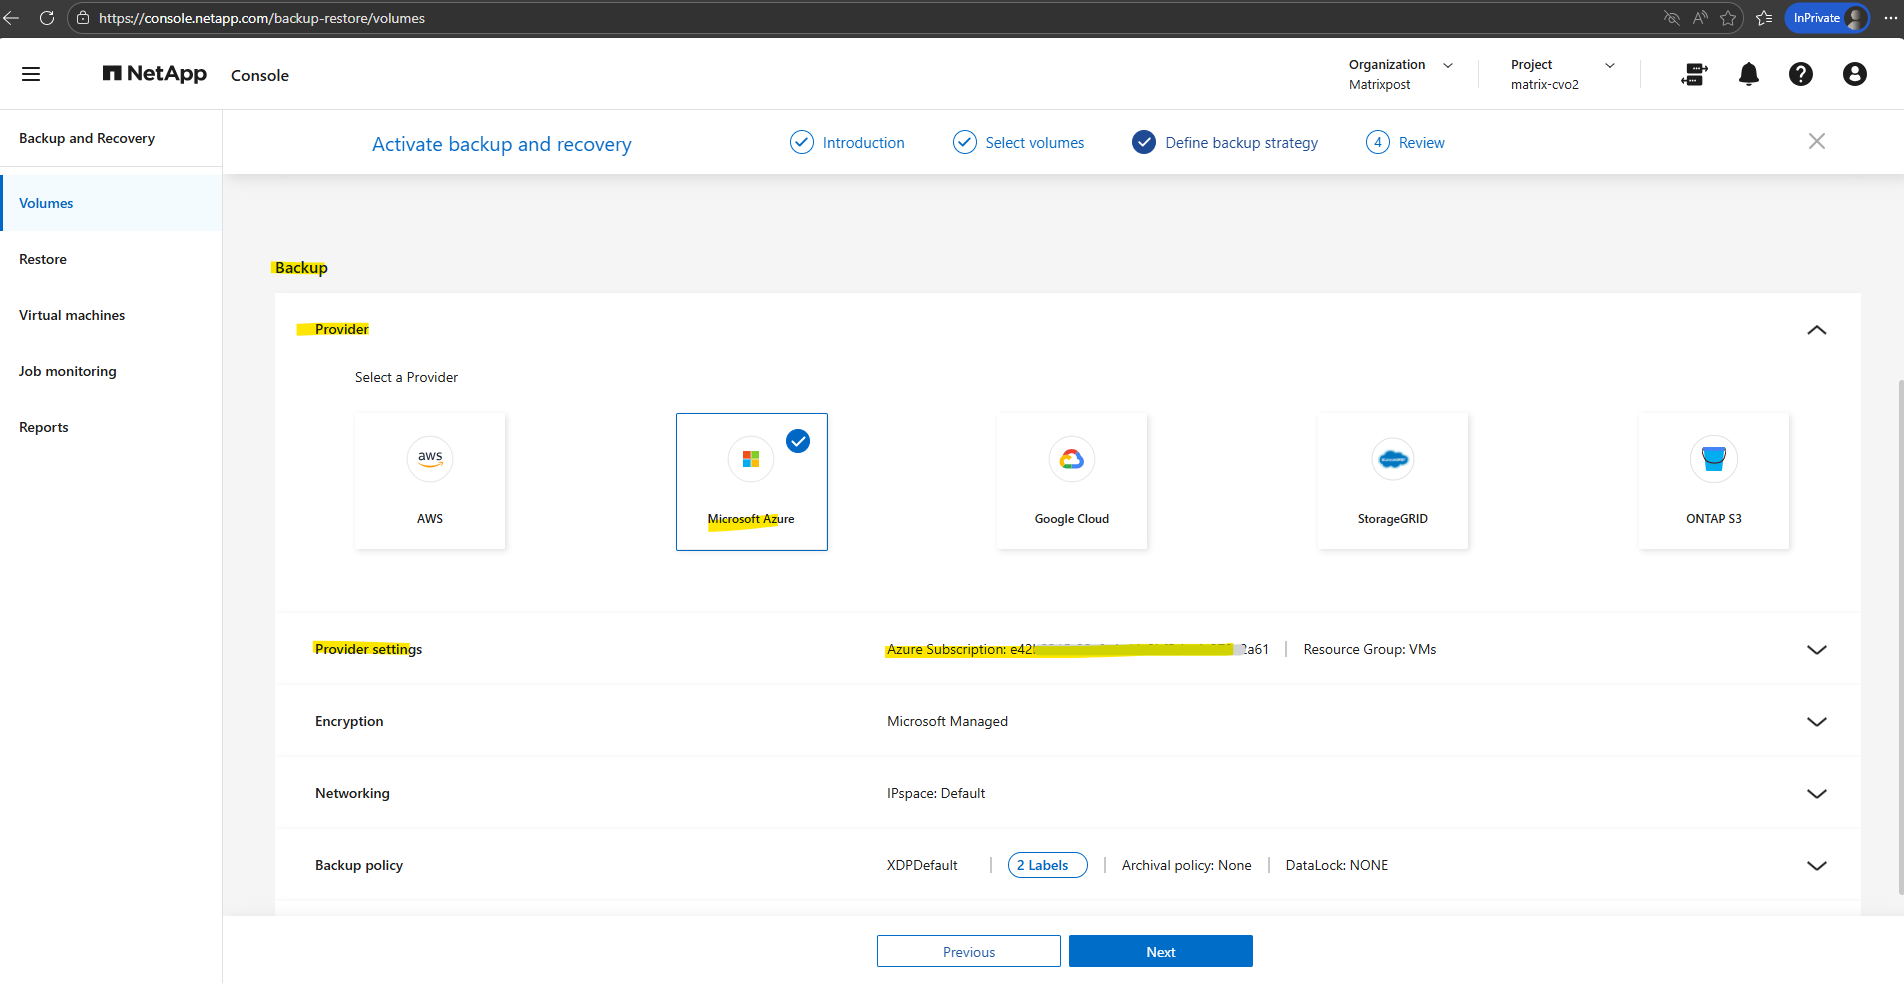
The term “bucket” remains fixed in the interface because NetApp console is a cross-cloud platform; NetApp uses this universal storage industry term (originally popularized by AWS S3) to provide a consistent management experience whether you are backing up to Azure Blob, AWS S3, or Google Cloud Storage.
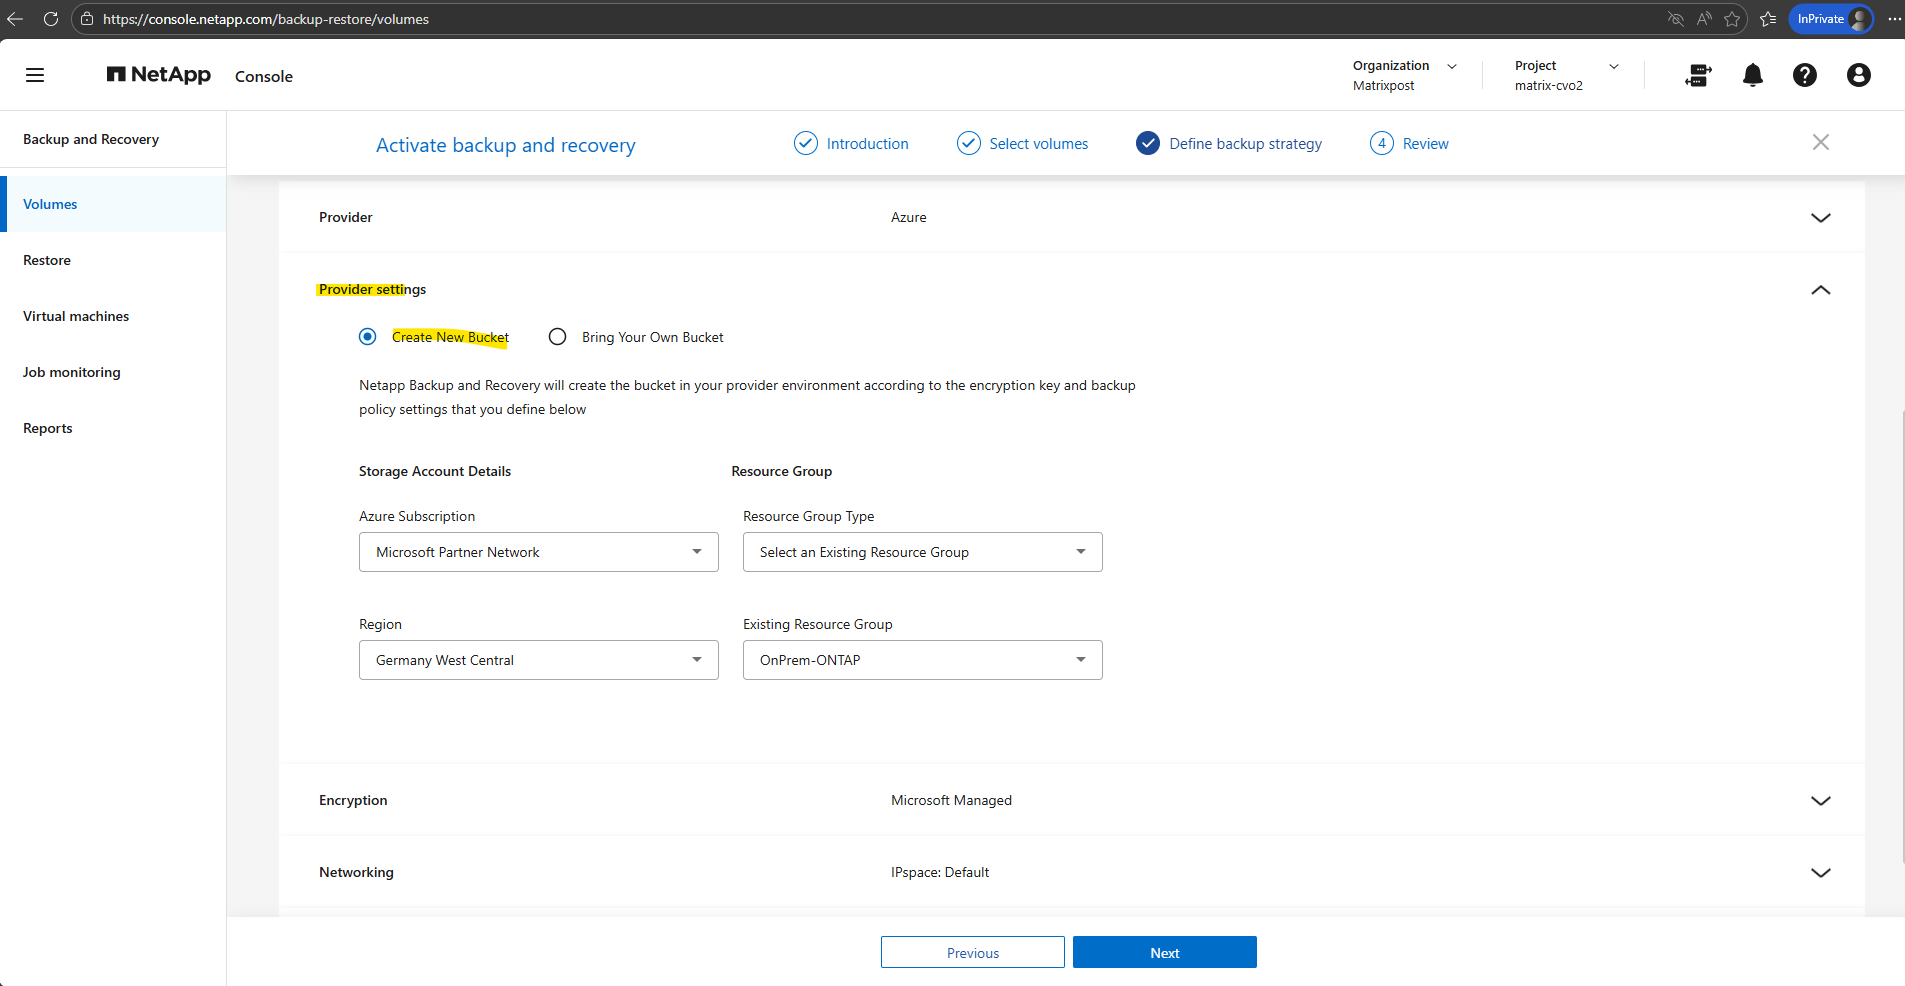
In the Encryption section, by default, Microsoft-managed keys are used, meaning Azure automatically handles the encryption and rotation of keys for your Storage Account, providing a seamless, no-maintenance security layer that is perfect for most test or standard environments.
For this lab environment I will not use private endpoints and instead backup traffic is traversing the public internet.
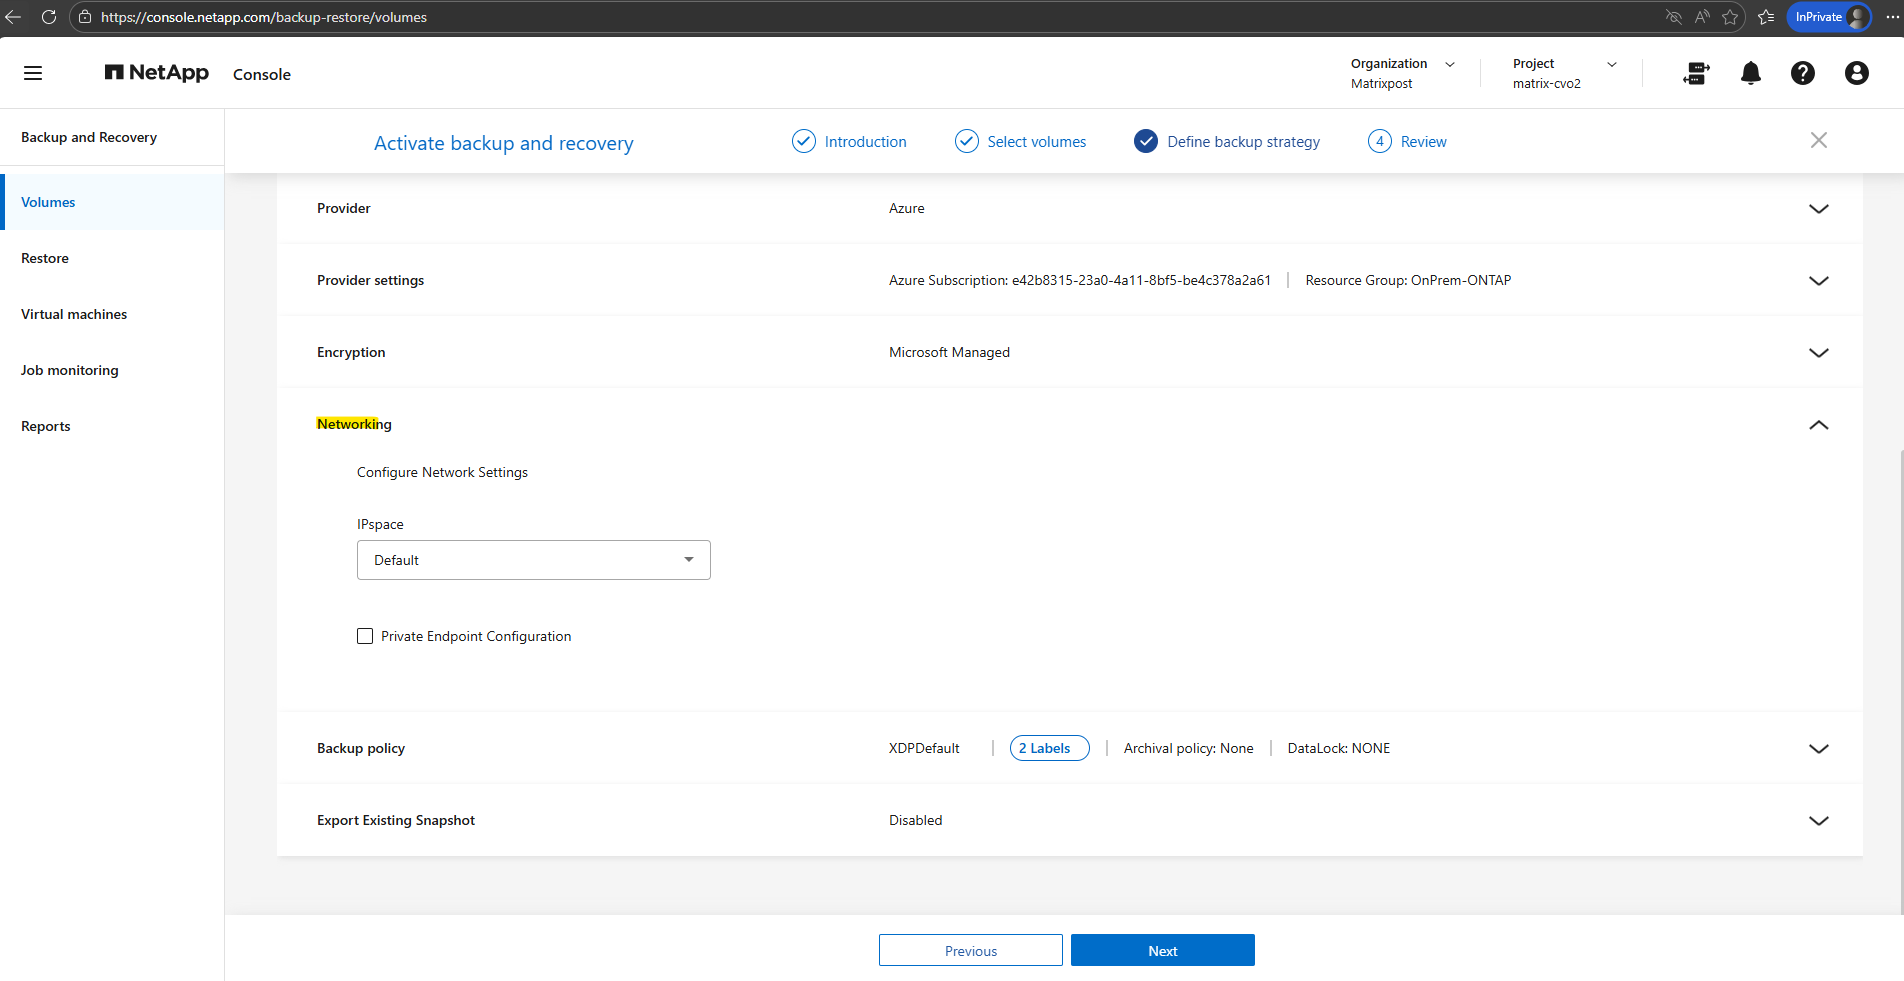
More about Azure private endpoints you will also find in my following post.
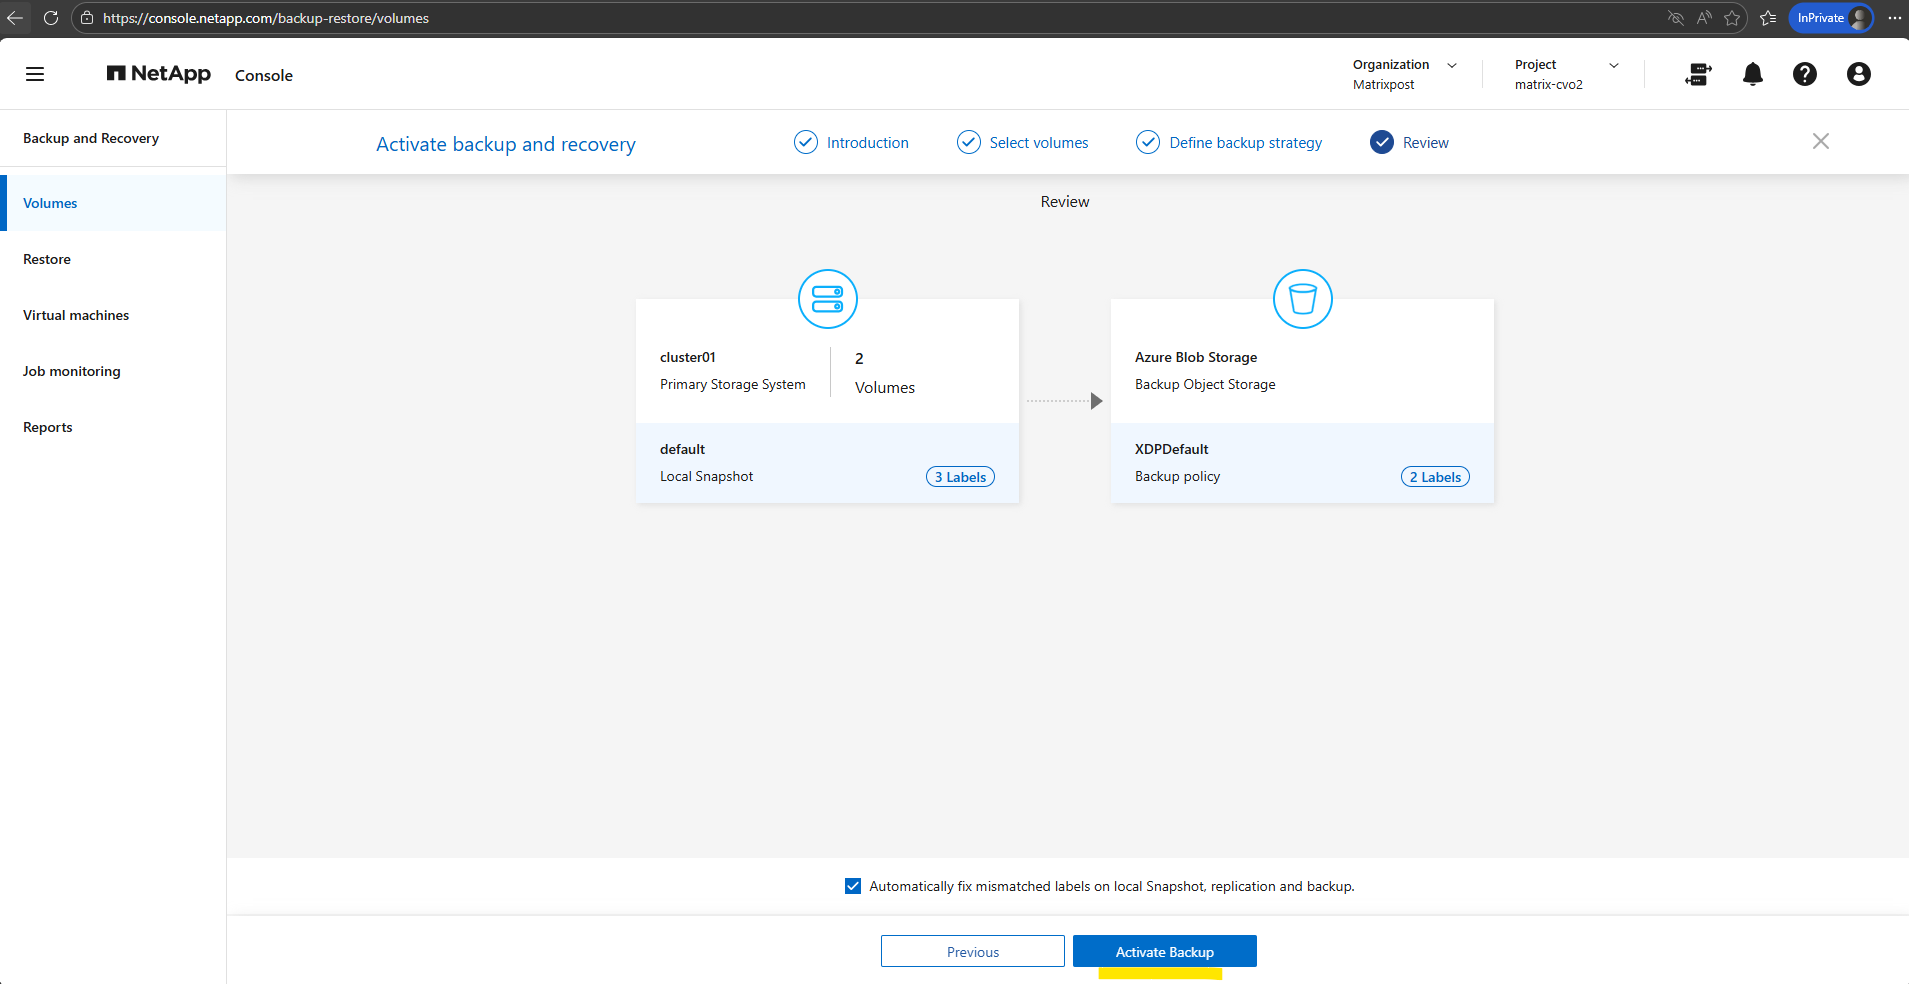
Before activating the backup, we can hover the mouse over the local snapshots and backup policy labels to finally check these settings as shown below.
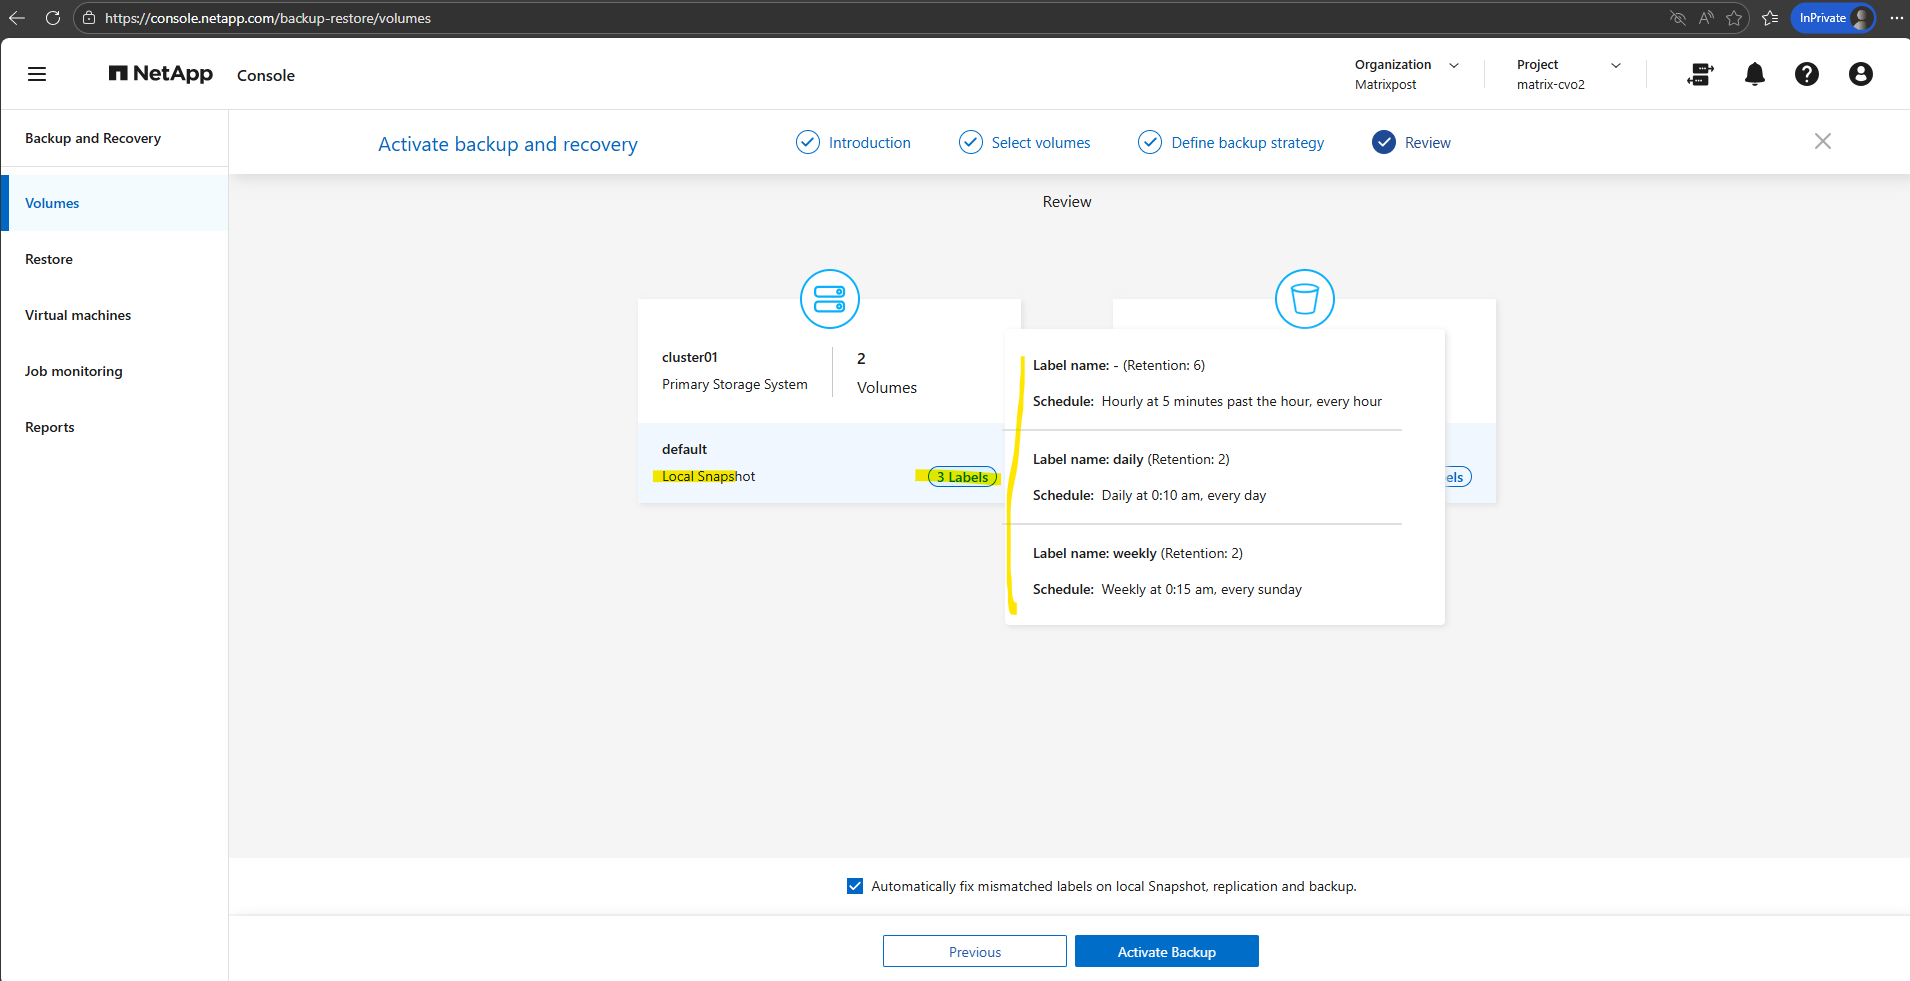
The backup policy settings.
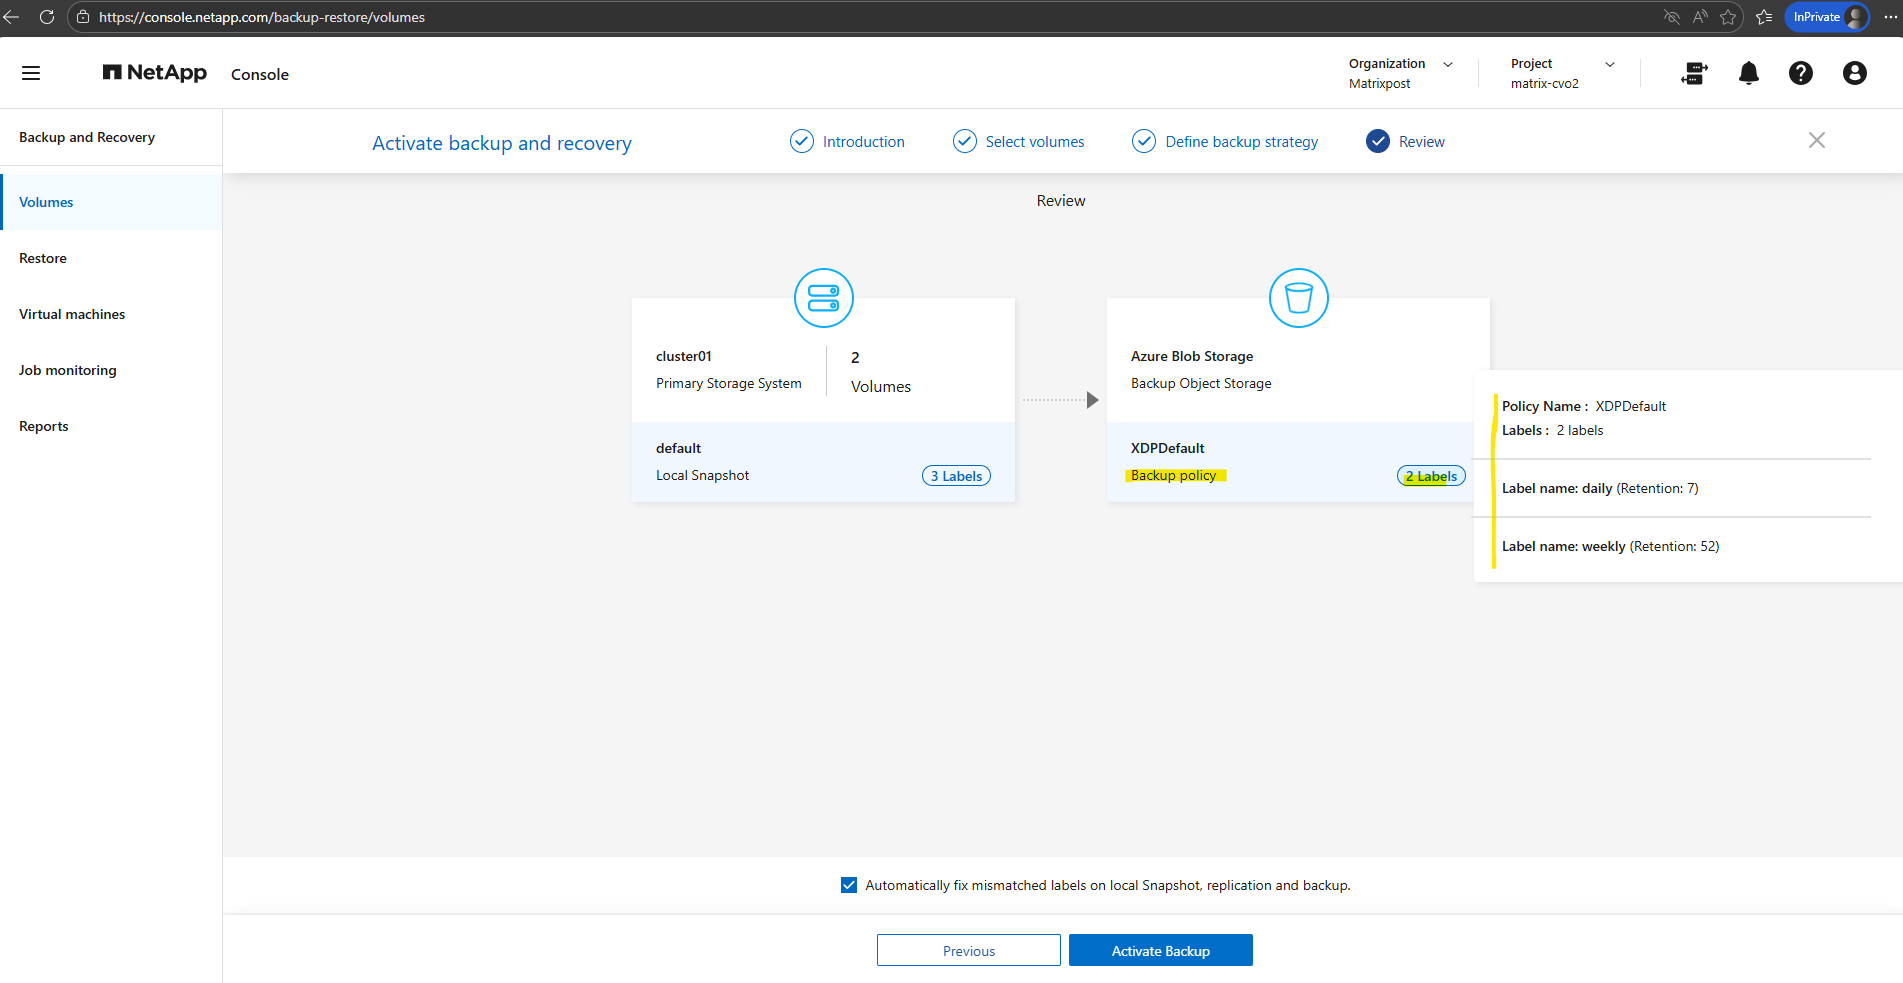
Finally we can activate the backup by clicking on the button Activate Backup below.
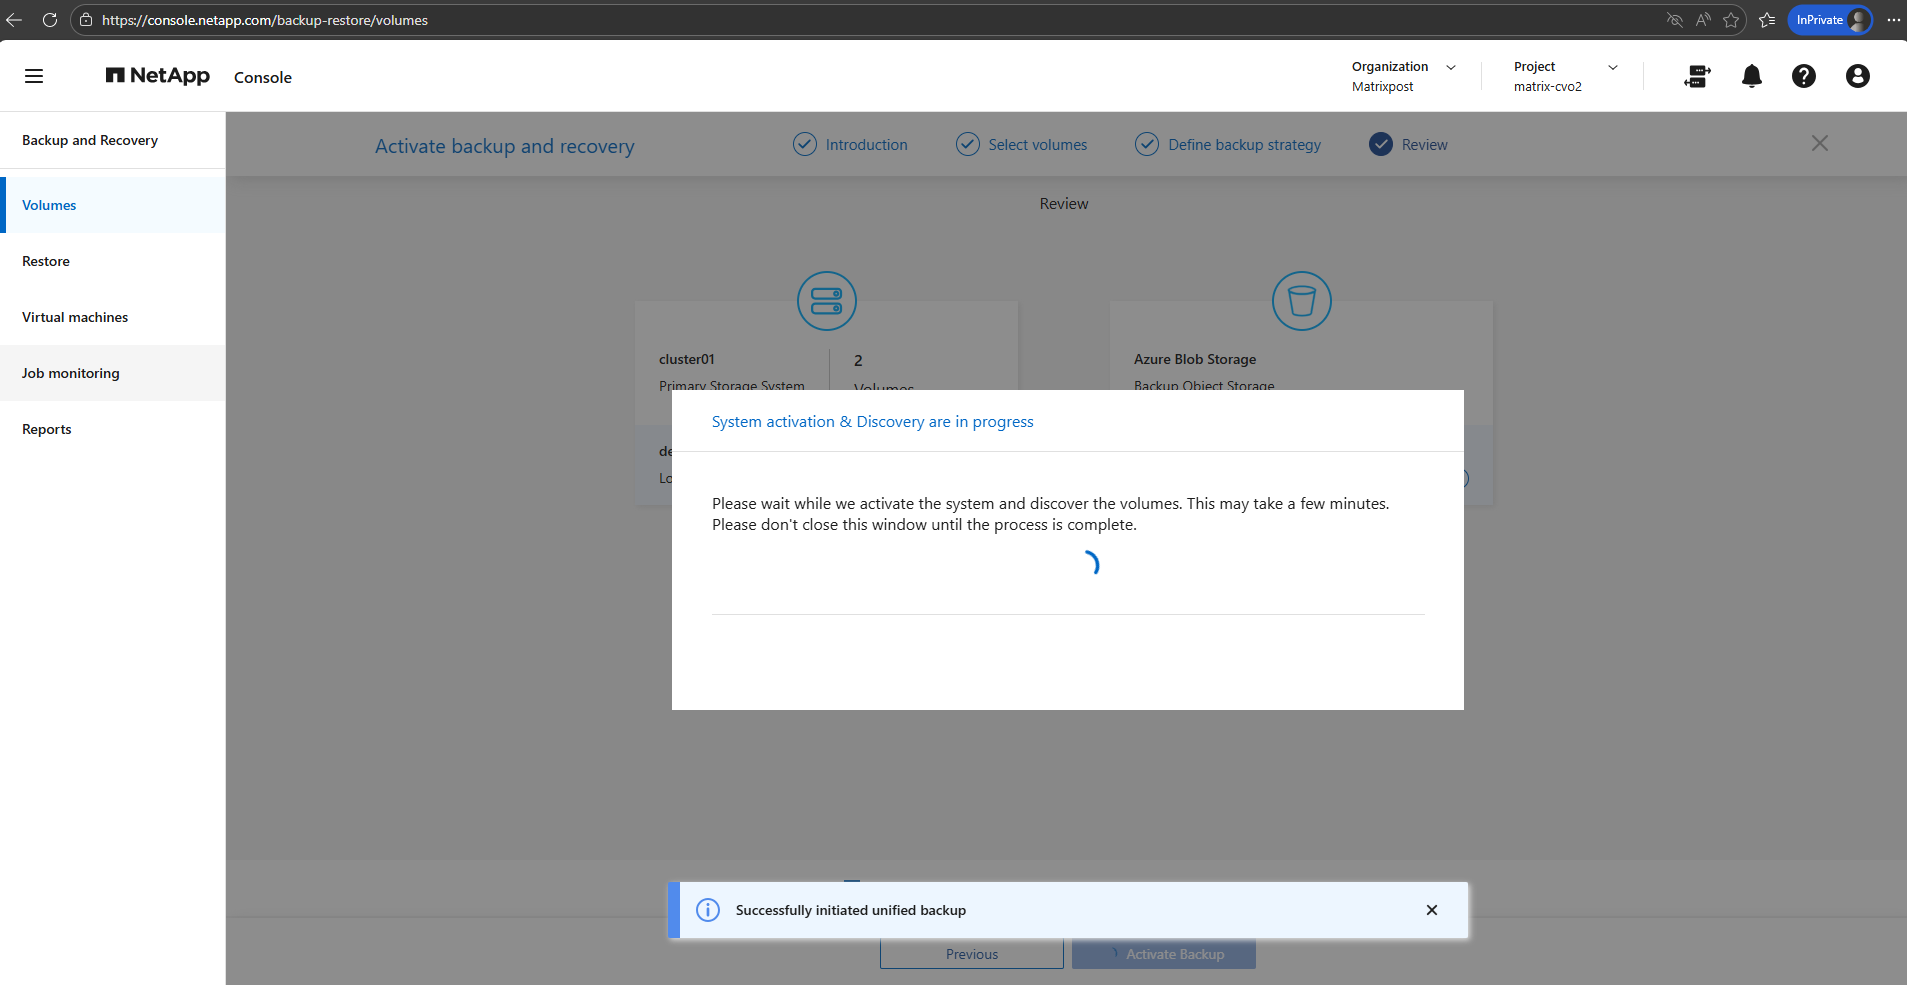
Please wait while we activate the system and discover the volumes. This may take a few minutes. Please don’t close this window until the process is complete.
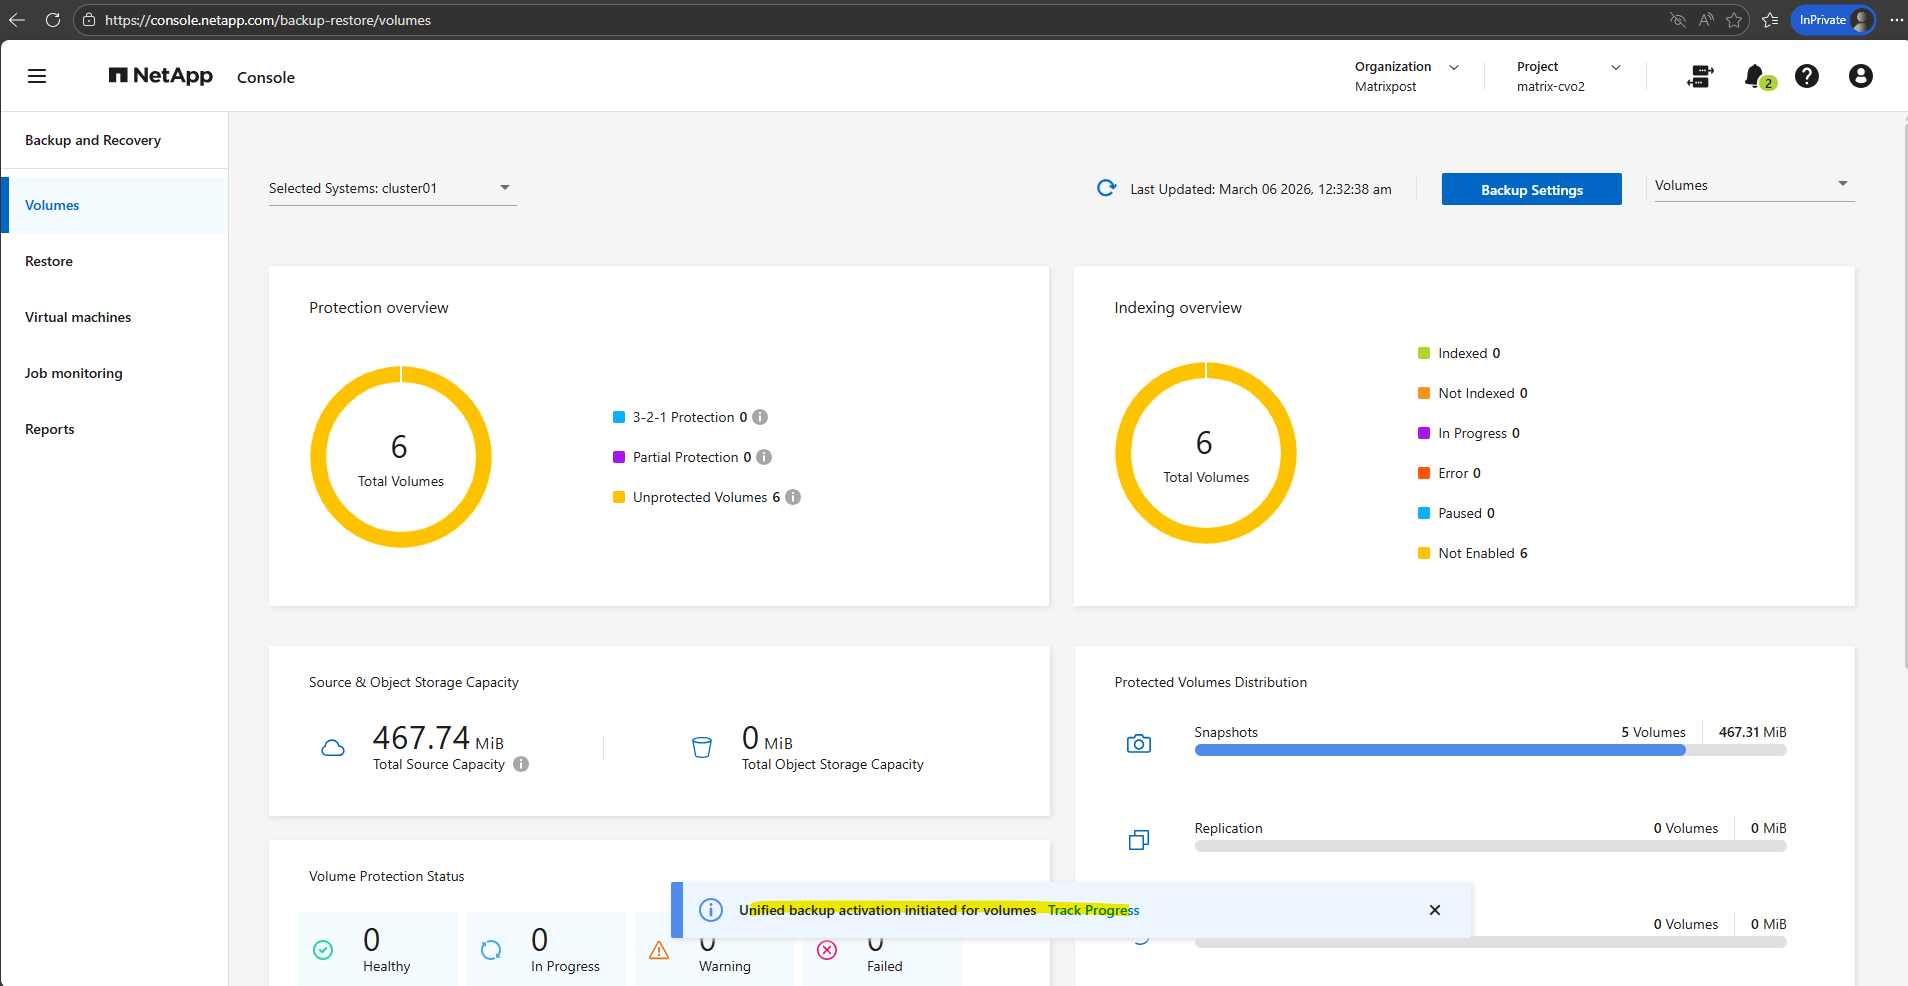
Looks good, after a few minutes we will get redirected to the Backup and Recovery -> Volumes page as shown below.
I will also trigger a initial backup for our selected volumes.
Currently the transfer to the object storage (Azure storage account – blob storage) is running for my cifs volume.
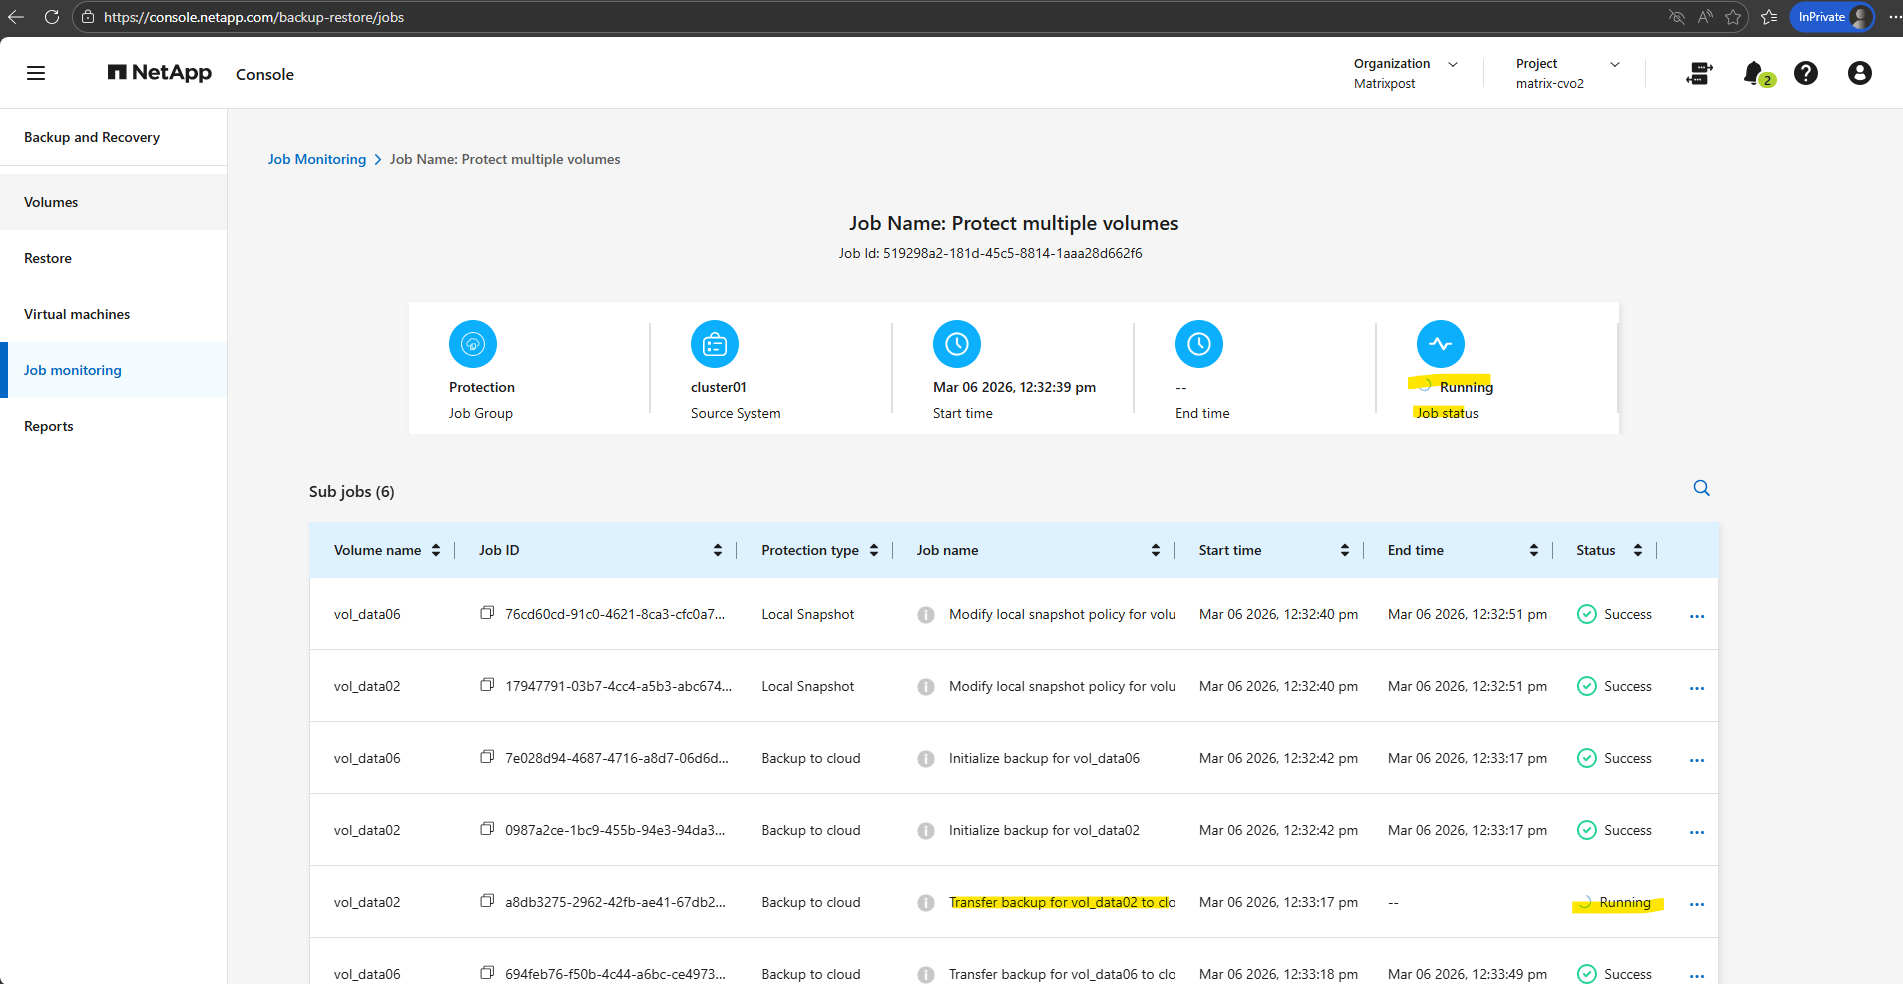
A few minutes later successfully transferred.

The new created bucket (Azure Storage account), I can see the corresponding resource group.
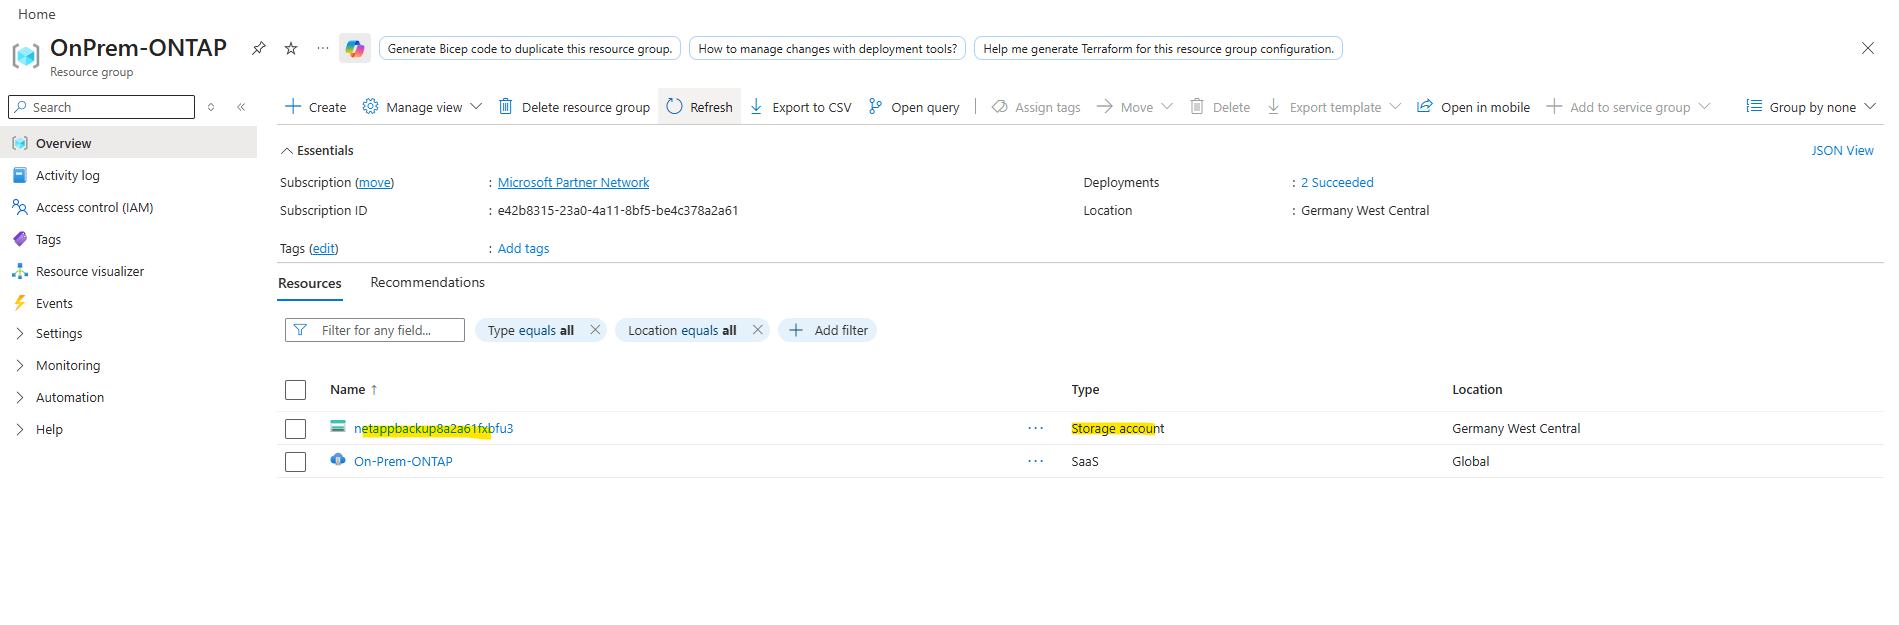
The automatically created Azure Storage account uses Blob Storage, which my On-Premises ONTAP (simulator) system leverages as object storage for cost-efficient, scalable long-term backups.
Azure Blob Storage is Microsoft’s implementation of object storage, meaning it follows the same architectural principles of storing data as objects within a highly scalable and durable platform.
The difference is primarily in naming, object storage describes the technology model, while Blob Storage is Azure’s service that delivers it. In practice, there is no functional difference, as Cloud Volumes ONTAP simply uses Azure Blob Storage as its object storage backend for backups.
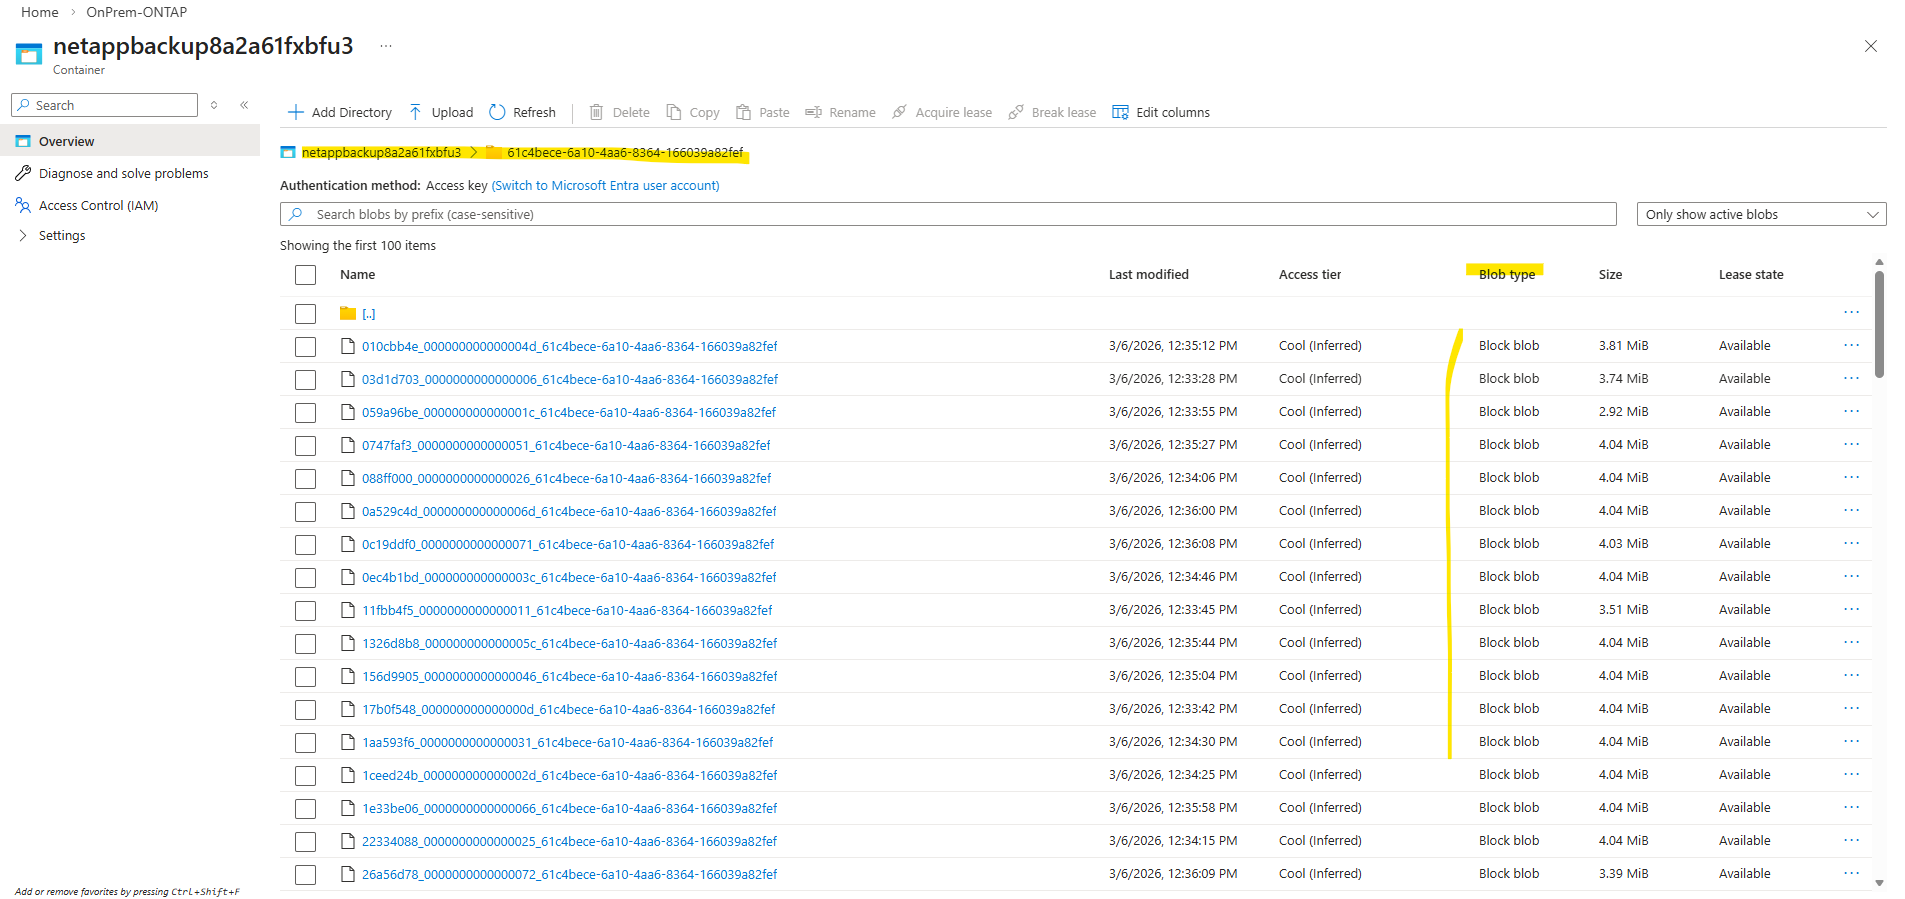
After Backup and Recovery was activated successfully and the first backups runs, navigate to Data storage → Containers, the presence of a container confirms that the backups are stored in Azure Blob Storage. Containers are the top-level namespace for blobs, which aligns with the object storage model that my On-Premises ONTAP (simulator) system uses for backup data.

When moving the mouse over the On-Premises ONTAP cloud below, we will now also see here that we enabled Backup and Recovery which will be stored to our newly created storage account (before in my case just 2 accounts were shown here).
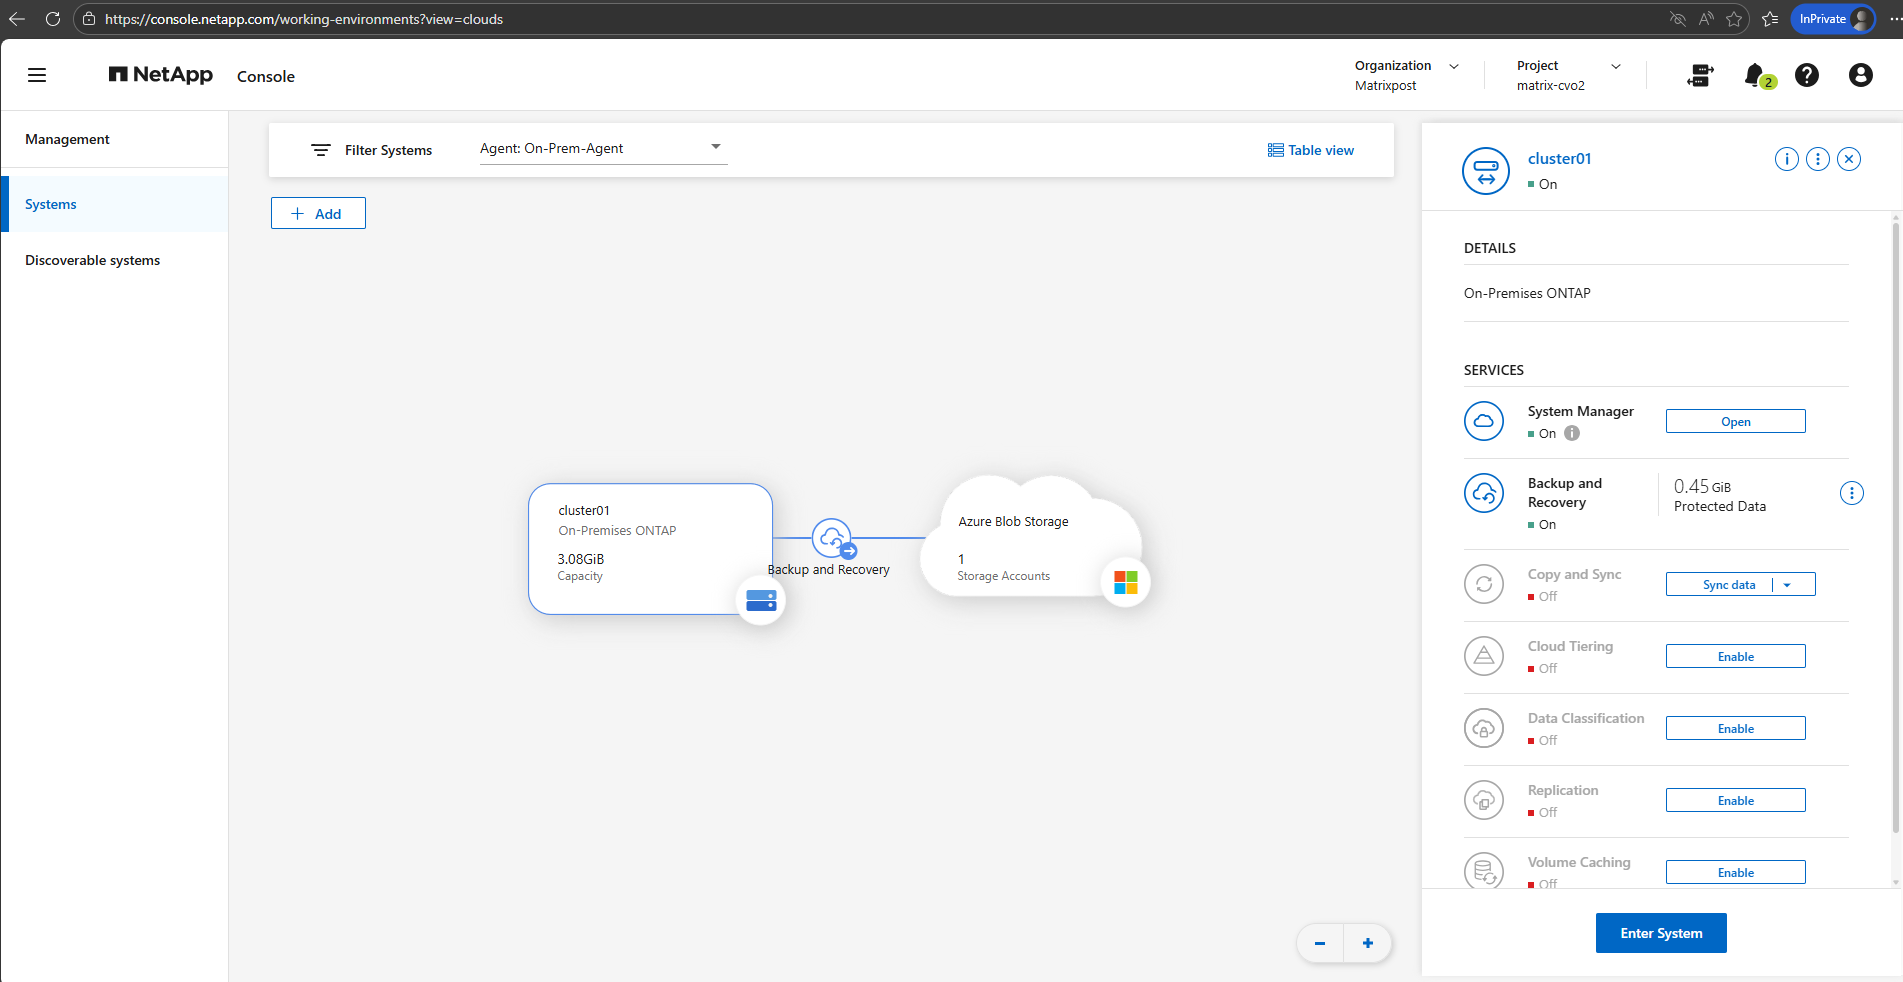
With the provider settings configured and the required Azure credentials in place, Backup and Recovery is now be successfully enabled for the on-prem ONTAP system.
From this point on, selected volumes can be protected by sending backups to the configured object storage in Azure.
If you are interested in how to restore data from these backups, you can find a detailed walkthrough in my following post: https://blog.matrixpost.net/deploying-netapp-cloud-volumes-ontap-part-5/.
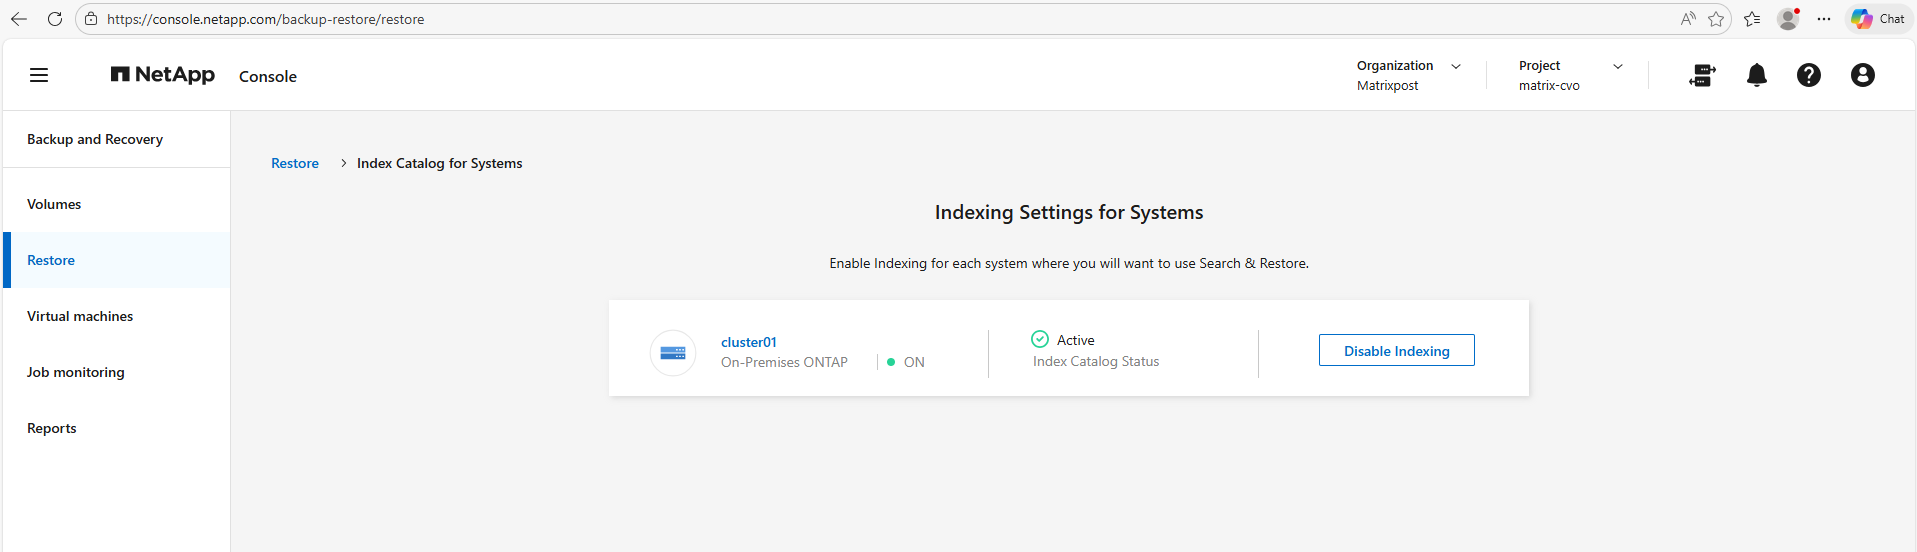
You will also see in this post about how to enable indexing on the ONTAP system.
To restore individual files or folders through the NetApp Console, indexing must first be enabled for the protected volumes. The indexing service builds a searchable catalog of the backup contents, allowing administrators to quickly locate and recover specific data without performing a full restore. Without indexing, file-level and directory-level recovery from backups is not available

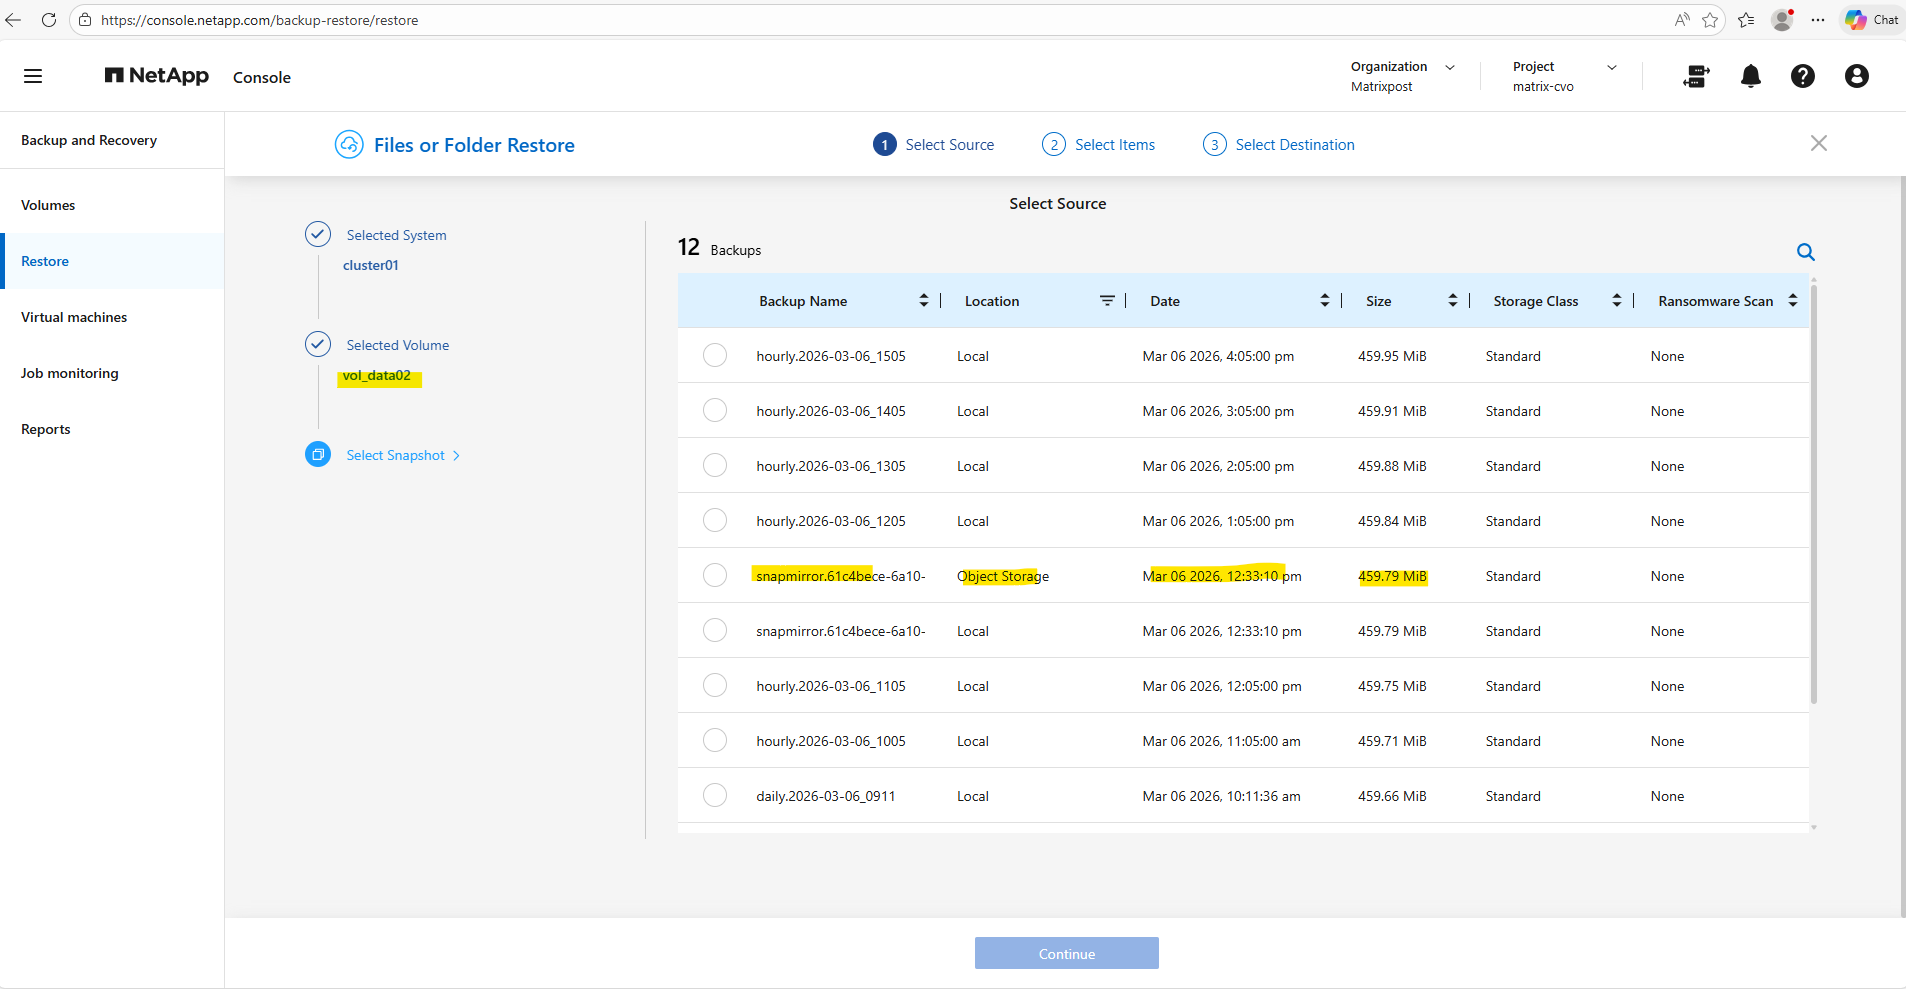
To address one thing up front, below when restoring files or folders, we can choose either between local Snapshots stored on the On-Premises ONTAP system (in my case the simulator), or backups stored in Object Storage (in my case an Azure Storage Account – Blob Storage) and highlighted below. This is by the way our first previously transferred backup when we enabled and configured Backup and Recovery in the NetApp console.
The other hourly backups are finally the local Snapshots stored on the On-Premises ONTAP system.
When restoring data through the NetApp Console, both local snapshots and off-site backups are available as selectable sources.
Snapshots enable rapid recovery directly from the storage system, while backups allow restores from object storage if the local copies are no longer available. This flexibility ensures that administrators can choose the most appropriate recovery point based on the failure scenario.
Links
Protect your ONTAP volume data using NetApp Backup and Recovery
https://docs.netapp.com/us-en/data-services-backup-recovery/prev-ontap-protect-overview.htmlBack up on-premises ONTAP data to Azure Blob storage with NetApp Backup and Recovery
https://docs.netapp.com/us-en/data-services-backup-recovery/prev-ontap-backup-onprem-azure.htmlManually install a Console agent on-premises
https://docs.netapp.com/us-en/console-setup-admin/task-install-agent-on-prem.htmlInstall a Console agent on-premises using VCenter
https://docs.netapp.com/us-en/console-setup-admin/task-install-agent-on-prem-ova.htmlCreate Console agent cloud permissions for AWS or Azure
https://docs.netapp.com/us-en/console-setup-admin/task-install-agent-on-prem.html#agent-permission-aws-azure